P9060 - Smartphone PANTECH - Free user manual and instructions
Find the device manual for free P9060 PANTECH in PDF.


| Product Type | Smartphone |
| Brand | Pantech |
| Model | P9060 |
| Dimensions | 120 x 62 x 12 mm |
| Weight | 130 g |
| Battery Type | Li-Ion 1500 mAh |
| Display | 4.0 inch TFT, 480 x 800 pixels |
| Operating System | Android 2.3 Gingerbread |
| Processor | 1 GHz single-core |
| RAM | 512 MB |
| Internal Storage | 4 GB, expandable via microSD |
| Camera | 5 MP rear, VGA front |
| Network | GSM/HSPA |
| Connectivity | Wi-Fi 802.11 b/g, Bluetooth 3.0, GPS |
| Sensors | Accelerometer, proximity, compass |
| Maintenance | Clean with soft dry cloth; avoid liquids |
| Safety | Avoid extreme temperatures; use original charger |
| Spare Parts | Battery, screen, charging port |
| Repairability | Moderate; screen and battery replaceable |
| General Information | Released 2012, QWERTY keyboard variant available |
Frequently Asked Questions - P9060 PANTECH
User questions about P9060 PANTECH
0 question about this device. Answer the ones you know or ask your own.
Ask a new question about this device
Download the instructions for your Smartphone in PDF format for free! Find your manual P9060 - PANTECH and take your electronic device back in hand. On this page are published all the documents necessary for the use of your device. P9060 by PANTECH.
USER MANUAL P9060 PANTECH
Thank you for choosing the Pantech Pocket, our latest smartphone. The Pantech Pocket has many features designed to enhance your mobile experience. With its unique, stylish design you will enjoy the entire phone experience.
This User Guide contains important and useful information that will maximize your familiarity with all that the Pantech phone has to offer.

Some of the contents in this manual may differ from your phone depending on the software of the phone. Actual color may vary.
Your phone is designed to make it easy for you to access a wide variety of content. For your protection, we want you to be aware that some applications that you enable may involve the location of your phone being shared. For applications available through AT&T, we offer privacy controls that let you decide how an application may use the location of your phone and other phones on your account. However, the AT&T privacy tools do not apply to applications available outside of AT&T. Please review the terms and conditions and the associated privacy policy for each location-based service to learn how location information will be used and protected. In addition, your AT&T phone may be used to access the internet and to download, and/or purchase goods, applications, and services from AT&T or elsewhere from third parties. AT&T provides tools for you to control access to the Internet and certain Internet content. These controls may not be available for certain devices which bypass AT&T controls.
Service provided by AT&T Mobility. Portions © 2011 AT&T Intellectual Property. All rights reserved. AT&T, the AT&T logo and all other AT&T marks contained herein are trademarks of AT&T Intellectual Property and/or AT&T affiliated companies. All other marks contained herein are the property of their respective owners.
Copyright © 2011. Pantech. All Rights Reserved.
Important Safety Information
Safety information
The following list shows how to maintain your mobile phone and precautions to take as you use the device.
- Keep your mobile phone and its accessories out of the reach of children and pets.
- Maintain your mobile phone in dry conditions and keep it within normal operating temperatures. It may be damaged at temperatures higher than 55°C/131°F or lower than -20°C/-4°F.
- Do not dry your phone in a microwave oven. Sparks may occur and cause an explosion or fire.
- Do not use or store your mobile phone in dusty, dirty areas.
• Do not disassemble your mobile phone. - Do not drop or cause severe impact to your mobile phone.
- Do not clean your mobile phone with chemical products, cleaning solvents or detergents.
- Contact your dealer immediately if your mobile phone does not work properly.
- Use only authorized batteries, battery chargers and accessories. Any malfunction or damage caused by the use of unauthorized batteries, battery chargers and accessories will void the limited product warranty.
- Ensure that the battery and the battery charger do not come in contact with conductive objects.
- For optimal performance, use cases and accessories that do not contain magnets.
Safety precautions
• Using a mobile phone while driving is prohibited.
- Using a mobile phone while driving can distract your attention and cause an accident. Always switch your phone off to drive safely.
• In an emergency, use a hands-free device built into your car or pull over in a safe place first.
- Check local laws and regulations and comply with them, with regard to the prohibition of mobile phone use while driving.
Switch off in restricted areas
Always switch your phone off in areas where mobile phone use is restricted.
Switch off in an aircraft
Always switch your phone off or select the airplane mode when you are in an aircraft. Electromagnetic waves emitted by your phone may affect the electronic navigation equipment in the aircraft.
Switch off in hospitals and near medical equipment
Always switch your phone off in hospitals and obey their regulations. Switch your phone off when using medical equipment for private purposes. Always consult with the medical equipment's manufacturer or an expert regarding phone use near the medical equipment.
Switch off in dangerous areas
Always switch your phone off in areas where explosive or dangerous materials (e.g. fuels or chemical products) are located and obey relevant instructions or signals. Do not insert or remove your mobile phone's battery in such areas.
Install a hands-free device in a safe location
Install a hands-free device away from the steering wheel and airbag expansion areas. Otherwise you can be injured in a car accident.
Keep away from other electronic devices
Mobile phones emit electromagnetic waves that may affect nearby electronic devices. After switching on your phone, do not place it close to other electronic goods.
About the battery usage
Your phone is powered by a Lithium Ion (Li-Ion) battery. In other words, you can recharge your battery while some charge remains without reducing your phone's autonomy due to the "battery memory effect."
- Do not use a damaged battery or charger.
- Do not disassemble, open crush, bend, deform, puncture or shred the battery.
- Do not modify or remanufacture, insert foreign objects into the battery, immerse or expose to water or other liquids, expose to fire, explosion or other hazard.
- Do not put your battery in contact with conductive objects.
-
Dispose of and recycle used batteries in accordance with local regulations. Do not dispose of batteries by burning; they may explode.
-
Do not use an unauthorized charger or battery.
• Use the battery only for the device for which it is specified. - Use the battery with a charging device that has been qualified for the device per this standard. Use of an unqualified battery or charger may present a risk of fire, explosion, leakage, or other hazard.
- Do not short circuit a battery or allow metallic conductive objects to contact battery terminals.
- Replace the battery only with another battery that has been qualified with the device per this standard, IEEE-Std-1725-2006.
• Children should be supervised when they use the battery. - Avoid dropping the phone or the battery. If the phone or the battery is dropped, especially on a hard surface, and the user suspects damage, take it to a service center for inspection.
• Use your battery for the specified purpose only. - The closer you move to your network's base station, the longer you can use your phone because less battery power is required for connection.
- The battery recharging time varies depending on the remaining battery capacity and the battery and charger type.
• Battery life inevitably shortens over time. - Since overcharging may shorten battery life, remove the phone from its charger once it is fully charged. Unplug the charger once charging is complete. Leaving the battery in hot or cold places, especially inside a car in summer or winter, may reduce its capacity and life.
- To prevent injury or burns, ensure that no metal objects come into contact with the + and - terminals of the battery.
Basic instructions
Useful tips
To understand information contained in this user guide, please keep in mind the following:
• We assume that you start operating applications from the Applications screen.
- Tap on the bottom of the home screen to access Applications.
- Flick the screen left or right. (Grid view only) Flick the screen up or down. (List view only)
- Tap an application you want to run and use.

[NO TEXT]

or

Accessing Applications
Grid view List view
- Words in bold fonts refer to the relevant action on the screen. For example, "Tap Add to contacts" for the screen below means that you have to tap.
-
Words in all capital letters refer to hard keys of your phone. For example, LOCK/PWR indicates the lock/power key on the top right of the handset that locks the screen or turns on/off power.
-
The symbol “>” refers to the next action. For example, “Tap Settings > Language & keyboard” means that you should tap Settings first and Language & keyboard next.
- "Applications" refers to the screen where all applications of the phone appear.
- "Home screen" refers to the screen that appears first when you unlock the screen.
- "Idle mode" refers to the status when you stay on the home screen ready to run an application.
- Channels through which you can share your items such as contacts or pictures increase as you subscribe to a service. For example, if you sign up for Facebook or Twitter, you can also share your information with others through Facebook or Twitter.
About Google accounts
We recommend that you have a Google account to use some applications provided by Google, e.g. Calendar, Latitude, Market, Talk, of the phone. For more information on setting up a Google account, refer to Activating the phone on page 15.
Table of contents
Important Safety Information 3
Safety information ....3
Safety precautions 3
About the battery usage ....4
Basic instructions .... 5
1. Getting Started
Getting Started 9
Inside the package 9
Installing the SIM/USIM card....9
Installing the microSD card 9
Inserting the battery 10
Charging the battery ....10
Turning the phone on/off....11
Unlocking the screen....11
Locking the screen....11
Product overview 12
Gripping the phone....14
Activating the phone 14
Using the touch screen 16
Understanding the home screen....17
Customizing the home screen 19
Understanding the applications menu 21
2. Communication
Communication 24
Calling 24
Messaging 26
Emailing 33
Using Gmail 34
Using Twitter 35
Using Facebook....36
S-Board 37
Google Talk 38
3. Entertainment
Entertainment 41
Using the camera....41
Using the camcorder 44
Using the gallery 46
Using the video player ....47
Using the music player 48
Enjoying YouTube....50
4. Personal Information
Personal Information 53
Managing contacts ....53
Using the calendar 55
Using a memo 57
Using a voice memo ....58
5. Documents
Documents....60
Viewing documents 60
Handling documents view 61
6. Web
Web 63
Accessing the Internet 63
Shopping in the Android Market 65
Using Google Maps 66
Using Places 66
Using Latitude 67
Searching with Google 69
News & Weather....69
7. Connectivity
Connectivity 72
Using a Wi-Fi network 72
Connecting to a 3G network....73
Using Bluetooth....73
Making the phone a modem ....74
8. Storage
Storage 77
Managing the memory card ....77
Connecting to a PC....77
Using the phone as Mass Storage 78
Transferring files through Media Transfer 78
9. Tools
Tools 80
Clock Tools....80
Clock 81
Calculator 82
Converter 83
Sketch Pad 83
Voice Dialer 85
Voice Search 85
Compass 85
Navigation 87
Weather 88
Stocks 89
RSS Reader....91
AT&T Services 92
10. Settings
Settings 94
Personalize 94
Wireless & networks....94
Call settings 95
Sound 96
Display 97
Location & security 97
Applications 99
Accounts & sync 100
Privacy 100
Storage ....101
Language & keyboard 101
Voice input & output 102
Accessibility....102
Date & time ....102
About phone 103
Appendix
Appendix 105
PC Suite 105
Troubleshooting checklist 105
Specifications....106
FCC Hearing-Aid Compatibility Regulations for Wireless Devices 106
FCC Regulatory Compliance ....108
Warranty 109
Legal notice 110
1
Getting Started
Getting Started
Follow the outlined steps that should be taken first before using the phone.
Inside the package
The package should contain the following items:
- Handset
- Battery
- MicroSD card
- Adapter
- USB cable
- Quick Start Guide
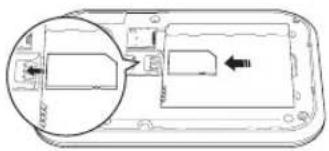
Installing the SIM/USIM card
- Put your thumb in the groove at the bottom of the phone, and then lift it up to remove the battery cover.
- Before inserting the SIM/USIM card, eject the battery from the phone.
- Insert the SIM/USIM card into the slot. Ensure that the gold contacts of the card go against the metal contacts of the phone.
- Insert the battery again, and then close the battery cover.
About the SIM/USIM card
When you subscribe to the network operator, you receive the Subscriber Identity Module (SIM) card or the Universal Subscriber Identity Module (USIM) card that contains your registration information, PIN code, etc. You should keep it secure and handle carefully. Do not bend, scratch or expose it to moisture. Avoid static electricity.
① Note Do not lose or transfer your SIM/USIM card to someone. Pantech is not responsible for damage due to theft or loss.
Installing the microSD card
When you want to handle image files such as photos or videos or an external memory card, use the microSD card.
- Put your thumb in the groove at the bottom of the phone, and then lift it up to remove the battery cover.
- Before inserting the micro SD card, eject the battery from the phone.
- Insert the microSD card into the slot. Ensure that the gold contacts of the card go against the metal contacts of the phone.
- Insert the battery again, and then close the battery cover.

About the microSD card
A microSD card is a removable flash memory card where you can save data. Save pictures and contacts, and download
Getting Started
applications to the SD card. You can expand the external memory up to 32GB. We recommend that you format the microSD card before using the phone. For more information, refer to page 77.
Inserting the battery
- Put your thumb in the groove at the bottom of the phone, and then lift it up to remove the battery cover.
- Align the gold contacts on the battery with the contacts located at the top of the battery compartment on the phone.
- Press the battery down until it lays flat in the compartment.
- Close the battery cover.

About the battery
The phone uses a Lithium Ion (Li-Ion) battery. Make sure to use the authorized battery and charger only. Maximum hours to use the battery might vary depending on service types offered by the service provider and temperatures. For more details, inquire at your nearest dealer.
① Note The Li-ion battery can be recharged while some charge remains without reducing your phone's autonomy due to the "battery memory effect" inherent in those technologies.
Charging the battery
- Open the protective cover on the right side of the phone and connect the charger adapter to the USB connector of the phone.
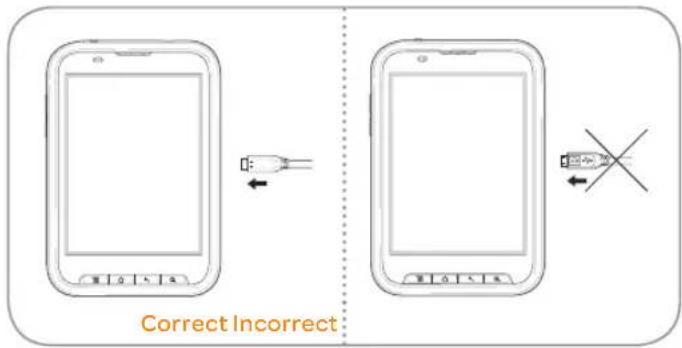
① Note Make sure to align the connector as indicated in the image. Otherwise, the charging connector will be damaged and the battery will not be charged.

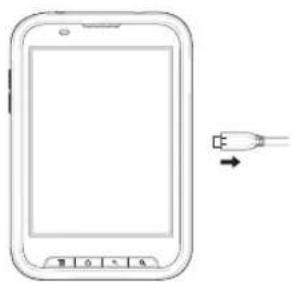
Battery Charging - Power ON
- Disconnect the charger from the phone when the battery is fully charged.
Turning the phone on/off
To turn on the phone,
- Press and hold the LOCK/PWR key for a few seconds.
- Unlock the screen.
To turn the phone off,
- Press and hold the LOCK/PWR key for a few seconds.
- Tap Power off.
- Tap OK.
① Note If you press the LOCK/PWR key shortly, the LCD screen turns on or off.
Unlocking the screen
The screen is locked by default when you turn on power. To unlock the screen,
- Press the LOCK/PWR key or ▲.
- Drag one of the application icons into the circle diagonally. The phone will open the corresponding application.
- Enter a PIN or a password if the screen is locked by a PIN or a password.
For more information on screen lock, refer to Location & security in Settings on page 97.

Key Description
| Views messages. | |
| Launches Browser. | |
| Views Call log. | |
| Goes to the home screen or an application if the application is running before locking. | |
| Views emails. | |
| Launches Music Application. |
Locking the screen
Lock the screen to protect information in the phone or save the usage of the battery.
To lock the screen, press the LOCK/PWR key in any mode.
Product overview
Touch mode
Front view Rear view
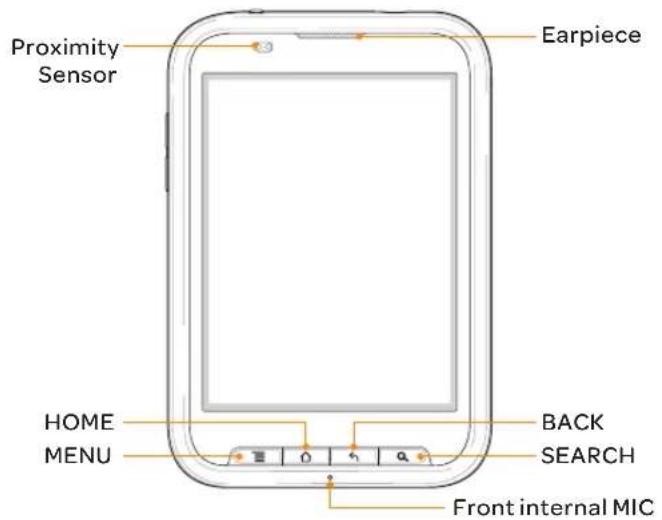
Key Function
BACK Ends an application; returns to the previous menu
MENU Displays options available; rearranges the home screen
LOCK/PWR Locks the screen; turns on/off the phone

Key Function
SEARCH Searches through the Internet; searches applications, contacts and messages that are saved; Searches with voice by pressing and holding the button.
HOME Moves to the Home screen; turns on the screen; manages applications that are running
① Note Make sure not to cover the proximity sensor with the LCD protection film. If the sensor is covered, you might experience difficulties using the touch screen.
Side view
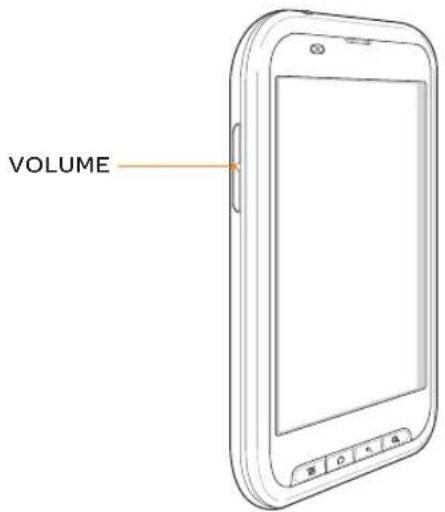
Key Function
VOLUME Adjusts all sound volumes; adjusts the ring mode

Using 3.5 Pi stereo earphones
You can control your stereo earphone by inserting the stereo earphone's plug into Ear jack on the phone.
① Note The stereo earphones that support common call management features including making and answering calls have not been standardized. Therefore the phone may not be compatible with some stereo earphones.
Gripping the phone
Hold the phone in the right position for a call as indicated below:

• Make sure not to block the internal antenna embedded in the phone. Check the location of the antenna on the illustration on page 13.
• Metal accessories can affect the quality of calls.
① Note If you place your hand over the area where the internal antenna is installed during a call or transmission/reception of data, the signals may be poor and the battery life may drain very fast
Activating the phone
Go through the following steps when you turn on the phone for the first time.
Learning how to use the phone
- Press and hold the LOCK/PWR key to turn on the phone.
- Tap the android.
- Select and tap a language for the phone and tap Next.
-
Tap either Mobile network or Wi-Fi or Wi-Fi only, for Internet connection and tap Next.
-
Tap Connect to Wi-Fi network > Next if you want to establish a connection to the Wi-Fi network. Or tap Next if you want to connect to the network later.
- Select and tap an available Wi-Fi network if you have tapped Connect to Wi-Fi network > Next in step 2. Follow the necessary steps to connect to the Wi-Fi network. For more information, refer to page 94.
- Check the mobile network or Wi-Fi network and tap Next.
- Tap See location in applications (such as Maps) using wireless networks to Use Google location, tap Agree for Location consent, and tap Next.
- Tap Google account if you want to set up a Google account and follow the necessary steps, or just tap Next. For more information on creating a Google account, refer to the next section.
- Check how to unlock screen and tap Next in the middle of the screen.
- Check how to view new events in the notification bar and tap Next.
- Tap Sync now for Address Book sync. You should insert a SIM/USIM card in the phone. Tap Skip if you want to sync later and tap OK.
① Note You can do all of these steps later by tapping Tutorial.
Creating a Google account
After finishing learning how to use the phone:
- Tap Settings > Accounts & sync > Add account.
- Tap Google > Next.
- Tap Connect to Wi-Fi if you have not connected the phone to the Wi-Fi network and follow the instructions.
- Tap Create.
- Enter your first name, last name, and user name for the account, and if you finish entering them, tap Done > Next. The user name should be more than 6 or less than 30 characters. You can also select an alternative.
- Enter a password and enter it again to confirm, and then tap Done. You should enter at least 8 characters.
- Tap Next.
- Select and tap a security question and enter an answer.
- Enter a secondary email address and tap Done > Create.
- Tap I agree, Next for the Google Terms of Service.
- Tap Try again if your password is too weak for a password or contains invalid characters.
- Repeat the steps 6 to 10.
- Enter the characters that appear on screen and tap Done > Next.
- Tap Back up data with my Google Account if you want to backup your data.
- Tap Finish setup.

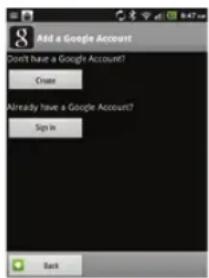
① Note Steps for connecting to Wi-Fi network and Google location service might not appear if you have already done with them.
Forgot your password for Google account?
If you have forgotten your password for Google account, reset it at the Google website.
- Open your web browser on your computer and go to https://www.google.com/accounts/recovery.
-
Enter the email address or username that you use to sign in to your Google account and click Submit.
-
Enter the characters that you see on the screen and click Continue.
-
Select an option about recovering your account and click Continue.
-
Take necessary steps for each option:
-
Enter the answer for security questions if you have selected Answer your security question. This option will not be available if you have signed in to your Google account within last five days.
- Check your email account you provided when you created your Google Account and follow the instructions if you have selected Email to ••••••@****.
- Fill in the form for Google Accounts Help if you have selected I no longer have access to these, and click Submit on the bottom of the window.
Getting Started
Using the touch screen
Run an application or perform functions with the touch screen. The following finger actions help you easily understand how to use the touch screen and the phone.
Tap: Tap once to access a menu or an option.
Double tap: Tap an item twice.
Drag: Tap and hold your finger on an item and move it without losing contact with the screen.
Flick: Place a finger on the screen and move the screen up or down, or left or right.
Pinch: Place two fingers on the screen and move them apart to zoom in a picture, a document or a web page, or move them together to zoom out.
Select and tap: Tap one in the list of options available.
Press and hold: Press a key for a few seconds.

Tap Drag

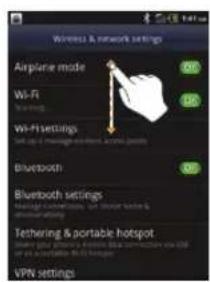
Flick Press and hold
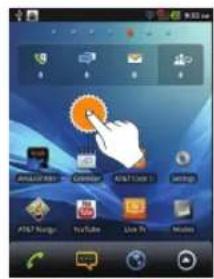
① Note Use one finger at a time except when you deal with a picture or a document. The phone will not recognize it when you use more than two fingers at the same time.
CAUTION
- Do not use sharp tools that can scratch the touch screen.
- Do not allow the touch screen to come in contact with water or chemicals. The touch screen may malfunction in humid conditions or in chemicals.
• Do not sit on the phone. The touch screen can be damaged.
Understanding the home screen
Home screen is the starting point to use applications. Access shortcuts, widgets or folders, and display a wallpaper according to your preference.

idle mode
① Note Press ▲ if you want to move to the home screen.
No. Description
| 1 | Displays notification and easy settings. Drag down 1. |
| 2 | Moves to the selected page. Tap 2. |
| 3 | Opens Shortcuts, Widgets, folders, etc. Tap an icon. |
| 4 | Runs the menu items used most frequently. Tap an icon. |
Home screen icons
| Icon Description | |
 | Makes calls. |
| [17SH] | Opens messaging. |
| [X7DB] | Accesses the Internet. |
 | Opens Applications menu. |
① Note The home screen displays the menu items used frequently as the home screen icons. You can run them easily and immediately.
Navigating the home screen
The phone provides seven different screens where you can place items according to your preference.
- Flick the screen from the left to the right or vice versa.
- Tap a desired application or widget to run.


Sample home screens
① Note If you want to change or edit the home screen or to add a widget to the home screen, refer to page 19.
Getting Started
Screen indicators
| Icon Description | |
| Connected to a Wi-Fi network | |
| WiFi networks are available. | |
| An alarm has been set. | |
| Sync in progress | |
| TTY is active. | |
| The GPS is active. | |
| There is a message that is not sent. | |
| New SMS message | |
| New MMS message | |
| New Email | |
| New WAP message | |
| New voicemail | |
| Bluetooth is connected. | |
| Bluetooth is active but not connected to other device. | |
| Portable Wi-Fi hotspot is active. | |
| USB tethering is active. | |
| The speakerphone is active. | |
| Icon Description | |
| Strength of signal: The bar becomes bigger when the signal is strong. | |
| Airplane mode is active. | |
| There is no signal. | |
| A call is under way. | |
| There is a call on hold. | |
| There is a missed call. | |
| Strength of battery: The greener, the more it is charged. | |
| The battery is charging. | |
| There is an upcoming event. | |
| Music is being played. | |
| There is no SIM/USIM card. | |
| The phone vibrates when there is an incoming call. | |
| The other party cannot listen to you during a call. | |
| The phone doesn't ring when there is an incoming call. | |
| The memory disk is full. | |
| There is an error. | |
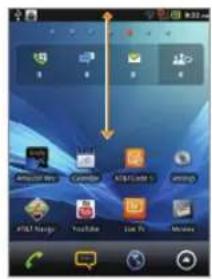
Navigating the notification and easy setting screen
The Easy Settings and Notification help manage a few important functions easily and check ongoing events such as network, GPS, alarm, or sound setting or the current running applications.
- Drag the top of the home screen down.
- Tap an icon in Easy Setting that you want to run. The icon turns orange when the function is on.
- Tap or drag up the bottom of the home screen to close the Easy Setting and notification mode.


Customizing the home screen
Adding a shortcut
- Press and hold on an empty space on the home screen.
- Tap Shortcuts.
- Select and tap an item among those in the list to place on the home screen as a shortcut.
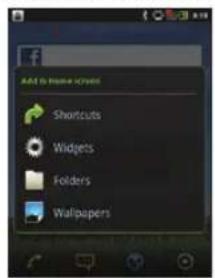

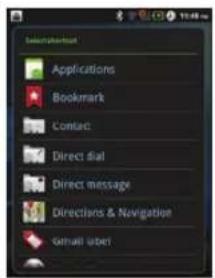
① Note You can also make a shortcut of an application by pressing and holding the application in Applications.
Adding a widget
- Press and hold any empty space on the home screen.
- Tap Widgets.
- Tap either Pantech Widgets or Android Widgets.
- Select and tap an item on the list to place the widget on the home screen.
Getting Started
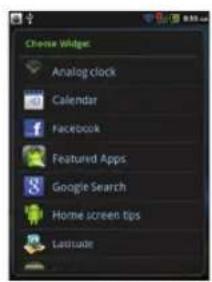

Android Widgets Pantech Widgets
① Note Make sure to secure enough room on the screen for a widget. Depending on the type of the widget, you have to delete another widget or shortcut or rearrange them.
Adding a folder
- Press and hold an empty space on the home screen.
- Tap Folders.
- Select and tap an item on the list to place the folder on the home screen.
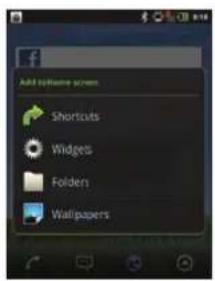

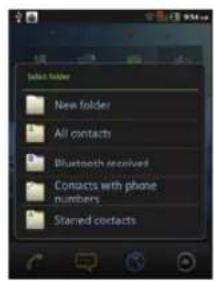
Adding a wallpaper from the Gallery
- Press and hold an empty space on the home screen and tap Wallpapers, or press ≡ in idle mode and tap Wallpaper.
- Tap Gallery.
- Select and tap a picture and adjust the size.
- Tap Save.
① Note If you want to create a live wallpaper, tap Wallpapers > Live wallpapers, select a wallpaper and tap Set wallpaper. Remember that Maps consumes the battery relatively quickly. Even if you select Maps other than wallpapers, we recommend that you save the battery consumption by tapping Force stop (Tap Settings > Applications > Manage applications > Maps).
Deleting a shortcut or a widget from the home screen
- Press and hold a shortcut or widget you want to delete.
- Drag it to the trash bin on the bottom of the screen and release it.
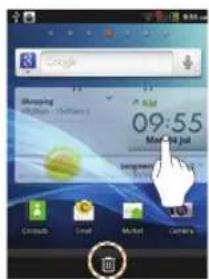
Changing the home screen theme
- Press ≡ in idle mode and tap Themes. The User theme (Unsaved) is selected by default.
- Select and tap a home screen theme among contextual themes and tap Done.
Deleting the user theme from the home screen
- Press ≡ in idle mode and tap Themes.
- Press ≡ and tap Delete if your phone has the saved user themes.
- Select and tap one of the personal themes.
- Tap Done.
Changing the order of screens
- Press and hold ≡ in idle mode.
- Press and hold a screen and drag it to the new position.
- Tap a screen or press ⏻ or ⏻ if you want to go back to the home screen.
① Note You can also change the order of screens by pinching to zoom the screen in.
Selecting the language
- Press ≡ in idle mode.
- Tap Settings > Language & keyboard > Select language.
- Select and tap a language that you want to use for the phone.
① Note We recommend to set the language option first before using other functions.
Understanding the applications menu
When you download an application in the phone, it will be added to the applications menu.
Changing the view mode
- Tap the bottom of the home screen.
- Press ▲ and tap List View if in the Alphabetic Grid, User Defined Grid, or Date Grid view mode.
- Press ▲ and tap Alphabetic Grid, User Defined Grid, or Date Grid to see applications at a glance if in the list view mode.
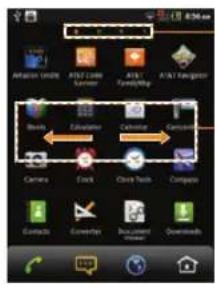
Applications menu pages
Drag the screen left or right to move to the previous or next page
Sorting applications
- Tap the bottom of the home screen.
- Press ≡ and tap Sort.
- Select and tap Alphabetic Grid, User Defined Grid, or Date Grid. Sorting function is not available in the list view.
Rearranging applications (User Defined Grid view only)
- Tap 📄 the bottom of the home screen.
- Press ≡ and tap Rearrange.
- Press and hold an application and drag it to its new location. If you want to undo your changes, press ≡ and tap Reset.
Changing the background image (Grid view only)
- Tap the bottom of the home screen.
- Press ≡ and tap Background.
-
Tap OK.
-
Flick the screen left or right and tap an image you want to change.
Uninstalling applications (Grid view only)
- Tap ☐ the bottom of the home screen.
- Press □ and tap Uninstall. The removable downloaded applications will appear. Uninstalling function is not available in the list view.
- Tap an application you want to uninstall.
- Tap OK.
- Press □ and tap Exit if you want to return to the applications menu.
Adding an application shortcut to the home screen
- Tap to the bottom of the home screen.
- Press and hold an application you want to place as a shortcut.
- Drag the shortcut to the new position if you want to rearrange.
Searching applications
- Tap the bottom of the home screen.
- Press Q, and enter a word to search.
2
Communication

Communication
Calling
Making a call
- Tap the bottom of the home screen.
- Enter the area code and the phone number. Tap to delete the previous number. Press and hold to delete the whole number.
- Tap on the bottom of the screen.
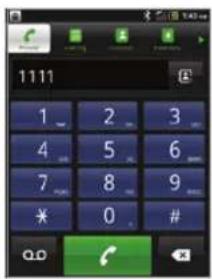
Answering and ending a call
- Drag the right to answer the call.
- Tap ■ to end a call during the conversation. After ending a call, its summary is shortly displayed.

Adjusting the volume
- Press the volume key + to increase the volume during a call.
Press the volume key - to decrease the volume during a call.
① Note Press the volume key in idle mode if you want to adjust the ringer volume. If you want to set it to the vibration mode, press the volume key all the way down until the mode appears.
Holding and unholding a call
- Tap Hold during a call. The party will hear nothing.
- Tap Unhold to resume the call.
- Tap End to finish the call.
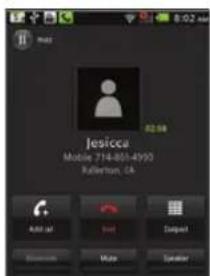
Turning Noise Suppression on/off
- Press ≡ during holding a call.
- Tap Noise Suppression > On or Off.
① Note If you tap Speaker to turn on the speakerphone during holding a call, Noise Suppression options change to In hand, On desk, and Off.
Swapping a call for a multiparty call
- Tap Add call during a call. Enter the area code and the phone number and tap. The first party will hear a waiting sound.
- Tap Swap to change the calling party.
- Tap End to finish the call.
Making a conference call
- Tap 📋 the bottom of the home screen.
- Enter the area code and the phone number.
- Tap Add call during a call. Enter the area code and the phone number, and tap to invite a third party to the current call.
- Tap Merge calls to let all the parties to participate in the conversation.

Making a call from the Address Book
- Tap the bottom of the home screen.
- Tap Contacts, select and tap a contact to call.
- Tap Call home, Call mobile or Call work according to your preferences.
① Note To open Contacts simply, tap from the home screen or applications menu screen.
Making an emergency call
- Tap Emergency call when the screen is locked with pattern, PIN, or password.
- Tap 911 or other numbers for emergency calls.
Checking missed calls
- Tap the bottom of the home screen.
- Tap Call log and check missed calls.
- Select and tap a number to call back.
- Tap if you want to make a call to the number.
Checking the call history
- Tap the bottom of the home screen.
- Tap Call log.
- Select and tap a contact to see.
- Tap if you want to make a call to the contact.
① Note The displayed call time is not equal to the call charge. You can search Call & Date usage when you press ≡ in the Call log mode.
Checking your voice mail
- Tap the bottom of the home screen.
- Press and hold 1 on the keypad.
① Note The screen moves to the voice mail contact editing screen if the number has not been designated for the voice mail.
Communication
Saving a new contact
- Tap the bottom of the home screen.
- Enter a telephone number.
- Press ≡ and tap Add to contacts.
- Tap Create new contact.
- Enter necessary information of the contact and tap Save.
Talking through the speaker
- Tap Speaker during a call. A white bar appears under Speaker when the function is on.
- Tap Speaker if you want to stop using the function.
① Note If a headset is connected to the phone, the speaker does not work.
Talking through the Bluetooth
- Tap Bluetooth during a call. A white bar appears under Bluetooth when the function is on.
- Tap Bluetooth if you want to stop using the function.
① Note Refer to the relevant manual of the Bluetooth headset for more information.
Muting the phone
- Tap Mute during a call. A white bar appears under Mute when the function is on.
- Tap Mute if you want to turn off the function.
Adding a call
- Tap Add call to make a call to another party during a call with a party.
- Enter the telephone number and tap 📞.
① Note The current call is held when you make a call with another party.
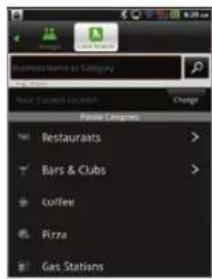
Using Local Search
- Tap the bottom of the home screen.
- Tap ▶ > Local Search.
- Tap Change (You can specify the location where you want to find business). If you don't change, it would do a search near current location by default.
- Select and tap a business name that you want to see from each category, or enter a business name and tap 🔒.
Messaging
Sending a new message
- Tap Messaging from the applications menu or on the home screen.
- Tap New message.
- Enter the recipient's number. You can also tap ▲ > Contact or Group to enter recipients' numbers. Then select contacts and tap Done.
- Tap in the message field and then enter a message using the virtual keyboard.
- Tap Send.
① Note A failed message remains in the list. If you want to delete it, press and hold the message and tap Delete. To send a new message, you can also press ≡ and tap New message.
Entering a message using voice
- Tap Messaging from the applications menu
- Tap New Message and tap in the body of the text.
-
Tap in the virtual keyboard and speak your message.
-
Tap Send.
① Note You can also send a voice message by pressing ≡ and taping More > Voice mail.
Entering a message using the keyboard
Use different keyboard settings for different characters.
- Tap Messaging from the applications menu
- Tap New message and tap in the body of the text.
- Tap to select and enter letters for the message.
- When is selected, the next letter entered is capitalized.
-
When is selected, all letters entered are capitalized.
-
Tap was if you want to enter a number or/and common symbols. Tap was > all you want to enter complicated symbols.

Capital letters Numbers and common symbols


Complicated symbols
Creating a message using Swype
- Tap Messaging from the applications menu.
- Tap New message and tap on the empty space.
-
Press and hold in the message field.
-
Tap Input method > Swype.
-
Drag your finger on the screen and enter a message.
① Note If you want to change the text input method, press and hold in the message field and tap Input method > Android keyboard. If you want to set Android keyboard options, refer to page 101.
About Swype
Swype is a fast and easy way to enter a message. For example, drag your finger on the screen keyboard as shown and input "Quick."

Entering "Quick"
Setting Swype options
- Tap Options.
- Tap Language if you want to change the language for Swype.
- Tap Word prediction if you want to see predicted words while you enter a message.
- Tap Audio feedback if you want to turn on sounds from Swype.
Communication
- Tap Vibrate on keypress if you want the phone to vibrate when you press any key.
- Tap Enable tip indicator if you want to see the flashing indicator for quick help. The check box is selected by default.
- Tap an option in Swype Advanced Settings if you want to select and set. If you tap Word choice window or Speed vs. accuracy, drag the progress bar left or right and then tap OK.
- Tap Swype help or Tutorial if you need to learn more about how to use Swype.
Inserting bookmarks to a message
- Tap Messaging from the applications menu.
- Tap New message.
- Enter the recipient's number.
- Enter a message in the message field.
- Press ≡ and tap Insert text.
- Tap Bookmarks.
- Tap a bookmark to attach.
Inserting quick texts to a message
- Tap Messaging from the applications menu.
- Tap New message.
- Enter the recipient's number.
- Enter a message in the message field.
- Press ≡ and tap Insert text.
- Tap Quick text and tap a text to select.
- Tap Attach.
Inserting smileys to a message
- Tap Messaging from the applications menu.
- Tap New message.
- Enter the recipient's number.
- Enter a message in the message field.
- Press ≡ and tap Insert text.
- Tap Smiley and select a smiley to attach to a message.
Inserting text files to a message
- Tap Messaging from the applications menu.
- Tap New message.
- Enter the recipient's number.
- Enter a message in the message field.
- Press ≡ and tap Insert text.
- Tap Text file > Documents Viewer or Handy Memo(Text).
- Select a text file and tap Attach.
Attaching pictures to a message
- Tap Messaging from the applications menu.
- Tap New message.
- Enter the recipient's number.
- Enter a message in the message field.
- Press ≡ and tap Attach > Picture.
- Tap Take a picture, Gallery, Sketch Pad or Handy Memo (Drawing).
- Take a picture or tap a picture to attach.
- Tap Send.
Attaching videos to a message
- Tap Messaging from the applications menu
- Tap New message.
- Enter the recipient's number.
- Enter a message in the message field.
- Press ≡ and tap Attach > Video.
- Tap Take a video or Videos.
- Take a video or tap a video to attach.
- Tap Send.
Attaching audios to a message
- Tap Messaging from the applications menu.
- Tap New message.
- Enter the recipient's number.
- Enter a message in the message field.
- Press ≡ and tap Attach > Audio > Record voice memo, Music, or Voice memo.
- Record voice or tap a file to attach.
Attaching contacts to a message
- Tap Messaging from the applications menu.
- Tap New message.
- Enter the recipient's number.
- Enter a message in the message field.
- Press ≡ and tap Attach > Contact (vCard).
- Select a contact to attach and tap Done.
Attaching calendars to a message
- Tap Messaging from the applications menu.
- Tap New message.
- Enter the recipient's number.
- Enter a message in the message field.
- Press ≡ and tap Attach > Calendar (vCalendar) > a event to attach
- Tap Attach.
Attaching a slide show
- Tap Messaging from the applications menu.
- Tap New message.
- Enter the recipient's number and a message in the message field.
- Press ≡ and tap Attach > Slideshow.
- Tap Add slide > Done.
- Tap Attach if you want add an attachment.
- Tap Add slide if you want to add a new slide to the attached slide show.
- Tap Duration if you want to set duration for the current slide.
Attaching locations
- Tap Messaging from the applications menu
- Tap New message.
- Enter the recipient's number.
- Enter a message in the message field.
- Press ≡ and tap Attach > Location.
- Tap either Searching for GPS signal or Find on map.
- Place the indicator on the map and tap Done.
- Tap either Address or Google maps Web link.
- Tap Send.
Adding cc/bcc
- Tap Messaging from the applications menu.
- Tap New message.
- Enter the recipient's number in the To: field.
- Press ≡ > Add cc/bc.
- Tap in the Cc: field and enter a recipient's number for CC.
- Tap in the Bcc: field and enter a recipient's number for BCC.
Adding templates
- Tap Messaging from the applications menu.
- Tap New message.
- Press ≡ and tap Templates.
- Tap a template > Attach.
Viewing received messages
- Tap Messaging from the applications menu. Unread messages will appear in bold fonts.
- Tap a sender you want to read the messages. The threaded message view will appear.
- Press and hold a message if you want to view and tap Detail view.
Replying to a received message
- Tap Messaging from the applications menu.
- Tap a sender you want to reply to.
- Tap in the text box and enter a message using the virtual keyboard.
- Tap Send.
Locking/Unlocking messages
- Tap Messaging from the applications menu.
- Tap a sender whose message you want to lock (Unlock).
- Press and hold a message that you want to lock (Unlock).
- Tap lock (Unlock).
Forwarding messages
- Tap Messaging from the applications menu.
- Tap a sender whose message you want to forward.
- Press and hold a message that you want to forward.
- Tap Forward.
Copying messages
- Tap Messaging from the applications menu
- Tap a sender whose message you want to copy.
- Press and hold a message that you want to copy.
- Tap Copy message text.
- Press ← and tap New message.
- Tap in the message field, press and hold it.
- Tap Paste.
Deleting a message
- Tap Messaging from the applications menu. Unread messages will appear in bold fonts.
- Tap a sender to delete a message in threaded message view.
- Press and hold a message you want to delete.
- Tap Delete.
① Note If you want to delete a sender's all messages, press and hold a sender, then tap Delete.
Viewing a message information
- Tap Messaging from the applications menu.
- Tap a sender you want to view message information.
- Press and hold a bubble message, tap Message info.
Deleting the entire messages
- Tap Messaging from the applications menu
- Press ≡ and tap Delete.
- Tap senders to delete their all messages.
- Tap Done > Delete.
Sending a message using a Quick Text
- Tap Messaging from the applications menu.
- Press
- Tap Quick text, select and tap a message.
- Press ≡ Tap Send message.
- Enter the recipient's number.
- Tap Send.
Adding a Quick Text
- Tap Messaging from the applications menu.
- Press ≡ and tap Quick text.
- Press ≡ and tap Add new.
- Enter a quick text.
- Tap Save.
Deleting a Quick Text
- Tap Messaging from the applications menu.
- Press ≡ and tap Quick text.
- Press ≡ and tap Delete.
- Select and tap a quick text to delete.
- Tap Done.
Sending a message using a template
- Tap Messaging from the applications menu.
- Press ≡, tap Templates > a template.
- Press ≡ and tap Send message.
- Enter a message in the message field.
- Tap Send.
Communication
Adding a template
- Tap Messaging from the applications menu
- Press ≡ and tap Templates.
- Press ≡ and tap Add new.
- Enter the recipient's number and message.
- Tap Save.
Deleting templates
- Tap Messaging from the applications menu
- Press ≡ and tap Templates.
- Press ≡ and tap Delete.
- Tap Templates you want to delete.
- Tap Done.
Setting storage limits
- Tap Messaging from the applications menu
- Press ≡ and tap Settings > Delete old messages if you want old messages to be deleted when the storage limit is reached.
- Tap Text message limit, set the maximum number of messages and tap Set.
- Tap Multimedia message limit, enter the maximum number of messages and tap Set. Make sure to delete old messages before setting the maximum number of messages.
Setting a signature
- Tap Messaging from the applications menu
- Press ≡ and tap Settings.
-
Tap Edit signature.
-
Enter a signature and tap Save.
- Tap Signature auto-append if you want to add your signature automatically, and tap either Manual/off or Append on Compose and tap OK.
Setting a SIM card message
- Tap Messaging from the applications menu.
- Press ≡ and tap Settings.
- Tap Manage SIM card messages if you want to manage messages that are stored in the SIM card.
Multimedia message settings
- Tap Messaging from the applications menu.
- Press ≡ and tap Settings.
- Tap Auto-retrieve if you want to retrieve messages automatically. The check box is selected by default.
- Tap Extra settings and adjust settings as you prefer.
Setting notifications
- Tap Messaging from the applications menu.
- Press ≡ and tap Settings.
- Tap Notifications if you want to see in the status bar when a message is delivered. The check box is selected by default.
- Tap Select ringtone and select and tap a ringtone for incoming messages, and tap OK.
- Tap Vibrate and tap Always, Only when silent or Never, and tap OK.
Checking used space
-
Tap Messaging from the applications menu.
-
Press ≡ and tap More > Used space. You can see the number of the messages that you have saved. Used space only appears as a menu option if you have saved messages.
Searching messages
- Tap Messaging from the applications menu
- Press ≡ and tap More.
- Tap Search.
- Enter a word to search for in messages and tap 🔒.
Sending a voice mail
- Tap Messaging from the applications menu.
- Press ≡ and tap More.
- Tap Voice mail.
Emailing
Setting up an email account
- Tap Email from the applications menu.
- Enter your email address and password for the first use.
- Tap either Manual setup or Next.
- If you tap Manual setup, tap POP3, IMAP or Exchange, set the necessary options and tap Next.
- Give a name for the account.
- Give your name that will be displayed on the outgoing messages.
- Tap Done.
① Note The screen varies depending on the email service provider.
Adding a new email account
- Tap Email from the applications menu.
- Press ≡ and tap More > Accounts.
- Press ≡ and tap Add account.
- Follow the steps to set up an email account.
Viewing incoming messages
- Tap Email from the applications menu.
- Select and tap an account, and tap a message you want to check.
① Note Make sure to secure enough internal memory space: you might experience difficulties receiving or sending emails when the memory space is low.
Sending an email
- Tap Email from the applications menu.
- Tap Compose mail.
① Note If you have added more than two email accounts, the first one is designated as the primary account for sending an email. - Enter the recipient's email address, or tap and select and tap the contact.
- Enter the subject of the email and the message.
- Tap Send.
Adding attachments to an email
- Press ∈ in the composed message and tap Attach.
- Tap Pictures if you want to add a picture.
- Tap vCard if you want to add a vCard.
- Tap Send when you are finished.
Designating emails as favorites
- Tap Email from the applications menu.
- In the Inbox screen, press ≡ and tap Star.
- Select and tap the message and tap Done. An orange star icon appears next to the message.
Marking emails as read
- Tap Email from the applications menu.
- Press ≡ and tap Read/Unread in the Inbox screen.
- Select and tap the message to display it as read.
- Tap Read.
Removing the email account
- Tap Email from the applications menu.
- Press ≡ and tap More > Accounts.
- Press and hold the account that you want to remove.
- Tap Remove account > OK.
Email settings
- Tap Email from the applications menu.
- Tap an account.
- Press ≡ and tap More > Account settings.
- Tap Inbox check frequency, set the time interval to check email and tap OK.
- Tap Default account if you want to set the email account as the basic account by default.
Using Email widget
- Press and hold an empty space on the home screen.
- Tap Widgets > Pantech Widgets > Email.
- Select and tap a style.
- Tap the Email widget on the home screen to check Emails.
Using Gmail
Adding a Gmail account
- Tap Gmail from the applications menu.
- Tap Next.
- Tap Sign in if you have a Gmail account.
- Enter your user name and password.
- Tap Sign in.
① Note For more information on adding a Gmail account, refer to Creating a Gmail account on page 15.
Reading incoming messages
- Tap Gmail from the applications menu.
- Select and tap the message to read.
- Tap Archive if you want to preserve the message in a separate folder.
- Tap Delete if you want to delete the message.
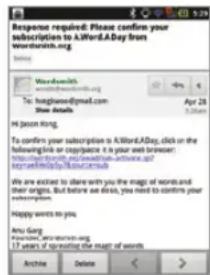
① Note You can read messages by label. Press ≡ in the Inbox screen and tap Go to labels.
Sending an email through Gmail
- Tap Gmail from the applications menu
- Press ≡ and tap Compose.
- Enter the recipient's email address, the subject and the message.
- Tap or press ≡ and tap Send.
Designating emails as spam
- Tap Gmail from the applications menu.
- Select and tap an email.
- Press ≡ and tap More.
- Tap Report spam if you want to report the email and put it from your inbox.
Setting Gmail options
- Tap Gmail from the applications menu.
- Press □ and tap More > Settings.
- Tap Confirm actions, tap Archive, Delete and/or Send to see the confirmation message for each action, and tap OK.
- Tap Reply all if you want to make it default to reply all to incoming messages.
- Tap Email notifications if you want to see if a new mail arrives. The check box is selected by default.
Using Twitter
Joining in Twitter
- Tap Twitter from the applications menu.
- Tap Sign In, enter Username or email address and password, and tap Sign In again. If you do not have an account, tap Sign Up and follow the necessary steps.
Posting a Tweet
- Tap Twitter from the applications menu.
- Tap 📋 on the top of the screen.
- Enter a message in the box. You can enter up to 140 words for a message.
- Tap 🔒, and select and tap a picture from your gallery if you want to attach a picture for the message. You can take a photo right away by tapping 🔒 and running the camera.
- Tap Tweet.
Sending messages
- Tap Twitter from the applications menu.
- Tap 📋 on the top of the screen.
- Enter a message in the box.

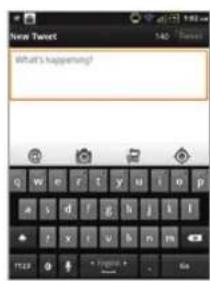
Posting Tweet
Communication
- Tap @
- Tap the check box next to the recipient you want to send to and tap OK.
- Tap Tweet.
Searching Tweets or people
- Tap Twitter from the applications menu
- Tap
- Enter the keyword in the box and tap 🔒. You can also tap one of keywords that appear below the box.
Adjusting settings for notifications
- Tap Twitter from the applications menu
- Press ≡ and tap Settings.
- Select an account and tap Tweets if you want to know when there is a new Tweet for your account.
- Tap Vibrate if you want the phone to make vibrations when there is an incoming notification.
- Tap Ringtone if you want to assign a ringtone for the notification. Then, select and tap one in the list and tap OK.
Using Facebook
Joining-in Facebook
- Tap Facebook from the applications menu
- Tap I agree for the end user license agreement screen.
- Enter your email address and password.
- Tap Login. If you don't have the account, tap Sign up and follow the necessary steps.
- Select and tap an option for syncing and tap Next.
- Tap Finish to complete the process. Tap Back if you want to see the previous screen and change any options.
Posting messages
- Tap Facebook from the applications menu
- Enter a message in the box on the top and tap Share if you want to display a new status to your friends.
① Note If your friend has posted a new message, it appears first. Then, press tap and post a message.
Sending messages
- Tap Facebook from the applications menu
- Tap ⇔ to go to the first screen.
- Tap Messages.
- Press ≡ and tap Compose. Or you can tap 📋 to post a message.
- Enter the recipient's name, or tap 🔒, select and tap the check box next to the recipient you want and tap Done.
- Enter the subject and contents of the message.
- Tap Send.

First screen Posting a message
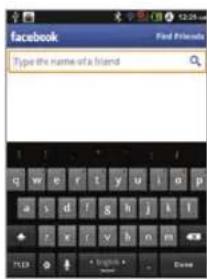
Adjusting settings
- Tap Facebook from the applications menu.
- Press ≡ and tap Settings.
- Tap Refresh interval and set the frequency for refreshing.
- Tap Messages if you want to see when a new message arrives.
- Tap Friend requests if you want to see when a friend wants to add you on Facebook, and then confirm or ignore a friend request.
S-Board
Form a group with your friends through S-Board and share contents and logs that you have created using the phone.
Sharing media
- Tap S-Board from the applications menu.
- Tap Contents on the top left of the screen.
- Tap a content icon.
- Select content from a corresponding application.
- Move the attached icon.
- Resize the icon if it is resizable.
- Tap Share.
Deleting logs
- Tap S-Board from the applications menu.
- Tap Logs.
- Press ≡ and tap Delete Logs.
- Select and tap logs you want to remove.
- Tap Done.
Adding members to a group
- Tap S-Board from the applications menu.
- Press ≡ and tap Add members.
- Enter the name or phone number of a member to add to the group. You can also add by tapping, selecting and tapping a contact, and tapping Done.
- Tap Next on the top of the screen.
-
Enter a message in the empty space and tap Done.
-
Tap Send.
Deleting members from a group
- Tap S-Board from the applications menu.
- Press ≡ and tap Delete members.
- Select and tap a member you want to remove.
- Tap Next on the top of the screen.
- Enter a message in the empty space.
- Tap Send.
Editing a group
- Tap S-Board from the applications menu.
- Press ≡ and tap Edit group.
- Tap Photo, select and tap a picture from the Gallery.
- Change the name of the group.
- Tap ★ if you want to set the group as your favorite.
- Tap Done.
Deleting a group
- Tap S-Board from the applications menu.
- Press ≡ and tap Delete group.
- Tap Yes.
- Enter a message in the empty space.
- Tap Send.
Google Talk
Setting your status
- Tap Talk from the applications menu.
- Tap on the top of the screen where your Gmail address is displayed.
- Tap the status bar on the top of the screen.
- Tap Available, Busy or Invisible.
① Note The status message will not be displayed if your status is invisible. - Enter the status message.
- Tap if you want to insert a photo
- Select and tap a picture from your gallery, adjust the size of the picture and tap Save.
- Tap Done. Your status is displayed at the top of the screen.
Inviting a friend to chat
- Tap Talk from the applications menu.
- Press ≡ and tap Add friend.
- Enter the user name of the friend you want to add.
- Tap Send invitation.
Chatting with friends
- Tap Talk from the applications menu.
- Select and tap one of friends that appear on the screen.
- Enter a message and tap Send.
-
Press 📄 and tap Add to chat if you want another friend to join the conversation.
-
Press ≡ and tap More > Insert smiley, and select and tap one.
- Press □ and tap End chat if you want to stop chatting with your friend.
Managing your friends list
- Tap Talk from the applications menu.
- Press ≡ and tap More.
- Tap Invites. You can check pending invitations.
Setting the talk environment
- Tap Talk from the applications menu.
- Press ≡ and tap Settings.
- Tap Automatically sign in if you want to remain signed-in for Talk.
- Tap Mobile indicator if you want your friends to see that you are on a mobile device.
- Tap IM notifications if you want to see notifications in the status bar when a new IM arrives.
3
Entertainment

Entertainment
The phone offers a variety of tools for entertainment purposes.
Using the camera
Take pictures with the built-in camera. They can be saved and sent via multimedia messages.
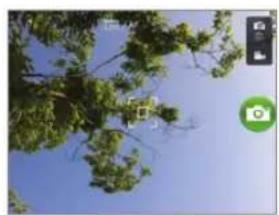
→
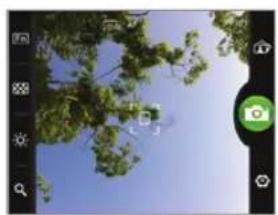
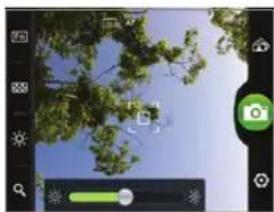
Tap any area on the screen to display the camera menu options.
Camera menu options
| Icon Name Description | ||
 | Shutter Takes a picture | |
 | Function | Adds special functions: White Balance, Filter, and timer |
 | Effect | Adds special effects: Single shot, Multi shot, Division shot, and Instant |
 | Brightness Adjusts brightness | |
 | Zoom Zooms the object in or out | |
 | Gallery Views saved pictures | |
| Icon Name Description | ||
 | Setting | Changes settings: Resolution, Shutter Sound, Focus mode, Store location, Save picture to |
 | Camera mode | Changes to the camera mode |
 | Camcorder mode | Changes to the camcorder mode |
Taking pictures
- Tap Camera. The screen changes to landscape mode by default.
- Tap on the screen and select options if necessary. Option buttons disappear in a few seconds.
- Focus on the object and tap 📷. The shutter sound occurs and the picture is saved automatically.
- Tap Share, Set as or Delete.
• Share : Uploads the saved picture via Bluetooth,
Facebook, Gmail, Messaging, Picasa or Twitter.
- Set as: Set as Contact icon or Wallpaper.
- Delete: Deletes the saved picture.
- Press ← if you want to take another picture.

Focusing on the object
Entertainment
① Note The screen moves to Applications if you do not touch the screen or run the camera for two minutes.
Adding special functions
- Tap on the screen or press ≡ while in the camera mode.
- Tap 📄 and select a special function you want to add.
- Tap Done.
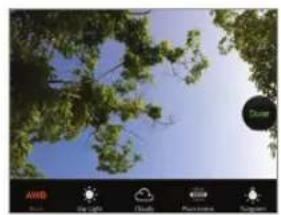
White Balance Filter

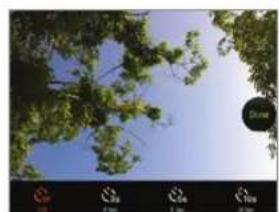
Timer
Adding special effects
-
Tap on the screen or press ☐ while in the camera mode.
-
Tap 📋 and select a special function you want to add.
- Tap Done.
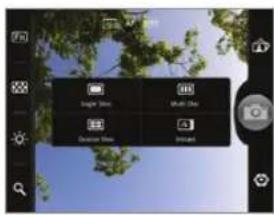
① Note When the phone turns off or exits in the camera mode, the current effects setting returns to the default setting. The phone automatically sets the photo resolution to 640x480 in the Multi, Division, or Instant mode.
Adjusting brightness
- Tap on the screen or press while in the camera mode.
- Tap
- Drag ⚡ to the left to reduce brightness, or to the right to increase brightness.
Zooming in/out
- Tap on the screen or press while in the camera mode.
- Tap
- Drag ⚙ to the left to zoom out, or to the right to zoom in.

Moving to Gallery
- Press to move to Gallery.
- Select a picture you want to view.
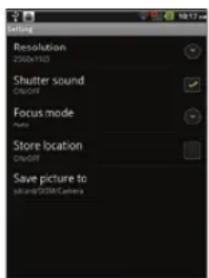
Changing settings
- Tap on the screen or press ≡ while in the camera mode.
- Tap
- Tap Resolution and adjust the resolution from 640x480 to 2560x1920.
- Tap Shutter Sound if you want to make sound when taking a picture. The check box is selected by default.
- Tap Focus mode, and tap Auto, Infinity or Macro.
- Tap Store location if you want to take a picture with geo-information. The GPS icon 🙏 will appear on the top of the screen. Tap GPS 🙏 > GPS Searching.
- Tap Save picture to if you want to take a picture with the saving location.
Sharing pictures
- Tap on the screen and tap while in the camera mode, or tap Gallery in Applications.
- Press and hold a picture to share. If you want to share all pictures, tap Select All. You can also select a few pictures.
- Tap Share.
- Tap Facebook, Bluetooth, Twitter, Picasa, Gmail, or Messaging.
Cropping a picture
- Tap on the screen and tap while in the camera mode or tap Gallery in Applications.
- Select and tap a picture to crop.
- Tap Menu > More > Crop.
- Adjust the size of the picture and tap Save.
Setting a picture as wallpaper
- Tap on the screen and tap while in the camera mode or tap Gallery in Applications.
- Select and tap a picture to set as wallpaper.
- Tap Menu > More > Set as > Wallpaper.
- Adjust the size of the picture and tap Save.
Assigning a picture to a contact
- Tap on the screen and tap while in the camera mode or tap Gallery in Applications.
- Select and tap a picture to assign to a contact.
- Tap Menu > More > Set as > Contact icon.
- Select and tap a contact to set the picture for its icon.
- Adjust the size of the picture and tap Save.
Deleting pictures
- Tap while in the camera mode or tap Gallery in Applications.
- Press and hold a picture to delete. If you want to delete all pictures, tap Select All. You can also select a few pictures.
- Tap Delete > Confirm Delete.
Entertainment
Using the camcorder
Record videos with the built-in camera. They can be saved and sent via multimedia messages.
[NO TEXT]

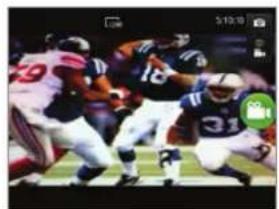
Tap any area on the screen to display the camcorder menu options.
Camcorder menu options
| Icon Name Description | ||
 | Video Records a video | |
 | Function | Uses functions: White Balance, Filter, Duration |
| [86BY] | Brightness Adjusts brightness | |
 | Zoom Zooms the object in or out | |
 | Gallery Views saved videos | |
 | Settings | Changes settings: Resolution, Video Encoder, Shutter Sound, and Save video to |
 | Camera mode | Changes to the camera mode |
 | Camcorder mode | Changes to the camcorder mode |

Recording a video
Recording videos
- Tap Camcorder from the applications menu. The screen changes to landscape mode by default.
- Tap on the screen and select options if necessary. Option buttons disappear in a few seconds.
- Focus on the object and press 📋. The recording start sound occurs. Press ← if you want to cancel recording.
- Tap ☐ to stop recording. The recording end sound occurs.
- Tap Share, Play or Delete.
• Share : Uploads the recorded video via Bluetooth, Facebook, Gmail, Messaging, or YouTube.
• Play: Plays back the recorded video. - Delete: Deletes the recorded video.
- Press ← if you want to record another video.
① Note The screen moves to Applications if you do not touch the screen or run an application for two minutes. The camcorder screen is set to landscape mode only. If you have an incoming call while recording a video, the phone will stop recording and save it.
Recording videos for a certain period of time
- Tap on the screen while in the camcorder mode.
- Tap FM and tap Duration.
- Select and tap a time duration and tap Done.
- Tap 📋. The video will record for the selected duration.
Adding special functions
- Tap on the screen or press ≡ while in the camcorder mode.
- Tap and select a special function.
- Tap Done.
① Note The camcorder mode does not support Effect and GPS.
Adjusting brightness
- Tap on the screen while in the camcorder mode.
- Tap
- Drag ⚡ to the left to reduce brightness, or to the right to increase brightness.
Zooming in/out
- Tap on the screen while in the camcorder mode.
- Tap
- Drag ⬤ to the left to zoom out, or to the right to zoom in.
Changing settings
- Tap on the screen while in the camcorder mode.
- Tap
- Tap Resolution and adjust the resolution from 176x144 (MMS) to 1280x720.
- Tap Video Encoder > MPEG4 or H.264.
- Tap Shutter Sound if you want to make a sound when taking a video. The check box is selected by default.
- Tap Save video to if you want to record a video with the saving location.
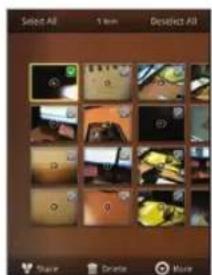
Sharing videos
- Tap on the screen and tap while in the camcorder mode, or tap Gallery in Applications.
- Tap on the first video on the screen.
- Press and hold a video to share. If you want to share all videos, tap Select All. You can also select a few videos.
- Tap Share.
- Tap YouTube, Bluetooth, Facebook, Messaging, or Gmail

Selecting a video Sharing a video
Entertainment
Deleting videos
- Tap on the screen and tap while in the camcorder mode or tap Gallery in Applications.
- Tap on the first video on the screen.
- Press and hold a video to delete. If you want to delete all videos, tap Select All. You can also select a few videos.
- Tap Delete > Confirm Delete.
Using the gallery
You can see pictures or videos stored in your product.
Viewing pictures
- Tap Gallery from the applications menu.
- Select and tap a picture to view.
- Tap the image on the screen to zoom in or out. Double-tap on the screen to zoom in to the maximum.
- Flick the screen to the left or right if you want to see other pictures.

① Note Functions of the gallery disappear in a few seconds. Tap on the screen if you want to see functions available.
Viewing pictures in a slideshow
- Tap Gallery from the applications menu.
- Select and tap the pictures that you want to view in a slideshow.
- Tap Slideshow.
- Tap on the screen if you want to stop the slideshow.
- Tap on the screen and tap Slideshow if you want to resume the slideshow.

Viewing videos
- Tap Gallery from the applications menu.
- Select a video to view. An item with ▶ is a video.
- Tap on the screen to pause, fast-forward or rewind the video.
Video Player settings
- Press ☐ while a video is playing through Video Player.
- Tap Settings.
- Tap Caption language if you want to change the caption language. The default language is English. You can activate it during playback.
- Tap Repeat if you want to repeat the video playback and tap Repeat all, Repeat single movie, or Repeat off.
- Tap Sound Effect, select and tap an effect from the 3D sounds, Equalizer, and User set, and tap Done.
Using the video player
Viewing a video
- Tap Video Player from the applications menu.
- Tap All or Folder.
- Press and hold a video you want to view.
- Tap Play. The selected video plays back in full view.
- Tap any area on the screen during playback if you want to display the video player options.
① Note You can just tap a video from the list to view. To view some videos sequentially, press ≡ in the video list mode and tap Play Selected Items.

Video Player icons
| Icon Name Description | ||
| Bookmark Displays the thumbnail video clips | ||
| Rewind | Press if you want to move the previous file. Press and hold if you want to rewind the current video. | |
| Play Plays the video | ||
| Pause Pauses the video | ||
| Icon Name Description | ||
| Fast-forward | Press ▶ if you want to move to the next file. Press and hold ▶ if you want to fast forward the current video. | |
| Resize Adjusts the screen size. | ||
Deleting a video
- Tap Video Player from the applications menu.
- Tap All or Folder.
- Press and hold a video you want to delete.
- Tap Delete.
- Tap Yes.
① Note To delete some videos at a time, press ≡ in the video list mode and tap Delete.
Sharing videos
- Tap Video Player from the applications menu.
- Tap All or Folder.
- Press and hold a video you want to share.
① Note To share videos, you can also press ≡ and tap Share. Select videos and then tap Done. - Select and tap Bluetooth, Facebook, Gmail, Messaging, or YouTube.
Entertainment
Viewing properties
- Tap Video Player from the applications menu.
- Tap All or Folder.
- Press and hold a video to view its property or press ☐ while playing back.
- Tap Properties.
Video player setting
- Tap Video Player from the applications menu.
- Tap All or Folder.
- Press ≡ and tap Setting
- Select and tap a video player setting option you want.
- Select and tap an item.
Using the music player
Enjoy music on the phone. Make sure to insert a microSD card to transfer music to the phone and listen to it.
Listening to music
- Tap Music Player from the applications menu
- Select and tap a file from the list to listen to. Files that the phone offers include MP3, AAC, AAC+, eAAC+, WMA, OGG, etc.

① Note Press and hold the artist name, album title or song title if you want to search for related information with Music Player, Web or YouTube.
Music Player icons
Icon Description

Rates the file

Nowplaying list bar

Progress bar

Random play music on/off toggle
Icon Description

Pauses and plays a file

Moves to the next/previous file Fast-forwards or rewinds the file if you press and hold

All : Repeat All / Repeat One / : Repeat at Off
Playing back music in shuffle
- Tap Music Player from the applications menu.
- Press ≡ and tap Settings.
- Select and tap Shuffle.
Adding sound effects
- Tap Music Player from the applications menu.
- Press □ and tap Settings.
- Tap Sound Effect.
- Add sound effects according to your preferences.
- Tap Done.
Controlling volume
- Tap Music Player from the applications menu.
- Press Volume key and the volume controller appears.
- Press Volume Up or Volume Down to adjust volume.
Creating a new playlist
- Tap Music Player from the applications menu
- Tap Playlists and press ≡
- Tap New Playlist.
- Enter the name of the playlist and tap Done.
- Select and tap the check box next to the song(s) that you want to add to the playlist.
- Tap Add.
Adding songs to a playlist
- Tap Music Player from the applications menu
- Tap Playlists.
- Press and hold the playlist you would like to add songs to and tap Add Tracks.
- Select and tap the check box next to the song(s) that you want to add to the playlist.
- Tap Add.
Removing songs from a playlist
- Tap Music Player from the applications menu
- Tap Playlists.
- Press and hold a playlist and tap Remove Tracks.
- Select and tap the trash bin next to the song(s) to remove.
- Tap Done.
Repeating music
- Tap Music Player from the applications menu
- Press □ and tap Settings.
Entertainment
- Tap Repeat if you want to repeat the songs in the playlist and tap Repeat Off, Repeat One, or Repeat All.
- Tap Sound effect if you want to use sound effect for the songs.
Viewing properties
- Tap Music Player from the applications menu.
- Press and hold a file you want to see its property.
- Tap Properties.
- Scroll up or down to view information.
Sorting files by type
- Tap Music Player from the applications menu.
- Tap Songs on the top of the screen and select the option you would like to sort by. Songs is set up by default.
① Note Music offers 8 sorting types; Songs/Albums/Artists/Genre/Playlists/Rating/Mood/Most played.
Rating a file
- Tap Music Player from the applications menu.
- Select and tap a file to rate.
- Tap ★ while the file is playing and rate from one to five stars.
Deleting files
- Tap Music Player from the applications menu
- Press ≡ and tap Delete.
- Select and tap the trash bin next to the file you want to delete.
- Tap Done.
① Note You can also delete the song while playing back.
Using Music widget
- Press and hold an empty space on the home screen.
- Tap Widgets > Pantech Widgets > Music.
- Select and tap a style.
- Tap the Music widget on the home screen.
Enjoying YouTube
Watching videos
- Tap YouTube from the applications menu.
- Select and tap a video to watch.
- Double-tap the screen to watch the video in full screen.

Uploading videos
- Tap YouTube from the applications menu.
-
Press ≡ and tap Upload
-
Select and tap a video to upload.
- Set a title for the video and tap Upload.
① Note To upload videos, you should login to YouTube.
Checking upload status
- Tap on the top of the screen and drag it down while the video is being uploaded.
- Tap Uploading. You can see the status of the upload.
- Press 📄 and tap Pause uploads if you want to pause uploading. Press 📄 and tap Resume uploads if you want to resume upload.
- Tap the video on the top of the screen and tap Cancel if you want to cancel the upload.
Creating a YouTube account
- Tap YouTube from the applications menu.
- Press □ and tap My Channel > Add account.
- Tap here on the bottom of the YouTube sign-in screen.
- Follow the steps to create an account.
Sharing videos
- Tap YouTube from the applications menu.
- Select and tap a video to share.
- Tap More > Share on the top of the screen.
- Tap Bluetooth, Facebook, Gmail, Messaging or Twitter.
Watching videos by category
- Tap YouTube from the applications menu.
-
Press ≡ and tap Browse.
-
Select and tap a category.
- Flick the screen to scroll, select and tap a video to watch.
Watching videos by upload date
- Tap YouTube from the applications menu.
- Press ≡ and tap Browse.
- Select and tap a category.
- Tap This week on the top of the screen.
- Select and tap one among time intervals.
Viewing my account information
- Tap YouTube from the applications menu.
- Press ≡ and tap My Channel.
- Tap your Google account. You can tap Add account and add an account for YouTube.
- Tap each item for your account including Uploads, Favorites, Playlists and Subscriptions.
YouTube Settings
- Tap YouTube from the applications menu.
- Press ≡ and tap Settings.
- Tap High quality on mobile if you want to watch high-quality videos.
- Tap Caption font size and select and tap the font size if you want to adjust the size of the font.
- Tap Clear search history if you want to remove search history from the search box and tap OK.
- Tap SafeSearch filtering if you want to block videos that contain restricted content, and select and tap the filtering option.
4
Personal Information

Personal Information
This chapter explains how to manage contacts and to communicate via memos.
Managing contacts
Viewing contacts information
- Tap Contacts from the applications menu.
- Select and tap a contact for more information.
① Note To view the contact menu items simply, press and hold a contact. The phone displays View, Edit, Share, Options, Add to favorites, and Delete.
Creating contacts
- Tap Contacts from the applications menu.
- Tap Create new contact.
- Enter related information and tap Save.

① Note You can create a contact by entering the telephone number first. Tap enter a telephone number, press and tap Add to contacts > Create new contact.
Editing contacts
- Tap Contacts from the applications menu.
- Press and hold a contact to edit, and tap Edit.
- Edit information and tap Save.
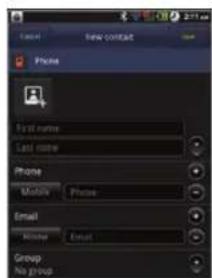
Sharing contact details
- Tap Contacts from the applications menu.
- Press and hold a contact to share and tap Share.
- Tap Bluetooth, Gmail or Messaging.
Setting contact options
- Tap Contacts from the applications menu.
- Press and hold a contact, and tap Options.
① Note You cannot find option menu when you press and hold a SIM contact. - Tap Ringtone, select and tap a ringtone for the contact and tap OK.
- Tap Incoming calls if you want to send incoming calls from the contact to voicemail directly.
Adding to favorite contacts
- Tap Contacts from the applications menu.
- Press and hold a contact to add to favorites, and tap Add to favorites. An orange star appears next to the contact.

① Note You cannot find Add to favorites menu when you press and hold a SIM contact.
3. Tap Favorites on the top of the screen if you want to see added favorite contacts.
Deleting contacts
- Tap Contacts from the applications menu.
- Press and hold a contact to delete and tap Delete.
- Tap Yes.
Searching contacts information
- Tap Contacts from the applications menu.
- Press ≡ and tap Search or press Q.
- Enter the name of contact. The search result appears instantly.
- Tap Contacts from the applications menu.
- Press ≡ and tap Display options.
- Tap Only contacts with phones if you want to see contacts
Setting display options
with phone numbers only.
- Tap Sort list by and tap either First name or Last name.
- Tap View contact names as to display and tap either First name first or Last name first.
- Tap your account, select and tap display options for system group.
- Tap Done when you are finished.
Setting up Address Book
- Tap Contacts from the applications menu.
- Press ≡ and tap Settings.
- Tap AT&T Address Book > OK. Your contacts are backed up to your Address Book and changes to contacts are automatically saved.
Managing accounts and sync
- Tap Contacts from the applications menu.
- Press ≡ and tap More > Accounts.
- Tap Background data to allow applications to retrieve data at any time.
- Tap Auto sync if you want to sync data automatically.
- Tap Add account if you want to add an account and follow the next steps for creating accounts.
Importing/Exporting contacts information
- Tap Contacts from the applications menu.
- Press ≡ and tap More > Import/Export.
- Tap Import from SD card, Export to SD card or Share visible contacts.
• Tap Phone, SIM or your account if you tapped Import
from SD card.
- Tap OK if you want to export your contact list to the SD card, if you tapped Export to SD card.
- Tap Bluetooth, Gmail or Messaging if you tapped Share visible contacts. Follow the next steps to share contacts.
Using Contacts widget
- Press and hold an empty space on the home screen.
- Tap Widgets > Pantech Widgets > Contacts.
- Select and tap a style. You can select Person or People.
- Tap a contact you want to add to the contacts widget.
- Tap the Contacts widget on the home screen to view your favorite contacts.
Person People
① Note If you select the People style, you can select up to 30 contacts to add to it.
Using the calendar
Manage your schedule with the calendar. Make sure to have a Google account. For details on Google account, refer to page 15.
Creating an event
- Tap Calendar from the applications menu.
- Tap a day in the calendar. (Weekly and Monthly view only)
-
Press and hold the time that you want to add an event to and tap New event.
-
Enter necessary information.
-
Press □ and tap Add reminder to have your phone remind you of the event. Press □ and tap Show extra options if you need more options.
-
Tap Done.
① Note You can also create an event by pressing ≡ and tapping More > New event.
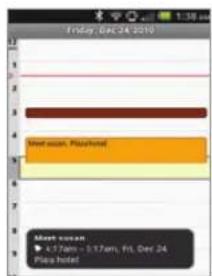
Viewing the calendar
- Tap Calendar from the applications menu.
- Tap a day that you want to view events for the day. A blue dot indicates an event for a day.
- Press □ and tap Week or Month if you want to see events for a weekly or monthly basis.
- Tap Today if you want to view events for today.
- Tap Agenda if you want to see events in the text mode.
Personal Information

Monthly view Day view
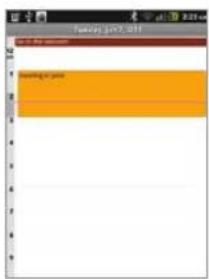

Weekly view Agenda

Calendar icons
Icon Description
| 10 | Today |
| 15 | Day with events |
Setting reminders
- Tap Calendar from the applications menu.
- Press ≡ and tap More > Settings.
- Tap Set alerts & notifications and select and tap an option if you want to change the notification method.
- Tap Select ringtone if you want to set a specific ringtone for calendar reminders, and select and tap one.
Editing events
- Tap Calendar from the applications menu.
- Tap the day that you want to edit events.
- Press the event that you want to edit.
- Press and tap Edit event.
- Edit the details and tap Done.

Editing an event
Using a memo
Write a memo with your finger, the keypad or your voice. Make sure to insert a microSD card to use the memo.
Creating a new text memo
- Tap Handy Memo from the applications menu.
- Enter a memo. If there are saved memos, tap Create new > Text memo.
- Tap Save.
Drawing a new handy memo
- Tap Handy Memo from the applications menu.
- Press □ and tap Hand drawing memo. If there are saved memos, tap Create new > Hand drawing memo.
- Draw a memo with your finger and adjust the thickness of the pencil and the eraser.
- Tap Save.


Adding effects
Editing a memo
- Tap Handy Memo from the applications menu.
- Press and hold a memo to edit and tap Edit.
- Edit the memo and tap Save.
Sharing a memo
- Tap Handy Memo from the applications menu.
- Press and hold a memo to share, and tap Share.
- Tap Bluetooth, Messaging, or Gmail. The Share list can differ depending on the applications you are using.
Deleting a memo
- Tap Handy Memo from the applications menu.
- Press and hold a memo to delete, and tap Delete.
- Tap Yes.
Using Memo widget
- Press and hold an empty space on the home screen.
- Tap Widgets > Pantech Widgets > Memo.
- Select the text or drawing memos and tap Done.
- Tap the memo widget on the home screen. The expanded view appears. Flick or drag left or right to move to the previous or next page.
① Note Memo widget gives you up to 500 memos.
Personal Information

Text momo

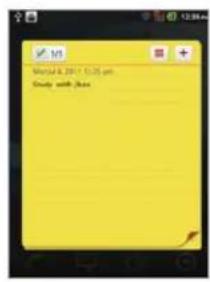
Expanded view
Using a voice memo
Recording voice
- Tap Voice Memo from the applications menu.
- Tap ● to start recording your voice.
- Tap ☐ to stop recording your voice.
① Note Once you have recorded a voice memo, the screen to play it appears. Tap▶ to replay the recorded voice memo. Press◀ if you want to record a new voice memo. If you have an incoming call while recording a voice, the current recorded voice is saved automatically.

Ready to record Recording starts

Listening to recorded voices
- Tap Voice Memo from the applications menu.
- Tap List.
- Select and tap a memo to listen.
- Tap


Sharing a voice memo
- Tap Voice Memo from the applications menu.
- Tap List.
- Press and hold a memo to share, and tap Share.
- Tap Bluetooth, Gmail, or Messaging.
Deleting a voice memo
- Tap Voice Memo from the applications menu.
- Tap List.
- Press and hold a memo to delete, and tap Delete > Yes.
5
Documents

Documents
Viewing documents
Read documents that are stored in a variety of formats (pdf, excel, ppt, word, and text) in the phone.
Reading documents
- Tap Document Viewer from the applications menu.
- Select and tap a folder where you have stored documents.
- Select and tap a document to read.
- Tap anywhere on the screen while a document is open.
- Tap 🔒 and drag up if you want to zoom in the document. Tap 🔒 and drag down if you want to zoom out. You can also zoom in the document by pinching your fingers apart, and zoom out by pinching your fingers together.
- Tap ☐ if you want to fit the document to width.
- Tap ☐ if you want to fit the document to height.

→
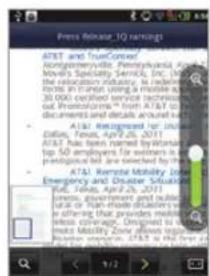
No. Icon Description
| 1 | First Release 'C########' | Displays Document file name |
| 2 |  | Displays the current shown area of the screen. |
| 3 |  | Zooms in or out the current screen. |
| 4 | [ABXA] | Moves to the previous page. |
| 5 |  | Current page number/total page number. |
| 6 |  | Moves to the next page. |
| 7 | [GWWB] | Resets the screen height or width. |
Searching for words in a document
- Tap Document Viewer from the applications menu.
- Open a document.
- Press ≡ and tap Word Search.
- Enter a word to search for and tap Done in the virtual keyboard.
- Tap ▼ to see the word that you have searched for in the next sentence or page.
- Tap Done if you want to stop searching for the word.

Moving to a page in a document
- Tap Document Viewer from the applications menu.
- Open a document and tap on the screen.
- Tap ◀ to move to the previous page. Tap ➞ to move to the next page.
- Press ≡ and tap Go to Page.
- Enter the page to go and tap
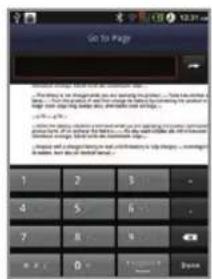
Sharing documents
- Tap Document Viewer from the applications menu.
- Select and tap a folder where you have stored documents.
- Press and hold a document to share, and tap Share.
- Tap Bluetooth, Gmail, or Messaging.
Deleting documents
- Tap Document Viewer from the applications menu.
- Select and tap a folder where you have stored documents.
- Press and hold a document to delete, and tap Delete > Yes.
Renaming documents
- Tap Document Viewer from the applications menu.
- Select and tap a folder where you have stored documents.
- Press and hold a document to rename, and tap Rename.
- Enter the new name and tap Save.
Adding recent documents as Widget
- Press and hold an empty space on the home screen.
- Tap Widgets.
- Tap Pantech Widgets.
- Tap Recent Documents.
Handling documents view
Zooming in/out with two fingers
Pinch two fingers to zoom in/out as the shown figures.

[NO TEXT]

Rotating the document viewer

[NO TEXT]

6
Web

Web
This chapter introduces useful applications that you can use through the Internet. Make sure to connect the phone to a 3G or Wi-Fi network.
Accessing the Internet
Searching for information in the Internet
- Tap Web from the applications menu or on the home screen.
- Tap on the search box and type the keyword using the virtual keyboard.
- Tap in the virtual keyboard.
- Pinch two fingers apart on the screen if you want to zoom in the web page. You will not zoom in some web pages to the maximum if they are optimized for mobile devices.
- Press ≡ and tap Back or Forward if you want to visit the previous or the current web page again.
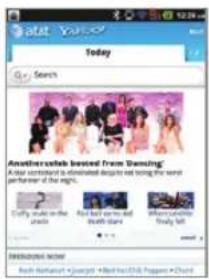
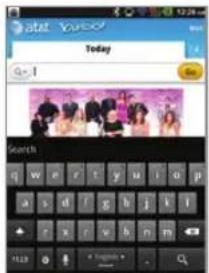
Changing the home page
- Tap Web from the applications menu.
- Press ≡ and tap More.
- Tap Settings > Set home page.
- Enter a new URL if you want to change the home page, and tap OK.
- Tap Use current page if you want to use the current page as the home page.
Using voice search
- Tap Web from the applications menu.
- Press 🔒 and tap 🔒.
- Speak a keyword as clearly as you can.
- Select and tap the web page in the search result.
Refreshing a page
- Tap to refresh the page.
- Tap ✗ to stop refreshing the page.
Visiting a new page
- Tap Web from the applications menu.
- Tap the address bar and enter a new URL.
- Tap → next to the address bar or tap ▶ the virtual keyboard.
Opening a new window
- Tap Web from the applications menu.
- Press □ and tap New window. Another window appears.
Web
Viewing the thumbnail windows
- Tap Web from the applications menu.
- Press □ and tap Windows.
- Select and tap a window on the bottom of the screen that you want to see.
- Tap on the screen. You can see the window in full screen view.
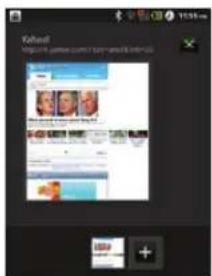
Adding bookmarks as Widget
- Tap Web from the applications menu
- Press ≡ and tap Bookmarks while you are visiting a web page.
- Tap +Add on the top of the screen.
- Enter the name and location of the website and tap OK.
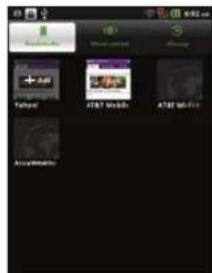
Bookmarks Adding a bookmark
Viewing browser history
- Tap Web from the applications menu.
- Press ≡ and tap Bookmarks.
- Tap Most visited if you want to see web pages that you visit the most. Tap the star icon next to the website if you want to add it to bookmarks.
- Tap History if you want to see past browsing activity. Press and tap Clear history if you want to delete the browsing history.
Setting the display options
- Tap Web from the applications menu.
- Press ≡ and tap More > Settings.
- Tap Text size, select and tap your preferred text size.
- Tap Default zoom, select and tap your preferred zoom mode.
- Tap Block pop-up windows if you want to prevent pop-up windows from appearing. The check box is selected by default.
Setting privacy options
- Tap Web from the applications menu.
- Press ≡ and tap More.
- Tap Settings.
- Tap Clear all cookie data > OK if you want to delete all cookie data.
- Tap Clear form data > OK if you want to delete all form data.
Shopping in the Android Market
Download useful applications from the Android Market and use them for your purposes.
Downloading applications
- Tap Market from the applications menu.
- Tap Next and follow the necessary steps for adding a Google account if you do not have a Google account.
- Tap Accept on the Android Market Terms of Service if you are accessing the Android Market for the first time.
- Tap Apps in the middle of the screen if you want to install useful applications.
- Select and tap a category.
- Tap Top paid, Top free or Just in.
- Select and tap an application.
- Tap FREE > OK for free applications. Tap the paid price > OK and follow the necessary steps for paid applications.


Application information Installing an application
Searching applications
- Tap Market from the applications menu.
- Tap 🔒 and enter the name or the keyword of the application that you want to install and tap 🔒 or 🔒
- Select and tap the application and install it.
Running downloaded applications
- Drag the notifications on the top of the home screen down.
- Tap the application that you have downloaded from the Android Market. 📁 indicates that an application is completely downloaded. You can also run the application in the Applications screen.
Deleting applications from the Android Market
- Tap Market from the applications menu.
- Tap My apps. All the applications that you have downloaded will appear.
- Select and tap the application to delete.
- Tap Uninstall > OK.
Deleting applications from Settings
- Tap Settings from the applications menu.
- Tap Applications > Manage applications.
- Select and tap an application to delete.
- Tap Uninstall > OK.
- Tap OK.
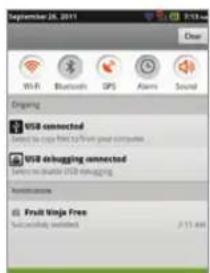
Web
Using Google Maps
Google Maps offers useful information based on your region. Make sure to connect the phone to a Wi-Fi or 3G network. If you turn on the GPS function, you can obtain more accurate information.
Searching places
- Tap Maps from the applications menu. You can see your current location on the map.
① Note Make sure to connect to wireless networks or GPS satellites by tapping Settings > Location & security and tapping either Use wireless networks or Use GPS satellites. - Tap on the search box and type the keyword using the virtual keyboard and tap 📄 or 🔒
- Tap ☐ if you want to see the result list. ☐ appears when there are many results that match your search.
- Select and tap the location that you want to see, and check the related information.
Zooming in and out of the map
- Tap to zoom in the map.
- Tap 🔒 to zoom out of the map.
① Note You can double-tap the screen to zoom in the map.
Searching directions
- Tap Maps from the applications menu.
- Press ≡ and tap Directions.
- Enter the name of the place you want to visit.
- Decide whether you want to go to the end point by car, public transportation, or foot.
- Tap Go.
Searching the current location on the map
- Tap Maps from the applications menu.
- Tap ◎: Your location is indicated as
Using Places
Finding places
- Tap Places from the applications menu.
- Enter a keyword in the search box, or tap Restaurants, Coffee, Bars, Attractions, ATMs, Gas Stations, or Explore Nearby.
- Select and tap a place in the search results.
① Note If you want to sort the result by distance or ratings by customers, tap Distance or Rating in the search results.
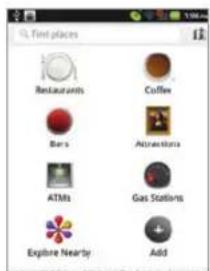
Viewing places at a glance
- Tap Places from the applications menu.
- Select and tap a category.
- Press ■ in the search results and tap See map. You can see related places in the map.
Adding a category for places
- Tap Places from the applications menu.
- Tap Add on the bottom of the screen and enter a category to add. The category appears on the screen.
Adding starred places
- Tap Places from the applications menu.
- Select and tap a category.
- Select and tap a place that you want to see.
- Tap the star icon for each place. When selected, the icon turns yellow.
① Note You can see stared places by pressing ≡ and tapping Starred Places in the first screen of Places.
Using Latitude
Share your location with your friends or check those of your friends. Make sure to have a Google account to use Latitude.
Joining Latitude
-
Tap Latitude from the applications menu.
-
Tap Allow & Share if you allow your location to be informed to your friends. The Latitude screen appears shortly where your personal information is displayed.
- Press ⇔ if you want to see your location in the map.

Adding friends from contacts
- Tap Latitude from the applications menu.
- Press ≡ and tap Add friends.
- Tap Select from Contacts.
- Select the contact of your choice to add as your friend, and then tap Done.
① Note All contacts are displayed by default. If you want to classify contacts, tap All Contacts on the top of the screen, and select and tap a category of contacts. - Tap Yes if you want to send sharing requests.
Adding friends from email addresses
- Tap Latitude from the applications menu.
- Press ≡ and tap Add friends.
- Tap Add via email address.
- Enter the email address of your friend and tap Send.
- Tap Yes if you want to send sharing requests.
Web
Accepting invitation from friends
- Tap Latitude from the applications menu.
- Tap 1 new sharing request on the top of the screen.
- Tap Accept and share back. You can see the location of your friend shortly below.

Managing friends
- Tap Latitude from the applications menu.
- Tap one of the friends in the screen.
- Tap Sharing options, and select and tap an option.
- Tap Remove this friend and tap OK if you want to remove the friend from Latitude.

Checking personal settings
- Tap Latitude from the applications menu.
- Tap your name on the top of the screen. You can see your name, Gmail account and your current location.
- Tap Change your photo, tap either Take a photo or Pick from gallery, and change your photo.
Adjusting privacy settings
- Tap Latitude from the applications menu.
- Press ≡ and tap Settings.
- Tap Detect your location, Set your location or Do not update your location for a location reporting.
- Tap Enable location history if you want to store your locations in the past and visualize them on the Latitude website.
- Tap Sign out of Latitude if you do not want to use Latitude. If you want to join Latitude again, press ≡ and tap Join Latitude.
① Note For more information on the map, refer to Using Google Maps on page 66
Searching with Google
Searching for information with Google
- Tap Google Search, or press Q in idle mode.
- Enter a keyword in the search box and tap ☐ or .You can also tap and say it on the phone.
Setting search options
- Tap Google Search from the applications menu.
- Press ≡ and tap Search settings.
- Tap Google search.
- Tap Show web suggestions if you want to see suggestions from Google as you search through Google. The check box is selected by default.
- Tap Use My Location if you allow your location to be used for Google search results.
- Tap Search history if you want to see personalized search history.
Selecting items that can be searched
- Tap Google Search from the applications menu.
- Press ≡ and tap Search settings.
- Tap Searchable items.
- Select and tap items you want to include for the search result.
Managing search history
- Tap Google Search from the applications menu.
- Press ≡ and tap Manage search history.
① Note Make sure to tap Search history first if you want to use Manage search history. - Enter the email address and password for your Google account.
- Select and tap search history in the list and tap Remove if you want to remove the search history.
News & Weather
News and Weather offers news in various fields and weather information in your region.
Viewing weather information
- Tap News & Weather from the applications menu. Information on your current region for the moment is provided by default.
- Tap on the weather information in the middle of the screen if you want to check the weather forecast throughout the day.
- Tap on the chart and drag the vertical bar on the screen to the left or right if you want to see weather information for a certain time of the day.


Weekly weather forecast Daily weather forecast
Selecting weather settings
- Tap News & Weather from the applications menu.
- Press ≡ and tap Settings.
- Tap Weather settings.
- Tap Use my location if you want to see information of your region automatically.
- Tap Use metric if you want to change the unit for weather information.
Changing my location
- Tap News & Weather from the applications menu.
- Press ≡ and tap Settings.
- Tap Weather settings.
- Deselect Use my location.
- Tap Set location and enter the name or postal code of a city you want.
Reading news articles
- Tap News & Weather from the applications menu.
- Tap Top Stories on the top of the screen.
- Select and tap an article if you want to see the full story.
- Flick the screen to the left or right if you want to see articles by category.
Customizing news topics
- Tap News & Weather from the applications menu.
- Press ≡ and tap Settings.
- Tap News settings > Select news topics.
- Select and tap the topic you want to see. Tap it again if you want to delete the topic.
Adding news topics
- Tap News & Weather from the applications menu.
- Press ≡ and tap Settings.
- Tap News settings > Select news topics.
- Tap Custom topic, enter the title and tap OK. You can see articles related to the title.
Setting refresh options
- Tap News & Weather from the applications menu.
- Press ≡ and tap Settings.
- Tap Refresh settings.
- Tap Auto-refresh if you want to update weather and news automatically. The check box is selected by default.
- Tap Refresh interval, select and tap an interval to refresh.
7
Connectivity

Connectivity
This chapter introduces useful tips on how to connect to the network available that enables applications of the phone to run.
Using a Wi-Fi network
Connecting to a Wi-Fi network
- Tap Settings from the applications menu.
- Tap Wireless & networks > Wi-Fi settings.
- Tap Wi-Fi to activate the technology.
- Select and tap a network. You should enter the password if the network is secured. 📋 indicates a secured Wi-Fi network.
- Tap Connect. Once the network is remembered, the phone will automatically connect to it when in range.

Activating Wi-Fi
Connecting to a Wi-Fi network
① Note The icon next to each network indicates the strength of the signal. For example, 📄 indicates the signal is poor while ⚙ indicates the signal is strong.
Using the Easy Setting
- Tap on the top of the home screen and drag it down, or press ≡ in idle mode and tap Notifications.
- Tap in Easy Setting. The icon turns red when the function is on.
About network notifications
You are informed by default when a Wi-Fi network is available around you. The message 📋 in the status bar indicates a network is available. Tap Network notification in the Wi-Fi settings if you do not want to be informed the availability of the network.
Setting Wi-Fi networks
- Tap Settings from the applications menu.
- Tap Wireless & networks > Wi-Fi settings.
- Tap Wi-Fi to activate the technology.
- Tap Network notification if you want to know an open network available.
- Tap Automatic connection if you want the phone to connect to Wi-Fi network automatically.
- Tap WPS button connection if you want to establish a new wireless connection using the Wi-Fi Protected Setup (WPS). You should press WPS button on your Wi-Fi access point within two minutes.
Searching for Wi-Fi networks
- Tap Settings from the applications menu.
-
Tap Wireless & networks > Wi-Fi settings.
-
Tap Wi-Fi to activate the technology. The phone scans networks automatically every six seconds. The newly found networks appear on the bottom of the list.
Adding a Wi-Fi network
- Tap Settings from the applications menu.
- Tap Wireless & networks > Wi-Fi settings.
- Tap Wi-Fi to activate the technology.
- Tap Add Wi-Fi network.
- Enter a Network SSID and select the security type among Open, WEP, WPA/WPA2 PSK and 802.1x EAP. Aside from Open, you must enter a password for the network.
- Tap Save.
Disconnecting to a Wi-Fi network
- Tap the network that is connected to the phone.
- Tap Forget to disconnect with the network.
① Note You can also disconnect to the Wi-Fi network by pressing and holding the network and tapping Forget network.
Connecting to a 3G network
Use 3G (or EDGE if available) to connect the phone to the Internet and exchange multimedia messages. You will need a data plan to access a 3G network.
3G settings are already preconfigured on the phone, and it is ready to use 3G services. Please do not change the settings; this may cause services to stop working.
① Note Using 3G loads Internet data faster in some cases, but may decrease battery performance. If you are making a lot of phone calls, you may want to turn 3G function off to extend battery performance.
Using Bluetooth
Bluetooth technology enables wireless connections between electronic devices. Using this technology, you can send images, text, and business cards.
With Bluetooth technology, the phone provides:
• Connection to hands-free devices.
- Connection to electronic devices.
Pairing with devices
- Tap Settings from the applications menu.
- Tap Wireless & networks > Bluetooth settings.
- Tap Bluetooth to activate the technology.
- Tap Scan for devices.
- Select and tap a device from the list.
- Enter PIN to pair with the device.
- Tap OK.


Scanning devices Requesting pairing
Using the Easy Setting
- Tap on the top of the home screen and drag it down, or press ≡ in idle mode and tap Notifications.
- Tap ✿ in Easy Setting. The icon turns red when the function is on.
Bluetooth settings
- Tap Settings from the applications menu.
- Tap Wireless & networks > Bluetooth settings.
- Tap Bluetooth to activate the technology.
- Tap Discoverable if you want to let other people pair their devices with the phone. The status lasts for 120 seconds.
Sharing a picture using Bluetooth
- Tap Gallery from the applications menu.
- Select and tap a picture to share.
- Tap Menu > Share > Bluetooth.
- Select and tap a device among those paired with the phone. The other party will receive a message to accept the requesting permission.
Renaming the device
- Tap Settings from the applications menu.
- Tap Wireless & networks > Bluetooth settings.
- Tap Bluetooth to activate the technology.
- Tap Device name and enter a new name.
- Tap OK.
Making the phone a modem
The phone provides other devices with an Internet connection by becoming a Wi-Fi hotspot.
Activating the USB Tethering
- Connect the phone with an electronic device using the USB cable.
- Tap Settings from the applications menu.
- Tap Wireless & networks > Tethering & portable hotspot.
- Tap USB tethering to activate the technology. The electronic device that is connected to the phone can now access the Internet.
① Note You cannot use a few applications that require Internet connection while using the tethering technology.
Becoming a portable Wi-Fi hotspot
- Tap Settings from the applications menu.
- Tap Wireless & networks > Tethering & portable hotspot.
- Tap Portable Wi-Fi hotspot. The phone can offer the Internet connection to other devices around you.
Setting options for portable Wi-Fi hotspot
- Tap Settings from the applications menu.
- Tap Wireless & networks > Tethering & portable hotspot > Portable Wi-Fi hotspot.
- Tap Portable Wi-Fi hotspot settings > Configure Wi-Fi hotspot.
-
Enter a name for Network SSID. Tap Hide SSID if you want to hide the SSID.
-
Tap WPA2(AES), WPA(TKIP), WPA/WPA2 mixed, or Open for Security and enter the related items if you want to allow limited devices to access the Internet through the phone, and tap Save.


Wi-Fi hotspot for Open Wi-Fi hotspot for WPA2(AES)
① Note The default password is an 8-digit random number. When you tap Configure Wi-Fi hotspot > Show password, you can view the current password.
8
Storage

Storage
The microSD card offers useful functions including mass storage and media file transfer.
Managing the memory card
You should manage the microSD card carefully. If you do not follow the steps described below to manage the memory card, you can incur serious damage to the card.
Viewing available memory
-
Tap Settings from the applications menu.
-
Tap Storage. You can view and check the status of Total space and Available space for SD card and Internal storage.
Unmounting the SD Card
- Tap Settings from the applications menu.
- Tap Storage > Unmount SD card > OK.
- Press and hold the LOCK/PWR key.
- Tap Power off > OK.
- Open the battery cover.
- Remove the battery.
- Remove the SD card.
① Note If you want to mount the SD card, tap Settings > Storage > Mount SD card.
Formatting the microSD card
- Tap Settings from the applications menu.
- Tap Storage > Unmount SD card > OK.
- Tap Erase SD Card > Erase SD Card > Erase everything.
Connecting to a PC
Synchronize files and exchange data with a computer using the PC data cable.
Selecting the USB mode
- Tap Settings from the applications menu.
- Tap Storage > USB Mode. If you have turned on the USB debugging function, tap OK to turn it off.
① Note You can turn on the USB debugging function by tapping Settings > Applications > Development > USB debugging. -
Select and tap a USB mode.
-
Tap Media Transfer > OK if you want to transfer media files between the phone and your PC when they are connected.
- Tap Mass storage > OK if you want to save mass files in the phone.
-
Tap Ask on connection > OK if you want to select the USB mode whenever the phone is connected.
-
Connect the USB cable to the phone.
- Connect the other end of the cable to your computer.
Turning on/off the USB mode in the Easy Setting
- Connect the phone to your computer using the USB cable.
- Tap on the top of the home screen and drag it down, or press ≡ in idle mode and tap Notifications.
- Tap USB connected > Turn on USB storage. Keep in mind that you can use this function only when you have selected

Storage
the USB mass storage mode.
- Tap OK.
① Note Tap Turn off USB storage in the notifications screen if you want to turn off the function.
Using the phone as Mass Storage
Copy files between your computer and the microSD card in the phone. In the mass storage mode, a few applications—Handy Memo, Voice Memo, Sketch Pad, Music Player, Camera, Camcorder, Document Viewer—that need the microSD card will not run.
Copying files
-
Tap Settings from the applications menu.
-
Tap Storage > USB Mode. If you have turned on the USB debugging function, tap OK to turn it off.
-
Tap Mass Storage > Turn on USB storage > OK.
-
Select and copy files to transfer from the phone.
-
Paste files to your PC.
-
Tap Turn off USB storage if you finish copying files and then disconnect the phone from your computer.
Transferring files through Media Transfer
Transfer media files between your computer and the microSD card in the phone. Once you have turned on the MTP connection, media files are collected through Windows Media Player™.
Transferring files
-
Tap Settings from the applications menu.
-
Tap Storage > USB Mode. If you have turned on the USB debugging function, tap OK to turn it off.
-
Tap Media Transfer > Turn on MTP connection > OK.
-
Select files to transfer from the phone or your PC.
-
Transfer files to your PC or the phone.
-
Tap Turn off MTP connection if you finish transferring files and then disconnect the phone from your computer.

9
Tools

Tools
The phone offers a variety of tools that help you live a convenient life.
Clock Tools
Clock Tools offers the current time in major cities and time zones around the world. World time is displayed first by default.
Viewing the world time
- Tap Clock Tools from the applications menu.
- Tap Add new city and enter the name of a city. Enter the first letter and you can find the city more easily.
- Select and tap the city.

Rearranging the order of cities
- Tap Clock Tools from the applications menu.
- Press ≡ and tap Rearrange.
- Select a city to relocate and drag up or down to rearrange the order.
- Tap Done.
Deleting a city
- Tap Clock Tools from the applications menu
- Press ≡ and tap Delete.
- Select and tap the trash icon next to the city to delete.
- Tap Done.
① Note You can delete a city by pressing and holding it and tapping Delete > Yes.
Using the timer
- Tap Clock Tools from the applications menu.
- Tap Timer.
- Press □ and tap Set for setting the time.
- Set the hour, minute and second and tap Done.
- Tap Start.
① Note You can reset the time by tapping Reset while the timer is running.
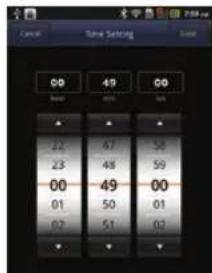
Using the stopwatch
- Tap Clock Tools from the applications menu.
- Tap Stopwatch.
-
Tap Lap on the top of the screen and tap Start. This function is used when you want to measure time that takes to run for a certain distance.
-
Tap Lap > Split on the top of the screen and tap Start. This function is used when you want to measure the accumulated time.
- Tap Reset to restart the stopwatch.

Lapping time Splitting time
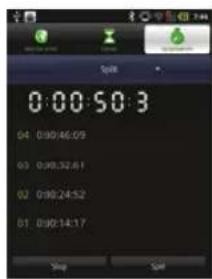
Clock
Clock helps set the alarm and see basic information on your region including time and weather. Desk clock is provided by default.
Adding a new alarm
- Tap Clock from the applications menu
- Tap 🤨 and tap Add alarm.
- Enter the hour and the minute and tap Set.
- Adjust settings for alarm and tap Done. You will see a green bar under the set alarm.

Desk Clock Adding an alarm
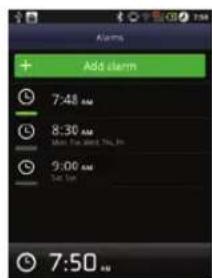
Changing an alarm
- Tap Clock from the applications menu.
- Tap 📋.
- Select and tap the alarm time to change.
- Adjust settings and tap Done.
Deactivating an alarm
- Tap Clock from the applications menu.
- Tap 🤒.
- Tap of the alarm to deactivate. A green bar indicates that the alarm is on. The color disappears when the alarm is turned off.
Deleting an alarm
- Tap Clock from the applications menu.
- Tap 🤒.
- Press and hold the alarm to delete, and tap Delete alarm.
- Tap OK.
Tools
Setting an alarm
- Tap Clock from the applications menu.
- Tap 🤒.
- Press ≡ and tap Settings.
- Tap Alarm in silent mode if you want to play the alarm even when the phone is in silent mode. The check box is selected by default.
- Tap Alarm volume if you want to adjust the volume, set the volume and tap OK.
- Tap Snooze duration if you want to adjust the snooze duration, select and tap the duration and tap OK.
- Tap Side button behavior if you want to assign an action for the side buttons, select and tap the option and tap OK.
Adding Clock widget
You can create a different integrate clock with Weather, Clock, and Schedule functions.
- Press and hold an empty space on the home screen.
- Tap Widgets > Pantech Widgets > Integrated Clock.
- Select and tap a style.
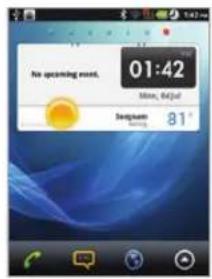
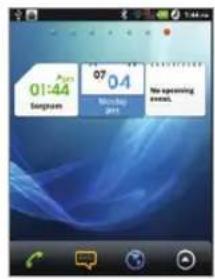
Calculator
Perform basic mathematical calculations with the calculator in the phone.
Doing calculations
- Tap Calculator from the applications menu.
- Enter a number and tap a mathematical sign you want to use.
- Tap C to delete a number and hold C to delete the whole number.

① Note You can calculate numbers up to six decimal places.
Saving a calculation
- Tap Calculator from the applications menu.
- Press ≡ during a calculation.
- Tap Save and enter the file name. The date of the day appears on the screen by default.
- Tap Done.
Editing a saved calculation
- Tap Calculator from the applications menu.
- Press ≡ and tap List.
- Select and tap a calculation to edit.
- Tap the result and edit it.
- Press ≡ and tap Save.
Deleting a calculation
- Tap Calculator from the applications menu.
- Press ≡ and tap List.
- Press and hold the calculation to delete, and tap Delete.
- Tap Yes.
Converter
Converter helps convert values for length, volume, weight, temperature, area and speed.
Converting values
- Tap Converter from the applications menu.
-
Select a unit type. Length is selected by default. Change the unit type by tapping ◀ or ▶
-
Tap on the box below the unit type and enter a value.
- Select the original unit by flicking the wheel in the middle of the screen.
- Select a target unit. The changed value promptly appears below.
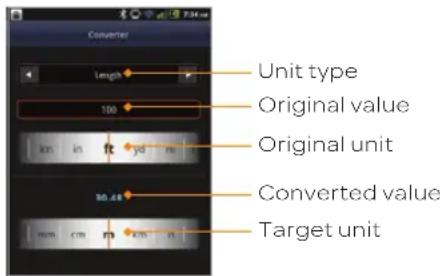
Resetting a conversion
- Tap Converter from the applications menu.
- Press ☐ during a conversion and tap Reset.
Sketch Pad
Sketch a drawing and share it with your friends. The screen is set to portrait mode only.
Creating a drawing
- Tap Sketch Pad from the applications menu.
- Tap Create new if there are saved drawings. The sketch board appears first if there are no saved drawings.
- Sketch a drawing.
Tools
- Select the size and color of the brush and the size of the eraser.
- Press ≡ and tap Background if you want to select as background of the drawing.
- Press □ and tap Import image if you want to select a photo as background of the drawing.
- Tap Save and enter the name of the drawing to save.
- Tap Save.
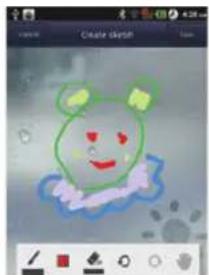
Sketch Pad icons
| Icon Description | |
| / | Set the size of the Pen |
| ■ | Set the color of the Pen |
| ◀ | Set the size of the eraser |
| ○ | Undo the previous drawing |
| ○ | Redo the next drawing |
| ● | Move canvas |
Deleting a drawing
-
Tap Sketch Pad from the applications menu.
-
Press and hold the drawing to delete, and tap Delete.
-
Tap Yes.
Editing a drawing
-
Tap Sketch Pad from the applications menu.
-
Press and hold the drawing to edit, and tap Edit.
-
Edit the drawing and tap Save.
Saving to the Gallery
-
Tap Sketch Pad from the applications menu.
-
Press and hold the drawing to save to the gallery, and tap Save to gallery.
Sharing a drawing
-
Tap Sketch Pad from the applications menu.
-
Press and hold the drawing to share, and tap Share.
-
Tap Bluetooth, Facebook, Gmail, Messaging, Picasa, or Twitter.
Changing the view mode
-
Tap Sketch Pad from the applications menu.
-
Press □ and tap Thumbnail view if you want to see drawings only.
-
Press □ and tap List view. You can see the file name and file format of the drawings.
Voice Dialer
Perform functions by speaking on the phone.
Searching for a contact
- Tap Voice Dialer from the applications menu.
- Say a contact's name.
- Tap on the message or OK.

Voice Search
Search the Internet by speaking on the phone.
- Tap Voice Search from the applications menu.
- Say a keyword on the mic.
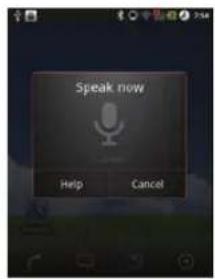
Voice search Search results
Compass
Compass helps you find your location using the speed and the distance of your moving. Turn on the GPS function to use.
Setting the way point
- Tap Compass from the applications menu.
- Tap No Way Point.
- Enter the way point name in the box and select an address and tap Done. You can see the distance and the direction from the current location.
① Note When there is interference on the compass, keep it away from the interfering items or wave the phone in a figure 8 motion. You can also set a way point by pressing and holding the I'mark in the list and tapping Set as way point.
Moving toward the way point
- Tap Start after you set the way point and start moving. The moving track begins to be recorded.
- Tap Pause if you stop recording temporarily. Tap Resume if you want to resume recording.
- Tap Stop if you want to end recording.
- Tap Yes if you want to export data. The data is saved in the external memory card.
① Note You might experience difficulties using the compass if you are indoors or near metal materials.
Tools
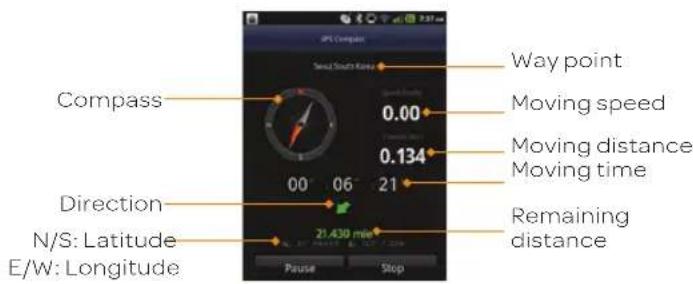
Reviewing the moving track
- Tap Compass from the applications menu.
- Press ≡ and tap Map View.
indicates your current location on the map.
- Tap Start. The marker ◆ on the map starts moving.
- Tap 🔒 and move it up if you want to zoom in the map. Move it down if you want to zoom out the map.

[NO TEXT]

Creating I'mark
- Tap Compass from the applications menu.
- Press ≡ and tap Add to I'mark.
- Enter the name, latitude, longitude, proximate range and comment and tap Save.
Deleting I'mark
- Tap Compass from the applications menu.
- Press ≡ and tap I'mark list.
- Press ≡ and tap Delete.
- Select and tap the I'mark to delete.
- Tap Done.
① Note You can delete a I'mark by pressing and holding the I'mark in the list and tapping Delete.
Adding a photo for l'mark
- Tap Compass from the applications menu.
- Press ≡ and tap Add photo.
- Tap Take a photo if you want to take a picture.
- Tap Picture if you want to add a photo from your gallery.
Navigation
Searching for the destination by voice
- Tap Navigation from the applications menu.
- Tap Speak Destination and speak your destination toward the phone.
- Select and tap a destination in the list when there are many possible destinations.

① Note You can also search the destination by typing it or selecting in the contacts.
Finding directions using Google Maps
- Tap Maps from the application menu.
- Press ≡ and tap Directions.
- Enter the name of the end point.
- Tap car, on, and tap Get directions.
- Select and tap a place in the results.
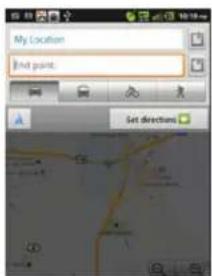
① Note For more information on Google Maps, refer to Using Google Maps on page 66.
Setting the end point manually
- Tap Maps from the application menu.
- Press ≡ and tap Directions.
- Tap □> Point on map if you want to set the end point.
- Tap your end point on the map.
- Tap Tap to select this point on the map to set the end point.
- Tap 🎨, 🎨 on and tap Get directions.
① Note You can also set your location following the same process.
Checking the traffic conditions
- Press □ and tap Route Info while Navigation is running.
- Flick the screen along the suggested route to the destination. Depending on the traffic conditions, the road appears in green (good), yellow (congested) or red (jammed).
- Tap and tap the route if you want to set an alternative route.
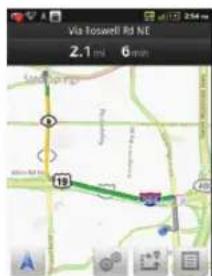
Tools
Weather
Adding a new city
- Tap Weather from the applications menu.
- Tap Add new city.
- Enter the name of the city you want, or flick the screen upwards and tap one. Weather information of the city appears on the list.

Viewing weather information
- Tap Weather from the applications menu.
- Select and tap a city in the list you want to see.
- Flick the screen to the left to see forecasted weather information of the city. Or press □ and tap Forecast.
- Tap Update to view updated information.


Current weather Weather forecast
Changing the temperature unit
- Tap Weather from the applications menu.
- Press ≡ and tap Settings.
- Tap ◀ or ▶ the temperature changes from Fahrenheit to Celsius.
Rearranging the order of cities
- Tap Weather from the applications menu.
- Press ≡ and tap Rearrange.
- Select a city and drag up or down to move the city.
- Tap Done.
Deleting a city
- Tap Weather from the applications menu.
- Press □ and tap Delete.
- Select and tap the trash icon next to the city to delete.
- Tap Done.
Updating weather information
- Tap Weather from the applications menu.
- Press
- Tap Update all.
Stocks
Check the current stock market conditions and establish your investment strategy with the phone. Stocks is in sync with Google Finance by default.
Checking the current stock market conditions
- Tap Stocks from the applications menu. You can see the overall stock market conditions for the moment.
- Select and tap an index in the list. The fluctuation of the index for one day is displayed by default.
- Tap Prev or Next above the graph in the middle of the screen if you want to adjust the period of the fluctuation.
① Note You can also change the period by tapping the graph and select and tap one from one day to the maximum when data is available.

The overall market conditions
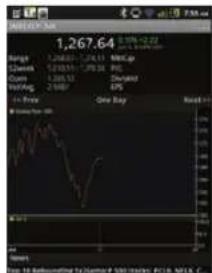
Detailed information
Renaming the stock market index
- Tap Stocks from the applications menu
- Press and hold an index to rename and tap Rename.
- Enter a new name of the index and tap OK.
① Note You can also rename an index by pressing ≡ and tapping Edit, selecting and tapping an index to rename.
Deleting the stock market index
- Tap Stocks from the applications menu
- Press and hold an index to delete and tap Delet e.
① Note You can also delete an index by pressing and tapping Edit, selecting and tapping next to an index to delete. The trash bin appears in front of the index. Then, tap the trash bin.
Adding the stock market index
- Tap Stocks from the applications menu.
- Press ≡ and tap Edit.
- Tap on the box in the bottom of the screen, enter the name of the index and tap 🙏.

Tools
Sharing the stock market information
- Tap Stocks from the applications menu.
- Select and tap an index to see the relevant information.
- Press ≡ and tap Share.
- Tap Bluetooth, Facebook, Gmail, Messaging or Twitter.
Adjusting the alert
- Tap Stocks from the applications menu.
- Select and tap an index to receive the alert.
- Press ≡ and tap Alert.
- Enter the value for Above and tap Next, enter the value for Below and tap Done.

Setting the alert
- Tap Stocks from the applications menu.
- Press ≡ and tap Settings.
- Tap Ringtone, and select and tap a ringtone for the alert and tap OK.
- Tap Check interval, and select and tap the refresh period.
- Tap Check time, adjust the time for checking stock market indexes and tap OK.
Writing notes
- Tap Stocks from the applications menu
- Select and tap an index to write notes.
- Press ≡ and tap Notes.
- Tap on the screen and enter a message.
- Press if you want to check the notes. Press again and you can see the note on the bottom of the screen.
Viewing related news articles
- Tap Stocks from the applications menu
- Select and tap an index to see the relevant news.
- Flick the screen downwards, and select and tap an article to see.
Adjusting the appearance
- Tap Stocks from the applications menu
- Press ≡ and tap Settings.
- Tap Sort, and select and tap the sorting order for the stock market indexes.
- Tap Default Chart, and select and tap the refresh period. The comparing period of the graph for each index changes accordingly.
Adding the Stocks widget
- Press and hold the empty space of the screen.
- Tap Widgets.
- Tap Android Widgets > Stocks.
- Select and tap a market in the portfolio list and tap Save. You can see the stock market indexes on the home screen.
RSS Reader
RSS Reader helps check updated news from various sources.
Creating channels
- Tap RSS Reader from the applications menu.
- Tap All channels > Add Channel. If you have already subscribed to channels, Tap RSS Reader > All channels, and press ≡ and tap Add channel.
- Tap URL, Google Reader or Recommendation.
- Tap URL and enter the title and URL of the channel, tap Category, select the relevant category and tap Done. If there is no category you want, tap Create New and create a category.
- Tap Google Reader, select and tap a channel, and tap Add.
① Note Make sure to register your Google account first by tapping RSS Reader, pressing ≡ and tapping Settings >Username. - Tap Recommendation, select and tap a category you want to add, and select and tap a channel and tap Add.
Viewing new feeds
- Tap RSS Reader.
- Tap New feeds.
- Press ≡ and tap Update.
- Select and tap updated new feeds to read.
Managing favorites
- Tap RSS Reader.
-
Tap Favorites.
-
Tap the star icon next to a favorite if you want to lease the favorite.
Managing categories
- Tap RSS Reader from the applications menu.
- Tap Categories.
- Press □ and tap Edit category.
- Select and tap a category, enter a new name and tap Save.
- Tap Create New if you want to make a new category, enter the name of the category and tap Save.
Setting options
- Tap RSS Reader.
- Press ≡ and tap Settings.
- Tap Automatic Update, select the interval of updating feeds and tap OK.
- Tap Automatic Delete and select the timing to delete feeds automatically, and tap OK.
- Tap Delete Feeds and select a time cycle to delete feeds, and tap OK.
- Tap Limited Update Size, select the size of updated feeds, and tap OK.
- Tap Feeds per Feed and select a recent feeds, and tap OK.
- Tap Text Update to update texts or images, and tap Only Texts or Texts and Images > OK.
- Tap Username: if you want to register your Google Account and enter your username and password, and tap Save.
AT&T Services
Make your phone do more for you with useful apps from AT&T.

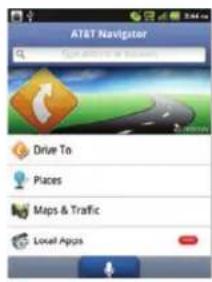

Kindle™: Read Kindle books, magazines, and newspapers right from your mobile phone.

Live TV: Watch LIVE, on-demand & downloadable mobile TV including ESPN Mobile TV, Fox News, and more.

AT&T Code Scanner: Scan barcodes you find in magazines, in stores, and online and see video clips, get coupons, or learn more about your favorite products and services!

AT&T Navigator SM : Get voice-guided, turn-by-turn driving directions and traffic updates right on your phone!

YPmobile®. Find restaurants, bars, businesses, and more, whether around the corner or across the nation.
Live TV requires mobile broadband service and is not available in all areas. Data usage and subscription charges may apply.
Note For more AT&T apps, visit the AT&T tab in Android Market.
10
Settings

Settings
This chapter explains how to change the settings of the phone. Access the settings from Applications or simply do it from the home screen by pressing ≡ and tapping Settings.
Personalize
Setting and managing home screen themes
- Tap Settings > Personalize > Themes.
- Select a predefined theme or a user saved theme that you want to apply to the home screen.
- Tap Done. The selected theme will be applied to the home screen.
Setting home wallpaper
- Tap Settings > Personalize > Home Wallpaper.
- Tap Gallery, Live wallpapers or Wallpapers.
- Select an image you want to use as wallpaper and tap Set wallpaper.
① Note If you want to create a live wallpaper, tap Wallpapers > Live wallpapers, select a wallpaper and tap Set wallpaper. Remember that Maps consumes the battery relatively quickly. Even if you select Maps other than wallpapers, we recommend that you save the battery consumption by tapping Force stop (Tap Settings > Applications > Manage applications > Maps).
Wireless & networks
Setting Airplane mode
-
Tap Settings > Wireless & networks > Airplane mode. If you turn on Airplane mode, Wi-Fi, Bluetooth and GPS functions are turned off at once. However, you can turn on each function for your preference.
-
Tap Airplane mode again to reactivate other functions.
Turning Wi-Fi on/off
- Tap Settings > Wireless & networks.
- Tap Wi-Fi if you want to turn on or off.
Setting Wi-Fi networks
- Tap Settings > Wireless & networks.
- Tap Wi-Fi settings to manage the wireless network. Refer to page 72 for more information.
Turning Bluetooth on/off
- Tap Settings > Wireless & networks.
- Tap Bluetooth if you want to turn on or off.
Setting Bluetooth
- Tap Settings > Wireless & networks.
- Tap Bluetooth settings to manage the wireless technology option. Refer to page 74 for more information.
Setting Tethering and portable hotspots
- Tap Settings > Wireless & networks > Tethering & portable hotspot.
- Tap USB tethering to provide Internet connection to other devices. You should connect the phone with your other device through the USB cable.
- Tap Portable Wi-Fi hotspot to make the phone a portable Wi-Fi hotspot. Refer to page "Becoming a portable Wi-Fi hotspot" on page page 74 for more information.
Setting VPN settings
- Tap Settings > Wireless & networks > VPN settings > Add VPN.
- Tap Add PPTP VPN, Add L2TP VPN, Add L2TP/IPSec PSK VPN or Add L2TP/IPSec CRT VPN.
- Set up the network by entering necessary information.
Setting mobile networks
- Tap Settings > Wireless & networks > Mobile networks.
- Tap Data Services to allow access to data over mobile network.
- Tap International Data roaming to connect to data services when roaming and tap OK.
① Note You may incur significant roaming charges. - Tap Access Point Names > Phone APN, Broadband APN, or Wap APN. Press ≡ and tap New APN if you want to add an APN in the Phone APN or Wap APN mode.
- Tap Network operators > Default Setup > Automatic or Manual if you want to search networks and select one.
Call settings
Managing fixed dialing numbers
Fixed dialing is a service that limits your access to specific numbers in the address book list recorded on the SIM. Input the PIN2 to set up or cancel this service.
- Tap Settings > Call settings > Fixed Dialing Numbers.
- Tap Enable FDN, Change PIN2, or FDN list.
- Enter the necessary information.
① Note You must enter the correct PIN2 within three attempts. If you input incorrect codes three times in a row, the PIN2 code will be blocked. If this happens, contact your service provider. Your PIN2 code is supplied with the SIM card.
Setting your voicemail
- Tap Settings > Call settings > Voicemail settings > Voicemail number.
- Enter the voicemail number or tap 📁 and select a contact to designate as the voicemail number and tap OK.
- Tap OK.
Setting Auto Redial
Tap Settings > Call settings > Auto Redial.
Setting TTY mode
- Tap Settings > Call settings > TTY mode.
-
Tap TTY Off, TTY Full, TTY HCO or TTY VCO.
-
Tap OK.
① Note When you connect the headphone into the ear jack of the Phone, the TTY mode can work.
Setting DTMF Tones
- Tap Settings > Call settings > DTMF Tones.
- Tap Normal or Long.
- Tap OK.
Setting Caller ID
- Tap Settings > Call settings > Caller ID
- Tap Network default, Hide number or Show number.
- Tap OK.
Settings
Setting Call forwarding
- Tap Settings > Call settings > Call forwarding.
- Tap Always forward, Forward when busy, Forward when unanswered or Forward when unreachable.
Setting Call waiting
Tap Settings > Call settings > Call waiting > Call waiting.
Turning suppression on/off
- Tap Settings > Call settings.
- Tap Noise Suppression if you want to turn suppression on or off.
Sound
Setting silent mode
- Tap Settings > Sound > Silent mode. All other functions except the media volume and alarms are silenced if you select this option.
- Tap Silent mode again to activate all functions.
Setting to vibrate
- Tap Settings > Sound > Vibrate.
- Tap Always, Never, Only in Silent mode or Only when not in Silent mode.
- Tap OK.
Setting volume
- Tap Settings > Sound > Volume. Make sure to deselect Silent mode.
- Adjust the volume for ringtone, media and alarm. Tap Use incoming call volume for notifications if you want to use this function. Otherwise, deselect it and adjust the volume for notifications.
- Tap OK.

Setting phone ringtone
- Tap Settings > Sound > Phone ringtone.
- Select and tap a ringtone in the list.
- Tap OK.
Setting notification ringtone
- Tap Settings > Sound > Notification ringtone.
- Select and tap a ringtone for notifications.
- Tap OK.
Setting feedback options
- Tap Settings > Sound.
- Tap Audible touch tones if you want to play tones when using the dial pad. It is selected by default.
- Tap Audible selection if you want to play sound when making selection on the screen.
-
Tap Screen lock sounds if you want to play sound when locking and unlocking the screen.
-
Tap Haptic feedback if you want the phone to vibrate when you press soft keys. It is selected by default.
Setting Sound effect
- Tap Settings > Sound > NASH Sound Effect.
- Select and tap an effect from 3D sounds and equalizers. You can choose the user set.
- Tap Done.
Display
Setting brightness
- Tap Settings > Display > Brightness.
- Drag ⚙ to the right to increase the brightness. Drag it to the left to decrease the brightness.
- Tap OK.
① Note Adjusting the display brightness may affect your battery life.
Setting auto-rotate screen
Tap Settings > Display > Auto-rotate screen if you want to make the screen rotate automatically when you move the phone horizontally or vertically.
Setting animation options
- Tap Settings > Display > Animation.
- Tap No animations, Some animations or All animations.
- Tap OK.
Setting screen timeout
- Tap Settings > Display > Screen timeout.
- Select and tap the time interval to turn off the screen.
- Tap OK.
Location & security
Setting my location
- Tap Settings > Location & security > Use wireless networks.
- Tap Agree to allow Google's location service to collect anonymous location data.
- Tap Use GPS satellites if you want to find street-level locations.
Setting screen lock with a pattern key
- Tap Settings > Location & security > Set up screen lock > Pattern.
- Read "Securing your phone" page and tap Next.
- Watch how to set up the pattern and tap Next.
- Drag your pattern on the screen and tap Continue. Make sure to connect the pattern with at least four dots. Tap Retry and draw another pattern if you want to set up one.
- Tap Continue.
- Drag the pattern again and tap Confirm.
Settings
![graph TD A["●"] --> B["●"] B --> C["●"] C --> D["●"] D --> E["●"] E --> F["●"] F --> G["●"] G --> H["●"] H --> I["●"] I --> J["●"] J --> K["●"] K --> L["●"] L --> M["●"] M --> N["●"] N --> O["●"] O --> P["●"] P --> Q["●"] Q --> R["●"] R --> S["●"] S --> T["●"] T --> U["●"] U --> V["●"] V --> W["●"]…](/content/2026/07/1488140/images/845c1cd42a5d556d1e21244633cb08fb937b9e10d00e424e68057b147f7da413.jpg)

Setting the pattern lock Unlocking the pattern lock
Setting screen lock with a PIN
- Tap Settings > Location & security > Set up screen lock > PIN.
- Enter numbers as PIN and tap Continue. The PIN should be at least 4 characters.
- Enter the numbers again to confirm.
- Tap OK.
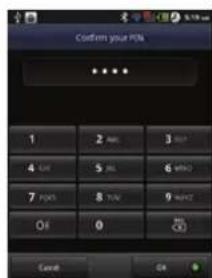
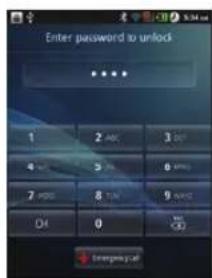
Setting PIN Entering PIN
Setting screen lock with a password
- Tap Settings > Location & security > Set up screen lock > Password.
- Enter your password and tap Continue. The password should be at least 4 characters and include at least one of alphabet letters.
- Enter the password again to confirm.
- Tap OK.


Setting the password lock Unlocking the password lock
Setting SIM card lock
- Tap Settings > Location & security > Set up SIM card lock.
- Tap Lock SIM card and enter the SIM PIN if you want to require a PIN to use the phone.
- Tap Change SIM PIN and enter the old SIM PIN and a new SIM PIN if you want to change the SIM PIN.

Displaying passwords
- Tap Settings > Location & security.
- Tap Visible passwords if you want to see passwords while typing it.
Selecting device administrators
- Tap Settings > Location & security.
- Tap Select device administrators if you want to add or remove device administrators.
Setting to use secure credentials
Tap Use secure credentials if you allow application to access secure certificates and other credentials.
Installing certificates from SD card
Tap Install from SD card if you want to install encrypted certificates from SD card.
Setting the credential storage password
- Tap Settings > Location & security > Set password.
- Enter a new password and enter it again to confirm.
- Tap OK.
Clearing the storage
Tap Clear storage if you want to clear credential storage of all contents and reset its password.
Applications
Allowing installation of unknown applications
- Tap Settings > Applications.
- Tap Unknown sources to allow non-market applications to be installed on the phone.
Managing applications
- Tap Settings > Applications > Manage applications > Downloaded.
- Tap an application and tap Force stop if you want to stop its operation by force. Tap Uninstall if you want to uninstall the application.
- Tap Running on the top of the screen and tap an application to manage its operation.
Viewing running services and applications
- Tap Settings > Applications > Running services.
- Tap a service or an application to stop its operation or to edit its options.
- Tap Stop if you want to stop its operation.
Settings
Viewing storage used by applications
- Tap Storage use to view storage used by applications
Viewing items used the battery
- Tap Battery use to view what has been using the battery.
Debugging USB
- Tap Settings > Applications > Development.
- Tap USB debugging to allow the debug mode when the USB cable is connected.
- Read and tap OK on the USB debugging information page.
Allowing mock locations
- Tap Settings > Applications > Development.
- Tap Allow mock locations to pretend to be in another location for development purposes.
Accounts & sync
Managing background data
- Tap Settings > Accounts & sync.
- Tap Background data if you want to sync, send and receive data any time.
Allowing background data to sync automatically
- Tap Settings > Accounts & sync.
- Tap Auto-sync if you want to sync data automatically.
Adding an account
- Tap Settings > Accounts & sync.
- Tap Add account.
- Select and tap an account type, and follow the necessary steps for creating an account.
Privacy
Backing up data
- Tap Settings > Privacy.
- Tap Back up my data if you want to back up your data.
- Tap Automatic restore if you want to restore backed-up data for an application.
Resetting the phone
- Tap Settings > Privacy.
- Tap Factory data reset if you want to erase all data from the phone. Tap Erase SD card if you want to erase all data on the phone's SD card such as music or photos.
- Tap Reset phone.
- Tap Erase everything
Storage
Selecting the USB mode
- Tap Settings > Storage.
- Tap USB Mode. If you turn on the USB debugging function, tap OK to turn it off.
- Tap Media Transfer, Mass storage or Ask on connection, tap OK, and follow the relevant steps.
Viewing the status of space
- Tap Settings > Storage. The status of the total and available spaces on the SD card and the available space on the internal storage will appears.
Mounting/Unmounting a SD card
- Tap Settings > Storage.
- Tap Unmount SD card > OK if you want to remove the SD card from the phone safely. Tap Mount SD card if you want to mount the card.
Erasing a SD card
- Tap Settings > Storage.
- Tap Erase SD card if you want to erase all data on the phone's SD card.
① Note You can erase all data by unmounting a SD card.
Language & keyboard
Selecting the language
- Tap Settings > Language & keyboard > Select language.
- Select and tap a language to use for the phone.
Setting Swype
- Tap Settings > Language & keyboard > Swype.
- Tap Word prediction if you want to see predicted words as you type in the Swype.
- Tap Word choice window and drag the bar to the left or the right if you want to adjust the frequency of the word choice window, and tap OK.
- Tap Speed vs. accuracy, drag the bar to the left or the right if you want to adjust the response speed and tap OK.
Setting the Android keyboard
- Tap Settings > Language & keyboard > Android keyboard.
- Tap Vibrate on keypress if you want the phone to vibrate when you press soft keys.
- Tap Input languages, select and tap the language for the keyboard and press ↩.
Setting the Android keyboard word suggestion
- Tap Settings > Language & keyboard > Android keyboard.
- Tap Show settings key if you want to change the status of the settings key while typing. Tap Automatic, Always show, or Always hide and tap OK.
- Tap Quick fixes if you want to correct commonly typed mistakes. The check box is selected by default.
Settings
- Tap Show suggestions if you want to see suggestions while you are typing. The check box is selected by default.
Managing the user dictionary
- Tap Settings > Language & keyboard > User dictionary.
- Press ≡ and tap Add.
- Enter the name of the dictionary in the box and tap OK.
Voice input & output
Text-to-speech helps listen to a text file by transforming it to a speech file.
Setting input options
- Tap Settings > Voice input & output > Voice recognizer settings.
- Tap Language, select and tap a language that will be used for the input language.
- Tap SafeSearch, and tap Off, Moderate or Strict for filtering input language.
- Tap Block offensive words if you want to hide recognized offensive voice results. The check box is selected by default.
Setting output options
- Tap Settings > Voice input & output > Text-to-speech settings.
- Tap Install voice data that is required for speech synthesis.
-
Select and tap related application from the Android market and install it. Voice is offered when you finish installing the application.
-
Tap Listen to an example if you want to listen to an example.
- Tap Always use my settings when you want make your settings the default settings for the phone.
- Tap Speech rate, select and tap an option, and tap OK.
- Tap Language, select and tap a language, and tap OK.
Accessibility
Setting the accessibility option
- Tap Settings > Accessibility.
- Tap OK in the No accessibility related applications found screen.
- Select and tap related application from the Android Market and install it.
- Tap Accessibility when you finish installing the application.
Date & time
Allowing date and time to be set automatically
- Tap Settings > Date & time.
- Tap Automatic.
① Note Set date, Select time zone and Set time will not work if you tap Automatic.
Setting the date
- Tap Settings > Date & time > Set date.
- Enter month, day and year for the phone.
- Tap Set.
Setting the time zone
- Tap Settings > Date & time > Select time zone.
- Select and tap a time zone in the list.
Setting time
- Tap Settings > Date & time > Set time.
- Enter the minute and the hour.
- Tap Set.
Setting 24-hour format
- Tap Settings > Date & time > Use 24-hour format if you want to set 24-hour format instead of AM/PM format.
Selecting date format
- Tap Settings > Date & time > Select date format.
- Select a preferred date format.
- Tap OK.
About phone
Checking the status of the phone
- Tap Settings > About phone.
- Tap Status if you want to check the current status of the phone, including battery status, battery level and your phone number.
Checking battery use
- Tap Settings > About phone.
- Tap Battery use if you want to check how the battery is being used.
Seeing legal information
- Tap Settings > About phone.
- Tap Legal information if you want to see the open source licenses and Google's legal information.
Call & Data Usage
- Tap Settings > About phone.
- Tap Call & Data Usage if you want to check what has been using call and data.
Appendix

Appendix
To update software
You can update your software without visiting the nearest dealer.
- Tap Settings > AT&T software update.
- Tap Check for updates to check whether you need to update the software.
① Note After downloading the software, the device will ask you whether to update the software now. If you choose to update the software now, it will restart the handset. If you postpone updating the software, you can select between 1 hour, 4 hours or 8 hours in Options. After selecting the updating time, you will be sent back to standby mode. If you go to Software Update while you postpone the process, tap Resume Update.
To view the version of software
- Tap Settings > About phone.
- Scroll down to see the version of software.
PC Suite
PC suite is a Windows-based program that allows you to easily manage personal data and multimedia files by connecting your phone to a PC. The application can be downloaded at http://www.pantechusa.com.
System requirements
• Microsoft Windows XP family, Windows 7 and Vista
• Minimum 100MB of free disk space
• Interface devices such as USB or Wifi for connection with the phone
PC Suite features:
• PC Suite launcher
• Application Management
• Data Backup & Restore
- File Management
• Multimedia Management
- Outlook Sync
Troubleshooting checklist
When audio quality is poor: End a call and try again.
When the other party cannot hear you speaking:
Your phone may be set to MUTE. Disable the MUTE function. Or your hand may be covering the microphone.
When battery life is shorter than usual:
This may happen when you are in an area with low signal strength. Turn off your phone when it is not in use. Change the battery when battery energy is exhausted.
When you cannot turn on your phone:
Make sure your battery is charged. Check to see if your phone works while recharging the battery.
When you are unable to send a message:
Either you are not registered to receive an SMS service, or you may be in an area where your network service provider cannot provide such a service.
When you are unable to make a call:
Your phone may be set to "fixed dial." Cancel the "fixed dial" function. When you are unable to receive a call: Your phone may be set to "Call forwarding". Cancel the "Call forwarding".
Appendix
When you are unable to charge the battery:
This may be the result of one of the following three cases.
- Your charger may be out of order. Contact your nearest dealer.
- You may be attempting to use the phone in an overly hot/cold temperature. Try changing the charging environment.
- Your battery may have not been connected to the charger properly. Check the connector.
When you are unable to input data into your Address Book: Your Address Book memory may be full. Delete some entries from your Address Book.
When you are unable to select a certain function:
You may not have subscribed to that function, or your network service provider may be in an area where such service cannot be provided. Contact your local service provider.
Specifications
Design
Touch Candy Bar
Displays
16 M colors TFT with 4" display 600 x 800(SVGA) pixels in resolution
Melodies
MP3, AAC / AAC+ / eAAC+, WMA, AMR-NB / ARM-WB / AMR-WB+, QCELP, EVRC
Camera
Integrated 5M CMOS Camera with AF (Auto Focus)
• Resolution up to 2560X1920 (4,915,200 pixels)
• Video Encoding up to 20fps; decoding up to 30fps
• Photo album and video album
Dimensions & Weight
• Weight: 132.2g (with battery pack)
• Dimensions: 114.7 x 78 x 10.6 mm (4.45" x 3" x 0.4")
Power Management (Performance)
| Battery Type | Capacity Standby Time | Talk Time |
| Standard Lithium-Ion (Li-ion) | 1650 mAh | Up to 250 hours |
Operating Frequency
- GSM/GPRS/EDGE 850/900/1800/1900 MHz, UMTS/HSPA+850/1900/2100 MHz networks in North America, South America, Europe, Africa, and Asia-Pacific where these networks are supported.
• Automatic band switching
FCC Hearing-Aid Compatibility Regulations for Wireless Devices
On July 10, 2003, the U.S. Federal Communications Commission (FCC) Report and Order in WT Docket 01-309 modified the exception of wireless phones under the Hearing Aid Compatibility Act of 1988 (HAC Act) to require digital wireless phones be compatible with hearing-aids. The intent of the HAC Act is to ensure reasonable access to telecommunications services for persons with hearing disabilities.
While some wireless phones are used near some hearing devices (hearing aids and cochlear implants), users may detect a buzzing, humming, or whining noise. Some hearing devices are more immune than others to this interference noise, and phones also vary in the amount of interference they generate.
The wireless telephone industry has developed a rating system for wireless phones, to assist hearing device users find phones that may be compatible with their hearing devices. Not all phones have been rated. Phones that are rated have the rating on their boxes or a label located on the boxes.
The ratings are not guarantees. Results will vary depending on the user's hearing device and hearing loss. If your hearing device happens to be vulnerable to interference, you may not be able to use a rated phone successfully. Trying out the phone with your hearing device is the best way to evaluate it for your personal needs.
- M-Ratings: Phones rated M3 or M4 meet FCC requirements and are likely to generate less interference to hearing devices than phones that are not labeled. M4 is the better/higher of the two ratings.
- T-Ratings: Phones rated T3 or T4 meet FCC requirements and are likely to generate less interference to hearing devices than phones that are not labeled. T4 is the better/higher of the two ratings.
Hearing devices may also be rated. Your hearing device manufacturer or hearing health professional may help you find this rating. Higher ratings mean that the hearing device is relatively immune to interference noise. The hearing aid and wireless phone rating values are then added together. A sum of 5 is considered acceptable for normal use. A sum of 6 is considered for best use.
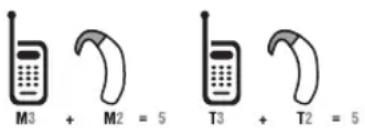
In the above example, if a hearing aid meets the M2 level rating and the wireless phone meets the M3 level rating, the sum of the two values equals M5. This is synonymous for T ratings. This should provide the hearing aid user with “normal usage” while using their hearing aid with the particular wireless phone. “Normal usage” in this context is defined as a signal quality that is acceptable for normal operation.
The M mark is intended to be synonymous with the U mark. The T mark is intended to be synonymous with the UT mark. The M and T marks are recommended by the Alliance for Telecommunications Industries Solutions (ATIS). The U and UT marks are referenced in Section 20.19 of the FCC Rules. The HAC rating and measurement procedure are described in the American National Standards Institute (ANSI) C63.19 standard. To ensure that the Hearing Aid Compatibility rating for your phone is maintained, secondary transmitters such as Bluetooth and WLAN components must be disabled during a call. See page 73 for instructions to disable these components. This phone has been tested and rated for use with hearing aids for some of the wireless technologies that it uses. However, there may be some newer wireless technologies used in this phone that have not been tested yet for use with hearing aids. It is important to try the different features of this phone thoroughly and in different locations, using your hearing aid or cochlear implant, to determine if you hear any interfering noise. Consult your service provider about its return and exchange policies and for information on hearing aid compatibility.
FCC Regulatory Compliance
FCC Regulatory Compliance
This device complies with Part 15 of the FCC Rules. Operation is subject to the following two conditions: (1) this device may not cause harmful interference, and (2) this device must accept any interference received, including interference that may cause undesired operation. Your mobile device is a low power radio transmitter and receiver. When it is ON, it receives and also sends out radio frequency (RF) signals. In August 1996, the Federal Communications Commission (FCC) adopted RF exposure guidelines with safety levels for mobile devices. Those guidelines are consistent with safety standards previously set by both U.S. and international standards bodies: American National Standard Institute (ANSI), National Council of Radiation Protection and Measurements (NCRP), and International Commission on Non-Ionizing Radiation Protection (ICNRP). Those standards were based on comprehensive and periodic evaluations of the relevant scientific literature. The design of your phone complies with the FCC guidelines and applicable.
Statement according to FCC part 15.105
This equipment has been tested and found to comply with the limits for a Class B digital device, pursuant to Part 15 of the FCC Rules. These limits are designed to provide reasonable protection against harmful interference in a residential installation. This equipment generates uses and can radiate radio frequency energy and, if not installed and used in accordance with the instructions, may cause harmful interference to radio communications. However, there is no guarantee that interference will not occur in a particular installation. If this equipment does cause harmful interference to radio or television reception, which can be determined by turning the equipment off and on, the user is encouraged to try to correct the interference by one or more of the following measures:
• Reorient or relocate the receiving antenna.
- Increase the separation between the equipment and receiver.
- Connect the equipment into an outlet on a circuit different from that to which the receiver is connected.
- Consult the dealer or an experienced radio/TV technician for help.
Statement according to FCC part 15.21
Modifications not expressly approved by this company could void the user's authority to operate the equipment.
RF exposure FCC
For body worn operation, to maintain compliance with FCC RF exposure guidelines, use only accessories that contain no metallic components and provide a separation distance of 10 mm (0.39 inches) to the body. Use of other accessories may violate FCC RF exposure guidelines and should be avoided.
This device and its antenna must not be co-located or operating in conjunction with any other antenna or transmitter.
Health and Safety Information FCC
This EUT has been shown to be capable of compliance for localized specific absorption rate (SAR) for uncontrolled environment/general population exposure limits specified in ANSI/IEEE Std. C95.1-1992 and had been tested in accordance with the measurement procedures specified in FCC/OET Bulletin 65 Supplement C (2001) and IEEE Std. 1528-2003 Ministry of Health (Canada), Safety Code 6. The standards include a substantial safety margin designed to assure
the safety of all persons, regardless of age and health. The exposure standard for wireless mobile phones employs a unit of measurement known as the Specific Absorption Rate, or SAR. The SAR limit set by the FCC is 1.6W/kg.*
* In the U.S. and Canada, the SAR limit for mobile phones used by the public is 1.6 watts/kg (W/kg) averaged over one gram of tissue. The standard incorporates a substantial margin of safety to give additional protection for the public and to account for any variations in.
** This device contains 1800 MHz GSM functions that are not operational in U.S. Territories; this filing is applicable only for 850 MHz GSM and 1900 MHz PCS operations.
Warranty
Protect Your Warranty
Read your Warranty carefully, with the special consideration to paragraph seven of the Limited Warranty for your unit:
"Warranty does not apply to... or to any product or part thereof which has suffered through alteration... mishandling, misuse, neglect or accident."
Many companies are making look alike accessories and in some cases, promoting that their products are equal to or better than the Pantech product. Be careful. Some of these products may not be compatible to use with your Pantech product and may damage the unit or cause it to malfunction.
If service is required on your unit and it is determined that a non-Pantech accessory has created the problem with your unit, the Warranty will not apply. In addition, if the unit has already suffered irreversible damage by the reason of a non-compatible accessory, the Warranty will be voided. To protect your warranty, use only compatible accessories which cannot damage or interfere with the functioning of your Pantech product.
12-Month Limited Warranty
Pantech Wireless, Inc. (the Company) warrants to the original retail purchaser of this Pantech handheld portable cellular telephone, that should this product or any part thereof during normal consumer usage and conditions, be proven defective in material or workmanship that results in product failure within the first twelve (12) months period from the date of purchase, such defect(s) will be repaired or replaced (with new or rebuilt parts) at the Company's option, without charge for parts or labor directly related to the defect(s).
The antenna, keypad, display, rechargeable battery and battery charger, if included, are similarly warranted for twelve (12) months from date of purchase. This Warranty extends only to consumers who purchase the product in the United States or Canada and it is not transferable or assignable.
This warranty does not apply to:
(a) Products subjected to abnormal use or conditions, accident, mishandling, neglect, unauthorized alteration, misuse, improper installation or repair or improper storage;
(b) Products whose mechanical serial number or electronic serial number has been removed, altered or defaced
(c) Damage from exposure to moisture, humidity, excessive temperatures or extreme environmental conditions;
(d) Damage resulting from connection to, or use of any accessory or other product not approved or authorized by the Company;
(e) Defects in appearance, cosmetic, decorative or structural items such as framing and non-operative parts;
(f) Products damaged from external causes such as fire, flooding, dirt, sand, weather conditions, battery leakage, blown fuse, theft or improper usage of any electrical source.
Appendix
The Company disclaims liability for removal or reinstallation of the product, for geographic coverage, for inadequate signal reception by the antenna or for communications range or operation of the cellular system as a whole.
To obtain repairs or replacement within the terms of this Warranty, the product should be delivered with proof of Warranty coverage (e.g. dated bill of sale), the consumer's return address, daytime phone number and/or fax number and complete description of the problem, transportation prepaid, to the Company by calling the number listed below or to the place of purchase for repair or replacement processing.
To locate Pantech Authorized Service Center, call: (800) 962-8622 or email HandsetHelp@Pantech.com. Please have the following information available when you send the phone in for repair:
• A valid original Proof of Purchase
- Return address
• Daytime phone number or fax number
- Model number
- IMEI number (Look for the 15-digit IMEI number behind the battery of the device.)
• Complete description of the problem
• Transportation prepaid
Other Warranty Program
You may have other warranty program with your purchase, such as warranty exchange. If so, please refer to equipment package or the original point of sale.
- THE EXTENT OF THE COMPANY'S LIABILITY UNDER THIS WARRANTY IS LIMITED TO THE REPAIR OR REPLACEMENT PROVIDED ABOVE AND, IN NO EVENT, SHALL THE COMPANY'S LIABILITY EXCEED THE PURCHASE PRICE PAID BY PURCHASER FOR THE PRODUCT. ANY IMPLIED WARRANTIES, INCLUDING ANY IMPLIED WARRANTY OF MERCHANTABILITY OR FITNESS FOR A PARTICULAR
PURPOSE, SHALL BE LIMITED TO THE DURATION OF THIS WRITTEN WARRANTY.
ANY ACTION FOR BREACH OF ANY WARRANTY MUST BE BROUGHT WITHIN A PERIOD OF 18 MONTHS FROM DATE OF ORIGINAL PURCHASE. IN NO CASE SHALL THE COMPANY BE LIABLE FOR ANY SPECIAL CONSEQUENTIAL OR INCIDENTAL DAMAGES FOR BREACH OF THIS OR ANY OTHER WARRANTY, EXPRESS OR IMPLIED, WHATSOEVER. THE COMPANY SHALL NOT BE LIABLE FOR THE DELAY IN RENDERING SERVICE UNDER THIS WARRANTY OR LOSS OF USE DURING THE TIME THE PRODUCT IS BEING REPAIRED OR REPLACED.
No person or representative is authorized to assume for the Company any liability other than expressed herein in connection with the sale of this product.
Some states or provinces do not allow limitations on how long an implied warranty lasts or the exclusion or limitation of incidental or consequential damage so the above limitation or exclusions may not apply to you. This Warranty gives you specific legal rights, and you may also have other rights which vary from state to state or province to province.
For technical support in the U.S. & Canada, call (800) 962-8622. Or email us to HandsetHelp@Pantech.com. Or visit the web site at www.pantechusa.com.
For all other inquiries, write to:
PANTECH WIRELESS, INC.5607 Glenridge Dr. Suite 500 Atlanta, GA 30342, USA.
Legal notice
Bluetooth is a trademark of Bluetooth SIG, Inc. Wi-Fi is a trademark of the Wi-Fi Alliance. Google, YouTube, Picasa, Gmail, Google Maps and Android Market are trademarks of Google, Inc.
- IMPORTANT SAFETY INFORMATION
- SAFETY INFORMATION
- SAFETY PRECAUTIONS
- SWITCH OFF IN RESTRICTED AREAS
- SWITCH OFF IN AN AIRCRAFT
- SWITCH OFF IN HOSPITALS AND NEAR MEDICAL EQUIPMENT
- SWITCH OFF IN DANGEROUS AREAS
- INSTALL A HANDS-FREE DEVICE IN A SAFE LOCATION
- KEEP AWAY FROM OTHER ELECTRONIC DEVICES
- ABOUT THE BATTERY USAGE
- BASIC INSTRUCTIONS
- USEFUL TIPS
- ABOUT GOOGLE ACCOUNTS
- TABLE OF CONTENTS
- IMPORTANT SAFETY INFORMATION 3
- GETTING STARTED
- GETTING STARTED 9
- COMMUNICATION
- COMMUNICATION 24
- ENTERTAINMENT
- ENTERTAINMENT 41
- PERSONAL INFORMATION
- PERSONAL INFORMATION 53
- DOCUMENTS
- DOCUMENTS....60
- WEB
- WEB 63
- CONNECTIVITY
- STORAGE
- TOOLS
- SETTINGS
- APPENDIX
- 1
- INSIDE THE PACKAGE
- INSTALLING THE SIM/USIM CARD
- ABOUT THE SIM/USIM CARD
- INSTALLING THE MICROSD CARD
- ABOUT THE MICROSD CARD
- INSERTING THE BATTERY
- ABOUT THE BATTERY
- CHARGING THE BATTERY
- TURNING THE PHONE ON/OFF
- TO TURN ON THE PHONE
- TO TURN THE PHONE OFF
- UNLOCKING THE SCREEN
- LOCKING THE SCREEN
- PRODUCT OVERVIEW
- TOUCH MODE
- KEY FUNCTION
- USING 3.5 PI STEREO EARPHONES
- GRIPPING THE PHONE
- ACTIVATING THE PHONE
- LEARNING HOW TO USE THE PHONE
- CREATING A GOOGLE ACCOUNT
- FORGOT YOUR PASSWORD FOR GOOGLE ACCOUNT
- USING THE TOUCH SCREEN
- CAUTION
- UNDERSTANDING THE HOME SCREEN
- NAVIGATING THE HOME SCREEN
- NAVIGATING THE NOTIFICATION AND EASY SETTING SCREEN
- CUSTOMIZING THE HOME SCREEN
- ADDING A SHORTCUT
- ADDING A WIDGET
- ADDING A FOLDER
- ADDING A WALLPAPER FROM THE GALLERY
- DELETING A SHORTCUT OR A WIDGET FROM THE HOME SCREEN
- CHANGING THE HOME SCREEN THEME
- DELETING THE USER THEME FROM THE HOME SCREEN
- CHANGING THE ORDER OF SCREENS
- SELECTING THE LANGUAGE
- UNDERSTANDING THE APPLICATIONS MENU
- CHANGING THE VIEW MODE
- SORTING APPLICATIONS
- REARRANGING APPLICATIONS (USER DEFINED GRID VIEW ONLY)
- CHANGING THE BACKGROUND IMAGE (GRID VIEW ONLY)
- UNINSTALLING APPLICATIONS (GRID VIEW ONLY)
- ADDING AN APPLICATION SHORTCUT TO THE HOME SCREEN
- SEARCHING APPLICATIONS
- 2
- CALLING
- MAKING A CALL
- ANSWERING AND ENDING A CALL
- ADJUSTING THE VOLUME
- HOLDING AND UNHOLDING A CALL
- TURNING NOISE SUPPRESSION ON/OFF
- SWAPPING A CALL FOR A MULTIPARTY CALL
- MAKING A CONFERENCE CALL
- MAKING A CALL FROM THE ADDRESS BOOK
- MAKING AN EMERGENCY CALL
- CHECKING MISSED CALLS
- CHECKING THE CALL HISTORY
- CHECKING YOUR VOICE MAIL
- SAVING A NEW CONTACT
- TALKING THROUGH THE SPEAKER
- TALKING THROUGH THE BLUETOOTH
- MUTING THE PHONE
- ADDING A CALL
- USING LOCAL SEARCH
- MESSAGING
- SENDING A NEW MESSAGE
- ENTERING A MESSAGE USING VOICE
- ENTERING A MESSAGE USING THE KEYBOARD
- CREATING A MESSAGE USING SWYPE
- ABOUT SWYPE
- SETTING SWYPE OPTIONS
- INSERTING BOOKMARKS TO A MESSAGE
- INSERTING QUICK TEXTS TO A MESSAGE
- INSERTING SMILEYS TO A MESSAGE
- INSERTING TEXT FILES TO A MESSAGE
- ATTACHING PICTURES TO A MESSAGE
- ATTACHING VIDEOS TO A MESSAGE
- ATTACHING AUDIOS TO A MESSAGE
- ATTACHING CONTACTS TO A MESSAGE
- ATTACHING CALENDARS TO A MESSAGE
- ATTACHING A SLIDE SHOW
- ATTACHING LOCATIONS
- ADDING CC/BCC
- ADDING TEMPLATES
- VIEWING RECEIVED MESSAGES
- REPLYING TO A RECEIVED MESSAGE
- LOCKING/UNLOCKING MESSAGES
- FORWARDING MESSAGES
- COPYING MESSAGES
- DELETING A MESSAGE
- VIEWING A MESSAGE INFORMATION
- DELETING THE ENTIRE MESSAGES
- SENDING A MESSAGE USING A QUICK TEXT
- ADDING A QUICK TEXT
- DELETING A QUICK TEXT
- SENDING A MESSAGE USING A TEMPLATE
- ADDING A TEMPLATE
- DELETING TEMPLATES
- SETTING STORAGE LIMITS
- SETTING A SIGNATURE
- SETTING A SIM CARD MESSAGE
- MULTIMEDIA MESSAGE SETTINGS
- SETTING NOTIFICATIONS
- CHECKING USED SPACE
- SEARCHING MESSAGES
- SENDING A VOICE MAIL
- EMAILING
- SETTING UP AN EMAIL ACCOUNT
- ADDING A NEW EMAIL ACCOUNT
- VIEWING INCOMING MESSAGES
- SENDING AN EMAIL
- ADDING ATTACHMENTS TO AN EMAIL
- DESIGNATING EMAILS AS FAVORITES
- MARKING EMAILS AS READ
- REMOVING THE EMAIL ACCOUNT
- EMAIL SETTINGS
- USING EMAIL WIDGET
- USING GMAIL
- ADDING A GMAIL ACCOUNT
- READING INCOMING MESSAGES
- SENDING AN EMAIL THROUGH GMAIL
- DESIGNATING EMAILS AS SPAM
- SETTING GMAIL OPTIONS
- USING TWITTER
- JOINING IN TWITTER
- POSTING A TWEET
- SENDING MESSAGES
- SEARCHING TWEETS OR PEOPLE
- ADJUSTING SETTINGS FOR NOTIFICATIONS
- USING FACEBOOK
- JOINING-IN FACEBOOK
- POSTING MESSAGES
- ADJUSTING SETTINGS
- S-BOARD
- SHARING MEDIA
- DELETING LOGS
- ADDING MEMBERS TO A GROUP
- DELETING MEMBERS FROM A GROUP
- EDITING A GROUP
- DELETING A GROUP
- GOOGLE TALK
- SETTING YOUR STATUS
- INVITING A FRIEND TO CHAT
- CHATTING WITH FRIENDS
- MANAGING YOUR FRIENDS LIST
- SETTING THE TALK ENVIRONMENT
- 3
- USING THE CAMERA
- TAKING PICTURES
- ADDING SPECIAL FUNCTIONS
- ADDING SPECIAL EFFECTS
- ADJUSTING BRIGHTNESS
- ZOOMING IN/OUT
- MOVING TO GALLERY
- CHANGING SETTINGS
- SHARING PICTURES
- CROPPING A PICTURE
- SETTING A PICTURE AS WALLPAPER
- ASSIGNING A PICTURE TO A CONTACT
- DELETING PICTURES
- USING THE CAMCORDER
- RECORDING VIDEOS
- RECORDING VIDEOS FOR A CERTAIN PERIOD OF TIME
- SHARING VIDEOS
- DELETING VIDEOS
- USING THE GALLERY
- VIEWING PICTURES
- VIEWING PICTURES IN A SLIDESHOW
- VIEWING VIDEOS
- VIDEO PLAYER SETTINGS
- USING THE VIDEO PLAYER
- VIEWING A VIDEO
- DELETING A VIDEO
- VIEWING PROPERTIES
- VIDEO PLAYER SETTING
- USING THE MUSIC PLAYER
- LISTENING TO MUSIC
- MUSIC PLAYER ICONS
- ICON DESCRIPTION
- PLAYING BACK MUSIC IN SHUFFLE
- ADDING SOUND EFFECTS
- CONTROLLING VOLUME
- CREATING A NEW PLAYLIST
- ADDING SONGS TO A PLAYLIST
- REMOVING SONGS FROM A PLAYLIST
- REPEATING MUSIC
- SORTING FILES BY TYPE
- RATING A FILE
- DELETING FILES
- USING MUSIC WIDGET
- ENJOYING YOUTUBE
- WATCHING VIDEOS
- UPLOADING VIDEOS
- CHECKING UPLOAD STATUS
- CREATING A YOUTUBE ACCOUNT
- WATCHING VIDEOS BY CATEGORY
- WATCHING VIDEOS BY UPLOAD DATE
- VIEWING MY ACCOUNT INFORMATION
- YOUTUBE SETTINGS
- 4
- MANAGING CONTACTS
- VIEWING CONTACTS INFORMATION
- CREATING CONTACTS
- EDITING CONTACTS
- SHARING CONTACT DETAILS
- SETTING CONTACT OPTIONS
- ADDING TO FAVORITE CONTACTS
- DELETING CONTACTS
- SEARCHING CONTACTS INFORMATION
- SETTING DISPLAY OPTIONS
- SETTING UP ADDRESS BOOK
- MANAGING ACCOUNTS AND SYNC
- IMPORTING/EXPORTING CONTACTS INFORMATION
- FROM SD CARD
- USING CONTACTS WIDGET
- USING THE CALENDAR
- CREATING AN EVENT
- VIEWING THE CALENDAR
- CALENDAR ICONS
- SETTING REMINDERS
- EDITING EVENTS
- USING A MEMO
- CREATING A NEW TEXT MEMO
- DRAWING A NEW HANDY MEMO
- EDITING A MEMO
- SHARING A MEMO
- DELETING A MEMO
- USING MEMO WIDGET
- USING A VOICE MEMO
- RECORDING VOICE
- LISTENING TO RECORDED VOICES
- SHARING A VOICE MEMO
- DELETING A VOICE MEMO
- 5
- VIEWING DOCUMENTS
- READING DOCUMENTS
- SEARCHING FOR WORDS IN A DOCUMENT
- MOVING TO A PAGE IN A DOCUMENT
- SHARING DOCUMENTS
- DELETING DOCUMENTS
- RENAMING DOCUMENTS
- ADDING RECENT DOCUMENTS AS WIDGET
- HANDLING DOCUMENTS VIEW
- ZOOMING IN/OUT WITH TWO FINGERS
- ROTATING THE DOCUMENT VIEWER
- 6
- ACCESSING THE INTERNET
- SEARCHING FOR INFORMATION IN THE INTERNET
- CHANGING THE HOME PAGE
- USING VOICE SEARCH
- REFRESHING A PAGE
- VISITING A NEW PAGE
- OPENING A NEW WINDOW
- VIEWING THE THUMBNAIL WINDOWS
- ADDING BOOKMARKS AS WIDGET
- VIEWING BROWSER HISTORY
- SETTING THE DISPLAY OPTIONS
- SETTING PRIVACY OPTIONS
- SHOPPING IN THE ANDROID MARKET
- DOWNLOADING APPLICATIONS
- RUNNING DOWNLOADED APPLICATIONS
- DELETING APPLICATIONS FROM THE ANDROID MARKET
- DELETING APPLICATIONS FROM SETTINGS
- USING GOOGLE MAPS
- SEARCHING PLACES
- ZOOMING IN AND OUT OF THE MAP
- SEARCHING DIRECTIONS
- SEARCHING THE CURRENT LOCATION ON THE MAP
- USING PLACES
- FINDING PLACES
- VIEWING PLACES AT A GLANCE
- ADDING A CATEGORY FOR PLACES
- ADDING STARRED PLACES
- USING LATITUDE
- JOINING LATITUDE
- ADDING FRIENDS FROM CONTACTS
- ADDING FRIENDS FROM EMAIL ADDRESSES
- ACCEPTING INVITATION FROM FRIENDS
- MANAGING FRIENDS
- CHECKING PERSONAL SETTINGS
- ADJUSTING PRIVACY SETTINGS
- SEARCHING WITH GOOGLE
- SEARCHING FOR INFORMATION WITH GOOGLE
- SETTING SEARCH OPTIONS
- SELECTING ITEMS THAT CAN BE SEARCHED
- MANAGING SEARCH HISTORY
- NEWS & WEATHER
- VIEWING WEATHER INFORMATION
- SELECTING WEATHER SETTINGS
- CHANGING MY LOCATION
- READING NEWS ARTICLES
- CUSTOMIZING NEWS TOPICS
- ADDING NEWS TOPICS
- SETTING REFRESH OPTIONS
- 7
- USING A WI-FI NETWORK
- CONNECTING TO A WI-FI NETWORK
- USING THE EASY SETTING
- ABOUT NETWORK NOTIFICATIONS
- SETTING WI-FI NETWORKS
- SEARCHING FOR WI-FI NETWORKS
- ADDING A WI-FI NETWORK
- DISCONNECTING TO A WI-FI NETWORK
- CONNECTING TO A 3G NETWORK
- USING BLUETOOTH
- PAIRING WITH DEVICES
- BLUETOOTH SETTINGS
- SHARING A PICTURE USING BLUETOOTH
- RENAMING THE DEVICE
- MAKING THE PHONE A MODEM
- ACTIVATING THE USB TETHERING
- BECOMING A PORTABLE WI-FI HOTSPOT
- SETTING OPTIONS FOR PORTABLE WI-FI HOTSPOT
- 8
- MANAGING THE MEMORY CARD
- VIEWING AVAILABLE MEMORY
- UNMOUNTING THE SD CARD
- FORMATTING THE MICROSD CARD
- CONNECTING TO A PC
- SELECTING THE USB MODE
- TURNING ON/OFF THE USB MODE IN THE EASY SETTING
- USING THE PHONE AS MASS STORAGE
- COPYING FILES
- TRANSFERRING FILES THROUGH MEDIA TRANSFER
- TRANSFERRING FILES
- 9
- CLOCK TOOLS
- VIEWING THE WORLD TIME
- REARRANGING THE ORDER OF CITIES
- DELETING A CITY
- USING THE TIMER
- USING THE STOPWATCH
- CLOCK
- ADDING A NEW ALARM
- CHANGING AN ALARM
- DEACTIVATING AN ALARM
- DELETING AN ALARM
- SETTING AN ALARM
- ADDING CLOCK WIDGET
- CALCULATOR
- DOING CALCULATIONS
- SAVING A CALCULATION
- EDITING A SAVED CALCULATION
- DELETING A CALCULATION
- CONVERTER
- CONVERTING VALUES
- RESETTING A CONVERSION
- SKETCH PAD
- CREATING A DRAWING
- DELETING A DRAWING
- EDITING A DRAWING
- SAVING TO THE GALLERY
- SHARING A DRAWING
- VOICE DIALER
- SEARCHING FOR A CONTACT
- VOICE SEARCH
- COMPASS
- SETTING THE WAY POINT
- MOVING TOWARD THE WAY POINT
- REVIEWING THE MOVING TRACK
- CREATING I'MARK
- DELETING I'MARK
- ADDING A PHOTO FOR L'MARK
- NAVIGATION
- SEARCHING FOR THE DESTINATION BY VOICE
- FINDING DIRECTIONS USING GOOGLE MAPS
- SETTING THE END POINT MANUALLY
- CHECKING THE TRAFFIC CONDITIONS
- WEATHER
- ADDING A NEW CITY
- CHANGING THE TEMPERATURE UNIT
- UPDATING WEATHER INFORMATION
- STOCKS
- CHECKING THE CURRENT STOCK MARKET CONDITIONS
- RENAMING THE STOCK MARKET INDEX
- DELETING THE STOCK MARKET INDEX
- ADDING THE STOCK MARKET INDEX
- SHARING THE STOCK MARKET INFORMATION
- ADJUSTING THE ALERT
- SETTING THE ALERT
- WRITING NOTES
- VIEWING RELATED NEWS ARTICLES
- ADJUSTING THE APPEARANCE
- ADDING THE STOCKS WIDGET
- RSS READER
- CREATING CHANNELS
- VIEWING NEW FEEDS
- MANAGING FAVORITES
- MANAGING CATEGORIES
- SETTING OPTIONS
- AT&T SERVICES
- 10
- PERSONALIZE
- SETTING AND MANAGING HOME SCREEN THEMES
- SETTING HOME WALLPAPER
- WIRELESS & NETWORKS
- SETTING AIRPLANE MODE
- TURNING WI-FI ON/OFF
- TURNING BLUETOOTH ON/OFF
- SETTING BLUETOOTH
- SETTING TETHERING AND PORTABLE HOTSPOTS
- SETTING VPN SETTINGS
- SETTING MOBILE NETWORKS
- CALL SETTINGS
- MANAGING FIXED DIALING NUMBERS
- SETTING YOUR VOICEMAIL
- SETTING AUTO REDIAL
- SETTING TTY MODE
- SETTING DTMF TONES
- SETTING CALLER ID
- SETTING CALL FORWARDING
- SETTING CALL WAITING
- TURNING SUPPRESSION ON/OFF
- SOUND
- SETTING SILENT MODE
- SETTING TO VIBRATE
- SETTING VOLUME
- SETTING PHONE RINGTONE
- SETTING NOTIFICATION RINGTONE
- SETTING FEEDBACK OPTIONS
- SETTING SOUND EFFECT
- DISPLAY
- SETTING BRIGHTNESS
- SETTING AUTO-ROTATE SCREEN
- SETTING ANIMATION OPTIONS
- SETTING SCREEN TIMEOUT
- LOCATION & SECURITY
- SETTING MY LOCATION
- SETTING SCREEN LOCK WITH A PATTERN KEY
- SETTING SCREEN LOCK WITH A PIN
- SETTING SCREEN LOCK WITH A PASSWORD
- SETTING SIM CARD LOCK
- DISPLAYING PASSWORDS
- SELECTING DEVICE ADMINISTRATORS
- SETTING TO USE SECURE CREDENTIALS
- INSTALLING CERTIFICATES FROM SD CARD
- SETTING THE CREDENTIAL STORAGE PASSWORD
- CLEARING THE STORAGE
- APPLICATIONS
- ALLOWING INSTALLATION OF UNKNOWN APPLICATIONS
- MANAGING APPLICATIONS
- VIEWING RUNNING SERVICES AND APPLICATIONS
- VIEWING STORAGE USED BY APPLICATIONS
- VIEWING ITEMS USED THE BATTERY
- DEBUGGING USB
- ALLOWING MOCK LOCATIONS
- ACCOUNTS & SYNC
- MANAGING BACKGROUND DATA
- ALLOWING BACKGROUND DATA TO SYNC AUTOMATICALLY
- ADDING AN ACCOUNT
- PRIVACY
- BACKING UP DATA
- RESETTING THE PHONE
- VIEWING THE STATUS OF SPACE
- MOUNTING/UNMOUNTING A SD CARD
- ERASING A SD CARD
- LANGUAGE & KEYBOARD
- SETTING SWYPE
- SETTING THE ANDROID KEYBOARD
- SETTING THE ANDROID KEYBOARD WORD SUGGESTION
- MANAGING THE USER DICTIONARY
- VOICE INPUT & OUTPUT
- SETTING INPUT OPTIONS
- SETTING OUTPUT OPTIONS
- ACCESSIBILITY
- SETTING THE ACCESSIBILITY OPTION
- DATE & TIME
- ALLOWING DATE AND TIME TO BE SET AUTOMATICALLY
- SETTING THE DATE
- SETTING THE TIME ZONE
- SETTING TIME
- SETTING 24-HOUR FORMAT
- SELECTING DATE FORMAT
- ABOUT PHONE
- CHECKING THE STATUS OF THE PHONE
- CHECKING BATTERY USE
- SEEING LEGAL INFORMATION
- CALL & DATA USAGE
- TO UPDATE SOFTWARE
- TO VIEW THE VERSION OF SOFTWARE
- PC SUITE
- SYSTEM REQUIREMENTS
- PC SUITE FEATURES
- TROUBLESHOOTING CHECKLIST
- WHEN THE OTHER PARTY CANNOT HEAR YOU SPEAKING
- WHEN BATTERY LIFE IS SHORTER THAN USUAL
- WHEN YOU CANNOT TURN ON YOUR PHONE
- WHEN YOU ARE UNABLE TO SEND A MESSAGE
- WHEN YOU ARE UNABLE TO MAKE A CALL
- WHEN YOU ARE UNABLE TO CHARGE THE BATTERY
- WHEN YOU ARE UNABLE TO SELECT A CERTAIN FUNCTION
- SPECIFICATIONS
- DESIGN
- DISPLAYS
- MELODIES
- CAMERA
- INTEGRATED 5M CMOS CAMERA WITH AF (AUTO FOCUS)
- DIMENSIONS & WEIGHT
- OPERATING FREQUENCY
- FCC HEARING-AID COMPATIBILITY REGULATIONS FOR WIRELESS DEVICES
- FCC REGULATORY COMPLIANCE
- STATEMENT ACCORDING TO FCC PART 15.105
- STATEMENT ACCORDING TO FCC PART 15.21
- RF EXPOSURE FCC
- HEALTH AND SAFETY INFORMATION FCC
- WARRANTY
- PROTECT YOUR WARRANTY
- 12-MONTH LIMITED WARRANTY
- THIS WARRANTY DOES NOT APPLY TO
- OTHER WARRANTY PROGRAM
- LEGAL NOTICE
Brand : PANTECH
Model : P9060
Category : Smartphone