
EHU-3 - Lift bridge Vestil - Free user manual and instructions
Find the device manual for free EHU-3 Vestil in PDF.


| Product Type | Electric Chain Hoist |
| Model | EHU-3 |
| Brand | Vestil |
| Lifting Capacity | 3 tons (6,000 lbs) |
| Lifting Speed | 8 ft/min (single speed) or 16 ft/min (high speed) |
| Voltage | 230V / 460V, 3-phase, 60 Hz |
| Motor Power | 5 HP |
| Chain Type | Grade 80 load chain |
| Chain Length | 10 ft standard (custom lengths available) |
| Net Weight | 150 lbs (68 kg) |
| Dimensions (L x W x H) | 24 x 12 x 12 inches |
| Control Type | Pendant control with emergency stop |
| Safety Features | Overload clutch, upper/lower limit switches, emergency stop button |
| Duty Cycle | FEM 2m / M4 (60% duty cycle) |
| Lubrication | Automatic chain lubrication system recommended |
| Maintenance | Inspect chain and hooks monthly; lubricate every 40 operating hours |
| Warranty | 1 year limited warranty |
| Compliance | ANSI/ASME B30.16, OSHA |
| Certification | ETL listed (pending) |
Frequently Asked Questions - EHU-3 Vestil
User questions about EHU-3 Vestil
0 question about this device. Answer the ones you know or ask your own.
Ask a new question about this device
Download the instructions for your Lift bridge in PDF format for free! Find your manual EHU-3 - Vestil and take your electronic device back in hand. On this page are published all the documents necessary for the use of your device. EHU-3 by Vestil.
USER MANUAL EHU-3 Vestil

VESTIL MANUFACTURING CORP.
2999 NORTH WAYNE STREET, P.O. BOX 507, ANGOLA, IN 46703
TELEPHONE: (260) 665-7586 -OR- TOLL FREE (800) 348-0868
FAX: (260) 665-1339
URL: WWW.VESTILMFG.COM EMAIL: SALES@VESTIL.COM
THANK YOU VERY MUCH FOR SELECTING OUR PRODUCT. THIS INSTRUCTION MANUAL DESCRIBES CORRECT OPERATING METHOD TO ENSURE PROLONGED SERVICE LIFE. PLEASE READ AND COMPLETELY UNDERSTAND THIS MANUAL BEFORE OPERATING THE LOW PROFILE LIFT TABLE. ALWAYS KEEP THIS MANUAL AT AN APPROPRIATE PLACE. IF THE MANUAL OR WARNING DECAL IS MISSING, PLEASE CONTACT WITH DEALER.
Note: This manual has been prepared for skilled and competent personal. It provides instructions for using the product correctly and parts list. This Manual cannot replace the professional skills and expertise of the user.
1.

WARNING! If operating the lift table improperly, a person may be seriously! Injured. Therefore, operate properly according to the following instruction
Read & thoroughly understand the instruction manual completely before using. Follow all safety instructions strictly.
◇ It is necessary to check all safety devices before operation.
◇ Make sure that there are no obstacles in the working area.
◇ Do not put foot or hand in scissors mechanism or through frame.
- Screw the lifting eyes on the base frame before working on the lift table.
Do not overload the lift table. Load should be distributed on the table according to relevant load distribution chart.
- Pay attention if local voltage and frequency is as same as the input specification of the lift table.
◇ Use the lift table on flat and solid ground.
- All the electrical connection and disconnection operations must be carried out by skilled and competent personal.
- While operation, it is forbidden to contact the moving parts of the lift table.
- While the lift table moving, it is forbidden to adjust or to move the load
It is forbidden to lift the load, which perhaps does harm to a person or other object.
- It is forbidden to operate the lift table while a person is under the table.
◇ Do not adjust the safety valve of hydraulic power pack.
◇ It is forbidden to operate the lift table even if there is underf the table.
◇ Do not adjust the safety valve of hydraulic power pack. - It is forbidden to operate the lift table even if there is small structure distortion.
◇ Do not use in an explosive or flammable place.
2.

CAUTION! Operating the lift table improperly accident. Operate properly according to the following instruction.
◇ The lift table is just for raise and lower purpose. Do not use it for any other purpose.
Do not allow a person to operate the lift table, who does not understand its operation.
- It is forbidden to change the lift table without manufacture’s written admission.
- It is necessary to use the spare parts designated by manufacturer.
Make sure to keep a distance between the table and ambient objects enough to operate the lift table safety.
◇ Keep the hydraulic system under clean and safe condition.
The hydraulic power pack features an electric lowering control those coils. The coils must be fed with the power supply voltage should not exceed ± 10% of the rated required voltage.
- Always do maintenance and routine check while the lift table is unloaded.
◇ The lift table is not waterproof and should be used in a dry environment.
3. DAILY INSPECTION
Daily inspection is effective to find the malfunction or fault on the lift table. Before operation, check the lift table according to the following points.

CAUTION! Do not use the lift table if any malfunction or fault is found.
◇ Check all the terms of WARNING and CAUTION.
◇ Check scratches, bending or crack on the lift table.
◇ Check smooth movement of the table.
◇ Check if there is any hydraulic oil leakage.
◇ Check the vertical creep of the table.
◇ Check if all the bolts and nuts are firmly tightened.
4. Operating the lift table
- LOADING
The maximum capacity of the lift table is 2,000/3,000 lbs load should be distributed on the lift table equably.
■ Lifting the Table

CAUTION! Do not overload the lift table. Ensure the balance of loading. Do not load partially or concentrically
◇ Screw and loose emergency stop switch.
◇ Push the UP button and power pack starts to work to lift the load.
◇ Loose the UP button and power pack stops working.
■ Lowering the Table

WARNING! Do not put foot or hand in scissors mechanism.
◇ Push the DOWN button and the table will lower.
◇ Loose the DOWN button and the table will stop.
NOTE
◇ The table is equipped with an aluminum guard to avoid accidental danger.
If aluminum guard strikes an object while the table lowers, stop operation and check the lift table. After making sure no any abnormality, strike the UP button slightly and then the electric system will function as before.
Emergency stop
◇ There are two methods of emergency stop as follows.
◇ Push down the emergency stop switch and the movement of table stops.
◇ Strike aluminum guard upward and the movement of table also stops.
■ Transportation
If necessary, the lift table can be transported with attached ringbolts.
◇ Pay attention to the maximum capacity of lifting equipment to be used.
◇ Keep the ringbolts with reasonableness.
5. HYDRAULIC CIRCUIT & ELECTRIC
PRINCIPLE DIAGRAM
See Figure 1 & Figure 2
![graph TD A["Hydraulic cylinder"] --> B["Adjusting Valve"] B --> C["Single Valve"] C --> D["Overflow Valve"] D --> E["Hydraulic Motor"] E --> F["Discharge Valve"]](/content/2026/07/1453264/images/fcd191de4bbe7aea28719397f272e43ed58c7debe2a781aa94c7745307579247.jpg)
Fig. 1 Hydraulic circuit
ELECTRIC PRINCIPLE DIAGRAM

| No. | Description | Specification | Q'ty | Marks |
| BK | Power Transformer | 25W(120V-24V) | 1 | |
| FU | Fuse | RT14-20(6A) | 1 | |
| KM | Connect | CJX2-1201/24V | 1 | |
| M | Hydraulic Power Pack | 120V/1.5kw | 1 | |
| PE | Ground Wire | 1 | ||
| SQ1-6 | Control Switch-down | TZ-8104 | 6 | |
| SQ7 | Control Switch-up | 1 | ||
| YA | Fuse-down | AC24V | 1 | |
| SB1 | Emergency Button | 1 | ||
| SB2 | Button-up | 1 | ||
| SB3 | Button-down | 1 |
Fig. 2 Electric Principle Diagram
6. Specification
| Model | EHU-2 | ||
| Capacity (lbs) 2,000 3,000 | |||
| Min. Height (inch) 31/2 41/4 | |||
| Max. Height (inch) 331/2 331/2 | |||
| Platform Outside Dimensions Law (inch) | 553/4 × 523/4 63 × 531/2 | ||
| Platform Inside Dimensions LxW (inch) | 411/4 × 297/8 | 441/4 × 297/8 | |
| Base Outside Dimensions LxW (inch) | 521/4 × 505/8" | 541/4 × 505/8" | |
| Base Inside Dimensions LxW (inch) | 421/8 × 343/8 | 44 × 341/2 | |
| Raise Time (secs) | Unloaded | 16.2 | 21.5 |
| Loaded | 16.8 | 22.8 | |
| Down Time (secs) | Unloaded | 22.9 | 31.3 |
| Loaded | 22.7 | 31.2 | |
| Motor | Output (w) 1500 1500 | ||
| Voltage (v) AC110V 60HZ | |||
| Revolution (r/min) | 1.66cc/rev 3.3cc/rev | ||
| Protection Class IP.54 | |||
| Insulation Class | F. | ||
| Net Weight (lbs) | 630 | 850 | |
EHU-3
7. SERVICE INSTRUCTIONS
■ Do routine check of fasteners, packing and oil leaking.
■ Do routine check of the function of the lift table.
■ Before service the lift table, make sure to turn off the AC power supply.
■ After service it is necessary to check the function of the lift table again.
■ ONLY a qualified personnel can do service work.
■ Do routine check of the micro-switches on the safety guard.
- Do routine check of the hydraulic system by listening its noise, touch motor's surface.
- Caution: It is necessary to turn off the AC power supply before touch motor's surface.
■ Pay attention to clear or even replace the oil filter after operating for a long time.
■ Appropriate lubrication is necessary to make the lift table work easily and have a prolonged service lift.
■ Following table is recommended to service the lift table periodically.
| Content | After every 500 hour’ working or every 3 months later | After every 2000 hours working or every year |
| Check oil level of oil tank | ☆ | |
| Check the cleanliness of oil filter | ☆ | |
| Fasten all the connecting parts again | ☆ | |
| Check wear and tear of pressure oil pipes | ☆ | |
| Check hydraulic cylinder | ☆ | |
| Fix main parts tightly again | ☆ | |
| Check the function of micro-switches | ☆ | |
| Check whole working state of the lift table | ☆ | |
| Lubricate all the joints and pivot points | ☆ | |
| Check wear and tear of all axial bushes | ☆ | |
| Replace hydraulic oil for the first time Accumulated working ten hours’ | ||
| Replace hydraulic oil | ☆ | |
| Check oil leaking | ☆ | |
| Remark: ☆ stands for proceeding the item. | ||
8. TROUBLE SHOOTING
Note: Before service it is necessary to screw two eyebolts into relevant screw-holes on the basis lest the table lowers accidentally.
| Trouble | Cause | Reme |
| Table cannot lift while motor works normally | ◇ Eyebolt has not been removed◇ AC Voltage phrases mistake◇ Electromagnetic dysfunctions◇ The table is overloaded | ◇ Remove eyebolt◇ Correct AC voltage phrase electromagnetic valve and repair it◇ Remove excessive load |
| Table cannot lift and motor does not work | ◇ Lowering limit switch (if switched) damaged | ◇ Replace limit switch |
| Table cannot lower | ◇Lowering limit switch or micro-switch on safety guard damaged◇ Electromagnetic valve dysfunctions◇ Safety guard works◇ Something wrong with electric circuit board | ◇ Replace lowering limit switch switch or micro-switch.◇ Check the function of electromagnetic valve and repair it◇ Strike the UP button slightly◇ Replace electric circuit board |
| Table's legs go over limit position (if existed) while table lowers | ◇ Internal leaking in electromagnetic valve◇ Packing damaged in hydraulic cylinder | ◇Repair electromagnetic valve and if necessary replace it◇ Check and replace packing |
| Table cannot reach the highest position | ◇ Oil not enough◇ Limit switch damaged | ◇ Fill enough oil◇ Check and repair limit switch. If necessary, replace it |
Instruction for Power Pack Installment

- Loosen the Bolt

- a) Install the vertical pole and fix then by tightening the screw showed in the figure.
b) Insert the plug of power and the plug of the handle each other.

- a) Join the oil jose of control box and the one of the lift table.
b) Join the plug of the control box with the lift table.
EHU-2/3 "U" Type Electric Lift Table
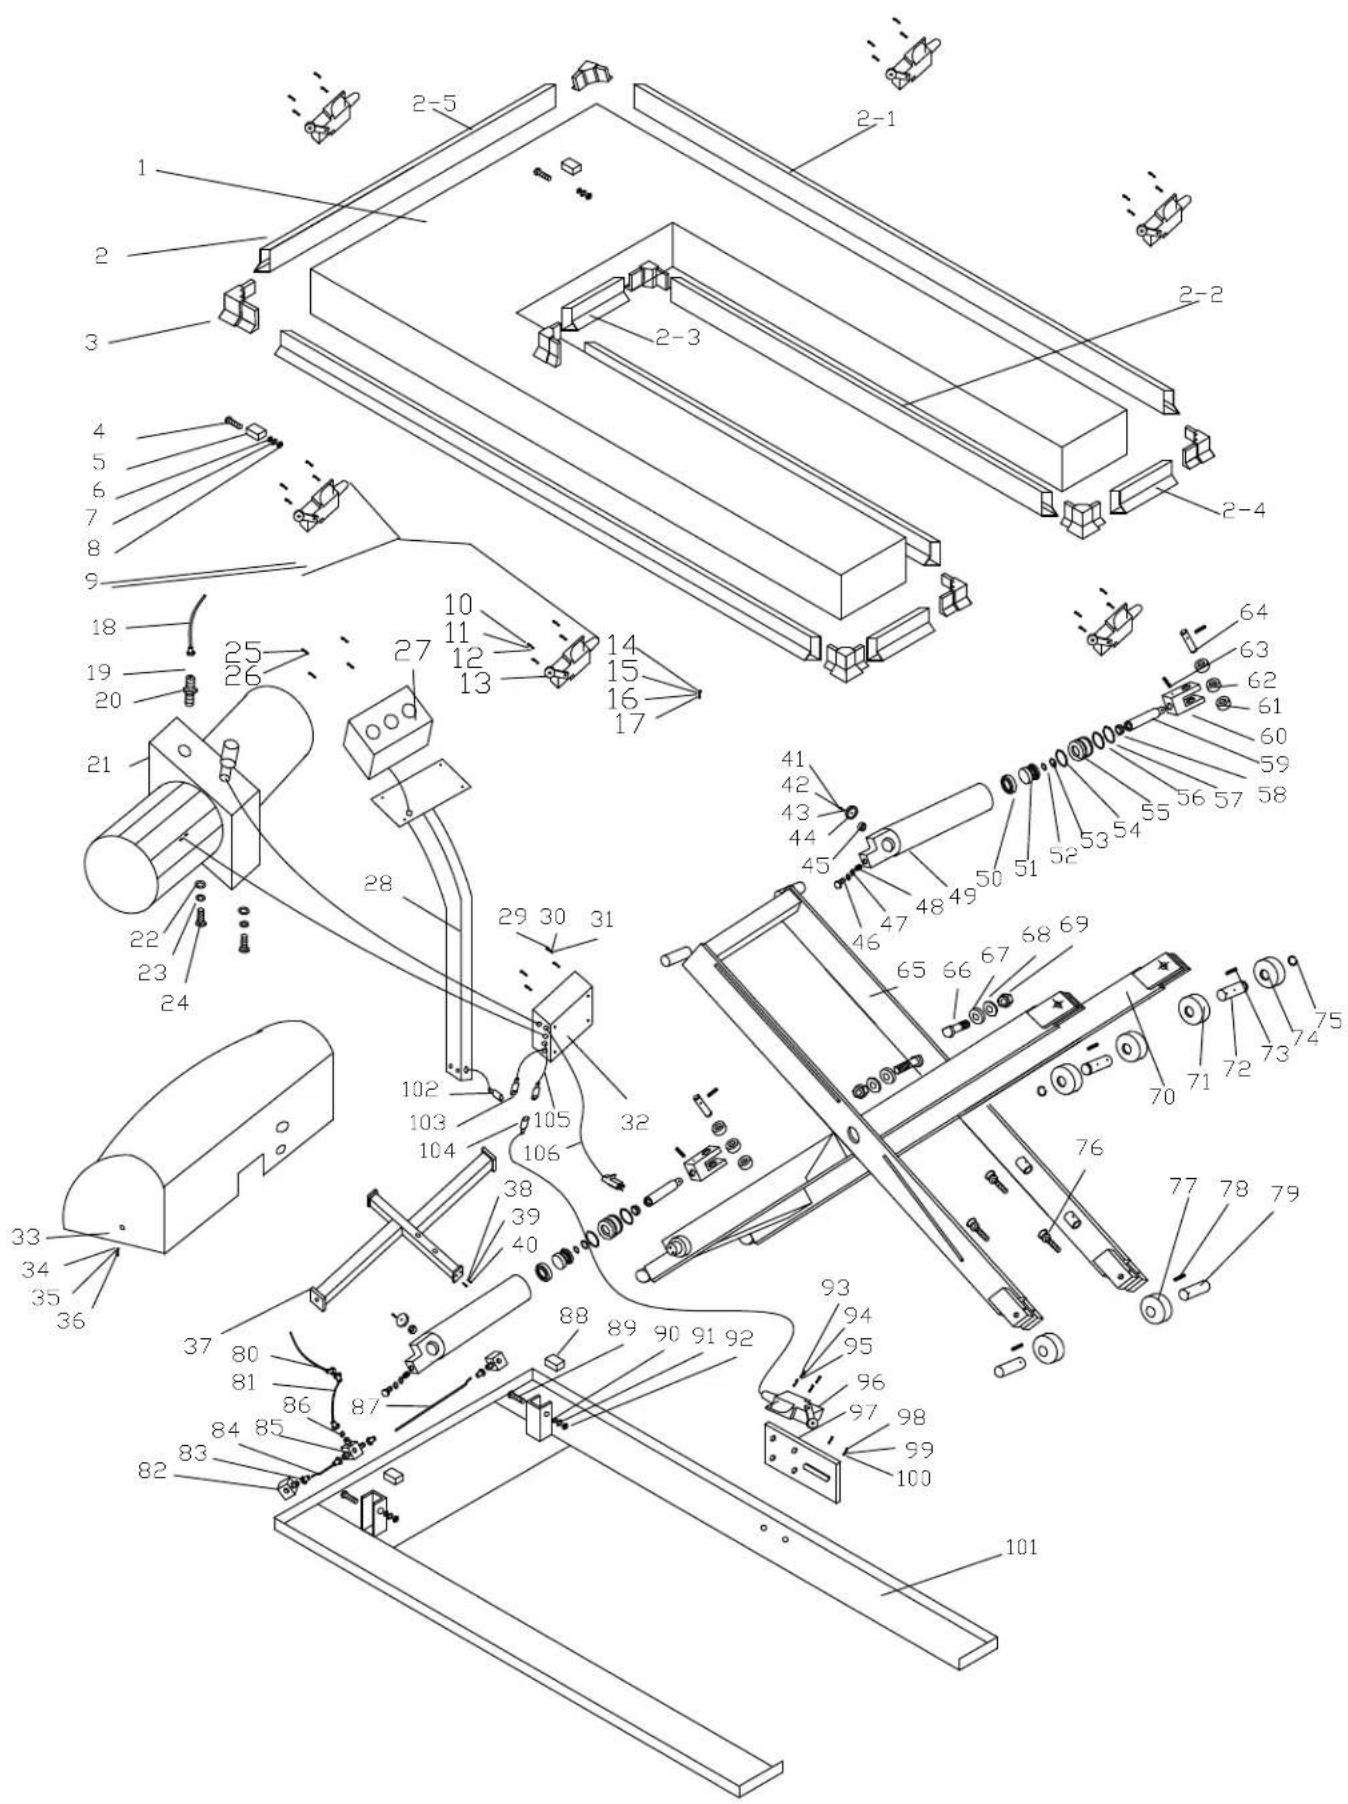
EHU-2 ELECTRIC LIFT TABLE PARTS LIST
| Part # | Description | Qty. | Part # | Description | Qty. | Part # | Description | Qty. |
| EHU-2-1 | Deck | 1 | EHU-2-37 | Bracket | 1 | EHU-2-73 | Spring Pin | 4 |
| EHU-2-2 | Guard, Toe | 8 | EHU-2-38 | Washer, Flat | 2 | EHU-2-74 | Roller, Guide | 2 |
| EHU-2-3 | Corner | 8 | EHU-2-39 | Washer, Lock | 2 | EHU-2-75 | Ring, Retaining | 2 |
| EHU-2-4 | Screw, Philips Head Machine | 2 | EHU-2-40 | Bolt, Hex Head | 2 | EHU-2-76 | Bolts, Eye | 3 |
| EHU-2-5 | Washer | 2 | EHU-2-41 | Bolt, Hex Head | 2 | EHU-2-77 | Roller, Guide | 3 |
| EHU-2-6 | Washer, Flat | 2 | EHU-2-42 | Washer, Lock | 2 | EHU-2-78 | Spring Pin | 3 |
| EHU-2-7 | Washer, Lock | 2 | EHU-2-43 | Washer, Flat | 2 | EHU-2-79 | Shaft | 3 |
| EHU-2-8 | Nut, Nylon Lock | 2 | EHU-2-44 | Big Washer | 2 | EHU-2-80 | Connector, Threaded | 1 |
| EHU-2-9 | Wiring | 1 | EHU-2-45 | Bearing | 2 | EHU-2-81 | Hose, Oil | 1 |
| EHU-2-10 | Screw, Phillips Head Machine | 24 | EHU-2-46 | Connector, Threaded | 2 | EHU-2-82 | Fitting, Threaded | 2 |
| EHU-2-11 | Washer, Flat | 24 | EHU-2-47 | Washer | 4 | EHU-2-83 | Connector, Threaded | 4 |
| EHU-2-12 | Washer, Lock | 24 | EHU-2-48 | Valve, Velocity | 2 | EHU-2-84 | Pipe, Oil - Steel | 1 |
| EHU-2-13 | Switch, Limit | 6 | EHU-2-49 | Cylinder | 2 | EHU-2-85 | Fitting, Threaded | 1 |
| EHU-2-14 | Washer | 8 | EHU-2-50 | Oil Seal | 2 | EHU-2-86 | O-Ring | 1 |
| EHU-2-15 | Washer, Flat | 8 | EHU-2-51 | Piston | 2 | EHU-2-87 | Pipe, Oil - Steel | 1 |
| EHU-2-16 | Washer, Spring | 8 | EHU-2-52 | C-Ring | 2 | EHU-2-88 | Spacer, Nylon | 2 |
| EHU-2-17 | Bolt, Hex Head | 8 | EHU-2-53 | O-Ring | 2 | EHU-2-89 | Bolt, Hex Head | 2 |
| EHU-2-18 | Hose, Oil | 1 | EHU-2-54 | O-Ring | 2 | EHU-2-90 | Washer, Flat | 2 |
| EHU-2-19 | O-Ring | 1 | EHU-2-55 | Top Nut | 2 | EHU-2-91 | Washer, Lock | 2 |
| EHU-2-20 | Connector, Threaded | 1 | EHU-2-56 | Steel Washer | 2 | EHU-2-92 | Nut, Nylon Lock | 2 |
| EHU-2-21 | Assembly, Hydraulic Pump | 1 | EHU-2-57 | C-Ring | 2 | EHU-2-93 | Screw, Phillips Head Machine | 4 |
| EHU-2-22 | Washer, Flat | 2 | EHU-2-58 | Dust Cover | 2 | EHU-2-94 | Washer, Lock | 4 |
| EHU-2-23 | Washer, Lock | 2 | EHU-2-59 | Piston, Lift | 2 | EHU-2-95 | Washer, Flat | 4 |
| EHU-2-24 | Bolt, Hex Head | 2 | EHU-2-60 | Assembly, Top Holder | 2 | EHU-2-96 | Switch, Limit | 1 |
| EHU-2-25 | Screw, Phillips Head Machine | 2 | EHU-2-61 | Wheel, Side | 4 | EHU-2-97 | Plate, Mounting | 1 |
| EHU-2-26 | Washer, Lock | 2 | EHU-2-62 | Wheel, Center | 2 | EHU-2-98 | Screw, Phillips Head Machine | 2 |
| EHU-2-27 | Assembly, Raise / Lower Button | 1 | EHU-2-63 | Spring Pin | 1 | EHU-2-99 | Washer, Lock | 2 |
| EHU-2-28 | Weldment, Switch | 1 | EHU-2-64 | Pin, Top | 2 | EHU-2-100 | Washer, Flat | 2 |
| EHU-2-29 | Screw, Phillips Head Machine | 2 | EHU-2-65 | Scissors | 2 | EHU-2-101 | Frame | 1 |
| EHU-2-30 | Washer, Flat | 2 | EHU-2-66 | Pin, Link | 2 | EHU-2-102 | Cord, Power | 1 |
| EHU-2-31 | Washer, Lock | 2 | EHU-2-67 | Washer, Flat | 2 | EHU-2-103 | Wire, Handle | 1 |
| EHU-2-32 | Box, Junction | 1 | EHU-2-68 | Washer, Nylon | 2 | EHU-2-104 | Wire, Switch | 1 |
| EHU-2-33 | Cover, Power Assembly | 1 | EHU-2-69 | Nut, Nylon Lock | 2 | EHU-2-105 | Wire, Control Switch | 1 |
| EHU-2-34 | Washer, Flat | 3 | EHU-2-70 | Scissors | 2 | EHU-2-106 | Wire, Power | 1 |
| EHU-2-35 | Washer, Lock | 3 | EHU-2-71 | Roller, Guide | 2 | |||
| EHU-2-36 | Screw, Phillips Head Machine | 3 | EHU-2-72 | Shaft, Guide Roller | 2 | |||
EHU-3 ELECTRIC LIFT TABLE PARTS LIST
| Part # | Description | Qty. | Part # | Description | Qty. | Part # | Description | Qty. |
| EHU-3-1 | Deck | 1 | EHU-3-37 | Bracket | 1 | EHU-3-73 | Spring Pin | 4 |
| EHU-3-2 | Guard, Toe | 8 | EHU-3-38 | Washer, Flat | 2 | EHU-3-74 | Roller, Guide | 2 |
| EHU-3-3 | Corner | 8 | EHU-3-39 | Washer, Lock | 2 | EHU-3-75 | Ring, Retaining | 2 |
| EHU-3-4 | Screw, Philips Head Machine | 2 | EHU-3-40 | Bolt, Hex Head | 2 | EHU-3-76 | Bolts, Eye | 3 |
| EHU-3-5 | Washer | 2 | EHU-3-41 | Bolt, Hex Head | 2 | EHU-3-77 | Roller, Guide | 3 |
| EHU-3-6 | Washer, Flat | 2 | EHU-3-42 | Washer, Lock | 2 | EHU-3-78 | Spring Pin | 3 |
| EHU-3-7 | Washer, Lock | 2 | EHU-3-43 | Washer, Flat | 2 | EHU-3-79 | Shaft | 3 |
| EHU-3-8 | Nut, Nylon Lock | 2 | EHU-3-44 | Big Washer | 2 | EHU-3-80 | Connector, Threaded | 1 |
| EHU-3-9 | Wiring | 1 | EHU-3-45 | Bearing | 2 | EHU-3-81 | Hose, Oil | 1 |
| EHU-3-10 | Screw, Phillips Head Machine | 24 | EHU-3-46 | Connector, Threaded | 2 | EHU-3-82 | Fitting, Threaded | 2 |
| EHU-3-11 | Washer, Flat | 24 | EHU-3-47 | Washer | 4 | EHU-3-83 | Connector, Threaded | 4 |
| EHU-3-12 | Washer, Lock | 24 | EHU-3-48 | Valve, Velocity | 2 | EHU-3-84 | Pipe, Oil - Steel | 1 |
| EHU-3-13 | Switch, Limit | 6 | EHU-3-49 | Cylinder | 2 | EHU-3-85 | Fitting, Threaded | 1 |
| EHU-3-14 | Washer | 8 | EHU-3-50 | Oil Seal | 2 | EHU-3-86 | O-Ring | 1 |
| EHU-3-15 | Washer, Flat | 8 | EHU-3-51 | Piston | 2 | EHU-3-87 | Pipe, Oil - Steel | 1 |
| EHU-3-16 | Washer, Spring | 8 | EHU-3-52 | C-Ring | 2 | EHU-3-88 | Spacer, Nylon | 2 |
| EHU-3-17 | Bolt, Hex Head | 8 | EHU-3-53 | O-Ring | 2 | EHU-3-89 | Bolt, Hex Head | 2 |
| EHU-3-18 | Hose, Oil | 1 | EHU-3-54 | O-Ring | 2 | EHU-3-90 | Washer, Flat | 2 |
| EHU-3-19 | O-Ring | 1 | EHU-3-55 | Top Nut | 2 | EHU-3-91 | Washer, Lock | 2 |
| EHU-3-20 | Connector, Threaded | 1 | EHU-3-56 | Steel Washer | 2 | EHU-3-92 | Nut, Nylon Lock | 2 |
| EHU-3-21 | Assembly, Hydraulic Pump | 1 | EHU-3-57 | C-Ring | 2 | EHU-3-93 | Screw, Phillips Head Machine | 4 |
| EHU-3-22 | Washer, Flat | 2 | EHU-3-58 | Dust Cover | 2 | EHU-3-94 | Washer, Lock | 4 |
| EHU-3-23 | Washer, Lock | 2 | EHU-3-59 | Piston, Lift | 2 | EHU-3-95 | Washer, Flat | 4 |
| EHU-3-24 | Bolt, Hex Head | 2 | EHU-3-60 | Assembly, Top Holder | 2 | EHU-3-96 | Switch, Limit | 1 |
| EHU-3-25 | Screw, Phillips Head Machine | 2 | EHU-3-61 | Wheel, Side | 4 | EHU-3-97 | Plate, Mounting | 1 |
| EHU-3-26 | Washer, Lock | 2 | EHU-3-62 | Wheel, Center | 2 | EHU-3-98 | Screw, Phillips Head Machine | 2 |
| EHU-3-27 | Assembly, Raise / Lower Button | 1 | EHU-3-63 | Spring Pin | 1 | EHU-3-99 | Washer, Lock | 2 |
| EHU-3-28 | Weldment, Switch | 1 | EHU-3-64 | Pin, Top | 2 | EHU-3-100 | Washer, Flat | 2 |
| EHU-3-29 | Screw, Phillips Head Machine | 2 | EHU-3-65 | Scissors | 2 | EHU-3-101 | Frame | 1 |
| EHU-3-30 | Washer, Flat | 2 | EHU-3-66 | Pin, Link | 2 | EHU-3-102 | Cord, Power | 1 |
| EHU-3-31 | Washer, Lock | 2 | EHU-3-67 | Washer, Flat | 2 | EHU-3-103 | Wire, Handle | 1 |
| EHU-3-32 | Box, Junction | 1 | EHU-3-68 | Washer, Nylon | 2 | EHU-3-104 | Wire, Switch | 1 |
| EHU-3-33 | Cover, Power Assembly | 1 | EHU-3-69 | Nut, Nylon Lock | 2 | EHU-3-105 | Wire, Control Switch | 1 |
| EHU-3-34 | Washer, Flat | 3 | EHU-3-70 | Scissors | 2 | EHU-2-106 | Wire, Power | 1 |
| EHU-3-35 | Washer, Lock | 3 | EHU-3-71 | Roller, Guide | 2 | |||
| EHU-3-36 | Screw, Phillips Head Machine | 3 | EHU-3-72 | Shaft, Guide Roller | 2 | |||
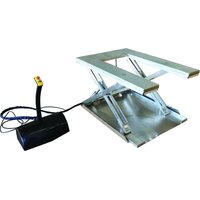
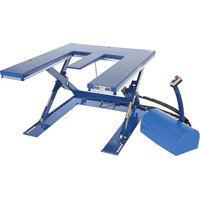
- VESTIL MANUFACTURING CORP
- DAILY INSPECTION
- OPERATING THE LIFT TABLE
- LOADING
- LIFTING THE TABLE
- LOWERING THE TABLE
- WARNING! DO NOT PUT FOOT OR HAND IN SCISSORS MECHANISM
- NOTE
- TRANSPORTATION
- HYDRAULIC CIRCUIT & ELECTRIC
- PRINCIPLE DIAGRAM
- SERVICE INSTRUCTIONS
- TROUBLE SHOOTING
- INSTRUCTION FOR POWER PACK INSTALLMENT
Brand : Vestil
Model : EHU-3
Category : Lift bridge