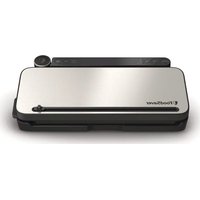
VS3182 - Vacuum packaging machines FOODSAVER - Free user manual and instructions
Find the device manual for free VS3182 FOODSAVER in PDF.


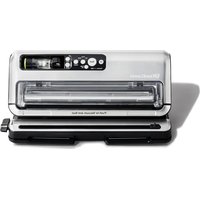
| Product Type | Vacuum Packaging Machine |
| Brand | FoodSaver |
| Model | VS3182 |
| Dimensions (Approx.) | 15.7 x 7.5 x 4.1 inches (40 x 19 x 10.5 cm) |
| Weight | 4.6 lbs (2.1 kg) |
| Power Supply | 120V AC / 60 Hz |
| Power Consumption | 120 W |
| Vacuum Pressure | -0.8 bar |
| Main Functions | Dry/Moist food vacuum sealing, pulse vacuum, manual seal |
| Accessories Included | Vacuum hose, roll starter clip, drip tray |
| Bag Compatibility | FoodSaver bags and rolls |
| Cleaning and Maintenance | Wipe exterior with damp cloth; drip tray removable for washing |
| Safety Features | Automatic shut-off, overheat protection |
| Repairability | Spare parts available via manufacturer; user-serviceable sealing strip |
| Warranty | 2-year limited warranty |
Frequently Asked Questions - VS3182 FOODSAVER
User questions about VS3182 FOODSAVER
0 question about this device. Answer the ones you know or ask your own.
Ask a new question about this device
Download the instructions for your Vacuum packaging machines in PDF format for free! Find your manual VS3182 - FOODSAVER and take your electronic device back in hand. On this page are published all the documents necessary for the use of your device. VS3182 by FOODSAVER.
USER MANUAL VS3182 FOODSAVER


Important Safeguards
Product Features
"How To"
Make a FoodSaver® Bag
Vacuum Seal a FoodSaver® Bag
Vacuum Seal with FoodSaver® Accessories
Care & Cleaning
Storage Guide
Guidelines
Vacuum Sealing and Food Safety
Food Preparation and Reheating Tips
Sealing Non-Food Items
Troubleshooting
Replacement Parts
Warranty
2
4
6


Important Safeguards
When using electrical appliances, basic safety precautions should always be followed to reduce the risk of fire, electric shock, and/or injury to persons including the following:
- Read all instructions before using this product.
- For bag sealers: To reduce the risk of burns, do not touch the sealing strip while using the appliance.
- To protect against electric shock, do not place or immerse cord, plugs, or appliance in water or other liquid.
- This appliance is not to be used by children or by persons with reduced physical, sensory or mental capabilities.
- Close supervision is necessary when any appliance is used near children. Children should not play with the appliance.
- Unplug from outlet when not in use, before putting on or taking off parts and before cleaning. Allow to cool before putting on or taking off parts, and before cleaning. To disconnect, unplug power cord from outlet. Do not disconnect by pulling on cord.
-
Do not operate any appliance with a damaged cord or plug or after the appliance malfunctions, or has been damaged in any manner. Do not attempt to replace or splice a damaged cord. Contact Customer Service (see warranty) for examination, repair or adjustment.
-
The use of an accessory not recommended by the appliance manufacturer for use with this appliance may result in fire, electric shock or injury to persons.
- Do not use in wet locations or leave outdoors. Do not use for commercial purposes.
- Do not let cord hang over edge of table or counter, or touch hot surfaces.
- Place cord where it cannot be tripped over, pulled on, cause user to become entangled with, especially by children, or cause the appliance to be overturned.
- Do not place on or near wet surfaces, or heat sources such as a hot gas or electric burner, or heated oven. Always use appliance on a dry, stable, level surface.
- Extreme caution must be used when sealing bags or moving an appliance containing hot liquids.
- Always attach plug to appliance first, then plug cord into outlet (for appliances with detachable cords).
- Use appliance only for its intended use.
- Vacuum packaging is not a substitute for the heat process of canning. Perishables still need to be refrigerated or frozen.
SAVE THESE INSTRUCTIONS
HOUSEHOLD USE ONLY
NORTH AMERICAN MODELS WITH POLARIZED PLUGS:
This appliance has a polarized plug, (one blade is wider than the other). As a safety feature to reduce the risk of electrical shock, this plug is intended to fit in a polarized outlet only one way. If the plug does not fit fully in the outlet, reverse the plug. If it still done not fit, contact a qualified electrician. Do not attempt to defeat this safety feature or modify the plug in any way. If the plug fits loosely into the AC outlet or if the AC outlet feels warm do not use that outlet.

POWER CORD INSTRUCTIONS:
A short power-supply cord or detachable power-supply cord (shorter than 4 1/2 feet or 1.4m) is provided on some models to reduce risks resulting from becoming entangled in or tripping over a longer cord. Longer detachable power-supply cords or extension cords are available and may be used if care is exercised in their use. Models provided with cords longer than 4 1/2 feet (1.4m), or if a long detachable power-supply cord or extension cord is used on short-cord models:
a. The marked electrical rating of the detachable power-supply cord or extension cord should be no less than the marked electrical rating of the product;
b. When the product is of the grounded type, the extension cord shall be a grounding type 3-wire cord.
c. The longer cord shall be arranged so that it does not drape over the counter-top or tabletop where it is capable of being tripped over, snagged, or pulled on unintentionally, especially by children.
Product Features


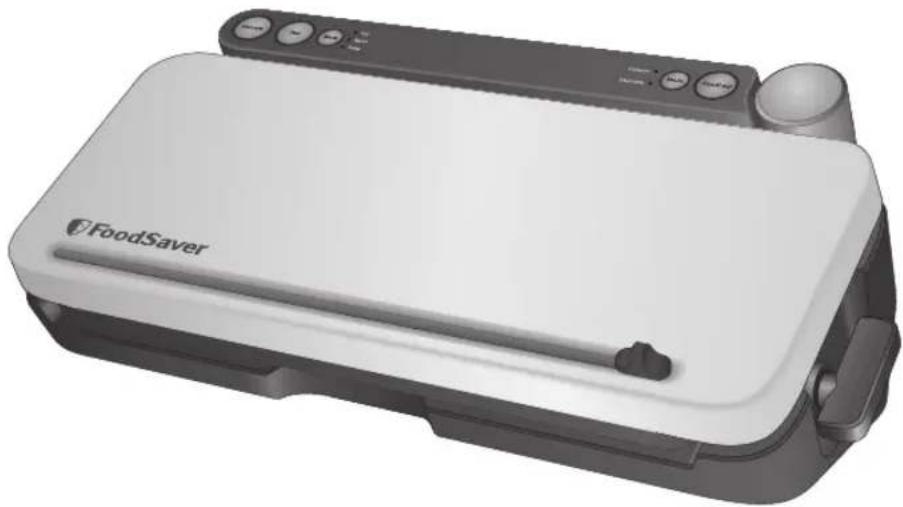
The user-friendly, intuitive control panel makes it easy for you to get the most out of your FoodSaver® System:
Heat Seal Controls
1. Vacuum Button
Press to vacuum seal food airtight. Appliance shuts off automatically.
2. Seal Button
This button as three uses:
i. Press button to create a seal when making bags using a FoodSaver ® Roll.
ii. Press to immediately stop vacuum process and begin sealing bag.
iii. Press to create a seal on film bags (such as a potato chip and cereal bags) to keep food sealed airtight.
3. Mode Button
Press Mode Button to select custom setting. Indicator light will illuminate next to the custom setting that is initiated.
3a. Dry
For optimal vacuuming and sealing of dry foods. This is the default setting.
3b. Moist
For optimal vacuuming and sealing of moist or juicy foods.
3c. Pulse (available on select models)
Press and hold to manually control the vacuum function. Press Seal Button when ready to seal bag.
3d. Sous Vide (available on select models)
For optimal vacuuming and sealing of bags to use in Sous Vide cooking.
Handheld Sealer Controls
4. Handheld Button
Press for use with FoodSaver ® accessories using Built-In Handheld Sealer.
5. Mode Button (available on select models)
Press Mode Button to select setting. Indicator light will illuminate next to the custom setting that is initiated.
5a. Vacuum
For use with FoodSaver ® Zipper Bags, Containers, Bottle Stoppers, and other accessories using built-in Handheld Sealer.
5b. Marinate ( available on select models)
For use with FoodSaver® Marinator Containers using built-in Handheld Sealer. Vacuum pulse sequence takes 12 minutes or less. It allows for optimum flavor infusion in less time. Appliance will vacuum and release three times.
6. Latch
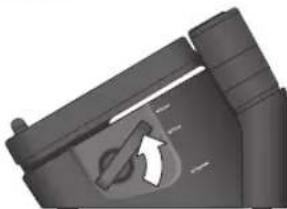
Operate - Adjust Down to put unit in Operate Mode. This turns unit on for vacuuming and sealing.
Store - Adjust Center to Store
Open - Adjust Up to Open
How to
1 Make a FoodSaver® Bag
-
Turn Latch to Open position A and open lid.
-
Place roll inside unit's internal storage space as indicated. Pull enough bag material to edge until it is on top of the sealing strip to make the first seal B and close lid.
-
Turn Latch to Operate position C.
-
Press Seal Button D to seal open end of bag. Wait until Seal Indicator Light turns off.
CAUTION: To reduce risk of burns, do not touch sealing strip while using appliance.


- Turn Latch to Open position E, open lid and pull enough bag material out to desired length for whatever you intend to vacuum seal F and close lid.
- Turn Latch to Operate position G.
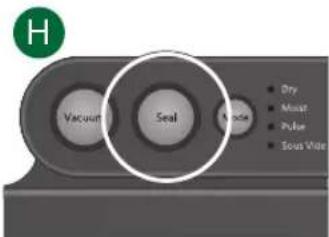
- Press Seal Button Ⓗ to make seal for next bag. While sealing, you can slide bag cutter across Ⓗ to remove bag.



How to
2 Vacuum Seal a FoodSaver® Bag
-
Turn Latch to Open position A and open lid.
-
Place item(s) in bag, allowing at least 3 inches (7.62 cm) of space between contents and open end of bag. Place open end of bag into Vacuum Channel (Drip Tray) B and close lid.
-
Turn Latch to Operate position C.
-
Press Vacuum Button D to begin vacuum and sealing process of open end of bag. Motor will continue to run until bag is fully vacuumed, then will automatically seal.
-
When Seal Indicator Light turns off, turn Latch to Open position A and open lid. Remove bag. Refrigerate, freeze or store as needed. (See FoodSaver® Guidelines, pg. 12 for safe food storage tips.)
CAUTION: To reduce risk of burns, do not touch sealing strip while using appliance.
IMPORTANT TIPS:
- Let appliance cool down for 20 seconds after each use. Always store appliance with Latch in center Store position.
- To minimize bag waste, do not insert too much bag material into Removable Drip Tray. Place bag just over edge of Removable Drip Tray.
A

B

C
D


3 Vacuum Seal with FoodSaver® Accessories
Your new FoodSaver® Appliance includes a Built-In Handheld Sealer for accessories.
For Zipper Bags & Containers:
- Turn Latch to Operate position and pull Handheld Sealer A from appliance.
- Place Built-in Handheld Sealer on zipper bag B or container C valve.
- Press Press Mode button (on select models) until the Indicator light next to Vacuum is illuminated. Then press Handheld button to vacuum. If no Mode button, press Handheld button to vacuum D.
For Canisters, Jar Sealers, & Bottle Stoppers
- Turn Latch to Operate position and pull Built-in Handheld Sealer A from appliance.
- Disassemble Handheld Sealer to remove clear bottom portion from top handle. Insert tip into port on accessory E.
- Press Mode button (on select models) until the Indicator light next to Vacuum is illuminated. Then press Handheld button to vacuum. If no Mode button, press Handheld button to vacuum D.
NOTE: FoodSaver ® Jar Sealers are for use with Ball ® and Kerr ® brand Mason jars only.
For Quick Marinators:
- Turn Latch to Operate position and pull Built-in Handheld Sealer A from appliance.
- Disassemble Handheld Sealer to remove clear bottom portion from top handle. Insert tip into port on Quick Marinator E.
- Press Mode button (on select models) until the Indicator light next to Marinate is illuminated. Then press Handheld button to marinate F.
Please refer to Quick Marinator instructions that come with accessory.


Customer Service: 1-877-777-8042
Care & Cleaning

of your Vacuum Sealer
To Clean Appliance:
CAUTION: Remove Power Cord from electrical outlet. Do not immerse in liquid.
Check Gaskets and around Drip Tray to make sure they are free from food materials. Wipe off Gasket with warm soapy cloth if needed Ⓐ. Upper and Lower Gaskets may be removed for cleaning. Clean with warm, soapy water and allow gaskets to dry before reinserting in machine.
The Removable Drip Tray makes cleanup easy when small amounts of liquids are pulled into Vacuum Channel during vacuum process.
Empty Drip Tray after each use. Wash in warm soapy water or place in top rack of dishwasher. Check for food residues in Drip Tray Slot. Clean if needed. Dry thoroughly before reinserting into appliance.
To Clean Built-in Handheld Sealer Reservoir:
Empty Reservoir after each use. To remove Reservoir from Handheld Sealer, holding top portion (black upper piece) firmly, pull Lower Reservoir down and off B. Wash in warm soapy water. Air dry before replacing.
NOTE: Always clean after each use when fluid is visible.

Lift Drip Tray out

Pull Reservoir off
Storage Guide

of your Vacuum Sealer
To Store Appliance:
Clean unit thoroughly as detailed in "Care & Cleaning" section.
After unit has been cleaned and allowed to fully dry, close lid and push Latch into Store (middle) position A. This setting will keep lid closed but prevents any undue pressure from being applied to internal sealing Gaskets of unit.
Always leave Latch in Store position when not in use. Never store Lid in Operate position as Gaskets may become compressed and unit will not vacuum bag.

Push Latch into Store position to store.
Guidelines
Vacuum Sealing and Food Safety
The vacuum sealing process extends the life of foods by removing most of the air from the sealed container, thereby reducing oxidation, which affects nutritional value, flavor and overall quality. Removing air can also inhibit growth of microorganisms, which can cause problems under certain conditions:
Mold – Easily identified by its fuzzy characteristic. Mold cannot grow in a low oxygen environment, therefore vacuum sealing can slow the growth of mold.
Yeast – Results in fermentation, which can be identified by smell and taste. Yeast needs water, sugar and a moderate temperature to grow. It can also survive with or without air. Slowing the growth of yeast requires refrigeration, while freezing stops it completely.
Bacteria – Results in an unpleasant odor, discoloration and/or soft or slimy texture. Under the right conditions, anaerobic bacteria such as Clostridium Botulinum (the organism that causes Botulism) can grow without air and sometimes cannot be detected by smell or taste. Although it is extremely rare, it can be very dangerous.
To preserve foods safely, it is critical that you maintain low temperatures. You can significantly reduce the growth of microorganisms at temperatures of 40° F ( 4° C) or below. Freezing at 0° F (-17°C) does not kill microorganisms, but stops them from growing. For long-term storage, always freeze perishable foods that have been vacuum sealed, and keep refrigerated after thawing.
It is important to note that vacuum sealing is NOT a substitute for canning and it cannot reverse the deterioration of foods. It can only slow down the changes in quality. It is difficult to predict how long foods will retain their top-quality flavor, appearance or texture because it depends on age and condition of the food on the day it was vacuum sealed.
IMPORTANT:
Vacuum sealing is NOT a substitute for refrigeration or freezing. Any perishable foods that require refrigeration must still be refrigerated or frozen after vacuum sealing.
Food Preparation & Reheating Tips

Thawing and Reheating Vacuum-Sealed Foods
Always thaw foods in either refrigerator or microwave — do not thaw perishable foods at room temperature.
To reheat foods in a microwave in a FoodSaver ® Bag, always cut corner of the bag before placing it on a microwave-safe dish. However, to avoid hot spots, do not reheat bone-in meat or greasy foods in microwave within a FoodSaver ® Bag. You can also reheat foods in FoodSaver ® Bags by placing them in water at a low simmer below 170°F (75°C).

Preparation Guidelines for Meat and Fish:
For best results, pre-freeze meat and fish for 1-2 hours before vacuum sealing in a FoodSaver® Bag. This helps retain the juice and shape, and guarantees a better seal.
If it's not possible to pre-freeze, place a folded paper towel between meat or fish and top of bag, but below seal area. Leave paper towel in bag to absorb excess moisture and juices during vacuum sealing process.
NOTE: Beef may appear darker after vacuum sealing due to the removal of oxygen. This is not an indication of spoilage.

Preparation Guidelines for Hard Cheeses:
To keep cheese fresh, vacuum seal it after each use. Make your FoodSaver® Bag extra long, allowing one inch (2.54 cm) of bag material for each time you plan to open and reseal in addition to the three inches (7.62 cm) room you normally leave between contents and seal. Simply cut sealed edge and remove cheese. When you're ready to reseal the cheese, just drop it in bag and reseal.
IMPORTANT:
Due to the risk of anaerobic bacteria, Soft cheeses should never be vacuum sealed.
Customer Service: 1-877-777-8042
Guidelines
Food Preparation & Reheating Tips

Preparation Guidelines for Vegetables:
Vegetables need to be blanched before vacuum sealing. This process stops the enzyme action that could lead to loss of flavor, color and texture.
To blanch vegetables, place them in boiling water or in the microwave until they are cooked, but still crisp. Blanching times range from 1 to 2 minutes for leafy greens and peas; 3 to 4 minutes for snap peas, sliced zucchini or broccoli; 5 minutes for carrots; and 7 to 11 minutes for corn on the cob. After blanching, immerse vegetables in cold water to stop the cooking process. Finally, dry vegetables on a towel before vacuum sealing.
NOTE: All vegetables (including broccoli, brussels sprouts, cabbage, cauliflower, kale, turnips) naturally emit gases during storage. Therefore, after blanching, they must be stored in freezer only.
When freezing vegetables, it is best to pre-freeze them for 1-2 hours or until solidly frozen. To freeze vegetables in individual servings, first place on a baking sheet and spread them out so they are not touching. This prevents them from freezing together in a block. Once they are frozen, remove from baking sheet and vacuum seal vegetables in a FoodSaver ® Bag. After they have been vacuum sealed, return them to the freezer.
IMPORTANT:
Due to the risk of anaerobic bacteria, Fresh mushrooms, onions and garlic should never be vacuum sealed.

Preparation Guidelines for Leafy Vegetables:
For best results, use a canister to store leafy vegetables. First wash the vegetables, and then dry with a towel or salad spinner. After they are dried, put them in a canister and vacuum seal as normal. Store in refrigerator.
Food Preparation & Reheating Tips

Preparation Guidelines for Fruits:
When freezing soft fruits or berries, it is best to pre-freeze them for 1-2 hours or until solidly frozen. To freeze fruit in individual servings, first place on a baking sheet and spread them out so they are not touching. This prevents them from freezing together in a block. Once they are frozen, remove from baking sheet and vacuum seal fruit in a FoodSaver® Bag. After they have been vacuum sealed, return them to the freezer.
You can vacuum seal portions for baking or in your favorite combinations for easy fruit salad all year round. If storing in the refrigerator, we recommend using a FoodSaver® Canister.

Preparation Guidelines for Baked Goods:
To vacuum seal soft or airy baked goods, we recommend using a FoodSaver® Canister so they will hold their shape. If using a bag, pre-freeze for 1-2 hours or until solidly frozen. To save time, make cookie dough, pie shells, whole pies, or mix dry ingredients in advance and vacuum seal for later use.

Preparation Guidelines for Coffee and Powdery Foods:
To prevent food particles from being drawn into vacuum pump, place a coffee filter or paper towel at top of bag or canister before vacuum sealing. You can also place the food in its original bag inside a FoodSaver® Bag, or use a FoodSaver® Universal Lid with the original container to vacuum seal.
Guidelines
Food Preparation & Reheating Tips

Preparation Guidelines for Liquids:
Before you vacuum seal liquids such as soup stock, pre-freeze in a casserole dish, loaf pan or ice cube tray until solid. Remove frozen liquid from pan and vacuum seal in a FoodSaver® Bag. You can stack these "frozen bricks" in your freezer. When you're ready to use, just cut corner of bag and place in a dish in microwave or drop into water at a low simmer, below 170°F (75°C).
To vacuum seal non-carbonated bottled liquids, you can use a FoodSaver® Bottle Stopper with the original container. Remember to leave at least one inch (2.54 cm) of room between contents and bottom of Bottle Stopper. You can reseal bottles after each use.

Preparation Guidelines for Make-ahead Meals, Leftovers and Sandwiches:
Efficiently store your make-ahead meals, leftovers and sandwiches in the stackable, lightweight FoodSaver® containers. They are microwaveable, top rack dishwasher safe and come with a custom adaptor. The lightweight containers will be ready to head off to the office, to school or the great outdoors whenever you are!

Preparation Guidelines for Snack Foods:
Your snack foods will maintain their freshness longer when you vacuum seal them. For best results, use a FoodSaver® Canister for crushable items like crackers.
Vacuum Sealing Non-Food Items
The FoodSaver® Vacuum Sealing System also protects non-food items from oxidation, corrosion and moisture. Simply follow directions to vacuum seal items using FoodSaver® Bags, Canisters and Accessories.

Silverware
To vacuum seal silver, wrap fork tines in soft cushioning material, such as a paper towel, to avoid puncturing bag, and seal as normal. Your silver will be clean, fresh and untarnished right when you need it for your next dinner gathering.

Camping
Your FoodSaver® Bags are ideal for outdoor excursions. For camping and hiking, keep your matches, maps and food dry and compact.

Water
To have fresh water for drinking, simply fill a FoodSaver® Bag with ice, seal it, and when needed, let the ice pack melt. You can trim the corner off the bag to make a spout for drinking or pouring.

Boating
If you're going sailing or boating, you can vacuum seal your food, extra batteries, memory cards, cash, identification cards, boating license and a dry change of clothes. Just remember to bring scissors or a knife to open the bags when you need them!

Emergency
To keep emergency kits safe and dry, vacuum seal flares, batteries, flashlights, matches, candles, first aid kits, extra food and other necessities. Your emergency items will stay dry and organized in your home, car, boat or RV.
Troubleshooting
Problem Solution
| Seal LED flashing | Unit is overheated. Always allow 20 seconds between seals. Under heavy usage, appliance will shut off automatically and Seal Light will flash. Wait for 20 min. for unit to cool off.Always wait 20 seconds between seals.Latch has been left in Operate position: Gaskets may be compressed. Turn Latch to Open or Store position and allow 10 to 20 minutes for Gaskets to expand.Vacuum pump running more than 120 seconds. Under heavy usage, appliance will shut off automatically and Seal Light will flash. See next section Vacuum Pump is running, but bag is not evacuating.Latch was left in On position for 5 minutes and not being used reminding user to turn Latch to Open or Store position. |
| Vacuum Pump is running, but bag is not evacuating | If making a bag from a roll, make sure one end of bag is sealed.See How to Make a Bag from a FoodSaver®Vacuum Sealing Roll.Adjust the bag and try again. Make sure the open end of the bag is down inside the Drip Tray.Check for wrinkles in bag along Sealing Strip. To prevent wrinkles in the seal, gently stretch bag flat while inserting bag into Drip Tray.Open unit and make sure Gaskets are inserted properly and there are no foreign objects, dirt or debris on the Upper or Lower Gasket (See Care and Cleaning on pg 10).Latch has been left in Operate position: Gaskets may be compressed. Turn Latch to Open or Store position and allow 10 to 20 minutes for Gaskets to expand.Make sure the lid is latched down all the way. If the Latch does not catch the lid and bring it down, there will be a leak between the Gaskets. |
| Gasket is loose or has a tear | Take out the gasket, clean it and re-insert the Gasket into the Gasket Channel (See Care and Cleaning on pg 10).If Gasket has minor damage remove, flip over and reinstall.Call 877-777-8042 or visit website for replacement. |
| Bag is not sealing properly | Too much liquid in bag, freeze before vacuuming.Check for food debris around seal area. If present, take out the gasket, clean it and re-insert the Gasket into the Vacuum Channel (See Care and Cleaning on pg 10).Bag has wrinkles: To prevent wrinkles in the seal, gently stretch bag flat while inserting bag into Gasket Channel. |
Problem Solution
| No lights on the control panel | Make sure unit is plugged in.Make sure wall outlet is functional.Make sure lid is all the way down, and the Latch is in the Operate position. |
| Nothing happens when Latch is closed and Button is pressed | Make sure unit is plugged in.Make sure wall outlet is functional.Open Latch, make sure lid is all the way down, re-latch lid. |
| Cannot insert bag into machine | Make sure there is enough bag material to reach center of drip tray. Always allow three inches (7.62 cm) extra space to allow the bag to seal tightly around food contents.Gently stretch bag flat while inserting. Insert bag curl down into Drip Tray. |
| Air was removed from the bag, but now air has re-entered | Examine the seal. A wrinkle along the seal may cause air to re-enter the bag. To prevent wrinkles in the seal, gently stretch bag flat while inserting bag into Drip Tray.Sometimes moisture or food material (such as juices, grease, crumbs, powders, etc.) along seal prevents bag from sealing properly. Cut bag open, wipe top inside of bag and re-seal.Sharp food items may have punctured bag. Use a new bag if there is a hole. Cover sharp food items with a soft cushioning material, such as a paper towel, and re-seal.Fermentation or the release of natural gases from inside the foods may have occurred. When this happens, food may have begun to spoil and should be discarded.Faulty bag. Bag could be punctured. Try another bag. |
| Bag melts | Sealing Strip may have become too hot. Always wait at least 20 seconds for appliance to cool down before you vacuum seal another item.Use FoodSaver® brand bags. Our FoodSaver® Bags and Rolls are specially designed for FoodSaver® units. |
| Container does not vacuum | The lid of the container must be correctly placed on and aligned to the container.Make sure you press the Handheld Button.Make sure lid is closed securely on all 4 sides.Make sure rubber gasket on inside of lid is free from food residues.Examine rim of container for cracks or scratches. Make sure container valve is clean. |
| If you need further assistance: | Call Consumer Services at 1-877-777-8042.For additional tips and answers to frequently asked questions, go to www.foodsaver.com and click the "Service & Support" tab. |
Customer Service: 1-877-777-8042
Replacement

Parts

Replacement parts are available for purchase on
FoodSaver.com or by calling 1-877-777-8042
Warranty

5 Year Limited Warranty
Sunbeam Products, Inc. warrants that for a period of five (5) years from the date of initial retail purchase, this product will be free from defects in material and workmanship, when used in accordance with the instructions provided.
Sunbeam, at its option, will repair or replace this product or any component of the product found to be defective during the warranty period.
Replacement will be made with a new or remanufactured product or component. If the product is no longer available, replacement may be made with a similar product of equal or greater value. This is your exclusive warranty. Do NOT attempt to repair or adjust any electrical or mechanical functions on this product. Doing so will void this warranty.
This warranty is valid for the original retail purchaser from the date of initial retail purchase and is not transferable. Keep the original sales receipt. Proof of purchase is required to obtain warranty performance. Sunbeam dealers, service centers, or retail stores selling Sunbeam products do not have the right to alter, modify or any way change the terms and conditions of this warranty.
This warranty does not cover normal wear of parts or damage resulting from any of the following: negligent use or misuse of the product, use on improper voltage or current, use contrary to the operating instructions, disassembly, repair or alteration by anyone other than Sunbeam or an authorized Sunbeam service center. Further, the warranty does not cover: Acts of God, such as fire, flood, hurricanes and tornadoes.
What are the limits on Sunbeam's Liability?
Sunbeam shall not be liable for any incidental or consequential damages caused by the breach of any express, implied or statutory warranty or condition. Except to the extent prohibited by applicable law, any implied warranty or condition of merchantability or fitness for a particular purpose is limited in duration to the duration of the above warranty. Sunbeam disclaims all other warranties, conditions or representations, express, implied, statutory or otherwise. Sunbeam shall not be liable for any damages of any kind resulting from the purchase, use or misuse of, or inability to use the product including incidental, special, consequential or similar damages or loss of profits, or for any breach of contract, fundamental or otherwise, or for any claim brought against purchaser by any other party. Some provinces, states or jurisdictions do not allow the exclusion or limitation of incidental or consequential damages or limitations on how long an implied warranty lasts, so the above limitations or exclusion may not apply to you. This warranty gives you specific legal rights, and you may also have other rights that vary from province to province, state to state or jurisdiction to jurisdiction.
How to Obtain Warranty Service
In the U.S.A.
If you have any question regarding this warranty or would like to obtain warranty service, please call 1.877.777.8042 and a convenient service center address will be provided to you.
In Canada
If you have any question regarding this warranty or would like to obtain warranty service, please call 1.877.804.5383 and a convenient service center address will be provided to you.
In the U.S.A., this warranty is offered by Sunbeam Products, Inc. located in Boca Raton, Florida 33431. In Canada, this warranty is offered by Newell Brands Canada ULC, located at 20 B Hereford Street, Brampton, Ontario L6Y 0M1. If you have any other problem or claim in connection with this product, please write our Consumer Service Department.
PLEASE DO NOT RETURN THIS PRODUCT TO ANY OF THESE ADDRESSES OR TO THE PLACE OF PURCHASE.

FoodSaver®
THE #1 VACUUM SEALING SYSTEM
Registering your appliance is quick and easy at www.foodsaver.com/register.
For important safety information and helpful tips, please visit us at www.foodsaver.com to get tips on vacuum sealing and order FoodSaver® brand accessories, bags and rolls, or call 1-877-777-8042 (U.S.).

For more information, watch our "How To" videos on our Youtube channel.
www.youtube.com/foodsaver
©2019 Sunbeam Products, Inc. All rights reserved. Distributed by Sunbeam Products, Inc. Boca Raton, Florida 33431.
Printed in China.
GCDS-FSV-SL
P.N. PKG0001019859


- IMPORTANT SAFEGUARDS
- PRODUCT FEATURES
- HOW TO
- CARE & CLEANING
- STORAGE GUIDE
- GUIDELINES
- TROUBLESHOOTING
- REPLACEMENT PARTS
- WARRANTY
- SAVE THESE INSTRUCTIONS
- NORTH AMERICAN MODELS WITH POLARIZED PLUGS
- POWER CORD INSTRUCTIONS
- THE USER-FRIENDLY, INTUITIVE CONTROL PANEL MAKES IT EASY FOR YOU TO GET THE MOST OUT OF YOUR FOODSAVER® SYSTEM
- HEAT SEAL CONTROLS
- VACUUM BUTTON
- SEAL BUTTON
- MODE BUTTON
- HANDHELD SEALER CONTROLS
- HANDHELD BUTTON
- MODE BUTTON (AVAILABLE ON SELECT MODELS)
- 5A. VACUUM
- 5B. MARINATE ( AVAILABLE ON SELECT MODELS)
- LATCH
- 1 MAKE A FOODSAVER® BAG
- 2 VACUUM SEAL A FOODSAVER® BAG
- IMPORTANT TIPS
- 3 VACUUM SEAL WITH FOODSAVER® ACCESSORIES
- FOR ZIPPER BAGS & CONTAINERS
- FOR CANISTERS, JAR SEALERS, & BOTTLE STOPPERS
- FOR QUICK MARINATORS
- TO CLEAN APPLIANCE
- TO CLEAN BUILT-IN HANDHELD SEALER RESERVOIR
- TO STORE APPLIANCE
- IMPORTANT
- FOOD PREPARATION & REHEATING TIPS
- THAWING AND REHEATING VACUUM-SEALED FOODS
- PREPARATION GUIDELINES FOR MEAT AND FISH
- PREPARATION GUIDELINES FOR HARD CHEESES
- PREPARATION GUIDELINES FOR VEGETABLES
- PREPARATION GUIDELINES FOR LEAFY VEGETABLES
- PREPARATION GUIDELINES FOR FRUITS
- PREPARATION GUIDELINES FOR BAKED GOODS
- PREPARATION GUIDELINES FOR COFFEE AND POWDERY FOODS
- PREPARATION GUIDELINES FOR LIQUIDS
- PREPARATION GUIDELINES FOR MAKE-AHEAD MEALS, LEFTOVERS AND SANDWICHES
- PREPARATION GUIDELINES FOR SNACK FOODS
- VACUUM SEALING NON-FOOD ITEMS
- SILVERWARE
- CAMPING
- WATER
- BOATING
- EMERGENCY
- REPLACEMENT
- 5 YEAR LIMITED WARRANTY
- WHAT ARE THE LIMITS ON SUNBEAM'S LIABILITY
- HOW TO OBTAIN WARRANTY SERVICE
- IN THE U.S.A
- IN CANADA
- FOODSAVER®
Brand : FOODSAVER
Model : VS3182
Category : Vacuum packaging machines