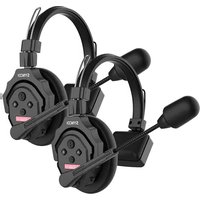
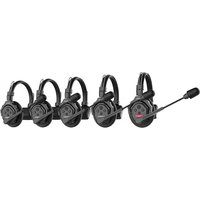
X-Talk X2 - Headphones Synco - Free user manual and instructions
Find the device manual for free X-Talk X2 Synco in PDF.


| Product Type | Two-Way Radio (Walkie-Talkie) |
| Brand | Synco |
| Model | X-Talk X2 |
| Frequency Band | UHF 400-470 MHz |
| Number of Channels | 16 |
| Maximum Range | Up to 5 km (open area) |
| RF Power Output | 2 Watts |
| Battery Type | Li-Ion Rechargeable |
| Battery Capacity | 1500 mAh |
| Charging Time | Approx. 4-5 hours |
| Dimensions (H x W x D) | 120 x 55 x 35 mm |
| Weight (with battery) | 180 g |
| Waterproof Rating | IP54 (splash resistant) |
| Display | Backlit LCD |
| Key Features | VOX, Channel Scan, Keypad Lock, Low Battery Alert |
| Included Accessories | Charger, Belt Clip, User Manual |
| Certifications | CE, FCC |
| Warranty | 1 Year |
Frequently Asked Questions - X-Talk X2 Synco
User questions about X-Talk X2 Synco
0 question about this device. Answer the ones you know or ask your own.
Ask a new question about this device
Download the instructions for your Headphones in PDF format for free! Find your manual X-Talk X2 - Synco and take your electronic device back in hand. On this page are published all the documents necessary for the use of your device. X-Talk X2 by Synco.
USER MANUAL X-Talk X2 Synco
Xtalk
Full Duplex Wireless Intercom Headset System
User Manual
Thank you for choosing SYNCO product. Please read this manual carefully before use and follow all instructions mentioned herein.
Contents
P 01 // Product Introduction
P 01 // Button Function
P 03 // Operations
P 03 // 1. Power On/Off
P 04 // 2. Master/Remote/Level 1/Level 2 Settings
P 05 // 3. Pairing/Unpairing
P 08 // 4. Group Management
P 10 // 5. Volume Settings
P 10 // 6. Noise Cancellation
P 10 // 7. Mute/Unmute
P 10 // 8. Dominant Mode
P 11 // 9. Boost Mode
P 11 // 10. Real-Time Monitoring
P 11 // 11. Powering
P 12 // 12. Indicator Light Status
P 12 // 13. Firmware Update
P 13 // Specifications
P 14 // Packing List
P 16 // Care Guide
P 16 // Warranty
Product Introduction
① 3.5mm Mic In Port
② Power On/Off Toggle
③ Indicator Light
④ Button A
⑤ Volume + & Headset Settings Verification button
⑥ Button B
⑦ Volume —
⑧ Type-C Port

Button Function
Note: The operations may vary depending on the firmware version. Please follow the instructions below to check the current firmware version.

Move the boom arm up/down:
Play the voice prompt → Previous firmware
No voice prompt → New firmware
Button A
![graph TD A["Previous firmware"] --> B["Pairing/Unpairing"] A --> C["Set as the Master/Remote"] D["New firmware"] --> E["Pairing/Unpairing"] D --> F["Set as the Master/Level 1/Level 2"]](/content/2026/07/1436461/images/1df18e57768520db961d33ca9f86bf606e4154f6cbbd90acc825e85c0004b9e5.jpg)
Button B
![graph TD A["Noise Cancellation on/off"] --> B["Turn on the Dominant Mode(Only For Master)"] B --> C["Pair with nearby Level 1(Only For Level 2)"]](/content/2026/07/1436461/images/f9f07d1ea9369a5e30e9a3e2a6609745d70d5744d6dd926bedd9f620a4ba5011.jpg)
Volume +
![graph TD A["Device Icon"] --> B["Volume Up"] A --> C["Indicate whether the headset is Master, Remote, Level 1, or Level 2"]](/content/2026/07/1436461/images/844a750d627a92b89cc7dc0791a390395d53bbe92c9e33fc1ae10a1c937b778c.jpg)
Volume —
![graph TD A["Device with +, -, -"] --> B["Volume Down"] A --> C["Switch among Boost Mode 1/2/3(Only For Master With New Firmware)"]](/content/2026/07/1436461/images/fe01d9a0708c3d0bd02016ff0a16c80ed62ba239c441e51f2224377a8c8ee9ac.jpg)
Operations
1. Power On/ Off
Power On: Push the power toggle switch upwards to turn it on.
Power Off: Push the power toggle switch downwards to turn it off.
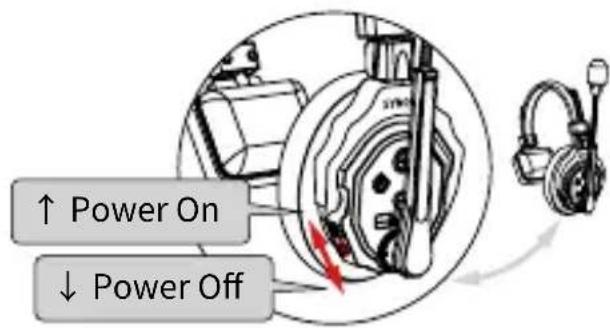
*Products are pre-paired from the factory (except X1) and ready to use.
*To ensure a successful auto-reconnect, please turn on the headsets in the sequence of Master → Level 1 → Level 2.
![graph LR A["Turn on the Master\n(The red-labeled headset is set as the default Master from the factory)"] --> B["Turn on the Level 1\n(The blue-labeled headset with LV.1 sticker is set as the default Level 1 from the factory)"] B --> C["Turn on the Level 2\n(The blue-labeled headset with LV.2 sticke…](/content/2026/07/1436461/images/f8d0d46f30485b917143645138d022ef66da5dad87c1b760e2a907eb83d2efa0.jpg)
*If no LV.1/LV.2 sticker, please turn on all headsets and check its settings:
- Turn it on and long press Volume+, release after the 1st "Beep" sound, and hear "Master Mode/Level 1Pairing/Level 2 Pairing" to check its settings
- Mark it with the sticker and turn it off.
![graph LR A["Level 1"] --> B["Level 2"] B --> C["Level 3"]](/content/2026/07/1436461/images/4ee52ee9af4a71806f64417d0b51bd2bfeb640ad38398db753684442961fc7b5.jpg)
- Turn on the headsets in the sequence of Master → Level 1 → Level 2.
2. Master/Remote/Level 1/Level 2 Settings
All headsets can be set as:
Previous firmware: Master/Remote
New firmware: Master/Level 1/Level 2
Set as Master:
Long press the button A, release after the 2nd "Beep" sound and hear "Master Mode".
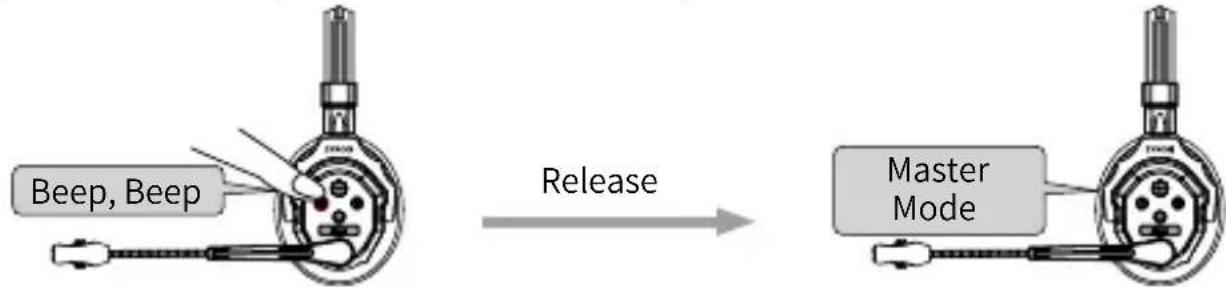
Set as Remote (Previous firmware):
Long press the button A, release after the 2nd "Beep" sound and hear "Exit Master Mode".
![graph LR A["Beep, Beep"] --> B["Release"] B --> C["Exit Master Mode"]](/content/2026/07/1436461/images/beb69784d9dbb93fe1c370b8d6e3b7ecb6d86f21612fb25ef8108b83d52255e6.jpg)
Set as Level 1 (New firmware):
Long press the button A, release after the 3rd "Beep" sound and hear "Level 1 Pairing".
![graph LR A["Beep, Beep, Beep"] --> B["Release"] B --> C["Level 1 Pairing"]](/content/2026/07/1436461/images/c6036f8a45a2ec335d6cd594077aeb68685a1af785cdd2ef31d651930b5255c3.jpg)
Set as Level 2 (New firmware):
Long press the button A, release after the 4th "Beep" sound and hear "Level 2 Pairing".
![graph LR A["Beep, Beep, Beep"] --> B["Release"] B --> C["Level 2 Pairing"]](/content/2026/07/1436461/images/f8ffe81f3fc0b3bb08706511bba6d659317cf8d1245ddec9c693c6ea34fd40c8.jpg)
3. Pairing/Unpairing
*Ensure all headsets have the same firmware, or the pairing will not be successful.
*The previous firmware supports group communication with up to 5 people, while the new firmware supports group connections with up to 13 people.
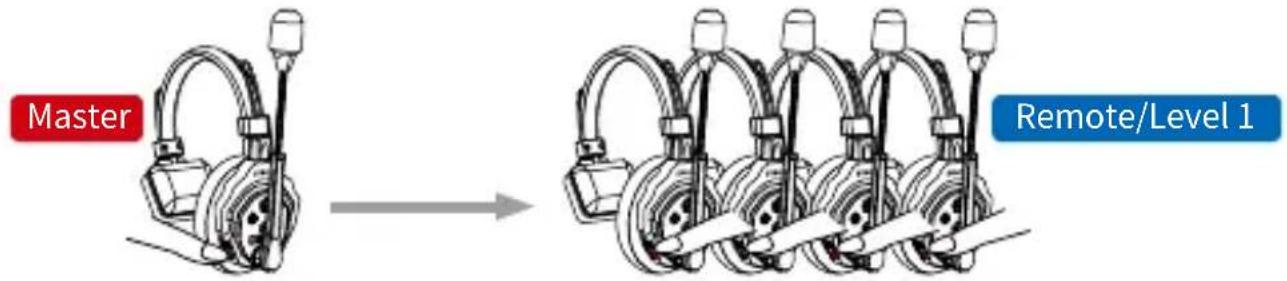
3.1 If Pair 5 headsets
1) Set a Master and 1\~4 Remote/Level 1.
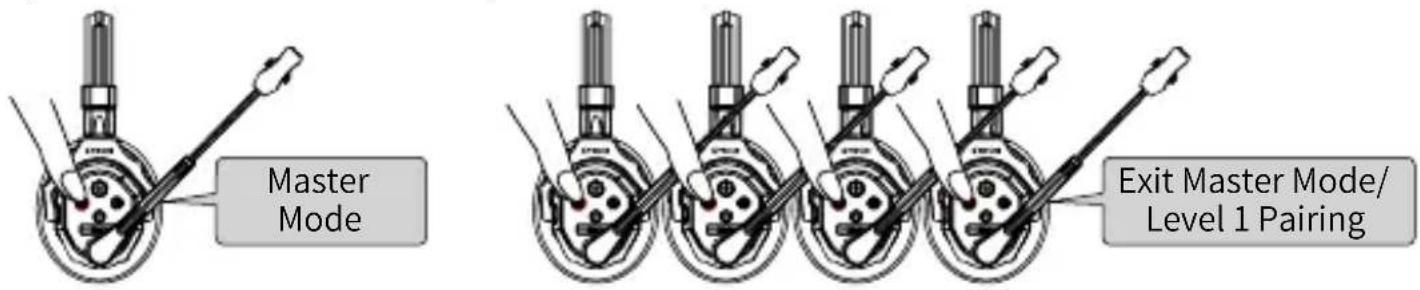
2) Long press the button A on all headsets in 1 min, release after the 1st “Beep” sound, and hear "Connecting and Pairing".
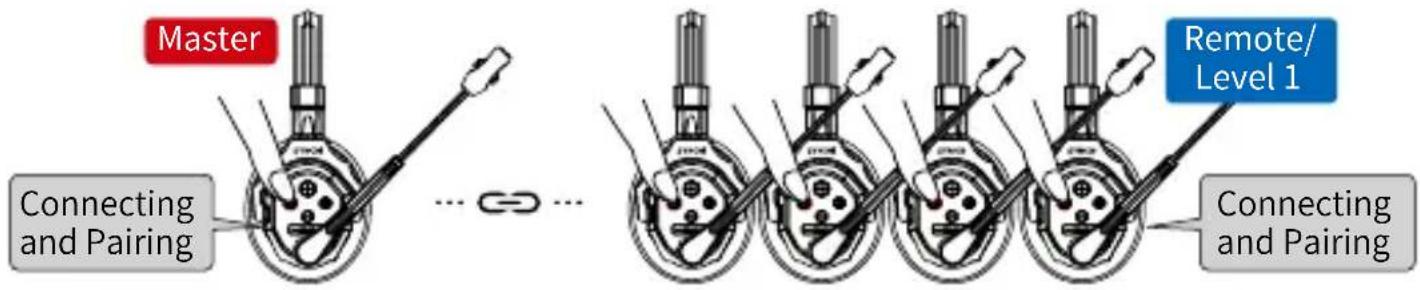
![graph TD A["Remote/Level 1 Re"] --> C["Master"] B["Remote/Level 1 Re"] --> C["Master"] C --> D["Blue Terminal"] C --> E["Blue Terminal"]](/content/2026/07/1436461/images/8e1e39cc04ea50b1761407c9cf0e704a740f6e912c37cf2d9c3a8afb2dc562b6.jpg)
3) Restart all headsets to use.
3.2 If Pair 6\~13 headsets
1) Set a Master, 4 Level 1 and 1\~8 Level 2.
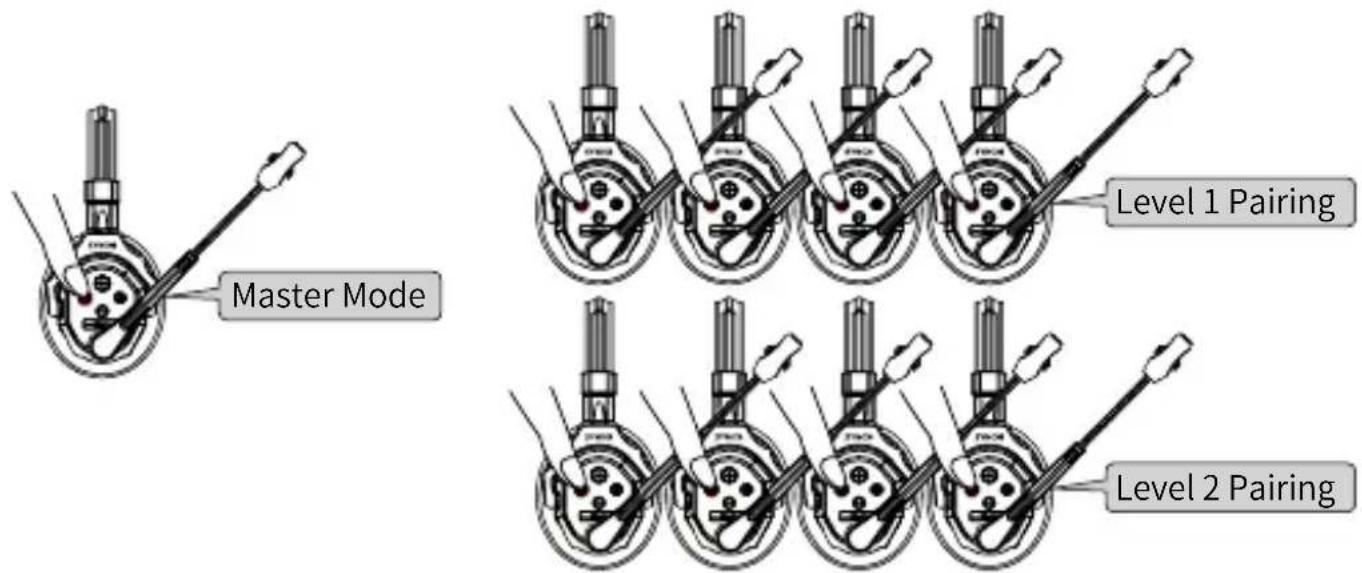
2) Long press the button A on Master and 4 Level 1 in 1 min, release after the 1st “Beep” sound, and hear "Connecting and Pairing".

![graph TD A["Level 1 Level"] --> C["Master"] B["Level 1 Level"] --> C["Master"] C --> D["Output Node 1"] C --> E["Output Node 2"]](/content/2026/07/1436461/images/83d4675b4927c0856d5765e82c842f21612e7e27c32f54b8e3a9e4652e138ed5.jpg)
3) After finishing pairing then restart the Master and 4 Level 1, long press the button A on Level 1 and level 2 in 1 min, release after the 1st “Beep” sound, and hear "Connecting and Pairing".

![graph LR A["Level 2"] --> B["Level 1 L"] C["Level 2"] --> B D["Level 2"] --> E["Level 1 L"] F["Level 2"] --> E B --> G["Master"] E --> G G --> H["Level 2"] G --> I["Level 2"] G --> J["Level 2"]](/content/2026/07/1436461/images/b51cbb31017da9c1ad00dc818332f0a5b5cb0405c75aa142568ef4472ddbbf56.jpg)
* A Master can connect up to 4 Level 1, and a Level 1 can connect up to 2 Level 2.
* The Level 2 must be paired with the Level 1 before it can connect to the Master. They cannot directly pair for communication.
4) Restart all headsets to use.(Turn them on in the sequence of Master → Level 1 → Level 2.)
![graph LR A["Engine cylinder with multiple actuators"] --> B["Intermediate cylinder with multi-pulley actuators"] B --> C["Final cylinder with multi-pulley actuators"]](/content/2026/07/1436461/images/5a702da6ee9ecfe98fcd44cc1430a3ab7d3b308bb560461a09f1e5801ff1b9e5.jpg)
* If disconnected, please return to the pairing range with the upper-level headset for automatic reconnection.
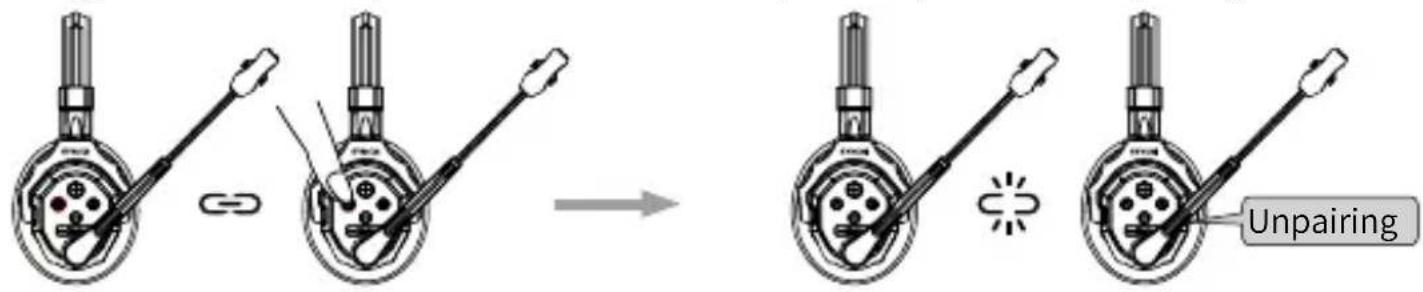
3.3 Unpairing
Long press the button A, release after the 1st "Beep" sound, and hear "Unpairing".
4. Group Management
You can divide an Xtalk system into independent groups or merge multiple groups into one single group.
4.1 Divide Into Groups
1) Set the required number of Master based on the planned group count (see 2. Master Settings).
2) Set the Remote/Level 1/Level 2 for each group (see 2. Remote/Level 1/Level 2 Settings).
3) Pair and restart each group one by one (see 3. Pairing/Unpairing).
EG. Divide X9 into 2 groups: 2-Person Group & 7-Person Group
1) Set 2 Masters, 5 Level 1, and 2 Level 2.
2) Pairing (* Please pair and restart each group before pairing the next.).
2-Person Group:
Long press the button A on a Master and a Level 1, release after the 1st "Beep" sound and hear "Connecting and Pairing", then restart the headsets. (Power On Sequence: Master → Level 1)
7-Person Group:
1) Pair the Master and Level 1: Long press button A on Master and Level 1, release after the first "Beep" sound and hear "Connecting and Pairing", then restart the headsets.
2) After finishing pairing then restarting the Master with Level 1, pair Level 1 with Level 2: Long press the button A on Level 1 and Level 2, release after the first "Beep" sound, and hear "Connecting and Pairing", then restart all headsets. (Power On Sequence: Master → Level 1 → Level 2)
![graph TD A["X9"] --> B["2-Person Group 7-Person Group"] B --> C["Master"] B --> D["Level 1"] B --> E["Level 2"] B --> F["..."] B --> G["..."]](/content/2026/07/1436461/images/a9e6c04d4703046941300efe445d4ac4b7cc64e11f8263da60af8facd3be1792.jpg)
4.2 ComBeepne Into One Group
1) Only keep one Master, and set the other headsets as Level 1 and Level 2 if needed. (See 2. Master/Remote/Level 1/Level 2 Settings).
2) Pair all headsets and restart (see 3. Pairing/Unpairing).
EG. ComBeepne 2 groups(A 2-Person Group and A 9 Person Group) into 1 group
1) Keep 1 Master, set 4 Level 1 and 6 Level 2 (See 2. Master/Remote/Level 1/Level 2 Settings).
2) Pair headsets in sequence: Pair Master with Level 1, then pair Level 1 with Level 2 (See 3. Pairing/Unpairing).
3) Restart all headsets after successfully connecting (Power on sequence: Master → Level 1 → Level 2).
![graph TD A["Top Entity"] --> B["Level 1"] A --> C["Level 2"] B --> D["Level 1"] B --> E["Level 2"] C --> F["Level 1"] C --> G["Level 2"] D --> H["..."] E --> I["..."] F --> J["..."] K["Master"] --> L["Level 1"] K --> M["Level 2"] N["2-Person Group9-Person Group"] --> O["Level 1"] N --> P["Level 2"]](/content/2026/07/1436461/images/0635f29a4969a0908b80dc95f145e189af27ac0b524130bd7357f4092f55f2af.jpg)
![graph TD A["11-Person Group"] --> B["Master"] A --> C["Level 1"] A --> D["Level 2"] C --> E["Child icon 1"] C --> F["Child icon 2"] C --> G["Child icon 3"] C --> H["Child icon 4"] C --> I["Child icon 5"] C --> J["Child icon 6"] C --> K["Child icon 7"] C --> L["Child icon 8"] C --> M["Child icon 9"]…](/content/2026/07/1436461/images/09f26d6c4df4dd7718b07204d61448b52f288881d8c6dcb3a7abb86fdd64ca08.jpg)
5. Volume Settings
Short press the volume up/down button to increase/decrease the volume.
6. Noise Cancellation
Short press the B button to turn on/off the noise cancellation feature.
7. Mute/Unmute
Rotate the boom arm up/down (see the picture below) to mute/unmute.
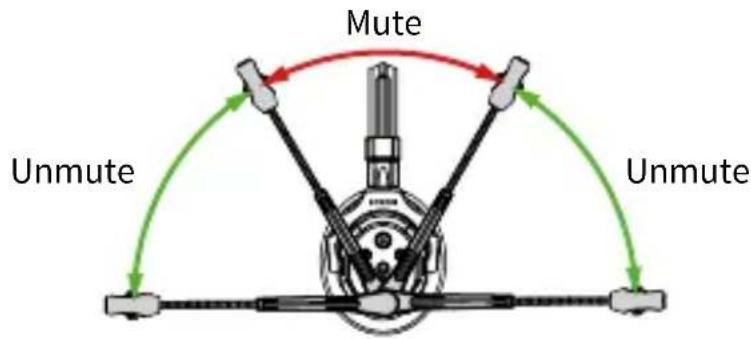
8. Dominant Mode
Press and hold the button B of Master to enter the dominant mode for muting other headsets. Other headsets are still available for listening and only the Master is available for speaking. Release the button B to exit dominant mode.
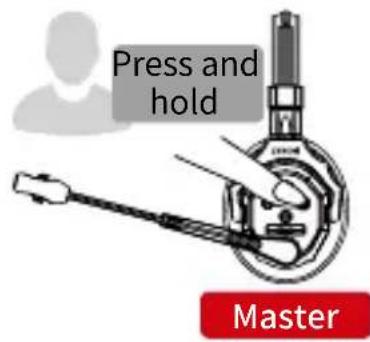

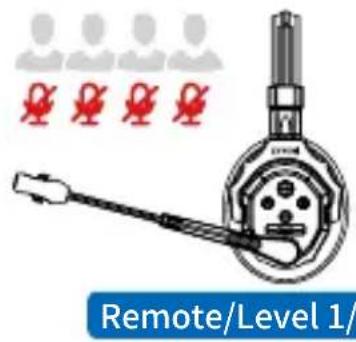
Remote/Level 1/Level 2
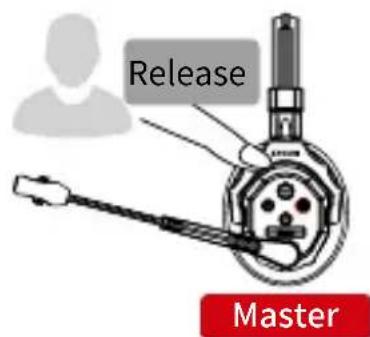

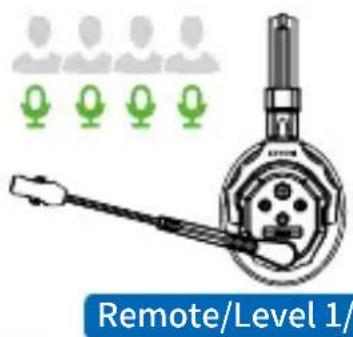
Remote/Level 1/Level 2
9. Boost Mode
When poor signal, switch the Boost Mode to amplify the signal, improving communication clarity and staBeeplity, and reducing interruptions and disconnections.
Long press the volume-, release after the 1st "Beep" sound to switch the mode and hear "Mode 1/Mode 2/Mode 3".
*The operation is only available by Master.
* Mode 1 by default.
*After changing the Mode, if Level 1/Level 2 is restarted, please pair it with the upper-level headset again to rejoin the communication group.

10. Real-Time Monitoring
Connect the device(Camera, Camcorder, etc.) with the Xtalk headset via 3.5mm TRS port for monitoring the audio from the device.
*This port is only for monitoring and is not the outputting port.
![graph TD A["Video Camera"] --> B["Phone Icon"] C["Headphones"] --> D{Check} D -->|✓| E["Auto Red Valve"] D -->|×| F["Auto Red Valve"] E --> G["Car Top"] F --> H["Car Bottom"]](/content/2026/07/1436461/images/f94484cbd9b187b95c7a3e97e20b5cca9bd68520909aad8d859cc260a3e75d48.jpg)
11. Powering
Via Replaceable Battery Power
Push down the toggle of the battery case then pull the case door outward to place/remove the battery.

12. Indicator Light Status
| Green Light Steady | Connection Successful |
| Green Light Flashing Slow | Not Connected |
| Green/Yellow Lights Alternating | Noise Cancellation Off |
| Red Light Flashing Slow | Low Battery |
| Red Light Steady | Charging |
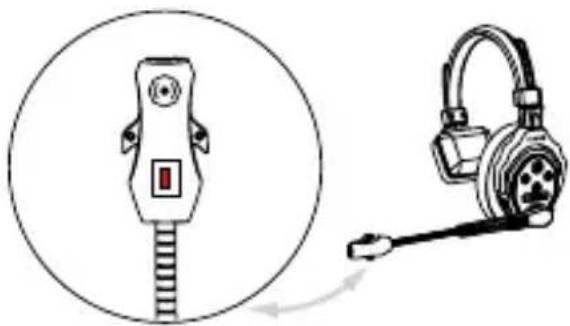
13. Firmware Update
- Connect the Xtalk headset to the PC using a USB C data cable and power on the Xtalk.
- Long press Volume+ and Volume- for 10s until you hear the “BeepBeep” sound twice.
- Release Volume+, then Volume-. Click “Next” within 3s and wait for the "Firmware updated successfully!" message.
*Can only be performed on Windows system.
*Use a USB C cable that supports data transfer.
*If the popup disappears quickly, try reversing the Type-C connector on the headset end and repeat Step 2 and Step 3.
*All headsets, not just the Master, need to be upgraded.
Download firmware upgrade and more info:
https://www.syncoaudio.com/pages/synco-xtalk-firmware-update


Specifications
| Wireless Technology | Digital 2.4GHz |
| Transmission Mode | Full-Duplex |
| Operating Range | 350m (LOS) |
| Frequency Band | 2.4GHz |
| Latency | About 120ms |
| Approximate RF Sensitivity | <-90dBm |
| Radio Output Frequency | 20dBm |
| Power | USB-C 5V |
| Battery Capacity | 1050mAh Li-ion Battery |
| Working Time | 24H |
| Charging Time | About 2.5H |
| Frequency Response | 150Hz~7KHz |
| Signal-To-Noise Ratio | ≥65dB |
| Distortion | <1 % |
| Microphone Type | Condenser Microphone |
| Max Input Sound Pressure Level | >115dBSPL |
| Output Sound Pressure Level | Typical 98+3dBSPL(at 94dBSPL 1KHz) |
| Weight | About 188g (Battery Included) |
| Temperature Range | "0~+45°C(Working Status)-20~+60°C(Storage Condition)" |
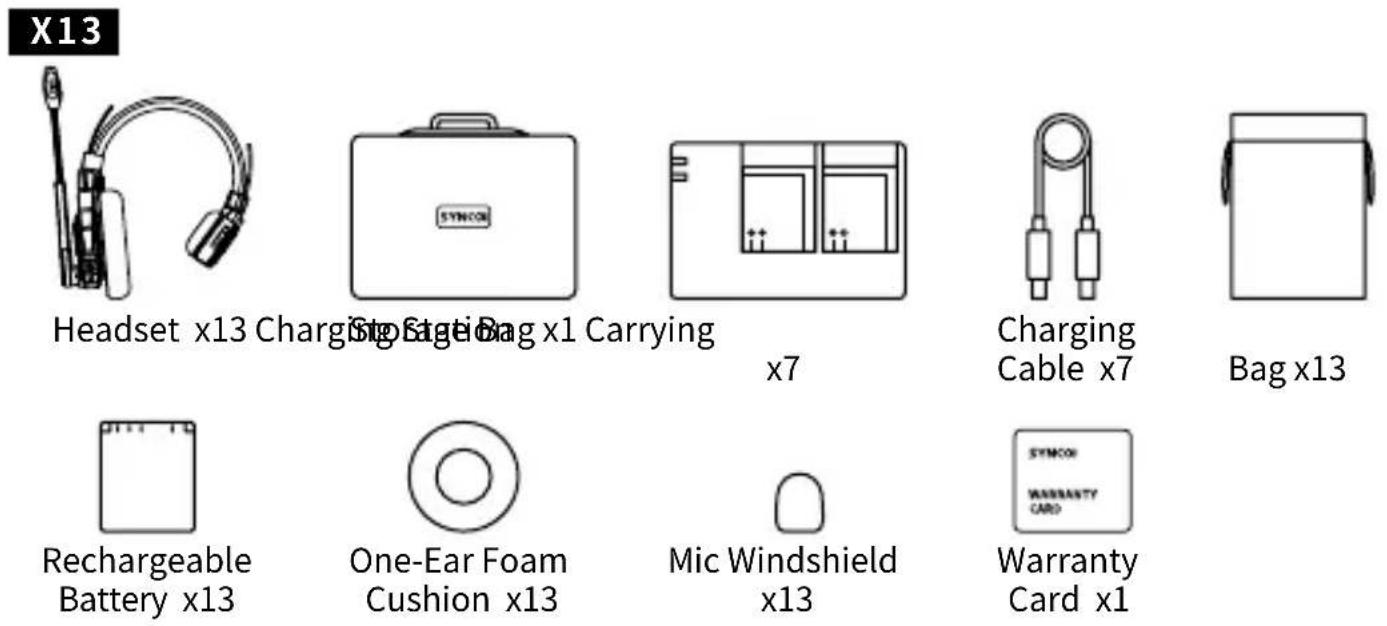
Packing List
X1
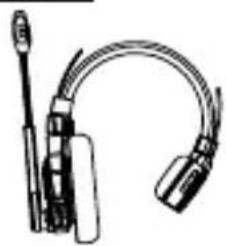
Headset x1

Charging Cable
x1

Carrying Bagx1

Rechargeable Battery x1

One-Ear Foam
Cushion x1

Mic Windshield
x1
Warranty
Card x1
X2
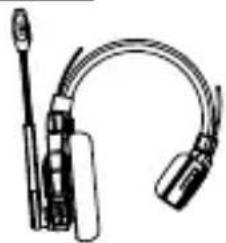
Headset x2
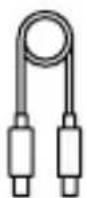
Charging Cable
x1

Carrying Bag
x2

Charging Station x1

One-Ear Foam Cushion x2

Mic Windshield
x2

Rechargeable Battery x2

Warranty Card
x1
X5


x3
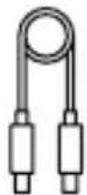
Charging Cable x3

Bag x5
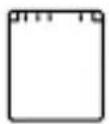
Rechargeable Battery x5

One-Ear Foam Cushion x5

Mic Windshield
x5

Warranty Card x1
X9
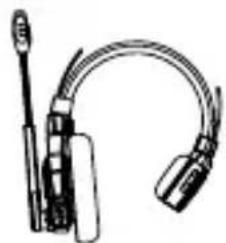


x5
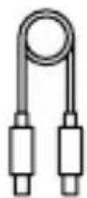
Charging Cable x5

Bag x9

Rechargeable Battery x9

One-Ear Foam Cushion x9

Mic Windshield
x9
Warranty Card x1
Caring For Your SYNCO Product
• Caring For Your SYNCO Product
- Please keep the product in a dry, clean, dust-free environment.
- Keep corrosive chemicals, liquids, and heat sources away from the product to prevent mechanical damage.
- Use only a soft and dry cloth for cleaning the product.
- Malfunction may be caused by dropping, the impact of external force.
- Do not attempt to disassemble the product. Doing so voids the warranty.
- Please have the product checked or repaired by authorized technicians if any malfunctions happen.
- Failure to follow all the instructions may result in mechanical damage.
- Warranty does not apply to human errors.
WARRANTY
Warranty Period
Thank you for purchasing SYNCO products.
- Customers are entitled to free replacement or repair service in case of quality defect(s) found in the product under normal use within 30 days upon receipt of the product.
- Original SYNCO products are entitled to 12-month limited warranty service. The warranty period begins on the date of purchase of brand new, unused products by the first end-user.
Within the warranty period, if product defect or failure is attributable to material defection or technological problem, the defective product or defective part will be repaired or replaced without charge (service and materials fee).
Warranty Exclusions and Limitations
- Faults resulted from inappropriate use of a product without following its operation specification
- Artificial damage, e.g. crash, squeeze, scratch, or soaking
- Modifications to a product by its user or a third party without prior written consent of SYNCO, e.g. replacement of element or circuit, label alteration
- The code on product is inconsistent with that of warranty certificate, or the code on the product or warranty certificate is altered or torn off
- All consumable accessory attached to a product, like cable, wind muff, battery
- Faults as a result of force majeure, such as fire, flood, lightning, etc.
Warranty Claim Procedure
- If failure or any problem occurs to your product after purchase, please contact a local agent for assistance, or you can always contact SYNCO's customer service through email at support@syncoaudio.com.
- Please retain your sales receipt and warranty certificate as proof of purchase. If any of these documents is missing, only sales return or chargeable service will be provided.
- If the SYNCO product is out of the warranty coverage, the service and the parts cost will be charged.
Guangzhou Zhiying Technology Co., Ltd
Room 2401, 24 / F, South Tower, Lisheng Plaza, No. 68 Huadi Avenue, Liwan District, Guangzhou, China, 510000
support@syncoaudio.com
www.syncoaudio.com
https://www.facebook.com/syncomicrophones

- XTALK
- FULL DUPLEX WIRELESS INTERCOM HEADSET SYSTEM
- CONTENTS
- PRODUCT INTRODUCTION
- BUTTON FUNCTION
- BUTTON A
- OPERATIONS
- POWER ON/ OFF
- MASTER/REMOTE/LEVEL 1/LEVEL 2 SETTINGS
- ALL HEADSETS CAN BE SET AS
- SET AS MASTER
- SET AS REMOTE (PREVIOUS FIRMWARE)
- SET AS LEVEL 1 (NEW FIRMWARE)
- SET AS LEVEL 2 (NEW FIRMWARE)
- PAIRING/UNPAIRING
- 3.1 IF PAIR 5 HEADSETS
- 3.2 IF PAIR 6\~13 HEADSETS
- 3.3 UNPAIRING
- GROUP MANAGEMENT
- 4.1 DIVIDE INTO GROUPS
- EG. DIVIDE X9 INTO 2 GROUPS: 2-PERSON GROUP & 7-PERSON GROUP
- 2-PERSON GROUP
- 7-PERSON GROUP
- 4.2 COMBEEPNE INTO ONE GROUP
- EG. COMBEEPNE 2 GROUPS(A 2-PERSON GROUP AND A 9 PERSON GROUP) INTO 1 GROUP
- VOLUME SETTINGS
- NOISE CANCELLATION
- MUTE/UNMUTE
- DOMINANT MODE
- BOOST MODE
- REAL-TIME MONITORING
- POWERING
- INDICATOR LIGHT STATUS
- FIRMWARE UPDATE
- PACKING LIST
- CARING FOR YOUR SYNCO PRODUCT
- WARRANTY
- WARRANTY PERIOD
- WARRANTY EXCLUSIONS AND LIMITATIONS
- WARRANTY CLAIM PROCEDURE
- GUANGZHOU ZHIYING TECHNOLOGY CO., LTD
Brand : Synco
Model : X-Talk X2
Category : Headphones