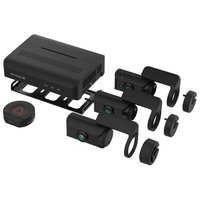
DR770X-BOX - Dash cam BlackVue - Free user manual and instructions
Find the device manual for free DR770X-BOX BlackVue in PDF.


| Product Type | Dash Cam |
| Model | DR770X-BOX |
| Brand | BlackVue |
| Dimensions (Main Unit) | Approx. 58.9 x 36.3 x 63.0 mm (excluding lens) |
| Weight (Main Unit) | Approx. 48 g |
| Power Supply | 12V DC (cigarette lighter adapter or hardwiring kit) |
| Main Features | 4K UHD recording, Sony STARVIS sensor, Wi-Fi, GPS, Cloud connectivity, parking mode |
| Recording Resolution | Front: 3840x2160p at 30fps; Rear (optional): 1920x1080p |
| Memory Card | microSD (up to 128GB, Class 10 or UHS-I) |
| Connectivity | Wi-Fi 802.11 b/g/n, GPS/GLONASS, LTE (via optional module) |
| Maintenance & Cleaning | Wipe with a dry soft cloth; clean lens with lens tissue; format microSD regularly |
| Safety Precautions | Do not install where it obstructs driver's view; avoid direct sunlight; use only supplied accessories |
| Spare Parts & Repairability | Replacement suction mount, adhesive mount, power cable; contact BlackVue support for repairs |
| General Information | Manufacturer: BlackVue (Pittasoft); Designed in South Korea; Warranty: 2 years |
Frequently Asked Questions - DR770X-BOX BlackVue
User questions about DR770X-BOX BlackVue
0 question about this device. Answer the ones you know or ask your own.
Ask a new question about this device
Download the instructions for your Dash cam in PDF format for free! Find your manual DR770X-BOX - BlackVue and take your electronic device back in hand. On this page are published all the documents necessary for the use of your device. DR770X-BOX by BlackVue.
USER MANUAL DR770X-BOX BlackVue
BLACKVUE
DR770X Box Series
Important safety information
For user safety and to avoid property damage, read through this manual and follow these safety instructions to use the product correctly.
- Do not disassemble, repair, or modify the product yourself. Doing so may cause fire, electric shock, or malfunction. For internal inspection and repair, contact the service center.
- Do not adjust the product while driving. Doing so may cause an accident. Stop or park your car in a safe place before installing and setting up the product.
- Do not operate the product with wet hands. Doing so may cause electric shock.
- If any foreign matter gets inside the product, detach the power cord immediately. Contact the service center for repair.
- Do not cover the product with any material. Doing so may cause external deformation of the product or fire. Use the product and peripherals in a well-ventilated location.
- If the product is used outside the optimal temperature range, performance can decline or malfunctions may occur.
- When entering or exiting a tunnel, when directly facing into bright sunlight, or when recording at night without lighting the quality of recorded video may deteriorate.
- If the product is damaged or the power supply is cut due to an accident, video may not be recorded.
- Do not remove the microSD card while the microSD card is saving or reading data. The data can be damaged or malfunctions may occur.
This equipment has been tested and found to comply with the limits for a Class B digital device, pursuant to Part 15 of the FCC Rules. These limits are designed to provide reasonable protections against harmful interference in a residential installation.
This equipment generates, uses and can radiate radio frequency energy and, if not installed and used in accordance with the instructions, may cause harmful interference to radio communications. However, there is no guarantee that interference will not occur in a particular installation.
If this equipment does cause harmful interference to radio or television reception, which can be determined by turning the equipment off and on, the user is encouraged to try to correct the interference by one or more of the following measures.
- Reorient or relocate the receiving antenna.
- Increase the separation between the equipment and receiver.
- Connect the equipment into an outlet on a circuit different from that to which the receiver is connected.
- Consult the dealer or an experienced radio/TV technician for help.
- Only shielded interface cable should be used.
Finally, any changes or modifications to the equipment by the user not expressly approved by the grantee or manufacturer could void the user's authority to operate such equipment.
This device complies with Part 15 of the FCC Rules. Operation is subject to the following two conditions:
(1) This device may not cause harmful interference, and (2) This device must accept any interference received, including interference that may cause undesired operation of this device.
FCC ID: YCK-DR770XBox
CAUTION
Any changes or modifications in construction of this device which are not expressly approved by the party responsible for compliance could void the user's authority to operate the equipment.
There is a risk of explosion if the battery is replaced by an incorrect type. Dispose of used batteries according to the instructions.
Do not ingest battery, as it could cause chemical burns.
This product contains a coin/button cell battery. If the coin/button cell battery is swallowed, it can cause severe internal burns in just 2 hours and can lead to death.
Keep new and used batteries away from children.
If the battery compartment does not close securely, stop using the product and keep it away from children. If you think batteries might have been swallowed or placed inside any part of the body, seek immediate medical attention.
Do not dispose of the battery into fire or a hot oven, or mechanically crush or cut the battery, it can result in an explosion.
Leaving a battery in an extremely high temperature environment can result in an explosion or the leakage of flammable liquid or gas.
A battery subjected to extremely low air pressure may result in an explosion or the leakage of flammable liquid or gas.
CE WARNING
- Changes and modifications not expressly approved by the party responsible for compliance could void the user's authority to operate the equipment.
- It is desirable that it be installed and operated with at least 20cm or more between the radiator and a person's body (excluding extremities: hand, wrists, feet, and ankles).
IC Compliance
This Class [B] digital apparatus complies with Canadian ICES-003.
This radio transmitter has been approved by Industry Canada to operate with the antenna types listed below with the maximum permissible gain and required antenna impedance for each antenna type indicated. Antenna types not included in this list, having a gain greater than the maximum gain indicated for that type, are strictly prohibited for use with this device.
- IC Warning
This device complies with Industry Canada licence-exempt RSS standard(s).
Operation is subject to the following two conditions:
(1) this device may not cause interference, and (2) this device must accept any interference, including interference that may cause undesired operation of the device.
Disposal of your BlackVue dashcam

- All electrical and electronic products should be disposed of separately from the municipal waste stream via designated collection facilities appointed by the government or the local authorities. Contact local authorities to learn about disposal and recycling options available in your area.
- The correct disposal of your BlackVue dashcam will help prevent potential negative consequences for the environment and human health.
- For more detailed information about disposal of your BlackVue dashcam, please contact your city office, waste disposal service or the shop where you purchased the product.

In the box
Check the box for each of the following items before installing the BlackVue dashcam.

DR770X Box (Front + Rear + IR)
 | Main unit Front camera |  | |
 | Rear camera Rear Infrared |  | Came |
 | SOS button External GPS |  | |
 | Main unit Cigarette Lighter power cable (3p) |  | Camera connection cable (3EA) |
 | Main unit Hardwiring power cable (3p) |  | microSD card |
 | microSD card reader Quick start guide |  | |
 | Velcro Strip Pry tool |  | |
 | Main unit key | 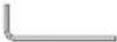 | Allen wrench |
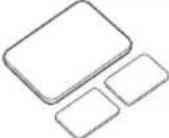 | Double-sided tape for the Mounting Brackets | (SE3T) | Spare screws for tamperproof cover (3EA) |
Need help?
Download the manual (including FAQs) and the latest firmware from www.blackvue.com
Or contact a Customer Support expert at cs@pittasoft.com
DR770X Box Truck (Front + IR + ERC1 (Truck))
 | Main unit Front camera |  | |
 | Infrared Interior/Rear Camera |  | Rear Truck IR Camera |
 | SOS button External GPS |  | |
 | Main unit Cigarette Lighter power cable (3p) |  | Camera connection cable (2EA) |
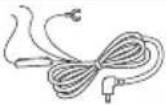 | Main unit hardwiring power cable (3p) | 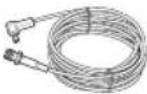 | Rear camera connection cable (15m long waterproof) |
 | Truck camera screws for the mounting brackets (3eA) |  | microSD card |
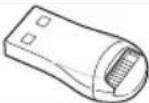 | microSD card reader Quick start guide |  | |
 | Velcro Strip Pry tool |  | |
 | Main unit key |  | Allen wrench |
 | Double-sided tape for the Mounting Brackets | [0794] | Spare screws for tamperproof cover (2EA) |
Need help?
Download the manual (including FAQs) and the latest firmware from www.blackvue.com
Or contact a Customer Support expert at cs@pittasoft.com

At a glance
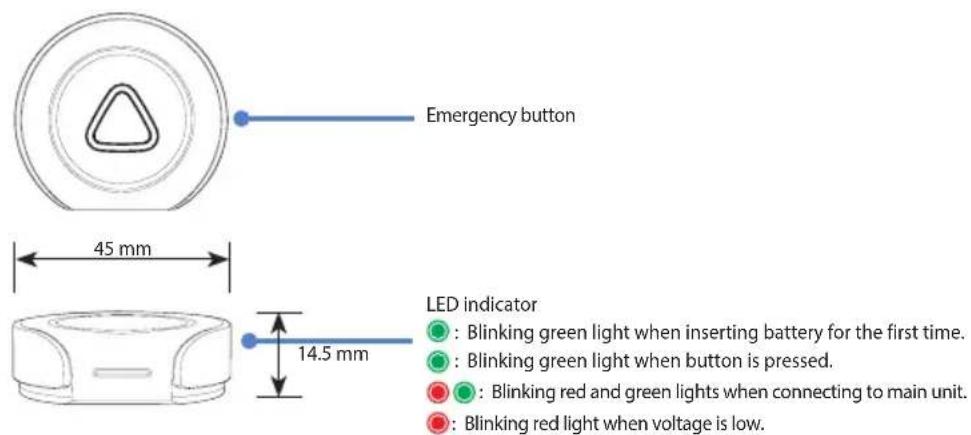
The following diagrams explain each part of the DR770X Box.

Main box


SOS button
Front camera
Rotate the screw on the tamper-proof cover counterclockwise and detach the cover from the camera to connect the cable.
Front security LED
: Lights on during (i) normal mode, (ii) an event is being recorded (impact detected), (iii) manual recording has started, or (iv) motion is detected in parking mode. ☐: Blinks slowly during parking mode motion detection standby.
Rear camera
Main unit connection port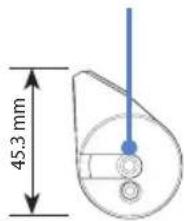

Mounting bracket Tamperproof case
Front security LED
: Lights on during (i) normal mode, (ii) an event is being recorded (impact detected), (iii) manual recording has started, or (iv) motion is detected in parking mode.
Rear Infrared camera

Rear truck camera

STEP 1 Main box and SOS Button Installation
Install the main unit (box) on the side of the center console or inside the glove box. For heavy-duty vehicles, the box can also be installed on the luggage shelf.

For Sedans For Heavy Vehicles

Insert the key into the box, rotate it counterclockwise, and open the lock on the main unit. Take out the lock case and insert the micro SD card.


Warning
- The front camera cable must be connected to the respective port. Connecting it to the rear camera port will give a warning beep sound.
Insert the cables into the cable cover and connect them to their respective ports. Fix the cover on the main unit and lock it.

The SOS button can be installed where it is within arm's reach and can be easily accessed.
Changing SOS Button Battery![graph TD A["Top View"] --> B["Assembly Step"] B --> C["CR2450 Component"] C --> D["Assembly Step"] D --> E["Bottom View"]](/content/2026/07/1421678/images/75a44f5e33d9727bfc6529d6c129e3ea03cac3190f09ec2246dc988b0f0d35d1.jpg)
STEP 1: Unscrew the back panel of the SOS button. STEP 2: Remove the battery and replace it with a new CR2450 type coin battery. STEP 3: Close and re-screw the back panel of the SOS button.

Front camera installation
Install the front camera behind the rearview mirror. Remove any foreign matter and clean and dry the windshield before installation.


Detach the tamperproof bracket from the front camera by rotating the screw counterclockwise with the Allen wrench.


Connect the front camera ('Rear' port) and the main unit ('Front') using the rear camera connection cable.


Note
- Please make sure that the front camera cable is connected to the "Front" port in the main unit.
Align the tamperproof bracket with the mount bracket. Use the Allen wrench to tighten the screw. Do not fully tighten the screw as this could be done after attaching the camera to the front windshield.


Peel off the protective film from the double-sided tape and attach the front camera to the windshield behind the rear-view mirror.


Adjust the angle of the lens by rotating the body of the front camera. We recommend pointing the lens slightly downwards (approximately 10 degrees below horizontal), so as to record video with a 6:4 road to background ratio. Tighten the screw fully.

Use the pry tool to lift the edges of the rubber window sealing and/or molding and tuck in the front camera connection cable.


Rear camera installation
Install the rear camera at the top of the back windshield. Remove any foreign matter and clean and dry the windshield before installation.
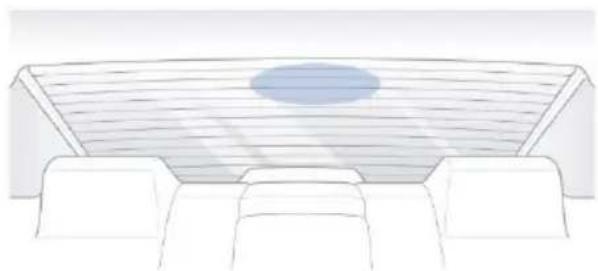

Detach the tamperproof bracket from the rear camera by rotating the screw counterclockwise with the Allen wrench.


Connect the rear camera ('Rear' port) and the main unit ('Rear') using the rear camera connection cable.


Note
- Please make sure that the Rear camera cable is connected to the "Rear" port in the main unit.
- In case of connecting the rear camera cable to "Rear" port the output file name will start with "R".
- In case of connecting the rear camera to "Option" port the output file name will start with "O".
Align the tamperproof bracket with the mount bracket. Use the Allen wrench to tighten the screw. Do not fully tighten the screw as this should be done after attaching the camera to the rear windshield.


Peel off the protective film from the double-sided tape and attach the rear camera to the rear windshield.

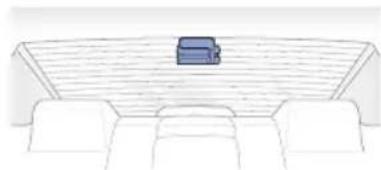
Adjust the angle of the lens by rotating the body of the front camera.
We recommend pointing the lens slightly downwards (approximately 10 degrees below horizontal) to record video with a 6:4 road-to-background ratio. Tighten the screw fully.

Use the pry tool to lift the edges of the rubber window sealing and/or molding, and tuck in the rear camera connection cable.
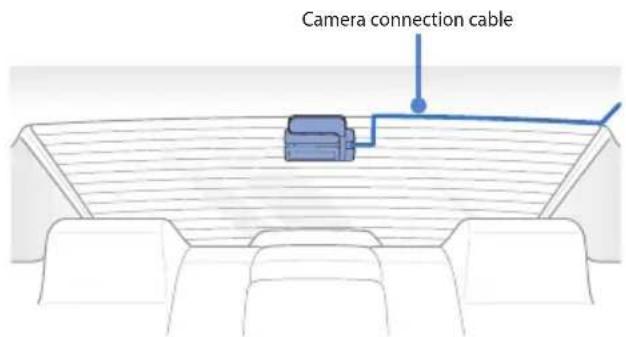

Rear IR camera installation
Install the rear IR camera at the top of the front windshield. Remove any foreign matter and clean and dry the windshield before installation.

Detach the tamperproof bracket from the rear IR camera by rotating the screw counterclockwise with the Allen wrench.


Connect the rear IR camera ("Rear" port) and main unit ("Option") using the rear camera connection cable.


Note
- Please make sure that the Rear Infrared camera cable is connected to the "Rear" or "Option" port in the main unit.
- In case of connecting the rear camera cable to the "Rear" port, the output file name will start with "R".
- In case of connecting the rear camera to the "Option" port, the output file name will start with "O".
Align the tamperproof bracket with the mount bracket. Use the Allen wrench to tighten the screw. Do not fully tighten the screw as this should be done after attaching the camera to the rear windshield.
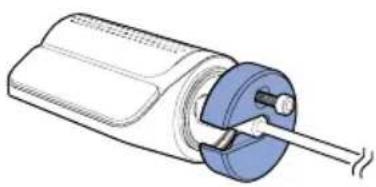

Peel off the protective film from the double-sided tape and attach the rear IR camera to the front windshield.
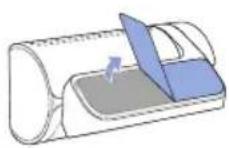

Adjust the angle of the lens by rotating the body of the front camera. We recommend pointing the lens slightly downwards (approximately 10 degrees below horizontal) to record video with a 6:4 road-to-background ratio. Tighten the screw fully.


Use the pry tool to lift the edges of the rubber window sealing and/or molding, and tuck in the rear IR camera connection cable.

Rear truck camera installation
Install the rear camera externally at the top of the back of the truck.
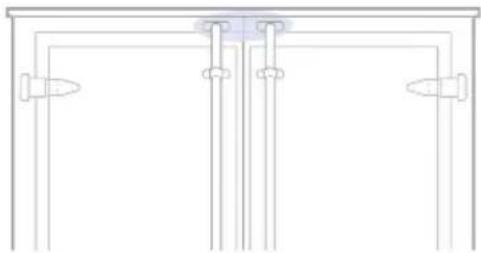
A Fasten the rear camera mounting bracket using the included screws to the top of the back of the vehicle.

Connect the Main box (Rear or Option Port) and the rear camera ("V out") using the rear camera waterproof connection cable.

Note
- Please make sure that the Rear Truck camera cable is connected to the "Rear" or "Option" port in the main unit.
- In case of connecting the Rear Truck camera cable to "Rear" port the output file name will start with "R".
- In case of connecting the Rear Truck camera to "Option" port the output file name will start with "O".
22 BLACKVUE
GNSS Module installation and pairing
A Connect the GNSS Module to the box and attach it to the edge of the window.


Insert the cables into the cable cover and connect them to the USB socket.


Blackvue Connectivity Module (CM100GLTE) installation (optional)
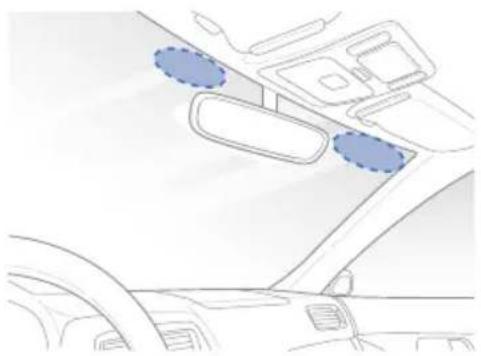
Install the connectivity module at top corner of the windshield. Remove any foreign matter and clean and dry the windshield before installation.
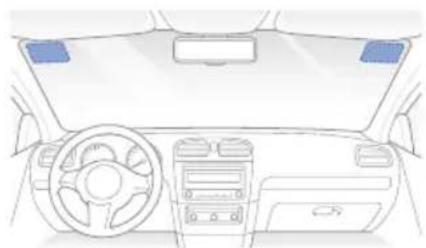
Warning
- Do not install the product in a location where it can obstruct the driver's field of vision.
Turn off the engine. Unscrew the bolt that locks the SIM slot cover on the connectivity module. Remove the cover, and unmount the SIM slot using the SIM eject tool. Insert the SIM card into the slot.


Peel off the protective film from the double-sided tape and attach the connectivity module to the top corner of the windshield.


Connect the main box (USB port) and the connectivity module cable (USB).

Use the pry tool to lift the edges of the windshield trim/molding and tuck in the connectivity module cable.
Note
• SIM card must be activated to use LTE service. For details, refer to the SIM Activation Guide.
Cigarette lighter power cable installation
Plug the cigarette lighter power cable into the cigarette lighter socket of your car and the main unit.

Use the pry tool to lift the edges of the windshield trim/molding and tuck in the power cord.

Hardwiring for main Unit
A Hardwiring Power Cable uses the automotive battery to power your dashcam when the engine is off. A low voltage power cut-off function and a parking mode timer to protect the automotive battery from discharge is installed in the device. Settings can be changed in the BlackVue App or Viewer.
To do the hardwiring, first locate the fuse box to connect the hardwiring power cable.
Note
- Location of the fuse box differ by manufacturer or model. For details, refer to the vehicle owner's manual.
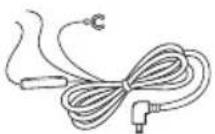
After removing fuse panel cover, find a fuse that powers on when engine is turned on (ex. cigarette lighter socket, audio, etc) and another fuse that remains powered on after the engine is turned off (ex. hazard light, interior light). Connect the ACC+ cable to a fuse that powers on after engine start, and BATT+ cable to a fuse that remains powered on after engine is turned off.
Note
- To use the battery saver feature, connect the BATT+ cable to the hazard light fuse. Functions of fuses differ by manufacturer or model. For details, refer to the vehicle owner's manual.
Connect the GND cable to a metal ground bolt.

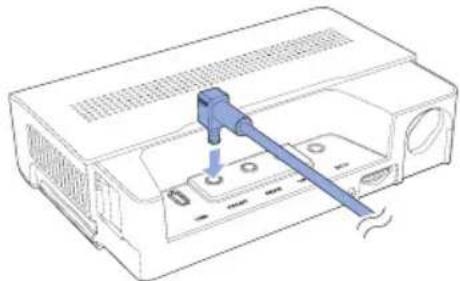
Connect the power cable to the DC IN terminal of the main unit. BlackVue will power up and start recording. Video files are stored on the microSD card.
Note
- When you run the dashcam for the first time, the firmware is automatically loaded onto the microSD card. After the firmware has been loaded onto the microSD card, you can customize settings using the BlackVue app on a smartphone or BlackVue Viewer on a computer.
Use the pry tool to lift the edges of the rubber window sealing and/or molding and tuck in the hardwiring power cable.


SOS button pairing
The SOS button can be paired in two ways.
- In the BlackVue app, tap on Camera, choose Seamless Pairing models, and select "DR770X Box".
![graph TD A["Free plan 0/1 Upgrade"] --> B["Welcome BlackVue Camera"] B --> C["Camera"] C --> D["Add camera"] D --> E["Select your camera model"] E --> F["Seamless pairing models"] E --> G["Wi-Fi-only models"] F --> H["Supported model"] G --> I["Next"] H --> J["Searching for camera..."] I --> J J -->…](/content/2026/07/1421678/images/349ff983a633780dd37ae9611bfb0175ade0a3ab3548319804549c0d71ebd699.jpg)
To connect to the main unit, press the SOS button until you hear a "beep" sound. Your dashcam will also be verified on the app with this step.

- In the BlackVue App, go to "Camera Settings" by tapping on the three dots and choose "System settings".

Choose "SOS Button" and tap on "Register". To connect to the main unit, press the SOS button until you hear a "beep" sound.
![graph LR A["Time Zone"] --> B["Register 8 Bits"] B --> C["SOS Button"] C --> D["Register SOS Button"] D --> E["Registered"]](/content/2026/07/1421678/images/75ea6e19554a6582a3db031759d6f87967612951afb383a5b71d12338c0002aa.jpg)

Using BlackVue app

App overview

*Image shown is the BlackVue app home screen
Explore
- See the latest product and marketing information from BlackVue. Also watch popular video uploads and live views shared by BlackVue users.
Camera
- Add and remove camera. Watch recorded videos, check camera status, change the camera settings and use Cloud functions of cameras added to the camera list.
Event map
• See all the events and uploaded videos on the map shared by BlackVue users.
Profile
- Review and edit account information.
Register BlackVue account
Search for the BlackVue app in the Google Play Store or Apple App Store and install it on your smartphone.
(B) Create an account
(i) Select Login if you have an account, otherwise tap create account. (ii) During sign up, you will receive an e-mail with confirmation code. Enter the confirmation code to finish creating your account.


Add BlackVue dashcam to camera list

Choose one of the following methods to add your BlackVue dashcam to the camera list. Once your camera is added, continue to the steps in 'Connect to Blackvue Cloud'.


Add via Seamless Pairing
(i) Select Camera in the Global Navigation Bar. (ii) Find and press + Camera. (iii) Select Seamless Pairing models. Make sure your smartphone's Bluetooth is turned on.
![graph TD A["Hi Peter"] --> B["Free plan 0/1 Approve"] B --> C["Add camera"] C --> D["Select your camera model"] D --> E["Seamless pairing models"] D --> F["WiFi-only models"] E --> G["Camera"] F --> H["Next"]](/content/2026/07/1421678/images/c89b37608fc4c6805de1b8f08b7987e408a514b0683782a453dc654de41e2997.jpg)
(iv) Choose your BlackVue dashcam from the detected camera list. (v) To connect to the main unit, press the SOS button until you hear a "beep" sound.
![graph LR A["Searching for camera... <br>Select your camera"] --> B["Register SOS Button"] B --> C["Camera successfully verified"] subgraph A D["Detected cameras"] E["BlackVue750KPlus-E63404"] F["BlackVue750KPlusLTE-E23414"] G["BlackVue750X-E34204"] H["BlackVue750KPlus-E63135"] I["BlackVue750KPlus-E9…](/content/2026/07/1421678/images/a9ee14a646991000b111f16ae7c5015590ff2ead731480bcba44e442c1e5c69f.jpg)

Add manually
(i) If you want to connect to the camera manually, press Add camera manually. (ii) Press How to connect phone to the camera and follow the instructions.


Note
- Bluetooth and/or Wi-Fi Direct has a connection range of 10m between your dashcam and smartphone.
- The dashcam SSID is printed on the connectivity details label attached to your dashcam or inside the product box.
Connect to BlackVue Cloud (optional)
If you don't have a mobile Wi-Fi hotspot, BlackVue connectivity module, or if you don't want to use the BlackVue Cloud service, you can skip this step.
If you have a mobile Wi-Fi hotspot (also known as a portable Wi-Fi router), BlackVue connectivity module (CM100GLTE), a car-embedded wireless internet network, or a Wi-Fi network near your car, you can use the BlackVue app to connect to BlackVue Cloud and see in real-time where your car is and the dashcam's live video feed.
For more information about using the BlackVue app, please refer to the BlackVue App manual from https://cloudmanual.blackvue.com.
Choose one of the following methods to add your BlackVue dashcam to the camera list. Once your camera is added, continue to the steps in 'Connect to BlackVue Cloud'.
⑭-① Wi-Fi hotspot
(i) Select Wi-Fi hotspot. (ii) Choose your Wi-Fi hotspot from the list. Enter the password and tap Save.
![graph TD A["Select a Cloud connection method"] --> B["Select the Wi-Fi Hotspot the camera will use to connect to the cloud."] B --> C["Add the Wi-Fi Hotspot the camera will use to connect to the cloud."] C --> D["Add network manually to search hotspots list"] D --> E["Add network manually to save ho…](/content/2026/07/1421678/images/730aaba157e1f254e42becff0d56cba97957bea59834682a254497cf89abaf7d.jpg)

SIM card (Cloud connectivity using CM100GLTE)
Make sure your connectivity module is installed as instructed by the manuals included in the CM100GLTE (sold separately) package. Then, follow the below steps for SIM registration.
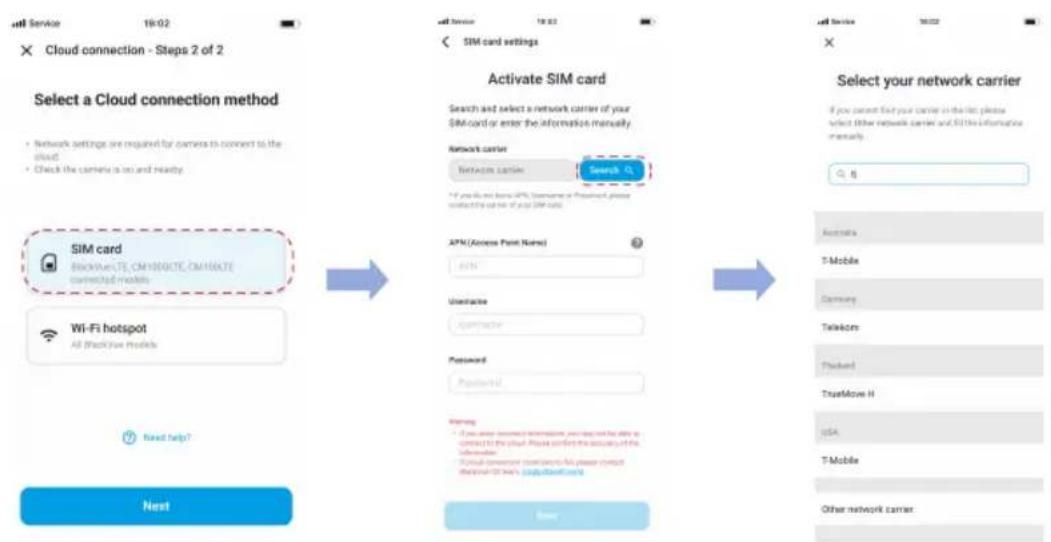
(i) Select SIM card. (ii) Configure the APN settings to activate the SIM card. For detailed information, please check "SIM activation guide" in the packaging box or visit BlackVue Help Center: www.helpcenter.blackvue.com -> LTE connectivity guide.

Note
- When the dashcam is connected to internet, you can use BlackVue Cloud features such as remote Live View and Video playback, Real-time location, push notification, Auto-upload, remote Firmware update etc. on BlackVue app and Web Viewer. • The BlackVue DR770X Box Series is not compatible with 5GHz wireless networks. • To use the BlackVue Cloud Service via LTE network, SIM card must be properly activated for Internet access.
- If LTE and Wi-Fi hotspot is available for internet connection, Wi-Fi hotspot will be in priority. If LTE connection is preferred at all times, please remove Wi-Fi hotspot information. • Some Cloud features may not work when surrounding temperature is high and/or LTE speed is slow.

Quick settings (optional)

Choose your preferred settings. Quick settings allow you to choose your FW language, time zone, and speed unit. If you prefer to do this later, press skip. Otherwise, press next.
(i) Select the firmware language for your BlackVue dashcam. Press next. (ii) Select a time zone of your location. Press next. (iii) Select the speed unit of your preference. Press next.

(iv) Press more settings to access all of the settings or press save. Your main unit will format the SD card to apply the settings. Press OK to confirm. (v) BlackVue dashcam installation is complete.

Playing video files and changing settings
After installation is complete, follow the below steps to play video files and change settings.

Select Camera on your Global Navigation Bar.

Tap your dashcam model in the camera list.

To play video files, press Playback and tap the video you want to play.

To change the settings, press the settings button.


Note
- For more information about the BlackVue app, go to https://cloudmanual.blackvue.com.

Using BlackVue Web Viewer
To experience the camera features in the Web Viewer, you must create an account and your dashcam must be connected to the Cloud. For this setup, it is recommended to download the BlackVue app and follow the instructions, including optional steps in Using BlackVue App, prior to accessing the Web Viewer.


Go to www.blackvuecloud.com to access BlackVue Web Viewer.

Select Start Web Viewer. Enter the login information if you have an account; otherwise, press Sign up and follow the guidelines in the Web Viewer.

To play video files after login, select your camera in the camera list and press Playback. If you have not already added your camera, press Add camera and follow the guidelines in the Web Viewer.

Select the video you want to play from the video list.

Note
- For more information about BlackVue Web Viewer features, refer to the manual from https://cloudmanual.blackvue.com.

Using BlackVue Viewer

Playing video files and changing settings

Remove the microSD card from the main unit.


Insert the card into the microSD card reader and connect it to a computer.


Download BlackVue Viewer program from www.blackvue.com > Support > Downloads and install it on your computer.

Run BlackVue Viewer. To play, select a video and click on the play button or double click the selected video.

To change settings, click on the ⚙ button to open the BlackVue settings panel. Settings that can be changed include Wi-Fi SSID & password, image quality, sensitivity settings, voice recording on/off, speed unit (km/h, MPH), LEDs on/off, voice guidance volume, Cloud settings etc.

Windows/macOS Viewer

Note
• For more information about BlackVue Viewer, go to https://cloudmanual.blackvue.com. - All images shown are for illustration purpose only. Actual program may differ from images shown.
Tips for optimal performance
For stable operation of the dashcam, it is recommended to format the microSD card once a month.
Format using BlackVue App (Android/iOS):
Go to BlackVue App > : > Format microSD card and format the microSD card.
Format using BlackVue Viewer (Windows):
Download BlackVue Windows Viewer from www.blackvue.com > Support > Downloads and install it on your computer. Insert the microSD card into the microSD card reader and connect the reader to your computer. Launch the copy of BlackVue Viewer that is installed on your computer. Click the Format button, select the card drive and click OK.
Format using BlackVue Viewer (macOS):
Download BlackVue Mac Viewer from www.blackvue.com > Support > Downloads and install it on your computer. Insert the microSD card into the microSD card reader and connect the reader to your computer. Launch the copy of BlackVue Viewer that is installed on your computer. Click the Format button and select the microSD card from the list of drives in the left frame. After selecting your microSD card select the Erase tab in the main window. Select "MS-DOS (FAT)" from the Volume Format drop-down menu and click Erase.
Only use official BlackVue microSD cards. Other cards may have compatibility issues.
Regularly upgrade the firmware for performance improvements and updated features. Firmware updates will be made available for download at www.blackvue.com > Support > Downloads.
Customer Support
For customer support, manuals and firmware updates please visit www.blackvue.com
You can also email a Customer Support expert at cs@pittasoft.com
Product specifications:
| Model Name | DR770X Box Series |
| Color/Size/Weight | Main unit : Black / Length 130.0 mm x Width 101.0 mm x Height 33.0 mm / 209 gFront : Black / Length 62.5 mm x Width 34.3 mm x Height 34.0 mm / 43 gRear : Black / Length 63.5 mm x Width 32.0 mm x Height 32.0 mm / 33 gRear Truck : Black / Length 70.4 mm x Width 56.6 mm x Height 36.1 mm / 157 gInterior IR : Black / Length 63.5 mm x Width 32.0 mm x Height 32.0 mm / 34 gEB-1 : Black / Length 45.2 mm x Width 42.0 mm x Height 14.5 mm / 23 g |
| Memory | microSD Card (32 GB/64 GB/128 GB/256 GB) |
| Recording Modes | Normal recording, Event recording (when impact is detected in normal and parking mode), Manual recording and Parking recording (when motion is detected)* When using Hardwiring Power Cable, ACC+ will trigger parking mode.When using other methods, G-sensor will trigger parking mode. |
| Camera | Front : STARVISTM CMOS Sensor (Approx. 2.1 M Pixel)Rear/Rear Truck : STARVISTM CMOS Sensor (Approx. 2.1 M Pixel)Interior IR : STARVISTM CMOS Sensor (Approx. 2.1 M Pixel) |
| Viewing Angle | Front : Diagonal 139°, Horizontal 116°, Vertical 61°Rear/Rear Truck : Diagonal 116°, Horizontal 97°, Vertical 51°Interior IR : Diagonal 180°, Horizontal 150°, Vertical 93° |
| Resolution/Frame Rate | |
| Image Quality | Highest (Extreme): 25 + 10 MbpsHighest: 12 + 10 MbpsHigh: 10 + 8 MbpsNormal: 8 + 6 Mbps |
| Video Compression Mode | MP4 |
| Wi-Fi | Built-in (802.11 b.g.n) |
| GNSS | External (Dual Band : GPS, GLONASS) |
| Bluetooth | Built-in (V2.1+EDR/4.2) |
| LTE | External (Optional) |
| Microphone | Built-in |
| Speaker (Voice Guidance) | Built-in |
| LED Indicators | Main unit : Recording LED, GPS LED, BT/Wi-Fi/LTE LEDFront : Front & Rear Security LEDRear/Rear Truck : noneInterior IR : Front&Rear Security LDEB-1 : Operating/Battery low voltage LED |
| Wavelength of IR camera light | Rear Truck : 940nm (6 Infrared (IR) LEDs)Interior IR : 940nm (2 Infrared (IR) LEDs) |
| Button | EB-1 button :Press the button - manual recording. |
| Sensor | 3-Axis Acceleration Sensor |
| Backup Battery | Built-in super capacitor |
| Input Power | DC 12V-24V (3 pole DC Plug(∅3.5 x ∅1.1) to Wires (Black: GND / Yellow: B+ / Red: ACC) |
| Power Consumption | Normal Mode (GPS On / 3CH) : Avg. 730mA / 12VParking Mode (GPS Off / 3CH) : Avg. 610mA / 12V* Approx. 40mA increase in current when Interior Camera IR LEDs are ON.* Approx. 60mA increase in current when Rear Truck Camera IR LEDs are ON.* Actual power consumption may vary depending on use conditions and environment. |
| Operation Temperature | -20°C - 70°C (-4°F - 158°F ) |
| Storage Temperature | -20°C - 80°C (-4°F - 176°F ) |
| High Temperature Cut-Off | Approx. 80 °C (176 °F ) |
| Certifications | Front (with Main unit & EB-1) : FCC, IC, CE, UKCA, RCM, Telec, WEEE, RoHSRear,Rear Truck & Interior IR : KC, FCC, IC, CE, UKCA, RCM, WEEE, RoHS |
| Software | BlackVue Application* Android 8.0 or higher, iOS 13.0 or higherBlackVue Viewer* Windows 7 or higher, Mac Sierra OS X (10.12) or higherBlackVue Web Viewer* Chrome 71 or higher, Safari 13.0 or higher |
| Other Features | Adaptive Format Free File Management SystemAdvanced Driver Assistance SystemLDWS (Lane Departure Warning System)FVSA (Forward Vehicle Start Alarm) |
* STARVIS is a trademark of Sony Corporation.
Product Warranty
The term of this product warranty is 1 year from the purchase date. (Accessories such as an External Battery/microSD Card: 6 Months) We, PittaSoft Co., Ltd., provide the product warranty according to the Consumer Dispute Settlement Regulations (drawn up by the Fair Trade Commission). PittaSoft or designated partners will provide the warranty service upon request.
| Circumstances | Warranty | |||
| Within the Term | Outside of the Term | |||
| For performance/functional problems under normal use conditions | For serious repair required within 10 days of purchase Exchange/Refund | N/A | ||
| For serious repair required within 1 month of purchase Exchange | ||||
| For serious repair required within 1 month of exchange Exchange/Refund | ||||
| When not exchangeable Refund | ||||
| Repair(If Available) | For Defect Free Repair | Paid Repair/Paid Product Exchange | ||
| Repeated problem with the same defect (up to 3 times) | Exchange/Refund | |||
| Repeated trouble with different parts (up to 5 times) | ||||
| Repair(If Unavailable) | For the loss of a product while being serviced/repaired | Refund after depreciation plus an additional 10% (Maximum: purchase price) | ||
| When repair is unavailable due to lack of spare parts within the component holding period | ||||
| When repair is unavailable even when spare parts are available | Exchange/Refund after depreciation | |||
| 1) Malfunction due to customer fault- Malfunction & damage caused by user negligence (fall, shock, damage, unreasonable operation, etc.) or careless use- Malfunction & damage after being serviced/repaired by an unauthorized third party, and not through Pittasoft's Authorized Service Center.- Malfunction & damage due to the use of unauthorized components, consumables, or separately sold parts2) Other Cases- Malfunction due to natural disasters (fire, flood, earthquake, etc.)- Expired life span of a consumable part- Malfunction due to external reasons | Paid Repair Paid | Repair | ||
This warranty is only valid in the country where you purchased the product.
DR770X Box Series
Smart, Reliable and Connected Dashcam

FCC ID: YCK-DR770X Box / HVIN: DR770X Box series / IC: 23402-DR770X Box
Product | Car Dashcam
Model Name | DR770X Box Series
Manufacturer | Pittasoft Co., Ltd.
Address | 4F ABN Tower, 331, Pangyo-ro, Bundang-gu, Seongnam-si, Gyeonggi-do, Republic of Korea, 13488
Customer Support | cs@pittasoft.com
Product Warranty | One-Year Limited Warranty

BLACKVUE
facebook.com/BlackVueOfficial
instagram.com/blackvueOfficial
www.blackvue.com
Made in Korea


- BLACKVUE
- IMPORTANT SAFETY INFORMATION
- CAUTION
- CE WARNING
- IC COMPLIANCE
- DISPOSAL OF YOUR BLACKVUE DASHCAM
- IN THE BOX
- NEED HELP
- AT A GLANCE
- MAIN BOX
- SOS BUTTON
- FRONT CAMERA
- FRONT SECURITY LED
- REAR CAMERA
- REAR INFRARED CAMERA
- REAR TRUCK CAMERA
- STEP 1 MAIN BOX AND SOS BUTTON INSTALLATION
- WARNING
- FRONT CAMERA INSTALLATION
- NOTE
- REAR CAMERA INSTALLATION
- REAR IR CAMERA INSTALLATION
- REAR TRUCK CAMERA INSTALLATION
- 22 BLACKVUE
- GNSS MODULE INSTALLATION AND PAIRING
- BLACKVUE CONNECTIVITY MODULE (CM100GLTE) INSTALLATION (OPTIONAL)
- CIGARETTE LIGHTER POWER CABLE INSTALLATION
- HARDWIRING FOR MAIN UNIT
- SOS BUTTON PAIRING
- USING BLACKVUE APP
- APP OVERVIEW
- EXPLORE
- CAMERA
- EVENT MAP
- PROFILE
- REGISTER BLACKVUE ACCOUNT
- ADD BLACKVUE DASHCAM TO CAMERA LIST
- ADD VIA SEAMLESS PAIRING
- CONNECT TO BLACKVUE CLOUD (OPTIONAL)
- ⑭-① WI-FI HOTSPOT
- QUICK SETTINGS (OPTIONAL)
- PLAYING VIDEO FILES AND CHANGING SETTINGS
- USING BLACKVUE WEB VIEWER
- USING BLACKVUE VIEWER
- TIPS FOR OPTIMAL PERFORMANCE
- CUSTOMER SUPPORT
- PRODUCT WARRANTY
- DR770X BOX SERIES
Brand : BlackVue
Model : DR770X-BOX
Category : Dash cam