Poly Evolver - Musical Keyboard Dave Smith - Free user manual and instructions
Find the device manual for free Poly Evolver Dave Smith in PDF.


| Product Type | Polyphonic Synthesizer |
| Brand | Dave Smith Instruments |
| Model | Poly Evolver |
| Polyphony | 4 voices |
| Oscillator Type | Analog & Digital Hybrid |
| Filter | 4-pole analog low-pass with resonance |
| Effects | Built-in digital effects (delay, reverb, chorus, etc.) |
| Sequencer | 16-track sequencer with pattern mode |
| MIDI | MIDI In/Out/Thru |
| Audio Outputs | Main stereo out (2x 1/4" TRS), headphone jack |
| Audio Inputs | Audio input for processing external signals |
| Display | 2x16 character LCD backlit |
| Dimensions (W x H x D) | 19" x 3.5" x 12" (rack-mountable, 3U) |
| Weight | Approx. 20 lbs (9 kg) |
| Power Supply | Internal, 100-240V AC, 50/60 Hz, IEC power cord |
| Power Consumption | 30W max |
| Preset Storage | 2 banks x 128 programs (256 total) |
| Keyboard | Not included (rack module) |
| Maintenance | Clean with dry, lint-free cloth; avoid moisture |
| Safety | Keep away from water and heat; use only included power cord |
| Repairability | Service by qualified technician only; no user-serviceable parts inside |
| Manual | Free PDF download, 76 pages, EN |
Frequently Asked Questions - Poly Evolver Dave Smith
User questions about Poly Evolver Dave Smith
0 question about this device. Answer the ones you know or ask your own.
Ask a new question about this device
Download the instructions for your Musical Keyboard in PDF format for free! Find your manual Poly Evolver - Dave Smith and take your electronic device back in hand. On this page are published all the documents necessary for the use of your device. Poly Evolver by Dave Smith.
USER MANUAL Poly Evolver Dave Smith
Poly Evolver Keyboard
Operation Manual

Poly Evolver Keyboard Operation Manual
Version 1.4
October, 2009
Dave Smith Instruments
1210 Cabrillo Hwy N
Half Moon Bay, CA 94019-1449
USA
FC
Tested To Comply With FCC Standards FOR OFFICE USE
CE
This device complies with Part 15 of the FCC Rules. Operation is subject to the following two conditions: (1) This device may not cause harmful interference and (2) this device must accept any interference received, including interference that may cause undesired operation.
This Class B digital apparatus meets all requirements of the Canadian Interference-Causing Equipment Regulations.
For Technical Support, email support@davesmithinstruments.com
Contents
Quick Start 6
Preset Notes 8
FAQs 9
Chaining Evolvers and Polys 10
Inside Evolver 12
Signal Flow Diagram 13
Basic Operations 14
Naming Programs and Combos 16
Global Parameters 18
Program Parameters 22
Analog Oscillators (1 and 2) 22
Digital Oscillators (3 and 4) 23
Lowpass Filter 25
Amplifier (VCA) 26
Highpass Filter 27
Feedback 27
Distortion 28
Delay 28
Envelope 3 31
Low Frequency Oscillators (LFO) 31
Modulators 33
Miscellaneous Parameters 34
Sequencer Operation 37
Modulation Destination Table 41
Modulation Source Table 43
Combo Parameters 44
MIDI Implementation 48
MIDI Parameters 48
Basic MIDI Messages 50
System exclusive Messages 54
Global Parameter Data 62
Combo Parameter Data 64
Program Parameter Data 66
Welcome...
Thanks for purchasing the Poly Evolver Keyboard! Listen to the sounds, twiddle some knobs, have some fun!
Register
If you purchased your Poly directly from us, there is no need to register – we already have your contact information. If you purchased it from a music dealer, please go to www.davesmithinstruments.com and register.
Quick Start
Here's how to quickly get started with your new keyboard:
First, plug in the power supply. The power supply will work anywhere in the world; use the included Euro AC adapter if necessary. Next, plug the stereo audio outputs into your mixer/sound system and switch on the power.
The Poly Evolver has two main modes, Program and Combo. Program mode sets all 4 voices to the same sound, one of the 128 Programs in 4 Banks (512 total). It powers up in Program mode, ready to play. If you are an Evolver owner, you are already familiar with the basic Poly voice – it is the same, but now there are four of them!
Programs are usually meant to be played from the keyboard, but you have the option of hitting the Sequencer's START/STOP switch, and voice 1 will play the sequence associated with that Program. You can then play along with the other 3 voices. Not all Programs have pre-programmed sequences.
Try applying keyboard pressure (aftertouch) and the mod wheel. Many sounds are fairly simple at first, then come alive when you use the controllers. With other sounds, you may need to hold the notes a while to let the sound unfold. Playing in different ways has a big effect on the Programs.
Selecting and Editing Programs, Combos, and Global Settings
There are a number of ways to change Programs; you can use the ten-key pad to directly select any Program, and use the 4 Bank switches to select banks. Or, you can use the +/- switches to step through the Programs. Finally, the PARAM 1 knob changes the Program number, and the PARAM 2 knob changes the Bank. Check the diagram on the next page for reference.
If you want to edit a Program, just turn any knob. The new value will be displayed in the LCD. Once a parameter has been selected, the PARAM 1 knob will also change the value, and the +/- switches will increment or decrement the value.
That's the whole idea with this instrument – grabbing knobs and changing the sound!
To select Combo mode, press the COMBO switch. Combos give you complete flexibility configuring the four voices; you can stack or split the keyboard, assign different Programs to different MIDI channels, set it to play multiple different sequences synchronously, and so on.
There are 3 banks of 128 Combos for a total of 384. There are up to 4 Parts in each Combo, though all four do not have to be used. For example, a split Combo, with one voice for bass on the low end of the keyboard, and 3 polyphonic voices on the upper end, would only require 2 parts. The COMBO PART switches select the four parts for quick editing.
Your Poly Evolver also has some very cool features for use as a stereo signal processor. In Combo mode you can have one or more voices using the External Signal Input, so the external signal can be routed to all four voices, with each voice doing different processing, such as filtering, envelope following, distortion, feedback, delay, driving a sequence, and so on.
Press the GLOBAL switch to change higher level parameters, such as MIDI channel number, Transpose/Detune, and so on. These are remembered when the synth is turned off. Note that in Global Mode, the screen displays two parameters at a time. The top parameter is changed by the PARAM 1 knob and the lower parameter is edited by the PARAM 2 knob. The +/- switches select new pages.
Summary
You should be up and running now; for more operation information, read on. Or, just look up specific parameters for detailed notes. Pages 41 through 43 contain a handy reference for mod destinations and sources. At some point you should read through the manual to discover all the little features that you might not notice at first.
I should mention that this manual does not include explanations of basic synthesizer functions. It assumes you already know what an oscillator is, how a lowpass filter affects the sound, what an ADSR envelope looks like, and so on.
Fortunately, these days it is quite easy to find such resources on the Internet. If you want to learn the lingo and the basics, just try a search in Google (or the search engine of your choice), something like “analog synthesizer tutorial”. You’ll find plenty of good reading material.
Have fun!
Dave Smith
Special thanks to the “bragging rights” team for their assistance during development:
Tim Ande, David Bryce, Robert Shanks, Ravi Ivan Sharma, and Stefan Trippler. Also to Mark Wilcox for assistance on this manual.
About the Presets
There are 512 Programs and 384 Combos in your Poly Evolver. The factory sound set is on our website if you ever need to refresh it. There are additional banks of Programs at:
http://www.davesmithinstruments.com/polyevolver/sounds.html
Remember to save your sounds via program dumps occasionally!
The Programs are not set up in any particular order, so you might just want to listen through them to see what you like. Bank 4 programs are used for most of the combo sequences, so some may not make sense as a program. There are some test Programs at the end of Bank 4 that you might want to erase. Also, Program 128 in all four banks is a simple basic Program that you can use as a starting point.
Combos are also mixed, again with some test Combos at the end of bank 3. You will also see that there is only one bank of Combos. You will likely want to make your own Combos based on the specific combinations of Programs that fit your music.
When using Combos, remember that changing a Program will affect any Combo that refers to it.
The Programs and Combos were collected from previous Evolver and Poly Evolver Rack patches, and a bunch of new ones were made up for the keyboard. Special thanks to Program contributors (past and present), including:
Tim Ande
Andrew Bode
Cameron Brand
David Bryce
Chris Curtis
Mike Estee
Don Gothard
Damon Menne
Eric Norlander
Mike Peake
Ravi Ivan Sharma
Doug Terrebonne
Goffe Torgerson
Stefan Trippler
Dave Wyatt
Frequently Asked Questions
The Poly Evolver is a very flexible instrument. While this provides a wide range of operational possibilities, it also means that you can put Evolver into a state where it doesn't seem to work. Here are some tips:
- How do I save a Program or Combo? Hit the WRITE switch. Then press the + / YES switch when prompted. All other switches are locked out, though you can hit the -/No switch if you change your mind. You can change the Program and/or Bank and store in a different location using the knobs. You can also press COMPARE to check the sounds in the Program destinations.
- When I change Programs, the Sequencer speed always stays the same. Check the Global Prog Tempo parameter – if it is Off, then the speed is not updated when Programs change. Set it to On.
- I can't get the filter to oscillate. Check the 4/2/POLE switch – the filter only oscillates when in 4-pole mode. (The filter is in 4-pole mode when the 4/2/POLE switch is lit.)
- I seem to be getting distortion in my output. Assuming that Distortion and Output Hack are off, you are likely just overloading the signal somewhere. There are many signal sources in the Poly, and many sources of gain. If too many are used at levels that are too high, you will likely get some distortion. For example, if you are using all four oscillators, lower the LEVEL setting of each oscillator to the 40 – 60 range. Likewise, if using all three delay taps, lower the AMOUNT setting of each.
- I can't hear the External Audio input. In addition to increasing External In LEVEL, the filter and VCA must be open to hear the signal. You can initially turn up the Lowpass Filter FREQUENCY and the initial VCA LEVEL to hear the signal. The Peak Hold or Envelope Follower can be used to control the VCA or Filter level, or the sequencer can trigger the envelopes. There are many different ways to use different modulation sources to control the VCA and Filter when using external inputs.
Chaining Multiple Evolvers Together
The Poly Evolver Keyboard has 4 voices that are identical to the 4 voices in a rackmount Poly Evolver, and the single voice in the original desktop Evolver. This compatibility enables you to chain multiple Evolvers together to increase polyphony, using your Poly Keyboard as a controller for all chained Evolvers.
Note that if the Poly Chain parameter is Off, the Poly Chain MIDI Output jack acts as a second MIDI Out jack.
To chain a single Poly Rack to your Poly Evolver Keyboard:
- Connect the Poly Chain MIDI output on the back of your Poly Evolver Keyboard to the MIDI In of the Poly Rack.
- Connect the stereo outputs of the keyboard to the right and left Mix Inputs of the Rack, then connect the output of the Rack to your mixer/sound system.
- On the Keyboard, in Global select the Poly Chain screen, and set it to the total number of voices you have chained, ie 8 for a keyboard and a rack in this case.
- Next set the MIDI clock parameter to MIDI Out on the keyboard (or MIDI In/Out if using an external MIDI clock to drive the keyboard). On the Rack, select MIDI Clock In.
You should be all set to play! You can now virtually ignore the Rack, since the controls on the keyboard will control both units as if they were a single 8 voice. This includes saving a Program/Combo; if you save an edited program on the keyboard, it will also save the program on any Poly Chained instruments (updated with the latest revision software).
Note: Remember that if you change a Main parameter on the Keyboard, the Rack will change also. For example, changing MIDI channels on the Keyboard will also change the MIDI channels on the Rack, which is likely what you would want. There are a couple exceptions: if you change Poly Chain or MIDI clock, it is not chained, since these parameters are usually different in each unit.
While everything is transparent in Program mode, there are some differences in Combo mode operation. For example, Combos that have Mono parts will be handled differently. This is due to the fact that in Mono, Poly chain does not function, since the Part interprets new notes per the Key Mode (low note, last note, and so on), and does not re-transmit the notes. If, for example, you have a 1/3 split with Part 1 playing a mono Program, and Part 2 playing 3 voices polyphonically, with two Polys chained you will still only have a single mono voice in Part 1, but Part 2 will now be 6 voices. So, you will lose a voice in this configuration.
Other configurations work as you would expect; for example, if you have a Combo with 2 programs stacked, it will play them as a 4 voice with two Polys.
Using Multiple Poly Racks
You can also chain more than a single Rack in the same manner. With two Racks, set the main parameter Poly Chain on the Keyboard to 12, and set Poly Chain on the first Rack to 8. The second Rack Poly Chain should be set to Off.
On the Keyboard MIDI clock is again set to Out, the first Rack set to In/out, and the second Rack to In.
Chaining Mono Evolvers
You can also use one or more mono table-top Evolvers for more voices. If using one to get 5 voices (a magic number!), set the Keyboard to MIDI clock Out, and set Poly Chain to 5. Set the Evolver to MIDI Clock In.
A Note on Versions
The same basic voice structure is used on all three instruments, the mono Evolver, the Poly Rack, and the Poly Keyboard. Though there has been great care to keep backwards compatibility, there have been a few changes necessary in both the mono Evolver and the Poly Rack to make them work more seamlessly with the keyboard.
As a result, you will likely have to update your current synths to be compatible. Please check our website to get the latest information on these updates.
The Poly Evolver Voice
Before going through the individual parameters, following is a brief description of the architecture of a single Poly Evolver voice. The signal flow diagram on the next page is a good starting point for understanding how the Poly works.
The Analog Side
The analog electronics for each voice consist of two identical (Left/Right) synth sections, each with an analog waveshape oscillator, a 2/4 pole resonant lowpass filter, and a Voltage Controlled Amplifier (VCA). Control voltages are generated by the processors to control the analog components.
The Digital Side
Surrounding the Analog electronics is a high-speed Digital Signal Processor (DSP) that both pre- and post-processes the audio signal. Since the DSP also computes the control voltages for the analog circuitry, it can handle a wide range of modulation with high precision.
The DSP provides audio functions such as the Digital Oscillators, Envelope Follower, the Peak/Hold detector (and associated external trigger generator), Highpass filter, Distortion (with noise gate), Pan, Delay, and Hack. It also handles the tuned feedback, as well as the additional Delay feedback paths. And all the modulation calculations (envelopes, LFOs, routing, and so on).
Analog-to-Digital (A/D) and Digital-to-Analog (D/A) converters are used to connect the analog and digital sections. There are two sets of stereo converters running at a 48 kHz sampling rate with 24 bits of precision for minimum impact on the analog sound.
Each voice is completely independent, except that the single stereo external Audio In signal is routed to all four voices.
Inputs and Outputs
There are several audio jacks on the rear panel. All are unbalanced stereo pairs (two mono jacks). First, there are the Audio Inputs, which can be routed to the input of any or all of the voices, for using the Poly as a signal processor.
Next, there are individual voice outputs for all 4 voices. When a plug is inserted into one of these jacks, that signal is disconnected from the mix output. This allows each channel to go to a different mixer channel for separate EQ/processing. It also allows the output of one voice to be routed to the Audio Input jacks, where it can then be routed to another voice's input for some interesting effects.
Next are the mixed Stereo Outputs. If you only use the Left/Mono jack, you will get a mono mix of both channels – but you really should use both channels! Finally, there is a stereo headphone jack on the rear panel.
Note: Always turn down your mixer/amplifier volume when turning the Poly on or off to prevent pops!
![graph TD A["White Noise"] --> B["Tuned Feedback"] A --> C["Delay Line"] A --> D["Digital Osc 3"] A --> E["Gain"] A --> F["Ext In Left"] A --> G["Gain"] A --> H["Ext In Right"] A --> I["Tuned Feedback"] A --> J["Delay Line"] B --> K["+"] D --> L["D/A"] L --> M["+"] M --> N["Low Pass Filter"] N --> O[…](/content/2026/06/1406150/images/69d848f26e1f1113a5d7c21a3f8a24892a93a21195673c842e79cafcf74e17cb.jpg)
* Highpass can be placed either before or after analog filter
** Distortion can be placed either before or after analog filter
Evolver Signal Path
Basic Operation
Program Mode
When you first turn the Poly on, it is in Program Mode with the PROGRAM LED lit and the following screen active:
Program: xxx Bix
XXXXXX
The top line shows the Program (1...128) and Bank (1...4) number of the currently selected Program, and the bottom line shows the 16-character name of the Program. The PARAM 1 knob changes the Program, and the PARAM 2 knob changes the Bank. The Program can also be incremented or decremented by pressing the +/YES or -/NO switch respectively or selected with the numeric program selection switches.
![graph TD A["128"] --> B["Program: 128 8:1 Cosmic Shift"] B --> C{selects program} C --> D["Param 1"] C --> E{selects bank} E --> F["Param 2"] F --> G{selects bank} G --> H["1"] G --> I["2"] G --> J["3"] H --> K["1"] H --> L["2"] H --> M["4"] H --> N["5"] H --> O["6"] I --> P["7"] I --> Q["8"] I -->…](/content/2026/06/1406150/images/b020b69eb642e7951443dc256500de7b3349da21d75e23eb453cace1c61b2a57.jpg)
o edit a Program, simply turn any knob while in Program mode. See the PrograT m Parameters section for a detailed list of all parameters and their functionality.
Combo Mode
When you press the COMBO switch, the Poly switches to Combo Mode with the following screen active:
Combo: xxx B: x
XXXXXX
The top line shows the Combo and Bank number of the currently selected Combo, and the bottom line shows the 16-character name of the Combo. The PARAM 1 knob changes the Combo, and the PARAM 2 knob changes the Bank. To increment or decrement the Combo, press the +/YES or -/NO switch respectively.
![graph TD A["128"] --> B["Program: 128 8:1 Cosmic Shift"] B --> C{selects combo} C --> D["Param 1"] C --> E{selects bank} E --> F["Param 2"] F --> G{selects bank} G --> H["1"] G --> I["2"] G --> J["3"] H --> K["100"] H --> L["0"] I --> M["4"] I --> N["5"] I --> O["6"] J --> P["7"] J --> Q["8"] J -->…](/content/2026/06/1406150/images/d254d56855b71ae6ab5a0fd095b2414fe45564d5c7f4f38f5f41d31297d5abf6.jpg)
To edit the Combo parameters, first hit the desired COMBO PART Switch. The PARAM 1 knob now selects the parameter, and the PARAM 2 knob changes the value. The + and – switches will increment/decrement the value also. See the Combo Parameters section for a detailed list of all parameters and their functionality.
Saving a Program or Combo
To save a Program or Combo, press the WRITE switch and the following screen appears:
Write? P:xxx B: x Hit: Yes or No
Press the +/YES switch to save the current Program or Combo, or -/NO (or the WRITE switch again) to cancel. To store in a different location, use PARAM 1 to select a new Program or Combo destination, and PARAM 2 for a different bank.
If there is another Poly Evolver or Evolver Poly Chained, and they have been updated to the latest software revisions, the program/combo will be saved in the chained units also.
Compare Feature: While editing a Program or Combo, you can press the COMPARE switch to listen to the original version. If you press the switch again, the Poly returns to the edited version.
Audition Destination Feature: While there is a write pending (see screen above), you can press the COMPARE switch to hear the target Program or Combo destination before saving. Just be sure to turn Compare off again before you actually hit the +/YES switch to save.
Transposing the Keyboard Range
Use the UP and DOWN Transpose switches to transpose the Poly Keyboard up or down by octaves. The LED indicates the current keyboard transposition state. The transposition changes the MIDI note number of the keys, so MIDI notes sent will also be transposed. The transposition can also affect the key ranges in Combos.

Transpose
Renaming a Program or Combo
To rename a Program or Combo, press the NAME switch. The lower LCD line displays the name of the Program. The PARAM 1 knob selects which character is currently active, which is displayed by blinking the letter. The PARAM 2 knob changes the character.
![graph TD A["4x Cosmic Shift"] --> B["Formula: moves to next/previous space"] B --> C["Param 1"] B --> D["Param 2"] E["Combo"] --> F["Name: press to enable renaming"] G["Program"] --> H["Compare"] I["Global"] --> J["Write"] K["+ / Yes"] --> L["- / No"] M["increment and decrement characters"] --> L N[…](/content/2026/06/1406150/images/e02aa8b22b0a1fc280e435bb0ffcf47c14ebf412429c795bdf354a40e5f4a31b.jpg)
Voice Assignment
The Poly has a total of four voices, and as such uses a specific method for assigning them as keys are played. The scheme used by the Poly is a circular assignment; that is, as a new notes are received, the next unused voice is assigned to the new note. You can see how this works by watching the 4 voice LEDs as you play.
When all 4 voices are held and a new note is received, it is necessary to “steal” a voice to play the new note, since you always want to hear any new key hit. The algorithm used in the Poly steals the oldest note held of the 4 voices playing. This is done to be consistent; you can always predict which note will be stolen.
When in Combo mode, each Part acts as a separate mini-synthesizer, so the same voice assignment rules apply within the Part.
An exception to the voice stealing rule is when Poly Chain is On. In this case rather than stealing an already-used voice, the Poly will transmit the new note over MIDI so it can be played by another linked Poly.
Individual Voice Outputs
The Poly has a pair of output jacks for each of the four voices on the back panel, allowing separate mixing/processing of each voice. When a plug is inserted in the jack, that signal is disconnected from the mix output.
Another trick is to route the output of one voice to the external audio inputs; then, in Combo mode, you can use one (or more) voices to process a different voice. Or take two different voice outputs (programmed in mono) and run one to the Left input and one to the Right input for even wilder results.
Note: The individual outputs will normally be used in Combo mode only, where you have complete control over the individual voices.
Global Parameters
To edit the Global parameters, press the GLOBAL switch and Global page 1 is displayed. The PARAM 1 knob changes the parameter on the upper LCD line, and the PARAM 2 knob changes the lower parameter. The +/YES and -/NO switches select the other pages.
Note: If you hold the -/NO switch while you hit the +/YES switch, it will jump to the last page. Similarly, if you hold the +/YES switch when you hit the -/NO switch, it will jump to the first page.
Note: When in Combo mode, some of the Global parameters will be overwritten by the Combo parameters.
Page 1:
| Transpose: | xx |
| Fine Tune: | xx |
Transpose: -36...+36 – Master Transpose control, 0 is centered. Steps in semitones.
Fine Tune: -50...+50 – Master Fine Tune control; 0 centered. Steps in cents (50 cents = 1/2 semitone).
Page 2:
| MIDI Channel: xxPoly Chain: xx |
MIDI Channel: ALL, 1...16 – Selects which MIDI channel to send and receive data, 1 to 16. All receives on any channel.
Poly Chain: Off, 5...20 – Use this to link multiple Evolvers and Poly Evolvers into a system with more voices by intelligently processing the keys hit and passing MIDI data through to the Poly Chain MIDI out jack where it can be routed to another Evolver or Poly Evolver. Note that MIDI clocks are handled separately per the MIDI Clock parameter. Check page 10 for more details.
Page 3:
| Clock: xxxxxxxxxProg Tempo: xx |
Clock: see table – Selects the MIDI clock status, and enables External sequencer triggers, as follows:
| Display MIDI | Clock Setting |
| Internal | MIDI clock is neither sent nor received |
| MIDI Out | MIDI clock is sent |
| MIDI In | MIDI clock is received |
| MidiIn/Out | MIDI clock is received and transmitted (usewith Poly Chain) |
| MidInNoS/S | MIDI clock is received, but MIDI start/stop/continue messages are ignored. |
Prog Tempo: Off, On – When set to Off, changing a Program or Combo will not change the tempo- this is useful for keeping a constant tempo but using different sounds. If set to On, a Program change will change the tempo to the BPM and Clock Divide values saved with the Program. When on, changing the main BPM will also change the Program BPM, and vice-versa. When off, changing one has no effect on the other.
Page 4:
| Tempo (BFM): xxx |
| Clock Div: xxxxxx |
Tempo: 30...250 – Sets the basic speed for the sequencer in BPM. Actual speed also depends on the Clock Divide setting. If using MIDI clock, it will display the BPM of the incoming MIDI clocks. If Prog Tempo is On, the Tempo and Clock Divide will both be updated on every Program or Combo change.
Clock Divide: see table – Used as a clock divider to provide a wider range of sequencer speeds. When set to Quartr (quarter notes), the BPM setting is exact, i.e. 120 BPM = 120 BPM. If set to Half (half note), the actual speed is half, so a setting of 120 BPM will actually play at 60 BPM.
Swing settings add a delay to every the odd steps (1, 3, 5, and so on), while shortening the even steps by the same amount, for a swing feel to the timing. Half swing is the same with less delay.
Here are all the possible settings, with the effect on the overall tempo:
| Display Tempo Timing Division | ||
| Half | BPM/2 | Half note |
| Quartr | BPM | Quarter note |
| Eighth | BPM x 2 | Eighth note |
| 8 half | BPM x 2 | Eighth note, half swing timing |
| 8swing | BPM x 2 | Eighth note, full swing timing |
| 8 trip | BPM x 3 | Eighth note triplets |
| 16th | BPM x 4 | Sixteenth note |
| 16half | BPM x 4 | Sixteenth note, half swing timing |
| 16swing | BPM x 4 | Sixteenth note, full swing timing |
| 16trip | BPM x 6 | Sixteenth note triplets |
| 32nd | BPM x 8 | Thirty-second note |
| 32trip | BPM x 12 | Thirty-second note triplets |
| 64trip | BPM x 24 | Sixty-fourth note triplets |
MIDI Program: xxx
MIDI Pressure: xx
MIDI Program: Off, On – When On, the Poly will respond to MIDI program changes received, and will transmit Program changes to MIDI Out.
MIDI Pressure: Off, On – When On, the Poly will respond to MIDI pressure (aftertouch) received, and will transmit Keyboard Pressure to MIDI Out.
Page 6:
MIDI Control:xxx
MIDI SysExi xx
MIDI Control: Off, On – When On, the Poly will respond to MIDI controllers, and will transmit controllers from the keyboard to the MIDI Out. Controllers include Pitch Wheel, Mod wheel, Pedal 1, and pedal 2.
MIDI SysEx: Off, On – When On, the Poly will respond to MIDI SysEx messages, and will transmit them from the keyboard to the MIDI Out. Note that all knobs/parameters on the keyboard are sent as SysEx messages when enabled.
Page 7:
Input Gain:xxxxx
LCD Contrast: xx
Input Gain: 0db... 24d – Provides extra gain on the Left and Right External Inputs. You can select no gain (0 dB), or a gain in steps of 3 dB up to 24 db.
LCD Contrast: 1...100 – This sets the contrast level for the LCD. Normally it will be around 15.
Page 8:
Pedal 1: xxxxxxxxx
Pedal 2: xxxxxxxxx
Pedal 1: see table – Sets the destination for the Pedal/CV1 input. Note that this input is heavily filtered for clean operation, so there is a limit to the speed it will respond to an external control voltage.
Pedal 2: see table – Same for Pedal/CV 2.
| Display Pedal Routing | |
| FootCtrl | Routed to the Foot Control Modulation |
| Breath | Routed to the Breath Control Modulation |
| Expressn | Routed to the Expression Modulation |
| Volume | Controls Master Volume |
| LpFilter | Routed to the low pass filter |
Page 9:
Velocity Curves x Pressure Curves x
Velocity Curve: 1...4 – Sets one of the four velocity curves for the keyboard; this gives you the ability to adjust the keyboard to your playing style.
Pressure Curve: 1...4 – Sets one of the four pressure curves for the keyboard; this gives you the ability to adjust the keyboard to your playing style.
Page 10:
LocalControl:xxx DamperPolarity:x
Local Control: Off, On – Enables or disables the internal connection between the keyboard and panel controls and the synth electronics. This is useful with external sequencer operation.
DamperPolarity: -, + - For compatibility with different sustain (Damper) pedals connected to the Sustain jack on the rear panel. Use + for normally Open switches, and use - for normally closed switches.
Page 11:
Dump: (Hit S/S) XXXXXXXXXXXXXX
MIDI Dumps: see table – Allows dumping of Programs and Combos over MIDI in a number of ways.
| Display MIDI Transmit Operation | |
| Single Program | Send current program |
| Program Bank | Send all 128 programs in current bank |
| All Program Banks | Send all programs in all four banks |
| Single Combo | Send current combo |
| Combo Bank | Send all 128 combos in current bank |
| All Combo Banks | Send all combos in all three banks |
| Everything | Sends the whole banana (all of the above) |
When this screen is active, the sequencer START/STOP LED will start blinking. When the START/STOP switch is hit, the transmission will start. It is handy for saving Programs on a computer or sending to another Poly. The dumps include Program and Bank numbers, so when received it will be stored in the same location.
Program Parameters
All Program parameters can be edited using the front panel controls. To edit a program, simply turn the desired parameter knob. The selected parameter and value appears in the LCD display.
After a parameter is selected by turning its knob, you can also use the PARAM 2 knob to change the value of the selected parameter. The + / YES or - / NO switches incrementally adjust parameter values as well.
![graph TD A["LowPass Filter Frequency: 10"] --> B["Param 1"] A --> C["Param 2"] D["Combo"] --> E["Program"] D["Program"] --> F["Global"] G["Name"] --> H["Compare"] G["Name"] --> I["Write"] J["+ / Yes"] --> K["- / No"] L["increment and decrement parameter values"] --> K M["adjusts parameter value"] --…](/content/2026/06/1406150/images/5544e0835cdb50cc20b60d8e94f464fc18b785a3e166485ae0f1b828fe4f13d7.jpg)
Following are descriptions of each Poly Evolver Program Parameter.
Oscillators
There are four oscillators per Poly Evolver voice. To select a particular oscillator for editing, press the appropriate oscillator switch, 1–4. Turning a knob will then adjust the parameters of the selected oscillator. Holding one of the four switches will solo that oscillator (the switch will blink) by setting the levels of the other three to zero. It does not affect any modulation that is routed to oscillator level, though, so at times it may not completely turn off all other levels.

Oscillators 1 and 2
Oscillators 1 and 2 are analog oscillators. Oscillator 1 is hardwired to the Left channel; Oscillator 2 is hardwired to the Right channel.
Note: There are additional modulation controls that affect Oscillators 1 and 2. These are covered in other sections of the Parameter definitions.
Frequency: C -2...C 8 – Selects the base oscillator frequency over a 10 octave range, from 8 Hz to 8KHz, stepping in semitones. C3 is middle C, the first octave is -2 (C-2, C#-2, and so on), the second octave is -1 (C-1, C#-1, and so on), the third is zero (C 0, C# 0...), and so on.
Fine: -50...+50 – Fine Tune control; 0 centered. Steps in cents (50 cents = ½ semitone).
Shape/PW: see table – Selects the analog waveshape as follows:
| Display Waveshape | |
| Sawtooth | Sawtooth |
| Triangle | Triangle |
| Saw-Tri | Sawtooth – Triangle mix |
| Pulse xx | Pulse Wave, with pulse width ranging from minimum (0) to maximum (99). The pulse width will turn off at the two extremes – this allows some interesting modulation possibilities. A square wave will be around P50. |
Level: 0...100 – Sets the volume of the selected Oscillator.
Glide: Normal 0...100; Finger 02...Finger 100; Keybd Off – Sets the Oscillator Glide rate. Glide can be set independently for each oscillator. Low settings are faster. Normal Glide covers the range from 1 to 100 (0 is no glide). A “fingered” mode that only glides when more than one note is held down is selected by setting glide over 100, where it ranges from Finger 02 to Finger 100 (equivalent to glides of 2 to 100).
Note: If you set glide all the way to maximum, it goes to Keybd Off, which has the effect of disconnecting the selected oscillator from the keyboard.
Note: Fingered Glide only works in Mono or Unison key assign modes.
Sync 2->1 – When enabled (lit), turns oscillator hard sync on. With sync on, whenever oscillator 2 resets, it will also reset oscillator 1 for the classic hard sync sound.
Oscillators 3 and 4
Oscillators 3 and 4 are digital waveshape oscillators. Oscillator 3 is hardwired to the Left channel; Oscillator 4 is hardwired to the Right channel. Like the original Prophet VS, the digital oscillators in Evolvers get quite trashy at higher frequencies.
Frequency: C -2...C 8 – Selects base frequency over a 10 octave range, from 8 Hz to 8KHz, stepping in semitones. C3 is middle C, the first octave is -2 (C-2, C#-2, and so on), the second octave is -1 (C-1, C#-1, and so on), the third is zero (C 0, C# 0...), and so on.
Fine: -50...+50 – Fine Tune control; 0 centered. Steps in cents (50 cents = ½ semitone).
Shape/PW: 1...128 – Selects a digital waveshape. Waveshapes 1 - 95 correspond to ROM (preset) Waveshapes 32 - 126 in the Prophet-VS. Waveshapes 97 - 128 are user programmable via the software editor. In the VS, the user waves were 0 - 31, and wave 127 was noise, which is not included because the Poly Evolver has a separate noise generator. Wave 96 has a Waveshape that is unique to Evolver in
place of the VS noise. Wave 95 (126 on the VS) is a “blank” wave, which can give some options while sequencing waves. The Poly Evolver ships with waves 97 – 128 the same as 1 – 32.
Level: 0...100 – Sets the volume of the selected Oscillator.
Glide: Normal 0...100; Finger 02...Finger 100; Keybd Off – Sets the oscillator Glide rate. Glide can be set independently for each oscillator. Low settings are faster. Normal Glide covers the range from 1 to 100 (0 is no glide). A “fingered” mode that only glides when more than one note is held down is selected by setting glide over 100, where it ranges from Finger 02 to Finger 100 (equivalent to glides of 2 to 100).
Note: If you set glide all the way to maximum, it goes to Keybd Off, which has the effect of disconnecting the selected oscillator from keyboard.
Note: Fingered Glide only works in Mono or Unison key assign modes.
FM: 0...100 – Sets the amount of Frequency Modulation. If Oscillator 3 is selected, FM is applied to Oscillator 3 from Oscillator 4. If Oscillator 4 is selected, FM is applied to Oscillator 4 from Oscillator 3. Note that each digital oscillator can FM the other at the same time for some wild results.
Ring Mod: 0...100 – Sets the amount of Ring (Amplitude) Modulation. If Oscillator 3 is selected, Ring Modulation is applied to Oscillator 3 from Oscillator 4. If Oscillator 4 is selected, Ring Modulation is applied to Oscillator 4 from Oscillator 3. Note that each digital oscillator can Ring modulate the other at the same time.
Note: If the Ring Mod amount is turned up, you will get output from the Oscillator even if the Oscillator Level is set to zero.
Shape Seq: Off, Seq1...4 – This parameter allows sequencing Waveshapes. Off if not in use, otherwise select one of the four sequences Seq 1, Seq 2, Seq3, or Seq 4 to change the waveshape on every sequence step. In other words, if sequence 1 is selected, with step 1 = 10 and step 2 = 5, then waveshape 10 will play in the first step, and waveshape 5 will play in the second.
Noise

Level: 0...100 – Controls the volume of white noise mixed into the filter. The same amount goes into both channels.
External In

Level: 0...100 – Controls the volume of external audio input connected to the Left and/or Right Audio Input jack on the back of the Poly Evolver Keyboard. The same signal is routed to all four voices.
Note: Use the External Audio input type parameter in the Misc Parameters section to choose the input mode.
Lowpass Filter

The analog (real analog!) lowpass filter is actually two different filters; one for the Left channel and one for the Right channel. This allows true stereo processing of external audio signals run through Evolver. However, for simplicity and consistency the two filters are normally driven together in tandem, so they normally respond the same way.
Exceptions are when using the SPILT parameter, and when using the separate filter cutoff and resonance modulation destinations, which allow the two filters to be modulated independently. Note that though they are normally controlled together, since they are analog there will always be some subtle differences between the two filters, which gives the Poly Evolver a more natural sound.
4/2 Pole: - Selects either 2- or 4-pole operation for the filter. (The filter is in 4-pole mode when the 4/2/POLE switch is lit.)
Frequency: 0...164 – Sets the base filter cutoff frequency over more than 13 octaves. There is special smoothing on the operation of the filter knob to eliminate stepping as you turn the knob for clean manual filter sweeps.
Resonance: 0...100 – Sets the Resonance level of the filter. At high settings the filter will self-oscillate in 4-pole mode. If the filter does not oscillate, make sure that 4 pole mode is selected. (The filter is in 4-pole mode when the 4/2 POLE switch is lit.)
Env Amount: -99...+99 – Sets the amount of filter envelope to the cutoff frequency. This can be positive or negative, allowing inverted envelope control of the filter.
Velocity: 0...100 – Amount of MIDI velocity controlling the level of the filter envelope.
Key Amount: 0...100 – Sets the amount of keyboard (MIDI note) to the filter cutoff. A setting of 72 will step the filter one semitone for each MIDI note, 36 would be half-semitones, and so on. Also, the MIDI note is derived using Oscillator 1 Glide, allowing Glide tracking.
Attack: 0...110 – Sets the Attack time of the filter ADSR envelope generator
Decay: 0...110 – Sets the Decay time.
Sustain: 0...100 – Sets the Sustain level.
Release: 0...110 – Sets the Release time.
Audio Mod: 0...100 – Sets the amount of audio modulation from the analog oscillator to the filter, separate in left and right channels; i.e. Oscillator 1 modulates the left filter, and Oscillator 2 mods the right filter.
L/R Split: 0...100 – Split separates the cutoff of the left and right filters by raising the left and lowering the right. Normally the filters track in both channels, so this parameter provides a way to unlock them.
Amplifier
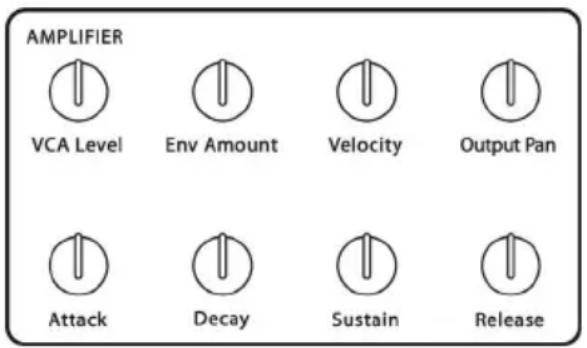
VCA Level: 0...100 – Sets a base level for the VCA (Voltage controlled Amplifier). This allows the VCA to be essentially bypassed, which may be necessary for processing external audio signals, or for Programs that drone.
Note: If VCA Level is on full, Envelope Amount has no effect.
Env Amount: 0...100 – Sets the amount of VCA envelope to the VCA level.
Velocity: 0...100 – Sets the amount of MIDI velocity controlling the level of the VCA envelope.
Attack: 0...110 – Sets the Attack time of the VCA ADSR envelope generator.
Decay: 0...110 – Sets the Decay time.
Sustain: 0...100 – Sets the Sustain level.
Release: 0...110 – Sets the Release time.
Output Pan: see table – Sets output panning. This affects the feedback; it allows signal from one channel to feedback into the other, for example.
| Display Output Pan Selection | |
| LxxxxR | Stereo 1 – Left channel panned fully left, Right fully to the right |
| xLxxRx | Stereo 2 – Left channel panned mostly left, Right mostly to the right |
| xxLRxx | Stereo 3 – Left channel panned somewhat left, Right somewhat to the right |
| xMonox | Mono – Both channels mixed to the center – also useful when only using one output |
| xxRLxx | Reverse Stereo 1 – Right channel panned somewhat left, Left somewhat to the right |
| xRxxLx | Reverse Stereo 2 – Right channel panned mostly left, Left mostly to the right |
| RxxxxL | Reverse Stereo 3 – Right channel panned fully left, Left fully to the right |
High Pass Filter

Frequency: 0...99 – Sets the cutoff frequency of the four-pole highpass filter. When the PRE/POST switch is on (lit), the highpass filter is inserted before the analog lowpass filter, and only affects external audio input. When the PRE/POST switch is off (unlit), the highpass filter is placed after the analog lowpass filter and VCA (but before the Delay) and filters the Evolver's audio accordingly. Refer to the Signal Flow diagram on page 13 for details on the signal path. There are two separate highpass filters, one for each channel, and they are controlled in tandem.
Remember that any of the modulation sources can be routed to control the Highpass Filter. For example, Envelope 3 can be dedicated to the Highpass.
Tuned Feedback

Feedback is implemented via two identical tuned delay lines, one for each channel. See the diagram on page 13 for details on the signal path. Since the delay is tuned, it can be played by modulating the feedback frequency, from the sequencer or other sources.
Note: Feedback can also be used to implement plucked string physical models. Use Envelope 3 with Noise as a destination (all oscillators off). Play around with different Feedback Levels, and adjust the filter cutoff frequency.
Frequency: 0...48 – Sets the base frequency of the main feedback loop. It steps in semitones from C0 to C4 (0 – 48) for a four octave range. The exact frequency is influenced by other factors, such as the filter frequency and number of poles, which can drive it slightly sharp or flat.
Level: 0...100 – Sets the level of feedback. As the level goes up, the feedback will eventually oscillate at the set Frequency. Medium levels of feedback add depth and movement to the sound.
Grunge: OFF...On – When on, it enables nasty feedback at higher levels. It has no effect at lower levels of feedback.
Distortion

Distortion: 0...99 – Sets the amount of distortion. There are two separate distortions, one for each channel. When the PRE/POST switch is on (lit), the distortion is introduced before the analog filter, and only affects external input. When the PRE/POST switch is off (unlit), the distortion is introduced after the analog filter, VCA, and Highpass, but before the Delay.
Note: There is a built-in noise gate that is enabled when distortion is not zero. If you want to use the noise gate but without distortion, use a distortion setting of 1. The noise gate uses the Left channel signal level to gate both channels.
Delay
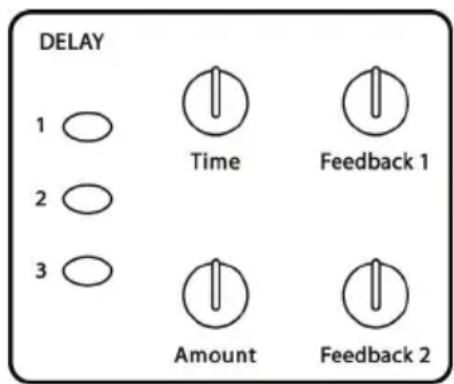
The delay takes a mix of both channels as input, and provides up to three independent taps, each of which can be individually time or level modulated. To select a delay tap for editing, press the appropriate Delay switch, 1–3. Turning a knob will then adjust the parameters of the selected Delay tap. Holding one of the three switches will solo that delay (the switch will blink) by setting the levels of the other two to zero. It does not affect any modulation that is routed to delay level, though, so at times it may not completely turn off all other levels.
The outputs of the three taps are mixed and summed with the Left and Right channels. The delay output also can be mixed back to the input of the delay for more ambience, repeating delays, or tuned feedback if the feedback level is set high.
A second feedback path takes the delay output and routes it back to the input of the analog filter. This path can be used for more extreme feedback effects.
Note: If all three Delay taps are in use, the Levels of each should be set to lower amounts to prevent overload distortion.
Time: 0...150, sync – Sets the delay time of the selected delay tap. A setting of 0 - 150 will adjust the delay from zero to 1 second at 16 bits 48KHz sampling, no compression. The middle range steps are in tuned semitones (noticeable with Feedback 1 turned up high). Since delay is a time measurement, higher delay numbers are lower frequencies. Step 22 corresponds to C7 (2,093 Hz), down to step 94 which is tuned to C1 (32.7 Hz).
After 150 the sync delay times are as shown in the table below. The delay time can be set in multiples of a single sequencer step, or exact divisions of a step.
Note: Depending on the current sequence speed, the longer sync delays may not be reachable. For example, at Tempo of 60 BPM and Clock Divide of Quartr (quarter note) each beat takes one second, so if you set it to 2 Steps (Delay is 2 steps in length), the delay should be two seconds. But, there is only enough memory for one second of delay, so it will not work. When too slow as in this case, simply clamping it at one second would not likely be a multiple of the step time. So, if the requested time is too long, the requested time is cut in half until it fits within the one second of available memory. So, don't be surprised if changing longer sync delay times does not make any difference to the sound.
| Display Timing Sync | |
| 32 Steps | Delay is 32 steps in length |
| 16 Steps | Delay is 16 steps in length |
| 8 Steps | Delay is 8 steps in length |
| 4 Steps | Delay is 4 steps in length |
| 2 Steps | Delay is 2 steps in length |
| 1 Step | Delay is 1 step in length |
| 1/2 Step | Delay is one-half step in length |
| 1/4 Step | Delay is one-quarter step in length |
| 1/8 Step | Delay is one-eighth step in length |
| 1/16Step | Delay is one-sixteenth step in length |
| 6 Steps | Delay is 6 steps in length |
| 3 Steps | Delay is 3 steps in length |
| 1.5 Step | Delay is one and a half steps in length |
| 2/3 Step | Delay is two-thirds of a step in length |
| 1/3 Step | Delay is one-third step in length |
| 1/6 Step | Delay is one-sixth step in length |
Amount: 0...100 – Sets the delay amount of the selected delay tap. The left and right channels are mixed into a single delay.
Feedback 1: 0...100 – Sets the amount of feedback from the summed output of all the delay taps to the input of the delay.
Feedback 2: 0...100 – Sets the amount of feedback from the summed output of all the delay taps to the input of the filter for more extreme effects.
Output Hack

Amount: 0...14 – Trashes the output signal, quite rudely.
Voice Vol

Level: 0...100 – Sets the voice volume; usually used for matching volumes between Programs.
Envelope 3
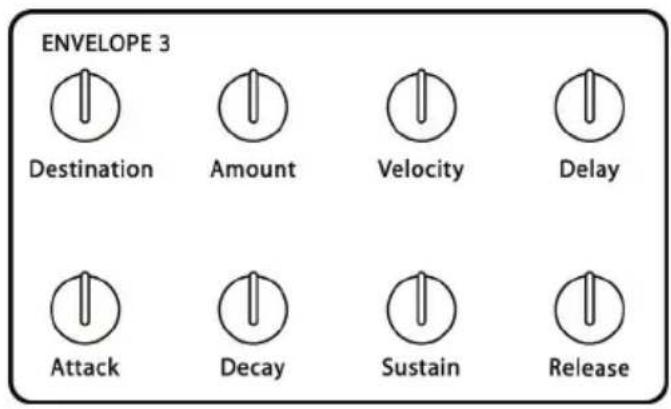
Destination: see table – Sets the Envelope 3 destination. See the Modulation Destination table on page 41 for a list of possible destinations.
Amount: -99...+99 – Sets the amount of Envelope 3.
Velocity: 0...100 – Sets the amount of MIDI velocity controlling the level of envelope 3.
Delay: 0...100 – Sets the delay time of Envelope 3, prior to Attack.
Attack: 0...110 – Sets the Attack time of Envelope 3.
Decay: 0...110 – Sets the Decay time.
Sustain: 0...100 – Sets the Sustain level.
Release: 0...110 – Sets the Release time.
LFOs
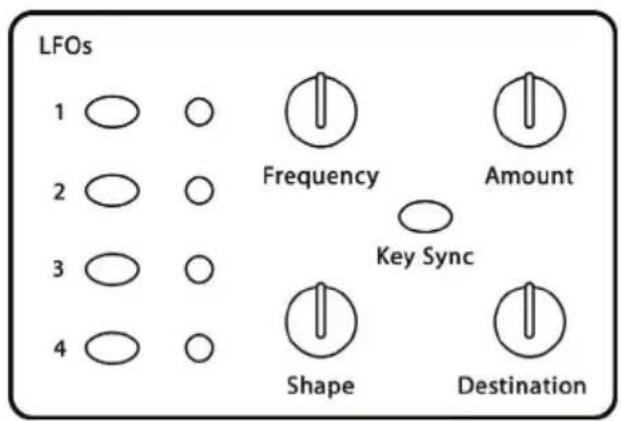
The Poly Evolver has four identical Low Frequency Oscillators (LFOs). To select a specific LFO for editing, press the appropriate switch, 1–4. Turning a knob will then adjust the parameters of the selected LFO. Holding one of the four switches will solo that LFO (the switch will blink) by setting the Amounts of the other three to zero. It does not affect any modulation that is routed to LFO Amounts, though, so at times it may not completely turn off all other Amounts.
Frequency: 0...150, sync – Sets the LFO frequency. Range 0–150 for unsynced LFO; speed ranges from slow (30 seconds) to very fast – at 90 (8 HZ, C-2) and ab the (264 Hz tepidles) omitones, up to 150
Note: Some of the analog functions may not respond well to the fastest LFO speeds, due to speed limitations of the control voltages; but they will certainly generate some i sting sounds.
Above 15 pe
eds as follows: 0, the sync s
| Display Timing Sync | |
| 32 Steps | Sequence speed divided by 32; i.e. one LFO cycle takes 32 steps |
| 16 Steps | Sequence speed divided by 16 |
| 8 Steps | Sequence speed divided by 8 |
| 4 Steps | Sequence speed divided by 4 |
| 2 Steps | Sequence speed divided by 2 |
| 1 Step | One cycle per step |
| 1/2 Step | Two cycles per step |
| 1/4 Step | Four cycles per step |
| 1/8 Step | Eight cycles per step |
| 1/16Step | Sixteen cycles per step |
Shape: see tables the selec LFO waveshape:
| Display LFO Shape | |
| T triangle | Triangle |
| Rev Saw | Reverse Sawtooth |
| Sawtooth | Sawtooth |
| Square | Square Wave |
| Random | Random – changes once per cycle for sample-and-hold effects |
Amount: 0...100 – Sets the amount of LFO routed to the destination.
ey Sync: When this sKitch is enabled (lit) the Poly Evolver re-starts the LFO each time a new note is played (Key Sync). Each LFO can be set independently.
Destination: see table – see the Modulation Destination table on page 41 for a list of possible destinations.
Modulators

The Modulators section lets you configure the modulation routing and amount for the Poly Evolver's four general-purpose modulation slots as well as for MIDI controllers such as the Mod Wheel, Key Pressure, Velocity, Breath Control, and more.
Since each Evolver mod source has a single destination, the four general purpose Mods provide a way to send a mod source (such as a sequence or LFO) to additional destinations, with a different amount. There are also additional mod sources available here, such as noise and the digital oscillators, allowing a wide variety of possibilities, such as audio-rate modulation. While some destinations may not be able to keep up with audio-rate modulation, you will certainly be able to generate interesting sonic results.
To configure a general-purpose modulation slot, press the appropriate switch, 1–4, and use the Source, Destination and Amount knobs to set the modulation as desired. Holding one of the four switches will solo that Mod (the switch will blink) by setting the Amounts of the other three to zero. It does not affect any modulation that is routed to Mod Amount, though, so at times it may not completely turn off all other Amounts.
To configure modulation for a controller, press the FIXED switch, select the desired controller with the Source knob, then use the Destination and Amount knobs to set its modulation.
The Breath and Foot Controller parameters can be controlled by the Pedal/CV 1 and 2 inputs on the rear panel. This gives you the ability to route them to different parameters on each Program for more flexible control.
The In Peak fixed source takes the momentary peak of the left external audio input, and uses it as a modulation signal. The In Env Follower generates an envelope from the Left external audio input, and uses it as a modulation signal.
Source 1: see table – Selects a modulation source. See the list on page 43 for possible sources.
Note: General-purpose mod slot Sources are not filtered, so a MIDI controller going through this route will react quicker, but may produce stepping noise, depending on the controller. For filtered (smoothed) MIDI controller operation, use the direct Pressure, Mod Wheel, Breath Control, or Foot Control parameters in the Fixed mods.
Amount 1: -99...+99 – Sets the amount of modulation.
Destination 1: see table – Selects a modulation destination. See the Modulation Destination table on page 41 for a list of possible destinations.
Misc Parameters

The Misc Parameters section lets you configure a variety of parameters not found elsewhere. The parameter list is printed on the panel as seen above.
Trigger Select: see table – Selects the source of triggers/gates for the envelope generators. In the Poly (different from the Evolver) some of the Trigger modes will automatically turn the Sequencer on. This allows gated-sequence Programs to be played without having to manually hit the START/STOP switch. The Trigger modes that do this are marked in the table as AUTO.
| Display Envelope Trigger Selections | |
| Sequencer or Key | The envelopes will be triggered by either the sequencer or the keyboard. When triggered by the sequencer, the gates are on for half the step time. Simply adjust the envelope parameters (ADSR) for the desired effect. |
| Sequencer Only | The envelopes will be triggered by only the sequencer. |
| Keyboard Only | The envelopes will be triggered by the keyboard only. |
| Key, Resets Seq | The envelopes will be triggered by the keyboard, and the sequencer will be reset on every key (if it is running). The sequencer will not trigger the envelopes. |
| Key, Gates Seq | Gated mode – the envelopes will be triggered by the sequencer when a key is held; in other words the keyboard will gate the sequencer. AUTO |
| KeyGates Seq Rst | Gated mode, reset – same as Gated mode, except every time a key is hit, the sequencer is reset to step 1. AUTO |
| Ext Audio Input | The envelopes are gated by the Left external audio input signal level, in other words, when the signal gets above a fixed threshold, the envelopes start. The envelopes then go into the release phase when thesignal level drops below a second fixed threshold. |
| Ext In, ResetsSeq | Same as external in, but also resets the sequencer to step 1 if it is running. |
| Ext In, Gates Seq | External In signal will gate the sequencer. AUTO |
| Ext In GateSeqRst | External In signal will gate the sequencer, and also resets the sequencer to step 1 on each new gate. AUTO |
| Key GatesSeqOnce | Plays a sequence once (according to the length of Sequence 1) when a key is hit. The sequence is not restarted on multiple keys until it finishes and stops. AUTO |
| Key GateSeqOnceR | Also plays a sequence once when a key is hit, but will re-start the sequence on each key hit. AUTO |
| Ext In Steps Seq | Plays one step of the sequencer on each External Input audio trigger. AUTO |
| Key Steps Seq | Plays one step of the sequencer on each key hit. AUTO |
Key Mode: Poly, Mono, Unison 1, Unison 2; see table – Selects the key mode when playing on the keyboard. There are 4 groups of key modes: Poly, Mono, Unison 1, and Unison 2. Each mode has 6 basic key modes as seen in the table. Poly is for normal polyphonic playing; in Program mode and Poly, the six key modes will have no effect, though they will in Combo when set to Mono.
Mono will only play one voice in Program mode. Unison will play all four voices together for a very thick sound. Unison 2 has more detuning between the voices than Unison 1.
Note: For quick key mode changing while playing in Program mode, the four Combo Part switches will select between Poly, Mono, Unison 1, and Unison 2 modes when switches 1-4 are hit respectively.
| Display Keyboard mode | |
| Low Note | Low note priority |
| LowRetrig | Low note priority, re-trigger envelopes |
| HighNote | High note priority |
| HighRetrog | High note priority, re-trigger envelopes |
| LastNote | Last note hit priority |
| LastRetrog | Last note hit priority, re-trigger envelopes |
Key Off/Xpose: Off, -36...+36 – Enables and transposes the keyboard. If set to Off, the keyboard note values are ignored. Otherwise, it transposes the keyboard from -36 to +36 semitones (+/- 3 octaves). It is usually set to -24 or -36 to be in the best range for both the keyboard and the sequencer.
Note: When set to Off, the Poly will not respond to the keyboard.
Another Note: This parameter is useful to help balance oscillator pitch ranges between the keyboard and the sequencer. For example, if you make a Program using the sequencer, you will likely set the Oscillator frequencies up to the desired
pitch range. But, if you then try to play this Program from a keyboard, the pitches will likely be too high. Rather than lowering all the oscillator frequencies (which would mess up the sequence!) you can simply use the transpose here.
Pitch Wheel Range: 0...12 – Sets the Pitch Bend Range of the Pitch Wheel, in semitones.
Osc Slop: 0...5 – The amount of random oscillator frequency slop. The analog and digital oscillators in Evolver are very accurate, and will not drift. This works great for accurate sounds, and allows precise de-tuning. The Oscillator Slop parameter allows subtle amounts of frequency drift. For larger amounts, use a random LFO or white noise mod.
Input Mode: see table – Selects the external signal input mode. Note that the same signal goes to all four voices; this can be useful in Combo mode to do multiple parallel processing of an external audio signal. Or, the output of one voice can be routed to the input of another voice.
| Display External Audio Input Mode | |
| Stereo | The left channel in goes to the left channel, right to right. |
| Mono Left | The left channel in goes to both channels (mono in). |
| Mono Right | The right channel in goes to both channels (mono in). |
| LCon RAudio | A mono audio signal is input to the Right Input; and a separate control audio signal (for envelope follower, peak hold, and clock source) into the Left Input. This allows one audio signal to control another for gating, filtering etc. |
Env Shape: Exponential, Linear – Selects whether all three envelopes have a linear (straight line) shape, or exponential (curved). Exponential is the more natural of the two.
Input Hack: 0...14 – Trashes the external input signal, quite rudely. But, the analog filter tames it nicely. A good way to mess up a clean stereo signal.
Sequencer

The Poly Evolver features a 4 x 16 “analog-style” step sequencer that can generate four separate sequences of up to 16 steps each. Individual sequences can be routed to any standard modulation destination (see the table on page 41). Using VCA Envelope as a destination, for example, varies the volume of each step; a destination of Filter or Filter Envelope Amount will produce different filter settings per step. Typically, however, at least one sequence is routed to an oscillator to control pitch.
The sequencer can be triggered in a variety of ways, including via its own internal clock, by the keyboard, or with an external audio signal.
BPM: 30...250 – Sets the programmed basic speed for the sequencer in BPM. When “Prog Tempo” is set to On in the Global Parameters menu, changing this parameter also changes the master BPM, and vice-versa. When Off, changing this parameter has no effect.
Tap Tempo – Lets you tap in a tempo. If the sequencer is Off, hit the Tap Tempo four times, and on the fifth hit the sequencer will start with the speed set according to the timing of the taps. If you keep hitting it, or otherwise hit it while playing, the sequence speed will change to match the tap speed. You can use this to speed up or slow down a sequence by continually hitting the switch.
Clock Divide: see table – Provides a wider range of sequencer speeds. When “Prog Tempo” is set to On in the Global Parameters menu, changing this parameter also changes the master Clock Divide, and vice-versa. When Off, changing this parameter has no effect.
| Display Tempo Timing Division | ||
| Half | BPM/2 | Half note |
| Quartr | BPM | Quarter note |
| Eighth | BPM x 2 | Eighth note |
| 8 half | BPM x 2 | Eighth note, half swing timing |
| 8swing | BPM x 2 | Eighth note, full swing timing |
| 8 trip | BPM x 3 | Eighth note triplets |
| 16th | BPM x 4 | Sixteenth note |
| 16half | BPM x 4 | Sixteenth note, half swing timing |
| 16swing | BPM x 4 | Sixteenth note, full swing timing |
| 16trip | BPM x 6 | Sixteenth note triplets |
| 32nd | BPM x 8 | Thirty-second note |
| 32trip | BPM x 12 | Thirty-second note triplets |
Programming a Sequence
Each of the 16 steps in the sequence has its own knob, which can be set to a value from 0-100. Turning a Step knob past 100 sets the step to "Reset." Reset is useful for creating a sequence of fewer than 16 steps. For example, if you want to create a four step sequence, set step 5 to Reset.
In addition, in Sequence 1 you can program rests by setting a step value to "Rest", just past Reset. On that step, no trigger is sent to the envelopes. Since Sequence 1 controls rests for Sequences 2–4 as well, the rests will end up in different places on other sequences if they are a different length.
If you want all sequences to be the same length, make sure that the reset step is the same for all four sequences. If however, each sequence is a different length, the rests and clock swing settings will follow sequence 1. In other words, the envelopes are always triggered from one sequence and can't be separately handled by each of the 4 sequences.
Using rests, resets, and different Clock Divides (half swing, swing, and so on) you can generate very complex sequences.
To program a sequence:
- Select the sequence you want to program by pressing the appropriate switch, 1–4.
- Select the destination for the sequence using the Destination knob. For example, to generate a sequence of notes, select OscAllFreq.
Note: When a sequence is routed to oscillator frequency, each knob increment equals half of a semitone. The LCD display will show the relative note value, with a “+” after it to show when at a half-semitone step.
- Press the Reset switch to reset the sequence to Step 1.
- Turn the Step 1 knob to the desired value. If the sequencer is stopped, each time you turn a Step knob, the envelopes are triggered, allowing you to hear the notes (or other modulation) generated by the step value.
- Repeat for each subsequent step in the sequence.
- Press the S TART/STOP switch to start the sequence.
- Press the S TART/STOP switch again to stop the sequence.
Note: Pressing the RESET switch resets the sequencer to step 1 whether or not it is running. The RESET switch also acts as an all-notes-off, and resets all controllers if pressed while the sequencer is not running.
An alternate way to program a sequence is to use the keyboard. Hit the WRITE switch, then hit START/STOP – you are now in sequence record mode. Simply hit the keys you want to record and the sequencer will automatically increment to the next step. It will keep looping from 16 to 1 if you keep hitting notes. You can hit any of the other
sequence switches while recording to program all of the sequences in one write session. Hit START/STOP or WRITE when you are done recording.
When recording from the keyboard, you cannot reach the half semitone step values. You can program rests by just hitting any key above the highest D key, and you can program a reset by hitting high C. Note that you can program values into sequences using the keyboard even if a sequence is going to a destination other than oscillator pitch; this makes for quick programming.
In Program mode, only voice 1 plays the sequence (if one is programmed); the other 3 voices are still controlled via the keyboard. In Combo mode, each Part can have the sequencer individually enabled or disabled.
Some Trigger modes will automatically start the sequencer for gated sequence operation. In this case, all four voices in Program mode will use the sequencer, not just voice 1.
Suggested Destinations
You can really have some fun with other destinations. For example, route a sequence to Delay amount to have the delay level change; or to feedback amount to drastically change the sound every step. FM and Ring Mod Levels are fun to sequence, too – you get the idea. With four sequences, you can program a very dynamic sequence.
Note: Another very useful way to modulate a sequence is using LFOs with sync; LFO frequency runs 0–150, after which you can select the sync settings. A setting of 16 Steps for LFO Frequency with a Triangle wave selected and routed to the filter will provide a clean filter sweep over a 16 step sequence, perfectly in sync! This is much easier (and smoother) than programming a filter sweep using sequence steps.
The sequencer can also be routed to MIDI output destinations, including Note Number, Velocity, Mod Wheel, Pressure, Breath, and Foot Controller. Velocity is a special case – it only works if selected as the destination for Sequence 2 when Sequence 1's destination routed to Note Number. The same for Sequence 3 and 4 (Sequence 4 can be velocity for Sequence 3). If velocity is not used as a destination, the velocity output is 120. So, it is possible to have up to 4 note sequences sent out over MIDI.
The actual MIDI note transmitted is the sequence step value plus one (since MIDI note on of zero = note off). Note that this is different than the half-semitone when driving the internal oscillators – this was done to provide a wider range of notes. Also, the main Transpose is added/subtracted to the MIDI note output. Velocity and the other controllers are converted from 0 – 100 range to 0 – 127 range for MIDI.
Note: The MIDI output destinations only work on Voice 1; you cannot have multiple voices in Combo mode sending out to MIDI.
Another possible sequencer destination is Clock Mod. It works via a multiplier based on a step value of 40. If a sequencer step is set to 40, the clock speed stays as set. If set to 20, (half of 40), the clock will be twice as fast for that step. Likewise, a step value of 80 will be twice as slow as normal, and 10 would be 4 times faster.
Note that overall limits of 30 to 250 BPM still apply; for example, if you have a BPM of 120, and a sequencer step of 10, it will try to go four times faster than 120, which is 480. Since it is greater than 250, it will clamp at 250. With clever choices of BPM (using Clock Divide as necessary) you can develop a pretty wide range of timing possibilities. Also, with sequences of different lengths, it can really get quite wild.
Modulation Destinations
| Display Destination | |
| Off | No destination selected |
| Osc 1 Freq | Oscillator 1 Frequency |
| Osc 2 Freq | Oscillator 2 Frequency |
| Osc 3 Freq | Oscillator 3 Frequency |
| Osc 4 Freq | Oscillator 4 Frequency |
| OscAllFreq | Oscillator All Frequency – goes to all four |
| Osc1 Level | Oscillator 1 Level |
| Osc2 Level | Oscillator 2 Level |
| Osc3 Level | Oscillator 3 Level |
| Osc4 Level | Oscillator 4 Level |
| OscAll Lev | Oscillator All Level |
| NoiseLevel | Noise Level |
| Ext InLevel | External In Level |
| Osc1 PulseW | Oscillator 1 Pulse width |
| Osc2 PulseW | Oscillator 2 Pulse width |
| Osc All PW | Oscillator All Pulse width |
| FM Osc4>3 | Frequency Mod (FM) Amount; Osc 4 -> 3 |
| FM Osc3>4 | Frequency Mod (FM) Amount; Osc 3 -> 4 |
| RM Osc4>3 | Ring Mod (Amplitude) Amount; Osc 4 -> 3 |
| RM Osc3>4 | Ring Mod (Amplitude) Amount; Osc 3 -> 4 |
| Low Pass | Lowpass filter frequency |
| LP Split | Filter Split –separation between left / right |
| Resonance | Resonance |
| High Pass | Highpass filter- will not work if Highpass is set to 0 |
| UCA Level | VCA amount |
| Output Pan | Pan |
| FBack Freq | Feedback frequency |
| FBack Amt | Filter Amount |
| Delay1Time | Delay 1 Time |
| Delay2Time | Delay 2 Time |
| Delay3Time | Delay 3 Time |
| DlyAllTime | Delay All Time |
| Delay1 Amt | Delay 1 Amount |
| Delay2 Amt | Delay 2 Amount |
| Delay3 Amt | Delay 3 Amount |
| DlyAll Amt | Delay All Amount |
| Delay FB1 | Delay Feedback 1 |
| Delay FB2 | Delay Feedback 2 |
| LFO 1 Freq | LFO 1 Frequency |
| LFO 2 Freq | LFO 2 Frequency |
| LFO 3 Freq | LFO 3 Frequency |
| LFO 4 Freq | LFO 4 Frequency |
| LFOA11Freq | LFO All Frequency |
| LFO 1 Amt | LFO 1 Amount |
| LFO 2 Amt | LFO 2 Amount |
| LFO 3 Amt | LFO 3 Amount |
| LFO 4 Amt | LFO 4 Amount |
| LFOA11 Amt | LFO A Amount |
| Env 1 Amt | Envelope 1 Amount (Level) |
| Env 2 Amt | Envelope 2 Amount (Level) |
| Env 3 Amt | Envelope 3 Amount (Level) |
| EnvA11 Amt | Envelope All Amount (Level) |
| Env1Attack | Envelope 1 Attack Rate |
| Env2Attack | Envelope 2 Attack Rate |
| Env3Attack | Envelope 3 Attack Rate |
| EnvA11 Att | Envelope All Attack Rate |
| Env1 Decay | Envelope 1 Decay Rate |
| Env2 Decay | Envelope 2 Decay Rate |
| Env3 Decay | Envelope 3 Decay Rate |
| EnvA11 Dec | Envelope All Decay Rate |
| Env1Releas | Envelope 1 Release Rate |
| Env2Releas | Envelope 2 Release Rate |
| Env3Releas | Envelope 3 Release Rate |
| EnvA11 Rel | Envelope All Release Rate |
| LeftLP Frq | Filter 1 (Left) lowpass filter cutoff frequency |
| RightLPFrq | Filter 2 (Right) lowpass filter cutoff frequency |
| LeftLP Res | Filter 1 (Left) lowpass filter resonance |
| RightLPRes | Filter 2 (Right) lowpass filter resonance |
| Distortion | Distortion - will not work if distortion is set to 0 (off) or 1 (noise gate select) |
Additional Sequencer-Only Modulation Destinations
| Seq Clock | Sequencer clock (BPM) multiplier |
| Midi Note | MIDI note number |
| M Note Vel | MIDI Velocity |
| Midi ModWh | MIDI Mod Wheel |
| Midi press | MIDI Pressure |
| Midibreath | MIDI Breath Controller |
| Midi Foot | MIDI Foot Controller |
Modulation Sources
Display Source
| Off | No Source selected |
| Sequence1 | Sequence 1 |
| Sequence2 | Sequence 2 |
| Sequence3 | Sequence 3 |
| Sequence4 | Sequence 4 |
| LFO 1 | LFO 1 |
| LFO 2 | LFO 2 |
| LFO 3 | LFO 3 |
| LFO 4 | LFO 4 |
| FilterEnv | Filter Envelope |
| VCA Env | Amp (VCA) Envelope |
| Envelope3 | Envelope 3 |
| Ext InPeak | External Audio Input Peak |
| EInEnvFol | External Audio Envelope Follower |
| PitchBend | Pitch Bend |
| Mod Wheel | Mod Wheel |
| Pressure | Pressure (Aftertouch) |
| MidBreath | Midi - Breath Controller |
| Midi Foot | Midi - Foot Controller |
| Velocity | Keyboard Note Velocity |
| KeyNumber | Keyboard Note Number |
| Midi Exp | Midi – Expression |
| Noise | Noise |
| Osc 3 | Oscillator 3 |
| Osc 4 | Oscillator 4 |
Combo Parameters
Combos are used to make different combinations of Programs, and use them in different ways. You can use up to four different Parts, each with its own set of 16 parameters.
To edit the Combo parameters, first hit the desired COMBO PART Switch. The PARAM 1 knob now selects the parameter, and the PARAM 2 knob changes the value. The + and – switches will increment/decrement the value also. The COMBO PART switches select one of the four parts.
While playing a Combo, it is possible to edit the Program parameters of the individual Parts, or of all the Parts together. If you turn a knob with no Parts selected (meaning no Combo Part LEDs are on), the new value will go to all Parts. While this doesn't really make a lot of sense, since the Programs are often very different in each Part, it turns out to be interesting to do quite often.
Otherwise, if you select a Part first, and then turn a knob, then just that Part will be edited. This allows you to go between different parts while performing and change the sound however you wish.
Note: You cannot save the individual programs in each Part while in Combo mode. Since a Program can be used in many different Combos, saving the changes will likely cause problems elsewhere.
Below we describe the 16 parameters for each Part. The upper LCD line shows the Part number; lower lines are used for the parameter.
Mode: see table – Selects the polyphony of this Part. When a Combo is selected, it starts assigning voices to Parts with Part 1. You cannot assign more than 4 voices. For example, if you set both Part 1 and Part 2 to Poly 3, the total would be 6 voices, so it obviously it will not work in a four voice instrument. In this case, it would assign the first 3 voices to Part 1, and the last voice to Part 2, ignoring the rest of the Parts. Looking at the voice LED's on the front panel will help to see the voice operation.
| Display Part Mode | |
| Off | Don't use this Part |
| Poly 4 | Assign 4 voices to this Part |
| Poly 3 | Assign 3 voices to this Part |
| Poly 2 | Assign 2 voices to this Part |
| Mono | Assign 1 voice monophonically to this Part |
Program: 1...128 – Selects the Program to use for this Part.
Bank: 1...3 – Selects the Bank of the Program to use for this Part.
MIDI Mode: see table – Selects the Program to use for this Part.
| Display MIDI mode | |
| Off | This Part will not respond to MIDI |
| Notes | This Part only responds to MIDI notes |
| OntrIs | This Part only responds to MIDI controller messages |
| On All | This Part responds to both MIDI notes and MIDI controller messages |
MIDI Ch: 1...16, All – Selects the MIDI channel to use for this Part. If All is selected, it responds to any MIDI channel. If MIDI Mode is set to Off, this parameter is ignored.
Sequencer: Enable, Disable—Enables or disables the Program's sequencer for this Part. Only Parts with the Sequencer enabled will respond to hitting the START switch or MIDI Start commands (when MIDI clocks are enabled in the Global setting). If this Part uses a gated sequence Trigger mode (see below), you should leave the Sequencer Off – the voices in this Part will play the gated sequences automatically.
Tempo: 30...250 – Sets the tempo of the Part – ignored if the Sequencer is Off.
Clock Div: see table – Sets the clock divider for this Part, also ignored if Sequencer is Off.
| Display Tempo Timing Division | ||
| Half | BPM/2 | Half note |
| Quartr | BPM | Quarter note |
| Eighth | BPM x 2 | Eighth note |
| 8 half | BPM x 2 | Eighth note, half swing timing |
| 8swing | BPM x 2 | Eighth note, full swing timing |
| 8 trip | BPM x 3 | Eighth note triplets |
| 16th | BPM x 4 | Sixteenth note |
| 16half | BPM x 4 | Sixteenth note, half swing timing |
| 16swing | BPM x 4 | Sixteenth note, full swing timing |
| 16trip | BPM x 6 | Sixteenth note triplets |
| 32nd | BPM x 8 | Thirty-second note |
| 32trip | BPM x 12 | Thirty-second note triplets |
| 64trip | BPM x 24 | Sixty-fourth note triplets |
Trigger: see table – Selects the source of triggers/gates for the envelope generators for this Part. Note that the Sequencer and/or keyboard must be enabled to match the Trigger selected.
In the Poly (different from the Evolver) some of the Trigger modes will automatically turn the Sequencer on. This allows gated-sequence Programs to be played without having to manually hit the START/STOP switch. The Trigger modes that do this are marked in the table as AUTO.
| Display Envelope | Trigger Selections |
| Sequencer or Key | The envelopes will be triggered by either the sequencer or the keyboard. When triggered by the sequencer, the gates are on for half the step time. Simply adjust the envelope parameters (ADSR) for the desired effect. |
| Sequencer Only | The envelopes will be triggered by only the sequencer. |
| Keyboard Only | The envelopes will be triggered by the keyboard only. |
| Key, Resets Seq | The envelopes will be triggered by the keyboard, and the sequencer will be reset on every key (if it is running). The sequencer will not trigger the envelopes. |
| Key, Gates Seq | Gated mode – the envelopes will be triggered by the sequencer when a key is held; in other words the keyboard will gate the sequencer. AUTO |
| KeyGates Seq Rst | Gated mode, reset – same as Gated mode, except every time a key is hit, the sequencer is reset to step 1. AUTO |
| Ext Audio Input | The envelopes are gated by the Left external audio input signal level, in other words, when the signal gets above a fixed threshold, the envelopes start. The envelopes then go into the release phase when the signal level drops below a second fixed threshold. |
| Ext In, ResetsSeq | Same as external in, but also resets the sequencer to step 1 if it is running. |
| Ext In, Gates Seq | External In signal will gate the sequencer. AUTO |
| Ext In GateSeqRst | External In signal will gate the sequencer, and also resets the sequencer to step 1 on each new gate. AUTO |
| Key GatesSeqOnce | Plays a sequence once (according to the length of Sequence 1) when a key is hit. The sequence is not restarted on multiple keys until it finishes and stops. AUTO |
| Key GateSeqOnceR | Also plays a sequence once when a key is hit, but will re-start the sequence on each key hit. AUTO |
| Ext In Steps Seq | Plays one step of the sequencer on each External Input audio trigger. AUTO |
| Key Steps Seq | Plays one step of the sequencer on each key hit. AUTO |
Transpose: -36...+36 – Transpose control for this Part; 0 is centered, steps in semitones. Note that it is summed with the Global Transpose, and the overall limit of the two controls is -36 to +36. For example, if the Combo is transposed down two octaves (-24) and you then turn the Global transpose down two octaves, summing the two would be -48, which is out of range. In this case, it automatically adds octaves to keep it in range.
Fine Freq: -50...+50 – Fine Tune control for this Part; 0 centered, steps in cents (50 cents = 1/2 semitone). As with the Transpose, it is summed with the Global Fine Freq, and the summed limit is -50 to +50.
Volume: 0...100 – Sets the Volume level for this Part.
Low Key: C -2...C 8 – This parameter, along with the High Key parameter following, sets the keyboard range that this part will respond to. The frequency covers a 10 octave range, from 8 Hz to 8KHz, stepping in semitones. C3 is middle C (MIDI note 60). The keyboard range is used for setting up keyboard splits, for example when Part 1 is set from C-2 to C2 with one voice (unison), and Part 2 is set from C#2 to C 8 with 3 voices (Poly 3).
Or, you may want to stack two voices, by setting two Parts to Poly 2, and setting both keyboard ranges to the same range (C-2 to C8). You can even stack four Unison Parts, each with a different Program, for a super-thick mono synth.
High Key: C -2...C 8 – This parameter sets the high keyboard limit for this Part in conjunction with the Low Key parameter.
Low Velocity: 0...127 – This parameter, along with the Hi Velocity parameter following, sets the velocity range this Part responds to. This is useful for setting a velocity split point, so one Part plays at low velocity notes, and another plays at higher velocities. Or, you could set multiple velocity split points.
Hi Velocity: 0...127 – This parameter, along with the Lo Velocity parameter following, sets the velocity range this Part responds to.
MIDI Implementation
The Poly Evolver receives MIDI data according to the mode controls in the Global Section. When in Combo mode, the Global parameters may be overridden by the Combo settings. In addition, there is interaction between some of the Program parameters that determine the overall response of Evolver to MIDI data. Following are the parameters that affect response to MIDI.
Global Parameters
MIDI Channel: ALL, 1...16 – Selects the MIDI channel to send and receive data, 1 to 16. All receives on any channel.
Poly Chain: ALL, 5...20— Use this to link multiple Evolvers and Poly Evolvers into a system with more voices by intelligently processing the keys hit and passing MIDI data through to the Poly Chain MIDI out jack where it can be routed to another Evolver or Poly Evolver. Note that MIDI clocks are handled separately per the MIDI Clock parameter.
Local Control: Off, On – Enables or disables the internal connection between the keyboard and panel controls and the synth electronics. This is useful with some sequencers.
Clock: see table – Selects the MIDI clock status, and enables External sequencer triggers, as follows:
| Display MIDI Clock Setting | |
| Internal | MIDI clock is neither sent nor received |
| MIDI Out | MIDI clock is sent |
| MIDI In | MIDI clock is received |
| M In Out | MIDI clock is received and transmitted (use with Poly Chain) |
| In no ss | MIDI clock is received, but MIDI start/stop/continue messages are ignored. |
Combo Parameters
MIDI Mode: see table – Selects the Program to use for this Part.
| Display MIDI mode | |
| Off | This Part will not respond to MIDI |
| Notes | This Part only responds to MIDI notes |
| OntrIs | This Part only responds to MIDI controller messages |
| On All | This Part responds to both MIDI notes and MIDI controller messages |
MIDI Ch: 1...16, All – Selects the MIDI channel to use for this Part. If All is selected, it responds to any MIDI channel. If MIDI Mode is set to Off, this parameter is ignored.
RESET switch: Acts as a MIDI all-notes-off, and resets all MIDI controllers when hit while the sequencer is not running.
MIDI Messages
Received Channel Messages
| Status | Second | Third | Description | |
| 1000 | nnnn | 0kkkkkkk | 0vvvvvv | Note Off. Velocity is ignored |
| 1001 | nnnn | 0kkkkkkk | 0vvvvvv | Note On. Note off if vvvvvvv = 0 |
| 1010 | nnnn | 0kkkkkkk | 0vvvvvv | Polyphonic Key Pressure |
| 1011 | nnnn | 0vvvvvv | 0vvvvvv | Control Change; see “Received Controller Messages” table following |
| 1100 | nnnn | 0ppppppp | Program change, 0 – 127 for Programs 1 – 128 within current Bank | |
| 1101 | nnnn | 0vvvvvvv | Channel Pressure | |
| 1110 | nnnn | 0vvvvvvv | 0vvvvvvv | Pitch Bend LS Byte then MS Byte |
Notes: 0kkkkkkk Note number 0 - 127 nnnn Channel number 0 to 15 (MIDI channel 1-16). Ignored if MIDI channel set to ALL 0vvvvvv Value
Received Controller Messages
| Status | Second | Third | Description | |
| 1011 | nnnn | 1 | 0vvvvvvv | Mod Wheel – directly assignable controller |
| 1011 | nnnn | 2 | 0vvvvvvv | Breath Controller – directly assignable controller |
| 1011 | nnnn | 3 | 0vvvvvvv | Foot Controller – directly assignable controller |
| 1011 | nnnn | 7 | 0vvvvvvv | Volume – Combined with Master Volume and Program Volume |
| 1011 | nnnn | 74 | 0vvvvvvv | Brightness – Added to lowpass filter cutoff frequency |
| 1011 | nnnn | 13 | 0vvvvvvv | Expression Controller – directly assignable controller |
| 1011 | nnnn | 32 | 0vvvvvvv | Bank Select – 0 to 3 selects banks 1 to 4; others ignored |
| 1011 | nnnn | 64 | 0vvvvvvv | Damper pedal – holds envelopes in Sustain if 0100 0000 or higher |
| 1011 | nnnn | 125 | 0vvvvvvv | All Notes Off – clear all MIDI notes |
| 1011 | nnnn | 123 | 0vvvvvvv | Reset All Controllers – clears all MIDI controllers to 0, MIDI volume to maximum |
Additional received CCs:
| 20 | Oscillator 1 Frequency |
| 21 | Oscillator 2 Frequency |
| 22 | Oscillator 3 Frequency |
| 23 | Oscillator 4 Frequency |
| 24 | Oscillator 1 Level |
| 25 | Oscillator 2 Level |
| 26 | Oscillator 3 Level |
27 Oscillator 4 Level
28 Oscillator 1 Shape
29 Oscillator 2 Shape
30 Oscillator 3 Shape
31 Oscillator 4 Shape
40 FM 4->3
41 FM 3->4
42 RM 4->3
43 RM 3->4
62 Noise Level
52 Low Pass Filter Frequency
53 Filter Resonance
54 Filter Envelope Amount
55 Filter Attack
56 Filter Decay
57 Filter Sustain
58 Filter Release
59 Filter Audio Mod
60 Filter Split
61 Filter Key Amount
75 Amp Attack
76 Amp Decay
77 Amp Sustain
78 Amp Release
13 Highpass Filter Cutoff
85 Feedback Frequency
86 Feedback Level
12 Distortion
102 Delay 1 Time
103 Delay 2 Time
104 Delay 3 Time
105 Delay 1 Amount
106 Delay 2 Amount
107 Delay 3 Amount
108 Delay Feedback 1
109 Delay Feedback 2
System Common Messages
| Status | Second | Third | Description |
| 1111 0010 | 0vvvvvvv | Song Position Pointer – LS Byte then MS Byte. Positions depends on Clock Divide. For example, if Clock Divide is set to 4η (quarter note), then the sequence is 4 measures of 4/4 in length. The Song Position will calculate correctly within the four bars. |
System Real-time Messages
| Status | Description |
| 1111 | 1000 Timing Clock |
| 1111 | 1010 Start – starts the sequencer from step 1 |
| 1111 | 1011 Continue – re-starts the sequencer from the current step |
| 1111 | 1100 Stop – Stops the sequencer |
Universal System Exclusive Message (Device Inquiry)
| Status Description | |
| 1111 0000 | System Exclusive (SysEx) |
| 0111 1110 | Non-realtime message |
| 0vvv vvvv | If MIDI channel is set to 1-16, 0vvvvvv must match (unless MIDI Channel = ALL); always responds if 0vvvvvv = 0111 1111. |
| 0000 0110 | Inquiry Message |
| 0000 0001 | Inquiry Request |
| 1111 0111 | End of Exclusive (EOX) |
Evolver responds with:
| Status Description | |
| 1111 0000 | System Exclusive (SysEx) |
| 0111 1110 | Non-realtime message |
| 0vvv vvvv | If MIDI Channel = ALL, 0vvvvvv = 0111 1111. Otherwise 0vvvvvv = Channel Number 0-15. |
| 0000 0110 | Inquiry Message |
| 0000 0010 | Inquiry Reply |
| 0000 0001 | DSI ID |
| 0010 0001 | Poly Evolver ID (Family LS) |
| 0000 0000 | Family MS |
| 0000 0000 | Family Member LS |
| 0000 0000 | Family Member MS |
| 0jjj nnnn | Main PIC Software version: jjj – Major rev; nnnn – Minor Rev |
| 0jjj nnnn | Voice PIC Software version: jjj – Major rev; nnnn – Minor Rev |
0vvv vvvv DSP Software version LS
0vvv vvvv DSP MS
1111 0111 End of Exclusive (EOX)
Transmitted Channel Messages
| Status | Second | Third | Description | |
| 1000 | nnnn | 0kkkkkkk | 0000000 | Note Off. |
| 1001 | nnnn | 0kkkkkkk | 0vvvvvvv Note On. | |
| 1011 | nnnn | 0vvvvvvv | 0vvvvvvv | Control Change; see “Received Controller Messages” table following |
| 1100 | nnnn | 0ppppppp | Program change, 0 – 127 for Programs 1 – 128 within current Bank | |
| 1101 | nnnn | 0vvvvvvv | Channel Pressure | |
| 1110 | nnnn | 0vvvvvvv | 0vvvvvvv | Pitch Bend LS Byte then MS Byte |
Notes: 0kkkkkkk Note number 0 - 127
nnnn Channel number 0 to 15 (MIDI channel 1-16). Ignored if MIDI channel set to ALL
0vvvvvvv Value
Transmitted Controller Messages
| Status | Second | Third | Description | |
| 1011 | nnnn | 0000 | 0001 0vvvvvvv Mod Wheel | |
| 1011 | nnnn | 0000 | 0010 | 0vvvvvvv |
| 1011 | nnnn | 0000 | 0100 | 0vvvvvvv |
| 1011 | nnnn | 0000 | 0111 | 0vvvvvvv |
| 1011 | nnnn | 0100 | 1010 | 0vvvvvvv |
| 1011 | nnnn | 0000 | 1101 | 0vvvvvvv |
| 1011 | nnnn | 0010 | 0000 0vvvvvvv Bank Select - 0 to 3 | |
| 1011 | nnnn | 0100 | 0000 | 0vvvvvvv Damper pedal - sends 0 if off, 0100 0000 when on |
System Exclusive Messages
Note that all the System Exclusive messages use the Evolver ID, rather than the Poly Evolver ID. This maintains compatibility with Evolver, since the Programs are the same.
Program Parameters
If this message is received while in Combo mode, only the Parts with MIDI enabled will respond to the change.
Status Description
| 1111 0000 | System Exclusive (SysEx) |
| 0000 0001 | DSI ID |
| 0010 0000 | Evolver ID |
| 0000 0001 | File Version |
| 0000 0001 | Program Parameter |
| 0vvv vvvv | Parameter Number 0 – 127. Parameters are in the same order as Evolver.The Parameter data starts on page 66. |
| 0000 vvvv | Parameter value, LS Nibble |
| 0000 vvvv | Parameter value, MS Nibble |
| 1111 0111 | End of Exclusive (EOX) |
Sequencer Parameters
Status Description
| 1111 0000 | System Exclusive (SysEx) |
| 0000 0001 | DSI ID |
| 0010 0000 | Evolver ID |
| 0000 0001 | File Version |
| 0000 1000 | Sequence Parameter |
| 00vv vvvv | Sequence step 0 – 63. 0 – 15 are sequence 1 steps, 16- 31 for sequence 2, etc. |
| 0000 vvvv | Step value, LS Nibble |
| 0000 vvvv | Step value, MS Nibble |
| 1111 0111 | End of Exclusive (EOX) |
Combo Parameters
This message is ignored if the synth is in Program mode
Status Description
| 1111 0000 | System Exclusive (SysEx) |
| 0000 0001 | DSI ID |
| 0010 0000 | Evolver ID |
| 0000 0001 | File Version |
| 0010 1010 | Combo Parameter |
| 00vv vvvv | Combo Parameter number 0 – 79. See table on page 64. |
| 0000 vvvv | Parameter value, LS Nibble |
| 0000 vvvv | Parameter value, MS Nibble |
| 1111 0111 | End of Exclusive (EOX) |
Global Parameters
Status Description
| 1111 0000 | System Exclusive (SysEx) |
| 0000 0001 | DSI ID |
| 0010 0000 | Evolver ID |
| 0000 0001 | File Version |
| 0000 1001 | Global Parameter |
| 0000 vvvv | Global Parameter Number 0 – 17. Global Parameters are listed starting on page 62. Note that some parameter numbers are not used; this is to maintain compatibility with Evolvers. |
| 0000 vvvv | Parameter value, LS Nibble |
| 0000 vvvv | Parameter value, MS Nibble |
| 1111 0111 | End of Exclusive (EOX) |
Request Program Dump
Status Description
| 1111 0000 | System Exclusive (SysEx) |
| 0000 0001 | DSI ID |
| 0010 0000 | Evolver ID |
| 0000 0001 | File Version |
| 0000 0101 | Request Program Transmit |
| 0000 00vv | Bank Number, 0 - 3 |
| 0vvv vvvv | Program Number, 0 - 127 |
| 1111 0111 | End of Exclusive (EOX) |
The Poly Evolver will respond by sending out the Program Data in the format described in the Program Data Dump on page 58. It also sends a Program Name Dump message (also on page 58) after the Program dump. This makes it a complete Program dump while maintaining compatibility with Evolvers.
Request Program Edit Buffer Dump
Status Description
| 1111 0000 | System Exclusive (SysEx) |
| 0000 0001 | DSI ID |
| 0010 0000 | Evolver ID |
| 0000 0001 | File Version |
| 0000 0110 | Request Program Edit Buffer Transmit |
| 1111 0111 | End of Exclusive (EOX) |
Evolver will respond by sending out the current Program edit buffer in the format described in the Edit Buffer Dump on page 59
Request Waveshape Dump
Status Description
| 1111 0000 | System Exclusive (SysEx) |
| 0000 0001 | DSI ID |
| 0010 0000 | Evolver ID |
| 0000 0001 | File Version |
| 0000 1011 | Request Waveshape Transmit |
| 0vvv vvvv | Waveshape number, 0 - 127 |
| 1111 0111 | End of Exclusive (EOX) |
Evolver will respond by sending out the requested Waveshape data, in the format described in the Waveshape Data Dump on page 59.
Request Combo Dump
Status Description
| 1111 0000 | System Exclusive (SysEx) |
| 0000 0001 | DSI ID |
| 0010 0000 | Evolver ID |
| 0000 0001 | File Version |
| 0010 0001 | Request Combo Transmit |
| 0000 00vv | Bank Number, 0 - 2 |
| 0vvv vvvv | Program Number, 0 - 127 |
| 1111 0111 | End of Exclusive (EOX) |
Evolver will respond by sending out the Combo Data in the format described in the Combo Data Dump on page 58.
Request Combo Edit Buffer Dump
Status Description
| 1111 0000 | System Exclusive (SysEx) |
| 0000 0001 | DSI ID |
| 0010 0000 | Evolver ID |
| 0000 0001 | File Version |
| 0011 1000 | Request Combo Edit Buffer Transmit |
| 1111 0111 | End of Exclusive (EOX) |
Evolver will respond by sending out the current edit buffer in the format described in the Combo Edit Buffer Dump on page 59
Request Global Parameter Dump
Status Description
| 1111 0000 | System Exclusive (SysEx) |
| 0000 0001 | DSI ID |
| 0010 0000 | Evolver ID |
| 0000 0001 | File Version |
| 0000 1110 | Request Global Parameter Transmit |
| 1111 0111 | End of Exclusive (EOX) |
Evolver will respond by sending out the current edit buffer in the format described in the Global Parameter Dump on page 58
Program Data Dump
Status Description
| 1111 0000 | System Exclusive (SysEx) |
| 0000 0001 | DSI ID |
| 0010 0000 | Evolver ID |
| 0000 0001 | File Version |
| 0000 0010 | Program Data |
| 0000 00vv | Bank Number, 0 - 3 |
| 0vvv vvvv | Program Number, 0 - 127 |
| 0vvv vvvv | 220 bytes in “packed MS bit” format (see page Error! Bookmark not defined.). Includes 128 bytes of Program parameters and 64 bytes of Sequence data. |
| 1111 0111 | End of Exclusive (EOX) |
Program Name Data Dump
Status Description
| 1111 0000 | System Exclusive (SysEx) |
| 0000 0001 | DSI ID |
| 0010 0000 | Evolver ID |
| 0000 0001 | File Version |
| 0001 0001 | Program Name Data |
| 0000 00vv | Bank Number, 0 - 3 |
| 0vvv vvvv | Program Number, 0 - 127 |
| 0vvv vvvv | 16 name data bytes. Note that the Poly Evolver stores the basic 7 bit data.The assumption is that the data is ACSCII |
| 1111 0111 | End of Exclusive (EOX) |
Combo Data Dump
Status Description
| 1111 0000 | System Exclusive (SysEx) |
| 0000 0001 | DSI ID |
| 0010 0000 | Evolver ID |
| 0000 0001 | File Version |
| 0010 0010 | Combo Data |
| 0000 00vv | Bank Number, 0 - 2 |
| 0vvv vvvv | Combo Number, 0 - 127 |
| 0vvv vvvv | 92 bytes in “packed MS bit” format (see page Error! Bookmark not defined.) = 80 bytes of Combo data |
| 1111 0111 | End of Exclusive (EOX) |
Program Edit Buffer Data Dump
| Status | Description |
| 1111 0000 | System Exclusive (SysEx) |
| 0000 0001 | DSI ID |
| 0010 0000 | Evolver ID |
| 0000 0001 | File Version |
| 0000 0011 | Edit Buffer Data |
| 0vvv vvvv | 220 bytes in “packed MS bit” format (see page Error! Bookmark not defined.). Includes 128 bytes of Program parameters and 64 bytes of Sequence data. |
| 1111 0111 | End of Exclusive (EOX) |
Combo Edit Buffer Data Dump
| Status | Description |
| 1111 0000 | System Exclusive (SysEx) |
| 0000 0001 | DSI ID |
| 0010 0000 | Evolver ID |
| 0000 0001 | File Version |
| 0011 0111 | Edit Buffer Data |
| 0vvv vvvv | 220 bytes in “packed MS bit” format (see page Error! Bookmark not defined.). Includes 128 bytes of Program parameters and 64 bytes of Sequence data. |
| 1111 0111 | End of Exclusive (EOX) |
Global Parameters Data Dump
| Status | Description |
| 1111 0000 | System Exclusive (SysEx) |
| 0000 0001 | DSI ID |
| 0010 0000 | Evolver ID |
| 0000 0001 | File Version |
| 0000 1111 | Main Parameter Data |
| 0vvv vvvv | 34 nibbles (LS then MS) for 17 Global parameters. Global Parameters are listed starting on page 62. |
| 1111 0111 | End of Exclusive (EOX) |
Waveshape Data Dump
| Status | Description |
| 1111 0000 | System Exclusive (SysEx) |
| 0000 0001 | DSI ID |
| 0010 0000 | Evolver ID |
| 0000 0001 | File Version |
| 0000 1010 | Waveshape Data |
| 0vvv vvvv | Waveshape number, 0 – 127, corresponds to Waveshapes 1 – 128. Only Waveshapes 96 – 127 can be sent to Evolver and saved as user programmable; others will be ignored. |
| 0vvv vvvv | 293 bytes in “packed MS bit” format (see page Error! Bookmark not defined.). The 293 bytes = 256 data bytes, in the format of LS byte/MS byte, for the 128 16-bit words that make up a waveshape. The ROM Waveshapes are 12 bit two’s complement (to match the VS), but the User Waveshapes (97 – 128) can be a full 16 bits. |
| 1111 0111 | End of Exclusive (EOX) |
Packed Data Format
Data is packed in 8 byte "packets", with the MS bit stripped from 7 parameter bytes, and packed into an eighth byte, which is sent at the start of the 8 byte packet.
Example:
| Input Data | Packed MIDI data | |||||||||||||||||
| 1 | A7 | A6 | A5 | A4 | A3 | A2 | A1 | A0 | 1 | 00 | G7 | F7 | E7 | D7 | C7 | B7 | A7 | |
| 2 | B7 | B6 | B5 | B4 | B3 | B2 | B1 | B0 | 2 | 00 | A6 | A5 | A4 | A3 | A2 | A1 | A0 | |
| 3 | C7 | C6 | C5 | C4 | C3 | C2 | C1 | C0 | 3 | 00 | B6 | B5 | B4 | B3 | B2 | B1 | B0 | |
| 4 | D7 | D6 | D5 | D4 | D3 | D2 | D1 | D0 | 4 | 00 | C6 | C5 | C4 | C3 | C2 | C1 | C0 | |
| 5 | E7 | E6 | E5 | E4 | E3 | E2 | E1 | E0 | 5 | 00 | D6 | D5 | D4 | D3 | D2 | D1 | D0 | |
| 6 | F7 | E6 | E5 | E4 | E3 | E2 | E1 | E0 | 6 | 00 | E6 | E5 | E4 | E3 | E2 | E1 | E0 | |
| 7 | G7 | G6 | G5 | G4 | G3 | G2 | G1 | G0 | 7 | 00 | E6 | E5 | E4 | E3 | E2 | E1 | E0 | |
| 8 | 00 | G6 | G5 | G4 | G3 | G2 | G1 | G0 | ||||||||||
This is why it takes 220 MIDI bytes to transmit 192 Program/Sequence data bytes, and 293 bytes to send 256 Waveshape bytes.
Reset Switch
Status Description
| 1111 0000 | System Exclusive (SysEx) |
| 0000 0001 | DSI ID |
| 0010 0000 | Evolver ID |
| 0000 0001 | File Version |
| 0000 0100 | Reset Switch |
| 1111 0111 | End of Exclusive (EOX) |
Only sent when Poly Chain is on and MIDI clock is set to Out
Select Program Mode
Status Description
| 1111 0000 | System Exclusive (SysEx) |
| 0000 0001 | DSI ID |
| 0010 0000 | Evolver ID |
| 0000 0001 | File Version |
| 0011 0000 | Select Program Mode |
| 1111 0111 | End of Exclusive (EOX) |
Select Combo Mode
Status Description
| 1111 0000 | System Exclusive (SysEx) |
| 0000 0001 | DSI ID |
| 0010 0000 | Evolver ID |
| 0000 0001 | File Version |
| 0011 0001 | Select Combo Mode |
| 1111 0111 | End of Exclusive (EOX) |
Global Parameter Data
| Parameter | Range | Description |
| 0 | 0 - 127 | Program Number 1 - 128 |
| 1 | 0 - 3 | Bank Number 1 - 4 |
| 2 | 0 - 100 | Master Volume 0 - 100 |
| 3 | 0 - 72 Master Transpose; 0 = -36 semitones (- 3 octaves), 36 = 0 (no transpose), and 72 = +36 semitones. | |
| 4 | 30 - 250 | BPM |
| 5 | 0 - 12 | Clock Divide:0 Half Note1 Quarter Note2 Eighth Note3 Eighth Note half swing4 Eighth Note full swing5 Eighth Note triplets6 Sixteenth Note7 Sixteenth Note half swing8 Sixteenth Note full swing9 Sixteenth Note triplets10 Thirty-second Notes11 Thirty-second Notes triplets12 Sixty-Fourth Notes triplets |
| 6 | 0 - 1 | Use Program tempo; 0 = Off, 1 = On |
| 7 | 0 - 6 | MIDI clock select0 Use Internal clock, don't send MIDI clock1 Use Internal clock, send MIDI clock2 Use MIDI clock In3 Use MIDI clock In, and retransmit MIDI clock out4 No change5 No change6 Use MIDI clock In, but ignore MIDI Start/Stop |
| 8 | x Not used (zero sent in Main Dump) | |
| 9 | 0 - 16 | Poly Chain0 No Chaining1 5 voices total2 6 voices total.16 20 voices total |
| 10 | 0 - 8 | Input Gain0 No gain1 + 3 db2 + 6 db3 + 9 db4 + 12 db5 + 15 db6 + 18 db7 + 21 db8 + 24 db |
| 11 | 0 - 100 Master Fine Tune; 0 = -50 cents, 50 = 0 (centered), 100 = + 50 cents | |
| 12 x Not used (zero sent in Main Dump) | ||
| 13 x Not used (zero sent in Main Dump) | ||
| 14 | 0 - 16 | MIDI Channel; if = 0, data received on all MIDI channels. Otherwise = channel number 1 – 16. |
| 15 X Not used (zero sent in Main Dump) | ||
| 16 0 – 127 Combo number 1 - 128 | ||
| 17 0 – 2 Combo Bank 1 to 3 | ||
| 18 0 - 1 MIDI Program Change enable | ||
| 19 0 - 1 MIDI Pressure enable | ||
| 20 0 - 1 MIDI Controller enable | ||
| 21 0 - 1 MIDI SysEx enable | ||
| 22 0 - 5 Pedal/CV 1 destination | ||
| 23 0 - 5 Pedal/CV 2 destination | ||
| 24 0 - 3 Velocity Curve | ||
| 25 0 - 3 Pressure Curve | ||
| 26 0 - 1 Local Control Off/On | ||
| 27 | 0 - 1 | Damper Polarity; 0 = normally open, 1 = normally closed |
Note: Some parameters are not used in order to maintain the closest match with standard Evolvers.
Combo Parameter Data
There are 4 identical parts in a Combo; they are listed below. The name of the combo follows the other parameters.
| 1 | 2 | 3 | 4 | Range | Description | |
| 0 | 16 | 32 | 48 | 0 - 4 | Mode – number of polyphonic voices | |
| 0 Off | ||||||
| 1 Poly 4 | ||||||
| 2 Poly 3 | ||||||
| 3 Poly 2 | ||||||
| 4 Unison | ||||||
| 1 | 17 | 33 | 49 | 0 - | 127 Program | |
| 2 | 18 | 34 | 50 | 0 - 3 | Bank | |
| 3 | 19 | 35 | 51 | 0 - 3 | MIDI Mode | |
| 0 Off | ||||||
| 1 Notes only | ||||||
| 2 Controller messages only | ||||||
| 3 All – notes and controllers | ||||||
| 4 | 20 | 36 | 52 | 0 - 16 | ||
| MIDI Channel; if = 0, data received on all MIDI channels. Otherwise = channel number 1 – 16. | ||||||
| 5 | 21 | 37 | 53 | 0 - 1 | Sequencer; 0 = | Off, 1 = On |
| 6 | 22 | 38 | 54 | 30 - 250 | Tempo | |
| 7 | 23 | 39 | 55 | 0 - 12 | Clock Divide: | |
| 0 Half Note | ||||||
| 1 Quarter Note | ||||||
| 3 Eighth Note | ||||||
| 4 Eighth Note half swing | ||||||
| 5 Eighth Note full swing | ||||||
| 6 Eighth Note triplets | ||||||
| 7 Sixteenth Note | ||||||
| 8 Sixteenth Note half swing | ||||||
| 9 Sixteenth Note full swing | ||||||
| 10 Sixteenth Note triplets | ||||||
| 11 Thirty-second Notes | ||||||
| 12 Thirty-second Notes triplets | ||||||
| 12 Sixty-Fourth Notes triplets | ||||||
| 8 | 24 | 40 | 56 | 0 - 13 | Trigger Select | |
| 0 All - The envelopes will be triggered by either the sequencer or keyboard | ||||||
| 1 Seq – The envelopes will be triggered by the sequencer only. | ||||||
| 2 Keyboard - The envelopes will be triggered by the keyboard only. | ||||||
| 3 Keyboard Reset– Same, with sequencer reset on Note On | ||||||
| 4 Combo - Envelopes will only be triggered with both a keyboard note and the sequencer running | ||||||
| 5 Combo Reset – same, with sequencer reset on Note On | ||||||
| 6 External Input gates the envelopes | ||||||
| 7 External Input gates the envelopes and resets the sequencer | ||||||
| 8 External Input gates the sequencer | ||||||
| 9 External Input gates the sequencer and resets the sequencer10 Keyboard plays sequence once11 Keyboard plays sequence once, resetting on multiple notes12 External Trigger – the sequence plays once on an external signal13 Keyboard trigger – the sequence plays once when a key is hit | |||||
| 9 | 25 | 41 | 57 | 0 - 72 | Transpose; 0 = -36 semitones (- 3 octaves), 36 = 0 (no transpose), and 72 = +36 semitones. |
| 10 | 26 | 42 | 58 | 0 - 100 | Fine Freq; 0 = -50 cents, 50 = 0 (centered), 100 = +50 cents |
| 11 | 27 43 | 59 0 | - 100 | Volume level for this part | |
| 12 | 28 44 | 60 0 | - 127 | Low Key | |
| 13 | 29 45 | 61 0 | - 127 | High Key | |
| 14 | 30 46 | 64 0 | - 127 | Low Velocity | |
| 15 | 31 47 | 63 0 | - 127 | High Velocity | |
Parameters
64 - 79 32 - 127 Name characters 1 - 16
Program Parameter Data
| Parameter | Range | Description |
| 0 | 0 - 120 | Oscillator 1 Frequency, 0 – 120 in semitones (10 octave range) |
| 1 | 0 - 100 | Oscillator 1 Fine Tune; 0 = -50 cents, 50 = 0 (centered), 100 = + 50 cents |
| 2 | 0 - 102 Oscillator 1 Shape | |
| 0 Sawtooth | ||
| 1 Triangle | ||
| 2 Sawtooth/triangle mix | ||
| 3 – 102 Pulse Wave, Pulse width 0 - 99 | ||
| 3 | 0 - 100 Oscillator 1 Level | |
| 4 | 0 - 120 | Oscillator 2 Frequency, 0 – 120 in semitones (10 octave range) |
| 5 | 0 - 100 | Oscillator 2 Fine Tune; 0 = -50 cents, 50 = 0 (centered), 100 = + 50 cents |
| 6 | 0 - 102 Oscillator 2 Shape | |
| 0 Sawtooth | ||
| 1 Triangle | ||
| 2 Sawtooth/triangle mix | ||
| 3 – 102 Pulse Wave, Pulse width 0 - 99 | ||
| 7 | 0 - 100 Oscillator 2 Level |
| Parameter | Range | Description |
| 8 | 0 - 120 | Oscillator 3 Frequency, 0 – 120 in semitones (10 octave range) |
| 9 | 0 - 100 | Oscillator 3 Fine Tune; 0 = -50 cents, 50 = 0 (centered), 100 = + 50 cents |
| 10 | 0 - 127 | Oscillator 3 Shape 1 - 128 |
| 11 | 0 - 100 | Oscillator 3 Level |
| 12 | 0 - 120 | Oscillator 4 Frequency, 0 – 120 in semitones (10 octave range) |
| 13 | 0 - 100 | Oscillator 4 Fine Tune; 0 = -50 cents, 50 = 0 (centered), 100 = + 50 cents |
| 14 | 0 - 127 | Oscillator 4 Shape 1 - 128 |
| 15 | 0 - 100 | Oscillator 4 Level |
| Parameter Range Description | |
| 16 0 - 164 Filter Frequency, steps in semitones | |
| 17 0 - 198 Filter Envelope Amount; -99 to +99 | |
| 18 0 - 110 Filter Envelope Attack | |
| 19 0 - 110 Filter Envelope Decay | |
| 20 0 - 100 Filter Envelope Sustain | |
| 21 0 - 110 Filter Envelope Release | |
| 22 0 - 100 Resonance | |
| 23 0 - 100 Filter Keyboard Amount |
Parameter Range Description
| 24 | 0 - 100 | VCA Level |
| 25 | 0 - 100 | VCA Envelope Amount |
| 26 | 0 - 110 | VCA Envelope Attack |
| 27 | 0 - 110 | VCA Envelope Decay |
| 28 | 0 - 100 | VCA Envelope Sustain |
| 29 | 0 - 110 | VCA Envelope Release |
| 30 | 0 - 6 | Output Pan |
0 Left channel panned fully left, Right fully to the right
1 Left channel panned mostly left, Right mostly to the right
2 Left channel panned somewhat left, Right somewhat to the right
3 Mono
4 Right channel panned somewhat left, Left somewhat to the right
5 Right channel panned mostly left, Left mostly to the right
6 Right channel panned fully left, Left fully to the right
31 0 - 100 Program Volume
Parameter Range Description
| 32 | 0 - 48 | Feedback Frequency – steps in semitones |
| 33 | 0 - 100 | Feedback Amount |
| 34 | 0 - 1 | Grunge; 0 = off, 1 = on |
| 35 | 0 - 166 | Delay 1 Time |
| 36 | 0 - 100 | Delay 1 Level |
| 37 | 0 - 100 | Delay sum feedback to Delay input |
| 38 | 0 - 100 | Delay sum feedback to filter input |
| 39 | 0 - 14 | Output hack amount |
Parameter Range Description
| 40 | 0 - 160 | LFO 1 Frequency; 0 – 150 unsynced frequency |
| 151 Sequence speed divided by 32 | ||
| 152 Sequence speed divided by 16 | ||
| 153 Sequence speed divided by 8 | ||
| 154 Sequence speed divided by 4 | ||
| 155 Sequence speed divided by 2 | ||
| 156 One cycle per step | ||
| 157 Two cycles per step | ||
| 158 Four cycles per step | ||
| 159 Eight cycles per step | ||
| 160 Sixteen cycles per step |
41 0 - 4 LFO 1 Shape
| 0 | Triangle |
| 1 | Reverse Sawtooth |
| 2 | Sawtooth |
| 3 | Pulse (square) |
| 4 | Random |
| 42 | 0 - 200 | LFO 1 Amount (over 100 repeats with Key sync on) |
| 43 | 0 - 68 | LFO 1 Destination (see destination table on page 72) |
| 44 | 0 - 160 LFO 2 Frequency (same as LFO 1) | |
| 45 | 0 - 4 LFO 2 Shape (same as LFO 1) | |
| 46 | 0 - 200 | LFO 2 Amount (over 100 repeats with Key sync on) |
| 47 | 0 - 68 | LFO 2 Destination (see destination table on page 72) |
| Parameter Range Description | ||
| 48 0 - 198 Envelope 3 Amount; -99 to +99 | ||
| 49 | 0 - 68 | Envelope 3 Destination (see destination table on page 72) |
| 50 0 - 110 Envelope 3 Envelope Attack | ||
| 51 0 - 110 Envelope 3 Envelope Decay | ||
| 52 0 - 100 Envelope 3 Envelope Sustain | ||
| 53 0 - 110 Envelope 3 Envelope Release | ||
| 54 0 - 13 Trigger Select | ||
| 0 All - The envelopes will be triggered by either the sequencer or the keyboard1 Seq – The envelopes will be triggered by the sequencer only.2 The envelopes will be triggered by the keyboard only.3 Same, with sequencer reset on Note On4 Combo - Envelopes will only be triggered by both the keyboard and the sequencer is running5 Combo Reset – same, with sequencer reset on Note On6 External Input gates the envelopes7 External Input gates the envelopes and resets the sequencer8 External Input gates the sequencer9 External Input gates the sequencer and resets the sequencer10 Keyboard plays sequence once11 Keyboard plays sequence once, resetting on multiple notes12 External Trigger – the sequence plays once on an external signal13 The sequence plays once when a key is hit | ||
| 55 | 0 - 73 | Key Off / Transpose – 0 = Key pitch ignored. 1 = -36 semitones keyboard transpose, 37 = no transposing, 73 = +36 semitones |
| Parameter | Range | Description |
| 56 | 0 - 75 | Sequencer 1 Destination (see destination table on page 72) |
| 57 | 0 - 75 | Sequencer 2 Destination (see destination table on page 72) |
| 58 | 0 - 75 | Sequencer 3 Destination (see destination table on page 72) |
| 59 | 0 - 75 | Sequencer 4 Destination (see destination table on page 72) |
| 60 | 0 - 100 Noise Volume | |
| 61 | 0 - 100 External Input Volume | |
| 62 | 0 - 2 External Input Mode | |
| 0 Stereo1 Left Input channel goes to both channels2 Right Input channel goes to both channels | ||
3 Left channel audio, Right channel control
63 0 - 14 Input Hack Amount
Parameter Range Description
| 64 | 0 - 200 | Glide, Oscillator 1; 101 – 199 = Fingered; 200 = osc midi off |
| 65 0 - 1 | Sync; 0 = off, 1 = on | |
| 66 30 - 250 | Program tempo | |
| 67 0 - 12 | Program Clock Divide (see Master Clock Divide for selections) | |
| 68 | 0 - 200 | Glide, Oscillator 2; 101 – 199 = Fingered; 200 = osc midi off |
| 69 0 - 5 | Oscillator Slop | |
| 70 0 - 12 | Pitch Bend Range, in semitones | |
| 71 0 - 23 | Key Mode | |
| 0 Low note priority1 Low note priority with re-trigger2 High note priority3 High note priority with re-trigger4 Last note hit priority5 Last note hit priority with re-triggerAdd 0 for Poly, 6 for Mono, 12 for Unison 1, and 18 for Unison 2 to the above |
Parameter Range Description
| 72 | 0 - 200 | Glide, Oscillator 3; 101 – 199 = Fingered; 200 = osc midi off |
| 73 | 0 - 100 FM, Oscillator 4 to Oscillator 3 | |
| 74 | 0 - 4 | Shape Mod Oscillator 3; 0 = Off, 1 = Sequence 1, etc. |
| 75 | 0 - 100 Ring Mod, Oscillator 4 to Oscillator 3 | |
| 76 | 0 - 200 | Glide, Oscillator 4; 101 – 199 = Fingered; 200 = osc midi off |
| 77 | 0 - 100 FM, Oscillator 3 to Oscillator 4 | |
| 78 | 0 - 4 | Shape Mod Oscillator 4; 0 = Off, 1 = Sequence 1, etc |
| 79 | 0 - 100 Ring Mod, Oscillator 3 to Oscillator 4 |
Parameter Range Description
| 80 | 0 - 1 | 2/4 Pole Select; 0 = 2 Pole, 1 = 4 Pole |
| 81 | 0 - 100 | Filter Envelope Velocity |
| 82 | 0 - 100 | Filter Audio Modulation |
| 83 | 0 - 100 | Filter Split |
| 84 | 0 – 199 Highpass Filter cutoff. 0-99 for filter on output; 100 – 199 for levels 0-99 with filter on input | |
| 85 | 0 - 24 Modulation 1 Source (see Source Table on page 74) | |
| 86 | 0 - 198 | Modulation 1 Amount; -99 to +99 |
| 87 | 0 - 68 Modulation 1 Destination (see destination table on page 72) |
Parameter Range Description
| 88 | 0 - 1 | Linear/Exponential envelopes 0 = Exponential, 1 = Linear |
| 89 0 - 100 VCA Envelope Velocity | ||
| 90 | 0 - 24 | Modulation 2 Source (see Source Table on page 74) |
| 91 0 - 198 Modulation 2 Amount; -99 to +99 | ||
| 92 | 0 - 68 | Modulation 2 Destination (see destination table on page 72) |
| 93 | 0 - 24 | Modulation 3 Source (see Source Table on page 74) |
| 94 0 - 198 Modulation 3 Amount; -99 to +99 | ||
| 95 | 0 - 68 | Modulation 3 Destination (see destination table on page 72) |
Parameter Range Description
| 96 | 0 - 24 | Modulation 4 Source (see Source Table on page 74) |
| 97 | 0 - 198 Modulation 4 Amount; -99 to +99 | |
| 98 | 0 - 68 | Modulation 4 Destination (see destination table on page 72) |
| 99 | 0 - 166 Delay 2 Time | |
| 100 | 0 - 100 Delay 2 Level | |
| 101 | 0 - 166 Delay 3 Time | |
| 102 | 0 - 100 Delay 3 Level | |
| 103 | 0 - 199 | Distortion; 0-99 for distortion on output; 100 – 199 for levels 0-99 with distortion on input |
Parameter Range Description
| 104 | 0 - 160 | LFO 3 Frequency (same as LFO 1) | |
| 105 | 0 - 4 | LFO 3 Shape (same as LFO 1) | |
| 106 | 0 - 200 | LFO 3 Amount (over 100 repeats with Key sync on) | |
| 107 | 0 - 68 | LFO 3 Destination (see destination table on page 72) | |
| 108 | 0 - 160 | LFO 4 Frequency (same as LFO 1) | |
| 109 | 0 - 4 | LFO 4 Shape (same as LFO 1) | |
| 110 | 0 - 200 | LFO 4 Amount (over 100 repeats with Key sync on) | |
| 111 | 0 - 68 | LFO 4 Destination (see destination table on page 72) | |
Parameter Range Description
| 112 0 - 100 Envelope 3 Delay | ||
| 113 0 - 100 Envelope 3 Velocity | ||
| 114 0 - 198 External Input Peak Amount; -99 to +99 | ||
| 115 | 0 - 68 | External Input Peak Destination (see destination table on page 72) |
| 116 | 0 - 198 | External Input Envelope Follower Amount; -99 to +99 |
| 117 | 0 - 68 | External Input Envelope Follower Destination (see destination table on page 72) |
| 118 0 - 198 Velocity Amount; -99 to +99 | ||
| 119 | 0 - 68 | Velocity Destination (see destination table on page 72) |
Parameter Range Description
| 120 0 - 198 Mod Wheel Amount; -99 to +99 | ||
| 121 | 0 - 68 | Mod Wheel Destination (see destination table on page 72) |
| 122 0 - 198 Pressure Amount; -99 to +99 | ||
| 123 | 0 - 68 | Pressure Destination (see destination table on page 72) |
| 124 0 - 198 Breath Controller Amount; -99 to +99 | ||
| 125 | 0 - 68 | Breath Controller Destination (see destination table on page 72) |
| 126 0 - 198 Foot Controller Amount; -99 to +99 | ||
| 127 | 0 - 68 | Foot Controller Destination (see destination table on page 72) |
Modulation Destinations
0 No destination selected
1 Oscillator 1 Frequency
2 Oscillator 2 Frequency
3 Oscillator 3 Frequency
4 Oscillator 4 Frequency
5 Oscillator All Frequency – goes to all four
6 Oscillator 1 Level
7 Oscillator 2 Level
8 Oscillator 3 Level
9 Oscillator 4 Level
10 Oscillator All Level
11 Noise Level
12 External In Level
13 Oscillator 1 Pulse width
14 Oscillator 2 Pulse width
15 Oscillator All Pulse width
16 Frequency Mod (FM) Amount; Osc 4 -> 3
17 Frequency Mod (FM) Amount; Osc 3 -> 4
18 Ring Mod (Amplitude) Amount; Osc 4 -> 3
19 Ring Mod (Amplitude) Amount; Osc 3 -> 4
20 Filter frequency
21 Filter Split -separation between left / right
22 Resonance
23 Highpass Frequency
24 VCA amount
25 Pan
26 Feedback frequency
27 Feedback Amount
28 Delay Time 1
29 Delay Time 2
30 Delay Time 3
31 Delay Time All
32 Delay Amount 1
33 Delay Amount 2
34 Delay Amount 3
35 Delay Amount All
36 Delay Feedback 1
37 Delay Feedback 2
38 LFO 1 Frequency
39 LFO 2 Frequency
40 LFO 3 Frequency
41 LFO 4 Frequency
42 LFO All Frequency
43 LFO 1 Amount
44 LFO 2 Amount
45 LFO 3 Amount
46 LFO 4 Amount
47 LFO A Amount
48 Envelope 1 Amount
49 Envelope 2 Amount
50 Envelope 3 Amount
51 Envelope A Amount
52 Envelope 1 Attack
53 Envelope 2 Attack
54 Envelope 3 Attack
55 Envelope A Attack
56 Envelope 1 Decay
57 Envelope 2 Decay
58 Envelope 3 Decay
59 Envelope A Decay
60 Envelope 1 Release
61 Envelope 2 Release
62 Envelope 3 Release
63 Envelope A Release
66 Filter 1 (left) Resonance
67 Filter 2 (right) Resonance
68 Distortion
64 Filter 1 (left) Cutoff Frequency
65 Filter 2 (right) Cutoff Frequency
Sequencer only destinations
69 Tempo Clock multiplier
70 MIDI Note Out
71 MIDI Velocity Out
72 MIDI Mod Wheel Out
73 MIDI Pressure Out
74 MIDI Breath Controller Out
75 MIDI Foot Controller Out
Modulation Sources
0 No Source selected
1 Sequence 1
2 Sequence 2
3 Sequence 3
4 Sequence 4
5 LFO 1
6 LFO 2
7 LFO 3
8 LFO 4
9 Filter Envelope
10 Amp (VCA) Envelope
11 Envelope 3
12 External Audio Input Peak
13 External Audio Envelope Follower
14 Pitch Bend
15 Mod Wheel
16 Pressure
17 Midi - Breath Controller
18 Midi - Foot Controller
19 Key Velocity
20 Key Note Number
21 Midi – Expression
22 Noise
23 Oscillator 3
24 Oscillator 4
Dave Smith
INSTRUMENTS
1210 Cabrillo Hwy N
Half Moon Bay, CA 94019-1449
USA
www.DaveSmithInstruments.com
- POLY EVOLVER KEYBOARD
- OPERATION MANUAL
- POLY EVOLVER KEYBOARD OPERATION MANUAL
- FC
- TESTED TO COMPLY WITH FCC STANDARDS FOR OFFICE USE
- CE
- CONTENTS
- WELCOME
- REGISTER
- QUICK START
- SELECTING AND EDITING PROGRAMS, COMBOS, AND GLOBAL SETTINGS
- SUMMARY
- ABOUT THE PRESETS
- FREQUENTLY ASKED QUESTIONS
- CHAINING MULTIPLE EVOLVERS TOGETHER
- TO CHAIN A SINGLE POLY RACK TO YOUR POLY EVOLVER KEYBOARD
- USING MULTIPLE POLY RACKS
- CHAINING MONO EVOLVERS
- A NOTE ON VERSIONS
- THE POLY EVOLVER VOICE
- THE ANALOG SIDE
- THE DIGITAL SIDE
- INPUTS AND OUTPUTS
- BASIC OPERATION
- PROGRAM MODE
- COMBO MODE
- SAVING A PROGRAM OR COMBO
- TRANSPOSING THE KEYBOARD RANGE
- RENAMING A PROGRAM OR COMBO
- VOICE ASSIGNMENT
- INDIVIDUAL VOICE OUTPUTS
- GLOBAL PARAMETERS
- PAGE 1
- PAGE 2
- PAGE 3
- PAGE 4
- PAGE 6
- PAGE 7
- PAGE 8
- PAGE 9
- PAGE 10
- PAGE 11
- PROGRAM PARAMETERS
- OSCILLATORS
- OSCILLATORS 1 AND 2
- OSCILLATORS 3 AND 4
- NOISE
- EXTERNAL IN
- LOWPASS FILTER
- AMPLIFIER
- HIGH PASS FILTER
- TUNED FEEDBACK
- DISTORTION
- DELAY
- OUTPUT HACK
- VOICE VOL
- ENVELOPE 3
- LFOS
- MODULATORS
- MISC PARAMETERS
- SEQUENCER
- PROGRAMMING A SEQUENCE
- TO PROGRAM A SEQUENCE
- SUGGESTED DESTINATIONS
- MODULATION SOURCES
- COMBO PARAMETERS
- MIDI IMPLEMENTATION
- MIDI MESSAGES
- SYSTEM COMMON MESSAGES
- SYSTEM REAL-TIME MESSAGES
- UNIVERSAL SYSTEM EXCLUSIVE MESSAGE (DEVICE INQUIRY)
- SYSTEM EXCLUSIVE MESSAGES
- SEQUENCER PARAMETERS
- REQUEST PROGRAM DUMP
- REQUEST PROGRAM EDIT BUFFER DUMP
- REQUEST WAVESHAPE DUMP
- REQUEST COMBO DUMP
- REQUEST COMBO EDIT BUFFER DUMP
- REQUEST GLOBAL PARAMETER DUMP
- PROGRAM DATA DUMP
- PROGRAM NAME DATA DUMP
- COMBO DATA DUMP
- PROGRAM EDIT BUFFER DATA DUMP
- COMBO EDIT BUFFER DATA DUMP
- GLOBAL PARAMETERS DATA DUMP
- PACKED DATA FORMAT
- RESET SWITCH
- SELECT PROGRAM MODE
- SELECT COMBO MODE
- COMBO PARAMETER DATA
- PARAMETERS
- PROGRAM PARAMETER DATA
- 3 LEFT CHANNEL AUDIO, RIGHT CHANNEL CONTROL
- MODULATION DESTINATIONS
- SEQUENCER ONLY DESTINATIONS
Brand : Dave Smith
Model : Poly Evolver
Category : Musical Keyboard