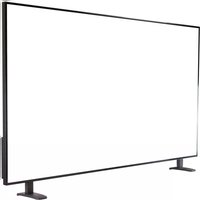
VZ-65UHD - Monitor ViewZ - Free user manual and instructions
Find the device manual for free VZ-65UHD ViewZ in PDF.


| Product Type | 65-inch UHD Monitor |
| Brand | ViewZ |
| Model | VZ-65UHD |
| Screen Size | 65 inches (diagonal) |
| Resolution | 3840 x 2160 (4K UHD) |
| Display Technology | LED-backlit LCD |
| Aspect Ratio | 16:9 |
| Dimensions (W x H x D) | 57.4 x 33.1 x 2.4 inches (without stand) |
| Weight | Approx. 55 lbs (without stand) |
| Power Consumption | Typical: 150W, Standby: <0.5W |
| Input Voltage | 100-240V AC, 50/60Hz |
| Video Inputs | HDMI x3, DisplayPort x1, VGA x1 |
| Audio Input/Output | 3.5mm audio in, 3.5mm audio out |
| USB Ports | USB 2.0 x2 (for firmware update) |
| VESA Mount | 400 x 400 mm |
| Stand | Included (detachable) |
| Built-in Speakers | 2 x 10W stereo speakers |
| Refresh Rate | 60 Hz |
| Response Time | 8 ms (typical) |
| Viewing Angle | 178° horizontal / 178° vertical |
| Contrast Ratio | 4000:1 (static) |
| Brightness | 350 cd/m² |
| Energy Rating | Energy Star certified |
| Package Contents | Monitor, stand base, screws, power cord, HDMI cable, remote control, user manual |
| Color | Black |
Frequently Asked Questions - VZ-65UHD ViewZ
User questions about VZ-65UHD ViewZ
0 question about this device. Answer the ones you know or ask your own.
Ask a new question about this device
Download the instructions for your Monitor in PDF format for free! Find your manual VZ-65UHD - ViewZ and take your electronic device back in hand. On this page are published all the documents necessary for the use of your device. VZ-65UHD by ViewZ.
USER MANUAL VZ-65UHD ViewZ
ViewZ®
www.viewzusa.com
Please read this manual thoroughly before use, and keep it handy for future reference.
CONTENTS
Safety Instruction 3
- Mark Indication & Substance 4
- Warning & Caution 4
- FCC RF INTERFERENCE STATEMENT.... 6
- RoHS Compliance 7
Installation 8
- Feature & Package 8
- Stand Installation 9
- Interface 10
Function 11
- Remote Function 11
- Monitor Button Function 12
- OSD Control and Function 13
- Media Player 21
RS232 Command 28
Mounting Guide 30
Specification 31
Trouble Shooting 32
RMA 33
Warranty 36
SAFETY INSTRUCTION
Important Safety Instruction
-
Read all warnings.
-
Follow all instructions to ensure longevity of monitor.
-
Do not place the monitor near water.
-
Clean only with dry cloth.
-
Do not block any ventilation openings. Install in accordance with the manufacturer's instructions.
-
Do not install near any heat sources such as radiators, heat registers, stoves, or other heat generating devices.
-
Do not override the safety purpose of the polarized or grounding-type plug.
-
A polarized plug has two blades with one wider than the other.
-
A grounding type plug has two blades and a third grounding prong.
-
The wide blade or the third prong is provided for your safety.
-
If the provided plug does not fit into your outlet, consult with electrician for replacement of the outlet.
-
Protect the power cord from being walked on or pinched particularly at plugs, convenience receptacles and the point where it connects to the monitor.
-
Only use attachment/accessories specified by the manufacturer.
-
Use only with the cart, stand, tripod, bracket or table specified by the manufacturer or sold with the monitor. When a cart is used, use caution when moving the cart & monitor in combination to avoid injuries.
-
Unplug the monitor during lightning storms or when unused for long periods of time.
-
Refer all servicing to qualified service personnel. Servicing is required when the monitor has been damaged in any way.

The monitor shall not be exposed to dripping or splashing and objects containing liquids such as vases shall not be placed near the monitor.
The monitor should have ample distance (e.g. 10cm) from the wall for sufficient ventilation.
SAFETY INSTRUCTION
Important Safety Instruction
Mark Indication and Substance



CAUTION : TO REDUCE THE RISK OF ELECTRICAL SHOCK, DO NOT REMOVE COVER (OR BACK). NO USER SERVICEABLE PARTS INSIDE. REFER SERVICING TO QUALIFIED SERVICE PERSONNEL

This symbol is intended to alert the user to the presence of uninsulated & dangerous voltage within the monitor's enclosure that may be of sufficient magnitude to constitute a risk of electric shock to persons.

This symbol is intended to alert the user to the presence of important operating and maintenance (servicing) instructions in the literature accompanying the monitor.
Warning
- Do not use damaged or loose cables and plug.
- Do not pull the plug out by the wire nor touch the plug with wet hands.
- Use only a properly grounded plug and receptacle.
- Do not connect too many extension cords or plugs to one outlet.
- Do not excessively bend the plug and wire.
- Do not disconnect the power cord while it's still plugged into the monitor.
- Do not place any heavy objects on the power cord. Damage to the cord may cause shock or fire.
- Never open the monitor. There are no user-serviceable parts inside and opening will void warranty.
- Removing covers may expose you to dangerous shock hazards or other risks.
- Keep any heating devices away from the power cable and monitor.
- Do not place the monitor near water.
- Do not insert objects of any kind into the monitor's open slots, as they may touch dangerous voltage points.
- Please follow the laws and regulations of your municipality to dispose the monitor properly.
- Do not use the monitor in high temperature, humid, dusty or oily areas.
- Do not install the monitor where it will be exposed to continual vibration.
- Keep the plastic packaging out of children's reach.
• If any damage is detected upon first opening the box, contact agency from which you bought the monitor directly.
- If your monitor does not operate normally – in particular, if there is any unusual sound or smell coming from the monitor – unplug it immediately and contact an authorized dealer or the service center.
SAFETY INSTRUCTION
Important Safety Instruction

Caution
- If the connector between the plug and the pin is dusty or dirty, clean it properly using a dry cloth.
- Make sure to unplug the power cord before cleaning the monitor.
• Make sure to leave a gap between monitor and wall. - Do not drop the monitor when moving it.
- Place your monitor in a location with low humidity and minimal dust.
• Install the monitor base on a showcase or shelf so that the end of the base does not protrude from the showcase or shelf. - Do not place the monitor on an unstable or small surface area.
- Do not install inside a vehicle.
- Disconnect the plug from the outlet during storms or lightning or if it has not been used for a long time.
- Do not try to move the monitor by pulling on the power cord.
- Do not cover the vents on the monitor.
- When moving the monitor, turn off and unplug the power cord. Make sure that all cables, including HDMI cable and cables connected to other devices, are disconnected before moving it.
- Place the monitor out of children's reach as they could damage it by hanging onto it.

Available Temperature & Humidity
• Operating Temperature: 32irc F \~ 104irc F / 0irc C \~ 40irc C
• Operating Humidity : 20 \~ 85% RH
• Storage Temperature : 50°F \~ 140°F / 10°C \~ 60°C
• Storage Humidity : 10 \~ 90% RH
Dot Defect (dead pixel) of TFT
ViewZ monitors are manufactured using high-end semiconductor technology with precision ratings of 99.9% and above. However, it may be the case that certain RGB and white pixels seem darker (or entirely unlit i.e. black).
Modern production methods cannot guarantee an absolute fault-free monitor. To this effect, no LED manufacturer can guarantee a defect free panel. A few isolated pixel or sub-pixel faults are considered tolerable and different policies exist that govern the amount of these tolerable values.
While most pixel faults occur in isolated regions, a cluster of dead pixels or sub-pixels can sometimes form for which a separate ruling applies. A cluster is defined as an area of 5x5 pixels. ViewZ's policy on pixel failure: either as an isolated fault or in the form of a cluster is outlined on the website: www.viewzusa.com
FCC RF INTERFERENCE STATEMENT
Note
This equipment has been tested and found to comply with the limits for a Class A digital device, pursuant to part 15 of the FCC Rules. These limits are designed to provide reasonable protection against harmful interference when the equipment is operated in a commercial environment.
This equipment generates, uses, and can radiate radio frequency energy and, if not installed and used in accordance with the instruction manual, may cause harmful interference to radio communications. Operation of this equipment in a residential area is likely to cause harmful interference in which case the user will be required to correct the interference at his own expense.
- Reorient or relocate the receiving antenna.
- Increase the separation between the equipment and receiver.
- Connect the equipment into an outlet on a circuit different from that to which the receiver is connected.
- Consult the dealer or an experienced radio, TV technician for help.
- Only shielded interface cable should be used.
Finally, any changes or modifications to the equipment by the user not expressly approved by the grantee or manufacturer could void the users authority to operate such equipment.
▶ DOC COMPLIANCE NOTICE
This digital apparatus does not exceed the Class A limits for radio noise emissions from digital apparatus set out in the radio interference regulation of Canadian Department of communications.
Statement
• VGA and XGA are the registered trademark of IBM.
• VESA is the trademark of Video Electronics Standard Association.
- HDMI, HDMI logo and High-Definition Multimedia Interface (high definition multimedia digital interface) are the trademark or registered trademark of HDMI Licensing LLC.

HIGH-DEFINITION MULTIMEDIA INTERFACE
If some company or product trademark is not particularly stated, the use of trademark has been fully recognized. Do not alter, decompile, disassemble, decode or conduct reverse engineering to the software installed in the product, or it can be deemed as breach of the law.
RoHS COMPLIANCE
Note
Name and contents of toxic and hazardous substances or elements contained in the product.
1) PCB assembly includes the PCB and the electronic components composed by the PCB
2) Packing materials include the carton, expandable polystyrene and etc.
3) Accessories include User Manual and etc.
☐ : The toxic and hazardous substance contain the homogeneous materials which components do not exceed the required limit, prescribed in the GB/T26572-2011 standards.
X : The toxic and hazardous substance contain one or more homogeneous materials which component exceeds the required limit, prescribed in the GB/T26572-2011 standards.
Based on the provided information, the product contains hazardous material. Due to the limitation of the existing technology, the hazardous material cannot be replaced, although we have been striving to improve this situation. The product has the Environmental Friendly Use Period (EFUP) of 10 years.
The EFUP is valid only when the user operates in normal conditions as specified in the user manual.
Indicative description of Regulations on Regulation on Recycling and Disposal of Waste Electrical and Electronic Products..
When you will not use this product anymore or warranty is expired, please dispose / send this product to the qualified recycling station near your area. It is ordered / regulated by the Regulation on Recycling and Disposal of Waste Electrical and Electronic Products.
INSTALLATION
Installation Tools
The following tools may be required depending on your installation.

Assembly Components - provided
Your ViewZ monitor is shipped with all proper installation hardware and components. If there are parts missing and/or damaged, please stop the installation and contact ViewZ USA at (888)-998-4399.

TFT-LED Monitor (Qty 1)
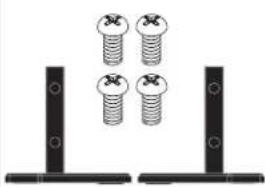
natural_image
Diagram of two identical mechanical components with four screws, no text or symbols presentMonitor Stand 1 set (Qty 2) M8 x L15 screws (Qty 6) M4 x L10 Screws (Qty 6)

110V Power Cable (Qty 1) DP

Cable (Qty 1)
User Manual (Qty 1)
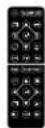
Remote Controller (Qty 1)
Mounting Option
VZ-43, 55 & 65UHD is VESA compliant and compatible with ViewZ monitor mounts. For more information, please contact ViewZ USA at (888)-998-4399.
Compatible ViewZ Wall Mount
- Part #
WM71

- Tilting -10irc 0irc
- Universal Mount
-
Load Capacity 165 lbs /75 kg
-
Part #
XMS

- Tilting Hor. ± 3irc
Ver. -2irc +4irc - Universal Mount
- Load Capacity
154 lbs /70 kg
Compatible ViewZ Ceiling & Free Standing Mount
- Part #
CMKiT-04 - Tilting -12irc +5irc
- Rotation 360irc
- Universal Mount
- Load Capacity 110 lbs / 50 kg 110 lbs / 50 kg
- Part #
VZ-FSM2x2 - Tilting ± 4irc
- Universal Mount
- Load Capacity

STAND INSTALLATION
Stand Installation
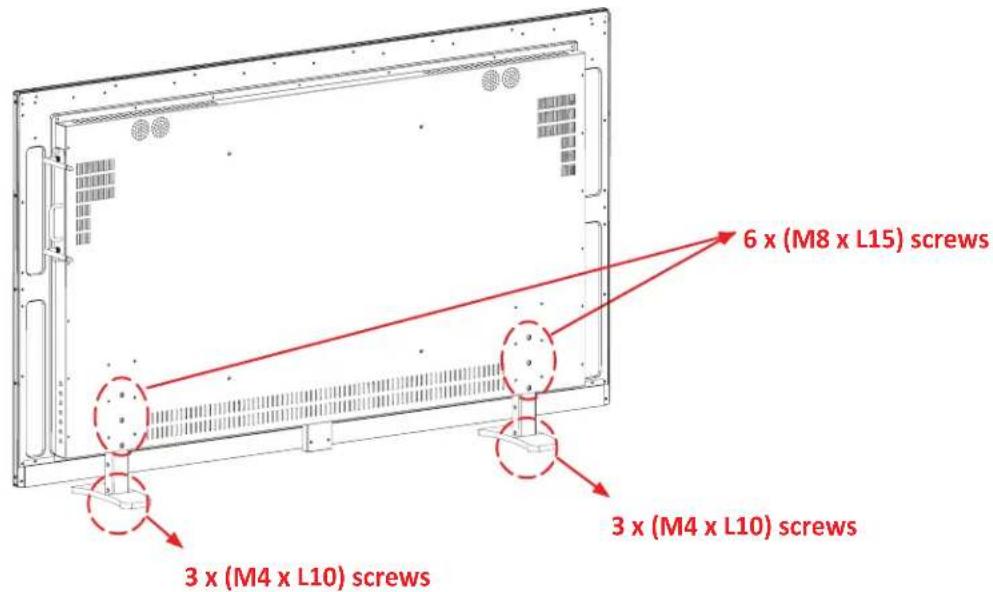
- Slot each stand into bottom holes of VZ-49UHD, VZ-55UHD & VZ-65UHD monitors.
- Align the holes between stand and VZ-49UHD, VZ-55UHD & VZ-65UHD monitors
- tighten provided screws (M8 x L15mm) into the holes.
! Attention!
VZ-49UHD, VZ-55UHD & VZ-65UHD: User must use 6 * M8 x L15 mm screws (each side use 3 pieces) to assemble this monitor and the stand.
WARNING! If the user uses longer screws than M8 x L15 mm, it may damage the unit.
! Mounting Safety!
At least two people are recommended to install the mount.
Interface Input Ports
The following image is the description of interface input ports of VZ-49, 55 & 65UHD

- Power ON / OFF SWITCH
- AC 100 \~ 240 V
- HDMI 2 IN (Ver 1.4)
- HDMI 1 IN (Ver 2.0)
- DP 2 IN x 1
-
DP 1 IN x 1
-
AUDIO OUT
- RS-232 IN
- RS-232 OUT
- DP OUT
- USB (OPS Only) IN
- Media Player USB IN
- Media Player SD Card IN
Interface Resolution & Refresh Rate
| Interface Input Source | Max Resolution | Refresh Rate |
| HDMI ( Ver. 2.0) | 3840 x 2160 | 60Hz |
| HDMI ( Ver. 1.4) | 3840 x 2160 | 30Hz |
| DP ( Ver. 1.2) | 3840 x 2160 | 60Hz |
REMOTE FUNCTION
Remote Controller
- POWER - Power On & Off
- MENU - Enter the monitor OSD menu
- SOURCE - Change the input source
- ARROW - Monitor OSD control - left, right, select or enter, volume up & volume down
- UP, DOWN - Not support
- ROTATE - Rotate the display
- BACK - Exit or return to the previous menu
- OPS - Enter the OPS mode
- PIP - Set PIP mode
- MUTE - Mute audio
- MEDIA (Media Player) - Enter the media play mode
- HOME - Enter the root menu of media play
- SETTINGS - Enter the setup window of media play
- ARROW - Media Player control - left, right, up, down & select / enter
- MENU - Enter the monitor OSD menu
- BACK - Exit or return to the previous menu
- VOLUME DOWN, DELETE (BACKSPACE), VOLUME UP - Control the audio of media play

flowchart
graph TD
    subgraph Monitor
        1["①"] --> 1a["②"]
        2["②"] --> 2a["③"]
        3["③"] --> 3a["④"]
        4["④"] --> 4a["⑤"]
        5["⑤"] --> 5a["⑥"]
        6["⑥"] --> 6a["⑦"]
        7["⑦"] --> 7a["⑧"]
        8["⑧"] --> 8a["⑨"]
        9["⑨"] --> 9a["⑩"]
        10["⑩"] --> 10a["⑪"]
        11["⑪"] --> 11a["⑫"]
        12["⑫"] --> 12a["⑬"]
        13["⑬"] --> 13a["⑭"]
        14["⑭"] --> 14a["⑮"]
        15["⑮"] --> 15a["⑯"]
        16["⑯"] --> 16a["⑰"]
        17["⑰"] --> 17a["⑱"]
        18["⑱"] --> 18a["⑲"]
        19["⑲"] --> 19a["⑳"]
        20["⑳"] --> 20a["㉑"]
        21["㉑"] --> 21a["㉚"]
        22["㉚"] --> 22a["㉔"]
        23["㉔"] --> 23a["㉕"]
        24["㉕"] --> 24a["㉕"]
        25["㉕"] --> 25a["㉖"]
        26["㉖"] --> 26a["㉗"]
        27["㉗"] --> 27a["㉙"]
        28["㉙"] --> 28a["㉚"]
        29["㉚"] --> 29a["㉛"]
        30["㉛"] --> 30a["㉜"]
Display image, sound and custom settings can be adjusted in OSD (On Screen Display) menu by remote controller. To adjust monitor setting value :
- Press the MENU button to enter the OSD menu
- Press the SOURCE button to select input source
- Press the SELECT buttons to select the desired sub MENU. The selected sub MENU will be highlighted
- Press the ◀ / ▶ button to enter the sub MENU for adjusting items
- Change the value as user want to adjust by using the ◀ / ▶ buttons
- Press the SELECT button to confirm
- Press the BACK button to exit & save adjustment value on sub MENU
- Press the MUTE button to mute audio - audio only works with a selected input source
CONTROL AND FUNCTION
On Monitor, Button Control

- Source
Select an input source
- Menu
Enter or exit the OSD / Select a menu on OSD
- Left & Right
◀ (VOL) ▶
Select the submenu / Adjust the value of feature
◀ / ▶ (hot key) set the volume up / down
- PIP & PBP
Select the display type
- Rotate
Rotate the screen
- Power
Monitor power on / off
Monitor Button Function
All picture, sound settings and setup can be adjusted in OSD (On Screen Display) menu.
To adjust the OSD screen:
- Press the MENU button to enter the OSD MENU
- Press the SOURCE button, then press the ◀ / ▶ buttons to select input source Press the MENU button to select a desired input source
- Press the ◀ / ▶ buttons to select the desired main MENU. The selected main MENU is highlighted
- Press the MENU buttons to select the desired sub MENU. The selected sub MENU is highlighted
- Change the value you wish to adjust by using the ◀ / ▶ buttons
- Press the MENU button to confirm the adjustment on sub MENU
- Press the MENU button to exit the sub MENU and go back to the main MENU
- Press the MENU button to exit the OSD MENU
CONTROL AND FUNCTION
Select Input Source

Press 'SOURCE' button on monitor or press the 📋 button on remote controller.
Press ◀ / ▶ button to change input source and then press 'MENU' button to select input source on monitor.
Press ◀ / ▶ button to change input source and then press ⏻ button to select input source on remote controller.
Detect Source Signal Message
If user connects any input source, ViewZ UHD series monitor will display current input source resolution and frequency.
CONTROL AND FUNCTION
Volume
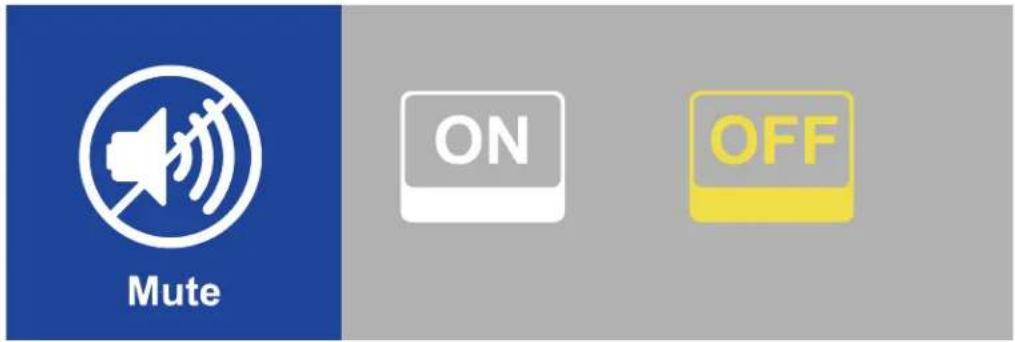
Press 'Mute' button on remote controller to mute the sound.
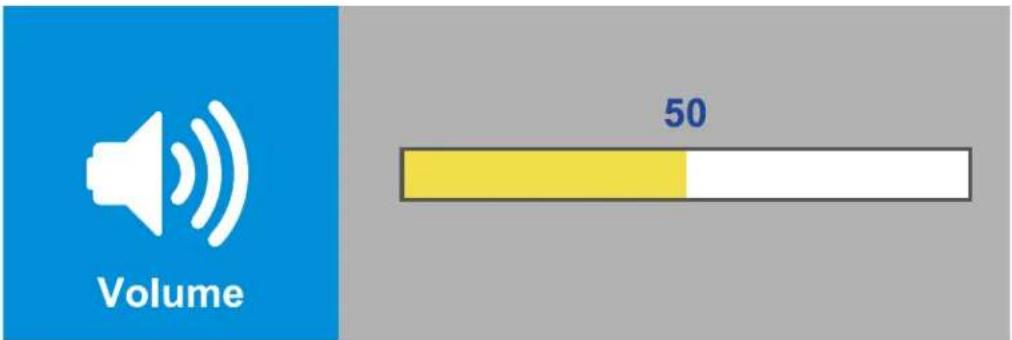
Press the ◀ / ▶ buttons (on monitor) to adjust volume on the monitor.
Press the 📋 or 🌐 buttons (on remote controller) to adjust volume on the monitor.
CONTROL AND FUNCTION
PICTURE
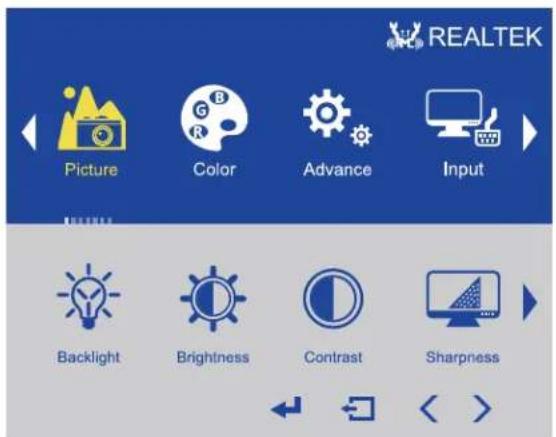
FUNCTION VALUE
| PICTURE MODE | Adjust the image color setting | |
| BACKLIGHT | Adjust the monitor backlight level | 0 ~ 100 (default: 50) |
| BRIGHTNESS | Provide enhanced contrast and sharpness | 0 ~ 100 (default: 50) |
| CONTRAST | Adjust the contrast level | 0 ~ 100 (default: 50) |
| SHARPNESS | Adjust the sharpness level | 0 ~ 4 (default: 2) |
| CLONE | Turn on / off clone mode |
CONTROL AND FUNCTION
COLOR
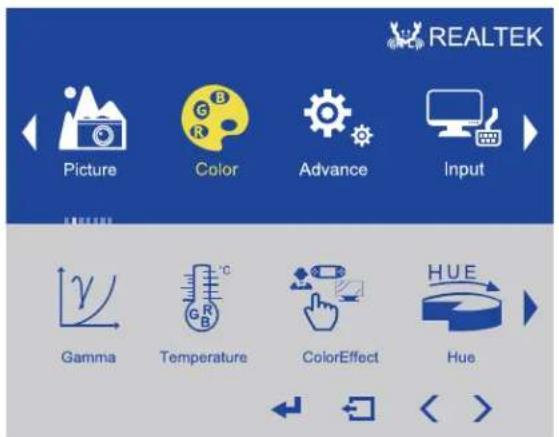
FUNCTION VALUE
| COLOR | Adjust the color setting | |
| GAMMA | Adjust the brightness of monitor | Off/1.8/2.0/2.2/2.4 (default:off) |
| TEMPERATURE | Adjust the color setting | 5800/6500/7500/9300/sRGB/User(default: R/G/B 128,R:0~256, G:0~256, B:0~256) |
| COLOR EFFECT | Adjust the color effect | Standard / Game / MoviePhoto / Vivid /User (R/Y/B/C/G/M,Hue: 0 ~ 100, SAT: 0 ~ 100) |
| HUE | Adjust the hue level | 0 ~ 100 (default: 50) |
| SATURATION | Adjust the saturation level | 0 ~ 100 (default: 50) |
| PCM | Adjust the PCM level | sRGB / Adobe RGB / User / Native |
CONTROL AND FUNCTION
ADVANCE & INPUT
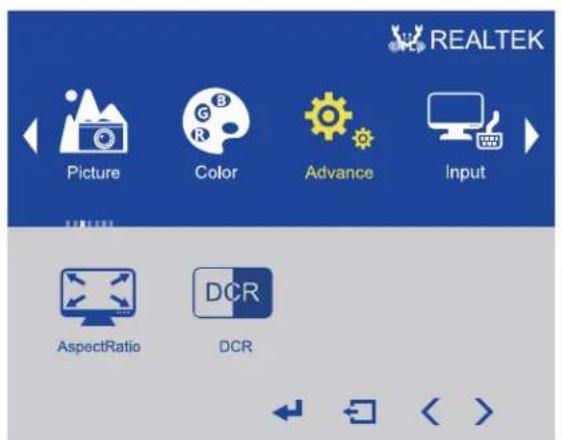

MOVE / ADJUST

RETURN

FUNCTION VALUE
| ADVANCE Adjust the video setting | ||
| ASPECT RATIO | Adjust the video format | Full/16:9/4:3/5:4/ 1:1 /User |
| DCR | Turn on / off overdrive | ON / OFF (default: OFF) |
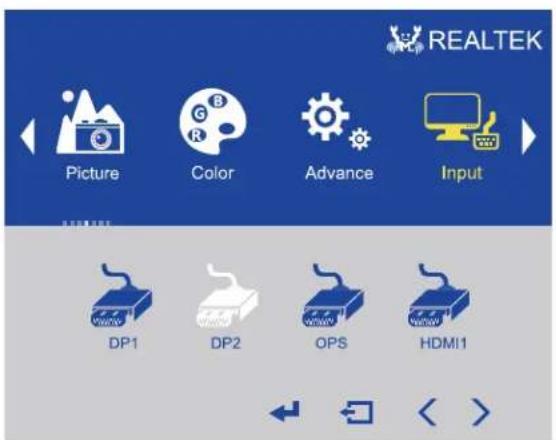
FUNCTION VALUE
| INPUT1) | Select the input source DP1 / DP2 / OPS / MEDIA | HDMI 1 / HDMI 2 |
1) User can select the input source for PIP, PBP, 4P & Full screen
CONTROL AND FUNCTION
AUDIO
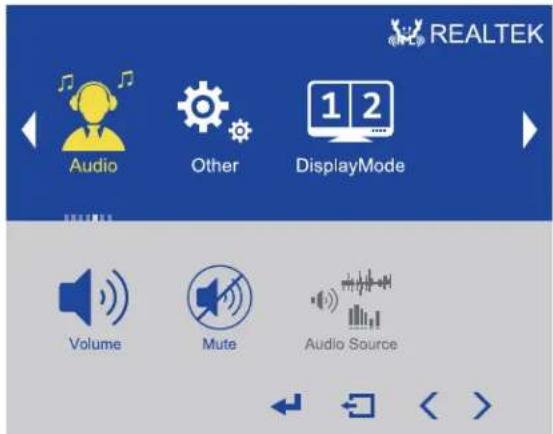
1) Available on the mode of 2P LR, 2P TB, 2P PIP & 4P
CONTROL AND FUNCTION
OTHER
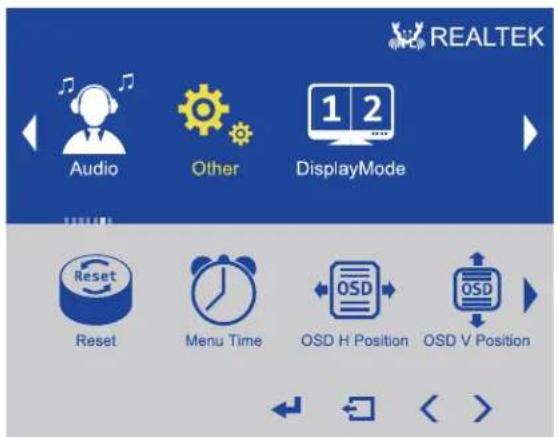
To select the input source for 2P LR, 2P TB, 2P PIP & 4P, user should click the 📅 button (on remote controller) or select the mode at OSD. After selecting a mode, user can select the input source for each region at OSD / Input (refer to page 17).
If no source is assigned to each section, the monitor will show 'No Signal' sign.
CONTROL AND FUNCTION
Media Card Interface
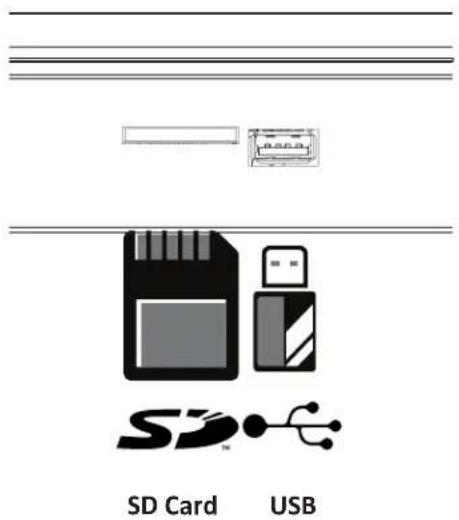
- Connect USB or SD card
- Connect USB or SD card devices to USB or SD Card slot located at the back of the UHD
- Remove USB or SD card
- Return to the main menu and press exit
- Remove the USB & SD card from the slot
Media Player OSD

| FUNCTION | |
| MOVIE | Plays video files from the USB or internal storage |
| PICTURE | Displays image files from the USB or internal storage |
| MUSIC | Plays music files from the USB or internal storage |
| FOLDER | Copy, save, rename and search the file and folder |
| SETTINGS | Change the setup of media player |
CONTROL AND FUNCTION
Movie

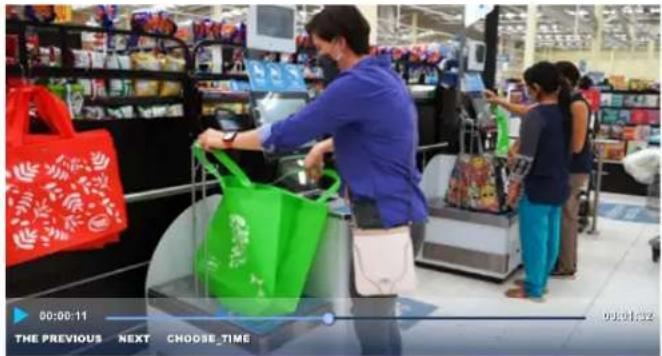
When user select MOVIE on the entry menu of Media Play:
- Press the ⏻ button (on remote controller) and then press ◀ / ▶ / ▲ / ▼ (ARROW) buttons to select a movie file to display.
- Press the ⏻ button (on remote controller) to select movie files to play and then press ⏻ button to play the movie.
*Note: If you have more than one movie file, selected movie files will display one by one. If there are movie files in a folder and select a movie file to play, other movie files will be played after the selected movie file playing.
- Press the button (on remote controller) or button (on the OSD) to pause the movie play.
- Press the THE PREVIOUS & NEXT buttons (on the OSD) to play next or previous movie.
- Press the CHOOSE_TIME button (on the OSD) to jump to the specific time to play.
- Press the ↻ button (on remote controller) to go back to the previous menu.
- Press the 🏠 button or 🏠 button (on remote controller) to volume up & down.
- Press the button (on remote controller) to adjust video display setting. Use can adjust;
Screen Size (Format): select Full screen, Original scale, Proportional play, 16:9 Equal Width, 16:9 Contour,
4:3 Equal Width, 4:3 Contour
Play Mode: select Play in Sequence, Loop All, Single Cycle, Random Play, Single Play
Track settings: show video codec information
Subtitle: select the applicable subtitle
Subtitle Encoding: select the applicable subtitle encoding among UTF-8, UTF0-16LE, ISO8859-1, EUC-JP, EUC-KR, GBK, BIG5
- Press the ⚙ button (on remote controller) to go back to the home screen of media play.
- Press the ⚙ button (on remote controller) to open the Media OSD MENU.
- Press the Media button (on remote controller) to turn off/on the Media Play.
CONTROL AND FUNCTION
Picture

natural_image
Collage of grayscale surveillance camera feeds showing various equipment and devices (no visible text or symbols)When user select PHOTO on the entry menu of Media Play:
- Press the ⏻ button and then press ◀ / ▶ / ▲ / ▼ (ARROW) buttons to select an image file to display.
- Press the ⏻ button to select image files to play and then press ▶ (PLAY) button to display the image or slide-show.
*Note: If you have more than one image file, selected image files will display one by one. If there are image files in a folder and select a image file to play, other image files will be played after the selected image file playing.
- Press the 🏠 button (on remote controller) or 📄 button (on the OSD) to pause & play the music play.
- Press the ◀ / ▶ buttons (on remote controller) to display next or previous image.
- Press the ⏻ button (on remote controller) to go back to the previous menu.
- Press the ◀ button or ◀ button (on remote controller) to volume up & down.
- Press the button (on remote controller) to adjust image display setting. Use can adjust;
Switching Mode: select the image switching mode - Default, Alpha, Rotate, Flip, Accordion, ZoomFade, Fade, ZoomCenter, ZoomStack, Stack, Depth, Zoom, Mosaic
Picture Preview Time: select the image display time (second) - 0s, 1s, 3s, 7s, 10s, 30s, 1min, 3min
Background Music: turn on/off the background music
Picture Ratio: select the display ratio - Full-Screen Display, Proportional Display, Proportional Zoom
- Press the ⚙ button (on remote controller) to go back to the home screen of media play.
- Press the ⚙ button (on remote controller) to open the Media OSD MENU.
- Press the Media button (on remote controller) to turn off/on the Media Play.
CONTROL AND FUNCTION
Music

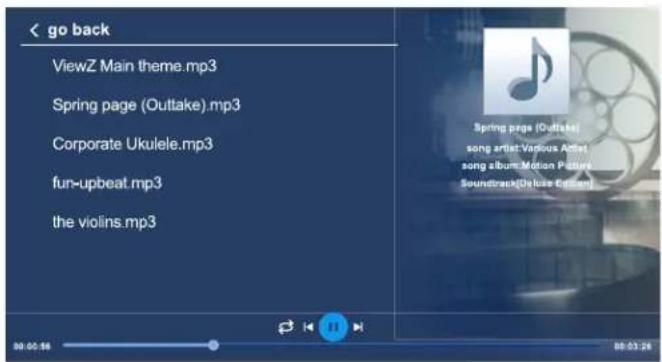
When user select MUSIC on the entry menu of Media Play:
- Press the ⏻ button (on remote controller) and then press ◀ / ▶ / ▲ / ▼ (ARROW) buttons to select a music file to display.
- Press the 🖼 button to select music files to play and then press ▶ (PLAY) button to play the music.
*Note: If you have more than one music file, selected movie files will display one by one. If there are music files in a folder and select a music file to play, other music files will be played after the selected music file playing.
- Press the 🏠 button (on remote controller) or 📄 button (on the OSD) to pause & play the music play.
- Press the ◀ & ▶ buttons (on the OSD) to play next or previous movie.
- Press the ➕ button (on the OSD) to loop the current playing music file.
- Press the ⏻ button (on remote controller) to go back to the previous menu.
- Press the 📋 button or 🌐 button (on remote controller) to volume up & down.
- Press the button (on remote controller) to switch between play control and music file list.
- Press the ⏻ button (on remote controller) to go back to the home screen of media play.
- Press the ⚙ button (on remote controller) to open the Media OSD MENU.
- Press the Media button (on remote controller) to turn off/on the Media Play.
CONTROL AND FUNCTION
Folder
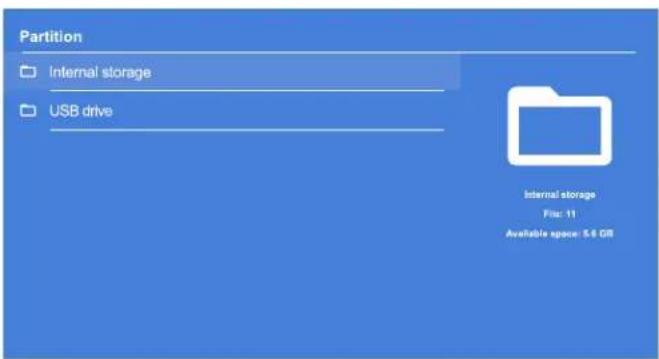
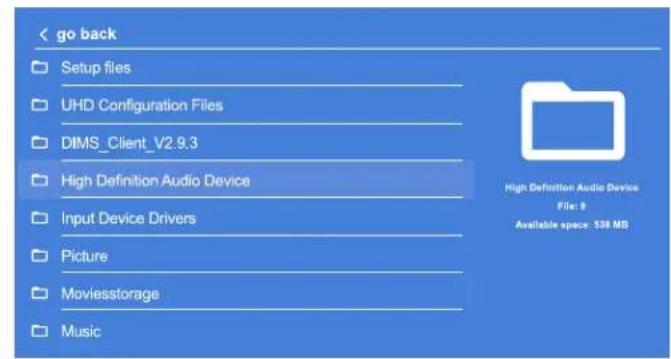
When user select FOLDER on the entry menu of Media Play:
- Press the ⏻ button and then press ◀ / ▶ / ▲ / ▼ (ARROW) buttons to select a file or folder to display.
- Press the ⏻ button to select a file or folder to see or play the inside folder or the file.
*Note: If you select a file, a selected file (movie, music or picture) can be played.
![[4K] Secret World 4K Footage.mp4 mp4 Amaza_UHD_24_H265-25M mp4 B_C32V1Q_OD_SPANISH.mp4 The Legend of 1900.mp4 copy mobile delete rename paste [4K] Secret World 4K Footage.mp4 No size: 478MB File type:.mp4 Revision time: 2021-03-18 00:00:00](/content/2026/06/1404576/images/e83e373e0375c2b94ce89dc945fa0063038c428b2ccfefa696d8f18d96864d59.jpg)
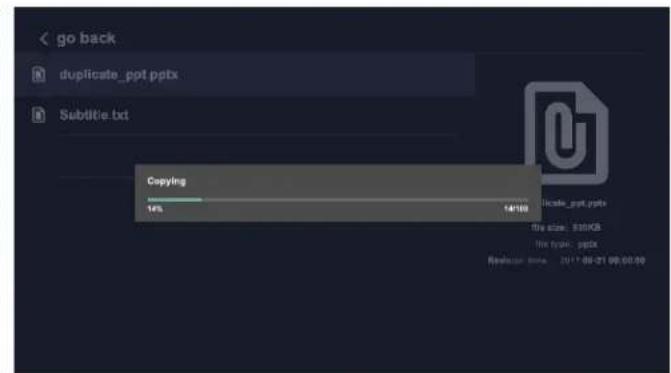
- Select a file or folder, press the button to copy, delete, rename and paste a file or folder.
CONTROL AND FUNCTION
Settings

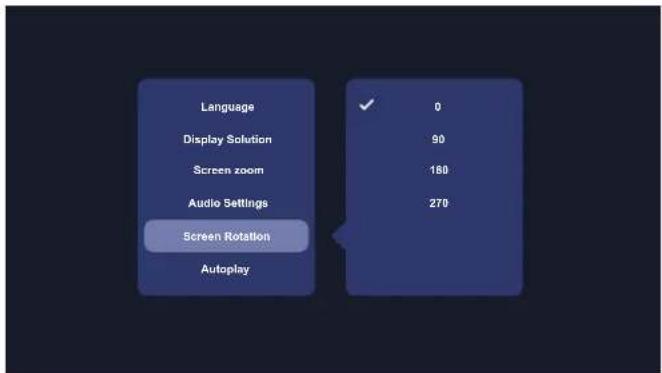
When you select SETTINGS on the entry menu of Media Play:
User can adjust the Media Play settings. Press the ⏻ button (on remote controller) and then press ◀ / ▶ / ▲ / ▼ (ARROW) buttons to adjust the value.
| FUNCTION VALUE | ||
| LANGUAGE | Set the language of the Media Play | English / French / Spanish / Japanese / Portuguese / Korean / Italian / Chinese / Deutsch / Russian / Islam |
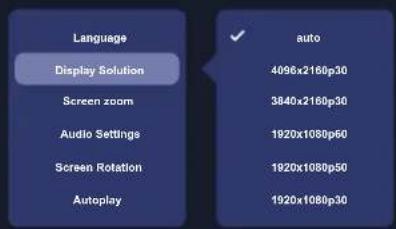
| DISPLAY RESOLUTION | Select the resolution of input source | AUTO / 4K / 1080p / 720p |
| SCREEN ZOOM | Adjust the zooming level | |
| AUDIO SETTINGS | Select the sound source | Default / SPDIF Source Code / HDMI Source Code |
| SCREEN ROTATION | Rotate the screen | 0irc / 90irc / 180irc / 270irc |
| AUTOPLAY | Set the autoplay of Media Play contents | OFF / MOVIE / MUSIC / PICTURE / Movie&Picture / Picture&Music (default: OFF) |
CONTROL AND FUNCTION
Settings
| FUNCTION VALUE | ||
| CYCLIC MODE | Select the playing style of contents | Play in Sequence / Loop All / Single Cycle / Random Play / Single Play |
| VIDEO DISPLAY RATIO | Adjust the video format at Movie Display | Full Screen / Original Scale / Proportional Play / 16:9Equal Width / 16:9Contour/ 4:3Equal Width / 4:3Contour |
| VIDEO MEMORY | Use the video memory at Movie Display | ON / OFF (default: OFF) |
| PICTURE PREVIEW MODE | Set the switching mode of images at Picture Display | Default / Alpha / Rotate / Cube / Flip / Accordion / ZoomFade / Fade / ZoomCenter / ZoomStack / Stack / Depth / Zoom / Mosaic |
| PICTURE PREVIEW TIME | Set the preview time of images at Picture Display | 1s / 3s / 5s / 7s / 10s / 30s / 1min / 3min |
| COPY TO INTERNAL STORAGE | Copy & save the file/folder from external to internal storage. VZ-UHD series monitor has 5GB of internal memory space. | ON / OFF |
| RESTORE DEFAULT SETTINGS | Reset the media play settings to the factory default | YES / NO |
| VERSION | Check the media play version | |
RS232 COMMAND
RS 232 Communication Command & Relevant Configurations
In consideration of secondary development of centralized control circumstances, the function of RS232 communication command & relevant configuration setup are described as follow:
• RS 232 communication settings
Baud rate : 9600 bps
Parity check bit: none
Data bit : 8 bits
Stop bit : 1 bits


RS 232 input RS 232 output
- RS 232 input
1 - RX
3 - Ground
- RS 232 output
3 - Ground
8 - TX
RS232 COMMAND
RS 232 Communication Command & Relevant Configurations
In consideration of secondary development of centralized control circumstances, the POWER ON/OFF function of RS232 communication command & relevant configuration setup are described as follow:
• RS 232 communication settings
Baud rate : 9600 bps
Data bit : 8 bits
Parity check bit : none
Stop bit : 1 bits
• RS232 communication command
PARAMETER (DATA) DESCRIPTION
SET COMMAND
| POWER OFF | RS232 command: | 53 47 01 00 00 9B |
| POWER ON | RS232 command: | 53 47 01 00 01 9C |
| MUTE OFF | RS232 command: | 53 47 01 01 00 9C |
| MUTE ON | RS232 command: | 53 47 01 01 01 9E |
| DP1 | RS232 command: | 53 47 01 03 00 9E |
| DP2 | RS232 command: | 53 47 01 03 01 9F |
| OPS | RS232 command: | 53 47 01 03 02 A0 |
| HDMI1 | RS232 command: | 53 47 01 03 03 A1 |
| HDMI2 | RS232 command: | 53 47 01 03 04 A2 |
| Media | RS232 command: | 53 47 01 03 05 A3 |
The above commands are hexadecimal.
MOUNTING GUIDE
Wall Mounting (Optional)
VZ-49,55&65UHD monitors are suitable for universal wall mounting (not included).

M6 x L14 screws for VZ-49UHD, VZ-55UHD, VZ-65UHD
- VZ-49UHD : Universal Wall Mount (VESA) 400mm x 400mm
- VZ-55UHD : Universal Wall Mount (VESA) 400mm x 400mm
- VZ-65UHD : Universal Wall Mount (VESA) 400mm x 400mm
! WARNING!
If user uses screws longer than M6 x L14 mm for VZ-49UHD, VZ-55UHD, VZ-65UHD
it may cause damage to the unit. Please use the screws of correct and size and length as instructed.
! Mounting Safety !
At least two people are recommended to safely install the mount and monitor.
SPECIFICATION
Model No. VZ-49UHD VZ-55UHD VZ-65UHD
| Size & Type 49" | 55" | 65" | ||
| LCD | Panel Type | 49" 4K LED Backlit Monitor | 55" 4K LED Backlit Monitor | 65" 4K LED Backlit Monitor |
| Pixel Pitch | 0.27963 (H) x 0.27963 (V) mm | 0.315 (H) x 0.315 (V) mm | 0.372 (H) x 0.372 (V) mm | |
| Brightness | 350 cd/m2 (Typical) | 350 cd/m2 (Typical) | 350 cd/m2 (Typical) | |
| Contrast Ratio | 1200 : 1 (Typ.) | 1300 : 1 (Typ.) | 1200 : 1 (Typ.) | |
| Viewing Angle | 178° / 178° | |||
| Display Color | 1.07 Billion Colors (10 Bit) | |||
| Response Time | < 9 ms | < 9 ms | < 8 ms | |
| Active Display Area | 1075.2 (H) x 607.2 (V) mm | 1211.1 (H) x 681.9 (V) mm | 1428.5 (H) x 803.5 (V) mm | |
| Resolution | 3840 (H) x 2160 (V) @ 60Hz | |||
| Refresh Rate (Max.) | HDMI 2.0 - 3840x2160 @60Hz | HDMI 1.4 - 3840x2160 @30Hz | DP 1.2 - 3840x2160 @60Hz | |||
| Aspect Ratio | 16 : 9 (1.78 : 1) | |||
| Case Type | Black Metal | |||
| Color Temperature | 5800 / 6500 / 7500 / 9300 / sRGB / USER | |||
| Speaker | 2 x 5W | 2 x 5W | 2 x 5W | |
| Operating Temperature | 32°F ~ 104°F / 0°C ~ 40°C | |||
| Operating Humidity | 20 ~ 85% RH | |||
| Weight | Net : 36.15 lbs / 16.4 kgGross : 52.91 lbs / 24.0 kg | Net : 47.39 lbs / 21.5 kgGross : 66.13 lbs / 30.0 kg | Net : 73.85 lbs / 33.5 kgGross : 95.01 lbs / 43.1 kg | |
| INTERFACE | HDMI 1.4 In x 1, HDMI 2.0 In x 1, DP IN x 2, DP OUT x 1, RJ45 (RS-232) In / Out x 1 / 1,Audio Out x 1, USB (Media Player) In x 1, SD Card (Media Player) In x 1 | |||
| INTERFACE (OPS - Option) | USB (Typc C) In x 1, USB 2.0 (Type A) In x 2, USB 3.0 (Type A) In x 2,RJ45 In x 1, HDMI Out x 1, Mic. In x 1, Audio Out x 1 | |||
| Safety & EMC Certification | CE / FCC / KC / RoHS | |||
| Electrical Ratings | AC 100-240V, 50/60Hz | |||
| Power Consumption | ≤ 160 W | ≤ 170 W | ≤ 240 W | |
| Accessories | AC 110V Power Cable x1, User's Manual x1, Remote Controller x1, Stand x1 | |||
TROUBLESHOOTING GUIDE
- Check the following before calling for service.
- If the same problems continue after checking, contact the reseller you purchased the monitor from.
| At start | We recommend that you test with different input sources when you have trouble with the current input source. If symptom persists, follow the instructions below. After following the instructions below, please contact us at 1-888-99-VIEWZ. |
| No image or Noise on the screen | - Make sure the cable is correctly plugged into the outlet.- Make sure the power cable is correctly plugged into the monitor.- Make sure the cable is correctly connected between monitor & source.- Check brightness and see if brightness is set to '∅'.- Check video source. |
| Incorrect display or Half display | - Check your video source.- Reset video source : connection, cable replacement, setting & more. |
| Flickering and shadow image | - Check your input source setting for resolution and phase (Hz). |
| The audio function is not working | - Check the volume and make sure MUTE is not on.- Check HDMI / DP / Audio port cable connection. |
| LED is flickering or no image | - Check the interface cable connection and make sure it's plugged in correctly.- Check the input source. |
TERMS OF WARRANTY / RMA
- The warranty period for this monitor is 3 years. The warranty will be voided for the scenarios listed below.
- You can also download the manual and information of VIEWZ web site: VIEWZUSA.COM
| Cases of Non-Warranty Coverage | When power feed to the monitor exceeds capacity and causes damage. |
| Accident, Abuse, Misuse, Neglect, Fire, Water/liquids, Lightning or any act of nature. | |
| Damaged by dropping, throwing and hitting the monitor. | |
| Failure caused by users attempt to modify the product. | |
| Failure by limited life of parts such as LED Lamps and any other consumables. | |
| Damaged by using third party power cable, unstable power input and electric shock. |
* Above information can be changed without notification - please check our website or contact ViewZ representative for latest RMA service policy.
* When shipping the monitor for RMA, make sure to pack safely to ensure the monitor is not damaged during shipping.
NOTE
NOTE
WARRANTY
ViewZ USA LIMITED 3 YEAR WARRANTY
What and Who is Covered by this Limited Warranty and for How Long
ViewZ USA warrants this product to be free from defects in material and workmanship for 3 years to the original owner of this product. The limited warranty is valid only for the original purchaser of the product.
What ViewZ USA Will Do
At their sole discretion, ViewZ USA will repair or replace any product or product part that is defective. If ViewZ USA chooses to replace a defective product or part, a replacement product or part will be shipped to you at no charge, but you must pay any labor costs.
What is Not Covered; Limitations
ViewZ USA disclaims any liability for damage to mounts, adapters, displays, projectors, other property, or personal injury resulting, in whole or in part, from improper installation, modification, use or misuse of its products.
ViewZ USA disclaims all other warranties, express or implied, including warranties of merchantability and fitness for a particular purpose. ViewZ USA is not responsible for incidental or consequential damages, including but not limited to, inability to use its products or labor costs for removing and replacing defective products or parts. Some states do not allow the exclusion or limitation of incidental or consequential damage, so the above limitation or exclusion many not apply to you.
What Customers Must Do for Limited Warranty Service
If you discover a problem that you think may be covered by the warranty you MUST REPORT it in writing to the address below within thirty (30) days. Proof of purchase (an original sales receipt) from the original consumer purchaser must accompany all warranty claims. Warranty claims must also include a description of the problem, the purchaser's name, address, and telephone number. General inquiries can be addressed to ViewZ USA Customer Service at 1-888-998-4399. Warranty claims will not be accepted over the phone or by fax.
ViewZ USA
Attn: Warranty Claim
1030 N ARMANDO ST.,
ANAHEIM, CA 92806
How State Law Applies
This warranty gives you specific legal rights, and you may also have other rights which vary from state to state.
Disclaimer
ViewZ USA intends to make this manual accurate and complete. However, ViewZ USA makes no claim that the information contained herein covers all details, conditions or variations, nor does it provide for every possible contingency in connection with the installation or use of this monitor. The information contained in this document is subject to change without notice or obligation of any kind. ViewZ USA makes no representation of warranty, expressed or implied, regarding the information contained herein. ViewZ USA assumes no responsibility for accuracy, completeness or sufficiency of the information contained in this document.
Contact Us
| NORTH AMERICA | |
| 1030 N ARMANDO ST.,ANAHEIM, CA 92806USA and CanadaPhone: 1-888-998-4399Fax: 1-714-996-1138Other Locations | |
| © ViewZ USA | Phone: (001) 888-998-4399Fax: (001) 714-996-1138 |
- CONTENTS
- Safety Instruction 3
- Installation 8
- Function 11
- RS232 Command 28
- Mounting Guide 30
- Specification 31
- Trouble Shooting 32
- RMA 33
- Warranty 36
- SAFETY INSTRUCTION
- Important Safety Instruction
- Mark Indication and Substance
- Warning
- Caution
- Available Temperature & Humidity
- Dot Defect (dead pixel) of TFT
- FCC RF INTERFERENCE STATEMENT
- Note
- ▶ DOC COMPLIANCE NOTICE
- Statement
- RoHS COMPLIANCE
- Indicative description of Regulations on Regulation on Recycling and Disposal of Waste Electrical and Electronic Products..
- INSTALLATION
- Installation Tools
- Assembly Components - provided
- Mounting Option
- Compatible ViewZ Wall Mount
- Compatible ViewZ Ceiling & Free Standing Mount
- STAND INSTALLATION
- ! Attention!
- ! Mounting Safety!
- Interface Input Ports
- REMOTE FUNCTION
- Remote Controller
- CONTROL AND FUNCTION
- On Monitor, Button Control
- Monitor Button Function
- Select Input Source
- Detect Source Signal Message
- Volume
- AUDIO
- Media Card Interface
- - Connect USB or SD card
- - Remove USB or SD card
- Media Player OSD
- Movie
- Picture
- Music
- Folder
- Settings
- RS232 COMMAND
- RS 232 Communication Command & Relevant Configurations
- - RX
- - Ground
- - TX
- MOUNTING GUIDE
- Wall Mounting (Optional)
- ! WARNING!
- ! Mounting Safety !
- SPECIFICATION
- TROUBLESHOOTING GUIDE
- TERMS OF WARRANTY / RMA
- WARRANTY
- ViewZ USA LIMITED 3 YEAR WARRANTY
- What and Who is Covered by this Limited Warranty and for How Long
- What ViewZ USA Will Do
- What is Not Covered; Limitations
- What Customers Must Do for Limited Warranty Service
- How State Law Applies
- Disclaimer
- Contact Us
Brand : ViewZ
Model : VZ-65UHD
Category : Monitor