SF 1008G+ SE+ HD - Receiver Octagon - Free user manual and instructions
Find the device manual for free SF 1008G+ SE+ HD Octagon in PDF.


| Product Type | Satellite Receiver |
| Brand | Octagon |
| Model | SF 1008G+ SE+ HD |
| Dimensions (W x D x H) | 280 x 200 x 50 mm |
| Weight | 1.5 kg |
| Power Supply | 12V DC, 1.5A |
| Tuner Type | DVB-S2 |
| Video Output | HDMI, CVBS |
| Audio Output | Digital Optical, RCA Stereo |
| USB Port | Yes, for media playback and recording |
| Ethernet Port | Yes, 10/100 Mbps |
| Supported Satellite Standards | MPEG-4, H.264, H.265 |
| Max Resolution | 1080p Full HD |
| Remote Control | Included |
| Maintenance | Clean with a dry, soft cloth; avoid solvents |
| Safety | Keep away from moisture and heat sources; unplug during storms |
| Spare Parts and Repairability | Contact authorized service center; no user-serviceable parts inside |
| General Information | Octagon SF 1008G+ SE+ HD is a versatile satellite receiver with USB recording and network connectivity. |
Frequently Asked Questions - SF 1008G+ SE+ HD Octagon
User questions about SF 1008G+ SE+ HD Octagon
0 question about this device. Answer the ones you know or ask your own.
Ask a new question about this device
Download the instructions for your Receiver in PDF format for free! Find your manual SF 1008G+ SE+ HD - Octagon and take your electronic device back in hand. On this page are published all the documents necessary for the use of your device. SF 1008G+ SE+ HD by Octagon.
USER MANUAL SF 1008G+ SE+ HD Octagon
Full HD Digital Satellite Receiver Digital Innovation Life
User's Manual
OCTAGON SF 1008G+ SE+ HD INTELLIGENCE


CTagon
INDEX
INDEX....3
Precautions ....5
- Important Safety Instructions....5
- Notice 5
- Copyright 6
- Disclaimer....6
- Trademarks 6
Before You Begin 7
- Main Features ....7
- Accessories 8
Hardware Description....9
- Front Panel Configuration 9
- Rear Panel Configuration....10
- Remote Control Unit....11
Connecting diagram 14
- Receiver to A/C power....14
- Receiver to TV with Digital A/V Output 14
- Receiver to TV with Analog A/V Output....15
- Connecting to Antenna Cable 15
Guide of Functions 17
- Selecting a Service....17
1.1 Using CH UP/DOWN buttons.... 17
1.2 Using Service List 17
1.3 Using Simple Service List 17
1.4 Using Recent Service List.... 18
- Information Window....18
- Multi-Picture Display....18
- Electronic Program Guide (EPG) 18
- Favorite Group 19
- Volume Control....19
- Pause 19
- Subtitle....20
- Audio Control....20
- Teletext 21
- PIP (Picture in Picture) 21
PVR (Personal Video Recorder) Function 23
- Recording 23
1.1 Recording methods 23
1.2 Recording Edit....25
1.3 Long Time recording 25
1.4 Pause during recording 25
-
Time Shifting....27
-
Playback (Play List)....28
3.1 Recorded Files 28
3.2 Imported Files 29
3.3 Music 29
3.4 Photo 29
- Bookmark 30
- Trick mode....30
Menu Map 31
Main Menu of Guide....32
- System Tools 32
1.1 Storage Manager....32
1.2 Timer Settings 33
1.3 Service List Manager 33
1.4 Data Transfer....35
- Configuration 36
2.1 Recording Option 36
2.2 Parental Control 37
2.3 Display Setting 37
2.4 Time Setting 38
2.5 Language Setting 38
2.6 A/V Output Setting 39
- Installation 40
3.1 Dish Setting....40
3.2 Positioner Setting 40
3.3 Service Search....41
3.5 System Recovery 43
3.6 System Information 44
- Utility 44
4.1 Calculator 44
4.2 Calendar 44
4.3 CAS (Conditional Access System)....44
4.4 Plugin 45
4.5 Free TV+ 46
4.6 Internet TV+ 47
4.7 Internet Radio+ (WebRadio+) 48
4.8 Weather forecast....49
Troubleshooting....50
Specifications....51
Precautions
1. Important Safety Instructions
- Read these instructions.
- Keep these instructions.
- Heed all warnings.
- Follow all instructions.
- Do not use this apparatus near water.
● Clean only with dry cloth.
- Do not block any ventilation openings. Install in accordance with the manufacturer's instructions.
- Do not install near any heat sources such as radiators, heat registers, stoves, or other apparatus (including amplifiers) that produce heat.
- Do not reverse the safety purpose of the polarized or grounding-type plug. A polarized plug has two blades with one wider than the other. A grounding type plug has two blades and a third grounding prong. The wide blade or third prong is provided for your safety. If the provided plug does not fit into your outlet, consult an electrician for replacement of the obsolete outlet.
- Protect the power cord from being walked on or pinched particularly at plugs, convenience receptacles, and the point where they exit from the apparatus.
- Only use attachments/accessories specified by the manufacturer.
- Use only with the cart, stand, tripod, bracket, or table specified by the manufacturer, or sold with the apparatus. When a cart is used, use caution when moving the cart/apparatus combination to avoid injury from tip-over.

● Unplug this apparatus during lightning storms or when unused for long periods of time.
- Refer all servicing to qualified service personnel. Servicing is required when the apparatus has been damaged in any way, such as power-supply cord or plug is damaged, liquid has been spilled or objects have fallen into the apparatus, the apparatus has been exposed to rain or moisture, does not operate normally, or has been dropped.
WARNING: To Prevent fire or shock hazard do not expose the set to rain or moisture.
2. Notice
- These servicing instructions are for use by qualified service personnel only. To reduce the risk of electric shock, do not perform any servicing other than that contained in the operating instructions unless you are qualified to do so.
- The apparatus shall not be exposed to dripping or splashing and that no objects filled with liquids, such as vases, shall be placed on the apparatus.
● The mains plug is used as the disconnect device. The disconnect device shall remain readily operable.
To reduce the risk of electric shock, do not remove the cover (or back).
No user serviceable parts are inside.
Refer servicing to qualified service personnel.
The Lightning Flash with arrowhead symbol within an equilateral triangle, is intended to alert the user to the presence of un-insulated "dangerous voltage" within the product enclosure that may be of sufficient magnitude to constitute a risk of shock to persons
The exclamation point within an equilateral triangle is intended to alert the user to the presence of important operating and maintenance (servicing) instructions in the literature accompanying the product
NOTE : Contents of this manual and features/specifications of the STB are subjected to change without prior notice.
3. Copyright
This manual is protected by copyright laws.
Copy, use and reproduction of this manual in part or whole without Manufacturer's prior written approval are prohibited.
4. Disclaimer
The manufacturers, distributors and agents are not liable to any kind of damage caused by the use of the information contained in this manual.
The instruction and descriptions which this manual contains are based on the time of this manual's production.
The manufacturer constantly updates it with new functions and technology.
All the specifications are subject to change without prior notice.
5. Trademarks
HDMI, the HDMI logo and High-Definition Multimedia Interface are trademarks or registered trademarks of HDMI Licensing LLC
Manufactured under license from Dolby Laboratories.
Dolby and the double-D symbol are trademarks of Dolby Laboratories.
Before You Begin
1. Main Features
√ Supports MPEG4 /MPEG2 - HD/SD and Fully DVB-S2 /DVB-S Compliant
√ Intelligent Blind Scan for both SD and HD TV & Multi-Satellite Search
√ Multi-LNB Controlled by DiSEqC Control Version 1.0, 1.1, 1.2 and USALS
√ HDTV PVR Receiver (H.264/ MPEG4 HD )
√ Embedded Linux OS
√ Time Shifting, Recording & Playback with External HDD (USB 2.0)
√ Simultaneously Records upto 3 Channels and allows Viewing of 2 others (PIP) on the same Transponder
√ Powerful Extended EPG supports Event Recording
√ Dual USB 2.0 Host ports (MP3 Player & JPEG Viewer)
√ MKV, Xvid file play back support
√ Ethernet Support
√ High Definition On-Screen Display
√ Favorite Groups
√ Powerful Service List Manager for Favorites, Lock, Skip, Move, Edit and Delete
√ Service Sorting by Name, Transponder and CAS
√ User Friendly & Multi-language Supported (OSD & Menu)
√ Teletext / Subtitles Supported
√ Maximum 10,000 Services(TV & Radio) Programmable
√ Picture-in-Picture (PIP) & Multi-picture Display
√ Parental Lock / System Lock / Installation Lock
√ HDMI Video & Audio Output (576i, 576p, 720p, 1080i, 1080p)
√ Supports Y/Pb/Pr(component) Output in HD
√ CVBS(composite) Video & Audio Output via RCA
√ CVBS, RGB, Video & Audio Output via TV SCART
√ Optical Output for Digital Audio(SPDIF)
√ Software & Service channel Database upgrade via USB & RS-232C port
√ 2 Smart card reader and 2 Common Interface Slots
√ 1W Stand-by Power Consumption
2. Accessories
User's Manual

Remote Control

AAA size Batteries X2

HDMI Cable

AC Power Cord
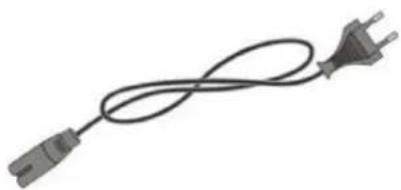
NOTE : If any accessories listed above are missing, contact the sales representative where you purchased this unit.
Hardware Description
1. Front Panel Configuration

- POWER BUTTON: Press to switch between STANDBY and POWER ON modes.
- CH Up/Down button : Press to change services in normal mode, or to move highlighted-bar in menu mode.
- VFD Display: The VFD consist of 8-digit letter. These letters and icon display the current status of receiver such as service name, service information and so on.
- USB (Front): Use it when connecting to external USB storage device.
- SMART CARD READER: Insert smart card for encrypted service access.
- PCMCIA : To receive pay-tv service you need a CA-Module and a smart card from the service provider.
2. Rear Panel Configuration
- LNB IN: Use to connect a satellite antenna.
- LNB OUT: Use it when connecting to another STB for loop-through.
- RS-232C: Serial port for firmware update and data transfer.
- Ethernet : Local area network port for direct computer connection.
- USB : Use it when connecting to external USB storage device.
- SPDIF: Connects to the audio system using a S/PDIF cable. (digital audio)
- HDMI: Connects to the TV by using a HDMI cable for the best quality picture and audio.
- VIDEO : Connects to the TV or VCR using a RCA cable. (Composite video output / Yellow)
- AUDIO L/R: Connects to the TV or VCR using a RCA cable. (Stereo audio output / White, Red)
- Component: Connects to the TV or VCR using a component cable. (YPbPr)
- TV SCART: Connects to the TV input using a TV SCART cable.
- A/C power cable socket : Connects to A/C power cord.
- A/C Switch : Power switch
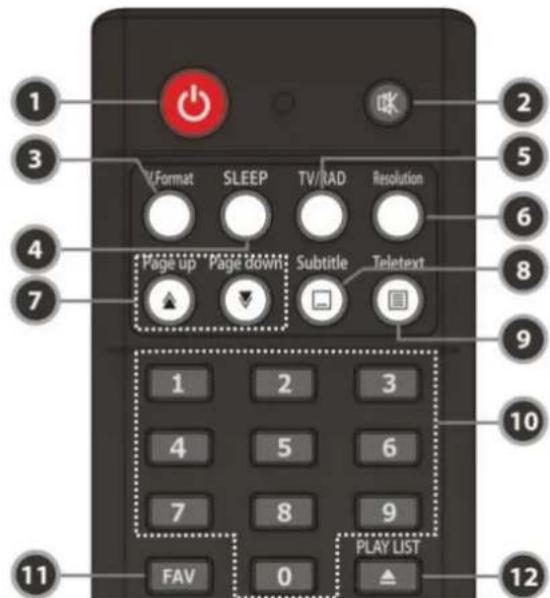
3. Remote Control Unit
-
POWER: Turns the STB On/Off.
-
MUTE: Turns the sound On/Off.
-
V.Format: You can switch the Display Format (4:3 / 16:9)
-
Sleep: To adjust sleep timer.
-
TV/RADIO: Switches between TV and Radio.
-
Resolution : To select the resolution format. Each time you press the Resolution button, the resolution changes in the following sequence: 576i > 576p > 720p > 1080i
-
Page Up& Down : Move to the next or previous page if more than one page are available. This button also is change the location of sub picture in PIP.
-
Subtitle: To show multilingual subtitle.
-
Teletext: To show the digital teletext.
-
Numeric: Controls the numerical operation and service numbers directly.
-
Favorite : To display the satellite group and the favorite groups.
-
Play List: To show the file list in the USB Storage Device or Network Storage Device.

-
Information : Shows the information of the current program. If you press one more, detail information box will be shown.
-
Recall: Moves to previous service.
-
ARROW Buttons
a. Up & Down Buttons : To change the value of a selected item with preprogrammed values in menu. b. Left & Right Buttons : To move the cursor left and right in menu.
-
OK or Service List : Show the service list in non-menu mode and select an item or confirm in menu mode.
-
Menu : To enter the main menu or to move to the previous menu.
-
EXIT : Exit from the menu or pop-up window.
-
Volume Up & Down : To change the Volume.
-
Channel Up & Down: To change service channel.
-
EPG(Electronic Program Guide): Show the TV/Radio program guide.
-
Color Buttons
a. RED : Used for special function in menu. RED key is used to sort lists in service list or go to previous day search in EPG or make/delete the current position as a bookmark.
b. GREEN: Used for special function in menu. Green key is used to set favorites setting in service list or go to the next bookmark position.
c. YELLOW : Used for special function in menu. Yellow key is used to find service in service list or change the audio track.
d. BLUE : Used for special function in menu. Blue key is used to set service list option in service list or display Multi-Picture.

-
Rewind : Rewinds at high speed. Each time you press this button the rewind speed is increased.
-
Play / Time shift : Display the progress bar of playback when no progress bar is displayed. Start playback with normal speed. Return to normal speed from trick mode..
-
Pause: This key is used to pause the video. Press once more to resume the video.
-
Fast Forward : Fasts forward at high speed. Each time you press this button the speed is increased.
-
Previous File : To play the previous MP3 file in MP3 play mode. This button is also used to jump back to beginning of recording during a playback.
-
STOP: To stop time shifting, play back or recording.
-
Recording : To start Recording.
-
Next File : To play the next file. This button is also used to jump to end of recording during a playback.
-
Repetition (*): This key is used to play back a recording repeatedly.
-
PIP Buttons
a. PIP(Picture in Picture): To set PIP window.
b. PIP Swap : Switching between main-picture and sub-picture
c. PIP(Picture in Picture) Service List: To shown the sub-picture service list.
NOTE : (*) This Feature(Repetition) will be supported later, by new s/w version by upgrading. Please refer to your local dealer / distributor.
Connecting diagram
1. Receiver to A/C power
- Connect the A/C power cord between A/C power cord socket of receiver and A/C outlet.

2. Receiver to TV with Digital A/V Output
- Connect the HDMI Cable to the HDMI Connector of the TV.
- Connect SPDIF to Digital audio input of the equipment(Digital Audio)

NOTE : Depending on the A/V equipment you own, there are various ways you can connect the STB. To choose the best connection option, please refer to the manual of the equipment you would like to connect to. To get High Definition playback of High Definition content, we recommend that you connect your high definition display with a HDMI cable. HDMI supports standard, enhanced or high-definition video and multichannel audio in a single cable.
3. Receiver to TV with Analog A/V Output
- Connect the VIDEO and AUDIO L, R to VIDEO IN and AUDIO L, R IN of TV.
- Connect the Component to the Component input of the TV.
- Connect the TV SCART to the SCART input of the TV.
![graph TD A["TV"] --> B["Audio L/R"] A --> C["Video"] A --> D["Component"] A --> E["TV Scart"] B --> F["Computer Interface"] C --> F D --> F E --> F](/content/2026/06/1402988/images/22204c8c7d56f124ab9e2663de26b604183706f6341596d93d06070a863f9133.jpg)
NOTE : The SCART cable connection is recommended for analogue TV or VCR The composite connection(RCA cable) is recommended for analogue TV You cannot view high definition video with the SCART and the composite video connector.
4. Connecting to Antenna Cable
● Using Single DISH : Connect the Satellite Antenna cable to LNB IN.

● Using DiSEqC switch : Connect the cable of DiSEqC switch to LNB IN.
![graph TD A["Satellite Dish 1"] --> D["DiSEqC switch"] B["Satellite Dish 2"] --> D C["More Dish..."] --> D D --> E["Device with antenna"] E --> F["USB OUT"] E --> G["MS-333C"] E --> H["USB 41-60MHz"] E --> I["HDMI"] E --> J["AUDIO"] E --> K["TV 12.84V"] E --> L["CAUTION"] L --> M["USB OUT"] L --> N["…](/content/2026/06/1402988/images/9ca7f51890fce3c8248529213a0e735bdb246e5c864dbc9ebc4f8fd504217f62.jpg)
- Using DiSEqC motor: Connect the cable of DiSEqC motor to LNB IN.

Guide of Functions
1. Selecting a Service
To select the desired service (channel), please refer to the instructions below.
1.1 Using CH UP/DOWN buttons
You can navigate between services by pressing CH UP/DOWN buttons. Whenever you press the CH UP(DOWN) button, current service will be changed to next/previous service. Please press CH UP or CH DOWN button until you fine the service you want to watch.
1.2 Using Service List
To select the desired service in the service list, you should firstly display the service list by pressing the OK button.
Use the ARROW buttons to select a desired service and press the OK button.
You can see that the service is changed in the small screen on the top-right.
To watch that service, press the OK button once more.
To watch the previous service, press the EXIT button.
![Service List [ All Service ] G = 2 TP SPRPG CAS Pricetted F28 Pks info 743 Phoenix China... FA5 KING KONG FA5 Channel [V] China Channel [V] #1 STAR Media (M) C... Aut. Geo STAR World Substation Text Add Channel [V] #1 Default Pres Service Wks CA Pks Info SST Line 22 TF: 4000 [ng] 28/036 PID: 525/576…](/content/2026/06/1402988/images/a1bfe508ffb7249a30124ea872bffc2bc51f119a0a66d2f1412a5f22854bcbdb.jpg)
In the Service List window, you can also select additional functions with the COLOR buttons. Press the RED button, and you can sort the services by the Alphabet, Transponder(TP), Group, Tuner and CAS (Conditional Access System).
Press the GREEN button, and you can add the services to one of 10 Favorite List.
Press the YELLOW button, and you can search & find the service via a virtual keyboard.
Press the BLUE button, and you can adjust service list option.
1.3 Using Simple Service List
- If you press NUMERIC buttons or UP/DOWN ARROW button, instant service list will be displayed.
- Select the desired service by using the ARROW button, and press OK button to watch.
- You can also enter the service number directly by using the NUMERIC button.
![V000 6000 736 PR's radio 9011 243 Phoenix Chos... 0012 245 XING KONG 0013 340 Channel [V] ... 0003 (1-3) Champion [V] INT 0007 37AM Wireless 34E... 0003 8bit, Gain 0004 21AM NIO M 0005 SubVideo Test... 0000 804 Channel [V] ... 0007 715 PR's Pandora 0008 725 Pandora Int'l 0010 720 Pandora Int'l 0014…](/content/2026/06/1402988/images/63c98446ce4a7c816d2c55f6d6ead6de04411a1c883c613ef094cadb1343d3ec.jpg)
1.4 Using Recent Service List
- To display recent service list, press the RECALL button for a short time.
- To return to the previous service that you were watching, press RECALL button twice or for a longer time.
- Choose the service from the recent service list, use the ARROW button to select, and then press the OK button.
- Press EXIT button to exit from the recent service list.
2. Information Window
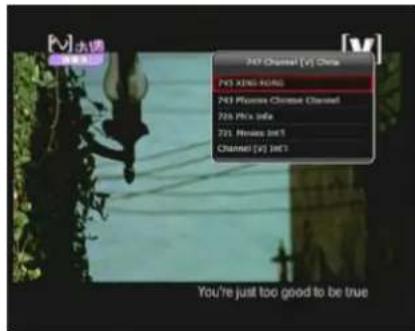
If you want to view the information of the current service that you are watching, press INFO button. Then the Information window will be displayed.
This Information window is automatically displayed when changing between the services.
This window contains much useful information such as service number, service name, scrambled types of service, teletext, subtitle, Audio indication for Dolby Digital, Time duration of the service and so on.
By pressing INFO button once again, you can get more detailed information about the service.
![未満 [V] 07:14 / 09:00 [2023] [Movie] 13 07 Channel [V] Chiba No Information 60% 4600 [W] 34856](/content/2026/06/1402988/images/e7e0cc1a5942f1f0b6e1b8039c0fcda953a66e47f6a593add0f15464be84520c.jpg)
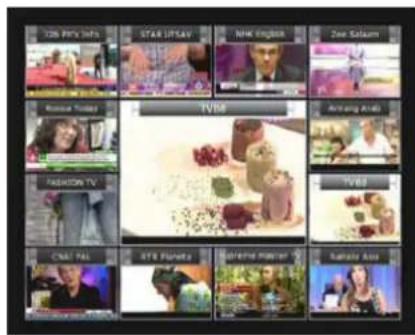
3. Multi-Picture Display.
Press the BLUE button to display multiple pictures and use the RED button to select the display options for 9 or 12 multiple pictures.
4. Electronic Program Guide (EPG)
Electronic Program Guide (EPG) allows you to see program schedule and program information from the service which includes this data as part of their transmission. Multiple services will be shown with a time line of programming events. The EPG supplies additional information of channel service, such as program listings, start/end times and detailed information about the program listings for all available services. The availability and details of information of these program details can be varied, depending on the particular broadcasters, individual services.
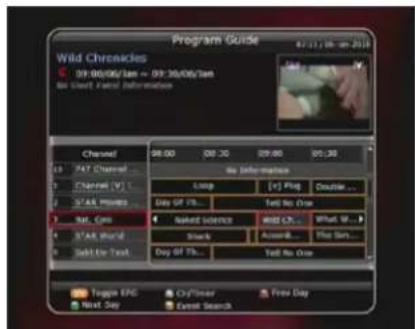
- Press the EPG button, then the EPG menu will be displayed.
● Use the ARROW buttons to move to other services or to see previous/next guide. - Press the EPG button once to view full EPG with multi service list, and press it twice to view the additional EPG information of a specific channel service. Keep pressing the EPG button to toggle between the full and detailed menus of EPG.
● Press the GREEN button to view next day EPG and the RED button to view EPG for a previous day. -
Select the program by using the ARROW buttons then set the event timer by pressing OK.
● You can schedule a recording with the EPG menu as follows. -
Press RECORD button to schedule the event. This schedule can be checked in the menu of Timer Settings, in the System tool menu.
- To cancel the schedule of the recording, press the OK button for the appointed event.
- To edit the schedule of the recording, press the RECORD button for the appointed event.
5. Favorite Group
Press the FAV(Favorite) button to view all favorite groups such as sports, movie, drama, satellite group and so on. Scroll through the various favorite group using the UP/DOWN ARROW buttons, and select the desired favorite group by pressing OK button.

6. Volume Control
● To adjust the audio volume, press the VOL UP/ DOWN buttons.
● Audio volume control bar will be displayed at the top of the screen and disappear after 4 seconds.
- When necessary, press the MUTE button to turn on/off the audio sound.
NOTE: The mute function remains set while you change services.

7. Pause
PAUSE button is used to freeze the video. Press PAUSE button once more to resume the video.
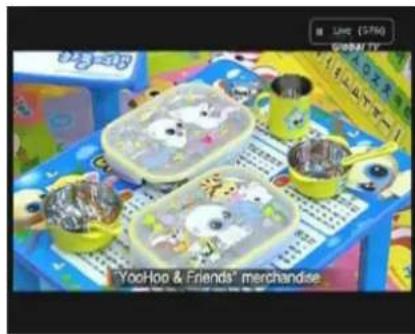
8. Subtitle
You can select the language for a Subtitle, if the program provides subtitle information.
- Press the SUBTITLE button on your remote control unit.
- Select the desired subtitle language then press OK button.
● The subtitle will be displayed in the selected language at the bottom of the screen. - To turn OFF the subtitle from the screen, Select 'Off' from the subtitle language list.
![Subthe Auto the [0vrs] spa [0vrs] sex [0vrs] max [0vrs] my [0vrs] and [0vrs] ohc [0vrs]](/content/2026/06/1402988/images/6a86e1b216cf29f8d31c81cac3d4116a6f884d475dacc69bd91b78198e56019b.jpg)
NOTE : When program does not provide subtitle information, SUBTITLE button will not be active.
9. Audio Control
Press YELLOW button on live TV service to display Audio Control menu. You can set Audio Track / Sound Mode / Sound Level.
- Audio Track:
You can see all the audio track of the service you are watching. Use the ARROW buttons to choose the preferred audio track. If you select Auto, audio track will play as what you set for audio language in language setting menu.
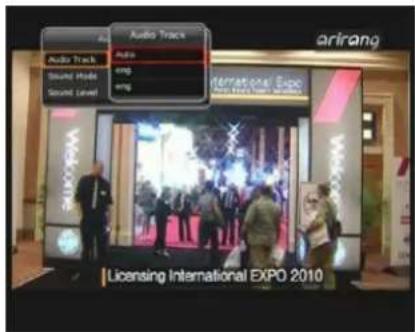
Sound Mode :
To set sound mode, Stereo / Mono / Left / Right.

● Sound Level:
To set sound level, Low(-30%) / Normal / High(+30%) / Off.

10. Teletext
When the TELETEXT icon on the INFO Banner, press the TELETEXT button to view the teletext.


11. PIP (Picture in Picture)
- When you press the PIP button, a sub picture screen will appear on the main screen view.
If you press the PIP button one more time, the primary picture and the sub picture will appear together side-by-side with the same size. The picture of the left side is the primary and the picture on the right side is sub. If you press the PIP button one more time, the sub picture will disappear.

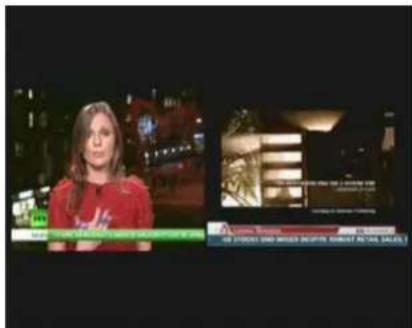
- In the PIP mode, you can change primary and sub with the PIP SWAP button.


- If you press the PAGE UP/DOWN button, the location of the sub picture is changed.



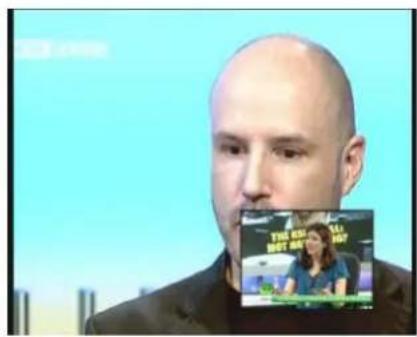
- If you press the PIP SERVICE LIST button, you can see the list of services of sub picture.
You can change the service of the sub picture from the service list shown.
NOTE : Changing services of sub the picture could be limited by the condition of the tuner connection or a recording event ongoing.

PVR (Personal Video Recorder) Function
1. Recording
You can select a recording storage device with the following sequence: Menu > Configuration > Recording Option > Record Device. Default is set to 'USB'.
1.1 Recording methods
There are 3 type recording methods.
(Instant Recording / Time Scheduled Recording / Event Scheduled Recording).
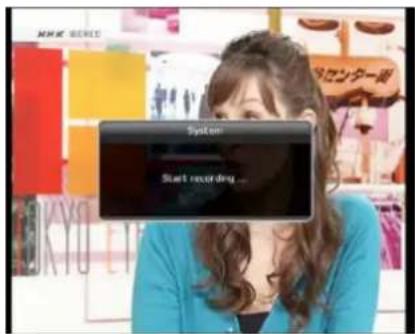
- Instant Recording :
You may press the RECORD button to start your recording instantly at anytime.
● Time Scheduled Recording :
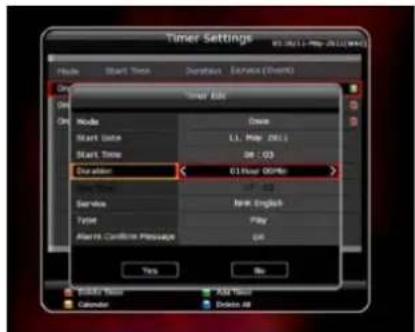
- In Timer Settings menu, you may set the time & program to record your desired service program. (Go to Main Menu > System Tools > Timer Settings)
![Timer Settings File 10/22/11 - Web: (01.12) [04.07] Host Insert Time Duration Seconds (Start) Once 07:22/11, May 06:30 Extra-primary Drugs Once 08:57/11, May 06:55 Preinstrumented Once 09:25/11, May 06:49 Castle Delete Status Add Waste Calendar Delete All](/content/2026/06/1402988/images/f5e625c75aa3545555e3534a9f83899c56b927663cbe77116c57707aad310cf6.jpg)
- Press the GREEN button to activate the new timer edit screen. - In the Timer Edit screen, you may choose start date/time, duration, service, mode, type (Recording/Play) then simply press the Yes button to schedule your recording event. Please note that the minimum offset time of 3 minutes is required from the Start time & current time for appropriate recording process to take place.
● Event Scheduled Recording via EPG :
- In the EPG menu screen, you can choose the event you wish to schedule or record.
-
While watching the LIVE TV screen, press the EPG button to access the EPG menu screen.
-
Go to the event which you wish to view at the time indicated on the EPG schedule, then press OK. The event will be scheduled with the BLUE play icon. This BLUE play icon means that you want to just watch the event at the scheduled time.
- Press the OK button one more time, then the event will be scheduled with the RED dot icon. This RED dot icon means that you want to record the event at the scheduled time.
- When you set an event for scheduled recording via the EPG menu. It automatically sets a Timer Event in the Main Menu > System Tools > Timer Settings.
![Program Guide National Geographic Asia 11:06/11/May ~ 11:30/11/May (Wed) National Geographic Asia Channel 19:00 10:30 11:00 11:30 Channel [V] Channel [V] INT Channel [S] INT Fox News Fox News Last Action History First 12,000 So... Next 1... Extravd Gloss Aust/Kan Ubl Last Action Here Topic: GPS City…](/content/2026/06/1402988/images/f8b0a7827cf25f57119fb2de8e62a792af9b891314dce63a3d93093ab513382b.jpg)
![Program Guide National Geographic Asia 11:00/11/May = 11:30/11/May (Rmn) National Geographic Asia Channel Channel [V] 1... J26 Street STAK World 1 Net, Geo STAK World Switch Text 19:00 10:30 11:00 11:30 Channel [V] OK! Fox Smart Last Action Here First(0): 12,000 Bo... Gnet Last Action Here Channel […](/content/2026/06/1402988/images/5906f767b903ba13c06ed62171cae1ae5b2dcb03edd11236f4b60e0778c691ca.jpg)
![Program Guide National Geographic Asia 11:00/11/May = 11:30/11/May (Wed) National Geographic Asia Channel 19:00 10:30 11:00 11:30 ESP Channel [V] L Channel [V] INT Channel [S] INT ESP Valor News Fire News Play News ESP STAR Wars I ESP Star Wars L ESP Star Wars L ESP Star Wars L ESP Star Wars L Last…](/content/2026/06/1402988/images/11b5a6753429371ec434c6e09b24d7cd85804cac16d1998e498b95881cc5391f.jpg)

1.2 Recording Edit
Press the REC button while recording to see the recording message window.
● Pause : Select Pause Recording then press OK to pause the current recording process.
● Duration : Set recording duration. Press LEFT/RIGHT ARROW button to change recording duration.
- Stop Position :
Set the finishing time of recording.
- End of current event : finish recording at the end of current event
- End of next event: finish recording at the end of next event.
- Not Available: EPG is not available.
![8239 PTV MTNOMAL [S] Start Time : 06:03/12 Duration : 38 : 57 : 00 Recording : 00 : 00 Focus Duration Stop Position Stop Position Not Available End of current event End of next event 1Drive: 37% End of current event Status: None](/content/2026/06/1402988/images/0890addd448a0f5951b78838d981180e0f2e4fc2a57adbd21a4d5f3b26015703.jpg)
- Record Slot: When you are recording 3 services, you can select Primary / Secondary / Tertiary by pressing Left/Right Arrow button, then go to Change Service and press OK button to show that recording service.
![03.07 Next English [Mean] Start Time - 08:52/12 Duration - 02 : 80 : 90 Recording - 03 : 00 : 4 Pause Duration Record Unit Record Set Primary Secondary Tertiary 02 [year] 80%+1s Primary He really is constantly on the lookout for new ideas.](/content/2026/06/1402988/images/3e22100bc75d82e0456e28c2869d8af4fa61f8ab23f5da82a18685fdf25f59d7.jpg)
1.3 Long Time recording
During lengthy time recording processes of 4GB(Giga Byte) or more, additional files may be created per every 4GB. (For example; aaa.ts, aaa.ts1, aaa.ts2... and so on).
You must remember not to delete any of duplicated file. These files are only able to be viewed with your PC not with the receiver (STB).
1.4 Pause during recording
- When the PAUSE button is pressed during recording, only the live video is paused, but recording is continued at the selected recording device.
(Menu > Configuration > Recording Option > Record Device)

- Press PAUSE button once again and event will resume from the pause time.
● During recording, press the PLAY/TIMESHIFT button to show the Play bar screen.

● While the Play bar is shown on your screen, you may use the LEFT/RIGHT Arrow button to move (forward & backward) freely within recorded time.
- If you press YELLOW button in the Play bar, you can set the Position Jump time at Auto / 10sec / 30sec / 1min / 2min / 4min / 10min. Then press LEFT/RIGHT Arrow button to jump as you set the time.
- If you press the STOP button, it will go to LIVE and you may press PREV FILE button to view the recorded file from the beginning.
● STB can record up to 3 different services simultaneously.
- When recording 3 services at the same time, you can press the STOP button to see a message window of current recording status / information.
If you select one of the 3 or 2 recordings and press the OK button, that recording service will be stopped.
If you press the STOP button during recording 1 service, a recording stop message window will appear. Then select YES to stop recording.


NOTE: If If you want the recording up to 3 services, please format the storage devise with 'NTFS' or 'Journaled(JFS)' file system.
Menu > Storage Manager > Format > File System > select 'NTFS' or 'Journaled(JFS)'..
2. Time Shifting
You can select a storage device for a temporary file of the Time shifting with the following sequence:
Menu > Configuration > Recording Option > TimeShift Device.
Default storage device is set to 'USB'
![Recording Option 06:10:11 May 2011 [Speed] Agr to Confirm Message Recording Stop Message Extra Recording Time Before Extra Recording Time After P TimeShift Start TimeShift Duration Playback Position Jump Playback Numeric Function TownShift Group Record Device On On GPT GPT Auto 1.57 Ms Auto Percenta…](/content/2026/06/1402988/images/9795d8f23dca7bde21553c59d056ea4c76ff0a8b562b60bb56b3101805995243.jpg)
- If pressing the PAUSE button during Time shift, the live video is paused but the temporary recording for time shift is continued at the selected storage device.
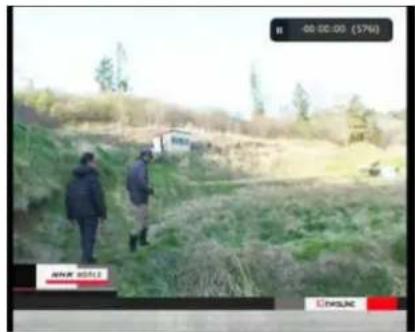
- Press the PAUSE button once again, then the event will resume from the paused time.
● While watching live TV, press the PLAY/TIMESHIFT button to show the play bar on your screen.


- When the play bar is displayed on your screen, you may use the LEFT/RIGHT Arrow buttons to move freely through the recorded times bar.
- If you press YELLOW button in the Play bar, you can set the Position Jump time at Auto / 10sec / 30sec / 1min / 2min / 4min / 10min. Then press LEFT/RIGHT Arrow button to jump as you set the time.
- If you press the STOP button while time-shifting, the screen will be turned to a live TV channel. You can also use PREV FILE button to move to a start location of the Time-shifted file.

3. Playback (Play List)
You can playback many files with the Playlist which you access by the PLAYLIST button.
In the Playlist, you can check and playback recorded files, multimedia movie files, MP3 music files, and image files. With the LEFT/RIGHT ARROW button, go to the Recorded Files, Imported Files, Music and Photo category and check & for playback files in each category.
If press the PLAYLIST button, you can see all playable files. In this mode, Green button is not in operation (not working). And when you select the file, you will not be able to select the different types of file format files together at once.
![Play List 146 PS / 3.00 AUSB1 image pluger disc mp3 NPK English-10 CHTV-4 BHL MUSIC_3MOS-5 NPK English-6 Current-7 link English-8 NPK English-9 NPK English-10 NPK English 11:00:2011 00:07 00:03:18 [94.03:48] Change Device Screen/Unread/Out Sort Tools - Time File Option](/content/2026/06/1402988/images/b36b530a2044ba80cb67c33c32b6ba4b3378653eca2707c25765023109af6496.jpg)
You can press LEFT/RIGHT Arrow button to move to Recorded Files / Imported Files / Music / Photo / Play List menu.
3.1 Recorded Files
- If you press RIGHT Arrow button in Play List, you can go to Recorded Files menu.
- Locate the recorded file(s) you wish to play with the UP/DOWN button and press the OK button to playback the recorded file(s).
- To choose a particular selection of files, select a desired file and press the RED button. Press the OK button to begin the selected files.
- Select Device: Press PLAYLIST button one more time in the Playlist mode to see "Select Device" window, and select the device which has the file you want to play.
NOTE : "Select Device" window shows devices which are currently connected to the STB.
![Recorded Files 1.46 MB / 3.02 CMTV 11.05/2011 06:06 00:01:13 [44.80 MB] MNTV-4 BIL_MUSIC_MEDS-9 MNT English-6 Current-7 MNT English-8 MNT English-7 Change Device Spread/Unwired Sort Units - Time Select Alt/Unwired All File Option](/content/2026/06/1402988/images/4d8c81627f4272db4a8f0b9c035219c0f384ed673d5a3dda941967af256f9ae9.jpg)

- Sorting : If you press the YELLOW button, you can sort the files by Time / Name / Size / Type.

- File Option :
If you press the BLUE button, you can select a option for Delete, New Folder, Move to Folder, Copy to Device, Rename, Lock/Unlock. You can select multiple files together and delete or move all of them at once.
- Delete: To delete file(s)
- New Folder: To make new folder. Default name of the folder is "Group#".
- Move to Folder: To move the selected file(s) to a folder you want. This option is available if there is no folder.
- Copy to Device: To copy the file(s) to other storage device.
This option is not available if only one storage device is connected.
- Rename: To rename the folder or file.
- Lock / Unlock: To lock and/or unlock the file with your PIN Code. You must select a file to do this option.

3.2 Imported Files
- If you press RIGHT ARROW button in Recorded Files, you can go to Imported File menu.
- Locate the file(s) you wish to play with the UP/DOWN button and press the OK button to enjoy the movie.
- To choose a particular selection of files, select a desired file and press the RED button. Press the OK button to begin the selected files.
- You can use the same 'Select Device', 'Sorting' and 'File Option' features as in the Recorded Files.
![[USB1/Flow] com-1a com-1f com-1d com-1c com-1b com-1a com-1j com-1i com-1h com-2g 1.46 MB / 3 GB 1000.18 GB 0.05MB/0.05 [4.87 MB] 22:52 Change Device Select/Unselected Sort Table - Time Select All/Unselected All File Option](/content/2026/06/1402988/images/fb40378a0ccb8a957ffbf3f4e39f9580147733c958b12a3f7fbdeeb4194f07ac.jpg)
3.3 Music
- If you press the RIGHT ARROW button in Imported Files, you can go to Music menu.
- If you press the RECALL button, you can enjoy music with Shuffle playback and repeat.
You can use the same 'Select Device', 'Sorting' and 'File Option' features as in the Recorded Files.

3.4 Photo
- If you press the RIGHT ARROW button in Music, you can go to the Image Photo menu.
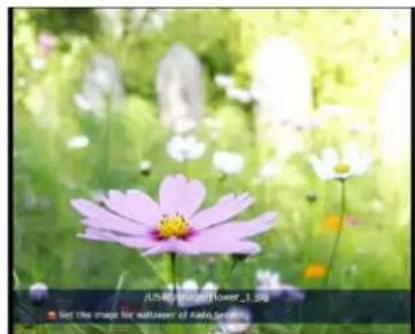
- If you press the RED button or OK button, you can start the slide show of image files. Press the EXIT button to stop slide show.
- RED button: Auto Slide show
- OK button: Manual Slide show
- If you press the GREEN button, you can adjust the Slide Time, Repetition, Title, Down-scale.
- You can use the same 'Select Device', 'Sorting' and 'File Option' features as in the Recorded Files.
4. Bookmark
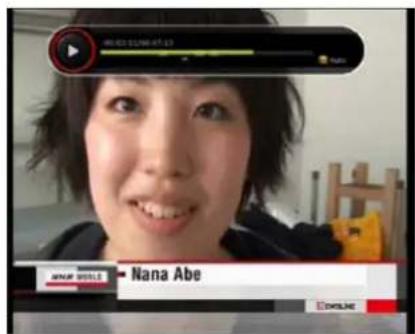
- When the Play bar is displayed, you may move to desired time and book mark it by pressing the RED button. Bookmark(s) are indicated with a Green line on the play bar. Also, you may press the RED button to activate the play bar to mark your bookmark(s).
● When the play bar is on, user can move / jump between the bookmarks by pressing the GREEN button.


- If you wish to delete any Bookmarks, go to that bookmark by pressing the GREEN button, then press the RED button to delete the current bookmarks.
5. Trick mode
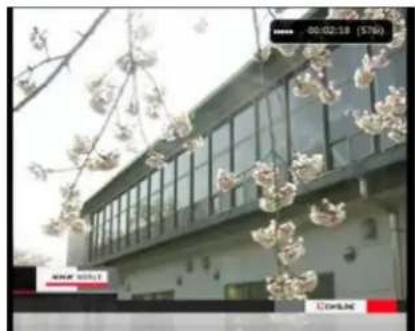
- The user can change the speed of a fast forward play with FF(Fast Forward) button. Press FF button to change the speed to x2, x4, x6, and x8. If you once again press FF button in its x8 mode, it returns to normal(x1) speed play.
- You can also change rewind speed with the REWIND button. Press REWIND button to change the speed to x2, x4, x6, and x8. If you press the REWIND button again in it is at the x8 mode, it returns to normal speed.
- You may press the PAUSE button at any time to pause a pre-recorded event. Press the PAUSE button once again to resume play of the recorded event.
Menu Map
| Main Menu | |
 System Tools System Tools | 1. Storage Manager2. Timer Settings3. Service List Manager4. Data Transfer |
 Configuration Configuration | 1. Recording Option2. Parental Control3. Display Setting4. Time Setting5. Language Setting6. A/V Output Setting |
 Installation Installation | 1. Dish Setting2. Positioner Setting3. Service Search4. Network Setting5. System Recovery6. System Information |
 Utilities Utilities | 1. Calculator2. Calendar3. CAS4. Plugin5. Free TV+6. Internet TV +7. Internet Radio+ (WebRadio+) |
Main Menu of Guide
To display the menu, press the MENU button at any time. You can select the sub menus by using the ARROW buttons.
The selected sub menu becomes highlighted. After selecting (highlighting) the sub menu you want to access, press the OK button. If you want to return to the previous menu, press the MENU button. And if you want to exit from the menu, press the EXIT button.

1. System Tools
1.1 Storage Manager
The items in this menu allow you to access and control the storage devices that you want.
● Current Device : Select the storage device you want to access with the ARROW/OK buttons.
- Status: You can see the information of current connected devices, such as 'Mounted', 'Not Available'
- File System: It shows the file system of the current device. You can also select desired file system that you want when you format the device.
NOTE : NTFS is the recommended file system to format, and it will be also recognized in Windows system

● Total : Displays total size of current device.
● Free : Displays free size of current device.
- Format: If you press the OK button to format current device, the device will be formatted with above file system.
NOTE : When file system is 'Unknown', the device will be formatted with 'NTFS'.
● Storage Check: Check the current connected device.
- Play List: Press OK button to move to 'Play List' menu directly.
1.2 Timer Settings
Insert a new timer entry or modify an existing timer entry.
- To add new timer entry: Press the GREEN button. Timer Edit window will popup. You can set the specific start date, time, duration and service for its reservation. And you can choose one of Timer Modes as 'Once' or 'Daily' or 'Weekly'. You can choose timer operation type as 'Recording' or just to 'Play'.
- If you choose 'Recording', it will start recording at that time.
- If you choose 'Play', it will change and tune to the service that you wish to watch.
- If you set Alarm Confirm Message to 'On', alarm message will activate. Or choose 'Off' to disable.
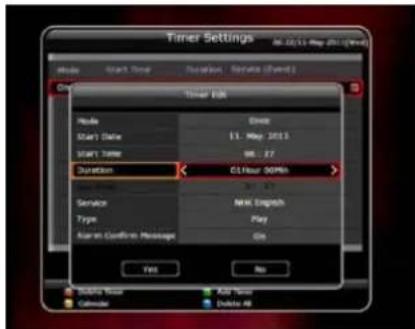
- To modify existing timer entry : Choose the timer entry which you wish to modify and press the OK button.
- To delete an existing timer entry: Choose the timer entry that you want to delete and press the RED button.
● Press YELLOW button to enter to Calendar. - Press BLUE button if you want to delete all the event(s).
NOTE : If you reserve one or more event through the EPG menu, the reserved event(s) will be added to Timer Settings automatically.
![5 May 2011 Mon Tue Wed Thu Fri Sat Sun 2 3 4 5 6 7 8 5 10 11 12 13 14 15 16 17 18 19 20 21 22 23 24 25 26 27 28 29 30 31 Mode Start Time Duration Service (Start) [+] Once 08:00 08:25 DV Cupakers Calendar Delete All](/content/2026/06/1402988/images/26c1702b36cb522e01d4c068f957611e21ff6cb174210fdadf33a97780e1bcf6.jpg)
1.3 Service List Manager
Service List Manager menu will appear when you press the OK button. You can select Edit Mode by pressing the BLUE button.
- Lock Services: All service lists will be shown on the left side of the window, the middle will show the list of service to be locked. By using the ARROW and OK buttons, you may move the chosen service to the middle window to lock that service. Services can also be moved back from the middle to the left side to un-lock them.
- Move Services: All service lists will be shown on left side of the window, services to be moved will be shown on the middle window. Move the service to the middle window by using the ARROW and OK buttons, then the middle window service will be moved to a specified location when the desired location is selected from the left window.
![Service List Manager [ 63 Servers ] CLOSED ITEMS S20 P4U_PROVICES... 800 P4U STAR Ops... S21 S4U releasing_DNTUA 801 P50 ESPN S22 S4K_English... 802 P63 STAR Ops... S23 CHSY... 803 P73 ESPN Index S24 ZSTV... 804 P92 ESPN Index S25 Sub TV... S26 Kingfa Auto... S27 Lethun... S28 STAR Cash Info! User I…](/content/2026/06/1402988/images/8dfdae302cf2c50f102a59dd2d8837574cc70d5e67d965a1178bc91451aeb8fb.jpg)
![Service List Manager [ All Service ] Selected Services 100 F42 STAA Sp... 101 F35 ESPN 102 763 STAA Sp... 103 New Engle8 104 CHFV 105 CSFV 106 New TV 107 Kingy Auto 108 Lakh User V1 2000 P42STAG User V2 2000 P42STAY User V3 2000 P42STAY OK / Select Call Mode Lock Services Home Services Delete Servic…](/content/2026/06/1402988/images/fd737b1a29a2e1ca2a75debed0b693fab6d861a4b99280cce5e037317fb62dc7.jpg)
- Delete Services: All service lists will be shown on left side of the window. By using the ARROW and OK buttons you may select services to be deleted by placing them in the middle window. The press the GREEN button to delete the selected services.
![Service List Manager [ All Service ] Download Services 009 743 STAR Sp... 003 772 ESPB India 004 753 ESPB India 005 B4L MONUS... 006 B4L MUSIC INISA 007 NEW English 010 Sun TV 011 Black Auto 012 Latin 013 Select Cell Mode Lock Services Home Services Delete Services Stop Services Send Data [ Default…](/content/2026/06/1402988/images/4a604dad0a935ea0fc78ca8447fd2be94fa5f3702ba0175e2ee6c4cb7a024934.jpg)
- Skip Services: All services will be shown on left side of the window, the middle window will only show the services that are chosen to be skipped. By using the ARROW and OK buttons you may move the selected services from the left to middle window to skip them.
![Service List Manager [ All Service ] Report Services 000 742 STAR Sp... 001 753 ESPK 002 742 STAR Sp... 003 BHL MUSIC_JNDA 004 MHC Englick 005 CRTV 006 CSTV 007 Run TV 008 JHPTA A200 Select CBI Music Lock Services Move Services Delete Services Copy Services Gain ES Gain ES Gain ES Gain ES Losses Los…](/content/2026/06/1402988/images/1158057bd8a41d1b8eae97acb99934421928b4be610de5783a29500f0949ce74.jpg)
- Set Favorite Services : Use the ARROW and OK buttons to select your desired favorite group. Once, favorite group is chosen, the left side window will show all service lists and the middle window will only show the selected services of the favorite group selected. By using the ARROW and OK buttons, you may ADD the desired services to a favorite group or DELETE any from the favorite group. The name of the favorite group can be edited by pressing the GREEN button.
![Service List Manager Select Favorite Group Sports Movie Drama News Music Lock Group Edit Group Name: Add User(s) Delete Group User ID New Print/Prints NRS / 100% Sum List [ Default ] Select List Mode Select Favorite Group Select List Mode](/content/2026/06/1402988/images/53bc1382d24fa1d93059c78f7708fe2431a96b57902379a3df91ad0c5b74a8e3.jpg)
You can go to Select Favorite Group by pressing GREEN button. In this mode, you can select Lock Group / Edit Group Name / Add Group / Delete Group.
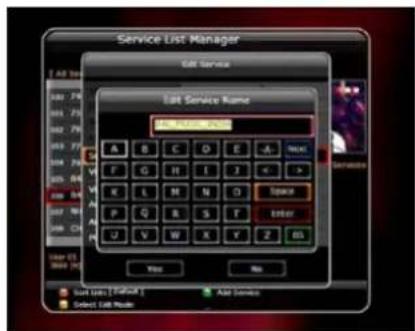
- Edit Services: All services name will be shown on the left side of the window.
Move the highlighted bar to the service where you want to edit its name and press the OK button for Edit Service menu. Then move the highlighted bar which you want to edit.
You can edit Service Name, Video Stream Type, Video PID, Audio Stream Type, Audio PID, PCR PID.
1.4 Data Transfer
When the data transfer task is in process, the Front USB slot is set to a default device slot. But, if no USB device is connected on a front USB slot, then the Rear USB slot is set as a device to be used for the data transfer process.
NOTE : If no USB device is connected on either two (Front & Rear) USB slots, then a Menu item will not be available.
- Transfer all System data to USB storage : If you want to transfer and use BOTH of the current system parameters and service data in the future, this menu will allow you to store all data to your USB device. Press OK button to store all current data to an external USB storage.
- Transfer Service data to USB storage: If you want to transfer and use ONLY the service data in the future, this menu allows you to store current service data. Press the OK button to store the current service data to your external USB storage. The
service data can also be viewed and edited on a PC with an appropriate editor (DrEdit) for the file saved.
- Data download from USB storage device : This menu allows you to download the saved data from the external USB storage to your STB. Press OK button to download data.

2. Configuration
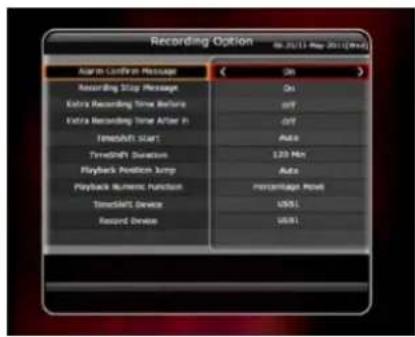
2.1 Recording Option
- Alarm Confirm Message: Turn 'ON' this Alarm message to indicate and show the alert pop-up message when there is a reserved recording event. The alert message will show 3 minutes before the starting time of the reserved recording event.
● Recording Stop Message :
- Set 'On': When you press the STOP button while recording, then a confirmation window is displayed.
- Set 'Off': When you press the STOP button while recording, the STB will stop the recording process immediately / instantly without asking the additional confirmation from the user.
● Extra Recording Time Before(Start) & After(Finish):
- You can add an extra recording time before start / after finish (1min /2min /3min /4min /5min/ 10min/ 15min/ off) to scheduled recording events. If you set an extra recording time by using the ARROW and OK buttons, the scheduled recording event will have a 'Start' / 'Finish' time of additional recording time added to the basic event. This option only works for real time events. But, when you schedule a service recording in the Timer Settings menu, this option has no affect.
● TimeShift Start : You can choose the method of TimeShift function.
- Auto : TimeShift function is automatically activated.
- Off: TimeShift function will be disabled.
- Manual: TimeShift will be activated when the Pause key is pressed.
- TimeShift Duration: You can adjust TimeShift duration in 30 minute intervals. (Off /30min /60min /90min /120min). This duration defines the maximum time length of the TimeShift as long as the storage device has enough memory space left.
- Playback Position Jump: When you use LEFT/RIGHT ARROW button to move back/forward through the recorded time bar, You can select the time intervals. (10 Sec / 30 Sec / 1Min / 2 Min / 4 Min / 10 Min / Auto).
-
Playback Numeric Function: This selection of function defines the operation type of the NUMERIC buttons of your remote control unit (RCU) while the 'Playbar' is displayed on the screen.
-
Commercial Skip: When the NUMERIC buttons (1 to 9) are pressed the video will move forward according to the NUMERIC buttons pressed. For example; when '1' is pressed, 1min move forward, '5' is pressed, 5min move forward from current position. When '0' is pressed, it will move back for 1minute.
- Percentage Move: When the NUMERIC buttons are pressed, the video will move to the location of that % percentage of numbers pressed. For example; if you press '10', you will move to the 10% location of the total video length. If you press '99', you will move to the end of the video clip recorded.
● TimeShift Device : You can select the TimeShift Device you wish to use.
- USB1(Front), USB2(Rear), Network Drive.
● Record Device : You can select the Recording device you wish to use.
- USB1(Front), USB2(Rear), Network Drive.
2.2 Parental Control
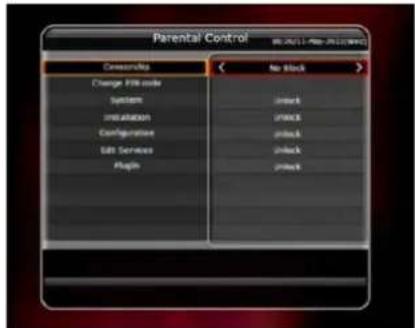
User's access rights to a service and programs are controlled by a 4-digit secret code that is defined by the user. Whenever you attempt to access the parental control menu, a pop-up window will ask you to input a PIN code. (If necessary, you can change it.)
NOTE : The default PIN code is '0000'
● Censorship : Set the parental guidance rating of highlighted censorship classification. The parental level is given as an age-based number.
- Change Pin code : To change your PIN code, input the new PIN code using the NUMERIC buttons. To verify the new PIN code, input the new PIN code again.
● System : Set the access rights to the System menu.
● Installation : Set the access rights to the Installation menu.
- Configuration: Set the access rights to the Configuration menu.
● Edit Service : Set the access rights to the Edit menu.
- Plugin : Plugin Set the access rights to the Plugin menu.

2.3 Display Setting
- Info Box position : Set a position of the information window.
- Info Box Display Time : Set the time duration of the information window being displayed on the screen after changing services.
- Info Box Event Type: Set the event type that display in left bottom part of the information window.
- Present Event with Time :
Display the present event name with time. (Default)
- Present and Follow Event :
Display the present and following event name.

- Volume Bar Display Time : Set the time duration of the volume bar being displayed on the screen after changing audio volumes.
● Zapping Mode: You can set the zapping mode as follows (zapping mode is when changing services).
- Black screen : Display a black screen when changing between services.
- Freeze: Display the last still picture when changing services.
- Simple Service List: To set the simple service list 'On' to display or 'Off'.
- On: Press UP/DOWN ARROW button to display the simple service list while watching live TV.
- Off: If you set Off, channel Up/Down when you press UP/DOWN ARROW button.
2.4 Time Setting
● Time Setting : To set the current time, you can use two modes; Auto or Manual.
- Local Offset: Enter the offset value by using the standardized information of current service area.
● Daylight Saving : If you want to apply daylight saving, select the counter by using the ARROW buttons.
- Clock Mode: Select the type of clock display(12 Hours or 24 Hours) using ARROW buttons.
● Wake Up Mode : Enter the time for the receiver to

automatically power ON. And you can choose one of Wake Up Mode as 'off' or 'Once' or 'Daily' or 'Weekly'.
- Wake Up Date: Select the date when the STB is turn on. Press the OK button to display calendar.
- Wake Up Days: Select a day of the week when the STB is turn on.
- Wake Up Time : Enter the wake up time of the STB using the NUMERIC buttons.
- Wake Up Service : Select the service when the STB is turn on. Press the OK button to display the service list.
- Sleep Mode: Enter the time for the receiver to automatically switch OFF and go to standby mode. And you can choose one of the Wake Up Mode as 'off' or 'Once' or 'Daily' or 'Weekly'.
- Sleep Date: Select the date when the STB is turn off. Press the OK button to display the calendar.
- Sleep Days: Select a day of the week when STB is turn off.
- Sleep Time: Enter the turn-off time of the STB using the NUMERIC buttons.
2.5 Language Setting
- Menu Language: Select the desired menu language by using the ARROW buttons.
NOTE : The menu and operation languages can be changed depending on the country sold. Available languages are subject to change without prior notice.
● Audio Language : Select the default language for the audio when changing services. If no other language is provided, then the default language of current will be automatically selected.
- Subtitle Language: Select the default language for subtitle when changing service.
- Teletext Language : Select the default language for Teletext.
- User Font file : Select a font you want to use.

NOTE : To show and use the User Font, please install a desired font file(*.ttf) to the /Var/Font directory(folder) in your PC which is connected with your receiver(STB) by network. Then press LEFT/RIGHT button to select a font and press OK button.
2.6 A/V Output Setting
- TV Type : Select the TV types.(PAL/NTSC/Auto) In Auto mode, the STB is automatically selected to NTSC or PAL accordingly to the service played.
- TV Aspect Ratio : Select the aspect ratio of TV which is connected to the STB (4:3/16:9). This menu must be set prior to selecting the Display Format function.
- Display Resolution : Select the Display Resolution of the screen by using ARROW or OK button. You can also change the resolution with Resolution button in the remote. Each time you press the Resolution button, the resolution changes in the following sequence: 576i > 576p > 720p > 1080i > 1080p.

NOTE : Please note that your TV may not show a picture depending on the Display Resolution set by your STB as well as if set to PAL when NTSC is required or vice versa. If you set the Display Resolution as HD(more than 576p), your TV cannot display anything when the TV is connected to the Composite Video output of the STB. In case of HDMI, your TV can display a picture for all of the resolution settings of the STB. But it is also possible that your TV may not display a picture with 576i, because some HDTV's does not support 576i.
- Display Format: In case of a 4:3 ratio TV set, you can select Letter Box or Pan&Scan. In case of a 16:9 ratio TV set, you can select Pillar Box or Full Screen. In case of a 14:9, 16:10 ratio TV set, you can select Pillar Box, Pan&Scan or Full Screen.
- HDMI Dolby Digital: Set the Dolby Digital mode 'On' or 'Off' in status of HDMI output.
- Dolby Digital Default: Set the Dolby Digital Default mode 'On' or 'Off'. If you set 'On', Dolby Audio will play on the service that support Dolby Audio.
● Sound Mode : Set the audio mode output among the RCA jack, optical SPDIF and HDMI (Stereo/Mono/Left/Right).
● Power Saving in Standby Mode : You can select the Power Saving in standby Mode.
● Audio Sync Delay : To adjust Audio Sync. You can adjust from 0ms to 400ms.
3. Installation
3.1 Dish Setting
Select the satellite/antenna and LNB settings for service search. The values that are set in this menu will be available for selection in other service searching menus.
- Satellite : Select the satellite which you want to do a search for.
- Press the LEFT/RIGHT ARROW button to select the satellite.
- If you press the OK button, the entire satellite list will be displayed.
- Select the desired satellite name to search.
- If the desired satellite name is not listed then select User Defined.
● Frequency : Select the satellite frequency which you want to use for checking the signal.
● LNB Power : Select the LNB power on or off.
● LNB Type : Select the LNB type.
● LNB Frequency: Select the local oscillator (L.O.). frequency that is specified for the LNB used..
- Use the LEFT/RIGHT ARROW buttons to select the LNB frequency.
- If the required LNB frequency is not listed, then enter the frequency manually using the NUMERIC buttons.
-
When you select Universal LNB type, both 9750 and 10600 are supported at the same time. And then the LNB 22KHz setting is disabled.
-
LNB 22KHz : When you use a separate coax 22 KHz tone switch box, make the 22 KHz tone switch enabled or disabled to select the input you desire of the tone switch.
- DiSEqC Switch: If you use DiSEqC 1.0 or DiSEqC 1.1 switch, select one of the DiSEqC inputs.
● Service Search : Press the OK button to move to the Search Menu
3.2 Positioner Setting
- Satellite : Select the satellite which you want to search for the Service.
- Press the LEFT/RIGHT ARROW button to select the satellite.
- If you press the OK button, a complete satellite list will be displayed.
- Select the wanted satellite name.
- If the desired satellite name is not listed then select User Defined.
● Frequency : Select the satellite frequency you want to use to check for a signal.
- Positioner: Select the positioner.
- None : (No Positioner)
- Using DiSEqC 1.2:
Move: To move the dish, press LEFT/RIGHT button.
Fine Move : To move the dish in smaller steps, press the LEFT/RIGHT ARROW button.
Step : Set to positioner moving steps as 1, 2, 3, 4
Positioner Command : To use various positioner commands, press the OK button. Then, available positioner commands will appear.

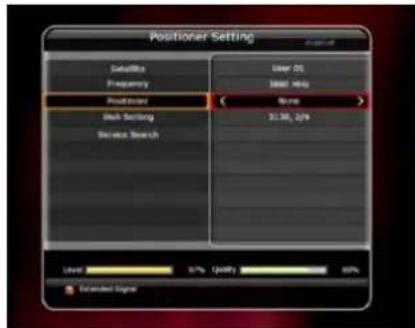

- Using USALS:
Dish Longitude : Enter the longitude position of the antenna using the NUMERIC buttons.
Go To : Press the OK button to rotate the dish to the selected antenna position.
Positioner Command : To use various positioner commands press the OK button. Then, available positioner commands will appear.

● Dish Setting : Press the OK button to move to Dish Setting menu directly.
● Service Search : Press the OK button to move to Service Search menu directly.
3.3 Service Search
● Auto Search Mode :
- Satellite : Press the OK button to select the target satellite to be searched.
- Search Type: Select the search type.
- Network Search: You can select Off or On. When you select 'On', you can find more transponders using the home network. As it refers to NIT during searching, if there is the frequency information of other transponder, it searches the other transponder besides the transponder that the user inputs.
- Time Calibration : You can select 'Simple', 'Full' and 'Off' to get TDT(Time Data Table) from each TP
- Dish Setting: Press the OK button to move to Dish Setting menu directly.
- Positioner Setting: Press the OK button to move to the Positioner Setting menu directly.
- Start Search : Press the OK button to start search.
● Manual Search Mode :
- Satellite : Press the OK button to select the target satellite for search.
- Frequency: Select the frequency from the list to search.
- Symbol rate : Enter the symbol rate using the NUMERIC buttons.
- Polarity: Select the polarity. (Vertical/Horizontal)
- Search Type: Select the search type.
- Network Search : You can select Off or On. When you select 'On', you can find more transponders using the home network. As it refers to NIT during searching, if there is the frequency information of other transponder, it searches transponder that the user inputs.
- Dish Setting : Press the OK button to move to the Dish Setting menu directly.
- Transmission: You can select 'DVB' and 'DVB-S2'
- Start Search : Press the OK button to start a search
![Service Search Search Mode Database Search Type Network Search Time Calibration Check Setting Positioner Setting Start Search Audio User 01 All Service CIF Simple 31.96, 2/4 None User: 5.7% Quality: 80% Easy Find: All [UP]](/content/2026/06/1402988/images/b31250080e8340b79636ab85d0809704cd95c370b7cd460e46369860b1390f91.jpg)
![Service Search Search Mode CatalRate Frequency Symbol rate Property Search Type Network search Disk Setting TRANSMSSSUN Start Search Mensil user 01 3880 MHz 27300 Hemysical AS Service cIF 5150, 274 ONB Lower 97% Quality 60% Temp (Min. Diff.) [Off]](/content/2026/06/1402988/images/a14f2e27b699ba13cdeabeb390622893b2d7187fe28073741ba92be11a5f40b7.jpg)
the other transponder besides the
● Blind Search Mode :
- Satellite: Press the OK button to select multiple satellites.
- Frequency : Set Auto to search whole frequency, Set Manual to search only desired frequency.
- Polarity: Select the polarity. (All Polarity/Vertical/Horizontal)
- Search Type: Select the search type.
- Dish Setting : Press the OK button to move to the Dish Setting menu directly.
- Start Search : Press the OK button to start a search.

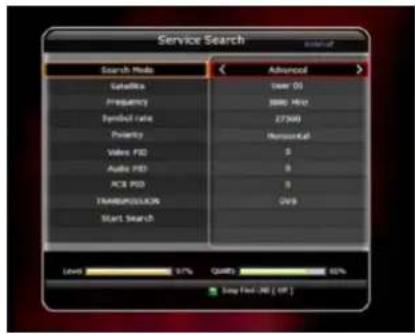
● Advanced Search Mode :
- Satellite : Press the OK button to select the target satellite for search.
- Frequency: Select the frequency from the list to search.
- Symbol rate : Enter the symbol rate by using the NUMERIC buttons.
- Polarity: Select the polarity. (Vertical/Horizontal)
- Video PID : Enter the video PID using the NUMERIC buttons.
- Audio PID : Enter the audio PID using the NUMERIC buttons.
- PCR PID : Enter the PCR PID using the NUMERIC buttons.
- Transmission: You can select 'DVB' and 'DVB-S2'
- Start Search : Press the OK button to start a search.
3.4 Network Setting
To use a Network connected to the STB Ethernet port, you have to prepare the STB Network settings. When the STB and a PC are connected via a network, you can access the files of the STB storage device such as USB storage device.
NOTE: If you use DHCP function of router, you can set easily network configuration.
- DHCP: You can select On/Off for the Dynamic Host Configuration Protocol (DHCP) to get the all configuration from the router.
- If you select 'On': You will obtain the configuration from network and be set up automatically. In this case, the remaining item (IP Address, Subnet Mask, Gateway, First DNS, Second DNS) are automatically set and you don't have to configure them manually.
- If you select 'Off': You have to input the IP address manually together with the following data.
-
IP Address, Subnet Mask, Gateway, First DNS, Second DNS : You can input the address with the OK button, NUMERIC buttons and the LEFT/RIGHT buttons. You can move to the next item of Subnet Mast with the DOWN button and you can configure the following items in the same way.
-
MAC Address: This will display the MAC address of the STB Ethernet interface and is a fixed assignment unique to each STB.
● Firmware Upgrade Server : To upgrade the firmware by downloading from a internet server.
NOTE : Server installation and settings must be controlled by expert server manager. A storage device must be connected with your receiver(STB) when firmware upgrade from server.
- Proxy Server: This will allow you to access the blocked websites indirectly (like detour path).
NOTE: However, due to the indirect method of access, the slow loading speed and failure of data reception can happen.
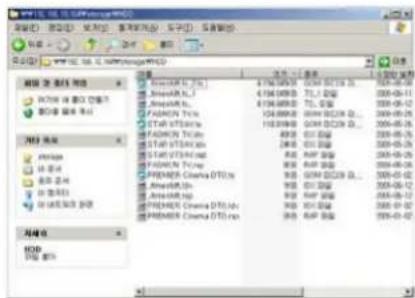
● Control of the files via the network and your PC :
- Check the IP Address of the STB on the Network Setting menu.
- Press Enter button on your PC, after writing IP Address on the web browser address line. Ex.) \168.158.10.146\storage
- You can see the folder name of USB in the Storage folder.
- USB:USB Storage Device
- You may be able to load and retrieve data between the PC and the STB via the browser
● Dynamic settings (RED key)
- You can make your DDNS setting in this menu by pressing the RED colored button.
- For more details about your DDNS settings, please ask your local DDNS service provider.
- Wireless LAN can be supported by using the 'USB to Wi-Fi' module connected (*Option)
- By pressing the BLUE colored button, you can automatically find and do the settings for AP.
- For the details of Wireless Wi-Fi settings, please refer to the additional AP manual.
NOTE: The speed of Wireless LAN is slower than the Wired LAN. So, it could take much more time when a file copy / move functions are performed.

NOTE : Inevitably, only the limited types of Wireless LAN modules are supported. So, you MUST check for the compatible / supported types BEFORE you purchase. Currently supported types are : RT73 series, RT3070 series, RT2870 series.
3.5 System Recovery
- System restore to factory default: Restore the factory set values in case the user has encountered some problems after changing any new parameters of service data and other parameters which may be in error. Press the OK button to erase all services and restore default setting.
- Reset Configuration data: Maintain the service data and reset the configuration data.
- Reset Service data: Maintain configuration data and reset the service data.
- System restore to stored position: Restore the stored values including service data and system parameters. Press the OK button to restore all data.
- Store system data: If you want to use system parameters and service data in the future, this menu allows you to store current state. Press the OK button to store current state.

- Delete store position : Delete stored system data.
3.6 System Information
This menu displays general information about the hardware and software version of your receiver.
4. Utility
4.1 Calculator
To use the calculator, highlight the calculator and press the OK button.

4.2 Calendar
To display the calendar, highlight the calendar and press the OK button. Utilize the ARROW buttons to choose the date. If you press PAGE UP/DOWN button, you can see the past/next month of the calendar.

4.3 CAS (Conditional Access System)
Smart Card Slot
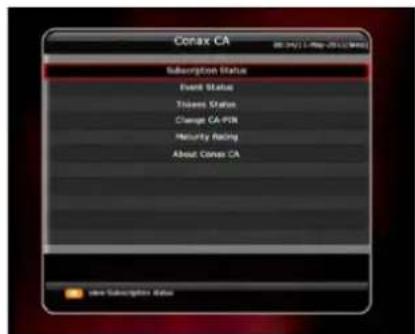
- Conax smart card menu :
To watch scrambled services, you need to have an appropriate Conax smart card from the service providers. Insert a valid smart card into smart card slot (only the bottom slot of the two is active). The message of 'Smart card Initializing...' will appear on the screen. After the message disappears, you can watch the service you want.
- Smart card information :
You can view the current status of smart card. Select the slot which you want to view using the ARROW buttons. And press the OK button.
- CAM Initializing
To watch scrambled services, you need to have a Common Interface Conditional Access Module(CAM) and an appropriate smart card from the provider. Insert the CAM together with a valid smart card into CI slot (two slots available). The message of 'CI Initializing...' will appear on the screen. After the message disappears, you can watch the service you want.
● CAM information
You can view the current status of CAM. Select the slot which you want to view using the ARROW buttons, and press the OK button. If the CAM is available, you can view information about each slot.
NOTE : The displayed information of each CAMs may be different depending on the CAM used.

- CI message
- On: To display the CI message on live TV service.
- Off: To disable the CI message on live TV service.
4.4 Plugin
If you have the program file for Plugin, you can download the file(s) to Plugin then enjoy the program.
- Download Plugin File
- In the USB storage, please create a new folder name 'plugin' and in this 'plugin' folder, create a folder name 'bin'. (plugin > bin)
- Store(Copy) the plugin file in the 'bin' folder.
- Connect the USB storage to the receiver. When Software Download menu is appeared, then press LEFT/RIGHT ARROW buttons to move to User Data Download mode.
- Press RED button to start download the plugin file that you want.

NOTE: You can also download by Menu > System Tools > Data Transfer > Data download from USB storage.
- Plugin Menu
- RED button: To set the plugin Start Type. You can select Auto or Manual.
- GREEN button: To Start the plugin. You will see 'Started' in State if the plugin is started.
- BLUE button: Press BLUE button if you want to delete the plugin file.
- We provide a special feature called WebZeal which is for Web-Browsing. You can simply enjoy the WebZeal when you want web surfing.

WebZeal Option
- Recall Button : Press to access website you have visited recently.
- GREEN button : Press to display virtual keyboard.
- FAV Button : Press to add the current web page to favorite.
- YELLOW/BLUE button: Press to adjust the page Zoom In and Zoom Out as you want.
- MENU button : Press MENU button to show simple internet menu.

4.5 Free TV+
● What is Free TV+?
- Free TV+ is a unique feature that enables you to play & enjoy FREE web media contents like Youtube and other free (but premium) contents from various internet websites such as documentary and more.
So, you can enjoy watching and also downloading various free web contents with our HD receiver.
- Required settings
- To enjoy your great Free TV+ feature, please make sure to check for the following conditions.
- STB (Set-top-box) should be connected with Ethernet cable, with proper network settings. (Please refer to the menu of "Network setting", and its operating instructions).
- USB or HDD storage requirement
| Mode | USB or HDD storage connection | Remark |
| Playing Not Required | For playing function, no additional storage connection is required.The internal Flash memory in the STB will be used automatically for the buffering of the contents being played. | |
| Downloading Required | The available web contents can also be downloaded to your USB or HDD storage connected.If more than one storage devices are connected with the STB at the same time, then the Downloaded files will be saved at the faster and bigger storage device automatically. | |
NOTE
a) Problems in network environment: Problems such as flickering and freezing of the screen can occur while you are watching the YouTube service. These kind of problems can often occur due to the lagging and poor network status from your local internet service provider at home. This may also cause the STB to be halted, then we kindly recommend you to reboot your STB by resetting Power.
- Control part.
- Play: Select the media content you wish to play, and press OK button.
- Settings (Red button): You can set Picture quality, Unit seek time and Parental lock options.
- Country : You can change the available contents area where you would like to watch (this option is only valid for YouTube).
- Picture Quality: High - Medium - Low
- Unit Seek Time: Set Forward and Backward seeking time interval for 10 / 20 / 30 / 60 sec.
- Parental Lock: You can lock each contents and video downloading function with password.
- Category (Yellow button): Press this Yellow button to view the list of categories, then choose the one you prefer to watch in the list of contents.
• Service (Green button): You can select among various free contents provided from web-site.
- Note: Each web-site is removable by pressing Green key on the list.

- Download (Recording button): Web contents are available for download into USB or HDD storage.
- Note: If more than one storage devices are connected with the STB at the same time, then the Downloaded files will be saved at the faster and bigger storage device automatically.
- Backward and Forward (Rewind and Fast forward button) playing
- Note: Forward and Backward seeking interval can be set for 10 / 20 / 30 / 60 sec at Settings menu.
• Full Screen: Press OK button to view in full screen size.
4.6 Internet TV+
● What is Internet TV+?
- Internet TV+ feature enables you to watch the 'Media contents' being served from the Internet through a specific URL. It is just like a web-browsing but watching TV instead of web contents. This feature is not only supporting the streaming of the live broadcast service, but also supports FMS (Flash Media Server) and Wowza server (RTMP)
● Required settings
- All users are required to do the below settings before you can enjoy the Internet TV+ feature with your set-top-box (STB).
- STB should be connected with Ethernet cable, with proper network settings. (Please refer to the menu of "Network setting", and its operating instructions).
- Control part
- Play: Select the service which you wish to play, and press OK button.
-
Add : User can add the URL of the specific site which they want to watch. And they can add more sites continuously.
-
Install Type: You can define the type of URL. (default : Input URL)
- Title : You can input the name of the media contents here.
- URL You can input the URL address that you would like to watch.
- Description : You can define the description of contents here.
- Media Type : You can choose the type of Media service between the "File" and "Live".
Note : Supported protocols are RTMP, RTMPT, HTTP only.
The codec types supported in this Internet TV+feature are ;
■ Video : MP1V, MP2V, MPEG4P2(MP4), H.264, VC1.
■ Audio : MP1A, MP2A, MP3A, AC3, AAC, PCM
• Edit : You can edit the existing contents that you have.
- Delete: You can delete contents you have with this function.
• Full Screen : You can watch the contents with full screen size with this function.
4.7 Internet Radio+ (WebRadio+)
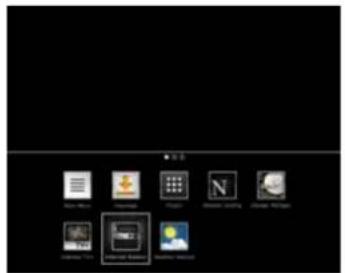
Start the Internet Radio using the main menu or the icon menu. For this functionality an internet connection is required.
Use the arrow keys ( ▲ & ▼ & ◀ & ▶ ) to select a radio station. You can select 4 categories
shown at the lower display area : News, Music, International or Recently. Use the keys ◀ P & P ▶ to scroll one page back or forward in the station list.
You can add new station to the current list with the red key. With the green key an existing entry can be edited. To delete the active entry, press yellow key.
Currently no further categories can be added. To exit the Internet Radio, press EXIT key.


4.8 Weather forecast
Start the weather forecast using the icon menu. For this functionality an internet connection is required. On the first start, you are asked to enter the name of your town or region. Upon entry you receive a forecast of the temperature and the chance of rain in the next days. To exit the weather forecast, press EXIT key.
While using the weather forecast functionality, you may add further twons/regions by pressing the red key. An overview of all regions entered can be shown using the green key. With the yellow key, you can define, which region is shown as default when starting the weather forecast functionality.

![27°C [80°F] Weather: 40% day 3 - 15.00 AM Day 2 Day 1 Day 0 Day 0 Day 0 Day 0 Day 0 Day 0 Day 0 Day 0 Day 0 Day 0 Day 0 Day 0 Day 0 Day 0 Day 0 Day 0 Day 0 Day 0 Day 0 Day 0 Day 0 Day 0 Day 0 Day 0 Day 0 Day 1 Day 1 Day 1 Day 1 Day 1 Day 1 Day 1 Day 1 Day 1 Day 1 Day 1 Day 1 Day 1 Day 1 Day 1 Day 1…](/content/2026/06/1402988/images/3cfda8b3c99fa2514a8cd5c7d677f7cc93956297f14bac3d2ebc8a91894ec290.jpg)
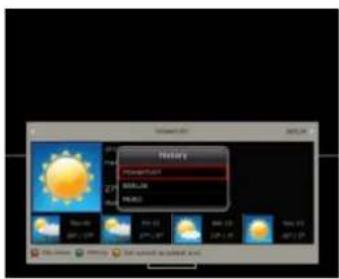

![Weather Forecast Default - PMR/PMR OK 25°C [2017] Normality: 40% Max. 0 - 10.00 - 6.0kW Max. 0 - 10.00 - 6.0kW Max. 0 - 10.00 - 6.0kW Max. 0 - 10.00 - 6.0kW Max. 0 - 10.00 - 6.0kW Max. 0 - 10.00 - 6.0kW Max. 0-10.00 Max. 10.00 Max. 20.00 Max. 30.00 Max. 40.00 Max. 50.00 Max. 60.00 Max. 70.00 Max. 80…](/content/2026/06/1402988/images/191b1714e4d5aa001a9c3bd3131b2a1a2482b44ef0656f79c189462e2872c9ad.jpg)
Troubleshooting
| Problem Solution | |
| Does not display any message on the front panel. | ✓ Check the main power cable and check that it is plugged into a suitable power outlet. ✓ Check the STB main power switch 'ON' at the rear of the STB. |
| No Picture | ✓ See 'Does not display any message on the front panel' above. ✓ To match the STB system with your TV system (PAL/NTSC), press V.Format button until a picture is displayed. ✓ Check the video output port is firmly connected to the TV or VCR. ✓ Check that you have selected the Video Input on your TV. ✓ Press the STB button on the remote to assure you are controlling the STB and no other device with the remote. ✓ Check the brightness level of the TV. ✓ Check the resolution that your TV supports, and set the proper resolution with the remoteResolutionbutton to obtain a picture. |
| Poor picture quality | ✓ See 'No Picture' above. ✓ Check the signal level, if this is low then tries adjusting the alignment of your dish. |
| No Sound | ✓ See 'No Picture' above. ✓ Check the volume level of the TV and STB. ✓ Check the Mute status of the TV and STB. |
| Remote Control does not operate | ✓ Point remote control directly towards the STB. ✓ Check that the STB button lights up when you press any button ✓ Check and replace batteries. |
| No or Bad Signal | ✓ Check the LNB; Replace the LNB if necessary. ✓ Check the cable from the LNB. ✓ Check the position of the dish; realign dish if necessary. ✓ If you are using a DiSEqC 1.0 switch, check that you have connected and programmed the LNBs to the correct connections on the switch. ✓ Check the 'Signal Level' and the 'Signal Quality'. |
Specifications
Tuner & Channel Decoder
| Input Connector | F-type, IEC 169-24, Female |
| Loop through out | F-type, IEC 169-24, Female |
| Frequency Range | 950MHz ~ 2150MHz |
| Input Impedance | 75Ω, unbalanced |
| Signal Level | -65 to -25dBm |
| LNB Power | 13/18VDC, max.400mA |
| 22KHz Tone | (22±2)KHz, (0.6±0.2)V |
| DiSEqC Control | V1.0/1.2/USALS Compatible |
| Demodulation | QPSK / 8PSK |
| Input Symbol Rate | 2 ~ 45 Ms/s(QPSK of DVB-S) |
| 2 ~ 45 Ms/s(QPSK of DVB-S2) | |
| 2 ~ 35 Ms/s(8PSK of DVB-S2) | |
| FEC Decoder | 1/2, 2/3, 3/4, 5/6 and 7/8 with Constraint Length K=7(DVB-S) |
| 1/2, 3/5, 2/3, 3/4, 4/5, 5/6, 8/9 and 9/10 (DVB-S2/QPSK) | |
| 3/5, 2/3, 3/4, 5/6, 8/9, 9/10(DVB-S2/8PSK) |
MPEG Transport Stream A/V Decoding
| Transport Stream | H.264(MPEG-4 part 10, MPEG-4/AVC and H26L) |
| MPEG-II ISO/IEC 13818-2/11172-2 | |
| Profile Level | MPEG-4/AVC MP@L4, MPEG-II MP@HL |
| Input Rate | Max. 80Mbit/s |
| Video Formats | 4:3 Letter Box, 4:3 PanScan, 16 : 9 |
| Video Resolution | 720 x 576i, 720 x 576p, 720 x 480i, 720 x 480p |
| 1280 x 720p, 1920 x 1080i, 1920 x 1080p(supports only HDMI) | |
| Audio Decoding | Dolby Digital, MPEG-1 Layer 1,2 and 3 |
| Audio Mode | Stereo/Joint stereo/Mono, Dolby Digital bitstream |
| Sampling Rate | 32KHz, 44.1KHz and 48KHz(According to input) |
Main System
| Main Processor | STi chipset STI7110 |
| Memory | Flash-ROM : 256 MbyteSDRAM : 256 Mbyte (2 x 128MB DDR2)EEPROM : 256 Byte |
Audio / Video & Data IN/OUT
| TV SCART | RGB, CVBS Video, Audio L, R Output |
| RCA | CVBS Video Output, Audio L, R Output |
| Component | YPbPr Video Output |
| OPTIC | Dolby Digital (SPDIF) |
| HDMI | Video & Audio Output |
| RS-232C | 9 pin D-SUB (Male) type, Transfer rate 115Kbps |
| USB | USB 2.0 Host Front & Rear Support. (5V DC 500 mA Max.) |
| Ethernet | RJ45 connector, 100 Mbps |
Front Panel
| Slot | 1 USB 2.0 Host port |
| 2 Common interface PCMCIA slot | |
| 2 Smart Card Slot | |
| Display | VFD(Vacuum Fluorescent Display) - 8Digit |
| Buttons | 3 Buttons (Standby, CH UP/DOWN) |
Power Supply
| Input Voltage | AC 100 ~ 250V, 50/60Hz |
| Type | SMPS |
| Power Consumption | Max. 30W |
| Protection | Separate Internal Fuse & Lighting protection |
Physical Specification
| Size (W x H x D) | 300mm X 58mm X 220mm |
| Weight (Net) | 1.6 Kg |
| Operating Temp. | 0°C ~ +45°C |
| Storage Temp. | -10°C ~ +70°C |

CTAGON
www.octagon-germany.de
Full HD Digital Satellite Receiver
SF 1008G+ SE+ HD INTELLIGENCE
- USER'S MANUAL
- INDEX
- INDEX....3
- PRECAUTIONS ....5
- BEFORE YOU BEGIN 7
- HARDWARE DESCRIPTION....9
- CONNECTING DIAGRAM 14
- GUIDE OF FUNCTIONS 17
- PVR (PERSONAL VIDEO RECORDER) FUNCTION 23
- MENU MAP 31
- MAIN MENU OF GUIDE....32
- TROUBLESHOOTING....50
- SPECIFICATIONS....51
- PRECAUTIONS
- IMPORTANT SAFETY INSTRUCTIONS
- NOTICE
- COPYRIGHT
- DISCLAIMER
- TRADEMARKS
- BEFORE YOU BEGIN
- MAIN FEATURES
- ACCESSORIES
- HARDWARE DESCRIPTION
- FRONT PANEL CONFIGURATION
- REAR PANEL CONFIGURATION
- REMOTE CONTROL UNIT
- CONNECTING DIAGRAM
- RECEIVER TO A/C POWER
- RECEIVER TO TV WITH DIGITAL A/V OUTPUT
- RECEIVER TO TV WITH ANALOG A/V OUTPUT
- CONNECTING TO ANTENNA CABLE
- GUIDE OF FUNCTIONS
- SELECTING A SERVICE
- 1.1 USING CH UP/DOWN BUTTONS
- 1.2 USING SERVICE LIST
- 1.3 USING SIMPLE SERVICE LIST
- 1.4 USING RECENT SERVICE LIST
- INFORMATION WINDOW
- MULTI-PICTURE DISPLAY
- ELECTRONIC PROGRAM GUIDE (EPG)
- FAVORITE GROUP
- VOLUME CONTROL
- PAUSE
- SUBTITLE
- AUDIO CONTROL
- AUDIO TRACK
- SOUND MODE
- ● SOUND LEVEL
- TELETEXT
- PIP (PICTURE IN PICTURE)
- PVR (PERSONAL VIDEO RECORDER) FUNCTION
- RECORDING
- 1.1 RECORDING METHODS
- INSTANT RECORDING
- ● TIME SCHEDULED RECORDING
- ● EVENT SCHEDULED RECORDING VIA EPG
- 1.2 RECORDING EDIT
- 1.3 LONG TIME RECORDING
- 1.4 PAUSE DURING RECORDING
- TIME SHIFTING
- PLAYBACK (PLAY LIST)
- 3.1 RECORDED FILES
- 3.2 IMPORTED FILES
- 3.3 MUSIC
- 3.4 PHOTO
- BOOKMARK
- TRICK MODE
- MENU MAP
- MAIN MENU OF GUIDE
- SYSTEM TOOLS
- 1.1 STORAGE MANAGER
- 1.2 TIMER SETTINGS
- 1.3 SERVICE LIST MANAGER
- 1.4 DATA TRANSFER
- CONFIGURATION
- 2.1 RECORDING OPTION
- 2.2 PARENTAL CONTROL
- 2.3 DISPLAY SETTING
- 2.4 TIME SETTING
- 2.5 LANGUAGE SETTING
- 2.6 A/V OUTPUT SETTING
- INSTALLATION
- 3.1 DISH SETTING
- 3.2 POSITIONER SETTING
- 3.3 SERVICE SEARCH
- ● BLIND SEARCH MODE
- ● ADVANCED SEARCH MODE
- 3.4 NETWORK SETTING
- ● CONTROL OF THE FILES VIA THE NETWORK AND YOUR PC
- ● DYNAMIC SETTINGS (RED KEY)
- WIRELESS LAN CAN BE SUPPORTED BY USING THE 'USB TO WI-FI' MODULE CONNECTED (*OPTION)
- 3.5 SYSTEM RECOVERY
- 3.6 SYSTEM INFORMATION
- UTILITY
- 4.1 CALCULATOR
- 4.2 CALENDAR
- 4.3 CAS (CONDITIONAL ACCESS SYSTEM)
- SMART CARD SLOT
- CONAX SMART CARD MENU
- SMART CARD INFORMATION
- CAM INITIALIZING
- ● CAM INFORMATION
- CI MESSAGE
- 4.4 PLUGIN
- DOWNLOAD PLUGIN FILE
- PLUGIN MENU
- WEBZEAL OPTION
- 4.5 FREE TV
- ● WHAT IS FREE TV
- REQUIRED SETTINGS
- NOTE
- CONTROL PART
- 4.6 INTERNET TV
- ● WHAT IS INTERNET TV
- ● REQUIRED SETTINGS
- 4.7 INTERNET RADIO+ (WEBRADIO+)
- 4.8 WEATHER FORECAST
- SPECIFICATIONS
- CTAGON
Brand : Octagon
Model : SF 1008G+ SE+ HD
Category : Receiver