
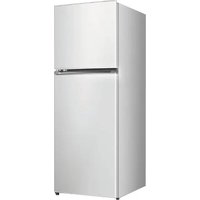
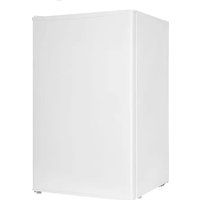
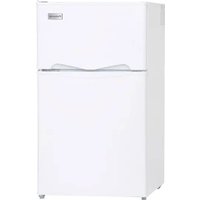
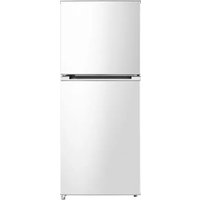
PW46SBF - Refrigerator Palsonic - Free user manual and instructions
Find the device manual for free PW46SBF Palsonic in PDF.


| Product Type | Refrigerator |
| Brand | Palsonic |
| Model | PW46SBF |
| Width | 550 mm |
| Depth | 570 mm |
| Height | 1430 mm |
| Weight | 35 kg |
| Power Supply | 230 V, 50 Hz |
| Energy Consumption | 250 kWh/year |
| Climate Class | N-ST |
| Noise Level | 42 dB |
| Refrigerator Net Capacity | 120 L |
| Freezer Net Capacity | 80 L |
| Total Net Capacity | 200 L |
| Cooling System | Static cooling |
| Defrosting | Manual (freezer), automatic (fridge) |
| Interior Light | LED |
| Door Reversibility | Yes |
| Shelves Material | Tempered glass |
| Freezer Drawers | 3 |
| Maintenance and Cleaning | Clean interior with mild detergent; defrost freezer regularly |
| Safety | Do not store flammable substances; ensure proper ventilation |
| Spare Parts and Repairability | Contact Palsonic service center for genuine parts |
| General Information | Free user manual available in PDF format |
Frequently Asked Questions - PW46SBF Palsonic
Manual defrost is required for this model.
User questions about PW46SBF Palsonic
0 question about this device. Answer the ones you know or ask your own.
Ask a new question about this device
Download the instructions for your Refrigerator in PDF format for free! Find your manual PW46SBF - Palsonic and take your electronic device back in hand. On this page are published all the documents necessary for the use of your device. PW46SBF by Palsonic.
USER MANUAL PW46SBF Palsonic
natural_image
Line drawing of a simple refrigerator with lid and side panel (no text or symbols)Contents
- SAFETY WARNINGS.... 1
- INSTALLATION.... 1
2.1 Locaon.... 2
2.2 Reversing the Door Swing 2
2.3 Door Space Requirements.... 3
2.4 Levelling the Unit 3
2.5 Cleaning Before Use 4
2.6 Before Using Your Unit....4
2.7 Interior Accessories....4
- PRODUCT OVERVIEW 4
- OPERATION....5
4.1 Adjusting the Temperature.... 5
4.2 Noise Inside the Unit.... 5
4.3 Tips for Keeping Food in the Unit....6
- CLEANING 6
5.1 Defrosting 6
5.2 Cleaning the Interior and the Exterior of the Unit....6
5.3 Cleaning Tips 6
- MAINTENANCE 6
6.1 Care When Handling / Moving Your Unit.... 6
6.2 Servicing 6
6.3 Switching Off for Long Periods of Time....7
- Trouble shoong 7
7.1 Warm ps: 7 - TIPS FOR ENERGY SAVING 7
- DISPOSAL 8
9.1 Correct Disposal of this product....8
1. SAFETY WARNINGS
1) WARNING—Keep venlaon openings, in the appliance enclosure or in the built-in structure, clear of obstrucon.
2) WARNING—Do not use mechanical devices or other means to accelerate the defrosing process, other than those recommended by the manufacturer.
3) WARNING—Do not damage the refrigerant circuit.
4) WARNING—Do not use electrical appliances inside the food storage compartments of the appliance, unless they are of the type recommended by the manufacturer.
5) The appliance has to be unplugged aer use and before carrying out user maintenance on the appliance.
6) This appliance can be used by children aged from 8 years and above and persons with reduce physical sensory or mental capabilities or lack of experience and knowledge if they have been given supervision or instrucon concerning use of the appliance in a safe way and understand the hazards involved. Children shall not play with the appliance. Cleaning and user maintenance shall not be made by children without supervision.
7) If the supply cord is damaged, it must be replaced by the manufacturer, its service agent or similarly qualified persons in order to avoid a hazard.
8) Please dispose the refrigerator according to local regulators for it uses ammable blowing gas and refrigerant.
9) Please according to local regulaons regarding disposal of the appliance for its ammable refrigerant and blowing gas. Before you scrap the appliance, please take o the doors to prevent children trapped.
10) This appliance is intended to be used in household and similar applicaons such as
– sta kitchen areas in shops, oces and other working environments;
– farm houses and by clients in hotels, motels and other residential type environments;
— bed and breakfast type environments;
– catering and similar non-retail applicaons.
11) Do not store explosive substances such as aerosol cans with a ammable propellant in this appliance.

IT IS HAZARDOUS FOR ANYONE OTHER THAN AUTHORISED SERVICE PERSONNEL TO CARRY OUT SERVICING OF REPAIRS WHICH INVOLVE THE REMOVAL OF COVERS.

TO AVOID THE RISK OF AN ELECTRICAL SHOCK DO NOT ATTEMPT REPAIRS YOURSELF.
2. INSTALLTION
2.1 Locaon
When selecng a posion for your unit you should make sure the oor is flat and rm, and the room is well venlated. Avoid locang your unit near a heat source, e.g. cooker, boiler or radiator. Also avoid direct sunlight as it may increase the electrical consumpon. Extreme cold ambient temperatures may also cause the unit not to perform properly. This unit is not designed for use in a garage or outdoor installaon. Do not drape the unit with any covering. When installing the unit, ensure that 40 cm of free space is le at both sides, 15 cm at the rear and 20 cm at the top of the unit. This will allow cold air to circulate around the bar fridge and improve the eciency of the cooling process. The door can be opened to the right or the le, depending on what beer suits the locaon. Please ensure there is adequate space for the door to fully open.
2.2 Reversing the Door Swing
Tools Required: Phillips style screwdriver / Flat blated screwdriver / Hexagonal spanner

◆ If you want to have the door swing reversed, we recommend that you contact a qualified technician. You should only try to reverse the door yourself if you believe that you are qualified to do so.
◆ Ensure the unit is unplugged and empty.
◆ Adjust the two levelling feet to their highest posion.
◆ To take the door of it is necessary to lt the unit backwards. You should rest the unit on something solid so that it will not slip during the door reversing process.
◆ All parts removed must be saved to do the reinstallation of the door.
◆ Do not lay the unit fat as this may damage the coolant system.
◆ We recommend that 2 people handle the unit during assembly.
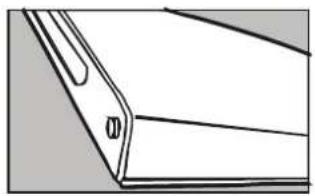
1) Remove the plasc covering from the top door hinge.
2) Unscrew the two screws from the boom bracket. Remove the foot from opposite side.
3) Place to one side.

natural_image
Simple line drawing of a mechanical lever or pivot (no text or symbols)
natural_image
Simple line drawing of a mechanical component with no text or symbols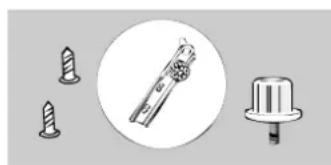
natural_image
Illustration of four different electronic components: screw, pin, and knob (no text or symbols)4) Slide the Appliance door down about 15cm and o the top hinge pin and li away from the Appliance.
5) Remove the two screws from top bracket and replace on the otherside. You will need to rst remove the plasc caps from the other side.
6) Slide the Appliance door back on to the Top hinge, making sure it's the right way up. Screw the boom hinge into place on the new side. Replace the other foot on the other side. Replace the plasc covering by clicking back into posion on the door hinge.
7) Check that the door is aligned horizontally and vercally and that the seals are closed on all sides before nally ghtening the boom hinge. Re-adjust the levelling feet.
2.3 Door Space Requirements
The unit's door must be able to open fully as shown.
2.4 Levelling the Unit
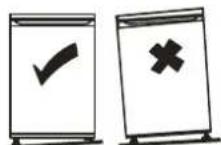
To do this adjust the two levelling feet at the front of the unit. If the unit is not level, the door and magnec seal alignments will not be covered properly.
natural_image
Pure geometric diagram of a folded paper edge with no text or symbols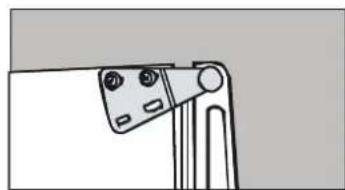
natural_image
Simple line drawing of a mechanical component with no text or symbols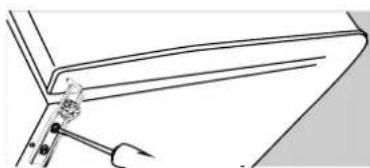
natural_image
Simple line drawing of a mechanical assembly with a tool and bracket (no text or symbols)
natural_image
Simple line drawing of a hexagonal container with a horizontal line inside (no text or symbols)
2.5 Cleaning Before Use
Wipe the inside of the unit with a weak soluon of bicarbonate soda. Then rinse with warm water using a damp sponge or cloth. Wash the shelves and salad bin in warm soapy water and dry completely before replacing in the unit. Clean the exterior of the unit with a damp cloth. If you require more informaon refer to the Cleaning secon.
2.6 Before Using Your Unit
Before placing any food in your unit, turn it on and wait for 24 hours, to make sure it is working properly and to allow it me to drop to the correct temperature. Your unit should not
be overlled.

Before Plugging in
You must check that you have a socket which is compatible with the plug supplied with the unit.
Before Turning On!
Do not turn on unl two hours aer moving the unit. The coolant uid needs me to sele.
2.7 Interior Accessories
Various glass or plasc storage shelves are included with your appliance - dierent models have dierent combinaons.
You should always slide one of the full size glass storage shelves into the lowest set of guides, above the fruit and vegetable containers, and keep it in this posion. To do this, pull the storage shelf forward until it can be swivelled upwards or downwards and removed.
Please do the same in reverse to insert the shelf at a dierent height.

In order to make the most of the volume of the fresh food storage compartment and frozen-food storage compartment, the user can remove one or more shelves, drawers, out of the appliance, according to your daily use.
3. PRODUCT OVERVIEW
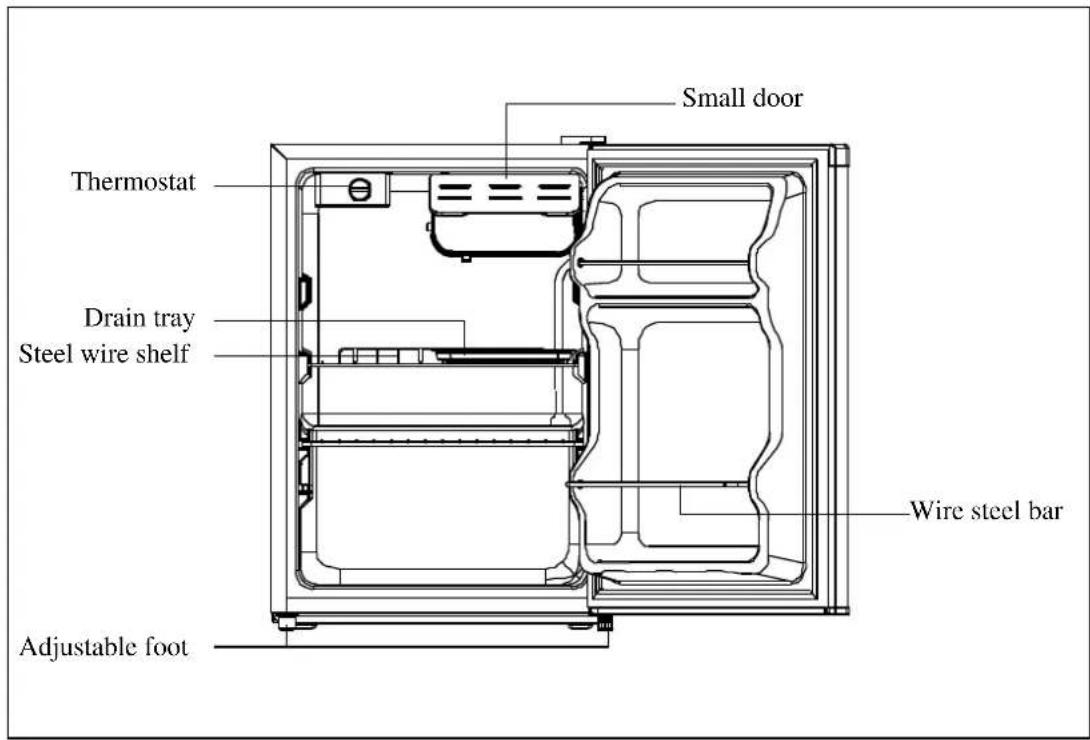
*All images in this instrucon manual are for indicaon only; please refer to your individual unit for details.
4. OPERATION
4.1 Adjusng the Temperature
◆The temperature selector knob is located on the right hand side wall of the refrigerator interior Seng “O”: Unit O
Seng "1": Less Cool Temperature
Seng "4": Normal Operaon(adequate for most situaons)
Seng "6": Coolest Temperature
◆During high ambient temperatures e.g. on hot summer days. It may be necessary to set the thermostat to the Coolest seng(posion "6").This may cause the compressor running connuously in order to maintain a low temperature in the cabinet.
◆ For the rst me you install your refrigerator, set the thermostat knob at "4".
Give your refrigerator time to cool down completely before adding food. It is the best to wait 24 hours before adding food. The thermostat knob controls the temperature. When the thermostat control knob is set to OFF, the refrigerator will not be running.
4.2 Noise Inside the Unit!
You may noce that your unit makes some unusual noises. Most of these are perfectly normal, but you should be aware of them!
These noises are caused by the circulaon of the refrigerant liquid in the cooling system. It has become more pronounced since the introducon of CFC free gases. This is not a fault and will not affect the performance of your unit. This is the compressor motor working, as it pumps the
refrigerant around the system.
4.3 Tips for Keeping Food in the Unit
◆ Cooked meats/shes should always be stored on a shelf above raw meats/shes to avoid bacterial transfer. Keep raw meats/shes in a container which is large enough to collect juices and cover it properly. Place the container on the lowest shelf.
Leave space around your food, to allow air to circulate inside the unit. Ensure all parts of the unit are kept cool.
◆ To prevent transfer of flavours and drying out, pack or cover the food separately. Fruit and vegetables do not need to be wrapped.
◆ Always let pre-cooked food cool down before you put in the unit. This will help to maintain the internal temperature of the unit.
◆ To prevent cold air escaping from the unit, try to limit the number of mes you open the door. We recommend that you only open the door when you need to put food in or take food out.
5. CLEANING
5.1 Defrosting
Defrost the freezing compartment whenever the layer of frost on the surface of the evaporator reaches 3 or 4mm. When defrosting remove all food and set the thermostst to oFF position. Put the drip tray under the evaporator to collect melte water. After the frost has melted, discard the water and dry up the interior of refrigerator. The refrigerator can then be restarted by turning its thermostst to the desired setting.
5.2 Cleaning the Interior and the Exterior of the Unit
◆ Remove all the shelves and the salad bin. To remove the salad bin rst remove the lower door shelf.
◆ Wipe the inside of the unit with a weak soluon of bicarbonate soda and then rinse with warm water using a damp sponge or cloth. Wipe completely dry before replacing the shelves and salad bin.
◆ The grille of the condenser at the back of the unit and the adjacent components can be vacuumed using a so brush aachment.
5.3 Cleaning Tips
Condensaon may appear on the outside of the unit. This may be due to a change in room temperature. Wipe of any moisture residue. If the problem connues, please contact a qualified technician for assistance.
6. MAINTENANCE
6.1 Care When Handling / Moving Your Unit
Hold the unit around its sides or base when moving it. Under no circumstances should it be lied by holding the edges of the top surface.
6.2 Servicing
The unit should be serviced by an authorized engineer and only genuine spare parts should be used. Under no circumstances should you aempt to repair the unit yourself. Repairs carried out by inexperienced persons may cause injury or serious malfuncon. Contact a qualified technician.
6.3 Switching Of for Long Periods of Time
When the unit is not in use for a long period of me, disconnect it from the mains supply, empty all food and clean the appliance, leaving the door ajar to prevent unpleasant smells.
7. Trouble shoong
The following simple issues can be handled by the user. Please call the aer-sale service department if the issues are not seled.
| Inoperaon | Whether the freezer is plugged and connected to power;Low voltage;Failure power or tripping circuit |
| Odour | Odorous foods should closely wrapped;Whether foods are roen;Whether the interior shall be cleaned. |
| Long-term operaon of compressor | It is normal that refrigerator operates for longer me in summer when the ambient temperature is higher;Do not put too much food in the freezer at one me;Do not put foods unl they are cooled;Frequent opening of refrigerator door. |
| Illuminang light does not shine | Whether the refrigerator is connected to power,whether the illuminang light is damaged. |
| The refrigerator door can not be properly closed. | The freezer door is stuck by food packages;Too much food;Tilt refrigerator. |
| Loud noises | Whether the food is leveled, whether the refrigerator is balanced;Whether the refrigerator parts are properly placed. |
7.1 Warm ps:
◆The refrigerator enclosure may emit heat during operaon specially in summer, this is caused by the radiaon of the condenser, and it is a normal phenomenon.
◆ Condensaon: condensaon phenomenon will be detected on the exterior surface and door seals of the freezer when the ambient humidity is large, this is a normal phenomenon, and the condensaon can be wiped away with a dry towel.
◆Buzz: Buzz will be generated by running compressor specially when starting up or shung down.
8. TIPS FOR ENERGY SAVING
Try not to open the door too oen, especially when the weather is wet and hot. Once you open the door, close it as soon as possible.
Every now and then check if the appliance is suciently venlated (adequate air circulaon behind the appliance).
In normal temperature condions, please arrange the thermostat at the middle seng.
Before loading the appliance with packages of fresh food, make sure they are cooled to ambient temperature.
Ice and frost layer increase energy consumption, so clean the appliance as soon as the layer is 3-5 mm thick.
If it is the outer condenser, the rear wall should be always clean free of dust or any impurities.
Always consider instrucons stated in the "Posioning and Energy Saving Tips" sections, otherwise the energy consumption might be substantially higher.
◆ The appliance should be located in the coolest area of the room, away from heat producing appliances or heang ducts, and out of the direct sunlight.
Let hot foods cool to room temperature before placing in the appliance. Overloading the appliance forces the compressor to run longer. Foods that freeze too slowly may lose quality, or spoil.
◆ Be sure to wrap foods properly, and wipe containers dry before placing them in the appliance. This cuts down on frost build-up inside the appliance.
◆ Appliance storage bin should not be lined with aluminum foil, wax paper, or paper toweling. Liners interfere with cold air circulaon, making the appliance less ecient.
◆ Organize and label food to reduce door openings and extended searches. Remove as many items as needed at one me, and close the door as soon as possible.
9. DISPOSAL
Old units sll have some residual value. An environmentally friendly method of disposal will ensure that valuable raw materials can be recovered and used again. The refrigerant used in your unit and insulaon materials require special disposal procedures. Ensure that none of the pipes on the back of the unit are damaged prior to disposal. Up to date informaon concerning opons of disposing of your old unit and packaging from the new one can be obtained from your local council oce.
When disposing of an old unit break of any old locks or latches and remove the door as a safeguard.
9.1 Correct Disposal of this product
This marking indicates that this product should not be disposed with other household wastes throughout the EU. To prevent possible harm to the environment or human health from uncontrolled waste disposal, recycle it responsibly to promote the sustainable reuse of material resources. To return your used device, please use the return and collecon systems or contact the retailer where the product was purchased. They can take this product for environmental safe recycling.
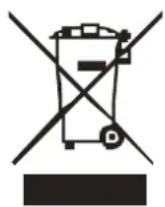
For more informaon, please contact the local authority or your retailer where you purchased the product.
Palsonic
The AUSTRALIAN Company
Palsonic Customer Service
Telephone (Australia) 1300 657 888
Palsonic Corporation Pty Ltd ABN 34 000 474 108
1 Joynton Avenue, Waterloo NSW 2017 Australia
Telephone (02) 9313 7111 Facsimile (02) 9697 0655
www.palsonic.com.au
- Contents
- SAFETY WARNINGS
- INSTALLTION
- Locaon
- Reversing the Door Swing
- Door Space Requirements
- Levelling the Unit
- Cleaning Before Use
- Before Using Your Unit
- Before Plugging in
- Before Turning On!
- Interior Accessories
- PRODUCT OVERVIEW
- OPERATION
- Adjusng the Temperature
- Noise Inside the Unit!
- Tips for Keeping Food in the Unit
- CLEANING
- Defrosting
- Cleaning the Interior and the Exterior of the Unit
- Cleaning Tips
- MAINTENANCE
- Care When Handling / Moving Your Unit
- Servicing
- Switching Of for Long Periods of Time
- Trouble shoong
- Warm ps:
- TIPS FOR ENERGY SAVING
- DISPOSAL
- Correct Disposal of this product
- Palsonic
- The AUSTRALIAN Company
Brand : Palsonic
Model : PW46SBF
Category : Refrigerator