
BFS615S8B - Steamer HISENSE - Free user manual and instructions
Find the device manual for free BFS615S8B HISENSE in PDF.


| Product Type | Steamer |
| Brand | Hisense |
| Model | BFS615S8B |
| Dimensions (W x D x H) | 30 x 30 x 20 cm |
| Weight | 2.5 kg |
| Power Consumption | 1000 W |
| Water Tank Capacity | 2.5 L |
| Number of Tiers | 2 |
| Material | Stainless Steel / Plastic |
| Functions | Steam cooking, timer (up to 60 min), auto shut-off |
| Safety Features | Boil-dry protection, overheat protection |
| Maintenance | Descaling indicator, removable water tank |
| Cleaning | Hand wash recommended for accessories |
| Accessories Included | Steam basket, drip tray, lid |
| Warranty | 1 year |
| Reparability | Spare parts available for order |
Frequently Asked Questions - BFS615S8B HISENSE
User questions about BFS615S8B HISENSE
0 question about this device. Answer the ones you know or ask your own.
Ask a new question about this device
Download the instructions for your Steamer in PDF format for free! Find your manual BFS615S8B - HISENSE and take your electronic device back in hand. On this page are published all the documents necessary for the use of your device. BFS615S8B by HISENSE.
USER MANUAL BFS615S8B HISENSE
We thank you for your trust and the purchase of our appliance.
This detailed instruction manual is supplied to make the use of this product easier. The instructions should allow you to learn about your new appliance as quickly as possible.
Make sure you have received an undamaged appliance. If you do find transport damage, please contact the seller from which you purchased the appliance, or the regional warehouse from which it was supplied. The telephone number can be found on the invoice or on the delivery note.
Instructions for installation and connection are supplied on a separate sheet.
The following symbols are used throughout the manual and they have the following meanings:

INFORMATION!
Information, advice, tip, or recommendation

WARNING!
Warning – general danger

It is important that you carefully read the instructions.
Contents
1. Safety precautions .... 5
3. Appliance description 8
3.1 Appliance equipment 8
3.2 Control panel 10
4. Before first use 11
4.1 Switching on for the first time 11
4.2 Water hardness 12
5. Using the oven – selecting the baking settings 13
5.1 Main menu - Manual 14
5.2 Timer - Timer functions 16
5.3 Cooking by steps (+ menu) 18
5.4 Cooking with steam 19
5.5 Steam injection during the baking process 20
5.6 Filling the water tank 21
5.7 Auto 21
5.8 Extra 22
6. Starting the cooking process 24
6.1 Gratin (+ menu) 24
6.2 Crispy bottom 25
7. End of cooking by touching 25
7.1 Favourites - save your own settings 27
8. General settings 28
8.1 Display lock (+ menu) 29
9. Connections
10. Wi-Fi management 30
10.1 Using Wi-Fi 30
10.2 Managing the oven remote control 31
11. General tips and advice for baking 33
11.1 Cooking table 34
11.2 Cooking with a Temperature Probe 40
12. Cleaning and maintenance 43
12.1 Cleaning the oven (Steam Clean) 43
12.2 Cleaning the water tank and filter foam 44
12.3 Cleaning the steam system 45
12.4 Removing wire and fixed pull-out (extendible) guides 46
12.5 Removing and replacing the oven door and glass panes 46
12.6 Replacing the bulb 47
13. Troubleshooting 48
13.1 Troubleshooting table 48
13.2 Label – appliance information 49
14. Compliance information 49
- Environment protection 50
- Cooking test 51
1. Safety precautions
IMPORTANT SAFETY PRECAUTIONS - CAREFULLY READ THE INSTRUCTIONS AND SAVE THEM FOR FUTURE REFERENCE.
The appliance may only be connected to the power mains by an authorized service technician or expert. Tampering with the appliance or nonprofessional repair thereof may result in risk of severe injury or damage to the product.
Appliance must be connected to fixed wiring which has incorporated means of disconnection. Fixed wiring must be made in accordance with the wiring rules.
The appliance must not be installed behind a decorative door in order to avoid overheating.
If the supply cord is damaged, it must be replaced by the manufacturer, its service agent, or similarly qualified persons in order to avoid a hazard (only for appliances supplied with a connection cord).
This appliance can be used by children aged 8 years and above, and by persons with reduced physical, sensory, or mental capabilities, or lack of experience and knowledge, if they have been given supervision or instruction concerning the use of the appliance in a safe way and if they understand the hazards involved. Children shall not play with the appliance. Cleaning and user maintenance shall not be done by children without supervision.
WARNING: Accessible parts may become hot during use. Young children should be kept away.
WARNING: The appliance and some of its accessible parts may become very hot during use. Care should be taken to avoid touching heating elements. Children less than 8 years of age shall be kept away unless continuously supervised.
The appliance is not intended to be controlled by external timers or a separate remote control system.
Only use the temperature probe recommended for use in this oven.
Do not use harsh abrasive cleaners or sharp metal scrapers to clean the oven door glass or the glass of hinged lids of the hob (as appropriate), since they can scratch the surface, which may result in shattering of the glass.
Do not use steam cleaners or high-pressure cleaners to clean the appliance, as this may result in an electric shock.
WARNING: Before replacing the light bulb, make sure the appliance has been disconnected from the mains power, in order to prevent the hazard of an electric shock.
Never pour water directly on the bottom of the oven cavity. Temperature differences could result in damage to the enamel coating.
2. Other important safety warnings
The appliance is intended for household use. Do not use it for any other purpose, such as room heating, drying of pets or other animals, paper, fabrics, herbs, etc., as this may lead to injury or fire hazard.
The appliance may only be connected to the power mains by an authorized service technician or expert. Tampering with the appliance or nonprofessional repair thereof may result in risk of severe injury or damage to the product.
We recommend that (due to appliance weight) at least two persons carry and install the appliance.
Do not lift the appliance by holding it by the door handle.
Oven door hinges may be damaged when under excessive load. Do not stand or sit on the open oven door, and do not lean against it. Also, do not place any heavy objects onto the oven door.
If the power cords of other appliances located in the vicinity of the oven become entangled in the oven door, they may get damaged, which may cause a short circuit. Therefore, make sure that the power cords of other appliances are at a safe distance.
Make sure the vents are never covered or obstructed in any other way.
Do not line the oven walls with aluminium foil and do not place baking trays or other containers on the bottom of the oven. This would reduce air circulation in the oven, obstruct and slow down the baking process and destroy the enamel coating.
We recommend you avoid opening the oven door during baking, as this increases power consumption and increases condensate accumulation.
At the end of the baking process, and during baking, be careful when opening the oven door, as there is danger of scalding.
To prevent limescale accumulation, leave the oven door open after baking or using the oven, to allow the oven cavity to cool down to room temperature.
Clean the oven when it has completely cooled down.
Eventual mismatches in colour shades between different appliances or components within a single design line may occur due to various factors, such as different angles under which the appliances are observed, different coloured backgrounds, materials, and room illumination.
Do not use the appliance if it is damaged. Unplug the appliance from the power mains and call an authorized service centre.
The oven can be safely used with or without baking pan guides.
Do not store items in the oven, which could cause danger when the oven is switched on.
The silicone lining may wear over time and is not subject to the lifetime of the appliance.
Before connecting the appliance to the power mains, leave it at room temperature for some time to allow all components to adapt to room temperature. If the oven was stored at a temperature close to freezing point or below it, this could be hazardous to some components, particularly the pump.
Do not operate the appliance in an environment colder than 5 °C. If the appliance is switched on in such conditions, the pump could be damaged.
Do not use distilled water, tap water with high chlorine content, or other similar liquids.
When baking with steam injection, always fully open the oven door when the baking process is completed. If you do not do so, the steam rising from the oven cavity could affect the operation of the control unit.
Peel off the adhesive tape from the control unit after installing the appliance into the cabinet. Failure to do so may result in a tank failure.

WARNING!
Carefully read the instructions for use before connecting the appliance. Repair or any warranty claim resulting from incorrect connection or use of the appliance shall not be covered by the warranty.
3. Appliance description

WARNING!
Appliance functions and equipment depend on the model.

- Control panel
- Water tank
- Door switch 4. Lighting 5. Temperature probe socket
- Guides - rack levels 7. Label 8. Oven door
- Door handle
- Container cover
- Tank container
- Filter foam
3.1 Appliance equipment
Oven door switch
The switch switches off the operation of the heaters and the ventilation in the oven room when the oven door is opened during operation.
Guides
Wire guides – always insert the wire rack and baking tray into the guide.
Fixed pull-out guides—place the equipment on the guide. On the same guide, you can place the rack together with the drip pan.
NOTE: Guides – rack levels are counted from the bottom up.
Oven equipment and accessories
 | Wire grid– used for grilling/broiling or as support for a pan, baking tray or baking dish.NOTE: When inserting the wire rack into the guide, always make sure its elevated part is at the back and on the top side.There is a safety latch on the wire rack. Therefore, the wire rack has to be lifted slightly at the front when pulling it out from the oven. |
 | Shallow baking tray– used for flat and small cakes. It can also be used as a drip tray.NOTE: A shallow baking tray may become deformed when heated in the oven. When it cools down, it returns to its original state. The deformation does not affect its functionality. |
 | Airfry grid tray – (baking tray with holes) used for cooking with systems that feature steam injection and for air frying. The holes allow for better air flow around the food and contribute to greater crispness. |
 | Deep baking tray – used for baking vegetables and moist pastries.It can also be used as a drip tray.NOTE: Never insert the deep all-purpose (or universal) baking tray into the first guide when baking. |
 | Temperatureprobe- (BAKESENSOR) |
 | Silicone baking mat - used as replacement for single use baking paper, can be reused until it wears out over time. Prevents food from sticking to the baking tray. It is suitable for baking pastries, rolls, pizza, frozen pre-cooked products, etc. Discoloration or stains do not affect its properties. Easy to clean and store.Silicone mat is not subject to warranty. |
| NOTE: Additional equipment can be purchased from an authorised service center. | |
3.2 Control panel

| UseKey | ||
 | Selection of basic menus1. | |
| 2. |  | Wi-Fi connectivity setting and remote control |
| 3. |  | Switching the oven light on and off |
 | Left selector key4. | |
| 5. |  | Exit or return without saving |
| 6. |  | Switching the fast preheat on and off |
| 7. |  | Switching the oven on and off |
| 8. |  | Addition of steam |
| [BZHT] | Time function resets9. | |
 | Confirmation of selection, settings10. | |
 | Right selector key11. | |
| 12. |  | Cancel the current setting, delete the function |
 | Additional setup options13. | |
 | Selection of time functions14. | |
| 15. |  | Starting and stopping the operation |
| NOTE: Only the keys that are enabled in the current menu are illuminated (fully or partially) on the control panel. | ||

INFORMATION!
The project uses the LVGL graphics library as its graphical user interface.
| Explanation of shortcuts in the manual: | |
 Short press –for basic selections Short press –for basic selections |  Long press, 5 seconds –for additional settings or fast increase of setting Long press, 5 seconds –for additional settings or fast increase of setting |
| [23WZ] INFORMATION!All settings are controlled by the keys.For better key responsiveness, touch them with a large area of your fingertip. Each time you press a key, this will be acknowledged by an acoustic signal (when this function is available). | |




4. Before first use
| 1. | Remove oven utensils and any packaging (cardboard, polystyrene foam, plastic) from the oven. |
| 2. | Wipe the utensils, the inside of the oven and the tank container with a damp cloth. Do not use rough cloths or cleaners. |
| 3. | Switch on the oven (see chapter 4.1 Switching on for the first time). |
| 4. | Preheat the oven with the top and bottom heater system for about one hour at a temperature of 250 °C (see chapter 5.1 Main menu - Manual cooking mode). |
| NOTE: During heating, the characteristic "new smell" is released, so ventilate the room thoroughly during this time. | |
4.1 Switching on for the first time
After connecting the appliance to the mains for the first time or after a prolonged power outage, you will need to set the language, time and hardness of the water.

INFORMATION!
If you do not want to set this, touch OK. The default settings will be saved. You can change the settings at any time (see chapter 8. General settings).
![graph LR A["English lt; gt;"] -- gt; B["OK"] B -- gt; C["12 : 30 lt; gt; gt; lt; gt;"] C -- gt; D["OK"] D -- gt; E[" lt; gt;"]](/content/2026/06/1383203/images/9221a80492c2b254427c7fc121632807fe123ef8df73b0aba4761c18e9d0f135.jpg)

textimage
OK| 1. | Settingthelanguage:The display shows the default language (English). By pressing lt; or gt; you can change the language. Confirm with . OK |
| 2. | Settingtheexacttime:By pressing or you can set the exact time of day. Set the hours and minutes separately. Confirm your selection with . OK |
| 3. | Settingthewaterhardness:By pressing lt; or gt; you can set the water hardness. Confirm your selection with OK . |
| All initial settings are set and the appliance is in standby mode. | |
4.2 Water hardness
Cleaning of the steam system depends on both frequency of baking with steam injection and on the hardness of the water used.
The hardness of the water must be adjusted before the first use. If the water is softer or harder than the default setting, you can change the set hardness level.
| 1. | Soak the test paper strip (supplied with the appliance) in water for one second. Wait one minute, then note the number of bars on the paper strip. The level setting corresponds to the number of coloured bars on the paper strip (see table). |
| 2. | Compare the test strip with the image on the display. |
| Value(°N) | Amountofwatertobedecalcified | Numberofcolouredbars | |
| very soft | 0-3 dH | 30 | 4 green bars |
| 1 red bar253-7 dHsoft | |||
| medium hard | 7-14 dH | 22 | 2 red bars |
| hard | 14-21 dH | 20 | 3 red bars |
| very hard | 21 dH | 18 | 4 red bars |
| You can also adjust the water hardness in the Settings menu (see chapter 8. General settings). | |||
5. Using the oven - selecting the baking settings
| Mainselectionmenu | |
| Switch on the appliance and select . By pressing or you can choose from different menus: | |
| Manual | Allows you to arbitrarily set the cooking parameters with factory preset values that can be changed (see chapter 5.1 Main menu - Manual). |
| Auto | Allows a large selection of preset programmes depending on the selected dish (see chapter 5.7 Auto). |
| Favourites | This mode allows you to select your own programmes that you have previously saved (see chapter 7.1Favourites-saveyouownsettings). |
| Extra | Selection of additional programmes (see chapter 5.8 Extra). |
| Oven cleaning programmes.Cleaning | |
| Settings | General oven settings (see chapter 8. General settings). |
| + menu-additionalsettings | |
| The function provides additional setting options. Menu content varies depending on the control options available at that time.To select additional settings, touch + . | |
| Stepbake | Three-step cooking setting with different parameters (see chapter 5.3 Cookingbysteps(+menu)). |
| Information | Detailed information on the programmes and function of the oven systems. |
| Gratin | It is used for dishes to which you add dressing/topping or you want to additionally bake its surface at the end. The function can be selected after 10 minutes of cooking or at the end of cooking (see chapter 6.1Gratin(+menu)). |
| Favourites | Saving selected custom settings (see chapter 7.1 Favourites - save yourownsettings). |
| Displaylock | Activating / deactivating the safety key lock to protect the oven from accidental use (see chapter 8.1 Display lock (+ menu)). |
5.1 Main menu - Manual
![graph LR A["①"] -- gt; B[" lt; gt;"] B -- gt; C["220°C"] C -- gt; D[" lt; gt;"] D -- gt; E["$"] E --> F["▶|□"]](/content/2026/06/1383203/images/d52efd4ab69950c897c382efbf202733b5d1dcd5a7817a67ae0b3cfd798df283.jpg)
| 1. | Switch on the appliance.1 |
| 2. | By pressing < or > you can select the cooking system (see table Selection of cooking systems). |
| 3. | By pressing < or > you can set the temperature or power. |
| 4. | Use quick preheating to bring the oven to the desired temperature as quickly as possible. By pressing the symbol will light up fully. When the set temperature is reached, an acoustic signal sounds. The display will show Insert the dish. Open the door and insert the dish. The programme automatically resumes cooking with the selected settings. |
| 5. | Additionally, you can set:- Timer (see chapter 5.2 Timer - Timer functions)- Cooking by steps (see chapter 5.3 Cooking by steps (+ menu)) |
| 6. | To start cooking, touch ▷|□ |
Choosing the baking system
| UseSymbol | |
 | SteamIt is used for cooking all kinds of vegetables, small pieces of meat, fruits and side dishes (rice, pasta). |
 | SousvideIt is a process of slow cooking in vacuum, at a precisely defined and maintained temperature. Sous vide is suitable for preparing meat, fish and all kinds of fruits and vegetables. The food prepared in this way is juicy and develops a fuller taste. |
 [IMAGE] [IMAGE] | Topheater+BottomheaterUse this system for conventional cooking on a single rack, making soufflés, and cooking at low temperatures (slow cooking).Use the addition of steam if you want the surface of the food to cook more and create more crispness. |
 [IMAGE] [IMAGE] | HotairHot air allows for better air circulation around the dish. In this way, it dries its surface more and creates a thicker crust. For roasting meat, baking cakes, cooking vegetables and for drying food at one or more levels at the same time.Use the addition of steam if you want the surface of the food to cook more and create more crispness. |
 | Hotair+BottomheaterPerfect for making pizza and pastries with a higher water content. For cooking on one level when you want your dishes cooked and crisp as quickly as possible. |
 | Topheater+Bottomheater+FanFor even cooking of dishes on one level and making souffles. |
Table continued from last page
| UseSymbol | |
 | LargegrillFor cooking large quantities of flat foods, such as toasted bread, canapees, grill sausages, steaks, fish, skewers, for cooking au gratin and achieving a nice crispy crust. The heaters mounted on the top of the oven cavity heat the entire surface evenly.Low level - suitable for cooking fish fillets, whole fish, frying cheese.Medium level - suitable for cooking small pieces of meat, fish cutlets, vegetables, canapees, skewers.High level - suitable for cooking steaks, burgers, grill sausages, toast and cooking au gratin. |
 [IMAGE] [IMAGE] | Largegrill+FanFor roasting poultry and grilling large pieces of meat.Use the addition of steam if you want the surface of the food to cook more and create more crispness. |
 | Topheater+HotairThis cooking method gives the food a crispy crust, without added fat. It is a healthy version of "fast food" with a lower calorie content. Suitable for small cuts of meat, fish, vegetables and pre-cooked frozen products (fries, chicken medallions). |
 | MoresystemsConfirm your selection with OK . Additional systems will be displayed. |
 | Largegrill+BottomheaterFor faster cooking of dishes on one level and for a crispy pastry crust. |
 | Smallgrill+BottomheaterFor gentle and controlled slow cooking of delicate food (soft cuts of meat) and baking pastry with a crunchy bottom. |
 | Smallgrill+Bottomheater+FanFor optimal preparation of yeast-leavened bakery products and all types of bread and for preservation. |
 | Largegrill+Bottomheater+HotairFor dishes where even crispiness from all sides is desirable. The function is also suitable as a first step of multi-step roasting of meat, as it allows for quick searing of the surface in the initial phase and slow roasting in the second phase. The meat will be juicy and the crust nicely browned. |
 | Smallgrill+HotairHot air allows for better air circulation around the dish. This will dry out the surface more. In combination with the grill heater this will also result in a more intensive colour. For faster cooking of meat and vegetables. |
 | HotairECO 1)For gentle, slow and even cooking of meat, fish and pastries on one level. This way of cooking retains a higher proportion of water in the meat, which leaves it juicier and softer, while the pastry becomes evenly browned/baked. The used temperature range is between 140 °C and 220 °C. |
 | AutomaticmenuShortcut to the Automatic Menu (see chapter 5.7 Auto) |
1) This function is used to determine the energy efficiency class according to EN60350-1.
5.2 Timer - Timer functions
To select the timer functions, touch . By pressing or you can select the time function you want to set.

INFORMATION!
The clock must be set to day time.

INFORMATION!
You can reset the selected time function by touching 0:00.
| UseDescription/timefunction | |
| Duration | In this mode, you can specify the duration of operation for the oven. |
| Eggtimer | The independent alarm operates independently of the oven operation. After the set time has expired, the appliance does not turn on or off automatically. |
| Endbakingat | Use this mode when you want the food in the oven to start cooking with a time delay. Enter the duration and desired end time of cooking. The appliance starts automatically and ends its operation at the desired time. |
Setting duration![graph LR A["+"] --> B["220°"] B --> C["①"] C --> D["00:30"] D --> E["OK"]](/content/2026/06/1383203/images/49316a52d21e4d757c55c1f29c8c2c401e58622bda5f3212b6b1e554a8f2b286.jpg)

| 1. | By pressing < or > you can set the desired cooking time (hours and minutes). Confirm your selection with OK . The oven operating time selected will appear on the display unit. |
| 2. | To start cooking, touch ▷|□ |
Setting egg timer![graph LR A["Clock"] --> B[">"] B --> C["00:05 < >> <>"] C --> D["OK"]](/content/2026/06/1383203/images/1900d1c2d4e6950906f84a43ff7f2afaf073739baeb6ac68648616c91f6b7894.jpg)
| 1. | By pressing < or > you can set the duration of the independent alarm (hours and minutes). Confirm your selection with . OK |
| The maximum possible setting is 24 hours. | |
Table continued from last page
NOTE: If the appliance is switched off, the alarm will still be active.
Setting the end of baking at
![graph LR A["温度表"] --> B["220℃"] B --> C["①"] C --> D["02:00"] D --> E["OK"] F["②"] --> G[">2x"] G --> H["18:00"] H --> I["OK"] J["▷/□"] --> K["OK"]](/content/2026/06/1383203/images/7e1b571e36980e5cf3d7931a8381fedb9f23cf9bec2fdea606fd9a71e36ffdb2.jpg)
| 1. | First set the cooking time. With the key or you can set the desired cooking time (hours and minutes). Confirm your selection with OK . The oven operating time selected will appear on the display unit.Example:cookingtimeis2hours |
| 2. | You can select the delayed operation by pressing ⏻ and then double-clicking on > .By pressing < or > you can set the time at which you want the dish to be ready. Confirm your selection with OK . The desired end time is shown on the display.Example:cookingendsat18:00 ⏻ |
| 3. | To start cooking, touch ▷□The oven switches to partial standby mode while waiting for switch-on. The selected settings are automatically switched on and off at the selected time.Example: cooking starts at 16:00, cooking ends at 18:00 |
| After the set time has expired, the oven stops working automatically. A short beep will be emitted. | |

WARNING!
This function is not suitable for food that requires quick preheating.
Perishable food should not be kept in the oven for a long time. Before using this mode, check whether the clock on the appliance is accurately set.
5.3 Cooking by steps (+ menu)
This function allows you to set the cooking in three steps (combine three consecutive cooking steps in one cooking process).

INFORMATION!
The function can be set in the Main Menu - manual cooking mode (see chapter 5.1 Main menu - Manual).
![graph TD A["①"] --> B["< >"] B --> C["180°c"] C --> D["< >"] D --> E["“”!!!”"] E --> F["②"] G["02:00"] --> H["OK"] H --> I["+"] I --> J["OK"] K["250°c"] --> L["00:15"] L --> M["OK"] M --> N["▶|□"] N --> O["< >"] P["< >>"] --> Q["OK"] Q --> R["+"] R --> S["OK"] T["< >"] --> U["OK"]](/content/2026/06/1383203/images/44872676b50102b90977b7893609958f071c69dce61f293586c3c2e0f75935e2.jpg)
| 1. | Switch on the appliance 1 |
| 2. | FirststepBy pressing < or > you can select the cooking system, temperature and cooking duration as the first step. You can also select quick preheating and touch OK . |
| 3. | Select additional settings. Touch + . The display will show Add step. Confirm with OK . |
| 4. | Step2Select the settings for the second cooking step (see setting under point 2) and touch OK .NOTE: Do the same for Step 3. |
| 5. | You can also change all three steps before starting cooking. By pressing < or > you can select the step you want to change. |
| 6. | To start cooking, touch ▷□The oven first starts working with the settings for the first step. |
| NOTE: You can remove an individual step by touching × . | |
5.4 Cooking with steam
Season the food and pack it in a dedicated plastic bag that is suitable for vacuuming and cooking using the sous vide method. Place the packaged food on a perforated baking tray and place on the middle level of the oven.
| 1. | Switch on the appliance.1 |
| 2. | By pressing < or > you select the system. Steam Steam Sous vide Sous vide |
| 3. | By pressing < or > you select the temperature (only with Sous vide) and steam operation time.The display shows the symbol 🎨+.Confirm your selection with .OK |
| 4. | Fill the water tank (see chapter Filling the water tank below). |
| 5. | To start cooking, touch ▷|□ |
5.5 Steam injection during the baking process
The addition of steam roasts the food surface more and creates greater crispness.
Just the right amount of steam created during this process cooks the surface of the food better and improves its crispness, while the inside of the food remains soft and fluffy. It is recommended to use the steam addition system when baking goods such as bread, fresh rolls, sponge rolls and cakes, and when cooking small pieces of poultry and vegetables.
![graph LR A["①"] --> B["< >"] B --> C["+"] C --> D["< >"] D --> E["00 : 15"] F["OK"] --> G["H2O bottle"] G --> H["▶ | □"]](/content/2026/06/1383203/images/01a06c57890d53fec2e94a331854deca3cee5ff2607c8f167c667bbd40ecae24.jpg)
| 1. | Switch on the appliance.1 |
| 2. | By pressing < or > you select the system. Top heater + Bottom heater Top heater + Bottom heater Hot air Hot air Large grill + FanThe display shows the partially illuminated symbol 🎨+ . Touch the key to add steam during cooking.Theadditionofsteamisonlypossiblewiththeabovethreesystems. Large grill + FanThe display shows the partially illuminated symbol 🎨+ . Touch the key to add steam during cooking.Theadditionofsteamisonlypossiblewiththeabovethreesystems. |
| 3. | By pressing < or > you select the steam intensity level and steam operating time.Low level - suitable for cooking large pieces of meat, raising dough, fish.Medium level - suitable for baking fresh buns, sponge cakes, soufflés and cooking poultry.High level - suitable for baking bread.For cooking fish, baking bread and cakes and cooking chicken, we recommend adding steam in the initial phase of cooking, in the first 10-15 minutes.Confirm your selection with .OKThe symbol lights up fully, which means that the steam addition is successfully activated. |
| 4. | Fill the water tank (see chapter Filling the water tank below). |
| 5. | To start cooking, touch ▷|□ |
5.6 Filling the water tank
The water tank allows for independent feeding of water into the oven. The capacity of the tank is approximately 1.2 l.
Always fill the tank with clean water from the water supply network or bottled water, without additional admixture.

| 1. | Remove the water tank from the housing by pressing on the door. |
| 2. | Open the cover. Wash the tank with water.Assemble the tank and pour in fresh water. |
| 3. | Push the tank back into the housing to the end position. |
| NOTE: After cooking, the remaining water in the steam system is pumped into the water tank. The cover and the water tank can be cleaned with conventional liquid cleaners that do not contain abrasives. | |

WARNING!
If you do not observe the MAX indicator and pour too much water into the tank, excess water might spill onto the ground through the gap between the tank cover and the tank.
The water that is poured into the tank must have a room temperature of about 20°C (+/-10°C). Do not use distilled water, tap water with high chlorine content, or other similar liquids. Use only fresh tap water, softened water, or non-carbonated mineral water.
5.7 Auto
The programme offers you a large selection of preset recipes that were approved by chefs and nutritionists.
![graph LR A["①"] --> B["≡"] B --> C[">"] C --> D["OK"] D --> E["<< >"] F["OK"] --> G["<< >"] G --> H["0.5kg<< >"] H --> I["OK"] I --> J["▷|□"]](/content/2026/06/1383203/images/6983b3547fad68f232c9eedd567cfee2c7f0c2bf31a930908f1fa6b974502cf3.jpg)
| 1. | Switch on the appliance and select ≡ . By touching < or > select menu Auto. Confirm with to enter the submenu. |
Table continued from last page
| 2. | By touching < or > you select the type of food and then the selected dish. Confirm with OK.The recipes have a predetermined system, temperature and cooking time.NOTE: For some dishes, you can change the weight and degree of cooking. |
| 3. | Za začetek delovanja peke se dotaknite ▷|□ . |
| 4. | Some dishes also include the quick preheating function. When the set temperature is reached, an acoustic signal will sound. The display will show Insert dish. Open the door and insert the dish. The programme automatically resumes cooking with the selected settings. |
| NOTE: By touching + you can see a detailed description of the current selection. | |
5.8 Extra
![graph LR A["①"] --> B["≡"] B --> C[">3x"] C --> D["OK"] D --> E["40°C 0:45"] E --> F["<<"]](/content/2026/06/1383203/images/86dc8a7e4e5b899da547d37b8f4869692e8ed2079e7990a367d71239f291c935.jpg)

![graph LR A["①"] --> B["≡"] B --> C["> 4x"] C --> D["OK"] D --> E["40 °C 0:45"] E --> F["<< >>"]](/content/2026/06/1383203/images/375566ad4fc40e79ccace56b9ac3fbde40ed682369506a1af1ff9a250df5175a.jpg)

| 1. | Switch on the appliance and select ≡ . By touching < or > select the Extra. Confirm with to enter the submenu. |
| 2. | By touching < or > you select the function (see table below). Confirm with OK. Preset values are displayed. Some functions allow you to set the temperature and cooking duration. |
| 3. | To start cooking, touch . ▷|□UseProgramme |
| AirFry | Frying food with hot air, without added fat. Faster and healthier version of "fast food". This cooking method gives the food a crispy crust, without added fat. It is a healthy version of "fast food" with a lower calorie content. |
| Proofing | The dough will rise faster and more evenly without drying out the surface. While the dough is rising, do not open the door. |
| Dehydrate | With the help of air, you reduce the amount of moisture in the food and thus prolong its durability. |
| Defrost | It is used for slow defrosting of frozen food (cakes, pastries, breads and rolls and deep-frozen fruit).Halfway through the defrosting time, turn the food pieces over and separate them if they have been frozen on top of each other. |
| Reheat | This mode allows you to gently reheat ready-made dishes. Do not open the door unnecessarily during operation. |
| Keepwarm | It is used to keep already prepared dishes warm. Do not open the door during operation. |
| Platewarming | Useful if you want to preheat the plates or cups so that the food stays warm for a long time. You can set the temperature. |
| Preserving | The process by which we prolong the durability of the food. |
| Sterilisebottles | Suitable for sterilisation of all types of bottles. Sterilisation is a process that destroys all types of microorganisms. |
| Sabbath | The Sabbath function allows the food in the oven to stay warm without having to turn the oven on and off.Set the duration of operation (between 24 and 72 hours) and temperature. By pressing ▷|□ , the countdown begins.All sounds and operations are switched off except for the key ➀ .NOTE: In case of a power outage, Sabbath mode will be deactivated and the oven will return to its initial state. |
6. Starting the cooking process
![graph TD A["▶"] --> B["□"] style A fill:#f9f,stroke:#333 style B fill:#ccf,stroke:#333](/content/2026/06/1383203/images/b106f0cacb91134074a1a384273c6a72707beee52cdfa73a54abb86be0970b69.jpg)
Start cooking by touching ▷|□.
The following values appear on the display:
- selected settings and operating time,
- current temperature,
- set temperature,
- if you selected a timer, food preparation time and end time will be displayed, too.
During the cooking process, you can change the system, temperature and timer functions.
6.1 Gratin (+menu)
This function is used in the last phase of cooking, when we add dressing/topping to the dish or we want to crispen its surface. When using the gratin function, a crispy golden yellow crust is formed on the dish, which protects it from drying, and at the same time gives the dish a nicer appearance and better taste.
![graph TD A["Start"] --> B{>10 min} B --> C["+"] C --> D[">"] D --> E["OK"] F["Start"] --> G{00:10} G --> H["OK"] H --> I["End"]](/content/2026/06/1383203/images/62b77f24bd3938a767f3e2d777e8a7b95d8440b487286eb2fc42bbac60c47fa8.jpg)
| 1. | Touch + and press < or > to select Gratin. |
| 2. | The display shows the preset system (large grill) and the temperature 300 °C. Set the operating time (max 10 min). |
| 3. | The function can also be switched off during operation. Switch off the cooking by touching ▷|□ . |
| WARNING!Controlthecooking.Whenusingtheaugratinfunction,theovenreacheshigh temperatures.Theaugratinfunctionworksforamaximumof10minutes,thentheovenswitchesoff automatically. | |
6.2 Crispy bottom
![graph LR A["Start"] --> B{Decision} B -->|Yes| C["OK"] B -->|No| D["End"] C --> E["OK"] E --> F["OK"] G["Start"] --> H["OK"] H --> I["OK"] I --> J["OK"] K["Start"] --> L["OK"] L --> M["OK"] M --> N["OK"] O["Start"] --> P["OK"] P --> Q["OK"] Q --> R["OK"] S["Start"] --> T["OK"] T --> U["OK"] U --> V[…](/content/2026/06/1383203/images/3b65b8fecf442c6afd03c059848a1c06bb1480c4354bdb9cc0b033ae4528c93b.jpg)
| This function is available only at the end of cooking and can be activated for 10 min. | |
| 1. | In the final menu, press < or > to select the function Au gratin from below. Confirm with OK . |
| 2. | The function can also be switched off during operation. Switch off the cooking by touching ▷|□ . |
7. End of cooking by touching
After cooking is completed, the display shows Baking finished. You can also stop the operation by touching ▷□.
![graph LR A["▶"] --> B[">"] B --> C["OK"]](/content/2026/06/1383203/images/82957c91ba2c06f44bdfe8eaa2695e04f988cfacfbed00b5251f2cb6ae6256f3.jpg)
| By pressing < or > you can choose a new setting. Confirm with OK .Menu content varies depending on the control options available at that time. | |
| Finish | Select End to finish cooking. The main menu appears on the display. |
| Continuebaking | By selecting this, you extend the cooking with the same system and temperature settings.NOTE: If you had a cooking duration set, the time is counted forward from where it was stopped. |
| Gratin | Select to cook the top of the dish even more. |
| Crispy bottom | Select to further brown the underside of the dish. |
| Addtofavorite | This mode allows you to save the selected settings to your favourites and use them again later (7.1 Favourites - save your own settings). |

INFORMATION!
After the operation is completed, all timer settings are also stopped and deleted, except for the egg timer. Time of day (clock) will be displayed. The cooling fan will continue to operate for a while.
After the use of the oven, some water may be left in the condensate channel (underneath the door). Wipe the channel with a sponge or a cloth.
7.1 Favourites - save your own settings
Add to favourites is a feature that allows you to save your favourite and most frequently used settings and use them again in the future. Up to 12 recipes can be stored.
![graph LR A["+"] --> B[">"] B --> C["ok"] C --> D["u V w < >"]](/content/2026/06/1383203/images/be96ddabd13bc42dc0e41437edaaa271d448bf5bdd7afc072cf6392c73103ff1.jpg)

| Savingrecipesinsettings.1.Touch + and press < or > to select Add to favourites. Confirm with OK . | |
| 2. | Savingthesettingaftercookingiscompleted.In the final menu, press < or > to select Add to favourites. Confirm with OK . |
| You can also change the name of a saved setting. By pressing < or > you select the letter and confirm it with OK . If necessary, delete the character with X . Confirm with + to save your favorite recipe. | |
| Displayingalreadysavedrecipes.3.Touch ≡ . By pressing < or > select Favourites. Confirm with OK to enter the submenu. Saved recipes are displayed.NOTE: You can also change the preset values for already saved recipes and save them under a new name after cooking. | |
| Deletingalreadysavedrecipes4.Switch on the appliance and select ≡ . By touching < or > select Favourites. Confirm with OK to display already saved recipes. Select a recipe and delete it by tapping X . | |
8. General settings

WARNING!
After a power outage or after the appliance is switched off, additional function settings will remain stored for no more than a few minutes. Then, all settings, except for the acoustic signal volume and display dimmer, will be reset to factory defaults.
![graph LR A["①"] --> B["≡"] B --> C["> 5x"] C --> D["OK"]](/content/2026/06/1383203/images/2b0ee94550e73f375d5c1897af7289ea69fe4481a6257b9a2a7b9326d920d600.jpg)

| Touch ≡ . By pressing < or > select Settings. Confirm with OK to enter the submenu.You can edit individual settings with < or > and confirm them with OK . | ||
| 1. |  | ClockSet the hours and minutes.You can select the 12h or 24h format. Confirm the selection again by touching . ⏻ |
| 2. |  | VolumeYou can choose between four levels of volume (no sound, low, medium, high). |
| 3. |  | TouchsoundYou can choose between four levels of volume (no sound, low, medium, high). |
| 4. | 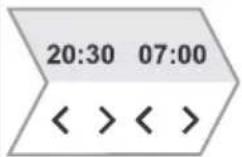 | NightmodeIt is a feature that automatically reduces display brightness during night time (between 19:00 and 7:00) and turns off the clock display as well as the acoustic signals. Set the time. |
| 5. |  | DisplayIt is a function that turns the daytime display on or off. Turn it on (ON) or off (OFF). |
| 6. |  | FastpreheatsettingsThe function allows quick preheating to be automatically added to cooking systems that allow for it.Turn it on (ON) or off (OFF). |
Table continued from last page
| 7. | 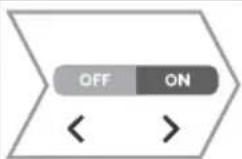 | HeatingsystemsThis function allows all cooking systems to be displayed on the display.Turn it on (ON) or off (OFF). |
| 8. |  | Resets-FactorysettingsThis function allows the appliance to be reset to factory settings. Thedisplay will showReset, which is confirmed by long pressingOK. |
 | LanguageThe display shows the default language (English). If the language in whichthe texts are displayed on the display does not suit you, choose anotherone. | |
| 9. |  | WaterhardnessYou can choose between five water hardness levels. The default settingis level 5.Whr 1 means water with the lowest hardness.Whr 5 means water with the highest hardness. |
| To exit the general settings menu, touch≡or← | ||
8.1 Display lock (+ menu)
![graph LR A["+"] --> B[">"] B --> C["OK"]](/content/2026/06/1383203/images/d9723d27e53ec1d603cc6c6972fb366d6135f5f2eb6ec482eb567cdc66365608.jpg)
- Touch + and press < or > to Display lock. Confirm the selection by touching OK. The screen is now locked. To unlock the screen, touch + and confirm your selection with OK.
- If the lock is activated with no timer function engaged (only clock is displayed), then the oven will not operate.
- If the lock is activated after a timer function has been set, then the oven will operate normally; however, it will not be possible to change the settings.
- When the keys are locked, you cannot change the cooking systems or additional functions. You can only turn off the cooking.
- The keys remain locked even after the oven is switched off. To select a new system, you must deactivate the lock.
9. Connecting the appliance to the ConnectLife application
application

ConnectLife is a smart home platform that connects people, devices and services. The ConnectLife application includes advanced digital services and carefree solutions that allow users to monitor and control appliances, receive notifications from a smartphone, and update software (supported features may vary depending on your appliance and the region/country in which you are located).
To connect your smart device, you need a home Wi-Fi network (only 2.4 GHz networks are supported) and a smartphone equipped with the application ConnectLife.

ConnectLife


To download the ConnectLife application, scan the QR code or search for ConnectLife in your favourite app store.
- Install the ConnectLife application and create an account.
- In the ConnectLife application, go to the "Add device" menu and select the appropriate type of device. Then scan the QR code (it can be found on the nameplate of the appliance; you can also enter the AUID/MV number manually).
- The application then guides you through the entire process of connecting the appliance to your smartphone.
- After successful connection, you can control the appliance remotely via the mobile application.
10. Wi-Fi management

INFORMATION!
If this setting is not available, then your oven is not fitted with a Wi-Fi module and does not support internet connectivity.
When the Wi-Fi module is enabled and connections are successfully set up and synchronized, then the oven can be controlled and operated via a mobile device and the ConnectLife app.
The Wi-Fi connection works in the same frequency range as some other devices (e.g. microwave ovens and remote-controlled toys). Consequently, temporary or permanent disruption of the connection is possible. In such cases, the availability of the offered functions cannot be guaranteed.
Ensuring the quality of the functions offered depends heavily on the signal strength. If the router is far away from the appliance, there may be problems with the reliability of the connection.
10.1 Using Wi-Fi
Switch on the appliance ①, then press ≡ to activate the Wi-Fi function settings.
To enter different Wi-Fi module settings, press 📤.
If you touched ⏻ inadvertently, the setting can be cancelled by repeatedly long tapping (for 18 seconds).
| 1. | [>3s]  | SwitchingontheWi-Fimodule: After long-pressing (up to 3 seconds) , the display will show Wi-Fi active to indicate that the module is switched on. The symbol will start blinking. |
| 2. | 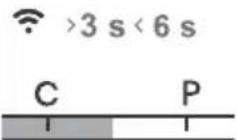 | Connectingtheappliance: After long-pressing (between 3 to 6 seconds) , the display will show Establishingconnection. NOTE: For further settings, follow the instructions in the ConnectLife app.. |
| 3. |  | Connectingadditionalusers: After long-pressing (between 6 to 9 seconds) , the display will show Pairing. Use this setting to connect additional users to the appliance using the ConnectLife app.. NOTE: For further settings, follow the instructions in the ConnectLife app.. |
| 4. |  | Removingallconnectedusers: After long-pressing (between 9 and 12 seconds), the display will show Ungroupalldevices. Use this setting to remove all connected users from the ConnectLife app.. |
| 5. |  | SwitchingofftheWi-Fimodule: Switch off the Wi-Fi connection by long tapping (between 15 and 18 seconds) . The display will show Wi-Fi disabled. |
10.2 Managing the oven remote control

WARNING!
The remote monitoring function via a mobile device should not be used to replace direct personal supervision of the cooking process in the oven. Always regularly check, in person, what is actually going on in the oven.
Press 🔗. The display shows Remote to indicate the possibility of remote control via the ConnectLife app.

INFORMATION!
For safety reasons, some functions are not available via remote access.
- If the oven is in standby mode and you open the oven door, the remote control option has to be enabled again.
- If the oven door is opened during the baking process, the remote control option on the oven is disabled.
- Any user activity on the control unit will automatically disable the remote control option on the oven.
- Cancellation or completion of the baking program or process is the only option that remains available regardless of whether remote control is enabled or not.
Remote control is disabled when using a microwave system (not applicable to combined microwave systems).
•

WARNING!
Always make sure the oven is used correctly and in compliance with the instructions, especially when using remote control. Do not run the oven via remote access unless you are certain about what exactly is in the oven.
| Wi-FisymbolonthedisplayunitWi-Fistatus | |
| Wi-Fi is disabled. | Wi-Fi is constantly dimly lit. |
| Wi-Fi is enabled and it is successfully connected to the server. | The Wi-Fi symbol is constantly fully lit. |
| Wi-Fi is enabled and:• a connection to the server is being established,• is in the state of setting up or establishing connections,• there is no connection to the server. | Wi-Fi icon is fully lit and flashes. |
| Remote control of the oven is not enabled. | REMOTE symbol is not lit on the display unit. |
| Remote control of the oven is enabled. | REMOTE sign is fully lit on the display unit. |
11. General tips and advice for baking
Equipment:
- Use equipment made of heat-resistant non-reflective materials (supplied baking trays and dishes, enamel-coated cookware, tempered glass cookware). Bright-coloured materials (stainless steel or aluminium) reflect heat. As a result, thermal processing of food in them is less effective.
- Always insert the baking sheets and trays to the end of the guides. When baking on the wire rack, place the baking dishes or trays in the middle of the rack.
- Do not place the baking trays directly onto the oven cavity bottom.
- Do not use the all-purpose deep baking tray on the 1st guide level while the appliance is operating.
- Do not cover the oven cavity bottom or the wire rack with aluminium foil. • Always place the baking dishes onto the wire rack.
- When cooking on several levels at the same time, insert the deep all-purpose baking tray into the lower level.
- If you are using parchment paper, make sure it is resistant to high-temperatures. Always trim it accordingly. Parchment paper prevents the food from sticking to the baking tray and makes it easier to remove the food from the baking tray.
- When baking directly on the wire rack, insert the all-purpose deep tray one level lower to serve as a drip tray.
Food preparation:
- For optimum food preparation, we recommend observing the guidelines specified in the cooking table. Choose the lower specified temperature and the shortest specified cooking time. When this time expires, check the results and then adjust the settings as necessary.
- When cooking according to recipes from older cookbooks, use the bottom and top heater system (as in conventional ovens) and set the temperature 10 °C lower than specified in the recipe.
- When cooking larger cuts of meat or pastry with higher water content, a lot of steam will be generated inside the oven, which in turn may condense on the oven door. This is a normal phenomenon which will not affect the operation of the appliance. After the cooking process, wipe the door and the door glass dry.
Efficient use of energy
- Preheat the oven only if indicated in the recipe or in the tables in this instruction manual. If you are using quick preheating, do not put food in the oven until the oven is fully heated, unless otherwise recommended. When heating an empty oven, a lot of energy is consumed, so if possible, we recommend that you prepare several dishes in a row or several dishes at the same time.
- Remove all unnecessary equipment from the oven during baking • Unless it is absolutely necessary, do not open the oven door during baking.
- With longer cooking programs, you can switch off the oven approximately 10 minutes before the end of cooking time to make use of the accumulated heat.
11.1 Cooking table
NOTE: Dishes requiring a fully pre-heated oven are indicated with a single asterisk in the table. * Dishes that only require a 5-minute preheating of the oven are indicated with two asterisks. ** . In this case, do not use the quick preheating mode.
| Dish | °C | min | ||
| PASTRYANDBAKERYPRODUCTS | ||||
| pastry/cakesinmoulds | ||||
| 3creme caramel | 95 | |||
| 3sponge cake | 60-70200-220 | |||
| 2pie with filling | 60-70180 | |||
| 2marble cake | 50-60170-180 | |||
| cake with leavened dough, Gugelhupf (Bundt cake, pound cake) | 2 | 45-55170-180 | ||
| 3open pie, tart | 35-45170-180 | |||
| 2brownies | 30-35170-180 | |||
| pastryonbakingtraysanddishes | ||||
| 60-70180-1 | ||||
| 34-45200-2 | ||||
| 13-18170-1 | ||||
| 30-40180-1 | ||||
| biscuits,cookies | ||||
| 25-35160 * | ||||
| cupcakes, 2 levels | 2, 4 | 155-165 * | 30-40 | |
| 17-22180 * | ||||
| yeast-leavened small pastry, 2 levels | 2, 4 | 160 * | 18-25 | |
| 30-45200-2 | ||||
| puff pastry, 2 levels | 2, 4 | 170 * | 25-30 | |
| cookies/biscuits | ||||
| 30-40150 * | ||||
| Dish |  | °C | min | |
| piped cookies, 2 levels | 2, 4 |  | 150* | 30-40 |
| piped cookies, 3 levels | 1, 3, 5 |  | 145* | 40-50 |
 | 40-50160-1803cool | |||
| biscuits, 2 levels | 2, 4 |  | 150-160* | 20-25 |
 | 120-15080-100 *3me | |||
| meringue, 2 levels | 2, 4 |  | 80-100* | 120-150 |
 | 15-20130-140 *3ma | |||
| macarons, 2 levels | 2, 4 |  | 130-140* | 15-20 |
| bread | ||||
 | 2 rising and proofing | 30-4540-45 | ||
| 3bao buns |  | 100 | 10-20* | |
| bread on a baking tray | 2 |  | 190-200 | 40-55 |
 | ||||
| bread on a baking tray, 2 levels | 2, 4 |  | 190-200* | 40-55 |
 | 30-45190-2003brea | |||
| bread in a tin, 2 levels | 2, 4 |  | 200-210 | 30-45 |
2flatbread (fo  a) a) | 270 | 15-25 | ||
| fresh bread rolls (Semmel/morning rolls) |  | 20-30180-2003 | ||
| fresh bread rolls (Semmel/morning rolls), 2 levels |  | 15-20200-210 *2, 4 | ||
| 5toast |  | High | 4-6 | |
5open sandw  ; ; | High | 3-5 | ||
| pizzaandotherdishes | ||||
| homemade pizza | 1 |  | 300* | 4-10 |
| homemade pizza, 2 rack levels | 2, 4 |  | 210-220* | 25-30 |
| Dish |  | °C | min | |
 | 10-20200-2202froze | |||
| frozen pizza, 2 levels | 2, 4 |  | 200-220 | 10-25 |
 | 50-60190-2002savc | |||
 | 40-50180-1902bure | |||
| MEAT | ||||
| beefandveal | ||||
| beef roast (loin, rump), 1.5 kg | 2 | [TDSK] | 160-170 | 130-160 |
 | 90-120200-2102brai | |||
| sirloin, medium done, 1 kg | 2 |  | 170-190 * | 40-60 |
| beef roast, slow cooked | 2 |  | 120-140 * | 250-300 |
| beef steaks, well done, thickness 4 cm |  | 25-30High4 | ||
 | 25-35High4burgers, | |||
 | 120-150160-1702vea | |||
| pork | ||||
| pork roast, rump, 1.5 kg | 3 |  | 200-220 | 100-200 |
| pork roast, shoulder, 1.5 kg | 3 |  | 180-190 | 90-120 |
| pork fillet, slow cooking, 400 g | 2 |  | 80-100 * | 80-100 |
| pork roast, slow cooked | 2 | [BH73] | 100-120 * | 200-230 |
| pork ribs, slow cooked | 2 |  | 120-140 * | 210-240 |
| pork chops, thickness 3 cm | 4 |  | Medium | 20-25 |
| poultry | ||||
 | 60-80200-2202poul | |||
 | ||||
| poultry with stuffing, 1.5 kg | 2 |  | 170-180 | 70-90 |
 | 45-60170-1802poul | |||
| Dish | °C | min | ||
 | 25-40210-2203chicl | |||
| 4chicken win |  | 25-40210-220 | ||
| poultry, breast, slow cooked | 3 |  | 100-120 * | 60-90 |
| meatdishes | ||||
 | 60-70170-1802mea | |||
 | 8-15High4grill saus | |||
| FISHANDSEAFOOD | ||||
 | 12-20230-2404who | |||
 | ||||
| fish fillet, thickness 1 cm | 4 | Low | 8-12 | |
 | 10-15Medium4fish s | |||
 | 5-10230 *4scallops | |||
 | 3-10Low4shrimps | |||
| 3octopus, sq |  ntacles ntacles | 180-24085 | ||
| VEGETABLES | ||||
| 3broccoli, wh |  00 g 00 g | 100 | 15-25 | |
| broccoli, blossoms, 5300 g - 1200 g | 3 |  | 100 | 12-18 |
| 3peas, | 2.5 kg  | 100 | 30-40 | |
| 3cauliflower, |  oms, 500 g oms, 500 g | 100 | 15-20 | |
| 3carrots, whc |  0 g 0 g | 100 | 25-35 | |
| 3squash, wec |  500 g 500 g | 100 | 25-35 | |
| 3asparagus, |  | 100 | 15-30 | |
 | 30-40210-220 *3bal | |||
 | ||||
 | 40-50200-210 *3bal | |||
| Dish | °C | min | ||
| 30-40190-2003stuff | ||||
| 20-30210-220 *4Fre | ||||
| 30-40190-2003mixe | ||||
| 30-40190-2003stuff | ||||
| CONVENTIONALPRODUCTS-FROZEN | ||||
| 20-25210-2203Fren | ||||
| french fries, 2 levels | 2, 4 | 190-210 | 30-40 | |
| 12-17210-220 *4chi | ||||
| 15-20210-2202fish | ||||
| 30-40200-2102lasag | ||||
| 20-30190-2002dice | ||||
| 18-23170-1803crois | ||||
| BAKEDPUDDINGS,SOUFFLÉSANDDISHESAUGRATIN | ||||
| 35-45180-1902pota | ||||
| 35-45180-1902lasag | ||||
| 40-60160-1802swe | ||||
| 35-45160-180 *2sw | ||||
| 30-45170-1903dish | ||||
| 20-35180-2002stuff | ||||
| 6-9High**4grilling c | ||||
| OTHER | ||||
| 301802preservatic | ||||
| 301253sterilization | ||||
| Dish | °C | min | ||
 | /150-170 *2cookin | |||
 | /60-953reheating | |||
 | 15752plate warmi |
11.2 Cooking with a Temperature Probe (BAKESENSOR)
The temperature probe allows for accurate monitoring of the core temperature of the food during cooking.

WARNING!
The temperature probe should not be in direct vicinity of the heating elements.
![graph LR A["①"] --> B["鱼"] B --> C["鱼 jumping"] C --> D[" ramping"] D --> E[">"] F["OK"] --> G["210°C 52°"] G --> H["<< >"] H --> I["▶/□"]](/content/2026/06/1383203/images/9967778c63d1b68bc4cd26a57413e3a2b5230f4478bdfab5d06e2ea1a6b78856.jpg)
| 1. | Stick the metal end of the probe into the thickest part of the food.NOTE: To start cooking with the temperature probe, the current cooking process must first be interrupted and then the temperature probe must be connected to the socket. By inserting the probe into the socket, the preset functions on the oven are deleted. |
| 2. | Unscrew the socket cover in the right front upper corner of the oven (see figure) and insert the probe plug into the socket.By pressing < or > you select automatic or manual setting. |
| 3. | - In manual mode, the symbol ∧ will appear next to the system on the display unit, together with the preset cooking temperature (in the temperature range up to 210 °C), which can be changed. Also determine the core temperature of the food (in the temperature range from 30 to 99 °C).- In automatic mode, touch < or > to select the dish. The recipes have a predetermined system, temperature and cooking time. You can change the degree of browningNOTE: When using the probe, setting the cooking time is not possible. |
| 4. | Confirm the setting by touching ▷|□ .During cooking, the set temperature and current temperature of the foodstuff are alternated on the display. If desired, you can change the cooking temperature or the desired core temperature of the foodstuff during operation. |
| 5. | When the set core temperature is reached, the oven will stop operating. End will appear on the display unit. An acoustic signal will be heard which you may turn off by touching any key. After one minute, the acoustic signal will be switched off automatically. |
Correct use of the probe, by type of food:
• poultry: stick the probe in the thickest part of the breast; • red meat: stick the probe into a lean part that is not marbled with fat; • smaller chunks with bone: stick them into an area along the bone; • fish: stick the probe behind the head, towards the spine.

INFORMATION!
If you do not want to use it, remove the temperature probe from the appliance and screw the cap back on.

WARNING!
After use, carefully remove the probe from the food, unplug from the socket in the oven cavity, and clean it.
Recommended doneness levels for different types of meat
| Typeoffood | ☐/°C/ | medium rare | medium | medium well | welldone |
| BEEF | |||||
| beef, roast |  / 170 / 2 / 170 / 2 | 68-7359-6553-584 | |||
| beef, sirloin |  / 140 / 2 / 140 / 2 | 63-6658-6254-574 | |||
| roast beef/rump steak |  / 160 / 3 / 160 / 3 | 63-6658-6254-574 | |||
| burgers |  / 210 / 4 / 210 / 4 | 71-7466-6860-635 | |||
| VEAL | |||||
| veal, sirloin |  / 140 / 2 / 140 / 2 | 63-6658-6254-574 | |||
| veal, rump |  / 160 / 2 / 160 / 2 | 63-6658-6254-574 | |||
| PORK | |||||
| roast, neck |  / 170 / 3 / 170 / 3 | 75-8565-70// | |||
| pork, loin |  / 140 / 2 / 140 / 2 | /60-69// | |||
| meat loaf | [78SD] / 170 / 2 | 80-85/// | |||
| LAMB | |||||
| lamb |  / 170 / 3 / 170 / 3 | 77-8072-7666-716 | |||
| MUTTON | |||||
| mutton |  / 170 / 3 / 170 / 3 | 77-8072-7666-716 | |||
| GOATMEAT | |||||
| goat |  / 170 / 3 / 170 / 3 | 77-8072-7666-716 | |||
| POULTRY | |||||
| poultry, whole |  / 210 / 2 / 210 / 2 | 82-90/// | |||
| poultry, breast |  / 170 / 2 / 170 / 2 | 62-65/// | |||
| FISHANDSEAFOOD | |||||
Table continued from last page
| Typeoffood | ☐ / °C / | medium rare | medium | medium well | welldone | |
| trout |  | / 210 / 4 | /62-65// | |||
| tuna |  | / 210 / 4 | /55-60// | |||
| salmon |  | / 210 / 4 | /52-55// | |||
12. Cleaning and maintenance

WARNING!
Be sure to unplug the appliance from the power supply and wait for the appliance to cool down.
Children should not clean the appliance or perform maintenance tasks without proper supervision.
- For easier cleaning, the oven cavity and baking tray are coated with special enamel for a smooth and resistant surface.
- Regularly clean the appliance using warm water and hand dishwashing liquid to remove larger impurities and limescale. Use a clean soft cloth or sponge cloth.
- Never use aggressive or abrasive cleaners and accessories (abrasive sponges and detergents, stain and rust removers, scrapers for glass ceramic plates).
- Food residue (fat, sugar, protein) can ignite during the use of the appliance. Therefore, remove larger chunks of dirt from the oven interior and accessories before each use.
- Oven equipment is dishwasher-safe.
| Exterioroftheappliance | Use hot soapy water and a soft cloth to remove impurities and wipe the surfaces dry. |
| Interioroftheappliance | For stubborn dirt or grime, use conventional oven cleaners. After using such agents, wipe the appliance thoroughly with a wet cloth to remove any residual cleaning agents. |
| Utensilsandguides | Clean with hot soapy water and a damp cloth. In case of persistent dirt, we recommend prior soaking and the use of a brush. |
| If the cleaning results are not satisfactory, repeat the cleaning process. | |
12.1 Cleaning the oven (Steam Clean)
This program makes it easier to remove any stains from inside the oven.
The function is most effective if used regularly, after each use.
Before running the cleaning program, remove all large visible chunks of dirt and food residues from the oven cavity.

WARNING!
Use the Steam Clean system when the oven has fully cooled down.
![graph LR A["①"] --> B["0,4 I"] B --> C["≡"] C --> D["> 5x"] D --> E["OK"] F["▷|□"] --> G["30 min"] G --> H["Output"]](/content/2026/06/1383203/images/bf908972b2f37174b4795305d67d8c2cea62e9e1fe1344ecaee33a0506291869.jpg)
![graph LR A["①"] --> B["H2O"] B --> C["≡"] C --> D[">"] D --> E["OK"] F["▶|□"] --> G["30 min"] G --> H["End"]](/content/2026/06/1383203/images/84f76456e7d454bc97bd2ddbfa6f11048f5efbee7177a0f5ab37a9eca67ad59b.jpg)
| 1. | Insert the shallow baking tray into the first guide level and pour 0.4 litres of hot water into it.Fill the water tank. |
| 2. | Switch on the appliance and select ≡ . By touching < or > select Cleaning. Confirm with to enter the submenu. |
| 3. | By touching < or > select Steam Clean. Confirm with OK |
| 4. | The program will operate for 30 minutes. When the program is complete, End will appear on the display unit. |
| 5. | When the program is completed, carefully remove the baking tray, using oven mitts (there can still be some water on the baking tray). Wipe down the stains with damp cloth and soapsuds.Thoroughly wipe the appliance with a wet cloth to remove all cleaner residue.If the cleaning process is not successful (in case of particularly stubborn dirt), repeat it. |
12.2 Cleaning the water tank and filter foam

WARNING!
Clean the filter foam every time you clean the water tank and descale it.

| 1. | Remove the water tank from the housing by pressing on the door. |
| 2. | Open the cover. Wash the tank with water. |
| 3. | The cover and water tank can be cleaned with conventional liquid cleaners that do not contain abrasives or in the dishwasher. |
| 4. | Clean the inlet pipe with the filter foam under running water. Rinse the foam clean so that there is no visible dirt on it.After cleaning, push the tank back into the housing to the end position (a short click is heard). |
12.3 Cleaning the steam system
Cleaning of the steam system depends on both frequency of baking with steam injection and on the hardness of the water used.
You can carry out the procedure yourself, otherwise the display will alert you.

INFORMATION!
If you do not want to perform the cleaning of the steam system when the oven prompts you to, you can interrupt this by touching ←. Cleaning can be cancelled up to three times, then the oven disables the steam function until the procedure is carried out.

- Descaling agent - Water
![graph TD A["①"] --> B["≡"] B --> C[">"] C --> D["OK"] D --> E[">"] F["▷|□"] --> G["OK"] G --> H["H₂O"] H --> I["OK"] I --> J["OK"]](/content/2026/06/1383203/images/9ae23ad05b8077bf6cade80d4d65d01bcfb469479ebc9a3e7a8211687b34a746.jpg)
| 1. | Switch on the appliance and select . By touching or select Cleaning. Confirm with to enter the submenu. |
| 2. | By touching < or > select Descaling. Confirm with OK . |
| 3. | Fill the tank with descaler. (We recommend the use of a decalcifying agent, for which we ensure quality cleaning of the steam system of the appliance.)Confirm with . OKDescaling in progress. |
| 4. | When the process is completed, the display again shows that the descaling process has been completed.Pour fresh rinse water into the tank. Confirm with OK . |
| 5. | After the rinsing process is completed, the display shows that the rinsing process has been completed.Now you can clean the water tank and oven. |
12.4 Removing wire and fixed pull-out (extendible) guides

INFORMATION!
When removing the guides, take care not to damage the enamel coating.

| 1. | Undo the screw on the bottom front. Use a screwdriver. |
| 2. | Grasp the guide and pull it out of the oven. |
| NOTE: The screw on the guides must be tightened again firmly with a screwdriver after cleaning.When replacing the guides, make sure you mount them on the same side they were installed onprior to removal. | |
12.5 Removing and replacing the oven door and glass panes
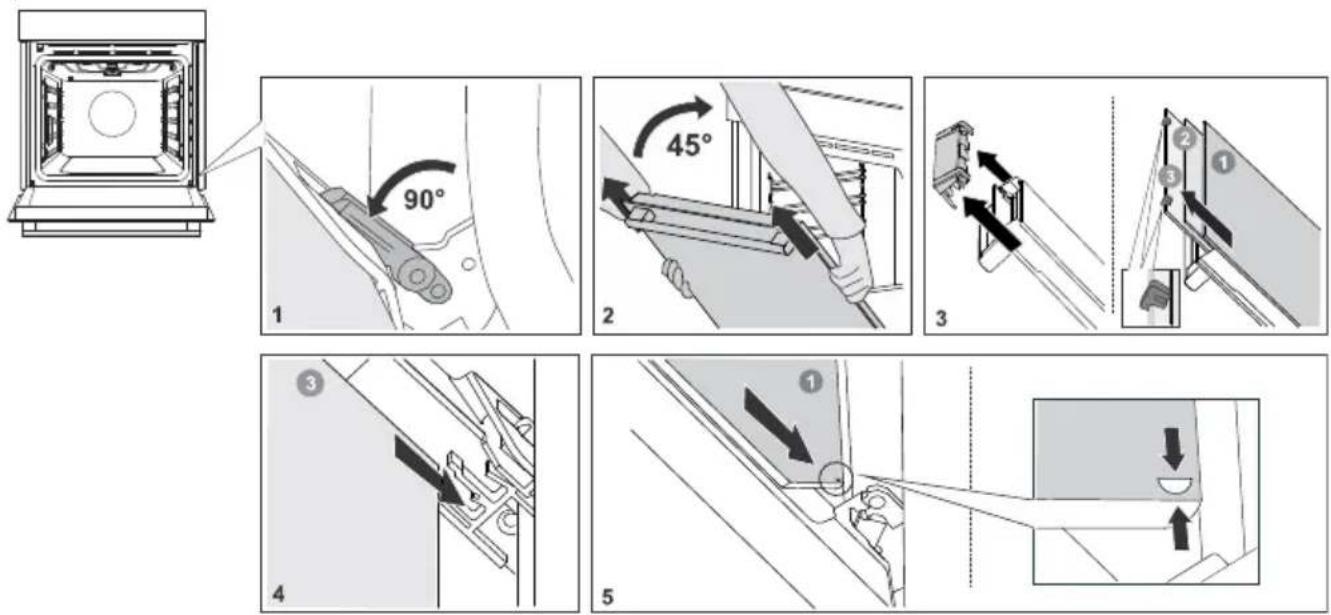
| 1. | First, fully open the door (as far as it will go). |
| 2. | Oven door is attached to the hinges with special supports that also include safety levers. Rotate the safety levers towards the door by 90°. Slowly close the door to a 45° angle (relative to the position of the fully closed door); then, lift the door and pull it out.The oven door glass can be cleaned from the inside, but it has to be removed from the appliance door first. First do as described in point 2, but do not remove it. |
| 3. | Remove the air guide. Hold it on the left- and right-hand side of the door with your hands. Remove it by slightly pulling it towards you. |
Table continued from last page
| 4. | Hold the door glass at the upper edge and remove it. To the same for the second and third glass pane (depending on the model). |
| 5. | To replace the glass panes, observe the reverse order. |

INFORMATION!
To replace the door, follow the reverse order. If the door does not open or close properly, make sure the notches on the hinges are aligned with the hinge beds.

WARNING!
The oven door hinge can close with considerable force. Therefore, always rotate both safety levers to the support when fitting or removing the appliance door.
Soft door closing and opening
(depending on the model)
Oven door is fitted with a system that dampens the door closing force, starting at a 75° angle. It allows simple, quiet, and gentle opening and closing of the door. A gentle push (to a 15° angle relative to the closed door position) is enough for the door to close automatically and softly.

WARNING!
If the force applied to the closed door is too strong, the effect of the system is reduced or the system will be bypassed for safety.
12.6 Replacing the bulb
The light bulb is a consumable and is not covered by warranty. Before changing the bulb, remove any utensils from the oven.
Halogen bulb: G9, 230 V, side bulb - 25W and ceiling bulb - 40W.

WARNING!
Only replace the light bulb when the appliance is disconnected from the power supply. Be careful not to damage the enamel. Use protection to avoid burns.

| 1. | Unscrew and remove the cover (in anti-clockwise direction). Remove the halogen bulb. |
| 2. | Use a flat plastic tool to remove the cover. Remove the halogen bulb. |
| NOTE: There is a gasket on the lid that should not be removed from the lid. The gasket must fit on the wall of the oven space. | |
13. Troubleshooting
During the warranty period, only a service center authorized by the manufacturer may carry out any repairs.
- Before making any repairs, make sure the appliance is disconnected from the power mains either by removing the fuse or by disconnecting the power plug from the wall outlet.
- Any unauthorized repairs of the appliance may result in electric shock and short circuit hazard; therefore, do not perform them. Leave such work to an expert or a service technician.
- In case of minor problems with appliance operation, check this manual to see if you can fix the problem yourself.
- If the appliance is not operating properly or at all due to inappropriate operation or handling, a visit from a service technician shall not be free of charge, even during the warranty period.
- Save the instructions for future reference and pass them on to any subsequent owners or users of the appliance.
- Following is some advice on rectifying some common problems.
13.1 Troubleshooting table
| CauseProblem/error | |
| The main fuse in your home trips often. | Call a service technician. |
| Theovenlightingdoesnotwork. | The process of changing the light bulb in the oven is described in the chapter Replacing the bulb. |
| Controlunitisnotresponding,the screenisfrozen. | Disconnect the appliance from the power mains for a few minutes (undo the fuse or switch off the main switch); then, reconnect the appliance and switch it on. |
| ErrorcodeErrXisdisplayed.Incaseofadouble-digiterrorcode,the displaywillshowErXX. | There is an error in the electronic module operation.Disconnect the appliance from the power mains for a few minutes.If the error is still indicated, call a service technician. |
| ThedisplaywillshowSEnSwhenthe temperatureprobeisnotconnected. | Clean the socket.Try to connect and disconnect the temperature probe several times in succession. |
| Steamleaksattheovendoor. | Check that the door seal is properly positioned in the door groove. Install it properly in case it is not. |
| If the problems persist despite observing the above advice, call an authorized service technician. Repair or any warranty claim resulting from incorrect connection or use of the appliance shall not be covered by the warranty. In this case, the user will cover the cost of repair. | |
13.2 Label-appliance information
A rating plate with basic information about the appliance is attached to the edge of the oven. Precise information on appliance type and model can also be found on the warranty sheet.
- Serial number
- Model
- Type
- Brand
- ID/code
- QR code
- Technical information
- Compliance labels/symbols
14. Compliance information
Radio equipment type:
Built-in WiFi/BLE module
Wi-Fi indicator
Operating frequency range:
2412 ~ 2472 MHz
Maximum output power:
19.99 dBm EIRP
3.26 dBi Maximum antenna gain:
Bluetooth indicator
2402 ~ 2480 MHz Frequency range:
10.00 dBm Carrier Output:
F1DE Emission type:
Hisense declares that the radio equipment mentioned above is in compliance with Directive 2014/53/EU.
15. Environment protection
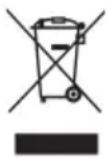
Our product packaging is made of environmentally friendly materials that can be recycled, disposed of, or destroyed without any hazard to the environment. To this end, packaging materials are labelled appropriately.
The symbol on the product or its packaging indicates that the product should not be treated as normal household waste. Take the product to an authorized collection centre for waste electric and electronic equipment processing.
Correct disposal of the product will help prevent any negative effects on the environment and health of people, which could occur in case of incorrect product removal. For detailed information on removal and processing of the product, please contact the relevant municipal body in charge of waste management, your waste disposal service, or the store where you bought the product.
We reserve the right to any changes and errors in the instructions for use.
16. Cooking test
EN60350-1: Only use equipment supplied by the manufacturer.
Always insert the baking tray all the way to the end position on the wire guide. Place pastry or cakes baked in moulds as shown in the image.
* Preheat the appliance to desired temperature. Do not use the rapid preheat mode. ** Preheat the appliance for 10 minutes. Do not use the rapid preheat mode. *** Turn after 2/3 of cooking time.
| BAKING | ||||||
| EquipmentDish | mould placement | °C | min | [SWXC] | ||
| shortbread -single rack | 25-40150 |  allow bakir allow bakir | ||||
| shortbread -single rack | 35-50135 |  allow bal allow bal | ||||
| shortbread -two racks/levels | shallow baking tray | 2, 4 | 140 ** | 25-40 |  | |
| shortbread -three racks/levels | shallow baking tray | 1, 4, 5 | 135 | 45-60 |  **3shallow **3shallow | |
| small cakes -single rack | 20-30160 |  allow bal allow bal | ||||
| small cakes -single rack | 20-30155 | |||||
| small cakes -two racks/levels | shallow baking tray | 1,5 | 140 ** | 30-45 | [CTAB] | |
| small cakes -three racks/levels | shallow baking tray | 1, 3, 5 | 140-150 | 30-50 |  | |
| sponge cake | round metal mould, diameter 26 cm/wire rack | 45-55150 |  | |||
| sponge cake | round metal mould, diameter 26 cm/wire rack | 45-55160 |  | |||
| sponge cake -two racks/levels | 2 × round metal mould, diameter 26cm/wire rack | ○○ | 2, 4 | 170 * | 45-55 |  |
| apple pie | 2 × round metal mould, diameter 20cm/wire rack | ○○ | 160 **2 | 70-120 |  | |
| apple pie | 2 × round metal mould, diameter 20cm/wire rack | ○○ | 1602 | 70-120 |  | |
| BROILING | ||||||
| toast | 5wire rackmax | [TSKD] | ||||
Table continued from last page
| BAKING | ||||||
| beef burgers | wire rack + shallow baking sheet as drip tray | 25-40 ***High5 | ||||
| COOKINGWITHSTEAM | ||||||
| EquipmentDish | mould placement | °C | omin | |||
| cake | round metal mould, diameter 26 cm/wire rack | |||||
| bread with seeds | shallow baking tray | |||||
| shallow baking traybuns | ||||||
| shallow baking traybread | ||||||
| leavened buns | ||||||
| fresh pizza | ||||||
| frozen pizza | ||||||
| bread - bread mixture | ||||||
| sunflower seed bread | ||||||
| puff pastry rolls | ||||||
| chicken | ||||||
Hisense
life reimagined
- INFORMATION
- WARNING
- CONTENTS
- SAFETY PRECAUTIONS
- APPLIANCE DESCRIPTION
- BEFORE FIRST USE
- USING THE OVEN – SELECTING THE BAKING SETTINGS
- STARTING THE COOKING PROCESS
- END OF COOKING BY TOUCHING
- GENERAL SETTINGS
- WI-FI MANAGEMENT
- GENERAL TIPS AND ADVICE FOR BAKING
- CLEANING AND MAINTENANCE
- TROUBLESHOOTING
- COMPLIANCE INFORMATION
- IMPORTANT SAFETY PRECAUTIONS - CAREFULLY READ THE INSTRUCTIONS AND SAVE THEM FOR FUTURE REFERENCE
- OTHER IMPORTANT SAFETY WARNINGS
- APPLIANCE EQUIPMENT
- OVEN DOOR SWITCH
- GUIDES
- CONTROL PANEL
- SWITCHING ON FOR THE FIRST TIME
- WATER HARDNESS
- USING THE OVEN - SELECTING THE BAKING SETTINGS
- MAIN MENU - MANUAL
- CHOOSING THE BAKING SYSTEM
- TIMER - TIMER FUNCTIONS
- TABLE CONTINUED FROM LAST PAGE
- SETTING THE END OF BAKING AT
- COOKING BY STEPS (+ MENU)
- COOKING WITH STEAM
- STEAM INJECTION DURING THE BAKING PROCESS
- FILLING THE WATER TANK
- AUTO
- EXTRA
- GRATIN (+MENU)
- CRISPY BOTTOM
- FAVOURITES - SAVE YOUR OWN SETTINGS
- DISPLAY LOCK (+ MENU)
- CONNECTING THE APPLIANCE TO THE CONNECTLIFE APPLICATION
- APPLICATION
- USING WI-FI
- MANAGING THE OVEN REMOTE CONTROL
- EQUIPMENT
- FOOD PREPARATION
- EFFICIENT USE OF ENERGY
- COOKING TABLE
- COOKING WITH A TEMPERATURE PROBE (BAKESENSOR)
- CORRECT USE OF THE PROBE, BY TYPE OF FOOD
- CLEANING THE OVEN (STEAM CLEAN)
- CLEANING THE WATER TANK AND FILTER FOAM
- CLEANING THE STEAM SYSTEM
- REMOVING WIRE AND FIXED PULL-OUT (EXTENDIBLE) GUIDES
- REMOVING AND REPLACING THE OVEN DOOR AND GLASS PANES
- SOFT DOOR CLOSING AND OPENING
- REPLACING THE BULB
- TROUBLESHOOTING TABLE
- LABEL-APPLIANCE INFORMATION
- WI-FI INDICATOR
- BLUETOOTH INDICATOR
- ENVIRONMENT PROTECTION
- COOKING TEST
- HISENSE
Brand : HISENSE
Model : BFS615S8B
Category : Steamer