
MX-KM3070 - Juicer PANASONIC - Free user manual and instructions
Find the device manual for free MX-KM3070 PANASONIC in PDF.


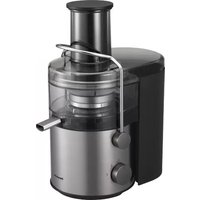
| Product Type | Juicer |
| Brand | Panasonic |
| Model | MX-KM3070 |
| Power Consumption | 800 W |
| Rated Voltage | 220-240 V ~ 50/60 Hz |
| Dimensions (W x D x H) | Approx. 250 x 200 x 400 mm |
| Weight | Approx. 3.5 kg |
| Juice Extraction Method | Centrifugal |
| Pulp Container Capacity | 1.5 L |
| Juice Jug Capacity | 1.0 L |
| Feeding Tube Diameter | Approx. 75 mm (suitable for whole fruits) |
| Speed Settings | 2 speeds (low and high) |
| Safety Features | Safety lock arm, non-slip feet |
| Dishwasher Safe Parts | Juice jug, pulp container, strainer, lid |
| Cleaning Brush Included | Yes |
| Anti-Drip System | Yes |
| Overheating Protection | Automatic shut-off |
| Warranty | 2 years (depending on region) |
| Spare Parts Availability | Strainer, lid, jug, pulp container available |
Frequently Asked Questions - MX-KM3070 PANASONIC
User questions about MX-KM3070 PANASONIC
0 question about this device. Answer the ones you know or ask your own.
Ask a new question about this device
Download the instructions for your Juicer in PDF format for free! Find your manual MX-KM3070 - PANASONIC and take your electronic device back in hand. On this page are published all the documents necessary for the use of your device. MX-KM3070 by PANASONIC.
USER MANUAL MX-KM3070 PANASONIC
Operating Instructions
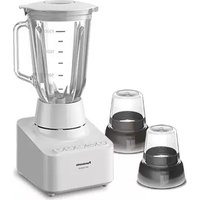
Blender (Household Use)
TABLE OF CONTENTS
Safety Precautions ...... EN2
Parts Identification ...... EN4
Before Use EN5
Guide of Menus and Functions ...... EN6
How to Use Blender....EN7
How to Use Dry Mill ....EN9
After Use ...... EN10
Circuit Breaker Protection ...... EN11
Troubleshooting EN11
Specifications EN11
Thank you for purchasing this Panasonic product.
- Please read these Operating Instructions carefully to ensure correct and safe use of this product.
- Before using this product, please pay special attention to the Safety Precautions.
- Please keep these Operating Instructions for future reference.
- Panasonic will not accept any liability if the appliance is subject to improper use, or failure to comply with these instructions.
Safety Precautions
Make sure to follow these instructions.
To prevent accidents or injuries to the user, other people, and damage to property, please follow the instructions below.
■ The following indications indicate the degree of damage caused by incorrect operation.

WARNING
Indicates serious injury or death.

CAUTION
Indicates risk of injury or property damage.
■ The symbols are classified and explained as follows.

This symbol indicates prohibition.

This symbol indicates a requirement that must be followed.

WARNING
To prevent electric shock, fire caused by a short circuit, burning, injury, or smoke.

● Do not damage the Cord or the Plug.
- Do not use the appliance if the Cord or the Plug is damaged or the Plug is loosely connected to the outlet.
- If the Cord is damaged, it must be replaced by the manufacturer, its Service Centre, or similarly qualified persons in order to avoid a hazard.
- Do not plug or unplug with wet hands.
- Do not operate the appliance when the Cord is wound.
- Do not immerse the Motor Housing in water or splash water on it.
● Do not disassemble, repair, or modify the appliance.
- Please contact your Service Centre for repairing.
- Do not insert any objects in the vent or the gap.
- Especially metal objects such as pins or wires.
- Do not try to remove the Blender Lid when the appliance is still operating.
- Do not use hot water (over 60 °C) to clean or place near a fire to dry the appliance.
- Do not place hot ingredients (over 60 °C) in the Blender Jug or the Mill Container.
- Do not operate without the Blender Jug Base and the Blender Jug in place correctly.
- Do not operate without the Mill Container Base and the Mill Container in place correctly.
- Do not insert fingers or utensils such as spoon or fork into the Blender Jug while the appliance is operating.
- Do not remove the Blender Jug when the motor is still rotating.
- Do not push the Safety Lock Pin and any Safety Levers with any instrument such as stick as the appliance may be switched ON.
- Do not use the Mill Container if it is damaged or has visible cracks.

Make sure the voltage indicated on the label of the appliance is the same as your local supply.
- Also avoid plugging other devices into the same outlet to prevent electric over heating. However, if you are connecting a number of Plugs, make sure the total wattage does not exceed the rated wattage of the outlet.
● This appliance is not intended for use by persons (including children) with reduced physical, sensory or mental capabilities, or lack of experience and knowledge, unless they have been given supervision or instruction concerning use of the appliance by a person responsible for their safety.
Children should be supervised to ensure that they do not play with the appliance.

WARNING

- Insert the Plug firmly.
- Otherwise it may cause electric shock and fire caused by the heat that may generate around the Plug. ● Clean the Plug regularly.
- A soiled Plug may cause insufficient insulation due to the moisture, and may cause fire.
● Discontinue using the appliance immediately and unplug it in the unlikely event that this appliance stops working properly.
For example, in case of abnormal occurrences or breakdowns:
- The plug or the cord becomes abnormally hot.
- The cord is damaged or there has been a power failure.
- The motor housing is deformed, has visible damage, or is abnormally hot.
→ Please unplug the appliance immediately and contact the Service Centre for advice or a repair.
- Be careful if hot liquid is poured into the blender jug, as it can be ejected out of the appliance due to sudden steaming.

CAUTION
To prevent electric shock, fire caused by a short circuit, burning, injury, or smoke.

- Do not replace any parts of the appliance with non-genuine spare parts.
- Do not leave the appliance unattended when it is in operation.
- When leaving the appliance unattended, turn the power off. ● Do not use the appliance in the following places:
- Any uneven surface, on non-heat-resistant carpet, tablecloth, etc.
- The place where it may be splashed with water or near a heat source.
- Do not blend more than 1.5 L working capacity marked on the Blender Jug.
- Do not place more than the maximum working capacity allowed for the Mill Container. Follow the recommended ingredient amount for processing.
- Do not operate without the Blender Lid and the Inner Lid in place correctly for the Blender Jug.

● Make sure to hold the Plug when unplugging. Never pull on the Cord. ● Ensure to operate and rest the appliance based on the table below:
| Function | Operating Time (minutes) | Rest Time (minutes) |
| Blender 2 2 | ||
| Dry Mill 1 2 |
● Unplug the appliance when not in use.
- When carrying the appliance, be sure to hold the Motor Housing with both hands.
- Switch off the appliance and disconnect from the power supply before changing accessories or approaching parts that move in use. ● Care shall be taken when handling the sharp Cutting Blades, emptying the Blender Jug or the Mill Container and during cleaning.
● Operate the appliance on a clean, flat, hard and dry surface.
- If the Blender Cutting Blade gets stuck, switch off immediately and unplug. Do not insert finger into the Blender Jug. Use the Scraper to remove the ingredients that are blocking the Blender Cutting Blade. ● This product is intended for household use only. ● Ensure to clean the surfaces in contact with food after use. (See Page EN10 "After Use".)
Parts Identification

* The shape of the Plug may vary according to regions or countries. The Safety Lock mechanism has been designed to prevent the appliance from switching ON when the appliance is not properly in place.
Note:
- Do not push the Safety Lock Pin and any Safety Levers with any instrument such as stick.
- Do not pour liquids or ingredients at the Safety Lock Pin and Control Panel area.
- Keep the Safety Lock Pin and Safety Lever area clean to avoid foreign particles accumulating in the area.
Control Panel

* Use this function for intermittent operation until the required blending texture is obtained.
Wash each part before using the appliance for the first time.
Note:
- Place your thumb on the Rib when assembling or disassembling the Blender Jug to its Base for easier turning.

To Disassemble
Blender
① Turn the Blender Jug Base clockwise to disassemble.
- Be careful with the Blender Cutting Blade.
② Pull up the Blender Jug to release from the Blender Jug Base.

Dry Mill
① Turn the Mill Container upside down and turn the Mill Container Base anticlockwise to disassemble.
- Be careful with the Mill Cutting Blade.
② Pull up the Mill Container Base to release it from the Mill Container.

To Assemble
Blender
① Place the Blender Gasket on the Blender Jug Base.
- If the Blender Gasket is not placed, it will cause leakage.
② Follow the assembly sequence in the direction of the arrow as illustrated. Attach the Blender Jug to the Blender Jug Base and tighten the Blender Jug Base anticlockwise to assemble.
- Ensure that the Blender Gasket is set properly and the Blender Jug is tightened securely. Otherwise, it may cause leakage.
- Do not attach or remove the Blender Jug after the Blender Jug Base is placed on the Motor Housing. The liquid will leak or the motor will not operate.

Dry Mill
① Place the Mill Gasket on the Mill Container Base.
- If the Mill Gasket is not placed, it will cause leakage.
② Turn the Mill Container upside down.
③ Attach the Mill Container Base to the Mill Container and turn the Mill Container Base clockwise until a "click" sound is heard.
• Make sure that the Mill Gasket is fitted properly on the Mill Container Base. Otherwise, it may cause leakage.
![graph TD A["Step ①: Raw material being covered"] --> B["Step ②: St Quartering with a bowl"] B --> C["Step ③: St Quartering with a cup"]](/content/2026/06/1379089/images/f5dc30eed32ccfc56a3a723d3e0482df818a08f46391ddbf1573b5648c7f9503.jpg)
Note:
Blender
- When placing viscous or low water ingredients (such as boiled beans or garlic), do not exceed 1/3 of the Blender Jug capacity.
- Add soft ingredients (fruits, vegetables) into the Blender Jug before adding in other ingredients. Cut them into small pieces (2-3 cm cubes).
- Before blending hard ingredients (such as carrot), cut it into small pieces (1-2 cm long).
- Do not blend food of 60°C or higher.
- Do not operate exceeding the rated operation time (2 min ON, 2 min OFF).
Dry Mill
- When placing hard spices, do not exceed 1/3 of the Dry Mill capacity.
- Do not operate exceeding the rated operation time (1 min ON, 2 min OFF).
| Function | Menu Speed Quantity | Operating Time (approx.) | Remarks | |||
 (Blender) (Blender) | Pudding | 1 | 350 - 1 000 mL Max 10 sec | Remove the fl oating bubbles if necessary. | ||
| Baby Food | Porridge | 1 | 300 - 600 g 30 - 60 sec | For porridge:- Recommended ratio of rice:water is 1:10.For boiled spinach:- Recommended ratio of boiled spinach:water is 2:1.- Boil the spinach more than 5 minutes to soften it.For boiled carrot:- Place the same amount of water as the ingredients and blend.For all menus:- After blending the baby food, transfer it to another container and sterilise by heating. | ||
| Boiled Spinach + water | 1 | 300 - 400 g 60 - 120 sec | ||||
| Boiled Carrot + water | 1 | 250 - 800 g 30 - 90 sec | ||||
| Ice Crush | 1 | Max 220 g(For a piece of ice cube size greater than 10 g and less than 20 g) | Blend until there is no sound. | - Only use 20 g ice cube or less which are made from a household refrigerator. Do not use commercial ice cubes.- If the crushed ice stick to the wall of the Blender Jug, turn off the appliance and remove the Blender Lid. Insert the Scraper to circulate. | ||
| Max 250 g(For a piece of ice cube size approximately 8-10 g) | ||||||
| Soup | 2 | 250 - 1 000 mL Max 2 min | - | |||
| Juice/Smoothie | 2 | 250 - 1 500 mL Max 2 min | For Smoothie:- Only use approximately 8-10 g ice cubes or less which are made from a household refrigerator. Do not use commercial ice cubes and ensure to add liquid. | |||
| Cookie Crush P1 | Max 150 g | Blend until a desired texture is obtained(1 sec ON, 1 sec OFF) | - If the cookie is 5 cm or more, break it before inserting into the Blender Jug.- If the cookie stick to the wall of the Blender Jug, turn off the appliance and remove the Blender Lid. Insert the Scraper to circulate. | |||
| Cleaning | P2 | 750 mL | 3 - 10 times(1 sec ON, 1 sec OFF) | Operate with water only. | ||
 (Dry Mill) (Dry Mill) | Coffee Beans | 2 | Max 50 g 15 - 30 sec | - | ||
| Pepper | 2 | Max 20 g | Max 60 sec | |||
| Dried Chilli | 2 | Max 20 g | Max 60 sec | Remove the seeds. | ||
How to Use Blender
Note:
• Working capacity: 1.5 L - Do not operate with an empty Blender Jug. - This Blender cannot be operated if the Blender Jug is not in place correctly. - If the Blender Cutting Blade gets stuck, switch off immediately and unplug. Do not insert fingers into the Blender Jug. Use the Scraper to remove the ingredients that are blocking the Blender Cutting Blade. - When removing the ingredients, be careful with the Blender Cutting Blade. - Do not drop the appliance to avoid damaging it. - Do not store liquid in the Blender Jug. - It is prohibited to place the following kinds of ingredients in the Blender Jug: Meat, fish, hard ingredients (example: turmeric, dried soya beans, frozen ingredients, Cassia cinnamon), very sticky ingredients (example: peanut butter), ingredients with low water content (example: mashed potato) or commercial ice cubes.
① Place the ingredients in the Blender Jug. ② Close the Blender Lid. • Make sure the Inner Lid is attached. ③ Make sure the switch is off. Place the Blender Jug according to the triangle marks on the Blender Jug Base and Motor Housing as A. Rotate the Blender Jug (left and right) a few times when it does not fit properly to the Motor Housing. ④ Turn the Blender Jug Unit clockwise until a "click" sound is heard and make sure the marks are aligned as B. ⑤ Plug into the rated power supply. ⑥ Turn on the Blender by pressing the required speed. - Support the Blender Lid while in use to ensure that it is tightly closed.
![graph LR A["Step 1: Hand holding a spoon, Step 2: Down arrow"] --> B["Step 3: Presser in blender, Step 4: Presser pressing down"] B --> C["Step 5: Hand press with a switch, Step 6: Presser holding a tablet"] C --> D["Step 6: Control with keyboard, P1, P2"]](/content/2026/06/1379089/images/e5ef48c764cf9ce1ed2790b137c54007f7e18fb9bb90b8fe5f75cf681f2b5df4.jpg)
⑦ After blending, switch off by pressing the button. ⑧ Unplug. ⑨ Turn the Blender Jug anticlockwise to remove it from the Motor Housing. ⑩ Remove the ingredients. Be careful when pouring the mixture from the Blender Jug as it may spill. - Avoid getting soiled with the ingredients.
![graph LR A["7:00 P1/2"] --> B["8: Hand presser"] B --> C["9: Hand presser with handle"] C --> D["10: Tap water bottle pouring into bowl"]](/content/2026/06/1379089/images/50998ecaab1e59d08d8e297769f98b115213098dad6e9a336bf806503ab2166d.jpg)
How to Use Scraper
■ Use the Scraper when:
• The ingredients are hard to blend due to too little liquid. (For example: chili, curry dishes) • The ingredients stick to the side of the Blender Jug. (For example: garlic, leaves, crushed ice) • The ingredients stick to the bottom of the Blender Cutting Blade. (For example: crushed ice)
Note:
- Use the Scraper during blending only through the Blender Lid opening.
- Do not use the Scraper from other models for this product.
- Make sure the Inner Lid is attached when the Scraper is not used.
① Turn off the appliance and remove the Inner Lid carefully. ② Slowly slide the Scraper through the Blender Lid opening to perform operation. The Scraper can be inserted through the Blender Lid opening while blending without interfering with the Blender Cutting Blade.

Crushed ice removal
① Remove the crushed ice inside the Blender Jug. ② Disassemble the Blender Jug Base (page EN5). ③ Use the Scraper to remove any crushed ice beneath the Blender Cutting Blade. *Be careful with the Blender Cutting Blade.

How to Use Dry Mill
This Dry Mill is designed for grinding dry ingredients such as coffee beans, dried pepper and spices.
Note:
• Working capacity: 50 g (coffee beans). - Do not operate with an empty Dry Mill. - Do not put liquid into the Mill Container. - When removing the ingredients, be careful with the Mill Cutting Blade. - Do not remove the Dry Mill from the Motor Housing until the rotation stops completely. - Ensure that the Mill Cutting Blade stops completely before proceeding to the next P1 or P2 operation. - Do not drop the appliance to avoid damaging it. - It is prohibited to place following kinds of ingredients in the Mill Container: Meat, fish, hard ingredients (example: turmeric, dried soya beans, frozen ingredients, Cassia cinnamon), very sticky ingredients (example: peanut butter), oily ingredients (example: peanuts, walnuts), wet ingredients or any ice cubes. - Remove the ingredients from the Mill Container and wash it immediately after blending.
① Turn the Mill Container upside down and fill in the ingredients. ② Place the Mill Container Base onto the Mill Container and turn it clockwise until a "click" sound is heard. ③ Place the Dry Mill onto the Motor Housing. ④ Turn the Dry Mill clockwise until a “click” sound is heard. ⑤ Plug into the rated power supply.


⑥ Turn on the Dry Mill by pressing the required speed. - Support the Mill Container while in use to ensure that it is stable. ⑦ After blending, switch off the power supply. ⑧ Unplug.
![graph TD A["Step 6: Usage of P1 D22"] --> B["Step 7: Usage of P1 D22"] B --> C["Step 8: Use of a handheld device"]](/content/2026/06/1379089/images/8b04947639e291bc99baf754cdcc2f9d4704a60cec33db79ae6acfbd1f901ab1.jpg)
⑨ Turn the Dry Mill anticlockwise and remove it from the Motor Housing. ⑩ Turn the Dry Mill upside down and turn the Mill Container Base anticlockwise to remove it from the Mill Container. ⑪ Remove the ingredients.
![graph LR A["9: Added granular substance"] --> B["10: Starching with added granular substance"] B --> C["11: Stacking into a bowl with powder"]](/content/2026/06/1379089/images/9ba8681565bfb44bfc89795e5df70579036f6159560860b7f165a9e6ce9e7d29.jpg)
Cleaning
Note:
- During prewash, do not fill in the normal water more than the amount indicated. It may cause high vibration.
- After prewash, unplug the appliance before cleaning. Handle the Cutting Blades and glass parts carefully during cleaning.
- Do not use benzene, thinner, alcohol, bleach, polishing powder or metal brush to clean the appliance. The surface may be damaged.
- Do not place the appliance in the dishwasher or the dish dryer for cleaning.
- Some discolouration of the plastic parts may occur upon usage but it does not affect usage.
- Make sure to clean the appliance after every use.
- Do not use water or hand to clean the Mill Cutting Blade
Prewash
- For Blender, fill in 750 mL of normal water. Press P2 while holding the Blender Jug by hand and operate for 3 to 10 times for cleaning.
Wash
- Before cleaning, make sure to take out the Blender Gasket and the Mill Gasket.
- Wash with diluted dish soap (neutral) and a soft sponge. After washing, be sure to rinse and wipe dry thoroughly.
- Clean the Mill Cutting Blade with a brush. Do not use water or hand to clean the Cutting Blades.
* Brush is not provided.
Wiping
- Wipe the Motor Housing with a damp cloth.


Storing
Note:
- Do not wrap the Cord around the Motor Housing.
- Mount the Blender Jug onto the Blender Jug Base and store it.
- Mount the Mill Container onto the Mill Container Base and store it.
Circuit Breaker Protection
When the Circuit Breaker automatically stops the motor due to overloading, follow the below steps:
1 Switch off to reset the Circuit Breaker. 2 Reduce the ingredients to less than 1/2 of the working capacity and/or remove hard ingredients. 3 Resume blending. If the Circuit Breaker still activates, repeat step 1 - 2. Do not repeatedly reset the Circuit Breaker.
Note:
- Circuit breaker may not reset over 40 °C room temperature. In that case please move appliance to the room temperature under 35 °C and wait until it is cooled down.
Troubleshooting
Ensure to turn OFF the appliance and the power supply before taking the actions in the table below
Problems Causes Actions
| The appliance does not turn on. The Plug is not inserted to the root of the power source. | Insert the Plug down to the root. | |
| Even though the power is on, the appliance does not start blending. | The Blender Jug or the Mill Container is not placed correctly. | Place the Blender Jug or the Mill Container correctly. |
| Overloaded with ingredients or prohibited ingredients are used. | Do not exceed the working capacity of the ingredients and ensure that prohibited ingredients are not used. | |
| The Safety Lever is stucked. Disassemble the Blender | Jug Base and follow the assembly sequence (page EN5). | |
| The appliance stops during blending. | The Circuit Breaker protection is activated. • Too many ingredients or hard ingredients are used. | See "Circuit Breaker Protection". |
| Prohibited ingredients are used. Remove prohibited ingredients. | ||
| Maximum operating time is exceeded. Turn off the power and refer to the recommended operating time (page EN3). | ||
| The mixture in the Blender Jug is leaking. | The Blender Jug Base is attached loosely. Tighten the Blender Jug Base firmly onto the Blender Jug. | |
| The Blender Gasket is not installed correctly. Install the Blender Gasket correctly. | ||
| The Blender Gasket is not installed. Install the Blender Gasket. | ||
| The Safety Lever is stucked. Disassemble the Blender | Jug Base and follow the assembly sequence (page EN5). | |
| There is abnormal noise or vibration. | Too many ingredients in the Blender Jug. | Turn off the appliance and reduce the ingredients. |
| The Blender Jug Base is attached loosely. Tighten the Blender Jug Base firmly onto the Blender Jug. | ||
| The Cutting Blades is spinning freely without cutting. | Ingredients are stuck to the wall of the Blender Jug. | Turn off the appliance and insert the Scraper to circulate. |
| Quantity of the liquid is low. | Add liquid. | |
- A "kiiiin" sound may be heard during operation. This is normal.
Specifications
| Function | Blender | Dry Mill |
| Power Supply | 220 - 240 V ~50 - 60 Hz | |
| Power Consumption | 290 - 320 W | |
| Switch | ○ (OFF), 1, 2, P1, P2 | |
| Operation Rating | 2 minutes ON2 minutes OFF | 1 minute ON2 minutes OFF |
| Dimension (Approx.)W × L × H (mm) | 188 × 210 × 405 | 170 × 210 × 262 |
| Mass (Approx.) (kg) | 3.6 | 2.1 |
| Working Capacity (Approx.) | 1.5 L | 50 g (Coffee Beans) |
| Cutting Blades | 4 stainless steel blades | 2 stainless steel blades |
Grinder
Blender
Grinder
Blender
Removing crushed ice


![graph TD A["Coffee Cup"] --> B["Blender"] B --> C["Handheld Device"] C --> D["Phone Icon"] style A fill:#f9f,stroke:#333 style D fill:#ccf,stroke:#333](/content/2026/06/1379089/images/cff1d6c5fa7442a7d0895be5d8ba5b81b6adc07058223046d1b166ea77ee7ab1.jpg)
Cleaning the appliance
Note:
During operation
Grinder
Blender
Blender


Removing crushed ice

Pre-wash
No. 3, Jalan Sesiku 15/2, Section 15, Shah Alam Industrial Site,
40200 Shah Alam, Selangor Darul Ehsan, Malaysia.
http://www.panasonic.com


- OPERATING INSTRUCTIONS
- TABLE OF CONTENTS
- SAFETY PRECAUTIONS
- WARNING
- CAUTION
- TO PREVENT ELECTRIC SHOCK, FIRE CAUSED BY A SHORT CIRCUIT, BURNING, INJURY, OR SMOKE
- PARTS IDENTIFICATION
- NOTE
- CONTROL PANEL
- TO DISASSEMBLE
- BLENDER
- DRY MILL
- TO ASSEMBLE
- HOW TO USE BLENDER
- HOW TO USE SCRAPER
- USE THE SCRAPER WHEN
- CRUSHED ICE REMOVAL
- HOW TO USE DRY MILL
- CLEANING
- PREWASH
- WASH
- WIPING
- STORING
- CIRCUIT BREAKER PROTECTION
- TROUBLESHOOTING
- GRINDER
- CLEANING THE APPLIANCE
- DURING OPERATION
- PRE-WASH
Brand : PANASONIC
Model : MX-KM3070
Category : Juicer