
FORNEBY - Microwave IKEA - Free user manual and instructions
Find the device manual for free FORNEBY IKEA in PDF.


| Product Type | Microwave Oven |
| Brand | IKEA |
| Model | FORNEBY |
| Capacity | 20 liters |
| Power Output | 700 W |
| Power Consumption | 1050 W |
| Voltage | 220-240 V |
| Frequency | 50/60 Hz |
| Display Type | Digital LED |
| Control Type | Touch + Dial |
| Turntable Diameter | 25.5 cm |
| Interior Light | Yes |
| Child Lock | Yes |
| Defrost Function | By weight or time |
| Auto Cook Programs | 8 preset menus |
| Timer | Up to 95 minutes |
| Weight | Approx. 11.5 kg |
| Dimensions (W x D x H) | 45.5 x 35.0 x 26.0 cm |
| Internal Dimensions (W x D x H) | 30.5 x 29.5 x 18.0 cm |
| Cavity Material | Stainless steel |
| Door Type | Side opening with handle |
| Warranty | 2 years (subject to IKEA terms) |
| Cleaning Recommendation | Wipe with damp cloth; mild detergent |
Frequently Asked Questions - FORNEBY IKEA
User questions about FORNEBY IKEA
0 question about this device. Answer the ones you know or ask your own.
Ask a new question about this device
Download the instructions for your Microwave in PDF format for free! Find your manual FORNEBY - IKEA and take your electronic device back in hand. On this page are published all the documents necessary for the use of your device. FORNEBY by IKEA.
USER MANUAL FORNEBY IKEA
Please refer to the last page of this manual for the full list of IKEA appointed After Sales Service Provider and relative national phone numbers.
ENGLISH
Contents
| Safety information 4 | Hints and tips 24 | |
| Safety instructions 6 | Care and cleaning 27 | |
| Installation 9 | Troubleshooting 33 | |
| Product description 9 | Technical data 34 | |
| Control panel 10 | Energy efficiency35 | |
| Before first use 11 | Menu structure 36 | |
| Daily use 12 | Environmental concerns | 37 |
| Clock functions 18 | IKEA guarantee | 37 |
| Using the accessories 20 | ||
| Additional functions 23 |
Subject to change without notice.

Safety information
Before the installation and use of the appliance, carefully read the supplied instructions. The manufacturer is not responsible if an incorrect installation and use causes injuries and damage. Always keep the instructions with the appliance for future reference.
Children and vulnerable people safety
- This appliance can be used by children aged from 8 years and above and persons with reduced physical, sensory or mental capabilities or lack of experience and knowledge if they have been given supervision or instruction concerning the use of the appliance in a safe way and understand the hazards involved. Children of less than 8 years of age and persons with very extensive and complex disabilities shall be kept away from the appliance unless continuously supervised.
- Children should be supervised to ensure that they do not play with the appliance.
- Keep all packaging away from children and dispose of it appropriately.
- WARNING: The appliance and its accessible parts become hot during use. Keep children and pets away from the appliance when in use and when cooling down.
- If the appliance has a child safety device, it should be activated.
- Children shall not carry out cleaning and user maintenance of the appliance without supervision.
General Safety
- Only a qualified person can install this appliance and replace the cable.
- WARNING: The appliance and its accessible parts become hot during use. Care should be taken to avoid touching heating elements.
- Always use oven gloves to remove or insert accessories or ovenware.
- Before any maintenance, cut the power supply.
- WARNING: Ensure that the appliance is switched off before replacing the lamp to avoid the possibility of electric shock.
- Do not use the appliance before installing it in the built-in structure.
- Do not use a steam cleaner to clean the appliance.
- Do not use harsh abrasive cleaners or sharp metal scrapers to clean the glass door since they can scratch the surface, which may result in shattering of the glass.
- If the mains power supply cable is damaged, it must be replaced by the manufacturer, its Authorised Service Centre or similarly qualified persons to avoid an electrical hazard.
- Before pyrolytic cleaning, remove all accessories and excessive deposits/spills from the appliance cavity.
- To remove the shelf supports first pull the front of the shelf support and then the rear end away from the side walls. Install the shelf supports in the opposite sequence.
- Use only the food sensor (core temperature sensor) recommended for this appliance.
Safety instructions
Installation

Warning! Only a qualified person must install this appliance.
- Remove all the packaging.
- Do not install or use a damaged appliance.
- Follow the installation instructions supplied with the appliance. Always take care when moving the appliance as it is heavy. Always use safety gloves and enclosed footwear.
- Do not pull the appliance by the handle. Install the appliance in a safe and suitable place that meets installation requirements.
- Keep the minimum distance from other appliances and units.
- Before mounting the appliance, check if the oven door opens without restraint.
| Cabinet minimum height (Cabinet under the worktop mini-mum height) | 580 (600) mm |
| Cabinet width 560 mm | |
| Cabinet depth 550 (550) mm | |
| Height of the front of the appliance | 589 mm |
| Height of the back of the appliance | 571 mm |
| Width of the front of the appliance | 595 mm |
| Width of the back of the appliance | 559 mm |
| Depth of the appli-ance | 569 mm |
| Built in depth of the appliance | 548 mm |
| Depth with open door | 1022 mm |
| Ventilation opening minimum size. Opening placed on the bottom rear side | 560x20 mm |
| Mains supply cable length. Cable is placed in the right corner of the back side | 1500 mm |
| Mounting screws 4x25 mm | |
Electrical connection

Warning! Risk of fire and electric shock.
- All electrical connections should be made by a qualified electrician. The appliance must be earthed.
- Make sure that the parameters on the rating plate are compatible with the electrical ratings of the mains power supply. Always use a correctly installed shockproof socket.
- Do not use multi-plug adapters and extension cables. Make sure not to cause damage to the mains plug and to the mains cable. Should the mains cable need to be replaced, this must be carried out by our Authorised Service Centre.
- Do not let mains cables touch or come near the appliance door or the niche below the appliance, especially when it operates or the door is hot.
- The shock protection of live and insulated parts must be fastened in such a way that it cannot be removed without tools.
- Connect the mains plug to the mains socket only at the end of the installation. Make sure that there is access to the mains plug after the installation.
- If the mains socket is loose, do not connect the mains plug.
- Do not pull the mains cable to disconnect the appliance. Always pull the mains plug.
- Use only correct isolation devices: line protecting cut-outs, fuses (screw type fuses removed from the holder), earth leakage trips and contactors.
- The electrical installation must have an isolation device which lets you disconnect the appliance from the mains at all poles. The isolation device must have a contact opening width of minimum 3 mm.
- Fully close the appliance door before you connect the mains plug to the mains socket.
Use

Warning! Risk of injury, burns and electric shock or explosion.
- Do not change the specification of this appliance.
- Make sure that the ventilation openings are not blocked.
- Do not let the appliance stay unattended during operation.
- Deactivate the appliance after each use.
- Be careful when you open the appliance door while the appliance is in operation. Hot air can release.
- Do not operate the appliance with wet hands or when it has contact with water.
- Do not apply pressure on the open door.
- Do not use the appliance as a work surface or as a storage surface.
- Open the appliance door carefully. The use of ingredients with alcohol can cause a mixture of alcohol and air.
- Do not let sparks or open flames come in contact with the appliance when you open the door.
- Do not put flammable products or items that are wet with flammable products in, near, or on the appliance.

Warning! Risk of damage to the appliance.
- To prevent damage or discoloration to the enamel:
- do not put ovenware or other objects in the appliance directly on the bottom.
- do not put aluminium foil directly on the bottom of the cavity of the appliance.
- do not put water directly into the hot appliance.
- do not keep moist dishes and food in the appliance after you finish cooking.
- be careful when you remove or install the accessories.
- Discoloration of the enamel or stainless steel has no effect on the performance of the appliance.
- Use a deep pan for moist cakes. Fruit juices cause stains that can be permanent.
• Always cook with the appliance door closed.
- If the appliance is installed behind a furniture panel (e.g. a door) make sure the door is never closed when the appliance operates. Heat and moisture can build up behind a closed furniture panel and cause subsequent damage to the appliance, the housing unit or the floor. Do not close the furniture panel until the appliance has cooled down completely after use.
Care and Cleaning

Warning! Risk of injury, fire, or damage to the appliance.
- Before maintenance, deactivate the appliance and disconnect the mains plug from the mains socket.
- Make sure the appliance is cold. There is a risk that the glass panels can break.
- Replace immediately the door glass panels when they are damaged. Contact the Authorised Service Centre.
- Be careful when you remove the door from the appliance. The door is heavy!
- Clean regularly the appliance to prevent the deterioration of the surface material.
- Fat and food remaining in the appliance can cause fire.
- If you use an oven spray, obey the safety instructions on the packaging.
Pyrolytic cleaning

Warning! Risk of Injury / Fires / Chemical Emissions (Fumes) during the pyrolytic mode.
- During pyrolytic cleaning, fumes are released that are not harmful to humans, including infants or persons with medical conditions.
- Unlike all humans, some birds and reptiles can be extremely sensitive to potential fumes emitted during the cleaning process of all pyrolytic ovens. Small pets can also be highly sensitive to the localized temperature changes in the vicinity of all pyrolytic ovens when the pyrolytic self-cleaning program is in operation.
- Before carrying out a pyrolytic self-cleaning function or the First Use please remove from the oven cavity:
- Any excess food residues, oil or grease spills / deposits.
- Any removable objects (including shelves, side rails / telescopic runners, etc. provided with the product) particularly any non-stick pots, pans, trays, utensils etc.
- Non-stick surfaces on pots, pans, trays, utensils etc., can be damaged by the high temperature pyrolytic cleaning operation of all pyrolytic ovens and can be also a source for low level harmful fumes.
- Read carefully all the instructions for pyrolytic cleaning.
- Keep children away from the appliance while the pyrolytic cleaning is in operation. The appliance becomes very
hot and hot air is released from the front cooling vents.
- Pyrolytic cleaning and first maximum temperature use are high temperature operations that can release fumes from cooking residues and construction materials, as such consumers are strongly advised to:
- Provide good ventilation during and after each pyrolytic cleaning.
- Provide good ventilation during and after the first use at maximum temperature operation.
- Ensure that any pets (especially birds) are taken as far as possible from the vicinity of the appliance location during and after the pyrolytic cleaning and first use maximum temperature operation. Keeping them in a different room would be the preferred option during the pyrolytic cycle and until appliance has cooled down again to room temperature. Good ventilation has to be provided during and after (till appliance cool down) operations of the pyrolytic cycle and first maximum temperature use cycle.
Internal lighting

Warning! Risk of electric shock.
- Concerning the lamp(s) inside this product and spare part lamps sold separately: These lamps are intended to withstand extreme physical conditions in household appliances, such as temperature, vibration, humidity, or are intended to signal information about the operational status of the appliance. They are not intended to be used in other applications and are not suitable for household room illumination.
- This product contains a light source of energy efficiency class G.
- Use only lamps with the same specifications.
Service
• To repair the appliance, contact the Authorised Service Centre.
- Use original spare parts only.
Disposal

Warning! Risk of injury or suffocation.
- Disconnect the appliance from the mains supply.
- Cut off the mains electrical cable close to the appliance and dispose of it.
- Remove the door to prevent children and pets from getting closed in the appliance.
- Packaging material:
The packaging material is recyclable. Plastic parts are marked with international abbreviations such as PE, PS, etc. Dispose of the packaging material in the containers provided for this purpose at your local waste management facility.
Installation

Warning! Refer to Safety chapters.
Assembly

Refer to the Assembly Instructions for the installation.

The manufacturer is not responsible if you do not follow the safety precautions from the Safety chapters.
This oven is only supplied with a main cable.
Electrical installation

Warning! Only a qualified person must do the electrical installation.
Product description
General overview

1 Control panel 2 Knob for the heating functions 3 Display 4 Control knob 5 Heating element 6 Socket for the food sensor 7 Lamp 8 Fan 9 Cavity embossment 10 Shelf support, removable 11 Shelf positions
Accessories
- Wire shelf x 2 For cookware, cake tins, roasts.
- Baking tray x 1 For cakes and biscuits.
- Grill- / Roasting pan x 1
To bake and roast or as pan to collect fat.
- Food Sensor x 1
To measure how far the food is cooked.
- Telescopic runners x 1 set
For shelves and trays.
Control panel
Control panel overview
| [2HW6] | [2YCH] | [3BCA] | [0ZTB] | [HHZW] |  |  |
| Timer | Fast Heat Up | Light | Food Sensor | Confirm setting | Press Turn | the knob |
| Select a heating function to turn on the appliance. | ||||||
| Turn the knob for the heating functions to the off position to turn the appliance off. | ||||||
Display
 | Display with key functions. |
Display indicators
| Basic indicators | ||||
 Lock Assisted Lock Assisted |  Cooking Cooking |  Cleaning Cleaning |  Settings Settings |  Fast Heat Up Fast Heat Up |
| Timer indicators | ||||
 Minute minder Minute minder |  End time End time |  Time Delay Time Delay |  Uptimer Uptimer | |
| Progress bar - for temperature or time.The bar is fully red when the appliance reaches the set temperature. | ||||
| Steam cooking indicator |  | |||
| Food sensor indicator |  | |||
Before first use

Warning! Refer to Safety chapters.
Initial cleaning
| Before the first use, clean the empty appliance and set the time: | |||
 |  |  |  00:00Set the time. Press OK 00:00Set the time. Press OK |
Initial preheating
| Preheat the empty oven before the first use. | |
| Step 1 Remove all accessories and removable shelf supports from the oven. | |
| Step 2 | Set the maximum temperature for the function: [IMAGE]Let the oven operate for 1 h. |
| Step 3 | Set the maximum temperature for the function: [IMAGE]Let the oven operate for 15 min. |
| i The oven can emit an odour and smoke during preheating. Make sure that the room is ventilated. | |
How to use: Mechanical child lock
The oven has the mechanical child lock installed. It is the door lock on the right side of the oven, below the control panel.
To open the oven door with the child lock:
| Step 1 Push | and hold up the child lock. |  |
| Step 2 Pull | the door handle to open the door.Close the oven door without pushing the child lock. |
| To remove the child lock: | ||
| Step 1 Open | the door and remove the child lock with the torx key supplied with the oven. | 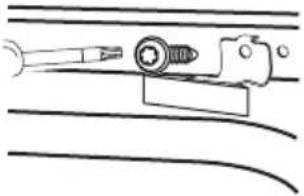 |
| Step 2 Fix the | the screw back after removing the child lock. | |
Daily use

Warning! Refer to Safety chapters.
How to set: Heating functions
| Step 1 Turn the knob for the heating functions and select a heating function. | |
| Step 2 Turn the control knob to set the temperature. | |
| ### - press and hold to turn on the function: Fast Heat Up. It is available for some oven functions. |
| Steam cooking | |||
| Make sure that the oven is cold. | |||
| Step 1 Step 2 Step 3 Step 4 | |||
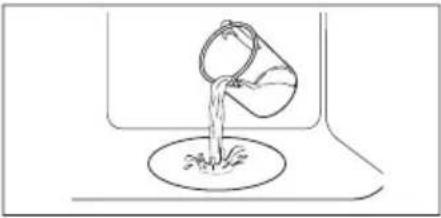 |  |  | Preheat the empty oven for 10 min to create humidity. Put food in the oven. |
| Fill the cavity embossment with tap water. | Select the steam heating function. | Set the temperature. | |
| i The maximum capacity of the cavity embossment is 250 ml. Do not refill the cavity em-bossment during cooking or when the oven is hot. | |||
| When the steam cooking ends: | ||
| Step 1 Step 2 Step | 3 | |
| Turn the knob for the heating functions to the off position to turn off the oven. | Carefully open the door. Re-leased humidity can cause burns. | Make sure that the oven is cold. Remove the remaining water from the cavity em-bossment. |
Heating functions
| Heating function Application | |
 True Fan Cooking True Fan Cooking | To bake on up to three shelf positions at the same time and to dry food. Set the temperature 20 - 40 °C lower than for Conventional Cooking. |
 Conventional Cook-ing Conventional Cook-ing | To bake and roast food on one shelf position. |
 SteamBake SteamBake | To add humidity during the cooking. To get the right colour and crispy crust during baking. To give more juiciness during reheating. To preserve fruit or vegetables. |
 Pizza Function Pizza Function | To bake pizza. To make intensive browning and a crispy bottom. |
 Bottom Heat Bottom Heat | To bake cakes with crispy bottom and to preserve food. |
 Frozen Foods Frozen Foods | To make convenience food (e.g., french fries, potato wedges or spring rolls) crispy. |
 Moist Fan Baking Moist Fan Baking | This function is designed to save energy during cooking. When you use this function, the temperature in the cavity may differ from the set temperature. The residual heat is used. The heating power may be reduced. For more information refer to "Daily Use" chapter, Notes on: Moist Fan Baking. |
 Grill Grill | To grill thin pieces of food and to toast bread. |
 Turbo Grilling Turbo Grilling | To roast large meat joints or poultry with bones on one shelf position. To make gratins and to brown. |
| ≡Menu | To enter the Menu: Assisted Cooking, Cleaning, Settings. |

True Fan Cooking, Conventional Cooking: When you set the temperature below 80 °C the lamp automatically turns off after 30 sec.
Notes on: Moist Fan Baking
This function was used to comply with the energy efficiency class and ecodesign requirements. Tests according to:
BS EN 60350-1
The oven door should be closed during cooking so that the function is not
interrupted and the oven operates with the highest energy efficiency possible.
When you use this function the lamp automatically turns off after 30 sec.
For the cooking instructions refer to "Hints and tips" chapter, Moist Fan Baking.
How to set: Assisted Cooking
Every dish in this submenu has a recommended heating function and temperature. Use the function to prepare a dish quickly with default settings. You can also adjust the time and the temperature during cooking.
| For some of the dishes you can also cook with: | The degree to which a dish is cooked: |
| • Food Sensor • Rare | • Medium• Well done |
| Step 1 Step 2 Step 3 Step 4 | |||
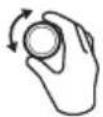 |  |  |  |
| ≡ | ✕ | P1 - P45 | OK |
| Enter the menu. Select Assisted Cooking. Press OK | Select the dish. Press OK. | Insert the dish to the oven. Confirm setting. | |
Assisted Cooking
| Legend | |
 | Food sensor available. Place the Food sensor in the thickest part of the dish.The appliance turns off when the set Food sensor temperature is reached. |
 | The amount of water for the steam function. |
 | Preheat the appliance before you start cooking. |
 | Shelf level. |
The display shows P and a number of the dish that you can check in the table.
When the function ends check if the food is ready.
| Dish Weight | Shelf level / Accessory | |
 | Roast Beef, rare | 1 - 1.5 kg; 4 - 5 cm thick pieces |
| [W47A] | Roast Beef, medium | |
 | Roast Beef, well done | |
 | Steak, medium 180 | - 220 g per piece; 3 cm thick slices |
  | Beef roast / braised (prime rib, top round, thick flank) | 1.5 - 2 kg |
| Dish Weight | Shelf level / Accessory | ||
| 6 | Roast Beef, rare (slow cooking) | 1 - 1.5 kg; 4 - 5 cm thick pieces | baking trayUse your favourite spices or simply salt and fresh grounded pepper. Fry the meat for a few minutes on a hot pan. Insert to the appliance. |
| 7 | Roast Beef, medium (slow cooking) | ||
| 8 | Roast Beef, well done (slow cooking) | ||
| 9 | Fillet, rare (slow cooking) | 0,5 - 1.5 kg; 5 - 6 cm thick pieces | baking trayUse your favourite spices or simply salt and fresh grounded pepper. Fry the meat for a few minutes on a hot pan. Insert to the appliance. |
| 10 | Fillet, medium (slow cooking) | ||
| 11 | Fillet, done (slow cooking) | ||
| 12 | Veal roast (e.g. shoulder) | 0.8 - 1.5 kg; 4 cm thick pieces | roasting dish on wire shelfUse your favourite spices. Add liquid. Roast covered. |
| 13 | Pork roast neck or shoulder | 1.5 - 2 kg | 2; roasting dish on wire shelfTurn the meat after half of the cooking time. |
| 14 | Pulled pork (slow cooking) | 1.5 - 2 kg | baking trayUse your favourite spices. Turn the meat after half of the cooking time to get an even browning. |
| 15 | Loin, fresh 1 - 1.5 kg; 5 - 6 cm thick pieces | roasting dish on wire shelfUse your favourite spices. | |
| 16 | Spare Ribs 2 - 3 kg; use raw, 2 - 3 cm thin spare ribs | 3; deep panAdd liquid to cover the bottom of a dish. Turn the meat after half of the cooking time. | |
| 17 | Lamb leg with bones | 1.5 - 2 kg; 7 - 9 cm thick pieces | roasting dish on baking trayAdd liquid. Turn the meat after half of the cooking time. |
| 18 | Whole chicken 1 - 1.5 kg; fresh | 200 ml; casserole dish on baking trayUse your favourite spices. Turn the chicken after half of the cooking time to get an even browning. | |
| 19 | Half chicken 0.5 - 0.8 kg | baking trayUse your favourite spices. | |
| 20 | Chicken breast 180 | - 200 g per piececasserole dish on wire shelfUse your favourite spices. Fry the meat for a few minutes on a hot pan. | |
| 21 | Chicken legs, fresh | - baking trayIf you marinated chicken legs first, set lower temperature and cook them longer. | |
| 22 | Duck, whole 2 - 3 kg | roasting dish on wire shelfUse your favourite spices. Put the meat on roasting dish. Turn the duck after half of the cooking time. | |
| 23 | Goose, whole 4 - 5 kg | deep panUse your favourite spices. Put the meat on deep baking tray. Turn the goose after half of the cooking time. | |
| 24 | Meat loaf 1 kg | wire shelfUse your favourite spices. | |
| 25 | Whole fish, grilled | 0.5 - 1 kgper fishbaking trayFill the fish with butter and use your favourite spices and herbs. | |
| 26 | Fish fillet- | ||
| 27 | Cheesecake - | ||
| 28 | Apple cake - | ||
| 29 | Apple tart - | ||
| 30 | Apple pie - | ||
| 31 | Brownies | 2 kg of dough3; deep pan | |
| 32 | Chocolate muffins | - 2; 400 - 150 ml; muffin tray on wire shelf | |
| 33 | Loaf cake | - 2; loaf pan on wire shelf | |
| 34 | Baked potatoes 1 kg | 2; baking trayPut the whole potatoes with skin on baking tray. | |
| 35 | Wedges 1 kg | ||
| 36 | Grilled mixed vegetables | 1 - 1.5 kg | |
| 37 | Croquets, frozen 0.5 kg | 3; baking tray | |
| 38 | Pommes, frozen 0.75 kg | 3; baking tray | |
| 39 | Meat / vegetable lasagna with dry noodle plates | 1 - 1.5 kg | |
| 40 | Potato gratin (raw potatoes) | 1 - 1.5 kg | |
| 41 | Pizza fresh, thin | - | |
| 42 | Pizza fresh, thick | - | |
| 43 | Quiche - | ||
| 44 | Baguette / Cia-batta / White bread | 0.8 kg | |
| 45 | All grain / rye / dark bread all grain in loaf pan | 1 kg | |
Clock functions
Clock functions
| Clock Function Application | |
| [2007]Minute minder | When the timer ends, the signal sounds. |
| [KWOT]Cooking time | When the timer ends, the signal sounds and the heating function stops. |
 Time Delay Time Delay | To postpone the start and / or end of cooking. |
| [SABA]Uptimer | Maximum is 23 h 59 min. This function has no effect on the operation of the oven.To turn on and off the Uptimer select: Menu, Settings. |
How to set: Clock functions
| How to set: Time of day | ||
| Step 1 Step 2 Step 3 | ||
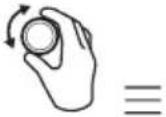 |  |  |
| To change the time of day enter the menu and select Settings, Time of day. Refer to "Menu structure" chapter. | Set the clock. | Press: OK |
| How to set: Minute minder | |||
| Step 1 | The display shows:0:00 | Step 2 Step 3 | |
 |  |  | |
| Press: ⏻ | Set the Minute minder | Press: OK | |
| i Timer starts counting down immediately. | |||
| How to set: Cooking time | ||||
| Step 1 Step 2 | The display shows:0:00 | Step 3 Step 4 | ||
 |  |  |  | |
| Choose a heating function and set the temperature. | Press repeatedly: [IMAGE]. | Set the cooking time. | Press: OK | |
| How to set: Cooking time | ||||
| Step 1 Step 2 | The display shows:0:00STOP | Step 3 Step 4 | ||
| Choose a heating function and set the temperature. | Press repeatedly:☐. | Set the cooking time. | Press: ☑K | |
| How to set: Cooking time |
| i Timer starts counting down immediately. |
| How to set: Time Delay | |||||||
| Step 1 Step 2 | The display shows: the time of daySTART | Step 3 Step 4 | The display shows:--:--STOP | Step 5 Step 6 | |||
 |  |  |  |  |  | ||
| Select the heating function. | Press repeatedly: ). | Set the start time. | Press: OK | Set the end time. | Press: OK. | ||
| i Timer starts counting down at a set start time. | |||||||
Using the accessories

Warning! Refer to Safety chapters.
devices. The high rim around the shelf prevents cookware from slipping off the shelf.
Inserting accessories
A small indentation at the top increases safety. The indentations are also anti-tip
Wire shelf:
Push the shelf between the guide bars of the shelf support and make sure that the feet point down.

| Baking tray / Deep pan:Push the tray between the guide bars of the shelf support. | 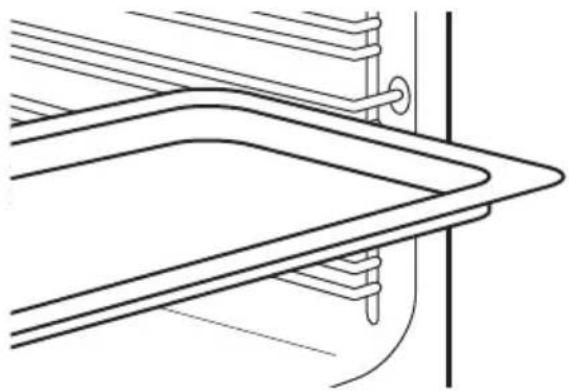 |
Food Sensor
Food Sensor - measures the temperature inside the food.
| There are two temperatures to be set: | |
| [072A]The oven temperature. |  The core temperature. The core temperature. |
| For the best cooking results: | ||
| Ingredients should be at room temperature. | Do not use it for liquid dishes. | During cooking it must remain in the dish. |
How to use: Food Sensor
| Step 1 Turn on the oven. | ||
| Step 2 Set a heating function and, if necessary, the oven temperature. | ||
| Step 3 Insert: Food Sensor. | ||
| Meat, poultry and fishCasserole | ||
| Insert the tip of Food Sensor into the centre of meat, fish, in the thickest part if possible. Make sure that at least 3/4 of Food Sensor is inside of the dish. | Insert the tip of Food Sensor exactly in the centre of the casserole. Food Sensor should be stabilized in one place during baking. Use a solid ingredient to achieve that. Use the rim of the baking dish to support the silicone handle of Food Sensor. The tip of Food Sensor should not touch the bottom of a baking dish. | |
 |  | |
| Step 4 Plug Food Sensor into the socket at the front of the oven.The display shows the current temperature of: Food Sensor. | ||
| Step 5 | - press to set the core temperature of the sensor. | |
| Step 6 | OK - press to confirm.When food reaches the set temperature, the signal sounds. You can choose to stop or to continue cooking to make sure the food is well done. | |
| Step 7 Remove Food Sensor plug from the socket and remove the dish from the oven.Warning! There is a risk of burns as Food Sensor becomes hot. Be careful when you unplug it and remove it from the food. | ||
How to use: telescopic runners

Keep the installation instructions for the telescopic runners for future use.

Caution! Do not clean the telescopic runners in the dishwasher. Do not lubricate the telescopic runners.
With telescopic runners you can put in and remove wire shelves and trays easily.
| Step 1 Pull out the right and left hand telescopic runners. |  |
| Step 2 Put the wire shelf on the telescopic runners and carefully push them into the oven.Make sure you push back the telescopic run-ners fully in the oven before you close the oven door. |  |
Additional functions
Lock
| This function prevents an accidental change of the appliance function. | ||
| Turn it on when the appliance works - the set cooking continues, the control panel is locked.Turn it on when the appliance is off - it cannot be turned on, the control panel is locked. | ||
 OK OK | OK- press and hold to turn on the function.A signal sounds. | OK- press and hold to turn it off. |
| i 3 x flashes when the lock is turned on. | ||
Automatic switch-off
For safety reasons the appliance turns off after some time, if a heating function works and you do not change any settings.
| (°C) (h) | |
| 30 - 115 12.5 | |
| 120 - 195 8.5 | |
| 200 - 245 5.5 |
 (°C) (h) (°C) (h) |  | ||
| 250 - maximum 3 | |||
The Automatic switch-off does not work with the functions: Light, Food sensor, Time Delay.
Cooling fan
When the appliance operates, the cooling fan turns on automatically to keep the surfaces of the appliance cool. If you turn off the appliance, the cooling fan can continue to operate until the appliance cools down.
Hints and tips
Cooking recommendations
| i |
| The temperature and cooking times in the tables are guidelines only. They depend on the recipes and the quality and quantity of the ingredients used.Your appliance may bake or roast differently to the appliance you had before. The hints below show recommended settings for temperature, cooking time and shelf position for specific types of the food.If you cannot find the settings for a special recipe, look for the similar one. |
Moist Fan Baking
For the best results follow suggestions listed in the table below.
 |  |  (°C) (min) (°C) (min) |  |  |
| Sweet rolls, 16 pieces | baking tray or dripping pan | 180 2 20 - 30 | ||
| Rolls, 9 pieces baking pan | tray or dripping | 180 2 30 - 40 | ||
| Pizza, frozen, 0.35 kg | wire shelf 220 2 10 - 15 | |||
| Swiss Roll baking tray or dripping pan | 170 2 25 - 35 | |||
| Brownie baking tray or dripping pan | 175 3 25 - 30 | |||
| Soufflè, 6 pieces ceramic ramekins on wire shelf | 200 3 25 - 30 | |||
| Sponge flan base flan base tin on wire shelf | 180 2 15 - 25 | |||
| Victoria sandwich baking dish on wire shelf 170 2 40 - 50 | ||||
| Poached fish, 0.3 kg | baking tray or dripping pan | 180 3 20 - 25 | ||
| Whole fish, 0.2 kg baking tray or dripping pan | 180 3 25 - 35 | |||
| Fish fillet, 0.3 kg pizza pan on wire shelf 180 3 | 25 - 30 | |||
| Poached meat, 0.25 kg | baking tray or dripping pan | 200 3 35 - 45 | ||
| Shashlik, 0.5 kg baking tray or dripping pan | 200 3 25 - 30 | |||
| Cookies, 16 pieces baking tray or dripping pan | 180 2 20 - 30 | |||
| Macaroons, 24 pieces | baking tray or dripping pan | 180 2 25 - 35 | ||
| Muffins, 12 pieces baking tray or dripping pan | 170 2 30 - 40 | |||
| Savory pastry, 20 pieces | baking tray or dripping pan | 180 2 25 - 30 | ||
| Short crust biscuits, 20 pieces | baking tray or dripping pan | 150 2 25 - 35 | ||
| Tartlets, 8 pieces baking tray or dripping pan | 170 2 20 - 30 | |||
| Vegetables, poached, 0.4 kg | baking tray or dripping pan | 180 3 35 - 45 | ||
| Vegetarian omelette | pizza pan on wire shelf 20 | 0 3 25 - 30 | ||
| Mediterranean vegetables, 0.7 kg | baking tray or dripping pan | 180 4 25 - 30 | ||
Moist Fan Baking - recommended accessories
Use the dark and non-reflective tins and containers. They have better heat absorption than the light colour and reflective dishes.
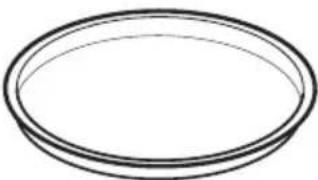 Pizza pan Pizza pan |  Baking dish Baking dish |  Ramekins Ramekins |  Flan base tin Flan base tin |
| Dark, non-reflective 28 cm diameter | Dark, non-reflective 26 cm diameter | Ceramic 8 cm diameter, 5 cm height | Dark, non-reflective 28 cm diameter |
Cooking tables for test institutes
Information for test institutes
Tests according to IEC 60350-1.
 |  |  |  |  (°C) (min) (°C) (min) |  |  |
| Small cakes, 20 per tray | Conventional Cooking | Baking tray | 3 170 20 - 35 | - | ||
| Small cakes, 20 per tray | True Fan Cooking | Baking tray | 3 150 - 160 | 20 - 35 - | ||
| Small cakes, 20 per tray | True Fan Cooking | Baking tray | 2 and 4 150 | - 160 20 - 35 | - | |
| Apple pie, 2 tins ∅20 cm | Conventional Cooking | Wire shelf 2 | 180 70 - 90 | - | ||
| Apple pie, 2 tins ∅20 cm | True Fan Cooking | Wire shelf 2 | 160 70 - 90 | - | ||
| Fatless sponge cake, cake mould ∅26 cm | Conventional Cooking | Wire shelf 2 | 170 40 - 50 | Preheat the oven | for 10 min | |
| Fatless sponge cake, cake mould ∅26 cm | True Fan Cooking | Wire shelf 2 | 160 40 - 50 | Preheat the oven | for 10 min | |
| Fatless sponge cake, cake mould ∅26 cm | True Fan Cooking | Wire shelf 2 | and 4 160 40 | - 60 Preheat the oven | for 10 min | |
| Short bread | True Fan Cooking | Baking tray | 3 140 - 150 | 20 - 40 - | ||
| Short bread | True Fan Cooking | Baking tray | 2 and 4 140 | - 150 25 - 45 - | ||
| Short bread | Conventional Cooking | Baking tray | 3 140 - 150 | 25 - 45 - | ||
| Toast, 4 - 6 pieces | Grill Wire shelf 4 max. 1 - 5 Preheat the oven | for 10 min | ||||
| Beef burger, 6 pieces, 0.6 kg | Grill Wire shelf, dripping pan | 4 max. 20 - 30 Put the wire shelf | on the fourth level and the dripping pan on the third level of the oven. Turn the food halfway through the cooking time. Preheat the oven for 10 min | |||
Care and cleaning

Warning! Refer to Safety chapters.
Notes on cleaning
 | Clean the front of the appliance only with a microfibre cloth with warm water and a mild detergent. |
| Use a cleaning solution to clean metal surfaces. | |
 | Clean stains with a mild detergent. |
 Everyday Use Everyday Use | Clean the cavity after each use. Fat accumulation or other residue may cause fire. |
| Moisture can condense in the appliance or on the door glass panels. To decrease the condensation, let the appliance work for 10 minutes before cooking. Do not store the food in the appliance for longer than 20 minutes. Dry the cavity only with a microfibre cloth after each use. |
 Accessories Accessories | Clean all accessories after each use and let them dry. Use only a microfibre cloth with warm water and a mild detergent. Do not clean the accessories in a dishwasher. |
| Do not clean the non-stick accessories using abrasive cleaner or sharp-edged objects. |
How to clean: Cavity embossment
Clean the cavity embossment to remove limestone residue after cooking with steam.
| Step 1 Step 2 Step | 3 | |
| Pour: 250 ml of white vinegar into the cavity embossment. Use maximum 6% vinegar without any additives. | Let the vinegar dissolve the limestone residue at the ambient temperature for 30 minutes. | Clean the cavity with warm water and a soft cloth. |
| For the function: SteamBake clean the oven for every 5 - 10 cooking cycles. | ||
How to remove: Shelf supports
Remove the shelf supports to clean the oven.
| Step 1 Turn off the oven and wait until it is cold. |  | |
| Step 2 Pull the front of the shelf support away from the side wall. | ||
| Step 3 Pull | the rear end of the shelf support away from the side wall and remove it. |
| Step 4 Install | all the shelf supports in the opposite sequence.The retaining pins on the telescopic runners must point to the front. |

How to use: Pyrolytic Cleaning
Clean the oven with Pyrolytic Cleaning.

Warning! There is a risk of burns.

Caution! If there are other appliances installed in the same cabinet, do not use them at the same time as this function. It can cause damage to the oven.

Warning! Ensure that any pets (especially birds) are taken as far as possible from the vicinity of the appliance location during and after the Pyrolytic cleaning and first use maximum temperature operation. Keeping them in a different room would be the preferred option during the pyrolytic cycle and until appliance has cooled down again to room temperature. Good ventilation has to be provided during and after (till appliance cool down) operations of the pyrolytic cycle and first maximum temperature use cycle.

Warning! Before carrying out a Pyrolytic self-cleaning function or the First Use, please remove from the oven cavity:
- Any excess food residues, oil or grease spills / deposits. - Any removable objects (including shelves, side rails / telescopic runners, etc. provided with the product) particularly any non-stick pots, pans, trays, utensils etc.
Before you turn on the Pyrolysis:
- remove all the accessories and removable shelf supports.
- clean the oven floor with warm water and mild detergent.
- clean the inner door glass with warm water and soft cloth.
- close the oven door.
| Before the Pyrolytic Cleaning: | ||
| Turn off the oven and wait until it is cold. | Remove all accessories. Clean the oven floor and the inner door glass with warm water, a soft cloth and a mild detergent. | |
| Pyrolytic Cleaning | ||
| Step 1 | Enter menu: Cleaning | |
| Option Duration | ||
| C1 - Light cleaning 1 h | ||
| C2 - Normal cleaning 1 h 30 min | ||
| C3 - Thorough cleaning 2 h 30 min | ||
| Step 2 | OK- press to select the cleaning programme. | |
| Step 3 | OK- press to start the cleaning. | |
| Step 4 | After cleaning, turn the knob for the heating functions to the off position. | |
| When the cleaning starts, the oven door is locked and the lamp is off. Until the door unlocks the display shows: | ||
| When the cleaning ends: | ||
| Turn off the oven and wait until it is cold. | Clean the cavity with a soft cloth. | Remove the residue from the bottom of the cavity. |
Cleaning Reminder
| The oven reminds you when to clean it with pyrolytic cleaning. | |
| flashes in the display for 5 sec after each cooking session. | To turn off the reminder enter the Menu and select Settings, Cleaning Reminder. |
How to remove and install: Door
The oven door has three glass panels. You can remove the oven door and the internal glass panels to clean them. Read the whole "Removing and installing door" instruction before you remove the glass panels.

Caution! Do not use the oven without the glass panels.
| Step 1 Open the door fully and hold both hinges. | 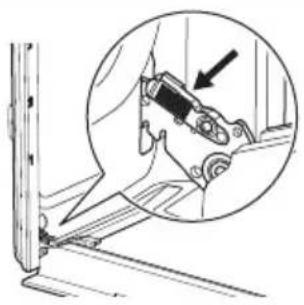 | |
| Step 2 Lift and pull the latches until they click. |  | |
| Step 3 Close the oven door halfway to the first opening position. Then lift and pull to remove the door from its seat. |  | |
| Step 4 Put the door on a soft cloth on a stable surface. | ||
| Step 5 Hold the door trim (B) on the top edge of the door at the two sides and push inwards to release the clip seal. |  | |
| Step 6 Pull the door trim to the front to remove it. | ||
| Step 7 Hold the door glass panels by their top edge and carefully pull them out one by one. Start from the top panel. Make sure the glass slides out of the supports completely. |  | |
| Step 8 Clean the glass panels with water and soap. Dry the glass panels carefully. Do not clean the glass panels in the dishwasher. |
| Step 9 After cleaning, install the glass panels, the door trim and the oven door, close the latches on the both hinges. |
| If the door is installed correctly, you will hear a click when closing the latches. |
Make sure that you put the glass panels (A and B) back in the correct sequence. Check for the symbol / printing on the side of the glass panel, each of the glass panels looks different to make the disassembly and assembly easier.
The screen-printing zone must face the inner side of the door. Make sure that after the installation the surface of the glass panel frame on the screen-printing zones is not rough when you touch it.
When installed correctly the door trim clicks.
Make sure that you install the middle panel of glass in the seats correctly.

How to replace: Lamp

Warning! Risk of electric shock. The lamp can be hot.
Always hold the halogen lamp with a cloth to prevent grease residue from burning on the lamp.
| Before you replace the lamp: | ||
| Step 1 Step 2 Step | 3 | |
| Turn off the oven. Wait until the oven is cold. | Disconnect the oven from the mains. | Put a cloth on the bottom of the cavity. |
Back lamp
Step 1: Turn the glass cover to remove it.
| Step 2 Clean the glass cover. | |
| Step 3 Replace the lamp with a suitable 300 °C heat-resistant lamp. | |
| Step 4 Install the glass cover. |
Troubleshooting

Warning! Refer to Safety chapters.
What to do if...
In any cases not included in this table, please contact an Authorised Service Centre.
| The appliance does not turn on or does not heat up | |
| Problem Check if... | |
| The appliance does not heat up. The automatic switch-off is deactivated. | |
| The appliance does not heat up. The appliance door is closed. | |
| The appliance does not heat up. The fuse is not blown. | |
| The appliance does not heat up. The Lock is off. | |
| Components | |
| Problem Check if... | |
| The lamp is turned off.Moist Fan Baking - is turned on. | |
| The lamp does not work. The lamp is burnt out. | |
| The Food sensor does not operate. The plug of the Food sensor is fully inserted into the socket. | |
| Error codes | |
| The display shows... Check if... | |
| Err C2 You removed the Food sensor plug from the socket. | |
| Err C3 The appliance door is closed or the door lock is not broken. | |
| Err F102 The appliance door is closed. | |
| Err F102 The door lock is not broken. | |
| 00:00 There was a power cut. Set the time of day. | |
| If the display shows an error code that is not in this table turn the house fuse off and on to restart the appliance. If the error code recurs contact an Authorised Service Centre. | |
| Cleaning | |
| Problem Check if... | |
| The water leaks out of the cavity emboss-ment. | There is too much water in the cavity em-bossment. |
Service data
If you cannot find a solution to the problem yourself, contact an Authorised Service Centre.
The necessary data for the service centre is on the rating plate. The rating plate is on the front frame of the appliance cavity. Do not remove the rating plate from the appliance cavity.
| We recommend that you write the data here: | |
| Model (MOD.) | |
| Product number (PNC) | |
| Serial number (S.N.) | |
Technical data
Technical data
| Dimensions (internal) | WidthHeightDepth | 480 mm361 mm416 mm |
| Area of baking tray 1438 cm2 | ||
| Top heating element 2300 W | ||
| Bottom heating element 1000 W | ||
| Grill 2300 W | ||
| Ring 2400 W | ||
| Total rating 3490 W | ||
| Voltage 220 - 240 V | ||
| Frequency 50 - 60 Hz | ||
| Number of functions 9 | ||
Energy efficiency
Product Information Sheet according to UK Ecodesign and Energy Labelling Regulations
| Supplier's name IKEA | ||
| Model identification | FORNEBY 305.569.03 FORNEBY 905.568.96 | |
| Energy Efficiency Index 81.2 | ||
| Energy efficiency class A+ | ||
| Energy consumption with a standard load, conventional mode | 0.93 kWh/cycle | |
| Energy consumption with a standard load, fan-forced mode | 0.69 kWh/cycle | |
| Number of cavities 1 | ||
| Heat source Electricity | ||
| Volume 72 l | ||
| Type of oven Built-In Oven | ||
| Mass | FORNEBY 305.569.03 | 34.0 kg |
| FORNEBY 905.568.96 | 34.0 kg | |
| BS EN 60350-1 - Household electric cooking appliances - Part 1: Ranges, ovens, steam ovens and grills - Methods for measuring performance. | ||
Energy saving

The appliance has features which help you save energy during everyday cooking.
Make sure that the appliance door is closed when the appliance operates. Do not open the appliance door too often during cooking. Keep the door gasket clean and make sure it is well fixed in its position.
Use metal cookware to improve energy saving.
When possible, do not preheat the appliance before cooking.
Keep breaks between baking as short as possible when you prepare a few dishes at one time.
Cooking with fan
When possible, use the cooking functions with fan to save energy.
Residual heat
The fan and lamp continue to operate. When you turn off the appliance, the display shows the residual heat. You can use that heat to keep the food warm.
When the cooking duration is longer than 30 min, reduce the appliance temperature to minimum 3 - 10 min before the end of
cooking. The residual heat inside the appliance will continue to cook.
Use the residual heat to warm up other dishes.
Keep food warm
Choose the lowest possible temperature setting to use residual heat and keep a meal warm. The residual heat indicator or temperature appears on the display.
Cooking with the lamp off
Turn off the lamp during cooking. Turn it on only when you need it.
Moist Fan Baking
Function designed to save energy during cooking.
When you use this function the lamp automatically turns off after 30 sec. You may turn on the lamp again but this action will reduce the expected energy savings.
Menu structure
Menu
| Step 1 Step | 2 Step 3 Step 4 Step 5 | |||
 |  |  |  | 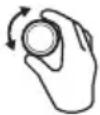 |
| ≡ - select to enter the Menu. | Select the option from Menu struc-ture and press OK. | Select the set-ting. | OK - press to confirm setting. | Adjust the value and press OK |
| Turn the knob for the heating functions to the off position to exit the Menu. | ||||
| Menu structure | ||
| Assisted Cooking ✗ | Cleaning √ | Settings ⚙️ |
| Settings | |||||
| 01 Time of day Change 02 Display brightness | 1 - 5 | ||||
| 03 Key tones 1 - Beep | 2 - Click3 - Sound off | 04 Buzzer volume 1 - 4 | |||
| 05 Food Sensor Action 1 - Alarm and stop2 - Alarm | 06 Optimer On / Off | ||||
| 07 Light On / Off08 Fast Heat | Up On | / Off | |||
| 09 Cl | cleaning Reminder On / Off10 Demo mode Activation | code: 2468 | |||
| 11 Software version Check 12 | Reset all settings Yes / No | ||||
Environmental concerns
Recycle materials with the symbol. Put the packaging in relevant containers to recycle it. Help protect the environment and human health by recycling waste of electrical and electronic appliances. Do not dispose of
appliances marked with the symbol with the household waste. Return the product to your local recycling facility or contact your municipal office.
IKEA guarantee
How long is the IKEA guarantee valid?
This guarantee is valid for 5 years from the original date of purchase of your appliance at IKEA. The original sales receipt is required as proof of purchase. If service work is carried out under guarantee, this will not extend the guarantee period for the appliance.
Who will execute the service?
IKEA service provider will provide the service through its own service operations or authorized service partner network.
What does this guarantee cover?
The guarantee covers faults of the appliance, which have been caused by faulty construction or material faults from the date of purchase from IKEA. This guarantee applies to domestic use only. The exceptions are specified under the headline "What is not covered under this guarantee?" Within the guarantee period, the costs to remedy the fault e.g. repairs, parts, labour and travel will be covered, provided that the appliance is accessible for repair without special expenditure. On these conditions the EU guidelines (Nr. 99/44/EG) and the respective
local regulations are applicable. Replaced parts become the property of IKEA.
What will IKEA do to correct the problem?
IKEA appointed service provider will examine the product and decide, at its sole discretion, if it is covered under this guarantee. If considered covered, IKEA service provider or its authorized service partner through its own service operations, will then, at its sole discretion, either repair the defective product or replace it with the same or a comparable product.
What is not covered under this guarantee?
• Normal wear and tear. - Deliberate or negligent damage, damage caused by failure to observe operating instructions, incorrect installation or by connection to the wrong voltage, damage caused by chemical or electro-chemical reaction, rust, corrosion or water damage including but not limited to damage caused by excessive lime in the water supply, damage caused by abnormal environmental conditions. - Consumable parts including batteries and lamps.
• Non-functional and decorative parts which do not affect normal use of the appliance, including any scratches and possible color differences. - Accidental damage caused by foreign objects or substances and cleaning or unblocking of filters, drainage systems or soap drawers. - Damage to the following parts: ceramic glass, accessories, crockery and cutlery baskets, feed and drainage pipes, seals, lamps and lamp covers, screens, knobs, casings and parts of casings. Unless such damages can be proved to have been caused by production faults. - Cases where no fault could be found during a technician's visit. - Repairs not carried out by our appointed service providers and/or an authorized service contractual partner or where non-original parts have been used. - Repairs caused by installation which is faulty or not according to specification. - The use of the appliance in a non-domestic environment i.e. professional use. - Transportation damages. If a customer transports the product to their home or other address, IKEA is not liable for any damage that may occur during transport. However, if IKEA delivers the product to the customer's delivery address, then damage to the product that occurs during this delivery will be covered by this guarantee. - Cost for carrying out the initial installation of the IKEA appliance. However, if an IKEA service provider or its authorized service partner repairs or replaces the appliance under the terms of this guarantee, the service provider or its authorized service partner will re-install the repaired appliance or install the replacement, if necessary.
This restriction does not apply to fault-free work carried out by a qualified specialist using our original parts in order to adapt the appliance to the technical safety specifications of another EU country.
How country law applies
The IKEA guarantee gives you specific legal rights, which cover or exceed local demands. However, these conditions do not limit in any way consumer rights described in the local legislation.
Area of validity
For appliances which are purchased in one EU country and taken to another EU country, the services will be provided in the framework of the guarantee conditions normal in the new country. An obligation to carry out services in the framework of the guarantee exists only if the appliance complies and is installed in accordance with:
- the technical specifications of the country in which the guarantee claim is made; • the Assembly Instructions and User Manual Safety Information;
The dedicated After Sales Service for IKEA appliances:
Please do not hesitate to contact IKEA After Sales Service to:
- make a service request under this guarantee;
- ask for clarification on installation of the IKEA appliance in the dedicated IKEA kitchen furniture. The service won't provide clarifications related to:
- the overall IKEA kitchen installation;
- connections to electricity (if machine comes without plug and cable), to water and to gas since they have to be executed by an authorized service engineer.
- ask for clarification on user manual contents and specifications of the IKEA appliance.
To ensure that we provide you with the best assistance, please read carefully the Assembly Instructions and/or the User Manual section of this booklet before contacting us.
How to reach us if you need our service
Please refer to the last page of this manual for the full list of IKEA appointed contacts and relative national phone numbers.

In order to provide you with a quicker service, we recommend that you use the specific phone numbers listed at the end of this manual. Always refer to the numbers listed in the booklet of the specific appliance you need an assistance for. Before calling us, assure that you have to hand the IKEA article number (8 digit code) and the Serial Number (8 digit code that can be found on the rating plate) for the appliance of which you need our assistance.

SAVE THE SALES RECEIPT! It is your proof of purchase and required for the guarantee to apply. Note that the receipt reports also the IKEA article name and number (8 digit code) for each of the appliances you have purchased.
Do you need extra help?
For any additional questions not related to After Sales of your appliances, please contact our nearest IKEA store call centre. We recommend you read the appliance documentation carefully before contacting us.
| Country Phone number Call Fee Opening time | |||
| België | 070 246016 | Binnenlandse gesprekskosten | 8 tot 20 Weekdagen |
| Belgique Tarif des appels nationaux 8 à 20. | En semaine | ||
| България +359 2 492 9397 | Според тарифата на оператора за обаждания към стационарен номер | От 8:30 до 17:30 ч в работни дни | |
| Česká Republika | 246 019721 Cena za místní hovor 8 až 20 v pracovních dnech | ||
| Danmark | 7015 09 09 | Landstakst | man. - fre. 09.00 - 20.00lør. - søn. 09.00 - 18.00 |
| Deutschland | +49 1806 33 45 32* | * 0,20 €/Verbindung aus dem Festnetz max. 0,60 €/Verbindung aus dem Mobilfunknetz | Werktags von 8.00 bis 20.00 |
| Еллáδα | 211 176 8276 | Упераστική κλήση | 8 éws 20 катá тис ерγάσψες ημέρες |
| España | 91 1875537 | Tarifa de llamadas nacionales | De 8 a 20 en días laborables |
| France | 0170 36 02 05 | Tarif des appels nationaux | 9 à 21. En semaine |
| Hrvatska | 00385 1 6323 339 | Cijena ovisi o pružatelju telefonske usluge korisnika | radnim danom od ponedjeljka do petka od 08:00 do 16:00 |
| Ireland | 0 14845915 | National call rate | 8 till 20 Weekdays |
| Ísland | +354 5852409 | Innanlandsgjald fyrir síma | 9 til 18. Virka daga |
| Italia | 02 00620818 | Tariffa applicata alle chiamate nazionali | dalle 8 alle 20 nei giorni feriali |
| Купроç | 22 030 529 | Упераστική κλήση | 8.30 éws 16.30 катá тис ерγάσψες ημέρες |
| Lietuva | 5 230 06 99 | Nacionalinių pokalbių tarifai | Pr. - Ketv.: 8:00 - 12:00, 12:45 - 17:00 Pn 8:00 - 12:00, 12:45 - 15:45 |
| Magyarország | 06-1-252-1773 | Belföldi dijszabás | Hétköznap 8.00 és 17.00 óra között |
| Nederland Luxembourg | 050-7111267(0900-BEL IKEA)+31 507111267(internationaal) | Geen extra kosten.Alleen lokaal tarief. | ma-vr: 8.00 - 21.00zat: 9.00 - 21.00zon / pub. vakantie: 10.00 - 18.00 |
| Norge | 2272 35 00 | Takst innland | 8 til 18 ukedager |
| Österreich | +43-1-2056356 | max. 10 Cent/min. | Mo - Fr 8.00 - 20.00 Uhr |
| Polska | 801 400 711 and+48 22 749 60 99 | Koszt zgodny z taryfą operatora | Od 8 do 20 w dni robocze |
| Portugal | 211557985 | Chamada Nacional | 9 às 21. Dias de Semana *excepto feriados |
| România | 021 211 08 88 | Tarif apel național | 8 - 20în zilele lucrătoare |
| Россия | 8 495 6662929 | Действующие телефонные тарифы | с 8 до 20 по рабочим дням Время московское |
| Schweiz | 031 5500 324 | Tarif für Anrufe im Bundesgebiet | 8 bis 20 Werktage |
| Suisse | Tarif des appels nationaux 8 à 20. En semaine | ||
| Svizzera | Tariffa applicata alle chiamate nazionali | dalle 8 alle 20 nei giorni feriali | |
| Slovenija | +38618108621 | lokalni strošek je običajna tržna vrednost, odvisna od ponudnika telefonije | 8.00 - 16.00 ob delavnikih |
| Slovensko | (02) 3300 2554 | Cena vnútroštátneho hovoru | 8 až 20 v pracovných dňoch |
| Suomi | 030 6005203 | pvm/mpm | Ma - To 8:00 -18:00Pe 9:00 -16:00 |
| Sverige | 0775 700 500 | lokalsamtal (lokal taxa) | mân-fre 8.30 - 20.00lör-sön 9.30 - 18.00 |
| United Kingdom | 020 3347 0044 | National call rate | 9 till 21. Weekdays |
| Србија | +381 11 7 555 444(ако позивате изван Србије)011 7 555 444(ако позивате из Србије) | Цена позива у националном саобраћају | Понедельак - субота: 09 - 20Недельа: 09 - 18 |
| Eesti, Latvija, Україна | www.ikea.com | ||


- ENGLISH
- SAFETY INFORMATION
- CHILDREN AND VULNERABLE PEOPLE SAFETY
- GENERAL SAFETY
- SAFETY INSTRUCTIONS
- INSTALLATION
- ELECTRICAL CONNECTION
- USE
- CARE AND CLEANING
- PYROLYTIC CLEANING
- INTERNAL LIGHTING
- SERVICE
- DISPOSAL
- PACKAGING MATERIAL
- ASSEMBLY
- ELECTRICAL INSTALLATION
- PRODUCT DESCRIPTION
- GENERAL OVERVIEW
- ACCESSORIES
- CONTROL PANEL
- BEFORE FIRST USE
- HOW TO USE: MECHANICAL CHILD LOCK
- DAILY USE
- HEATING FUNCTIONS
- NOTES ON: MOIST FAN BAKING
- HOW TO SET: ASSISTED COOKING
- CLOCK FUNCTIONS
- USING THE ACCESSORIES
- INSERTING ACCESSORIES
- WIRE SHELF
- FOOD SENSOR
- HOW TO USE: TELESCOPIC RUNNERS
- ADDITIONAL FUNCTIONS
- AUTOMATIC SWITCH-OFF
- COOLING FAN
- HINTS AND TIPS
- COOKING RECOMMENDATIONS
- MOIST FAN BAKING
- MOIST FAN BAKING - RECOMMENDED ACCESSORIES
- COOKING TABLES FOR TEST INSTITUTES
- HOW TO CLEAN: CAVITY EMBOSSMENT
- HOW TO REMOVE: SHELF SUPPORTS
- HOW TO USE: PYROLYTIC CLEANING
- CLEANING REMINDER
- HOW TO REMOVE AND INSTALL: DOOR
- HOW TO REPLACE: LAMP
- TROUBLESHOOTING
- WHAT TO DO IF
- SERVICE DATA
- TECHNICAL DATA
- ENERGY EFFICIENCY
- ENERGY SAVING
- COOKING WITH FAN
- RESIDUAL HEAT
- KEEP FOOD WARM
- COOKING WITH THE LAMP OFF
- MENU STRUCTURE
- ENVIRONMENTAL CONCERNS
- IKEA GUARANTEE
- HOW LONG IS THE IKEA GUARANTEE VALID
- WHO WILL EXECUTE THE SERVICE
- WHAT DOES THIS GUARANTEE COVER
- WHAT WILL IKEA DO TO CORRECT THE PROBLEM
- WHAT IS NOT COVERED UNDER THIS GUARANTEE
- HOW COUNTRY LAW APPLIES
- AREA OF VALIDITY
- THE DEDICATED AFTER SALES SERVICE FOR IKEA APPLIANCES
- HOW TO REACH US IF YOU NEED OUR SERVICE
- DO YOU NEED EXTRA HELP
Brand : IKEA
Model : FORNEBY
Category : Microwave