
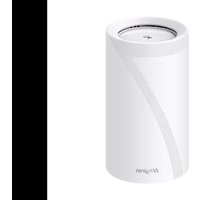
Deco X5400 Pro - Wi-Fi Router TP-LINK - Free user manual and instructions
Find the device manual for free Deco X5400 Pro TP-LINK in PDF.


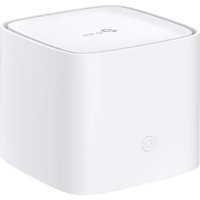
| Product Type | Whole Home Mesh Wi-Fi System |
| Brand | TP-Link |
| Model | Deco X5400 Pro |
| Wi-Fi Standard | 802.11ax (Wi-Fi 6) |
| Frequency Bands | Dual-band: 2.4 GHz (574 Mbps) + 5 GHz (4804 Mbps) |
| Total Speed | AX5400 (Up to 5.4 Gbps) |
| Number of Units | 3-pack (typical), sold in various configurations |
| Ethernet Ports | Per unit: 2 Gigabit WAN/LAN auto-sensing ports |
| Dimensions (Each) | Approx. 3.5 x 3.5 x 6.0 in (89 x 89 x 152 mm) |
| Weight (Each) | Approx. 0.6 lbs (280 g) |
| Power Supply | External AC adapter, 12V/1.5A |
| Coverage | Up to 5,500 sq ft (510 m²) for 3-pack |
| Security | WPA3, TP-Link HomeCare (Antivirus, QoS, Parental Control) |
| App Control | TP-Link Deco App (iOS/Android) for setup and management |
| Voice Control | Amazon Alexa, Google Assistant |
| Mesh Technology | Adaptive routing, seamless roaming, band steering |
| Backhaul | Wired (Ethernet) or wireless backhaul |
| Additional Features | MU-MIMO, OFDMA, Beamforming, IPv6 support |
| Operating Temperature | 32°F to 104°F (0°C to 40°C) |
| Certification | FCC, CE, RoHS |
| Repairability | Not user-serviceable; contact support for repairs |
| Spare Parts Availability | Power adapter and Ethernet cables available from TP-Link |
| Cleaning Instructions | Wipe with soft dry cloth; avoid liquids and solvents |
Frequently Asked Questions - Deco X5400 Pro TP-LINK
User questions about Deco X5400 Pro TP-LINK
0 question about this device. Answer the ones you know or ask your own.
Ask a new question about this device
Download the instructions for your Wi-Fi Router in PDF format for free! Find your manual Deco X5400 Pro - TP-LINK and take your electronic device back in hand. On this page are published all the documents necessary for the use of your device. Deco X5400 Pro by TP-LINK.
USER MANUAL Deco X5400 Pro TP-LINK
Create a New Network 9
Switch Between Deco Networks 11
Monitor Your Deco Network 13
Manage Your Decos 14
Add More Decos 15
Replace Main Deco 16
Manage Network Clients 17
Protect Your Network with HomeShield Pro……20
Smart Home 21
Add Smart Devices 22
Quickly Do Tasks with Shortcut 23
Automate Your Smart Devices 25
Parental Controls 27
Control Online Time and Content 28
Monitor the Internet Usage 30
Owner and Managers 31
Add Managers 32
Set Privileges for Managers 33
Change Account Information 34
Change Network Owner 35
More Features 36
Test Features at the Deco Lab 37
Check Network Reports 38
Block/Unblock Specific Devices 39
QoS 40
Change Wi-Fi Settings 41
Create a Guest Network 43
Create a IoT Network 45
WPS 46
Change Internet Settings 47
Network Optimization 48
Create Static Routes 49
Set Up VPN Server/Client 51
Configure Connection Alerts 70
Control the Light on Decos 71
Upgrade Your Deco 72
Reboot Your Deco 73
Reboot Schedule 74
Control Your Deco with Alexa 75
Enable App Notifications 76
Advanced Features 77
Get Started
About This Guide
This guide provides a brief introduction to the Deco app.
Features available in Deco may vary by model and software version. Deco availability may also vary by region or ISP. All images, steps, and descriptions in this guide are only examples and may not reflect your actual Deco experience.
Conventions
In this guide, the following conventions are used:
| Convention Description | |
| Underline | Hyperlinks are in teal and underlined. You can click to redirect to a website or a specific section. |
| Teal | Key information appears in teal, including management page text such as menus, items, buttons and so on. |
| ■ Note: Ignoring this type of note might result in a malfunction or damage to the device. | |
| ◦ Tips: Indicates important information that helps you make better use of your device. | |
IoT Compatibility Disclaimer
IoT compatibility refers only to smart devices that can be controlled via the Deco app. Other wireless devices can still connect to Deco for normal Wi-Fi use.
Seamless Roaming Disclaimer
Clients need to support 802.11k/v/r and may require additional set up. Performance may vary depending on the client device.
HomeShield Disclaimer
HomeShield includes the Free Basic Plan. Fees apply for the Pro Plan. Visit https://www.tp-link.com/homeshield/ for more information.
Introduction to Deco App
TP-Link Deco app is the perfect way to set up your Deco mesh Wi-Fi in minutes and control your whole-home network. You can monitor your home Wi-Fi from anywhere, and make changes right from the palm of your hand.
Your network at-a-glance
Easily access what you use most in the reorganized dashboard. View the network topology and status, manage clients, and more.
Safeguard your network
Power up your protection against intrusions and attacks, stay updated on security details, and get network recommendations.
Maintain healthy digital habits
Easily control your kids' online time and content. Receive intuitive charts and detailed statistics concerning your kids' online usage.
More features within reach
Test the in-development features at the Deco Lab, receive intuitive network reports, set up networks for dedicated needs, and more.


Set Up Your Deco Network
First let's start by setting up the Deco network. Get the TP-Link Deco app for iOS or Android, then follow the app to walk through the setup.
1. Get the Deco app
Download and install the Deco app from Google Play or App Store, or by scanning the QR code below.

2. Log in with TP-Link ID
Open the app and log in with your TP-Link ID. If you don't have a TP-Link ID, create one first.
Tip: If you forgot your login password, tap Forget Password. The app will help you reset your password.

3. Select your Deco model
Search for and select your Deco model. If you have more than one Deco model, tap the question below the search box to check how to maximize the overall network.

4. Plug in your devices
Power off your modem, connect your Deco to the modem, then power them both on.
If you don't have a modem, connect your Deco directly to the Ethernet outlet.
5. Wait until your Deco is ready for setup
Wait until your Deco's LED pulses blue, indicating that your Deco is ready for setup.
6. Specify your Deco's location
Select or custom a location for your Deco. The location will be used as the name of your Deco.


7. Connect your Deco to the internet
Select the internet connection type and enter the information. If you are not sure, contact your internet service provider.
8. Create your Wi-Fi network
Set a network name and a password. These will be the name and password you use to connect your devices to Wi-Fi.
9. Connect to your Wi-Fi network
Connect your smartphone/tablet to the Deco's Wi-Fi.


10. Setup complete
Your Deco network is now up. You can connect your devices to the Deco network.
11. Add more Decos
Plug in the other included Decos, and they will automatically join the network within 2 minutes.


Network
After setting up your Deco network, you can easily access what you use most in the reorganized dashboard. Create a new network, switch between networks, view the network topology and status, manage clients, and more.
Create a New Network
In the Deco app, you can create different Deco networks with your TP-Link ID and manage them conveniently from the Deco app with one account. You can also help family or friends manage their networks with your Deco app. Two methods are provided as below to create a new network.
Method 1. via the home page
-
On the home page, tap + and select Create a Network.
-
Search for and select your Deco model. Follow app instructions to create the network.

Method 2. via the side menu
-
Tap to open the side menu.
-
Tap
-
Tap Create New Network.
-
Search for and select your Deco model. Follow app instructions to create the network.


Switch Between Deco Networks
If you have created multiple Deco networks with your TP-Link ID, you can switch between them conveniently.
Method 1. via the home page
-
On the home page, tap Change Network.
-
Select a network to switch to.

* Features available in Deco may vary by model and software version. Deco availability may also vary by region or ISP.
Method 2. via the side menu
-
Tap to open the side menu.
-
Tap
-
Select a network to switch to.

* Features available in Deco may vary by model and software version. Deco availability may also vary by region or ISP.
Monitor Your Deco Network
After setting up your Deco network, you can easily monitor your whole-home network. Check the network status and speeds, reboot network, change the network owner and main Deco, delete the network, and more.
- On the home page, tap the Network module.

- Check the network status, speeds, and topology.

- Tap to manage the network.

Manage Your Decos
You can easily manage the Decos in your network. View Deco connections, check the clients of each Deco, edit the Deco's name, and reboot or remove a Deco.
- On the home page, tap the Network module.

- Tap a Deco to view device details.

- Tap to reboot or remove the Deco.


Add More Decos
After creating a Deco network, you can add more Decos to the network to expand the Wi-Fi coverage and manage them easily on your Deco app.
-
On the home page, tap + and select Add a Deco Unit.
-
Search for and select your Deco model. Follow app instructions to add the Deco.

* Features available in Deco may vary by model and software version. Deco availability may also vary by region or ISP.
Replace Main Deco
You can replace the current main Deco with a new Deco, and your internet configuration and Wi-Fi settings will remain unchanged. Note: Make sure that the new Deco supports the operation mode of the current main Deco. Otherwise, the network may be unavailable.
-
On the home page, tap + and select Replace Main Deco.
-
Follow instructions to complete the settings.


Manage Network Clients
You can manage each network client easily. Change the device name, check its connection status, add it to the profile of a family member, enable high priority and Mesh Technology for it, and block the device.
- On the home page, tap the Clients module.

- Tap a client to view device details. 3. Configure the device type and


-
Tap Family Member to check the profile it belongs to.
-
Tap Connection Preference to configure the preferred Deco and Wi-Fi band for this client.
-
Enable High Priority for this client.


- Enable Mesh Technology for this client to turn on seamless roaming between Decos for this device.

-
Enable Device Isolation to block this device from communicating with other devices on the network to ensure the network security.
-
Tap Block to prevent this device from accessing to the network.


* Features available in Deco may vary by model and software version. Deco availability may also vary by region or ISP.
Protect Your Network with HomeShield Pro
With HomeShield Pro, you can power up your protection against intrusions and attacks, stay updated on security details, and receive network recommendations.
- On the home page, tap Security. Deco will automatically scan your network and give you feedbacks.


- If risks are detected, tap them to know more. Then upgrade to HomeShield Pro to optimize them and enhance your network security.

* Features available in Deco may vary by model and software version. Deco availability may also vary by region or ISP.
Smart Home
After creating a Deco network, you can add your smart home devices to the network and manage them conveniently on your Deco app.
Add Smart Devices
To set up your Smart Home, let's start by adding smart devices to your Deco network.
- On the home page, swipe up and tap the Smart module.

- Tap Get Started. 3. Follow app instructions to add your devices.


- The added devices will be displayed in the Smart module.

Quickly Do Tasks with Shortcut
Shortcut lets you execute an action with a simple tap. For example, if you want to power off your living room light at one tap, follow the steps below. Note: If you want to create shortcuts for your smart devices, refer to Add Smart Devices to add the them to your Deco network first.
- On the home page, swipe up and tap the Smart module.

- Tap + and select Add Shortcut.

-
Tap Add Action.
-
Choose the devices you'd like to control.

- Add an action to be executed with a simple tap.

- Name the shortcut and choose an icon for easy identification.

Now you can tap to execute the action anytime you like.

Automate Your Smart Devices
Automation allows you to set interactions between your devices by adding triggers and actions. For example, when you arrive home or when your smartphone is connected to the Deco network (which is a trigger), the living room plug automatically turns on (which is an action). Then the kettle plugged into the living room plug will start to boil water.
Note: If you want to create shortcuts for your smart devices, refer to Add Smart Devices to add the them to your Deco network first.
-
On the home page, swipe up and tap the Smart module.
-
Tap + and select Add Automation.
-
Tap Add Trigger. 4. Set a time or device trigger to activate this automation.


* Features available in Deco may vary by model and software version. Deco availability may also vary by region or ISP.
- Add an action to be executed when triggered.

- Name the automation. Now the action will be executed when triggered.


Parental Controls
Parental Controls helps your kids maintain healthy digital habits.
Easily control your kids' online time and content. Receive intuitive charts and detailed statistics concerning your kids' internet usage.
Control Online Time and Content
To set up Parental Controls, let's start by creating profiles for your kids.
- On the home page, tap Parental Controls.

-
Tap Get Started and create a profile for your kid.
-
Select the devices belong to your kid.

- A profile will be created for your kid.

- Control your kids' online time and content with the created profile.
Tip: You can upgrade to HomeShield Pro for more flexible controls.
- Filter inappropriate content

- Block specific websites

- Set "No internet" bedtime

- Set online time limits

- Set "No internet" offtime

Monitor the Internet Usage
With the created profiles, you can view intuitive charts and detailed statistics concerning your kids' internet usage.
- On the home page, tap Parental Controls.

- Tap a profile to monitor the internet usage.
Tip: You can also go to More > Reports for more statistics.

Owner and Managers
The Owner creates the Deco network and has full authority to manage the network. The Owner can add one or multiple Managers to help manage the network as permitted.
Add Managers
Add friends and family members to help manage your network. Each manager should have their own TP-Link ID. Note: Managers cannot modify the Owner account, add other accounts, or set manager privileges.
- Go to More > Managers.

- Tap Add a Manager to add another TP-Link ID account as Manager.


Set Privileges for Managers
You can authorize Managers to manage specific settings.
Note: Privileges may vary slightly depending on the model, software version you have, and the current operation mode.
- Go to More > Managers.

- Tap to specify the privileges for the Managers.

Change Account Information
You can change your account name, password, and profile photo.
-
Go to ≈ your account to edit account information.
-
Tap your account for detailed information.
-
Change the account information as needed.


Change Network Owner
You can change the current Owner account to another TP-Link ID without resetting the whole Deco network. Follow the steps below. Note: Changing the network owner will delete the network from the old Owner, and this Owner will no longer be able to manage this network.
- On the home page, tap the Network module.
- Tap and select Change Network Owner.
- Follow app instructions to change the Owner account. The old Owner will be unable to manage this network anymore. The new Owner needs to follow steps in an email sent from TP-Link to log in and manage the network.


* Features available in Deco may vary by model and software version. Deco availability may also vary by region or ISP.
More Features
More features are within reach. Test the in-development features at the Deco Lab, receive intuitive network reports, set up networks for dedicated needs, and more.
Tip: You can use the search box on the More page to quickly find the features you need.
Test Features at the Deco Lab
Deco Lab is a collection of experimental features like Wi-Fi Assistant. We will keep updating the lab to provide you even better experiences. You can test the in-development features at the Deco Lab.
- Go to More > Deco Lab.

- Check and test the in-development features.

* Features available in Deco may vary by model and software version. Deco availability may also vary by region or ISP.
Check Network Reports
The Deco app provides intuitive charts and detailed statistics to help you know your home network better.
- Go to More > Reports.

- Check the weekly and monthly reports of your network.


Block/Unblock Specific Devices
You can block undesired devices to prevent them from accessing your network or unblock specific devices.
- Go to More > Block List.

- Tap + and choose a method to block devices.

- Tap to unblock a device.

QoS
QoS (Quality of Service) allows you to prioritize specific devices. Devices set as high priority will run smoothly even when the network is crowded.
1. Go to More > QoS.

2. Enable QoS.

3. Set the total bandwidth provided by your ISP.

4. Add high priority devices.

Change Wi-Fi Settings
You can change the network name and password of your main network at any time and share the network easily with family and friends.
1. Go to More > Wi-Fi Settings.

2. Change Wi-Fi network name, password and security.


3. Tap Advanced for advanced Wi-Fi settings.

- Select a preferred band to be enabled in this network.

- Select a preferred channel width for 5 GHz network.

- Enable to hide this network from Wi-Fi list.

Create a Guest Network
You can create and share a separate network for guests to guarantee the security and privacy of your main network.
-
Go to More > Guest Network.
-
Turn on Guest Network.
-
Set a Wi-Fi network name, password and security.
-
Tap Duration to set how long the Guest Network works before it automatically turns off.


-
Configure advanced settings.
-
Band: Select a preferred band to be enabled in this network.
• Channel Width for 5 GHz: Select a preferred channel width for 5 GHz network. The higher one provides better Wi-Fi performance. - Bandwidth Control: Enable it and set a download and upload bandwidth for your network.


Create a IoT Network
Create a dedicated and wireless network to manage all your IoT devices, such as smart lights and cameras.
-
Go to More > IoT Network.
-
Turn on IoT Network. Set a Wi-Fi network name and password for this network.
-
Select a preferred security method for this network.
-
Select a preferred band to be enabled in this network.


![3:23 Security WPA2 WPA/WPA2 None WPA2: PDR [AED] = WPA_PDR [TRIP]](/content/2026/06/1374264/images/5d08e7f3d27ed183ee9d24de61029d74152fb32bddf3e6f4159939b93595b715.jpg)

WPS
WPS (Wi-Fi Protected Setup) helps you to quickly and securely connect a client to the network with a tap without entering any password.
1. Go to More > WPS.

2. Tap the WPS icon on Deco app and then on your client.

Change Internet Settings
You can change internet settings if needed.
- Go to More > Internet Connection.

- Tap IPv4 for IPv4 settings.

- Tap IPv6 for IPv6 settings.

- Tap Firewall Rules to add rules if you want to allow specific devices to access specific services.

Network Optimization
Network Optimization analyzes the quality of the Deco wireless network by scanning the interference signals in the environment and improves your wireless experience by optimizing the Deco network's channel.
-
Go to More > Network Optimization.
-
Tap Scan to detect network security and performance.
-
Optimize the network if needed.


Create Static Routes
Static routing is a form of routing that is configured manually by a network administrator or a user by adding entries into a routing table. The manually-configured routing information guides the router in forwarding data packets to the specific destination.
- Go to More > Advanced> Static Routing, and tap Add Static Route.


* Features available in Deco may vary by model and software version. Deco availability may also vary by region or ISP.
- Fill in the necessary information.
• Description: Specify a description for the routing entry.
• Network Destination: The network destination is the address of the network of host that you want to assign to a static route.
- Subnet Mask: The Subnet Mask divides the network portion and the host portion of an IP address.
- Default Gateway: This is the IP address of the default gateway device that allowing for the contact between the router and the network or host.
- Interface: Select the interface to specify the type of the network destination.


- After you save the settings, if the entry you have set appear on the screen, the static routing is set successfully.

* Features available in Deco may vary by model and software version. Deco availability may also vary by region or ISP.
Set Up VPN Server/Client
Use Open VPN, PPTP VPN, or L2TP/IPSec VPN to access your home network, and use VPN Client to access a remote VPN server.
Use OpenVPN to Access Your Home Network
OpenVPN Server is used to create an OpenVPN connection for remote devices to access your home network.
To use the VPN feature, you need to enable OpenVPN Server on your Deco router, and install and run VPN client software on remote devices. Please follow the steps below to set up an OpenVPN connection.
- Go to More > Advanced > VPN Server.

- Tap Add VPN Server and select OpenVPN.

* Features available in Deco may vary by model and software version. Deco availability may also vary by region or ISP.
- Enter the necessary information and save the settings.
• Description: Enter a name for this OpenVPN.
• Service Type: Select the service type (UDP/TCP) for OpenVPN.
• VPN Port: Enter a VPN service port to which a VPN device connect, and the port number should be between 1024 and 65535.
• VPN Subnet/Netmask: Enter the range of IP addresses that can be leased to the device by the OpenVPN server.
- Client Access: Select your client access type. Select Home Network Only if you only want the remote device to access your home network. Select Internet and Home Network if you also want the remote device to access internet through the VPN server.


* Features available in Deco may vary by model and software version. Deco availability may also vary by region or ISP.
- Tap the VPN you have saved and tap Export Config File to save the OpenVPN configuration file which will be used by the remote device to access your router.


- Now you need to configure OpenVPN connection on your remote device.
(1) Visit https://openvpn.net/community-downloads/ to download the OpenVPN software, and install it on your device where you want to run the OpenVPN client utility.
Note: You need to install the OpenVPN client utility on each device that you plan to apply the VPN function to access your Deco router. Mobile devices should download a third-party app from Google Play or Apple App Store.
(2) After the installation, copy the file exported from your router to the OpenVPN client utility's "config" folder (for example, C:\Program Files\OpenVPN\config on Windows). The path depends on where the OpenVPN client utility is installed.
(3) Run the OpenVPN client utility and connect it to OpenVPN Server.
Use PPTP VPN to Access Your Home Network
PPTP VPN Server is used to create a PPTP VPN connection for remote devices to access your home network.
To use the VPN feature, you need to set up PPTP VPN Server on your Deco router, and configure the PPTP connection on remote devices.
Please follow the steps below to set up a PPTP VPN connection.
-
Go to More > Advanced > VPN Server.
-
Tap Add VPN Server and select PPTP.

* Features available in Deco may vary by model and software version. Deco availability may also vary by region or ISP.
- Enter the necessary information and save the settings.
• Description: Enter a name for this VPN.
- Client IP Address: Enter the range of IP addresses (up to 10) that can be leased to the devices by the PPTP VPN server.
- Allow NetBIOS passthrough: Enable it to allow your VPN device to access your Samba server using NetBIOS name.
- Allow unencrypted connections: Enable it to allow unencrypted connections to your VPN server.
• Account List: Add the PPTP VPN connection account (user name and password) for the remote device. You can create up to 16 accounts.


* Features available in Deco may vary by model and software version. Deco availability may also vary by region or ISP.
- Now you need to configure PPTP VPN on your remote device. The remote device can use the Windows built-in PPTP software or a third-party PPTP software to connect to PPTP Server. Here we use the Windows built-in PPTP software as an example.
(1) Go to Start > Control Panel > Network and Internet > Network and Sharing Center and select Set up a new connection or network.
(2) Select Connect to a workplace and click Next.


* Features available in Deco may vary by model and software version. Deco availability may also vary by region or ISP.
(3) Select Use my Internet connection (VPN).

(4) Enter the internet IP address of the router in the Internet address field. Click Next.

* Features available in Deco may vary by model and software version. Deco availability may also vary by region or ISP.
(5) Enter the User name and Password you have set for the PPTP VPN server on your router, and click Connect.
(6) Click Connect Now when the VPN connection is ready to use.


* Features available in Deco may vary by model and software version. Deco availability may also vary by region or ISP.
Use L2TP/IPSec VPN to Access Your Home Network
L2TP/IPSec VPN Server is used to create a L2TP/IPSec VPN connection for remote devices to access your home network.
To use the VPN feature, you need to set up L2TP/IPSec VPN Server on your Deco router, and configure the L2TP/IPSec connection on remote devices.
Please follow the steps below to set up the L2TP/IPSec VPN connection.
-
Go to More > Advanced > VPN Server.
-
Tap Add VPN Server and select L2TP/IPSec.

* Features available in Deco may vary by model and software version. Deco availability may also vary by region or ISP.
- Enter the necessary information and save the settings.
• Description: Enter a name for this VPN.
- Client IP Address: Enter the range of IP addresses (up to 10) that can be leased to the devices by the L2TP/IPSec VPN server.
- IPSec Encryption/ IPSec Pre-Shared Key: Keep IPSec Encryption as Encrypted and create an IPSec Pre-Shared Key.
• Account List: Add the L2TP/IPSec VPN connection account (user name and password) for the remote device. You can create up to 16 accounts.


* Features available in Deco may vary by model and software version. Deco availability may also vary by region or ISP.
- Now you need to configure L2TP/IPSec on your remote device. The remote device can use the Windows or Mac OS built-in L2TP/IPSec software or a third-party L2TP/IPSec software to connect to L2TP/IPSec Server. Here we use the Windows built-in L2TP/IPSec software as an example.
(1) Go to Start > Control Panel > Network and Internet > Network and Sharing Center and select Set up a new connection or network.
(2) Select Connect to a workplace and click Next.


* Features available in Deco may vary by model and software version. Deco availability may also vary by region or ISP.
(3) Select Use my Internet connection (VPN).

(4) Enter the internet IP address of the router in the Internet address field. Select Don't connect now, just set it up so I can connect later. Then click Next.

* Features available in Deco may vary by model and software version. Deco availability may also vary by region or ISP.
(5) Enter the User name and Password you have set for the L2TP/IPSec VPN server on your router, and click Connect.
(6) Click Close when the VPN connection is ready to use.


* Features available in Deco may vary by model and software version. Deco availability may also vary by region or ISP.
(7) Go to Network and Sharing Center and click Change Adapter Settings.

(8) Find the VPN connection you created, then double-click it.

* Features available in Deco may vary by model and software version. Deco availability may also vary by region or ISP.
(9) Enter the Username and Password you have set for the L2TP/IPSec VPN server on your router, and click Properties.

(10) Switch to the Security tab, select Layer 2 Tunneling Protocol with IPsec (L2TP/IPSec) and click Advanced settings.

* Features available in Deco may vary by model and software version. Deco availability may also vary by region or ISP.
(11) Select Use preshared key for authentication and enter the IPSec Pre-Shared Key you have set for the L2TP/IPSec VPN server on your router. Then click OK.

(12) Switch to the Security tab, select Layer 2 Tunneling Protocol with IPsec (L2TP/IPSec) and click Advanced settings.

Done! Click Connect to start VPN connection.
* Features available in Deco may vary by model and software version. Deco availability may also vary by region or ISP.
Use VPN Client to Access a Remote VPN Server
VPN Client is used to create VPN connections for devices in your home network to access a remote VPN server.
To use the VPN feature, simply configure a VPN connection and choose your desired devices on your Deco router, then these devices can access the remote VPN server. Please follow the steps below:
-
Go to More > Advanced > VPN Client.
-
Enable VPN Client and tap Add VPN Server.

* Features available in Deco may vary by model and software version. Deco availability may also vary by region or ISP.
-
Select a VPN Type and enter the VPN information provided by your VPN provider and save the settings.
-
OpenVPN: Enter the VPN username and password if required by your VPN provider, otherwise simply leave them empty. Then import the configuration file provided by your VPN provider.
- PPTP: Enter the VPN server address and the VPN username and password provided by your VPN provider.
• L2TP/IPSec: Enter the VPN server address, VPN username and password, and IPSec pre-shared key provided by your VPN provider.


- Tap Client List and + to add devices that will use the VPN function


- Tap Access Permission to allow all devices connected to your Deco to use the VPN function or only allow devices on the Client List to use VPN function.

Done! Now the devices you specified can access the VPN server you enabled.
Configure Connection Alerts
You can configure Connection Alerts so you can get alerts when new devices connect to your network or when the devices you care about go online or offline.
Go to More > Connection Alerts to enable notifications of new or known clients.

* Features available in Deco may vary by model and software version. Deco availability may also vary by region or ISP.
Control the Light on Decos
You can turn on or off the light on your Decos immediately or at specific period.
Go to More > LED Control to turn on or off the light on your Decos or specify a period during which the light will go off.


Upgrade Your Deco
TP-Link is dedicated to improving product features and providing a better customer experience. An up-to-date firmware provides better and more stable network performance. Always update your Deco to the latest firmware version when prompted in the Deco app.
1. Go to More > System > Update Deco.


2. Download and install the latest firmware (if any).

3. All Decos in your network will be updated.

Reboot Your Deco
Reboot your Deco at any time when needed.
- Go to More > System > Reboot Deco.


- Select the Deco you need to reboot and tap Reboot. You will lose your internet connection temporarily during the reboot.

* Features available in Deco may vary by model and software version. Deco availability may also vary by region or ISP.
Reboot Schedule
With Reboot Schedule, you can set when and how often the Deco reboots regularly, which may improve the network stability.
- Go to More > System > Reboot Schedule.


- Enable Reboot Schedule and set when and how often to reboot the Deco regularly.


* Features available in Deco may vary by model and software version. Deco availability may also vary by region or ISP.
Control Your Deco with Alexa
Alexa Integration allows you to control your Deco using Amazon's Alexa voice service. You can control and customize your home network by giving simple voice commands to Alexa, such as enabling the Guest Network, turning off your Deco LEDs, and more.
Follow the steps below to use Alexa voice commands to control your Deco network.
Note: This feature is currently available in English (US), English (UK), German and Japanese.
In the Deco app, tap ≡ and go to Link Account > Alexa > TP-Link Router Skill, then follow the app instructions to complete the setup.
![graph TD A["Deco WiFi 1.7"] --> B["View Account"] B --> C["Link Account"] C --> D["Link Account"] D --> E["08:37"] E --> F["Alexia"] style A fill:#f9f,stroke:#333 style B fill:#ccf,stroke:#333 style C fill:#cfc,stroke:#333 style D fill:#fcc,stroke:#333 style E fill:#ffc,stroke:#333 style F fill:#fcc…](/content/2026/06/1374264/images/a5159ec77902c1fbad27f13516e688a6fbb8b096b2a9a595e26a60d6101b866b.jpg)
* Features available in Deco may vary by model and software version. Deco availability may also vary by region or ISP.
Enable App Notifications
You can enable notifications of what you care most.
Go to ≡ > App Settings > Notifications to enable notifications.
![graph TD A["Deco WiFi 1.7"] --> B["App Settings"] B --> C["13:30"] C --> D["Notifications"] D --> E["13:30"]](/content/2026/06/1374264/images/44f799de0d871e8196f31d325c8bb0004ba2990f531cb5b29842048c3b7f9fe9.jpg)
* Features available in Deco may vary by model and software version. Deco availability may also vary by region or ISP.
Advanced Features
The Deco app offers a list of advanced features to fulfill diverse network needs.
Tip: You can use the search box on the More page to quickly find the features you need.
Tap More > Advanced to access advanced features.
Note: Features available on this page are based on the current operation mode of the network.
Change the operation mode.
Enable IPTV/VLAN mode to support IPTV services.


* Features available in Deco may vary by model and software version. Deco availability may also vary by region or ISP.
Tip: You can use the search box on the More page to quickly find the features you need.
Enable MAC Clone if your ISP only allows specific MAC addresses.
Register a TP-Link DDNS domain name to access your Decos and local resources over the internet.
Modify LAN IP to avoid IP address conflict.
Change DHCP Server settings.


Tip: You can use the search box on the More page to quickly find the features you need.
Reserve IP addresses for specific devices to recognize and manage them more easily.
Enable Fast Roaming to further reduce roaming delays for your wireless devices.


Enable Beamforming to concentrate Wi-Fi signal towards connected devices for stronger connections.

Set up port forwarding rules to enable devices in your network accessible over the internet with safety.

Tip: You can use the search box on the More page to quickly find the features you need.
Enable SIP ALG to communicate with SIP (Session Initiation Protocol) servers via NAT.
Enable UPNP to allow your local network to dynamically open ports for applications like gaming.


* Features available in Deco may vary by model and software version. Deco availability may also vary by region or ISP.
- SMART HOME
- PARENTAL CONTROLS
- OWNER AND MANAGERS
- MORE FEATURES
- GET STARTED
- ABOUT THIS GUIDE
- CONVENTIONS
- IOT COMPATIBILITY DISCLAIMER
- SEAMLESS ROAMING DISCLAIMER
- HOMESHIELD DISCLAIMER
- INTRODUCTION TO DECO APP
- YOUR NETWORK AT-A-GLANCE
- SAFEGUARD YOUR NETWORK
- MAINTAIN HEALTHY DIGITAL HABITS
- MORE FEATURES WITHIN REACH
- SET UP YOUR DECO NETWORK
- GET THE DECO APP
- LOG IN WITH TP-LINK ID
- SELECT YOUR DECO MODEL
- PLUG IN YOUR DEVICES
- WAIT UNTIL YOUR DECO IS READY FOR SETUP
- SPECIFY YOUR DECO'S LOCATION
- CONNECT YOUR DECO TO THE INTERNET
- CREATE YOUR WI-FI NETWORK
- CONNECT TO YOUR WI-FI NETWORK
- SETUP COMPLETE
- ADD MORE DECOS
- NETWORK
- CREATE A NEW NETWORK
- METHOD 1. VIA THE HOME PAGE
- METHOD 2. VIA THE SIDE MENU
- SWITCH BETWEEN DECO NETWORKS
- MONITOR YOUR DECO NETWORK
- MANAGE YOUR DECOS
- REPLACE MAIN DECO
- MANAGE NETWORK CLIENTS
- PROTECT YOUR NETWORK WITH HOMESHIELD PRO
- ADD SMART DEVICES
- QUICKLY DO TASKS WITH SHORTCUT
- AUTOMATE YOUR SMART DEVICES
- CONTROL ONLINE TIME AND CONTENT
- MONITOR THE INTERNET USAGE
- ADD MANAGERS
- SET PRIVILEGES FOR MANAGERS
- CHANGE ACCOUNT INFORMATION
- CHANGE NETWORK OWNER
- TEST FEATURES AT THE DECO LAB
- CHECK NETWORK REPORTS
- BLOCK/UNBLOCK SPECIFIC DEVICES
- QOS
- GO TO MORE > QOS
- ENABLE QOS
- SET THE TOTAL BANDWIDTH PROVIDED BY YOUR ISP
- ADD HIGH PRIORITY DEVICES
- CHANGE WI-FI SETTINGS
- GO TO MORE > WI-FI SETTINGS
- CHANGE WI-FI NETWORK NAME, PASSWORD AND SECURITY
- TAP ADVANCED FOR ADVANCED WI-FI SETTINGS
- CREATE A GUEST NETWORK
- CREATE A IOT NETWORK
- WPS
- GO TO MORE > WPS
- TAP THE WPS ICON ON DECO APP AND THEN ON YOUR CLIENT
- CHANGE INTERNET SETTINGS
- NETWORK OPTIMIZATION
- CREATE STATIC ROUTES
- SET UP VPN SERVER/CLIENT
- USE OPENVPN TO ACCESS YOUR HOME NETWORK
- USE PPTP VPN TO ACCESS YOUR HOME NETWORK
- USE L2TP/IPSEC VPN TO ACCESS YOUR HOME NETWORK
- USE VPN CLIENT TO ACCESS A REMOTE VPN SERVER
- CONFIGURE CONNECTION ALERTS
- CONTROL THE LIGHT ON DECOS
- UPGRADE YOUR DECO
- GO TO MORE > SYSTEM > UPDATE DECO
- DOWNLOAD AND INSTALL THE LATEST FIRMWARE (IF ANY)
- ALL DECOS IN YOUR NETWORK WILL BE UPDATED
- REBOOT YOUR DECO
- REBOOT SCHEDULE
- CONTROL YOUR DECO WITH ALEXA
- ENABLE APP NOTIFICATIONS
- ADVANCED FEATURES
Brand : TP-LINK
Model : Deco X5400 Pro
Category : Wi-Fi Router