
HM 16-80 - Iron MIELE - Free user manual and instructions
Find the device manual for free HM 16-80 MIELE in PDF.
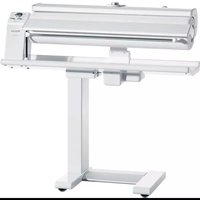


| Product Type | Iron |
| Brand | Miele |
| Model | HM 16-80 |
| Dimensions (Approx.) | 30 x 15 x 15 cm |
| Weight (Approx.) | 1.5 kg |
| Power Consumption | 2200 W |
| Voltage | 220-240 V / 50-60 Hz |
| Soleplate Material | Stainless steel |
| Water Tank Capacity | 300 ml |
| Steam Output (Continuous) | Up to 40 g/min |
| Steam Boost | Up to 150 g/min |
| Spray Function | Yes |
| Self-Clean Function | Yes |
| Anti-Drip System | Yes |
| Auto Shut-Off | Yes |
| Cord Length | 2.0 m |
| Descaling | Recommended every 1-2 months |
| Spare Parts Availability | Miele service centers |
Frequently Asked Questions - HM 16-80 MIELE
User questions about HM 16-80 MIELE
0 question about this device. Answer the ones you know or ask your own.
Ask a new question about this device
Download the instructions for your Iron in PDF format for free! Find your manual HM 16-80 - MIELE and take your electronic device back in hand. On this page are published all the documents necessary for the use of your device. HM 16-80 by MIELE.
USER MANUAL HM 16-80 MIELE
Operating Instructions Rotary Iron HM 16-80
To prevent accidents and machine damage, read these instructions
before
installation or use.
en-US
M.-Nr. 07 660 670
IMPORTANT SAFETY INSTRUCTIONS. 4
Guide to the Rotary Iron 7
Moving and folding the appliance 9
Transport strut 9
Before using for the first time.... 11
Preparing the work area 13
Preparing the laundry 13
Testing the finger guard 14
Steam setting 15
Filling the water reservoir....15
Emptying the water reservoir....16
Ironing 17
Turning on and off 17
Selecting the ironing temperature (operation without steam) ..... 17
Selecting the ironing temperature (operation with steam). 18
Turning the steam setting ON and OFF....18
Selecting the roller speed 19
Ironing 19
Positioning the laundry 20
Removing the feed board 20
After ironing 21
Power failure 22
Ironing Tips 23
Towels, dishcloths, handkerchiefs, napkins, etc. 23
Tablecloths 23
Sheets and bedspreads 23
Duvet covers 24
Pillowcases 24
Shirts 25
Smock-type aprons 27
Aprons with ties 27
Steam-pressing pants 27
Steam-pressing skirts 27
Cleaning and care 28
Cleaning the water reservoir 28
Ironing cover 29
Frequently asked questions 32
After sales service 34
Electrical connection 35
Technical data 36
Help protect our environment....37
IMPORTANT SAFETY INSTRUCTIONS
When using an electrical appliance, basic precautions should always be followed, including the following:
Read the operating instructions carefully before using this appliance for the first time. They contain important information about the safe operation and care of your appliance.
To prevent personal injury or damage to the rotary iron, it is important that you read this booklet carefully.
Keep the instructions in a safe place for reference, and pass them on to any future user.
Proper use
This rotary iron is only intended for ironing fabrics washed in water. Check the fabric care labels to be sure the materials can be ironed. Persons who lack physical, sensory or mental abilities, or experience with the appliance should not use it without supervision or instruction by a responsible person.
Technical and electrical safety
Before setting up the rotary iron, check for any visible damage. Do not install or use a damaged appliance. A damaged appliance is dangerous. Turn off the rotary iron, unplug from the wall outlet and call Technical Service. If the power cord is damaged it must be replaced by a Miele authorized service technician. Before connecting the appliance, ensure that the connection data on the data plate (fusing, voltage and frequency) match the household electrical supply. If in doubt, consult an electrician. Do not modify the machine power cord or plug. All electrical work should be carried out by a qualified electrician in accordance with local and national safety regulations. To guarantee the electrical safety of this appliance, continuity must exist between the appliance and an effective grounding system. It is imperative that this basic safety requirement be met. If there is any doubt, have the electrical system of the house checked by a qualified electrician.
IMPORTANT SAFETY INSTRUCTIONS
Do not use an extension cord to connect this appliance to electricity. Extension cords do not guarantee the required safety of the appliance (e.g. danger of overheating). Repairs should only be performed by a Miele authorized technician. Faulty components should be replaced using Miele original parts only. Only original replacement parts guarantee the safety of the appliance. The appliance is completely isolated from the electricity supply when:
- it is turned off at the wall switch and unplugged, or
- The circuit breaker has been "tripped". Do not damage, remove, or bypass the safety components or control elements in the iron. ▶ Only operate the rotary iron when all removable outer casings are fitted so that it is impossible to touch an electrical component or moving part. This equipment has not been designed for maritime use or for use in mobile installations such as aircraft or recreational vehicles. However, under certain circumstances it may be possible for an installation in these applications. Please contact the nearest Miele Dealer or Miele Technical Service with specific requirements.
Use
▶ Be aware of loose fitting or hanging clothing when using the rotary iron. Items such as wide sleeves or apron strings could be wound in the roller. Remove all jewelry and tie back long hair before ironing. When the rotary iron is heated there is a danger of burns:
- if the heater plate is touched.
- if the foot pedal is pressed down while fingers or hands are positioned between the raised heater plate and the roller to smooth an item. When the steam setting is on, do not unscrew the cap to the water reservoir. Danger of burns! Do not allow children to play on or near the rotary iron, or to operate it themselves. Do not use distilled water. It will cause pitting corrosion of the water reservoir. ▶ Never drape items over the heater plate when it is heated. This is a fire hazard. Hang laundry on the laundry bar. ▶ Hang laundry on the laundry bar. The bar is only to be used to hang laundry. Swing it back immediately after use. Take care not to press down on the rod when it is swung out, as this could cause the iron to tip over.
IMPORTANT SAFETY INSTRUCTIONS
▶ Turn the appliance off before removing the plug from the electrical outlet. ▶ Pull only on the plug and not on the power cord. Do not lay the power cord over the heater plate when it is heated. This could damage the cord - danger of electric shock.
Use the cable holders attached to the appliance to secure the cord.
Do not store the iron in a room where there is a risk of frost occurring. Frozen water in the reservoir and steam line can damage the appliance.
Accessories
Accessories should only be used if approved by Miele. If other parts are used, warranty, performance and product liability claims may be void.
Regard the national and local codes and standards.
SAVE THESE INSTRUCTIONS AND REVIEW THEM PERIODICALLY

①Emergency release ②Temperature selector ③Control panel ④Release catch ⑤Power cord ⑥Foot pedal switch ⑦Ironing table
⑧Laundry rod ⑨Feed board ⑩Roller ⑪Heater plate ⑫Finger guard ⑬Water reservoir with cap
Control panel

① Roller speed selector ② On/Off indicator I-0 ③ On/Off button I-0 ④ Steam switch
⑤ Steam indicator ⑥ Temperature indicator °C ⑦ Water empty indicator
Transport strut
Do not remove the transport strut until the rotary iron has been placed onto the four rollers.
Pull out the transport strut.

Keep the strut in a safe place. It will need to be attached each time you transport the appliance.
Moving and folding the appliance
The rotary iron sits on 4 rollers.

Hold the iron by the ironing table and push or pull to move it.
To steer the iron and to handle obstacles such as carpet edges and doorways:
Tip the iron slightly.
The iron can be moved either when folded or unfolded.

Hold the ironing table and release the catch, located on the right-hand side at the back, underneath the ironing table.

Swing the top section of the rotary iron to the side until it clicks horizontally into position. Do not let go of the catch until you have finished swinging the top.
To prevent water from spilling over when you fold or move the iron, the cap on the water reservoir must be firmly tightened down.
Power cord
The power cord is wound behind the ironing table.

Unwind the cord.
⚠️ Do not insert the plug into the electrical socket yet.
Before using for the first time
A dust cover is placed on the roller for protection during shipping.

First remove the feed board by lifting it out of the right hand holder, then pull it out to the left of the roller. Plug the appliance in and turn it on. The heater plate will rise automatically.

The protective dust cover can now be pulled off.
The adhesive film supplied with the iron can now be placed around the temperature selector.

Adhere the sticker (included) to the temperature control as shown above.
Preparing the work area
When positioning the rotary iron, make sure it is level. This will ensure even steam production and keep the appliance from rolling sideways.
A height-adjustable chair and a flat surface for stacking completed items will be useful.

Have the following close by:
- to the left of the iron, place a basket with laundry ready for ironing,
- to the right of the iron, have a surface for stacking the ironed articles.
Shirts, smocks, blouses, etc., should be hung on hangers immediately after ironing.
Small items can be hung over the swing-out rod.
Have some water handy to re-dampen the laundry as needed.
Preparing the laundry
Proper preparation of the laundry is essential for good results.
Before ironing, laundry should be:
- dampened (for operation without steam) – pulled into shape and smoothed out
- sorted
Proper dampness (for operation without steam)
The laundry needs to be sufficiently damp so that on the first pass through the rotary iron at the correct temperature it will come out smooth and dry. Dampen the laundry as you would for hand ironing; preferably several hours beforehand so that the articles achieve a uniform degree of dampness throughout.
If a tumble dryer is being used, select a "Machine iron" program.
■ If preparation time is short, use warm water to re-dampen.
| Material Dampness for ironing | |
| Silk | wrap in a damp cloth to avoid water marks |
| Synthetics e.g. Nylon, polyester, etc. | slightly damp to dry |
| Wool (e.g., pants) | press under a damp cloth |
| Cotton | slightly damp |
| Linen | quite damp |
Pulling into shape and smoothing out
Pull the dampened laundry into shape as usual. Smooth out any ribbons, straps, seams, and hems. Large items such as tablecloths, bed linens, etc., should be folded lengthwise into a number of pleats so that they can be ironed as easily as possible.
Sorting
Sort the laundry according to how much heat is required, and then according to flat and shaped pieces.
Start ironing at a lower temperature and gradually increase the temperature according to the fabric being ironed.
Minimum Iron (Perlon, Nylon, etc.) ●
Woolens, Silk ●●
Cottons, Linen ●●●
Iron starched items last to avoid starch deposits on other items.
Using the iron for the first time:
You may notice some unevenness on the roller. This is normal, and will smooth itself out after approx. 3 hours of use.
This will keep the under padding mostly free of creases.
Testing the finger guard
The finger guard is a safety feature, and should be checked every time the rotary iron is used.
With the iron turned on, press the foot pedal all the way down.
The heater plate comes down onto the rotating roller.

If you lift the finger guard now, the roller stops rotating and the heater plate rises. Let go of the finger guard and remove your foot from the foot pedal. Now press the foot pedal down again.
The heater plate lowers and the roller rotates.
For ironing dry or nearly dry laundry items, the steam setting can be used.
Ironing with and without steam
If the laundry items are already damp, use the iron without steam. The steam setting is intended for pressing dry or nearly-dry laundry.
Filling the water reservoir

Before turning on the iron, and with the roller in the up position, fill the water reservoir to the lower edge of the spout with tap water approx. 1 ½ pints (0.8 l). Do NOT use "ironing water" available in stores.
The funnel can be screwed into place for easier filling.
Do not use distilled water. It will cause pitting corrosion of the water reservoir.
Only ever fill the water reservoir to the lower edge of the spout.
To prevent water from spilling over when you close the roller down, be sure the cap is secure.
If the indicator light "Water empty" is red, it is time to re-fill the reservoir.
If the steam setting is on but the water reservoir is empty, the display lights "Steam" and "Water" will flash alternately in intervals of a few minutes.
Caution - hot steam! Slowly loosen the cap.
Allow the steam from the water reservoir to dissipate before opening the cap entirely, then add water as needed.
Typically you will find some water left in the reservoir. The amount depends on the water hardness and how much lime is deposited.
A full water reservoir will provide approximately 40 minutes of steam ironing time. It takes approx. 4 minutes for the iron to begin producing steam. As lime deposits form in the tank, the heating time may increase.
■ Whenever you stop ironing, turn off the steam switch.
Emptying the water reservoir
Do not attempt to empty the water reservoir unless the roller and water are both cool.
Always empty the reservoir once you have finished ironing. This will help prevent damage to the reservoir from damage caused by standing exposure to such elements in the water as chlorine, calcium, and copper.
■ Unscrew the cap. ■ The funnel can be screwed into place for easier emptying.

■ Slowly flip open the roller while simultaneously holding a suitable receptacle (e.g., a measuring cup) under the spout. Let the water drain out.
■ Screw the cap back onto the spout.

■ After use, return the funnel to its place in the cord receptacle.
Turning on and off

Use the I-0 button to turn the rotary iron on and off.
To turn on
■Press the button in.
The indicator light comes on.
To turn off
■ Press and release the button.
The indicator light goes out.
Selecting the ironing temperature (operation without steam)
The temperature selector is used to set the ironing temperature.
The temperature range is marked by dots on the ring around the temperature selector. These correspond with the international fabric care symbols for ironing.
| Material Dot symbol Temperature range | |
| Minimum Iron | ●cool iron |
| Woolens, Silk | ●● medium hot iron |
| Cotton, Linen | ●●●hot iron |
| I 104 - 140 °F(40 - 60 °C) | |

■ Turn the temperature selector to the desired temperature.
The "Temperature" indicator °C will light up while the roller is heating up. The light will go out when the desired temperature is reached.
When ironing a fabric blend (such as poly-cottons), the more delicate fiber determines the ironing temperature. For example, items made of poly-cotton blends should be ironed at the ●● setting for Woolens, rather than using the cotton setting.
Selecting the ironing temperature (operation with steam)
■ Turn the temperature selector to the ●●● setting for Cottons (hot iron).
If the temperature selector is set to ● or ●●, no steam will be available.
Turning the steam setting ON and OFF
Before turning on the steam setting, you will need to turn the temperature selector to the ●●● setting.
■ Use the ⏻ button for "Steam" to turn this setting on and off.
Turning on
Press the ⏻ button.
Once the desired roller temperature is reached, the indicator light next to the button will come on.
If the water reservoir runs out while the iron is in operation, the indicator light ⚙ for "Steam" will go out and the light 📋 "Water empty" will turn red. If the steam setting is on and you do not re-fill the water reservoir, the indicator lights 📋 "Steam" and 📋 "Water reservoir" will flash alternately at intervals of several minutes.
Turning off
Press and release the ⏻ button.
The indicator light next to the button goes out.
Selecting the roller speed
There are 5 roller speed settings, from low (approximately 6.5 ft/min [2 m/min]) to high (15 ft/min [4.5 m/min]).
A lower roller speed makes it easier to iron complicated articles, such as shirts and blouses. It is also best to select a low roller speed when ironing layered or folded items, which may require more than one pass through the rotary iron to get them smooth and dry.
Thinner, single-thickness articles, such as handkerchiefs or dishcloths, can be ironed at a higher roller speed.

Set the roller speed selector to the desired speed.
Ironing
The ironing process is controlled by the foot pedal, which has three operating positions:

- rest (heater plate is raised)
- press
- iron
To iron:
■ Press the foot pedal all the way down to the floor.
⚠️ Do not put fingers between the heater plate and the roller. Danger of crushing and burns!
To press:
■ First press the foot pedal down to the floor, then lift your foot up a little, so that the heater plate remains in position but the roller does not rotate.
To raise the heater plate:
■ Take your foot off the pedal.
Positioning the laundry
■ Arrange the laundry items on the feed board so that they are straight, and smooth them out by hand.

■ Then turn the roller by hand until the edge of the article to be ironed can be held by the heater plate.
■ Press down the foot pedal.
Removing the feed board
The feed board can be removed when shaped garments are being ironed, e.g. skirts (round).

Lift the feed board out of the right-hand holder, then pull it outward toward the left of the roller.
Laundry bar
Ironed laundry can be hung over the swing out bar to avoid creasing.
⚠️ Take care not to press down on the bar when it is swung out, this could cause the rotary iron to tip over.
Tips
- To avoid creasing: Stop the roller, pull the item back towards you slightly, and smooth it out by hand. If needed, dampen again with a wet cloth or spray bottle.
- If possible, always use the whole width of the roller, to maintain the smooth, elastic surface of the roller.
- For small items, such as handkerchiefs, alternate between the right and left-hand sides of the roller.
- Articles with raised parts, such as buttons, should be ironed face down onto the roller, so that they are pressed into the cushioned surface.
- Cover zippers, metal buttons and metal hooks with a cloth, to protect the heater plate.
- Buttons that are very large or not heat-resistant should not be ironed, as they can damage the heater plate.
- When you have nearly finished ironing, you can turn the temperature selector to I and continue ironing small items at a low temperature.
After ironing
Turn the appliance off. Turn off the ⏻ switch for "Steam". Turn the temperature selector to I. Unplug from the outlet.
To store the rotary iron:
■ Allow the heater plate to cool. ■ Empty the water reservoir. ■ Fold the iron. ■ Wind up the power cord. ■ Put the cover on.
Do not store the iron in a room where there is a risk of frost occurring. Frozen water in the reservoir and steam line can damage the appliance.
Power failure
In the event of a power failure, pull the emergency release lever up.
If there is a power failure while the iron is in use, the heater plate will stay pressed onto the roller. The item being ironed will be held there, and can become scorched.
To free a trapped item:
■ Pull the emergency release lever up.
The pressure is reduced, and the item can be removed.
When the power is restored (the On/Off indicator comes on), push the emergency release lever back down. Continue ironing as usual.
Towels, dishcloths, handkerchiefs, napkins, etc.
■ Lay the item with the straight grain of the fabric to the feed board.
This will prevent it from losing its shape and will be easier to fold.
Pass handkerchiefs diagonally through the rotary iron and, if necessary, fold them and then iron again.
■ Please use the whole length of the roller.
Tablecloths
■ Avoid creases by ironing the middle first.

■ Lay the tablecloth crossways, so that the ends hang over to the left and right.
■ Iron the middle section first.
■ Fold in half lengthwise.

■ Fold in half with unironed edges together and place over the left end of the roller with the ironed middle section hanging over the edge to prevent creasing. Then pass both sides of the non-ironed sections through the rotary iron.
■ If needed, make one more pass once the tablecloth is folded.
Sheets and bedspreads
Sheets may be ironed like tablecloths, or if a lengthwise fold is acceptable, fold the sheet together lengthwise and iron it on both sides.
To accentuate embroidery and raised patterns on bedspreads, iron first in one direction and then in the other.
Duvet covers

If the duvet cover has buttons at the open end, iron the buttons first.
Note: Only pass this end through the rotary iron if the buttons are heat-resistant.
■ Start the first run by carefully feeding this end in first on the left side of the roller, taking care not to damage any buttons.

■ It is best to iron the cover in two runs lengthwise.
Pillowcases
■ Lay the pillowcase on the feeder plate, position under the heater plate and iron in one step. ■ If the open end has buttons, only pass it through the rotary iron if the buttons are heat resistant.
Shirts
■ Remove the feed board to iron shirts.
1. Shoulder yoke

■ Arrange the yoke, collar first, on the roller and smooth out.
■ Hot press the yoke.
2. Collar

The collar is ironed on both sides using the left hand end of the roller. Stop ironing when the button comes to the heater plate.
■ Then turn down the collar and press lightly, holding taut.

3. Front sides
■ Lay the button hole front on the left hand end of the roller with the side seam along the edge of the roller.
■ Iron from the button hem up to the armhole.
■ Now move the shirt out and iron past the armhole to the side seam.
■ Iron the button side inside out so the buttons are pressed into the cushioned surface of the roller.
4. Back

■ Start at the side seam. Pull the shirt over the roller as far as the armhole. Smooth it out.
■ Starting from the side seam, iron past the armhole, then pull the shirt further onto the roller and iron the full back length to the second armhole.

■ Pull the shirt further down the roller and iron past the armhole.
5. Cuffs and sleeves

■ First iron both sides of the cuff on the left edge of the roller. Fold double cuffs with one buttonhole placed over the other and press lightly.
■ Smooth out the sleeve and place it on the edge of the roller.

■ Iron the arm from the edge of the cuff to the underarm. Shift diagonally to iron the full width of the armhole.
Smock-type aprons
■ Iron smocks as you would a shirt.
Aprons with ties
■ Iron the ties one by one up to the bib, then over the bib and up to the waistband.
■ Then iron, in passes, up to the waistband, or iron crosswise. Let the bib hang over the left edge of the roller.
Steam-pressing pants
■ Lay each pant leg separately on the roller. Let the upper part hang down over the left edge of the roller.

■ Cover with a damp cloth, then turn the roller by hand until the part of the pants to be pressed is covered by the heater plate.
■ Press each leg from both sides starting from the crease.
■ Iron the upper part from waistband to inseam of pants and jeans in sections. Set on a slow speed.
Steam-pressing skirts
Skirts are best ironed without the feed board, using the roller fully.
■ Pull the skirt over the roller from the hem to the waistband.
■ Lay a damp cloth over it.
■ Iron each section of the skirt until completed.
⚠️ Turn the iron off and unplug it from the outlet before performing any maintenance work.
Cleaning the heater plate
- Check that the temperature selector is set to I.
- Allow the heater plate to cool before cleaning. ■ Pull the emergency release lever up to make cleaning easier. ■ Clean lime or starch deposits from the heater plate using a non-abrasive household cleaner. Avoid spraying the heater plate.
Do not use abrasive cleaners.
Cleaning the casing
■ Depending on soiling, the casing can be wiped down with a dry or damp cloth.
Do not use abrasive cleaners.
Cleaning the water reservoir
If the steam nozzles seem to be producing less steam, this may mean there are lime deposits in the water reservoir, caused by hard water. To remove these lime deposits, rinse the reservoir under tap water.
Unplug from the socket.
Wait until the iron is cold before you attempt to rinse out the water reservoir.
Depending on the hardness of the tap water used, the water reservoir will need to be rinsed out after 3 to 10 tankfuls.
Stubborn deposits can be removed with a lime remover.
Always follow the manufacturer's instructions for use of such products (dose, time, etc.).
Fill the water reservoir halfway (3/4 pint / 400 ml) and close the cap. Roll the heater plate backwards and forwards several times. Rinse twice thoroughly with tap water to help prevent damage to laundry items.
See the section on "Steam" for instructions on filling and emptying the water reservoir.
Ironing cover
It is normal for the ironing cover on the roller to become slightly brown with use.
Wash the cover with a hot temperature program (140°F [60°C]).
If the cover looks worn and used, it can be easily replaced.
Ironing covers are available at your Miele dealer or Miele.
Replacing the ironing cover
The ironing cover should only be changed when the appliance is cold.
Remove the feed board.

Untie the old ironing cover cords at each end of the roller.

Unwind the old ironing cover.

Completely unwind the cotton padding attached to the roller and let it hang down smoothly.

Hold the corners of the cotton padding, pull taut, and lay it taught over the heater plate.
Note: the slot for the cotton padding is now at the top.

Insert the long edge of the new ironing cover into the retaining slot with the side seams inside (upside down). Keep side ties hanging free and smooth out.

Turn the roller by hand in the direction you iron (see arrow) until the retaining slot is at the bottom.
Turn the rotary iron on.
When the iron is turned on, the heater plate heats up immediately. The temperature selector must be turned to the I setting.

Press the foot pedal and "iron" the new cloth all the way around.
Do not let the cords get under the cloth as it turns.
Once the roller has completed 3 or 4 revolutions and the end of the ironing cover is under the heater plate:
Turn the rotary iron off while keeping the foot pedal pressed down.
The ironing cover is held firmly in place with the heater plate which is still lowered.

■ Tighten the cords at the left and right-hand sides of the roller, tie together and tuck under the cover. ■ Put the feed board back into place. ■ Turn the rotary iron on.
The heater plate will rise.
⚠️ Repairs should only be carried out by an authorized technician in accordance with local and national safety regulations. Unauthorized repairs could cause injury or appliance damage.
| The rotary iron does not turn on. | |
| Possible fault Solution | |
| The rotary iron has no power. | Plug the machine in and check if the circuit breaker has tripped. |
| The laundry is not properly or poorly pulled in. | |
| Possible fault Solution | |
| This tends to happen when ironing delicate items with a new machine. | Continue ironing, the issue is usually resolved after 5-10 minutes of ironing. |
| New iron cover | A new rotary iron cover should be washed at 140°F (60°C) for the laundry to be ideally pulled in. |
| Lime or starch deposits on the heater plate. | Clean with household cleaners or dishwasher detergent. |
| Creases/Folds occur | |
| Possible fault Solution | |
| The heater plate is soiled (lime deposits). | Clean the heater plate with household cleaners or dishwasher detergent. |
| The rotary iron cover is heavily soiled. | |
| Possible fault Solution | |
| Deposits | Wash the iron cover with household detergent at 140°F (60°C) or replace with a new one. |
| The heater plate does not press on the roller. | |
| Possible fault Solution | |
| The emergency release was activated. | Press the emergency release down (see "Power failure"). |
| No steam is being produced.The indicator light ⚙ for "Steam" goes out while ironing. | |
| Possible fault Solution | |
| The iron temperature is too low for steam production. | Set the temperature selector to ●●● and wait until the display light comes on. |
| No steam is being produced.The indicator light ⚙ for "Steam" goes out while ironing, and the indicator 📋 for "Water empty" is red. | |
| Possible fault Solution | |
| The water reservoir is empty. | Fill the water reservoir. |
| The steam nozzles are sputtering. | |
| Possible fault Solution | |
| Clean tap water was not used. | Empty the steam reservoir, rinse it out, then fill with tap water (see "Cleaning and Care"). |
| The steam nozzles are not releasing enough water. | |
| Solution Solution | |
| There are lime deposits in the water reservoir, from hard water. | To remove these lime deposits, rinse the reservoir under tap water (see "Cleaning and Care"). |
In the event of a fault which you cannot easily fix yourself, please contact the Miele Technical Service Department at the address on the back of this booklet.
When contacting the Technical Service Department, please quote the model and serial number of your appliance given on the data plate under the front side of the appliance.
① Model ② Serial number ③ Voltage/Frequency ④ Minimum fuse rating (house wiring) ⑤ Power consumption (wattage)
The wiring diagram is located under the right side of the ironing table.
The appliance is supplied with a power cord and NEMA 6-20 P plug ready for connection to an a.c. single phase 220-240 V 60 Hz power supply (see data plate).
The fuse rating is 20 amps.
⚠️ Do not modify the machine power cord or plug, the machine is approved for US and CDN.
All electrical work should be carried out by a qualified electrician in accordance with local and national safety regulations.
Do not connect the rotary iron to an extension cord. Extension cords do not guarantee the required safety of the appliance (e.g. danger of overheating).
WARNING
THIS APPLIANCE MUST BE GROUNDED
Technical data
| Height 37 | 3/4 " (folded 41 3/8 ") [95.9 (folded 105.2) cm] |
| Width 38 | 3/4 " (folded 19 5/8 ") [98.5 (folded 50) cm] |
| Depth 15" [38 cm] | |
| Weight 86 lbs (39 kg) | |
| Water reservoir capacity | 1 1/2 pints (800 ml) |
| Voltage see data plate | |
| Rated load see data plate | |
| Minimum fuse rating | see data plate |
Disposal of packing materials
The cardboard box and packing materials are biodegradable and recyclable. Please recycle.
Ensure that any plastic wrapping, bags, etc. are disposed of safely and kept out of the reach of children. Danger of suffocation!
Disposal of an old appliance
Old appliances contain materials that can be recycled. Please contact your local recycling authority about the possibility of recycling these materials.
Before discarding an old appliance, disconnect it from the electrical supply and cut off the power cord directly behind the appliance, to prevent misuse.
Miele PROFESSIONAL
Miele, Inc. USA
National Headquarters
9 Independence Way
Princeton, NJ 08540
Phone: 800-991-9380
609-419-9898
Fax: 609-419-4241
www.mieleusa.com
Technical Service & Support
Nationwide
Phone: 800-991-9380
Fax: 888-586-8056
Mid-West Region
Phone: 800-666-6740
Fax: 847-714-9434
West-Coast Region
Phone: 800-245-8215
Fax: 415-241-6822
Miele Limited CDN
National Headquarters
55G East Beaver Creek Road
Richmond Hill, ON L4B 1E5
Phone: 800-565-6435
905-707-1171
Fax: 905-707-0177
www.miele.ca
professional@miele.ca

- OPERATING INSTRUCTIONS ROTARY IRON HM
- IMPORTANT SAFETY INSTRUCTIONS
- GUIDE TO THE ROTARY IRON
- MOVING AND FOLDING THE APPLIANCE
- TRANSPORT STRUT
- BEFORE USING FOR THE FIRST TIME
- PREPARING THE WORK AREA
- PREPARING THE LAUNDRY
- TESTING THE FINGER GUARD
- STEAM SETTING
- FILLING THE WATER RESERVOIR
- EMPTYING THE WATER RESERVOIR
- IRONING
- TURNING ON AND OFF
- SELECTING THE IRONING TEMPERATURE (OPERATION WITHOUT STEAM)
- SELECTING THE IRONING TEMPERATURE (OPERATION WITH STEAM)
- TURNING THE STEAM SETTING ON AND OFF
- SELECTING THE ROLLER SPEED
- POSITIONING THE LAUNDRY
- REMOVING THE FEED BOARD
- AFTER IRONING
- POWER FAILURE
- IRONING TIPS
- TOWELS, DISHCLOTHS, HANDKERCHIEFS, NAPKINS, ETC
- TABLECLOTHS
- SHEETS AND BEDSPREADS
- DUVET COVERS
- PILLOWCASES
- SHIRTS
- SMOCK-TYPE APRONS
- APRONS WITH TIES
- STEAM-PRESSING PANTS
- STEAM-PRESSING SKIRTS
- PROPER USE
- TECHNICAL AND ELECTRICAL SAFETY
- USE
- ACCESSORIES
- SAVE THESE INSTRUCTIONS AND REVIEW THEM PERIODICALLY
- CONTROL PANEL
- POWER CORD
- PROPER DAMPNESS (FOR OPERATION WITHOUT STEAM)
- PULLING INTO SHAPE AND SMOOTHING OUT
- SORTING
- USING THE IRON FOR THE FIRST TIME
- IRONING WITH AND WITHOUT STEAM
- TO TURN ON
- TO TURN OFF
- TURNING ON
- TURNING OFF
- TO IRON
- TO PRESS
- TO RAISE THE HEATER PLATE
- LAUNDRY BAR
- TIPS
- TO STORE THE ROTARY IRON
- SHOULDER YOKE
- COLLAR
- FRONT SIDES
- BACK
- CUFFS AND SLEEVES
- CLEANING THE HEATER PLATE
- CLEANING THE CASING
- CLEANING THE WATER RESERVOIR
- IRONING COVER
- REPLACING THE IRONING COVER
- WARNING
- THIS APPLIANCE MUST BE GROUNDED
- DISPOSAL OF PACKING MATERIALS
- DISPOSAL OF AN OLD APPLIANCE
- MIELE PROFESSIONAL
- NATIONAL HEADQUARTERS
- TECHNICAL SERVICE & SUPPORT
- NATIONWIDE
- MID-WEST REGION
- WEST-COAST REGION
Brand : MIELE
Model : HM 16-80
Category : Iron