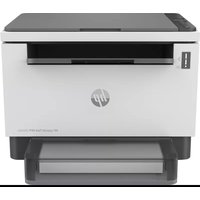
USER MANUAL LaserJet Tank MPF 2604dw HP
User Guide


HP LaserJet Tank MFP
1005, 160x, 260x series
HP LaserJet Tank MFP
260x series
HP company notices
Copyright and License
THE INFORMATION CONTAINED HEREIN IS SUBJECT TO CHANGE WITHOUT NOTICE.
ALL RIGHTS RESERVED. REPRODUCTION, ADAPTATION, OR TRANSLATION OF THIS MATERIAL IS PROHIBITED WITHOUT PRIOR WRITTEN PERMISSION OF HP, EXCEPT AS ALLOWED UNDER THE COPYRIGHT LAWS. THE ONLY WARRANTIES FOR HP PRODUCTS AND SERVICES ARE SET FORTH IN THE EXPRESS WARRANTY STATEMENTS ACCOMPANYING SUCH PRODUCTS AND SERVICES. NOTHING HEREIN SHOULD BE CONSTRUED AS CONSTITUTING AN ADDITIONAL WARRANTY. HP SHALL NOT BE LIABLE FOR TECHNICAL OR EDITORIAL ERRORS OR OMISSIONS CONTAINED HEREIN.
© Copyright 2022 HP Development Company, L.P.
Trademark Credits
Microsoft and Windows are either registered trademarks or trademarks of Microsoft Corporation in the United States and/or other countries.
Mac, OS X, macOS, and AirPrint are trademarks of Apple Inc., registered in the U.S. and other countries.
ENERGY STAR and the ENERGY STAR mark are registered trademarks owned by the U.S. Environmental Protection Agency.
Android and Chromebook are trademarks of Google LLC.
iOS is a trademark or registered trademark of Cisco in the U.S. and other countries and is used under license.
Always follow basic safety precautions when using this product to reduce risk of injury from fire or electric shock.
Read and understand all instructions in the documentation that comes with the printer.
Observe all warnings and instructions marked on the product.
Unplug this product from wall outlets before cleaning.
Do not install or use this product near water, or when you are wet.
Install the product securely on a stable surface.
Install the product in a protected location where no one can step on or trip over the line cord, and the line cord cannot be damaged.
If the product does not operate normally, see Solve a problem in this guide.
There are no user-serviceable parts inside. Refer servicing to qualified service personnel.
Table of contents
1 Get started....1
Printer parts and locations (dn/dw/w/USB)....1
Printer parts and locations (sdn/sdw)....1
Printer parts rear 2
Control panel features (dn/dw/w/USB)....3
Control panel features (sdn/sdw)....5
Control panel display features....7
Use the HP Smart app to print, scan, and manage....8
2 Connect your printer....10
Connect your printer to a Wi-Fi network using HP Smart....10
Connect your printer to a Wi-Fi network using Wi-Fi Protected Setup (WPS) 10
Connect your printer to an Ethernet network 11
Connect your printer using a USB cable 11
Change wireless settings....12
Change the connection type (network models)....13
Load paper 15
Load envelopes 17
Load labels....18
Load an original on the scanner glass.... 19
Load an original in the document feeder (some models only) 20
4 Print....22
Print from a Windows computer....22
Print from a Mac computer 22
Print with mobile devices....23
5 Copy and scan....24
Make a copy....24
Copy an identification (ID) card....24
Scan using HP Smart (iOS/Android, Windows 10, and macOS)....26
Scan using the HP Scan software (Windows 7)....27
Use Web Services 28
Update the printer 29
Configure the printer using EWS....29
Check and refill the toner 33
Replace the imaging drum 38
Order supplies, accessories, and parts 38
8 Solve problems 40
HP support 40
Interpreting Error Codes 41
Print reports 48
Restore original factory defaults and settings 49
Printer does not pick up paper or misfeeds 49
Clear paper jams 52
Improve print quality 58
Resolving print quality problems 60
Improve copy and scan image quality 65
Solve wireless network problems 67
Solve Ethernet connection problems 70
Printer specifications....71
Service and support....74
Environmental product stewardship program 92
Regulatory information....98
Get started1
This section describes the printer parts, control panel features, and other printer functionalities.
Printer parts and locations (dn/dw/w/USB)
Part names and their locations on the front and top of the printer.

Table 1-1 Printer parts and locations
| Feature Description |
| 1 Scanner lid |
| 2 Scanner glass |
| 3 Control panel |
| 4 Output tray extender |
| 5 Toner access door / Output tray |
| 6 Paper tray cover |
| 7 Paper tray |
| 8 Refill toner indicator |
| 9 Toner gauge |
Printer parts and locations (sdn/sdw)
Part names and their locations on the front and top of the printer.

Table 1-2 Printer parts and locations
| Feature Description |
| 1 Document feeder |
| 2 Document feeder door |
| 3 Toner access door/Output tray |
| 4 Output tray extender |
| 5 Control panel |
| 6 Power button/light |
| 7 Refill toner indicator |
| 8 Toner gauge |
| 9 Scanner lid |
| 10 Scanner glass |
| 11 Paper tray cover |
| 12 Paper tray |
Printer parts rear
Part names and their locations on the back of the printer.

Table 1-3 Printer parts rear
| Feature Description |
| 1 USB port |
| 2 Ethernet port (some models only) |
| 3 Power input |
| 4 Rear access door |
Control panel features (dn/dw/w/USB)
Features and functions of the printer control panel.
![graph TD A["Device 1"] --> B["Node 2"] A --> C["Node 3"] A --> D["Node 4"] A --> E["Node 5"] A --> F["Node 6"] G["Device 2"] --> H["Node 7"] G --> I["Node 8"] G --> J["Node i"] G --> K["Node 9"] G --> L["Node i"] M["Device 1"] --> N["Node 10"] M --> O["Node 11"] M --> P["Node 12"] M --> Q["Node 11"]…](/content/2026/06/1369734/images/8469d3fec49c43deff54362ded7b4f5e547000e455923e0b6241a6a7b1ea2819.jpg)
Table 1-4 Control panel features
| Feature Buttons/Lights Description |
| 1 | Open Lid light | A light indicating the scanner lid is open. This light flashes during the ID Card Copy mode. |
| 2 Wireless light A small LED light to indicate the status of the Wi-Fi connection. This light blinks when connecting to Wi-Fi and is on when connected. |
| 3 | Wireless button (some models only) | A button to turn on or off the Wi-Fi connection to the printer. |
| 4 Attention light A light that is on or blinks when the printer requires attention. |
| 5 Control panel display An LCD display to display errors, number of copies and the status of other printer functions. |
6 Copy Options A Menu button with Up/Down buttons / to adjust the number of copies to be printed, or to adjust the contrast of the document copied. |
| 7 Copy button/light A button to execute a copy job. This light blinks when you are copying and stops when complete. |
|  | |
| 8 | ID Card copy button/light | A button to execute a copy job for a two-sided identification card or similar document. |
| 9 | Information button/light | A button to print a summary of printer settings and status. The button lights up or blinks when a printer error occurs. |
| 10 | Resume button/light | A button to acknowledge and resume printing. If the light on this button is on, the printer needs attention. |
| 11 Cancel button/light A button to cancel a job. |
|  | |
| 12 Power button/light A button to turn the printer on or off. |
|  | |
Control panel features (sdn/sdw)
Features and functions of the printer control panel.
![graph TD A["1"] --> B["Power"] C["2"] --> D["!"] E["3"] --> F["Switch"] G["4"] --> H["0:0:0%"] I["5"] --> J["✓...^"] K["6"] --> L["Document Icon"] M["7"] --> N["Print Icon"] O["8"] --> P["Down/Right Arrow"] Q["9"] --> R["+"] S["10"] --> T["i"] U["11"] --> V["Diode Icon"]](/content/2026/06/1369734/images/1e0f858dbba336b6a3ffec2ac428a87285ba103aeea147ecd313b9ff6cf8715e.jpg)
Table 1-5 Control panel features
| Feature Buttons/lights Description |
| 1 Power button/light A button to turn the printer on or off. |
|  | |
| 2 Attention light A light that is on or blinks when the printer requires attention. |
| ! | |
| 3 | Open Lid light | A light indicating the scanner lid is open. This light flashes during the ID Card Copy mode. |
|  | |
| 4 | Control panel display | An LCD display to display errors, number of copies and the status of other printer functions. |
| 5 | Copy Options | A Menu button with Up/Down buttons ∧/∨ to adjust the number of copies to print or to adjust the contrast of the document copied. |
|  | |
| 6 | ID Card copy button/light | A button to execute a copy job for a two-sided identification card or similar document. |
|  | |
| 7 | Copy button/light | A button to execute a copy job. This light starts to blink when you are copying and stops when complete. |
|  | |
| 8 Cancel button/light A button to cancel a job. |
|  | |
| 9 | Information button/light | A button to print a summary of printer settings and status. The button lights up or blinks when a printer error occurs. |
 | |
| 10 Wireless button (some models only) | A button to turn on or off the Wi-Fi connection to the printer. |
|
|
| 11 | Resume button/light | A button to acknowledge and resume printing. If the light on this button is on or blinking, the printer needs attention. |
 | |
Control panel display features
Features and functions of the control panel display.

Table 1-6 Control panel elements
| Feature Icon/Button Description |
| 1 Paper icon Blinks when the input tray is out of paper, or when there is a paper error. |
| [Y765] | |
| 2 Wi-Fi Direct icon (wireless model only) | Indicates that Wi-Fi Direct is on.You can connect any device (for example: smart phones, tablets, or computers) that support Wi-fi directly to the printer without using a wireless router. |
 | |
| 3 Ethernet icon This indicates the printer is connected through a wired (Ethernet) connection. |
|  | |
4 Wireless icon (some models only)  | This indicates that there is a stable wireless connection. If an exclamation icon appears beside the wireless icon, seeWireless status of the printer (dw models only). |
| 5 Character display The characters display the following: |
|  | ●Number of copies being printed●Copy settings (contrast and the reduce/enlarge setting)●Animation to show that the device is busy●Error and status codes. For a list of printer display codes, seeInterpreting Error Codes. |
| 6 Number of Copies icon Shows the number of copies currently selected for printing. |
|  | |
| 7 Lighter/Darker (contrast) icon Shows the contrast setting (as a bar graphic). |
|  | |
8 Reduce/Enlarge (scale) icon (sdn/sdw models only)  | Shows the current scaling factor (in percent). |
Use the HP Smart app to print, scan, and manage
The HP Smart app can help you perform many different printer tasks, including the following:
- Set up and connect your printer.
- Print and scan documents and photos.
- Share documents through email and other applications.
- Manage printer settings, check printer status, print reports, and order supplies.
HP Smart is supported on mobile devices and computers running on Android OS 7.0 or later, iOS 12.0 or later, iPadOS, Windows 10 and above, and macOS 10.14 and later.

NOTE: At this time, the HP Smart app might not be available in all languages. Some features are available only on specific printers or models. HP Smart does not support all file formats. For more information, see Get more information about HP Smart.
To install HP Smart and open the app
- Visit 123.hp.com to download and install HP Smart on your device.

NOTE:
- iOS, Android, Windows 10 and above, and macOS: You can also download HP Smart from the respective app stores for the device.
- Windows 7: You can download the HP Easy Start from 123.hp.com, install the software, and connect the printer wirelessly using the software.

NOTE: Windows 7 Service Pack1 (SP1) is required to install the HP Smart app.
- Open HP Smart after installation.
- iOS/Android: From the mobile device desktop or app menu, tap HP Smart.
- Windows 10 and above: From the computer desktop, click Start, and then select HP Smart from the app list.
- macOS: From the Launchpad, select HP Smart.
- Connect your printer wirelessly using HP Smart. See Get more information about HP Smart.
- If prompted, create an HP account and register the printer.
To learn how to connect, print, and scan using HP Smart, visit the website for your device:
- iOS/iPadOS/Android: www.hp.com/go/hpsmart-help
- Windows 10 and above: www.hp.com/go/hpsmartwin-help • macOS: www.hp.com/go/hpsmartmac-help
Connect your printer2
This section describes different ways to connect your printer.
Connect your printer to a Wi-Fi network using HP Smart
Install the HP Smart app on your computer or mobile device and use the app to set up or connect the printer to your Wi-Fi network.

NOTE: This section is applicable to wireless printers only.
For information about HP Smart, including where to download the app, see Use the HP Smart app to print, scan, and manage.
- Make sure your computer or mobile device is connected to your Wi-Fi network. On your mobile device, turn on Bluetooth and location services.

NOTE: HP Smart uses Bluetooth for printer setup. It does not support printing using Bluetooth.
- If your printer's Wi-Fi was previously turned off, make sure to turn it on. For more information about wireless status, see Change wireless settings.
- If the printer is no longer in wireless setup mode, restore the printer's network settings. See Restore network settings to default.
- Open the HP Smart app on your computer or mobile device. See Use the HP Smart app to print, scan, and manage.
- From HP Smart, click or tap the Plus icon ⊕ or Add Printer, and then choose the option to select or add a printer. If prompted, allow Bluetooth and location permissions. Follow the instructions to add the printer to your network.
- When prompted, create an HP account and register the printer.

NOTE: When the printer is connected successfully, the Wireless light stops blinking and remains lit (for all Wireless models). See Change wireless settings.
Connect your printer to a Wi-Fi network using Wi-Fi Protected Setup (WPS)
This topic describes how to connect your printer to a Wi-Fi network using WPS.
This wireless setup method can be used if your router has a WPS button. If the router does not have this button, it is recommended that you connect the printer using the HP Smart app. See Get more information about HP Smart.
- Make sure your router and printer are not too far from each other.
- From the printer control panel, press and hold the Wireless button 📋 for at least 5 seconds to start WPS. The Wireless light/icon blinks.
- Press the WPS button on your router.

NOTE:
- Be sure to press the WPS button on the router within 2 minutes.
- When the printer is connected successfully, the Wireless light/icon stops blinking and remains lit (for all Wireless models).
- Open the HP Smart app on your computer or mobile device. See Use the HP Smart app to print, scan, and manage.
- From HP Smart, click or tap the Plus icon or Add Printer, and then choose the option to select or add a printer.
Follow the instructions to add the printer to your network.
- When prompted, create an HP account and register the printer.
Connect your printer to an Ethernet network
This topic describes how to connect your printer to an Ethernet network.
If your Ethernet network does not have an Internet connection, connect the printer wirelessly to the HP Smart app. See Get more information about HP Smart.
- Make sure your computer is connected to the router.
- Connect your printer and router using an Ethernet cable (Ethernet cable sold separately).

NOTE:
- The Wi-Fi connection is automatically disabled when you connect the Ethernet cable.
- To connect the printer wirelessly, disconnect the Ethernet cable and connect the printer to your wireless network using HP Smart. See Get more information about HP Smart.
- Open the HP Smart app on your computer or mobile device. See Use the HP Smart app to print, scan, and manage.
- From HP Smart, click or tap the Plus icon ⊕ or Add Printer, and then choose the option to select or add a printer.
Follow the instructions to add the printer to your network.
- When prompted, create an HP account and register the printer.
Connect your printer using a USB cable
This topic describes how to connect your printer using a USB cable.
- Connect the printer and computer using a USB cable.
- Open the HP Smart app on your computer. See Use the HP Smart app to print, scan, and manage.
- From HP Smart, click or tap the Plus icon ⊕ or Add Printer, and then choose the option to select or add a printer. Follow the instructions to add the printer.
- When prompted, create an HP account and register the printer.
Change wireless settings
You can set up and manage the wireless connection for your printer. This includes printing information about network settings, turning the wireless function on or off, and restoring wireless settings.
Wireless status of the printer (dw models only)
Table 2-1 Wireless status of the printer - dw models only
| Wireless button Wireless light Wi-Fi Status |
| Off No light on the control panel | The printer is not connected to the network. |
To turn on wireless, press the Wireless button  |
| To connect the printer to a Wi-Fi network, see Connect your printer to a Wi-Fi network using HP Smart or Connect your printer to a Wi-Fi network using Wi-Fi Protected Setup (WPS). |
 | Solid blue light is lit on the control panel. | The printer is connected to the network. |
| On | [ ] | |
| ### | The blue light blinks in sync with the wireless icon. | The printer is trying to connect to a wireless network. |
| On | [ ] | |
| ### | The blue light blinks in sync with the wireless icon. | The printer is unable to connect to a wireless network. |
| On |  | If the printer is unable to connect to a wireless network, the Wireless icon blinks and Er/61 appears on the control panel. Press the Cancel button to continue and then try connecting the printer to the wireless network again. See Connect your printer to a Wi-Fi network using HP Smart. |
| If problem persists, try connecting using the HP Smart app. See Connect your printer to a Wi-Fi network using Wi-Fi Protected Setup (WPS). |
Wireless status of the printer (sdw models only)
Table 2-2 Wireless status of the printer (sdw models only)
| Wireless icon Wi-Fi Status |
| Off The printer is not connected to the network. |
| To turn on wireless, press the Wireless button |
| To connect the printer to a Wi-Fi network, see Connect your printer to a Wi-Fi network using HP Smart or Connect your printer to a Wi-Fi network using Wi-Fi Protected Setup (WPS). |
 | The printer is connected to the network. |
| On | |
 | The printer is trying to connect to a wireless network. |
| On (signal bar cycles) | |
 | The printer is unable to connect to a wireless network. |
| On (signal bar cycles) | If the printer is unable to connect to a wireless network, (the Wireless icon) blinks and Er/61 appears on the control panel. Press (the Cancel button) to continue and then try connecting the printer to the wireless network again. See Connect your printer to a Wi-Fi network using Wi-Fi Protected Setup (WPS). If problem persists, try connecting using the HP Smart app. See Connect your printer to a Wi-Fi network using HP Smart. |
Restore network settings to default
- Press and hold the Information button for 5 seconds, and then release the button. All control panel buttons light up.
- Press and hold the Wireless button ⓦ and the Cancel button ✗. The printer restarts and the Wireless light starts blinking. This indicates that the printer is in wireless setup mode. You can now set up a wireless connection between the printer and your device.

NOTE: Use the HP Smart app to connect the printer wirelessly.
Change the connection type (network models)
This topic describes how to change the way to connect your printer.
USB to a wireless connection
Perform the following steps to convert your HP printer from a USB to a wireless connection in Windows/macOS.
Windows 10/macOS
- Unplug the USB cable from the printer.
- Make sure your computer or mobile device is connected to your Wi-Fi network. On your mobile device, turn on Bluetooth and location services.
- If your printer Wi-Fi was previously turned off, make sure to turn it on. For more information about wireless status, see Change wireless settings.
- If the printer is no longer in wireless setup mode, restore the printer network settings. See Restore network settings to default.
- Open the HP Smart app on your computer or mobile device. See Use the HP Smart app to print, scan, and manage.
- When prompted, create an HP account and register the printer.
- Follow the on-screen instructions to connect the printer to your Wi-Fi network.
Wireless to a USB connection
This topic describes how to change the connection from Wireless to USB.
Windows/macOS
- Connect the printer and computer using a USB cable.
- Open the HP Smart app on your computer. See Use the HP Smart app to print, scan, and manage.
- From HP Smart, click or tap the Plus icon ⊕ or Add Printer, and then choose the option to select or add a printer. Follow the instructions to add the printer.
- When prompted, create an HP account and register the printer.
This section helps you load different media into the printer.
Load paper
This topic describes how to load paper into the input tray.

NOTE: To avoid paper jams:
- Never add or remove paper from the input tray during printing. Before loading the input tray, remove all of the paper from the input tray and straighten the stack.
- Use paper that is not wrinkled, folded, or damaged. • Always use 1 size paper. For example, do not place A5 paper over A4 size paper. • Always push the paper guides to ensure paper does not slant/skew while picking up by printer.
To load paper
- Lift the tray cover and remove paper from the input tray, if any.


TIP: To load Legal-size paper, lift the printer cover and, if necessary, leave it open. Depending on your printer model, you might also need to lower the tray door.
- Slide the paper guides to the edges of the input tray.

- Insert the stack of paper into the input tray with the top forward and the side to be printed on facing up.

- Slide the paper guides until they touch the edges of the media.

- Lower the tray cover and extend the output tray.

Load envelopes
This topic describes how to load envelopes into the input tray.
For a list of supported sizes and tray capacity, visit the HP support website. Click Product information, and then click the product specifications for your printer.
For more information about product-specific support links, see HP support.
To load envelopes
- Remove all paper from the input tray.
- Insert the envelope into the middle of the input tray. Place the top edge of the envelope toward the back of the tray, and the side to be printed on should face up.
- Slide the paper guides until they touch the edges of the media.

- Lower the tray cover and extend the output tray.
Load labels
This topic describes how to load labels into the input tray.
For a list of supported sizes and tray capacity, visit the HP support website. Click Product information, and then click the product specifications for your printer.
For more information about product-specific support links, see HP support.
To load labels
- Remove all paper from the input tray.
- Insert the sheet of labels into the middle of the input tray. Place the top edge of the sheet toward the back of the tray and the side to be printed on should face up.
- Slide the paper guides until they touch the edges of the media.

- Lower the tray cover and extend the output tray.
Load an original on the scanner glass
This topic describes how to load an original on the scanner glass.
You can copy or scan originals by loading them on the scanner glass.

NOTE:
- The scanner might not work correctly if the scanner glass and lid backing are not clean.
- Remove all originals from the document feeder tray before lifting the lid on the printer.
To load an original on the scanner glass
- Lift the scanner lid.

- Load your original print-side down and align it with the marking on the rear left corner of the glass.

TIP: For more help on loading an original, refer to the engraved guides along the edge of the scanner glass.

- Close the lid.
Load an original in the document feeder (some models only)
This topic describes how to load an original in the document feeder.
You can copy or scan a document by placing it in the document feeder.
CAUTION: Do not load photos in the document feeder, this might cause damage to your photos. Use only paper that is supported by the document feeder.
NOTE: Some features, such as the Fit to Page copy feature, do not work when you load your originals in the document feeder. For those features to work, load your originals on the scanner glass.
To load an original in the document feeder
- Load your original print-side up into the document feeder.
a. If you are loading an original printed in portrait orientation, place the pages so that the top edge of the document goes in first. If you are loading an original printed in landscape orientation, place the pages so that the left edge of the document goes in first.
b. Slide the paper into the document feeder until you hear a tone.
TIP: For more help on loading originals in the document feeder, refer to the diagram on the document feeder tray.

- Slide the paper-width guides inward until they stop at the left and right edges of the paper.
Print4
This printer is designed to work with the HP Smart app, a software application that makes it easy to print, scan, and manage your printer from a smartphone, laptop, desktop computer, or other devices. The HP Smart app is compatible with iOS, Android, Windows 10, and Mac.
Learn more about printing with the HP Smart app as well as printing from other software applications using the HP printer driver. Also find basic instructions for printing with Apple AirPrint on a Mac and printing from mobile devices using the print commands provided in the device software.
Be sure to check out tips for successful printing to ensure you get the best results every time you print.
Print from a Windows computer
This topic describes how to print from a Windows computer.
- Make sure you have installed the HP Smart app. See Use the HP Smart app to print, scan, and manage.
- Open the document you wish to print.
- From the File menu in your software program, select the Print option.
- Click the button that opens the Properties dialog box.
Depending on your software application, this button might be called Properties, Options, Setup, or Preferences.
- Make sure your printer is selected.
- Change any print settings, and Click OK.
- Click Print or the OK button to print the job.
Print from a Mac computer
This topic describes how to print from a Mac computer.
- Make sure you have installed the HP Smart app. See Use the HP Smart app to print, scan, and manage.
- From the computer, open System Preference, and select Printers and Scanners.
- Click the Add button +, select the printer from the printer list, and then click Add.
- Once connected, open the document you wish to print and use the Print command.
- Make sure the desired printer is selected.
- Change any print settings.
- Click Print to print the document.
Print with mobile devices
This topic describes how to print from mobile devices.
You can use the HP Smart app to print documents and photos from your mobile device, social media account, or cloud storage. For more information, see Use the HP Smart app to print, scan, and manage.
You can also print directly from your mobile devices using AirPrint (iOS) or HP Print Service Plugin (Android):
- iOS: Devices running iOS 4.2 or later have AirPrint pre-installed.
- Android: Download the HP Print Service Plugin from the Google Play Store or your favorite app store, and then enable it on your device.

NOTE: You can print using HP Smart or AirPrint/HP Print Service Plugin when the mobile device is on the same network as the printer or a different network (using Wi-Fi Direct).
Print while connected to same Wi-Fi network
You can print documents and photos from your mobile device when the device is on the same Wi-Fi network as the printer.
Visit www.hp.com/go/mobileprinting for more information on mobile printing.

NOTE: Make sure your mobile device and printer are connected to the same Wi-Fi network. See Connect your printer to a Wi-Fi network using HP Smart.
Print without connecting to same Wi-Fi network (Wi-Fi Direct)
With Wi-Fi Direct, you can directly connect your computer or mobile device to the printer and print wirelessly—without connecting your computer or mobile device to an existing wireless network.
Visit www.hp.com/go/wifidirectprinting for more information on Wi-Fi Direct.

NOTE:
- Make sure Wi-Fi Direct on your printer is turned on. If Wi-Fi Direct is turned on, the Wi-Fi Direct icon appears on the control panel display.

- Up to 5 computers and mobile devices can connect to the printer using Wi-Fi Direct connection.
To turn Wi-Fi Direct on or off from the control panel:
- Press and hold the Information button for three seconds and then release the button.
All control panel buttons will light up.
- Press the Resume button and the Wireless button at the same time.

TIP: Press the Information button ⓘ to print a report to check Wi-Fi Direct status and password.
Copy and scan
This section describes how to use the copy and scan features.
Make a copy
Follow these steps to make a copy from the scanner glass:
- Load the document on the scanner glass according to the indicators on the printer.
- Press the Menu button to choose any of the following copy settings.
- Use the Up button and the Down button to adjust the number of copies to print.
- Select the Lighter/Darker setting, and then use the Up button and the Down button to adjust the darkness setting for the current copy job.
- Press the Copy button to start copying.

TIP: If your device has a camera, you can use the HP Smart app to scan a printed document or photo with the device camera. You can then use HP Smart to edit, save, print, or share the image.
Copy an identification (ID) card
Use the ID Copy feature to copy both sides of an identification card, or other small-size documents, onto the same side of one sheet of paper. The printer prints both images at the same time.
- Open the scanner lid and place the ID card on the top half of the scanner glass as shown.

- Close the scanner lid and press the ID Copy button to start copying.

When the copying is done, the Open Lid light is lit and "P2" appears on the display.
- Open the scanner lid, flip over the ID card and place on the same area of the scanner glass.

- Close the scanner lid and press the Resume button ↓ to start scanning the second side and print.

Scan using HP Smart (iOS/Android, Windows 10, and macOS)
You can use the HP Smart app to scan documents or photos from the printer's scanner, and you can also scan using your device camera. HP Smart includes editing tools that allow you to adjust the scanned image before saving or sharing.
You can print, save your scans locally or in cloud storage, and share them via email, SMS, Facebook, Instagram, etc. To scan with HP Smart, follow the instructions provided in the appropriate section below, depending on the type of device you are using.
iOS/Android: www.hp.com/go/hpsmart-help
• Windows 10: www.hp.com/go/hpsmartwin-help • macOS: www.hp.com/go/hpsmartmac-help
Scan using the HP Scan software (Windows 7)
Use the HP Scan software to initiate scanning from software on your computer. You can save the scanned image as a file or send it to another software application.
- Load the document on the scanner glass according to the indicators on the printer.
- Open the HP Printer software. From the computer desktop, click Start, select All Programs, click HP, click the folder for the printer, and then select the printer name.
- Select Scan, and then select Scan a Document or Photo.
- Adjust the settings if necessary.
- Click Scan.
This section describes how to configure your printer.
Use Web Services
The printer offers innovative, cloud-based solutions, such as print anywhere, scan-and-save to cloud, and other services (including supplies auto replenishment).
For more information, visit the HP Smart website http://www.hpsmart.com.

NOTE: To use these cloud-based solutions, the printer must be connected to the Internet. Unless otherwise agreed, HP can modify or cancel these cloud-based solution offerings at its discretion.
Set up Web Services
- Before you set up Web Services, make sure your printer is connected to the Internet.
- Open the printer home page (the embedded web server or EWS). See To open EWS using HP Smart (iOS, Android, and Windows 10).
- Click the HP Web Services tab.
- In Web Services Settings, click Enable, and follow the on-screen instructions to accept the terms of use.
- If prompted, choose to allow the printer to check for and install printer updates.

NOTE:
- If prompted for a password, enter the PIN from the label on your printer. See Things to note when accessing EWS.
- If prompted for proxy settings and if your network uses proxy settings, follow the on-screen instructions to set up a proxy server. If you do not have the details, contact your network administrator or the person who set up the network.
- If a printer update is available, the printer downloads and installs the update and then restarts automatically. Repeat the instructions above to set up HP Web Services.
- After the printer is connected to the HP server, the printer prints an information sheet. Follow the instructions on the information sheet to finish setting up Web Services.
Remove Web Services
- Open the printer home page (the embedded web server or EWS). See To access and use EWS.
- Click the HP Web Services tab.
- In Web Services Settings, click Disable Web Services.
Update the printer
HP offers periodic printer updates to improve printer performance, fix issues, or protect your printer against potential security threats.
If your printer is connected to a Wi-Fi or Ethernet network with Internet access, you can update the printer using HP Smart. See Use the HP Smart app to print, scan, and manage.
You can change the setting to auto update from the embedded web server (EWS). From EWS Home page, click Device Status tab, click Printer Updates at the bottom, and select the desired options.
Use EWS to manage printing functions from your computer.
• View printer status information - Check the information and status of the printing supplies - Receive notification of printer and supplies events • View and change the network and the printer settings
To access and use EWS
You can open EWS using one of the following:
• HP Smart app - HP printer software - Web browser using IP address - Web browser using Wi-Fi Direct connection
Things to note when accessing EWS
If the web browser displays a message indicating that the website is unsafe, select the option to continue.
- Accessing the website will not harm your device.
- If prompted, enter the default user name and password of the printer.
- Username: admin
– Password: Open the toner access door, and look for the PIN number on the label inside the printer.

- Depending on how the printer is connected, some features in EWS might not be available.
- EWS is not accessible beyond the network firewall.
To open EWS using HP Smart (iOS, Android, and Windows 10)
- Open the HP Smart app on your computer or mobile device. For more information, see Use the HP Smart app to print, scan, and manage.
- From HP Smart, select your printer, and then click or tap Advanced Settings.
To open EWS using an IP address (Wi-Fi or Ethernet connection)
- Find out the IP address. Press the Information button ⓘ on the printer to print an information page.
- Open a web browser, type the IP address or hostname in the address bar, and then click or tap Enter.
To open EWS using an IP address (Wi-Fi Direct connection)
Perform the following step:
- Make sure your device and the printer are connected using Wi-Fi Direct. See Print without connecting to same Wi-Fi network (Wi-Fi Direct).
- Open a web browser, type the following IP address or hostname of the printer in the address bar, and then click or tap Enter.
IP Address: 192.168.223.1
To open EWS using HP Printer software (Windows 7)
- From the computer desktop, click Start, select All Programs, click HP, click the folder for the printer, select the icon with the printer's name, and then open HP Printer Assistant.
- In the HP Printer Assistant, select Print tab.
- Select Printer Home Page (EWS).
Use the following sections to configure the printer network settings.
View or change network settings
Use EWS to view or change IP configuration settings.
- Open EWS. For more information, see To access and use EWS.
- Click the Networking tab to obtain network information. Change settings as needed.
Rename the printer on a network
To rename the printer on a network so that it can be uniquely identified, use the Embedded Web Server.
- Open EWS. For more information, see To access and use EWS.
- Open the System tab.
- On the Device Information page, the default printer name is in the Device Description field. You can change this name to uniquely identify this printer.

NOTE: Completing the other fields on this page is optional.
- Click the Apply button to save the changes.
Use EWS to manually set an IPv4 address, subnet mask, and default gateway.
- Open EWS. For more information, see To access and use EWS.
- On the Networking tab, click IPv4 Configuration in the left navigation pane.
- From the IP Preferred Address Method drop-down menu, select Manual, and then edit the IPv4 configuration settings.
- Click the Apply button.
Assign or change the system password using EWS
Assign an administrator password for access to the printer and EWS so that unauthorized users cannot change the printer settings.
- Open EWS. For more information, see To access and use EWS.
- On the System tab, click the Administration link in the left navigation pane.
- In the area labeled Product Security, enter the password in the Password field.
- Re-enter the password in the Confirm Password field.
- Click the Apply button.

NOTE: Make note of the password and store it in a safe place.
Change energy-conservation settings
The printer includes several economy features to conserve energy and supplies.
Set the Sleep/Auto Off After Inactivity setting
Use EWS to set the amount of idle time before the printer enters sleep mode.
Complete the following procedure to change the Sleep/Auto Off After Inactivity setting:
- Open EWS. For more information, see To access and use EWS.
- Click the System tab, and then select Energy Settings.
- From the Sleep/Auto Off After Inactivity drop-down menu, select the time for the delay.
- Click the Apply button.
Use EWS to set the amount of time before the printer shuts down.

NOTE: After the printer shuts down, the power consumption is 1 watt or less.
Complete the following procedure to change the Shut Down After Inactivity setting:
- Open EWS. For more information, see To access and use EWS.
- Click the System tab, and then select Energy Settings.
- From the Shut Down After Inactivity drop-down list, select the time for the delay.

NOTE: The default value is 4 hours.
- Click the Apply button.
Set the Delay Shut Down setting.
Use the EWS to delay the printer shutdown when the Power button is pressed.
- Open EWS. For more information, see To access and use EWS.
- Click the System tab, and then select Energy Settings.
- Select or clear the Delay when ports are active option.

NOTE: When this option is selected the printer will not shut down unless all ports are inactive. An active network link will prevent the printer from shutting down.
This section describes how to check toner level, refill the toner, replace drum, and order supplies, accessories, and parts.
Check and refill the toner
The printer is pre-filled with toner at purchase. The value of bars on the toner gauge are estimated toner levels and may vary slightly from the actual toner level.

NOTE: The printer only works with original HP toner refill kits. If original HP toner is not installed in the printer, the printer will not work as expected.

Types of toner refill kit
HP toner refill kits (TRK) are available in two options and depending on the requirement you can purchase anyone of the TRK.
- High Capacity TRK - order this TRK when the toner is completely empty and no more printing can be done.

- Standard TRK - order this TRK when the toner is partly depleted.


NOTE: You can identify the TRK with letter "X" (for High capacity) and letter "A" (for Standard) on the TRK.
For ordering the TRK, see Order supplies, accessories, and parts.
Toner level indicator states
Check the toner level indicator before ordering the toner refill kit.
Table 7-1 Toner level indicator states
| Toner level Description |
 | Three lights indicate that toner is full and you cannot add toner anymore. |
 | Two lights indicate that toner is partly depleted and you can add toner if required.NOTE: One Standard TRK can be added. For more information, seeTypes of toner refill kit. |
 | One light (the bottom light) indicate that toner is at reserve, but you can still continue to print.The toner level indicator glows steadily with amber light indicating reserve level.NOTE: One High Capacity TRK or two Standard TRK can be added. For more information, seeTypes of toner refill kit. |
 | One light (the bottom light) glows steadily and the toner level indicator also blinks continuously with amber light. It indicates that toner is very low and no more printing can be done.NOTE: One High Capacity TRK or two Standard TRK must be added. For more information, seeTypes of toner refill kit. |
To refill the toner
When the toner levels show low on the toner level indicator, follow these steps to refill the toner.
- Make sure the printer is powered on, and then open the toner access door.

NOTE: The port indicator will only display the Unlock icon if a toner refill is possible.

- Shake the toner pack for a few seconds and remove the cap.

- Open the toner access door, and then insert the toner pack until it clicks into place. Ensure that the toner pack is fully inserted into the port.

- Rotate the refill lock ring counterclockwise until it stops.

- Gently squeeze the toner pack to empty it into the tank.

- Turn the lock ring lever clockwise back to its original position.

- Remove the toner pack from the port and close the toner access door. Recycle the toner pack, visit www.hp.com/recycle.

NOTE: After emptying the toner pack, the printer might take a few minutes to be ready for use.

Replace the imaging drum
When the imaging drum has surpassed 50,000 prints and print quality becomes poor, the printer is past its service life and requires authorized service maintenance.
When the toner drum reaches its end of service life, the toner level indicator light (Amber) blinks continuously. You can print an information report to check the status of the drum. If the information report shows error "Er/32" then it indicates the drum has reached end of its life. You can contact HP support for more information.
Disclaimer: The yield of imaging drum is approximately 50,000 single-sided pages (letter or A4 size paper). There are many factors that determine the actual drum useful life, such as temperature, humidity, type of paper, type of toner used and other variables. The imaging drum unit is replaceable through authorized service provider.
Order supplies, accessories, and parts
This section describes how to order supplies and manage accessories.
Order
Table 7-2 Order
| Description URL Links |
| Order supplies and paper www.hp.com/go/suresupply |
| Order genuine HP parts or accessories www.hp.com/buy/parts |
| Order through service or support providers Contact an HP-authorized service or support provider. |
| Order using the HP Embedded Web Server (EWS) | To access, in a supported Web browser on the computer, enter the printer IP address in the address/URL field. The EWS provides options for purchasing Original HP supplies. |

NOTE: You can also order using the HP Smart app. For information about this app, see Use the HP Smart app to print, scan, and manage.
Supplies and accessories
Table 7-3 Supplies and accessories
| Item Description TRK number Part number Countries in use |
| HP 153A Black Original LaserJet Tank Toner Reload Kit | Standard-capacity replacement black toner reload kit | 153A W1530A European Economic | Area, Switzerland, UK, and Israel only* |
| HP 153X Black Original LaserJet Tank Toner Reload Kit | High-capacity replacement black toner reload kit | 153X W1530X European Economic | Area, Switzerland, UK, and Israel only* |
| HP 154A Black Original LaserJet Tank Toner Reload Kit | Standard-capacity replacement black toner reload kit | 154A W1540A Africa, Latin America, | Middle East, CIS, non-EU Balkan countries/regions, and Asia Pacific (except China, India, Australia, and New Zealand) only |
| HP 154X Black Original LaserJet Tank Toner Reload Kit | High-capacity replacement black toner reload kit | 154X W1540X Africa, Latin America, | Middle East, CIS, non-EU Balkan countries/regions, and Asia Pacific (except China, India, Australia, and New Zealand) only |
| HP 158A Black LaserJet Tank Toner Reload Kit | Standard-capacity replacement black toner reload kit | 158A W1580A China and India only | |
| HP 158X Black LaserJet Tank Toner Reload Kit | High-capacity replacement black toner reload kit | 158X W1580X China and India only | |
*The product is region-specific for the regions and countries listed above. However, nothing herein must be deemed as an authorization from HP to import products into the European Economic Area, Switzerland, and the UK from any country outside that region.
Solve problems8
This section suggests solutions to common problems.
You can also get help from the HP Smart app. HP Smart provides alerts for printer issues (jams and other problems), links to help content, and options to contact support for additional assistance. For more information, see Use the HP Smart app to print, scan, and manage.
If the suggestions do not solve the problems, try getting help using one of the support services, see HP support.
HP support
For the latest product updates and support information, visit the product-specific links given in the table below. HP online support provides a variety of options for help with your printer:
Table 8-1 HP support
| Icons Description | |
 | Get software and drivers: Download software, drivers, and firmware you need for the printer. |
 | Ask the community: Join the community forums to find solutions, ask questions, and share tips. |
 | HP Diagnostic Tools: Use HP online tools to detect your printer and find recommended solutions. |
Table 8-2 Product support link
| Product name Support links |
| HP LaserJet Tank MFP 2602dn | |
| HP LaserJet Tank MFP 2602sdn | |
| HP LaserJet Tank MFP 2602sdw | |
| HP LaserJet Tank MFP 2604dw | hp.com/support/ljtmfp260x |
| HP LaserJet Tank MFP 2604sdw |
| HP LaserJet Tank MFP 2606dn | |
| HP LaserJet Tank MFP 2606sdn | |
| HP LaserJet Tank MFP 2606sdw | |
| HP LaserJet Tank MFP 1602w | hp.com/support/ljtmfp160x |
| HP LaserJet Tank MFP 1604w |
| Product name Support links | |
| HP LaserJet Tank MFP 1005 | hp.com/support/ljtmfp1005 |
| HP LaserJet Tank MFP 1005w |
If you need help from an HP technical support representative to solve a problem, visit www.hp.com/support. The following contact options are available at no cost for in-warranty customers (HP agent-assisted support for out-of-warranty customers may require a fee):
Table 8-3
| Icons Description |
 | Chat with an HP support agent or the HP Virtual Agent online. |
 | Call an HP support agent. |
When contacting HP support, be prepared to provide the following information:
• Product name (located on the printer) • Product number (located on a label inside the printer) • Serial number (located on a label inside the printer)
Register printer
By taking just a few minutes to register, you can enjoy quicker service, more efficient support, and product support alerts.
If you did not register your printer while installing the software, you can register now at www.register.hp.com.
Additional warranty options
Extended service plans are available for the printer at additional costs. Go to HP support, select your country/region and language, then explore the service plan options available for your printer.
Interpreting Error Codes
This topic describes the different error codes displayed on the control panel display.
Error go/01
The printer is in manual-feed mode.
The Attention light is blinking, the Resume light is on, and the Paper icon is displayed on the control panel display.
- Load the correct paper type and size into the input tray.
- Press the Resume button to continue.
Error go/02
The printer is processing a manual duplex job.
- Load the printed pages into the input tray with the side to be printed facing down and the top toward the back of the printer.
- Press the Resume button to continue.
Error go/03
The actual paper size does not match the paper settings.
- Load the correct paper size into the input tray, or change the paper settings in the printer software.
- Press the Resume button to continue with the currently loaded paper.
Error go/04
The printer received a request for Google Cloud Print registration.
Press the Resume button to connect.
Error go/06
The printer has received a request to connect using Wi-Fi Direct.
The Information light starts blinking and Wi-Fi Direct icon is displayed on the control panel display.
Press the Resume button to connect.
Error go/99
Prompt to unlock hidden EWS service page.
- Open EWS web page and click the HP Web Services tab.
- In Web Services Settings, click Enable to unlock the EWS service page.
Error P2
The printer has completed the first side of an ID Card copy job.
- Open the scanner lid and turn over the ID card.

- Close the scanner lid.
- Press the Resume button to continue.
Error Er/01
The input tray is empty.
Load paper in the input tray and press the Resume button to continue.

Error Er/02
The toner access door is open.
Make sure the toner access door is completely closed.

Error Er/03
The printer failed to pick a sheet of paper to print.
- Reload the paper in the input tray.
- Press the Resume button to continue.
Error Er/04
Paper is jammed in the input tray/printer base.
- Clear the jam in input tray area or from the printer base.

- After clearing the paper jam, press the Resume button to continue.
For more information, see Clear paper jams.
Error Er/05 display
Paper jam in the toner fusing area.
Clear the jam in the fusing area. Close the door and your print job should resume automatically.
For more information, see Clear paper jams.
Error Er/06 display
Paper jam in the output tray area.
- Clear the jam in the output tray area.

- After clearing the paper jam, press the Resume button to continue.
For more information, see Clear paper jams.
Error Er/08
The toner level is too low for printing.
Refill the toner. Purchase any of the following Toner Reload Kits and other supplies from the HP Store or local retailers.
• HP 153A Black Original LaserJet Tank Toner Reload Kit • HP 153X Black Original LaserJet Tank Toner Reload Kit • HP 154A Black Original LaserJet Tank Toner Reload Kit • HP 154X Black Original LaserJet Tank Toner Reload Kit • HP 158A Black LaserJet Tank Toner Reload Kit • HP 158X Black LaserJet Tank Toner Reload Kit
For more information, see Check and refill the toner.
Error Er/20
Toner/Imaging drum sensor error.
- Turn off the printer.
- Wait for 30 seconds and turn on the printer. If the problem persists, contact HP Support.
Error Er/23
The printer is running low on memory (Print, Copy, or Scan).
- Press the Cancel button to cancel current job.
- Break the job into smaller jobs that contain fewer pages and resend.
- Avoid doing multiple tasks at a time such as scanning while printing.
Error Er/25
The loaded paper does not match the size of print job.
Check the paper type in the paper tray and adjust the printer settings to match, replace the paper or press the Resume button to continue with the size currently loaded.
Error Er/26
The printer has experienced a general engine error.
Press the Resume button ↓ to continue. If error repeats, turn off the printer. Wait for 30 seconds and turn on the printer. If the problem persists, contact HP Support.
Error Er/30
There is an issue with the scanner.
Ensure that the protective sheet is removed from the scan glass. Turn off the device, wait 30 seconds and then turn it on. If the problem persists, contact HP Support.
Error Er/31
Reload kit inserted, but toner does not need to be reloaded (full).
The Refill toner indicator starts blinking Amber light.
The imaging drum cannot be reloaded because the imaging drum is full.
Error Er/32
Imaging drum near to end of life cycle.
The imaging drum needs to be replaced soon and cannot be reloaded. Continue printing until print quality becomes unacceptable. To replace the imaging drum contact HP Support.
Error Er/40
Mispick in Document feeder.
Reload the paper in document feeder and press the resume button.
Error Er/41
Paper jam in the document feeder.
Clear jam in the document feeder. After clearing the paper jam, copy or scan the job again.

Error Er/42
Paper jam in the rear duplexer.
Clear jam in the rear duplexer. After clearing the paper jam, press the Resume button to continue.

Error Er/50, Er/51, Er/52, Er/54, Er/55, Er/58, Er/59, Er/61
There is an issue with the print engine.
Turn off the printer. Wait for 30 seconds and turn on the printer. If the problem persists, contact HP Support.
Error Er/61
An error occurred during Wi-Fi Protected Setup (WPS) and the printer was not able to connect to the network.
Press the Cancel button to continue and then try connecting the printer to the wireless network again.
Error Er/66
The printer cannot detect the wireless hardware.
Press the Resume button ↓ to continue without the wireless hardware. Else, turn off the printer. Wait for 30 seconds and turn on the printer. If the problem persists, contact HP Support.
Error Er/77
Secure Device Failure.
Turn off the printer. Wait for 30 seconds and turn on the printer. If the problem persists, contact HP Support.
Print reports

NOTE: This section is applicable to wireless printers only.
For USB model, press and hold the Resume button (↓) for 5 seconds to print a configuration report.
Table 8-4 Print reports
| Printer report How to print Description |
| Information Report | Press the Information button  | Provides a summary of the printer information and its current status. |
| Configuration Report | Press and hold the Information button  seconds until all the buttons are lit. Press the Resume button [AXST] to print a configuration report. seconds until all the buttons are lit. Press the Resume button [AXST] to print a configuration report. | Shows the printer usage log (pages printed, images scanned), event logs, copy/energy settings, network status and more. |
| Wireless Network Test Report | Press and hold the Information button  seconds until all the buttons are lit. Press the Information button seconds until all the buttons are lit. Press the Information button  and the Resume button and the Resume button  same time.Alternatively, open embedded web server (EWS), click Networking tab, and click Wireless Configuration, and then click Print Test Report. same time.Alternatively, open embedded web server (EWS), click Networking tab, and click Wireless Configuration, and then click Print Test Report. | Shows the diagnostics results for the status of the wireless network, wireless signal strength, detected networks, and more. |
| Web Service information page | Open embedded web server (EWS), click HP Web Services tab, and click Web Services Settings and then click Print Information Sheet.If you have not enabled the Web Services, click Enable to Print Information Sheet. | Provides different instructions to help you turn on Web Services, set up Web Services, fix connection issues, and more. |
| Adjust Alignment Test Page | Open embedded web server (EWS), click System tab, and click Service. Follow the on-screen instructions in Adjust Alignment to position the image on desired location on the paper. | Prints an alignment page. |
Restore original factory defaults and settings
If you disable some functions or change some settings and want to change them back, you can restore the printer to the original factory settings or network settings.
- Open EWS. See To access and use EWS.
- On the System tab, click Service.
- In the Restore Defaults area, click the Restore defaults button. The printer automatically restarts.
Printer does not pick up paper or misfeeds
The following solutions can help solve problems if the printer is not picking up paper from the input tray or is picking up multiple sheets of paper at one time. Either of these situations can result in paper jams.
The product does not pick up paper
If the product does not pick up paper from the input tray, try these solutions.
- Open the product and remove any jammed sheets of paper.
- Load the tray with the correct size of paper for your job.
- Make sure the paper size and type are set correctly.
- Make sure the paper guides in the tray are adjusted correctly for the size of paper. Adjust the guides to the appropriate indentation in the tray.
- Clean the pickup roller.

NOTE: If the problem persists, visit the HP support site for this printer to learn more about solving paper problems.
The product picks up multiple sheets of paper
If the product picks up multiple sheets of paper from the input tray, try these solutions.
- Remove the stack of paper from the input tray and rotate it 180 degrees, and flip it over. Return the stack of paper to the input tray.
- Use only paper that meets HP specifications for this product.
- Use paper that is not wrinkled, folded, or damaged. If necessary, use paper from a different package.
- Make sure the input tray is not overfilled. If it is, remove the entire stack of paper from the tray, straighten the stack, and then return some of the paper to the input tray.
- Make sure the paper guides in the tray are adjusted correctly for the size of paper. Adjust the guides to the appropriate indentation in the tray.
- Make sure the printing environment is within recommended specifications.
Clean the pickup roller
This topic describes about cleaning the pickup roller to avoid paper jams.
- Turn off the printer.
- Unplug the power cord from the back of the printer.
- Remove the stack of paper from the input tray.
- Flip the printer on its side.

- Release and hold on to the blue latch, and then remove the panel.

- Dampen a soft, lint-free cloth with alcohol or water, and then wipe each roller.

NOTE: Apply a moderate amount of pressure to each roller to ensure that they are completely cleaned.

- Wait approximately 10 minutes to allow the pickup roller to dry completely.
- Hold onto the blue latch, align, and insert the panel. Release the blue latch to lock the panel in the place.

- Flip the printer back to the original, upright position.

- Reload the stack of paper into the input tray.
- Plug the power cord back into the printer, and then turn on the printer.
Clear paper jams
The following information includes instructions for clearing paper jams from the printer.
Frequent or recurring paper jams?
Follow these steps to solve problems with frequent paper jams. If the first step does not resolve the problem, continue with the next step until you have resolved the problem.
- If paper has jammed in the printer, clear the jam and then print a test page to test the printer.
- Check that the tray is configured for the correct paper size and type.
- Open EWS. See To access and use EWS.
- Click the System tab, and then click the Paper Setup page.
- Select the type of paper that is in the tray.
- Turn the printer off, wait 30 seconds, and then turn it on again.
- Print a cleaning page to remove excess toner from inside the printer.
- Print a test page to test the printer.
If none of these steps resolves the problem, the printer might need service. Contact support.
Clear jams in the printer base.
- Flip the printer on its side.

- Release and hold on to the blue latch, and then remove the panel.

- Remove the jammed media.

- Hold onto the blue latch, align, and insert the panel. Release the blue latch to lock the panel in place.

- Flip the printer back to the original, upright position.

Clear jams from the output areas.
CAUTION: Do not use sharp objects, such as tweezers or needle-nose pliers, to remove jams. Damage caused by sharp objects is not covered by the warranty.
When a jam occurs, the Paper light blinks.
Open the scanner door, remove any visible jammed paper from the output tray area. Use both hands to remove jammed paper to avoid tearing the paper.

Clear jams from the rear of the printer.
- Open the rear access door.

- Open the duplex door.

- If you can see the jammed paper, carefully grasp the jammed paper, and then slowly pull it out of the printer.

- Close the duplex and rear access door.

Clear jams in the document feeder (some models only).
Error code: Er/41.
When a jam occurs, a jam error code displays on the printer control panel.
- Remove any loose paper from the input tray of the document feeder.

- Remove any jammed paper visible in the input tray area. Use both hands to remove jammed paper to avoid tearing the paper.

- Lift the jam-access cover in the document feeder.
- Remove any jammed paper.
- Close the jam-access cover.

Improve print quality
The following information provides troubleshooting steps to resolve print-quality problems, including the following problems:
• Smears, fuzzy print, dark print, light print, streaks, missing toner, scattered dots of toner, loose toner, skewed images
To resolve these or other print-quality problems, try the following solutions in the order presented.
For information about resolving specific image defects, see Resolving print quality problems.
Print from a different software program
Try printing from a different software program. If the page prints correctly, the problem is with the software program from which you were printing.
If the page does not print correctly, try updating the printer and print again. See Update the printer.
Check the paper-type setting for the print job
Check the paper type setting when printing from a software program and the printed pages have smears, fuzzy or dark print, curled paper, scattered dots of toner, loose toner, or small areas of missing toner.
Check the paper type setting on the printer
Verify that the tray is loaded with the correct type of paper.
Check the paper type setting (Windows)
- From the software program, select the Print option.
- Select the printer, and then click the Properties or Preferences button.
- Check the paper settings.
Check the paper type setting (OS X)
- Click the File menu, and then click the Print option.
- In the Printer menu, select the printer.
- By default, the print driver displays the Copies & Pages menu. Open the menus drop-down list, and then click the Finishing menu.
- Select a type from the Media Type drop-down list.
Print a cleaning page
During the printing process, paper, toner, and dust particles can accumulate inside the printer and can cause print-quality issues such as toner specks or spatter, smears, streaks, lines, or repeating marks.
Use the following procedure to print a cleaning page.
- Open EWS. See "To access and use EWS."
- On the System tab, click Service.
- In the Fuser Cleaning mode area, click Start to begin the cleaning process.
Check paper and the printing environment.
Perform the following steps:
Step one: Use paper that meets HP specifications.
Some print-quality problems arise from using paper that does not meet HP specifications.
● Always use a paper type and weight that this printer supports. - Use paper that is of good quality and free of cuts, nicks, tears, spots, loose particles, dust, wrinkles, voids, staples, and curled or bent edges. - Use paper that has not been previously printed on. - Use paper that does not contain metallic material, such as glitter.
- Use paper that is designed for use in laser printers. Do not use paper that is designed only for use in Inkjet printers. • Use paper that is not too rough. Using smoother paper generally results in better print quality.
Step two: Check the environment.
The environment can directly affect print quality and is a common cause for print-quality or paper-feeding issues. Try the following solutions:
- Move the printer away from drafty locations, such as open windows or doors, or air-conditioning vents. • Make sure the printer is not exposed to temperatures or humidity outside of printer specifications.
- Do not place the printer in a confined space, such as a cabinet.
- Place the printer on a sturdy, level surface.
- Remove anything that is blocking the vents on the printer. The printer requires good air flow on all sides, including the top.
- Protect the printer from airborne debris, dust, steam, grease, or other elements that can leave residue inside the printer.
Adjust Print Density
Complete the following steps to adjust the print density.
- Open EWS. See To access and use EWS.
- Click the System tab, and then select System Setup from the left navigation pane.
- Select the correct density settings.
- Click Apply to save the changes.
Resolving print quality problems
The following information provides troubleshooting steps for solving image defect issues, including the following defects:
• Light print - Gray background or dark print - Blank pages - Black pages Dark or light bands Dark or light streaks - Missing toner - Skewed images - Colors that do not align
- Curled paper
Troubleshoot print quality problems
Image defects, no matter the cause, can often be resolved using the same steps. Use the following steps as a starting point for solving image defect issues.
- Reprint the document. Print quality defects can be intermittent in nature or can go away completely with continued printing.
- Check the toner level on the toner level indicator. See Toner level indicator states.
- Make sure that the driver and tray print mode settings match the media that is loaded in the tray. Try using a different ream of media or a different tray. Try using a different print mode.
- Make sure that the printer is within the supported operating temperature/humidity range.
- Make sure that the paper type, size, and weight are supported by the printer. See the printer support page at hp.com/support for a list of the supported paper sizes and types for the printer.

NOTE: The term "fusing" refers to the part of the printing process where toner is affixed to paper.
The following examples depict letter-size paper that has passed through the printer short-edge first.
Table 8-5 Light print Description Sample Possible solutions
| Light print:The printed content on the entire page is light or faded. | AaBbCcAaBbCcAaBbCcAaBbCcAaBbCcAaBbCcAaBbCc | 1. Reprint the document.2. Check the toner level on the toner level indicator. See Toner level indicator states.3. Print a configuration report and check for life and usage of the toner (Press and hold the information button i for 5 seconds until all the buttons are lit, then press the resume button to print a configuration report).4. Check and refill the toner.5. If the problem persists, go to hp.com/support. |
Table 8-6 Gray background or dark print
| Description Sample Possible solutions |
| Gray background or dark print:The image or text is darker than expected. | 1. Make sure that the paper in the trays has not already been run through the printer.2. Use a different paper type.3. Reprint the document.4. From the printer EWS, go to the Adjust Toner Density menu, and then adjust the toner density to a lower level.5. Make sure that the printer is within the supported operating temperature and humidity range.6. Check and refill the toner.7. If the problem persists, go to hp.com/support. |
Table 8-7 Blank page — No print
| Description Sample Possible solutions |
| Blank page — No print:The page is completely blank and contains no printed content. | | 1. Make sure that the toner used is genuine HP toner.2. Check the toner level on the toner level indicator. See Toner level indicator states.3. Check the paper type in the paper tray and adjust the printer settings to match. If necessary, select a lighter paper type.4. If the problem persists, go to hp.com/support. |
Table 8-8 Black page
| Description Sample Possible solutions |
| Black page:The entire printed page is black. | 1. Check the toner level on the toner level indicator. See Toner level indicator states.2. Check and refill the toner.3. If the problem persists, go to hp.com/support. |
Table 8-9 Banding defects
| Description Sample Possible solutions |
| Repetitive wide-pitch banding and Impulse bands:Dark or light lines which repeat down the length of the page. They might be sharp or soft in nature. The defect displays only in areas of fill, not in text or sections with no printed content. |  | 1. Reprint the document.2.Check and refill the toner.3. Use a different paper type.4. If the problem persists, go tohp.com/support. |
Table 8-10 Streak defects
| Description Sample Possible solutions |
| Light vertical streaks:Light streaks that usually span the length of the page. The defect displays only in areas of fill, not in text or sections with no printed content. |  | 1. Reprint the document.2. Check the toner level on the toner level indicator. See Toner level indicator states.3. If the problem persists, go to hp.com/support.NOTE: Both light and dark vertical streaks can occur when the printing environment is outside the specified range for temperature or humidity. Refer to your printer's environmental specifications for allowable temperature and humidity levels. |
| Dark vertical streaks and ITB cleaning streaks (color models only):Dark lines which occur down the length of the page. The defect might occur anywhere on the page, in areas of fill or in sections with no printed content. |  |  | 1. Reprint the document.heck the toner level on the toner level indicator. See Toner level indicator states. at a cleaning page.If the problem persists, go to hp.com/support. |
Table 8-11 Fixing/fuser defects
| Description Fixing/fuser Possible solutions |
| Hot fuser offset (shadow):Slight shadows, or offsets, of the image repeated down the page. The repeated image might fade with each recurrence. |  | 1. Reprint the document.2. Check the paper type in the paper tray and adjust the printer settings to match. If necessary, select a lighter paper type.3. If the problem persists, go tohp.com/support. |
| Poor fusing:Toner rubs off along either edge of page. This defect is more common at the edges of high-coverage jobs and on light media types but can occur anywhere on the page. |  | 1. Reprint the document.2. Check the paper type in the paper tray and adjust the printer settings to match. If necessary, select a heavier paper type.3. If the problem persists, go tohp.com/support. |
Table 8-12 Image placement defects
| Description Sample Possible solutions |
| Margins and skew:The image is not centered, or is skewed on the page. The defect occurs when the paper is not positioned properly as it is pulled from the tray and moves through the paper path. |  | 1. Reprint the document.2. Remove the paper and then reload the tray.Make sure that all the paper edges are even on all sides.3. Make sure that the top of the paper stack is below the tray full indicator. Do not overfill the tray.4. Make sure that the paper guides are adjusted to the correct size for the paper. Do not adjust the paper guides tightly against the paper stack. Adjust them to the indentations or markings in the tray.5. If the problem persists, go tohp.com/support. |
Table 8-13 Output defects
| Description Sample Possible solutions |
| Output curl:Printed paper has curled edges. The curled edge can be along the short or long side of the paper. Two types of curl are possible:Positive curl: The paper curls toward the printed side. The defect occurs in dry environments or when printing high coverage pages.Negative curl: The paper curls away from the printed side. The defect occurs in high-humidity environments or when printing low coverage pages. |  | 1. Reprint the document.2. Positive curl: From the printer EWS, select a heavier paper type. The heavier paper type creates a higher temperature for printing.Negative curl: From the printer EWS, select a lighter paper type. The lighter paper type creates a lower temperature for printing. Try storing the paper in a dry environment prior or use freshly opened paper.Print in duplex mode.If the problem persists, go tohp.com/support. |
| Output stacking:The paper does not stack well in the output tray. The stack might be uneven, skewed, or the pages might be pushed out of the tray and onto the floor. Any of the following conditions can cause this defect:Extreme paper curlThe paper in the tray is wrinkled or deformedThe paper is a non-standard paper type, such as envelopesThe output tray is too full |  | 1. Reprint the document.2. Extend the output bin extension.If the defect is caused by extreme paper curl, complete the troubleshooting steps for Output curl.Use a different paper type.Use freshly opened paper.Remove the paper from the output tray before the tray gets too full.If the problem persists, go tohp.com/support. |
Improve copy and scan image quality
This topic helps you troubleshoot copy and scan issues.
If the printer is having image quality problems, first make sure you are using high-quality originals. If the problem still exists, try the following solutions in the order presented to resolve the issue.
Check the scanner glass for dirt and smudges
Over time, specks of debris might collect on the scanner glass and white plastic backing, which can affect performance. Use the following procedure to clean the scanner.
- Press the Power button ⏻ to turn the printer off, and then disconnect the power cable from the electrical outlet.
- Open the scanner lid.
- Clean the scanner glass and the white plastic backing underneath the scanner lid with a soft cloth or sponge that has been moistened with nonabrasive glass cleaner. CAUTION: Do not use abrasives, acetone, benzene, ammonia, ethyl alcohol, or carbon tetrachloride on any part of the printer; these can damage the printer. Do not place liquids directly on the glass or platen. They might seep and damage the printer.
- Dry the glass and white plastic parts with a chamois or a cellulose sponge to prevent spotting.
- Connect the power cable to an outlet, and then press the Power button ⏻ to turn the printer on.
Check the paper settings
- Open EWS. See To access and use EWS.
- On the Systems tab, click Paper Setup.
- Change the necessary settings, and then click Apply.
Optimize for text or pictures
- Open EWS. See To access and use EWS.
- On the Copy tab, select the Optimize drop-down list.
- Select the setting you want to use.
- Mixed: Use this setting for documents that contain a mixture of text and graphics.
- Text: Use this setting for documents that contain mostly text. Picture: Use this setting for documents that contain mostly graphics.
- Change the necessary settings, and then click Apply.
Edge-to-edge copying
The printer cannot print fully edge-to-edge. There is a 4 mm (1/6 in) unprintable border around the page.
Considerations for printing or scanning documents with cropped edges:
- When the original is smaller than the output size, move the original 4 mm (1/6 in) away from the corner indicated by the icon on the scanner. Recopy or scan in this position.
- When the original is the size of the printed output that you want, use the Reduce/Enlarge feature to reduce the image so the copy is not cropped.
To make a copy and reduce/enlarge copy from Embedded Web Server (EWS)
- Open Embedded Web Server (EWS). See To access and use EWS.
- On the Copy tab, enter the enlargement or reduction value you want in Reduce/Enlarge option, and then click Set as New Defaults.
For example, enter ratio value 100 - 400 to enlarge or 25 - 99 to reduce.
- Do one of the following:
- Place the document you want to copy face up in the document feeder with the top edge first.
- Open the scanner lid and place the document you want to copy face down on the scanner glass.
- From the printer control panel, press the Copy button to start copying.
To make a copy and reduce/enlarge copy from control panel (SDN/SDW models only)
- Press the Copy button on the printer control panel.
- Do one of the following:
- Place the document you want to copy face up in the document feeder with the top edge first.
- Open the scanner lid and place the document you want to copy face down on the scanner glass.
- From the printer control panel, press the Menu button .... until the Reduce/Enlarge option is displayed.
- Press the Up/Down arrow buttons (∧/∨) on the printer control panel to display the available options.
- Press the Up arrow button (∧) to enlarge (101% - 400%) or the Down arrow button (∨) to reduce (25% - 99%) the copy ratio.
NOTE: If you select 100% ratio or Fit to Page, go to STEP 6.
- Press the Copy button to start copying.
Solve wireless network problems
Use the troubleshooting information to help resolve issues.

NOTE: To determine if Wi-Fi Direct printing is enabled on your printer, print an information report from the printer control panel.
Wireless connectivity checklist
- Verify that the printer and the wireless router are turned on and have power. Also make sure that the wireless network in the printer is turned on.
- Verify that the service set identifier (SSID) is correct. Print an information report to determine the SSID.
On the printer control panel, press the Information button ⓘ.
If you are not sure the SSID is correct, run the wireless setup again.
With secured networks, verify that the security information is correct. If the security information is incorrect, run the wireless setup again.
- If the wireless network is working correctly, try accessing other computers on the wireless network. If the network has Internet access, try connecting to the Internet over a wireless connection.
- Verify that the encryption method (AES or TKIP) is the same for the printer as it is for the wireless access point (on networks using WPA security).
- Verify that the printer is within the range of the wireless network. For most networks, the printer must be within 30 m (100 ft) of the wireless access point (wireless router).
- Verify that obstacles do not block the wireless signal. Remove any large metal objects between the access point and the printer. Make sure poles, walls, or support columns containing metal or concrete do not separate the printer and wireless access point.
- Verify that the printer is located away from electronic devices that might interfere with the wireless signal. Many devices can interfere with the wireless signal including motors, cordless phones, security system cameras, other wireless networks, and some Bluetooth devices.
- Verify that the print driver is installed on the computer.
- Verify that you have selected the correct printer port.
- Verify that the computer and printer connect to the same wireless network.
- For OS X, verify that the wireless router supports Bonjour.
The printer does not print after the wireless configuration completes.
- Make sure that the printer is turned on and in the ready state.
- Turn off any third-party firewalls on your computer.
- Make sure that the wireless network is working correctly.
- Make sure that your computer is working correctly. If necessary, restart the computer.
- Verify that you can open the printer EWS from a computer on the network.
The printer does not print, and the computer has a third-party firewall installed
- Update the firewall with the most recent update available from the manufacturer.
- If programs request firewall access when you install the printer or try to print, make sure you allow the programs to run.
- Temporarily turn off the firewall, and then install the wireless printer on the computer. Enable the firewall when you have completed the wireless installation.
The wireless connection does not work after moving the wireless router or printer
- Make sure that the router or printer connects to the same network that your computer connects to.
- Print an information report.
- Compare the service set identifier (SSID) on the information report to the SSID in the printer configuration for the computer.
- If the numbers are not the same, the devices are not connecting to the same network. Reconfigure the wireless setup for the printer.
Cannot connect more devices to the wireless printer (Wi-Fi Direct)
- Make sure that the other computers are within the wireless range and that no obstacles block the signal. For most networks, the wireless range is within 30 m (100 ft) of the wireless access point.
- Make sure that the printer is turned on and in the ready state.
- Make sure there are not more than 5 concurrent Wi-Fi Direct users.
- Turn off any third-party firewalls on your computer.
- Make sure that the wireless network is working correctly.
- Make sure that your computer is working correctly. If necessary, restart the computer.
The wireless printer loses communication when connected to a VPN
Typically, you cannot connect to a VPN and other networks at the same time.
The network does not appear in the wireless networks list
- Make sure the wireless router is turned on and has power. • The network might be hidden.
- Make sure that the printer is within wireless range of the wireless router, and that there are no obstacles blocking the signal.
- The printer operates on the 2.4 GHz and 5 GHz wireless bands.
- Refresh the wireless networks list.
- Try restarting the printer.
The wireless network is not functioning
- To verify if the network has lost communication, try connecting other devices to the network.
- Test network communication by pinging the network.
a. Open a command-line prompt on your computer.
- For Windows, click Start, click Run, type cmd, and then press Enter.
- For OS X, go to Applications, then Utilities, and open Terminal.
b. Type ping followed by the router IP address.
c. If the window displays round-trip times, the network is working.
- Make sure that the router or printer connects to the same network that the computer connects to.
a. On the printer control panel, press the information button to print an information report.
b. Compare the service set identifier (SSID) on the information report to the SSID in the printer information for the computer.
c. If the numbers are not the same, the devices are not connecting to the same network. Reconfigure the wireless setup for the printer.
A wireless network diagnostic test can be performed using the printer control panel or the Embedded Web Server (EWS). The wireless network diagnostic test provides information about the wireless network settings.
From the printer control panel, press and hold the Information button for 5 seconds, and then press the Information button and the Resume button at the same time.
- Open EWS. See To access and use EWS.
- Select the Networking tab.
- On the Wireless Configuration page, verify that On is selected.
- Click the Print Test Report button to print a test page.
Reduce interference on a wireless network
The following tips can reduce interference in a wireless network:
- Keep the wireless devices away from large metal objects, such as filing cabinets, and other electromagnetic devices, such as microwaves and cordless telephones. These objects can disrupt radio signals.
- Keep the wireless devices away from large masonry structures and other building structures. These objects can absorb radio waves and lower signal strength.
- Position the wireless router in a central location in line of sight with the wireless printers on the network.
Solve Ethernet connection problems
Check the following:
- The network is operational. The network hub, switch, or router is turned on.
- The Ethernet cable is properly connected between the printer and the router. The Ethernet cable is plugged into the Ethernet port on the printer and the light near the connector lights up when connected.
- Antivirus programs, including spyware protection programs, are not impacting your network connection to the printer. If you know that antivirus or firewall software is preventing your computer from connecting to the printer, use the HP online firewall troubleshooter to help solve the problem.
- Run the HP Print and Scan Doctor to troubleshoot the issue automatically. The utility will try to diagnose and fix the issue. The HP Print and Scan Doctor may not be available in all languages.
The information contained herein is subject to change without notice. Some statements might not be applicable for your printer or all countries/regions.
Printer specifications

IMPORTANT: The following specifications are correct at the time of publication, but they are subject to change. For current information, visit the HP Support website.
Technical specifications
For more information, visit the HP Support website. Select your country or region. Click Product Support & Troubleshooting. Enter the name shown on the front of the printer, and then select Search. Click Product Information, and then select Product specifications.
System requirements
For information about software and system requirements or future operating system releases and support, visit the HP online support website at hp.com/support.
Printer dimensions
Figure A-1 Dimensions for the printer (dn/dw/w/USB models)
Table A-1 Dimensions for the printer (dn/dw/w/USB models)
| Measurement Printer fully closed Printer fully open |
| 1. Height 255 mm (10.04 in) 436.25 mm (17.17 in) |
| 2. Depth 326 mm (12.83 in) 419.61 mm (16.52 in) |
| 3. Width 368 mm (14.48 in) 368 mm (14.48 in) |
| Weight 7.9 kg (17.38 lb) |
Figure A-2 Dimensions for the printer (sdn/sdw model)
Table A-2 Dimensions for the printer (sdn/sdw model)
| Measurement Printer fully closed Printer fully open |
| 1. Height 311.40 mm (11.59 in) 452.83 mm (17.82 in) |
| 2. Depth 345 mm (13.58 in) 467.64 mm (18.41 in) |
| 3. Width | 418 mm (16.45 in) 418 mm (16.45 in) |
| Weight | 9.5 kg (20.94 lb) |
Power consumption, electrical specifications, and acoustic emissions
See HP support for product-specific support links for current information.
CAUTION: Power requirements are based on the country/region where the printer is sold. Do not convert operating voltages. This will damage the printer and void the printer warranty.
Operating-environment range
Table A-3 Operating-environment range
| Environment Recommended | Allowed | |
| Temperature | 17.5° to 25°C (63.5° to 77°F) | 15° to 32°C (59° to 90.5°F) |
| Operating humidity | 30% to 70% relative humidity (RH), non-condensing | 10% to 80% (RH), non-condensing |
Table A-3 Operating-environment range (continued)
| Environment Recommended Allowed |
| Relative humidity 20% to 70% relative humidity (RH), non-condensing | 10% to 80% (RH), non-condensing |
| Altitude Not applicable 0 to 3048 m (0 to 10,000 ft) | |
Warning icons
Warning icon definitions: The following warning icons may appear on HP products. Apply appropriate caution where applicable.
- Caution: Electric shock
- Caution: Hot surface
- Caution: Keep body parts away from moving parts
- Caution: Sharp edge in close proximity • Warning
Laser Warning

CAUTION - CLASS 3B INVISIBLE LASER RADIATION WHEN OPEN. AVOID EXPOSURE TO THE BEAM.
ATTENTION - RAYONNEMENT LASER INVISIBLE DE CLASSE 3B EN CAS D'OUVERTURE. ÉVITEZ L'EXPOSITION AU FAISCEAU.
This section describes the service and support information.
HP limited warranty statement
Table A-4 HP limited warranty statement
| HP PRODUCT DURATION OF LIMITED WARRANTY* |
| HP LaserJet Tank MFP 1005, 160x, 260x series series One-year limited warranty |

NOTE: *Warranty and support options vary by product, country, and local legal requirements. Go to www.support.hp.com to learn about HP award-winning service and support options in your region. For details on the HP limited warranty policy on supplies, go to www.hp.com/go/learnaboutsupplies.
HP warrants to you, the end-user customer, this HP Limited Warranty applies only to HP branded products sold or leased a) from HP Inc., its subsidiaries, affiliates, authorized resellers, authorized distributors, or country distributors; and, b) with this HP Limited Warranty, that HP hardware and accessories will be free from defects in materials and workmanship after the date of purchase, for the period specified above. If HP receives notice of such defects during the warranty period, HP will, at its option, either repair or replace products which prove to be defective. Replacement products may be either new or equivalent in performance to new. HP products presented for repair may be replaced by refurbished goods of the same type rather than being repaired. Refurbished parts may be used to repair the goods. Repair of goods may result in lost user-generated data.
HP warrants to you that HP software will not fail to execute its programming instructions after the date of purchase, for the period specified above, due to defects in material and workmanship when properly installed and used. If HP receives notice of such defects during the warranty period, HP will replace software which does not execute its programming instructions due to such defects.
HP does not warrant that the operation of HP products will be uninterrupted or error free. If HP is unable, within a reasonable time, to repair or replace any product to a condition as warranted, you will be entitled to a refund of the purchase price upon prompt return of the product.
HP products may contain remanufactured parts equivalent to new in performance or may have been subject to incidental use.
Warranty does not apply to defects resulting from (a) improper or inadequate maintenance or calibration, (b) software, interfacing, parts or supplies not supplied by HP, (c) unauthorized modification or misuse, (d) operation outside of the published environmental specifications for the product, or (e) improper site preparation or maintenance.
TO THE EXTENT ALLOWED BY LOCAL LAW, THE ABOVE WARRANTIES ARE EXCLUSIVE AND NO OTHER WARRANTY OR CONDITION, WHETHER WRITTEN OR ORAL, IS EXPRESSED OR IMPLIED AND HP SPECIFICALLY DISCLAIMS ANY IMPLIED WARRANTIES OR CONDITIONS OF MERCHANTABILITY, SATISFACTORY QUALITY, AND FITNESS FOR A PARTICULAR PURPOSE. Some countries/regions, states or provinces do not allow limitations on the duration of an implied warranty, so the above limitation or exclusion might not apply to you. This warranty gives you specific legal rights and you might also have other rights that vary from country/region to country/region, state to state, or province to province. Please refer to the Country Specific statements at the end of this document.
HP's limited warranty is valid in any country/region or locality where HP has a support presence for this product and where HP has marketed this product. The level of warranty service you receive may vary according to local standards. HP will not alter form, fit or function of the product to make it operate in a country/region for which it was never intended to function for legal or regulatory reasons.
TO THE EXTENT ALLOWED BY LOCAL LAW, THE REMEDIES IN THIS WARRANTY STATEMENT ARE YOUR SOLE AND EXCLUSIVE REMEDIES. EXCEPT AS INDICATED ABOVE, IN NO EVENT WILL HP OR ITS SUPPLIERS BE LIABLE FOR LOSS OF DATA OR FOR DIRECT, SPECIAL, INCIDENTAL, CONSEQUENTIAL (INCLUDING LOST PROFIT OR DATA), OR OTHER DAMAGE, WHETHER BASED IN CONTRACT, TORT, OR OTHERWISE. Some countries/regions, states or provinces do not allow the exclusion or limitation of incidental or consequential damages, so the above limitation or exclusion may not apply to you.
THE WARRANTY TERMS CONTAINED IN THIS STATEMENT, EXCEPT TO THE EXTENT LAWFULLY PERMITTED, DO NOT EXCLUDE, RESTRICT OR MODIFY AND ARE IN ADDITION TO THE MANDATORY STATUTORY RIGHTS APPLICABLE TO THE SALE OF THIS PRODUCT TO YOU. PLEASE REFER TO THE COUNTRY SPECIFIC STATEMENTS AT THE END OF THIS DOCUMENT (IF APPLICABLE) FOR FURTHER INFORMATION ON YOUR CONSUMER RIGHTS.
Country Specific Terms
In some jurisdictions, you may have other statutory rights. Please see below.
Australia
Your rights as an Australian consumer are different to those stated in the document above.
You should disregard any limitations or exclusions in the above document and refer to the information below.
- When you buy a good from HP as a consumer, the goods come with guarantees that cannot be excluded under the Australian Consumer Law. You are entitled to a replacement or refund for a major failure and for compensation for any other reasonably foreseeable loss or damage. You are also entitled to have the goods repaired or replaced if the goods fail to be of acceptable quality and the failure does not amount to a major failure.
- This means that there is no defined warranty period for HP goods supplied to Australian consumers.
- Instead, the goods should, for example, be fit for the purposes for which they are commonly supplied for such a period as a reasonable consumer fully acquainted with the state and condition of the goods would expect. This period may vary depending on the product.
- You should contact HP if you are concerned that one of HP's products fails to satisfy any of the guarantees listed below. HP will discuss with you the specific nature and circumstances of that good and whether the particular fault/issue falls within the scope of the statutory guarantees.
Nothing in HP's Limited Warranty excludes, restricts, or modifies any condition, warranty, guarantee, right or remedy you may have at law (including a consumer guarantee under the Australian Consumer Law) which cannot be lawfully excluded or limited.
The relevant guarantees are as follows:
- Quality — goods supplied by HP must be of acceptable quality. The test for acceptable quality is whether a reasonable consumer, fully aware of the state and condition of the goods, would find them:
● safe, durable, and free from defects; ● acceptable in appearance and finish; and - fit for all the purposes for which goods of that kind are commonly supplied.
This must take into account the nature and price of the goods, and any statements on packaging or labeling.
- Disclosed Purpose — goods or services supplied by HP that HP represents are reasonably fit for a purpose expressly disclosed by a consumer must be reasonably fit for that purpose.
- Description — goods supplied by HP must match the description provided by HP.
- Sample — goods supplied by HP must match any sample shown to you by HP.
- Title — a consumer who purchases a good from HP must receive clear title to the good.
- Due care and skill — services provided to you by HP must be provided with due care and skill.
- Express warranties — HP will be legally required to comply with the express warranty that is set out in its terms and conditions.
- Reasonable time — repair services provided by HP must be provided within a reasonable time.
If you think that you are entitled to any of the above remedies or any remedy under the HP Worldwide Limited Warranty and Technical Support Document, please contact HP:
HP PPS Australia Pty Ltd
Rhodes Corporate Park, Building F, Level 5
1 Homebush Bay Drive
Rhodes, NSW 2138
Australia
To initiate a support request, please use the numbers below or visit www.hp.com.au and select the "Customer Service" option for the most current list of phone support numbers.
| Product | Phone |
| Support for all HP Products except those listed separately below 13 10 47 |
| If dialing internationally: +61 2 8278-1039 |
| DeskJet, Office Jet, PSC, All-in-One, Photosmart & Personal LaserJet Series 1000, P1000, M1000 and Colour LaserJet CP1000 Series and model CM1415 | 1300 721 147 |
| If dialing internationally: +61 2 8934 4380 |
For further information on consumer rights, visit www.consumerlaw.gov.au and www.accc.gov.au/consumerguarantees.
New Zealand
In New Zealand, the hardware and software comes with guarantees that cannot be excluded under the New Zealand consumer law. In New Zealand, Consumer Transaction means a transaction involving a person who is purchasing goods for personal, domestic or household use or consumption and not for the purpose of a business. New Zealand consumers who are purchasing goods for personal, domestic or household use or consumption and not for the purpose of a business ("New Zealand Consumers") are entitled to repair, replacement or refund for a failure and compensation for other reasonably foreseeable loss or damage. A New Zealand Consumer (as defined above) may recover the costs of returning the product to the place of purchase if there is a breach of the New Zealand consumer law; furthermore, if it will be of significant cost to the New Zealand Consumer to return the goods to HP then HP will collect such goods at its own cost.
| Product | Phone |
| Support for all HP Products except those listed separately below | 0800 449 553If dialing internationally: +61 2 8031-8317 |
Product Phone
| DeskJet, Office Jet, PSC, All-in-One, Photosmart & Personal LaserJet Series 1000, P1000, M1000 and Colour LaserJet CP1000 Series and model CM1415 | 0800 441 147If dialing internationally: +61 2 8934 4380 |
UK, Ireland, and Malta
The HP Limited Warranty is a commercial guarantee voluntarily provided by HP. The name and address of the HP entity responsible for the performance of the HP Limited Warranty in your country/region is as follows:
UK: HP Inc UK Limited, Cain Road, Amen Corner, Bracknell, Berkshire, RG12 1HN
Ireland: Hewlett-Packard Ireland Limited, Liffey Park Technology Campus, Barnhall Road, Leixlip, Co. Kildare
Malta: Hewlett-Packard Europe B.V., Amsterdam, Meyrin Branch, Route du Nant-d'Avril 150, 1217 Meyrin, Switzerland
United Kingdom: The HP Limited Warranty benefits apply in addition to any legal rights to a guarantee from seller of nonconformity of goods with the contract of sale. These rights expire six years from delivery of goods for products purchased in England or Wales and five years from delivery of goods for products purchased in Scotland. However various factors may impact your eligibility to receive these rights. For further information, please consult the following link: Consumer Legal Guarantee (https://www.hp.com/go/eu-legal) or you may visit the European Consumer Centers website (ec.europa.eu/info/live-work-travel-eu/consumers/resolve-your-consumer-complaint/european-consumer-centres-network-ecc-net_en). Consumers have the right to choose whether to claim service under the HP Limited Warranty or against the seller under the legal guarantee.
Ireland: The HP Limited Warranty benefits apply in addition to any statutory rights from seller in relation to nonconformity of goods with the contract of sale. However various factors may impact your eligibility to receive these rights. Consumer statutory rights are not limited or affected in any manner by HP Care Pack. For further information, please consult the following link: Consumer Legal Guarantee (https://www.hp.com/go/eu-legal) or you may visit the European Consumer Centers website (ec.europa.eu/info/live-work-travel-eu/consumers/resolve-your-consumer-complaint/european-consumer-centres-network-ecc-net_en). Consumers have the right to choose whether to claim service under the HP Limited Warranty or against the seller under the legal guarantee.
Malta: The HP Limited Warranty benefits apply in addition to any legal rights to a two-year guarantee from seller of nonconformity of goods with the contract of sale; however various factors may impact your eligibility to receive these rights. Consumer statutory rights are not limited or affected in any manner by the HP Limited Warranty. For further information, please consult the following link: Consumer Legal Guarantee (https://www.hp.com/go/eu-legal) or you may visit the European Consumer Centers website (ec.europa.eu/info/live-work-travel-eu/consumers/resolve-your-consumer-complaint/european-consumer-centres-network-ecc-net_en). Consumers have the right to choose whether to claim service under the HP Limited Warranty or against the seller under two-year legal guarantee.
Austria, Belgium, Germany, and Luxemburg
Belgium, France, and Luxemburg
Romania: HP Inc Romania SRL, 5 Fabrica de Glucoza Str., Building F, Ground Floor and Floor 8, 2nd District, Bucharest
Belgium and the Netherlands
Slovenia: Hewlett-Packard Europe B.V., Amsterdam, Meyrin Branch, Route du Nant-d'Avril 150, 1217 Meyrin, Switzerland
HP's Premium Protection Warranty: HP LaserJet Tank Toner Reload Kit and HP Laser Imaging Drum limited warranty statement
This HP product is warranted to be free from defects in materials and workmanship.
This warranty does not apply to products that (a) have been refilled, refurbished, remanufactured or tampered with in any way, except for the use of a Toner Reload Kit as specified in the printer manual, (b) experience problems resulting from misuse, improper storage, or operation outside of the published environmental specifications for the printer product, or (c) exhibit wear from ordinary use.
To obtain warranty service, please return the product to the place of purchase (with a written description of the problem and print samples) or contact HP customer support. At HP's option, except where provided otherwise by local law, HP will either replace products that prove to be defective or refund your purchase price.
TO THE EXTENT ALLOWED BY LOCAL LAW, THE ABOVE WARRANTY IS EXCLUSIVE AND NO OTHER WARRANTY OR CONDITION, WHETHER WRITTEN OR ORAL, IS EXPRESSED OR IMPLIED AND HP SPECIFICALLY DISCLAIMS ANY IMPLIED WARRANTIES OR CONDITIONS OF MERCHANTABILITY, SATISFACTORY QUALITY, AND FITNESS FOR A PARTICULAR PURPOSE.
TO THE EXTENT ALLOWED BY LOCAL LAW, IN NO EVENT WILL HP OR ITS SUPPLIERS BE LIABLE FOR DIRECT, SPECIAL, INCIDENTAL, CONSEQUENTIAL (INCLUDING LOST PROFIT OR DATA), OR OTHER DAMAGE, WHETHER BASED IN CONTRACT, TORT, OR OTHERWISE.
THE WARRANTY TERMS CONTAINED IN THIS STATEMENT, EXCEPT TO THE EXTENT LAWFULLY PERMITTED, DO NOT EXCLUDE, RESTRICT OR MODIFY AND ARE IN ADDITION TO THE MANDATORY STATUTORY RIGHTS APPLICABLE TO THE SALE OF THIS PRODUCT TO YOU.
HP policy on non-HP supplies
HP cannot recommend the use of non-HP Toner Reload Kits, non-HP toner, non-HP Laser Imaging Drums, and non-HP imaging system components, either new or remanufactured.

NOTE: For HP LaserJet Tank products, warranty does not cover printer or imaging drum failures or complications due to damage, contamination, or general print-related defects from the use of non-HP Toner Reload Kits, non-HP Toner, non-HP Laser Imaging Drums, or non-HP Laser Imaging Drum components. In such cases, HP will charge its standard time and materials charges to service the printer for the particular failure or damage.
HP anticounterfeit Web site
Go to https://www.hp.com/go/anticounterfeit if you use an HP Laser Imaging Drum and a software or firmware message indicates that you have installed a previously used imaging drum. HP will help determine if the imaging drum is genuine and take steps to resolve the problem.
Your reload kit or imaging drum might not be a genuine HP Toner Reload Kit or HP Laser Imaging Drum if you notice the following:
- The supplies status page indicates that a non-HP supply, or a used or counterfeit supply, is installed or has been used.
- A software or firmware message indicates that a non-HP supply, or a used or counterfeit supply, is installed or has been used.
- You are experiencing a high number of problems with the reload kit or imaging drum.
- The reload kit or imaging drum does not look like it usually does (for example, the packaging differs from HP packaging).
End User License Agreement
READ CAREFULLY BEFORE USING THIS SOFTWARE EQUIPMENT:
This End-User License Agreement ("EULA") is a legal agreement between (a) you (either an individual or a single entity) and (b) HP Inc. ("HP") that governs your use of any Software Product, installed on or made available by HP for use with your HP product ("HP Product"), that is not otherwise subject to a separate license agreement between you and HP or its suppliers. Other software may contain a EULA in its online documentation. The term "Software Product" means computer software and may include associated media, printed materials and "online" or electronic documentation.
An amendment or addendum to this EULA may accompany the HP Product.
RIGHTS IN THE SOFTWARE PRODUCT ARE OFFERED ONLY ON THE CONDITION THAT YOU AGREE TO ALL TERMS AND CONDITIONS OF THIS EULA. BY INSTALLING, COPYING, DOWNLOADING, OR OTHERWISE USING THE SOFTWARE PRODUCT, YOU AGREE TO BE BOUND BY THE TERMS OF THIS EULA. IF YOU DO NOT ACCEPT THESE LICENSE TERMS, YOUR SOLE REMEDY IS TO RETURN THE ENTIRE UNUSED PRODUCT (HARDWARE AND SOFTWARE) WITHIN 14 DAYS FOR A REFUND SUBJECT TO THE REFUND POLICY OF YOUR PLACE OF PURCHASE.
THIS EULA IS A GLOBAL AGREEMENT AND IS NOT SPECIFIC TO ANY PARTICULAR COUNTRY, STATE OR TERRITORY. IF YOU ACQUIRED THE SOFTWARE AS A CONSUMER WITHIN THE MEANING OF RELEVANT CONSUMER LEGISLATION IN YOUR COUNTRY, STATE OR TERRITORY, THEN DESPITE ANYTHING TO THE CONTRARY IN THIS EULA, NOTHING IN
THIS EULA AFFECTS ANY NON EXCLUDABLE STATUTORY RIGHTS OR REMEDIES THAT YOU MAY HAVE UNDER SUCH CONSUMER LEGISLATION AND THIS EULA IS SUBJECT TO THOSE RIGHTS AND REMEDIES. REFER TO SECTION 16 FOR FURTHER INFORMATION ON YOUR CONSUMER RIGHTS.
- GRANT OF LICENSE. HP grants you the following rights provided you comply with all terms and conditions of this EULA:
a. Use. You may use the Software Product on a single computer ("Your Computer"). If the Software Product is provided to you via the internet and was originally licensed for use on more than one computer, you may install and use the Software Product only on those computers. You may not separate component parts of the Software Product for use on more than one computer. You do not have the right to distribute the Software Product, nor do you have the right to modify the Software Product or disable any licensing or control feature of the Software Product. You may load the Software Product into Your Computer's temporary memory (RAM) for purposes of using the Software Product. b. Storage. You may copy the Software Product into the local memory or storage device of the HP Product. c. Copying. You may make archival or back-up copies of the Software Product, provided the copy contains all of the original Software Product's proprietary notices and that it is used only for back-up purposes. d. Reservation of Rights. HP and its suppliers reserve all rights not expressly granted to you in this EULA. e. Freeware. Notwithstanding the terms and conditions of this EULA, all or any portion of the Software Product which constitutes non-proprietary HP software or software provided under public license by third parties ("Freeware"), is licensed to you subject to the terms and conditions of the software license agreement accompanying such Freeware whether in the form of a discrete agreement, shrink wrap license or electronic license terms accepted at time of download. Use of the Freeware by you shall be governed entirely by the terms and conditions of such license. f. Recovery Solution. Any software recovery solution provided with/for your HP Product, whether in the form of a hard disk drive-based solution, an external media-based recovery solution (e.g. floppy disk, CD or DVD) or an equivalent solution delivered in any other form, may only be used for restoring the hard disk of the HP Product with/for which the recovery solution was originally purchased. The use of any Microsoft operating system software contained in such recovery solution shall be governed by the Microsoft License Agreement.
- UPGRADES. To use a Software Product identified as an upgrade, you must first be licensed for the original Software Product identified by HP as eligible for the upgrade. After upgrading, you may no longer use the original Software Product that formed the basis for your upgrade eligibility. By using the Software Product, you also agree that HP may automatically access your HP Product when connected to the internet to check the version or status of certain Software Products and may automatically download and install upgrades or updates to such Software Products on to your HP Product to provide new versions or updates required to maintain the functionality, performance, or security of the Software Product and your HP Product and facilitate the provision of support or other services provided to you. In certain cases, and depending on the type of upgrade or update, notifications will be provided to you (via pop-up or other means), which may require you to initiate the upgrade or update.
- ADDITIONAL SOFTWARE. This EULA applies to updates or supplements to the original Software Product provided by HP unless HP provides other terms along with the update or supplement. In case of a conflict between such terms, the other terms will prevail.
- TRANSFER.
a. Third Party. The initial user of the Software Product may make a one-time transfer of the Software Product to another end user. Any transfer must include all component parts, media, printed materials, this EULA, and if applicable, the Certificate of Authenticity. The transfer may not be an indirect transfer, such as a consignment. Prior to the transfer, the end user receiving the transferred product must agree to all the EULA terms. Upon transfer of the Software Product, your license is automatically terminated. b. Restrictions. You may not rent, lease or lend the Software Product or use the Software Product for commercial timesharing or bureau use. You may not sublicense, assign or transfer the license or Software Product except as expressly provided in this EULA.
- PROPRIETARY RIGHTS. All intellectual property rights in the Software Product and user documentation are owned by HP or its suppliers and are protected by law, including but not limited to United States copyright, trade secret, and trademark law, as well as other applicable laws and international treaty provisions. You shall not remove any product identification, copyright notices or proprietary restrictions from the Software Product.
- LIMITATION ON REVERSE ENGINEERING. You may not reverse engineer, decompile, or disassemble the Software Product, except and only to the extent that the right to do so is mandated under applicable law notwithstanding this limitation or it is expressly provided for in this EULA.
- TERM. This EULA is effective unless terminated or rejected. This EULA will also terminate upon conditions set forth elsewhere in this EULA or if you fail to comply with any term or condition of this EULA.
- NOTICE OF DATA COLLECTION.
CONSENT TO COLLECTION/USE OF DATA.
a. You agree that HP and its affiliates may collect, combine, and use device and individual user information you provide in relation to support services related to the Software Product. HP agrees not to use this information to market to you without your consent. Learn More about HP data collection practices at www.hp.com/go/privacy b. HP will use cookies and other web technology tools to collect anonymous technical information related to HP Software and your HP Product. This data will be used to provide the upgrades and related support or other services described in Section 2. HP will also collect personal information including your Internet Protocol address or other unique identifier information associated with your HP Product and data provided by you on registration of your HP Product. As well as providing the upgrades and related support or other services, this data will be used for sending marketing communications to you (in each case with your express consent where required by applicable law).
To the extent permitted by applicable law, by accepting these terms and conditions you consent to the collection and use of anonymous and personal data by HP, its subsidiaries, and affiliates as described in this EULA and as further described in HP's privacy policy: www.hp.com/go/privacy
c. Collection/Use by Third Parties. Certain software programs included in your HP Product are provided and separately licensed to you by third party providers ("Third Party Software"). Third Party Software may be installed and operational on your HP Product even if you choose not to activate/purchase such software. Third Party Software may collect and transmit technical information about your system (i.e., IP address, unique device identifier, software version installed, etc.) and other system data. This information is used by the third party to identify technical system attributes and ensure that the most current version of the software has been installed on your system. If you do not want the Third Party Software to collect this technical information or automatically send you version updates, you should uninstall the software prior to connecting to the Internet.
- DISCLAIMER OF WARRANTIES. TO THE MAXIMUM EXTENT PERMITTED BY APPLICABLE LAW, HP AND ITS SUPPLIERS PROVIDE THE SOFTWARE PRODUCT "AS IS" AND WITH ALL FAULTS, AND HEREBY DISCLAIM ALL OTHER WARRANTIES, DUTIES, AND CONDITIONS, EITHER EXPRESS, IMPLIED, OR STATUTORY, INCLUDING, BUT NOT LIMITED TO, WARRANTIES: (i) OF TITLE AND NON-INFRINGEMENT; (ii) OF MERCHANTABILITY; (iii) OF FITNESS FOR A PARTICULAR PURPOSE; (iv) THAT THE SOFTWARE PRODUCT WILL FUNCTION WITH NON-HP SUPPLIES OR ACCESSORIES; AND (v), OF LACK OF VIRUSES ALL WITH REGARD TO THE SOFTWARE PRODUCT. Some states/jurisdictions do not allow exclusion of implied warranties or limitations on the duration of implied warranties, so the above disclaimer may not apply to you in its entirety.
- LIMITATION OF LIABILITY. Subject to the laws of the People's Republic of China, notwithstanding any damages that you might incur, the entire liability of HP and any of its suppliers under any provision of this EULA and your exclusive remedy for all of the foregoing shall be limited to the greater of the amount actually paid by you separately for the Software Product or U.S. $5.00. TO THE MAXIMUM EXTENT PERMITTED BY APPLICABLE LAW, IN NO EVENT SHALL HP OR ITS SUPPLIERS BE LIABLE FOR ANY SPECIAL, INCIDENTAL, INDIRECT, OR CONSEQUENTIAL DAMAGES WHATSOEVER (INCLUDING, BUT NOT LIMITED TO, DAMAGES FOR LOSS OF PROFITS OR CONFIDENTIAL OR OTHER INFORMATION, FOR BUSINESS INTERRUPTION, FOR PERSONAL INJURY, OR FOR LOSS OF PRIVACY) ARISING OUT OF OR IN ANY WAY RELATED TO THE USE OF OR INABILITY TO USE THE SOFTWARE PRODUCT, OR OTHERWISE IN CONNECTION WITH ANY PROVISION OF THIS EULA, EVEN IF HP OR ANY SUPPLIER HAS BEEN ADVISED OF THE POSSIBILITY OF SUCH DAMAGES AND EVEN IF THE REMEDY FAILS OF ITS ESSENTIAL PURPOSE. Some states/jurisdictions do not allow the exclusion or limitation of incidental or consequential damages, so the above limitation or exclusion may not apply to you.
- U.S. GOVERNMENT CUSTOMERS. Consistent with FAR 12.211 and 12.212, Commercial Computer Software, Computer Software Documentation, and Technical Data for Commercial Items are licensed to the U.S. Government under HP's standard commercial license.
- COMPLIANCE WITH EXPORT LAWS. You shall comply with all laws and regulations of the United States and other countries ("Export Laws") to assure that the Software Product is not (1) exported, directly or indirectly, in violation of Export Laws, or (2) used for any purpose prohibited by Export Laws, including, without limitation, nuclear, chemical, or biological weapons proliferation.
- CAPACITY AND AUTHORITY TO CONTRACT. You represent that you are of the legal age of majority in your state of residence and, if applicable, you are duly authorized by your employer to enter into this contract.
- APPLICABLE LAW. This EULA is governed by the laws of the country in which the equipment was purchased.
- ENTIRE AGREEMENT. This EULA (including any addendum or amendment to this EULA which is included with the HP Product) is the entire agreement between you and HP relating to the Software Product and it supersedes all prior or contemporaneous oral or written communications, proposals and representations with respect to the Software Product or any other subject matter covered by this EULA. To the extent the terms of any HP policies or programs for support services conflict with the terms of this EULA, the terms of this EULA shall control.
- CONSUMER RIGHTS. Consumers in some countries, states or territories may have the benefit of certain statutory rights and remedies under consumer legislation in respect of which HP's liability cannot lawfully be excluded or limited. If you acquired the Software as a consumer within the meaning of relevant consumer legislation in your country, state or territory, the provisions of this EULA (including the disclaimers of warranties, limitations and exclusions of liability) must be read subject to applicable law and apply only to the maximum extent permitted by that applicable law.
Australian Consumers: If you acquired the Software as a consumer within the meaning of the ‘Australian Consumer Law’ under the Australian Competition and Consumer Act 2010 (Cth) then despite any other provision of this EULA:
a. The Software comes with guarantees that cannot be excluded under the Australian Consumer Law, including that goods will be of acceptable quality and services will be supplied with due care and skill. You are entitled to a replacement or refund for a major failure and compensation for any other reasonably foreseeable loss or damage. You are also entitled to have the Software repaired or replaced if it is not of acceptable quality and the failure does not amount to a major failure. b. Nothing in this EULA excludes, restricts or modifies any right or remedy, or any guarantee, warranty or other term or condition implied or imposed by the Australian Consumer Law which cannot be lawfully excluded or limited; and c. The benefits provided to you by the express warranties in this EULA are in addition to other rights and remedies available to you under the Australian Consumer Law. Your rights under the Australian Consumer Law prevail to the extent that they are inconsistent with any limitations contained in the express warranty. d. The Software may be capable of retaining user-generated data. HP hereby provides you with notice that if HP repairs your Software, that repair may result in the loss of that data. To the full extent permitted by law, the limitations and exclusions of HP's liability in this EULA apply in respect of any such loss of data. If you think that you are entitled to any warranty under this agreement or any of the above remedies, please contact HP:
HP PPS Australia Pty Ltd
Rhodes Corporate Park, Building F, Level 5
1 Homebush Bay Drive
Rhodes, NSW 2138
Australia
To initiate a support request or warranty claim, please call 13 10 47 (within Australia) or +61 2 8278 1039 (if dialing internationally) or visit www8.hp.com/au/en/contact-hp/phone-assist.html for the most current list of phone support numbers.
If you are a consumer within the meaning of the Australian Consumer Law and you are purchasing the Software or warranty and support services for the Software which are not of a kind ordinarily acquired for personal, domestic or household use or consumption, then despite any other provision of this EULA, HP limits its liability for failure to comply with a consumer guarantee as follows:
a. Provision of warranty or support services for the Software: to any one or more of the following: re-supply of the services or payment of the costs of having the services re-supplied; b. Provision of the Software: to any one or more of the following: replacement of the Software or the supply of equivalent software; repair of the Software; payment of the costs of replacing the Software or of acquiring equivalent software; or payment of the costs of having the Software repaired; and c. Otherwise, to the maximum extent permitted by law.
New Zealand Consumers: In New Zealand, the Software comes with guarantees that cannot be excluded under the Consumer Guarantees Act 1993. In New Zealand, Consumer Transaction means a transaction involving a person who is purchasing goods for personal, domestic or household use or consumption and not for the purpose of a business. New Zealand consumers who are purchasing goods for personal, domestic or household use or consumption and not for the purpose of a business ("New Zealand Consumers") are entitled to repair, replacement or refund for a failure and compensation for other reasonably foreseeable loss or damage. A New Zealand Consumer (as defined above) may recover the costs of returning the product to the place of purchase if there is a breach of the New Zealand consumer law; furthermore, if it will be of significant cost to the New Zealand Consumer to return the goods to HP then HP will collect such goods at its own cost. Where any supply of products or services is for business purposes, you agree that the Consumer Guarantees Act 1993 does not apply and that given the nature and value of the transaction, this is fair and reasonable.
© Copyright 2022 HP Development Company, L.P.
The information contained herein is subject to change without notice. All other product names mentioned herein may be trademarks of their respective companies. To the extent permitted by applicable law, the only warranties for HP products and services are set forth in the express warranty statements accompanying such products and services. Nothing herein should be construed as constituting an additional warranty. To the extent permitted by applicable law, HP shall not be liable for technical or editorial errors or omissions contained herein.
Customer self-repair warranty service
HP products are designed with many Customer Self Repair (CSR) parts to minimize repair time and allow for greater flexibility in performing defective parts replacement. If during the diagnosis period, HP identifies that the repair can be accomplished by the use of a CSR part, HP will ship that part directly to you for replacement. There are two categories of CSR parts: 1) Parts for which customer self repair is mandatory. If you request HP to replace these parts, you will be charged for the travel and labor costs of this service. 2) Parts for which customer self repair is optional. These parts are also designed for Customer Self Repair. If, however, you require that HP replace them for you, this may be done at no additional charge under the type of warranty service designated for your product.
Based on availability and where geography permits, CSR parts will be shipped for next business day delivery. Same-day or four-hour delivery may be offered at an additional charge where geography permits. If assistance is required, you can call the HP Technical Support Center and a technician will help you over the phone. HP specifies in the materials shipped with a replacement CSR part whether a defective part must be returned to HP. In cases where it is required to return the defective part to HP, you must ship the defective part back to HP within a defined period of time, normally five (5) business days. The defective part must be returned with the associated documentation in the provided shipping material. Failure to return the defective part may result in HP billing you for the replacement. With a customer self repair, HP will pay all shipping and part return costs and determine the courier/carrier to be used.
Customer support
Table A-5 Customer Support
| Support URL links |
| Get telephone support for your country/regionHave the product name, serial number, date of purchase, and problem description ready. | Country/region phone numbers are on the flyer that was in the box with your product or atwww.hp.com/support |
| Get 24-hour Internet support, and download software utilities and drivers | www.hp.com/support |
| Order additional HP service or maintenance agreements www.hp.com/go/carepack |
| Register your product www.register.hp.com | |
Environmental product stewardship program
This section describes the environmental-friendly product stewardship program at HP.
Protecting the environment
HP is committed to providing quality products in an environmentally sound manner. This product has been designed with several attributes to minimize impacts on our environment.
Ozone production
The airborne emissions of ozone for this product have been measured according to a standardized protocol and when these emissions data are applied to an anticipated high-use scenario in an office workspace, HP has determined there is no appreciable amount of ozone generated during printing and the levels are well within current indoor air quality standards and guidelines.
References -
Test method for the determination of emissions from hardcopy devices with respect to awarding the environmental label for office devices with printing function; DE-UZ 205 – BAM; January 2018.
Based on ozone concentration when printing 2 hours per day in 30.6 cubic meter room with a ventilation rate of 0.68 air changes per hour with HP printing supplies.
Power consumption
Power usage drops significantly while in Ready, Sleep, or Off mode, which saves natural resources and saves money without affecting the high performance of this product. HP printing and imaging equipment marked with the ENERGY STAR® logo is qualified to the U.S. Environmental Protection Agency's ENERGY STAR specifications for imaging equipment. The following mark will appear on ENERGY STAR qualified imaging products:

Additional ENERGY STAR qualified imaging product model information is listed at:
Toner consumption
EconoMode uses less toner, which might extend the life of the imaging drum. HP does not recommend the full-time use of EconoMode. If EconoMode is used full-time, the toner supply might outlast the mechanical parts in the imaging drum.
Paper use
This product's duplex feature (manual or automatic) and N-up printing (multiple pages printed on one page) capability can reduce paper usage and the resulting demands on natural resources.
Plastics
Plastic parts over 25 grams are marked according to international standards that enhance the ability to identify plastics for recycling purposes at the end of the product's life.
HP LaserJet print supplies
Original HP Supplies were designed with the environment in mind. HP makes it easy to conserve resources and paper when printing. And when you are done, we make it easy and free to recycle. 1
All HP Toner Reload Kits returned to HP Planet Partners go through a multiphase recycling process. No Original HP Toner Reload Kits returned through HP Planet Partners are ever sent to a landfill, and HP never refills or resells Original HP Toner Reload Kits.
To participate in HP Planet Partners return and recycling program, visit www.hp.com/recycle. Select your country/region for information on how to return HP printing supplies. Multi-lingual program information and instructions are also included in every new HP LaserJet Toner Reload Kit.
1 Program availability varies. For more information, visit www.hp.com/recycle
Paper
This product is capable of using recycled paper and lightweight paper (EcoFFICIENT™) when the paper meets the guidelines outlined in the HP Laser Printer Family Print Media Guide. This product is suitable for the use of recycled paper and lightweight paper (EcoFFICIENT™) according to EN12281:2002.
Material restrictions
This HP product does not contain added mercury.
Disposal of waste equipment by users (EU and India)

This symbol means do not dispose of your product with your other household waste. Instead, you should protect human health and the environment by handing over your waste equipment to a designated collection point for the recycling of waste electrical and electronic equipment. For more information, please contact your household waste disposal service, or go to: www.hp.com/recycle
Electronic hardware recycling
HP encourages customers to recycle used electronic hardware. For more information about recycling programs go to: www.hp.com/recycle

www8.hp.com/br/pt/ads/planet-partners/index.html
Chemical substances
HP is committed to providing our customers with information about the chemical substances in our products as needed to comply with legal requirements such as REACH (Regulation EC No 1907/2006 of the European Parliament and the Council). A chemical information report for this product can be found at: www.hp.com/go/reach
Product Power Data per European Union Commission Regulation 1275/2008
For product power data, including the power consumption of the product in networked standby if all wired network ports are connected and all wireless network ports are activated, please refer to section P14 'Additional Information' of the product IT ECO Declaration at www.hp.com/hpinfo/globalcitizenship/environment/productdata/itecodesktop-pc.html
User instructions for China Environmental Labeling certified products
The regulation of the implementation on China energy label for printer, fax, and copier
Restriction on Hazardous Substances statement (India)
This product, as well as its related consumables and spares, complies with the reduction in hazardous substances provisions of the "India E-waste Rule 2016." It does not contain lead, mercury, hexavalent chromium, polybrominated biphenyls or polybrominated diphenyl ethers in concentrations exceeding 0.1 weight % and 0.01 weight % for cadmium, except where allowed pursuant to the exemptions set in Schedule 2 of the Rule.
WEEE (Turkey)
The Table of Hazardous Substances/Elements and their Content (China)
Names and content of hazardous substances or elements in the product
The Table of Hazardous Substances/Elements and their Content
As required by China's Management Methods for Restricted Use of Hazardous Substances in Electrical and Electronic Products

This form has been prepared in compliance with the provisions of SJ/T 11364.
○: Indicates that the content of said hazardous substance in all of the homogenous materials in the component is within the limits required by GB/T 26572.
X: Indicates that the content of said hazardous substance exceeds the limits required by GB/T 26572 in at least one homogenous material in the component.
All parts named in this table with an "X" are in compliance with the China RoHS "List of Exceptions to RoHS Compliance Management Catalog (or China RoHS Exemptions)".
All parts named in this table with an "X" are in compliance with the European Union's RoHS Legislation.
Note: The referenced Environmental Protection Use Period Marking was determined according to normal operating use conditions of the product such as temperature and humidity.
Material Safety Data Sheet (MSDS)
Material Safety Data Sheets (MSDS) for supplies containing chemical substances (for example, toner) can be obtained by accessing the HP Web site at www.hp.com/go/msds
EPEAT
Many HP products are designed to meet EPEAT. EPEAT is a comprehensive environmental rating that helps identify greener electronics equipment. For more information on EPEAT go to www.epeat.net. For information on HP's EPEAT registered products go to www8.hp.com/us/en/hp-information/global-citizenship/index.html
Declaration of the Presence Condition of the Restricted Substances Marking (Taiwan)
Taiwan Declaration of the Presence Condition of the Restricted Substances Marking
Taiwan Declaration of the Presence Condition of the Restricted Substances Marking
| 單元Unit | 限用物質及其化學符號Restricted substances and its chemical symbols |
| 鉛Lead(Pb) | 汞Mercury(Hg) | 鎘Cadmium(Cd) | 六價鉻Hexavalent chromium( Cr*6 ) | 多溴聯苯Polybrominated biphenyls(PBB) | 多溴二苯醚Polybrominated diphenyl ethers(PBDE) |
| 列印引擎Print engine | - | ○ | ○ | ○ | ○ | ○ |
| 外殼和紙匣External Casing and Trays | ○ | ○ | ○ | ○ | ○ | ○ |
| 電源供應器Power Supply | - | ○ | ○ | ○ | ○ | ○ |
| 電線Cables | ○ | ○ | ○ | ○ | ○ | ○ |
| 印刷電路板Print printed circuit board | - | ○ | ○ | ○ | ○ | ○ |
| 控制面板Control panel | - | ○ | ○ | ○ | ○ | ○ |
| 碳粉匣Cartridge | ○ | ○ | ○ | ○ | ○ | ○ |
| 掃描器組件Scanner assembly | - | ○ | ○ | ○ | ○ | ○ |
| 備考1. “超出0.1 wt %”及“超出0.01 wt %”係指限用物質之百分比含量超出百分比含量基準值。Note 1: “Exceeding 0.1 wt %” and “exceeding 0.01 wt %” indicate that the percentage content of the restricted substance exceeds the reference percentage value of presence conditn.備考2. “○”係指該項限用物質之百分比含量未超出百分比含量基準值。Note 2: “o * indicates that the percentage content of the restricted substance does not exceed the percentage of reference value of presence.備考3. “—”係指該項限用物質為排除項目。Note 3: The “-”indicates that the restricted substance corresponds to the exemption. |
TWR-LI-PK-MSP-02
To access the latest user guides or manuals for your product, go to www.support.hp.com. Select Find your product, and then follow the onscreen instructions.
To obtain information about these environmental topics:
• Product environmental profile sheet for this and many related HP products
- HP's commitment to the environment
- HP's environmental management system
- HP's end-of-life product return and recycling program • Material Safety Data Sheets
Visit www.hp.com/go/environment
Also, visit www.hp.com/recycle
This section describes the regulatory statements.
Regulatory statements
The printer meets product requirements from regulatory agencies in your country/region.
European Union & United Kingdom Regulatory Notice

Products bearing the CE marking and UKCA marking comply with one or more of the following EU Directives and/or equivalent UK Statutory Instruments as may be applicable: Low Voltage Directive 2014/35/EU, EMC Directive 2014/30/EU, Eco Design Directive 2009/125/EC, RED 2014/53/EU, RoHS Directive 2011/65/EU.
Compliance with these directives is assessed using applicable European Harmonized Standards. The full EU and UK Declaration of Conformity can be found at the following website: www.hp.com/go/certificates (Search with the product model name or its Regulatory Model Number (RMN), which may be found on the regulatory label.)
The point of contact for regulatory matters is: Email techregshelp@hp.com
The EU point of contact for regulatory matters is:
HP Deutschland GmbH, HP HQ-TRE, 71025 Boeblingen, Germany
The UK point of contact for regulatory matters is:
HP Inc UK Ltd, Regulatory Enquiries, Earley West, 300 Thames Valley Park Drive, Reading, RG6 1PT
Regulatory model identification numbers
For regulatory identification purposes, your product is assigned a regulatory model number. Regulatory model numbers should not be confused with marketing names or product numbers.
Table A-6 Regulatory model identification numbers
| Product model number Regulatory model number |
| HP LaserJet Tank MFP 1005 | SHNGC-2101-00 |
| HP LaserJet Tank MFP 2606dn | |
| HP LaserJet Tank MFP 2602dn | |
| HP LaserJet Tank MFP 2606sdn | |
| HP LaserJet Tank MFP 2602sdn | |
| HP LaserJet Tank MFP 2606sdw SHNGC-2101-01A |
| HP LaserJet Tank MFP 1602w | SHNGC-2101-01 |
| HP LaserJet Tank MFP 1005w | |
| HP LaserJet Tank MFP 2604dw | |
| HP LaserJet Tank MFP 1604w | |
| HP LaserJet Tank MFP 2606sdw | |
| HP LaserJet Tank MFP 2602sdw | |
| HP LaserJet Tank MFP 2604sdw | |
| HP LaserJet Tank MFP 2606sdn SHNGC-2101-00A |
FCC regulations
This equipment has been tested and found to comply with the limits for a Class B digital device, pursuant to Part 15 of the FCC rules. These limits are designed to provide reasonable protection against harmful interference in a residential installation. This equipment generates, uses, and can radiate radio frequency energy. If this equipment is not installed and used in accordance with the instructions, it may cause harmful interference to radio communications. However, there is no guarantee that interference will not occur in a particular installation. If this equipment does cause harmful interference to radio or television reception, which can be determined by turning the equipment off and on, the user is encouraged to try to correct the interference by one or more of the following measures:
- Reorient or relocate the receiving antenna.
- Increase separation between equipment and receiver.
- Connect equipment to an outlet on a circuit different from that to which the receiver is located.
- Consult your dealer or an experienced radio/TV technician.

NOTE: Any changes or modifications to the printer that are not expressly approved by HP could void the user's authority to operate this equipment.
Use of a shielded interface cable is required to comply with the Class B limits of Part 15 of FCC rules.
Canada - Industry Canada ICES-003 Compliance Statement
CAN ICES-3(B)/NMB-3(B)
Power cord instructions
Make sure your power source is adequate for the product voltage rating. The voltage rating is on the product label. The product uses either 110-127 Vac or 220-240 Vac and 50/60 Hz.
Connect the power cord between the product and a grounded AC outlet.
CAUTION: To prevent damage to the product, use only the power cord that is provided with the product.
Laser safety
The Center for Devices and Radiological Health (CDRH) of the U.S. Food and Drug Administration has implemented regulations for laser products manufactured since August 1, 1976. Compliance is mandatory for products marketed in the United States. The device is certified as a “Class 1” laser product under the U.S. Department of Health and Human Services (DHHS) Radiation Performance Standard according to the Radiation Control for Health and Safety Act of 1968. Since radiation emitted inside the device is completely confined within protective housings and external covers, the laser beam cannot escape during any phase of normal user operation.
WARNING! Using controls, making adjustments, or performing procedures other than those specified in this user guide may result in exposure to hazardous radiation.
For other US/Canada regulatory matters, please contact:
HP Inc.
HP Inc. 1501 Page Mill Rd, Palo Alto, CA 94304, USA
Email contact: (techregshelp@hp.com) or Telephone contact: +1 (650) 857-1501
Laser statement for Finland
Luokan 1 laserlaite
GS statement (Germany)
Nordic Statements (Denmark, Finland, Norway, Sweden)
Denmark:
The statements in this section apply to wireless-capable printers only.
FCC compliance statement—United States
Exposure to radio frequency radiation
CAUTION: The radiated output power of this device is far below the FCC radio frequency exposure limits. Nevertheless, the device shall be used in such a manner that the potential for human contact during normal operation is minimized.
In order to avoid the possibility of exceeding the FCC radio frequency exposure limits, human proximity to the antenna shall not be less than 20 cm (8 in) during normal operation.
This device complies with Part 15 of FCC Rules. Operation is subject to the following two conditions: (1) this device may not cause interference, and (2) this device must accept any interference, including interference that may cause undesired operation of the device.
CAUTION: Based on Section 15.21 of the FCC rules, changes or modifications to the operation of this product without the express approval by HP may invalidate its authorized use.
Australia statement
This device incorporates a radio-transmitting (wireless) device. For protection against radio transmission exposure, it is recommended that this device be operated no less than 20 cm from the head, neck, or body.
Belarus statement
Brazil ANATEL statement
For Indoor Use. This digital apparatus does not exceed the Class B limits for radio noise emissions from digital apparatus as set out in the radio interference regulations of the Canadian Department of Communications. The internal wireless radio complies with RSS 210 of Industry Canada.
China CMIIT Wireless statements
China Radio Transmission Equipment Notice
The model approval code is displayed on the nameplate of the product itself.
Korean statement
Wireless-only product:
Taiwan statement (Traditional Chinese)
Products with 5 GHz Operation Industry of Canada
CAUTION: When using IEEE 802.11a wireless LAN, this product is restricted to indoor use, due to its operation in the 5.15- to 5.25-GHz frequency range. Industry Canada requires this product to be used indoors for the frequency range of 5.15 GHz to 5.25 GHz to reduce the potential for harmful interference to co-channel mobile satellite systems. High-power radar is allocated as the primary user of the 5.25- to 5.35-GHz and 5.65- to 5.85-GHz bands. These radar stations can cause interference with and/or damage to this device.
Taiwan NCC Statement: (Only for 5GHz)
To avoid affecting the operation of nearby radar systems.
Exposure to Radio Frequency Radiation (Canada)
To avoid the possibility of exceeding the Industry Canada radio frequency exposure limits, human proximity to the antennas should not be less than 20 cm (8 inches).
European regulatory notice
The telecommunications functionality of this product may be used in the following European countries/regions:
Austria, Belgium, Bulgaria, Cyprus, Czech Republic, Denmark, Estonia, Finland, France, Germany, Greece, Hungary, Iceland, Ireland, Italy, Latvia, Liechtenstein, Lithuania, Luxembourg, Malta, Netherlands, Norway, Poland, Portugal, Romania, Slovak Republic, Slovenia, Spain, Sweden, Switzerland, and United Kingdom.
Notice for use in Russia
This radio communication equipment has the electromagnetic field strength in compliance with the Safety Standard for the Use of Radio Communication Equipment on Human Health announced by the National Telecommunications Commission.
Vietnam Telecom


NOTE: Telecom wireless marking for ICTQC Type approved products.