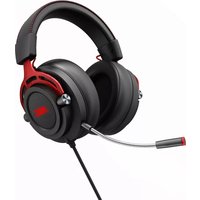
GH300 - Headset AOC - Free user manual and instructions
Find the device manual for free GH300 AOC in PDF.


| Product Type | Gaming Headset |
| Model | GH300 |
| Brand | AOC |
| Driver Size | 50 mm |
| Frequency Response | 20 Hz - 20 kHz |
| Impedance | 32 Ω |
| Microphone Type | Unidirectional, noise-canceling |
| Microphone Frequency Response | 100 Hz - 10 kHz |
| Microphone Sensitivity | -42 dB |
| Connectivity | USB (wired) |
| Audio Features | Virtual 7.1 surround sound |
| Lighting | RGB (customizable zones) |
| Controls | On-ear volume wheel, mute button, RGB toggle |
| Cable Length | 2.2 m braided cable |
| Weight | 380 g (without cable) |
| Dimensions (L x W x H) | 200 x 190 x 100 mm |
| Material | Leatherette ear cushions, metal headband |
| Compatibility | PC, PS4, Xbox One (via USB), Nintendo Switch |
| Software | AOC G-Tools (custom EQ, lighting, surround) |
| Power Supply | USB bus-powered (5V, 500mA) |
| Maintenance | Wipe with dry cloth; avoid liquids |
| Safety | Complies with safety standards; do not disassemble |
| Spare Parts | Replacement ear pads and cables available |
| General Info | Warranty 1 year; manual included |
Frequently Asked Questions - GH300 AOC
User questions about GH300 AOC
0 question about this device. Answer the ones you know or ask your own.
Ask a new question about this device
Download the instructions for your Headset in PDF format for free! Find your manual GH300 - AOC and take your electronic device back in hand. On this page are published all the documents necessary for the use of your device. GH300 by AOC.
USER MANUAL GH300 AOC
AOC GH300 GAMING HEADSET
USER MANUAL Ver. 1.0.0

natural_image
Black and red headboard headphones with a microphone, no visible text or symbols on the devices or backgroundCAUTION: To use this product properly, please read the user's guide before installing.
Contents
- Package Contents and System Requirements....3
- Technical Specifications....4
- Device Layout Overview ....5
- Software Installation....6
- Software Running 9
- Software Update....10
- Home Page ......11
- Headset Settings....16
- Discovery ....28
- Macro 45
- Language 49
- Safety Guide and Maintenance ....50
1. Package Contents and System Requirements
Package Contents
■ GH300 wired gaming headset
■ Quick start guide
Product Requirements
■ Windows ^® 7 or above
■ Available USB port
AOC G-Menu Requirements
■ Windows ^® 7 or above
■ 500MB free hard disk space
■ Internet connection
Technical Support
■ 2 years limited warranty
Free online technical support at www.aoc.com
2. Technical Specifications
■ Driver: 50mm, PU+PEEK composite diaphragm, Neodymium Magnet
■ Frequency range: 20Hz - 20KHz
■ Impedance: 32 Ω±15%
■ Sensitivity: 100 ± 3 dB (at 1KH 1mW)
■ Connection: USB
■ Audio: 7.1 Virtual Surround Sound (PC+AOC G-Menu), support up to 24bit/96kHz Hi-Res Audio(PC/Mac) by internal DAC
■ Software: AOC G-Menu
■ Microphone: Detachable Omnidirectional
■ Control: In-line control
■ LED lighting: AOC Light FX RGB lighting, customizable via AOC G-Menu
Approximate Size & Weight
■ Length: 160 mm
■ Width: 100 mm
■ Height: 195m
■ Weight: 363g (including the cable and the remote controller)
3. Device Layout Overview
Overview
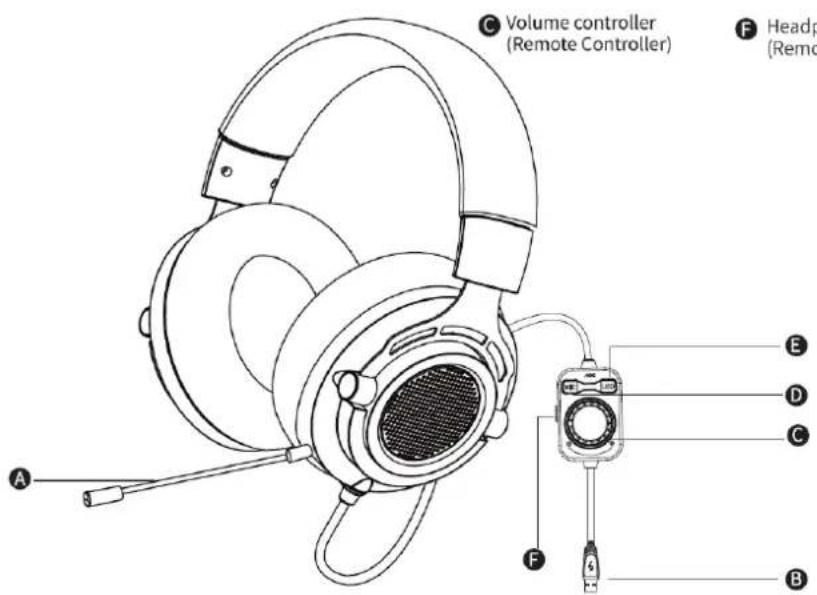
A Microphone
B USB plug
© Volume controller (Remote Controller)
D Microphone Mute Switch (Remote Controller)
E LED Lighting On/Off Button (Remote Controller)
F Headphone Mute Button (Remote Controller)
4. Software Installation
Search and download the latest version of AOC G-Menu file from your local/regional AOC official website by http://www.aoc.com, and double click the EXE file to start the installation.
Accept the license agreement by selecting the I Agree radio button, and clicking the Next button.
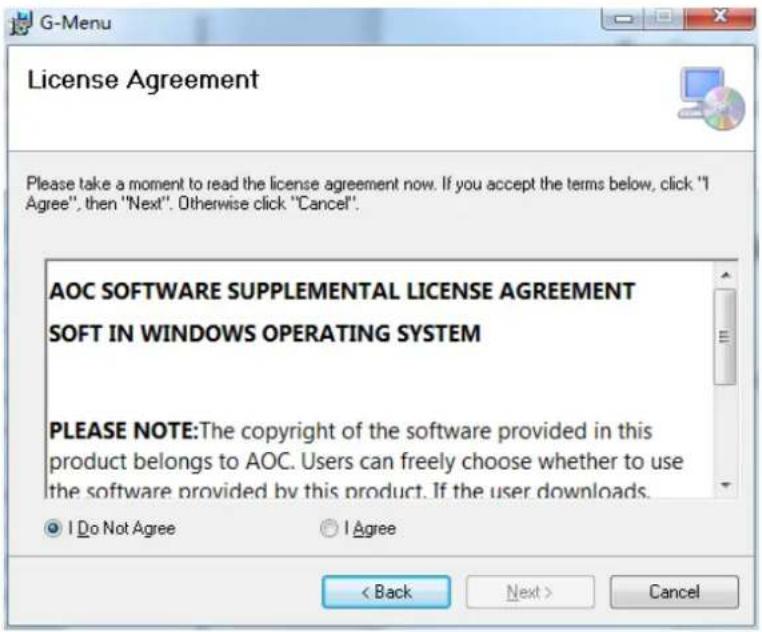
Select the installation folder. Select the default folder by pressing the Next button.

Selecting the Browse button will open a Browse for Folder dialog box.

Confirm Installation by pressing the Next button.
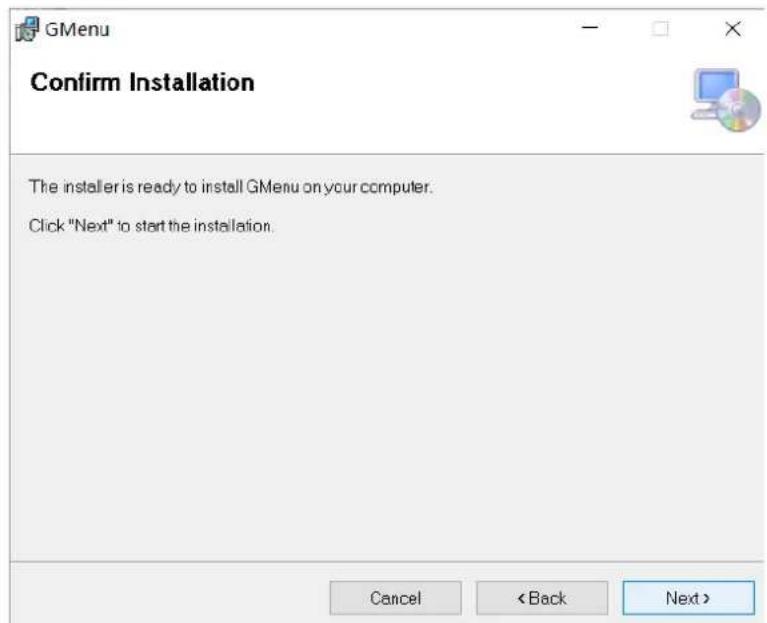
Complete the installation by pressing the Close button. Congratulations on installing G-menu!

GMenu
Installation Complete


GMenu has been successfully installed.
Click "Close" to exit.
Please use Windows Update to check for any critical updates to the .NET Framework.
Cancel
< Back
Close
To uninstall G-Menu:
For Windows 10: Go to Windows Settings > Apps > Apps and Features > select G-Menu and press the Uninstall button.
For Windows 7/8/8.1: Go to Control Panel > Programs > Programs and Features > select G-Menu and press the Uninstall button.
5. Software Running
There are 3 ways to run the AOC G-Menu application.
- Start Menu>G-Menu

- Taskbar>Right click on the taskbar icon

- Double click the shortcut on Desktop

6. Software Update
When you enter the G-Menu home page, the software will automatically check for updates, if there is a new version, it will be downloaded in the background.
After the download is complete, the interface will alert you to install the update.

- Note: If there is no network connection, G-Menu will not be able to detect updates.
7. Home Page
Open the AOC G-Menu application and enter the home page.

Application name: Displayed on the top left, not clickable.
Brand logo, Software version: Displayed at the bottom right, not clickable.
Minimize/Restore: Displayed at the top right. Click to switch the interface to zoom in/restore the display.
Setting: Displayed at the top right. Click to enter the setting interface, where you can modify the language.
Device display:
● The device types supported by the current software are displayed by default, including: Monitor, Keyboard, Mouse, Mouse mat, and Headset.
● Currently connected devices are highlighted and may be clicked. Other device types are grayed out and cannot be clicked.
- Click on the device icon to enter the device settings interface.
Discover: Click the Discover button to find the latest game profiles.
Close: Click the Close button to close the application interface, the actual application is still running in the background.
AOC AUDIO CENTER installation (AOC GH300 Headset ONLY)
If it's the first time for you to use the AOC GH300 headset, you may need to install the AOC AUDIO CENTER application to activate the audio driver when clicking the headset device icon and prompt will be displayed.

By following the scree prompt, click the "DOWNLOAD" to download the AOC AUDIO CENTER software.
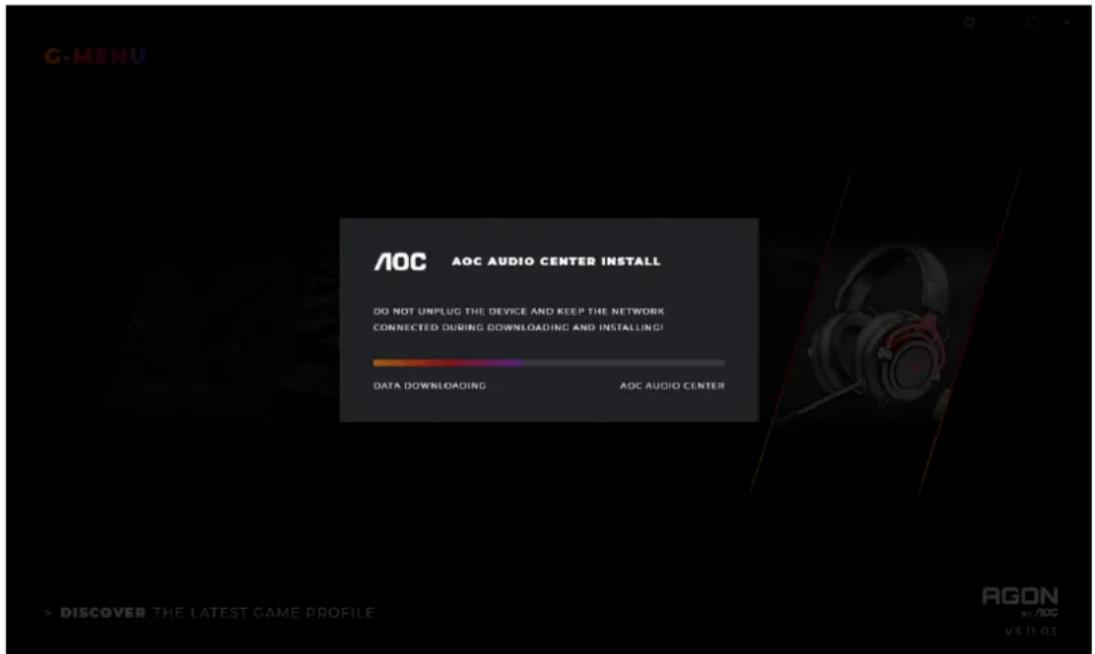
Please don't do anything until the downloading is finished and new prompt is displayed. After the downloading, click "INSTALL" to start the installation of AOC AUDIO CENTER software package.

Wait for a while, click "Yes" to permit your system to run the "Setup.exe" if you are receiving an alert about the installation, when the installation interface is displayed, please click "Next".
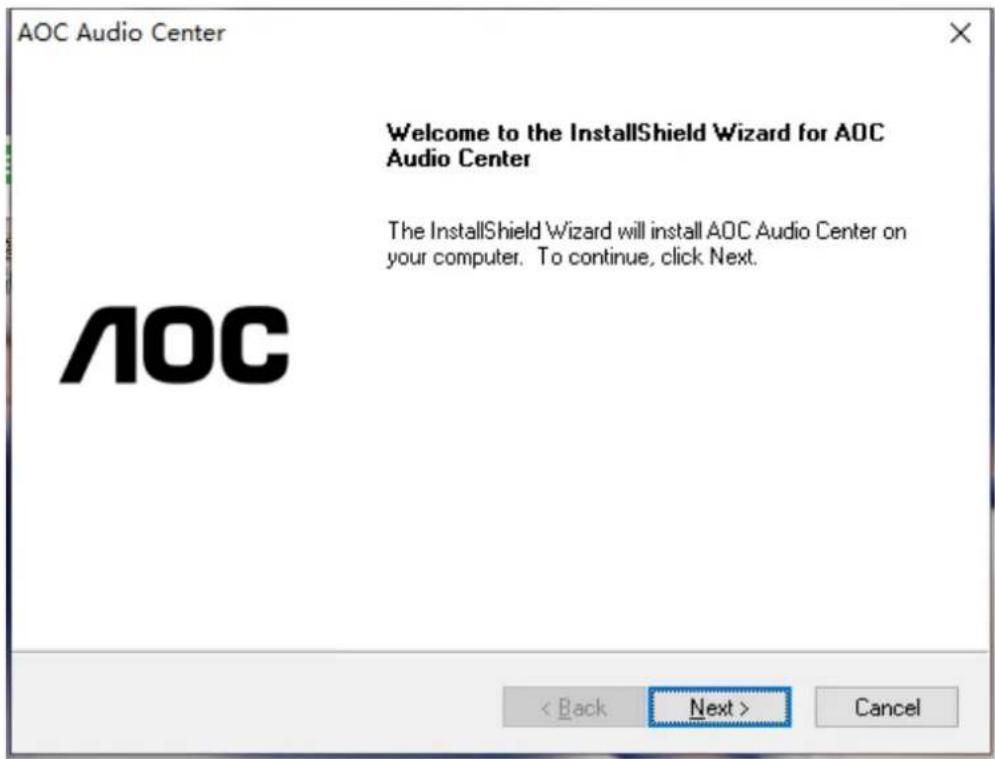
Choose "I accept the terms of the license agreement" and click "Next".


When the installation is finished, you may need to restart your computer.
- Headset Settings
8.1 General Settings
8.1.1 Top Navigation

G-Menu navigation options: Home, Monitor, Mouse, Keyboard, Mouse mat, Headset, and Macro.
The unconnected devices will not be displayed.
Click an active button to open the device settings interface.
Click the Home button to return to the homepage.
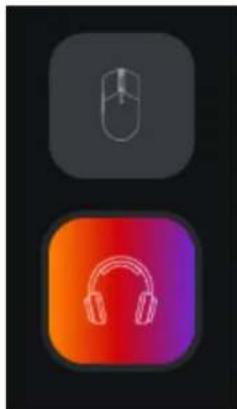
8.1.2 Left Navigation
natural_image
Two app icons: a computer mouse and an orange-hued headphones, both on a dark background (no text or symbols)Navigation button are, from top-to-bottom: Monitor, Keyboard, Mouse, Mouse mat, Headset.
The icons of unconnected devices are hidden.
8.1.3 Profile Management
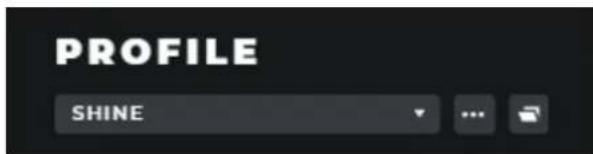
■ Display Profiles
Click on the Profile drop-down menu to display all local profiles.
After switching the profile, it will be automatically configured on the current board and takes effect in real time.

■ Manage Profiles
Click the Meatball menu to expand the profile selection item: Add, Import, Export, Rename, and Associate.
A) Add
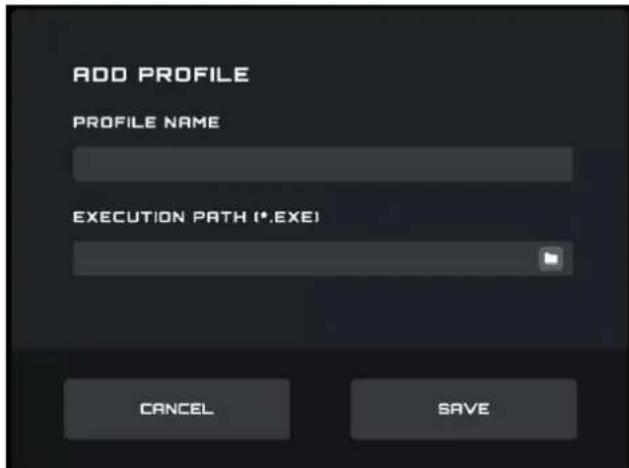
Enter the name of the new profile.
Click the File button to open the local executable file or enter the execution path in the input box directly.
Click the Save button to add the profile.
Click the Cancel button to close the pop-up box.
B) Import
Opens a File Explorer dialog box.
Locate the file to import and select it. Press the OK button to import the profile.
The profile will be imported and populate the currently selected profile. The previous profile will be overwritten with the imported settings.
C) Export
The export command will only export the settings for the current profile.
A Save dialog box will open, and you may navigate to where you wish to save the file.
Click the Save button to save the exported profile.
D) Rename
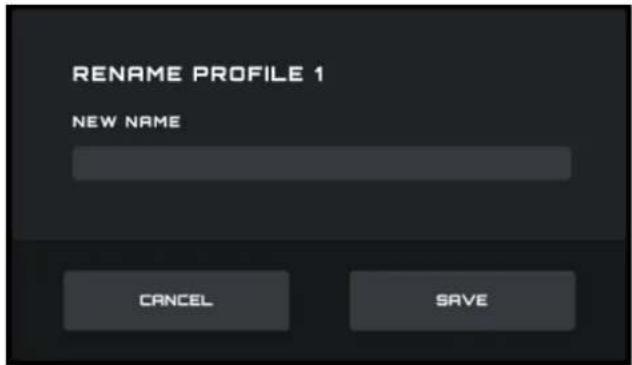
Change the name of the current profile. It cannot be a duplicate of an existing profile name.
Click the Save button to save the new name.
Click the Cancel button to close the pop-up box.
E) Associate

You may associate an executable file to run each time the profile is selected.
Click the File button to open a File Explorer dialog box that shows .exe files.
Or you can directly enter the execution path in the input box.
After selecting the application, click the Open button, the path will be automatically filled into the input box.

Click the Save button to add the application to the profile.
Click the Cancel button to close the pop-up box.
8.1.4 On board memory
Click the icon to open the On-Board Memory pop-up interface
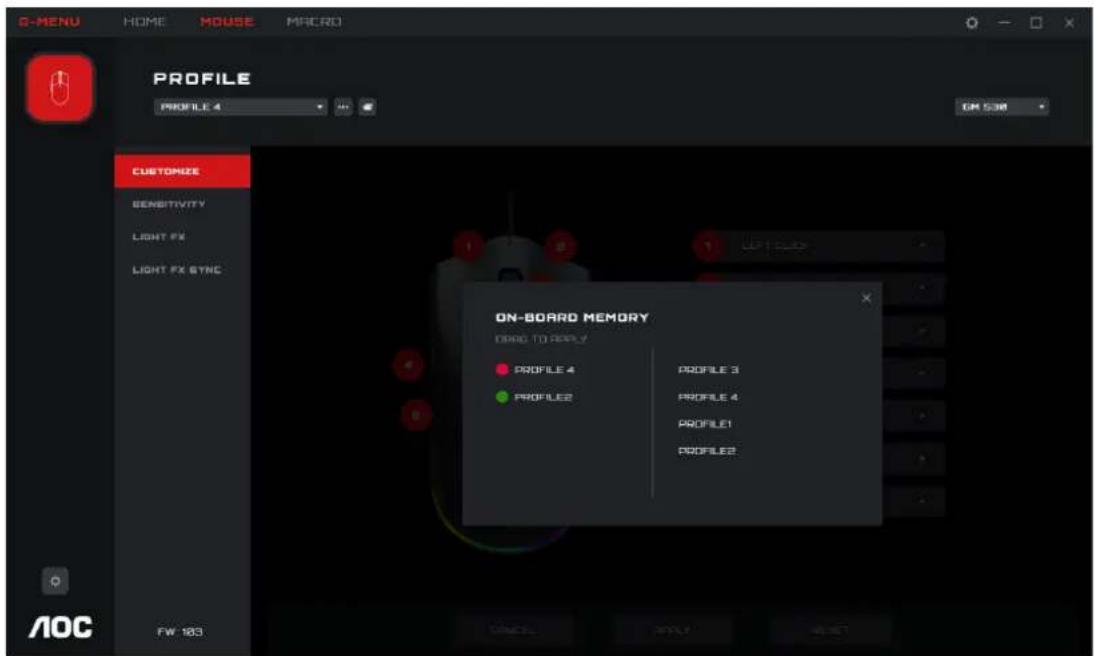
The left side of the interface is the current device onboard; the right side is list of all local profile files.
On-board adaptation: Drag the profile file to the back of the corresponding on-board color. After completion, the profile will be immediately applied to the on-board to take effect.
Delete a profile
- Click the delete icon behind the profile to delete it.
■ The profile currently in use does not support deletion. - Click the close icon to close the pop-up window.

8.2 Headset Settings
Prerequisites: Connect the headset, and click the headset icon on the home page.
The modifications on the headset will be immediately implemented on the headset, however you can click the CANCEL button in the bottom to cancel the modifications you have done, or click the Reset button to set the headset to the default factory settings, or click the APPLY button to confirm and save the settings you have done.

Cancel
Click the Cancel button to cancel this setting and return to the last saved state.
■ Apply
Click the Apply button to save this setting
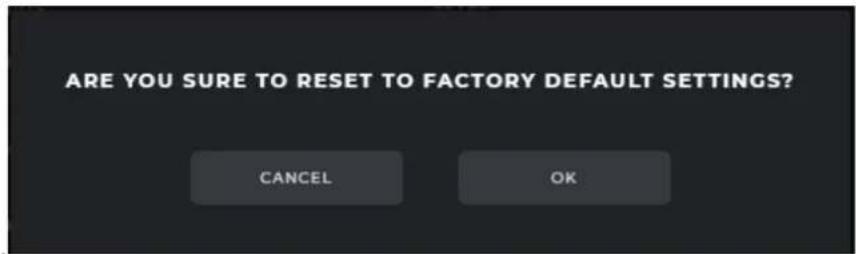
Reset
Click the Reset button to restore the default factory settings.
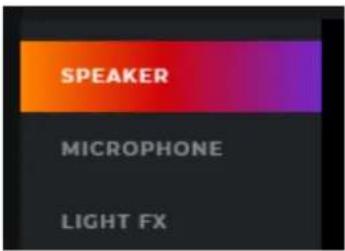
8.2.1 SPEAKER

● VOLUME CONTROL (Default MASTER/FRONT= -20dB, LOCK=Enabled, MUTE=Disabled)

You can either adjust the volume of the master speaker (MASTER), or adjust the Left/Right side speakers (FRONT L/R) individually.
MUTE button can mute the whole master speaker.
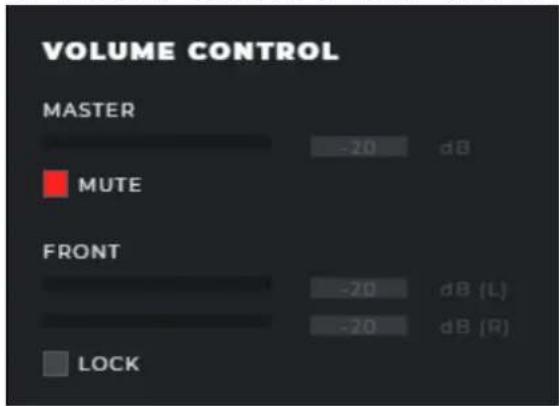
LOCK button can make the other side speaker follow the same adjustment you have done on one side speaker.


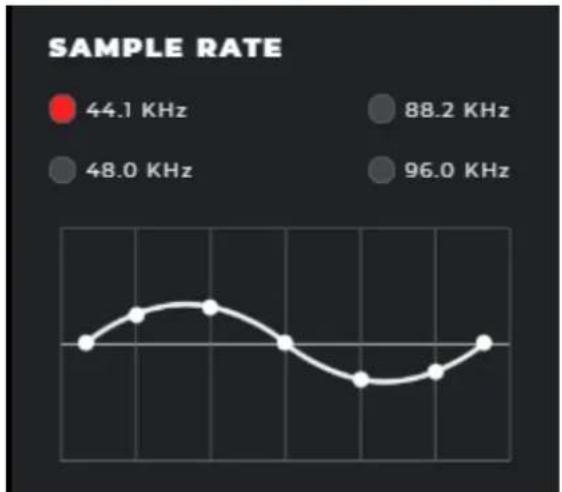
● SAMPLE RATE (Default=44.1 KHz)
line
SAMPLE RATE | Frequency | Sample Rate | | :--- | :--- | | 44.1 KHz | 44.1 | | 48.0 KHz | 48.0 | | 88.2 KHz | 88.2 | | 96.0 KHz | 96.0 |You can adjust the sample rate on the speakers here(44.1/48.0/88.2/96.0KHz).
● VOICE CLARITY (Default=Disabled)
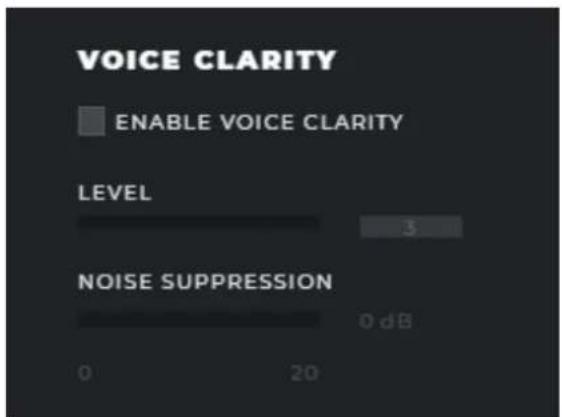
You can enable/disable the Voice Clarity of Speakers here. After enabling the Voice Clarity, you can adjust the Voice Clarity Level (0-6) and the Noise Suppression(0-20dB).
● BIT RATE (Default=16 bits)

line
BIT RATE | Time Point | Bit Rate | | :--- | :--- | | 1 | 16 | | 2 | 24 | | 3 | 16 | | 4 | 24 | | 5 | 16 | | 6 | 24 | | 7 | 16 | | 8 | 24 | | 9 | 16 | | 10 | 24 | | 11 | 16 | | 12 | 24 | | 13 | 16 | | 14 | 24 | | 15 | 16 | | 16 | 24 | | 17 | 16 | | 18 | 24 | | 19 | 16 | | 20 | 24 | | 21 | 16 | | 22 | 24 | | 23 | 16 | | 24 | 24 | The chart displays a single data series with 'Bits' values for each bit. The 'Time Point' is marked at the top left. There are no additional data series or trends visible in the image.You can adjust the bit rate on the speakers here (16/24 Bits).
● SURROUND SOUND (Default=Disabled)

You can enable/disable the 7.1 surround sound here. After enabling the 7.1 surround sound, you can choose between Music/Gaming mode and Movie mode (the 7.1 surround sound will be optimized according to the user scenario), or adjust the room size (Small/Middle/Large, the 7.1 surround sound will be optimized based on the space size).
You can also experience the 7.1 surround sound on the testing audio by clicking the TEST button.
8.2.2 MICROPHONE

● VOLUME CONTROL (Default MIC-IN=19.53dB, LOCK=Enabled, MUTE=Disabled)

bar
| Condition | Voltage (dB) | | --------- | ------------ | | MIC-IN | 19.53 | | MUTE | 19.53 |You can either adjust the overall mic volume (LOCK button=Enabled), or adjust the Left/Right side mic volume (FRONT L/R) individually (LOCK button=Disabled). You can mute/unmute the mic by enable/disable the MUTE button as well.
● SAMPLE RATE (Default=44.1 KHz)

line
SAMPLE RATE | Frequency | Sample Rate | | :--- | :--- | | 44.1 KHz | 44.1 | | 48.0 KHz | 48.0 |You can adjust the sample rate on the microphone here(44.1/48.0KHz).
- NOISE REDUCTION (Default=Disabled)

You can enable/disable the Noise Reduction on the microphone here.
● MAGIC VOICE(Default=Disabled)
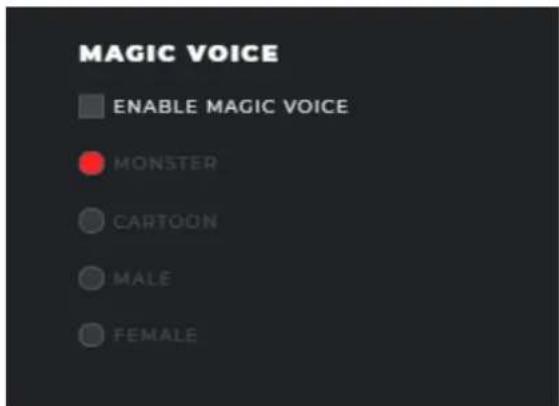
You can enable/disable the Magic Voice on the microphone here. After enabling the Magic Voice, you can change your real voice by one of the four virtual magic voices MONSTER/CARTOON/MALE/FEMALE.
8.2.3 LIGHT FX
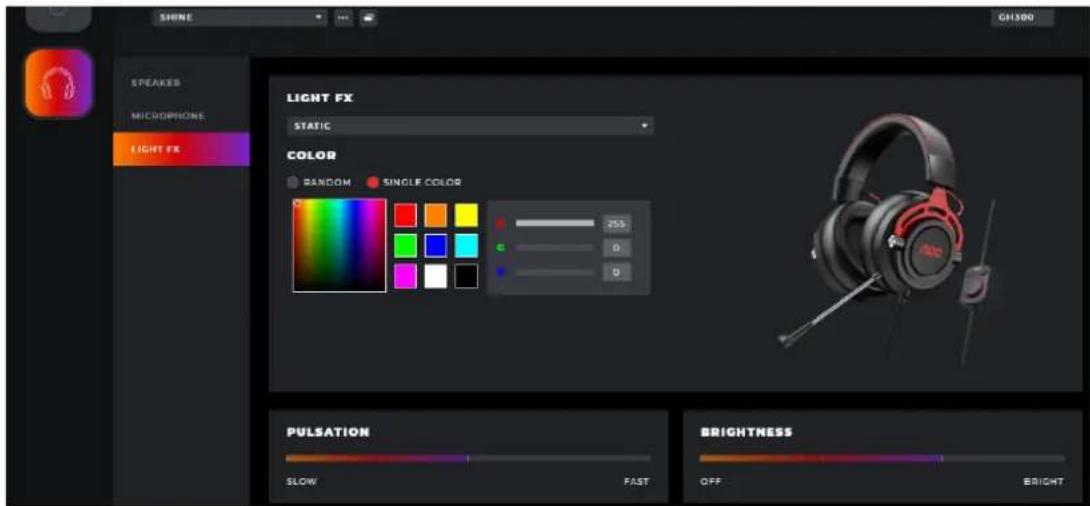
Click drop-down box to select a light effect.
COLOR
■ RANDOM: Let the computer select a random color.
■ SINGLE COLOR: A color can be selected from the color palette, color block, or a color can be defined by entering RGB values.
PULSATION
Select how fast the color will change.
● BRIGHTNESS
Select the brightness the color will glow or turn off.
9. Discovery

Discover and share profiles with others on the G-Menu network.
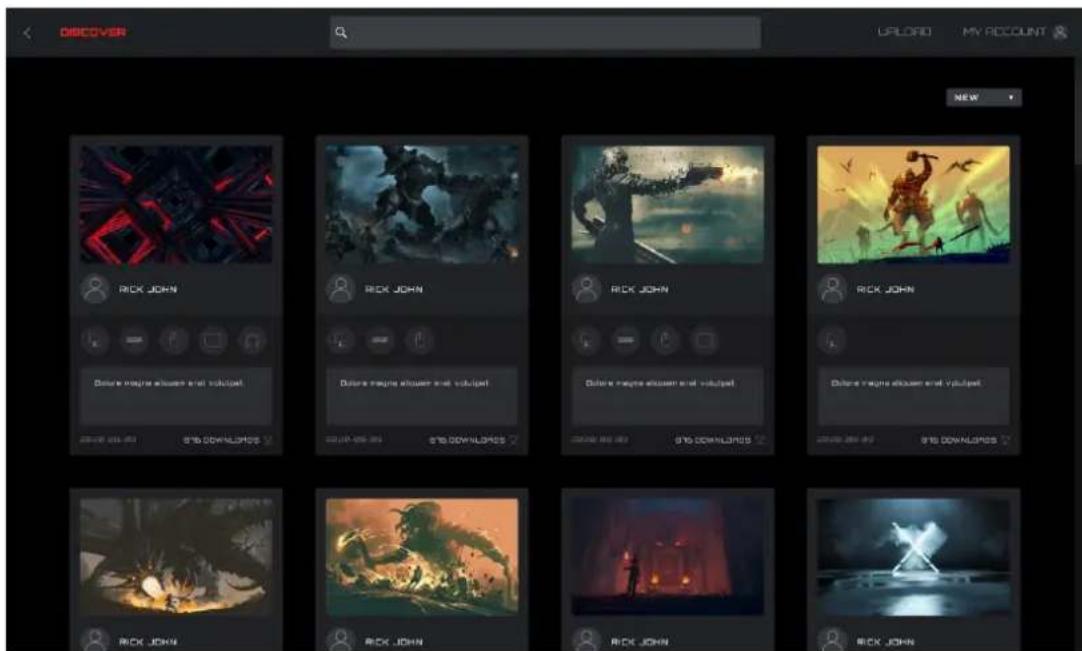
9.1 Back
Click the < (Back) button to return to the main menu.
9.2 Discover
Click the Discover button in the upper left corner to refresh the screen.
9.3 Search Bar
Click in the Search bar to find profiles containing the search term in the publisher, title or description.
9.4 Upload
Click on the Upload button to open the upload interface.
If not logged in, the login interface opens.
9.5 My Account
Displays the current account name and avatar. If the name is too long, it will be shown truncated with an ellipsis "...".
If not logged in, enter the login credentials and click the Login button. See below for creating an account.
9.6 Profiles
Select a sorting method from the drop-down menu:
■ Hot (default): Displays the most popular profiles.
■ New: Displays the newest profiles.
Profile Details
■ Cover image: Each profile comes with a cover image.
■ Publisher name: The account that created and uploaded the profile.
■ Supported devices: Select the icon to reveal the supported model details.
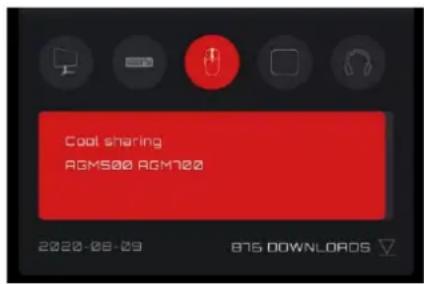
■ Profile Title and Introduction
◆ The profile’s title and description, click on the ellipsis "..." for more information. Maximum 50 characters.

■ Upload Date: When the profile was uploaded, in year-month-day (yyyy-mm-dd) format.
■ Downloads: Shows how often the profile was downloaded.
■ Download Icon: Click on the Download button to download the profile.
■ Once the profile has been downloaded, the profile will be available for configuration. Click the Configure button to enter the configuration dialog box.
- Load a Profile
■ Double-click on a profile to load a profile for use.
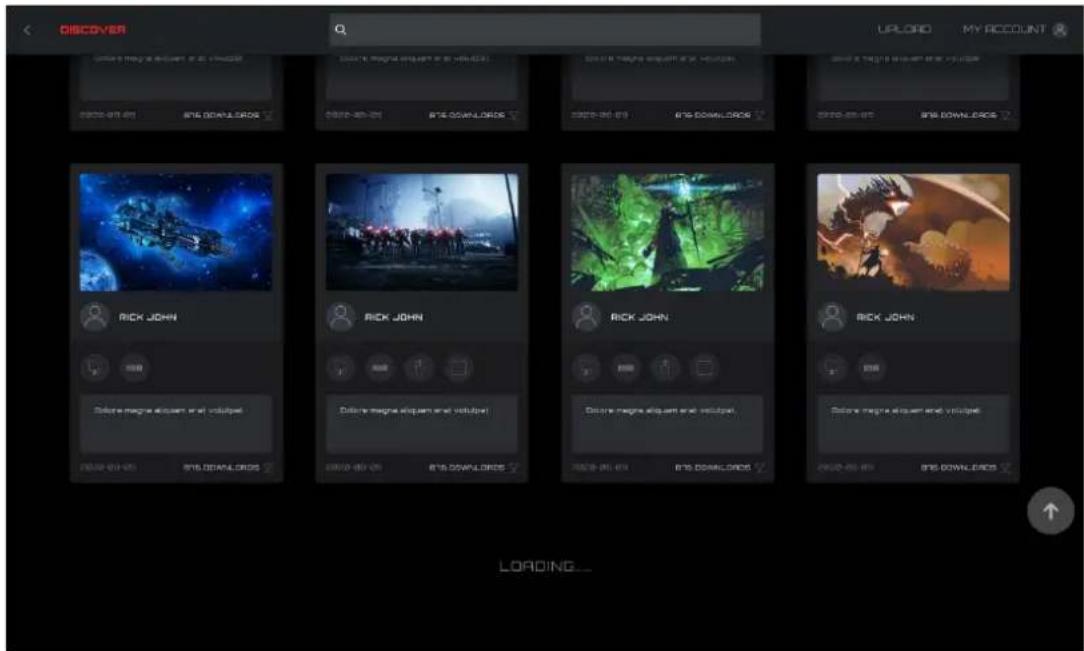
9.7 If the network cannot be reached the following error screen will appear.
- Click the Retry button to try connecting again.

9.8 Download Profile
9.8.1 Click the Download button to start downloading the selected profile.
This display will change to 'Downloading...'.

9.8.2 After the download is complete.
Click the Apply button to begin configuration.
Click the Dismiss button to configure later.

9.8.3 Abnormal situation
If the download is interrupted, the software will attempt to continue or you may re-download later.
9.9 Configure Profile
9.9.1 When the profile download is complete, click the Apply button.
Enter the Profile Configuration.
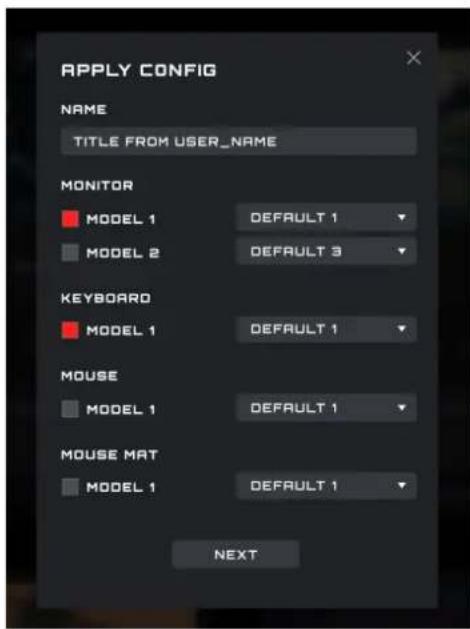
If there is currently no compatible device available an error will appear.
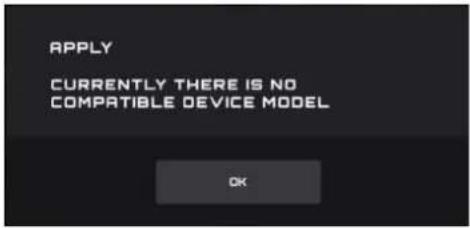
■ Click the OK button to close.
9.9.2 Configure
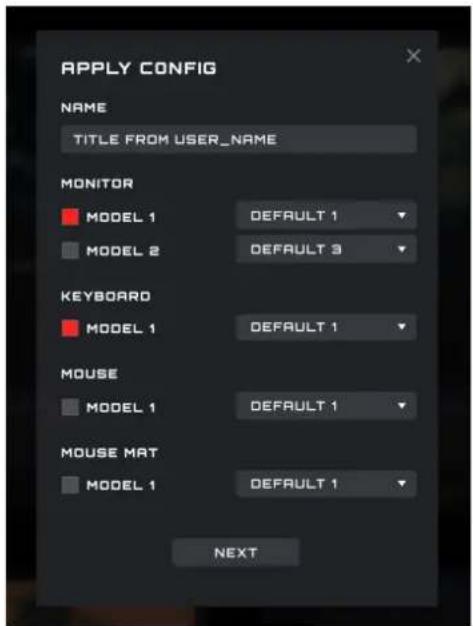
Name
Enter a name for the configuration.
● Devices
Select your specific device models.
- Profile
The current profile is displayed by default, and the selection cannot be switched.
- Close
Click the Close button to cancel the configuration.
- Next
Click the Next button to apply the current profile to your device(s).
9.10 Upload Profile
Configure a profile and upload to share with others.
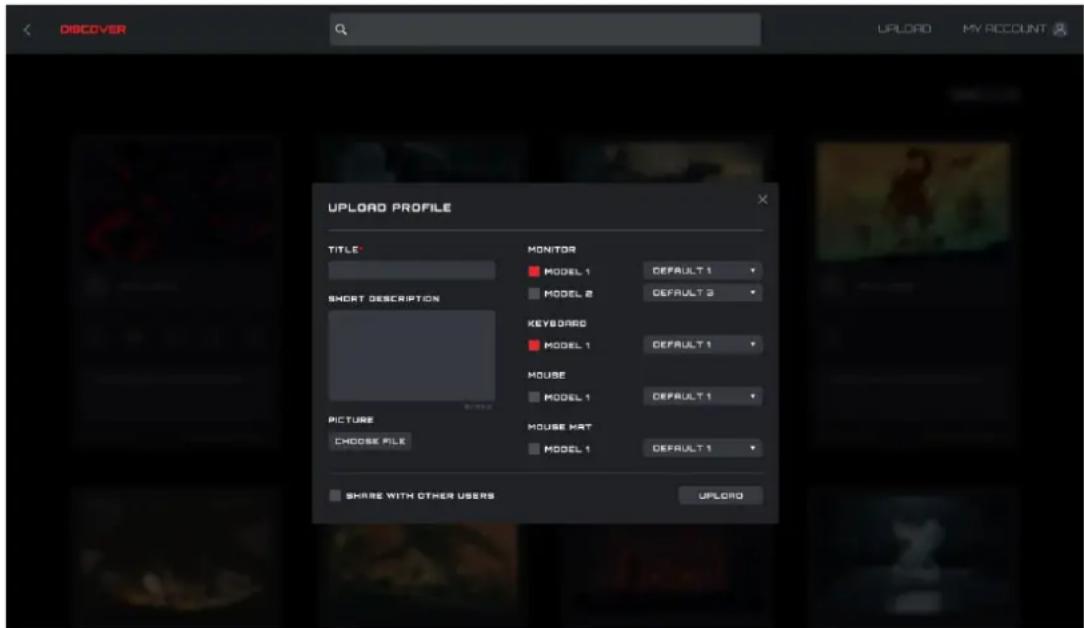
- Title
Enter a title. This is a required field.
The number of input characters is limited to 50 characters.
- Short description
Enter a description of the profile. The character limit is 300.
● Picture
Click the Choose File button to open a File Explorer dialog box to add a picture to the profile.
● Monitor, Keyboard, Mouse, and Mouse Pad Models
With the checkboxes, select the connected devices and device models for this profile.
- Select a profile
Select an existing profile to use with each device.
- Share with Other Users
Enabled: Shares this profile with the public.
Disabled: Only visible in your My Upload screen.
- Upload
Click the Upload button to upload the profile.
- Close
Click the Close button to cancel upload.
After the upload is successful, the "Upload Successfully!" pop-up dialog box will appear.
9.11 Search

Prerequisite: Click the search bar
Supports search of the publisher, profile name, and description text.
9.12 Login
Log into your account.
When not logged in, you may also click on the Upload button to enter the login interface.

Enter your Email address.
- PASSWORD
Enter your password.
- LOGIN
Click the Login button to log into your account.
● FORGOT PASSWORD
Click the Forgot Password button to reset your password. For more information, see below.

To reset your password: Enter the email address associated with your account. A recovery link will be sent.
Click the Email Me button to have the password reset email being sent to the email address input above.

Login to your email address input above and open the Password Reset email and click the Reset Password button:
AOC
You are receiving this because you (or someone else) requested the reset of the account.
Please click on the following link in 2 hours:
Reset Password
Or copy and paste the following link to open it in your browser? http://acc-gmenu.zeasn.tv/resetPassword?resetToken=10e7e0f1aa8da244789d8e3cac7e296233
If you received this in error, you can safely ignore it.
Alternatively, copy and paste the link into your browser to open it there and the link is valid for 2 hours.
After clicking the Reset Password button, the Password reset interface is displayed as below:
AOC
Reset Password
Please enter a password with no less than 6 characters.
New Password
Re-enter Your New Password
Reset Password
You can enter and confirm a password containing between 6 to 18 characters (numbers or letters).
And click the Reset Password button:
If the passwords match and pass verification, the password is changes, and the success dialog box appears.
AOC

Password has been reset successfully!
You can try to log in to your account again on the client
Possible error message: "The reset password link has expired"
AOC
The reset password link has expired
You can select "Forgot Password" in the G-menu client to receive emails again
CREATE ACCOUNT.
Click the Create Account button to create an account.
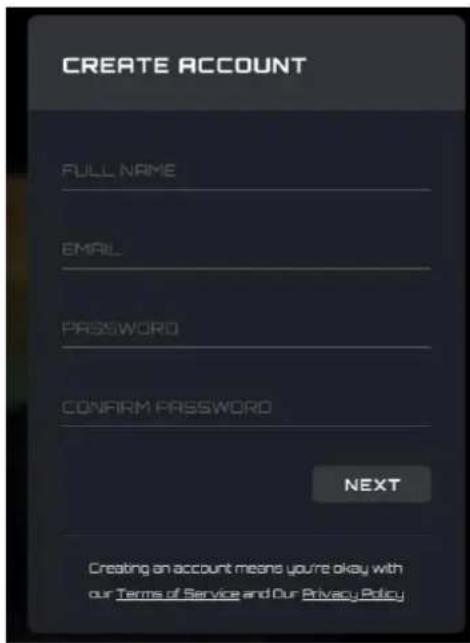
Full Name
Enter your name.
Enter your email address.
◆ Password and Confirm Password
Enter and confirm a password. From 6-18 characters (letters, digits or special characters).
Click the Next button to receive a verification code email. The code will expire in 15 minutes.
AOC
Thank you for using AOC G-Menu service.
Your Verification Code:
JKUCON
If you did not request this verification code, please rest assured to ignore the email. Others may have typed your email address by mistake. This will not have any impact on your mailbox security.
◆ Verification code confirmation
Enter the verification code you received.

Click the OK button:
If the verification code is correct, it will prompt that the account is created successfully, click the Login button to re-enter the account login interface.
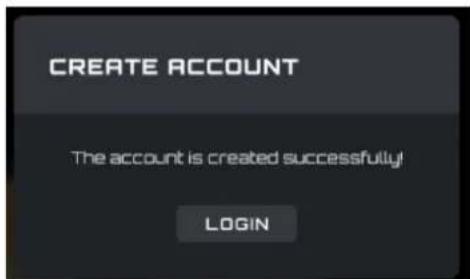
If the verification code is wrong, the error "The verification code is wrong" will appear.
If the verification code is expired, the error "Verification code has expired" will appear.
- Privacy Policy
Click the Privacy Policy button to read the privacy policy for this software.
- Terms of Service
Click the Terms of Service button to read the Terms of Service for this software.
- Back
Click in the main window to dismiss the menu.
9.13 My Account
Prerequisite: You must be logged in to access your account information.
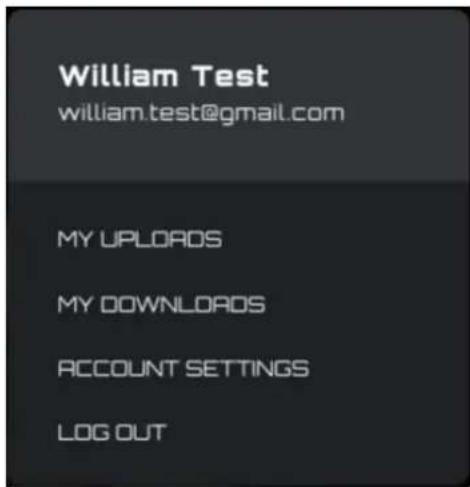
Click on the My Account button to display the account information.
Click the My Uploads button to enter the My Uploads interface.
Click the My Downloads button to enter the My Downloads interface.
Click the Account Setting button to enter the Account Settings interface.
Click the Log out button to log the account out of the device.
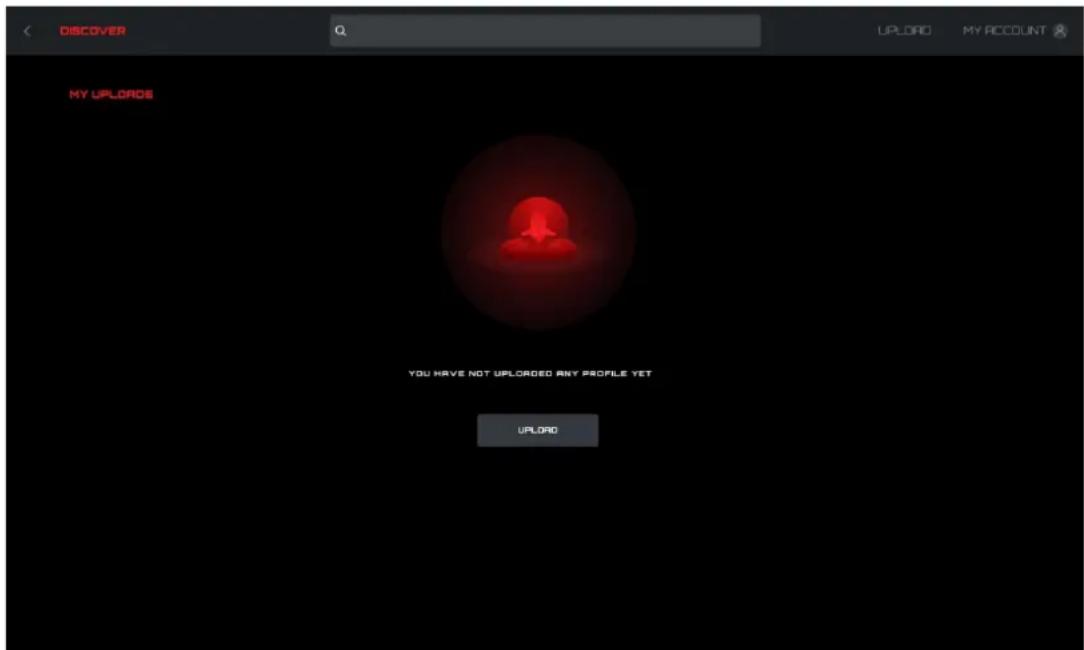
9.13.1 My uploads

Click the Discover button to return to the discover homepage.
Click the Back button to return to the main menu.
Profile content:
- Cover
● Publisher's nickname and avatar
● Profile title and introduction
● Adaptation equipment and model - Public/Private
- Release time
- Download (configure)/delete button
Click the Delete button to delete the Profile file from the discover screen.
Click the Upload button to upload a profile.
9.13.2 My downloads
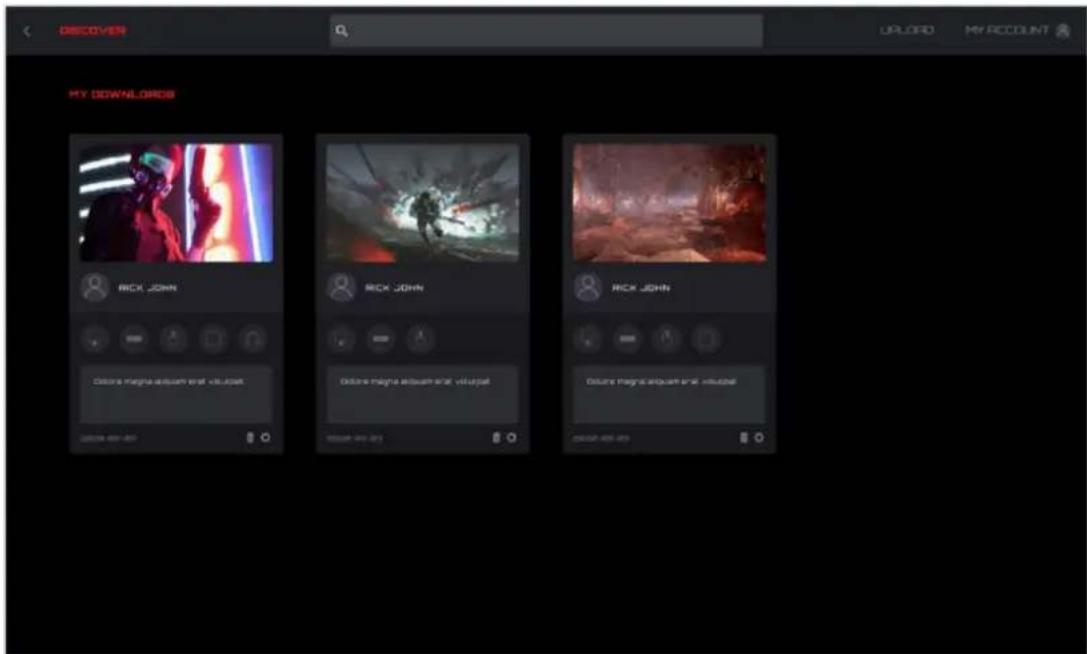
Display the profile information and download time of profiles that have been downloaded and saved locally.
Click the Configuration button to enter the configuration interface.
Click the Delete button to delete the profile file locally and return to the Profile list.
9.13.3 ACCOUNT SETTING

The Email address cannot be changed, changing the email address will create a new account.
- PROFILE PICTURE
Click to open a File Explorer dialog box to change the picture.
● CHANGE NAME

● CHANGE PASSWORD

The old password input box always obscures the password field.
New password and new password confirmation input field always obscures the password field.
Click the Cancel button to cancel the modification.
Click the Done button to confirm the modification. After verification, the new password takes effect, and the login interface is opened to log into.
- BACK
Click the Back button to return to the previous interface.
10. Macro

Create and edit macros from the Macro interface.
10.1 EDIT
Select a macro from the drop-down menu.
10.2 ADD
Click the ADD button to display the macro editing interface.

1) MACRO NAME
Enter a name into the text box. 50 characters max.
2) DELAY
Select the delay time for running the macro.
■ Recording: Follow the delays between actions exactly as recorded. Default.
■ Fixed: The trigger time between each action is fixed. Default, 20ms.
- Ignore: Do each action in order, without delay.
3) START
Click the Start button to begin recording a macro.
If a macro exists, click the Clear button to remove the actions and begin a new recording.
While recording, the Start button becomes a Stop button. During a recording, the macro setting options are disabled and only the keypress record box will be updated.
Click the Stop button to finish recording.
4) Keypress record
Provides a real-time recording of all device keypress operations.
■ Device: Show which device initiated the event, or the delay between events.
■ Action: Registers Key down, key up and delay time events.
■ Key: Which key was pressed or the duration of the delay time between events.

5) SAVE
Click the Save button to save the macro, making the macro editable.
6) CANCEL
Click the Cancel button to cancel the macro creation process.
10.3 DEL
Click the DEL button to delete the macro. Then confirm or cancel the deletion.

10.4 Import
Click the Import button to open a File Explorer dialog box.
■ Find the macro file to import.
- Click the Open button to import the macro file.
- Click the Cancel button to cancel the import, and close the dialog box.

10.5 Export
Click the Export button to open a Save As dialog box, the file name defaults to the current macro name.
Navigate to your desired export folder.

Click the Save button to export the macro file.
Click the Cancel button to cancel the export, and close the dialog box.
11. Language

natural_image
Three pixelated icons on black background: gear, minus sign, and cross (no text or symbols)Change the language for G-Menu.
- Switch Language
Displays all currently supported languages, among which the currently used language is highlighted.
Click the appropriate language button to switch languages immediately.

- Back
Click the < (Back) button to return to the previous interface.
12. Safety Guide and Maintenance
Important
For your safety, please carefully read the following guidelines for the device:
- Do not operate the device under abnormal conditions.
- Avoid looking directly at the device's tracking beam or pointing the beam at anyone's eyes. Please note that the tracking beam is not visible to the naked eye and is set as always-on.
- Do not disassemble the device (this will void the warranty) and do not attempt to operate under abnormal current loads.
- Keep the device away from liquid or moisture. Operate the device only within the indicated temperature range: 0^ C ( 32^ F) to 40^ C ( 104^ F). If the temperature of the device is too high, unplug the device to lower the temperature.
- If the RGB lighting is not running properly, or the device is not functioning, or if there is an abnormal thermal situation, troubleshoot the device by unplugging the device and plugging the device back in.
- If the troubleshooting process does not resolve the issue, unplug the device and visit www.aoc.com for support. Do not attempt to repair the device yourself.
Safety
Federal Communication Commission Interference Statement
This device complies with Part 15 of the FCC Rules. Operation is subject to the following two conditions:
(1) This device may not cause harmful interference.
(2) This device must accept any interference received, including interference that may cause undesired operation.
Note:
This device has been tested and found to comply with the limits for a Class B digital device, pursuant to Part 15 of the FCC Rules. These limits are designed to provide reasonable protection against harmful interference in a residential installation. This device generates, uses, and can radiate radio frequency energy and, if not installed and used in accordance with the instructions, may cause harmful interference to radio communications. However, there is no guarantee that interference will not occur in a particular installation. If this device does cause harmful interference to radio or television reception, which can be determined by turning the equipment off and on, the user is encouraged to try to correct the interference by one or more of the following measures:
—Reorient or relocate the receiving antenna.
—Increase the separation between the device and receiver.
—Connect the device into an outlet on a circuit different from that to which the receiver is connected.
—Consult the dealer or an experienced radio/TV technician for help.
- AOC GH300 GAMING HEADSET
- Contents
- Package Contents and System Requirements
- Package Contents
- Product Requirements
- AOC G-Menu Requirements
- Technical Support
- Technical Specifications
- Approximate Size & Weight
- Device Layout Overview
- Software Installation
- Installation Complete
- To uninstall G-Menu:
- Software Running
- Software Update
- Home Page
- Device display:
- AOC AUDIO CENTER installation (AOC GH300 Headset ONLY)
- ■ Manage Profiles
- On board memory
- Delete a profile
- Headset Settings
- SPEAKER
- MICROPHONE
- LIGHT FX
- Discovery
- Back
- Discover
- Search Bar
- Upload
- My Account
- Profiles
- Profile Details
- Abnormal situation
- Configure Profile
- Configure
- Upload Profile
- Search
- Login
- ● FORGOT PASSWORD
- AOC
- Reset Password
- New Password
- Re-enter Your New Password
- JKUCON
- My Account
- My uploads
- Profile content:
- My downloads
- ACCOUNT SETTING
- Macro
- EDIT
- ADD
- 1) MACRO NAME
- 2) DELAY
- 3) START
- 4) Keypress record
- 5) SAVE
- 6) CANCEL
- DEL
- Import
- Export
- Language
- Safety Guide and Maintenance
- Important
- Safety
- Federal Communication Commission Interference Statement
- Note:
Brand : AOC
Model : GH300
Category : Headset