
BP-50C45 - Photocopier SHARP - Free user manual and instructions
Find the device manual for free BP-50C45 SHARP in PDF.


| Product Type | Digital Multifunctional Photocopier |
| Model | BP-50C45 |
| Brand | Sharp |
| Technology | Laser / LED |
| Functions | Copy, Print, Scan, Optional Fax |
| Maximum Paper Size | A3 (11x17 inches) |
| Speed (Black & White) | Up to 50 ppm |
| Speed (Color) | Up to 45 ppm |
| Warm-up Time | Approx. 20 seconds |
| First Copy Out Time (Black) | Less than 4.0 seconds |
| Paper Trays | 2 x 500-sheet trays + 100-sheet bypass |
| Paper Output Capacity | 250-500 sheets (face down) |
| Duplex Printing | Automatic (standard) |
| Scanning Resolution | Up to 600 x 600 dpi |
| Print Resolution | 1200 x 1200 dpi equivalent |
| Dimensions (W x D x H) | 620 x 720 x 950 mm |
| Weight | Approx. 105 kg |
| Power Supply | 220-240 V, 50/60 Hz |
| Power Consumption (Max) | 1.8 kW |
| Maintenance | Clean glass and rollers regularly; replace toner and drum as needed |
| Safety | Auto shut-off, overheat protection, safety interlocks |
| Spare Parts & Repairability | Serviceable by certified technicians; common parts available |
Frequently Asked Questions - BP-50C45 SHARP
User questions about BP-50C45 SHARP
0 question about this device. Answer the ones you know or ask your own.
Ask a new question about this device
Download the instructions for your Photocopier in PDF format for free! Find your manual BP-50C45 - SHARP and take your electronic device back in hand. On this page are published all the documents necessary for the use of your device. BP-50C45 by SHARP.
USER MANUAL BP-50C45 SHARP
Functions of the machine and procedures for placing originals and loading paper

Operation of the touch screen and customisation of the user interface
COPIER
Using the copy function
PRINTER
Using the printer function
FACSIMILE
Using the fax function
SCANNER/INTERNET FAX
Using the scan / Internet fax function
DOCUMENT FILING
Storing jobs as files on the local drive
CONVENIENT USE OF THE MACHINE
Useful features of this machine
SETTING MODE
Configuring settings to make the machine easier to use
TROUBLESHOOTING
Questions and answers and care instructions
APPENDIX
About the specifications
Click to go to chapter index
HOW TO USE THIS MANUAL
Click a button below to move to the page that you wish to view.
The following explanation assumes that Adobe Reader is being used (Some buttons do not appear in the default state.).
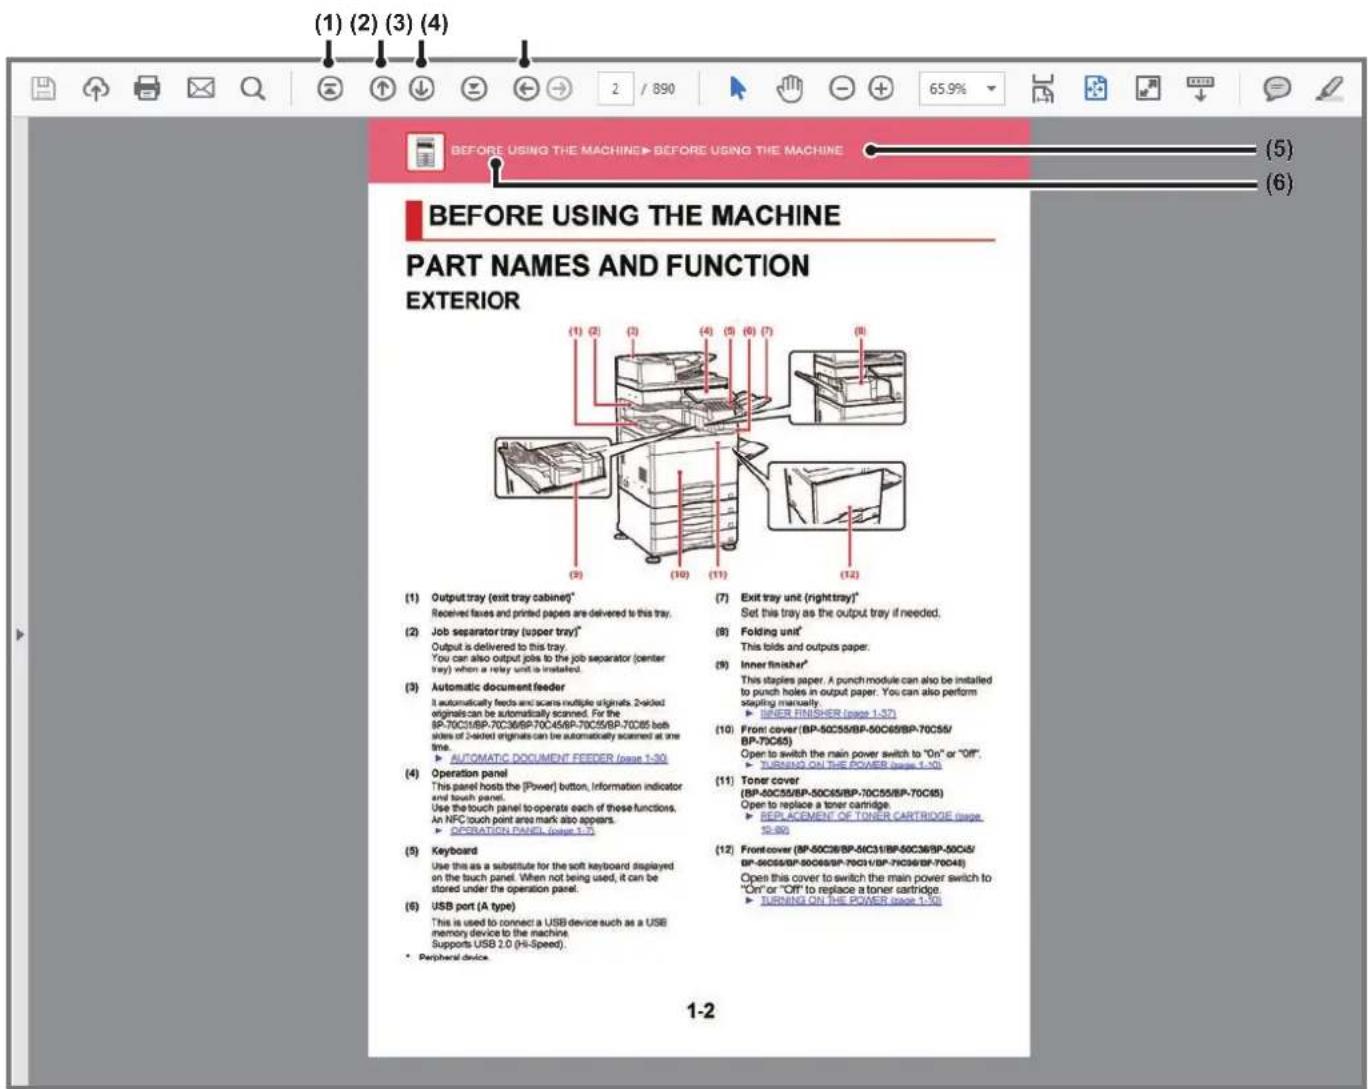
(1) Return to top page button
If an operation does not proceed as expected, click this button to start over again.
(2) Back one page button
Displays the previous page.
(3) Forward one page button
Displays the next page.
(4) Return to previously displayed page button
Displays the page that was displayed before the current page.
(5) Title button
Displays the page of the title indicated by the button.
(6) Contents button
Displays the contents of each chapter.
For example, if the current page is part of the printer chapter, the table of contents of the printer chapter appears.

If a button does not appear, refer to Adobe Reader Help to display the button.
ABOUT OPERATION MANUAL
This manual explains how to use the
BP-50C26/BP-50C31/BP-50C36/BP-50C45/BP-50C55/BP-50C65/BP-55C26/BP-60C31/BP-60C36/BP-60C45/BP-70C31/BP-70C36/BP-70C45/BP-70C55/BP-70C65 digital full colour multifunctional system.
Please note
- For information on installing the drivers and software cited in this manual, please refer to the Software Setup Guide.
- For information on your operating system, please refer to your operating system manual or the online Help function.
- The explanations of screens and procedures in a Windows environment are primarily for Windows® 10. The screens may be different depending on the version of the operating system or the software application.
- The explanations of screens and procedures for use in a macOS environment generally assume that macOS 11 is being used and a PPD driver is installed. The screens may be different depending on the version of the operating system or the software application.
- Wherever "BP-xxxx" appears in this manual, please substitute your model name for "xxxxx".
- This manual contains references to the fax function. However, please note that the fax function is not available in some countries and regions.
- Considerable care has been taken in preparing this manual. If you have any comments or concerns about the manual, please contact your dealer or nearest authorised service representative.
- This product has undergone strict quality control and inspection procedures. In the unlikely event that a defect or other problem is discovered, please contact your dealer or nearest authorised service representative.
- Aside from instances provided for by law, SHARP is not responsible for failures occurring during the use of the product or its options, or failures due to incorrect operation of the product and its options, or other failures, or for any damage that occurs due to use of the product.
Warning
- Reproduction, adaptation or translation of the contents of the manual without prior written permission is prohibited, except as allowed under copyright laws.
- All information in this manual is subject to change without notice.
Illustrations and the operation panel and touch panel shown in this manual
The peripheral devices are generally optional, however, some models include certain peripheral devices as standard equipment.
The explanations in this manual assume that a paper drawer is installed on the BP-70C65.
For some functions and procedures, the explanations assume that devices other than the above are installed.
The display screens, messages, and key names shown in the manual may differ from those on the actual machine due to product improvements and modifications.
Icons used in the manuals
The icons in the manuals indicate the following types of information:
 | This alerts you to a situation that could result in death or serious personal injury. This alerts you to a situation that could result in personal injury or damage to properties. |  | This explains how to stop or correct an operation. |
 | This alerts you to a situation where there is a risk of machine damage or failure. |  | This describes a routine work relevant to setting mode. |
 | This supplements function or operation procedure. |
BEFORE USING THE MACHINE
PART NAMES AND FUNCTION.... 1-2
EXTERIOR 1-2
INTERIOR 1-4
AUTOMATIC DOCUMENT FEEDER AND DOCUMENT
GLASS 1-5
SIDE AND BACK 1-6
OPERATION PANEL 1-7
INFORMATION INDICATOR 1-8
NAMES AND LOCATIONS OF TRAYS 1-11
THE DEFINITION OF "R" IN PAPER SIZE ..... 1-11
APPLICABLE PAPER TYPES 1-12
TRAY 1 - 4 (when a stand/550/2x550/3x550/ 550&2100
sheet paper drawer is installed)....1-15
LOADING PAPER IN THE SRA3. 1-16
LOADING ENVELOPE IN TRAY 1....1-17
TRAY 3 - 4 (when a stand/550&2100 sheet paper
drawer is installed) 1-18
LOADING PAPER IN THE LARGE-CAPACITY TRAY
(when a large capacity tray is installed) 1-20
LOADING PAPER INTO THE BYPASS TRAY....1-22
HOW TO LOAD THE PAPER....1-22
LOADING TAB PAPER 1-22
INSERTING TRANSPARENCY FILM 1-23
LOADING ENVELOPES 1-23
HOW TO PLACE THE LONG PAPER GUIDE. . . . . . . 1-27
HOW TO PLACE THE ORIGINAL
SELECTING A PROCEDURE FOR PLACING THE
ORIGINAL DEPENDING ON THE TYPE AND STATUS
OF THE ORIGINAL....1-28
DETECTABLE ORIGINAL SIZES 1-28
AUTOMATIC DOCUMENT FEEDER 1-30
PREVENTIVE LIGHT TO INDICATE ORIGINAL LEFT
BEHIND 1-32
DOCUMENT GLASS....1-34
PERIPHERAL DEVICES
PERIPHERAL DEVICES 1-36
INNER FINISHER....1-38
PART NAMES....1-38
HOW TO STAPLE MANUALLY 1-39
SUPPLIES....1-40
INNER FINISHER MAINTENANCE 1-40
FINISHER....1-42
PART NAMES. 1-42
SUPPLIES....1-43
FINISHER MAINTENANCE 1-43
FINISHER (LARGE STACKER)....1-45
PART NAMES....1-45
HOW TO STAPLE MANUALLY 1-46
SUPPLIES....1-47
FINISHER (LARGE STACKER) MAINTENANCE.....1-47
SADDLE STITCH FINISHER....1-49
PART NAMES....1-49
SUPPLIES....1-50
SADDLE STITCH FINISHER MAINTENANCE .....1-50
SADDLE STITCH FINISHER (LARGE STACKER)....1-53
PART NAMES. 1-53
HOW TO STAPLE MANUALLY 1-54
SUPPLIES....1-55
SADDLE STITCH FINISHER (LARGE STACKER)
MAINTENANCE 1-55
PUNCH MODULE 1-59
DISCARDING PUNCH WASTE 1-59
FOLDING UNIT 1-65
PART NAMES 1-65
MAINTENANCE
REGULAR MAINTENANCE 1-66
CLEANING THE DOCUMENT GLASS AND
AUTOMATIC DOCUMENT FEEDER .....1-66
CLEANING THE LASER UNIT 1-69
CLEANING THE BYPASS FEED ROLLER .....1-72
CLEANING THE PAPER FEED ROLLER. 1-73
REPLACEMENT OF TONER CARTRIDGE .....1-74
Replacement message 1-74
REPLACING THE TONER COLLECTION
CONTAINER 1-78
REPLACING THE STAMP CARTRIDGE 1-80
WHEN USING THE BP-55C26 / BP-70C31 / BP-70C36 /
BP-70C45 / BP-70C55 / BP-70C65....1-80
BEFORE USING THE MACHINE
PART NAMES AND FUNCTION EXTERIOR

(1) Output tray (exit tray cabinet) *1
Received faxes and printed papers are delivered to this tray.
(2) Job separator tray (upper tray) *2
Output is delivered to this tray.
You can also output jobs to the job separator (centre tray) when a relay unit is installed.
(3) Automatic document feeder
It automatically feeds and scans multiple originals. 2-sided originals can be automatically scanned. For the
BP-55C26/BP-70C31/BP-70C36/BP-70C45/BP-70C55/BP-70C65 both sides of 2-sided originals can be automatically scanned at one time.
AUTOMATIC DOCUMENT FEEDER (page 1-30)
(4) Operation panel
This panel hosts the [Power] button, Information indicator and touch panel.
Use the touch panel to operate each of these functions. There is also an NFC touch point area mark.
▶ OPERATION PANEL(page 1-7)
(5) Keyboard *3
Use this as a substitute for the soft keyboard displayed on the touch panel. When not being used, it can be stored under the operation panel.
(6) USB port (A type)
This is used to connect a USB device such as a USB memory device to the machine.
Supports USB 2.0 (Hi-Speed).
(7) Exit tray unit (right tray) *2
Set this tray as the output tray if needed.
(8) Folding unit *2
This folds and outputs paper.
▶ FOLDING UNIT (page 1-65)
(9) Inner finisher *2
This staples paper. A punch module can also be installed to punch holes in output paper. You can also perform stapling manually.
▶ INNER FINISHER (page 1-38)
(10) Front cover
(BP-50C55/BP-50C65/BP-70C55/BP-70C65)
Open to switch the main power switch to "On" or "Off".
▶ TURNING ON THE POWER (page 1-10)
(11) Toner cover
(BP-50C55/BP-50C65/BP-70C55/BP-70C65)
Open to replace a toner cartridge.
REPLACEMENT OF TONER CARTRIDGE (page 1-74)
(12) Front cover
(BP-50C26/BP-50C31/BP-50C36/BP-50C45/BP-50C55/BP-50C65/BP-55C26/BP-60C31/BP-60C36/BP-60C45/BP-70C31/BP-70C36/BP-70C45)
Open this cover to switch the main power switch to "On" or "Off" to replace a toner cartridge.
▶ TURNING ON THE POWER (page 1-10)
*1 Depending on the country, region or model, it may be installed as standard or may be a peripheral device. Contact your dealer or nearest authorised service representative.
*2 Peripheral device.
*3 Equipped standard or not available in some countries and regions. Not available on some models. Contact your dealer or nearest authorised service representative.

(13) Saddle Stitch Finisher (large stacker) *1
This staples and folds paper.
A punch module can also be installed to punch holes in output paper.
You can also perform stapling manually.
▶ SADDLE STITCH FINISHER (LARGE STACKER) (page 1-53)
(14) Paper pass unit *1
Relay between the machine and the finisher, finisher (large stacker), saddle stitch finisher or saddle stitch finisher (large stacker).
(15) Motion sensor *2
This sensor detects the presence of a person that approaches the machine, and automatically wakes the machine from sleep mode. (Motion Sensor Mode Only)
(16) Utility table *2
You can use this as a work platform, or temporarily place originals or a mobile device.

- Do not place anything that weighs more than 5kg or otherwise apply a load.
- Do not place a container that contains water or other liquid. Risk of fire and electrical shock if the liquid spills and enters the machine.
- Working on the table while the machine is in operation may cause poor image quality or other problems.
(17) Bypass tray
Use this tray to feed paper manually. When loading paper larger than A4R or 8-1/2" x 11"R, pull out the extension guide. ▶ LOADING PAPER INTO THE BYPASS TRAY (page 1-22)
(18) Tray 5 (when a large capacity tray is installed) *1
Store paper in this tray. ▶ LOADING PAPER IN THE LARGE-CAPACITY TRAY (when a large capacity tray is installed) (page 1-20)
(19) Finisher *1
This staples paper. A punch module can also be installed to punch holes in output paper. ▶ FINISHER (page 1-42)
(20) Saddle stitch finisher *1
This staples and folds paper. A punch module can also be installed to punch holes in output paper. ▶ SADDLE STITCH FINISHER (page 1-49)
*1 Peripheral device. Equipped standard or not available in some countries and regions. Not available on some models. Contact your dealer or nearest authorised service representative. *2 This device can only be equipped on the BP-60C31/BP-60C36/BP-60C45/BP-70C31/BP-70C36/BP-70C45/BP-70C55/BP-70C65.
INTERIOR

(9)(2) (10) (11)(3) (12)
(1) Main power switch
Use this switch to turn on the power for the machine. When using the fax or Internet fax functions, always keep this switch in the "position."
▶ TURNING ON THE POWER (page 1-10)
(2) Toner cartridge
This cartridge contains toner. When the toner in a cartridge runs out, replace it with a new one.
REPLACEMENT OF TONER CARTRIDGE (page 1-74)
(3) Toner collection container
This container collects excess toner that remains after printing.
REPLACING THE TONER COLLECTION CONTAINER (page 1-78)

A service technician collects replaced toner collection containers.
(4) Fusing unit
Heat is applied here to fuse the transferred image onto the paper.

The fusing unit is hot.
Take care not to burn yourself when removing a misfeed.
(5) Transfer belt
During full colour printing, the toner images of the four colours on the photoconductive drums are combined together on the transfer belt.
During black and white printing, only the black toner image is transferred onto the transfer belt.

Do not touch or damage the transfer belt. This may cause a defective image.
(6) Right side cover release lever
To remove a paper misfeed, pull and hold this lever up to open the right side cover.
(7) Right side cover
Open this cover to remove a paper misfeed.
(8) Paper reversing section cover
This unit is used for reversing paper when 2-sided printing is performed. Open this cover to remove a paper misfeed.
(9) Toner collection container release button
Press this button when you need to release the Toner collection container lock to replace the Toner collection container.
REPLACING THE TONER COLLECTION CONTAINER (page 1-78)
(10) Handle
Pull this out and grasp it when moving the machine.
(11) Stand/550/2x550/3x550/550&2100 sheet paper drawer right-side cover
Open this to remove a paper misfeed in tray 2, 3 and 4.
(12) Paper tray right side cover
Open this to remove a paper misfeed in tray 1.
AUTOMATIC DOCUMENT FEEDER AND DOCUMENT GLASS
BP-50C26/BP-50C31/BP-50C36/BP-50C45/BP-50C55/BP-50C65/BP-60C31/BP-60C36/BP-60C45
BP-55C26/BP-70C31/BP-70C36/BP-70C45/BP-70C55/BP-70C65

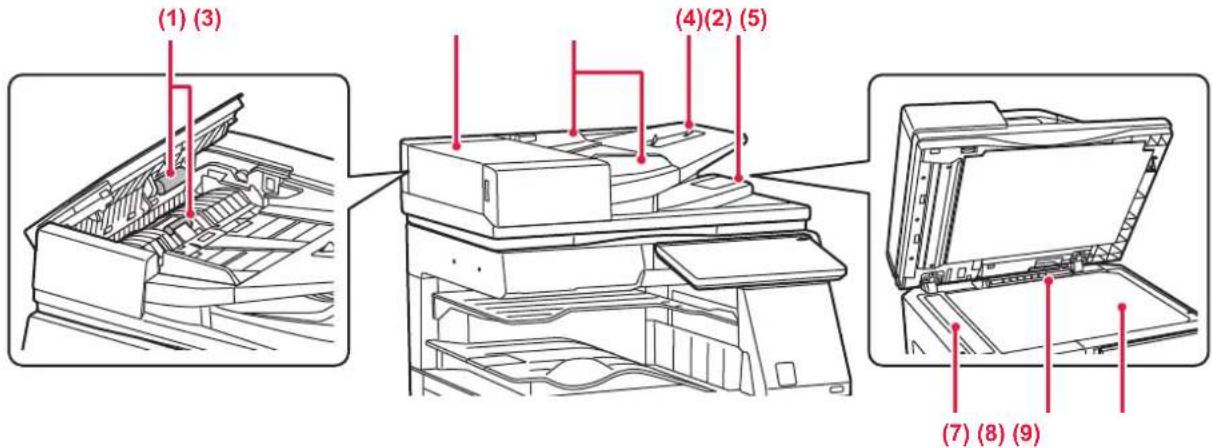
(1) Paper feed roller
This roller rotates to automatically feed the original.
(2) Document feeding cover
Open this cover to remove an original misfeed.
This cover is also opened to clean the paper feed roller.
▶ CLEANING THE PAPER FEED ROLLER (page 1-73)
(3) Original guides
These guides help ensure that the original is scanned correctly.
Adjust the guides to the width of the original.
(4) Document feeder tray
Place the original.
Place the original with the print side facing up.
AUTOMATIC DOCUMENT FEEDER (page 1-30)
(5) Original exit tray
The original is discharged to this tray after scanning.
ORIGINAL SETTING INDICATOR (page 1-33)
(6) Original setting indicator
This indicator lights when the document is correctly loaded on the document feeder tray.
ORIGINAL SETTING INDICATOR (page 1-33)
(7) Scanning area
Originals placed in the automatic document feeder are scanned here.
▶ CLEANING THE DOCUMENT GLASS AND AUTOMATIC DOCUMENT FEEDER (page 1-66)
(8) Original size detector
This unit detects the size of an original placed on the document glass.
▶ DOCUMENT GLASS (page 1-34)
(9) Document glass
If you want to scan books or other thick originals that cannot be fed through the automatic document feeder, place them on this glass.
▶ DOCUMENT GLASS (page 1-34)
SIDE AND BACK

(1) External phone socket (TEL) *
When the fax function of the machine is used, an external phone can be connected to this socket.
(2) Telephone line socket (LINE)
When the fax function of the machine is used, the telephone line is connected to this socket.
(3) USB port (A type)
This is used to connect a USB device such as a USB memory device to the machine.
Supports USB 2.0 (Hi-Speed) and USB3.0 (SuperSpeed).
* Peripheral device
(4) USB port (B type)
The machine does not use this connector.
(5) LAN connector
Connect the LAN cable to this connector when the machine is used on a network. Use a shielded LAN cable.
(6) Power plug
OPERATION PANEL
This section describes the names and functions of the respective parts of the operation panel.

(1) Information indicator
This indicator illuminates when the power to the machine is turned on, and when a user logs in to the machine.
▶ INFORMATION INDICATOR (page 1-8)
(2) Touch panel
Messages and keys appear on the touch panel display. Operate the machine by directly tapping the displayed keys.
TOUCH PANEL (page 2-2)
(3) Main power indicator
This indicator lights up when the machine's main power switch is in the " " position.
Blinks blue during the time that the [Power] button does not operate immediately after the main power switch is switched on.
This indicator will also blink blue when receiving printer data.
This indicator blinks yellow during Auto Power Shut-Off mode.
▶ TURNING ON THE POWER (page 1-10)
(4) [Power] button
Use this button to turn the machine's power on and off.
▶ TURNING ON THE POWER (page 1-10)
(5) NFC touch point area
You can easily connect a mobile device to the machine by touching the mobile device.
▶ CONNECTING BY NFC (page 8-37)

You can change the angle of the operation panel.
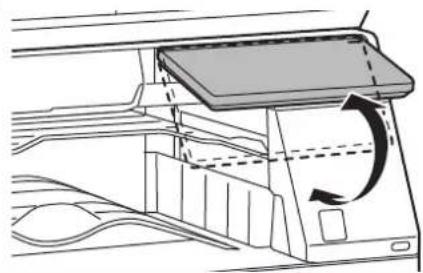

• The touch panel is a capacitance type. - Use your finger to operate the touch panel. If you operate it with a pen, it may not work properly. Also, be aware that precious metals such as accessories may cause unintended touch movements. - Do not touch the touch panel while the unit is starting up. If you touch the touch panel, it may not operate normally. Example:
Turn on the main power switch, press the [Power] button, and wait until the home screen is displayed.
Returning from auto power shutoff.
INFORMATION INDICATOR
When turning the machine power ON/OFF; at user authentication when the user has logged in using IC card or NFC; when connecting USB memory to the machine; when starting a job on the machine control panel; or during image adjustment or when adding toner; a fax is being received or an error has occurred in the machine, the LED lights blue, white and orange in response to the request/operation from the user to communicate to the user the machine status.

This light is used to communicate with users in front of the machine, therefore this is not lit as a result of remote operations.
Lighting patterns
Lighting patterns differ depending on status.
| Lighting colour | Lighting patterns | Status |
| Blue | Lighting pattern 1 | When the power is turned on by user operation or motion sensor, when the power is turned off by user operation, when the power is restored from sleep mode*1, when the power is shifted to sleep mode*1, and when a job (copy, scan, fax) is started by the operation panel. |
| Lighting pattern 2 | During user authentication, at user login using an IC card or NFCInsertion of USB memory into the machine | |
| Lighting pattern 3 | When users are made to wait, during image quality adjustment or adding toner | |
| White | Blinks | A fax is being received. when the job separator (upper tray) or exit tray unit (right tray) is used for output, this blinks until the output is removed. |
| Orange Solidly *2 | Errors that do not stop machine operation, such as replacement timing of the toner collection container. | |
| Errors that stop machine operation, such as misfeeds and out of toner. | ||
*1 The information lamp lights up when the power is turned on or off directly by the user, or when the machine is restored from sleep mode. The information lamp does not light up when the printer is not operated directly by the user, such as when receiving a print job or when the scheduled auto power shut-off is turned on or off. *2 If the lighted state and the blinking state overlap, the blinking state takes priority.
Lighting pattern 1
After lighting sporadically, all lights come on together, and then turn off.

Lighting pattern 2
The centre light comes on, the left and right lights come on, then the centre light turns off.

Lighting pattern 3
Lights come on in succession, from the left lamp to the right lamp.


If there are multiple lighting patterns for the information indicator, then that which is later has priority. The previous information indicator lighting pattern turns off, then the information indicator lights in accordance with the later generated lighting pattern.
However, if lighting pattern 3 and another lighting pattern overlap, then lighting pattern 3 will have priority, and the other pattern will not be received until lighting pattern 3 is completed.
This section describes how to turn on/off the machine's power and how to restart the machine.
Operate two power switches: the main power switch inside the front cover, located in the lower left corner, and the [Power] button on the operation panel.
- Turn the main power switch to the "1" position.
- When the main power indicator lights in blue, press the [Power] button.
After pressing the [Power] button, tap the [Turn off] key on the touch.
To turn off the power for a long time, press the [Power] button to turn off the power, and after the screen display on the operation panel disappears, set the main power switch to the "↑" position.
RESTART THE MACHINE
Press the [Power] button to turn off the power, and then tap the [Turn off] key on the touch panel. After that, press the [Power] button again to turn on the power.
![Main power indicator [Power] button MAIN POWER](/content/2026/06/1367452/images/49cab86927818cf64df87169898bbbb6cb3b20b72c4217790d2bc1fe57432451.jpg)
Main power switch

- When turning off the main power switch, be sure to press the [Power] button on the operation panel, tap the [Turn off] key on the touch panel, and then set the main power switch to the "off" position.
- In a sudden case of main power outage, turn the power for the machine back on and then turn it off in the correct order. If the machine is left for a long time with the main power having been turned off prior to the [Power] button being turned off, abnormal noises, degraded image quality or other problems may result.
- Turn off both the [Power] button and the main power switch and unplug the power cord if you suspect a machine failure, if there is a bad thunderstorm nearby, or when you are moving the machine.

- When using the fax or Internet fax function, always keep the main power switch in the " | " position.
- If the fax function will be used, and in particular if reception or timer transmission will take place at night, do not turn the main power off.
- In order for some settings to take effect, the machine must be restarted. In some states of the machine, restarting with the [Power] button may not make the settings take effect. In this case, turn off the main power switch and then turn it on again.
LOADING PAPER
IMPORTANT POINTS ABOUT PAPER
NAMES AND LOCATIONS OF TRAYS

THE DEFINITION OF "R" IN PAPER SIZE
To indicate the landscape setting, "R" is added to the end of the name of a paper size enabled for both landscape and portrait settings.
| Paper that can be set either in the portrait or landscape orientation Paper that can only be set in the landscape orientation | ||
| A4, B5, 8-1/2" x 11" | SRA3, A3W, A3, B4, SRA4, 12" x 18", 11" x 17", 8-1/2" x 14", 8-1/2" x 13" | |
Paper set in the landscape orientation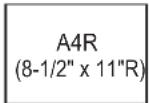 | Paper set in the portrait orientation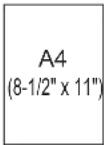 | Can be placed only in the landscape orientation |
APPLICABLE PAPER TYPES
This section describes paper types that can be used and those that cannot be used.
All types of paper other than plain paper are referred to as special media.

- Various types of paper are commercially available, some of which cannot be used on the machine. Before using any paper, consult the dealer or nearest authorised service representative.
- The image quality and toner fusibility of paper may change due to ambient conditions, operating conditions, and paper characteristics, resulting in image quality inferior to that of Sharp standard paper. Before using any paper, consult the dealer or nearest authorised service representative.
- The use of non-recommended or non-usable paper may result in skewed feeding, misfeeds, poor toner fusing (the toner does not adhere to the paper well and can be rubbed off), or machine failure.
- The use of non-recommended paper may result in misfeeds or poor image quality. Before using non-recommended paper, check whether printing can be performed properly.
Useable paper
Specifications of plain paper, heavy paper and thin paper
| Plain Paper* | Plain Paper 1 | 60 g/m2 to 89 g/m2 (16 lbs. bond to 24 lbs. bond) |
| Plain Paper 2 | 90 g/m2 to 105 g/m2 (24 lbs. bond to 28 lbs. bond) | |
| Heavy Paper | Heavy Paper 1 | 106 g/m2 to 176 g/m2 (28 lbs. bond to 65 lbs. cover) |
| Heavy Paper 2 | 177 g/m2 to 220 g/m2 (65 lbs. cover to 80 lbs. cover) | |
| Heavy Paper 3 | 221 g/m2 to 256 g/m2 (80 lbs. cover to 140 lbs. index) | |
| Heavy Paper 4 | 257 g/m2 to 300 g/m2 (140 lbs. index to 110 lbs. cover) | |
| Thin Paper 55 g/m | 2 to 59 g/m2 (13 lbs to 16 lbs) | |
* If the paper that you normally use is Recycled, Pre-Punched, Pre-Printed, Letter Head, Colour, or User Type 1 to 7, set an appropriate paper weight in "Settings" – [System Settings] → [Common Settings] → [Paper Settings] → [Paper Tray Settings] → [Paper Weight].

- The category of "Useable paper" is based on Sharp standard paper.
- If non-recommended paper is used, print quality may be affected even if a paper type setting that accords with the above paper divisions is selected. In that case, try setting the paper type to a type that is slightly heavier or slightly lighter than normal. For more information, consult the dealer or nearest authorised service representative.
- For paper specifications, see the specifications in the "Start Guide". • Recycled paper, coloured paper and pre-punched paper must meet the same specifications as plain paper. Before using any paper, consult the dealer or nearest authorised service representative.
- If the paper that was output is significantly curled, remove the paper from the cassette, turn the paper over so it is face down, and resume use.
Paper that can be used for the fax function
A5, A5R, B5, B5R, A4, A4R, B4, A3, 8-1/2" x 11", 8-1/2" x 11"R, 8-1/2" x 13", 8-1/2" x 13-2/5", 8-1/2" x 13-1/2" (5-1/2" x 8-1/2"R, 8-1/2" x 11", 8-1/2" x 11"R, 8-1/2" x 13", 8-1/2" x 13-2/5", 8-1/2" x 14", 11" x 17", A4, A4R)
Specifications of paper that can be used for two-sided printing
| Paper Type | Plain, Recycled, Colour, Letter Head, Pre-Printed, Punched, Heavy Paper (106 g/m2(28 lbs. bond) to 256 g/m2(140 lbs. index)) |
| Paper Size | SRA3, A3W, A3, B4, SRA4, A4, A4R, B5, B5R, A5R, 12" x 18", 11" x 17", 8-1/2" x 14", 8-1/2" x 13-1/2", 8-1/2" x 13-2/5", 8-1/2" x 13", 8-1/2" x 11", 8-1/2" x 11"R, 5-1/2" x 8-1/2"R |
Types of paper that can be set in each tray

- For detailed information on the sizes and types of paper that can be loaded into each tray of the machine, see "SPECIFICATIONS" in the "Start Guide" and "Paper Tray Settings (page 9-133)". Recycled paper, coloured paper and pre-punched paper must meet the same specifications as plain paper. Before using any paper, consult the dealer or nearest authorised service representative.
| Tray 1 Tray 2 | *1Tray 3+2 Tray 4+3 | Tray 3Tray 4+4 | Trays 5+5 | Bypass tray | |
| Plain Paper 1*6 | Permitted | Permitted | Permitted | Permitted | Permitted |
| Plain Paper 2*6 | Permitted | Permitted | Permitted | Permitted | Permitted |
| Heavy Paper 1*7 | Permitted | Permitted | - | Permitted | Permitted |
| Heavy Paper 2*7 | Permitted | Permitted | - | Permitted | Permitted |
| Heavy Paper 3*7 | Permitted Permitted | -- Permitted | |||
| Heavy Paper 4*7 | Permitted Permitted | -- Permitted | |||
| Embossed - - - - Permitted | |||||
| Thin Paper*8 | - - - - Permitted | ||||
| Pre-Printed | Permitted | Permitted | Permitted | Permitted | Permitted |
| Recycle Paper | Permitted | Permitted | Permitted | Permitted | Permitted |
| Letter Head | Permitted | Permitted | Permitted | Permitted | Permitted |
| Pre-Punched | Permitted | Permitted | Permitted | Permitted | Permitted |
| Colour | Permitted | Permitted | Permitted | Permitted | Permitted |
| Labels | - - - - Permitted | ||||
| Glossy Paper | - - - - Permitted | ||||
| Transparency | - - - - Permitted | ||||
| Tab Paper | - - - - Permitted | ||||
| Envelope*9 | Permitted*10 | - - - Permitted | |||
*1 When a stand/550 sheet paper drawer/stand/2x550 sheet paper drawer/stand/3x550 sheet paper drawer/stand/550&2100 sheet paper drawer is installed.
*2 When a stand/2x550/3x550 sheet paper drawer is installed
*3 When a stand/3x550 sheet paper drawer is installed
*4 When a stand/550&2100 sheet paper drawer is installed
*5 When a large capacity tray is installed.
*6 "Plain Paper 1" is plain paper 60 to 89 g/m² (16 to 24 lbs. bond), "Plain Paper 2" is plain paper 90 to 105 g/m² (24 to 28 lbs. bond).
*7 "Heavy Paper 1" is heavy paper up to 176 g/m² (65 lbs. cover), "Heavy Paper 2" is heavy paper up to 220 g/m² (80 lbs. cover), "Heavy Paper 3" is heavy paper up to 256 g/m² (140 lbs. index), and "Heavy Paper 4" is heavy paper up to 300 g/m² (110 lbs. cover).
*8 Thin paper of A6R size cannot be used.
*9 For envelopes that can be used, see "Paper Tray Settings (page 9-133)".
*10 Some envelopes may not be usable due to the shape of the flap or the type of envelope. Depending on the countries or regions, envelopes may not be available.
Setting orientation of the print side
The setting orientation varies for the print side of paper, depending on the tray used. For "Letter Head" and "Pre-Printed", set the paper in the reverse orientation.
Place with the print side facing the direction indicated below.
| Tray | In normal status | With letter head or pre-printed paper set |
| Trays 1 - 4 Facing up Facing down | ||
| Bypass, Tray 5 Facing down Facing up |

When [Disabling of Duplex] is set for "Letter Head" or "Pre-Printed", set the print side in the same orientation as for the ordinary operation.
Paper that cannot be used
- Special media for an ink jet printer (fine paper, glossy paper, glossy film, etc.) • Carbon paper or thermal paper
- Pasted paper
- Paper with clips • Paper with fold marks
- Torn paper
- Oil-feed transparency film
- Thin paper less than 55 g/m² (15 lbs)
- Heavy paper as thick as 300 g/m² (110 lbs. cover) over
- Irregularly shaped paper
- Stapled paper
- Damp paper
- Curled paper
- Paper with a wave-like pattern due to moisture absorption
- Paper with creases
- Paper with dust
Paper whose print side or reverse side has already been printed on by a printer or multifunction device.
Non-recommended paper
- Iron-on transfer paper
- Perforated paper
TRAY 1 - 4 (when a stand/550/2x550/3x550/550&2100 sheet paper drawer is installed)
A maximum of 550 sheets of paper from size A6R to SRA3 (5-1/2" x 8-1/2" R to 12" x 18") can be loaded into tray 1. A maximum of 550 sheets of paper from size A5 to SRA3 (5-1/2" x 8-1/2" R to 12" x 18") can be loaded into trays 2 to 4. Envelopes can be loaded up to 50 sheets or the height of the indicator line, or up to 200 sheets for 106 g/m² to 220 g/m² (28 lbs. bond to 80 lbs. cover) heavy paper and up to 100 sheets for 221 g/m² to 300 g/m² (80 lbs. cover to 110 lbs. cover) heavy paper in Tray 1.

- If you loaded paper of a different type or size from the paper previously loaded, be sure to check the settings in "Settings (administrator)". Incorrect setting affects automatic paper selection action. It may cause print failure, printing on paper of a wrong size or type, or paper misfeeds.
- Depending on the countries or regions, envelopes may not be available.

Do not place heavy objects on the tray or press down on the tray.
1

Pull out the paper tray.
Gently pull the tray out until it stops. To load paper, go to step 3. To load a different size of paper, go to the next step.

Pull the handle until the lock is released.
2

Adjust guide plates A and B to match the longitudinal and transversal dimensions of the paper to be loaded.
The guide plates A and B are slidable. Squeeze the separator plate lever and slide to the desired paper size. Adjust to the non-standard paper size so that the paper will not be too loose or too tight.
3

Fan the paper.
Fan the paper well before loading it. If the paper is not fanned, multiple sheets may feed at once and cause a misfeed.
4

Insert the paper into the tray.
- Load the paper with the print side facing up. The stack must not be higher than the indicator line (maximum of 550 sheets).
- Fan the paper well before loading it. If the paper is fed while overlapping, it may cause a paper jam.
- After loading the paper, close the guides to the paper width not to leave the gap from the guides A and B. Do not load the paper as shown below.

5

Close the tray slowly.
Push the tray into the machine slowly.
Forcefully inserting the paper may cause skewed feeding and paper misfeeds.
LOADING PAPER IN THE SRA3
When loading paper in the SRA3, follow the steps below to move the control plate auxiliary block.
1

Remove the control plate auxiliary block.
2
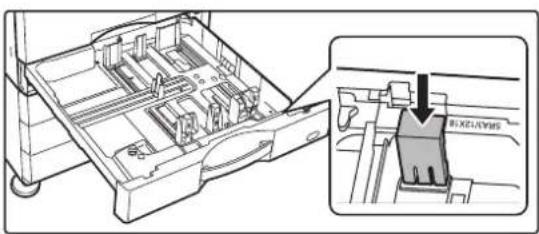
Attach the control plate auxiliary block that was removed in step 1.
LOADING ENVELOPE IN TRAY 1
Load the paper with the copy and print side facing up. The diagram shows an example of printing on the front side.
The maximum number of sheets (50) may not exceed the indicator line.
Envelopes with triangular flaps cannot be used in tray 1.

Cautions when placing envelopes
- Removing curling
- Ensure these are flat, containing no air
- Ensure the four folded edges are pressed flat (for items with flaps, three edges)
- Align on a flat surface

- Before printing envelopes in tray 1, print a trial print to check the results.
- If the envelope is not folded tightly, is warped or bent, it may cause misfeeds.
TRAY 3 - 4 (when a stand/550&2100 sheet paper drawer is installed)
A maximum of 1200 sheets of A4 (8-1/2" × 11") paper can be loaded into tray 3 (left).
A maximum of 900 sheets of A4 (8-1/2" × 11") and B5 paper can be loaded into tray 4 (right).

If you loaded paper of a different type or size from the paper previously loaded, be sure to check the settings in "Settings". An incorrect setting may cause print failure, printing on paper of an incorrect size, or type or paper misfeeds.

To check the type and size of paper:
[Tray Settings] in the home screen or in "Settings", select [Status] → [Machine Identification] → [Paper Input Tray Status] → [Paper Tray Settings].

When the tray is open, do not place heavy objects on the tray or press down on the tray.
1
Tray 3

Tray 4
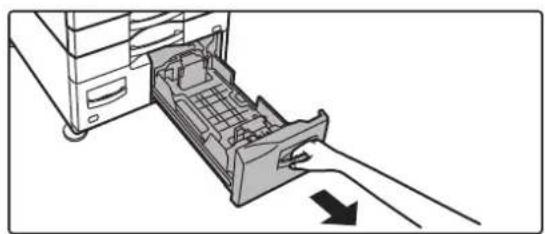
Pull out the paper tray.
Gently pull the tray out until it stops.

Pull the handle until the lock is released.

Fan the paper.
Fan the paper well before loading it. If the paper is not fanned, multiple sheets may feed at once and cause a misfeed.
Tray 3
Tray 4
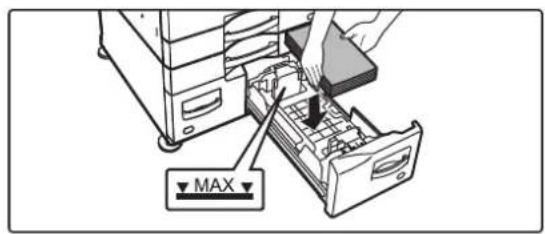
Place paper into the tray.
- Load the paper with the print side facing up. The stack must not be higher than the indicator line (maximum of 1200 sheets for tray 3, or maximum of 900 sheets for tray 4).
- Fan the paper well before loading it. If the paper is fed while overlapping, it may cause a paper jam. After loading the paper, close the guides to the paper width to not leave a gap from the guides A and B. Do not load the paper as shown below.

Tray 3
Tray 4

Close the tray slowly.
Push the tray into the machine slowly.
LOADING PAPER IN THE LARGE-CAPACITY TRAY (when a large capacity tray is installed)
The large capacity tray is used for very large print jobs that cannot be handled with a regular tray. Up to 3000 sheets of A4 or B5 (8-1/2" x 11") paper (80 g/m² (21 lbs.)) can be loaded in the tray.
If you find it necessary to change the paper size, consult the dealer or nearest authorized service representative.

If you loaded paper of a different type from the paper previously loaded, be sure to check the settings in "Settings".

To check the paper type loaded in the tray
[Tray Settings] in the home screen or in "Settings", select [Status] → [Machine Identification] → [Paper Input Tray Status] → [Paper Tray Settings].

When the tray is open, do not place heavy objects on the tray or press down on the tray.
1

Open the top cover.
2

Fan the paper.
Fan the paper well before loading it. If the paper is not fanned, multiple sheets may feed at once and cause a misfeed.
3
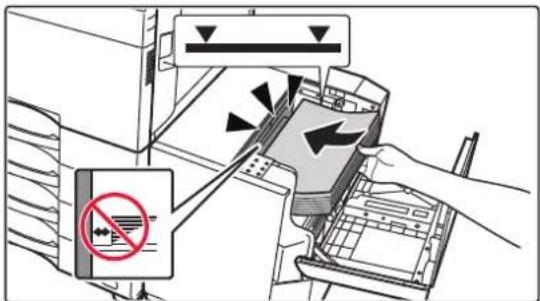
Place the paper in the paper feed table.
Insert the paper into the tray until it stops.
Place the paper print side down. The stack should not exceed the indicator line (maximum 3000 sheets).

When adding paper, take care that previously loaded paper does not shift out of place. This may cause misfeeds and folding back of the front edge of the loaded paper.
4

Gently close the cover.
LOADING PAPER INTO THE BYPASS TRAY
Use the bypass tray for printing on plain paper, envelopes, label sheets, tab paper, and other special media. Up to 100 sheets of paper can be loaded (Heavy paper weighing between 106 g/m² and 256 g/m² (28 lbs. bond and 140 lbs. index): 40 sheets, heavy paper weighing between 257 g/m² and 300 g/m² (140 lbs. index and 110 lbs. cover), transparency, tab paper, film and envelope: 20 sheets) for continuous printing, just like operation using other trays.

- When using plain paper other than Sharp standard paper or special media other than SHARP-recommended transparency film, glossy paper, or when printing on the reverse side of paper that has been printed on one side, load paper one sheet at a time. Loading more than one sheet at a time will cause misfeeds.
- Before loading paper, straighten any curling in the paper.
- When adding paper, remove any paper remaining in the bypass tray, combine it with the paper to be added, and reload as a single stack. If paper is added without removing the remaining paper, a misfeed may result. Loading more sheets than the specified number of sheets or the limit may cause paper misfeeds.
HOW TO LOAD THE PAPER
Paper smaller than A5 (7-1/4" x 10-1/2") size is loaded horizontally.

LOADING TAB PAPER
To print on tab paper, load tab paper into the bypass tray with the print side facing down.


- Use only tab paper that is made of paper. Tab paper made of a material other than paper (film, etc.) cannot be used. •To print on the tabs of tab paper: In copy mode, use [Tab Copy] in "Others". In print mode, use the tab print function.
INSERTING TRANSPARENCY FILM

- Use SHARP-recommended transparency film.
- When loading multiple sheets of transparency film into the bypass tray, fan the sheets several times before loading.
- When printing on transparency film, remove each sheet as it is printed and output from the machine. If multiple sheets of film are allowed to stack on the output tray, the sheets may stick together or become curled.
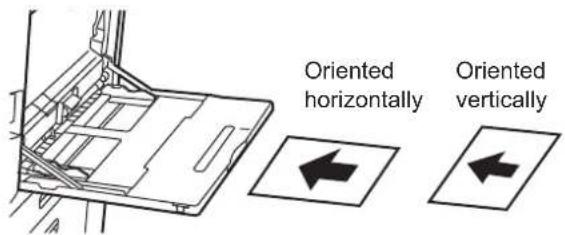
LOADING ENVELOPES
When inserting envelopes in the bypass tray, place them aligned to the left side in the orientation shown below. Only the front side of envelopes can be printed or copied on. Place the front side facing down.
Fold the flap and make a sharp crease at the fold.

When placing DL
- Open the flap of the envelope.
- Place so that the flap is on the right.

When placing C4, C5, or C6
- Close the flap of the envelope.
- Place so that the flap is on the back side.
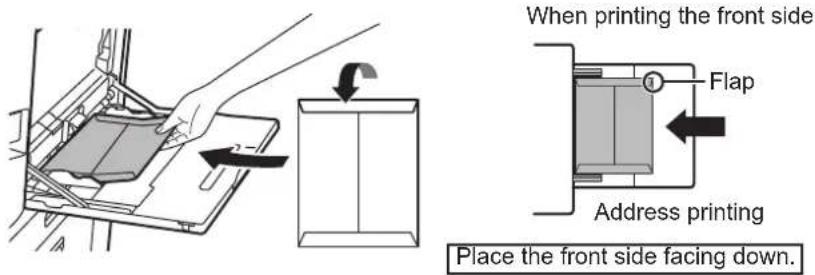
Important points when using envelopes
- Do not print the rear surface (the side with adhesive) of the envelope. This may result in misfeeds or poor print quality.
- Restrictions apply to some types of envelopes. For more information, consult a qualified service technician.
- Some operating environments may cause creasing, smudging, misfeeds, poor toner fusing, or machine failure.
- When placing multiple envelopes, they may not feed properly if the print surface is not flat, and they may feed at an angle.
- Feeding thick envelopes may not be possible.
- Envelopes with low surface smoothness may not feed correctly.
- Do not use the following envelopes:
- Those with a string for closing
- Those with a metal piece, a plastic hook, or a ribbon hook
- Those with a lining
- Those with an uneven surface, finished with titling or emboss
- Lined envelopes and other items that use adhesives or other composites for sealing may have these substances melt due to heat from the fusing unit.
- Hand-made envelopes
- Those containing air inside
- Those with wrinkles, bending marks, cuts, or other damage.
- Envelopes whose surface has deteriorated or whose shape has been deformed due to long-term storage or moisture absorption cannot be used.
- Those with four or more layers of lamination cannot be fed.
- Those with a window
![graph TD A["Envelope"] --> B{Can be used} A --> C{Cannot be used} B --> D["Arrow to top"] C --> E["Arrow to bottom"]](/content/2026/06/1367452/images/ba9dc9fd5eba4340b475086556822f5e5f9fe50cdf3c17f34e5effb777a62344.jpg)
Fold the flap of the envelope and make a sharp crease at the fold. A misfeed may occur if the flap is up.
- Envelopes with the corner gluing position on the back not aligned with the corner edge cannot be used as it may cause creasing.
- Print quality is not guaranteed in the area 10 mm (13/32") around the edges of the envelope.
- Print quality is not guaranteed on parts of envelopes where there is a large step-like change of thickness, such as on four-layer parts or parts less than three layers.
- In the case of landscape envelopes, make sure that flaps are not in the range where the bypass feed roller moves on.

- Press envelopes to bleed air inside, and press creases on all 4 sides well before setting. In addition, when envelopes are warped or bent, straighten them using hard objects such as pencil or ruler before setting.
- Align on a flat surface
- Some envelopes may not be usable due to the shape of the flap or the type of envelope.
Important points when using embossed paper/label sheets
- The effect of asperity surfaces of embossed paper may affect the print quality depending on the type of embossed paper.
For more information, consult the dealer or nearest authorised service representative.
- Some labels may have to be loaded into the bypass tray in the specified orientation. Follow such instructions. If a form is already printed on the labels, and the print images and the preprinted form do not line up, adjust the application or printer driver settings to rotate the print images.
- Do not use the following types of label sheets.
- Label sheets without an adhesive copy or label copy
- Label sheets with adhesive exposed
- Label sheets with a specified feeding direction that is not supported by the machine
- A label sheet that has already been fed or has some labels removed
- Label sheets consisting of multiple sheets
- Label sheets that do not support laser printing
- Label sheets that cannot withstand heat
- Label sheets that have perforations in the backing paper
- Label sheets with slits in the backing paper • Non-standard label sheets
- Label sheets with adhesive that has deteriorated due to prolonged storage or otherwise
- Label sheets with cutouts that expose the backing paper
- Curled or otherwise deformed label sheets • Torn or creased label sheets
- Label sheets consisting of three sheets or more.

Open the bypass tray.

When loading paper larger than 8-1/2" x 11"R or A4R, pull out the extension guide.
Pull the extension guide all the way out.

Do not place heavy objects on the bypass tray or press down on the tray.

Load the paper with the print side facing down.
Insert the paper along the bypass tray guides all the way into the bypass tray until it stops slowly. Inserting the paper with excessive force may cause the leading edge to fold back. Inserting the paper too loosely may cause skewed feeding or misfeeds.
The paper must not exceed the maximum number of sheets and must not be higher than the indicator line.

Set the bypass tray guides correctly to the width of the paper.
Adjust the bypass tray guides so that they slightly contact the loaded paper.

For "Letter Head" and "Pre-Printed", set the paper with the print side up. However, when [Disabling of Duplex] is enabled, set the print side in the same orientation as in the regular mode (facing down).

- Do not forcefully push in paper that you are loading. This may cause misfeeds.
- If the bypass tray guides are set wider than the paper, move the bypass tray guides in until they correctly fit the width of the paper. If the bypass guides are set too wide, the paper may skew or be creased.
How to close the bypass tray
Remove any paper remaining in the bypass tray. When the extension guide is pulled, push the extension guide into the bypass tray and then close the bypass tray.
HOW TO PLACE THE LONG PAPER GUIDE
The steps for attaching the optional long paper feeding tray to the bypass tray are explained below.
1
Extend the auxiliary guide of the long paper feeding tray.
2
Pull out the extension guide of the bypass tray.
3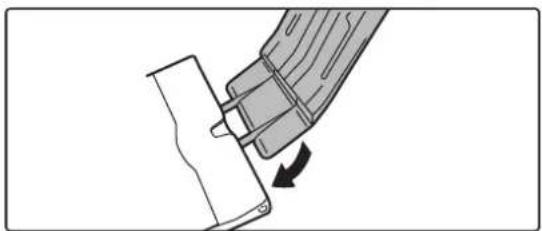
Attach the long paper feeding tray onto the extension guide of the bypass tray.
4
Replace the extension guide of the bypass tray.
HOW TO PLACE THE ORIGINAL
SELECTING A PROCEDURE FOR PLACING THE ORIGINAL DEPENDING ON THE TYPE AND STATUS OF THE ORIGINAL
Place the original in the automatic document feeder. Depending on the type and status of the original, use the document glass. Follow the instructions to select the method for placing the original.
AUTOMATIC DOCUMENT FEEDER (page 1-30)
DETECTABLE ORIGINAL SIZES
In "Settings (administrator)", select [System Settings] → [Common Settings] → [Device Control] → [Condition Settings] → [Original Size Detector Setting].
One of the 8 groups of standard original sizes shown below can be selected for detection by the original size detection function.
| Selections Detectable original sizes | ||
| Document glass Document feeder tray (automatic document feeder) | ||
| AB-1 | A3, A4, A4R, A5, B4, B5, B5R | A3, A4, A4R, A5, A5R, A6R*, B4, B5, B5R, 11" x 17", 8-1/2" x 14", 8-1/2" x 11" |
| AB-2 A3, A4, A4R, A5, B5, B5R, 216 mm x 330 mm (8-1/2" x 13") | A3, A4, A4R, A5, A5R, A6R*, B4, B5, B5R, 11" x 17", 8-1/2" x 11", 216 mm x 330 mm (8-1/2" x 13") | |
| AB-3 | A4, A4R, A5, B4, 8K, 16K, 16KR | A3, A4, A4R, A5, A5R, A6R*, B4, 11" x 17", 8-1/2" x 11", 216 mm x 330 mm (8-1/2" x 13"), 8K, 16K, 16KR |
| AB-4 216 mm x 340 mm (8-1/2" x 13-2/5"), A3, A4, A4R, A5, B5, B5R | A3, A4, A4R, A5, A5R, A6R*, B4, B5, B5R, 11" x 17", 8-1/2" x 11", 216 mm x 340 mm (8-1/2" x 13-2/5") | |
| AB-5 216 mm x 343 mm (8-1/2" x 13-1/2"), A3, A4, A4R, A5, B5, B5R | A3, A4, A4R, A5, A5R, A6R*, B4, B5, B5R, 11" x 17", 8-1/2" x 11", 216 mm x 343 mm (8-1/2" x 13-1/2") | |
| Inch-1 | 11" x 17", 8-1/2" x 14", 8-1/2" x 11", 8-1/2" x 11"R, 5-1/2" x 8-1/2" | 11" x 17", 8-1/2" x 14", 8-1/2" x 11", 8-1/2" x 11"R, 5-1/2" x 8-1/2", 5-1/2" x 8-1/2"R, A3, A4 |
| Inch-2 11" x 17", | 216 mm x 330 mm (8-1/2" x 13"), 8-1/2" x 11", 8-1/2" x 11"R, 5-1/2" x 8-1/2" | 11"x17", 216 mm x 330 mm (8-1/2"x13"), 8-1/2"x11", 8-1/2"x11"R, 5-1/2"x8-1/2", 5-1/2"x8-1/2"R, A3, A4 |
| Inch-3 11" x 17", | 8-1/2" x 13-2/5" (216 mm x 340 mm), 8-1/2" x 11", 8-1/2" x 11"R, 5-1/2" x 8-1/2" | 11"x17", 8-1/2"x13-2/5 (216 mm x 340 mm), 8-1/2"x11", 8-1/2"x11"R, 5-1/2"x8-1/2", A3, A4 |
* Can be used with BP-55C26/BP-70C31/BP-70C36/BP-70C45/BP-70C55/BP-70C65.
Original Feeding Mode
The following original feeding modes can be set to operate by default in copy, image send, and scan to local drive.
When a mode is frequently used, this saves you from having to select the mode in another mode each time you need to use it.
In "Settings (administrator)", select [System Settings] → [Common Functions] → [Device Control] → [Condition Settings] → [Original Feeding Mode].
- Mixed Size Doc. Different Width
- Slow Scan Mode
- Blank Page Skip*
* Excluding fax mode and Internet fax mode.
AUTOMATIC DOCUMENT FEEDER
This section explains how to place originals in the automatic document feeder.
- Place originals of different sizes together, if needed, in the automatic document feeder. In that case, use the "Others" function in each mode to set [Mixed Size Original]. • See the following pages for the combinations of document sizes that can be loaded.
Copy: SCANNING ORIGINALS OF DIFFERENT SIZES (MIXED SIZE ORIGINAL) (page 3-94)
Fax/Scanner: SCANNING ORIGINALS OF DIFFERENT SIZES (MIXED SIZE ORIGINAL) (page 6-99)

- Before inserting originals into the document feeder tray, be sure to remove any staples or paper clips.
- If originals have damp spots due to correction fluid, ink or paste up glue, wait until the originals are dry before making copies. Otherwise the interior of the machine or the document glass may be soiled.
- Do not use the following originals. Incorrect original size detection, original misfeeds, and smudges may result. Transparency film or other transparent material for backup copy, tracing paper, carbon paper, thermal paper or originals printed with thermal transfer ink ribbon should not be fed through the document feeder. Originals to be fed through the feeder should not be damaged, crumpled, folded, loosely pasted together, or have cut-out holes. Originals with multiple punched holes other than two-hole or three-hole punched paper may not feed correctly.
- Business cards may not be scanned correctly depending on the condition, material, shape and processing method used. (Business cards can be set in the automatic document feeder of the BP-55C26/BP-70C31/BP-70C36/BP-70C45/BP-70C55/BP-70C65.)
- When using originals with two or three holes, place them so that the punched edge is at a position away from the feed slot of the document feeder tray. Specify the orientation of the original using [Original].

- Depending on the condition of the original, the type of paper, and the temperature and humidity of the environment in which the machine is used, multiple sheets of paper may be fed at the same time and may not be scanned correctly, or the ejected originals may not be neatly aligned.
It may be improved by the following settings.
- For copying: Set the resolution to 600x600dpi
- For scan transmission: use "Preview"
- When the document rolls in the original exit tray on the automatic document feeder, fix the paper fixing arm at the centre to the top.

Allowed original sizes
Minimum original size Maximum original size
| Standard size(Minimum size that can be automatically detected)A6R: 105 mm (longitudinal) × 148 mm (transversal)*15-1/2" (longitudinal) × 8-1/2" (transversal)*1A5: 148 mm (longitudinal) × 210 mm (transversal)*25-1/2" (longitudinal) × 8-1/2" (transversal)*2Non-standard size(Minimum size that can be specified manually)51 mm (longitudinal) × 128 mm (transversal)*12-1/64" (longitudinal) × 5-3/64" (transversal)*1Business card: 51 mm (longitudinal) × 89 mm (transversal)*1131 mm (longitudinal) × 140 mm (transversal)*25-1/8" (longitudinal) × 5-1/2" (transversal)*2 | Standard size(Maximum size that can be automatically detected)A3: 297 mm (longitudinal) × 420 mm (transversal)11" (longitudinal) × 17" (transversal)A3W (12" × 18") cannot be used.Non-standard size(Maximum size that can be specified manually)Copy mode:297 mm (longitudinal) × 432 mm (transversal)11-5/8" (longitudinal) × 17" (transversal)Fax/image send mode:297 mm (longitudinal) × 1000 mm (transversal)11" (longitudinal) × 39-3/8" (transversal) |
*1 This can be set in BP-55C26/BP-70C31/BP-70C36/BP-70C45/BP-70C55/BP-70C65.
*2 This can be set in BP-50C26/BP-50C31/BP-50C36/BP-50C45/BP-50C55/BP-50C65/BP-60C31/BP-60C36/BP-60C45.

- When the original is a non-standard size, see the appropriate explanation below for the mode you are using.
• COPIER: "STORING FREQUENTLY USED ORIGINAL SIZES (page 3-31)"
- FAX: "SPECIFYING THE ORIGINAL SCAN SIZE USING NUMERIC VALUES (page 5-47)"
- IMAGE SEND: "SPECIFYING THE ORIGINAL SCAN SIZE USING NUMERIC VALUES (page 6-72)"
- In fax or Imaging send mode, to load a 1000 mm (39-3/8") long original, you need to set the scan size to [Long Size]. In fax mode, see "SPECIFYING THE ORIGINAL SCAN SIZE IN PAPER SIZE (page 5-45)" and "SPECIFYING THE ORIGINAL SCAN SIZE USING NUMERIC VALUES (page 5-47)", and in image sending mode, see "SPECIFYING THE ORIGINAL SCAN SIZE IN PAPER SIZE (page 6-70)" and "SPECIFYING THE ORIGINAL SCAN SIZE USING NUMERIC VALUES (page 6-72)".
Allowed original weights
| BP-50C26/BP-50C31/BP-50C36/BP-50C45/BP-50C55/BP-50C65/BP-60C31/BP-60C36/BP-60C45 | 1-sided scanning: 35 to 128 g/m 2 (9 to 32 lbs Bond)2-sided scanning: 50 to 105 g/m 2 (13 to 28 lbs Bond) |
| BP-55C26/BP-70C31/BP-70C36/BP-70C45/BP-70C55/BP-70C65 | 1-sided scanning: 35 to 220 g/m 2 (9 lbs Bond to 80 lbs Cover)2-sided scanning: 50 to 220 g/m 2 (13 lbs Bond to 80 lbs Cover)Business card: Thickness, 0.1mm to 0.2mm |
To scan originals from 35 to 49 g/m² (9 to 13 lbs Bond), use "Slow Scan Mode" in the "Others" function. Scanning without using "Slow Scan Mode" may result in original misfeeds.
When "Slow Scan Mode" is selected, automatic 2-sided scanning is not possible.
On the BP-55C26/BP-70C31/BP-70C36/BP-70C45/BP-70C55/BP-70C65, to scan originals 158 to 220 g/m² (32 lbs Bond to 80 lbs Cover), use "Heavy Paper Scan" in the "Others" function.
Scanning without using "Heavy Paper Scan" may result in original misfeeds.
1
Make sure that there is no original on the document glass.
2

Place the original.
BP-50C26/BP-50C31/BP-50C36/BP-50C45/BP-50C55/
BP-50C65/BP-60C31/BP-60C36/BP-60C45:
Up to 100 sheets can be inserted.
BP-55C26/BP-70C31/BP-70C36/BP-70C45/BP-70C55/
BP-70C65:
Up to 300 sheets can be inserted.
After scanning is finished on the automatic document feeder, remove originals from the original exit tray.
PREVENTIVE LIGHT TO INDICATE ORIGINAL LEFT BEHIND
In order to prevent originals being left behind, the automatic document feeder (BP-55C26/BP-70C31/BP-70C36/BP-70C45/BP-70C55/BP-70C65) incorporates a lamp on the top of the original exit tray.
This lamp detects a document on the automatic document feeder, and starts blinking after the last original is output from the original exit tray.

Light turning off
The preventive light to indicate original left behind will turn off in the event of the following.
- When the scanned original is removed • After the preventive light to indicate original left behind blinks three times, repeated three times
- When a new original is placed in the automatic document feeder, and a job started
- When the machine enters sleep mode
- When use of the automatic document feeder is prohibited

- When the preventive light to indicate original left behind is blinking, placing the original on the document glass will not turn off the preventive light to indicate original left behind.
- The preventive light to indicate original left behind will not turn off by only placing an original on the automatic document feeder.
- The preventive light to indicate original left behind will not turn off even if the operation panel is off.
- If the preventive light to indicate original left behind turns off, this will not flash even if an original is left on the automatic document feeder.
ORIGINAL SETTING INDICATOR
On the BP-70C31/BP-70C36/BP-70C45/BP-70C55/BP-70C65, the original setting indicator lights when the document is correctly loaded on the document feeder tray.
If the original setting indicator is lit, it is possible for a user who has difficulty in confirming that a document is loaded on the document feeder tray to confirm that the document is loaded.

SKEW FEED PREVENTION
BP-70C31, BP-70C36, BP-70C45, BP-70C55 or BP-70C65 is equipped with a skewed feed prevention function. When a document is loaded at an angle, the function stops loading the document as misfeed.
DOUBLE FEED DETECTION
When you attach the double feed detection kit of the peripheral device to the automatic document feeder of the BP-70C31/BP-70C36/BP-70C45/BP-70C55/BP-70C65, you can use the double feed detection function.
This automatic document feeder is equipped with a double feed detection function.
If you attempt to scan multiple originals at the same time, scanning stops as a document jam.
DOCUMENT GLASS
This section describes the steps for setting the original on the document glass.

- Close the automatic document feeder slowly. Abruptly closing the automatic document feeder may damage it. • Take care that your fingers are not pinched when closing the automatic document feeder.
Allowed original sizes
| Minimum original size Maximum original size | |
| Standard size(Minimum size that can be automatically detected)A5: 210 mm (longitudinal) × 148 mm (transversal)8-1/2" (longitudinal) × 5-1/2" (transversal)Non-standard size(Minimum size that can be specified manually)25 mm (longitudinal) x 25 mm (transversal)1" (longitudinal) x 1" (transversal) | Standard size(Maximum size that can be automatically detected)A3: 297 mm (longitudinal) x 420 mm (transversal)11" (longitudinal) x 17" (transversal)Non-standard size(Maximum size that can be specified manually)297 mm (longitudinal) x 432 mm (transversal)11-5/8" (longitudinal) x 17" (transversal) |

When the original is a non-standard size, see the appropriate explanation below for the mode you are using.
• COPIER: "STORING FREQUENTLY USED ORIGINAL SIZES (page 3-31)" • FAX: "SPECIFYING THE ORIGINAL SCENE USING NUMERIC VALUES (page 5-47)" • IMAGE SEND: "SPECIFYING THE ORIGINAL SCAN SIZE USING NUMERIC VALUES (page 6-72)"
1
Open the automatic document feeder.
2
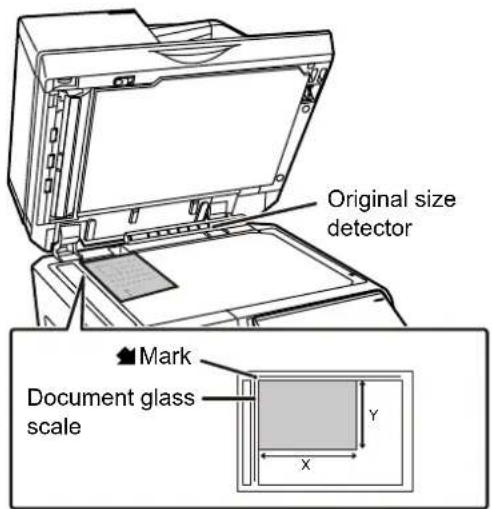
Load the paper with the print side facing down.
Place the original face down and align the top left corner of the original with back left (at the tip of the mark) if the document glass.

Do not place any objects under the original size detector.
Closing the automatic document feeder with an object underneath may damage the original size detector or disable correct detection of the original size.
3
Close the automatic document feeder.
After placing the original, close the automatic document feeder. If the unit is left open, parts outside of the original will be copied in black, causing excessive use of toner.

- When closing, open the automatic document feeder all the way and then close it.
- If originals have damp spots due to correction fluid, ink or paste up glue, wait until the originals are dry before making copies. Otherwise the interior of the machine or the document glass may be soiled.
PERIPHERAL DEVICES
PERIPHERAL DEVICES
Peripheral devices can be installed on the machine to increase its range of functionality.
The peripheral devices are generally optional. However, some models include certain peripheral devices as standard equipment.
(As of April, 2022)
| Product name Product | number | Description |
| Stand/550 sheet paper drawer | BP-DE12 | TRAY 1 - 4 (when a stand/550/2x550/3x550/ 550&2100 sheet paper drawer is installed) (page 1-15) |
| Stand/2x550 sheet paper drawer BP-DE13 | ||
| Stand/3x550 sheet paper drawer BP-DE14 | ||
| Stand/550&2100 sheet paper drawer | BP-DE15 | TRAY 3 - 4 (when a stand/550&2100 sheet paper drawer is installed) (page 1-18) |
| Large capacity tray | BP-LC10 | LOADING PAPER IN THE LARGE-CAPACITY TRAY (when a large capacity tray is installed) (page 1-20) |
| Long paper feeding tray | MX-LT10 | HOW TO PLACE THE LONG PAPER GUIDE (page 1-27) |
| Exit tray unit | BP-TR12 | When a finisher is installed, this can be added to the right side of the machine. |
| Exit tray cabinet*1 | BP-TU10 | This enables separation of output locations by mode (copy, printer, etc.). |
| Job separator tray MX-TR20 | ||
| Folding unit | BP-FD10 | FOLDING UNIT (page 1-65) |
| Inner finisher BP-FN11 | BP-FN12 | INNER FINISHER (page 1-38) |
| Finisher | BP-FN13 | FINISHER (page 1-42) |
| Finisher (large stacker) | BP-FN15 | FINISHER (LARGE STACKER) (page 1-45) |
| Saddle stitch finisher | BP-FN14 | SADDLE STITCH FINISHER (page 1-49) |
| Saddle stitch finisher (large stacker) | BP-FN16 | SADDLE STITCH FINISHER (LARGE STACKER) (page 1-53) |
| Paper pass unit | BP-RB10 | This unit is required to install a finisher or a saddle stitch finisher. |
| Punch module | MX-PN14AMX-PN14BMX-PN14CMX-PN14D | This unit punches holes in copies and other output. An inner finisher (BP-FN11/BP-FN12) is required. |
| MX-PN15AMX-PN15BMX-PN15CMX-PN15D | This unit punches holes in copies and other output. A finisher or saddle stitch finisher (BP-FN13/BP-FN14) is required. | |
| MX-PN16AMX-PN16BMX-PN16CMX-PN16D | This unit punches holes in copies and other output. A finisher (large stacker) or saddle stitch finisher (large stacker) (BP-FN15/BP-FN16) is required. | |
| Product name | Product number | Description |
| PS3 expansion kit*2 | MX-PK13 Enables the machine to be used as a Postscript printer. | |
| Barcode font kit MX-PF10 Adds barcode fonts to the machine. | ||
| Facsimile expansion kit BP-FX11 Enables Fax. | ||
| Internet fax expansion kit MX-FWX1 Enables Internet Fax. | ||
| Double feed detection kit | BP-DD10 | If you attempt to scan multiple originals at the same time, scanning stops as a document jam. |
| Direct print expansion kit*2 | MX-PU10 This enables direct printing of DOCX, XLSX, and PPTX files without going through a computer. | |
| Application integration module | MX-AMX1 | PREPARATIONS FOR METADATA DELIVERY (page 6-177) |
| Application communication module*2 | BP-AM10 Sharp OSA (page 8-42) | |
| External account module*2 | BP-AM11 | |
| Stamp unit | AR-SU1 | This stamps each original page after it is scanned in image send mode. An automatic document feeder is required. |
| Stamp cartridge | AR-SV1 | Two stamp cartridges are included in a package. |
| Enhanced compression kit*2 | MX-EB19 Saves a scanned document in the Compact PDF format. Compact PDF results in a smaller size than regular PDF. | |
| OCR expansion kit*2 | MX-EB20 This is required to use the OCR function. | |
| Wireless connection adaptor | BP-EB10 | Adds the wireless LAN or Bluetooth function to the machine. |
| High capacity SSD | BP-SD10 | Extends the local drive capacity of the machine. |
| Utility table | MX-UT10 | You can use this as a work platform, or temporarily place originals or a mobile device. A password can also be established. |
| Data security kit | BP-FR12U | The data which is being stored in the local drive and memory of this machine is stored in encrypted form. Furthermore, after copy and print data has been output and after fax and scanner transmissions, the data is automatically deleted in order to securely protect important information. |
| Virus detection kit | BP-VD10 | VIRUS SCAN (page 8-44) |
*1 Depending on the country, region or model, it may be installed as standard or may be a peripheral device. Contact your dealer or nearest authorised service representative. *2 These peripheral devices can be installed on the BP-50C26/BP-50C31/BP-50C36/BP-50C45/BP-50C55/BP-50C65/BP-55C26. (These devices are equipped standard on the BP-60C31/BP-60C36/BP-60C45/BP-70C31/BP-70C36/BP-70C45/BP-70C55/BP-70C65.)

Some options may not be available in some countries and regions.
INNER FINISHER
This device outputs sorted paper while staggering each set of paper. As needed, it staples each set. You can also perform stapling manually.
To punch holes in printed paper, install an optional hole punch module.
PART NAMES
The following describes the parts that appear when the finisher is open.

(1) Output tray
Stapled and offset output is delivered to this tray. The tray is slidable. To print on large paper such as A3 (11" x 17") size, extend the tray.
(2) Manual staple key
Press to execute manual stapling.
(3) Punch waste box (when a punch module is installed)
This stores punch waste discharged from punching.
(4) Insertion slot
Place the paper that you want to staple in this slot. Maximum thickness 4 mm.
(5) Front cover
Open this cover to remove a paper misfeed, replace staples, remove a staple jam, or remove the punch waste box.
(6) Staple case
This holds the staple cartridge. Pull the case out to replace the staple cartridge or remove a staple jam.
(7) Staple case release lever
Use this lever to remove the staple case.
(8) Lever
Use this lever to move the finisher in order to remove a paper misfeed, or remove a staple jam.

- The inner finisher cannot be installed at the same time as the folding unit, finisher, finisher (large stacker), saddle stitch finisher or saddle stitch finisher (large stacker).
• Exercise caution when you turn on the power and when printing takes place, as the output tray may move up and down.
HOW TO STAPLE MANUALLY
You can perform stapling manually.
Make sure the manual staple key is lit green.
1

Place the paper that you want to staple in the insertion slot.
When you place the paper, the manual staple key blinks green.
After two seconds elapse, stapling automatically starts.

• To staple earlier than the auto staple start time, press the manual staple key.

- Manual stapling cannot be executed during execution of a staple job.
- Manual stapling cannot be executed during auto power shutoff mode.
Relation between paper orientation and stapling result
| Paper Paper orientation when inserted After stapling | ||||
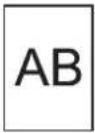 AB AB |  |  | 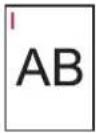 |  |
 |  |  | 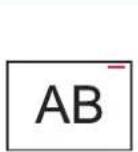 | |
SUPPLIES
The finisher requires the following staple cartridge:
Staple cartridge (approx. 5000 staples per cartridge x three cartridges)
MX-SCX1

INNER FINISHER MAINTENANCE
When the staple cartridge runs out of staples, a message will appear in the operation panel. Follow the operation procedure to replace the staple cartridge.
Replacing the staple cartridge
1

Open the finisher front cover.
2

Lower the staple case release lever and remove the staple case.
Pull the staple case out to the right.
3

Remove the empty staple cartridge from the staple case.
4

Insert a new staple cartridge into the staple case as shown.
Push the staple cartridge in until it clicks into place.
5

Push the staple case.
Push the staple case in until it clicks into place.
6

Close the finisher front cover.

Make a proof copy in staple function to verify that stapling takes place correctly. ▶ page 3-38
FINISHER
This device outputs sorted paper while staggering each set of paper. As needed, it staples each set. To punch holes in printed paper, install an optional hole punch module.
PART NAMES

(1) Output tray (upper tray)
The tray is slidable. To print on large paper such as A3 (11" x 17") paper, extend the tray.
(2) Output tray (lower tray)
Stapled and offset output is delivered to this tray. The tray is slidable. To print on large paper such as A3 (11" x 17") paper, extend the tray.
(3) Top cover
Open this cover to remove a paper misfeed.
(4) Front cover
Open this cover to replace the staple cartridge, remove a staple jam, or remove a paper misfeed.

- To install a finisher, a paper pass unit or folding unit and stand/550/2x550/3x550/550&2100 sheet paper drawer are required.
- A finisher cannot be installed simultaneously with an inner finisher, finisher (large stacker), saddle stitch finisher, or saddle stitch finisher (large stacker).
- Do not place heavy objects on the finisher or press down on the finisher. Exercise caution when you turn on the power and when printing takes place, as the tray may move up and down.
SUPPLIES
The finisher (large stacker) requires the following staple cartridge: Staple cartridge (approx. 5000 staples per cartridge x three cartridges) MX-SCX1
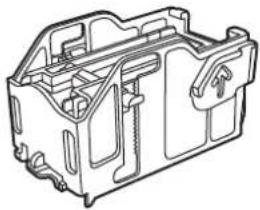
When the staple cartridge runs out of staples, a message will appear in the operation panel. Follow the operation procedure to replace the staple cartridge.
Replacing the staple cartridge
1

Open the front cover.
2

Pull out the staple unit.
3

Remove the staple case.
4
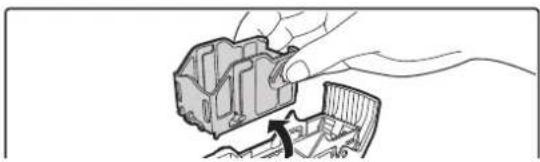
Remove the empty staple cartridge from the staple case.
5

Insert a new staple cartridge into the staple case as shown.
Push the staple cartridge in until it clicks into place.
6

Push the staple case firmly back in.
Push the staple case in until it clicks into place.
7

Replace the staple unit.
8

Close the front cover.
FINISHER (LARGE STACKER)
This device outputs sorted paper while staggering each set of paper. As needed, it staples each set. You can also perform stapling manually. To punch holes in printed paper, install an optional hole punch module.
PART NAMES

(6)(5)
(1) Output tray (upper tray)
The tray is slidable. To print on large paper such as A3 (11" x 17") paper, extend the tray.
(2) Output tray (lower tray)
Stapled and offset output is delivered to this tray. The tray is slidable. To print on large paper such as A3 (11" x 17") paper, extend the tray.
(3) Manual staple key
Press to execute manual stapling.
(4) Top cover
Open this cover to remove a paper misfeed.
(5) Insertion slot
Place the paper that you want to staple in this slot. Maximum thickness 9 mm.
(6) Front cover
Open this cover to replace the staple cartridge, remove a staple jam or remove a paper misfeed.

- To install a finisher (large stacker), a paper pass unit or folding unit and stand/550/2x550/3x550/550&2100 sheet paper drawer are required.
- A finisher (large stacker) cannot be installed simultaneously with an inner finisher, finisher, saddle stitch finisher, or saddle stitch finisher (large stacker).
- Do not place heavy objects on the finisher (large stacker) or press down on the finisher (large stacker). Exercise caution when you turn on the power and when printing takes place, as the tray may move up and down.
HOW TO STAPLE MANUALLY
You can perform stapling manually.
Make sure the manual staple key is lit green.
1

Place the paper that you want to staple in the insertion slot.
When you place the paper, the manual staple key blinks green.
After two seconds elapse, stapling automatically starts.

To staple earlier than the auto staple start time, press the manual staple key.

- Manual stapling cannot be executed during execution of a staple job.
- Manual stapling cannot be executed during auto power shut-off mode.
Relation between paper orientation and stapling result
| Paper Paper orientation when inserted After stapling | |||||
 AB AB |  |  |  | 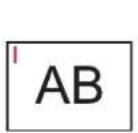 | |
 |  |  |  | ||
SUPPLIES
The finisher (large stacker) requires the following staple cartridge: Staple cartridge (approx. 5000 staples per cartridge x three cartridges) MX-SC11

FINISHER (LARGE STACKER) MAINTENANCE
When the staple cartridge runs out of staples, a message will appear in the operation panel. Follow the operation procedure to replace the staple cartridge.
Replacement the staple cartridge
1

Open the front cover.
2

Remove the staple case.
3

Remove the empty staple cartridge.
4

Insert a new staple cartridge into the staple case.
Push the staple cartridge in until it clicks into place.
5
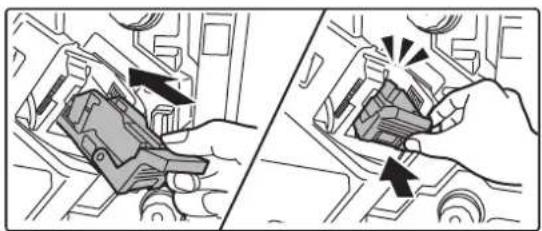
Push the staple case firmly back in.
Push the staple case in until it clicks into place.
6

Close the front cover.

Make a proof copy in staple function to verify that stapling takes place correctly. ▶ page 3-38
SADDLE STITCH FINISHER
This includes the offset function that outputs sorted paper while staggering each set of paper, the staple sort function that staples each set of prints, the saddle stitch function that automatically staples the centre of the sheets and folds the sheets in half, and the paper folding function that folds paper in half.
To punch holes in printed paper, install an optional hole punch module.
PART NAMES

(1) Output tray (upper tray)
The tray is slidable. To print on large paper such as A3 (11" x 17") paper, extend the tray.
(2) Output tray (lower tray)
Stapled and offset output is delivered to this tray. The tray is slidable. To print on large paper such as A3 (11" x 17") paper, extend the tray.
(3) Top cover
Open this cover to remove a paper misfeed.
(4) Saddle stitch tray
Saddle-stitched output is delivered to this tray.
Front cover
Open this cover to replace the staple cartridge, remove a staple jam, or remove a paper misfeed.

- To install a saddle stitch finisher, a paper pass unit or folding unit and stand/550/2x550/3x550/550&2100 sheet paper drawer are required.
- Do not place heavy objects on the saddle finisher or press down on the saddle stitch finisher. Exercise caution when you turn on the power and when printing takes place, as the tray may move up and down.
- A saddle stitch finisher cannot be installed simultaneously with an inner finisher, finisher, finisher (large stacker) or saddle stitch finisher (large stacker).
SUPPLIES
The saddle stitch finisher requires the following staple cartridge: Staple cartridge (approx. 5000 staples per cartridge x three cartridges) AR-SC2
SADDLE STITCH FINISHER MAINTENANCE
When the staple cartridge runs out of staples, a message will appear in the operation panel. Follow the operation procedure to replace the staple cartridge.
1

Open the front cover.
2

Pull the lever and withdraw the staple unit.
Pull it slowly out until it stops.
3

Lower the staple case release lever and remove the staple case.
4

Remove the empty staple cartridge from the staple case.
5

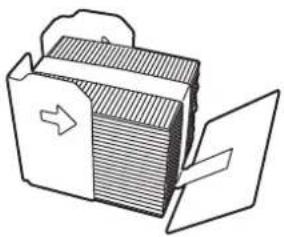
Insert a new staple cartridge into the staple case as shown.
Push the staple cartridge in until it clicks into place. After inserting the staple cartridge, pull the seal that holds the staples straight out.

Do not remove the seal from the cartridge before inserting the cartridge into the case.
6

Attach the staple case.
Push the staple case in until it clicks into place.
7

Push the staple unit back in.
8
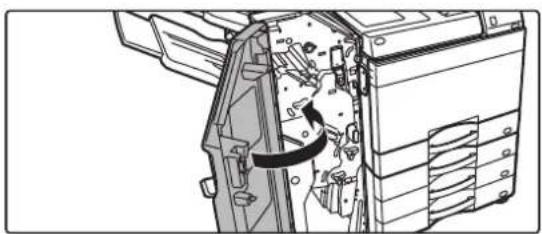
Close the front cover.

Make a proof copy in staple function to verify that stapling takes place correctly.
SADDLE STITCH FINISHER (LARGE STACKER)
This includes the offset function that outputs sorted paper while staggering each set of paper, the staple sort function that staples each set of prints, the saddle stitch function that automatically staples the centre of the sheets and folds the sheets in half, and the paper folding function that folds paper in half. You can also perform stapling manually. To punch holes in printed paper, install an optional hole punch module.
PART NAMES

(1) Output tray (upper tray)
The tray is slidable. To print on large paper such as A3 (11" x 17") paper, extend the tray.
(2) Output tray (lower tray)
Stapled and offset output is delivered to this tray. The tray is slidable. To print on large paper such as A3 (11" x 17") paper, extend the tray.
(3) Manual staple key
Press to execute manual stapling.
(4) Top cover
Open this cover to remove a paper misfeed.
(5) Insertion slot
Place the paper that you want to staple in this slot. Maximum thickness 9 mm.
(6) Saddle stitch tray
Saddle-stitched output is delivered to this tray.
(7) Front lower cover
Open this cover to replace the staple cartridge, remove a staple jam, or remove a paper misfeed.
(8) Front upper cover
Open this cover to replace the staple cartridge, remove a staple jam, or remove a paper misfeed.

- To install a saddle stitch finisher (large stacker), a paper pass unit or folding unit and stand/550/2x550/3x550/550&2100 sheet paper drawer are required.
- Do not place heavy objects on the saddle stitch finisher (large stacker) or press down on the saddle stitch finisher (large stacker).
• Exercise caution when you turn on the power and when printing takes place, as the tray may move up and down.
- A saddle stitch finisher (large stacker) cannot be installed simultaneously with an inner finisher, finisher, finisher (large stacker) or saddle stitch finisher.
HOW TO STAPLE MANUALLY
You can perform stapling manually.
Make sure the manual staple key is lit green.
1

Place the paper that you want to staple in the insertion slot.
When you place the paper, the manual staple key blinks green.
After two seconds elapse, stapling automatically starts.

- To staple earlier than the auto staple start time, press the manual staple key.

- Manual stapling cannot be executed during execution of a staple job.
- Manual stapling cannot be executed during auto power shutoff mode.
Relation between paper orientation and stapling result
| Paper Paper orientation when inserted After stapling | |||||
 AB AB |  |  |  | 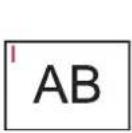 | |
 | 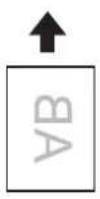 |  |  | ||
SUPPLIES
The saddle stitch finisher (large stacker) requires the following staple cartridge:
Finisher unit
Staple cartridge (approx. 5000 staples per cartridge x three cartridges) MX-SC11

Saddle stitch unit
Staple cartridge (approx. 2000 staples per cartridge x four cartridges) MX-SC12
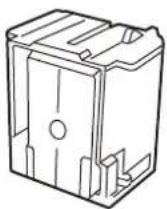
SADDLE STITCH FINISHER (LARGE STACKER) MAINTENANCE
When the staple cartridge runs out of staples, a message will appear in the operation panel. Follow the operation procedure to replace the staple cartridge.
Replacement the staple cartridge (finisher unit)
1

Open the front upper cover.
2
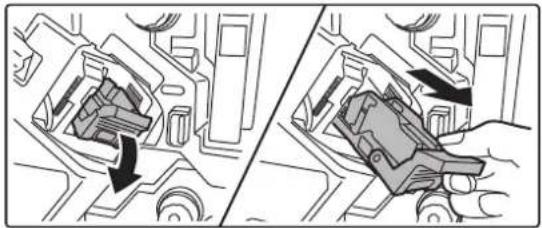
Remove the staple case.
3

Remove the empty staple cartridge.
4

Insert a new staple cartridge into the staple case.
Push the staple cartridge in until it clicks into place.
5

Push the staple case firmly back in.
Push the staple case in until it clicks into place.
6

Close the front upper cover.
Replacing the staple cartridge (saddle stitch unit)
Before starting this procedure, remove all output from the output tray of the saddle finisher (large stacker). Do not replace removed output back in the output tray.
1
Open the front upper cover.
2
Slowly pull out the front lower cover until it stops.
3
Remove the staple case.
4
Remove the empty staple cartridge.
5

Insert a new staple cartridge into the staple case.
Replace both staple cartridges.
6

Push the staple case firmly back in.
Push the staple case in until it clicks into place.
7

Push the front lower cover back in.
8

Close the front upper cover.
When the staple cartridge has been replaced, the staple is automatically tested.

Make a test print or copy using the saddle stitch function to verify that stapling takes place correctly.
▶ page 3-39
PUNCH MODULE
The punch module can be installed on an inner finisher, finisher or saddle stitch finisher to punch holes in paper to be output.
DISCARDING PUNCH WASTE
Punch waste from punched holes is collected in the punch waste box. Follow the operation procedure to replace punch waste.
Inner finisher installed
1
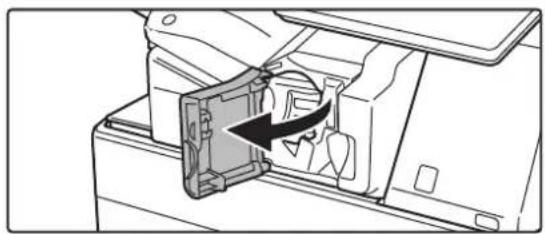
Open the finisher front cover.
2

While pressing the lever over to the left, slide the finisher to the left until it stops.
3

Grasp the punch waste box handle, gently pull out the box, and discard the punch waste.

4

Replace the punch waste box.
If the punch waste box is not replaced properly, printing will not be possible to use the punch function.
5
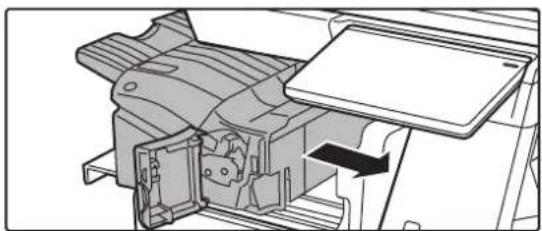
Slide the finisher to the right until it stops.
6

Close the finisher front cover.
Finisher installed
1
Open the front cover.
2
Pull out the punch waste box and discard the punch waste.
3
Replace the punch waste box.
If the punch waste box is not replaced properly, printing will not be possible to use the punch function.
4
Close the front cover.
Finisher (large stacker) installed
1
Open the front cover.
2
Pull out the punch waste box and discard the punch waste.
3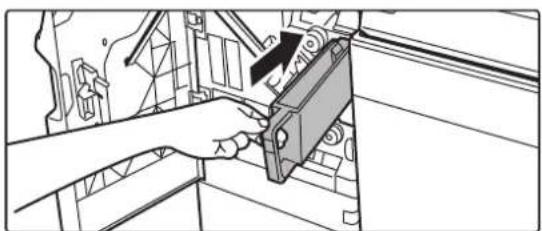
Replace the punch waste box.
If the punch waste box is not replaced properly, printing will not be possible to use the punch function.
4
Close the front cover.
Saddle stitch finisher installed
1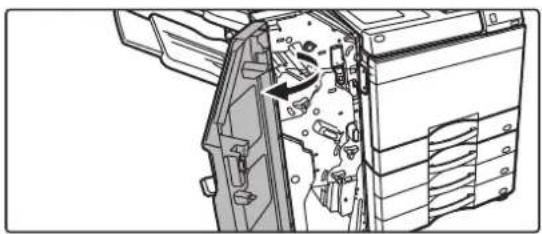
Open the front cover.
2
Pull out the punch waste box and discard the punch waste.

3
Replace the punch waste box.
If the punch waste box is not replaced properly, printing will not be possible to use the punch function.
4
Close the front cover.
Saddle stitch finisher (large stacker) installed
1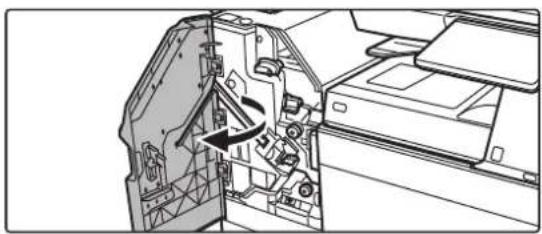
Open the front cover.
2
Pull out the punch waste box and discard the punch waste.
3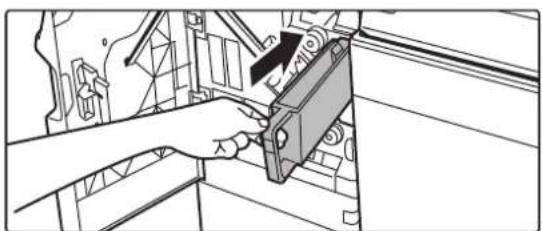
Replace the punch waste box.
If the punch waste box is not replaced properly, printing will not be possible to use the punch function.
4
Close the front cover.
FOLDING UNIT
A folding unit can be used for Z-Fold, C-Fold, Accordion Fold, and Half Fold.
PART NAMES
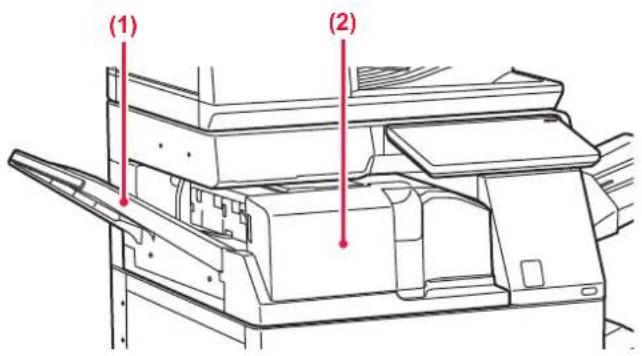
(1) Front cover
Open this cover to remove a paper misfeed. The tray is slidable. To print on large paper such as 11" x 17" (A3) paper, extend the tray.
(2) Output tray of folding unit
Folded output is delivered to this tray.
MAINTENANCE
REGULAR MAINTENANCE
To ensure that the machine continues to provide top quality performance, periodically clean the machine.

Do not use a flammable spray to clean the machine. If gas from the spray comes in contact with hot electrical components or the fusing unit inside the machine, fire or electrical shock may result.

- Do not use thinner, benzene, or similar volatile cleaning agents to clean the machine. These may degrade or discolour the housing.
- Use a soft cloth to gently wipe off dirt from the area on the operation panel with a mirror-like finish (shown at right). If you use a stiff cloth or rub hard, the surface may be damaged.
CLEANING THE DOCUMENT GLASS AND AUTOMATIC DOCUMENT FEEDER
If the document glass or document backplate sheet becomes dirty, the dirt will appear as dirty spots, coloured lines, or white lines in the scanned image. Keep these parts clean at all times.
Wipe the parts with a clean, soft cloth.
If necessary, moisten the cloth with water or a small amount of neutral detergent. After that, wipe with a clean dry cloth.
Examples of lines in the image


Document glass

Document backplate sheet

SCANNING AREA
If black lines or white lines appear in images scanned using the automatic document feeder, clean the scanning area (the thin long glass next to the document glass).
To clean this part, use the glass cleaner that is stored in the automatic document feeder. After using the glass cleaner, be sure to return it to its storage position.
When using the BP-55C26 / BP-70C31 / BP-70C36 / BP-70C45 / BP-70C55 / BP-70C65
1
Open the automatic document feeder and remove the glass cleaner.
2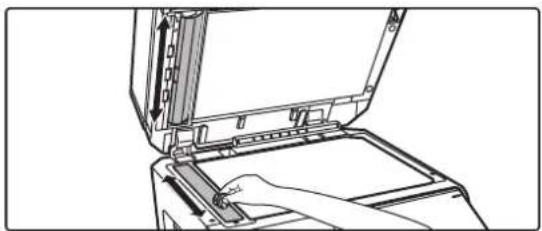
Clean the document scanning area on the document glass with the glass cleaner.
One scanning area is on the document glass and the other is inside the automatic document feeder.
3
Open the scanning area cover on the automatic document feeder.
Push in the release switch to release the cover.
4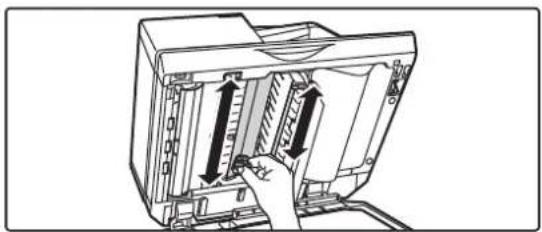
Clean the scanning area in the automatic document feeder.
5

Close the cover.
6
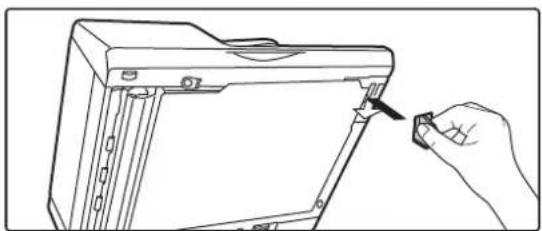
Replace the glass cleaner.
When using the BP-50C26 /BP-50C31 / BP-50C36 / BP-50C45 / BP-50C55 / BP-50C65 / BP-60C31 / BP-60C36 / BP-60C45
1

Open the automatic document feeder and remove the glass cleaner.
2

Clean the document scanning area on the document glass with the glass cleaner.
3

Replace the glass cleaner.
CLEANING THE LASER UNIT
When the laser unit inside the machine becomes dirty, line patterns (coloured lines) may form in the printed image. Identifying lines (coloured lines) caused by a dirty laser unit
- Coloured lines always appear in the same place. (The lines are never black.)
- Coloured lines appear in parallel with the direction of paper feeding.
- Coloured lines appear not only on output from a copier but also on prints from a computer. (The same lines appear on both copies and print jobs.)
If conditions similar to the above occur, clean the laser unit as explained below.
1

Open the front cover.
Open while pressing the convex parts on both sides.
2

Remove the toner collection container.
Spread newspaper or something similar in advance where you will place the toner collection container.
Press the release buttons on the sides of the toner collection container, push the toner collection container down until it stops, and then slowly lift it up to remove it.

- Do not touch the internal cords or connectors.
- The toner recovery container should be placed in an upright position, not collapsed.
3

Take out the cleaning tool for the laser unit.
The cleaning tool is attached to the front cover.
(1) Pull the right-hand side of the cleaning tool to detach it from the hook. (2) Put it over the hook to place it on the back side. (3) Turn the cleaning tool around the boss to detach it from the left-hand hook.

4

Make sure that the cleaner at the tip of the cleaning tool is not dirty.
If the cleaner is dirty, remove the cleaner from the cleaning tool and replace it with a clean one.
For the procedure for replacing the cleaner, see steps 5 through 7. If the cleaner is not dirty, go to step 8.
5

Take out a replacement cleaner from the toner collection container.
Replacement cleaners are stored on the toner collection container. Grasp the end of the cleaner and pull it out of the toner collection container.
Remove the dirty cleaner from the tip of the cleaning tool.
6
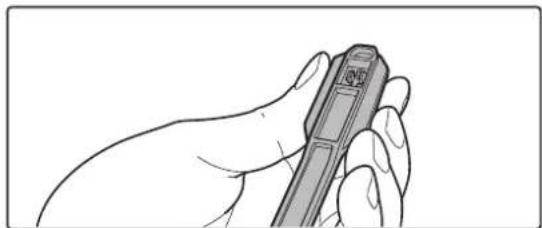
Remove the dirty cleaner from the end of the cleaning tool.
(1) Firmly grasp the tool where the cleaner is attached. (2) Use your other hand to press down on the hook that secures the cleaner, and remove the cleaner.


Put the removed cleaner back on the toner collection container.
7

Attach the new cleaner to the cleaning tool.
(1) Align the cleaner hook with the attachment hole in the cleaning tool. (2) Hold the cleaner firmly and push the cleaning tool in.

8


Clean the laser unit.
(1) Point the cleaner down and slowly insert the tool into the hole that you wish to clean.
Be sure to point the cleaner down.
Labels similar to (A) are attached to areas that require cleaning.
(2) Insert the cleaning tool all the way into the hole and then pull it back out.
Pull the cleaning tool out until you feel the tip of the tool leave the cleaning surface of the laser unit.
(3) Repeat step 2 two or three times, then remove the cleaning tool.

Do not touch the internal cords or connectors.
9

(A)
Repeat steps 8 to clean all holes (4 holes) in the laser unit.
The laser unit is cleaned in four locations, including the location cleaned in step 8. Clean all holes.
10


Replace the cleaning tool.
(1) Engage the cleaning tool onto the boss and turn it around it, then put the edge (the cleaner side) on the left hand hook. (2) Put the right-hand side of the cleaning tool over the hook to place it on the near side. (3) Turn the cleaning tool onto the hook.
11
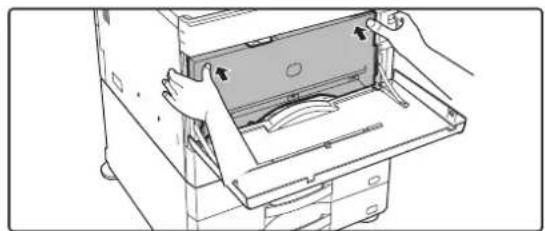
Push the toner collection container into the machine.
Push in until you hear a "click" sound indicating that the left and right locks are engaged.
12

Close the front cover.
Hold both sides and close.
CLEANING THE BYPASS FEED ROLLER
If paper misfeeds frequently occur when feeding envelopes or heavy paper through the bypass tray, wipe the surface of the feed roller with a clean soft cloth moistened with water or a neutral detergent.

When using the automatic document feeder, if the placed original is smudged or jammed, wipe the surface of the paper feed roller in the direction of the arrow with a clean, soft cloth moistened with water or a neutral detergent.
BP-50C26/BP-50C31/BP-50C36/BP-50C45/BP-50C55/BP-50C65/BP-60C31/BP-60C36/BP-60C45

Be careful not to bend or detach the plastic sheet.
BP-55C26/BP-70C31/BP-70C36/BP-70C45/BP-70C55/BP-70C65

Be careful not to bend or detach the plastic sheet.
REPLACEMENT OF TONER CARTRIDGE
Replace the toner cartridge. When this message appears, prepare a toner cartridge for replacement. Always replace the toner cartridge after the "Change the toner cartridge." message appears. You should keep one set of replacement toner cartridges on hand so that you can replace a toner cartridge immediately when toner runs out.

On the BP-50C55/BP-50C65/BP-70C55/BP-70C65, you can replace a toner cartridge without stopping printing.
Replacement message
When using the BP-50C55/BP-50C65/BP-70C55/BP-70C65

Toner Low. (☐☐☐☐)(Do not replace cartridge until requested.)

When this message appears, prepare a toner cartridge for replacement. (□□□□) shows the colour of the toner cartridge that should be prepared.

If you continue printing, the following message appears. When this message appears, prepare a toner cartridge for replacement.

Ready to scan for copy. (□□□□ Change the toner supply.)


If you continue to use the machine, the following message will appear when the toner runs out. (□□□□) shows the colour of the run out toner cartridge. Y: Yellow toner, M: Magenta toner, C: Cyan toner, and Bk: Black toner Replace the toner cartridge with a one of the relevant colour.
Change the toner cartridge. (□□□□)
When using the BP-50C26/BP-50C31/BP-50C36/BP-50C45/BP-50C55/BP-50C65/BP-55C26/BP-60C31/BP-60C36/BP-60C45/BP-70C31/BP-70C36/BP-70C45

Toner Low. (□□□□)(Do not replace cartridge until requested.)

When this message appears, prepare a toner cartridge for replacement. (□□□□) shows the colour of the toner cartridge that should be prepared.

If you continue to use the machine, the following message will appear when the toner runs out. (□□□□) shows the colour of the run out toner cartridge. Y: Yellow toner, M: Magenta toner, C: Cyan toner, and Bk: Black toner Replace the toner cartridge with a one of the relevant colour.
Change the toner cartridge. (□□□□)
1
When using the BP-50C55/BP-50C65/BP-70C55/BP-70C65

Open the toner cover.
(1) Yellow (2) Magenta (3) Cyan (4) Black Hold both sides and close.
When using the BP-50C26/BP-50C31/BP-50C36/BP-50C45/BP-50C55/BP-50C65/BP-55C26/BP-60C31/BP-60C36/BP-60C45/BP-70C31/BP-70C36/BP-70C45
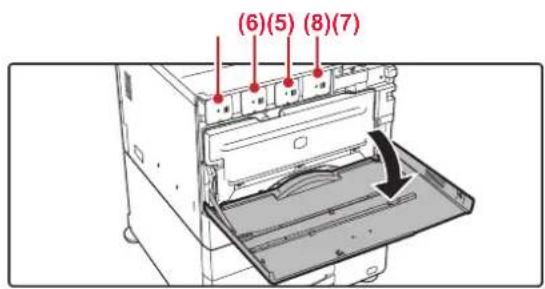
Open the front cover.
(5) Yellow (6) Magenta (7) Cyan (8) Black Hold both sides and close.
2

Pull the toner cartridge toward you.
The empty toner cartridge is ejected forward to enable removal.
Gently pull out the toner cartridge horizontally.
If the cartridge is pulled out abruptly, toner may spill out.
(Example) Replacing the yellow toner cartridge
Hold the toner cartridge with both hands as shown and slowly pull it out of the machine.


Do not attempt to remove a toner cartridge that has not been ejected.
3

Take out a new toner cartridge from its package and shake it horizontally five or six times.
4

Slowly insert the new toner cartridge on the level.

A toner cartridge of a different colour cannot be installed. Be sure to install a toner cartridge of the same colour.
5

Press in firmly until you hear a "click" sound
6
When using the BP-50C55/BP-50C65/BP-70C55/BP-70C65

Close the toner cover.
Hold both sides and close.
When using the BP-50C26/BP-50C31/BP-50C36/BP-50C45/BP-50C55/BP-50C65/BP-55C26/BP-60C31/BP-60C36/BP-60C45/BP-70C31/BP-70C36/BP-70C45

Close the front cover.
After the toner cartridge is replaced, the machine automatically enters image adjustment mode. Do not open the front cover while this is occurring. Hold both sides and close.

- Do not throw a toner cartridge into a fire. Toner may fly and cause burns.
- Store toner cartridges out of reach of small children.
- If a toner cartridge is stored upright, the toner may harden and become unusable. Always store toner cartridges on their side.
- If a toner cartridge other than a SHARP-recommended toner cartridge is used, the machine may not attain full quality and performance and there is a risk of damage to the machine. Be sure to use a SHARP-recommended toner cartridge.

- If any one of the toner colours runs out, colour printing will no longer be possible. If the Y, M, or C toners run out but a quantity of Bk toner still remains, printing is performed in black and white.
- Depending on your conditions of use, the colour may become light or the image blurred.

- Be sure to install four toner cartridges (Y/M/C/Bk).
- Your service technician will collect used toner cartridges. Your service technician will collect them.
- To view the approximate amount of toner remaining (indicated in %), hold down the [Home Screen] key during printing or in standby mode. When the percentage falls to "25-0%", keep a toner cartridge for replacement purposes before toner runs out.
- When toner runs out while the home screen is displayed, the "Toner Empty" message appears in the upper right corner of the screen. Additionally, if the toner quantity is displayed on the home screen, a "⚠️" will be displayed alongside colours for which toner has run out.
REPLACING THE TONER COLLECTION CONTAINER
The toner collection container collects excess toner that is produced during printing. When the toner collection container becomes full, the message "Replace toner collection container." will appear.
Replace the toner collection container as instructed by the message in the touch panel.
When the key is tapped, instructions for replacing the toner collection container will appear. Follow the instructions.
When the toner collection container is replaced, the message will automatically disappear.


- Do not throw the toner collection container into a fire. Toner may fly and cause burns.
- Store the toner collection container out of the reach of small children.

Do not touch the internal cords or connectors.


Open the front cover.
Open while pressing the convex parts on both sides.


Remove the toner collection container.
Press the release buttons on the sides of the toner collection container, push the toner collection container down until the toner collection container stops, and then slowly lift it up to remove it.

Keep the replacement cleaner that has not been used. Store it at the left of the new toner collection container.

Place the toner collection container on a flat surface.
Place a sheet of paper such as newspaper on the surface before placing the toner collection container.

- Keep the toner collection container in an upright position without collapsing it.
- Do not point the holes down as used toner will spill out.
- Do not throw away the removed toner collection container, instead place it in the plastic bag provided and keep it in the box in which it was packed.
4

Install a new toner collection container.
Insert the box from above at a slant. (In the direction opposite to the direction you removed it in.)
5

Close the front cover.
Hold both sides and close.
REPLACING THE STAMP CARTRIDGE
If a stamp unit (AR-SU1) is installed on the automatic document feeder and the stamp has become light, replace the stamp cartridge (AR-SV1).
Supplies
Stamp cartridge (2 in package) AR-SV1
WHEN USING THE BP-55C26 / BP-70C31 / BP-70C36 / BP-70C45 / BP-70C55 / BP-70C65
1
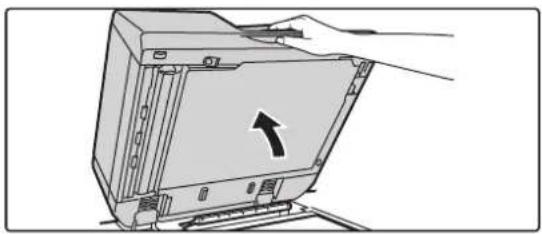
Open the automatic document feeder.
2

Remove the document backplate sheet from the automatic document feeder.
Remove the sheet slowly. Place the removed sheet with the side that was attached face up on the document glass.
3

Grasp the tab on the stamp unit and pull the unit out.
4

Remove the stamp cartridge (A).
5

Install a new stamp cartridge.
6

Push the stamp unit back in.
Push the stamp unit in until it clicks into place.
7

Close the automatic document feeder to attach the document backplate sheet.
When the automatic document feeder is closed, the document backplate sheet on the document glass attaches to the automatic document feeder.
8

Make sure that the document backplate sheet is firmly attached to the automatic document feeder and then close the automatic document feeder.
If the document backplate sheet is not firmly attached, remove the sheet and then close the automatic document feeder again to firmly attach the sheet.
WHEN USING THE BP-50C26 / BP-50C31 / BP-50C36 / BP-50C45 / BP-50C55 / BP-50C65 / BP-60C31 / BP-60C36 / BP-60C45
1

Open the document feeder tray.
2
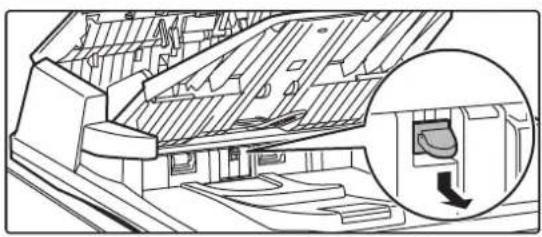
Remove the stamp cartridge while pushing it downwards.
3

Install a new stamp cartridge.
4

Close the document feeder tray.
TOUCH PANEL
TOUCH TYPES 2-2
OPERATION TYPES 2-2
OPERATION OF FREQUENTLY USED KEYS ..... 2-5
ACTION PANEL 2-6
SYSTEM INFORMATION SCREEN 2-6
HOME SCREEN AND PREVIEW SCREEN
HOME SCREEN 2-7
OVERVIEW 2-7
ICON INDICATING THE STATUS OF THE
MACHINE....2-9
PREVIEW SCREEN....2-11
CHANGE THE DISPLAY OF THE TOUCH PANEL
EDITING THE HOME SCREEN 2-18
CHANGING THE LAYOUT PATTERN OF THE HOME SCREEN 2-36
SELECTING A MFP DISPLAY PATTERN FOR THE HOME SCREEN....2-38
CHANGING THE COLOUR OF TEXT ON THE HOME SCREEN 2-40
CHANGING THE BACKGROUND IMAGE OF THE HOME SCREEN....2-42
CHANGING THE FIXED KEYS 2-45
INCREASING THE TEXT SIZE 2-47
CHANGING THE LANGUAGE USED ON THE MACHINE. 2-48
JOB STATUS
STOPPING/DELETING A JOB, PRIORITY
PROCESSING AND CHECKING THE STATUS .....2-53
TYPES OF JOB STATUS SCREENS.....2-53
STOPPING/DELETING A JOB IN PROGRESS OR RESERVED....2-55 PRIORITY PROCESSING OF A RESERVED JOB ...2-56
CHECKING A RESERVED JOB OR THE JOB IN PROGRESS 2-58
CHECKING COMPLETED JOBS .....2-59
READING THE JOB LIST 2-60
CHARACTER ENTRY
CHARACTER ENTRY .....2-63
NAMES AND FUNCTIONS OF SOFT KEYBOARD KEYS. 2-63
SET THE KEYBOARD SETTING .....2-64
TOUCH PANEL
TOUCH TYPES
OPERATION TYPES
In addition to tapping, equivalent to conventional touching, the touch panel of the machine can be operated by long touching, flicking and sliding.


Tapping
Touch the panel with your finger and then lift it quickly. Use this method to select a key, tab or check box.
Long touching
Touch the panel with your finger and hold it for a while. Keep holding (long touching) it on the action panel or characters in the text box to display characters in a balloon.
Flicking
Flick the panel to scroll a preview image quickly.
Dragging
Drag (slide your finger touching the panel in a random direction) to replace a page in the original during preview.


Sliding
Slide the scroll bar (with your finger touching the panel) to scroll up and down a list with a large number of items.
Double tapping
Touch the screen twice. Use this operation to enlarge the image in the preview.
Pinch
Touch the screen with two fingers and move them toward each other. This is used to reduce the browser and preview display.
Spread
Touch the screen with two fingers and move them away from each other. This is used to enlarge the browser and preview display.
Operation on respective screens
Key (tapping)
A. Tap to select an item. The selected key turns into a different colour. B. Tap numeric keys to enter numbers. C. Tap to increase or decrease the value. Long touching causes the value to be increased or decreased until you stop touching. D. Tap to enter a checkmark and enable the setting. E. Tap here to close the screen
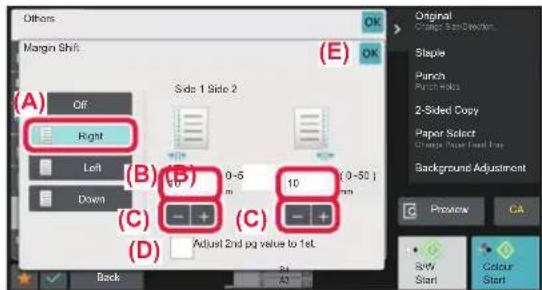
List (tapping, sliding and flicking)
A. Tap to select an item. The selected item turns into a different colour. B. Slide the bar up and down. It appears when the item does not fit in the screen. C. Flick the key upwards or downwards. The item scrolls up or down.

Slider (sliding)
A. Slide the knob from side to side.
![Others Background Adjustment Adjust Original Background Darkness. Off On (A) Touch [+] darken background. Touch [-] erase background. Original Erase Sharpness Exposure Colour Mode Preview CA Other All BIV Start Colour Start](/content/2026/06/1367452/images/8c36850cf875a5c5e58eaada88ef7f69d23c7d72f3944623762abe68050b0822.jpg)
Tab (tapping)
A. Tap a tab to switch what is displayed.

Preview screen (Double tapping/ Pinch/ Spread)
A. When a preview screen is "pinched", the screen image is reduced. When "spread", the image is enlarged. When "Double tapping", the image is also enlarged.

OPERATION OF FREQUENTLY USED KEYS
Numeric keys
Tap a number to enter it.
To clear the entered number, tap the [C] key.


On the address screen, you can enter characters other than numbers, and a different key layout is provided. You can also move the cursor by using the [←] and [→] keys. Tap the [C] key to delete one character to the left of the cursor.
[Start] key ([B/W Start] key and [Colour Start] key)
Tap to perform a print or send job.

![SHARP BP-50C45 - [Start] key ([B/W Start] key and [Colour Start] key) - 2](/content/2026/06/1367452/images/71f7495a2ebb4d32ef6873a67df4bee89114bda150f29a01e53eeed4fe4db4d1.jpg)
In copy mode, [B/W Start] and [Colour Start] keys are displayed.
[Cancel Copy] key, [Storing Cancelled] key, [Cancel Scan] key, [Sending Cancelled] key
Tap to stop copying, printing, or transmission.
[CA] key
Tap to cancel all settings and restore the initial status in each mode.

ACTION PANEL
Recommended functions are displayed on the action panel when you configure functions in each mode.
From the action panel, you can configure functions or combine the configured function with a function displayed on the action panel.
If the action panel does not appear, tap the action panel tab.
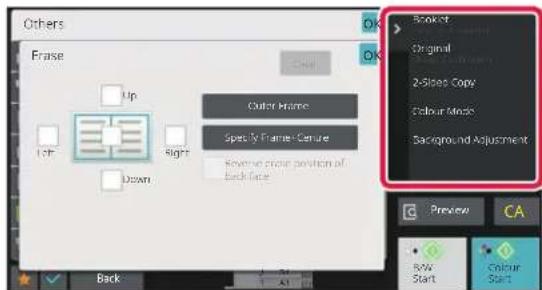

The functions displayed on the action panel vary depending on the mode or the functions that have been configured.
If too many functions have been configured to be displayed on the action panel, you can slide the panel vertically or tap and to view all.
In enlarge display mode, part of the text on the action panel may not be displayed. To display the whole text, long-touch the partially hidden key or slide the tab of the action panel to the left.
Tap the [System Info.] key in the System Information area at the top of the touch screen to display the System Information screen.
In addition, in case that an error has occurred to this machine, this screen is displayed automatically to show the details of an error.

(1) Notification
If there is an error which requires an user operation to recover, such as toner outage or transmission error, an instruction is displayed here.
If → is displayed on the right side of the Notification list, tap → to jump to the setting screen where the error originated in.
Notifications disappear from the list when problems are resolved.
(2) Machine Information
The connection information of the machine is displayed.
(3) Paper Tray
Size, type, and remaining amount of paper inside the machine are displayed. Tap here to jump to the Paper Tray Settings screen.
HOME SCREEN AND PREVIEW SCREEN
HOME SCREEN
Tapping the [Home Screen] key displays the home screen on the touch panel. The home screen displays the keys for selecting modes or functions.
OVERVIEW

(1) System Information area
Tap this area to display the System Information screen.
▶ SYSTEM INFORMATION SCREEN (page 2-6)
(9) Home screen page switching key
Switch the pages for displaying shortcut keys.
(2) [Home Screen]
Switch to the home screen.
(3) Mode selection area
The mode selection screen is displayed.
(4) Shortcut keys
Select shortcut keys for modes or functions.
EDITING THE HOME SCREEN (page 2-18)
(5) Fixed display key
Use these keys to select functions that make the machine easier to use.
(6) [Job Status] key
Displays the job in progress or waiting with text or icon.
STOPPING/DELETING A JOB, PRIORITY PROCESSING AND CHECKING THE STATUS (page 2-53)
(7) Clock
Displays the time.
(8) Action panel
Select functions that can be utilized in respective modes.
Tap the tab, and the list of function keys is displayed.
▶ ACTION PANEL (page 2-6)
Recent jobs

Tap this key to display the contents of the most recently used jobs in a list.
Tap an item in the list to set the contents in the list.
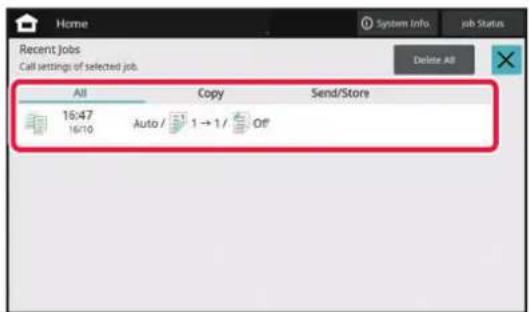
ICON INDICATING THE STATUS OF THE MACHINE
| Icon | Machine status | Icon | Machine status |
 | Printer data is being processed. A USB device is installed | [X6A2] | |
| [04HZ] | Printer data is being printed. The field support system is enabled. | [T32H] | |
 | Send data exists. Single-byte alphanumeric character entry |  | |
 | Forward error data exists. A data security kit is installed |  | |
| [04ZC] | Received data exists. Connecting to the access point (Level 4) |  | |
 | Received confidential fax data exists. Connecting to the access point (Level 3) |  | |
 | Received data is held. Connecting to the access point (Level 2) |  | |
 | Received preview data exists. Connecting to the access point (Level 1) |  | |
 | OSA communication is in progress. Not connected to the access point |  | |
 | Enlarge display mode is enabled. Bad connection of the wireless LAN device in the machine* | [2X55] | |
 | Eco mode is enabled. Waiting for the access point |  | |
 | A maintenance notification is issued. A LAN cable is not connected. | [02DY] | |
 | Remote operation is in progress. Bluetooth connection in progress |  |
* Contact your dealer or nearest authorised service representative.
CHANGING MODES
Changing mode from the Home screen Changing mode from the mode display

↓

↓

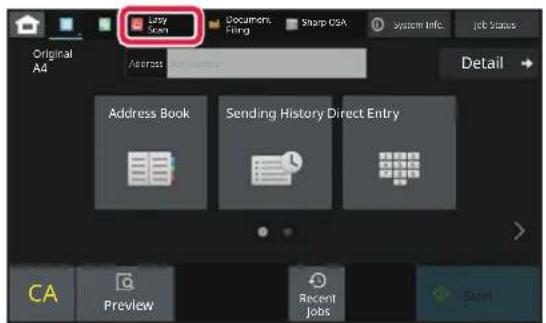
↓

For procedures for editing the home screen, see "EDITING THE HOME SCREEN (page 2-18)".
PREVIEW SCREEN
In the preview screen, you can view output images or images stored in the machine using the touch panel. [Easy mode] [Normal mode]


Keys used in the preview screen
 | This changes the mode to edit mode.Pages of the original can be changed,rotated, or deleted. |  | This rotates the preview image of wholepage in the arrow's direction. Theprinting result is not rotated. |
* | This reduces the image. |  | This displays preview images ofrespective pages. |
* | This displays the scroll bar forenlargement/reduction operations.Moving the slider to the left reduces theimage, and moving the slider to the rightenlarges the image. |  | This displays thumbnails of previewimages. |
* | This enlarges the image. |  | This displays pages in a 3D view. |
* Can also be used in Easy mode.

- The display position of an image can be moved by dragging it while it is enlarged.
- To enlarge an image, double-tap it when the preview image is displayed by page.
Deleting a page
1
In the preview screen, tap to switch to edit mode.
2
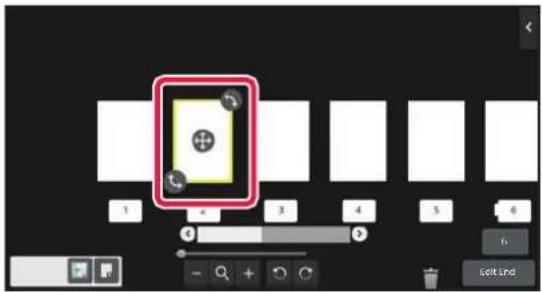
Tap the page you want to delete, and tap 📄.

- You can also delete the page by tapping [Delete the Page] on the action panel.
- You can also delete the page by dragging a page to .

• To undo the deletion, tap ☐ to redo the deletion, tap .

3
Tap the [Edit End] key.
Moving a page
1
In the preview screen, tap to switch to edit mode.
2

Tap the page you want to move, and drag to move the page.

You can also move the page by tapping [Move the Page] on the action panel and then tap ± of the destination.
3
Tap the [Edit End] key.
Rotating a page
1
In the preview screen, tap to switch to edit mode.
2

Tap the page you want to rotate, and drag or to rotate the page.

You can also rotate the page by tapping [Rotate 180 Degrees] (Copy mode only) or [Rotate 90 Degrees] (Fax and scanner mode only) on the action panel.
3
Tap the [Edit End] key.
Setting chapter inserts
When N-Up or 2-Sided is specified, you can move a page marked with to the first page.
In the preview screen, tap to switch to edit mode.

Tap the page you want to set chapter inserts.

Tap


is displayed on the page.

- You can also set chapter inserts by tapping [Specify Chapter Inserts] on the action panel. • To cancel the Chapter Inserts setting:
Tap displayed on the page, or select the page and tap [Cancel Chapter Inserts of Selected Page.] on the action panel.
Tap the [Edit End] key.
Inserting a blank page
In the preview screen, tap to switch to edit mode.

Tap the location into which you want to insert a blank page.

You can also insert a blank page by tapping [Insert Blank Page] on the action panel.
3
Tap the [Edit End] key.
Deleting part of the original image
1
In the preview screen, tap to switch to edit mode.
2

Tap [Erase Specified Range] on the action panel.
3

Follow the on-screen instructions to specify the erase range.
Specify the erase range and then tap the [OK] key.

To delete the image outside the selected range, tap [Reverse Erase Range] on the action panel.
4

On the action panel, select [Apply This Erase Position to All Pages.] or [Apply This Erase Position to This Page.].
5
As necessary, repeat the steps to specify the erase range and the pages to which it is applied.
6

Tap the [Exit] key.
Changing the settings
Tapping the tab on the left of the screen allows you to change the settings. You cannot tap the keys for functions whose settings cannot be changed.

CHANGE THE DISPLAY OF THE TOUCH PANEL
EDITING THE HOME SCREEN
In the home screen, you can change the number of shortcut keys shown and change shortcut keys.
This includes changing the background and text colour, and changing the background to a custom image.
ADDING SHORTCUT KEYS
This section explains how to add a shortcut key to the home screen.
You can add a shortcut key using the touch panel, or from the Web page. In the Web page, you can change a shortcut key image to any custom image.
![Scan to Local Drive File Retrieve Tray Settings I want to add the [Address Control] shortcut key](/content/2026/06/1367452/images/22210be85eac667116a5ad4a93f030f9d0834729677e1cd23839ddd0b2a8a7e3.jpg)

From the touch panel
1

Open the action panel on the home screen, and tap [Edit Home].
2

The administrator password screen appears. Enter your password.
Enter the administrator password.
3

Tap an empty shortcut key location.
4

Tap the function you want to add.
The shortcut key will be added to the selected location.
5
After completing the settings, tap the [Logout] key.
From the Web page
1
Enter the IP address set in the machine in the address bar of your web browser.
In the factory default state, you must enter your user password after entering the IP address.
On the Web page, click the [System Settings] tab → [Home Screen Settings].
Some settings may require that you enter your user password after clicking [Home Screen Settings]. If you did not perform user authentication, you must enter the administrator password.
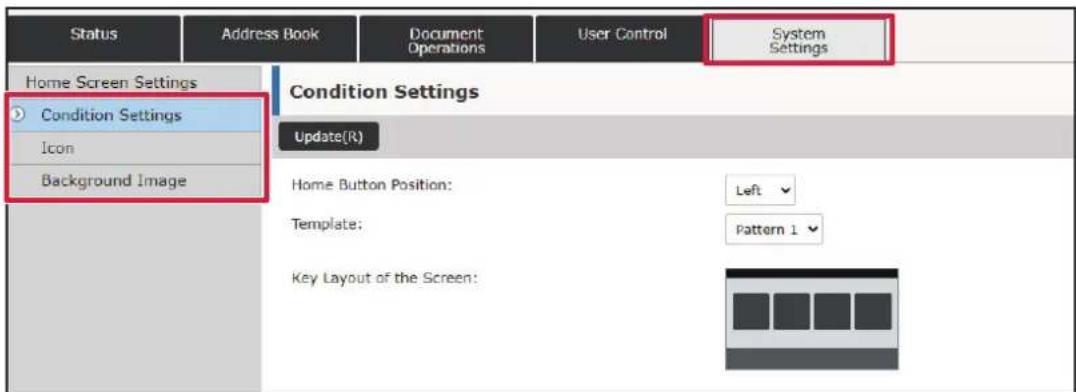
Select the function you want to add.

To change the name of a shortcut key, select [Custom] in [Key Name] and enter the desired name in the text box.

To change the image of a shortcut key, go to the next step. If you are not changing the image, go to step 5.
To change the image of a shortcut key, set the [Use Custom Image] checkbox to , and select a previously added image with [Select File].
To save an image, see "ADDING A SHORTCUT KEY IMAGE (page 2-27).
When you have finished configuring the settings, click the [Submit] button.
The settings are saved in the machine and applied.
When you have finished settings, click the [Logout] button and close your Web browser.
EDITING SHORTCUT KEYS
You can add shortcut keys to the home screen, and delete unneeded shortcut keys.
You can also change the display order of the shortcut keys and change names and images to make the machine easier to use.
![05:45, Scan to Local Drive, File Retrieve, Tray Settings, Address Control, I want to delete the [Address Control] shortcut key. Toler, Quantity, Rk, C, M, Y, Users Manual](/content/2026/06/1367452/images/5b089dcb77c6ffb2b3b2f90d5d88139d62e589d9ed7bea91cf4c93ae477733c0.jpg)


From the touch panel
1

Open the action panel on the home screen, and tap [Edit Home].
2

The administrator password screen appears. Enter your password.
Enter the administrator password.
3

Tap the shortcut key you want to delete, and tap [Delete Key].
A yellow frame appears around the selected shortcut key. With the shortcut key selected, tap .
You can also delete by dragging the shortcut key to .
4

Tap the [Yes] key.
The selected shortcut key will be deleted.
5
After completing the settings, tap the [Logout] key.
From the Web page
1
Enter the IP address set in the machine in the address bar of your web browser.
In the factory default state, you must enter your user password after entering the IP address.
2
On the Web page, click the [System Settings] tab → [Home Screen Settings].
Some settings may require that you enter your user password after clicking [Home Screen Settings]. If you did not perform user authentication, you must enter the administrator password.

3
Click [Condition Settings] and click the shortcut key you want to delete.
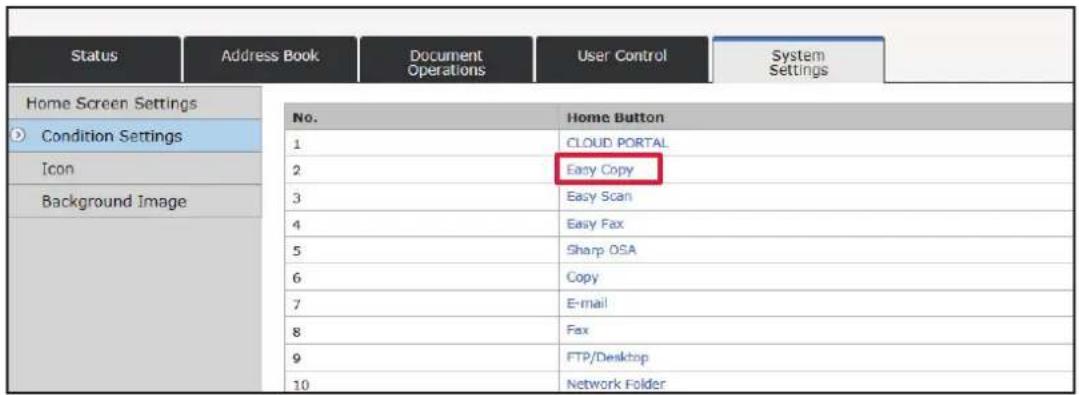
4
Select [None] and click the [Submit] button.
When you click the [Submit] button, the [Home Screen Registration] screen closes.

5
When you have finished configuring the settings, click the [Submit] button.
The settings are saved in the machine and applied.
When you have finished settings, click the [Logout] button and close your Web browser.
CHANGING A SHORTCUT KEY
This section explains how to change a shortcut key in the home screen.
Only the name can be changed from the touch panel. You can change the icon image from the Web page.
![05:45 Scan to Local Drive File Retrieve Tray Settings Address Control I want to change the [Address Control] shortcut key Scan to Local Drive File Retrieve Tray Settings Address setting Toner Quantity Bk C M Y User+ Manual User+ Manual FNGer Dauer Mode Settings Total Count Brightness Adjustment Job…](/content/2026/06/1367452/images/c060fb3d028bd9ae554498a25568e818f94400af061b7d97ba62732bf1d9ae27.jpg)
From the touch panel
To change a shortcut key from the touch panel, move the shortcut key in the desired location away from that location, and then register the new shortcut key in the location that has been freed. For information about how to move shortcut keys, see "MOVING A SHORTCUT KEY (page 2-29)". For information about how to add shortcut keys, see "ADDING SHORTCUT KEYS (page 2-18)".
This section explains how to change the name of a shortcut key.
1
![Edit Home Easy Copy Easy Scan Easy Fax Setting Change Text Colour On Blume Screen Key Transparency Setting Tunnel Quantity BA C M V Finger- [0-1] Eange Gray Mode Settings Total Count Brightness Adjustment Job Status](/content/2026/06/1367452/images/4f8a013cb75a8da8292c77e79594dae9a83a27a10f34a0006a93d377ec15c811.jpg)
Open the action panel on the home screen, and tap [Edit Home].
2

The administrator password screen appears. Enter your password.
Enter the administrator password.
3
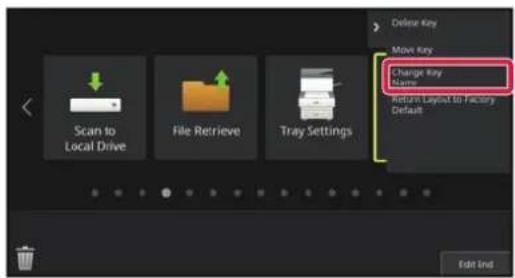
A yellow frame appears around the selected shortcut key.
A yellow frame appears around the selected shortcut key.
4
![Key Name Address:control .com net org bit info httpur ' 1 2 3 4 5 6 7 8 9 0 - = @ q w e r t y u i o p [ ] \ a s d f g h j k l ; ' z x c v b n m , . / Space AltGr ← →](/content/2026/06/1367452/images/ce382cfde1fa3fed6c7bb905a369578c9c88a8c913bfb750c49f656d361545dd.jpg)
Enter the new name by keyboard.
Enter the name, and tap the [OK] key.
5
After completing the settings, tap the [Logout] key.
From the Web page
1
Enter the IP address set in the machine in the address bar of your web browser.
In the factory default state, you must enter your user password after entering the IP address.
2
On the Web page, click the [System Settings] tab → [Home Screen Settings].
Some settings may require that you enter your user password after clicking [Home Screen Settings]. If you did not perform user authentication, you must enter the administrator password.

3
Click [Condition Settings], and click the shortcut key you want to change.

4
Select the desired function.
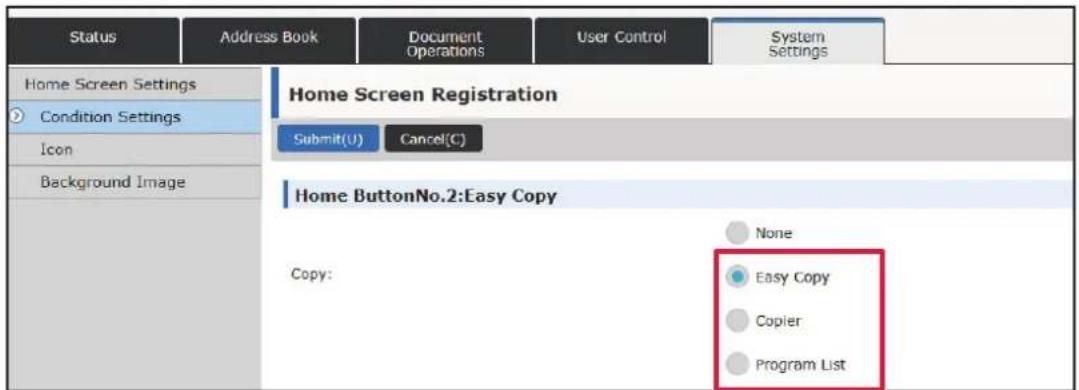
To change the name of a shortcut key, select [Custom] in [Key Name] and enter the desired name in the text box.

To change the image of a shortcut key, go to the next step. If you are not changing the image, go to step 5.
5
To change the icon image, set the [Use Custom Image] checkbox to √, and select a previously added image with [Select File].
To save an image, see "ADDING A SHORTCUT KEY IMAGE"
6
When you have finished configuring the settings, click the [Submit] button.
The settings are saved in the machine and applied.
When you have finished settings, click the [Logout] button and close your Web browser.
ADDING A SHORTCUT KEY IMAGE
To change a shortcut key image to a new image, you must first add the new image.
This section explains how to add an image. Images are added by using the Web page.
![graph TD A["Settings"] --> B["Settings"] C["I want to change the [Settings"] shortcut key.] --> D["I want to add this image"]](/content/2026/06/1367452/images/cd8360a1d06e936534462148a1d840c306a06ab504dec2c383e4ad9aa2bda2c7.jpg)

Icon images are automatically enlarged or reduced to match the size of the shortcut keys.
1
Enter the IP address set in the machine in the address bar of your web browser.
In the factory default state, you must enter your user password after entering the IP address.
2
On the Web page, click the [System Settings] tab → [Home Screen Settings].
Some settings may require that you enter your user password after clicking [Home Screen Settings]. If you did not perform user authentication, you must enter the administrator password.

3
Click [Icon].
4
Select any item
If you are adding a new image, click "Not Set". If "Not Set" items are all in use, click an unneeded item in the already added items.

5
Select the file to be added in "Select File".
Click the [Browse] button, and select the image to be submitted.

- File formats that can be used are JPEG, GIF and PNG (jpeg, jpg, jpe, jff, gif and png).
- The maximum file size of an image that can be used for a shortcut key is 50 KB.
6
When you have finished configuring the settings, click the [Submit] button.
The settings are saved in the machine and applied.
When you have finished settings, click the [Logout] button and close your Web browser.
MOVING A SHORTCUT KEY
This section explains how to move a shortcut key in the home screen.
Shortcut keys are moved by using the touch panel.
![I want to move the [PC Scan] shortcut key.](/content/2026/06/1367452/images/29f7de9f597a3eaa5b1bb26152ffeaaf3f7b6fc1f2cc1736a8ed596b51fad431.jpg)


1

Open the action panel on the home screen, and tap [Edit Home].
2

The administrator password screen appears. Enter your password.
Enter the administrator password.
3

Tap the shortcut key you want to move, and tap [Move Key].
A yellow frame appears around the selected shortcut key.
4


Tap an empty shortcut key location.
The shortcut key moves to the tapped location.
The shortcut key will not move if you tap a location that already has a shortcut key.
5
After completing the settings, tap the [Logout] key.
RETURNING THE SHORTCUT KEYS TO THE FACTORY DEFAULT STATE
This section explains how to return the shortcut keys in the home screen to the factory default state.
This procedure can be performed from the touch panel or from the Web page.
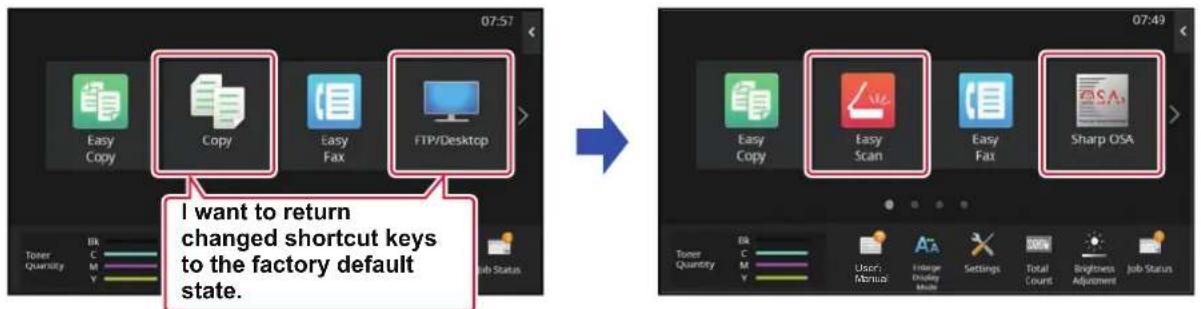

The positions, names, and images of the shortcut keys are returned to the factory default state.
From the touch panel
1

Open the action panel on the home screen, and tap [Edit Home].
2

The administrator password screen appears. Enter your password.
Enter the administrator password.
3

Tap [Return Layout to Factory Default] on the action panel.
4
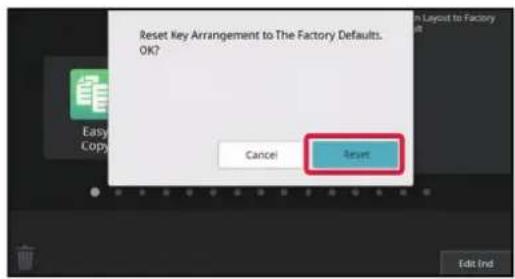
Tap the [Reset] key.
The shortcut keys are returned to the factory default state.
5
After completing the settings, tap the [Logout] key.
From the Web page
1
Enter the IP address set in the machine in the address bar of your web browser.
In the factory default state, you must enter your user password after entering the IP address.
2
On the Web page, click the [System Settings] tab → [Home Screen Settings].
Some settings may require that you enter your user password after clicking [Home Screen Settings]. If you did not perform user authentication, you must enter the administrator password.

3
Click [Condition Settings], and click the [Return to the Defaults] button.
A confirmation window appears. Click the [OK] button.

4
When you have finished configuring the settings, click the [Submit] button.
The settings are saved in the machine and applied.
When you have finished settings, click the [Logout] button and close your Web browser.
CHANGING THE TRANSPARENCY OF A SHORTCUT KEY
You can change the transparency of the shortcut keys.
If you want to change the background of your home screen to show what's behind the shortcut keys, increase the transparency to make it easier to see what's behind the shortcut keys.
This procedure can be performed from the touch panel or from the Web page.


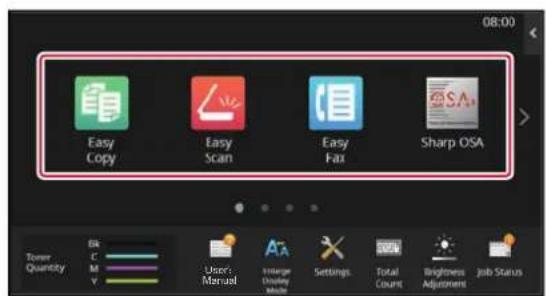
From the touch panel
1
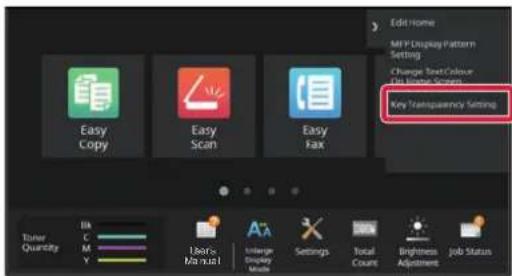
Open the action panel on the home screen, and tap [Key Transparency Setting].
2

The administrator password screen appears. Enter your password.
Enter the administrator password.
3
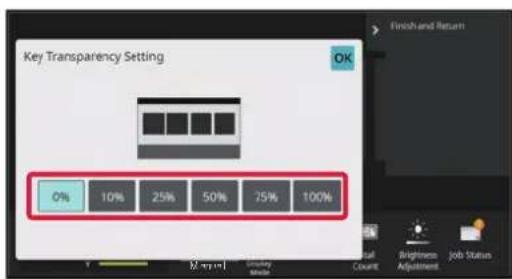
Select the level of transparency you wish to set.
4

Tap the [Finish and Return] key.
5
After completing the settings, tap the [Logout] key.
From the Web page
1
Enter the IP address set in the machine in the address bar of your web browser.
In the factory default state, you must enter your user password after entering the IP address.
2
On the Web page, click the [System Settings] tab → [Home Screen Settings].
Some settings may require that you enter your user password after clicking [Home Screen Settings]. If you did not perform user authentication, you must enter the administrator password.

3
Click [Condition Settings], and click the [Key Transparency Setting] button.
4
When you have finished configuring the settings, click the [Submit] button.
The settings are saved in the machine and applied.
When you have finished settings, click the [Logout] button and close your Web browser.
CHANGING THE LAYOUT PATTERN OF THE HOME SCREEN
Multiple home screen layout patterns are preset in the machine. These include a layout pattern that reduces the display size of the shortcut keys to increase the number of keys shown, and a layout pattern that eliminates the fixed key display area to increase the number of shortcut keys shown. The layout pattern can be changed in the Web page.

Home screen layout patterns
Six layout patterns are available.
| Pattern Number of shortcut keys displayed per screen | Fixed key area Maximum number of screens | |
| 1 4 Yes 15 screens | ||
| 2 8 No 8 screens | ||
| 3 8 Yes 8 screens | ||
| 4 12 No 5 screens | ||
| 5 12 Yes 5 screens | ||
| 6 18 No 4 screens | ||
1
Enter the IP address set in the machine in the address bar of your web browser.
In the factory default state, you must enter your user password after entering the IP address.
On the Web page, click the [System Settings] tab → [Home Screen Settings].
Some settings may require that you enter your user password after clicking [Home Screen Settings]. If you did not perform user authentication, you must enter the administrator password.

Click [Condition Settings] and select the desired layout pattern from the "Template".
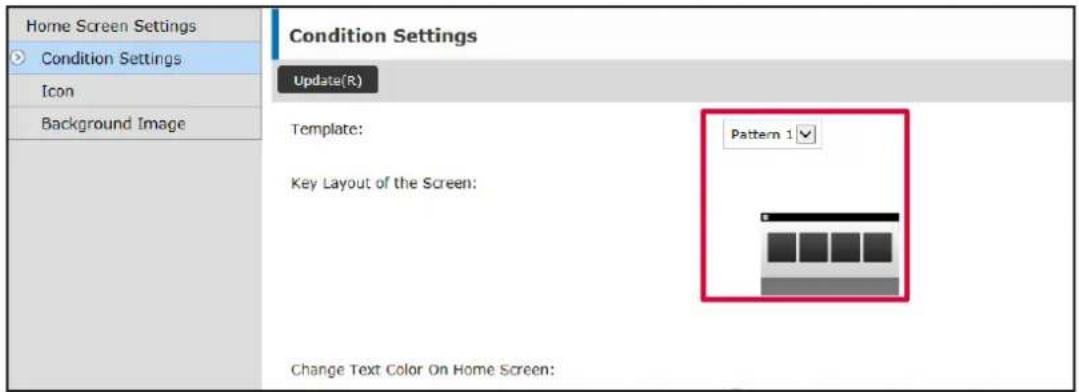
When you have finished configuring the settings, click the [Submit] button.
The settings are saved in the machine and applied.

SELECTING A MFP DISPLAY PATTERN FOR THE HOME SCREEN
Multiple colour patterns are preset in the machine. You can change the colour pattern from the touch panel.


Open the action panel on the home screen, and tap [MFP Display Pattern Setting].
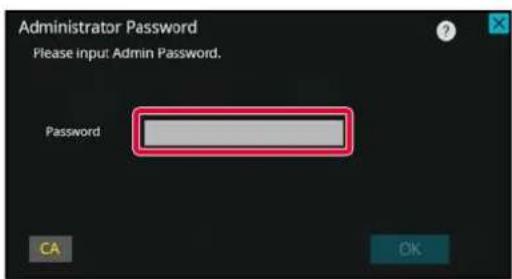
The administrator password screen appears. Enter your password.
Enter the administrator password.
3
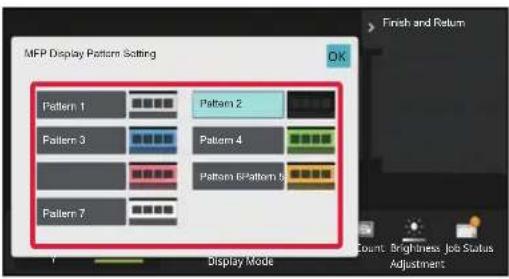
Select the desired pattern.
4
After settings are completed, tap the [Logout] key.
CHANGING THE COLOUR OF TEXT ON THE HOME SCREEN
You can change the colour of the text in shortcut keys, fixed keys, and the clock on the home screen to white or black. The colour is changed using the touch panel.
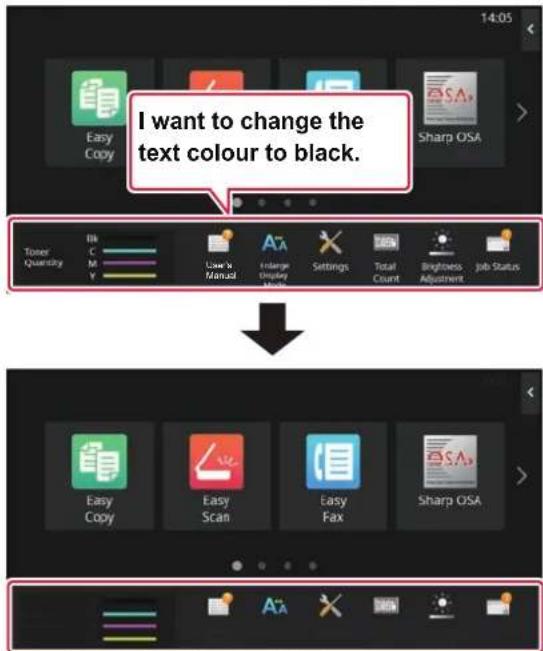
The colour of text on the home screen varies depending on the layout pattern.
For information about layout patterns of the home screen, see "CHANGING THE LAYOUT PATTERN OF THE HOME SCREEN" (▶ page 2-36).
Factory default text colours
Home screen layout patterns and text colours
| Layout Pattern Scrolling Area(Text colour of shortcut key) | Fixed Area(Text colour of fixed keys) | Clock(Text colour of clock) | |
| 1 White White Black | |||
| 2 White No Black | |||
| 3 Black White Black | |||
| 4 Black No Black | |||
| 5 Black White Black | |||
| 6 Black No Black | |||
1

Open the action panel on the home screen, and tap [Change Text Colour On Home Screen].
2

The administrator password screen appears. Enter your password.
Enter the administrator password.
3

Change the text colour.
4
After settings are completed, tap the [Logout] key.
CHANGING THE BACKGROUND IMAGE OF THE HOME SCREEN
You can change the background image of the home screen to a custom image.
This procedure can be performed from the touch panel or from the Web page.
To change the image from the touch panel, first save the desired image in a USB device and connect the device to the machine.


The display size of the background image is 1024 dots x 544 dots.
The height of the image is adjusted to the display height, and the width is adjusted to the display width.
Because the height and width are enlarged/reduced separately, some images may become distorted.
If you want to display the image correctly, adjust the size of the image to the display size of the background image in advance.
From the touch panel
1
Connect the USB device containing the desired image to the machine.
When the USB device is connected to the machine, a popup window will appear. Tap the [OK] key.
2
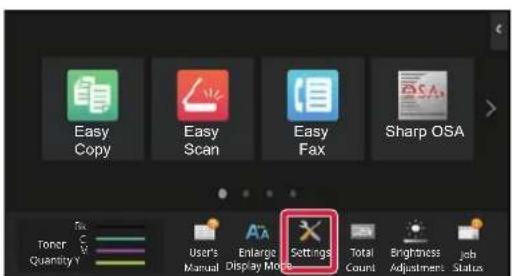
Tap the [Settings] key on the Home screen.
The screen changes to the settings screen.
3
Tap [System Settings] → [Home Screen Settings] → [Background Image], and then tap the [Change] key.
The "Register Background Image" screen will appear.

The administrator password entry screen will appear while you are selecting settings. Enter the administrator password and log in.

4
Set the [Use Custom Image] checkbox, and select the desired image with [Folder Name/File Name].

- File formats that can be used are JPEG, GIF, and PNG (jpeg, jpg, jpe, jfif, gif, and png).
- The maximum file size of an image that can be used for the background image is 640 KB.
5
Click the [Store] button.
After all U/I customize settings are completed, tap the [Logout] key.
From the Web page
1
Enter the IP address set in the machine in the address bar of your web browser.
In the factory default state, you must enter your user password after entering the IP address.
2
On the Web page, click the [System Settings] tab → [Home Screen Settings].
Some settings may require that you enter your user password after clicking [Home Screen Settings]. If you did not perform user authentication, you must enter the administrator password.

3
Click the [Change] button in [Background Image].

4
Set the [Use Custom Image] checkbox to , and select the image with [Select File].
Click [Browse] to select the image.

![SHARP BP-50C45 - Set the [Use Custom Image] checkbox to , and select the image with [Select File]. - 2](/content/2026/06/1367452/images/3da4d46884db85082551bdfaf96ba59bdb82a10ec7fa6521b27bba2154719ab2.jpg)
- File formats that can be used are JPEG, GIF and PNG (jpeg, jpg, jpe, jfif, gif and png).
- The maximum file size of an image that can be used for the background image is 640 KB.
5
When you have finished configuring the settings, click the [Submit] button.
The settings are saved in the machine and applied.
When you have finished settings, click the [Logout] button and close your Web browser.
CHANGING THE FIXED KEYS
You can change the fixed keys. The fixed keys are changed using the Web page.

1
Enter the IP address set in the machine in the address bar of your web browser.
In the factory default state, you must enter your user password after entering the IP address.
2
On the Web page, click the [System Settings] tab → [Home Screen Settings].
Some settings may require that you enter your user password after clicking [Home Screen Settings]. If you did not perform user authentication, you must enter the administrator password.
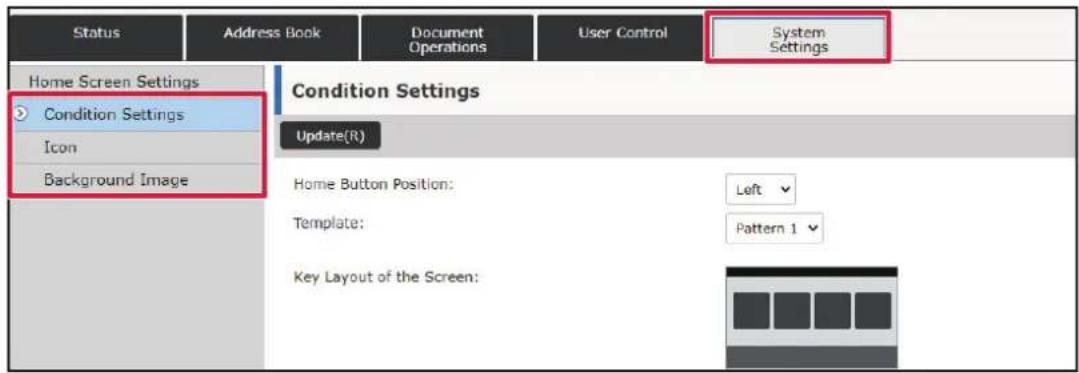
3
Click [Condition Settings], and click the desired item under "Fix Key".
You can click [Not Set] to add a new fixed key.

4
Select the function you want to add, and click the [Submit] button.
When you click the [Submit] button, the [Home Screen Registration] screen closes.
5
When you have finished configuring the settings, click the [Submit] button.
The settings are saved in the machine and applied.
When you have finished settings, click the [Logout] button and close your Web browser.
INCREASING THE TEXT SIZE
In a Normal mode screen such as copy or image send, you can enlarge the character size and interval. This function is selected on the touch panel.


- The setting keys and the action panel will increase the text size. Setting items that no longer appear on the action panel can be displayed by tapping the scroll keys. Setting keys that no longer appear (the [Exposure] key in this example) can be displayed by tapping the [Others] key.
- In screens other than Normal mode of each function such as Easy mode and settings, the size of characters and keys does not change.
- Increasing the text size may decrease the number of keys displayed in the base screen and other screens of each function.


Tap the [Enlarge Display Mode] key in the home screen.
The key image changes to and enlarge display mode is enabled.
To cancel enlarge display mode, tap the [Enlarge Display Mode] key again. The key image changes to and enlarge display mode is cancelled.
CHANGING THE LANGUAGE USED ON THE MACHINE
You can change the language used on the home screen.

Open the action panel on the home screen, and tap [Edit Home].
2

The administrator password screen appears. Enter your password.
Enter the administrator password.
3
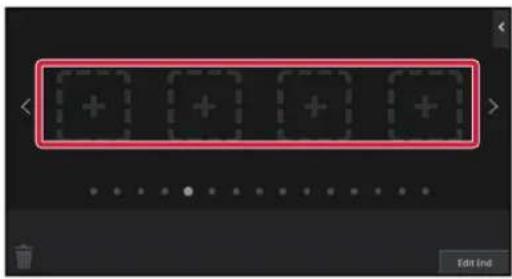
Tap an empty shortcut key location.
4

Tap the [Language Setting] key.
The shortcut key will be added to the selected location.
5
After settings are completed, tap the [Logout] key.
6

Tap the [Language Setting] key on the home screen.
7

Select the desired language and tap.

The display changes to the selected language.
From the Web page
1. Enter the IP address set in the machine in the address bar of your web browser.
In the factory default state, you must enter your user password after entering the IP address.
2. On the Web page, click the [System Settings] tab → [Common Settings] → [Operation Settings] → [Condition Settings] → [Language Setting].
This setting may require that you enter your user password. If you did not perform user authentication, you must enter the administrator password.
3. Select the language you want to change from the list.
When you have finished configuring the settings, click the [Submit] button.
The settings are saved in the machine and applied.
When you have finished settings, click the [Logout] button and close your Web browser.
CHANGING THE POSITION OF THE [Home Screen] KEY
You can change the position of the [Home Screen] key.

![SHARP BP-50C45 - CHANGING THE POSITION OF THE [Home Screen] KEY - 2](/content/2026/06/1367452/images/b44305e37b9e9c65e78c02b4ba759ddd53164347d8161534a9f077e9c14ee0db.jpg)

From the touch panel
1

Tap the [Settings] key on the Home screen.
The screen changes to the settings screen.
2
Tap [System Settings] → [Home Screen Settings] and then tap [Home Button Position] key.

The administrator password entry screen will appear while you are selecting settings. Enter the administrator password and log in.

3
Select [Left] or [Right]
4
Click the [Store] button.
After settings are completed, tap the [Logout] key.
From the Web page
1
Enter the IP address set in the machine in the address bar of your web browser.
In the factory default state, you must enter your user password after entering the IP address.
2
On the Web page, click the [System Settings] tab → [Home Screen Settings] → [Home Button Position].
Some settings may require that you enter your user password after clicking [Home Screen Settings]. If you did not perform user authentication, you must enter the administrator password.
3
Select [Left] or [Right]
4
When you have finished configuring the settings, click the [Submit] button.
The settings are saved in the machine and applied. When you have finished settings, click the [Logout] button and close your Web browser.

Display in Arabic
When the display position of the [Home Screen] key is switched in the setting mode of the machine, the [Home Screen] key is displayed on the right when [Left] is selected, and the [Home Screen] key is displayed on the left when [Right] is selected.
JOB STATUS
STOPPING/DELETING A JOB, PRIORITY PROCESSING AND CHECKING THE STATUS
TYPES OF JOB STATUS SCREENS
When you tap the job status display, the job status screen appears. Tap it again to return to the previous mode. The job status screen is divided into the following four tabs, enabling you to select a job list by tapping a desired tab.
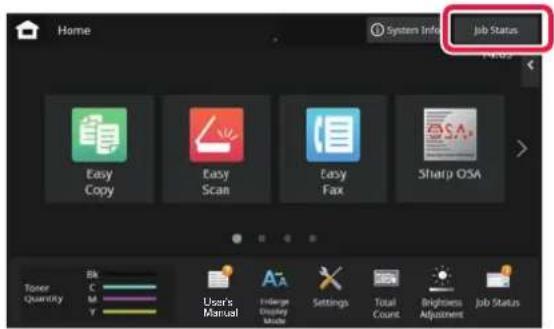


Lists print jobs such as copying, printing from a PC, Scan to FTP job, Scan to Network Folder job, USB direct print, printing of Data List from system settings, reprint jobs and printing for faxed or other received data.
Lists send jobs of e-mail messages and FTP/Desktop send jobs.
- Fax
Lists fax send jobs using a telephone line.
- Internet Fax
Lists fax send jobs using Internet Fax.

The background of the job status display changes as follows:
• Green: Job in progress • Yellow: Warming up/waiting • Red: Waiting for error clearing
Jobs move among the lists according to the processing status, from [Spool], [Job Queue] and [Complete], in that order. To switch the job list display to the display by processing status, tap the [Spool], [Job Queue] or [Complete] key as desired.

- Spool list
Lists print jobs up to the transfer to the machine. The jobs move to the Job Queue list after the transfer is completed. If you printed an encrypted PDF file by direct print, enter the password from here to print the file.
- Job Queue list
Lists jobs in progress and in the queue for copying, printing from a computer and printing of received fax. This list also displays jobs in progress and in the queue for sending fax data or sending image. The jobs move to the Complete list after printing or sending is completed.
- Complete list
Lists jobs through with copying, printing or sending.
STOPPING/DELETING A JOB IN PROGRESS OR RESERVED
1
Tap the job status display and tap the tab for the job that you wish to stop or delete.
2

Tap the [Job Queue] key.

When you wish to stop a print job being sent from the computer, tap the [Spool] key.
3
Tap the job that you wish to stop or delete, and then tap [Stop/Delete] on the action panel.
When a screen appears that allows you to confirm that you do want to stop the job, tap the [Cancel] key.
![SHARP BP-50C45 - Tap the job that you wish to stop or delete, and then tap [Stop/Delete] on the action panel. - 1](/content/2026/06/1367452/images/ad3f9e10fe6facfe03a5c32d9b56403846d99f105f5f0fc94d59da21139c10c5.jpg)
- If the machine runs out of paper during a copy or print job, you can cancel the job from the job status screen.
- To delete more than one job, operate the check box for [Enter Plural Selection Mode] on the action panel so that it looks like
- Printing of a received fax or Internet fax cannot be stopped. • A job set for transfer cannot be cancelled.
PRIORITY PROCESSING OF A RESERVED JOB
This function gives priority to processing of copied, faxed or image send jobs arising later to jobs already in a queue for printing or sending.

Priority processing operation varies, as follows, depending on the job type.
- Job on the print tab: The job currently in progress is suspended to let the priority job make an interruption. • Job on the scanner/fax/Internet fax tab: The priority job is moved directly under the job currently in progress.
1
Tap the job status display and tap the job for priority processing.
2

Tap the [Job Queue] key.
3

Tap the job for priority processing and then tap [Change Job Priority] on the action panel.
Changing the job order
If there is a job in progress, an interrupt job can be performed, or a job can be moved down in the queue to change the job order. Tap the key of the job you want to move, and tap the "Priority Change" key.
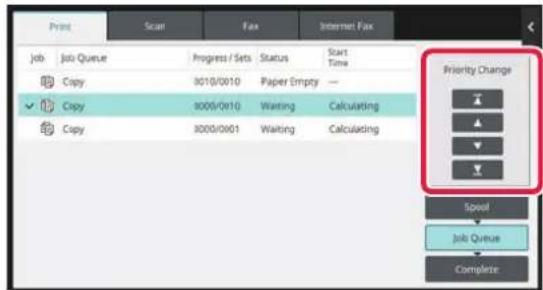

key
Moves the selected job to the top of the queue. The current job will be interrupted and the selected job starts.

key
Moves the selected job up one position. When the second job from the top is selected, tapping this key interrupts the current job and starts the selected job.

key
Moves the selected job down one position.

key
Moves the selected job to the bottom of the queue.
Scanner job with a timer setting
When a scanner job with a timer setting is selected, tapping the order change keys moves the job as follows.

key
The timer setting is cancelled and the job moves to the position after the job in progress (second from top).

key
The timer setting is cancelled and the job moves to the lowest position in the queue (if there are 3 jobs, the 4th position).


key
These keys cannot be used.

The jobs below cannot be moved.
Job currently in progress, interrupt copy jobs, list print jobs, and jobs when Passing Prohibited is set in the system settings.
In the print tab, you can switch the display in the "Job Queue" screen between the number of printed copies and remaining copies to be printed for each job.
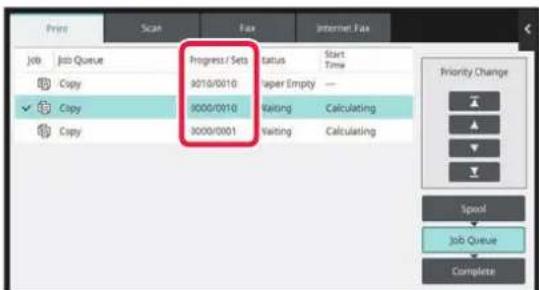
CHECKING A RESERVED JOB OR THE JOB IN PROGRESS
1
Tap the job status display and tap the tab for the job whose contents you wish to check.
2

Tap the [Job Queue] key.
3
Tap the job whose contents you wish to check and then tap [Check Details of Selected Job] on the action panel.

- Different job contents appear in different modes.
- For information on the icons displayed on the job keys or the messages displayed in "Status", see "READING THE JOB LIST (page 2-60)".
CHECKING COMPLETED JOBS
1
Tap the job status display and tap the tab for the job whose contents you wish to check.
2

Tap the [Complete] key.
3
Tap the job whose contents you wish to check and then tap [Check Details of Selected Job] on the action panel.
Jobs you can check are displayed as keys so that you can tap them.
- Different job contents appear in different modes.
- For information on the icons displayed on the job keys or the messages displayed in "Status", see "READING THE JOB LIST (page 2-60)".
READING THE JOB LIST
The meaning of each job icon and message displayed in "Status" is as follows: Icons indicating the job type
 | Print job (RGB/CMYK) Copy job |  | |
 | |||
 | Scan to E-mail job Scan to FTP job |  | |
 | Scan to Network Folder job Scan to Desktop job |  | |
 | Fax transmission job Fax reception job |  | |
 | PC-Fax transmission job Internet fax transmission job (Including  ) ) | Direct SMTP) | |
 | PC-I-Fax transmission job Scan to Local Drive file print job  | ||
 | Internet fax reception job (Including Direct SMTP) |  | Broadcast job* Inbound routing job |
 | Tandem copy/print job Broadcast job * Inbound routing job  | (When a destination is group destination address) | |
 | OSA Scan Job | ||
* This appears in a broadcast job.
Messages displayed in "Status"
Job in progress
| Display Status | |
| "Printing" Print job in progress | |
| "Copying" Copy job in progress | |
| "Connecting" Connecting | |
| "Sending" Sending | |
| "Receiving" Receiving | |
| "Processing" Processing | |
| "Tel" Speaking with the other party using an external telephone | |
| "Stopped" The job has been stopped | |
| "Toner Empty" Toner Empty | |
| "Paper Empty" Paper Empty | |
| "Paper Jam" Paper jam | |
| "Waiting" Waiting | |
| "Warming up" Warming up | |
| "Limit" Having reached the account limit | |
| "Report Wait" | Transmission confirmation reception timeout |
| "Error" | An error occurred while the job was being executed |
Reserved job
| Display Status | |
| "Waiting" The job is waiting to be executed | |
| "Retry Mode" | The job is being retried due to a communication error or other problem |
| "Report Wait" | Waiting for confirmation of Internet fax transmission |
| A day and time is displayed | Timer transmission job (the specified time is displayed) |
Completed job
| Display Status | |
| "OK" Normal termination | |
| "Send OK" Transmission was completed. | |
| "NG Ck Line" Fax line cable is not connected | |
| "In Memory" Reception completed but the fax has not been printed. | |
| "Received" Printed received fax data. | |
| "Forward OK" | The received data/received data (each file) has been forwarded. |
| "FAST" FAST transmission completed. | |
| "Stopped" The job was stopped. | |
| "Delete" Deleted received data in the image check screen. | |
| "Number of successful transmission destinations/Total destinations OK" | Completion of a broadcast transmission, serial polling, or inbound routing operation. |
| If transmission to 3 destinations was successful out of a total of 5, "003/005 OK" will appear. | |
| "No Response" | An error occurred because there was no response from the destination. |
| "Busy" An error occurred because the other party was busy. | |
| "Received" | E-mail other than Internet fax received |
| "Rejected" | A fax was sent from a party that has been blocked by the anti junk fax function. |
| "NGxxxxx" | Transmission/reception was not successful because a communication error occurred (a 6-digit error code appears in xxxxxx.) |
| "Error" An error occurred while the job was being executed. | |
| "Limit" | Jobs exceeding the maximum size of e-mail attachments |
| "displayed"* | Displayed at the receiving machine when delivery confirmation is set |
| "dispatched"* | Forwarded elsewhere before being displayed at the receiving machine when delivery confirmation is set |
| "processed"* | Processed without being displayed at receiving machine when delivery confirmation is set |
| "deleted"* | Message deleted at receiving machine when delivery confirmation is set |
| "denied"* | Receiving machine refused to notify sending machine of message processing content when delivery confirmation is set |
| "failed"* | An abnormal condition occurred when delivery confirmation is set |
* If the receiving machine is a SHARP machine, the receiving machine will return "dispatched" if the fax was received normally, or "processed" if reception failed. When delivery confirmation is set for Internet Fax, the disposition field value indicated on the delivery confirmation return e-mail appears.
CHARACTER ENTRY
CHARACTER ENTRY
NAMES AND FUNCTIONS OF SOFT KEYBOARD KEYS
Display the soft keyboard to register the name of a file, program, folder or user.

(1) Text input area
Displays the entered text.
(2) Registered word key
Retrieves the stored words. Use "Settings" to store words.
(3) Keyboard
Tap a key to enter text.
The key types vary depending on the selected entry mode.
(4) [Caps] key
Switches the alphabet to upper case. Use this key to enter a series of capital letters.
(5) [Shift] key
Switch the alphabet to uppercase.
(6) Keyboard Select
Switches the key layout.
(7) Pre-Set Select
Use this to retrieve a previously stored subject for e-mail or pre-set text.
(8) [Cancel] key
Exits the soft keyboard.
(9) [OK] key
Finalizes the entered characters and exits the soft keyboard.
(10) [Symbols] key
Switch to other input modes.
(11) Backspace key
Deletes one character to the left.
(12) [Enter] key
Temporarily fixes the converted characters or inserts a line break.
(13) [Space] key
Converts the entered characters. The [Space] key inserts a space between words if there are no characters specified to be converted.
(14) [AltGr] key
Used to enter accented characters and special symbols.
(15) Cursor keys
Used to move the cursor or to change the range of the specified conversion target.

The soft keyboard shown here is an image for your reference. Different keys may be enabled depending on the actual situation and condition under which you enter characters.
SET THE KEYBOARD SETTING
In "Settings (administrator)", select [System Settings] → [Common Settings] → [Operation Settings] → [Keyboard Settings].
Keyboard Settings
Default Keyboard Setting
Configure settings for the keyboard used for entry on the text.
Keyboard Select
Change the key layout and display according to the set language.
Set Keyboard Priority
When an external keyboard is connected, set whether the external keyboard or the keyboard shown on the touch panel (soft keyboard) is given priority.
Soft Keyboard Template Setting
Register a text that you frequently use when entering an address or domain name in advance. Enter a maximum of 16 characters.
BEFORE USING THE MACHINE AS A COPIER
COPY MODE....3-3
EASY MODE 3-3
NORMAL MODE 3-5
SELECTING COPY MODE 3-5
BASIC PROCEDURE FOR MAKING COPIES
COPYING 3-6
DEFAULT SETTINGS FOR COPYING 3-10
CHECKING THE ORIGINAL SIZE 3-11
SELECTING THE PAPER TRAY FOR COPYING ..... 3-13
AUTOMATIC 2-SIDED COPYING....3-14
USING THE AUTOMATIC DOCUMENT FEEDER FOR
2-SIDED COPYING 3-14
USING THE DOCUMENT GLASS FOR 2-SIDED
COPYING....3-15
COPY COLOUR MODES 3-17
CHANGING THE EXPOSURE AND ORIGINAL IMAGE
TYPE 3-20
AUTOMATIC ADJUSTMENT OF EXPOSURE AND
ORIGINAL TYPE 3-20
MANUAL ADJUSTMENT OF EXPOSURE AND
ORIGINAL TYPE 3-20
ENLARGE/REDUCE 3-22
AUTO RATIO SELECT....3-22
MANUAL RATIO SELECTION 3-23
ENLARGING/REDUCING THE LENGTH AND WIDTH
SEPARATELY 3-26
SELECTING THE ORIENTATION AND SIZE OF THE
ORIGINAL 3-29
STORING FREQUENTLY USED ORIGINAL SIZES .... 3-31
MAKING COPIES USING THE BYPASS TRAY.....3-34
MAKING COPIES USING THE BYPASS TRAY ..... 3-34
SPECIFYING A TYPE AND SIZE OF PAPER LOADED
ON BYPASS TRAY 3-35
OUTPUT 3-36
SORT/GROUP SETTING....3-36
STAPLE SETTINGS....3-37
PUNCH SETTINGS 3-40
FOLD SETTING 3-42
INSERTING SEPARATOR PAGES BETWEEN
COPIES OR JOBS 3-44
BATCH COPY FUNCTIONS 3-46
COPYING MULTIPLE ORIGINALS AS A SINGLE
PAGE (N-Up) 3-46
COPYING EACH FACING PAGE OF A BOUND
DOCUMENT (DUAL PAGE COPY) 3-48
COPYING BOTH SIDES OF A CARD AS A SINGLE
PAGE (CARD SHOT)....3-50
REPEATING THE SAME IMAGE ON ONE SHEET (REPEAT LAYOUT) ....3-52 COPYING MULTIPLE BUSINESS CARDS (BUSINESS CARD COPY) ....3-57
OTHER FUNCTIONS
OUTPUT AND LAYOUT EDITING FUNCTIONS.....3-60
MAKING COPIES IN PAMPHLET FORMAT (BOOKLET)....3-60
COPYING MULTIPLE ORIGINALS ON EACH BOOKLET PAGE (BOOKLET 2-Up/4-Up) ....3-63
COPYING A PAMPHLET (BOOK COPY)....3-66 SPLITTING A PAMPHLET ORIGINAL BY PAGE (BOOK DIVIDE)....3-69
PAPER, AND TIME SAVING FUNCTIONS .....3-70
SKIPPING BLANK PAGES IN AN ORIGINAL (BLANK PAGE SKIP)....3-70
ADJUSTING THE BACKGROUND BY MAKING LIGHT AREAS OF THE ORIGINAL DARKER OR LIGHTER (BACKGROUND ADJUSTMENT). 3-72
MAKING A PROOF COPY (PROOF COPY) .....3-74 CHECKING THE NUMBER OF SCANNED ORIGINAL SHEETS (ORIGINAL COUNT) .....3-77
USING TWO MACHINES TO REDUCE THE COPY TIME (TANDEM COPY)....3-79
SECURITY REINFORCEMENT FUNCTIONS ..... 3-81
PADDING UNAUTHORISED COPY PREVENTION DATA (HIDDEN PATTERN PRINT)....3-81
OUTPUT POSITION AND MARGIN ADJUSTMENT
FUNCTIONS....3-83
ADDING MARGINS (MARGIN SHIFT)....3-83 ERASING PERIPHERAL SHADOWS FOR COPYING (ERASE)....3-85
COPYING ORIGINALS WITH NO EDGE CUT-OFF (FULL BLEED COPY)....3-87
COPYING IN THE CENTRE OF THE PAPER (CENTRING)....3-88
SPECIFYING A PAPER POSITION (POSITION IMAGE)....3-89
SCANNING FUNCTIONS....3-91
COLLECTIVELY SCANNING A LARGE NUMBER OF ORIGINALS (JOB BUILD)....3-91
SCANNING ORIGINALS OF DIFFERENT SIZES (MIXED SIZE ORIGINAL)....3-94
SCANNING THIN ORIGINALS (SLOW SCAN MODE) 3-97
SCANNING HEAVY ORIGINALS (HEAVY PAPER SCAN) 3-98
ADJUSTING RESOLUTION WHEN SCANNING (RESOLUTION). 3-99
TEXT AND IMAGE ADDITION FUNCTIONS....3-100
PRINTING DATES, PAGE NUMBERS, AND WATERMARKS (STAMP)....3-100

ADDING A REGISTERED IMAGE TO AN ORIGINAL
(CUSTOM IMAGE)....3-103
INSERTING COVERS IN COPIES
(COVERS/INSERTS) 3-106
INSERTING INSERTION SHEETS IN COPIES
(COVERS/INSERTS) 3-114
CHECKING, EDITING, AND DELETING THE PAGE
LAYOUT OF COVERS AND INSERTION SHEETS
(PAGE LAYOUT) 3-118
INSERTING INSERTION SHEETS IN BETWEEN
TRANSPARENCY FILMS (TRANSPARENCY
INSERTS)....3-119
FUNCTIONS FOR SPECIFIC USES. 3-121
COPYING CAPTIONS ONTO TAB PAPER (TAB
COPY) 3-121
MAKING A POSTER-SIZED COPY (MULTI-PAGE
ENLARGEMENT)....3-124
COPYING WITH MIRROR IMAGE (MIRROR IMAGE). 3-126
OUTPUT AND DENSITY ADJUSTMENT FUNCTIONS 3-127
REVERSING WHITE AND BLACK IN A COPY (B/W REVERSE) 3-127
EASY ADJUSTMENT OF THE IMAGE QUALITY (QUICK IMAGE QUALITY ADJUSTMENT) 3-128
ADJUSTING RED/GREEN/BLUE IN COPIES (RGB ADJUST) 3-129
ADJUSTING THE SHARPNESS OF AN IMAGE (SHARPNESS)....3-130
ADJUSTING THE COLOUR (COLOUR BALANCE) 3-131
CONVENIENT COPY FUNCTIONS
ADJUSTING RED/GREEN/BLUE IN COPIES (RGB ADJUST) 3-129
ADJUSTING THE SHARPNESS OF AN IMAGE
ADJUSTING THE SHARPNESS OF AN IMAGE
(SHARPNESS)....3-130
ADJUSTING THE COLOUR (COLOUR
BALANCE) 3-131
CONVENIENT COPY FUNCTIONS
INTERRUPT COPY ....3-135
SEND DATA WHILE COPYING....3-136
COPY JOBS....3-137
PROGRAMS....3-138
STORING A PROGRAM....3-138
RETRIEVING A PROGRAM....3-140
DELETING AND RENAMING A PROGRAM .....3-141
BEFORE USING THE MACHINE AS A COPIER
COPY MODE
There are two modes for copying: easy mode and normal mode.
Easy mode is limited to frequently used functions that allow you to smoothly perform most copy jobs.
If you need to select detailed settings or special functions, use normal mode. All functions can be used in normal mode.
EASY MODE
Easy mode makes it easy to select basic settings for copying.
1st screen

2nd screen
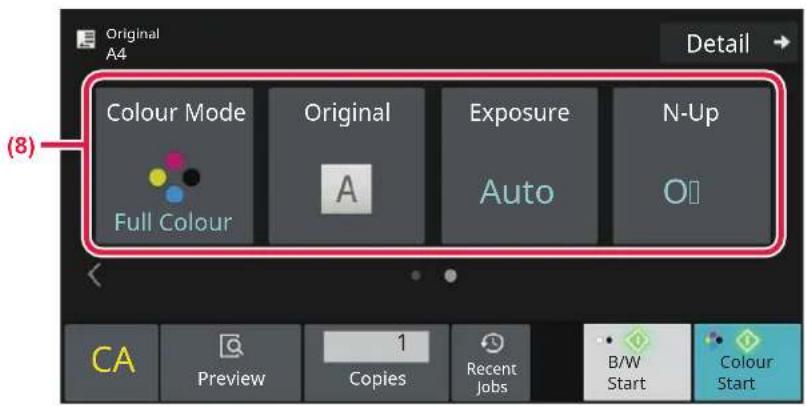
(1) Show the size of the placed original.
SELECTING THE ORIENTATION AND SIZE OF THE ORIGINAL (page 3-29)
(2) Reset all settings.
(3) Scans the original and shows a preview image.
PREVIEW SCREEN (page 2-11)
(4) Enter the number of copies.
(5) Recently used job setting can be loaded.
▶ JOB STATUS (page 2-53)
(6) Starts black and white or colour copying.
(7) Change the function display.
(8) Select function to be set up.
(9) Change to normal mode.
NORMAL MODE (page 3-5)
The following features can be set in easy mode.
• Paper Select SELECTING THE PAPER TRAY FOR COPYING (page 3-13) • 2-Side Copy AUTOMATIC 2-SIDED COPYING (page 3-14) • Copy Ratio ENLARGE/REDUCE (page 3-22) • Staple/Punch OUTPUT (page 3-36) • Colour Mode COPY COLOUR MODES (page 3-17) • Original SELECTING THE ORIENTATION AND SIZE OF THE ORIGINAL (page 3-29) • Exposure CHANGING THE EXPOSURE AND ORIGINAL IMAGE TYPE (page 3-20) • N-Up COPYING MULTIPLE ORIGINALS AS A SINGLE PAGE (N-Up) (page 3-46) • Card Shot COPYING BOTH SIDES OF A CARD AS A SINGLE PAGE (CARD SHOT) (page 3-50) • Job Build COLLECTIVELY SCANNING A LARGE NUMBER OF ORIGINALS (JOB BUILD) (page 3-91) • Blank Page Skip SKIPPING BLANK PAGES IN AN ORIGINAL (BLANK PAGE SKIP) (page 3-70) • Dual Page Copy COPYING EACH FACING PAGE OF A BOUND DOCUMENT (DUAL PAGE COPY) (page 3-48)

• To select a function in easy mode
In "Settings (administrator)", select [System Settings] → [Common Settings] → [Operation Settings] → [Easy Mode Settings] → [Easy Copy].
• To cancel the warning message displayed when switching from easy mode to normal mode
In "Settings (administrator)", select [System Settings] → [Common Settings] → [Operation Settings] → [Easy Mode Settings] → [Display a Confirmation Message when Selecting "Detail" in Easy Modes] to disable this setting.
NORMAL MODE
Normal mode lets you select any function setting that can be used for copying.
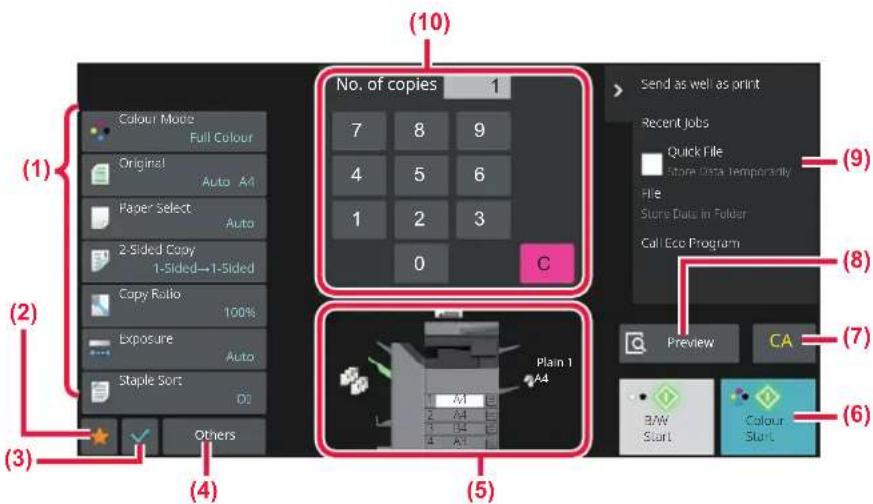
(1) Setting keys used for copying. (2) Your favorite setting items will be displayed. Register frequently used [Other] and programs. Favorites can be registered when you register a program. (3) Check the current settings. (4) Display keys other than the Setting keys indicated above. (5) Indicates the presence or absence of an original and the size of paper loaded in each tray. Tap to open the paper select screen.
(6) Starts black and white or colour copying. (7) Reset all settings. (8) Scans the original and shows a preview image. PREVIEW SCREEN (page 2-11) (9) Displays the functions that can be utilized in copy mode. (10) Enter the number of copies.

The displayed contents of the above screen will vary depending on the devices installed.
SELECTING COPY MODE
Change the copy mode to other mode as explained in CHANGING MODES (page 2-10).
BASIC PROCEDURE FOR MAKING COPIES
COPYING
This section explains the basic procedure for copying. Select settings in the order shown below to ensure that the copy operation takes place smoothly.
For detailed procedures for selecting the settings, see the explanation of each setting in this chapter.
1
Switch to copy mode.
SELECTING COPY MODE (page 3-5)
2

Place the original.
Place the original in the document feeder tray of the automatic document feeder, or on the document glass. AUTOMATIC DOCUMENT FEEDER (page 1-30) DOCUMENT GLASS (page 1-34)
3
Select functions.
Specify the original scan size, exposure, resolution, etc.
Tap the [Original] key and specify the orientation of the original to have the orientation be correctly recognized.
Specifying the orientation of the original (page 3-29)
In Easy mode
SELECTING THE PAPER TRAY FOR COPYING (page 3-13)
AUTOMATIC 2-SIDED COPYING (page 3-14)
AUTO RATIO SELECT (page 3-22)
OUTPUT (page 3-36)
COPY COLOUR MODES (page 3-17)
SELECTING THE ORIENTATION AND SIZE OF THE ORIGINAL (page 3-29)
AUTOMATIC ADJUSTMENT OF EXPOSURE AND ORIGINAL TYPE (page 3-20)
COPYING MULTIPLE ORIGINALS AS A SINGLE PAGE (N-Up) (page 3-46)
COPYING BOTH SIDES OF A CARD AS A SINGLE PAGE (CARD SHOT) (page 3-50)
COPYING MULTIPLE ORIGINALS AS A SINGLE PAGE (N-Up) (page 3-46)
COPYING BOTH SIDES OF A CARD AS A SINGLE PAGE (CARD SHOT) (page 3-50)
COPYING EACH FACING PAGE OF A BOUND DOCUMENT (DUAL PAGE COPY) (page 3-48)
SKIPPING BLANK PAGES IN AN ORIGINAL (BLANK PAGE SKIP) (page 3-70)
COPY COLOUR MODES (page 3-17)
DOCUMENT (DUAL PAGE COPY) (page 3-48)
In Normal mode
COPY COLOUR MODES (page 3-17)
SELECTING THE ORIENTATION AND SIZE OF THE
ORIGINAL (page 3-29)
SELECTING THE PAPER TRAY FOR COPYING (page 3-13)
AUTOMATIC 2-SIDED COPYING (page 3-14)
ENLARGING/REDUCING THE LENGTH AND WIDTH SEPARATELY (page 3-26)
AUTOMATIC ADJUSTMENT OF EXPOSURE AND ORIGINAL TYPE (page 3-20)
OUTPUT (page 3-36)
OTHER FUNCTIONS (page 3-60)
4
Scan the original.
Tap the [Preview] key to scan the original.
In Easy mode

In Normal mode


• To make 2-sided copies, configure the 2-sided copy settings before scanning the original. AUTOMATIC 2-SIDED COPYING (page 3-14) - When not checking the preview image, tap the [Colour Start] or [B/W Start] key to start copying.
5
Check the preview image.
Display the preview image of the scanned original.
In the preview screen, check the settings such as colour mode and 2-sided copy.
PREVIEW SCREEN (page 2-11)
In Easy mode

In Normal mode

6
Tap the [Colour Start] or [B/W Start] key to start copying.
When making only one set of copies, you do not need to specify the number of copies.
![SHARP BP-50C45 - Tap the [Colour Start] or [B/W Start] key to start copying. - 1](/content/2026/06/1367452/images/2d94fe6e90d01e5cf8effb721cb051080166b10925578ce6dbcf087c15da8ecb.jpg)
- To cancel all settings, tap the [CA] key. When the [CA] key is tapped, all settings selected to that point are cleared and you will return to the base screen.
- To cancel copying, tap the [Cancel Copy] key.
![SHARP BP-50C45 - Tap the [Colour Start] or [B/W Start] key to start copying. - 2](/content/2026/06/1367452/images/94fd343efbcbf1dd0895efa63b259e36d4129caa323c6abf7adf2be54766b5ed.jpg)
•To make two or more sets of copies:
Tap the copies display key to specify the number of copies. In Easy mode

In Normal mode

- In normal mode, you can tap [File] or [Quick File] on the action panel before starting the copy job to save the scanned original as a file. QUICK FILE (page 7-9) FILE (page 7-10)
DEFAULT SETTINGS FOR COPYING
Set in "Initial Status Settings" of "Copy Settings" in the System Settings. Initial Status Settings (page 9-63)
CHECKING THE ORIGINAL SIZE
Easy mode
The size of the placed original is displayed in the upper left corner of the screen.
When you place the original in the automatic document feeder, the original icon appears next to the original size.
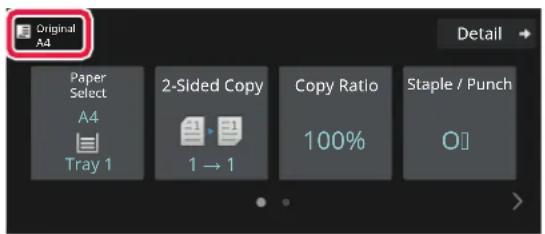
Normal mode
Check the size of the placed original on the display of the [Original] key.
If the original size is set to [Auto], the automatically detected size (standard size) is displayed. If the original size is specified manually, the specified original size is displayed.
When you place the original in the automatic document feeder, the original icon appears above the automatic document feeder.

Standard sizes
Standard sizes are sizes that the machine can automatically detect.
For standard sizes that can be detected, refer to DETECTABLE ORIGINAL SIZES (page 1-28).

- Even when [Original] is set to [Auto], some original sizes may be detected as other one that is near the standard size. In this case, manually set the original size. SELECTING THE ORIENTATION AND SIZE OF THE ORIGINAL (page 3-29)
- When placing a non-standard size original on the document glass, you can make it easier for the size to be detected by placing a blank sheet of A4 (8-1/2" x 11"), B5 (5-1/2" x 8-1/2"), or other standard size of paper on top of the original.
Orientation of placed original
Place the original as shown below.
If you place the original in an incorrect orientation, it may result in punching at an unexpected position or stapling.
On "Preview Screen", view the image orientation or preview image.
PREVIEW SCREEN (page 2-11)
| Document glass | 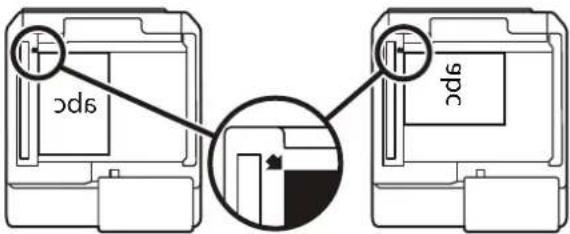 | |
| Document feeder tray |  |  |

Set the orientation of the image to ensure that the orientation of the placed original is correctly recognized.
For information on the orientation of the original, see "Specifying the orientation of the original (page 3-29)".
Automatic copy image rotation (Rotation Copy)
If the orientation is different between the original and paper, the original image will be automatically rotated 90 degrees to match the paper.
![graph TD A["Document with 'B' and a red arrow"] --> B["Barcode with 'B' and a red arrow"] C["Blank"] --> B](/content/2026/06/1367452/images/45b7448e78271c51fd53ca0caed33ea3050b77b522812ecceadbfd238a0f85e1.jpg)
SELECTING THE PAPER TRAY FOR COPYING
The machine is set to automatically select a tray that has the same size of paper as the size of the placed original (Auto Paper Select).
If the original size cannot be detected correctly because it is a non-standard size or when you want to change the paper size for copying, you can select the paper tray manually.

- If the selected tray runs out of paper during a copy job and there is another tray that has the same size and type of paper, that tray will be automatically selected and the copy job will continue.
- If a suitable size of copy paper is not loaded, copying may stop.
1
Tap the [Paper Select] key.
BASIC PROCEDURE FOR MAKING COPIES (page 3-6)
2
Tap the required tray key.
After the settings are completed, tap [OK] key.
In Easy mode

In Normal mode


- When the bypass tray is selected, specify the paper type and size based on the paper loaded into the bypass tray. SPECIFYING A TYPE AND SIZE OF PAPER LOADED ON BYPASS TRAY (page 3-35)
- In normal mode, you can also open the [Paper Select] screen by tapping the machine image on the base screen.

To automatically select the tray, tap the [Auto] key.
AUTOMATIC 2-SIDED COPYING
USING THE AUTOMATIC DOCUMENT FEEDER FOR 2-SIDED COPYING
Originals![graph LR A["Blank Document"] --> B["Image File"] B --> C["Converted Image File"]](/content/2026/06/1367452/images/12ce993faaa49a0a92ed6390b9783b4f2c50ef0711bb0ae99c7f9a8404b548bb.jpg)
Automatic 2-sided copying of 1-side originals
Copies Originals Copies Originals Copies
Automatic 2-sided copying of 2-sided originals
![graph LR A["Tree Icon"] --> B["Document Icon"] style A fill:#fff,stroke:#000 style B fill:#fff,stroke:#000](/content/2026/06/1367452/images/e01f295a995e97c8d4fb53b56ad25bc50a5e118c7749bd0611682292eae14a73.jpg)
1-sided copying of 2-sided originals

- To make 2-sided copies, configure the 2-sided copy settings before scanning the original.
- Dual-side copy helps to save paper.
1
Place the original in the document feeder tray of the automatic document feeder.
AUTOMATIC DOCUMENT FEEDER (page 1-30)
2
Tap the [2-Sided Copy] key.
PREVIEW SCREEN (page 2-11)
3

Select 2-sided copy mode.
(1) Select the 2-sided copy type. (2) When the original is set to "2-Sided", select "Book" or "Tablet" in "Original Binding". (3) When the output is set to "2-Sided", select "Book" or "Tablet" in "Output Binding". (4) After the settings are completed, tap [OK].
4
Check the paper (tray) and color mode you want to use for copying, and tap the keys for any other settings you want to select.
Tap the [Original] key and specify the orientation of the original to have the orientation be correctly recognized. Specifying the orientation of the original (page 3-29)
For details on the functions that can be set, see step 3 in "COPYING (page 3-6)".
5
Check the preview.
PREVIEW SCREEN (page 2-11)
6
Tap the [Colour Start] or [B/W Start] key to start copying.
USING THE DOCUMENT GLASS FOR 2-SIDED COPYING

Automatic 2-sided copying of 1-sided originals

Dual-side copy helps to save paper.
1
Place the original on the document glass.
DOCUMENT GLASS (page 1-34)
2
Tap the [2-Sided Copy] key.
BASIC PROCEDURE FOR MAKING COPIES (page 3-6)
3

Select the 2-sided copy mode.
(1) Tap the [1 → 2] key. (2) When the output is set to "2-Sided", select "Book" or "Tablet" in "Output Binding". (3) After the settings are completed, tap [OK].

- The [2 → 2] key and [2 → 1] key cannot be used when copying from the document glass.
- Depending on the size of the placed original, there may be cases where the same size of paper as the original is not selected automatically. In this case, change the paper tray manually.
4
Check the paper (tray) and color mode you want to use for copying, and tap the keys for any other settings you want to select.
Tap the [Original] key and specify the orientation of the original to have the orientation be correctly recognized. Specifying the orientation of the original (page 3-29)
For details on the functions that can be set, see step 3 in "COPYING (page 3-6)".
5
Tap the [Colour Start] or [B/W Start] key.
6
Set the next original, and tap the [Colour Start] or [B/W Start] key to scan the original.
Tap the same key you tapped in step 5.
Repeat this step until all originals have been scanned.
7
![Place next original. Press [Start]. When finished, press [Read-end]. Read End](/content/2026/06/1367452/images/aa003378635e67653a5ac803f644d3f94b37a78c26d7aee9d9696c76ae5d7ee2.jpg)
Tap the [Read-End] key to start copying.
COPY COLOUR MODES
Select the colour mode from Auto, Full Colour, B/W, 2 Colour, and Single Colour.
| Auto | The machine automatically detects whether each original is colour or black & white and switches the mode appropriately (full colour for a colour original or black & white for a black & white original). |
| Full Colour The original is copied in full colour. | |
| B/W The original is copied in black and white. | |
| 2 Colour | The original is copied in two colours by changing a specific colour used in the original to another colour. If red is set to a specific colour, reddish parts in an original are extracted, and changed to the specified colour to make a copy. |
| Single Colour* | The original is copied in any one colour regardless of the colours used in the original. |
*Can be set in normal mode.

If any colour mode is selected, copying takes place in black and white when you tap the [B/W Start] key.
1

Tap the [Colour Mode] key.
2

Select the colour mode.
After the settings are completed, tap [OK] key. Check that the specified colour mode is selected.

- When auto mode is used, there may be some originals for which switching between colour and black & white does not take place correctly. If so, tap the [Colour Start] or [B/W Start] key to manually switch between colour and black & white.
- When [B/W Start] is selected, the [Colour Start] key cannot be tapped.
Copying in two colours
The original is copied in two colours by changing a specific colour to another colour.
1 Tap the [Colour Mode] Key.
2 Tap the [Z Colour] Key.
3
Tap the [Change] key.
4

Tap the key of the colour to be extracted to specify the extract colour.
- [Except Black]: Extracts black parts in an original, and changes non-black parts to the specified colour.
- [Reddish Colour]: Extracts reddish parts in an original, and changes them to the specified colour.
5
Specify the colour to change the extracted colour to.
After the settings are completed, tap the [OK] key on the [2 Colour] screen, and check that the changed setting is displayed at the side of [2 Colour] key on the colour mode screen.
After you have checked it, tap [OK].
Check that the specified colour mode is selected.
Copying in single colour
The original is copied in any one colour.
1
Tap the [Detail] key to change to normal mode.
EASY MODE (page 3-3)
2
Tap the [Colour Mode] key.
3
Tap the [Single Colour] key.
4

Tap the [Change] key.
5

Tap a colour you wish to use.
After the settings are completed, tap [OK] on the [Single Colour] screen, and check that the changed setting is displayed at the side of [Single Colour] key on the colour mode screen.
After you have checked it, tap [OK] on the [Colour Mode] screen.
CHANGING THE EXPOSURE AND ORIGINAL IMAGE TYPE
AUTOMATIC ADJUSTMENT OF EXPOSURE AND ORIGINAL TYPE
Automatic exposure adjustment operates by default to automatically adjust the exposure level and original type as appropriate for the original being copied. ([Auto] is displayed.)
This function automatically adjusts the image during black & white copying and full colour copying to obtain the most suitable copy.

MANUAL ADJUSTMENT OF EXPOSURE AND ORIGINAL TYPE
This section explains how to select the original type depending on the original to be copied or manually adjust the exposure.
1
Tap the [Exposure] key.
COPY MODE (page 3-3)
2

Tap or slide the slider to adjust the copy exposure.
After the adjustment, tap [OK] key.
This completes the procedure in easy mode.
3
To select more detailed settings, tap the [Detail] key to switch to normal mode.
EASY MODE (page 3-3)
Tap the [Exposure] key.

Tap the required original image type key to specify the original type.
Tap the key matching the original.
Original image type select keys
- Text: Use this mode for regular text documents.
- Text/Printed Photo: This mode provides the best balance for copying an original which contains both text and printed photographs, such as a magazine or catalogue.
- Text/Photo: This mode provides the best balance for copying an original which contains both text and photographs, such as a text document with a photo pasted on.
- Printed Photo: This mode is best for copying printed photographs, such as photos in a magazine or catalogue.
- Photo: Use this mode to copy photos.
- Map: This mode is best for copying the light colour shading and fine text found on most maps. • Light Original: Use this mode for originals with light pencil writing.

- When using a copy or printed page from the machine as an original: When using a copy or printed page from the machine as an original, tap the [Copy of Copy] checkbox so that it appears. [Copy of Copy] is available when [Auto], [Text], [Printed Photo], or [Text/Printed Photo] is selected as the original image type.
- To enhance the colour of a colour copy: Tap the [Colour Tone Enhancement] checkbox so that it appears. Set the [Colour Tone Enhancement] when you select an original type.
- When you want to make fluorescent marker parts more visible: When using a page with highlighted lines as an original, tap the [Copy Original with Highlighted Lines] checkbox so that it appears.
• [Copy of Copy] and [Colour Tone Enhancement] cannot be specified together.
- [Copy of Copy], [Colour Tone Enhancement], [Copy Original with Highlighted Lines] and [Intensity] of "Others" cannot be combined.
6

Tap or slide the slider to adjust the copy exposure.
If you adjust the exposure with the original type selected to [Auto], the original image type is automatically selected to [Text/Printed Photo].
After the adjustment, tap [OK] key.

Guidelines for the exposure level when [Text] is selected for "Exposure/Original Type"
1 to 2: Dark originals such as a newspaper
3: Normal density originals
4 to 5: Originals written in pencil or light coloured text
ENLARGE/REDUCE
AUTO RATIO SELECT
This section explains how to automatically select the appropriate ratio to meet the paper size when manually changing the paper tray to make a copy on paper that has a size different from the original.

For a non-standard size original, the size must be entered in order to use Auto Image.
1 Manually select the paper tray, and place the original.
Place the original in the document feeder tray of the automatic document feeder, or on the document glass.
SELECTING THE PAPER TRAY FOR COPYING (page 3-13)
AUTOMATIC DOCUMENT FEEDER (page 1-30)
DOCUMENT GLASS (page 1-34)
2 Tap the [Copy Ratio] key.
COPY MODE (page 3-3)
3

Tap the [Auto Image] key.
The reduction or enlargement ratio is automatically selected based on the original size and the selected paper size.
The automatically selected ratio will appear in the ratio display.
![SHARP BP-50C45 - Tap the [Auto Image] key. - 1](/content/2026/06/1367452/images/a1a5e36109c02a81235837a811e7b8414b88d26489072f00abb1b9f6a3fd2113.jpg)
•To cancel the Auto Ratio Selection setting:
Tap [Auto Image] to deselect it.
•To return the ratio to 100%:
Tap the [100%] key.
MANUAL RATIO SELECTION
This section explains how to specify any ratio when making a copy on paper that has a size different from the original or changing the image size for copying.
The following three methods can be used to specify the ratio.
Specifying the desired zoom ratio
You can adjust the zoom ratio in 1% increments using the 10 key to specify the desired zoom ratio.
You can also select the enlargement or reduction ratio between commonly used fixed sizes from the preset ratio keys.
Up to two ratio values can be added to preset ratio keys, respectively for enlargement and reduction.
Specifying the paper size
Specify the paper sizes of the original and output to automatically obtain the appropriate ratio.
For example, when you select A3 as the original size and A4 as the paper size, the ratio is automatically set to 70%.
Original size: A3 Copy size: A4

Specifying the image dimensions
Specify the image sizes of the original and output to automatically obtain the appropriate ratio.
To make a copy with the same ratio between the vertical and horizontal sizes, enter either one of the vertical and horizontal sizes.
For example, when you enter 90mm as the source size and 135mm as the output size, the aspect ratio will be automatically set to 150%.
Image size: 90mm Output size: 135mm


When the automatic document feeder is used, the vertical and horizontal ratio selection ranges are both between 25% to 200%.

To return the ratio to 100%:
Tap the [100%] key.
Specifying the desired zoom ratio
1. Tap the [Copy Ratio] key.
COPY MODE (page 3-3)
2. Tap to set the ratio.

After the settings are completed, tap the [OK] key. Check that a paper size suitable for the ratio is selected.
After the settings are completed, tap the [OK] key. Check that a paper size suitable for the ratio is selected.
![SHARP BP-50C45 - After the settings are completed, tap the [OK] key. Check that a paper size suitable for the ratio is selected. - 1](/content/2026/06/1367452/images/349b64dfed38990788e8660f888521d32a7dae1adcfa09875326848c137165ff.jpg)
- If you tap the [Slightly Reduce (3% Reduction)] key, the ratio will be set lower than the specified one by 3%. In normal mode
- There are two setting screens. Use the [Other Ratio] key to switch between the screens. • To quickly set the area, first specify a value close to the desired value by the numeric keys, then adjust it with
- Up to two frequently used ratio values can be added to the preset ratio key, respectively for enlargement and reduction.
![SHARP BP-50C45 - After the settings are completed, tap the [OK] key. Check that a paper size suitable for the ratio is selected. - 2](/content/2026/06/1367452/images/0f19626f0deb70d8281ea371566728103509a7794c4c02f10ca2ad25dc1f777b.jpg)
![SHARP BP-50C45 - After the settings are completed, tap the [OK] key. Check that a paper size suitable for the ratio is selected. - 3](/content/2026/06/1367452/images/daa65c636ebc6e710e5a93f5ae5bf33b033fdcdbffd9cc8cff557492532f5d07.jpg)
Tap the [CA] key.
Specifying the paper size
Specifying the paper size
1 Tap the [Copy Ratio] key.
COPY MODE (page 3-3)
2
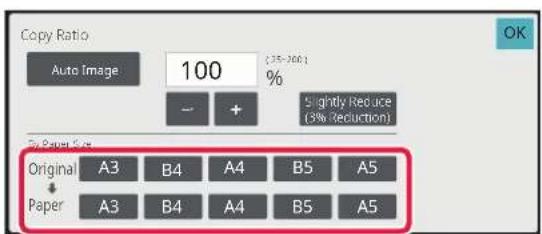
Specify the original size (paper size of the loaded original) and the copy size (paper size of the copy output).
After the settings are completed, tap [OK] key.

To cancel all settings:
Tap the [CA] key.
Specifying the image dimensions
1
Tap the [Detail] key to change to normal mode.
EASY MODE (page 3-3)
2
Tap the [Copy Ratio] key.
3

Tap the [by Size] key of the [Zoom] tab.
4

Specify the image size (dimensions of the image to be enlarged or reduced) and the output size (dimensions of the enlarged and reduced images).
Tap the area of image size and output size, and enter the sizes using the numeric keys.
After the settings are completed, tap [OK] key.

- If you have entered an incorrect size:
Tap the [C] key on the numeric keys that appears when you tap the entry area, and set to the correct size.
•To cancel all settings:
Tap the [CA] key.
ENLARGING/REDUCING THE LENGTH AND WIDTH SEPARATELY
This section explains how to individually specify the horizontal and vertical copy ratios.
When 50% is selected for the horizontal ratio and 70% for the vertical ratio

The following three methods can be used to specify the ratio.
Using the preset ratio key
Specify any ratio by combination of preset ratio key, which is pre-registered.
Specify the desired ratio
Specify any ratio by combining which allows you to adjust the ratio in 1% increments.
Specifying the image dimensions
Specify the image sizes of the original and output to automatically obtain the appropriate ratio.
Enter the vertical and horizontal sizes.

When the automatic document feeder is used, the vertical and horizontal ratio selection ranges are both between 25% to 200%.

To cancel the XY zoom setting: Tap the [Zoom] tab or the [CA] key.
Using the preset ratio key
1
Tap the [Detail] key to change to normal mode.
EASY MODE (page 3-3)
2
Tap the [Copy Ratio] key, and then tap the [XY Zoom] tab.
3

Tap the [X] key, and set the X (horizontal) ratio.

- To quickly set the ratio, first specify a value close to the desired one, then adjust it with - + .
- Tap each area of the X (horizontal) and Y (vertical) directions, and enter the sizes using the numeric keys.
4
Tap the [Y] key, and set the Y (vertical) ratio in the same way as the [X] key.
After the settings are completed, tap [OK] key.
Check that a paper size suitable for the ratio is selected.
Specifying the image dimensions
1
Tap the [by Size] key.
Specifying the desired zoom ratio (page 3-24)
2

Specify the X and Y dimensions of the image size and those of the output size.
Check that a paper size suitable for the ratio is selected. After the settings are completed, tap [OK] key.

Tap the image size and output size areas, and enter the sizes using the numeric keys.

- If you have entered an incorrect size:
Tap the [C] key on the numeric keys that appears when you tap the entry area, and set to the correct size.
•To cancel all settings:
Tap the [CA] key.
SELECTING THE ORIENTATION AND SIZE OF THE ORIGINAL
When the original size is a non-standard size or is not detected correctly, manually specify the original size. Set the orientation of the image to ensure that the orientation of the placed original is correctly recognized.

Set the orientation and size of the original before scanning the original.
Specifying the orientation of the original
By specifying the starting side (top or left side) of the placed original, the orientation of the original will be correctly recognized. Finishing position settings and N-Up layout settings are specified using the recognized orientation. In Easy mode

In Normal mode

Specify the orientation and size of the original
1
Tap the [Original] key to set the orientation of the original.
COPY MODE (page 3-3)
2
Tap the [Auto] key.
3

Tap the appropriate original size key.
After the settings are completed, tap [OK] key.
Specifying the orientation and size of a non-standard size originals
1
Tap the [Original] key to set the orientation of the original.
COPY MODE (page 3-3)
2
Tap the [Auto] key.
3
Tap the [Direct Entry] key.
4

Specify the original size.
After the settings are completed, tap [OK] key.

- Tap the areas displaying width and height sizes respectively, and enter the sizes using the numeric keys.
- It is convenient to use to finely adjust the entered size.
Tap the [OK] key.
Make sure that the original size you have set is displayed in the upper left corner of the screen.
STORING FREQUENTLY USED ORIGINAL SIZES
Store the frequently used non-standard original sizes. This section explains how to store, retrieve, change, and delete non-standard original sizes.

- The stored original size will be retained even if the main power is turned off.
- A total of up to 12 non-standard original sizes can be registered for copying, fax, and image sending.
- The added original sizes will also appear in other modes.
- You can register, modify, and delete the original size only in Normal mode.
Storing original sizes (Amend/Delete)
Tap the [Detail] key to change to normal mode.
EASY MODE (page 3-3)
Tap the [Original] key.
3
Tap the [Custom Size] tab.
4
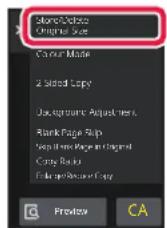
Tap [Store/Delete Original Size] on the action panel.
5

Tap a key () for storing a custom original size.
Tap a key that does not show a size.

To amend or delete a previously stored key:
Tap the key that you want to amend or delete. The following screen will appear.
- To amend the key, tap the [Amend] key and go to the next step.
- To delete the key, tap the [Delete] key. Make sure that the original size has been cleared and tap the [OK] key.

6

Specify the original size.
Tap the areas displaying width and height sizes respectively, and enter the sizes using the numeric keys.

It is convenient to use to finely adjust the entered size.
Tap the [OK] key.
After the settings are completed, tap the ✗ key, and check that the key of the size stored on the original screen is added properly. After you have checked it, tap [OK].
![SHARP BP-50C45 - Tap the [OK] key. - 1](/content/2026/06/1367452/images/e4e268bd21a639521157d7a83c2ab4975bae1a863a36a0c61d3d81b437db2be3.jpg)
To cancel the operation:
Tap the [CA] key.
Retrieving a stored original size
1
Perform steps 1 to 2 in Specify the orientation and size of the original (page 3-29).
2
Tap the [Custom Size] key.
3
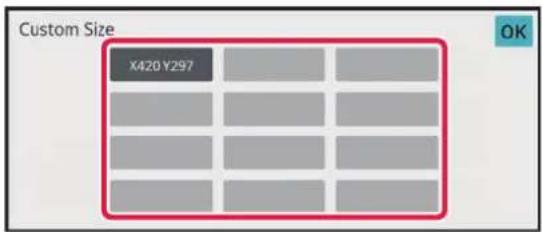
Tap the key of the original size that you wish to retrieve.
After selecting the key of the original size, tap the [OK] key.

To cancel the operation
Tap the [CA] key.
4
Tap the [OK] key.
Make sure that the original size you have set is displayed in the upper left corner of the screen.
MAKING COPIES USING THE BYPASS TRAY
MAKING COPIES USING THE BYPASS TRAY
In addition to plain paper, the bypass tray allows you to make copies on transparency film, envelopes, tab paper, and other special media.

For detailed information on paper that can be loaded into the bypass tray, see "APPLICABLE PAPER TYPES (page 1-12)". For precautions on loading paper into the bypass tray, see "LOADING PAPER INTO THE BYPASS TRAY (page 1-22)".
1
Load paper into the bypass tray.
LOADING PAPER INTO THE BYPASS TRAY (page 1-22)
2
Tap the [Paper Select] key, and tap the bypass tray key.
The bypass tray key displays the size and type of the loaded paper. SELECTING THE PAPER TRAY FOR COPYING (page 3-13)
![SHARP BP-50C45 - Tap the [Paper Select] key, and tap the bypass tray key. - 1](/content/2026/06/1367452/images/f7dfa1ede8443d6abf4c6e2908555b9a20c4071bea82073232a17d590f736b9e.jpg)
When the setting requires change, tap the [Type and Size] key and select the paper size and type. SPECIFYING A TYPE AND SIZE OF PAPER LOADED ON BYPASS TRAY (page 3-35)

3
Place the original.
Place the original in the document feeder tray of the automatic document feeder, or on the document glass. AUTOMATIC DOCUMENT FEEDER (page 1-30) DOCUMENT GLASS (page 1-34)
4
Tap the [Colour Start] or [B/W Start] key to start copying.
SPECIFYING A TYPE AND SIZE OF PAPER LOADED ON BYPASS TRAY
1
Tap the [Paper Select] key.
SELECTING THE PAPER TRAY FOR COPYING (page 3-13)
2
Tap the [Type and Size] key, and tap the key that meets the type of the loaded paper.
3

Tap the [Size] tab, and tap the key that meets the size of the loaded paper.
•[Auto-AB]:
Automatically detects the appropriate AB paper size when loading paper such as A4 or B5.
•[Auto-Inch]:
Automatically detects the appropriate inch paper size when loading paper such as 8-1/2" x 11".
• [Size Set]:
Tap this key to manually specify the paper size that is not detected automatically.
• [Direct Entry]:
Tap this key to enter a numeric value for the size of the loaded paper. After the settings are completed, tap the [OK] key.
![SHARP BP-50C45 - Tap the [Size] tab, and tap the key that meets the size of the loaded paper. - 1](/content/2026/06/1367452/images/8ab337f14302f577195db87b43ba46e167d5dc90b0a802811209ba9bd6b79bcf.jpg)
To directly enter a paper size
Tap the [inch] key to set a paper size in inches, or tap the [AB] key to set it in millimetres.
After you have entered the paper size using the keypad, tap the [OK] key.
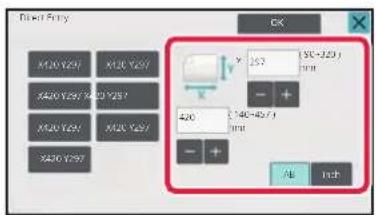
OUTPUT
SORT/GROUP SETTING
This section explains how to select the sorting method when outputting the scanned original.
| Auto | Enables the sort mode when the original is placed in the automatic document feeder, and enables the group mode when the original is placed on the document glass. |
Sort Sorts the scanned original on a set basis, and outputs them.Example: When 5 is set for the number of copies in sorting | |
| Group | Groups the scanned original on a page basis, and outputs them.Example: When 5 is set for the number of copies in grouping |
1
Tap the [Detail] key to change to normal mode.
EASY MODE (page 3-3)
![SHARP BP-50C45 - Tap the [Detail] key to change to normal mode. - 1](/content/2026/06/1367452/images/757e185123a1c59f575eb59030eed45f774aa5c79140fb13c131c6a4a696f303.jpg)
Tap the [Original] key and specify the orientation of the original to have the orientation be correctly recognized. Specifying the orientation of the original (page 3-29)
2
Tap the [Sort/Group] key.
![SHARP BP-50C45 - Tap the [Sort/Group] key. - 1](/content/2026/06/1367452/images/01887e5ee32f20cb3f3cfdabe3caf1cc9c034d67a1c49ecbe0d8dbf828cc6150.jpg)
If a finisher or saddle stitch finisher is installed, tap the [Sort/ Group] key in [Others].
3
Select the sorting method.
After the settings are completed, tap [OK] key.

- You can select the offset output checkbox √ to have each set of output be offset from the previous set to enable easy removal from the output tray.
- To change the output tray, tap the [Output Tray] key, and select the output destination.
STAPLE SETTINGS
Specify whether or not the set of output will be stapled.
Portrait orientation
| Original Orientation | Staple | Staple Position | ||
| Left Top Right | ||||
| Portrait orientation 1 Staples |  |  |  | |
| 2 Staples |  |  |  | |
| Stapleless Staple | ||||
| Landscape orientation 1 | Staples |  | 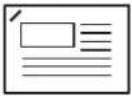 |  |
| 2 Staples |  |  | 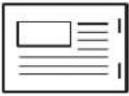 | |
| Stapleless Staple | ||||

- You can view staple positions on the "PREVIEW SCREEN (page 2-11)". Text will be printed at the preset size regardless of the copy ratio or paper size setting.
- An inner finisher, finisher, finisher (large stacker), saddle stitch finisher or saddle stitch finisher (large stacker) is required to use the staple function.
- A saddle stitch finisher or saddle stitch finisher (large stacker) is required to use the saddle stitch function.
- An inner finisher, finisher (large stacker) or saddle stitch finisher (large stacker) is required to use the stapleless staple.
Staple ON (excluding saddle stitch)
1 Tap the [Staple / Punch] Key.
COPY MODE (page 3-3)
![SHARP BP-50C45 - Tap the [Staple / Punch] Key. - 1](/content/2026/06/1367452/images/f024846ae9a2c13b6f738b2163e95103273b705216c57179207397f79f537d3f.jpg)
Tap the [Original] key and specify the orientation of the original to have the orientation be correctly recognized. Specifying the orientation of the original (page 3-29)
2

Select the number of staples and staple position.
- After the settings are completed, tap [OK] key.
- A binding position cannot be selected for stapleless stapling.

In normal mode
- Tap the [Staple Sort] key.
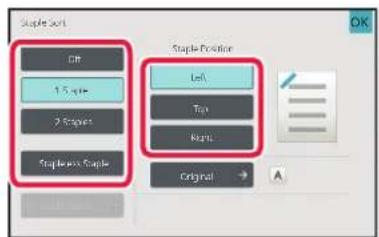
- To change the output paper output tray, select the output destination in [Output Tray] of [Other functions] before setting the staples.
- If the number of scanned originals exceeds the staple sheet limit, a message is displayed. Tap [Continue] or [Cancel]. [Cancel]: Cancels the staple sort setting. [Continue]: Continues sorting without stapling.
Saddle Stitch
1 Tap the [Staple / Punch] Key.
COPY MODE (page 3-3)
![SHARP BP-50C45 - Tap the [Staple / Punch] Key. - 1](/content/2026/06/1367452/images/a17b8a7fa2c7fcc6097c2371d4c2f0e4eee2de63a5688370041187ebf5710c28.jpg)
Tap the [Original] key and specify the orientation of the original to have the orientation be correctly recognized. Specifying the orientation of the original (page 3-29)
2
Select .
3

After the settings are completed, tap [OK] key.
Select binding edge and original settings.
MAKING COPIES IN PAMPHLET FORMAT (BOOKLET) (page 3-60)

In normal mode
- If [Booklet] is already specified in [Others], you do not need to configure binding edge and cover settings.
- If [Booklet] is specified in [Others], the saddle stitch screen appears. Confirm the message shown on the screen, and tap the [On] key.
- If the number of scanned originals exceeds the staple sheet limit, a message is displayed. Tap [Divide], [Continue] or [Cancel].
[Cancel]: Cancels printing.
[Divide]: Divide the document into the number of sheets that can be stapled and saddle staple them.
[Continue]: Continue printing without saddle stapling.
Note that [Divide] may not be displayed depending on the setting status.
PUNCH SETTINGS
This function punches copies and outputs them to the tray.
Example: When the original is in either portrait or landscape orientation, and the punch position is set to the left
Original 1 Punch Positions
Original 2 Punch Positions
| Original Orientation | Punch Position | ||
| Left Top Right | |||
| OFF Does not punch. | |||
| Portrait orientation |  | 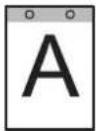 |  |
| Landscape orientation |  |  |  |

- When staple and punch are set at the same time, punch positions are linked to staple positions.
- You can view punch positions on the "PREVIEW SCREEN (page 2-11)". • A punch module is required for paper punch.
- You cannot use A3W (12" x 18") size paper or special media such as transparency film and tab paper.
- You cannot use a paper punch together with the staple and paper folding.
However, it can be used with them if the paper size used is A3, B4, 8K or 11" × 17" for Z-fold.
1 Tap the [Staple / Punch] Key. COPY MODE (page 3-3)
![SHARP BP-50C45 - Tap the [Staple / Punch] Key. COPY MODE (page 3-3) - 1](/content/2026/06/1367452/images/1138250f17549f539f96f853f61ebbf23ac9aef135930952aa7bec234e32285a.jpg)
Tap the [Original] key and specify the orientation of the original to have the orientation be correctly recognized. Specifying the orientation of the original (page 3-29)
2 Select punching and set the position. After the settings are completed, tap [OK].
![SHARP BP-50C45 - Select punching and set the position. After the settings are completed, tap [OK]. - 1](/content/2026/06/1367452/images/4ee385fc14691ca3acb93e46559fa5e965f699a8988ceab4a14d3ce9fdd9aa14.jpg)
In normal mode
- You can select the offset output checkbox easy removal from the output tray. ☑ to have each set of output be offset from the previous set to enable Tray] key, and select the output destination.
FOLD SETTING
This function is used to fold copies before delivery to the output tray.
When a paper folding unit is installed, you can fold papers in Z-fold and C-fold.
When a saddle stitch finisher is installed, you can use saddle folds.
The paper sizes that can be selected vary depending on the type of paper fold.
Example: Fold Inside, Fold Outside


- A saddle stitch finisher or saddle stitch finisher (large stacker) is required to use the Saddle Fold function.
- A folding unit is required to use the Half Fold, C-Fold, Accordion Fold and Z-Fold functions.
- The fold function cannot be used in combination with the staple function and punch function. However, when the finisher or saddle stitch finisher is installed and the paper size to be used for Z-folding is A3, B4, 11" x 17", or 8K, the punch function can be used together. In addition, when the finisher (large capacity) or saddle stitch finisher (large capacity) is installed, and when the paper size to be used for Z-folding is A3, B4, 11" x 17", or 8K, the staple function and punch function can be used together.
- The folding function cannot be combined with the staple function or punch function.
- You can check the selected folding method in "PREVIEW SCREEN (page 2-11)".
Types of folds and paper sizes available
| Fold Paper Size Image | ||
| Saddle Fold A3W, A3, B4, | A4R, B5R *1, 8K,16KR, 12" × 18", 11" × 17", 8-1/2" ×14", 8-1/2" × 13-1/2" *2, 8-1/2" ×13-2/5" *2, 8-1/2" × 13" *2, 8-1/2" ×11"R |  |
| Half Fold A4R, A3, B4, 11" | × 17", 8-1/2" ×14", 8-1/2" × 13-2/5", 8-1/2" × 11"R,8K |  |
| C-Fold A3, A4R, 11" × 17", | 8-1/2" × 14",8-1/2" × 13-2/5", 8-1/2" × 11"R | 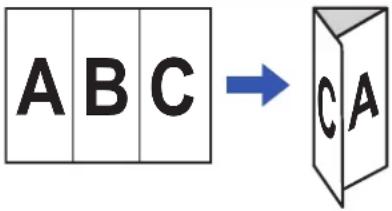 |
| Fold Paper Size Image | |
| Accordion Fold A3, A4R, 11" × 17", 8-1/2" × 14",8-1/2" × 13-2/5", 8-1/2" × 11"R |  |
| Z-Fold A3, B4, A4R, 8K, 11" × 17", 8-1/2" ×14", 8-1/2" × 13-2/5", 8-1/2" ×11"R*3 |  |
*1 Cannot be used when a finisher (large capacity) or saddle stitch finisher (large capacity) is installed. *2 Cannot be used when a finisher or saddle finisher is installed. *3 This paper size cannot be output to the finisher tray.
1
Tap the [Detail] key to change to normal mode.
EASY MODE (page 3-3)

Tap the [Original] key and specify the orientation of the original to have the orientation be correctly recognized. Specifying the orientation of the original (page 3-29)
2
Tap the [Others] key, and tap the [Fold] key.
3

Select the folding method.
After the settings are completed, tap [OK] key.
INSERTING SEPARATOR PAGES BETWEEN COPIES OR JOBS
This function inserts separator pages between each set of copies or between each job.
When you insert separator pages between sets of copies, you can specify whether to insert the separator page before or after each set. You can also specify the number of copies that makes one set.
When you insert separator pages between jobs, you can specify whether to insert a separator page before or after each job.
Separator page insertion examples
In the following examples, four copies of a two-page original are output.
Inserting a separator page before each set of two copies
Insert before each set Insert before each set

Inserting a separator page after each set of two copies
Insert after each set

Inserting separator pages before and after a job
Insert Before Job / Insert After Job


- When this function is combined with Sort/Group and Staple/Punch, Sort/Group and Staple/Punch are not applied to the separator pages.
- This function cannot be used with the saddle stitch or fold function.
- This function cannot be used in combination with staple/punch and insertion of divider for each job.
- When used in combination with the offset function, a separator page is never offset by itself; the separator page is always offset together with the set of output.
1
Tap the [Detail] key to change to normal mode.
EASY MODE (page 3-3)
![SHARP BP-50C45 - Tap the [Detail] key to change to normal mode. - 1](/content/2026/06/1367452/images/e5b9f61f803e7e9637e6e97fc1658dc3407b8fdbe66b440d41bd3fa3ef6f1e56.jpg)
Tap the [Original] key and specify the orientation of the original to have the orientation be correctly recognized.
Specifying the orientation of the original (page 3-29)
2
Tap the [Others] key, and tap the [Separator Page] key.

Specify the separator page insertion mode.
- To insert separator pages between sets of copies, set the [Insert Top of Sets] or [Insert End of Sets] checkbox to √. Next, tap to specify the number of copies in each set.
- To insert separator pages between jobs, set the [Insert Before Job] or [Insert After Job] checkbox to √. After the settings are completed, tap the [OK] key.

To change the separator page tray:
Tap the [Paper Tray] key to display the tray selection screen. Tap the separator page tray in the tray selection screen. For more information, see "SELECTING THE PAPER TRAY FOR COPYING (page 3-13)" and "SPECIFYING A TYPE AND SIZE OF PAPER LOADED ON BYPASS TRAY (page 3-35)".

To cancel the separator page insertion setting:
Clear the checkmark for separator page insertion mode.
BATCH COPY FUNCTIONS
COPYING MULTIPLE ORIGINALS AS A SINGLE PAGE (N-Up)
This function copies multiple original pages onto a single sheet of paper in a uniform layout.
Select 2-Up to copy two original pages onto one sheet, 4-Up to copy four original pages onto one sheet, or 8-Up to copy eight original pages onto one sheet.
This function is convenient when you wish to present multiple pages in a compact format, or show a view of all pages in a document.
2-Up copying 4-Up copying



When inserting a cover sheet, select Cover Setting to copy only a front sheet to one page and collectively copy the second and subsequent pages.

To use N-Up in Easy mode
In "Settings (administrator)", select [System Settings] → [Common Settings] → [Operation Settings] → [Easy Mode Settings] → [Easy Copy].
1
Place the original.
Place the original in the document feeder tray of the automatic document feeder, or on the document glass. AUTOMATIC DOCUMENT FEEDER (page 1-30) DOCUMENT GLASS (page 1-34)

- When using the document glass to scan multiple original pages, change the original and tap the [Colour Start] or [B/W Start] key. • In Normal mode, go to step 4.
2
Tap the [N-Up] key.
COPY MODE (page 3-3)
![SHARP BP-50C45 - Tap the [N-Up] key. - 1](/content/2026/06/1367452/images/a384fd4437694c8258578eb4156a60cd539d74789941bb17bb6dfbdbd3bb1f2b.jpg)
Tap the [Original] key and specify the orientation of the original to have the orientation be correctly recognized.
Specifying the orientation of the original (page 3-29)
3
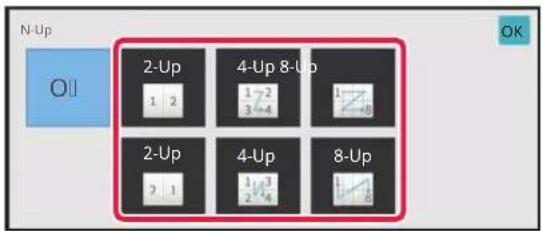
Tap the number of originals you want to copy collectively, and select the layout key.
If needed, the images will be rotated.
If you have finished selecting settings, go to step 7.
4
To select more detailed settings, tap the [Detail] key to switch to normal mode.
EASY MODE (page 3-3)
5
Tap the [Others] key, and tap the [N-Up] key.
6

Tap [Border], and select the border.
A line can be inserted between pages arranged on a sheet. After the settings are completed, tap [OK] key.
![SHARP BP-50C45 - Tap [Border], and select the border. - 1](/content/2026/06/1367452/images/afdd9b3a602fdcae88ca3ba181a291156f88b63339ced831360658f733fb9d0c.jpg)
•To cancel the N-Up setting:
Tap the [Off] key.
•To cancel all settings:
Tap the [CA] key.
7
Tap the [Colour Start] or [B/W Start] key to start copying.
COPYING EACH FACING PAGE OF A BOUND DOCUMENT (DUAL PAGE COPY)
This function copies the left and right halves of an original successively. This function is useful when making copies of facing pages of a book or other bound document.
Copying the facing pages of a book or bound document
Books and bound documents are copied into 2 separate pages.


- Specify dual page copy before scanning the original.
- To erase shadows caused by the binding of a book or other bound document, use the erase function. This function cannot be used in combination with Centre Erase.
- This function cannot be used in combination with 2-sided Original and Image Orientation: Horizontal.

To use Dual Page Copy in Easy mode
In "Settings (administrator)", select [System Settings] → [Common Settings] → [Operation Settings] → [Easy Mode Settings] → [Easy Copy].
1
Tap the [Detail] key to change to normal mode.
EASY MODE (page 3-3)
2
Tap the [Others] key, and tap the [Dual Page Copy] key.
A checkmark appears on the icon. After the settings are completed, tap the [OK] key.

When dual page copy is selected, A4 (8-1/2" x 11") size paper is automatically selected. If you want to use paper in another tray, tap the [Paper Select] key and select the tray containing the desired paper from the paper tray selection screen that appears. SELECTING THE PAPER TRAY FOR COPYING (page 3-13)

To cancel the dual page copy setting: Tap the [Dual Page Copy] key to uncheck it.
3

Place the original on the document glass.
DOCUMENT GLASS (page 1-34)


To cancel all settings:
Tap the [CA] key.
4
Tap the [Colour Start] or [B/W Start] key to start copying.
COPYING BOTH SIDES OF A CARD AS A SINGLE PAGE (CARD SHOT)
This function copies the front and reverse sides of a card on one sheet, not on separate sheets. This function is convenient for making copies for identification purposes and helps save paper. For example, both sides of a card can be copied to a single sheet in A4 portrait or landscape.
![graph LR A["Front"] --> B["Back"] B --> C["Example of an A4 (8-1/2" x 11") size portrait copy"] C --> D["Example of an A4 (8-1/2" x 11") size landscape copy"]](/content/2026/06/1367452/images/ad1cf1dfc78f452b892ef196dc950da282d6fdba56cf4f313ab93ebd22a07cb4.jpg)
1
Select the paper to be used for card shot.
Set a paper by referring to the "SELECTING THE PAPER TRAY FOR COPYING (page 3-13)".
2
Tap the [Detail] key to change to normal mode. EASY MODE (page 3-3)
3
Tap the [Others] key, and tap the [Card Shot] key.
4
![Scan Sheet. On. X, Y, Z = 20 [20-210] mm. X, Z = 20 [20-210] mm. -, +, Reset. Adjust to Paper Sheet. Show. OK.](/content/2026/06/1367452/images/23fc244a983cc9e535d02fbf3d7396015d2344b3629cf26ffa9448db64637c31.jpg)
Tap the [On] key, and specify the original size as required.
After the settings are completed, tap [OK] and [Back] keys in sequence.

- Tap the areas displaying width and height sizes respectively, and enter the sizes using the numeric keys.
- If the image is missing, enter a slightly larger size.
- To quickly set the size, first specify a value close to the desired ratio value by the numeric keys, then adjust it by tapping - + .
- When you set the [Adjust to Paper Size] checkbox to √, the original is enlarged or reduced with the ratio appropriate to the original size.

To cancel the Card Shot settings:
Tap the [Off] key.
5

Place a card face down on the document glass, and tap the [Colour Start] or [B/W Start] key.
DOCUMENT GLASS (page 1-34)

If the image is missing, shift the original inward and set it.
Place a card face up on the document glass, and tap the [Colour Start] or [B/W Start] key to scan the reverse side.

- Copy settings cannot be changed when scanning additional pages.
• To cancel all settings:
Tap the [CA] key.
Tap the [Read-End] key to start copying.
REPEATING THE SAME IMAGE ON ONE SHEET (REPEAT LAYOUT)
This function copies multiple same original images on one sheet.
You can set any of the following three types of repeat copy.
![graph LR A["Input"] --> B["Output"] style A fill:#fff,stroke:#000 style B fill:#fff,stroke:#000](/content/2026/06/1367452/images/e4fdf00ddfbd240e6790ec7c335d56e10e2edb9a0418c6fb73f8ad2803f07ff7.jpg)
| Repeat method Description | |
| Auto Repeat | The maximum repeat count to copy images on a sheet is calculated automatically according to the original size, paper size, and copy ratio being selected from the base screen. |
| Fixed Repeat | When you select a repeat count, original size, and paper size to copy images on a sheet, the copy ratio is calculated automatically and the original is copied. |
| Photo Repeat | This function repeatedly copies on A4 (8-1/2" x 11") or A3 (11" x 17") papers without changing the copy ratio of the photo size original. You can select any of the following five types of original size:• E/L Size, Postcard (Up to 148 mm x 105 mm (3" x 5"))• Up to 100 mm x 150 mm (5" x 7")• Card (Up to 70 mm x 100 mm (2-1/2" x 4"))• ID Photo (Up to 65 mm x 70 mm (2-1/2" x 2-1/2"))• Card (Up to 57 mm x 100 mm (2-1/8" x 2-5/8"))* Reduction will be 95%. |

- Repeat Layout cannot be selected in easy mode.
- Repeat Layout must be specified before scanning the original.
- If the copy ratio automatically obtained in [Fixed Repeat] exceeds 25 to 400% (using document glass) or 25 to 200% (using automatic document feeder), it will result in an error. Select the number of faces to repeat again.
- Always place an original on the document glass for photo repeating.
- Repeat Layout can be combined with Staple / Punch or Saddle Stitch.

- This function cannot be combined with Mixed Size Original or 2-Sided Copy.
- Photo Repeat cannot be combined with Image Orientation.
Copy by automatically calculating the repeat count (Auto Repeat)
1 Place the original.
Place the original in the document feeder tray of the automatic document feeder, or on the document glass. AUTOMATIC DOCUMENT FEEDER (page 1-30) DOCUMENT GLASS (page 1-34)
2 Tap the [Detail] key to change to normal mode. EASY MODE (page 3-3)
3 Tap the [Others] key, and then tap the [Repeat Layout] key.
Tap the [Auto Repeat] key.
5

Check the repeat faces which have been calculated automatically.
Change the original size, paper size, or copy ratio by tapping the respective [Original], [Paper Select], or [Copy Ratio] key when necessary. SELECTING THE ORIENTATION AND SIZE OF THE ORIGINAL (page 3-29) MANUAL RATIO SELECTION (page 3-23) SELECTING THE PAPER TRAY FOR COPYING (page 3-13)

Set so that there are one or more repeat faces.
6

Tap the [Layout] key.
Tap the [Layout w/o spacing] key or the [Layout evenly spaced] key, and then tap the [OK] key.
7

Specify the repeat partition line.
After the settings are completed, tap [OK] key.

• To cancel the Auto Repeat setting:
Tap the [Off] key.
• To cancel all settings:
Tap the [CA] key.
8
Tap the [Colour Start] or [B/W Start] key to start copying.
Copy by specifying a repeat count (Fixed Repeat)
1
Perform steps 1 to 3 in Copy by automatically calculating the repeat count (Auto Repeat) (page 3-53).
2
Tap the [Fixed Repeat] key.
3
Tap the [Original] and [Paper Select] keys to select an original size and a paper size, respectively.
SELECTING THE ORIENTATION AND SIZE OF THE ORIGINAL (page 3-29)
SELECTING THE PAPER TRAY FOR COPYING (page 3-13)
4

Tap [No. of Faces] to set a repeat count.
After the settings are completed, tap the [OK] key.
The automatic calculation result is shown as the copy ratio.
![SHARP BP-50C45 - Tap [No. of Faces] to set a repeat count. - 1](/content/2026/06/1367452/images/3fe344eb60543e6ed5478c1c531ab81de295934012166cc9af35580118e577fc.jpg)
If the calculated copy ratio exceeds the range from 25% to 400% (using the document glass) or 25% to 200% (using the automatic document feeder), an error occurs.
5

Tap the [Layout] key.
Tap the [Layout w/o spacing] key or the [Layout evenly spaced] key, and then tap the [OK] key.
6
Specify the repeat partition line.
After the settings are completed, tap the [OK] key.

• To cancel the fixed repeat setting: Tap the [Off] key. • To cancel all settings: Tap the [CA] key.
Tap the [Colour Start] or [B/W Start] key to start copying.
Repeat a photo size original in actual size (Photo Repeat)
1
Perform steps 1 to 3 in Copy by automatically calculating the repeat count (Auto Repeat) (page 3-53).
2
Tap the [Photo Repeat] key.
3
Place the original on the document glass.
4
Tap the [Original] key and select an original size.
When you tap the original size key, the original direction is indicated in the "How To Set". Place the original to meet the displayed orientation.
After the settings are completed, tap [OK] key.
5
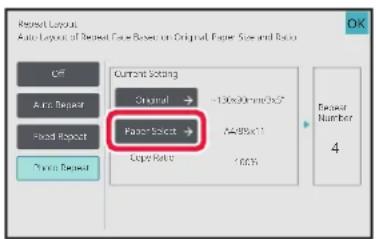
Tap the [Paper Select] key and select a paper size.
After the settings are completed, tap [OK] and [Back] keys in sequence.
The automatic calculation result is shown as the copy ratio.
![SHARP BP-50C45 - Tap the [Paper Select] key and select a paper size. - 1](/content/2026/06/1367452/images/f415c7b062be0526df77ce551d2abc097c2555fdae0b51182f82c07c6ba426a2.jpg)
When you tap the [*Up to 57x100mm(Card) *\~ 2 1/8 x 2 5/8"] key on the [Original] screen, you can select the A4 paper size only.
![SHARP BP-50C45 - Tap the [Paper Select] key and select a paper size. - 2](/content/2026/06/1367452/images/7a7d3b7478401a56a9945a3f1c7af10b670f44ca299458b8d02ca58383f132b2.jpg)
•To cancel the photo repeat setting:
Tap the [Off] key.
•To cancel all settings:
Tap the [CA] key.
6
Tap the [Colour Start] or [B/W Start] key to start copying.
COPYING MULTIPLE BUSINESS CARDS (BUSINESS CARD COPY)
Business Card Copy can be used to copy up to 8 business cards on one sheet of paper.
This function can be used when you want to create the list of business cards, and when you want to file business cards.
1-Sheet Layout, 2-Sheet Layout, 8-Sheet Layout


• Business Card Copy cannot be selected in easy mode. • Business Card Copy cannot be selected on
BP-50C26/BP-50C31/BP-50C36/BP-50C45/BP-50C55/BP-50C65/BP-60C31/BP-60C36/BP-60C45.
Tap the [Detail] key to change to normal mode.
EASY MODE (page 3-3)
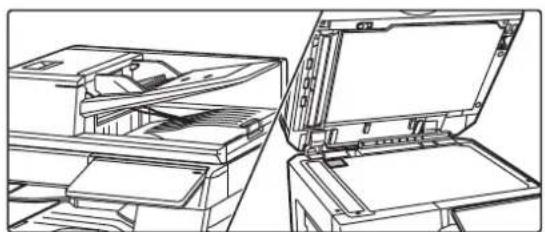
Place a business card, and select the paper to be used to copy the card.
- Refer to "SELECTING THE PAPER TRAY FOR COPYING (page 3-13)" to select the paper.
Tap the [Others] key, and then tap the [Business Card Copy] key.

Specify settings for Business Card Copy.
(1) Specify the number of business cards to be copied and touch the [1-Sheet Layout] key or the [2-Sheet Layout] or the [8-Sheet Layout] key. (2) When [8-Sheet Layout] is selected, select the desired layout from "Layout".
After the settings are completed, tap [OK] and [Back] keys in sequence.

•To Business Card Copy setting:
Tap the [Off] key.
•To cancel all settings:
Tap the [CA] key.
5
Tap the [Start] key to start copying.
![SHARP BP-50C45 - Tap the [Start] key to start copying. - 1](/content/2026/06/1367452/images/18c07dee9fa11058e207100ffab7ad149d7b9fb5d440177823295a44ac19c438.jpg)
The zoom is fixed at 100%.
Copy results of 8-Sheet Layouts
| Originals (Original orientation) Settings Results | ||
| 1st A 5th E2nd B 6th F3rd C 7th G4th D 8th H |  |  |
 |  | |
| 1st 2nd 3rd 4thA B C D5th 6th 7th 8thE F G H |  |  |
 | 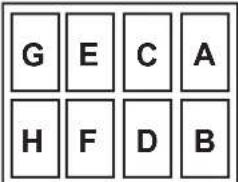 | |
OTHER FUNCTIONS
OUTPUT AND LAYOUT EDITING FUNCTIONS
MAKING COPIES IN PAMPHLET FORMAT (BOOKLET)
Copies made by "Booklet" can be folded at the centre to create a booklet.
This function is convenient for arranging copies into an attractive booklet or pamphlet.
Booklet copy using 8 original pages
![graph LR A["Originals"] --> B["Step 2: Document with blue rectangle"] B --> C["Step 3: Document with yellow rectangle"] C --> D["Step 4: Document with green line graph"] D --> E["Step 5: Histogram chart with red bar and green bar"] E --> F["Step 6: Histogram chart with red bar and green bar"] F -->…](/content/2026/06/1367452/images/93634a0486c863acd4f72de3eb61e3142ae96743d09fe6fc58f01e4584d2ff2e.jpg)
Binding side
Left Binding Right Binding

- Booklet cannot be selected in easy mode. • To make Booklet copies of a book or other bound original, use the book copy function. COPYING A PAMPHLET (BOOK COPY) (page 3-66)
- When Booklet is selected, 2-sided copying mode is automatically selected. When settings are selected that prevent 2-sided copying, the booklet function cannot be used.
- Scan the originals in order from the first page to the last page. The order of copying will be automatically adjusted by the machine. Four original pages will be copied onto each sheet of paper. Blank pages will be automatically produced at the end of pamphlet copies if the number of original pages is not a multiple of four.
- When a saddle stitch finisher is installed, you can select [Staple Sort] and set the Saddle Stitch (Staple each set of copies at two positions in the centre of paper). STAPLE SETTINGS (page 3-37)

To staple copies automatically when Booklet is enabled:
From the "Settings (administrator)", select [System Settings] → [Common Settings] → [Device Control] → [Condition Settings] → [Automatic Saddle Stitch].
This is used to activate Saddle Stitch automatically when Booklet is enabled when a saddle stitch finisher is installed. To make pamphlet copies without stapling when the [Automatic Saddle Stitch] option is ON, tap the [Staple Sort] key. Then, select [Booklet] and tap the [Off] key on the saddle stitch screen.
1
Place the original.
Place the original in the document feeder tray of the automatic document feeder, or on the document glass.
AUTOMATIC DOCUMENT FEEDER (page 1-30)
DOCUMENT GLASS (page 1-34)

If the originals are 2-sided, place them in the document feeder tray.
2
Tap the [Others] key and then the [Booklet] key, or tap the [Staple Sort] key and then the [Saddle Stitch] key.
3
Select the binding edge.

To cancel the booklet setting:
Tap the [Off] key.
4

Tap the [1-Sided], [2-Sided Booklet] or [2-Sided Tablet] key as appropriate for the original.
When not inserting a cover, go to step 6.
5
When inserting a cover, tap the [Cover Setting] key, and tap the [On] key.
After the settings are completed, tap the [OK] and [Back] keys in sequence.
![SHARP BP-50C45 - When inserting a cover, tap the [Cover Setting] key, and tap the [On] key. - 1](/content/2026/06/1367452/images/eec485815080ff19eccf27dc96d051446e3450b965ea2f8e44a65541a077e305.jpg)
To change the cover input tray:
Tap the [Paper Tray] key to display the tray selection screen.
Tap the cover input tray on the tray selection screen.
For more information, see "SELECTING THE PAPER TRAY FOR COPYING (page 3-13)".
![SHARP BP-50C45 - When inserting a cover, tap the [Cover Setting] key, and tap the [On] key. - 2](/content/2026/06/1367452/images/6628900156bcfa783f3a396ed6f9eee3087fde517e336ffc855b08635ecccc43.jpg)
- If the cover will be copied on, label sheets, transparency film, and tab paper cannot be used.
•To cancel all settings:
Tap the [CA] key.
Tap the [Colour Start] or [B/W Start] key to start copying.
COPYING MULTIPLE ORIGINALS ON EACH BOOKLET PAGE (BOOKLET 2-UP/4-UP)
This function copies two or four original pages equally on one page of pamphlet copy paper.
This function is convenient for arranging a minimum number of copies into an attractive booklet or pamphlet format.


- Booklet 2-Up/4-Up cannot be selected in easy mode.
- The following paper sizes and number of sheets are available for booklet 2-Up or 4-Up.
Paper size: A3W, A3, B4, A4R, B5R, 12" x 18", 11" x 17", 8-1/2" x 14", 8-1/2" x 11"R
Number of stapled sheets: Max. 15 sheets
- Scan the originals in order from the first page to the last page. The order of copying will be automatically adjusted by the machine.
Eight or 16 original pages will be copied onto each sheet of paper. Blank pages will be automatically produced at the end if the number of original pages is not a multiple of eight or 16.
1. Place the original.
Place the original in the document feeder tray of the automatic document feeder, or on the document glass.
AUTOMATIC DOCUMENT FEEDER (page 1-30)
DOCUMENT GLASS (page 1-34)

If the originals are 2-sided, place them in the document feeder tray.
2 Tap the [Staple Sort] key, and tap the [Saddle Stitch] key.
3 Select the binding edge.

To cancel the booklet setting:
Tap the [Off] key.
4

Tap the [1-Sided], [2-Sided Booklet] or [2-Sided Tablet] key as appropriate for the original.
When not inserting a cover, go to step 6.
5
When inserting a cover, tap the [Cover Setting] key, and tap the [On] key.

•To change the cover input tray:
Tap the [Paper Tray] key to display the tray selection screen.
Tap the cover input tray on the tray selection screen.
For more information, see "SELECTING THE PAPER TRAY FOR COPYING (page 3-13)".
• To make a copy on a cover sheet, check the [Make Copy on Cover (Duplex)] box so that √ appears.

- If the cover will be copied on, label sheets, transparency film, and tab paper cannot be used.
• To cancel all settings:
Tap the [CA] key.
6
Tap [N-Up] on the action panel.
7
Tap the key of the N-Up sheets you wish to use.
If needed, the images will be rotated.

To cancel the N-Up setting
Tap the [Off] key.
8
Select the layout.
9

Tap [Border], and select the border.
A line can be inserted between pages arranged on a sheet. After the settings are completed, tap [OK] key twice, and [Back] keys in sequence.
![SHARP BP-50C45 - Tap [Border], and select the border. - 1](/content/2026/06/1367452/images/75f6c2fa5f1c11278a918fe45c95e10f3f464108e43b7d077a2deb52d550b92a.jpg)
To cancel all settings:
Tap the [CA] key.
10
Tap the [Colour Start] or [B/W Start] key to start copying.
COPYING A PAMPHLET (BOOK COPY)
This function makes a copy of the two facing pages of an open book or other bound document.
Copies made with this function can be folded at the centre to create a booklet.
This function is convenient for arranging copies into an attractive booklet or pamphlet.
Book copy flow (when the original has 4 pages)
Scan the original in the order of "cover and back cover" → "inside of cover and 1st page" → "2nd and 3rd page" → "4th page and inside of back cover" to copy.
![graph LR A["Originals"] --> B["Back cover"] B --> C["Cover Inside of cover 1st page 2nd page"] C --> D["3rd page 4th page"] D --> E["Inside of back cover"] F["Place the original"] --> G["A"] G --> H["B"] H --> I["C"] I --> J["D"]](/content/2026/06/1367452/images/824d88de20fa705d040a670d3d28c504098dffeac6bbfd5ea98dc0047806b73e.jpg)


• Book Copy cannot be selected in easy mode. • Book Copy must be specified before scanning the original. - Four original pages will be copied onto each sheet of paper. Blank pages will be automatically added at the end if the total number of original pages is not a multiple of four. - This function can be combined with saddle stitch or fold if a saddle stitch finisher is installed. - When the book copy function is selected, 2-sided copying mode is automatically selected. When settings are selected that prevent 2-sided copying, the book copy function cannot be used.


Place the original on the document glass.
Place the opened pages of the "front and last sheets". DOCUMENT GLASS (page 1-34)
2
Tap the [Others] key, and tap the [Book Copy] key.
3

Select a binding position.
When not inserting a cover, tap the [OK] and [Back] keys in sequence. Then, go to step 5.

To cancel the book copy setting: Tap the [Off] key.
4
When inserting a cover, tap the [Cover Setting] key, and tap the [On] key.
To make a copy on the inserted cover sheet, check the [Make Copy on Cover (Duplex)] box so that ☑ appears. After the settings are completed, tap the [OK] and [Back] keys in sequence.
![SHARP BP-50C45 - When inserting a cover, tap the [Cover Setting] key, and tap the [On] key. - 1](/content/2026/06/1367452/images/ad18977d94b5af8a08025a2da0748f8ef24b30f04274898212e7ccba75dabbbd.jpg)
To change the cover input tray:
Tap the [Paper Tray] key to display the tray selection screen. Tap the cover input tray on the tray selection screen. For more information, see "SELECTING THE PAPER TRAY FOR COPYING (page 3-13)".
![SHARP BP-50C45 - When inserting a cover, tap the [Cover Setting] key, and tap the [On] key. - 2](/content/2026/06/1367452/images/63eafd00cdd254ef8fbb6cce0a4c3aa36af1c399494d3643c7b0548e03e66585.jpg)
- If the cover will be copied on, label sheets, transparency film, and tab paper cannot be used.
- This setting is not available when the covers/inserts function is disabled in the setting mode.
5
Tap the [Colour Start] or [B/W Start] key to scan the first original page.
Scanning of the original starts.
6
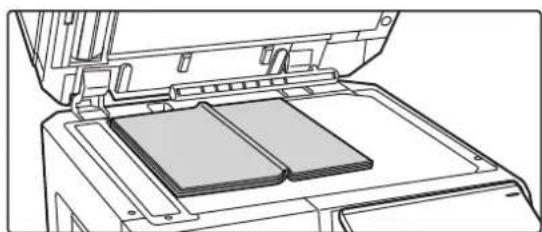
Place the next opened original pages, and tap the [Colour Start] or [B/W Start] key.
Tap the same key you tapped in step 5. Repeat this step until all original pages have been scanned. Scan the remaining original pages in the following order: Inside of the front cover and the 1st page (facing pages) The 2nd and 3rd pages (facing pages) The last page and inside of back cover (facing pages)
![SHARP BP-50C45 - Place the next opened original pages, and tap the [Colour Start] or [B/W Start] key. - 1](/content/2026/06/1367452/images/86d83fc410e5ec568c9285844a654b921036d3cbaffa034a5af7d2d4c51aba9b.jpg)
- Copy settings cannot be changed when scanning additional pages. •To cancel all settings: Tap the [CA] key.
7
Tap the [Read-End] key to start copying.
SPLITTING A PAMPHLET ORIGINAL BY PAGE (BOOK DIVIDE)
This function splits a saddle-stitch original such as a catalogue or a pamphlet page by page, and copies in sequence.
![graph TD A["Document with 8 cards"] --> B["Grid with 1, 2, 3 cards"] B --> C["Grid with 4, 5, 6, 7, 8 cards"]](/content/2026/06/1367452/images/7bb784edfa74efdcaf89834430835ba59897f5584a140b8f5499e6659738ac5b.jpg)

• Book Divide cannot be selected in easy mode. • Book Divide must be specified before scanning the original. - This function supports three original binding edges: left binding, right binding, and top open. • The scanned original is split in the centre.

The document glass is not available for this function.
1
Tap the [Others] key, and tap the [Book Divide] key.
2

Select the binding edge of the pamphlet original.

Check the preview image displayed in the screen, and make sure that the binding edge is correct.

•To cancel the Book Divide setting:
Tap the [Off] key.
• To cancel all settings:
Tap the [CA] key.
3
Tap the [Colour Start] or [B/W Start] key to start copying.
PAPER, AND TIME SAVING FUNCTIONS
SKIPPING BLANK PAGES IN AN ORIGINAL (BLANK PAGE SKIP)
If the scanned original contains blank pages, this function skips them to copy only non-blank pages. The machine detects blank pages, enabling you to skip useless copies without checking an original.


- If an original of which one side is blank is scanned, blank pages are skipped for 2-sided copying.
- Depending on the original, some pages that are not blank may be detected as blank pages and thus not being copied, and some pages that are blank may not be detected as blank and thus copied.

To use Blank Page Skip in Easy mode
In "Settings (administrator)", select [System Settings] → [Common Settings] → [Operation Settings] → [Easy Mode Settings] → [Easy Copy].
1
Place the original.
Place the original in the document feeder tray of the automatic document feeder, or on the document glass.
AUTOMATIC DOCUMENT FEEDER (page 1-30)
DOCUMENT GLASS (page 1-34)
2
Tap the [Others] key, and tap the [Blank Page Skip] key.
3
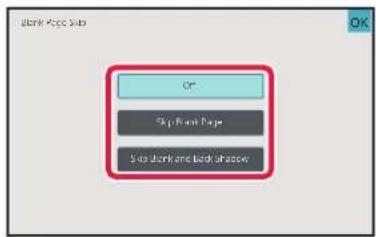
Tap the [Skip Blank Page] or [Skip Blank and Back Shadow] key.
After the settings are completed, tap [OK] and [Back] keys in sequence.
![SHARP BP-50C45 - Tap the [Skip Blank Page] or [Skip Blank and Back Shadow] key. - 1](/content/2026/06/1367452/images/b4bbf3ed563a8031cd4c16e9bc850b3ea1e2c232ca1843136a23b10f5ce64066.jpg)
To cancel all settings:
Tap the [CA] key.
4
Tap the [Colour Start] or [B/W Start] key.
5

Check the confirmation message, and tap the [OK] key to start copying.
On the confirmation screen, the number of scanned original sheets appears in (A), the number of scanned sides in (B), and the number of copies excluding blank pages in (C).
For example, if five original sheets that include two blank pages are scanned by duplex scanning, the result is displayed as follows:
5 pages of original have been scanned. (P.10)
Copy 8 pages of originals.
ADJUSTING THE BACKGROUND BY MAKING LIGHT AREAS OF THE ORIGINAL DARKER OR LIGHTER (BACKGROUND ADJUSTMENT)
You can adjust the background by making light areas of the original darker or lighter.
Changing the level of [Background Adjustment] to the [+] side makes the background darker, while changing to the [-] side makes it lighter.
Darkness of the light area can be adjusted by this function.
![graph LR A["House with window"] --> B["Adjust light areas in this way."] B --> C["Level [+"]] B --> D["Level [-"]] C --> E["+"] makes the background darker. [-] makes the background lighter.](/content/2026/06/1367452/images/bb39e2d8a319584ac60aaf17d1905d079aa77f6586a73ad69e98e6dda2709b4d.jpg)

- Background Adjustment cannot be selected in easy mode.
- You must select Background Adjustment before scanning the original.
1
Tap the [Others] key, and tap the [Background Adjustment] key.
2
![Background Adjust Viewers Adjust Original Background. Dark tone 3 - + 2 - + 3 - + Touch [1] channel background. Touch [2] erase background.](/content/2026/06/1367452/images/7db4c329a8da93a076c917440986d51a7d495bb4bcc916df81971670c3bc46b2.jpg)
Tap or move the slider to set the value.
After the settings are completed, tap [OK] and [Back] keys in sequence.

To cancel the Background Adjustment setting:
Tap the [Off] key.
3
Place the original.
Place the original in the document feeder tray of the automatic document feeder, or on the document glass. AUTOMATIC DOCUMENT FEEDER (page 1-30) DOCUMENT GLASS (page 1-34)

To cancel all settings: Tap the [CA] key.
4
Tap the [Colour Start] or [B/W Start] key to start copying.
MAKING A PROOF COPY (PROOF COPY)
This function makes a proof copy before printing the specified number of copies. Check the preview image with a proof copy. If necessary, change the settings. Using this function stores the scanned original in the machine, saving you the trouble of re-scanning the original in the changed setting.
Proof copy flow
![graph TD A["Select "Proof Copy" and set 5 sets of copies"] --> B["One set of copies is printed for you to check"] B --> C["The remaining 4 sets are printed"] D["Adjust the settings"] --> E["After adjustment, one set is printed for you to check"] E --> F["If OK"] F --> G["The remaining 4 se…](/content/2026/06/1367452/images/0f2d03c7c99a5011283c20e0280f3580dd871f8fd4c9ac13594d2dfda9b4bd3e.jpg)

• Proof Copy cannot be selected in easy mode. • Proof Copy must be specified before scanning the original. - If Proof Copy is executed while the machine is printing another job, the job in progress is interrupted, and a proof copy is printed preferentially. The interrupted job will resume after proof copying has been completed.
However, if proof copy is executed during printing of a job for which both 2-sided printing and staple function are enabled, the proof copy will be printed after the job in progress is finished.
If the [Start Print] key is tapped to execute printing of the remaining sets while the machine is printing another job, the remaining sets will be printed after all previously reserved jobs are completed.
1
Tap the [Others] key, and tap the [Proof Copy] key.
A checkmark appears on the icon.
After the settings are completed, tap the [Back] key.
![SHARP BP-50C45 - Tap the [Others] key, and tap the [Proof Copy] key. - 1](/content/2026/06/1367452/images/112b346d5f97a43b7826a0ce6d2a4242ee37c50a6058c5c146f0b3894edd67a5.jpg)
To cancel the Proof copy setting:
Tap the [Proof Copy] key to uncheck it.
2
As necessary, specify the required functions such as "Exposure" and "Copy Ratio".
3
Place the original.
Place the original in the document feeder tray of the automatic document feeder, or on the document glass. AUTOMATIC DOCUMENT FEEDER (page 1-30) DOCUMENT GLASS (page 1-34)

To cancel all settings: Tap the [CA] key.
4

Set the number of copies (number of sets) using the numeric keys.

Up to 9999 copies (sets) can be set.

If an incorrect number of copies is set, tap the [C] key and enter the correct number.
5
Tap the [Colour Start] or [B/W Start] key. Make only one set of copies.
6

Check the copy result. If no problem is found, tap the [Start Print] key.
As necessary, change the settings and repeat proof copying until you are satisfied with the copy result.
![SHARP BP-50C45 - Check the copy result. If no problem is found, tap the [Start Print] key. - 1](/content/2026/06/1367452/images/07a484fe4212402ff8a3847b0bf3ebc015d19be26942adf2e371c51d5d8d6f8f.jpg)
You can also change the number of copies. To change the number of copies, use the numeric keys.
![SHARP BP-50C45 - Check the copy result. If no problem is found, tap the [Start Print] key. - 2](/content/2026/06/1367452/images/8e9659c04087f49b4c3170303f155597c468f1868b7f2f4ef77fdbf61cd95af8.jpg)
- In Proof Copy, unavailable function keys are not displayed.
- Some available functions may be restricted. •To cancel all settings:
Tap the [CA] key.
CHECKING THE NUMBER OF SCANNED ORIGINAL SHEETS (ORIGINAL COUNT)
This function counts the number of scanned original sheets, and displays the result before making a copy.
By allowing you to check the number of original sheets that were scanned, this helps reduce the occurrence of copy mistakes.

- Original count cannot be selected in easy mode.
- The count result is displayed with the number of scanned original sheets, not the number of scanned original pages. For example, when 2-sided copying is performed using one original, the number "1" will appear to indicate that one original sheet was scanned, not "2" to indicate the front-side page and the reverse side page.
- Original Count must be specified before scanning the original.
Tap the [Others] key, and tap the [Original Count] key.
A checkmark appears on the icon.
After the settings are completed, tap the [Back] key.
![SHARP BP-50C45 - Tap the [Others] key, and tap the [Original Count] key. - 1](/content/2026/06/1367452/images/158e1aa3409c9e6fb1dd267612c4baae96daf2be5a6e595d236e2c7a51b52bea.jpg)
To cancel the Original Count setting:
Tap the [Original Count] key to uncheck it.
Place the original in the document feeder tray of the automatic document feeder.
AUTOMATIC DOCUMENT FEEDER (page 1-30)
3
Tap the [Colour Start] or [B/W Start] key.
4

Check the number of original sheets.
The number that is displayed is the number of scanned original sheets, not the number of scanned original pages. For example, when 2-sided copying is performed using one original, the number "1" will appear to indicate that one original sheet was scanned, not "2" to indicate the front-side page and the reverse side page.

If the displayed number of original sheets is different from the actual number of sheets
Tap the [Cancel] key to stop the job.
5
Tap the [OK] key to start copying.
![SHARP BP-50C45 - Tap the [OK] key to start copying. - 1](/content/2026/06/1367452/images/9ff500a519919f37bbee78570a3673aaae561b0c4f71ab0500836724c268ee8b.jpg)
If this function is combined with [Job Build], the count result is displayed after the [Read-End] key has been tapped.
USING TWO MACHINES TO REDUCE THE COPY TIME (TANDEM COPY)
This function shares a copy job half-and-half between two machines connected to the network, enabling the reduction of the copy time.
Primary unit and secondary unit
The primary unit performs only scanning, and a secondary unit registered in the primary unit performs only printing without scanning the original.
![graph LR A["Server"] -->|4 Sets of copies| B["Master machine"] B --> C["Client machine"] C --> D["2 Sets of copies"] B --> E["Computer"] C --> F["Computer"] style A fill:#f9f,stroke:#333 style B fill:#ccf,stroke:#333 style C fill:#cfc,stroke:#333 style D fill:#fcc,stroke:#333 style E fill:#cff,strok…](/content/2026/06/1367452/images/b4e409f6eb6386ce9add37a9ab139ad3a6f3108cc9cf12b9f032cf31e6220069.jpg)
Network environment

• Tandem Copy cannot be selected in easy mode. - To use this function, two machines must be connected to your network. - Even if more machines are connected to the network, this function can only be used to have one other machine share a job. - To configure the tandem connection setting, register IP address information of the secondary unit in the primary unit. For the port number, it is best to use the initial setting (50001). Unless you experience difficulty with this setting, do not change the port number. The tandem setting should be configured by your network administrator. If the primary unit and secondary unit will switch roles, configure the IP address of the primary unit in the secondary unit. The same port number can be used for both machines. • In this situation:
A saddle stitch finisher is installed in the primary unit while not installed in a secondary unit.
• Tandem Copy is enabled when specifying copies without stapling. • Tandem Copy is disabled when specifying copies with stapling.
As shown here, if Tandem Copy is enabled using a function provided in the primary unit and not provided in a secondary unit, a message will appear.
If a machine runs out of paper
If either the primary unit or the secondary unit run out of paper, the machine that ran out of paper will hold the job while the machine that still has paper continues the job. When paper is added to the machine that ran out, the job resumes.
If user authentication is specified
- Tandem Copy is enabled when user authentication is specified in the primary unit.
- Tandem Copy is disabled when user authentication is specified in the secondary unit while it is not specified in the primary unit.
- If an odd number of sets is being made, one more set is output to the primary unit.
1 Tap the [Others] key, and tap the [Random Copy] key.
A checkmark appears on the icon.
After the settings are completed, tap the [Back] key.
![SHARP BP-50C45 - Tap the [Others] key, and tap the [Random Copy] key. - 1](/content/2026/06/1367452/images/54fa829ab58a86ad12908476819766cb3898ddd37d25a0acfea0258735c89ce2.jpg)
To cancel the Tandem Copy setting:
Tap the [Tandem Copy] key to uncheck it.
3 Place the original.
Place the original in the document feeder tray of the automatic document feeder, or on the document glass.
When using the document glass to scan multiple original pages, change the original and tap the [Colour Start] or [B/W Start] key.
AUTOMATIC DOCUMENT FEEDER (page 1-30)
DOCUMENT GLASS (page 1-34)
3

Tap the number of copies key to specify the number of copies.
Up to 9999 copies (sets) can be set. The specified number of copies are shared between the primary unit and secondary unit. If the number of copies is odd, the primary unit makes more copies than the secondary unit.

- If an incorrect number of copies is set:
Tap the [C] key and then enter the correct number.
•To cancel all settings:
Tap the [CA] key.
4 Tap the [Colour Start] or [B/W Start] key to start copying.
![SHARP BP-50C45 - Tap the [Colour Start] or [B/W Start] key to start copying. - 1](/content/2026/06/1367452/images/d0b359de7c55757d2841a201feaa9b377ad38b427267066848a31a5f2c59fd40.jpg)
To cancel Tandem Copy:
Tap the [Cancel Copy] keys on both the primary unit and secondary unit.
SECURITY REINFORCEMENT FUNCTIONS
PADDING UNAUTHORISED COPY PREVENTION DATA (HIDDEN PATTERN PRINT)
Characters to prevent unauthorised copying such as pre-set or customized text are placed as invisible characters in a background pattern.
When an output sheet with a pattern print is copied, the hidden characters will appear.


- Hidden Pattern Print cannot be selected in easy mode.
- "Hidden Pattern Print" is a function provided for the purpose of deterring unauthorised copying. It does not guarantee the prevention of information leakage.
- Text may not be completely hidden on an output sheet with a hidden pattern print under certain machine conditions. In such a case, adjust the contrast by selecting the [Hidden Pattern Print Setting] from the "Settings (administrator)".
- When copying an output sheet with a hidden pattern print, the hidden pattern may not emerge depending on settings other than "Hidden Pattern Print".
- The hidden pattern may not emerge on copies with certain types of devices or under certain setting conditions used to copy an output sheet with a hidden pattern print.
1
Place the original.
Place the original in the document feeder tray of the automatic document feeder, or on the document glass.
AUTOMATIC DOCUMENT FEEDER (page 1-30)
DOCUMENT GLASS (page 1-34)
2
Tap the [Others] key, and tap the [Hidden Pattern Print] key.
3

Tap the [On] key, and specify each item in the [Default Settings] tab as required.

- We recommend you to select the [Positive] option for the "Method".
- The black background pattern is printed in the following cases even when you set the [Print Colour] to "Magenta" or "Cyan":
If the colour mode is set to "B/W"
If the black and white mode is determined automatically
4

Specify each item in the [Print Contents Setting] tab as required.
To specify print settings, you can select the required one from pre-set text or use the soft keyboard. You can also print serial number and account job ID.
After the settings are completed, tap [OK] and [Back] keys in sequence.
![SHARP BP-50C45 - Specify each item in the [Print Contents Setting] tab as required. - 1](/content/2026/06/1367452/images/eb636e6e231dd344a6e3c66e9f3f34514ea092c6d139c77ab4578ae492469451.jpg)
•To cancel the Hidden Pattern Print setting:
Tap the [Off] key.
- Tapping the [Function Rev.] key displays the settings of the [Print Contents Setting] tab.
- The hidden pattern print preview may slightly differ from the actual pattern and exposure as the preview is used for simple pattern colour checking. •To cancel all settings:
Tap the [CA] key.
5
Tap the [Colour Start] or [B/W Start] key to start copying.
OUTPUT POSITION AND MARGIN ADJUSTMENT FUNCTIONS
ADDING MARGINS (MARGIN SHIFT)
This function shifts the copy image right, left or down to adjust the margin. This is convenient when you wish to bind the copies with a string or in a binder. Shifting the image to the right so the copies can be bound at the left edge

Not using the Margin Shift Using the Margin Shift
 |  |
| The punch holes cut off part of the image. | The image is moved to allow space for the holes so the image is not cut off. |
Margin Shift

Right Left



- Margin Shift cannot be selected in easy mode.
- Rotation copy cannot be used in combination with the margin shift function.
1
Place the original.
Place the original in the document feeder tray of the automatic document feeder, or on the document glass.
AUTOMATIC DOCUMENT FEEDER (page 1-30)
DOCUMENT GLASS (page 1-34)
2
Tap the [Others] key, and tap the [Margin Shift] key.
3

Tap the image shift direction.
4
Sets a margin shift width.
Tap the numeric value display indicating the margin shift area on the front side or reverse side, and enter the area using the numeric keys.
After the settings are completed, tap [OK] and [Back] keys in sequence.

If you set the [Adjust 2nd pg value to 1st.] checkbox to ☐, 📞 goes out and you can set sides 1 and 2 separately.

•To cancel the margin shift setting:
Tap the [Off] key.
•To cancel all settings:
Tap the [CA] key.
5
Tap the [Colour Start] or [B/W Start] key to start copying.
ERASING PERIPHERAL SHADOWS FOR COPYING (ERASE)
The erase function is used to erase shadows around the edges of copies that occur when copying thick originals or books.
When a thick book is copied

Shadows appear here
Not using the Erase Using the Erase


Shadows appear on the copy Shadows do not appear on the copy
Erase modes (Outer Frame Erase, Centre Erase, Edge + Centre Erase, Side Erase)
Outer Frame Erase Centre Erase


Edge + Centre Erase Side Erase


- Erase cannot be selected in easy mode.
- If a ratio setting is used in combination with an erase setting, the erase width will change according to the selected ratio. If the erase width setting is 20 mm (1") and the image is reduced to 50%, the erase width will be 10 mm (1/2").
- This function erases the parts of the image where shadows tend to form, but does not detect shadows and erase only the shadows.
- When Erase is selected, the orientation of the original is automatically set to portrait.
1
Place the original.
Place the original in the document feeder tray of the automatic document feeder, or on the document glass.
AUTOMATIC DOCUMENT FEEDER (page 1-30)
DOCUMENT GLASS (page 1-34)
2
Tap the [Others] key, and tap the [Erase] key.
3
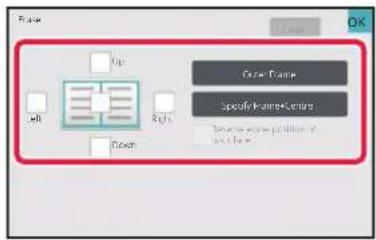
Tap the checkbox of the edge that you wish to erase, and specify the erase position.
Check that the tapped checkbox is set to √ If the [Outer Frame] key is tapped, the [Up], [Down], [Left], and [Right] checkboxes are set to √ If the [Specify Frame+Centre] key is tapped, all the checkboxes are set to √

Specify the erase edge on the reverse side when erasing edges of one to three sides of Up, Down, Left, and Right on the front side to scan a 2-sided original.
- If the [Reverse erase position of back face] checkbox is set to √, the edge in the position opposite to the erased edge on the front side will be erased.
- If the [Reverse erase position of back face] checkbox is set to □, the edge in the same position as on the front side will be erased.
4
Specify the erase width.
Tap the numeric value display indicating the erase width area on the front side or reverse side, and enter the area using the numeric keys.
After the settings are completed, tap [OK] and [Back] keys in sequence.

To quickly set the area, first specify a value close to the desired value by the numeric keys, then adjust it with - + .

•To cancel the erase setting:
Tap the [Clear] key.
•To cancel all settings:
Tap the [CA] key.
5
Tap the [Colour Start] or [B/W Start] key to start copying.
COPYING ORIGINALS WITH NO EDGE CUT-OFF (FULL BLEED COPY)
This feature lets you copy an entire original to paper larger than the original size with no image cut-off at the edges.


• Full Bleed Copy cannot be selected in easy mode. - The punch function cannot be used.
1 Tap the [Others] key, and tap the [Full Bleed Copy] key.
"Select larger paper size than output image size of original." is displayed on the page.
Tap [OK] key.
When you have finished selecting other settings, tap the [Back] key.
![SHARP BP-50C45 - Tap the [Others] key, and tap the [Full Bleed Copy] key. - 1](/content/2026/06/1367452/images/06f35169454c9c997bd62670e2844f6701676379f2e32a668e6b09e562d3bfbd.jpg)
To cancel the full bleed copy setting:
Tap the [Full Bleed Copy] key to uncheck it.
2 Place the original.
AUTOMATIC DOCUMENT FEEDER (page 1-30)
DOCUMENT GLASS (page 1-34)
2 Select paper larger than the output image
SELECTING THE PAPER TRAY FOR COPYING (page 3-13)
SPECIFYING A TYPE AND SIZE OF PAPER LOADED ON BYPASS TRAY (page 3-35)

To cancel all settings:
Tap the [CA] key.
4 Tap the [Colour Start] or [B/W Start] key to start copying.
COPYING IN THE CENTRE OF THE PAPER (CENTRING)
This function centres the copied image on the paper.
This lets you place the image in the centre of the paper when the original size is smaller than the paper size or when the image is reduced.
Not using the centring function Using the centring function


- Centring cannot be selected in easy mode.
- Centring must be specified before scanning the original.

- When the original size or the paper size is displayed as a special size, this function cannot be used.
- This function cannot be used in combination with an enlargement setting. If enlargement of 101% or more is selected, the enlargement is automatically returned to 100%.
1 Tap the [Others] key, and tap the [Centring] key.
A checkmark appears on the icon.
After the settings are completed, tap the [Back] key.
![SHARP BP-50C45 - Tap the [Others] key, and tap the [Centring] key. - 1](/content/2026/06/1367452/images/5c2dd470a3193bfad901dd792b162364c771a77470ff0ca495bebfe978102551.jpg)
•To cancel the centring setting:
Tap the [Centring] key to clear the checkmark.
•To cancel all settings:
Tap the [CA] key.
2 Tap the [Colour Start] or [B/W Start] key to start copying.
SPECIFYING A PAPER POSITION (POSITION IMAGE)
This function moves the scanned original to a specified position to make a copy.
You can make a copy in any desired position as you can fine adjust the position.
We recommend that you specify the top as the starting side of the original.
![graph TD A["Originals"] --> B["Processing Box"] B --> C{Position Image is used} C --> D["Printing Paper"] D --> E["Top edge of paper"] E --> F["Position Image is not used"]](/content/2026/06/1367452/images/3006024d530e44c5afceb2ce1ba60ad5d28dd385eb3d11ef4aaf80acb55010f2.jpg)

Position Image cannot be selected in easy mode.
1 Copy the original that you want to use for move copy. Copying is performed without using move copy.
2 Measure the movement amount with the top as the starting side of the output copy.
3 Tap the [Others] key, and tap the [Position Image] key.

Tap the [Original] key and specify the orientation of the original to have the orientation be correctly recognized. Specifying the orientation of the original (page 3-29)
4

Sets a movement distance.
Tap the area indicating the movement distance on the front or reverse side, and enter the distance using numeric keys. After the settings are completed, tap [OK] and [Back] keys in sequence.

• To quickly set the area, first specify a value close to the desired value by the numeric keys, then adjust it with - If you set the [Adjust 2nd pg value to 1st.] checkbox to , goes out and you can set sides 1 and 2 separately. - If you want to copy in the horizontal orientation, specify "Left" as the starting side of the original. Even if you copied in the horizontal orientation, setting the starting side of the original to the top enables measurement of the movement distance in the same way as in the vertical orientation.


To cancel the Position Image setting:
Tap the [Clear] key.
5
Place the original.
Place the original in the document feeder tray of the automatic document feeder, or on the document glass.
AUTOMATIC DOCUMENT FEEDER (page 1-30)
DOCUMENT GLASS (page 1-34)

To cancel all settings:
Tap the [CA] key.
6
Tap the [Colour Start] or [B/W Start] key to start copying.
SCANNING FUNCTIONS
COLLECTIVELY SCANNING A LARGE NUMBER OF ORIGINALS (JOB BUILD)
This function divides the originals into sets and feeds each set through the automatic document feeder one set at a time when copying a very large number of originals.
This saves you the trouble of sorting the copies.
When scanning originals that are separated into sets, scan the set that has the first page first.
The individual copy settings can be configured for each set of originals to be scanned separately.
Up to 100 sets of originals can be scanned for one job.
![graph LR A["File"] --> B["Data Range -1"] B --> C["Data Range -101"] C --> D["Server Rack"] D --> E["Server Rack -1"]](/content/2026/06/1367452/images/d2b864109e21dcaa22c636070be813ca272b3b914bf7933d267ba55c5748ef8b.jpg)

- You must select Job Build mode before scanning the original.
- If you need to change all original settings, change them before scanning the original.
- If the Quick File Folder of document filing mode is full, copying in Job Build mode will be impeded. Delete unnecessary files from the Quick File Folder.

The Job Build mode cannot be combined with other functions.
- Dual Page Copy • Book Copy
- Card shot
- Multi-Page Enlargement
- Book Divide
- Repeat Layout

To use Job Build in Easy mode
In "Settings (administrator)", select [System Settings] → [Common Settings] → [Operation Settings] → [Easy Mode Settings] → [Easy Copy].
Copying in Job Build mode
1
Tap the [Others] key, and tap the [Job Build] key.
A checkmark appears on the icon.
After the settings are completed, tap the [OK] key.
![SHARP BP-50C45 - Tap the [Others] key, and tap the [Job Build] key. - 1](/content/2026/06/1367452/images/c7b2032a099d24a1e78f530c8b4ecf51f2c48571c81ee79e25c1d4d4229bea58.jpg)
To cancel the job build setting
Tap the [Job Build] key to uncheck it.
2
Change settings as needed.
3

Place the original in the document feeder tray of the automatic document feeder, and tap the [Start] key to scan the first original.
Insert the originals all the way into the document feeder tray. Originals can be stacked up to the indicator line. AUTOMATIC DOCUMENT FEEDER (page 1-30)
4
Place the next set of originals and tap the [Start] key.
Repeat this step until all originals have been scanned.
![SHARP BP-50C45 - Place the next set of originals and tap the [Start] key. - 1](/content/2026/06/1367452/images/fb22fc849512ea6721aa54599cebc7fe9d90553e831e718e04464b19a2320dd1.jpg)
- To change copy settings for each set of originals, tap the [Change Setting] key. For more information, see "Changing the copy settings for each set of originals (page 3-93)".
- If you tap the [Preview] key, you cannot scan additional pages.
5
![Place next original. Press [Start] to scan original. [Change Setting] Change setting of next original. [Preview] Finish scan and display preview. Change Setting Preview Read End](/content/2026/06/1367452/images/8eeb10e9102183a09b421846987c08cdae8d5631fafaeec9fa21ea40a4c706bc.jpg)
Repeat until all pages have been scanned and check the preview image in the preview screen.

To cancel all settings:
Tap the [CA] key.
6
Tap the [Read-End] key to start copying.
Changing the copy settings for each set of originals
As necessary, change copy settings for each set of originals.
Perform the steps below before scanning the next set of originals in step 4 of "Copying in job build mode (page 3-91)".

A [Separator Page] setting cannot be changed for the second and later sets.
1 Tap the [Change Setting] key.
2 Change copy settings.
3 Place the next set of originals and tap the [Start] key. Repeat this step until all originals have been scanned.
SCANNING ORIGINALS OF DIFFERENT SIZES (MIXED SIZE ORIGINAL)
This feature copies originals in different sizes at the same time even when B4 (8-1/2" x 14") size originals are mixed with A3 (11" x 17") size originals.
When scanning the originals, the machine automatically detects the size of each original and uses paper appropriate for that size.
When mixed size original is combined with auto ratio selection, the ratio is adjusted individually for each original according to the selected paper size, enabling printing on a uniform paper size.

When mixed size original is combined with auto ratio selection
(When A3 (11" x 17") is selected with the auto ratio selection, B4 (8-1/2" x 14") size original is enlarged to A3 (11" x 17") size for printing.)

A B4 (8-1/2" x 14") size original is enlarged to A3 (11" x 17") size for printing.
There are two settings for mixed size originals.
| Same Width | Use this setting for originals that are in 2 types of different sizes but have sides that are the same length. The originals are inserted in the document feeder tray with the sides that are the same length aligned together on the left.A3 and A4 • B4 and B5 • A4R and A5 • 11" x 17" and 8-1/2" x 11"8-1/2" x 14" and 8-1/2" x 11"R • 8-1/2" x 14" and 5-1/2" x 8-1/2" • 8-1/2" x 13" and 8-1/2" x 11"R and 5-1/2" x 8-1/2" |
| Different Width | Use this setting when the originals are in 2 types of different sizes and do not have sides that are the same length. This setting can only be used for the following combinations of sizes:A3 and B4 • A3 and B5 • B4 and A5 • A4 and B5 • B4 and A4R • B4 and A5B5 and A4R • B5 and A511"x17" and 8-1/2"x14" • 11"x17" and 8-1/2"x13" • 11"x17" and 5-1/2"x8-1/2"Use this setting when the originals are in 3 types of different sizes and do not have sides that are the same length. This setting can only be used for the following combinations of sizes:A4R, B4, and A3 • A5, B4, and A3 • A4R, B5, and A3 • A5, B5, and A3 • A4R, A4, and B4A5, A4, and B4 • B5, A4R, and A4 • A5, B5, and A4 • B5R, A4R, and B4 • A5, B5R, and B4B5R, A4R, and B5 • A5, B5, and B5R |

- Mixed Size Original cannot be selected in easy mode.
- Mixed Size Original must be specified before scanning the original.

- Three Different Widths cannot be selected on
BP-50C26/BP-50C31/BP-50C36/BP-50C45/BP-50C55/BP-50C65/BP-55C26/BP-60C31/BP-60C36/BP-60C45.
- When [Different Width] is selected on the
BP-50C26/BP-50C31/BP-50C36/BP-50C45/BP-50C55/BP-50C65/BP-60C31/BP-60C36/BP-60C45, automatic two-sided scanning cannot be used. - When [Different Width] is selected, the staple function cannot be used.
1
Tap the [Others] key, and tap the [Mixed Size Original] key.
2
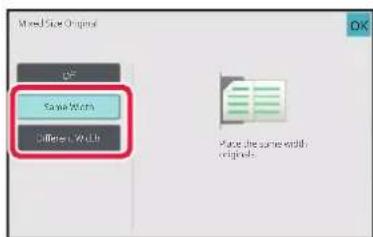
Tap the [Same Width] key or the [Different Width] key as appropriate for the originals.
After the settings are completed, tap [OK] and [Back] keys in sequence.
![SHARP BP-50C45 - Tap the [Same Width] key or the [Different Width] key as appropriate for the originals. - 1](/content/2026/06/1367452/images/eea9f0a744fc81a7cce4d22a93b7de3e141454ffc8acd0797c3e43345d8110bc.jpg)
To cancel the mixed size original setting
Tap the [Off] key.
3
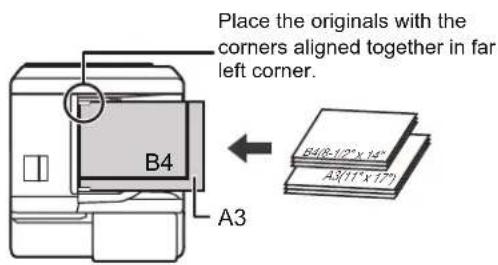
Place the original face up on the document feeder tray with the corners aligned together in far left corner.
Place the original as shown on the Mixed Size Original screen.

For mixed size originals, set "Original" to "Auto".
4
Tap the [Colour Start] or [B/W Start] key to start copying.
![SHARP BP-50C45 - Tap the [Colour Start] or [B/W Start] key to start copying. - 1](/content/2026/06/1367452/images/eb6fb010a10b17e90f135d6e2461638e446a906781fb161a76504e9276ff9f75.jpg)
BP-50C26/BP-50C31/BP-50C36/BP-50C45/BP-50C55/BP-50C65/BP-60C31/BP-60C36/BP-60C45
If the printed image is skewed when using the mixed size original function for originals of mixed width, open the document feeder cover, change the switch position, and then scan the originals.
Switch position A is used for normal scanning, and switch position B is used for mixed size original scanning. When you have finished using the mixed size original function, be sure to return the switch to position A.

SCANNING THIN ORIGINALS (SLOW SCAN MODE)
When you wish to scan thin originals using the automatic document feeder, you can use this function, which helps prevent thin originals from misfeeding.
![graph LR A["Document Blocks"] --> B["Arrow"] B --> C["Final Diagram"]](/content/2026/06/1367452/images/374eaa8720aee808f74bec277404cce7f5c5c177f73beccc7d15917b9495c6fc.jpg)

- Slow Scan Mode cannot be selected in easy mode.
- Slow Scan Mode must be specified before scanning the original.

The "2-Sided→2-Sided" and "2-Sided→1-Sided" modes of automatic 2-sided copying cannot be used.
1 Tap the [Others] key, and tap the [Slow Scan Mode] key.
A checkmark appears on the icon.
After the settings are completed, tap the [Back] key.
![SHARP BP-50C45 - Tap the [Others] key, and tap the [Slow Scan Mode] key. - 1](/content/2026/06/1367452/images/8d49afe45933d05b735805321aa2d045205983a71936998eb5550a9c71319074.jpg)
To cancel slow scan mode:
Tap the [Slow Scan Mode] key to clear the checkmark.
2 Place the original in the document feeder tray of the automatic document feeder.
AUTOMATIC DOCUMENT FEEDER (page 1-30)

If the originals are inserted with too much force, they may crumple and misfeed.
3 Tap the [Colour Start] of [B/W Start] key to start copying.
![SHARP BP-50C45 - Tap the [Colour Start] of [B/W Start] key to start copying. - 1](/content/2026/06/1367452/images/46dea9f73d4ede3c99967e154057b0dab86585a6f98b043d2a62d5715657e5c2.jpg)
On the BP-50C26/BP-50C31/BP-50C36/BP-50C45/BP-50C55/BP-50C65/BP-60C31/BP-60C36/BP-60C45, when the document rolls in the original exit tray on the automatic document feeder, fix the paper fixing arm at the centre to the top.
SCANNING HEAVY ORIGINALS (HEAVY PAPER SCAN)
When you wish to scan heavy originals using the automatic document feeder, you can use this function, which helps prevent heavy originals from misfeeding.
![graph TD A["Block A"] --> D["Block D"] B["Block B"] --> D["Block D"] C["Block C"] --> D["Block D"] D --> E["Block A"]](/content/2026/06/1367452/images/635db25c3599ade9ee6ace4a1cbdc45d818e56635733f1c7ef6334ce122414b4.jpg)

- Heavy Paper Scan cannot be selected in easy mode.
- Heavy Paper Scan must be specified before scanning the original. • Heavy Paper Scan cannot be selected on BP-50C26/BP-50C31/BP-50C36/BP-50C45/BP-50C55/BP-50C65/BP-60C31/BP-60C36/BP-60C45.
1 Tap the [Others] key, and tap the [Heavy Paper Scan] key.
A checkmark appears on the icon.
After the settings are completed, tap the [Back] key.
![SHARP BP-50C45 - Tap the [Others] key, and tap the [Heavy Paper Scan] key. - 1](/content/2026/06/1367452/images/719a5c1f0db21f7ac971b42b90d910f8e9654646c5750846c769db01914602ef.jpg)
To cancel Heavy Paper Scan:
Tap the [Heavy Paper Scan] key to clear the checkmark.
2 Place the original in the document feeder tray of the automatic document feeder.
AUTOMATIC DOCUMENT FEEDER (page 1-30)

If the originals are inserted with too much force, they may crumple and misfeed.
3 Tap the [Colour Start] of [B/W Start] key to start copying.
ADJUSTING RESOLUTION WHEN SCANNING (RESOLUTION)
This function adjusts the resolution when scanning the original, enabling the high-quality output or speed-priority output according to the application.

- Resolution cannot be selected in easy mode.
- Resolution must be specified before scanning the original.
- The resolution setting is applied when making a full-size black & white copy.
1 Tap the [Others] key, and tap the [Scan Resolution] key.
2

Select the resolution.
The resolution can be set to both the document feeder and document glass.
After the settings are completed, tap [OK] and [Back] keys in sequence.

In the BP-55C26/BP-70C31/BP-70C36/BP-70C45/BP-70C55/BP-70C65, [600x300dpi] can be set.
Place the original.
Place the original in the document feeder tray of the automatic document feeder, or on the document glass.
AUTOMATIC DOCUMENT FEEDER (page 1-30)
DOCUMENT GLASS (page 1-34)
4 Tap the [B/W Start] key to start copying.
TEXT AND IMAGE ADDITION FUNCTIONS
PRINTING DATES, PAGE NUMBERS, AND WATERMARKS (STAMP)
This function prints information such as the "Date" or "Stamp", which is not shown on the original, on copies. You can print the following six types of information.
- Date
- Page No.
- Stamp
- Copies
- Text
- Watermark
For the stamp or watermark, you can print text such as "CONFIDENTIAL" or "PRIORITY". You can print pre-set text or any characters as the text.
Each of the items above can be printed on the header or footer of each sheet.


- Stamp cannot be selected in easy mode.
- If the selected stamp content of one position overlaps the stamp content of another position, priority will be given in the following order: watermark, right side, left side, centre. Content that is hidden due to overlapping will not be printed.
- Text will be printed at the preset size regardless of the copy ratio or paper size setting.
- Text will be printed at the preset exposure regardless of the exposure setting.
- Depending on the size of the paper, some printed content may be cut off or shifted out of position.

Text Setting (Stamp) in Print menu
In "Settings (administrator)", select [System Settings] → [Copy Settings] → [Condition Settings] → [Text /Image Printing] → [Text Settings (Stamp)]
Register preset text to be used in [Stamp].
When [Stamp] is combined with other functions:
| Combined function name | Print operation |
| Margin Shift | Together with the image, the stamp content is shifted the amount of the margin width. |
| Tab Copy Centring | Unlike a copy image that moves, the image will be printed in the position set in the stamp. |
| Dual Page Copy Book Divide Card Shot | Stamp items are printed for each copy sheet. |
| N-Up Stamp items are printed for each original page. | |
| Booklet Book Copy | Stamp items are printed for each page when compiling. |
| Covers/Inserts | Use the stamp settings to select whether or not the item is printed on inserted covers and inserts. |
1
Place the original.
Place the original in the document feeder tray of the automatic document feeder, or on the document glass. AUTOMATIC DOCUMENT FEEDER (page 1-30) DOCUMENT GLASS (page 1-34)
2
Tap the [Others] key, and tap the [Stamp] key.
3
Tap a tab to be printed, and tap the format.
The format of the [Text] tab can be entered using pre-set text or soft keyboard. Setting using the [Text] tab (page 3-102)

When you tap the 📄, the display tab is switched.
4
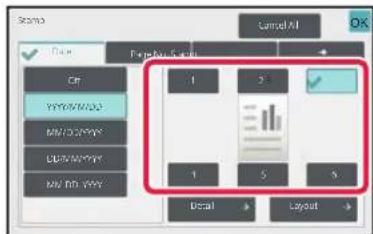
Tap a key of the desired print position.
Tap any of [1] to [6] keys.

- Tapping the [Detail] key allows you to configure settings for each setting position.
- Tapping the [Layout] key allows you to check the printing position or detailed settings.

• To cancel the text settings:
Tap the [Cancel All] key.
• To cancel all settings:
Tap the [CA] key.
5
Tap the [Colour Start] or [B/W Start] key to start copying.
![SHARP BP-50C45 - Tap the [Colour Start] or [B/W Start] key to start copying. - 1](/content/2026/06/1367452/images/a093461c8c17c0fa7cf7bb06511fd36a7bdf0eb172916f4739d3ef6b1338b0fc.jpg)
- If you select colour printing, tap the [Colour Start] key. Tapping the [B/W Start] key will print the stamp items in black and white even if colour printing is specified.
- If colour printing is specified for the original in black and white, it is counted as a full colour copy.
Setting using the [Text] tab
Tap the [Direct Entry] key in the [Text] tab to display the soft keyboard. Use the soft keyboard to enter any characters.

Selecting the format from pre-set text
Tapping the [Pre-Set Text] key allows you to select the required one of the registered formats for printing. Tapping the [Store/Delete] key allows you to edit, delete, or store pre-set text.

ADDING A REGISTERED IMAGE TO AN ORIGINAL (CUSTOM IMAGE)
This function adds an image registered in the machine to an original to make a copy.
Following are two types of custom images.
- Custom stamp (Full-colour stamp image)
![graph LR A["Document"] --> B["Output"] C["MEZO Icon"] --> D["Arrow Pointing Down"] style A fill:#f9f,stroke:#333 style B fill:#bbf,stroke:#333 style C stroke-dasharray: 5 5](/content/2026/06/1367452/images/f45a6017b2e89632cbcce3c8b7e67f4bb9afb182e814da467cb9076eaafb2191.jpg)
- Custom watermark (Stamp image with grey-scale watermark)
![graph LR A["Document"] --> B["Output"] style A fill:#fff,stroke:#000 style B fill:#fff,stroke:#000](/content/2026/06/1367452/images/4f83fd8d979189ea88481f7d6950886d4f2c81a0fdbd2ef615d3d9c11e917e6b.jpg)
The combination with other functions is described in the table below.
| Combined function Custom image operations | |
| Margin Shift Shifts in the same way as for an original image. | |
| Erase Makes a stamp copy as normal. | |
| Dual Page Copy Makes a stamp copy by sheet. | |
| Booklet Makes a stamp copy as normal. | |
| Job Build Makes a stamp copy as normal. | |
| Tandem Copy Based on the tandem copy. | |
| Covers/Inserts Based on the custom image setting. | |
| Separator Page Printing does not take place on separator pages. | |
| Transparency Inserts Makes a stamp copy as normal. | |
| N-Up Makes a stamp copy by sheet. | |
| Book Copy Makes a stamp copy as normal. | |
| Tab Copy Makes a stamp copy as normal regardless of image shift setting. | |
| Card Shot Makes a stamp copy by sheet. | |
| Business Card Copy | Makes Business Card Copy by sheet. |
| Mirror Image | Makes a stamp copy as normal without mirror image reverse. |
| B/W Reverse | Prints an image as normal without B/W reverse. However, the following condition is set when printed on a dark background.Custom stamp: Printed in whiteCustom watermark: Printed without being whitened |
| Full Bleed Copy Makes a stamp copy as normal. | |
| Centring Makes a stamp copy as normal without centring. | |
| Colour Adjustments Makes a stamp copy using the registered data. | |
| Stamp Makes a stamp copy on the Stamp menu. | |
| Photo Repeat Cannot be combined. | |
| Multi-Page Enlargement Cannot be combined. | |
| Hidden Pattern Print Makes a stamp copy under a pattern print. | |
| Tracking Information Print Makes a stamp copy under a tracking information print. | |
| Repeat Layout Cannot be combined. | |
| Position Image | Prints an image at the original position regardless of the Position Image setting. |
| Book Divide Makes a stamp copy by sheet. | |

- Custom Image cannot be selected in easy mode.
- An image must be registered in advance from the printer driver to the machine. REGISTERING A CUSTOM IMAGE (page 4-56)
- A custom stamp image is copied by sheet, not by original. If N-Up is enabled, user stamps are copied for each set of pages.
- A custom stamp image is copied with the registered size. The size remains unchanged even when the copy ratio is enlarged or reduced.
- A different custom image cannot be specified for each page.
- When you tap the [B/W Start] key, a monochrome copy is made even if you have selected a custom stamp.
- If an image runs off of the specified paper depending on the registered size or position, the excess will not be copied.
- Custom Image can be combined with Tandem Copy. Stamp copy is performed when a custom image with the same file name is registered in both the primary unit and secondary unit. If it is not registered, a copy will be made without a custom image.
1 Place the original.
Place the original in the document feeder tray of the automatic document feeder, or on the document glass.
AUTOMATIC DOCUMENT FEEDER (page 1-30)
DOCUMENT GLASS (page 1-34)
2 Tap the [Others] key, and tap the [Custom Image] key.
3 Tap the [Custom Stamp] of [Custom Watermark] Key.
4
Tap the [Image] key to select an image.
Select the required thumbnail image(s) from the available selection.
5

Set [Print Page] or [Print Position].
After the settings are completed, tap [OK] and [Back] keys in sequence.
![SHARP BP-50C45 - Set [Print Page] or [Print Position]. - 1](/content/2026/06/1367452/images/4055b49d0eae576ba6fe7ec33d9c352be431bdc84b5a09785236e77e083514c5.jpg)
•To cancel the custom image setting:
Tap the [Off] key.
•To cancel all settings:
Tap the [CA] key.
6
Tap the [Colour Start] or [B/W Start] key to start copying.
For settings related to custom stamp and custom watermark, see the following table.
For custom stamp
| Print Page Specify a page(s) for stamp copy. First Page or All Pages | |
| Print Position Specify a position for stamp copy. | |
| Print Angle | Specify the corner of the image. 0 degrees, -90 degrees, 90 degrees, or 180 degrees |
For custom watermark
| Print Colour | Specify the image watermark colour. Black, red, green, blue, cyan, magenta or yellow. |
| Print Pattern Specify the image | watermark print pattern. Transparent: Makes an original image transparent for stamp copy. Overlap: Hides a watermark added to an original image for stamp copy. |
| Exposure Select the exposure | of a watermark from nine levels. |
| Print Page Specify a page(s) | for stamp copy. First Page or All Pages |
| Print Position Specify a position for stamp copy. | |
| Print Angle | Specify the corner of the image. 0 degrees, -90 degrees, 90 degrees, or 180 degrees |
INSERTING COVERS IN COPIES (COVERS/INSERTS)
This function inserts a different type of paper into the pages corresponding to the front and back covers of a copy job. It is helpful when you want to change cover paper to make resources look better.
Configure insertion sheet settings if needed.

- To insert insertion sheets, see "INSERTING INSERTION SHEETS IN COPIES (COVERS/INSERTS) (page 3-114)".
- For N-Up, the layout is based on the first page and excludes covers.
Copying on a front cover and inserting together with a back cover
A different type of paper is inserted as a front cover, and a back cover is inserted to the last of the copy job.
![graph TD A["Document 1"] --> B["Document 2"] B --> C["Document 3"] C --> D["Document 4"] D --> E["Document 5"] E --> F["Document 6"] F --> G["Document 7"] G --> H["Document 8"] H --> I["Document 9"] I --> J["Document 10"] J --> K["Document 11"] K --> L["Document 12"] L --> M["Document 13"] M --> N["…](/content/2026/06/1367452/images/d19826620c1d31ed0d32ad330a1765112b03ebfe7b4bcfea09c35f1cf01ec329.jpg)
Front cover paper Back cover paper Copy
Cover inserting examples
The following shows the copy results when front and back covers are inserted into six 1-sided original pages or three 2-sided original pages in the four copy modes below.
1-sided copying of 1-sided originals
| Setting conditions for each cover | Resulting copies | ||||||||
| Front Cover Back Cover | |||||||||
| Not copied Not copied |  |  |  |  |  |  |  |  | |
| Inserts cover sheets at the beginning and end of copies. | |||||||||
| 1-sided copy Not copied |  |  |  |  |  |  |  | ||
| Makes a 1-sided copy on the first original page for front cover, and inserts a back cover at the end of copies. | |||||||||
| 2-sided copy Not copied |  |  |  |  |  |  | |||
| Makes a 2-sided copy on the first and second original pages for front cover, and inserts a back cover at the end of copies. | |||||||||
| Setting conditions for each cover | Resulting copies | |
| Front Cover Back Cover | ||
| Not copied 1-sided copy |  Inserts a front cover at the beginning of copies, and makes a 1-sided copy on the sixth original page for back cover. Inserts a front cover at the beginning of copies, and makes a 1-sided copy on the sixth original page for back cover. | |
| Not copied 2-sided copy |  Inserts a front cover at the beginning of copies, and makes a 2-sided copy on the fifth and sixth original pages for back cover. Inserts a front cover at the beginning of copies, and makes a 2-sided copy on the fifth and sixth original pages for back cover. | |
| 1-sided copy 1-sided copy | 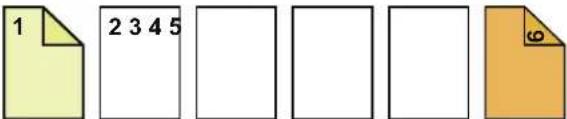 Makes a 1-sided copy on the first original page for front cover, and also makes a 1-sided copy on the sixth original page for back cover. Makes a 1-sided copy on the first original page for front cover, and also makes a 1-sided copy on the sixth original page for back cover. | |
| 1-sided copy 2-sided copy | 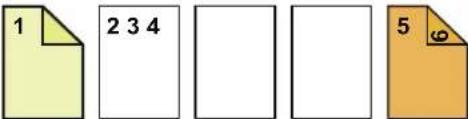 Makes a 1-sided copy on the first original page for front cover, and also makes a 2-sided copy on the fifth and sixth original pages for back cover. Makes a 1-sided copy on the first original page for front cover, and also makes a 2-sided copy on the fifth and sixth original pages for back cover. | |
| 2-sided copy 1-sided copy | 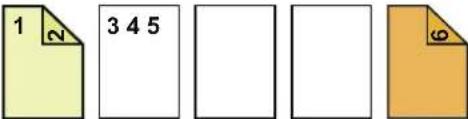 Makes a 2-sided copy on the first and second original pages for front cover, and also makes a 1-sided copy on the sixth original page for back cover. Makes a 2-sided copy on the first and second original pages for front cover, and also makes a 1-sided copy on the sixth original page for back cover. | |
| 2-sided copy 2-sided copy | 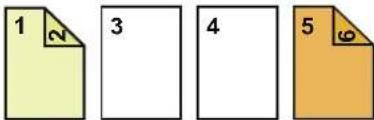 Makes a 2-sided copy on the first and second original pages for front cover, and also makes a 2-sided copy on the fifth and sixth original pages for back cover. Makes a 2-sided copy on the first and second original pages for front cover, and also makes a 2-sided copy on the fifth and sixth original pages for back cover. | |
2-sided copying of 1-sided originals
| Setting conditions for each cover | Resulting copies | |
| Front Cover | Back Cover | |
| Not copied Not copied |  Inserts cover sheets at the beginning and end of copies. Inserts cover sheets at the beginning and end of copies. | |
| 1-sided copy Not copied |  Makes a 1-sided copy on the first original page for front cover, and also makes a 1-sided copy on the sixth original page. Inserts cover sheets at the end of copies. Makes a 1-sided copy on the first original page for front cover, and also makes a 1-sided copy on the sixth original page. Inserts cover sheets at the end of copies. | |
| 2-sided copy Not copied |  Makes a 2-sided copy on the first and second original pages for front cover, and inserts a back cover at the end of copies. Makes a 2-sided copy on the first and second original pages for front cover, and inserts a back cover at the end of copies. | |
| Not copied 1-sided copy |  Inserts a front cover at the beginning of copies, and makes a 1-sided copy on the sixth original page for back cover. A 1-sided copy is made on the fifth original page. Inserts a front cover at the beginning of copies, and makes a 1-sided copy on the sixth original page for back cover. A 1-sided copy is made on the fifth original page. | |
| Not copied 2-sided copy |  Inserts a front cover at the beginning of copies, and makes a 2-sided copy on the fifth and sixth original pages for back cover. Inserts a front cover at the beginning of copies, and makes a 2-sided copy on the fifth and sixth original pages for back cover. | |
| 1-sided copy 1-sided copy |  Makes a 1-sided copy on the first original page for front cover, and also makes a 1-sided copy on the sixth original page for back cover. Makes a 1-sided copy on the first original page for front cover, and also makes a 1-sided copy on the sixth original page for back cover. | |
| 1-sided copy 2-sided copy |  Makes a 1-sided copy on the first original page for front cover, and also makes a 2-sided copy on the fifth and sixth original pages for back cover. Makes a 1-sided copy on the first original page for front cover, and also makes a 2-sided copy on the fifth and sixth original pages for back cover. | |
| 2-sided copy 1-sided copy |  Makes a 2-sided copy on the first and second original pages for front cover, and also makes a 1-sided copy on the sixth original page for back cover. A 1-sided copy is made on the fifth original page. Makes a 2-sided copy on the first and second original pages for front cover, and also makes a 1-sided copy on the sixth original page for back cover. A 1-sided copy is made on the fifth original page. | |
| 2-sided copy 2-sided copy |  Makes a 2-sided copy on the first and second original pages for front cover, and also makes a 2-sided copy on the fifth and sixth original pages for back cover. Makes a 2-sided copy on the first and second original pages for front cover, and also makes a 2-sided copy on the fifth and sixth original pages for back cover. | |
1-sided copying of 2-sided originals
| Setting conditions for each cover | Resulting copies | |
| Front Cover | Back Cover | |
| Not copied Not copied |  123456Inserts cover sheets at the beginning and end of copies. 123456Inserts cover sheets at the beginning and end of copies. | |
| 1-sided copy Not copied |  23456Makes a 1-sided copy on the first original page for front cover, and inserts a back cover at the end of copies. 23456Makes a 1-sided copy on the first original page for front cover, and inserts a back cover at the end of copies. | |
| 2-sided copy Not copied |       Makes a 2-sided copy on the first and second original pages for front cover, and inserts a back cover at the end of copies. Makes a 2-sided copy on the first and second original pages for front cover, and inserts a back cover at the end of copies. | |
| Not copied 1-sided copy |  123456Inserts a front cover at the beginning of copies, and makes a 1-sided copy on the sixth original page for back cover. 123456Inserts a front cover at the beginning of copies, and makes a 1-sided copy on the sixth original page for back cover. | |
| Not copied 2-sided copy |       Inserts a front cover at the beginning of copies, and makes a 2-sided copy on the fifth and sixth original pages for back cover. Inserts a front cover at the beginning of copies, and makes a 2-sided copy on the fifth and sixth original pages for back cover. | |
| 1-sided copy 1-sided copy |  Makes a 1-sided copy on the first original page for front cover, and also makes a 1-sided copy on the sixth original page for back cover. Makes a 1-sided copy on the first original page for front cover, and also makes a 1-sided copy on the sixth original page for back cover. | |
| 1-sided copy 2-sided copy |  Makes a 1-sided copy on the first original page for front cover, and also makes a 2-sided copy on the sixth original page for back cover. Makes a 1-sided copy on the first original page for front cover, and also makes a 2-sided copy on the sixth original page for back cover. | |
| 2-sided copy 1-sided copy |  Makes a 2-sided copy on the first and second original pages for front cover, and also makes a 1-sided copy on the sixth original page for back cover. Makes a 2-sided copy on the first and second original pages for front cover, and also makes a 1-sided copy on the sixth original page for back cover. | |
| 2-sided copy 2-sided copy |  Makes a 2-sided copy on the first and second original pages for front cover, and also makes a 2-sided copy on the fifth and sixth original pages for back cover. Makes a 2-sided copy on the first and second original pages for front cover, and also makes a 2-sided copy on the fifth and sixth original pages for back cover. | |
2-sided copying of 2-sided originals
| Setting conditions for each cover | Resulting copies | |
| Front Cover | Back Cover | |
| Not copied Not copied |  Inserts cover sheets at the beginning and end of copies. Inserts cover sheets at the beginning and end of copies. | |
| 1-sided copy Not copied |  Makes a 1-sided copy on the first original page for front cover, and inserts a back cover at the end of copies.*The second original page is not copied. Makes a 1-sided copy on the first original page for front cover, and inserts a back cover at the end of copies.*The second original page is not copied. | |
| 2-sided copy Not copied |  Makes a 2-sided copy on the first and second original pages for front cover, and inserts a back cover at the end of copies. Makes a 2-sided copy on the first and second original pages for front cover, and inserts a back cover at the end of copies. | |
| Not copied 1-sided copy |  Inserts a front cover at the beginning of copies, and makes a 1-sided copy on the sixth original page for back cover.* The fifth original page is not copied. Inserts a front cover at the beginning of copies, and makes a 1-sided copy on the sixth original page for back cover.* The fifth original page is not copied. | |
| Not copied 2-sided copy |  Inserts a front cover at the beginning of copies, and makes a 2-sided copy on the fifth and sixth original pages for back cover. Inserts a front cover at the beginning of copies, and makes a 2-sided copy on the fifth and sixth original pages for back cover. | |
| 1-sided copy 1-sided copy |  Makes a 1-sided copy on the first original page for front cover, and also makes a 1-sided copy on the sixth original page for back cover. The second and the fifth original pages are not copied. Makes a 1-sided copy on the first original page for front cover, and also makes a 1-sided copy on the sixth original page for back cover. The second and the fifth original pages are not copied. | |
| 1-sided copy 2-sided copy |  Makes a 1-sided copy on the first original page for front cover, and also makes a 2-sided copy on the fifth and sixth original pages for back cover.* The second original page is not copied. Makes a 1-sided copy on the first original page for front cover, and also makes a 2-sided copy on the fifth and sixth original pages for back cover.* The second original page is not copied. | |
| 2-sided copy 1-sided copy |  Makes a 2-sided copy on the first and second original pages for front cover, and also makes a 1-sided copy on the sixth original page for back cover.* The fifth original page is not copied. Makes a 2-sided copy on the first and second original pages for front cover, and also makes a 1-sided copy on the sixth original page for back cover.* The fifth original page is not copied. | |
| 2-sided copy 2-sided copy |  Makes a 2-sided copy on the first and second original pages for front cover, and also makes a 2-sided copy on the fifth and sixth original pages for back cover. Makes a 2-sided copy on the first and second original pages for front cover, and also makes a 2-sided copy on the fifth and sixth original pages for back cover. | |

- Covers/Inserts cannot be selected in easy mode.
- Before using the covers/inserts function, load insertion sheets in the tray.
- When selecting the covers/inserts function, place the originals in the document feeder tray, select 1-sided or 2-sided copying, and select the number of copies and any other desired copy settings. When these settings have been completed, perform the procedure to select covers/inserts.
- One sheet can be inserted for each of front and back covers.

- When performing 2-sided copying of 2-sided originals, an insertion sheet cannot be inserted between the front and reverse sides of an original.
- This function cannot be used in combination with the saddle stitch function.
1
Place the original in the document feeder tray of the automatic document feeder.
AUTOMATIC DOCUMENT FEEDER (page 1-30)
2
Tap the [Others] key, and then tap the [Covers/Inserts] key.
3

Tap the [Front Cover] key, and then tap the [On] key.
When inserting a back cover, tap the [Back Cover] tab, and then tap the [On] key.
4

Tap the [Change] key.
5

Configure copy settings for a front cover sheet.
When only inserting a cover, tap the [Make No Copy] key. If you selected the [2-Sided Copy] key, tap the [Book] or [Tablet] key for the front cover binding.
After the settings are completed, tap the [OK] key.

To change the cover input tray:
Tap the [Paper Tray Settings] key to display the input tray setting screen. On the input tray setting screen, tap the [Paper Tray] key of [Front Cover] or [Back Cover].
For more information, see "SELECTING THE PAPER TRAY FOR COPYING (page 3-13)".

- If the cover will be copied on, label sheets, transparency film, and tab paper cannot be used. If not copied on, tab paper can be inserted. • To cancel cover sheet insertion: Tap the [Off] key.
- To cancel the front cover, back cover, and insertion sheet settings at the same time: Tap the [Cancel All] key. • To cancel all settings: Tap the [CA] key.
6
Tap the [Colour Start] or [B/W Start] key to start copying.
INSERTING INSERTION SHEETS IN COPIES (COVERS/INSERTS)
This function inserts a sheet of paper into a specific page as an insertion sheet.
There are two types of insertion sheets. Insertion positions can be specified.
Insert covers if needed.

When inserting covers, see "INSERTING COVERS IN COPIES (COVERS/INSERTS) (page 3-106)".
Example: Inserting sheets after pages 3 and 5![graph LR A["Originals"] --> B["Copy"] subgraph Originals 1["1"] 2["2"] 3["3"] 4["4"] 5["5"] 6["6"] end subgraph Copy 1_1["1"] 1_2["2"] 1_3["3"] 1_4["4"] 1_5["5"] 1_6["6"] 1_7["1"] 1_8["2"] 1_9["3"] 1_10["4"] 1_11["5"] 1_12["6"] 1_13["1"] 1_14["2"] 1_15["3"] 1_16["4"] 1_17["5"] 1_18["6"] end](/content/2026/06/1367452/images/e89d28e39f96d356b0eb8f2b55fc72b2d48f7aad56e9d44fc79734425c1e9edb.jpg)
Sheet inserting examples
The following examples show the copy results when insertion sheets are inserted into six 1-sided originals or three 2-sided originals using two copy modes.
1-sided original copying
| Insertion sheet setting conditions | Resulting copies | |
| Insert an insertion sheet in 1-sided copy mode. Insert an insertion sheet in 2-sided copy mode. | ||
| Not copied |     Inserts an insertion sheet between the second and third pages of copies. Inserts an insertion sheet between the second and third pages of copies. | [ ZZ48 ]    |
| 1-sided copy |     Makes a 1-sided copy of the third original page on an insertion sheet. Makes a 1-sided copy of the third original page on an insertion sheet. |     |
| 2-sided copy |  Makes a 2-sided copy of the third and fourth original pages on an insertion sheet. Makes a 2-sided copy of the third and fourth original pages on an insertion sheet. | 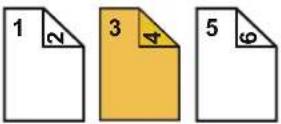 |
2-sided original copying
| Insertion sheet setting conditions | Resulting copies | |
| Insert an insertion sheet in 1-sided copy mode. | Insert an insertion sheet in 2-sided copy mode. | |
| Not copied |  Inserts an insertion sheet between the second and third pages of copies. Inserts an insertion sheet between the second and third pages of copies. | 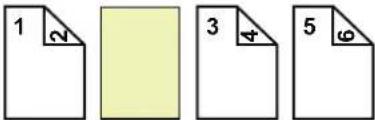 |
| 1-sided copy |  Makes a 1-sided copy of the third original page on an insertion sheet. Makes a 1-sided copy of the third original page on an insertion sheet. |  * The fourth original page is not copied. * The fourth original page is not copied. |
| 2-sided copy |  Makes a 2-sided copy of the third and fourth original pages on an insertion sheet. Makes a 2-sided copy of the third and fourth original pages on an insertion sheet. |  |

- Covers/Inserts cannot be selected in easy mode.
- Before using the covers/inserts function, load insertion sheets in the tray.
- When selecting the covers/inserts function, place the originals in the document feeder tray, select 1-sided or 2-sided copying, and select the number of copies and any other desired copy settings. When these settings have been completed, perform the procedure to select covers/inserts.
- The insertion sheet size must be the same as the copy size.
- Up to 100 insertion sheets can be inserted.

- The document glass is not available for this function. • Take care that two insertion sheets cannot be inserted into the same page.
- When performing 2-sided copying of 2-sided originals, an insertion sheet cannot be inserted between the front and reverse sides of an original.
- This function cannot be used in combination with the saddle stitch function.
1
Place the original in the document feeder tray of the automatic document feeder.
AUTOMATIC DOCUMENT FEEDER (page 1-30)
2
Tap the [Others] key, and then tap the [Covers/Inserts] key.
3
Tap the [Insertion Sheet] tab.
4
Tap the [Insertion Type A] key, and tap the insert page display key.
The Insertion Type B to Type H settings are the same as the Insertion Type A settings.
5

Enter the number of the page you want to insert a sheet into using numeric keys, and then tap the [Enter] key.
The total number of insertion sheets is displayed at the side of the [Enter] key. Repeat these steps for the number of insertion sheets.
After the settings are completed, tap the [OK] key.

- If you have entered an incorrect insert page number:
Tap the [Page Layout] key and change the page.
CHECKING, EDITING, AND DELETING THE PAGE LAYOUT OF COVERS AND INSERTION SHEETS (PAGE LAYOUT) (page 3-118)
•To cancel insertion sheets:
Tap the [Cancel All] key.
6

Tap the [Change] key.
7

When only inserting insertion sheet A, tap the [Make No Copy] key.
When making a copy on insertion sheet A, tap the [Simplex] or [2-Sided Copy] key.
If you selected [2-Sided Copy], tap the [Book] key or [Tablet] key for the insert sheet binding.
After the settings are completed, tap the [OK] key.
![SHARP BP-50C45 - When only inserting insertion sheet A, tap the [Make No Copy] key. - 1](/content/2026/06/1367452/images/d6e0c69d5e4a56fdc901c4664ec66c9273ea0fb086f4086722507e8b30a9967f.jpg)
•To change an insertion sheet:
Tap the [Paper Tray] key, and select the tray with insertion sheets loaded.
• To copy on tab paper, tap the [Tab Copy] key.
COPYING CAPTIONS ONTO TAB PAPER (TAB COPY) (page 3-121)

- When copying on both sides of an insertion sheet, you cannot use label sheets, transparency films, or tab paper for insertion. If not copied on, tab paper can be inserted.
•To cancel all settings:
Tap the [CA] key.
8
Tap the [Colour Start] or [B/W Start] key to start copying.
CHECKING, EDITING, AND DELETING THE PAGE LAYOUT OF COVERS AND INSERTION SHEETS (PAGE LAYOUT)

The editing contents are different between the registered covers and insertion sheets as shown below.
- For the "Cover Sheet", you can change settings such as the paper type, copy/do not copy, 1-Sided, and 2-Sided.
- For "Insert Sheet", you can change only the page number you want to insert an insert sheet into.
1
Tap the [Others] key, and then tap the [Covers/Inserts] key.
2

Tap the [Page Layout] key.
![SHARP BP-50C45 - Tap the [Page Layout] key. - 1](/content/2026/06/1367452/images/d1fa1cd8273bf04ead023fad519f5f4cf7fee88e6521e9a94a6e2012d0d50817.jpg)
If the settings for the covers or insertion sheets are not configured, the [Page Layout] key is disabled.
3

Check the page layout.
To exit this job after checking the page layout, tap the [OK] key.
To edit or delete, tap the required key. When deleting, tap the [Delete] key.
When editing, tap the [Amend] key.
When setting consecutive insertion of different types of inserts at the same page, you can tap [Replace Order of Inserts] on the action panel to change the order.
4
Change cover or insertion sheet settings.
For the cover, you can change the copy mode.
You can change the page number you want to insert an insert sheet into.
After the settings are completed, tap [OK] key.
INSERTING INSERTION SHEETS IN BETWEEN TRANSPARENCY FILMS (TRANSPARENCY INSERTS)
When copying on transparency film, the sheets may stick together due to static electricity.
The transparency inserts function can be used to automatically insert a sheet of paper between each sheet of transparency film, making the sheets easy to handle.
It is also possible to copy on insertion sheets.


- Transparency Inserts cannot be selected in easy mode.
- When performing 2-sided copying, only "2-Sided→1-Sided" mode can be used.

- The number of copies cannot be selected in this mode.
- Transparency film must be loaded in the bypass tray.

Place the transparency film face down in the bypass tray, and load transparency film sheets.
After loading the transparency film, configure the bypass tray settings. MAKING COPIES USING THE BYPASS TRAY (page 3-34)

Place the original.
Place the original in the document feeder tray of the automatic document feeder, or on the document glass. AUTOMATIC DOCUMENT FEEDER (page 1-30) DOCUMENT GLASS (page 1-34)

Tap the [Others] key, and then tap the [Transparency Inserts] key.
4

Tap the [On] key.
When making a copy on insertion sheets, tap the [Also Make
Copy on Inserts] checkbox to set to
![SHARP BP-50C45 - Tap the [On] key. - 1](/content/2026/06/1367452/images/c96ceb37925bdc8f782a292aa6a8f1498acdf70e727dcb513096d1a1cba0fc3d.jpg)
After the settings are completed, tap the [OK] key.
![SHARP BP-50C45 - Tap the [On] key. - 2](/content/2026/06/1367452/images/b7742c7374f6d226d60084acf51b6acd6628e4b3a5e9e8fcda34a36990152743.jpg)
• To cancel the transparency inserts setting:
Tap the [Off] key.
• To cancel all settings:
Tap the [CA] key.
5
Tap the [Colour Start] or [B/W Start] key to start copying.
FUNCTIONS FOR SPECIFIC USES
COPYING CAPTIONS ONTO TAB PAPER (TAB COPY)
Load a tab sheet in the bypass tray, and make a copy on a tab.
Prepare originals for captions that match the tab positions.
The image is shifted by the width of the tab.

Relation between the originals and the tab paper
Tab copying with a left binding
| Originals Placing the originals Loading tab paper | ||
 Final image Final image | Document feeder tray Insert the originals so that the side with no tab text enters first. Insert the originals so that the side with no tab text enters first. |  Load the tab paper so that the tab on the first sheet is toward you. Load the tab paper so that the tab on the first sheet is toward you. |
Document glass Place so that the side with the tab text is on the left. Place so that the side with the tab text is on the left. | ||
Tab copying with a right binding
| Originals Placing the originals Loading tab paper | ||
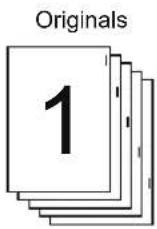 Final image Final image | Document feeder tray Insert the originals so that the side with no tab text enters first. Insert the originals so that the side with no tab text enters first. | 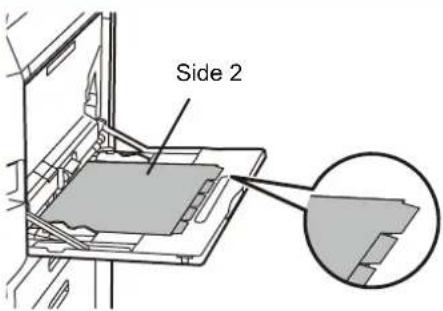 Load the tab paper so that the tab on the first sheet is away from you. Load the tab paper so that the tab on the first sheet is away from you. |
Document glass Place so that the side with the tab text is on the left. Place so that the side with the tab text is on the left. | ||

- Tab Copy cannot be selected in easy mode.
- Tab Copy must be specified before scanning the original.
1
Tap the [Others] key, and tap the [Tab Copy] key.
2
Tap the [On] key.
3

Sets an image shift width (tab width).
- Tap the numeric value display indicating the image shift width, and enter a shift width using numeric keys. • After the settings are completed, tap [OK] and [Back] keys in sequence.

To cancel the tab copy setting:
Tap the [Off] key.
4
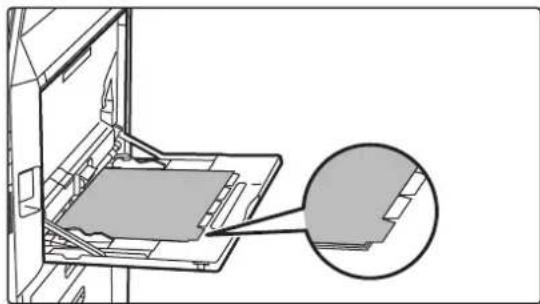


Load the tab paper.
When using the bypass tray, place the paper with the print side down.
Place the paper so that the sides with the tabs enter the machine last.
After loading tab paper into the bypass tray, configure the bypass tray settings as explained in "MAKING COPIES USING THE BYPASS TRAY (page 3-34)".
Tab copying with a left binding
Place the tab paper with side 2 facing up, and the tab on the first sheet is on the near side.
Tab copying with a right binding
Place the tab paper with side 2 facing up, and the tab on the first sheet is on the back side.

The width of the tab paper can be as wide as A4 width (210 mm) plus 20 mm (or 8-1/2" x 11" paper (8-1/2") plus 5/8").
5
Place the original and tap the [Preview] key.
Place the original in the document feeder tray of the automatic document feeder, or on the document glass. AUTOMATIC DOCUMENT FEEDER (page 1-30) DOCUMENT GLASS (page 1-34)
![SHARP BP-50C45 - Place the original and tap the [Preview] key. - 1](/content/2026/06/1367452/images/6a6955f8260b9ae1227268e9922f6604f60827f2fdee63f77e68facf3e6392a0.jpg)
To cancel all settings:
Tap the [CA] key.
6
Tap the [Colour Start] or [B/W Start] key to start copying.
MAKING A POSTER-SIZED COPY (MULTI-PAGE ENLARGEMENT)
This function separately copies an enlarged original image on multiple sheets.
For example, an A4 (8-1/2" x 11") size original can be enlarged on 8 sheets of A3 (11" x 17") paper.
![graph TD A["H"] --> B["Grid of black squares"] B --> C["Grid of black squares"] C --> D["Grid of black squares"] D --> E["Grid of black squares"]](/content/2026/06/1367452/images/273cfebfa0446019e2fae6929eb5b103151890449085260a97f017424abd0011.jpg)

- Multi-Page Enlargement cannot be selected in easy mode.
- You must select Multi-Page Enlargement before scanning the original.
- Place an original on the document glass.
- When Multi-Page Enlargement is selected, the image orientation is changed to vertical. • Overlap of sections of image
- There will be a margin around the edges of each copy.
- Areas for overlapping the copies will be created at the leading and trailing edges of each copy.
- The paper size, number of sheets required for the enlarged image, and the ratio are automatically selected based on the selected original size and enlargement size. (The paper size and ratio cannot be selected manually.)
1 Tap the [Others] key, and tap the [Multi-Page Enlargement] key.
2 Select the [AB] of [inch] tab to meet the original size for poster-sized copy, and tap the key that meets the original size.
Tapping the key of the original size displays the keys that show the available enlargement size, copy paper size, and number of sheets.
3

Tap the key of the size you want to enlarge the original to.
The image orientation appears.
After the settings are completed, tap [OK] key.

When printing the copy image and margin border, set the [Print Paste Position Mark] checkbox to


•To cancel Multi-Page Enlargement setting:
Tap the [Clear] key.
Even when the multi-page enlargement setting is cancelled, the automatically selected ratio is retained.
•To return the ratio to 100%:
Tap the [Copy Ratio] key on the base screen to display the ratio menu, and then tap the [100%] key.
4
Place the original on the document glass based on the orientation displayed on the screen.
5
Tap the [Colour Start] or [B/W Start] key to start copying.
COPYING WITH MIRROR IMAGE (MIRROR IMAGE)
This function makes copies by inverting the original into a mirror image.


- Mirror Image cannot be selected in easy mode.
- Specify the Mirror Image before scanning an original.
Tap the [Others] key, and tap the [Mirror Image] key.
A checkmark appears on the icon.
After the settings are completed, tap the [OK] key.
![SHARP BP-50C45 - Tap the [Others] key, and tap the [Mirror Image] key. - 1](/content/2026/06/1367452/images/1883ee00ac5872cec2c93e14b55bd20f0650ca42edbbddb353ca3898585f6eaf.jpg)
To cancel the mirror image setting:
Tap the [Mirror Image] key to uncheck it.
2 Place the original.
Place the original in the document feeder tray of the automatic document feeder, or on the document glass.
AUTOMATIC DOCUMENT FEEDER (page 1-30)
DOCUMENT GLASS (page 1-34)
3 Tap the [Colour Start] or [B/W Start] key to start copying.
OUTPUT AND DENSITY ADJUSTMENT FUNCTIONS
REVERSING WHITE AND BLACK IN A COPY (B/W REVERSE)
This function reverses black and white in a copy to create a negative image. This function can only be used for black and white copying.
Originals with large black areas (which use a large amount of toner) can be copied using Black/White Reverse to reduce toner consumption.


- B/W Reverse cannot be selected in easy mode.
- B/W Reverse must be specified before scanning the original.
- When this function is selected, the "Exposure/Original Type" setting for exposure adjustment automatically changes to "Text".
- This function is not available in some countries and regions.

When this function is selected, you cannot use the [Colour Start] key.
Tap the [Others] key, and tap the [B/W Reverse] key.
1
A checkmark appears on the icon.
After the settings are completed, tap the [Back] key.
![SHARP BP-50C45 - Tap the [Others] key, and tap the [B/W Reverse] key. - 1](/content/2026/06/1367452/images/852085241a4d71be3c2d8a1a88feb06981790ad4ac3eaf7a38d4dd42ca168b99.jpg)
To cancel the B/W reverse setting:
Tap the [B/W Reverse] key to uncheck it.
2
Place the original.
Place the original in the document feeder tray of the automatic document feeder, or on the document glass.
AUTOMATIC DOCUMENT FEEDER (page 1-30)

To cancel all settings:
Tap the [CA] key.
3
Tap the [B/W Start] key to start copying.
EASY ADJUSTMENT OF THE IMAGE QUALITY (QUICK IMAGE QUALITY ADJUSTMENT)
You can easily adjust the colour and outlines of images and text.

- Quick Image Quality Adjustment cannot be selected in easy mode.
- You must select Quick Image Quality Adjustment before scanning the original.
1
Tap the [Others] key, and tap the [Quick Image Quality Adjustment] key.
2

Tap or slide the slider to adjust the image quality.
After the settings are completed, tap [OK] key.

To cancel the quick image quality adjustment setting:
Tap the [Off] key.
3
Place the original.
Place the original in the document feeder tray of the automatic document feeder, or on the document glass. AUTOMATIC DOCUMENT FEEDER (page 1-30) DOCUMENT GLASS (page 1-34)

To cancel all settings:
Tap the [CA] key.
4
Tap the [Colour Start] or [B/W Start] key to start copying.
ADJUSTING RED/GREEN/BLUE IN COPIES (RGB ADJUST)
This function heightens or lightens any one of the three colour components R (red), G (green), and B (blue).
![graph TD A["Red (R) + Blue (B)"] --> C["G (Green) + Green (A)"] A --> D["R (Red) + Red (A)"] C --> E["B (Blue) + Blue (A)"] D --> F["B (Blue) + Green (A)"]](/content/2026/06/1367452/images/89549b003f358ec8b01fa6ac8b59bd3f52c3f401c51792e4a3c1ece77f1da3cb.jpg)

- RGB cannot be selected in easy mode.
- RGB must be specified before scanning the original.
1
Tap the [Others] key, and tap the [RGB Adjust] key.
2
Tap the key of the colour you want to adjust.
3
![RGB Adjust Any one colour must be adjusted. This setting is only applied to colour. OK RGB RGB RGB RGB 2 - 1 - 5 - 1 - 2 - + Touch [ ] to display and [ ] to highlight select and colour tone.](/content/2026/06/1367452/images/f79a17e43319470f1c1475d4479f9d2685a2db6e004a2d43aa1f82d560f946d7.jpg)
Tap or slide the slider to adjust the colouring.
After the settings are completed, tap [OK] key.

- Only one colour can be adjusted. (If you adjust one colour and then tap another colour, the adjustment of the first colour is cancelled.) •To cancel the RGB adjust setting:
Tap the [Off] key.
4
Place the original.
Place the original in the document feeder tray of the automatic document feeder, or on the document glass.
AUTOMATIC DOCUMENT FEEDER (page 1-30)
DOCUMENT GLASS (page 1-34)

To cancel all settings:
Tap the [CA] key.
5
Tap the [Colour Start] key to start copying.
ADJUSTING THE SHARPNESS OF AN IMAGE (SHARPNESS)
This function adjusts the sharpness to make a sharper or softer image.
![graph TD A["Red apple"] --> B["Softer"] A --> C["Sharper"]](/content/2026/06/1367452/images/241268b2ed88f2d9e9378a6c4101bd4222d4d20c5e1980e6a176bd3326d03779.jpg)

- Sharpness cannot be selected in easy mode.
- Sharpness must be specified before scanning the original.
1
Tap the [Others] key, and tap the [Sharpness] key.
2
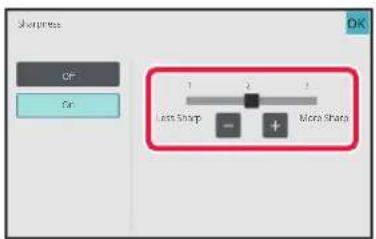
Tap or slide the slider to adjust the sharpness.
Select [More Sharp] for sharper outlines, or [Less Sharp] for softer outlines.
After the settings are completed, tap [OK] key.

To cancel the sharpness setting:
Tap the [Off] key.
3
Place the original.
Place the original in the document feeder tray of the automatic document feeder, or on the document glass.
AUTOMATIC DOCUMENT FEEDER (page 1-30)
DOCUMENT GLASS (page 1-34)

To cancel all settings:
Tap the [CA] key.
4
Tap the [Colour Start] or [B/W Start] key to start copying.
ADJUSTING THE COLOUR (COLOUR BALANCE)
You can adjust the colour, tone, and density of copies.
Use the [Colour] tab for colour copy settings, or the [B/W] tab for black & white copy settings.
If you select the [Colour] tab, the densities of the colours yellow, magenta, cyan, and black are divided into three ranges, and you can adjust the density of each range. If needed, you can also adjust all three density ranges at once.
![graph TD A["Image: Banana, Green/Green fruit, Red apple"] --> B["Cyan+"] C["Image: Yellow, Purple/green fruit, Orange apple"] --> D["Y"] E["Image: Magenta+, Red/green fruit"] --> F["Bk"] G["Image: Black+"] --> H["Bk"]](/content/2026/06/1367452/images/2cdefd29b7ee3a30625725fc1feeddf3a2705253b50080e488defb6f881d5566.jpg)

- Colour Balance cannot be selected in easy mode.
- Colour Balance must be specified before scanning the original.
1 Tap the [Others] key, and tap the [Colour Balance] key.
2 Tap the tab of the mode you want to adjust.
3

Tap the -key or slide the slider to adjust the colour balance.
- If you want to adjust each colour individually on the [Colour] tab, set the [Set in a Batch] checkmark to .
- If you want to further adjust each range of each colour individually, set the [Set in a Group by Colour] checkbox to ____.
- To adjust each range on the [B/W] tab, set the [Set in a Batch] checkbox to .
- To adjust a slider individually with the keys, tap the slider you want to adjust and tap the keys.
- After the settings are completed, tap [OK] key.

To return the colour balance of the current tab to the default balance:
Tap the [Reset] key.
The values of all gradations currently being adjusted will return to their default colour balance values.
4
Place the original.
Place the original in the document feeder tray of the automatic document feeder, or on the document glass. AUTOMATIC DOCUMENT FEEDER (page 1-30) DOCUMENT GLASS (page 1-34)
5
Tap the [Colour Start] or [B/W Start] key to start copying.
ADJUSTING THE BRIGHTNESS OF A COPY (BRIGHTNESS)
This function adjusts the brightness of a colour copy image.


- Brightness cannot be selected in easy mode.
- Brightness must be specified before scanning the original.
Tap the [Others] key, and tap the [Brightness] key.
1
2
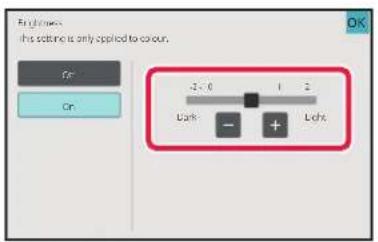
Tap the - key or slide the slider to adjust the brightness.
After the settings are completed, tap the [OK] and [Back] keys in sequence.

To cancel the brightness setting:
Tap the [Off] key.
3
Place the original.
Place the original in the document feeder tray of the automatic document feeder, or on the document glass.
AUTOMATIC DOCUMENT FEEDER (page 1-30)
DOCUMENT GLASS (page 1-34)

To cancel all settings:
Tap the [CA] key.
4
Tap the [Colour Start] key to start copying.
ADJUSTING THE INTENSITY OF A COPY (INTENSITY)
This function adjusts the intensity (saturation) of a colour copy image.


- Intensity cannot be selected in easy mode.
- You must set the intensity before scanning the original.

This function cannot be combined with [Copy of Copy] or [Colour Tone Enhancement] in Exposure.
1 Tap the [Others] key, and tap the [Intensity] key.
2

Tap the key or slide the slider to adjust the intensity.
After the settings are completed, tap the [OK] and [Back] key.

To cancel the Intensity setting:
Tap the [Off] key.
3
Place the original.
Place the original in the document feeder tray of the automatic document feeder, or on the document glass.
AUTOMATIC DOCUMENT FEEDER (page 1-30)
DOCUMENT GLASS (page 1-34)

To cancel all settings:
Tap the [CA] key.
4
Tap the [Colour Start] key to start copying.
CONVENIENT COPY FUNCTIONS
INTERRUPT COPY
This function suspends a job in progress, and preferentially prints the original specified with interrupt copy.
When you need to make an urgent copy and the machine is busy with a long copy run or other job, use interrupt copy.

- The [Interrupt] key does not appear while an original is being scanned.
- Depending on the settings of the job in progress, the [Interrupt] key may not appear.
- Interrupt copy cannot be used in combination with the following functions: Job Build, Tandem Copy, Book Copy, Card Shot, Multi-Page Enlargement, Original Count, Proof Copy, Preview Setting, and Book Divide.
- If you use the document glass for interrupt copy, you cannot select the booklet, covers/inserts function, or N-Up setting. If any of these functions are necessary, use the automatic document feeder.
1

Tap the [Interrupt] key.
The interrupt mode screen appears.
![SHARP BP-50C45 - Tap the [Interrupt] key. - 1](/content/2026/06/1367452/images/abdddd5fa13a2a23f1bdd867d5d5f029d63ebe1ac6c159a61251e726817672c5.jpg)
If user authentication is specified:
Tap the [Interrupt] key to display the user authentication screen. Enter the login name and password to perform user authentication.
2
Place the original.
Place the original in the document feeder tray of the automatic document feeder, or on the document glass. AUTOMATIC DOCUMENT FEEDER (page 1-30) DOCUMENT GLASS (page 1-34)
3
Configure copy settings.

To cancel interrupt copy, tap the [Cancel] key.
4
Tap the [Colour Start] or [B/W Start] key to start interrupt copying.
When the interrupt copy job is completed, the interrupted job will resume.
![SHARP BP-50C45 - Tap the [Colour Start] or [B/W Start] key to start interrupt copying. - 1](/content/2026/06/1367452/images/c092195041c1dac7897ecc032334c3b17c9f73e264fe857ec43b1d2ed4a7ccb7.jpg)
The interrupt copy function does not display the preview of the scanned original.
SEND DATA WHILE COPYING
This function allows you to send a fax while making a copy, send an e-mail with an image attached, or save data in the network folder.

You need to store the destination in the address book in advance. STORING ADDRESSES THROUGH DIRECT ENTRY (page 6-19)
The fax and image send transmission starts after the copy, and the settings same as the copy are used for transmission. However, the same results as the copy may not be provided by some functions.
1
Tap the [Detail] key to change to normal mode.
EASY MODE (page 3-3)
2

Tap [Send as well as print] on the action panel.
3

Select a recipient from the address book.
Selecting "Contacts" or "Group" (page 6-16)
After you have selected the recipient, tap the [Enter Address] key.

- You cannot use the soft keyboard to enter an address. If you cannot find the recipient in the address book, enter it in the address book.
- An Internet Fax address cannot be selected.
4
Place the original.
Place the original in the document feeder tray of the automatic document feeder, or on the document glass. AUTOMATIC DOCUMENT FEEDER (page 1-30) DOCUMENT GLASS (page 1-34)
5
Set each copy item as required.
These copy settings are used for fax transmission. However, some settings may be unavailable depending on the function.

You can preview the scanned original by tapping the [Preview] key.
6
Tap the [Colour Start] or [B/W Start] key to start copying.
After the copy, the transmission starts.
![SHARP BP-50C45 - Tap the [Colour Start] or [B/W Start] key to start copying. - 1](/content/2026/06/1367452/images/ae942206b00eeff76e8a9c537c7e4685eb05e5526e34e077b7a444d3adb0031d.jpg)
After the copy, you cannot preview the settings before transmission.
COPY JOBS
When you tap the job status display, jobs are displayed in a list. To check the status of a copy job, tap the [Print] tab. When you wish to stop or delete jobs or to perform priority processing, read "STOPPING/DELETING A JOB, PRIORITY PROCESSING AND CHECKING THE STATUS (page 2-53)".

PROGRAMS
Programs are set from the base screen of normal mode.
EASY MODE (page 3-3)

Programs cannot be stored in easy mode.
STORING A PROGRAM
This function collectively stores copy settings as one program. The stored program can be retrieved using an easy operation.
For information about how to retrieve a program, see "RETRIEVING A PROGRAM (page 3-140)".
For example, suppose A3 (11" x 17") size CAD drawings are copied once a month for archive purposes using the following settings:
- The A3 (11" x 17") size CAD drawings are reduced to A4 (8-1/2" x 11") size.
- To reduce paper use by half, 2-sided copying is used.
- Margin shift is used to allow a margin to punch holes for filing.
A3 (11" x 17") size CAD drawings![graph LR A["Document with grid layout"] --> B["Copy"] style A fill:#f9f,stroke:#333 style B fill:#bbf,stroke:#333](/content/2026/06/1367452/images/54dc00e93a3cd7bca4e4aeed544907fc70b4a98881c40d88cef98e2f038de113.jpg)
| When a job program is not stored When a job program is stored | |
Set reduction from A3 (11" x 17") to A4 (8-1/2" x 11") Change the exposure setting. Change the exposure setting. Set 2-sided copying. Set 2-sided copying. Set margins. Set margins. Set punch hole settings. Set punch hole settings. Tap the [Colour Start] or [B/W Start] key. Tap the [Colour Start] or [B/W Start] key. | Retrieve the stored program.Tap the [Colour Start] or [B/W Start] key. |
| Considerable time is required to copy the drawings each month because the above settings must be selected.In addition, mistakes are occasionally made when selecting the settings, so some copies must be redone. | The settings are stored in a program, so they can be selected by the touch of a key. This is simple and takes no time.In addition, the settings are all stored so there are no chances for mistakes, and thus no need to redo copies due to setting mistakes. |

- Up to 48 programs can be stored.
- Program settings remain registered even when the main power has been turned off.
- A program can also be stored in the home screen or favourite as a shortcut; therefore, it is helpful when retrieving it.
1
Specify the copy function to be stored.

In the base screen, display [Program Registration] on the action panel.
2
Tap [Program Registration] on the action panel.
3

Tap an unused key.
A key with a program stored is displayed in colour.
Tap a key with no program stored.

If you do not set a name for the program, a serial number will be automatically assigned as the name.
4
![Program Name Cancel OK com ### ang xo jp blz ne jp Characters symbols 1 2 3 4 5 6 7 8 9 0 - - @ q w e r t y u i o p [ ] # a s d f g h j k l ; ' ↑ \ z x c v b n m , . / Space](/content/2026/06/1367452/images/51e3d333d9ebc3fce17727725c00ac5f6c07f14fb66648a69f90742dfa328d0b.jpg)
Set a name for the program and tap the [OK] key.
A registration completion message appears.
5

Select whether or not the program will be added to the home screen or the favourites.
To specify print settings, you can select the required one from pre-set text or use the soft keyboard. You can also print serial number and account job ID. When you have completed the settings, tap [OK] and the [Back] keys in sequence.

- If user authentication is enabled, the shortcut key for the program is registered in the user's home screen or favourite.
- If user authentication is disabled, the administrator password entry screen appears. When the administrator password is entered, the registration is completed. • The number of copies cannot be stored.
RETRIEVING A PROGRAM
1
Tap [Call Program] on the action panel.
2
Tap the key of the program you want to retrieve.

You can tap [Register in Favourite] or [Register for Home] on the action panel to register a shortcut key for the selected program in the favourite or home screen.
DELETING AND RENAMING A PROGRAM
This section explains how to delete copy settings in a program and rename a program.

A program that is already stored cannot be deleted.
Deleting a program
1
Tap [Call Program] on the action panel.
2

Tap [Delete] on the action panel.
3
Tap the key of the program you want to delete, and tap [Delete].
Renaming a program
1
Tap [Call Program] on the action panel.
2

Tap [Change Name] on the action panel.
3
Tap the key of the required program, and rename the program. Then tap the [OK] key.
After the settings are completed, tap [OK] key.
PRINTER FUNCTION OF THE MACHINE
PRINTER FUNCTION 4-3
Windows environment 4-3
macOS Environment 4-3
PRINTING IN A WINDOWS ENVIRONMENT
BASIC PRINTING PROCEDURE 4-4
PRINTER DRIVER SETTINGS SCREEN / REFERRING TO HELP 4-6 SELECTING THE PAPER 4-7 PRINTING ON ENVELOPES 4-8
PRINTING WHEN THE USER AUTHENTICATION
FUNCTION IS ENABLED 4-9
FREQUENTLY USED FUNCTIONS ..... 4-11
SAVING SETTINGS AT THE TIME OF PRINTING . . . 4-11
USING SAVED SETTINGS 4-12
CHANGING THE PRINTER DRIVER DEFAULT SETTINGS 4-13
SHARE FAVORITE SETTINGS BETWEEN SERVER AND CLIENT 4-14
PRINTING IN A macOS ENVIRONMENT
BASIC PRINTING PROCEDURE 4-15
SELECTING THE PAPER 4-16
PRINTING ON ENVELOPES 4-17
PRINTING WHEN THE USER AUTHENTICATION
FUNCTION IS ENABLED 4-18
FREQUENTLY USED FUNCTIONS
SELECTING THE COLOR MODE 4-20
SELECTING THE RESOLUTION 4-22
2-SIDED PRINTING 4-23
FITTING THE PRINT IMAGE TO THE PAPER 4-25
PRINTING MULTIPLE PAGES ON ONE PAGE 4-27
PRINTING WHILE SKIPPING BLANK PAGES 4-29
STAPLING OUTPUT/PUNCHING HOLES IN
OUTPUT 4-30
Staple function 4-30
Punch function 4-30
CONVENIENT PRINTING FUNCTIONS
CONVENIENT FUNCTIONS FOR CREATING
PAMPHLETS AND POSTERS....4-33
CREATE A PAMPHLET (BOOKLET/SADDLE STITCH) 4-33
PRINTING WITH MARGIN SHIFT SETTING (MARGIN) 4-35
CREATE A LARGE POSTER (POSTER PRINTING) 4-37
FUNCTIONS TO ADJUST THE SIZE AND
ORIENTATION OF THE IMAGE .....4-38
ADJUST PRINT POSITION ON ODD AND EVEN PAGES SEPARATELY (PRINT POSITION)....4-38
ROTATING THE PRINT IMAGE 180 DEGREES (ROTATE 180 DEGREES)....4-39
ENLARGING/REDUCING THE PRINT IMAGE (ZOOM SETTING/ENLARGE OR REDUCE).....4-40
ADJUST THE LINE THICKNESS (WIDTH) .....4-42
PRINT A MIRROR-IMAGE (MIRROR-IMAGE REVERSE/VISUAL EFFECTS)....4-47
COLOR MODE ADJUSTING FUNCTION 4-48
ADJUST THE BRIGHTNESS AND CONTRAST OF THE IMAGE (COLOR ADJUSTMENT/RGB ADJUSTMENT)....4-48
PRINTING FAINT TEXT AND LINES IN BLACK (TEXT TO BLACK/VECTOR TO BLACK)....4-49
SELECTING COLOR SETTINGS TO MATCH THE IMAGE TYPE (ADVANCED COLOR SETTINGS).....4-50
FUNCTIONS TO COMBINE TEXT AND IMAGES.....4-53
ADDING A WATERMARK TO PRINTED PAGES (WATERMARK)....4-53
PRINTING AN IMAGE OVER THE PRINT DATA (IMAGE STAMP)....4-55
REGISTERING A CUSTOM IMAGE .....4-56
OVERLAY A FIXED FORM ON THE PRINT DATA (OVERLAYS)....4-57
ADDING THE NUMBER OF COPIES (COPIES STAMP). 4-59
PRINT FUNCTIONS FOR SPECIAL PURPOSES.....4-60
PRINTING SPECIFIC PAGES ON DIFFERENT PAPER (DIFFERENT PAPER)....4-60
ADDING INSERTS WHEN PRINTING ON TRANSPARENCY FILM (TRANSPARENCY INSERTS) 4-63
INSERTING SEPARATOR PAGES BETWEEN JOBS OR COPIES 4-65
PRINTING A CARBON COPY (CARBON COPY) .....4-66
PRINTING TEXT ON TABS OF TAB PAPER (TAB SHIFT/TAB PAPER PRINT)....4-67
TWO-SIDED PRINTING WITH SPECIFIC PAGES PRINTED ON THE FRONT SIDE (CHAPTER INSERTS)....4-70
FOLDING PAPER FOR PRINTING (FOLD) .....4-71

INSERT PRESET DATA BEFORE OR AFTER EACH
PAGE (PAGE INTERLEAVE)....4-76
PRINT THE SAME IMAGE IN TILE PATTERN (REPEAT PRINT). 4-77
PRINTING PATTERN DATA (HIDDEN PATTERN PRINT) 4-78
CHANGING THE RENDERING METHOD AND PRINTING JPEG IMAGES (USE DRIVER TO RENDER JPEGS) 4-80
MAXIMIZING THE PRINT AREA ON THE PAPER (PRINT AREA) 4-81
PRINTING AT AN ENHANCED RESOLUTION (SMOOTHING)....4-82
CONVENIENT PRINTER FUNCTIONS....4-83
USING TWO MACHINES TO PRINT A LARGE PRINT JOB (TANDEM PRINT) 4-83
SAVING AND USING PRINT FILES (DOCUMENT FILING)....4-85
AUTOMATICALLY PRINT ALL STORED DATA ..... 4-88
PRINTING AND SENDING SIMULTANEOUSLY.....4-89
PRINTING WITHOUT THE PRINTER DRIVER
EXTENSION OF PRINTABLE FILES 4-90
DIRECTLY PRINTING A FILE ON AN FTP SERVER ... 4-90
DIRECTLY PRINTING A FILE IN USB MEMORY ..... 4-92
DIRECTLY PRINTING A FILE IN A NETWORK FOLDER 4-93
DIRECTLY PRINTING FROM A COMPUTER ..... 4-97
SUBMIT PRINT JOB 4-97
FTP PRINT....4-98
E-MAIL PRINT 4-98
Universal Print 4-100
BEFORE CONNECTING THE Universal Print SERVICE 4-100
Universal Print Settings 4-101
Registering the machine with Azure Active Directory 4-101
Registering the machine with each client PC ..... 4-101
Delete from Azure Active Directory 4-101
PRINTER JOBS
CHECKING THE PRINT STATUS....4-102
PRINTING AN ENCRYPTED PDF FILE .....4-102
CHANGING TO ANOTHER PAPER SIZE AND PRINTING WHEN PAPER RUNS OUT ..... 4-103
PRINT RELEASE FUNCTION
PRINT RELEASE FUNCTION ....4-104 INTER-GROUP PRINTING....4-104
BEFORE USING THE PRINT RELEASE
FUNCTION 4-105
Settings required on the machine .....4-105 Installing the printer driver of the primary unit .....4-105
USING THE PRINT RELEASE FUNCTION. . . . . . . . . 4-106
Storing a job in the primary unit from your computer....4-106
Printing/deleting a job stored in the primary unit from a secondary unit. 4-108
APPENDIX
PRINTER DRIVER SPECIFICATIONS LIST ..... 4-109
SPECIFYING A BILLING CODE USING THE PRINTER
DRIVER 4-112
Enable billing code 4-112
AUTHENTICATION BY SINGLE SIGN-ON....4-114
Settings 4-114
PRINTER FUNCTION OF THE MACHINE
PRINTER FUNCTION
The machine is equipped with a full color printing function as standard. To enable printing from your computer, a printer driver must be installed.
See the table below to determine which printer driver to use in your environment.
Windows environment
Printer driver type
PCL6
The machine supports the Hewlett-Packard PCL6 printer control languages.
PS (On the BP-50C26/BP-50C31/BP-50C36/BP-50C45/BP-50C55/BP-50C65, the PS3 expansion kit is required.)
- This printer driver supports the PostScript 3 page description language developed by Adobe.
- If it is desired to use the Windows standard PS printer driver, the PPD driver must be used.

- To install the printer driver and configure settings in a Windows environment, see the Software Setup Guide.
- The User's Manual mainly uses PCL6 printer driver screens to explain how to print in a Windows environment. The printer driver screens may differ slightly depending on the printer driver you are using.
macOS Environment
Printer driver type
PS (On the BP-50C26/BP-50C31/BP-50C36/BP-50C45/BP-50C55/BP-50C65, the PS3 expansion kit is required.)
PS This printer driver supports the PostScript 3 page description language developed by Adobe and uses a PPD file.

• To install the printer driver and configure settings in a macOS environment, see the Software Setup Guide. - The explanations of screens and procedures for use in a macOS environment generally assume that macOS 11 is being used and a PPD driver is installed. The screens may be different depending on the version of the operating system or the software application.

If a notice page is printed
If a print job cannot be printed as specified and the reason is not shown on the operation panel, a notice page indicating the reason will print. Read the message and take appropriate action. For example, a notice page will print if the following occurs:
- There is more print data than can be held in memory.
- You selected a function that has been prohibited by the administrator.
PRINTING IN A WINDOWS ENVIRONMENT
BASIC PRINTING PROCEDURE
The following example explains how to print a document from "WordPad", which is a standard accessory application in Windows.

- The menu used to execute printing may vary depending on the application.
- The button that is used to open the printer driver properties window (usually [Property] or [Preferences]) may vary depending on the application.
- The machine name that normally appears in the [Printer] menu is [BP-xxxxx]. ("xxxxx" is a sequence of characters that varies depending on the machine model.)
1

Select [Print] from the [File] menu of WordPad.
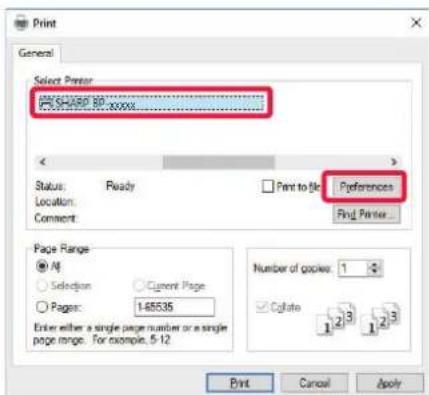
Select the printer driver for the machine and click the [Preferences] button.
The button that is used to open the printer driver properties window (usually [Property] or [Preferences]) may vary depending on the application.

Select print settings.
(1) Click the [Main] tab.
(2) Select the original size.
- You can register up to seven user-defined sizes in the menu. To store an original size, select [Custom Paper] or one of [User1] to [User7] from the menu, and click the [OK] button.
- To select settings on other tabs, click the desired tab and then select the settings.
PRINTER DRIVER SETTINGS SCREEN / REFERRING TO HELP (page 4-6)
- If an original size larger than the largest paper size that the machine supports is set, select the paper size for printing in "Output Size".
- If an "Output Size" different from the "Original Size" is selected, the print image will be adjusted to match the selected paper size.
(3) Click the [OK] button.
Click the [Print] button.
Printing begins.
PRINTER DRIVER SETTINGS SCREEN / REFERRING TO HELP
The printer driver settings screen consists of 9 tabs. Click a tab to select the settings on that tab.
You can check information on each of the settings in the Help screen. Click the [Help] button at the bottom right of the screen.
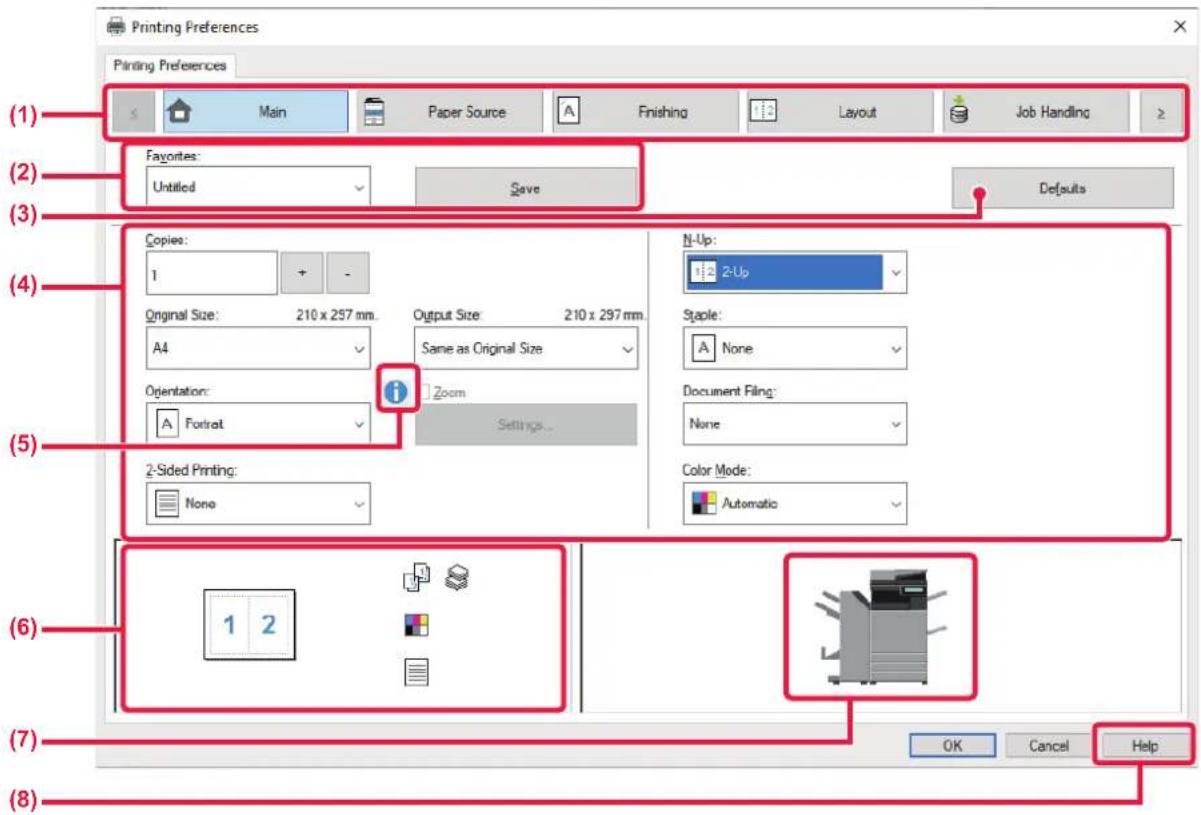
(1) Tabs: Click to change the tabs shown.
•[Main]: Frequently used functions are grouped on this tab. The settings are also on other tabs, and each setting on this tab is linked to the corresponding setting on the other tab.
•[Paper Source]: Set the size and type of paper used for printing, and the paper tray. •[Finishing]: Select a finishing function such as stapling, punch, or folding, and set the output tray. •[Layout]: Select functions related to the layout such as two-sided printing and booklet. •[Job Handling]: Set Document Filing and user authentication. •[Inserts]: Select insertion functions such as covers, inserts, and tab paper. •[Stamp]: Select the watermark or stamp function. •[Image Quality]: Select various image quality settings. •[Detailed Settings]: Select tandem print and other detailed print settings.
(2) Favorites
Settings configured on each tab at the time of printing can be saved as Favorite. FREQUENTLY USED FUNCTIONS (page 4-11)
(3) Defaults
Return the settings on the currently selected tab to their default state.
(4) Setup Items
Displays the settings on each tab.
(5) Information icon( )
Some restrictions exist on the combinations of settings that can be selected in the printer driver properties window. When a restriction exists on a selected setting, an information icon ( i ) will appear next to the setting. Click the icon to view an explanation of the restriction.
(6) Print image
This lets you visually check how the current settings affect the print image. Finishing settings and the color mode are indicated by icons.
(7) Machine image
This shows the options that are installed on the machine, and the paper trays and output trays that are used.
(8) [Help] button
Displays the Help window of the printer driver.
![SHARP BP-50C45 - [Help] button - 1](/content/2026/06/1367452/images/307c65b783aa8c86d921ef139a713655944d74e8ac8a45583a85ebf1f39d9430.jpg)
- Help can be displayed for a setting by clicking the setting and pressing the [F1] key.
- You can click the ? button in the upper right corner of the settings screen and then click a setting to show Help for that setting in a sub-window.
SELECTING THE PAPER
Before printing, check the paper sizes, paper types, and paper remaining in the machine's trays. To check the most recent tray information, click the [Tray Status] button in the [Paper Source] tab.
The "Output Size" setting and the "Paper Tray" setting are related as follows:
- When "Paper Tray" is set to [Auto Select]
The tray that contains paper of the size and type selected in "Output Size" and "Paper Type" is automatically selected.
- When "Paper Tray" is set to any setting other than [Auto Select]
The specified tray is used for printing regardless of the "Output Size" setting.
When you have set "Paper Type" to [Bypass Tray], be sure to select "Paper Type". Check the paper type that is set for the bypass tray of the machine, check that paper of that type is actually loaded into the bypass tray, and then select the appropriate paper type.
- When "Paper Type" is set to [Auto Select]
A tray with plain paper or recycled paper of the size specified in "Output Size" is automatically selected. (The factory default setting is plain paper 1 only.)
- When "Paper Type" is set to anything other than [Auto Select]
A tray with the specified type of paper and the size specified in "Output Size" is used for printing.

Special media such as envelopes can also be placed in the bypass tray.
For the procedure for loading paper in the bypass tray, see "LOADING PAPER INTO THE BYPASS TRAY (page 1-22)".

When [Enable Detected Paper Size in Bypass Tray] (disabled by factory default) or [Enable Selected Paper Type in Bypass Tray] (enabled by factory default), which you can reach by selecting [System Settings] in "Settings (administrator)" → [Printer Settings] → [Condition Settings] → [Bypass Tray Settings] is enabled, printing will not take place if the paper size or paper type specified in the printer driver is different from the paper size or paper type specified in the settings of the bypass tray.
PRINTING ON ENVELOPES
The bypass tray or tray 1 can be used for envelope printing.

- For the types of paper that can be used in the tray, see "APPLICABLE PAPER TYPES (page 1-12)".
- For the procedure for loading paper in the bypass tray, see "LOADING PAPER INTO THE BYPASS TRAY (page 1-22)".
- For the procedure for loading paper in the tray 1, see "TRAY 1 - 4 (when a stand/550/2x550/3x550/550&2100 sheet paper drawer is installed) (page 1-15)".
- For more information on the procedure for loading paper, see "SELECTING THE PAPER (page 4-7)". • After printing, there may be creases in the envelope depending on the envelope type and format as well as on the printing environment. Before high-quantity printing, it is recommended that you conduct a test print.
- When using media such as envelopes that can be loaded only in a specific orientation, you can rotate the image 180 degrees. For more information, see "ROTATING THE PRINT IMAGE 180 DEGREES (ROTATE 180 DEGREES) (page 4-39)"

(1) Click the [Paper Source] tab. (2) Select the envelope size from the "Output Size" menu.
When [Output Size] is set to envelope, [Paper Type] is automatically set to [Envelope].
When "Original Size" is set to envelope on the [Main] tab and "Output Size" is set to [Same as Original Size], "Paper Type" is automatically set to [Envelope].
(3) Select [Bypass Tray] or [Tray 1] in "Paper Tray".
PRINTING WHEN THE USER AUTHENTICATION FUNCTION IS ENABLED
The user information (such as login name and password) that must be entered varies depending on the authentication method being used, so check with the administrator of the machine before printing.

- If you have configured "Printing Policy" on the [Configuration] tab so that user authentication is always performed, users are required to be authenticated for each print job. This is done by entering authentication information in a dialog box that appears each time printing is performed.
- The machine's user authentication function cannot be used when the PPD driver* is installed and the Windows standard PS printer driver is used.
- For this reason, the machine can be configured to prohibit users from executing printing unless their user information is stored in the machine. * The PPD driver enables the machine to print using the Windows standard PS printer driver. (On the BP-50C26/BP-50C31/BP-50C36/BP-50C45/BP-50C55/BP-50C65, the PS3 expansion kit is required.)
1 in the printer driver properties window of the application, select the printer driver of the machine and click the [Preferences] button.
![SHARP BP-50C45 - in the printer driver properties window of the application, select the printer driver of the machine and click the [Preferences] button. - 1](/content/2026/06/1367452/images/62ccc0ecd51eeaa2d6893a7ee57adb5f2b7ac2f5c2df5374192f347799ef7711.jpg)
The button that is used to open the printer driver properties window (usually [Property] or [Preferences]) may vary depending on the application.
2
![Printing Preferences Main | Paper Source | Finishing | Layout | Job Handling Favorites: Untitled Save Defaults Print Release Document Linking Name (1) Job Handling (2) Authentication Login Name: [ ] Password: [ ] Login Name: [ ] Join 1 Password: [ ] Join Name: [ ] Use Image Job Name: [ ] Auto Job Co…](/content/2026/06/1367452/images/b001f9636c657ba0f54e885bbb5f7955de0cd2455d5291746feeeead17b134bf.jpg)
Enter your user information.
(1) Click the [Job Handling] tab. (2) Enter your user information.
- When authentication is performed by login name, select [Login Name] and enter your login name.
- When authentication is performed by login name/password, click [Login Name/Password] and enter your login name and password. Enter the password using 1 to 32 characters.
- When the machine's authentication destination is Active Directory, [Single Sign-on] can be selected. For information on single sign-on, refer to "AUTHENTICATION BY SINGLE SIGN-ON (page 4-114)".
- When authentication is performed by user number, select [User Number] and enter your 5 to 8 digit user number.
(3) Enter the user name and job name as necessary.
- Click the [User Name] checkbox, and enter your user name using up to 32 characters. The entered user name will appear on the touch panel of the machine. If you do not enter a user name, your PC login name will appear.
- Click the [Job Name] checkbox, and enter a job name using up to 30 characters. The entered job name will appear as a file name on the touch panel of the machine. If you do not enter a job name, the file name set in the application will appear.
(4) To have a confirmation window appear before printing starts, select the [Auto Job Control Review] checkbox. (5) Click the [OK] button to execute printing.

Authentication by Single Sign-on requires that Active Directory authentication be performed on the machine and your computer. This can only be used when your computer is running Windows.
FREQUENTLY USED FUNCTIONS
SAVING SETTINGS AT THE TIME OF PRINTING
Settings configured on each of the tabs at the time of printing can be saved as Favorite. Saving frequently used settings or complex color settings under an assigned name makes it easy to select those settings the next time you need to use them.
Settings can be saved from any tab of the printer driver properties window. Settings configured on each tab are listed at the time of saving, allowing you to check the settings as you save them.

Deleting saved settings
In step 2 of "USING SAVED SETTINGS (page 4-12)", select the user settings that you want to delete and click the [Delete] button.
1 Select the machine's printer driver from the print window of the application, and click the [Preferences] button.
![SHARP BP-50C45 - Select the machine's printer driver from the print window of the application, and click the [Preferences] button. - 1](/content/2026/06/1367452/images/e381725d0122e24d45d94cc701b412289821a5eb35c1c41eda2b0be0ea2453d0.jpg)
The button that is used to open the printer driver properties window (usually [Property] or [Preferences]) may vary depending on the application.
2
Register Print Settings.
(1) Configure the print settings on each tab. (2) Click the [Save] button.
3![Current Settings Main | Paper Source | Finishing | Layout | Job Handling Copies: [ ] Original Size: [ ] Output Size: [ ] Duration: [ ] Down 3 Quick Pending Up Share Document Ring Color Block Paper Source: [ ] Output Size: [ ] Paper Type: [ ] Finding Stack Finish (1) Same as Original Size None Auto S…](/content/2026/06/1367452/images/0b68b8a4332cf8cbdb589740cbaa3f8385d71060a6f1c43ea316f36ab8671b2b.jpg)
Check and save the settings.
(1) Check the displayed settings. (2) Enter a name for the settings using up to 20 characters. (3) Click the [OK] button.
USING SAVED SETTINGS
You can specify the saved favorites through just one click to apply frequently used settings or complicated color settings to your printing.
1
Select the machine's printer driver from the print window of the application, and click the [Preferences] button.

The button that is used to open the printer driver properties window (usually [Property] or [Preferences]) may vary depending on the application.
2
![Printing Preferences Main | Paper Source | Finishing | Layout | Job Handling Copies: [ ] Unfold Save Defaults Color: [ ] 1 Digital Size: 210 x 257 mm 44 Operation Format 2/Select Printing None (1) Output Size: 210 x 257 mm Save as Digital Size [1] Sides: Blue Simple None Document Ring: None Color Bl…](/content/2026/06/1367452/images/9165e27d90b9cc90097704cf6e4a5713b54e0f51fd9a81abac49b3b98cc2f427.jpg)
Select favorite settings.
(1) Select the favorite settings you want to use. (2) Click the [OK] button.
3
Start printing.
CHANGING THE PRINTER DRIVER DEFAULT SETTINGS
You can change the default settings of the printer driver.
Changes you have made in the printer driver properties window when you execute printing from the application are returned to the default settings specified here when you exit the application.
1
Click the [Start] button, select [Settings] → [Device] → [Printers & scanners].
![SHARP BP-50C45 - Click the [Start] button, select [Settings] → [Device] → [Printers & scanners]. - 1](/content/2026/06/1367452/images/16f2373e6f31957098e5bed28608ea2a7be6d6d7b72dfcfa0114cf08c1239d29.jpg)
- In Windows 11, click the [Start] button, select [Bluetooth & devices] → [Printers & scanners].
- In Windows 8.1/Windows Server 2012, right-click the [Start] button, select [Control Panel] → [View devices and printers] (or [Devices and Printers]).
2

Click the printer driver name of the machine and click [Manage].
3
Click [Start].
4
Configure the settings and click the [OK] button.
For explanations of the settings, see printer driver Help.
SHARE FAVORITE SETTINGS BETWEEN SERVER AND CLIENT
When using this machine as a shared printer, if "Favorite" is set in the printer driver of the shared server, this setting can also be used on the shared destination.
When "Share Favorites" is enabled...
![graph TD Server["Server"] --> Client["Client"] subgraph Server A["Server"] --> B["Database Selection"] B --> C["Database No.1"] B --> D["Database No.2"] B --> E["Database No.3"] B --> F["Database No.4"] B --> G["Database No.5"] B --> H["Database No.6"] B --> I["Database No.7"] B --> J["Database No.8…](/content/2026/06/1367452/images/6cc9fa01824d53e574e4aff25b6b32f5abe8245b894cf7cfa1695fc730aa3b5d.jpg)
The favorite settings configured on the server can be used on the client computer.
Configure the following settings in the printer driver of the shared server.
1
Click the [Start] button, select [Settings] → [Device] → [Printers & scanners].

- In Windows 11, click the [Start] button, select [Bluetooth & devices] → [Printers & scanners].
- In Windows 8.1/Windows Server 2012, right-click the [Start] button, select [Control Panel] → [View devices and printers] (or [Devices and Printers]).
2
Click the printer driver name of the machine and click [Manage].
3
Click [Printer Properties].
4

Configure the sharing settings.
(1) Click the [Configuration] tab. (2) Set the [Share Favorites] check box to √.
PRINTING IN A macOS ENVIRONMENT
BASIC PRINTING PROCEDURE
The following example explains how to print a document from the standard accessory application "TextEdit" in macOS.

- To install the printer driver and configure settings in a macOS environment, see the Software Setup Guide.
- The explanations of screens and procedures for use in a macOS environment generally assume that macOS 11 is being used and a PPD driver is installed. The screens may be different depending on the version of the operating system or the software application.
- The menu used to execute printing may vary depending on the application.
- On the BP-50C26/BP-50C31/BP-50C36/BP-50C45/BP-50C55/BP-50C65, the PS3 expansion kit is required to use the machine as a printer in a macOS environment.
1

Select [Page Setup] from the [File] menu and select the printer.
If the printer drivers appear as a list, select the name of the printer driver to be used from the list.
2

Select paper settings.
(1) Make sure that the correct printer is selected. (2) Select paper settings. Paper size, paper orientation, and enlarge/reduce settings can be selected. (3) Click the [OK] button.

Select [Print] from the [File] menu.


Select print settings.
(1) Make sure that the correct printer is selected. (2) Select an item from the menu and configure the settings as needed. (3) Click the [Print] button.
SELECTING THE PAPER
This section explains the [Paper Feed] settings in the print settings window.
- When [Auto Select] is selected:
A tray that is set for plain or recycled paper (only plain paper 1 in the factory default setting) of the size specified in "Paper Size" on the page setup screen is automatically selected.
- When a paper tray is specified:
The specified tray is used for printing regardless of the "Paper Size" setting on the page setup screen.
For the bypass tray, also specify the paper type. Check that the paper type that is set for the bypass tray of the machine, check that paper of that type is actually loaded into the bypass tray, and then select the appropriate bypass tray (paper type).
- When a paper type is specified:
A tray with the specified type of paper and the size specified in "Paper Size" on the page setup screen is used for printing.

Special media such as envelopes can also be placed in the bypass tray. For the procedure for loading paper in the bypass tray, see "LOADING PAPER INTO THE BYPASS TRAY (page 1-22)".

When [Enable Detected Paper Size in Bypass Tray] (disabled by factory default) or [Enable Selected Paper Type in Bypass Tray] (enabled by factory default), which you can reach by selecting [System Settings] in "Settings (administrator)" → [Printer Settings] → [Condition Settings] → [Bypass Tray Settings] is enabled, printing will not take place if the paper size or paper type specified in the printer driver is different from the paper size or paper type specified in the settings of the bypass tray.
PRINTING ON ENVELOPES
The bypass tray or tray 1 can be used for envelope printing.

- For the types of paper that can be used in the tray, see "APPLICABLE PAPER TYPES (page 1-12)".
- For the procedure for loading paper in the bypass tray, see "LOADING PAPER INTO THE BYPASS TRAY (page 1-22)".
- For the procedure for loading envelopes in tray 1, see "LOADING ENVELOPE IN TRAY 1 (page 1-17)".
- For more information on the procedure for loading paper, see "SELECTING THE PAPER (page 4-16)".
- When using media such as envelopes that can be loaded only in a specific orientation, you can rotate the image 180 degrees. For more information, see "ROTATING THE PRINT IMAGE 180 DEGREES (ROTATE 180 DEGREES) (page 4-39)". After printing, there may be creases in the envelope depending on the envelope type and format as well as on the printing environment. Before high-quantity printing, it is recommended that you conduct a test print.
Select the envelope size in the settings of the application ("Page Setup" in many applications) and then perform the following steps.
1
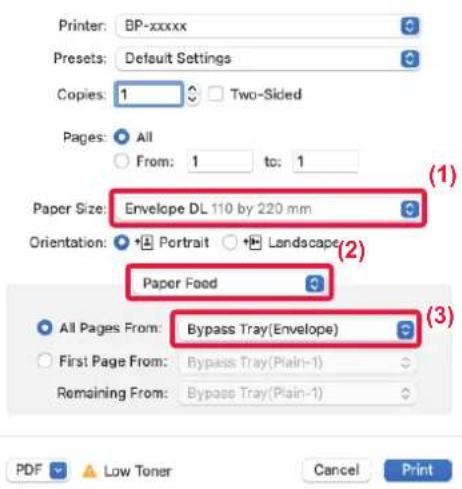
Select print settings.
(1) Select the envelope size from the "Paper Size" menu. (2) Select [Paper Feed]. (3) Select the [Bypass Tray (Envelope)] or [Tray 1] from the "All Pages From" menu.

When [Enable Selected Paper Type in Bypass Tray] (enabled by factory default) is enabled in "Settings (administrator)", set the paper type of the bypass tray to [Envelope].
PRINTING WHEN THE USER AUTHENTICATION FUNCTION IS ENABLED
The user information (such as login name and password) that must be entered varies depending on the authentication method being used, so check with the administrator of the machine before printing.

The menu used to execute printing may vary depending on the application.


In the application, select [Print] from the [File] menu.
2

Enter your user information.
(1) Make sure that the machine's printer name is selected. (2) Select [Job Handling]. (3) Click the [Authentication] tab. (4) Enter your user information.
- When authentication is carried out using the login name/password, enter your login name in "Login Name" and your password (1 to 32 characters) in "Password".
- When authentication is carried out using the user number, enter your user number (5 to 8 digits) in "User Number".
(5) Enter the user name and job name as necessary.
- User Name
Enter your user name using up to 32 characters. The entered user name will appear on the touch panel of the machine. If you do not enter a user name, your PC login name will appear.
• Job Name
Enter a job name using up to 32 characters. The entered job name will appear as a file name on the touch panel of the machine. If you do not enter a job name, the file name set in the application will appear.
(6) Click the [Print] button.
FREQUENTLY USED FUNCTIONS
SELECTING THE COLOR MODE
The following three selections are available for the "Color Mode" (a set of colors used for printing):
| Automatic | The machine automatically determines whether each page is color or black and white and prints the page accordingly. Pages with colors other than black and white are printed using Y (Yellow), M (Magenta), C (Cyan) and Bk (Black) toner. Pages that are only black and white are printed using Bk (Black) toner only. This is convenient when printing a document that has both color and black and white pages, however, the printing speed is slower. |
| Color | All pages are printed in color. Both color data and black and white data are printed using Y (Yellow), M (Magenta), C (Cyan) and Bk (Black) toner. |
| Black and White | All pages are printed in black and white. Color data such as images or materials for a presentation is printed using black toner only. This mode helps conserve color toner when you do not need to print in color, such as when proofreading or checking the layout of a document. |

When "Color Mode" is set to [Automatic]:
Even if the print result is black and white, the following types of print jobs will be counted as 4-color (Y (Yellow), M (Magenta), C (Cyan), and Bk (Black)) print jobs.
When you want such jobs to be counted as black and white jobs, select [Black and White].
- When the data is created as color data.
- When the application treats the data as color data even though the data is black and white.
- When an image is hidden under a black and white image.
Windows

(1) Click the [Main] tab. (2) Select "Color Mode".

In addition to the [Main] tab, [Color Mode] can also be set on the [Image Quality] tab.
macOS

(1) Select [Image Quality]. (2) Select "Color Mode".
SELECTING THE RESOLUTION
The following three selections are available for "Print Mode" (resolution):
| 600 dpi This mode is suitable for printing data such as regular text or a table. | |
| 600 dpi (High Quality) The print quality of color photos and text are high. | |
| 1200 dpi | Select this mode to print color photos with higher definition, and to print fine lines clearly. |
Windows

(1) Click the [Image Quality] tab. (2) Select "Print Mode".
macOS

(1) Select [Image Quality]. (2) Select "Print Mode".
2-SIDED PRINTING
The machine can print on both sides of the paper. This function is useful for many purposes, and is particularly convenient when you want to create a simple pamphlet. 2-sided printing also helps conserve paper.
| Paper orientation | Print results | |
| Portrait | Long Edge Short Edge | |
 |  | |
| Landscape | Short Edge Long Edge | |
 |  | |
| The pages are printed so that they can be bound at the left or right side. | The pages are printed so that they can be bound at the top. | |
Windows

(1) Click the [Main] tab. (2) Select the paper orientation. (3) Select [Long Edge] or [Short Edge].

If necessary, you can select the method of implementing 2-sided printing. Click the [Other Settings] button on the [Detailed Settings] tab, and select the mode from "Duplex Style".
macOS

(1) Select [Layout]. (2) Select [Long-Edge binding] or [Short-Edge binding].
FITTING THE PRINT IMAGE TO THE PAPER
This function automatically enlarges or reduces the print image to match the size of the paper loaded in the machine. This function is convenient when enlarging a letter or A4 size document to ledger or A3 size to make it easier to view, or when printing a document on paper that is different in size from the original document.
![graph TD A["Document with tree icon"] --> B["Document layout with horizontal lines and vertical bars"] B --> C["Output: Document with tree icon"]](/content/2026/06/1367452/images/284d0ccfdc47d4c39e134fe4d9531c47debae094bb2f1928576a7bfe91b86707.jpg)
The following example explains how to print a Letter (or A4) size document on A3 (or ledger) size paper.
Windows

(1) Click the [Main] tab. (2) Select the original size from [Original Size] (for example: A4). (3) Select the actual paper size to be used for printing from [Output Size] (for example: A3).
If the output size is larger than the original size, the printed image will be automatically enlarged.

If A0, A1, A2, B1, B2, or B3 size is selected in "Original Size", Letter (or A4) is automatically selected in "Output Size".
macOS
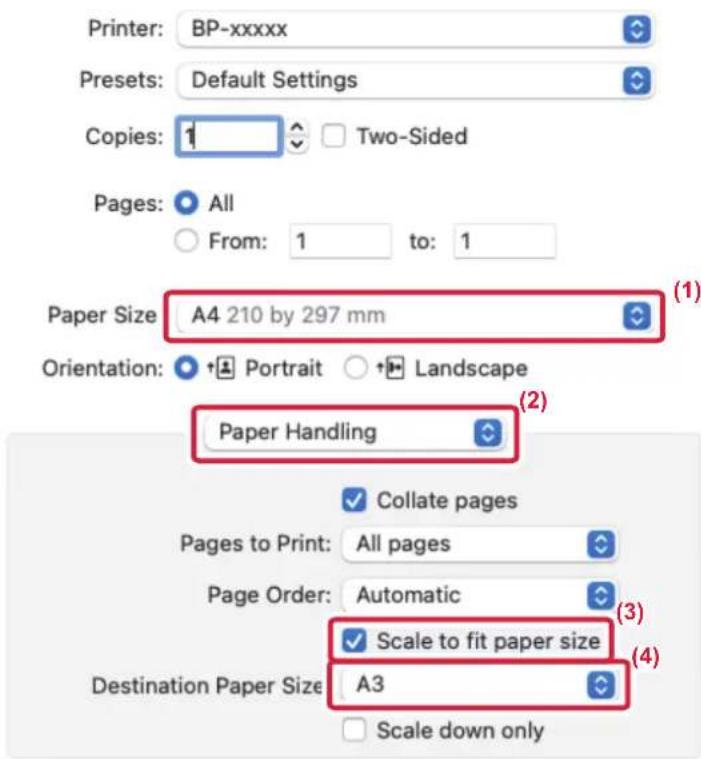
(1) Check the paper size for the print image (for example: A4). (2) Select [Paper Handling]. (3) Select [Scale to fit paper size]. (4) Select the actual paper size to be used for printing (for example: A3).

When you select A0 (Fit to Page), A1 (Fit to Page), A2 (Fit to Page), B1 (Fit to Page), B2 (Fit to Page), or B3 (Fit to Page) in "Paper Size", the selected paper size will be selected after the "Suggested Paper" in "Destination Paper Size".
PRINTING MULTIPLE PAGES ON ONE PAGE
This function reduces the print image and prints multiple pages on a single sheet of paper. You can print only the first page in the original size and print multiple reduced pages on the subsequent sheets.
For example, when [2-Up] (2 pages per sheet) or [4-Up] (4 pages per sheet) is selected, the following print results will be obtained, depending on the selected page order.
This is convenient when you want to print multiple images such as photos on a single sheet of paper, and when you want to conserve paper. When used in combination with 2-sided printing, this function saves more paper.
| 2-Up(2 pages per sheet) | ||
Left to Right Right to Left Top To Bottom |  | (When the print orientation is landscape) |
| 4-Up(4 pages per sheet) | |||
Right, and Down | Down, and Right | Left, and Down | Down, and Left |

- [N-Up] that can be set on the [Layout] tab can also be set on the [Main] tab. ("Order" can only be set in the [Layout] tab.)
- Note the following when printing multiple pages on one sheet:
• The page orders for 6-Up, 8-Up, 9-Up, and 16-Up are the same as for 4-Up. - In a Windows environment, the page order can be viewed in the print image in the printer driver properties window. - In a macOS environment, the page orders are displayed as selections. - In a macOS environment, the number of pages that can be printed on a single sheet is 2, 4, 6, 9, or 16. Printing 8 pages on one sheet is not supported. - For information on the "Repeat" function, see "PRINT THE SAME IMAGE IN TILE PATTERN (REPEAT PRINT) (page 4-77)".

The function for printing only the first page normally can only be used in the PCL6 printer driver.
Windows

(1) Click the [Layout] tab. (2) Select the number of pages per sheet. (3) Select the order of the pages. (4) If you wish to print borderlines, click the [Border] checkbox so that the checkmark appears.
- To print the first page normally (as a cover), select the [N-Up with cover] checkbox ( )PCL6 only)
- When [100% N-Up] is selected (☑) for jobs such as N-Up copying of two A4 size pages onto one A3 sheet, the pages will be printed at the full size of the original. If you select [Border] at this time, only the border will be printed.
macOS

(1) Select [Layout]. (2) Select the number of pages per sheet. (3) Select the order of the pages. (4) If you wish to print borderlines, select the desired type of borderline.
PRINTING WHILE SKIPPING BLANK PAGES
If the scanned original contains blank pages, the blank pages are skipped during printing. The machine detects blank pages and does not print them. This eliminates unnecessary printing without you having to check for blank pages before printing.
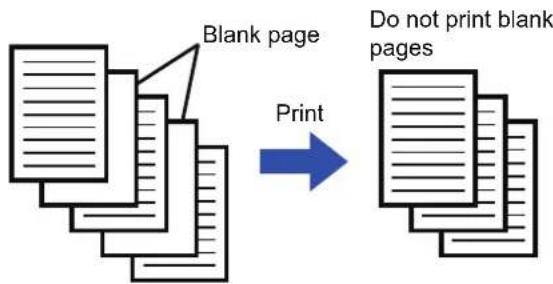

This function is available in a Windows environment.

- Depending on the state of the original, some pages that are not blank may be detected as blank pages and thus not being printed, or some pages that are blank may not be detected as blank and thus printed.
- In N-Up Print, blank pages are not excluded and are printed.
Windows

(1) Click the [Detailed Settings] tab. (2) Select [On] in [Disable Blank Page Print].
STAPLING OUTPUT/PUNCHING HOLES IN OUTPUT
Staple function
The staple function staples the output. To create materials with more sophisticated appearance, the staple function can be used in combination with 2-sided printing.
This function saves considerable time when preparing handouts for a meeting or other stapled materials.
The stapling positions and the number of staples can be selected to obtain the following stapling results.
| 1 Staple* | ||
Left Right Top |  |  |
| 2 Staples | ||
Left Right Top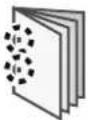 |  |  |
| Stapleless | ||
Left Right Top |  | 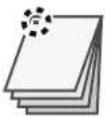 |
* The staple orientation (" " or "—") varies depending on the size and orientation of the paper.
Punch function
The punch function punches holes in the output. The punch hole positions are set by selecting the binding edge.
| Left Right Top | ||
 |  |  |

- An inner finisher, finisher, finisher (large stacker), saddle stitch finisher or saddle stitch finisher (large stacker) is required to use the staple function.
- An inner finisher, finisher (large stacker) or saddle stitch finisher (large stacker) is required to use the stapleless staple function.
- To use the punch function, installing a punch module in the inner finisher, finisher, finisher (large stacker), saddle stitch finisher or saddle stitch finisher (large stacker).
- For the maximum number of sheets that can be stapled, see "SPECIFICATIONS" in the Start Guide.
- The maximum number of sheets that can be stapled at once includes any covers and/or inserts that are inserted.
- For information on the saddle stitch function, see "CREATE A PAMPHLET (BOOKLET/SADDLE STITCH) (page 4-33)".

- The staple and offset (shifting the position of the paper that is output for each job) functions cannot be used simultaneously.
- When the finisher is disabled in the machine's settings, the staple function and punch function cannot be used.
- When the staple function or the punch function is disabled in the machine's settings, stapling or punching is not possible.
Windows
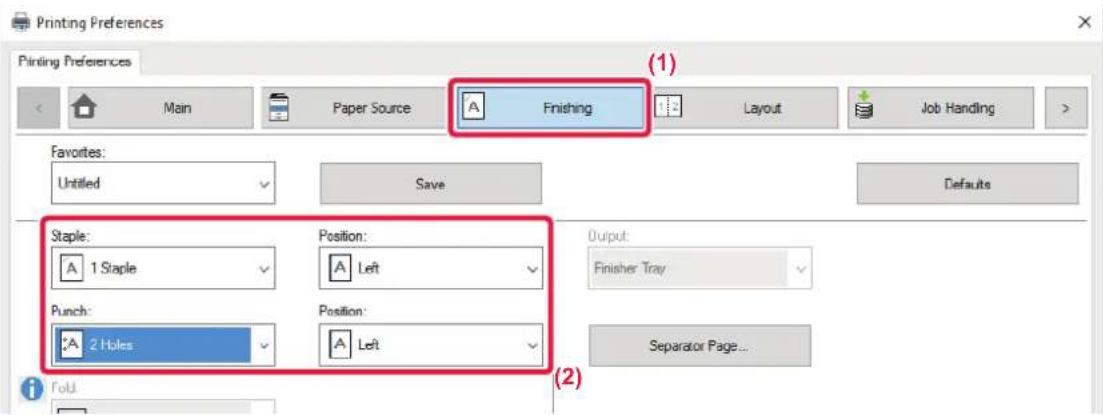
(1) Click the [Finishing] tab. (2) Select the staple function or the punch function.
- For the staple function, select the number of staples in the "Staple" menu and the staple position in the "Position" menu.
- For the punch function, select the type of punch in the "Punch" menu and the punch position in the "Position" menu.

- In addition to the [Finishing] tab, [Staple] can also be set on the [Main] tab.
- On the [Paper Source] tab, use [Force Letter-R for Letter Size] to always use letter size paper in landscape orientation. Using this setting, when printing mixed legal size, the short sides will be printed with the same width, so you can staple them together.

macOS

(1) Select [Printer Features] and then select [Output]. (2) Select "Binding Edge". (3) Select the staple function or the punch function.
- For the staple function, select the number of staples in the "Staple" menu.
- For the punch function, select the type of punch in the "Punch" menu.

Use [Force Letter-R for Letter Size] to always use letter size paper in landscape orientation. Using this setting, when printing mixed legal size, the short sides will be printed with the same width, so you can staple them together.

CONVENIENT PRINTING FUNCTIONS
CONVENIENT FUNCTIONS FOR CREATING PAMPHLETS AND POSTERS
CREATE A PAMPHLET (BOOKLET/SADDLE STITCH)
The pamphlet function prints on the front and back of each sheet of paper so that the sheets can be folded and bound to create a pamphlet.
If a saddle stitch finisher is installed and if "Booklet" and "Staple" are selected, this function automatically folds and outputs the copies. This is convenient when you wish to compile printed output into a pamphlet.
![graph TD A["1 2 3 4 5 6 7 8"] --> B["8 1 6 3"] B --> C[" "]](/content/2026/06/1367452/images/a9d086d873fd9f0da2ebad15618a7f73168848e6cc2f53efc13a5cff967304a7.jpg)
Windows
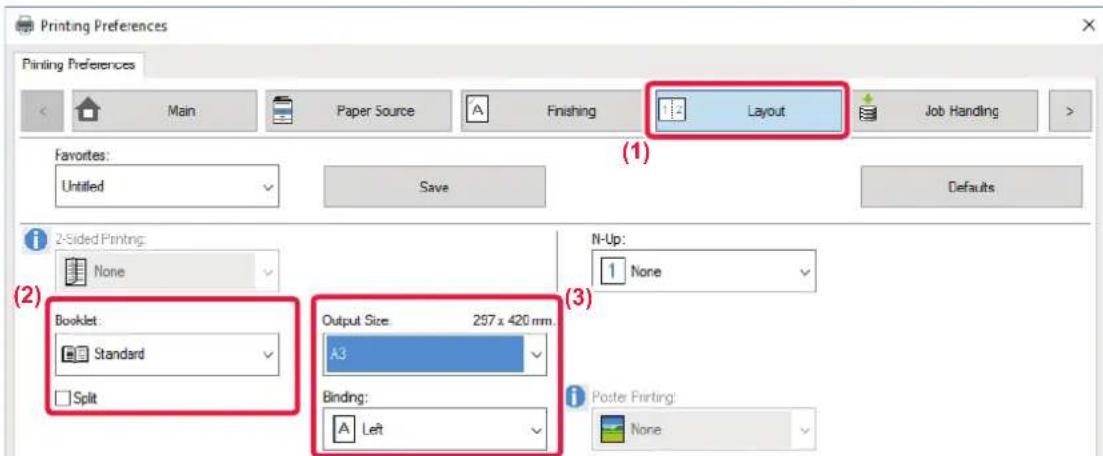
(1) Click the [Layout] tab. (2) Select [Standard] or [Full Image] in "Booklet".
- When [Standard] is selected, the printed image will be enlarged or reduced to fit the paper selected in "Output Size".
- When [Full Image] is selected, the printed image will be enlarged or reduced to fit the size selected in "Fit To Paper Size". By selecting a paper size that is larger than the print image, you can cut off the edges of the paper after making the booklet to create a booklet with no margins.
- When the number of output pages will exceed the number of sheets that can be stapled, you can select the [Split] checkbox (☑) to divide the output into multiple sub-booklets that can each be stapled. When stacked, the sub-booklets will have the same page order as the original pages.
(3) Select the specified output size and the binding edge.
- When [Standard] is selected, select the output paper size.
- When [Full Image] is selected, select the size to which you want to enlarge or reduce the print image in [Fit To Paper Size], and select the paper size you want to use for printing in "Output Size".
If a saddle stitch finisher is installed
(4) Click the [Finishing] tab. (5) Select [Saddle Stitch] from "Staple".

When a saddle stitch finisher (large stacker) is installed and the job is not output correctly with [Saddle Stitch], select [Saddle Stitch (Reverse)].
macOS

(1) Select [Printer Features] and then select [Output]. (2) Select "Binding Edge". (3) Select [Saddle Stitch]. (4) Select [Tiled] or [2-Up].
PRINTING WITH MARGIN SHIFT SETTING (MARGIN)
This function shifts the print image to increase the margin at the left, the right, or the top of the paper.
If a finisher or saddle stitch finisher is installed, the staple and punch functions of the machine can also be used together.
This is convenient when you wish to staple or punch the output but the binding area overlaps the text.
![graph LR A["Document with blank text"] --> B["Process Step"] B --> C["Output: Paper with pen and scissors"]](/content/2026/06/1367452/images/6310f2f2e0dbc3f32a96111a120acd558b95c9a466abadea7ea7dd68ccb45eb4.jpg)
By shifting the image, the part of the image that is outside the print area will not be printed.
Windows
![Printing Preferences Print Position (3) Print Position Margin Shift Margin Shift: [0] 10 mm Width: [0...30] 10 + - mm Unit: millimeters Position: Left OK Cancel (4) Finishing Layout Job Handling Defaults N-Up: None Poster Printing: None Print Position... (2)](/content/2026/06/1367452/images/b055aec2debbc9dba818c76282e517555f7c7bff74b46c9a18712c8f04d0de2f.jpg)
(1) Click the [Layout] tab. (2) Click the [Print Position] button. (3) Select [Margin Shift]. (4) Select the shift width.
Select from the "Margin Shift" menu. If you wish to configure another numeric setting, select the setting and click + - buttons or directly enter the number.
macOS

(1) Select [Printer Features] and then select [Output]. (2) Select "Binding Edge". (3) Select "Margin Shift".
CREATE A LARGE POSTER (POSTER PRINTING)
One page of print data is enlarged and printed using multiple sheets of paper (2 sheets (1× 2) , 4 sheets (2× 2) , 9 sheets (3× 3) or 16 sheets (4× 4) ). The sheets can then be attached together to create a large poster.
To enable precise alignment of the edges of the sheets during attachment, borderlines can be printed or overlapping edges can be created (overlap function).


This function is available in a Windows environment.
Windows

(1) Click the [Layout] tab. (2) Select the number of sheets to be used in "Poster Printing".
If you wish to print borderlines and/or use the overlap function, click the corresponding checkboxes so that the √ appears.
FUNCTIONS TO ADJUST THE SIZE AND ORIENTATION OF THE IMAGE
ADJUST PRINT POSITION ON ODD AND EVEN PAGES SEPARATELY (PRINT POSITION)
This function sets different print positions (margins) separately for odd and even pages and prints the pages.

This function is available in a Windows environment.
Windows

(1) Click the [Layout] tab. (2) Click the [Print Position] button. (3) Select [Custom]. (4) Set the amount of shifting of the print position for odd-numbered pages and even-numbered pages. (5) Click the [OK] button.
ROTATING THE PRINT IMAGE 180 DEGREES (ROTATE 180 DEGREES)
This feature rotates the image 180 degrees so that it can be printed correctly on paper that can be loaded in only one orientation (such as envelopes or paper with punch holes).
![graph LR A["ABCD"] --> B["ABCD"]](/content/2026/06/1367452/images/9f9209d4e3fbcdc6fa4804d32a5db51ec6d740298c8f34d60057b197d456b848.jpg)
Windows

(1) Click the [Main] tab. (2) Select [Portrait (Rotated)] or [Landscape (Rotated)] in "Orientation".
macOS

(1) Select [Layout]. (2) Select the [Reverse page orientation] checkbox so that appears.
ENLARGING/REDUCING THE PRINT IMAGE (ZOOM SETTING/ENLARGE OR REDUCE)
This function enlarges or reduces the image to a selected percentage.
This allows you to enlarge a small image or add margins to the paper by slightly reducing an image.
![graph LR A["Document with blank text"] --> B["Arrow pointing right"]](/content/2026/06/1367452/images/59d9b87f99c2ca07e06f77d36790e972ab8622cbb189b953e34eaf7e086242e7.jpg)

When using the PS printer driver (Windows), you can set the width and length percentages separately to change the proportions of the image. (On the BP-50C26/BP-50C31/BP-50C36/BP-50C45/BP-50C55/BP-50C65/BP-55C26, the PS3 expansion kit is required.)
Windows
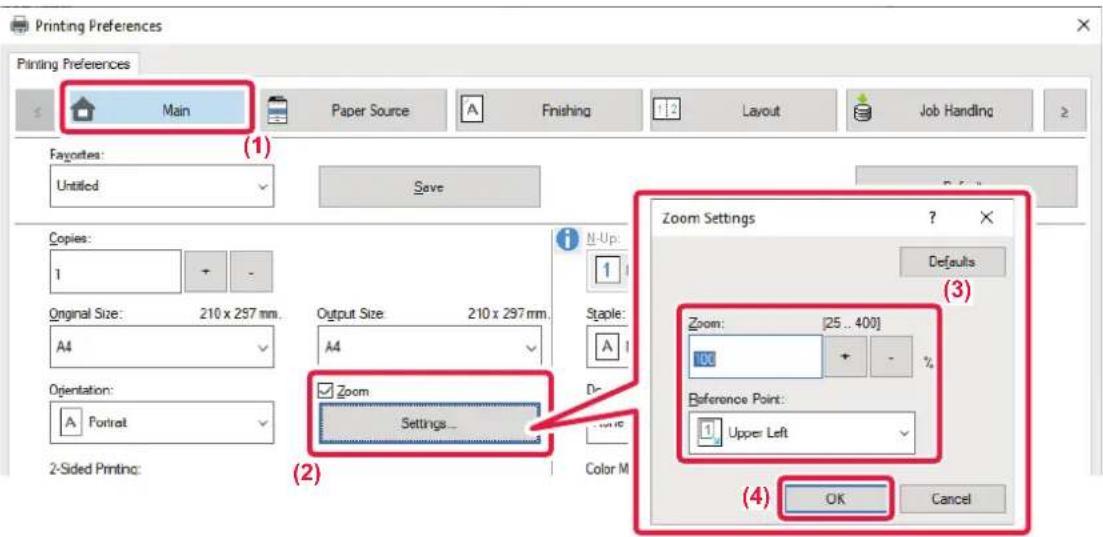
(1) Click the [Main] tab. (2) Click the [Zoom] checkbox so that appears, and click the [Settings] button. (3) Enter the percentage.
By clicking the + - button, you can specify the value in increments of 1%. In addition, select [Upper Left] or [Center] for the base point on the paper.
(4) Click the [OK] button.
macOS

(1) Select [Page Setup] from the [File] menu and enter the ratio (%). (2) Click the [OK] button.
ADJUST THE LINE THICKNESS (WIDTH)
Adjusting line widths used in data such as CAD
This function increases the thickness of the entire line when the print lines are not clear in CAD or other special applications.
When the data includes lines of varying widths, you can print all lines at the minimum width as necessary.
![graph LR A["Geometric Shape"] --> B["Transformation Arrow"] C["Square Symbol"] --> B D["Circle Symbol"] --> E["Symbol"]](/content/2026/06/1367452/images/9e1f732e0ebfe9e31ac06973a913d85ef3b25a677fe4555fc988e7f0aa9d04e0.jpg)

• This function is available in a Windows environment. - This function can be used when the PCL6 printer driver is used. - When printing from an application that processes lines as raster graphics, line widths cannot be adjusted.
Windows

(1) Click the [Image Quality] tab. (2) Click the [Line Width] button. (3) Set the line thickness and click the [OK] button.

- The units of line-width adjustment can be set to "Fixed Width" or "Ratio". Select from the "Unit" menu.
- To print all line data in the minimum line width, click the [Minimum Line Width] checkbox.
Thickening fine lines in Excel
When fine border lines in Excel do not print correctly, you can make the lines thicker.

- This function is available in a Windows environment.
- This function can be used when the PCL6 printer driver is used. • Normally this setting is not necessary.
Windows
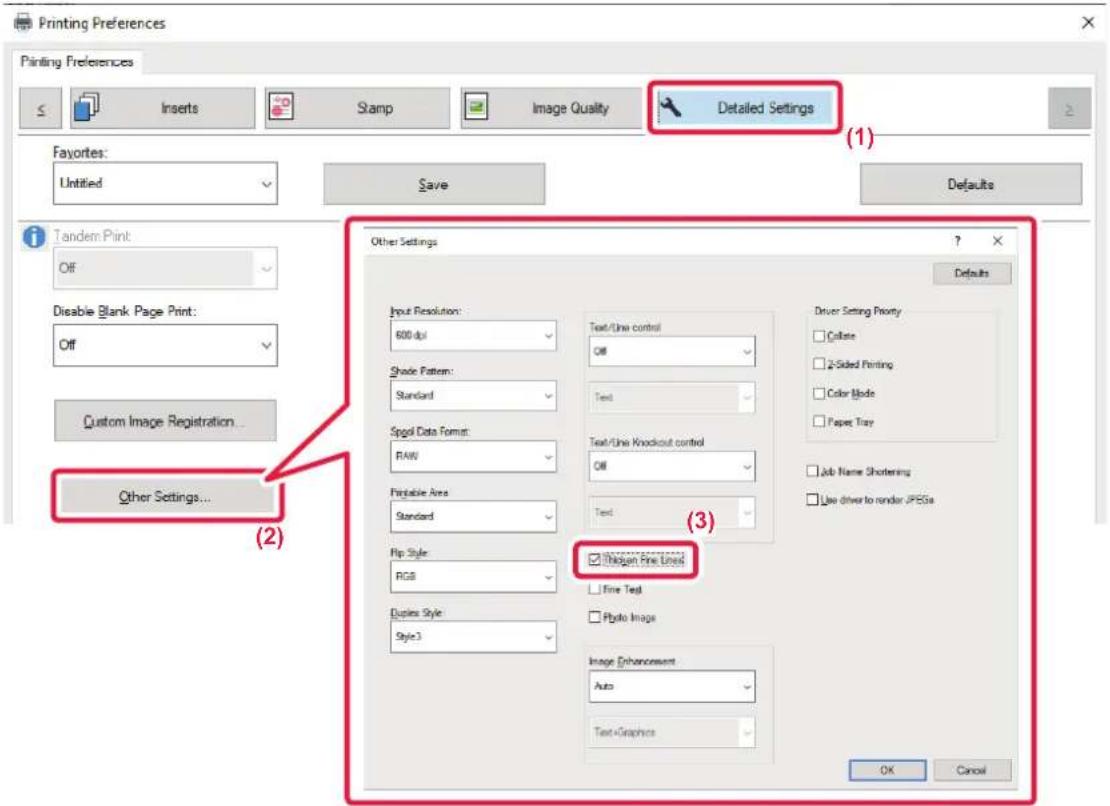
(1) Click the [Detailed Settings] tab. (2) Click the [Other Settings] button. (3) Select the [Thicken Fine Lines] checkbox ( ).
Adjusting the thickness of text and lines
You can make text and lines thicker. You can also make edges smoother or sharper.
Windows

(1) Click the [Detailed Settings] tab. (2) Click the [Other Settings] button. (3) Specify the settings.
| Item Description | |||
| Text/Line control | Text | You can make characters and text thicker. | |
| Graphics | |||
| Text+Graphics | |||
| Text+Graphics+Photo | |||
| Text/Line Knockout control | Text | You can make knockout text and lines thicker. | |
| Text+Graphics | |||
| Image Enhancement | Auto | You can make the edges of text and graphics smoother or sharper. Auto: Perform optimal image enhancement. Off: No image enhancement is applied. Sharp: Image enhancement is applied sharply. Soft: Image enhancement is applied smoothly. | |
| Off | |||
| Sharp Text | Text+Graphics | ||
| Text+knockout text | |||
| Text+Graphics+knockout text | |||
| Text+Graphics+knockout | |||
| Soft Text | |||
| Text+Graphics | |||
| Text+knockout text | |||
| Text+Graphics+knockout text | |||
| Text+Graphics+knockout | |||
macOS

(1) Select [Printer Features]. (2) Select [Advanced2]. (3) Specify the settings.
PRINT A MIRROR-IMAGE (MIRROR-IMAGE REVERSE/VISUAL EFFECTS)
The image is reversed to create a mirror image.
This function is conveniently used to print a design for a woodblock print or other printing medium.
![graph LR A["B"] --> B["B"]](/content/2026/06/1367452/images/ff0d6cf0a967bbce3247efb8ccbb07e3ebc53a2fe7bd75bebfc1e5e6f0e4a4d9.jpg)

In a Windows environment, this function is only available when using the PS printer driver. (On the BP-50C26/BP-50C31/BP-50C36/BP-50C45/BP-50C55/BP-50C65, the PS3 expansion kit is required.)
Windows

(1) Click the [Detailed Settings] tab. (2) If you wish to reverse the image horizontally, select [Horizontal]. If you wish to reverse the image vertically, select [Vertical].
macOS

(1) Select [Layout]. (2) Select the [Flip horizontally] checkbox ( ).
COLOR MODE ADJUSTING FUNCTION
ADJUST THE BRIGHTNESS AND CONTRAST OF THE IMAGE (COLOR ADJUSTMENT/RGB ADJUSTMENT)
This function adjusts the brightness and contrast in the print settings when a photo or other image is printed. This function makes simple corrections even if image editing software is not installed on your computer.

This function is available in a Windows environment.
Windows

(1) Click the [Image Quality] tab. (2) Click the [Image Adjustment] button.
When using the PS printer driver, click the [RGB Adjustment] button. Proceed to step (4).
(3) To adjust objects (text, graphics, photos) individually, select the [Adjust at each object] checkbox ( ) and select the object. (4) Drag the slide bar or click buttons to adjust the image.
PRINTING FAINT TEXT AND LINES IN BLACK (TEXT TO BLACK/VECTOR TO BLACK)
When printing a color image in grayscale, text and lines that are drawn in faint colors are printed in black. This function allows you to bring out color text and lines that are faint and difficult to see when printed in grayscale.
![graph LR A["Rectangle ABCD"] --> B["Square ABCD"]](/content/2026/06/1367452/images/da237c95ecdec9c2d226a6c68bbcd738025b445af0dd118dc4df95982b9b3780.jpg)

- Raster data such as bitmap images cannot be adjusted.
- This function is available in a Windows environment.
Windows

(1) Click the [Image Quality] tab. (2) Select the [Text To Black] checkbox and/or the [Vector To Black] checkbox so that appears.
- When [Text To Black] is selected, all text other than white text is printed in black.
- When [Vector To Black] is selected, all vector graphics other than white lines and areas are printed in black.
SELECTING COLOR SETTINGS TO MATCH THE IMAGE TYPE (ADVANCED COLOR SETTINGS)
Preset color settings are available in the machine's printer driver for various uses. These enable printing using the most suitable color settings for the color image type.
Advanced color settings, such as the color management settings and the screening setting for adjusting the color tone expression, are also available for meeting the needs of color image printing.
The following color management settings are available.
| Windows ICM Color management | method in a Windows environment |
| ColorSync Color management method in a macOS environment | |
| Source Profile Select a source color profile of color matching. | |
| Rendering Intent | The selections below provide the ability to modify color image processing to suit specific preferences. (Color matching method: Method of color converting RGB colors on the display, etc. into CMYK colors in the printer) |
| Output Profile Select a color profile for the image to be printed | |
| CMYK Correction*1 | Correct the image to obtain the optimum printing result when printing a CMYK image. |
| Screening | Select the screening to modify the image to suit specific preferences, according to the appropriate image processing method. |
| Neutral Gray Select a creating method of neutral gray. | |
| Pure Black Print | Select whether you want to print black data area with only black toner. |
| Trapping | Select to prevent void area which may be generated around edge of colors. |
| Sharpness This is used to sharpen an image or make it softer. | |
| Black Overprint*2 | Prevents whitening of the outline of black text. |
| CMYK Simulation*2 | Adjusts the colors to simulate printing that would be obtained with the process colors used in printing presses. |
| Preserve Pure CMYK Colors | When using CMYK simulation, retain cyan, magenta, and yellow pure colors, and retain black printer information. |
| Simulation Profile*2 | Select the simulation target. |
*1 Can only be used when using the PCL6 printer driver. *2 Can only be used when using the PS printer driver (Windows/macOS). (On the BP-50C26/BP-50C31/BP-50C36/BP-50C45/BP-50C55/BP-50C65/BP-55C26, the PS3 expansion kit is required.)
Windows

(1) Click the [Image Quality] tab. (2) Select [Image Type].
• Text: Data consisting mostly of text - Presentation: Data with many photos or illustrations • Photo: Photo data or data that uses photos • CAD: Engineering drawing data - Scan: Data scanned by a scanner • Colorimetric: Data to be printed in colors as viewed on the screen - Custom: Data to be printed with special settings
(3) Click the [Advanced Color] button and specify the settings. (4) To configure color management using the Windows OS ICM, set "Image Type" to [Custom] in step (2). Then, click the [Windows ICM] checkbox so that the checkmark appears. (5) To configure "Source Profile" and other detailed color management tasks, select the desired settings from the menus.
macOS

(1) Select [Image Quality]. (2) Click the [Advanced] tab.
To use the macOS color management function, select the
[ColorSync] checkbox so that the checkmark √ appears. In this case, you cannot select "Image Type".
(3) Select [Image Type].
To configure color management settings, select the desired settings from the menus. To select a "CMYK Simulation" setting, select [Custom] in "Image Type", select the [CMYK Simulation] checkbox ( √ ), and then select the desired setting.
• Text: Data consisting mostly of text - Presentation: Data with many photos or illustrations • Photo: Photo data or data that uses photos • CAD: Engineering drawing data - Scan: Data scanned by a scanner • Colorimetric: Data to be printed in colors as viewed on the screen - Custom: Data to be printed with special settings
(4) Specify the settings.
FUNCTIONS TO COMBINE TEXT AND IMAGES
ADDING A WATERMARK TO PRINTED PAGES (WATERMARK)
This function adds faint shadow-like text as a watermark in the background of the printed image. The size and angle of the watermark text can be adjusted.
The watermark text can be selected from the previously registered text in the list. When necessary, you can enter text to create an original watermark.
![graph LR A["Document"] --> B["Output"] style A fill:#fff,stroke:#000 style B fill:#fff,stroke:#000](/content/2026/06/1367452/images/aca40f17fa35e9ea80f89f394a5740cd0308fd21a5ad50ede06fd7d91e438835.jpg)
Windows

(1) Click the [Stamp] tab. (2) Select [Watermark] from "Stamp" and click the [Settings] button. (3) Select the watermark to be used and click the [OK] button.
Click the [Edit] button to edit the font color and select other detailed settings.

If you want to create a new watermark, enter the text of the watermark in the text box and click the [Add] button.
macOS

(1) Select [Watermarks]. (2) Click the [Watermark] checkbox and configure watermark settings.
- Configure detailed watermark settings such as selection of the text.
- Adjust the size and angle of the text by dragging the slide bar.
PRINTING AN IMAGE OVER THE PRINT DATA (IMAGE STAMP)
This function prints a bitmap or JPEG image stored on your PC over the print data.
This function prints a frequently used image or an icon of your own creation as if it is stamped on the print data. The size, position, and angle of the image can be adjusted.
![graph TD A["Input Document"] --> B["Output Document"] B --> C{Error Message} C -->|Yes| D["End"] C -->|No| E["Error Message"] E --> F["Error Message"] F --> G["End"]](/content/2026/06/1367452/images/67104e81d01714b6492a92a850631effcbb97060d6ff407367e8715308e3a5ff.jpg)

This function is available in a Windows environment.
Windows

(1) Click the [Stamp] tab. (2) Select [Image Stamp] from "Stamp" and click the [Settings] button. (3) Select the image stamp to be used, and click the [OK] button.
- If an image stamp has already been stored, it can be selected from the menu.
- If you have not stored an image stamp, click the [Image File], select the file you wish to use for the image stamp, and click the [Add] button.
REGISTERING A CUSTOM IMAGE
This function registers images used as custom images from the printer driver to the machine.

• This function is available in a Windows environment. - This function can be used when the PCL6 printer driver is used.
Windows

(1) Click the [Detailed Settings] tab. (2) Click the [Custom Image Registration] button. (3) Select the registration type and name of the custom image.
When [Custom stamp] is selected in "Registered Type", a full-color, non-transparent stamp image is registered. When [Custom watermark] is selected, a single-color, transparent watermark image is registered.

If you have attempted to store multiple pages of data, only the first page will be stored.
OVERLAY A FIXED FORM ON THE PRINT DATA (OVERLAYS)
This function overlays data on a fixed form you have prepared.
By creating table rulings or a decorative frame in an application different from that of the text file and registering the data as an overlay file, an attractive print result can be easily obtained without the need for complex manipulations.
![graph TD A["XXXX\nXXX 1 100\nXXX 10 150\nXXX 0 120\nXXX 10 250"] --> B["XX\XXX\nXXX 1 100\nXXX 10 150\nXXX 0 120\nXXX 10 250"] B --> C["anabbbcc 1-2-3"] C --> D["..."] D --> E["anabbbcc 1-2-4"]](/content/2026/06/1367452/images/d4f2321c5384c2b8089343cfa3d0f83cd1b66a00b1282636db82c47a63bcbf91.jpg)

This function is available in a Windows environment.
Windows
Creating an overlay file

(1) Open the driver properties window from the application that is used for creating overlay data. (2) Click the [Stamp] tab. (3) Click the [Settings] button. (4) Click the [New] button and specify the name and folder to be used for the overlay file that you wish to create.
The file will be created when the settings are completed and printing is started.

- When printing is started, a confirmation message will appear. The overlay file will not be created until the [Yes] button is clicked.
- When you click the [Open] button, the existing overlay file is registered.
Printing with an overlay file

(1) Open the driver properties window from the application that is used for printing with an overlay file. (2) Click the [Stamp] tab. (3) Select an overlay file.
A previously created or stored overlay file can be selected from the menu.
ADDING THE NUMBER OF COPIES (COPIES STAMP)
You can add the number of copies to the header or footer of the print data. You can also set a copies number and print position.

This function is available in a Windows environment.

(1) Click the [Stamp] tab. (2) Click the [Copies Stamp] button. (3) Select the settings, and click the [OK] button.
PRINT FUNCTIONS FOR SPECIAL PURPOSES
PRINTING SPECIFIC PAGES ON DIFFERENT PAPER (DIFFERENT PAPER)
In a Windows environment
The front and back covers and specified pages of a document are printed on paper that is different from the other pages. Use this function when you wish to print the front and back covers on heavy paper, or insert colored paper or a different paper type at specified pages.
As necessary, paper can be inserted as insertion sheets where nothing is printed.
![graph TD A["Input Image"] --> B["Processing Section"] B --> C["Output Section 1"] B --> D["Output Section 2"] B --> E["Output Section 3"] B --> F["Output Section 4"] B --> G["Output Section 5"]](/content/2026/06/1367452/images/aa12d2c91750dc7d534302d57694b25fe96c44a4bbc29126b84247ebbdbf2a3d.jpg)
In a macOS environment
The front and back covers are printed using paper that is different from the other pages. This function can be used, for example, when you want to print only the front cover and last page on thick paper.
Windows

(1) Click the [Inserts] tab. (2) Select [Covers/Inserts] from [Inserts Option], and click the [Settings] button. (3) Select the paper insertion settings.
- Select the insertion position, paper source, and printing method from the corresponding menus.
- Click the [Add] button and your settings will appear in "Information".
- When you have finished selecting settings, click the [Save] button in "Favorites" to save the settings.

- When [Bypass Tray] is selected in "Paper Tray", be sure to select the "Paper Type" and load that type of paper in the bypass tray.
- When [Other Page] is selected for "Insert Position", specify the insert position by directly entering a page number. When "Printing Method" is set to [2-Sided Printing], the specified page and the next page after it will be printed on the front and reverse side of the paper, and thus an insert setting at a page printed on the reverse side will not be effective.
macOS
(1) Printer Features

(2) Feature Sets: Covers

(3)
Cover Page: Off

Paper Tray: Auto Select

Paper Type: Auto Select

Last Page: Off

Paper Tray: Auto Select

Paper Type: Auto Select


Low Toner
Cancel
(1) Select [Printer Features]. (2) Select [Covers]. (3) Select the cover insertion settings.
Select the print setting, paper tray, and paper type for the front and back covers.
ADDING INSERTS WHEN PRINTING ON TRANSPARENCY FILM (TRANSPARENCY INSERTS)
When transparency film is used for printing, this function prevents the sheets of transparency film from sticking together by inserting a sheet of paper between each sheet of film. As necessary, the same content as that printed on each sheet of transparency film is also printed on the corresponding sheet of inserted paper.
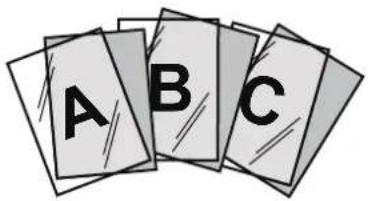
Windows
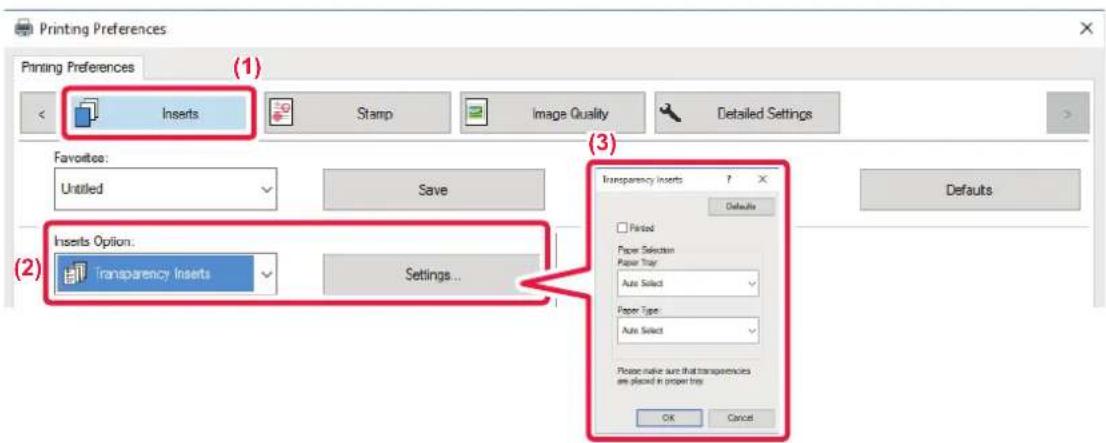
(1) Click the [Inserts] tab. (2) Select [Transparency Inserts] and click the [Settings] button.
Select the print setting, paper tray, and paper type for the front and back covers.
(3) Select the transparency insert settings.
When the [Printed] checkbox is selected to set to ☑, the same content as that printed on the transparency film is also printed on the insert. Select the paper source and type if needed.

Set the paper type of the bypass tray to [Transparency] and load transparency film into the bypass tray.
macOS

(1) Select [Printer Features]. (2) Select [Transparency Inserts] in "Feature Sets". (3) Select the transparency insert settings.
When [On (Printed)] is selected from "Transparency Inserts", the same content as that printed on the transparency film is also printed on the insert. Select the paper source and type if needed.

Set the paper type of the bypass tray to [Transparency] and load transparency film into the bypass tray.
INSERTING SEPARATOR PAGES BETWEEN JOBS OR COPIES
You can insert separator pages between jobs or the specified number of copies.
Job 1
Job 2


This function is available in a Windows environment.
Windows

(1) Click the [Finishing] tab. (2) Click the [Separator Page] button. (3) Changing the settings
- Select the paper tray and paper type from "Paper Selection", and specify the separator page position in "Insert Position". • To add a separator page each time printing of the set number of copies is completed, select [Per Copies] in "Insert Position".
- For example, if you are printing 10 copies and you select "5", a separator page will be added after the 5th copy and after the 10th copy.

When the bypass tray is selected, be sure to select the "Paper Type".
PRINTING A CARBON COPY (CARBON COPY)
This function prints an additional copy of the print image on paper that is of the same size but from a different paper tray. For example, if carbon copy print is selected when plain paper is loaded into tray 1 and colored paper is loaded into tray 2, a print result similar to a carbon copy slip is obtained with a single selection of the print command. If plain paper is loaded into tray 1 and recycled paper is loaded into tray 2 as necessary, selecting Carbon Copy simultaneously prints one copy for presentation and one copy as a duplicate.
![graph TD A["Computer"] --> B["Server"] B --> C["Output Format 1"] B --> D["Output Format 2"] B --> E["Output Format 3"]](/content/2026/06/1367452/images/7c95f2aa545dce89009e8326033104c2c97261d3745092a7ff1db9bf121d33b8.jpg)

This function is available in a Windows environment.
Windows

(1) Click the [Inserts] tab. (2) Select [Carbon Copy] from "Inserts Option" and click the [Settings] button. (3) Select the tray for the first copy from "Top Copy", and then select the tray for the carbon copy from "Carbon Copy".

When the bypass tray is selected, be sure to select the "Paper Type".
PRINTING TEXT ON TABS OF TAB PAPER (TAB SHIFT/TAB PAPER PRINT)
There are two methods of printing on the tabs of tab paper: "Tab Shift" and "Tab Paper Print".
Tab Shift
Create the text to be printed on tab paper in an application, and set the text shifting distance in [Print Position] on the [Layout] tab of the printer driver property window. The text will be printed on the tabs.
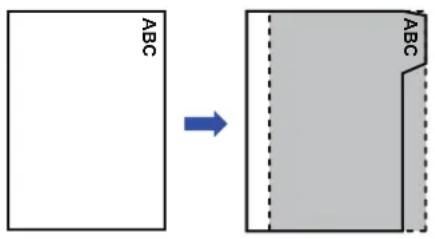
Tab Paper Print (for PCL6 only)
Tab sheets are printed while they are inserted between the desired pages.
Select [Tab Paper] in [Inserts Option] on the [Inserts] tab of the printer driver properties window, and enter the text that you want to print on the tabs. Specify the detailed settings such as the size of the tabs, the starting position, the distance between tabs, and the page numbers where tab sheets will be inserted.


- These functions are available in a Windows environment.
- Tab paper must be loaded into the bypass tray.
Windows
Tab Shift
When you have finished preparing the data to be printed on tab papers in an application, take the following steps:
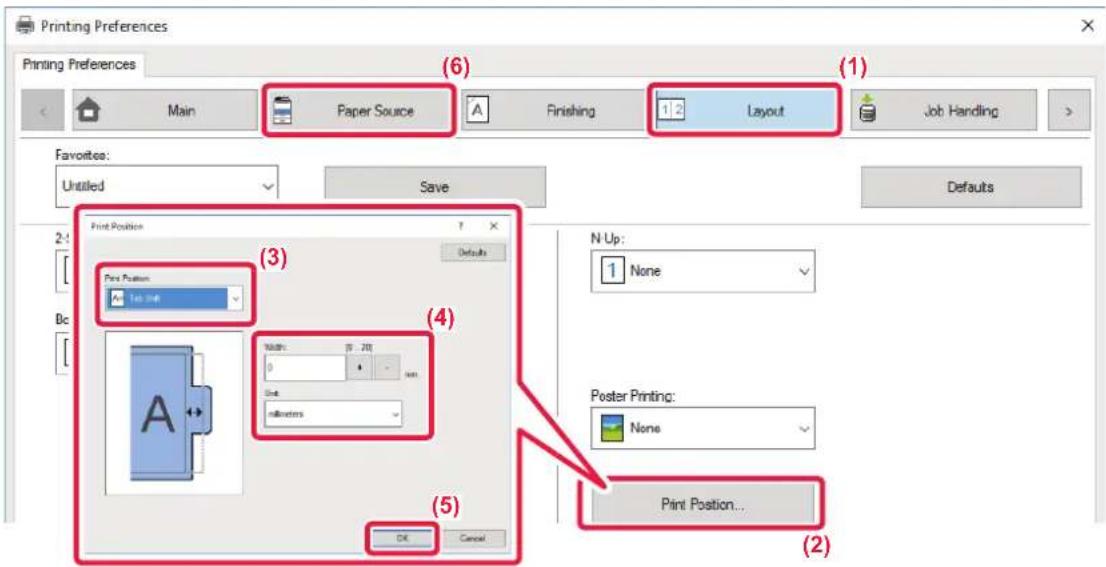
(1) Click the [Layout] tab. (2) Click the [Print Position] button. (3) Select [Tab Shift]. (4) Specify the distance of shifting the image by directly entering a value or by clicking the button. (5) Click the [OK] button. (6) Select the paper source and type.
Click the [Paper Source] tab, and select [Bypass Tray] in "Paper Tray" and [Tab Paper] in "Paper Type".

Set the paper type of the bypass tray to [Tab Paper] and load tab papers into the bypass tray.
Tab Paper Print (for PCL6 only)
Open the data into which you wish to insert tab paper, and then select the settings.
![Printing Preferences Printing Preferences (1) < Inserts Stamp Image Quality Favorites: Untitled Save Inserts Option: Tab Paper Settings... (2) (3) Tab Paper Favorites Details Inserts Position of the First Tab [0. 2540] 6.0 4 mm 13 Tab Width [5.20] Internal [0. 2540] 6.0 4 mm 52.0 Tab Length [0. 169.…](/content/2026/06/1367452/images/e55e6852b29d69b0ed098b33d3f65a1b8584f07ab1a2834ce876ed025ab3e79e.jpg)
(1) Click the [Inserts] tab. (2) Select [Tab Paper] from "Inserts Option", and click the [Settings] button. (3) Select the tab position settings.
For commercially available tab paper, use the existing settings such as [A4-5tab-D] in "Favorites". For other types of tab paper, the position of the first tab, the distance between tabs, and the horizontal and vertical dimensions of the tab can be directly entered or changed using the + - button. In addition, select the size of the tab paper from "Output Size".
(4) Select the page settings.
Specify the pages where you wish to insert tab paper and enter the text that you wish to print on the tabs. Also select the font and adjust the layout.

- Set the paper type of the bypass tray to [Tab Paper] and load tab papers into the bypass tray.
- The tab paper settings can be stored and a stored file can be opened from "Favorites".
TWO-SIDED PRINTING WITH SPECIFIC PAGES PRINTED ON THE FRONT SIDE (CHAPTER INSERTS)
This function prints specific pages on the front side of the paper.
When you specify a page (such as a chapter cover page) to be printed on the front side of the paper, it is printed on the front side of the next sheet even if it would normally be printed on the reverse side of the paper.


Example: When pages 4 and 8 are specified as page settings.
(4 has a reverse side, and 3 and 8 are blank on the reverse side.)

• This function is available in a Windows environment. - This function can be used when the PCL6 printer driver is used.
Windows

(1) Click the [Layout] tab. (2) Select the 2-Sided Printing.
For information on the "2-Sided Printing" setting, see "2-SIDED PRINTING (page 4-23)".
(3) Enter the page numbers of the initial pages of the chapters, separating the numbers with commas.
FOLDING PAPER FOR PRINTING (FOLD)
If a folding unit is installed, print paper can be folded.
For example, if A4 (8-1/2" × 11") and A3 (11" × 17") size print images are mixed, you can fold A3 (11" × 17") size paper to the A4 (8-1/2" × 11") size to adjust the width of the actual print paper to the A4 (8-1/2" × 11") size. When necessary, you can staple folded sheets.

To use the Half Fold and Saddle Fold (Staple) functions, you need to mount a saddle stitch finisher.
Types of paper folding functions
| Folding types | Print Side | Fold Orientation | Folding results Descrition | |
| Saddle Fold | Inside - | 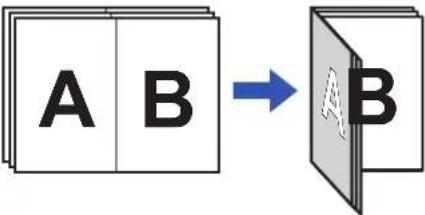 | Multiple sheets are collectively folded in the center. | |
| Outside - | 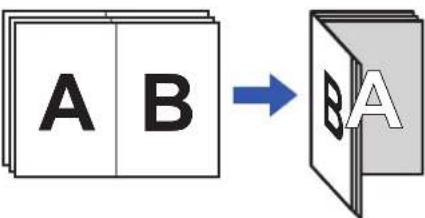 | |||
| Half Fold | Inside - |  | Paper is folded in the center.Copies are output sheet by sheet. | |
| Outside - |  | |||
| C-Fold | Inside | Open Right |  | For example, paper is folded in three so that it can be put into an envelope. Copies are output sheet by sheet. |
| Open Left |  | |||
| Outside | Open Right |  | ||
| Open Left | 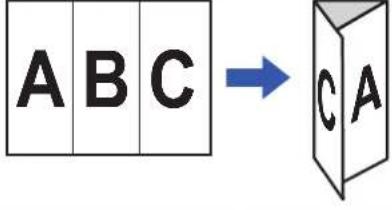 | |||
| Accordion Fold | - Open Right |  | For example, paper is folded in three so that it can be put into an envelope. Copies are output sheet by sheet. | |
| - Open Left |  | |||
| Z-Fold | - Open Right | 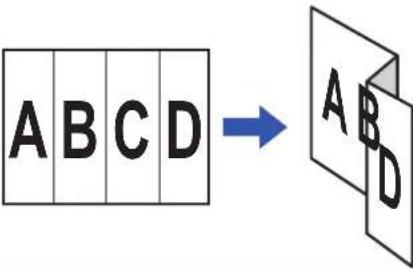 | For example, if A4 (8-1/2" × 11") and A3 (11" × 17") size print images are mixed, only the A3 (11" × 17") size paper is folded and changed to A4 (8-1/2" × 11") size paper. Copies are output sheet by sheet. | |
| - Open Left |  |

- When printing data in a pamphlet layout, the "Booklet" function can be used to conveniently fold and staple printed output to create a pamphlet. See "CREATE A PAMPHLET (BOOKLET/SADDLE STITCH) (page 4-33)".
- The Fold function cannot be used together with the Punch and Staple functions. However, when finisher (large stacker) or saddle stitch finisher (large stacker) is installed the Z-Fold function can be used together with the punch and staple functions when one of the following paper size is specified.
• B4, A3, 8K, Ledger (11" × 17")
- When a saddle stitch finisher (large stacker) is mounted, the Saddle Fold function folds five sheets every set. For example, if an original has 12 A4 size plain sheets, they are folded three times in total: 5 sheets + 5 sheets + 2 sheets. However, some types of paper reduce the number of sheets that are folded every set. For example, heavy paper is folded on a three-sheet basis.
- When a saddle stitch finisher is installed, the Saddle Fold function folds sheets one by one.
Windows
Folding

(1) Click the [Finishing] tab. (2) Select the folding method in "Fold", and click the [Settings] button. (3) Select the desired folding method.
Folding (Z-Fold)
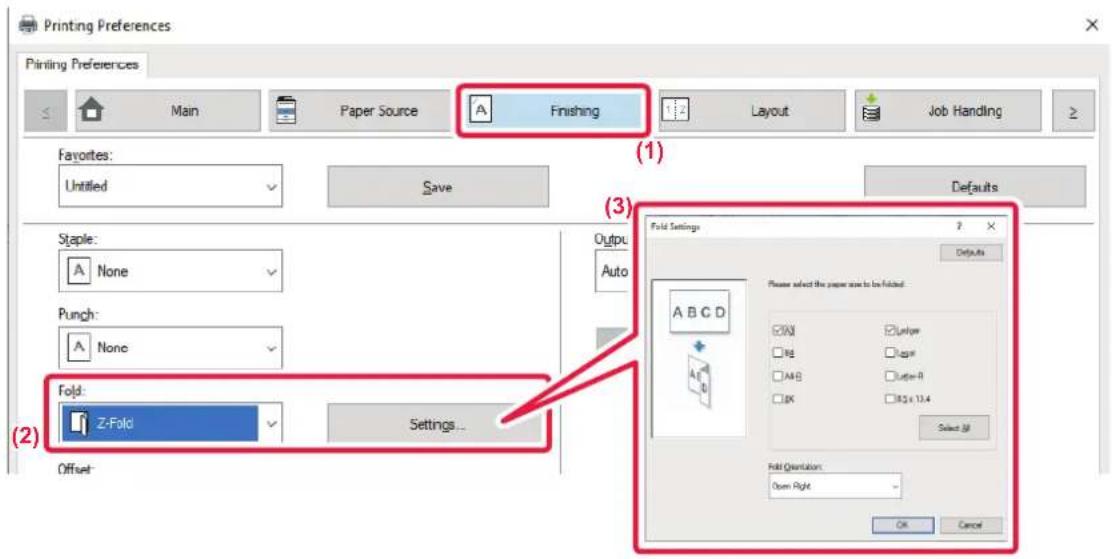
(1) Click the [Finishing] tab. (2) Select the folding method in "Z-Fold", and click the [Settings] button. (3) Select the paper to be folded and choose the opening direction.
macOS
Folding

(1) Select [Printer Features]. (2) Select [Folding]. (3) Select the desired folding method.
Folding (Z-Fold)
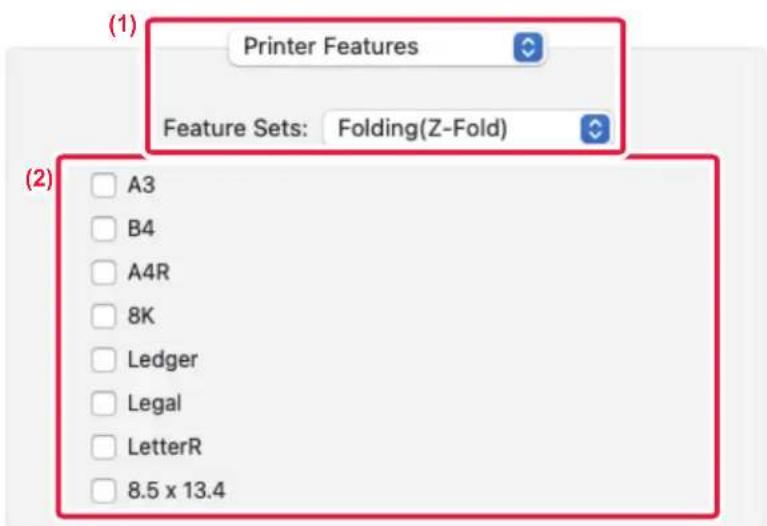
(1) Select [Printer Features], then select [Folding(Z-Fold)]. (2) Configure Fold settings.
INSERT PRESET DATA BEFORE OR AFTER EACH PAGE (PAGE INTERLEAVE)
This function inserts a preset data item into every page during printing.
You can easily create documents with opened page spread that is made up of text on the left-hand page and a memo space on the right-hand page.


- This function is available in a Windows environment.
- This function can be used when the PCL6 printer driver is used.

You have to create page data to be inserted in advance.
For the procedure for creating page data, see "Creating an overlay file (page 4-57)" in "OVERLAY A FIXED FORM ON THE PRINT DATA (OVERLAYS) (page 4-57)".
Windows

(1) Click the [Stamp] tab. (2) Click the [Settings] button. (3) Select [Page Interleave] from the "Printing Method". (4) Set the overlay data to be inserted and set its insertion position.
PRINT THE SAME IMAGE IN TILE PATTERN (REPEAT PRINT)
This function prints the same image in tile pattern on a sheet. This is useful for producing name cards and stickers.
![graph LR A["Input"] --> B["Output"] style A fill:#fff,stroke:#000 style B fill:#fff,stroke:#000](/content/2026/06/1367452/images/51dd15969e14872a551cbd0151c00ac471fdf4a9df863ffa386cb7f787c038be.jpg)

- This function is available in a Windows environment.
- This function can be used when the PCL6 printer driver is used.
Windows
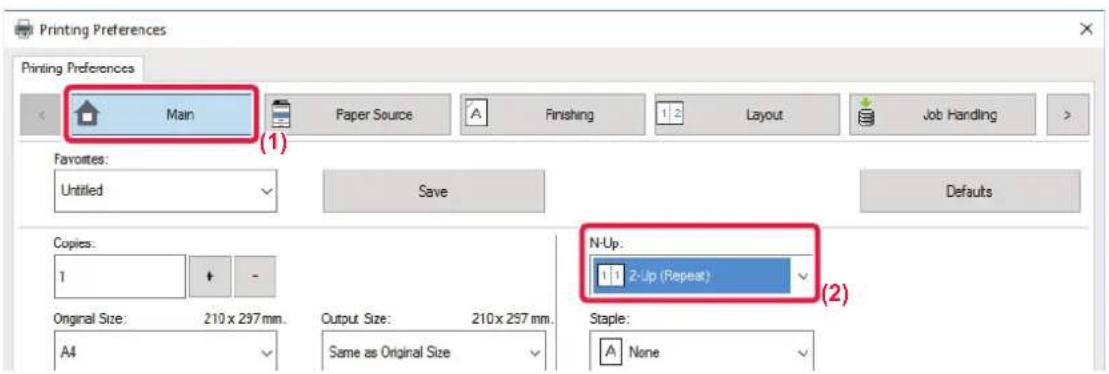
(1) Click the [Main] tab. (2) Select the repeat count in "N-Up".
PRINTING PATTERN DATA (HIDDEN PATTERN PRINT)
This function prints pattern data such as "DO NOT COPY" behind the print data.
If paper with pattern data is duplicated, the pattern data emerges in the background, which will help to prevent information from being leaked through unauthorized document copying.
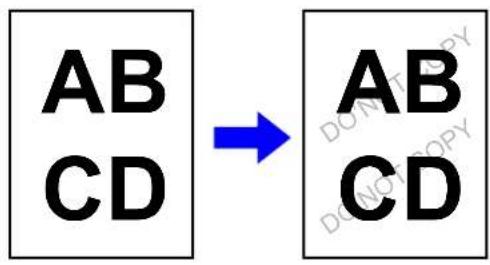

- This function is available in a Windows environment.
- This function can be used when the PCL6 printer driver is used.
Windows

(1) Click the [Stamp] tab. (2) Click the [Hidden Pattern] button. (3) Configure the settings for hidden pattern printing and click the [OK] button.

The hidden pattern printing function cannot be used when "Print Mode" is set to [1200 dpi].

- "Hidden Pattern" is a function provided for the purpose of deterring unauthorized printing. It does not guarantee the prevention of information leakage.
- Text may not be completely hidden on an output sheet with a pattern print under certain machine conditions. In "Settings (administrator)", select [Security Settings] → [Hidden Pattern Print Setting] → [Contrast] if this is the case.
- The hidden pattern may not emerge on copies with certain types of devices or under certain setting conditions used to copy an output sheet with a pattern print.
- When the color mode is set to [Black and White] or when it is set to [Automatic] and the original is recognized as black and white, a black background pattern is printed even if a cyan or magenta pattern is selected.
CHANGING THE RENDERING METHOD AND PRINTING JPEG IMAGES (USE DRIVER TO RENDER JPEGS)
In some situations, a document containing a JPEG image may not be printed correctly. This can be solved by changing the way the JPEG image is rendered.
When you print an original containing JPEG images, this function allows you to select whether the images are rendered in the printer driver or the machine.

• This function is available in a Windows environment. - When images are rendered in the printer driver, it may take time until the printing is completed.
Windows

(1) Click the [Detailed Settings] tab. (2) Click the [Other Settings] button. (3) Click the [Use driver to render JPEGs] checkbox so that appears. (4) Click the [OK] button.
MAXIMIZING THE PRINT AREA ON THE PAPER (PRINT AREA)
By maximizing the print area, you can print on the full paper size.

This function is available in a Windows environment.

Even when the print area is maximized, edges may be cut off.
Windows

(1) Click the [Detailed Settings] tab. (2) Click the [Other Settings] button. (3) Select [Maximum] from the "Printable Area". (4) Click the [OK] button.
PRINTING AT AN ENHANCED RESOLUTION (SMOOTHING)
Resolution enhancement techniques (RETs) are used to smoothen the outlines of images. The images are printed at a digitally enhanced resolution.

This function is available in a Windows environment.
Windows

(1) Click the [Image Quality] tab. (2) Select the [Smoothing] checkbox so that appears.
CONVENIENT PRINTER FUNCTIONS
USING TWO MACHINES TO PRINT A LARGE PRINT JOB (TANDEM PRINT)
To use this function, two machines that can perform tandem printing are required.
Two machines connected to the same network are used to run a large print job in parallel. This function reduces the printing time when you handle a large number of prints.
Example: Printing four sets of copies (2 sets of copies are executed by the primary unit and secondary unit each)
![graph TD A["Computer"] --> B["Data Storage Unit"] A --> C["File Storage Unit"] B --> D["Desktop"] C --> E["Desktop"] style A fill:#f9f,stroke:#333 style B fill:#ccf,stroke:#333 style C fill:#ccf,stroke:#333 style D fill:#dfd,stroke:#333 style E fill:#dfd,stroke:#333](/content/2026/06/1367452/images/1a7dd1bd554ec9c41d88b887e6b9171274d4c0d0f78506fd4612b31e4b0d2987.jpg)

This function is available in a Windows environment.

To use the tandem print function, the IP address of the secondary unit must be registered in the printer driver.
Windows

(1) Click the [Detailed Settings] tab. (2) Select [On] in "Tandem Print".

The tandem print function can be used only when the printer driver has been installed using "Custom Installation" with [LPR Direct Print (Specify Address/Auto Search)] selected and with the [Yes] checkbox selected for "Do you want to use Tandem Print function?".
SAVING AND USING PRINT FILES (DOCUMENT FILING)
This function stores a print job as a file on the machine's local drive, allowing the job to be printed from the touch panel when needed. The location for storing a file can be selected to prevent the file from being mixed together with files of other users.
- Hold Only
This setting is used to hold a print job on the machine's local drive without printing it.
- Hold After Print
This setting is used to hold a print job on the machine's local drive after it is printed.
- Sample Print
When a print job is sent to the machine, only the first set of copies is printed. After checking the contents of the first set of copies, you can print the remaining sets from the operation panel of the machine. This prevents the occurrence of excessive misprints.
![graph TD A["Desktop Computer"] -->|Blue Arrow| B["Server"] B -->|Blue Arrow| C["Document"] style A fill:#f9f,stroke:#333 style B fill:#ccf,stroke:#333 style C fill:#cfc,stroke:#333](/content/2026/06/1367452/images/4f0ab29c2759a2d8a07247683f3698c57ad4a77a5660ed3dab429dc23aaa1076.jpg)

- For the procedure for printing files stored on the machine's local drive, see "FILE PRINTING (page 7-24)" in "Document Filing".
- When printing from a PC, you can set a password (4 to 8 digits) to maintain the confidentiality of information in a stored file. When a password is set, the password must be entered to print data.
- [Document Filing] that can be set on the [Job Handling] tab can also be set on the [Main] tab.
Windows

(1) Click the [Job Handling] tab. (2) Select the function from the "Document Filing". (3) Select the folder for storing the file in "Stored to".
To enter a password (4 to 8 digit number), click the [PIN Code] checkbox so that the checkmark ☑ appears. To create a public PDF for PC browsing, select the [Create PDF for PC Browsing] checkbox (☑).

- When [Quick File] is selected, "Document Filing" will be set to [Hold After Print].
- When [Quick File] is selected, the password entered in "Document Filing" is cleared.
- If necessary, you can select the data format from CMYK and RGB for data to be stored in the machine. Click the [Other Settings] button on the [Detailed Settings] tab and select the format from "Rip Style".
- To store a file in a custom folder, you must first create the custom folder using [Document Operations] in "Settings (administrator)" → [Document Filing]. If you have set a password for the custom folder, enter the password (5 to 8 digit number) in "PIN Code" on the stored to screen.

If you have configured to always use the force document filing function in "Printing Policy" on the [Configuration] tab, you cannot clear the [Document Filing] checkbox.
macOS
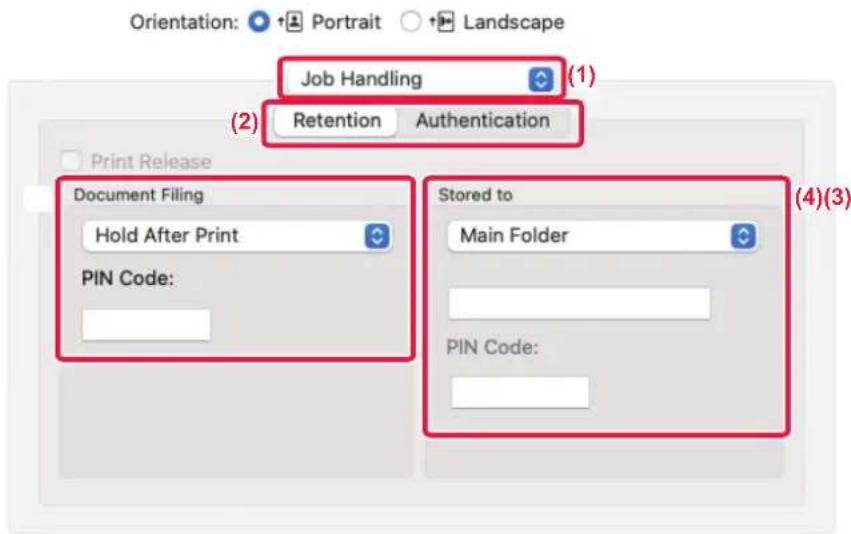
(1) Select [Job Handling]. (2) Select [Retention]. (3) Select how to save the print data in "Document Filing".
If necessary, you can enter a password (4 to 8-digit number).
(4) Select the folder to store the file in "Stored To".
If you selected [Custom Folder], enter the name of the custom folder where you want to save the file.

- When [Quick File] is selected, "Document Filing" will be set to [Hold After Print].
- When [Quick File] is selected, the password entered in "Document Filing" is cleared.
- If necessary, you can select the data format from CMYK and RGB for data to be stored in the machine. Select [Advanced1] in [Printer Features] and select the format from "Rip Style".
- To store a file in a custom folder, you must first create the custom folder using [Document Operations] in "Settings (administrator)" → [Document Filing]. If you have set a password for the custom folder, enter the password (5 to 8 digit number) in "PIN Code" on the folder selection screen.
AUTOMATICALLY PRINT ALL STORED DATA
When user authentication is enabled on the machine, all document filing (stored) print jobs of the user who logs in are automatically printed. After all jobs are printed, the stored jobs are deleted.

To use the Print All function, the following steps are necessary:
- In "Settings (administrator)", select [System Settings] → [Authentication Settings] → [Default Settings] and enable [Automatically print stored jobs after login].
- When executing document filing print, in addition to the user authentication information, click on the "User Name" checkbox to enter a user name.
Using this function in a Windows environment: PRINTING IN A WINDOWS ENVIRONMENT (page 4-4)
Using this function in a macOS environment: PRINTING IN A macOS ENVIRONMENT (page 4-15)

Files with a password and files that are protected by the document filing function of the machine will not be printed. Files in a folder (excluding My Folder) that has a password will also not be printed.
(1) Select [Job Handling]. (2) After logging in to the machine, a confirmation message will appear, and then tap the [OK] key.
The print files stored in the quick file folder, main folder, and custom folder will be printed automatically and then deleted.
PRINTING AND SENDING SIMULTANEOUSLY
This function prints data created in an application from the machine and simultaneously sends the data to the addresses stored in the machine.
This function allows you to complete two tasks, printing and sending, with one operation from the printer driver.

- Addresses must be stored in advance in the machine. For more information, see "STORING ADDRESSES THROUGH DIRECT ENTRY (page 6-19)".
- You must complete the preparatory steps for using each sending function of the machine. For more information, see the explanation of each sending function.

• This function is available in a Windows environment. - This function can be used when the PCL6 printer driver is used.
Windows

(1) Click the [Job Handling] tab. (2) Click the [Print and Send] button. (3) Select the [Print and Send] checkbox so that appears. (4) Click the [Get Address Book] button. (5) From the "Address Book" list, select the address to which you wish to send the data, and click the [Add] button to add the address to the "Destination" list.
- If you wish to send the data to all addresses, click the [Add All] button.
- To delete an address from the "Destination" list, select the address and click the [Delete] button. If you wish to delete all addresses, click the [Delete All] button.

- Up to 50 destinations can be specified. • Data cannot be sent to an Internet Fax address.
(6) Click the [OK] button.
The printer driver settings are applied to sending settings.
PRINTING WITHOUT THE PRINTER DRIVER
EXTENSION OF PRINTABLE FILES
When you do not have the printer driver installed on your PC, or when the application used to open a file that you wish to print is not available, you can print directly to the machine without using the printer driver.
The file types (and corresponding extensions) that can be printed directly are shown below.
| File Type | TIFF | JPEG | PNG | PCL | PS*1 | PDF/Encrypt PDF/Compact PDF*1 | DOCX, XLSX, PPTX*2 |
| Extension tiff, | tif | jpeg, jpg, jpe, jfif | png pcl, prn ps, prn pdf | docx, xlsx, pptx | |||
*1 On the BP-50C26/BP-50C31/BP-50C36/BP-50C45/BP-50C55/BP-50C65, the PS3 expansion kit is required. *2 On the BP-50C26/BP-50C31/BP-50C36/BP-50C45/BP-50C55/BP-50C65, the Direct print expansion kit is required.

- Even if the print result is black and white, the following types of print jobs will be counted as 4-color (Y (Yellow), M (Magenta), C (Cyan), and Bk (Black)) print jobs. When you want such jobs to be counted as black and white jobs, select the black and white printing option.
- When the data is created as color data.
- When the application treats the data as color data even though the data is black and white.
- When an image is hidden under a black and white image.
- Some files may not print correctly even if shown in the above table.
DIRECTLY PRINTING A FILE ON AN FTP SERVER
When an FTP server is configured, you can directly select and print files on the FTP server from the touch panel of the machine. This function eliminates the need for downloading the files from the FTP server to your PC and sending print jobs from the PC to the machine.

When you select a PDF file that has a password, you must enter the password in the job status screen to begin printing. PRINTING AN ENCRYPTED PDF FILE (page 4-102)
1
Tap the [File Retrieve] key.
2

Tap the [Select File from FTP to Print] key on the action panel.
3
Tap the key of the FTP server that you wish to access.
When a server is selected, entry of a user name and password may be necessary. Enter your user name and password, and tap the [Enter] key.
4
Tap the key of the file that you wish to print, and tap the [Choose Print Settings] key on the action panel.
- When printing multiple files, tap the keys of the files you wish to print, and tap the [Print] key on the action panel.
- The icon appears to the left of keys of files that can be printed.
- The icon is displayed to the left of keys of folders on the FTP server. To display a folder or a file in a folder, tap this key.
![SHARP BP-50C45 - Tap the key of the file that you wish to print, and tap the [Choose Print Settings] key on the action panel. - 1](/content/2026/06/1367452/images/07f1ac19895d74b7c52cef94c50631b1c605ff05bd4daf4d0dbb906ac785adae.jpg)
• A total of 100 keys of files and folders can be displayed. - Tap to move up one folder level. - When you move down a folder level by tapping a folder key, appears. Tap this key to return to the file or folder name selection screen. - Tap to switch to thumbnails. - Tap the [File or Folder Name] key to change the order of the files and folders displayed on the screen. Each time the key is tapped, the order changes between ascending and descending. - When you tap [Filter by File Type] in the action panel, the screen to specify the file format will be displayed. Select the file format you want to narrow down, and tap the [OK] key to display the list of files narrowed down to the selected file format. You can select other file formats in [Other]. - The file format that can be selected by narrowing down the list is always the same, regardless of the installation status of the peripheral device. There are some file formats that cannot be used depending on the status of the machine. When you select a file format that this machine does not support for printing, the [Start] key will be grayed out and you will not be able to print.
5
Select the print conditions.
- If you have selected multiple files in step 4, you can select only the number of prints.
- If you selected a PS or PCL file that includes print conditions in step 4, the print conditions in the file will be given priority.
6
Tap the [Start] key.
Printing begins after the selected file is downloaded.
Qualcomm® DirectOffice™ is a product of Qualcomm Technologies, Inc. and/or its subsidiaries. Qualcomm® is a trademark of Qualcomm Incorporated, registered in the United States and other countries. DirectOffice™ is a trademark of CSR Imaging US, LP, registered in the United States and other countries.
DIRECTLY PRINTING A FILE IN USB MEMORY
Files in a USB memory device connected to the machine are printed from the operation panel of the machine without using the printer driver.
When the printer driver of the machine is not installed on your PC, you can copy a file into a commercially available USB memory device and connect the device to the machine to print the file directly.

- Use FAT32, NTFS or exFAT format for USB memory device.
- When the format of the USB memory device is FAT32, use a 32 GB or less USB memory device.

When you select a PDF file that has a password, enter the password in the job status screen to begin printing. PRINTING AN ENCRYPTED PDF FILE (page 4-102)
1

Connect the USB memory device to the machine.
2

When the screen for selecting the action appears, tap [Print from external memory device (USB)].
If the screen does not appear, follow the steps below.
(1) Tap the [File Retrieve] key. (2) Tap the [Select File from USB Memory to Print] key on the action panel.
3
Tap the key of the file that you wish to print, and tap the [Choose Print Settings] key on the action panel.
- When printing multiple files, tap the keys of the files you wish to print, and tap the [Print] key on the action panel.
- The icon appears to the left of keys of files that can be printed.
- The icon is displayed to the left of keys of folders in the USB memory device. To display a folder or a file in a folder, tap this key.

• A total of 500 keys of files and folders can be displayed.
- Tap to move up one folder level.
- When you move down a folder level by tapping a folder key, appears. Tap this key to return to the file or folder name selection screen.
- Tap to switch to thumbnails.
- Tap the [File or Folder Name] key to change the order of the files and folders displayed on the screen. Each time the key is tapped, the order changes between ascending and descending.
4
Select the print conditions.
- If you have selected multiple files in step 3, you can select only the number of prints.
- If you selected a PS or PCL file that includes print conditions in step 3, the print conditions in the file will be given priority.
5
Tap the [Start] key.
Printing begins after the selected file is transferred.
6

Remove the USB memory device from the machine.
DIRECTLY PRINTING A FILE IN A NETWORK FOLDER
You can specify and print a file in a network folder from the touch panel of the machine.
Even if the network folder is not registered, you can access the network folder by directly entering or referring to the path to the folder in the workgroup.

To register a network folder:
In "Settings (administrator)", select [System Settings] → [Printer Settings] → [Direct Print Settings (Network Folder)].

When you select a PDF file that has a password, you must enter the password in the job status screen to begin printing. PRINTING AN ENCRYPTED PDF FILE (page 4-102)
Printing a file in the network folder you have configured in the machine's settings
1
Tap the [File Retrieve] key.
2
Tap the [Select File from Network Folder to Print] key on the action panel.
3
Tap the [Open Registered Network Folder.] key on the action panel and tap the network folder that you wish to access.
If a screen appears prompting you to enter a user name and password, check with your server administrator and enter the appropriate user name and password.

- When you tap the [Direct Input of Folder Path] key, a screen appears to allow direct input of the network folder path. For more information, see "Entering the network folder path directly (page 4-96)".
- When you select the workgroup, server, and network folder in sequence, you can access the network folder. For more information, see "Referring to the network folder path (page 4-96)".
4
Tap the key of the file that you wish to print, and tap the [Choose Print Settings] key on the action panel.
- When printing multiple files, tap the keys of the files you wish to print, and tap [Print] on the action panel.
- The icon appears to the left of keys of files that can be printed. The icon is displayed to the left of keys of folders in the network folder. To display a folder or a file in a folder, tap this key.
- When you tap [Filter by File Type] in the action panel, the screen to specify the file format will be displayed. Select the file format you want to narrow down, and tap [OK] key to display the list of files narrowed down to the selected file format. [Others] allows you to select other file types.
- The file formats that can be selected by narrowing down the list are always the same, regardless of the status of the peripheral device. Some file formats may not be available depending on the status of the unit.

- A total of 100 keys of files and folders can be displayed.
- Tap to move up one folder level. To return to the network folder selection screen, tap.
- Tap to switch to thumbnails.
- Tap the [File or Folder Name] key to change the order of the files and folders displayed on the screen. Each time the key is tapped, the order changes between ascending and descending.
- When you tap [Filter by File Type] in the action panel, the screen to specify the file format will be displayed. Select the file format you want to narrow down, and tap the [OK] key to display the list of files narrowed down to the selected file format.
You can select other file formats in [Other].
- The file format that can be selected by narrowing down the list is always the same, regardless of the installation status of the peripheral device. There are some file formats that cannot be used depending on the status of the machine. When you select a file format that this machine does not support for printing, the [Start] key will be grayed out and you will not be able to print.
5
Select the print conditions.
- If you have selected multiple files in step 4, you can select only the number of prints.
- If you selected a PS or PCL file that includes print conditions in step 4, the print conditions in the file will be given priority.
6
Tap the [Start] key.
Printing begins after the selected file is transferred.
Entering the network folder path directly
1

Tap [Direct Input of Folder Path] in step 3 of "Printing a file in the network folder you have configured in the machine's settings (page 4-94)".
2
Enter the path to the folder, user name and password.
Access the network folder.
For the procedure for printing, see steps 4 to 6 of "Printing a file in the network folder you have configured in the machine's settings".
Referring to the network folder path
1
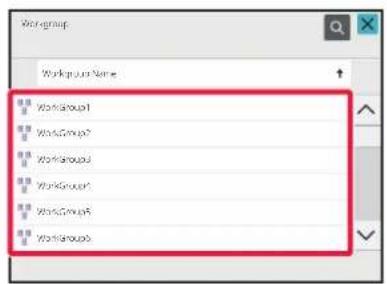
Tap the key of the workgroup that you wish to access in step 3 of "Printing a file in the network folder you have configured in the machine's settings (page 4-94)".
2
Tap the key of the server or computer that you wish to access.
If a screen appears prompting you to enter a user name and password, check with your server administrator and enter the appropriate user name and password.
3
Tap the key of the network folder that you wish to access.
Access the network folder.
For the procedure for printing, see steps 4 to 6 of "Printing a file in the network folder you have configured in the machine's settings (page 4-94)".

- Tap the 🔒 icon and enter a keyword to search for a workgroup, server, or network folder. To enter text, see "STORING ADDRESSES THROUGH DIRECT ENTRY (page 6-19)".
- Up to 100 workgroups, 100 servers, and 100 network folders are displayed.
- Tap to move up one folder level.
- To return to the workgroup selection screen, tap
DIRECTLY PRINTING FROM A COMPUTER
SUBMIT PRINT JOB
By selecting [Document Operations] → [Submit Print Job] from "Settings (Web version)" and specifying a file, you can directly print the file without using the printer driver.
In addition to a file on your PC, this procedure can be used to print any file that can be accessed from your PC, such as a file on another PC connected to the same network.
Files that can be printed are PDF*1, TIFF, JPEG, PCL, PS*1, XPS, DOCX*2, PPTX*2, and XLSX*2 files with extensions pdf*1, tif, tiff, jpeg, jpg, jpe, jff, pcl, ps*1, xps, docx*2, pptx*2, and xlsx*2. Available only if the MFP supports PostScript. Enter the password for the encrypted PDF data on Spool Queue of the Job Status screen.
*1 On the BP-50C26/BP-50C31/BP-50C36/BP-50C45/BP-50C55/BP-50C65, the PS3 expansion kit is required.
*2 On the BP-50C26/BP-50C31/BP-50C36/BP-50C45/BP-50C55/BP-50C65, the Direct print expansion kit is required.

- If you selected a PS or PCL file that includes print conditions, the print conditions in the file will be given priority.
- When user authentication is enabled in the settings of the machine, the print function may be restricted. For more information, ask your administrator.
Print Settings
Select print settings. Select the file you want to print in "Select File", select settings, and then click [Print].
| Item Description | |
| Copies Set the number of copies to be printed. | |
| Paper Size Set the print size. | |
| Orientation | Select portrait or landscape for the print orientation. |
| 2-Sided Print | Select one-sided printing, two-sided printing (booklet), or two-sided printing (tablet). |
| Output If printing by set, select the "Print per Unit" checkbox. | |
| Staple Select staple settings. | |
| Print B/W Print the file in black & white. | |
| Separator Page | Select to insert separator pages. Specify whether separator pages are to be added in front of or behind each set. Select the paper tray with the paper you want to use from the paper trays. |
| Fit To Page Print with the file expanded to the full paper size. | |
| Print What | BP-60C31/BP-60C36/BP-60C45/BP-70C31/BP-70C36/BP-70C45/BP-70C55/BP-70C65 or when the direct print expansion kit is installed on the BP-50C26/BP-50C31/BP-50C36/BP-50C45/BP-50C55/BP-50C65, select whether to print a sheet or to print the entire workbook when printing an Excel file. |
| Output Tray Select the output tray for the print job. | |
| Quick File Save the print data in the Quick File Folder of the machine. | |
| Print Glossy | Select this checkbox if the print job will be printed on glossy paper. |
| Fold | Set the paper fold. |
| Billing Code | Select the checkbox of the Billing Code to assign, and then enter the billing code. |
Qualcomm® DirectOffice™ is a product of Qualcomm Technologies, Inc. and/or its subsidiaries. Qualcomm® is a trademark of Qualcomm Incorporated, registered in the United States and other countries. DirectOffice™ is a trademark of CSR Imaging US, LP, registered in the United States and other countries.
FTP PRINT
You can print a file from your PC by simply dragging and dropping the file onto the FTP server of the machine.
Performing FTP print
Enter the IP address of this machine in the server name field of your FTP client application to connect to this machine. When you upload the file you want to print in the "Ip" folder on the FTP server of this machine, printing will start automatically.

- If you selected a PS or PCL file that includes print conditions, the print conditions in the file will be given priority.
- When user authentication is enabled in the settings of the machine, the print function may be restricted. For more information, ask your administrator.
E-MAIL PRINT
If you configure your e-mail account in the machine, the machine periodically checks your mail server and automatically prints received e-mail attachments without using the printer driver.

To perform e-mail print:
In "Settings (administrator)", select [System Settings] → [Printer Settings] → [E-mail Print Settings], and register your e-mail account. (Administrator rights are required.)
Performing e-mail print
Using your PC's e-mail software, specify the e-mail address of the machine in "Address" and send e-mail attached with a file to be printed.
Control commands can be entered in the message of the e-mail to specify the number of copies and print format.
Commands are entered in the format "command name = value" as shown in the following example.
| COPIES=2 |
| DUPLEX=LEFT |
| ACCOUNTNUMBER=11111 |
| PAPER=A4 |
As an example, the control commands include the following:
| Function Command name Values | ||
| Copies COPIES 1 to 9999 | ||
| Staple*1 | STAPLEOPTION | NONE, ONE, TWO, SADDLE, STAPLELESS |
| Punch*2 | PUNCH OFF, ON | |
| Punch holes PUNCH-NUMBER TWO, THREE, FOUR, FOURWIDE | ||
| Collate COLLATE OFF, ON | ||
| 2-sided Print DUPLEX TOP, LEFT, RIGHT, OFF | ||
| Account Number*3 | ACCOUNTNUMBER Number (5 to 8 digits) | |
| File Format*4 | LANGUAGE | PCL, PCLXL, POSTSCRIPT, PDF, TIFF, JPG |
| Paper PAPER | Paper that can be used (LETTER, A4, or others) | |
| Fold*5 | V-FOLD | OFF, INSIDE, OUTSIDE |
| Fold (Z-Fold)*6 | FOLD | OFF, A3, A4, B4, 8K, LEDGER, LEGAL, MXLEGAL, LETTER |
| Document Filing*7 | FILE | OFF, ON |
| FOLDERNAME | Up to 28 characters | |
| Quick File*7 | QUICKFILE | OFF, ON |
| Output | OUTTRAY | CENTER, RIGHT, FINISHER, TOPTRAY |
| B/W Print | B/W PRINT | OFF, ON |
| Fit Page | FITIMAGETOPAGE | OFF, ON |
| Print Glossy | MEDIATYPE | GLOSSY |
| Print Pages | PRINTPAGES | 1-2,5,9- |
| Print What*8 | ALLSHEETS | OFF, ON |
*1 Enabled only when an inner finisher, finisher, finisher (large stacker), saddle stitch finisher or saddle stitch finisher (large stacker) is installed. "STAPLELESS" is only enabled when an inner finisher, finisher (large stacker) or saddle stitch finisher (large stacker) that allows stapling without staples is installed. *2 Enabled only when a punch module is attached to the inner finisher, finisher, finisher (large stacker), saddle stitch finisher or saddle stitch finisher (large stacker). *3 Can be omitted except when authentication is by user number. *4 On the BP-50C26/BP-50C31/BP-50C36/BP-50C45/BP-50C55/BP-50C65, the PS3 expansion kit is required for POSTSCRIPT and PDF files. *5 When a Direct print expansion kit is installed. *6 When the folding unit is installed. *7 Only enabled when either "Document Filing" or "Quick File" is "ON". When both are "ON", this is disabled. *8 On the BP-50C26/BP-50C31/BP-50C36/BP-50C45/BP-50C55/BP-50C65, the Direct print expansion kit is installed.

- The mail text must be in a text format. If entered in Rich Text format (HTML), the commands will have no effect.
- If you enter "Config" in the mail text, a list of control commands is returned.
- If nothing is entered in the body text (message) of the e-mail, printing will take place according to the settings configured in "Settings (administrator)." → [System Settings] → [Printer Settings] → [Initial Status Settings]. If you selected a PS or PCL file that includes print conditions, the print conditions in the file will be given priority.
- Enter a file type only when you wish to specify the page-description language. Normally there is no need to enter a file type.
- Images such as the body of the received email and the logo in the signature may also be printed.
Qualcomm® DirectOffice™ is a product of Qualcomm Technologies, Inc. and/or its subsidiaries.
Qualcomm® is a trademark of Qualcomm Incorporated, registered in the United States and other countries.
DirectOffice™ is a trademark of CSR Imaging US, LP, registered in the United States and other countries.
Universal Print
Universal Print is a service that allows data from users and computers connected to Microsoft 365 to be printed on MFPs and printers via the Universal Print service operated by Microsoft. With Universal Print, MFPs and printers can be centrally monitored and configured using Azure Active Directory, rather than having to install a printer server and install printer drivers on each user's computer.
Users can also print to MFPs and printers connected to the Universal Print service via the cloud, without having to install a printer driver on each user's computer.

- This section describes the licenses and other information you will need to use Universal Print, assuming you have already prepared them. Contact Microsoft for more information on the licenses required to use Universal Print.
- For the BP-50C26/BP-50C31/BP-50C36/BP-50C45/BP-50C55/BP-50C65 the PS3 expansion kit is required.
BEFORE CONNECTING THE Universal Print SERVICE
Before connecting the machine to the Universal Print service, make sure that the machine is connected to the Internet beforehand and that [IPP INFRA] is enabled in the client port in "Port Control (page 9-181)" in the setting mode.
The machine must also be registered in Azure Active Directory and on the client PC before it can be used with the Universal Print service. For information on how to register with Azure Active Directory and client PCs, see "Universal Print Settings (page 4-101)".
Printing methods
Once registration is complete, you will be able to print from various Windows applications.
Open the print menu of each application, select the machine and print.
Printing permissions for invalid users
Prints from Universal Print are treated as jobs from "Other User". Therefore, if "Disable Printing by Invalid User (page 9-130)" is enabled in the setting mode, change it to disabled.
Also, if user authentication is enabled in the Sharp OSA application, the Sharp OSA application should allow invalid users to print.
Registering and deleting from the Universal Print service
You can register or delete the machine in "Universal Print Settings (page 4-101)".
Operation in power saving mode
Prints from Universal Print, as well as normal prints, can be made in the power saving mode, but will return and start printing as soon as the data is communicated to the machine.

When registered with Universal Print, the machine does not shift to "Low Power" in "Sleep Mode Power Level (page 8-5)."
Universal Print Settings
This function allows you to register or remove the device from the Azure Active Directory, check the current registration status, or enable or disable the Universal Print function.

To register with Azure Active Directory, launch the setting mode from your web browser.
Registering the machine with Azure Active Directory
To register the machine with the Universal Print Service, follow the procedure below from the web administration screen.
(1) Open "Universal Print Settings" in System Settings. (2) Check the printer name and click "Execute" under "Register with Universal Print".
You will be presented with a registration code and a URL for registering your code. The registration code is valid for 15 minutes. If you register after 15 minutes, you will have to start from the beginning.
(3) Click on the URL for code registration.
A separate window will open in which you can enter your registration code.
(4) Follow the instructions on the screen to enter the registration code. (5) View the Azure Active Directory Universal Print management screen in a web browser. (6) Select the registered printer and click [Share Printer]. (7) Click [Members], and then click [Add]. (8) Select a member or group from the list to use the machine.
To use the machine with the Universal Print service, continue with "Registering the machine with each client PC" below.
Registering the machine with each client PC
To register the machine with each client PC, follow the procedure below on your computer.
(1) Click the [Start] button, select [Settings] → [Accounts]. (2) Click [Connect] under [Access work or school].
If necessary, follow the prompts to sign in with your Microsoft 365 account.
(3) Click [Home], and then click [Devices]. (4) Click [Printers & Scanners], and then click [Add Printer or Scanner]. (5) Select a registered machine from the list.
When you have completed this operation, the unit is ready to be used on the client PC.
Delete from Azure Active Directory
This setting is available when the machine has already been registered for Universal Print Service.
To delete the machine from the Universal Print Service, in the web page (administrator), click [System Settings] → [Universal Print Settings], and then click the [Delete] key.
PRINTER JOBS
CHECKING THE PRINT STATUS
When you tap the job status display, jobs are displayed in a list. To check the status of a printer job, tap the [Print] tab. When you wish to stop or delete jobs or to perform priority processing, read "STORING ADDRESSES THROUGH DIRECT ENTRY (page 6-19)".

PRINTING AN ENCRYPTED PDF FILE
PDF encryption is used to protect a PDF file by requiring the entry of a password to print or edit the file. To directly print an encrypted PDF file on an FTP server or in a USB memory device, etc. connected to the machine, reset the password and begin printing.

- On the BP-50C26/BP-50C31/BP-50C36/BP-50C45/BP-50C55/BP-50C65, the PS3 expansion kit is required.
- To print an encrypted PDF file using the printer driver, enter the password when opening the file on your PC.
- Printing is not possible if you do not know the password for the encrypted PDF file.
- Encrypted PDF versions that can be directly printed are 1.6 (Adobe Acrobat 7.0) and earlier.
(1) Tap the Job status display and tap the [Print] tab. (2) Tap the [Spool] key.
When the list contains an encrypted PDF file, a message is displayed to indicate that an encrypted PDF file exists.
(3) Tap the print job key for the encrypted PDF file.

You cannot select multiple encrypted PDF files.
(4) Tap the [Enter Password for Encrypt PDF.] key on the action panel. (5) Enter the password (32 characters or less) and tap the [Yes] key.

When both a master password and a user password (which is used to open the file) have been set, enter the master password.
CHANGING TO ANOTHER PAPER SIZE AND PRINTING WHEN PAPER RUNS OUT
If printing stops because the machine ran out of paper, or if the size of paper specified in the printer driver is not loaded in the machine, a message will appear in the touch panel.
Printing will begin automatically when paper is loaded in the machine. If paper of the desired size is not immediately available, you can use paper that is set in a different tray.

If you changed to a different paper size, printing may not take place correctly; for example part of the text or image may run off the paper.
(1) Tap the job status display. (2) Tap the key of the job for which "Paper Empty" appeared. (3) Tap the [Reselect Paper] key on the action panel. (4) Tap the key for the tray containing the paper that you wish to use, and tap [OK].
PRINT RELEASE FUNCTION
PRINT RELEASE FUNCTION
When there are multiple machines that support the print release function on the same network, you can use the print release function to save data in the machine that is set as the primary unit and then print the saved data from secondary unit which you set (multiple secondary units can be set).
INTER-GROUP PRINTING
Primary and secondary units can be grouped.
Select a registered group, and use the print release function on the selected group.
Print release settings, such as Primary Unit, Secondary Unit, and group settings, can be configured from the web page (administrator) in [System Settings] → [Print Settings] → [Print Release Settings].
Print Release Settings (page 9-71)
![graph TD A["Computer"] -->|Saving a job in the primary unit.| B["Primary Unit 1*"] B --> C["Primary Unit 2*"] C --> D["Secondary Unit"] D --> E["Secondary Unit"] E --> F["Secondary Unit"] F --> G["Secondary Unit"] G --> H["Secondary Unit"] H --> I["Secondary Unit"] I --> J["Secondary Unit"] J --> K[…](/content/2026/06/1367452/images/73a6d711538180d7921f476b527b1622604a85f533c8684a128a84009ccf938f.jpg)
![graph TD A["Group 2 Primary Unit 1 Primary Unit 2 Primary Unit 3"] --> B["Secondary Unit Secondary Unit Secondary Unit Secondary Unit"] C["Group 2 Secondary Unit Secondary Unit Secondary Unit"] --> D["Secondary Unit Secondary Unit Secondary Unit Secondary Unit"] E["Group 2 Horizontal Base Line"] -->…](/content/2026/06/1367452/images/a66e6be5cd4002b68b4bd87fcfc916af1c3453cb0d83ce91542d90fd3e393f6b.jpg)
![graph TD A["Group 10"] --> B["Primary Unit 1"] A --> C["Primary Unit 2"] A --> D["Primary Unit 3"] A --> E["Secondary Unit Secondary Unit Secondary Unit"] B --> F["Server 1"] C --> G["Server 2"] D --> H["Server 3"] E --> I["Server 4"]](/content/2026/06/1367452/images/3c28396d4a9dd1fce82c0f25cf7ae2cc49261e60389d891efbf07b5b3a7e01df.jpg)
For models that support the print release function, and for the number of secondary units that can be controlled by one primary unit, consult your dealer.
* Available for models with local drive.

- Up to 3 primary units can be set.
- Up to 10 groups can be registered into Inter-Group Printing.
- When user authentication is enabled, only jobs of the logged-in user can be printed.
- In an environment with mixed models, some printer drivers may not produce the expected print result.
BEFORE USING THE PRINT RELEASE FUNCTION
This section explains settings that must be configured before you can use the Print Release function.
Settings required on the machine
To use the print release function, configure in setting mode (administrator).
Fixing the IP address of the machine
If the machine is used in a DHCP environment, the IP address of the machine may change. If this happens, you will not be able to send print release information to the machine.
Adding the print release icon to the Home screen
It is not necessary this setting, if already added the print release icon.
1

Tap [Edit Home] on the action panel.
2

Tap a place without a shortcut key in home edit mode.

Tap [Print Release].
Tap the [Edit End] key.
Home Edit Mode is exited and you return to the home screen.
Installing the printer driver of the primary unit
Install the printer driver of the primary unit on your computer. For the procedures for installing the printer driver, see the Software Setup Guide.
USING THE PRINT RELEASE FUNCTION
This section explains how to store jobs in the primary unit, and how to select and print jobs from a secondary unit.
Storing a job in the primary unit from your computer
When user authentication is enabled in the machine, you must enter your user information (login name, password, etc.) in the settings screen of the printer driver in order to print.* For explanations of the settings, see "PRINTER FUNCTION (page 4-3)".
* The user information that is required varies depending on the enabled authentication method. Check with the machine administrator for this information.

- Check the paper size and paper type used for printing.
- Select a paper size and paper type that are supported by the machine to be used.
- If you select a non-supported paper size or paper type, you may not be able to print.
In a Windows environment
1
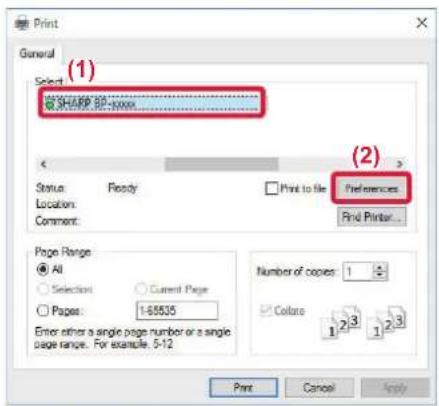
Open the printer driver properties window.
(1) Select the printer driver of the Primary Unit. (2) Click the [Preferences] button.
2
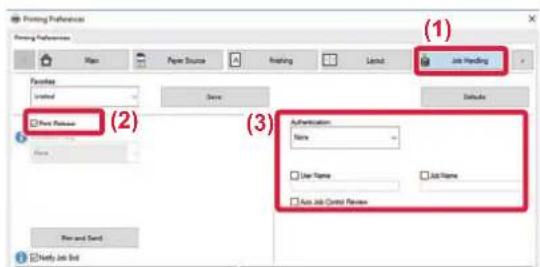
Configure the print release function.
(1) Click the [Job Handling] tab. (2) Select the [Print Release] checkbox. (3) Enter user information as needed.
For more information, see "Authentication Settings (page 9-125)".

- The print release function cannot be used at the same time as the document filing function.
- You can change the number of copies and color mode at the time of printing.
- If you select the [Print Release] checkbox in [Printing Policy] on the [Configuration] tab, that function will always be enabled and information on various functions will no longer appear in the print settings screen.
- If less than 10 MB is free in the storage area of the primary unit, the job will not be stored. Delete unneeded jobs and print again.
3

Select any print settings that are needed, and click the [OK] button.
4
Start printing.
In a macOS environment
1
In the application, select [Print] from the [File] menu. Make sure that the machine's printer name is selected.
2

Configure the print release function.
(1) Select [Job Handling]. (2) Click [Retention]. (3) Select the [Print Release] checkbox. (4) Click [Authentication] and enter your user information as needed.
If user authentication is not enabled, this step can be omitted.
For more information, see "Authentication Settings (page 9-125)".
(5) Select any other print settings that are needed, and click the [Print] button.

- The print release function cannot be used at the same time as the document filing function.
- You can change the number of copies and color mode at the time of printing.
- If less than 10 MB is free in the storage area of the primary unit, the job will not be stored. Delete unneeded jobs and print again.
3
Start printing.
Printing/deleting a job stored in the primary unit from a secondary unit
This section explains how to print and delete a stored job from a secondary unit.
1
Tap the [Print Release] key on the Home screen.
• A list of the jobs stored in the primary unit appears. - If the main power of the primary unit is not on, a message will appear and you will not be able to view the stored jobs.
2
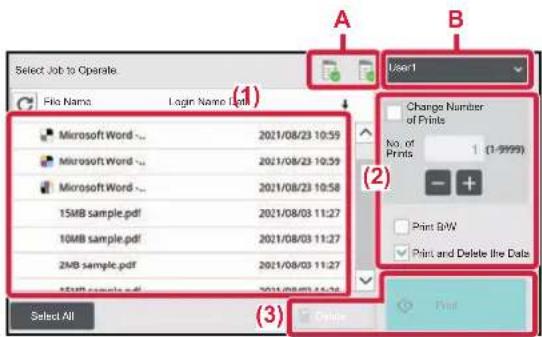
Print or delete the selected job.
(1) Tap the job you want to print or delete. The checkbox is selected √
You can select more than one job.
You can select all jobs with the [Select All] key.
(2) Configure print settings.
To delete the job from the primary unit after printing, select the [Print and Delete the Data] checkbox (This step is not necessary when only deleting the job.)
(3) Start printing or deleting.
If you are deleting the job, a confirmation screen will appear. Select [Yes] to delete.
A: Machine icon
The communication status with the primary unit is displayed. By tapping the machine icon, detailed information is displayed.
B: Pull-down menu
Appears when the MFP group collaboration function is used. By selecting another MFP group in this pull-down menu, the print jobs of the other MFP groups are displayed.

When user authentication is enabled, only the print jobs of the logged-in user appear.

- When the secondary unit is a monochrome machine, [B/W Print] does not appear and jobs saved in color are printed in monochrome.
- When the secondary unit is a color machine, jobs saved in monochrome are printed in monochrome even if the [B/W Print] checkbox is not selected.
- If you selected a setting such as stapling that cannot be executed because the secondary unit does not have the necessary option, the setting will be disregarded.
- If the selected job is a PS file, the job will only be printed if the secondary unit supports PS file printing.
APPENDIX
PRINTER DRIVER SPECIFICATIONS LIST
For information on the setting items, refer to printer driver Help.
PRINTER DRIVER SETTINGS SCREEN / REFERRING TO HELP (page 4-6)
| Function PCL6 PS | *1 | WindowsPPD*1 | macOSPS*1 | |||
| Tab(Windows) | Item Page | |||||
| Main | Copies | - | 1-9999 | 1-9999 | 1-9999 | 1-9999 |
| Collate - Yes Yes Yes Yes | ||||||
| Original Size 4-4 Yes Yes Yes Yes | ||||||
| Output Size | 4-4 | Yes | Yes | Yes | Yes | |
| Orientation 4-39 Yes Yes Yes Yes | ||||||
| Adjust to Paper Size | 4-25 | Yes | Yes | No | Yes | |
| Zoom 4-40 Yes | *2 | Yes Yes | *2 | Yes*2 | ||
| 2-Sided | 4-23 | Yes | Yes | Yes | Yes | |
| N-Up | 4-27 | 2, 4, 6, 8, 9, 16 | 2, 4, 6, 8, 9, 16 | 2, 4, 6, 9,16 | 2, 4, 6, 9,16 | |
| Staple*3 | 4-30 Yes | Yes Yes Yes | ||||
| Document Filing | 4-30 | Yes | Yes | No | Yes | |
| Color Mode | 4-20 | Yes | Yes | Yes | Yes | |
| Paper Source | Output Size | 4-4 | Yes | Yes | No | No |
| Paper Tray | 4-7 | Yes | Yes | Yes | Yes | |
| Paper Type | 4-7 | Yes | Yes | Yes | Yes | |
| Tray Status | 4-7 | Yes | Yes | No | No | |
| Force Letter-R for Letter Size | 4-30 | Yes | Yes | No | Yes | |
| Finishing | Staple *3 Saddle Stitch*4 | 4-30 Yes | Yes Yes Yes | |||
| Punch*3 | 4-30 Yes | Yes Yes Yes | ||||
| Fold*4 | 4-71 Yes | Yes Yes Yes | ||||
| Offset | - | Yes | Yes | Yes | Yes | |
| Output | - | Yes | Yes | Yes | Yes | |
| Separator Page | 4-65 | Yes | Yes | No | No | |
| Layout | 2-Sided | 4-23 | Yes | Yes | Yes | Yes |
| Chapter Inserts | 4-70 | Yes | No | No | No | |
| Booklet | 4-33 | Yes | Yes | Yes | Yes | |
| N-Up | Page No. | 4-27 | 2, 4, 6, 8, 9, 16 | 2, 4, 6, 8, 9, 16 | 2, 4, 6, 9,16 | |
| Repeat | 4-77 | Yes | No | No | ||
| Order 4-27 Yes Yes No Yes | ||||||
| Border 4-27 Yes Yes No Yes | ||||||
| Function | PCL6 PS | *1 | Windows PPD*1 | macOS PS*1 | |||
| Tab (Windows) | Item | Page | |||||
| Layout | N-Up | N-Up with cover | 4-27 Yes | No No No | |||
| 100% N-Up 4-27 | Yes Yes No | No | |||||
| Poster Printing | 4-37 | Yes | Yes | No | No | ||
| Print Position | Margin Shift 4-33 | 0mm to 30mm (0 inch to 1.2 inch) | 0mm to 30mm (0 inch to 1.2 inch) | 0mm to 30mm (0 inch to 1.2 inch) | 0mm to 30mm (0 inch to 1.2 inch) | ||
| Tab Shift 4-67 Yes | Yes Yes No | ||||||
| Custom 4-38 Yes | Yes Yes No | ||||||
| Job Handling | Print Release - Yes Yes No Yes | ||||||
| Document Filing | 4-85 | Yes | Yes | No | Yes | ||
| Create PDF for PC Browsing | 4-85 | Yes | No | No | No | ||
| Print and Send | 4-89 | Yes | No | No | No | ||
| Notify Job End - Yes Yes No No | |||||||
| Authentication | 4-9 | Yes | Yes | No | Yes | ||
| Inserts | Covers/Inserts | 4-60 | Yes | Yes | Yes*5 | Yes*5 | |
| Transparency Inserts | 4-63 | Yes | Yes | No | Yes | ||
| Carbon Copy | 4-66 | Yes | Yes | No | No | ||
| Tab Paper | 4-67 | Yes | No | No | No | ||
| Stamp | Watermark | 4-53 | Yes | Yes | Yes | Yes | |
| Image Stamp | 4-55 | Yes | Yes | No | No | ||
| Overlay | 4-57 | Yes | Yes | No | No | ||
| Hidden Pattern | 4-78 | Yes | No | No | No | ||
| Copies Stamp | 4-59 | Yes | No | No | No | ||
| Image Quality | Print Mode | 4-22 | Yes | Yes | Yes | Yes | |
| Graphics Mode | - | Yes | No | No | No | ||
| Bitmap Compression | - | Yes | Yes | No | No | ||
| Sharpness | 4-50 Yes | Yes Yes Yes | |||||
| Screening | 4-50 | Yes | Yes | Yes | Yes | ||
| Smoothing | 4-82 | Yes | Yes | No | Yes | ||
| Text To Black | 4-49 | Yes | Yes | No | No | ||
| Vector To Black | 4-49 | Yes | Yes | No | No | ||
| Toner Save *6 | - Yes Yes | Yes Yes | |||||
| Color Mode | 4-20 | Yes | Yes | Yes | Yes | ||
| Image Type | 4-50 | Yes | Yes | Yes | Yes | ||
| Advanced Color | 4-50 | Yes | Yes | Yes | Yes | ||
| Colour Adjustment | 4-48 | Yes | Yes | No | No | ||
| Font | - | Yes | Yes | No | No | ||
| Line Width | 4-42 | Yes | No | No | No | ||
| Boldness Adjustment | - | No | No | No | No | ||
| Detailed Settings | Mirror Image | 4-47 | No | Yes | Yes | Yes | |
| PS Error Information | - | No | Yes | Yes | No | ||
| PS Pass-Through | - | No | Yes | No | No | ||
| Job Compression | - | No | Yes | No | No | ||
| Tandem Print | 4-83 | Yes | Yes | No | No | ||
| Disable Blank Page Print | 4-29 | Yes | Yes | No | No | ||
| Custom Image Registration | 4-56 | Yes | No | No | No | ||
| Other Settings | |||||||
| • Input Resolution | - | Yes | Yes | No | No | ||
| • Shade Pattern | - | Yes | No | No | No | ||
| • Spool Data Format | - | Yes | Yes | No | No | ||
| • Printable Area | 4-81 | Yes | Yes | No | No | ||
| • Rip Style | 4-85 | Yes | Yes | No | Yes | ||
| • Duplex Style | 4-23 | Yes | Yes | No | No | ||
| • CMYK Image Enhancement | - | No | Yes | No | No | ||
| • Job Name Shortening | - | Yes | Yes | No | No | ||
| • Use driver to render JPEGs | 4-80 | Yes | Yes | No | No | ||
| • Expand | - | No | No | No | No | ||
| • Thicken Fine Lines | 4-43 | Yes | No | No | No | ||
| • Fine Text | - | Yes | Yes | Yes | Yes | ||
| • Fine Edge | - | No | No | No | No | ||
| • Text/Line control | 4-44 | Yes | Yes | Yes | Yes | ||
| • Text/Line knockout control | 4-44 | Yes | Yes | Yes | Yes | ||
| • Photo Image | - | Yes | Yes | Yes | Yes | ||
| • Image Enhancement | 4-44 | Yes | Yes | Yes | Yes | ||
| • Driver Setting Priority | - | Yes | Yes | No | No | ||
*1 On the BP-50C26/BP-50C31/BP-50C36/BP-50C45/BP-50C55/BP-50C65/BP-55C26, the PS3 expansion kit is required. The specifications of each function in Windows PPD and macOS PPD vary depending on the operating system version and the application. *2 The horizontal and vertical proportion cannot be set separately. *3 If a finisher or a saddle stitch finisher is installed (The punch module is also required in order to use the punch function.) *4 If a saddle stitch finisher is installed. *5 Only covers can be inserted. *6 This setting may not operate in some applications and operating systems.
SPECIFYING A BILLING CODE USING THE PRINTER DRIVER
You can enter a billing code using the printer of the machine.
For an overview of a billing code, refer to "BILLING CODE (page 8-25)".
Enable billing code
This setting is required only in the Windows environment. (Always usable under macOS environment)
1
Click the [Start] button, select [Settings] → [Device] → [Devices and Printers].

- In Windows 11, click the [Start] button, select [Bluetooth & devices] → [Printers & scanners].
- In Windows 8.1/Windows Server 2012, right-click the [Start] button, select [Control Panel] → [View devices and printers] (or [Devices and Printers]).
2
Right-click the printer driver icon of the machine and select [Printer Properties].
3

Specify a billing code
(1) Click the [Configuration] tab. (2) Click the [Printing Policy] button. (3) Set the [Billing Code] check box to (4) Click the [OK] button.
Windows
When printing starts, the billing code setting screen appears.
Enter the main code and sub code, and click the [OK] button.
To retain the specified billing code, set [Always Use This Billing Code] to


- You can click [Get Billing Code] to get the machine's billing code list and select the billing code from the list.
- If you have started printing without specifying a billing code, a use code is recorded in the job log.
macOS

(1) Select [Billing Code]. (2) Enter the main code and sub code.
AUTHENTICATION BY SINGLE SIGN-ON
When user authentication is used, you must enter your user name and password to print from a printer driver. The Single Sign-on function can be used when Active Directory authentication is used on both the machine and the computer.
When you use this function and print from the printer driver, the print job is sent to the machine using the authentication information that you used to log in to the computer. This allows easy printing of jobs from the printer driver without the need to enter your user name or password each time you print when user authentication is enabled.

Authentication by Single Sign-on requires that Active Directory authentication be performed on the machine and your computer. This can only be used when your computer is running Windows.
Settings
Active Directory must be enabled on the machine in advance. For information on Active Directory, refer to "ACTIVE DIRECTORY LINKING FUNCTION (page 8-24)". After enabling Active Directory, configure the settings below in the printer driver.
(1) Click the [Start] button, select [Settings] → [Device] → [Devices and Printers].
- In Windows 11, click the [Start] button, select [Bluetooth & devices] → [Printers & scanners].
- In Windows 8.1/Windows Server 2012, right-click the [Start] button, select [Control Panel] → [View devices and printers] (or [Devices and Printers]).
(2) Right-click the machine's printer driver icon and select [Printer Properties].
The printer properties appear.
(3) Click the [Configuration] tab. (4) Set the [Single Sign-on] checkbox to [Authentication Option].
![General Sharing Ports Advanced Colour Management Secu [Configuration] (3) Input Tray Options: Four Trays Output Tray Options: Saddle Stitch Finisher (Large Stack) Large Capacity Tray: None Punch Module: 3 Holes □ Job Separator □ Folding Unit ☑ Right Tray □ Single Sign-on Auto Configuration... Set Tr…](/content/2026/06/1367452/images/995968461c908ac562753bd4e7f9a83368ebd47fd389db2c8c2477015a353e8b.jpg)
For the authentication method, refer to "PRINTING WHEN THE USER AUTHENTICATION FUNCTION IS ENABLED (page 4-9)".
For the authentication method, refer to "PRINTING WHEN THE USER AUTHENTICATION FUNCTION IS ENABLED (page 4-9)".
(2) In [Authentication], select [Single Sign-on].
Single Sign-on authentication is also possible from the Job Handling dialog box and the User Authentication dialog box.

- Single Sign-on authentication is also possible from the Job Handling dialog box and the User Authentication dialog box.
- When Single Sign-on is enabled, [Print and Send] cannot be used.
- If you logged in to the machine in advance before using Single Sign-on, you will have the permissions of the user account you used to log in. If you use Single Sign-on without logging in to the machine, the user permissions will be those of "User". This may limit the functions that you can use.
- If Single Sign-on is used without logging in to the machine, the user name in the job log will be the name set by the printer driver. If the user name is not set by the printer driver, the user name in the job log will be the computer login name.
BEFORE USING THE MACHINE AS A FAX ..... 5-3
FAX MODE 5-6
EASY MODE 5-6
NORMAL MODE 5-7
NORMAL MODE 5-7
USING A TRANSMISSION LOG TO RESEND ..... 5-20
SENDING BY CHAIN DIALLING 5-22
BASIC TRANSMISSION METHODS
BASIC TRANSMISSION METHODS 5-23
FAX TRANSMISSION METHODS 5-23
ORIGINAL ORIENTATION....5-25
AUTOMATIC REDUCTION OF THE TRANSMITTED IMAGE 5-26
TRANSMITTABLE ORIGINAL SIZES 5-26
THE SIZE OF THE PLACED ORIGINAL 5-26
WHEN THE LINE IS BUSY 5-27
WHEN A COMMUNICATION ERROR OCCURS ..... 5-27
FAX DEST. CONFIRMATION MODE 5-28
CHECKING THE IMAGE TO BE TRANSMITTED ..... 5-29
FAX TRANSMISSION METHODS 5-30
USING THE AUTOMATIC DOCUMENT FEEDER FOR TRANSMISSION 5-30
USING THE AUTOMATIC DOCUMENT FEEDER FOR FAXING IN DIRECT TX MODE 5-31
USING THE DOCUMENT GLASS FOR TRANSMISSION 5-33
USING THE DOCUMENT GLASS TO SEND A FAX IN DIRECT TX MODE 5-35
TRANSMISSION USING THE SPEAKER ..... 5-37
SENDING THE SAME FAX TO MULTIPLE DESTINATIONS (BROADCAST TRANSMISSION)....5-38
RESENDING TO UNSUCCESSFUL BROADCAST TRANSMISSION DESTINATIONS....5-41
SENDING A FAX DIRECTLY FROM A COMPUTER (PC-Fax)....5-42
DELETING A TRANSMISSION LOG....5-42
SET THE SCANNING OF THE ORIGINALS .....5-43
AUTOMATICALLY SCANNING BOTH SIDES OF AN ORIGINAL (2-Sided Original)....5-43
AUTO DETECTION....5-44
SPECIFYING THE ORIGINAL SCAN SIZE IN PAPER SIZE 5-45
SPECIFYING THE ORIGINAL SCAN SIZE USING NUMERIC VALUES 5-47
STORING FREQUENTLY USED ORIGINAL SIZES ...5-49
SPECIFYING THE SEND SIZE OF THE IMAGE .....5-53
CHANGING THE EXPOSURE .....5-55
CHANGING THE RESOLUTION ....5-56
FAX RECEPTION
RECEIVING A FAX 5-57
RECEIVING A FAX AUTOMATICALLY .....5-57
RECEIVING A FAX MANUALLY....5-59
PRINTING RECEIVED DATA 5-60
PRINTING A PIN CODE-PROTECTED FAX (Hold setting for received data print). 5-60
PRINTING RECEIVED DATA AT A SPECIFIED TIME 5-61
CHECKING THE IMAGE BEFORE PRINTING.....5-62
FORWARDING RECEIVED DATA .....5-64
FORWARDING RECEIVED FAXES (FAX DATA FORWARD)....5-64
FORWARDING RECEIVED DATA TO PRESET DESTINATIONS (INBOUND ROUTING SETTINGS) .. .5-66 SAVING RECEIVED FAXES TO THE MACHINE'S
STORAGE (INBOUND ROUTING)....5-70
FORWARDING RECEIVED DATA MANUALLY.....5-71
SAVING RECEIVED DATA....5-73
OTHER FUNCTIONS
STORING FAX OPERATIONS (PROGRAM) 5-75
OPERATING FAX TRANSMISSION AND RECEPTION
REMOTELY 5-77
CALLING A FAX MACHINE AND INITIATING RECEPTION (POLLING) 5-77
INITIATING POLLING RECEPTION MANUALLY.....5-79
SENDER-RELATED FEATURES ....5-80
ADDING YOUR SENDER INFORMATION TO FAXES (FAX OWN NUMBER SENDING)....5-80
TEMPORARILY CHANGING THE SENDER INFORMATION (OWN NAME SELECT)....5-81
ASSUMING A SPECIFIC USAGE 5-83

CHANGING THE PRINT SETTINGS FOR THE
TRANSACTION REPORT (TRANSACTION
REPORT) 5-83
POLLING MEMORY FUNCTIONS .... 5-85
SENDING A FAX WHEN ANOTHER MACHINE POLLS
YOUR MACHINE (POLLING MEMORY) 5-85
RESTRICTING POLLING ACCESS (POLLING
SECURITY SETTING) 5-85
SCANNING A DOCUMENT INTO POLLING
MEMORY 5-86
CHECKING THE DOCUMENT IN THE PUBLIC
BOX 5-87
DELETING A DOCUMENT FROM THE PUBLIC
BOX 5-88
PERFORMING F-CODE COMMUNICATION
F-CODE COMMUNICATION....5-89
F-CODE COMMUNICATION 5-89
CREATING MEMORY BOXES IN THE MACHINE FOR
F-CODE COMMUNICATION 5-90
F-CODE DIALLING 5-91
F-CODE CONFIDENTIAL TRANSMISSION ..... 5-91
CONFIDENTIAL TRANSMISSION USING
F-CODES 5-92
CHECKING FAXES RECEIVED BY F-CODE
CONFIDENTIAL RECEPTION 5-93
POLLING RECEPTION USING F-CODES 5-94
SCANNING A DOCUMENT INTO A MEMORY BOX
FOR F-CODE POLLING TRANSMISSION ..... 5-96
CHECKING THE DOCUMENT IN THE F-CODE
MEMORY POLLING BOX 5-98
DELETING A DOCUMENT STORED FOR F-CODE
POLLING TRANSMISSION 5-99
RELAY REQUEST TRANSMISSION USING
F-CODES 5-100
RELAY BROADCAST TRANSMISSION USING
F-CODES 5-102
USING AN EXTERNAL TELEPHONE
CONNECTING AN EXTERNAL TELEPHONE ..... 5-103
CONNECTING AN EXTERNAL TELEPHONE.....5-103
RECEIVING A FAX AFTER ANSWERING A CALL ON
THE EXTERNAL TELEPHONE (REMOTE
RECEPTION) 5-104
MAKING AND RECEIVING PHONE CALLS ..... 5-104
CHECK THE COMMUNICATION STATUS
FAX JOBS....5-105
COMPLETED FAX TRANSMISSION/RECEPTION
JOBS 5-105
CHECKING IMAGE SENDING ACTIVITIES....5-106
PRINTING IMAGE SENDING ACTIVITY
REPORTS 5-106
INFORMATION APPEARING IN THE RESULT
COLUMN 5-106
BEFORE USING THE MACHINE AS A FAX
BEFORE USING THE MACHINE AS A FAX
To use the machine as a facsimile, connect the telephone line, and set the telephone line type.

The facsimile expansion kit is required in order to make use of fax functionality.
1
Connecting to the telephone line.
Insert the plug on one end of the telephone line cord into the telephone line socket (LINE) of the machine as shown until it clicks, and insert the other plug into a wall telephone socket until it clicks.

In some countries, an adaptor is required to connect the telephone line cable to the wall telephone socket, as shown in the illustration.
![graph TD A["Wall socket"] --> B["Adaptor"] C["For United Kingdom, Malaysia"] --> D["Adaptor"] E["For Australia"] --> F["Adaptor"] G["For New Zealand"] --> H["Adaptor"] D --> I["Line"] F --> I H --> I](/content/2026/06/1367452/images/d96b1f8ea41195e34ab9e7324a3137b3d738c7ad931078e7f426b651c31764cd.jpg)

If the connection cable is not properly connected, "Sending has failed. Please check network connection." will appear when you attempt to send a fax. Properly connect the connection cable.
2
Make sure the main power switch is in the " | " position.
When the main power indicator is lit up, the main power is in the " | " position. If the main power indicator is not lit up, turn the main power switch to the " | " position and press the [POWER] button on the operation panel. TURNING ON THE POWER (page 1-10)

When "Settings (administrator)" → [System Settings] → [Image Send Settings] → [Fax Settings] → [Condition Settings] → [Auto Wake Up Print] is enabled, even if the power to the machine is turned off (the main power switch is on), when a fax is received, the machine will automatically turn on and output the received data. When [Auto Wake Up Print] is disabled and the [Power] button is unlit, the received data is stored in memory in the machine and will not be output until the power is turned on.

If the fax function will be used, and in particular if reception or timer transmission will take place at night, do not turn the main power off.
3
Setting the telephone line type.
The machine's dial mode setting must be set to match the type of telephone line you are using.
* If the setting is incorrect, it may result in dialling failures or cause calls to be made to the wrong destination.

- If you want to set the type of telephone line automatically
In "Settings (administrator)", select [System Settings] → [Image Send Settings] → [Fax Settings] → [Default Settings] → [Dial Mode Setting], and tap the [Auto Select] key.
- If necessary, you can set the type of telephone line manually.
•This setting can only be activated in Canada.
- When you connect to a digital line When Digital Line Network is enabled, the send level will be 15 dB or less when you connect to a digital line. In "Settings (administrator)", select [System Settings] → [Image Send Settings] → [Fax Settings] → [Default Settings] → [Digital Line Network].
4
Checking the date and time.
Verify that the correct date and time are set in the machine.

To set the date and time of the machine:
In "Settings", select [System Settings] → [Common Settings] → [Device Control] → [Clock Adjust].
5
Storing the sender fax number.
Store a sender name in [Sender Name] and a fax number in [Fax No.]. Be sure to configure this information, as it is required for communication.

To store the sender's name and address:
In "Settings (administrator)", select [System Settings] → [Image Send Settings] → [Common Settings] → [Own Number and Name Set] → [Sender Data Registration].
Storing destination addresses for each scan mode in the address book.
When using fax, it is convenient to previously store addresses in the address book.
For how to use the address books and how to store addresses, see the following item.
ADDRESS BOOK (page 6-14)
STORING ADDRESSES THROUGH DIRECT ENTRY (page 6-19)
STORING ADDRESSES THROUGH GLOBAL ADDRESS SEARCH (page 6-20)
STORING ADDRESSES FROM FAX OR IMAGE SEND LOGS (page 6-22)
STORING GROUPS (page 6-24)
FAX MODE
Fax mode has two modes: easy mode and normal mode.
Easy mode is limited to frequently used functions that allow you to smoothly perform most fax jobs.
If you need to select detailed settings or special functions, use normal mode. All functions can be used in normal mode.
EASY MODE
Easy mode makes it easy to select basic settings for fax.
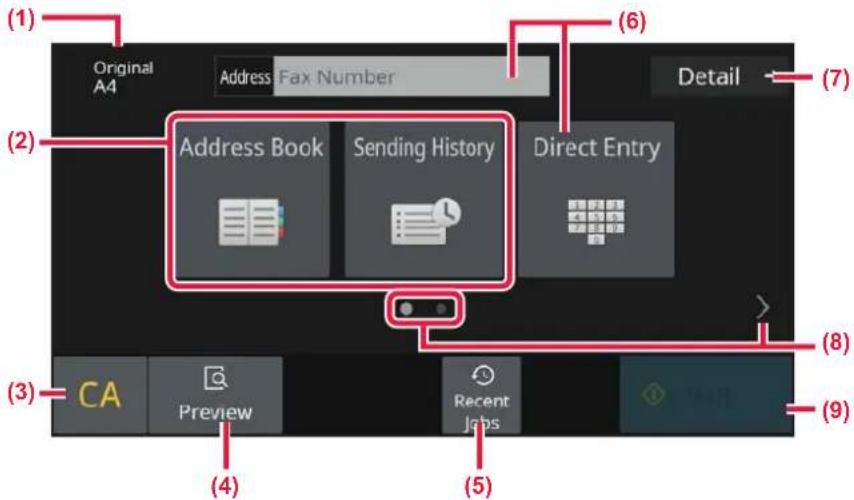
(1) Show the size of the placed original.
(2) Select an address.
SPECIFYING THE ORIGINAL SCAN SIZE IN PAPER SIZE (page 5-45) SPECIFYING THE ORIGINAL SCAN SIZE USING NUMERIC VALUES (page 5-47)
(3) Reset the address and settings.
(4) Scans the original for preview.
PREVIEW SCREEN (page 2-11)
(5) Recently used job setting can be loaded. ▶ OPERATION PANEL (page 1-7)
(6) Tap this key to display the numeric keys.
(7) Change to normal mode. ▶ NORMAL MODE (page 5-7)
(8) Change the function display. (9) Immediately starts sending a fax.
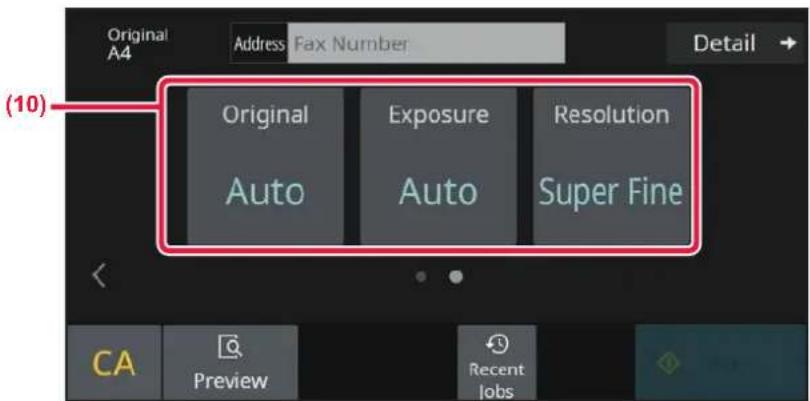
(10) Select function to be set up.
You can select these functions in easy mode.
- SET THE SCANNING OF THE ORIGINALS (page 5-43) • CHANGING THE EXPOSURE (page 5-55) • CHANGING THE RESOLUTION (page 5-56)

• To select a function in easy mode:
In "Settings", select [System Settings] → [Common Settings] → [Operation Settings] → [Easy Mode Settings] → [Easy Fax].
• To cancel the warning message displayed when switching from easy mode to normal mode:
In "Settings (administrator)", select [System Settings] → [Common Settings] → [Operation Settings] → [Easy Mode Settings] → [Display a Confirmation Message when Selecting "Detail" in Easy Modes] to disable this setting.
NORMAL MODE
Normal mode lets you select any function setting that can be used for fax.

(1) Tap to display the numeric keys. (2) Used to display the address book and enter a destination. (3) Used to change fax settings. (4) Displays the list of setting keys. Frequently used [Others], programs, and other settings can be registered. (5) Check the current settings. (6) Displays the list of keys other than the function keys indicated above.
(7) Displays the sizes of the original and the data to send. (8) Enter Fax No. (9) Finds an address. (10) Displays functions available in fax mode. (11) Scans the original for preview. PREVIEW SCREEN (page 2-11) (12) Reset the address and settings. (13) Immediately starts sending a fax. (14) Connects a line before starting sending a fax.
SELECTING FAX MODE
Change the fax mode to other mode as explained in CHANGING MODES (page 2-10).
[R] KEY
When the machine is connected to a PBX, the "PBX Setting" can be enabled to automatically connect to the outside line each time you dial normally. When the PBX setting is enabled, the [R] key appears in the base screen. To dial a number inside your PBX, touch the [R] key before dialling to temporarily cancel the "PBX Setting".
In Easy mode In Normal mode

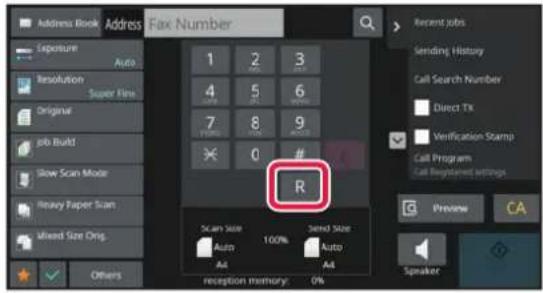
![SHARP BP-50C45 - [R] KEY - 3](/content/2026/06/1367452/images/0d0e68b34b34cf8d787f34d165c0f00ead56ba2f716c8213361ab3e81a6d4017.jpg)
• This setting can only be activated in Germany. - The [R] key can be included in a fax number stored in a one-touch key. - When the [Speaker] key is touched, the "PBX Setting" is temporarily cancelled and the [R] key does not appear. - When the [R] key is touched before dialling, an F-code (sub-address and passcode) cannot be used. Likewise, a one-touch key in which an F-code (sub-address and passcode) is stored cannot be used.
![SHARP BP-50C45 - [R] KEY - 4](/content/2026/06/1367452/images/c910422bda38047bd094c14f8942d092e0225acb5298ab7c00736d945a5263dc.jpg)
System Settings (Administrator): PBX Setting
This is used to enable PBX Setting.
This section explains the basic steps for sending a fax.
1

Place the original.
Place the original in the document feeder tray of the automatic document feeder, or on the document glass. AUTOMATIC DOCUMENT FEEDER (page 1-30) DOCUMENT GLASS (page 1-34)
2
Enter the destination fax number.
Tap the numeric keys to enter the destination number directly, or search and retrieve the address book or number.
In Easy mode • ENTERING A DESTINATION NUMBER USING THE

NUMERIC KEYS (page 5-11)
• RETRIEVING A DESTINATION FROM AN ADDRESS BOOK (page 5-12) • USING A TRANSMISSION LOG TO RESEND (page 5-20) • RETRIEVING A DESTINATION FROM A MOBILE ADDRESS BOOK (page 5-18)
In Normal mode • ENTERING A DESTINATION NUMBER USING THE

NUMERIC KEYS (page 5-11)
• RETRIEVING A DESTINATION FROM AN ADDRESS BOOK (page 5-12) • USING A SEARCH NUMBER TO RETRIEVE A DESTINATION (page 5-15) • RETRIEVING A DESTINATION FROM A GLOBAL ADDRESS BOOK (page 5-16) • RETRIEVING A DESTINATION FROM A MOBILE ADDRESS BOOK (page 5-18) • USING A TRANSMISSION LOG TO RESEND (page 5-20)
3
Configure the settings.
Specify the original scan size, exposure, resolution, etc.
If necessary, you can refer to the following functions for the setting.
In Easy mode
• SCANNING ORIGINALS (page 6-131) • CHANGING THE EXPOSURE (page 5-55) • CHANGING THE RESOLUTION (page 5-56)
In Normal mode
• SCANNING AND SENDING ORIGINALS COLLECTIVELY (page 6-97)
• SCANNING ORIGINALS (page 6-131) • AUTOMATICALLY SCANNING BOTH SIDES OF AN ORIGINAL (2-Sided Original) (page 5-43) • AUTO DETECTION (page 5-44) • SPECIFYING THE ORIGINAL SCAN SIZE USING NUMERIC VALUES (page 5-47) • SPECIFYING THE SEND SIZE OF THE IMAGE (page 5-53) • CHANGING THE EXPOSURE (page 5-55) • CHANGING THE RESOLUTION (page 5-56) • SCANNING MANY ORIGINALS AT ONCE (JOB BUILD) (page 6-113) • SCANNING A THIN ORIGINAL (SLOW SCAN MODE) (page 6-134) • SCANNING ORIGINALS OF DIFFERENT SIZES (MIXED SIZE ORIGINAL) (page 6-99) • CHECKING THE NUMBER OF SCANNED ORIGINAL SHEETS BEFORE TRANSMISSION (ORIGINAL COUNT) (page 6-140) • OTHER FUNCTIONS (page 5-74)
4
Send the original.
Tap the [Start] key.

- To check a preview of a scanned image, tap the [Preview] key before tapping the [Start] key.
- When the original is placed on the document glass:
- When sending a fax normally (memory transmission)
Repeat the steps for placing and scanning the originals the same number of times as there are originals. After scanning all originals, tap the [Read-End] key.
- When sending a fax in direct transmission mode
Multi-page originals cannot be scanned in direct transmission mode. Tap the [Start] key to start transmission.
- In normal mode, if you tap [File] or [Quick File] on the action panel before starting fax transmission, you can save the scanned original as data.
QUICK FILE (page 7-9)
FILE (page 7-10)
ENTERING DESTINATIONS
ENTERING DESTINATIONS
This section explains how to enter a destination from the initial screen of easy mode. EASY MODE (page 5-6)
ENTERING A DESTINATION NUMBER USING THE NUMERIC KEYS
1

Tap the [Direct Entry] key or [Fax Number] to enter the destination fax number.
If you want to specify multiple destinations, tap and enter the next fax number.
If you enter an incorrect number, tap the [C] key to delete the number and re-enter.
Entering a Pause Between Digits of the Number
Enter a pause after the number used to dial out from a PBX (for example, after "0"), or after the country code when dialling an international number.
1
Tap the [Pause] key.
A hyphen "-" is entered when the [Pause] key is tapped once.
![SHARP BP-50C45 - Tap the [Pause] key. - 1](/content/2026/06/1367452/images/93eba3b52f1d75dd9b034d4e1479d8b04bdf5270bd239171752a6c33711d0a94.jpg)
If you want to enter a pause between digits of the number:
Enter a pause after the number used to dial out from a PBX (for example, after "0"), or after the country code when dialling an international number.
The [Pause] key appears on the numeric keys when the destination fax number is entered.
A hyphen "-" is entered when the [Pause] key is tapped once.

To set the length of pause:
In "Settings", select [System Settings] → [Image Send Settings] → [Fax Settings] → [Default Settings] → [Pause Time Setting].
RETRIEVING A DESTINATION FROM AN ADDRESS BOOK
A destination fax number is retrieved by simply tapping the one-touch key of that destination on the address book screen. (One-touch dialling)
It is also possible to store multiple fax numbers in a one-touch key, allowing you to retrieve all the numbers by simply tapping the key. This dialling method is convenient when you wish to send a fax to (or poll) multiple fax destinations.
When destinations of other scan modes are stored in addition to fax destinations, an icon indicating the mode appears together with the name of the destination in each one-touch key.
| Fax | |
| Scan to E-mail | |
| Internet Fax (Direct SMTP) | |
| Scan to FTP | |
| Scan to Network Folder | |
| Scan to Desktop | |
| Group key with multiple destinations |
- For information on the address book, see "ADDRESS BOOK (page 6-14)".
- For the procedure for storing an address in the address book, see "STORING ADDRESSES THROUGH DIRECT ENTRY (page 6-19)", "STORING ADDRESSES THROUGH GLOBAL ADDRESS SEARCH (page 6-20)", "STORING ADDRESSES FROM FAX OR IMAGE SEND LOGS (page 6-22)", "STORING GROUPS (page 6-24)".
1

Tap the [Address Book] key.
2

Tap a one-touch key of contact or group that includes the fax destination.
- The destinations displayed on the list can be narrowed with frequent use, categories, indexes, and keywords. (In normal mode, you can narrow down the destinations by job type.)
- Tapping [Sort] allows you to change the order of destinations displayed in the list.
- When adding a destination, tap another one-touch key.
- If two or more destinations are selected or specified, the total number of addresses appears next to address.
- Even if only a single destination is selected, the number of addresses appears when the destination is a contact or group in which multiple addresses are stored. For more information, see "ADDRESS BOOK (page 6-14)".

•If you select an incorrect destination:
Tap the key again to cancel the selection.
To cancel a selected destination
Select the destination you want to cancel in the destination list screen, and tap the [Delete] key.

- To select a destination from the transmission log, tap the [Sending History] key. USING A TRANSMISSION LOG TO RESEND (page 5-20) • To check the entered destinations, tap the [Address Review] key. THE SELECTED DESTINATIONS (page 5-14)
- The destination for transmission can be selected by tapping a stored destination.
- If an address that you do not have permission to use is included in the addresses, a message will appear when you press the [Start] key. To send only to the permitted addresses, press the [OK] key and then the [Enter for send] key.
In normal mode
- Tap the one-touch key, and then tap [Display Registered Information] on the action panel to display the detailed information.
- To retrieve a destination by using a search number, tap [Call Search Number] on the action panel. USING A TRANSMISSION LOG TO RESEND (page 5-20)
- To retrieve a destination from a global address book, tap [Global Address Search] on the action panel RETRIEVING A DESTINATION FROM A GLOBAL ADDRESS BOOK (page 5-16)

To send to an address in other than the current mode
In "Settings (administrator)", remove the checkmark from [System Settings] → [Image Send Settings] → [Common Settings] → [Condition Settings] → [Address Book Default Selection] → [Apply Addresses of Sending Modes Only].
THE SELECTED DESTINATIONS
When multiple destinations have been selected, you can display and check the destinations. You can also delete a destination (cancel selection of the destination) if necessary.
1

Tap the All Destinations key.

Confirm the destination.
After the confirmation is completed, tap


- To confirm detailed information such as the type or name of the specified destination, tap the one-touch key of the target destination, and then tap the [Info.] key.
- If an address that you do not have permission to use is included, a prohibition mark will appear on the address.
DELETING SPECIFIED DESTINATIONS
Select the address and tap the [Delete] key.

If you placed the original on the document glass and tapped the [Start] key, you cannot delete an address when changing settings.
USING A SEARCH NUMBER TO RETRIEVE A DESTINATION
The search number can be used to specify a destination stored in an address book.
1
Tap the [Detail] key to change normal mode.
EASY MODE (page 5-6)
2

Tap [Call Search Number] on the action panel.
3

Enter a search number (4 digits) using the numeric keys and tap OK.
When the search number is entered, the stored address is retrieved and specified as a destination.

If an incorrect search number is entered:
Tap the [C] key to clear the number and enter the correct number.

- The search number is programmed when the destination is stored in the address book.
- If you do not know the search number, tap [Print Individual List] on the action panel to print and check the address list.
- When entering search numbers such as "0001" and "0011", "0" can be omitted. For example, to enter "0001", enter "1" and tap OK.
RETRIEVING A DESTINATION FROM A GLOBAL ADDRESS BOOK
If an LDAP server is configured in the setting mode (Web version), you can search for the desired destination in the global address book and obtain the fax number when performing a fax transmission.
You can also add a retrieved address to the address book. However, addresses of the FTP/Desktop transmission cannot be stored from the machine.
1

In the base screen or address book screen, tap [Global Address Search] on the action panel.
2
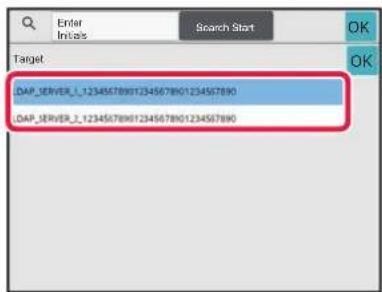
Tap [Target] and tap the LDAP server to be used.
- If an authentication screen for the LDAP server appears, enter your user name and password.
- If only one LDAP server has been stored, it is not necessary to take step 2. In this case, start from step 3. After the settings are completed, tap OK.
3

Tap [Item], and select an item to be searched from [Name/Address].

How to search
Enter the search characters (maximum of 64 characters). The system will look for names starting with the entered letters.
An asterisk * can be used as follows:
XXX*: Names beginning with "XXX"
*XXX: Names that end with "XXX"
*XXX*: Names containing "XXX"
AA*X: Names that start with "AA" and end with "XX".
4

Enter a keyword and tap the [Search Start] key.
When you tap the keyword entry box, the soft keyboard appears.
The search results will appear after a brief interval.
![SHARP BP-50C45 - Enter a keyword and tap the [Search Start] key. - 1](/content/2026/06/1367452/images/8eb72c4b81a551800c14e508fd1bbbe2553449943ee9df207c9a1cc210b985a4.jpg)
- If no destination is found:
Tap the [Search Again] key.
• To continuously add other destinations:
Tap the destination.
![SHARP BP-50C45 - Enter a keyword and tap the [Search Start] key. - 2](/content/2026/06/1367452/images/bb6e495cb021990255396c09dbbd543046fb02012ceb1e1e1aad95da4d6e364a.jpg)
To check the destination information:
Tap the one-touch key of the target destination, and then tap the [Info.] key. Tap OK to close the address information screen.
When you select the destination and tap the [New Registration with Address Book] on the action panel, the destination can be stored in the address book. This is convenient if you have entered a destination directly.
RETRIEVING A DESTINATION FROM A MOBILE ADDRESS BOOK
If the machine and mobile device are connected by Bluetooth, you can retrieve a destination from the mobile address book.
Destinations for fax transmission and e-mail transmission can be retrieved.

- The called address book is not saved in this machine.
- The maximum number of addresses that can be read from the mobile address book is 2000.
- For more information about the operation of mobile devices, please refer to the operation manual/help of the mobile device.

To use this function
Enable "Settings (administrator)" → [Network Settings] → [Bluetooth Setting] → [Bluetooth] to pair the machine and mobile device.
1
In Easy mode
In Normal mode
Tap the [Mobile Address Book] key.
In the base screen or address book screen, tap [Refer to Mobile Address Book] on the action panel.
2

Operate the mobile device to be connected to pair it with the machine.
Device name of the machine is displayed on the screen.

When pairing with a mobile device that has been paired with this unit before, delete the information of this unit stored in the mobile device.

To set a device name to this machine
Configure in "Settings (administrator)" → [System Settings] → [Network Settings] → [Network Name Setting] → [Device Name].
The device name must be in 7 or less double-byte characters, or 15 or less single-byte characters.
3
![Enter Initials Search Start Item Name AAA 0123-45-6788 BBB 0111-22-3333 CCC 0222-93-4444 DDD 0333-44-5555 EEE 0444-55-6666 EEE Enter Initial and press Enter key of external keyboard or [Start Search] button. OK A D G J M P T W](/content/2026/06/1367452/images/52d1c4bcbeace0e2d72d098f01b91dafe750877c9b4563060aad934a6af50da9.jpg)
Tap (☐) of [Name], and select an item to be searched from [Initial], [Name] or [Address].
4
![Enter Initials Search Start Name AAA 0123-45-6789 BBB 0111-22-3333 CCC 0222-33-4444 DDD 0333-44-5555 EEE 0444-55-6666 Enter Initial and press Enter key of external keyboard or [Start Search] button. OK A D G J M P T W](/content/2026/06/1367452/images/5056439fd477c89ee4ae76ee547fa18db9d0539eacc3a509ec62f8c351bf72f4.jpg)
Enter a keyword and tap the [Search Start] key.
When you tap the keyword entry box, the soft keyboard appears.
The search results will appear after a brief interval.
![SHARP BP-50C45 - Enter a keyword and tap the [Search Start] key. - 1](/content/2026/06/1367452/images/a18a6087c5cb2156ee71700659ad0a7aa0ba54d96b250d69eaa7b22693b857bb.jpg)
• If no destination is found:
Tap the [Search Again] key to add more search letters.
• To continuously add other destinations.
Tap the destination.
USING A TRANSMISSION LOG TO RESEND
Select a destination from a transmission log and resend the data.
The destinations of the most recent 50 transmissions by fax, Scan to E-mail, and/or Internet fax are stored. One of these can be selected to resend to that destination. The destinations of the FTP/Desktop transmission and Scan to Network Folder are also shown in the transmission log.
In normal mode, you can also add an address in a transmission history to the address book. This is a convenient way to store the fax numbers and addresses of destinations that were manually entered. However, addresses of the Network Folder transmission cannot be stored from the machine.

- If numeric keys were tapped during the previous transmission, the number may not be redialled correctly.
- The fax addresses below are not stored as addresses for which resend is possible.
• One-touch key for a contact in which multiple destinations are stored. • Group destinations • Broadcasting destinations
In Easy mode

In Normal mode
Tap the [Sending History] key.
In the base screen or address book screen, tap [Sending History] on the action panel.
2

Tap the key of the fax destination that you wish to redial.
The last 50 addresses used for transmission are displayed.

To cancel the resend setting:
Tap the highlighted key.

In normal mode
- To add an address to the address book, select the address and tap [New Registration with Address Book] or [Additional Registration with Address Book] on the action panel.
- You can select an address and tap [Delete the Selected History] or [Delete All Histories] on the action panel to delete one or all histories.
SENDING BY CHAIN DIALLING
Number sequences entered using the numeric keys and/or one-touch keys can be linked together with pauses and dialled as a single number.
For example when dialling an international number, tap the [Pause] key between the identification number of an international telephone service company (e.g., "001") and the country code (e.g., "81" for Japan) to insert a pause for smoother line connection.
The time (in seconds) set in "Settings", select [System Settings] → [Image Send Settings] → [Fax Settings] → [Default Settings] → [Pause Time Setting] defines the length of pause. Set a value from 1 to 15 seconds in increments of 1 second.
On the screen, a hyphen "-" indicates a pause.
If two seconds are set in [Pause Time Setting], tapping the [Pause] key three times enters pauses for 6 seconds.
Example: Using chain dialling to dial an international number
![graph TD A["010"] --> B["1"] B --> C["212"] C --> D["xxxxxx"] E["Country code of USA"] --> F["Area code of New York City"] G["Telephone number of other machine"] --> H["000000"] I["Pause"] --> J["AAA AAA"] K["Numeric keys"] --> L["0 0 1 Pause"]](/content/2026/06/1367452/images/ecb923b41ab64a01905487a0612588f3dff83f790c23a199c77becf7a03f6395.jpg)

- Addresses that can be selected are addresses that only have one fax address saved.
- After entering the number with the numeric keys, tap the [Pause] key to enter the next number with the numeric keys, or tap the [Chain Dial] key on the action panel to select an address from the address book.
- After selecting the address from the address book, select [Chain Dial Combine with Direct Input] on the action panel to enter the next number with the numeric keys, or [Chain Dial Combine with Address Book] to select an address from the address book.
BASIC TRANSMISSION METHODS
BASIC TRANSMISSION METHODS
This section explains how to enter a destination from the initial screen of easy mode. SELECTING FAX MODE (page 5-7)
FAX TRANSMISSION METHODS
The methods that can be used to send a fax from the machine are described below. Select the method that best suits your needs.
To fax a large number of sheet originals:
Use the automatic document feeder.
The originals will be scanned into memory and then transmitted (memory transmission).
When multiple original sheets are placed in line idle state, they will be sent in sequence from the scanned page in parallel with the scanning process (Quick On Line Sending).
If transmission cannot begin immediately because the line is in use, all pages will be scanned and stored in memory. USING THE AUTOMATIC DOCUMENT FEEDER FOR TRANSMISSION (page 5-30)
![graph TD A["Printer"] --> B["Document"] B --> C["Document Output"] style A fill:#f9f,stroke:#333 style C fill:#bbf,stroke:#333](/content/2026/06/1367452/images/8bbbe84eb6233d0e943e8a4ea8de71210a6108d894590611340e6ca5ceb4928b.jpg)
Storing a fax job
If transmission cannot begin immediately because the line is in use, all pages will be scanned and stored in memory. If you want to attempt to send a fax while another job is in progress, you can store the fax job. To check the stored fax job, display the job status screen.
FAX JOBS (page 5-105)

- If memory becomes full while the first original page is being scanned, transmission will stop.
- When the transmission is finished, the scanned original pages are cleared from memory. However, when the document filing function is used, the transmitted fax is stored. QUICK FILE (page 7-9) FILE (page 7-10)
- If Job Build is enabled, you can select the automatic document feeder or the document glass to scan the original. This sending method may not be available depending on the function. SCANNING MANY ORIGINALS AT ONCE (JOB BUILD) (page 6-113)
In the following situations, the transmission will be automatically reserved (memory transmission)
- When the line is busy or a communication error occurs and automatic resending is enabled. WHEN A COMMUNICATION ERROR OCCURS (page 5-27)
- The line of the machine will be busy if another fax is being sent, received, or if the machine is in the busy state.
- Another fax transmission was reserved ahead of your fax.
•One of the following functions is being used for transmission.
- Broadcast transmission, F-code transmission, Timer transmission, Dual Page Scan, Book Divide, N-Up, Card Shot, Job Build, Original Count
- The document glass is being used (except when the speaker is being used to dial).

To disable the Quick On Line Sending setting:
In "Settings", select [System Settings] → [Image Send Settings] → [Fax Settings] → [Send Settings] → [Quick On Line Sending].
If you disable this setting, transmission will not begin until all pages have been scanned. Note that this setting does not apply to manual transmission.
To fax thick originals or pages of a book:
Place the original on the document glass.
USING THE DOCUMENT GLASS FOR TRANSMISSION (page 5-33)
![graph TD A["Print"] --> B["File 1"] B --> C["Document Output"]](/content/2026/06/1367452/images/8bbd921edea587ecd9a25c9aa4fc83ad4c7dd1c4ec93279a220710f786603d74.jpg)

- Quick On Line Sending is not available when a fax is being sent from the document glass.
- When the document glass is used, multiple original pages cannot be scanned at a time. In this case, the original pages can be separated into multiple times of scanning.
If you wish to send a fax ahead of other previously reserved fax transmissions:
Send the fax in direct transmission mode. The original is transmitted directly to the receiving fax machine without being scanned into memory.
When direct transmission mode is used, transmission will begin as soon as the transmission in progress is completed (ahead of any previously reserved transmissions).
Tap [Direct TX] on the action panel to send a fax.
USING THE AUTOMATIC DOCUMENT FEEDER FOR FAXING IN DIRECT TX MODE (page 5-31)
USING THE DOCUMENT GLASS TO SEND A FAX IN DIRECT TX MODE (page 5-35)

When transmission in direct transmission mode ends, the mode automatically changes back to memory transmission mode.

In direct transmission mode, the [Preview] key cannot be used for transmission.
When an A4 (8-1/2" x 11") original is placed in vertical orientation (☐), the image is automatically rotated 90 degrees and transmitted in horizontal orientation (☐) (Rotation Sending).
If the original is placed in horizontal orientation (☐), it is transmitted in that orientation (☐) without being rotated.
![graph LR A["Tree"] --> B["Leaf Node"] B --> C["Leaf Node"]](/content/2026/06/1367452/images/c0a6f2d3beaabb3770bc53408bf1a0faaa34592dccef4893197c1a5ea037f086.jpg)
A4 (8-1/2" x 11") A4R (8-1/2" x 11"R) A4R (8-1/2" x 11"R)

Rotation sending is not available for originals with A4R, B5, or A5 (8-1/2" x 11"R or 5-1/2" x 8-1/2") size.

To cancel the rotation sending setting:
In "Settings (administrator)", select [System Settings] → [Image Send Settings] → [Fax Settings] → [Send Settings] → [Rotation Sending Setting].
If this setting is disabled, the original will be transmitted in the orientation in which it is placed.
Because of this, some receiving machines may reduce the received data.
AUTOMATIC REDUCTION OF THE TRANSMITTED IMAGE
If the width of the transmitted image is larger than the width of the paper in the receiving machine, the image will be automatically reduced to fit the receiving machine's paper width.
Example: Reduced sizes and reduction ratios
| Transmitted image width | Receiving machine's paper width | Reduced size Scaling | |
| A3 (11" x 17") B4 B4 1:0.8 | |||
| A3 (11" x 17") | A4 (8-1/2" x 11") | A4R | 1:0.7 |
| B4 A4 (8-1/2" x 11") A4R 1:0.8 |

To cancel the Auto Reduction Sending setting:
In "Settings", select [System Settings] → [Image Send Settings] → [Fax Settings] → [Send Settings] → [Auto Reduction Sending Setting].
If this setting is disabled, the image will be sent at full size and part of the image may be cut off.
TRANSMITTABLE ORIGINAL SIZES
For information on the original sizes that can be loaded, see "AUTOMATIC DOCUMENT FEEDER (page 1-30)" and "DOCUMENT GLASS (page 1-34)".
THE SIZE OF THE PLACED ORIGINAL
When a standard size original is placed, the original size is automatically detected and displayed in "Scan Size" on the base screen.
AUTO DETECTION (page 5-44)
Standard sizes are sizes that the machine can automatically detect. The standard sizes are set in "Original Size Detector Setting" in setting mode.

When the automatic original detection function is operating and the original (of inch or non-standard size) is placed, the closest size may be displayed or the original size may not appear. In this event, manually set the correct original size. SPECIFYING THE ORIGINAL SCAN SIZE IN PAPER SIZE (page 5-45) SPECIFYING THE ORIGINAL SCAN SIZE USING NUMERIC VALUES (page 5-47)

To specify the size that the machine can automatically detect:
In "Settings (administrator)", select the group of detected original sizes in [System Settings] → [Common Settings] → [Device Control] → [Condition Settings] → [Original Size Detector Setting].
List of original size detector settings
DETECTABLE ORIGINAL SIZES (page 1-28)
WHEN THE LINE IS BUSY
If the line is busy when you send a fax, transmission will be attempted again automatically after a preset interval. This function only operates in memory transmission mode. In direct transmission mode or manual transmission mode, the transmission will be cancelled. Wait for a brief period and then try sending the fax again.

To cancel transmission:
Do so from the job status screen.
STOPPING/DELETING A JOB, PRIORITY PROCESSING AND CHECKING THE STATUS (page 2-53)

To set the number of recall attempts and the interval between attempts when the connection cannot be established because the line is busy, or for other reasons:
In "Settings (administrator)", select [System Settings] → [Image Send Settings] → [Fax Settings] → [Send Settings] → [Recall in Case of Line Busy].
When this setting is enabled, note that the machine will not attempt the call again when manual transmission or direct transmission is used.
WHEN A COMMUNICATION ERROR OCCURS
If a communication error occurs or the other fax machine does not answer the call within a preset period of time, transmission will automatically be attempted again after a preset interval. This function only operates in memory transmission mode.

Faxes sent by direct transmission or manual transmission are not automatically resent.

To cancel transmission:
Do so from the job status screen.
STOPPING/DELETING A JOB, PRIORITY PROCESSING AND CHECKING THE STATUS (page 2-53)

To set the number of recall attempts and the interval between attempts when a transmission fails due to an error:
In "Settings (administrator)", select [System Settings] → [Image Send Settings] → [Fax Settings] → [Send Settings] → [Recall in Case of Communication Error].
FAX DEST. CONFIRMATION MODE
This mode displays a destination confirmation message when a fax is sent to prevent accidental transmission to the wrong destination. Set it in setting mode. If a fax is sent while this function is enabled, an address confirmation message will appear when the [Start] key is tapped.
The message that appears will vary depending on the method used to specify the destination.

After tapping the [Speaker] key while "Fax Dest. Confirmation Mode" is enabled, the destination cannot be specified using the numeric keys, one-touch key, [Call Search Number] key, or [Sending History] key. However, it is possible to send through a telephone.

• To display the destination confirmation message prior to fax transmission:
In "Settings", select [System Settings] → [Image Send Settings] → [Fax Settings] → [Default Settings] → [Fax Dest. Confirmation Mode].
• To check destinations other than fax:
In "Settings", select [System Settings] → [Image Send Settings] → [Fax Settings] → [Default Settings] → [Fax Dest. Confirmation Mode] → [Apply to Addresses Other Than Fax].
• To disable fax broadcast when Fax Dest. Confirmation Mode is enabled:
In "Settings", select [System Settings] → [Image Send Settings] → [Fax Settings] → [Send Settings] → [Disable Fax Broadcasting].
Destination specified by one-touch key/search number/global address search
Tap the [Start] key to display all destinations in the destination confirmation screen. Check that the destinations are correct, and tap the [Enter for send] key to start scanning of the original.
If the destination is not correct, tap the [OK] key and select the destination again.

- You can select multiple one-touch keys for contacts or groups including fax destinations.
- Before tapping the [Enter for send] key, you can change scan or other settings.
Destination specified using the numeric keys
With "Fax Dest. Confirmation Mode" enabled, and "Require Re-entry when Directly Entering the Fax Destination" enabled
Tap the [Start] key to display the confirmation message.
Tap the [OK] key, re-enter the destination using the numeric keys, and tap the [Enter Address] key.
If the re-entered destination is correct, scanning will begin.
If the re-entered destination is not correct, a message will appear. Tap the [OK] key and re-enter the destination. If an incorrect address is entered three times for confirmation, all the previous settings are cancelled, and you will return to the base screen.
With "Fax Dest. Confirmation Mode" enabled, and "Require Re-entry when Directly Entering the Fax Destination" disabled
Tap the [Start] key to display entered destinations in the destination confirmation screen. Check that the destinations are correct, and tap the [Enter for send] key to start scanning of the original.

- You can use the numeric keys to enter fax numbers serially. In that case, tap + to enter the destination fax number to be added.
- If the [Sub Address] key was tapped to enter a sub-address and passcode, the fax number must be re-entered during confirmation. After re-entering the fax number, tap the [Sub Address] key and enter the sub-address and passcode.
- If chain dialling was used, tap the [Pause] key to enter "-" during confirmation.
- Before tapping the [Enter for send] key, you can change scan or other settings.

To set whether to re-enter at direct entry:
In "Settings (administrator)", select [System Settings] → [Image Send Settings] → [Fax Settings] → [Condition Settings] → [Fax Dest. Confirmation Mode] → [Require Re-entry when Directly Entering the Fax Destination].
When a fax that was selected from the Sending History has been resent
A confirmation screen is displayed based on the method used to specify the destination during the previous transmission.
CHECKING THE IMAGE TO BE TRANSMITTED
Check the image that will be sent in the touch panel before transmission.
You can tap the [Preview] key and then scan the original to check a preview of the scanned image. As you can adjust the exposure and resolution to scan the original while checking it in the preview screen, you can send a better quality original to the destination.
PREVIEW SCREEN (page 2-11)
The settings and functions that can be changed while and after an image is scanned for preview are as follows:
Exposure, Send Size, 2-Sided Booklet/Tablet, Resolution, Erase, N-Up, File, Quick File, Timer, Own Name Select, and Transaction Report.

- Depending on the size of the transmission data, part of the preview image may not appear in the preview screen in the touch panel.
- The preview function is not available when the original size is set to Long Size.
FAX TRANSMISSION METHODS
This section explains how to enter a destination from the initial screen of easy mode. EASY MODE (page 5-6)
USING THE AUTOMATIC DOCUMENT FEEDER FOR TRANSMISSION
Storing scanned originals in machine's memory before transmitting them is called "Memory TX".
This section explains how to scan the original through the automatic document feeder and send the data by the memory transmission function.

- To fax a thick original or other original that cannot be placed in the automatic document feeder, open the automatic document feeder and place the original on the document glass.
- If there is a fax job in progress when the transmission operation is performed, the fax is transmitted when the job in progress is finished.
- If the memory becomes full while the originals are being scanned, a message will appear and scanning will stop. When Quick On Line Sending is enabled for transmission, the scanned originals are sent.

• To disable the Quick On Line Sending setting:
In "Settings (administrator)", select [System Settings] → [Image Send Settings] → [Fax Settings] → [Send Settings] → [Quick On Line Sending]. If you disable this setting, memory transmission will not begin until all pages have been scanned.
•To set the scan complete sound:
In "Settings (administrator)", select [System Settings] → [Common Settings] → [Sound Settings] → [Beep Sound Settings (Common)] → [Scan Complete Sound (Image Send)].
•Always stamp scanned originals:
In "Settings (administrator)", select [System Settings] → [Image Send Settings] → [Common Settings] → [Condition Settings] → [Default Verification Stamp]. When this is enabled, originals are always stamped without the need to select "Verification Stamp".
•To disable the Disabling of Document Feeder setting:
In "Settings (administrator)", select [System Settings] → [Common Settings] → [Device Control] → [Condition Settings] or [Enable/Disable Settings] → [Disabling of Document Feeder].
1
Place the original in the document feeder tray of the automatic document feeder.
AUTOMATIC DOCUMENT FEEDER (page 1-30)
2
Specify the destination fax number.
• ENTERING A DESTINATION NUMBER USING THE NUMERIC KEYS (page 5-11) • RETRIEVING A DESTINATION FROM AN ADDRESS BOOK (page 5-12) • USING A SEARCH NUMBER TO RETRIEVE A DESTINATION (page 5-15) • RETRIEVING A DESTINATION FROM A GLOBAL ADDRESS BOOK (page 5-16) • RETRIEVING A DESTINATION FROM A MOBILE ADDRESS BOOK (page 5-18) • USING A TRANSMISSION LOG TO RESEND (page 5-20)
3
Tap the [Start] key to begin transmission.
When scanning is completed, the machine beeps.
![SHARP BP-50C45 - Tap the [Start] key to begin transmission. - 1](/content/2026/06/1367452/images/999b530575e8dac5c15376de6219b46291ed0f3097194e01d944f79e082a9270.jpg)
- Tap the [Preview] key to check the preview of an image before sending a fax. For more information, see "FAX TRANSMISSION METHODS (page 5-30)".
- When all originals have been scanned, "Job stored." will be displayed together with a job control number. This number is recorded in the transaction report and image sending activity report and can be used to check fax jobs. PRINTING IMAGE SENDING ACTIVITY REPORTS (page 5-106)
![SHARP BP-50C45 - Tap the [Start] key to begin transmission. - 2](/content/2026/06/1367452/images/f21cd3ee50f988d894d6a5e42889cc402aae705a38e9a4b93755ddf95ff967f9.jpg)
To cancel scanning the original:
Tap the [Cancel Scan] key.
USING THE AUTOMATIC DOCUMENT FEEDER FOR FAXING IN DIRECT TX MODE
Sending a scanned original without saving it in the machine's memory is called "Direct TX".
This section explains how to scan the original through the automatic document feeder and directly send it.

To fax a thick original or other original that cannot be placed in the automatic document feeder, open the automatic document feeder and place the original on the document glass.

- The following functions cannot be used with direct transmission: Timer Transmission, N-Up, Card Shot, Job Build, Polling Memory, Original Count, File, Quick File, Memory Box, Book Divide, Polling, 2-Sided Scan, Search Global Address Book
- Resending will not take place when a direct transmission is not successful due to a communication error or other reason.
- If a fax transmission is already in progress when the direct transmission operation is performed, the direct transmission will wait until the previous transmission is finished. When the previous transmission is completed, the direct transmission will begin.
- While the direct transmission is waiting, the job status display can be tapped to display the job status screen. No other operations are possible. FAX JOBS (page 5-105) •The [Preview] key cannot be used for transmission.
- To disable the Disabling of Document Feeder setting: In "Settings (administrator)", select [System Settings] → [Common Settings] → [Device Control] → [Condition Settings] or [Enable/Disable Settings] → [Disabling of Document Feeder].
1
Tap the [Detail] key to change to normal mode.
CHANGING MODES (page 2-10)
2
Place the original in the document feeder tray of the automatic document feeder.
AUTOMATIC DOCUMENT FEEDER (page 1-30)
3

Specify the destination fax number, and tap [Direct TX] on the action panel.
4
Specify the destination fax number.
- ENTERING A DESTINATION NUMBER USING THE NUMERIC KEYS (page 5-11) • RETRIEVING A DESTINATION FROM AN ADDRESS BOOK (page 5-12) • USING A SEARCH NUMBER TO RETRIEVE A DESTINATION (page 5-15) • USING A TRANSMISSION LOG TO RESEND (page 5-20)

- Only one destination can be specified. A one-touch key in which multiple destinations are stored cannot be used. •The destination cannot be retrieved from a global address book.
5
Tap the [Start] key to begin transmission.
![SHARP BP-50C45 - Tap the [Start] key to begin transmission. - 1](/content/2026/06/1367452/images/2149ecfd655ebd3fb65ce13d9bd31f419eb7a5da615a37e751cbcd405e6b0fe2.jpg)
If a fax transmission is already in progress when the direct transmission operation is performed, the direct transmission will wait until the previous transmission is finished. When the previous transmission is completed, the direct transmission will begin.
While the direct transmission is waiting, you can only check the job status. JOB STATUS (page 2-53)
![SHARP BP-50C45 - Tap the [Start] key to begin transmission. - 2](/content/2026/06/1367452/images/f4c892ae91e630fd8210dc463366f9b09228ba308e57d9165f2bacab75f9d96a.jpg)
To cancel scanning the original: Tap the [Cancel Scan] key.
USING THE DOCUMENT GLASS FOR TRANSMISSION
Storing scanned originals in the machine's memory before transmitting them is called "Memory TX".
This section explains how to scan the original placed on the document glass and send the data using the memory transmission function.

- If a fax is being received when the transmission operation is performed, the transmission will be reserved and will take place after fax reception is completed.
- If the memory becomes full while the originals are being scanned, a message will appear and transmission will be cancelled.

Do not place any objects under the original size detector. Closing the automatic document feeder with an object underneath may damage the original size detector plate and prevent correct detection of the document size.
1
Place the original on the document glass.
DOCUMENT GLASS (page 1-34)

When faxing a multi-page original, scan each page in order starting from the first page.
2
Specify the destination fax number.
- ENTERING A DESTINATION NUMBER USING THE NUMERIC KEYS (page 5-11)
- RETRIEVING A DESTINATION FROM AN ADDRESS BOOK (page 5-12) • USING A SEARCH NUMBER TO RETRIEVE A DESTINATION (page 5-15)
- RETRIEVING A DESTINATION FROM A GLOBAL ADDRESS BOOK (page 5-16) • RETRIEVING A DESTINATION FROM A MOBILE ADDRESS BOOK (page 5-18) • USING A TRANSMISSION LOG TO RESEND (page 5-20)
3
Tap the [Start] key to begin transmission.
When scanning is completed, the machine beeps.
4
If you have another page to scan, change pages and then tap the [Start] key.
Repeat until all originals have been scanned.
![SHARP BP-50C45 - If you have another page to scan, change pages and then tap the [Start] key. - 1](/content/2026/06/1367452/images/f8fccba538fbb16e904747b268e77570734679f41243cf70e8ea010b409ae6e9.jpg)
If no action is taken for one minute, scanning automatically ends and the transmission is reserved.
5
![Place next original. (PC No.) Press [Start] When finished, press [Read End] Change Setting Read End](/content/2026/06/1367452/images/b3d0c9c9d162456f0432029d756d6a27e10be6c26019911e455cbf6b2961c618.jpg)
Tap the [Read-End] key.
A beep sounds.
Open the automatic document feeder and remove the original.
![SHARP BP-50C45 - Tap the [Read-End] key. - 1](/content/2026/06/1367452/images/abff570c72309236498a8c8c0e6ae6995768c5d415792ff2669f0846e049b4bb.jpg)
To cancel scanning:
Tap the [CA] key before the [Read-End] key is tapped.

- When all originals have been scanned, "Job stored." will be displayed together with a job control number. This number can be used to locate the job in the Transaction Report or in the Image Sending Activity Report. PRINTING IMAGE SENDING ACTIVITY REPORTS (page 5-106)
- If no action is taken for one minute after the confirmation screen is displayed, scanning automatically ends and the transmission is reserved.
- The [Change Setting] key can be tapped, if necessary, to change the exposure, resolution, scan size, and send size for each original page scanned. However, when "N-Up" or "Card Shot" is selected in Others, only the exposure can be changed when scanning an even-numbered original page.

To cancel transmission:
Tap the [CA] key before the [Read-End] key is tapped.
USING THE DOCUMENT GLASS TO SEND A FAX IN DIRECT TX MODE
Sending a scanned original without saving it in the machine's memory is called "Direct TX".
This section explains how to scan the original placed on the document glass and directly send data.
When sending a fax from the document glass in direct transmission mode, only one page can be transmitted.

•The following functions cannot be used with direct transmission: Timer Transmission, N-Up, Card Shot, Job Build, Polling Memory, Original Count, File, Quick File, Memory Box, Book Divide, Polling, 2-Sided Scan, Search Global Address Book. - Resending will not take place when a direct transmission is not successful due to a communication error or other reason. - If a fax transmission is already in progress when the direct transmission operation is performed, the direct transmission will wait until the previous transmission is finished. When the previous transmission is completed, the direct transmission will begin. - While the direct transmission is waiting, the job status display can be tapped to display the job status screen. No other operations are possible. FAX JOBS (page 5-105) •The [Preview] key cannot be used for transmission.

Do not place any objects under the original size detector. Closing the automatic document feeder with an object underneath may damage the original size detector plate and prevent correct detection of the document size.
1
Tap the [Detail] key to change to normal mode.
EASY MODE (page 5-6)
2
Place the original on the document glass.
DOCUMENT GLASS (page 1-34)

When faxing a multi-page original, scan each page in order starting from the first page.
3
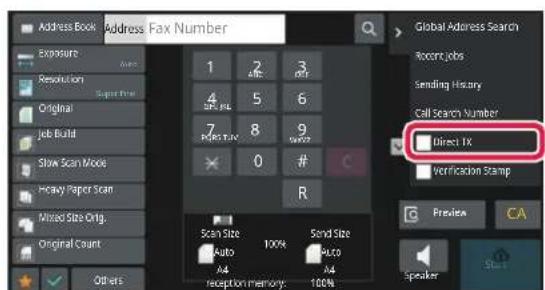
Specify the destination fax number, and tap [Direct TX] on the action panel.
4
Specify the destination fax number.
- ENTERING A DESTINATION NUMBER USING THE NUMERIC KEYS (page 5-11)
- RETRIEVING A DESTINATION FROM AN ADDRESS BOOK (page 5-12) • USING A SEARCH NUMBER TO RETRIEVE A DESTINATION (page 5-15) • USING A TRANSMISSION LOG TO RESEND (page 5-20)

- Only one destination can be specified. A one-touch key in which multiple destinations are stored cannot be used. •The destination cannot be retrieved from a global address book.
5
Tap the [Start] key to begin transmission.
When the line has been connected to the destination, scanning of the original starts.
![SHARP BP-50C45 - Tap the [Start] key to begin transmission. - 1](/content/2026/06/1367452/images/cf1fa31f0e6c982bbd2cfad36d9ca75a4482aea2e5eea738127a2275b312e9b2.jpg)
If a fax transmission is already in progress when the direct transmission operation is performed, the direct transmission will wait until the previous transmission is finished. When the previous transmission is completed, the direct transmission will begin.
While the direct transmission is waiting, you can only check the job status.
JOB STATUS (page 2-53)
![SHARP BP-50C45 - Tap the [Start] key to begin transmission. - 2](/content/2026/06/1367452/images/e7aec2196fbc5652ead118a9aa8624cdb6305bc697834643d00691ef1467caeb.jpg)
To cancel scanning the original:
Tap the [Cancel Scan] key.
TRANSMISSION USING THE SPEAKER
When the speaker is used to dial, the fax is sent after the number is dialed and the connection is established.

- If a person answers, you will be able to hear his or her voice, but you will not be able to speak.
- When the speaker is used, transmission takes place without scanning the original into memory.
- A destination that includes an F-code (sub-address and passcode) cannot be used.
- A one-touch key that has multiple destinations or has a non-fax destination cannot be used. In speaker mode, the [Preview] key cannot be used for transmission.
1
Tap the [Detail] key to switch to the normal mode.
EASY MODE (page 5-6)
2
Place the original.
Place the original in the document feeder tray of the automatic document feeder, or on the document glass. AUTOMATIC DOCUMENT FEEDER (page 1-30) DOCUMENT GLASS (page 1-34)
3
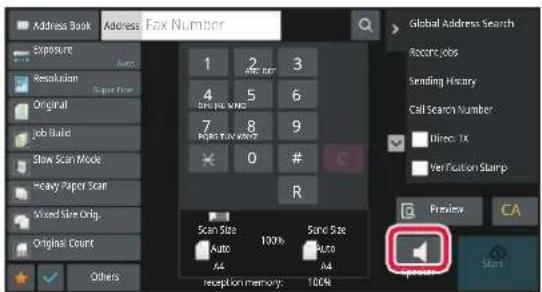
Tap the [Speaker] key.
When the connection is established, you will hear the dial tone through the machine's speaker.
![SHARP BP-50C45 - Tap the [Speaker] key. - 1](/content/2026/06/1367452/images/fc0235347b4b6aa52bd05e2a6def4311ca71f835a0f2042f6865e92f032db923.jpg)
Tapping allows you to use the slider or keys to adjust the volume of the speaker.
4
Specify the destination fax number.
- ENTERING A DESTINATION NUMBER USING THE NUMERIC KEYS (page 5-11) • RETRIEVING A DESTINATION FROM AN ADDRESS BOOK (page 5-12) • USING A SEARCH NUMBER TO RETRIEVE A DESTINATION (page 5-15) • USING A TRANSMISSION LOG TO RESEND (page 5-20)

A one-touch key in which multiple destinations are stored cannot be used
5
When the connection is made, tap the [Start] key to begin transmission.
![SHARP BP-50C45 - When the connection is made, tap the [Start] key to begin transmission. - 1](/content/2026/06/1367452/images/3cd6ab912cff8459edd73c8ff2fcf76d19685e0a44399b9937cf7af6f6225962.jpg)
To cancel transmission:
To stop transmission, tap the [Sending Cancelled] key. To stop communication, tap the [Speaker] key.
SENDING THE SAME FAX TO MULTIPLE DESTINATIONS (BROADCAST TRANSMISSION)
You can send a fax to multiple destinations in a single operation when, for example, sending a report to branch offices in different regions. This function is called "Broadcasting".
One operation allows you to send data to up to 500 destinations, including the reserved send jobs. (For example, if broadcast transmission jobs with 450 destinations are already reserved, data can be broadcasted to up to 50 destinations.)
![graph TD A["Document Input"] --> B{Processing Process} B --> C["Output 1"] B --> D["Output 2"] B --> E["Output 3"] B --> F["Output 4"]](/content/2026/06/1367452/images/ef6c4e43a9183e59b1b653090ffa79b4731f3a66a66f861ea786c41a1b474052.jpg)
It is convenient to store destinations you frequently use for broadcast transmission as contacts or groups. A maximum of 500 destinations can be stored in one contact.
For broadcast transmission, the contact or group key can be simply tapped to retrieve multiple fax numbers.
You can also send faxes with the one-touch key by setting the [Set as Default used] checkbox to ☑ when addresses are registered. If you wish to temporarily remove a destination from the stored addresses, open the detail confirmation screen and remove the destination in the screen.
ADDRESS BOOK (page 6-14)
STORING ADDRESSES THROUGH DIRECT ENTRY (page 6-19)
STORING ADDRESSES THROUGH GLOBAL ADDRESS SEARCH (page 6-20)
STORING ADDRESSES FROM FAX OR IMAGE SEND LOGS (page 6-22)
STORING GROUPS (page 6-24)

When the checkbox of "Settings (administrator)" -[System Settings] → [Image Send Settings] → [Common Settings] → [Default Settings] → [Address Book Default Selection] → [Apply Addresses of Sending Modes Only] is selected ☑ (factory default setting), the fax is only sent to those destinations that are for fax among the destinations that are set to [Set as Default used]. If the checkmark is removed ☐, the fax can be sent to destinations of other modes.
When a one-touch key is used to dial, the number of fax numbers that are dialled is the number of destinations that are stored in the one-touch key. When a one-touch key that has 10 destinations is used, 10 fax numbers are dialled.

- Broadcast transmission is available only for memory transmission.
- If this function is combined with "Timer Transmission", broadcast transmission can be performed at any time, such as at night.
A broadcast transmission can also be used in combination with other convenient functions.
- Even if a colour original is being used, it will be sent to fax and Internet fax destinations in black and white. A long original is also sent in black and white.
- If you wish to send the same image as fax to all destinations, tap [Send Same Image as Fax Address] on the action panel.
- When Scan to E-mail and Internet Fax destinations are included, the send width for Scan to E-mail and Internet Fax will be the same as the send width for fax.
- Direct SMTP addresses cannot be included in a transmission.
1
Place the original.
Place the original in the document feeder tray of the automatic document feeder, or on the document glass. AUTOMATIC DOCUMENT FEEDER (page 1-30) DOCUMENT GLASS (page 1-34)
2
Specify all destinations.
• ENTERING A DESTINATION NUMBER USING THE NUMERIC KEYS (page 5-11) • RETRIEVING A DESTINATION FROM AN ADDRESS BOOK (page 5-12) • USING A SEARCH NUMBER TO RETRIEVE A DESTINATION (page 5-15) • RETRIEVING A DESTINATION FROM A GLOBAL ADDRESS BOOK (page 5-16) • RETRIEVING A DESTINATION FROM A MOBILE ADDRESS BOOK (page 5-18) • USING A TRANSMISSION LOG TO RESEND (page 5-20)

After entering a destination using the numeric keys, if you wish to enter another destination using the numeric keys, tap + before entering the next destination.
+ can be omitted before or after a destination entered using a one-touch key.
If "Be sure to press Next Address Key ([+]) before selecting the next address." is enabled in setting mode, tap + before specifying the next destination.
3

Tap the All Destinations key.
4

Confirm the destination.

To cancel a specified destination:
Select the address you want to cancel in the address list screen, and tap the [Delete] key.
5
Tap the [Start] key to start scanning of the original.
- If you inserted the original pages in the document feeder tray, all pages are scanned. A beep will sound to indicate that scanning and transmission have ended.
- When you place the original on the document glass, scan each page one at a time. When scanning finishes, place the next original and tap the [Start] key. Repeat the procedure until all pages have been scanned and then tap the [Read-End] key. A beep will sound to indicate that scanning and transmission have ended.
![SHARP BP-50C45 - Tap the [Start] key to start scanning of the original. - 1](/content/2026/06/1367452/images/b1afa44b106ecee8352e61bc11fc2648b2e6d5f88de63d669adf8cf7575fe23a.jpg)
You can tap the [Preview] key to check a preview of the image before sending a fax. For more information, see "CHECKING THE IMAGE TO BE TRANSMITTED (page 5-29)".
RESENDING TO UNSUCCESSFUL BROADCAST TRANSMISSION DESTINATIONS
The results of a completed broadcast transmission can be checked in the job status screen. If transmission to any of the destinations failed, resend the fax to those destinations.
1
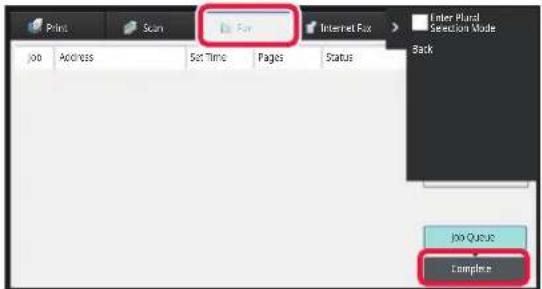
Tap the job status display, and tapping the [Fax] tab.
2
Tap the [Complete] key.
3

After tapping the key of the completed broadcast transmission, tap [Check Details of Selected Job] on the action panel.

If the broadcast transmission included destinations of different modes, the same broadcast transmission key will appear in each of those modes.
4
After tapping the [Failed] tab, tap [Resend to All Addresses Which Failed in Sending] on the action panel to resend the image.

The steps to follow after [Resend to All Addresses Which Failed in Sending] is tapped differ depending on whether or not the document filing function is used.
• Using document filing:
You will return to the document filing resend screen with the unsuccessful destinations entered. Perform the document filing resend procedure. (There is no need to re-scan the original.)
If the job was stored in a confidential folder or was stored as a confidential file, a password entry screen will appear after you tap the [Retry] key. Enter the password.
• Not using document filing:
You will return to the base screen with the unsuccessful destinations entered. Place the original and perform the steps of the broadcast transmission.
SENDING A FAX DIRECTLY FROM A COMPUTER (PC-Fax)
A file on a computer can be sent via the machine as a fax (PC-Fax function). Faxes are sent using the PC-Fax function in the same way that documents are printed. Select the PC-Fax driver as the printer driver for your computer and then select the Print command in the application. Image data for transmission will be created and sent as a fax.
By using the "Log Viewer" application, faxes can be sent using the transmission log displayed in the Log Viewer.
![graph TD A["Server"] --> B["Computer"] B --> C["Document"] C --> D["Document"] D -->| (1) | B style A fill:#f9f,stroke:#333 style B fill:#ccf,stroke:#333 style C fill:#cfc,stroke:#333 style D fill:#fcc,stroke:#333](/content/2026/06/1367452/images/3050ead94c853ade00bc3eee323e1bd510b055c51be45d413d36f715a86f8e3a.jpg)
(1) PC-I-Fax Send (2) Log Viewer
Re-send faxes using the transmission log
For the procedures for using this function, see the PC-Fax driver Help.

- To use the PC-Fax function, the PC-Fax driver must be installed. For more information, see the Software Setup Guide.
- This function can only be used on a Windows® computer.

Only transmission is available for this function. Faxes cannot be received by your computer.
DELETING A TRANSMISSION LOG
You can check transmission logs from the action panel of each image send mode.
You can delete an address selected in a transmission log, or delete all addresses.
STOPPING/DELETING A JOB, PRIORITY PROCESSING AND CHECKING THE STATUS (page 2-53)
SET THE SCANNING OF THE ORIGINALS
This section explains how to enter a destination from the initial screen of easy mode.
EASY MODE (page 5-6)
AUTOMATICALLY SCANNING BOTH SIDES OF AN ORIGINAL (2-Sided Original)
The automatic document feeder will automatically scan both sides of the document.
For example, a 2-sided original can be scanned, and its front and back sides can be sent as 2 pages.
![graph LR A["Document with a tree icon"] --> B["Document with a tree icon"] style A fill:#f9f,stroke:#333 style B fill:#bbf,stroke:#333](/content/2026/06/1367452/images/9117360ff42b339f53c972282ae48cd7b9538eced0e685fabd06e7d0ecf0fa3f.jpg)

- 2-sided scanning is not possible when direct transmission or speaker transmission is performed.
- On the BP-60C31/BP-60C36/BP-60C45/BP-50C26/BP-50C31/BP-50C36/BP-50C45, duplex scanning is not possible when originals of mixed width are scanned.
- You cannot use 2-sided scanning when the original size is set to Long Size.
- 2-sided scanning is not possible when "Settings (administrator)" - [System Settings] → [Common Settings] → [Device Control] → [Condition Settings] or [Enable/Disable Settings] → [Disabling of Document Feeder is enabled.

2-sided scanning automatically turns off after transmission has ended.
1


Tap the [Original] key, and tap the [Book] key or [Tablet] key.
See the figure on the left to check the binding edge of the original and select the key to be tapped.
(1) Book (2) Tablet
![SHARP BP-50C45 - Tap the [Original] key, and tap the [Book] key or [Tablet] key. - 1](/content/2026/06/1367452/images/e41810cb5c7e8c4092ae461d035caf2e82e6a230d12779a8ebc1e541d2175ad3.jpg)
In normal mode, tap the [2-Sided Booklet] key or [2-Sided Tablet] key.
2

Tap the [Image Orientation] key with the same orientation as the placed original.
If this setting is not correct, a suitable image may not be transmitted.
After the settings are completed, tap OK
![SHARP BP-50C45 - Tap the [Image Orientation] key with the same orientation as the placed original. - 1](/content/2026/06/1367452/images/7f46f6a0fe502a82f6a12f7bf564e06ff1d80e44bb06e0b218c426d6469d07c0.jpg)
To cancel 2-sided scanning:
Tap the [1-Sided] key.
In normal mode, tap the [2-Sided Booklet] key or the [2-Sided Tablet] key that has been forcibly displayed and cancel the display.
AUTO DETECTION
When the original is placed, its size is automatically detected.
In normal mode, the size of the placed original is shown as the "Scan Size" and the transmission size is shown as the "Send Size" in the initial screen.

In the above screen, the scan size (the placed original) is A4 (8-1/2" x 11") and the send size is auto. For example, if the scan size is A4 (8-1/2" x 11") and the send size is B5 (5-1/2" x 8-1/2"), the image will be reduced before transmission.


- Only standard original sizes can be automatically detected. NORMAL MODE (page 3-5)
- When the original size is an inch size or a non-standard size, or if the size is not detected correctly, manually specify the original scan size.
SPECIFYING THE ORIGINAL SCAN SIZE IN PAPER SIZE (page 5-45)
SPECIFYING THE ORIGINAL SCAN SIZE USING NUMERIC VALUES (page 5-47)
SPECIFYING THE ORIGINAL SCAN SIZE IN PAPER SIZE
When the original size is not standard (inch size or non-standard size) or is not detected correctly, manually specify the original size.

When [Long Size] is selected, the 2-sided scanning setting and send size cannot be changed. The image is sent in Mono2 only.
In Easy mode
1
Tap the [Original] key.
2
Tap the [Auto] key.
3

Tap a key of the desired original size.
After the settings are completed, tap OK.
![SHARP BP-50C45 - Tap the [Original] key. - 3](/content/2026/06/1367452/images/4c0bdeb4dade546099f90cc549f10210bc11e9039ec7ede58b49b4836775c06c.jpg)
If you are sending a long original, perform the setting in normal mode.
In Normal mode:
1
Tap the [Detail] key to change to normal mode.
EASY MODE (page 5-6)
2
Tap the [Original] key.
3

Tap the [Scan Size] key.
4

Tap the appropriate original size key.
After the settings are completed, tap OK.

If you are sending a long original, tap the [Long Size] key.
Use the automatic document feeder to scan a long original. The maximum width that can be scanned is 1,000 mm (39-3/8") (the maximum height is 297 mm (11-5/8)).
TRANSMITTABLE ORIGINAL SIZES (page 5-26)
SPECIFYING THE ORIGINAL SCAN SIZE USING NUMERIC VALUES
When scanning a non-standard size original such as a postcard, specify the original size by numeric values after placing the original. The width can be from 25 mm to 432 mm (1" to 17"), and the height can be from 25 mm to 297 mm (1" to 11-5/8").

When the scan size is specified by numeric values, the send size cannot be specified.
In Easy mode
1
Tap the [Original] key.
2
Tap the [Auto] key.
3
Tap the [Direct Entry] key.
4

Specify the original size.

- Tap the areas displaying width and height sizes respectively, and enter the sizes using the numeric keys. - It is convenient to use ( ) to finely adjust the entered size.
5
Tap OK twice.
On the base screen, check that the specified size is displayed on the [Original] key.

To cancel the specified size settings:
Tap the [Auto] key.
In Normal mode
1
Tap the [Detail] key to change to normal mode.
EASY MODE (page 5-6)
2
Tap the [Original] key.
3

Tap the [Scan Size] key.
4
![Scan Set A103 A4 A8 inch Enter Entry Outer Set Y 237 [75 - 294] FTT X 421 [65 - 421] FTT OK](/content/2026/06/1367452/images/cc363b3dd1459766b05ceeb4fd2e109e5efdadbfe8c7b1655ee85f20fbd535be.jpg)
Tap the [Direct Entry] key, and enter the scan size.
- Tap the areas displaying width and height sizes respectively, and enter the sizes using the numeric keys.
- It is convenient to use to finely adjust the entered size.
5
Tap the [OK] key.
After the settings are completed, tap twice. On the base screen, check that the specified size is displayed on the [Original] key.

To cancel the specified size settings:
Tap the [Auto] key.
STORING FREQUENTLY USED ORIGINAL SIZES
Store the frequently used non-standard original sizes. This section explains how to store, retrieve, change, and delete non-standard original sizes.

- The stored original size will be retained even if the main power is turned off.
- A total of up to 12 non-standard original sizes can be registered for copying, fax, and image sending. •The added original sizes will also appear in other modes.
Storing original sizes (Amend/Delete)
1
Tap the [Detail] key to change to normal mode.
EASY MODE (page 5-6)
2
Tap the [Original] key.
3
Tap the [Scan Size] key and tap the [Custom Size] tab.
4

Tap [Store/Delete] key.
5

Tap a key () for storing a custom original size.
Tap a key that does not show a size.

To amend or delete a previously stored key:
Tap the key that you want to amend or delete. The following screen will appear.
•To amend the key, tap the [Amend] key and go to the next step. - To delete the key, tap the [Delete] key. Make sure that the original size has been cleared and tap the ok key.

6

Specify the original size.
Tap the areas displaying width and height sizes respectively, and enter the sizes using the numeric keys.

It is convenient to use to finely adjust the entered size.
7
Tap the [OK] key.
Tap the OK key, and check that the key of the size stored on the Scan Size screen is added properly. After you have checked it, tap OK.
![SHARP BP-50C45 - Tap the [OK] key. - 1](/content/2026/06/1367452/images/d9b4757975190f4f8a55756944427c1cac1a19b43fe47d6ef7ff2ec4615f38f0.jpg)
To cancel the operation:
Tap the [CA] key.
Retrieving a stored original size in Easy mode
1
Tap the [Original] key.
2

Tap the [Auto] key.
3
Tap the [Custom Size] key.
4

Tap the key of the original size that you wish to retrieve.
Tap OK twice.
On the base screen, check that the specified size is displayed on the [Original] key.

To cancel the operation
Tap the [CA] key.
In Normal mode
1 Tap the [Detail] key to change to normal mode. EASY MODE (page 5-6)
2 Tap the [Original] key.
3 Tap the [Scan Size] key and tap the [Custom Size] tab.
4

Tap the key of the original size that you wish to retrieve.
After selecting the key of the original size, tap the key. Check that the specified size is displayed on the scan size screen.

To cancel the operation
Tap the [CA] key.
SPECIFYING THE SEND SIZE OF THE IMAGE
Tap this key to specify the send size as a paper size. If the specified send size is larger than the scan size, the image will be enlarged. If the specified send size is smaller than the scan size, the image will be reduced.

The send size cannot be specified when [Long Size] is selected for the scan size, or when the scan size is specified by numeric values.
1
Tap the [Detail] key to change to normal mode.
EASY MODE (page 5-6)
2
Tap the [Original] key.
3

Tap the [Send Size] key.
4

Tap the desired send size key.
After the settings are completed, tap OK.

Depending on the paper size specified for the "Scan Size", it may not be possible to select some sizes for the "Send Size". You cannot tap size keys that are unavailable for the "Send Size".
5

Tap the [Image Orientation] key with the same orientation as the placed original.
If this setting is not correct, a suitable image may not be transmitted.
After the settings are completed, tap OK.
![SHARP BP-50C45 - Tap the [Image Orientation] key with the same orientation as the placed original. - 1](/content/2026/06/1367452/images/3490fd479232dfab03ed272d77d60fb0b541e0a26a9b91b27ab550923a021d08.jpg)
To configure the default setting of image orientation:
Select [System Settings] → [Image Send Settings] → [Common Settings] → [Condition Settings] → [Image Orientation] in "Settings (administrator)".

The ratio used for reduction or enlargement of the original will appear between the "Scan Size" and the "Send Size".
CHANGING THE EXPOSURE
The exposure can be changed to suit the darkness of the original.

When using the automatic document feeder, the exposure setting cannot be changed once scanning has begun. (However, when "Job Build" or "Preview Setting" in "Others" is used, the exposure can be changed each time a new set of originals is inserted.)
Exposure settings
| Exposure Suggestion | ||
| Auto | This setting automatically adjusts the exposure for light and dark parts of the original. | |
| Manual | 1-2 | Select this setting when the original consists of dark text. |
| 3 Select this setting for a normal original (neither dark nor light). | ||
| 4-5 | Select this setting when the original consists of light text. | |
1
After tapping the [Exposure] key, tap the [Manual] key.
2

Adjust the exposure with the slider or

After the adjustment, tap


When [Auto] is selected, the exposure will be set to "3".
CHANGING THE RESOLUTION
The resolution can be specified to match the characteristics of the original, such as text or photo, the size of the text, and the darkness of the image.
Resolution settings
| Resolution Suggestion | |
| Standard | Select this setting when your original consists of normal-sized text (like the text in this manual). |
| Fine Select this setting when your original has small text or diagrams with fine lines.The original will be scanned at twice the resolution of the [Standard] setting. | |
| Super Fine Select this setting when your original has intricate pictures or diagrams.A higher-quality image will be produced than with the [Fine] setting. | |
| Ultra Fine Select this setting when your original has intricate pictures or diagrams.This setting gives the best image quality. However, transmission will take longer than with the other settings. | |
| Half Tone | Select this setting when your original is a photograph or has gradations of colour (such as a colour original).This setting will produce a clearer image than [Fine], [Super Fine], or [Ultra Fine] used alone.Halftone cannot be selected when [Standard] is used. |

- When using the automatic document feeder, the resolution setting cannot be changed once scanning has begun. (However, when "Job Build" or "Preview Setting" in "Others" is used, the resolution can be changed each time a new set of originals is inserted.)
- When a fax is sent at [Ultra Fine], [Super Fine], or [Fine] resolution, a lower resolution will be used if the receiving machine does not have that resolution.
1
Tap the [Resolution] key.
2

Tap the key of the desired resolution.
When your original is a photograph or has gradations of colour (such as a colour original), and you wish to produce a clearer image than [Fine], [Super Fine], or [Ultra Fine] used alone, set the [Half Tone] checkbox to √
Halftone cannot be selected when [Standard] is used. After the settings are completed, tap OK.
FAX RECEPTION
RECEIVING A FAX
This section explains how to enter a destination from the initial screen of easy mode. EASY MODE (page 5-6)
RECEIVING A FAX AUTOMATICALLY
When the reception mode is set to "Auto Reception", the machine will receive and print faxes automatically.

- When fax reception is in progress, it is possible to reserve a transmission by performing the transmission in memory transmission mode.
FAX TRANSMISSION METHODS (page 5-23)
- The information indicator blinks in white from the start of fax reception until printing is completed. When output is delivered to the job separator (upper tray), the indicator blinks until printing is completed and the output is removed from the tray.
- To print received faxes, make sure that the required paper is loaded into the machine's paper trays. It is not necessary to load A4 (8-1/2" x 11") paper and B5 (5-1/2" x 8-1/2") paper in both the vertical (☐) and horizontal (☐) orientations. Differences in orientation are automatically adjusted when faxes are received.
When a fax smaller than A4 (8-1/2" x 11") size is received, the size of the paper used for printing will vary depending on the orientation (vertical or horizontal) in which the sender placed the original.
- If a print job such as the copy or printer function has already been executed when printing the received data, the first reserved job is printed before the received data.
- Received faxes will not be printed when the machine cannot print due to an error condition such as out of paper, out of toner, or a paper misfeed. The faxes will be printed automatically when the error condition is cleared. (If the paper has run out, add paper and tap on the touch panel.)
- You can check current fax reception mode in the system area at the top of the screen.

- To switch between auto reception and manual reception modes:
Select [System Settings] in "Settings (administrator)" → [Image Send Settings] → [Fax Data Receive/Forward (Manual)] → [Fax Settings] → [Receive Settings].
• Distinctive Ring Detection
If multiple telephone numbers have been assigned to your telephone line, the number called can be identified by its ringing pattern. By using one number for voice calls and another number for faxes, you can tell which type of call you are receiving by the ringing pattern. You can set your machine to automatically receive faxes when your fax number is called by setting the pattern that corresponds to your fax number.
In "Settings (administrator)", select [System Settings] → [Image Send Settings] → [Fax Settings] → [Default Settings] → [Distinctive Ring Detection].
1

The machine rings and fax reception begins automatically.
When reception begins, the information indicator blinks in white.
A beep sounds when reception ends.
2

The faxes are printed automatically.
When printing ends, the Information indicator turns off. When the job separator (upper tray) is used for output, this blinks until the output is removed.

If a PIN Code entry screen appears:
A PIN Code is registered to print the received fax data. When the correct PIN Code is entered, the received fax is printed.
PRINTING A PIN CODE-PROTECTED FAX (Hold setting for received data print) (page 5-60)
How to check the fax reception mode
You can check current fax reception mode in the system area at the top of the screen.
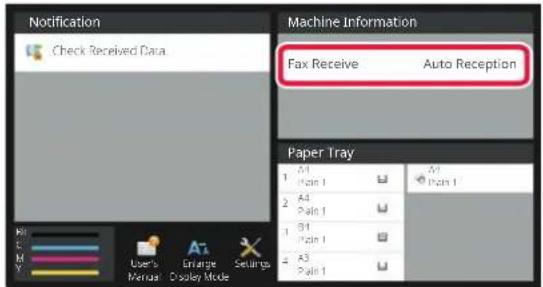
RECEIVING A FAX MANUALLY
A fax can be received manually using the touch panel (manually).

- When answering the telephone by tapping the [Speaker] key, you will be able to hear the voice of the caller, but you will not be able to speak.
- You can receive a fax after answering a call on an external telephone. Remote reception can also be used to receive a fax. RECEIVING A FAX AFTER ANSWERING A CALL ON THE EXTERNAL TELEPHONE (REMOTE RECEPTION) (page 5-104)

To switch between auto reception and manual reception modes:
Select [System Settings] in "Settings (administrator)" → [Image Send Settings] → [Fax Data Receive/Forward (Manual)] → [Fax Settings] → [Receive Settings].
1
When the machine rings, tap the [Detail] key to change to normal mode, and tap the [Speaker] key.
When the [Speaker] key is tapped, the [Receive] key appears. EASY MODE (page 5-6)
![SHARP BP-50C45 - When the machine rings, tap the [Detail] key to change to normal mode, and tap the [Speaker] key. - 1](/content/2026/06/1367452/images/9eb37120d156115d0104551679b48c3363e53cb240732a7da623fed2c76cb15e.jpg)
• To adjust the speaker volume, tap the key and adjust with the slider or keys. + - If the received fax data remains unprinted, it will cause the fax memory to fill up, which may prevent some faxes from being received. When using this function, you should print the received data as soon as possible without leaving it in the fax memory. You can view the remaining fax memory capacity on the fax mode base screen.

2

Tap the [Receive] key to receive a fax.
When printing ends, the Information indicator turns off. When the job separator (upper tray) is used for output, this blinks until the output is removed.
PRINTING RECEIVED DATA
PRINTING A PIN CODE-PROTECTED FAX (Hold setting for received data print)
Enable this setting to have faxes received and stored in memory without being printed. To print the faxes, a PIN Code must be entered. When this function is used, a PIN Code entry screen appears in the touch panel when a fax is received.


• To enable the hold setting for received data print:
In "Settings (administrator)", select [System Settings] → [Image Send Settings] → [Common Settings] → [Condition Settings] → [Hold Setting for Received Data Print].
These settings can only be configured when there is no received data in the machine memory (excluding data in a confidential or relay broadcast memory box).
- Disable Switching of Display Order
In "Settings (administrator)", select [System Settings] → [Image Send Settings] → [Common Settings] → [Condition Settings] → [Disable Switching of Display Order].
Disables changing the order of display (search number order, ascending, descending).
Once set, the display sequence is not changed. The display order will remain fixed at the order that is in effect when this setting is enabled.
Important points when using this function
If the received fax data is not printed or deleted, the fax memory will run low, and the machine will not be able to receive any faxes. When using this function, you should print the received data as soon as possible without leaving it in the fax memory.
You can view the remaining fax memory capacity on the fax mode base screen.
When little space remains in the fax memory, "Manual receive is disabled. Due to out of memory." appears on the touch panel.

- The received faxes will be stored in memory regardless of whether they are received automatically or manually.
- When the received data is transferred to another machine, data stored in memory is also transferred. At that time, the same PIN Code entry screen will appear as for printing. Forwarding will not take place unless the PIN Code is entered.

You can check the received data image on the touch panel before printing. CHECKING THE IMAGE BEFORE PRINTING (page 5-62)
When the previously programmed 4-digit PIN Code is entered using the numeric keys, printing begins.
When the [Cancel] key is tapped, the PIN Code entry screen closes. It will reappear when you tap or change modes. The data in memory key will blink in the touch panel.

•To display the received data list screen after entering the PIN Code:
In "Settings (administrator)", select [System Settings] → [Image Send Settings] → [Common Settings] → [Condition Settings] → [Preview Setting] → [Received Data Image Check Setting].
•To transfer received data to another machine:
In "Settings (administrator)", select [System Settings] → [Image Send Settings] → [Inbound Routing (Forwarding/Storing) Settings].
PRINTING RECEIVED DATA AT A SPECIFIED TIME
You can start printing the received data at a specified time.
For stress-free printing, you should avoid printing large numbers of pages at peak times during the day, and when you do not urgently need to print.
For example, if it is set to print data received during the day at 20:00, the received data will not be printed immediately, and printing will begin automatically at 20:00.
![graph LR A["Sun"] --> B["Morningstar"] B --> C["Sun/ Moon"] C --> D["Back to Document"] style A fill:#f9f,stroke:#333 style B fill:#ccf,stroke:#333 style C fill:#cfc,stroke:#333 style D fill:#fcc,stroke:#333](/content/2026/06/1367452/images/3e48383cbad16489b6894e13d22aec54af55aeb576ec9cde67d85f06fbfaa626.jpg)

- The printed data is automatically deleted from memory.
- If the power is turned off at the specified time, printing will start at the timing when the power is turned on.
- This function can be used when "Settings (administrator)" - [System Settings] → [Image Send Settings] → [Common Settings] → [Condition Settings] → [Preview Setting] → [Received Data Image Check Setting] is enabled.

If Hold Setting for Received Data Print is enabled, this function is not available.

•To print received data at the specified time:
In "Settings", select [System Settings] → [Image Send Settings] → [Common Settings] → [Condition Settings] → [Time Specified Output of Received Data].
When "Change Password" or "Hold Setting for Received Data print" is, the password entry field is greyed out.
•To disable the hold setting for received data print:
In "Settings (administrator)", disable this function using [System Settings] → [Image Send Settings] → [Common Settings] → [Condition Settings] → [Hold Setting for Received Data Print].
CHECKING THE IMAGE BEFORE PRINTING
Check the image of received data on the touch panel before printing.
This function can be used when "Settings (administrator)" - [System Settings] → [Image Send Settings] → [Common Settings] → [Condition Settings] → [Preview Setting] → [Received Data Image Check Setting] is enabled*.
* The factory default setting is disabled.
Important points when using this function
If the received fax data is not printed or deleted, the fax memory will run low, and the machine will not be able to receive any faxes. When using this function, you should print the received data as soon as possible without leaving it in the fax memory.
You can view the remaining fax memory capacity on the fax mode base screen.
When data is received, is shown at the top of the screen.


Depending on the size of the received data, part of the check image on the touch panel may not appear.
The received data list can be also shown in the job status screen that appears when you tap the job status display.
The received data can be forwarded, deleted, or saved from the received data list.
FORWARDING RECEIVED DATA MANUALLY (page 5-71)
SAVING RECEIVED DATA (page 5-73)
1

In the System Information, tap the [Check Received Data].
The received data is listed.
![SHARP BP-50C45 - In the System Information, tap the [Check Received Data]. - 1](/content/2026/06/1367452/images/aae3a773621021fb3c0ac9a1c08b72c9ca0b6aac03dc857222c22108adaeeb20.jpg)
You can also display the received data list by tapping the job status display and tapping [Check Received Data] on the action panel of Job Status screen.
2

Tap the key of the received data you wish to check, and tap [Check Image] on the action panel.
Displays the received data image.

- Tap ≡ to show a list of received data. The list view or thumbnails view can be changed depending on the setting mode.
- To delete a received image, tap [Delete] on the action panel.
- To transfer the selected received image, tap [Forward to Other Address] on the action panel. FORWARDING RECEIVED DATA MANUALLY (page 5-71)
- To save the selected received image, tap [File] on the action panel. SAVING RECEIVED DATA (page 5-73)
- To store the sender fax number as a number for "Allow/Reject Number Setting", tap [Register as Junk Fax] on the action panel and, in the confirmation message screen, tap the [OK] key. Specify a sender fax number as a number for "Allow/Reject Number Setting" by selecting, in "Settings (administrator)", select [System Settings] → [Image Send Settings] → [Fax Settings] → [Receive Settings] → [Allow/Reject Number Setting].
3

Tap the image you wish to print, and tap the [Print] on the action panel.
The machine starts printing the image.
- [Select All Page]: Selects all displayed images.
- [Release All Page]: Cancels all images that have been selected by "Select All Page". • /+Use these keys to enlarge or reduce an image.
- / Rotates image counterclockwise or clockwise.

- A preview image is an image for the touch panel. It will differ from the actual print result.
- Tap [Erase Specified Range] on the action panel to delete unwanted area of the image. Specify the image area you wish to delete in the Erase Specified Range screen.
- To forward the selected image, tap [Forward to Other Address] on the action panel. FORWARDING RECEIVED DATA MANUALLY (page 5-71) • To save the selected received image, tap [File] on the action panel. SAVING RECEIVED DATA (page 5-73)
FORWARDING RECEIVED DATA
This section explains how to enter a destination from the initial screen of easy mode. CHANGING MODES (page 2-10)
FORWARDING RECEIVED FAXES (FAX DATA FORWARD)
When the machine cannot print because it is out of paper or out of toner, received faxes can be forwarded to another previously stored fax machine. Store a recipient by selecting [Send Setting (page 9-92)] in Setting mode. If the machine has received data, the information indicator blinks in white.
This function is convenient in an office or work area that has two or more telephone lines and another fax machine is connected to a different line than the machine.
![graph TD A["Server"] -->|X| B["Printer"] B --> C["Output"] D["Document"] -->|Circled| E["Document"] style A fill:#f9f,stroke:#333 style B fill:#ccf,stroke:#333 style C fill:#cfc,stroke:#333](/content/2026/06/1367452/images/1cef8259b986aa9d33427e4175a75ef394607d054cb04bd47ba8b73f19068de7.jpg)

- If some pages of a fax that is being forwarded were successfully printed, only those pages that were not printed will be forwarded.
- A forwarded fax becomes a fax transmission job. If transmission does not take place because the transmission was cancelled or an error occurred, the fax will be held in memory until it can be printed.
- All faxes received are forwarded. Note, however, that faxes received and stored in an F-code confidential memory box cannot be forwarded.
- If a PIN Code entry screen appears after tapping the [OK] key, "Hold Setting for Received Data Print" has been enabled. Enter the PIN Code using the numeric keys to begin forwarding. PRINTING A PIN CODE-PROTECTED FAX (Hold setting for received data print) (page 5-60)
1

Make sure that the information indicator is blinking in white, and tap the [Settings] key in the home screen.
2
Tap the [System Settings] → [Image Send Settings] → [Fax Data Receive/Forward (Manual)] key.
3
Tap the [Execute] key in [Forward Received Data] to begin forwarding.
![SHARP BP-50C45 - Tap the [Execute] key in [Forward Received Data] to begin forwarding. - 1](/content/2026/06/1367452/images/c8109929dc4824e3eace35d142c08a0afbca929cf7167cebee9e10592cba3240.jpg)
If a PIN Code entry screen appears, the "Hold Setting for Received Data Print" has been enabled. Enter the PIN Code using the numeric keys to begin forwarding. PRINTING A PIN CODE-PROTECTED FAX (Hold setting for received data print) (page 5-60)
FORWARDING RECEIVED DATA TO PRESET DESTINATIONS (INBOUND ROUTING SETTINGS)
You can have received faxes automatically forwarded to a fax address, Internet fax address, e-mail address, file server address, desktop address, or network folder address. Received data can be forwarded to the specified destinations without being printed.
![graph LR A["File Cabinet"] --> B["Document Process"] B --> C["Computer"] C --> D["Server"]](/content/2026/06/1367452/images/b160270838a10dad79185c23b458e6827fbc8b23d1eac966d590b33e1757ed05.jpg)
Configure all forwarding settings for received faxes in setting mode (Web version). For the procedure for accessing the setting mode (Web version), see Quick Start Manual.
The following explanation assumes that the setting mode (Web version) has been accessed with administrator rights.

Whether or not to forward data for each forwarding table can be quickly set.
In "Settings (administrator)" - [System Settings] → [Image Send Settings] → [Inbound Routing (Forwarding/Storing) Settings] → [Administration Settings] → [Inbound Routing], tap [Enable]/[Disable] for each forwarding table that appears.

- This function cannot be used for faxes received by confidential reception.
- When faxes forwarded using this function are printed at the forwarding destination, the date and time of reception cannot be printed on the faxes. ("Receiving Date & Time Print" is disabled.)
- The received data is not forwarded to a hyperlink destination that is registered in the specified address.
- A direct SMTP address cannot be specified as a forwarding destination.
1
In "Settings (Web version)", click [System Settings] → [Image Send Settings] → [Inbound Routing (Forwarding/Storing) Settings] → [Administration Settings].
2
In "Inbound Routing", select [Enable] and click the [Submit] button.

Users without administrator rights can be prohibited from storing, editing, and deleting forwarding tables in this screen, and from specifying which table is used. To do so, set the checkboxes for the following items to √.
- Disable Registration of Forward Table
- Disable Change/Delete of Forward Table • Disabling of Forward Condition Change Specify in [Print Style Setting] whether or not to have the machine print the faxes to forward when inbound routing is enabled. After the settings are completed, be sure to click the [Submit] button.
- [Always Print]: Always prints received data before forwarding the data.
- [Print at Error]: Prints received data only when an error prevents forwarding.
- [Save Only at Error]: Saves received data only when an error prevents forwarding. For the saved data, the error address can be confirmed and the data can be resent. From the [Scan] or [Fax] tab in the job status screen, tap [Check Error Box] on the action panel.
3 Click [Sender Address Registration] in the [Inbound Routing (Forwarding/Storing) Settings] menu in the "Settings (Web version)".
4 Enter the sender address of fax number in "Internet Fax Address" or "Fax Number" as appropriate, and click the [Add to List] button.
The entered address will be added to the "Address to be Entered" list. Enter the address directly (maximum of 1500 characters) or select the address from a global address book by clicking the [Global Address Search] button. To store multiple sender addresses or fax numbers, repeat these steps.
![SHARP BP-50C45 - Enter the sender address of fax number in "Internet Fax Address" or "Fax Number" as appropriate, and click the [Add to List] button. - 1](/content/2026/06/1367452/images/285bfe5d7155732239a04fc72d1a9868b1a3b6f8ff89791a18fd80a8bd970a41.jpg)
- If you wish to have only faxes from specified addresses forwarded, store the desired sender addresses. Send addresses stored here can be selected from a list when you store a forwarding table.
- A maximum of 500 sender numbers/addresses can be stored.
- To delete an entered address, select the address in "Address to be Entered" and click the [Delete] button.
5 When you have finished adding addresses, click the [Submit] button.
6 Click [mbound Routing Settings] in the [mbound Routing (Forwarding/Storing) Settings] in the "Settings (Web version)" menu and click the [Add] button.
7 Enter a Table Name.
Select the sender whose taxes will be forwarded.
- To forward all received data, select [Forward All Received Data].
- To forward only data received from specific senders, select [Forward received data from specified senders only.]. To forward all data except data from specific senders, select [Forward all received data except that from specified senders.]. Then, select the appropriate senders from the list and click the [Add] button.

When selecting senders from the "Sender Address Setting" list, you can use the [Shift] key or the [Ctrl] key on your keyboard to select multiple senders.
9
Select the forwarding conditions.
- To always forward received data, select [Always Forward].
- To specify a day and time on which received data will be forwarded, select [Forward received data only on specified days.] and select the checkbox (√) of the desired day of the week. To specify a time, select the [Set Forwarding Time] checkbox ( ) and specify the time.

Up to three forwarding day and time settings can be set for one forwarding table, and a forwarding destination can be set for each set time. To configure these settings, use the [Forward Condition] tabs to access each setting.
10
Select the file format.
The format can be set separately for each forwarding address (for each of forwarding addresses 1, 2, and 3 in the table).

- Images forwarded in TIFF format may not be displayed correctly in some recipient environments. In this event, change the file format to PDF.
- If the Internet fax address is selected as a recipient, data is forwarded in TIFF regardless of the specified format.
- If a fax number is selected as a recipient, the file format is ignored.
11
Select the recipient from the address book.
You can specify multiple registered addresses or telephone numbers from the address book of the machine.
Up to 1,000 recipients can be registered for Recipients 1, 2, and 3 in total.
When you select the recipients from the address book, up to 400 recipients can be registered for network folder, FTP/Desktop, Internet fax, and fax.

A direct SMTP address cannot be specified as a forwarding destination.
12
Enter a recipient directly and specify the recipient.
- Specify this information if necessary.
- Enter an e-mail address, an Internet fax address, a direct SMTP address, or a fax number directly and tap the [Add] key.
- When you specify an e-mail address or a fax number, you can use the global address search.
- When you specify a fax number, also specify the international correspondence mode.
- When entering recipients directly, up to 100 recipients can be registered for e-mail address, network folder, FTP/Desktop, Internet fax, and fax.
13
Click [Submit].
14 Click [Inbound Routing Settings] in the [Inbound Routing (Forwarding/Storing) Settings] in "Settings (Web version)". 15 From the forwarding table, select [Forward to All Forward Destinations] or [Forward based on Forward Condition]. 16 From the forwarding table, select [Always Forward] or [Forward received data only on specified days].
The forwarding permission settings that appear here are linked to the forwarding conditions set in step 10. If you wish to use different forwarding conditions than those set in step 10, set the forwarding permission settings.
![SHARP BP-50C45 - Click [Submit]. - 1](/content/2026/06/1367452/images/9eec23bcc984ec9610f60280cf3534f52a44e8a57bd5a1fdb7c31a888f97bd07.jpg)
- To use the inbound routing function, enable the forwarding tables that you wish to use from among the stored tables.
- To delete a forwarding table, click the checkbox next to the table name so that it is selected (√) and click [Delete].
17 Click [Submit].
SAVING RECEIVED FAXES TO THE MACHINE'S STORAGE (INBOUND ROUTING)
Received faxes can be saved to the machine's storage. Saved faxes can be viewed on a computer.
Set PDF, TIFF (multi) or TIFF (single) for the saved Internet faxes.
You can also receive notification of the storage result or storage folder by E-mail.
Received faxes are saved in the following directory:
\MFP\faxreceive

- Up to 500 files can be stored in one folder as received data.
- The "faxreceive" folder contains files of "Settings for Local Drive Storing of Received Data".
- The folder is automatically created.
- The file name for received data can be set in "File Name Setting" in "Settings for Local Drive Storing of Received Data" in "Inbound Routing (Storage) Settings".
How to save received faxes to the storage
In "Settings (administrator)", click [System Settings] → [Network Settings] → [Public Folder / NAS Setting]. (Administrator rights required.)
2 Select [Allowed] in "faxreceive:Use of Storage" and click the [Submit] button.
Settings for saving received faxes to the storage
In "Settings (administrator)", click [System Settings] → [Image Send Settings] → [Inbound Routing (Forwarding/Storing) Settings] → [Inbound Routing (Storage) Settings] (administrator rights are required).
![SHARP BP-50C45 - In "Settings (administrator)", click [System Settings] → [Image Send Settings] → [Inbound Routing (Forwarding/Storing) Settings] → [Inbound Routing (Storage) Settings] (administrator rights are required). - 1](/content/2026/06/1367452/images/01bd7c1cb2606a4e2f6c7583394ff579c567bf705a75ff48e89c0d52d3efb8f6.jpg)
- Data that can be saved are received faxes and received Internet faxes. Confidential reception and polling reception faxes cannot be saved.
- Depending on the setting, received faxes that cannot be saved because of the file number limit or other reason are either printed or saved in the inbound routing error box.
FORWARDING RECEIVED DATA MANUALLY
Received faxes can be forwarded manually after receipt.
This function is available when [System Settings] → [Image Send Settings] → [Common Settings] → [Condition Settings] → [Preview Setting] → [Received Data Image Check Setting] is enabled* in "Settings (administrator)".
* The factory default setting is disabled.
When data is received, is shown at the top of the screen.

In the System Information, tap [Check Received Data].
The received data is listed.
![SHARP BP-50C45 - In the System Information, tap [Check Received Data]. - 1](/content/2026/06/1367452/images/d072156e21d22ae069e3037c637a9aed4fb828bde422ce861db77d5a5c25393c.jpg)
You can also display the received data list by tapping the job status display and tapping [Check Received Data] on the action panel of the Job Status screen.
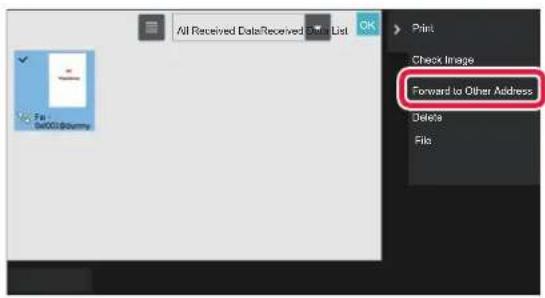
Tap the key of the received data you wish to forward, and tap [Forward to Other Address].
- Tap to show a list of received data. The list view or thumbnails view can be changed depending on the setting mode.
- Multiple sets of received data can be selected.
![SHARP BP-50C45 - Tap the key of the received data you wish to forward, and tap [Forward to Other Address]. - 1](/content/2026/06/1367452/images/d5356240993c5cd47018eb654954be69bd6a5bfe77502d9f18be38f6b18d43a2.jpg)
- When you select a single received data only, you can tap [Check Image] on the action panel and check the image on the preview screen.
- To store the sender fax number as a number for "Allow/Reject Number Setting", tap [Register as Junk Fax] on the action panel and, in the confirmation message screen, tap the [Store] key.
- Specify a sender fax number as a number for "Allow/Reject Number Setting" by selecting, in "Settings (administrator)", [System Settings] → [Image Send Settings] → [Fax Settings] → [Receive Settings] → [Allow/Reject Number Setting].
Select the destination from the Address Book screen, and tap the [Start] key.
SAVING RECEIVED DATA
You can save received faxes in the document filing folder.
This function is available when [System Settings] → [Image Send Settings] → [Common Settings] → [Condition Settings] → [Preview Setting] → [Received Data Image Check Setting] is enabled* in "Settings (administrator)".
* The factory default setting is disabled.
![graph LR A["Desktop"] --> B["Database"] style A fill:#f9f,stroke:#333 style B fill:#bbf,stroke:#333](/content/2026/06/1367452/images/7d2d0b9747f300885e70252d2467fb205d84f1111a7ca8c7d932da78f0483f91.jpg)
When data is received, is shown at the top of the screen.
1

In the System Information, tap the [Check Received Data].
The received data is listed.
![SHARP BP-50C45 - In the System Information, tap the [Check Received Data]. - 1](/content/2026/06/1367452/images/0f909d164a63159400aa78c2b6601e081fb01da551876077a549f58746aeaa13.jpg)
You can also display the received data list by tapping the job status display and tapping [Check Received Data] on the action panel of Job Status screen.
2

Tap the key of the received data you wish to save, and tap [File] on the action panel.
- Tap to show a list of received data. The list view or thumbnails view can be changed depending on the setting mode.
- Multiple sets of received data can be selected.
![SHARP BP-50C45 - Tap the key of the received data you wish to save, and tap [File] on the action panel. - 1](/content/2026/06/1367452/images/53570a496612fd74d0096a17fb04f8baa731401dc66fabcec3480f721ad1a270.jpg)
- When you select a single received data only, you can tap [Check Image] on the action panel and check the image on the preview screen.
- To store the sender fax number as a number for "Allow/Reject Number Setting", tap [Register as Junk Fax] on the action panel and, in the confirmation message screen, tap the [Store] key. Specify a sender fax number as a number for "Allow/Reject Number Setting" by selecting, in "Settings (administrator)", select [System Settings] → [Image Send Settings] → [Fax Settings] → [Receive Settings] → [Allow/Reject Number Setting].
3
Set the file information, and tap the [Save] key.
OTHER FUNCTIONS
COMMON FUNCTIONS
The following functionality is the same as scanner functionality.
For detailed explanations, see the explanation in the scanner/internet fax chapter.
N-Up Printing: "SENDING TWO PAGES AS A SINGLE PAGE (N-Up) (page 6-97)"
Card Shot: "SCANNING BOTH SIDES OF A CARD ONTO A SINGLE PAGE (CARD SHOT) (page 6-101)"
Job Build: "SCANNING MANY ORIGINALS AT ONCE (JOB BUILD) (page 6-113)"
Mixed Size Original: "SCANNING ORIGINALS OF DIFFERENT SIZES (MIXED SIZE ORIGINAL) (page 6-99)"
Dual Page Scan: "SCANNING AN ORIGINAL AS TWO SEPARATE PAGES (DUAL PAGE SCAN) (page 6-116)"
Book Divide: "SPLITTING A PAMPHLET BY PAGE AND TRANSMITTING THE PAGES SUCCESSIVELY (BOOK DIVIDE) (page 6-119)"
Erase: "ERASING PERIPHERAL SHADOWS ON THE IMAGE (ERASE) (page 6-131)"
Slow Scan Mode: "SCANNING A THIN ORIGINAL (SLOW SCAN MODE) (page 6-134)"
Heavy Paper Scan: "SCANNING A HEAVY ORIGINAL (HEAVY PAPER SCAN) (page 6-136)"
Original Count: "CHECKING THE NUMBER OF SCANNED ORIGINAL SHEETS BEFORE TRANSMISSION (ORIGINAL COUNT) (page 6-140)"
Verification Stamp: "STAMPING SCANNED ORIGINALS (VERIFICATION STAMP) (page 6-142)"
Timer: "STARTING A TRANSMISSION AT A SPECIFIED TIME (TIMER TRANSMISSION) (page 6-149)"
STORING FAX OPERATIONS (PROGRAM)
This function collectively stores various settings as one program. The stored program can be retrieved using an easy operation.
For example, suppose that the same A4 (8-1/2" x 11") size documents are distributed to branch offices in various regions once a month.
(1) The same documents are faxed to each branch office. (2) To save paper, two document pages are faxed as a single page. (3) Smudges on the edges of the documents are erased before transmission.
![graph TD A["Document Type -1"] --> B["Document Type -2"] B --> C["Document Type -1"] C --> D["Document Type -2"] D --> E["Document Type -1"] E --> F["Document Type -2"] style A fill:#f9f,stroke:#333 style B fill:#f9f,stroke:#333 style C fill:#ccf,stroke:#333 style D fill:#ccf,stroke:#333 style E fil…](/content/2026/06/1367452/images/84f7a2da68ca227449c7723766aa228e9e6ec7077ad2cbfdda5a711fe5fbf795.jpg)
| When a job program is not stored When a job program is stored | |
| Enter the fax number for each branch.↓Specify N-Up.↓Specify Erase.↓Tap the [Start] key.Scan and send the original. | Call the registered program.↓Tap the [Start] key.Scan and send the original. |
| Considerable time is required to send the documents each month because the above settings must be selected.In addition, mistakes are occasionally made when selecting the settings. | When a program is stored, settings are selected with ease by simply tapping the key of the program.In addition, transmission takes place according to the stored settings so there are no chances for mistakes. |

• To configure a program:
Tap [Program Registration] that appears on the action panel when you operate any mode screens.
- Prohibit registration of programs / prohibit deleting of registered programs:
In "Settings (administrator)", select [System Settings] → [Image Send Settings] → [Common Settings] → [Enable/Disable Settings] → [Settings to Disable Transmission] → [Disable Registration/Deletion of All Program Items].

- The settings stored in a program will be retained even after the program is used for transmission. The same settings can be used repeatedly for transmission. • The following contents cannot be stored in programs:
- Tapping the [Speaker] key, Quick File, File, page move and unspecified erase during preview, Metadata Entry, Send Settings, and Own Name Select.
- Up to 48 programs can be stored.
- Up to 500 destinations can be stored in one program.
- A program in which sub addresses and passcodes are specified as an F-code destination records all sub addresses and passcodes.
This section explains how to enter a destination from the initial screen of normal mode. EASY MODE (page 5-6)
1
Place the original.
According to the function stored in the program, place the original in the document feeder tray of the automatic document feeder, or on the document glass. AUTOMATIC DOCUMENT FEEDER (page 1-30) DOCUMENT GLASS (page 1-34)
2
Tap [Call Program] on the action panel.
3

Tap the desired program key.
4
Configure additional settings as required.

Some settings cannot be added depending on the contents of the called program.
5
Tap the [Start] key to start scanning of the original.
If you inserted the original pages in the document feeder tray, all pages are scanned. When you place the original on the document glass, scan each page one at a time. After you have scanned the last original, tap the [Read-End] key. A beep will sound to indicate that scanning and transmission have ended.
![SHARP BP-50C45 - Tap the [Start] key to start scanning of the original. - 1](/content/2026/06/1367452/images/f159cb31f1af1cf40573f9c8a616d327d1ff153ddc2b9761fe78b3ea1871d411.jpg)
You can tap the [Preview] key to check a preview of the image before sending a fax. For more information, see "FAX TRANSMISSION METHODS (page 5-30)".
OPERATING FAX TRANSMISSION AND RECEPTION REMOTELY
This section explains how to enter a destination from the initial screen of normal mode.
EASY MODE (page 5-6)
CALLING A FAX MACHINE AND INITIATING RECEPTION (POLLING)
When you connect to another machine and receive a document from it, this is called "Polling".
The document reception from another machine is called "Polling Reception".
You can enter multiple destination numbers. When you enter multiple destination numbers, the document is received by polling in the sequence you have entered the destination numbers.
Document reception by polling from multiple machines is called "Serial Polling".
Use the manual polling reception when you must start polling after listening to a recorded greeting, such as when using a fax information service.
![graph TD A["Requests fax transmission Memory Box"] -->|Send| B["Send"] B --> C["Fax transmission"]](/content/2026/06/1367452/images/26ac507d19689797cc72adffe85d796d728b3b585764ede4d6b08e9054ed5200.jpg)
(3) The fax is received. (2) The prepared document is transmitted.

- Make sure there is no original in the machine when using the polling reception function.
- The function can only be used when the other machine is Super G3 or G3 compatible and has a polling function.
- The receiving machine bears the expense (phone charges) of the polling reception.
- If necessary, this function can be combined with the timer transmission to perform the polling reception at any time such as at night or when you are not present. (Only one timer polling reception can be set.)
1
Enter the destination fax number.
• ENTERING A DESTINATION NUMBER USING THE NUMERIC KEYS (page 5-11) • RETRIEVING A DESTINATION FROM AN ADDRESS BOOK (page 5-12) • USING A SEARCH NUMBER TO RETRIEVE A DESTINATION (page 5-15) • RETRIEVING A DESTINATION FROM A GLOBAL ADDRESS BOOK (page 5-16) • USING A TRANSMISSION LOG TO RESEND (page 5-20)

- Multiple fax numbers can be entered (maximum of 500).
- Polling will take place in the order that the multiple fax numbers were entered. Document reception by polling from multiple machines is called "Serial Polling". • To enter multiple fax numbers, tap + after entering a fax number and enter the next fax number.

- In this procedure, one-touch keys that have a sub-address and passcode cannot be used.
- A one-touch key in which an address other than fax number is stored cannot be used.
2
Tap the [Others] key, and tap the [Polling] key.
A checkmark appears on the icon. After the settings are completed, tap the [Back] key.
![SHARP BP-50C45 - Tap the [Others] key, and tap the [Polling] key. - 1](/content/2026/06/1367452/images/5adfe833dd6485b2a08ff868b9e7c2a486816f1b7be359ab8b1d5a0c4818392c.jpg)
To cancel the Polling setting: Tap the [Polling] key to clear the checkmark.
3
Tap the [Start] key to initiate fax reception.
Your machine will call the other machine and initiate reception of the fax.
INITIATING POLLING RECEPTION MANUALLY
Use the manual polling reception when you must start polling after listening to a recorded greeting, such as when using a fax information service.

- Make sure there is no original in the machine when using the polling reception function.
- This function cannot be used to poll multiple machines (serial polling).
- The function can only be used when the other machine is Super G3 or G3 compatible and has a polling function.

The receiving machine bears the expense (phone charges) of the polling reception.
1

Tap the [Speaker] key.
You will hear the dial tone through the machine's speaker.
2
Enter the destination fax number.
- ENTERING A DESTINATION NUMBER USING THE NUMERIC KEYS (page 5-11) • RETRIEVING A DESTINATION FROM AN ADDRESS BOOK (page 5-12) • USING A SEARCH NUMBER TO RETRIEVE A DESTINATION (page 5-15) • RETRIEVING A DESTINATION FROM A GLOBAL ADDRESS BOOK (page 5-16)
- RETRIEVING A DESTINATION FROM A MOBILE ADDRESS BOOK (page 5-18) • USING A TRANSMISSION LOG TO RESEND (page 5-20)

One-touch key for a contact or group in which multiple destinations are stored, and one-touch key for which an address other than fax number is stored cannot be used.

After tapping the [Speaker] key, you can tap the [Speaker Volume] key to adjust the volume of the speaker.
3
Tap the [Others] key, and tap the [Polling] key to receive originals (data).
A checkmark appears on the icon.
![SHARP BP-50C45 - Tap the [Others] key, and tap the [Polling] key to receive originals (data). - 1](/content/2026/06/1367452/images/55ee5deea0b3174ff6d8479b2f4e2271d14845d2e736ea7200b222fb00e6539d.jpg)
To cancel the Polling setting:
Tap the [Polling] key to clear the checkmark.
SENDER-RELATED FEATURES
This section explains how to enter a destination from the initial screen of normal mode.
EASY MODE (page 5-6)
ADDING YOUR SENDER INFORMATION TO FAXES (FAX OWN NUMBER SENDING)
Your sender information (date, time, sender name, sender fax number or destination name, number of pages) is automatically added to the top of each fax page you transmit.
| Outside scanned image (factory default setting) | Load |
| The transmitted image length will be length of sender information + length of original image. When the fax is printed by the receiving machine, it may be reduced or divided onto two pages. | The sender information is printed inside the original image, and thus the transmitted image length is the length of the original. Note that the sender information will overlap part of the original image (the overlapped part of the original image will not appear). |
Example of the sender information printed

(1) Date, time: The date and time of transmission. (2) Sender name: The sender name programmed in the machine. (3) Sender fax number or destination name (one-touch key name) (4) Page numbers: Page number/total pages

If destination name is set to be attached and the destination is not specified using a one-touch key, this information is not added to the fax and not printed.

•To set the date and time:
In "Settings", select [System Settings] → [Common Settings] → [Device Control] → [Clock Adjust].
•To store a sender name and sender fax number:
In "Settings (administrator)", select [System Settings] → [Image Send Settings] → [Common Settings] → [Own Name and Destination Set] → [Own Number and Name Set] → [Sender Data Registration]. When you use the Own Number Setting, always configure this information.
•To add the number of pages to be transmitted:
In "Settings", select [System Settings] → [Image Send Settings] → [Fax Settings] → [Send Settings] → [Printing Page Number at Receiver].
Page numbers appear in the format "page number/total pages". Only the page number is printed when "Manual Transmission" or "Quick On Line Sending" is used.
•To select a sender fax number or destination:
In "Settings", select [System Settings] → [Image Send Settings] → [Fax Settings] → [Send Settings] → [Sender Destination Name Switch].
TEMPORARILY CHANGING THE SENDER INFORMATION (OWN NAME SELECT)
You can temporarily change sender information to be used in the own number sending by selecting from data stored separately.

The function is released when the transmission with the changed sender information ends.

•To store the sender information to be used for Own Name Select function:
In "Settings (administrator)", select [System Settings] → [Image Send Settings] → [Common Settings] → [Own Name and Destination Set] → [Own Number and Name Set] → [Registration of Own Name Select].
- Sender Name
Enter the sender name. A maximum of 20 characters can be entered for the sender name.
After entering a sender name, tap the [Store] key.
The lowest unused registration number from 01 to 18 will be automatically assigned to the sender name. This number cannot be changed.
- Sender Name List
Displays a list of stored sender names.
When you select a sender name, it is deleted.
1
Place the original.
Place the original in the document feeder tray of the automatic document feeder, or on the document glass.
AUTOMATIC DOCUMENT FEEDER (page 1-30)
DOCUMENT GLASS (page 1-34)
2
Enter the destination fax number.
- ENTERING A DESTINATION NUMBER USING THE NUMERIC KEYS (page 5-11)
- RETRIEVING A DESTINATION FROM AN ADDRESS BOOK (page 5-12) • USING A SEARCH NUMBER TO RETRIEVE A DESTINATION (page 5-15) • RETRIEVING A DESTINATION FROM A GLOBAL ADDRESS BOOK (page 5-16) • RETRIEVING A DESTINATION FROM A MOBILE ADDRESS BOOK (page 5-18) • USING A TRANSMISSION LOG TO RESEND (page 5-20)
3
Tap the [Others] key, and tap the [Own Name Select] key.
4
Tap the sender information key to specify the sender information.
After the settings are completed, tap the and [Back] keys in sequence.

To cancel the sender information setting:
Tap the [Clear] key.
5
Tap the [Start] key to start scanning of the original.
- If you inserted the original pages in the document feeder tray, all pages are scanned.
- A beep will sound to indicate that scanning and transmission have ended.
- When you place the original on the document glass, scan each page one at a time.
- When scanning finishes, place the next original and tap the [Start] key. Repeat until all pages have been scanned and then tap the [Read-End] key.
- A beep will sound to indicate that transmission has ended.
![SHARP BP-50C45 - Tap the [Start] key to start scanning of the original. - 1](/content/2026/06/1367452/images/67b2feea8ae9e9653f81706c7c8e26dc27cb9e0d52e39b1c5eb1217162da8304.jpg)
You can tap the [Preview] key to check a preview of the image before sending a fax.
For more information, see "CHECKING THE IMAGE TO BE TRANSMITTED (page 5-29)". However, settings for this function cannot be changed in the preview screen.
ASSUMING A SPECIFIC USAGE
This section explains how to enter a destination from the initial screen of normal mode.
EASY MODE (page 5-6)
CHANGING THE PRINT SETTINGS FOR THE TRANSACTION REPORT (TRANSACTION REPORT)
A transaction report is automatically printed out to alert you when a transmission fails or when a broadcast transmission is performed.
The transaction report contains a description of the transmission (date, start time, name of destination, time required, number of pages, result, etc.).
INFORMATION APPEARING IN THE RESULT COLUMN (page 5-106)

- Transaction reports are printed based on conditions set in "Settings"; however, you can temporarily select different conditions for a transmission.
- For a broadcast transmission, changes to the transaction report print conditions apply to all destinations.

To set the printing conditions of transaction report:
In "Settings (administrator)", select [System Settings] → [Image Send Settings] → [Fax Settings] → [Default Settings] → [Transaction Report Print Select Setting].
1
Place the original.
Place the original in the document feeder tray of the automatic document feeder, or on the document glass.
AUTOMATIC DOCUMENT FEEDER (page 1-30)
DOCUMENT GLASS (page 1-34)
2
Enter the destination fax number.
- ENTERING A DESTINATION NUMBER USING THE NUMERIC KEYS (page 5-11) • RETRIEVING A DESTINATION FROM AN ADDRESS BOOK (page 5-12) • USING A SEARCH NUMBER TO RETRIEVE A DESTINATION (page 5-15) • RETRIEVING A DESTINATION FROM A GLOBAL ADDRESS BOOK (page 5-16) • RETRIEVING A DESTINATION FROM A MOBILE ADDRESS BOOK (page 5-18) • USING A TRANSMISSION LOG TO RESEND (page 5-20)
Tap the [Others] key, and tap the [Transaction Report] key.

Tap the key of the print settings.
After the settings are completed, tap the [OK] and [Back] keys in sequence.

To cancel the transaction report setting:
Tap the [Do not Print] key.

- The print conditions for a transaction report are as follows:
- "Always Print": A transaction report is printed no matter whether the transmission succeeds or fails.
- "Print at Error": A transaction report is printed when transmission fails.
- "Do not Print": Do not print a transaction report.
- Set the [Print Original Image] checkbox to √ to include the first page of the transmitted original in the transaction report.
- Even if the [Print Original Image] checkbox is √, the original cannot be printed when speaker dialling, manual transmission, direct transmission, polling reception, or F-code transmission is used.
Tap the [Start] key to start scanning of the original.
- If you inserted the original pages in the document feeder tray, all pages are scanned.
- A beep will sound to indicate that scanning and transmission have ended.
- When you place the original on the document glass, scan each page one at a time.
- When scanning finishes, place the next original and tap the [Start] key. Repeat until all pages have been scanned and then tap the [Read-End] key. A beep will sound to indicate that transmission has ended.
![SHARP BP-50C45 - Tap the [Start] key to start scanning of the original. - 1](/content/2026/06/1367452/images/a41f1c9de2e3baa366ca028b65216cf872c17065929b74af4a4502711af5c5c8.jpg)
You can tap the [Preview] key to check a preview of the image before sending a fax.
For more information, see "CHECKING THE IMAGE TO BE TRANSMITTED (page 5-29)". However, settings for this function cannot be changed in the preview screen.
Original image in transaction report
When [Print Original Image] is enabled, the first page of the transmitted original is printed on the same sheet as the transaction report. The original image is reduced to allow it to fit on the sheet. If the vertical scanning length (X direction) of the original is longer than 432 mm (17-1/64"), the part that exceeds 432 mm (17-1/64") may be cut off.
POLLING MEMORY FUNCTIONS
This section explains how to enter a destination from the initial screen of normal mode.
EASY MODE (page 5-6)
SENDING A FAX WHEN ANOTHER MACHINE POLLS YOUR MACHINE (POLLING MEMORY)
Sending a document that has been scanned into memory when another machine polls your machine is called "Polling Memory". Prior to polling, the document that will be faxed to the other machine must be scanned into a polling memory box.
SCANNING A DOCUMENT INTO POLLING MEMORY (page 5-86)
This function can only be used when the other machine is Super G3 or G3 compatible and has a polling function.
![graph TD A["Polling memory box"] -->|Send| B["(2) The document in the memory box is transmitted."] B -->|Requests fax transmission| C["(1) Requests fax transmission"] C --> D["(2) The fax is received."]](/content/2026/06/1367452/images/30db9c7f04eba0a410d5514a747e3071012eb321282c983faea08789ecfd689a.jpg)
RESTRICTING POLLING ACCESS (POLLING SECURITY SETTING)
The following explains "Polling Security Setting", a feature restricting other machines that can use polling memory.
When a machine requests fax transmission, you can only allow the machine to use polling memory if its programmed sender fax number matches a fax number stored in your machine as a polling passcode number. This function is called "Polling Security Setting".
To use this function, first store polling passcode numbers (the sender fax numbers programmed in the other machines) in settings mode of the machine, and then enable the polling security setting.

The polling security setting can be enabled for up to 10 other machines.

To set the polling security:
In "Settings (administrator)", select [System Settings] → [Image Send Settings] → [Fax Settings] → [Fax Polling Security] → [Set Fax Polling Security], [Add New], [Passcode Number Key List].
Note that these settings do not apply to F-code polling memory.
SCANNING A DOCUMENT INTO POLLING MEMORY
Follow these steps to scan a document into the memory box for polling transmission (Public Box).

If another document remains in the memory box (Public Box), the newly scanned document is added to the previous document. In this case, the number of polling times will be the number set for the newly scanned document.
1
Place the original.
Place the original in the document feeder tray of the automatic document feeder, or on the document glass. AUTOMATIC DOCUMENT FEEDER (page 1-30) DOCUMENT GLASS (page 1-34)
2
Select settings for the original to be scanned and other functions.

You cannot set the Program, Timer, Transaction Report, Polling, and Document Filing.
3
Tap the [Others] key, and tap the [Memory Box] key.
4

Tap the [Polling Memory] tab.
5
Tap the [Public Box] key from the folder list.
6
Tap [Change Number of Times] on the action panel.
7
Tap the [Once] key or [Unlimited] key to specify the number of times.
To repeat transmitting an original, tap the [Unlimited] key.
After the settings are completed, tap and . ×
8
Tap the [Start] key to start scanning of the original.
- A preview of the image will appear in the touch panel when the original is scanned.
- If you inserted the original pages in the document feeder tray, all pages are scanned.
- When you place the original on the document glass, scan each page one at a time. When scanning finishes, place the next original and tap the [Start] key. Repeat the procedure until all pages have been scanned and then tap the [Read-End] key.
CHECKING THE DOCUMENT IN THE PUBLIC BOX
You can check the document stored in the machine's memory box (public box) for memory polling.
1
Tap the [Others] key, and tap the [Memory Box] key.
2
Tap the [Polling Memory] tab.
3
Tap the [Public Box] key from the folder list.

When a document is not stored in the Public Box, the [Public Box] key is greyed out.
4
Tap [Check Image] on the action panel to check the document.
To print the document, tap [Print] on the action panel.
DELETING A DOCUMENT FROM THE PUBLIC BOX
Delete a document from the memory box (public box) when it is no longer required.
1 Tap the [Others] key, and tap the [Memory Box] key.
2 Tap the [Polling Memory] tab.
2 Tap the [Public Box] key from the folder list.
Tap [Empty out Box] on the action panel.

If you tap [Check Image] on the action panel, you can check the image on the touch panel before it is erased.
5 Tap the [res] key.
- The document is deleted and you return to the screen of step 2.
- If you tap [Check Image] on the action panel, you can check the image on the touch panel before it is erased.

To cancel the document deletion:
Tap the [No] key.
PERFORMING F-CODE COMMUNICATION
F-CODE COMMUNICATION
This section explains how to enter a destination from the initial screen of normal mode. EASY MODE (page 5-6)
F-CODE COMMUNICATION
This function allows the machine to communicate with other machines that also support F-code.
It enables exchange of confidential documents (confidential communication), retrieval (polling) and distribution (polling memory) of information, distribution of information to multiple destinations (relay broadcast transmission) with other machines that support F-code communication. An F-code* is specified in each communication, enabling a higher level of security.
* F-code is a communication function based on the G3 standard of the ITU-T.
![graph TD A["The fax is received in the memory box specified by the F-code."] --> B["Fax number of other machine"] B --> C["Box Name: BBBB\nSub Address: AAAAAAAA\nPasscode: XXXXXXXX"] C --> D["Final Box"]](/content/2026/06/1367452/images/02a2be518894bd0736fedde305df6b659ee2c93238ba771f6b28858df5fb2b23.jpg)

The ITU-T is a United Nations organization that establishes communications standards. It is a department of the International Telecommunication Union (ITU), which coordinates global telecommunications networks and services.
How F-codes work
A fax that is transmitted with an F-code is received in the memory box of F-code communication in the receiving machine specified by the F-code (sub-address and passcode). If the F-code sent by the transmitting machine does not match the F-code in the receiving machine, reception will not take place.
The products of other manufacturers may use different terms for "Sub Address" and "Passcode". If you need to contact the operator of another machine regarding sub-addresses and passcodes, refer to the terms used by the ITU-T in the table below.
| The machine | ITU-T | ||
| F-code polling memory box F-code confidential box | F-code relay broadcasting function | ||
| Sub Address SEP SUB SUB | |||
| Passcode PWD SID SID | |||

An F-code consists of a sub-address and passcode, and cannot be longer than 20 digits.
CREATING MEMORY BOXES IN THE MACHINE FOR F-CODE COMMUNICATION
Before the F-code communication function can be used, special memory boxes must be created in "Settings".
Set the box name and F-code (sub-address and passcode) in each memory box, and store them.
After you have created a memory box, notify the other party of F-code communication of the sub-address and passcode of the box.
Items to be configured on the memory box are as follows:
- Memory Box Name
- Sub Address • Passcode
- Recipient (only for F-code relay broadcast transmission)
- Print PIN (only for F-code confidential reception)

To create F-code memory boxes:
Create in "Settings" - [System Settings] → [Image Send Settings] → [Fax Settings] → [F-Code Memory Box].
To use the following F-code communication functions, F-code memory boxes must be created in your machine.
• F-code confidential reception • F-code polling memory • F-code relay broadcast transmission
To use the following F-code communication functions, F-code memory boxes must be created in the other machine.
• F-code confidential transmission • F-code polling reception • F-code relay request transmission
F-CODE DIALLING
When performing an F-code operation, the F-code (sub-address and passcode) is appended to the fax number that is dialled. Check the F-code (sub-address and passcode) stored in the memory box in the other machine before you perform an F-code transmission. It is convenient to store an F-code (sub-address and passcode) together with the fax number in a one-touch key or group key.
To use the following F-code communication functions, your machine must dial the other machine.
• F-code confidential transmission • F-code polling reception • F-code relay request transmission
To use the following F-code communication functions, the other machine must dial your machine.
• F-code confidential reception • F-code polling memory • F-code relay broadcast transmission

If the destination machine does not have a passcode configured in the F-code, do not enter a passcode when dialling that machine.

Communication using the F-code (sub-address and passcode) is not available when dialling using a speaker or manual transmission.

To store and edit one-touch keys and group keys:
Select [Address Book] in "Settings".
F-CODE CONFIDENTIAL TRANSMISSION
By sending a fax to an F-code memory box (confidential) stored in the receiving machine (your machine or the other machine), the sender can direct the transmission specifically to the user of the box.
This is convenient for sending sensitive documents that you do not wish people other than the recipient to see, or when the receiving machine is shared by multiple departments.
To print an F-code confidential fax, the PIN Code must be entered.
CHECKING FAXES RECEIVED BY F-CODE CONFIDENTIAL RECEPTION (page 5-93)

The F-code (sub-address and passcode) of the memory box to be used should be verified by the sender and the recipient before the fax is sent.

To create F-code memory boxes: Create in "Settings (administrator)" - [System Settings] → [Image Send Settings] → [Fax Settings] → [F-Code Memory Box].
CONFIDENTIAL TRANSMISSION USING F-CODES
Send a fax to a destination fax number after adding the F-code (sub-address and passcode).

If necessary, the F-code confidential transmission can be used in combination with a broadcast transmission or timer transmission. It is convenient to store this function in a program.

The F-code confidential transmission cannot be registered as a "Favourite" item.
1
Place the original.
Place the original in the document feeder tray of the automatic document feeder, or on the document glass. AUTOMATIC DOCUMENT FEEDER (page 1-30) DOCUMENT GLASS (page 1-34)
2
Specify the destination.
(1) Tap the [Direct Entry] key. (2) Enter the destination line number using the numeric keys. (3) Tap the [Sub Address] key. Symbol "/" is entered. (4) Enter the sub-address using the numeric keys. (5) Tap the [Passcode] key. Symbol "/" is entered. (6) Enter the passcode using the numeric keys.

- If the sub-address and passcode are already registered, you can select a one-touch key as well.
- If the passcode is omitted for the memory box of destination machine, you can skip Steps (4) and (5).
3
Tap the [Start] key.
Scanning of the original starts.
- If you inserted the original pages in the document feeder tray, all pages are scanned. A beep will sound to indicate that scanning and transmission have ended.
- When you place the original on the document glass, scan each page one at a time. When scanning finishes, place the next original and tap the [Start] key. Repeat until all pages have been scanned and then tap the [Read-End] key. A beep will sound to indicate that transmission has ended.
![SHARP BP-50C45 - Tap the [Start] key. - 1](/content/2026/06/1367452/images/79192a99e78876429dc4b464adf0f6eb846a975d8335c0474cc1e3539aa26233.jpg)
You can tap the [Preview] key to check a preview of the image before sending a fax.
For more information, see "CHECKING THE IMAGE TO BE TRANSMITTED (page 5-29)". However, settings for this function cannot be changed in the preview screen.
CHECKING FAXES RECEIVED BY F-CODE CONFIDENTIAL RECEPTION
When an F-code confidential fax is received, the fax is stored in the memory box specified by the F-code. To check received faxes, enter the PIN Code.

- Confidential faxes are automatically given priority in the print job queue. •The fax is automatically cleared from the memory box after being printed.

To print a transaction report automatically when an F-code confidential fax is received:
In "Settings", select [System Settings] → [Image Send Settings] → [Fax Settings] → [Default Settings] → [Transaction Report Print Select Setting] → [Confidential Reception].

If you forget the PIN Code:
There is no way to use the machine to check a PIN Code that has been specified. Exercise care not to forget the PIN Code. Should you forget or need to verify the PIN Code, contact your dealer or nearest authorised service representative.
1
The machine rings and the fax is received.
A beep sounds when reception ends.
2
Tap the [Others] key, and tap the [Memory Box] key.
3
From the [Confidential] tab.
Tap the key of the memory box containing the confidential fax.
" " appears in the keys of memory boxes that have received faxes. The keys of memory boxes that have not received faxes are greyed out and cannot be tapped.

Enter the PIN Code using the numeric keys.

Take care to enter the correct PIN Code. If you make a mistake, a message will appear and you will return to the entry screen. You can tap the [Cancel] key to return to step 4.

Tap the key of the received data you wish to check, and tap [Check Image] on the action panel.
Displays the received data image.
To print the document, tap [Print] on the action panel.
POLLING RECEPTION USING F-CODES
This function enables your machine to call another machine and initiate reception of a fax stored in an F-code memory box (polling memory) in the other machine. During the polling operation, your machine must correctly specify the F-code (sub-address and passcode) configured in the other machine. Otherwise, polling reception will not take place.
Transmission request (Polling) using an F-code
Sub Address: AAAAAAAA Passcode: XXXXXXXX
The machine![graph TD A["File"] -->|Send| B["F-code polling memory box"] B -->|Receive| C["File"] C -->|Receive| D["Passcode: XXXXXXXX"] D -->|Receive| E["File Name: BBBB"] E -->|Receive| F["Sub Address: AAAAAAAAAA"] F -->|Receive| G["Passcode: XXXXXXXX"]](/content/2026/06/1367452/images/136cbaa69daa384797ac345c7ef283f4f776543399e4a6abf319290d0b35bda3.jpg)

- Verify the F-code (sub-address and passcode) of the memory box in the other machine before you perform F-code polling reception. •The receiving machine bears the telephone charges of the transmission.
- If necessary, use the F-code polling reception in combination with a broadcast transmission or timer transmission. Only one polling reception with a timer setting can be stored at a time.

- Polling multiple machines (serial polling) is not possible.
- Make sure there is no original in the machine when using the F-code for the polling reception function.
- The polling reception using the F-code cannot be registered as a "Favourite" item.
1
Tap the [Others] key, and tap the [Polling] key.
A checkmark appears on the icon.
After the settings are completed, tap the [Back] key.
![SHARP BP-50C45 - Tap the [Others] key, and tap the [Polling] key. - 1](/content/2026/06/1367452/images/38f990aea44fcc60d911cb5aa22f06b4ce1d91249840ee2ce00fd8fe58475409.jpg)
To cancel the Polling setting:
Tap the [Polling] key to clear the checkmark.
2
Specify the destination.
(1) Enter the destination line number using the numeric keys. (2) Tap the [Sub Address] key. Symbol "/" is entered. (3) Enter the sub-address using the numeric keys. (4) Tap the [Passcode] key. Symbol "/" is entered. (5) Enter the passcode using the numeric keys.

- If the sub-address and passcode are already registered, you can select a one-touch key as well.
- If the passcode is omitted for the memory box of the destination machine, you can skip Steps (4) and (5).
3
Tap the [Start] key.
Your machine will call the other machine and initiate reception of the fax.
SCANNING A DOCUMENT INTO A MEMORY BOX FOR F-CODE POLLING TRANSMISSION
When your machine receives a transmission request from another machine, this function sends a fax stored in an F-code memory box (polling memory) in your machine to that machine. The other machine must correctly specify the F-code (sub-address and passcode) configured in your machine. Otherwise, transmission will not take place.
An original to be sent to the other machine using F-code polling communication must be previously scanned into an F-code memory box (polling memory) in your machine.
Transmission request (Polling) using an F-code
Sub Address: AAAAAAAAA
Passcode: XXXXXXXX
Receiving machine
The machine
F-code polling memory box

Send

Box Name: BBBB
Sub Address: AAAAAAAAA
Passcode: XXXXXXXXX

- If other documents have already been stored in the memory box, the document is added to the previously stored documents.
- By factory default, the document sent to the other machine will be deleted automatically.

To create F-code memory boxes:
Create in "Settings (administrator)" - [System Settings] → [Image Send Settings] → [Fax Settings] → [F-Code Memory Box].
1
Place the original.
Place the original in the document feeder tray of the automatic document feeder, or on the document glass.
AUTOMATIC DOCUMENT FEEDER (page 1-30)
DOCUMENT GLASS (page 1-34)
2
Select settings for the original to be scanned and other functions.

You cannot set the Program, Timer, Transaction Report, Polling, and Document Filing.
3
Tap the [Others] key, and tap the [Memory Box] key.
4

Tap the [Polling Memory] tab.
5
Tap the folder of the F-code memory polling box.
6
Tap [Change Number of Times] on the action panel, and set the polling times.
To erase the original after its transmission, tap the [Once] key. To repeat transmitting an original, tap the [Unlimited] key. Change the settings as necessary.
After the settings are completed, tap the [OK] and [Back] keys.
7
Tap the [Start] key.
Scanning of the original starts.
- If you inserted the original pages in the document feeder tray, all pages are scanned.
- When you place the original on the document glass, scan each page one at a time.
- When scanning finishes, place the next original and tap the [Start] key.
Repeat until all pages have been scanned and then tap the [Read-End] key.

You can tap the [Preview] key to check a preview of the image before sending a fax.
For more information, see "CHECKING THE IMAGE TO BE TRANSMITTED (page 5-29)". However, settings for this function cannot be changed in the preview screen.
CHECKING THE DOCUMENT IN THE F-CODE MEMORY POLLING BOX
You can check the document stored in the F-code memory polling box.

A document in a memory box cannot be printed while the document is being transmitted. By factory default, the document sent to the other machine will be deleted automatically.
1
Tap the [Others] key, and tap the [Memory Box] key.
2
Tap the [Polling Memory] tab.
3

Tap the folder of the F-code memory polling box.
4
Tap [Check Image] on the action panel.
To print the document, tap the [Print] key.
DELETING A DOCUMENT STORED FOR F-CODE POLLING TRANSMISSION
Delete the document stored in an F-code memory polling box in order to be able to store a new document.

No original can be deleted from the memory box during communication.
1
Tap the [Others] key, and tap the [Memory Box] key.
2
Tap the [Polling Memory] tab.
3
Tap the folder of the F-code memory polling box.
4
Tap [Empty out Box] on the action panel.
If you tap [Check Image] on the action panel, you can check the image on the touch panel before it is erased.
5
Tap the [Yes] key.
The document is deleted, and you return to Step 2.

To cancel the document deletion:
Tap the [No] key.
RELAY REQUEST TRANSMISSION USING F-CODES
This function sends a fax to an F-code relay broadcast memory box in another machine and have that machine relay the fax to multiple destination machines.
When the destination machines are far from your machine, sending the fax to a relay machine that is close to the destination machines can help reduce telephone charges. A relay request transmission can be used in combination with the timer transmission function to further reduce cost.
The fax is transmitted in sequence to the end receiving machines registered in the F-code relay broadcast memory box.
![graph TD A["The machine"] -->|F-code relay broadcast transmission| B["Receiving machine F-code relay broadcast memory box"] B -->|Send| C["Forward Destination"] B -->|Receive machines are programmed in this box| D["Box Name: BBBB\nSub Address: AAAAAAAA\nPasscode: XXXXXXXX"] D -->|Send| E["Block 1"]…](/content/2026/06/1367452/images/b02130ad4eb113a878cad294e0065494b391cb0725dcd3643926a3525951246f.jpg)

- F-code (sub-address and passcode) and the destination in the F-code relay broadcast memory box of the recipient machine should be verified by the recipient in advance.
- Before using this function, program the destination machines in the F-code relay broadcast memory box in the relay machine.
- It is not necessary for the destination machines to support F-code communication.
- Your machine (the machine that requests a relay broadcast transmission) only bears the cost of sending the fax to the relay machine. The relay machine bears the cost of sending the fax to each of the destination machines.
- If necessary, this function can be used in combination with a broadcast transmission or timer transmission. It is convenient to store this function in a program.

When faxes forwarded using this function are printed at the forwarding destination, the date and time of reception cannot be printed on the faxes. ("Receiving Date & Time Print" is disabled.)

To create F-code memory boxes:
Create in "Settings (administrator)" - [System Settings] → [Image Send Settings] → [Fax Settings] → [F-Code Memory Box].
Place the original.
Place the original in the document feeder tray of the automatic document feeder, or on the document glass.
AUTOMATIC DOCUMENT FEEDER (page 1-30)
DOCUMENT GLASS (page 1-34)
2
Specify the destination.
- ENTERING A DESTINATION NUMBER USING THE NUMERIC KEYS (page 5-11) • RETRIEVING A DESTINATION FROM AN ADDRESS BOOK (page 5-12) • USING A SEARCH NUMBER TO RETRIEVE A DESTINATION (page 5-15) • RETRIEVING A DESTINATION FROM A GLOBAL ADDRESS BOOK (page 5-16) • RETRIEVING A DESTINATION FROM A MOBILE ADDRESS BOOK (page 5-18) • USING A TRANSMISSION LOG TO RESEND (page 5-20)

If the sub-address and passcode are stored in the one-touch key, it is not necessary to take steps 3 to 6. Go to step 7.
3
Tap the [Sub Address] key.
Enter "/".
4
Enter the sub-address using the numeric keys.
5
Tap the [Passcode] key.
Enter "/".
6
Enter the passcode using the numeric keys.

If a passcode has been omitted in the memory box of the destination machine, it is not necessary to take steps 5 and 6.
7
Tap the [Start] key.
Scanning begins.
- If you inserted the original pages in the document feeder tray, all pages are scanned. A beep will sound to indicate that scanning and transmission have ended.
- When you place the original on the document glass, scan each page one at a time. When scanning finishes, place the next original and tap the [Start] key. Repeat until all pages have been scanned and then tap the [Read-End] key. A beep will sound to indicate that scanning and transmission have ended. When the relay machine receives the fax, it will automatically transfer the fax to the destination machines programmed in the memory box.
![SHARP BP-50C45 - Tap the [Start] key. - 1](/content/2026/06/1367452/images/0a5d4d59a8cada2663690c125486738645ce72e54dc0f83950e987668f847a96.jpg)
When you use the automatic document feeder to scan an original, you can tap the [Preview] key to check a preview of the image before sending a fax. For more information, see "CHECKING THE IMAGE TO BE TRANSMITTED (page 5-29)"
RELAY BROADCAST TRANSMISSION USING F-CODES
When your machine receives an F-code relay request transmission, the fax is received and stored in an F-code relay broadcast memory box in your machine.
Your machine then relays the fax to each of the destination machines programmed in the memory box. Transmission to the destination machine takes place automatically.
The fax is transmitted in sequence to the end receiving machines registered in the F-code relay broadcast memory box.
![graph TD A["Receiving machine"] -->|F-code relay broadcast transmission| B((The machine F-code relay broadcast memory box)) B -->|Send| C["Forward Destination"] B -->|Receive machines are programmed in this box| D["Box Name: BBBB\nSub Address: AAAAAAAA\nPasscode: XXXXXXXX"] D -->|Send| E["Block 1"]…](/content/2026/06/1367452/images/b8db00a67a9efbf4d1c3226ae2c99c27294bbc53adeabeca3e0ebe90a023a1f2.jpg)

- Prior to carrying out the operation, inform the requesting party, who you will communicate with using F-code relay request transmission, of the sub-address and passcode of the F-code relay broadcast memory box in your machine.
- Program the destination machines in the F-code relay broadcast memory box when you create the box in your machine. CREATING MEMORY BOXES IN THE MACHINE FOR F-CODE COMMUNICATION (page 5-90)
- It is not necessary for the destination machines to support F-code communication.
- The machine that requests a relay broadcast transmission only bears the cost of sending the fax to your machine (the relay machine). Your machine bears the cost of sending the fax to each of the destination machines.
- If both direct SMTP and other sending methods are added to the forwarding destinations, transmission will not take place.

When faxes forwarded using this function are printed at the forwarding destination, the date and time of reception cannot be printed on the faxes. ("Receiving Date & Time Print" is disabled.)
USING AN EXTERNAL TELEPHONE
CONNECTING AN EXTERNAL TELEPHONE
CONNECTING AN EXTERNAL TELEPHONE
You can connect an existing telephone to the machine.
The telephone can be used for voice calls and to start fax reception on the machine. Connect the external telephone as shown below. After connecting an external telephone, configure the "External Telephone Setting" in setting mode (administrator).
Insert the plug on one end of the telephone line cord into the external telephone connection socket of the machine as shown until it clicks, and insert the other plug into a wall telephone socket until it clicks.


Enable the "Tel/Fax Auto Change" function. This is useful as the telephone or fax operation is selected automatically according to the calling.

- You cannot send a fax from your telephone.
- You can connect a telephone with a modular cable plug to your machine. Also, use the two-wire cable for telephone connection. If another type of cable is used, the telephone may not operate normally.
- If the plug on the telephone line cord does not fit into the socket on your external phone, contact your dealer or nearest authorised service representative.
RECEIVING A FAX AFTER ANSWERING A CALL ON THE EXTERNAL TELEPHONE (REMOTE RECEPTION)
Follow the steps below if you need to start fax reception after answering a call and speaking on the external telephone. Dial [5], [*] and [*] buttons of the external telephone.
If you are using a pulse line, set the extension to send tone signals.

If "Settings (administrator)" → [System Settings] → [Image Send Settings] → [Fax Settings] → [Default Settings] → [External Telephone Setting] → Display Fax Screen when External Telephone is Off-hook] is enabled and the external phone is still lifted when fax transmission ends, an alarm signal will sound and a message will appear in the touch panel.

•To receive a fax after answering a call on the external telephone:
Set "Settings (administrator)" - [System Settings] → [Image Send Settings] → [Fax Data Receive/Forward (Manual)] → [Fax Settings] → [Receive Settings] to [Manual Reception].
•To change the number to receive faxes:
In "Settings", select [System Settings] → [Image Send Settings] → [Fax Settings] → [Default Settings] → [Remote Reception Number Setting]. Set a value from 00 to 99.
1
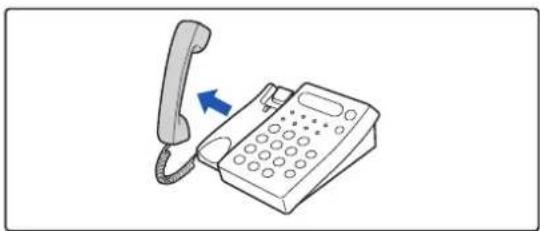
While the machine is ringing, pick up the receiver to speak.
2

Signal the machine to start fax reception.
Press from the external telephone.
3

Replace the receiver.
The machine beeps when reception ends.
MAKING AND RECEIVING PHONE CALLS
You can make and receive calls like normal on your external phone. A phone call can also be made by dialling on the machine.
CHECK THE COMMUNICATION STATUS
FAX JOBS
When you tap the job status display, jobs are displayed in a list. To confirm the fax job status, tap the mode display and select the fax.
When you wish to stop or delete jobs or to perform priority processing, read the following items:
STOPPING/DELETING A JOB IN PROGRESS OR RESERVED (page 2-55)
PRIORITY PROCESSING OF A RESERVED JOB (page 2-56)
CHECKING A RESERVED JOB OR THE JOB IN PROGRESS (page 2-58)
CHECKING COMPLETED JOBS (page 2-59)


Fax jobs include reception, timer transmission, and data forwarding as well as usual transmission. For information on jobs in fax mode, see "COMPLETED FAX TRANSMISSION/RECEPTION JOBS (page 5-105)".
COMPLETED FAX TRANSMISSION/RECEPTION JOBS
A usual transmission job moves to the job list when transmission is completed. Then the status field displays "Send OK". However, received faxes, timer transmission faxes, retries, fax forwarding, and other fax jobs are displayed in the job status screen as follows:
Fax reception jobs
When a fax is being received, the status field displays "Receiving" in the job queue list.
When reception is completed, the job moves to the completed job list and the status field displays "In Memory". After the fax is printed, the status changes to "Received".
Timer transmission jobs
A timer transmission job appears at the end of the job queue list until the specified time is reached.
Transmission begins at the specified time. When transmission is completed, the job moves to the completed job list and the status field displays "Send OK".
Retry jobs
A retry job appears at the end of the job queue list.
Transmission of the retry job starts according to the [Recall in Case of Line Busy] setting in "Settings". When the transmission is completed, the retry job moves to the completed job list and the status changes to "Send OK".
Reception jobs when the inbound routing settings are enabled
When the inbound routing settings are enabled, reception jobs are handled as follows depending on the print setting. FORWARDING RECEIVED DATA TO PRESET DESTINATIONS (INBOUND ROUTING SETTINGS) (page 5-66)
Received data is not printed
When a data is being received, "Receiving" appears in the job queue list. When the reception is completed, the status changes to "Waiting".
Received fax is printed
When reception is completed, the status field displays "In Memory" in the completed job list. After the fax is printed, the status changes to "Received". Then a job is added for which the status field displays "Waiting" in the job queue list. When forwarding the received fax is completed, the field changes to "Forward OK".
CHECKING IMAGE SENDING ACTIVITIES
PRINTING IMAGE SENDING ACTIVITY REPORTS
You can have the machine print a log of recent image sending activity (date, name of other party, time required, result, etc.). The Image Sending Activity Report contains useful information such as the types of errors that occurred.
The most recent 200 transactions are included in the report.
You can have the machine print the Image Sending Activity Report each time the number of transactions reaches 201, or at a specified time (once a day only).

The contents of the Image Sending Activity Report are erased when the report is printed, and thus it cannot be reprinted.

To configure the image sending activity report:
In "Settings", select [System Settings] → [Image Send Settings] → [Fax Settings] → [Default Settings] → [Activity Report Print Select Setting].
INFORMATION APPEARING IN THE RESULT COLUMN
Error types and other information are printed in the result column of transaction and activity reports. When a transaction or activity report is printed, check the result of the transaction in the result column and take action as needed.
Examples of messages that are printed in the result column
| Print Page | Description |
| Yes The transaction was completed normally. | |
| G3 Communication took place in G3 mode. | |
| ECM Communication took place in G3 ECM mode. | |
| SG3 Communication took place in Super G3 mode. | |
| Forward The received data was forwarded. | |
| No Response No response from the receiving party. | |
| Busy Transmission was not possible because the other party was already using the line. | |
| No The transmission was cancelled while in progress. | |
| MEMORY OVER The memory became full during quick on-line transmission. | |
| FULL The memory became full during reception. | |
| LENGTH OVER | The transmitted fax was over 59" (1.5 m) long and therefore could not be received. |
| ORIGINAL ERROR | Direct transmission or manual transmission was not successful because a misfeed occurred. |
| PASS# NG The connection was broken because the polling passcode was not correct. | |
| NO RX POLL The machine that was polled does not have a polling function. | |
| RX POLL FAIL | The other machine refused the polling operation, or your machine broke the connection when polled because no data was in memory. |
| NO F-CODE POLL | The other machine refused an F-code polling operation, or your machine broke the connection when polled because no data was in its F-code memory polling box. |
| RX POLL# NG | The connection was broken because the sub-address for F-code polling memory was not valid. |
| F POLL PASS# NG | The connection was broken because the passcode for F-code polling memory was not valid. |
| BOX NO. NG | Your machine broke the connection because the specified sub-address for an F-code memory box does not exist. |
| F PASS# NG | Your machine broke the connection because the other machine sent an incorrect passcode for F-code communication. |
| RX NO F-CODE POLL | F-code polling was attempted, however, the other machine did not have an F-code polling memory box. |
| NO F FUNC | F-code communication was attempted, however, the other machine does not support F-code communication. |
| NO F-CODE | F-code communication was refused by the other machine because of an incorrect sub-address or other reason. |
| M. BOX: [xxxxxx] ***** | Data was received and stored in a confidential or relay broadcast memory box, or data was sent from a memory polling box.The name of the memory box appears in [xxxxxx], and the type of F-code operation (relay request reception, polling memory transmission, or confidential reception) appears in *****. |
| FAIL xx (xxxx) | The transaction failed due to a communication error.First 2 digits of communication error number: Error code from 00 to 99.Last 4 digits of communication error number: Code for use by service technicians. |
| Rejected | A fax was sent from a party from which reception is blocked. |
BEFORE USING THE MACHINE AS A NETWORK SCANNER
BEFORE USING THE MACHINE AS A NETWORK
SCANNER FUNCTION 6-3
USES OF THE NETWORK SCANNER 6-3
BEFORE USING THE NETWORK SCANNER ..... 6-4
STORING DESTINATIONS FOR SCAN TO
DESKTOP 6-6
BEFORE SENDING TO A DIRECT SMTP
ADDRESS 6-6
NETWORK SCANNER MODE 6-7
EASY MODE 6-7
NORMAL MODE 6-9
SELECTING NETWORK SCANNER MODE 6-9
IMAGE SEND SEQUENCE....6-10
ORIGINAL SIZE 6-13
TRANSMITTABLE ORIGINAL SIZES 6-13
THE SIZE OF THE PLACED ORIGINAL 6-13
ADDRESS BOOK 6-14
ADDRESS BOOK SCREEN 6-15
Selecting "Contacts" or "Group" 6-16
STORING ADDRESSES THROUGH DIRECT ENTRY....6-19
STORING ADDRESSES THROUGH GLOBAL ADDRESS SEARCH 6-20
STORING ADDRESSES FROM FAX OR IMAGE SEND LOGS. 6-22
STORING GROUPS 6-24
EDITING/DELETING ADDRESSES IN ADDRESS BOOK 6-26
SETTING THE SCOPE FOR PUBLICIZING CONTACTS AND GROUPS....6-28
DELETING THE TRANSMISSION HISTORY....6-29
Deleting a selected history 6-29
REGISTER AN ADDRESS BOOK IN THE WEB PAGE....6-30
SETTING THE SCOPE FOR PUBLICIZING CONTACTS
AND GROUPS....6-28
DELETING THE TRANSMISSION HISTORY....6-29
Deleting a selected history 6-29
REGISTER AN ADDRESS BOOK IN THE WEB
PAGE....6-30
Address Book 6-30
Category Setting 6-32
ENTERING DESTINATIONS
ENTERING DESTINATIONS....6-33
RETRIEVING A DESTINATION FROM AN ADDRESS
BOOK 6-33
MY ADDRESS 6-35
VIEWING A LIST OF THE SELECTED
DESTINATIONS....6-36
USING A SEARCH NUMBER TO RETRIEVE A
DESTINATION 6-37
ENTERING AN ADDRESS MANUALLY 6-38
SPECIFYING A NETWORK FOLDER 6-39
RETRIEVING A DESTINATION FROM A GLOBAL ADDRESS BOOK 6-41
RETRIEVING A DESTINATION FROM A MOBILE ADDRESS BOOK 6-43
USING A TRANSMISSION LOG TO RESEND.....6-45
SENDING ONLY THE URL OF A SCANNED FILE TO A SCAN DESTINATION....6-47
TRANSMITTING AN IMAGE
TRANSMITTING AN IMAGE 6-50
SENDING AN IMAGE IN SCAN MODE .....6-50
CHANGING THE SUBJECT, FILE NAME, REPLY-TO, AND BODY TEXT AT THE TIME OF SCAN TRANSMISSION....6-53
SENDING A FAX IN INTERNET FAX MODE ..... 6-56
CHANGING THE SUBJECT, FILE NAME, AND BODY TEXT AT THE TIME OF INTERNET FAX
TRANSMISSION....6-58
SENDING THE SAME IMAGE TO MULTIPLE DESTINATIONS (BROADCAST TRANSMISSION)....6-61
SETTING MODES WHEN MULTIPLE TYPES OF ADDRESSES ARE INCLUDED IN A BROADCAST TRANSMISSION. 6-63
RESENDING TO UNSUCCESSFUL BROADCAST TRANSMISSION DESTINATIONS....6-65
SENDING AN INTERNET FAX FROM A PC (PC-I-FAX). 6-67
IMAGE SETTINGS....6-68
AUTOMATICALLY SCANNING BOTH SIDES OF AN ORIGINAL (2-SIDED ORIGINAL)....6-68
SCAN SIZE AND SEND SIZE (ENLARGE/REDUCE)....6-69
SPECIFYING THE ORIGINAL SCAN SIZE IN PAPER SIZE 6-70
SPECIFYING THE ORIGINAL SCAN SIZE USING NUMERIC VALUES 6-72
STORING FREQUENTLY USED ORIGINAL SIZES 6-75
SPECIFYING THE SEND SIZE OF THE IMAGE .....6-79
CHANGING THE EXPOSURE AND ORIGINAL IMAGE TYPE....6-81
CHANGING THE RESOLUTION 6-83
CHANGING FORMAT IN SCAN OR DATA ENTRY MODE 6-84
CHANGING FORMAT IN INTERNET FAX MODE .....6-90
CHANGING COLOUR MODE....6-90
SETTING SCAN SETTINGS AUTOMATICALLY (Auto Set)....6-92
CHECKING THE IMAGE TO BE TRANSMITTED.....6-93

OTHER FUNCTIONS
STORING SCAN OPERATIONS (PROGRAM) ..... 6-94
SCANNING AND SENDING ORIGINALS
COLLECTIVELY 6-97
SENDING TWO PAGES AS A SINGLE PAGE (N-Up). 6-97
SCANNING ORIGINALS OF DIFFERENT SIZES (MIXED SIZE ORIGINAL)....6-99
SCANNING BOTH SIDES OF A CARD ONTO A SINGLE PAGE (CARD SHOT)....6-101
SIMULTANEOUSLY SCANNING MULTIPLE CARDS, RECEIPTS OR OTHER SMALL ORIGINALS TO INDIVIDUAL FILES (MULTICROP) 6-103
SCANNING A BUSINESS CARD, READING THE TEXT STRING, CREATING A FILE, AND SENDING THE FILE (BUSINESS CARD SCAN)....6-106
SCANNING MULTIPLE PHOTOS AT ONCE TO INDIVIDUAL FILES (Image Crop) 6-111
SCANNING MANY ORIGINALS AT ONCE (JOB BUILD) 6-113
SCANNING AND SENDING AN ORIGINAL AS
SEPARATE PAGES 6-116
SPLITTING A PAMPHLET BY PAGE AND TRANSMITTING THE PAGES SUCCESSIVELY (BOOK DIVIDE) 6-119
ADJUSTING COLOURS AND SHADING. 6-121
ADJUSTING THE BACKGROUND BY MAKING LIGHT AREAS OF THE ORIGINAL DARKER OR LIGHTER (BACKGROUND ADJUSTMENT)....6-121
ADDING CONTRAST TO THE SCANNED ORIGINAL BEFORE TRANSMISSION (CONTRAST) 6-123
ENHANCING THE OUTLINE OF THE SCANNED ORIGINAL BEFORE TRANSMISSION (SHARPNESS). 6-125
REMOVING CHROMATIC COLOURS FROM THE SCANNED ORIGINAL BEFORE TRANSMISSION (DROP OUT COLOUR)....6-127
ADJUSTING RED/GREEN/BLUE (RGB Adjust) ..... 6-129
SCANNING ORIGINALS....6-131
ERASING PERIPHERAL SHADOWS ON THE IMAGE (ERASE) 6-131
SCANNING A THIN ORIGINAL (SLOW SCAN MODE)....6-134
SCANNING A HEAVY ORIGINAL (HEAVY PAPER SCAN) 6-136
ELIMINATING BLANK PAGES FROM A TRANSMISSION (BLANK PAGE SKIP)....6-138
CHECKING THE NUMBER OF SCANNED ORIGINAL SHEETS BEFORE TRANSMISSION (ORIGINAL COUNT) 6-140
STAMPING SCANNED ORIGINALS (VERIFICATION STAMP) 6-142
AUTOMATICALLY ADJUST SKEWED SCAN DATA
(Original Skew Adjustment) 6-144
SPECIFIC FUNCTIONS 6-146
ADDING YOUR SENDER INFORMATION TO FAXES (I-FAX OWN ADDRESS SEND)....6-146
CHANGING THE PRINT SETTINGS FOR THE TRANSACTION REPORT (TRANSACTION REPORT) 6-147
STARTING A TRANSMISSION AT A SPECIFIED TIME (TIMER TRANSMISSION)....6-149
ADDING A SIGNATURE WHEN SENDING AN IMAGE (ELECTRONIC SIGNATURE) 6-152 ENCRYPTING THE TRANSMITTED DATA (ENCRYPTION) 6-154
INTERNET FAX RECEPTION FUNCTIONS
CHECKING THE INTERNET FAX ACTIVITY LOG ..... 6-156
PRINTING IMAGE SENDING ACTIVITY REPORTS....6-156
INFORMATION APPEARING IN THE RESULT COLUMN....6-157
RECEIVING INTERNET FAXES. 6-158
RECEIVING INTERNET FAXES MANUALLY .....6-158
PRINTING RECEIVED DATA 6-159
PRINTING RECEIVED DATA AT A SPECIFIED TIME 6-160
CHECKING THE IMAGE BEFORE PRINTING.....6-161
FORWARDING RECEIVED DATA 6-163
FORWARDING RECEIVED INTERNET FAX DATA (FAX DATA FORWARD)....6-163
FORWARDING RECEIVED DATA TO PRESET DESTINATIONS (INBOUND ROUTING SETTINGS)....6-164
SAVING RECEIVED FAXES TO THE MACHINE'S LOCAL DRIVE (INBOUND ROUTING)....6-167
FORWARDING RECEIVED DATA MANUALLY ..... 6-169
SAVING RECEIVED DATA 6-170
CHECKING THE STATUS OF TRANSMISSION/RECEPTION JOBS
IMAGE SEND JOBS 6-171
COMPLETED TRANSMISSION/RECEPTION JOBS ... 6-172
SCANNING FROM A COMPUTER (PC Scan Mode)
BASIC SCANNING PROCEDURE .....6-173
METADATA DELIVERY
PREPARATIONS FOR METADATA DELIVERY ..... 6-177
METADATA DELIVERY (DATA ENTRY) .....6-177
SETTINGS REQUIRED IN THE SETTING MODE (WEB VERSION)....6-178
METADATA DELIVERY USING SCAN TO DESKTOP....6-178
TRANSMITTING METADATA....6-179
TRANSMITTING METADATA. 6-179
METADATA FIELDS 6-180
BEFORE USING THE MACHINE AS A NETWORK SCANNER
BEFORE USING THE MACHINE AS A NETWORK SCANNER FUNCTION
USES OF THE NETWORK SCANNER
The network scanner allows you to create an image file from the original data scanned by the machine, and send the file over a network to a PC, FTP server, or other destinations. If necessary, it scans the original using a TWAIN-compliant application on your PC.
The network scanner function provides the following scanning modes.
Scanner mode
The scanner function of the machine sends a scanned original as described below based on the specification of the destination.
- Scan to E-mail
You can send a scanned file as an e-mail attachment. You can also save the file to the machine's local drive and send only a URL link (without attaching the file) that allows the recipient to download the file.
- Scan to FTP
The scanned file is sent to a specified folder of an FTP server.
When the file is sent, it is also possible to send an e-mail to a previously stored e-mail address to inform the recipient of the location of the file.
- Scan to Desktop
The scanned file is sent to a specified folder on your computer.
For information on Scan to Desktop, consult your dealer.
- Scan to Network Folder
The scanned file is sent to a network folder on a Windows PC on the same network as the machine.
When the file is sent, it is also possible to send an e-mail to a previously stored e-mail address to inform the recipient of the location of the file.
For the operating procedure, see "SENDING AN IMAGE IN SCAN MODE (page 6-50)".
Internet fax mode
The scanned file is sent as an Internet fax. Internet faxes are received if necessary.
The machine supports Direct SMTP, which lets you directly send Internet faxes within your company without using a mail server.

To use the Internet fax function, the Internet fax expansion kit must be installed.
For the operating procedure, see "SENDING A FAX IN INTERNET FAX MODE (page 6-56)".
Data entry mode
In data entry mode, information entered using the touch panel or automatically generated by the machine is sent to a directory on an FTP server or an application on a PC as a metadata file in XML format.

Installing the application integration module is required to use the metadata delivery function.
The application integration module can be combined with the network scanner to append a metadata file to a scanned image file.
Metadata is information about a file, how it is to be processed, and its relation to other objects.
For the operating procedure, see "TRANSMITTING METADATA (page 6-179)".
BEFORE USING THE NETWORK SCANNER
To use the machine as a network scanner, you must store sender information, configure server settings, store destinations in the address book, and perform other required operations.
Make sure the main power switch is in the 1 position.
When the main power indicator is lit up, the main power is in the " | " position. If the main power indicator is not lit up, turn the main power switch to the " | " position and press the [POWER] button on the operation panel. TURNING ON THE POWER (page 1-10)
Check the date and time.
Verify that the correct date and time are set in the machine.

To set the date and time of the machine:
In "Settings", select [System Settings] → [Common Settings] → [Device Control] → [Clock Adjust].
Store the sender information.
Before using Scan to E-mail:
Store a default sender name in "Sender Name" and a reply e-mail address in "Reply E-mail Address".

- To store the sender's name and e-mail address that are used when a sender is not selected: In "Settings (administrator)", select [System Settings] → [Image Send Settings] → [Scan Settings] → [Condition Settings] → [Default Reply.Address Set]. • Before using Internet fax: Store a sender name in "Sender Name" and a sender Internet fax address in "Own Address". • To store the sender's name and address: In "Settings (administrator)", select [System Settings] → [Image Send Settings] → [Common Settings] → [Own Number and Name Set] → [Sender Data Registration].
4
Configure settings required in the setting mode.
Configure server settings, default settings for the network scanner, and settings for Internet Fax.

• To configure server settings: In "Settings (administrator)", select [System Settings] → [Network Settings] → [Services Settings]. (Administrator rights are required.) - To configure basic settings for the network scanner: In "Settings (administrator)", select [System Settings] → [Image Send Settings] → [Scan Settings]. (Administrator rights are required.) • To configure settings for Internet Fax: In "Settings (administrator)", select [System Settings] → [Image Send Settings] and then configure options in [Internet Fax Settings]. (Administrator rights are required.)
5
Store the destination addresses for each scan mode in the address book.
You can send an image by directly entering an address when using Scan to Image. It is convenient to previously store addresses in the address book.
Up to 6000 addresses can be stored in the address book. For information on the address book, see "ADDRESS BOOK".
For how to use the address books and how to store addresses, see the following item.
RETRIEVING A DESTINATION FROM AN ADDRESS BOOK (page 6-33)
VIEWING A LIST OF THE SELECTED DESTINATIONS (page 6-36)
USING A SEARCH NUMBER TO RETRIEVE A DESTINATION (page 6-37)
ENTERING AN ADDRESS MANUALLY (page 6-38)
SPECIFYING A NETWORK FOLDER (page 6-39)
RETRIEVING A DESTINATION FROM A GLOBAL ADDRESS BOOK (page 6-41)
RETRIEVING A DESTINATION FROM A MOBILE ADDRESS BOOK (page 6-43)
USING A TRANSMISSION LOG TO RESEND (page 6-45)
STORING DESTINATIONS FOR SCAN TO DESKTOP
To store your computer in the machine as a destination for Scan to Desktop, Network Scanner Tool Lite must be installed.
To scan an image to your computer, Network Scanner Tool Lite must be running on your computer.

For information on how to obtain and install Network Scanner Tool Lite, see the following URL: https://global.sharp/products/copier/products/nst_lite/tips/index.html
BEFORE SENDING TO A DIRECT SMTP ADDRESS
The machine supports Direct SMTP, which lets you directly send Internet faxes within your company without using a mail server.
For the procedure for storing the Direct SMTP address in the address book, see "STORING ADDRESSES THROUGH DIRECT ENTRY (page 6-19)", "STORING ADDRESSES THROUGH GLOBAL ADDRESS SEARCH (page 6-20)" or "STORING GROUPS (page 6-24)". Stored Direct SMTP addresses are included in the address book for Internet fax mode.
If the destination is busy:
If the destination is busy, the machine will wait briefly and then automatically resend.

To cancel transmission:
Do so from the job status screen.
STOPPING/DELETING A JOB, PRIORITY PROCESSING AND CHECKING THE STATUS (page 2-53)

To set the number of recall attempts and the interval between attempts when the connection cannot be established because the line is busy, or for other reasons:
In "Settings (administrator)", select [System Settings] → [Image Send Settings] → [Internet Fax Settings] → [Send Setting] → [Recall in Case of Line Busy].
When a communication error occurs:
If a communication error occurs or the other fax machine does not answer the call within a preset period of time, transmission will automatically be attempted again after a preset interval.

To cancel transmission:
Do so from the job status screen.
STOPPING/DELETING A JOB. PRIORITY PROCESSING AND CHECKING THE STATUS (page 2-53)

To set the number of recall attempts and the interval between attempts when a transmission fails due to an error:
In "Settings (administrator)", select [System Settings] → [Image Send Settings] → [Internet Fax Settings] → [Send Setting] → [Recall in Case of Communication Error].
NETWORK SCANNER MODE
Network scanner mode has two modes: easy mode and normal mode.
Easy mode is limited to frequently used functions that allow you to smoothly perform most image send jobs.
If you need to select detailed settings or special functions, use normal mode. All functions can be used in normal mode.
EASY MODE
Easy mode makes it easy to select basic settings for network scanner mode.

(1) The original size is displayed. (2) Set an address. (3) Reset the address and settings. (4) Scans the original and shows a preview image.
PREVIEW SCREEN (page 2-11)
(5) Automatically set the original placement orientation, resolution, skipping of blank pages, automatically detect mono2/greyscale, and Original Skew Adjustment.
▶ SETTING SCAN SETTINGS AUTOMATICALLY (Auto Set) (page 6-92)
(6) Recently used job setting can be loaded. ▶ JOB STATUS (page 2-53) (7) Tap to display the soft keyboard. (8) Change to normal mode. ▶ NORMAL MODE (page 6-9) (9) Change the function display. (10) Starts black and white or colour transmission.

(1) Select the function you want to use.
You can select these functions in easy mode.
• Original ▶ page 6-81 - Resolution ▶ page 6-83
- File Format ▶ page 6-84
- Blank Page Skip ▶ page 6-138

If able to search for My Address, a [Find My Address] key will be displayed next to the address entry.

• To select a function in easy mode
In "Settings (administrator)", select [System Settings] → [Common Settings] → [Operation Settings] → [Easy Mode Settings] → [Easy Scan].
- To cancel the warning message displayed when switching from easy mode to normal mode
In "Settings (administrator)", select [System Settings] → [Common Settings] → [Operation Settings] → [Easy Mode Settings] → [Display a Confirmation Message when Selecting "Detail" in Easy Modes] to disable this setting.
NORMAL MODE
Normal mode lets you select any function setting that can be used for network scanner.
This section explains the keys on a base screen, taking as an example the E-mail base screen. Several methods are available in the Image Send mode, including Scan to E-mail and Scan to FTP. The base screen layout slightly differs depending on how image is sent.

(1) Tap to display the soft keyboard. (2) Displays the address box to enter addresses. (3) Setting keys used for image send operations. (4) Displays the list of setting keys. Frequently used [Others], programs, and other settings can be registered. (5) Check the current settings. (6) Displays keys other than the function keys indicated above. (7) Displays the sizes of the original and the data to send.
(8) Enter subject, file name, and other items. (9) Searches for the address. (10) Displays the functions that can be used in image send mode. (11) Scans the original and shows a preview image.
PREVIEW SCREEN (page 2-11)
(12) Reset the address and settings. (13) Transmission will start immediately. (14) Enter reply address and body text.
SELECTING NETWORK SCANNER MODE
Change the network scanner mode to other mode as explained in CHANGING MODES (page 2-10).
IMAGE SEND SEQUENCE
First, to place the machine in a desired image send mode, tap the appropriate icon in the Home screen. CHANGING MODES (page 2-10)
1

Place the original.
Place the original in the document feeder tray of the automatic document feeder, or on the document glass.
▶ AUTOMATIC DOCUMENT FEEDER (page 1-30) ▶ DOCUMENT GLASS (page 1-34)
2
Enter the destination.
Tap the address key to directly enter the destination, or search and retrieve the address book or destination.
In Easy mode![Original A4 Address Cancel OK Characters 1 2 3 4 5 6 7 8 9 0 - = q w e r t y u l o p [ ] # a s d f g h j k l ; ' \ z x c v b n m , . / File Format Space AltGr](/content/2026/06/1367452/images/f7a30c57a2b328928539d2d0be3988350260e021eab30a73af681859f142a917.jpg)
ENTERING AN ADDRESS MANUALLY (page 6-38)
RETRIEVING A DESTINATION FROM AN ADDRESS BOOK (page 6-33)
USING A TRANSMISSION LOG TO RESEND (page 6-45)
RETRIEVING A DESTINATION FROM A GLOBAL ADDRESS BOOK (page 6-41)
RETRIEVING A DESTINATION FROM A MOBILE
ADDRESS BOOK (page 6-43)
In Normal mode![Address Global Address Search Cancel OK Characters 1 2 3 4 5 6 7 8 9 0 - = @ q w e r t y u l o p [ ] # a s d f g h j k l ; ' \ z x c v b n m , . / File Format Space AltGr](/content/2026/06/1367452/images/8981e80560b0d4ee2242e8436dc2385493afce30ff85389086c4d1fbe4462751.jpg)
ENTERING AN ADDRESS MANUALLY (page 6-38)
RETRIEVING A DESTINATION FROM AN ADDRESS BOOK (page 6-33)
USING A SEARCH NUMBER TO RETRIEVE A DESTINATION (page 6-37)
RETRIEVING A DESTINATION FROM A GLOBAL ADDRESS BOOK (page 6-41)
RETRIEVING A DESTINATION FROM A MOBILE ADDRESS BOOK (page 6-43)
USING A TRANSMISSION LOG TO RESEND (page 6-45)
VIEWING A LIST OF THE SELECTED DESTINATIONS (page 6-36)
SPECIFYING A NETWORK FOLDER (page 6-39)
3
Select functions.
Specify the original scan size, exposure, file format, and other items.
If necessary, you can refer to the following functions for the setting.
In Easy mode AUTOMATICALLY SCANNING BOTH SIDES OF AN

ORIGINAL (2-SIDED ORIGINAL) (page 6-68)
CHANGING THE RESOLUTION (page 6-83)
CHANGING FORMAT IN SCAN OR DATA ENTRY MODE (page 6-84)
ELIMINATING BLANK PAGES FROM A TRANSMISSION (BLANK PAGE SKIP) (page 6-138)
In Normal mode
SCANNING AND SENDING ORIGINALS COLLECTIVELY (page 6-97)
ADJUSTING COLOURS AND SHADING (page 6-121)
SCANNING ORIGINALS (page 6-131)
AUTOMATICALLY SCANNING BOTH SIDES OF AN
ORIGINAL (2-SIDED ORIGINAL) (page 6-68)
SCAN SIZE AND SEND SIZE (ENLARGE/REDUCE) (page 6-69)
SPECIFYING THE ORIGINAL SCAN SIZE IN PAPER SIZE (page 6-70)
SPECIFYING THE ORIGINAL SCAN SIZE USING NUMERIC VALUES (page 6-72)
SPECIFYING THE SEND SIZE OF THE IMAGE (page 6-79)
CHANGING THE EXPOSURE AND ORIGINAL IMAGE TYPE (page 6-81)
CHANGING THE RESOLUTION (page 6-83)
CHANGING FORMAT IN SCAN OR DATA ENTRY MODE (page 6-84)
CHANGING FORMAT IN INTERNET FAX MODE (page 6-90)
CHANGING COLOUR MODE (page 6-90)
4
Send the original.
Tap the [B/W Start] or [Colour Start] key ([Start] key in normal mode).
- You can tap the [Preview] key before tapping the [B/W Start] key or the [Colour Start] key (the [Start] key in normal mode) to check a preview of the image.
![SHARP BP-50C45 - Tap the [B/W Start] or [Colour Start] key ([Start] key in normal mode). - 1](/content/2026/06/1367452/images/bd9c15cc204618f37dc5b43063e0cb385721648f96d034c0d605462f7d3c71dc.jpg)
- You can tap the [Preview] key before tapping the [B/W Start] key or the [Colour Start] key (the [Start] key in normal mode) to check a preview of the image.
- When the original is placed on the document glass, repeat the placing original and transmission procedures until all originals have been sent. After scanning all originals, tap the [Read-End] key.
- In normal mode, if you tap [File] or [Quick File] on the action panel before sending an image, you can save the scanned original as data.
USING DOCUMENT FILING IN EACH MODE (page 7-7)
- When the original is scanned while skewed, there is a function which automatically adjusts the skew.
The automatic skew adjustment function is enabled when enabling auto configuration in easy mode.
In normal mode, tap the [Others] key and then the [Original Skew Adjustment] key to switch.
AUTOMATICALLY ADJUST SKEWED SCAN DATA (Original Skew Adjustment) (page 6-144)
If paper misfeeds in the automatic document feeder
2 patterns can be set.
In "Settings (administrator)", select [System Settings] → [Image Send Settings] → [Scan Settings] → [Condition Settings] → [Quick On Line Sending].
- If enabled
When an original misfeeds, scanning stops, and scanned data up until that point is sent.
- If disabled
Even if an original misfeeds, scanning does not stop, the misfed original is set again, and scanning starts again. After all of the original has been scanned, the scanned data is sent.
ORIGINAL SIZE
TRANSMITTABLE ORIGINAL SIZES
For information on the original sizes that can be loaded, see "AUTOMATIC DOCUMENT FEEDER (page 1-30)" and "DOCUMENT GLASS (page 1-34)".
THE SIZE OF THE PLACED ORIGINAL
When a standard size original is placed, the original size is automatically detected and displayed in "Scan Size" on the based screen.
SCAN SIZE AND SEND SIZE (ENLARGE/REDUCE) (page 6-69)
Standard sizes are sizes that the machine can automatically detect. The standard sizes are set in "Original Size Detector Setting" in "Settings".

When the automatic original detection function is operating and the original (of inch or non-standard size) is placed, the closest standard size may be displayed or the original size may not appear. In this event, manually set the correct original size.
SPECIFYING THE ORIGINAL SCAN SIZE IN PAPER SIZE (page 6-70) SPECIFYING THE ORIGINAL SCAN SIZE USING NUMERIC VALUES (page 6-72)

To specify the size that the machine can automatically detect:
Select the group of detected original sizes by selecting [System Settings] in "Settings (administrator)" → [Common Settings] → [Device Control] → [Condition Settings] → [Original Size Detector Setting].
List of original size detector settings
DETECTABLE ORIGINAL SIZES (page 1-28)
ADDRESS BOOK
"Contacts" and "Group" can be stored in the address book.
For a contact, more than one address can be stored, including fax, e-mail, Internet fax and direct SMTP addresses.
Registering addresses stored as "Contacts" as well as directly entered addresses as "Group" enables you to easily send messages to multiple destinations simply by specifying a group.

The fax and Internet fax function may not be available depending on the country, region, or model.
Address Book![graph TD A["Contact: Mr. Yamada"] --> B["Address 1"] A --> C["06-1234-1234Address 2"] D["Contact: Mr. Suzuki"] --> E["Address 1"] D --> F["suzuki@xxxx.□□□"] D --> G["\suzuki_smbAddress 2"] D --> H["192.168.0.XXXAddress 3"] I["Group address: X-project members"] --> J["Address 1"] I --> K["suzuki@xxxx…](/content/2026/06/1367452/images/c5e84bfa63976cf54d4d37675d7c467c75d10ee880d35b2e3780bf39874c516d.jpg)

- Up to 2000 entries in all can be stored for "Contacts" and "Group". • The address book can store up to 6000 addresses. • One "Contacts" can store up to 500 addresses. • One "Group" can store up to 500 addresses.
- A group that combines direct SMTP with other sending methods cannot be used for transmission.
ADDRESS BOOK SCREEN
To display the address book, tap the [Address Book] key on the base screen in image send mode such as fax, e-mail, or Internet fax. You can also display it by tapping the [Address Book] icon in the home screen. "Contacts" and "Group" registered are enabled for alphabetical search and selected condition-based advanced search.


- When the [Address Book] key is tapped on the e-mail base screen, groups and contacts having e-mail addresses are displayed.
- If user authentication is enabled, registered contacts can be shared within a specified group or stored as personal contacts that only you are allowed to access.
SETTING THE SCOPE FOR PUBLICIZING CONTACTS AND GROUPS (page 6-28)
- You can tap the [Find My Address] key while logging in and select your e-mail address from the user list. This is convenient when you want to send an e-mail to yourself.

Disable register an address book
• Prohibiting registration from the machine
In "Settings (administrator)", select [System Settings] → [Image Send Settings] → [Common Settings] → [Enable/Disable Settings] → [Settings to Disable Registration] → [Disable Registering Destination from Operation Panel].
• Prohibiting registration from the web page
In "Settings (administrator)", select [System Settings] → [Image Send Settings] → [Common Settings] → [Enable/Disable Settings] → [Settings to Disable Registration] → [Disable Registering Destination on Web Page].
- Disable Switching of Display Order
In "Settings (administrator)", select [System Settings] → [Image Send Settings] → [Common Settings] → [Condition Settings] → [Disable Switching of Display Order].
Disables changing the order of display (search number order, ascending, descending).
Once set, the display sequence is not changed. The display order will remain fixed at the order that is in effect when this setting is enabled.
• The type of screen set in the initial screen of the address book is shown
In "Settings (administrator)", select [System Settings] → [Image Send Settings] → [Common Settings] → [Condition Settings] → [Category Displayed as Default].
Select a category to be displayed with the default.
- None
- Frequent Use
- Categories 1 to 32
• Show all addresses regardless of the mode
In "Settings (administrator)", select [System Settings] → [Image Send Settings] → [Common Settings] → [Condition Settings] → [Display all address type regardless of the mode being displayed currently.].
Displays all destinations regardless of the displayed mode when this setting is enabled.
- Enlarge the address book
In "Settings (administrator)", select [System Settings] → [Image Send Settings] → [Common Settings] → [Condition Settings] → [Enlarge Address Book].
An enlarged address book list appears.
Selecting "Contacts" or "Group"
Tap a "Contacts" or "Group", and the tapped "Contacts" or "Group" is selected.
After selection, tap OK
To add "Contacts" and "Group", refer to the following.
STORING ADDRESSES THROUGH DIRECT ENTRY (page 6-19)
STORING ADDRESSES THROUGH GLOBAL ADDRESS SEARCH (page 6-20)
STORING ADDRESSES FROM FAX OR IMAGE SEND LOGS (page 6-22)
STORING GROUPS (page 6-24)

(1) One touch keys of "Contacts"
(2) One touch keys of "Group"
(3) [Frequent Use] key
(4) [Category] key
(5) [Narrow Down] key
Narrowing by frequent Use
Tap the [Frequent Use] key and select an address in the screen that appears. Addresses registered as "Frequent Use" addresses are shown.

Narrowing by category
Tap the [Category] key to select a category on the screen that appears. The "Contacts" and "Group" in the selected category appear on a list. The narrowed-down condition is displayed under the [Category] key.

Narrowing by job type
Tap the [Narrow Down] key to select a job on the screen that appears. To narrow by "Group", tap the [Group] key. The "Contacts" and "Group" for the selected job appear on a list. The narrowed-down condition is displayed under the [Narrow Down] key.

Narrowing by index
Search by alphabet to narrow down addresses.
For example, tap "A" on the index bar to display "Contacts" stored with search text starting with "A".
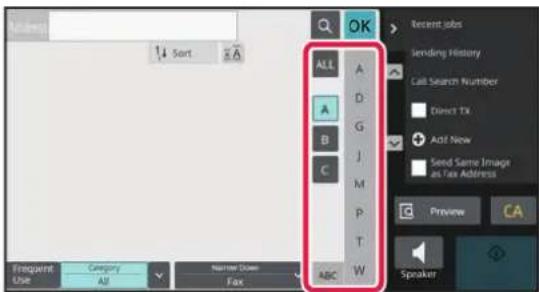
Narrowing by keyword
Tap 🔒 to display a search screen. Select a target for search, enter a keyword and then tap the [Search Start] key. The search results are listed.
For example, if [Item] is [Name], search with a keyword "SH" lists contacts and groups starting with "SH".
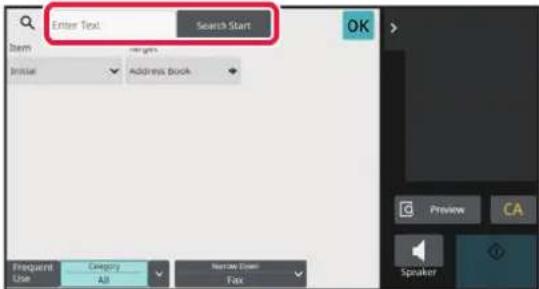
Displaying in the order of search numbers
Tapping the [Sort] key displays a list in ascending order, descending order, or in the order of search numbers. The display is switched in the order of [Sort] (▲) (Up) →[Sort] (▼) (Down) → Search Number Order.

STORING ADDRESSES THROUGH DIRECT ENTRY
Store new names or addresses in the address book by directly entering them.
1
In the address book screen, tap [Add New] on the action panel, or tap the [Address Control] icon in the home screen.
2
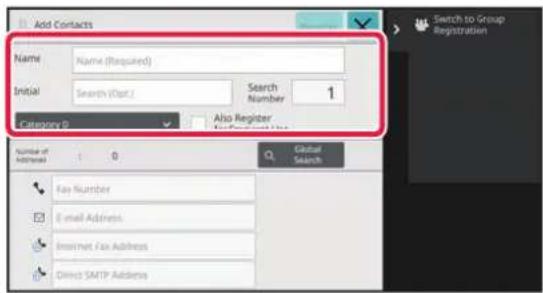
Enter basic information.
Be sure to enter [Name] and [Initial].
To specify a category, select one from a category list that appears when the entry box is tapped.
To register for frequent use, select the [Also Register for Frequent Use] checkbox.

To register a category name:
In "Settings (administrator)", select [System Settings] → [Image Send Settings] → [Common Settings] → [Category Setting].

If user authentication is enabled, the tab for address publication setting appears. Setting address publication enables stored "Contacts" and "Group" to be shared within a specified group or stored as personal contacts that only you are allowed to access.
SETTING THE SCOPE FOR PUBLICIZING CONTACTS AND GROUPS (page 6-28)
3

Tap [Fax Number], [E-mail Address], [Internet Fax Address], or [Direct SMTP Address] to enter the address, and tap OK

- Select the checkbox to set that address as the preferred over the others if two or more addresses are stored for "Contacts".
- FTP, Desktop, and Network Folder addresses can be registered from [Address Book] in "Settings (Web version)".
4
Tap the [Register] key.
The first address of each address type is set as the default address. If no address has the checkbox next to it selected, a confirmation screen will appear asking you if you want to select a default address.
STORING ADDRESSES THROUGH GLOBAL ADDRESS SEARCH
Store the results of searching the global address book as new addresses in the address book.

Global address search requires an LDAP server.

Disable Destination Registration Using Global Address Search
In "Settings (administrator)", select [System Settings] → [Image Send Settings] → [Common Settings] → [Enable/Disable
Settings] → [Settings to Disable Registration] → [Disable Destination Registration Using Global Address Search].
This disables address control from the global address search.
Configure the setting for each of the following items:
E-mail, Internet Fax, Fax
1
In the address book screen, tap [Add New] on the action panel, or tap the [Address Control] icon in the home screen.
2

Enter basic information.
Be sure to enter [Name] and [Initial].
To specify a category, select one from a category list that appears when the entry box is tapped.
To register for frequent use, select the [Also Register for Frequent Use] checkbox.

To register a category name:
In "Settings (administrator)", select [System Settings] → [Image Send Settings] → [Common Settings] → [Category Setting].

If user authentication is enabled, the tab for address publication setting appears. Setting address publication enables stored "Contacts" and "Group" to be shared within a specified group or stored as personal contacts that only you are allowed to access.
SETTING THE SCOPE FOR PUBLICIZING CONTACTS AND GROUPS (page 6-28)
3

Tap the [Global Search] key.
4

Select the server from the list of servers.
If an authentication screen appears, enter your user name and password, and tap the [OK] key.
After selecting a server, tap [OK].
5

Tap the entry field to enter the search condition and then tap the [Search Start] key.
To change the search target, tap [Item]. You can select [Name] or [Address].
6
Select one address from the search result list, and tap the OK key.

To check address information, select the address and tap the [Confirm Registered Information] key.
7
Tap the [Register] key.
The first address of each address type is set as the default address. If no address has the checkbox next to it selected, a confirmation screen will appear asking you if you want to select a default address.
STORING ADDRESSES FROM FAX OR IMAGE SEND LOGS
As a new registration, add an address you have entered via fax or image send operations to the address book.

FTP and desktop addresses cannot be stored in the address book from transmission logs.
1
In fax or image send mode, tap [Sending History] on the action panel.
2

Select one address you want to register in the address book from the send logs, and then tap [New Registration with Address Book] on the action panel.

When you tap [Additional Registration with Address Book] on the action panel, you can add the address to a contact stored in the address book.
3

Enter basic information.
Be sure to enter [Name] and [Initial].
To specify a category, select one from a category list that appears when the entry box is tapped.
To register for frequent use, select the [Also Register for
Frequent Use] checkbox.

If user authentication is enabled, the tab for address publication setting appears. Setting address publication enables stored "Contacts" and "Group" to be shared within a specified group or stored as personal contacts that only you are allowed to access.
SETTING THE SCOPE FOR PUBLICIZING CONTACTS AND GROUPS (page 6-28)

To register a category name:
In "Settings (administrator)", select [System Settings] → [Image Send Settings] → [Common Settings] → [Category Setting].
4
Tap the [Register] key.
The address is registered in the address book and the transmission log screen is restored.
The first address of each address type is set as the default address. If no address has the checkbox next to it selected, a confirmation screen will appear asking you if you want to select a default address.
5
Tap the [OK] key.
STORING GROUPS
Register "Group" by selecting addresses from those already stored as "Contacts". In this case of registration, only reference to addresses already stored takes place, and so, the total number of registered addresses (maximum 6000) in the address book does not increase. You can also directly enter a new address for a "Group".
1
In the address book screen, tap [Add New] on the action panel, or tap the [Address Control] icon in the home screen.
2

Enter the basic information, and tap [Switch to Group Registration] on the action panel.
3
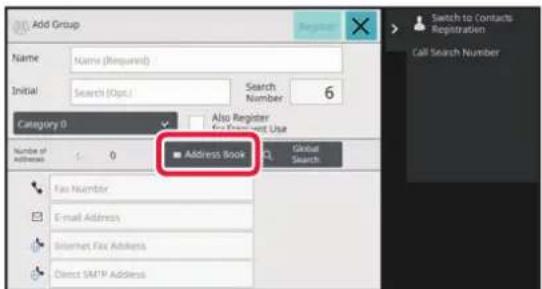
Tap the [Address Book] key.

To directly enter a new address for a "Group", tap [Fax Number], [E-mail Address], [Internet Fax Address], or [Direct SMTP Address].
4

In the contact list, tap the "Contacts" that includes the address you want to add to the "Group", and tap [Display Registered Information] on the action panel.
5
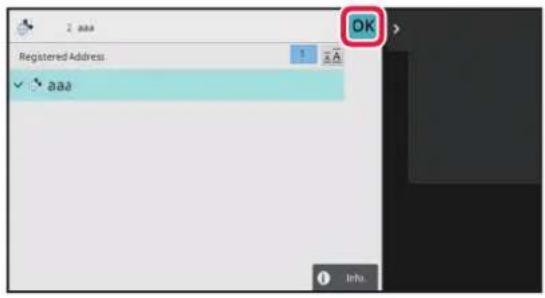
Tap the address to be registered in the "Group", and then tap the key.
You can select more than one address.
6
Repeat steps 3 through 5 to register addresses. After address registration is completed, tap the key.
7
Tap the [Register] key.
EDITING/DELETING ADDRESSES IN ADDRESS BOOK
You can edit or delete "Contacts" or "Group" information stored in the address book as well as addresses listed under "Contacts" and "Group".
Editing/deleting contacts and groups
1
In the address book screen, select a contact or group you wish to edit, and tap [Edit] on the action panel.
To delete a "Contacts" or "Group", tap [Delete] on the action panel.
![SHARP BP-50C45 - In the address book screen, select a contact or group you wish to edit, and tap [Edit] on the action panel. - 1](/content/2026/06/1367452/images/c8700721239677604d25d561fb666bdc3cc9033085a0cb323c06983c31db2c4b.jpg)
- For editing, you can only select one "Contacts" or "Group" at a time.
- For deleting, you can select more than one "Contacts" or "Group" at a time.
- If you have logged in as the administrator, you can delete all addresses stored in the address book by tapping the [Delete All] that appears on the action panel.
2

Editing a "Contacts" or "Group"
- You can change basic information such as names and categories, and you can also add addresses. STORING ADDRESSES THROUGH DIRECT ENTRY (page 6-19) STORING ADDRESSES THROUGH GLOBAL ADDRESS SEARCH (page 6-20) STORING ADDRESSES FROM FAX OR IMAGE SEND LOGS (page 6-22) STORING GROUPS (page 6-24)
- You can change the publicity scope. SETTING THE SCOPE FOR PUBLICIZING CONTACTS AND GROUPS (page 6-28)
Editing/deleting addresses
1
Select a contact or group you wish to edit, and tap [Edit] on the action panel. In the address book screen, select the contact or group that has the address you want to edit, and tap [Edit] on the action panel.
Only one contact or group can be selected. If more than one is selected, the [Edit] key does not appear.
2

Tap the address display in the list of addresses.
To delete an address, tap the key.

- To edit or delete, you can only select one address at a time.
- To check address information, tap the [Detail] key.

You cannot edit or delete an address for a job in a job queue.
3

Edit an address.
After editing, tap the [Register] key.
4
Tap the [OK] key.

You can only edit addresses in the network folder on the edit screen. (The Add New screen cannot be displayed.)
SETTING THE SCOPE FOR PUBLICIZING CONTACTS AND GROUPS
"Contacts" and "Group" stored in the address book can be shared within a specified group or stored as personal contacts that only you are allowed to access.
If no publicity scope is specified, stored "Contacts" and "Group" are publicized to all users.

User authentication is required to set the scope for publicizing "Contacts" and "Group".
| Scope for publicizing addresses | Description |
| Publicized to all | "Contacts" and "Group" are published to all users of the machine. |
| User | "Contacts" and "Group" are published only to the user. Registered addresses are preferentially displayed as "Personal Contacts" in the user's address book. |
| User Group | Publication of "Contacts" and "Group" is limited to the specified group. Up to eight groups per "Contacts" or "Group" can be set as the publicity scope. |
1
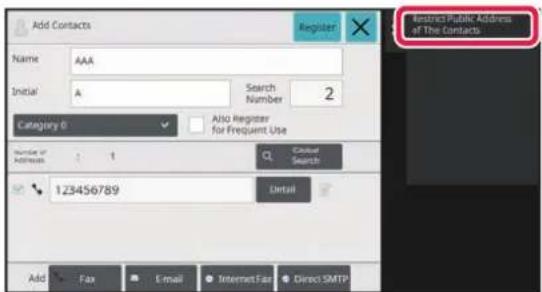
In the address registration screen, tap [Restrict Public Address of The Contacts] on the action panel.
2

Tap the [Designate Public Address] key.
3

Tap [User] or [Group] and specify who the address is made public to.
After the settings are completed, tap OK

If you have logged in as the administrator, select any user name desired from the user list.

To register a user:
In "Settings (administrator)", select [User Control] → [User Settings] → [User List] → [Add].
DELETING THE TRANSMISSION HISTORY
You can delete the fax or image send transmission history.

The transmission history is deleted in normal mode.
Deleting a selected history
1
Tap the history you want to delete.
2
In the transmission log screen, tap [Delete the Selected History] on the action panel.
3
The message "Delete the Selected History?" will appear, tap the [Delete] key.
The selected transmission log is deleted.
Deleting all transmission histories
1
In the transmission log screen, tap [Delete All Histories] on the action panel.
2
The message "Delete All Histories" will appear, tap the [Delete All] key.
All transmission logs are to be deleted.
REGISTER AN ADDRESS BOOK IN THE WEB PAGE
Address Book
Transmission destinations (contacts) such as fax and Scan to E-mail addresses, and groups of transmission destinations, can be stored in the address book. In setting mode, a list of stored contact and group information is displayed.
To edit a contact or group, select the name of the contact/group. To add a new contact or group, click the [Add] key.
| Item Description | |
| Type Select the contact or group. | |
| Search Number Store a number that can be used to search for a contact or group. | |
| Address Name Store a name for an address. | |
| Initial Store an initial that can be used to search for a contact or group. | |
| Category Enter a category for a contact or group. | |
| Register this Address to be added to the [Frequent Use] index. | Add a contact to the "Frequent Use" index. |
| Address Public Setting | Set whether the address will be shared with all users or only selected users.If you select [Select user], click the user selection buttons to select the users with whom the address will be shared. |
| Share also to the following group | When this function is enabled, you can select a previously stored group from the list below and share the address with that group. |
| E-mail Address | To store a new address, select [New Address] and enter the address in the address entry field. |
| Global Address Search | To search for an address stored as a global address, click this key and select the address from the list. |
| File Type* | Select the file format used for a scanned image.Black & white: Select the compression format used for saving black & white images.Colour/Greyscale: Select the compression format used for saving colour/greyscale images. If the original is mainly text with a small number of colours, select "Reduce Colours" to scan with the appropriate settings and reduce the file size. |
| Set as Default used Set an address as a default address. | |
| Fax | |
| Fax Number | To store a new fax number, select [New Address] and enter the fax number in the fax number entry field. |
| Global Address Search | To search for a fax number stored as a global address, click this key and select the fax number from the list. |
| Transmission Mode Select the communication speed and International Correspondence Mode. | |
| Set as Default used Set an address as a default address. | |
| Internet Fax | |
| Internet Fax Address | To store a new address, select [New Address] and enter the address in the address entry field. |
| Global Address Search | To search for an address stored as a global address, click this key and select the address from the list. |
| Compression Mode Set the compression format used for transmitted images. | |
| Request Internet Fax Reception Report | Select whether or not you wish to receive a reception report by e-mail after transmission is completed. |
| Set as Default used Set an address as a default address. | |
| Direct SMTP | |
| Direct SMTP Address | To store a new address, select [New Address] and enter the address in the address entry field. |
| Add Hostname or IP Address. | When the receiving machine is set to only receive e-mail from specific addresses, enter the specified specific e-mail address in the [Direct SMTP Address] text box. Select the "Add Hostname or IP Address." checkbox and enter the host name or IP address of the receiving machine in the [Hostname or IP Address] text box.Example: When the e-mail address of the receiving machine is "user@sample_domain.com" and the IPv4 address is "192.168.123.45"Enter "user@sample_domain.com" in the [Direct SMTP Address] text box and enter "192.168.123.45" in the [Hostname or IP Address] text box. |
| Compression Mode Set the compression format used for transmitted images. | |
| Set as Default used Set an address as a default address. | |
| FTP | |
| FTP Address | To add a new address, select [New Address] and enter the address in [Hostname or IP Address]. |
| Port Number Set the port number used by the FTP server. | |
| File Type* | Select the file format used for a scanned image.Black & white: Select the compression format used for saving black & white images.Colour/Greyscale: Select the compression format used for saving colour/greyscale images. If the original is mainly text with a small number of colours, select "Reduce Colours" to scan with the appropriate settings and reduce the file size. |
| Directory Specify a directory in the FTP server to be used for transmission. | |
| User Name Enter a user name in the FTP server to be used for transmission. | |
| Password Enter the password associated with the entered user name. | |
| Enable SSL Use SSL/TLS to encrypt data before transmission. | |
| Use PASV mode Send data to an FTP server in PASV mode. | |
| Enable Hyperlink to FTP server to be e-mailed | When sending data to an FTP server, send the data to the e-mail address that is specified in the hyperlink to the FTP server. |
| Set as Default used Set an address as a default address. | |
| Desktop | |
| Desktop Destination | To add a new address, select [New Address] and enter the address in [Hostname or IP Address]. |
| Port Number Enter the port of the destination computer. | |
| Process Directory Specify the directory to which the data is be to sent. | |
| File Type* | Select the file format used for a scanned image.Black & white: Select the compression format used for saving black & white images.Colour/Greyscale: Select the compression format used for saving colour/greyscale images. If the original is mainly text with a small number of colours, select "Reduce Colours" to scan with the appropriate settings and reduce the file size. |
| User Name Enter a user name in the computer to be used for transmission. | |
| Password Enter the password associated with the entered user name. | |
| Enable SSL Use SSL/TLS to encrypt data before transmission. | |
| Set as Default used Set an address as a default address. | |
| Network Folder | |
| Network Folder Path | To store a new path, select [New Address] and enter the path in the path entry field. |
| User Name Enter a user name in the computer to be used for transmission. | |
| Password Enter the password associated with the entered user name. | |
| File Type* | Select the file format used for a scanned image.Black & white: Select the compression format used for saving black & white images.Colour/Greyscale: Select the compression format used for saving colour/greyscale images. If the original is mainly text with a small number of colours, select "Reduce Colours" to scan with the appropriate settings and reduce the file size. |
| Enable Hyperlink to Network Folder to be e-mailed | When sending data to a shared folder, send the data to the e-mail address that is specified in the hyperlink to the shared folder. |
| Set as Default used Set an address as a default address. | |
* Depending on the model and upon installation of peripheral devices, High Compression PDF may be selected. When [OCR] is enabled, text in the scanned data is automatically recognized. For PDF, the text information is embedded in the PDF. For PDF, RTF, TXT(UTF-8), DOCX, XLSX, or PPTX, the recognized text is saved in the corresponding format.
Category Setting
A category can be renamed for greater ease of use.
Delete the previously entered characters and enter a new name (up to 127 characters).
The factory default names are "Category 1" to "Category 32".
ENTERING DESTINATIONS
ENTERING DESTINATIONS
RETRIEVING A DESTINATION FROM AN ADDRESS BOOK
In the address book screen, simply tap the one-touch key of a registered destination to retrieve the destination. If necessary, store multiple destinations in a one-touch key. Tapping the key will retrieve all the stored destinations. The address book screen shows all destinations used in each mode. Each one-touch key shows the name of the destination and an icon indicating the mode used for the destination.
| Fax | |
| Scan to E-mail | |
| Internet Fax | |
| Direct SMTP | |
| Scan to FTP | |
| Scan to Network Folder | |
| Scan to Desktop | |
| Group key with multiple destinations |
- For information on the address book, see "CHANGING MODES (page 2-10)" and "ADDRESS BOOK (page 6-14)".
- For the procedure for storing the destinations in the address book, see "STORING ADDRESSES THROUGH DIRECT ENTRY (page 6-19)", "STORING ADDRESSES THROUGH GLOBAL ADDRESS SEARCH (page 6-20)", and "STORING GROUPS (page 6-24)".
1
Tap the [Address Book] key.
In Easy mode In Normal mode


2

Tap the one-touch key of the contact or group that has a destination.
- The destinations displayed on the list can be narrowed with categories, frequent use, indexes, and keywords. (In normal mode you can narrow down by job type.)
- Tapping the [Sort] key allows you to change the order of destinations displayed in the list.
- When adding a destination, tap another one-touch key.
- If two or more destinations are selected or specified, the total number of addresses appears next to address.
- Even if only a single destination is selected, the number of addresses appears when the destination is a contact or group in which multiple addresses are stored. For more information, see "ADDRESS BOOK SCREEN (page 6-15)".

- If you select an incorrect destination:
Tap the key again to cancel the selection.
• To cancel a specified destination:
Select the address you want to cancel in the address list screen, and tap the [Delete] key.

• To select a destination from the transmission log, tap the [Sending History] key. USING A TRANSMISSION LOG TO RESEND (page 6-45) • To check the entered destinations, tap the [Address Review] key. VIEWING A LIST OF THE SELECTED DESTINATIONS (page 6-36) - The destination for transmission can be selected by tapping a stored destination. - If an address that you do not have permission to use is included in the addresses, a message will appear when you press the [Start] key. To send only to the permitted addresses, press the [OK] key and then the [Enter for send] key. • In Normal mode
- Tap the one-touch key, and then tap [Display Registered Information] on the action panel to display the detailed information screen. • To retrieve a destination by using a search number, tap [Call Search Number] on the action panel. USING A TRANSMISSION LOG TO RESEND (page 6-45) • To retrieve a destination from a global address book, tap [Global Address Search] on the action panel. RETRIEVING A DESTINATION FROM A GLOBAL ADDRESS BOOK (page 6-41)
- To retrieve a destination from the address book of the mobile device, tap [Refer to Mobile Address Book] on the action panel.

To enable transmission to addresses of modes other than the current mode:
Remove the checkmark from [System Settings] → [Image Send Settings] → [Common Settings] → [Condition Settings] → [Address Book Default Selection] → [Apply Addresses of Sending Modes Only] in "Settings (administrator)".
MY ADDRESS
My Address is the user's own e-mail address, and is the e-mail address that has been registered in the user list.
My Address can be used when login by login name / password is enabled in user authentication.
Use this address when you want to send a scanned image to your own e-mail address.
In E-mail mode, [Find My Address] appears on the action panel to let you immediately find and use My Address.
When you use the address book in easy scan screen or E-mail mode, the [Find My Address] button also appears at the top of the user list for easy access from the address book.

- My Address cannot be used in the following instances:
- When address search from the user list is prohibited in the system settings
- When user authentication is disabled, or is only by user number
- When [Apply E-mail address of the user for login.] is enabled in [Default Address]
- When the e-mail address of the logged in user has not been registered
- After the [Next Address] key is pressed when [Be sure to press Next Address Key ([+]) before selecting the next address.] is enabled in System Settings - [Image Send Settings] → [Common Settings] → [Condition Settings]
- When [S/MIME Settings] → [Disable sending to the addresses which cannot be encrypted.] is enabled in the security settings
- You can register [Find My Address] in the home screen. This is convenient when you frequently use My Address.
VIEWING A LIST OF THE SELECTED DESTINATIONS
When multiple destinations have been selected, you can display and check the destinations. You can also delete a destination from the list (cancel selection of the destination).
1
Tap the Address Review key.
In Easy mode In Normal mode
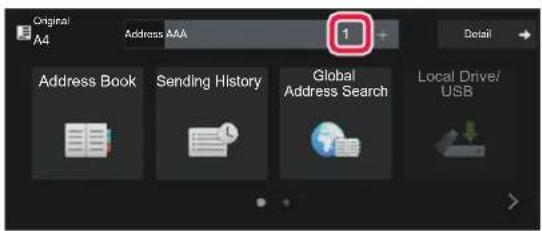

2

Confirm the destination.
After the confirmation is completed, tap OK

To confirm detailed information such as the type or name of the specified destination, tap the one-touch key of the target destination, and then tap the [Info.] key.
In normal mode, you can change the delivery type (To/Cc/Bcc). Tap the address and then tap [Change to To], [Change to Cc], or [Change to Bcc] on the action panel.
Deleting Specified Destinations
In step 2 of "VIEWING A LIST OF THE SELECTED DESTINATIONS", select the destination and tap the [Delete] key.


If you placed the original on the document glass and tapped the [Start] key, you cannot delete an address when changing settings.
USING A SEARCH NUMBER TO RETRIEVE A DESTINATION
The search number can be used to specify a destination stored in an address book.
1
Tap the [Detail] key to change to normal mode.
EASY MODE (page 6-7)
2
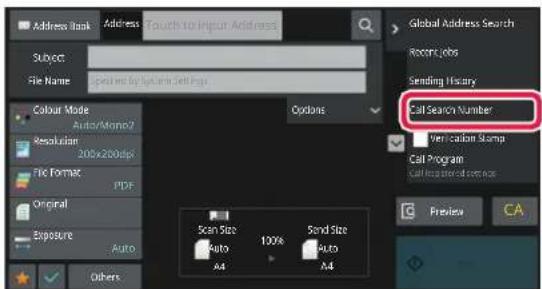
Tap [Call Search Number] on the action panel.
3
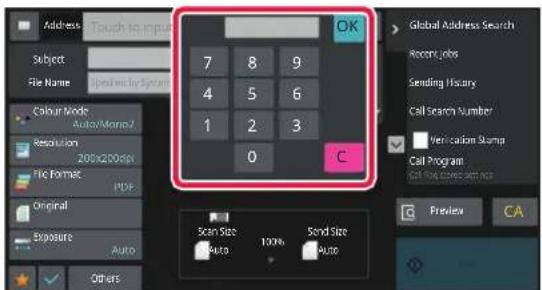
Enter a search number (4 digits) using the numeric keys and tap ♀K
When the search number is entered, the stored address is retrieved and specified as a destination.

If an incorrect search number is entered:
Tap the [C] key to clear the number and enter the correct number.

- The search number is programmed when the destination is stored in the address book.
- If you do not know the search number, tap [Print Individual List] on the action panel to print and check the address list.
- When entering search numbers such as "0001" and "0011", "0" can be omitted. For example, to enter "0001", enter "1" and tap the [OK] key.
ENTERING AN ADDRESS MANUALLY
1
In the base screen of a mode, tap [Text Box].
On the base screen of Internet Fax, tap [Text Box] to display the screen you want to select the address type. Tap either the [Internet Fax] or [Direct SMTP] key.
In easy mode, only the e-mail addresses can be entered.
In Easy mode In Normal mode

2
![Original A4 Details Cancel OK Characters 1 2 3 4 5 6 7 8 9 0 - = @ q w e r t y u i o p [ ] # a s d f g h j k l ; ' \ z x c v b n m , . / File Format Space AltGr](/content/2026/06/1367452/images/b96f592769c606e3bf1012a20e6558576be7e3bdf618b2f701c04887809561bf.jpg)
Enter the destination address on the soft keyboard that appears.
- In data entry mode, select the mode of the destination, and enter the destination address.
- For Scan to Network Folder mode, the network folder entry screen appears. See "SPECIFYING A NETWORK FOLDER (page 6-39)".
- After entering the destination address, tap the [OK] key to close the soft keyboard.

- For details on how to enter characters, refer to "CHARACTER ENTRY (page 2-63)" in "How to operate this machine".
- You can select [Bcc] if [Image Send Settings] → [Scan Settings] → [Default Settings] → [Bcc Setting] → [Enable Bcc] is enabled in [System Settings].
- When you want to display Bcc address on the job status screen or address list tab, [Image Send Settings] → [Scan Settings] → [Default Settings] → [Bcc Setting] → [Display Bcc Address on the Job Status Screen] is enabled in [System Settings].
- In Internet Fax mode, the transmission confirmation request setting screen will appear if [System Settings] - [Image Send Settings] → [Internet Fax Settings] → [Send Setting] → [I-Fax Reception Report On/Off Setting] is enabled. To request confirmation, tap the [Set] key. To cancel, tap the [Cancel] key. (When Direct SMTP is used, transmission confirmation is not performed.)
SPECIFYING A NETWORK FOLDER
1
Tap the [Browse] key in the network folder entry screen.
- To directly enter a folder, tap the [Folder Path] box. The soft keyboard is displayed.
- If a user name and password are required, check with the administrator of the server and enter the user name and password.
![SHARP BP-50C45 - Tap the [Browse] key in the network folder entry screen. - 1](/content/2026/06/1367452/images/ab894717607522979a62f313722f4e052dcd2a488375f66a3e323ab1b242023d.jpg)
- For details on how to enter characters, refer to "CHARACTER ENTRY (page 2-63)" in "How to operate this machine".
- If a user authentication function other than authentication by user number is enabled, the login name of the current user is automatically entered in the user name field.
- If user authentication is not set and a network folder which has different passwords for each user is selected as the destination, a screen to enter a user name and password can be displayed at the time of sending. Configure in "Settings (administrator)" → [System Settings] → [System Control] → [Advanced Settings].
- Enter a password with up to 255 single-byte characters.
2
Tap the key of the workgroup that you wish to access.

- Tap the [Search] key and enter a keyword to search for a workgroup, server, or network folder.
- Up to 100 workgroups, 100 servers, and 100 network folders are displayed.
- Tap the [Cancel] key to return to the screen of step 1.
3
Tap the key of the server or computer that you wish to access.
If a screen appears prompting you to enter a user name and password, check with your server administrator and enter the appropriate user name and password.
4

Tap the key of the network folder.
After the settings are completed, tap the [OK] key. You will return to the screen of step 1. Tap the [OK] key again to accept the destination.
SELECTING A SUBFOLDER AS A DESTINATION
If there is only one shared folder selected as the destination, tapping [Select a Subfolder] changes the destination to the subfolder.

- If the destination is changed to a subfolder, hyperlink e-mail transmission will not take place.
- If a selected destination is a group destination, this function cannot be used.
- If [Send and Print] of the copy function is set, this function cannot be used.
- If [Disable Selection from Address Book] or [Disable Direct Entry] in "Settings (administrator)" → [System Settings] → [Device Control] → [Enable/Disable Settings] → [Settings to Disable Transmission] is prohibited, this function cannot be used.
- If [Approval Settings for Each Mode], [Approval Setting for Direct Entry], or [Approval Setting to Use a Local Address Book] in "Settings (administrator)" → [System Settings] → [User Control] → [Authority Group] is prohibited, this function cannot be used.
RETRIEVING A DESTINATION FROM A GLOBAL ADDRESS BOOK
When an LDAP server is configured in the "Settings (Web version)", look up an address in a global address book and retrieve the destination address for Scan to E-mail or Internet fax transmission (excluding Direct SMTP addresses). In normal mode, you can add an address retrieved by searching to the address book. However, addresses of the FTP/Desktop transmission cannot be stored from the machine.
1
In Easy mode
In Normal mode
Tap the [Global Address Search] key.
In the base screen or address book screen, tap [Global Address Search] on the action panel.
2
Tap [Destination] and tap the LDAP server to be used.
- If an authentication screen for the LDAP server appears, enter your user name and password.
- If only one LDAP server has been stored, it is not necessary to take step 2. In this case, start from step 3.
3

Tap ☐ of [Item], and select an item to be searched from [Name] or [Address].

How to search
Enter the search characters (maximum of 64 characters). The system will look for names starting with the entered letters.
An asterisk * is used as follows:
XXX* Names beginning with "XXX"
*XXX : Names that end with "XXX"
*XXX* Names containing "XXX"
AA*X : Names that start with "AA" and end with "XX".
4

Enter a keyword and tap the [Search Start] key.
When you tap the keyword entry box, the soft keyboard appears.
The search results will appear after a brief interval.
![SHARP BP-50C45 - Enter a keyword and tap the [Search Start] key. - 1](/content/2026/06/1367452/images/fa8eadd91c8f81ffb0e07b223f365698061d4f1b6837d2bfdf587002240e7092.jpg)
- If no destination is found:
Tap the [Search Again] key to add more search letters.
• To continuously add other destination.
Tap the destination.
![SHARP BP-50C45 - Enter a keyword and tap the [Search Start] key. - 2](/content/2026/06/1367452/images/09a1af957493d05b6f30d6e0bfd1e49adf0ff4d27cc598eae6e5bd9f599f2546.jpg)
To check the destination information:
Tap the one-touch key of the target destination, and then tap the [Info.] key. Tap OK to close the address information screen.
In normal mode, you can select an address and tap [New Registration with Address Book] on the action panel to add the address to the address book. This is convenient if you have entered a destination directly.
RETRIEVING A DESTINATION FROM A MOBILE ADDRESS BOOK
If the machine and mobile device are connected by Bluetooth, you can retrieve a destination from the mobile address book.
Destinations for fax transmission and e-mail transmission can be retrieved.

- The called address book is not saved in this machine.
- The maximum number of addresses that can be read from the mobile address book is 2000.
- For more information about the operation of mobile devices, please refer to the operation manual/help of the mobile device.

To use this function
Enable "Settings (administrator)" → [Network Settings] → [Bluetooth Setting] → [Bluetooth] to pair the machine and mobile device.

In Easy mode

Tap the [Mobile Address Book] key.
In Normal mode

In the base screen or address book screen, tap [Refer to Mobile Address Book] on the action panel.
2
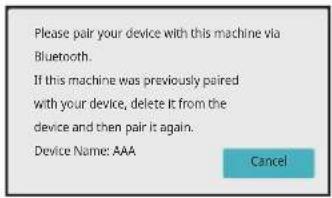
Operate the mobile device to be connected to pair it with the machine.
Device name of the machine is displayed on the screen.

When pairing with a mobile device that has been paired with this unit before, delete the information of this unit stored in the mobile device.

To set a device name to this machine
Configure in "Settings (administrator)" → [System Settings] → [Network Settings] → [Network Name Setting] → [Device Name].
The device name must be in 7 or less double-byte characters, or 15 or less single-byte characters.
3
![Enter Text Search Start Initial AAA BBB CCC DDD EEE Enter Initial and press Enter key of external keyboard or [Start Search] button. ABC W](/content/2026/06/1367452/images/591a7d0acc8fca603aa66001e1efcd3d0cd1b0d205186c5845c885ce571aa9a1.jpg)
Tap (☐) of [Item], and select an item to be searched from [Initial], [Name] or [Address].
4

Enter a keyword and tap the [Search Start] key.
When you tap the keyword entry box, the soft keyboard appears.
The search results will appear after a brief interval.
![SHARP BP-50C45 - Enter a keyword and tap the [Search Start] key. - 1](/content/2026/06/1367452/images/5151676620b1b82c88d09c2d77901ed60d88bec7c9f2549a6143a507982a1b19.jpg)
- If no destination is found:
Tap the [Search Again] key to add more search letters.
• To continuously add other destinations.
Tap the destination.
USING A TRANSMISSION LOG TO RESEND
Select a destination from a transmission log and resend the data.
The destinations of the most recent 50 transmissions by Scan to E-mail, Internet fax (including Direct SMTP addresses), and/or fax are stored. Select one of these to resend to that destination. The destinations of the FTP/Desktop transmission and Scan to Network Folder are also shown in the transmission log.
In normal mode, the addresses shown in the transmission log can also be stored in an address book. This is convenient when storing an address that was manually entered.

- When a destination for retransmission is selected in the transmission log screen, the mode of the selected destination is automatically selected.
- The following types of addresses are not stored for resending.
• One-touch key for a contact or group in which multiple destinations are stored. - Group destinations - Broadcasting destinations - The user name and password are not stored for security reasons. If a screen requiring you to enter such information appears, enter the information again.
In Easy mode
In Normal mode
Tap the [Sending History] key
In the base screen or address book screen, tap [Sending History] on the action panel.
2

Tap the key of the destination to resend.
The last 50 addresses used for transmission are displayed. If a screen requiring you to enter the user name and password appears, enter the information.

To cancel the resend setting:
Tap the highlighted key.

In normal mode, you can select an address and tap [New Registration with Address Book] on the action panel to add the address to the address book. This is convenient if you have entered a destination directly.
SENDING ONLY THE URL OF A SCANNED FILE TO A SCAN DESTINATION
When using Scan to E-mail, some originals and/or scan settings may result in a large file.
When the file is large, there is a risk that the e-mail server may reject the file and it will not be sent.
This function saves the scanned file on the machine's local drive, and sends an e-mail providing only the file's URL information to the recipient.
This function helps reduce the load on the e-mail server and prevents non-delivery of scanned files caused by the e-mail server.
Upon receiving the e-mail, the recipient can use the URL in the e-mail to download the scanned file.
When the scanned file is too large
Scan to E-mail
Scanned file
![graph LR A["Sending the file as an e-mail attachment"] --> B{The attachment is too large and the e-mail server rejects the e-mail} B --> C["Sending fails"] C --> D["E-mail server"] D --> E["Destination"]](/content/2026/06/1367452/images/21c58d868172ff9c96c7a90f20da66b92eb8a8f4a253d45e6f81bf90eece3c44.jpg)
Sending only a URL to the recipient
Scanned file
![graph TD A["Save to the machine's local drive"] --> B["Send the URL of the save location by e-mail"] B --> C["E-mail server"] C --> D["The e-mail arrives at the destination"] D --> E["Destination"] A --> F["Local Drive"] F --> G["E-mail server"] G --> H["Destination"]](/content/2026/06/1367452/images/28349122a30113dcf6239e91f767f95f51127bb61c4df7463046a3f374bc19c2.jpg)
The recipient uses the URL in the e-mail to download the scanned file.
Sending only a URL to the recipient.
Using easy mode.
When [Enable Send Destination Link as Default] is enabled in the settings (administrator), the scanned data is saved in the machine's local drive, and URL information is sent to the e-mail destination. When disabled, scanned data is sent by regular Scan to E-mail. This function enable/disable cannot be changed in the easy mode screen.
Using normal mode.
[Send Destination Link] appears on the action panel of the home screen of Scan to E-mail. By selecting this checkbox √, you can use this function.

Number of URLs created.
One URL is created per file to be downloaded.
Using [One Page per File].
Multiple scanned files will be created and saved at once, and a URL will be created for each file and sent to the recipient.
Using [Programmed].
Files will be created and saved in a format that varies by recipient, and a URL will be created for each file. A URL will be sent to each recipient for the file in the format for that recipient.
![SHARP BP-50C45 - Using [Programmed]. - 1](/content/2026/06/1367452/images/e26db951caf94fef601544b11b9c9e9cafd9e19f802a1977da090aab6e5622b9.jpg)
- To use this function, [Send Destination Link Settings] must be enabled in the System Settings (administrator).
- This function cannot be used in combination with metadata transmission or resending from document filing.
- If a subfolder is selected as the saving destination, this function cannot be used.
- Scanned files are saved in the standard folder area.
- Scanned files cannot be browsed by a method other than downloading.
- Scanned files cannot be manually deleted, and are retained for the save period set in the System Settings. However, scanned files will be deleted if Clear All Memory or Initialize Private Data/Data in Machine is executed, or you move to Advanced Security Settings.
- When all destinations in a broadcast transmission are e-mail addresses, URL information is sent to all destinations. If the file format of the saved scan data is the same for all destinations, the same URL will be sent. If the file format varies by destination, separate URLs will be sent.
- If the transmission includes recipients for different jobs (Scan to FTP, Scan to Desktop, etc.), transmission will take place by sending only a URL to the recipient to any e-mail addresses, while the scanned file will be sent directly in the normal way to recipients for other jobs.
- When [Document Administration Function] is enabled in the System Settings (administrator), the scanned file will be sent directly to the administrator, not by URL.
- Even when [Send Destination Link Settings] is disabled in the System Settings (administrator), the URL can be accessed and the scanned file downloaded during the file save period.
- The scanned file will be saved even if a send data limit is set in the System Settings (administrator) and the file exceeds the limit. The scanned file will be saved as a single file even if [If the send data exceeds maximum size, it will be sent in multiple files.] is enabled in the System Settings (administrator) and the file exceeds the limit.
If there is a job other than a Scan to E-mail job in a broadcast transmission and the scanned file exceeds the [Maximum Size of Send Data (FTP/Desktop/Network Folder)] setting, transmission will not be possible.
![SHARP BP-50C45 - Using [Programmed]. - 2](/content/2026/06/1367452/images/fd7dc0350af1b897a9f6edd8721dad3867fcd049c9d2e410d6b2fff3a34ab7bc.jpg)
• To use this function
Configure in "Settings (administrator)" → [System Settings] → [Image Send Settings] → [Scan Settings] → [Condition Settings] → [Send Destination Link Settings].
• To always use this function in easy mode
Configure in "Settings (administrator)" → [System Settings] → [Image Send Settings] → [Scan Settings] → [Condition Settings] → [Enable Send Destination Link as Default].
When this function is enabled and e-mail is sent in normal mode, the [Send Destination Link] checkbox in the action panel is always √
- Save period for scanned files saved using this function
Configure in "Settings (administrator)" → [System Settings] → [Image Send Settings] → [Scan Settings] → [Condition Settings] → [File Retention Period].
- Protecting the URL by SSL/TLS
Configure in "Settings (administrator)" → [System Settings] → [Image Send Settings] → [Scan Settings] → [Condition Settings] → [Enable SSL/TLS].
TRANSMITTING AN IMAGE
TRANSMITTING AN IMAGE
SENDING AN IMAGE IN SCAN MODE
An image can be sent in scan mode (Scan to E-mail, Scan to FTP, Scan to Desktop, and Scan to Network Folder).

- If the memory becomes full while the originals are being scanned, a message will appear and scanning will stop.
- When performing Scan to E-mail, take care not to send a file that is too large. In particular, multi-page files tend to be large. When sending a multi-page file or other large file, it may be necessary to reduce the number of scanned pages or reduce the send size.

Do not place any objects under the original size detector. Closing the automatic document feeder with an object underneath may damage the original size detector plate and prevent correct detection of the document size.
1
Place the original.
Place the original in the document feeder tray of the automatic document feeder, or on the document glass. AUTOMATIC DOCUMENT FEEDER (page 1-30) DOCUMENT GLASS (page 1-34)

- When placing the originals, orient them as shown below.
| Originals | Document feeder trayPlace the original face up. | Document glassPlace the original face down and align the corner with the tip of the ▲ mark in the top left corner of the document glass scale. |
Portrait orientation* |  |  |
Landscape orientation* |  |  |
*To place a large portrait-oriented original, place it as shown in the figure titled "Landscape orientation" and specify the placement orientation in step 4.
- Place A5 (5-1/2" x 8-1/2") size originals in portrait (vertical) orientation (☐). If placed in landscape (horizontal) orientation (☐), an incorrect size will be detected. For an A5R (5-1/2" x 8-1/2"R) size original, enter the original size manually.
2
Specify the destination.
RETRIEVING A DESTINATION FROM AN ADDRESS BOOK (page 6-33)
VIEWING A LIST OF THE SELECTED DESTINATIONS (page 6-36)
USING A SEARCH NUMBER TO RETRIEVE A DESTINATION (page 6-37)
ENTERING AN ADDRESS MANUALLY (page 6-38)
SPECIFYING A NETWORK FOLDER (page 6-39)
RETRIEVING A DESTINATION FROM A GLOBAL ADDRESS BOOK (page 6-41)
RETRIEVING A DESTINATION FROM A MOBILE ADDRESS BOOK (page 6-43)
USING A TRANSMISSION LOG TO RESEND (page 6-45)
The icon on the key indicates the type of destination stored in the key.
Scan to E-mail
Scan to FTP
Scan to Network Folder
Scan to Desktop

- After a one-touch key is tapped, if the screen is changed without tapping +, the destination of the tapped key is automatically specified.
- When performing Scan to E-mail, you can also send Cc or Bcc copies to other destinations. Tap the [Address Review] key to select destinations. VIEWING A LIST OF THE SELECTED DESTINATIONS (page 6-36)
- Multiple destinations can be specified.
- To change [Subject], [File Name], [Reply-To], or [Body Text] in normal mode, tap a target entry box, or tap [Options]. CHANGING THE SUBJECT, FILE NAME, REPLY-TO, AND BODY TEXT AT THE TIME OF SCAN TRANSMISSION (page 6-53)
3
Tap the [Original] key.
4

Tap the appropriate orientation key.
Specify the orientation of the original placed in step 1.
After the settings are completed, tap OK

- You can change exposure, resolution, file format, colour mode, and other settings. AUTOMATICALLY SCANNING BOTH SIDES OF AN ORIGINAL (2-SIDED ORIGINAL) (page 6-68) SCAN SIZE AND SEND SIZE (ENLARGE/REDUCE) (page 6-69) CHANGING THE EXPOSURE AND ORIGINAL IMAGE TYPE (page 6-81) CHANGING THE RESOLUTION (page 6-83) CHANGING FORMAT IN SCAN OR DATA ENTRY MODE (page 6-84) CHANGING COLOUR MODE (page 6-90)
- Tapping the [Others] key allows you to configure various functions, for example, collectively sending two original pages as one sheet or original pages with different sizes.
5
Tap the [B/W Start] or [Colour Start] key to start scanning of the original.
- If the original was inserted in the document feeder tray, a beep will sound when scanning is completed and transmission will take place.
- If the original is placed on the document glass, the [Read-End] key appears in the touch panel. If the original is only one page, go to step 7. To scan more pages, go to step 6.
![SHARP BP-50C45 - Tap the [B/W Start] or [Colour Start] key to start scanning of the original. - 1](/content/2026/06/1367452/images/df64b1674090bcbcba8bc5d190245c0d37bb08a776531d68346a745f3ad9c48b.jpg)
- You can tap the [Preview] key to check a preview of the image before sending an image. For more information, see "CHECKING THE IMAGE TO BE TRANSMITTED (page 6-93)".
- If the file format is set to [PDF/Encry.], [PDF/Encry./Reduce Colours], [PDF/Encry./Compact], or [PDF/Encry./Compact/U-Fine], you will be prompted to enter the password when you tap the [B/W Start] or [Colour Start] key.
- Tap the password entry box to open the keyboard screen, enter a password using a maximum of 32 characters, and tap the [OK] and [Send] key in sequence. The recipient must use the password entered here to open the Encrypt PDF file.
- To cancel Encrypt PDF, tap the [Cancel] key. The format settings screen will appear to let you change the file type. Select a new file type and tap the [B/W Start] or [Colour Start] key to begin transmission.
6
If the original was placed on the document glass, replace it with the next original and tap the [B/W Start] or [Colour Start] key.
Repeat until all originals have been scanned.
7
Tap the [Read-End] key.
A beep will sound to indicate that the operation is completed.
![SHARP BP-50C45 - Tap the [Read-End] key. - 1](/content/2026/06/1367452/images/99449da249ef1e85bc461195592943c3e78d8d688e9bdd7aa595f31763e167a5.jpg)
- If no action is taken for one minute after the confirmation screen is displayed, scanning automatically ends and the transmission is reserved.
- Tap the [Change Setting] key to change the exposure, resolution, scan size, and send size for each original page scanned. However, when "Card Shot" is selected in Others, change only the exposure when scanning an even-numbered original page.
- When Scan to E-mail and Internet Fax destinations are included, the send width for Scan to E-mail and Internet Fax will be the same as the send width for fax.
![SHARP BP-50C45 - Tap the [Read-End] key. - 2](/content/2026/06/1367452/images/0c0764c30e20ae489d07d3d9fa573cf254352325f2a2b7a2634fea231fe2376c.jpg)
- To change the time until transmission takes place automatically: Select "Settings (administrator)" - [System Settings] → [Image Send Settings] → [Common Settings] → [Condition Settings] → [Job Auto Start Time During Scanning].
- To set the scan complete sound: In "Settings (administrator)", select [System Settings] → [Sound Settings] → [Beep Sound Settings (Common)] → [Scan Complete Sound (Image Send)].
CHANGING THE SUBJECT, FILE NAME, REPLY-TO, AND BODY TEXT AT THE TIME OF SCAN TRANSMISSION
Change the subject, file name, reply-to, and body text when performing a scan transmission. If necessary, directly enter the text.

- When performing Scan to FTP, Scan to Desktop, or Scan to Network Folder, only the file name is used.
- If the subject or file name is not changed, the settings in [System Settings] → [Image Send Settings] → [Scan Settings] → [Subject Name Settings], [File Name Settings], and [Message Body Settings] in "Settings (administrator)" are used.
- If the reply-to address is not changed, the settings in [System Settings] → [Image Send Settings] → [Scan Settings] → [Condition Settings] → [Default Reply.Address Set] in "Settings (administrator)" are used. If this is not configured, the reply address configured in [Network Settings] → [Services Settings] → [SMTP] → [Sender Address] in the "Settings" is used. (Administrator rights are required.)
- To configure the candidates for the subject, file name, and body text, select [System Settings] → [Image Send Settings] → [Scan Settings] in "Settings (administrator)".
- For details on how to enter characters, refer to "CHARACTER ENTRY (page 2-63)" in "How to operate this machine".
1
Tap the [Detail] key to change to normal mode.
EASY MODE (page 6-7)
2

To change the subject, tap the [Subject] entry box.
3

Tap a pre-set text key.
After the settings are completed, tap OK.

To cancel the selection of the subject:
Tap the [Clear] key.

If you wish to directly enter the text, tap the [Direct Entry] key to open the soft keyboard.
Enter the text and tap the [OK] key.
4

To change the file name, tap the [File Name] entry box.
After the settings are completed, tap OK.
- Tap the key of the file name from the list.
- To directly enter the file name, tap the [Direct Entry] key.
- A prompt is displayed in the file name. The prompt is changed according to the settings. If the settings are not changed, "Following the System Settings" is displayed.
- In [OCR Setting], if [File Name Auto Extraction] is enabled, "File Name Auto Extraction" will be displayed. (In the BP-50C26/BP-50C31/BP-50C36/BP-50C45/BP-50C55/BP-50C65/BP-55C26, the OCR Expansion Kit is required.)
![SHARP BP-50C45 - To change the file name, tap the [File Name] entry box. - 1](/content/2026/06/1367452/images/ca4b2497a8ddbbc1680619a5933feed4352cf0ede2c9557fe2d5013dc910632b.jpg)
When scanning to a shared folder, if you set a file name that is the same as an existing file name in the shared folder, the file name will be changed to prevent overwriting of the existing file.
5
Tap [Options].
6
To change the reply address, tap the [Reply-To] entry box.
![SHARP BP-50C45 - To change the reply address, tap the [Reply-To] entry box. - 1](/content/2026/06/1367452/images/5ff45ec475a1829acb6bc92cddfc7d085372e25c1b7cf4a5d7461c92eb890ea0.jpg)
If user authentication is being used, the information of the user that logged in will be applied, and thus the reply address cannot be changed.
7

Tap the key that you wish to use for the reply address.
After the settings are completed, tap OK.
- You can select addresses from the user list in the same way as you would select the reply address. You can also tap [Global Address Search] on the action panel to specify a user stored in the global address book as the reply address.
- Tapping [Direct Entry] on the action panel allows you to directly enter the e-mail address.
- Selecting the [Add 'Reply to' to Cc] checkbox adds a reply address to the Cc address.
8
To change the body text, tap the [Body Text] entry box.
9

Enter the body text.
After the settings are completed, tap OK.
- To select a pre-set text previously stored in the Setting mode (Web version), tap the [Pre-Set Select] key.
- To directly enter the body text, tap the [Edit] key.

To clear all entered text:
Tap the [Clear All] key. When this key is tapped, the entire body of the message is erased immediately, not just the selected line.

- Enter up to 1800 characters. (A line break counts as one character.)
- To edit the selected line, tap the [Edit] key. The soft keyboard will appear with the selected text entered.
SENDING A FAX IN INTERNET FAX MODE
Transmits a fax in Internet Fax mode. This procedure can also be used to perform a direct transmission by Direct SMTP.

- If the memory becomes full while the originals are being scanned, a message will appear and scanning will stop.
- When all originals have been scanned, the message "Job stored." will be displayed together with a job control number. If necessary, use this number to locate the job in the Transaction Report or in the Image Sending Activity Report.
- If the job is a broadcast transmission, this number will also appear in the key of the job in the job status screen. For this reason, it is advisable to make a note of the number so that you can check the result easily.
- Mail Footer Registration: The specified text is automatically appended to the end of the body text of e-mail. This is convenient when you wish to append pre-set text such as a corporate policy. To enter the text to append, select [System Settings] → [Image Send Settings] → [Scan Settings] → [Message Body Settings] → [Mail Footer Registration] in "Settings (administrator)". Enter up to 900 characters. (The appended text is not included in the maximum number of characters that can be entered in the e-mail body.) To specify whether or not to append text, select [System Settings] → [Image Send Settings] → [Scan Settings] → [Message Body Settings] → [Add a Footer Automatically to the Mail Message Body] in "Settings".

If a default address has been configured using "Settings" → [System Settings] → [Image Send Settings] → [Scan Settings] → [Default Address] → [Default Address Setting], the mode cannot be changed, or the destination cannot be changed or added.
To switch to Internet fax mode, tap the [Cancel] key in the touch panel and then perform the transmission procedure.

Place the original.
Place the original in the document feeder tray of the automatic document feeder, or on the document glass. AUTOMATIC DOCUMENT FEEDER (page 1-30) DOCUMENT GLASS (page 1-34)

Do not place any objects under the original size detector. Closing the automatic document feeder with an object underneath may damage the original size detector plate and prevent correct detection of the document size.

- Place the original of the A5 (5-1/2" x 8-1/2") size in the portrait orientation ( ) If placed in landscape orientation ( ) an incorrect size will be detected. For an A5R (5-1/2" x 8-1/2"R) size original, enter the original size manually. SPECIFYING THE ORIGINAL SCAN SIZE IN PAPER SIZE (page 6-70)
- Rotation sending A4, B5R and A5R (8-1/2" x 11" and 5-1/2" x 8-1/2R") originals are rotated 90 degrees, and respectively sent in the A4R, B5 and A5 (8-1/2" x 11"R and 5-1/2" x 8-1/2") orientations. (Rotation sending is not available for originals with A4R, B5, or A5 (8-1/2" x 11"R or 5-1/2" x 8-1/2") size.) Example: When sending an A4 (8-1/2" x 11") original
![graph LR A["Green Tree"] --> B["Tree with a leaf"] B --> C["Leaf with a crosshatch"] C --> D["Leaf with a fish"]](/content/2026/06/1367452/images/50f149e878f7d6a71f370951d2bd1de198baf908e9a37e2d4fc4e435999f306c.jpg)
A4 (8-1/2" x 11") A4R (8-1/2" x 11"R) A4R (8-1/2" x 11"R)
2
Tap the mode display to switch to the initial screen of Internet Fax mode. SELECTING NETWORK SCANNER MODE (page 6-9)
3
Specify the destination.
RETRIEVING A DESTINATION FROM AN ADDRESS BOOK (page 6-33) VIEWING A LIST OF THE SELECTED DESTINATIONS (page 6-36) USING A SEARCH NUMBER TO RETRIEVE A DESTINATION (page 6-37) ENTERING AN ADDRESS MANUALLY (page 6-38) SPECIFYING A NETWORK FOLDER (page 6-39) RETRIEVING A DESTINATION FROM A GLOBAL ADDRESS BOOK (page 6-41) RETRIEVING A DESTINATION FROM A MOBILE ADDRESS BOOK (page 6-43) USING A TRANSMISSION LOG TO RESEND (page 6-45) The icon of appears in one-touch keys in which Internet fax addresses are stored.

To change [Subject], [File Name], or [Body Text], tap the [Others] key and tap the [Send Settings] key. CHANGING THE SUBJECT, FILE NAME, AND BODY TEXT AT THE TIME OF INTERNET FAX TRANSMISSION (page 6-58)
4
Tap the [Original] key.
![SHARP BP-50C45 - Tap the [Original] key. - 1](/content/2026/06/1367452/images/e681cdbacb78fd3fc3baacb4d6105339aa45e97d58d7adc150d23395c859da85.jpg)
- Set the density, resolution, and format in [System Settings] → [Image Send Settings] → [Internet Fax Settings] → [Server Settings] → [Default Settings] in "Settings (administrator)".
- Tapping the [Others] key allows you to configure various functions, for example, collectively sending two original pages as one sheet or original pages with different sizes.
5
Tap the appropriate orientation key.
After the settings are completed, tap OK.
6
Tap the [Start] key to start scanning of the original.
- If the original is placed on the document glass, the [Read-End] key appears in the touch panel. If the original is only one page, go to step 8. To scan more pages, go to the next step.
- If the original was inserted in the document feeder tray, a beep will sound when scanning is completed and transmission will take place.
![SHARP BP-50C45 - Tap the [Start] key to start scanning of the original. - 1](/content/2026/06/1367452/images/a6719d45054795c183c82f96a18871c7f8c0c35bc2c91a906f3a8d52a052f97f.jpg)
You can tap the [Preview] key to check a preview of the image before sending an image. For more information, see "CHECKING THE IMAGE TO BE TRANSMITTED (page 6-93)".
7
If the original was placed on the document glass, replace it with the next original and tap the [Start] key.
Repeat until all originals have been scanned.
8
Tap the [Read-End] key.
A beep will sound to indicate that the operation is completed.
Open the automatic document feeder and remove the original.
![SHARP BP-50C45 - Tap the [Read-End] key. - 1](/content/2026/06/1367452/images/5cb750317ddcdce1c65a280c4282fd47f8852a2c88888c1136f29de15e0d2d07.jpg)
- If no action is taken for one minute after the confirmation screen is displayed, scanning automatically ends and the transmission is reserved.
- Tap the [Change Setting] key to change the exposure, resolution, scan size, and send size for each original page scanned. However, when "N-Up" or "Card Shot" is selected in Others, only change the exposure when scanning an even-numbered original page.
CHANGING THE SUBJECT, FILE NAME, AND BODY TEXT AT THE TIME OF INTERNET FAX TRANSMISSION
Change the subject, file name, and body text when performing an Internet fax transmission. If necessary, directly enter the text. Configure a file name, and other settings for an Internet fax using the Send Settings of the other functions.

- If the subject and file name are not changed, the settings in the Setting mode (Web version) are used.
- To configure the candidates for the subject, file name, and body text, click [System Settings] → [Image Send Settings] → [Scan Settings] in "Settings (administrator)".
- For details on how to enter characters, refer to "CHARACTER ENTRY (page 2-63)" in "How to operate this machine".
1
Tap the mode display to switch to the initial screen of Internet Fax mode.
SELECTING NETWORK SCANNER MODE (page 6-9)
2

Tap the [Send Settings] key.
3
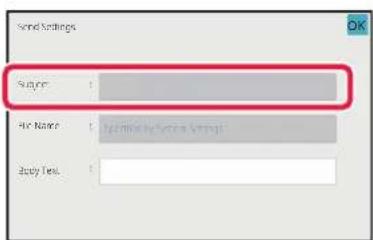
To change the subject, tap the [Subject] entry box.
4

Tap a pre-set text key.

To cancel the selection of the subject: Tap the [Clear] key.

If you wish to directly enter the text, tap the [Direct Entry] key to open the soft keyboard. Enter the subject and tap the [OK] key.
5
To change the file name, tap the [File Name] entry box.
6

Tap a pre-set text key.
After the settings are completed, tap OK.

- To store the pre-set text for the file name, select [System Settings] in "Settings" → [Image Send Settings] → [Scan Settings] → [File Name Settings].
- If you wish to directly enter the text, tap the [Direct Entry] key to display the soft keyboard. Enter the file name and tap the [OK] key.

To cancel the selection of the file name: Tap the [Clear] key.
7
To change the body text, tap the [Body Text] entry box.
8
Enter the body text.
After the settings are completed, tap OK.
- To select a pre-set text previously stored in the Setting mode (Web version), tap the [Pre-Set Select] key. • To directly enter the body text, tap the [Edit] key.

To clear all entered text:
Tap the [Clear All] key. When this key is tapped, the entire body of the message is erased immediately, not just the selected line.

- Enter up to 1800 characters. (A line break counts as one character.) Use to select on a line basis.
- To edit the selected line, tap the [Edit] key. The soft keyboard will appear with the selected text entered.
SENDING THE SAME IMAGE TO MULTIPLE DESTINATIONS (BROADCAST TRANSMISSION)
Send the same scanned image to multiple scan, Internet fax, and fax mode destinations in a single operation. One operation allows you to send data to up to 500 destinations, including the reserved send jobs. (For example, if broadcast transmission jobs with 450 destinations are already reserved, data can be broadcasted to up to 50 destinations.)
![graph TD A["Originals"] -->|Transmission| B["Server"] B --> C["Printer"] C --> D["Output"]](/content/2026/06/1367452/images/655a0fc21f9f93049a6322fc48a1b565176b4901238fb3cab8ac0e387fa94b4d.jpg)
It is convenient to store destinations you frequently use for broadcast transmission as contacts or groups. A maximum of 500 destinations can be stored in one contact.
For broadcast transmission, the contact or group key can be simply tapped to retrieve multiple fax numbers.
You can also send faxes with the one-touch key by setting the [Set as Default used] checkbox to √ when addresses are registered. If you wish to temporarily remove a destination from the stored addresses, open the detail confirmation screen and remove the destination in the screen.
USING A TRANSMISSION LOG TO RESEND (page 6-45)

- When the checkbox of "Settings (administrator)" -[System Settings] → [Image Send Settings] → [Common Settings] → [Condition Settings] → [Address Book Default Selection] → [Apply Addresses of Sending Modes Only] is set to (factory default setting), the image is only sent to those destinations among the destinations that are set to [Set as Default used] which are for the currently selected mode. If the checkmark is removed, the image can also be sent to destinations of other modes.
- When broadcast transmission includes Internet Fax addresses, the document is sent in black and white to all addresses.
- When Internet Fax mode addresses are included in broadcast transmission addresses, the image data is converted and sent as image data for Internet Fax.
Even when scanned in colour, the image data is converted to Internet Fax black and white binary and sent to addresses such as e-mail addresses.
- If you wish to send the same image as fax to all destinations in normal mode, tap [Send Same Image as Fax Address] on the action panel. This cannot be selected when Internet Fax is included in the destinations.
- When Scan to E-mail and Internet Fax destinations are included, the send width for Scan to E-mail and Internet Fax will be the same as the send width for fax.
- Broadcast transmission is not possible to both direct SMTP addresses and other types of addresses.

A transmission is performed, ignoring hyperlinks with Scan to FTP and Scan to Network Folder addresses.

To register destinations in a contact or group:
In the address book screen, tap [Add New] on the action panel, or tap the [Address Control] icon in the home screen. For more information, see "STORING ADDRESSES THROUGH DIRECT ENTRY (page 6-19)", "STORING ADDRESSES THROUGH DIRECT ENTRY (page 6-19)", "USING A TRANSMISSION LOG TO RESEND (page 6-45)", "STORING GROUPS (page 6-24).
1
Place the original.
Place the original in the document feeder tray of the automatic document feeder, or on the document glass. AUTOMATIC DOCUMENT FEEDER (page 1-30) DOCUMENT GLASS (page 1-34)
2
Specify all destinations.
RETRIEVING A DESTINATION FROM AN ADDRESS BOOK (page 6-33) VIEWING A LIST OF THE SELECTED DESTINATIONS (page 6-36) USING A SEARCH NUMBER TO RETRIEVE A DESTINATION (page 6-37) ENTERING AN ADDRESS MANUALLY (page 6-38) SPECIFYING A NETWORK FOLDER (page 6-39) RETRIEVING A DESTINATION FROM A GLOBAL ADDRESS BOOK (page 6-41) RETRIEVING A DESTINATION FROM A MOBILE ADDRESS BOOK (page 6-43) USING A TRANSMISSION LOG TO RESEND (page 6-45)

- One-touch keys that cannot be used for broadcast transmission are greyed out to prevent selection.
- If a Scan to FTP or Network Folder address is specified in a broadcast transmission, hyperlink e-mail transmission will not take place.
- If [System Settings] → [Image Send Settings] → [Common Settings] → [Condition Settings] → [Be sure to press Next Address Key ([+]) before selecting the next address.] is enabled in "Settings (administrator)", tap before specifying the next destination.
- If you wish to send the same image (Mono2) as the one for the fax address to all destinations in normal mode, tap [Send Same Image as Fax Address] on the action panel.

3
Tap [Address Review] on the action panel.
4

Confirm the destination.

- To cancel a specified destination: Tap the key of the destination that you wish to cancel to release the selection.
- To switch delivery types (To/Cc/Bcc): Tap the address that you want to change, and tap [Change to To], [Change to Cc], or [Change to Bcc] on the action panel.
5
Tap the [B/W Start] or [Colour Start] key ([Start] key in normal mode) to start scanning of the original.
- If you inserted the original pages in the document feeder tray, all pages are scanned. A beep will sound to indicate that scanning and transmission have ended.
- When you place the original on the document glass, scan each page at a time.
When scanning finishes, place the next original and tap the [B/W Start] or [Colour Start] key ([Start] key in normal mode). Repeat until all pages have been scanned and then tap the [Read-End] key.
A beep will sound to indicate that transmission has ended.
![SHARP BP-50C45 - Tap the [B/W Start] or [Colour Start] key ([Start] key in normal mode) to start scanning of the original. - 1](/content/2026/06/1367452/images/559fc2a402c7744db22454d102578ad20d94788f2176e4c973e1aaeb55bd412d.jpg)
You can tap the [Preview] key to check a preview of the image before sending an image. For more information, see "CHECKING THE IMAGE TO BE TRANSMITTED (page 6-93)".
SETTING MODES WHEN MULTIPLE TYPES OF ADDRESSES ARE INCLUDED IN A BROADCAST TRANSMISSION
This section explains settings you should bear in mind if multiple types of addresses are included in a broadcast transmission.
When a broadcast transmission includes a mix of several types of addresses (such as scan mode and Internet Fax mode destinations), its settings are enabled for all addresses regardless of which mode screen is used to configure them. Note the following exceptions:
When Internet Fax addresses are not included
| File format (file compression mode) | The compression mode set with [System Settings] → [Image Send Settings] → [Scan Settings] → [Condition Settings] → [Compression Mode at Broadcasting] in "Settings (administrator)" is used for all destinations. |
| Colour Mode | When the colour mode setting is [Full Colour] in scan mode, the image will be sent in Mono2 to fax addresses and in colour to scan addresses.To send the image in Mono2 to all addresses, tap [Send Same Image as Fax Address] on the action panel in normal mode |
| Original Count | An address of a mode in which the number of original sheets are specified, if it exists, is enabled. |
| Scan file size | If a broadcast transmission is performed that includes destinations for which an attachment size limit has been set using [Maximum Size of Send Data (E-Mail)] or [Maximum Size of Send Data (FTP/Desktop/Network Folder)] (in "Settings (administrator)", select [System Settings] → [Image Send Settings] → [Scan Settings] → [Condition Settings]), the limit will also apply to destinations for which a limit is not set. |
| N-Up | This mode is available only for Fax. It is linked to a mode with an appropriate function. |
| Drop Out colour | This mode is available for Scanner and Data entry. It is linked to a mode with an appropriate function. |
| RGB | This mode is available for Scanner, Network Folder, and FTP/Desktop. It is linked to a mode with an appropriate function. |
When Internet Fax addresses are included
When Internet Fax addresses are included in the destinations, the following restrictions apply.
| Colour Mode | Fixed at black & white binary. |
| File format (file compression mode) | Fixed at TIFF. |
| Original | Transmission will take place to all addresses using the same image width as Internet Fax. |
| Background Adjustment | Cannot be set. |
| Blank Page Skip | |
| Drop Out colour | |
| Contrast | |
| Sharpness | |
| RGB | |
| Sign | |
| Encrypt | |
| Multicrop | |
| Business Card Scan | |
| Image Crop |

Broadcast transmission is not possible to both direct SMTP addresses and other types of addresses.
RESENDING TO UNSUCCESSFUL BROADCAST TRANSMISSION DESTINATIONS
The results of a completed broadcast transmission can be checked in the job status screen. If transmission to any of the destinations failed, resend the image to those destinations.
1
Tap the job status display.
2

Tap the [Scan] tab or [Internet Fax] tab, and tap the [Complete] key.

If the broadcast transmission included destinations of different modes, the same broadcast transmission key will appear in each of those modes.
3

After tapping the key of the completed broadcast transmission, tap [Check Details of Selected Job] on the action panel.
4

After tapping the [Failed] tab, tap [Resend to All Addresses Which Failed in Sending] on the action panel to resend the image.

The steps to follow after [Resend to All Addresses Which Failed in Sending] is tapped differ depending on whether or not document filing is used.
• Using document filing:
You will return to the document filing resend screen with the unsuccessful destinations entered. Perform the document filing resend procedure. (There is no need to re-scan the original.)
- Not using document filing:
You will return to the base screen with the unsuccessful destinations entered. Place the original and perform the steps of the broadcast transmission.
SENDING AN INTERNET FAX FROM A PC (PC-I-FAX)
A file on a computer can be sent via the machine as a fax (PC-I Fax function).
Faxes are sent using the PC-I Fax function in the same way that documents are printed. Select the PC-Fax driver as the printer driver for your computer and then select the Print command in the application. Image data for transmission will be created and sent as an Internet fax.
By using the "Log Viewer" application, Internet faxes can be sent using the transmission log displayed in the Log Viewer. For the procedures for using this function, see the PC-Fax driver Help.
![graph TD A["Server"] --> B["Computer"] B --> C["Document"] C --> D["Document"] D -->|Feedback| B D -->|Feedback| A style A fill:#f9f,stroke:#333 style B fill:#ccf,stroke:#333 style C fill:#cfc,stroke:#333 style D fill:#fcc,stroke:#333](/content/2026/06/1367452/images/9b1321c93a6d2366a4fd24b99d32a3ea16869f28d0b5d699fcb898befff889db.jpg)
(1) PC-i-Fax Send (2) Log Viewer Re-send faxes using the transmission log

- To send an Internet fax using the PC-I-Fax function, the PC-Fax driver must be installed and then updated using the CD-ROM that accompanies the Internet fax expansion kit. For more information, see the Software Setup Guide.
- This function can only be used on a Windows computer.

This function is available for transmission. Internet faxes received on the machine cannot be received to a computer that is connected to the machine.
IMAGE SETTINGS
AUTOMATICALLY SCANNING BOTH SIDES OF AN ORIGINAL (2-SIDED ORIGINAL)
The automatic document feeder is used to automatically scan both sides of an original.
2-Sided Original
Scan transmission

Front and reverse sides are scanned

The settings on 2-sided scanning are cleared when transmission has completed.

- You cannot use 2-Sided scanning when the original size is set to Long Size.
- On the BP-60C31/BP-60C36/BP-60C45/BP-50C26/BP-50C31/BP-50C36/BP-50C45, duplex scanning is not possible when originals of mixed width are scanned.
- 2-sided scanning is not possible when "Settings (administrator)" - [System Settings] → [Common Settings] → [Device Control] → [Condition Settings] or [Enable/Disable Settings] → [Disabling of Document Feeder] is enabled.
1


After tapping the [Original] key, tap the [Book] or [Tablet] key.
See the figure on the left to check the binding edge of the original and select the key to be tapped.
(1) Book
(2) Tablet
![SHARP BP-50C45 - After tapping the [Original] key, tap the [Book] or [Tablet] key. - 1](/content/2026/06/1367452/images/724ec4141e1d404bfd99d9bb9baf47e98f85cd4e60e797e4072ba7de8d05eec6.jpg)
In normal mode, tap the [2-Sided Tablet] or [2-Sided Book] key.
2

Tap the [Image Orientation] key with the same orientation as the placed original.
If this setting is not correct, a suitable image may not be transmitted.
After the settings are completed, tap OK.
![SHARP BP-50C45 - Tap the [Image Orientation] key with the same orientation as the placed original. - 1](/content/2026/06/1367452/images/208db008a834cb1554fa43ad6466a0fdecbb86dfc13702016901ca408963bb1a.jpg)
To cancel 2-sided scanning:
Tap the [1-Sided] key.
In normal mode, tap the [2-Sided Tablet] key or the [2-Sided Book] key that has been forcibly displayed and cancel the display.
SCAN SIZE AND SEND SIZE (ENLARGE/REDUCE)
When the original is placed, its size is automatically detected.
In normal mode, the size of the placed original is indicated as the "Scan Size", and the size to be transmitted is indicated as the "Send Size".

In the above screen, the scan size (the placed original) is A4 (8-1/2" x 11") and the send size is auto. For example, if the scan size is A4 (8-1/2" x 11") and the send size is B5 (5-1/2" x 8-1/2"), the image will be reduced before transmission.

A4 (8-1/2" x 11")
B5 (5-1/2" x 8-1/2")
Transmission "Send S"


The image is reduced to
B5 (5-1/2" x 8-1/2") before transmission.

- Only standard original sizes can be automatically detected. THE SIZE OF THE PLACED ORIGINAL (page 6-13)
- When the original size is an inch size or a non-standard size, or if the size is not detected correctly, manually specify the original scan size.
SPECIFYING THE ORIGINAL SCAN SIZE IN PAPER SIZE (page 6-70)
SPECIFYING THE ORIGINAL SCAN SIZE USING NUMERIC VALUES (page 6-72)
SPECIFYING THE ORIGINAL SCAN SIZE IN PAPER SIZE
When the original size is a non-standard size or is not detected correctly, manually specify the original size.

When [Long Size] is selected, the 2-sided scanning setting and send size cannot be changed. The image is sent in Mono2 only.
In Easy mode
1
Tap the [Original] key.
2

Tap the [Auto] key.
3

Tap a key of the desired original size.
After the settings are completed, tap OK.
![SHARP BP-50C45 - Tap the [Original] key. - 3](/content/2026/06/1367452/images/38a95b5a7d8b62106d04048ec67073b2cfe9477adde355b4b116a87489bbd9cc.jpg)
If you are sending a long original, perform the setting in normal mode.
In Normal mode
1 Tap the [Detail] key to change to normal mode.
EASY MODE (page 6-7)
2

After tapping the [Original] key, tap the [Scan Size] key.
3

Tap the appropriate original size key.
After the settings are completed, tap OK.

If you are sending a long original, tap the [Long Size] key.
Use the automatic document feeder to scan a long original. The maximum width that can be scanned is 1,000 mm (39-3/8") (the maximum height is 297 mm (11-5/8)).
TRANSMITTABLE ORIGINAL SIZES (page 6-13)
SPECIFYING THE ORIGINAL SCAN SIZE USING NUMERIC VALUES
When scanning a non-standard size original such as a card or postcard, specify the original size using numeric values after placing the original.
The width can be from 25 mm to 432 mm (1" to 17"), and the height can be from 25 mm to 297 mm (1" to 11-5/8").

When the scan size is specified by numeric values, the send size cannot be specified.
In Easy mode
1
Tap the [Original] key.
2

After tapping the [Original] key, tap the [Scan Size] key.
3

Tap the [Direct Entry] key.
4

Specify the original size.
![SHARP BP-50C45 - Tap the [Original] key. - 4](/content/2026/06/1367452/images/3179e44fde94a714d69ec7373e5a68eb9301792ca28c8fe070b3f00f392b82eb.jpg)
- Tap the areas displaying width and height sizes respectively, and enter the sizes using the numeric keys.
- It is convenient to use ( ) to finely adjust the entered size.
5
Tap [OK] twice.
On the base screen, check that the specified size is displayed on the [Original] key.
![SHARP BP-50C45 - Tap [OK] twice. - 1](/content/2026/06/1367452/images/78ded46d3f30cd6c7cfc66d46e67dfa27a4c98c5fbbc0fa99a95d82671a13a09.jpg)
To cancel the specified size settings:
Tap the [Auto] key.
In Normal mode
1 Tap the [Detail] key to change to normal mode. EASY MODE (page 6-7)
2 Tap the [Original] key.
After tapping the "Scan Size" key, tap the [Direct Entry] key.
4 Address Book Address Learn to Input Address Specify the original size.
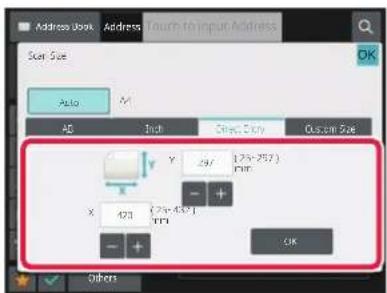
![SHARP BP-50C45 - Tap [OK] twice. - 3](/content/2026/06/1367452/images/f0742f0a418c2fc340f52e4762fc450789b9d82430e2623bfb84f13eb0109934.jpg)
- Tap the areas displaying width and height sizes respectively, and enter the sizes using the numeric keys.
- It is convenient to use to finely adjust the entered size.
Tap the [OK] key.
After the settings are completed, tap twice. On the base screen, check that the specified size is displayed on the [Original] key.
![SHARP BP-50C45 - Tap the [OK] key. - 1](/content/2026/06/1367452/images/6bf52635146afa23f2550e620e342929b44f947ebcd7e02f2084e2445f1a0703.jpg)
To cancel the specified size settings: Tap the [Auto] key.
STORING FREQUENTLY USED ORIGINAL SIZES
Store the frequently used non-standard original sizes. This section explains how to store, retrieve, change, and delete non-standard original sizes.

- The stored original size will be retained even if the main power is turned off.
- A total of up to 12 non-standard original sizes can be registered for copying, fax, and image sending. • The added original sizes will also appear in other modes.
Storing original sizes (Amend/Delete)
1
Tap the [Detail] key to change to normal mode.
EASY MODE (page 6-7)
2
Tap the [Original] key.
3
Tap the [Scan Size] key and tap the [Custom Size] tab.
4
Tap [Store/Delete] key.
5

Tap a key () for storing a custom original size.
Tap a key that does not show a size.

To amend or delete a previously stored key:
Tap the key that you want to amend or delete. The following screen will appear.
• To amend the key, tap the [Amend] key and go to the next step. - To delete the key, tap the [Delete] key. Make sure that the original size has been cleared and tap the OK key.

6

Specify the original size.
Tap the areas displaying width and height sizes respectively, and enter the sizes using the numeric keys.

It is convenient to use to finely adjust the entered size.
7
Tap the [OK] key.
Tap the OK key, and check that the key of the size stored on the Scan Size screen is added properly. After you have checked it, tap OK.
![SHARP BP-50C45 - Tap the [OK] key. - 1](/content/2026/06/1367452/images/12d968adeb97b93c0e3cab9f2293c097c1e6ddb2069b8b43fa7e0035a8e406b1.jpg)
To cancel the operation:
Tap the [CA] key.
Retrieving a stored original size In Easy mode
1 Tap the [Original] key.
2

Tap the [Auto] key.
3

Tap the [Custom Size] key.
4

Tap the key of the original size that you wish to retrieve.
Tap OK twice.
On the base screen, check that the specified size is displayed on the [Original] key.

To cancel the operation
Tap the [CA] key.
In Normal mode
1 Tap the [Detail] key to change to normal mode. EASY MODE (page 6-7)
2 Tap the [Original] key.
3 Tap the [Scan Size] key and tap the [Custom Size] tab.
4

Tap the key of the original size that you wish to retrieve.
After selecting the key of the original size, tap the key. Check that the specified size is displayed on the scan size screen.

To cancel the operation, tap the [CA] key.
SPECIFYING THE SEND SIZE OF THE IMAGE
Tap this key to specify the send size as a paper size. If the specified send size is larger than the scan size, the image will be enlarged. If the specified send size is smaller than the scan size, the image will be reduced.

- The send size cannot be specified when [Long Size] is selected for the scan size, or when the scan size is specified by numeric values.
- The send size cannot be specified when [TIFF-S] is selected for the format in Internet fax mode. (The send size is fixed at A4R (8-1/2" x 11"R).)
1 Tap the [Detail] key to change to normal mode. EASY MODE (page 6-7)
2 Tap the [Original] key.
3 Tap the [Send Size] key.
4

Tap the desired send size key.
After the settings are completed, tap OK.

Depending on the paper size specified for the "Scan Size", it may not be possible to select some sizes for the "Send Size". You cannot tap size keys that are unavailable for the "Send Size".
5

Tap the [Image Orientation] key with the same orientation as the original image.
If this setting is not correct, a suitable image may not be transmitted. After the settings are completed, tap OK.
![SHARP BP-50C45 - Tap the [Image Orientation] key with the same orientation as the original image. - 1](/content/2026/06/1367452/images/145929e0812ee565832c39cc946101fc1e3378e2d8377e43ca341a9ca4a0a445.jpg)
To configure the default setting of image orientation, select [System Settings] → [Image Send Settings] → [Common Settings] → [Condition Settings] → [Image Orientation] in "Settings (administrator)".
![SHARP BP-50C45 - Tap the [Image Orientation] key with the same orientation as the original image. - 2](/content/2026/06/1367452/images/19d5665167b19db2a810a70c44dbc522c602a34ff3c868d5ec435a38be5c078a.jpg)
The ratio used for reduction or enlargement of the original will appear between the "Scan Size" and the "Send Size".
CHANGING THE EXPOSURE AND ORIGINAL IMAGE TYPE
Optimum scanning is ensured by selecting exposure and original image type based on the original.

- When using the document glass to scan multiple original pages, change the exposure setting each time you change pages.
- The contrast for Internet Fax mode is set in the system settings. Internet Fax Settings (page 9-109)

When using the automatic document feeder, the exposure setting cannot be changed once scanning has begun. (If "Job Build" is used in Others, change the exposure each time a new set of originals is inserted.)
Exposure settings
| Exposure Suggestion | ||
| Auto | This setting automatically adjusts the exposure for light and dark parts of the original. | |
| Manual | 1-2 | Select this setting when the original consists of dark text. |
| 3 Select this setting for a normal original (neither dark nor light). | ||
| 4-5 | Select this setting when the original consists of light text. | |
How to select the original type (Scan mode, Data entry mode)
| Setup Items Description | ||
| Auto | The original image type is automatically selected to match the original. | |
| Manual | Text/Printed Photo | This mode provides the best balance for scanning an original which contains both text and printed photographs, such as a magazine or catalogue. |
| Text/Photo | This mode provides the best balance for scanning an original which contains both text and photographs, such as a text document with a photo pasted on. | |
| Text Use this mode for regular text documents. | ||
| Photo Use this mode to scan photos. | ||
| Printed Photo | This mode is best for scanning printed photographs, such as photos in a magazine or catalogue. | |
| Map | This mode is best for copying maps with light colour shading and fine text. | |
In Scan mode or Data entry mode
1
Tap the [Detail] key to change to normal mode.
EASY MODE (page 6-7)
2
Tap the [Exposure] key.
3
Tap the key assigned to the original type you wish to set based on the original type.
4
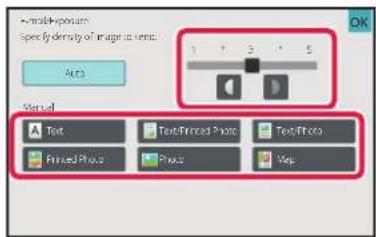
Tap to adjust the exposure.
After the settings are completed, tap OK.

When [Auto] is selected, changing the exposure sets the original image type to [Text/Printed Photo] automatically.
CHANGING THE RESOLUTION
Specify the resolution setting.
How to select the resolution
For normal text originals, 200 x 200 dpi produces an image that is sufficiently legible.
For photos and illustrations, a high resolution setting (600 x 600 dpi, etc.) will produce a sharp image.
However, a high resolution setting will result in a large file, and if the file is too large, transmission may not be possible.
In this event, reduce the number of pages scanned or take other measures to decrease the file size.
CHANGING FORMAT IN SCAN OR DATA ENTRY MODE (page 6-84)
CHANGING FORMAT IN INTERNET FAX MODE (page 6-90)
SPECIFYING THE SEND SIZE OF THE IMAGE (page 6-79)

When using the automatic document feeder, the resolution setting cannot be changed after scanning has begun. (However, when "Job Build" is used in Others, change the resolution each time a new set of originals is inserted.)

- When using the document glass to scan multiple original pages, change the resolution setting each time you change pages.
- The resolution for Internet Fax mode is set in the system settings. Internet Fax Settings (page 9-109)
1
Tap the [Detail] key to change to normal mode.
EASY MODE (page 6-7)
2
Tap the [Resolution] key.
3

Tap the key of the desired resolution.
After the settings are completed, tap OK

- This cannot be selected when Internet Fax addresses are included.
- If there is a mix of destinations in different modes, tap ▼ to switch modes to set the resolution in each mode. However, FTP/Desktop and Network Folder are set to the same mode.
- If the file format in [File Format] is set to [Compact PDF], then this will set the resolution set in "Compact PDF Resolution Setting" in system settings.
CHANGING FORMAT IN SCAN OR DATA ENTRY MODE
Change the file format (file type and compression mode/compression ratio) for sending a scanned image at the time of transmission. In addition, if the scanned originals are divided into separate files, the number of pages per file can be changed.

The file type of [B/W] mode and the file type of [Colour/Greyscale] mode are linked. The file type cannot be set separately for each. (When [JPEG] is selected for [Colour/Greyscale] mode, [TIFF] is automatically selected for [B/W] mode.)
File format combinations
| [Colour/Greyscale] tab [B/W] tab | |
| PDF*1 | PDF*1 |
| Compact PDF*1, 2 | PDF*1 |
| Compact PDF (Ultra Fine)*1, 2 | PDF*1 |
| PDF/A-1a*1, 5 | PDF/A-1a*1, 5 |
| PDF/A-1b*1, 5 | PDF/A-1b*1, 5 |
| PDF/A*1, 6 | PDF/A*1, 6 |
| Compact PDF/A-1a*1, 7 | PDF/A-1a*1, 7 |
| Compact PDF/A-1b*1, 7 | PDF/A-1b*1, 7 |
| Compact PDF/A PDF/A | *1, 3 |
| Compact PDF/A-1a (Ultra Fine)*1, 7 | PDF/A-1a*1, 7 |
| Compact PDF/A-1b (Ultra Fine)*1, 7 | PDF/A-1b*1, 7 |
| Compact PDF/A (Ultra Fine)*1, 3, 4 | PDF/A*1, 3 |
| Encrypt PDF*1 | Encrypt PDF*1 |
| Encrypt/Compact PDF*1, 2 | Encrypt PDF*1 |
| Encrypt/Compact PDF (Ultra Fine)*1, 2 | Encrypt PDF*1 |
| TIFF TIFF | |
| JPEG TIFF | |
| XPS XPS | |
| TXT(UTF-8)*5 | TXT(UTF-8)*5 |
| RTF*5 | RTF*5 |
| DOCX*5 | DOCX*5 |
| XLSX*5 | XLSX*5 |
| PPTX*5 | PPTX*5 |
*1 When PDF (including encrypted and high compression) is selected for the file format, Flate Compression can be used to reduce the file size. *2 On the BP-55C26/BP-50C26/BP-50C31/BP-50C36/BP-50C45/BP-50C55/BP-50C65, this only appears when the Enhanced compression kit is installed. *3 Only appears on the BP-55C26/BP-50C26/BP-50C31/BP-50C36/BP-50C45/BP-50C55/BP-50C65. *4 Only appears when the Enhanced compression kit is installed and the OCR expansion kit is not installed. *5 On the BP-55C26/BP-50C26/BP-50C31/BP-50C36/BP-50C45/BP-50C55/BP-50C65, this only appears when the OCR expansion kit is installed. *6 On the BP-50C26/BP-50C31/BP-50C36/BP-50C45/BP-50C55/BP-50C65/BP-55C26, this only appears when the OCR expansion kit is not installed. In other case, this item will not be appeared. *7 On the BP-50C26/BP-50C31/BP-50C36/BP-50C45/BP-50C55/BP-50C65/BP-55C26, this only appears when the Enhanced compression kit and OCR expansion kit are installed.

- The file format for sending a scanned image is specified when the destination is stored in a one-touch key; however, you can change the format at the time of transmission.
- If [PDF/Encry.] is specified for the file format, the password entry screen appears when scanning. Enter a password with up to 32 characters.

Note the following when [PDF/High] is specified in the [Colour/Greyscale] file format. (On the BP-55C26/BP-50C26/BP-50C31/BP-50C36/BP-50C45/BP-50C55/BP-50C65, this only appears when the Enhanced compression kit is installed.)
- When broadcasting to an address with [PDF/High] specified, all files for the scanner will be sent as Compact PDF files.
- When broadcasting to an address with [PDF/High] and [PDF/Compact/U-Fine] specified, all files for the scanner will be sent as Compact PDF (Ultra Fine) files.
- If [PDF/High] is specified, the resolution cannot be changed in the scanner mode. The resolution set in "Compact PDF Resolution Setting" in system settings is set.
- If [PDF/High] is set when a resolution setting has been specified in scanner (or other) mode, the resolution setting will be cancelled and the Compact PDF resolution will be used for transmission.
- When [PDF/High] is selected, [Resolution] cannot be changed while waiting for the next original or in [Change Setting] in the job build settings.
- If [PDF/High] is set when an original type setting has been specified in scanner (or other) mode, [Photo] will change to [Text/Photo] and [Map] will change to [Text/Printed Photo].
- The condition of the original may prevent the OCR function from correctly recognizing some characters and graphics, and omissions or incorrect recognition of characters may result.*
- The OCR function is not guaranteed to completely reproduce all characters, graphics, or other contents of a scanned original.* * On the BP-55C26/BP-50C26/BP-50C31/BP-50C36/BP-50C45/BP-50C55/BP-50C65, the OCR expansion kit is required.
Flate Compression
After compressing a PDF file by JPEG compression, this function compresses the file by lossless compression to further reduce the file size by a small amount. When the data contains significant solid colour, this increases the effectiveness of compression.
When sending a PDF file, Flate Compression enables greater reduction of the file size than conventional methods. If the recipient's PDF viewer does not support Flate Compression, the recipient may not be able to view the PDF file. In this case, Flate Compression can be disabled.

To enable Flate Compression
Enable or disable Flate Compression in [System Settings] → [Image Send Settings] → [Scan Settings] → [Condition Settings] → [PDF Compression Options] in "Settings (administrator)".
1
Tap the [File Format] key.
If you are in data input mode, start from step 5.
2
Tap the [Colour/Greyscale] or [B/W] key.
![SHARP BP-50C45 - Tap the [Colour/Greyscale] or [B/W] key. - 1](/content/2026/06/1367452/images/2cb9d0e591ab6d421f8006127e0c9fab7e29b7717f3671fe411b159bc3ff42a4.jpg)
- The format setting for [B/W] mode is the file format used when the [B/W Start] key is tapped.
- The format setting for [Colour/Greyscale] mode is the file format used when the [Colour Start] key is tapped.
- When [Colour/Greyscale] mode is selected and the enhanced compression kit is installed, the [Compact] and [U-Fine] checkboxes appear. To suppress image quality deterioration and reduce the data size of a file to be transmitted, select Compact PDF. Select [U-Fine] only when you select Compact PDF.
3
Tap the key of the desired file type.
After the settings are completed, tap

When the OCR function expansion kit is not installed on the BP-50C26/BP-50C31/BP-50C36/BP-50C45/BP-50C55/BP-50C65/BP-55C26, or when [Disabling of OCR] is set in the system settings.
When the [B/W] key is selected When the [Colour/Greyscale] key is selected


Other
When the [B/W] key is selected When the [Colour/Greyscale] key is selected


4
(On the BP-50C26/BP-50C31/BP-50C36/BP-50C45/BP-50C55/BP-50C65/BP-55C26, the OCR expansion kit is required.) To enable OCR, select the [OCR] checkbox ( ) and tap [OCR Setting].
After the settings are completed, tap ( )


- This procedure cannot be used if [Disabling of OCR] is set in the system settings. Proceed to the next step.
- When "Long Size" is selected for the original, [OCR] cannot be used.
- Select the scanning language in the language settings. The following languages can be selected. Japanese, English, Spanish, French, German, Italian, Dutch, Swedish, Norwegian, Finnish, Danish, Hungarian, Czech, Polish, Russian, Greek, Portuguese, Turkish, Slovak, Catalan, Simplified Chinese, Traditional Chinese, Korean.
- When [RTF], [DOCX], [XLSX], or [PPTX] is selected for the file format, you can set the font of the output text.
- When the [Detect Image Direction] checkbox is selected (☑), the orientation of the original is detected and the image is rotated before transmission.
- When the [File Name Auto Extraction] checkbox is selected (☑), the text string that is read from the file is included in the file name. If a file name is set, the set file name will be used for transmission.
- You can set the accuracy of OCR in [OCR Accuracy:]. Select from [Auto] or [Priority Text]. When [Priority Text] is selected, the character reading accuracy is raised before scanning. When [Priority Text] is selected, accuracy in diagram and table areas may be degraded. Only change the setting when you particularly want to increase the accuracy of text areas.
- When the original is scanned while skewed, there is a function which automatically adjusts the skew. AUTOMATICALLY ADJUST SKEWED SCAN DATA (Original Skew Adjustment) (page 6-144)
5
To select more detailed settings, tap the [Detail] key to switch to normal mode.
EASY MODE (page 6-7)
6
Tap the [File Format] key.
7
Tap the [Colour/Greyscale] or [B/W] tab and select the format mode for scanning.
![SHARP BP-50C45 - Tap the [Colour/Greyscale] or [B/W] tab and select the format mode for scanning. - 1](/content/2026/06/1367452/images/105b911f7aa8d02ea6f324540e537e91f113bbe9db91ca5f0ee4e5366a3f73e4.jpg)
- The format setting for [B/W] mode is the file format with the colour mode set to [Mono2].
- The format setting for [Colour/Greyscale] mode is the file format with the colour mode set to [Full Colour] or [Greyscale].
8
Tap the key of the desired file type.
When the OCR function expansion kit is not installed on the BP-50C26/BP-50C31/BP-50C36/BP-50C45/BP-50C55/BP-50C65/BP-55C26, or when [Disabling of OCR] is set in the system settings.
When the [B/W] key is selected When the [Colour/Greyscale] key is selected


Other
When the [B/W] key is selected When the [Colour/Greyscale] key is selected


- When [Colour/Greyscale] mode is selected, the [Compact] and [U-Fine] checkboxes appear. To suppress image quality deterioration and reduce the data size of a file to be transmitted, select Compact PDF. Select [U-Fine] only when you select Compact PDF.* * On the BP-50C26/BP-50C31/BP-50C36/BP-50C45/BP-50C55/BP-50C65/BP-55C26, the Enhanced compression kit is required.
- Tap [Original Skew Adjustment] on the action panel to automatically correct the document skew. AUTOMATICALLY ADJUST SKEWED SCAN DATA (Original Skew Adjustment) (page 6-144)
9
(On the BP-50C26/BP-50C31/BP-50C36/BP-50C45/BP-50C55/BP-50C65/BP-55C26, the OCR expansion kit is required.) Tap the [Compression Mode] key or [Compression Ratio] key.

This procedure cannot be used if [Disabling of OCR] is set in the system settings. Proceed to the next step.
10
Tap the Compression key or Compression Ratio key.
When the OCR function expansion kit is not installed on the BP-50C26/BP-50C31/BP-50C36/BP-50C45/BP-50C55/BP-50C65/BP-55C26, or when [Disabling of OCR] is set in the system settings.
When the [B/W] key is selected When the [Colour/Greyscale] key is selected
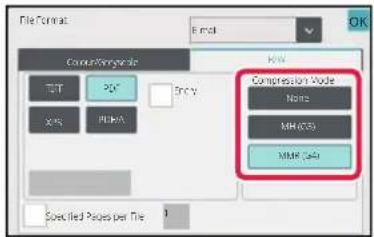

Other
When the [B/W] key is selected When the [Colour/Greyscale] key is selected


- In the [Colour/Greyscale] tab, [Reduce Colours] is a file format that reduces the data size by limiting the number of colours and shades.
- (When using BP-60C31/BP-60C36/BP-60C45/BP-70C31/BP-70C36/BP-70C45/BP-70C55/BP-70C65, or when the OCR expansion kit is installed on the BP-50C26/BP-50C31/BP-50C36/BP-50C45/BP-50C55/BP-50C65/BP-55C26 only) When settings are completed, tap OK
11
To change the number of pages per file, set the [Specified Pages per File] checkbox to , and use numeric keys to specify the number of pages per file.
![SHARP BP-50C45 - To change the number of pages per file, set the [Specified Pages per File] checkbox to , and use numeric keys to specify the number of pages per file. - 1](/content/2026/06/1367452/images/016b00c79afe2c28a8153814aaf0ffd010985c6ffc5115a644f52aebab77c2e0.jpg)
- When the [Specified Pages per File] checkbox is ☑, one file is created for each of the number of pages at the right. When the checkmark is removed, one file is created for all pages.
- When [Specified Pages per File] is selected, consecutive numbers are added to the created file names.
- When [JPEG] is selected for the file type, one file is created for each page. For this reason, the [Specified Pages per File] checkbox does not appear.
CHANGING FORMAT IN INTERNET FAX MODE
The format for Internet Fax mode is set in the system settings.
▶ Internet Fax Settings (page 9-109)
CHANGING COLOUR MODE
Change the colour mode used to scan the original.
In Easy mode
Tap the [B/W Start] or [Colour Start] key when scanning the original.

To set the settings used when each key is tapped, select "Settings (administrator)" - [System Settings] → [Image Send Settings] → [Scan Settings] → [Initial Status Settings] → [Easy Scan Settings].
In Normal mode
| Mode Scanning method | |
| Auto | The machine detects whether the original is colour or black and white and automatically selects full colour or black and white (Mono2 or Greyscale) scanning. |
| Full Colour | The original is scanned in full colour. This mode is best for full colour originals such as catalogues. |
| Mono2 | Colours in the original are scanned as black or white. This mode is best for text-only originals. |
| Greyscale | The colours in the original are scanned in black and white as shades of grey (greyscale). |

This function cannot be used in Internet fax mode.
1 Tap the [Detail] key to switch to the normal mode. EASY MODE (page 6-7)
2 Tap the [Colour Mode] key.
3

Tap the key of the desired colour mode for the original.

If there is a mix of destinations in different send modes, tap ▼ to select a send mode (E-mail, DeskTop/FTP or Data Entry) to set the colour mode for each mode.
4
Tap the [Greyscale] or [Mono2] key to set the B/W mode for automatic colour selection.
Specify whether Mono2 or greyscale is used when scanning black and white originals.
Note that if the file format is set to JPEG, scanning will take place in greyscale.
After the settings are completed, tap .OK
![SHARP BP-50C45 - Tap the [Greyscale] or [Mono2] key to set the B/W mode for automatic colour selection. - 1](/content/2026/06/1367452/images/71403811de8247dbb67fe8e0b7aaf911fbdb26aa87c200022a7f451328a3df26.jpg)
The B/W mode can be set only when the [Auto] key is selected in the colour mode setting (step 3).
SETTING SCAN SETTINGS AUTOMATICALLY (Auto Set)
To automatically set scan settings appropriate for the original, tap the [Auto Set] key in the base screen of Easy Mode.

The following functions are set automatically.
- Image Orientation *1
- 1-Sided/2-Sided*1
- Resolution
- Blank Page Skip • Automatically detecting mono2/greyscale • Automatically adjusting the original skew • Business Card Scan 4 • Automatically detecting the original size*3 • Automatically detecting the compression ratio
Each function setting value/parameter can be changed in setting mode.
*1 When using the BP-60C31/BP-60C36/BP-60C45/BP-70C31/BP-70C36/BP-70C45/BP-70C55/BP-70C65, or the BP-55C26/BP-50C26/BP-50C31/BP-50C36/BP-50C45 with the OCR expansion kit installed and the OCR function is enabled. *2 When using the automatic document feeder with BP-55C26/BP-70C31/BP-70C36/BP-70C45/BP-70C55/BP-70C65. When using the BP-55C26, the OCR expansion kit is installed.
*3 When using the automatic document feeder

- When "Auto Set" is enabled, greyed out functions cannot be enabled.
- When an Internet Fax address is selected, "Auto Set" cannot be enabled.
CHECKING THE IMAGE TO BE TRANSMITTED
Check the image that will be sent in the touch panel before transmission.
You can tap the [Preview] key to check a preview of the image before sending an image.
As you can adjust the exposure and resolution to scan the original while checking it in the preview screen, you can send a better quality original to the destination.

- Depending on the size of the transmission data, part of the preview image may not appear in the preview screen in the touch panel.
- The preview function is not available when the original size is set to Long Size.
OTHER FUNCTIONS

Fax mode details cautions for functions such as N-Up Printing that have the same operating procedures as fax mode.
STORING SCAN OPERATIONS (PROGRAM)
This function collectively stores various settings as one program. The stored program can be retrieved using an easy operation.
For example, suppose A4 (8-1/2" x 11") size documents are scanned into a file and sent to each branch office once a month.
• The same documents are sent to each branch office • Each page of a bound document is successively transmitted - Smudges on the edges of the documents are erased before transmission
A4 (8-1/2" x 11") size documents to be distributed

Fax received by recipients.
When a job program is not stored When a job program is stored
Enter the address of each branch office. Select Dual Page Scan.[25TT]Specify Erase. Select Dual Page Scan.[25TT]Specify Erase. Tap the [Start] key.Scan and send the original. Tap the [Start] key.Scan and send the original. | Tap the key of a stored program.Tap the [Start] key.Scan and send the original. |
| Considerable time is required to send the documents each month because the above settings must be selected.In addition, mistakes are occasionally made when selecting the settings. | When a program is stored, settings are selected with ease by simply tapping the key of the program. In addition, transmission takes place based on the stored settings so there are no chances for mistakes. |

To configure a program:
Tap [Program Registration] on the action panel that appears when you operate any mode screens.

- The settings stored in a program will be retained even after the program is used for transmission. The same settings can be used repeatedly for transmission. • The following contents cannot be stored in programs:
- Quick File
- File • Page changes and unspecified erases during preview
- Reply to/Add 'Reply to' to Cc
- Own Name • Sign E-mail
- Encrypt E-mail
- Up to 48 programs can be stored.
- Up to 500 destinations can be stored in one program.
- When registering a program, if the subject name or file name use the pre-set text set in the system, then by changing the pre-set text in system settings the program will call the changed subject name and file name. (If the pre-set text registered in the program is deleted, then the subject name and file name will be blank.)

This function cannot be used in data entry mode.
1
Tap the [Detail] key to switch to the normal mode.
EASY MODE (pages 6-7)
2
Place the original and tap [Call Program] on the action panel.
According to the function stored in the program, place the original in the document feeder tray of the automatic document feeder, or on the document glass.
AUTOMATIC DOCUMENT FEEDER (page 1-30)
DOCUMENT GLASS (page 1-34)
3

Tap the desired program key.
The normal mode screen at program registration is displayed. If registered in other modes, then switch the screen.
4
Configure additional settings if needed.

Some settings cannot be added depending on the contents of the called program.
5
Tap the [Start] key to start scanning of the original.
- A beep will sound to indicate that scanning and transmission have ended.
- When you place the original on the document glass, scan each page one at a time. When scanning finishes, place the next original and tap the [Start] key. Repeat until all pages have been scanned and then tap the [Read-End] key.
![SHARP BP-50C45 - Tap the [Start] key to start scanning of the original. - 1](/content/2026/06/1367452/images/47490d747c97a4902f870cd334be2025739e89d80c99894a61c64aef10abae75.jpg)
You can tap the [Preview] key to check a preview of the image before sending an image. For more information, see "CHECKING THE IMAGE TO BE TRANSMITTED (page 6-93)".
SCANNING AND SENDING ORIGINALS COLLECTIVELY
SENDING TWO PAGES AS A SINGLE PAGE (N-Up)
Reduce two original pages to the equal size and sent them as a single page. This function is convenient when you have a large number of original pages and wish to reduce the number of pages sent.
For the standard size (A4 (8-1/2" x 11"), B5 or A5 (5-1/2" x 8-1/2"), original pages are scanned from both the single pass feeder and document glass.
Original in portrait orientation
Original in landscape orientation

- This function cannot be used in scan mode or data entry mode.
- The N-Up is only available for originals with A4 (8-1/2" x 11"), B5 or A5 (5-1/2" x 8-1/2") size.
- Transmission is not possible at a size smaller than the original size.
- When the scan size of the original is specified by numeric values, this function cannot be used.
- This function cannot be used together with Dual Page Scan or Card Shot.
1
Place the original.
Place the original in the document feeder tray of the automatic document feeder, or on the document glass.
When in fax mode, after completing this procedure, proceed to Step 3.
AUTOMATIC DOCUMENT FEEDER (page 1-30)
DOCUMENT GLASS (page 1-34)
2
Tap the mode display to switch to the initial screen of Internet Fax mode.
CHANGING MODES (page 2-10)
3
Specify the destination.
RETRIEVING A DESTINATION FROM AN ADDRESS BOOK (page 6-33)
VIEWING A LIST OF THE SELECTED DESTINATIONS (page 6-36)
USING A SEARCH NUMBER TO RETRIEVE A DESTINATION (page 6-37)
ENTERING AN ADDRESS MANUALLY (page 6-38)
SPECIFYING A NETWORK FOLDER (page 6-39)
RETRIEVING A DESTINATION FROM A GLOBAL ADDRESS BOOK (page 6-41)
RETRIEVING A DESTINATION FROM A MOBILE ADDRESS BOOK (page 6-43)
USING A TRANSMISSION LOG TO RESEND (page 6-45)
When in fax mode, enter the destination number.
ENTERING A DESTINATION NUMBER USING THE NUMERIC KEYS (page 5-11)
RETRIEVING A DESTINATION FROM AN ADDRESS BOOK (page 5-12)
USING A SEARCH NUMBER TO RETRIEVE A DESTINATION (page 5-15)
RETRIEVING A DESTINATION FROM A GLOBAL ADDRESS BOOK (page 5-16)
RETRIEVING A DESTINATION FROM A MOBILE ADDRESS BOOK (page 5-18)
USING A TRANSMISSION LOG TO RESEND (page 5-20)
4
Tap the [Others] key, and tap the [N-Up] key.
A checkmark appears on the icon.
After the settings are completed, tap the [Back] key.
![SHARP BP-50C45 - Tap the [Others] key, and tap the [N-Up] key. - 1](/content/2026/06/1367452/images/10b41b78b06102ccb0b80d1b3aeaea1c7e7ce747aaeeb453b3a9ea37e00c4412.jpg)
To cancel the N-Up setting
Tap the [N-Up] key to uncheck it.
5
Tap the [Original] key.
6

Tap the [Image Orientation] key with the same orientation as the original image.
If this setting is not correct, a suitable image may not be transmitted.
After the settings are completed, tap OK.
7
Tap the [Start] key to start scanning of the original.
- If you inserted the original pages in the document feeder tray, all pages are scanned.
A beep will sound to indicate that scanning and transmission have ended.
- When you place the original on the document glass, scan each page one at a time.
When scanning finishes, place the next original and tap the [Start] key.
Repeat the procedure until all pages have been scanned and then tap the [Read-End] key.
A beep will sound to indicate that scanning and transmission have ended.
![SHARP BP-50C45 - Tap the [Start] key to start scanning of the original. - 1](/content/2026/06/1367452/images/4b4717b5861f313ed1b276e5169ba43ea8aea268d2661d2069390c85ecbf2048.jpg)
You can tap the [Preview] key to check a preview of the image before sending an image. For more information, see "CHECKING THE IMAGE TO BE TRANSMITTED (page 6-93)" (When in fax mode, "CHECKING THE IMAGE TO BE TRANSMITTED (page 5-29)").
Tap the [Change Setting] key in the scan-end confirmation screen to change the exposure, resolution, scan size, and send size. (However, when scanning each even-numbered page of the original, only the exposure is changed.)
SCANNING ORIGINALS OF DIFFERENT SIZES (MIXED SIZE ORIGINAL)
Scan originals of different sizes at the same time; for example, when B4 (8-1/2" x 14") size originals are mixed together with A3 (11" x 17") size originals.
When scanning the originals, the machine automatically detects the size of each original.

This function can only be used with the combinations of original sizes as shown below.
• A3 and B4, A3 and B5, B4 and A4, and A4 and B5 • A4R and B5, B4 and A4R, B4 and A5, and B5 and A5 • A3, B4 and A4R, A3, B4 and A5, A3, A4R and B5, A3, B5 and A5, B4, A4R and A4, B4, A4 and A5, A4, A4R and B5, A4, B5 and A5 • B4, A4R and B5R, B4, B5R and A5, A4R, B5R and B5, B5, B5R and A5 - 11" x 17" and 8-1/2" x 14", 11" x 17" and 8-1/2" x 13", and 11" x 17" and 5-1/2" x 8-1/2"

Three Different Widths cannot be selected on BP-55C26/BP-50C26/BP-50C31/BP-50C36/BP-50C45/BP-50C55/BP-50C65/BP-60C31/BP-60C36/BP-60C45.
- On the BP-50C26/BP-50C31/BP-50C36/BP-50C45/BP-50C55/BP-50C65, two sided scanning cannot be used when scanning originals of mixed width as in the above.
- Mixed size scanning is not possible when "Settings (administrator)" - [System Settings] → [Common Settings] → [Device Control] → [Condition Settings] or [Enable/Disable Settings] → [Disabling of Document Feeder] is enabled.
- When Mixed Size Original is selected, an original scan size cannot be specified. • After the original scan size has been selected, Mixed Size Original cannot be specified.
- Rotate cannot be used when Mixed Size Original is enabled.
- This function is not available if [System Settings] → [Common Settings] → [Device Control] → [Condition Settings] → [Original Size Detector Setting] is set to "AB-3" in "Settings (administrator)".
1

Place the original in the document feeder tray of the automatic document feeder.
Insert the originals with the corners aligned together in the far left corner of the document feeder tray. When in fax mode, then after completing this procedure, proceed to Step 3.
Tap the mode display to switch to the initial screen of each mode.
CHANGING MODES (page 2-10)
Specify the destination.
RETRIEVING A DESTINATION FROM AN ADDRESS BOOK (page 6-33)
VIEWING A LIST OF THE SELECTED DESTINATIONS (page 6-36)
USING A SEARCH NUMBER TO RETRIEVE A DESTINATION (page 6-37)
ENTERING AN ADDRESS MANUALLY (page 6-38)
SPECIFYING A NETWORK FOLDER (page 6-39)
RETRIEVING A DESTINATION FROM A GLOBAL ADDRESS BOOK (page 6-41)
RETRIEVING A DESTINATION FROM A MOBILE ADDRESS BOOK (page 5-18)
USING A TRANSMISSION LOG TO RESEND (page 6-45)
When in fax mode, enter the destination number.
ENTERING A DESTINATION NUMBER USING THE NUMERIC KEYS (page 5-11)
RETRIEVING A DESTINATION FROM AN ADDRESS BOOK (page 5-12)
USING A SEARCH NUMBER TO RETRIEVE A DESTINATION (page 5-15)
RETRIEVING A DESTINATION FROM A GLOBAL ADDRESS BOOK (page 5-16)
RETRIEVING A DESTINATION FROM A MOBILE ADDRESS BOOK (page 5-18)
USING A TRANSMISSION LOG TO RESEND (page 5-20)
4
Tap the [Mixed Size Original] key. Otherwise, tap the [Others] key, and tap the [Mixed Size Original] key.
A checkmark appears on the icon.
After the settings are completed, tap the [Back] key.
![SHARP BP-50C45 - Tap the [Mixed Size Original] key. Otherwise, tap the [Others] key, and tap the [Mixed Size Original] key. - 1](/content/2026/06/1367452/images/d5b597fb57b9ebff920cd8f3d70d321f88d6a661035a6fce2ff82f77c30818ad.jpg)
For mixed size originals, set "Original" to "Auto".
![SHARP BP-50C45 - Tap the [Mixed Size Original] key. Otherwise, tap the [Others] key, and tap the [Mixed Size Original] key. - 2](/content/2026/06/1367452/images/a243ba6b745ea3fadc6c720824daa00f92df1548a8e1d59c2e880d682ef3604d.jpg)
To cancel the mixed size original setting
Tap the [Mixed Size Original] key to uncheck it.
5
Tap the [Start] key to start scanning of the original.
A beep will sound to indicate that scanning and transmission have ended.
![SHARP BP-50C45 - Tap the [Start] key to start scanning of the original. - 1](/content/2026/06/1367452/images/9c0e3de2cf7e37a0dfeb8ed399c3d24fcfe0714196672a7c15eb204b6380c46a.jpg)
Tap the [Preview] key to check the preview of an image before sending a fax. For more information, see "CHECKING THE IMAGE TO BE TRANSMITTED (page 6-93)" (When in fax mode, "CHECKING THE IMAGE TO BE
TRANSMITTED (page 5-29)"). However, settings for this function cannot be changed in the preview screen.
SCANNING BOTH SIDES OF A CARD ONTO A SINGLE PAGE (CARD SHOT)
Send the front and reverse sides of a card as a single page, without the need to send each side separately.
![graph LR A["Originals"] -->|Transmission| B["Transmitted image"] C["Front"] --> D["Example of an 8-1/2" x 11" (A4) size portrait scan transmission"] E["Back"] --> F["Example of an 8-1/2" x 11" (A4) size landscape scan transmission"]](/content/2026/06/1367452/images/e12594238f3734fd4620d8d109187c1937c245150c1883da8a7d00c4e1d3fa82.jpg)

- If the scan size is larger than the send size, it will result in a sending failure.
- The ratio cannot be specified and "Rotation Sending Setting" cannot be selected.
1
Place a card face down on the document glass.
When in fax mode, then after completing this procedure, proceed to Step 3. DOCUMENT GLASS (page 1-34)
2
Tap the mode display to switch to the initial screen of each mode.
CHANGING MODES (page 2-10)
3
Specify the destination.
RETRIEVING A DESTINATION FROM AN ADDRESS BOOK (page 6-33) VIEWING A LIST OF THE SELECTED DESTINATIONS (page 6-36) USING A SEARCH NUMBER TO RETRIEVE A DESTINATION (page 6-37) ENTERING AN ADDRESS MANUALLY (page 6-38) SPECIFYING A NETWORK FOLDER (page 6-39) RETRIEVING A DESTINATION FROM A GLOBAL ADDRESS BOOK (page 6-41) RETRIEVING A DESTINATION FROM A MOBILE ADDRESS BOOK (page 5-18) USING A TRANSMISSION LOG TO RESEND (page 6-45) When in fax mode, enter the destination number. ENTERING A DESTINATION NUMBER USING THE NUMERIC KEYS (page 5-11) RETRIEVING A DESTINATION FROM AN ADDRESS BOOK (page 5-12) USING A SEARCH NUMBER TO RETRIEVE A DESTINATION (page 5-15) RETRIEVING A DESTINATION FROM A GLOBAL ADDRESS BOOK (page 5-16) RETRIEVING A DESTINATION FROM A MOBILE ADDRESS BOOK (page 5-18) USING A TRANSMISSION LOG TO RESEND (page 5-20)
4
Tap the [Others] key, and tap the [Card Shot] key.
5

Tap the [On] key, and specify the original size as required.
After the settings are completed, tap the [Back] key in sequence.
![SHARP BP-50C45 - Tap the [On] key, and specify the original size as required. - 1](/content/2026/06/1367452/images/d76e4c361c3296788c3671055ffef6361c49d98ccf540f2ef8c097c30c56fb52.jpg)
- Tap the areas displaying width and height sizes respectively, and enter the sizes using the numeric keys.
- To quickly set the size, first specify a value close to the desired ratio value by the numeric keys, then tap [-] or [+] for adjustment.
- To enlarge or reduce the images to fit the paper based on the entered original size, tap the [Fit to Send Size] key.
- After selecting Card Shot, tap the [Original] key in the base screen to change the original scan size or the send size. In this case, the screen of this step appears when you tap the scan size key. For the procedure for setting the send size, see "SPECIFYING THE SEND SIZE OF THE IMAGE (page 6-79)" (When in fax mode, "SPECIFYING THE SEND SIZE OF THE IMAGE (page 5-53)").
![SHARP BP-50C45 - Tap the [On] key, and specify the original size as required. - 2](/content/2026/06/1367452/images/4098b8ddc239a84c4341cee366ac000d4097fc82b7950ab7186508aec8511ad7.jpg)
To cancel the Card Shot settings
Tap the [Off] key.
6
Tap the [Start] key, and scan the front side.
7
Place a card face up on the document glass, and tap the [Start] key to scan the reverse side.
![SHARP BP-50C45 - Place a card face up on the document glass, and tap the [Start] key to scan the reverse side. - 1](/content/2026/06/1367452/images/62d322defa7af974ce0d2b89ccfb38a0186edff6017adfde719d0ea00b76e426.jpg)
Before scanning the back of the card, tap the [Change Setting] key on the touch panel to change the exposure.
8
Tap the [Read-End] key.
![SHARP BP-50C45 - Tap the [Read-End] key. - 1](/content/2026/06/1367452/images/7672f4fddc56d4e6e4e2e6992df1959f17a844d5dc5abb2c44d6532790716c97.jpg)
If you will continue by scanning the front of the card, you can tap the [Change Setting] key to change the exposure, resolution, scan size, and send size.
SIMULTANEOUSLY SCANNING MULTIPLE CARDS, RECEIPTS OR OTHER SMALL ORIGINALS TO INDIVIDUAL FILES (MULTICROP)
This function automatically crops and scans multiple cards, receipts, or other small originals placed on the document glass to individual files.
![graph TD A["Input Image"] --> B["Document Processing"] B --> C{Error Message} C -->|Yes| D["Output Document"] C -->|No| E["Error Message"] E --> F["Document Output"]](/content/2026/06/1367452/images/6bb2e36b8bc8d7c1ce6acd7802e61115850830678acc68ecc6c0c3d39d30fdf2.jpg)

- This function can be used with Scan to E-mail, Scan to FTP/Desktop, Scan to Network Folder, and Save to External Memory Device.
- The e-mail will be sent without being divided if System Settings - [Image Send Settings] → [Scan Settings] → [Condition Settings] → [If the E-mail attachment(s) exceed maximum size, it will be sent in multiple files.] is enabled and [Maximum Size of Send Data (E-Mail)] is set. If the transmitted e-mail exceeds the limit, a send error occurs.
1
Place the multiple originals that you want to scan on the document glass.
DOCUMENT GLASS (page 1-34)

Cautions when placing the originals
- Up to 50 originals can be placed at once.
- Separate the originals by at least 5 mm. • Available originals sizes are 40 to 297 mm in height and 40 to 432 mm in width.
- If the shape of an original is not square or rectangular, the original may not be cropped correctly.
2
Keep the auto document feeder open, not closed.
If you scan the originals with the auto document feeder closed, it will not be possible to detect the outlines of the originals and scanning will fail. Always use this function with the auto document feeder open. If a light source such as an electric light shines onto the originals during scanning, cropping may not be successful. Adjust the angle of the automatic document feeder so that the light source does not affect the image.

Do not look directly at the light during scanning.
3
Tap the mode display and change to the base screen of the desired mode.
CHANGING MODES (page 2-10)
4
Specify the destination.
RETRIEVING A DESTINATION FROM AN ADDRESS BOOK (page 6-33) VIEWING A LIST OF THE SELECTED DESTINATIONS (page 6-36) USING A SEARCH NUMBER TO RETRIEVE A DESTINATION (page 6-37) ENTERING AN ADDRESS MANUALLY (page 6-38) SPECIFYING A NETWORK FOLDER (page 6-39) RETRIEVING A DESTINATION FROM A GLOBAL ADDRESS BOOK (page 6-41) RETRIEVING A DESTINATION FROM A MOBILE ADDRESS BOOK (page 5-18) USING A TRANSMISSION LOG TO RESEND (page 6-45)
5
Tap the [Others] key, and tap the [Multicrop] key.
A checkmark appears on the icon. When you have completed the setting, tap the [Back] key.
![SHARP BP-50C45 - Tap the [Others] key, and tap the [Multicrop] key. - 1](/content/2026/06/1367452/images/86e83d52f28daa59810e72d829305ee7c80cf5b511fbab4bb4b6a7a1880547d9.jpg)
When original count is enabled, the number of scanned originals will appear during scanning.
![SHARP BP-50C45 - Tap the [Others] key, and tap the [Multicrop] key. - 2](/content/2026/06/1367452/images/52207212cfd2adda109c95236ea601eb6f5fe9f495f5110972661ee27e98ad0c.jpg)
To cancel the multicrop setting
Tap the [Multicrop] key to remove the checkmark.
6
Tap the [Start] key to start scanning the originals.
When scanning is completed, place the next originals and tap the [Start] key.
Repeat the above step until you have scanned all originals, and then tap the [Read-End] key.
When transmission is completed, a beep sounds.
![SHARP BP-50C45 - Tap the [Start] key to start scanning the originals. - 1](/content/2026/06/1367452/images/54d02631fed10abb542e9ec79a97a19050767286be1fa1afbaae0fe61383724f.jpg)
- Restrictions when multicrop is enabled
The following restrictions apply when multicrop is enabled. Restricted items may change automatically in some cases.
- Resolution: 600 x 600 dpi cannot be used.
- Scan size / send size: Only auto can be used.
- Two-sided original: Only one-sided original is enabled.
- Image Orientation: Cannot be used. (Each cropped original is corrected to the orientation that is least skewed.)
- Format: High compression and ultra-fine cannot be used.
- Compression / compression format: Reduce Colours cannot be used.
- One file per page: Cannot be set when the checkmark is enabled and the number is "1".
- The following functions cannot be used at the same time as multicrop.
Job Build, Slow Scan Mode, Mixed Size Original, Erase, Dual Page Scan, Book Divide, Card Shot, Verif. Stamp, Blank Page Skip, File, Quick File, Preview, Business Card Scan, Image Crop
- When the Multicrop setting is cancelled, the following items retain the setting changes that occurred when Multicrop was enabled.
Resolution, Scan Size, Send Size, 2-Sided Original, File Type, OCR, Compression Mode/Compression Ratio, Specified Pages per File
- Depending on the original, it may not be extracted to the file correctly.
SCANNING A BUSINESS CARD, READING THE TEXT STRING, CREATING A FILE, AND SENDING THE FILE (BUSINESS CARD SCAN)
(On the BP-50C26/BP-50C31/BP-50C36/BP-50C45/BP-50C55/BP-50C65/BP-55C26, the OCR expansion kit is required.)
You can scan a business card, extract the name and telephone number from the text string read by OCR, and create and send a vCard or other file.

- If [Disabling of OCR] is set in the system settings, this function cannot be used even if the OCR expansion kit is installed in BP-50C26/BP-50C31/BP-50C36/BP-50C45/BP-50C55/BP-50C65/BP-55C26. For other models, business card scanning can be used, but only the image will be scanned and the business card information will not be scanned.
- This function can be used with Scan to E-mail, Scan to FTP/Desktop, Scan to Network Folder, and Save to External Memory Device.
The e-mail will be sent without being divided if System Settings - [Image Send Settings] → [Scan Settings] → [Condition Settings] → [If the E-mail attachment(s) exceed maximum size, it will be sent in multiple files.] is enabled and [Maximum Size of Send Data (E-Mail)] is set. If the transmitted e-mail exceeds the limit, a send error occurs.
For the information that can be extracted and output from a scanned business card, refer to the table below.
| Item Description | |
| Name The name is extracted. | |
| Kana When the language is set to | Japanese, you can convert the name to kana. |
| Pinyin | When the language is set to Chinese, you can convert the name to pinyin. |
| Postal code The postal code is extracted. | |
| Address The address is extracted. | |
| Company/group name The company/organization name is extracted. | |
| Department The department is extracted. | |
| Job title The position is extracted. | |
| Telephone number The telephone number is extracted. Up to five. | |
| Fax number The fax number is extracted. Up to five. | |
| URL The URL is extracted. | |
| E-mail address The E-mail address is extracted. | |
| Other Other is used if none of the above apply. | |
1 Place the multiple business cards that you want to scan in the document feeder tray of the automatic document feeder or on the document glass.
With the BP-55C26/BP-70C31/BP-70C36/BP-70C45/BP-70C55/BP-70C65, you can scan business cards by setting them in the automatic document feeder.
AUTOMATIC DOCUMENT FEEDER (page 1-30)
DOCUMENT GLASS (page 1-34)

• Cautions when placing business cards
- Up to 20 business cards can be placed at once.
- Separate the business cards by at least 5 mm. • Available business card sizes are 45 x 85 mm to 110 x 110 mm.
- If the shape of a business card is not square or rectangular, the business card may not be cropped correctly.
- Place the business cards with the top side of the cards at the far side of the document glass as shown. If the cards are placed in the wrong orientation, it will not be possible to read the cards correctly.

- Notes on loading business cards in the automatic document feeder
- Up to 150 business cards (or a maximum loading height of 38 mm) can be scanned at one time. • Supported business card sizes range from 51 x 89 mm to 55 x 91 mm.
- If the business card is not square or rectangular in shape, the business card will misfeed.
- When scanning a business card, be sure to set the image orientation.
2 (When using the document glass) Keep the auto document feeder open, not closed.
If you scan the business cards with the auto document feeder closed, it will not be possible to detect the outlines of the business cards and scanning will fail. Always use this function with the auto document feeder open. If a light source such as an electric light shines onto the originals during scanning, cropping may not be successful. Adjust the angle of the automatic document feeder so that the light source does not affect the image.

Do not look directly at the light during scanning.
3 Tap the mode display and change to the base screen of the desired mode. CHANGING MODES (page 2-10)
4
Specify the destination.
RETRIEVING A DESTINATION FROM AN ADDRESS BOOK (page 6-33)
VIEWING A LIST OF THE SELECTED DESTINATIONS (page 6-36)
USING A SEARCH NUMBER TO RETRIEVE A DESTINATION (page 6-37)
ENTERING AN ADDRESS MANUALLY (page 6-38)
SPECIFYING A NETWORK FOLDER (page 6-39)
RETRIEVING A DESTINATION FROM A GLOBAL ADDRESS BOOK (page 6-41)
RETRIEVING A DESTINATION FROM A MOBILE ADDRESS BOOK (page 6-43)
USING A TRANSMISSION LOG TO RESEND (page 6-45)
5
Tap the [Others] key, and tap the [Business Card Scan] key.
![SHARP BP-50C45 - Tap the [Others] key, and tap the [Business Card Scan] key. - 1](/content/2026/06/1367452/images/51719817a72fbf148d7f15d525854bb2edeeb4937a68ee101cbb261637eb1d92.jpg)
When [Disabling of OCR] is set in the system settings, tap the [Business Card Scan] key and then a checkmark appears on the icon. After the settings are completed, tap the [Back] key.
6

Tap the [On] key, and change settings as needed.
When you have completed the settings, tap the Key and then the [Back] key.
![SHARP BP-50C45 - Tap the [On] key, and change settings as needed. - 1](/content/2026/06/1367452/images/703ac0627a1094dc55fa253c7c48b9bf9faf1f46f27bf14fe41b2fd230f90fd9.jpg)
- This procedure cannot be used if [Disabling of OCR] is set in the system settings. Proceed to the next step.
- If original count is enabled, the number of scanned originals will appear during scanning.
- Change the language setting to match the language used on the business card. For the language settings, refer to "CHANGING FORMAT IN SCAN OR DATA ENTRY MODE (page 6-84)". • To use the full name as the file name, enable [Use Full Name on Card as the File Name].
- To send the scanned image file together with the file format selected in [File Format], enable [Also Send Image].
![SHARP BP-50C45 - Tap the [On] key, and change settings as needed. - 2](/content/2026/06/1367452/images/71f6b86a47d7da4684fcc9686ddcf56a9fdc5266561d2d0c0f8ef33246269fba.jpg)
To cancel the business card scan setting
Tap the [Off] key.
7
Tap the [Start] key to start scanning the originals.
When scanning is completed, place the next group of originals and tap the [Start] key.
Repeat the above step until you have scanned all originals, and then tap the [Read-End] key.
When transmission is completed, a beep sounds.
The image of the scanned business card is sent together with the VCard or CSV file set in File Format.
![SHARP BP-50C45 - Tap the [Start] key to start scanning the originals. - 1](/content/2026/06/1367452/images/0c64199d95892838df383f7a7732b06bbef2fd8af7f6e07500be4f38ddf7f480.jpg)
- Restrictions when Business Card Scan is enabled
The following restrictions apply when Business Card Scan is enabled. Restricted items may change automatically in some cases.
- Resolution: When you select other than [Image], only 300 x 300 dpi or 400 x 400 dpi can be used.
- Scan size / send size: Only auto can be used.
- Two-sided original: When using the BP-55C26/BP-70C31/BP-70C36/BP-70C45/BP-70C55/BP-70C65 to scan from the automatic document feeder, if you select a setting other than [Card Information], 2-sided documents can be scanned. Otherwise, only 1-sided documents can be scanned.
- Image Orientation: Cannot be used. (Each cropped original is corrected to the orientation that is least skewed.)
- Format: High compression and ultra-fine cannot be used.
- Compression / compression format: Reduce Colours cannot be used.
- One file per page: Cannot be set when the checkmark is enabled and the number is "1".
- The following functions cannot be used at the same time as multicrop.
Job Build, Slow Scan Mode, Mixed Size Original, Erase, Dual Page Scan, Book Divide, Card Shot, Verif. Stamp, Blank Page Skip, File, Quick File, Preview, Multicrop, Image Crop
- When the Business Card Scan setting is cancelled, the following items retain the setting changes that occurred when Business Card Scan was enabled.
Resolution, Scan Size, Send Size, 2-Sided Original, File Type, OCR, Compression Mode/Compression Ratio, Specified Pages per File
- Depending on the business card, it may not be extracted to the file correctly.
File names
The user can assign any file name to a file.
When [Use Full Name on Card as the File Name] is enabled, the name on a scanned business card can be assigned as the file name.
If you do not set a file name, the machine will assign an automatically generated file name.
File name rules
File names are assigned as follows in each setting.
| Setting File File name Description | |||
| User entry vCard User_0001.vcf | User_0002.vcf | The name entered by the user ("User" in this case) is inserted at the beginning of the file name. | |
| File name auto extraction | vCard AAAAAA_0001.vcf | AAAAAA_0002.vcf | Example: The names read from business cards are "AAAAAA", "BBBBB" |
| BBBBBB_0001.vcf | When there are cards with the same first and last name such as "AAAAAA", the number at the end is a serial number. If the name could not be read, the file name is "Untitled". If there are multiple untitled files, the number at the end is a serial number. | ||
| Untitled_0001.vcf | |||
| Untitled_0002.vcf | |||
| CSV AAAAAA_0001.csv | |||
| Scanned image AAAAAA_0001.jpg | AAAAAA_0002.jpg | ||
| BBBBBB_0001.jpg | |||
| Untitled_0001.jpg | |||
| Untitled_0002.jpg | |||
| Automatic generation vCard MXxxxx_yyyyyy_zzzzzz_0001.vcf | MXxxxx_yyyyyy_zzzzzz_0002.vcf | "xxxx" is the model name,"yyyyy" is the scan date, and "zzzzzz" is the scan time. | |

If the user sets a file name when file name auto extraction is enabled, the user's file name is given priority.
SCANNING MULTIPLE PHOTOS AT ONCE TO INDIVIDUAL FILES
(Image Crop)
This function automatically scans photographs placed on the document glass to individual files.


This function can be used with Scan to E-mail, Scan to FTP/Desktop, Scan to Network Folder, and Save to External Memory Device.
Settings (administrator) - "Image Send Settings"→"Scan Settings"→"Condition Settings"→"If the E-mail attachment(s) exceed maximum size, it will be sent in multiple files." is not applied.
If the transmitted e-mail exceeds the limit, a send error will occur.

Place the multiple originals that you want to scan on the document glass.
DOCUMENT GLASS (page 1-34)

Cautions when placing the originals
- Up to 50 originals can be placed at once.
- Separate the originals by at least 5 mm. • Available originals sizes are 40 to 297 mm in height and 40 to 432 mm in width.
- If the shape of an original is not square or rectangular, the original may not be cropped correctly.
- The top and bottom of each original cannot be distinguished automatically, so take care to orient the originals appropriately.
2
Close the automatic document feeder.
The scanning method is different from multi-crop. Close the automatic document feeder.
3
Tap the mode display and change to the home screen of the desired mode.
CHANGING MODES (page 2-10)
4
Specify the destination.
RETRIEVING A DESTINATION FROM AN ADDRESS BOOK (page 6-33)
VIEWING A LIST OF THE SELECTED DESTINATIONS (page 6-36)
USING A SEARCH NUMBER TO RETRIEVE A DESTINATION (page 6-37)
ENTERING AN ADDRESS MANUALLY (page 6-38)
SPECIFYING A NETWORK FOLDER (page 6-39)
RETRIEVING A DESTINATION FROM A GLOBAL ADDRESS BOOK (page 6-41)
RETRIEVING A DESTINATION FROM A MOBILE ADDRESS BOOK (page 6-43)
USING A TRANSMISSION LOG TO RESEND (page 6-45)
5
Tap the [Others] key, and tap the [Image Crop] key.
A checkmark appears on the icon. After the settings are completed, tap the [Back] key.
![SHARP BP-50C45 - Tap the [Others] key, and tap the [Image Crop] key. - 1](/content/2026/06/1367452/images/c44b7970b42553f3b8258fbecfc0d8e1ec23cbe2b21ff35f310d07801084ef12.jpg)
When original count is enabled, the number of scanned originals will appear during scanning.
![SHARP BP-50C45 - Tap the [Others] key, and tap the [Image Crop] key. - 2](/content/2026/06/1367452/images/7aa16efe1ebdb4ba6ebc40ee2e8aa25e7b4c6dc13785b3b977b484d376078e16.jpg)
To cancel the image crop setting
Tap the [Image Crop] key to remove the checkmark.
6
Tap the [Start] key to start scanning the originals.
When scanning is completed, place the next group of originals and tap the [Start] key.
Repeat the above step until you have scanned all originals, and then tap the [Read-End] key.
When transmission is completed, a beep sounds.
![SHARP BP-50C45 - Tap the [Start] key to start scanning the originals. - 1](/content/2026/06/1367452/images/af1b8852833ef46ea1c18f8a52c7f29fb8e819f21c5b54a242e42d2b7f63b83d.jpg)
- Restrictions when image crop is enabled
The following restrictions apply when image crop is enabled. Restricted items may change automatically in some cases.
- Scan size / send size: Only auto can be used.
- Two-sided original: Only one-sided original is enabled.
- Image Orientation: Cannot be used. (Each cropped original is corrected to the orientation that is least skewed.)
- Format: High compression and ultra-fine cannot be used.
- Compression / compression format: Reduce Colours cannot be used.
- One file per page: Cannot be set when the checkmark is enabled and the number is "1".
- The following functions cannot be used at the same time as image crop.
Job Build, Slow Scan Mode, Mixed Size Original, Erase, Dual Page Scan, Book Divide, Card Shot, Verif. Stamp, Blank Page Skip, File, Quick File, Preview, Multicrop Business Card Scan
- When the image crop setting is cancelled, the following items retain the setting changes that occurred when image crop was enabled.
Resolution, Scan Size, Send Size, 2-Sided Original, File Type, OCR, Compression Mode/Compression Ratio, Specified Pages per File
- Depending on the photo, it may not be extracted to the file correctly.
SCANNING MANY ORIGINALS AT ONCE (JOB BUILD)
This function lets you separate an original consisting of numerous pages into sets, scan each set using the automatic document feeder, and transmit the pages in a single transmission. You can also send a fax by placing originals in both the automatic document feeder and on the document glass.
Use this function when there are more original pages than can be placed at once in the automatic document feeder.
When scanning originals that are separated into sets, scan the set that has the first page first.
The settings that you select for the first set can be used for all remaining sets.
![graph LR A["File Orientation"] --> B["Server Rack 1"] B --> C["Server Rack 2"] C --> D["Server Rack 3"] D --> E["Server Rack 4"] E --> F["Server Rack 5"]](/content/2026/06/1367452/images/75bfdde86ce206f75e1e7afd84326934a9022f6c4b0828bd84690daad9f08910.jpg)

- To change all original settings, configure before scanning the original.
- Up to 9999 (excluding Internet Fax) pages can be scanned.
Note that when the memory is being used for other jobs, fewer pages can be scanned.
- If the memory becomes full during scanning, a message will appear and the transmission will be cancelled.
- The scan settings can be changed for each set of originals.
- When in fax mode, this function is not available for Quick On Line Sending, manual transmission, Direct TX, or transmission using the speaker.
- Job build is not possible when "Settings (administrator)" - [System Settings] → [Common Settings] → [Device Control] → [Condition Settings] or [Enable/Disable Settings] → [Disabling of Document Feeder] is enabled.
1

Place originals in the automatic document feeder.
Insert the originals all the way into the document feeder tray. Originals can be stacked up to the indicator line.
When in fax mode, then after completing this procedure, proceed to Step 3.
AUTOMATIC DOCUMENT FEEDER (page 1-30)
2
Tap the mode display to switch to the initial screen of each mode.
CHANGING MODES (page 2-10)
3
Specify the destination.
RETRIEVING A DESTINATION FROM AN ADDRESS BOOK (page 6-33)
VIEWING A LIST OF THE SELECTED DESTINATIONS (page 6-36)
USING A SEARCH NUMBER TO RETRIEVE A DESTINATION (page 6-37)
ENTERING AN ADDRESS MANUALLY (page 6-38)
SPECIFYING A NETWORK FOLDER (page 6-39)
RETRIEVING A DESTINATION FROM A GLOBAL ADDRESS BOOK (page 6-41)
RETRIEVING A DESTINATION FROM A MOBILE ADDRESS BOOK (page 6-43)
USING A TRANSMISSION LOG TO RESEND (page 6-45)
When in fax mode, enter the destination number.
ENTERING A DESTINATION NUMBER USING THE NUMERIC KEYS (page 5-11)
RETRIEVING A DESTINATION FROM AN ADDRESS BOOK (page 5-12)
USING A SEARCH NUMBER TO RETRIEVE A DESTINATION (page 5-15)
RETRIEVING A DESTINATION FROM A GLOBAL ADDRESS BOOK (page 5-16)
RETRIEVING A DESTINATION FROM A MOBILE ADDRESS BOOK (page 6-43)
USING A TRANSMISSION LOG TO RESEND (page 5-20)
4
Tap the [Job Build] key.
A checkmark appears on the icon.
![SHARP BP-50C45 - Tap the [Job Build] key. - 1](/content/2026/06/1367452/images/8cee50f76c83c65800a6dd00806bcd3901cf136353840d43f0125cdbe92fb873.jpg)
If you are performing Scan to E-mail, tap the [Others] key and then tap the [Job Build] key.
![SHARP BP-50C45 - Tap the [Job Build] key. - 2](/content/2026/06/1367452/images/381952f473971e8cd57b98bc5150b141fe60a9c8b2b7f78fabc06f241c231b18.jpg)
To cancel the job build setting:
Tap the [Job Build] key to uncheck it.
5
Change settings as needed.
6
Tap the [Start] key to scan the first original page.
7
Place the next set of originals and tap the [Start] key.
Repeat until all originals have been scanned.
![SHARP BP-50C45 - Place the next set of originals and tap the [Start] key. - 1](/content/2026/06/1367452/images/ca7c7a4b79336c229c16e1643e8f634b312c67e69c44094b1ee31facbe59b01a.jpg)
- If needed, tap [Change Setting] before tapping the [Start] key, and change the original scan settings and send settings for the next original. The setting changes will be applied to the next job.
- If you tap the [Preview] key, you cannot scan additional pages.
![SHARP BP-50C45 - Place the next set of originals and tap the [Start] key. - 2](/content/2026/06/1367452/images/d2d64f7c578319d8201c71bad5dbcdc1f0cc1702cef0af9613eda89f1b471a35.jpg)
To cancel scanning:
Tap the [CA] key. All the settings including scanned data will be cleared.
8
Tap the [Read-End] key.
![SHARP BP-50C45 - Tap the [Read-End] key. - 1](/content/2026/06/1367452/images/1227c0c2b40494b6f825b996b6102dbfbcc9fbdca0e73e50e504fbb6ad4b1953.jpg)
When in fax mode, if no action is taken for one minute after the confirmation screen appears, scanning automatically ends and the transmission is reserved.
![SHARP BP-50C45 - Tap the [Read-End] key. - 2](/content/2026/06/1367452/images/a2d503ff477c6487cac6cadceda56b862957485d583ea8d37f5df892fc2b34af.jpg)
To change the time until automatic send:
In "Settings (administrator)", select [System Settings] → [Image Send Settings] → [Common Settings] → [Condition Settings] → [Job Auto Start Time During Scanning].
SCANNING AND SENDING AN ORIGINAL AS SEPARATE PAGES
SCANNING AN ORIGINAL AS TWO SEPARATE PAGES (DUAL PAGE SCAN)
The left and right sides of an original are scanned as two separate pages. This function is useful when you wish to successively scan each page of a book or other bound document.
When using dual page scan, the original must be placed on the document glass.

Original scan size Transmitted image
A3 (11" x 17") x 1 page A4 (8-1/2" x 11") x 2 pages

- This function is available when the original size setting is set to [Auto].
- Note that "Centre Erase" and "Edge+Centre Erase" cannot be used.
1

Place the original on the document glass.
DOCUMENT GLASS (page 1-34)
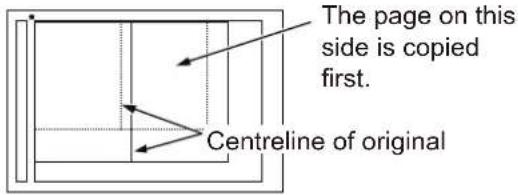
2
Tap the mode display to switch to the initial screen of each mode.
CHANGING MODES (page 2-10)
3
Specify the destination.
RETRIEVING A DESTINATION FROM AN ADDRESS BOOK (page 6-33)
VIEWING A LIST OF THE SELECTED DESTINATIONS (page 6-36)
USING A SEARCH NUMBER TO RETRIEVE A DESTINATION (page 6-37)
ENTERING AN ADDRESS MANUALLY (page 6-38)
SPECIFYING A NETWORK FOLDER (page 6-39)
RETRIEVING A DESTINATION FROM A GLOBAL ADDRESS BOOK (page 6-41)
RETRIEVING A DESTINATION FROM A MOBILE ADDRESS BOOK (page 6-43)
USING A TRANSMISSION LOG TO RESEND (page 6-45)
When in fax mode, enter the destination number.
ENTERING A DESTINATION NUMBER USING THE NUMERIC KEYS (page 5-11)
RETRIEVING A DESTINATION FROM AN ADDRESS BOOK (page 5-12)
USING A SEARCH NUMBER TO RETRIEVE A DESTINATION (page 5-15)
RETRIEVING A DESTINATION FROM A GLOBAL ADDRESS BOOK (page 5-16)
RETRIEVING A DESTINATION FROM A MOBILE ADDRESS BOOK (page 6-43)
USING A TRANSMISSION LOG TO RESEND (page 5-20)
4
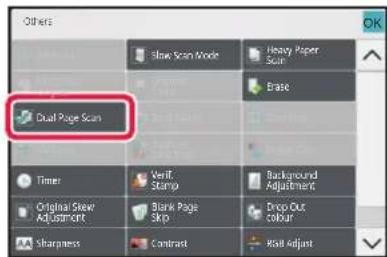
Tap the [Others] key, and tap the [Dual Page Scan] key.
A checkmark appears on the icon.
After the settings are completed, tap the [Back] key.
![SHARP BP-50C45 - Tap the [Others] key, and tap the [Dual Page Scan] key. - 1](/content/2026/06/1367452/images/de3bd04744a660888a3efe8e0375dd9522ee7bd5733cd81a09cd9f2d2777bfbd.jpg)
To cancel the dual page scan setting
Tap the [Dual Page Scan] key to uncheck it.
5
Tap the [Start] key to start scanning of the original.
When scanning finishes, place the next original and tap the [Start] key.
Repeat until all pages have been scanned and then tap the [Read-End] key.
A beep will sound to indicate that transmission has ended.
SPLITTING A PAMPHLET BY PAGE AND TRANSMITTING THE PAGES SUCCESSIVELY (BOOK DIVIDE)
The opened pages of a saddle-stitch pamphlet are split by page according to actual page order before transmission. When using this function, you do not need to sort the original pages to be sent.
![graph TD A["Receipts"] --> B["File 8"] B --> C["File 1"] B --> D["File 6"] B --> E["File 3"] C --> F["File 2"] F --> G["File 1"] G --> H["File 2"] H --> I["File 3"] H --> J["File 4"] H --> K["File 5"] H --> L["File 6"] H --> M["File 7"] H --> N["File 8"]](/content/2026/06/1367452/images/922e14544dba5f996fbcf76357302dac94b3690c68f5b245a704812e6ec032bc.jpg)

This function can be enabled when the original size setting is set to [Auto].

• The document glass is not available for this function. - Book Divide is not possible when "Settings (administrator)" - [System Settings] → [Common Settings] → [Device Control] → [Condition Settings] or [Enable/Disable Settings] → [Disabling of Document Feeder] is enabled.
1
Place the original in the document feeder tray of the automatic document feeder.
When in fax mode, then after completing this procedure, proceed to Step 3. AUTOMATIC DOCUMENT FEEDER (page 1-30)
2
Tap the mode display to switch to the initial screen of each mode. CHANGING MODES (page 2-10)
3
Specify the destination.
RETRIEVING A DESTINATION FROM AN ADDRESS BOOK (page 6-33)
VIEWING A LIST OF THE SELECTED DESTINATIONS (page 6-36)
USING A SEARCH NUMBER TO RETRIEVE A DESTINATION (page 6-37)
ENTERING AN ADDRESS MANUALLY (page 6-38)
SPECIFYING A NETWORK FOLDER (page 6-39)
RETRIEVING A DESTINATION FROM A GLOBAL ADDRESS BOOK (page 6-41)
RETRIEVING A DESTINATION FROM A MOBILE ADDRESS BOOK (page 6-43)
USING A TRANSMISSION LOG TO RESEND (page 6-45)
When in fax mode, enter the destination number.
ENTERING A DESTINATION NUMBER USING THE NUMERIC KEYS (page 5-11)
RETRIEVING A DESTINATION FROM AN ADDRESS BOOK (page 5-12)
USING A SEARCH NUMBER TO RETRIEVE A DESTINATION (page 5-15)
RETRIEVING A DESTINATION FROM A GLOBAL ADDRESS BOOK (page 5-16)
RETRIEVING A DESTINATION FROM A MOBILE ADDRESS BOOK (page 6-43)
USING A TRANSMISSION LOG TO RESEND (page 5-20)
4
Tap the [Others] key, and tap the [Book Divide] key.
5

Select the binding edge of the pamphlet original.
After the settings are completed, tap the [Back] key in sequence.

Check the preview image displayed on the screen, and make sure that the binding edge is correct.

To cancel the Book Divide setting:
Tap the [Off] key.
6
Tap the [Start] key to start scanning of the original.
A beep will sound to indicate that scanning and transmission have ended.
ADJUSTING COLOURS AND SHADING
ADJUSTING THE BACKGROUND BY MAKING LIGHT AREAS OF THE ORIGINAL DARKER OR LIGHTER (BACKGROUND ADJUSTMENT)
You can adjust the background by making light areas of the original darker or lighter.
![graph LR A["House with roof"] --> B["Light Area"] B --> C["Adjust light areas in this way."] D["House with roof"] --> E["Light Area"] E --> F["Level [-"]] G["Light Area"] --> H["Level [+"]]](/content/2026/06/1367452/images/844849f10db23a661fdee7a87b62f6045cd8f6f95dab678d2f05c1ff2b58c7c1.jpg)
[+] makes the background darker. [-] makes the background lighter.

This function cannot be used in Internet fax mode.
1
Place the original.
Place the original in the document feeder tray of the automatic document feeder, or on the document glass.
AUTOMATIC DOCUMENT FEEDER (page 1-30)
DOCUMENT GLASS (page 1-34)
2
Tap the mode display to switch to the initial screen of each mode.
CHANGING MODES (page 2-10)
3
Specify the destination.
RETRIEVING A DESTINATION FROM AN ADDRESS BOOK (page 6-33)
VIEWING A LIST OF THE SELECTED DESTINATIONS (page 6-36)
USING A SEARCH NUMBER TO RETRIEVE A DESTINATION (page 6-37)
ENTERING AN ADDRESS MANUALLY (page 6-38)
SPECIFYING A NETWORK FOLDER (page 6-39)
RETRIEVING A DESTINATION FROM A GLOBAL ADDRESS BOOK (page 6-41)
RETRIEVING A DESTINATION FROM A MOBILE ADDRESS BOOK (page 6-43)
USING A TRANSMISSION LOG TO RESEND (page 6-45)
4
Tap the [Others] key, and tap the [Background Adjustment] key.
5

Tap or slide the slider to adjust the range to be suppressed.
After the settings are completed, tap and [Back] key in sequence.

To cancel the background adjustment setting:
Tap the [Off] key.
6
Tap the [Start] key to start scanning of the original.
- If you inserted the original pages in the document feeder tray, all pages are scanned. A beep will sound to indicate that scanning and transmission have ended.
- When you place the original on the document glass, scan each page one at a time. When scanning finishes, place the next original and tap the [Start] key. A beep will sound to indicate that transmission has ended.
![SHARP BP-50C45 - Tap the [Start] key to start scanning of the original. - 1](/content/2026/06/1367452/images/011eedd4235823c08580669e5baa50d7981ee136fa8e77fdca15005637526bfa.jpg)
- You can tap the [Preview] key to check a preview of the image before sending an image. For more information, see "CHECKING THE IMAGE TO BE TRANSMITTED (page 6-93)". However, settings for this function cannot be changed in the preview screen.
- When the colour mode setting is [Mono2], the background adjustment function will not operate.
ADDING CONTRAST TO THE SCANNED ORIGINAL BEFORE TRANSMISSION (CONTRAST)
![graph LR A["House Icon"] --> B["House Icon with chimney"] style A fill:#f9f,stroke:#333 style B fill:#bbf,stroke:#333](/content/2026/06/1367452/images/078677e4153eef481bb2f8b65f6b6dc9f414480181c954c5dbdf61e35e5d04aa.jpg)

This function cannot be used in Internet fax mode.
1
Place the original.
Place the original in the document feeder tray of the automatic document feeder, or on the document glass. AUTOMATIC DOCUMENT FEEDER (page 1-30) DOCUMENT GLASS (page 1-34)
2
Tap the mode display to switch to the initial screen of each mode. CHANGING MODES (page 2-10)
3
Specify the destination.
RETRIEVING A DESTINATION FROM AN ADDRESS BOOK (page 6-33) VIEWING A LIST OF THE SELECTED DESTINATIONS (page 6-36) USING A SEARCH NUMBER TO RETRIEVE A DESTINATION (page 6-37) ENTERING AN ADDRESS MANUALLY (page 6-38) SPECIFYING A NETWORK FOLDER (page 6-39) RETRIEVING A DESTINATION FROM A GLOBAL ADDRESS BOOK (page 6-41) RETRIEVING A DESTINATION FROM A MOBILE ADDRESS BOOK (page 6-43) USING A TRANSMISSION LOG TO RESEND (page 6-45)
4
Tap the [Others] key, and tap the [Contrast] key.
5

Tap or slide the slider to adjust the contrast level.
After the settings are completed, tap the [Back] key in sequence.

To cancel the contrast settings: Tap the [Off] key.
6
Tap the [Start] key to start scanning of the original.
- If you inserted the original pages in the document feeder tray, all pages are scanned.
A beep will sound to indicate that scanning and transmission have ended.
- When you place the original on the document glass, scan each page one at a time.
When scanning finishes, place the next original and tap the [Start] key. Repeat the procedure until all pages have been scanned and then tap the [Read-End] key.
A beep will sound to indicate that scanning and transmission have ended.
![SHARP BP-50C45 - Tap the [Start] key to start scanning of the original. - 1](/content/2026/06/1367452/images/6d4d3a589e7b7c1e36f98563d3b938a4f55b4f560c9e9d4570118db3b6dd5139.jpg)
You can tap the [Preview] key to check a preview of the image before sending an image. For more information, see "CHECKING THE IMAGE TO BE TRANSMITTED (page 6-93)". However, settings for this function cannot be changed in the preview screen.
ENHANCING THE OUTLINE OF THE SCANNED ORIGINAL BEFORE TRANSMISSION (SHARPNESS)

This function cannot be used in Internet fax mode.
1
Place the original.
Place the original in the document feeder tray of the automatic document feeder, or on the document glass. AUTOMATIC DOCUMENT FEEDER (page 1-30) DOCUMENT GLASS (page 1-34)
2
Tap the mode display to switch to the initial screen of each mode.
CHANGING MODES (page 2-10)
3
Specify the destination.
RETRIEVING A DESTINATION FROM AN ADDRESS BOOK (page 6-33) VIEWING A LIST OF THE SELECTED DESTINATIONS (page 6-36) USING A SEARCH NUMBER TO RETRIEVE A DESTINATION (page 6-37) ENTERING AN ADDRESS MANUALLY (page 6-38) SPECIFYING A NETWORK FOLDER (page 6-39) RETRIEVING A DESTINATION FROM A GLOBAL ADDRESS BOOK (page 6-41) RETRIEVING A DESTINATION FROM A MOBILE ADDRESS BOOK (page 6-43) USING A TRANSMISSION LOG TO RESEND (page 6-45)
4
Tap the [Others] key, and tap the [Sharpness] key.
5

Tap or slide the slider to adjust the sharpness.
After the settings are completed, tap the [Back] key in sequence.

To cancel the sharpness setting:
Tap the [Off] key.
6
Tap the [Start] key to start scanning of the original.
- If you inserted the original pages in the document feeder tray, all pages are scanned. A beep will sound to indicate that scanning and transmission have ended.
- When you place the original on the document glass, scan each page one at a time.
When scanning finishes, place the next original and tap the [Start] key. Repeat the procedure until all pages have been scanned and then tap the [Read-End] key.
A beep will sound to indicate that scanning and transmission have ended.
![SHARP BP-50C45 - Tap the [Start] key to start scanning of the original. - 1](/content/2026/06/1367452/images/d90155f6d64f7c6a8d14f94fb1ce5c074984ff35d1b73529a77c39abd1ef3b4d.jpg)
You can tap the [Preview] key to check a preview of the image before sending an image. For more information, see "CHECKING THE IMAGE TO BE TRANSMITTED (page 6-93)". However, settings for this function cannot be changed in the preview screen.
REMOVING CHROMATIC COLOURS FROM THE SCANNED ORIGINAL BEFORE TRANSMISSION (DROP OUT COLOUR)

This function cannot be used in Internet fax mode.
Place the original.
Place the original in the document feeder tray of the automatic document feeder, or on the document glass. AUTOMATIC DOCUMENT FEEDER (page 1-30) DOCUMENT GLASS (page 1-34)
Tap the mode display to switch to the initial screen of each mode.
CHANGING MODES (page 2-10)
Specify the destination.
RETRIEVING A DESTINATION FROM AN ADDRESS BOOK (page 6-33) VIEWING A LIST OF THE SELECTED DESTINATIONS (page 6-36) USING A SEARCH NUMBER TO RETRIEVE A DESTINATION (page 6-37) ENTERING AN ADDRESS MANUALLY (page 6-38) SPECIFYING A NETWORK FOLDER (page 6-39) RETRIEVING A DESTINATION FROM A GLOBAL ADDRESS BOOK (page 6-41) RETRIEVING A DESTINATION FROM A MOBILE ADDRESS BOOK (page 6-43) USING A TRANSMISSION LOG TO RESEND (page 6-45)
Tap the [Others] key, and then tap the [Drop Out Colour] key.
A checkmark appears on the icon. After the settings are completed, tap the [Back] key.
![SHARP BP-50C45 - Tap the [Others] key, and then tap the [Drop Out Colour] key. - 1](/content/2026/06/1367452/images/645b2d4821a932e3449825965e90a9e0a1ab1b9c7ba3d13063b7b5e01bd6213c.jpg)
To cancel the drop out colour setting, tap the [Drop Out Colour] key to uncheck it.
5
Tap the [Start] key to start scanning of the original.
- If you inserted the original pages in the document feeder tray, all pages are scanned.
A beep will sound to indicate that scanning and transmission have ended.
- When you place the original on the document glass, scan each page one at a time.
When scanning finishes, place the next original and tap the [Start] key. Repeat the procedure until all pages have been scanned and then tap the [Read-End] key.
A beep will sound to indicate that scanning and transmission have ended.
![SHARP BP-50C45 - Tap the [Start] key to start scanning of the original. - 1](/content/2026/06/1367452/images/cbdb28971b5b74d26617b32a28c8c272187bbb87abf38b4aaa2224e46454f13c.jpg)
You can tap the [Preview] key to check a preview of the image before sending an image. For more information, see "CHECKING THE IMAGE TO BE TRANSMITTED (page 6-93)".
Tap the [Change Setting] key in the scan-end confirmation screen to change the exposure, resolution, scan size, and send size. (However, when scanning each even-numbered page of the original, only the exposure can be changed.)
ADJUSTING RED/GREEN/BLUE (RGB Adjust)
This function heightens or lightens any one of the three colour components R (red), G (green), and B (blue).
![graph TD A["Red (Red)"] --> B["G (Green)"] A --> C["B (Blue)"] B --> D["Green"] B --> E["Blue"] C --> F["Blue"] D --> G["Red (Red)"] E --> H["Green (Green)"] F --> I["Blue (Blue)"]](/content/2026/06/1367452/images/312883f2728cd28d0572c3f0299c6b3ac605b81d63774da66b9e59491b228dbc.jpg)
1
Place the original.
Place the original in the document feeder tray of the automatic document feeder, or on the document glass. AUTOMATIC DOCUMENT FEEDER (page 1-30) DOCUMENT GLASS (page 1-34)
2
Tap the mode display to switch to the initial screen of each mode.
CHANGING MODES (page 2-10)
3
Specify the destination.
RETRIEVING A DESTINATION FROM AN ADDRESS BOOK (page 6-33) VIEWING A LIST OF THE SELECTED DESTINATIONS (page 6-36) USING A SEARCH NUMBER TO RETRIEVE A DESTINATION (page 6-37) ENTERING AN ADDRESS MANUALLY (page 6-38) SPECIFYING A NETWORK FOLDER (page 6-39) RETRIEVING A DESTINATION FROM A GLOBAL ADDRESS BOOK (page 6-41) RETRIEVING A DESTINATION FROM A MOBILE ADDRESS BOOK (page 6-43) USING A TRANSMISSION LOG TO RESEND (page 6-45)
4
Tap the [Others] key, and tap the [RGB Adjust] key.
5

Tap of the colour you want to adjust or slide the slider to adjust the colouring.
After the settings are completed, tap the [Back] key.

To cancel the RGB Adjust setting:
Tap the [Off] key.
6
Tap the [Start] key to start scanning of the original.
- If you inserted the original pages in the document feeder tray, all pages are scanned. A beep will sound to indicate that scanning and transmission have ended.
- When you place the original on the document glass, scan each page one at a time. When scanning finishes, place the next original and tap the [Start] key. Repeat the procedure until all pages have been scanned and then tap the [Read-End] key. A beep will sound to indicate that scanning and transmission have ended.
![SHARP BP-50C45 - Tap the [Start] key to start scanning of the original. - 1](/content/2026/06/1367452/images/3cbffda32b5edb1c21438e306c521764576b3925f7ddbe812ed16269e5957e9a.jpg)
You can tap the [Preview] key to check a preview of the image before sending an image. For more information, see "CHECKING THE IMAGE TO BE TRANSMITTED (page 6-93)".
Tap the [Change Setting] key in the scan-end confirmation screen to change the exposure, resolution, scan size, and send size. (However, when scanning each even-numbered page of the original, only the exposure can be changed.)
SCANNING ORIGINALS
ERASING PERIPHERAL SHADOWS ON THE IMAGE (ERASE)
When scanning thick originals or books, erase any peripheral shadows that may be produced on the image.
Scanning a thick book
When a bound document is scanned, shadows appear in the peripheral areas and around the binding portion of the scanned image.
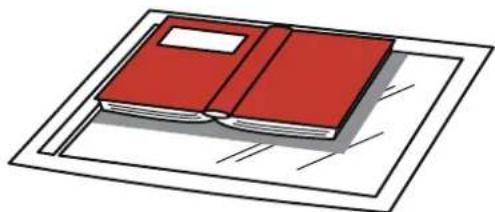

| Not using the erase function | Using the erase function |
 | 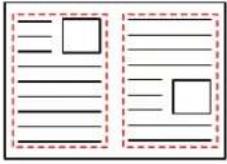 |
| Shadows appear in the image. | No shadows appear. |
Erase modes
Outer Frame Erase, Centre Erase, Edge + Centre Erase, Side Erase


- This function erases the parts of the image where shadows tend to form, but does not detect shadows and erase only the shadows.
- If a ratio setting is used in combination with an erase setting, the erase width will change according to the selected ratio. For example, if you set an erase width of 10 mm (1/2") and reduce the image to 70% before scanning it, the erase width will be reduced to 7 mm (3/8").
- When the erase setting is selected, the image orientation will be forcibly portrait.

To change the default erase width setting:
In "Settings (administrator)", select [System Settings] → [Image Send Settings] → [Common Settings] → [Condition Settings] → [Erase Width Adjustment].
The width can be set from 0 mm to 20 mm (0" to 1"). The factory default setting is 10 mm (1/2"). The setting changed here will apply to [System Settings] → [Copy Settings] → [Condition Settings] → [Erase Width Adjustment] in "Settings".
1
Place the original.
Place the original in the document feeder tray of the automatic document feeder, or on the document glass.
When in fax mode, then after completing this procedure, proceed to Step 3.
AUTOMATIC DOCUMENT FEEDER (page 1-30)
DOCUMENT GLASS (page 1-34)
2
Tap the mode display to switch to the initial screen of each mode.
CHANGING MODES (page 2-10)
3
Specify the destination.
RETRIEVING A DESTINATION FROM AN ADDRESS BOOK (page 6-33)
VIEWING A LIST OF THE SELECTED DESTINATIONS (page 6-36)
USING A SEARCH NUMBER TO RETRIEVE A DESTINATION (page 6-37)
ENTERING AN ADDRESS MANUALLY (page 6-38)
SPECIFYING A NETWORK FOLDER (page 6-39)
RETRIEVING A DESTINATION FROM A GLOBAL ADDRESS BOOK (page 6-41)
RETRIEVING A DESTINATION FROM A MOBILE ADDRESS BOOK (page 6-43)
USING A TRANSMISSION LOG TO RESEND (page 6-45)
When in fax mode, enter the destination number.
ENTERING A DESTINATION NUMBER USING THE NUMERIC KEYS (page 5-11)
RETRIEVING A DESTINATION FROM AN ADDRESS BOOK (page 5-12)
USING A SEARCH NUMBER TO RETRIEVE A DESTINATION (page 5-15)
RETRIEVING A DESTINATION FROM A GLOBAL ADDRESS BOOK (page 5-16)
RETRIEVING A DESTINATION FROM A MOBILE ADDRESS BOOK (page 6-43)
USING A TRANSMISSION LOG TO RESEND (page 5-20)
4
Tap the [Others] key, and tap the [Erase] key.
5

Tap the checkbox of the edge that you wish to erase, and specify the erase position.
Check that the tapped checkbox is set to ✓ If the [Outer Frame] key is tapped, the [Up], [Down], [Left], and [Right] checkboxes are set to ✓ If the [Specify Frame+Centre] key is tapped, all the checkboxes are set to ✓

Specify the erase edge on the reverse side when erasing edges of one to three sides of Up, Down, Left, and Right on the front side to scan a 2-sided original.
- If the [Reverse Erase Position of The Back Face] checkbox is set to √, the edge in the position opposite to the erased edge on the front side will be erased.
- If the [Reverse Erase Position of The Back Face] checkbox is set to , the edge in the same position as on the front side will be erased.
- [Reverse Erase Position of The Back Face] is not possible when "Settings (administrator)" - [System Settings] → [Common Settings] → [Device Control] → [Condition Settings] or [Enable/Disable Settings] → [Disabling of Document Feeder] is enabled.
6
Specify the erase width.
After the settings are completed, tap and [Back] keys in sequence.

- Tap the numeric value display indicating the margin shift area on the front side or reverse side, and enter the area using the numeric keys.
- To quickly set the area, first specify a value close to the desired value by the numeric keys, then adjust it with - + .

To cancel the erase setting:
Tap the [Clear] key.
7
Tap the [Start] key to start scanning of the original.
- If you inserted the original pages in the document feeder tray, all pages are scanned. A beep will sound to indicate that scanning and transmission have ended.
- When you place the original on the document glass, scan each page one at a time. When scanning finishes, place the next original and tap the [Start] key. Repeat until all pages have been scanned and then tap the [Read-End] key. A beep will sound to indicate that transmission has ended.
![SHARP BP-50C45 - Tap the [Start] key to start scanning of the original. - 1](/content/2026/06/1367452/images/b7492fb915403ad8d509edd18109f3a35d653adf9aef647922f480819d12bb76.jpg)
You can tap the [Preview] key to check a preview of the image before sending an image. For more information, see "CHECKING THE IMAGE TO BE TRANSMITTED (page 6-93)" (When in fax mode, "CHECKING THE IMAGE TO BE TRANSMITTED (page 5-29)").
SCANNING A THIN ORIGINAL (SLOW SCAN MODE)
Use this function when you wish to scan thin originals using the automatic document feeder. This function helps prevent thin originals from misfeeding.


- When slow scan mode is selected, 2-sided scanning is not possible.
- Slow scan mode is not possible when "Settings (administrator)" - [System Settings] → [Common Settings] → [Device Control] → [Condition Settings] or [Enable/Disable Settings] → [Disabling of Document Feeder] is enabled.
1
Place the original in the document feeder tray of the automatic document feeder.
When in fax mode, after completing this procedure, proceed to Step 3.
Adjust the original guides slowly.
AUTOMATIC DOCUMENT FEEDER (page 1-30)

If the originals are inserted with too much force, they may crumple and misfeed.
2
Tap the mode display to switch to the initial screen of each mode.
CHANGING MODES (page 2-10)
3
Specify the destination.
RETRIEVING A DESTINATION FROM AN ADDRESS BOOK (page 6-33)
VIEWING A LIST OF THE SELECTED DESTINATIONS (page 6-36)
USING A SEARCH NUMBER TO RETRIEVE A DESTINATION (page 6-37)
ENTERING AN ADDRESS MANUALLY (page 6-38)
SPECIFYING A NETWORK FOLDER (page 6-39)
RETRIEVING A DESTINATION FROM A GLOBAL ADDRESS BOOK (page 6-41)
RETRIEVING A DESTINATION FROM A MOBILE ADDRESS BOOK (page 6-43)
USING A TRANSMISSION LOG TO RESEND (page 6-45)
When in fax mode, enter the destination number.
ENTERING A DESTINATION NUMBER USING THE NUMERIC KEYS (page 5-11)
RETRIEVING A DESTINATION FROM AN ADDRESS BOOK (page 5-12)
USING A SEARCH NUMBER TO RETRIEVE A DESTINATION (page 5-15)
RETRIEVING A DESTINATION FROM A GLOBAL ADDRESS BOOK (page 5-16)
RETRIEVING A DESTINATION FROM A MOBILE ADDRESS BOOK (page 6-43)
USING A TRANSMISSION LOG TO RESEND (page 5-20)
4
Tap the [Others] key, and tap the [Slow Scan Mode] key.
A checkmark appears on the icon.
After the settings are completed, tap the [Back] key.
![SHARP BP-50C45 - Tap the [Others] key, and tap the [Slow Scan Mode] key. - 1](/content/2026/06/1367452/images/97e91659a87ca21d1ed13128eaee74343d2f161721c4815b2ba5bf5e44196e42.jpg)
To cancel the slow scan Mode setting
Tap the [Slow Scan Mode] key to uncheck it.
5
Tap the [Start] key to start scanning of the original.
A beep will sound to indicate that scanning and transmission have ended.
![SHARP BP-50C45 - Tap the [Start] key to start scanning of the original. - 1](/content/2026/06/1367452/images/2050aa6d802135c6e1fd03fbb38b6504b3578384a23da3de6ddf1a9d21f0628b.jpg)
Tap the [Preview] key to check the preview of an image before sending a fax. For more information, see "CHECKING THE IMAGE TO BE TRANSMITTED (page 6-93)" (When in fax mode, "CHECKING THE IMAGE TO BE TRANSMITTED (page 5-29)"). However, settings for this function cannot be changed in the preview screen.
SCANNING A HEAVY ORIGINAL (HEAVY PAPER SCAN)
Use this function when you wish to scan heavy originals using the automatic document feeder. This function helps prevent heavy originals from misfeeding.


- This function cannot be used for BP-50C26/BP-50C31/BP-50C36/BP-50C45/BP-50C55/BP-50C65/BP-60C31/BP-60C36/BP-60C45.
- Heavy paper scan is not possible when "Settings (administrator)" - [System Settings] → [Common Settings] → [Device Control] → [Condition Settings] or [Enable/Disable Settings] → [Disabling of Document Feeder] is enabled.
1
Place the original in the document feeder tray of the automatic document feeder.
When in fax mode, then after completing this procedure, proceed to Step 3. Adjust the original guides slowly. AUTOMATIC DOCUMENT FEEDER (page 1-30)

If the originals are inserted with too much force, they may crumple and misfeed.
2
Tap the mode display to switch to the initial screen of each mode. CHANGING MODES (page 2-10)
3
Specify the destination.
RETRIEVING A DESTINATION FROM AN ADDRESS BOOK (page 6-33)
VIEWING A LIST OF THE SELECTED DESTINATIONS (page 6-36)
USING A SEARCH NUMBER TO RETRIEVE A DESTINATION (page 6-37)
ENTERING AN ADDRESS MANUALLY (page 6-38)
SPECIFYING A NETWORK FOLDER (page 6-39)
RETRIEVING A DESTINATION FROM A GLOBAL ADDRESS BOOK (page 6-41)
RETRIEVING A DESTINATION FROM A MOBILE ADDRESS BOOK (page 6-43)
USING A TRANSMISSION LOG TO RESEND (page 6-45)
When in fax mode, enter the destination number.
ENTERING A DESTINATION NUMBER USING THE NUMERIC KEYS (page 5-11)
RETRIEVING A DESTINATION FROM AN ADDRESS BOOK (page 5-12)
USING A SEARCH NUMBER TO RETRIEVE A DESTINATION (page 5-15)
RETRIEVING A DESTINATION FROM A GLOBAL ADDRESS BOOK (page 5-16)
RETRIEVING A DESTINATION FROM A MOBILE ADDRESS BOOK (page 6-43)
USING A TRANSMISSION LOG TO RESEND (page 5-20)
4
Tap the [Others] key, and tap the [Heavy Paper Scan] key.
A checkmark appears on the icon.
After the settings are completed, tap the [Back] key.
![SHARP BP-50C45 - Tap the [Others] key, and tap the [Heavy Paper Scan] key. - 1](/content/2026/06/1367452/images/d7bb4db167c9a8b3743fb6e81a7663e1d527b063dd6296278dfa34d1ce06ca5b.jpg)
To cancel the Heavy Paper Scan setting
Tap the [Heavy Paper Scan] key to uncheck it.
5
Tap the [Start] key to start scanning of the original.
A beep will sound to indicate that scanning and transmission have ended.
![SHARP BP-50C45 - Tap the [Start] key to start scanning of the original. - 1](/content/2026/06/1367452/images/0d658c128d139d4e50491a94a5d14fd3b63f82acb9d1def508135d995d6607f4.jpg)
Tap the [Preview] key to check the preview of an image before sending a fax. For more information, see "CHECKING
THE IMAGE TO BE TRANSMITTED (page 6-93)" (When in fax mode, "CHECKING THE IMAGE TO BE
TRANSMITTED (page 5-29)"). However, settings for this function cannot be changed in the preview screen.
ELIMINATING BLANK PAGES FROM A TRANSMISSION (BLANK PAGE SKIP)
If the scanned original contains blank pages, this function skips them to send only non-blank pages.
The machine detects blank pages, enabling you to skip useless blank sheets without checking an original.
![graph LR A["Document with horizontal lines"] --> B["Document with vertical lines"] B --> C["Output: Arrow"]](/content/2026/06/1367452/images/974998c7ef0c87db8d94c16c9258d3ebd55f8cc21413146ee1b186f80ddecff9.jpg)

- If an original of which one side is blank is scanned, blank pages are skipped for 2-sided sending.
- In a broadcast transmission to destinations including fax and Internet fax destinations, this function is applied to scan mode destinations only.
- Depending on the original, some pages that are not blank may be detected as blank pages and thus not being sent, and some pages that are blank may not be detected as blank and thus sent.

• This function cannot be used in Internet fax mode. - If the [Send Same Image as Fax Address] key is tapped, this function is cancelled if a fax address is specified for the destination.

To display the blank page skip confirmation message:
Select [System Settings] → [Common Settings] → [Device Control] → [Condition Settings] → [Display Blank Page Skip Confirmation Message].
1
Place the original.
Place the original in the document feeder tray of the automatic document feeder, or on the document glass.
AUTOMATIC DOCUMENT FEEDER (page 1-30)
DOCUMENT GLASS (page 1-34)
2
Tap the mode display to switch to the initial screen of each mode.
CHANGING MODES (page 2-10)
Specify the destination.
RETRIEVING A DESTINATION FROM AN ADDRESS BOOK (page 6-33)
VIEWING A LIST OF THE SELECTED DESTINATIONS (page 6-36)
USING A SEARCH NUMBER TO RETRIEVE A DESTINATION (page 6-37)
ENTERING AN ADDRESS MANUALLY (page 6-38)
SPECIFYING A NETWORK FOLDER (page 6-39)
RETRIEVING A DESTINATION FROM A GLOBAL ADDRESS BOOK (page 6-41)
RETRIEVING A DESTINATION FROM A MOBILE ADDRESS BOOK (page 6-43)
USING A TRANSMISSION LOG TO RESEND (page 6-45)
Tap the [Others] key, and tap the [Blank Page Skip] key.
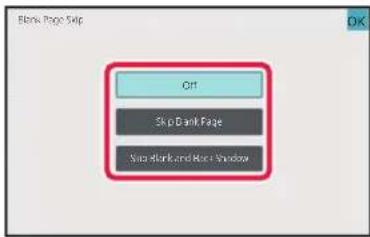
Tap the [Skip Blank Page] or [Skip Blank and Back Shadow] key.
After the settings are completed, tap and [Back] keys in sequence.
![SHARP BP-50C45 - Tap the [Skip Blank Page] or [Skip Blank and Back Shadow] key. - 1](/content/2026/06/1367452/images/f703d971d56784f223323715bc7f627a588c4991320a6268f7515fd786c64061.jpg)
To cancel the Blank Page Skip setting: Tap the [Off] key.
6
Tap the [Start] key to start scanning of the original.
A beep will sound to indicate that scanning has ended.
![SHARP BP-50C45 - Tap the [Start] key to start scanning of the original. - 1](/content/2026/06/1367452/images/5fadcfa99410441243b248c69c112f869338ff2d3b3404c153c347f0d56fe24a.jpg)
Tap the [Preview] key to check the preview of an image before sending a fax. For more information, see "CHECKING THE IMAGE TO BE TRANSMITTED (page 6-93)".
7

When scanning ends, check the number of original sheets and the number of sheets to be sent and tap the [OK] key to start transmission.
- When Job Build mode is used, the confirmation message will appear after the [Start] key is tapped.
- On the confirmation screen, the number of scanned original sheets appears in (A), the number of scanned sides in (B), and the number of sheets to be sent excluding blank pages in (C). For example, if five original sheets that include two blank pages are scanned by duplex scanning, (A) will show "5", (B) will show "10", and (C) will show "8".
![SHARP BP-50C45 - When scanning ends, check the number of original sheets and the number of sheets to be sent and tap the [OK] key to start transmission. - 1](/content/2026/06/1367452/images/c2b6dfededeb90a74f723225aa4fc6312daba6a43c33672e91050cbf4d910bca.jpg)
If this step is not performed within one minute after the above confirmation screen appears, the scanned image and settings will be cleared and the base screen will reappear.
Scanning will not be completed automatically and the image will not be reserved for transmission.
CHECKING THE NUMBER OF SCANNED ORIGINAL SHEETS BEFORE TRANSMISSION (ORIGINAL COUNT)
Count the number of scanned original sheets and display the count before transmission.
Checking the number of scanned original sheets before transmission helps prevent transmission mistakes.

- The count result is displayed with the number of scanned original sheets, not the number of scanned original pages. For example, when a 2-sided original is transmitted, the number "1" will appear to indicate that one original sheet is transmitted, not "2" to indicate the front-side page and the reverse side page.
- When a broadcast transmission is performed, if the original count function is selected in any of the modes, the function will operate for all destinations.
- The setting should be enabled separately for each mode.
Place originals in the automatic document feeder.
When in fax mode, after completing this procedure, proceed to Step 3. AUTOMATIC DOCUMENT FEEDER (page 1-30)
Tap the remote display to return to the initial screen of each mode!
CHANGING MODES (page 2-10)
Specify the destination.
RETRIEVING A DESTINATION FROM AN ADDRESS BOOK (page 6-33) VIEWING A LIST OF THE SELECTED DESTINATIONS (page 6-36) USING A SEARCH NUMBER TO RETRIEVE A DESTINATION (page 6-37) ENTERING AN ADDRESS MANUALLY (page 6-38) SPECIFYING A NETWORK FOLDER (page 6-39) RETRIEVING A DESTINATION FROM A GLOBAL ADDRESS BOOK (page 6-41) RETRIEVING A DESTINATION FROM A MOBILE ADDRESS BOOK (page 6-43) USING A TRANSMISSION LOG TO RESEND (page 6-45) When in fax mode, enter the destination number. ENTERING A DESTINATION NUMBER USING THE NUMERIC KEYS (page 5-11) RETRIEVING A DESTINATION FROM AN ADDRESS BOOK (page 5-12) USING A SEARCH NUMBER TO RETRIEVE A DESTINATION (page 5-15) RETRIEVING A DESTINATION FROM A GLOBAL ADDRESS BOOK (page 5-16) RETRIEVING A DESTINATION FROM A MOBILE ADDRESS BOOK (page 5-18) USING A TRANSMISSION LOG TO RESEND (page 5-20)
Tap the [Coinc] key, and tap the [Original Setting] key.
A checkmark appears on the icon. After the settings are completed, tap the [Back] key.
![SHARP BP-50C45 - Tap the [Coinc] key, and tap the [Original Setting] key. - 1](/content/2026/06/1367452/images/83d741390ab3921de52c93dc06f27a5b916777ffe5f3f12f7538a31465749481.jpg)
To cancel the original count setting: Tap the [Original Count] key to uncheck it.
Tap the [Start] key to start scanning of the original.
A beep will sound to indicate that scanning has ended.
![SHARP BP-50C45 - Tap the [Start] key to start scanning of the original. - 1](/content/2026/06/1367452/images/7647237b96b5cfb0cc3318ca7168b1426b5e50d04f06c600aaf1720cfc23c996.jpg)
Tap the [Preview] key to check the preview of an image before sending a fax. For more information, see "CHECKING THE IMAGE TO BE TRANSMITTED (page 6-93)" (When in fax mode, "CHECKING THE IMAGE TO BE TRANSMITTED (page 5-29)"). However, settings for this function cannot be changed in the preview screen.
6

Check the number of original sheets.
The number that is displayed is the number of scanned original sheets, not the number of scanned original pages. For example, when 2-sided copying is performed using one original, the number "1" will appear to indicate that one original sheet was scanned, not "2" to indicate the front-side page and the reverse side page.
7
Tap the [Send] key to start transmission.
![SHARP BP-50C45 - Tap the [Send] key to start transmission. - 1](/content/2026/06/1367452/images/41b211dc88dce650618b6e825239a68705869486e9349e7b245f24a433ae47eb.jpg)
If this function is combined with [Job Build], the count result is displayed after the [Read-End] key has been tapped. If this step is not performed within one minute after the above confirmation screen appears, the scanned image and settings will be cleared and the base screen will reappear. Scanning will not be completed automatically and the image will not be reserved for transmission.
![SHARP BP-50C45 - Tap the [Send] key to start transmission. - 2](/content/2026/06/1367452/images/1c5797cb3b181028dddcb00b73a7c66387e0b85f3ec4cccb0ea9b54243a35af3.jpg)
If the displayed number of original sheets is different from the actual number of sheets:
Tap the [Cancel] key and then tap the [OK] key in the message screen to clear all scanned data. Scan settings and destination settings will not be cleared. Insert the original sheets in the document feeder tray again and tap the [Start] key to re-scan.
STAMPING SCANNED ORIGINALS (VERIFICATION STAMP)
This function stamps each original that is scanned using the automatic document feeder, allowing you to verify that all originals were correctly scanned.
An "O" mark is stamped in fluorescent pink on scanned originals.
![graph LR A["Receipt with number 1"] --> B["Printer with printer icon"] B --> C["Verification stamp with red circle"]](/content/2026/06/1367452/images/69321746f97b38d6787debc90214e16621dac81af74366bfc03bab7050e440ba.jpg)

- To use the verification stamp function, the optional stamp unit must be installed.
- When 2-sided originals are used, the front of each original is stamped twice.
- If an error occurs during scanning, an original that was not scanned may be stamped.
- When the "O" mark that is stamped on originals starts to become faint, replace the stamp cartridge. For the procedure for replacing the stamp cartridge, see "REPLACING THE STAMP CARTRIDGE (page 1-80)".
- This function is not possible when "Settings (administrator)" - [System Settings] → [Common Settings] → [Device Control] → [Condition Settings] or [Enable/Disable Settings] → [Disabling of Document Feeder] is enabled.
1
Place originals in the automatic document feeder.
When in fax mode, after completing this procedure, proceed to Step 3. AUTOMATIC DOCUMENT FEEDER (page 1-30)
2
Tap the mode display to switch to the initial screen of each mode.
CHANGING MODES (page 2-10)
3
Specify the destination.
RETRIEVING A DESTINATION FROM AN ADDRESS BOOK (page 6-33) VIEWING A LIST OF THE SELECTED DESTINATIONS (page 6-36) USING A SEARCH NUMBER TO RETRIEVE A DESTINATION (page 6-37) ENTERING AN ADDRESS MANUALLY (page 6-38) SPECIFYING A NETWORK FOLDER (page 6-39) RETRIEVING A DESTINATION FROM A GLOBAL ADDRESS BOOK (page 6-41) RETRIEVING A DESTINATION FROM A MOBILE ADDRESS BOOK (page 6-43) USING A TRANSMISSION LOG TO RESEND (page 6-45) When in fax mode, enter the destination number. ENTERING A DESTINATION NUMBER USING THE NUMERIC KEYS (page 5-11) RETRIEVING A DESTINATION FROM AN ADDRESS BOOK (page 5-12) USING A SEARCH NUMBER TO RETRIEVE A DESTINATION (page 5-15) RETRIEVING A DESTINATION FROM A GLOBAL ADDRESS BOOK (page 5-16) RETRIEVING A DESTINATION FROM A MOBILE ADDRESS BOOK (page 5-18) USING A TRANSMISSION LOG TO RESEND (page 5-20)
4
Tap [Verification Stamp] on the action panel or [Others] key, and tap the [Verif. Stamp] key.
The appropriate icon or checkbox is selected.
If you tap the [Others] key, tap the [Back] key after the settings have been completed.
![SHARP BP-50C45 - Tap [Verification Stamp] on the action panel or [Others] key, and tap the [Verif. Stamp] key. - 1](/content/2026/06/1367452/images/2a7f5efc6e787db1dd4751e79e339c699cba1845bd6a0edf012bb6f36eb9b02f.jpg)
To cancel the verification stamp setting:
Tap [Verification Stamp] on the action panel or the [Others] key, and tap [Verif. Stamp] to clear the checkmark.
5
Tap the [Start] key to start scanning of the original.
A beep will sound to indicate that scanning and transmission have ended.
![SHARP BP-50C45 - Tap the [Start] key to start scanning of the original. - 1](/content/2026/06/1367452/images/c4b31b3fe8d73124a04f7e2f447cdbbd54c1e81707a8303a44a22d2853a1d1e9.jpg)
Tap the [Preview] key to check the preview of an image before sending a fax. For more information, see "CHECKING THE IMAGE TO BE TRANSMITTED (page 6-93)" (When in fax mode, "CHECKING THE IMAGE TO BE TRANSMITTED (page 5-29)"). However, settings for this function cannot be changed in the preview screen.
AUTOMATICALLY ADJUST SKEWED SCAN DATA (Original Skew Adjustment)
When the original is skewed, or when images within the original are skewed, this automatically corrects the skewing, and saves the document.
![graph LR A["Document with header"] --> B["Output with arrow"]](/content/2026/06/1367452/images/91bead6f4a9b39cbf89ca02dc412596b5eafca105e79fecf48bba977e240cc8a.jpg)

- The post-adjustment image is not shown in preview images, and is displayed as it was scanned.
- If adjustment is not required and text and images are on an angle for design reasons, adjustment may still occur automatically.
- If there is little text or image data in the original, this may not be adjusted regardless of the degree of skewing.
- If an Internet fax address is added as a destination, this function will be disabled.
- For card shot, this function cannot be used.
- If [Document Filing] → [Main Folder] → [Property] → [Create PDF for PC Browsing] in System Settings is enabled, this function cannot be used on the document filing function.
- Depending on the degree of skew, correction may not be possible.
1

Place the original.
Place the original in the document feeder tray of the automatic document feeder, or on the document glass. AUTOMATIC DOCUMENT FEEDER (page 1-30) DOCUMENT GLASS (page 1-34)
2
Tap the mode display to switch to the initial screen of each mode.
CHANGING MODES (page 2-10)
3
Specify the destination.
RETRIEVING A DESTINATION FROM AN ADDRESS BOOK (page 6-33) VIEWING A LIST OF THE SELECTED DESTINATIONS (page 6-36) USING A SEARCH NUMBER TO RETRIEVE A DESTINATION (page 6-37) ENTERING AN ADDRESS MANUALLY (page 6-38) SPECIFYING A NETWORK FOLDER (page 6-39) RETRIEVING A DESTINATION FROM A GLOBAL ADDRESS BOOK (page 6-41) RETRIEVING A DESTINATION FROM A MOBILE ADDRESS BOOK (page 6-43) USING A TRANSMISSION LOG TO RESEND (page 6-45)
4
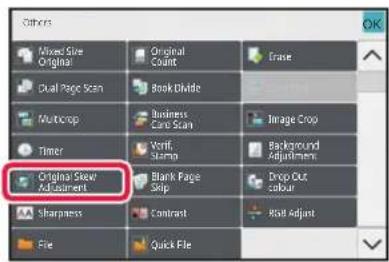
Tap the [Others] key, and tap the [Original Skew Adjustment] key.
A checkmark appears on the icon.
When you have completed the setting, tap the [Back] key.
![SHARP BP-50C45 - Tap the [Others] key, and tap the [Original Skew Adjustment] key. - 1](/content/2026/06/1367452/images/46d0f57b02ec16c8fb9b9c713668e0cfc1d6bf372ee83bf93843548897d95445.jpg)
To cancel the Original Skew Adjustment setting
Tap the [Original Skew Adjustment] key to remove the checkmark.
5
Tap the [Start] key to start scanning of the original.
When scanning finishes, place the next original and tap the [Start] key.
Repeat until all pages have been scanned and then tap the [Read-End] key.
A beep will sound to indicate that transmission has ended.
SPECIFIC FUNCTIONS
ADDING YOUR SENDER INFORMATION TO FAXES (I-FAX OWN ADDRESS SEND)
Your sender information (date, time, sender name, sender address, number of pages) is automatically added to the top of the file you transmit.

This function cannot be used in scan mode or data entry mode.
Example of the sender information printed

(1) Date, time: The date and time of transmission. (2) Sender name: The sender name programmed in the machine. (3) Source Address. (4) Page numbers: Page number/total pages.

- Storing and setting sender information
Date, time: In "Settings", select [System Settings] → [Common Settings] → [Device Control] → [Clock Adjust].
Sender name, sender address: In "Settings (administrator)", select [System Settings] → [Image Send Settings] → [Common Settings] → [Own Number and Name Set] → [Sender Data Registration]. If you intend to use the I-Fax Own Address Send function, be sure to configure this information.
Page numbers: Select whether or not to include page numbers using [System Settings] → [Image Send Settings] → [Internet Fax Settings] → [Send Setting] → [Printing Page Number at Receiver] in "Settings (administrator)".
- Position of sender information
The sender information is printed at the top of the scanned image data. This makes the transmission data longer than the scan size, so it may be reduced or divided onto two pages when printed by the receiving machine.
CHANGING THE PRINT SETTINGS FOR THE TRANSACTION REPORT (TRANSACTION REPORT)
A transaction report is automatically printed out to alert you when an Internet fax transmission fails or when a broadcast transmission is performed.
The transaction report contains a description of the transmission (date, start time, name of destination, time required, number of pages, result, etc.).
▶ INFORMATION APPEARING IN THE RESULT COLUMN (page 6-157)
Transaction reports are printed based on conditions set in the setting mode. Select different conditions for a transmission as required.

This function cannot be used in scan mode or data entry mode.

For a broadcast transmission, changes to the transaction report print conditions apply to all destinations.
1
Place the original.
Place the original in the document feeder tray of the automatic document feeder, or on the document glass. AUTOMATIC DOCUMENT FEEDER (page 1-30) DOCUMENT GLASS (page 1-34)
2
Tap the mode display to switch to the initial screen of Internet Fax mode. CHANGING MODES (page 2-10)
3
Specify the destination.
RETRIEVING A DESTINATION FROM AN ADDRESS BOOK (page 6-33) VIEWING A LIST OF THE SELECTED DESTINATIONS (page 6-36) USING A SEARCH NUMBER TO RETRIEVE A DESTINATION (page 6-37) ENTERING AN ADDRESS MANUALLY (page 6-38) SPECIFYING A NETWORK FOLDER (page 6-39) RETRIEVING A DESTINATION FROM A GLOBAL ADDRESS BOOK (page 6-41) RETRIEVING A DESTINATION FROM A MOBILE ADDRESS BOOK (page 6-43) USING A TRANSMISSION LOG TO RESEND (page 6-45)
4
Tap the [Others] key, and then tap the [Transaction Report] key.
5

Tap the key for the print settings.
After the settings are completed, tap the [Back] key in sequence.

To cancel the transaction report settings:
Tap the [Do not Print] key.

- The print conditions for a transaction report are as follows:
• "Always Print": A transaction report is printed no matter whether the transmission succeeds or fails.
- "Print at Error": A transaction report is printed when transmission fails.
- "Do not Print": Do not print a transaction report.
- Set the [Print Original Image] checkbox to √ to include part of the transmitted original in the transaction report.
6
Tap the [Start] key to start scanning of the original.
- If you inserted the original pages in the document feeder tray, all pages are scanned.
A beep will sound to indicate that scanning and transmission have ended.
- When you place the original on the document glass, scan each page one at a time.
When scanning finishes, place the next original and tap the [Start] key. Repeat the procedure until all pages have been scanned and then tap the [Read-End] key.
A beep will sound to indicate that scanning and transmission have ended.
![SHARP BP-50C45 - Tap the [Start] key to start scanning of the original. - 1](/content/2026/06/1367452/images/657db6c5b453b2bfbd00450a0dd49aa46476853e84f03fa6d8d1c695d69bd025.jpg)
You can tap the [Preview] key to check a preview of the image before sending an image. For more information, see "CHECKING THE IMAGE TO BE TRANSMITTED (page 6-93)".
Original image in transaction report
When [Print Original Image] is enabled, the first page of the transmitted original is printed on the same sheet as the transaction report. The original image is reduced to allow it to fit on the sheet. If the vertical scanning length (X direction) of the original is longer than 432 mm (17-1/64"), the part that exceeds 432 mm (17-1/64") may be cut off.
STARTING A TRANSMISSION AT A SPECIFIED TIME (TIMER TRANSMISSION)
Specify a time at which a transmission or broadcast transmission will automatically take place. Transmission begins automatically at the specified time.
This function is helpful when you wish to perform reserved, broadcast or other transmissions during your absence or at night or other times when telephone rates are low.
In fax mode, a timer setting can also be specified for polling reception to receive a fax when you are not present.
For example, if it is set to print data received during the day at 20:00, the received data will not be printed immediately, and printing will begin automatically at 20:00.
![graph TD A["During the day, configure the setting to transmit received data at 20:00."] --> B["At 20:00, the transmission begins automatically."] B --> C["Computer"] B --> D["Tower"] B --> E["Flower"] B --> F["Phone"] style A fill:#f9f,stroke:#333 style B fill:#ccf,stroke:#333 style C fill:#cfc,stro…](/content/2026/06/1367452/images/e07147ec95914cfb5510809a03f472f60c50fdef7915bb7a154aa6f5c36701ce.jpg)

- When a timer transmission is set, keep the main power switch in the " " position. If the main power switch is in the " position at the specified time, transmission will not take place.
- When performing a timer transmission, you must scan the original into memory when you set up the transmission. It is not possible to leave the document in the document feeder tray or on the document glass and have it scanned at the reserved time of transmission.
- Up to 100 timer transmissions can be stored at once.
- In fax mode, this function cannot be used in direct transmission mode or when the speaker is used to dial.

- Settings selected for a timer transmission (exposure, resolution, and other functions) are automatically cleared after the transmission is finished. (However, when the document filing function is used, the scanned original image and settings are stored in the built-in local drive.)
- If another transmission is in progress when the specified time arrives, the timer transmission will begin after that transmission is finished.
- If a job scheduled for timer transmission is given priority on the job status screen, the timer will be cancelled. The transmission will begin as soon as the job in progress is completed. PRIORITY PROCESSING OF A RESERVED JOB (page 2-56) • The time can be specified up to a week in advance. • After the timer transmission settings are specified, start the transmission in the same way as other functions.
- A timer transmission can be deleted in the job status screen.
- When in fax mode, only one timer polling operation can be stored at once. To receive data from multiple destinations by polling, specify Timer for serial polling.
1
Place the original.
When in fax mode, then after completing this procedure, proceed to Step 3. Place the original in the document feeder tray of the automatic document feeder, or on the document glass. AUTOMATIC DOCUMENT FEEDER (page 1-30) DOCUMENT GLASS (page 1-34)
2
Tap the mode display to switch to the initial screen of each mode. CHANGING MODES (page 2-10)
3
Specify the destination.
RETRIEVING A DESTINATION FROM AN ADDRESS BOOK (page 6-33) VIEWING A LIST OF THE SELECTED DESTINATIONS (page 6-36) USING A SEARCH NUMBER TO RETRIEVE A DESTINATION (page 6-37) ENTERING AN ADDRESS MANUALLY (page 6-38) SPECIFYING A NETWORK FOLDER (page 6-39) RETRIEVING A DESTINATION FROM A GLOBAL ADDRESS BOOK (page 6-41) RETRIEVING A DESTINATION FROM A MOBILE ADDRESS BOOK (page 6-43) USING A TRANSMISSION LOG TO RESEND (page 6-45) When in fax mode, enter the destination number. ENTERING A DESTINATION NUMBER USING THE NUMERIC KEYS (page 5-11) RETRIEVING A DESTINATION FROM AN ADDRESS BOOK (page 5-12) USING A SEARCH NUMBER TO RETRIEVE A DESTINATION (page 5-15) RETRIEVING A DESTINATION FROM A GLOBAL ADDRESS BOOK (page 5-16) RETRIEVING A DESTINATION FROM A MOBILE ADDRESS BOOK (page 5-18) USING A TRANSMISSION LOG TO RESEND (page 5-20)
4
Tap the [Others] key, and tap the [Timer] key.
5
Tap [On] key.
6

Specify the date.
7
Specify the time (hour and minute) in 24-hour format.
After the settings are completed, tap [Back] key in sequence.

- Tap the areas displaying the hour and minute respectively, and enter the values using the numeric keys.
- It is convenient to use to finely adjust the time.
- The setting will show the current time. If the time is not correct, press the [CA] key to cancel the operation. Correct the time in setting mode and then perform the timer transmission procedure.
BEFORE USING THE MACHINE AS A NETWORK SCANNER FUNCTION (page 6-3)

To cancel the Timer Transmission settings:
Tap the [Off] key.

To set the date and time of the machine:
In "Settings", select [System Settings] → [Common Settings] → [Device Control] → [Clock Adjust].
8
Tap the [Start] key to start scanning of the original.
- If you inserted the original pages in the document feeder tray, all pages are scanned. A beep will sound to indicate that scanning has ended, and the machine stands by for transmission.
- When you place the original on the document glass, scan each page one at a time. When scanning finishes, place the next original and tap the [Start] key. Repeat until all pages have been scanned and then tap the [Read-End] key. A beep will sound to indicate that scanning has ended, and the machine stands by for transmission.
![SHARP BP-50C45 - Tap the [Start] key to start scanning of the original. - 1](/content/2026/06/1367452/images/b39f1ed7a6366a93c7e9254850722113d5c8969c091e2f2fa44453d201531648.jpg)
You can tap the [Preview] key to check a preview of the image before sending an image. For more information, see "CHECKING THE IMAGE TO BE TRANSMITTED (page 6-93)" (When in fax mode, "CHECKING THE IMAGE TO BE TRANSMITTED (page 5-29)").
![SHARP BP-50C45 - Tap the [Start] key to start scanning of the original. - 2](/content/2026/06/1367452/images/1efc87509ee6b6d7b2a0dc00212d88c87bbbac4ec78bad66c206614d5624a015.jpg)
The original is scanned into memory. The original cannot be scanned at a specified time.
ADDING A SIGNATURE WHEN SENDING AN IMAGE (ELECTRONIC SIGNATURE)
You can add a signature when sending a scanned image. This allows the recipient to check your sender information in the electronic signature.

This function is available for Scan to E-mail.

To add an electronic signature to a scanned image
- In "Settings (administrator)", select [System Settings] → [Security Settings] → [S/MIME Settings] → [Condition Settings].
- When [Select at Sending] is selected in "Sign E-mail" in "Settings (administrator)", you can specify whether or not an electronic signature is added each time you send an image. When [Always Enable] is selected, the setting cannot be changed.
1
Place the original.
Place the original in the document feeder tray of the automatic document feeder, or on the document glass. AUTOMATIC DOCUMENT FEEDER (page 1-30) DOCUMENT GLASS (page 1-34)
2
Tap the mode display to switch to the initial screen of E-mail mode.
CHANGING MODES (page 2-10)
3
Specify the destination.
RETRIEVING A DESTINATION FROM AN ADDRESS BOOK (page 6-33) VIEWING A LIST OF THE SELECTED DESTINATIONS (page 6-36) USING A SEARCH NUMBER TO RETRIEVE A DESTINATION (page 6-37) ENTERING AN ADDRESS MANUALLY (page 6-38) SPECIFYING A NETWORK FOLDER (page 6-39) RETRIEVING A DESTINATION FROM A GLOBAL ADDRESS BOOK (page 6-41) RETRIEVING A DESTINATION FROM A MOBILE ADDRESS BOOK (page 6-43) USING A TRANSMISSION LOG TO RESEND (page 6-45)
4

Tap the [Others] key, and tap the [Sign E-mail] key.
A checkmark appears on the icon. After the settings are completed, tap the [Back] key.
![SHARP BP-50C45 - Tap the [Others] key, and tap the [Sign E-mail] key. - 1](/content/2026/06/1367452/images/a3e6d01c463c05235d87f503f02b936e75bb3f171cfe2f0c0dfab6c9cd87d149.jpg)
To cancel the sign E-mail setting
Tap the [Sign E-mail] key to uncheck it.
5
Tap the [Start] key to start scanning of the original.
- If you inserted the original pages in the document feeder tray, all pages are scanned.
A beep will sound to indicate that scanning and transmission have ended.
- When you place the original on the document glass, scan each page one at a time.
When scanning finishes, place the next original and tap the [Start] key. Repeat the procedure until all pages have been scanned and then tap the [Read-End] key.
A beep will sound to indicate that scanning and transmission have ended.
![SHARP BP-50C45 - Tap the [Start] key to start scanning of the original. - 1](/content/2026/06/1367452/images/e79346bf88e6c90cd2d3a12bf42ab2d117caefd930342f90f1ee70c58fa02089.jpg)
You can tap the [Preview] key to check a preview of the image before sending an image. For more information, see "CHECKING THE IMAGE TO BE TRANSMITTED (page 6-93)".
ENCRYPTING THE TRANSMITTED DATA (ENCRYPTION)
You can encrypt the transmitted data to strengthen security.

This function is available for Scan to E-mail.

To encrypt transmitted data
- In "Settings (administrator)", select [System Settings] → [Security Settings] → [S/MIME Settings] → [Condition Settings].
- When [Select at Sending] is selected in "Encrypt E-mail" in "Settings (administrator)", you can specify whether or not the data is encrypted each time you send an image. When [Always Enable] is selected, the setting cannot be changed.
1
Place the original.
Place the original in the document feeder tray of the automatic document feeder, or on the document glass. AUTOMATIC DOCUMENT FEEDER (page 1-30) DOCUMENT GLASS (page 1-34)
2
Tap the mode display to switch to the initial screen of E-mail mode.
CHANGING MODES (page 2-10)
3
Specify the destination.
RETRIEVING A DESTINATION FROM AN ADDRESS BOOK (page 6-33) VIEWING A LIST OF THE SELECTED DESTINATIONS (page 6-36) USING A SEARCH NUMBER TO RETRIEVE A DESTINATION (page 6-37) RETRIEVING A DESTINATION FROM A GLOBAL ADDRESS BOOK (page 6-41) RETRIEVING A DESTINATION FROM A MOBILE ADDRESS BOOK (page 6-43)

- Data encryption is not possible when the address is directly entered.
- Encrypted data can only be sent to an address for which you have registered a user certificate. Register a user certificate for the address in "Settings (Web version)" - [Address Book] → [E-mail] → "User Certificate". Only one E-mail address can be registered for an address that has a user certificate.
- If the "Disable sending to the addresses which cannot be encrypted." checkbox is (☑) in "Settings (administrator)" - [System Settings] → [Security Settings] → [S/MIME Settings] → [Condition Settings] → [Encryption Settings], addresses without a user certificate cannot be selected. When the checkmark is removed (☐), the data is sent without encryption.
4

Tap the [Others] key, and tap the [Encrypt E-mail] key.
A checkmark appears on the icon. After the settings are completed, tap the [Back] key.
![SHARP BP-50C45 - Tap the [Others] key, and tap the [Encrypt E-mail] key. - 1](/content/2026/06/1367452/images/f6958650fe4b0468f3fcd3ade5c559658c42e724736d7e69e466112f383912c3.jpg)
To cancel the encryption setting
Tap the [Encrypt E-mail] key to remove the checkmark.
5
Tap the [Start] key to start scanning of the original.
- If you inserted the original pages in the document feeder tray, all pages are scanned.
A beep will sound to indicate that scanning and transmission have ended.
- When you place the original on the document glass, scan each page one at a time.
When scanning finishes, place the next original and tap the [Start] key. Repeat the procedure until all pages have been scanned and then tap the [Read-End] key.
A beep will sound to indicate that scanning and transmission have ended.
![SHARP BP-50C45 - Tap the [Start] key to start scanning of the original. - 1](/content/2026/06/1367452/images/4d4f8b1681b4edf8a1cadd8c644d7af1dbdb6fce87b270d14876c9b571812c55.jpg)
You can tap the [Preview] key to check a preview of the image before sending an image. For more information, see "CHECKING THE IMAGE TO BE TRANSMITTED (page 6-93)".
INTERNET FAX RECEPTION FUNCTIONS
CHECKING THE INTERNET FAX ACTIVITY LOG
PRINTING IMAGE SENDING ACTIVITY REPORTS
Print a log of recent image sending activities (date, name of destination, time required, result, and other items).
The Image Sending Activity Report contains information that is useful in dealing with problems, such as the types of errors that occurred.
The most recent 200 transactions are included in the report.
You can have the machine print the Image Sending Activity Report each time the number of transactions reaches 201, or at a specified time (once a day only).

The contents of the Image Sending Activity Report are erased when the report is printed, and thus it cannot be reprinted.

To configure the image sending activity report:
In "Settings", select [System Settings] → [Image Send Settings] → [Internet Fax Settings] → [Condition Settings] → [Activity Report Print Select Setting].
INFORMATION APPEARING IN THE RESULT COLUMN
Error types and other information are printed in the result column of transaction and activity reports. When a transaction or activity report is printed, check the result of the transaction in the result column and take action as needed.
Examples of messages that are printed in the result column
| Print Page Description | |
| OK The transaction was completed normally. | |
| Cancel | A transmission was stopped while in progress, or a reserved transmission job was cancelled. |
| FULL The memory became full during reception. | |
| Rejected An Internet fax was sent from a party that is blocked. | |
| Report Wait | Transmission confirmation was enabled, but transmission confirmation was not received within the set time. |
| NG LIMIT | Transmission was not possible because the file size exceeded the machine's file size limit setting. |
| An e-mail was received, however, the attached file was not a TIFF-F file or there was no attached file, and thus printing was not possible. | |
| FAIL xx (xxxx) The transaction failed due to a communication error.First 2 digits of communication error number: Error code from 00 to 99.Last 4 digits of communication error number: Code for use by service technicians. | |
| displayed* Displayed at the receiving machine when delivery confirmation is set. | |
| dispatched* | Forwarded elsewhere before being displayed at the receiving machine when delivery confirmation is set. |
| processed* | Processed without being displayed at receiving machine when delivery confirmation is set. |
| deleted* Message deleted | at receiving machine when delivery confirmation is set. |
| denied* | Receiving machine refused to notify sending machine of message processing content when delivery confirmation is set. |
| failed* | An abnormal condition occurred when delivery confirmation is set. |
* If the receiving machine is a SHARP machine, the receiving machine will return "dispatched" if the fax was received normally, or "processed" if reception failed. When delivery confirmation is set for Internet Fax, the disposition feel value indicated on the delivery confirmation return e-mail appears.
RECEIVING INTERNET FAXES
RECEIVING INTERNET FAXES AUTOMATICALLY
The Internet fax function periodically connects to the mail server (POP3 server) and checks whether or not Internet faxes have been received. When faxes have been received, the faxes are automatically retrieved and printed. In the default setting, this function checks for reception once every five minutes.

- If faxes will be received at night, keep the main power switch of the machine in the " | " position.
- If the machine is out of paper or there is no paper that matches the size of the received fax, a message will appear in the touch panel. Follow the instructions in the message to load an appropriate size of paper.
- You can print the received Internet fax data at the specified time. PRINTING RECEIVED DATA AT A SPECIFIED TIME (page 6-160)
- You can print the received Internet fax data when a password has been entered. PRINTING A PIN CODE-PROTECTED FAX (Hold setting for received data print) (page 6-159)
- You can print, forward, or save the received Internet fax data after checking it. CHECKING THE IMAGE BEFORE PRINTING (page 6-161) FORWARDING RECEIVED DATA MANUALLY (page 6-169) SAVING RECEIVED DATA (page 6-170)
1
The machine rings and fax reception begins automatically.
A beep sounds when reception ends.
2
The fax is automatically printed.
RECEIVING INTERNET FAXES MANUALLY
If the interval for checking for received faxes is somewhat long and you wish to check immediately, you can manually initiate reception.

The [Receive] key can be tapped only when POP3 server settings are configured in the Setting mode (administrator).
Tap the [Receive] key to connect to the mail server and retrieve received faxes.
PRINTING RECEIVED DATA
PRINTING A PIN CODE-PROTECTED FAX (Hold setting for received data print)
Enable this setting to have faxes received and stored in memory without being printed. To print the faxes, a PIN Code must be entered.
When this function is used, a PIN Code entry screen appears in the touch panel when a fax is received.

To enable the hold setting for received data print:
In "Settings (administrator)", select [System Settings] → [Image Send Settings] → [Common Settings] → [Condition Settings] → [Hold Setting for Received Data Print].
When the previously programmed 4-digit PIN Code is entered using the numeric keys, printing begins.
When the [Cancel] key is tapped, the PIN Code entry screen closes; however, the data in memory key will blink in the touch panel. The PIN Code entry screen will reappear when you tap the blinking key or change modes.

• To display the received data list screen after entering the PIN Code:
In "Settings", select [System Settings] → [Common Settings] → [Operation Settings] → [Condition Settings] → [Preview Setting] → [Received Data Image Check Setting].
• To transfer received data to another machine:
In "Settings (administrator)", select [System Settings] → [Image Send Settings] → [Inbound Routing (Forwarding/Storing) Settings].

You can check the received data image on the touch panel before printing.
CHECKING THE IMAGE BEFORE PRINTING (page 6-161)

- The received faxes will be stored in memory regardless of whether they are received automatically or manually.
- When the received data is transferred to another machine, data stored in memory is also transferred. At that time, the same PIN Code entry screen will appear as for printing. Forwarding will not take place unless the PIN Code is entered.
PRINTING RECEIVED DATA AT A SPECIFIED TIME
Print received data at a specified time.
For stress-free printing, you should avoid printing large numbers of pages at peak times during the day, and when you do not urgently need to print.

- The printed data is automatically deleted from memory.
- If the power is turned off at the specified time, printing will start at the timing when the power is turned on.
- This function can be specified when the Received Data Image Check Setting is enabled.

If Hold Setting for Received Data Print is enabled, this function cannot be used.
![graph LR A["Sun"] --> B["Day"] C["Time Icon"] --> B D["Sun"] --> E["Day"] F["Time Icon"] --> E G["Day Icon"] --> H["At 20:00, printing starts automatically."] I["Day Icon"] --> H J["Day Icon"] --> K["Print"]](/content/2026/06/1367452/images/3754da3f7b630ee7688c39a6e7e3437b3f02d84d56ad1cbe262354f66fda7d55.jpg)

• To print received data at the specified time:
In "Settings", select [System Settings] → [Image Send Settings] → [Common Settings] → [Condition Settings] → [Time Specified Output of Received Data].
• To disable the hold setting for received data print:
In "Settings (administrator)", disable this function using [System Settings] → [Image Send Settings] → [Common Settings] → [Condition Settings] → [Hold Setting for Received Data Print].
CHECKING THE IMAGE BEFORE PRINTING
Check the image of received data on the touch panel before printing.
This function is available when [System Settings] → [Image Send Settings] → [Common Settings] → [Condition Settings] → [Preview Setting] → [Received Data Image Check Setting] is enabled* in "Settings (administrator)". * The factory default setting is disabled.

Depending on the size of the received data, part of the check image on the touch panel may not appear.

The received data list can also be shown in the job status screen that appears when you tap the job status display. The received data can be forwarded, deleted, or saved from Received Data List. FORWARDING RECEIVED DATA MANUALLY (page 6-169) SAVING RECEIVED DATA (page 6-170)
When data is received, is shown at the top of the screen.
1

In the System Information, tap the [Check Received Data].
The received data is listed.
![SHARP BP-50C45 - In the System Information, tap the [Check Received Data]. - 1](/content/2026/06/1367452/images/7325c5cfe5b25e529337b6a90f8555a10fa80f95f6fc1f09e284de069568ccde.jpg)
You can also display the received data list by tapping the job status display and tapping [Check Received Data] on the action panel of Job Status screen.
2

Tap the key of the received data you wish to check, and tap [Check Image] on the action panel.
Displays the received data image.
![SHARP BP-50C45 - Tap the key of the received data you wish to check, and tap [Check Image] on the action panel. - 1](/content/2026/06/1367452/images/e4217f6ed37b5769337718d8865b5fa4cd9836e5448bc92d9f87671c8ee08b32.jpg)
- Tap ☐ to show thumbnails of received images (Thumbnail screen). The list view or thumbnails view can be changed depending on the setting mode.
- To delete a received image, tap [Delete] on the action panel. • To transfer the selected received image, tap [Forward to Other Address] on the action panel. FORWARDING RECEIVED DATA MANUALLY (page 6-169) • To save the selected received image, tap the [File] key. SAVING RECEIVED DATA (page 6-170)
3

Tap the image you wish to print, and tap [Print] on the action panel.
The machine starts printing the image.
- [Select All Page]: Selects all displayed images.
- [Release All Page]: Cancels all images that have been selected by "Select All Page". • /+Use these keys to enlarge or reduce an image.
- / Rotates image counterclockwise or clockwise.
![SHARP BP-50C45 - Tap the image you wish to print, and tap [Print] on the action panel. - 1](/content/2026/06/1367452/images/c861e3bd65d9fe1e01d8b19d54501d6e1c733e699a76e087ea7cd59a2d8563b3.jpg)
- A preview image is an image for the touch panel. It will differ from the actual print result.
- Tap [Erase Specified Range] on the action panel to delete unwanted area of the image. Specify the image area you wish to delete in the Erase Specified Range screen. • To forward the selected image, tap the [Forward to Other Address] on the action panel. FORWARDING RECEIVED DATA MANUALLY (page 6-169)
- To save the selected image, tap the [File] key. SAVING RECEIVED DATA (page 6-170)
FORWARDING RECEIVED DATA
FORWARDING RECEIVED INTERNET FAX DATA (FAX DATA FORWARD)
When the machine cannot print because it is out of paper or out of toner, received Internet faxes are forwarded to another previously registered Internet fax address (including direct SMTP).
![graph TD A["Server"] -->|Blue Arrow| B["Printer"] B -->|Blue Arrow| C["Output"] D["Document"] -->|Red X| B E["Document"] -->|Blue Arrow| B](/content/2026/06/1367452/images/cea9b12e09ec5f35b141d89311868d53ae48db5f7fc3e4d9f126bc5be1f30d06.jpg)

- Forwarding is not possible if no faxes were received or a forwarding fax number is not programmed.
- If some pages of a fax that is being forwarded were successfully printed, only those pages that were not printed will be forwarded.
- If forwarding was not successful because the transmission was cancelled or a communication error occurred, the faxes that were to be forwarded will return to the print queue on the machine.
- If a PIN Code entry screen appears after tapping the [OK] key, "Hold Setting for Received Data Print" has been enabled. Enter the PIN Code using the numeric keys to begin forwarding. PRINTING A PIN CODE-PROTECTED FAX (Hold setting for received data print) (page 6-159)
1
Tap the [Settings] key on the Home screen.
2
Select the [System Settings] key and tap the [Image Send Settings] key.
3
Tap the [Fax Data Receive/Forward (Manual)] key.
4
To start forwarding, tap the [Execute] key of "Forward Received Data" in "I-Fax Settings".
FORWARDING RECEIVED DATA TO PRESET DESTINATIONS (INBOUND ROUTING SETTINGS)
Received Internet faxes are automatically forwarded to a fax destination number, an Internet fax address, an e-mail address, a file server address, a desktop address, or a network folder address.
Received data can be forwarded to the specified destinations without being printed.

In setting mode (Web version), configure the inbound routing settings. For the procedure for accessing the setting mode (Web version), see Start Guide.
The following explanation assumes that the setting mode (Web version) has been accessed with administrator rights.

Whether or not to forward data for each forwarding table can be quickly set.
In "Settings (administrator)", select [Image Send Settings] → [Inbound Routing (Forwarding/Storing) Settings] → [Administration Settings] → [Inbound Routing], and tap [Enable]/[Disable] on the displayed forwarding table to switch the settings.

- When faxes forwarded using this function are printed at the forwarding destination, the date and time of reception cannot be printed on the faxes. ("Receiving Date & Time Print" is disabled.)
- The received data is not forwarded to a hyperlink destination that is registered in the specified address.
- A direct SMTP address cannot be specified as a forwarding destination.
1
In "Settings (Web version)", click [System Settings] → [Image Send Settings] → [Inbound Routing (Forwarding/Storing) Settings] → [Administration Settings].
2
In "Inbound Routing", select [Enable] and click the [Submit] button.
![SHARP BP-50C45 - In "Inbound Routing", select [Enable] and click the [Submit] button. - 1](/content/2026/06/1367452/images/58fa4cd24813ee2233905eef580bf0eb475904032ba6e0957add022193615def.jpg)
Users without administrator rights can be prohibited from storing, editing, and deleting forwarding tables in this screen, and from specifying which table is used. To do so, set the checkboxes for the following items to √.
- Disable Registration of Forward Table
- Disable Change/Delete of Forward Table • Disabling of Forward Condition Change
Specify in [Print Style Setting] whether or not to have the machine to print the faxes to forward when inbound routing is enabled. After the settings are completed, be sure to click the [Submit] button.
- [Always Print]: Always prints received data before forwarding the data.
- [Print at Error]: Prints received data only when an error prevents forwarding.
- [Save Only at Error]: Saves received data only when an error prevents forwarding. For the saved data, the error address can be confirmed and the data can be resent.
3 Check [Sender Address Registration] in the [Inbound Routing (Forwarding/Storing) Settings] menu in the "Settings (Web version)".
4 Enter the sender address of tax number in "Internet Fax Address" or "Fax Number" as appropriate, and click the [Add to List] button.
The sender address or number you entered will be added to the "Address to be Entered" list.
- Enter the address directly (maximum of 1500 characters) or select the address from a global address book by clicking the [Global Address Search] button.
- To store multiple sender addresses or fax numbers, repeat these steps.
![SHARP BP-50C45 - Enter the sender address of tax number in "Internet Fax Address" or "Fax Number" as appropriate, and click the [Add to List] button. - 1](/content/2026/06/1367452/images/1dd247d228ce46e43d6a33caf8a54e3d8da2065ffc2b7b2193582b777c3ebb4f.jpg)
- If you wish to have only faxes from specified addresses forwarded, store the desired sender addresses. Send addresses stored here can be selected from a list when you store a forwarding table.
- A maximum of 500 sender numbers/addresses can be stored.
- To delete an entered address, select the address in "Address to be Entered" and click the [Delete] button.
5 When you have finished adding addresses, click the [Submit] button.
6 Click [Inbound Routing Settings] in the "Inbound Routing (Forwarding/Storing) Settings" menu in the "Settings (Web version)" menu and click the [Add] button.
7 Enter a Table Name:

A maximum of 50 forwarding tables can be stored.
The following summary table will be written with
- To forward all received data, select [Forward All Received Data].
- To forward only data received from specific senders, select [Forward received data from specified senders only.]. To forward all data except data from specific senders, select [Forward all received data except that from specified senders.]. Select the appropriate senders from the list and click the [Add] button.

When selecting senders from the "Sender Number/Address Setting" list, you can use the [Shift] key or the [Ctrl] key on your keyboard to select multiple senders.
Select the forwarding conditions.
- To always forward received data, select [Always Forward].
- To specify a day and time on which received data will be forwarded, select [Forward received data only on specified days.] and select the checkbox (☑) of the desired day of the week. To specify a time, select the [Set Forwarding Time] checkbox (☐) and specify the time.

Up to three forwarding day and time settings can be set for one forwarding table, and a forwarding destination can be set for each set time. To configure these settings, use the [Forward Condition] tabs to access each setting.
10
Select the file format.
The format can be set separately for each forwarding address (for each of forwarding addresses 1, 2, and 3 in the table).

- Images forwarded in TIFF format may not be displayed correctly in some recipient environments. In this event, change the file format to PDF.
- If the Internet fax address is selected as a recipient, data is forwarded in TIFF regardless of the specified format.
- If a fax number is selected as a recipient, the file format is ignored.
11
Select the recipient from the address book.
You can specify multiple registered addresses or telephone numbers from the address book of the machine. Up to 1,000 recipients can be registered for Recipients 1, 2, and 3 in total. When you select the recipients from the address book, up to 400 recipients can be registered for network folder, FTP/Desktop, Internet fax, and fax.

A direct SMTP address cannot be specified as a forwarding destination.
12
Enter a recipient directly and specify the recipient.
- Specify this information if necessary.
- Enter an E-mail address, an Internet fax address, or a fax number directly and tap the [Add to forwarding destinations] key.
- When you specify an E-mail address or a fax number, you can use the global address search.
- When you specify a fax number, also specify the sending line and international correspondence mode.
- When entering the recipients directly, up to 100 recipients can be registered for E-mail address, network folder, FTP/Desktop, Internet fax, and fax.
13
Click [Submit].
14
Click [Inbound Routing Settings] in the "Inbound Routing (Forwarding/Storing) Settings" menu in the "Settings (Web version)" menu.
15
From the forwarding table, select [Forward to All Forward Destinations] or [Forward based on Forward Condition].
16
Select [Always Forward] or [Forward received data only on specified days.] from the forwarding table.
The forwarding permission settings that appear here are linked to the forwarding conditions set in step 9. If you wish to use different forwarding conditions than those set in step 9, set the forwarding permission settings.
![SHARP BP-50C45 - Select [Always Forward] or [Forward received data only on specified days.] from the forwarding table. - 1](/content/2026/06/1367452/images/f9c10bf79dd829df0395ba76cc67ca39039c0b3fec99480621ce51999ee09ae2.jpg)
- To use the inbound routing function, enable the forwarding tables that you wish to use from among the stored tables.
- To delete a forwarding table, click the checkbox next to the table name so that it is selected ( √ ) and click [Delete].
17
Click [Submit].
SAVING RECEIVED FAXES TO THE MACHINE'S LOCAL DRIVE (INBOUND ROUTING)
Received faxes can be saved to the machine's local drive. Saved faxes can be viewed on a computer.
Set PDF, TIFF (multi) or TIFF (signal) for the saved Internet faxes.
You can also receive notification of the storage result or storage folder by E-mail.
Received faxes are saved in the following directory:
\MFP\faxreceive

- Up to 500 files can be stored in one folder as received data.
- The "faxreceive" folder contains files of "Settings for Local Drive Storing of Received Data". • The folder is automatically created.
- The folder name is automatically assigned based on the setting of "Settings for Local Drive Storing of Received Data" in the received data save settings.
How to save received faxes to the local drive
1
In "Settings (administrator)", click [System Settings] → [Network Settings] → [Public Folder / NAS Setting]. (Administrator rights required.)
2
Select [Allowed] in "faxreceive:Use of Storage" and click the [Submit] button.
Settings for saving received faxes to the local drive
1
In Setting mode (administrator), click [System Settings] → [Image Send Settings] → [Inbound Routing (Forwarding/Storing) Settings] → [Inbound Routing (Storage) Settings] → [Settings for Local Drive Storing of Received Data]. (Administrator rights required.)

- Data that can be saved are received faxes and received Internet faxes. Confidential reception and polling reception faxes cannot be saved.
- Depending on the setting, received faxes that cannot be saved because of the file number limit or other reason are either printed or saved in the inbound routing error box.
FORWARDING RECEIVED DATA MANUALLY
Received faxes can be forwarded manually after receipt.
This function is available when [System Settings] → [Image Send Settings] → [Common Settings] → [Condition
Settings] → [Preview Setting] → [Received Data Image Check Setting] is enabled* in "Settings (administrator)".
* The factory default setting is disabled.
When data is received, is shown at the top of the screen.
1

In the System Information, tap the [Check Received Data].
The received data is listed.
![SHARP BP-50C45 - In the System Information, tap the [Check Received Data]. - 1](/content/2026/06/1367452/images/666a2f12465949b2a25ddc637b76e34de201eeb61efe463ca69fd62a49a3b46d.jpg)
You can also display the received data list by tapping the job status display and tapping [Check Received Data] on the action panel of Job Status screen.
2

Tap the key of the received data you wish to forward, and tap [Forward to Other Address].
- Tap 📋 show thumbnails of received images (Thumbnail screen). The list view or thumbnails view can be changed depending on the setting mode.
- Multiple sets of received data can be selected.
![SHARP BP-50C45 - Tap the key of the received data you wish to forward, and tap [Forward to Other Address]. - 1](/content/2026/06/1367452/images/fed04fa6dee0d3f8b370a7f0c64751c6a85b3929cd56c02a7ea62a0c7760c921.jpg)
When you select a single received data only, you can tap [Check Image] on the action panel and check the image on the preview screen.
3
Select the destination from the Address Book screen, and tap the [Start] key.
SAVING RECEIVED DATA
Save received faxes in the document filing folder.
This function is available when [System Settings] → [Image Send Settings] → [Common Settings] → [Condition Settings] → [Preview Setting] → [Received Data Image Check Setting] is enabled in "Settings (administrator)".
The factory default setting is disabled.
![graph LR A["Server"] -->|Transfer| B["Database"]](/content/2026/06/1367452/images/41d56185e0e683976fb5732d7a20bdb6a2f9ad2a406cc634d7d6e0da2fa444a4.jpg)
When data is received, an icon is shown at the top of the screen.
1

In the System Information, tap [Check Received Data].
The received data is listed.
![SHARP BP-50C45 - In the System Information, tap [Check Received Data]. - 1](/content/2026/06/1367452/images/6f512f093e4455b27318e0a427824315539334cce2231dcb2e4a61fdd35f4ae2.jpg)
You can also display the received data list by tapping the job status display and tapping [Check Received Data] on the action panel of the Job Status screen.
2

Tap the key of the received data you wish to save, and tap [File] on the action panel.
- Tap to show thumbnails of received images (Thumbnail screen). The list view or thumbnails view can be changed depending on the setting mode.
- Multiple sets of received data can be selected.
![SHARP BP-50C45 - Tap the key of the received data you wish to save, and tap [File] on the action panel. - 1](/content/2026/06/1367452/images/f2e4eff2668925827e116d6b1070eaab9162d16c47eded41e5bc071ceabb6e7f.jpg)
When you select a single received data only, you can tap [Check Image] on the action panel and check the image on the preview screen.
3
Set the file information, and tap the [Save] key.
CHECKING THE STATUS OF TRANSMISSION/RECEPTION JOBS
IMAGE SEND JOBS
When you tap the job status display, jobs are displayed in a list. To check the status of a scanner mode job, select the [Scan] tab. To check the status of an Internet fax job, select the [Internet Fax] tab.
When you wish to stop or delete jobs or to perform priority processing, see the following items:
STOPPING/DELETING A JOB IN PROGRESS OR RESERVED (page 2-55)
PRIORITY PROCESSING OF A RESERVED JOB (page 2-56)
CHECKING A RESERVED JOB OR THE JOB IN PROGRESS (page 2-58)
CHECKING COMPLETED JOBS (page 2-59)


Image send jobs include reception, timer transmission, and data forwarding as well as usual transmission. For the Image Send job operations, see "COMPLETED TRANSMISSION/RECEPTION JOBS (page 6-172)".
COMPLETED TRANSMISSION/RECEPTION JOBS
A usual transmission job moves to the job list when transmission is completed. Then the status field displays "Send OK". However, Internet Fax jobs such as reception, timer transmission, retries, and forwarding are displayed in the job status screen as follows:
Reception job
During Internet Fax receiving, the status field displays "Receiving" in the job queue list. When reception is completed, the job moves to the completed job list and the status field displays "In Memory". After Internet Fax printing is completed, the status changes to "Received".
Timer transmission jobs
A timer transmission job appears at the end of the job queue list until the specified time is reached.
Transmission begins at the specified time. When transmission is completed, the job moves to the completed job list and the status field displays "Send OK".
Internet Fax transmission job with reception report request specified
An Internet Fax transmission job with a reception report request specified, excluding a direct SMTP transmission job, is placed into the standby state at the bottom of the Job Queue screen after a transmission has been completed. "Report Wait" appears in the status field.
The screen changes to the completion screen when a reception report e-mail has been received from the destination.
Reception jobs when the inbound routing settings are enabled
When the inbound routing settings are enabled, reception jobs are handled as follows depending on the print setting. FORWARDING RECEIVED DATA TO PRESET DESTINATIONS (INBOUND ROUTING SETTINGS) (page 6-164)
Received data is not printed
When a data is being received, "Receiving" appears in the job queue list. When the reception is completed, the status changes to "Waiting".
Received Internet fax is printed
When reception is completed, the status field displays "In Memory" in the completed job list. After the fax is printed, the status changes to "Received". Then a job is added for which the status field displays "Waiting" in the job queue list. When forwarding the received fax is completed, the field changes to "Forward OK".
SCANNING FROM A COMPUTER (PC Scan Mode)
BASIC SCANNING PROCEDURE
You can install the scanner driver on your computer and use a TWAIN* compliant application to scan an image using your computer.
Scanning from your computer is most useful for scanning a single original such as a photo, particularly when you want to adjust scan settings as you scan. By contrast, scanning at the machine is most useful for continuous scanning of multiple originals.
* An interface standard used for scanners and other image input devices. When the scanner driver is installed on your computer, you can use any TWAIN-compliant application to scan an image.

- For the procedures for installing the scanner driver and configuring settings, see the Software Setup Guide.
- This function cannot be used when it has been disabled using "Disable Scan Function" in the system settings (administrator).
- The procedures for selecting the scanner driver and starting scanning vary depending on the TWAIN-compliant application. For more information, see the manual for the application or Help.
- When a large image is scanned at high resolution, the amount of data will be very large and scanning will take a long time. Be sure to select appropriate scan settings for the original (text, photo, etc.).
[At the machine]
![SHARP BP-50C45 - [At the machine] - 1](/content/2026/06/1367452/images/49d57f8125436db1c8491e2ebc515fb94b5341b03103a8b16d4b10c8d832eab2.jpg)
Prohibit PC Scan:
Prohibit sending when a fax number or address is manually entered To enable the hold setting for received data print In "Settings (administrator)", select [System Settings] → [Image Send Settings] → [Common Settings] → [Enable/Disable Settings] → [Settings to Disable Transmission] → [Disabling of PC Scan]. Prohibit PC Scan.
1

Place the original.
Place the original face up in the document feeder tray, or face down on the document glass.
2

Tap the [PC Scan] mode icon to switch to PC Scan mode.
If the [PC Scan] mode icon does not appear, tap move the screen.
![SHARP BP-50C45 - Tap the [PC Scan] mode icon to switch to PC Scan mode. - 1](/content/2026/06/1367452/images/0d71f5cb833e4ca0c3b8eabbecf62ebe38932d0c47f14c7c303e75733391c255.jpg)
When PC scan mode is selected, only the [Exit] key displayed in the touch panel can be used on the machine; no other keys can be used.
[At your computer]
Start the TWAIN-compliant application on your computer and select [SHARP MFP TWAIN K] in the application's scanner selection.

Preview the image.
(1) Select the location where the original is placed.
"Scanning Source" menu:
- If the original is a one-sided original and is placed in the document feeder tray, select [SPF(Simplex)].
- If the original is a 2-sided original and is placed in the document feeder tray, select [SPF(Duplex - Book)] or [SPF(Duplex - Tablet)] depending on whether the original is a book-style or tablet-style original. In addition, select [Left edge is fed first] or [Top edge is fed first] depending on the orientation of the original.
(2) Select scan settings.
"Scanning Mode" menu:
Switch between the "Standard" screen and the "Professional" screen. In the "Standard" screen, select "Monitor", "Photo", "FAX" or "OCR" depending on the original type and your scanning purpose.
"Image Area" menu:
Select the scan area. If "Auto" is selected, the original size detected by the machine will be scanned. You can also set the scanning area in the preview window with your mouse.
(3) Click the [Preview] button.
The preview image will appear in the scanner driver. If you are not satisfied with the preview image, repeat (2) and (3).
If the [Zoom Preview] checkbox is selected before the [Preview] button is clicked, the selected area will be enlarged in the preview window. If the checkmark is removed, the preview image will return to normal. Note that if SPF is selected in the "Scanning Source" menu, the [Zoom Preview] function cannot be used.
![SHARP BP-50C45 - Click the [Preview] button. - 1](/content/2026/06/1367452/images/0c02539eb5dec9dd24aa7e72ca34446c346910c84dc1d515293312b846b53c17.jpg)
- For further information on the scan settings, click the 🔒 button in the preview image screen of step 7 to open scanner driver Help.
- If the [Preview] button is clicked when scanning from the document feeder tray, only one original page will be scanned for the preview image. If you wish to include that original in the scan, return it to the document feeder tray.
![SHARP BP-50C45 - Click the [Preview] button. - 2](/content/2026/06/1367452/images/f2d80cee1f0c45ef7218e43c3a0c14240f32e7dfda357e3bdc464e14b8e249df.jpg)

Select scanning settings while viewing the image.
[Rotate] button:
Each time this button is clicked, the preview image rotates 90 degrees. This lets you change the orientation of the image without picking up and placing the original again. The image file will be created using the orientation that appears in the preview window.
[Image Size] button:
Click this button to specify the scan area by entering numerical values. Pixels, mm, or inches can be selected for the units of the numerical values. If a scanning area has already been specified, the entered numbers will change the area relative to the top left corner of the specified area.
× button:
When a preview image is displayed and a scanning area is not specified, you can click the button to automatically set the scanning area to the entire preview image.

- For further information on the scan settings, click 🔒 button to open scanner driver Help.
- If the originals are placed in the document feeder tray, only the top page will be previewed. The top page will be delivered to the original exit tray. Be sure to return the previewed page to the document feeder tray before previewing again or scanning.

Click the [Scanning] button.
Scanning begins. The image appears in your application. Assign a file name to the scanned image and save it as appropriate in the software application you are using.
[At the machine]
5

Tap the [Exit] key.
6

Tap the [Finish] key.
METADATA DELIVERY
PREPARATIONS FOR METADATA DELIVERY
METADATA DELIVERY (DATA ENTRY)
When the application integration module kit is installed, metadata (data indicating the attributes of the image file and how it is to be processed) is generated based on pre-stored information and transmitted separately from an image file that is generated for sending a scanned image. The metadata file is created in XML format.
By linking the metadata with applications such as document management software, a workflow application, or an encryption server, a sophisticated document solution environment can be built.
Using the application integration module kit, information on a generated image file can be entered at the touch panel and transmitted along with the image as an XML file.
![graph TD A["Server"] --> B["Scan to E-mail\nScan to FTP\nScan to Network Folder"] A --> C["Scan to Desktop"] D["Client Computer that Uses\nNetwork Scanner Tool"] --> C E["Image file"] --> A F["Metadata (XML file)"] --> C](/content/2026/06/1367452/images/efe151720183eb882d7a886814112e08d0d2d728977708c95302c63781f96cad.jpg)
Fax server, document management software, workflow application, and encryption server, etc.
SETTINGS REQUIRED IN THE SETTING MODE (WEB VERSION)
To configure the settings related to metadata, select [System Settings] → [Image Send Settings] → [Metadata Settings] → [Metadata Entry] in "Settings (administrator)". (Administrator rights are required.) Enable metadata delivery.
Storing Metadata Sets
Store the items (the metadata set) to write to the XML file that will be generated during scanning. Up to 10 metadata items can be configured in a metadata set. A stored metadata set can be selected at the time of transmission.
Addresses specified in "Address Type Allowing Metadata Entry" when a metadata set is stored can be selected as transmission destinations at the time of transmission using one-touch keys, manual entry, or a global address book search. (Addresses for which metadata entry is not allowed cannot be specified as transmission destinations.)
METADATA DELIVERY USING SCAN TO DESKTOP
When Network Scanner Tool Lite is used in its factory default configuration, a file will be generated with a new file name on the PC.
When Network Scanner Tool Lite is used as a means of sending a metadata file to a third party application, this setting must be disabled to allow cross referencing between the image file and XML file by means of the file name generated by the computer.
(When setting the file name in [Options▼], to ensure that an existing file on the PC is not overwritten by a transmitted file of the same name, be sure to configure the file name so that name duplication will not occur; for example, by including a unique extension (the date, etc.) in the generated file name. If the file name setting is left blank, the machine will automatically generate a unique file name.)

It is recommended that you use Network Scanner Tool Lite to receive metadata.
Using third party applications
Various types of third party applications exist. Some applications can start automatically from Network Scanner Tool Lite and some cannot.
When the auto-run function of an application is enabled, Network Scanner Tool Lite will start the application with the "exe" command using the image file name as a parameter. For example, when Network Scanner Tool Lite is set to start application "APP.EXE", the "APP.EXE IMG.TIF" command is applied. If a file was specified to receive metadata, the metadata file name cannot be specified at the same time using the command to start the application directly.
(However, the metadata file is stored in the same folder as IMG.TIF in the computer.)
TRANSMITTING METADATA
TRANSMITTING METADATA
Select a metadata set, enter each item, and perform metadata delivery.

Metadata delivery is performed using the document filing function. The [Data Entry] tab appears in the transmission settings screen of document filing mode to allow metadata delivery. In addition, perform metadata delivery using document filing in [Metadata Entry] in "Settings (Web version)."

- In data entry mode, configure metadata settings to perform metadata delivery. To perform transmission without sending metadata, switch the screen from data entry mode to a different mode and then perform transmission.
- When metadata settings have been configured or an address is specified in data entry mode, it will not be possible to switch to another mode.
- Before configuring metadata settings, specify addresses in all available modes. After metadata settings have been configured, specify only addresses in modes that are allowed in the selected metadata.
1
Tap the [Data Entry] icon on the [Home Screen], and tap [Metadata Set].
![SHARP BP-50C45 - Tap the [Data Entry] icon on the [Home Screen], and tap [Metadata Set]. - 1](/content/2026/06/1367452/images/524a4e703d59a40d34dbefb30d674fdb2cb971cd5ca965eda2f835fc3989c18c.jpg)
If a specific metadata set has been specified as the default set, go to step 3.
![SHARP BP-50C45 - Tap the [Data Entry] icon on the [Home Screen], and tap [Metadata Set]. - 2](/content/2026/06/1367452/images/2297b3092ea412db7121824d05ca9902cd7e0ebe1555c0f276655e9ba5ff8180.jpg)
If no metadata sets have been stored, Metadata Entry is unavailable. Store metadata set in the setting mode (Web version) before performing transmission.
2
Tap the key for the desired metadata set.
3
The keys of the items stored in the metadata set will appear. Tap the key of the item that you wish to enter.
4
Tap the key of the value that you wish to enter, and tap the [OK] key.
To directly enter the metadata value, tap the [Direct Entry] key. On the soft keyboard screen that appears, tap the [OK] key. You will return to the screen shown in step 3. After the settings are completed, tap .OK
![SHARP BP-50C45 - Tap the key of the value that you wish to enter, and tap the [OK] key. - 1](/content/2026/06/1367452/images/73e17b54b37a07a7e2dc9f6add6f6a846f2d8ef136ee2796e09d11c1d7d862ec.jpg)
To cancel the selection of the metadata value:
Tap the [Clear] key.
5
Configure image or other settings, and perform the scan send procedure.
- Configure job detail settings and then start transmission using the same operations as in other modes.
- When directly entering an address, tap [Touch to input Address] to display the screen for selecting an address type. If the address type such as E-mail, Internet Fax, Fax, Network Folder, or Direct SMTP is selected, the address type entry screen appears.
METADATA FIELDS
The following three types of metadata are included in the XML file that is transmitted.
• Data automatically generated by the machine
These data are always included in the XML file and are automatically stored on your PC.
• Previously defined fields
These fields are automatically recognized by the machine and assigned to appropriate XML tags. These fields can be selected, and can only be included in the XML file if they are enabled in the setting mode (Web version).
- User defined fields
Custom fields are added to the XML file. These fields can be selected and are defined in the setting mode (Web version).
If a defined metadata field is one of the following fields, a message will appear informing you that the field cannot be filled in. Enter appropriate information in the related items of the send settings.
| Name entered in metadata fields | Description Where entered | |
| formName Name of the user who sent the job. If the name is not entered as metadata, the sender name determined by the usual rules for determining the sender name will be applied as metadata. | [Reply-To](sender name of selected sender) | |
| replyTo E-mail address to which the transmission result will be sent. | [Reply-To](E-mail address of selected sender) | |
| documentSubject Job name appearing in the E-mail "Subject" line, or job name on the fax cover sheet.When the user enters a [Subject] in the send settings screen in the touch panel, the entered value is applied as metadata. | [Subject](Blank until a value is set in the send settings screen.) | |
| fileName | Enter the file name of the image to be sent. | [File Name](Only when the [Allow Custom Filenames] checkbox is selected in the metadata entry screen in the setting mode (Web version))(Blank until a value is set in the send settings screen.) |
DOCUMENT FILING
DOCUMENT FILING 7-2
USES OF DOCUMENT FILING 7-3
TYPES OF DOCUMENT FILING 7-3
BEFORE USING SCAN TO LOCAL DRIVE IN
DOCUMENT FILING 7-3
USING DOCUMENT FILING IN EACH MODE .....7-7
BASE SCREEN OF DOCUMENT FILING MODE....7-8
SAVING FILES WITH DOCUMENT FILING
FILING WHILE USING ANOTHER MODE 7-9
QUICK FILE 7-9
FILE 7-10
SAVING DOCUMENT DATA ONLY (SCAN TO LOCAL
DRIVE)....7-15
SAVE ON LOCAL DRIVE....7-15
SAVE IN EXTERNAL MEMORY DEVICE....7-17
USING STORED FILES
SEQUENCE FOR USING A STORED FILE 7-20
FILE SELECTION SCREEN 7-21
SELECTING A FILE TO RETRIEVE....7-23
FILE PRINTING....7-24
MULTI-FILE PRINTING....7-25
MULTI-FILE PRINTING 7-25
BATCH PRINTING 7-26
FILE TRANSMISSION....7-27
FILE MOVING 7-28
DELETE FILE 7-29
FILE IMAGE CHECKING 7-31
FILE MERGING....7-32
RETRIEVING AND USING A FILE FROM THE JOB
STATUS SCREEN....7-33
FILE SEARCH AND RETRIEVAL....7-34
PRINTING AN EXTERNAL FILE 7-36
DOCUMENT FILING
DOCUMENT FILING
This function saves the original scanned on the machine, transmitted fax image, or print data from a computer on the local drive of the machine or an external memory device as data.
The stored files can be printed or transmitted as required. Editing of the stored files, for example combining, is also possible.

A PDF file created for PC browsing can be displayed or printed on a computer.
![graph TD A["Printer"] --> B["Image send"] B --> C["File Store"] C --> D["Edit"] D --> E["Reuse"] E --> F["Print"] E --> G["Transmission"] E --> H["Download"] C --> I["Local Drive"] I --> J["External memory device"] J --> K["Your computer"]](/content/2026/06/1367452/images/090bfb09ec1bad1ea9715726c2b4edf0b7a7fec6995ef2adfc5f8e88d72e4e36.jpg)
USES OF DOCUMENT FILING
Using the document filing function allows you to additionally print out conference material with the same settings, or print out ledger sheets used for routine tasks as required.

TYPES OF DOCUMENT FILING
There are the following ways to save a file using document filing: [Quick File] and [File] in copy mode or image send mode, and [Scan to Local Drive] and [Scan to External Memory Device] in document filing mode.
| Quick File | As a copy, image send, or other job is performed, this function saves the document data to the local drive. Use this function when you want to quickly and easily store document data without specifying a file name or other information. The stored file can also be used by other people. Do not use this method to save files that you do not want others to use. |
| File | As a copy, image send, or other job is performed, this function saves the document data to the local drive. Unlike Quick File, various types of information can be appended to the file when the file is saved to enable efficient file management. A password can also be established. |
| Scan to Local Drive | This function scans an original and stores it to the local drive. Like File, various types of information can be appended. |
| Scan to External Memory Device | This function scans an original and stores it in an external memory device such as a USB memory device. Like File, various types of information can be appended. |
BEFORE USING SCAN TO LOCAL DRIVE IN DOCUMENT FILING
Folder types
Three types of folders are used to store files on the local drive using the document filing function. Folders on the local drive
![graph TD A["Database"] --> B["Quick File Folder"] A --> C["Main Folder"] A --> D["Custom Folder"]](/content/2026/06/1367452/images/5855ce1c4c6d15452217c397c8246da7e32c4142c625c60525b1457818a3c3bb.jpg)
Quick File Folder
Documents scanned using [Quick File] on the action panel are stored in this folder. A user name and file name are automatically assigned to each job.
Main Folder
Scanned documents are stored in this folder.
When you store a job in the Main folder, you can specify a previously stored user name and assign a file name.
A password (4 to 32 characters) can also be set when storing a file ("Confidential" save) as required.
Custom Folder
Folders with custom names are stored inside this folder.
Scanned documents are stored in the stored folder.
Like the Main folder, a custom folder allows you to specify a previously stored user name and assign a file name when storing a job.
Passwords (PIN code: 4 to 8 digit number) can be established for custom folders and for files saved in custom folders.

A maximum of 1000 custom folders can be created on the local drive.
Convenient items to store
When storing a job using [File] in copy mode or image send mode, or [Scan to Local Drive] in document filing mode, it is convenient to store the items below. These settings are not required when storing a job using [Quick File].
| User Name | This is necessary if you will be assigning a user name to stored files. A user name is also used as a search condition when searching for a file. |
| Custom Folder | The Main folder is initially available as a location for storing files by [File] and [File Store].Store a custom folder and specify it as a location for storing files. Specify a password for the user folder as required. Enter the PIN Code to use the folder.When the folder is set a password, " "appears in the folder that the password is set. |
| My Folder | A previously created custom folder can be selected as "My Folder", or a new folder created as "My Folder". When "My Folder" has been configured and user authentication is used, "My Folder" will always be selected as the destination of [File] and [File Store]. |

•To store a custom folder for document filing:
On the Web page, select "Settings (administrator)" → [Document Operations] → [Document Filing] → [Custom Folder]. On the machine, select "Settings (administrator)" → [System Settings] → [Document Filing Settings] → [Document Filing Control] → [Custom Folder].
•To store a user name and specify a folder as "My Folder":
In "Settings (administrator)", select [User Control] → [User Settings] → [User List].
Approximate number of pages and files that can be stored
Combined total number of pages and total number of files that can be stored in custom folders and in the Main folder
| Examples of original types Number of pages *1 | Number of files | ||
| Full colour original(Text and photo example)Size: A4 |  | Max. 5700*2Max. 900 | Max. 3000*2Max. 500 |
| Black & white original(Text)Size: A4 |  | Max. 13000*2Max. 2100 | |
Number of pages and number of files that can be stored in the Quick File folder
| Examples of original types Number of pages | *1 | Number of files | |
| Full colour original(Text and photo example)Size: A4 |  | Max. 700*2Max. 300 | Max. 1000*2Max. 300 |
| Black & white original(Text)Size: A4 |  | Max. 2000*2Max. 300 | |
*1 The indicated numbers are guidelines for the number of pages that can be stored when all pages are full colour, and when all pages are black & white. *2 When the high capacity SSD is installed. Copying in sort mode uses the same memory area as the main folder and custom folder. For this reason, when too much data has been stored in the main folder and custom folder, it may not be possible to perform a large copy job using sort mode. Delete unnecessary files from the main folder and custom folder.
The original types above are examples to make the explanation easier to understand. The actual number of pages and number of files that can be stored will vary depending on the contents of the original images and the settings when the files are stored.
Information added to files
When saving a file using "File", add the following information to distinguish it from other files.

| User Name | The user name is required to enter a file ownership and other information. The user name must be registered in advance. | |
| File Name | Names a file. | |
| Stored to | Specifies a folder to store files. | |
| Property | Sharing Any user | can display and operate files having the "Sharing" property. |
| Protect | Once "Protect" is set, its file cannot be edited, moved, and deleted. No password setting is required. | |
| Confidential You can set a password (4 to 32 characters) for file protection. | ||

- The above information cannot be specified when a file is saved with Quick File.
- When you select [Create Downloadable File] in Scan to Local Drive and save as a confidential file, the properties cannot be changed.

To store a user name:
In "Settings (administrator)", select [User Control] → [User Settings] → [User List].
IMPORTANT POINTS WHEN USING DOCUMENT FILING
- Files stored using [Quick File] are provided with the "Sharing" property that can be accessed by any person for output and sending. Therefore, do not store sensitive documents or documents that you do not want to be used by others using the [Quick File] function.
- When saving a file with [File], you can save it with the "Confidential" property. Set a password for a "Confidential" file to prevent the file from being used by other people. Exercise care to prevent other people from obtaining the password.
- The property of a stored "Confidential" file can be changed to "Sharing" by "Property Change" as required. Do not store sensitive documents or documents that you do not want to be used by others.
- Except in cases provided for by law, SHARP Corporation bears no responsibility for any damages that result from the disclosure of sensitive information due to manipulation by a third party of any data saved using the Quick File function or File function, or incorrect operation of the Quick File function or File function by the operator who saves the data.
USING DOCUMENT FILING IN EACH MODE
To use Document Filing, select the action panel for each mode.
To save data simultaneously with a copy or fax, tap [File] or [Quick File] on the action panel in each mode.
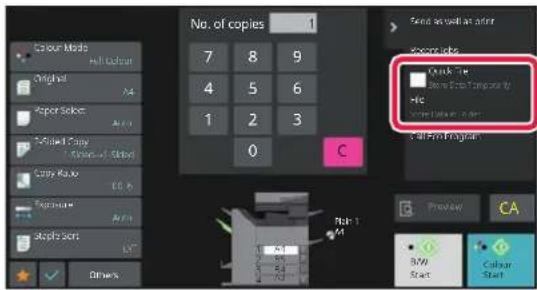
To use Document Filing from the beginning, select the action panel in the Document Filing mode. Tap any one of the keys to scan and save the original.


• [File] and [Quick File]
These keys may not appear on the action panel depending on the mode or settings. In this case, tap [Others] on the base screen in each mode, and then tap [Quick File] or [File].
• Using document filing in print mode
To use document filing in print mode, select document filing in the printer driver. For details on document filing, see "SAVING AND USING PRINT FILES (DOCUMENT FILING) (page 4-85)" in "PRINTER".
• Using document filing in PC-Fax/PC-I-Fax mode
To use document filing in PC-Fax or PC-I-Fax mode, select document filing settings in the PC-Fax driver. For more information, see Help in the PC-Fax driver.
BASE SCREEN OF DOCUMENT FILING MODE

(1) Use to save originals to be shared among users. (2) The folder for the registered user. (3) Displayed during user authentication. Tap this key to open the logged-in user's personal screen. (4) Use to save a file temporarily. (5) Use to search for a file in a folder.
(6) Displays the functions available in document filing mode. (7) Switch the custom folder order between ascending and descending. (8) Reset all settings. (9) Displays the usage status of the machine's built-in storage. Tap the key to display details.
SAVING FILES WITH DOCUMENT FILING
FILING WHILE USING ANOTHER MODE
QUICK FILE
This function allows you to store an original in copy mode or image send mode as an image file in the Quick File folder of the machine.
The image file stored in quick file mode can be retrieved at a later time, allowing you to copy the document or transmit it in image send mode without having to locate the original.
As an example, the procedure for using "Quick File" in copy mode is explained below.

- Quick File can be used in normal mode.
- When a file is stored using Quick File, the following user name and file name are automatically assigned to the file.
User Name: User Unknown
File Name: Mode_Month-Day-Year_Hour-Minute-Second
(Example: Copy_10102021_112030)
Save location: Quick File Folder
When user authentication is used, the user name that was used for login is automatically selected.
Only the file name and location of a file stored in the Quick File folder can be changed.
- You can change the name of the sending file at scanner or resend transmission by system settings.

To delete all files in the Quick File folder with the exception of protected files:
In "Settings (administrator)", select [System Settings] → [Document Filing Settings] → [Condition Settings] → [Delete All
Quick Files]. Configure settings to have all files deleted when the power is turned on as required.
1
Place the original.
Place the original in the document feeder tray of the automatic document feeder, or on the document glass.
SELECTING A PROCEDURE FOR PLACING THE ORIGINAL DEPENDING ON THE TYPE AND STATUS OF THE ORIGINAL (page 1-28)
2

Change to normal mode and tap [Quick File] on the action panel so that it is selected √

When a message relating to saving confidential information appears, tap the [OK] key.
3
Start a copy or image sending.
When the function is executed, the image data of the original is stored in the Quick File folder.

To prevent accidental saving of the file, the message "The scanned data is stored in the quick file folder." appears for 6 seconds (default setting) after the [Start] key ([Colour Start] key or [B/W Start] key in copy mode) is tapped.
To change the message display time, in "Settings (administrator)" → [System Settings] → [Common Settings] → [Operation Settings] → [Condition Settings] → [Message Time Setting].

To cancel Quick File:
Tap [Quick File] to enable
FILE
Tapping the [File] key of the document filing function when printing or transmitting an original in each mode allows you to store the original in the Main folder or stored Custom folder as a file simultaneously with printing or transmission. The stored file can be retrieved at a later time, allowing you to recopy or resend the original without having to locate it. As an example, the procedure for using "File" in copy mode is explained below.

- File can be used in normal mode.
- When a file is stored using File without appending file information, the following user name and file name are automatically assigned to the file.
User Name: User Unknown
File Name: Mode_Month-Day-Year_Hour-Minute-Second
(Example: Copy_10102021_112030)
Save location: Main Folder
- You can change the name of the sending file at scanner or resend transmission by system settings.
1
Place the original.
Place the original in the document feeder tray of the automatic document feeder, or on the document glass. SELECTING A PROCEDURE FOR PLACING THE ORIGINAL DEPENDING ON THE TYPE AND STATUS OF THE ORIGINAL (page 1-28)

There are also cases where settings are required to be made before a preview is carried out.
2
Change to normal mode and tap [File] on the action panel to specify the file information.
To select the user name, file name, folder, and property setting, see "File Information (page 7-12)".
To save on the local drive:
Changing the property (page 7-12)
Specifying a user name (page 7-13)
Assigning a file name (page 7-13)
Specifying the folder (page 7-14)
Creating PDF for PC browsing (page 7-14)
To save in an external memory device:
Assigning a file name (page 7-13)
Specifying the folder (page 7-14)
Creating PDF for PC browsing (page 7-14)

After configuring the above settings, you will return to this screen. Go to the next step.
If you do not wish to assign a user name or other information to the file, go to the next step.
3
Tap OK.
You will return to the base screen of copy mode.
4
Select copy settings and then tap the [Colour Start] key or the [B/W Start] key.
- Simultaneously with starting copy, the original is stored as a file.
The selected copy settings are also saved.
- For the procedure for placing the original, see "SELECTING A PROCEDURE FOR PLACING THE ORIGINAL
DEPENDING ON THE TYPE AND STATUS OF THE ORIGINAL (page 1-28)".
File Information
The procedure for detail settings is described below.
Specifying a property, user name, file name, and folder makes it easier to manage and search for a file. In addition, when [Confidential] is selected for Property and a password is established, other people will not be able to view the file without permission.
Changing the property
A protect setting can be selected for files saved with the document filing function. This prevents a file from being moved, or automatically or manually deleted.
Three properties are available for saved files: "Sharing", "Protect", and "Confidential". When saved with the "Sharing" property, a file is not protected. When saved with the "Protect" or "Confidential" property, a file is protected.
Files saved to the Quick File folder are all saved as "Sharing" files. When a file is saved to the Main folder or a custom folder, "Sharing", "Protect" or "Confidential" can be selected.
| Sharing | A "Sharing" file can be changed to "Protect" or "Confidential" using "Property Change" in the Job Settings. |
| Protect | "Protect" does not require setting of a password, but prevents a file from being moved, deleted or edited. A password cannot be established. |
| Confidential | To protect a "Confidential" file, a password is set. (The password must be entered to retrieve the file.) When a file is saved in encrypted PDF format, the file property is automatically set to "Confidential". |

Restrictions on changing the property
- A file that is set to "Sharing" can be changed to "Protect" or "Confidential" as required. However, a "Sharing" file that is saved in the Quick File folder can only be changed to "Protect".
- A file that is set to "Protect" can be changed to "Sharing" or "Confidential" as required. However, a "Protect" file that is saved in the Quick File folder can only be changed to "Sharing".
- A file that is saved in the Quick File folder cannot be changed to "Confidential". If the file is moved to the Main folder or a custom folder, the property can be changed to "Confidential".
- Two properties cannot be selected for a single file.
1
Select [Property] in the File Information screen.
2
When you have selected [Confidential], enter a password (4 to 32 characters).
Every time you enter one digit, “*” is displayed.
Specifying a user name
1 Tap the [User Name] text box.
When user authentication is used, the user name that was used for login is automatically selected. In this case, this step is not necessary.
![SHARP BP-50C45 - Tap the [User Name] text box. - 1](/content/2026/06/1367452/images/40e4c473a762a727e63fb3b718d9d18e74138bf49d9ff3bf30d1c9cf06241e03.jpg)
The user name must first be stored by selecting [User Control] in "Settings (administrator)" → [User Settings] → [User List].
2 Tap the key of the user name.
Alternatively, you can select a user name by tapping the [Call with Registration Number] key and entering the user number.
The user number must be first set by selecting [User Control] in "Settings (administrator)" → [User Settings] → [User List].
3
Tap OK.
The system goes back to the screen of step 1 to display the selected user name.
Assigning a file name
A file name can be assigned to the file.
1 Tap the [File Name] text box and enter the file name.
Enter a file name using up to 30 characters.
![SHARP BP-50C45 - Tap the [File Name] text box and enter the file name. - 1](/content/2026/06/1367452/images/c7bc1aa91ef0f50781fef6540f942434f361c4442446e334a2764dcacefe8d99.jpg)
File Name
- If a file name that already exists is specified, a tilde and a serial number are added after the file name and this file is saved as a different file. The file name is not case-sensitive.
For example, if the "test.txt" file already exists and you specify the "TEST.TXT" file, the file will be saved as "TEST.TXT\~1" file.
- If the length of the file name exceeds the limit, excess characters will be omitted and a serial number will be added to the end of the file name.
Specifying the folder
Specify the folder for storing the file.
1
Tap the [Stored to] text box.
If a user name with a "My Folder" setting is selected, "My Folder" of that user will automatically be selected.
2
Tap the key of the folder where you want to store the file, and tap OK.
If a password has been set for the folder, a password entry screen appears. Enter the password (5 to 8 digit number) using the numeric keys and tap OK.
Creating PDF for PC browsing
Tap the [Create PDF for PC Browsing] checkbox to √, and a public PDF for PC browsing will be created when the file is saved.

- Data saved before using [Disabling of OCR] in the system settings can be downloaded with the OCR function even after [Disabling of OCR] is enabled.
- Even if using the scanner function "AUTOMATICALLY ADJUST SKEWED SCAN DATA (Original Skew Adjustment) (page 6-144)", correction results will not be reflected.
Default Setting of PDF Format for PC Browsing
You can set the initial file format of public PDF or the file for download which is created during execution of each job. In "Settings (administrator)", select [System Settings] → [Document Filing Settings] → [Common Settings] → [Default Setting of PDF Format for PC Browsing].
B/W : Compression Mode
None, MH (G3), MMR (G4)
Colour/Greyscale: Compression Ratio
Low, Middle, High
SAVING DOCUMENT DATA ONLY (SCAN TO LOCAL DRIVE)
SAVE ON LOCAL DRIVE
Storing from Easy Scan
1

Tap the [Easy Scan] key on the Home screen.
2
Tap [Scan to USB/Local Drive].
3
Place the original.
Place the original in the document feeder tray of the automatic document feeder, or on the document glass. AUTOMATIC DOCUMENT FEEDER (page 1-30) DOCUMENT GLASS (page 1-34)
4

Tap [Scan to Local Drive].
5
To select settings, tap the key of each desired setting.
IMAGE SEND SEQUENCE (page 6-10)
6
Tap the [Colour Start] or [B/W Start] key to start scanning.
A beep will sound to indicate that scanning and file store have ended.
Storing from Document Filing
1
Tap the [File Retrieve] key on the Home screen.
2
Tap [Scan to Local Drive] on the action panel.
3
Place the original.
Place the original in the document feeder tray of the automatic document feeder, or on the document glass. AUTOMATIC DOCUMENT FEEDER (page 1-30) DOCUMENT GLASS (page 1-34)
4

Check the file name and save location, and tap keys for any settings you want to select.

- When the [Create Downloadable File] checkbox is checked (☑), the [File Format] key is greyed out and cannot be used. You will not be able to download scan data in the specified format from the Web page.
- For original scan settings, see the explanation of the copy or image send mode.
- If the original is 2-sided, be sure to tap the [Original] key and then tap the [2-Sided Tablet] key or the [2-Sided Book] key as appropriate for the original.
- To set a user name, file attribute, or password, tap [Options].
- When a file is created with [Create Downloadable File] disabled, this setting cannot be enabled later.
5
Tap the [Start] key to start scanning.
A beep will sound to indicate that scanning and file store have ended.
SAVE IN EXTERNAL MEMORY DEVICE
Storing from Easy Scan
1

Tap the [Easy Scan] key on the Home screen.
2
Tap [Scan to USB/Local Drive].
3
Place the original.
Place the original in the document feeder tray of the automatic document feeder, or on the document glass. AUTOMATIC DOCUMENT FEEDER (page 1-30) DOCUMENT GLASS (page 1-34)
4

Tap [Scan to USB].

When using BP-60C31/BP-60C36/BP-60C45/BP-70C31/BP-70C36/BP-70C45/BP-70C55/BP-70C65, or when the OCR expansion kit is installed on the BP-50C26/BP-50C31/BP-50C36/BP-50C45/BP-50C55/BP-50C65/BP-55C26, tap the [Auto Set] key to automatically set the read settings to match the original. "Auto Set" cannot be used if [Disabling of OCR] is set in the system settings.
SETTING SCAN SETTINGS AUTOMATICALLY (Auto Set) (page 6-92)
5
To select settings, tap the key of each desired setting.
IMAGE SEND SEQUENCE (page 6-10)
6
Tap the [Colour Start] or [B/W Start] key to start scanning.
A beep will sound to indicate that scanning and file store have ended.
Storing from Document Filing
1
Tap the [File Retrieve] key on the Home screen.
2
Tap [Scan to External Memory Device] on the action panel.
3
Place the original.
Place the original in the document feeder tray of the automatic document feeder, or on the document glass. AUTOMATIC DOCUMENT FEEDER (page 1-30) DOCUMENT GLASS (page 1-34)
4

Check the file name and save location, and tap keys for any settings you want to select.

- For original scan settings, see the explanation of the copy or image send mode.
- If the original is 2-sided, be sure to tap the [Original] key and then tap the [2-Sided Tablet] key or the [2-Sided Book] key as appropriate for the original.
5
Tap the [Start] key to start scanning.
A beep will sound to indicate that scanning and file store have ended.
Scan to USB memory device
1
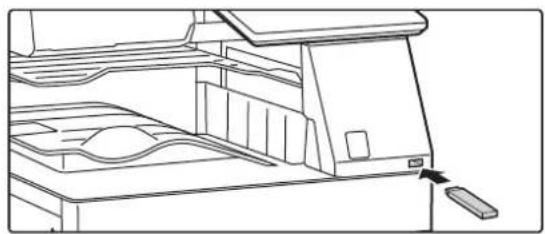
Connect the USB memory device to the machine.
- Use FAT32, NTFS or exFAT format for USB memory device.
- When the format of the USB memory device is FAT32, use a 32 GB or less USB memory device.
2
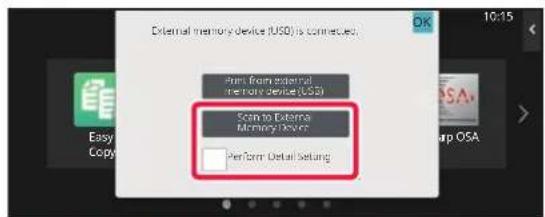
When a screen for selecting the action appears, tap [Scan to External Memory Device].
To select detailed settings in normal mode, select the [Perform Detail Setting] checkbox. See NETWORK SCANNER MODE (page 6-7).
![SHARP BP-50C45 - When a screen for selecting the action appears, tap [Scan to External Memory Device]. - 1](/content/2026/06/1367452/images/fec92c15749e53fd9099e29684d1479df9b865f1f976360d35a2f855aff1126f.jpg)
If the machine/device save screen is open, this screen will not appear.
3

Tap the [Colour Start] key or [B/W Start] key.
To check a preview of a document, tap the [Preview] key. See PREVIEW SCREEN (page 2-11).
4
![Place next original (Page No.) Press [Scan] When finished, press [Read-End] Change Setting Read-End](/content/2026/06/1367452/images/c3eff4b3e659427e99db668eeae5b60b001b928db425fd3167d1d940f96d8d32.jpg)
After scanning all originals, tap the [Read-End] key.
![SHARP BP-50C45 - After scanning all originals, tap the [Read-End] key. - 1](/content/2026/06/1367452/images/656d54219f5072d02d0f611f6a8d3d891124321eed7f9ad9123c7f3e01a45dcc.jpg)
When you scan the original using the automatic document feeder, this screen does not appear.
5

Check the [Sending data has been completed.] message, and remove the USB memory device from the machine.
USING STORED FILES
SEQUENCE FOR USING A STORED FILE
The screens and procedures differ depending on whether or not user authentication is enabled.
The sequence for using a stored file depending on the situation is explained.
For information on user authentication procedures, see "USER AUTHENTICATION (page 8-12)". For information on enabling user authentication and storing user names, see "USER CONTROL (page 8-20)".

Also in setting mode (Web version), you can use document filing. In setting mode (Web version), click [Document Operations] → [Document Filing], and then click the folder that contains the file you wish to use. You can also check a preview of a stored file in setting mode (Web version).
1 SWITCH to document filing mode. CHANGING MODES (page 2-10)
2

Select the file that you wish to retrieve.
When the folder is selected, the files in the folder will appear.
Select the file that you wish to retrieve.
Select a file from the thumbnail images of the stored files.
FILE SELECTION SCREEN (page 7-21)
SELECTING A FILE TO RETRIEVE (page 7-23)
Retrieve a file using the search function.
FILE SEARCH AND RETRIEVAL (page 7-34)
3

Select an operation item.
Select the desired operation and configure settings.
FILE SELECTION SCREEN (page 7-21)
FILE PRINTING (page 7-24)
FILE TRANSMISSION (page 7-27)
FILE MOVING (page 7-28)
DELETE FILE (page 7-29)
FILE IMAGE CHECKING (page 7-31)
FILE MERGING (page 7-32)

When retention is selected on the printer, reset items that cannot be set for retention do not appear.
FILE SELECTION SCREEN
The file selection screen can be displayed in "List" format or "Thumbnail" format to display thumbnail images of files.
List display mode
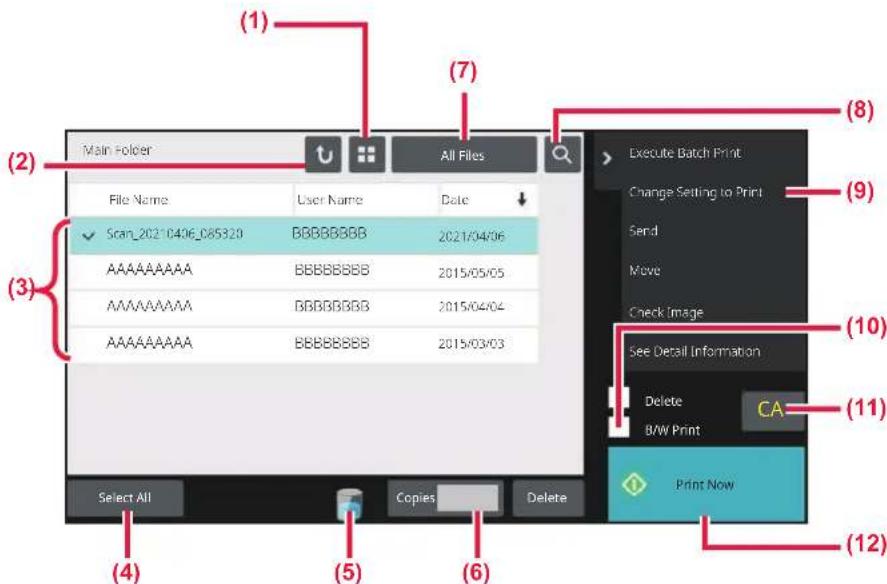
(1) Switch the file display mode between list and thumbnail. (2) Return to the base screen of document filing mode. (3) Displays the saved files. (4) Select or clear all files. Tapping this key switches the key display mode between [Select All] and [Cancel All]. (5) Tap this key to display the usage status of the machine's built-in storage.
(6) The number of copies set in [Copies] is valid when tapping [Print Now]. (7) Switch the file key displayed for each job type. (8) Search for a file saved in a folder. (9) Displays the functions that can be used. (10) Print in black and white. (11) Reset all settings. (12) Start printing immediately.
Thumbnail display mode

(1) Switch the file display mode between list and thumbnail. (2) Displays thumbnails of the saved files.
Sorting order
In "Settings (administrator)", select [System Settings] → [Document Filing Settings] → [Condition Settings] → [Sort Method Setting].
Selects an order of display files stored in the Main Folder, Custom Folder, and Quick File Folder. Select one of the following settings:
- File Name
- User Name
- Date
SELECTING A FILE TO RETRIEVE
1 Tap the [File Retrieve] key.
When user authentication is enabled and "My Folder" is configured by selecting [User Control] in "Settings (administrator)" → [User List], the custom folder specified as "My Folder" opens.
2

Tap the key of the folder that contains the desired file.
If the folder with a PIN Code is tapped, a PIN Code entry screen will appear.
Enter the PIN Code (4 to 8 digit number) using the numeric keys and tap the OK.
2 Tap the key of the desired life.
If the folder with a PIN Code is tapped, a PIN Code entry screen will appear. Enter the PIN Code (4 to 32 characters) and tap the OK.

- Tap the [Print Now] key to print out the file with the settings used for its storage.
- Tap the [Filter by Job] key to display the keys of a particular mode such as copy or scanner mode, enabling quick data search.
- Tap the [File Name] key, the [User Name] key, or the [Date] key to change the order of display of the files.
- Select [User Control] in "Settings (administrator)" → [User Settings] → [User List] → [User Registration] → [Authority Group]. Then, in authority group setting for the users who are currently logged in, select [Job Settings] → [Document Filing] and enable [Display only the Files of Logged-in Users] to display only files stored by the users who are currently logged in.
FILE PRINTING
A file stored using document filing can be retrieved and printed when needed. The settings used when the file was stored are also stored, and thus the file can be printed again using those settings. The file can also be modified before printing by changing the print settings.

- A file saved in black and white or greyscale cannot be printed in colour.
- Print settings that are changed by re-manipulation of the file cannot be saved.
- The printing speed may be somewhat slow depending on the resolution and exposure mode settings of the stored file.
- When retention is selected on the printer, reset items that cannot be set for retention do not appear.
Quick printing
Prints a file with the various settings used when it was saved. Select a file and tap the [Print Now] key.
To delete data after printing, set the [Delete] checkbox to √.
To print the file in black and white, select the [B/W Print] checkbox.
To change the number of sheets to print, tap the [Copies] key and then use the numeric keys to set the number to print.

Changing settings before printing
After selecting the desired file, follow the steps below.
SELECTING A FILE TO RETRIEVE (page 7-23)
1
Tap [Change Setting to Print] on the action panel.
2
Change the print settings.
3
Select the [Delete] or [B/W Print] checkbox when needed.
4
Tap the [Start] key.
The file will be printed.
MULTI-FILE PRINTING
MULTI-FILE PRINTING
1. Select the keys of the multiple files that you wish to print.

- Confidential files cannot be printed simultaneously with other files.
- A file in the currently selected folder cannot be selected simultaneously with a file in a different folder.

- If the job type is changed with the By Job Display key or the screen is changed by tapping the document icon while a file is selected, the selection of the file will be cancelled.
2. Tap [Print] on the action panel.
3. When not printing with the number of copies at data saving, tap the [Apply the Number from Stored Setting of Each Job.] checkbox to set it to unchecked.
When printing with the number of copies at data saving without specifying copies, go to step 5.
4. Use the up/down arrows to specify the number of copies.
As required, directly tap the numeric value display key and change the value using the numeric keys.
5. To set the order of files to print, change with [Print Order].
6. To delete the file after printing, tap the [Delete] checkbox to set it to checked.
7. Tap the [Start] key to start printing.
BATCH PRINTING
Batch Print Settings
In "Settings (administrator)", select [System Settings] → [Document Filing Settings] → [Condition Settings] → [Batch Print Settings].
Set whether or not the [All Users] key and the [User Unknown] key are prohibited in the user name selection screen when printing all files, whether files are sorted by date in newest or oldest order, and whether file names are sorted in ascending or descending order.
1
Tap the [Execute Batch Print] key on the action panel.
2
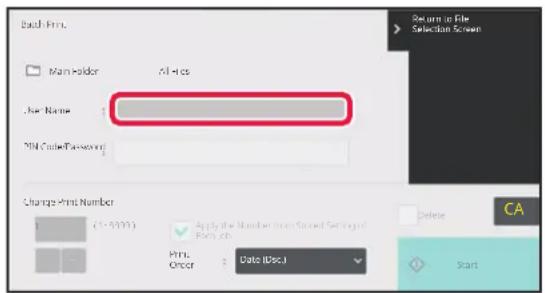
Tap the [User Name] text box.
3
Select the user name.
After selecting the user name, tap


If you have selected [System Settings] in "Settings (administrator)" → [Document Filing Settings] → [Condition Settings] → [Batch Print Settings] and disabled the [Selection of [All Users] is not allowed.] checkbox and [Selection of [User Unknown] is not allowed.] checkbox, select the [All Users] key and [User Unknown] key. If you tap the [All Users] key, all files in the folder (the files of all users) are selected. If you tap the [User Unknown] key, all files in the folder with no user name specified are selected.
4
If a password has been established, tap the [Password] key.
Enter the password (4 to 32 characters) and tap OK. Only files that have the same password will be selected. If you do not wish to enter a password, go to the next step.
5
When not printing with the number of copies at data saving, tap the [Apply the Number from Stored Setting of Each Job.] checkbox to set to ☐.
When printing with the number of copies at data saving, go to step 7.
6
Use to specify the number of copies.
As required, directly tap the numeric value display key and change the value using the numeric keys.
7
To automatically delete the file after printing, tap the [Delete] key.
8
Tap the [Start] key to start printing.
If there are no files that match the search conditions, you will return to the file list screen.
![SHARP BP-50C45 - Tap the [Start] key to start printing. - 1](/content/2026/06/1367452/images/dbd92161d4c5e11772d4da41bb8400178584663d9f49a221d29503ae33e400fd.jpg)
If [Delete the Data] on the action panel is tapped, all files that match the current search conditions will be deleted.
FILE TRANSMISSION
The settings used when the file was stored with document filing are stored, and thus the file can be transmitted using those settings. If needed, you can also change the transmission settings to modify the retrieved file.
After selecting the desired file, follow the steps below.
SELECTING A FILE TO RETRIEVE (page 7-23)

- A file saved in black and white or greyscale cannot be transmitted in colour.
- A stored print job cannot be transmitted. (However, if the job was filed in the printer driver, it can be transmitted if "Rip Style" is set to [RGB]. This setting is accessed by selecting the [Other Settings] button on the [Detailed Settings] tab.)

• These transmission methods require installation of the corresponding options. - If any of the following other modes were included in the saved file, the file cannot be transmitted: "Stamp", "Photo Repeat", "Multi-Page Enlargement" for copying. - If any of the following other modes were included in the saved file, the file can be transmitted, but other functions cannot be executed: "Margin Shift", "Transparency Inserts", "Book Copy", "Tab Copy", "Stamp", all "Colour Adjust" menu items, "Centring". - Depending on the reduction or enlargement ratio used when storing a file, it may not be possible to send the stored file using a selected resolution setting. In this event, try changing the resolution. However, when sending a stored file by Internet fax, transmission may not be possible even if the resolution is changed. - Files saved in other than Internet Fax mode cannot be sent to an Internet Fax address. - When the original job is not a Print Job, Fax Receive Job, or Internet Fax Receive Job and the resend format is a PDF format, this function automatically corrects the skew and sends if the original is scanned while skewed. Since this function is the same as the scanner function, see "AUTOMATICALLY ADJUST SKEWED SCAN DATA (Original Skew Adjustment) (page 6-144)".
1
Tap [Send] on the action panel.
2
Select settings for sending.
3
Tap the [Start] key.
FILE MOVING
Changes the file storage location. (The file is moved to another folder.)

A file whose property is "Protect" cannot be moved. To move a protected file, change its property to "Sharing" or "Confidential".
After selecting the desired file, follow the steps below.
SELECTING A FILE TO RETRIEVE (page 7-23)
1

Tap [Move] on the action panel.
2
Tap the [Move to:] key.
![SHARP BP-50C45 - Tap the [Move to:] key. - 1](/content/2026/06/1367452/images/149544d010d7f98138a448dec28187ae4cfd232ce84c4c984f8cfe79332ed732.jpg)
- A file cannot be moved to the Quick File folder.
- To change the file name, tap the [File Name] key.
3

Tap the key of the folder to which you want to move the file.
If the folder with a password is tapped, a password entry screen will appear.
Enter the password (5 to 8 digit number) using the numeric keys and tap the OK

When multiple files are moved, file names cannot be changed.
4
Tap the [Move] key.
DELETE FILE
Stored files that are no longer required can be deleted.

A file whose property is "Protect" cannot be deleted. To delete a protected file, change its property to "Sharing" or "Confidential".
After selecting the desired file, follow the steps below.
SELECTING A FILE TO RETRIEVE (page 7-23)
1

Tap the [Delete] key.
2

Check the file and then tap the [Delete] key.
Automatic Deletion of File
You can have document filing data in specified folders automatically deleted by specifying the folders and the time.
Periodic deletion of files stored in the machine helps to prevent the disclosure of sensitive information and frees space on the local drive.
Automatic Deletion of File Settings
Document filing settings are described below. Tap the [Document Filing Settings] key to configure the settings.
Time and folder settings can be configured to have files in specified folders (stored by document filing) automatically deleted at a specified time. Up to 3 settings can be stored to be automatically deleted.
The procedure for using this function is as follows:
(1) Select [Setting 1], [Setting 2], or [Setting 3]. (2) Set the time and date for automatic deletion. (3) Select the desired folder. (4) Specify whether or not protected files and confidential files are to be deleted. (5) Enable the stored settings.
| Item Settings | |
| Schedule | Select the cycle for automatic deletion. Select from [Delete by Schedule] or [Delete at Specified Time after Specified Days Have Elapsed].Delete by ScheduleSelect an automatic deletion cycle.Every Day: Auto deletion every day at the specified time.Every Week: Auto deletion at the specified time on the specified day of the week.Every Month: Auto deletion at the specified time on the specified day of the month.Delete at Specified Time after Specified Days Have ElapsedDeletes the file automatically at the specified time after the specified number of days have passed from the day the file was saved.Days: Set the elapsed time and date.Time of Deletion: Deletes the file automatically at the specified time. |
| Folders | To select the folder separately, select [Folder Select] and select the desired folder. To select all folders, including the folder currently being created, select [All Folders (Including folders registered hereafter)]. |
| Delete Protected File Enable this setting to include protected files in the deletion. | |
| Delete Confidential File | Enable this setting to include confidential files in the deletion. |
Delete Now
When this is executed with a folder selected, all files in the folder will be immediately deleted regardless of the date and time setting.
Executing automatic deletion during Auto Power Shut-Off
(If this is not selected, the files will be deleted after the machine wakes from auto power shutoff mode.)
Execute Auto Deletion even if Auto Power Shut-Off is enabled. When the checkbox is not selected (☐), the files will be deleted after the machine wakes from auto power shutoff mode.
FILE IMAGE CHECKING
FILE IMAGE

(1) Displays file information. (2) Displays file preview images. (3) Enlarge or reduce the preview screen.
(4) Displays the page number. (5) Displays the total page count. (6) Rotate the preview screen in increments of 90 degrees.

- Depending on the size of the image, part of the image may be clipped off in the image check screen on the touch panel.
- A preview image is an image for display on the touch panel. It will differ from the actual print result.
- The image check screen does not appear when multiple files are selected.
After selecting the desired file, follow the steps below.
SELECTING A FILE TO RETRIEVE (page 7-23)


Tap [Check Image] on the action panel.


Check the image of the file.
FILE MERGING
You can combine files that have been saved by Document Filing.

- If you have only selected a single file, the [Combine File] key is not displayed.
- The file name is a combination of "the first file name", "a tilde (~)", and "Serial No.". As required, change the file name at a later time. • The files are joined in the selected order.
After selecting two desired files, follow the steps below.
SELECTING A FILE TO RETRIEVE (page 7-23)
1

Tap [Combine File] on the action panel.
2
Append file information.
To select the user name, file name, folder, and property setting, see "File Information (page 7-12)". To delete the original file, select the [Delete Original File] checkbox.
3
Tap the [Execute] key.
Combining of files starts, and after the processing is finished, the "Combining complete" message appears.
![SHARP BP-50C45 - Tap the [Execute] key. - 1](/content/2026/06/1367452/images/3f3a210f68d0696b3c3540e363d9e3e5841de837760635ff8e1c61b0989a3287.jpg)
To cancel the operation
Tap the [CA] key. Note that the operation cannot be cancelled when the original file is being deleted after the files are combined.
RETRIEVING AND USING A FILE FROM THE JOB STATUS SCREEN
Files stored using File and Quick File appear as keys in the job status complete screen.
This is convenient when you need to quickly print the saved data of a copy job or quickly send a saved fax to another destination.
1
Tap the job status display.
2

Tap the tab with a file to be retrieved, and tap the [Complete] key.
3
Tap the key of the desired file from the completed job.
A file that has been processed by Quick File or File can be selected for a job in the retrieve operation.
4
Tap [Send] or [Change Setting to Print] on the action panel.
FILE TRANSMISSION (page 7-27)
FILE PRINTING (page 7-24)

To view detailed information on a file, select the file, and then tap [Check Details of Selected Job] on the action panel.
FILE SEARCH AND RETRIEVAL
When there are many stored files, it may take some time to locate a file. The search function of document filing mode can be used to find a file quickly.
Searching is possible even when you only know part of the file name or folder name. As required, a folder can also be specified as a search range.
Example: Only part of a file name is known: "Conference"
![graph LR A["Local Drive"] --> B["Personal use"] A --> C["Quick File"] A --> D["Standard"] A --> E["for conference"] B --> F["Regular conference"] C --> G["Reports"] D --> H["Graph for conference"] E --> I["When you search by entering "Conference"..."] I --> J["Search result"] J --> K["for…](/content/2026/06/1367452/images/3f15eddab791f87046612428aac303c98e3935a7b26c4c707a8f31c7684dd4a3.jpg)
1

To search for a specific folder, tap its key.

If the folder with a password is tapped, a password entry screen will appear. Enter the password (4 to 8 digit number) using the numeric keys.
2
Tap .
3
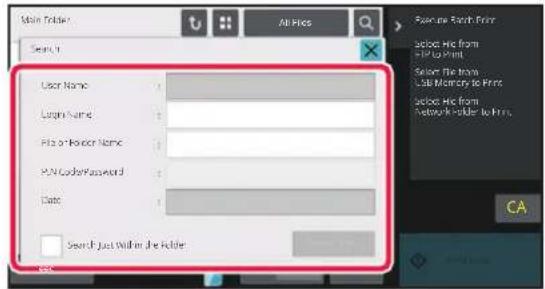
Select search conditions.
Tap each text box and set the search condition.
To search for the current folder, set the [Search Just Within the Folder] checkbox to √
[User Name]
Search using the user name.
Select a user on the user selection screen that appears, and then tap OK.
[Login Name]
Search using the login name.
Enter the login name on the soft keyboard that appears and tap the [OK] key.
[File or Folder Name]
Search using the file name or folder name.
Enter the file name or folder name on the soft keyboard that appears and tap the [OK] key.
[PIN Code/Password]
Search for files that have a password set. Enter the password with the soft keyboard that appears, and tap the [OK] key.
[Date]
Search using the date when the file was created.
When you have selected [Today] or [Date Set], set the time and date.
4
Tap the [Search Start] key.
A list of the files that match your search conditions will appear. Select the desired file from the list. The job settings screen will appear.
To return to the base screen of document filing mode, tap the [CA] key.
To return to the file search screen, tap the [Search Again] key.
![SHARP BP-50C45 - Tap the [Search Start] key. - 1](/content/2026/06/1367452/images/df25bb70d008558249ff30feb780ad362454cd1fb0358d9bd9bc9e9e2509a4ea.jpg)
- When you search using [File or Folder Name], custom folders that match the search characters will also appear in the list. When a folder key is tapped, a list of the files in the folder appears. Tap the desired file in the list.
- Also in setting mode (Web version), you can use the file search function. Click [Document Operations] in "Settings (Web version)" → [Document Filing] → [Search].
PRINTING AN EXTERNAL FILE
A file stored in the FTP server, USB memory device, or network folder of a PC can be printed. The file can also be modified before printing by changing the print settings.
On the action panel, tap [Select File from FTP to Print], [Select File from USB Memory to Print] or [Select File from Network Folder to Print].
For more information, see "PRINTING WITHOUT THE PRINTER DRIVER (page 4-90)".
Document Filing operations can be performed from the Web page using "Settings (Web)" - [Document Operations] → [Document Filing].
Main Folder
The files that are in the Main Folder can be displayed. A specified file can be manipulated by clicking [Print], [Send], [Move], or [Delete]. If the file to be manipulated has a password, enter the password in "PIN Code/Password of File".
| Item Description | |
| Display Style Saved files can be displayed in list format or thumbnail format. | |
| Job Classification | The saved files that are displayed can be filtered by job. |
| Display Items Set the number of files that are displayed. | |
Quick File Folder
Files in the Quick File Folder can be displayed. A specified file can be manipulated by clicking [Print], [Send], [Move], or [Delete].
| Item Description | |
| Display Style Saved files can be displayed in list format or thumbnail format. | |
| Job Classification | The saved files that are displayed can be filtered by job. |
| Display Items Set the number of files that are displayed. | |
Custom Folder
The files that are in the Custom Folder can be displayed. A specified file can be manipulated by clicking [Print], [Send], [Move], or [Delete]. If the file to be manipulated has a password, enter the password in "PIN Code/Password of File".
| Item Description | |
| Index The displayed Custom Folder | names can be filtered by index. |
| Display Items Set the number of files | that are displayed. |
Search
Use these settings to enter search conditions. A specified file can be manipulated by clicking [Print], [Send], [Move], or [Delete]. If the file to be manipulated has a password, enter the password in "PIN Code/Password of File".
| Item Description | |
| User Name Enter the user name. (Up to 32 characters) | |
| Select from User List Click the [Setup] button and search for users from the list. | |
| Login Name Set the number of files that are displayed. | |
| Search Folder Set the folder. | |
| File Name Enter a file name. (Up to 30 characters) | |
| PIN Code/Password of File Enter the password that is set for the file (4 to 32 digits). | |
| Stored Date Set the date and time the file was saved. | |
Search Result
Use these settings to enter search conditions. A specified file can be manipulated by clicking [Print], [Send], [Move], or [Delete]. If the file to be manipulated has a password, enter the password in "PIN Code/Password of File".
| Item Description | |
| Display Style The files that were found can be displayed in list format or thumbnail format. | |
| Job Classification The found files can be filtered by job. | |
| Display Items Set the number of files that are displayed. | |
File Batch Print
Multiple files can be printed at once by batch printing. Search for the files using search conditions, and then select multiple files from the displayed search results.
If you want to use the number of copies set when each file was saved by Document Filing, select "Apply the Number of Copies Stored in Each File". If you want to set a different number of copies, enter the desired number in "Enter the Number". Click [Print] to print the file. To have the file deleted after printing, select the "Print and Delete the Data" checkbox.
| Item Description | |
| Search Condition | |
| User Name Enter the user name. (Up to 32 characters) | |
| Select from User List Click the [Setup] button and search for users from the list. | |
| Search Folder Set the folder. | |
| File Name Enter a file name. (Up to 30 characters) | |
| PIN Code/Password of File Enter the password that is set for the file. (4 to 32 digits) | |
| Search Result | |
| Job Classification The found files can be filtered by job. | |
| Billing Code | |
| Main Code Select this checkbox, and then enter the main code.(32 characters or less) | |
| Sub Code Select this checkbox, and then enter the sub code.(32 characters or less) | |
USE ENVIRONMENTALLY FRIENDLY
ECO 8-2
ECO FUNCTIONS OF THE MACHINE 8-2
AUTO POWER SHUT-OFF MODE 8-2
PREHEAT MODE....8-3
ECO RECOMMENDATION FUNCTION DISPLAY ..... 8-3
AS SOON AS THE REMOTE JOB IS FINISHED,
ENTER AUTO POWER SHUT OFF MODE ... 8-4
ECO SCAN ... 8-6
ECO SCAN SETTING ... 8-6
ENERGY SAVING PATTERN LIST ... 8-7
POWER ON/OFF SCHEDULE SETTING ... 8-8
SPECIFIC DATE OPERATION SETTINGS ... 8-9
DISPLAYING ECO RECOMMENDATION SETTINGS
(ECO RECOMMENDATION FUNCTION DISPLAY) ... 8-10
TONER SAVE MODE ... 8-10
MOTION SENSOR ... 8-11
MANAGING THE USE OF THE MACHINE
USER AUTHENTICATION ... 8-12
AUTHENTICATION BY USER NUMBER ... 8-12
AUTHENTICATION BY LOGIN
NAME/PASSWORD ... 8-14
QUICK AUTHENTICATION 8-17
USER CONTROL 8-20
ORGANIZATION/GROUP LIST 8-21
PAGE LIMIT GROUP LIST....8-22
AUTHORITY GROUP....8-23
FAVORITE OPERATION GROUP LIST....8-24
ACTIVE DIRECTORY LINKING FUNCTION ..... 8-24
BILLING CODE 8-25
BILLING CODE 8-25
EASILY CONNECT WITH AN NFC-COMPATIBLE
MOBILE DEVICE (EASY CONNECT) 8-37
CONNECTING BY NFC 8-37
CONNECTING BY QR CODE....8-38
NAS 8-39
FOLDER STRUCTURE....8-39
REMOTE OPERATION OF THE MACHINE .....8-40
Sharp OSA....8-42
APPLICATION COMMUNICATION 8-42
EXTERNAL ACCOUNT APPLICATION 8-43
VIRUS SCAN 8-44
VIRUS SCAN/VIRUS DEFINITION UPDATE TIMING
AND TARGET DATA....8-44
WHEN A VIRUS IS DETECTED 8-46
UPDATING THE VIRUS DEFINITION FILE .....8-48
UNIVERSAL DESIGN IN THE MACHINE
UNIVERSAL DESIGN IN THE MACHINE .....8-49
UNIVERSAL DESIGN RELATED TO OPERATION . . . 8-49
UNIVERSAL DESIGN RELATED TO VISION .....8-50
UNIVERSAL DESIGN RELATED TO HEARING .....8-50
UNIVERSAL DESIGN FEATURES....8-51
JOB LOG LIST
ITEMS RECORDED IN THE JOB LOG 8-53
USE ENVIRONMENTALLY FRIENDLY
ECO
ECO FUNCTIONS OF THE MACHINE
Mode Settings
The eco function settings are set in a batch. "Custom Mode" and "Eco Mode" are available. Setting values applied by each mode is as follows.
| Function Custom Mode Eco Mode | ||
| Preheat Mode Setting 1min. 1min. | ||
| Turn off Panel Display during pre-heat mode | On On | |
| Auto Power Shut-Off Timer Fix transition time.:11min. (for Europe), 1min. (Except for Europe) | Fix transition time.:1min. | |
| As soon as the remote job is finished, enter Auto power shut off mode. | On On | |
| Sleep Mode Power Level Low Power Low Power | ||
| Eco Scan On On (All Modes Except Copy) | ||
Each Energy Save settings in System Settings is not applied when Custom/Eco mode is used.
AUTO POWER SHUT-OFF MODE
This mode turns off the power to the operation panel and the fusing unit, and makes the machine wait in the lowest power consumption state.
Auto Power Shut-Off mode will activate when the set duration of time elapses in waiting status without executing a job. Compared to preheat mode, the power-saving rate is considerably higher but the wakeup time is longer.
The main power indicator blinks in yellow when the machine is in Auto Power Shut-Off mode.
This mode is cleared when print data is being received, fax data is being output, or when the [Power] button is pressed while it is blinking.
![Main power indicator [Power] button](/content/2026/06/1367452/images/ab45d77ee0d22b34925466783d61b1465567b0417748e435318bf4c504aa21df.jpg)
A message appears 15 seconds before Auto Power Shut-Off Mode is entered.
To close the message and continue normal operation, tap the [Continue] button.
The message appears again 15 seconds before the end of the extension of normal operation time.
If no action is taken within 15 seconds after the message appears, the machine enters auto power shut-off mode.

To set display of the message:
In "Settings (administrator)", select [System Settings] → [Energy Save] → [Eco Setting] → [Display Message When Extending Transition Time to Preheat/Auto Power Shut-Off Mode].

Pressing and holding the [Power] button during auto power shut-off will turn off the machine.
PREHEAT MODE
This mode lowers the temperature of the fusing unit and makes the machine wait in low power consumption state.
Preheat mode will activate when the set duration of time elapses in waiting status without executing a job.
Compared to Auto Power Shut-Off Mode, the amount of energy saved is less and the wakeup time is shorter.
The touch panel goes off.
The main power indicator lights in blue when the machine is in preheat mode.
The touch panel is cleared when it is tapped or the [Home Screen] button is pressed.

To set preheat mode:
"Settings (administrator)" → select [System Settings] → [Energy Save] → [Eco Setting] → [Preheat Mode Setting].
A message appears 15 seconds before Preheat Mode is entered.
To close the message and continue normal operation, tap the [Continue] button.
If no action is taken within 15 seconds after the message appears, the machine enters preheat mode.

To set display of the message:
In "Settings (administrator)", select [System Settings] → [Energy Save] → [Eco Setting] → [Display Message When Extending Transition Time to Preheat/Auto Power Shut-Off Mode].
ECO RECOMMENDATION FUNCTION DISPLAY
Shows recommended copy/print settings for copy, document filing reprint, and direct print.
Copying
When you change to copy mode (normal mode), the settings recommended for copy mode appear.
Recommended settings: 2-Sided Copy, N-Up, B/W Copy, and Image Orientation
Document filing print
When you tap the [Change Setting to Print] in the action panel on the file list screen of document filing, the settings recommended for this mode appear.
Recommended settings: 2-Sided Print, N-Up, and Print B/W.
Direct print
When you tap the [Change Setting to Print] in the action panel on the file list screen of direct print, the settings recommended for this mode appear.
Recommended settings: 2-Sided Print, N-Up, and Print B/W.
As soon as the remote job is finished, enter Auto Power Shut-Off mode.
Printing or outputting received fax data in Auto Power Shut-Off Timer turns on the power, and then the machine returns to Auto Power Shut-Off Mode immediately after completing the print job.
![graph LR A["Printed"] --> B["Fusing unit is turned off"] B --> C["Fusing unit is turned on"] C --> D["Fusing unit is turned off"]](/content/2026/06/1367452/images/a40280681700f1c855f4a16b04716bacd4f481c586bce449def1ea2bd0b0e99f.jpg)

To set "As soon as the remote job is finished, enter Auto power shut off mode."
In "Settings (administrator)", select [System Settings] → [Energy Save] → [Eco Setting] → [As soon as the remote job is finished, enter Auto power shut off mode.].
Fix transition time.
The Auto Power Shut-Off Timer is fixed. Select [Fix transition time.], and set the transition time in [Auto Power Shut-Off Timer].
When this setting is enabled, the [Change transition time by time of day.] option is disabled.
Change transition time by time of day.
This function controls the transition to Auto Power Shut-Off mode optimally for each time period by analyzing the use of the machine based on job logs obtained during a 4-week period.
When this setting is enabled, the [Fix transition time.] option is disabled.

- The image transfer control settings are not changed.
- This does not link to the Power On/Off Scheduling. If both of them are enabled, the Power On/Off Scheduling settings precede.
- Pages are counted for each paper size separately.
- When the power supply of the machine was off, there was no job during this time.
Transition to Energy Saving and Auto Power Shut-Off modes
| Pattern Transition time Average outputs per | hour* | |
| Mode1 (Job Start Priority1) | After 1 hour 700 or more | |
| Mode2 (Job Start Priority2) | After 30 minutes 150 to 699 | |
| Mode3 (Energy Saving Priority1) | After 5 minutes 40 to 149 | |
| Mode4 (Energy Saving Priority2) | After the minimum time period Up to 39 | |
* Factory default setting
Automatic
This function controls the power optimally for each time period by analyzing the use of the machine based on job logs obtained during a certain time period.

If the machine does not have the 4-week job log information, the machine enters the template2 (Mode3 (Energy Saving Priority1) between 8:00 and 18:00 hours). Then after that, it enters Mode4 (Energy Saving Priority2).
Manual
You can set a pattern for each time band.
The machine already has the 3-pattern template. The Energy Save pattern can be added to the "Original Eco Patterns 1 to 4".
Three-pattern template
| Template Pattern Description of mode | ||
| Template 1 All Day "Energy | SavePriority2" | The machine runs in the "Mode4 (Energy Saving Priority2)" all the time. |
| Template 2 8:00-18:00 "Energy SavePriority1" | The machine runs in "Mode3 (Energy Saving Priority1)" between 8:00 and 18:00, and in "Mode4 (Energy Saving Priority2)" at other times. | |
| Template 3 8:00-18:00 "Job | StartPriority1" | The machine runs in "Mode1 (Job Start Priority1)" between 8:00 and 18:00, and in "Mode4 (Energy Saving Priority2)" at other times. |
Sleep Mode Power Level
Low Power:
The machine switches to the power saving mode, but it takes some time to recover.
Fast Wake Up:
Compared with Low Power, the power value rises by a certain degree, but it results in faster recovery.
Motion Sensor Mode
(BP-60C31/BP-60C36/BP-60C45/BP-70C31/BP-70C36/BP-70C45/BP-70C55/BP-70C65):
The motion sensor enables the machine to automatically wake from sleep mode.
ECO SCAN
Non-print jobs such as sending a scanned original are performed with the fusing unit turned off.
![graph TD A["Fusing unit is turned off"] -->|Copy Print| B["Fusing unit is turned on"] A -->|Image Send Document Filing| C["Fusing unit is turned off"] B --> D["Computer"] C --> E["Print"] B --> F["File Icon"] C --> G["Document Icon"]](/content/2026/06/1367452/images/7cd28272a0a663eeed4ebabeaffe088aa3dc4a1995deee82aadd24b40874f435.jpg)
ECO SCAN SETTING
Set "Eco Scan Setting" to ☑, and select a mode or screen in which to enable Eco Scan Setting. The following modes and screens can be set.
- Home Screen • Copy
- Image Send
- Document Filing
- System Settings
- Sharp OSA

To set Eco scan:
"Settings (administrator)" → select [System Settings] → [Energy Save] → [Eco Scan Setting].
ENERGY SAVING PATTERN LIST
This function analyzes machine usage and controls entry into auto power shutoff mode based on frequency of use. If you want to manage machine power by using an energy saving pattern list, select [Manual] in "Settings (administrator)" - [Eco Setting] - [Energy Save] - [Change transition time by time of day.], and select an Automatic Update Pattern from the pull-down list or one of Original Eco Patterns 1 to 4.
To automatically analyze machine usage and update the pattern as needed, set Automatic Update Pattern.
Edit Pattern
Set the Original Eco Pattern.
| Item Description | |
| Change Pattern Name | To change the pattern name, enter the desired name. |
| Pattern to Be Modeled | Select the stored pattern that you want to base the new pattern on. To copy the settings of a selected pattern, select [Copy the selected pattern]. |
| Energy Save Setting | Set time periods for machine modes. Select a mode from 1 to 4, and select a day of the week, start time, and end time. |
| Day of the Week | Set the day of week on which you want to enable the mode selected in the Energy Save Setting. |
| Start Time/Completing Time | Set the period of time during which you want to enable the mode selected in the Energy Save Setting. |
POWER ON/OFF SCHEDULE SETTING
The machine operator panel can be turned On or Off at a preset time. Up to three (3) patterns can be set. The "Setting 1", "Setting 2" and "Setting 3" are executed in this sequence if set at the same day of week or at the same clock time.


- The scheduling function does not support the power management settings in the Preheat Mode and Auto Power Shut-Off Mode.
- The preset power-off time is subject to the following restrictions:
- If the machine is running due to the current job execution or other reasons, the machine is turned off only after the job has finished.
- The machine cannot receive printer jobs.
- The machine can receive output jobs, such as received fax data outputs.
- If the Time Specified Output of Received Data setting is enabled, they are output next time the machine is turned on.
- If the power management setting is also enabled, the Power On/Off Scheduling settings precede.
- If the same time is specified, settings are applied in the order of "Setting 1", "Setting 2", and "Setting 3".
- The power is not turned off in the following cases:
- "Power Up Auto Clear" is in progress.
- While the Optimization of a Local Drive is in progress or while a restart is in progress after the setting mode has been changed.
- The preset power on/off time is within one minute from when the setting is accepted.

Setting Power ON/OFF Scheduling Function
In "Settings", select [System Settings] → [Energy Save] → [Power ON/OFF Schedule Setting].
You can configure a day on which you have high-output printing or want to perform a special operation as the "specific date" and set a specific energy saving pattern only for that specific date.
"Specific Date" tab
A period of up to 7 days can be set for Specific Date. Set the specific date, energy saving pattern to be applied, and the operation that takes place if the specific date falls on a non-work day.

Regardless of whether the auto power shut-off transition time is enabled or disabled, the machine will operate on the Specific Date Operation Settings for the specific date.
| Item Description | |
| Date Setting | Configure the date on which you want to operate the machine with a specific pattern. Select a day between 1 and 31 in Every Month or from End of Every Month. |
| Applied Energy Saving Operation | Select an energy saving pattern you want to apply.Use theENERGY SAVING PATTERN LIST(page 8-7)to specify the details of the energy saving pattern. |
| Operation for Holiday | Configure how the machine operates if the preset specific date falls on a holiday.Use theENERGY SAVING PATTERN LIST(page 8-7)to specify the day as the holiday. |

- If a specific date that is initially specified coincides with the one that is moved because it falls on a holiday, the setting for the former takes precedence.
- If specific dates of the same dates are configured, they are used in ascending order between 1 and 7 (specific date numbers).
"Pattern" tab
This tab is used to configure the details of an energy saving pattern.
| Item Description | |
| Energy Save Operation Select a specific date pattern you want to specify. | |
| Change Pattern Name | Enter a pattern name when you want to change the name of a specific date pattern. |
| Pattern to Be Modeled | Select a source pattern when you create a pattern using a stored or preset pattern. |
| Add new schedule. Add a schedule. | |
"Holiday" tab
Specify a holiday. The day you specified as the holiday will not be a specific date.
| Item Description | |
| Holiday List | When you tap this option, the dates and days of the week for the holidays you have set for two years. |
| Day of Week Use this option to specify a holiday using a day of the week. | |
| Set Period | Use this to specify a holiday using a date."Final Registered Time" shows when the holiday that is stored with Set Period was stored. |
DISPLAYING ECO RECOMMENDATION SETTINGS (ECO RECOMMENDATION FUNCTION DISPLAY)
When the base screen of normal mode is displayed, eco recommendation settings appear.

This function does not operate in easy mode.

To use the eco recommendation function display:
"Settings (administrator)" → [System Settings] → [Energy Save] → [Eco Setting] → [Eco Recommendation Function Display].
The displayed functions are as follows.
• 2-Sided Copy: ▶ page 3-20
• B / W Copy: ▶ page 3-20
• N - U p : ▶ page 3-52
• Image Orientation: ▶ page 3-31
TONER SAVE MODE
This mode is used to reduce toner consumption.
Toner consumption can be set for each print job of "Copy", "Printer", and "Prints (Document Filing)".
Toner consumption can be selected from three levels.
- Toner Save1 (Toner Consumption: Much)
- Toner Save2 (Toner Consumption: Middle)
- Toner Save3 (Toner Consumption: Little)
MOTION SENSOR
(BP-60C31/BP-60C36/BP-60C45/BP-70C31/BP-70C36/BP-70C45/BP-70C55/BP-70C65)
This sensor detects the presence of a person that approaches the machine, and automatically wakes the machine from sleep mode. (Motion Sensor Mode Only)
Three settings are available for the detection range (A/) || III
In addition, when the motion sensor responds during the time when the power of this machine is set to OFF in the Power ON/OFF Schedule Setting, you can be warned with a notification message.
When you register an e-mail address as an alert destination, detection information will be sent to inform you that the motion sensor has responded to the registered e-mail address.


- The motion sensor detects the movement of sources of heat.
- The detection range may vary depending on the installation site and environment (ambient temperature, etc.).

The motion sensor may not operate correctly in the conditions below.
- An object is in front of the motion sensor • There are scratches or dirt on the motion sensor cover • The motion sensor is directly exposed to sunlight or air flow • The motion sensor is damaged • There is a source of heat such as a heater nearby
- An object is moving in the detection range

To enable the motion sensor:
"Settings (administrator)" select [System Settings] → [Energy Save] → [Eco Setting] → [Sleep Mode Power Level].
MANAGING THE USE OF THE MACHINE
USER AUTHENTICATION
User authentication restricts the use of the machine to users that have been registered. The functions that each user is allowed to use can be specified, allowing the machine to be customized to meet the needs of your workplace.
When the administrator of the machine has enabled user authentication, each user must log in to use the machine. There are different types of user authentication, and each type has a different login method.
For more information, see the explanations of the login methods.
AUTHENTICATION BY USER NUMBER (page 8-12)
AUTHENTICATION BY LOGIN NAME/PASSWORD (page 8-14)
QUICK AUTHENTICATION (page 8-17)
For the settings that are required for user authentication, refer to USER CONTROL (page 8-20).
AUTHENTICATION BY USER NUMBER
The following procedure is used to log in using a user number received from the administrator of the machine. When starting the machine, the login screen appears.
When controlled by user number


- If "A Warning when Login Fails" is enabled in the system settings, the operation panel will be locked for five minutes if an incorrect user number is entered three times in a row.
- Contact the machine administrator to check the user number assigned for you.
1
Enter your user number (5 to 8 digits) using the numeric keys.
Each entered digit will be displayed as " *"

Tap the [OK] key.
If the entered user number is authenticated, the number of remaining pages that the user can copy or scan is displayed. When a limitation is set for the number of pages that a user can use, the use count for the user that has logged in is displayed.
![SHARP BP-50C45 - Tap the [OK] key. - 1](/content/2026/06/1367452/images/9a08e3f4754b8108bd83ef0d37cd661bd2e5a1701713bca95353593344479ad0.jpg)
• To limit the number of pages that a user can use:
In "Settings (administrator)", select [User Control] → [Access Control Settings] → [Pages Limit Group].
• To hide the number of pages that can be used after login:
In "Settings (administrator)", disable [System Settings] → [Authentication Settings] → [Default Settings] → [Display Usage Status after Login].
• To change the message display time:
In "Settings (administrator)", select [System Settings] → [Common Settings] → [Operation Settings] → [Condition Settings] → [Message Time Setting].
![SHARP BP-50C45 - Tap the [OK] key. - 2](/content/2026/06/1367452/images/8a40d71dcdd08dfbb7d57e8167f9f90ce48f467282a0821962e3937e1b79e4e8.jpg)
When the user number is an 8-digit number, this step is not necessary. Login takes place automatically after the user number is entered.
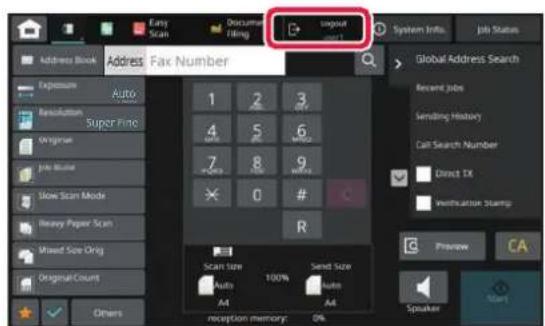
When you have finished using the machine and are ready to log out, tap [Logout].
AUTHENTICATION BY LOGIN NAME/PASSWORD
This method enables users to log in using a login name and password received from the administrator of the machine or the administrator of the LDAP server.
When starting the machine, the login screen appears.
When controlled by login name and password


- Different items may appear in the screen when LDAP authentication is used.
- When LDAP authentication is used, the [E-mail Address] key may appear, depending on the authentication method. Tap the [E-mail Address] text box and enter your e-mail address.

- If "A Warning when Login Fails" is enabled in the system settings, the operation panel will be locked for five minutes if an incorrect login name or password is entered three times in a row.
Contact the machine administrator to check the login name/password assigned to you.

• To set [A Warning when Login Fails]:
In "Settings (administrator)", select [System Settings] → [Authentication Settings] → [A Warning when Login Fails].
• To store a user name:
In "Settings (administrator)", select [User Control] → [User Settings] → [User List].
Also register detailed information such as the login name, user number, and password. Ask the administrator of the machine for the information that you need to use the machine.

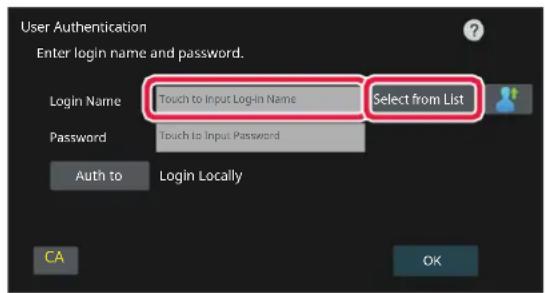
Enter the login name.
Entering using the soft keyboard
If user name registration has not been performed in setting mode, a user only using LDAP authentication should tap the [Login Name] text box and enter the login name using the soft keyboard.
Selecting from a list
Tap the [Select from List] key and select a user name from the User List screen.

LDAP authentication can be used when the administrator of the server provides LDAP service on the LAN (local area network).
2

Enter the password.
Enter the from the soft keyboard.
If you are logging in to an LDAP server, enter the password that is stored with your LDAP server login name.
Each entered character will be displayed as " *After entering, tap the [OK] key.
When authentication is by LDAP server and you have different passwords stored in "User List" and in the LDAP server, use the password stored in the LDAP server.

To have the user name and password registered:
In "Settings (administrator)", select [User Control] → [User Settings] → [User List].

When registering the LDAP server, change the information for [Auth to] as required.
- When selecting from the User List screen:
The LDAP server you are connecting to has been registered upon user registration, and so the target server to which authentication should be directed appears when the login name is selected.
Go to step 3.
- When entering from the soft keyboard:
Tap [Auth to] and select the LDAP server to log in.
3

Tap the [OK] key.
If the entered login name and password are authenticated, the number of remaining pages that the user can copy or scan is displayed.
![SHARP BP-50C45 - Tap the [OK] key. - 1](/content/2026/06/1367452/images/a237748c48e8c70aaf13e97cb4e69efa8dfd4ee6ac7fb38bbf850990c9718731.jpg)
When a limitation is set for the number of pages that a user can use, the use count for the user that has logged in is displayed.
![SHARP BP-50C45 - Tap the [OK] key. - 2](/content/2026/06/1367452/images/ca3388f65b55454c6ce9969722652a1e4e4a01a9b4e255b99647be1e04dd3ec9.jpg)
•To limit the number of pages that a user can use:
In "Settings (administrator)", select [User Control] → [Access Control Settings] → [Pages Limit Group].
•To hide the number of pages that can be used after login:
In "Settings (administrator)", disable [System Settings] → [Authentication Settings] → [Default Settings] → [Display Usage Status after Login].
•To change the message display time:
In "Settings" (administrator)", select [System Settings] → [Common Settings] → [Operation Settings] → [Condition Settings] → [Message Time Setting].
4

When you have finished using the machine and are ready to log out, tap [Logout].
QUICK AUTHENTICATION
When operating the machine, this enables easy authentication by tapping a preconfigured icon.

- Up to 20 users can be registered.
- Only the machine supports quick authentication. Web page authentication and authentication from a printer driver cannot be used. To use web page authentication and authentication from a printer driver, enter to authenticate.
- Quick authentication cannot use IC card authentication or device account mode.
- If [A Warning when Login Fails] is enabled in the system settings, the operation panel will be locked for five minutes if an incorrect password is entered three times in a row. Contact the machine administrator to check the password assigned to you.

To use quick authentication:
In "Settings (administrator)", enable [System Settings] → [Authentication Settings] → [Default Settings] → [Enable Quick Login].
For the authentication server settings, set "Login Locally", and for the authentication method settings, set "Login Name/Password".
Register users with quick authentication
When registering users with quick authentication, the User Administration Settings and Web page settings used when registering normal users cannot be used. Registration is carried out on the quick authentication login screen.
1

Tap [Add user/Edit user registration] on the action panel.
2

Tap the position you wish to register.
This switches to the user registration screen.
When tapping an icon that is already registered, this switches to the user information edit screen.
Details to edit are the same as the settings details in registering a new user screen. See step 3 when editing.
3

Enter user information, and tap the [Register] key.
Specify the user icon, Login Name, E-mail Address, Password, and Password (confirmation). Tap the items to register, and enter necessary details.
- Tap "Change icon(s)" on the action panel, and the icon selection screen appears. Select the desired icon to configure.
- Login Name is displayed together with the icon. Ensure this is entered.
- When editing user information, the Password cannot be changed. "Password" and "Password (confirmation)" will not be displayed on the edit screen.
![SHARP BP-50C45 - Enter user information, and tap the [Register] key. - 1](/content/2026/06/1367452/images/d8989c4dff73c2af0335c79131794a09f397a31b0e468ffaf25eb51db76aa6f6.jpg)
To delete a registered user
Tap [Add user/Edit user registration] on the action panel, then tap the icon of the user to delete. Tap [Delete] on the action panel, and then tap the [Delete] key in the displayed confirmation message.

User editing and deleting from User Administration Settings and Web page
Users cannot be registered from User Administration Settings and the Web page, but users registered using quick authentication are displayed in the User List. Editing and deletion of user data is possible from the User List. Configure the User List from [User Control] → [User Settings] → [User List] in the "Settings (administrator)".
Authenticating the machine using quick authentication
1

Tap the icon.
If a password is not set, then login will close at this time.
2
![Home Admin Login Job Status Password Cancel OK .com .net .org .so.jp .biz .ne.jp Characters Symbols 1 2 3 4 5 6 7 8 9 0 - = @ q w e r t y u i o p [ ] # a s d f g h j k l ; * \ z x c v b n m , . / Space AltGr ← →](/content/2026/06/1367452/images/b480445c805c6a28e93042a86786984d9cc1818361001fd363bea5c59e46fe3e.jpg)
If setting a Password, enter the Password.
Enter the Password from the soft keyboard.
Entered text is displayed with "*". After entering the
Password, tap the [OK] key.
3
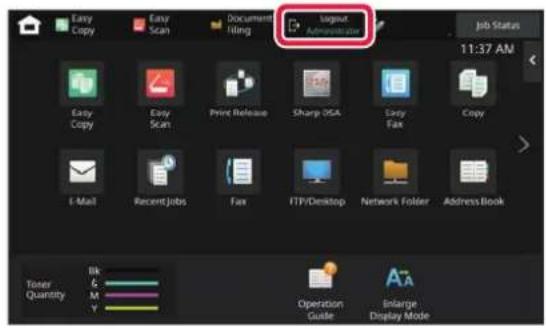
When you have finished using the machine and are ready to log out, tap [Logout].
USER CONTROL
You can perform user management such as registering login users and specifying the user authentication method. In [User Control] of "Settings (administrator)" and [System Settings] of [Authentication Settings].
User Control allows you to register and manage the users who use the machine.
By limiting the number of pages and functions that a user or a group of users can use, incorrect use of the machine can be prevented.
To prevent unauthorised use, persons who are not registered can be prohibited from using the machine or prohibited from using certain functions.
Example: Information stored in User Name Registration
| [SWC4] | User Name : AAACustom Index : Group APages Limit Group : "Limited" group | Authority Group: UserFavourite Operation Group:Group a |
 | User Name : BBBCustom Index : Group BPages Limit Group : "Limited" group | Authority Group: UserFavourite Operation Group:Group a |
 | User Name : CCCCustom Index : Group APages Limit Group : "Unlimited" group | Authority Group: AdministratorFavourite Operation Group:Group b |
| [XXHS] | User Name : None(Users not registered in the machine) |
Custom Index
| Group A |
| Group A |
Using the machine
| All machine functions can be used |
| You can only use functions set in the user permissions of the Authority Group, and only the number of sheets set in the Pages Limit Group. |
| Only functions set in guest authority in the Authority Group can be used |
Favourite Operation Group
| Group a |
| Group b |
The machine can be operated using the screen displays and default settings set for each group.
ORGANIZATION / GROUP LIST
A user can be registered in an organization/group to enable sharing the contacts and group information registered in that group. When counting all used pages, you can check how many pages and what functions are used by each group. Multiple organizations/groups can be set for a user.
![graph TD A["New employee group"] --> B["Design group"] A --> C["Accounting group"] A --> D["Sales group"] B --> E["D"] B --> F["E"] C --> G["B"] C --> H["C"] D --> I["H"] D --> J["I"]](/content/2026/06/1367452/images/fd6bacb5880659eb70b239ba831453a4c34c334d563a6fb6ab8b4d99b6975296.jpg)


Information sharing within new employee group
Information sharing within design group
Information sharing within sales group
Information sharing within accounting group
PAGE LIMIT GROUP LIST
A Page Limit Group List can be used to limit the number of sheets that users in a specific group can use for copies or print jobs, and limit the number of pages that can be scanned or faxed. The users can also be prohibited from using certain functions.
Page Limit Group List A
Copy :
B/W : Page Limit (10000)
Full Colour : Page Limit (10000)
Printer :
B/W : Unlimited
Full Colour: Prohibited
Document Filing Print:
B/W: Unlimited
Full Colour: Unlimited
List Prints:
B/W: Unlimited
Full Colour: Unlimited
Scanner:
B/W: Prohibited
Full Colour: Prohibited
Fax Send: Prohibited
Scan to Local Drive:
B/W: Page Limit (50000)
Full Colour: Page Limit (50000)
This section explains how to set the Page Limit Group List.
- Users in this group can use up to 10,000 pages for each colour and black & white copying.
- There is no limit on black & white printing. Colour printing cannot be used.
- Both colour and black & white Document Filing Print and List Print can be used without restriction. Scanner and fax transmission cannot be used.
- Up to 50,000 pages each can be used for colour and black & white scan save.
AUTHORITY GROUP
Authority Group is used to restrict the functions and settings that users who belong to a specific group can use. By setting restrictions on functions and settings, you can prevent inexperienced users from performing incorrect operations and settings, and thereby enable safe use of the machine.
Main authority types (Default Group List)
All functions can be used and machine settings can be configured. Copy, printer, and other functions cannot be used, but machine settings can be configured. Copy, print, and other functions can be used, but machine settings cannot be configured. Only certain functions can be used.

Colour functions cannot be used.

Scanner functions cannot be used.
For each group, you can register an environment with settings that are convenient for the group. For example, if the users speak different languages, a language can be set for each group, and this setting is applied automatically at login (normally the display language cannot be changed each time the machine is used).
![graph TD A["Users using Japanese Users using English"] --> B["Login"] B --> C["Home"] C --> D["Job Status"] style A fill:#f9f,stroke:#333 style B fill:#bbf,stroke:#333 style C fill:#dfd,stroke:#333 style D fill:#dfd,stroke:#333](/content/2026/06/1367452/images/cbb4554d7975ee0b2c47b5e997f5545b24b76405771ad21e10b5a89685a8fb27.jpg)
By setting English for users using English and Japanese for users using Japanese in the Favorite Operation Group List, the language will automatically switch between English and Japanese when a user logs in to the machine.
ACTIVE DIRECTORY LINKING FUNCTION
You can join the Active Directory domain (AD domain) of the machine, and easily perform user management on the network.
On a network that does not have Active Directory enabled, you must perform network device authentication for each device.
For this reason, one user must have multiple domain names and passwords.
When you join an AD domain, you only need to be authenticated once. After you are authenticated, the Active Directory server automatically authenticates network devices. You can log in to multiple devices on the network with a single domain name and password.
A billing code, which is added to a recorded job log when a printing or sending job has been executed, is used to perform billing processing.
Billing codes are classified into two types: main code and sub code. A billing code is recorded in the job log when it is entered and a print or send job is executed.
Summing up the amounts by Billing Code based on the job logs will facilitate the subsequent operations, for instance, when making combined billings.
![graph LR A["Registering billing codes"] --> B["Assigning a billing code and executing the job"] B --> C["Recording a billing code in the job log"] C --> D["Collecting job logs"]](/content/2026/06/1367452/images/4a616b15842e55bb1650d9cb30ea08dad7c0c233fc1f93b8022b17185e1f3082.jpg)
Types of billing codes
| Type Description | |
| Main Code | Used to categorize the results of the executed print and send jobs to enable efficient management. For example, you can assign a code by customer and collect cost information by customer from job logs.Code example: Issue of company A |
| Sub Code | Available when the main code alone is not sufficient to enable management of billing codes. For example, you can assign monthly cost information to a sub code and collect the total monthly cost information of all customers when the customer name is assigned to the main code.Code example: Issue of October, 2020 |
| Default Code | Automatically assigned when the main code or sub code has not been specified. |
Enable use of billing code
To enable use of the billing code, select "Settings (administrator)" → [User Control] → [Billing Code Setting] → [Administration Settings], then set [Use Billing Code] to [Enable].
Collecting billing codes
In "Settings (administrator)", select [System Settings] → [System Control] → [Job Log] → [Job Log Operation], and click [Save] button to download the job logs. Then sum up the data by classifying and arranging the stored job logs.
USE BILLING CODE
If the use of billing code is enabled in "Settings (administrator)", the billing code entry window is displayed at the time of mode transition (at the time of printing/sending in document filing mode).
Enter the main code or sub code as required.

•To enable use of the billing code
Select "Settings (administrator)" → [User Control] → [Billing Code Setting] → [Administration Settings], then set [Use Billing Code] to [Enable].
•To retain the specified billing code at the time of mode transition
Select "Settings (administrator)" → [User Control] → [Billing Code Setting] → [Administration Settings], then set the [Remember Billing Code Between Modes] check box to √. This eliminates the need to enter billing codes at each mode transition.

You can assign billing codes to reprinting/resending of target files and sending of print jobs from "Settings (administrator)" → [Document Operations].
Specifying a billing code again
To change the specified billing code to another one, tap [Switch Billing Code.] on the action panel.
When the billing code entry window is displayed, select a new billing code.
Select a billing code from the list
Select the desired billing code from the list of registered billing codes.
You need to register billing codes in advance.
REGISTERING A NEW BILLING CODE (page 8-29)
1
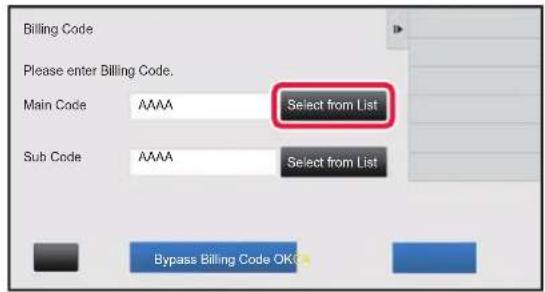
When the billing code entry window is displayed, tap the [Select from List] key of the main code.

When not specifying a billing code
Tap the [Bypass Billing Code] key.

To select the previously used billing code (at the time of user authentication)
Tap [Use Previously-Used Billing Code] on the action panel at the time of user authentication; this displays the main code and sub code the authenticated user has entered previously.
2

Tap and select the main code from the list.

To search for the main code or main code name
Tap the search icon. When the search window is displayed, enter the main code and main code name, then tap the [Search Start] key. The search result list is displayed.
3
Tap the [OK] key.
Returns the screen to the billing code entry window.
![SHARP BP-50C45 - Tap the [OK] key. - 1](/content/2026/06/1367452/images/60a872f2386a7198a04627dac0a62477e3117ce82e572896ab5337194ea2631b.jpg)
To cancel the selection from the list
Tap [Cancel and Return] on the action panel. This cancels the selected main code and returns the screen to the billing code entry window.

To check the details of the main code
Tap [Display Details] on the action panel. The detail window is displayed. Check the details, then tap [OK].
4

Tap the [Select from List] key of the sub code.
The sub code list is displayed. Perform the procedure shown in steps 2 and 3, then specify the sub code.
5

Tap the [OK] key.

To clear the value of the specified billing code
Tap the [CA] key. Enter the billing code again.
Directly entering a billing code
1

When the billing code entry window is displayed, tap the box in [Main Code], then enter the main code.
Specify the code using up to 32 single-byte characters.

When not specifying a billing code
Tap the [Bypass Billing Code] key. The use code is set to the main code.
2

Tap the box of [Sub Code], then enter the sub code.
Specify the code using up to 32 single-byte characters.
3

Tap the [OK] key.

To clear the value of the specified billing code
Tap the [CA] key. Enter the billing code again.
REGISTERING A NEW BILLING CODE
Register a new billing code.
A billing code can be registered not only from the billing code entry window but also from "Settings".

A total of up to 2000 main and sub codes can be registered.
Shared range of billing code
The registered billing codes can only be shared in the specified group at the time of user authentication. If the shared range is not specified, the registered billing codes are shared by all users.
1

When the billing code entry window is displayed, tap [Select from List] of the main code.
To register a new sub code, tap the [Select from List] key of the sub code.
The subsequent steps are the same as the main code.
2

Tap [Add/Edit Billing Code] on the action panel.
3

Tap [Add New] on the action panel.
![SHARP BP-50C45 - Tap [Add New] on the action panel. - 1](/content/2026/06/1367452/images/610c96c4f85ba9448ded4c107f5f1796d61df1d93bb15e578b933ba887f1855e.jpg)
To return to the billing code selection window
Tap OK.
4

Tap the box of [Main Code], then type in the main code.
Specify the code using up to 32 single-byte characters.
5
Tap the box of [Main Code Name], then type in the main code name.
Specify the code name using up to 32 double- or single-byte characters.
6

If necessary, select the share range of billing code.
Public to All: Registers the billing code as a public code for all users who use the machine.
Specify target public address: Limits the share range of billing code to be registered only to the specified group. Up to eight groups can be specified as a public destination.
For details on how to specify a public destination, refer to "Shared range of billing code (page 8-29)".

The public destination of a billing code is not displayed if user authentication is not performed. The mode is automatically set to [Public to All].
7

Tap and select a group as a public destination
Up to eight groups can be specified. After the settings are completed, tap OK

To cancel the setting
Tap [Clear] on the action panel. This cancels the registered public destination and returns the screen to the previous window.
8
To continuously register other billing codes, tap [Register Next Billing Code.].
Execute steps 4 to 7 to register the main code.
![SHARP BP-50C45 - To continuously register other billing codes, tap [Register Next Billing Code.]. - 1](/content/2026/06/1367452/images/c4cd4cfa4e79e10f51334a5b1bce376b185d441f4804d468e3cf28bfe8bc91c5.jpg)
To cancel the registration
Tap [Cancel and Return] on the action panel. This cancels all the registered billing codes and returns the screen to the previous window.
9
Tap [End Registration] on the action panel.
This finalizes the registration and returns the screen to the previous window. Tap OK to finish the registration procedure.
![SHARP BP-50C45 - Tap [End Registration] on the action panel. - 1](/content/2026/06/1367452/images/33eb4aa1b9723518c7a0f9747978feb0eebfaa7605075c78a39d2468842af6ad.jpg)
To return to the billing code entry window
Tap the [CA] key.
EDITING OR DELETING THE REGISTERED BILLING CODE
You can change or delete the registered billing code.
The billing code can also be edited or deleted from "Settings".
Editing a billing code
1
When the billing code entry window is displayed, tap the [Select from List] key of the main code.
To register a new sub code, tap the [Select from List] key of the sub code.
The subsequent steps are the same as the main code.
2

Tap [Add/Edit Billing Code] on the action panel.
3

Tap and select the main code to be edited, then tap [Edit] on the action panel.
![SHARP BP-50C45 - Tap and select the main code to be edited, then tap [Edit] on the action panel. - 1](/content/2026/06/1367452/images/d30a42147496b81bed5fc7fda5f28f1c1f77012ec9ca679b0be6d8586309d9da.jpg)
To return to the billing code selection window
Tap OK.
4
Edit the main code as required.
For information on how to correct the code, refer to steps 4 to 7 in "REGISTERING A NEW BILLING CODE (page 8-29)".
5
Tap [End Registration] on the action panel.
This finalizes the registration and returns the screen to the previous window. Tap OK to finish the registration procedure.
![SHARP BP-50C45 - Tap [End Registration] on the action panel. - 1](/content/2026/06/1367452/images/b48dd8407225bc4f2a8fa758322a9f612906933e055e121034eca5fe1ce15ffe.jpg)
To return to the billing code entry window
Tap the [CA] key.
Deleting a billing code
1

When the billing code entry window is displayed, tap the [Select from List] key of the main code.
To delete a sub code, tap the [Select from List] key of the sub code.
The subsequent steps are the same as the main code.
2

Tap [Add/Edit Billing Code] on the action panel.
3

Tap and select the main code to be deleted, then tap [Delete] on the action panel.
![SHARP BP-50C45 - Tap and select the main code to be deleted, then tap [Delete] on the action panel. - 1](/content/2026/06/1367452/images/f6a0a9a149dcd2d641ccae73da9c646382fd7f876a7a7e9df58a58c4ebbe64ec.jpg)
To return to the billing code selection window
Tap OK.
4
When the confirmation message appears, tap the [Delete] key.
USING THIS MACHINE IN A NETWORK ENVIRONMENT
USING WI-FI
WI-FI
This machine can connect to mobile devices and others via Wi-Fi.
This machine can use three communication modes.
Wi-Fi environment can be configured from System Settings.
COMMUNICATION MODES OF WI-FI
Infrastructure Mode
The machine and mobile device can communicate via network with an access point installed.
![graph TD A["Device"] -->|Data flow| B["Network"] B -->|Access point| C["Mobile Device"] C -->|Access point| A note1["Since the machine and mobile device are connected to the same access point, they can communicate with the network where the access point is connected."] --> A](/content/2026/06/1367452/images/6fff8a92c95210e493289e719fd281591eda7b96e7a9c2d7b6b9bdc5828f6ce2.jpg)
Access Point Mode
The machine can be set as an access point and communicate with a mobile device. In this mode, communication with the network to which the machine is connected is unavailable.
![graph TD A["Smartphone"] -->|Data flow| B["Network"] B --> C["Machine = Access point"] style B fill:#f9f,stroke:#333 note right of B: "Data will not be sent to the network beyond the machine." note left of B: "The machine and mobile device are connected with Wi-Fi."](/content/2026/06/1367452/images/3a8ae78b6d0399a21411d6af437e6b64f471c9bd2519c9184f6e775263ca1025.jpg)
Wi-Fi Direct Mode
The machine and mobile device directly communicate via Wi-Fi. In this mode, communication with the network to which the machine is connected is unavailable.
![graph TD A["Mobile Device"] -->|Data flow| B["Mobile Device with Wi-Fi Direct Mode"] B --> C["Network"] C -->|Data will not be sent to Network beyond the machine.| D["Network"]](/content/2026/06/1367452/images/c52a450b981c2d2f65777dc4f7e50bef2f8a1ca1e268ae57b47c219540354362.jpg)

This function can be used on an Android™ device.
WPS
When connecting with Wi-Fi, connection to the network environment can be done simply with WPS, instead of manually configuring SSID and security setting.

WPS is available for the infrastructure mode only.
CONNECTING BY BLUETOOTH
This machine and mobile devices can be connected by Bluetooth.
When a mobile device is connected, its address book data can be displayed on the panel of the machine and used as destination addresses.
Fax numbers (telephone numbers) and e-mail addresses in the connected mobile device can be used as destination addresses.

For BP-50C26/BP-50C31/BP-50C36/BP-50C45/BP-50C55/BP-50C65/BP-55C26, a wireless connection adaptor is required.
EASILY CONNECT WITH AN NFC-COMPATIBLE MOBILE DEVICE (EASY CONNECT)
You can easily connect the machine to a smartphone or other NFC compatible mobile device.
Touch the NFC touch point area in the lower right corner of the operation panel.
By installing the dedicated application in the mobile device in advance, the application will start automatically after the device connects to the machine, allowing you to print immediately.
You can also connect by displaying a QR code on the machine's touch panel and scanning the code with a mobile device that has a dedicated application installed.

- Make sure that the mobile device's Wi-Fi function and NFC function are turned on in advance.
- For NFC card readers and dedicated applications that can be used, consult your dealer or nearest authorised service representative.
CONNECTING BY NFC
You can easily connect a mobile device to the machine by holding it to the NFC touch point area.
In addition, by installing the dedicated application on your mobile device, the application will automatically start when the device connects to the machine, allowing you to send data and print to the machine right away.
Configure settings on the machine in advance to enable use of an NFC and wireless LAN.

This function may not support depending on the Android version of your device.
1
Hold your mobile device to the NFC touch point area

If the machine is in the auto power shutoff state, holding your mobile device to the NFC touch point area will wake the machine. However, if [Sleep Mode] is set to [Energy Saving Priority], you must wake the machine manually.
2
Connecting to the Machine from a Mobile Device
The machine and mobile device automatically start the connection.
If the dedicated application is not installed, your mobile device will automatically connect to the Google Play™ site and download the dedicated application.
If the dedicated application is installed on your mobile device, it will start.
You can print and scan from the application.

If the connection is not successful, try the following:
- Move the mobile device slowly over the NFC touch point area.
- If a case is attached to the mobile device, remove the case.
CONNECTING BY QR CODE
You can connect by displaying the QR code on the machine's touch panel and then having your mobile device (with the dedicated application already installed) read the QR code.
The machine sends the information required for connection to the mobile device, and the information is saved. No settings are required on the mobile device, and setup is quickly accomplished.
Configure settings on the machine in advance to enable connection by QR code.

This function can be used on an Android device and on an iOS device.
1
Tap the [Easy Connect (QR code)] key in the home screen.
The QR code appears on the touch panel.
In advance, enable QR codes in [Easy Connection Setting] in Settings (administrator), and enable display of the [Easy Connect Setup (QR code)] key in [Home Screen Settings].
2
Start the dedicated application on your mobile device.
3
Read the QR code on the touch panel with your mobile device.

The QR code is the machine's connection information. This information is saved on your mobile device. You can also set an external access point as the connection destination.
NAS
NAS (Network Attached Storage) is a storage device that is connected to the network.
You can use part of the machine's local drive area as a simple file server to save files and browse saved files.
FOLDER STRUCTURE
The folder structure is as follows.
![graph TD A["root public"] --> B["shared"] A --> C["faxreceive"]](/content/2026/06/1367452/images/b120ff048e5833481a92ec0e1149604691b9d436665af1659fb9d6a049d1811c.jpg)
- root
• public: Area for storing PDF files for PC browsing that have been created using the document filing function.
- shared: Area where you can freely create folders.
- Fax receive: Area for storing received data using the received data local drive storage function.
Saving files in NAS / browsing NAS files
1
You can save data that you need to the machine's local drive, and view the data on your computer.
Document scanned on the machine
In document filing, tap the [Create PDF for PC Browsing] checkbox so that it is selected √, and copy to the public folder to save the data.
▶ File Information (page 7-12)
Received fax data
Configure "Settings (administrator)" - [System Settings] → [Image Send Settings] → [Inbound Routing (Forwarding/Storing) Settings] → [Inbound Routing (Storage) Settings].
▶ SAVING RECEIVED FAXES TO THE MACHINE'S STORAGE (INBOUND ROUTING) (page 5-70)
2
Using as a file server / browsing saved files.
To use this, open any folder screen on your computer and enter the IP address of the machine after "\" in the address bar (example: \192.168.1.28).

- Access restrictions are set for each folder, so you must enter the login name and password of the administrator account or of a user account that has been registered in the machine.
- The maximum size per file is 2 GB.
Remotely operate the machine on your computer or mobile device such as a smartphone.
You can operate the machine from the same panel as the machine's operation panel that is displayed on your PC, with the same feel as operating in front of the machine.
![graph TD A["Your computer"] --> B["Operate the machine using your computer screen."] B --> C["Operation panel"] C --> D["The machine"] D --> E["Network"]](/content/2026/06/1367452/images/bd7c2f9cdaa68023c915d8afc904d52b14c3487afec032ad7cb74d8ff7653a56.jpg)
The remote operation function can only be used on one device at a time.
Before you can use the remote operation function, the following preparation is required.
- In "Settings (administrator)", select [System Settings] → [Common Settings] → [Operation Settings] → [Condition Settings] → [Remote Operation Settings] → [Remote Software Operation] and select [Allow] for [Operational Authority].
- Connect the machine to the network. • Install a VNC application software (recommended VNC software: RealVNC) in your device.
After the preparation is completed, follow the operation described below to set up the function.
Example: RealVNC®
1
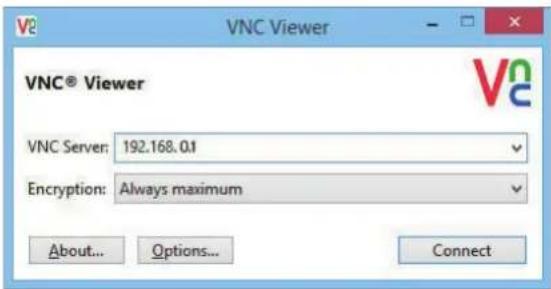
Start the VNC viewer, enter the IP address of the machine in the "VNC Server" entry box, and click the [Connect] button.

Check with the administrator of the machine for its IP address.
2
Follow the message on the operation panel of the machine to permit the connection.
When the machine is connected to a VNC application software, 📋 appears on the system bar of the machine's touch panel.
If you wish to disconnect, exit the VNC application software or tap

Use the operation panel in the same way as you would on the machine. However, you cannot enter values in series by continuously clicking the key.
Sharp OSA
Sharp OSA (Open Systems Architecture) is an architecture that directly links the machine to software applications for work (external applications) over a network.
When you use a machine that supports Sharp OSA, you can link controls on the operation panel and device functions such as scan send to external applications.
APPLICATION COMMUNICATION
This module enables you to link the machine with a scanner application and other standard applications. Set a standard application in "Settings (administrator)" and "Sharp OSA".

The Application communication module (BP-AM10) is required to use these functions on the BP-50C26/BP-50C31/BP-50C36/BP-50C45/BP-50C55/BP-50C65/BP-55C26.
1

Tap the [Sharp OSA] key in the Home screen.
If no standard applications have been stored, the key cannot be tapped.
2

Select a standard application.
If two or more standard applications have been stored, the screen for selecting a standard application will appear. Tap the standard application that you wish to use.
If only one standard application has been stored, connection to the standard application will begin.
3
Connect the machine to the standard application.
The message "Connecting to the external application." appears while the machine communicates with the standard application.
EXTERNAL ACCOUNT APPLICATION
The external account module enables you to use an "external account application" for centralized account management of an MFP on a network.
An "external account application" can be used in "external authentication mode" or "external count mode".
When "external authentication mode" is used, the login screen is retrieved from the application when the machine is started. When a job ends, a job notification screen is sent to the application for counts by authenticated user. When "external count mode" is used, the login screen is not displayed when the machine is started. Only a job result notification is sent to the application. User authentication by the external account application cannot be used. However, the external account application can be used in combination with the internal account function.

The External account module (BP-AM11) is required to use these functions on the BP-50C26/BP-50C31/BP-50C36/BP-50C45/BP-50C55/BP-50C65/BP-55C26.
External account application setup
After setting an external application in "Settings (administrator)", restart the machine to enable the setting. To restart the machine, see "TURNING ON THE POWER (page 1-10)".
Operation in external account mode
The following describes operation in the two modes for using an external account application.
External authentication mode
When the machine is powered on in external authentication mode, the machine accesses the external account application and displays the login screen. The login screen also appears when the [Call] key is tapped to run a job in the job status complete screen. (The login screen does not appear if the user has already logged in by the normal method.) Tap the job status display while the login screen is displayed, and the Job Status screen appears. To return to the previous screen, tap a mode select key.

- The user control function of the machine cannot be used in external authentication mode. However, "User Registration", "User Count Display", "User Count Reset", "User Information Print", and "The Number of User Name Displayed Setting" can be used.
- The mode select key cannot be used while the login screen appears.
If login fails:
If the login screen fails to appear or the application does not operate correctly, the machine may also stop operating correctly. In that case, terminate external account mode forcibly.
External count mode
Unlike in external authentication mode, when the machine is started in "external count mode", the login screen of the external account application is not displayed after the machine has started up. Only the job result is sent to the external account application.
External count mode can be used together with the user control function of the machine. (External count mode can also be used when the user control function is disabled.)
VIRUS SCAN
When this machine is connected to a network environment, it may be exposed to viruses and other attacks from outside. It is also possible to be infected with a virus via a USB memory device. There is a concern that a virus infecting the device may spread to other devices. By installing a virus detection kit, viruses can be detected and dealt with at an early stage to prevent the spread of virus infection.

- The machine must be connected to a network and have access to the Internet. Connect to a LAN using the LAN connector of the machine or the wireless LAN function, and make the necessary settings by referring to "Network Settings (page 9-156)". Also, see "Port Control (page 9-181)", and the HTTPS client port must be set to "Enabled". In addition, if necessary, configure "Proxy Setting (page 9-171)".
- The virus scan settings are configured in [Virus Scan Setting] in [Security Settings]. The first time you enter [Virus Scan Setting], the software license agreement screen will appear. Read and agree to the terms of the agreement before using the virus detection kit.
VIRUS SCAN/VIRUS DEFINITION UPDATE TIMING AND TARGET DATA
This section describes the timing of virus scan and virus definition file updates and the target data for scanning.
Virus scan timing
The virus scan starts at the following timings.
During the virus scan, icon will be displayed in the System Area and in the machine information of the System Information screen.
Scan during installation and update
Scans for viruses during firmware updates, embedded application installation and updates.
Real time scan
This function scans for viruses during the input and output of data from the machine. This function can be used when [Perform Virus Scan on Input-Output Data] is enabled in [Virus Scan Setting] of the system settings.
Regular scan
Scans for viruses at a fixed date and time. This function can be used when [Perform Virus Scan at Specified Time] is enabled in [Virus Scan Setting] of the system settings. The date and time can be set in [Time Schedule] under [Virus Scan Setting].
On-demand scan
You can run a virus scan immediately. When ⓘ is displayed in the virus scan of the machine information on the System Information screen, tap ⓘ, and then tap [Scan Now] to execute the scan. You can also select [Perform Virus Scan Now] under [Virus Scan Setting] in the system settings to execute the scan.

Update timing for virus definition files
You can update the virus definition file at the following time.
Regular update
Automatically updates and keeps virus definition files in the latest state.
On-demand update
You can update the virus definition file immediately. When is displayed in the virus scan of the machine information on the System Information screen, tap i and then tap [Update Now] to update the virus definition file. You can also update the virus definition file by selecting [Perform Update Now] in [Virus Scan Setting] in the system settings.

Target data for virus scan
The following data will be scanned for viruses.
- Firmware for the machine
- Embedded applications
- Input/output data of the machine (job data, configuration data of the machine, address book data, input/output data of document filing)
- Data stored in the machine's NAS folder (shared folder, fax receive folder)
Combination of target data and virus scan
The combinations of target data and virus scan are as follows.
| Scan during installation and update | Real time scan Regular scan On-demand scan | ||
| Firmware for the machine | Yes No Yes Yes | ||
| Embedded applications | Yes No Yes Yes | ||
| Input/output data of the machine | No Yes Yes | * | Yes* |
| Data stored in the NAS folder | No No Yes Yes | ||
* As for the input/output data of the machine, the data stored in the storage will be targeted for regular scan and on-demand scan.
WHEN A VIRUS IS DETECTED
Displayed in the System Information screen
When a virus is detected by the virus scan, the following screen will be displayed on the System Information screen.

An icon will also appear in the System Area to indicate that a virus has been detected.
If a virus is detected, stop using the machine and take anti-virus countermeasure.
When you tap on the list of "Notification" will display the deleted message and information about the virus, if deleted, the date and time of detection, the type of target data, and the target file name or the application name.
If the virus detection kit has already taken action against the virus, tap [Delete Notification] to clear the message from "Notification".
If administrative rights are required to remove the virus, a message will appear with information about the virus, the date and time of detection, the type of target data, and the target file name or the application name, along with a message to contact the administrator.
If you need confirmation from the administrator, tap [Delete Notification] to display the administrator's login screen, and after logging in, the message will be cleared.

Even if multiple viruses are detected, only one line will be displayed in "Notification". After the first message is deleted from "Notification", the contents of the next virus will be displayed on the same line in "Notification".
When a virus is detected, the machine will proceed as follows.
If the target data is the firmware of the machine
| Scan during installation and update | The update will be cancelled and the touch panel will display that the updated file is damaged. After the user confirms the contents and closes the screen, the machine will operate with the firmware before the update.If the firmware was updated remotely, the update will be cancelled and the virus detection information will be displayed in the "Notification" of the System Information screen. The machine will operate with the firmware before the update |
| Regular scan/On-demand scan | The message is displayed in the "Notification" of the System Information screen about the virus detection and the need to consult a service representative. The machine will continue to operate. |
If the target data is an embedded application
| Scan during installation and update | Installation and update via Application Portal/USB memoryCancel the installation/update, and the touch panel will display that a virus has been detected. When updating, the user confirms the contents, the screen display is turned off, and then the application operates as before the update.Installation and update via Web pageCancel the installation/update, and display the virus detection on the web page.When updating, the machine will operate with the application before the update.When updating the firmwareChecks when the machine is started up after update of the firmware. The update is cancelled and the virus detection message is displayed in the "Notification" of the System Information screen. The application that detected the virus will be deleted. |
| Regular scan/On-demand scan | The virus detection message is displayed in the "Notification" of the System Information screen. |
When the target data is the input/output data of the machine
| Real time scan | When a virus is detected with respect to the input data, the touch panel will display that a virus has been detected, the input data or the job to be input will be cancelled, and the data or job data that was about to be output will be discarded. Data in the data input source (USB memory, external server, etc.) will not be deleted.When a virus is detected with the output data, the touch panel will display that a virus has been detected, the output data or the job to be output will be cancelled, and the output data or job data will be deleted.The virus detection message will be displayed in the "Notification" of the System Information screen. |
| Regular scan/On-demand scan | The virus detection message is displayed in the "Notification" of the System Information screen. |
If the target data is data stored in a NAS folder
| Regular scan/On-demand scan Delete the detected data.A message will be displayed in the "Notification" of the System Information screen with the contents of the infected data deleted because a virus was detected. |

Any files on the NAS folder that are detected to have a virus will be deleted, so be sure to back up your files before you get infected with a virus. Also, do not save important files in the NAS folder.
If "Audit Log" and "E-mail Alert" are enabled, when a virus is detected, it will be logged and an e-mail alert will be sent.
"Audit Log" of virus scan
For more information about "Audit Log", see "Audit Log (page 9-192)" in system settings.
E-Mail Alert
The subject line of the detected virus and the virus information are reported in the body of the e-mail. For more information about e-mail alerts, see "E-mail Alert and Status (page 9-207)" in system settings.
UPDATING THE VIRUS DEFINITION FILE
Updates the virus definition file at the following timings.
- When the machine starts up
Updates the virus definition file when the machine starts up. If virus scan is performed at startup, the virus definition file is updated before scanning.
- Regular update
Update virus definition files automatically to keep the files in the latest state. It updates automatically, so no settings are required.
- On-demand update
The virus definition file is updated using the machine information on the System Information screen or [Perform Update Now] in the Virus Scan Setting.
When the virus definition file update fails
When the virus definition file update fails, the following screen appears on the System Information screen.
In addition, an icon will be displayed in the System Area to indicate that the virus definition file update has failed. As for the status, the reason for the update failure will be displayed in the "Notification" section of the System Information screen, check the details.
- Server connection error (cannot connect to the Internet / server not found)
- Download failure (communication error / received data damaged, etc.)
- System time error (the time on the device and the time on the server side are off by more than 24 hours)
- Authentication failure (server authentication failure)

When "Audit Log" is enabled, failure to update virus definition files is logged.
UNIVERSAL DESIGN IN THE MACHINE
UNIVERSAL DESIGN IN THE MACHINE
The structure of the machine and the software are designed to allow all people to use the machine with ease.
UNIVERSAL DESIGN RELATED TO OPERATION
Adjustment of operation panel angle
The angle of the entire operation panel can be adjusted to enable use even when seated.

Grip handle on paper trays
The grip-type handles allow easy use from above or below. By simply placing your hand on a handle and pulling forward, the lock releases. The trays can be manipulated in a natural manner. (excluding a stand/550&2100 sheet paper drawer or large capacity tray)

Changing of key response time
The response time of the keys can be changed as needed.
In "Settings" (administrator), select [System Settings] → [Common Settings] → [Operation Settings] → [Condition Settings] → [Key Operation Setting].
• Time for Accepting Key Entry
This setting determines how long a key in the touch panel must be tapped until the key input is registered. The time can be set from 0 to 2 seconds in increments of 0.5 seconds.
By lengthening the time setting, key input can be prevented when a key is tapped accidentally. Keep in mind, however, that when a longer setting is selected more care is required when tapping keys to ensure that key input is registered.
- Disable Auto Key Repeat
This is used to disable key repeat.
Key repeat causes a setting to change continuously not only each time the key is tapped but while a key is tapped.
- Long-touch Detection Time
Select a time when a long key touch is detected.
• Double Tap Speed Interval
Select an interval when a double tap is detected.
Confirmation of placement of original in document feeder
The original setting lamp lights up when the original is correctly set on the original setting table.
Even for users who have difficulty confirming that the original is set on the original setting table, the original setting lamp can be turned on to confirm that the original is set correctly.
UNIVERSAL DESIGN RELATED TO VISION
Changing of text size
The size of the text on the touch panel can be changed. When the text on the touch panel is small and difficult to read, the text can be enlarged.
In "Settings" (administrator), select [System Settings] → [Common Settings] → [Operation Settings] → [Condition Settings] → [Enlarge Display Mode].
- Enlarge Display Mode
Displays large characters on the screen.
appears in the system area when Enlarge Display Mode is enabled.
UNIVERSAL DESIGN RELATED TO HEARING
Audible alert sounds when changing settings
When moving through copy ratio or exposure settings, the user is alerted by an audible sound at the default setting (copy ratio 100%, exposure 3).
In "Settings (administrator)", select [System Settings] → [Sound Settings] → [Beep Sound Settings (Common)] → [Keys Touch Sound] and [Reference Tone].
- Keys Touch Sound
Control the key touch sound level, or turns the sound off. You can also have two peeps sound at initial values when setting the ratio in copy mode or when adjusting the exposure in any mode.
| Screen in which setting is effective Initial value | |
| Ratio setting screen in base screen of copy mode Ratio 100% | |
| Exposure setting screen in base screen of copy mode Exposure level: 3 (medium) | |
| Exposure adjustment screen in base screen of fax, Internet fax, and network scanner modes | |
| Exposure adjustment screen for Scan to local drive in document filing mode |
- Make Key Touch Sound at Default Setting
When you specify the exposure in the exposure adjustment screen of each mode, a bleep sounds two times when the reference value is reached.
UNIVERSAL DESIGN FEATURES
The machine has design features and settings that are compatible with universal design.
Easy-to-use user interface
- Easy mode
This mode shows only frequently used items. Buttons and text are enlarged to increase ease of operation. Almost all regular operations can be completed using the easy mode screen.
COPY MODE (page 3-3)
FAX MODE (page 5-6)
NETWORK SCANNER MODE (page 6-7)
- Customizing the home screen and adding icons
You can add icons to the home screen. You can also change an icon image to a custom image.
Add an icon image in "Settings (administrator)" - [System Settings] → [Home Screen Settings] → [Icon].
To add an icon to the home screen, add a key in "Settings (administrator)" - [System Settings] → [Home Screen Settings] → [Condition Settings] → [Home Button]/[Fix Key].
- Customizing the home screen - changing the display order
You can change the order of the items in the home screen so that the items you use most frequently appear first.
To change the order of the items in the home screen, change in "Settings (administrator)" - [System Settings] → [Home Screen Settings] → [Condition Settings] → [Home Button].
- Customizing the home screen - intuitive and easy-to-use design
A flat icon design is used to make the screen intuitive and easy to view. The toner level is always shown, eliminating the need to perform an action to check the toner level.

For the procedures for editing the home screen, see "EDITING THE HOME SCREEN (page 2-18)".
• High-contrast display (UD pattern)
The touch panel image can be set to high contrast.
Select [Pattern 7] in "Settings (administrator)" - [System Settings] → [Common Settings] → [Operation Settings] → [Condition Settings] → [MFP Display Pattern Setting].
- Multi-language display
The language used in the touch panel can be changed to another language such as English or French. Select the desired language in "Settings (administrator)" - [System Settings] → [Common Settings] → [Operation Settings] → [Condition Settings] → [Display Language Setting].
Intuitive operation
- Use the QR code to view the User's Manual page.
Tap the [User's Manual] key on the home screen of the touch panel to display a QR code that indicates the page containing the user's manual. You can read the QR code with your mobile device to easily view the corresponding page.
- Easy operation by storing programs
The program function lets you store groups of settings for copying, fax, and other functions. By storing groups of settings that you frequently use, you can easily select those settings.
PROGRAMS (page 3-138)
STORING FAX OPERATIONS (PROGRAM) (page 5-75)
STORING SCAN OPERATIONS (PROGRAM) (page 6-94)
- Remote operation
You can display the machine's touch panel on a computer on the same network to operate the machine from the computer. You can show how to use the machine on a computer, and people who have difficulty using the touch panel can operate the machine from a computer.
Easier operation at the machine
- Job separator
Even when a copy job is run while the machine is receiving a fax, you can use the job separator to output the jobs to separate trays so that the pages are not mixed together.
PART NAMES AND FUNCTION (page 1-2)
• Darkened output tray colour
Output tray colours are darkened to make it easy to distinguish the tray to which a job has been output.
- On right side of operation panel
Located on the right side of the operation panel, this allows smooth removal of paper without interfering with the output tray.
Simple toner replacement
- Toner box can be opened with one hand
The box that contains a toner cartridge can be easily opened with one hand.
• Automatic toner cartridge ejection
When a toner cartridge runs out of toner, the cartridge is automatically ejected from the machine. This ensures that the wrong toner cartridge is not accidentally removed.
REPLACEMENT OF TONER CARTRIDGE (page 1-74)
• Prevention of toner cartridge mis-installation
To prevent installation of a toner cartridge in the wrong location, each colour of toner cartridge can only be installed in its own location.
REPLACEMENT OF TONER CARTRIDGE (page 1-74)
JOB LOG LIST
ITEMS RECORDED IN THE JOB LOG
The machine records the performed jobs in the job log.
The main information recorded in the job log is described below.

- To make it easy to total the usage counts of differently configured machines, the items recorded in the job log are fixed, regardless of what peripheral devices are installed or the objective of the recording.
- In some cases, job information may not be correctly recorded, such as when a power failure occurs during a job.
| No. Item name Description | |||
| 1 | Main items | Job ID | The job ID is recorded. Job IDs appear in the log as consecutive numbers up to a maximum of 999999, after which the count resets to 1. |
| 2 | Account Job ID | The job ID used in the Sharp OSA is recorded. | |
| 3 Job Mode The job mode type, such as copy or print is | recorded. | ||
| 4 | Computer Name | The name of the computer that sent a print job is recorded.* | |
| 5 User Name The user name when the user authentication | function is used is recorded. | ||
| 6 Login Name The login name when the user authentication | function is used is recorded. | ||
| 7 | Card ID | The card ID when it is used for an authentication process is recorded. | |
| 8 | Number of Card Issuance | The number of times the card has been issued is written in an SSFC IC card is recorded. | |
| 9 Main Code Main Code is recorded. | |||
| 10 | Sub Code | Sub Code is recorded. | |
| 11 | Starting Date & Time | The date and time the job was started are recorded. | |
| 12 | Completing Date & Time | The date and time the job was completed are recorded. | |
| 13 | Black & White Total Count | For a print job, the total count is recorded.For a send job, the number of transmitted black & white pages is recorded.When a broadcast transmission is summarized, the total number of pages is recorded.For a scan to local drive job, the number of stored black & white pages is recorded. | |
| 14 | Full Colour Total Count | For a print job, the total count is recorded.For a send job, the number of transmitted full colour pages is recorded.When a broadcast transmission is summarized, the total number of pages is recorded.For a scan to local drive job, the number of stored full colour pages is recorded. | |
| No. | Item name | Description | |
| 15 | Main itemsPaper Count(Black & | Count according to size | Counts by original/paper size in colour mode and black & white mode are recorded. |
| 16 | Invalid Paper Count(Colour) | The colour invalid sheet count is recorded. | |
| 17 Invalid | White) | The black & white invalid sheet count is recorded. | |
| 18 | Number of Reserved Sets | Number of specified sets or reserved destinations is recorded. | |
| 19 | Number of Completed Sets | Number of completed sets or number of destinations to which transmission was successfully completed is recorded. | |
| 20 | Number of Reserved Pages | Number of reserved original pages of a copy, print, scan job, or other job is recorded. | |
| 21 Number of Completed Pages Number of completed pages of a set is recorded. | |||
| 22 Result The result of a job is recorded. | |||
| 23 | Error Cause | When an error occurs during a job, the cause of the error is recorded. | |
| 24 | Print Job Related Item | Output | The output mode of a printed job is recorded. |
| 25 Staple The status of stapling is recorded. | |||
| 26 Staple Count The staple count is recorded. | |||
| 27 Punch The status of punching is recorded. | |||
| 28 Punch Count The punch count is recorded. | |||
| 29 | Fold | A job that uses the fold function is recorded. | |
| 30 | Fold Count | Number of folded pages is recorded. | |
| 31 | Saddle Fold | A job that uses the saddle fold function is recorded. | |
| 32 | Saddle Fold Count | Number of saddle folded pages is recorded. | |
| 33 | Printer Tone | The tone used for a print job is recorded. | |
| 34 | Image Send Related Item | Address | Address of an image send job is recorded. |
| 35 | Sender Name Sender name of an image send job is recorded. | ||
| 36 | Transmission Type Transmission type of an image send job is | Sender Address | Sender address of an image send job is recorded. |
| 37 | Transmission Type Transmission type of an image send job is | Number | recorded. |
| 38 | Administrative Serial | Administrative serial number of an image send job is recorded. | |
| 39 | Broadcast number Broadcast number of an image send job is | recorded. | |
| 40 | Entry order | Reservation order for broadcast transmission of an image send job is recorded. This is used to link communication and printing when recording multi polling jobs. | |
| 41 | File Format | File format of an image send job or scan to local drive job is recorded. | |
| 42 | Sign Records whether or not an electronic signature is | used in e-mail transmission. | |
| 43 | Encry. Records whether or not encryption is used for | e-mail transmission. | |
| 44 | Compression | Mode/Compression Ratio | Compression mode and compression ratio of the file of an image send job or scan to local drive job is recorded. |
| 45 | Communication Time | The communication time of image send jobs is recorded. | |
| 46 | Fax No. The stored sender's number is recorded. | ||
| 47 | Document Filing Related Item | Document Filing | Status of document filing is recorded. |
| 48 | Storing Mode | Document filing storing mode is recorded. | |
| 49 | Common Functionality | Colour Setting | Colour mode selected by user is recorded. |
| 50 | Special Modes | Special modes selected when the job was executed is recorded. | |
| 51 | File Name | The stored file name is recorded.* | |
| 52 | Data Size [KB] | The size of a file is recorded. | |
| 53 | Detailed Items | Original Size | Size of scanned original is recorded. For a document filing print job, the paper size of the file is recorded. |
| 54 | Original Type | Original type (text, printed photo, etc.) set in the exposure settings screen is recorded. | |
| 55 Original Count Number of scanned original sheets is recorded. | |||
| 56 Paper Size For a print job, the paper size is recorded. | For a send job, the transmitted paper size is recorded.For a Scan to local drive job, the paper size of the stored file is recorded. | ||
| 57 Paper Type The paper type used for printing is recorded. | |||
| 58 | Paper Property | The paper property specified in "Paper Type" is recorded. | |
| 59 Duplex Setup The duplex setting is recorded. | |||
| 60 Resolution The scanning resolution is recorded. | |||
| 61 | Machine Item | Model Name | The model name of the machine is recorded. |
| 62 | Unit Serial Number | The serial number of the machine is recorded. | |
| 63 Name The name of the machine that is set in the Web | pages is recorded. | ||
| 64 | Machine Location | The installation location of the machine that is set in the Web pages is recorded. | |
| 65 | Machine ID | Record the Machine ID entered by the service technician. | |
* In some environments this is not recorded.
SETTING MODE
SETTING MODE 9-3
DISPLAYING THE SETTING MODE ON THE
MACHINE. 9-3
Displaying the setting mode (Web version) 9-4
SETTING MODE SCREEN 9-6
Overview of setting mode. 9-6
SETTING METHOD....9-7
SETTING MODE LIST
SETTING MODE LIST....9-9
STATUS
Status 9-28
Machine Identification 9-28
Total Count 9-29
Device Status 9-29
Network Status 9-29
Security Status 9-29
Firmware Version 9-30
Power Reset 9-30
Data List 9-30
ADDRESS BOOK
Address Book 9-33
Category Setting 9-37
DOCUMENT OPERATIONS
Document Operations 9-38
Document Filing 9-38
Quick File Folder 9-38
Custom Folder 9-38
My Folder 9-39
File Batch Print 9-39
Submit Print Job 9-40
User Control
User Settings 9-42
User List 9-42
Access Control Settings 9-46
Pages Limit Group....9-46
Machine Page Limit Setting. 9-46
Authority Group 9-47
Favourite Operation Group 9-51
User Count 9-53
View User Count 9-53
Save User Count 9-54
Billing Code Setting 9-55
Administration Settings 9-55
Main Code List 9-55
Sub Code List 9-56
SYSTEM SETTINGS
Home Screen Settings 9-58
Condition Settings 9-58
Icon 9-59
Background Image 9-59
Copy Settings 9-60
Condition Settings 9-60
Initial Status Settings 9-63
Text/Image Printing 9-65
Printer Settings....9-66
Condition Settings 9-66
Interface Settings 9-67
Initial Status Settings....9-68
PCL Settings 9-70
PostScript Settings 9-70
OOXML Settings 9-71
Print Release Settings....9-71
E-mail Print Settings 9-73
Direct Print Settings (FTP) 9-74
Direct Print Settings (Network Folder)....9-75
Common Settings 9-76
Condition Settings 9-76
Enable/Disable Settings 9-79
Own Name and Destination Set 9-81
Scan Settings 9-82
Initial Status Settings....9-82
Condition Settings 9-84
Default Address....9-87
Subject Name Settings 9-88
File Name Settings 9-88
Message Body Settings. 9-89
Internet Fax Settings 9-100
Default Settings. 9-100
Send Setting 9-102
Receive Settings 9-104
Server Settings 9-106

Fax Data Receive/Forward (Manual) 9-108
Internet Fax Settings 9-109
Reception Start. 9-109
Manual Reception Key in Initial Screen 9-109
Forward Received Data 9-109
Inbound Routing (Forwarding/Storing) Settings .... 9-110
Inbound Routing Settings 9-110
Metadata Settings 9-113
Document Filing Settings 9-115
Condition Settings 9-115
Custom Folder Registration 9-118
Automatic Deletion of File Settings. 9-119
Sharp OSA Settings....9-120
Condition Settings 9-120
Standard Application Settings 9-121
Receiving Application Setting 9-122
External Accounting Application Settings. 9-122
Embedded Application Settings 9-123
Polling Setting 9-123
External Service Connect. 9-124
Authentication Settings....9-125
Default Settings 9-125
Administration Settings. 9-130
Actions when the user is authenticated ..... 9-131
Card Reader Settings. 9-132
Paper Settings 9-133
Paper Tray Settings 9-133
Tray Registration 9-135
Custom Size Registration (Bypass) 9-136
Paper Type Registration....9-136
Operation Settings....9-137
Condition Settings 9-137
Easy Mode Settings 9-141
Favourite Key Setting 9-142
Mode Key Display Setting 9-142
Keyboard Settings 9-142
Custom Links 9-142
Device Control 9-143
Default Settings 9-143
Status Indicator Setting 9-146
Machine Identification Settings 9-146
Clock Adjust 9-147
Enable/Disable Settings 9-149
Product Key/Application Number Input 9-154
Sound Settings 9-154
Beep Sound Settings (Common) 9-154
Beep Sound Settings (Image Send) 9-155
Network Settings 9-156
Quick Settings 9-156
Network Name Setting 9-159
Interface Settings 9-159
Services Settings 9-162
Print Port Settings 9-165
LDAP Settings 9-167
Proxy Setting 9-171
Wireless Settings 9-172
Device Web Page Setting 9-175
Security Settings 9-177
Password Setting 9-177
Condition Settings 9-180
Port Control 9-181
Filter Setting 9-181
Intrusion/Attack Detection 9-182
Virus Scan Setting. 9-183
SSL/TLS Settings 9-185
S/MIME Settings 9-186
IPsec Settings 9-187
Document Administration Function .....9-189
Hidden Pattern Print Setting 9-190
Tracking Information Print 9-191
Audit Log 9-192
Certificate Management 9-196
Energy Save 9-198
Eco Setting 9-198
Eco Scan Setting....9-201
Energy Saving Pattern List 9-202
Specific Date Operation Settings 9-202
Power ON/OFF Schedule Setting 9-203
Toner Save Mode 9-203
System Control....9-204
Job Log 9-204
Data Import/Export (CSV Format)....9-204
Storage Backup. 9-205
Device Cloning 9-205
Address Book Forward 9-205
Filing Data Backup 9-206
Reset Settings....9-206
Optimization of a Local Drive 9-206
E-mail Alert and Status 9-207
Image Quality Adjustment 9-210
Collective Adjustment 9-210
Copy Image Quality....9-211
Print Image Quality 9-211
Scan Image Quality....9-212
Colour Profile Settings....9-212
Common Functions 9-213
Initial Installation Settings 9-215
SETTING MODE
SETTING MODE
"Settings" allows management of various functions that will make it easier to use the machine, such as default registration for each function, network connection setting, and log check of operation status.
Setting mode can also be selected using the Web browser by accessing the machine from a PC connected to the same network as the machine.

Administrator password
To maintain security, the machine administrator should promptly change the password after the machine is purchased. (For the default administrator password, see Start Guide.) To change the password, see "CHANGE PASSWORD".
DISPLAYING THE SETTING MODE ON THE MACHINE
1

Tap the [Settings] key.
Tap the [Settings] key on the home screen.
The setting mode screen appears on the touch panel.
The setting menu appears at the top of the displayed screen.
Tap the setting in the menu that you want to configure.
For details of the settings, see the explanation for each item.
2

On the upper tab, tap the item that you want to set.
The setting menu appears on the left side of the displayed screen.
Tap the setting in the menu that you want to configure.
When you tap the [System Settings] tab, item keys appear on the screen.
When you tap the key of an item, a setting item menu appears.
(When you tap the [Image Send Settings] key, further item keys appear.)

- To quit the setting mode, tap the [Exit] key in the upper right corner of the screen.
- For details on login procedures when user authentication is enabled, see "USER AUTHENTICATION (page 8-12)".
Displaying the setting mode (Web version)
When the machine is connected to the network, access the built-in Web server of the machine using the PC's Web browser.
From the setting mode of the machine, print the IP address of the machine and enter the address on the PC's Web browser.
Tap the [System Info.] key.

Check the IP address in the machine information.

Start the Web browser on the PC, and enter the IP address of the machine.
Start a Web browser on a PC on the same network the machine is on, and enter the IP address of the machine.
Recommended Web browsers:
Internet Explorer: 11 or higher (Windows®),
Latest version and previous major release
Displays the setting mode (Web version).
In the factory default state, the user password must be entered.
Depending on the machine settings, user authentication may be required to display the setting mode (Web version).
For password and other information required for user authentication, contact the administrator of the machine.
Select a login name and enter your password.
Entering a password

- If you click an item that requires administrator rights, the password entry screen will appear regardless of the settings. Select a user that has administrator rights and enter the user password.
- If user authentication is not enabled, you can set the login name to "Administrator" and enter the administrator password to log in to the Web page.
Once you have logged in to the Web page with administrator rights, the password entry screen will not appear when you click other items that require administrator rights (until you log out).

At the bottom of the login screen you will find links to download manuals, such as the User's Manual, and the latest printer drivers.
SETTING MODE SCREEN
This section describes typical items in the operation method in the setting mode.
Overview of setting mode

(1) Menu tab
This tab shows the first level of the setting menu. Click this tab to show the tab's setting items in the setting menu.
Some settings such as the system settings do not appear in the setting menu when the tab is clicked. Instead, further setting item buttons appear in the setting area.
(2) Setting menu
This shows the items that can be set on the web page. The items are in a tree structure.
When you click an item that requires machine administrator rights, the password entry screen appears. Select the previously registered login name and enter the password.
(3) Custom links
You can register custom links in advance to show the custom links in the setting menu.
▶ Custom Links (page 9-142)
(4) Language
Set the language that appears on the web page.
(5) User's Manual Download
Go to the website of the instruction manual in PDF format such as the user's manual.
(6) Driver/Software
Go to the website where you can download the printer driver and software.
(7) Sitemap
This shows a sitemap of the website.
(8) Search
Use this to search for setting items and other information. Enter the item you want to find in the text box and click 🔒.
(9) [Login/Logout] button
[Login] button
Click to log in to the web page.
[Logout] button
When you have completed all settings in the web pages, click this button to log out and exit the web browser.
(10) Shortcut icon
Click this icon to register a page you want to show on the shortcut tab.
(11) Setting area
This shows the setting screen of the item selected in the setting menu at left.
SETTING METHOD
This section explains the basic procedure for configuring settings using "Home Screen Settings" as an example. This setting is used to change the background image of a home screen to an image provided by the user.
1
Connect to the web page as explained in "Displaying the setting mode (Web version) (page 9-4)".
2
Display the "Home Screen Settings" setting screen.
(1) Click the [System Settings] tab ( ). System Settings
The setting items of the system settings appear in the setting area.
(2) Click the [Home Screen Settings] button.

3
Click [Background Image] in the setting menu and set the background image.
(1) Click [Background Image] in the setting menu.
(2) Click the [Change] button in "Background Image".
The "Home Screen Registration" screen appears.

4
Select "Use Custom Image" and click the [Browse] button to select the desired image.
(1) Check the "Use Custom Image" checkbox. (2) Click the [Browse] button.

When you click the [Browse] button, the file selection screen appears. Select the file of the desired background image.
5
Click the [Submit] button.

6
If you have another item you want to set, configure the setting from the setting menu or menu tab.

If you use the "Forward" or "Back" function of the web browser to move to a different item, the item that you set may not be saved. Use the setting menu or menu tab to move to a different item.
7
When you have finished configuring settings, click the [Logout] button and exit.
When you exit the settings, a message may appear on the touch panel of the machine. Read and then close the message.
SETTING MODE LIST
SETTING MODE LIST
Click the link file to see the details of each description.
In the setting mode, there are some that can be set only on the Web page and some that can be set only on this machine.
*1 Only web pages can be set. *2 Items that can be set only in the setting mode of this machine. *3 For more information on settings, consult a qualified service technician.

Depending on the machine specifications and peripheral devices installed, it may not be possible to use settings.
Status
Status
▶ Machine Identification ▶ Total Count ▶ Device Status ▶ Network Status ▶ Security Status ▶ Firmware Version ▶ Power Reset Data List
◆ List for User ◆ List for Administrator
■Address Book *1
- Address Book
Category Setting
■Document Operations*1
●Document Operations
▶ Document Filing
◆Main Folder ◆Quick File Folder ◆ Custom Folder ◆ My Folder ◆File Batch Print
▶ Submit Print Job
◆Print Settings
■User Control-User Settings
●User Settings
▶ User List ▶ Custom Index ▶ Organization /Group List ▶ User Information Print
■User Control-Access Control Settings
●Access Control Settings
▶ Pages Limit Group ▶ Machine Page Limit Setting ▶ Authority Group ▶ Favourite Operation Group *1
◆Favourite Operation Group List ◆Favourite Key List ◆Home Screen List
■User Control-User Count
User Count
User Control - Billing Code Setting
Billing Code Setting
Administration Settings
Use Billing Code, Use Code Settings, Take Over Billing Code at Mode Transition, Disable Change of Billing Code, Apply Use Code While Logged in with Device Account, Exception Setting for Billing Code Function, Billing Code Display Name Setting
Main Code List
Sub Code List
System Settings - Home Screen Settings
Home Screen Settings
Condition Settings: Home Screen Registration, Icon, Background Image
System Settings - Copy Settings
Copy Settings
Condition Settings
Rotation Copy Setting, Disable Copy in Different Size, Add or Change Extra Preset Ratios, Setting a Maximum Number of Copies Stamp, Initial Margin Shift Setting, Erase Width Adjustment, Initial N-Up Setting, Card Shot Settings, Automatic Saddle Stitch, Initial Tab Copy Setting, Disabling of Registration/Deletion of Program, Disabling of Bypass-Tray in Duplex Copy, Disabling of Auto Paper Selection, Auto Selection Setting of Tray that is Supplied the Paper, Disabling Registration of Custom Image, Disabling sending while copying, High Quality Scan from Document Feeder (B/W), Quick Scan from Document Glass (B/W), Auto Clear Before Copy Execution Also
Display Warning Message when Original is not Detected, Initial Status Settings, Text/Image Printing: Text Settings (Stamp), Custom Stamp, Custom Watermark
■ System Settings - Printer Settings
● Printer Settings
▶ Condition Settings ◆ Prohibit Notice Page Printing ◆ Prohibit Test Page Printing ◆ A4/Letter Size Auto Change ◆ A3/Ledger Size Auto Change ◆ Bypass Tray Settings ◆ Job Spool Queuing ◆ Disabling of USB Memory Direct Print ◆ Disabling of Network Folder Direct Print ◆ Disabling sending while printing ▶ Interface Settings ◆ Hexadecimal Dump Mode ◆ I/O Timeout ◆ Enable Network Port ◆ Network Port Emulation Switching ◆ Port Switching Method ▶ Initial Status Settings ▶ PCL Settings ▶ PostScript Settings ▶ OOXML Settings ▶ Print Release Settings Standard ◆ Advanced Settings ▶ E-mail Print Settings ◆ E-mail Print ◆ POP3 Server ◆ Port Number ◆ POP Authentication ◆ User Name ◆ Password ◆ Check Interval ◆ Enable SSL/TLS ▶ Direct Print Settings (FTP) ◆ FTP Server Registration ▶ Direct Print Settings (Network Folder)
◆ Registration of Network Folder
▶ Print Setting from PC/Mobile Terminal
◆ FTP Print ◆ Port Number ◆ IPP Print (Driverless) ◆ geo URI (RFC 5870)
■ System Settings - Image Send Settings - Common Settings ● Common Settings
▶ Condition Settings
◆ Hold settings for a while after scanning has been completed ◆ Job Auto Start Time During Scanning ◆ Default Display Setting ◆ Address Book Default Selection ◆ Image Orientation ◆ Preview Setting ◆ Default Exposure Settings ◆ Default Original Image Type ◆ Default Verification Stamp ◆ Erase Width Adjustment ◆ Time Specified Output of Received Data
▶ Enable/Disable Settings
◆ Settings to Disable Registration ◆ Settings to Disable Transmission ◆ Disabling of PC Scan ◆ Disable Storing to External Memory Device ◆ Disable PC-I-Fax Transmission ◆ Disable PC-Fax Transmission ◆ Disabling of Find My Address
▶ Own Name and Destination Set
◆ Sender Data Registration ◆ Registration of Own Name Select ◆ Sender Name List
Category Setting 2
■ System Settings - Image Send Settings - Scan Settings
- Scan Settings
▶ Initial Status Settings
◆ Default Colour Mode Settings ◆ Initial File Format Setting ◆ Easy Scan Settings ◆ Resolution Setting ◆ Original Skew Adjustment
▶ Condition Settings
◆ Default Reply Address Set ◆ Bcc Setting ◆ Quick On Line Sending ◆ PDF Compression Options ◆ Compact PDF Resolution Setting ◆ Compression Mode at Broadcasting ◆ Send Destination Link Settings ◆ Maximum Size of Send Data (E-Mail) ◆ Maximum Size of Send Data (FTP/Desktop/Network Folder) ◆ Auto Scan Setting ◆ Preset restriction of E-mail for direct input
▶ Default Address
◆ Default Address Setting ◆ Add Selected
▶ Subject Name Settings
◆ Default Subject ◆ Pre-Set Registration
▶ File Name Settings
◆ Default Settings for File Names ◆ Direct Entry/Pre-Set Text Selection Settings ◆ Pre-Set Registration
▶ Message Body Settings
◆ Add Job Information Automatically to the Mail Message Body ◆ Add a Footer Automatically to the Mail Message Body ◆ Mail Footer Registration ◆ Message Body Settings
■ System Settings - Image Send Settings - Fax Settings
● Fax Settings
▶ Condition Settings
◆Resolution Setting ◆Factory default settings: ◆Auto Wake Up Print ◆Pause Time Setting ◆Fax Dest. Confirmation Mode ◆Remote Reception Number Setting ◆Display Fax Screen when External Telephone is Off-hook ◆Transaction Report Print Select Setting ◆Activity Report Print Select Setting ◆Super G3 Setting ◆ECM ◆Digital Line Network ◆Distinctive Ring Detection PBX Setting
▶ Send Setting
◆Auto Reduction Sending Setting ◆Rotation Sending Setting ◆Quick On Line Sending ◆Printing Page Number at Receiver ◆Sender Destination Name Switch ◆Date/Own Number Print Position Setting ◆Recall in Case of Line Busy ◆Recall in Case of Communication Error ◆Disable Fax Broadcasting
▶ Receive Settings
◆Number of Calls in Auto Reception ◆Switching to Automatic Reception ◆2-Sided Printing of Received Data ◆Auto Receive Reduce Setting ◆Print Style Setting ◆Set the Telephone Number for Data Forwarding ◆Letter Size RX Reduce Print ◆Receiving Date & Time Print ◆A3 RX Reduce ◆ Output Tray ◆Number of Prints ◆Staple Settings ◆Paper Size ◆Fold Size Setting ◆Allow/Reject Number Setting ◆Reject hidden Number
▶ Fax Polling Security ▶ F-Code Memory Box
■System Settings-Image Send Settings-Internet Fax Settings ●Internet Fax Settings
▶ Default Settings
◆Initial File Format Setting ◆Auto Wake Up Print ◆Original Print on Transaction Report ◆Transaction Report Print Select Setting ◆Activity Report Print Select Setting
▶ Send Setting
◆I-Fax Reception Report On/Off Setting ◆I-Fax Reception Report Request Timeout Setting ◆Number of Resend Times at Reception Error ◆Maximum Size of Send Data ◆Rotation Sending Setting ◆Default Own Number Sending ◆Printing Page Number at Receiver ◆Recall in Case of Line Busy ◆Recall in Case of Communication Error
▶ Receive Settings
◆Auto Receive Reduce Setting ◆2-Sided Printing of Received Data ◆Set Address for Data Forwarding ◆Letter Size RX Reduce Print ◆Receiving Date & Time Print ◆A3 RX Reduce ◆POP3 Communication Timeout Setting ◆Reception Check Interval Setting ◆ I-Fax Output Setting ◆Allow/Reject Mail or Domain Name Setting
▶ Server Settings
Receive Settings ◆Default Settings ◆Direct SMTP Setting
■System Settings-Image Send Settings-Fax Data Receive/Forward (Manual)
●Fax Data Receive/Forward (Manual)
Fax Settings ▶ Internet Fax Settings
■System Settings-Image Send Settings-Inbound Routing (Forwarding/Storing) Settings
●Inbound Routing (Forwarding/Storing) Settings
▶ Inbound Routing Settings ▶ Sender Address Registration ▶ Administration Settings ▶ Inbound Routing (Storage) Settings
■System Settings-Image Send Settings-Metadata Settings
●Metadata Settings
■System Settings-Document Filing Settings
●Document Filing Settings
▶ Condition Settings ◆Default Mode Settings ◆Sort Method Setting ◆Administrator Authority Setting ◆ Delete All Quick Files ◆ Image Orientation ◆Default Colour Mode Settings ◆Default Exposure Settings ◆Default Original Image Type ◆Initial Resolution Settings ◆Default Output Tray ◆Disable Text/Stamp functions for Reprinting ◆Batch Print Settings ◆Print Order Setting for the Batch Print/Multi-File Print ◆Erase Width Adjustment ◆ Card Shot Settings ◆Setting of store/delete after file print ◆Default Setting of PDF Format for PC Browsing ◆Document Output Options
▶ Custom Folder Registration 2
▶ Automatic Deletion of File Settings
◆ Delete Now ◆Executing automatic deletion during Auto Power Shut-Off.
■ System Settings - Sharp OSA Settings
● Sharp OSA Settings
▶ Condition Settings ◆ Sharp OSA version ◆ Cookie Setting*2 ◆ Delete Cookie*2 ◆ Automatically Start an Application at Power up and Wake up ◆ Accept remote access request from application ◆ Application allowed to access ◆ Approve remote access request on operation panel ◆ Accept UI operation request from application ◆ Display dialog of connection in Sharp OSA mode ◆ Accept secondary send request from Sharp OSA application ▶ Standard Application Settings ▶ Receiving Application Setting ▶ External Accounting Application Settings ▶ Embedded Application Settings ▶ Polling Setting ▶ External Service Connect
■ System Settings - Authentication Settings
● Authentication Settings
▶ Default Settings
◆ User Authentication ◆ Authentication Settings ◆ Default Network Authentication Server Setting ◆ Specify network server access control ◆ Authentication Method Setting ◆ Enable Quick Login ◆ Device Account Mode Setting ◆ Login User ◆ Settings for Using Authentication Information ◆ Cache Authentication Information for External Service Connect ◆ Card Setting ◆ Disable Printing by Invalid User ◆ Automatic Logout Setting ◆ A Warning when Login Fails ◆ Allow Remote Scanner Using Before Login. ◆ Include Job Status in user authentication ◆ Display System Information Screen Before Login ◆ Enable IPP Authentication Except for Printer Driver ◆ Actions when the Limit of Pages for Output Jobs ◆ Automatically print stored jobs after login ◆ Reset Counter After Sending E-mail Status ◆ Disable display/change of other users' information in the job status ◆ Apply login name to the user name of network folder ◆ Login Name Display ◆ Display Usage Status after Login ◆ Edit Help Display of Login Screen ◆ Default Settings ◆ Card Reader Device Registration
▶ Card Reader Settings
■ System Settings - Common Settings - Paper Settings
● Paper Settings
▶ Paper Tray Settings
◆ Auto Switching of Tray ◆ Display Paper Tray Settings when bypass tray detects paper. ◆ Paper Weight Setting ◆ Tray Settings
▶ Tray Registration
◆ Select Paper Sizes for Auto Detection
▶ Custom Size Registration (Bypass)
▶ Paper Type Registration
■System Settings-Common Settings-Operation Settings
●Operation Settings
▶ Condition Settings
◆Enlarge Display Mode ◆Message Time Setting ◆Language Setting ◆Default Display Setting ◆Display System Information Screen as Default ◆Display IP Address on the System Information Screen ◆Display Favorite Menus as Default ◆Display Action Panel as Default ◆Icon is displayed when network cable is not connected ◆Display Confirmation Dialog when job is cancelled ◆Display Status Notification Message ◆Restrict Total Count display ◆Switch the Number of Sets to be Displayed for Job Status ◆Display the estimated job start time ◆Alignment Order of 10-Key ◆Setting Display from Main Unit ◆MFP Display Pattern Setting ◆Key Operation Setting ◆Disabling of Bypass Printing ◆Priority of Print Jobs ◆Disabling of Covers/Inserts Mode ◆Disabling Recent Jobs ◆Initial Original Count Setting ◆Preview Setting ◆Remote Operation Settings ◆Data List ◆Tandem Connection Setting
▶ Easy Mode Settings
▶ Favourite Key Setting
▶ Mode Key Display Setting ▶ Keyboard Settings ◆Default Keyboard Setting ◆Keyboard Select ◆Set Keyboard Priority ◆Soft Keyboard Template Setting ▶ Custom Link
■System Settings-Common Settings-Device Control
●Device Control
▶ Default Settings
◆Original Size Detector Setting ◆Cancel Detection at Document Glass ◆Original Feeding Mode ◆Actions When Maximum Number of Sheets that can be Stapled is Reached ◆Double Feed Detection Setting ◆Automatic Saddle Stitch ◆Saddle Fold/Stitch Position Adjust ◆Paper Type for Auto Paper Selection ◆Plain Paper Compatibility Settings ◆Detect Standard in Auto Colour Mode
◆Total Setting for Finish
◆Disabling of Duplex
◆Disabling of Offset
Disabling of Stapler
Disabling of Punch
Disabling of Colour Mode
Disabling of Document Feeder
Disabling of Large Capacity Cassette
Disabling of Optional Paper Drawer
Disabling of Tray Settings
Disabling of Finisher
Disabling of Folding Unit
Status Indicator Setting
Information Indicator Setting / Document Feeder Indicator Setting
Machine Identification Settings
Clock Adjust
Daylight Saving Time Setting / Date Format
Enable/Disable Settings
◆ Authentication Settings ◆ Copy Settings ◆ Printer Settings ◆ Image Send Settings ◆ Document Filing Settings ◆ Operation Settings ◆ Device Control ◆ Security Settings
▶ Product Key/Application Number Input
■ System Settings - Common Settings - Sound Settings
● Sound Settings
▶ Beep Sound Settings (Common)
◆ Keys Touch Sound ◆ Beep of Invalid Input ◆ Reference Tone ◆ Copy Complete Sound ◆ Scan Complete Sound (Image Send) ◆ Powering Off Sound ◆ Caution Sound Settings
▶ Beep Sound Settings (Image Send)
Fax Internet Fax
■ System Settings - Network Settings
● Network Settings
▶ Quick Settings
◆ Wireless Settings ◆ IPv4 Settings ◆ Network Name Settings ◆ DNS Settings ◆ SMTP Settings ◆ LDAP Settings
▶ Network Name Setting
◆ Device Name ◆ Domain Name ◆ Comment
▶ Interface Settings
◆ Connection Type ◆ IPv4 Settings ◆ IPv6 Settings ◆ DNS Settings ◆ IEEE802.1X Setting
▶ Services Settings
◆ SMTP ◆ Kerberos ◆ SNTP ◆ mDNS ◆ SNMP
▶ Print Port Settings
◆ LPD RAW ◆ WSD
▶ External Print Services Settings ▶ Universal Print Settings *1 ▶ LDAP Settings ▶ Active Directory Settings ▶ Public Folder / NAS Setting ▶ Proxy Setting ▶ Wireless Settings
◆ Connection Type ◆ Keep Wireless Access Point activated
◆ Current Setting
◆ Current Wireless Status
◆ Show Wireless Setting Screen
◆ Initialize Wireless Settings
◆ Wireless Setting screen (Access Point Mode)
◆ Wireless setting screen (infrastructure mode)
▶ Easy Connection Setting
◆ NFC ◆ NFC Signal ◆ QR code ◆ Destination
Bluetooth Setting
Bluetooth
▶ Device Web Page Setting
◆HTTP Access Settings ◆View Login User ◆Current Login User ◆Logout All Users
■System Settings - Security Settings
●Security Settings
▶ Password Setting ◆Password Policy Settings ◆Password Change ▶ Condition Settings ◆Restrict Print Jobs other than the current Print Hold Job ◆Automatic Deletion of Suspended Print Jobs ◆ Time until Suspended Print Jobs are Automatically Deleted ◆Reject Requests from External Sites ◆If Firmware Corruption is Detected, Restore It ◆Apply Security Policy ◆Mandatory Access Control ◆Job Status Jobs Completed List Display Setting ◆Job Status Display Setting
▶ Port Control
▶ Filter Setting
◆IP Address Filter Settings ◆MAC Address Filter Settings
▶ Intrusion/Attack Detection
▶ Virus Scan Setting
◆Virus Scan ◆Virus Scan Settings ◆Virus Definition File Update Setting
▶ SSL/TLS Settings
◆SSL/TLS Settings
S/MIME Settings
S/MIME Settings
IPsec Settings
Condition Settings / IPsec Rules
Document Administration Function
Hidden Pattern Print Setting
Initial Status Settings / Contrast / Custom Text Registration
Tracking Information Print
Initialize Private Data/Data in Machine
Security code input
Tracking Information Print
Audit Log
Audit Log / Storage/Send Settings / Save/Delete Audit Log
Certificate Management
Device Certificate Management / Certificate Signing Request (CSR) Management / CA Certificate Management
■ System Settings - Energy Save
● Energy Save
▶ Eco Setting
◆ Eco Recommendation Function Display ◆ Display a Message to Delay the Time of Entry into Preheat Mode / Auto Power Shut-Off Mode ◆ Mode Setting ◆ Preheat Mode Setting ◆ As soon as the remote job is finished, enter Auto power shut off mode. ◆ Fix transition time. ◆ Change transition time by time of day. ◆ Sleep Mode Power Level
▶ Eco Scan Setting
▶ Energy Saving Pattern List
▶ Specific Date Operation Settings
▶ Power ON/OFF Schedule Setting
▶ Toner Save Mode
■ System Settings - System Control
● System Control
▶ Job Log ◆ View Job Log ◆ Job Log Operation ▶ Data Import/Export (CSV Format) ◆ Export Settings ◆ Import Settings Storage Backup ◆ Export Settings ◆ Import Settings ▶ Device Cloning ◆ Export Settings ◆ Import Settings
▶ Address Book Forward 2 ▶ Filing Data Backup *1
◆ Export Settings ◆ Import Settings
▶ Reset Settings
◆ Restore Factory Defaults ◆ Reset the NIC
▶ Optimization of a Local Drive *4 ▶ E-mail Alert and Status
◆ Status Message Alerts Message ◆ SMTP Settings
■ System Settings - Image Quality Adjustment
● Image Quality Adjustment
▶ Collective Adjustment *2
◆ Registration Adjustment *2 ◆ Fusing Cleaning Mode ◆ Black Letter/Black Line Width Adjustment ◆ Black Streak Reduction ◆ Display warning message for black streaks detection.
▶ Copy Image Quality
◆ Quick Image Quality Adjustment ◆ Colour Balance (Colour / B/W) ◆ Color Copy Black Component Amount Adjustment ◆ Density Adjustment when [Auto] is selected for Exposure ◆ Sharpness ◆ Image Quality Priority
▶ Print Image Quality
◆ Quick Image Quality Adjustment (Colour / B/W) ◆ Colour Balance (Colour / B/W) ◆ Exposure Adjustment ◆ Colour Line Width Adjustment
▶ Scan Image Quality
◆ RGB Adjust ◆ Sharpness Contrast
▶ Colour Profile Settings *1
◆ Custom CMYK Simulation Profile ◆ Custom Input Profile ◆ Custom Output Profile
Common Functions
Auto Colour Calibration (for Copy) / Auto Colour Calibration (for Print) / Copy Calibration by Screen / Printer Calibration by Screen
Density Smoothing Adjustment
Remove Toner Cartridge
System Settings - Initial Installation Settings
Initial Installation Settings
STATUS
Status
Machine Identification
The Machine Identification displays the system information of the machine. It displays the model name, current status, and machine location. This setting can also be set by general users, except for some items.
| Item Description | |
| Unit Serial Number Indicates the serial number of the machine. | |
| Name When you tap the [Not Set] key, the [Machine Identification] screen appears.If [Name] is not set, [Not Set] appears. | |
| Model Name Displays the standard model name of the machine. | |
| Machine Location | The information entered in the [Machine Location] item in [Machine Identification] appears.If no name has been set, [Not Set] appears. |
| Current Status Displays the current status of the machine.If two or more errors occur at the same time, only one status is displayed according to the priority order.The errors and machine conditions are displayed in the following priority order.Printer ErrorAccount LimitIncorrect PaperOverdue service maintenancePaper JamMarker Supply MissingToner EmptyReplace toner collection container.Cover OpenPaper EmptyInput Tray EmptySpecified Input Tray OpenSpecified Output Tray FullOfflinePrinter WarningToner LowPaper LowInput Tray OpenOutput Tray FullOutput Tray Nearly FullNear to overdue service maintenanceOnlineAuto Power Shut-OffWarming UpBusy | |
| Memo Displays text that the administrator entered.If you have logged in as an administrator, you can enter a memo.If no name has been set, [Not Set] appears.When you tap the [Not Set] key, the Machine Identification screen appears. | |
| Supply Status Displays the current status of supplies. If staples are installed, their status is displayed. | |
| Paper Input Tray Status | Displays the current status of the paper trays installed in the machine. |
| Display Pattern Setting Switches the display pattern of the home screen. | |
| [Reboot the MFP] key Displays the restart screen. (Administrator rights are required.) | |
| [Enter the Power Save Mode] key Displays the power save mode screen. (Administrator rights are required.) | |
Total Count
This function shows the page count in each mode.
This setting may require administrator privileges.

- Pages printed directly from the machine such as list prints are included in the "Other Prints" count.
- The items displayed (or printed) will vary depending on the machine specifications and peripheral devices installed.
- When "Restrict Total Count display" is set, only administrators can confirm this.
Device Status
This screen shows the device status.
This setting can also be made by general users.
| Item Description | |
| Paper Input Tray Status | Displays the current status of the paper trays installed in the machine. |
| Output Tray Status | Displays the current status of the output tray installed in the machine. |
| Supply Status | Displays the current status of supplies.If staples are installed, their status is displayed. |
| Device Configuration | Displays the information of options installed in the machine. |
| Local Drive Status Displays the usage status of the local drive. | |
Network Status
Displays general, TCP/IP, and DNS status information.
The contents displayed here are the items to be set in the network settings and their setting values.
For each setting, see the following "Network Settings (page 9-156)".
This setting can also be made by general users.
Security Status
Displays the security settings status of the machine.
The contents displayed here are the items to be set in the security settings and their setting values.
For each setting, see the following "Security Settings (page 9-177)".
This setting can also be made by general users.
Firmware Version
Shows the firmware version of the machine as a list.
This function requires administrator rights.
Power Reset
The Power Reset screen enables you to restart the machine or enter the power save mode.

This function requires administrator rights.
| Item Description | |
| Reboot the machine Reboots the machine. | Tapping the [Execute] key opens the Restart screen, and then tapping the [Execute] key again restarts the machine. |
| Enter the Power Save Mode Shifts the machine to power save mode. | Tap the [Execute] key to open the power saving mode screen. |
Data List
Lists showing the settings and information registered in the machine can be printed.

The two-sided or one-sided list printing setting is determined by Operation Settings - Data List - 1-Sided/2-Sided.
List for User
This setting can also be made by general users.
| List name Description | |
| Machine Status List | This list shows information needed by regular users, such as hardware statuses, software statuses, printer environment settings, and paper tray settings. |
| Printer Test Page | This is used to print the PCL Symbol Set List, various font lists, and the NIC page (network interface settings, etc.).PCL Symbol Set ListPCL Internal Font ListPCL Extended Font ListPS Font ListPS Extended Font ListNIC Page |
| Destination List Lists can be printed | of various addresses stored in the machine.Individual ListGroup ListMemory Box List |
| Document Filing Folder List This shows the folder names for document filing. | |

Prohibit Test Page
You cannot print the test page when [Prohibit Test Page Printing] is enabled. In "Settings (administrator)", select [System Settings] → [Printer Settings] → [Condition Settings] → [Prohibit Test Page Printing].
List for Administrator
You can print out the lists and reports that only the administrator can refer to.
When using "Image Sending Activity Report (Internet Fax)" in Image Sending Activity Report (Auto), select "Setting mode" → [System Settings] → [Image Send Settings] → [Internet Fax Settings] → [Receive Settings] → [2-Sided Printing of Received Data], enabling you to specify 1-sided or 2-sided printing.
When using "Image Sending Activity Report (Fax)" in Image Sending Activity Report (Auto), select "Setting mode" → [System Settings] → [Image Send Settings] → [Fax Settings] → [Receive Settings] → [2-Sided Printing of Received Data], enabling you to specify 1-sided or 2-sided printing.

When [Print Only the Settings that have been Changed] is enabled, only the items in the selected list that have been changed from the factory default will be selected for printing.
Home Screen
• Home Screen List
Copy Settings
- Copy Settings List
Printer Settings
- Printer Settings List
Image Send Settings
- Metadata Set List
- Common Settings List
- Scan Settings List
- Fax Settings List
- I-Fax Settings List
Document Filing Settings
Document Filing Settings List
Sharp OSA Settings
Sharp OSA Settings List
Authentication Settings
Authentication Settings List
Common
Lists of the administrator settings for the following modes can be printed.
- Paper Settings List • Machine Identification Settings List • Operation Settings List
- Keyboard Settings List
- Device Control List
Network Settings
Network Settings List
Security Settings
Security Settings List
Energy Save Setting
Energy Save List
Image Quality Adjustment
• Image Quality Adjustment List
Image Sending Activity Report
The following Image Sending Activity Reports can each be printed separately.
• Image Sending Activity Report (Fax) • Image Sending Activity Report (Scan) • Image Sending Activity Report (Internet Fax)
Data Receive/Forward List
The following lists showing reception settings and forwarding settings can be printed.
- Allow/Reject Number List
- Allow/Reject Mail & Domain Name List
- Inbound Routing List
- Document Admin List
ADDRESS BOOK
Address Book
Transmission destinations (contacts) such as fax and Scan to E-mail addresses, and groups of transmission destinations, can be stored in the address book.
To edit a contact or group, select the name of the contact/group. To add a new contact or group, click the [Add] key.
For the procedure for storing contacts and groups using the machine's
touch panel, see "ADDRESS BOOK SCREEN (page 6-15)". In setting mode, a list of stored contact and group information is displayed.
This setting can also be made by general users.

This setting can only be set on web pages.
| Item Description | |
| Type Select the contact or group. | Factory default settings: Contacts |
| Search Number Store a number that can be used to search for a contact or group. | |
| Address Name Store a name for an address. | |
| Group Name Store a name of group. | |
| Initial Store an initial that can be used to search for a contact or group. | |
| Category Enter a category for a contact or group. | Factory default settings: Category1 |
| Register this Address to be added to the [Frequent Use] index. | Add a contact to the "Frequent Use" index. Factory default settings: Disabled |
| Address Public Setting | Set whether the address will be shared with all users or only selected users. If you select [Select user], click the user selection buttons to select the users with whom the address will be shared. Factory default settings: All. |
| Share also to the following group | When this function is enabled, you can select a previously stored group from the list below and share the address with that group. Factory default settings: Disabled |
| E-mail Address | To store a new address, select [New Address] and enter the address in the address entry field. |
| Global Address Search | To search for an address stored as a global address, click this key and select the address from the list. |
| File Type* | Select the file format used for a scanned image. When [OCR] is enabled, text in the scanned data is automatically recognized. If [OCR] is using BP-50C26/BP-50C31/BP-50C36/BP-50C45/BP-50C55/BP-50C65/BP-55C26, the OCR expansion kit must be installed. If [Disabling of OCR] is set, OCR function cannot be used. Factory default settings: PDF |
| Black & White | Select the compression format used for saving black & white images.Factory default settings: MMR (G4) |
| Colour/Greyscale | Colour/Greyscale: Select the compression format used for saving colour/greyscale images. If you select a PDF file format as the file format setting, you can select [Reduce Colours].Factory default settings: Compression Ratio: Middle, Reduce Colours: Disabled |
| Set as Default used Set an address | as a default address.Factory default settings: Disabled |
| User Certificate | Displayed when S/MIME setting is enabled and one destination is selected when [Contacts] is set for the type. You can install and select the user certificate to be used. |
| Fax | |
| Fax Number | To store a new fax number, select [New Address] and enter the fax number in the fax number entry field. |
| Global Address Search | To search for a fax number stored as a global address, click this key and select the fax number from the list. |
| Transmission Mode Select the communication speed and International Correspondence Mode.Factory default settings: Transmission Speed: 33.6kbps, Transmission Mode: None | |
| Set as Default used Set an address | as a default address.Factory default settings: Disabled |
| Internet Fax | |
| Internet Fax Address | To store a new address, select [New Address] and enter the address in the address entry field. |
| Global Address Search | To search for an address stored as a global address, click this key and select the address from the list. |
| Compression Mode Set the compression format used for transmitted images.Factory default settings: MH(G3) | |
| Request Internet Fax Reception Report | Select whether or not you wish to receive a reception report by e-mail after transmission is completed.Factory default settings: Disabled |
| Set as Default used Set an address | as a default address.Factory default settings: Disabled |
| Direct SMTP | |
| Direct SMTP Address | To store a new address, select [New Address] and enter the address in the address entry field. |
| Add Hostname or IP Address. | When the receiving machine is set to only receive e-mail from specific addresses, enter the specified specific e-mail address in the [Direct SMTP Address] text box. Select the "Add Hostname or IP Address." checkbox and enter the host name or IP address of the receiving machine in the [Hostname or IP Address] text box.Example: When the e-mail address of the receiving machine is "user@sample_domain.com" and the IPv4 address is "192.168.123.45"Enter "user@sample_domain.com" in the [Direct SMTP Address] text box and enter "192.168.123.45" in the [Hostname or IP Address] text box.Factory default settings: Disabled |
| Compression Mode Set the compression format used for transmitted images.Factory default settings: MH(G3) | |
| Set as Default used Set an address | as a default address.Factory default settings: Disabled |
| FTP | |
| FTP Address | To add a new address, select [New Address] and enter the address in [Hostname or IP Address]. |
| Port Number Set the port number used by the FTP server.Factory default settings: 21 | |
| File Type* | Select the file format used for a scanned image.For PDF, the text information is embedded in the PDF.When [OCR] is enabled, text in the scanned data is automatically recognized.If [OCR] is using BP-50C26 / BP-50C31 / BP-50C36 / BP-50C45 / BP-50C55 / BP-50C65 / BP-55C26, the OCR expansion kit must be installed.For PDF, RTF, TXT(UTF-8), DOCX, XLSX, or PPTX, the recognized text is saved in the corresponding format.If [Disabling of OCR] is set, OCR function cannot be used. |
| Black & White | Select the compression format used for saving black & white images.Factory default settings: MMR (G4) |
| Colour/Greyscale | Colour/Greyscale: Select the compression format used for saving colour/greyscale images.If you select a PDF file format as the file format setting, you can select [Reduce Colours].Factory default settings: Compression Ratio: Middle, Reduce Colours: Disabled |
| Directory Specify a directory in the FTP server to be used for transmission. | |
| User Name Enter a user name in the FTP server to be used for transmission. | |
| Password Enter the password associated with the entered user name.Factory default settings: Change Password: Disabled | |
| Enable SSL/TLS Use SSL/TLS to encrypt data before transmission.Factory default settings: Disabled | |
| Use PASV mode Send data to an FTP server in PASV mode.Factory default settings: Disabled | |
| Enable Hyperlink to FTP server to be e-mailed | When sending data to an FTP server, send the data to the e-mail address that is specified in the hyperlink to the FTP server.Factory default settings: Disabled |
| Set as Default used Set an address | as a default address.Factory default settings: Disabled |
| Desktop | |
| Desktop Destination | To add a new address, select [New Address] and enter the address in [Hostname or IP Address]. |
| Port Number Enter the port of the destination computer. | |
| Process Directory Specify the directory to which the data is be to sent. | |
| File Type* | Select the file format used for a scanned image. For PDF, the text information is embedded in the PDF.If [OCR] is usingBP-50C26/BP-50C31/BP-50C36/BP-50C45/BP-50C55/BP-50C65/BP-55C26, the OCR expansion kit must be installed.If [OCR] is using BP-50C26/BP-50C31/BP-50C36/BP-50C45/BP-50C55/BP-50C65, the OCR expansion kit must be installed.When [OCR] is enabled, text in the scanned data is automatically recognized.For PDF, RTF, TXT(UTF-8), DOCX, XLSX, or PPTX, the recognized text is saved in the corresponding format.If [Disabling of OCR] is set, OCR function cannot be used. |
| Black & White | Select the compression format used for saving black & white images.Factory default settings: MMR (G4) |
| Colour/Greyscale | Colour/Greyscale: Select the compression format used for saving colour/greyscale images.If you select a PDF file format as the file format setting, you can select [Reduce Colours].Factory default settings: Compression Ratio: Middle, Reduce Colours: Disabled |
| User Name Enter a user name in the computer to be used for transmission. | |
| Password Enter the password associated with the entered user name.Factory default settings: Change Password: Disabled | |
| Enable SSL/TLS Use SSL/TLS to encrypt data before transmission.Factory default settings: Disabled | |
| Set as Default used Set an address as a default address.Factory default settings: Disabled | |
| Network Folder | |
| Network Folder Path | To store a new path, select [New Address] and enter the path in the path entry field. |
| User Name Enter a user name in the computer to be used for transmission. | |
| Password Enter the password associated with the entered user name.Factory default settings: Change Password: Disabled | |
| File Type* | Select the file format used for a scanned image.For PDF, the text information is embedded in the PDF.When [OCR] is enabled, text in the scanned data is automatically recognized.If [OCR] is usingBP-50C26/BP-50C31/BP-50C36/BP-50C45/BP-50C55/BP-50C65/BP-55C26, the OCR expansion kit must be installed.For PDF, RTF, TXT(UTF-8), DOCX, XLSX, or PPTX, the recognized text is saved in the corresponding format.If [Disabling of OCR] is set, OCR function cannot be used. |
| Black & White | Select the compression format used for saving black & white images.Factory default settings: MMR (G4) |
| Colour/Greyscale | Colour/Greyscale: Select the compression format used for saving colour/groyscale images.If you select a PDF file format as the file format setting, you can select [Reduce Colours].Factory default settings: Compression Ratio: Middle, Reduce Colours: Disabled |
| Enable Hyperlink to Network Folder to be e-mailed | When sending data to a shared folder, send the data to the e-mail address that is specified in the hyperlink to the shared folder.Factory default settings: Disabled |
| Set as Default used Set an address as a default address.Factory default settings: Disabled | |
* Depending on the model and upon installation of peripheral devices, High Compression PDF may be selected. When [OCR] is enabled, text in the scanned data is automatically recognized. For PDF, the text information is embedded in the PDF. For PDF, RTF, TXT(UTF-8), DOCX, XLSX, or PPTX, the recognized text is saved in the corresponding format.
Category Setting
A "Category" can be set for an address. By setting a category for an address, the category can be used to filter addresses when searching for that address, making it easier to find the address.
Any name can be set for a category. By assigning distinctive names to categories, addresses can be easily sorted. The factory default names are "Category 1" to "Category 32".
![graph TD subgraph_Group_A["(Group A\n(Category 1)"] AAA AAA BBB BBB CCC CCC DDD DDD] end subgraph_Group_B["(Group B\n(Category 2)"] EEE EEE FFF FFF GGG GGG HHH HHH] end A["Address"] --> B](/content/2026/06/1367452/images/74d1cb59357bf76c273fe8f588feb03eff64afb2e8e72213e53adde35558845d.jpg)

This setting can only be set on web pages.
DOCUMENT OPERATIONS
Document Operations
This setting can also be made by general users.
Document Filing
Data saved by Document Filing can be manipulated from the Web.
Main Folder
Files in the Main Folder can be displayed. A specified file can be manipulated by clicking [Print], [Send], [Move], or [Delete].
| Item Description | |
| Display Style Saved files can be displayed in list format or thumbnail format. | |
| Job Classification | The saved files that are displayed can be filtered by job. |
| Download | When there is a PDF file for PC viewing or downloading, select it to download the file to your computer. |
| Display Items Set the number of files that are displayed. | |
Quick File Folder
Files in the Quick File Folder can be displayed. You can re-operate the specified file by clicking [Print], [Send], [Move], or [Delete].
| Item Description | |
| Display Style Saved files can be displayed in list format or thumbnail format. | |
| Job Classification | The saved files that are displayed can be filtered by job. |
| Display Items Set the number of files that are displayed. | |
Custom Folder
The files that are in the Custom Folder can be displayed. You can re-operate the specified file by clicking [Print], [Send], [Move], or [Delete]. If the file to be manipulated has a password, enter the password in "Password of File".
| Item Description | |
| Index The displayed Custom Folder | names can be filtered by index. |
| Download | When there is a PDF file for PC viewing or downloading, select it to download the file to your computer. |
| Display Items Set the number of files | that are displayed. |
My Folder
Displayed when My Folder is set.
Displays the files in My Folder. Allows you to retrieve the specified file. A specified file can be manipulated by clicking [Print], [Send], [Move], or [Delete].
If the file to be manipulated has a password, enter the password in "Password of File".
Search
| Item Description | |
| User Name Enter the user name. | |
| Select from User List | Click the [Setup] button and search for users from the list. |
| Login Name Set the number of files | that are displayed. |
| Search Folder Set the folder. | |
| File Name Enter a file name. | |
| Password of File Enter the password | that is set for the file. |
| Stored Date Set the date and time the file was saved. | |
Search Result
Use these settings to enter search conditions. A specified file can be manipulated by clicking [Print], [Send], [Move], or [Delete]. If the file to be manipulated has a password, enter the password in "Password of File".
| Item Description | |
| Display Style The files that were found can be displayed in list format or thumbnail format. | |
| Job Classification The found files can be filtered by job. | |
| Display Items Set the number of files that are displayed. | |
File Batch Print
Multiple files can be printed at once by batch printing. Search for the files using search conditions, and then select multiple files from the displayed search results.
Click [Print] to print the file.
| Item Description | |
| Search Condition | |
| User Name Enter the user name. | |
| Select from User List | Click the [Setup] button and search for users from the list. |
| Search Folder | Select the folder that contains the target file. |
| File Name Enter a file name. | |
| Password of File Enter the password | for the target file. |
| Search Result | |
| Job Classification The found files can be filtered by job.Factory default settings: All Jobs | |
| Number of Copies Set the number of copies to be printed.Factory default settings: Apply the Number of Copies Stored in Each File | |
| Print and Delete the Data After printing, delete the file.Factory default settings: Disabled | |
| Billing CodeDisplayed when "Use Billing Code" is enabled. | |
| Main Code Select this checkbox, and then enter the main code.(32 characters or less) | |
| Sub Code Select this checkbox, and then enter the sub code.(32 characters or less) | |
Submit Print Job
In addition to a file on your PC, this procedure can be used to print any file that can be accessed from your PC, such as a file on another PC connected to the same network.
Files that can be printed are PDF*1, TIFF, JPEG, PCL, PS*1, XPS, DOCX*2, PPTX*2, and XLSX*2 files with extensions pdf, tif, tiff, jpeg, jpg, jpe, jfif, pcl, ps*1, xps, docx*2, pptx*2, and xlsx*2. Available only if the MFP supports PostScript.
Enter the password for the encrypted PDF data on Spool Queue of the Job Status screen
For the procedure for accessing "Setting Mode (Web version)", refer to "SETTING MODE".
*1 On the BP-50C26/BP-50C31/BP-50C36/BP-50C45/BP-50C55/BP-50C65/BP-55C26, the PS3 expansion kit is required. *2 On the BP-50C26/BP-50C31/BP-50C36/BP-50C45/BP-50C55/BP-50C65/BP-55C26, the Direct print expansion kit is required.
Print Settings
Select print settings. Select the file you want to print in "Select File", select settings, and then click [Print].
| Item Description | |
| Print Set the number of copies to be | printed. |
| Paper Size Set the print size. | |
| Orientation | Select portrait or landscape for the print orientation.Factory default settings: Portrait |
| 2-Sided Print | Select one-sided printing, two-sided printing (booklet), or two-sided printing (tablet).Factory default settings: 1-Sided |
| Output If printing by set, select the "Print per Unit" checkbox.Factory default settings: Print per Unit: Enabled | |
| Staple | It can be used by connecting an inner finisher, finisher, or saddle finisher. The settings differ depending on the connected inner finisher, finisher, and saddle finisher.Factory default settings: Off |
| Separator Page | Select to insert separator pages. Specify whether separator pages are to be added in front of or behind each set. Select the paper tray with the paper you want to use from the paper trays.Factory default settings: Insert Top of Sets:Disabled, Insert End of Sets:Disabled |
| Punch It can be used when the punch unit is attached to the finisher. | |
| Fold | It can be used when the saddle finisher is attached. Set the orientation of the paper fold. |
| Saddle Fold | It can be used when the saddle finisher is attached. Set the orientation of the paper fold in "Print Side". If you want to fold the printed paper together in the saddle, set "Fold Multiple Sheets Together". |
| Paper Size for Z-Fold | It can be used when the paper folding unit is attached. Select the paper size to use for Z-fold. |
| C-Fold | It can be used when the paper folding unit is attached. Set the fold orientation in "Print Side". In "Opening direction", select the opening orientation when unfolding the folded paper. |
| Accordion Fold | It can be used when the paper folding unit is attached. In "Opening direction", select the opening orientation when unfolding the folded paper. |
| Double Fold | It can be used when the paper folding unit is attached. Set the orientation of the paper fold in "Print Side". |
| B/W Print Print the file in black & white. | |
| Fit To Page Print with the file expanded to the full paper size. | |
| Print What Direct Print with | BP-60C31/BP-60C36/BP-60C45/BP-70C31/BP-70C36/BP-70C45/BP-70C55/BP-70C65 or BP-50C26/BP-50C31/BP-50C36/BP-50C45/BP-50C55/BP-50C65/BP-55C26 When the Direct print expansion kit is installed, select whether to print the sheet or the entire workbook when printing the Excel file. |
| Output Tray Select the output tray for the print job. | |
| Quick File Save the print data in the | Quick File Folder of the machine. |
| Print Glossy | Select this checkbox if the print job will be printed on glossy paper. |
| Billing Code | Select the checkbox of the Billing Code to assign, and then enter the billing code. |
Qualcomm® DirectOffice™ is a product of Qualcomm Technologies, Inc. and/or its subsidiaries. Qualcomm® is a trademark of Qualcomm Incorporated, registered in the United States and other countries. DirectOffice™ is a trademark of CSR Imaging US, LP, registered in the United States and other countries.
User Control
User Settings
It manages users such as registration of users to log in and user authentication methods.
User List
Add, edit, and delete users for user authentication, and configure user authentication settings.
• [Add] key
Add a new user.
- [Delete All Users] key
Deletes all registered users. (Excluding users stored as factory default.) Only the administrator of the machine can use this function.
- [Delete All Auto-registered users] key
Deletes all auto-registered users.
- [Delete Your Information for External Service Connect] key
Deletes the external connect caches used by the logged in user. [Store user authentication information for External Connect] must be enabled to use this function.
- [Delete All Information for External Service Connect] key
Only the administrator of the machine can use this function. Delete all External Connect caches. [Store user authentication information for External Connect] must be enabled to use this function.
- User List
This shows the users stored as factory default and the currently stored users. An asterisk [*] appears in front of the user name of auto-registered users.
When you select a user name, the user edit or delete screen appears.

The [Vender] and [Vender2] options are displayed only when the vender is connected.
Storing a user
When you tap the [Add] key, the registration screen appears. Up to 1000 groups can be registered.
For each setting, see the following "Settings (page 9-44)".
Editing and deleting a user
When you select a user from the list, the user edit/delete screen appears.
For each setting, see the following "Settings (page 9-44)".
A user can be deleted using the [Delete] key.

- If the login authentication with a Fixed User is set, the "Delete All Users" option cannot be used.
- Users stored as factory default cannot be deleted.
Users stored as factory default
The following users are stored in the machine at the factory.
- Administrator:
The administrator account of the machine, stored as factory default.
-User:
This is used when network authentication is used and a login name that is not stored in the machine is entered directly. (This cannot be selected from the login user screen.)
• Device Account:
An account to which the colour prohibited authority is granted.
- Other User:
This is used when a print job is executed using invalid user information. (This cannot be selected from the login user screen.)
For settings related to each of the users, see the following table.
| User Name | Administrator | User | Device Account | Other User |
| Login Name | admin | users | device account | Other |
| Password (Refer to the | Start Guide) *1 | users *1 | device account *1 | - |
| My Folder | No | No | Main Folder | No |
| Authentication Settings | Login Locally | - | ||
| Pages Limit Group | Unlimited *1 | |||
| Authority Group *2 | Admin | User *1 | Colour Prohibited Authority *1 | Guest *1 |
| Favourite Operation Group | Following the System Settings *1 | |||
| Default Billing Code | Not Set *1 | |||
*1 Items that can be changed *2 For detailed information about each of the settings, see "List of settings and factory default settings of template groups".
Settings
| Item Description | |
| User Name | This user name is used as the key name in the authentication screen, the user name for document filing, and the sender name. If you want to use the "Automatically print stored jobs after login (page 9-131)" function, register up to 16 double-byte characters. |
| Apply User Name to Log-in Name.*1 | Select this to enter the entered user name in the login name.Factory default settings: Disabled |
| Initial | This determines where the user name will appear in the user list. Enter a maximum of 10 characters for the initials. |
| Index | Select a custom index to be stored. The custom index names are the same as those used in the address book.Factory default settings: User 1 |
| Login Name*1 | Login name/password Enter the login name to be used when setting authentication. Enter the password, consisting of 1 to 255 characters, that is used for user authentication by login name and password (the password is optional). |
| Password*1,*3 | Enter the password used when setting the authentication by login name / password using 1 to 255 characters. (Optional)After entering the password, enter once again in "Password (for confirmation)". |
| Change PIN Code/Password | Check this when you want to change the set password. (Displayed when amending/deleting.)Factory default settings: Disabled |
| Release Operation Lock Status | Displayed when login has failed, and subsequent login to the printer is not possible. Tap the [Execute] to clear this login lock, and allow the user to log in again. |
| User Number*2 | Enter a user number in 5 to 8 digits. |
| E-mail Address | Enter the e-mail address that is used in the sender list and for LDAP authentication. |
| Home Directory Path Enter for the home directory path. | |
| Use Login Name for User Authentication | Set whether or not the login name for user authentication will be the same as the user name for home directory path authentication.Factory default settings: Enabled |
| User Name | Enter for the user name for home directory path authentication. |
| Password Enter a maximum of 255 numeric digits for the password for home directory path authentication. | |
| Change PIN Code/Password | Check this when you want to change the set password. (Displayed when amending/deleting.)Factory default settings: Disabled |
| Authentication Settings*1 | Select either [Login Locally], [Network Authentication] (when LDAP is enabled) or [Active Directory] (when Active Directory is enabled) for authentication.Factory default settings: Login Locally |
| Authentication Server | When the [Network Authentication] is selected, select the server to be used for user authentication from the LDAP server list that is stored using Setting mode (Web version). |
| Organization/Group Set a group to which the user belongs.Up to 8 groups can be assigned. | |
| Pages Limit Group | Specify the page limit for the user by selecting one of the stored page limit groups. For more information, see "Pages Limit Group (page 9-46)".Factory default settings: Unlimited |
| Authority Group | Specify the user authority by selecting one of the stored authority groups. For more information, see "Authority Group (page 9-47)".Factory default settings: User |
| Favourite Operation Group | The favourite operation group is displayed when the user logs in.To change the settings, select [User Control] in Setting mode (Web version).Factory default settings: Following the System Settings |
| Default Billing Code Set the Main Code and Sub Code when the user logs in. | Factory default settings: Not Set |
| My Folder | Store a folder to be used for document filing as the dedicate user folder (or My folder). A stored folder can be selected, or you can create and specify a new folder. |
*1 It is not displayed when "User Number" is selected for the authentication method. *2 It is displayed when "User Number" is selected for the authentication method. *3 When using network authentication, the password registered in the LDAP server is used, so there is no need to set it.
Custom Index
You can change the custom index name.
Tap the custom index name on the list to edit it.
Delete the previously entered characters and enter a new name.
Organization /Group List
This is used to store user groups.
Tap each group name to enter them directly.
User Information Print
Prints the following item lists.
- User List • List of Number of Pages Used • Page Limit Group List* • Authority Group List
- Favourite Operation Group List* • All User Information Print
Select each item and tap the [Print] key to print it out.
* Cannot be printed when no groups are stored.

In All User Information Print, the following items are handled by 2-sided printing on an item basis.
- User List • List of Number of Pages Used
- Pages Limit Group • Favourite Operation Group
Access Control Settings
Pages Limit Group
This is used to register the page limit settings in advance for each group.
The page limit for each user is specified by selecting one of these registered groups when the user is registered.
• [Add] key
Use this to add a new group.
- List Display
This shows the currently stored groups. Selecting a group name displays the edit screen for that group.
Storing page limit groups
When you tap the [Add] key, the registration screen appears. Up to 20 groups can be registered.
For each setting, see the following "Settings (page 9-46)".
Editing a page limit group
Selecting a group from the list displays the edit screen for that group.
For each setting, see the following "Settings (page 9-46)".
To return a group to the factory default state, set "Select the Group Name to be the Registration Model" to "Unlimited" on the edit screen.
Settings
| Item Description | |
| Group Name Store a name of group | (up to 32 characters). |
| Select the Group Name to be the Registration Model | Select one of the previously stored groups for use as a template for the new group. When selected, the settings of this group are applied. |
| Function Names | The name of the functions that can be configured is displayed. Set a limit for each function. |
| Page Limit | When [Prohibited] is selected for a mode, input from the mode is prohibited.When [Unlimited] is selected for a mode, there is no limit to the number of pages that can be input/output in that mode.When [Limited] is selected, enter a page limit (1 to 99999999 pages). |
Machine Page Limit Setting
Sets the page limit for the machine.
Settings
| Item Description | |
| Function Names | The name of the functions that can be configured is displayed. Set a limit for each function. |
| Page Limit | When [Prohibited] is selected for a mode, input from the mode is prohibited.When [Unlimited] is selected for a mode, there is no limit to the number of pages that can be input/output in that mode.When [Limited] is selected, enter a page limit (1 to 99999999 pages). |
Authority Group
This is used to store the settings relevant to user authorities in advance for each group. The authority of each user is specified by selecting one of these registered groups when the user is registered.
• [Add] key
Use this to add a new group.
- List Display
This shows the currently stored groups. Selecting a group name displays the edit screen for that group.
Storing authority groups
When you tap the [Add] key, the registration screen appears. Up to 20 groups can be registered.
For detailed information about each of the settings, see "List of settings and factory default settings of template groups".
Editing an authority group
Selecting a group from the list displays the edit screen for that group. For detailed information about each of the settings, see "List of settings and factory default settings of template groups".
To return a group to the factory default state, select the group from the list and select any of the options [Return to the Administrator Authority], [Return to the system administrator authority.], [Return to the User Authority], [Return to the Guest Authority], [Return to the Colour prohibited authority.] and [Return to the scanner prohibited authority.].
Tapping the [Execute] key resets the group status to the factory default.
| Item Description | ||||||
| Group Name Store a name of group (up to 32 characters). | ||||||
| Select the Group Name to be the Registration Model | Select one of the previously stored groups for use as a template for the new group. When selected, the settings of this group are applied.When selected, the settings of this group are applied. | |||||
| The factory default groups and their settings are shown below. | ||||||
| Admin System | Administrator | User Guest Colour | Prohibited Authority | Scanner Prohibited Authority | ||
| Job Settings | ||||||
| Copier | ||||||
| Colour Mode Approval Setting | All allowed | All prohibited | All allowed | Only Black & White Allowed | Only Black & White Allowed | All allowed |
| Special Modes Usage | Allowed | Prohibited | Allowed | Prohibited | Prohibited | Allowed |
| Sending while copying | Allowed | Allowed | Allowed | Allowed | Allowed | Allowed |
| Creation of PDF for PC Browsing | Allowed | Prohibited | Allowed | Allowed | Allowed | Allowed |
| Printer | ||||||
| Colour Mode Approval Setting | Allowed | All prohibited | Allowed | Only Black & White Allowed | Only Black & White Allowed | All allowed |
| FTP Pull Print | Allowed | Prohibited | Allowed | Prohibited | Prohibited | Allowed |
| USB Memory Direct Print | Allowed | Prohibited | Allowed | Prohibited | Prohibited | Allowed |
| Network Folder Pull Print | Allowed | Prohibited | Allowed | Prohibited | Prohibited | Allowed |
| Sending while printing | Allowed | Allowed | Allowed | Allowed | Allowed | Allowed |
| Creation of PDF for PC Browsing | Allowed | Prohibited | Allowed | Allowed | Allowed | Allowed |
| Approval Setting to Use Toner Save Mode | No Toner Save | No Toner Save | No Toner Save | No Toner Save | No Toner Save | No Toner Save |
| Image Send | ||||||
| Approval Settings for Each Mode | ||||||
| • E - m a i l• FTP• Desktop• Network Folder• Scan to Ext.Memory Dev.• P C S c a n• Internet Fax Send• P C - I - F a x S e n d• Fax Send• PC-Fax Send | All allowed | All prohibited | All allowed | All allowed | All allowed | All prohibited |
| Colour Scan | Allowed | Prohibited | Allowed | Prohibited | Prohibited | Allowed |
| Special Modes Usage | Allowed | Prohibited | Allowed | Prohibited | Prohibited | Allowed |
| Registration/Deletion of Program | Allowed | Prohibited | Allowed | Prohibited | Prohibited | Allowed |
| Creation of PDF for PC Browsing | Allowed | Prohibited | Allowed | Allowed | Allowed | Allowed |
| Access to Fax Data | Allowed | Allowed | Allowed | Allowed | Allowed | Allowed |
| Approval Setting for Addressing | ||||||
| • Approval Setting for Direct Entry• Approval Setting to Use a Local Address Book• Approval Settings to Use a Global Address Book | All allowed | All allowed | All allowed | All allowed | All allowed | All allowed |
| Document Filing | ||||||
| Scan to Local Drive | ||||||
| Colour Scan | Allowed | Prohibited | Allowed | Only Black & White Allowed | Only Black & White Allowed | Allowed |
| Special Modes Usage | Allowed | Prohibited | Allowed | Prohibited | Prohibited | Allowed |
| Creating Downloadable File | Allowed | Prohibited | Allowed | Allowed | Allowed | Allowed |
| Prints (Document Filing) | ||||||
| Colour Mode Approval Setting | Allowed | Prohibited | Allowed | Allowed | Allowed | Allowed |
| Special Modes Usage | Allowed | Prohibited | Allowed | Prohibited | Prohibited | Allowed |
| Document Filing Image Check | ||||||
| Approval Setting | Allowed | Prohibited | Allowed | Prohibited | Allowed | Allowed |
| Display only the Files of Logged-in Users | Prohibited | Prohibited | Prohibited | Prohibited | Prohibited | Prohibited |
| Sharp OSA | ||||||
| Approval Setting to Use a Sharp OSA | Allowed | Prohibited | Allowed | Allowed | Allowed | Allowed |
| Common Functions | ||||||
| Item | Description | |||||
| Approval Settings for 2-Sided Print | All allowed | All allowed | All allowed | All allowed | All allowed | All allowed |
| Change Billing Code | Allowed | Allowed | Allowed | Allowed | Allowed | Allowed |
| Output Approval Settings | All allowed | All prohibited | All allowed | All prohibited | All prohibited | All allowed |
| Security | ||||||
| Document Filing Approval Setting:Quick File Mode/Sharing Mode | Prohibited | Prohibited | Prohibited | Prohibited | Prohibited | Prohibited |
| Document Filing Approval Setting:Confidential Mode | Allowed | Prohibited | Allowed | Prohibited | Prohibited | Allowed |
| Print Jobs Other than Print Hold Job | Allowed | Allowed | Allowed | Allowed | Allowed | Allowed |
| Hidden Pattern Print Setting - Direct Entry | Allowed | Prohibited | Allowed | Prohibited | Prohibited | Allowed |
| Machine Settings | ||||||
| Total Count | Allowed | Allowed | Allowed | Prohibited | Allowed | Allowed |
| Device / Network Status | Allowed | Allowed | Allowed | Prohibited | Allowed | Allowed |
| Power Reset | Allowed | Allowed | Prohibited | Prohibited | Prohibited | Prohibited |
| List for User | Allowed | Allowed | Allowed | Prohibited | Allowed | Allowed |
| List for Administrator | Allowed | Allowed | Prohibited | Prohibited | Prohibited | Prohibited |
| Address Registration | Allowed | Allowed | Allowed | Prohibited | Allowed | Allowed |
| Document Filing Folder Registration | Allowed | Allowed | Allowed | Prohibited | Allowed | Allowed |
| User Control (Admin) | Allowed | Allowed | Prohibited | Prohibited | Prohibited | Prohibited |
| User Control (User) | Allowed | Allowed | Allowed | Prohibited | Allowed | Allowed |
| Home Screen Settings | Allowed | Allowed | Prohibited | Prohibited | Prohibited | Prohibited |
| Copy Settings | Allowed | Allowed | Prohibited | Prohibited | Prohibited | Prohibited |
| Printer Settings (Admin) | Allowed | Allowed | Prohibited | Prohibited | Prohibited | Prohibited |
| Printer Settings (User) | Allowed | Allowed | Allowed | Prohibited | Allowed | Allowed |
| Image Send Settings (Common Settings) | Allowed | Allowed | Prohibited | Prohibited | Prohibited | Prohibited |
| Scan Settings | Allowed | Allowed | Prohibited | Prohibited | Prohibited | Prohibited |
| Fax Settings | Allowed | Allowed | Prohibited | Prohibited | Prohibited | Prohibited |
| Internet Fax Settings | Allowed | Allowed | Prohibited | Prohibited | Prohibited | Prohibited |
| Fax Data Receive/Forward (Manual) | Allowed | Allowed | Allowed | Prohibited | Allowed | Allowed |
| Inbound Routing (Forwarding/Storing) Settings (Admin) | Allowed | Allowed | Prohibited | Prohibited | Prohibited | Prohibited |
| Inbound Routing (Forwarding/Storing) Settings (User) | Allowed | Allowed | Allowed | Prohibited | Allowed | Allowed |
| Metadata Settings | Allowed | Allowed | Prohibited | Prohibited | Prohibited | Prohibited |
| Document Filing Settings | Allowed* | Allowed* | Prohibited | Prohibited | Prohibited | Prohibited |
| Sharp OSA Settings | Allowed | Allowed | Prohibited | Prohibited | Prohibited | Prohibited |
| Paper Settings (Bypass Tray Excluded) | Allowed | Allowed | Allowed | Prohibited | Allowed | Allowed |
| Paper Settings (Bypass Tray) | Allowed | Allowed | Allowed | Prohibited | Allowed | Allowed |
| Operation Settings | Allowed | Allowed | Prohibited | Prohibited | Prohibited | Prohibited |
| Keyboard Settings | Allowed | Allowed | Prohibited | Prohibited | Prohibited | Prohibited |
| Device Control | Allowed | Allowed | Prohibited | Prohibited | Prohibited | Prohibited |
| Machine Identification Settings | Allowed | Allowed | Prohibited | Prohibited | Prohibited | Prohibited |
| Clock Adjust | Allowed | Allowed | Prohibited | Prohibited | Prohibited | Prohibited |
| Product Key | Allowed | Allowed | Prohibited | Prohibited | Prohibited | Prohibited |
| Custom Link Setting | Allowed | Allowed | Prohibited | Prohibited | Prohibited | Prohibited |
| Network Settings | Allowed | Allowed | Prohibited | Prohibited | Prohibited | Prohibited |
| Security Settings | Allowed | Allowed | Prohibited | Prohibited | Prohibited | Prohibited |
| Energy Save | Allowed | Allowed | Prohibited | Prohibited | Prohibited | Prohibited |
| System Control | Allowed | Allowed | Prohibited | Prohibited | Prohibited | Prohibited |
| Image Quality Adjustment | Allowed | Allowed | Prohibited | Prohibited | Prohibited | Prohibited |
| Shortcut Page Setting | Allowed | Allowed | Prohibited | Prohibited | Prohibited | Prohibited |
* For information on each setting, see the setting mode list.

Depending on the machine specifications and peripheral devices installed, it may not be possible to use some settings.
Favourite Operation Group
Favourite Operation Group List
For each group, you can register an environment with settings that are convenient for the group. For example, a user who speaks a different language would normally have to change the display language each time he or she uses the machine; however, by registering the language in a favourite operation group in advance, the language is automatically selected when the user logs in.

- This setting can only be configured in Setting mode (Web version). It cannot be configured in the touch panel of the machine.
- Depending on the machine specifications and peripheral devices installed, it may not be possible to use some settings.
Adding/editing a group
Tap the [Add] key to display the favourite operation group registration screen.
Tap a group name to display the registration screen for that favourite operation group. You can edit the group in this screen.
Settings
| Item Description | |
| Group Name Store a name of group. | |
| Select the Group Name to be the Registration Model | Select one of the previously stored groups for use as a template for the new group. When selected, the settings of this group are applied. |
| Copy | |
| Initial Status Settings | Select settings for Colour Mode, Paper Tray, Exposure Type, Copy Ratio, 2-Sided, Output, Offset, Output Tray, Staple Position, Punch, Fold, Z-fold paper size C-Fold Outer tri-fold and Half Fold. |
| Image Send | |
| Initial Status Settings | Select settings for Image Orientation, Exposure, Resolution, Colour Mode, File Format Original Image Type, and OCR Setting. |
| Document Filing | |
| Image Orientation Specify the image orientation. | |
| Initial Status Settings | Select settings for Colour Mode, Exposure, Original Image Type, and Resolution. |
| Prints (Document Filing) Set the default output tray for document filing print. | |
| System Settings | |
| Enlarge Display Mode | Turn this option ON to display large characters on the Setting mode screen. |
| Original Size Detector Setting Set the AB system and inch system for document detection. | |
| Cancel Detection at Document Glass | Cancels the detection of the original on the platen (document glass). |
| Language Setting Select the display language. | |
| Switch the Number of Sets to be Displayed for Job Status | Select whether to display the number of progress sets or remaining sets as the job status. |
| Key Operation Setting Set the key input time and Auto Key Repeat setting. | |
| Time for Accepting Key Entry of Long Touch | Select a time when a long key touch is detected. |
| Double Tap Interval Setting | Select an interval when a double tap is detected. |
| Keys Touch Sound Set the sound made when keys are touched. | |
| Keyboard Select Set the language that appears on the keyboard. | |
| MFP Display Pattern Setting Select the colour pattern used in the touch panel. | |
| Automatically print stored jobs after login | When retention is enabled in the printer driver and print data has been spooled to the machine, the spooled print data is automatically printed out when the user who enabled retention logs in. |
| Favourite Key Setting | Select whether to follow the system settings or the registered favourite key settings. |
| Home Screen Settings | Select to use System Settings or use the stored home screen settings for performing Home Screen Settings. |
| Preview Setting: Default List/Thumbnail Display | |
| Fax/I-Fax Reception Data | Select whether the default display format of the received fax/I-Fax list screen is list or thumbnails. |
| File Retrieve of Main Folder/Quick File Folder | Select whether the default display format of the document filing main folder and temporary folder screens is list or thumbnails. |
| File Retrieve of Custom Folder | Select whether the default display format of the document filing custom folder screen is list or thumbnails. |
| File Retrieve of Direct Print | Select whether the default state of the file list screen for direct print shows the folders as a list or as thumbnails. |
Returning a favourite operation group to "Unlimited"
To return a selected favourite operation group to the factory default state, select the checkbox ( √ ) to the left of "No." and tap the [Return to the Defaults] key.
Favourite Key List
Assign shortcut keys to frequently used functions.
They will be displayed in the base screen of each mode.

This setting can only be set on web pages.
Settings
| Item Description | |
| Key Name | Enter a maximum of 20 characters for the favourite key name.(Up to 20 full-width characters can be entered, but only 10 will be shown on the key.) |
| Function Menu/Program/Other | Select the function that you wish to assign to the favourite key. The functions that can be selected vary by mode. |
| Hide Enable this setting to not show | favourite keys. |
Home Screen List
Home screen settings must be previously stored.
Select a home screen when registering Favourite Operation Group List.
| Item Description | |
| Name Enter a maximum of 32 characters for the home screen name. | |
| Select the Group Name to be the Registration Model | Select one of the previously stored home screens as a template for the new home screen. When selected, the settings of this home screen are applied. |
| Key Layout of the Screen The layout of the keys in the home screen is displayed. | |
| Key Transparency Setting | Sets the transparency of the shortcut keys as a percentage. |
| Home Button Registers the function to use for the selected key number. | |
| Display Toner Quantity | Select this to display the toner level in the fixed area. |
| Fix Key | Registers the function to use for the selected key number. This button is displayed on all pages of the home screen. |
| Change Home Screen Name Enter a home screen name to change the existing name. | |
| Template Select a layout pattern of the registered key. | |
| Change Text Colour On Home Screen | Select this to display the toner level in the fixed area. |
User Count
This displays the total number of pages printed by each user.
• [Select All] key
This selects all users.
• [Clear Checked] key
This clears all selections.
• [Show] key
This shows the counts of the selected user.
• [Clear Count] key
Use this to reset the counts of the selected user.
- User List
This shows the users stored as factory default and the currently stored users. When you select a user name, the user is selected.
View User Count
When you select a user and tap the [Show] key, this user count is displayed.
| Item Description | |
| Next | Displays the next user (in the order of the registration numbers). |
| Previous | Displays the previous user (in the order of the registration numbers). |
| Show Counts | Displays the counts and the number of pages remaining of the selected user for each function. |
| Page Limit | The page limit set for the user appears in parentheses below the count. |

If peripheral devices are not mounted, their count is not displayed.
Resetting user counts
Select a user in the setting screen and tap the [Delete] key. A count reset screen for that user will appear.
The reset screen will vary depending on whether a single user or multiple users were selected. The items displayed in each case are described in the table below.
When a single user is selected
| Item Description | |
| Next | Displays the next user (in the order of the registration numbers). |
| Previous | Displays the previous user (in the order of the registration numbers). |
| Show Counts | Displays the counts and the number of pages remaining of the selected user for each function. |
| Clear Count | Reset the count of the selected item to "0". |
| Clear All Count Clears all counts of the selected user to zero (0). | |
When multiple users are selected
| Item Description | |
| Show Counts | Displays the counts and the number of pages remaining of the selected user for each function. |
| Clear Count | Reset the count of the selected item to "0". |
| Clear All Count Clears all counts of the selected user to zero (0). | |
Save User Count
Clicking the [Save] button saves the user count information as a data file.
To delete the user count information in the machine, click the checkbox next to the "Save and Delete the Data" so that it is selected and click the [Save] button.

This setting can only be configured in Setting mode (Web version). It cannot be configured in the touch panel of the machine.
Billing Code Setting
Select billing codes.
Administration Settings
Change the billing code setting.
Use Billing Code
Switch whether to enable or disable a billing code.
Factory default settings: Disabled
Use Code Settings
A use code is automatically assigned when no billing code is entered. Specify the code using up to 32 single-byte characters.
Take Over Billing Code at Mode Transition
If this function is enabled, the billing code entry window is not displayed at the time of mode transition.
Disable Change of Billing Code.
If this function is enabled, you cannot register, edit, or delete a billing code.
In addition, you cannot directly type in a billing code in the billing code entry window.
Apply Use Code While Logged in with Device Account
If this function is enabled, a use code is always set while you are logging in with device account.
Exception Setting for Billing Code Function
The billing code entry window is displayed when the external application that is set to enable is started.
The following settings can be configured.
- Application Name registered as Standard Application
Billing Code Display Name Setting
You can change the main code or sub code name displayed in the billing code entry window or billing code selection window.
Main Code List
You can display a list of main codes to search for, register, correct, or delete a main code.
- [Search] key
Searches for a main code.
• [Add] key
Adds a new main code.
- List display
Displays a list of registered main codes. Selecting each main code displays the window to correct the main code.
- [Delete] key
Set the check box on the left of each main code to , then tap the [Delete] key; the selected main code is deleted.
Register a main code
When you tap the [Add] key, the registration screen appears. A total of up to 2,000 main and sub codes can be registered.
After the setting has been completed, tap the [Submit and Register Next] key; you can continuously register the next main code. To end the registration process, tap the [Submit] key.
For each setting, see the following "Settings (page 9-56)".
Correct a main code
Selecting a main code from the list displays the window to correct the main code.
For each setting, see the following "Settings (page 9-56)".
After the setting has been completed, tap the [Submit] key; you can apply the corrected contents and complete processing.
Search for a main code
Enter the main code and main code name, then tap the [Search] key; the search result is displayed.
Settings
| Item Description | |
| Main Code Enter the main code. Specify the code using up to 32 single-byte characters. | |
| Main Code Name | Enter the main code. Specify the code name using up to 32 double- or single-byte characters. |
| Available to The registered billing codes can only be shared in the specified group.When not specifying a public destination, select [All Users].When specifying a public destination, select [Designate Public Address.], then specify a group to share the billing code. | |

To register a group for specifying a public destination:
In "Settings (administrator)", select [User Control] → [User Settings] → [Organization /Group List].
Sub Code List
You can display a list of sub codes to search for, register, correct, or delete a sub code.
- [Search] key Searches for a sub code. • [Add] key Adds a new sub code.
- List display Displays a list of registered sub codes. Selecting each sub code displays the window to correct the sub code.
- [Delete] key Set the check box on the left of each sub code to √, then tap the [Delete] key; the selected sub code is deleted.
Register a sub code
When you tap the [Add] key, the registration screen appears. A total of up to 2,000 main and sub codes can be registered.
For information on the settings, see "Settings (page 9-57)".
After the setting has been completed, tap the [Submit and Register Next] key; you can continuously register the next sub code. To end the registration process, tap the [Submit] key.
Correct a sub code
Selecting a sub code from the list displays the window to correct the sub code.
After the setting has been completed, tap the [Submit] key; you can apply the corrected contents and complete processing.
For each setting, see the following "Settings (page 9-57)".
Search for a sub code
Enter the sub code and sub code name, then tap the [Search] key; the search result is displayed.
Settings
| Item Description | |
| Sub Code Enter the sub code. Specify the code using up to 32 single-byte characters. | |
| Sub Code Name | Enter the sub code Specify the code name using up to 32 double- or single-byte characters. |
| Available to The registered billing codes can only be shared in the specified group.When not specifying a public destination, select [All Users].When specifying a public destination, select [Designate Public Address], then specify a group to share the billing code. | |

To register a group for specifying a public destination:
In "Settings (administrator)", select [User Control] → [User Settings] → [Organization /Group List].
SYSTEM SETTINGS
Home Screen Settings
You can change the layout, icons, and background of the machine's home screen.
This setting requires administrator privileges.
Condition Settings
| Item Description | |
| Home Button Position You can select the position of the [Home Screen] key, left or right.Factory default settings: Left | |
| Home Screen List | The order of arrangement of the shortcut keys in the home screen is indicated by the "No.", and the displayed keys appear in the home button column. To edit the home buttons, click the Home Button item. |
| Key Transparency Setting | Sets the transparency of the shortcut keys as a percentage. |
| Fixed area list | Set the keys (fixed keys) that appear in the fixed area below the home buttons. The order of arrangement of the keys is indicated by the "No.", and the keys appear in the fixed key column. To edit the fixed keys, click the Fix Key item. |
| Display Toner Quantity | Select this to display the toner level in the fixed area.Factory default settings: Enable |
| Template | You can change the layout of the keys by selecting a pattern saved in advance.The [Key Layout of the Screen] image changes as you make selections.Factory default settings: Pattern 1 |
| Change Text Colour On Home Screen | Select this to display the toner level in the fixed area.Scrolling AreaFactory default settings: WhiteFixed AreaFactory default settings: WhiteClockFactory default settings: White |
Home Screen Registration
You can click a home button in the home screen list to change the settings of the home button.
Select the function that you want to assign to the button. If you select [None], a home button will no longer appear in that location. To register a key name, select [Custom] and enter the name (maximum 28 characters).
To change the image of a home button, register the desired icon in advance using [Icon], and then select the image with [Select File].
Icon
Use this setting to register a key icon.
| Item Description | |
| Icon list | Use this setting to register icons for home screen shortcut keys. The image files of shortcut key icons are registered in a list. To register an image, click an image file registered in "Name" or "Not Set".Image formats that can be registered are JPEG, GIF, PNG (jpeg, jpg, jpe, jfif, gif, png).The maximum image file size that can be registered is 50 KB. |

To configure this setting on the machine, insert the USB memory device that contains the image into the machine.
Background Image
Use this setting to register a background image.
| Item Description | |
| Background image list | Image files such as a background images are registered in the registered image list. To register an image, click a name with a registered image or an unused name. The background image registration screen will appear. Register the desired image.The formats of images that can be registered are JPEG, GIF, and PNG (jpeg, jpg, jpe, jff, gif, png).The maximum file size for a background image is 640 MB. |

To configure this setting on the machine, insert the USB memory device that contains the image into the machine.
Copy Settings
Condition Settings
The following settings are related to copying.
Default settings selected with these settings apply to all functions of the machine (not just the copy function).
This setting requires administrator privileges.
Rotation Copy Setting
When the original and paper are placed in different orientations, this function automatically rotates the image 90 degrees to enable correct copying on the paper.
Factory default settings: Rotation Copy

When copying A5 / A6 (or 5-1/2" x 8-1/2") size documents to A5R / A6R (or 5-1/2" x 8-1/2" R) size paper, set the rotation copy.
Disable Copy in Different Size
Copying is prohibited when the orientation of the copy paper and the original are different, or when the optimum size copy paper is not loaded.
Factory default settings: Disable

It is valid when "Rotation Copy Setting (page 9-60)" is cancelled.
Add or Change Extra Preset Ratios
Add two enlargement preset ratio values (101% to 400%) and two reduction preset ratio values (25% to 99%).
Also, you can change the preset ratio if necessary.

Preset ratios other than added preset ratios cannot be changed.
Setting a Maximum Number of Copies
This is used to set the maximum number that can be entered for the number of copies (number of continuous copies).
Any number from 1 to 9999 can be specified.
Factory default settings: 9999
Stamp
Set the font size of the print menu.
Factory default settings: Middle
Initial Margin Shift Setting
This is used to set the default margin shift amount. Specify a value from 0 mm (0") to 50 mm (2") in increments of 3 mm (1/8") for both the front and reverse sides.
Factory default settings: Side 1:10mm (1/2"), Side 2:10mm (1/2")
Erase Width Adjustment
This is used to set the default erase width for erase function. Specify a value from 0 mm (0") to 25 mm (1") in increments of 3 mm (1/8") for both edge erase and centre erase.
Factory default settings: Edge Clearance Width:10mm (1/2"), Centre Clearance Width:10mm (1/2")
Initial N-Up Setting
Set the default state for Multi Shot. Select the page layout for Multi Shot, whether or not borders are added, and if added, whether the borders are solid lines or dotted lines.
Factory default settings: Off, Layout: Left to Right/Right, and Down, Border: No Print
Card Shot Settings
This is used to set the default original size for the card shot function.
Specify a value from 25 mm (1") to 216 mm (8-1/2") in increments of 3 mm (1/8") for both the X (horizontal) and Y (vertical) dimensions of the original.
Factory default settings: Original Size: X: 86 mm (3-3/8"), Y: 54 mm (2-1/8")
Fit to Page
Enable this setting to have the [Fit to Page] key always appear in the card shot screen.
Factory default settings: Disable
Layout
Select an image layout.
Factory default settings: Set Vertically
Automatic Saddle Stitch
Set when saddle stitching is automatically stapled when binding is set.
Factory default settings: Enable
Initial Tab Copy Setting
This is used to set the default image shift width (tab width) for tab copying.
Specify a value from 0 mm (0") to 25 mm (1") in increments of 3 mm (1/8").
Factory default settings: Image Shift: 10 mm

Disabling of Registration/Deletion of Program
This is used to prohibit the deletion and changing of copy settings stored in job programs.
Factory default settings: Disable
Disabling of Bypass-Tray in Duplex Copy
Disables the use of the bypass tray when making 2-sided copies.
The bypass tray is often used to feed label sheets, transparency film, and other special media for which 2-sided copying is prohibited. If a sheet of one of these special media enters the reversing unit, a misfeed or damage to the unit may result. If special media for which 2-sided copying is prohibited is often used, it is recommended that you enable this setting.
Factory default settings: Disable
Disabling of Auto Paper Selection
Disables the Auto Paper Selection function.
When this setting is enabled, automatic selection of paper that is the same size as the original on the document glass or in the automatic document feeder does not take place.
Factory default settings: Disable
Auto Selection Setting of Tray that is Supplied the Paper
When this setting is enabled and paper is loaded into a tray while the machine is on standby in copy mode, that tray is automatically selected.
Factory default settings: Disable
Disabling Registration of Custom Image
Disables storage of a custom image.
Factory default settings: Disable
Disabling sending while copying
Disables the Image Send function during copy.
Factory default settings: Disable
High Quality Scan from Document Feeder (B/W)
The resolution for copying in black and white using the automatic document feeder can be changed from 600 x 400 dpi to 600 x 600 dpi (high quality mode).
When high quality mode is used, fine print and thin lines are reproduced with greater clarity, however, the scanning speed is slower.
Factory default settings: Enable

When high quality mode is not selected, the following conditions must be satisfied in order to scan at 600 x 400 dpi and attain the fastest speed.
• The copy ratio must be set to 100%. - Do not select a special mode that will change the ratio. • [Copy of Copy] must not be enabled. - Do not copy in black and white with the [Colour Start] key.
Quick Scan from Document Glass (B/W)
The resolution for copying in black and white using the document glass can be changed from 600 × 600 dpi to 600 × 400 dpi (high speed mode).
When high speed mode is selected, the first copy time is quicker; however, the copy image is not as clear.
Factory default settings: Disable

When high quality mode is not selected, the following conditions must be satisfied in order to scan at 600 × 400 dpi and attain the fastest speed.
• The copy ratio must be set to 100%. - Do not select a special mode that will change the ratio. • [Copy of Copy] must not be enabled. - Do not copy in black and white with the [Colour Start] key.
Auto Clear Before Copy Execution Also
Enables the Auto Clear function during copy even when a copy job is not completed. This protects the machine from being held due to the incomplete copy job.
Factory default settings: Disable
Display Warning Message when Original is not Detected
A message is displayed when the original size cannot be detected when the original is set. You can prevent output with an unintended original size.
Factory default settings: Disable
Initial Status Settings
The following settings are related to copying.
Default settings selected with these settings apply to all functions of the machine (not just the copy function).
The copier settings are reset to the initial state when the [Power] button is turned on, when the [CA] key is tapped, or when the auto clear interval has elapsed. These settings are used to change the default settings for copy mode.
This setting requires administrator privileges.
The following settings can be changed:
| Item Description | |
| Colour Mode Configure default colour mode settings. Factory default settings: Full Colour | |
| Image Orientation Specify the original orientation. Factory default settings: Portrait | |
| Paper Tray Specify the paper tray that is selected by default. Factory default settings: Varies depending on the machine configuration | |
| Exposure Type Configure default exposure mode settings. Factory default settings: Auto | |
| Copy Ratio Specify the copy ratio that is selected by default. Factory default settings: 100% | |
| Select magnification automatically according to paper size, when paper tray is selected. | The copy magnification is automatically changed according to the paper size in the selected paper tray. Factory default settings: Disable |
| Item | Description |
| 2-Sided Copy Configure the 2-sided | mode settings that are selected by default.If this setting is used to change the default setting for the duplex function to any setting other than "1-Side to 1-Side" and the duplex function or automatic document feeder fails or is disabled, the setting will revert to "1-Side to 1-Side".Factory default settings: 1-Side to 1-Side |
| Original Binding Set the original binding in 2-Sided copy. | |
| Output | Set the print output method and output tray that are selected by default.Factory default settings: Auto |
| Output Tray Set the default delivery tray. | |
| Offset Set whether or not offset is performed in the default settings. | |
| Separator Page | Separator pages can be inserted before or after jobs. Set the paper tray used for the separator pages.Factory default settings: Insert Before Job:Disable, Insert After Job:Disable |
| Staple Sort Select staple settings. | Factory default settings: 1 Staple |
| Staple Position Set the staple position. | |
| Punch Set the punch. | Factory default settings: Left |
| Fold Set the paper folding. | Factory default settings: 2-Hole Punch |
| Saddle Fold Set the saddle fold. | Factory default settings: Disable |
| Paper Size for Z-Fold Select the paper size to use for Z-Fold. | |
| C-Fold Set the print surface and opening method for C-Fold. | |
| Accordion Fold Set how to open accordion fold. | |
| Half Fold Set the print surface and opening method for half fold. | |
| Return to the Defaults This returns all items to the factory default settings. | |
Text /Image Printing
Text Settings (Stamp)
You can add fixed text used in the [Stamp] of copying.
Custom Stamp
You can set an image to be used in [Custom Stamp] in [Custom Image] for copying.
Custom Watermark
You can set an image to be used in [Custom Watermark] in [Custom Image] for copying.
Printer Settings
Settings related to the printer function can be configured.
Condition Settings
Printer condition settings are described below.
Prohibit Notice Page Printing
Disables to print a notice page.
Factory default settings: Enable
Prohibit Test Page Printing
Disables printing of the test page.
When this setting is enabled, [Status] → [Data List] → [List for User] → [Printer Test Page] in "Settings" cannot be used to print test pages.
Factory default settings: Disable
A4/Letter Size Auto Change
When printing an 8-1/2" x 11" (letter) size image, this setting allows A4 size paper to be used if 8-1/2" x 11" size paper is not loaded. In addition, when printing an A4 size image, this setting allows 8-1/2" x 11" (letter) size paper to be used if A4 size paper is not loaded.
Factory default settings: Disable
A3/Ledger Size Auto Change
When printing 11" x 17" (ledger) size, if 11" x 17" size paper is not loaded in the paper tray, it will be printed on A3 paper. In addition, when printing A3 size, if A3 size paper is not loaded in the paper tray, it will be printed on 11" x 17" (ledger) paper.
Factory default settings: Disable
Bypass Tray Settings
Enable Detected Paper Size in Bypass Tray
This is used to prohibit printing when the paper size specified for a print job is different from the paper size inserted in the bypass tray.
Factory default settings: Disable
Enable Selected Paper Type in Bypass Tray
This is used to prohibit printing when the paper type specified for a print job is different from the paper type inserted in the bypass tray.
Factory default settings: Disable
Exclude Bypass-Tray from Auto Paper Select
When [Auto] is selected for paper type selection, the bypass tray is excluded from the trays that can be selected. This is recommended when special paper is often placed in the bypass tray.
Factory default settings: Disable
Job Spool Queuing
When this function is enabled, received print jobs are displayed in the spool queue of the job status screen. The jobs are moved to the job queue after they have been analyzed by the machine.
Multiple jobs that have not yet been analyzed appear in the spool queue.
When this function is disabled, received print jobs are displayed in the job queue instead of being displayed in the spool queue. However, when an encrypted PDF job is printed, the job appears in the spool queue.
Factory default settings: Enable
Disabling of USB Memory Direct Print
Disables the function for directly printing of a file in a USB memory device.
Factory default settings: Disable
Disabling of Network Folder Direct Print
Disables the direct printing from a network folder.
Factory default settings: Disable
Disabling sending while printing
Disables the Image Send function during printing.
Factory default settings: Disable
Interface Settings
Settings related to the printer function can be configured.
These settings are used to control and monitor data transmitted to the USB port or network port of the machine.
Hexadecimal Dump Mode
This function is used to print the print data from a computer in hexadecimal format together with the corresponding ASCII text. This mode allows you to check whether or not print data from the PC is being transmitted to the printer correctly.
Factory default settings: Disable
Example of a hexadecimal dump

I/O Timeout
The I/O timeout can be set to any number of seconds from 1 to 999.
The I/O timeout function temporarily breaks the connection if the set duration of time elapses without any data being received by the port. After the connection is broken, the port is set to auto selection or the next print job is begun.
Enable Network Port
Enables printing from the network port.
Factory default settings: Enable
Network Port Emulation Switching
This setting is used to select the emulated printer language when the machine is connected by a network port.
The following settings can be configured.
Auto
PostScript
PCL
Factory default settings: Auto

Unless printer errors occur frequently, it is recommended that you use the factory default setting "Auto".
Port Switching Method
Selects when port switching takes place.
- Switch at End of Job
The port changes to auto selection when printing ends.
- Switch after I/O Timeout
When the time set in "I/O Timeout" elapses, the port changes to Auto Selection.
Factory default settings: Switch at End of Job
Initial Status Settings
If you print data in an environment where the printer driver is not used (that is, if you print data using the MS-DOS system or if you print data using the PC that does not have the provided printer driver installed), set the detailed printing conditions. (However, the "Disable Blank Page Print" function will be effective even when the PCL printer driver is used.)
Settings
| Setting item Description | |
| Copies 1 - 9999 sets | |
| Orientation Portrait | LandscapeFactory default settings: Portrait |
| Paper Size Set the default paper size. | Factory default settings: Varies depending on the machine configuration |
| Output Tray Set the default delivery tray. | Factory default settings: Varies depending on the machine configuration |
| Paper Type Set the default paper type. | Factory default settings: Plain Paper 1 |
| Resolution Setting 600dpi | 600dpi (High Quality)1200dpiFactory default settings: 600dpi (High Quality) |
| Disable Blank Page Print (Enabled) | (Disabled)Factory default settings: It does not prohibit |
| 2-Sided Print 1-Sided | 2-Sided(Book)2-Sided(Tablet)Factory default settings: Portrait |
| Colour Mode Auto | Black & WhiteFactory default settings: Auto |
| N-Up Print*1 | N-Up1-Up2-Up4-Up8-UpFactory default settings: 1-Up |
| LayoutLeft to Right*2Right to Left*2Right, and Down*3Down, and Right*3Left, and Down*3Down, and Left*3Factory default settings: 1-Up/2-Up: Left to Right, 4-Up/8-Up: Right, and Down | |
| Fit To Page*4 | (Use Fit to Page)(Do not use Fit to Page)Factory default settings: Fit To Paper Size |
| Output (Use Print per Unit) | (Do not use Print per Unit)Factory default settings: Use Print per Unit |
| Separator Page Insert Before Job | Insert After JobFactory default settings: Disable |
| Staple Sort*5 | None, 1 Staple at Back, 2 Staples, 2 Staples (Top), Stapleless Staple**6Factory default settings: Off |
| Punch*7 | (Punch)(Do not use Punch)Factory default settings: No Punch |
| Fold*8 | (Fold the paper)(Do not fold paper)Factory default settings: Insert After Job |
| Fold*9 | Set the paper folding.Factory default settings: Disable |
| Saddle Fold*9 | Set the saddle fold.Factory default settings: Print Side: Fold Inside |
| Paper Size for Z-Fold*9 | Select the paper size to use for Z-Fold.Factory default settings: Valid for all paper sizes |
| C-Fold*9 | Set the print surface and opening method for C-Fold.Factory default settings: Print Side:Inside, Fold Orientation: Open Right |
| Accordion Fold*9 | Set how to open accordion fold.Factory default settings: Fold Orientation:Open Right |
| Half Fold*9 | Set the print surface and opening method for half fold. Factory default settings: Print Side:Inside |
| Quick File (Enabled) | [0005] (Disabled) |
*1 Paper sizes that can be used with this function are A3, B4, A4, 11" x 17", 8-1/2" x 14", and 8-1/2" x 11". (This function may not take effect with some print methods.)
*2 Can be selected when 2-Up is selected.
*3 Can be selected when 4-Up/8-Up is selected.
*4 Only effective when printing PDF, JPEG, and TIFF files.
*5 It can be used by connecting an inner finisher, finisher, or saddle finisher.
*6 When the inner finisher or saddle finisher (large stacker) or finisher (large stacker) is installed.
*7 When a punch module is installed.
*8 When the saddle finisher or saddle finisher (large stacker) is installed.
*9 When the folding unit is installed.
PCL Settings
This is used to set the symbol sets, fonts, and line feed code used in a PCL environment.
Settings
| Setting item Settings | |
| PCL Symbol Set Setting Specify the | symbol set used for printing.Factory default settings: PC-8 |
| PCL Font Setting Select a font used | for printing.Factory default settings: Internal Font |
| PCL Line Feed Code | This setting is used to select how the printer responds when a line feed command is received.Factory default settings: 0.CR=CR; LF=LF; FF=FF |
| Wide A4 | When this is enabled, 80 characters per line are printed on the 8-1/2" x 11" (A4) size paper using a 10-pitch font. (When this setting is disabled, up to 78 characters are printed per line.)Factory default settings: Disable |
PostScript Settings
When an error occurs during PostScript printing, these settings determine whether or not an error notice is printed and whether or not the PostScript data is received in binary format.
On the BP-50C26/BP-50C31/BP-50C36/BP-50C45/BP-50C55/BP-50C65/BP-55C26, the PS3 expansion kit is required.
| Setting item Settings | |
| Screen Settings Configure image settings for PostScript.Factory default settings: Standard | |
| Print PS Errors | When a PS (PostScript) error occurs during PostScript printing, this setting determines whether or not an error notice is printed.Factory default settings: Disable |
| Binary Processing | Receive PostScript data in binary format.Factory default settings: Disable |
OOXML Settings
On the BP-50C26/BP-50C31/BP-50C36/BP-50C45/BP-50C55/BP-50C65/BP-55C26, the Direct print expansion kit is required.
When you print an Excel file directly, select the sheet for which you want to print or the entire workbook of the file.
Print Release Settings
Standard
Print Release Settings
Sets the use of print releases.
Factory default settings: Disable
Initial Status Settings
B/W Print
When [Enable] is selected, [B/W Print] is enabled in the print screen of the print release job.
Factory default settings: Disable
Print and Delete the Data
When [Enable] is selected, [B/W Print] is enabled in the print screen of the print release job.
Factory default settings: Enable
Print Order
Set the print order from the oldest date, or from the data list number.
Factory default settings: Date (Asc.)
Communication Timeout
Sets the communication timeout used in the print release.
Factory default settings: 10 seconds
Primary Unit Settings
Primary Unit
Set the multifunction device that saves the print release job to [Primary Unit].
Factory default settings: Disable
Require Authentication when Storing
Select whether or not authentication is required to store a print release job in the machine that is functioning as the primary unit.
Factory default settings: Enable
Force to Enable the Print Release Function
When this is ON and the machine is functioning as the primary unit, print jobs that are not print release jobs are also forcibly saved as print release jobs.
Factory default settings: Disable
Delete Stored Data after Specified Time
Select whether or not stored print release jobs are automatically deleted after a set time elapses.
If you select [Enable], jobs that have been stored the number of days set in "Days" will be automatically deleted.
Factory default settings: Enable
Days
When "Delete Stored Data after Specified Time" is enabled, set the number of days jobs are stored.
Factory default settings: 7 days
Local Drive Status
Displays the usage status of the local drive.
Connecting Code
Enter a code for authentication between the primary unit and secondary unit. Maximum of 32 alphanumeric characters.
Port Number
Set the port number used for print release in the primary unit and in the secondary unit. Be sure to set the same number in both the primary unit and the secondary unit. (The default port number is "53000", and there is no particular need to change this.)
Factory default settings: 53000
Delete All
When the machine functions as the primary unit, select this to delete all stored print release jobs.
Destination Settings
Primary Unit 1 to Primary Unit 3
Enter the addresses of the Primary Unit 1 to the Primary Unit 3.
Connecting Code
Enter a code for authentication between the primary unit and secondary unit. Maximum of 32 alphanumeric characters.
Port Number
Set the port number used for print release in the primary unit and in the secondary unit. Be sure to set the same number in both the primary unit and the secondary unit. (The default port number is "53000", and there is no particular need to change this.)
Factory default settings: 53000
Advanced Settings
Extend Destination Group
You can increase the number of groups by using the extension.
Factory default settings: Disable
Default Group
Select the group to be used in groups 1-10.
You can set the selected group as the default group for use in print releases. It is convenient to set a frequently used group because it will always be set to the selected group.
Factory default settings: Group 1
Destination Group Setting
Set the group to connect to.
Groups 1-10
Use This Group
When [Enable] is selected, [Use This Group] is set on the print screen of the print release job.
Factory default settings: Disable
Primary Unit 1 address to Primary Unit 3 address, connection code, port number
Set the address, connection code, and port number of the base unit 1 to base unit 3 used in the group.
Factory default settings: Port Number: 53000
E-mail Print Settings
Select this option to use the E-mail printing.
E-mail Print
Set whether or not E-mail print is performed.
Factory default settings: Disable
POP3 Server
Set the POP3 server used for E-mail.
Port Number
Set the port number of the E-mail server.
Factory default settings: 110
POP Authentication
Set this to perform POP authentication for E-mail.
Factory default settings: Disable
User Name
Set the E-mail user name.
Password
Set the password used for E-mail.
Check Interval
Set the automatic e-mail check frequency (polling interval).
Factory default settings: 5 minutes
Enable SSL/TLS
Use when SSL/TLS is used.
Factory default settings: Disable
Direct Print Settings (FTP)
Configure these settings if you will be printing files on an FTP server by direct print.
A list of available FTP servers is shown. To add an FTP server, click the [Add] button and configure the settings.
FTP Server Registration
Configure FTP server settings.
Name
Set the name to be used for direct print.
FTP Server
Set the name of the FTP server.
Port Number
Set the port number of the FTP server.
Factory default settings: 21
Directory
Set the directory of the FTP server that has the files.
User Name
Set the user name used to log in to the FTP server.
Password
Set the password used to log in to the FTP server.
Enable SSL/TLS
Enable SSL/TLS
Factory default settings: Disable
Use PASV mode
Set to use PASV mode.
Factory default settings: Disable
Direct Print Settings (Network Folder)
Configure these settings if you will be printing files on a network folder by direct print.
A list of available network folders is shown. To add a network folder, click the [Add] button and configure the settings.
Registration of Network Folder
Configure network folder settings.
Name
Set the name to be used for direct print.
Folder Path
Set the folder path that has the files.
User Name
Set the user name used to log in to the network folder.
Password
Set the password used to log in to the network folder.
Print Setting from PC/Mobile Terminal
Configure these settings to print files on a computer or mobile terminal by direct print.
FTP Print
Specify whether or not FTP print settings are used for direct print.
Factory default settings: Enable
Port Number
Enter the port number used for direct print.
Factory default settings: 21
IPP Print (Driverless)
Print from the network using the IPP protocol without using a printer driver.
Factory default settings: Enable
geo URI (RFC 5870)
You can set the location information of this machine.
Factory default settings: geo
Common Settings
Settings related to the image send function (E-mail, Internet fax, etc.) can be configured. The operation settings below apply to all image send functions.
Condition Settings
Hold settings for a while after scanning has been completed
Use this setting to hold the settings after scanning is completed (until Auto Clear Mode activates).
Factory default settings: Disable
Job Auto Start Time During Scanning
Set the time at which transmission is automatically started even if the original is still being scanned.
Factory default settings: 60 seconds
Default Display Setting
When resending by document filing or recalling by saved program settings that do not include an address, select from the following 6 types of base screens that appear.
• E - Mail - Network Folder - FTP/Desktop - Internet Fax - Fax - Data Entry
Factory default settings: Fax
Address Book Default Selection
Higher priority is given to the display of address book.
If image send mode is enabled, the Address Book is displayed in place of the initial screen of this mode.
Factory default settings: Disable

In "Setting mode", if a default address has been configured by selecting [System Settings] → [Image Send Settings] → [Scan Settings] → [Default Address] → [Default Address Setting], the [Higher priority is given to the display of address book.] function cannot be used.
Apply Addresses of Sending Modes Only
When an address is selected from the address book, only the addresses displayed in narrowing mode are applied.
Factory default settings: Enable
Category Displayed as Default
Select a category to be displayed with the default.
- None
- Frequent Use
- Categories 1 to 32
Factory default settings: None
Display all address type regardless of the mode being displayed currently.
Displays all destinations regardless of the displayed mode when this setting is enabled.
Factory default settings: Disable
Enlarge Address Book
An enlarged address book list appears.
Factory default settings: Enable
Image Orientation
Sets the default image orientation.
Factory default settings: Portrait
Preview Setting
Received Data Image Check Setting
Select whether or not a preview of received faxes and Internet faxes is shown. This is displayed when a facsimile expansion kit or Internet fax expansion kit is installed.
Factory default settings: Disable
Fax/I-Fax Reception Data:
Fax/I-Fax Reception Data: Select whether the default display format of the received fax/I-Fax list screen is list or thumbnails.
Factory default settings: Thumbnail
Default Exposure Settings
This is used to set the default exposure settings for scanning a document in image send mode. Select [Auto] or [Manual]. If you select [Manual], set the exposure to one of 5 levels.
Factory default settings: Auto

When the exposure is set to [Auto], a default original type cannot be selected.
Default Original Image Type
Select the original type beforehand to enable scanning at a resolution suitable for the original (only in scan mode and USB memory device scan mode).
The following settings can be configured.
- Text/Printed Photo
- Text/Photo • Text
- Photo
- Printed Photo
- Map
Factory default settings: Text
Sending the same image sent in Fax mode
Enable this when sending by broadcast transmission in Fax and other modes and you want to send the same image in all modes. If this function is disabled, an image specified with each Scan Setting is sent to E-mail, FTP, Desktop, and Network Folder. When an Internet Fax address is included in the addresses, the same image is sent regardless of this setting.
Factory default settings: Disable
Be sure to press Next Address Key ([+]) before selecting the next address.
Set whether or not the Next Address ([+]) key must be pressed before an address is added for a multi-address job such as broadcast transmission.
Factory default settings: Disable
Disable Switching of Display Order
Disables the ability to change the order of display (search number order, ascending, descending).
Once set, the display sequence is not changed. The display order will remain fixed at the order that is in effect when this setting is enabled.
Factory default settings: Disable
Hold Setting for Received Data Print
This function holds received faxes and Internet faxes in memory without printing them. The faxes can be printed by entering a password (factory default setting: 0000) with the numeric keys.
Factory default settings: Disable
Password
When [Hold Setting for Received Data Print] is enabled, enter the password (4-digit number).

These settings can only be configured when there is no received data in the machine memory (excluding data in a confidential or relay broadcast memory box).
Default Verification Stamp
This is used to enable or disable the default setting. Enable this to always affix the verification stamp on the original that has already been scanned using the automatic document feeder. Configure the setting for each of the following items:
• E-mail/Scan/Data Entry - Fax/Internet Fax
Factory default settings: Disable
Erase Width Adjustment
This is used to set the default erase width for erase function. Specify a value from 0" (0 mm) to 1" (25 mm) in increments of 1/8" (3 mm) for both edge erase and centre erase.
Factory default settings: Edge Clearance Width: 10mm (1/2"), Centre Clearance Width: 10mm (1/2")
Time Specified Output of Received Data
This function is available when the Received Data Image Check Setting is enabled.
* This is displayed when a facsimile expansion kit or Internet fax expansion kit is installed.
If "Time Specified Output of Received Data" is set to √, this setting is greyed out.
If "Change Password" or "Hold Setting for Received Data Print" is set to ☐, the password entry field is greyed out.
Factory default settings: Disable
Enable/Disable Settings
Settings to Disable Registration
Storing from the machine, storing from Setting mode (Web version), and storing from the PC can each be separately prohibited.
Disable Registering Destination from Operation Panel
Disables address control from the machine.
Configure the setting for each of the following items:
- Group (Direct Entry) • Group (Address Book)
Select All: Select all items.
Clear Checked: Deselect all items.
Factory default settings: All Invalid
Disable Registering Destination on Web Page
Disables to store the destination from Setting mode (Web version).
Configure the setting for each of the following items:
- Group (Direct Entry) • Group (Address Book)
- Contacts
Select All: Select all items.
Clear Checked: Deselect all items.
Factory default settings: All Invalid
Disable Registration/Deletion of All Program Items
This is used to prohibit the deletion and changing of image send settings stored in job programs.
Factory default settings: Disable
Disable Registration of Memory Box
Disables all types of memory box registration.
Configure the setting for each of the following items:
Polling Memory, Confidential, Relay Broadcast (Direct Entry), Relay Broadcast (Address Book)
Factory default settings: All Invalid
Disable Destination Registration Using Global Address Search
This disables address control from the global address search.
Configure the setting for each of the following items:
E-mail, Internet Fax, Fax
Factory default settings: All Invalid
Disable Registration Using Network Scanner Tool
This disables address control from the Network Scanner Tool Lite.
Use this option to suppress storing data of another machine through Inbound Routing of the address book.
Factory default settings: Disable
Disabling of Forwarding via Network
This prohibits inbound routing.
Factory default settings: Disable
Settings to Disable Transmission
These settings are used to disable the following transmission operations.
Disabling Sending History
Prohibits resending using the sending history.
Factory default settings: Disable
Disable Selection from Address Book
Disables the selection of destinations from the address book.
Configure the setting for each of the following items:
• E-Mail - FTP - Desktop - Network Folder - Internet Fax (Including Direct SMTP) - Fax
Select All: Select all items.
Clear Checked: Deselect all items.
Factory default settings: All Invalid
Disable Direct Entry
Disables the direct entry of destination address and others.
Configure the setting for each of the following items:
• E-Mail - Network Folder - Internet Fax (Including Direct SMTP) - Fax
Select All: Select all items.
Clear Checked: Deselect all items.
Factory default settings: All Invalid
Disabling of PC Scan
Prohibits remote PC scans.
Factory default settings: Disable
Disable Storing to External Memory Device
Prohibits saving scan data to an external memory device.
Factory default settings: Disable
Disable PC-I-Fax Transmission
This prohibits PC-I-Fax transmission.
Factory default settings: Disable
Disable PC-Fax Transmission
This prohibits PC-Fax transmission.
Factory default settings: Disable
Disabling of Find My Address
This prohibits Find My Address.
Factory default settings: Disable
Disabling of OCR
Prohibits the use of the OCR function when scanning.
Factory default settings: Disable
Own Name and Destination Set
Stores the Internet-Fax or Fax sender information.
Sender Data Registration
Use this to store the sender name for fax and Internet fax, the sender fax number, and the sender address for Internet fax. The stored sender name and sender fax number or Internet sender address will be printed at the top of the received fax.
Sender Name
Enter the default sender name.
Sender Fax Number
Sets the sender fax number.
To insert a pause between digits of the number, tap the [-] key.
To insert a space between digits of the number, tap the [Space] key.
I-Fax Own Address
Enter the default source address.
Registration of Own Name Select
Stores the sender name used in "Own Name Select" of another function. Up to 18 sender names can be stored.
Add New
Store a sender name. A maximum of 20 characters can be stored.
After entering a sender name, tap the [Store] key.
The lowest unused registration number from 01 to 18 will be automatically assigned to the sender name. This number cannot be changed.
Sender Name List
Displays a list of stored sender names.
When you select a sender name, it is deleted.
Category Setting
This setting can be set on this machine. This setting is the same as "Category Setting (page 9-37)".
Scan Settings
The following settings are related to the scanner.
Initial Status Settings
Default Colour Mode Settings
Select a default colour mode setting for both colour and black & white in e-mail address, network folder, FTP and Desktop. Specify "Scanner Common" unless E-mail is specified.
Settings
Auto (Mono2, Greyscale*), Full Colour, Greyscale, Mono2
* When scanning a black and white original with the colour mode set to [Auto]
Factory default settings: Mono2
File Type
Disables black & white settings from the base screen when the colour mode is set to Auto.
Factory default settings: Disable
Initial File Format Setting
Specify the initial file format for sending a file in E-mail, Network Folder, FTP, or Desktop mode. Specify "Scanner Common" unless E-mail is specified.
File Format
Scanner function on BP-60C31/BP-60C36/BP-60C45/BP-70C31/BP-70C36/BP-70C45/BP-70C55/BP-70C65 or when the enhanced compression kit and OCR function expansion kit are installed on
BP-50C26/BP-50C31/BP-50C36/BP-50C45/BP-50C55/BP-50C65/BP-55C26.
PDF, PDF/A-1a, PDF/A-1b, TIFF, JPEG, Compact PDF, Compact PDF (Ultra Fine), Compact PDF/A-1a, Compact PDF/A-1a (Ultra Fine), Compact PDF/A-1b, Compact PDF/A-1b (Ultra Fine), Encrypt PDF, Encrypt/Compact PDF, Encrypt/Compact PDF (Ultra Fine), XPS, RTF, TXT(UTF-8), DOCX, XLSX, PPTX

If [Disabling of OCR] is set, you cannot select above file format.
The following "When the enhanced compression kit is installed on
BP-50C26/BP-50C31/BP-50C36/BP-50C45/BP-50C55/BP-50C65/BP-55C26" file format can be used.
When the enhanced compression kit is installed on
BP-50C26/BP-50C31/BP-50C36/BP-50C45/BP-50C55/BP-50C65/BP-55C26
PDF, PDF/A, TIFF, JPEG, Compact PDF, Compact PDF (Ultra Fine), Compact PDF/A, Compact PDF/A (Ultra Fine),
Encrypt PDF, Encrypt/Compact PDF, Encrypt/Compact PDF (Ultra Fine), XPS
Standard condition of BP-50C26/BP-50C31/BP-50C36/BP-50C45/BP-50C55/BP-50C65/BP-55C26
PDF, TIFF, JPEG, Encrypt PDF, XPS
Factory default settings: PDF
OCR Setting*
If the file format is PDF, the characters in the scanned image are read and the character information is added to the PDF.
Factory default settings: Disable
Black & White
Compression Mode: None, MH (G3), MMR (G4)
Factory default settings: MMR (G4)
Colour/Greyscale
Data compression ratio: Low, Medium, High
Factory default settings: Medium
Reduce Colours
Factory default settings: Disable
Specified Pages per File
Generates a separate file for each scanned page when multiple pages are scanned.
If this setting is enabled, a number of pages per file can be specified.
Factory default settings: Disable
Number of Pages
Any number of pages can be specified as the number of pages per file. This setting can be used if [Specified Pages per File] is enabled.
Factory default settings: 1
OCR Setting*
Configure the settings that are required for OCR.
Font*
Set the font used for each recognized character language.
Factory default settings: Western Languages: Arial, Japanese: MS gothic, Simplified Chinese: SimSun,
Traditional Chinese:MingLiU, Korean:Dotum
Detect Image Direction*
The orientation of the scanned original is automatically detected.
Factory default settings: Enable
File Name Extraction*
Extract the file name.
Factory default settings: Disable
* Scanner function on BP-60C31/BP-60C36/BP-60C45/BP-70C31/BP-70C36/BP-70C45/BP-70C55/BP-70C65 or when the enhanced compression kit and OCR function expansion kit are installed on BP-50C26/BP-50C31/BP-50C36/BP-50C45/BP-50C55/BP-50C65/BP-55C26 and OCR function enabled.

When [JPEG] is selected for the file type, [Specified Pages per File] cannot be selected.
Easy Scan Settings
Set the default colour mode for Easy Scan.
Set [Colour] for when the Colour Start key is tapped, and [Black & White] for when the B/W Start key is tapped.
| Setting item Settings | |
| Colour Auto | Full Colour |
| Black & White Greyscale | Mono2 |
Factory default settings: Colour:Auto, Black & White:Mono2
Resolution Setting
The following settings are available for the default resolutions of common scan, E-mail, Internet fax, and fax mode.
Scanner Common
100X100dpi, 150X150dpi, 200X200dpi, 300X300dpi, 400X400dpi, 600X600dpi
100X100dpi, 150X150dpi, 200X200dpi, 300X300dpi, 400X400dpi, 600X600dpi
Apply the Resolution Set when Stored
When an image stored by document filing is used, this applies the resolution setting that was stored with the image.
Factory default settings: Apply the Resolution Set when Stored: All Invalid, Resolution: 200×200 dpi
Original Skew Adjustment
When the document is tilted or the image in the document is tilted, the tilted state is automatically corrected and the data is saved.
Factory default settings: Disable
Condition Settings
Default Reply Address Set
The information stored here is used if you do not specify [Reply to] in the send settings when performing Scan to E-mail. Factory default settings: Disable
Bcc Setting
Enable Bcc
Enable this setting if you wish to use Bcc delivery. Displays the [Bcc] key on the image send address book screen.
Factory default settings: Disable
Display Bcc Address on the Job Status Screen
Displays Bcc addresses on the job status screen and address list tab.
Factory default settings: Disable
Quick On Line Sending
When this setting is enabled, the machine starts transmitting a fax as soon as the first page is scanned. Transmission takes place at the same time as the remaining pages are being scanned.
PDF Compression Options
Flate Compression
When sending a PDF file, you can compress the file by Flate Compression to reduce the file size.
Factory default settings: Enable
Compact PDF Resolution Setting
Set the resolution when saving as a highly compressed PDF.
Factory default settings: 300x300dpi
Compression Mode at Broadcasting
Selects the compression mode for broadcasting using Scan to E-mail or Internet fax. The compression mode set here is used for all destinations regardless of their individual compression mode settings.
Black & White
MH (G3), MMR (G4)
Colour/Greyscale
Low, Medium, High
Reduce Colours
Reduce the file size by limiting the number of colours and shades used.
Factory default settings: B/W: MH (G3), Colour/Greyscale: Middle, Reduce Colours: Disable
Send Destination Link Settings
Enable this to send only the URL of scanned data to the destination.
Factory default settings: Disable
Enable Send Destination Link as Default
Enable this to always send only the URL of scanned data to the destination. When this function is enabled and you are in simple mode, only the URL is sent to the e-mail address. When normal mode is used, the [Send Destination Link] checkbox is always in the action panel that appears in the home screen of Scan to E-mail.
Factory default settings: Disable
File Retention Period
Set the save period for scanned data saved in the machine when sending only the URL to the destination. When this period elapses, the files are automatically deleted.
Factory default settings: 4
Enable SSL/TLS
Use this to protect files using SSL/TLS transmission.
Factory default settings: Enable
Maximum Size of Send Data (E-Mail)
To prevent the transmission of excessively large image files by Scan to E-mail, a file size limit can be set from 1 MB to 99 MB in increments of 1 MB. If the total size of the image files created by scanning the original exceeds the limit, the image files are discarded.
If you do not wish to set a limit, select [Unlimited].
Factory default settings: Unlimited

This setting is linked to "Maximum Size of Send Data (page 9-102)" of the Internet fax settings.
If the E-mail attachment(s) exceed maximum size, it will be sent in multiple files.
If an E-mail attachment exceeds the maximum size, it will be sent in multiple files. If one of the divided files exceeds the maximum size, it will be sent with the resolution automatically lowered.
When sending files in JPEG format, only one file is attached to one e-mail, regardless of the file size.
If a file scanned in TXT(UTF-8), RTF, DOCX, XLSX, or PPTX format exceeds the file size limit, the file will be discarded without being sent even if this setting is selected.

- When a file scanned to a format other than TXT(UTF-8), RTF, DOCX, XLSX, or PPTX exceeds the size limit, this function reduces the data size below the limit by lowering the resolution or other means, and thereby enables sending without cancelling the data.
- When multi-crop, Image Crop, Send Destination Link and card scan are used, the scanned data is not divided. If the e-mail exceeds the set size limit, a send error occurs.
Maximum Size of Send Data (FTP/Desktop/Network Folder)
A limit can be set for the size of files that can be sent by Scan to FTP, Scan to Desktop, and Scan to Network Folder. Limits that can be selected are 50 MB, 150 MB, and 300 MB. If the total size of the image files created by scanning the original exceeds the limit, the image files are discarded.
If you do not wish to set a limit, select [Unlimited].
Factory default settings: Unlimited

During broadcasting that includes both e-mail and Internet fax destinations, the limit set in "Maximum Size of Send Data (page 9-102)" precedes.
Auto Scan Setting
Configure auto scan setting.
Factory default settings: Disable
Set Image Orientation Automatically
The orientation of placed originals can be automatically detected. Set whether the original is scanned by one-sided scanning or two-sided scanning.
Factory default settings: Enable
Set Resolution Automatically
You can have the machine automatically set the resolution.
Factory default settings: Enable
Blank Page Skip
Set whether or not blank original pages are automatically skipped during scanning.
Factory default settings: Blank Page Skip
Automatically Detect Mono2/Greyscale
Originals Automatically Detect Mono2/Greyscale.
Factory default settings: Enable
Detection Standard
Automatically Detect Mono2/Greyscale.
Factory default settings: 3 (Normal)
Automatically Adjust Skewed Original
The tilt of the document is automatically corrected.
Factory default settings: Enable
Automatically Detect Original Size from Document Feeder.
The original size is automatically determined when the original is read by the automatic original feeder.
Factory default settings: Enable
Create Card Information File when Detected
If it is determined that the card is a business card based on the original size, the business card information is also saved using the OCR function.
Factory default settings: Enable
File Format of Card Info
Set the file format of business card information.
Factory default settings: vCard (*.vcf)
Use Full Name on Card as the File Name
The name of the business card is the name of the file that stores the business card information.
Factory default settings: Enable
Set Compression Ratio Automatically
Automatically selects the best compression ratio from the original document.
Factory default settings: Enable
Preset restriction of E-mail for direct input
Enable this setting to prohibit e-mail transmission to an address that has an unsuitable domain. A file will not be sent if the e-mail address is entered directly and the domain is one of the set domains.
Default Address
Default Address Setting
A default address can be stored that makes it possible to transmit by simply pressing the [Colour Start] key or the [B/W Start] key without specifying an address.
If [Apply E-mail address of the user for login.] is selected, the E-mail address of the login user is set as the default destination. When [Apply Home Directory of The User for Login] is selected, the default address is the home directory of the user that logged in.
When the user logs in by internal authentication (authentication by the machine), the home directory setting of the user that logged in is configured in "User Registration" in "User List" in "User Control". When the user logs in by external authentication (network authentication), the home directory setting is configured in "Global Address Book Settings" in "LDAP Settings" in "Network Settings".
Factory default settings: Disable

Only a single default address can be set for Scan to E-mail, Scan to FTP, Scan to Desktop, and Scan to Network Folder.
Add Selected
Select an address that is to be used by default.
Apply E-mail address of the user for login.
The E-mail address of the login user is set as the default address.
Select [Allow cancel of the first entered address] based on your intended use.
Apply Home Directory of The User for Login
The home directory of the login user is set as the default address.
Select [Allow cancel of the first entered address] based on your intended use.
Select From Address Book
To display your desired address book, narrow the search by alphabet or category with the list of [Index]. You can select the number of addresses that are to be displayed at a time with [Display Items].
When you select the desired address name and tap the [Store] key, the selected address can be selected for the default address.
Allow cancel of the first entered address
You can cancel the E-mail address of the login user that is entered automatically. To cancel, tap the [x] button next to the address entry field.
When this setting is disabled, selection of an address other than the entered default address is prohibited.
Factory default settings: Disable

If an e-mail address is not set for the logged-in user, scanner transmission cannot be used.
Apply Login Name to the Path of Network Folder
Append the login name of the logged-in user to the path of the network folder.
Add a Subfolder Path to the End of the Home Directory Path
You can add more folders (subfolders) after the home directory path you have set, and make them the default address.
This setting is available only when [Default Address Setting] is [Enable] and [Apply Home Directory of The User for Login] is selected.
Factory default settings: Disable
Subfolder Path
Enter the path of the subfolder.
The entries here will be used as the subfolder name, and this folder will be set as the default address folder.
You can specify two or more levels of folders by entering "\". If the subfolder does not exist, a folder will be created.
For example, if you enter \AAA\BBB, the default address will be the subfolder AAA\BBB of the configured home directory.
Disable selection of other address(es)
It is prohibited to send to other than the default destination.
Factory default settings: Disable
Subject Name Settings
Default Subject
Set the title of the e-mail, such as sending an e-mail or sending an Internet fax.
Pre-Set Registration
You can save a preset subject for transmitted files. Click the [Add] key and set the subject.
File Name Settings
Default Settings for File Names
File Naming
You can select the information included in the name of scanned files.
Unit Serial Number
You can add the machine's serial number to the file name.
Factory default settings: Disable
Text
You can add any text to the file name.
Factory default settings: Disable
Sender Name
You can add the sender's name to the file name.
Factory default settings: Enable
Date & Time
You can add the date and time of transmission to the file name.
Factory default settings: Enable
Session Page Counter
You can add counter information to the file name.
Factory default settings: Disable
Unique Identifier
An ID number can be created for each file and added to the file name.
Factory default settings: Disable
Direct Entry/Pre-Set Text Selection Settings
Add Date & Time
Add the date and time to the end of the file name when the file name to be sent is set by direct input or fixed phrase selection.
Factory default settings: Disable
Pre-Set Registration
Add the date and time to the end of the file name when the file name to be sent is set by direct input or fixed phrase selection.
Message Body Settings
Add Job Information Automatically to the Mail Message Body
Add Job Information Automatically to the Mail Message Body
You can automatically add job information to the body message of e-mail.
Factory default settings: Enable
Add a Footer Automatically to the Mail Message Body
You can add any text as a footer to the body message of e-mail.
Factory default settings: Disable
Mail Footer Registration
Set any text to be added when [Add a Footer Automatically to the Mail Message Body] is enabled.
Message Body Settings
You can save a preset e-mail subject and body message (fixed text). Click the [Add] key.
Fax Settings
You can select the image send settings of fax functions.
Condition Settings
The fax settings can be enabled or disabled to suit the needs of your workplace.
Resolution Setting
You can select the resolution setting for faxes.
Apply the Resolution Set when Stored
Select this to use the resolution at which the fax was sent.
If you do not select [Apply the Resolution Set when Stored], the image will be stored at the resolution specified in the pull-down menu.
Factory default settings: Disabled, Resolution: Standard, Half Tone: Disabled
Factory default settings:
Auto Wake Up Print
When the [Power] button is "OFF" (but the main power switch is "ON") and a fax is received, this function activates the machine and prints the fax.
When this function is disabled, received faxes are not printed until the [Power] button is switched "On".
Factory default settings: Enabled
Pause Time Setting
Changes the length of pauses inserted in fax numbers.
If a hyphen (-) is entered when dialling or storing a fax number, a pause of 2 seconds is inserted.
It can be set between 1 and 15 seconds, in every 1 seconds.
Factory default settings: 2 seconds (in South Africa, 4 seconds)
Fax Dest. Confirmation Mode
This setting specifies whether or not a destination verification message is displayed when sending a fax in order to prevent accidental transmission to the wrong destination.
Factory default settings: Disabled, Apply to Addresses Other Than Fax: Disabled, Require Re-entry when Directly Entering the Fax Destination: Enabled
Remote Reception Number Setting
You can set the machine to the fax reception mode by entering a two-digit number from the connected external telephone and by tapping the ⓧ key. This one-digit number is called the Remote Reception number, and it can be between 0 and 9.
Factory default settings: 5
Display Fax Screen when External Telephone is Off-hook
The fax screen is displayed on the touch panel when the external telephone is off-hook.
Factory default settings: Enabled
Transaction Report Print Select Setting
Selects whether or not a transaction report will be printed, and if printed, the condition for being printed. Select a setting for each of the following operations:
Single Sending
- Print Out All Report • Print Out Error Report Only
- No Printed Report
Broadcasting
- Print Out All Report
- Print Out Error Report Only
- No Printed Report
Receiving
- Print Out All Report • Print Out Error Report Only
- No Printed Report
Confidential Reception
- Print Out Notice Page
- No Printed Report
When a transaction report is printed, this is used to print part of the first page of the transmitted original on the transaction report. For more information, see "Original Print on Transaction Report (page 9-101)".
Factory default settings: Single Sending: Print Out Error Report Only, Broadcasting: Print Out All Report, Receiving: No Printed Report, Confidential Reception: Print Out Notice Page

Even if a print setting is enabled for "Receiving", a transaction report will not be printed if you receive from a number that is rejected with the "Allow/Reject Number Setting (page 9-97)".
Activity Report Print Select Setting
You can set the machine to periodically print the activity report that is stored in memory.
The Image Sending Activity Report can be set to print each time the number of transactions reaches 200, or at a specified time (once a day only). (The settings can be simultaneously enabled.)
Factory default settings: Auto Print at Memory Full: Disabled, Print Daily at Designated Time: Disabled, Time: 00:00

If you only select the "Print Daily at Designated Time" setting and the number of recorded transactions reaches 200 before the specified time, each new transaction will delete the oldest transaction (the oldest transaction will not be printed). The Transaction Report can be printed out manually as needed. For more information, see "List for Administrator (page 9-31)".
Super G3 Setting
This setting is set when the destination does not correspond to Super G3.
Factory default settings: Enable
ECM
When you send a fax, noise on the line may occasionally cause distortion of the image. You can enable ECM (Error Correction Mode) to automatically resend only the part of the image that was distorted.
Factory default settings: Enable

If the receiving machine is a Super G3 machine, ECM will always operate, regardless of this setting.
Digital Line Network
When this setting is enabled, the send level will be 15 dB or less when you connect to a digital line.
Factory default settings: Disable
Distinctive Ring Detection
This setting can only be activated in Canada, Australia, New Zealand, and Hong Kong.
If multiple telephone numbers have been assigned to your telephone line, the number called can be identified by its ringing pattern. By using one number for voice calls and another number for faxes, you can tell which type of call you are receiving by the ringing pattern. You can set your machine to automatically receive faxes when your fax number is called by setting the pattern that corresponds to your fax number. (Note that in Canada, six selections are available.)
Factory default settings: Disable
PBX Setting
This setting can only be activated in France and Germany.
When the machine is used on a PBX, you can enable the PBX setting to have the machine automatically connect to the outside line. When this setting is enabled, the [R] key appears in the base screen. When the [R] key is touched, the PBX setting is temporarily cancelled.
If your PBX uses the Flash method to connect to the outside line, select the [Flash]. If your PBX uses an ID number to connect to the outside line, specify the ID number.
Factory default settings: Disable

Select a number for the first digit and then a number or a hyphen "-" for the second and third digits.
Send Setting
Make settings related to fax transmission.
Auto Reduction Sending Setting
Set to automatically reduce according to the chart paper size of the other party.
If you cancel the setting, the actual size will be sent without automatic reduction. In this case, part of the original may not be printed because it does not match the size of the chart paper of the other party.
Factory default settings: Disable
Rotation Sending Setting
When transmitting an image that is one of the following sizes, this function rotates the image 90 degrees counterclockwise. (The setting can be configured separately for each size.)
A4, B5R, A5R, 8-1/2"x11", 5-1/2"x8-1/2"R, 16K
Factory default settings: All enable

A4R and 8-1/2" x 11" R size images are not rotated.
Quick On Line Sending
When this setting is enabled, the machine starts transmitting a fax as soon as the first page is scanned.
Transmission takes place at the same time as the remaining pages are being scanned.
Factory default settings: Enable
Printing Page Number at Receiver
When the transmitted image is printed by the receiving machine, the page number can be added to the top of each printed page.
Factory default settings: Enable
Sender Destination Name Switch
Allows you to change the destination name and sender fax number if necessary.
Factory default settings: Fax No.
Date/Own Number Print Position Setting
This setting determines the position of the date and sender information printed at the top of faxes by the receiving machine. To have the information printed outside the transmitted document image, tap the [Outside the Original Image] key. To have the information printed inside the document image, tap the [Inside the Original Image] key.
For more information on the print position, see "ADDING YOUR SENDER INFORMATION TO FAXES (FAX OWN NUMBER SENDING) (page 5-80)".
Factory default settings: Outside the Original Image
Recall in Case of Line Busy
This program is used to set the number of recall attempts and the interval between recall attempts when a transmission is not successful due to the line being busy or other reason.
Number of Times to Recall When Line is Busy
This setting specifies whether or not recalling is performed when the line is busy. During recalling, you can set the number of recall attempts. Any number from 1 to 15 can be selected.
Interval to Wait Between Recall Attempts (min.) When Line is Busy
The interval between recall attempts can be set. Any number of minutes from 1 to 15 can be selected.
Area Differentiation Table
| The number of recall attempts The interval between attempts | ||
| United Kingdom, France, Germany, Sweden, Italy, Spain, Netherlands, Saudi Arabia, South Africa, Hungary, Czech Republic, Slovakia, Poland, Greece, Russia | 1 to 10 (default: 2) | any number of minutes from 1 to 15 (default: 3) |
| Canada 1 to 14 | (default: 2) | |
| Australia, New Zealand, Singapore,Thailand, Malaysia, India, Philippines | 1 to 9 (default: 2) | |
| Hong Kong 1 to 3 | (default: 2) | |
| Taiwan 1 to 15 | (default: 2) | any number of minutes from 4 to 15 (default: 4) |
| Indonesia 1 to 5 | (default: 2) | |

When this setting is enabled, note that the machine will not attempt the call again when manual transmission or direct transmission is used.
Recall in Case of Communication Error
This determines how many times the machine will automatically attempt the call again if a fax transmission fails due to a communication error.
Number of Times to Recall in Case of Error
Specify how many times the machine will attempt the call again when a communication error occurs. During recalling, you can set the number of recall attempts. Any number from 1 to 15 can be selected.
Interval to Wait Between Recall Attempts (min.) in Case of Error
The interval between recall attempts can be set. Any number of minutes from 1 to 15 can be selected.
| The number of recall attempts The interval between attempts | ||
| United Kingdom, France, Germany, Sweden, Italy, Spain, Netherlands, Saudi Arabia, South Africa, Hungary, Czech Republic, Slovakia, Poland, Greece, Russia | 1 to 5 (default: 1) | any number of minutes from 1 to 15 (default: 3) |
| Australia, New Zealand, Canada | 1 attempt | any number of minutes from 1 to 15 (default: 3) |

When this setting is enabled, note that the machine will not attempt the call again when manual transmission or direct transmission is used.
Disable Fax Broadcasting
Disables facsimile broadcasting.
Factory default settings: Disable
Receive Settings
Settings for fax transmission can be configured.
Number of Calls in Auto Reception
This setting is used to select the number of rings after which the machine automatically answers a call and begins fax reception in auto reception mode.
The "Number of Calls in Auto Reception" that can be set in each area are shown in the following table.
Factory default settings: 2 Time(s)
Area Differentiation Table
| The number of rings | |
| United Kingdom, France, Germany, Sweden, Italy, Spain, Netherlands, Thailand, Hong Kong, Saudi Arabia, South Africa, Hungary, Czech Republic, Slovakia, Poland, Greece, Russia, Philippines, Indonesia | 0 to 9 |
| Australia, New Zealand 2 to 4 | |
| Singapore 0 to 3 | |
| Malaysia, India, Canada, Taiwan 0 to 15 |

If you select "0" for the number of rings, the machine will immediately answer and begin fax reception without ringing in auto-reception mode.
Switching to Automatic Reception
When there is an incoming fax in manual reception mode, it automatically switches to automatic reception. Also, set the number of times the ringer sounds before switching to automatic reception between 1 and 9 times.
Factory default settings: 9 times
2-Sided Printing of Received Data
This is used to have received faxes printed on both sides of the paper.
When this setting is enabled and a fax consisting of 2 or more pages is received (the pages must be the same size), the pages are printed on both sides of the paper.
Factory default settings: Disable
Auto Receive Reduce Setting
When a fax is received that includes printed information such as the sender's name and address, the received image is slightly larger than the standard size. This setting is used to automatically reduce the image to fit the standard size.
Factory default settings: Enable

If Auto Receive Reduce is disabled, the edges of the image outside the standard size will be cut off. However, the image will be clearer because it will be printed at the same size as the original.
Standard sizes are sizes such as A4 and B5 (8-1/2" x 11" and 5-1/2" x 8-1/2").
Print Style Setting
This setting determines the paper selection condition when printing received faxes. Select one of the three conditions below.
Print Actual Size Cut off Disabled
The received fax image is printed at its actual size (without dividing it onto multiple sheets of paper). If the same size of paper or larger paper is not loaded, the fax will be received in memory and will not be printed until a suitable size of paper is loaded.
However, if the received fax is longer than 11" x 17" (A3) size, it will be automatically divided onto multiple sheets of paper.
Print Actual Size Cut off Enabled
Each received image is printed at full size. If necessary, the image is divided onto multiple sheets of paper.
Auto Size Select
Each received image is printed at actual size when possible. When not possible, the image is automatically reduced before printing.
Factory default settings: Auto Size Select
Print Received Data on the Paper Size Selected
Prints the received data in a size suitable for the received data.
Factory default settings: Disable
Set the Telephone Number for Data Forwarding
When a problem prevents the machine from printing a received fax, the received fax can be forwarded to another fax machine. This setting is used to program the fax number of the destination fax machine. Only one forwarding fax number can be programmed (maximum of 64 digits).
To insert a pause between digits of the number, tap the [-] key.
If you wish to specify an F-code confidential memory box in the destination machine, tap the [/] key after entering the fax number and enter the F-code (sub-address and passcode).
Letter Size RX Reduce Print
This program is not available in USA.
When a letter-R (8-1/2" x 11"R) size fax is received, this setting reduces the fax to A4R size.
When this setting is enabled, A4R size faxes are also reduced.
Factory default settings: Disable
Receiving Date & Time Print
Enable this setting to have the date and time of reception printed.
Select [Inside the Received Image] or [Outside the Received Image] for the position where the date and time is printed.
When [Inside the Received Image] is selected, the date and time of reception is printed on the received image.
When [Outside the Received Image] is selected, the received image is reduced and the date and time of reception is printed in the blank area that results.
Factory default settings: Disable

The [Outside the Received Image] cannot be selected for the reception date and time print setting if "Auto Receive Reduce Setting (page 9-95)" is not enabled.
A3 RX Reduce
This program is available in the USA.
When an A3 size fax is received, this function reduces the fax to ledger (11" x 17") size.
When this setting is enabled, ledger (11" x 17") size faxes are also reduced.
Factory default settings: Disable
Output Tray
Select the output tray for received faxes.
Number of Prints
Set the number of copies of received faxes that are printed to any number from 1 to 99.
Factory default settings: 1
Staple Settings
When a finisher is installed, set the position at which received faxes are stapled.
Factory default settings: 1 Staple at Back

- This setting can only be used when the [Multiple Set Print] and [Staple] checkboxes are selected in "Fax Settings".
- Up to 50 pages can be stapled. (When the paper is oriented horizontally, up to 30 sheets can be stapled.) The maximum number of staples is 5 for stapleless staples.
Paper Size
When a finisher is installed, select the paper used for printing of received faxes.
Factory default settings: A4 or A4R (8-1/2" x 11" or 8-1/2" x 11"R)
Fold Size Setting
Set the paper size to be used when folding the received data when printing.
Factory default settings: Valid except for A4R and Letter-R (8-1/2" x 11"R)
Allow/Reject Number Setting
Use this setting to specify whether reception from a stored number is to be allowed or rejected.
| Item Description | |
| Rejected Reject reception from the stored number. | |
| Allow Reception Allow reception from the stored number. | |
| All Invalid | Even if numbers have been stored, disregard the numbers and allow reception from all numbers. |
| Add New | Adds a new address or domain (maximum of 50) from which reception is to be rejected or allowed.Enter the number (maximum of 20 digits) and tap the [Store] key. |
| Registration Number List A list of the stored numbers can be displayed.When you select a number from this screen, it is deleted from the list. | |
| Reject hidden Number | If checked, any call from the number of Reject Unknown Calls setting is rejected, regardless of the certain number receive settings. |
Factory default settings: All Invalid
Reject Hidden Number
Rejects a call if the caller has blocked the sending of caller identification information.
Factory default settings: Disable

When there are no stored anti junk mail addresses or domains, only the [Add New] key can be selected.
Fax Polling Security
The following settings are for regular polling memory using the Public Box.
Set Fax Polling Security
When the memory polling function is used, this setting determines whether any machine will be allowed to poll your machine, or only machines that have been stored in your machine.
Factory default settings: Enable
Add New
When the Polling Security Setting is enabled, use this setting to store (or delete) the fax numbers of the machines that are allowed to poll your machine.
Up to 10 destination fax numbers can be stored. Each number must be within 20 digits in length.
Passcode Number Key List
This shows a list of the stored passcode numbers. Select a number from the list and delete it.

Please note that the contents set here do not apply to F-code bulletin board transmission.
F-Code Memory Box
This section explains how to store memory boxes for various types of F-code communication.
Storing a memory box
When you tap the [Add New] key, the registration screen appears. Up to 100 F-code memory boxes can be stored for all functions (polling memory, confidential, and relay broadcast).
Editing and deleting a memory box
When you select a memory box from the list, the edit screen appears for the box.
For information on the settings, see "Settings".
Tap the [Delete] key to delete the memory box.
Settings
| Item Description | |
| Items common to all types | |
| Box Type Select the type of box. | Polling Memory:Store a memory box for F-code polling memory. The sub-address and passcode that you store in the memory box are necessary for the other machine to poll the machine (request transmission) using F-code communication.Confidential:Store a memory box for F-code confidential communication. In addition, store a "Print PIN" in the memory box to print faxes received by confidential reception. The sub-address and passcode that you program in the memory box are necessary for the other machine to send a fax to the machine by F-code confidential transmission.Relay Broadcast:Store a memory box for F-code relay broadcast transmission.Relay Broadcast: Store a memory box for F-code relay broadcast transmission.Up to 30 destinations can be stored to forward the received data. The sub-address and passcode that you program in the memory box are necessary for the other machine to send a fax to the machine by F-code relay request transmission.Factory default settings: Box Type: Polling Memory |
| Memory Box Name Enter a name (maximum of 18 characters) for the memory box. | |
| Sub Address/Passcode | Enter a sub-address and passcode. A maximum of 20 digits can be entered for each sub-address and passcode.Separate a sub-address and passcode by a slash /("/"). |
| Items displayed when storing a confidential memory box | |
| Print PIN Set a "Print PIN" for confidential reception. Enter a 4-digit number. | |
| Items displayed when storing a relay broadcast memory box | |
| Recipients Select the end recipients of the relay broadcast.Select the recipients from the address book.Select Forward Address from the Address Book:Select an address from the address book.Destination Entry:An address that is not stored in the address book can be directly entered. Enter the address in the same way as when storing an address for a mode. | |

When programming a new memory box, a sub-address that is already programmed for another box cannot be used.
However, the same passcode can be used for more than one memory box. [ ] (space) and [#] cannot be used in a sub-address.
A passcode can be omitted.
Do not forget the Print PIN. In the event that you forget the Print PIN or need to verify the Print PIN, contact your dealer or nearest authorised service representative.
Internet Fax Settings
Settings related to the image send function (Internet fax, Direct SMTP, etc.) can be configured.
Default Settings
Configures the default settings for Internet fax.
Resolution Setting
Apply the Resolution Set when Stored
You can apply the resolution setting that was set when the file was saved to transmission of the file.
Factory default settings: Disable
Resolution
Set the resolution used for file transmission.
Factory default settings: 200×100dpi
Half Tone
Enable half-tones.
Factory default settings: Disable
Initial File Format Setting
File Type
This is used to set the file type for Internet fax transmission.
The following settings can be configured.
• TIFF-S • TIFF-F
If one of the following functions is set, the image will be sent in TIFF-F format even if TIFF-S is set.
- Mixed Size Orig.
- Dual Page Scan
- Book Divide
- Card Shot • N - Up
Compression Mode
This is used to set the compression mode for Internet fax transmission.
The following settings can be configured.
• MH (G3) • MMR (G4)
Factory default settings: File Type: TIFF, Compression Mode: MH (G3)

[MMR (G4)] cannot be selected when [File Type] is set to [TIFF-S].
Auto Wake Up Print
When the [Power] button is "Off" (but the main power switch is "On") and an Internet fax is received, this function activates the machine and prints the fax.
When this function is disabled, received Internet faxes are not printed until the ([Power] button) is switched "On".
Factory default settings: Enable
Original Print on Transaction Report
When a transaction report is printed, this is used to print part of the first page of the transmitted original on the transaction report. Select one of the settings below.
- Always Print
- Print at Error
- Do not Print
This setting will not be effective if the next "Transaction Report Print Select Setting (page 9-101)" is set to "Do not Print".
Factory default settings: Print at Error
Transaction Report Print Select Setting
Selects whether or not a transaction report will be printed, and if printed, the condition for being printed. Select a setting for each of the following operations:
Single Sending
- Always Print • Print Out Error Report Only
- Do not Print
Broadcasting
- Always Print
- Print Out Error Report Only
- Do not Print
Receiving
- Always Print
- Print at Error
- Do not Print
When a transaction report is printed, this is used to print part of the first page of the transmitted original on the transaction report. For more information, see "Original Print on Transaction Report (page 9-101)".
Factory default settings: Single Sending: Print Out Error Report Only, Broadcasting: Always Print, Receiving: Do not Print
Activity Report Print Select Setting
Prints the Image Sending Activity Report stored in the machine memory periodically.
The Image Sending Activity Report can be set to print each time the number of transactions reaches 200, or at a specified time (once a day only). (The settings can be simultaneously enabled.)
Factory default settings: Auto Print at Memory Full: Disable, Print Daily at Designated Time: Disable, Body Text Print Select Setting: Disable

If you only select the "Print Daily at Designated Time" setting √ and the number of recorded transactions reaches 200 before the specified time, each new transaction will delete the oldest transaction (the oldest transaction will not be printed). The Transaction Report can be printed out manually as needed. See "List for Administrator (page 9-31)".
Body Text Print Select Setting
Image files attached to Internet faxes are normally printed. This setting can be enabled to also have the e-mail body text (subject and message) printed.
This setting also applies to printing of the body text of e-mail messages without file attachments.
Factory default settings: Disable

A maximum of 5 pages of body text can be printed.
Send Setting
These settings are used to configure the settings for Internet fax.
I-Fax Reception Report On/Off Setting
This setting is used to request a reception report when an Internet fax is sent.
Factory default settings: Disable
I-Fax Reception Report Request Timeout Setting
The duration of time that the machine will wait for a reception report from the destination machine can be set by any number from 1 hour to 240 hours in increments of 1 minute.
Factory default settings: 1 Hour

This setting is only effective when "I-Fax Reception Report On/Off Setting (page 9-102)" is enabled.
Number of Resend Times at Reception Error
The number of resend attempts when an error message is received from an I-Fax recipient can be set to any number from 0 to 15.
Factory default settings: 2 Time(s)

This setting is only effective when "I-Fax Reception Report On/Off Setting (page 9-102)" is enabled.
Maximum Size of Send Data
To prevent the transmission of excessively large image files by Internet fax, a file size limit can be set from 1 MB to 99 MB in increments of 1 MB. If the total size of the image files created by scanning the original exceeds the limit, the image files are discarded.
If you do not wish to set a limit, select [Unlimited].
Factory default settings: Unlimited

This setting is linked to "Maximum Size of Send Data (E-Mail) (page 9-85)" in Scan Settings.
Rotation Sending Setting
When transmitting an image that is one of the following sizes, this function rotates the image 90 degrees counterclockwise. (The setting can be configured separately for each size.)
A4, B5R, A5R, 8-1/2"x11", 5-1/2"x8-1/2"R, 16K
Factory default settings: All Enabled

A4R and 8-1/2" x 11" R size images are not rotated.
Default Own Number Sending
You can include the date and your sender information (sender name and address) at the top of the page when the receiving machine prints an image that you send.
Factory default settings: Enable
Printing Page Number at Receiver
When the transmitted image is printed by the receiving machine, the page number can be added to the top of each printed page.
Factory default settings: Enable
Recall in Case of Line Busy
(This setting is only effective for Direct SMTP transmission.)
This setting sets the number of recall attempts and the interval between recall attempts when a transmission is not successful due to the line being busy or other reason.
Number of Times to Recall When Line is Busy
This setting specifies whether or not recalling is performed when the line is busy.
During recalling, you can set the number of recall attempts.
Any number from 0 to 15 can be selected.
Factory default settings: 2 Time(s)
Interval to Wait Between Recall Attempts (min.) When Line is Busy
The interval between recall attempts can be set. Any number of minutes from 1 to 15 can be selected.
Factory default settings: 3 Minute(s)
Recall in Case of Communication Error
(This setting is only effective for Direct SMTP transmission.)
This determines how many times the machine will automatically attempt the call again if a fax transmission fails due to a communication error.
Number of Times to Recall in Case of Error
Specify how many times the machine will attempt the call again when a communication error occurs.
During recalling, you can set the number of recall attempts.
Any number from 0 to 15 can be selected.
Factory default settings: 2 Time(s)
Interval to Wait Between Recall Attempts (min.) in Case of Error
The interval between recall attempts can be set. Any number of minutes from 1 to 15 can be selected.
Factory default settings: 3 Minute(s)
Receive Settings
Configures the settings for Internet fax.
Auto Receive Reduce Setting
When a fax is received that includes printed information such as the sender's name and address, the received image is slightly larger than the standard size. This setting is used to automatically reduce the image to fit the standard size.
Factory default settings: Enable

If Auto Receive Reduce is disabled, the edges of the image outside the standard size will be cut off.
However, the image will be clearer because it will be printed at the same size as the original.
Standard sizes are sizes such as A4 and B5 (8-1/2" x 11" and 5-1/2" x 8-1/2").
2-Sided Printing of Received Data
This is used to have received faxes printed on both sides of the paper.
When this setting is enabled and a fax consisting of 2 or more pages is received (the pages must be the same size), the pages are printed on both sides of the paper.
Factory default settings: Disable
Set Address for Data Forwarding
When the machine cannot print a received fax, the fax can be forwarded to another machine. This setting is used to configure the address of the other machine.
Forwarding to
Enter the forwarding address (maximum of 64 characters).
Direct SMTP
Select this to enable forwarding when direct SMTP is used.
Factory default settings: Disable
Add Hostname or IP Address.
Select this to separately enter a host name or IP address.
Factory default settings: Disable
Hostname or IP Address
Use this setting when "Add Hostname or IP Address." is enabled. Enter the host name or IP address (maximum of 64 characters).

Multiple forwarding addresses cannot be stored.
Letter Size RX Reduce Print
This program is not available in USA.
When a letter-R (8-1/2" x 11"R) size fax is received, this setting reduces the fax to A4R size.
When this setting is enabled, A4R size faxes are also reduced.
Factory default settings: Disable
Receiving Date & Time Print
Enable this setting to have the date and time of reception printed.
Select [Inside the Received Image] or [Outside the Received Image] for the position where the date and time is printed.
When [Inside the Received Image] is selected, the date and time of reception is printed on the received image.
When [Outside the Received Image] is selected, the received image is reduced and the date and time of reception is printed in the blank area that results.
Factory default settings: Disable

The [Outside the Received Image] cannot be selected for the reception date and time print setting if "Auto Receive Reduce Setting (page 9-104)" is not enabled.
A3 RX Reduce
This program is available in USA.
When an A3 size fax is received, this function reduces the fax to ledger (11" x 17") size.
When this setting is enabled, ledger (11" x 17") size faxes are also reduced.
Factory default settings: Disable
POP3 Communication Timeout Setting
The duration of time the machine waits until stopping reception can be set from 30 to 300 seconds in increments of 30 seconds if no response is received from the mail server (POP3 server).
Factory default settings: 60 sec.
Reception Check Interval Setting
Specifies an interval at which the machine automatically checks the mail server (POP3 server) for received Internet faxes. The interval can be set from 0 minutes to 8 hours in increments of 1 minute.
If 0 hours 0 minutes is specified, the machine does not automatically check the mail server for received Internet faxes.
Factory default settings: 0 hours 0 minutes

The machine also checks the mail server (POP3 server) for received Internet faxes when the main power is switched on. (Except when 0 hours 0 minutes is specified.)
I-Fax Output Setting
This sets the output tray for received Internet faxes.
The items that appear will vary depending the machine configuration.
Allow/Reject Mail or Domain Name Setting
Allows or refuses a reception from specified addresses/domains.
| Item Description | |
| Item Reception from the stored address/domain is not allowed. | |
| Allow Reception Reception from the stored address/domain is allowed. | |
| All Invalid All Invalid | |
| Add New | Adds a new address or domain (maximum of 50) from which reception is to be rejected or allowed.Enter the address/domain (maximum of 64 characters) and tap the [Store] key.If the first character of the entry is not "@", the entry is identified as an address. If the first character is "@", the entry is identified as a domain. (xxx@xx.xxx.□□□ is treated as an address, and @xx.xxx.□□□ is treated as a domain.) Storing an address specifies only that address. Storing a domain specifies all addresses that include that domain. |
| Registered address or domain list | Displays a list of the stored addresses and domains. An address or domain can be deleted from the list when selected. |
Factory default settings: All Invalid

When there are no stored anti junk mail addresses or domains, only the [Add New] key can be selected.
Server Settings
Receive Settings
Internet Fax Receive
Set whether or not Internet Fax reception is performed.
Factory default settings: Enable
POP3 Server
Enter the POP3 server name to use.
Port Number
Specify the port number of the POP3 server to be used.
Factory default settings: 110
POP Authentication
Set to use POP authentication.
Factory default settings: Disable
User Name
Enter a maximum of 64 characters for the user name used to access the server.
Password
Enter a maximum of 32 characters for the password used to access the server.
POP3 Communication Timeout
Set a timeout for communication to the POP3 server.
Factory default settings: 60sec.
Reception Check Interval Setting
Enter an acknowledge cycle to the POP3 server.
Factory default settings: 0 hours 0 minutes
Enable SSL/TLS
Allows the POP over SSL/TLS communication or the POP over TLS communication by STLS command. This requires the server to support the POP over SSL/TLS communication or the STLS command.
To allow the POP over SSL/TLS communication, set the "Port Number" to the POP over SSL/TLS communication port number.
To allow POP over TLS communication, set the "Port Number" to the same port number as for the normal POP3 communication.
Factory default settings: Disable
Connection Test
Tap the [Execute] button to test the connection to the POP3 server.
Default Settings
Own Number and Name Set
Set I-Fax Own Name
Enter the name of the sender when sending an Internet fax.
Set I-Fax Own Address
Enter the source address when sending an Internet fax.
Direct SMTP Setting
Port Number (Receive), Port Number (Send)
Specify the port number used for transmission and reception by direct SMTP.
Factory default settings: 25
Timeout
Set the wait time until transmission or reception is cancelled when a response is not received from the server during direct SMTP transmission/reception.
Factory default settings: 300 seconds
Fax Data Receive/Forward (Manual)
Fax Settings
These settings can be configured when the facsimile expansion kit is installed.
| Item Description | |
| Receive Settings Set the fax reception method. | Auto Reception:When a call comes in, the machine rings and then automatically begins fax reception.Manual Reception:Used when an existing external telephone is connected to the machine. You can answer to a phone call first, and then receive a fax by manual operation.Factory default settings: Auto Reception |
| Multiple Set Print | Specify whether or not two or more copies of received faxes will be printed. The number of copies can be set with the "Number of Prints (page 9-97)"Factory default settings: Disable |
| Staple Specify whether or not stapling is performed. | Set the binding method with "Staple Settings (page 9-97)".Factory default settings: Disable |
| Fold Specify whether or not folding is performed. | Factory default settings: Disable |
| Forward Received Data | When the machine cannot print because it is out of paper or out of toner, received faxes can be forwarded to another previously stored fax machine. |

- If there is no forwarding data or if the destination is not registered, no data is forwarded.
- If "Hold Setting for Received Data Print (page 9-78)" is enabled, you will be prompted for a password. Enter the correct password using numeric keys.
- If some pages of a fax that is being forwarded were successfully printed, only those pages that were not printed will be forwarded.
- A forwarded fax becomes a fax transmission job. If transmission does not take place because the transmission was cancelled or an error occurred, the fax will be held in memory until it can be printed.
- All faxes received are forwarded. Note that the received data stored in the F-code confidential memory box is not forwarded.
- For destination number registration, see "Set the Telephone Number for Data Forwarding (page 9-96)".
Internet Fax Settings
These settings can be configured when the Internet fax expansion kit is installed.
Reception Start
Tap this key to immediately connect to your mail server (POP3 server) and check for received Internet faxes. If you have received Internet faxes, the faxes will be retrieved and printed.
Manual Reception Key in Initial Screen
This displays the [Internet Fax Manual Reception] key in the base screen of Internet fax mode.
Factory default settings: Enable
Forward Received Data
When the machine cannot print because it is out of paper or out of toner, received faxes can be forwarded to another Internet fax machine.

To cancel forwarding
Tap the job status display and cancel fax forwarding in the same way as for a transmission job. Forwarding is not possible if no faxes were received or a forwarding fax number is not programmed.

- To enable "Reception Start", the POP3 server settings must be configured. See [Application Settings] in "Settings" → [Internet Fax Settings].
- To register a forwarding address, see "Set Address for Data Forwarding (page 9-104)" in "Settings".
- If forwarding was not successful because the transmission was cancelled or a communication error occurred, the faxes that were to be forwarded will return to the print queue on the machine.
- If the initial pages of a fax were successfully printed, only those pages that were not printed will be forwarded.
- If you select [System Settings] in "Settings" → [Image Send Settings] → [Operation Settings] → [Default Settings] and if "Hold Setting for Received Data Print" is enabled, you are prompted to enter a password. Enter the correct password using numeric keys.
• This setting can only be set on web pages.
Inbound Routing (Forwarding/Storing) Settings
Inbound Routing Settings
The fax and Internet fax received data can be forwarded according to the stored forwarding table.
When this function is enabled, you can also have the received Internet faxes forwarded to a specified e-mail address without printing them.
Table Registration
You can store or edit the data forwarding table that has the received data forward settings.
Up to 50 data forwarding tables can be stored.
A single forwarding table can store up to 500 sets of sender number and source address combinations.
Up to 1000 destinations can be stored in all data forwarding tables combined.
Up to 100 destinations of FTP/Desktop/Network Folder data can be stored.
| Item Description | |
| Table Name Enter a forward table name. | |
| Receive Line Select Selects a data receive line.Factory default settings: All Enabled | |
| Sender Address Setting Select the sender facsimile number or the Internet fax address.Before you select a sender number or address, store the destination number or address.To forward all received data, select [Forward All Received Data].Factory default settings: Forward All Received Data | |
| Forward Condition 1/2/3 You can set the forwarding date and destination.Forward Condition: Set the data forwarding conditions.Day of the Week: Select a day of week to start data forwarding.Start Time: Set a time to start data forwarding.Completing Time: Set a time to end the data forwarding.Format for Forwarding: Select a format of forwarding data.Factory default settings: Forward Condition: No Forwarding, Day of the Week: All Invalid, Set Forwarding Time: Disable, Start Time: 00:00, Completing Time: 0:00, Format for Forwarding: TIFF(Multi) | |
| Forwarding Destination List | Lists the addresses that can be set as the destination. Select a destination by setting it to √. |
| Add (Selecting from Address Book) | Open the address book and enter a forwarding destination. |
| Add (Direct Entry) Enter the destination name directly. | |
| Delete Deletes the selected address. | |
Sender Address Registration
Stores new sender number or address to be used for inbound routing.
| List name Settings | |
| Address to be Entered Displays the | entered sender number or address. |
| Fax Number | Enter a facsimile number to be stored as the sender. When you enter multiple sender numbers, separate them by a semicolon (;) or a comma (,). When you tap the [Global Address Search] key, the global address search screen appears. |
| Internet Fax Address | Enter an Internet fax address to be stored as the sender. When you enter multiple sender numbers, separate them by a semicolon (;) or a comma (,). When you tap the [Global Address Search] key, the global address search screen appears. |
| Delete Deletes the selected sender | number or address. |
| Add to List Adds the entered sender | number to the list. |
Administration Settings
Stores the administration settings to be used for inbound routing.
| List name Settings | |
| Inbound Routing Sets the inbound routing function. Factory default settings: Disable | |
| Disable Registration of Forward Table | Disables the registration of forward table. Factory default settings: Disable |
| Disable Change/Delete of Forward Table | Disables a change of forward table. Factory default settings: Disable |
| Disabling of Forward Condition Change | Disables a change of data forwarding conditions. Factory default settings: Disable |
| Print Style Setting Sets a print style of received data. If you have selected the [Always Print] or [Save Only at Error] option, enter a file name. Factory default settings: Print at Error | |
| Preset of Character Set the characters added to the file name when a file is saved. When "Character 1" and "Character 2" are set in "File Naming No. 1 to No. 7", the set characters are added to the file name. Enter up to 64 full-width/half-width characters. | |
| File Naming No.1 to No.7 | Set the information included in the file name when saving a file. Factory default settings: No.1:Sender Name, No.2:Date & Time, No.3~No.7:None |
| If received from a contact registered in the address book, sender's name is changed to contact's name. | When the sender of the data is stored in the address book, the sender information is changed to the name stored in the address book. Factory default settings: Disable |
1
Enable the [Inbound Routing] function.
Tap the [Administration Settings] from the menu.
Enable the [Inbound Routing] function from the setting screen.
2
Store the sender number or address.
Tap [Sender Number / Address Registration] from the menu.
Enter the destination number or address that you wish to store.

If you wish to forward all received data, you need not store the sender number and address separately.
3
Store a forwarding table.
Tap [Inbound Routing Settings] from the menu.
Tap the [Add] key on the displayed screen.
When the [Table Registration] screen appears, store the forwarding table.
4
Enable the stored forwarding table.
Tap [Inbound Routing Settings] from the menu.
Set the forwarding table name that you wish to enable to

To specify forwarding conditions, select [Forward based on the Conditions of Forward Destination 1-3], and also select [Always Forward] or [Forward on Selected Day & Time]. If you have selected the [Forward on Selected Day & Time] option, you can set the forwarding date and time in advance.
Inbound Routing (Storage) Settings
Settings for Local Drive Storing of Received Data
An external account application can be added and controlled.
Configure settings for saving received faxes to the local drive.
| Item Description | |
| Auto Storing of Received Data in Local Drive | Set whether received faxes are saved to the local drive.Factory default settings: Disable |
| Specifying Data to be Stored | Select which received faxes are saved. Select from line 1 and Internet Fax.Factory default settings: All Invalid |
| Specifying Stored Folder | Specify the folder in which received faxes are saved. Enter a folder name no longer than 32 full-width/half-width characters. |
| Sort Received Faxes by Date in Folders | Configure settings to have date folders created and received faxes saved to the folders by date.Factory default settings: Disable |
| Print Style Setting Configure print settings for received faxes.Save and print: Save received faxes to local drive, and also print.Only print when save error occurs: Print received fax when save fails.Save in inbound routing error box when save fails: When save fails, save the fax in the inbound routing error box.Factory default settings: Preset of Character | |
| File Format Select the file format for | inbound routing.Factory default settings: PDF |
| Preset of Character | Set the characters added to the file name when a file is saved. When "Character 1" and "Character 2" are set in "File Naming No. 1 to No. 7", the set characters are added to the file name. Enter up to 64 full-width/half-width characters. |
| File NamingNo.1 to No.7 | Set the information included in the file name when saving a file.Factory default settings: No.1:Sender Name, No.2:Date & Time, No.3~No.7:Off |
| If received from a contact registered in the address book, sender's name is changed to contact's name. | When Sender name of "File Naming" is enabled, you can change the sender name to a name in the address book.Factory default settings: Disable |
| Reception Notification Settings | Set whether notification is sent by e-mail when a fax is received.Factory default settings: Disable |
| Address of Notification Destination | Shows the address to which the notification is sent. |
| Direct Entry | Enter the notification address. Enter a maximum of 1500 half-width characters for the address. |
| Global Address Search Select the address from the global addresses. | |
| Add to List | An address directly entered or found by global address search is saved as the notification address. |
Metadata Settings
If the Application Integration Kit is installed, you can control the metadata to be used in other applications. The stored metadata is displayed on the metadata settings page. You can add a metadata, and edit or delete an existing metadata.
• [Add] key
Adds a new metadata set.
- List display
Lists the currently stored metadata sets.
Metadata Delivery
Enables or disables the metadata delivery function.
Factory default settings: Disable
Metadata Set Registration
When you tap the [Add] key, the registration screen appears. Up to 10 items can be stored. For each setting, see the following "Settings (page 9-114)".
Edit or Delete Metadata Set
When you tap a title on the list, the edit screen appears for that metadata set.
Tap the [Delete] key to delete the metadata set.
Settings
| Item Description | |
| Metadata Set Name Enter a metadata name. | |
| Metadata Destination Select a destination where you wish to send the image and metadata. | |
| Allow Custom Filenames | Enable or disable to edit the name of image file and XML file to be sent by the metadata send job.Factory default settings: Disable |
| Address Type Allowing Metadata Entry | Set the destination information to be used for metadata transmission.Factory default settings: All Invalid |
| Name Enter a metadata name to be displayed on the touch panel. | |
| XML Tag Name XML Tag Name | |
| Entry Type | Direct entry: Allows direct entry of each metadata from the soft keyboard or the numeric keypad.Metadata list: Allows a selection of metadata from the previously entered data list. You must enter optional values for metadata selection in the input area. Entries must be separated by semicolons or commas. Each option can be comprised of up to 70 characters. Initial entry by default: Uses a default value as the first value of the entered metadata list.Factory default settings: Direct Entry:Disable, Selection List:Disable |
| Include MFP Extended Scan Settings in XML File. | When the machine generates metadata automatically, the "metadataSetName", "userLoginId" (if user authentication is used), "pageSize", and "imageMode" are added to the metadata.Factory default settings: Enable |
| To Be Used as Default The current metadata set is used as the default.Factory default settings: Disable | |
Document Filing Settings
Condition Settings
Document filing settings are described below.
Tap the [Document Filing Settings] key to configure the settings.
Default Mode Settings
Specifies which mode, Sharing or Confidential, is used as the default mode when storing a file.
When [Confidential Mode] is selected, the [Confidential] checkbox is set to ☑ on the information screen for filing.
Factory default settings: Sharing Mode
Sort Method Setting
Selects an order of display files stored in the Main Folder, Custom Folder, and Quick File Folder. Select one of the following settings:
- File Name
- User Name
- Date
Factory default settings: Date
Administrator Authority Setting
For files and user folders that have a password, this setting allows the administrator password to be entered instead of the password when accessing the file or folder.
Also, you can change the preset ratio if necessary.
Factory default settings: All Invalid
Delete All Quick Files
Deletes all files from the Quick File folder except for protected files.
Delete
Tap this key to start deletion of all files immediately.
Delete quick files at power up. (Protected files excluded)
This is used to automatically delete all files in the Quick File Folder (with the exception of protected files) when the [Power] button is turned "On".
Factory default settings: Enable

The condition of the machine may prevent deletion in some cases.
Image Orientation
Changes the image orientation.
Factory default settings: Portrait
Default Colour Mode Settings
Selects the default settings for black & white and colour when Scan to Local Drive is used.
The following settings can be configured.
• Auto - Full Colour - Greyscale - Mono2
Factory default settings: Auto, Mono2
Disable Change of B/W Setting in Auto Mode
Disables black & white settings from the base screen when the colour mode is set to Auto.
Factory default settings: Disable
Default Exposure Settings
Default exposure settings for document filing can be configured.
Select [Auto] or [Manual].
If you select [Manual], set the exposure to one of 5 levels.
Factory default settings: Auto
Default Original Image Type
Select the original type beforehand to enable scanning at a resolution suitable for the original.
The following settings can be configured.
- Text/Printed Photo
- Text/Photo
- Text
- Photo
- Printed Photo
- Map
Factory default settings: Text

When the exposure is set to [Auto], a default original type cannot be selected.
Initial Resolution Settings
One of the following resolutions can be selected for the default resolution for transmission.
- 100x100dpi
- 150x150dpi
- 200x200dpi
- 300x300dpi
- 400x400dpi
- 600x600dpi
Factory default settings: 200x200dpi
Default Output Tray
Selects the default output tray for printing a file stored by Scan to Local Drive.
The items that appear will vary depending the machine configuration.
Disable Text/Stamp functions for Reprinting
When a stored file is retrieved and printed, the printing functions are disabled.
This function prevents an inconsistency of the date between the original data and output data and others.
Factory default settings: Disable
Batch Print Settings
Set whether or not the [All Users] key and the [User Unknown] key are prohibited in the user name selection screen when printing all files.
Factory default settings: Selection of [All Users] is not allowed.: Enable, Selection of [User Unknown] is not allowed.: Enable
Print Order Setting for the Batch Print/Multi-File Print
Sets whether the files are ordered by date (newer/older) or by file name (ascending/descending).
Factory default settings: Date (Dsc.)
Erase Width Adjustment
This is used to set the default erase width for the erase function.
Specify a value from 0" (0 mm) to 1" (25 mm) in increments of 1/8" (3 mm) for both edge erase and centre erase.
Factory default settings: Edge Clearance Width: 10 mm (1/2"), Centre Clearance Width: 10 mm (1/2")
Card Shot Settings
This is used to set the default original size for the card shot function.
Specify a value from 1" (25 mm) to 8-1/2" (216 mm) in increments of 1/8" (3 mm) for both the X (horizontal) and Y (vertical) dimensions of the original.
Factory default settings: Original Size: X: 86 mm (3-3/8"), Y: 54 mm (2-1/8")
Fit to Store Size
Always displays the [Fit to Store Size] key on the card shot screen.
Factory default settings: Disable
Setting of store/delete after file print
Select whether to save or delete a file after printing.
Factory default settings: Store
Default Setting of PDF Format for PC Browsing
You can set the initial file format of public PDF or the file for download which is created during execution of each job.
B/W, Compression Mode
Set the compression format for B/W, and the compression rate for Colour/Greyscale.
For B/W, select from uncompressed, MH (G3), MMR (G4).
For Colour/Greyscale, select the file compression ratio from Low, Medium, and High.
Settings during each job execution
When each of copy, printer, scanner, Internet fax, fax, or stored scan data is executed, you can specify to create a public PDF and to set the resolution of public PDF.
Factory default settings: B/W: Compression Mode: MMR (G4)
Colour/Greyscale: Compression Ratio: Middle
Copy: Disable, Apply the resolution at job execution: Disable, Resolution: 200dpi×200dpi
Printer: Disable, Apply the resolution at job execution: Disable, Resolution: 200dpi×200dpi
Scanner: Disable, Apply the resolution at job execution: Disable, Resolution: 200dpi×200dpi
Internet fax: Disable, Apply the resolution at job execution: Disable, Resolution: 200dpi×200dpi
FAX: Disable, Apply the resolution at job execution: Disable, Standard
Scan to Local Drive: Disable, Apply the resolution at job execution: Disable, Resolution: 200dpi×200dpi
Document Output Options
The use of a stored file can be allowed or prohibited by operation type and by the mode from which the file was stored.

The items that appear will vary depending on the functions that have been added to the machine.
| Item Description | |
| For each mode, select whether or not printing of stored files is allowed.Factory default settings: Copy: Enable, Printer: Enable, Scan Send: Disable, Internet Fax Send(Incl. PC-I-Fax): Disable, Fax Send(Incl. PC-Fax): Enable, Scan to Local Drive: Enable | |
| Scan Send | For each mode, select whether or not fax transmission of stored files is allowed.Factory default settings: Copy: Disable, Printer: Disable, Scan Send: Enable, Internet Fax Send(Incl. PC-I-Fax): Disable, Fax Send(Incl. PC-Fax): Disable, Scan to Local Drive: Enable |
| Internet Fax Send(Incl. PC-I-Fax) | For each mode, select whether or not fax transmission of stored files is allowed.Factory default settings: Internet Fax Send(Incl. PC-I-Fax): Enable |
| Fax Send(Incl. PC-Fax) | For each mode, select whether or not fax transmission of stored files is allowed.Factory default settings: Copy: Disable, Printer: Disable, Scan Send: Disable, Internet Fax Send(Incl. PC-I-Fax): Disable, Fax Send(Incl. PC-Fax): Enable, Scan to Local Drive: Disable |
Custom Folder Registration
This setting can be set on this machine. This setting is the same as the registration method of "Custom Folder (page 9-38)".
Automatic Deletion of File Settings
Document filing settings are described below. Tap the [Document Filing Settings] key to configure the settings. Time and folder settings can be configured to have files in specified folders (stored by document filing) automatically deleted at a specified time. Up to 3 settings can be stored to be automatically deleted. The procedure for using this function is as follows:
(1) Select [Setting 1], [Setting 2], or [Setting 3]. (2) Set the time and date for automatic deletion.
(3) Select the desired folder.
(4) Specify whether or not protected files and confidential files are to be deleted.
(5) Enable the stored settings.
| Item Description | |
| Schedule | Select an automatic deletion cycle. Select from [Delete by Schedule] and [Delete at Specified Time after Specified Days Have Elapsed].Delete by ScheduleEvery Day: Auto deletion every day at the specified time.Every Week: Auto deletion at the specified time on the specified day of the week.Every Month: Auto deletion at the specified time on the specified day of the month.Delete at Specified Time after Specified Days Have ElapsedThe file is automatically deleted at the specified time after the specified number of days have passed since the file was saved.Elapsed date and time: Set the elapsed date and time.Delete time: Automatically deletes at the specified time.Factory default settings: Delete by Schedule, Every Day |
| Folders | To select individual folders, select [Folder Select] and select any folder. To select all folders, including the folder currently being created, select [All Folders (Including folders registered hereafter)]. |
| Delete Protected File Enable this setting to include protected files in the deletion.Factory default settings: Enable | |
| Delete Confidential File | Enable this setting to include confidential files in the deletion.Factory default settings: Enable |
Delete Now
When this is executed with a folder selected, all files in the folder will be immediately deleted regardless of the date and time setting.
Executing automatic deletion during Auto Power Shut-Off.
(If this is not selected, the files will be deleted after the machine wakes from auto power shut-off mode.) Execute Auto Deletion even if Auto Power Shut-Off is enabled. When the checkbox is not selected (☐), the files will be deleted after the machine wakes from auto power shut-off mode.
Factory default settings: Disable
Sharp OSA Settings
Condition Settings
Sharp OSA version
Displays the version of Sharp OSA Settings by this unit.
Cookie Setting
Specify how application cookies are handled when using an application in Sharp OSA.
When "Hold Cookie" is selected, the machine holds cookies that are used in an application.
When "Not hold Cookie" is selected, cookies are not held when an application is used.
Factory default settings: Not hold Cookie

When "Hold Cookie" is selected, the login information from the previous operation may be stored. Note that when the user authentication function is disabled, and when the fixed user login setting is enabled, all users can use the login information stored in the machine.
Delete Cookie
Delete cookies held by the machine.
Automatically Start an Application at Power up and Wake up
After the machine has been turned on, or after it has recovered from an auto power shut-off, it will automatically start the registered applications.
Application
Set the applications to be launched automatically.
Accept remote access request from application
Check this when using a Sharp OSA application that is accessed remotely from the outside of this unit.
Application allowed to access
Register the application URL of the Sharp OSA application that allows remote access to this machine.
Approve remote access request on operation panel
When you start using the remote access function, the approval dialog is displayed on the operation panel of the main unit.
Accept UI operation request from application
Select this when using an application that operates the UI of this machine.
Display dialog of connection in Sharp OSA mode
During remote access, the connecting dialog is displayed on the operation panel of the main unit.
Accept secondary send request from Sharp OSA application
Accept secondary send request from Sharp OSA application
Standard Application Settings
The standard application settings can be added and controlled.
• [Add] key: When "Hold Cookie" is selected, the machine holds cookies that are used in an application. - List display: When "Not hold Cookie" is selected, cookies are not held when an application is used.

On the BP-50C26/BP-50C31/BP-50C36/BP-50C45/BP-50C55/BP-50C65/BP-55C26, the application communication module is required.
Standard Application Settings
When you tap the [Add] key, the registration screen appears. Up to 64 items can be stored. For information on the settings, see "Settings".
Edit or Delete Standard Application
When you tap an application name on the list, the edit screen appears for that standard application. Tap the [Delete] key to delete the standard application.
Settings
| Item Description | |
| Application Name Enter an application name. | |
| Address for Application UI | Set an IP address of the application or a network name to control the UI of the machine. |
| Timeout Enter a timeout. The default setting is 20 seconds. | |
| Extended Platform Set this option to use the expansion platform. | |
| Data Size Set the screen size of application. | |
| Use Custom Icon* Select whether or not custom icon is used. | |
| File Name* Reports file name. | |
| Select File* Type the file name. | |
* These functions can be set only in the Web page.
Receiving Application Setting
The Fax or I-Fax Receive functions can be set in the Sharp OSA applications.

On the BP-50C26/BP-50C31/BP-50C36/BP-50C45/BP-50C55/BP-50C65/BP-55C26, the application communication module is required.
Settings
| Item Description | |
| Forward to Application | The Fax or I-Fax message reception can be controlled by Sharp OSA applications. |
| Application Name Enter the application name to receive. | |
| Address for Web Service Enter the Web service address. | |
| Timeout Enter a timeout. The default setting is 20 seconds. | |
| E-mail Address | Enter the address to which a notification e-mail is sent when an application connection error occurs. |
| Body Text | Enter the body message that appears in the notification e-mail for connection errors. |
External Accounting Application Settings
An external account application can be added and controlled.
Set the server name where you have installed the external accounting application.

On the BP-50C26/BP-50C31/BP-50C36/BP-50C45/BP-50C55/BP-50C65/BP-55C26, the external account module is required.
| Item Description | |
| Server 1-4 Set to enable each of the servers. | |
| Application Name Enter an application name. | |
| Use Embedded Application Set when using an embedded application. | |
| Address for Application UI* | Enter the URL of the login screen to be accessed first when the machine is turned on. |
| Address for Web Service | Enter the URL of the server or computer which sends commands and events by XML/SOAP protocol. |
| Timeout Enter a timeout. The default setting is 20 seconds. | |
| Extended Platform Set this option to use the expansion platform. | |
| Data Size* Set the screen size of application. | |
| Find My Address This Search Find My Address. | |
* This setting can be set in Server 1.
Embedded Application Settings
Store and manage "embedded applications" that are installed in the machine.
• [Add] key Adds a new embedded application. - List
Lists the currently installed embedded applications.

On the BP-50C26/BP-50C31/BP-50C36/BP-50C45/BP-50C55/BP-50C65/BP-55C26, the application communication module is required.
Install Embedded Application
When you tap the [Add] key, the registration screen appears. You can install up to 64 in total.

- When installing from the operation panel of the machine, the files in the USB memory connected to the machine are installed. When installing from the Web page, the files in the computer are installed.
- The maximum storage space available to the application is 4GB. If previously installed applications are already using 4 GB of area, a new application cannot be installed.
Store Embedded Application
By storing an already installed embedded application in "standard application", the application can be used. Select the application name checkbox and tap the [Add Standard Applications] key.
Delete Embedded Application
Tap an application name in the list to display the information of that standard application. After checking the information, delete the standard application with the [Delete] key.
Polling Setting
When linked to an external application, you can store and manage addresses in order to use a service that uses a polling function.

On the BP-50C26/BP-50C31/BP-50C36/BP-50C45/BP-50C55/BP-50C65/BP-55C26, the application communication module is required.
| Item Description | |
| Server 1 - Server 2 Set to enable each of the servers. | |
| Polling Address Enter the URL of the server or computer that the machine will poll. | |
| Check Interval Enter the check interval for the server. The default is 1 minute. | |
| Timeout Set the timeout time. The default setting is 20 seconds. | |
External Service Connect
Enable the cloud connector function you want to use.
The following cloud connector functions can be set.
- SharePoint Online Connector*
- OneDrive Connector*
- Google Drive Connector*
- Gmail Connector
- Exchange Connector
* On the BP-50C26/BP-50C31/BP-50C36/BP-50C45/BP-50C55/BP-50C65/BP-55C26, the application communication module is required.
Authentication Settings
Default Settings
This section describes the settings in [System Settings] → [Authentication Settings] → [Default Settings] in "Settings (Administrator)".
User Authentication
This setting enables or disables user authentication and specifies the authentication method.
When user authentication is enabled, each user of the machine is registered. When a user logs in, the separate authentication settings apply to the user. This function allows greater control of security and cost management than that on previous machines.
Even if user information is not stored on the machine, you can directly enter the user information stored in an LDAP server to log in to the machine if necessary. In this case, the authentication information of the "User" being stored as factory default applies to the login user. For more information, see "Users stored as factory default (page 9-43)".
Factory default settings: Disable

- For the procedure for storing users, see "User List (page 9-42)".
- For details on login procedures when user authentication is enabled, see "USER AUTHENTICATION (page 8-12)".
User Authentication
When [User Authentication] is enabled, the authentication screen appears before an operation is carried out in any mode except the job status screen*.
Log in as an already registered user.
After logging in, you can move freely through the modes.
The login screen appears when a document filing file is used or when a broadcast transmission is reattempted from the job status screen.
Authentication Settings
Set the location where user authentication is to be enabled.
Login Locally: User authentication is performed on this machine.
LDAP: User authentication by LDAP server.
Active Directory: User authentication by Active Directory.
Sharp OSA: Authenticate the user using the Sharp OSA application.
Factory default settings: Login Locally
Default Network Authentication Server Setting
Use this to set the default network authentication server.
When you log into Setting mode (Web version) or send a print job to the machine using user information that is not registered in the machine, the authentication server is not known.
This setting is used to select one of the LDAP servers registered in the machine as the authentication server.

When login is performed by network authentication using user information that is not registered in the machine, the login user will be the "User" registered as factory default. For more information see "Users stored as factory default (page 9-43)".
Specify network server access control
Register the access control information for page count limits, authorities, and favourite operations can be registered on a network server in advance. By using this network server for network authentication, perform the user authentication based on the registered access control information.
Use this function when user authentication is performed by network authentication using an LDAP server or a directory service (Active Directory, etc.).
Before using this function, configure settings for authentication by network server, obtain control numbers for the "Pages Limit Group", "Authority Group", "Favourite Operation Group", and "My Folder" (including base settings for each group), and associate these with the control numbers registered in the machine.
To use this function, add the properties associated with "Pages Limit Group", "Authority Group", "Favourite Operation Group", and "My Folder" to the directory information of the network server used for user authentication.
The property information is indicated below. Settings previously stored in the machine cannot be changed.
| Property Name of property in factory default state | Settings | |
| Pages Limit Group | pagelimit | Registration number of Pages Limit Group registered in the machine, or a group name previously registered in the machine.Registration number of Authority Group registered in the machine, or a group name previously registered in the machine.Unlimited: unlimited |
| Authority Group | authority | Registration number of Authority Group registered in the machine, or a group name previously registered in the machine.Registration number of Authority Group registered in the machine, or a group name previously registered in the machine.Admin: adminUser: userGuest: guest |
| Favourite Operation Group | favourite Registration number of Favourite | Operation Group registered in the machine, or a group name previously registered in the machine.Following the System Settings: systemsettings |
| My Folder | myfolder | Folder name of user folder stored in the machine.Do not enter if the default folder is specified. |
Rename the properties that the machine obtains from the LDAP server as follows. In "Settings", select [Network Settings] → [LDAP Settings]. From the Global Address Book setting screen that is displayed, select [Linkage with User Control Function] and then select [Pages Limit Group], [Authority Group], [Favourite Operation Group] and [My Folder]. The [Pages Limit Group], [Authority Group], and [Favourite Operation Group] information that is registered in each machine determines the authority and settings that the user is actually granted. To use this function to ensure that users are granted the same authority and settings on any machine, register the [Pages Limit Group], [Authority Group], and [Favourite Operation Group] information with the same authority so that they will be registered in each machine using the same registration numbers.
For [My Folder], register the folder having the same name in [Custom Folder] in each machine.
The directory information of the network server that is used cannot be changed from the machine. Consult the administrator of the network server.
If 1000 users have already been manually registered, login will not be possible. Consult the administrator of the machine.
Factory default settings: Disable

- If Access Control is enabled and the access control information cannot be acquired from the authentication server, user authentication will not be possible.
- If a user that is registered in the machine is authenticated by network authentication, the user registration settings in the machine will be given priority for the page count limit group, authority group, favourite operations group, and my folder.
- If the access control obtained from the LDAP server is not registered in the machine, the factory default user authority will be applied.
- When this function is not enabled and a user is authenticated by network authentication as a non-registered user, the factory default user authority will be applied.
Users auto-registered
When you log in by network authentication, your user information is automatically registered in the machine. The information stored is as follows:
| Item Description | |
| User Name | This information is acquired from the authentication server.* |
| Initial 1 | |
| Index User1 | |
| Card ID - | |
| PIN Code/Password - | |
| Authentication Server Settings - | |
| Authentication Server Network Authentication | |
| E-mail Address | When Access Control is enabled, this information is acquired from the authentication server. |
| My Folder | |
| Pages Limit Group | |
| Authority Group | |
| Favourite Operation Group | |
If the user name cannot be acquired by network authentication, the first 16 characters of the text string used as the login name for network authentication is applied.
Authentication Method Setting
This selects the authentication method. When using user authentication, be sure to configure this setting first. The items to be configured for users stored after setting the user authentication method vary depending on the selected authentication method.
Authenticate a User by Login Name and Password
Standard authentication method using a login name and password.
Authenticate a User by Login Name, Password and E-mail Address
This authentication also checks the e-mail address, in addition to the login name and password of the user.
Authenticate a User by User Number Only
Use this option for simple authentication if you skip the network authentication.
Factory default settings: Authenticate a User by Login Name and Password

- The login screen will vary depending on the authentication method that is selected. For more information see "USER AUTHENTICATION (page 8-12)".
- When "Authenticate a User by User Number Only" is selected for the authentication method, network authentication cannot be used.
Case sensitivity of login name is enabled.
Set whether or not to make login names used at the time of user authentication case sensitive. If the checkbox is set to √, login names with identical spelling but different cases (upper and lower) will be identified as different login names.
Therefore, login names with identical spelling but different cases will be authenticated as user names of different users. If the checkbox is set to ☐, case sensitivity for login names is disabled. Therefore, identically spelled user names with upper and lower case character differences will be authenticated as the user name of the same user.
Factory default settings: Enable

If the selected checkbox is changed to , and identical user names with only upper and lower case character differences exist, the user names that have already been registered are identified as user names of different users.
Enable Quick Login
Enable "QUICK AUTHENTICATION (page 8-17)".
Factory default settings: Disable
Device Account Mode Setting
A specific user can be registered as an auto login user. When this option is enabled, the registered user can log in the machine automatically.
This function can eliminate each login procedure on the authentication screen and apply the selected user settings (such as network authentication and favourite operations). As an example, this enables uses such as "authentication for colour copying only".
Also, you can temporarily log in as a user other than the auto login user, and operate the machine with the privileges of this user. To allow other users to log in temporarily when [Device Account Mode] is enabled, select [Allow Login by Different User].
Factory default settings: Device Account Mode:Disable, Allow Login by Different User:Disable, Disable Home Edit Mode when in Device Account Mode:Disable

- If you have logged in as the Auto Login user, and if you have failed automatic login due to some reasons or if you do not have the administrator's privileges, you cannot use the general setting modes or Setting mode. In that case, the administrator should tap the [Admin Password] key on the Setting mode screen and log in again.
- To log in as a user other than a fixed user when [Allow Login by Different User] is enabled, tap the [Logout] key to cancel the fixed user login state. When the user authentication screen appears, log in as the desired user again. After you have used the machine, tap the [Logout] key to log out as the current user.
Login User
This setting is used to select the auto login user when auto user login is enabled.
Settings for Using Authentication Information
Store User Information
Set whether or not automatically registered users are created.
Externally authenticated users in Sharp OSA can also be automatically registered.
Factory default settings: Enable
Store Password
Set whether or not automatically registered users are created. Externally authenticated users in Sharp OSA can also be automatically registered.
Factory default settings: Enable
Cache Period
Set whether or not automatically registered users are created.
Externally authenticated users in Sharp OSA can also be automatically registered.
Factory default settings: Unlimited
Enable Offline Authentication with stored User Information
Allows the machine to be used in the event of a network failure, even when using network-based user authentication.
Factory default settings: Disable
Enable Personalization when external authentication is used
Even if you use external authentication such as LDAP authentication, you can customize it for each user.
The items that can be customized are as follows.
Home screen icon, home screen text colour, custom display pattern, display language, large text mode, favourites
Factory default settings: Enable
Cache Authentication Information for External Service Connect
Set whether or not authentication information for connection to the cloud is retained as cache information.
When this setting is enabled, the authentication information of a successfully authenticated user is retained to enable smooth authentication when the user subsequently logs in.
When this setting is disabled, the previously retained cloud connection authentication information of all users is deleted and authentication information is no longer retained.
Factory default settings: Enable
Card Setting
Authentication Method Setting
Allows the IC card to be used when authenticating the user.
Factory default settings: Disable
Authentication Method Setting
Set the authentication method with the IC card.
Factory default settings: Only Card Authentication Approved
| Item Description | |
| Only Card Authentication Approved | User authentication is only for IC cards. |
| Card / Front Panel Operation Authentication Approved | User authentication is possible from both the IC card and the operation panel. |
Request Password at IC Card Authentication
This can be set when "Authentication Settings" is "Active Directory" and "Use IC Card for Authentication" is enabled.
When enabled, enter the password each time you authenticate with the IC card. If disabled, the password will be entered when logging in with the IC card for the first time, and the password information will be sent to the Active Directory server. You can omit entering the password for the second and subsequent logins.
Factory default settings: Disable
Automatic Logout with a Card
Log out when you remove the IC card from the IC card reader/writer. (You can also log out by tapping the [Logout] key.)
Factory default settings: Disable
Administration Settings
Disable Printing by Invalid User
Print jobs by users who have not registered user information in this machine, such as jobs for which appropriate user information has not been entered in the printer driver or when "DIRECTLY PRINTING A FILE ON AN FTP SERVER (page 4-90)" is entered from the setting mode (administrator), are prohibited.
Factory default settings: Disable
Automatic Logout Setting
When user authentication is enabled, this setting specifies whether or not to enable automatic logout. The time until logout can be specified up to 240 seconds in increments of 10 seconds.
Factory default settings: Enable
A Warning when Login Fails
When entering passwords, including administrator passwords, during user authentication, the number of incorrect password attempts is counted, and if the number of attempts reaches the specified number (three), the user account is locked, and the user is blocked from making any more attempts at authenticating their account until a period of five minutes has elapsed. The number of incorrect entries made is counted separately for each user, and the count is reset when the correct password is entered.
This prevents an unauthorized person from attempting to guess a password. (The number of failed login attempts is retained even if the power is turned off.)
Factory default settings: Disable

- Lockout only applies to the user who failed to login, not all users. Even if one user is locked out, the other users can still log in.
- When LDAP or Active Directory network authentication is used, lockout is executed by the server, not the machine. Select appropriate lockout settings on the server.
- If the same user has been locked out, the [Release Operation Lock Status] key is displayed in the "User Registration" screen for that user. An administrator can tap this key to carry out a manual clear.
Allow Remote Scanner Using Before Login.
This setting specifies whether scanning can be performed by remote operation before a user has logged in. Factory default settings: Disable
Include Job Status in user authentication
When user authentication is enabled, this setting specifies whether or not to include the job status in user authentication. Factory default settings: Disable
Display System Information Screen Before Login
Set whether the system information screen can be displayed before logging in. Factory default settings: Disable
Enable IPP Authentication Except for Printer Driver
Enable IPP authentication on a non-printer driver. Factory default settings: Enable
Actions when the user is authenticated
Actions when the Limit of Pages for Output Jobs
This setting determines whether or not a job will be completed if the page limit is reached while the job is in progress. The following settings can be configured.
• Print through the end of the job - Stop the job - Cancel and delete the job during receiving
Factory default settings: Switch at End of Job
Automatically print stored jobs after login
When retention is enabled in the printer driver and print data has been spooled to the machine, you can have the spooled print data automatically print out when the user who enabled retention logs in.
Factory default settings: Disable
Reset Counter After Sending E-mail Status
After E-mail Status has been sent, the counter is reset. Displayed only when E-mail Alert and Status is enabled.
Factory default settings: Disable
Disable display/change of other users' information in the job status
This can be set when the job status is subject to user authentication.
When this setting is enabled, only the logged-in user's job is displayed on the job status screen.
Factory default settings: Disable
Apply login name to the user name of network folder
Applies the login name to the user name in the shared folder.
Login Name Display
When user authentication is enabled, select whether the login name is shown or asterisks are shown. Factory default settings: Display login name
| Item Description | |
| Display login name Show the login name. | |
| Display Login Name with Asterisk "*". | Hide the login name with asterisks. |
Display Usage Status after Login
When user authentication is enabled, this setting specifies whether or not to display the page counts of a user when the user logs in.
Factory default settings: Disable
Edit Help Display of Login Screen
Settings you have created here are displayed on the login screen.
Card Reader Settings
Default Settings
Card Scan Test
Perform a read test of the card to be used.
Card ID Registration/Change Authority
Set whether the logged-in user can register/change/delete his/her card ID information in this machine.
Factory default settings: Disable
Check System Code only in FeliCa User Area mode
Check the System Code only in FeliCa User Area mode.
Factory default settings: Disable
Check Facility Code in HID mode
Set whether to check the facility code when using a HID card.
When this setting is enabled, the facility code (up to 128 single-byte characters) is registered.
Factory default settings: Disable
Importing from the setup file
When you enter the configuration file name and tap the [Execute] key, the card area settings are read from the configuration file. If you tap the [Clear] key, all files that match the current search conditions are deleted.
Facility Code
Enters the facility code of a HID card. When you tap the [Store] key, the facility code is stored.
Card Reader Device Registration
Set when connecting a card reader/writer.

This setting can be set in the setting mode of this machine.
Paper Settings
Paper Tray Settings
Paper tray and paper type settings are explained in this section.
These settings specify the paper type, paper size, and functions allowed for each paper tray.
When the [Paper Tray Settings] key is tapped, a list appears showing the trays and the current settings.
Auto Switching of Tray
When a tray runs out of paper during printing, this determines whether or not another tray with the same size and type of paper is automatically selected and printing continues.
Factory default settings: Disable
Display Paper Tray Settings when bypass tray detects paper.
You can have the paper tray settings appear automatically when paper is detected in the bypass tray.
Factory default settings: Disable
Paper Weight Setting
These are used to control the toner fusing temperature according to the weight of the paper.
These settings apply to recycled paper, punched paper, pre-printed paper, letterhead paper, coloured paper, and user type paper.
You can select "60g/m² to 89g/m²" or "90g/m² to 105g/m²" ("16 to 23 lbs." or "23+ to 28 lbs.").
Factory default settings: 60 to 89g/m² (16 to 24 lbs)
Settings of each tray
When the [Change] key is tapped, the corresponding setting screen appears.
The following settings can be configured.
| List name Description | |
| Type Select a type of paper to be loaded into the tray.The paper types that can be selected vary by paper tray. For more information see "Tray Settings (page 9-134)".To user type setup, see "Paper Type Registration (page 9-136)". | |
| Size | Select the paper size from the list. The paper sizes that can be selected vary by tray. The sizes that can be selected may also be restricted by the paper type selected above. For more information see "Tray Settings (page 9-134)".If the desired size does not appear in the list, select [Custom Size] and directly enter the size (only for the bypass tray). For more information see "Tray Settings (page 9-134)". |
| Feeding Approved Job | Select the modes that can be used. If there is a function that you do not wish to be used with the selected tray, disable the function.When the "Type" is other than plain paper, recycled paper, coloured paper, or a user type, [Fax] and [Internet Fax] cannot be selected. |

- If the paper size specified here is different from the size of paper that is loaded into a tray, a problem or misfeed may occur when printing.
- To change the paper size in a tray, see "IMPORTANT POINTS ABOUT PAPER (page 1-11)".
- Paper properties such as "Fixed Paper Side" are automatically set when the paper type is selected. The paper tray properties cannot be changed in this screen.
- [Settings] → [System Settings] → [Common Settings] → [Device Control] → [Default Settings] → [Disabling of Tray Settings], [Disabling of Large Capacity Cassette], [Disabling of Optional Paper Drawer]. When it is set, the paper feed tray (excluding the bypass tray) cannot be set.
Tray Settings
| Paper Tray Paper Type Size | ||
| Tray 1 Plain1/2, | Pre-Printed,Recycled, LetterHead,Pre-Punched,Colour, HeavyPaper 1-4*1,Envelope, UserType | Auto-AB (A3W (12" × 18"), A3, B4, A4, A4R, B5, B5R, 216 mm × 330 mm(8-1/2" × 13"))Auto-Inch (12" × 18", 11" × 17", 8-1/2" × 14", 8-1/2" × 11", 8-1/2" × 11"R,7-1/4" × 10-1/2"R)SRA3, SRA4, 8-1/2" × 13-1/2", 8-1/2" × 13-2/5", 5-1/2" × 8-1/2"R, A5, A5R,A6RPostcard, Reply Postcard, 4-Postcard Printed Sheet, 8K, 16K, 16KRWhen [Envelope] is selected as the paper typeCOM9, COM10, Monarch, DL, C4, C5 and C6 are selectable. |
| Tray 2 (When 1-stagepaper feed desk / 2-stagepaper feed desk / 3-stagepaper feed desk isinstalled) | Plain1/2,Pre-Printed,Recycled, LetterHead,Pre-Punched,Colour, HeavyPaper 1-4*1, UserType | Auto-AB (A3W (12" × 18"), A3, B4, A4, A4R, B5, B5R, 216 mm × 330 mm(8-1/2" × 13"))Auto-Inch (12" × 18", 11" × 17", 8-1/2" × 14", 8- 1/2" × 11", 8-1/2" × 11"R,7-1/4" × 10-1/2"R), SRA3, SRA4, 8-1/2" × 13-1/2",8-1/2" × 13-2/5", 5-1/2" × 8-1/2"R, A5R, 8K, 16K, 16KR |
| Tray 3 (When the 2-stagepaper feed desk / 3-stagepaper feed desk isinstalled) | ||
| Tray 4 (when a 3-stagepaper feed desk isinstalled) | ||
| Tray 3 (when alarge-capacity desk isinstalled) | Plain1/2,Pre-Printed,Recycled, LetterHead,Pre-Punched,Colour, User Type | A4, 8-1/2"x11" |
| Tray 4 (when alarge-capacity desk isinstalled) | Plain1/2,Pre-Printed,Recycled, LetterHead,Pre-Punched,Colour, User Type | A4, 8-1/2"x11", B5 |
| Tray 5 (when a large-capacity desk is installed) | Plain1/2,Pre-Printed,Recycled, Letter Head,Pre-Punched,Colour, Heavy Paper 1-2*1, User Type | A4, 8-1/2"x11", B5 |
| Bypass Tray In addition to the paper types in trays 1 to 4, Thin Paper*1, embossed paper, Envelope, transparencies, label sheets, Tab paper, Glossy Paper | paper types in trays 1 to 4, Thin Paper*1, embossed paper, Envelope, transparencies, label sheets, Tab paper, Glossy Paper | Auto-AB (A3W, A3, B4, A4, A4R*2, A6R*2, *3, SRA3, SRA4, A5R*2, B5, B5R, 11" × 17", 8-1/2" × 11", 216 mm × 330 mm (8-1/2" × 13")*2, 216 mm × 340 mm (8-1/2" × 13-2/5")*2, 216mm × 343mm(8-1/2" × 13-1/2")*2Auto-Inch (12" × 18", 11" × 17", 8-1/2" × 14"*2, 8-1/2" × 13-2/5" (216 mm × 340 mm)*2, 8-1/2" × 11", SRA3, SRA4, 8-1/2" × 11"R, 7-1/4" × 10-1/2"R, 5-1/2" × 8-1/2"R, A3, A4, B4, B5)Size Input-AB (X=140 mm to 457 mm, Y=90 mm to 320 mm)Size Input-Inch (X=5-1/2" to 18", Y=3-5/8" to 12-1/2")8K, 16K, 16KR, A5, Custom1 to Custom7 |
*1 Heavy paper 1: 28 lbs bond to 65 lbs Cover (106 g/m² to 176 g/m²) Heavy paper 2: 65 lbs Cover to 80 lbs Cover (177 g/m² to 220 g/m²) Heavy paper 3: 80 lbs Cover to 140 lbs Index (221 g/m² to 256 g/m²) Heavy paper 4: 140 lbs Index to 110 lbs Cover (257 g/m² to 300 g/m²) Thin paper: 13 lbs bond to 16 lbs. bond (55 g/m² to 59 g/m²) *2 The size that is automatically detected is set in "Select Paper Sizes for Auto Detection" in the bypass tray settings screen. *3 Thin paper of A6R size cannot be used.
Tray Registration
Select Paper Sizes for Auto Detection
"Select Paper Sizes for Auto Detection" in the bypass tray settings screen is used to select the paper size that is automatically detected from similar sizes when the automatic paper size detection takes place.
When paper that is the same size as one of the paper sizes in the settings is placed in the bypass tray, the size that is selected in the settings will be automatically detected.
| List name Description | |
| Auto-AB | A4R, A5, 216mm x 330mm (8-1/2" x 13"), 216mm x 340mm (8-1/2" x 13-2/5"), 216mm x 343mm (8-1/2" x 13-1/2") |
| Auto-Inch | 8-1/2" x 14", 8-1/2" x 13-2/5" (216 mm x 340 mm), 8-1/2" x 13-1/2" (216 mm x 343 mm) |
Custom Size Registration (Bypass)
If you frequently use a non-standard size paper in the bypass tray, register that paper size in advance.
Registering the paper size saves you the trouble of setting the size each time you need to use it.
Up to seven paper sizes can be registered.
Tap the key ([Custom 1] to [Custom 7]) in which you wish to register or change a paper size, and the registration screen appears.
Select whether you wish to enter the size in mm ("Size Input-AB") or inches ("Size Input-Inch"), and then set the X and Y dimensions of the paper.
"Size Input-AB"
The X direction can be set between 140mm and 457mm.
The Y direction can be set between 90mm and 320mm.
Factory default settings: X: 420 mm, Y: 297 mm
"Size Input-Inch"
The X direction can be set between 5-1/2" and 18".
The Y direction can be set between 3-5/8" and 12-1/2".
Factory default settings: X: 17" Y: 11"
Paper Type Registration
Store a paper type when the desired paper type does not appear as a selection or when you wish to create a new set of paper properties.
Up to 7 paper types can be registered.
| List name Description | |
| Type Name Register any name. | The factory default names are "User Type 1" to "User Type 7". |
| Fixed Paper Side | Use this setting when paper with a front and reverse side is used.Factory default settings: Disable |
| Disable Duplex | Use this setting when paper loaded cannot be used for 2-sided printing.Factory default settings: Disable |
| Disable Staple | Use this setting when paper used cannot be stapled.Factory default settings: Disable |
| Disable Stapleless Staple | Use this settings when paper used cannot be stapleless stapled.Factory default settings: Disable |
| Disable Punch Use this setting when paper used cannot be punched.Factory default settings: Disable | |
| Disable Fold Use this setting when using paper that cannot be disable fold.Factory default settings: Disable | |

The settings that can be selected vary depending on the peripheral devices installed.
Operation Settings
Condition Settings
Enlarge Display Mode
Displays large characters on the screen.
appears in the system area when Large Character Mode is enabled.
Factory default settings: Disable
Message Time Setting
The duration of time that messages appear in the touch panel (the time until a message is automatically cleared) can be set to any number of seconds from 1 to 12.
Factory default settings: 6 seconds
Language Setting
The language that appears in the touch panel can be changed to any language.
Factory default settings: Varies depending on country and region

When user authentication is enabled and a display language is specified in the favorite operation group, that setting is given priority.
Default Display Setting
Set the screen that appears after auto clear and login.
Easy Copy, Easy Scan, Easy Fax, Copy, Print Release, E-mail, Network Folder/FTP/Desktop, Internet Fax, Fax, Address Book, Address Book (Easy Scan), Address Book (Easy Fax), Document Filing, Select from the Home Screen, Sharp OSA screen, Exchange (E-Mail), and Gmail.
Factory default settings: Home Screen
Display System Information Screen as Default
When switching between modes, first set whether to display the "System Information Screen".
Factory default settings: Disable
Display IP Address on the System Information Screen
This setting specifies whether or not to display the IP address of the machine on the "System Information" screen.
Factory default settings: Enable
Display Favorite Menus as Default
You can specify to display the "Favorite" first during mode selection.
Factory default settings: Disable
Display Action Panel as default.
Specify whether or not to display with the action panel on the screen.
Factory default settings: Enable
Icon is displayed when network cable is not connected.
Show an icon when a LAN cable is not connected.
Factory default settings: Enable
Display Confirmation Dialog when job is cancelled.
Set whether to display a notification message when a job is completed.
Factory default settings: Disable
Display Status Notification Message
Show a confirmation dialog box when a job is cancelled.
Factory default settings: Enable
Restrict Total Count display
When this setting is enabled, the total count is hidden when checking the total count from the home screen.
Factory default settings: Disable
Switch the Number of Sets to be Displayed for Job Status
Set whether the remaining number of sets or the final number of sets is shown in the job status.
Factory default settings: Progress
Display the estimated job start time
Specify whether or not to display the estimated start time of the job in the job status.
Factory default settings: Enable
Alignment Order of 10-Key
Set whether the numeric keys are arranged in ascending order with "1" in the upper left corner, or "1" in the lower left corner.
Factory default settings: Ascending order from upper left
Setting Display from Main Unit
Select settings for the path information of the setting destination displayed when setting mode is set on the machine.
Display Current Path
Set whether or not the current setting items are shown in the path information.
Factory default settings: Enable
Enable link of current path
Set whether the link at the top is enabled.
Factory default settings: Enable
MFP Display Pattern Setting
Set the background colour of the touch panel. Each time you change patterns, the touch panel image at the bottom of the screen changes.
Factory default settings: Pattern 2
Key Operation Setting
Auto Clear Setting
The time until Auto Clear activates can be set to any number of seconds from 10 to 240 in increments of 10 seconds. If the machine is not used for the duration of time set here, the auto clear function will clear any settings that have been selected and return the screen to the base screen of copy mode or the job status screen.
Factory default settings: 60 seconds
Cancel Timer
This is used to disable the auto clear function.
Factory default settings: Disable
Key Operation Setting
Time for Accepting Key Entry
This setting determines how long a key in the touch panel must be tapped until the key input is registered. The time can be set from 0 to 2 seconds in increments of 0.5 seconds.
By lengthening the time setting, key input can be prevented when a key is tapped accidentally. Keep in mind, however, that when a longer setting is selected more care is required when tapping keys to ensure that key input is registered.
Factory default settings: 0.0 seconds
Disable Auto Key Repeat
This is used to disable key repeat.
Factory default settings: Disable
Key repeat causes a setting to change continuously not only each time the key is tapped but while a key is tapped.
Time for Accepting Key Entry of Long Touch
Select a time when a long key touch is detected.
Factory default settings: 0.5 seconds
Double Tap Interval Setting
Select an interval when a double tap is detected.
Factory default settings: 0.5 seconds
Disabling of Bypass Printing
This setting is used to disable bypass printing (printing other jobs ahead of a job that has been stopped because the paper required for the job is not available in any of the trays).*
* This does not include cases where the paper ran out during the job.
Factory default settings: Disable
Priority of Print Jobs
Set the priority for each job and start printing from the job with the highest priority.
Factory default settings: All Low
Disabling of Covers/Inserts Mode
Disables the use of the covers and inserts function.
Disabling Recent Jobs
Prohibit the use of [Recent Jobs].
Factory default settings: Disable
Initial Original Count Setting
Specifies whether or not "Original Count" in Others is enabled for each function.
Copy
- Copy
Image Send
- Scan to
- Internet Fax
- Fax
- Data Entry
Document Filing
- Scan to Local Drive
Factory default settings: All Invalid
Preview Setting
Received Data Image Check Setting
Select whether or not a preview of received faxes and Internet faxes is shown. This is displayed when a facsimile expansion kit or Internet fax expansion kit is installed.
Factory default settings: Disable
Received Data Image Check Setting:
• Fax/I-Fax Reception Data:
Select whether the default display format of the received fax/I-Fax list screen is list or thumbnails.
Factory default settings: Thumbnail
- File Retrieve of Main Folder/Quick File Folder:
Select whether the default display format of the document filing main folder and temporary folder screens is list or thumbnails.
Factory default settings: List
- File Retrieve of Custom Folder:
Select whether the default display format of the document filing custom folder screen is list or thumbnails.
Factory default settings: List
- File Retrieve of Direct Print:
Select whether the default state of the folder screen for direct print shows the folders as a list or as thumbnails.
Factory default settings: List
Remote Operation Settings
Configure settings required for remote operation of the machine from a PC connected to the same network.
Remote Software Operation
• Operational Authority:
This is used when remote software is used to operate the machine remotely.
• View Password Entry Screen:
When operating the machine by remote control using the remote software, the password entry screen will appear on both the computer and the machine, or on only the computer.
Factory default settings: Operational Authority: Prohibited, View Password Entry Screen: Display in Both PC and MFP
Operation from Specified PC
• Operational Authority:
This is used to allow remote operation of the machine using the specified PC.
• View Password Entry Screen:
When operating the machine by remote control using the remote software, the password entry screen will appear on both the computer and the machine, or on only the computer.
Factory default settings: Operational Authority: Prohibited, View Password Entry Screen: Display in Both PC and MFP
Operation by User who Has Password
• Operational Authority: This is used to allow a user who has a password to operate the machine remotely. For information on the password, consult your service technician. • View Password Entry Screen: When operating the machine by remote control using the remote software, the password entry screen will appear on both the computer and the machine, or on only the computer.
Factory default settings: Operational Authority: Prohibited, View Password Entry Screen: Display in Both PC and MFP
Data List
Set whether to print the data list with 1-sided print or 2-sided print.
Factory default settings: 1-sided print
Tandem Connection Setting
When two machines are used as network printers using TCP/IP protocol, use this setting to configure the port number and IP address of the machine used as the tandem secondary unit.
Factory default settings: Port Number:50001
Disabling of Primary Unit Mode
To prohibit tandem transmission, enable this setting. (Normally this setting is not necessary.)
Factory default settings: Disable
Disabling of Secondary Unit Mode
To prohibit tandem reception, enable this setting. (Normally this setting is not necessary.)
Factory default settings: Disable

To use the tandem function when user authentication is enabled, the same login name and password must be used on both the primary unit and secondary unit. If the same login name and password are not used, the page count may not be added to the appropriate user count or only the primary unit print.
Use the same port number as long as it does not cause any inconvenience.
Easy Mode Settings
Set the items that can be selected in Easy Copy and other Easy modes.
The items appear will appear in order on the screen starting from the item that is set in No. 1.
Items that can be set in Easy Copy
Paper Select, 2-Sided Copy, Copy Ratio Staple / Punch, Colour Mode, Original, Exposure, N-Up, Card Shot Job Build, Blank Page Skip, Dual Page Copy
Factory default settings: No.1:Paper Select, No.2:2-Sided Copy, No.3:Copy Ratio, No.4:Staple / Punch, Staple (For models without punch function), No.5:Colour Mode, No.6:Image Orientation, No.7:Exposure, No.8:N-Up
Items that can be set in Easy Scan
Address Book, History, Global Address Search, Local Drive/USB, Original, Resolution, File Format, Blank Page Skip, and Card Shot. Job Build, Dual Page Scan, File Name, Mobile Address Book
Factory default settings: No.1: Address Book, No.2: History, No.3: Global Address Search, No.4: Local Drive/USB, No.5: Original, No.6: Resolution, No.7: File Format, No.8: Blank Page Skip
Items that can be set in Easy Fax
Address Book, History, Direct Entry, Original, Exposure, and Resolution. Sending Line, Job Build, Mobile Address Book
Factory default settings: No.1: Address Book, No.2: History, No.3: Direct Entry, No.4: None, No.5: Original, No.6: Exposure, No.7: Resolution, No.8: Sending Line

The items that can be set vary depending on the peripheral devices that are installed.
Favourite Key Setting
Set the information that appears when favourite keys are tapped in normal mode.
Click the Copy, Scan, Internet Fax, Fax, and Data Entry tabs to configure settings for the favourite key screens shown in each of the normal modes.
Favorite Key Number
Sets the favourite key number.
The items will appear in order on the screen starting from the item that is set in No. 1.
Key Name
Enter a maximum of 20 characters for the favourite key name.
Function Menu
To set functions such as "Other Functions", select the functions from the pull-down menu.
Job Programs
To set a program, select one of the preset programs from the program list.
Not Display
You can hide a set key in the favourite key screen.
Mode Key Display Setting
Configure settings for the display of mode keys at the top of the screen.
Modes to Display
Select the mode keys that you want to display.
Factory default setting: Easy Copy: Enabled, Copy: Disabled, Easy Scan: Enabled, Easy Fax: Enabled, Image Send: Disabled, Document Filing: Disabled, Sharp OS: Enabled (On the BP-50C26/BP-50C31/BP-50C36/BP-50C45/BP-50C55/BP-50C65/BP-55C26, the application integration module or the application communication module is required.)
Display Mode Keys on Home
You can enable display of the mode keys in the home screen as well.
Factory default settings: Enable
Keyboard Settings
Default Keyboard Setting
Configure settings for the keyboard used for entry on the text.
Keyboard Select
Change the key layout and display according to the set language.
Factory default settings: Varies depending on country and region
Set Keyboard Priority
When an external keyboard is connected, set whether the external keyboard or the keyboard shown on the touch panel (soft keyboard) is given priority.
Factory default settings: Soft Keyboard
Soft Keyboard Template Setting
Register a text that you frequently use when entering an address or domain name in advance.
Custom Links
You can display registered web addresses in the display field of the setting menu.
By clicking on a custom link, you can jump to the web site of the registered address.
Device Control
Various devices mounted on the machine can be set.
Default Settings
Original Size Detector Setting
One of the 8 groups of standard original sizes shown below can be selected for detection by the original size detection function.
| Selections | Detectable original sizes | |
| Document Glass Document feeder tray (automatic document feeder) | ||
| AB-1 A3, A4, | A4R, A5, B4, B5, B5R A3, A4, A4R, A5, A5R, A6R | *, B4, B5, B5R, 11"x17", 8-1/2"x14", 8-1/2"x11" |
| AB-2 | A3, A4, A4R, A5, B5, B5R, 216 mm x 330 mm (8-1/2" x 13") | A3, A4, A4R, A5, A5R, A6R*, B4, B5, B5R, 11" x 17", 8-1/2" x 11", 216 mm x 330 mm (8-1/2"x13") |
| AB-3 | A4, A4R, A5, B4, 8K, 16K, 16KR | A3, A4, A4R, A5, A5R, A6R*, B4, 11" x 17", 8-1/2" x 11", 216 mm x 330 mm (8-1/2" x 13"), 8K, 16K, 16KR |
| AB-4 | 216 mm x 340 mm (8-1/2" x 13-2/5"), A3, A4, A4R, A5, B5, B5R | A3, A4, A4R, A5, A5R, A6R*, B4, B5, B5R, 11"x17", 8-1/2"x11", 216mm x 340mm (8-1/2" x 13-2/5") |
| AB-5 | 216 mm x 343 mm (8-1/2" x 13-1/2"), A3, A4, A4R, A5, B5, B5R | A3, A4, A4R, A5, A5R, A6R*, B4, B5, B5R, 11" x 17", 8-1/2" x 11", 216 mm x 343 mm (8-1/2" x 13-1/2") |
| Inch-1 | 11" x 17", 8-1/2" x 14", 8-1/2" x 11", 8-1/2" x 11"R, 5-1/2" x 8-1/2" | 11"x17", 8-1/2"x14", 8-1/2"x11", 8-1/2"x11"R, 5-1/2"x8-1/2", 5-1/2"x8-1/2"R, A3, A4 |
| Inch-2 11" x 17", | 216 mm x 330 mm (8-1/2" x 13"), 8-1/2" x 11", 8-1/2" x 11"R, 5-1/2" x 8-1/2" | 11"x17", 216 mm x 330 mm (8-1/2"x13"), 8-1/2"x11", 8-1/2"x11"R, 5-1/2"x8-1/2", 5-1/2"x8-1/2"R, A3, A4 |
| Inch-3 11"x17", | 216 mm x 340 mm (8-1/2" x 13-2/5"), 8-1/2"x11", 8-1/2"x11"R, 5-1/2"x8-1/2" | 11"x17", 216 mmx340 mm (8-1/2" x 13-2/5), 8-1/2"x11", 8-1/2"x11"R, 5-1/2"x8-1/2", 5-1/2" x 8-1/2"R, A3, A4 |
* Can be used with BP-55C26/BP-70C31/BP-70C36/BP-70C45/BP-70C55/BP-70C65 Factory default settings: AB-1
Cancel Detection at Document Glass
Original size detection on the document glass can be disabled. When this is done, all originals placed on the document glass are treated as special size originals.
Factory default settings: Disable
Original Feeding Mode
The following original feeding modes can be set to operate by default in copy, image send, and scan to local drive.
When a mode is frequently used, this saves you from having to select the mode in another mode each time you need to use it.
- Mixed Size Doc. Same Width
- Mixed Size Doc. Different Width
- Slow Scan Mode*
- Blank Page Skip
If you select Skip blank paper, select [Blank Page Skip] or [Skip Blank and Back Shadow].
* Excluding fax mode and Internet fax mode.
Factory default settings: None
Display Blank Page Skip Confirmation Message
Set whether to display a message when a blank page is detected by the automatic document feeder.
Factory default settings: Enable
Actions When Maximum Number of Sheets that can be Stapled is Reached
Set whether to display a message to select a remedy when the maximum number of staples is reached.
Factory default settings: Stop the Job and Display Confirmation Message
Double Feed Detection Setting
This setting is available when using the BP-70C31/BP-70C36/BP-70C45/BP-70C55/BP-70C65 and the Double feed detection kit is installed.
If an original overlaps with another original and you try to load it at the same time, the original will be considered misfed and loading will be stopped.
Factory default settings: Enable
Automatic Saddle Stitch
When the bookbinding function is set, the saddle stitch staple setting is automatically enabled.
Factory default settings: Enable
Saddle Fold/Stitch Position Adjust
Adjust the position of the folds and staples when saddle stitching.
Factory default settings: All 0 mm
Paper Type for Auto Paper Selection
The paper types* that the Auto Paper Selection function will select can be specified. Select one of the following settings:
- Plain 1
- Plain 2
- Plain and Recycle Paper
- Recycled
The Auto Paper Selection function will not select any paper types other than the paper types specified with this setting.
* The paper type set for each paper tray by selecting [System Settings] in "Settings" → [Paper Tray Settings].
Factory default settings: Plain1, Plain2
Plain Paper Compatibility Settings
Set the basis weight of plain paper that is normally used.
Select from Plain1 and Plain2.
The weight of Plain Paper 1 is 60 to 89 g/m² (16 to 24 lbs bond). The weight of Plain Paper 2 is 90 to 105 g/m² (24 to 28 lbs bond).
Factory default settings: Plain1
Detect Standard in Auto Colour Mode
When the colour mode is set to auto in copy mode, the discrimination point for detecting whether originals are colour or black and white can be set to one of 5 levels. When set to [Closer to B/W], the originals are easier to recognize as black and white. When set to [Closer colour], the originals are easier to recognize as colour.
Factory default settings: 3 (Normal)
Total Setting for Finish
Select the finish setting. Set whether finishing positions are specified on the specified paper or on the original.
Factory default settings: Specify Finishing Position Based on Paper Selected.
Disabling of Duplex
This is used to disable 2-sided printing, such as when the duplex module malfunctions.
Factory default settings: Disable
Disabling of Offset
Disable offset output.
Factory default settings: Disable
Disabling of Stapler
This setting is used to prohibit the use of staple, such as when the staple of finisher or saddle finisher malfunctions.
Factory default settings: Disable
Disabling of Punch
This setting is used to prohibit the use of punch, such as when the punch module of finisher or saddle finisher malfunctions.
Disabling of Colour Mode
(Normally this setting is not necessary.)
When a colour-related problem has occurred and printing is not possible, the use of colour mode can be temporarily prohibited. Black & white printing will still be allowed.
Factory default settings: Disable

This function is only for use as an emergency measure. Once this setting is enabled, only a service technician can cancel the setting.
Contact your dealer or the nearest authorised service representative as soon as possible and have a service technician cancel the settings and resolve the problem.
Disabling of Document Feeder
Use this setting to prohibit the use of the automatic document feeder, such as when the feeder malfunctions. (When the setting is enabled, scanning is still possible using the document glass.)
Factory default settings: Disable
Disabling of Large Capacity Cassette
This setting is used to prohibit the use of the large capacity tray, such as when it malfunctions.
Factory default settings: Disable
Disabling of Optional Paper Drawer
This setting is used to disable the optional paper drawer, such as when it malfunctions.
Factory default settings: Disable
Disabling of Tray Settings
This setting is used to prohibit tray settings (except for the bypass tray).
Factory default settings: Disable
Disabling of Finisher
This setting is used to prohibit the use of finisher or saddle finisher, such as when it malfunctions.
Factory default settings: Disable
Disabling of Folding Unit
It is used when the use of the paper folding unit is prohibited or when it breaks down.
Factory default settings: Disable
Status Indicator Setting
Information Indicator Setting
Set the operation of the information indicator. For each setting, see the following "INFORMATION INDICATOR (page 1-8)".
Factory default settings: Pattern 1
Data Indicator Setting
- Status Indicator will blink if data is received. Set whether to blink the information lamp when there is received fax data. Factory default settings: Enable
- Prioritize the indicator display of received data over the error indicator display. If there is received fax data, give priority to lighting the error display. Factory default settings: Disable
Error Light Setting
Sets the operation of the error lamp. For each setting, see the following "INFORMATION INDICATOR (page 1-8)".
Factory default settings: Light & Blink
Use Communication Indicator
Set whether to use the information lamp. Even if this setting is disabled, faxes will be received and errors will be lit / blinked.
Factory default settings: Enable
Document Feeder Indicator Setting
(BP-55C26/BP-70C31/BP-70C36/BP-70C45/BP-70C55/BP-70C65)
Use Original Detection Light for Document Feeder
Set whether to use the document set lamp on the automatic document feeder.
Factory default settings: Enable
Use Preventive Light to Indicate Original Left Behind
Set whether to use the document removal prevention lamp on the automatic document feeder.
Factory default settings: Enable
Machine Identification Settings
Enter a name or code to identify the machine.
Clock Adjust
Use this to set the date and time in the machine's built-in clock.
| Item Description | |
| Specify Time Zone | If your region is ahead of GMT (Greenwich Mean Time), select [+]. If your region is behind GMT, select [-]. Next, specify the time difference between your region and GMT in hours and minutes. (Example: If your region is Japan, + 9 hours 00 minutes.) |
| Date&Time Settings Select and set | the year, month, day, hour, and minute. |
Daylight Saving Time Setting
Enable daylight saving time.
| Item Description | |
| Daylight Saving Time Setting | Select whether or not the Daylight Saving Time Setting is enabled. If disabled, the following settings will not be possible.Factory default settings: In United Kingdom, Europe, and Australia: Enabled, Others: Disabled |
| Select Setting Type | Specify whether the starting and ending day of daylight saving time are to be set using the day of the week or the date. |
| Start Time | Set the starting time of daylight saving time. If you selected "Day of the Week" in "Select Setting Type", set the starting week of daylight saving time and then the starting day. If you selected "Date" in "Select Setting Type", set the starting date. Set the hour and minute and the UTC (Coordinated Universal Time) setting. |
| Completing Time | Set the ending time of daylight saving time in the same way as you set the starting time. |
| Adjustment Time Set the time to be | adjusted when daylight saving time begins. |
| Area | Standard time → Daylight saving time | Daylight saving time → Standard time |
| Europe* | Last Sunday in March, 1:00 to 2:00 AM | Last Sunday in October, 1:00 to 0:00 AM |
| Australia, New Zealand | Last Sunday in October, 2:00 to 3:00 AM | Last Sunday in March 3:00 to 2:00 AM |
| Other countries or regions | Select the [Daylight Saving Time Setting] checkbox so that a checkmark ☑ appears. The clock setting is configured to normal time plus one hour. When the ☑ is selected, clock returns to normal time. | |
Date Format
The format used to print the date on lists and other output can be changed.
| Item Description | |
| Current Setting | The current time appears in the format set in Date Format. |
| Format | Set the order of display of the year, month, and day (YYYY/MM/DD).Factory default settings: DD/MM/YYYY |
| Separator Select one of three symbols or a blank space for the separator used in the date.Factory default settings: / | |
| Day-Name Position | Select whether the day name appears before or after the date.Factory default settings: Varies depending on country and region |
| Time Display Select 12-hour format or 24-hour format for the time.• 24-Hour Display: 00:00 to 24:00• 12-Hour Display: 00:00 AM to 11:59 AM/00:00 PM to 11:59 PMFactory default settings: 24 Hour | |
Enable/Disable Settings
The following settings enable or disable certain functions.
The prohibited setting items in the settings of each function such as copy settings and the items in this prohibited setting are linked.
Authentication Settings
Disable Home Edit Mode when in Device Account Mode
Disable Home Edit Mode when in Device Account Mode.
Factory default settings: Disable
Disabling of Printing by Invalid User
Printing by users whose information is not stored in the machine, such as printing without entering valid user information in the printer driver or printing of a file on an FTP server in Setting mode (Web version), can be prohibited.
Factory default settings: Disable
Copy Settings
Disable Copy in Different Size/Direction
Copying is prohibited when the orientation of the copy paper and the original are different, or when the optimum size copy paper is not loaded.
Factory default settings: Disable

It is valid when "Rotation Copy Setting (page 9-60)" is cancelled.
Disabling of Registration/Deletion of Program
This is used to prohibit the deletion and changing of copy settings stored in job programs.
Factory default settings: Disable
Disabling of Bypass-Tray in Duplex Copy
Disables the use of the bypass tray when making 2-sided copies.
The bypass tray is often used to feed label sheets, transparency film, and other special media for which 2-sided copying is prohibited. If a sheet of one of these special media enters the reversing unit, a misfeed or damage to the unit may result. If special media for which 2-sided copying is prohibited is often used, it is recommended that you enable this setting.
Factory default settings: Disable
Disabling of Auto Paper Selection
Disables the Auto Paper Selection function.
When this setting is enabled, automatic selection of paper that is the same size as the original on the document glass or in the automatic document feeder does not take place.
Factory default settings: Disable
Disabling Registration of Custom Image
Disables storage of a custom image.
Factory default settings: Disable
Disabling sending while copying
Disables the Image Send function during copy.
Factory default settings: Disable
Printer Settings
Prohibit Notice Page Printing
Disables printing a notice page.
Factory default settings: Enable
Prohibit Test Page Printing
Disables printing the test page.
When this setting is enabled, [Status] → [Data List] → [List for User] → [Printer Test Page] in "Settings" cannot be used to print test pages.
Factory default settings: Disable
Exclude Bypass-Tray from Auto Paper Select
When [Auto] is selected for paper type selection, the bypass tray is excluded from the trays that can be selected. This is recommended when special paper is often placed in the bypass tray.
Factory default settings: Disable
Disabling of USB Memory Direct Print
Disables the function for directly printing a file in a USB memory device.
Factory default settings: Disable
Disabling of Network Folder Direct Print
Disables the direct printing from a network folder.
Factory default settings: Disable
Disabling sending while printing
Disables the Image Send function during printing.
Factory default settings: Disable
Disable Blank Page Print
Disables printing a blank page.
Factory default settings: Disable
Image Send Settings
Disable Switching of Display Order
Disables a change of display sequence (search number order, ascending, descending) in the address book and others.
If set, the display is not sorted even when you tap the tab on the address book screen.
The currently selected display order will be the order that is used after the setting is selected.
Factory default settings: Disable
Disable Fax Broadcasting
Disables the facsimile broadcasting.
Factory default settings: Disable
Disable Scan Function
PC Scan
Specify this to disable remote PC scanning.
Factory default settings: Disable
Disable Storing to External Memory Device
Set this when you want to prohibit data saving to an external memory such as a USB memory.
Factory default settings: Disable
Disable Registering Destination from Operation Panel
Disables address control from the machine.
Configure the setting for each of the following items:
- Group (Direct Entry)
- Group (Address Book)
- Contacts
Select All: Selects all items.
Clear Checked: Clears all selections.
Factory default settings: All Invalid
Settings to Disable Registration
Disable Registering Destination on Web Page
Disables storing the destination from Setting mode (Web version).
Configure the setting for each of the following items:
- Group (Direct Entry) • Group (Address Book)
- Contacts
Select All: Selects all items.
Clear Checked: Clears all selections.
Factory default settings: All Invalid
Disable Registration/Deletion of All Program Items
Disables the use of address book when a program is stored.
Factory default settings: Disable
Disable Registration of Memory Box
Disables all types of memory box registration.
Configure the setting for each of the following items:
Polling Memory, Confidential, Relay Broadcast (Direct Entry), Relay Broadcast (Address Book)
Factory default settings: All Invalid
Disable Destination Registration Using Global Address Search
This disables address control from the global address search.
Configure the setting for each of the following items:
E-mail, Internet Fax, Fax
Factory default settings: All Invalid
Disable Registration Using Network Scanner Tool
This disables address control from the Network Scanner Tool Lite.
Factory default settings: Disable
Disabling of Forwarding via Network
This prohibits inbound routing.
Factory default settings: Disable
Settings to Disable Transmission
These settings are used to disable the following transmission operations.
Disabling Sending History
This disables the use of [Sending History].
Factory default settings: Disable
Disable Selection from Address Book
Disables the selection of destinations from the address book.
Configure the setting for each of the following items:
• E-mail - FTP - Internet Fax (Including Direct SMTP) - Fax - Desktop - Network Folder
Select All: Select all items.
Clear Checked: Deselect all items.
Factory default settings: All Invalid
Disable Direct Entry
Disables the direct entry of destination address and others.
Configure the setting for each of the following items:
• E-mail - Network Folder - Internet Fax (Including Direct SMTP) - Fax
Select All: Selects all items.
Clear Checked: Clears all selections.
Factory default settings: All Invalid
Disable PC-I-Fax Transmission
This prohibits PC-I-Fax transmission.
Factory default settings: Disable
Disable PC-Fax Transmission
This prohibits PC-Fax transmission.
Factory default settings: Disable
Disabling of Find My Address
This prohibits Find My Address.
Factory default settings: Disable
Disabling of OCR
Prohibits the use of the OCR function when scanning.
Factory default settings: Disable
Document Filing Settings
Disable Text/Stamp functions for Reprinting
When a stored file is retrieved and printed, the printing functions are disabled.
This function prevents an inconsistency of the date between the original data and output data and others.
Factory default settings: Disable
Batch Print Settings
Set whether or not the [All Users] key and the [User Unknown] key are prohibited in the user name selection screen when printing all files, whether files are sorted by date in newest or oldest order, and whether file names are sorted in ascending or descending order.
Factory default settings: Disable

The Enable/Disable Settings control the same parameters as the enable/disable settings in other settings. The settings are linked together (changing one setting changes the other).
Operation Settings
Cancel Auto Clear Timer
Disables the Auto Clear mode.
Factory default settings: Disable
Disabling of Job Priority Operation
Disables bypass printing (printing other jobs ahead of a job that has been stopped because the paper required for the job is not in any of the trays * ).
* This option is ignored when paper runs out during the job.
Factory default settings: Disable
Disable Auto Key Repeat
Disables the Auto Key Repeat function.
Factory default settings: Disable
Disabling of Covers/Inserts Mode
Disables the use of the covers and inserts function.
Factory default settings: Disable
Disabling Recent Jobs
Prohibit the use of [Recent Jobs].
Factory default settings: Disable
Device Control
Disabling of Document Feeder
Use this setting to prohibit the use of the automatic document feeder, such as when the feeder malfunctions. (When the setting is enabled, scanning is still possible using the document glass.)
Factory default settings: Disable
Disabling of Duplex
This is used to disable 2-sided printing, such as when the duplex module malfunctions.
Factory default settings: Disable
Disabling of Large Capacity Cassette
This setting is used to prohibit the use of the large capacity tray, such as when it malfunctions.
Factory default settings: Disable
Disabling of Optional Paper Drawer
This setting is used to disable the optional paper drawer, such as when it malfunctions.
Factory default settings: Disable
Disabling of Tray Settings
This setting is used to prohibit tray settings (except for the bypass tray).
Factory default settings: Disable
Disabling of Finisher
This setting is used to prohibit the use of finisher or saddle finisher, such as when it malfunctions.
Factory default settings: Disable
Disabling of Offset
Disable offset output.
Factory default settings: Disable
Disabling of Stapler
This setting is used to prohibit the use of staple, such as when the staple of finisher or saddle finisher malfunctions.
Factory default settings: Disable
Disabling of Punch
Disabling of Folding Unit.
Factory default settings: Disable
Disabling of Folding Unit
It is used when the use of the paper folding unit is prohibited or when it breaks down.
Factory default settings: Disable
Disabling of Colour Mode (When colour-related trouble occurs)
When a colour-related problem has occurred and printing is not possible, the use of colour mode can be temporarily prohibited. Black & white printing will still be allowed.
Factory default settings: Disable

This function is only for use as an emergency measure. Once this setting is enabled, only a service technician can cancel the setting. Contact your dealer or the nearest authorized service representative as soon as possible and have a service technician cancel the settings and resolve the problem.
Disabling of Primary Unit Mode
Disables the primary unit mode for tandem printing.
(Normally this setting is not necessary.)
Factory default settings: Disable
Disabling of Secondary Unit Mode
Disables the secondary unit mode for tandem printing.
(Normally this setting is not necessary.)
Factory default settings: Disable
Security Settings
This setting is used to set the security enhancement functions.
Hidden Pattern Print Setting
Disables the direct entry of background pattern and others.
Factory default settings: Disable
Product Key/Application Number Input
Enter the product key and application number to use the extensions below.
Serial Number
Font Kit for Barcode
PS3 Expansion Kit
Internet Fax Expansion Kit
E-mail Alert and Status
Application Integration Module
Application Communication Module
External Account Module
Direct Print Expansion Kit
OCR Expansion Kit
Enhanced Compression Kit
Virus Detection Kit
Enter the product key and application number for the above functions.

Depending on the activation status of the extended function of the machine, the items displayed will change. For the product key to be entered, contact your dealer.
Sound Settings
Configure machine notification sounds and their volume.
Beep Sound Settings (Common)
Keys Touch Sound
Controls the key touch sound level, or turns the sound off.
Factory default settings: Middle
Beep of Invalid Input
Control the volume of the sound, or turn the sound off at an invalid setting, such as when a number that cannot be specified is entered.
Factory default settings: Middle
Reference Tone
This turns the sound on when changing the copy ratio or exposure, and the setting reaches the standard value (copy ratio 100%, exposure 3). Control the reference tone sound level, or turns the sound off.
Factory default settings: No Sound
Copy Complete Sound
Control the copy completed notification sound level, or turns the sound off.
Factory default settings: No Sound
Scan Complete Sound (Image Send)
Control the fax or scanner scanning completed notification sound level, or turns the sound off.
Factory default settings: Middle
Powering Off Sound
Control the machine power off notification sound level, or turns the sound off.
Factory default settings: Middle
Caution Sound Settings
Set whether to play a notification sound when the machine is in the following status.
Paper Empty, No Original, Jam, Toner Empty (Black), Toner Empty (Colour), Waste Toner Full, Output Tray Full, Stapler Empty, Maximum Number of Sheets that can be Stapled is Reached
Factory default settings: Warning Beep: Medium, Paper Empty: Enable, Invalid except Paper Empty
Beep Sound Settings (Image Send)
Adjust the sound volume of functions used in fax and scan operations.

You can check the setting sound in the setting mode of this unit.
Fax
Set the sound for the Speaker, Ringer Volume, Line Monitor, Fax Receive Complete Signal, Fax Send Complete Signal, and Fax Communication Error Signal.
Factory default settings: Speaker: Speaker Volume Setting: 5, Ringer Volume: Speaker Volume Setting: 3, Line Monitor: Speaker Volume Setting: None, Fax Receive Complete Signal: Speaker Volume Setting: 3, Tone Pattern: Pattern 3, Transmission Complete Sound Time Setting: 3.0 sec, Fax Send Complete Signal: Speaker Volume Setting: 3, Tone Pattern: Pattern 3, Transmission Complete Sound Time Setting: 3.0 sec, Fax Communication Error Signal: Speaker Volume Setting: 3, Tone Pattern: Pattern 3, Transmission Complete Sound Time Setting: Every 0.3 seconds
Internet Fax
Adjust the Fax Communication Error Signal and Fax Receive Complete Signal speaker volume settings. Factory default settings: Communication Error Signal: Middle, Fax Receive Complete Signal: Middle
Network Settings
Quick Settings
Select the minimum required settings for the machine connection to the network.
Wireless Settings

When using BP-50C26/BP-50C31/BP-50C36/BP-50C45/BP-50C55/BP-50C65/BP-55C26, it is displayed when the wireless connection adapter is installed.
Connection Type
Use this setting to switch between [Wired Only], [Wired+Wireless (Access Point Mode)] or [Wireless (Infrastructure Mode)].
Factory default settings: Wired + wireless (access point)
Keep Wireless Access Point activated
This can be set only when "Connection Type" is "Wired+Wireless (Access Point Mode)".
If enabled, the machine can normally use a wireless LAN network.
If disabled, the NFC card reader must be touched to the mobile device or the [Easy Connect (QR code)] key must be tapped in the home screen to enable wireless LAN.
When one of the conditions below occurs, the wireless LAN connection is automatically cancelled.
- When there is no connection to the access point for a certain period of time.
Factory default settings: Disable
When "Wireless (Infrastructure Mode)" is selected in "Connection Type"
Access Point Search
Click this to search access points. When the search results are displayed, select the access point to use and click [OK]. [SSID], [Security Type], and [Encry.] are automatically applied.
SSID
Enter the SSID.
Security Type
Select a security type.
Factory default settings: No Sound
Encry.
Select an encryption type.
Factory default settings: No Sound
Security Key
Enter a security key.
| Security Type Security | Key |
| None | WEP64bit: 5 characters or 10-digit hexadecimal number |
| WEP | WEP128bit: 13 characters or 26-digit hexadecimal number |
| WPA/WPA2-mixed Personal | WPA/WPA2/WPA3: 8 to 63 characters or 64-digit hexadecimal number |
| WPA/WPA2-mixed Enterprise | |
| WPA2 Personal | |
| WPA2 Enterprise | |
| WPA2/WPA3-mixed Personal | |
| WPA3 Personal | |
| WPA2/WPA3-mixed Enterprise | |
| WPA3 Enterprise |
Show Security Key
If it is set to ON, the security key appears.
Factory default settings: No Sound
IPv4 Settings
When using the machine on a TCP/IP (IPv4) network, use this setting to configure the IP address of the machine. The settings are shown below.
DHCP
Use this setting to have the IP address obtained automatically using DHCP (Dynamic Host Configuration Protocol)/BOOTP (Bootstrap Protocol). When this setting is enabled, it is not necessary to manually enter an IP address.
Factory default settings: Enable

If DHCP/BOOTP is used, the IP address assigned to the machine may change automatically. If the IP address changes, printing will not be possible.
IPv4 Address
Enter the IP address of the machine.
Subnet Mask
Enter the IP subnet mask.
Default Gateway
Enter the default gateway address.
Network Name Settings
Device Name
Enter a device name.
Domain Name
Enter the domain name.
Factory default settings: Sharp-Printer
DNS Settings
Primary Server
Enter the IP address of primary DNS server.
Secondary Server
Enter the IP address of secondary DNS server.
Domain Name
Enter the domain name where the selected DNS server exists.
SMTP Settings
Primary Server
Enter the IP address or the host name of the primary SMTP server.
Sender Name
Enter the sender name.
Sender Address
If data transmission has failed, the undelivered e-mail may be returned from the server. Enter an e-mail address (a single address only) to receive such undelivered mails. Usually, enter the e-mail address of the system administrator.
Enable SSL/TLS
If selected, the SMTP-over-TLS encryption communication can be used by STARTTLS command.
This requires the server to support the STARTTLS command.
To allow SSL/TLS communication, set the "Port Number" to the same port number as the normal SMTP.
Factory default settings: Disable
SMTP Authentication
If set, the SMTP server authentication is carried out.
Factory default settings: Disable
User Name
Enter the user name.
Password
Enter the password.
Change PIN Code/Password
To change the password, set √
Factory default settings: Disable
Connection Test
Tap the [Execute] button to test the connection to the SMTP server.
LDAP Settings
Name
Enter the address book name.
Default Address Setting
Enters the search defaults to search for a specific area of the LDAP directory information tree.
Example: o = ABC, ou = NY, cn = Everyone
Entries must be separated by semicolons or commas.
LDAP Server
Enter the IP address or host name of the LDAP server.
User Name
Enter the account name for LDAP setting.
Password
Enter the password.
Change PIN Code/Password
To change the password, set √
Authentication Type
Select the authentication server from the drop-down list.
Factory default settings: Anonymous
KDC Server
Enter the IP address or host name of the Kerberos authentication server.
Realm
Enter the Kerberos realm.
Enable SSL/TLS
If this is set, SSL/TLS encrypted communication is enabled.
Connection Test
Tap the [Execute] button to test the connection to the LDAP server.
Network Name Setting
Device Name
Enter a device name.
Domain Name
Enter the domain name.
Factory default settings: Sharp-Printer
Comment
Enter a comment.
Interface Settings
Mainly set items related to TCP/IP.
Connection Type
Switch between [Wired Only], [Wired+Wireless (Access Point Mode)], [Wireless (Infrastructure Mode)] or [Wired+Wireless (Wi-Fi Direct Mode)] according to the network connection status.
Factory default settings: Wired+Wireless (Access Point Mode)
Keep Wireless Access Point activated
This can be set only when "Connection Type" is "Wired+Wireless (Access Point Mode)".
If enabled, the machine can normally use a wireless LAN network.
If disabled, wireless LAN will be enabled when the NFC touchpoint area is touched on a mobile device or when the [Easy Connect Setup (QR code)] key is tapped on the home screen.
When one of the conditions below occurs, the wireless LAN connection is automatically cancelled.
- When there is no connection to the access point for a certain period of time.
Factory default settings: Disable
IPv4 Settings
When using the machine on a TCP/IP (IPv4) network, use this setting to configure the IP address of the machine. The settings are shown below.
DHCP
Use this setting to have the IP address obtained automatically using DHCP (Dynamic Host Configuration Protocol). When this setting is enabled, it is not necessary to manually enter an IP address.
Factory default settings: Enable

If DHCP/BOOTP is used, the IP address assigned to the machine may change automatically. If the IP address changes, printing will not be possible.
IPv4 Address
Enter the IP address of the machine.
Subnet Mask
Enter the IP subnet mask.
Default Gateway
Enter the default gateway address.
IPv6 Settings
When using the machine on a TCP/IP (IPv6) network, use this setting to configure the IP address of the machine.
IPv6
Enable this setting.
Factory default settings: Enable
DHCPv6
Use this setting to have the IP address obtained automatically using DHCP (Dynamic Host Configuration Protocol) v6. When this setting is enabled, it is not necessary to manually enter an IP address.
Factory default settings: Enable
Manual Address / Prefix Length
Enter the IP address and the prefix length (0 to 128) of the machine.
Factory default settings: 0
Default Gateway
Enter the default gateway.

If DHCPv6 is used, the IP address assigned to the machine may change automatically. If the IP address changes, printing will not be possible.
MTU Settings
Set the maximum data size that can be forwarded.
Factory default settings: 1500
Ping Command
Checks if the machine can communicate with the PC of the network.
Specify the IP address of the desired PC and tap the [Execute] key. A message indicating a response by the PC or not is displayed.
DNS Settings
IPv4 Settings
Primary Server
Enter the IP address of primary DNS server.
Secondary Server
Enter the IP address of secondary DNS server.
IPv6 Settings
Primary Server
Enter the IP address of primary DNS server.
Secondary Server
Enter the IP address of secondary DNS server.
Domain Name
Enter the domain name where the selected DNS server exists.
DNS Update
Set this option to use the dynamic updating of DNS server.
Factory default settings: Disable
IEEE802.1X Setting
IEEE802.1X can be used to authenticate a user to allow use of the machine.
IEEE802.1X protocol defines port-based authentication for both wired and wireless networks.
Use IEEE802.1X authentication to allow only authenticated devices to use the network, and protect against network abuse by third parties.
Depending on the Web page settings, connection to the machine may not be allowed, or the settings may not allow printing, scanning, or Setting mode (Web version) display. In this case, deselect this setting and change the Setting mode (Web version) settings.
IEEE802.1X Authentication / IEEE802.1X Authentication (Wired)
Set whether to use authentication using IEEE802.1X.
Factory default settings: Disable
EAP Authentication Method
Set the EAP authentication method in IEEE802.1X.
Factory default settings: EAP-TLS
EAP User Name
Enter the EAP user name when authenticating.
Password
Enter the EAP password for authentication.
Server Authentication
Set whether to use server authentication.
Factory default settings: Enable
EAP Timeout
Set the EAP timeout.
Factory default settings: 10 seconds
Number of EAP Retries
Set the number of times to re-access the EAP when communication fails.
Factory default settings: 3 Time(s)
Certificate Status
Shows the status of the certificate required for transmission using IEEE802.1X. To install a certificate, click [Install].
CA Certificate Status
Shows the status of the CA certificate required for transmission using IEEE802.1X. To install a certificate, click [Install].
Services Settings
Make settings for SMTP, Kerberos Authentication Settings, SNTP, mDNS, SNMP, and SMB.

When settings are changed, the changes will take effect after the machine is restarted. For details on restarting this machine, see "TURNING ON THE POWER (page 1-10)".
SMTP
SMTP Settings
Primary Server
Enter the IP address or the host name of the primary SMTP server.
Secondary Server
Enter the IP address or the host name of the secondary SMTP server.
Port Number
Enter a port number.
Factory default settings: 25
Timeout
Enter a timeout. This value is used for connection to the SMTP server and for data transmission according to the e-mail system specifications.
Factory default settings: 20 seconds
Sender Name
Enter the sender name.
Sender Address
Enter the sender's address
Enable SSL/TLS
If SSL is enabled, SMTP-over-TLS encrypted communication can be used via the STARTTLS command. This requires the server to support the STARTTLS command.
To allow SSL/TLS communication, set the "Port Number" to the same port number as normal SMTP.
Factory default settings: Disable
SMTP Authentication
Performs SMTP server authentication.
If you use Kerberos authentication, set the KDC server, port number, and realm on the Kerberos authentication settings page.
Factory default settings: Disable
User Name
Enter the user name.
Password
Enter the password.
To change the password, set [Change Password] to √
POP before SMTP
If set, you are authenticated to the POP server before using SMTP communication.
- POP3 Server: Enter the IP address or host name of the secondary SMTP server.
Factory default settings: Disable
- Port Number: Enter the POP3 port number for POP before SMTP communication. The default setting is port 110.
Factory default settings: 110
- POP Authentication: If √ is set, the authentication protocol (including APOP) is used for authentication to the POP3 server.
Factory default settings: Disable
- User Name: Enter the user name for POP before SMTP communication.
- Password: Enter the password required for POP before SMTP communication. To change the password, set [Change Password] to √.
- Enable SSL/TLS: If set to √, the POP over SSL/TLS communication or the POP over TLS communication by STLS command is enabled. This requires the server to support the POP over SSL/TLS communication or the STLS command. To allow SSL/TLS communication, set the "Port Number" to the POP over SSL communication port number. To allow POP over TLS communication, set the "Port Number" to the same port number as for the normal POP3 communication.
Factory default settings: Disable
Connection Test
Tap the [Execute] button to test the connection to the SMTP server.
Kerberos
Kerberos Authentication Settings
KDC Server
Enter the IP address or host name of the Kerberos authentication server.
Port Number
Enter the port number of the Kerberos authentication server.
Factory default settings: 88
Realm
Enter the Kerberos realm.
SNTP
SNTP Settings
SNTP
Set this option to use the SNTP protocol.
Factory default settings: Disable
SNTP Server
Enter the IP address or host name of the SNTP server.
Port Number
Enter a port number.
Factory default settings: 123
Timeout
Enter a timeout.
Factory default settings: 5 seconds
Synchronous Interval
Enter an interval to synchronize to the SNTP server.
Factory default settings: 6 Hour
Synchronize Upon Start
To establish synchronization during machine startup, set to √
Factory default settings: Disable
Synchronize Now
When tapped, the machine is synchronized with the SNTP server time.
mDNS
mDNS Settings
mDNS
Set this option to use the mDNS settings.
Factory default settings: Enable
Service Name
Enter a service name.
Domain Name
Display the domain name.
Highest Priority Service
Select a service you use with the priority.
Factory default settings: LPD
SNMP
SNMP v1 Settings
SNMP v1 Settings
Set this option to use the SNMPv1 settings.
Factory default settings: Enable
Access Method
Set an access method.
Factory default settings: Read-write Access
GET Community
Enter the GET community name to fetch the device information using SNMP.
Factory default settings: public
SET Community
Enter the SET community name required for SNMP setting.
Factory default settings: private
Change SET Community
To change the SET community, set √
Factory default settings: Disable
TRAP Community
Enter the community name to be used for the SNMP TRAP sent from the device.
Factory default settings: public
TRAP Target Address
Enter the IP address of the destination computer for SNMP TRAP communication.
SNMP v3 Settings
SNMP v3 Settings
Set this option to use the SNMPv3 settings.
Factory default settings: Disable
User Name
Enter the user name.
Authentication Key
Enter the authentication key.
Factory default settings: Algorithm: MD5
Privacy Key
Enter the privacy key.
Factory default settings: Algorithm
Context Name
Display the context name.
SMB
SMB Settings (Server)
Set the version of SMB protocol that is used for functions such as public folder/NAS.
Use this setting to connect to a device that cannot automatically change the SMB protocol version, or when there is a problem in the connection with another device due to different versions.
Set the version to SMBv1, SMBv2, or SMBv3.
Factory default settings: All Enabled
Use encrypted communication
When the checkbox is checked, encrypted communication is used when sending files from the connected terminal to the public folder/NAS of the machine.
Factory default settings: Disable
SMB Settings (Client)
Set the version of SMB protocol that is used for functions such as Scan to Network Folder.
Use this setting to connect to a device that cannot automatically change the SMB protocol version, or when there is a problem in the connection with another device due to different versions.
Set the version to SMBv1, SMBv2, or SMBv3.
Factory default settings: All Enabled
Print Port Settings
LPD
LPD Settings
LPD
Set this option to use LPD.
Factory default settings: Enable
Timeout
Enter a timeout.
Factory default settings: 90 seconds
Use Banner
Set this option to use the banner.
Factory default settings: Disable
RAW
Raw Print Settings
Raw Print
Set this option to use RAW printing.
Factory default settings: Enable
Port Number
Enter a port number.
Factory default settings: 9100
Timeout
Enter a timeout.
Factory default settings: 90 seconds
Use Bidirectional
To use bidirectional communication, set to √
Factory default settings: Disable
WSD
WSD Settings
WSD Print
Set this option to use WSD printing.
Factory default settings: Disable
Use Multicast Discovery
Set this option to use multicast discovery.
Factory default settings: Enable
External Print Services Settings
For AirPrint Settings, see the "AirPrint Guide".
Universal Print Settings
Universal Print
Sets whether the Universal Print service is used.
Factory default settings: Enable

Enabling this setting will automatically enable IPP INFRA on the Client Port in the Port Control.
Status
Displays the current status of the Universal Print service.
Printer Name
Set the print name for use with the machine's Universal Print service.
This setting is available when the machine is not registered for Universal Print service.
Register with Universal Print
This option is available when the Universal Print service is not yet registered.
Registration Code
You will see a code to register for the Universal Print service.
URL for code registration
Clicking on the URL will take you to a separate window where you can enter your code for registration.
Delete from Universal Print
This is used to unregister the machine from the Universal Print service.
LDAP Settings
The following explains the LDAP settings.
When you tap the [Store] key, the LDAP settings are updated with your entries.
The default address book is set to √
Add
To add a global address book, tap the Add key.
Delete
To delete the global address book, select the item and tap the [Delete] key.
Settings
| Setting item Settings | |
| Name Enter the address book name. | |
| Search Root | Enters the search defaults to search for a specific area of the LDAP directory information tree.Example: o = ABC, ou = NY, cn = EveryoneEntries must be separated from each other by semicolons or commas. |
| LDAP Server Enter the IP address or host name of the LDAP server. | |
| Server Type Select the Default or Custom from the service type list.Factory default settings: Default | |
| User Identity Attribute Set the user ID property.Factory default settings: uid | |
| Search Attribute Set the LDAP search property.Factory default settings: cn | |
| Obtain E-mail address from Set the e-mail address search.Factory default settings: mail | |
| Obtain Internet Fax address from Set the Internet Fax address search.Factory default settings: mail | |
| Obtain Fax number from Set the fax number search.Factory default settings: facsimile Telephone Number | |
| Public Key Search Sets the open key search.Factory default settings: userCertificate | |
| Pages Limit Group Set the Storing Page Limit Group Search.Factory default settings: pagelimit | |
| Authority Group Set the Storing Authority Group Search.Factory default settings: authority | |
| Favourite Operation Group | Set the Favourite Operation Group Search.Factory default settings: favourite |
| My Folder Set the My Folder Search. | |
| Card ID | Sets the card ID search.Factory default settings: cardid |
| Home Directory | Enter the path to your home directory.Factory default settings: homeDirectory |
| User Name | Enter the user name for authentication against your home directory path. |
| Password | Enter a maximum of 255 numeric digits for the password for home directory path authentication. |
| Custom Property 1-10 | Enter each custom property. |
| Port Number | Enter a port number.Factory default settings: 389 |
| Timeout | Enter a timeout.Factory default settings: 5 seconds |
| User Name | Enter the account name for LDAP setting.Factory default settings: Anonymous |
| Password Enter the password. | To change the password, set [Change Password] to √ |
| Authentication Type Select the authentication server from the drop-down list. | |
| Bind Prefix Set the Bind prefix. | Factory default settings: uid |
| Server Usage Set the server application. | Set the address book and user authentication. Factory default settings: All EnabledLPD |
| Applicable Destination Type | Select the applicable destination type from E-mail Address, Fax Number, and Internet Fax. Factory default settings: E-mail Address |
| Allow selection on operation panel. | Specify whether or not enable the global address to be selected on the operation panel of the machine. Factory default settings: Disable |
| To Be Used as Default | Specify whether or not to use the selected global address as default. Factory default settings: Disable |
| Authenticate a User in Global Address Search | Select whether or not authenticate a user when a global address is searched for. Factory default settings: Disable |
| Enable SSL/TLS Encrypted communication by SSL/TLS is performed. Factory default settings: Disable | |
| Connection Test | Tap the [Execute] button, and the connection test is executed and its result is displayed. |

When settings are changed, the changes will take effect after the machine is restarted. To restart the machine, see "TURNING ON THE POWER (page 1-10)".
Active Directory Settings
This section describes the items to be set in the Active Directory settings of the system settings among the settings to be made when using Active Directory on this machine.
Search Attribute:
Set search attributes.
Factory default settings: cn
Linkage with User Control Function
Pages Limit Group
Enter when setting the usage restriction group.
Factory default settings: pagelimit
Authority Group
Enter when setting the permission group.
Factory default settings: authority
Favourite Operation Group
Enter when setting the preferred operation group.
Factory default settings: favourite
My Folder
Enter when setting My Folder.
Factory default settings: myfolder
Device Registration Account
User Name
Enter the user name to use.
Password
Enter the password.
Public Folder / NAS Setting
Set each option to [Prohibited] if the storage is not used.
Factory default settings: Use of Storage: All Allow

When settings are changed, the changes will take effect after the machine is restarted. For details on restarting this machine, see "TURNING ON THE POWER (page 1-10)".
Proxy Setting
Access the network through a proxy server.
Settings
| Item Description | |
| Proxy Setting Access the network through a proxy server.Factory default settings: Disable | |
| Proxy Server Address Enter the proxy server address. | |
| User Name Enter a user name to access the proxy server. | |
| Password | Enter a password to allow access to the proxy server. |
| Port Number Enter the proxy server port number.Factory default settings:8080 | |
| Address without Using Proxy | Specify the exception address of the proxy used by the external linkage function or Sharp OSA.[Entry method]1) Can be set using a host name or an IP address.2) When using a host name, you can use a wildcard (*) at the beginning of the domain name.(Example: "*example.□□□" (equivalent to "example.□□□", "sub.example.□□□", "subexample.□□□", etc.)3) When using an IP address, you can use a wildcard (*) at the end of the address.(Example: "10*" (equivalent to 100.nnn.nnn.nnn to 109.nnn.nnn.nnn)If the Sharp OSA application using "HTML Browser 3.5" is set to an exception address, rule (3) cannot be used.4) You can use a separator (semicolon (;)) to enter multiple addresses.(Example: "99.99.99.99;example.□□□") |
Wireless Settings
Used to enable or disable the wireless LAN and show the status of wireless LAN.

When using BP-50C26/BP-50C31/BP-50C36/BP-50C45/BP-50C55/BP-50C65/BP-55C26, it is displayed when the wireless connection adapter is installed.
Connection Type
Switch between [Wired Only], [Wired+Wireless (Access Point Mode)], [Wireless (Infrastructure Mode)] or [Wired+Wireless (Wi-Fi Direct Mode)] according to the network connection status.
Factory default settings: Wired+Wireless (Access Point Mode)
Keep Wireless Access Point activated
This can be set only when "Connection Type" is "Wired+Wireless (Access Point Mode)".
If enabled, the machine can normally use a wireless LAN network.
If disabled, the NFC card reader must be touched to the mobile device or the [Easy Connect (QR code)] key must be tapped in the home screen to enable wireless LAN.
- When one of the conditions below occurs, the wireless LAN connection is automatically canceled.
- When there is no connection to the access point for a certain period of time.
Factory default settings: Disable
Current Setting
Shows settings, such as the SSID of a wireless LAN and security type. If the wireless LAN is disabled, "--" appears.
Current Wireless Status
This shows reception levels (Max. 100) of the wireless LAN and IP addresses.
Show Wireless Setting Screen
Click the [Setup] button.
In the Wireless Setting screen, you can configure the SSID of a wireless LAN, Security Type, Encry., and Security Key.
Initialize Wireless Settings
Click the [Initialize] button.
The settings for SSID, Security Type, Encry., and Security Key are initialized.
Wireless Setting screen (Access Point Mode)
If the [Setup] button is clicked while [Connection Type] is set to [Wired+Wireless (Access Point Mode)] or [Wired Only], the Wireless Settings (Access Point Mode) screen is displayed.
Configure the SSID of a wireless LAN, Security Type, Encry., and Security Key.
Clicking the [Submit] button stores the settings.
Frequency Band
Set the frequency band used for a wireless LAN.
Factory default settings: No Sound
SSID
Enter the SSID.
Security Type
Select a security type.
Factory default settings: WPA/WPA2-mixed Personal
Encry.
Select an encryption type.
Factory default settings: AES
Security Key
Enter a security key.
| Security Type Security | Key |
| WEP | WEP64bit: 5 characters or 10-digit hexadecimal number |
| WPA/WPA2-mixed Personal | WEP128bit: 13 characters or 26-digit hexadecimal number |
| WPA2 Personal | WPA/WPA2/WPA3: 8 to 63 characters or 64-digit hexadecimal number |
| WPA2/WPA3-mixed Personal | |
| WPA3 Personal | |
| WPA2/WPA3-mixed Enterprise | |
| WPA3 Enterprise |
Show Security Key
When enabled, the security key will be displayed.
Factory default settings: Disable
Device IP Address
Enter the IP address.
Channel to Be Used
Select the channel to be used in wireless LAN.
Factory default settings: When the frequency band is 2.4GHz: 1, when the frequency band is 5GHz: 36
IP Address Distribution Range Setting
Configure the range to be used the IP address.
Factory default settings: Start IP Address:11, End IP Address:15
Lease Period
Set the validity period of the IP address assigned by DHCP.
Factory default settings: 15 minutes
Wireless setting screen (infrastructure mode)
If you click the [Setup] button when [Switch Connection Type] is set to [Wireless (Infrastructure Mode)], the Infrastructure Mode Wireless Setting screen is displayed.
Configure the SSID of a wireless LAN, Security Type, Encry., and Security Key. Clicking the [Submit] button stores the settings.
Access Point Search
Click this to search access points. When the search results are displayed, select the access point to use and click [OK]. [SSID], [Security Type], and [Encry.] are automatically applied.
WPS: Push Button Method
Use WPS to connect to the access point. Put the signal on standby at the access point, then click the button to connect.
WPS: PIN Code Method
Enter the access point PIN code to connect.
SSID
Enter the SSID.
Security Type
Select a security type.
Factory default settings: None
Encry.
Select an encryption type.
Factory default settings: None
Security Key
Enter a security key.
| Security Type Security | Key |
| WEP | WEP64bit: 5 characters or 10-digit hexadecimal number |
| WPA/WPA2-mixed Personal | WEP128bit: 13 characters or 26-digit hexadecimal number |
| WPA/WPA2-mixed Enterprise | WPA/WPA2/WPA3: 8 to 63 characters or 64-digit hexadecimal number |
| WPA2 Personal | |
| WPA2 Enterprise | |
| WPA2/WPA3-mixed Personal | |
| WPA3 Personal | |
| WPA2/WPA3-mixed Enterprise | |
| WPA3 Enterprise |
Show Security Key
If it is set to ON, the security key appears.
Factory default settings: Disable
Easy Connection Setting
Set when using Easy Connection.
NFC
Set when connecting a mobile device to this unit using the NFC touch point area.
Factory default settings: Disable
NFC Signal
Switches the mode of the NFC outgoing signal.
Factory default settings: In United States and Europe: Mode2, others: Mode1
QR code
You can install the dedicated application on the mobile device in advance, scan the displayed QR code, send the connection settings to the mobile device, and register it.
Factory default settings: Enable
Destination
Set the connection destination to connect to and the connection destination to be registered in the QR code.
To connect to this machine, select [Connect with the machine]. The information required when connecting to this machine is registered in the application.
To select a connection destination other than this machine, select [Connect with the following access point].
When setting manually, obtain the network information of the connection destination in advance.
If you select [Connect with the following access point], make the following settings.
Factory default settings: Connect with the machine
Access Point Search
Click this to search access points. When the search results are displayed, select the access point to use and click [OK]. [SSID], [Security Type], and [Encry.] are automatically applied.
Frequency Band
Enter the name of the connection destination.
SSID
Enter the SSID.
Security Type
Select a security type.
Factory default settings: WPA2 Personal
Encryption
Select an encryption type.
Factory default settings: AES
Security Key
Enter a security key.
| Security Type Security Key | |
| WEP | WEP64bit: WEP64bit: 5 characters or 10-digit hexadecimal number |
| WPA/WPA2-mixed Personal | WEP128bit: 13 characters or 26-digit hexadecimal number |
| WPA2 Personal | WPA/WPA2/WPA3: 8 to 63 characters or 64-digit hexadecimal number |
| WPA2/WPA3-mixed Personal | |
| WPA3 Personal | |
| WPA2/WPA3-mixed Enterprise | |
| WPA3 Enterprise | |
Show Security Key
When enabled, the security key will be displayed.
Factory default settings: Disable
Bluetooth Setting
Set when connecting this unit to a mobile device using Bluetooth.
Bluetooth
You can use the Bluetooth function with this unit.
Factory default settings: Disable
Device Web Page Setting
The following explains the access settings to Setting mode (Web version).
HTTP Access Settings
Number of Users who can Log-in at the Same Time
Enter a number of users who can access Setting mode (Web version) simultaneously.
Factory default settings: 32
Auto Logout Time
Enter a time to automatically log out when no communication continues with the machine.
Factory default settings: 60 minutes

When settings are changed, the changes will take effect after the machine is restarted. For details on restarting this machine, see "TURNING ON THE POWER (page 1-10)".
View Login User
The user or users who have logged in this machine are displayed.
Current Login User
Shows the currently logged in user and IP address.
Logout All Users
The current login users are logged out.

When settings are changed, the changes will take effect after the machine is restarted. For details on restarting this machine, see "TURNING ON THE POWER (page 1-10)".
Security Settings

When settings are changed, the changes will take effect after the machine is restarted. For details on restarting this machine, see "TURNING ON THE POWER (page 1-10)".
Password Setting
Password Policy Settings
This setting is used when you want to set a more strict password or when users who have not logged in for a specified period of time are to be deleted.
Password Policy Settings
Enables this option when you want to make your existing password settings more strict.
Factory default settings: Disable
Admin Password
Changes the setting of the administrator password.
Minimum Password Length
Specifies the number of characters for the password to be entered.
Factory default settings: 5
Enable Password Creation Rules
When setting a password, make sure that it contains at least one or more numbers, uppercase and lowercase letters of the alphabet, and symbols.
The characters that can be entered are as follows.
- Numbers: 0 to 9 • Upper case alphabet: A to Z
- Lower case alphabet: a to z
- Symbols: ! @ # \$ % ^ & * ( ) “ + , - . / : ; <= > ? [ \ ] _ ` { | } \~ and spaces

If you enable this setting, you will need to enter at least four characters: one each for numbers, uppercase alphabet, lowercase alphabet, and symbols. Even if you set "Minimum Password Length" to 3 or less, you will still need to enter 4 characters.
Factory default settings: Disable
Prohibit Reuse of Current Password
Check if the password you set before the change is the same as the password after the change, and if it is the same, you will not be able to register it. (However, if "Minimum Password Length" is 0, this setting cannot be used.)
Factory default settings: Disable
User Password
Changes the setting of the user password.
Minimum Password Length
Specifies the number of characters for the password to be entered.
Factory default settings: 5
Enable Password Creation Rules
When setting a password, make sure that it contains at least one or more numbers, uppercase and lowercase letters of the alphabet, and symbols.
The characters that can be entered are as follows.
- Numbers: 0 to 9 • Upper case alphabet: A to Z
- Lower case alphabet: a to z
- Symbols: ! @ # $ % ^ & * ( ) “ + , - . / : ; <= > ? [ \ ] _ ` { | } ~ and spaces

If you enable this setting, you will need to enter at least four characters: one each for numbers, uppercase alphabet, lowercase alphabet, and symbols. Even if you set "Minimum Password Length" to 3 or less, you will still need to enter 4 characters.
Factory default settings: Disable
Prohibit Reuse of Current Password
Check if the password you set before the change is the same as the password after the change, and if it is the same, you will not be able to register it. (However, if "Minimum Password Length" is 0, this setting cannot be used.)
Factory default settings: Disable
Delete Users who Have not Logged in for a Specified Period of Time
Deletes users who have not logged in to the machine for the specified period from the machine's user list.
Counting the days
- If the user logs in before this setting is enabled, the number of days will be counted from the day after the setting is registered.
- If the user logs in after this setting is enabled, the number of days will be counted from the day after the last login.
- If a new user is registered after this setting is enabled, the number of days will be counted from the day after the user's registration date.
- Users imported via storage backup will be counted from the day after import.
Factory default settings: Disable
Delete timing
- Users will be deleted at the time the date changes (0:00) after the specified period has passed.
- If the machine is in energy saving mode or turned off, the user will be deleted when the machine is restored or turned on.
- If the number of days for this setting is shortened, the corresponding user will be deleted after the setting is registered.

- Users who are set as fixed users are excluded from this setting.
- If you enable this setting and then change the setting to disable it, the days count will be reset.
Factory default settings: Disable, Period:365
Prohibit Reuse of Deleted User's Account Name
Prohibits the reregistration of user accounts (login names) once they have been deleted. This setting can be used to prohibit reregistration for a certain period of time or for no period of time.
After enabling the setting, set the period of time to prohibit reregistration. If you select "Undefined", you can prohibit reregistration without setting a period.
If [Case sensitivity of login name is enabled.] is enabled in the authentication settings, it will be judged case sensitive. If it is disabled, it will be judged without distinguishing case.
Example: Deleted login name: ABC, login name to be registered: Abc
If [Case sensitivity of login name is enabled.] is enabled in the authentication settings, the login name Abc can be registered because bc is in lower case. If it is disabled, Abc cannot be registered.
Factory default settings: Disable, Period: 365

- The login names of user accounts that have been deleted since the time this setting was enabled are recorded in the list, up to a maximum of 2000. When the number of user accounts exceeds 2000, the login names of the oldest user accounts will be deleted.
- When this setting is enabled and then disabled, the login name record of the deleted user account will be erased.
- The login names of user accounts that are deleted when this setting is disabled will not be recorded.
- The day of deletion is the first day, and the login names of user accounts that have exceeded the set period will be removed from the list.
- The login names of user accounts deleted by [Delete All Users] in the user list will not be recorded in the list and will not be subject to this setting.
Password Change
Restrict Device Web Page Access Via Password
Use this setting to display the login screen and require login in order to access the Web server.
Password Change
The administrator password can be changed.
When you change the password, be sure to remember the new password.
(It is recommended that you periodically change the administrator password.)
- Enter a password consisting of 5 to 255 characters, and tap the [Store] key. Your setting is made valid only when the machine is turned On again. The user-level authentication password is required to add, edit or delete the destination. When you log on, enter "users" as the user name. Then, enter the user password that you have registered with this option. The administrator-level authentication password is required to select all settings and the same functions as those available with the user-level password. When you log on, enter "admin" as the user name. Then, enter the administrator password that you have registered with this option.
- If you tap the [Store] key without entering a password, the previously set value is assumed. Password protection is enabled by default.

In the factory default state, the user password must be entered.
(For the default administrator password, see Start Guide.)
Condition Settings
Restrict Print Jobs other than the current Print Hold Job
You can select settings to cancel print jobs that are not print hold jobs, or force all print jobs to be held.
When [Restrict Print Jobs other than the current Print Hold Job] is turned ON, the settings below can be selected.
| Item Description | |
| Force Retention | This setting forcibly sets all print jobs as print hold jobs, even jobs for which print hold is not selected. |
| Disable Job Prohibit all print jobs other than print hold jobs. | |
Factory default settings: Force Retention
Automatic Deletion of Suspended Print Jobs
If the job is interrupted due to a paper jam, etc., the job is automatically deleted after the time set in "Time until automatic deletion" has elapsed.
Factory default settings: Disable
Time until Suspended Print Jobs are Automatically Deleted
Set the time after stopping a job to automatically deleting the job.
Factory default settings: 5 minutes
Reject Requests from External Sites
You can reject the request from external sites.
Factory default settings: Enabled
If Firmware Corruption is Detected, Restore It
When the machine starts up, the firmware is inspected, and if any damage is found, it automatically recovers to the state before the damage.
Factory default settings: Disable
Apply Security Policy
The default administrator is displayed at login. Set whether to apply the security policy on this machine.
Factory default settings: Disable
Mandatory Access Control
Set whether to perform forced access control. Once set, access to all files inside the machine will be forcibly controlled.
Factory default settings: Disable
Job Status Jobs Completed List Display Setting
Set to show/hide the completion screen of the job status screen.
Factory default settings: All disable
Job Status Display Setting
Sets the contents to be displayed in the job status. For printing, you can choose to show or hide the file name. For image send, the destination can be shown or hidden.
Factory default settings: All disabled.
Port Control
For the various major ports used in the system, set the prohibition/permission and port number, and tap the [Store] key. The ports that can be set are as follows.
| Server Port | Factory default settings | Client Port | Factory default settings | ||
| Port Control Enable / Disable | Port Control Enable / Disable | ||||
| HTTP 80 Enabled HTTP Enabled | |||||
| HTTPS 443 Enabled HTTPS$ Enabled | |||||
| FTP Print | 21 | Enabled | FTP | Enabled | |
| Raw Print | 9100 | Enabled | FTPS | Enabled | |
| LPD | 515 | Enabled | SMTP | Enabled | |
| IPP | 631 | Enabled | SMTP-SSL/TLS | Enabled | |
| IPP-SSL/TLS | 443 | Disabled | POP3 | Enabled | |
| Tandem Output Receive | 50001 | Enabled | POP3-SSL/TLS | Enabled | |
| PC Scan | 52000 | Enabled | SNMP-TRAP | 162 | Enabled |
| Remote Operation Panel | 5900 | Enabled | Notify Job End | Enabled | |
| SNMPD | 161 | Enabled | LDAP | Enabled | |
| SMB | Disable | LDAP-SSL/TLS | Enabled | ||
| SMTP | Enabled | SMB | Enabled | ||
| WSD | Enabled | SNTP | Enabled | ||
| Print Release | 53000 | Enabled | mDNS | Enabled | |
| Sharp OSA (Expansion Platform) | Tandem Output Send | Enabled | |||
| • HTTP | 10080 | Enabled | Data Backup (Send) | Enabled | |
| • HTTPS | 1443 | Enabled | Print Release | Enabled | |
| IPP INFRA | Enabled | ||||
| syslog | 514 Enabled | ||||
| syslog-SSL/TLS 6514 Enabled | |||||
Filter Setting
You can set the filter by an IP or MAC address to prevent unauthorized access to the machine via a network.
Set the IP or MAC address filter and tap the [Store] key.
Factory default settings: Disabled.
IP Address Filter Settings
This option sets an IP address.
You can specify whether to allow or prohibit access to the machine from the IP address you set.
Factory default settings: Enabled.
MAC Address Filter Settings
This option sets a MAC address.
It allows access to the machine from the MAC address you set.
Intrusion/Attack Detection
This section explains how to protect the machine by partially blocking communications in the event of an attempted network attack.
If the multifunction device receives more than the set number of communications from the same IP address within the set period, communication from that IP address is prohibited.
IP addresses whose communication is prohibited are recorded in the audit log and registered in a reception refusal list. In addition, those IP addresses are notified by e-mail to the addresses in the e-mail alert message list 1/2 and dealer e-mail alert message list.
The removal of an IP address from the rejection list is also recorded in the audit log.
The maximum number of IP addresses that can be registered in the reception rejection list is 100. When the number reaches 100, external connection requests for multifunction devices will not be accepted.
Factory default settings: Disable

- Even if the power is turned on/off, the intrusion/attack detection settings and reception refusal list are retained. When you execute [Reset the NIC] or [Restore Factory Defaults], the intrusion/attack detection settings and reception rejection list are initialized.
- When you want to send e-mail to the E-mail alert address list or E-mail alert dealer address list, enable [Security Alert] in [Alerts Message].
![graph TD A["IP address xxx.xxx.xxx.1"] --> B{When the first attempt of attacking the machine is made, the attacker's IP address is registered on the list of denied IP addresses.} B --> C{List of Denied IP Addresses xxx.xxx.xxx.1} C --> D["Red X mark"] D --> E["Final storage or system"]](/content/2026/06/1367452/images/85a221caef5417084ef62a691e2c40f59482f954767aa3005c66a79ac8c41b8b.jpg)
Since the attacker's IP address is on the list of denied IP addresses, their attack does not reach the machine.
List of Denied IP Addresses
| Item Description | |
| IP Address | Displays the IP address that is rejected. The default setting is "OFF". |
| Start Time of Incoming Packet Denials | Displays the date and time when reception refusal started. |
| Total Displays the number registered in the reception rejection list.Factory default settings: Allow | |
Virus Scan Setting
This setting is available when the virus detection kit is installed. Specifies the settings for virus detection.

When you open the Virus Scan Setting for the first time, or when you go to the Virus Scan Setting if you have not agreed to the software license agreement when you opened it before, the software license agreement screen will appear. Check the contents, and if you have no problems using the software, select [Agree].
Virus Scan
Specifies whether to use the virus scan function.
Factory default settings: Disable
Virus Scan Settings
Perform Virus Scan on Input-Output Data
When the input/output data of the machine is generated, the corresponding data is scanned for viruses.
Factory default settings: Disable
Perform Virus Scan at Specified Time
Scans for viruses at the specified date and time.
Factory default settings: Disable
Perform Virus Scan Now
Perform this setting when you want to scan for viruses immediately.
Time Schedule
Specifies the schedule for virus scan.
Every Day
When this setting is enabled, a daily virus scan will be performed.
(Start Time)
Sets the time to start scanning.
Factory default settings: 12:00
Every Week
When this setting is enabled, a virus scan will be performed every week on the specified day and time.
(Day of the Week)
Sets the day of the week to start scanning.
Factory default settings: Monday
(Start Time)
Sets the time to start scanning.
Factory default settings: 12:00

When the machine is not turned on at the date and time specified in the "Time Schedule", the virus scan will start the next time the machine is started.
Every Month
When this setting is enabled, virus scan will be performed on the specified day and time.
(Date)
Sets the date when the scan will start.
For months that have days that do not exist (for example, February and April when 31 is set), run at the end of the month.
Factory default settings: 1
(Start Time)
Sets the time to start scanning.
Factory default settings: 12:00

When the machine is not turned on at the date and time specified in the "Time Schedule", the following operation is performed.
- Even when the Audit Log is enabled, virus scan failures are not recorded.
- When you set "Every Day", the virus scan will not be performed until the same time the next day.
- When you set "Every Week" or "Every Month", the virus scan is performed after the first start up of the machine after the time when the virus scan was not performed. Even if there are multiple times the opportunity to perform the virus scan during a period of time when the machine is not turned on, the virus scan will only be performed once after the machine is started up.
Virus Scan Target
Select the data to be scanned for viruses.
- System File (Firmware)
- Embedded Application • NAS Stored Data
Factory default settings: All enabled
Virus Definition File Update Setting
Perform Update Now
Perform this setting when you want to update the virus scan definition files immediately.
SSL/TLS Settings
SSL/TLS can be used for data transmission over a network.
SSL is a protocol that enables the encryption of information communicated over a network. Encrypting data makes it possible to transmit and receive sensitive information safely.
Data encryption can be set by the following protocols.
SSL/TLS Settings
Server Port
- HTTPS: Apply SSL encryption to HTTP communication.
Factory default settings: Enable
- IPP-SSL: Apply SSL encryption to IPP communication.
Factory default settings: Disable
- Redirect HTTP to HTTPS in Device Web Page Access: When this setting is enabled, all communication that attempts to access the machine by HTTP is redirected to HTTPS.
Factory default settings: Disable
Client Port
- HTTPS: Apply SSL encryption to HTTP communication.
Factory default settings: Enable
- FTPS: Apply FTP encryption to HTTP communication.
Factory default settings: Enable
- SMTP-SSL/TLS: Apply SMTP encryption to HTTP communication.
Factory default settings: Enable
- POP3-SSL/TLS: Apply SSL/TLS encryption to communication using POP3.
Factory default settings: Enable
- LDAP-SSL/TLS: Apply SSL/TLS encryption to communication using LDAP.
Factory default settings: Enable
- syslog-SSL/TLS: Apply SSL/TLS encryption when sending audit logs.
Factory default settings: Enable
- Verify Signature of Server Certificate of the Other Party: Validate the certificate of the server you are communicating with.
Factory default settings: Disable
• TLS1.2: Use only TLS1.2.
Factory default settings: Enable
• TLS1.3: Use only TLS1.3.
Factory default settings: Enable
Level of Encryption
The encryption strength can be set to one of three levels.
Factory default settings: Low
Device Certificate
Certificate Status
Displays the status of the certificate required for SSL/TLS communication. Click the [Select] key to install the certificate.
Certificate Information
If the device certificate is installed, click the [Show] key to display the certificate information.
Select Device Certificate
Click the [Select] key to display the device certificates that have already been registered. Select from them.
S/MIME Settings
S/MIME Settings
Sets whether or not to use S/MIME for scan to E-mail.
Factory default settings: Disable
Device Certificate
Certificate Status
Shows the status of the certificate required for sending using S/MIME. If you want to install the certificate, click the [Select] key.
Sign Settings
Sign E-mail
Enable "Sign E-mail" to use a signature.
Factory default settings: Always Enable
Signature Algorithm
Set the algorithm for the signature.
Factory default settings: SHA-1
Encryption Settings
Encry.
Sets the use of encryption.
Factory default settings: Always Enable
Encrypt
Select the method to be used for encryption.
Factory default settings: AES-128
Disable sending to the addresses which cannot be encrypted.
Prohibit transmission to addresses that cannot be encrypted.
Factory default settings: Enable
Certificate Information
If the device certificate is installed, click the [Show] key to display the certificate information.
Select Device Certificate
Click the [Select] key to display the device certificates that have already been registered. Select from them.

This setting can only be set on web pages.
IPsec Settings
IPsec can be used for data transmission/reception on a network.
When IPsec is used, data can be sent and received safely without the need to configure settings for IP packet encryption in a Web browser or other higher-level application.
When enabling this setting, take the following notes.
- It may take some time to reflect on the machine settings, and you cannot connect to the machine during this time.
- If the Setting mode (Web version) settings are not correctly selected, connection to the machine may not be allowed, or the settings may not allow printing, scanning, or Setting mode (Web version) display. In this case, deselect this setting and change the System Settings (on Web pages).
Condition Settings
IPsec Settings
Sets whether to use IPsec for transmission.
Factory default settings: Disable
IKEv1 Settings
Pre-Shared Key
Enter the Pre-Shared Key to be used for IKEv1.
SA Lifetime (time)
Set the SA lifetime.
Factory default settings: 28800 seconds
SA Lifetime (size)
Set the SA lifetime size.
Factory default settings: 28800 KB
IKE Lifetime
Set the IKE lifetime.
Factory default settings: 30 seconds
IPsec Rules
The registered IPsec rules are displayed.
To add a new rule, click the [Add] key.
To delete a rule, select the rule you want to delete and click the [Delete] key.
IPsec Rule Registration
Rule Name
Enter a name for the IPsec rule.
Priority
Set the priority level.
Factory default settings: 1
Select the Rule Name to be the Registration Model
If there is a previously registered rule that is similar to the rule you want to create, you can create the new rule based on the registered rule.
Device Address
Set the type of IP address to be used on the machine and the port number (for IPv6, set the port number / prefix length).
Client Address
Set the destination IP address type and port number (for IPv6, set the port number / prefix length).
Protocol
Set the protocol to be used.
Factory default settings: TCP
Filter Mode
Configure settings for the authentication method used for IPsec.
Factory default settings: IPsec
IPsec Encryption
Configure settings for the authentication method used for IPsec.
ESP
Select to use ESP authentication.
Factory default settings: Enable
Allow Communication not using ESP
Specify whether or not communication that does not use ESP is allowed.
Factory default settings: Enable
AH
Select to use AH authentication.
Factory default settings: Disable
Allow Communication not using AH
Specify whether or not communication that does not use AH is allowed.
Factory default settings: Disable
Document Administration Function
All of the transmitted image data (sent or received by facsimile or e-mail transfer) can be forwarded to any destination.
| List name Settings | |
| Forwarding Destination Settings (Send Data) | |
| Forward Send Data Set a destination to forward the send data. Factory default settings: Disable | |
| E-mail/Network Folder/FTP/Desktop | Select a forwarding type of the send or received image data. When determined, select the destination from the address book.You can enter an e-mail directly.Format: Select the file format for inbound routing. |
| Clear Setting Releases the destination settings. | |
| File Format Select the file format for inbound routing. | |
| Forwarding Destination Settings (Received Data) | |
| Forward Received Data Set a destination to forward the received data. Factory default settings: Disable | |
| E-mail/Network Folder/FTP/Desktop | Select a forwarding type of the send or received image data. When determined, select the destination from the address book.You can enter an e-mail directly.File Format: Select the file format for inbound routing. |
| Clear Setting Releases the destination settings. | |
| File Format Select the file format for inbound routing. Factory default settings: TIFF(Multi) | |

Even if using the scanner function "AUTOMATICALLY ADJUST SKEWED SCAN DATA (Original Skew Adjustment) (page 6-144)", correction results will not be reflected.
Hidden Pattern Print Setting
Select Hidden Pattern Print Setting.
The hidden pattern print function is effective at preventing unauthorized copying as the specified text emerges in the background on output sheets.
Initial Status Settings
Default Settings
| Item Description | |
| Hidden Pattern Print Setting A pattern | print can be printed with this settings.Factory default settings: All Invalid |
| Print Colour Select a print colour. | Factory default settings: Black |
| Exposure Select an exposure. | Factory default settings: Standard |
| Font Size Select a font size. | Factory default settings: 48point |
| Angle Select a character angle. | Factory default settings: 0° |
| Font Style Select the standard or italic character settings.Factory default settings: Standard | |
| Camouflage Pattern Set a camouflage pattern.Factory default settings: Pattern 1 | |
| Print Method Select a character display pattern.• Character stand out.• The background stands out.Factory default settings: Positive | |
Print Contents Setting
| Item Description | |
| Pre-Set Word Allows you to select a | preset character string.The following character strings can be selected.DO NOT COPY, Copy Ban, Internal Use Only, Handle With Care, CONFIDENTIAL, Copy Invalid, IMPORTANT, COPYFactory default settings: Enable, Copier |
| Fixed Phrase Select a stored preset | character string.This setting is ignored if [Direct Entry] is enabled.DO NOT COPY, Copy Ban, Internal Use Only, Handle With Care, CONFIDENTIAL, Copy Invalid, IMPORTANT, COPY |
| Information Printing Enables simultaneous printing of the following information sets.Serial number, account job ID, login name/user number, number of copy control, date and timeFactory default settings: All Invalid | |
| Disable Direct Entry | Set whether to enable direct input of print characters for tint block printing in each mode.Factory default settings: Disable |
Contrast
Set a character contrast.
The black, magenta, and cyan can be set in any of 9 levels.
Factory default settings: All 5
Custom Text Registration
Stores the user-created print characters. Up to 30 characters can be stored.
Tracking Information Print
Prints the tracking information at the top or bottom of output pages when copy or print job is executed.
This function forcibly prints the pre-specified traceable information to prevent an unauthorized copy.
![graph LR A["Originals"] --> B["Trace information area"]](/content/2026/06/1367452/images/ab4929517fa1e7a666f0a3a5a9765135a1ecc76ffedbfd36297f3ba4a88cedbd.jpg)
| Item Description | |
| Tracking Information Print Setting Set this option to print the tracking information. Factory default settings: Disable | |
| Print Information The following information can be printed.• Serial number, characters, account job ID, login name/user number, date and time Factory default settings: Serial number: Enable, Text: Disable, Account Job ID: Enable, Login Name/User Number: Enable, Date/Time: Enable | |
| Select the Print Colour Set the print colour. Factory default settings: Black | |
| Position Set a print position on each page. Factory default settings: Print Upper Side of Paper: Disable, Print Lower Side of Paper: Enable, Print Left Side of Paper: Enable, Print Right Side of Paper: Disable, Position Adjustment: 1(Outer) | |
| Font Size Set the size of the characters to be printed. Factory default settings: Middle | |
| Select the Job to Print Set a job to print the tracking information. Factory default settings: All Enabled | |

- If this function is specified together with another image compositing function, tracking information is printed at the top. • The information added at printing or the preview image of the account job ID and date/time are displayed as shown below.
Account job ID: 00000
Date/time: DD/MM/YYYY hh:mm
Audit Log
Logs are created and saved for various events relating to security functions and settings.
Audit logs are created and saved in English. However, setting values such as filenames which are input from external sources are saved as-is.
Audit logs which have been saved in the internal storage can be exported by an administrator to a PC as TSV files.
You can select either the internal storage or an external server as the destination for saving audit logs.

When the space for saving audit logs internally becomes full, the logs are overwritten starting from the oldest ones.
Audit Log
"Audit Log" can be carried out as follows.
In "Settings (administrator)", select [System Settings] → [Security Settings] → [Audit Log]
Select "Security Control", "Storage/Send Settings" or "Save/Delete Audit Log".
Factory default settings: Disable
Storage/Send Settings
"Storage/Send Settings" can be carried as follows.
In "Settings (administrator)", select [System Settings] → [Security Settings] → [Audit Log] → [Storage/Send Settings]
Then make the storage and transmission settings.
Factory default settings: Local Drive Store: Enable, Server Send: Disable, Enable SSL/TLS: Disable, Port Number: 514, Port Number (Use SSL/TLS): 6514
Save/Delete Audit Log
"Save/Delete Audit Log" can be carried out as follows.
In "Settings (administrator)", select [System Settings] → [Security Settings] → [Audit Log] → [Save/Delete Audit Log] Select "Save Audit Log" or "Delete Audit Log".

- "Save Audit Log" can only be carried out from the web page.
- If you have set a high level of security, it will not be displayed if audit logging is disabled or storage storage is disabled.
Audit Log specifications
If the audit log is saved to an external server, the audit log is temporarily saved in the buffer area reserved in the internal storage until the transmission to the external server is successful.
- Audit logs that are successfully sent to the external server are cleared from the buffer area.
- If the transmission to the external server fails, a warning message will be displayed on the operation panel and the screen of the web page, and the transmission will be periodically retransmitted to the external server until the transmission is successful.
The audit events and information stored in the audit log are as shown in the following table.

If the power of this machine is turned off by a method other than the procedure described in the user's manual or due to a power failure, the [End Audit] event may not be recorded. Make sure to turn off the power of this machine according to the correct procedure. We also recommend using an uninterruptible power supply (UPS) in the event of an unforeseen event such as a power outage.
| Event name Date & | Time*1 | Operation I/F*2 | Login Name | Result*3 | Additional Information |
| Audit Start | Yes | N/A | N/A | Yes | Reasons for starting Normal start-up: main power on, panel SW pressed, reboot, timer, fax, network, waste paper tray fax paper removal, other Other: security erase |
| Audit End Yes N/A N/A Yes N/A | |||||
| Job Completion Yes Yes Job owner | (SYSTEM) | Yes Finished job name | |||
| I&A Success Yes Yes The string entered as | your login name | N/A IP address of the login source 127.0.0.1 for the operation panel | |||
| I&A Failure Yes Yes The string entered as | the login name | N/A IP address of the login source 127.0.0.1 for the operation panel | |||
| Add User | Yes | Yes | User who added | Yes | Added login name |
| Login Terminated Yes Yes The string entered as | your login name | N/A Active termination/Timeout | |||
| Change Password | Yes | Yes | The user who made the change | Yes Login name of the user whose password has been changed | |
| Change Login Name | Yes | Yes | The user who made the change | Yes Login name after change | |
| Delete user | Yes | Yes | User who deleted | Yes | Deleted login name (ALL if all users are deleted) |
| Add Auth Group | Yes | Yes | User who added | Yes | Added authority group name |
| Change Role | Yes | Yes | The user who made the change | Yes | • Login name of the user whose authority group has been changed • Changed authority group name |
| Change Auth Group Setting | Yes | Yes | The user who made the change | Yes Privilege changed settings Group Name | |
| Add Page Limit Group | Yes | Yes | Users with additional functions | Yes Name of the additional page limit group | |
| Delete Page Limit Group | Yes | Yes | Users whose functions are deleted | Yes Name of the deleted page limit group | |
| Change Page Limit Group Setting | Yes Yes Users who have changed the settings | Yes Name of the changed page limit group | |||
| Change Time Setting | Yes | Yes | The user who made the change | Yes N/A | |
| Change Setting | Yes | Yes | User who made the change ("ByPolicy" when applying AD policy) | Yes | • Setting items whose setting values have been changed • Set value after change |
| Firm Recovery | Yes | N/A | N/A | Yes | • Firmware name • Firmware version after recovery |
| Exec Rejection | Yes | N/A | N/A | Yes | Distinguished name of firmware or embedded OSA app |
| TLS, IPsec communication failure (Comm Failure) * Communication partner is other than the audit server | Yes N/A Users who are communicating | N/A | • IP address of the communication starter • IP address of the communication partner • Communication direction • Reason for failure | ||
| Event name | Date & Time*1 | Operation I/F*2 | Login Name | Result*3 | Additional Information |
| Modify AddrBook | Yes | Yes | User who updated | Yes | · At the time of addition: Internal management ID and destination name of the added entry· When deleting / changing: Internal management ID of deleted / changed entry |
| Firm Update | Yes | Yes | User who updated | Yes | · Firmware name· Firmware version before update· Firmware version after update |
| Intrusion/Attack Detected | Yes | N/A | N/A | Yes | · IP addresses that have been blocked· When the maximum number of detections is reached, "reaches limit" is added. |
| Release Denied Addr Yes Yes | Users who have been | released | Yes Released IP address | ||
| Invoke EAM App | Yes | N/A | N/A | Yes | Starting Sharp OSA External Accounts Application Additional Information: IP Address and Application Name of Sharp OSA External Account Server |
| CSRF Trial | Yes | Net | N/A | N/A | Attacking IP address |
| Enabling Embedded OSA Applications | Yes Yes (N/A for firmware updates) | Users who have activated the function (default administrator for installation and update via Application Portal, system for firmware update) for installation and update from Application Portal, "system" for firmware update) | Yes · Application name· Connection details (IP address where the activation operation was performed)(127.0.0.1 for the operation panel)) | ||
| Send External Dest | Yes | Yes | Users who sent | Yes | Destination e-mail address/IP address/SMB folder path |
| Web Push Print | Yes | Yes | Users of the function | Yes | IP address from which the file was downloaded |
| Change Service Setting | Yes | Yes | Users who have changed the settings | Yes Changed settings and their values | |
| Switch to service mode | Yes | Yes | Service | Yes | N/A |
| Running in service mode | Yes | Yes | Service | Yes | Changed setting values |
| Sharp OSA external account user authentication | Yes Yes The string entered | as your login name | Yes N/A | ||
| Scheduled Virus Scan | Yes | N/A | N/A | Success/Failure | In case of failure, the reason· Interruption of running scan due to power off Interruption of the scan· Any other reason Interruption of a running scan due to other than the above· Scan failure due to errors other than the above |
| Event name Date & | Time*1 | Operation I/F*2 | Login Name | Result*3 | Additional Information |
| On-demand Virus Scan | Yes | Ope/Web | Users who requested the scan to be performed | Success/Failure | In case of failure, the reason• Interruption of running scan due to power off Interruption of the scan• Any other reason Interruption of a running scan due to other than the above• Scan failure due to errors other than the above |
| Virus Detection Yes N/A N/A | Always "Success" | One of the following• Firmware• Inbound data• Outbound data• Stored data• OSA appData identification name (file name, etc., if obtainable. N/A if not possible)Identification name of the virus | |||
| Auto Pattern Update Yes N/A N/A Success/ | Failure | In case of failure, the reason• Connection error to the server• Failed to download the pattern file• Incorrect system setting time• Scan failure due to errors other than the above | |||
| On-demand Pattern Update | Yes | Ope/Web | Users who requested the implementation of the update | Success/Failure | In case of failure, the reason• Connection error to the server• Failed to download the pattern file• Incorrect system setting time• Scan failure due to errors other than the above |
| Change Setting Yes Yes Users who have | changed the setting values | Success/Failure | Setting items and values for Web page (Virus Scan Setting) | ||
* 1 The date and time when the event occurred is displayed in the extended format of ISO 8601. * 2 Either Ope/Web/sNet is displayed as the operation interface. However, if it is "N / A" in the table, it will be written as "N / A". * 3 Either Success / Failure will be displayed as the result of the event.
Certificate Management
Device Certificate Management
Import
Import the certificate/private key.

This setting can only be set on web pages.
Export
Export the certificate/private key.

This setting can only be set on web pages.
Certificate Information
Shows the status of the certificate.
Creation of Certificate and Private Key

This setting can only be set on web pages.
Common Name (Required)
Enter the name to be used.
Organization
Enter the name of the organization.
Organizational Unit
Enter the name of the unit within the organization.
City/Locality
Enter the city or locality.
State/Province
Enter the state or province.
Country/Region (Required)
Enter the country code.
Sender Address
Enter the sender's E-mail address.
Certificate Start Date
Enter the start date and time for the certificate.
Certificate Validity Period
Enter the expiration date of the certificate.
Certificate Information
Enter the Certificate Information.
Certificate Signing Request (CSR) Management
Install
Install the certificate.
Certificate Information
Shows the status of the certificate.
Make of Certificate Signing Request(CSR)
Common Name (Required)
Enter the name to be used.
Organization
Enter the name of the organization.
Organizational Unit
Enter the name of the unit within the organization.
City/Locality
Enter the city or locality.
State/Province
Enter the state or province.
Country/Region (Required)
Enter the country code.
Sender Address
Enter the sender's E-mail address.
Certificate Start Date
Enter the start date and time for the certificate.
Certificate Validity Period
Enter the expiration date of the certificate.
Certificate Information
Enter the Certificate Information.
CA Certificate Management
Import
Import the certificate.
Certificate Information
Shows the status of the certificate.
Energy Save
Eco Setting
The machine's power consumption can be reduced by Eco Mode setting. Although each function setting can be changed separately, the machine has the "Custom" and "Eco Mode" to allow simultaneous changing of settings.
Eco Recommendation Function Display
You can display eco-recommended functions such as two-sided printing and N-Up during copying, document filing print, and direct print.
Setting values applied by each mode is as follows.
| Energy Save Custom Mode | Eco Mode | |
| Preheat Mode Setting 1 minutes 1 minutes | ||
| Turn off Panel Display during pre-heat mode On | On | |
| Auto Power Shut-Off Timer Fix transition time.: | 11min. (for Europe) 1min. (Except for Europe) | Fix transition time.:1min. |
| As soon as the remote job is finished, enter Auto power shut off mode. | On On | |
| Sleep Mode Power Level Low Power Low Power | ||
| Eco Scan Setting On On (All Modes Except Copy) |
Factory default settings: Disable

Each Energy Save settings in System Settings is not applied when Custom/Eco mode is used.
Display a Message to Delay the Time of Entry into Preheat Mode / Auto Power Shut-Off Mode
Set whether a message is displayed 15 seconds before Preheat Mode or Auto Power Shut-Off Mode is entered.
Factory default settings: Disable
Mode Setting
This function allows you to set the Eco function at once. There are "Custom Mode" and "Eco Mode".
| Item Description | |
| Custom Mode | Allows easy machine operation with reduced power consumption. |
| Eco Mode Minimizes the machine's | power consumption. |
Preheat Mode Setting
The time until the preheating mode works is 1 to 60 minutes in 1-minute units
(BP-50C26/BP-50C31/BP-50C36/BP-50C45/BP-55C26/BP-60C31/BP-60C36/BP-60C45/BP-70C31/BP-70C36/BP-70C45), Set in the range of 1 to 120 minutes (BP-50C55/BP-50C65/BP-70C55/BP-70C65).
Preheat Mode will activate when the set duration of time elapses after printing ends and no further operations are performed. This function reduces your power costs, and at the same time helps conserve natural resources and reduce pollution.
Select the time that best suits the needs of your workplace.
The panel display can be turned Off in the Preheat mode.
Factory default settings: 1 minutes

Preheat mode cannot be disabled.
Turn off Panel Display during pre-heat mode
Set whether the lights on the operation panel turn off in preheat mode.
Factory default settings: Enable
As soon as the remote job is finished, enter Auto power shut off mode.
This function works in Auto Power Shut-Off mode. When the machine completes a print job received from the PC or outputs received fax data, the machine immediately returns to the Auto Power Shut-Off mode.
Factory default settings: Enable
Fix transition time.
The Auto Power-Off transition time is fixed.
When this setting is enabled, the [Change transition time by time of day.] option is disabled.
Factory default settings: Enable, Auto Power Shut-Off Timer: 1 minute

In Europe, this setting is not available and auto power shut-off is always enabled.
Change transition time by time of day.
This function controls the transition to Auto Power Shut-Off mode optimally for each time period by analyzing the use of the machine based on job logs obtained during a 4-week period.
When this setting is enabled, the [Fix transition time.] option is disabled.
Factory default settings: Disable

- The image transfer control settings are not changed.
- This does not link to the Power On/Off Scheduling. If both of them are enabled, the Power On/Off Scheduling settings precede. • Pages are counted for each paper size separately.
- When the power supply of the machine was off, there was no job during this time.
Transition to Energy Saving and Auto Power Shut-Off modes
| Pattern Transition time Average outputs per | hour* | |
| Mode1 (Job Start Priority1) After 1 hour 700 or more | ||
| Mode2 (Job Start Priority2) After 30 minutes 150 to 699 | ||
| Mode3 (Energy Save Priority1) After 5 minutes 40 to 149 | ||
| Mode4 (Energy Save Priority2) | After the minimum time period | 0 to 39 |
* Factory default setting
Automatic
This function controls the power optimally for each time period by analyzing the use of the machine based on job logs obtained during a certain time period.

If the machine does not have the 4-week job log information, the machine enters template2 (Mode3 (Energy Saving Priority1) between 8:00 and 18:00 hours). Then after that, it enters Mode4 (Energy Saving Priority2).
Manual
You can set a pattern for each time band.
The machine already has the 3-pattern template. The Energy Save pattern can be added to the "Original Eco Patterns 1 to 4".
Three-pattern template
| Template Pattern | Description of mode | |
| Template 1 All Day "Energy | SavePriority2" | The machine runs in the "Mode4 (Energy Saving Priority2)" all the time. |
| Template 2 8:00-18:00 "Energy | SavePriority1" | The machine runs in "Mode3 (Energy Saving Priority1)" between 8:00 and 18:00, and in "Mode4 (Energy Saving Priority2)" at other times. |
| Template 3 8:00-18:00 "Job | StartPriority1" | The machine runs in "Mode1 (Job Start Priority1)" between 8:00 and 18:00, and in "Mode4 (Energy Saving Priority2)" at other times. |
Sleep Mode Power Level
Low Power: The machine switches to the power saving mode, but it takes some time to recover.
Fast Wake Up: Compared with Low Power, the power value rises by a certain degree, but it results in faster recovery.
Motion Sensor Mode (BP-60C31/BP-60C36/BP-60C45/BP-70C31/BP-70C36/BP-70C45/BP-70C55/BP-70C65)
This enables switching of power saving modes by the motion sensor.
Factory default settings: Low Power
Eco Scan Setting
This setting keeps the fusing unit off when you perform an operation that does not involve printing, such as sending a scanned document.
Set "Eco Scan Setting" to √, and select a mode or screen in which to enable Eco Scan Setting.
The following modes and screens can be set.
- Home Screen
- Copy
- Image Send
- Document Filing
- System Settings
- SharpOSA
Factory default settings: Enable, Home Screen: Disable, Copy: Disable, Image Send: All Enabled, Document Filing: All Enabled, System Settings: Enable, System Settings: All Enabled
Energy Saving Pattern List
This function analyzes machine usage and controls entry into auto power shut-off mode based on frequency of use. If you want to manage machine power by using an energy saving pattern list, select [Manual] in [System Settings] - [Eco Setting] - [Change transition time by time of day.], and select an Automatic Update Pattern from the pull-down list or one of Original Eco Patterns 1 to 4.
To automatically analyze machine usage and update the pattern as needed, set Automatic Update Pattern.
Edit Pattern
Set the Original Eco Pattern.
| Item Description | |
| Change Pattern Name | To change the pattern name, enter the desired name. |
| Pattern to Be Modeled | Select the stored pattern that you want to base the new pattern on. To copy the settings of a selected pattern, select [Copy the selected pattern]. |
| Energy Save Setting | Set time periods for machine modes. Select a mode from 1 to 4, and select a day of the week, start time, and end time. |
| Day of the Week | Set the day of week on which you want to enable the mode selected in the Energy Save Setting. |
| Start Time/Completing Time | Set the period of time during which you want to enable the mode selected in the Energy Save Setting. |
Specific Date Operation Settings
You can configure a day on which you have high-output printing or want to perform a special operation as the "specific date" and set a specific energy saving pattern only for that specific date.

The specific date operation is performed on the day configured as the specific date regardless of the setting on Auto Power-Off transition time (enabled or disabled).
"Specific Date" tab
A period of up to 7 days can be set for Specific Date. Set the specific date, energy saving pattern to be applied, and the operation that takes place if the specific date falls on a non-work day.
| Item Description | |
| Date Setting | Configure the date on which you want to operate the machine with a specific pattern. Select a day between 1 and 31 in Every Month or from End of Every Month. |
| Applied Energy Saving Operation Select an energy saving patten you want to apply.Use the "Pattern" tab (page 9-203) to specify the details of the energy saving pattern. | |
| Operation for Holiday | Configure how the machine operates if the preset specific date falls on a holiday.Use the "Holiday" tab (page 9-203) to specify the day as the holiday. |

- If a specific date that is initially specified coincides with the one that is moved because it falls on a holiday, the setting for the former takes precedence.
- If specific dates of the same dates are configured, they are used in ascending order between 1 and 7 (specific date numbers).
"Pattern" tab
This tab is used to configure the details of an energy saving pattern.
| Item Description | |
| Energy Save Operation Select a specific date pattern you want to specify. | |
| Change Pattern Name | Enter a pattern name when you want to change the name of a specific date pattern. |
| Pattern to Be Modeled | Select a source pattern when you create a pattern using a stored or preset pattern. |
| Add new schedule. Add a schedule. | |
"Holiday" tab
Specify a holiday. The day you specified as the holiday will not be a specific date.
| Item Description | |
| Holiday List | When you tap this option, the dates and days of the week for the holidays you have set for two years. |
| Day of Week Use this option to specify a holiday using a day of the week. | |
| Set Period Use this to specify a holiday using a date."Final Registered Time" shows when the holiday that is stored with Set Period was stored. | |
Power ON/OFF Schedule Setting
The machine operator panel can be turned On or Off at a preset time. Up to three (3) patterns can be set. The "Setting 1", "Setting 2" and "Setting 3" are executed in this sequence if set at the same day of week or at the same clock time.

- The scheduling function does not support the power management settings in the Preheat Mode and Auto Power Shut-Off Mode.
- The preset power-off time is subject to the following restrictions:
- If the machine is running due to the current job execution or other reasons, the machine is turned off only after the job has finished. • The machine cannot receive printer jobs.
- The machine can receive output jobs, such as received fax data outputs.
- If the Time Specified Output of Received Data setting is enabled, they are output next time the machine is turned on.
- If the power management setting is also enabled, the Power On/Off Scheduling settings precede.
- If the same time is specified, settings are applied in the order of "Setting 1", "Setting 2", and "Setting 3". • The power is not turned off in the following cases: • "Power Up Auto Clear" is in progress.
- While the optimization of the hard disk is in progress or while a restart is in progress after the setting mode has been changed.
- The preset power on/off time is within one minute from when the setting is accepted.
Toner Save Mode
This mode is used to reduce toner consumption.
Toner consumption can be set for each print job of "Copy", "Printer", and "Prints (Document Filing)".
Toner consumption can be selected from three levels.
• Toner Save1 (Toner Consumption: Much) - Toner Save2 (Toner Consumption: Middle) - Toner Save3 (Toner Consumption: Little)
Factory default settings: All Invalid

Items may not be displayed depending on country and region.
System Control
Job Log
View Job Log
Views log of a job executed on the machine.
Select a view item and period, and tap the [Show] key.
Factory default settings: Job Log: All Enabled
Job Log Operation
Deletes or stores log of a job executed on the machine.
Set the number of jobs for [The Number of Job Log to Notify by E-mail] and click [Store].
Tap the [Delete] key to delete the job log.
Factory default settings: The Number of Job Log to Notify by E-mail: 50000

You can save the job log by selecting the [Job Log] in Setting mode (Web version).
Data Import/Export (CSV Format)
You can import or export data.
Export Settings
Export Settings Type
Select the data to be exported from the address book or registered user information. Once you have selected the data, click the [Execute] key. The data will be exported in CSV format.
Factory default settings: Address Book: Enabled, User Register Information: Disabled
Import Settings
Import settings from file
You can import data that was exported in CSV format into the machine.
Storage Backup
Address book information and user information stored in the machine can be saved to and retrieved from a USB memory device.
To use the machine to manipulate a file, first insert the USB memory device in the machine. If you need to select settings on the Web page, use your computer to manipulate the file.
Export Settings
Exports data.
Factory default settings: All Invalid
Import Settings
Imports data into the machine.

When [Password Policy Settings] is enabled, the following user accounts are not targeted for import.
- User accounts that do not have a minimum password length.
- When [Enable Password Creation Rules] is enabled, user accounts that do not fully match this setting.
- User accounts that have been determined to be reregistration when [Prohibit Reuse of Deleted User's Account Name] is enabled.
Device Cloning
Saves the machine setting information in XML format and copies the information to another machine.
This function saves you the trouble of repeatedly configuring the same settings in multiple machines.
To use the machine to manipulate a file, first insert the USB memory device in the machine. If you need to select settings on the Web page, use your computer to manipulate the file.
Export Settings
Exports data.
Factory default settings: All Invalid
Import Settings
Imports data into the machine.

- For models that can be imported, please contact the store where you purchased the product.
- The following data is not copied when device cloning is performed:
- List print and fax forwarding items.
- Count and device status display items.
- IP address of the machine, device name, administrator password, sender names for image send, and other information that is specific to the machine.
- Adjustment values unique to each hardware, such as screen contrast/saddle stitch staple position adjustment
Address Book Forward
Forward the data stored in the address book of the machine to another machine.
To forward the address book contents, enter the IP address of the destination machine and the password of the administrator of that machine, and tap the [Execute] key.
Filing Data Backup
You can back up a file saved with Document Filing, and restore a backed up file to the machine.

Backup of filing data is operated in the setting mode (Web version).
Export Settings
Select the folder you want to back up and click [Execute]. The files are saved to your computer.
| Item Description | |
| Index The displayed Folder names can be filtered by index. | |
| Display Items Set the number of files that are displayed. | |
Import Settings
You can restore a file to the machine that was saved with "Export Settings". Enter a maximum of 200 characters for the path of the saved file in "Import settings from file", and click [Execute].
Reset Settings
Restores the current settings (you have selected in Setting mode) to the factory default settings. If you wish to create a record of the current settings before restoring, print the current settings by selecting [Status] in "Settings (administrator)" → [Data List] → [List for Administrator)".

When settings are changed, the changes will take effect after the machine is restarted. To restart the machine, see "TURNING ON THE POWER (page 1-10)".
Reset the NIC
This returns all "Network Settings" to the factory default settings.
Optimization of a Local Drive
Various devices mounted on the machine can be set.
This function optimizes the local drive of the machine by defragmenting data. If a job is in progress, a message will appear and optimization will not begin until the job is finished. During optimization, the following operations are not possible:
- Access to Setting mode (Web version), and reception of print data
- Use of keys on the operation panel
- Turning off the power with the main power switch of the machine. • Auto Power Shut-Off
When optimization is completed, the machine will automatically restart.

When the document filing function is frequently used and output of files seems somewhat slow, optimizing the hard drive may improve performance.
E-mail Alert and Status
Status Message
Selects the Standard E-mail Status function or Advanced E-mail Status function settings.
The E-mail Status function can periodically transmit the machine status information to the stored address.
Standard
Sets the E-mail status address list 1, E-mail status address list 2, and E-mail status dealer address list separately.
| Item Description | |
| E-mail Address | Enter the destination e-mail address for transmission of machine status information. When you enter multiple addresses, separate them by a semicolon (;) or a comma (.,). |
| Send Now | When tapped, the status message is sent to the destination of the e-mail address list. |
| Send on Schedule 1 | If checked as √, an E-mail is sent periodically according to the preset schedule. |
| Send on Schedule 2 | If checked as √, an E-mail is sent periodically according to the preset schedule. |
| Time Schedule Select a schedule to | send E-mails. |
Advanced
Bi-directional Status Message
Bi-directional status messaging can be enabled.
| Item Description | |
| POP3 Server Enter the IP address or host name of the POP3 server. | |
| Port Number Enter the port number of the POP3 server.Factory default settings:110 | |
| POP Authentication | The authentication protocol (including APOP) is used for authentication to the POP3 server.Factory default settings: Disable |
| User Name | Enter the user name. The special user account is required for bi-directional e-mail status transmission. |
| Password Enter the password. | To change the password, set [Change Password] to √ |
| Check Interval | Enter the polling interval for the POP3 server. The default setting is five minutes. |
| Enable SSL/TLS | When SSL/TLS is enabled √, encrypted communication is performed as POP over SSL/TLS or POP over TLS by STLS command.Therefore, the server must support POP over SSL/TLS or STLS commands.For POP over SSL / TLS, set the POP over SSL / TLS port number in "Port Number".To allow POP over TLS communication, set the "Port Number" to the same port number as for the normal POP3 communication.Factory default settings: Disable |
| Connection Test | Tap the [Execute] button to test the connection to the POP3 server. |
Alerts Message
Selects the E-mail Alert function settings.
The E-mail Alert function can report a trouble of the machine to the administrator or dealer using e-mail.
Sets the E-mail Alert Message List 1, E-mail Alert Message List 2, and Dealer E-mail Alert Message List separately.
E-mail Address
Enter the destination E-mail address for alert message transmission. You can enter multiple addresses by separating them by a semicolon or comma.
Example: aaa@xxxxx.□□□; bbb@xxxxx.□□□
A report will be sent by e-mail in the following situations. You can individually set the status for sending alerts for each address list. When the unit becomes the target of the alert, an email will be sent to the set address.
Jam, Toner Low, Toner Empty, Paper Empty, Service Request, PM Request, Waste Toner Almost Full, Waste Toner Full, Job Log Full, Security Alert
Factory default settings: All enable except security alerts
SMTP Settings
Use SMTP Server in [Network Settings].
Set the SMTP server settings used for e-mail status and E-mail alert to the same settings as SMTP Settings (page 9-158) of network setting.
SMTP Settings
Use this setting when not using "Use SMTP Server in [Network Settings].".
Primary Server
Enter the IP address or the host name of the primary SMTP server.
Secondary Server
Enter the IP address or the host name of the secondary SMTP server.
Port Number
Enter a port number. The default setting is port 25.
Timeout
Enter a timeout. The default setting is 20 seconds. This value is used for connection to the SMTP server and for data transmission according to the e-mail system specifications.
Sender Name
Enter a maximum of 20 full-width/half-width characters for the sender name.
Sender Address
Enter a maximum of 64 half-width characters for the sender address.
Enable SSL/TLS
If SSL is enabled (√), SMTP-over-TLS encryption communication can be used via the STARTTLS command.
This requires the server to support the STARTTLS command.
To allow SSL/TLS communication, set the "Port Number" to the same port number as the normal SMTP.
SMTP Authentication
Carries out SMTP server authentication.
If you use Kerberos authentication, set the KDC server, port number, and realm on the Kerberos authentication settings page.
User Name
Enter the user name.
Password
Enter the password.
To change the password, set [Change Password] to √.
POP before SMTP
If set, you are authenticated to the POP server before using SMTP communication.
- POP3 Server: Enter the IP address or the host name of the secondary SMTP server.
- Port Number: Enter the POP3 port number for POP before SMTP communication. The default setting is port 110.
- POP Authentication: If set to √, the authentication protocol (including APOP) is used for authentication to the POP3 server.
- User Name: Enter the user name for POP before SMTP communication.
- Password: Enter the password required for POP before SMTP communication. To change the password, set [Change Password] to √.
- Enable SSL/TLS: If set to √, the POP over SSL/TLS communication or the POP over TLS communication by STLS command is enabled.
This requires the server to support the POP over SSL/TLS communication or the STLS command.
To allow SSL/TLS communication, set the "Port Number" to the POP over SSL communication port number.
To allow POP over TLS communication, set the "Port Number" to the same port number as for the normal POP3 communication.
Connection Test
Tap the [Execute] button to test the connection to the SMTP server.
Image Quality Adjustment

Registration Adjustment and Fusing Cleaning Mode in [Collective Adjustment], all Common Functions, and removal of a toner cartridge can only be executed in setting mode on the machine.
Colour Profile Settings can only be configured on the Web page.
Collective Adjustment
Various devices mounted on the machine can be set.
Registration Adjustment
If the printed colours shift out of position when you print by Colour printing, you can adjust the print position of each colour to reduce colour shifting.
Tap the [Execute] key.
Fusing Cleaning Mode
Use this function to clean the machine's fusing unit when dots or other dirt appear on the printed side of the paper. When this function is executed, "V" printed paper is output and the fusing unit is cleaned.

If improvement is not noticed after the first time you use the function, try executing the function again.
Black Letter/Black Line Width Adjustment
Adjust black text and the width of black lines. After using this function to perform adjustment, perform [System Settings] - [Common Functions] - [Auto Colour Calibration (for Copy)], [Auto Colour Calibration (for Print)].
Factory default settings: 0
Black Streak Reduction
Specify whether to use the black streak reduction or not.
The black streak reduction can be used for Scan Original, Copy, Image Send, and Scan to local drive functions.
If the black streak reduction is enabled, select any of the following options.
Treat Thin Black Streaks: Use this setting to make thin black streaks less apparent. (Low level)
Normal: Use this setting to make black streaks less apparent. (Medium level)
Treat Up to Thick Black Streaks: Use this setting to make thick black streaks less apparent. (High level)
Factory default settings: Disable

Increasing the level of black streak treatment may result in faint text and poor reproduction of lines.
Display warning message for black streaks detection.
Set this option to display a warning message when black streaks are detected by the document feeder.
Factory default settings: Disable
Copy Image Quality
Quick Image Quality Adjustment
You can easily perform copy quality adjustment in the default state.
You can change the default setting ([2]) to [1 (Smooth)] or [3 (Sharp)].
Factory default settings: 2
Colour Balance (Colour / B/W)
You can adjust the default colour, gradation, and density of colour copies and black & white copies.
The density of each colour is divided into 3 ranges, and you can adjust the level of each.
Factory default settings: All 0
Color Copy Black Component Amount Adjustment
Adjust the proportion of the black component in copy quality settings.
Set this for auto, text / printed photo, text, printed photo, photo-paper photo, text / photo-paper photo, map, and faint original in the original type settings, and for text / printed photo, text, and printed photo when the original is a copy.
Factory default settings: All 0
Density Adjustment when [Auto] is selected for Exposure
Configure settings for colour copying and black & white copying when [Auto] is selected for the copy exposure. The exposure can be adjusted separately for copying using the document glass and copying using the auto document feeder.
Factory default settings: Colour: Document Glass, Document Feeder: 5 (Normal), B/W: Document Glass, Document Feeder: 5 (Normal)
Sharpness
You can make copy images in the default state sharper or softer.
Factory default settings: 2
Image Quality Priority
Specify image quality priority. Set this for the auto copy exposure and text / printed photo settings.
Factory default settings: All 0
Print Image Quality
Quick Image Quality Adjustment (Colour / B/W)
Perform quick adjustment of print quality.
You can change the default setting ([2]) to [1 (Smooth)] or [3 (Sharp)].
This setting can be set separately for colour mode and monochrome mode.
Factory default settings: All 2
Colour Balance (Colour / B/W)
You can adjust the tone and density of colour in colour printing and black & white printing. You can adjust the default colour, gradation, and density of colour copies and black & white copies.
The density of each colour is divided into 3 ranges, and you can adjust the level of each.
Factory default settings: All 0
Exposure Adjustment
Set the density of colour printing and of black & white printing.
Factory default settings: 3 (Normal)
Colour Line Width Adjustment
When colour lines do not print correctly in special applications such as CAD, you can make lines thicker.
Factory default settings:5
Scan Image Quality
RGB Adjust
Set the colour tone (RGB) for scanning.
Factory default settings: All 0
Sharpness
Use this setting to obtain a sharp image when scanning an original.
Factory default settings: 3 (Normal)
Contrast
You can adjust the contrast of scanned images.
Factory default settings: 3 (Normal)
Colour Profile Settings
Set colour profiles used for printing.
Custom CMYK Simulation Profile
Current Profile Name
This shows the currently set profile name.
Save to PC
Save the current colour profile on the computer.
Profile Update
Select the updated colour profile and click the [Store] key.
Custom Input Profile
Current Profile Name
This shows the currently set profile name.
Save to PC
Save the current colour profile on the computer.
Profile Update
Select the updated colour profile and click the [Store] key.
Custom Output Profile
Current Profile Name
This shows the currently set profile name.
Save to PC
Save the current colour profile on the computer.
Profile Update.
Select the updated colour profile and click the [Store] key.
Common Functions
Auto Colour Calibration (for Copy) / Auto Colour Calibration (for Print) / Copy Calibration by Screen / Printer Calibration by Screen
Performs automatic colour correction when the colour is off.
For copying, adjust with [Auto Colour Calibration (for Copy)]. For printing, adjust with [Auto Colour Calibration (for Print)].
You can use [Copy Calibration by Screen] and [Printer Calibration by Screen] to perform even higher precision adjustment of each mode.
The machine prints a test patch, the test patch is scanned, and the colour is automatically corrected.
After the [Execute] key is tapped and a test patch is printed, a message appears prompting you to begin automatic calibration.
Follow the instructions in the message to perform colour adjustment.

- If the colour is still off after performing Auto Colour Calibration, repeating Auto Colour Calibration once again may improve the colour.
- Before executing Auto Colour Calibration, check to see if the registration adjustment is correct. If the registration adjustment is not correct, perform "Registration Adjustment."
Density Smoothing Adjustment
If uneven density occurs in a copy and others, use this function to smooth the density.
The uneven density is automatically corrected by scanning a test patch that you print.
After the [Execute] key is tapped and a test patch is printed, a message appears prompting you to begin automatic calibration.
Follow the instructions in the message to perform density smoothing.
If there are no problems after adjustment, perform "Auto Colour Calibration (for Copy)" and "Auto Colour Calibration (for Print)".
To return the adjusted values to their factory default state, tap [Return Density Smoothing Adjustment Value to Defaults]. If you tapped [Return to the Defaults], perform adjustment of the density that you want to readjust (medium density in the default mode).
Factory default settings: Middle

If the intensity deviation correction does not resolve the intensity deviations, repeat the correction. This may suppress the deviations. To repeat the correction, start over the procedure from the first step, or tap the [Back] key after going through the correction procedure.
Remove Toner Cartridge
Normally toner cartridges cannot be removed. However, when a cartridge runs out of toner, the cartridge is automatically ejected to allow removal. If you need to remove a cartridge that still has toner, you can manually eject and remove the cartridge.
Select the toner cartridge to be ejected and tap the [Execute] key. The selected cartridge is ejected to allow removal.

To remove the toner cartridge, use the operation panel on the machine. You cannot perform the cartridge removal operation on the web screen.
- HOW TO USE THIS MANUAL
- ABOUT OPERATION MANUAL
- PLEASE NOTE
- WARNING
- ILLUSTRATIONS AND THE OPERATION PANEL AND TOUCH PANEL SHOWN IN THIS MANUAL
- ICONS USED IN THE MANUALS
- BEFORE USING THE MACHINE
- HOW TO PLACE THE ORIGINAL
- PERIPHERAL DEVICES
- MAINTENANCE
- PART NAMES AND FUNCTION EXTERIOR
- SADDLE STITCH FINISHER (LARGE STACKER)
- PAPER PASS UNIT
- MOTION SENSOR
- UTILITY TABLE
- BYPASS TRAY
- TRAY 5 (WHEN A LARGE CAPACITY TRAY IS INSTALLED)
- FINISHER
- SADDLE STITCH FINISHER
- INTERIOR
- MAIN POWER SWITCH
- TONER CARTRIDGE
- TONER COLLECTION CONTAINER
- FUSING UNIT
- TRANSFER BELT
- RIGHT SIDE COVER RELEASE LEVER
- RIGHT SIDE COVER
- PAPER REVERSING SECTION COVER
- TONER COLLECTION CONTAINER RELEASE BUTTON
- HANDLE
- STAND/550/2X550/3X550/550&2100 SHEET PAPER DRAWER RIGHT-SIDE COVER
- PAPER TRAY RIGHT SIDE COVER
- AUTOMATIC DOCUMENT FEEDER AND DOCUMENT GLASS
- SIDE AND BACK
- OPERATION PANEL
- INFORMATION INDICATOR
- TOUCH PANEL
- MAIN POWER INDICATOR
- [POWER] BUTTON
- NFC TOUCH POINT AREA
- LIGHTING PATTERNS
- LIGHTING PATTERN
- RESTART THE MACHINE
- LOADING PAPER
- IMPORTANT POINTS ABOUT PAPER
- NAMES AND LOCATIONS OF TRAYS
- THE DEFINITION OF "R" IN PAPER SIZE
- APPLICABLE PAPER TYPES
- USEABLE PAPER
- PAPER THAT CAN BE USED FOR THE FAX FUNCTION
- SPECIFICATIONS OF PAPER THAT CAN BE USED FOR TWO-SIDED PRINTING
- TYPES OF PAPER THAT CAN BE SET IN EACH TRAY
- SETTING ORIENTATION OF THE PRINT SIDE
- PAPER THAT CANNOT BE USED
- NON-RECOMMENDED PAPER
- TRAY 1 - 4 (WHEN A STAND/550/2X550/3X550/550&2100 SHEET PAPER DRAWER IS INSTALLED)
- PULL OUT THE PAPER TRAY
- ADJUST GUIDE PLATES A AND B TO MATCH THE LONGITUDINAL AND TRANSVERSAL DIMENSIONS OF THE PAPER TO BE LOADED
- FAN THE PAPER
- INSERT THE PAPER INTO THE TRAY
- CLOSE THE TRAY SLOWLY
- LOADING PAPER IN THE SRA
- LOADING ENVELOPE IN TRAY
- CAUTIONS WHEN PLACING ENVELOPES
- TRAY 3 - 4 (WHEN A STAND/550&2100 SHEET PAPER DRAWER IS INSTALLED)
- PLACE PAPER INTO THE TRAY
- LOADING PAPER IN THE LARGE-CAPACITY TRAY (WHEN A LARGE CAPACITY TRAY IS INSTALLED)
- PLACE THE PAPER IN THE PAPER FEED TABLE
- GENTLY CLOSE THE COVER
- LOADING PAPER INTO THE BYPASS TRAY
- HOW TO LOAD THE PAPER
- LOADING TAB PAPER
- INSERTING TRANSPARENCY FILM
- LOADING ENVELOPES
- WHEN PLACING DL
- WHEN PLACING C4, C5, OR C
- IMPORTANT POINTS WHEN USING ENVELOPES
- IMPORTANT POINTS WHEN USING EMBOSSED PAPER/LABEL SHEETS
- OPEN THE BYPASS TRAY
- LOAD THE PAPER WITH THE PRINT SIDE FACING DOWN
- SET THE BYPASS TRAY GUIDES CORRECTLY TO THE WIDTH OF THE PAPER
- HOW TO CLOSE THE BYPASS TRAY
- HOW TO PLACE THE LONG PAPER GUIDE
- SELECTING A PROCEDURE FOR PLACING THE ORIGINAL DEPENDING ON THE TYPE AND STATUS OF THE ORIGINAL
- DETECTABLE ORIGINAL SIZES
- ORIGINAL FEEDING MODE
- AUTOMATIC DOCUMENT FEEDER
- ALLOWED ORIGINAL SIZES
- ALLOWED ORIGINAL WEIGHTS
- MAKE SURE THAT THERE IS NO ORIGINAL ON THE DOCUMENT GLASS
- PLACE THE ORIGINAL
- PREVENTIVE LIGHT TO INDICATE ORIGINAL LEFT BEHIND
- LIGHT TURNING OFF
- ORIGINAL SETTING INDICATOR
- SKEW FEED PREVENTION
- DOUBLE FEED DETECTION
- DOCUMENT GLASS
- OPEN THE AUTOMATIC DOCUMENT FEEDER
- CLOSE THE AUTOMATIC DOCUMENT FEEDER
- INNER FINISHER
- PART NAMES
- HOW TO STAPLE MANUALLY
- PLACE THE PAPER THAT YOU WANT TO STAPLE IN THE INSERTION SLOT
- RELATION BETWEEN PAPER ORIENTATION AND STAPLING RESULT
- SUPPLIES
- INNER FINISHER MAINTENANCE
- REPLACING THE STAPLE CARTRIDGE
- FINISHER (LARGE STACKER)
- FINISHER (LARGE STACKER) MAINTENANCE
- REPLACEMENT THE STAPLE CARTRIDGE
- SADDLE STITCH FINISHER MAINTENANCE
- FINISHER UNIT
- SADDLE STITCH UNIT
- SADDLE STITCH FINISHER (LARGE STACKER) MAINTENANCE
- REPLACING THE STAPLE CARTRIDGE (SADDLE STITCH UNIT)
- PUNCH MODULE
- DISCARDING PUNCH WASTE
- INNER FINISHER INSTALLED
- REPLACE THE PUNCH WASTE BOX
- FINISHER INSTALLED
- FINISHER (LARGE STACKER) INSTALLED
- SADDLE STITCH FINISHER INSTALLED
- SADDLE STITCH FINISHER (LARGE STACKER) INSTALLED
- FOLDING UNIT
- FRONT COVER
- OUTPUT TRAY OF FOLDING UNIT
- REGULAR MAINTENANCE
- CLEANING THE DOCUMENT GLASS AND AUTOMATIC DOCUMENT FEEDER
- SCANNING AREA
- CLEANING THE LASER UNIT
- OPEN THE FRONT COVER
- REMOVE THE TONER COLLECTION CONTAINER
- TAKE OUT THE CLEANING TOOL FOR THE LASER UNIT
- MAKE SURE THAT THE CLEANER AT THE TIP OF THE CLEANING TOOL IS NOT DIRTY
- TAKE OUT A REPLACEMENT CLEANER FROM THE TONER COLLECTION CONTAINER
- REMOVE THE DIRTY CLEANER FROM THE END OF THE CLEANING TOOL
- ATTACH THE NEW CLEANER TO THE CLEANING TOOL
- CLEAN THE LASER UNIT
- REPEAT STEPS 8 TO CLEAN ALL HOLES (4 HOLES) IN THE LASER UNIT
- REPLACE THE CLEANING TOOL
- PUSH THE TONER COLLECTION CONTAINER INTO THE MACHINE
- CLOSE THE FRONT COVER
- CLEANING THE BYPASS FEED ROLLER
- REPLACEMENT OF TONER CARTRIDGE
- REPLACEMENT MESSAGE
- WHEN USING THE BP-50C55/BP-50C65/BP-70C55/BP-70C
- OPEN THE TONER COVER
- PULL THE TONER CARTRIDGE TOWARD YOU
- REPLACING THE TONER COLLECTION CONTAINER
- PLACE THE TONER COLLECTION CONTAINER ON A FLAT SURFACE
- INSTALL A NEW TONER COLLECTION CONTAINER
- REPLACING THE STAMP CARTRIDGE
- WHEN USING THE BP-55C26 / BP-70C31 / BP-70C36 / BP-70C45 / BP-70C55 / BP-70C
- WHEN USING THE BP-50C26 / BP-50C31 / BP-50C36 / BP-50C45 / BP-50C55 / BP-50C65 / BP-60C31 / BP-60C36 / BP-60C
- HOME SCREEN AND PREVIEW SCREEN
- CHANGE THE DISPLAY OF THE TOUCH PANEL
- JOB STATUS
- CHARACTER ENTRY
- TOUCH TYPES
- OPERATION TYPES
- TAPPING
- LONG TOUCHING
- FLICKING
- DRAGGING
- SLIDING
- DOUBLE TAPPING
- PINCH
- SPREAD
- OPERATION ON RESPECTIVE SCREENS
- KEY (TAPPING)
- LIST (TAPPING, SLIDING AND FLICKING)
- SLIDER (SLIDING)
- TAB (TAPPING)
- PREVIEW SCREEN (DOUBLE TAPPING/ PINCH/ SPREAD)
- OPERATION OF FREQUENTLY USED KEYS
- NUMERIC KEYS
- [START] KEY ([B/W START] KEY AND [COLOUR START] KEY)
- [CANCEL COPY] KEY, [STORING CANCELLED] KEY, [CANCEL SCAN] KEY, [SENDING CANCELLED] KEY
- [CA] KEY
- ACTION PANEL
- NOTIFICATION
- MACHINE INFORMATION
- PAPER TRAY
- HOME SCREEN
- OVERVIEW
- RECENT JOBS
- CHANGING MODES
- PREVIEW SCREEN
- KEYS USED IN THE PREVIEW SCREEN
- DELETING A PAGE
- MOVING A PAGE
- ROTATING A PAGE
- SETTING CHAPTER INSERTS
- TAP
- INSERTING A BLANK PAGE
- DELETING PART OF THE ORIGINAL IMAGE
- FOLLOW THE ON-SCREEN INSTRUCTIONS TO SPECIFY THE ERASE RANGE
- CHANGING THE SETTINGS
- EDITING THE HOME SCREEN
- ADDING SHORTCUT KEYS
- FROM THE TOUCH PANEL
- FROM THE WEB PAGE
- SELECT THE FUNCTION YOU WANT TO ADD
- EDITING SHORTCUT KEYS
- TAP THE [YES] KEY
- CLICK [CONDITION SETTINGS] AND CLICK THE SHORTCUT KEY YOU WANT TO DELETE
- SELECT [NONE] AND CLICK THE [SUBMIT] BUTTON
- WHEN YOU HAVE FINISHED CONFIGURING THE SETTINGS, CLICK THE [SUBMIT] BUTTON
- CHANGING A SHORTCUT KEY
- A YELLOW FRAME APPEARS AROUND THE SELECTED SHORTCUT KEY
- ENTER THE NEW NAME BY KEYBOARD
- ENTER THE IP ADDRESS SET IN THE MACHINE IN THE ADDRESS BAR OF YOUR WEB BROWSER
- ON THE WEB PAGE, CLICK THE [SYSTEM SETTINGS] TAB → [HOME SCREEN SETTINGS]
- ADDING A SHORTCUT KEY IMAGE
- SELECT ANY ITEM
- SELECT THE FILE TO BE ADDED IN "SELECT FILE
- MOVING A SHORTCUT KEY
- TAP AN EMPTY SHORTCUT KEY LOCATION
- RETURNING THE SHORTCUT KEYS TO THE FACTORY DEFAULT STATE
- CLICK [CONDITION SETTINGS], AND CLICK THE [RETURN TO THE DEFAULTS] BUTTON
- CHANGING THE TRANSPARENCY OF A SHORTCUT KEY
- CHANGING THE LAYOUT PATTERN OF THE HOME SCREEN
- HOME SCREEN LAYOUT PATTERNS
- CLICK [CONDITION SETTINGS] AND SELECT THE DESIRED LAYOUT PATTERN FROM THE "TEMPLATE
- SELECTING A MFP DISPLAY PATTERN FOR THE HOME SCREEN
- CHANGING THE COLOUR OF TEXT ON THE HOME SCREEN
- CHANGING THE BACKGROUND IMAGE OF THE HOME SCREEN
- CLICK THE [CHANGE] BUTTON IN [BACKGROUND IMAGE]
- SET THE [USE CUSTOM IMAGE] CHECKBOX TO , AND SELECT THE IMAGE WITH [SELECT FILE]
- CHANGING THE FIXED KEYS
- CLICK [CONDITION SETTINGS], AND CLICK THE DESIRED ITEM UNDER "FIX KEY
- SELECT THE FUNCTION YOU WANT TO ADD, AND CLICK THE [SUBMIT] BUTTON
- INCREASING THE TEXT SIZE
- TAP THE [ENLARGE DISPLAY MODE] KEY IN THE HOME SCREEN
- CHANGING THE LANGUAGE USED ON THE MACHINE
- ON THE WEB PAGE, CLICK THE [SYSTEM SETTINGS] TAB → [COMMON SETTINGS] → [OPERATION SETTINGS] → [CONDITION SETTINGS] → [LANGUAGE SETTING]
- SELECT THE LANGUAGE YOU WANT TO CHANGE FROM THE LIST
- CHANGING THE POSITION OF THE [HOME SCREEN] KEY
- STOPPING/DELETING A JOB, PRIORITY PROCESSING AND CHECKING THE STATUS
- TYPES OF JOB STATUS SCREENS
- SPOOL LIST
- JOB QUEUE LIST
- COMPLETE LIST
- STOPPING/DELETING A JOB IN PROGRESS OR RESERVED
- TAP THE JOB THAT YOU WISH TO STOP OR DELETE, AND THEN TAP [STOP/DELETE] ON THE ACTION PANEL
- PRIORITY PROCESSING OF A RESERVED JOB
- TAP THE JOB STATUS DISPLAY AND TAP THE JOB FOR PRIORITY PROCESSING
- CHANGING THE JOB ORDER
- SCANNER JOB WITH A TIMER SETTING
- CHECKING A RESERVED JOB OR THE JOB IN PROGRESS
- CHECKING COMPLETED JOBS
- READING THE JOB LIST
- MESSAGES DISPLAYED IN "STATUS
- NAMES AND FUNCTIONS OF SOFT KEYBOARD KEYS
- SET THE KEYBOARD SETTING
- KEYBOARD SETTINGS
- DEFAULT KEYBOARD SETTING
- KEYBOARD SELECT
- SET KEYBOARD PRIORITY
- SOFT KEYBOARD TEMPLATE SETTING
- BEFORE USING THE MACHINE AS A COPIER
- BASIC PROCEDURE FOR MAKING COPIES
- OTHER FUNCTIONS
- CONVENIENT COPY FUNCTIONS
- COPY MODE
- EASY MODE
- ST SCREEN
- ND SCREEN
- NORMAL MODE
- SELECTING COPY MODE
- COPYING
- SELECT FUNCTIONS
- SCAN THE ORIGINAL
- CHECK THE PREVIEW IMAGE
- TAP THE [COLOUR START] OR [B/W START] KEY TO START COPYING
- TO MAKE TWO OR MORE SETS OF COPIES
- DEFAULT SETTINGS FOR COPYING
- CHECKING THE ORIGINAL SIZE
- STANDARD SIZES
- ORIENTATION OF PLACED ORIGINAL
- AUTOMATIC COPY IMAGE ROTATION (ROTATION COPY)
- SELECTING THE PAPER TRAY FOR COPYING
- TAP THE [PAPER SELECT] KEY
- TAP THE REQUIRED TRAY KEY
- AUTOMATIC 2-SIDED COPYING
- USING THE AUTOMATIC DOCUMENT FEEDER FOR 2-SIDED COPYING
- SELECT 2-SIDED COPY MODE
- USING THE DOCUMENT GLASS FOR 2-SIDED COPYING
- SELECT THE 2-SIDED COPY MODE
- CHECK THE PAPER (TRAY) AND COLOR MODE YOU WANT TO USE FOR COPYING, AND TAP THE KEYS FOR ANY OTHER SETTINGS YOU WANT TO SELECT
- COPY COLOUR MODES
- COPYING IN TWO COLOURS
- SPECIFY THE COLOUR TO CHANGE THE EXTRACTED COLOUR TO
- COPYING IN SINGLE COLOUR
- TAP A COLOUR YOU WISH TO USE
- CHANGING THE EXPOSURE AND ORIGINAL IMAGE TYPE
- AUTOMATIC ADJUSTMENT OF EXPOSURE AND ORIGINAL TYPE
- MANUAL ADJUSTMENT OF EXPOSURE AND ORIGINAL TYPE
- TAP THE REQUIRED ORIGINAL IMAGE TYPE KEY TO SPECIFY THE ORIGINAL TYPE
- ORIGINAL IMAGE TYPE SELECT KEYS
- TAP OR SLIDE THE SLIDER TO ADJUST THE COPY EXPOSURE
- ENLARGE/REDUCE
- AUTO RATIO SELECT
- MANUALLY SELECT THE PAPER TRAY, AND PLACE THE ORIGINAL
- TAP THE [COPY RATIO] KEY
- TAP THE [AUTO IMAGE] KEY
- MANUAL RATIO SELECTION
- SPECIFYING THE DESIRED ZOOM RATIO
- SPECIFYING THE PAPER SIZE
- SPECIFYING THE IMAGE DIMENSIONS
- TAP TO SET THE RATIO
- AFTER THE SETTINGS ARE COMPLETED, TAP THE [OK] KEY. CHECK THAT A PAPER SIZE SUITABLE FOR THE RATIO IS SELECTED
- SPECIFY THE ORIGINAL SIZE (PAPER SIZE OF THE LOADED ORIGINAL) AND THE COPY SIZE (PAPER SIZE OF THE COPY OUTPUT)
- ENLARGING/REDUCING THE LENGTH AND WIDTH SEPARATELY
- USING THE PRESET RATIO KEY
- SPECIFY THE DESIRED RATIO
- TAP THE [BY SIZE] KEY
- SPECIFY THE X AND Y DIMENSIONS OF THE IMAGE SIZE AND THOSE OF THE OUTPUT SIZE
- SELECTING THE ORIENTATION AND SIZE OF THE ORIGINAL
- SPECIFYING THE ORIENTATION OF THE ORIGINAL
- SPECIFY THE ORIENTATION AND SIZE OF THE ORIGINAL
- SPECIFYING THE ORIENTATION AND SIZE OF A NON-STANDARD SIZE ORIGINALS
- SPECIFY THE ORIGINAL SIZE
- TAP THE [OK] KEY
- STORING FREQUENTLY USED ORIGINAL SIZES
- STORING ORIGINAL SIZES (AMEND/DELETE)
- TAP A KEY () FOR STORING A CUSTOM ORIGINAL SIZE
- TO AMEND OR DELETE A PREVIOUSLY STORED KEY
- TO CANCEL THE OPERATION
- RETRIEVING A STORED ORIGINAL SIZE
- MAKING COPIES USING THE BYPASS TRAY
- LOAD PAPER INTO THE BYPASS TRAY
- TAP THE [PAPER SELECT] KEY, AND TAP THE BYPASS TRAY KEY
- SPECIFYING A TYPE AND SIZE OF PAPER LOADED ON BYPASS TRAY
- TAP THE [SIZE] TAB, AND TAP THE KEY THAT MEETS THE SIZE OF THE LOADED PAPER
- OUTPUT
- SORT/GROUP SETTING
- TAP THE [DETAIL] KEY TO CHANGE TO NORMAL MODE
- TAP THE [SORT/GROUP] KEY
- SELECT THE SORTING METHOD
- STAPLE SETTINGS
- STAPLE ON (EXCLUDING SADDLE STITCH)
- TAP THE [STAPLE / PUNCH] KEY
- SELECT THE NUMBER OF STAPLES AND STAPLE POSITION
- IN NORMAL MODE
- SADDLE STITCH
- SELECT
- SELECT BINDING EDGE AND ORIGINAL SETTINGS
- PUNCH SETTINGS
- TAP THE [STAPLE / PUNCH] KEY. COPY MODE (PAGE 3-3)
- SELECT PUNCHING AND SET THE POSITION. AFTER THE SETTINGS ARE COMPLETED, TAP [OK]
- FOLD SETTING
- TYPES OF FOLDS AND PAPER SIZES AVAILABLE
- INSERTING SEPARATOR PAGES BETWEEN COPIES OR JOBS
- SEPARATOR PAGE INSERTION EXAMPLES
- TAP THE [OTHERS] KEY, AND TAP THE [SEPARATOR PAGE] KEY
- SPECIFY THE SEPARATOR PAGE INSERTION MODE
- TO CHANGE THE SEPARATOR PAGE TRAY
- TO CANCEL THE SEPARATOR PAGE INSERTION SETTING
- BATCH COPY FUNCTIONS
- COPYING MULTIPLE ORIGINALS AS A SINGLE PAGE (N-UP)
- TAP THE [N-UP] KEY
- TAP THE NUMBER OF ORIGINALS YOU WANT TO COPY COLLECTIVELY, AND SELECT THE LAYOUT KEY
- TO SELECT MORE DETAILED SETTINGS, TAP THE [DETAIL] KEY TO SWITCH TO NORMAL MODE
- TAP THE [OTHERS] KEY, AND TAP THE [N-UP] KEY
- TAP [BORDER], AND SELECT THE BORDER
- COPYING EACH FACING PAGE OF A BOUND DOCUMENT (DUAL PAGE COPY)
- COPYING BOTH SIDES OF A CARD AS A SINGLE PAGE (CARD SHOT)
- REPEATING THE SAME IMAGE ON ONE SHEET (REPEAT LAYOUT)
- COPY BY AUTOMATICALLY CALCULATING THE REPEAT COUNT (AUTO REPEAT)
- TAP THE [DETAIL] KEY TO CHANGE TO NORMAL MODE. EASY MODE (PAGE 3-3)
- TAP THE [OTHERS] KEY, AND THEN TAP THE [REPEAT LAYOUT] KEY
- TAP THE [AUTO REPEAT] KEY
- CHECK THE REPEAT FACES WHICH HAVE BEEN CALCULATED AUTOMATICALLY
- TAP THE [LAYOUT] KEY
- SPECIFY THE REPEAT PARTITION LINE
- COPY BY SPECIFYING A REPEAT COUNT (FIXED REPEAT)
- TAP [NO. OF FACES] TO SET A REPEAT COUNT
- REPEAT A PHOTO SIZE ORIGINAL IN ACTUAL SIZE (PHOTO REPEAT)
- TAP THE [ORIGINAL] KEY AND SELECT AN ORIGINAL SIZE
- TAP THE [PAPER SELECT] KEY AND SELECT A PAPER SIZE
- COPYING MULTIPLE BUSINESS CARDS (BUSINESS CARD COPY)
- TAP THE [OTHERS] KEY, AND THEN TAP THE [BUSINESS CARD COPY] KEY
- SPECIFY SETTINGS FOR BUSINESS CARD COPY
- TAP THE [START] KEY TO START COPYING
- COPY RESULTS OF 8-SHEET LAYOUTS
- OUTPUT AND LAYOUT EDITING FUNCTIONS
- MAKING COPIES IN PAMPHLET FORMAT (BOOKLET)
- TO STAPLE COPIES AUTOMATICALLY WHEN BOOKLET IS ENABLED
- WHEN INSERTING A COVER, TAP THE [COVER SETTING] KEY, AND TAP THE [ON] KEY
- COPYING MULTIPLE ORIGINALS ON EACH BOOKLET PAGE (BOOKLET 2-UP/4-UP)
- TAP THE [STAPLE SORT] KEY, AND TAP THE [SADDLE STITCH] KEY
- SELECT THE BINDING EDGE
- COPYING A PAMPHLET (BOOK COPY)
- BOOK COPY FLOW (WHEN THE ORIGINAL HAS 4 PAGES)
- PLACE THE ORIGINAL ON THE DOCUMENT GLASS
- TAP THE [OTHERS] KEY, AND TAP THE [BOOK COPY] KEY
- SELECT A BINDING POSITION
- TAP THE [COLOUR START] OR [B/W START] KEY TO SCAN THE FIRST ORIGINAL PAGE
- PLACE THE NEXT OPENED ORIGINAL PAGES, AND TAP THE [COLOUR START] OR [B/W START] KEY
- SPLITTING A PAMPHLET ORIGINAL BY PAGE (BOOK DIVIDE)
- TAP THE [OTHERS] KEY, AND TAP THE [BOOK DIVIDE] KEY
- PAPER, AND TIME SAVING FUNCTIONS
- SKIPPING BLANK PAGES IN AN ORIGINAL (BLANK PAGE SKIP)
- TAP THE [SKIP BLANK PAGE] OR [SKIP BLANK AND BACK SHADOW] KEY
- TAP THE [COLOUR START] OR [B/W START] KEY
- CHECK THE CONFIRMATION MESSAGE, AND TAP THE [OK] KEY TO START COPYING
- ADJUSTING THE BACKGROUND BY MAKING LIGHT AREAS OF THE ORIGINAL DARKER OR LIGHTER (BACKGROUND ADJUSTMENT)
- TAP THE [OTHERS] KEY, AND TAP THE [BACKGROUND ADJUSTMENT] KEY
- TAP OR MOVE THE SLIDER TO SET THE VALUE
- MAKING A PROOF COPY (PROOF COPY)
- PROOF COPY FLOW
- TAP THE [OTHERS] KEY, AND TAP THE [PROOF COPY] KEY
- AS NECESSARY, SPECIFY THE REQUIRED FUNCTIONS SUCH AS "EXPOSURE" AND "COPY RATIO
- CHECK THE COPY RESULT. IF NO PROBLEM IS FOUND, TAP THE [START PRINT] KEY
- CHECKING THE NUMBER OF SCANNED ORIGINAL SHEETS (ORIGINAL COUNT)
- TAP THE [OTHERS] KEY, AND TAP THE [ORIGINAL COUNT] KEY
- PLACE THE ORIGINAL IN THE DOCUMENT FEEDER TRAY OF THE AUTOMATIC DOCUMENT FEEDER
- CHECK THE NUMBER OF ORIGINAL SHEETS
- TAP THE [OK] KEY TO START COPYING
- USING TWO MACHINES TO REDUCE THE COPY TIME (TANDEM COPY)
- PRIMARY UNIT AND SECONDARY UNIT
- TAP THE [OTHERS] KEY, AND TAP THE [RANDOM COPY] KEY
- TAP THE NUMBER OF COPIES KEY TO SPECIFY THE NUMBER OF COPIES
- SECURITY REINFORCEMENT FUNCTIONS
- PADDING UNAUTHORISED COPY PREVENTION DATA (HIDDEN PATTERN PRINT)
- SPECIFY EACH ITEM IN THE [PRINT CONTENTS SETTING] TAB AS REQUIRED
- OUTPUT POSITION AND MARGIN ADJUSTMENT FUNCTIONS
- ADDING MARGINS (MARGIN SHIFT)
- TAP THE [OTHERS] KEY, AND TAP THE [MARGIN SHIFT] KEY
- TAP THE IMAGE SHIFT DIRECTION
- SETS A MARGIN SHIFT WIDTH
- ERASING PERIPHERAL SHADOWS FOR COPYING (ERASE)
- TAP THE [OTHERS] KEY, AND TAP THE [ERASE] KEY
- TAP THE CHECKBOX OF THE EDGE THAT YOU WISH TO ERASE, AND SPECIFY THE ERASE POSITION
- SPECIFY THE ERASE WIDTH
- COPYING ORIGINALS WITH NO EDGE CUT-OFF (FULL BLEED COPY)
- TAP THE [OTHERS] KEY, AND TAP THE [FULL BLEED COPY] KEY
- SELECT PAPER LARGER THAN THE OUTPUT IMAGE
- COPYING IN THE CENTRE OF THE PAPER (CENTRING)
- NOT USING THE CENTRING FUNCTION USING THE CENTRING FUNCTION
- TAP THE [OTHERS] KEY, AND TAP THE [CENTRING] KEY
- SPECIFYING A PAPER POSITION (POSITION IMAGE)
- SETS A MOVEMENT DISTANCE
- SCANNING FUNCTIONS
- COLLECTIVELY SCANNING A LARGE NUMBER OF ORIGINALS (JOB BUILD)
- COPYING IN JOB BUILD MODE
- TAP THE [OTHERS] KEY, AND TAP THE [JOB BUILD] KEY
- CHANGE SETTINGS AS NEEDED
- PLACE THE NEXT SET OF ORIGINALS AND TAP THE [START] KEY
- CHANGING THE COPY SETTINGS FOR EACH SET OF ORIGINALS
- SCANNING ORIGINALS OF DIFFERENT SIZES (MIXED SIZE ORIGINAL)
- WHEN MIXED SIZE ORIGINAL IS COMBINED WITH AUTO RATIO SELECTION
- TAP THE [OTHERS] KEY, AND TAP THE [MIXED SIZE ORIGINAL] KEY
- TAP THE [SAME WIDTH] KEY OR THE [DIFFERENT WIDTH] KEY AS APPROPRIATE FOR THE ORIGINALS
- PLACE THE ORIGINAL FACE UP ON THE DOCUMENT FEEDER TRAY WITH THE CORNERS ALIGNED TOGETHER IN FAR LEFT CORNER
- BP-50C26/BP-50C31/BP-50C36/BP-50C45/BP-50C55/BP-50C65/BP-60C31/BP-60C36/BP-60C
- SCANNING THIN ORIGINALS (SLOW SCAN MODE)
- TAP THE [OTHERS] KEY, AND TAP THE [SLOW SCAN MODE] KEY
- TAP THE [COLOUR START] OF [B/W START] KEY TO START COPYING
- SCANNING HEAVY ORIGINALS (HEAVY PAPER SCAN)
- TAP THE [OTHERS] KEY, AND TAP THE [HEAVY PAPER SCAN] KEY
- ADJUSTING RESOLUTION WHEN SCANNING (RESOLUTION)
- TAP THE [OTHERS] KEY, AND TAP THE [SCAN RESOLUTION] KEY
- SELECT THE RESOLUTION
- TAP THE [B/W START] KEY TO START COPYING
- TEXT AND IMAGE ADDITION FUNCTIONS
- PRINTING DATES, PAGE NUMBERS, AND WATERMARKS (STAMP)
- TEXT SETTING (STAMP) IN PRINT MENU
- TAP THE [OTHERS] KEY, AND TAP THE [STAMP] KEY
- TAP A TAB TO BE PRINTED, AND TAP THE FORMAT
- TAP A KEY OF THE DESIRED PRINT POSITION
- SETTING USING THE [TEXT] TAB
- SELECTING THE FORMAT FROM PRE-SET TEXT
- ADDING A REGISTERED IMAGE TO AN ORIGINAL (CUSTOM IMAGE)
- TAP THE [OTHERS] KEY, AND TAP THE [CUSTOM IMAGE] KEY
- TAP THE [CUSTOM STAMP] OF [CUSTOM WATERMARK] KEY
- TAP THE [IMAGE] KEY TO SELECT AN IMAGE
- SET [PRINT PAGE] OR [PRINT POSITION]
- INSERTING COVERS IN COPIES (COVERS/INSERTS)
- COPYING ON A FRONT COVER AND INSERTING TOGETHER WITH A BACK COVER
- COVER INSERTING EXAMPLES
- SIDED COPYING OF 1-SIDED ORIGINALS
- TAP THE [CHANGE] KEY
- CONFIGURE COPY SETTINGS FOR A FRONT COVER SHEET
- TO CHANGE THE COVER INPUT TRAY
- INSERTING INSERTION SHEETS IN COPIES (COVERS/INSERTS)
- SHEET INSERTING EXAMPLES
- WHEN ONLY INSERTING INSERTION SHEET A, TAP THE [MAKE NO COPY] KEY
- TO CHANGE AN INSERTION SHEET
- CHECKING, EDITING, AND DELETING THE PAGE LAYOUT OF COVERS AND INSERTION SHEETS (PAGE LAYOUT)
- TAP THE [OTHERS] KEY, AND THEN TAP THE [COVERS/INSERTS] KEY
- TAP THE [PAGE LAYOUT] KEY
- CHECK THE PAGE LAYOUT
- CHANGE COVER OR INSERTION SHEET SETTINGS
- INSERTING INSERTION SHEETS IN BETWEEN TRANSPARENCY FILMS (TRANSPARENCY INSERTS)
- PLACE THE TRANSPARENCY FILM FACE DOWN IN THE BYPASS TRAY, AND LOAD TRANSPARENCY FILM SHEETS
- TAP THE [OTHERS] KEY, AND THEN TAP THE [TRANSPARENCY INSERTS] KEY
- TAP THE [ON] KEY
- FUNCTIONS FOR SPECIFIC USES
- COPYING CAPTIONS ONTO TAB PAPER (TAB COPY)
- RELATION BETWEEN THE ORIGINALS AND THE TAB PAPER
- SETS AN IMAGE SHIFT WIDTH (TAB WIDTH)
- LOAD THE TAB PAPER
- PLACE THE ORIGINAL AND TAP THE [PREVIEW] KEY
- MAKING A POSTER-SIZED COPY (MULTI-PAGE ENLARGEMENT)
- TAP THE [OTHERS] KEY, AND TAP THE [MULTI-PAGE ENLARGEMENT] KEY
- SELECT THE [AB] OF [INCH] TAB TO MEET THE ORIGINAL SIZE FOR POSTER-SIZED COPY, AND TAP THE KEY THAT MEETS THE ORIGINAL SIZE
- TAP THE KEY OF THE SIZE YOU WANT TO ENLARGE THE ORIGINAL TO
- COPYING WITH MIRROR IMAGE (MIRROR IMAGE)
- TAP THE [OTHERS] KEY, AND TAP THE [MIRROR IMAGE] KEY
- OUTPUT AND DENSITY ADJUSTMENT FUNCTIONS
- REVERSING WHITE AND BLACK IN A COPY (B/W REVERSE)
- TAP THE [OTHERS] KEY, AND TAP THE [B/W REVERSE] KEY
- EASY ADJUSTMENT OF THE IMAGE QUALITY (QUICK IMAGE QUALITY ADJUSTMENT)
- TAP THE [OTHERS] KEY, AND TAP THE [QUICK IMAGE QUALITY ADJUSTMENT] KEY
- TAP OR SLIDE THE SLIDER TO ADJUST THE IMAGE QUALITY
- ADJUSTING RED/GREEN/BLUE IN COPIES (RGB ADJUST)
- ADJUSTING THE SHARPNESS OF AN IMAGE (SHARPNESS)
- TAP THE [OTHERS] KEY, AND TAP THE [SHARPNESS] KEY
- TAP OR SLIDE THE SLIDER TO ADJUST THE SHARPNESS
- ADJUSTING THE COLOUR (COLOUR BALANCE)
- ADJUSTING THE BRIGHTNESS OF A COPY (BRIGHTNESS)
- TAP THE [OTHERS] KEY, AND TAP THE [BRIGHTNESS] KEY
- ADJUSTING THE INTENSITY OF A COPY (INTENSITY)
- TAP THE [OTHERS] KEY, AND TAP THE [INTENSITY] KEY
- INTERRUPT COPY
- TAP THE [INTERRUPT] KEY
- CONFIGURE COPY SETTINGS
- TAP THE [COLOUR START] OR [B/W START] KEY TO START INTERRUPT COPYING
- SEND DATA WHILE COPYING
- SELECT A RECIPIENT FROM THE ADDRESS BOOK
- SET EACH COPY ITEM AS REQUIRED
- COPY JOBS
- PROGRAMS
- STORING A PROGRAM
- SPECIFY THE COPY FUNCTION TO BE STORED
- TAP [PROGRAM REGISTRATION] ON THE ACTION PANEL
- TAP AN UNUSED KEY
- SET A NAME FOR THE PROGRAM AND TAP THE [OK] KEY
- SELECT WHETHER OR NOT THE PROGRAM WILL BE ADDED TO THE HOME SCREEN OR THE FAVOURITES
- RETRIEVING A PROGRAM
- DELETING AND RENAMING A PROGRAM
- DELETING A PROGRAM
- RENAMING A PROGRAM
- PRINTER FUNCTION OF THE MACHINE
- PRINTING IN A WINDOWS ENVIRONMENT
- PRINTING IN A MACOS ENVIRONMENT
- FREQUENTLY USED FUNCTIONS
- CONVENIENT PRINTING FUNCTIONS
- PRINTING WITHOUT THE PRINTER DRIVER
- PRINTER JOBS
- PRINT RELEASE FUNCTION
- APPENDIX
- PRINTER FUNCTION
- WINDOWS ENVIRONMENT
- PRINTER DRIVER TYPE
- PCL
- MACOS ENVIRONMENT
- IF A NOTICE PAGE IS PRINTED
- BASIC PRINTING PROCEDURE
- SELECT PRINT SETTINGS
- CLICK THE [MAIN] TAB
- SELECT THE ORIGINAL SIZE
- PRINTER DRIVER SETTINGS SCREEN / REFERRING TO HELP (PAGE 4-6)
- CLICK THE [OK] BUTTON
- CLICK THE [PRINT] BUTTON
- PRINTER DRIVER SETTINGS SCREEN / REFERRING TO HELP
- PRINT IMAGE
- MACHINE IMAGE
- [HELP] BUTTON
- SELECTING THE PAPER
- PRINTING ON ENVELOPES
- PRINTING WHEN THE USER AUTHENTICATION FUNCTION IS ENABLED
- IN THE PRINTER DRIVER PROPERTIES WINDOW OF THE APPLICATION, SELECT THE PRINTER DRIVER OF THE MACHINE AND CLICK THE [PREFERENCES] BUTTON
- ENTER YOUR USER INFORMATION
- SAVING SETTINGS AT THE TIME OF PRINTING
- SELECT THE MACHINE'S PRINTER DRIVER FROM THE PRINT WINDOW OF THE APPLICATION, AND CLICK THE [PREFERENCES] BUTTON
- REGISTER PRINT SETTINGS
- CHECK AND SAVE THE SETTINGS
- USING SAVED SETTINGS
- SELECT FAVORITE SETTINGS
- CHANGING THE PRINTER DRIVER DEFAULT SETTINGS
- CLICK THE [START] BUTTON, SELECT [SETTINGS] → [DEVICE] → [PRINTERS & SCANNERS]
- SHARE FAVORITE SETTINGS BETWEEN SERVER AND CLIENT
- SELECT [PAGE SETUP] FROM THE [FILE] MENU AND SELECT THE PRINTER
- SELECT PAPER SETTINGS
- SELECTING THE COLOR MODE
- WINDOWS
- MACOS
- SELECTING THE RESOLUTION
- SIDED PRINTING
- FITTING THE PRINT IMAGE TO THE PAPER
- PRINTING MULTIPLE PAGES ON ONE PAGE
- PRINTING WHILE SKIPPING BLANK PAGES
- STAPLING OUTPUT/PUNCHING HOLES IN OUTPUT
- STAPLE FUNCTION
- PUNCH FUNCTION
- CONVENIENT FUNCTIONS FOR CREATING PAMPHLETS AND POSTERS
- CREATE A PAMPHLET (BOOKLET/SADDLE STITCH)
- PRINTING WITH MARGIN SHIFT SETTING (MARGIN)
- CREATE A LARGE POSTER (POSTER PRINTING)
- FUNCTIONS TO ADJUST THE SIZE AND ORIENTATION OF THE IMAGE
- ADJUST PRINT POSITION ON ODD AND EVEN PAGES SEPARATELY (PRINT POSITION)
- ROTATING THE PRINT IMAGE 180 DEGREES (ROTATE 180 DEGREES)
- ENLARGING/REDUCING THE PRINT IMAGE (ZOOM SETTING/ENLARGE OR REDUCE)
- ADJUST THE LINE THICKNESS (WIDTH)
- ADJUSTING LINE WIDTHS USED IN DATA SUCH AS CAD
- THICKENING FINE LINES IN EXCEL
- ADJUSTING THE THICKNESS OF TEXT AND LINES
- PRINT A MIRROR-IMAGE (MIRROR-IMAGE REVERSE/VISUAL EFFECTS)
- COLOR MODE ADJUSTING FUNCTION
- ADJUST THE BRIGHTNESS AND CONTRAST OF THE IMAGE (COLOR ADJUSTMENT/RGB ADJUSTMENT)
- PRINTING FAINT TEXT AND LINES IN BLACK (TEXT TO BLACK/VECTOR TO BLACK)
- SELECTING COLOR SETTINGS TO MATCH THE IMAGE TYPE (ADVANCED COLOR SETTINGS)
- FUNCTIONS TO COMBINE TEXT AND IMAGES
- ADDING A WATERMARK TO PRINTED PAGES (WATERMARK)
- PRINTING AN IMAGE OVER THE PRINT DATA (IMAGE STAMP)
- REGISTERING A CUSTOM IMAGE
- OVERLAY A FIXED FORM ON THE PRINT DATA (OVERLAYS)
- CREATING AN OVERLAY FILE
- PRINTING WITH AN OVERLAY FILE
- ADDING THE NUMBER OF COPIES (COPIES STAMP)
- PRINT FUNCTIONS FOR SPECIAL PURPOSES
- PRINTING SPECIFIC PAGES ON DIFFERENT PAPER (DIFFERENT PAPER)
- IN A WINDOWS ENVIRONMENT
- IN A MACOS ENVIRONMENT
- ADDING INSERTS WHEN PRINTING ON TRANSPARENCY FILM (TRANSPARENCY INSERTS)
- INSERTING SEPARATOR PAGES BETWEEN JOBS OR COPIES
- PRINTING A CARBON COPY (CARBON COPY)
- PRINTING TEXT ON TABS OF TAB PAPER (TAB SHIFT/TAB PAPER PRINT)
- TAB SHIFT
- TAB PAPER PRINT (FOR PCL6 ONLY)
- TWO-SIDED PRINTING WITH SPECIFIC PAGES PRINTED ON THE FRONT SIDE (CHAPTER INSERTS)
- FOLDING PAPER FOR PRINTING (FOLD)
- FOLDING
- FOLDING (Z-FOLD)
- INSERT PRESET DATA BEFORE OR AFTER EACH PAGE (PAGE INTERLEAVE)
- PRINT THE SAME IMAGE IN TILE PATTERN (REPEAT PRINT)
- PRINTING PATTERN DATA (HIDDEN PATTERN PRINT)
- CHANGING THE RENDERING METHOD AND PRINTING JPEG IMAGES (USE DRIVER TO RENDER JPEGS)
- MAXIMIZING THE PRINT AREA ON THE PAPER (PRINT AREA)
- PRINTING AT AN ENHANCED RESOLUTION (SMOOTHING)
- CONVENIENT PRINTER FUNCTIONS
- USING TWO MACHINES TO PRINT A LARGE PRINT JOB (TANDEM PRINT)
- SAVING AND USING PRINT FILES (DOCUMENT FILING)
- HOLD ONLY
- HOLD AFTER PRINT
- SAMPLE PRINT
- AUTOMATICALLY PRINT ALL STORED DATA
- PRINTING AND SENDING SIMULTANEOUSLY
- EXTENSION OF PRINTABLE FILES
- DIRECTLY PRINTING A FILE ON AN FTP SERVER
- TAP THE [SELECT FILE FROM FTP TO PRINT] KEY ON THE ACTION PANEL
- TAP THE KEY OF THE FTP SERVER THAT YOU WISH TO ACCESS
- TAP THE KEY OF THE FILE THAT YOU WISH TO PRINT, AND TAP THE [CHOOSE PRINT SETTINGS] KEY ON THE ACTION PANEL
- SELECT THE PRINT CONDITIONS
- TAP THE [START] KEY
- DIRECTLY PRINTING A FILE IN USB MEMORY
- DIRECTLY PRINTING A FILE IN A NETWORK FOLDER
- PRINTING A FILE IN THE NETWORK FOLDER YOU HAVE CONFIGURED IN THE MACHINE'S SETTINGS
- ENTERING THE NETWORK FOLDER PATH DIRECTLY
- ENTER THE PATH TO THE FOLDER, USER NAME AND PASSWORD
- REFERRING TO THE NETWORK FOLDER PATH
- TAP THE KEY OF THE SERVER OR COMPUTER THAT YOU WISH TO ACCESS
- TAP THE KEY OF THE NETWORK FOLDER THAT YOU WISH TO ACCESS
- DIRECTLY PRINTING FROM A COMPUTER
- SUBMIT PRINT JOB
- PRINT SETTINGS
- FTP PRINT
- PERFORMING FTP PRINT
- E-MAIL PRINT
- TO PERFORM E-MAIL PRINT
- PERFORMING E-MAIL PRINT
- UNIVERSAL PRINT
- BEFORE CONNECTING THE UNIVERSAL PRINT SERVICE
- PRINTING METHODS
- PRINTING PERMISSIONS FOR INVALID USERS
- REGISTERING AND DELETING FROM THE UNIVERSAL PRINT SERVICE
- OPERATION IN POWER SAVING MODE
- UNIVERSAL PRINT SETTINGS
- REGISTERING THE MACHINE WITH AZURE ACTIVE DIRECTORY
- REGISTERING THE MACHINE WITH EACH CLIENT PC
- DELETE FROM AZURE ACTIVE DIRECTORY
- CHECKING THE PRINT STATUS
- PRINTING AN ENCRYPTED PDF FILE
- CHANGING TO ANOTHER PAPER SIZE AND PRINTING WHEN PAPER RUNS OUT
- INTER-GROUP PRINTING
- BEFORE USING THE PRINT RELEASE FUNCTION
- SETTINGS REQUIRED ON THE MACHINE
- FIXING THE IP ADDRESS OF THE MACHINE
- ADDING THE PRINT RELEASE ICON TO THE HOME SCREEN
- TAP THE [EDIT END] KEY
- INSTALLING THE PRINTER DRIVER OF THE PRIMARY UNIT
- USING THE PRINT RELEASE FUNCTION
- STORING A JOB IN THE PRIMARY UNIT FROM YOUR COMPUTER
- START PRINTING
- PRINTING/DELETING A JOB STORED IN THE PRIMARY UNIT FROM A SECONDARY UNIT
- TAP THE [PRINT RELEASE] KEY ON THE HOME SCREEN
- PRINT OR DELETE THE SELECTED JOB
- PRINTER DRIVER SPECIFICATIONS LIST
- SPECIFYING A BILLING CODE USING THE PRINTER DRIVER
- ENABLE BILLING CODE
- SPECIFY A BILLING CODE
- AUTHENTICATION BY SINGLE SIGN-ON
- SETTINGS
- FOR THE AUTHENTICATION METHOD, REFER TO "PRINTING WHEN THE USER AUTHENTICATION FUNCTION IS ENABLED (PAGE 4-9)
- BEFORE USING THE MACHINE AS A FAX
- BASIC TRANSMISSION METHODS
- FAX RECEPTION
- PERFORMING F-CODE COMMUNICATION
- USING AN EXTERNAL TELEPHONE
- CHECK THE COMMUNICATION STATUS
- CONNECTING TO THE TELEPHONE LINE
- MAKE SURE THE MAIN POWER SWITCH IS IN THE " | " POSITION
- SETTING THE TELEPHONE LINE TYPE
- CHECKING THE DATE AND TIME
- STORING THE SENDER FAX NUMBER
- STORING DESTINATION ADDRESSES FOR EACH SCAN MODE IN THE ADDRESS BOOK
- FAX MODE
- SELECTING FAX MODE
- [R] KEY
- ENTER THE DESTINATION FAX NUMBER
- CONFIGURE THE SETTINGS
- SEND THE ORIGINAL
- ENTERING DESTINATIONS
- ENTERING A DESTINATION NUMBER USING THE NUMERIC KEYS
- TAP THE [DIRECT ENTRY] KEY OR [FAX NUMBER] TO ENTER THE DESTINATION FAX NUMBER
- ENTERING A PAUSE BETWEEN DIGITS OF THE NUMBER
- TAP THE [PAUSE] KEY
- IF YOU WANT TO ENTER A PAUSE BETWEEN DIGITS OF THE NUMBER
- TO SET THE LENGTH OF PAUSE
- RETRIEVING A DESTINATION FROM AN ADDRESS BOOK
- TAP A ONE-TOUCH KEY OF CONTACT OR GROUP THAT INCLUDES THE FAX DESTINATION
- IF YOU SELECT AN INCORRECT DESTINATION
- TO CANCEL A SELECTED DESTINATION
- TO SEND TO AN ADDRESS IN OTHER THAN THE CURRENT MODE
- THE SELECTED DESTINATIONS
- DELETING SPECIFIED DESTINATIONS
- USING A SEARCH NUMBER TO RETRIEVE A DESTINATION
- RETRIEVING A DESTINATION FROM A GLOBAL ADDRESS BOOK
- HOW TO SEARCH
- ENTER A KEYWORD AND TAP THE [SEARCH START] KEY
- RETRIEVING A DESTINATION FROM A MOBILE ADDRESS BOOK
- TO USE THIS FUNCTION
- TAP THE [MOBILE ADDRESS BOOK] KEY
- OPERATE THE MOBILE DEVICE TO BE CONNECTED TO PAIR IT WITH THE MACHINE
- TO SET A DEVICE NAME TO THIS MACHINE
- IF NO DESTINATION IS FOUND
- TO CONTINUOUSLY ADD OTHER DESTINATIONS
- USING A TRANSMISSION LOG TO RESEND
- TAP THE [SENDING HISTORY] KEY
- TAP THE KEY OF THE FAX DESTINATION THAT YOU WISH TO REDIAL
- TO CANCEL THE RESEND SETTING
- SENDING BY CHAIN DIALLING
- EXAMPLE: USING CHAIN DIALLING TO DIAL AN INTERNATIONAL NUMBER
- FAX TRANSMISSION METHODS
- TO FAX A LARGE NUMBER OF SHEET ORIGINALS
- STORING A FAX JOB
- TO DISABLE THE QUICK ON LINE SENDING SETTING
- TO FAX THICK ORIGINALS OR PAGES OF A BOOK
- IF YOU WISH TO SEND A FAX AHEAD OF OTHER PREVIOUSLY RESERVED FAX TRANSMISSIONS
- TO CANCEL THE ROTATION SENDING SETTING
- AUTOMATIC REDUCTION OF THE TRANSMITTED IMAGE
- TRANSMITTABLE ORIGINAL SIZES
- THE SIZE OF THE PLACED ORIGINAL
- LIST OF ORIGINAL SIZE DETECTOR SETTINGS
- WHEN THE LINE IS BUSY
- TO CANCEL TRANSMISSION
- WHEN A COMMUNICATION ERROR OCCURS
- FAX DEST. CONFIRMATION MODE
- DESTINATION SPECIFIED BY ONE-TOUCH KEY/SEARCH NUMBER/GLOBAL ADDRESS SEARCH
- DESTINATION SPECIFIED USING THE NUMERIC KEYS
- WITH "FAX DEST. CONFIRMATION MODE" ENABLED, AND "REQUIRE RE-ENTRY WHEN DIRECTLY ENTERING THE FAX DESTINATION" ENABLED
- WITH "FAX DEST. CONFIRMATION MODE" ENABLED, AND "REQUIRE RE-ENTRY WHEN DIRECTLY ENTERING THE FAX DESTINATION" DISABLED
- TO SET WHETHER TO RE-ENTER AT DIRECT ENTRY
- WHEN A FAX THAT WAS SELECTED FROM THE SENDING HISTORY HAS BEEN RESENT
- CHECKING THE IMAGE TO BE TRANSMITTED
- PREVIEW SCREEN (PAGE 2-11)
- USING THE AUTOMATIC DOCUMENT FEEDER FOR TRANSMISSION
- TO SET THE SCAN COMPLETE SOUND
- ALWAYS STAMP SCANNED ORIGINALS
- TO DISABLE THE DISABLING OF DOCUMENT FEEDER SETTING
- SPECIFY THE DESTINATION FAX NUMBER
- TAP THE [START] KEY TO BEGIN TRANSMISSION
- USING THE AUTOMATIC DOCUMENT FEEDER FOR FAXING IN DIRECT TX MODE
- USING THE DOCUMENT GLASS FOR TRANSMISSION
- IF YOU HAVE ANOTHER PAGE TO SCAN, CHANGE PAGES AND THEN TAP THE [START] KEY
- TAP THE [READ-END] KEY
- TO CANCEL SCANNING
- USING THE DOCUMENT GLASS TO SEND A FAX IN DIRECT TX MODE
- TRANSMISSION USING THE SPEAKER
- TAP THE [DETAIL] KEY TO SWITCH TO THE NORMAL MODE
- TAP THE [SPEAKER] KEY
- WHEN THE CONNECTION IS MADE, TAP THE [START] KEY TO BEGIN TRANSMISSION
- SENDING THE SAME FAX TO MULTIPLE DESTINATIONS (BROADCAST TRANSMISSION)
- SPECIFY ALL DESTINATIONS
- TAP THE [START] KEY TO START SCANNING OF THE ORIGINAL
- RESENDING TO UNSUCCESSFUL BROADCAST TRANSMISSION DESTINATIONS
- SENDING A FAX DIRECTLY FROM A COMPUTER (PC-FAX)
- DELETING A TRANSMISSION LOG
- SET THE SCANNING OF THE ORIGINALS
- AUTOMATICALLY SCANNING BOTH SIDES OF AN ORIGINAL (2-SIDED ORIGINAL)
- TAP THE [ORIGINAL] KEY, AND TAP THE [BOOK] KEY OR [TABLET] KEY
- TAP THE [IMAGE ORIENTATION] KEY WITH THE SAME ORIENTATION AS THE PLACED ORIGINAL
- TO CANCEL 2-SIDED SCANNING
- AUTO DETECTION
- SPECIFYING THE ORIGINAL SCAN SIZE IN PAPER SIZE
- IN EASY MODE
- TAP THE [ORIGINAL] KEY
- SPECIFYING THE ORIGINAL SCAN SIZE USING NUMERIC VALUES
- TAP OK TWICE
- TAP THE KEY OF THE ORIGINAL SIZE THAT YOU WISH TO RETRIEVE
- SPECIFYING THE SEND SIZE OF THE IMAGE
- TO CONFIGURE THE DEFAULT SETTING OF IMAGE ORIENTATION
- CHANGING THE EXPOSURE
- AFTER TAPPING THE [EXPOSURE] KEY, TAP THE [MANUAL] KEY
- ADJUST THE EXPOSURE WITH THE SLIDER OR
- CHANGING THE RESOLUTION
- TAP THE [RESOLUTION] KEY
- TAP THE KEY OF THE DESIRED RESOLUTION
- RECEIVING A FAX
- RECEIVING A FAX AUTOMATICALLY
- THE MACHINE RINGS AND FAX RECEPTION BEGINS AUTOMATICALLY
- THE FAXES ARE PRINTED AUTOMATICALLY
- IF A PIN CODE ENTRY SCREEN APPEARS
- HOW TO CHECK THE FAX RECEPTION MODE
- RECEIVING A FAX MANUALLY
- WHEN THE MACHINE RINGS, TAP THE [DETAIL] KEY TO CHANGE TO NORMAL MODE, AND TAP THE [SPEAKER] KEY
- TAP THE [RECEIVE] KEY TO RECEIVE A FAX
- PRINTING RECEIVED DATA
- PRINTING A PIN CODE-PROTECTED FAX (HOLD SETTING FOR RECEIVED DATA PRINT)
- TO ENABLE THE HOLD SETTING FOR RECEIVED DATA PRINT
- IMPORTANT POINTS WHEN USING THIS FUNCTION
- TO DISPLAY THE RECEIVED DATA LIST SCREEN AFTER ENTERING THE PIN CODE
- TO TRANSFER RECEIVED DATA TO ANOTHER MACHINE
- PRINTING RECEIVED DATA AT A SPECIFIED TIME
- CHECKING THE IMAGE BEFORE PRINTING
- IN THE SYSTEM INFORMATION, TAP THE [CHECK RECEIVED DATA]
- FORWARDING RECEIVED DATA
- FORWARDING RECEIVED FAXES (FAX DATA FORWARD)
- TAP THE [EXECUTE] KEY IN [FORWARD RECEIVED DATA] TO BEGIN FORWARDING
- FORWARDING RECEIVED DATA TO PRESET DESTINATIONS (INBOUND ROUTING SETTINGS)
- CLICK [SENDER ADDRESS REGISTRATION] IN THE [INBOUND ROUTING (FORWARDING/STORING) SETTINGS] MENU IN THE "SETTINGS (WEB VERSION)
- ENTER THE SENDER ADDRESS OF FAX NUMBER IN "INTERNET FAX ADDRESS" OR "FAX NUMBER" AS APPROPRIATE, AND CLICK THE [ADD TO LIST] BUTTON
- WHEN YOU HAVE FINISHED ADDING ADDRESSES, CLICK THE [SUBMIT] BUTTON
- CLICK [MBOUND ROUTING SETTINGS] IN THE [MBOUND ROUTING (FORWARDING/STORING) SETTINGS] IN THE "SETTINGS (WEB VERSION)" MENU AND CLICK THE [ADD] BUTTON
- ENTER A TABLE NAME
- SELECT THE SENDER WHOSE TAXES WILL BE FORWARDED
- SELECT THE FORWARDING CONDITIONS
- SELECT THE FILE FORMAT
- SELECT THE RECIPIENT FROM THE ADDRESS BOOK
- ENTER A RECIPIENT DIRECTLY AND SPECIFY THE RECIPIENT
- CLICK [SUBMIT]
- SAVING RECEIVED FAXES TO THE MACHINE'S STORAGE (INBOUND ROUTING)
- IN "SETTINGS (ADMINISTRATOR)", CLICK [SYSTEM SETTINGS] → [IMAGE SEND SETTINGS] → [INBOUND ROUTING (FORWARDING/STORING) SETTINGS] → [INBOUND ROUTING (STORAGE) SETTINGS] (ADMINISTRATOR RIGHTS ARE REQUIRED)
- FORWARDING RECEIVED DATA MANUALLY
- IN THE SYSTEM INFORMATION, TAP [CHECK RECEIVED DATA]
- TAP THE KEY OF THE RECEIVED DATA YOU WISH TO FORWARD, AND TAP [FORWARD TO OTHER ADDRESS]
- SELECT THE DESTINATION FROM THE ADDRESS BOOK SCREEN, AND TAP THE [START] KEY
- SAVING RECEIVED DATA
- TAP THE KEY OF THE RECEIVED DATA YOU WISH TO SAVE, AND TAP [FILE] ON THE ACTION PANEL
- SET THE FILE INFORMATION, AND TAP THE [SAVE] KEY
- COMMON FUNCTIONS
- STORING FAX OPERATIONS (PROGRAM)
- TAP [CALL PROGRAM] ON THE ACTION PANEL
- CONFIGURE ADDITIONAL SETTINGS AS REQUIRED
- OPERATING FAX TRANSMISSION AND RECEPTION REMOTELY
- CALLING A FAX MACHINE AND INITIATING RECEPTION (POLLING)
- TAP THE [OTHERS] KEY, AND TAP THE [POLLING] KEY
- TAP THE [START] KEY TO INITIATE FAX RECEPTION
- INITIATING POLLING RECEPTION MANUALLY
- TAP THE [OTHERS] KEY, AND TAP THE [POLLING] KEY TO RECEIVE ORIGINALS (DATA)
- TO CANCEL THE POLLING SETTING
- SENDER-RELATED FEATURES
- ADDING YOUR SENDER INFORMATION TO FAXES (FAX OWN NUMBER SENDING)
- TO SET THE DATE AND TIME
- TO STORE A SENDER NAME AND SENDER FAX NUMBER
- TO ADD THE NUMBER OF PAGES TO BE TRANSMITTED
- TO SELECT A SENDER FAX NUMBER OR DESTINATION
- TEMPORARILY CHANGING THE SENDER INFORMATION (OWN NAME SELECT)
- TO STORE THE SENDER INFORMATION TO BE USED FOR OWN NAME SELECT FUNCTION
- SENDER NAME
- SENDER NAME LIST
- TAP THE [OTHERS] KEY, AND TAP THE [OWN NAME SELECT] KEY
- TAP THE SENDER INFORMATION KEY TO SPECIFY THE SENDER INFORMATION
- ASSUMING A SPECIFIC USAGE
- CHANGING THE PRINT SETTINGS FOR THE TRANSACTION REPORT (TRANSACTION REPORT)
- TAP THE [OTHERS] KEY, AND TAP THE [TRANSACTION REPORT] KEY
- TAP THE KEY OF THE PRINT SETTINGS
- TO CANCEL THE TRANSACTION REPORT SETTING
- ORIGINAL IMAGE IN TRANSACTION REPORT
- POLLING MEMORY FUNCTIONS
- SENDING A FAX WHEN ANOTHER MACHINE POLLS YOUR MACHINE (POLLING MEMORY)
- RESTRICTING POLLING ACCESS (POLLING SECURITY SETTING)
- TO SET THE POLLING SECURITY
- SCANNING A DOCUMENT INTO POLLING MEMORY
- SELECT SETTINGS FOR THE ORIGINAL TO BE SCANNED AND OTHER FUNCTIONS
- TAP THE [OTHERS] KEY, AND TAP THE [MEMORY BOX] KEY
- TAP THE [ONCE] KEY OR [UNLIMITED] KEY TO SPECIFY THE NUMBER OF TIMES
- CHECKING THE DOCUMENT IN THE PUBLIC BOX
- DELETING A DOCUMENT FROM THE PUBLIC BOX
- F-CODE COMMUNICATION
- HOW F-CODES WORK
- CREATING MEMORY BOXES IN THE MACHINE FOR F-CODE COMMUNICATION
- F-CODE DIALLING
- F-CODE CONFIDENTIAL TRANSMISSION
- CONFIDENTIAL TRANSMISSION USING F-CODES
- SPECIFY THE DESTINATION
- CHECKING FAXES RECEIVED BY F-CODE CONFIDENTIAL RECEPTION
- POLLING RECEPTION USING F-CODES
- SCANNING A DOCUMENT INTO A MEMORY BOX FOR F-CODE POLLING TRANSMISSION
- CHECKING THE DOCUMENT IN THE F-CODE MEMORY POLLING BOX
- DELETING A DOCUMENT STORED FOR F-CODE POLLING TRANSMISSION
- RELAY REQUEST TRANSMISSION USING F-CODES
- TAP THE [SUB ADDRESS] KEY
- ENTER THE SUB-ADDRESS USING THE NUMERIC KEYS
- TAP THE [PASSCODE] KEY
- ENTER THE PASSCODE USING THE NUMERIC KEYS
- RELAY BROADCAST TRANSMISSION USING F-CODES
- CONNECTING AN EXTERNAL TELEPHONE
- RECEIVING A FAX AFTER ANSWERING A CALL ON THE EXTERNAL TELEPHONE (REMOTE RECEPTION)
- MAKING AND RECEIVING PHONE CALLS
- FAX JOBS
- COMPLETED FAX TRANSMISSION/RECEPTION JOBS
- FAX RECEPTION JOBS
- TIMER TRANSMISSION JOBS
- RETRY JOBS
- RECEPTION JOBS WHEN THE INBOUND ROUTING SETTINGS ARE ENABLED
- RECEIVED DATA IS NOT PRINTED
- RECEIVED FAX IS PRINTED
- CHECKING IMAGE SENDING ACTIVITIES
- PRINTING IMAGE SENDING ACTIVITY REPORTS
- INFORMATION APPEARING IN THE RESULT COLUMN
- BEFORE USING THE MACHINE AS A NETWORK SCANNER
- BEFORE USING THE MACHINE AS A NETWORK
- TRANSMITTING AN IMAGE
- INTERNET FAX RECEPTION FUNCTIONS
- CHECKING THE STATUS OF TRANSMISSION/RECEPTION JOBS
- SCANNING FROM A COMPUTER (PC SCAN MODE)
- METADATA DELIVERY
- BEFORE USING THE MACHINE AS A NETWORK SCANNER FUNCTION
- USES OF THE NETWORK SCANNER
- SCANNER MODE
- SCAN TO E-MAIL
- SCAN TO FTP
- SCAN TO DESKTOP
- SCAN TO NETWORK FOLDER
- INTERNET FAX MODE
- DATA ENTRY MODE
- BEFORE USING THE NETWORK SCANNER
- MAKE SURE THE MAIN POWER SWITCH IS IN THE 1 POSITION
- CHECK THE DATE AND TIME
- STORE THE SENDER INFORMATION
- CONFIGURE SETTINGS REQUIRED IN THE SETTING MODE
- STORE THE DESTINATION ADDRESSES FOR EACH SCAN MODE IN THE ADDRESS BOOK
- STORING DESTINATIONS FOR SCAN TO DESKTOP
- BEFORE SENDING TO A DIRECT SMTP ADDRESS
- IF THE DESTINATION IS BUSY
- NETWORK SCANNER MODE
- SELECT THE FUNCTION YOU WANT TO USE
- SELECTING NETWORK SCANNER MODE
- IMAGE SEND SEQUENCE
- ENTER THE DESTINATION
- TAP THE [B/W START] OR [COLOUR START] KEY ([START] KEY IN NORMAL MODE)
- IF PAPER MISFEEDS IN THE AUTOMATIC DOCUMENT FEEDER
- ORIGINAL SIZE
- ADDRESS BOOK
- ADDRESS BOOK SCREEN
- DISABLE REGISTER AN ADDRESS BOOK
- SELECTING "CONTACTS" OR "GROUP
- NARROWING BY FREQUENT USE
- NARROWING BY CATEGORY
- NARROWING BY JOB TYPE
- NARROWING BY INDEX
- NARROWING BY KEYWORD
- DISPLAYING IN THE ORDER OF SEARCH NUMBERS
- STORING ADDRESSES THROUGH DIRECT ENTRY
- ENTER BASIC INFORMATION
- TAP THE [REGISTER] KEY
- STORING ADDRESSES THROUGH GLOBAL ADDRESS SEARCH
- DISABLE DESTINATION REGISTRATION USING GLOBAL ADDRESS SEARCH
- IN THE ADDRESS BOOK SCREEN, TAP [ADD NEW] ON THE ACTION PANEL, OR TAP THE [ADDRESS CONTROL] ICON IN THE HOME SCREEN
- TO REGISTER A CATEGORY NAME
- TAP THE [GLOBAL SEARCH] KEY
- SELECT THE SERVER FROM THE LIST OF SERVERS
- TAP THE ENTRY FIELD TO ENTER THE SEARCH CONDITION AND THEN TAP THE [SEARCH START] KEY
- STORING ADDRESSES FROM FAX OR IMAGE SEND LOGS
- STORING GROUPS
- EDITING/DELETING ADDRESSES IN ADDRESS BOOK
- EDITING/DELETING CONTACTS AND GROUPS
- IN THE ADDRESS BOOK SCREEN, SELECT A CONTACT OR GROUP YOU WISH TO EDIT, AND TAP [EDIT] ON THE ACTION PANEL
- EDITING A "CONTACTS" OR "GROUP
- EDITING/DELETING ADDRESSES
- SETTING THE SCOPE FOR PUBLICIZING CONTACTS AND GROUPS
- DELETING THE TRANSMISSION HISTORY
- DELETING A SELECTED HISTORY
- DELETING ALL TRANSMISSION HISTORIES
- REGISTER AN ADDRESS BOOK IN THE WEB PAGE
- CATEGORY SETTING
- TAP THE [ADDRESS BOOK] KEY
- TAP THE ONE-TOUCH KEY OF THE CONTACT OR GROUP THAT HAS A DESTINATION
- TO ENABLE TRANSMISSION TO ADDRESSES OF MODES OTHER THAN THE CURRENT MODE
- MY ADDRESS
- VIEWING A LIST OF THE SELECTED DESTINATIONS
- TAP THE ADDRESS REVIEW KEY
- CONFIRM THE DESTINATION
- ENTERING AN ADDRESS MANUALLY
- IN THE BASE SCREEN OF A MODE, TAP [TEXT BOX]
- ENTER THE DESTINATION ADDRESS ON THE SOFT KEYBOARD THAT APPEARS
- SPECIFYING A NETWORK FOLDER
- TAP THE [BROWSE] KEY IN THE NETWORK FOLDER ENTRY SCREEN
- TAP THE KEY OF THE WORKGROUP THAT YOU WISH TO ACCESS
- TAP THE KEY OF THE NETWORK FOLDER
- SELECTING A SUBFOLDER AS A DESTINATION
- TAP [DESTINATION] AND TAP THE LDAP SERVER TO BE USED
- TO CHECK THE DESTINATION INFORMATION
- TAP THE KEY OF THE DESTINATION TO RESEND
- SENDING ONLY THE URL OF A SCANNED FILE TO A SCAN DESTINATION
- WHEN THE SCANNED FILE IS TOO LARGE
- SENDING ONLY A URL TO THE RECIPIENT
- USING EASY MODE
- USING NORMAL MODE
- NUMBER OF URLS CREATED
- USING [ONE PAGE PER FILE]
- USING [PROGRAMMED]
- TO ALWAYS USE THIS FUNCTION IN EASY MODE
- SAVE PERIOD FOR SCANNED FILES SAVED USING THIS FUNCTION
- PROTECTING THE URL BY SSL/TLS
- SENDING AN IMAGE IN SCAN MODE
- TAP THE APPROPRIATE ORIENTATION KEY
- TAP THE [B/W START] OR [COLOUR START] KEY TO START SCANNING OF THE ORIGINAL
- IF THE ORIGINAL WAS PLACED ON THE DOCUMENT GLASS, REPLACE IT WITH THE NEXT ORIGINAL AND TAP THE [B/W START] OR [COLOUR START] KEY
- CHANGING THE SUBJECT, FILE NAME, REPLY-TO, AND BODY TEXT AT THE TIME OF SCAN TRANSMISSION
- TO CHANGE THE SUBJECT, TAP THE [SUBJECT] ENTRY BOX
- TAP A PRE-SET TEXT KEY
- TO CANCEL THE SELECTION OF THE SUBJECT
- TO CHANGE THE FILE NAME, TAP THE [FILE NAME] ENTRY BOX
- TAP [OPTIONS]
- TO CHANGE THE REPLY ADDRESS, TAP THE [REPLY-TO] ENTRY BOX
- TAP THE KEY THAT YOU WISH TO USE FOR THE REPLY ADDRESS
- ENTER THE BODY TEXT
- TO CLEAR ALL ENTERED TEXT
- SENDING A FAX IN INTERNET FAX MODE
- IF THE ORIGINAL WAS PLACED ON THE DOCUMENT GLASS, REPLACE IT WITH THE NEXT ORIGINAL AND TAP THE [START] KEY
- CHANGING THE SUBJECT, FILE NAME, AND BODY TEXT AT THE TIME OF INTERNET FAX TRANSMISSION
- TAP THE MODE DISPLAY TO SWITCH TO THE INITIAL SCREEN OF INTERNET FAX MODE
- SENDING THE SAME IMAGE TO MULTIPLE DESTINATIONS (BROADCAST TRANSMISSION)
- TAP [ADDRESS REVIEW] ON THE ACTION PANEL
- TAP THE [B/W START] OR [COLOUR START] KEY ([START] KEY IN NORMAL MODE) TO START SCANNING OF THE ORIGINAL
- SETTING MODES WHEN MULTIPLE TYPES OF ADDRESSES ARE INCLUDED IN A BROADCAST TRANSMISSION
- WHEN INTERNET FAX ADDRESSES ARE INCLUDED
- SENDING AN INTERNET FAX FROM A PC (PC-I-FAX)
- IMAGE SETTINGS
- AFTER TAPPING THE [ORIGINAL] KEY, TAP THE [BOOK] OR [TABLET] KEY
- SCAN SIZE AND SEND SIZE (ENLARGE/REDUCE)
- TAP [OK] TWICE
- TAP THE [IMAGE ORIENTATION] KEY WITH THE SAME ORIENTATION AS THE ORIGINAL IMAGE
- EXPOSURE SETTINGS
- HOW TO SELECT THE ORIGINAL TYPE (SCAN MODE, DATA ENTRY MODE)
- IN SCAN MODE OR DATA ENTRY MODE
- HOW TO SELECT THE RESOLUTION
- CHANGING FORMAT IN SCAN OR DATA ENTRY MODE
- FLATE COMPRESSION
- TO ENABLE FLATE COMPRESSION
- TAP THE [FILE FORMAT] KEY
- TAP THE [COLOUR/GREYSCALE] OR [B/W] KEY
- TAP THE KEY OF THE DESIRED FILE TYPE
- OTHER
- TAP THE [COLOUR/GREYSCALE] OR [B/W] TAB AND SELECT THE FORMAT MODE FOR SCANNING
- TAP THE COMPRESSION KEY OR COMPRESSION RATIO KEY
- TO CHANGE THE NUMBER OF PAGES PER FILE, SET THE [SPECIFIED PAGES PER FILE] CHECKBOX TO , AND USE NUMERIC KEYS TO SPECIFY THE NUMBER OF PAGES PER FILE
- CHANGING FORMAT IN INTERNET FAX MODE
- CHANGING COLOUR MODE
- TAP THE [GREYSCALE] OR [MONO2] KEY TO SET THE B/W MODE FOR AUTOMATIC COLOUR SELECTION
- SETTING SCAN SETTINGS AUTOMATICALLY (AUTO SET)
- STORING SCAN OPERATIONS (PROGRAM)
- PLACE THE ORIGINAL AND TAP [CALL PROGRAM] ON THE ACTION PANEL
- TAP THE DESIRED PROGRAM KEY
- CONFIGURE ADDITIONAL SETTINGS IF NEEDED
- SCANNING AND SENDING ORIGINALS COLLECTIVELY
- SENDING TWO PAGES AS A SINGLE PAGE (N-UP)
- TAP THE [MIXED SIZE ORIGINAL] KEY. OTHERWISE, TAP THE [OTHERS] KEY, AND TAP THE [MIXED SIZE ORIGINAL] KEY
- SCANNING BOTH SIDES OF A CARD ONTO A SINGLE PAGE (CARD SHOT)
- PLACE A CARD FACE DOWN ON THE DOCUMENT GLASS
- TAP THE MODE DISPLAY TO SWITCH TO THE INITIAL SCREEN OF EACH MODE
- TAP THE [OTHERS] KEY, AND TAP THE [CARD SHOT] KEY
- TAP THE [ON] KEY, AND SPECIFY THE ORIGINAL SIZE AS REQUIRED
- TAP THE [START] KEY, AND SCAN THE FRONT SIDE
- PLACE A CARD FACE UP ON THE DOCUMENT GLASS, AND TAP THE [START] KEY TO SCAN THE REVERSE SIDE
- SIMULTANEOUSLY SCANNING MULTIPLE CARDS, RECEIPTS OR OTHER SMALL ORIGINALS TO INDIVIDUAL FILES (MULTICROP)
- PLACE THE MULTIPLE ORIGINALS THAT YOU WANT TO SCAN ON THE DOCUMENT GLASS
- CAUTIONS WHEN PLACING THE ORIGINALS
- KEEP THE AUTO DOCUMENT FEEDER OPEN, NOT CLOSED
- TAP THE MODE DISPLAY AND CHANGE TO THE BASE SCREEN OF THE DESIRED MODE
- TAP THE [OTHERS] KEY, AND TAP THE [MULTICROP] KEY
- TO CANCEL THE MULTICROP SETTING
- TAP THE [START] KEY TO START SCANNING THE ORIGINALS
- RESTRICTIONS WHEN MULTICROP IS ENABLED
- SCANNING A BUSINESS CARD, READING THE TEXT STRING, CREATING A FILE, AND SENDING THE FILE (BUSINESS CARD SCAN)
- PLACE THE MULTIPLE BUSINESS CARDS THAT YOU WANT TO SCAN IN THE DOCUMENT FEEDER TRAY OF THE AUTOMATIC DOCUMENT FEEDER OR ON THE DOCUMENT GLASS
- CAUTIONS WHEN PLACING BUSINESS CARDS
- NOTES ON LOADING BUSINESS CARDS IN THE AUTOMATIC DOCUMENT FEEDER
- (WHEN USING THE DOCUMENT GLASS) KEEP THE AUTO DOCUMENT FEEDER OPEN, NOT CLOSED
- TAP THE MODE DISPLAY AND CHANGE TO THE BASE SCREEN OF THE DESIRED MODE. CHANGING MODES (PAGE 2-10)
- TAP THE [OTHERS] KEY, AND TAP THE [BUSINESS CARD SCAN] KEY
- TAP THE [ON] KEY, AND CHANGE SETTINGS AS NEEDED
- RESTRICTIONS WHEN BUSINESS CARD SCAN IS ENABLED
- FILE NAMES
- FILE NAME RULES
- SCANNING MULTIPLE PHOTOS AT ONCE TO INDIVIDUAL FILES
- (IMAGE CROP)
- TAP THE MODE DISPLAY AND CHANGE TO THE HOME SCREEN OF THE DESIRED MODE
- TAP THE [OTHERS] KEY, AND TAP THE [IMAGE CROP] KEY
- TO CANCEL THE IMAGE CROP SETTING
- SCANNING MANY ORIGINALS AT ONCE (JOB BUILD)
- PLACE ORIGINALS IN THE AUTOMATIC DOCUMENT FEEDER
- TAP THE [JOB BUILD] KEY
- TAP THE [START] KEY TO SCAN THE FIRST ORIGINAL PAGE
- SCANNING AND SENDING AN ORIGINAL AS SEPARATE PAGES
- SCANNING AN ORIGINAL AS TWO SEPARATE PAGES (DUAL PAGE SCAN)
- ORIGINAL SCAN SIZE TRANSMITTED IMAGE
- TAP THE [OTHERS] KEY, AND TAP THE [DUAL PAGE SCAN] KEY
- SPLITTING A PAMPHLET BY PAGE AND TRANSMITTING THE PAGES SUCCESSIVELY (BOOK DIVIDE)
- SELECT THE BINDING EDGE OF THE PAMPHLET ORIGINAL
- ADJUSTING COLOURS AND SHADING
- TAP OR SLIDE THE SLIDER TO ADJUST THE RANGE TO BE SUPPRESSED
- ADDING CONTRAST TO THE SCANNED ORIGINAL BEFORE TRANSMISSION (CONTRAST)
- TAP OR SLIDE THE SLIDER TO ADJUST THE CONTRAST LEVEL
- ENHANCING THE OUTLINE OF THE SCANNED ORIGINAL BEFORE TRANSMISSION (SHARPNESS)
- REMOVING CHROMATIC COLOURS FROM THE SCANNED ORIGINAL BEFORE TRANSMISSION (DROP OUT COLOUR)
- TAP THE [OTHERS] KEY, AND THEN TAP THE [DROP OUT COLOUR] KEY
- ADJUSTING RED/GREEN/BLUE (RGB ADJUST)
- TAP THE [OTHERS] KEY, AND TAP THE [RGB ADJUST] KEY
- SCANNING ORIGINALS
- ERASING PERIPHERAL SHADOWS ON THE IMAGE (ERASE)
- SCANNING A THICK BOOK
- ERASE MODES
- TO CHANGE THE DEFAULT ERASE WIDTH SETTING
- SCANNING A THIN ORIGINAL (SLOW SCAN MODE)
- SCANNING A HEAVY ORIGINAL (HEAVY PAPER SCAN)
- ELIMINATING BLANK PAGES FROM A TRANSMISSION (BLANK PAGE SKIP)
- TAP THE [OTHERS] KEY, AND TAP THE [BLANK PAGE SKIP] KEY
- WHEN SCANNING ENDS, CHECK THE NUMBER OF ORIGINAL SHEETS AND THE NUMBER OF SHEETS TO BE SENT AND TAP THE [OK] KEY TO START TRANSMISSION
- CHECKING THE NUMBER OF SCANNED ORIGINAL SHEETS BEFORE TRANSMISSION (ORIGINAL COUNT)
- TAP THE REMOTE DISPLAY TO RETURN TO THE INITIAL SCREEN OF EACH MODE
- TAP THE [COINC] KEY, AND TAP THE [ORIGINAL SETTING] KEY
- TAP THE [SEND] KEY TO START TRANSMISSION
- STAMPING SCANNED ORIGINALS (VERIFICATION STAMP)
- TAP [VERIFICATION STAMP] ON THE ACTION PANEL OR [OTHERS] KEY, AND TAP THE [VERIF. STAMP] KEY
- AUTOMATICALLY ADJUST SKEWED SCAN DATA (ORIGINAL SKEW ADJUSTMENT)
- TAP THE [OTHERS] KEY, AND TAP THE [ORIGINAL SKEW ADJUSTMENT] KEY
- SPECIFIC FUNCTIONS
- ADDING YOUR SENDER INFORMATION TO FAXES (I-FAX OWN ADDRESS SEND)
- EXAMPLE OF THE SENDER INFORMATION PRINTED
- TAP THE KEY FOR THE PRINT SETTINGS
- TO CANCEL THE TRANSACTION REPORT SETTINGS
- STARTING A TRANSMISSION AT A SPECIFIED TIME (TIMER TRANSMISSION)
- SPECIFY THE TIME (HOUR AND MINUTE) IN 24-HOUR FORMAT
- TO CANCEL THE TIMER TRANSMISSION SETTINGS
- TO SET THE DATE AND TIME OF THE MACHINE
- ADDING A SIGNATURE WHEN SENDING AN IMAGE (ELECTRONIC SIGNATURE)
- TO ADD AN ELECTRONIC SIGNATURE TO A SCANNED IMAGE
- TAP THE MODE DISPLAY TO SWITCH TO THE INITIAL SCREEN OF E-MAIL MODE
- TAP THE [OTHERS] KEY, AND TAP THE [SIGN E-MAIL] KEY
- TO CANCEL THE SIGN E-MAIL SETTING
- ENCRYPTING THE TRANSMITTED DATA (ENCRYPTION)
- TO ENCRYPT TRANSMITTED DATA
- TAP THE [OTHERS] KEY, AND TAP THE [ENCRYPT E-MAIL] KEY
- TO CANCEL THE ENCRYPTION SETTING
- CHECKING THE INTERNET FAX ACTIVITY LOG
- EXAMPLES OF MESSAGES THAT ARE PRINTED IN THE RESULT COLUMN
- RECEIVING INTERNET FAXES
- RECEIVING INTERNET FAXES AUTOMATICALLY
- RECEIVING INTERNET FAXES MANUALLY
- TAP THE KEY OF THE RECEIVED DATA YOU WISH TO CHECK, AND TAP [CHECK IMAGE] ON THE ACTION PANEL
- TAP THE IMAGE YOU WISH TO PRINT, AND TAP [PRINT] ON THE ACTION PANEL
- FORWARDING RECEIVED INTERNET FAX DATA (FAX DATA FORWARD)
- WHETHER OR NOT TO FORWARD DATA FOR EACH FORWARDING TABLE CAN BE QUICKLY SET
- IN "SETTINGS (WEB VERSION)", CLICK [SYSTEM SETTINGS] → [IMAGE SEND SETTINGS] → [INBOUND ROUTING (FORWARDING/STORING) SETTINGS] → [ADMINISTRATION SETTINGS]
- IN "INBOUND ROUTING", SELECT [ENABLE] AND CLICK THE [SUBMIT] BUTTON
- CHECK [SENDER ADDRESS REGISTRATION] IN THE [INBOUND ROUTING (FORWARDING/STORING) SETTINGS] MENU IN THE "SETTINGS (WEB VERSION)
- ENTER THE SENDER ADDRESS OF TAX NUMBER IN "INTERNET FAX ADDRESS" OR "FAX NUMBER" AS APPROPRIATE, AND CLICK THE [ADD TO LIST] BUTTON
- CLICK [INBOUND ROUTING SETTINGS] IN THE "INBOUND ROUTING (FORWARDING/STORING) SETTINGS" MENU IN THE "SETTINGS (WEB VERSION)" MENU AND CLICK THE [ADD] BUTTON
- THE FOLLOWING SUMMARY TABLE WILL BE WRITTEN WITH
- CLICK [INBOUND ROUTING SETTINGS] IN THE "INBOUND ROUTING (FORWARDING/STORING) SETTINGS" MENU IN THE "SETTINGS (WEB VERSION)" MENU
- FROM THE FORWARDING TABLE, SELECT [FORWARD TO ALL FORWARD DESTINATIONS] OR [FORWARD BASED ON FORWARD CONDITION]
- SELECT [ALWAYS FORWARD] OR [FORWARD RECEIVED DATA ONLY ON SPECIFIED DAYS.] FROM THE FORWARDING TABLE
- SAVING RECEIVED FAXES TO THE MACHINE'S LOCAL DRIVE (INBOUND ROUTING)
- HOW TO SAVE RECEIVED FAXES TO THE LOCAL DRIVE
- SETTINGS FOR SAVING RECEIVED FAXES TO THE LOCAL DRIVE
- IMAGE SEND JOBS
- COMPLETED TRANSMISSION/RECEPTION JOBS
- RECEPTION JOB
- INTERNET FAX TRANSMISSION JOB WITH RECEPTION REPORT REQUEST SPECIFIED
- RECEIVED INTERNET FAX IS PRINTED
- BASIC SCANNING PROCEDURE
- [AT THE MACHINE]
- PROHIBIT PC SCAN
- TAP THE [PC SCAN] MODE ICON TO SWITCH TO PC SCAN MODE
- [AT YOUR COMPUTER]
- START THE TWAIN-COMPLIANT APPLICATION ON YOUR COMPUTER AND SELECT [SHARP MFP TWAIN K] IN THE APPLICATION'S SCANNER SELECTION
- PREVIEW THE IMAGE
- SELECT THE LOCATION WHERE THE ORIGINAL IS PLACED
- SELECT SCAN SETTINGS
- CLICK THE [PREVIEW] BUTTON
- SELECT SCANNING SETTINGS WHILE VIEWING THE IMAGE
- [ROTATE] BUTTON
- [IMAGE SIZE] BUTTON
- × BUTTON
- CLICK THE [SCANNING] BUTTON
- PREPARATIONS FOR METADATA DELIVERY
- METADATA DELIVERY (DATA ENTRY)
- SETTINGS REQUIRED IN THE SETTING MODE (WEB VERSION)
- STORING METADATA SETS
- METADATA DELIVERY USING SCAN TO DESKTOP
- USING THIRD PARTY APPLICATIONS
- TRANSMITTING METADATA
- TAP THE [DATA ENTRY] ICON ON THE [HOME SCREEN], AND TAP [METADATA SET]
- TAP THE KEY FOR THE DESIRED METADATA SET
- THE KEYS OF THE ITEMS STORED IN THE METADATA SET WILL APPEAR. TAP THE KEY OF THE ITEM THAT YOU WISH TO ENTER
- TAP THE KEY OF THE VALUE THAT YOU WISH TO ENTER, AND TAP THE [OK] KEY
- CONFIGURE IMAGE OR OTHER SETTINGS, AND PERFORM THE SCAN SEND PROCEDURE
- METADATA FIELDS
- DOCUMENT FILING
- SAVING FILES WITH DOCUMENT FILING
- USING STORED FILES
- USES OF DOCUMENT FILING
- TYPES OF DOCUMENT FILING
- BEFORE USING SCAN TO LOCAL DRIVE IN DOCUMENT FILING
- FOLDER TYPES
- QUICK FILE FOLDER
- MAIN FOLDER
- CUSTOM FOLDER
- CONVENIENT ITEMS TO STORE
- APPROXIMATE NUMBER OF PAGES AND FILES THAT CAN BE STORED
- INFORMATION ADDED TO FILES
- TO STORE A USER NAME
- IMPORTANT POINTS WHEN USING DOCUMENT FILING
- USING DOCUMENT FILING IN EACH MODE
- [FILE] AND [QUICK FILE]
- USING DOCUMENT FILING IN PRINT MODE
- USING DOCUMENT FILING IN PC-FAX/PC-I-FAX MODE
- BASE SCREEN OF DOCUMENT FILING MODE
- FILING WHILE USING ANOTHER MODE
- QUICK FILE
- START A COPY OR IMAGE SENDING
- FILE
- CHANGE TO NORMAL MODE AND TAP [FILE] ON THE ACTION PANEL TO SPECIFY THE FILE INFORMATION
- TAP OK
- SELECT COPY SETTINGS AND THEN TAP THE [COLOUR START] KEY OR THE [B/W START] KEY
- FILE INFORMATION
- CHANGING THE PROPERTY
- RESTRICTIONS ON CHANGING THE PROPERTY
- SELECT [PROPERTY] IN THE FILE INFORMATION SCREEN
- WHEN YOU HAVE SELECTED [CONFIDENTIAL], ENTER A PASSWORD (4 TO 32 CHARACTERS)
- SPECIFYING A USER NAME
- TAP THE [USER NAME] TEXT BOX
- TAP THE KEY OF THE USER NAME
- ASSIGNING A FILE NAME
- TAP THE [FILE NAME] TEXT BOX AND ENTER THE FILE NAME
- FILE NAME
- SPECIFYING THE FOLDER
- TAP THE [STORED TO] TEXT BOX
- TAP THE KEY OF THE FOLDER WHERE YOU WANT TO STORE THE FILE, AND TAP OK
- CREATING PDF FOR PC BROWSING
- DEFAULT SETTING OF PDF FORMAT FOR PC BROWSING
- B/W : COMPRESSION MODE
- COLOUR/GREYSCALE: COMPRESSION RATIO
- SAVING DOCUMENT DATA ONLY (SCAN TO LOCAL DRIVE)
- STORING FROM DOCUMENT FILING
- SAVE IN EXTERNAL MEMORY DEVICE
- STORING FROM EASY SCAN
- TO SELECT SETTINGS, TAP THE KEY OF EACH DESIRED SETTING
- TAP THE [COLOUR START] OR [B/W START] KEY TO START SCANNING
- SCAN TO USB MEMORY DEVICE
- CONNECT THE USB MEMORY DEVICE TO THE MACHINE
- WHEN A SCREEN FOR SELECTING THE ACTION APPEARS, TAP [SCAN TO EXTERNAL MEMORY DEVICE]
- TAP THE [COLOUR START] KEY OR [B/W START] KEY
- AFTER SCANNING ALL ORIGINALS, TAP THE [READ-END] KEY
- CHECK THE [SENDING DATA HAS BEEN COMPLETED.] MESSAGE, AND REMOVE THE USB MEMORY DEVICE FROM THE MACHINE
- SEQUENCE FOR USING A STORED FILE
- SWITCH TO DOCUMENT FILING MODE. CHANGING MODES (PAGE 2-10)
- SELECT THE FILE THAT YOU WISH TO RETRIEVE
- SELECT AN OPERATION ITEM
- FILE SELECTION SCREEN
- LIST DISPLAY MODE
- THUMBNAIL DISPLAY MODE
- SORTING ORDER
- SELECTING A FILE TO RETRIEVE
- TAP THE [FILE RETRIEVE] KEY
- TAP THE KEY OF THE FOLDER THAT CONTAINS THE DESIRED FILE
- TAP THE KEY OF THE DESIRED LIFE
- FILE PRINTING
- QUICK PRINTING
- CHANGING SETTINGS BEFORE PRINTING
- MULTI-FILE PRINTING
- SELECT THE KEYS OF THE MULTIPLE FILES THAT YOU WISH TO PRINT
- TAP [PRINT] ON THE ACTION PANEL
- WHEN NOT PRINTING WITH THE NUMBER OF COPIES AT DATA SAVING, TAP THE [APPLY THE NUMBER FROM STORED SETTING OF EACH JOB.] CHECKBOX TO SET IT TO UNCHECKED
- USE THE UP/DOWN ARROWS TO SPECIFY THE NUMBER OF COPIES
- TO SET THE ORDER OF FILES TO PRINT, CHANGE WITH [PRINT ORDER]
- TO DELETE THE FILE AFTER PRINTING, TAP THE [DELETE] CHECKBOX TO SET IT TO CHECKED
- TAP THE [START] KEY TO START PRINTING
- BATCH PRINTING
- BATCH PRINT SETTINGS
- TAP THE [EXECUTE BATCH PRINT] KEY ON THE ACTION PANEL
- SELECT THE USER NAME
- IF A PASSWORD HAS BEEN ESTABLISHED, TAP THE [PASSWORD] KEY
- WHEN NOT PRINTING WITH THE NUMBER OF COPIES AT DATA SAVING, TAP THE [APPLY THE NUMBER FROM STORED SETTING OF EACH JOB.] CHECKBOX TO SET TO ☐
- USE TO SPECIFY THE NUMBER OF COPIES
- TO AUTOMATICALLY DELETE THE FILE AFTER PRINTING, TAP THE [DELETE] KEY
- FILE TRANSMISSION
- TAP [SEND] ON THE ACTION PANEL
- SELECT SETTINGS FOR SENDING
- FILE MOVING
- TAP THE [MOVE TO:] KEY
- TAP THE KEY OF THE FOLDER TO WHICH YOU WANT TO MOVE THE FILE
- TAP THE [MOVE] KEY
- DELETE FILE
- AUTOMATIC DELETION OF FILE
- AUTOMATIC DELETION OF FILE SETTINGS
- DELETE NOW
- EXECUTING AUTOMATIC DELETION DURING AUTO POWER SHUT-OFF
- FILE IMAGE CHECKING
- FILE IMAGE
- FILE MERGING
- APPEND FILE INFORMATION
- TAP THE [EXECUTE] KEY
- RETRIEVING AND USING A FILE FROM THE JOB STATUS SCREEN
- FILE SEARCH AND RETRIEVAL
- SELECT SEARCH CONDITIONS
- [USER NAME]
- [LOGIN NAME]
- [FILE OR FOLDER NAME]
- [PIN CODE/PASSWORD]
- [DATE]
- TAP THE [SEARCH START] KEY
- PRINTING AN EXTERNAL FILE
- SEARCH
- SEARCH RESULT
- FILE BATCH PRINT
- USE ENVIRONMENTALLY FRIENDLY
- MANAGING THE USE OF THE MACHINE
- UNIVERSAL DESIGN IN THE MACHINE
- JOB LOG LIST
- ECO
- ECO FUNCTIONS OF THE MACHINE
- MODE SETTINGS
- AUTO POWER SHUT-OFF MODE
- TO SET DISPLAY OF THE MESSAGE
- PREHEAT MODE
- TO SET PREHEAT MODE
- ECO RECOMMENDATION FUNCTION DISPLAY
- DOCUMENT FILING PRINT
- DIRECT PRINT
- AS SOON AS THE REMOTE JOB IS FINISHED, ENTER AUTO POWER SHUT-OFF MODE
- FIX TRANSITION TIME
- CHANGE TRANSITION TIME BY TIME OF DAY
- AUTOMATIC
- MANUAL
- SLEEP MODE POWER LEVEL
- ECO SCAN
- ECO SCAN SETTING
- ENERGY SAVING PATTERN LIST
- EDIT PATTERN
- POWER ON/OFF SCHEDULE SETTING
- SETTING POWER ON/OFF SCHEDULING FUNCTION
- SPECIFIC DATE" TAB
- PATTERN" TAB
- HOLIDAY" TAB
- DISPLAYING ECO RECOMMENDATION SETTINGS (ECO RECOMMENDATION FUNCTION DISPLAY)
- TONER SAVE MODE
- (BP-60C31/BP-60C36/BP-60C45/BP-70C31/BP-70C36/BP-70C45/BP-70C55/BP-70C65)
- USER AUTHENTICATION
- AUTHENTICATION BY USER NUMBER
- AUTHENTICATION BY LOGIN NAME/PASSWORD
- ENTER THE LOGIN NAME
- ENTERING USING THE SOFT KEYBOARD
- SELECTING FROM A LIST
- ENTER THE PASSWORD
- TO HAVE THE USER NAME AND PASSWORD REGISTERED
- WHEN SELECTING FROM THE USER LIST SCREEN
- WHEN ENTERING FROM THE SOFT KEYBOARD
- QUICK AUTHENTICATION
- TO USE QUICK AUTHENTICATION
- REGISTER USERS WITH QUICK AUTHENTICATION
- TAP THE POSITION YOU WISH TO REGISTER
- ENTER USER INFORMATION, AND TAP THE [REGISTER] KEY
- TO DELETE A REGISTERED USER
- USER EDITING AND DELETING FROM USER ADMINISTRATION SETTINGS AND WEB PAGE
- AUTHENTICATING THE MACHINE USING QUICK AUTHENTICATION
- TAP THE ICON
- IF SETTING A PASSWORD, ENTER THE PASSWORD
- USER CONTROL
- ORGANIZATION / GROUP LIST
- PAGE LIMIT GROUP LIST
- PAGE LIMIT GROUP LIST A
- COPY
- PRINTER
- LIST PRINTS
- SCANNER
- SCAN TO LOCAL DRIVE
- AUTHORITY GROUP
- ACTIVE DIRECTORY LINKING FUNCTION
- ENABLE USE OF BILLING CODE
- COLLECTING BILLING CODES
- USE BILLING CODE
- TO ENABLE USE OF THE BILLING CODE
- TO RETAIN THE SPECIFIED BILLING CODE AT THE TIME OF MODE TRANSITION
- SPECIFYING A BILLING CODE AGAIN
- SELECT A BILLING CODE FROM THE LIST
- WHEN NOT SPECIFYING A BILLING CODE
- TO SELECT THE PREVIOUSLY USED BILLING CODE (AT THE TIME OF USER AUTHENTICATION)
- TO SEARCH FOR THE MAIN CODE OR MAIN CODE NAME
- TO CANCEL THE SELECTION FROM THE LIST
- TO CHECK THE DETAILS OF THE MAIN CODE
- TAP THE [SELECT FROM LIST] KEY OF THE SUB CODE
- TO CLEAR THE VALUE OF THE SPECIFIED BILLING CODE
- DIRECTLY ENTERING A BILLING CODE
- REGISTERING A NEW BILLING CODE
- SHARED RANGE OF BILLING CODE
- WHEN THE BILLING CODE ENTRY WINDOW IS DISPLAYED, TAP [SELECT FROM LIST] OF THE MAIN CODE
- TAP [ADD/EDIT BILLING CODE] ON THE ACTION PANEL
- TAP [ADD NEW] ON THE ACTION PANEL
- TAP THE BOX OF [MAIN CODE], THEN TYPE IN THE MAIN CODE
- TAP THE BOX OF [MAIN CODE NAME], THEN TYPE IN THE MAIN CODE NAME
- IF NECESSARY, SELECT THE SHARE RANGE OF BILLING CODE
- TAP AND SELECT A GROUP AS A PUBLIC DESTINATION
- TO CANCEL THE SETTING
- TO CONTINUOUSLY REGISTER OTHER BILLING CODES, TAP [REGISTER NEXT BILLING CODE.]
- TO CANCEL THE REGISTRATION
- TAP [END REGISTRATION] ON THE ACTION PANEL
- TO RETURN TO THE BILLING CODE ENTRY WINDOW
- EDITING OR DELETING THE REGISTERED BILLING CODE
- EDITING A BILLING CODE
- WHEN THE BILLING CODE ENTRY WINDOW IS DISPLAYED, TAP THE [SELECT FROM LIST] KEY OF THE MAIN CODE
- TAP AND SELECT THE MAIN CODE TO BE EDITED, THEN TAP [EDIT] ON THE ACTION PANEL
- EDIT THE MAIN CODE AS REQUIRED
- DELETING A BILLING CODE
- TAP AND SELECT THE MAIN CODE TO BE DELETED, THEN TAP [DELETE] ON THE ACTION PANEL
- USING THIS MACHINE IN A NETWORK ENVIRONMENT
- USING WI-FI
- WI-FI
- COMMUNICATION MODES OF WI-FI
- INFRASTRUCTURE MODE
- ACCESS POINT MODE
- WI-FI DIRECT MODE
- WPS
- CONNECTING BY BLUETOOTH
- EASILY CONNECT WITH AN NFC-COMPATIBLE MOBILE DEVICE (EASY CONNECT)
- CONNECTING BY NFC
- HOLD YOUR MOBILE DEVICE TO THE NFC TOUCH POINT AREA
- CONNECTING TO THE MACHINE FROM A MOBILE DEVICE
- CONNECTING BY QR CODE
- TAP THE [EASY CONNECT (QR CODE)] KEY IN THE HOME SCREEN
- START THE DEDICATED APPLICATION ON YOUR MOBILE DEVICE
- READ THE QR CODE ON THE TOUCH PANEL WITH YOUR MOBILE DEVICE
- NAS
- FOLDER STRUCTURE
- SAVING FILES IN NAS / BROWSING NAS FILES
- YOU CAN SAVE DATA THAT YOU NEED TO THE MACHINE'S LOCAL DRIVE, AND VIEW THE DATA ON YOUR COMPUTER
- USING AS A FILE SERVER / BROWSING SAVED FILES
- FOLLOW THE MESSAGE ON THE OPERATION PANEL OF THE MACHINE TO PERMIT THE CONNECTION
- SHARP OSA
- APPLICATION COMMUNICATION
- TAP THE [SHARP OSA] KEY IN THE HOME SCREEN
- SELECT A STANDARD APPLICATION
- CONNECT THE MACHINE TO THE STANDARD APPLICATION
- EXTERNAL ACCOUNT APPLICATION
- EXTERNAL ACCOUNT APPLICATION SETUP
- OPERATION IN EXTERNAL ACCOUNT MODE
- EXTERNAL AUTHENTICATION MODE
- IF LOGIN FAILS
- EXTERNAL COUNT MODE
- VIRUS SCAN
- VIRUS SCAN/VIRUS DEFINITION UPDATE TIMING AND TARGET DATA
- VIRUS SCAN TIMING
- SCAN DURING INSTALLATION AND UPDATE
- REAL TIME SCAN
- REGULAR SCAN
- ON-DEMAND SCAN
- UPDATE TIMING FOR VIRUS DEFINITION FILES
- REGULAR UPDATE
- ON-DEMAND UPDATE
- TARGET DATA FOR VIRUS SCAN
- COMBINATION OF TARGET DATA AND VIRUS SCAN
- WHEN A VIRUS IS DETECTED
- DISPLAYED IN THE SYSTEM INFORMATION SCREEN
- AUDIT LOG" OF VIRUS SCAN
- E-MAIL ALERT
- UPDATING THE VIRUS DEFINITION FILE
- WHEN THE VIRUS DEFINITION FILE UPDATE FAILS
- UNIVERSAL DESIGN RELATED TO OPERATION
- ADJUSTMENT OF OPERATION PANEL ANGLE
- GRIP HANDLE ON PAPER TRAYS
- CHANGING OF KEY RESPONSE TIME
- TIME FOR ACCEPTING KEY ENTRY
- DISABLE AUTO KEY REPEAT
- LONG-TOUCH DETECTION TIME
- DOUBLE TAP SPEED INTERVAL
- CONFIRMATION OF PLACEMENT OF ORIGINAL IN DOCUMENT FEEDER
- UNIVERSAL DESIGN RELATED TO VISION
- CHANGING OF TEXT SIZE
- ENLARGE DISPLAY MODE
- UNIVERSAL DESIGN RELATED TO HEARING
- AUDIBLE ALERT SOUNDS WHEN CHANGING SETTINGS
- KEYS TOUCH SOUND
- MAKE KEY TOUCH SOUND AT DEFAULT SETTING
- UNIVERSAL DESIGN FEATURES
- EASY-TO-USE USER INTERFACE
- CUSTOMIZING THE HOME SCREEN AND ADDING ICONS
- CUSTOMIZING THE HOME SCREEN - CHANGING THE DISPLAY ORDER
- CUSTOMIZING THE HOME SCREEN - INTUITIVE AND EASY-TO-USE DESIGN
- HIGH-CONTRAST DISPLAY (UD PATTERN)
- MULTI-LANGUAGE DISPLAY
- INTUITIVE OPERATION
- EASIER OPERATION AT THE MACHINE
- SIMPLE TONER REPLACEMENT
- ITEMS RECORDED IN THE JOB LOG
- SETTING MODE
- SETTING MODE LIST
- STATUS
- DOCUMENT OPERATIONS
- SYSTEM SETTINGS
- FAX DATA RECEIVE/FORWARD (MANUAL)
- INBOUND ROUTING (FORWARDING/STORING) SETTINGS
- DOCUMENT FILING SETTINGS
- SHARP OSA SETTINGS
- AUTHENTICATION SETTINGS
- PAPER SETTINGS
- OPERATION SETTINGS
- DEVICE CONTROL
- SOUND SETTINGS
- NETWORK SETTINGS
- SECURITY SETTINGS
- ENERGY SAVE
- SYSTEM CONTROL
- IMAGE QUALITY ADJUSTMENT
- INITIAL INSTALLATION SETTINGS
- ADMINISTRATOR PASSWORD
- DISPLAYING THE SETTING MODE ON THE MACHINE
- TAP THE [SETTINGS] KEY
- ON THE UPPER TAB, TAP THE ITEM THAT YOU WANT TO SET
- DISPLAYING THE SETTING MODE (WEB VERSION)
- START THE WEB BROWSER ON THE PC, AND ENTER THE IP ADDRESS OF THE MACHINE
- RECOMMENDED WEB BROWSERS
- SELECT A LOGIN NAME AND ENTER YOUR PASSWORD
- ENTERING A PASSWORD
- SETTING MODE SCREEN
- OVERVIEW OF SETTING MODE
- MENU TAB
- SETTING MENU
- CUSTOM LINKS
- LANGUAGE
- USER'S MANUAL DOWNLOAD
- DRIVER/SOFTWARE
- SITEMAP
- [LOGIN/LOGOUT] BUTTON
- SHORTCUT ICON
- SETTING AREA
- SETTING METHOD
- ●DOCUMENT OPERATIONS
- USER CONTROL-USER SETTINGS
- ●USER SETTINGS
- USER CONTROL-ACCESS CONTROL SETTINGS
- ●ACCESS CONTROL SETTINGS
- USER CONTROL-USER COUNT
- USER COUNT
- USER CONTROL - BILLING CODE SETTING
- BILLING CODE SETTING
- SYSTEM SETTINGS - HOME SCREEN SETTINGS
- HOME SCREEN SETTINGS
- SYSTEM SETTINGS - COPY SETTINGS
- COPY SETTINGS
- SYSTEM SETTINGS - PRINTER SETTINGS
- ● PRINTER SETTINGS
- SYSTEM SETTINGS - IMAGE SEND SETTINGS - COMMON SETTINGS ● COMMON SETTINGS
- SYSTEM SETTINGS - IMAGE SEND SETTINGS - SCAN SETTINGS
- SCAN SETTINGS
- SYSTEM SETTINGS - IMAGE SEND SETTINGS - FAX SETTINGS
- ● FAX SETTINGS
- CONDITION SETTINGS
- SEND SETTING
- RECEIVE SETTINGS
- SYSTEM SETTINGS-IMAGE SEND SETTINGS-INTERNET FAX SETTINGS ●INTERNET FAX SETTINGS
- SYSTEM SETTINGS-IMAGE SEND SETTINGS-FAX DATA RECEIVE/FORWARD (MANUAL)
- ●FAX DATA RECEIVE/FORWARD (MANUAL)
- SYSTEM SETTINGS-IMAGE SEND SETTINGS-INBOUND ROUTING (FORWARDING/STORING) SETTINGS
- ●INBOUND ROUTING (FORWARDING/STORING) SETTINGS
- SYSTEM SETTINGS-IMAGE SEND SETTINGS-METADATA SETTINGS
- ●METADATA SETTINGS
- SYSTEM SETTINGS-DOCUMENT FILING SETTINGS
- ●DOCUMENT FILING SETTINGS
- SYSTEM SETTINGS - SHARP OSA SETTINGS
- ● SHARP OSA SETTINGS
- SYSTEM SETTINGS - AUTHENTICATION SETTINGS
- ● AUTHENTICATION SETTINGS
- DEFAULT SETTINGS
- CARD READER SETTINGS
- SYSTEM SETTINGS - COMMON SETTINGS - PAPER SETTINGS
- ● PAPER SETTINGS
- SYSTEM SETTINGS-COMMON SETTINGS-OPERATION SETTINGS
- ●OPERATION SETTINGS
- SYSTEM SETTINGS-COMMON SETTINGS-DEVICE CONTROL
- ●DEVICE CONTROL
- SYSTEM SETTINGS - COMMON SETTINGS - SOUND SETTINGS
- ● SOUND SETTINGS
- SYSTEM SETTINGS - NETWORK SETTINGS
- ● NETWORK SETTINGS
- SYSTEM SETTINGS - SECURITY SETTINGS
- ●SECURITY SETTINGS
- SYSTEM SETTINGS - ENERGY SAVE
- ● ENERGY SAVE
- SYSTEM SETTINGS - SYSTEM CONTROL
- ● SYSTEM CONTROL
- SYSTEM SETTINGS - IMAGE QUALITY ADJUSTMENT
- ● IMAGE QUALITY ADJUSTMENT
- SYSTEM SETTINGS - INITIAL INSTALLATION SETTINGS
- MACHINE IDENTIFICATION
- TOTAL COUNT
- DEVICE STATUS
- NETWORK STATUS
- SECURITY STATUS
- FIRMWARE VERSION
- POWER RESET
- DATA LIST
- LIST FOR USER
- PROHIBIT TEST PAGE
- LIST FOR ADMINISTRATOR
- PRINTER SETTINGS
- IMAGE SEND SETTINGS
- COMMON
- ENERGY SAVE SETTING
- IMAGE SENDING ACTIVITY REPORT
- DATA RECEIVE/FORWARD LIST
- MY FOLDER
- USER SETTINGS
- USER LIST
- STORING A USER
- EDITING AND DELETING A USER
- USERS STORED AS FACTORY DEFAULT
- ADMINISTRATOR
- USER
- DEVICE ACCOUNT
- OTHER USER
- CUSTOM INDEX
- ORGANIZATION /GROUP LIST
- USER INFORMATION PRINT
- ACCESS CONTROL SETTINGS
- PAGES LIMIT GROUP
- STORING PAGE LIMIT GROUPS
- EDITING A PAGE LIMIT GROUP
- MACHINE PAGE LIMIT SETTING
- STORING AUTHORITY GROUPS
- EDITING AN AUTHORITY GROUP
- FAVOURITE OPERATION GROUP
- FAVOURITE OPERATION GROUP LIST
- ADDING/EDITING A GROUP
- RETURNING A FAVOURITE OPERATION GROUP TO "UNLIMITED
- FAVOURITE KEY LIST
- HOME SCREEN LIST
- VIEW USER COUNT
- RESETTING USER COUNTS
- SAVE USER COUNT
- ADMINISTRATION SETTINGS
- USE CODE SETTINGS
- TAKE OVER BILLING CODE AT MODE TRANSITION
- DISABLE CHANGE OF BILLING CODE
- APPLY USE CODE WHILE LOGGED IN WITH DEVICE ACCOUNT
- EXCEPTION SETTING FOR BILLING CODE FUNCTION
- BILLING CODE DISPLAY NAME SETTING
- MAIN CODE LIST
- REGISTER A MAIN CODE
- CORRECT A MAIN CODE
- SEARCH FOR A MAIN CODE
- SUB CODE LIST
- REGISTER A SUB CODE
- CORRECT A SUB CODE
- SEARCH FOR A SUB CODE
- HOME SCREEN REGISTRATION
- ICON
- BACKGROUND IMAGE
- ROTATION COPY SETTING
- DISABLE COPY IN DIFFERENT SIZE
- ADD OR CHANGE EXTRA PRESET RATIOS
- SETTING A MAXIMUM NUMBER OF COPIES
- STAMP
- INITIAL MARGIN SHIFT SETTING
- ERASE WIDTH ADJUSTMENT
- INITIAL N-UP SETTING
- CARD SHOT SETTINGS
- AUTOMATIC SADDLE STITCH
- INITIAL TAB COPY SETTING
- DISABLING OF REGISTRATION/DELETION OF PROGRAM
- DISABLING OF BYPASS-TRAY IN DUPLEX COPY
- DISABLING OF AUTO PAPER SELECTION
- AUTO SELECTION SETTING OF TRAY THAT IS SUPPLIED THE PAPER
- DISABLING REGISTRATION OF CUSTOM IMAGE
- DISABLING SENDING WHILE COPYING
- HIGH QUALITY SCAN FROM DOCUMENT FEEDER (B/W)
- QUICK SCAN FROM DOCUMENT GLASS (B/W)
- AUTO CLEAR BEFORE COPY EXECUTION ALSO
- DISPLAY WARNING MESSAGE WHEN ORIGINAL IS NOT DETECTED
- INITIAL STATUS SETTINGS
- TEXT /IMAGE PRINTING
- TEXT SETTINGS (STAMP)
- CUSTOM STAMP
- CUSTOM WATERMARK
- PROHIBIT NOTICE PAGE PRINTING
- PROHIBIT TEST PAGE PRINTING
- A4/LETTER SIZE AUTO CHANGE
- A3/LEDGER SIZE AUTO CHANGE
- BYPASS TRAY SETTINGS
- ENABLE DETECTED PAPER SIZE IN BYPASS TRAY
- ENABLE SELECTED PAPER TYPE IN BYPASS TRAY
- EXCLUDE BYPASS-TRAY FROM AUTO PAPER SELECT
- JOB SPOOL QUEUING
- DISABLING OF USB MEMORY DIRECT PRINT
- DISABLING OF NETWORK FOLDER DIRECT PRINT
- DISABLING SENDING WHILE PRINTING
- INTERFACE SETTINGS
- HEXADECIMAL DUMP MODE
- I/O TIMEOUT
- ENABLE NETWORK PORT
- NETWORK PORT EMULATION SWITCHING
- PORT SWITCHING METHOD
- PCL SETTINGS
- POSTSCRIPT SETTINGS
- OOXML SETTINGS
- PRINT RELEASE SETTINGS
- STANDARD
- B/W PRINT
- PRINT AND DELETE THE DATA
- PRINT ORDER
- COMMUNICATION TIMEOUT
- PRIMARY UNIT SETTINGS
- PRIMARY UNIT
- REQUIRE AUTHENTICATION WHEN STORING
- FORCE TO ENABLE THE PRINT RELEASE FUNCTION
- DELETE STORED DATA AFTER SPECIFIED TIME
- DAYS
- LOCAL DRIVE STATUS
- CONNECTING CODE
- PORT NUMBER
- DELETE ALL
- DESTINATION SETTINGS
- PRIMARY UNIT 1 TO PRIMARY UNIT
- ADVANCED SETTINGS
- EXTEND DESTINATION GROUP
- DEFAULT GROUP
- DESTINATION GROUP SETTING
- GROUPS
- USE THIS GROUP
- E-MAIL PRINT SETTINGS
- POP3 SERVER
- POP AUTHENTICATION
- USER NAME
- PASSWORD
- CHECK INTERVAL
- ENABLE SSL/TLS
- DIRECT PRINT SETTINGS (FTP)
- FTP SERVER REGISTRATION
- NAME
- FTP SERVER
- DIRECTORY
- USE PASV MODE
- DIRECT PRINT SETTINGS (NETWORK FOLDER)
- REGISTRATION OF NETWORK FOLDER
- FOLDER PATH
- PRINT SETTING FROM PC/MOBILE TERMINAL
- IPP PRINT (DRIVERLESS)
- GEO URI (RFC 5870)
- COMMON SETTINGS
- HOLD SETTINGS FOR A WHILE AFTER SCANNING HAS BEEN COMPLETED
- JOB AUTO START TIME DURING SCANNING
- DEFAULT DISPLAY SETTING
- ADDRESS BOOK DEFAULT SELECTION
- APPLY ADDRESSES OF SENDING MODES ONLY
- CATEGORY DISPLAYED AS DEFAULT
- IMAGE ORIENTATION
- PREVIEW SETTING
- RECEIVED DATA IMAGE CHECK SETTING
- DEFAULT EXPOSURE SETTINGS
- DEFAULT ORIGINAL IMAGE TYPE
- SENDING THE SAME IMAGE SENT IN FAX MODE
- BE SURE TO PRESS NEXT ADDRESS KEY ([+]) BEFORE SELECTING THE NEXT ADDRESS
- DISABLE SWITCHING OF DISPLAY ORDER
- HOLD SETTING FOR RECEIVED DATA PRINT
- DEFAULT VERIFICATION STAMP
- TIME SPECIFIED OUTPUT OF RECEIVED DATA
- ENABLE/DISABLE SETTINGS
- SETTINGS TO DISABLE REGISTRATION
- DISABLE REGISTERING DESTINATION FROM OPERATION PANEL
- DISABLE REGISTERING DESTINATION ON WEB PAGE
- DISABLE REGISTRATION/DELETION OF ALL PROGRAM ITEMS
- DISABLE REGISTRATION OF MEMORY BOX
- DISABLE REGISTRATION USING NETWORK SCANNER TOOL
- DISABLING OF FORWARDING VIA NETWORK
- SETTINGS TO DISABLE TRANSMISSION
- DISABLING SENDING HISTORY
- DISABLE SELECTION FROM ADDRESS BOOK
- DISABLE DIRECT ENTRY
- DISABLING OF PC SCAN
- DISABLE STORING TO EXTERNAL MEMORY DEVICE
- DISABLE PC-I-FAX TRANSMISSION
- DISABLE PC-FAX TRANSMISSION
- DISABLING OF FIND MY ADDRESS
- DISABLING OF OCR
- OWN NAME AND DESTINATION SET
- SENDER DATA REGISTRATION
- SENDER FAX NUMBER
- I-FAX OWN ADDRESS
- REGISTRATION OF OWN NAME SELECT
- ADD NEW
- DEFAULT COLOUR MODE SETTINGS
- INITIAL FILE FORMAT SETTING
- FILE FORMAT
- SPECIFIED PAGES PER FILE
- NUMBER OF PAGES
- OCR SETTING
- FONT
- DETECT IMAGE DIRECTION
- FILE NAME EXTRACTION
- FACTORY DEFAULT SETTINGS: DISABLE
- EASY SCAN SETTINGS
- RESOLUTION SETTING
- SCANNER COMMON
- APPLY THE RESOLUTION SET WHEN STORED
- ORIGINAL SKEW ADJUSTMENT
- DEFAULT REPLY ADDRESS SET
- BCC SETTING
- ENABLE BCC
- QUICK ON LINE SENDING
- PDF COMPRESSION OPTIONS
- COMPACT PDF RESOLUTION SETTING
- COMPRESSION MODE AT BROADCASTING
- BLACK & WHITE
- COLOUR/GREYSCALE
- REDUCE COLOURS
- SEND DESTINATION LINK SETTINGS
- ENABLE SEND DESTINATION LINK AS DEFAULT
- FILE RETENTION PERIOD
- MAXIMUM SIZE OF SEND DATA (E-MAIL)
- IF THE E-MAIL ATTACHMENT(S) EXCEED MAXIMUM SIZE, IT WILL BE SENT IN MULTIPLE FILES
- MAXIMUM SIZE OF SEND DATA (FTP/DESKTOP/NETWORK FOLDER)
- AUTO SCAN SETTING
- PRESET RESTRICTION OF E-MAIL FOR DIRECT INPUT
- DEFAULT ADDRESS
- DEFAULT ADDRESS SETTING
- ADD SELECTED
- APPLY E-MAIL ADDRESS OF THE USER FOR LOGIN
- APPLY HOME DIRECTORY OF THE USER FOR LOGIN
- SELECT FROM ADDRESS BOOK
- ALLOW CANCEL OF THE FIRST ENTERED ADDRESS
- APPLY LOGIN NAME TO THE PATH OF NETWORK FOLDER
- ADD A SUBFOLDER PATH TO THE END OF THE HOME DIRECTORY PATH
- SUBFOLDER PATH
- DISABLE SELECTION OF OTHER ADDRESS(ES)
- SUBJECT NAME SETTINGS
- DEFAULT SUBJECT
- PRE-SET REGISTRATION
- FILE NAME SETTINGS
- DEFAULT SETTINGS FOR FILE NAMES
- FILE NAMING
- UNIT SERIAL NUMBER
- TEXT
- DATE & TIME
- SESSION PAGE COUNTER
- UNIQUE IDENTIFIER
- DIRECT ENTRY/PRE-SET TEXT SELECTION SETTINGS
- ADD DATE & TIME
- MESSAGE BODY SETTINGS
- ADD JOB INFORMATION AUTOMATICALLY TO THE MAIL MESSAGE BODY
- ADD A FOOTER AUTOMATICALLY TO THE MAIL MESSAGE BODY
- MAIL FOOTER REGISTRATION
- FAX SETTINGS
- AUTO WAKE UP PRINT
- PAUSE TIME SETTING
- REMOTE RECEPTION NUMBER SETTING
- DISPLAY FAX SCREEN WHEN EXTERNAL TELEPHONE IS OFF-HOOK
- TRANSACTION REPORT PRINT SELECT SETTING
- SINGLE SENDING
- BROADCASTING
- RECEIVING
- CONFIDENTIAL RECEPTION
- ACTIVITY REPORT PRINT SELECT SETTING
- SUPER G3 SETTING
- ECM
- DIGITAL LINE NETWORK
- DISTINCTIVE RING DETECTION
- PBX SETTING
- AUTO REDUCTION SENDING SETTING
- ROTATION SENDING SETTING
- PRINTING PAGE NUMBER AT RECEIVER
- SENDER DESTINATION NAME SWITCH
- DATE/OWN NUMBER PRINT POSITION SETTING
- RECALL IN CASE OF LINE BUSY
- NUMBER OF TIMES TO RECALL WHEN LINE IS BUSY
- INTERVAL TO WAIT BETWEEN RECALL ATTEMPTS (MIN.) WHEN LINE IS BUSY
- RECALL IN CASE OF COMMUNICATION ERROR
- NUMBER OF TIMES TO RECALL IN CASE OF ERROR
- INTERVAL TO WAIT BETWEEN RECALL ATTEMPTS (MIN.) IN CASE OF ERROR
- DISABLE FAX BROADCASTING
- NUMBER OF CALLS IN AUTO RECEPTION
- SWITCHING TO AUTOMATIC RECEPTION
- SIDED PRINTING OF RECEIVED DATA
- AUTO RECEIVE REDUCE SETTING
- PRINT STYLE SETTING
- PRINT ACTUAL SIZE CUT OFF DISABLED
- PRINT ACTUAL SIZE CUT OFF ENABLED
- AUTO SIZE SELECT
- PRINT RECEIVED DATA ON THE PAPER SIZE SELECTED
- SET THE TELEPHONE NUMBER FOR DATA FORWARDING
- LETTER SIZE RX REDUCE PRINT
- RECEIVING DATE & TIME PRINT
- A3 RX REDUCE
- OUTPUT TRAY
- NUMBER OF PRINTS
- PAPER SIZE
- FOLD SIZE SETTING
- ALLOW/REJECT NUMBER SETTING
- REJECT HIDDEN NUMBER
- FAX POLLING SECURITY
- SET FAX POLLING SECURITY
- PASSCODE NUMBER KEY LIST
- F-CODE MEMORY BOX
- STORING A MEMORY BOX
- EDITING AND DELETING A MEMORY BOX
- INTERNET FAX SETTINGS
- RESOLUTION
- HALF TONE
- FILE TYPE
- COMPRESSION MODE
- ORIGINAL PRINT ON TRANSACTION REPORT
- BODY TEXT PRINT SELECT SETTING
- I-FAX RECEPTION REPORT ON/OFF SETTING
- I-FAX RECEPTION REPORT REQUEST TIMEOUT SETTING
- NUMBER OF RESEND TIMES AT RECEPTION ERROR
- MAXIMUM SIZE OF SEND DATA
- DEFAULT OWN NUMBER SENDING
- SET ADDRESS FOR DATA FORWARDING
- FORWARDING TO
- DIRECT SMTP
- ADD HOSTNAME OR IP ADDRESS
- HOSTNAME OR IP ADDRESS
- POP3 COMMUNICATION TIMEOUT SETTING
- RECEPTION CHECK INTERVAL SETTING
- I-FAX OUTPUT SETTING
- ALLOW/REJECT MAIL OR DOMAIN NAME SETTING
- SERVER SETTINGS
- DIRECT SMTP SETTING
- RECEPTION START
- MANUAL RECEPTION KEY IN INITIAL SCREEN
- FORWARD RECEIVED DATA
- TO CANCEL FORWARDING
- INBOUND ROUTING SETTINGS
- TABLE REGISTRATION
- SENDER ADDRESS REGISTRATION
- ENABLE THE [INBOUND ROUTING] FUNCTION
- STORE THE SENDER NUMBER OR ADDRESS
- STORE A FORWARDING TABLE
- ENABLE THE STORED FORWARDING TABLE
- INBOUND ROUTING (STORAGE) SETTINGS
- SETTINGS FOR LOCAL DRIVE STORING OF RECEIVED DATA
- METADATA SETTINGS
- METADATA SET REGISTRATION
- EDIT OR DELETE METADATA SET
- DEFAULT MODE SETTINGS
- SORT METHOD SETTING
- ADMINISTRATOR AUTHORITY SETTING
- DELETE ALL QUICK FILES
- DELETE
- INITIAL RESOLUTION SETTINGS
- DEFAULT OUTPUT TRAY
- DISABLE TEXT/STAMP FUNCTIONS FOR REPRINTING
- PRINT ORDER SETTING FOR THE BATCH PRINT/MULTI-FILE PRINT
- FIT TO STORE SIZE
- SETTING OF STORE/DELETE AFTER FILE PRINT
- B/W, COMPRESSION MODE
- SETTINGS DURING EACH JOB EXECUTION
- DOCUMENT OUTPUT OPTIONS
- CUSTOM FOLDER REGISTRATION
- SHARP OSA VERSION
- COOKIE SETTING
- DELETE COOKIE
- AUTOMATICALLY START AN APPLICATION AT POWER UP AND WAKE UP
- APPLICATION
- ACCEPT REMOTE ACCESS REQUEST FROM APPLICATION
- APPLICATION ALLOWED TO ACCESS
- APPROVE REMOTE ACCESS REQUEST ON OPERATION PANEL
- ACCEPT UI OPERATION REQUEST FROM APPLICATION
- DISPLAY DIALOG OF CONNECTION IN SHARP OSA MODE
- ACCEPT SECONDARY SEND REQUEST FROM SHARP OSA APPLICATION
- STANDARD APPLICATION SETTINGS
- EDIT OR DELETE STANDARD APPLICATION
- RECEIVING APPLICATION SETTING
- EXTERNAL ACCOUNTING APPLICATION SETTINGS
- EMBEDDED APPLICATION SETTINGS
- INSTALL EMBEDDED APPLICATION
- STORE EMBEDDED APPLICATION
- DELETE EMBEDDED APPLICATION
- POLLING SETTING
- EXTERNAL SERVICE CONNECT
- DEFAULT NETWORK AUTHENTICATION SERVER SETTING
- SPECIFY NETWORK SERVER ACCESS CONTROL
- USERS AUTO-REGISTERED
- AUTHENTICATION METHOD SETTING
- AUTHENTICATE A USER BY LOGIN NAME AND PASSWORD
- AUTHENTICATE A USER BY LOGIN NAME, PASSWORD AND E-MAIL ADDRESS
- AUTHENTICATE A USER BY USER NUMBER ONLY
- CASE SENSITIVITY OF LOGIN NAME IS ENABLED
- ENABLE QUICK LOGIN
- DEVICE ACCOUNT MODE SETTING
- LOGIN USER
- SETTINGS FOR USING AUTHENTICATION INFORMATION
- STORE USER INFORMATION
- STORE PASSWORD
- CACHE PERIOD
- ENABLE OFFLINE AUTHENTICATION WITH STORED USER INFORMATION
- ENABLE PERSONALIZATION WHEN EXTERNAL AUTHENTICATION IS USED
- CACHE AUTHENTICATION INFORMATION FOR EXTERNAL SERVICE CONNECT
- CARD SETTING
- REQUEST PASSWORD AT IC CARD AUTHENTICATION
- AUTOMATIC LOGOUT WITH A CARD
- DISABLE PRINTING BY INVALID USER
- AUTOMATIC LOGOUT SETTING
- A WARNING WHEN LOGIN FAILS
- ALLOW REMOTE SCANNER USING BEFORE LOGIN
- INCLUDE JOB STATUS IN USER AUTHENTICATION
- DISPLAY SYSTEM INFORMATION SCREEN BEFORE LOGIN
- ENABLE IPP AUTHENTICATION EXCEPT FOR PRINTER DRIVER
- ACTIONS WHEN THE USER IS AUTHENTICATED
- ACTIONS WHEN THE LIMIT OF PAGES FOR OUTPUT JOBS
- AUTOMATICALLY PRINT STORED JOBS AFTER LOGIN
- RESET COUNTER AFTER SENDING E-MAIL STATUS
- DISABLE DISPLAY/CHANGE OF OTHER USERS' INFORMATION IN THE JOB STATUS
- APPLY LOGIN NAME TO THE USER NAME OF NETWORK FOLDER
- LOGIN NAME DISPLAY
- DISPLAY USAGE STATUS AFTER LOGIN
- EDIT HELP DISPLAY OF LOGIN SCREEN
- CARD READER DEVICE REGISTRATION
- PAPER TRAY SETTINGS
- AUTO SWITCHING OF TRAY
- DISPLAY PAPER TRAY SETTINGS WHEN BYPASS TRAY DETECTS PAPER
- PAPER WEIGHT SETTING
- SETTINGS OF EACH TRAY
- TRAY REGISTRATION
- SELECT PAPER SIZES FOR AUTO DETECTION
- CUSTOM SIZE REGISTRATION (BYPASS)
- SIZE INPUT-AB
- SIZE INPUT-INCH
- PAPER TYPE REGISTRATION
- MESSAGE TIME SETTING
- LANGUAGE SETTING
- DISPLAY SYSTEM INFORMATION SCREEN AS DEFAULT
- DISPLAY IP ADDRESS ON THE SYSTEM INFORMATION SCREEN
- DISPLAY FAVORITE MENUS AS DEFAULT
- DISPLAY ACTION PANEL AS DEFAULT
- ICON IS DISPLAYED WHEN NETWORK CABLE IS NOT CONNECTED
- DISPLAY CONFIRMATION DIALOG WHEN JOB IS CANCELLED
- DISPLAY STATUS NOTIFICATION MESSAGE
- RESTRICT TOTAL COUNT DISPLAY
- SWITCH THE NUMBER OF SETS TO BE DISPLAYED FOR JOB STATUS
- DISPLAY THE ESTIMATED JOB START TIME
- ALIGNMENT ORDER OF 10-KEY
- SETTING DISPLAY FROM MAIN UNIT
- DISPLAY CURRENT PATH
- ENABLE LINK OF CURRENT PATH
- MFP DISPLAY PATTERN SETTING
- KEY OPERATION SETTING
- AUTO CLEAR SETTING
- DISABLING OF BYPASS PRINTING
- PRIORITY OF PRINT JOBS
- DISABLING OF COVERS/INSERTS MODE
- DISABLING RECENT JOBS
- INITIAL ORIGINAL COUNT SETTING
- IMAGE SEND
- REMOTE OPERATION SETTINGS
- REMOTE SOFTWARE OPERATION
- OPERATION FROM SPECIFIED PC
- OPERATION BY USER WHO HAS PASSWORD
- TANDEM CONNECTION SETTING
- EASY MODE SETTINGS
- FAVOURITE KEY SETTING
- FAVORITE KEY NUMBER
- KEY NAME
- FUNCTION MENU
- JOB PROGRAMS
- NOT DISPLAY
- MODE KEY DISPLAY SETTING
- MODES TO DISPLAY
- DISPLAY MODE KEYS ON HOME
- ORIGINAL SIZE DETECTOR SETTING
- CANCEL DETECTION AT DOCUMENT GLASS
- DISPLAY BLANK PAGE SKIP CONFIRMATION MESSAGE
- ACTIONS WHEN MAXIMUM NUMBER OF SHEETS THAT CAN BE STAPLED IS REACHED
- DOUBLE FEED DETECTION SETTING
- SADDLE FOLD/STITCH POSITION ADJUST
- PAPER TYPE FOR AUTO PAPER SELECTION
- PLAIN PAPER COMPATIBILITY SETTINGS
- DETECT STANDARD IN AUTO COLOUR MODE
- TOTAL SETTING FOR FINISH
- DISABLING OF DUPLEX
- DISABLING OF OFFSET
- DISABLING OF STAPLER
- DISABLING OF PUNCH
- DISABLING OF COLOUR MODE
- DISABLING OF DOCUMENT FEEDER
- DISABLING OF LARGE CAPACITY CASSETTE
- DISABLING OF OPTIONAL PAPER DRAWER
- DISABLING OF TRAY SETTINGS
- DISABLING OF FINISHER
- DISABLING OF FOLDING UNIT
- STATUS INDICATOR SETTING
- INFORMATION INDICATOR SETTING
- DATA INDICATOR SETTING
- ERROR LIGHT SETTING
- USE COMMUNICATION INDICATOR
- DOCUMENT FEEDER INDICATOR SETTING
- MACHINE IDENTIFICATION SETTINGS
- CLOCK ADJUST
- DAYLIGHT SAVING TIME SETTING
- DATE FORMAT
- FACTORY DEFAULT SETTINGS: ENABLE
- DISABLE BLANK PAGE PRINT
- DISABLE SCAN FUNCTION
- CANCEL AUTO CLEAR TIMER
- DISABLING OF PRIMARY UNIT MODE
- PRODUCT KEY/APPLICATION NUMBER INPUT
- BEEP SOUND SETTINGS (COMMON)
- BEEP OF INVALID INPUT
- REFERENCE TONE
- COPY COMPLETE SOUND
- SCAN COMPLETE SOUND (IMAGE SEND)
- POWERING OFF SOUND
- CAUTION SOUND SETTINGS
- BEEP SOUND SETTINGS (IMAGE SEND)
- FAX
- INTERNET FAX
- QUICK SETTINGS
- WIRELESS SETTINGS
- CONNECTION TYPE
- KEEP WIRELESS ACCESS POINT ACTIVATED
- WHEN "WIRELESS (INFRASTRUCTURE MODE)" IS SELECTED IN "CONNECTION TYPE
- ACCESS POINT SEARCH
- SSID
- SECURITY TYPE
- ENCRY
- SECURITY KEY
- SHOW SECURITY KEY
- IPV4 SETTINGS
- DHCP
- IPV4 ADDRESS
- SUBNET MASK
- DEFAULT GATEWAY
- NETWORK NAME SETTINGS
- DEVICE NAME
- DOMAIN NAME
- DNS SETTINGS
- PRIMARY SERVER
- SECONDARY SERVER
- SMTP SETTINGS
- SENDER ADDRESS
- SMTP AUTHENTICATION
- CHANGE PIN CODE/PASSWORD
- CONNECTION TEST
- LDAP SETTINGS
- LDAP SERVER
- AUTHENTICATION TYPE
- KDC SERVER
- REALM
- NETWORK NAME SETTING
- COMMENT
- IPV6 SETTINGS
- IPV
- DHCPV
- MANUAL ADDRESS / PREFIX LENGTH
- MTU SETTINGS
- PING COMMAND
- IEEE802.1X SETTING
- IEEE802.1X AUTHENTICATION / IEEE802.1X AUTHENTICATION (WIRED)
- EAP AUTHENTICATION METHOD
- EAP USER NAME
- SERVER AUTHENTICATION
- EAP TIMEOUT
- NUMBER OF EAP RETRIES
- CERTIFICATE STATUS
- CA CERTIFICATE STATUS
- SERVICES SETTINGS
- SMTP
- TIMEOUT
- POP BEFORE SMTP
- KERBEROS
- KERBEROS AUTHENTICATION SETTINGS
- SNTP
- SNTP SETTINGS
- SNTP SERVER
- SYNCHRONOUS INTERVAL
- SYNCHRONIZE UPON START
- SYNCHRONIZE NOW
- MDNS
- MDNS SETTINGS
- SERVICE NAME
- HIGHEST PRIORITY SERVICE
- SNMP
- SNMP V1 SETTINGS
- ACCESS METHOD
- GET COMMUNITY
- SET COMMUNITY
- CHANGE SET COMMUNITY
- TRAP COMMUNITY
- TRAP TARGET ADDRESS
- SNMP V3 SETTINGS
- AUTHENTICATION KEY
- PRIVACY KEY
- CONTEXT NAME
- SMB
- SMB SETTINGS (SERVER)
- USE ENCRYPTED COMMUNICATION
- SMB SETTINGS (CLIENT)
- PRINT PORT SETTINGS
- LPD
- LPD SETTINGS
- USE BANNER
- RAW
- RAW PRINT SETTINGS
- WSD
- WSD SETTINGS
- EXTERNAL PRINT SERVICES SETTINGS
- PRINTER NAME
- REGISTER WITH UNIVERSAL PRINT
- REGISTRATION CODE
- URL FOR CODE REGISTRATION
- DELETE FROM UNIVERSAL PRINT
- ADD
- ACTIVE DIRECTORY SETTINGS
- SEARCH ATTRIBUTE
- PUBLIC FOLDER / NAS SETTING
- PROXY SETTING
- CURRENT SETTING
- CURRENT WIRELESS STATUS
- SHOW WIRELESS SETTING SCREEN
- INITIALIZE WIRELESS SETTINGS
- WIRELESS SETTING SCREEN (ACCESS POINT MODE)
- FREQUENCY BAND
- DEVICE IP ADDRESS
- CHANNEL TO BE USED
- IP ADDRESS DISTRIBUTION RANGE SETTING
- LEASE PERIOD
- WIRELESS SETTING SCREEN (INFRASTRUCTURE MODE)
- WPS: PUSH BUTTON METHOD
- WPS: PIN CODE METHOD
- EASY CONNECTION SETTING
- NFC
- NFC SIGNAL
- QR CODE
- DESTINATION
- BLUETOOTH SETTING
- BLUETOOTH
- DEVICE WEB PAGE SETTING
- HTTP ACCESS SETTINGS
- NUMBER OF USERS WHO CAN LOG-IN AT THE SAME TIME
- AUTO LOGOUT TIME
- VIEW LOGIN USER
- CURRENT LOGIN USER
- LOGOUT ALL USERS
- PASSWORD SETTING
- PASSWORD POLICY SETTINGS
- ADMIN PASSWORD
- MINIMUM PASSWORD LENGTH
- ENABLE PASSWORD CREATION RULES
- PROHIBIT REUSE OF CURRENT PASSWORD
- USER PASSWORD
- DELETE USERS WHO HAVE NOT LOGGED IN FOR A SPECIFIED PERIOD OF TIME
- COUNTING THE DAYS
- DELETE TIMING
- PROHIBIT REUSE OF DELETED USER'S ACCOUNT NAME
- PASSWORD CHANGE
- RESTRICT DEVICE WEB PAGE ACCESS VIA PASSWORD
- RESTRICT PRINT JOBS OTHER THAN THE CURRENT PRINT HOLD JOB
- AUTOMATIC DELETION OF SUSPENDED PRINT JOBS
- TIME UNTIL SUSPENDED PRINT JOBS ARE AUTOMATICALLY DELETED
- REJECT REQUESTS FROM EXTERNAL SITES
- IF FIRMWARE CORRUPTION IS DETECTED, RESTORE IT
- APPLY SECURITY POLICY
- MANDATORY ACCESS CONTROL
- JOB STATUS JOBS COMPLETED LIST DISPLAY SETTING
- JOB STATUS DISPLAY SETTING
- PORT CONTROL
- FILTER SETTING
- IP ADDRESS FILTER SETTINGS
- MAC ADDRESS FILTER SETTINGS
- INTRUSION/ATTACK DETECTION
- VIRUS SCAN SETTING
- VIRUS SCAN SETTINGS
- PERFORM VIRUS SCAN ON INPUT-OUTPUT DATA
- PERFORM VIRUS SCAN AT SPECIFIED TIME
- PERFORM VIRUS SCAN NOW
- TIME SCHEDULE
- EVERY DAY
- (START TIME)
- EVERY WEEK
- (DAY OF THE WEEK)
- EVERY MONTH
- (DATE)
- VIRUS SCAN TARGET
- VIRUS DEFINITION FILE UPDATE SETTING
- PERFORM UPDATE NOW
- SSL/TLS SETTINGS
- SERVER PORT
- CLIENT PORT
- LEVEL OF ENCRYPTION
- DEVICE CERTIFICATE
- CERTIFICATE INFORMATION
- SELECT DEVICE CERTIFICATE
- S/MIME SETTINGS
- SIGN SETTINGS
- SIGN E-MAIL
- SIGNATURE ALGORITHM
- ENCRYPTION SETTINGS
- ENCRYPT
- DISABLE SENDING TO THE ADDRESSES WHICH CANNOT BE ENCRYPTED
- IPSEC SETTINGS
- IKEV1 SETTINGS
- PRE-SHARED KEY
- SA LIFETIME (TIME)
- SA LIFETIME (SIZE)
- IKE LIFETIME
- IPSEC RULES
- IPSEC RULE REGISTRATION
- RULE NAME
- PRIORITY
- SELECT THE RULE NAME TO BE THE REGISTRATION MODEL
- DEVICE ADDRESS
- CLIENT ADDRESS
- PROTOCOL
- FILTER MODE
- IPSEC ENCRYPTION
- ESP
- ALLOW COMMUNICATION NOT USING ESP
- AH
- ALLOW COMMUNICATION NOT USING AH
- DOCUMENT ADMINISTRATION FUNCTION
- HIDDEN PATTERN PRINT SETTING
- CONTRAST
- CUSTOM TEXT REGISTRATION
- TRACKING INFORMATION PRINT
- AUDIT LOG
- STORAGE/SEND SETTINGS
- SAVE/DELETE AUDIT LOG
- AUDIT LOG SPECIFICATIONS
- CERTIFICATE MANAGEMENT
- DEVICE CERTIFICATE MANAGEMENT
- IMPORT
- EXPORT
- CREATION OF CERTIFICATE AND PRIVATE KEY
- COMMON NAME (REQUIRED)
- ORGANIZATION
- ORGANIZATIONAL UNIT
- CITY/LOCALITY
- STATE/PROVINCE
- COUNTRY/REGION (REQUIRED)
- CERTIFICATE START DATE
- CERTIFICATE VALIDITY PERIOD
- CERTIFICATE SIGNING REQUEST (CSR) MANAGEMENT
- INSTALL
- MAKE OF CERTIFICATE SIGNING REQUEST(CSR)
- CA CERTIFICATE MANAGEMENT
- ECO SETTING
- DISPLAY A MESSAGE TO DELAY THE TIME OF ENTRY INTO PREHEAT MODE / AUTO POWER SHUT-OFF MODE
- MODE SETTING
- PREHEAT MODE SETTING
- TURN OFF PANEL DISPLAY DURING PRE-HEAT MODE
- AS SOON AS THE REMOTE JOB IS FINISHED, ENTER AUTO POWER SHUT OFF MODE
- SPECIFIC DATE OPERATION SETTINGS
- JOB LOG
- VIEW JOB LOG
- JOB LOG OPERATION
- DATA IMPORT/EXPORT (CSV FORMAT)
- EXPORT SETTINGS
- EXPORT SETTINGS TYPE
- IMPORT SETTINGS
- IMPORT SETTINGS FROM FILE
- STORAGE BACKUP
- DEVICE CLONING
- ADDRESS BOOK FORWARD
- FILING DATA BACKUP
- RESET SETTINGS
- RESET THE NIC
- OPTIMIZATION OF A LOCAL DRIVE
- E-MAIL ALERT AND STATUS
- STATUS MESSAGE
- ADVANCED
- BI-DIRECTIONAL STATUS MESSAGE
- ALERTS MESSAGE
- E-MAIL ADDRESS
- USE SMTP SERVER IN [NETWORK SETTINGS]
- COLLECTIVE ADJUSTMENT
- REGISTRATION ADJUSTMENT
- FUSING CLEANING MODE
- BLACK LETTER/BLACK LINE WIDTH ADJUSTMENT
- BLACK STREAK REDUCTION
- DISPLAY WARNING MESSAGE FOR BLACK STREAKS DETECTION
- COPY IMAGE QUALITY
- QUICK IMAGE QUALITY ADJUSTMENT
- COLOUR BALANCE (COLOUR / B/W)
- COLOR COPY BLACK COMPONENT AMOUNT ADJUSTMENT
- DENSITY ADJUSTMENT WHEN [AUTO] IS SELECTED FOR EXPOSURE
- SHARPNESS
- IMAGE QUALITY PRIORITY
- PRINT IMAGE QUALITY
- QUICK IMAGE QUALITY ADJUSTMENT (COLOUR / B/W)
- EXPOSURE ADJUSTMENT
- COLOUR LINE WIDTH ADJUSTMENT
- SCAN IMAGE QUALITY
- RGB ADJUST
- COLOUR PROFILE SETTINGS
- CUSTOM CMYK SIMULATION PROFILE
- CURRENT PROFILE NAME
- SAVE TO PC
- PROFILE UPDATE
- CUSTOM INPUT PROFILE
- CUSTOM OUTPUT PROFILE
- AUTO COLOUR CALIBRATION (FOR COPY) / AUTO COLOUR CALIBRATION (FOR PRINT) / COPY CALIBRATION BY SCREEN / PRINTER CALIBRATION BY SCREEN
- DENSITY SMOOTHING ADJUSTMENT
- REMOVE TONER CARTRIDGE
Brand : SHARP
Model : BP-50C45
Category : Photocopier