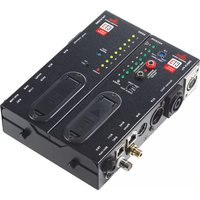
CT3 - Measuring equipment DBX - Free user manual and instructions
Find the device manual for free CT3 DBX in PDF.


| Product Type | Measuring Equipment |
| Brand | DBX |
| Model | CT3 |
| Dimensions (W x H x D) | 200 x 100 x 50 mm |
| Weight | 0.5 kg |
| Power Supply | 3 x AAA batteries (not included) |
| Battery Life | Approximately 50 hours of continuous use |
| Display Type | LCD with backlight |
| Measurement Range | 0.1 - 500 units (varies by mode) |
| Accuracy | ±1% of reading |
| Main Functions | Distance, area, volume, and indirect measurement |
| Units of Measurement | mm, cm, m, ft, in |
| Memory | Stores last 20 measurements |
| Auto Power Off | After 3 minutes of inactivity |
| Operating Temperature | 0°C to 40°C |
| Storage Temperature | -10°C to 50°C |
| Material | ABS plastic with rubber grip |
| Maintenance | Clean with a soft, dry cloth; avoid solvents |
| Safety Notes | Do not point laser at eyes; Class 2 laser |
| Spare Parts Availability | Battery compartment cover and strap |
| Warranty | 1 year |
Frequently Asked Questions - CT3 DBX
User questions about CT3 DBX
0 question about this device. Answer the ones you know or ask your own.
Ask a new question about this device
Download the instructions for your Measuring equipment in PDF format for free! Find your manual CT3 - DBX and take your electronic device back in hand. On this page are published all the documents necessary for the use of your device. CT3 by DBX.
USER MANUAL CT3 DBX
- Please register your product online at www.dbxpro.com. Proof-of-purchase is considered to be the responsibility of the consumer. A copy of the original purchase receipt must be provided for any warranty service.
- dbx warrants this product, when purchased new from an authorized U.S. dbx dealer and used solely within the U.S., to be free from defects in materials and workmanship under normal use and service. This warranty is valid to the original purchaser only and is non-transferable.
- dbx liability under this warranty is limited to repairing or, at our discretion, replacing defective materials that show evidence of defect, provided the product is returned to dbx WITH RETURN AUTHORIZATION from the factory, where all parts and labor will be covered up to a period of two years. A Return Authorization Number must first be obtained from dbx. The company shall not be liable for any consequential damage as a result of the product's use in any circuit or assembly.
- dbx reserves the right to make changes in design or make additions to or improvements upon this product without incurring any obligation to install the same additions or improvements on products previously manufactured.
- The foregoing is in lieu of all other warranties, expressed or implied, and dbx neither assumes nor authorizes any person to assume on its behalf any obligation or liability in connection with the sale of this product. In no event shall dbx or its dealers be liable for special or consequential damages or from any delay in the performance of this warranty due to causes beyond their control.
Technical Support & Service
If you require technical support, contact dbx Technical Support. Be prepared to accurately describe the problem. Know the serial number of your device – this is printed on a sticker attached to the chassis.
Before you return a product to the factory for service, we recommend you refer to this manual. Make sure you have correctly followed installation steps and operating procedures. For further technical assistance or service, please contact our Technical Support Department at (801) 566-8800 or visit www.dbxpro.com. If you need to return a product to the factory for service, you MUST first contact our Technical Support Department to obtain a Return Authorization Number.
NO RETURNED PRODUCTS WILL BE ACCEPTED AT THE FACTORY WITHOUT A RETURN AUTHORIZATION NUMBER.
Please refer to the Warranty information, which extends to the first end-user. After expiration of the warranty, a reasonable charge will be made for parts, labor, and packing if you choose to use the factory service facility. In all cases, you are responsible for transportation charges to the factory. If the product is still under warranty, dbx will pay the return shipping.
Use the original packing material if it is available. Mark the package with the name of the shipper and with these words in red: DELICATE INSTRUMENT, FRAGILE! Insure the package properly. Ship prepaid, not collect. Do not ship parcel post.
CT3
Table of Contents
Overview 2
Introduction 2
Features 2
Connections 3
Using The CT3 ....4
Example 1....5
Specifications 6
Overview
Introduction
The dbx CT3 is an advanced cable testing unit allowing you to evaluate a large variety of cables with ease. The CT3 offers many common connectors such as RJ45, RJ11, MIDI, Speaker Twist, XLR, RCA Phono, BNC, DIN, TRS, TS, DMX, & Banana. It can be split into 2 parts, a SENDER and RECEIVER so pre installed and long cables can be tested.
Features
- Tests up to 8-pin cables
- 2 piece chassis for testing installed cables
- Test Tone Generator
- Allows connection between different format connectors with ease
- 'Banana' connector continuity tester with beeper and LED indicator
- Super-rugged construction for durability and longer life
• (2) DMX (5-pin) connectors for testing of 5 pin->to pin connections
• (2) BNC connectors for testing of 2 pin->to pin connections
• (2) RCA Phono connectors for testing of 2 pin->to pin connections
• (2) XLR connectors (1 x Male, 1 x Female) for testing of 3 pin->to pin connections
• (2) MIDI (5-pin DIN) connectors for testing of 5 pin->to pin connections
• (2) Speaker Twist connectors for testing of 4 pin->to pin connections
• (2) Banana connectors for testing of 1 pin->to pin connections
• (2) 1/4" (6.3mm) TRS/TS connectors for testing of 3 pin->to pin connections
• (2) RJ45 connectors for testing of 8P8C modular connections
• (2) 1/8" (3.5mm) TRS/TS connectors for testing of 3 pin->to pin connections
The CT3 does not use any mains voltages, it only uses 9V DC batteries, one per side of the CT3. Please be aware that if batteries are left unused in the unit they may leak after a while and cause damage to the unit, make sure that if you are not using the CT3 for a long period you disconnect or remove the battery.
Connections
Important Note:
The CT3 TRS (1/4") inputs are STEREO, therefore if you are testing a TS jack (MONO) only insert it into the CT3 to the second click. When inserted properly LEDs 1 and 3 will flash in sequence. If you insert a TS connector all the way, you will see the LEDs on the receiver unit dim in intensity as the Ring and Sleeve are shorted by the jack being used.

A. Receiver side
B. Adjusts the level of the test tone
C. Sender side (voltage goes OUT from here to a cable for testing)
D. The speed at which the testing of cables occurs
E. ON-OFF switch for the sender
F. Battery compartments for 2 x 9V DC batteries
G. Test Tone - OFF - Cable Test switch
H. Input points and LED indication for the continuity tester.
Using The CT3
How can you test a long Multicore or a cable which is inside a wall? How can you test a cable when you can't access both ends to connect a standard cable tester?
For years this solution has been available for normal CAT5 and network cables. The CT3 brings this new technology to the audio world and now you are able to test cables which are already pre-installed or at different parts of a building. The CT3 has a vast number of audio connectors on it as well as RJ45 (CAT5 and CAT6) and RJ11 (Telephone).
When troubleshooting an audio system, having a test tone is imperative. The CT3 has the connectors available for virtually every audio system in use. Thus most any audio device can be connected to the CT3 for signal verification and processing.
The signal from the Tone Generator is sent out the jacks on the left hand side of the unit. This is a balanced signal and, as indicated, the positive signal is on pins 2 and 4, and the negative signal is on pins 3. Pin 1 is grounded. If you are testing an unbalanced device the output level indicated by the Tone Level Knob is exactly half of that shown.
The Test Tone generator is strong enough to drive certain devices directly for testing without additional power. For example, a speaker may be directly connected to the CT3 and the 1KHZ tone may be heard from the speaker. Head-phones can be directly driven, as well as telephone lines. If you are testing a mixer's Microphone Input and thereby its mic preamps, you will want to set the TONE LEVEL around -30 to -20dB. Otherwise you may overdrive the mic preamps. If you are testing a Line Input on a mixer or signal processor, set the TONE LEVEL around 0 to +3dB. For direct device testing like a speaker or headphones, set the TONE LEVEL to +7 or maximum.
Example 1
A. Connect an XLR cable to the Send side of the CT3.
B. Switch ON the Sender (E). If any of the YELLOW LEDs light, it indicates a short in the cable. Now, connect the other end of the cable to the Receiver side. You should see the first 3 YELLOW LEDs on the Sender and the first 3 GREEN LEDs on the Receiver lighting in sequence and the other 5 LEDs not being lit at all.

natural_image
Vertical column of yellow circular dots on black background, no text or symbols present
natural_image
Vertical column of yellow circles on black background, no text or symbols present
natural_image
Vertical column of yellow circles on black background, no text or symbols presentC. Switch the Receiver (G) to Cable Test. If a battery is installed you will now hear a BEEP sound when PIN 1 is detected. (As long as the cable is not faulty). Please note, the cable MUST have at least PIN 1 connected for the CT3 to operate properly. You will immediately know that PIN 1 is faulty if no sound or lights are working on the CT3 during cable testing.
In this way, you are now able to split the CT3 in half (Sender and Receiver) and still see if a cable is working properly by only looking at one side of the tester (the Receiver side).
The order in which PINs are shown in the receiver side (the GREEN LEDs) is the order in which the PINs (or wires) are being tested and connected.)
If for example the XLR cable is wired 1, 3, 2 instead of 1, 2, 3 you would first hear the BEEP when PIN 1 is connected and then you would see PIN 3 and then PIN 2. You would then know that the cable is not wired properly.
If for example the XLR cable is faulty with PIN 2 not connected. You would hear the BEEP for PIN 1 (and see the GREEN PIN 1 LED lit) you would then not see LED 2 light up and then LED 3 would light up.
Warning: Do not connect cables with PHANTOM POWER already present or any kind of power passing through them. The unit could be damaged and will not be covered by Warranty.
Specifications
POWER REQUIREMENT
(2) 9V batteries, one per side (Batteries not included)
DIMENSIONS
8.9cm (W) × 14cm (L) × 3.7cm (H)
3.5" (W) × 5.5" (L) × 1.5" (H)
dbx is constantly striving to maintain the highest professional standards. As a result of these efforts, modifications may be made from time to time to existing products without prior notice. Specifications and appearance may differ from those listed or shown.
Important Note:
Every effort has been made to ensure all information provided in this manual is accurate at the time of writing.
dbx is not liable for any incorrect information contained in this manual and extends no liabilities in regard to this manual other than those required by local law.
dbx may update the contents of this manual at any time without prior notice. The latest version of this manual is available from the dbx website at all times. http://dbxpro.com
CT3
THIS PAGE INTENTIONALLY LEFT BLANK
dbx® by HARMAN
Phone:(801) 566-8800
Website: dbxpro.com
Support: dbxpro.com/en-US/support
dbx Professional Products
is a registered trademark of Harman
CT3 Owner's Manual
© 2015 Harman
All rights reserved
Brand : DBX
Model : CT3
Category : Measuring equipment