
TIMER-2 - Stopwatch ASA - Free user manual and instructions
Find the device manual for free TIMER-2 ASA in PDF.


| Product Type | Stopwatch |
| Brand | ASA |
| Model | TIMER-2 |
| Display Type | Digital LCD |
| Dimensions (L x W x H) | 7.5 x 5.5 x 1.5 cm |
| Weight | 50 g (including battery) |
| Power Source | 1x CR2032 battery |
| Battery Life | Approximately 1 year under normal use |
| Accuracy | ±0.01 seconds |
| Main Functions | Start/Stop, Reset, Lap/Split time, Countdown timer |
| Water Resistance | Splash proof (not submersible) |
| Material | Plastic case, rubber buttons |
| Care & Cleaning | Wipe with soft dry cloth; avoid solvents |
| Safety Precautions | Do not immerse in water; keep away from heat sources |
| Spare Parts | Battery (CR2032) only; no other replaceable parts |
| Reparability | Not user-serviceable; contact support for issues |
| Accessories Included | Lanyard, CR2032 battery |
| General Information | Compact design for sports, timing, and daily use |
Frequently Asked Questions - TIMER-2 ASA
User questions about TIMER-2 ASA
0 question about this device. Answer the ones you know or ask your own.
Ask a new question about this device
Download the instructions for your Stopwatch in PDF format for free! Find your manual TIMER-2 - ASA and take your electronic device back in hand. On this page are published all the documents necessary for the use of your device. TIMER-2 by ASA.
USER MANUAL TIMER-2 ASA
Controls and Indicators 3
Parts and Assembly 3
Getting Started 3
Battery Replacement 5
Button Functions 5
Clock Function 6
Fuel Timer Function 8
Chronograph Function...... 10
Approach Timer Function 11
Note/Scratchpad Function 13
Backlight Operation 14
Device Reset 14
Care 14
Specifications 15
ASA Products 15
Limited Warranty 15
Congratulations on your purchase of the Flight Timer from Aviation Supplies & Academics, Inc. (ASA). This is a quality timekeeping instrument engineered to meet the needs of pilots. We hope you enjoy the functionality and convenience of your new Flight Timer.
Features
◆ Large, readable LCD display
◆ Uniform LED backlight preserves night vision
◆ Auto shut-off backlight extends battery life
◆ Multi-function clock:
- AM/PM indicator
- Military time
- Universal coordinated ("Zulu") time
◆ Allows simultaneous timing of three events
- Stopwatch with 1/10th and 1/100th second digits
◆ Fuel timer notifies you when to switch fuel tanks
◆ Approach timer stores 12 approach times
◆ Audible and visible alarms
◆ Intuitive push and rotate dial sets times quickly
◆ 5-digit note can remember important flight numbers
◆ Low battery indicator
◆ Multiple mounting options:
- Clips onto flight board
- Hook & loop attaches to panel or yoke clip
◆ Uses two AAA batteries (included)
♦ Sleek, ergonomic design
◆ Count-up or count-down timer function
Controls and Indicators
LCD Display Icons
1 Mode indicators
2 Home/Destination approach time memory banks
3 Low battery indicator
4 5-digit note scratchpad
5 Clock and timer display
Buttons
6 CLOCK
7 START/STOP
8 FUEL/CHRONO
9 APPROACH
10 RESET
11 DIAL
12 BACKLIGHT SWITCH
13 NOTE
Parts and Assembly
14 2 AAA Alkaline batteries
15 Mounting clip
16 Battery cover
17 Hook & loop mounting pad (optional)
18 Metric clip screw (M4 x 0.8mm)
Getting Started
To begin using your Flight Timer, turn the timer over and remove the battery tab. The timer should begin functioning.
Note: The Timer is intended to function effectively within an extensive span of atmospheric conditions. However, if subjected to direct sunlight or excessive temperatures for a prolonged period of time, the display may go black or you may see a rainbow effect (most visible when wearing polarized sunglasses).

If this happens, remove the timer from the heat and sunlight and it will display correctly within several minutes.
Battery Replacement
Follow these steps to replace the batteries:
- First, remove clip screw and mounting clip.
◆ Press snap tab down and remove battery cover. - Install 2 AAA Alkaline batteries according to polarity diagram.
◆ Check to see that timer display is on. - To reinstall battery cover, insert bottom lugs first then snap into place.
- Install mounting clip by tightening screw into threaded insert.
◆ Timer is ready for use.
Button Functions
CLOCK (6)—Displays time. Multiple presses toggle between standard time (AM/PM), military 24-hour time and universal time (UTC or “Zulu”).
FUEL/CHRONO (8)— Jumps to fuel timer from any other mode. Subsequent presses toggle between fuel and chrono (stopwatch) modes.
APPROACH (9)—Jumps to approach timer from any other mode.
NOTE (13)— Press to set note data.
START/STOP (7)—Starts a stopped timer, stops a started timer. Also stops the audible and visible alarm for the currently displayed timer.
DIAL (11) push—Pushing the dial knob allows the current timer, clock or note data to be set. Flashing digits indicate the current digits being modified.
Subsequent presses step through the data being set
(i.e., from hours to minutes to seconds). The knob must be pressed and held for 2 seconds in order to set the clock data.
DIAL rotate—Clockwise rotation increments and counterclockwise rotation decrements the flashing digits on the screen.
RESET (10)— Resets the fuel timer, chrono, or note to zero. In approach mode, the first press recalls the last preset value, the second press resets the timer to zero. When setting clock, resets time to 12:00 PM.
LIGHT (12)— Toggles backlight on and off. Backlight will stay on for 5 minutes then shut off.
Alternate Functionality: CLOCK, APPROACH, and NOTE can also accept a flashing value rather than stepping all the way through using the DIAL push button.
Clock Function
The Flight Timer keeps track of the current time and provides three display options:
◆ Standard 12-hour time (AM/PM)
◆ 24-hour military time
◆ Universal coordinated time (UTC or “Zulu”)
The “CLOCK” icon appears in the upper portion of the display when clock mode is active. If a different mode is active, press the CLOCK button to display the current time.
Display Formats
Press the CLOCK button to view the alternate display formats, standard with “AM” or “PM” (Fig 2), military (Fig 3) and UTC (Fig 4). UTC format displays hour digits associated with universal time, the minutes and seconds are identical to the other formats.

Fig 2— Standard 12-hour time format

Fig 3— Military time format

Fig 4— Universal coordinated time (UTC) format
Setting Time
- With standard or military time formats displayed, push and hold DIAL until the hour digits flash (about 2 seconds).
Trick—Press RESET at 0 seconds to reset to 12:00:00, then seconds will not need resetting later.
◆ Rotate DIAL to set the hours.
◆ Push DIAL. The minute digits will flash.
◆ Rotate DIAL to set the minutes.
◆ Push DIAL. The second digits will flash.
◆ Rotate DIAL to set the seconds.
◆ Push DIAL to finish setting time.
Setting UTC Hour
- With UTC time format displayed, push and hold DIAL until the hour digits flash (about 2 seconds).
◆ Rotate DIAL to set the hours.
◆ Push DIAL to finish setting UTC hour digits.
Fuel Timer Function
The Flight Timer includes a fuel timer function to time the intervals between fuel tank selections or other intermittent events. Fuel timer features include:
◆ Up to 99-hour timer
◆ Count-up or countdown operation
◆ Audible and visible countdown alarm
◆ Operates independently from other timers and clock
The “FUEL” icon appears in the upper portion of the display when fuel mode is active. If a different mode is active, press the FUEL/CHRONO button to display the fuel timer.
Count-up Operation
Count-up operation can be used to track the duration of events up to 99 hours and 59 minutes long. No alarm will sound when counting up.
- If timer is running press START/STOP to stop timer.
◆ Press RESET to zero timer as shown in Fig 5. - Press START/STOP to start timer. Seconds will begin to count up.
◆ Press START/STOP to stop timer.
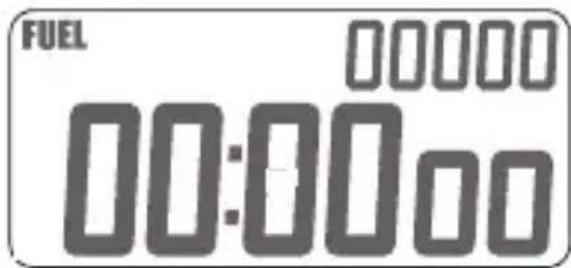
Fig 5—Fuel timer display
Countdown Operation
Countdown operation can be used to time the interval between events. A beeping alarm, flashing icons and backlight notify the user that time has elapsed.
- If timer is running press START/STOP to stop timer.
◆ Press RESET to zero timer as shown in Fig 5.
◆ Push DIAL. The hour digits will flash.
◆ Rotate DIAL to set hours.
◆ Push DIAL. The minute digits will flash.
◆ Rotate DIAL to set minutes.
◆ Push DIAL. The second digits will flash.
◆ Rotate DIAL to set seconds.
♦ Push DIAL to save.
Fuel Timer Alarm
When the fuel timer counts down to zero the Flight Timer sounds an audible and visible alarm then begins to count up, measuring the time since the alarm. If fuel mode is active, the hour, minute and second digits flash. If another mode is active, the “FUEL” icon flashes to indicate a fuel timer alarm. The audible alarm and flashing backlight cease after 10 seconds or when the alarm is canceled.
Canceling the Fuel Timer Alarm
- If a mode other than fuel is active, press FUEL/CHRONO.
◆ Press START/STOP to stop flashing digits.
◆ Elapsed time since alarm is maintained on screen.
Chronograph Function
The Flight Timer includes a chronograph (stopwatch) function for precise measurement of time intervals. The features of this timer are:
◆ Count-up measurement only.
◆ Precise 1/10th and 1/100th second digit display.
◆ Counts up to 99 minutes.
◆ Operates independently from other timers and clock.
The “CHRONO” icon appears in the upper portion of the display when chronograph mode is active. If a different mode is active, press the FUEL/CHRONO button to display the chronograph timer.
Chronograph Operation
◆ Press RESET to zero timer as shown in Fig 6.
◆ Press START/STOP to start chronograph.
◆ Press START/STOP to stop chronograph.
- Press START/STOP again to restart from same point or RESET to zero.
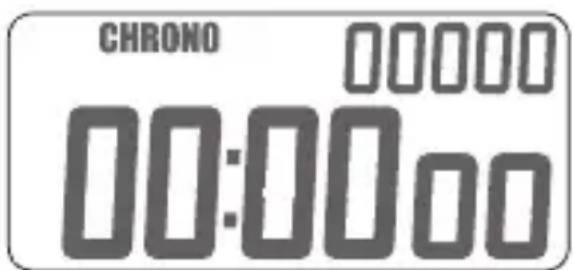
Fig 6—Chronograph (stopwatch) display
Approach Timer Function
The Flight Timer includes an approach timer function to time approach intervals. For convenience, multiple approach times can be programmed prior to flight. Features include:
◆ Count-up or countdown operation.
◆ Up to 59-minute 59-second timer.
◆ Stores 6 home (H) airport approach times.
◆ Stores 6 destination (D) airport approach times.
◆ Preset approach times can be recalled with the push of a button.
◆ Audible and visible countdown alarm.
◆ Operates independently of other timers and clock.
The “APPROACH” icon appears in the upper portion of the display when approach mode is active. If a different mode is active, press the APPROACH button to display the approach timer.
Selecting an Approach Time
There are 12 approach times stored in memory. Six are labeled H1, H2, H3, H4, H5, H6 and six are labeled D1, D2, D3, D4, D5, D6. Rotate the DIAL to view these one at a time. In a new timer, they will all be zero.
Count-up Operation
Count-up operation can be used to track the duration of events. No alarm will sound when counting up.
- If timer is running press START/STOP to stop timer.
◆ Press RESET to zero timer as shown in Fig 7.
- Press START/STOP to start timer. Seconds will begin to count up.
◆ Press START/STOP to stop timer.

Fig 7—Approach timer display
Countdown Operation
Countdown operation can be used to time the interval between events. A beeping alarm, flashing icons and backlight notify the user that time has elapsed.
- If timer is running press START/STOP to stop timer.
- Rotate DIAL to select an approach time (H1-H6 or D1-D6).
◆ Push DIAL. The minute digits will flash.
◆ Rotate DIAL to set minutes.
◆ Push DIAL. The second digits will flash.
◆ Rotate DIAL to set seconds. - Push DIAL to save or push START/STOP to start timer directly.
- START/STOP starts the timer counting down. Once started, it is not possible to reach other approach times.
Approach Timer Alarm
When the approach timer counts down to zero the Flight Timer sounds an audible and visible alarm then begins to count up, measuring the time since the alarm. If approach mode is active, the hour, minute and second digits flash. If another mode is active, the “APPROACH” icon flashes to indicate an approach timer alarm. The audible alarm and
flashing backlight cease after 10 seconds or when the alarm is canceled.
Canceling the Approach Timer Alarm
- If a mode other than approach is active, press the APPROACH button.
◆ Press START/STOP to stop flashing digits.
◆ Time since alarm is maintained on screen.
Recalling Stored Approach Times
With the approach timer stopped:
◆ Press RESET to recall the last saved time.
- Pressing RESET a second time clears the memory location.
Alternatively the DIAL can be rotated away from then back to the current memory location to recall the last saved time.
Note/Scratchpad Function
The Flight Timer includes a 5-digit numeric note displayed in the upper right corner of the LCD. Use it as a scratchpad for remembering important flight numbers such as approach altitudes, frequencies, or squawk codes. This note is always displayed and can be accessed from any mode as follows:
◆ Press NOTE. The two highest digits will flash.
♦ Rotate DIAL to set first two digits.
◆ Push DIAL. The hundreds digit will flash.
♦ Rotate DIAL to set the hundreds digit.
♦ Push DIAL. The tens digit will flash.
♦ Rotate DIAL to set the tens digit.
♦ Push DIAL. The ones digit will flash.
♦ Rotate DIAL to set the ones digit.
♦ Push DIAL to accept note.
- Also, pressing NOTE at any time while setting will accept the current note value.
Backlight Operation
The Flight Timer includes a LED backlight system for night visibility. Toggle on and off by pressing the LIGHT button. If left on, the backlight will automatically shut itself off after 5 minutes. Prior to auto shut-off, the backlight will flash ten times to announce that it is shutting off. Use of the backlight greatly increases battery drain (see specifications for details). For extended battery life, avoid excessive use of the backlight.
Device Reset
The Flight Timer includes a user enabled reset in case of malfunction. Press and hold NOTE and START/STOP for several seconds to reset the device. Under normal use, avoid holding these buttons simultaneously since the reset clears the clock, timers and approach memories.
Care
The ASA Flight Timer will provide years of service if cared for properly. We suggest that you:
-
Avoid drops or shocks to the unit that could damage the case or screen.
-
Protect your timer from dirt, dust, and water.
-
Cleaning with a damp cloth is OK but never submerge your timer.
-
Avoid exposure to extreme temperatures. Do not leave your timer exposed in the aircraft on sunny days. Take it with you.
Specifications
Voltage: 3V DC supplied by 2 AAA batteries
Current (backlight off): 4 µ A typical
Current (backlight on): 40 mA typical
Expected battery life (no backlight use): >10 years
Expected battery life (continuous backlight use): 30 hours
Service temperature range: -4ircF to 130ircF ( -20ircC to 54ircC )
ASA Products
ASA materials are used and sold by schools and retail locations worldwide. For information about the location nearest you and a free copy of the
ASA catalog, call Sales and Service: 800-ASA-2-FLY
Fax: (425) 235-0128 • Website: www.asa2fly.com
Aviation Supplies & Academics, Inc.
7005 132nd Place SE
Newcastle, Washington 98059-3153
Limited Warranty
Aviation Supplies & Academics, Inc. (ASA) warrants this ASA Flight Timer to the original purchaser for a period of five years from the initial date of purchase, against defects in material and workmanship. Batteries are not covered by this warranty.
For the above five-year limited warranty period, ASA will either amend or substitute a reconditioned model of identical quality (at ASA's option), provided the product is returned postage prepaid to ASA. In the event of substitution with a reconditioned model, the warranty of the original instrument will be upheld. Other than the above
requirements, repair, adjustments and/or substitutions will be made at no charge.
ASA strives to provide the most rugged and reliable equipment possible. So few items are received for repair that it is not economical to maintain parts inventory, test equipment, and trained repair technicians to perform electronic repair work. Therefore, a replacement unit (new or remanufactured) is sent in exchange for units returned for service or repair.
ASA will not be liable for lapse of use of the instrument or other secondary or sequential costs, expenditures, or damages brought about by the purchaser. Implied warranties originating out of this sale, including but not limited to the implied warranties of merchantability and fitness for a particular purpose, are limited in duration to the above five-year period. ASA shall not be liable for loss of use of the instrument or other incidental or consequential costs, expenses, or damages incurred by the purchaser.
Some states do not allow the exclusion or limitation of implied warranties or consequential damages; so, the above limitations or exclusions may not apply to you.
Record the purchase date in the space provided below. Refer to this when contacting ASA regarding this product.
The ASA Flight Timer is an instruction and pilot information aid, and is not an avionics instrument.
Purchase Date:
US Pat. No. 7,187,303
Made in China


- Features
- Controls and Indicators
- LCD Display Icons
- Buttons
- Parts and Assembly
- Getting Started
- Battery Replacement
- Button Functions
- Clock Function
- Display Formats
- Setting Time
- Setting UTC Hour
- Fuel Timer Function
- Count-up Operation
- Countdown Operation
- Fuel Timer Alarm
- Canceling the Fuel Timer Alarm
- Chronograph Function
- Chronograph Operation
- Approach Timer Function
- Selecting an Approach Time
- Approach Timer Alarm
- Canceling the Approach Timer Alarm
- Recalling Stored Approach Times
- Note/Scratchpad Function
- Backlight Operation
- Device Reset
- Care
- Specifications
- ASA Products
- Limited Warranty
Brand : ASA
Model : TIMER-2
Category : Stopwatch