
RM-AX4000 - Remote control SONY - Free user manual and instructions
Find the device manual for free RM-AX4000 SONY in PDF.


| Product Type | Universal Remote Control |
| Brand | Sony |
| Model | RM-AX4000 |
| Dimensions (approx.) | 64 mm x 229 mm x 38 mm (2.5 x 9.0 x 1.5 in) |
| Weight (approx.) | 200 g (7.1 oz) without batteries |
| Power Source | 2 AA batteries (not included) |
| Battery Life | Approx. 6 months with normal use |
| Display | LCD screen for programming and feedback |
| Learning Function | Yes, can learn IR codes from original remote |
| Pre-programmed Codes | Supports Sony and many other brands |
| Backlight | Yes, for keypad and display |
| Macro Support | Yes, programmable macro sequences |
| Number of Devices | Controls up to 8 devices |
| IR Range | Up to 10 m (33 ft) line of sight |
| Compatibility | TV, DVD, VCR, satellite, cable, audio, etc. |
| Maintenance | Wipe with a soft dry cloth; avoid solvents |
| Safety | Keep away from water and high temperatures; dispose batteries properly |
| Spare Parts & Repairability | Batteries are user-replaceable; no other serviceable parts |
| Manual | 96-page PDF available for download |
Frequently Asked Questions - RM-AX4000 SONY
User questions about RM-AX4000 SONY
0 question about this device. Answer the ones you know or ask your own.
Ask a new question about this device
Download the instructions for your Remote control in PDF format for free! Find your manual RM-AX4000 - SONY and take your electronic device back in hand. On this page are published all the documents necessary for the use of your device. RM-AX4000 by SONY.
USER MANUAL RM-AX4000 SONY
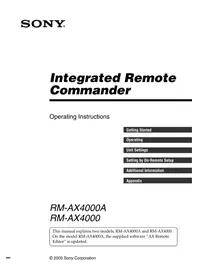
Integrated Remote Commander
Operating Instructions
Getting Started
Operating
Unit Settings
Setting by On-Remote Setup
Additional Information
Appendix
RM-AX4000A RM-AX4000
This manual explains two models, RM-AX4000A and RM-AX4000. On the model RM-AX4000A, the supplied software “AX Remote Editor” is updated.
WARNING
To reduce the risk of fire or electric shock, do not expose this apparatus to rain or moisture.
To avoid electrical shock, do not open the cabinet. Refer servicing to qualified personnel only.
You are cautioned that any changes or modifications not expressly approved in this manual could void your authority to operate this equipment.
Owner's Record
The model number is located on the rear of the unit and the serial number is located in the battery compartment. Record the serial number in the space provided below. Refer to them whenever you call upon your Sony dealer regarding this product.
Model No. RM-AX4000
Serial No. ____
INFORMATION
This equipment has been tested and found to comply with the limits for a Class B digital device, pursuant to Part 15 of the FCC Rules. These limits are designed to provide reasonable protection against harmful interference in a residential installation. This equipment generates, uses, and can radiate radio frequency energy and, if not installed and used in accordance with the instructions, may cause harmful interference to radio communications. However, there is no guarantee that interference will not occur in a particular installation. If this equipment does cause harmful interference to radio or television reception, which can be determined by turning the equipment off and on, the user is encouraged to try to correct the interference by one or more of the following measures:
– Reorient or relocate the receiving antenna. - Increase the separation between the equipment and receiver. - Connect the equipment to an outlet on a circuit different from that to which the receiver is connected. - Consult the dealer or an experienced radio/TV technician for help.
If you have any questions about this product, you may call; Sony Electronics Support 1-866-922-7669 or http://www.sony.com/remotesupport
Declaration of Conformity
Trade Name: SONY
Model number: RM-AX4000
Responsible Party:
Sony Electronics Inc.
Address: 16530 Via Esprillo,
San Diego, CA 92127
USA
Telephone number:
858-942-2230
This device complies with Part 15 of the FCC Rules. Operation is subject to the following two conditions: (1) This device may not cause harmful interference, and (2) this device must accept any interference received, including interference that may cause undesired operation.
Notice for users
On the supplied software
• Copyright laws prohibit reproducing the software or the manual accompanying it in whole or in part, or renting the software without the permission of the copyright holder.
- In no event will SONY be liable for any financial damage, or loss of profits, including claims made by third parties, arising out of the use of the software supplied with this unit.
- In the event a problem occurs with this software as a result of defective manufacturing, SONY will replace it. However, SONY bears no other responsibility.
- The software provided with this unit cannot be used with equipment other than that which is so designated.
- Please note that, due to continued efforts to improve quality, the software specifications may be changed without notice.
- Operation of this unit with software other than that provided is not covered by the warranty.
Program © 2005, 2006 Sony Corporation Documentation © 2005, 2006 Sony Corporation
Microsoft, Windows and Windows Media are trademarks or registered trademarks of Microsoft Corporation in the United States and/or other countries. All other trademarks and registered trademarks are trademarks or registered trademarks of their respective holders. In this manual, ™ and ® marks are not specified.
Adobe Reader is a trademark of Adobe Systems Incorporated.
- Microsoft Windows XP Media Center Edition, Microsoft Windows XP Professional and Microsoft Windows XP Home Edition are mentioned as Windows XP in this manual.
- Microsoft Windows 2000 Professional is referred to as Windows 2000 in this manual.
Features
The RM-AX4000 Remote Commander provides centralized control of all your AV components from a single remote control and saves the trouble of operating different AV components with different remote control devices. The following are its main features.
Control up to 16 components
With the Remote Commander, you can control up to 16 components, including your TV, VCR, DVD, DVR, CD, RCVR, etc.
Centralized control of Sony AV components with this one Remote Commander
The Remote Commander is preset at the factory to operate Sony brand components, so you can use it out of the box as a control center for your Sony AV components.
Remote control signals for non-Sony components are also preset
The Remote Commander also recognizes the preset codes for most major brands components, as well as Sony. Just select the corresponding codes to control all your AV components.
XPRESS functions for executing a series of actions to operate several AV components by pressing just one key.
Groups of commands from different components can be set for up to 8 XPRESS functions. For example, when you watch a DVD using a TV and amplifier/receiver, you can press just one key to turn on/off each component, and select the correct inputs. Available keys for the XPRESS function appear on the LCD display.
Also, the XPRESS function can memorize the status of power on/off, input select status of each component, and send a signal to synchronize them to the Remote Commander, regardless of their current.
Air-Slide executes an XPRESS function by "sliding your finger" across the LCD display
You can also perform an XPRESS function by sliding your finger in a set pattern across the Remote Commander's LCD Display. This function is called an "Air-Slide", and 6 different patterns are available.
The AX Remote Editor software allows you to make advanced settings for the Remote Commander.
Clock display and Timer function
Up to 8 Timer macros can be programmed to automatically turn on/off components and other controls (such as recording, stopping, etc.).
Learning function lets you program other remote control signals you may need
The Remote Commander can learn the remote control infrared signals of non-preset components. The Remote Commander can learn remote control signals (infrared signals only) of other devices such as air conditioners, lights, etc. (some specific appliances or functions may not be available).
System Control function executes a series of actions (a macro) by pressing one button/key
In addition to the XPRESS function, more settings can be programmed to perform a series of actions (a macro) just by pressing one button. You can program up to 8 System Control functions.
Furthermore, you can program a series of actions (a macro) to other buttons as a single step of an XPRESS function or component operation.
KeyMacro function allows you to select a channel with a single key
The Remote Commander allows you to program a macro for a key to operate an AV component. For example, you can create a macro that enters the numbers 1, 2, and 3, to select channel 123 just by pressing one key.
The AX Remote Editor software allows you to make advanced settings for the Remote Commander.
Easy-to-operate Touch-key LCD with blue back light
The Remote Commander has a Touch-key LCD that changes keys and labels according to the selected component. The Remote Commander is easy to operate as only the keys necessary to operate the selected component are shown. The display backlight allows operation even in the dark.
The supplied software "AX Remote Editor" for easy Remote Commander setup
By installing the “AX Remote Editor” on the supplied CD-ROM onto your PC, you can customize the setting of the Remote Commander according to your preferences. You can also program various advanced settings easily. The settings programmed on your PC can be transferred to the Remote Commander as necessary using the supplied USB cable.
Table of Contents
Getting Started
Unpacking 8
Location and function of controls 8
Installing the batteries 10
When to replace the batteries.... 10
Setting the clock 11
Remote Commander settings and operating procedures 13
About the factory setting 13
How to set up the Remote Commander (On-PC Setup and On-Remote Setup) ..... 13
Setting procedure for On-PC Setup 14
Setting procedure for On-Remote Setup 15
Setting up for your PC 16
Installing the "AX Remote Editor" 16
Installing the USB driver 17
Connecting the Remote Commander to your PC 19
Using the "AX Remote Editor" to set up the Remote Commander 19
Using "AX Remote Editor" – Help 20
Operating
Operating the Remote Commander 21
What is the XPRESS function? 21
Operating the XPRESS function 22
Operating components individually 25
To control the volume 27
To synchronize with the status of a component 28
To perform an easy action "Air-Slide" for XPRESS function 29
Executing a series of actions at a scheduled time 29
To quickly switch the Timer on or off 30
Executing a series of actions with just one button 31
Other useful functions 32
To operate the Remote Commander in the dark 32
Locking the controls – Hold function 33
To turn off all the components at one time 33
Unit Settings
Setting the backlight 34
Setting the LCD display 37
Setting the automatic-off time of the LCD display 37
Calibrating the alignment of the LCD display 39
Setting the contrast of the LCD display 40
Setting the beep 41
Adjusting the clock 42
To change the display to the daylight savings time (summer time) indication ..... 43
Setting by On-Remote Setup
Setting the preset codes 45
Using non-preset remote control operations – Learning function 47
To clear the learned signal from a key or button 49
Learning up to 4 signals to one key 49
For accurate learning 51
Programming a series of actions with just one button – System Control function ..... 51
To clear programmed series of actions for SYSTEM CONTROL button or System Control key 54
Setting the XPRESS macro activation 56
Controlling the volume of visual components connected to an audio component .... 57
Setting the Timer 59
To program the Timer 59
To clear a Timer macro 64
Changing the names of labels 65
Erasing all the settings – Reset 68
Additional Information
Precautions 70
Maintenance 70
Specifications 70
Troubleshooting 71
Appendix
Table of preset functions 76
TV 76
A-CBL (Analog Cable box) 77
D-SAT (Digital Satellite) 78
DVD (DVD player) 79
VCR (Video Cassette Recorder) 80
DVR (Digital Video Recorder) 81
CD (CD player) 82
RCVR (Receiver / Amplifier) 83
DVDVR (DVR/DVD combo) 84
DVD-R (DVD Recorder) 85
D-CBL (Digital Cable box) 86
DAV (DVD/Receiver combo) 87
PJ (Projector) 88
TAPE (Cassette deck) 89
MD (MD deck) 90
LIGHT 91
Full Display 92
Index 93
Getting Started
Unpacking
Check the contents of the package before using the Remote Commander.
- Remote Commander RM-AX4000 (1) Although the packaging may say RM-AX4000A, the Remote Commander is RM-AX4000.

- USB cable (1)

- CD-ROM* (1)
- AX Remote Editor software
- Operating Instructions (PDF file)

- Quick Start Guide (1)
- Preset Code Lists (1)
- Warranty Card (1)
* Do not attempt to play this CD-ROM in an audio CD player.
Location and function of controls

The CHANNEL + button has a tactile dot.
1 Clock display (pages 11, 42)
Displays the clock, the transmission mark, the battery mark and the timer mark.
2 Label keys
Different keys appear depending on the selected function. The Label keys are used mainly to choose the XPRESS function/component/System Control/Timer/setting items, etc. You can change the names of the XPRESS function, components, System Control key and Timer as the Label keys.
3 COMPONENT button (page 25)
The component names appear as the Label keys. When you press a component name, the operating display for that component appears.
4 BACK button
Used to return to the previous display.
5 XPRESS button (page 22)
The XPRESS names appear as the Label keys. When you press an XPRESS name, the operating display for that XPRESS function appears, and its macro is performed.
6 MENU button
Calls up the menu screen for components that have menu function.
7 EPG button
8 OK and Cursor Control buttons
9 EXIT button
10 TOOLS button
11 SYSTEM CONTROL buttons (pages 31, 51)
You can automatically carry out the entire program by pressing one button.
12 Display title
Shows the title of the LCD Display. If a page number such as “/1” appears, multiple pages are available. If you press the number, next page displays.
13 Touch-keys
The keys are used for setting the Remote Commander and operating each component appear on the LCD display.
Note
Do not press the touch-keys using sharp objects such as pins or ball-point pens.
14 SYNC-UP button (page 28)
Used to synchronize the Remote Commander with the status of a component.
15 TIMER button (page 29)
Used to set the timer program on/off.
16 COMMANDER OFF button
Turns the power of the Remote Commander off.
17 LIGHT button (page 32)
Used to brighten the backlight in the dark. Press the button once to turn on/off the backlight.
18 CHANNEL +/- buttons
Selects the channel.
19 VOLUME +/- buttons* (page 27)
Adjusts the volume.
20 RECALL button
21 ALL OFF button (page 33)
22 MUTING button* (page 27)
Silences the sound. Press the button to silence, and again to return to the previous volume level.
23 MORE button (pages 31, 51)
The System Control keys (SYSTEM5-8) are displayed as the Label keys. When you press a System Control key, its macro is performed.
Note
No default System Control key macros are set at the factory.
* Note on the VOLUME +/- and MUTING buttons
When you select a visual component, the TV's volume will be controlled; when you select an audio component, the amplifier's volume will be controlled.
Note on the LCD display's power on/off
To turn on the LCD display, press any button except the COMMANDER OFF button. To turn off the LCD display, press the COMMANDER OFF button. If you do not use the Remote Commander within 5 minutes, the LCD display automatically turns off. This interval can also be changed (page 37).
Installing the batteries
Slide and open the battery compartment lid and insert four size AA (R6) alkaline batteries (not supplied). Be sure to match the + and – of the batteries with the + and – of the battery compartment.


When to replace the batteries
When replacing the batteries, do it quickly. Otherwise, the memory settings for the clock will be erased. The clock does not work while replacing the batteries.
Alkaline batteries will last up to 5 months (a Sony TV turned On/Off up to approx. 300 times per day). If the Remote Commander does not operate properly, the batteries are getting weak and 🔒 appears on the LCD display. When the LCD display dims or the backlight for the touch keys grows dim, the batteries are getting weak, and need to be replaced.
Notes on replacing the batteries
- Do not attempt to recharge dry batteries.
- Do not carry dry batteries together with coins or other metallic objects. This can generate heat if the positive and negative terminals of the batteries accidentally come into contact with metallic objects.
- When you are not going to use the unit for a long time, remove the batteries to avoid damage from battery leakage and corrosion.
- Do not use different types of batteries at the same time.
- When you replace the batteries, replace them both with new ones.
Setting the clock
When you install batteries the first time, the Remote Commander enters clock setup mode.
"DS_TIME" appears as the Display title. "STD_TIME" lights and "SET" and "DS_TIME" flash on the Label keys. STD_TIME: standard time DS_TIME: daylight savings time
![DS_TIME SET [STD_TIME] DS_TIME](/content/2026/06/1353745/images/e6398491cd225c69270038069d01a168c864161f15325b293152f7110d645376.jpg)
1 Press "STD_TIME" or "DS_TIME" on the Label keys.
or

The current setting is shown inside the [ ], while the other flashes. If the summer time (daylight savings time) is used in your area, press the DS_TIME key. When the time change occurs (in spring and autumn), the Remote Commander will automatically adjust itself. If the summer time is not used in your area, press the STD_TIME key.
2 Press "SET" on the Label keys.

A beep sounds, "SET" and "SU" flash, and "12:00 AM" lights on the Clock display.

3 Set the day of the week by pressing the ↗ or ↓ button. The selected day of the week flashes.

SU : Sunday MO : Monday TU : Tuesday WE : Wednesday TH : Thursday FR : Friday SA : Saturday
Next, press the ➔ button. The day of the week is set. "12" (hour) "AM" and "SET" flash.

Note: If you press the ⇔ button, the day of the week is set and setting mode skips to step 5.
Setting the clock (continued)
4 Set the hour and AM (or PM) by pressing the ⇧ or ⇧ button. The selected hour and AM (or PM) flash.

Next, press the ➔ button. The hour and AM (or PM) are set. "00" (minute) and "SET" flash.

Note
If you press the ⇔ button, the hour and AM (or PM) are set and the setting mode returns to step 3.
5 Set the minute by pressing the ↗ or ↘ button. The selected minute flashes.

If you want to finish the clock setting, go to step 6.

Notes
- If you press the ⇒ button, the minute is set and the setting mode returns to step 3.
- If you press the ⇔ button, the minute is set and the setting mode returns to step 4.
6 Press "SET" on the Label keys.
SET

The beep sounds, and the clock starts from the 0 second of the current minute.
Note
If you press the SET key in any step above, the clock starts from the 0 second of the current minute.
Remote Commander settings and operating procedures
About the factory setting
The Remote Commander is preset at the factory to operate most Sony brand AV components (see the table below). If you operate a non-Sony AV component, you need to set the component's preset code on the Remote Commander first.
Default components list
| Displays on ComponentRemoteCommander | |
| TV TV | |
| A-CBL Analog Cable box | |
| D-SAT Digital Satellite | |
| DVD DVD player | |
| VCR Video Cassette Recorder | |
| DVR DVR (DVR, PVR, DVR/Satellite Combo, DVR/Cable Combo) | |
| CD CD player | |
| RCVR Receiver/Amplifier | |
| DVDVR DVR/DVD combo | |
| DVD-R DVD Recorder | |
| D-CBL*1 | Digital Cable box |
| DAV DVD/Receiver combo | |
| PJ Projector | |
| TAPE*2 | Cassette deck |
| MD MD deck | |
| LIGHT Light | |
*1 If your component has the built-in DVR function, preset the "Code No." of DVR.
*2 Analog audio compact cassette deck
See "Table of preset functions" (page 76) for the functions of keys and buttons for each component.
How to set up the Remote Commander (On-PC Setup and On-Remote Setup)
There are two ways to make settings for the Remote Commander, "On-PC Setup" with the aid of PC software and "On-Remote Setup" directly on the Remote Commander.
- On-PC Setup (Recommended) "On-PC Setup" uses the supplied software for your PC, "AX Remote Editor" to set up the Remote Commander. By following the wizard, it allows you to easily make all the necessary settings for the Remote Commander (components' preset codes, etc.). Furthermore, you can add and customize a range of settings which are not available with On-Remote Setup.
- On-Remote Setup "On-Remote Setup" is a way of setting up directly with the Remote Commander. However, some advanced settings are not available with On-Remote setup (see the table on page 14).
See "Setting procedure for On-PC Setup" (page 14), or "Setting procedure for On-Remote Setup" (page 15) for each setting method.
IMPORTANT
You cannot use both methods. Once you set up the Remote Commander by either On-PC Setup (recommended) or On-Remote Setup, you cannot make additional settings using the other method. You can only delete the entire setup and start over using the other setup method.
Remote Commander settings and operating procedures (continued)
Programmable items of On-PC Setup and On-Remote Setup
| Main setting items | Using the AX Remote Editor (On-PC Setup) | Using the Remote Commander (On-Remote Setup) |
| Setting the preset codes | ○ | ○ |
| Learning the remote control signals | ○ | ○ |
| Editing the label | ○ | ○ |
| Setting the Timer | ○ | ○ |
| Programming the Timer | ○ | ○ |
| Setting System Control function *1 | ○ | ○ |
| Setting XPRESS function *2 | ○ | × |
| Setting Air-Slide function *3 | ○ | × |
| Unit Settings | ○ | ○ |
*1 System Control function is used to perform a programmed series of actions (a macro) on several AV components by pressing just one button.
*2 An XPRESS function is also a macro function which executes a series of actions for controlling several AV components by pressing just one key. The difference is, the XPRESS display stays available for you to make additional settings.
*3 An Air-Slide is a function which executes an XPRESS function by “sliding your finger” in a set pattern across the display.
Setting procedure for On-PC Setup
If you set up the Remote Commander using On-PC Setup (recommended), follow the procedures below.
Step1: Installing the "AX Remote Editor" (page 16).
Step2: Installing the USB driver (page 17).
Step3: Using the "AX Remote Editor" to set up the Remote Commander (page 19).
See the Help file of AX Remote Editor for setting details.
Step4: Operating an AV component using the Remote Commander.
After finishing the setting with AX Remote Editor, operate the AV component using the Remote Commander.
- Operating the XPRESS function (page 22).
- Operating components individually (page 27).
Option 1: You can also change the Unit Settings such as the backlight and beep (pages 34, 41).
Option 2: You can also change the settings of the buttons or keys on the Remote Commander with AX Remote Editor.
See the Help of AX Remote Editor for setting with AX Remote Editor.
When using On-PC Setup
If you set up the Remote Commander using On-PC Setup, you do not need to read this PDF manual "Setting by On-Remote Setup". (pages 45 – 69)
Setting procedure for On-Remote Setup
If you set the Remote Commander On-Remote Setup, follow the procedure below.
Step 1: Setting the preset codes (page 45).
Step 2: Operating AV components using the Remote Commander.
After finishing the setting of the preset codes, you can use the Remote Commander to operate your AV components.
- Operating the XPRESS function (page 22).
- Operating components individually (page 27).
Option 1: You can also change the Unit Settings such as backlight and beep (pages 34, 41).
Option 2: You can also change the settings of the buttons or keys on the Remote Commander.
- Using non-preset remote control operations (Learning function) (page 47).
- Programming a series of actions with just one button (System Control function) (page 51).
- Setting the XPRESS macro activation (page 56).
- Controlling the volume of visual components connected to an audio component (page 57).
- Setting the Timer (page 59).
- Changing the names of labels (page 65).
When using On-Remote Setup
If you set up the Remote Commander using On-Remote Setup, you do not need to install the AX Remote Editor and its driver, or connect the Remote Commander to your PC. You also do not need to read the PDF pages 16 to 20.
Setting up for your PC
By installing the "AX Remote Editor" on the supplied CD-ROM onto your PC, you can set up the Remote Commander simply with your PC.
"AX Remote Editor" makes setting up complex series of operations (a macro) easy, and also allows various other convenient functions to be set up. For details, see the Help menu provided in "AX Remote Editor."
"AX Remote Editor" system requirements
Operating systems (manufacturer installed):
Windows XP Media Center Edition 2005/Windows XP Media Center Edition 2004/Windows XP Media Center Edition/Windows XP Professional/Windows XP Home Edition/Windows 2000 Professional
Computer:
IBM PC/AT or compatible (The software does not run on Macintosh operating system)
CPU:
Pentium II, 300 MHz or more
Required Hard Drive Capacity:
20 MB or more
RAM:
64 MB or more (128 MB or more for Windows XP)
Display:
High (16 bits) color or higher, 1024 x 768 dots or better*
Required Peripherals:
CD-ROM Drive, USB port
* Does not operate with a display of under 1024 x 768 dots.
Installing the "AX Remote Editor"
Follow the instructions below to install.
Notes
- Do not simply copy the "AX Remote Editor" folder in the supplied CD-ROM to a PC. You need to install it properly for it to work.
- Administrator privileges are required for installation on PCs running Windows 2000 or Windows XP.
1 Close all software running on Windows.
2 Insert the supplied CD-ROM into the CD-ROM drive of the PC.

After a moment, "RM-AX4000 Install CD Menu" appears.
3 Click [Install AX Remote Editor]. "AX Remote Editor 1.1 Setup" appears.

4 Click [Next].
Follow the on-screen instructions and proceed with the installation.
Tip
If the installation screen is hidden behind other windows
If "AX Remote Editor 1.1 Setup" disappears behind other screen while installing, press the [Tab] key several times while pressing down the [Alt] key to bring up "AX Remote Editor 1.1 Setup" again.
5 Click [Finish].
The "AX Remote Editor 1.1 Setup" screen closes and "RM-AX4000 Install CD Menu" appears.
6 Click [Exit].
Tip
You can read the "Operating Instructions" PDF file by clicking [Read Operating Instructions] in the "RM-AX4000 Install CD Menu".
Installing the USB driver
You need to install the USB driver before connecting the supplied USB cable to your PC and the Remote Commander. Follow the instructions below to install.
Notes
- Without batteries in the Remote Commander, the PC cannot detect the USB connection even if the USB cable is connected.
- Make sure to install the batteries before installing the USB driver. If the USB driver installation is interrupted by mistake, install it again from the beginning.
- Do not simply copy the USB driver from the supplied CD-ROM to the PC. You need to install it properly for it to work.
- On Windows 2000 or Windows XP, log on with an authorized "Administrator" ID when installing the USB driver.
- Administrator privileges are required for installation on PCs running Windows 2000 or Windows XP.
- Depending on the PC, various messages other than those mentioned in this manual may appear during the USB driver installation. Just follow the on-screen instructions of these messages to install.
Setting up for your PC (continued)
For Windows XP users
1 Close all software running on Windows. 2 Insert the supplied CD-ROM into the CD-ROM drive of the PC. After a moment, "RM-AX4000 Install CD Menu" appears. 3 Click [Exit] to close "RM-AX4000 Install CD Menu." 4 Connect the PC and the Remote Commander using the supplied USB cable (page 19).
"Found New Hardware" appears in the Notification Area in the lower right-hand of the display. After a moment, "Found New Hardware Wizard" appears.
Tip
If the following confirmation appears, "Can Windows connect to Windows Update to search for software?", select [No, not this time], then click [Next].

5 Select "Install the software automatically [Recommended]", then click [Next].
Installing of the USB driver starts.
"Completing the Found New Hardware Wizard" appears when the installation is complete.
6 Click [Finish].
Installing of the USB driver finishes.
For Windows 2000 users
1 Close all software running on Windows. 2 Insert the supplied CD-ROM into the CD-ROM drive of the PC. After a moment, "RM-AX4000 Install CD Menu" appears. 3 Click [Exit] to close "RM-AX4000 Install CD Menu." 4 Connect the PC and the Remote Commander using the supplied USB cable (page 19).
"Found New Hardware" appears. After a moment, "Found New Hardware Wizard" appears.
5 Click [Next].
"Install Hardware Device Drivers" appears.
6 Select "Search for a suitable driver for my device [recommended]", then click [Next].
"Locate Driver Files" appears.
7 Mark only the check box of "CD-ROM drives", then click [Next]. "Driver Files Search Results" appears, and the found driver is displayed.
8 Click [Next].
Installing of the USB driver starts. "Completing the Found New Hardware Wizard" appears when the installation is complete.
9 Click [Finish].
Installing of the USB driver finishes.
Connecting the Remote Commander to your PC
You can now connect the Remote Commander to your PC with the supplied USB cable. Connect whenever you want to verify correct operation of key/button commands for an XPRESS function, etc., or to exchange setup data between your PC and the Remote Commander.
IMPORTANT
Do not keep the Remote Commander connected to the PC when the PC is in standby/hibernation, otherwise, a malfunction could occur. Be sure to disconnect the Remote Commander from the PC before standby/hibernation begins. Furthermore, do not connect the Remote Commander to the PC while it is in standby/hibernation. Wait until the PC comes out of standby/hibernation before connecting.
Notes
- The Remote Commander uses the battery when connected to the PC. When you finish the setup, unplug from the USB connector.
- If "☐" is shown in the display, the Remote Commander cannot be recognized on your PC. Before connecting the Remote Commander to your PC, be sure to install fresh batteries in the Remote Commander.
- Do not disconnect the USB cable from your PC while your PC is communicating with the Remote Commander, as a malfunction may occur.
- Only connect one Remote Commander to your PC at a time. Otherwise, you will not be able to download the settings correctly.
1 Connect the USB cable to the USB connector of the Remote Commander.

2 Connect the USB cable to the USB connector of your PC.

Using the "AX Remote Editor" to set up the Remote Commander
You can set up the Remote Commander using the "AX Remote Editor." Follow the procedures below.
Note
"AX1400 Remote Editor" does not start up when you are not logged in as Administrator.
1. Gather all your remote controls.

We recommend using the remote controls that were supplied with each component, but if you are using a replacement remote control (due to loss or damage) or a universal remote (which controls multiple components), have it handy as well.
2. On your PC, click the Windows "Start" button, point to "All Programs" - "Sony Remote AX" - "AX Remote Editor", and click. "AX Remote Editor" starts up, and the last project appears. The first time "AX Remote Editor" starts up, the "Startup Wizard" appears. Following the on-screen instructions, create a project.

Tips
- If you are using an operating system other than Windows XP, click the "Start" button of Windows, point to "Programs" - "Sony AX" - "AX Remote Editor", and click to start up "AX Remote Editor".
- If the shortcut icon of "AX Remote Editor" appears on the Windows desktop, double-click the icon to open it. (Depending on the settings, Windows XP may automatically delete icons from the desktop if they have not been used for a certain period of time. If the icon does not appear on the desktop, use the "Start" button.)
Using "AX Remote Editor" – Help
You can set up the Remote Commander by operating "AX Remote Editor," referring to the detailed instructions provided in Help.
Starting Help
Start up "AX Remote Editor," then click "Help" on the menu bar and select "AX Remote Editor help."
Help topics for the current edit screen appear by pressing the "F1" key while editing. If no Help topic is available for the screen, the top menu of Help appears.
How to use Help
Click one of the tabs: "Contents," "Index" or "Search," and check the information you need.

To search by contents (Contents)
You can find information relating to a specific subject by using the table of contents shown on the "Contents" tab.
To search indexed information (Index)
You can find information from a list of predetermined keywords shown on the "Index" tab.
To search using keywords (Search)
You can submit a keyword search on the "Search" tab by typing in your keyword(s).
Operating the Remote Commander
There are two ways to operate the components on the Remote Commander.
- XPRESS operation: You can operate multiple AV components related to a specific task, such as "watching a DVD," or "watching a digital satellite," etc. This is called an "XPRESS function."
- Single component operation: You can operate each AV component individually (page 27).
What is the XPRESS function?
An "XPRESS function" is an executable series of actions that can operate several AV components by pressing just one key. For example, you have to perform the following operations sequentially to watch a DVD using a TV, receiver/amplifier, and DVD player.
- Turn on the DVD player.
- Turn on the TV.
- Set the appropriate input mode of the TV.
- Turn on the receiver/amplifier.
- Set the appropriate input selector of the receiver/amplifier.
- Start DVD playback. By setting the above actions as an XPRESS function, you can watch a DVD by simply pressing one key.

Also, the XPRESS function can memorize the status of power on/off, input selector for each component, and send a signal to synchronize the status which you want without reference to the component's status.
Some XPRESS functions are preset at the factory to operate Sony brand components (see the table below).
However, depending on the factory preset code, they may not necessarily be effective.
Default XPRESS function list
| Displays on the Label keys | Programmed commands |
| TV | Turns on TV, and the display of XPRESS_TV appears. |
| A-CBL | Turns on TV and Analog cable box, and the display of XPRESS_A-CBL appears. |
| D-SAT | Turns on TV and Digital Satellite, and the display of XPRESS_D-SAT appears. |
| DVD | Turns on TV and DVD player, and the display of XPRESS_DVD appears. |
| VCR | Turns on TV and Video Cassette recorder, and the display of XPRESS_VCR appears. |
| DVR | Turns on TV and Digital Video Recorder, and the display of XPRESS_DVR appears. |
| CD | Turns on CD player and Receiver (Amplifier), and the display of XPRESS_CD appears. |
| RCVR | Turns on Receiver (Amplifier), and the display of XPRESS_RCVR appears. |
How to set up an XPRESS function
For On-PC Setup: See the Help menu provided in "AX Remote Editor."
For On-Remote Setup: You cannot set up an XPRESS function.
Operating the Remote Commander (continued)
Operating the XPRESS function

When you press an XPRESS button on the Remote Commander, the XPRESS names appear at the bottom of the display.

When you press an XPRESS name you want to operate, programmed commands for the key are performed and the display to operate the XPRESS function appears. This display is called, "XPRESS display." Keys on the XPRESS display are divided into two types—"Touch-keys" with preset labels and "Label keys" that can be customized. Touch-keys are used to execute an XPRESS function. Label keys are used to switch to the individual component displays (page 27) that make up the XPRESS function.
XPRESS display
Example: To play a DVD player by XPRESS function (when On-PC Setup was used to set up the Remote Commander)
1 Press the XPRESS button.

"XPRESS" appears as the Display title.

If a page number such as "/1" appears to the right side of Display title, multiple pages are available. Press the number to go to the next page.
2 Press the XPRESS name you want to operate (in this case, DVD).

The TV and DVD turn on and each component is set to its appropriate input. The main keys you use to control the DVD are displayed as Touch-keys. The components that make up the XPRESS function are displayed as Label keys.

3 Press the key(s) or button(s) for desired operation.

When the signal is sent, appears. You can also use other buttons, such as the VOLUME +/-, CHANNEL +/-, MUTING, cursor, and MENU buttons. Also see "Table of preset functions" (page 76) for the functions of buttons for each source component.
4 When you are finished using the Remote Commander, press the COMMANDER OFF button.

The Remote Commander turns off.
If you want to return to the previous display
Press the BACK button.
Operating the Remote Commander (continued)
Example: To play a DVD player by XPRESS function (when On-Remote Setup was used to set up the Remote Commander)
1 Press the XPRESS button.

"XPRESS" appears as the Display title.

If a page number such as "/1" appears to the right side of Display title, multiple pages are available. Press the number to go to the next page.
2 Press the XPRESS name you want to operate (in this case, DVD).

The TV and DVD turn on. The main keys you use to control the DVD are displayed as Touch-keys.
The components that make up the XPRESS function are displayed as Label keys.

3 In this step, you need to set the appropriate input of each component that makes up this XPRESS function, e.g., the RCVR, TV, and DVD player. Press one of the component's Label keys to open its display, then press the INPUT key once or repeatedly until the correct input is selected.

4 Press the BACK button to return to the previous display, and repeat step 3 until all the necessary components' inputs are correctly set.

The previous LCD display returns.

Note
If you had used On-PC Setup, this step would be done automatically for you. That's why we recommend it.
5 Press the key(s) or button(s) for desired operation.

When the signal is sent, appears. You can also use other buttons, such as the VOLUME +/-, CHANNEL +/-, MUTING, cursor, and MENU buttons. Also see "Table of preset functions" (page 76) for the functions of buttons for each source component.
6 When you are finished using the Remote Commander, press the COMMANDER OFF button.

The Remote Commander turns off.
If you want to return to the previous display
Press the BACK button.
Operating components individually

When you press the COMPONENT button on the Remote Commander, the component names appear at the bottom of the display.

When you press a component name you want to operate, the display to operate the component appears. This display is called "Component display." Keys on the Component display are divided into two types—"Touch-keys" with preset labels and "Label keys" that can be customized.
Component display

See "Table of preset functions" (page 76) for the functions of keys and buttons for each component.
Operating the Remote Commander (continued)
How to register the components to the Remote Commander
You can register up to 16 components.
For On-PC Setup: See the Help menu provided in "AX Remote Editor."
For On-Remote Setup: See "Setting the preset codes" on page 45.
Example: To change the input select of the TV
1 Press the COMPONENT button.

"COMPONENT" appears as the Display title.

If a page number such as "/1" appears to the right side of Display title, multiple pages are available. Press the number to go to the next page.
2 Press the component name you want to operate (in this case, TV).

The component name appears as the Display title.
And the keys you use to control the TV are displayed as Touch-keys.

If a page number such as "/1" appears to the right side of Display title, multiple pages are available. Press the number to go to the next page.
3 Press the key(s) or button(s) for desired operation.
Example:
① Press the POWER key.

② Press the INPUT key repeatedly until the desired input is selected.

When the signal is sent, ⏻ appears. You can also use other buttons, such as the VOLUME +/-, CHANNEL +/-, MUTING, cursor, and MENU buttons. Also see “Table of preset functions” (page 76) for the functions of buttons for each source component.
4 When you are finished using the Remote Commander, press the COMMANDER OFF button.
COMMANDER
OFF

The Remote Commander turns off.
If you want to return to the previous display
Press the BACK button.
Note
The remote control signals may be different for some components or functions. In this case, program the remote control signals with the Learning function.
For On-PC Setup: See the Help menu provided in "AX Remote Editor."
For On-Remote Setup: See "Using non-preset remote control operations" on page 47.
To control the volume

Press the VOLUME +/- buttons to control the volume, and the MUTING button for silence. When you select a visual component, the TV's volume will be controlled; when you select an audio component, the amplifier's volume will be controlled.
How to set the volume control of visual components
For On-PC Setup: See the Help menu provided in "AX Remote Editor." For On-Remote Setup: See "Controlling the volume of visual components connected to an audio component" on page 57.
Operating the Remote Commander (continued)
To synchronize with the status of a component

The Remote Commander memorizes the status of the components' input selectors, and power on/off status. However, if you turn on/off a component manually or with a different remote control, the Remote Commander may not recognize the current component status. In this case, press the SYNC-UP button to synchronize with the status of the current component and the Remote Commander.
1 Press the SYNC-UP button.

The component you want to confirm the status of appears as the Display title.

2 Press the POWER key repeatedly until the desired status fixes, then press the DONE key.

The screen switches to the next status to be synchronized.
3 Press the INPUT key repeatedly until the desired status fixes, then press the DONE key.
4 When you are finished using the Remote Commander, press the COMMANDER OFF button.

The Remote Commander turns off.
If you want to return to the previous display
Press the BACK button.
To perform an easy action "Air-Slide" for XPRESS function
The Remote Commander can perform an XPRESS function by "sliding your finger" across its display. This function is called an "Air-Slide function."

The Air-Slide has the following 6 patterns.
Default Air-Slide list
| Pattern | Programmed commands |
 | XPRESS_TV is performed, and the display of XPRESS_TV appears. |
 | XPRESS_A-CBL is performed, and the display of XPRESS_A-CBL appears. |
 | XPRESS_D-SAT is performed, and the display of XPRESS_D-SAT appears. |
 | XPRESS_DVD is performed, and the display of XPRESS_DVD appears. |
 | No preset |
 | No preset |
How to set the Air-Slide action
For On-PC Setup: See the Help menu provided in "AX Remote Editor." You can set Air-Slide commands other than for XPRESS function, using "AX Remote Editor."
Executing a series of actions at a scheduled time
- Timer function

The Remote Commander can perform programmed commands automatically at a scheduled time every day or on a particular day. This function is called "Timer."
You can set up to 8 Timers with the following options.
- Timer ON/OFF Switches ON/OFF each Timer. • Key Label When you press the TIMER button on the Remote Commander, keys showing a Timer function appear at the bottom of the display. The default labels of each Timer are shown as "PROG1" to "PROG8" and you can change their labels.
- Commands to be operated
You can program a series of actions (a macro) to operate at a scheduled time. This is called "Timer macro."
- Time Sets the operation time (hour, minute, AM/PM) for a Timer.
• Day Sets the day(s) for a Timer.
Executing a series of actions at a scheduled time (continued)
How to set the Timer function
For On-PC Setup: See the Help menu provided in "AX Remote Editor."
For On-Remote Setup: See "Setting the Timer" on page 59.
To quickly switch the Timer on or off
With the Remote Commander, you can quickly switch a Timer function on or off. The following procedure is based on the assumption that a series of actions (a macro) is programmed to the PROG1.
1 Press the TIMER button.
TIMER

The Timer numbers for which a Timer is already set and is in standby mode stay lit. The available program numbers flash on the Label keys. If a page number such as "/1" appears to the right side of the Display title, multiple pages are available. Press the number to go to the next page.

2 Select a standby timer program that you want to switch on/off by pressing the Label keys (in this case, PROG1).
PROG1

The switching display for Timer of PROG1 appears.

If you select a non-timer program, the "NG" beep is heard and "NG" flashes twice.
3 Press the ON/OFF key.

A single beep is heard and the "◀" mark appears, and the standby mode of the selected Timer is set to on.

4 Press and hold the COMMANDER OFF button for more than 2 seconds.
COMMANDER

The Remote Commander turns off.
If you want to quit before finishing
Press and hold the COMMANDER OFF button for more than 2 seconds. The previous status returns, and the Remote Commander turns off.
If you want to return to the previous display
Press the BACK button or the COMMANDER OFF button.
Notes
- When you finish setting the timer standby mode, the “💡” mark stays lit beside the clock. This means that one or more Timers are activated.
- The timer program you set repeats every week until you set the timer standby mode to OFF (weekly timer). If you want to execute the timer program only once, set the timer standby mode to OFF after the execution of the timer program.
IMPORTANT
The Timer function of this Remote Commander is designed for use with AV components. Do not use the Timer function with other components, such as an air-conditioner or other electrical appliances. It may cause a fire or a serious injury.
Executing a series of actions with just one button
- System Control function

The Remote Commander has special buttons which can be programmed to perform a series of actions (a macro) by pressing just one button.
If you press the MORE button (rightmost SYSTEM CONTROL button), all keys sharing the same function as that SYSTEM CONTROL button appear at the bottom of the display. These keys are called, "System Control keys."
You can program a series of actions (a macro) for each of four SYSTEM CONTROL buttons and four System Control keys. This is called "System Control macro."
How to set the System Control function
For On-PC Setup: See the Help menu provided in "AX Remote Editor."
For On-Remote Setup: See
"Programming a series of actions with just one button" on page 51.
Executing a series of actions with just one button (continued)
Notes
- If the remote control detectors of the components are too far apart, or if something is blocking them, some of the components may not operate in the ordered sequence when you press a SYSTEM CONTROL button or System Control key.
- If some of the components did not operate correctly because of the above or for any other reason, always set all the components back to the states they were in before you pressed the SYSTEM CONTROL button or the System Control key. Failure to do this can result in incorrect operation when you press the SYSTEM CONTROL buttons or the System Control keys again.
- Some components may not always be powered-on by the System Control function. This is because the power of the component goes on and off alternately when receiving the power on/off signal. In this case, check the operating component's power on/off state before using the System Control function.
Other useful functions
To operate the Remote Commander in the dark

The Remote Commander has a backlight on the LCD display. Pressing any button or key also activates this by default. If no button or key is pushed within a set time, the backlight automatically turns off.
Default backlight settings
| Off-time setting 10 seconds |
| Brightness Level 15 (Max: 15) |
| Fade effect On |
| On-mode setting All keys and buttons |
How to set the backlight
For On-PC Setup: See the Help menu provided in "AX Remote Editor." Or see "Setting the backlight" on page 34. For On-Remote Setup: See "Setting the backlight" on page 34.
Locking the controls - Hold function
To prevent accidental operation, you can lock all the buttons with the Hold function. However, any programmed Timer functions will still be activated while the controls are locked.
While pressing the COMMANDER OFF button, press the touch-key.
A message reminding you to release the Hold function appears for 10 seconds on the LCD display.
When the controls are locked
If you attempt to operate the Remote Commander, a message reminding you to release the Hold function appears for 10 seconds on the LCD display.

To unlock the controls
While pressing the COMMANDER OFF button, press the touch-key.
With a beep sounds, the previous status display returns.
To turn off all the components at one time

If you press the ALL OFF button, all controlling components turn off.
Some components may not turn off by pressing the button. In this case, press the SYNC-UP button to synchronize with the power on/off status of the components.
For details, see "To synchronize with the status of a component" on page 28.
Unit Settings
Setting the backlight
The LCD display's backlight is preset at the factory to activate whenever the Remote Commander is operated, and to switch off automatically if you do not operate for more than 10 seconds. You can set the backlight automatic-off time, brightness, fade effect and which buttons activate the backlight. To change this setting, perform the following procedure.
1 While pressing the COMMANDER OFF button, press the MUTING button.

"SET" appears as the Display title.

If "LIGHT" does not flash on the Label keys, press the Display title (SET) repeatedly until it appears.
2 Press "LIGHT" on the Label keys.
LIGHT

“LIGHT” appears as the Display title.

3 Press "OFF_TIME" on the Label keys.
OFF_TIME

The setting display for automatic-off time of the backlight appears.

4 Press the (−) or (+) key to change the automatic-off time of the backlight.
You can set the automatic-off time from 1 to 60 seconds. Each time the (−)/(+) key is pressed, the time decreases/increases by 1 second. For example, "20sec" on the Label keys means 20 seconds.
5 Press the BACK button or the COMMANDER OFF button.

“LIGHT” appears as the Display title.

Note
When you set the automatic-off time to longer than 10 seconds (factory setting), the battery life may be shorter.
6 Press "LEVEL" on the Label keys.
LEVEL

The setting display for brightness appears.

7 Press the (−) or (+) key to change the brightness of the backlight. You can set the brightness from 1 to 15. Each time the (−)/(+) key is pressed, the level decreases/increases by 1.
8 Press the BACK button or the COMMANDER OFF button.

"LIGHT" appears as the Display title.

9 Press "FADE" on the Label keys.
FADE

The setting display for fade effect appears.
The current setting is shown inside the [ ], while the other flashes.
![LIGHT FADE [ ON ] OFF](/content/2026/06/1353745/images/4feb67186c2bcc95a75a5a455d43bbdc1d7826cd705d5587d3ce755a8442c9f9.jpg)
Setting the backlight (continued)
10 Press the ON or OFF key to select the fade effect of the backlight.
ON: fade in/out backlight OFF: normal backlight The fade effect of the backlight changes and a beep sounds each time you press the keys.
11 Press the BACK button or the COMMANDER OFF button.

"LIGHT" appears as the Display title.

12 Press "ON_MODE" on the Label keys.
ON_MODE

The setting display for buttons to activate the backlight appears. The current setting is shown inside the [ ], while the other flashes.
![LIGHT ON_MODE LIGHT [ ALL ]](/content/2026/06/1353745/images/ab7879e68896df8afacda0f148d71b95e548f5f8de303ee0c7da861921874f9d.jpg)
13 Press the LIGHT or ALL key to select which buttons activate the backlight.
LIGHT: The backlight is activated by pressing the LIGHT button only. ALL: The backlight is activated by pressing any button on the Remote Commander except the VOLUME +/-, CHANNEL +/- and COMMANDER OFF buttons.
The buttons to activate backlight changes and a beep sounds each time you press the keys.
Note
In the "ALL" position, if you use the Remote Commander frequently, the battery life may be shorter. In this case, shorten the automatic-off time.
14 Press the BACK button or the COMMANDER OFF button.

"LIGHT" appears as the Display title.

15 Press and hold the COMMANDER OFF button for more than 2 seconds.

The Remote Commander turns off.
If you want to quit before finishing
Press and hold the COMMANDER OFF button for more than 2 seconds. The previous status returns, and the Remote Commander turns off.
If you want to return to the previous display
Press the BACK button or the COMMANDER OFF button.
Setting the LCD display
Setting the automatic-off time of the LCD display
The Remote Commander is preset at the factory to switch off the LCD display automatically if you do not operate it for more than 5 minutes. To change this setting, perform the following procedure.
1 While pressing the COMMANDER OFF button, press the MUTING button.

"SET" appears as the Display title.

If "DISPLAY" does not flash on the Label keys, press the Display title (SET) repeatedly until it appears.
Setting the LCD display (continued)
2 Press "DISPLAY" on the Label keys.
DISPLAY

"DISPLAY" appears as the Display title.

3 Press "DISP-OFF" on the Label keys.
DISP-OFF

The setting display for automatic-off time of the LCD display appears.

4 Press the (-) or (+) key to change the automatic-off time of the LCD display.
You can set the automatic-off time from 1 to 30 minutes.
Each time the (-)/(+) key is pressed, the minute decreases/increases by 1 minute. For example, "02min" on the Label keys means 2 minutes.
5 Press and hold the COMMANDER OFF button for more than 2 seconds.

The Remote Commander turns off.
If you want to quit before finishing
Press and hold the COMMANDER OFF button for more than 2 seconds. The previous status returns, and the Remote Commander turns off.
If you want to return to the previous display
Press the BACK button or the COMMANDER OFF button.
Calibrating the alignment of the LCD display
You can calibrate the alignment of the LCD display if the Touch-keys are not working properly. To change this setting, perform the following procedure.
1 While pressing the COMMANDER OFF button, press the MENU button and EXIT button.

The setting display for calibrating the alignment of the LCD display appears.

2 Press the point on the bottom-left of the LCD display.
The other point appears on the top-right of the LCD display.

3 Press the point on the top-right of the LCD display.
The square appears in the center of the LCD display.

4 Press the square in the center of the LCD display.
When the calibration is complete, the beep sounds, and the LCD display returns to the selecting display of display setting.

Note
When calibrating, be sure to press the point accurately, otherwise the calibration will be off and you will need to start over.
5 Press and hold the COMMANDER OFF button for more than 2 seconds.

The Remote Commander turns off.
If you want to quit before finishing
Press and hold the COMMANDER OFF button for more than 2 seconds. The Remote Commander turns off.
Setting the LCD display (continued)
Setting the contrast of the LCD display
You can adjust the contrast of the LCD display if the screen is not viewed properly. To change this setting, perform the following procedure.
1 While pressing the COMMANDER OFF button, press the OK button.

The setting display for contrast appears.

2 Press the CHANNEL +/- button to adjust the contrast of the LCD display.
CHANNEL

You can set the contrast level from 1 to 15.
CHANNEL +: Darker contrast
CHANNEL -: Lighter contrast
Note
If you press the CHANNEL +/- button and the contrast level is already at the minimum/maximum level, the beep does not sound. The level can be set from 1 to 15.
3 Press and hold the COMMANDER OFF button for more than 2 seconds.

The Remote Commander turns off.
If you want to quit before finishing
Press and hold the COMMANDER OFF button for more than 2 seconds. The previous status returns, and the Remote Commander turns off.
Setting the beep
The Remote Commander is preset at the factory with the confirmation beep set to on. To change this setting, perform the following procedure.
1 While pressing the COMMANDER OFF button, press the MUTING button.

"SET" appears as the Display title.

If "OTHER" does not flash on the Label keys, press the Display title (SET) repeatedly until it appears.
2 Press "OTHER" on the Label keys.
OTHER

"OTHER" appears as the Display title.

3 Press "BEEP" on the Label keys.
BEEP

The setting display for beep appears. The current setting is shown inside the [ ], while the other flashes.
![OTHER BEEP [ON] OFF](/content/2026/06/1353745/images/c03c81d50faeb86aa6d59413c28180f3ce9498c7e70d01cd71970ae7e64e1ed9.jpg)
4 Press the ON or OFF key to select the beep.
ON: Turns on the beep.
OFF: Turns off the beep.
The beep setting changes and a beep sounds each time you press the key.
5 Press and hold the COMMANDER OFF button for more than 2 seconds.
COMMANDER

The Remote Commander turns off.
If you want to quit before finishing
Press and hold the COMMANDER OFF button for more than 2 seconds. The previous status returns, and the Remote Commander turns off.
If you want to return to the previous display
Press the BACK button or the COMMANDER OFF button.
Adjusting the clock
You can adjust the clock after setting. To change this setting, perform the following procedure.
1 While pressing the COMMANDER OFF button, press the MUTING button.

"SET" appears as the Display title.

If "OTHER" does not flash on the Label keys, press the Display title (SET) repeatedly until it appears.
2 Press "OTHER" on the Label keys.
OTHER

"OTHER" appears as the Display title.

3 Press "CLOCK" on the Label keys.
CLOCK

The setting display for clock appears.

4 Press the ⇔/⇔/⇔ buttons to change the time or day.
Each time the ⇔ or ⇔ button is pressed, the Clock display changes in order (the day ↔ the hour ↔ the minute ↔ the day).
Each time the ⇧ or ⇧ button is pressed, the hour or minute changes by 1 hour or minute.
Select the hour or minute by pressing the (⇔/⇨) button first.
5 Press "SET" on the Label keys.
SET

With a beep sound, the clock is started. "OTHER" appears as the Display title.

6 Press and hold the COMMANDER OFF button for more than 2 seconds.

The Remote Commander turns off.
If you want to quit before finishing
Press and hold the COMMANDER OFF button for more than 2 seconds. The previous status returns, and the Remote Commander turns off.
If you want to return to the previous display
Press the BACK button or the COMMANDER OFF button.
To change the display to the daylight savings time (summer time) indication
You can select the standard time (STD_TIME) or summer time (DS_TIME). To change this setting, perform the following procedure.
1 While pressing the COMMANDER OFF button, press the MUTING button.
COMMANDER OFF


MUTING
"SET" appears as the Display title.

If "OTHER" does not flash on the Label keys, press the Display title (SET) repeatedly until it appears.
2 Press "OTHER" on the Label keys.
OTHER

"OTHER" appears as the Display title.

Adjusting the clock (continued)
3 Press "DS_TIME" on the Label keys.
DS_TIME

The setting display for daylight savings time appears.
The current setting is shown inside the [ ], while the other flashes.
![OTHER DS_TIME [STD_TIME] DS_TIME](/content/2026/06/1353745/images/d2b129b40445bea1a0ae99ff819dfc07c0081a66a8f89b933b95d0c5a5fe51ad.jpg)
4 Press the STD_TIME or DS_TIME key.

or

STD_TIME is 1 hour behind the DS_TIME.
DS_TIME is 1 hour ahead of the STD_TIME.
The setting of the daylight savings time changes and a beep sounds each time you press the keys.
Note
In this case, the minute and second are not changed.
5 Press and hold the COMMANDER OFF button for more than 2 seconds.
COMMANDER OFF

The Remote Commander turns off.
If you want to quit before finishing
Press and hold the COMMANDER OFF button for more than 2 seconds. The previous status returns, and the Remote Commander turns off.
If you want to return to the previous display
Press the BACK button or the COMMANDER OFF button.
Setting by On-Remote Setup
The following section explains On-Remote Setup. If you set the Remote Commander by On-PC Setup, these explanations are not valid.
Setting the preset codes
You should register components to the Remote Commander by setting their preset codes.
Setting of the preset code is required in the following cases:
- To use a Sony component that is not registered to the Remote Commander by the default setting
- To use other brands of components
Example: To set up a Philips TV
1 See the tables in the supplied "Preset Code Lists," and find the four-digit preset code for the desired component.
If more than one preset code is listed for the component, use the first number on the list.
For example, to set up a Philips TV, you would use the preset code "8011."

Tip
The first digit of the preset code indicates the type of component (TV, VCR, etc.). For further details, see the tables in the supplied "Preset Code Lists."
2 While pressing the COMMANDER OFF button, press the MUTING button.

"SET" appears as the Display title.

3 Press "PRESET" on the Label keys.
PRESET

"PRESET" appears as the Display title. The component name flashes on the Label keys.
If a page number such as "/1" appears to the right side of the Display title, multiple pages are available. Press the number to go to the next page.

Setting the preset codes (continued)
4 Select the component name you want the Remote Commander to preset by pressing the Label key (in this case, TV).

The "TV" and current preset code (in this case, "8001") appear as the Label keys.
"0" - "9," "CLEAR" and "POWER" flash.

Note
If another remote control signal has already been learned, the delete confirmation message appears. Register the components after deleting the learned signal following the procedure on the LCD display.

5 Press the "8," "0," "1," and "1" number keys.
Tip
Each time the CHANNEL +/− button is pressed, the preset code increases/decreases by 1.
If you make a mistake in inputting
Press the CLEAR key. The preset code returns to the previous number.
6 Press the OK button.

A beep sounds and the input preset code appears on the Label key momentarily.

"PRESET" appears as the Display title.

7 Press and hold the COMMANDER OFF button for more than 2 seconds.
COMMANDER

The Remote Commander turns off.
If you want to quit before finishing
Press and hold the COMMANDER OFF button for more than 2 seconds. The previous status returns, and the Remote Commander turns off.
If you want to return to the previous display
Press the BACK button or the COMMANDER OFF button.
Notes
- If you enter a preset code that is not on the table in the supplied "Preset Code Lists," the Remote Commander beeps five times. The digits you input and "NG" appear on the Label key after you press the OK button. The previous setting returns. If this happens, check the preset code, and try setting again.
- If you do not enter any data to the Remote Commander for over 2 minutes between each step, the setup procedure will be canceled. To set the preset code again, press the MUTING button while pressing the COMMANDER OFF button.
- The first digit of the preset code means the type of component (TV, VCR, etc.). The component corresponding to the four-digit of the preset code is set in step 5. If you register a component whose type is different from that previously preset to the Label keys, you can, if necessary, change the component names as the Label keys (page 65).
- If you set a preset code after you input character contents (names, etc.) to the Label keys (page 65), they are cleared and return to the original display. Edit the characters after you decide the component to be used by setting a preset code.
- Except the DVD/Receiver combo (DAV), the components with the built-in amplifier should be registered as RCVR (Receiver). All the keys that are inoperative should be registered by the learning function.
Using non-preset remote control operations
- Learning function
To operate non-preset components or functions, use the following “learning” procedure to “program” any of the programmable buttons and keys to operate the functions of another remote control. You can also use the Learning function to change the signal of individual keys and buttons after setting the preset code (page 45).
Notes
- You cannot perform this procedure before setting the preset code. Set the preset code first.
- Some specific remote control signals may not be learned.
- The learned signal may not work properly if a target component's remote control preset button has two different functions for a single press. If this occurs, program the two signals for a Label key by referring to the “Learning up to 4 signals to one key” on page 49.
- If you do not perform learning steps within 2 minutes, the learning process is cancelled.
Using non-preset remote control operations (continued)
1 Place the Remote Commander head to head with your component's remote control.
Remote control for your component

2 While pressing the COMMANDER OFF button, press the MUTING button.

"SET" appears as the Display title.

3 Press "LEARN" on the Label keys.
LEARN

"LEARN" appears as the Display title. The component name flashes on the Label keys.
If a page number such as "/1" appears to the right side of Display title, multiple pages are available. Press the number to go to the next page.

Tip To change the component name of a Label key
Press and hold the Label key for the component name for more than 2 seconds.
The Label key flashes and the Remote Commander enters the component name changing mode.
See step 6 on page 67 for how to input characters.
4 Select the component name you want the Remote Commander to learn by pressing the Label key (in this case, TV).

The "TV" and "LEARN" appear on the Display title.
The learnable keys and the preset key flash alternately.

![graph TD A["LEAM"] --> B["21"] B --> C["54"] C --> D["7"] D --> E["0"] E --> F["ENTER"] F --> G["DISPLAY"] G --> H["INPUT"] H --> I["2FG/SWAP"] I --> J["/1"] J --> K["POWER"]](/content/2026/06/1353745/images/bf9df5dd789a7f886831a23d5fd1b1769d5f06932063f3c8a61f5e2042f804e8.jpg)
5 Press the key or button on the Remote Commander you want to "program" the preset code to.

"LEARN" flashes and only the pressed key remains on the LCD display.

When you have programmed the buttons on the Remote Commander
The names of buttons not on the LCD display (VOLUME +/-, CHANNEL +/-, MUTING, RECALL, MENU, EPG, TOOLS, EXIT, and the four arrow keys and OK) appear on the right Label keys.
To clear the learned signal from a key or button
While pressing the SYNC-UP button, press the learned key or button you want to clear.

The cleared key flashes together with other keys that are available for learning.
Learning up to 4 signals to one key
This is useful when the Remote Commander is not working properly, even when the signal is learned for the Remote Commander using the Learning function. You can also use this function to switch the input mode such as TV, etc., or to switch between DVD player and DVD recorder operation with one key.
To re-program already learned keys or buttons, press the key or button while pressing the LIGHT button.

"LEARN" flashes and only the pressed key remains on the LCD display. You can program a maximum of 4 functions to one key or button.
6 Press and hold the button on the other remote control until you hear a beep.
(If you release the button before you hear a beep, the signal may not be learned correctly.)
Other remote control's button

"LEARN" stops flashing and stays lit. When the command has been learned successfully, the learned keys stay lit and the other keys available for learning flash alternately.
Notes
- If "NG" flashes on the LCD display with 5 beep sounds, learning did not succeed. Try again steps 5 and 6.
- If you touch a wrong key by mistake, while pressing the SYNC-UP button, press the incorrect key again.
Using non-preset remote control operations (continued)
7 Press the BACK button or the COMMANDER OFF button.

"LEARN" appears as the Display title.

If you want to program another signal, repeat steps 4 - 6.
8 Press and hold the COMMANDER OFF button for more than 2 seconds.

The Remote Commander turns off.
If you want to quit before finishing
Press and hold the COMMANDER OFF button for more than 2 seconds. The previous status returns, and the Remote Commander turns off.
If you want to return to the previous display
Press the BACK button or the COMMANDER OFF button.
If the Remote Commander does not seem to be working properly, repeat from step 5.
If the learned key or button does not operate properly, program once again. (For example, if the volume becomes very loud after pressing the VOLUME + button just once, noise may have interfered during the learning procedure.)
When you program signals to the VOLUME +/- or MUTING buttons
- If you have programmed any signal on the VOLUME +/- or MUTING button for components other than TV and RCVR (Receiver/Amplifier) using the learning function, that signal will be transmitted only when you select that component.
- If you have programmed any signal for the VOLUME +/- or MUTING button of TV or RCVR (Receiver/Amplifier) using the learning function, that signal will also be transmitted when you select another component. However, if you have programmed any signal for the VOLUME +/- or MUTING button of another component, that signal will be transmitted only after you select that component.
For accurate learning
- Do not move the remote units during the learning procedure.
- Be sure to press and hold the button of the other remote control until you hear the confirmation beep.
- Use fresh batteries in both remote control units.
- Avoid learning in places under direct sunlight or strong fluorescent light.
- The remote control signal direction may differ depending on the remote control. If learning does not work, try changing the position of the remote control.
- When you program a remote control unit with an interactive signal exchange system (supplied with some Sony receivers and amplifiers) to the Remote Commander, the response signal of the component may interfere with the learning of the Remote Commander. In such a case, move to another room, etc., where the signals will not interfere.
IMPORTANT
Be sure to place the Remote Commander out of the reach of small children or pets. Also, set the Hold function to lock all the buttons on the Remote Commander (page 33) when it is not used. Devices such as air conditioners, heaters, electric appliances, and electric shutters or curtains receiving an infrared signal can be dangerous if misused.
Programming a series of actions with just one button
- System Control function
With the System Control function, you can program a series of actions (a macro) and execute them by pressing just one button. For example, when you watch a video, a series of operations like the ones below are necessary.
Example:
1 Turn on the TV. 2 Turn on the video (VCR). 3 Turn on the amplifier (RCVR). 4 Set the input selector of the amplifier to VIDEO 1. 5 Set the input mode of the TV to VIDEO 1. 6 Start video playback.
You can program up to 32 consecutive operation steps to each of the SYSTEM CONTROL buttons (1 - 4) or the System Control keys (SYSTEM 5 - 8).
Programming a series of actions with just one button (continued)
1 While pressing the COMMANDER OFF button, press the MUTING button.

"SET" appears as the Display title.

2 Press "MACRO" on the Label keys.
MACRO

"MACRO" appears as the Display title.

3 Press "SYSTEM" on the Label keys.
SYSTEM

"SYSTEM" appears as the Display title.

4 Select the System Control name by pressing the SYSTEM CONTROL button or the System Control key (in this case, SYSTEM CONTROL 2 button).
SYSTEM CONTROL
2
"COMPONENT" appears as the Display title. The component name flashes on the Label keys. If a page number such as "/1" appears to the right side of the Display title, multiple pages are available. Press the number to go to the next page.

5 Select the component name you want the Remote Commander to program the series of actions (a macro) by pressing the Label key (in this case, TV).

The "TV" appears as the Display title, and the programmable keys for the selected component flash.

6 Press the key(s) or button(s) for the desired operation.
If you want to turn on the TV, press the POWER key.

If you want to add commands from a different component, press the COMPONENT button and then select the component name from the Label keys.
When you have programmed the buttons on the Remote Commander
The names of buttons not on the LCD display (VOLUME +/-, CHANNEL +/-, MUTING, RECALL, MENU, EPG, TOOLS, EXIT, ⇧, ⇧, ⇧, ⇧ and OK) appear on the right Label keys.
When the maximum of 32 steps are input, the System Control macro programming finishes and a beep sounds, and the System Control macro displays in order.
"SYSTEM" appears as the Display title.

- You can input up to 32 steps for one System Control function.
- If you need a manual delay between two steps, press the TIMER button to add an interval of 250 ms. (ms: 1/1000 second)
- The Display title and the LIGHT button are not counted as steps.
7 When you have programmed all the keys and buttons, press the COMMANDER OFF button.

A beep sounds, the System Control macro programming finishes and displays in order.
8 Press and hold the COMMANDER OFF button for more than 2 seconds.

The Remote Commander turns off.
Programming a series of actions with just one button (continued)
If you want to quit before finishing
Press and hold the COMMANDER OFF button for more than 2 seconds. The setting is canceled, and the Remote Commander turns off.
If you want to return to the previous display
Press the BACK button or the COMMANDER OFF button.
Notes
- If you interrupt the procedure at any point for over 2 minutes, the setting is cancelled and the series of actions (a macro) will be programmed to that point. In this case, clear the program (page 54) and start again from step 1 to set the entire program from the beginning. You cannot continue from where you left off.
- If you set the preset code (page 45) or program a new signal by learning (page 47) on a key or button that has been programmed in the System Control macro, the new signal will be transmitted when you press the corresponding SYSTEM CONTROL button or System Control key.
- If you try to program more than 32 steps, the System Control macro programming finishes, and the 32 steps you have programmed are registered. If you want to program again, clear the program (page 54) and start again from step 1.
About the order of operation steps
Some of the components may not accept consecutive remote control signals. For example, a TV generally does not react to the next signal immediately after the Power-on signal. So, a series of actions such as TV power-on and input select may not work properly. In this case, insert other signals like the example below;
TV power-on → VCR power-on → VCR playback → TV input select
To clear programmed series of actions for SYSTEM CONTROL button or System Control key
1 While pressing the COMMANDER OFF button, press the MUTING button.
COMMANDER
OFF


MUTING
"SET" appears as the Display title.

2 Press "MACRO" on the Label keys.
MACRO

"MACRO" appears as the Display title.

3 Press "SYSTEM" on the Label keys.
SYSTEM

"SYSTEM" appears as the Display title.

4 While pressing the SYNC-UP button, press the programmed key or button you want to clear. A beep sounds, "SYSTEM" appears as the Display title.

5 Press and hold the COMMANDER OFF button for more than 2 seconds.

The Remote Commander turns off.
If you want to quit before finishing
Press and hold the COMMANDER OFF button for more than 2 seconds. The setting is canceled, and the Remote Commander turns off.
If you want to return to the previous display
Press the BACK button or the COMMANDER OFF button.
Setting the XPRESS macro activation
You can switch the XPRESS macro activation to on or off when selecting the XPRESS function.
If you set to off, the XPRESS display appears without sending the XPRESS macro.
To change this setting, perform the following procedure.
1 While pressing the COMMANDER OFF button, press the MUTING button.

"SET" appears as the Display title.

2 Press "MACRO" on the Label keys.
MACRO

"MACRO" appears as the Display title.

3 Press "XPRESS" on the Label keys.
XPRESS

The setting display for XPRESS macro activation appears.
The current setting is shown inside the [ ], while the other flashes.

4 Press the ON or OFF key to select the XPRESS macro activation.
ON: Turns on the XPRESS macro activation.
OFF: Turns off the XPRESS macro activation.
The setting of the XPRESS macro activation changes each time you press the key.
5 Press and hold the COMMANDER OFF button for more than 2 seconds.
COMMANDER OFF

The Remote Commander turns off.
If you want to quit before finishing
Press and hold the COMMANDER OFF button for more than 2 seconds. The previous status returns, and the Remote Commander turns off.
If you want to return to the previous display
Press the BACK button or the COMMANDER OFF button, the previous LCD display returns.
Controlling the volume of visual components connected to an audio component
The Remote Commander is factory preset based on the assumption that you hear the sound of your visual components from your TV speakers, and that you hear sound of your audio components from the loudspeakers connected to your amplifier.
This feature enables you to control the volume of your TV or amplifier without selecting TV or RCVR each time to control the volume.
For example, to control the volume while using a VCR, you do not need to select the TV to control the TV volume. With the Remote Commander, you can switch the volume of all the visual components to the amplifier.
The following table shows the factory setting of component/volume control.
| Component Controls the volume of |
| TV TV |
| A-CBL TV |
| D-SAT TV |
| DVD TV |
| VCR TV |
| CD RCVR |
| RCVR RCVR |
| DVDVR TV |
| DVD-R TV |
| D-CBL TV |
| DAV DAV |
| PJ (Projector) PJ |
| TAPE RCVR |
| MD RCVR |
| LIGHT —— |
However, if your visual components are connected to an audio component, you probably hear TV or VCR sound from the loudspeakers via your amplifier, not from your TV speakers. In this case, you need to change the factory preset so that you can control the volume of your visual components without first having to switch to the amplifier.
1 While pressing the COMMANDER OFF button, press the MUTING button.
COMMANDER OFF


MUTING
"SET" appears as the Display title.

Controlling the volume of visual components connected to an audio component (continued)
2 Press the Display title (SET) once.
SET
"VOLUME" flashes on the Label keys.

3 Press "VOLUME" on the Label keys.
VOLUME
The setting display of volume control appears.
The current setting is shown inside the [ ], while the other flashes.
![VOLUME VISUAL [ TV ] RCUR-](/content/2026/06/1353745/images/dc59c7bb29b93596a44c7746be27b0c24a1670cb052658cf61f95578286d921c.jpg)
4 Press the TV or RCVR key to select the volume control.
TV: You will hear the sound of your visual components from your TV speakers.
RCVR: You will hear the sound of your visual components from the loudspeakers connected to your amplifier.
The volume control setting changes and a beep sounds each time you press the keys.
5 Press and hold the COMMANDER OFF button for more than 2 seconds.
COMMANDER OFF

The Remote Commander turns off.
If you want to quit before finishing
Press and hold the COMMANDER OFF button for more than 2 seconds. The previous status returns, and the Remote Commander turns off.
If you want to return to the previous display
Press the BACK button or the COMMANDER OFF button.
Notes
- If you have already programmed any signal for the VOLUME or MUTING button of each component by "learning," the procedure above will not change the function of the VOLUME and MUTING buttons.
- If you have programmed volume control signals on the VOLUME or MUTING buttons of a TV or RCVR, you can only use that signal when you select TV or RCVR. For other components, the preset volume control signals for TV or RCVR (depending on the above setting procedure) will be transmitted. To use the new signals, you need to program each button for each component by the learning procedure (page 47).
Setting the Timer
Up to 8 Timers can be set on the Remote Commander. You can program the Timer for the day of the week, the hour, the minute and a series of actions (a macro). You can set each Timer to be executed or not. To program the Timer, perform the following procedure.
To program the Timer
1 While pressing the COMMANDER OFF button, press the MUTING button.

"SET" appears as the Display title.

2 Press "TIMER" on the Label keys.
TIMER

"TIMER" appears as the Display title. The Timer numbers "PROG1" - "PROG4" flash on the Label keys. If a page number such as "/1" appears to the right side of Display title, multiple pages are available. Press the number to go to the next page.

3 Select the Timer number you want the Remote Commander to set the Timer by pressing the Label key (in this case, PROG4).
PROG4

The "PROG4" appears as the Display title. "SU" and "12:00 AM" appear on the Clock display.

Setting the Timer (continued)
4 Press "MACRO" on the Label keys.
MACRO
"COMPONENT" appears as the Display title. The component names flash on the Label keys. If a page number such as "/1" appears to the right side of Display title, multiple pages are available. Press the number to go to the next page.

5 Select the component name you want the Remote Commander to program the series of actions (a macro) by pressing the Label key. The "TV" appears as the Display title, and the programmable keys for the selected component flash.

6 Press the key(s) or button(s) for the desired operation. If you want to turn on the TV, press the POWER key.

If you want to add commands from a different component, press the COMPONENT button and then select the component name from the Label keys.
When you have programmed the buttons on the Remote Commander
The names of buttons not on the LCD display (VOLUME +/-, CHANNEL +/-, MUTING, RECALL, MENU, EPG, TOOLS, EXIT, and OK) appear on the right Label key.
When the maximum of 32 steps are input, the Timer macro programming finishes and a beep sounds, and the Timer macro displays in order.

Notes
- You can input up to 32 steps for one Timer.
- If you need a manual delay between two steps, press the TIMER button to add an interval of 250 ms. (ms: 1/1000 second)
- The Display title and the LIGHT button are not counted as steps.
7 When you have programmed all the keys and buttons, press the COMMANDER OFF button.

A beep sounds, the Timer macro programming finishes and programmed contents are displayed in order.
8 Press "TIME" on the Label keys.
TIME

"SET" and "SU" flash and "12:00 AM" lights on the Clock display.

Setting the Timer (continued)
9 Press the ↑ or ↓ button to set the day(s) of the week.
Each time the ⇔ or ∇ button is pressed, the day(s) of the week change as follows.
![graph TD A["SUMOTUWETHFRSA"] --> B["MOTUWETHFRSA"] B --> C["MOTUWETHFR"] C --> D["SUSA"] D --> E["SUS"] E --> F["MO"] F --> G["TU"] G --> H["WE"] H --> I["TH"] I --> J["FR"] J --> K["SA"] K --> A](/content/2026/06/1353745/images/7ca68bab197be3c1d85b53314c2a42c3f42defa86de5b6afa9eaada238071d08.jpg)
SU: Sunday
MO: Monday
TU: Tuesday
WE: Wednesday
TH: Thursday
FR: Friday
SA: Saturday
Then, press the ⇒ button. The day(s) of the week is set.
"12" "AM" and "SET" flash.
10 Press the ⇔/⇔/⇔ buttons to change the time.
Each time the ⇔ or ⇔ button is pressed, the Clock display changes in order (the day(s) ↔ the hour ↔ the minute ↔ the day(s)).
Each time the ⇧ or ⇧ button is pressed, the hour or minute changes by 1 hour or minute.
11 Press "SET" on the Label keys.
SET

With a beep sound, the timer setting changes.

Note
If you press the SET key at any point, the time setting changes.
12 Press the ON/OFF or TEST key to activate the Timer.
ON/OFF: With a beep sound, "ON" appears on the top-right of the LCD display, and the Remote Commander enters the Timer standby mode.
TEST: You can check the Timer macro by transmitting the signals.

To reset the timer standby mode, press the ON/OFF key again.

13 Press and hold the COMMANDER OFF button for more than 2 seconds.
COMMANDER
OFF

The Remote Commander turns off.
If you want to quit before finishing
Press and hold the COMMANDER OFF button for more than 2 seconds. The previous status returns, and the Remote Commander turns off.
If you want to return to the previous display
Press the BACK button or the COMMANDER OFF button.
Notes
- Some Timer may not be executed at the set time because of conflicts with other set Timer. If the execution time arrives while another Timer is running, the later Timer begins only after the first one ends.
In this case also, the program may not be executed at the set time. So, set the Timer regarding the contents and the duration of the Timer execution.
- When using the Timer on this Remote Commander, only one setting can be assigned to one program. If you want to set the Timer to turn on at a programmed time, and to set the Timer to turn off at another time, program the two settings separately.
- If there are some programs set to be executed at the same time, they start in order from the lowest Timer number.
- According to the status of the component operated by the Timer, the next program might not function successfully. When setting a Timer, check carefully the setting of other programs.
Setting the Timer (continued)
To clear a Timer macro
1 While pressing the COMMANDER OFF button, press the MUTING button.

"SET" appears as the Display title.

2 Press "TIMER" on the Label keys.
TIMER

"TIMER" appears as the Display title. The Timer numbers "PROG1" - "PROG4" flash on the Label keys. If a page number such as "/1" appears to the right side of Display title, multiple pages are available. Press the number to go to the next page.

3 Select the Timer number you want the Remote Commander to clear the Timer by pressing the Label key.
The selected Timer number appears as the Display title.

4 Press the MACRO key if the Timer macro has already been programmed.
MACRO

"DELETE MACRO?" appears on the Label key and "YES" and "NO" flash.

5 Press "YES" on the Label keys.
YES

The Timer macro is cleared, then "COMPONENT" appears as the Display title.

If you press the NO key
The Timer macro is not cleared, and the display returns to step 3.
6 Press and hold the COMMANDER OFF button for more than 2 seconds.
COMMANDER OFF

The Remote Commander turns off.
If you want to quit before finishing
Press and hold the COMMANDER OFF button for more than 2 seconds. The previous status returns, and the Remote Commander turns off.
If you want to return to the previous display
Press the BACK button or the COMMANDER OFF button.
Changing the names of labels
You can change the names of the XPRESS function, components, System Control keys and Timer on the Label keys to the most suitable name using up to 8 characters or digits.
To change the names, perform the following procedure.
Example: To change the name of the component (TV).
1 While pressing the COMMANDER OFF button, press the MUTING button.
COMMANDER OFF


MUTING
"SET" appears as the Display title.

Changing the names of labels (continued)
2 Press the Display title (SET) once.

"LABEL" flashes on the Label keys.

3 Press "LABEL" on the Label keys.

"LABEL" appears as the Display title.

4 Select the type of Label key you want the Remote Commander to change by pressing the Label key (in this case, COMPO).
XPRESS: Displays XPRESS names. To change the Label keys, press the Display title.
COMPO: Displays component names. To change the Label key, press the Display title.
SYSTEM: Displays SYSTEM5 - 8. To change the Label key, press the Display title.
TIMER: Displays PROG1 - 4. To change the Label key, press the Display title.
To change the component name as the Display title
Press and hold the Display title for the component name displayed for more than 2 seconds. The Remote Commander enters the component name changing mode.
5 Press the Label key of the name you want to change.
The Remote Commander enters the Label setting mode.
COMPO (Example: TV)
The cursor flashes on the left side of the Display title.

6 Input digits or characters for the Label key by pressing the number keys (0 -9), SYMBOL 1 key or SYMBOL 2 key on the Touch-key. Begin inputting digits or characters from the left. Press the number key repeatedly until you obtain the desired digit or character. The digits or characters are assigned to the keys as follows.
1: 1 2: A → B → C → a → b → c → 2 3: D → E → F → d → e → f → 3 4: G → H → I → g → h → i → 4 5: J → K → L → j → k → l → 5 6: M → N → O → m → n → o → 6 7: P → Q → R → S → p → q → r → s → 7 8: T → U → V → t → u → v → 8 9: W → X → Y → Z → w → x → y → z → 9 0: 0 SYMBOL 1: ! → & → / → ? → $ → % → * → # → + → - → : → , → . → | → space SYMBOL 2: space → (→) → < → > → → ← → ↑ ↓ → ◀ ➔ ➔ ” → ’ → ~ → _ If you make a mistake, move the cursor to the desired position by pressing the ⇔ or ⇔ button, and input again. If you press the CLEAR key, the Label key returns to the previous display.
7 Press the OK button to decide the name.

8 Press and hold the COMMANDER OFF button for more than 2 seconds.

The Remote Commander turns off.
If you want to quit before finishing
Press and hold the COMMANDER OFF button for more than 2 seconds. The previous status returns, and the Remote Commander turns off.
If you want to return to the previous display
Press the BACK button or the COMMANDER OFF button.
Erasing all the settings - Reset
You can clear all the settings to reset the Remote Commander to its factory settings.
1 While pressing the COMMANDER OFF button, press the MUTING button.

"SET" appears as the Display title.

2 Press the Display title (SET) twice.

"OTHER" flashes on the Label keys.

3 Press "OTHER" on the Label keys.
OTHER

"RESET" flashes on the Label key.

4 Press the "RESET" on the Label keys.
RESET

"YES" and "NO" flash on the Label key.

5 Press the "YES" on the Label keys.
YES

"REALLY?" appears and "NO" and "YES" flash on the LCD display.

6 Press the "YES" on the Label keys. With a beep sound, the all settings are cleared.
7 Press and hold the COMMANDER OFF button for more than 2 seconds.

The Remote Commander turns off.
If you want to quit before finishing
Press and hold the COMMANDER OFF button for more than 2 seconds. The previous status returns, and the Remote Commander turns off.
If you want to return to the previous display
Press the BACK button or the COMMANDER OFF button.
Precautions
- Do not drop the unit or give a shock to the unit, or it may cause a malfunction.
- Do not leave the unit in a location near heat sources, or in a place subject to direct sunlight, excessive dust or sand, moisture, rain or mechanical shock.
- Do not put foreign objects into the unit. Should any liquid or solid object fall into the unit, have it checked by qualified personnel before operating the unit any further.
- Do not expose the remote control detectors of your components to direct sunlight or other strong illumination. Too much light there can interfere with remote control operations.
- Be sure to place the Remote Commander out of the reach of small children or pets. Components such as air conditioners, heaters, electric appliances, and electric shutters or curtains receiving an infrared signal can be dangerous if misused.
Maintenance
Clean the surface with a soft cloth slightly moistened with water or a mild detergent solution. Do not use any type of solvent such as alcohol, benzine, or thinner as they may damage the finish of the surface.
Specifications
Operating distance
Approx. 32.8 ft. (10 meters) (varies depending on components of different manufacturers)
Power requirements
Remote control and backlight: Four size AA (R6) batteries
Battery life
Approx. 5 months (a Sony TV turned on/off up to approx. 300 times per day)
Dimensions
Approx. 4 3/4 × 1 1/4 × 7 in. (w × h × d) (118 × 31.2 × 175 mm)
Mass
12 oz. (320 g) (not including batteries)
Learnable signals*
Capacity per signal: up to 300 bits Signal frequency range: 455 kHz and up to 300 kHz Signal interval: up to 1 second
* Some signals cannot be learned by the Remote Commander, even though the signals comply with these specifications.
Design and specifications are subject to change without notice.
Troubleshooting
If you have problems setting up or using the Remote Commander, first check the batteries (page 10), then check the items below. Refer also to Help of "AX Remote Editor."
Trouble with the Remote Commander's basic settings
| Problem | Solution |
| The Remote Commander does not turn on. | Check the remaining battery level. If low, replace with new ones. |
| The LCD display turns off automatically. | The Remote Commander is preset at the factory to turn the display off automatically if you do not operate for more than 5 minutes. You can reset the automatic-off time to 1-30 minutes (page 37). |
| The beep does not sound. | The beep is turned off. Turn the beep on (page 41). |
| The Timer function has stopped working. | Check the Timer setting (page 29). When the battery power is weak or empty, or if the battery is removed for a long time, the Timer setting may be cleared. |
| The touch-keys do not work properly. | Calibrate the alignment of the LCD display (page 39). |
| The LCD display does not light up even though the Remote Commander is turned on. | The contrast level is too low. Set the contrast of the LCD display higher. While pressing the COMMANDER OFF button, press the OK button. And then press the CHANNEL + button a few times to increase the contrast. |
| XPRESS function does not perform On-Remote Setup. | In case of On-Remote Setup, XPRESS function controls only the power on/off of the component. If you want to control the input selector of the TV, etc., follow the procedure for On-PC Setup. |
Trouble with operation mode
| Problem | Solution |
| Even if you press the keys/ buttons on the Remote Commander, the component does not work properly. | · Get closer to the component. The maximum operating distance is approximately 32.8 ft. (10 m).· Check that you are aiming the Remote Commander directly at the component, and that there are no obstructions between the Remote Commander and the component.· Turn on the components first, if necessary.· Check that the component has infrared remote capability. For example, if your component did not come with the Remote Commander, it probably is not capable of being controlled by a Remote Commander. |
| Even though you hold down a key/button, it does not work as intended. | · The volume buttons and cursor buttons, and some others, continue to work when they are pressed and held. If you program the signals of such buttons, RM-AX4000 Remote Commander may not learn the signals accurately. Reprogram the signals by continuing to hold down the desired button of the other remote control until “Learning is complete.” appears in the “AX4000 Remote Editor” screen.· The batteries of the other remote control are weak. Replace with new ones and reprogram the signals. |
| The backlight setting is unintentionally changed. | Unit Setting of the project set up on your PC is activated if you download data changed on your PC with the “Download the Unit Setting data together with the project data” box checked. |
| “RECOVERY” appears on the screen and all the buttons are disabled. | Error might has occurred in the firmware of the Remote Commander. Update the firmware using “AX Remote Editor.” |
| The component does not work when checking the code setting on the Emulator. | · Get closer to the component. The maximum operating distance is approximately 32.8 ft. (10 m).· Check that you are aiming the Remote Commander directly at the component, and that there are no obstructions between the Remote Commander and the component.· Turn on the components first, if necessary.· Check that the component has infrared remote capability. For example, if your component did not come with the Remote Commander, it probably is not capable of being controlled by a Remote Commander. |
| The visual/audio component's volume cannot be controlled by the Remote Commander. | The VOLUME button may be assigned to a different component than the one you want it to control.For On-PC Setup: Make sure to set “Action List” of the VOLUME button correctly after selecting the component to control the volume in Advanced mode.For On-Remote Setup: See “Controlling the volume of visual components connected to an audio component” on page 57.The VOLUME button of most components is already assigned to control the TV (or RCVR for audio components). Do not program any other function to the VOLUME button of the TV or RCVR. |
| A System Control function does not work properly. | · Make sure that you have programmed the commands in the correct order (page 51).· Try changing the orientation of the Remote Commander. If that does not help, try placing the components as close to each other as possible.· Check the status of the components and make sure that you have set the components properly to receive commands.· The preset codes are changed or new signals have been learned for a key or button that has been programmed with a series of actions. In this case, the new signals are transmitted when the series of actions is executed. |
| Even if you set the Timer macro, the component does not work properly. | · The component could not receive the signal from the Remote Commander successfully. When using the Timer, check the following.- Check that the Timer macro functions correctly by pressing the TEST key, after setting the Timer macro (page 59).- Check the location of the Remote Commander.· The status of the component is not suitable for operation (for example, you programmed the power-on setting, assuming that power of the component is off when the Timer turns on. However, if the power of the component is on when the component receives the signal from the Remote Commander, the component will turn off). |
| Even if you operate an XPRESS function, the TV does not turn on, or it turns off. | · The Remote Commander memorizes the status of the component's input selector and power on/off. However, if you turn on/off the component with the remote control or operate the component directly, it will not recognize the current component status. In this case, press the SYNC-UP button to synchronize with the status of the current component and the Remote Commander.· If the TV turns off by its own Sleep function, the Remote Commander does not recognize its status. Turn off the TV with the Remote Commander. You can also turn off the TV at the scheduled time with the Timer on the Remote Commander. |
| Even if you operate an XPRESS function, the Source component does not turn on, or it turns off. | The Remote Commander memorizes the status of the component's input selector and power on/off. However, if you turn on/off the component with the remote control or operate the component directly, it will not recognize the current component status. In this case, press SYNC-UP button to synchronize the status of the current component and the Remote Commander.If the TV turns off by its own Sleep function, the Remote Commander does not recognize its status. Turn off the TV with the Remote Commander. You can also turn off the TV at the scheduled time with the Timer on the Remote Commander. |
| Even if you operate an XPRESS function, the input selector of the TV or RCVR (Receiver/Amplifier) does not achieve the correct status. | The Remote Commander memorizes the status of the component's input selector and power on/off. However, if you turn on/off the component with the remote control or operate the component directly, it will not recognize the current component status. In this case, press the SYNC-UP button to synchronize the status of the current component and the Remote Commander.If the TV turns off by its own Sleep function, the Remote Commander does not recognize its status. Turn off the TV with the Remote Commander. You can also turn off the TV at the scheduled time with the Timer on the Remote Commander. |
| Air-Slide does not work properly. | Make sure to slide your finger from the top-left on the LCD display. If you slide other than from the top-left, Air-Slide cannot recognize the action. |
Trouble with setting mode
| Problem | Solution |
| You cannot operate the component even after you programmed a preset code. | Set the preset code correctly. If the preset code that is listed first for your component does not work, try all the preset codes for your component in the order listed in the supplied “Preset Code Lists.”Some features may not be preset. If some or all of the keys do not function correctly even after you have set the preset codes, use the learning function to program the remote control signals for the component (page 47).If you set a component code after changing the label of a component, they are cleared and return to the original label. Change the label of a component after you decide the component to be used by presetting a code. |
| You cannot operate a component even after you programmed remote control signals with the “learning” function. | Make sure that the Remote Commander has learned the correct signals. See “For accurate learning” (page 51) and try the learning procedure again (page 48). |
| “NG” flashes 5 times when learning. | Leaning has not succeeded. After checking the following, try the learning procedure again (page 48).– Change the distance between the Remote Commander and remote control.– See “For accurate learning” (page 51).The preset codes cannot be set. See the supplied “Preset Code Lists” and try setting the preset codes again (page 45). |
| Learning fails. | When you make the Remote Commander learn the remote control signals, be sure to keep about 1 to 3 inches (3 to 8 cm) between the remote control of the components and the Remote Commander.Check the remaining battery level of the remote control of the components. If low, replace with new ones.Avoid learning in places under direct sunlight or strong fluorescent light. The Remote Commander may fail to learn remote control signals under strong light.When you program signals of an interactive signal exchange system remote control unit (supplied with some of Sony's receivers and amplifiers) to the Remote Commander, the response signal of the main unit may interfere with the learning of the Remote Commander. In such a case, move to a place where the signals will not reach the main unit (e.g. other rooms, etc.).Perform the Learning procedure after turning off any nearby apparatus, such as an air-conditioner or infrared headphones.The Remote Commander may fail to learn remote control signals near plasma TVs. Avoid learning near plasma TVs or turn off the plasma TV when learning |
| "NG" flashes twice when learning. | Learned signals have been programmed for the button or key to which you want to set the learning, System Control function. Clear the learned signals (page 54) and try setting again.Learn the signal within 10 sec after selecting a key/button you want to program. |
| The Remote Commander does not memorize the radio band change (AM/FM) or frequency. | The Remote Commander cannot learn them. If you want to adjust the radio band or frequency, operate it manually. |
| The setting display does not appear. | The batteries are weak. Replace with new ones. |
| The setting mode unintentionally quits while setting up. | If you do not operate for more than 120 seconds during setting mode, the Remote Commander automatically exits the setting mode and turns off. Perform the next operation step within 120 seconds.The batteries are weak. Replace with new ones. |
| "PRESET", "LEARN", "MACRO", "TIMER", and "LABEL" do not appear on the LCD display. | These setting only appear with On-PC setup. To see these items, use the AX Remote Editor software. |
Others
| Problem | Solution |
| I want to restore all the settings. | For On-PC Setup: In “AX Remote Editor,” click “Tools” on the menu bar, then select “Update Firmware for Remote” to update the firmware of the Remote Commander. If the firmware is updated, all the settings or learned data of the Remote Commander are deleted and the Remote Commander is set back to the factory setting.For On-Remote Setup: See “Erasing all the settings” (page 68). |
| I want to use multiple components (VCR+DVD, TV+VCR, DVD+RCVR (receiver), etc.) with XPRESS function. | When you have a multiple components (such as a DVD/VCR combo), select only one of either component type. For example, in the case of a DVD/VCR combo, select “DVD” or “VCR”. If you select both components, the XPRESS function will not work properly. |
| You want to set a DVD player for both XPRESS DVD and XPRESS CD. | For On-PC Setup: You can set multiple XPRESS functions for one component. For example, when you watch a DVD, you can set the sound to output from the TV. Or, when you listen to a CD, you can set the sound to output from the RCVR (Receiver/Amplifier).For On-Remote Setup: You can set an XPRESS function for only one component. Choose either XPRESS_DVD or XPRESS_CD. |
| If the batteries die, are the learned signals lost? | No. The signals are not deleted because they are stored in the nonvolatile memory. |
| Your PC cannot recognize the USB connection. | Make sure to install the USB driver properly (page 17). Otherwise, you will have to reinstall the USB driver.The batteries may be weak. Replace with new ones if the battery icon appears.If the connection goes thorough the HUB, some PCs do not recognize it. In this case, connect it directly to the USB port of your PC.The Remote Commander does not work by the bus power. If you use it in the USB mode, make sure to install new batteries.Reconnect the USB mini cable to your PC.Restart your PC. |
Customer Support Information
After you have read through this manual, if you still cannot get the Remote Commander to work properly, call the Sony Customer Support Helpline at 1-800-822-2217.
Table of preset functions
Note
There may be some components or functions that cannot be operated.
TV
| KEY DISPLAY | FUNCTION |
| POWER | To turn the power on/off |
| 1 - 9, 0, ENTER | To change the channel (To change to channel 5, for example, press 0 and 5, or press 5 and ENTER.) |
| • | To enter the subchannel number |
| 2PIC | To turn on/off the twin pictures |
| SWAP | To swap the main picture and the sub picture |
| DISPLAY | To display the current channel on TV |
| MAIN/SUB | To switch the sound of the duplex broadcast |
| INPUT | To change the input mode |
| WIDE | To switch to the WIDE mode |
| To move the cursor upward | |
| To move the cursor downward | |
| ⇔ | To move the cursor to the right |
| ⇔ | To move the cursor to the left |
| OK | To enter the selection of the MENU display |
| EPG | To use the program guide |
| MENU | To call up the MENU |
| KEY DISPLAY | FUNCTION |
| EXIT | To exit the MENU |
| TOOLS | To go into the OPTION setting mode |
| VOLUME + | Volume up (TV) |
| VOLUME - | Volume down (TV) |
| CHANNEL + | Channel up |
| CHANNEL - | Channel down |
| MUTING | To mute the volume on the TV. Press again to turn muting off. |
| RECALL | To select the channel previously selected |
| TV_TUNER | To return to the TV (to reset the external input) |
| ANT/SW | To switch the multiplex antenna input |
| NORMAL | To return the picture and sound quality to the standard status |
| SOUND | To select the sound adjusting mode |
| PICTURE | To select the picture adjusting mode |
| SLEEP | To operate SLEEP function on the TV (works only for a TV with SLEEP function) |
A-CBL (Analog Cable box)
| KEY DISPLAY | FUNCTION |
| POWER | To turn the power on/off |
| 1 – 9, 0, ENTER | To change the channel (To change to channel 5, for example, press 0 and 5, or press 5 and ENTER.) |
| +100 | To select numbers 100 and above |
| DISPLAY | To turn on the display |
| VOLUME + | Volume up (TV) |
| VOLUME - | Volume down (TV) |
| CHANNEL + | Channel up |
| CHANNEL - | Channel down |
| MUTING | To mute the volume on the TV. Press again to turn muting off. |
| RECALL | To select the channel previously selected |
D-SAT (Digital Satellite)
| KEY DISPLAY | FUNCTION |
| POWER | To turn the power on/off |
| 1 - 9, 0, ENTER | To change the channel (To change to channel 5, for example, press 0 and 5, or press 5 and ENTER.) |
| • | To enter the subchannel number |
| INFO | To display program information |
| S.INDEX | To bring up the Station Index |
| DISPLAY | To turn on the display |
| FAVORITE | To use the “FAVORITE” function |
| INPUT | To switch the output of the SAT receiver to the TV (When connecting a TV cable or antenna to the receiver, the output switches between a TV and SAT program) |
| To move the cursor upward | |
| To move the cursor downward | |
| ⇔ | To move the cursor to the right |
| ⇔ | To move the cursor to the left |
| OK | To enter the selection of the MENU display |
| EPG | To use the program guide |
| MENU | To call up the MENU |
| EXIT | To exit the MENU |
| TOOLS | To go into the OPTION setting mode |
| VOLUME + | Volume up (TV) |
| VOLUME - | Volume down (TV) |
| CHANNEL + | Channel up |
| CHANNEL - | Channel down |
| MUTING | To mute the volume on the TV. Press again to turn muting off. |
| KEY DISPLAY | FUNCTION |
| RECALL | To select the channel previously selected |
| CATEGORY | Category guide |
| ANT/SW | To switch the antenna input in order |
| OUTPUT | Cyclic HDTV output resolution |
DVD (DVD player)
| KEY DISPLAY | FUNCTION |
| POWER | To turn to the power on/off |
| 1-9,0 | Number buttons: To set items selected from the screen |
| +10 | To select numbers 10 and above |
| ENTER | To enter a setting or to set items selected from the screen |
| A/B | To decide the distance between A and B |
| To rewind | |
| To play | |
| To fast-forward | |
| TOP_MENU | To display the TOP Menu |
| To stop | |
| To pause | |
| DISPLAY | To show the current play status on the screen |
| To proceed to the previous location or song | |
| To open or close the tray | |
| To proceed to the next location or song | |
| To briefly replay the scene To go to the previous frame | |
| SUBTITLE | To switch the subtitle |
| To briefly fast-forward the scene To go to the next frame | |
| To move the cursor upward | |
| To move the cursor downward | |
| To move the cursor to the right | |
| To move the cursor to the left | |
| OK | To enter the selection of the MENU display |
| MENU | To call up the MENU |
| KEY DISPLAY | FUNCTION |
| EXIT | To return to the previous display on the MENU |
| VOLUME + | Volume up (TV) |
| VOLUME - | Volume down (TV) |
| MUTING | To mute the volume on the TV. Press again to turn muting off. |
| TIME | To change the time display |
| SET_UP | To call up the setting up menu |
| ←SLOW | Slow playback in the reverse direction |
| SLOW→ | Slow playback in the forward direction |
| REPEAT | To go into the repeat mode |
| PLAYMODE | To change the playback mode |
| EDIT | To switch the edit mode to on/off |
| DISC | To change a disc |
| ←SEARCH | To search in the reverse direction |
| SEARCH→ | To search in the forward direction |
* The ▲ key does not work unless pressed for more than 2 seconds (factory setting).
VCR (Video Cassette Recorder)
| KEY DISPLAY | FUNCTION |
| POWER | To turn the power on/off |
| 1-9,0, ENTER | To change the channel (To change to channel 5, for example, press 0 and 5, or press 5 and ENTER.) |
| ◀◀ | To rewind |
| ▶ | To play |
| ▶▶ | To fast-forward |
| REC*1 | To record |
| ■ | To stop |
| ■■ | To pause |
| DISPLAY | To activate the on-screen display |
| MAIN/SUB | To switch the sound of the duplex broadcast |
| ▲*2 | To eject a cassette |
| INPUT | To change the input mode |
| •→ | CM skip function |
| ↑ | To move the cursor upward |
| ↓ | To move the cursor downward |
| ↔ | To move the cursor to the right |
| ↔ | To move the cursor to the left |
| OK | To enter the selection of the MENU display |
| MENU | To call up the MENU |
| EXIT | To exit the MENU |
| VOLUME + | Volume up (TV) |
| VOLUME - | Volume down (TV) |
| CHANNEL + | Channel up |
| CHANNEL - | Channel down |
| MUTING | To mute the volume on the TV. Press again to turn muting off. |
| PLAY x2 | To play at double speed |
| Q.TIMER | To select the recording time by 30 minutes and begin recording |
| KEY DISPLAY | FUNCTION |
| SP/LP | To switch the tape speed |
| H.S.REW | To rewind at high speed |
| COUNTER | To change the counter display |
| ANT/SW | To switch the antenna output |
| ←SEARCH | REVIEW locked picture search |
| SEARCH→ | CUE locked picture search |
| LINE1 | To select the input source: LINE 1 |
| LINE2 | To select the input source: LINE 2 |
| DV_IN | To select the input source: DV |
| TV_TUNER | To return to the TV (to reset the external input) |
*1 To avoid accidental recording, the REC key does not work unless pressed for more than 2 seconds (factory setting).
*2 The ▲ key does not work unless pressed for more than 2 seconds (factory setting).
DVR (Digital Video Recorder) – DVR, PVR, DVR/Satellite Combo, DVR/Cable Combo
| KEY DISPLAY | FUNCTION |
| POWER | To turn the power on/off |
| 1-9,0,ENTER | To change the channel (To change to channel 5, for example, press 0 and 5, or press 5 and ENTER.) |
| • | To enter the subchannel number |
| INFO | To display program information |
| ◀◀ | To rewind |
| ▶ | To play |
| ▶▶ | To fast-forward |
| S.INDEX | To bring up the Station Index |
| REC*2 | To record |
| ■ | To stop |
| ■■ | To pause |
| DISPLAY | To turn on the display |
| ◀◀◀ | To select the previous track |
| FAVORITE | To use the "FAVORITE" function |
| ▶▶I | To select the next track |
| INPUT | To switch the output of the SAT receiver to the TV (When connecting a TV cable or antenna to the receiver, the output switches between a TV and SAT program) |
| ←● | To briefly replay the scene |
| LIST*1 | To call up the title of the recorded program |
| •→ | To briefly fast-forward the scene |
| ↑ | To move the cursor upward |
| ↓ | To move the cursor downward |
| ↔ | To move the cursor to the right |
| ↔ | To move the cursor to the left |
| OK | To enter the selection of the MENU display |
| KEY DISPLAY | FUNCTION |
| EPG*1 | To use the program guide |
| MENU | To call up the MENU |
| EXIT | To exit the MENU |
| TOOLS | To go into the OPTION setting mode |
| VOLUME + | Volume up (TV) |
| VOLUME - | Volume down (YV) |
| CHANNEL + | Channel up |
| CHANNEL - | Channel down |
| MUTING | To mute the volume on the TV. Press again to turn muting off. |
| RECALL | To select the channel previously selected |
| REPLAY*1 | To replay, or to go into REC/ REVIEW mode during play (After about 5-second rewind, replay begins.) |
| LIVE_TV*1 | To bring up Master Guide |
| ANT/SW | To switch the antenna output |
| - PAGE*1 | Page down |
| PAGE +*1 | Page up |
| - THUMBS*1 | To select the desired recorded program (It is necessary to have recorded the desired program.) |
| THUMBS +*1 | To select the desired recorded program (It is necessary to have recorded the desired program.) |
| CATEGORY | Category guide |
| HOME | To return to the home display from any display |
| VIEWER | To display a drop menu and toggle to change the user |
*1 This key corresponds to Tivo service or the replay service. Refer to its instruction manual for details. *2 To avoid accidental recording, the REC key does not work unless pressed for more than 2 seconds (factory setting).
CD (CD player)
| KEY DISPLAY | FUNCTION |
| POWER | To turn the power on/off |
| 1 – 9, 0 | To select the track number |
| +10 | To select numbers 10 and above |
| ENTER | To enter the setting |
| ◀◀ | To rewind |
| ▶ | To play |
| ▶▶ | To fast-forward |
| ■ | To stop |
| ■■ | To pause |
| DISPLAY | To switch the display of the CD player to turn on/off |
| ◀◀◀ | To select the previous track |
| ▲* | To open/close |
| ▶▶▶ | To select the next track |
| CLEAR | To clear the setting |
| D.SKIP | To select the next disc |
| VOLUME + | Volume up (RCVR) |
| VOLUME - | Volume down (RCVR) |
| MUTING | To mute the volume. Press again to turn muting off. |
| REPEAT | To select repeat play mode |
| SHUFFLE | To play in random order |
| PROGRAM | To use for program play |
| CONTINUE | To select continuous play mode |
| KEY DISPLAY | FUNCTION |
| DISC | To decide the numeric key operation |
| TRACK | To decide the numeric key operation |
| EDIT | To go into the setting mode of automatic program and time fade |
| DSP_MODE | To toggle the mode of DSP added to the CD |
| PLAYMODE | To change the playback mode |
| FADER | To toggle the fade-in/fade-out operation |
* The ▲ key does not work unless pressed for more than 2 seconds (factory setting).
RCVR (Receiver/Amplifier)
| KEY DISPLAY | FUNCTION |
| POWER | To turn the power on/off |
| 1 - 9, 0 | Keys to use the tuner directly |
| +10 | To select numbers 10 and above |
| ENTER | To enter the setting |
| TUNER | To select the input source: TUNER |
| VIDEO 1 | To select the input source: VIDEO 1 |
| VIDEO 2 | To select the input source: VIDEO 2 |
| VIDEO 3 | To select the input source: VIDEO 3 |
| CD | To select the input source: CD |
| DVD | To select the input source: DVD |
| AUX | To select the input source: AUX |
| TAPE | To select the input source: TAPE |
| PHONO | To select the input source: PHONO |
| TV | To select the input source: TV |
| BAND | To select the tuner band |
| SHIFT | To shift band or preset select |
| INPUT | To change the input mode |
| MD | To select the input source: MD |
| 5.1 INPUT | To change the multi-channel of 5.1ch and above |
| ⇔ | To move the cursor upward |
| ⇔ | To move the cursor downward |
| ⇔ | To move the cursor to the right |
| ⇔ | To move the cursor to the left |
| OK | To enter the selection of the MENU display |
| MENU | To call up the MENU |
| KEY DISPLAY | FUNCTION |
| EXIT | To exit the MENU |
| VOLUME + | Volume up (RCVR) |
| VOLUME - | Volume down (RCVR) |
| CHANNEL + | Presetting or turning frequency to a higher: + |
| CHANNEL - | Presetting or turning frequency to a lower: - |
| MUTING | To mute the volume. Press again to turn muting off. |
| S.FIELD | To turn on/off the sound field |
| GENRE | To select a sound field genre |
| MODE | To select a sound field mode |
| T.TONE | To output a test tone |
| - CENTER | To adjust the center speaker level |
| CENTER + | To adjust the center speaker level |
| - REAR | To adjust the rear speaker level |
| REAR + | To adjust the rear speaker level |
| - SUB_WOOFER | To adjust the subwoofer level |
| SUB_WOOFER + | To adjust the subwoofer level |
| ←D.INPUT | To switch the digital input |
| D.INPUT→ | To switch the digital input |
DVDVR (DVR/DVD combo)
| KEY DISPLAY | FUNCTION |
| POWER | To turn the power on/off |
| 1-9,0 | Number buttons: To set items selected on the screen |
| +10 | To select numbers 10 and above |
| ENTER | To enter a setting or to set items selected on the screen |
| INFO | To display program information |
| ◀◀ | To rewind |
| ▶ | To play |
| ▶▶ | To fast-forward |
| TOP MENU | To display the Top Menu |
| REC*1 | To record |
| ■ | To stop |
| || | To pause |
| DISPLAY | To show the current play status on the screen |
| ◀◀◀ | To proceed to the previous location or song |
| ▲*2 | To open or close the tray |
| ▶▶▶ | To proceed to the next location or song |
| INPUT | To change the input mode |
| ←• | To briefly replay the scene |
| LIST | To call up the title of the recorded program |
| •→ | To briefly fast-forward the scene |
| ↔ | To move the cursor upward |
| ↔ | To move the cursor downward |
| ⇨ | To move the cursor to the right |
| ↔ | To move the cursor to the left |
| OK | To enter the selection of the MENU display |
| KEY DISPLAY | FUNCTION |
| EPG | To use the program guide |
| MENU | To call up the MENU |
| EXIT | To return to the previous display on the MENU |
| TOOLS | To go into the OPTION setting mode |
| VOLUME + | Volume up (TV) |
| VOLUME - | Volume down (TV) |
| CHANNEL + | Channel up |
| CHANNEL - | Channel down |
| MUTING | To mute the volume. Press again to turn muting off. |
| RECALL | To select a drive |
| HDD | To select HDD |
| DVD | To select DVD |
| TIMER | To go into the timer setting mode |
| SYS_MENU | To call up the SYSTEM MENU |
| RECMODE | To select the recording mode |
| RECSTOP | To stop the recording |
| RECPAUSE | To pause the recording |
| SUBTITLE | To switch the subtitle |
| AUDIO | To change the sound |
*1 To avoid accidental recording, the REC key does not work unless pressed for more than 2 seconds (factory setting). *2 The ▲ key does not work unless pressed for more than 2 seconds (factory setting).
DVD-R (DVD Recorder)
| KEY DISPLAY | FUNCTION |
| POWER | To turn the power on/off |
| 1-9,0 | Number buttons: To set items selected on the screen |
| +10 | To select numbers 10 and above |
| ENTER | To enter a setting or to set items selected on the screen |
| A/B | To decide the distance between A and B |
| To rewind | |
| To play | |
| To fast-forward | |
| TOP MENU | To display the Top Menu |
| REC*1 | To record |
| To stop | |
| To pause | |
| DISPLAY | To show the current play status on the screen |
| To proceed to the previous location or song | |
| To open or close the tray | |
| To proceed to the next location or song | |
| INPUT | To change the input mode |
| To briefly replay the scene | |
| SUBTITLE | To switch the subtitle |
| To briefly fast-forward the scene | |
| To move the cursor upward | |
| To move the cursor downward | |
| To move the cursor to the right | |
| To move the cursor to the left | |
| OK | To enter the selection of the MENU display |
| MENU | To call up the MENU |
| EXIT | To return to the previous display on the MENU |
| KEY DISPLAY | FUNCTION |
| VOLUME + | Volume up (TV) |
| VOLUME - | Volume down (TV) |
| CHANNEL + | Channel up |
| CHANNEL - | Channel down |
| MUTING | To mute the volume. Press again to turn muting off. |
| RECALL | To select a drive |
| TIME | To change the time display |
| SET_UP | To call up the setting up menu |
| ←SLOW | Slow playback in the reverse direction |
| SLOW→ | Slow playback in the forward direction |
| REPEAT | To go into the repeat mode |
| PLAYMODE | To change the playback mode |
| EDIT | To switch the edit mode to on/off |
| REC_MODE | To change the recording mode |
| DISC | To change a disc |
| ←SEARCH | To search in the reverse direction |
| SEARCH→ | To search in the forward direction |
*1 To avoid accidental recording, the REC key does not work unless pressed for more than 2 seconds (factory setting). *2 The ▲ key does not work unless pressed for more than 2 seconds (factory setting).
D-CBL (Digital Cable box)
| KEY DISPLAY | FUNCTION |
| POWER | To turn the power on/off |
| 1 - 9, 0, ENTER | To change the channel (To change to channel 5, for example, press 0 and 5, or press 5 and ENTER.) |
| INFO | To display program information |
| DISPLAY | To turn on the display |
| FAVORITE | To use the “FAVORITE” function |
| INPUT | To switch the output of the SAT receiver to the TV (When connecting a TV cable or antenna to the receiver, the output switches between a TV and SAT program) |
| ⇔ | To move the cursor upward |
| ⇔ | To move the cursor downward |
| ⇔ | To move the cursor to the right |
| ⇔ | To move the cursor to the left |
| OK | To enter the selection of the MENU display |
| EPG | To use the program guide |
| MENU | To call up the MENU |
| EXIT | To exit the MENU |
| TOOLS | To go into the OPTION setting mode |
| VOLUME + | Volume up (TV) |
| VOLUME - | Volume down (TV) |
| CHANNEL + | Channel up |
| CHANNEL - | Channel down |
| MUTING | To mute the volume. Press again to turn muting off. |
| RECALL | To select the channel previously selected |
| KEY DISPLAY | FUNCTION |
| HOME | To return to the home display from any display |
| VIEWER | To display a drop menu and toggle to change the user |
| ANT/SW | To switch the antenna input |
| - PAGE | Page up: + |
| PAGE + | Page down: - |
DAV (DVD/Receiver combo)
| KEY DISPLAY | FUNCTION |
| POWER | To turn the power on/off |
| 1-9,0 | Number buttons: To set items selected on the screen |
| +10 | To select numbers 10 and above |
| ENTER | To enter the setting |
| TUNER | To select the tuner band |
| To rewind | |
| To play | |
| To fast-forward | |
| TOP MENU | To display the Top Menu |
| REC* | To record |
| To stop | |
| To pause | |
| DISPLAY | To show the current play status on the screen |
| To proceed to the previous location or song | |
| BAND | To select the band |
| To proceed to the next location or song | |
| INPUT | To change the input mode |
| To briefly replay the scene | |
| SUBTITLE | To switch the subtitle |
| To briefly fast-forward the scene | |
| To move the cursor upward | |
| To move the cursor downward | |
| To move the cursor to the right | |
| To move the cursor to the left | |
| OK | To enter the selection of the MENU display |
| MENU | To call up the MENU |
| EXIT | To return to the previous display on the MENU |
| KEY DISPLAY | FUNCTION |
| VOLUME + | Volume up (DAV) |
| VOLUME - | Volume down (DAV) |
| CHANNEL + | Presetting or turning frequency to a higher: + |
| CHANNEL - | Presetting or turning frequency to a lower: - |
| MUTING | To mute the volume. Press again to turn muting off. |
| D.SKIP | To select next disc |
| S.FIELD | To turn on/off the sound field |
| EJECT | To open or close the tray |
| AMP_MENU | To go to the AMP MENU |
| MEMORY | To preset radio stations |
| FM_MODE | To set the FM mode |
| SLEEP | To set the sleep timer |
| REPEAT | To go into the repeat mode |
| PLAYMODE | To change the playback mode |
| AUDIO | To change the sound |
* To avoid accidental recording, the REC key does not work unless pressed for more than 2 seconds (factory setting).
PJ (Projector)
| KEY DISPLAY | FUNCTION |
| POWER | To turn the power on/off |
| DISPLAY | To show the current play status on the screen |
| INPUT | To change the input mode |
| WIDE | To switch to the WIDE mode |
| To move the cursor upward | |
| To move the cursor downward | |
| ⇔ | To move the cursor to the right |
| ⇔ | To move the cursor to the left |
| OK | To enter the selection of the MENU display |
| VOLUME + | Volume up (PJ) |
| VOLUME - | Volume down (PJ) |
| MUTING | To mute the volume. Press again to turn muting off. |
| RESET | To reset |
TAPE (Cassette deck)
| KEY DISPLAY | FUNCTION |
| POWER | To turn the power on/off |
| 1-9,0 | To select the track number |
| ENTER | To enter the setting |
| A/B | To select a tape deck: Deck A or B (Dual cassette deck only |
| To rewind | |
| To play | |
| To fast-forward | |
| REC* | To record |
| To stop | |
| To pause | |
| DISPLAY | To show the current play status on the display |
| To search the beginning of a track in the rewind direction | |
| To reverse | |
| To search the beginning of a track in the fast-forward direction | |
| VOLUME + | Volume up (RCVR) |
| VOLUME - | Volume down (RCVR) |
| MUTING | To mute the volume. Press again to turn muting off. |
| REC_REV | To record in the reverse direction |
| REC_FWD | To record in the forward direction |
| FADER | To stop after fading out and fade in after starting |
| KEY DISPLAY | FUNCTION |
| REC_MUTE | Record muting |
| - REC_LEVEL | To make the recording level lower |
| REC_LEVEL + | To make the recording level higher |
| C.RESET | To reset the tape counter |
| DOLBY_NR | To toggle the Dolby Noise Reduction |
| PROGRAM | To go into the program mode by first pressing, and start program play by second pressing |
| C.MEMORY | To switch the position memory operation according to the tape counter to on/off |
* To avoid accidental recording, the REC key does not work unless pressed for more than 2 seconds (factory setting).
MD (MD deck)
| KEY DISPLAY | FUNCTION |
| POWER | To turn the power on/off |
| 1 – 9, 0 | To select the track number (0 for the track 10) |
| +10 | To select numbers 10 and above |
| ENTER | To enter the setting |
| To rewind | |
| To play | |
| To fast-forward | |
| REC*1 | To record |
| To stop | |
| To pause | |
| DISPLAY | To show the current play status on the display |
| To select the previous track | |
| *2 | To eject the disc |
| To select the next track | |
| CLEAR | To clear the setting |
| D.SKIP | To select the next disc |
| KEY DISPLAY | FUNCTION |
| VOLUME + | Volume up (RCVR) |
| VOLUME - | Volume down (RCVR) |
| MUTING | To mute the volume. Press again to turn muting off. |
| REPEAT | To go into the repeat mode |
| SHUFFLE | To play in random order |
| PROGRAM | To use for program play |
| CONTINUE | To select continuous play mode |
| FADER | To select the fade-in/fade-out |
| CD-SYNC | To start synchronizing with the CD |
| REC_MODE | To toggle the recording mode |
*1 To avoid accidental recording, the REC key does not work unless pressed for more than 2 seconds (factory setting). *2 The ▲ key does not work unless pressed for more than 2 seconds (factory setting).
LIGHT
| KEY DISPLAY | FUNCTION (Key display of other remote controls) | ||||||
| Lutron | X10 | ||||||
| Spacer | Spacer System | Grafik Eye | RadioRA | Home-Works Interactive | Sivoia Shades | ||
| OFF | OFF | OFF | ALL OFF | OFF | |||
| 1 | SCENE1 | SCENE1 | SCENE1 | MACRO1 | POSITION1 | SCENE1 | |
| 2 | SCENE2 | SCENE2 | SCENE2 | MACRO2 | POSITION2 | SCENE2 | |
| 3 | SCENE3 | SCENE3 | SCENE3 | MACRO3 | POSITION3 | SCENE3 | |
| 4 | SCENE4 | SCENE4 | SCENE4 | MACRO4 | Open | SCENE4 | |
| 5 | SCENE5 | SCENE5 | MACRO5 | Close | SCENE5 | ||
| 6 | SCENE6 | SCENE6 | MACRO6 | SCENE6 | |||
| 7 | SCENE7 | SCENE7 | MACRO7 | SCENE7 | |||
| 8 | SCENE8 | SCENE8 | MACRO8 | SCENE8 | |||
| 9 | SCENE9 | SCENE9 | MACRO9 | SCENE9 | |||
| 10 | SCENE10 | SCENE10 | MACRO10 | SCENE10 | |||
| 11 | SCENE11 | SCENE11 | MACRO11 | SCENE11 | |||
| 12 | SCENE12 | SCENE12 | MACRO12 | SCENE12 | |||
| SCENE13 | SCENE13 | SCENE13 | MACRO13 | SCENE13 | |||
| SCENE14 | SCENE14 | SCENE14 | MACRO14 | SCENE14 | |||
| SCENE15 | SCENE15 | SCENE15 | MACRO15 | SCENE15 | |||
| SCENE16 | SCENE16 | MACRO16 | SCENE16 | ||||
| ALL ON | FULL ON | ALL ON | ALL ON | ||||
| ALL OFF | ALL OFF | ALL OFF | |||||
| ON | ON | ||||||
| OFF | OFF | ||||||
| CHANNEL + | Raise | Raise | Raise | Raise | Raise | Raise | |
| CHANNEL - | Lower | Lower | Lower | Lower | Lower | Lower | |
| RECALL | Toggle | ||||||
Full Display

Index
A
Adjusting
the backlight 34
the calibration of the LCD display 39
the clock 11, 42
the contrast of the LCD display 40
the volume 27
Air-Slide 29
Alignment 39
Audio component 57
Automatic-off time
of the backlight 34
of the LCD display 37
AX Remote Editor
installing 16
starting up 19
using Help 20
B
Backlight 9, 32, 34
Battery 10, 70
Beep 41
C
Calibrating the alignment of the
LCD display 39
CD-ROM 8, 16
Changing
the automatic-off time of the backlight 34
the automatic-off time of the LCD display 37
the backlight settings 34
the beep setting 41
the clock setting 42
the contrast of the LCD display 40
the names of the labels 65
the preset codes 45
the Timer setting 59
the volume 27
the volume control setting of visual components 57
the XPRESS macro activation 56
Clearing
all the settings (RESET) 68
the learned function from a key or button 49
the macro (programmed series of actions) 54
the Timer macro 64
Clock 11,42,59
Code list 45
COMMANDER OFF button 9
Component
changing the name of a component 65
default components list 13
operating non-preset components (Learn) 47
operating the components 21
preset functions of each components 76
setting the preset codes for your components 45
setting the volume control of visual components 57
synchronizing the status of the component 28
COMPONENT button 8,25
Connecting the Remote Commander to your PC 19
Contrast 40
D
Default settings
Air-Slide list 29
Backlight 32
Components list 13
Controlling the volume of visual components 57
Erasing all the settings (Reset) 68
Preset functions of each components 76
XPRESS list 21
DS_TIME (Daylight savings time) 11,43
Index (continued)
E
Erasing
all the settings (RESET) 68
the learned function from a key or button 49
the macro (programmed series of actions) 54
the Timer macro 64
F
Factory settings
Air-Slide list 27
Backlight 32
Components list 13
Controlling the volume of visual components 57
Erasing all the settings (Reset) 68
Preset functions of each component 76
XPRESS list 21
H
Help 20
Hold function 33
I
Installing
the AX Remote Editor 16
the batteries 10
the USB driver 17
L
Label 65
LCD display
calibrating the alignment 39
default backlight settings 32
full display 92
setting the automatic-off time 37
setting the backlight 34
setting the contrast 40
Learning function 47
LIGHT button 9, 32
Location and function of controls 8
Locking the controls (Hold function) 33
M
Macro
System Control macro 31,51
Timer macro 29,59
XPRESS macro activation 56
MORE button 9,31
MUTING button 9,27
0
On-PC Setup
connecting the Remote Commander 19
installing the AX Remote Editor 16
installing the USB driver 17
operating the XPRESS function 23
setting procedure 14
starting up AX Remote Editor 19
using AX Remote Editor Help 20
ways to make settings for the Remote Commander 13
On-Remote Setup
operating the XPRESS function 24
setting by On-Remote Setup 45
setting procedure 15
ways to make settings for the Remote Commander 13
P, R
PC
connecting the Remote Commander 19
installing the AX Remote Editor 16
installing the USB driver 17
On-PC Setup 14
starting up AX Remote Editor 19
using AX Remote Editor Help 20
Preset codes 45
Preset functions 76
Programming a series of actions (macro)
System Control macro 51
Timer macro 59
Reset 68
S
Setting
the automatic-off time of the backlight 34
the automatic-off time of the LCD display 37
the backlight 34
the beep 41
the calibration of the LCD display 39
the clock 11, 42
the contrast of the LCD display 40
the names of the labels 65
the preset codes 45
the System Control macro 51
the Timer 59
the volume 27
the volume control of visual components 57
the XPRESS macro activation 56
Specifications 70
Starting up AX Remote Editor 19
STD_TIME (Standard time) 11, 43
SYNC-UP button 9,28
SYSTEM CONTROL buttons 9,31,51
System Control function
clearing the System Control macro 54
executing the System Control macro 31
programming the System Control macro 51
System Control keys 9,31,51
System requirements 16
T
TIMER button 9,29
Timer function
clearing the Timer macro 64
executing the Timer 29
setting the Timer 59
Troubleshooting 71
U
Unit Settings 34
USB driver 17
USB cable 8,18,19
V
Visual components 57
Volume 27,57
VOLUME +/- buttons 9,27
X
XPRESS button 9,22
XPRESS function
changing the name of the XPRESS function 65
default XPRESS list 21
operating the XPRESS function 22
overview 21
perform an easy action "Air-Slide" for XPRESS function 29
setting the XPRESS macro activation 56
- INTEGRATED REMOTE COMMANDER
- WARNING
- TO REDUCE THE RISK OF FIRE OR ELECTRIC SHOCK, DO NOT EXPOSE THIS APPARATUS TO RAIN OR MOISTURE
- TO AVOID ELECTRICAL SHOCK, DO NOT OPEN THE CABINET. REFER SERVICING TO QUALIFIED PERSONNEL ONLY
- OWNER'S RECORD
- INFORMATION
- DECLARATION OF CONFORMITY
- NOTICE FOR USERS
- ON THE SUPPLIED SOFTWARE
- FEATURES
- CONTROL UP TO 16 COMPONENTS
- CENTRALIZED CONTROL OF SONY AV COMPONENTS WITH THIS ONE REMOTE COMMANDER
- REMOTE CONTROL SIGNALS FOR NON-SONY COMPONENTS ARE ALSO PRESET
- XPRESS FUNCTIONS FOR EXECUTING A SERIES OF ACTIONS TO OPERATE SEVERAL AV COMPONENTS BY PRESSING JUST ONE KEY
- AIR-SLIDE EXECUTES AN XPRESS FUNCTION BY "SLIDING YOUR FINGER" ACROSS THE LCD DISPLAY
- CLOCK DISPLAY AND TIMER FUNCTION
- LEARNING FUNCTION LETS YOU PROGRAM OTHER REMOTE CONTROL SIGNALS YOU MAY NEED
- SYSTEM CONTROL FUNCTION EXECUTES A SERIES OF ACTIONS (A MACRO) BY PRESSING ONE BUTTON/KEY
- KEYMACRO FUNCTION ALLOWS YOU TO SELECT A CHANNEL WITH A SINGLE KEY
- EASY-TO-OPERATE TOUCH-KEY LCD WITH BLUE BACK LIGHT
- THE SUPPLIED SOFTWARE "AX REMOTE EDITOR" FOR EASY REMOTE COMMANDER SETUP
- TABLE OF CONTENTS
- GETTING STARTED
- OPERATING
- UNIT SETTINGS
- SETTING BY ON-REMOTE SETUP
- ADDITIONAL INFORMATION
- APPENDIX
- UNPACKING
- LOCATION AND FUNCTION OF CONTROLS
- XPRESS BUTTON (PAGE 22)
- MENU BUTTON
- EPG BUTTON
- OK AND CURSOR CONTROL BUTTONS
- EXIT BUTTON
- TOOLS BUTTON
- SYSTEM CONTROL BUTTONS (PAGES 31, 51)
- DISPLAY TITLE
- TOUCH-KEYS
- NOTE
- SYNC-UP BUTTON (PAGE 28)
- TIMER BUTTON (PAGE 29)
- COMMANDER OFF BUTTON
- LIGHT BUTTON (PAGE 32)
- CHANNEL +/- BUTTONS
- VOLUME +/- BUTTONS* (PAGE 27)
- RECALL BUTTON
- ALL OFF BUTTON (PAGE 33)
- MUTING BUTTON* (PAGE 27)
- MORE BUTTON (PAGES 31, 51)
- NOTE ON THE VOLUME +/- AND MUTING BUTTONS
- NOTE ON THE LCD DISPLAY'S POWER ON/OFF
- INSTALLING THE BATTERIES
- WHEN TO REPLACE THE BATTERIES
- NOTES ON REPLACING THE BATTERIES
- SETTING THE CLOCK
- SETTING THE CLOCK (CONTINUED)
- NOTES
- REMOTE COMMANDER SETTINGS AND OPERATING PROCEDURES
- ABOUT THE FACTORY SETTING
- HOW TO SET UP THE REMOTE COMMANDER (ON-PC SETUP AND ON-REMOTE SETUP)
- IMPORTANT
- REMOTE COMMANDER SETTINGS AND OPERATING PROCEDURES (CONTINUED)
- SETTING PROCEDURE FOR ON-PC SETUP
- STEP1: INSTALLING THE "AX REMOTE EDITOR" (PAGE 16)
- STEP2: INSTALLING THE USB DRIVER (PAGE 17)
- STEP3: USING THE "AX REMOTE EDITOR" TO SET UP THE REMOTE COMMANDER (PAGE 19)
- STEP4: OPERATING AN AV COMPONENT USING THE REMOTE COMMANDER
- OPTION 1: YOU CAN ALSO CHANGE THE UNIT SETTINGS SUCH AS THE BACKLIGHT AND BEEP (PAGES 34, 41)
- OPTION 2: YOU CAN ALSO CHANGE THE SETTINGS OF THE BUTTONS OR KEYS ON THE REMOTE COMMANDER WITH AX REMOTE EDITOR
- WHEN USING ON-PC SETUP
- SETTING PROCEDURE FOR ON-REMOTE SETUP
- STEP 1: SETTING THE PRESET CODES (PAGE 45)
- STEP 2: OPERATING AV COMPONENTS USING THE REMOTE COMMANDER
- OPTION 1: YOU CAN ALSO CHANGE THE UNIT SETTINGS SUCH AS BACKLIGHT AND BEEP (PAGES 34, 41)
- OPTION 2: YOU CAN ALSO CHANGE THE SETTINGS OF THE BUTTONS OR KEYS ON THE REMOTE COMMANDER
- WHEN USING ON-REMOTE SETUP
- SETTING UP FOR YOUR PC
- AX REMOTE EDITOR" SYSTEM REQUIREMENTS
- OPERATING SYSTEMS (MANUFACTURER INSTALLED)
- COMPUTER
- CPU
- REQUIRED HARD DRIVE CAPACITY
- RAM
- DISPLAY
- REQUIRED PERIPHERALS
- INSTALLING THE "AX REMOTE EDITOR
- CLICK [NEXT]
- TIP
- IF THE INSTALLATION SCREEN IS HIDDEN BEHIND OTHER WINDOWS
- CLICK [FINISH]
- CLICK [EXIT]
- INSTALLING THE USB DRIVER
- SETTING UP FOR YOUR PC (CONTINUED)
- FOR WINDOWS XP USERS
- FOR WINDOWS 2000 USERS
- CONNECTING THE REMOTE COMMANDER TO YOUR PC
- USING THE "AX REMOTE EDITOR" TO SET UP THE REMOTE COMMANDER
- TIPS
- USING "AX REMOTE EDITOR" – HELP
- STARTING HELP
- HOW TO USE HELP
- TO SEARCH BY CONTENTS (CONTENTS)
- TO SEARCH INDEXED INFORMATION (INDEX)
- TO SEARCH USING KEYWORDS (SEARCH)
- OPERATING THE REMOTE COMMANDER
- WHAT IS THE XPRESS FUNCTION
- HOW TO SET UP AN XPRESS FUNCTION
- OPERATING THE REMOTE COMMANDER (CONTINUED)
- OPERATING THE XPRESS FUNCTION
- EXAMPLE: TO PLAY A DVD PLAYER BY XPRESS FUNCTION (WHEN ON-PC SETUP WAS USED TO SET UP THE REMOTE COMMANDER)
- PRESS THE XPRESS BUTTON
- PRESS THE XPRESS NAME YOU WANT TO OPERATE (IN THIS CASE, DVD)
- PRESS THE KEY(S) OR BUTTON(S) FOR DESIRED OPERATION
- WHEN YOU ARE FINISHED USING THE REMOTE COMMANDER, PRESS THE COMMANDER OFF BUTTON
- IF YOU WANT TO RETURN TO THE PREVIOUS DISPLAY
- EXAMPLE: TO PLAY A DVD PLAYER BY XPRESS FUNCTION (WHEN ON-REMOTE SETUP WAS USED TO SET UP THE REMOTE COMMANDER)
- OPERATING COMPONENTS INDIVIDUALLY
- COMPONENT DISPLAY
- HOW TO REGISTER THE COMPONENTS TO THE REMOTE COMMANDER
- EXAMPLE: TO CHANGE THE INPUT SELECT OF THE TV
- EXAMPLE
- TO CONTROL THE VOLUME
- HOW TO SET THE VOLUME CONTROL OF VISUAL COMPONENTS
- TO SYNCHRONIZE WITH THE STATUS OF A COMPONENT
- PRESS THE SYNC-UP BUTTON
- TO PERFORM AN EASY ACTION "AIR-SLIDE" FOR XPRESS FUNCTION
- HOW TO SET THE AIR-SLIDE ACTION
- EXECUTING A SERIES OF ACTIONS AT A SCHEDULED TIME
- EXECUTING A SERIES OF ACTIONS AT A SCHEDULED TIME (CONTINUED)
- HOW TO SET THE TIMER FUNCTION
- TO QUICKLY SWITCH THE TIMER ON OR OFF
- PRESS THE TIMER BUTTON
- PRESS THE ON/OFF KEY
- PRESS AND HOLD THE COMMANDER OFF BUTTON FOR MORE THAN 2 SECONDS
- IF YOU WANT TO QUIT BEFORE FINISHING
- EXECUTING A SERIES OF ACTIONS WITH JUST ONE BUTTON
- HOW TO SET THE SYSTEM CONTROL FUNCTION
- EXECUTING A SERIES OF ACTIONS WITH JUST ONE BUTTON (CONTINUED)
- OTHER USEFUL FUNCTIONS
- TO OPERATE THE REMOTE COMMANDER IN THE DARK
- HOW TO SET THE BACKLIGHT
- LOCKING THE CONTROLS - HOLD FUNCTION
- WHEN THE CONTROLS ARE LOCKED
- TO UNLOCK THE CONTROLS
- TO TURN OFF ALL THE COMPONENTS AT ONE TIME
- SETTING THE BACKLIGHT
- SETTING THE BACKLIGHT (CONTINUED)
- SETTING THE LCD DISPLAY
- SETTING THE AUTOMATIC-OFF TIME OF THE LCD DISPLAY
- SETTING THE LCD DISPLAY (CONTINUED)
- CALIBRATING THE ALIGNMENT OF THE LCD DISPLAY
- SETTING THE CONTRAST OF THE LCD DISPLAY
- SETTING THE BEEP
- ADJUSTING THE CLOCK
- TO CHANGE THE DISPLAY TO THE DAYLIGHT SAVINGS TIME (SUMMER TIME) INDICATION
- ADJUSTING THE CLOCK (CONTINUED)
- SETTING THE PRESET CODES
- EXAMPLE: TO SET UP A PHILIPS TV
- PRESET
- SETTING THE PRESET CODES (CONTINUED)
- IF YOU MAKE A MISTAKE IN INPUTTING
- USING NON-PRESET REMOTE CONTROL OPERATIONS
- LEARNING FUNCTION
- USING NON-PRESET REMOTE CONTROL OPERATIONS (CONTINUED)
- TIP TO CHANGE THE COMPONENT NAME OF A LABEL KEY
- WHEN YOU HAVE PROGRAMMED THE BUTTONS ON THE REMOTE COMMANDER
- TO CLEAR THE LEARNED SIGNAL FROM A KEY OR BUTTON
- LEARNING UP TO 4 SIGNALS TO ONE KEY
- PRESS THE BACK BUTTON OR THE COMMANDER OFF BUTTON
- IF THE REMOTE COMMANDER DOES NOT SEEM TO BE WORKING PROPERLY, REPEAT FROM STEP
- WHEN YOU PROGRAM SIGNALS TO THE VOLUME +/- OR MUTING BUTTONS
- FOR ACCURATE LEARNING
- PROGRAMMING A SERIES OF ACTIONS WITH JUST ONE BUTTON
- SYSTEM CONTROL FUNCTION
- PROGRAMMING A SERIES OF ACTIONS WITH JUST ONE BUTTON (CONTINUED)
- MACRO
- SYSTEM
- SYSTEM CONTROL
- ABOUT THE ORDER OF OPERATION STEPS
- TO CLEAR PROGRAMMED SERIES OF ACTIONS FOR SYSTEM CONTROL BUTTON OR SYSTEM CONTROL KEY
- SETTING THE XPRESS MACRO ACTIVATION
- CONTROLLING THE VOLUME OF VISUAL COMPONENTS CONNECTED TO AN AUDIO COMPONENT
- CONTROLLING THE VOLUME OF VISUAL COMPONENTS CONNECTED TO AN AUDIO COMPONENT (CONTINUED)
- PRESS THE DISPLAY TITLE (SET) ONCE
- PRESS "VOLUME" ON THE LABEL KEYS
- PRESS THE TV OR RCVR KEY TO SELECT THE VOLUME CONTROL
- SETTING THE TIMER
- TO PROGRAM THE TIMER
- SETTING THE TIMER (CONTINUED)
- PRESS THE ON/OFF OR TEST KEY TO ACTIVATE THE TIMER
- TO CLEAR A TIMER MACRO
- IF YOU PRESS THE NO KEY
- CHANGING THE NAMES OF LABELS
- EXAMPLE: TO CHANGE THE NAME OF THE COMPONENT (TV)
- CHANGING THE NAMES OF LABELS (CONTINUED)
- TO CHANGE THE COMPONENT NAME AS THE DISPLAY TITLE
- ERASING ALL THE SETTINGS - RESET
- PRECAUTIONS
- MAINTENANCE
- SPECIFICATIONS
- OPERATING DISTANCE
- POWER REQUIREMENTS
- BATTERY LIFE
- DIMENSIONS
- MASS
- LEARNABLE SIGNALS
- TROUBLESHOOTING
- CUSTOMER SUPPORT INFORMATION
- TABLE OF PRESET FUNCTIONS
- FULL DISPLAY
- INDEX
- A
- B
- C
- D
- INDEX (CONTINUED)
- E
- F
- H
- I
- L
- M
- P, R
- S
- T
- U
- V
- X
Brand : SONY
Model : RM-AX4000
Category : Remote control