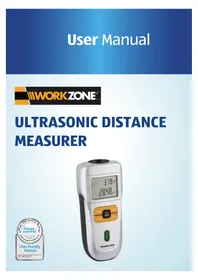
GT-UDM-04 - Rangefinder Workzone - Free user manual and instructions
Find the device manual for free GT-UDM-04 Workzone in PDF.


| Product Type | Laser Distance Measurer (Rangefinder) |
| Model | GT-UDM-04 |
| Brand | Workzone |
| Measuring Range | Up to 40 meters (131 ft) |
| Accuracy | ±2 mm |
| Measurement Units | Meters, Feet/Inches |
| Laser Class | Class II, <1 mW |
| Power Source | 2 x AAA batteries (1.5V) |
| Battery Life | Approximately 5000 measurements |
| Auto Power Off | After 30 seconds of inactivity |
| Display | Backlit LCD, 4-digit |
| Functions | Single distance, area, volume, Pythagorean (indirect measurement) |
| Memory | Last 20 measurements |
| Minimum Measurement | 0.05 m (2 in) |
| Dimensions (L x W x H) | 115 x 50 x 25 mm |
| Weight | 120 g (including batteries) |
| Operating Temperature | 0°C to 40°C |
| Storage Temperature | -20°C to 60°C |
| Safety Instructions | Do not stare into beam; avoid direct eye contact |
| Cleaning | Wipe with a soft, dry cloth; do not use solvents |
| Compliance | CE, RoHS |
Frequently Asked Questions - GT-UDM-04 Workzone
User questions about GT-UDM-04 Workzone
0 question about this device. Answer the ones you know or ask your own.
Ask a new question about this device
Download the instructions for your Rangefinder in PDF format for free! Find your manual GT-UDM-04 - Workzone and take your electronic device back in hand. On this page are published all the documents necessary for the use of your device. GT-UDM-04 by Workzone.
USER MANUAL GT-UDM-04 Workzone
Contents
Overview 3
Use....5
Product contents/device parts 6
General information ....7
Reading and storing the user manual....7
Explanation of symbols 8
Safety 9
Proper use....9
Safety notes 10
Additional safety instructions for lasers......14
First use 15
Checking the distance measurer and the product
contents......15
Inserting the battery....15
Switching the distance measurer on and off......16
Changing the measurement reference ....16
Preventing measurement errors....16
Distance measurement....19
Addition....20
Area measurement....21
Area addition in area mode 22
Volume measurement 24
Volume addition in volume mode 25
Temperature indicator 26
Changing the unit of measure 27
Cleaning and storage 27
Troubleshooting 29
Technical data 30
Disposal 31
Disposing of the packaging 31
Disposing of old devices 31
Warranty details.... 33
Repair and refurbished goods or parts notice ...... 34
Warranty certificate.... 35
A

B
C
1.

2.
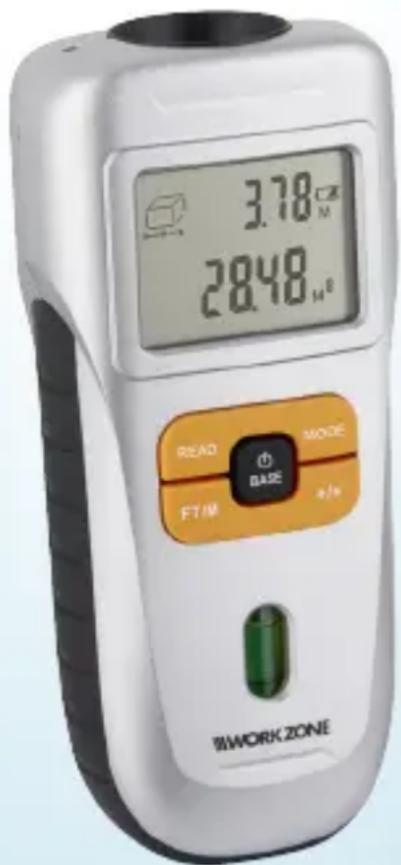
Product contents/device parts
1 Laser pointer (to target a measurement point)
2 Ultrasonic transmitter/receiver
3 Measurement reference
4 Display
5 ⏻ button (for switching on and off or for configuring the base)
6 MODE button
7 +/= button (for adding measured lengths, surfaces and volumes)
8 Level
9 Battery (9 V)
10 FT/M button (for switching foot/metre)
11 READ button
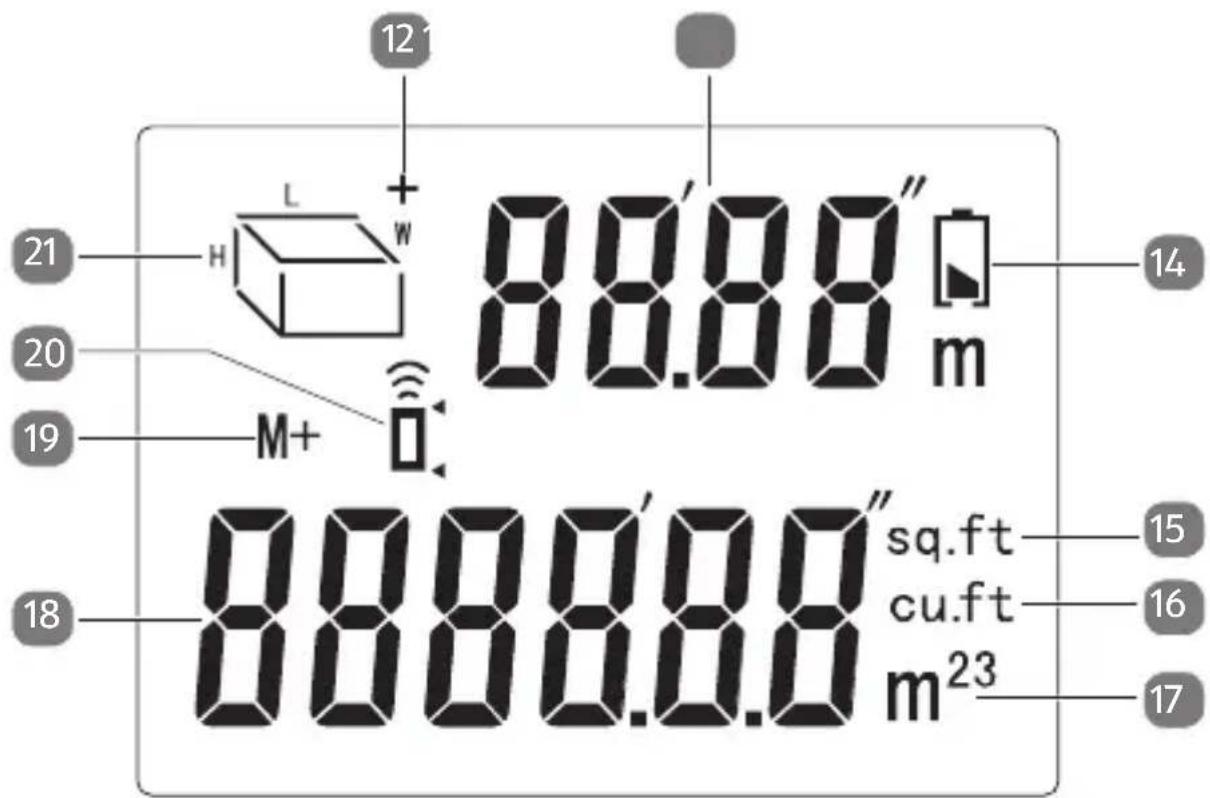
12 Plus sign (+)
13 Current measurement result
14 Battery icon
15 Square foot
16 Cubic foot
17 Metres/square metres/cubic metres
18 Memory, calculation result
19 Memory symbol (M+)
20 Indicator for the measurement reference
21 Length/surface/volume (L=length, W=width, H=height)
22 Battery compartment cover
23 Battery connector clip
General information
Reading and storing the user manual

This user manual accompanies this ultrasonic distance measurer. It contains important information on start-up and handling. To improve readability, the ultrasonic distance measurer will be referred to as the “distance measurer” in this user manual.
Before using the distance measurer, read the user manual carefully. This particularly applies for the safety notes. Non-observance of this user manual may cause personal injury or damage to the distance measurer.
Store the user manual for future use. If you pass the distance measurer on to third parties, please be absolutely sure to include this user manual.
Explanation of symbols
The following symbols and signal words are used in this user manual, on the distance measurer or on the packaging.
WARNING!
This signal symbol/word designates a hazard with moderate degree of risk which may lead to death or severe injury if not avoided.
NOTICE!
This signal word warns against potential damages to property.

This symbol provides you with useful supplementary information on assembly or operation.

A 9 V battery (type: 6F22/6LR61) is included in the product contents.
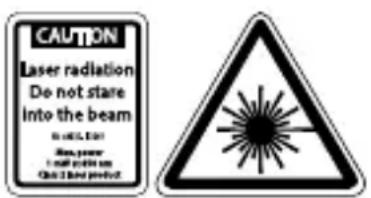
Attention! Laser beams!
The electronic distance measurer complies with laser class 2 according to the European safety standard
EN 60825-1:2007. Do not remove the labels on the distance measurer.
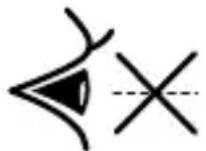
Do not look into the laser beam. The laser could cause eye damage.
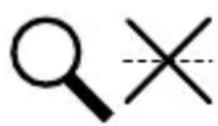
Do not view the laser beam with optical instruments.
Safety
Proper use
The distance measurer measures the distance of an object using electronically generated high speed signals.
The resulting measurement appears on the display. The distance measurer has a computer chip as well as a key indicator and memory function. The distance measurer can be used for continual cumulative measurement and for automatically calculating areas and volumes.
The distance measurer has a laser orientation function, that is, it emits a red laser beam so that you can easily target an object during use. The automatic temperature comparison of the device produces a more accurate measurement result and displays the exact ambient temperature at the same time. The distance measurer is only intended for private use and not suitable for commercial purposes.
Only use the distance measurer as described in this user manual. Any other use is deemed improper and may result in injury or damage to property.
Only use the distance measurer as recommended by the manufacturer. Failing to do so may negatively affect the safety protection features.
The manufacturer or vendor accepts no liability for damage caused by improper or incorrect use.
Safety notes
WARNING!
Risk of injury!
If you use the distance measurer improperly, you could hurt yourself and other persons.
- Keep your work area orderly!
A disorganised work area poses risks of accidents. - Always assume a stable stance to keep your balance in any work position.
- Concentrate on your work. Work in a reasonable manner.
- Do not use the distance measurer if you are tired.
WARNING!
Danger for children and persons with impaired physical, sensory or mental
capacities (e.g. partially disabled persons, older persons with reduced physical and mental capacities) or lack of experience and knowledge (e.g. older children).
- This distance measurer may be used by children ages eight and over as well as persons with impaired physical, sensory or mental capacities or those lacking experience and knowledge if they are supervised or have been instructed in how to safely use the distance measurer and have understood the risks associated with operating it.
- Children must not play with the distance measurer. Cleaning and user maintenance must not be performed by unsupervised children.
- Keep children under eight years of age away from the distance measurer and the batteries.
- Do not leave the distance measurer un-attended while in operation.
- Do not let children play with the packaging wrapper. Children may get caught in it when playing and suffocate.
WARNING!
Risk of explosion and chemical burns!
Handling batteries improperly may result in explosion or chemical burns.
- Only use batteries of the same type: 6F22/6LR61.
- Do not recharge the batteries or reactivate them with other means.
- Make sure that the polarity is correct when inserting the batteries.
- Do not take the batteries apart.
- Store the batteries in a cool, dry place. Do not expose the batteries to excessive heat (e.g. direct sunlight) and do not dispose of them in fire.
- Do not short circuit the batteries.
- Do not allow the batteries to come into contact with eyes or mucus membranes. In the event of contact with battery acid, immediately flush the applicable areas with plenty of clean water and consult a physician.
- If someone has swallowed a battery, he/she must immediately contact a physician.
- Clean the batteries and device contacts before inserting them.
- Take the empty battery out of the distance measurer. There is a risk of the battery acid leaking.
- Take the battery out of the distance measurer if you do not use it for a prolonged period of time.
- Remove the battery before you dispose of the distance measurer.
NOTICE!
Risk of damage!
Improper handling of the distance measurer may result in damage to the distance measurer.
- Protect the distance measurer against dust, intense heat, cold, severe vibrations and shocks.
- Do not expose the distance measurer to dripping water or splashes.
- Do not submerge the distance measurer in water or other liquids.
- Do not use the distance measurer if it is damaged.
- Do not make any modifications to the distance measurer.
- Never attempt to open the distance measurer or to access the inside with metallic objects.
- Only have qualified personnel perform repairs. Observe the warranty conditions.
Additional safety instructions for lasers
- This laser complies with class 2 in accordance with EN 60825-1:2007. Do not replace the laser diode with another type. Have a customer service workshop repair a defective laser.
- Only use the laser to target objects.
- Never look directly or intentionally into the laser beam.
- If the laser beam comes into contact with your eye, intentionally close your eyes and look away.
- Do not use any optical devices (e.g. binoculars or magnifying glass) to look at the laser beam.
- Do not point the laser beam at the eyes of other persons or animals. Do not use
the distance measurer at eye level and do not use it on reflective surfaces or near them as the laser beam could be projected into your eyes or the eyes of other persons or animals.
- Do not allow children to go near the laser.
First use
Checking the distance measurer and the product contents
- Take the distance measurer and the battery out of the packaging.
- Check whether the distance measurer or the battery exhibit damage.
If this is the case, do not use the distance measurer. Contact the manufacturer at the service address specified on the warranty card. - Check to make sure that the delivery is complete (see fig. A).
Inserting the battery
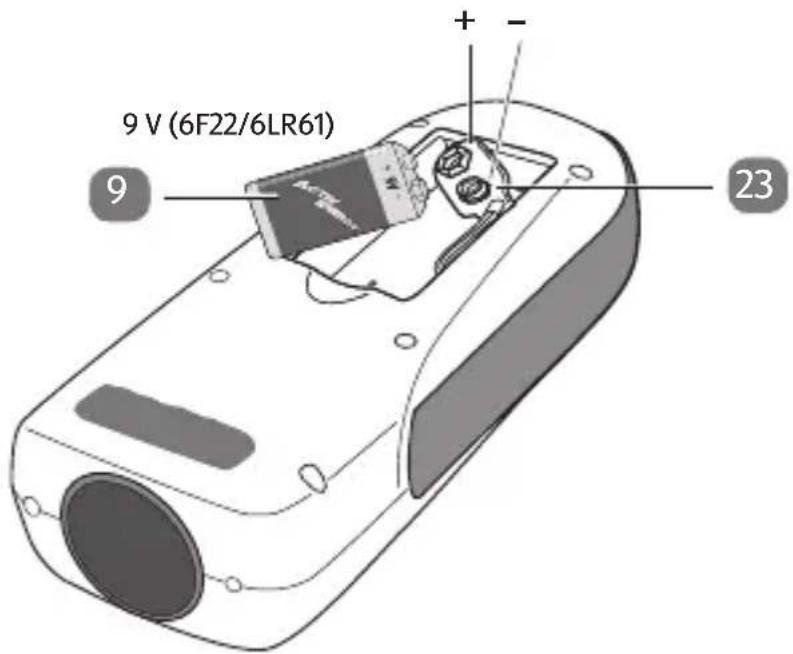
- Open the battery compartment cover 22 on the back of the distance measurer (see step 1 in fig. C).
-
Push the battery connector clip 23 onto the poles of the battery 9 (see step 2 in fig. C).
-
Insert the battery in the battery compartment and close the battery compartment cover.

If the battery icon 📋 14 appears on the display, the battery has to be changed.
Switching the distance measurer on and off
- Push the button 5 to switch the distance measurer on.
- Push and hold the ⏻ button for about 2 seconds to switch the distance measurer off.
- After 60 seconds without input, the distance measurer will automatically switch off.
Changing the measurement reference
The distance measurement can be calculated from two points (front or back side of the device). Briefly push the ⏻ button 5, to change the measurement reference 3. The indicator for the measurement reference 20 displays the selected measurement reference.
Preventing measurement errors
Observe the following points to avoid measurement errors:
- It is not possible to measure distances through glass.
- It is not possible to measure distances through noise-absorbing objects such as curtains.
- Depending on the surface composition of the opposite object, measurement errors may occur.
- The distance measurer must be positioned at 90° relative to the opposite surface. Use the level 8 for this.
- Strong wind may cause measurement errors.
- Objects between the measurement object and the distance measurer can impair the measurement accuracy.
- Measurement errors may occur when measuring distances that fall under the maximum distance measuring range (measuring range: 0.6 – 16 m or 2 – 52 ft).
If the value measured is outside of the specified range, the error message “Err” will appear on the top line of the display.

- If different parameters are added (e.g. length plus area), the plus sign (+) 12 will be ignored and the display will show the result from the previous measurement.
- In the event of measurements near other ultrasonic devices or high frequency tones, switch the noise source(s) off during the measurement.
- Temperatures and humidity may affect the measurement accuracy. The temperature of the distance measurer should correspond with the ambient temperature, particularly with measurements of larger
distances between 12 m and 16 m (39 ft to 52 ft). The relative humidity should be above 48 % and the area being measured should amount to at least 3 × 3 m.
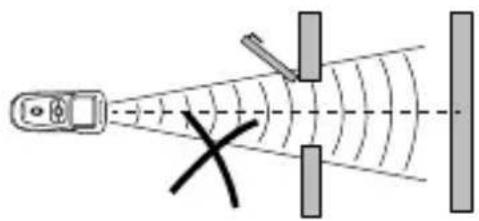
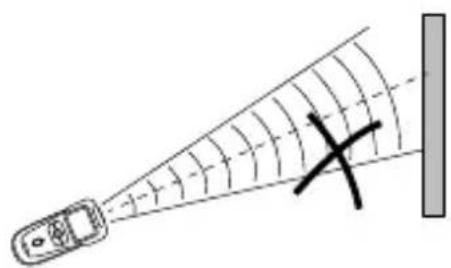
- Measurement errors may occur when measuring distances in narrow corridors or passages. The greater the distance, the wider the area that must be kept unobstructed in the direction of the measurement. The laser pointer 1 is only activated to mark the opposing point of measurement during the actual measurement, that is, as long as the READ button 11 is pressed down. Observe the following figures.

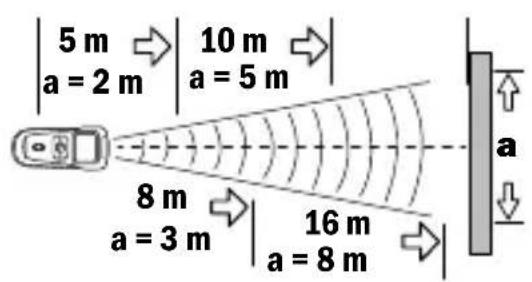
a = area to keep free


Distance measurement
- Use the level 8 to hold the distance measurer perpendicular to the object being measured (e.g. the wall).
- Push the ⏻ button 5 to switch the distance measur- er on.
If the last measured value still shows on the display, press the MODE button 6 to delete it.

- Push the READ button 11 to measure the distance between the measurement reference 3 and the targeted object.
- Continue to push the READ button and move the distance measurer for dynamic values. The distance measured is shown at the top of the display.

The object measured should have a solid surface and not be blocked by obstructions.
- For exact measurements, select a large, smooth and solid surface.
- If the surface measured is too small, irregular or too soft, place a particle board on the surface of the object you are measuring.
-
You cannot perform measurements through glass with this distance measurer.
-
The distance measurer should be more than 60 cm away from the targeted object when taking the measurement.
- For an accurate measurement result, the temperature of the distance measurer should correspond to the ambient temperature.
Addition
- Push the READ button 11.
The measurement will appear at the top of the display.

- Push the +/= button 7 to enter addition mode.
The plus sign (+) 12 will appear on the display and the result will be shown at the bottom of the display.
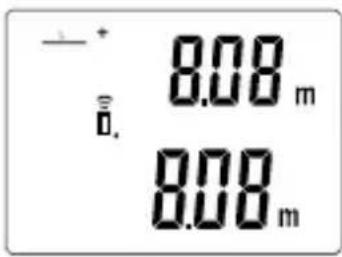
- Push the READ button again to take a second measurement.
The measurement will appear at the top of the display.

- Push the +/= button again to display the sum at the bottom of the display.
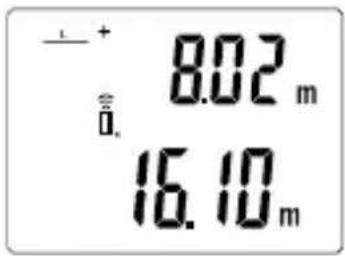
The addition will continue if the above steps are repeated.
Press the MODE button 6 to delete all values on the display. You can now start a new distance measurement.
Area measurement
-
Push the button 5 to switch the distance measurer on.
-
Push the MODE button 6 to switch to area mode ( ).

- The length symbol (L) will blink on the display and indicates the first measurement taken by you. Push the READ button 11 to obtain the length measurement, which is shown at the top of the display.

- The width symbol (W) will blink on the display and shows the next measurement to be taken. Push the READ button to obtain the width measurement, which is shown at the top of the display.
The area will automatically be dis- played at the bottom of the display.

-
Push the READ button again to switch between the length and width at the top of the display.
-
Push the MODE button to delete the data from the display.
You can now perform a new area calculation.

Pushing the MODE button 6 switches between the length, area and the volume. If data is already shown on the display, it is deleted by pushing the MODE button. The mode remains unchanged.
Area addition in area mode
- Push the +/= button 7 to save the calculated area from the first measurement.
At the same time, the beep will sound once and the memory symbol (M+) 19 will appear on the display.
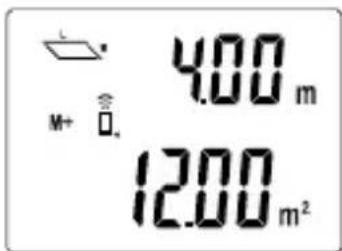
- Push the MODE button 6 to clear the data currently displayed. You can now take the second measurement and perform a calculation (see steps 3 and 4 in the chapter “Area measurement”).

- After the second area calculation is returned, push the +/= button 7 to add the last area measurement.
The beep will sound once and the sum of areas will display at the bottom of the display.

Repeat the above steps to start a new measurement and continue adding the measured areas.
To delete all saved values, press and hold the MODE button for 2 seconds until the beep sounds twice and the memory symbol (M+) disappears from the display.
Volume measurement
-
Push the button 5 to switch the distance measurer on.
-
Push the MODE button 6 to switch to volume mode (###).

- The length symbol (L) will blink on the display indicating that the length is being measured. Push the READ 11 button to measure the length.
The result will be displayed at the top of the display.
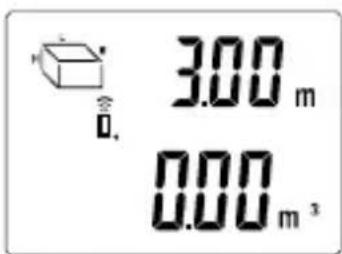
- The width symbol (W) will blink on the display and shows the next measurement to be taken. Push the READ button to measure the width.
The result will be displayed at the top of the display.
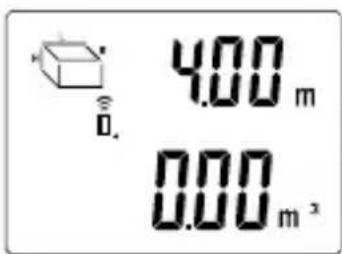
- The height symbol (H) will blink on the display and shows the next measurement to be taken. Push the READ button to measure the height.
The result will be displayed at the top of the display.
The volume will automatically be displayed at the bottom of the display.
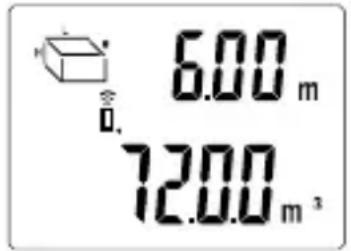
- Push the READ button again to switch between the length, width and height at the top of the display.
- Push the MODE button to delete the data from the display.
You can now perform a new volume calculation.

Pushing the MODE button 6 switches between the length, area and the volume. If data is already shown on the display, it is deleted by pushing the MODE button. The mode remains unchanged.
Volume addition in volume mode
- Push the +/= button 7 to save the calculated volume from the first measurement.
At the same time, the beep will sound once and the memory symbol (M+) 19 will appear on the display.

- Push the MODE button 6 to clear the data currently shown. You can now take the second measurement and perform a calculation (see steps 3 – 5 in the chapter “Volume measurement”).

- After the second volume calculation is returned, push the +/= button 7 to add the last volume measurement.
The beep will sound once and the sum of volumes will display at the bottom of the display.

Repeat the above steps to start a new measurement and continue adding the measured volumes.
To delete all saved values, press and hold the MODE button for 2 seconds until the beep sounds twice and the memory symbol (M+) disappears from the display.
Temperature indicator
- Push the FT/M button 10 for approx. two seconds.
The temperature appears at the bottom of the display.

If the imperial measurement system is set (ft), the temperature is shown in °F (Fahrenheit). If the metric system is set (m), the temperature is shown in °C (Celsius) (see chapter “Changing the unit of measure”).
- Push the READ button 11 to return to measuring mode.
Changing the unit of measure
The distance measurer can be set to the imperial measurement system (ft, sq. ft, cu. ft) or to the metric system (m, m², m³). Push the FT/M button 10 to change the unit of measure when the temperature is shown.
Cleaning and storage
NOTICE!
Risk of short circuit!
Water that has penetrated the housing may cause a short circuit.
- Never immerse the distance measurer in water.
- Make sure that no water penetrates the housing.
NOTICE!
Risk of damage!
Improper handling of the distance measurer may result in damage to the distance measurer.
- Do not use any aggressive cleaners, brushes with metal or nylon bristles, as well as sharp or metallic cleaning utensils such as knives, hard scrapers and the like. They could damage the surfaces.
- Do not in any case place the distance measurer in the dishwasher. It would be destroyed as a result.

The distance measurer is maintenance-free.
- Only wipe the distance measurer off with a damp cloth and a small amount of detergent.
- Carefully dry off all wet areas. Let all parts dry completely.
- Remove the battery 9 if you do not intend to use the device for a prolonged period of time.
- Store the distance measurer in a dry, frost-free location indoors out of the reach of children.
Troubleshooting
| Fault Possible cause and solution | |
| Measurement is clearly incorrect. | See chapter “Preventing measurement errors”. |
| Measurement varies by approx. 15 cm. | Observe the measurement reference (see chapter “Changing the measurement reference”). |
| “Err” will appear on the display. | Observe the measurement range (0.6–16 m or 2–52 ft). |
| Ambient-temperature is not shown. | Hold the FT/M button down for approx. two seconds to display the temperature. |
| The ambient temperature is only displayed in Fahrenheit (°F). | Briefly push the FT/M button to switch between Fahrenheit (°F) and Celsius (°C). |
Technical data
Model: GT-UDM-04
Battery type: 9 V block / 6F22/6LR61
Power consumption: < 50 mA
Measurement range: 0.6 to 16 m (2 to 53 ft)
Calculation range: Length: 9999.99 m
(9999' 11")
Area: 99999.9 m²
(99999.9 square feet)
Volume: 999999 m³
(999999 cubic feet)
Resolution: 0.01 m
Wavelength of the laser: 630\~660 nm
Temperature range/operating
temperature: 0° C to +40° C
(32 °F to 104 °F)
Laser class: 2
Automatic deactivation: After approximately 60
seconds of inactivity
Dimensions (length × width ×
height): 67 × 147 × 37 mm
Weight: approx. 112 g
Product code: 93032
This user manual can be downloaded via our homepage www.gt-support.de as a PDF.
Disposal
Disposing of the packaging

Dispose of the packaging separated into single type materials. Dispose of cardboard and carton as waste paper and foils via the recyclable material collection service.
Disposing of old devices
Old devices must not be disposed of with household waste!
Should the distance measurer no longer be capable of being used at some point in time, dispose of it in accordance with the regulations in force in your state or country.
Batteries and rechargeable batteries must not be disposed of with household waste!
As the end user you are required by law to bring all batteries and rechargeable batteries, regardless whether they contain harmful substances* or not, to a collection point run by the communal authority or borough or to a retailer, so that they can be disposed of in an environmentally friendly manner.
* labelled with: Cd = cadmium, Hg = mercury

WORKZONE
Ultrasonic Distance Measurer
Warranty Details
The product is guaranteed to be free from defects in workmanship and parts for a period of 36 months from the date of purchase. Defects that occur within this warranty period, under normal use and care, will be repaired, replaced or refunded at our discretion. The benefits conferred by this warranty are in addition to all rights and remedies in respect of the product that the consumer has under the Competition and Consumer Act 2010 and similar state and territory laws.
Our goods come with guarantees that cannot be excluded under the Australian Consumer Law. You are entitled to a replacement or refund for a major failure and for compensation for any other reasonably foreseeable loss or damage. You are also entitled to have the goods repaired or replaced if the goods fail to be of acceptable quality and the failure does not amount to a major failure.

WORKZONE
Ultrasonic Distance Measurer
Repair and Refurbished Goods or Parts Notice
Unfortunately, from time to time, faulty products are manufactured which need to be returned to the Supplier for repair.
Please be aware that if your product is capable of retaining user-generated data (such as files stored on a computer hard drive, telephone numbers stored on a mobile telephone, songs stored on a portable media player, games saved on a games console or files stored on a USB memory stick) during the process of repair, some or all of your stored data may be lost.
We recommend you save this data elsewhere prior to sending the product for repair.
You should also be aware that rather than repairing goods, we may replace them with refurbished goods of the same type of use refurbished parts in the repair process.
Please be assured though, refurbished parts or replacements are only used where they meet ALDI's stringent quality specifications.
If at any time you feel your repair is being handled unsatisfactorily, you may escalate your complaint. Please telephone us on 1800 269 981 or write to us at:
Euro Centra (Australia) Pty Ltd
c/o Install and Fix Solutions Pty Ltd
Unit 7, 210 Robinson Rd East, Geebung QLD 4034, AUSTRALIA
support@eurocentra.com.au
1800 269 981 (Toll-free) (8:30 a.m. - 6:00 p.m., Monday - Friday)
AFTER SALES SUPPORT
AUS 1800 269 981 (Toll-free)
support@eurocentra.com.au
3 YEARS WARRANTY
Warranty Certificate
PRODUCT NAME: Ultrasonic Distance Measurer
BRAND NAME: WORKZONE
PRODUCT NUMBER: 93032
MODEL NUMBER: GT-UDM-04
NAME
ADDRESS
EMAIL DAYTIME TEL. NO.
DATE OF PURCHASE
SERIAL NUMBER
We recommend that you attach a photocopy of your receipt, showing the date of purchase, to this Warranty certificate and keep for your reference.
Please do not send to the address below.
In the event of a product fault, please call the Customer Service hotline. Please ensure that you have the product details (as shown on this card) at hand so that we are able to respond as quickly and efficiently as possible.
Euro Centra (Australia) Pty Ltd
c/o Install and Fix Solutions Pty Ltd
Unit 7, 210 Robinson Rd East, Geebung QLD 4034, AUSTRALIA
support@eurocentra.com.au
1800 269 981 (8:30 a.m. - 6:00 p.m., Monday - Friday)
P051000304
AFTER SALES SUPPORT

AUS 1800 269 981 (Toll-free)
support@eurocentra.com.au
3
YEARS
WARRANTY
Warranty Certificate
Congratulations! You have made an excellent choice of this quality product. Our commitment to quality also includes our service. Should you, contrary to expectations, experience defects due to manufacturing faults, ALDI will provide you with a warranty against defects as follows:
Warranty
The product is guaranteed to be free from defects in workmanship and parts for a period of 36 months from the date of purchase. Defects that occur within this warranty period, under normal use and care, will be repaired, replaced or refunded at our discretion. The benefits conferred by this warranty are in addition to all rights and remedies in respect of the product that the consumer has under the Competition and Consumer Act 2010 and similar state and territory laws.
Our goods come with guarantees that cannot be excluded under the Australian Consumer Law. You are entitled to a replacement or refund for a major failure and for compensation for any other reasonably foreseeable loss or damage. You are also entitled to have the goods repaired or replaced if the goods fail to be of acceptable quality and the failure does not amount to a major failure.
Proof of Purchase
This warranty is valid for the original purchase and is not transferable. Please keep your purchase docket, tax invoice or receipt as the best proof of purchase, and as proof of date on which the purchase was made.
Extent of Warranty
This warranty is limited to defects in workmanship or parts. All defective products or parts will be repaired or replaced. This warranty does not cover batteries or any other consumable items.
Normal Wear and Tear
This warranty does not cover normal wear and tear to the products or parts.
Exclusions
This warranty does not cover:
- Any defects caused by an accident, misuse, abuse, improper installation or operation, lack of reasonable care, unauthorised modification, loss of parts, tampering or attempted repair by a person not authorised by the distributor.
- Any product that has not been installed, operated or maintained in accordance with the manufacturer's operating instructions provided with the product.
- Any product that has been used for purposes other than domestic use.
- Any damage caused by improper power input or improper cable connection.
To Make a Claim
This warranty against defects is provided by ALDI Stores, Locked Bag 56, St. Marys Delivery Centre, NSW 2760, Phone (02) 9675 9000. If a defect in the goods appears within 36 months, you are entitled to claim a warranty, please contact or send all warranty claims to:
Euro Centra (Australia) Pty Ltd
c/o Install and Fix Solutions Pty Ltd
Unit 7, 210 Robinson Rd East, Geebung QLD 4034, AUSTRALIA
support@eurocentra.com.au
1800 269 981 (Toll-free) (8:30 a.m. - 6:00 p.m., Monday - Friday)
When making a return, please ensure the product is properly packaged so as to ensure that no damage occurs to the product during transit.
Please provide the original or a copy of the proof of purchase. Also please make sure you have included an explanation of the problem.
Please note that the costs of making a warranty claim, including any return postage, will be covered by the supplier identified above.
Please note that upon receiving your warranty claim, the supplier will send, via the post or email, a repair and refurbished goods or parts notice. Please provide your email address and advise the supplier, if you wish to obtain a repair and refurbished goods or parts notice via email.
AFTER SALES SUPPORT

AUS 1800 269 981 (Toll-free)
support@eurocentra.com.au
3
YEARS
WARRANTY
ALDI guarantees that our exclusive brand products are developed to our stringent quality specifications. If you are not entirely satisfied with this product, please return it to the nearest ALDI store within 60 days from the date of purchase, for a full refund or replacement, or take advantage of our after sales support by calling the supplier's Customer Service Hotline.

Made in China
WORKZONE ® is a registered trademark of ALDI Stores
DISTRIBUTED BY:
ALDI STORES
1 SARGENTS ROAD
MINCHINBURY NSW 2770
www.aldi.com.au
AFTER SALES SUPPORT

AUS
1800 269 981

support@eurocentra.com.au
Model: GT-UDM-04
Product code: 93032

3
YEARS WARRANTY

- CONTENTS
- OVERVIEW 3
- USE....5
- PRODUCT CONTENTS/DEVICE PARTS 6
- GENERAL INFORMATION ....7
- SAFETY 9
- FIRST USE 15
- SWITCHING THE DISTANCE MEASURER ON AND OFF......16
- CHANGING THE MEASUREMENT REFERENCE ....16
- PREVENTING MEASUREMENT ERRORS....16
- DISTANCE MEASUREMENT....19
- AREA MEASUREMENT....21
- VOLUME MEASUREMENT 24
- TEMPERATURE INDICATOR 26
- CHANGING THE UNIT OF MEASURE 27
- CLEANING AND STORAGE 27
- TROUBLESHOOTING 29
- TECHNICAL DATA 30
- DISPOSAL 31
- WARRANTY DETAILS.... 33
- REPAIR AND REFURBISHED GOODS OR PARTS NOTICE ...... 34
- WARRANTY CERTIFICATE.... 35
- PRODUCT CONTENTS/DEVICE PARTS
- GENERAL INFORMATION
- READING AND STORING THE USER MANUAL
- EXPLANATION OF SYMBOLS
- WARNING
- NOTICE
- ATTENTION! LASER BEAMS
- SAFETY
- PROPER USE
- SAFETY NOTES
- RISK OF INJURY
- DANGER FOR CHILDREN AND PERSONS WITH IMPAIRED PHYSICAL, SENSORY OR MENTAL
- RISK OF EXPLOSION AND CHEMICAL BURNS
- RISK OF DAMAGE
- ADDITIONAL SAFETY INSTRUCTIONS FOR LASERS
- FIRST USE
- CHECKING THE DISTANCE MEASURER AND THE PRODUCT CONTENTS
- INSERTING THE BATTERY
- SWITCHING THE DISTANCE MEASURER ON AND OFF
- CHANGING THE MEASUREMENT REFERENCE
- PREVENTING MEASUREMENT ERRORS
- DISTANCE MEASUREMENT
- ADDITION
- AREA MEASUREMENT
- AREA ADDITION IN AREA MODE
- VOLUME MEASUREMENT
- VOLUME ADDITION IN VOLUME MODE
- TEMPERATURE INDICATOR
- CHANGING THE UNIT OF MEASURE
- CLEANING AND STORAGE
- RISK OF SHORT CIRCUIT
- TECHNICAL DATA
- DISPOSAL
- DISPOSING OF THE PACKAGING
- DISPOSING OF OLD DEVICES
- OLD DEVICES MUST NOT BE DISPOSED OF WITH HOUSEHOLD WASTE
- BATTERIES AND RECHARGEABLE BATTERIES MUST NOT BE DISPOSED OF WITH HOUSEHOLD WASTE
- WORKZONE
- WARRANTY DETAILS
- ULTRASONIC DISTANCE MEASURER
- REPAIR AND REFURBISHED GOODS OR PARTS NOTICE
- WARRANTY CERTIFICATE
- WARRANTY
- PROOF OF PURCHASE
- EXTENT OF WARRANTY
- NORMAL WEAR AND TEAR
- EXCLUSIONS
- TO MAKE A CLAIM
- AFTER SALES SUPPORT
- MADE IN CHINA
Brand : Workzone
Model : GT-UDM-04
Category : Rangefinder