
PRO - Epilator No!No! - Free user manual and instructions
Find the device manual for free PRO No!No! in PDF.


| Product Type | Thermo-Epilator |
| Brand | No!No! |
| Model | PRO |
| Dimensions | Approx. 5.5 x 1.8 x 1.2 inches |
| Weight | Approx. 4.2 oz |
| Power Source | Rechargeable Lithium-ion battery |
| Charging Time | Approx. 2 hours |
| Usage Time | Up to 40 minutes |
| Hair Removal Technology | Heat and mechanical cutting |
| Blade Material | Ceramic |
| Heat Settings | 3 adjustable levels |
| Skin Types | All skin types |
| Body Areas | Legs, arms, underarms, bikini line, face |
| Safety Features | Automatic shut-off, overheat protection |
| Cleaning | Remove blade and wipe with included brush |
| Replacement Parts | Replacement blades available |
| Accessories | Charging stand, cleaning brush, travel pouch |
| Warranty | 1 year limited |
Frequently Asked Questions - PRO No!No!
User questions about PRO No!No!
0 question about this device. Answer the ones you know or ask your own.
Ask a new question about this device
Download the instructions for your Epilator in PDF format for free! Find your manual PRO - No!No! and take your electronic device back in hand. On this page are published all the documents necessary for the use of your device. PRO by No!No!.
USER MANUAL PRO No!No!
natural_image
Blue and black electric shaver device with a digital display and base mount (no visible text or symbols)no! no!
PRO
Getting Started
Visit www.HowToNoNo.com
for Videos, Tips & Tricks

bar
| Category | Value | |---|---| | Bar 1 | 100 | | Bar 2 | 100 |Contents
Getting to Know no!no!
4 Getting to Know no!no!
6 Safety Warnings
8 Cautions
10 What to Expect
11 Where to Use
How to no!no!
12 A Quick Introduction to no!no!
14 Before Your First Treatment
14 Charging no!no!
15 About Thermicon Tips
18 Turning On/Off
19 Treatment Levels
22 Gliding no!no!
25 About Blue and Red Light
26 Treating Facial Hair
28 After Every Treatment: Buff
29 Taking Care of Your no!no!
Troubleshooting and Technical Specifications
30 Troubleshooting
31 Technical Specifications
33 Warranty

natural_image
Group of five smiling people posing together on a beach (no text or symbols visible)Getting to Know no!no!
no!no!® is suitable for home use on all skin types and hair colors.
It is intended for both women and men, and is designed for the removal of body hair through sustained periodic treatment.
Results take time, patience and a strong commitment to the treatment's unique procedures. Each individual has an unique pattern of hair growth and each will experience results at their own pace.
READ this entire GETTING STARTED guide completely before using the device to ensure safety and results.
The no!no! Device

Thermicon™ Wide Tip Thermicon Narrow Tip


Safety Warnings
When using this product...
Do not use this device on the genitals or nipples.
Do not use this device with the Thermicon Tip on the sensitive skin around the eyes, especially the area under the eyes.
Do not use this device on eyebrows.
Do not use this device on sunburned skin, open cuts, bruises, blisters, moles or on raised areas such as scars.
If you have any skin condition other than those listed above, like cold sores, herpes, severe acne, please consult your physician before using this device.
Do not use deodorants, lubricants, liquids, creams, gels, alcohol, water etc. before use.
Do not allow the thermodynamic wire inside the Thermicon Tip to touch your skin.
Only use this device for its intended purpose as described in this Getting Started guide.
This device can be used by children aged from 8 years and above and persons with reduced physical, sensory or mental capabilities or lack of experience and knowledge if they have been supervised/instructed and understand the hazards involved. Children shall not play with the device. Cleaning and user maintenance shall not be done by children unless they are older than 8 and supervised. Keep the device and Charger out of reach of children under 8 years.
Not intended for animals.
Keep the device dry.
Cautions
To reduce the risk of fire, electrical shock, etc.
Do not reach for a device that has fallen into water while it was plugged in. Unplug the Charger before removing the device from the water.
Do not place or store the device near a sink or bathtub.
This device should never be left unattended while plugged in.
Do not use the Thermicon Tip if the wire is bent or damaged in any way.
Turn off the device while changing the Thermicon Tip.
Do not use the Charger if the cord or plug is damaged in any way.Do not use this device near or rest it on flammable objects such as paper, cloth etc.
Always unplug the Charger from the electrical outlet immediately after charging or use and before cleaning.
Do not place this device near water or liquids.
This device should only be used with the supplied Charger.
Always turn off this device when you have finished using it.
Do not open the outer casing of the device. This might harm the device and it will void any warranty.

natural_image
Close-up of a person using a handheld device on a human forearm (no visible text or symbols)What to Expect While Using the no!no!
While everyone is different, some people experience a mild tingling when they first use no!no!, especially over sensitive areas.
This sensation fades and disappears after a few treatment sessions.
It is not uncommon to feel a warming of the skin. If it is uncomfortably warm during treatment, take short breaks between use on any one area.
Where to Use no!no!

WOMEN DO NOT use on:
× Nipples
× Genitals
×Around the Eye Area or Eyebrows

MEN DO NOT use on:
× Nipples
× Genitals
×Around the Eye Area or Eyebrows
A Quick Introduction to no!no!
READ this entire GETTING STARTED guide before using the no!no! to ensure safety and results.
1 3 4 2
natural_image
Close-up of hands holding a blue handheld device with a white lid (no visible text or symbols)Charge & Uncover

Tip

natural_image
Close-up of hands holding a blue electronic device with a black connector (no visible text or symbols)
natural_image
Hand holding a small blue and white electronic device with a square display (no visible text or symbols)Turn OnInser
5

natural_image
Close-up of hands holding a blue handheld device with a small screen (no visible text or symbols)Set Treatment Level
6

natural_image
Close-up of hands using a blue medical device to apply or apply a product on a person's arm (no visible text or symbols)Glide Buff
7
natural_image
Close-up of a person holding a white circular object on their arm (no text or symbols visible)Get Started

Before Your First Treatment
CHARGE the device for at least 5 hours.
Charging is complete when the Battery icon on the Status Screen stops blinking.
Unplug the Charger from the wall and the device once charging is complete.

Preparation
Cleanse the treatment area thoroughly, removing all lotions, oils, gels or creams before use.
Select Your Thermicon Tip

natural_image
Close-up of a black integrated circuit chip with multiple pins (no visible text or symbols)Wide Tip
Use the Wide Tip to treat large areas like the arms, legs, chest and back.
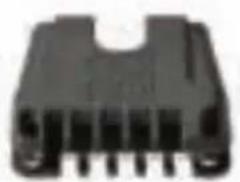
natural_image
Close-up of a black electronic component with multiple pins (no visible text or symbols)Narrow Tip
Use the Narrow Tip for small sensitive areas like the face, neck, underarms and bikini line.

natural_image
Close-up of hands assembling a blue electronic device with a black connector (no visible text or symbols)Insert the Thermicon Tip [FIGURE A]
![No!No! PRO - Insert the Thermicon Tip [FIGURE A] - 1](/content/2026/06/1350462/images/4beba3f817e240204d2df7aed37097457970983419d07fc44bae50ab0c57c685.jpg)
INSERTING the Thermicon Tip
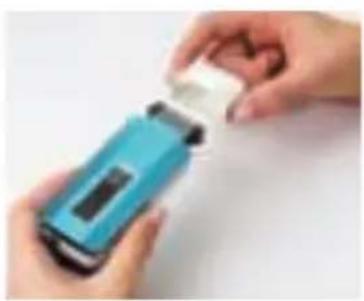
Make sure the device is turned off.
Hold no!no! in one hand and the Tip in the other.Make sure both logos are facing the same direction and line up the posts in the socket with the holes in the Thermicon Tip.
Gently push into place.
REMOVING the Thermicon Tip
Grasp the Tip by both sides.
Gently pull the Tip out of the socket.
When to REPLACE the Thermicon Tip
If the light turns red.
If it is no longer working efficiently.
If the wire is damaged in any way.
If the Thermicon Tip Icon is blinking and no more bars appear on the Status Screen.
Notes:
Make sure the Thermicon Tip is placed properly into the socket before treatment.
Never use a Thermicon Tip if the wire is bent or torn.

natural_image
Hand holding a small blue and white handheld device with a black square display (no visible text or symbols)
natural_image
Close-up of hands holding a blue handheld device with a digital display (no visible text or symbols)Turn no!no! On/Off [FIGURE B]
Press the On/Off Button down until the Status Screen lights up.
NOTE: If the red light appears, go to page 25 for further instructions.
Adjust the Treatment Level [FIGURE C]

There are 3 Treatment Levels to customize the treatment for individual comfort.
Default Treatment Level
The default Treatment Level is Low. When you turn the device on again, it will display the Treatment Level last used.
Changing the Treatment Level
Select the level by pressing the button under the Status Screen [FIGURE C] until the desired Treatment Level appears.
Getting Comfortable with Treatment Levels
Test a small section of your skin with the Low Treatment Level when starting to treat a new area for the first time.
Adjust the level after that, and if you can tolerate it, raise the Treatment Level to the highest level for optimal results.
Important Notes about Treatment Levels:
Should any discomfort appear at any time STOP immediately, lower the Treatment Level and try again or move to a new area.
When treating facial hair, please see the Treating Facial Hair section.
natural_image
Close-up of a person using a blue medical device on a human forearm (no visible text or symbols)Gliding no!no!
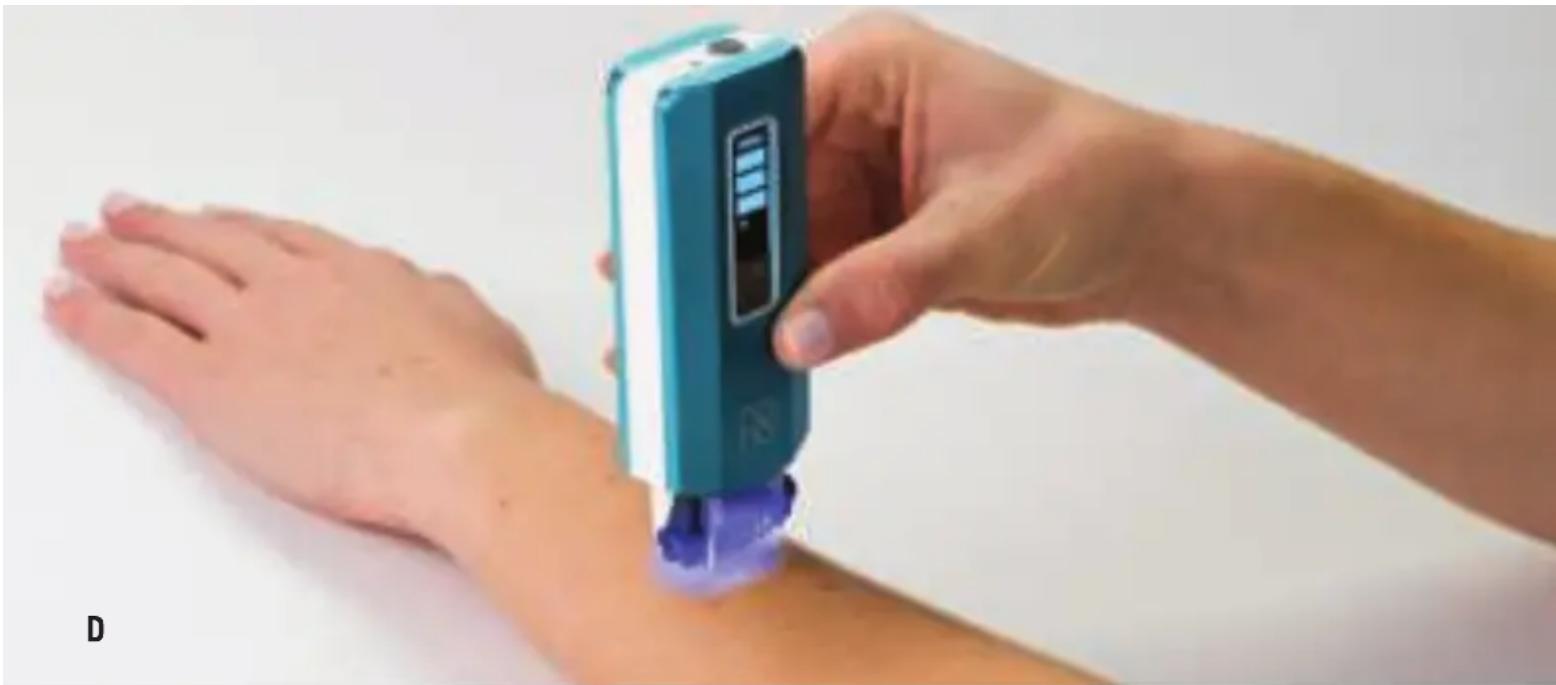
Glide no!no! at approximately a 90° angle with the Roller flat against your skin and the Status Screen facing in the direction you are treating. [FIGURE D]
Important Notes about Gliding:
Glide one way only, in the direction of the Status Screen.
Do not go back and forth.
It is best to glide towards your body against the grain of the hair growth. However, if it is more comfortable you may glide in other directions, but always in the direction of the Status Screen.
Use a STEADY, SMOOTH and EVEN motion. If you move too slowly, the device will not activate; if you move too fast, you will not achieve optimal results.
When gliding at the proper speed the blue light will be steady. A blinking or flickering blue light indicates that you may be moving too slowly. Once your movement has been adjusted, the blue light will remain steady.
Do not press down too hard on your skin.
You may need to go over an area more than once; 4-6 passes may be enough. If the skin is not uncomfortably warm, you may continue. If there is still hair left after buffing and your skin is too warm, wait a few minutes to return to the area. Try to remove all of the hair.
Buff after each treatment to remove treated hair left behind.
NOTE: Do not be alarmed when the number of bars change on the Status Screen. When you first start to glide, the Status Screen will automatically switch from the Treatment Level display to the Thermicon Tip status display. Check the icon to determine what information is being displayed.
Glide no!no! on Rounded Areas
Make sure you practice on smooth even skin like your legs or arms before moving to the face, knees, underarms or bikini line.
Go slowly and allow no!no! to follow the natural curve of the body.
NOTE: The face and bikini line may be extra-sensitive to temperature. If it becomes uncomfortably warm during treatment, lower the Treatment Level or work on a different area, and return later.

DO NOT use no!no! on the nipple or genital area, on or around the eye area or the eyebrows.
About the Blue and Red Light

natural_image
Close-up of a medical or laboratory procedure showing a purple tool interacting with a blue object on a surface (no visible text or symbols)The Blue Light under the Thermicon Tip will guide you throughout your treatment. It is visible only when you are gliding no!no! at the proper speed. [FIGURE E]

nt appears only when the Thermicon Tip is improperly installed, damaged or depleted or if the device needs to be charged. [FIGURE F]
BLUE LIGHT RED LIGHT WHAT IT MEANS
| ON AND STEADY OFF Correct Gliding Speed | ||
| OFF | ON | No Thermicon Tip in Socket |
| OFF | ON | Device Needs to be Charged |
| OFF | ON Depleted Thermicon Tip | |
| OFF | ON | Damaged Thermicon Tip |
| FLICKERING | OFF | Incorrect Gliding Speed |
| OFF | OFF Slow or No Movement | |
Treating Facial Hair [FIGURE G]
TEST no!no! on a small, discreet area of the face on the lowest Treatment Level to see how your skin reacts.
To treat the upper lip area, start under the nose and work your way outwards.
When treating the chin, jawline or sideburns, start just below the base of the chin or jawline and glide no!no! upwards following the curve of your face.If you need to, pull your skin tight and/or purse your lips inward to help create a smooth, straight surface.
If there is any discomfort, STOP.
DO NOT allow your lips to come in contact with the thermodynamic wire.
DO NOT go over one area excessively.
NOTE: The area just below the eye and around the eyelid is especially sensitive. DO NOT treat this area.
Go to www.HowToNoNo.com for helpful videos on how to maneuver no!no! on the face.

![No!No! PRO - Treating Facial Hair [FIGURE G] - 2](/content/2026/06/1350462/images/97b79c7887f61c6f933c0e7af353c37d81cc8f5336b50b60f10a78dd12c5ccb9.jpg)
natural_image
Close-up of a person's arm holding a white foam roller with embossed 'pap' logo (no text or symbols on the object itself)After Every Treatment: Buff
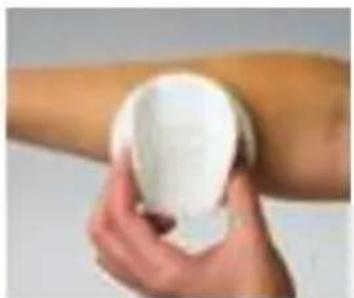
Buffing exfoliates, removes treated hair and leaves your skin feeling smooth. Without buffing, treated hair remains on the skin leaving a prickly feeling.
Hold the Buffer
Firmly rub the Buffer in a circular and/or back and forth motion over the treated area. [FIGURE H]
When to Replace the Buffer
When the pad feels smooth.
When it is no longer buffing effectively.
natural_image
Close-up of hands holding a black plastic connector with a small protrusion (no text or symbols visible)
Taking Care of Your no!no!
NOTE: Do not use any liquid to clean the device, Thermicon Tips or Rollers. Keep the Thermicon Tips and Rollers clean to lower the risk of malfunction and prolong the life of the Tips.
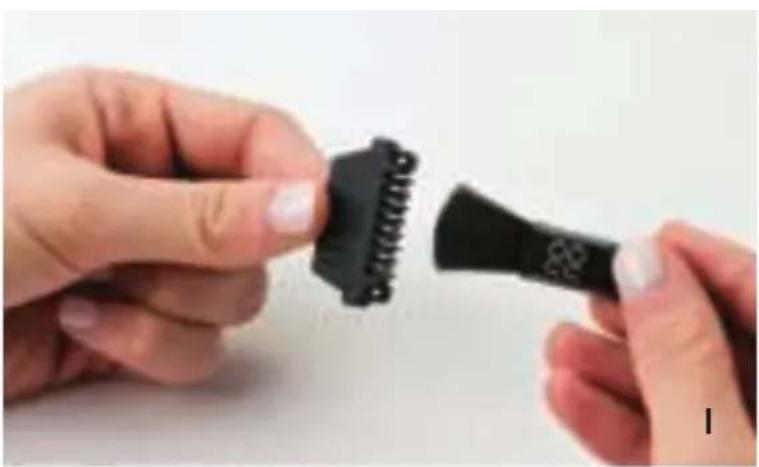
- Turn off your no!no!.
- Remove the Thermicon Tip.
- Gently brush the inside of the Tips clean. [FIGURE I]
- Brush debris out and away from the socket and roller. [FIGURE J]
If any hair or debris falls into the socket, this may cause no!no! to malfunction. Brush any particles out of the socket before beginning a treatment.
Troubleshooting
If the no!no! will not turn on:
Make sure it is charged.
Press and hold the On/Off Button for a few seconds until the Status Screen appears.
If the no!no! will not glide:
Make sure the Thermicon Tip is not bent or torn and is inserted correctly. Replace if necessary.
Increase gliding speed.
If the Red Light comes on:
Check if the Thermicon Tip needs to be replaced.
Restart your no!no!.
Make sure the device is charged.
If the device is not working properly contact no!no! Customer Support for more troubleshooting tips or go to www.HowToNoNo.com.
The no!no! warranty is only valid if no!no! has been used according to the instructions in this guide. Retain all receipts and original packaging.
Technical Specifications
Weight: 104gr
Physical Dimensions:
120 x 40 x 25mm
[4.7 × 1.6 × 1.0in]
Mode of Operations: Continuous
Operating Conditions
Temperature:

Humidity: 30%-80% RH
Charger Rating: Input
100-240VAC/50-60Hz. 0.2A
Output 8.4VDC 0.5A
Transport and Storage
Temperature:

Humidity: 5-95%RH
Atmospheric Pressure:
0.1-1.5 atm.
Electrical Safety
Power Supply: Class II equipment - double insulation.
This appliance is not suitable for use in the presence of flammable anesthetic mixture with air or with Oxygen or Nitrous Oxide.
The quality Management System of Radiancy (Israel) Ltd. complies with the Quality Management Standard EN ISO 13485:2012.
Design and technical specifications are subject to change without notice.
no!no! complies with the following international standards and directives: General Requirements for Basic Safety and Essential Performance, 3rd Ed.: IEC60601-1:2005/EN60601-1:2006
Your no!no! warranty lasts for one year on parts and service. Keep your receipt.
Manufacturer
Radiancy (Israel) Ltd.
5 Hanagar Street
Hod Hasharon, 4501307
Israel
EC Representative
Photo Therapeutics Ltd
105-109 Sumatra Road
London, NW6 1PL, U.K.
Phone: +44 20 7319 9190
Fax: +44 20 7319 9191
info@phototherapeutics.com
Symbols on Device

On/Off Switch

CE mark represents the compliance to the European Low Voltage Directive 2006/95/EC and the Electromagnetic Compatibility Directive 2004/108/EC.

Protect the environment by not disposing of this product with household waste (2002/96/EC). Check your local authority or retailer for recycling advice and facilities (Europe only).

Refer to instruction manual. Indicates the need to consult accompanying documents.
Manufacturer

Radiancy (Israel) Ltd. 5 Hanagar Street Hod Hasharon, 4501307 Israel
EC Representative

Photo Therapeutics Ltd 105-109 Sumatra Road London, NW6 1PL, U.K. Phone: +44 20 7319 9190 Fax: +44 20 7319 9191 info@phototherapeutics.com
Customer Support
US & Canada Customer Support: 888.525.7580
European Customer Support: +44 (0) 344 4082 5089
For additional no!no! products make sure to visit:
US & Canada: www.my-no-no.com
United Kingdom: www.mynono.co.uk
Warranty
Limited Warranty:
This Limited Warranty covers the no!no! product. The warranty provides for the repair or replacement of the device or its component parts, free of charge, within the warranty period.
Note: Certain items, such as Thermicon Tips and Buffers, are excluded from the coverage of this warranty, as they are spare parts/consumables and subject to wear and tear.
The warranty period is valid for one (1) year. In certain circumstances, an extended warranty may be available from the date of the original purchase of the device. When making a warranty claim, you must provide the following information: product serial number, date of purchase, guarantor's name, address and phone number, together with the original sales receipt or invoice to verify the date of purchase. Any alteration or amendment of the purchase documents, including the sales receipt or invoice, or failure to present the purchase documents at the time a warranty claim is made, will invalidate this warranty.
This warranty does not cover damage or deterioration:
- Incurred or reported more than one (1) year or more when an extended warranty is purchased after the date of purchase;
- Incurred due to improper use of the device;
- Due to the modification or repair of the device by an unauthorized third party;
- Due to damage or defects incurred during transportation or improper handling which were not reported
at the time the product was received;
- Due to humidity or any liquid or foreign body placed inside the device;
- Due to the use of unapproved accessories or attachments with the device;
- Due to use contradictory to the procedures shown in the device's user manual;
- Due to Acts of God, natural events (floods, fire, lightning, etc.), force majeure or accidental or deliberate damage; or
- Due to the device being subjected to high dust environments or excessive humidity or temperatures.
This Limited Warranty specifically disclaims and excludes all other warranties, whether express or
implied in law, including the warranties of merchantability and fitness for a particular purpose. Manufacturer shall not be liable for any incidental or consequential damages that result from the use of this device. This warranty does not extend to any purchases made from anyone other than an authorized dealer in the no!no! device.
This Limited Warranty gives specific rights to purchasers of the no!no! Device; purchasers may have other rights that vary from country to country. In the United States, this Limited Warranty is governed by the laws of the State of New York, regardless of any conflict of laws
provisions; any disputes under this warranty shall be adjudicated within the state courts situated in the county
where the manufacturer is located.
For more information visit www.my-no-no.com.

bar
| Category | Value | |---|---| | Bar 1 | 100 | | Bar 2 | 100 |
LIT-00364/Rev. A03/January 2016
WY1719E
- no! no!
- PRO
- Getting Started
- Contents
- Getting to Know no!no!
- How to no!no!
- Troubleshooting and Technical Specifications
- Safety Warnings
- When using this product...
- Cautions
- To reduce the risk of fire, electrical shock, etc.
- What to Expect While Using the no!no!
- Where to Use no!no!
- WOMEN DO NOT use on:
- MEN DO NOT use on:
- A Quick Introduction to no!no!
- 3 4 2
- Before Your First Treatment
- CHARGE the device for at least 5 hours.
- Preparation
- Select Your Thermicon Tip
- Wide Tip
- Narrow Tip
- Insert the Thermicon Tip [FIGURE A]
- INSERTING the Thermicon Tip
- REMOVING the Thermicon Tip
- When to REPLACE the Thermicon Tip
- Notes:
- Turn no!no! On/Off [FIGURE B]
- Adjust the Treatment Level [FIGURE C]
- Default Treatment Level
- Changing the Treatment Level
- Getting Comfortable with Treatment Levels
- Important Notes about Treatment Levels:
- Gliding no!no!
- Glide no!no! on Rounded Areas
- About the Blue and Red Light
- Treating Facial Hair [FIGURE G]
- After Every Treatment: Buff
- Hold the Buffer
- When to Replace the Buffer
- Taking Care of Your no!no!
- Troubleshooting
- If the no!no! will not turn on:
- If the no!no! will not glide:
- If the Red Light comes on:
- Technical Specifications
- Operating Conditions
- Transport and Storage
- Electrical Safety
- Manufacturer
- EC Representative
- Symbols on Device
- Customer Support
- For additional no!no! products make sure to visit:
- Warranty
- Limited Warranty:
- This warranty does not cover damage or deterioration:
Brand : No!No!
Model : PRO
Category : Epilator