
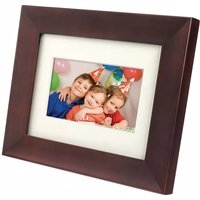
PhotoFrame SPF1007 - Digital photo frame PHILIPS - Free user manual and instructions
Find the device manual for free PhotoFrame SPF1007 PHILIPS in PDF.


| Product Type | Digital Photo Frame |
| Brand | Philips |
| Model | PhotoFrame SPF1007 |
| Display Size | 7 inches (diagonal) |
| Display Resolution | 480 x 234 pixels |
| Internal Memory | 128 MB |
| Supported Memory Cards | SD, MMC, MS |
| Power Supply | 5V DC, 1A AC adapter |
| Dimensions (W x H x D) | 200 x 150 x 30 mm |
| Weight | 400 g |
| Main Functions | Photo slideshow, clock, calendar |
| Slideshow Interval Settings | Yes, adjustable |
| Image Format Support | JPEG |
| Orientation | Landscape only |
| Display Aspect Ratio | 4:3 |
| Mounting Option | Stand only (not wall-mountable) |
| Cleaning Instructions | Wipe with a soft, dry cloth |
| Safety Precautions | Keep away from water and heat sources |
| Spare Parts Availability | Not available; non-user-repairable |
| Reparability | No user-serviceable parts; contact support |
Frequently Asked Questions - PhotoFrame SPF1007 PHILIPS
User questions about PhotoFrame SPF1007 PHILIPS
0 question about this device. Answer the ones you know or ask your own.
Ask a new question about this device
Download the instructions for your Digital photo frame in PDF format for free! Find your manual PhotoFrame SPF1007 - PHILIPS and take your electronic device back in hand. On this page are published all the documents necessary for the use of your device. PhotoFrame SPF1007 by PHILIPS.
USER MANUAL PhotoFrame SPF1007 PHILIPS
EN User manuals 1
Content
Introduction
1. Important Information 2
1.1 Safety precautions and maintenance 2
1.2 Care of the PhotoFrame 2
1.3 Recycling 2
2. Your PhotoFrame 3
2.1 What's in the Box 3
2.2 Control Buttons and Menu 4
2.3 Connections 4
2.4 Product Highlights 4
3. Getting started 5
3.1 Placing the Product 5
3.2 Connecting to the Mains 5
3.3 Initial Setup 6
4. Using your PhotoFrame 7
4.1 View Photos 7
4.2 Find a Photo 7
4.3 Delete Photos using the PhotoFrame 8
5. Use More of your PhotoFrame 8
5.1 Menu Selection 8
5.2 Photo Menu 8
6. Settings 11
6.1 Slideshow Sequence 11
6.2 Transition Effects 11
6.3 Frequency 12
6.4 Collage 12
6.5 Background Color 13
6.6 Brightness 13
6.7 Language 14
6.8 Timer Function (Auto On/Off) 14
6.9 Check the Status of your Photoframe 16
6.10 Key Help 16
7. Technical data 17
8. Frequently asked questions 18
9. Service and Warranty 19
Introduction
Philips digital PhotoFrame can be placed either vertically or horizontally to fit the photos on display. You can place it somewhere in a room for a continuous display by connecting it to the mains power supply.
1. Important
1.1 Safety precautions and maintenance
Read and follow these instructions when connecting and using your PhotoFrame:
- To protect your display from possible damage, do not put excessive pressure on the LCD panel. When moving your PhotoFrame, grasp the frame to lift; do not lift the it by placing your hand or fingers on the LCD panel.
- Unplug the PhotoFrame if you are not going to use it for an extensive period of time.
- Unplug the PhotoFrame if you need to clean it with a slightly damp cloth. The screen may be wiped with a dry cloth when the power is off. However, never use alcohol, solvents or ammonia-based liquids.
- Consult a service technician if the PhotoFrame does not operate normally when you have followed the instructions in this manual.
- The casing cover should be opened only by qualified service personnel.
- Keep the PhotoFrame out of direct sunlight and away from stoves or any other heat source.
- Keep the PhotoFrame dry. To avoid electric shock, do not expose it to rain or excessive moisture.
- When positioning the PhotoFrame, make sure the power plug and outlet are easily accessible.
- To avoid the risk of shock or permanent damage to the set, do not expose the PhotoFrame to rain or excessive moisture.
1.2 Care of the PhotoFrame
1 Do not drop
PhotoFrame is a complicated electronic device and cannot withstand shock from being dropped.
2 Do not expose to moisture
PhotoFrame is neither moisture proof nor moisture resistant. Exposing it to moisture or liquid of any kind will very likely damage your PhotoFrame.
3 Do not hit or scratch
The LCD panel of PhotoFrame is made of glass and is therefore sensitive to abnormal force and sharp edges.
4 Screen cleaning
Use only a dry soft cloth to clean your screen.
5 Keep the stand clear from cables
Make sure the stand of your PhotoFrame is clear from cables as cables could pull the stand out of PhotoFrame to the floor.
6 Temperature and humidity limitations
Operating temperature: 0° 40° (Celsius) / 32° 113° (Fahrenheit) Humidity: 20% \~ 80%
1.3 Recycling
- The PhotoFrame uses materials that can be recycled. To minimize the amount of waste in the environment, check your area for companies that will recover used televisions for dismantling and collection of reusable materials, or contact your dealer for recycling
- Please dispose of the carton and packing material through the proper waste disposal management in your area.
2. Your PhotoFrame
2.1 What's in the box

Digital PhotoFrame

Stand

Power adapter

Quick start guide

User Manual
What else you'll need


Power outlet Digital Photos on memory card
2.2 Control Buttons and Menu

- Use your PhotoFrame by pressing the control buttons in the back.
- The control buttons and instructions are shown at the bottom of the menu screen.

Use the Up / Down keys to move between the menus. Move it left and right to cycle through the menu tree.
2.3 Connections
2.3.1 Memory Card
Photo display (underside)

SD/MMC/MS/xD Card
Inserting a memory card:
- Insert the memory card into the slot in the frame.
- For xD, SD, SDHC, MMC, MMC+, or Memory Stickcards slide the card until it locks in place.
- Push the USB drive in the slot.
• After a few seconds, photos on the memory card will display and a slideshow will start.
DO NOT remove the memory card immediately after inserting it in to the PhotoFrame or when PhotoFrame is counting the Photos. Wait until the screen is stable
Removing a memory card:
- To remove the xD, SD, SDHC, MMC, or Memory Stick card, push the card again to unlock and then pull out the card.
Note
For able to delete photo from the memory device, it must NOT be locked. To unlock the devices please follow the manufacturer's instruction.
2.4 Product highlights
The PhotoFrame is designed to be flexible and convenient to use and it provides the following features:
- High pixel density for sharp and crisp photo display.
• View photos directly from memory cards - Rotating stand for best possible way of viewing photos.
- Clock
3. Getting started
3.1 Placing the Product
The PhotoFrame should be placed on a flat surface and close to a power socket. Keep it away from high temperatures and high levels of moisture
Install the stand
Place the head of the stand in the socket. Rotate counterclockwise until the stand clicks into place.

3.2 Connecting to the mains
Connect the supplied power cable from PhotoFrame to a power outlet.


Note:
For safety reasons and best stability Philips recommend to install the stand well properly. Using other positions may cause the PhotoFrame to fall and it is the responsibility of the user.
3.3 Initial Setup
3.3.1 Setting the Language
Press the Mode button to toggle to the Main Menu, select the Setup and Up / Down to Language.
1 Press Up and Down to select your preferred language (select between English, French, Spanish, Italian, German, Dutch, Danish, Simplified Chinese
2 Press the Play/OK button to confirm your selection. The new setting will be effective immediately.
Press the Mode button to leave this menu and play the slideshow.
3.3.2 Setting Time, Date
Use this function to set the time and date of the PhotoFrame
1 • Press the Mode button to access the Main Menu. • Press Up /Down to highlight Clock and press Play/OK.

2 • Press Down to
SlideShow/Time/Date/12/24hr and press the Play/OK button.

3 Time:
- Press Up and Down to select the time.
- Press Left and Right to move between hours and minutes.
- Press the Play/OK button to confirm.
12 / 24Hr :
Press Up and Down to select 12HR or 24HR.
Date:
- Press Up and Down to select the date.
- Press Left and Right to move between days, months and years.
- Press the Play/OK button to confirm.

Press the Play/OK button to toggle between Clock, Slideshow or Browse mode. Press the Mode button to leave this menu and play the slideshow.
3.3.3 Choosing Clock Mode
Setting Slideshow Clock The clock can be viewed in Slideshow displays the clock in the bottom right of the screen.
There are two ways to display photo in the clock mode:
- To quick access the clock when in slideshow, press Play/OK.
- To access the clock from the Main menu:
1 • Press the Mode button to access the Main Menu.
- Press Down to highlight Clock and press Play/OK.

2 • From the Clock screen, press Menu.
- Press Up to Slideshow Clock Mode/ and press the Play/OK button.

3 • Press Up and Down to select Yes /No. • Press the Play/OK button to confirm selection.
Press the Mode button to leave this menu and play the slideshow, browse or calendar mode.
4. Using your PhotoFrame
4.1 View Photos
View pre-stored photos
1 Press the Mode button to go to the Main Menu.
2 In the Main Menu select photos, select the source as the type of memory card installed (SD/MMC, Memory Stick, xD Cards, USB).
3 Press Play/OK, to play the photos in Thumbnail mode.
4 Press Play/OK, once again to play the photos in Slideshow mode.
4.2 Find a Photo
4.2.1 Browse Mode
1 When displaying photos in the slideshow, move through the photos, pressing Left and Right to find and select a photo.
2 Press Play/OK to access the Browse modes.
4.2.2 Slideshow Mode
Slideshow mode is entered once you turn on the PhotoFrame. Press Left and Right to move quickly through the photos.

Note 1:
The frequency of the slideshow can be adjusted. To do so please read "slideshow frequency" section.

Note 2:
Photos are easily editable from slideshow mode by pressing the Menu button. To go directly to thumbnail mode form read the photo menu section. thumbnail mode form read the photo menu section.
4.2.3 Calendar Mode
To display photos in clock mode.
1 In slideshow mode, use the Left and Right to move quickly through the photos.
2 Press Play/OK to the access Browse Mode, press again to go to the calendar mode.

4.2.4 Thumbnail Access and Navigation
A large number of Photos can be viewed quickly using thumbnail mode
1 • Press the Mode button to access the Main Menu.
- Press Up to photo and press the Play/OK button.
2 • Press Down to select the photo source to browse.
- Press Play/OK to access the source.
3 • Press Left, Right, Up and Down to move between photos and see a larger version of the image.

4 •Press the Play/OK button to leave this menu and to start playing the slideshow.
4.3 Delete Photos using the PhotoFrame
If you need to free up space on a memory card you can delete photos.
1 • Press the Mode button to access the Main Menu.
- Press Up to Photo and press the Play/OK button.

2 • Press Down to select the media to browse and press Play/OK.
- Press the Up, Down, Left or Right keys to find the image you want to delete.
3 • Press the Menu button and press Up to Delete.
- Press Play/OK
- Press Up or Down to Yes or No. Press Play/OK.
Press the Mode button to leave this menu and play the slideshow.
5. Use more of your PhotoFrame
5.1 Menu Selection
The menu is key using the Selection controller and the menu buttons. When in a menu follow the onscreen instructions in the bottom right of the screen for details on how to navigate.
• The Key Left and Right to cycle through the menus.
- Press Down and Up to select options.
- Press the Menu button to go to the main menu.
- Press the Play/OK button to make a selection.
- Press the Mode button to exit the current menu and play a slideshow.
5.2 Photo Menu
There are two ways to access the menu. To quick access the menu while you are viewing photos, press the Menu button to see the menu options for photo editing or slideshow settings. To access the menu options starting from the main menu:
1 Press the Mode button.
2 Press UP / Down to highlight the required menu (Photos and Setup).
3 Press Play/OK to access the menu. To exit from the menus press the Mode button again to return to the slideshow.
5.2.1 Rotate, Zoom and Crop
PhotoFrame can change the orientation of photos and change the framing of photos.

Note:
The crop function only applies to original photos stored on external memory card.
Rotating
1 • Press the Mode button to access the Main Menu.
- Press Up to Photo and press the Play/OK button.
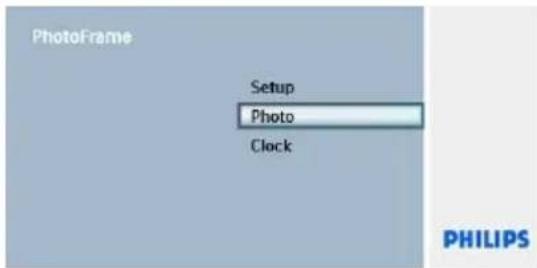
2 • Press Down to select the media to browse and press Play/OK.
- Press the Up, Down, Left or Right keys to find the image you want to rotate.

3 • Press the Menu button and press Up to Rotate.
- Press Play/OK or press Right.
- Press Up or Down to the rotation required. Press Play/ OK.

Press the Mode or Menu button to leave this menu and play the slideshow.
Zooming and Cropping

Note 1:
To retain image quality it is recommended that zooming and cropping is carried out before the image is stored in the PhotoFrame.

Note 2:
All photos processed by the PhotoFrame will be resized for optimal display on PhotoFrame and to save storage space.
1 • Press the Mode button to access the Main Menu.
- Press Up to Photo and press the Play/OK button.

2 • Press Down to select the media to browse and press Play/OK.
- Press the Up, Down, Left or Right keys to find the image you want to zoom & crop.

3 • Press the Menu button and press Up to Zoom and Crop.
- Press Play/OK or Right
- Press Up or Down to the zoom in and out as required. Press Play/OK.
- Press Up, Down, Left and Right to pan around the image. Press Play/OK to apply.
- Press Right to Yes to confirm the crop and return to the thumbnail images.

Press the Mode button to leave this menu and play the slideshow.
5.2.2 Frames
1 • Press the Mode button to access the Main Menu.
- Press Up to Photo and press the Play/ Ok button.

2 • Press Down to select the media to browse and press Play/OK.
- Press the Up, Down, Left or Right keys to find the image you want to add the frame to.
3 • Press the Menu button and navigate Up to Frames.
- Press Play/OK or Right.
- Press Up or Down to the required frame. Press Play/OK to confirm and return to the thumbnail images.
Press the Mode or Menu button to leave this menu and play the slideshow.

Note:
Frames can be removed by selecting no frame.
6. Settings
Use this section to setup the PhotoFrame slideshow sequences, transition effects, frequency of the change of image, collage effects, background color, brightness levels, display language, automatically turn on and off, turning on and off the key help screen when first starting the PhotoFrame
6.1 Slideshow Sequence
Slideshows can be played in one of two ways randomly or sequentially.
1 • Press the Mode button to access the Main Menu.
- Press Up /Down to Setup and press the Right, Play/OK button.
2 • Press Up/Down to access Sequence and press Right.
- Press Up and Down to select either Sequential or Random.
- Press Play/OK to confirm.
Press the Mode or Menu button to leave this menu and play the slideshow.
6.2 Transition Effects
The photos can appear on the screen using special transitions.
1 • Press the Mode button to access the Main Menu. • Press Up/Down to Setup and press the Right, Play/OK button.

2 • Press Down to Transition and press Right.
- Press Up and Down to select from the list as follows: Random, No Transition, Effect 1, Effect 2, Effect 3, ..... , Effect 21.
- Press Play/OK to confirm.

Press Mode or Menu to leave this menu and play the slideshow.
Note 1:
This function applies to all the slideshows stored on all media.
Note 2:
Random plays different effects out of sequence during the slideshow transition.
6.3 Frequency
Use this function to select how long each photo is displayed during the slide show.
1 • Press the Mode button to access the Main Menu.
- Press Up to Setup and press the Play/OK button.

2 • Press Down to access Frequency and press Right.
- Press Up and Down to select 5 seconds, 10 Seconds, 30 Seconds, 1 Minute, 5 Minutes, 30 Minutes, 1 Hour, 4 Hours, or 12 Hours1 Day.
- Press Play/OK to confirm.
Press the Mode button to leave this menu and play the slideshow.
Note:
This function applies to all the slideshows stored on all media.
6.4 Collage
To show multiple photos arranged on the screen at the same time select collage.

1 • Press the Mode button to access the Main Menu.
- Press Up/Down to Setup and press the Right, Play/OK button.

2 • Press Down to access Collage and press Right, Play/Ok
- Press Up and Down to select Off or Random.
- Press Play/OK to confirm.

Press the Mode or Menu button to leave this menu and play the slideshow.
Note:
If you select random the PhotoFrame will randomly use different collage layouts.
6.5 Background Color
Use this function to select the background border color for photos that are smaller than the PhotoFrame display (these photos appear with black borders).
1 • Press the Mode button to access the Main Menu.
- Press Up/Down to Setup and press the Right, Play/OK button.
2 • Press Down to access Background and press Right.
- Press Up and Down to select White, Black, Gray, AutoFit or RadiantColor.
- Press Play/OK to confirm.

Press the Mode or Menu
button to leave
this menu and play the slideshow.
RadiantColor
Perform the RadiantColor to extends photo colors to full screen.

6.6 Brightness
Change the brightness settings of the PhotoFrame to achieve the best visibility depending on the light conditions.
1 • Press the Mode button to access the Main Menu. • Press Up/Down to Setup and press the Right, Play/OK button.
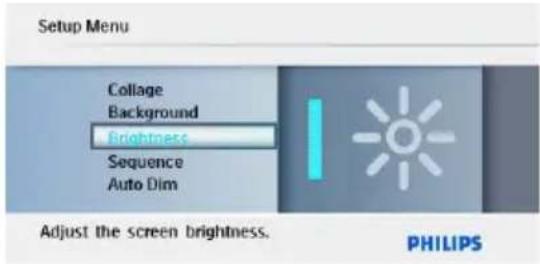
2 • Press Down to access Brightness and press Right, Play/Ok
- Press Up and Down to select the brightness of the screen from 1 \~ 5
- Press Play/OK to confirm.

Press the Mode or Menu this menu and play the slideshow.
button to leave
6.7 Language
Use this section to choose the menu language of the PhotoFrame.
1 • Press the Mode button to access the Main Menu.
- Press Up/Down to Setup and press the Play/OK button.
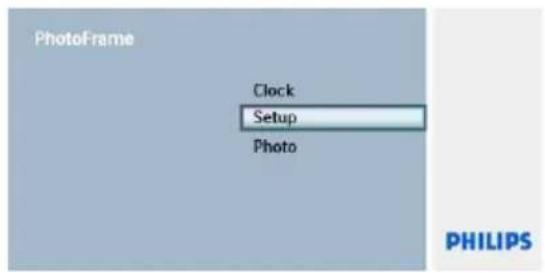
2 Press Down to go to language.

3 • Press Right to enter the Language menu.
- Press Up and Down to select your preferred language (select between English, French, German, Italian, Simplified Chinese, Spanish, Dutch, and Danish).
- Press the Play/OK button to confirm your selection. The new setting will be effective immediately.

Press the Mode button to leave this menu and play the slideshow.
6.8 AutoDim Timer Function
Depending on your lifestyle and schedule, you may want to have the PhotoFrame to automatically turn ON and OFF for you.
Note:
Local time must be set correctly before setting up this feature (see time and date section in the setup menu).
Setting the Start and End times
1 • Press the Mode button to access the Main Menu.
- Press Up to Setup and press the Play/OK button.
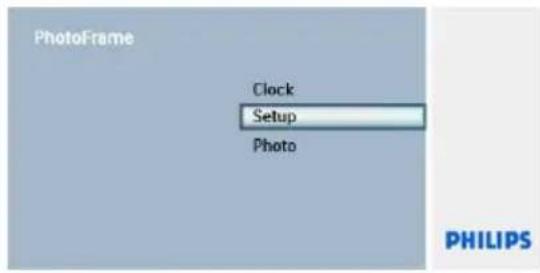
2 • Press Down to Auto Dim.

3 • Press Right to select AutoDim Timer.
- Press Up or Down to select either Auto Dim Start or Auto Dim End.
- Press Right or Press Play/OK.

4 • Press Up and Down to adjust the hours.
- Press Right to move to minutes.
- Press Up and Down to adjust the minutes.
- Press Play/OK to apply the settings and return to the previous screen.

Turning the Automatic start and finish On and Off
1 • Press the Mode button to access the Main Menu.
- Press Up to Setup and press the Play/OK button.
2 Press Down to Auto Dim

3 • Press Right to select AutoDim Timer..
- Press Play/OK to confirm.
- Navigate Up or Down to select either On or Off.
- Press Play/OK to apply the settings.

Press the Mode button to leave this menu and play the slideshow.
Press the Play/OK to Toggle to Slideshow, Browse or Calendar mode.
Note 1:
Digital PhotoFrame will automatically turn off its display exactly at the Auto-Dim-Start time; if the time has already passed it will go into Auto-Dim-End status at the next set time.
Note 2:
If you want to turn ON the PhotoFrame during an auto OFF period, just press any key, the PhotoFrame will wake up until the next auto OFF period.
6.9 Check the Status of your Photoframe
You may check the status of your PhotoFrame how many more photos can be stored, which media are currently connected, and the PhotoFrame software version.
1 • Press the Mode button to access the Main Menu.
- Press Down to highlight Setup and press Play/OK.

2 • Press Down to go to Status.
- The status of the PhotoFrame is shown in the right window.
- If you have a memory card in the PhotoFrame it will give you the status of the card (card type and free memory left).

Firmware: (PhotoFrame software version)
6.10 Key Help
When the PhotoFrame first starts a description of the control buttons is displayed for 10 seconds or until the press of any of the buttons. If you would like to turn this function off follow the instructions below.
1 • Press the Mode button to access the Main Menu.
- Press Down to highlight Setup and press Play/OK.

2 • Press Down to go to Key Help.
- Press Right to go to On or Off.
- Press Down and press Play/OK to confirm the selection.

Press the Mode button to leave this menu and play the slideshow.
7. Technical data
Model SPF1007
Picture Display
• Effective viewing area: 154 x 86.2 mm
• Resolution: 480x3(RGB) x 234 pixels
• Viewing angle: 120RL, 100UD (CR>/=10)
• Lifetime, to 50% brightness: 20,000 hr
- Brightness: 150
- Aspect ratio: 16:9
• Panel resolution: 480X234
• Pixel density: 0.107(W) × 0.37(H)mm
Storage Media
• Memory Card Types: SD/SDHC/MMC/XD/MS Pro
- USB Pen Drive
Dimensions
- Set dimensions with stand (W × H × D): 209 × 150 × 103 mm
- Weight: 0.324 kg
• Temperature range (operation): 0 °C to 40 °C
• Temperature range (storage): -20 °C to 70 °C
Power
• Power consumption: 5W
Model SPF1007
- Photo format supported: JPEG photo (in DCF structure), Up to 16 Megapixels.
Supported progressive JPEG format picture Maximum size 800x600. - Placement supported: Landscape, Portrait,
- Buttons and controls: 7 control key buttons.
1 Play/Ok key to play in Slideshow mode, in Browse mode or in Calender mode.
1 key each to go Up, Down, Right, or Left.
1 Mode key to toggle to Slideshow mode, Thumbnailmode, or Main menu.
1 Menu key to toggle photo menu, Slideshow mode (Browse) or toggle to Calendar mode, Clock Menu.
- Playback mode: Full screen browse, Slideshow, Thumbnail browse
• Photo effects: Frames, Zoom and Crop, Rotate. - Slideshow setting: Collage, Random, Sequential, Transition effects
- Screen background color: Black, White, Gray, RadiantColor and AutoFit.
- Clock function: Set time and date, Clock Auto dim on / off.
- Setup function: Brightness adjustment, Language, Status, AutoDim, Set time and date, Clock /Key help, display enable/disable, Factory setting and Photo source
- System status: Firmware & Bootloader version, Photo source, free memory size.
- OSD Languages: English, French, German, Italian, Simplified Chinese, Spanish, Dutch, Danish
• Regulatory Approvals: CE
8. Frequently asked questions
Is the LCD screen touch-enabled?
The LCD screen is not touch-enabled. Use the buttons on the back to control Digital PhotoFrame.
Can I switch between different slideshows photos by using different memory cards?
Yes. When a memory card is connected to the Digital PhotoFrame, it'll slideshow photos stored on that specific card.
Can I use Digital PhotoFrame to delete photos on memory card?
Yes, it supports operations to delete photos on external devices such as a memory cards.
Can I print photos from Digital PhotoFrame?
No, it does not support direct photo printing.
How does the Digital PhotoFrame show high-resolution 4:3 digital photos on its 16:9 screen?
To ensure high picture integrity, Digital PhotoFrame shrinks the photos at original aspect ratio and trims excessive portions before displaying these photos.
Can I use Digital PhotoFrame during its Auto-off periods?
Yes. Press any control button to bring the system back to ON status.
Why doesn't my Digital PhotoFrame show some of my photos?
Digital cameras take photos and store them in JPEG, GIF, TIFF and BITMAP format according to camera industry standards. Digital PhotoFrame is designed to show photos following the same industry standards. Some images, such as web images, scanned images, or photos in RAW format from professional cameras, are not stored according to camera industry standards and therefore cannot be correctly displayed on Digital PhotoFrame. Use PC applications to convert such images into standard JPEG format for Digital PhotoFrame.
Why doesn't my Digital PhotoFrame go into Auto-off status after I set it?
First, make sure you set Current Time, Auto-off at, and Auto-on at correctly. Digital PhotoFrame will automatically turn off its display exactly at the Auto-off time. If the time has already passed for the day, it will start entering Auto-off status at the specified time from the next day.
Do Philips PhotoFrame support progressive JPEG?
PhotoFrame is supports progressive JPEG formatted picture, maximum size 800x600.
9. Service and Warranty
Recycling Information for Customers
Philips establishes technically and economically viable objectives to optimize the environmental performance of the organization's product, service and activities.
From the planning, design and production stages, Philips emphasizes the important of making products that can easily be recycled. At Philips, end-of-life management primarily entails participation in national take-back initiatives and recycling programs whenever possible, preferably in cooperation with competitors.
There is currently a system of recycling up and running in the European countries, such as The Netherlands, Belgium, Norway, Sweden and Denmark.
Banned Substance Declaration
This product comply with RoHs and Philips BSD (AR17-G04-5010-010) requirements
CE Declaration of Conformity
Philips Consumer Lifestyle declare under our responsibility that the product is in conformity with the following standards
• EN60950:2000 (Safety requirement of Information Technology Equipment)
• EN55022:1998 (Radio Disturbance requirement of Information Technology Equipment)
• EN55024:1998 (Immunity requirement of Information Technology Equipment)
• EN61000-3-2:2000 (Limits for Harmonic Current Emission)
- EN61000-3-3:1995 (Limitation of Voltage Fluctuation and Flicker) following provisions of directives applicable
• 73/23/EEC (Low Voltage Directive)
• 89/336/EEC (EMC Directive)
• 93/68/EEC (Amendment of EMC and Low Voltage Directive)
and is produced by a manufacturing organization on ISO9000 level.
North Europe Information (Nordic Countries)
WARNING:
FÖRSÄKRA DIG OM ATT HUVUDBRYTARE OCH UTTAG ÄR LÄTÄTKOMLIGA, NÄR DU STÄLLER DIN UTRUSTNING PÅPLATS.
Placering/Ventilation
ADVARSEL:
S∅RG VED PLACERINGEN FOR, AT NETLEDNINGENS STIK OG STIKKONTAKT ER NEMT TILGÆNGELIGE.
Paikka/llmankierto
VAROITUS:
SIJOITA LAITE SITEN, ETTÄ VERKKOJOHTO VOIDAAN TARVITTAESSA HELPOSTI IRROTTAA PISTORASIASTA.
End-of-Life Disposal
- Your new product contains materials that can be recycled and reused. Specialized companies can recycle your product to increase the amount of reusable materials and to minimize the amount to be disposed of.
- Please find out about the local regulations on how to dispose of your old monitor from your local Philips dealer.
Waste Electronics and Electrical Equipment (WEEE)
This product is labelled with this symbol in accordance with European Directive 2002/96/EC to indicate that it must not be disposed of with your other household waste. Please check your local city office or waste disposal service for the return and recycling of this product.

End of life directives - Recycling
Your new DPF contains several materials that can be recycled for new uses.
Thank you for your confidence in Philips. You have selected one the best-built products available today. In the unlikely case that your product fails to work or in case you need product assistance in general, please do not address this to the Exxon petrol station. Our Philips helpdesk is ready to offer you full professional support.
For Italy: 840 320 086 (€0.08/min)
For German: 01803 386 852 (€0.09/min)
For The Netherlands: 0900 - 8407 (€0.10 ct/min)
For Belgium: 078 250 145
You can also contact your nearest Philips authorized service centers for technical support.
Caro Consumatore,



- CONTENT
- INTRODUCTION
- IMPORTANT INFORMATION 2
- YOUR PHOTOFRAME 3
- GETTING STARTED 5
- USING YOUR PHOTOFRAME 7
- USE MORE OF YOUR PHOTOFRAME 8
- SETTINGS 11
- TECHNICAL DATA 17
- FREQUENTLY ASKED QUESTIONS 18
- SERVICE AND WARRANTY 19
- IMPORTANT
- 1.1 SAFETY PRECAUTIONS AND MAINTENANCE
- 1.2 CARE OF THE PHOTOFRAME
- 1 DO NOT DROP
- 2 DO NOT EXPOSE TO MOISTURE
- 3 DO NOT HIT OR SCRATCH
- 4 SCREEN CLEANING
- 5 KEEP THE STAND CLEAR FROM CABLES
- 6 TEMPERATURE AND HUMIDITY LIMITATIONS
- 1.3 RECYCLING
- YOUR PHOTOFRAME
- 2.1 WHAT'S IN THE BOX
- WHAT ELSE YOU'LL NEED
- 2.2 CONTROL BUTTONS AND MENU
- 2.3 CONNECTIONS
- 2.3.1 MEMORY CARD
- INSERTING A MEMORY CARD
- REMOVING A MEMORY CARD
- NOTE
- 2.4 PRODUCT HIGHLIGHTS
- GETTING STARTED
- 3.1 PLACING THE PRODUCT
- INSTALL THE STAND
- 3.2 CONNECTING TO THE MAINS
- 3.3 INITIAL SETUP
- 3.3.1 SETTING THE LANGUAGE
- 3.3.2 SETTING TIME, DATE
- 2 • PRESS DOWN TO
- 3 TIME
- 12 / 24HR
- DATE
- 3.3.3 CHOOSING CLOCK MODE
- USING YOUR PHOTOFRAME
- 4.1 VIEW PHOTOS
- VIEW PRE-STORED PHOTOS
- 4.2 FIND A PHOTO
- 4.2.1 BROWSE MODE
- 4.2.2 SLIDESHOW MODE
- NOTE 1
- NOTE 2
- 4.2.3 CALENDAR MODE
- 4.2.4 THUMBNAIL ACCESS AND NAVIGATION
- 4.3 DELETE PHOTOS USING THE PHOTOFRAME
- USE MORE OF YOUR PHOTOFRAME
- 5.1 MENU SELECTION
- 5.2 PHOTO MENU
- 5.2.1 ROTATE, ZOOM AND CROP
- ROTATING
- ZOOMING AND CROPPING
- 5.2.2 FRAMES
- SETTINGS
- 6.1 SLIDESHOW SEQUENCE
- 6.2 TRANSITION EFFECTS
- 6.3 FREQUENCY
- 6.4 COLLAGE
- 6.5 BACKGROUND COLOR
- RADIANTCOLOR
- 6.6 BRIGHTNESS
- 6.7 LANGUAGE
- 6.8 AUTODIM TIMER FUNCTION
- SETTING THE START AND END TIMES
- TURNING THE AUTOMATIC START AND FINISH ON AND OFF
- 6.9 CHECK THE STATUS OF YOUR PHOTOFRAME
- 6.10 KEY HELP
- TECHNICAL DATA
- MODEL SPF1007
- PICTURE DISPLAY
- STORAGE MEDIA
- DIMENSIONS
- POWER
- FREQUENTLY ASKED QUESTIONS
- IS THE LCD SCREEN TOUCH-ENABLED
- CAN I SWITCH BETWEEN DIFFERENT SLIDESHOWS PHOTOS BY USING DIFFERENT MEMORY CARDS
- CAN I USE DIGITAL PHOTOFRAME TO DELETE PHOTOS ON MEMORY CARD
- CAN I PRINT PHOTOS FROM DIGITAL PHOTOFRAME
- HOW DOES THE DIGITAL PHOTOFRAME SHOW HIGH-RESOLUTION 4:3 DIGITAL PHOTOS ON ITS 16:9 SCREEN
- CAN I USE DIGITAL PHOTOFRAME DURING ITS AUTO-OFF PERIODS
- WHY DOESN'T MY DIGITAL PHOTOFRAME SHOW SOME OF MY PHOTOS
- WHY DOESN'T MY DIGITAL PHOTOFRAME GO INTO AUTO-OFF STATUS AFTER I SET IT
- DO PHILIPS PHOTOFRAME SUPPORT PROGRESSIVE JPEG
- SERVICE AND WARRANTY
- RECYCLING INFORMATION FOR CUSTOMERS
- BANNED SUBSTANCE DECLARATION
- CE DECLARATION OF CONFORMITY
- NORTH EUROPE INFORMATION (NORDIC COUNTRIES)
- WARNING
- ADVARSEL
- VAROITUS
- END-OF-LIFE DISPOSAL
- WASTE ELECTRONICS AND ELECTRICAL EQUIPMENT (WEEE)
- END OF LIFE DIRECTIVES - RECYCLING
Brand : PHILIPS
Model : PhotoFrame SPF1007
Category : Digital photo frame