
Professional L42TR - Grill plate LYNX - Free user manual and instructions
Find the device manual for free Professional L42TR LYNX in PDF.


| Product Type | Gas Grill with Griddle Plate |
| Brand | Lynx |
| Model | Professional L42TR |
| Dimensions (W x D x H) | 42 in x 23 in x 11 in (106.7 cm x 58.4 cm x 27.9 cm) |
| Weight | 120 lbs (54.4 kg) |
| Fuel Type | Natural Gas or LP Gas (convertible) |
| Main Burner Output | 60,000 BTU (17.6 kW) |
| Grill Plate Material | Stainless Steel, 42-inch griddle |
| Burner System | Trident burners for even heat distribution |
| Ignition | Electronic ignition with battery backup |
| Rotisserie | Infrared rear burner with motor (included) |
| Temperature Gauge | Built-in lid thermometer |
| Cart / Built-in | Designed for built-in installation (cart sold separately) |
| Cleaning | Stainless steel: mild soap and water; griddle: scrape and reseason |
| Safety Features | Flame failure device, cool-touch handle |
| Warranty | 15 years on burners, 2 years on parts |
| Country of Origin | USA |
Frequently Asked Questions - Professional L42TR LYNX
User questions about Professional L42TR LYNX
0 question about this device. Answer the ones you know or ask your own.
Ask a new question about this device
Download the instructions for your Grill plate in PDF format for free! Find your manual Professional L42TR - LYNX and take your electronic device back in hand. On this page are published all the documents necessary for the use of your device. Professional L42TR by LYNX.
USER MANUAL Professional L42TR LYNX
CARE & USE/INSTALLATION
WARNINGS

WARNING
- Never use dented, rusty or damaged propane cylinders. Never store additional or empty propane cylinders in the grill cabinet or in the vicinity of this or any other appliance. Do not store propane cylinders indoors or on their sides.
- Children should never be left alone or unattended in an area where a grill is located. Place your grill well away from areas where children play. Do not store items that may interest children in or around the grill, in the cart, or in the masonry enclosure.
- Never move the grill when hot. When in use, portions of the grill are hot enough to cause severe burns.
- Always maintain the required clearances from combustibles as detailed. The grill is designed for outdoor use only. Never use in a garage, building, shed, broozeway, or other enclosed area. Do not use this grill under any unprotected overhead combustible construction.
Gas grills are not designed or certified for and are not to be installed in or on recreational vehicles, portable trailers, boats or any other moving installation. - Always have an ABC Fire Extinguisher accessible — never attempt to extinguish a grease fire with water or other liquids.
- Storing your grill: Store your grill in a well-ventilated area. If stored indoors, detach and leave L.P. cylinder outdoors in a well-ventilated area away from heat and away from where children may tamper with it.
- Keep any electrical supply cord and the fuel supply hose away from any heated surfaces. Electrical cords should be placed away from walkways to avoid tripping hazard.
- Do not repair or replace any part of the grill unless specifically recommended in this manual. Other services should be performed by a qualified technician.
- If the grill is installed as a professional installer or technician, be sure that he/she shows you where your gas supply shut-off is located. All gas lines must have a shut-off that is readily and easily accessible. If you smell gas, check for gas leaks immediately. Check only with a soap and water solution. (See INDEX: "Leak Testing" for further details.) Never check for gas leaks with an open flame.
- Inspect the L.P. gas supply hose prior to each use of the grill. If there is evidence of excessive abrasion or wear, or the hose is cut, it must be replaced before using the grill.
- Never remove the grounding prong from the plug or use this product with an ungrounded, 2-prong adapter.
THIS MANUAL MUST REMAIN WITH THE PRODUCT OWNER FOR FUTURE REFERENCE.
This product complies with ANSI standard Z21.58/CSA 1.6 latest edition and has been tested and approved by Intertek.

To obtain replacement parts or service contact:
Lynx Professional Grills
7300 Flores Street
Downey, CA 90242
888-289-5969
WARNINGS

WARNING
READ THIS MANUAL CAREFULLY and completely before using your grill to reduce the risk of:
- Fire
- Bum hazard, personal injury or property damage
- Ruined steaks or other unpleasant cooking experiences
- Unapproved installation or servicing
THIS PRODUCT IS DESIGNED FOR OUTDOOR USE ONLY. Improper installation, adjustment, alteration, service or maintenance can cause property damage, injury or death
Read this manual thoroughly before installation, use, or servicing of this product.

DANGER
IF YOU SMELL GAS:
- Shut off all gas supply lines to the grill.
- Extinguish any open flames.
- Carefully open the lid. Remember, it may be extremely hot!
- If odor continues, keep everyone away from the grill and immediately call your gas supplier or your fire department.

WARNING
- DO NOT store or use gasoline or other flammable vapors and liquids in the vicinity of this or any other appliance.
- An LP cylinder not connected for use shall not be stored in the vicinity of this or any other appliance.

DANGER
S'IL Y A UNE ODEUR DE GAZ:
- The burning of gas cooking fuel generates some by-products which are on the list of substances which are known by the State of California to cause cancer or reproductive harm.
- California law requires businesses to warn customers of potential exposure to such substances. To minimize exposure to the substances, always operate this unit according to the use and care instructions found in this manual. Be certain to provide adequate ventilation when cooking.
WARNINGS

WARNING
- Always maintain the required clearances from combustible construction as detailed. The grill is designed for outdoor use only. Never use in a garage, building, shed, breezeway or other enclosed area. This grill shall not be used under any unprotected overhead combustible construction.
- Gas grills are not design certified for and are not to be installed in or on recreational vehicles, portable trailers, boats or any other moving installation.
- Keep any electrical supply cord and the fuel supply hose away from any heated surfaces. Electrical cords should be placed away from walkways to avoid creating a tripping hazard.
- Do not repair or replace any part of the grill unless specifically recommended in this manual. Other service should be performed by a qualified technician.
- All gas lines must have a shut-off that is readily and easily accessible. Be sure the owner knows where the shut-off is located. If you smell gas, check for gas leaks immediately. Check only with a soap and water solution. Never check for gas leaks with an open flame. (See INDEX: "Leak Testing" for further details.)

WARNING
- The outdoor cooking gas appliance and its individual shutoff valve must be disconnected from the gas supply piping system during any pressure testing of that system at test pressures in excess of 0.5 psi (3.5 kPa).
- The outdoor cooking gas appliance must be isolated from the gas supply piping system by closing its individual manual shutoff valve during any pressure testing of the gas supply piping system at test pressures equal to or less than 1/2 psi (3.5 kPa).

STATE OF MASSACHUSETTS
- Massachusetts requires all gas be installed using a plumber or gas fitter carrying the appropriate Massachusetts license.
- All permanently-installed natural gas or propane installations require a "T" handle type manual gas valve be installed in the gas supply line to this appliance.
- This does not apply to portable propene installations using a 20 pound cylinder.
TABLE OF CONTENTS
| USE & CARE GUIDELINES 7 | |
| Lynx Grill Models | 7 |
| HOW TO LIGHT YOUR GRILL 7 | |
| HOW TO LIGHT YOUR ROTISSERIE BURNER 7 | |
| BEFORE YOU START 8 | |
| If Shipment Arrives Damaged 8 | |
| Important Notes 6 | |
| Clearance to Combustibles 9 | |
| SPECIFICATIONS & INSTALLATION 10 | |
| UNPACKING & ASSEMBLY 12 | |
| GAS CONNECTIONS | 14 |
| Natural Gas | 14 |
| LP Gas | 15 |
| Gas Conversion Kits | 16 |
| ELECTRICAL CONNECTIONS | 18 |
| FINAL CHECKS | 19 |
| Leak Testing 19 | |
| CHECKLIST BEFORE EACH USE | 21 |
| A MESSAGE TO OUR CUSTOMERS | 21 |
| IMPORTANT SAFETY PRECAUTIONS | 22 |
| GRILLING IN WINDY CONDITIONS | 23 |
| USING YOUR LYNX GRILL 24 | |
| Pre-Grill Checklist | 24 |
| Lighting your Grill | 25 |
| Basic Grilling 27 | |
| Using the Trident 1st Burner | 28 |
| Using the Rotisserie Burner 29 | |
| Using the Smoker Box | 30 |
| CLEANING YOUR LYNX GRILL (Required Maintenance) | 31 |
| TROUBLESHOOTING YOUR LYNX GRILL | 33 |
| Potential Problems | 34 |
| Contacting Lynx Customer Care | 37 |
| The Lynx Story | 37 |
| LYNX LIMITED WARRANTY | 38 |
| LYNX COMMON AREA LIMITED WARRANTY | 39 |
| WIRING SCHEMATICS 40-42 | |
| L27 & L30 Rotisserie Grill | 40 |
| L36 & L42 Rotisserie Grill | 41 |
| L54 Rotisserie Grill | 42 |
| LYNX PROFESSIONAL GRILLS EXPLODED PARTS VIEW | 43 |
| LYNX PROFESSIONAL GRILLS PARTS LIST | 44 |
| MODEL-SPECIFIC BTU OUTPUTS & MAX. RUNS FOR APPLIANCES | 45 |
| INSULATED JACKET INSTALLATION | 46 |
| INDEX | 47 |
USE & CARE GUIDELINES
This use & care manual covers the Lynx grill models listed below. Some features and options will vary based upon the model that you purchased.
LYNX GRILL MODELS
| BUILT-IN | FREESTANDING |
| L27R-3 | |
| L27TR | L27TRF |
| L30R-3 | |
| L30TR | L30TRF |
| L36R-3 | |
| L36TR | L36TRF |
| L42R-3 | |
| L42TR | L42TRF |
| L54TR | L54TRF |
- Before each use, refer to the checklist on page 21.
- Make sure all burner control knobs are in the "OFF" position.
- Push and hold the control knob in for 5 - 7 seconds, allowing the igniter to heat up.
- Turn the knob to the "LITE" position.
- After ignition set the knob to the desired setting.
HOW TO LIGHT YOUR ROTISSERIE BURNER
Note: The rotisserie burner features a thermocouple sensor with a safety valve that automatically shuts off the flow of gas if the burner goes out for any reason.
- Before each use, complete the checklist below.
- Make sure all burner control knobs are in the "OFF" position.
- Push and hold the control knob for 5 - 7 seconds.
- Turn the knob to the "LITE" position and continue to hold the knob in for an additional 30 - 60 seconds to allow the thermocouple to heat up and keep the safety valve open.
BEFORE YOU START

WARNING
- Never install this product into a combustible enclosure without an insulated jacket. Doing so could result in fire, property damage and personal injury.
- Never locate the grill under a roof or overhang, in a building, garage, shed or other such enclosed area.
- Never locate the grill under unprotected combustible construction.
- Installation must conform with local codes or, in the absence of local codes, with either the National Fuel Gas Code, ANSI Z223.1/NFPA 54, Natural Gas and propane Installation Code, CSA B149.1, or Propane Storage and Handling Code, B149.2, in Canada.
IF SHIPMENT ARRIVES DAMAGED
VISIBLE LOSS OR DAMAGE
Be certain any visible damage to the carton is noted on freight bill or express receipt and signed by the person making delivery.
FILE CLAIM FOR DAMAGES IMMEDIATELY, regardless of extent of damage.
CONCEALED LOSS OR DAMAGE
If damage is unnoticed until the grill is unpacked, notify the transportation company or carrier immediately and file a "concealed damage" claim with them. This should be done within (5) days of the date delivery is made to you. Be sure to hold on to the container for inspection. We cannot assume responsibility for damage or loss incurred in transit. (See INDEX: "Obtaining Service from Lynx" for further details.)
IMPORTANT NOTES
WHERE'S THE WIND?
When selecting a suitable location, consider important factors such as exposure to the wind and foot-traffic patterns.
If you have a freestanding grill, position it so the prevailing wind blows into the front control panel (at your back when grilling), supporting the proper front-to-rear airflow.
Built-in grills located in areas with prevailing winds should be protected by a wind barrier.
Winds hitting the back of the grill directly may cause
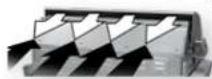
problems, as well as wind blowing along the hood gap.
Be sure wind doesn't blow into the hood gap
HOW LONG IS YOUR RUN?
Keep all gas supply lines as short as possible because gas lines lose pressure over distance and with each elbow and tee that is added. This drop in pressure affects grill performance. (See INDEX: "Gas Supply Line Runs" for further details.)
ARE YOU "ON-THE-LEVEL"?
Proper leveling during installation is critical. A grill that is out of level will cause erratic burner combustion and inefficient, uneven heating. A carpenter's spirit level should be used to level the grill both front-to-back and side-to-side.
If the floor is uneven or has a decided slope, re-leveling may be required each time you move a freestanding unit.
BEFORE YOU START ...continued
BUILT-IN INSTALLATIONS
The Lynx Built-In Grill is designed for easy installation into masonry enclosures.
NOTE: Lynx built-in grills are intended either for installation in a built-in enclosure constructed of non-combustible materials or for an installation in a built-in enclosure constructed of combustible material when installed with a Lynx insulating jacket (LU).
For non-combustible applications, the grill drops into the opening shown in the cutout detail drawing (Sec INDEX: "Gas Requirements") and hangs from its counter-top trim. A deck is not required to support it from the bottom.
When using the insulated jacket in a combustible enclosure, the jacket must be supported from the bottom by a ledge on each side or a full deck beneath the jacket.
(See INDEX: "Gas Requirements") Pay special attention to the provisions shown for gas line hook-up.
The enclosure should have ventilation holes to prevent gas build-up in the event of a leak. The clock lodges and counter should be flat and level. (refer to ANSI Z21.58 Standard for Outdoor Cooking Gas Appliances, Section 1.7 Enclosures For Self Contained LP-Gas Supply Systems)
This grill requires that a 120 volt, 60 hertz, 15 amp GFI certified outlet be installed by a qualified electrician.
Never locate the transformer or grill gas line behind the grill inside the insulated jacket.
CLEARANCE TO COMBUSTIBLE MATERIALS
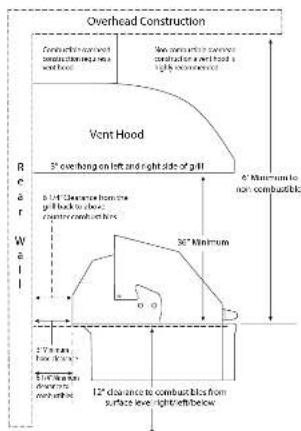
Minimum clearance from the sides and back of the grill to adjacent combustible construction below the counter top surface is 12" from the sides and 6 1/4" from the back of the hood.
Minimum clearance from sides and back of grill to adjacent combustible construction extending above the counter top surface is 12" from the sides and 6 1/4" from the back.
Do not use this appliance under unprotected overhead combustible surfaces.
A minimum of 6" of clearance is needed on the left side of the grill above the counter top for the rotissarie motor and spit rod.
If the grill is to be placed into a combustible enclosure, an approved insulated jacket is necessary and is available only from your Lynx dealer. Lynx insulated jackets have been designed and tested specifically for your Grill.
REAR HOOD CLEARANCE
A 3 inch clearance is required behind the grill to allow the front hood to open.
The grill exhausts combustion products and cooking greases to the back. Never locate the grill where this exhaust will be difficult to clean.
OVERHEAD PROTECTION AND EXHAUST REMOVAL
If installed under any combustible construction the cooking area over the grill must be covered with an exhaust hood. The hood must provide 3-6 inches of overhang on all exposed sides. The exhaust hood shall provide no less than 1,200 CFM for proper exhaust ventilation. The hood must be approved for outdoor installation and provided with a dedicated GFCI protected branch circuit.
CARE & USE/INSTALLATION
SPECIFICATIONS & INSTALLATION
The guides, measurements and dimensions detailed below are designed to assist you with planning your outdoor kitchen.
NOTE: Due to continuing product innovation, specifications are subject to change without notice.
IMPORTANT: Please reference the Care & Use / Installation manual for details on gas plumbing requirements, electrical specifications and the proper installation of your Lynx outdoor kitchen equipment. This manual can be downloaded from the Lynx website at www.lynxgrills.com
GRILLS
MODEL A B C
| L27 26.00 10.88 22.00 |
| L30 29.00 10.88 24.50 |
| L36 35.00 10.13 22.00 |
| L42 41.00 10.88 24.50 |
| L51 53.00 10.88 24.50 |
COMPLEMENTARY PRODUCTS
| ACCESS DOORS | |||
| MODEL | A | B | |
| LDR1BL/R 4 13.38 19.00 | |||
| LDR24UR-4 19.25 19.00 | |||
| LDR30T-1 25.13 19.00 | |||
| LDR36T-1 31.50 19.00 | |||
| LDR47T 4 37.50 19.00 | |||
| SIDE BURNERS | |||
| MODEL | A B C | ||
| LSB1-3 | 12.13 10.63 12.50 | ||
| LSB2-2 | 12.13 10.63 24.50 | ||
| LSB7PC-1 | 24.25 10.63 24.50 | ||
| LPB | 19.00 10.63 22.00 | ||
| UTILITY DRAWERS | |||
| MODEL A | B C | ||
| LDW16 4 12.25 19.00 24.50 | |||
| LDW19 4 15.25 19.00 24.50 | |||
| LMD-4 | 21.75 | 5.63 | 23.38 |
| LTWL | 14.63 | 7.25 | 7.00 |
WARMING DRAWERS
| MODEL A B C | |
| L30WD-1 28.50 | 10.00 20.50 |
| I42CC-1 | 40.25 19.38 24.75 |
COCKTAIL PRO/SINK
| MODEL | A | B C | |
| LCS30 | 29.00 | 10.50 | 22.00 |
| LSK18 | 17.00 | 10.50 | 22.00 |
| LSK24 | 23.00 | 10.50 | 22.00 |
| LSK30 | 29.00 | 10.50 | 22.00 |
10 | CARE & USE/INSTALLATION
WITH INSULATED JACKET INSTALLED
| MODEL | A | B | C |
| LIJ27 | 33.00 | 11.63 | 24.00 |
| LIJ30 | 36.00 | 11.63 | 26.50 |
| LIJ36 | 42.00 | 11.63 | 24.00 |
| LIJ42 | 48.00 | 11.63 | 26.50 |
| LIJ54 | 60.00 | 11.63 | 26.50 |
STORAGE SYSTEMS
| MODEL | A | B | C |
| LSA30-4 | 25.64 | 19.00 | 24.50 |
| LSA36-4 | 31.44 | 19.00 | 24.50 |
| LSA42-4 | 37.44 | 19.00 | 24.50 |
| LPA36-4 | 31.50 | 19.00 | 25.00 |
TRASH CENTERS
| MODEL | A | B | C |
| L20TR 4 | 16.13 | 24.00 | 24.50 |
| LTA30-4 | 25.44 | 19.00 | 24.50 |
PIZZA OVEN
| MODEL | A | B | C |
| LPZA | 29.00 | 4.00 | 24.50 |
SMOKER
| MODEL | A | B | C |
| LSMK | 29.00 | 4.00 | 24.50 |
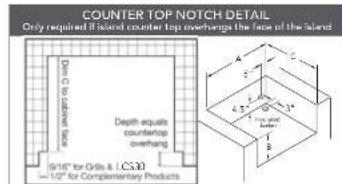
UNCONVENTIONAL ISLAND INSTALLS
If building an island that does not conform to the standard properties listed in the following pages, please contact Lynx Grills at 888-259-5969 to verify all safety requirements regarding installation have been met.
SPECIFICATIONS & INSTALLATION
OUTDOOR ICE AND REFRIGERATION
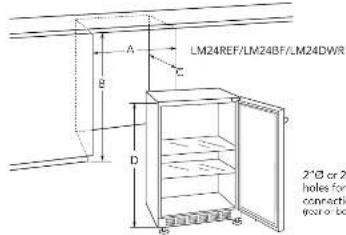
| MODEL | A | B | C | D |
| LM15REF1/R | 15.00 | 34.00-35.00 | 26.00 | 33.75-34.75 |
| LM24REF2/R | 24.00 | 34.00-35.00 | 26.00 | 33.75-34.75 |
| LM24REF1/CR | 24.00 | 34.00-35.00 | 26.00 | 33.75-34.75 |
| LM24BFL/R | 24.00 | 34.00-35.00 | 26.00 | 33.75-34.75 |
| LM24DWR | 24.25 | 34.00-35.00 | 26.00 | 33.75-34.75 |
| LMWINE | 15.00 | 34.00-35.00 | 26.00 | 33.75-34.75 |
| LM15/CF | 15.00 | 34.00-35.00 | 24.00 | 33.75-34.75 |
L15ICE/LMWINE/LM15REF


* Cocktail Pro should have an open bottom for plumbing and drain access.
CARE & USE/INSTALLATION
UNPACKING & ASSEMBLY
The grill arrives nearly ready to use and requires only minor assembly.
By carefully following the uncrating and unpacking steps, you will improve the customer's first Lynx experience.
Shipping weight on smaller units is app. 300 pounds and larger units may weigh over 500 pounds.

WARNING: EXCESSIVE WEIGHT HAZARD!
Use two or more people to move or install this unit. Failure to follow this instruction can result in back or other personal injuries.
CRATE & CARTON
- IMPORTANT! Do not remove staples around the top of the carton. These staples hold a wooden pallet in place inside the carton that protects the unit from damage. Removing these staples may cause the pallet to fall on the top of grill.
How to Remove the Carton
- Cut the main strap holding the grill to the pallet. - Remove the staples at the bottom of the carton.
- Lift off the carton.
- With assistance, remove the grill from the pallet and place into desired location.
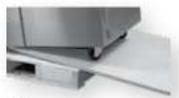
The wheels sit down in the gaps of the shipping crate so

Grill will not slide directly off pallet.
that the grill can sit safely and solidly on the crate during shipping. The grill cannot be slid directly off of the pallet.
One way to safely move the grill off of the pallet is by lifting one end of the grill high enough to place a ramp under the wheel and then lift the other end while rolling the grill off of the pallet.
When pushing, lifting, or pulling a freestanding Lynx Grill across gravel, grass, pavers, brick, stone,
12 13 CARE & USE/INSTALLATION
imperfections in the surface, or wood slatted decks be cautious and move slowly or use a carpet dolly. Failure to do so may damage the structure of the cart which will not be covered under warranty.
INTERIOR PACKING
Lynx uses sturdy tie-down cables and straps to ensure your grill arrives at your home in the same condition that it left our factory. BE SURE YOU HAVE REMOVED ALL TIE DOWNS BEFORE USING YOUR GRILL.
- Remove the white accessory box and wood packing, the grill racks, and remove any loose items from the firebox.
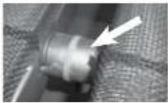

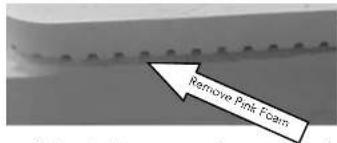
- Carefully cut the able ties securing the warming rack and rotisserie spit.
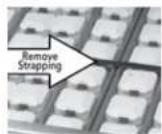
- Cut the strapping that secures the briquette trays and carefully lift them out, front first.
Make sure you remember to remove the strapping on the burners.
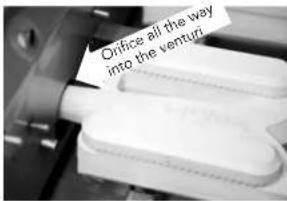
- On Trident TM burner models, cut and remove ties from the burner partition on the left side of the Trident TM burner.
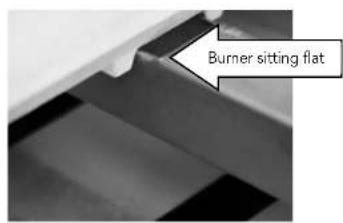
- Ensure that all burners are properly seated on the burner valve orifice and sitting level with the legs in the frame slots and no side-to-side movement.
UNPACKING & ASSEMBLY ...continued


Move the rear caps towards the back and pull the front caps forward
CARE & USE/INSTALLATION
GAS CONNECTIONS

WARNING
NEVER CONNECT A GAS LINE DIRECTLY TO THE GRILL. A PRESSURE REGULATOR MUST BE INSTALLED ON ALL GAS EQUIPMENT. ALL LOCAL CODES REQUIRE IT AND LYNX SUPPLIES THE CORRECT REGULATOR WITH YOUR GRILL. REMOVING OR FAILING TO INSTALL THE PRESSURE REGULATOR CAN RESULT IN FIRE AND SERIOUS PERSONAL INJURY AND WILL VOID THE WARRANTY.
The grill is factory set to use either propane (LP) or natural gas (NAT). It is critical that the gas you use matches that which the grill was set up for. You can verify that by checking the rating plate.
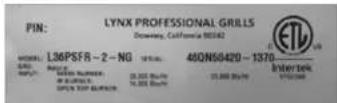
The Rating plate lists serial numbers, model numbers and gas type. This one is underneath the chip tray.
The rating plate is located in one or more of the following places:
- Attached to the underside of the drip tray - On the heat shield behind the front panel
Ensure that the gas supplied meets with the minimum pressure requirements. Do not operate the grill on any gas other than that for which the grill has been set.
| Fuel WC Max Inlot | WC Min Under | Full Load |
| Nat Gas 10 in 4 in | ||
| LP 14 in 11 in |
Water Column Requirements
Both the regulator and the manifold orifices have been tuned for the type of gas specified on the rating plate.
Converting to a different type of gas requires a conversion kit, available from Lynx or from your dealer and must be installed by a qualified technician or certified plumber.
All installation and all installation parts must conform to local codes with the National Electrical Code, ANSI Z223.1/NFPA 70 latest edition and the National Fuel Gas Code, ANSI Z223.1/NFPA 54 in the U.S. and CGA-B149.1/2 in Canada.
Canadian installations must conform to CGA-B149.1/2 natural gas/propene installation code. (Canada)
NATURAL GAS
Lynx recommends that only qualified professionals perform the required plumbing on this product.
To ensure satisfactory performance, the gas supply line must be sized to accommodate the total BTU requirements of all the gas-fired equipment that will be connected to that line.
In no case should an inlet pipe less than 3/4" inside diameter or 1" outside diameter ever be used to connect this product.
- Calculate the total BTU output of all equipment and refer to "INDEX: Gas Supply Line Runs" for allowable run distances for 1/2 inch pipe. Failure to meet these minimum requirements may reduce performance of the grill and any other appliances running on that supply line.
- Always keep supply line runs as short as possible. (See INDEX: "BTU Output" for specific model outputs)
- A gas shut-off valve must be installed in an easily accessible location by a qualified plumber.
- Keep threading compound off of the first two pipe threads to avoid having any small pieces of compound break loose and clog a bumper valve or orifice. Do not use threading compound on any flare fittings.
Keep last two threads clean

For built in installations, it is recommended that any flexible pipe used be kept as short as possible. (See INDEX: "Gas Connections" for typical permanent hook up.)
GAS CONNECTIONS ...continued
For freestanding units using natural gas, Lynx recommends using a mobile flex gas line.
This is available at your local hardware store or from your dealer.
LP GAS
Grills set up for LP gas come equipped with an LP hose/regulator assembly for connection to a standard 20 lb. LP cylinder. (Type 1). All fittings necessary to attach the assembly to the grill are included.
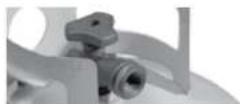
LP cylinder with type 1 valve connection
Permanently plumbed LP connections, such as those in line with a bulk cylinder, require a 4/11 regulator. (Lynx P/N 30781)
When using the 4/11 regulator you must ensure that it is set for the proper fuel type. This is done by removing the regulator cap and gasket and looking at the bottom of the plunger to see what fuel type is visible. This is the regulator fuel setting. NAT is for natural gas and LP is for propane gas. The LP setting can be further identified by the large diameter disk on the bottom of the plunger. To change from one gas to the other simply push the plunger to the side to snap it out of the cap, turn the plunger so it reads the desired gas type on the bottom, and push the plunger until it snaps back into place in the cap then replace the cap into the regulator.
Never connect an unregulated gas line to the grill.
![graph TD A["Cap"] --> B["Gasket"] B --> C["Plunger"] C --> D["LP Position"] D --> E["Pressure Regulator"] E --> F["NAT Position"] F --> A](/content/2026/06/1339776/images/9d46aaf92ac62b98eeab3b50695f8e987231e819a9b493d71a4a7d215ae28d70.jpg)

WARNING
Do not change the regulator/nose assembly or use any other assembly than the one supplied with your Lynx grill.
Do not attempt to use a 5LP-A equipped regulator/hose assembly with a standard 510 POL cylinder/valve assembly.
Do not store a spare LP-gas cylinder under or near this appliance.
Never fill the cylinder beyond 80 percent full. If the information above is not followed exactly, a fire causing death or serious injury may occur.
LP Cylinder Requirements
The LP cylinder must be constructed and marked in accordance with the specifications for LP gas cylinders of the U.S. Department of Transportation (DOT) and designed for use with a Type 1 system only.
Cylinders of free standing grills must be secured using the provided cylinder retention system to avoid accidental movement.
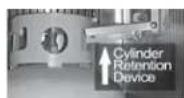
When exchanging your cylinder for a refill, exchange only for a Type 1 20lb cylinder with an over-fill protection device.
Never use a cylinder with a damaged valve.
A dented or rusty LP cylinder may be hazardous and should be avoided. If in doubt, have it checked by your LP supplier. Always check for leaks after every LP cylinder change. (See INDEX: "Leak Test" for further details.)
Always shut off the LP-gas supply at the cylinder when the grill is not in use.
Cylinders must be stored outdoors in a well-ventilated area out of the reach of children. If your grill is stored indoors, the LP cylinder must be stored outside.
LP Connections
Make sure the LP cylinder valve is fully closed. It is possible for the valve to be open without releasing gas but, as soon as you start connecting the regulator, gas will leak from the connection.
GAS CONNECTIONS ...continued
Insert the regulator inlet into the cylinder valve and turn the black coupler clockwise until the coupler is hand tight. Do not over-tighten this connection.
To disconnect the coupler, first make sure the main cylinder valve is turned off. Grasp the coupler and turn counter clockwise. The inlet will then disengage.
Always leak-test the connection after refilling or exchanging LP cylinders. (See INDEX: "Leak Test" for further details.)
GAS LINE PURGING
You should purge the gas line of air before attempting to light the grill.
- Make sure all grill controls are in the "OFF" position.
- Slowly turn on the main gas supply.
- Push in the rotisserie knob and confirm that the igniter is glowing. It is furthest from the fuel source and will completely purge the lines. It will take several seconds for the burner to light.
- Hold the knob ON for about 20 seconds to allow the air in the system to purge and the burner to light
- Wait at least 5 minutes after shutting off the control before attempting to light the burners.
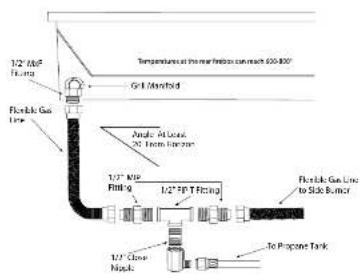
NG AND BULK LP BUILT-IN INSTALLATION
- Shut off the gas supply at the main valve.
- If connecting to a bulk propane tank, disconnect the brass elbow, hose and regulator from the grill.
- Remove all the fittings from the grill manifold.
- Connect the gas supply to the grill as shown in the diagram on this page.
- Turn the gas supply on and leak test all connections. (See INDEX: "Leak Test" for further details.)
Never run flex hose behind the firebox, run the hose at an angle, straight down, or out of the back.
GAS CONVERSION KITS
Gas conversion kits are available from Lynx Grills to allow the grill to operate on either Natural gas or LPG. These kits should be installed by a qualified technician or certified plumber.
The kits come with complete installation instructions. These instructions should be read completely and fully understood before installing the conversion kit.
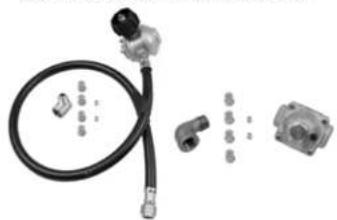
LP CONVERSION KIT
NG CONVERSION KIT

16 17 CARE & USE/INSTALLATION
GAS CONNECTIONS ...continued
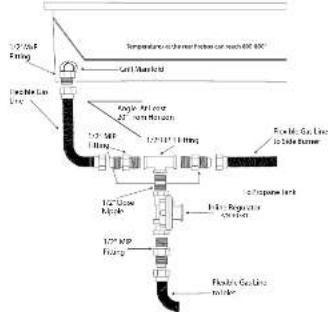
NG AND BULK PROPANE CART INSTALLATION
- Shut off the gas supply at the main valve.
- Disconnect all plumbing (if already attached) from the grill and the gas supply valve.
- Remove all the fittings from the grill manifold.
- Connect the gas supply to the grill as shown in the diagram on this page for your gas type.
- Tum the gas supply on and leak test all connections. (See INDEX: "Loak Test" for further details.)

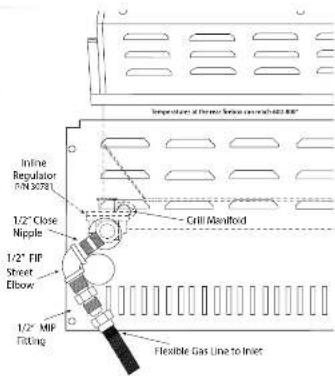
LP BOTTLE CART INSTALLATION
- Shut off the gas supply at the main valve.
- Connect the gas supply to the grill as shown in the diagram on this page for your gas type.
- Tum the gas supply on and leak test all connections. (See INDEX: "Leak Test" for further details.)
Side Burner Installation
CARE & USE/INSTALLATION
ELECTRICAL CONNECTIONS

WARNING: ELECTRICAL GROUNDING
- Product installation must meet local electric codes or, in the absence of local codes, the latest edition of the National Electrical Code ANSI/NFPA No. 70 or the Canadian Electrical Code CGA 1.6b2005.
- Use only a Ground Fault Interrupter (GFI) protected circuit with this outdoor cooking gas appliance.
- IMPORTANT: When connecting your rotisserie motor, first connect the motor to the grill and then plug the grill into the outlet.
- This grill is equipped with a three prong (grounding) electric plug for your protection against shock hazard and must be plugged directly into a properly grounded three prong outlet. Never cut or remove the grounding prong from this plug.
- Use only extension cords with a 3 prong grounding plug, rated for the power of the equipment, and approved for outdoor use with a "W-A" marking.
• To protect against electric shock, do not immerse any part of the power cord, an extension cord or any plugs in water or other liquid. - Unplug the product from the outlet when not in use and before cleaning. Allow it to cool before putting on or taking off parts.
- Do not let the cord hang over the edge of a table or touch hot surfaces.
- Do not use an outdoor cooking gas appliance for purposes other than intended.
- Do not operate any outdoor cooking gas appliance with a damaged cord, plug, or after the appliance malfunctions or has been damaged in any manner. Contact the manufacturer for repair.
CONNECTION TO AC
Installation requires an outdoor 120VAC 15A GFI (Ground Fault Interrupter) electrical outlet adjacent to the grill.
The GFI outlet features an internal breaker that reduces shock hazard. This type of outlet should be installed by a qualified electrician either inside the island enclosure for built-in units, or near the location where a free-standing unit will be used.
For built-in grills, the supplied 12VDC should be installed below the grill within the cabinet enclosure. Select a location where the transformer is protected against water, heat and physical damage.
When installing the transformer to the grill be careful to prevent the wiring and transformer from contacting any hot surfaces behind or below the grill. It is recommended that the transformer be located below the grill in a readily accessible location. Be sure to provide adequate access to facilitate service if the transformer or connections should need future maintenance.
If the electrical system fails to operate, a connection may have come loose in shipping or the GFI may have tripped, requiring a reset. See the Troubleshooting section for more details.
FINAL CHECKS
LEAK TESTING

DANGER!
To prevent fire or explosion hazard, DO NOT smoke or allow any potential source of ignition (sparks, electrical arcing, etc) in the area while performing a leak test. Leak tests should be conducted outdoors only. Never conduct a leak test using fire or flame.
Leak Test Procedure:
- Create a soapy solution of 1 part soap and 3 parts water.
- Confirm that all control knobs are in the off position.
- Turn on the fuel supply. For natural gas, turn the valve handle 1/4 turn to align with the gas flow.
- For L.P., turn the cylinder valve knob counter clockwise one full rotation.
- Apply the soap solution generously by paint brush or squirt bottle on all connections and fittings.
- If bubbles appear to "grow" on any of the connections, you have a gas leak. IMMEDIATELY turn off the gas supply.
Fixing a Gas Leak:
- Shut off the gas supply
- Turn all grill controls to the "ON" position to purge the grill of any gas build-up, then turn the controls back "OFF".
- Wash off the soapy solution with cold water and dry.
- Tighten the loose joint, or replace the faulty part with manufacturer-recommended replacement parts.
- DO NOT attempt to repair the L.P. cylinder valve if it is damaged. The only way to safely resolve a damaged cylinder is to REPLACE IT.
- Repeat the leak test to ensure that no leaks are present.
LOW HEAT BURNER ADJUSTMENT
FOR MAIN CERAMIC AND TRIDENT™ BURNERS ONLY! DO NOT ADJUST THE ROTISSERIE BURNER.
The main ceramic burners and Trident ™ burner on your Lynx grill feature an adjustable low setting.
Fluctuations in gas pressure, gas conversion and even in the quality of the gas itself may affect burner performance at the "LOW" setting. It could be either too high or too low.
To Adjust the Burner to a Low Setting:
- Make sure the grill is cool.
- Remove the racks so you can see the flames while adjusting the burners.
- Light the burner and allow it to preheat on high for 3 minutes.
- Turn the burner to "LOW".
- Pull off the control knob.
- While holding the valve shaft with pliers as shown insert a small flat screwdriver into the center shaft and adjust the flame's low setting. (1/8" blade 3" long shaft)
Clockwise will lower the flame setting, counterclockwise will raise it.

The proper setting is where the flame is stable at its lowest setting. On the Trident™ burner slight flutter will be present in the crossover portion of the front of the burner before the burner itself becomes weak.
The factory setting for propane gas is 1/2 to 3/4 turn from the very bottom of the adjustment. The setting for natural gas is 1- 1/2 to 1- 3/4 from the bottom. After the low settings are proper, turn all burners to high for visual inspection.
FINAL CHECKS ...continued
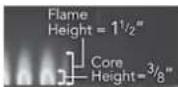
Flames should be blue and stable with slight yellow tips on the ceramic burner. The bright blue core should be about 3/8 inch high with a total flame height of about 1 1/2 inches.
The flames should burn quietly (no "torch" sounds) and they should not "lift" up from the burner. If your flames do not match those indicated in the photo, ensure that the burner ports are free and clear of dirt, debris, or spider webs. The ceramic tiles should be uniformly red to orange in appearance. There should be no lifting, fluttering or lazy blue flames.
The appearance of the Trident TM burner should be visually checked. Some food particles will show as yellow flames but should burn off.

ONE LAST THING
Finally, before leaving, check all the burners for proper operation. Make sure the control knobs turn freely and completely through their full range.
20 21 CARE & USE/INSTALLATION
IMPORTANT:
Make sure the owner knows where the main gas supply shut off valve is located.
Finally, for safety and for proper use & care, you must leave this manual with the owner. Make sure you advise them to keep it for future reference.
For technical assistance call:
Lynx Customer Care 888-289-5969
CHECKLIST BEFORE EACH USE (FOR YOUR SAFETY)
- Do you smell gas? If yes, shut off everything and call the gas company or a qualified plumber to check for leaks, if not please continue.
- Are you prepared to stay with the grill during the entire cooking process? If not, gather what you need before starting the lighting process. If yes, please continue.
- Is your cooking area free and clear of any combustibles, besides your food, that might ignite? If not, clear the area before starting the lighting process, if yes, please continue.
-
Do all control knobs turn freely? If not, call for service, if yes, please continue.
-
If you are using a portable propane cylinder, is it connected and leak tested? If not, check the connection before continuing. If yes, please continue.
- Do you know where your grill's main gas supply shut off valve is located? If not, locate it before continuing. If yes, please continue.
- Are all burners properly seated in the grill with mounting legs in slots? If not, seat the burners properly before continuing. If yes, please continue.
- Is the wind blowing just lightly and not blowing on the back of the grill? If not, wait until the wind subsides or turn your free standing grill so the wind goes into the front of the grill. If yes, please continue with the lighting process.
A MESSAGE TO OUR CUSTOMERS
You've just joined the world of Lynx cooks ... a discriminating collection of amateur and professional chefs that take outdoor cooking to a new level.
Your grill has been designed and built with meticulous attention to detail and it offers some unique and powerful features. You can achieve maximum performance and enjoyment of these features only by carefully reading this manual ... before your first cook-out.
This manual includes important safety tips and great hints for better grilling. You'll want to keep it handy for easy reference.
Also, at Lynx, we enjoy hearing from our customers. We like to hear about your successes but also about any difficulties you are having. Please feel free to contact us with any questions or problems, or just to share a new recipe. Please include the model number of your grill in your correspondence.
With the proper use and care this product will provide years of trouble-free service.
Should your Lynx grill change ownership, please make sure that the new owner receives this manual.
Thanks again for your purchase. Enjoy!
CARE & USE/INSTALLATION
IMPORTANT SAFETY PRECAUTIONS
PLEASE REVIEW THESE IMPORTANT SAFETY PRECAUTIONS BEFORE YOU USE YOUR GRILL.
-
NEVER LEAVE THE GRILL UNATTENDED WHILE COOKING.
-
Ensure all tie-down straps have been removed from the burners.
-
Always use caution when operating the grill in a windy area. (See INDEX: "Grilling in Windy Conditions" for further details.)
-
Avoid wearing loose-fitting garments or long sleeves while grilling. They could ignite.
-
Never touch the grill racks, hood or immediate surrounding metal surfaces with your bare hands while grilling.
-
Use an insulated glove or mitt when opening and operating the grill. Always open the grill lid slowly to allow heat and smoke to escape before fully opening.
-
The grill hood must be fully opened while lighting the grill. Releasing fuel into a closed grill before lighting will not make it light sooner or more efficiently. It will only risk explosion and personal injury or death. Never loan over a hot grill surface or look directly into the grill when attempting to light.
-
Do not heat unopened food containers as pressure build-up will cause the container to explode.
-
Do not use aluminum foil to line grill racks or drip pens. This will alter the airflow or trap excessive heat in the control area and can melt control knobs and ignition modules. Such damage is specifically excluded from your warranty.
-
Never use charcoal or any other solid fuel in the grill.
-
Cooking excessively fatty meats and oils will cause flares ups. Internal fires or damage caused by them or by the grill being left unattended while cooking are not covered under the terms and conditions of our warranty.
-
Never grill without the drip pan in place. Always ensure the drip pan is pushed all the way to the back of the grill. Hot grease can leak downward and produce a fire or explosion.
-
Grease is extremely flammable. Let hot grease cool down before attempting to handle or dispose of it. The drip tray should be cleaned of grease on a regular basis.
-
Do not use the grill unless a leak check has been performed on all gas connections. (See INDEX: "Leak Test Procedure" for further details.)
-
Never operate the grill while under the influence of alcohol or drugs.
-
Do not lean on side shelves and never place a load weighing more than 25 pounds on a side shelf.
-
If any burner does not light or goes out during operation, turn off all gas control knobs, open the hood and wait five (5) minutes before attempting to re-light.
-
Portable L.P. cylinders. Always shut off the main valve on the L.P. cylinder after each use.
-
Spiders and insects like to nest in the burners, venturis, valves and orifices of a grill, disrupting the gas flow. This very dangerous condition can cause a fire behind the control panel, damaging the grill and risking personal injury. If your grill has been unused for a long time, inspect and clean the burners, venturis, valves and orifices. (See INDEX: "Cleaning the Ceramic Burner" for further details.)
GRILLING IN WINDY CONDITIONS
Outdoor grills create more heat than interior kitchen ranges. That's how they sear and grill steaks and other foods.
These high-performance burners require a constant, steady supply of fresh air to mix with the fuel. Your Lynx grill pulls air

Air enters through the front of the grill.
in through the front and vents hot gases out through the rear. Using your grill in windy conditions may disrupt the front-to-back air flow, if, while grilling with all burners on high and the hood closed, you notice that the temperature gauge fails to rise ... be careful. If wind has kept hot gases from exiting the rear of the grill the control panel and knobs may have become extremely hot.


Wind hitting the back of the grill can disrupt proper exhaust.
Your Lynx grill features an exclusive, patent-pending Host Stabilizer that will deflect wind and, in most cases, prevent this situation.
But there are a few things you can do to further prevent the possibility of improper heat buildup:
- On breezy days, be careful not to leave the front hood down when the burners are on high if the is grill unattended.
- If you suspect the grill is overheating, using an oven mitt, open the front hood. Then adjust the burner control knob to a lower setting.
• Install your grill with a wind break behind it.
- Orient the grill so prevailing winds are not blowing into the rear of the grill.
Please Note: Any damage caused from use in windy conditions, such as melted knobs or igniter wires, or control panel discoloration from heat buildup, is excluded from warranty coverage.
USING YOUR LYNX GRILL
Grilling requires high heat for seating and low, controlled heat for slow cooking.
Thinner cuts of food are often cooked at a "HI" heat setting with the lid open.
On the other hand, large, thick pieces of meat or poultry are often first scared at the high setting and then grilled at a lower setting ... sometimes with the lid closed ... achieving the best results in the middle of the food without burning the outside.

Main Ceramic Burner
This coramic burner is the standard main burner found under the briquette trays.
Trident TM Burner
This advanced infrared burner provides high-intensity infrared heat for searing foods and sealing in flavor.
Some foods are cooked using direct heat and some using indirect heat.
Your Lynx grill features a variety of professional-level burners and tools for meeting the wide variety of cooking challenges. We will reveal how these features work for you. So please read and enjoy!
Depending on the model you chose, your Lynx grill may be equipped with up to three different burner types. The operation of each type varies, so it is important to understand all three.

Rotisserie Burner
This infrared burner spans the back of the cooking surface and provides consistent heat for slow rotisserie cooking.
PRE-GRILL CHECKLIST
BEFORE YOUR FIRST USE
There are a few must-check safety precautions to consider before you use your grill. Please be sure that:
- All packing materials and tie-downs have been removed from the burners. (See INDEX: "Unpacking & Assembly" for further details.)
- You have fuel connected. (See INDEX: "Gas Requirements" for further details.)
- You have electric connected. (See INDEX: "Electric Requirements" for further details.)
- A qualified plumber has performed a leak test on all the fittings that supply fuel to your grill.
• IF YOUR GRILL DOES NOT LIGHT IN 4 TO 5 SECONDS
you may need to purge the line. (Sea INDEX: "Purging the Gas Line")
AT EACH NEW SEASON
At the start of each new grilling season you should remove the grilling racks and check the burners, venturis, orifices and valves for obstructions.
Spiders and insects often nest in these areas of the grill and can disrupt air flow, causing damage to the grill and personal injury.
Also, check all hoses and fittings for damage, abrasion, wear and tear.
PRE-GRILL CHECKLIST ...continued
BEFORE EACH USE
Before any use, always make sure that
- ... you do not smell gas before you light the grill. If you do smell gas, shut everything off and have a qualified plumber check for leaks.
- ... the cooking area is free and clear of any combustibles, besides your food, that might ignite.
• ... the control knobs turn freely. - ... if you are using a portable propane cylinder, it is
securely connected and leak tested. (See INDEX: "Cylinder Requirements" for details.)
• ... you know where the main gas supply shut-off is located.
• ... the burners are seated properly in the grill. The main burners must sit level and firmly on the burner mounting support frame. (See INDEX. "Unpacking & Assembly" for further details.)
- ... wind is not blowing too strongly or blowing on the back of grill.
LIGHTING YOUR GRILL

WARNING
- Never attempt to light a burner if you smell gas.
- Always keep the lid open when lighting your grill
- Releasing fuel into a closed grill before lighting will increase the risk of explosion, property damage, personal injury or death.
- Keep your face and body as far from the grill as possible when lighting. Any time a burner doesn't light within 5 seconds, turn off the control, wait 5 minutes for gas to dissipate, and repeat the lighting procedure.
- YOU NEVER LEAVE THE GRILL UNATTENDED WHILE THE GRILL IS LIT.
ELECTRIC IGNITION
Before proceeding, make sure you have completed the "Before Each Use" checklist.
Follow these steps to light any of the burners on your grill:
First, make sure all burner control knobs are set to OFF.
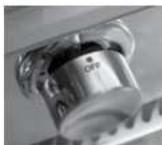
For the Main Ceramic Burner or Trident TM Burner:
Push and hold the control knob in for 5-7 seconds, allowing the igniter to heat up. Then rotate the knob to "LITE". After ignition, set the knob to the desired heat setting.
For the Rotisserie Burner:
The rotisserie burner features a thermocouple sensor with a safety valve that automatically shuts off the flow of gas if the burner goes out. (See INDEX: "Windy Conditions" for tips on how to prevent burner blow out)
To light the rotisserie burner, push and hold the control knob in for 5-7 seconds and then turn the knob to the "LITE" position.
After ignition CONTINUE HOLDING THE CONTROL KNOB IN for 30 to 60 seconds. During this time the thermocouple will heat up and the safety valve will remain open.
If you release the control knob before the thermocouple has heated up, the safety valve will shut off the flow of gas to the rotisserie burner and you will have to re-light the burner.
LIGHTING YOUR GRILL ...continued

COLD WEATHER WARNING: PROPANE
Extremely cold temperatures may cause your Trident ™ burners to light inside the burners instead of outside. Once lit, if you hear a 'whooshing' sound, immediately turn the burner knobs off to extinguish the flame and then immediately re-light the burners.
MANUAL LIGHTING
If a burner doesn't light after several attempts, it can be match lit using the lighting rod stored in the drip tray.
First, make sure you've returned all of the control knobs to the OFF position and have allowed 5 minutes for any accumulated gas to dissipate before attempting to match light a burner.
To match-light this burner, use the lighting rod to insert a lit match through the cooking grate into the front slot of the briquette tray for that burner.
Push and turn the corresponding burner control knob to "LITE". If the burner doesn't light within 5 seconds turn the knob off and wait 5 minutes before attempting to light it again.

Trident TM Burner
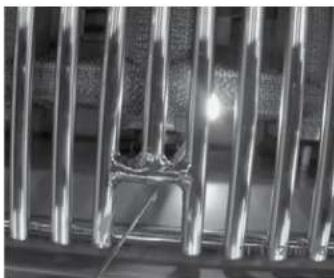
To match-light this burner, use the lighting rod to insert a lit match through the cooking grate and through the protective screen.
Push and turn the corresponding burner control knob to "LITE". If the burner doesn't light within 5 seconds turn the knob off and wait 5 minutes before attempting to light it again.
BASIC GRILLING
PRE-HEATING
Pre-heating your grill every time you use it is extremely important. Pre-heating allows the briquettes to properly heat up, providing more even and more consistent cooking results.
Pre-heat your grill by igniting all main burners, including the Trident TM burner, and setting them to "HI".
Then close the hood and allow the grill to heat for 10 to 15 minutes, the hood thermometer should reach approximately 450° . Once you've reached your desired pre-heat temperature, turn off the burners that you won't be using to cook your food. Remember, surface temperature can be up to 200° higher.

WARNING!
DO NOT LEAVE THE GRILL UNATTENDED DURING THE PRE-HEAT CYCLE OR AT ANY TIME WHILE THE GRILL IS IN USE.
PRE-HEATING FOR MORE THAN 10 - 15 MINUTESMAYOVERHEATTHEGRILL,CAUSING DAMAGE TO THE GRILL.
TYPES OF COOKING
The main ceramic burners and the Trident™ burner in your Lynx grill are capable of creating a range of heat intensities. By varying the heat output, the number of burners used and the position of the hood, you can create either direct or indirect heat or a combination of both and develop a wide variety of succulent redipes. There are two basic types of grilling in an outdoor grill.. Direct Heat and Indirect Heat
Direct Heat
Direct heat cooking occurs when foods are placed directly over the heat source. This form of heat is known as "radiant" heat because the heat radiates directly from the source to the load.
Direct heat is a must when you want to soar the outside of your food to seal in flavor. Lynx Trident ™ Burners provide the heat necessary to soar foods and seal in flavor.
Indirect Heat
Indirect heat cooking occurs when the food is not close to the heat source. Heat reaches the food via air movement within the cooking area. This form of heat is known as "convection" heat.
Indirect, or "convection" cooking is achieved by placing the food on one side of the grill and igniting burners on the other side. You leave the burner below the food "OFF". You should keep the hood closed as much as possible during this type of cooking to maintain even heat around the food. You regulate the heat by adjusting the burner, using the hood thermometer to monitor the temperature.
USING THE TRIDENT™ BURNER
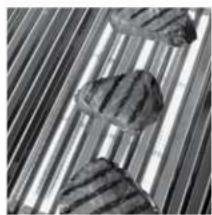
Professional restaurant chefs rely on a different type of heat ... infrared heat ... to create a higher searing temperature than what standard burners can achieve. So Lynx provides the Trident ™ infrared burner.
Infrared burners work by focusing the gas flame through a ceramic element filled with tiny holes.
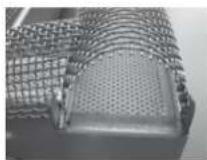
These holes focus the flame on the surface of the element, creating an intense heat much higher than that of a standard ceramic burner. It allows you to see your food more quickly while leaving the inside rare, if desired.
The Trident ™ burner, with its advanced components, requires particular attention to lighting, usage and cleaning guidelines.
Pre-Heating the Trident TM Burner
Always preheat the entire grill before cooking to achieve consistent, successful results. (See INDEX: "Preheating" for further details.)
If the grill is already hot from cooking you should still pre-host the Trident ™ burner for 2-3 minutes, or until it glows red.
Never place food over a Trident ™ burner before it is fully pre-heated because food particles and grease dripping onto a cold Trident ™ burner can clog the tiny ports and damage the burner.
For the same reason you should minimize water spills on the Trident TM burner and should not use water to control flare-ups. Take special care to minimize dropping any liquids on the Trident TM burner while cleaning the cooking grids.
HOW TO SEAR
Searing locks in flavor and juices while allowing the food's outer surface to absorb smoke and food-bom aromas produced when drippings are vaporized by the burner.
The result is a restaurant-style finish ... crisp, flavorful outside with a tender, juicy inside.
While the ceramic burners in your grill are capable of producing soaring heat, the Trident TM infrared burner is specifically designed for this purpose.

SAFETY PRECAUTIONS
Lynx grill cooking grids are heavy duty. Dropping them on the Trident ™ Burner will damage the burner. Such damage is not covered by the product warranty and will cause a fire, burns or other personal injury.
TRIDENT™ BURNER CLEANING
It's easy to keep your Trident TM Burner operating at peak performance. Just run it on "HI" with the hood open for 5 minutes after each use to burn away any food particles or drippings.
Any ash accumulation on the burner screen can be removed with a light brush (like a paint brush) or vacuum ... BUT WAIT UNTIL THE BURNER IS COOL! Never use water.
USING THE ROTISSERIE BURNER
Rotisserie
cooking provides an even delivery of heat to your foods. It has no equal.

The constant rotation not only cooks foods evenly, it also self-bastes. As juices rise to the surface of the food, they naturally flow around it as it rotates. And, by moving the burner out from beneath the food, you avoid scorching flare-ups.

Your foods will be more evenly cooked, more tender and juicier when slow-roasted on a Lynx's rotisserie.
The Lynx rotisserie system consists of four main parts, the motor, the skewer, the forks and the infrared burner.
The Motor
Install the motor by sliding it into one of the slots shown here. Use the top slot for small foods or
fast cooking and the lower slot for large foods and slower cooking.

Plug the motor power cord into the motor and into the built-in power outlet on the rear left panel. Your grill must be plugged into an AC portotisserie to work.
Rotisserie Motor Mount
Place a lasting pan in the grill to prevent food accumulations on the briquettes and burners. But BE SURE YOU REMOVE IT before using any of the other burners.
The location of the rotisserie burner makes it more susceptible to strong wind conditions (more so than the main grill burners).
For this reason it features a safety valve that automatically closes any time the rotisserie burner is not properly lit ... like if it were to extinguish in windy conditions. During windy conditions, it's best to keep the lid closed and to periodically check the burner.
When the rotisserie is not in use the rotisserie motor should be stored in a cool dry location.
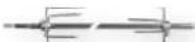
The Spit Rod & Forks
The rotisserie can handle large food items up to 50 lbs. You should prepare any item and first mount it on the skewer.
Swing the warming rack up and out of the way. It will rest in place.

Then mount the skewer on the grill before lighting the retis-serie infrared burner. Lighting the burner first could result in burning your hands while trying to mount the skewer on the grill.
It's okay to remove the grill racks and even the briquette trays to make room for large foods on the skewer.
To load the skewer, slide one of the forks onto the skewer. Push the skewer through the center of the food, then slide the second fork onto the skewer. Center the food to be cooked on the skewer then push the forks firmly together. Tighten the thumb screws (use pliers if necessary). You should wrap any loose, dangling pieces of food (like wings) with butcher's string (never use nylon or plastic string).
With the food secured to the skewer slowly roll the skewer in the palms of your hands to check for balance. It should rotate smoothly. If you find it has a heavy side, adjust where the skewer pierces the meat. An unbalanced skewer will cause uneven rotation and uneven cooking. It's normal for the skewer to flex with large foods.
USING THE ROTISSERIE BURNER ...continued
Slide the pointed end of the skewer into the motor and rest the other end on the rollers on the other side of the grill.
The notched portion of the skewer must rest on the rollers for proper operation.

Must rest on rollers
The Rotisserie Burner

To light the rotisserie infrared burner, first mount the skewered food item on the grill then follow the rotis-
serie lighting procedure. (See INDEX: "Rotisserie Bumer, Lighting" for further details.)
Once lit, the rotisserie burner should reach cooking temperatures in about 1 minute. It will glow evenly across its surface in about 5 minutes.
NOTE: The grill thermometer should not be used for rotisserie cooking. It is not designed to read direct infrared heat.
If the burner will not stay it when you release the control knob, re-light it and hold the control knob in for at least 60 seconds to allow the thermocouple to heat up.
If, after holding the control knob in for at least 60 seconds, the bumer still will not stay lit when releasing the control knob, call for service.
(See INDEX: "Obtaining service from Lynx" for further details.)
Professional chefs far and wide set their restaurant cuisine
apart by cooking
over wood fires. Imparting a delicate hint of wood smoke enhances food, raising your culinary skills to the next level.
Your new grill comes with the Lynx Smoker
Set with handle. This oval shaped Lynx Smoker box can be placed anywhere on the grates directly over any burner. The unique handle and interlock mechanism is designed to allow quick removal or refilling of the Lynx smoker box.
The smoker box is designed with special draft and flow through for maximum smoke. It is constructed of 304 Heavy Gauge Stainless Steel for years of use.
The Lynx Smoker box can be used with smoker pellets or wood chips. Whether using wood chips or pellets, we recommend using approximately 3 oz. of either material. There is no need for presoaking, just fill the smoker box.
Now use the handle to place the smoker box directly on the hot grates. Don't forget to remove the smoker handle before closing the grill lid.
Smoke occurs at approximately
575 degrees F. at the grilling surface. Set the bumer knob to medium/medium low to achieve this temperature. Use the handle to move or refill the smoker box. Control the smoking by adjusting the heat and being careful not to adjust it too high.
For best results keep the lid closed. The best absorption of smoke flavor occurs early in the cooking process. When finished with smoking, allow the smoker box to cool and dispose of remnants.

CAUTION
Hand a the smoker box with care. The cover becomes extremely hot when in use. Use sturdy, properly insulated gloves or dry pot holders.
CLEANING YOUR LYNX GRILL (Including Required Maintenance)
STAINLESS STEEL
Lynx products are known for their attractive appearance. We achieve this by selecting only the finest grades of stainless steel and applying exacting workmanship.
In order to maintain this attractive appearance over the life of the grill it is important to take the following steps:
- After each use wipe down the exterior of the grill to remove grease and splatters.
- Be sure to follow the cleaning instructions for keeping the grates and burners clean and ready for use.
- Use a commercially available Stainless Steel cleaner* to clean and polish the exterior surfaces.
Doing these things on a regular basis minimizes the amount of effort required.
Part of the appeal of your Lynx Grill is the fine grain finish. When removing stubborn stains:
- Do not use metallic abrasives and always rub in the direction of the grain.
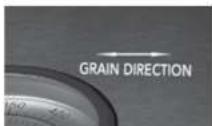
- Some household cleaning products are not suitable for stainless steel; be sure to read the label before using on your Lynx Grill.
• Always use the mildest cleaning solution first, scrubbing in the direction of the grain. Specks of grease may gather in the grain of the stainless steel and bake on to the surface, giving the appearance of rust.
To remove these baked-on foods use a fine to medium grit non-metallic abrasive pad (Scotch Brite is good) in conjunction with a stainless steel cleaner.
- Solutions used for cleaning concrete and masonry can be very corrosive and will 'attack' stainless steel. Ensure your Lynx products are well protected before you allow the use of such chemicals near your grill.
SPECIAL NOTE FOR LOCATIONS NEAR POOLS AND COASTAL AREAS:
The 304 stainless steel material used in the construction of a Lynx Grill is highly rust resistant, however, chlorine in the air from swimming pools or the salt from sea air may cause
surface rust to appear and even create some pitting if left on the product.
Here are a few tips to avoid this:
- Regularly wipe down the exterior surfaces with a clamp cloth. (Micro fiber cloths such as Ecloth perform very well).
- Allow the surfaces to dry before installing the cover. Do not cover a clamp grill.
- In extreme environments apply a rust inhibitor which leaves a microscopic protective layer on the grill. Products that provide a layer of vapor corrosion inhibitors (VpCl™) protect the surface very well.
- For seasonal storage use the product referred to above, ensure the grill is dry and then cover and secure the cover to minimize the amount of damp air getting to the surfaces
THE LYNX LIMITED LIFE TIME WARRANTY PROVIDES PROTECTION AGAINST RUST THROUGH OF PARTS THAT RENDER THE PRODUCT INOPERATIVE. IT DOES NOT COVER OCCASIONAL SURFACE RUST OR STAINING DUE TO ENVIRONMENTAL CONDITIONS.
After your first use certain areas of the grill may discolor from the intense heat given off by the burners - this is normal and cannot be cleaned off.
For light and heavy food stains there are many different stainless steel cleaners available.
DRIP TRAY
The drip tray should be cleaned after each use. After the grill is completely cool, remove the drip tray by pulling it out until it stops, then lifting the front edge until the drip tray comes free.
Clean it with hot soapy water or an oven-style cleaning product and re-install. When using an oven-style cleaning product be sure to carefully follow the manufacturer's instructions. Many of these cleaners are toxic and can damage the stainless steel finish if not used properly.
Also, check the tray after rain. If you've left the grill uncovered, you may need to remove the drip tray drain plug to drain the water from the tray. The drain plug can be removed with a flat-head screwdriver.
*RATED FOR HIGH HEAT
CLEANING YOUR LYNX GRILL (Including Required Maintenance)...continued

WARNING
DO NOT ALLOW EXCESS GREASE OR LIQUIDS TO ACCUMULATE IN THE DRIP TRAY AS THIS MAY CREATE A FIRE HAZARD. NEVER USE GRILL WITHOUT DRIP TRAY PROPERLY INSTALLED.
GRILLING RACKS
The easiest way to clean the grill racks is to do so immediately after turning off the burners, while they are still hot. Weaning a long BBO mitt to protect your hand from steam, dip a brass bristle brush in hot water and scrub the grill rack. Dip the brush frequently because the steam helps remove baked-on loads.
CERAMIC BRIQUETTES
The ceramic briquettes normally burn off any accumulated food drippings. But you may occasionally experience larger spills that don't burn off under normal use.
When this happens, let the grill cool completely. Remove the racks and then the briquette trays by lifting the front edge and pulling them toward you.
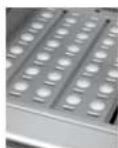
Flip the trays over and put them back in place over the burner. Light the burners and set them to "HI" for 5 - 10 minutes to burn the briquettes clean. Any remaining food items can be brushed off using a soft brush. Be sure the trays have completely cooled before reinstalling them.
Replacement briquette trays can be ordered from Lynx or from your dealer.
MAIN CERAMIC BURNERS
Make sure the grill is completely cool before proceeding. Ensure that the gas supply is off and all control knobs are in the "OFF" position.
To Remove Ceramic Burners:
Remove the grill racks and briquette trays.
Remove the burner caps to prevent accidental breakage
Lift the burner up until the legs exit the frame.
Then pull to the rear of the grill so the burner head comes off the brass orifice at the front.
Angle the burner sideways and lift it out.
To Clean the Ceramic Burner:
To maximize a grill performance, clean the exterior of the burner with a nylon brush when cooled. Clear any clogged ports by lifting the ceramic burner caps and cleaning any debris at the port holes.
Shake out any debris through the venturi or or burner cap openings.
Use a flashlight to inspect the burner inlet to ensure it is not blocked. If obstructions can be seen, clean it with a paper clip or a pipe cleaner.

WARNING
PROPER PLACEMENT OF EACH BURNER IS CRITICAL AFTER CLEANING THEY MUST BE CENTERED ON THE BRASS ORifice, RESTING LEVEL WITHOUT ANY ROCKING. FAILURE TO MEET THESE CONDITIONS MAY CAUSE A VERY DANGEROUS CONDITION THAT CAN CAUSE PERSONAL INJURY AND PROPERTY DAMAGE.

CLEANING YOUR LYNX GRILL. (Including Required Maintenance)...continued
TRIDENT™ BURNER
It's easy to keep your Trident TM burner operating at peak performance. Just run it on "H" with the hood open for 5 minutes after each use to bum away any food particles or drippings.
Any ash accumulation on the burner screen can be removed with a light brush or vacuum ... BUT WAIT UNTIL, THE BURNER IS COOL! Never use water or liquid to clean.
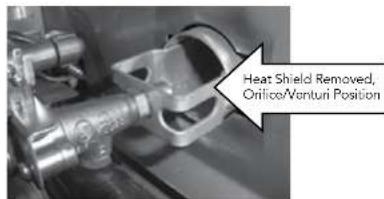
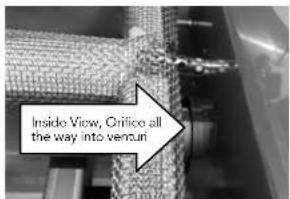
Every 3 to 6 months, remove the burner and inspect the venturi (inlet) and orifice to ensure that they're free of obstructions.
Food debris on the inside of the burner can be gently shaken out. Do not touch the ceramic surface.
When re-installing the Trident TM burner, be sure to correctly position the burner.
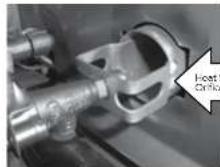
Host Shed Removed, StrikeVertur Position


WARNING: REQUIRED MAINTENANCE
- Failure to perform required maintenance will void your warranty
- Clean out port holes on all ceramic burners if necessary with a plastic scouring pad.
- Scrape the bottom of the firebox with a plastic putty knife or similar tool and discard the residue.
- Clean out the burner orifices and ensure they are free of debris.
- Clean the drip tray
TROUBLESHOOTING YOUR LYNX GRILL
BEFORE YOU CALL FOR SERVICE
Please check a few things before calling for service:
• Is there fuel supplied to the grill?
• Is the main shut-off valve open?
- Are you using the correct type of fuel? (LP or Natural Gas) (See INDEX: "Gas Requirements" for further details.)
- Is your propane cylinder empty? Have you recently refilled the propane cylinder? If so, is the connection tight?
- Have you opened the valve on the propane cylinder?
- Is the grill plugged in to a live electric circuit?
If you've checked the above items, review the trouble-shooting list below before calling for Lynx for service.
POTENTIAL PROBLEMS
GRILL WON'T LIGHT
First, confirm that the grill is getting electricity by turning on the lights, then:
Check The Igniters
Your Lynx grill uses an electric ignition system that does not spark. Instead, the igniters should glow constantly when a control knob is pushed in.
- Ensure that all burner controls are set to OFF.
- Remove the cooking grates and briquette trays.
- Watch an igniter as you push in and hold the corresponding control knob. You will need either a small mirror or shiny metal object to see the igniter under its cover.
Be sure you push in the correct control knob and keep

the knob in the "OFF" position).
- Check the remaining igniters. If igniters don't glow, proceed with troubleshooting or match-light the burner.
Check The Burners
If the igniters are working check to see if gas is reaching the burners by attempting to match light a burner,
BE CAREFUL IF THE BURNER FAILS TO IGNITE, WAIT 5 MINUTES BEFORE ATTEMPTING TO IGNITE OTHER BURNERS! (See INDEX: "Match Lighting" for further details.)
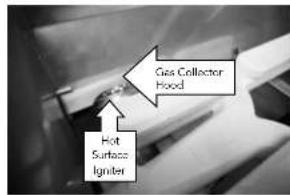
If match lighting doesn't work, re-check fuel connections for leaks and ensure the supply is of the correct type and is of adequate pressure. (See INDEX: "Leak Test Procedure" for further details.)
If the burner will light with a match, then the igniter may not be functioning correctly. Call for service.
If the burner will not match light, and you know you are getting gas, wait for any gas to dissipate and remove the burner and check it for blockages.
SMELL OF GAS WHILE COOKING
IF YOU SMELL GAS WHILE THE GRILL IS OPERATING, IMMEDIATELY TURN OFF ALL BURNERS AND SHUT OFF THE MAIN FUEL SUPPLY.
- Perform a leak test (See INDEX: "Leak Test Procedure" for further details.)
- Check for blockages (See INDEX: "Clean the Ceramic Burner" for further details.)
YELLOW FLAMES
A yellow flame on the main burners indicates a lack of air. But, if the air around the grill is dusty or if heavy grease is present, some orange tips on the burner flame are normal. Inspect for cracks in the burners where air may be entering.
LOW OR INSUFFICIENT HEAT
No part of the grill should ever be lined with aluminum foil. Doing so will interfere with airflow and can cause a low heat condition.
Ensure that you've preheated the main burners for at least 10 to 15 minutes with the hood closed and the Trident ™ burner for 3 minutes.
Proper leveling during installation is critical. A grill that is out of level will cause erratic burner combustion and inefficient, uneven heating. A carpenter's spirit level should be used to level the grill both front-to-back and side-to-side.
If the low heat problem persists:
- Check the gas supply line sizing requirements.
- Check the gas supply line for kinks or damage.
POTENTIAL PROBLEMS ...continued
REPLACE any damaged supply lines.
- Check the Regulator
Make sure that the regulator & hose assembly is the one designed for and supplied with your Lynx grill and that it is correctly set up for the type of fuel you are using. (See INDEX: "Regulator Conversion" for further details.)
The hose and regulator provided by Lynx must be used if your grill is set-up for a portable LP Gas Cylinder. Ensure the LP hose is not behind the firebox.
Check that there is no physical pressure being applied to the regulator attached to the back of the grill. The regulator contains a flexible diaphragm and should not be allowed to touch the grill body or its surroundings.
- Check for Obstructions
Ensure that the burners and drip tray are clean and free from obstructions.
LP (Propane) units:
• Is the cylinder almost empty?
Almost empty cylinders may not have sufficient pressure to run the burners at high heat.
- Have the line pressure checked by a qualified technician (See INDEX: "Gas Requirements" for further details.)
- Flow Limiting Device
Improper lighting procedures may have activated the LP cylinder's flow control device, reducing the heat output.
To reset the flow control:
- Shut off all burner controls and close the LP cylinder valve.
- Wait 30 seconds and, very slowly, reopen the cylinder valve.
- Wait a few seconds and relite a burner.
Bulk LP cylinder users:
Bulk LP cylinder lines must be properly regulated.
Ensure that you are using a 4/11 appliance regulator supplied by Lynx and converted to LP gas. Also ensure that you do not have more than one regulator in line.
Natural Gas units:
■ Supply Line
Ensure that the supply line is at least 31/4 " inside diameter or 1° outside diameter.
- Check line pressure
Natural gas inlet pressure should be at least 5" W.C. and manifold pressure not less than 4" W.C. under full load (with all burners on.)
- Check burners for blockages.
- Check flame characteristics. (See INDEX: "Flame, Correct Size")
- Clean or adjust air shutter (See INDEX: "Air Shutter Adjustment."
WIND HITTING GRILL
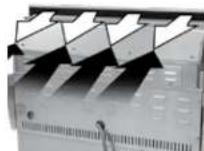
Wind hitting the grill while in use, especially winds blowing into or across the hood gap from behind, can cause poor performance and in some cases can cause the control panel and knobs to get dangerously hot.
Steady or gusty winds can prevent the normal exhaust of hot gases. Locate your grill away from prevailing winds and avoid grilling in windy conditions (see page 23).
POTENTIAL PROBLEMS ...continued
BURNER GOES OUT
- Location
First determine if the problem is being caused by location. If the grill is subject to high winds, reposition it to provide some protection.
- Check the Flame
Check the gas supply and flame characteristics. (See IN-DEX: "Flame, Correct Size")
- Burners Seated
Check to ensure that the burners are correctly positioned in the grill. (See INDEX: "Burner Placement" for further details.)
Correctly-installed burners should be seated firmly and level with no side-to-side movement.
BURNER GOES OUT ONLY WHEN SET TO "LOW"
The valves on the grill feature an adjustable low setting.
Fluctuations in gas pressure, gas conversion and even in the quality of the gas itself may affect burner performance at the "LOW" setting. It could be either too high or too low. (See INDEX: "Bumer Adjustment," for further details.)
ROTISSERIE WON'T LIGHT
Follow the same procedure as described for the grill burners to diagnose problems with the rotisserie burner.
BE CAREFUL The rotissario burner fame may be hard to see in bright sunny conditions.
ROTISSERIE LIGHTS BUT GOES OUT AS SOON AS CONTROL IS RELEASED
- Check Thermocouple
The control knob must be held in for 30 to 60 seconds after ignition for the rotisserie burner to stay lit. (See INDEX: "Lighting Rotisserie Burner" for further details.)
If the bumper will not stay it when you release the control knob, re-light it and hold the control knob in for at least 60 seconds to allow the thermocouple to heat up.
If, after holding the control knob in for at least 60 seconds, the burner still will not stay lit when releasing the control knob, call for service.
(See INDEX: "Obtaining service from Lynx" for further details.)
LIGHTS WILL NOT ILLUMINATE
- Check Power
Ensure that the grill is connected to a live AC power source and check for rotisserie motor operation.
- Replace the Bulb
Replacement bulbs are halogen. 12 volt, 10W max, T3 type with a G4 bi-pin, and are readily available at most home improvement stores. The glass cover is held in place by two spring tension labs. The bulbs are easily removable without the use of tools. Simply grasp the glass lens at the outer corners, near the front tension clips and push the lens back. Then, swing the lens down and pull it loose. You may have to loosen the screw to remove the lens.
Avoid touching the glass of a new bulb. Halogen bulbs are very sensitive to the oils found in human skin. Touching the bulbs may shorten their life.
Pull the bulb straight out from the socket without twisting.
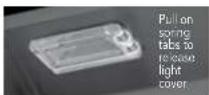
Hold the bulb using a paper towel or other cloth and gently press it straight into the socket. The glass cover should be gently snapped back into place.
CONTACTING LYNX CUSTOMER CARE
Before calling Lynx Customer Care, please make sure you have the following information:
- Model number
- Date of purchase
• Proof of purchase by the original owner
- Serial number
The serial number can be located on the rating plate which is located on the underside of the drip tray and on the heat shield behind the front panel.
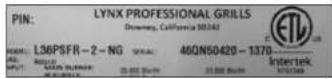
For warranty service, contact the Lynx Customer Care Department for an authorized service agent near you at:
(888) 289-5969
www.lynxgrills.com
Your satisfaction is of the utmost importance to us. If a problem cannot be resolved to your satisfaction, please write, fax or email us:
Lynx Professional Grills
7300 Flores Street
Downey, CA 90242
Service: [888] 289-5969
Tel: (562) 299-6900
Fax: (562) 299-6978
www.lynxgril.s.com
email: service@lynxgrills.com
Contact Lynx for replacement parts. Parts are shipped F.O.B. Downey, CA.
THE LYNX STORY
Lynx began with a vision.
A small group of manufacturing engineers with over a century of collective experience had a dream. They dared to take their extensive commercial manufacturing know-how and create a line of outdoor cooking products that offer commercial elegance and performance to the consumer market.

Lynx has taken the quality, workmanship, service and innovation of the commercial market and incorporated it into the Lynx Professional Grills line of consumer and commercial products. The combination of creative design, superior materials and exceptional craftsmanship elevates Lynx products to a class of their own.
Lynx original commercial products are used every day in restaurants, hotels and theme parks across the USA:
LYNX SATISFIED CUSTOMERS
• TGI Fridays
• Applebee's
• Houston's
• Red Lobster
- Hard Rock Cafe
• Wolfgang Pucks
- Cheesecake Factory
• Red Robin
• Planet Hollywood
• Hilton
• Hyatt
• Four Seasons Marriott
Le Meridian
- Sheraton
• Conrad International
• Bellagio
• New York New York
• MGM Grand
- Treasure Island
• Mirage
• Paris
• venedan
• Excheibur
- Manda - Divisions
• Riviera • Desert Inc
• Hard Rock Hotel
■ Disney World
LYNX LIMITED WARRANTY*
I. Limited Lifetime Warranty
The stainless steel grill body, ceramic grill burners, cooking grates, Trident ™ burner and rotissene infrared burner are warranted to be free from defects in material and workmanship when subjected to normal domestic use and maintenance for the lifetime of the original purchaser. This warranty excludes surface corrosion, scratches, and discoloration which may occur during normal use. This warranty is limited to the replacement of the defective parts, with the owner paying a processing fee and all other costs including labor. Failure to perform required maintenance will void this warranty
II. Limited Five-Year Warranty
The following grill parts are warranted to be free from defects in material and workmanship, when subjected to normal domestic use and maintenance, for a period of five (5) years from the original date of purchase; warming racks, split rods, briquette trays, manifolds and gas valves. This warranty is limited to the replacement of the defective parts, with the owner paying a processing fee and all other costs including labor.
III. Limited two-Year Warranty
All other grill components are warranted to be free from defects in material and workmanship, when subjected to normal domestic use and maintenance, for a period of two (2) years from the original date of purchase. This warranty is limited to the replacement of the defective parts, with the consumer paying all labor costs.
IV. Limited One-Year Warranty
For a period of one (1) year from the original date of purchase, Lynx will replace or repair parts found to be defective at no cost to the original purchaser. This includes the cost of shipping replacement parts and, where necessary, service labor at prevailing local rates by a Lynx authorized service person. Service will be provided during normal business hours and must be authorized in advance by Lynx.
V. Limitations & Exclusions
1) This Warranty shall apply to products purchased and located in the United States and Canada. Products must be purchased in the country where service is requested.
2) Warranty applies only to the original purchaser and may not be transferred.
3) Warranty is in lieu of all other warranties expressed or implied and all other obligations or liabilities related to the sale or use of Lynx products.
4) Warranty shall not apply and Lynx is not responsible for damage resulting from misuse, abuse, failure to provide reasonable and necessary required maintenance, natural disaster, animals, alteration of or tampering with the appliance, accident, hostile environment, flare-up fires, improper installation or operation, or an installation not in accordance with the instructions contained in this manual, or the local codes.
5) Lynx shall not be liable for incidental, consequential, special or contingent damages resulting from its breach of this written warranty or any implied warranty.
6) Some states do not allow limitations on how long an implied warranty lasts, or the exclusions of or limitations on consequential damages. This warranty gives you specific legal rights and you may have other rights which vary from state to state.
7) No one has the authority to add to or vary Lynx's warranty, or to create for Lynx any other obligation or liability in connection with the sale or use of its products.
8) Limited to the replacement of defective parts with the owner paying all other costs including labor.
1) Installation or start-up, damages or problems caused by improper installation or use;
2) Service by an unauthorized service provider;
3) Damage or repair due to service by an unauthorized service provider or use of unauthorized parts;
Warranty does not apply to products installed in any commercial or non-residential application. Examples of excluded applications include, but are not limited to day care centers, schools, bed and breakfast centers, churches, private clubs, fire stations, club houses, common areas in multi-family dwellings, restaurants, hotels, nursing homes, food service locations and institutional food service locations. Contact Lynx for Common Area Warranty.
5) To correct normal adjustments or settings, due to improper installation, commissioning or local gas supply properties.
6) Shipping and handling costs, export duties, installation, removal, or re-installation cost (RMA excluded).
7) Display models are sold "as is". If you have purchased a display model, please be advised that it is sold "as is" and that it is subject to the following warranty exclusions: any exterior or cosmetic damage is nonwarrantable; any missing components will be replaced at consumers' expense; major handling damage to manifold, valve and ignition system will be serviced at consumer's expense; all other warranties will remain in effect.
8) The cost of a service call to diagnose complaint.
9) Modification to Lynx product will void related warranties.
VI. What is not covered: Lynx shall not be responsible for and shall not pay for the following
* Please refer to Accessory Care & Use for respective warranties.
LYNX COMMON AREA LIMITED WARRANTY*
The Lynx Limited Warranty covers residential installations only and is non-transferable to any other party. This warranty applies when the product is installed in common areas where more than a single party has rightful access to its use or in locations considered beyond normal residential use such as B&B's, and private clubs.
THIS PROVISION EXCLUDES ALL COMMERCIAL APPLICATIONS, INCLUDING, BUT NOT LIMITED TO RESTAURANTS AND INSTITUTIONAL FOOD SERVICE LOCATIONS.
I. Limited Five-Year Warranty
The stainless steel body, the solid ceramic grill burners are warranted to be free from defects in material and workmanship when subjected to normal use and maintenance for a five year period from the original purchase date. This warranty excludes surface corrosion, scratches, and discoloration which may occur during regular use. This warranty is limited to the replacement of the defective parts, with the consumer paying labor.
II. Limited One-Year Warranty
The structural integrity of the interior grill parts, exterior, and drip pans are warranted to be free from defects in material and workmanship, when subjected to normal domestic use and service, for a period of one year from the date of purchase. This warranty is limited to the replacement of the defective parts, with the owner paying all other costs including labor.
III. Limited Parts & Labor Warranty
All other grill components are warranted to be free from defects in material and workmanship for a period of 90 days from the original date of purchase. Lynx will replace or repair parts found to be defective at no cost to the original purchaser. After the 90 day period Lynx will sell parts to the holder of this warranty at Lynx contractor prices for an additional 9 months.
IV. Limitations & Exclusions
1) This Warranty shall apply to products purchased and located in the United States and Canada. Products must be purchased in the country where service is requested.
2) Warranty applies only to the original location of installation and may not be transferred.
3) Warranty is in lieu of all other warranties expressed or implied and all other obligations or liabilities related to the sale or use of Lynx products.
4) Warranty shall not apply and Lynx is not responsible for damage resulting from misuse, abusa, failure to provide reasonable and necessary required maintenance, natural disaster, animals, alteration of or tampering with the appliance, accident, hostile environment, flare-up fires, improper installation or operation, oran installation not in accordance with the instructions contained in this manual, or the local codes.
special or contingent damages resulting from its breach of this written warranty or any implied warranty.
6) Some states do not allow limitations on how long an implied warranty lasts, or the exclusions of or limitations on consequential damages. This warranty gives you specific legal rights and you may have other rights which vary from state to state.
7) No one has the authority to add to or vary Lynx's warranty, or to create for Lynx any other obligation or liability in connection with the sale or use of its products.
8) Limited to the replacement of defective parts with the owner paying all other costs including labor.
V. What is not covered: Lynx shall not be responsible for and shall not pay for the following:
1) Installation or start-up, damages or problems caused by improper installation or use;
2) Service by an unauthorized service provider;
3) Damage or repair due to service by an unauthorized service provider or use of unauthorized parts;
4) To correct normal adjustments or settings, due to improper installation, commissioning or local gas supply properties;
5) Shipping and handling costs, export duties, installation, removal, or re-installation cost (RMA excluded).
6) Display models are generally sold "as is." If you have purchased a display model, please be advised that it is sold "as is" and that it is subject to the following warranty exclusions: any exterior or cosmetic damage is non-warrantable; any missing components will be replaced at consumer's expense; major handling damage to manifold, valve and ignition system will be serviced at consumer's expense; all other warranties will remain in effect.
7) The cost of a service call to diagnose complaint.
a) Modification to Lynx product will void related warranties.
* Please refer to Accessory Care & Use for respective warranties.
WIRING SCHEMATICS
L27 & L30 ROTISSERIE GRILL
![graph TD A["Black"] --> B["LED"] C["Red"] --> D["Orange"] E["Green"] --> F["White"] G["Light Source"] --> H["Light Source / Dark Source / Light Source"] I["Light Source / Dark Source / Light Source"] --> J["Light Source / Dark Source / Light Source"] K["Light Source / Dark Source / Light Source"] --…](/content/2026/06/1339776/images/5835cfd3a7b60dbaae2ac58b1bc194baa4eb103f8dc3930a4fa4aa6f435ba7c9.jpg)
WIRING SCHEMATICS
L36 & L42 ROTISSERIE GRILL
![graph TD A["Black"] --> B["LED Litter"] C["Red"] --> D["LCD Litter"] E["Orange"] --> F["Ground"] G["Green"] --> H["Light"] I["White"] --> J["Ground"] K["Black"] --> L["LED Litter"] M["Red"] --> N["LCD Litter"] O["Orange"] --> P["Ground"] Q["Green"] --> R["Light"] S["White"] --> T["Ground"] U["Black"…](/content/2026/06/1339776/images/0b1ce2d32e68478faebfa9daf7fc1f70e9273d81623a7bf69cb5194e3f063d38.jpg)
WIRING SCHEMATICS
L54 ROTISSERIE GRILL
![graph TD A["Light Source"] --> B["Black"] A --> C["Red"] A --> D["ORANGE"] A --> E["GREEN"] A --> F["WHITE"] B --> G["LED Light"] C --> H["LED Medium"] D --> I["LED High"] E --> J["LED Low"] F --> K["Black"] G --> L["LED Medium"] H --> M["LED High"] I --> N["LED Low"] J --> O["LED Medium"] K --> P["…](/content/2026/06/1339776/images/d125c48f62c533a2f88845dbf5425c6af364624f42be05e5f02d96244c39210d.jpg)
42 43 CARE & USE/INSTALLATION
LYNX PROFESSIONAL GRILLS EXPLODED PARTS VIEW
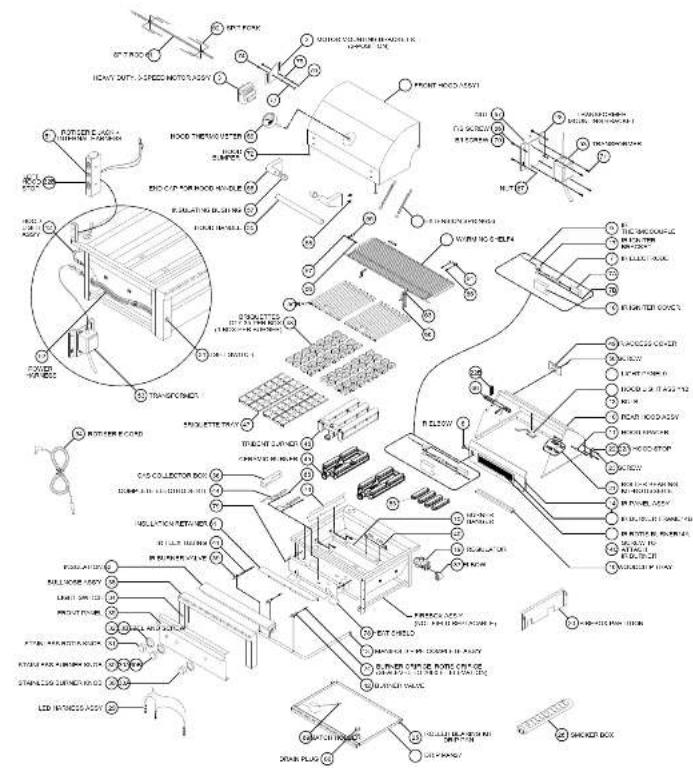
01/23/18
CARE & USE/INSTALLATION
LYNX PROFESSIONAL GRILLS PARTS LIST
| 1 | 27 | 03:02 | FEDERAL OFFICE OF 27" |
| 28 | 03:03 | FEDERAL OFFICE OF 28" | |
| 29 | 03:04 | FEDERAL OFFICE OF 29" | |
| 30 | 03:05 | FEDERAL OFFICE OF 30" | |
| 31 | 03:06 | FEDERAL OFFICE OF 31" | |
| 32 | 03:07 | FEDERAL OFFICE OF 32" | |
| 33 | 03:08 | FEDERAL OFFICE OF 33" | |
| 34 | 03:09 | FEDERAL OFFICE OF 34" | |
| 35 | 03:10 | FEDERAL OFFICE OF 35" | |
| 36 | 03:11 | FEDERAL OFFICE OF 36" | |
| 37 | 03:12 | FEDERAL OFFICE OF 37" | |
| 38 | 03:13 | FEDERAL OFFICE OF 38" | |
| 39 | 03:14 | FEDERAL OFFICE OF 39" | |
| 40 | 03:15 | FEDERAL OFFICE OF 40" | |
| 41 | 03:16 | FEDERAL OFFICE OF 41" | |
| 42 | 03:17 | FEDERAL OFFICE OF 42" | |
| 43 | 03:18 | FEDERAL OFFICE OF 43" | |
| 44 | 03:19 | FEDERAL OFFICE OF 44" | |
| 45 | 03:20 | FEDERAL OFFICE OF 45" | |
| 46 | 03:21 | FEDERAL OFFICE OF 46" | |
| 47 | 03:22 | FEDERAL OFFICE OF 47" | |
| 48 | 03:23 | FEDERAL OFFICE OF 48" | |
| 49 | 03:24 | FEDERAL OFFICE OF 49" | |
| 50 | 03:25 | FEDERAL OFFICE OF 50" | |
| 51 | 03:26 | FEDERAL OFFICE OF 51" | |
| 52 | 03:27 | FEDERAL OFFICE OF 52" | |
| 53 | 03:28 | FEDERAL OFFICE OF 53" | |
| 54 | 03:29 | FEDERAL OFFICE OF 54" | |
| 55 | 03:30 | FEDERAL OFFICE OF 55" | |
| 56 | 03:31 | FEDERAL OFFICE OF 56" | |
| 57 | 03:32 | FEDERAL OFFICE OF 57" | |
| 58 | 03:33 | FEDERAL OFFICE OF 58" | |
| 59 | 03:34 | FEDERAL OFFICE OF 59" | |
| 60 | 03:35 | FEDERAL OFFICE OF 60" | |
| 61 | 03:36 | FEDERAL OFFICE OF 61" | |
| 62 | 03:37 | FEDERAL OFFICE OF 62" | |
| 63 | 03:38 | FEDERAL OFFICE OF 63" | |
| 64 | 03:39 | FEDERAL OFFICE OF 64" | |
| 65 | 03:40 | FEDERAL OFFICE OF 65" | |
| 66 | 03:41 | FEDERAL OFFICE OF 66" | |
| 67 | 03:42 | FEDERAL OFFICE OF 67" | |
| 68 | 03:43 | FEDERAL OFFICE OF 68" | |
| 69 | 03:44 | FEDERAL OFFICE OF 69" | |
| 70 | 03:45 | FEDERAL OFFICE OF 70" | |
| 71 | 03:46 | FEDERAL OFFICE OF 71" | |
| 72 | 03:47 | FEDERAL OFFICE OF 72" | |
| 73 | 03:48 | FEDERAL OFFICE OF 73" | |
| 74 | 03:49 | FEDERAL OFFICE OF 74" | |
| 75 | 03:50 | FEDERAL OFFICE OF 75" | |
| 76 | 03:51 | FEDERAL OFFICE OF 76" | |
| 77 | 03:52 | FEDERAL OFFICE OF 77" | |
| 78 | 03:53 | FEDERAL OFFICE OF 78" | |
| 79 | 03:54 | FEDERAL OFFICE OF 79" | |
| 80 | 03:55 | FEDERAL OFFICE OF 80" | |
| 81 | 03:56 | FEDERAL OFFICE OF 81" | |
| 82 | 03:57 | FEDERAL OFFICE OF 82" | |
| 83 | 03:58 | FEDERAL OFFICE OF 83" | |
| 84 | 03:59 | FEDERAL OFFICE OF 84" | |
| 85 | 03:60 | FEDERAL OFFICE OF 85" | |
| 86 | 03:61 | FEDERAL OFFICE OF 86" | |
| 87 | 03:62 | FEDERAL OFFICE OF 87" | |
| 88 | 03:63 | FEDERAL OFFICE OF 88" | |
| 89 | 03:64 | FEDERAL OFFICE OF 89" | |
| 90 | 03:65 | FEDERAL OFFICE OF 90" | |
| 91 | 03:66 | FEDERAL OFFICE OF 91" | |
| 92 | 03:67 | FEDERAL OFFICE OF 92" | |
| 93 | 03:68 | FEDERAL OFFICE OF 93" | |
| 94 | 03:69 | FEDERAL OFFICE OF 94" | |
| 95 | 03:70 | FEDERAL OFFICE OF 95" | |
| 96 | 03:71 | FEDERAL OFFICE OF 96" | |
| 97 | 03:72 | FEDERAL OFFICE OF 97" | |
| 98 | 03:73 | FEDERAL OFFICE OF 98" | |
| 99 | 03:74 | FEDERAL OFFICE OF 99" | |
| 100 | 03:75 | FEDERAL OFFICE OF 100" | |
| 101 | 03:76 | FEDERAL OFFICE OF 101" | |
| 102 | 03:77 | FEDERAL OFFICE OF 102" | |
| 103 | 03:78 | FEDERAL OFFICE OF 103" | |
| 104 | 03:79 | FEDERAL OFFICE OF 104" | |
| 105 | 03:80 | FEDERAL OFFICE OF 105" | |
| 106 | 03:81 | FEDERAL OFFICE OF 106" | |
| 107 | 03:82 | FEDERAL OFFICE OF 107" | |
| 108 | 03:83 | FEDERAL OFFICE OF 108" | |
| 109 | 03:84 | FEDERAL OFFICE OF 109" | |
| 110 | 03:85 | FEDERAL OFFICE OF 110" | |
| 111 | 03:86 | FEDERAL OFFICE OF 111" | |
| 112 | 03:87 | FEDERAL OFFICE OF 112" | |
| 113 | 03:88 | FEDERAL OFFICE OF 113" | |
| 114 | 03:89 | FEDERAL OFFICE OF 114" | |
| 115 | 03:90 | FEDERAL OFFICE OF 115" | |
| 116 | 03:91 | FEDERAL OFFICE OF 116" | |
| 117 | 03:92 | FEDERAL OFFICE OF 117" | |
| 118 | 03:93 | FEDERAL OFFICE OF 118" | |
| 119 | 03:94 | FEDERAL OFFICE OF 119" | |
| 120 | 03:95 | FEDERAL OFFICE OF 120" | |
| 121 | 03:96 | FEDERAL OFFICE OF 121" | |
| 122 | 03:97 | FEDERAL OFFICE OF 122" | |
| 123 | 03:98 | FEDERAL OFFICE OF 123" | |
| 124 | 03:99 | FEDERAL OFFICE OF 124" | |
| 125 | 04:00 | FEDERAL OFFICE OF 125" | |
| 126 | 04:01 | FEDERAL OFFICE OF 126" | |
| 127 | 04:02 | FEDERAL OFFICE OF 127" | |
| 128 | 04:03 | FEDERAL OFFICE OF 128" | |
| 129 | 04:04 | FEDERAL OFFICE OF 129" | |
| 130 | 04:05 | FEDERAL OFFICE OF 130" | |
| 131 | 04:06 | FEDERAL OFFICE OF 131" | |
| 132 | 04:07 | FEDERAL OFFICE OF 132" | |
| 133 | 04:08 | FEDERAL OFFICE OF 133" | |
| 134 | 04:09 | FEDERAL OFFICE OF 134" | |
| 135 | 04:10 | FEDERAL OFFICE OF 135" | |
| 136 | 04:11 | FEDERAL OFFICE OF 136" | |
| 137 | 04:12 | FEDERAL OFFICE OF 137" | |
| 138 | 04:13 | FEDERAL OFFICE OF 138" | |
| 139 | 04:14 | FEDERAL OFFICE OF 139" | |
| 140 | 04:15 | FEDERAL OFFICE OF 140" | |
| 141 | 04:16 | FEDERAL OFFICE OF 141" | |
| 142 | 04:17 | FEDERAL OFFICE OF 142" | |
| 143 | 04:18 | FEDERAL OFFICE OF 143" | |
| 144 | 04:19 | FEDERAL OFFICE OF 144" | |
| 145 | 04:20 | FEDERAL OFFICE OF 145" | |
| 146 | 04:21 | FEDERAL OFFICE OF 146" | |
| 147 | 04:22 | FEDERAL OFFICE OF 147" | |
| 148 | 04:23 | FEDERAL OFFICE OF 148" | |
| 149 | 04:24 | FEDERAL OFFICE OF 149" | |
| 150 | 04:25 | FEDERAL OFFICE OF 150" | |
| 151 | 04:26 | FEDERAL OFFICE OF 151" | |
| 152 | 04:27 | FEDERAL OFFICE OF 152" | |
| 153 | 04:28 | FEDERAL OFFICE OF 153" | |
| 154 | 04:29 | FEDERAL OFFICE OF 154" | |
| 155 | 04:30 | FEDERAL OFFICE OF 155" | |
| 156 | 04:31 | FEDERAL OFFICE OF 156" | |
| 157 | 04:32 | FEDERAL OFFICE OF 157" | |
| 158 | 04:33 | FEDERAL OFFICE OF 158" | |
| 159 | 04:34 | FEDERAL OFFICE OF 159" | |
| 160 | 04:35 | FEDERAL OFFICE OF 160" | |
| 161 | 04:36 | FEDERAL OFFICE OF 161" | |
| 162 | 04:37 | FEDERAL OFFICE OF 162" | |
| 163 | 04:38 | FEDERAL OFFICE OF 163" | |
| 164 | 04:39 | FEDERAL OFFICE OF 164" | |
| 165 | 04:40 | FEDERAL OFFICE OF 165" | |
| 166 | 04:41 | FEDERAL OFFICE OF 166" | |
| 167 | 04:42 | FEDERAL OFFICE OF 167" | |
| 168 | 04:43 | FEDERAL OFFICE OF 168" | |
| 169 | 04:44 | FEDERAL OFFICE OF 169" | |
| 170 | 04:45 | FEDERAL OFFICE OF 170" | |
| 171 | 04:46 | FEDERAL OFFICE OF 171" | |
| 172 | 04:47 | FEDERAL OFFICE OF 172" | |
| 173 | 04:48 | FEDERAL OFFICE OF 173" | |
| 174 | 04:49 | FEDERAL OFFICE OF 174" | |
| 175 | 04:50 | FEDERAL OFFICE OF 175" | |
| 176 | 04:51 | FEDERAL OFFICE OF 176" | |
| 177 | 04:52 | FEDERAL OFFICE OF 177" | |
| 178 | 04:53 | FEDERAL OFFICE OF 178" | |
| 179 | 04:54 | FEDERAL OFFICE OF 179" | |
| 180 | 04:55 | FEDERAL OFFICE OF 180" | |
| 181 | 04:56 | FEDERAL OFFICE OF 181" | |
| 182 | 04:57 | FEDERAL OFFICE OF 182" | |
| 183 | 04:58 | FEDERAL OFFICE OF 183" | |
| 184 | 04:59 | FEDERAL OFFICE OF 184" | |
| 185 | 04:60 | FEDERAL OFFICE OF 185" | |
| 186 | 04:61 | FEDERAL OFFICE OF 186" | |
| 187 | 04:62 | FEDERAL OFFICE OF 187" | |
| 188 | 04:63 | FEDERAL OFFICE OF 188" | |
| 189 | 04:64 | FEDERAL OFFICE OF 189" | |
| 190 | 04:65 | FEDERAL OFFICE OF 190" | |
| 191 | 04:66 | FEDERAL OFFICE OF 191" | |
| 192 | 04:67 | FEDERAL OFFICE OF 192" | |
| 193 | 04:68 | FEDERAL OFFICE OF 193" | |
| 194 | 04:69 | FEDERAL OFFICE OF 194" | |
| 195 | 04:70 | FEDERAL OFFICE OF 195" | |
| 196 | 04:71 | FEDERAL OFFICE OF 196" | |
| 197 | 04:72 | FEDERAL OFFICE OF 197" | |
| 198 | 04:73 | FEDERAL OFFICE OF 198" | |
| 199 | 04:74 | FEDERAL OFFICE OF 199" | |
| 200 | 04:75 | FEDERAL OFFICE OF 200" | |
| 201 | 04:76 | FEDERAL OFFICE OF 201" | |
| 202 | 04:77 | FEDERAL OFFICE OF 202" | |
| 203 | 04:78 | FEDERAL OFFICE OF 203" | |
| 204 | 04:79 | FEDERAL OFFICE OF 204" | |
| 205 | 04:80 | FEDERAL OFFICE OF 205" | |
| 206 | 04:81 | FEDERAL OFFICE OF 206" | |
| 207 | 04:82 | FEDERAL OFFICE OF 207" | |
| 208 | 04:83 | FEDERAL OFFICE OF 208" | |
| 209 | 04:84 | FEDERAL OFFICE OF 209" | |
| 210 | 04:85 | FEDERAL OFFICE OF 210" | |
| 211 | 04:86 | FEDERAL OFFICE OF 211" | |
| 212 | 04:87 | FEDERAL OFFICE OF 212" | |
| 213 | 04:88 | FEDERAL OFFICE OF 213" | |
| 214 | 04:89 | FEDERAL OFFICE OF 214" | |
| 215 | 04:90 | FEDERAL OFFICE OF 215" | |
| 216 | 04:91 | FEDERAL OFFICE OF 216" | |
| 217 | 04:92 | FEDERAL OFFICE OF 217" | |
| 218 | 04:93 | FEDERAL OFFICE OF 218" | |
| 219 | 04:94 | FEDERAL OFFICE OF 219" | |
| 220 | 04:95 | FEDERAL OFFICE OF 220" | |
| 221 | 04:96 | FEDERAL OFFICE OF 221" | |
| 222 | 04:97 | FEDERAL OFFICE OF 222" | |
| 223 | 04:98 | FEDERAL OFFICE OF 223" | |
| 224 | 04:99 | FEDERAL OFFICE OF 224" | |
| 225 | 05:00 | FEDERAL OFFICE OF 225" | |
| 226 | 05:01 | FEDERAL OFFICE OF 226" | |
| 227 | 05:02 | FEDERAL OFFICE OF 227" | |
| 228 | 05:03 | FEDERAL OFFICE OF 228" | |
| 229 | 05:04 | FEDERAL OFFICE OF 229" | |
| 230 | 05:05 | FEDERAL OFFICE OF 230" | |
| 231 | 05:06 | FEDERAL OFFICE OF 231" | |
| 232 | 05:07 | FEDERAL OFFICE OF 232" | |
| 233 | 05:08 | FEDERAL OFFICE OF 233" | |
| 234 | 05:09 | FEDERAL OFFICE OF 234" | |
| 235 | 05:10 | FEDERAL OFFICE OF 235" | |
| 236 | 05:11 | FEDERAL OFFICE OF 236" | |
| 237 | 05:12 | FEDERAL OFFICE OF 237" | |
| 238 | 05:13 | FEDERAL OFFICE OF 238" | |
| 239 | 05:14 | FEDERAL OFFICE OF 239" | |
| 240 | 05:15 | FEDERAL OFFICE OF 240" | |
| 241 | 05:16 | FEDERAL OFFICE OF 241" | |
| 242 | 05:17 | FEDERAL OFFICE OF 242" | |
| 243 | 05:18 | FEDERAL OFFICE OF 243" | |
| 244 | 05:19 | FEDERAL OFFICE OF 244" | |
| 245 | 05:20 | FEDERAL OFFICE OF 245" | |
| 246 | 05:21 | FEDERAL OFFICE OF 246" | |
| 247 | 05:22 | FEDERAL OFFICE OF 247" | |
| 248 | 05:23 | FEDERAL OFFICE OF 248" | |
| 249 | 05:24 | FEDERAL OFFICE OF 249" | |
| 250 | 05:25 | FEDERAL OFFICE OF 250" | |
| 251 | 05:26 | FEDERAL OFFICE OF 251" | |
| 252 | 05:27 | FEDERAL OFFICE OF 252" | |
| 253 | 05:28 | FEDERAL OFFICE OF 253" | |
| 254 | 05:29 | FEDERAL OFFICE OF 254" | |
| 255 | 05:30 | FEDERAL OFFICE OF 255" | |
| 256 | 05:31 | FEDERAL OFFICE OF 256" | |
| 257 | 05:32 | FEDERAL OFFICE OF 257" | |
| 258 | 05:33 | FEDERAL OFFICE OF 258" | |
| 259 | 05:34 | FEDERAL OFFICE OF 259" | |
| 260 | 05:35 | FEDERAL OFFICE OF 260" | |
| 261 | 05:36 | FEDERAL OFFICE OF 261" | |
| 262 | 05:37 | FEDERAL OFFICE OF 262" | |
| 263 | 05:38 | FEDERAL OFFICE OF 263" | |
| 264 | 05:39 | FEDERAL OFFICE OF 264" | |
| 265 | 05:40 | FEDERAL OFFICE OF 265" | |
| 266 | 05:41 | FEDERAL OFFICE OF 266" | |
| 267 | 05:42 | FEDERAL OFFICE OF 267" | |
| 268 | 05:43 | FEDERAL OFFICE OF 268" | |
| 269 | 05:44 | FEDERAL OFFICE OF 269" | |
| 270 | 05:45 | FEDERAL OFFICE OF 270" | |
| 271 | 05:46 | FEDERAL OFFICE OF 271" | |
| 272 | 05:47 | FEDERAL OFFICE OF 272" | |
| 273 | 05:48 | FEDERAL OFFICE OF 273" | |
| 274 | 05:49 | FEDERAL OFFICE OF 274" | |
| 275 | 05:50 | FEDERAL OFFICE OF 275" | |
| 276 | 05:51 | FEDERAL OFFICE OF 276" | |
| 277 | 05:52 | FEDERAL OFFICE OF 277" | |
| 278 | 05:53 | FEDERAL OFFICE OF 278" | |
| 279 | 05:54 | FEDERAL OFFICE OF 279" | |
| 280 | 05:55 | FEDERAL OFFICE OF 280" | |
| 281 | 05:56 | FEDERAL OFFICE OF 281" | |
| 282 | 05:57 | FEDERAL OFFICE OF 282" | |
| 283 | 05:58 | FEDERAL OFFICE OF 283" | |
| 284 | 05:59 | FEDERAL OFFICE OF 284" | |
| 285 | 05:60 | FEDERAL OFFICE OF 285" | |
| 286 | 05:61 | FEDERAL OFFICE OF 286" | |
| 287 | 05:62 | FEDERAL OFFICE OF 287" | |
| 288 | 05:63 | FEDERAL OFFICE OF 288" | |
| 289 | 05:64 | FEDERAL OFFICE OF 289" | |
| 290 | 05:65 | FEDERAL OFFICE OF 290" | |
| 291 | 05:66 | FEDERAL OFFICE OF 291" | |
| 292 | 05:67 | FEDERAL OFFICE OF 292" | |
| 293 | 05:68 | FEDERAL OFFICE OF 293" | |
| 294 | 05:69 | FEDERAL OFFICE OF 294" | |
| 295 | 05:70 | FEDERAL OFFICE OF 295" | |
| 296 | 05:71 | FEDERAL OFFICE OF 296" | |
| 297 | 05:72 | FEDERAL OFFICE OF 297" | |
| 298 | 05:73 | FEDERAL OFFICE OF 298" | |
| 299 | 05:74 | FEDERAL OFFICE OF 299" | |
| 300 | 05:75 | FEDERAL OFFICE OF 300" | |
| 301 | 05:76 | FEDERAL OFFICE OF 301" | |
| 302 | 05:77 | FEDERAL OFFICE OF 302" | |
| 303 | 05:78 | FEDERAL OFFICE OF 303" | |
| 304 | 05:79 | FEDERAL OFFICE OF 304" | |
| 305 | 05:80 | FEDERAL OFFICE OF 305" | |
| 306 | 05:81 | FEDERAL OFFICE OF 306" | |
| 307 | 05:82 | FEDERAL OFFICE OF 307" | |
| 308 | 05:83 | FEDERAL OFFICE OF 308" | |
| 309 | 05:84 | FEDERAL OFFICE OF 309" | |
| 310 | 05:85 | FEDERAL OFFICE OF 310" | |
| 311 | 05:86 | FEDERAL OFFICE OF 311" | |
| 312 | 05:87 | FEDERAL OFFICE OF 312" | |
| 313 | 05:88 | FEDERAL OFFICE OF 313" | |
| 314 | 05:89 | FEDERAL OFFICE OF 314" | |
| 315 | 05:90 | FEDERAL OFFICE OF 315" | |
| 316 | 05:91 | FEDERAL OFFICE OF 316" | |
| 317 | 05:92 | FEDERAL OFFICE OF 317" | |
| 318 | 05:93 | FEDERAL OFFICE OF 318" | |
| 319 | 05:94 | FEDERAL OFFICE OF 319" | |
| 320 | 05:95 | FEDERAL OFFICE OF 320" | |
| 321 | 05:96 | FEDERAL OFFICE OF 321" | |
| 322 | 05:97 | FEDERAL OFFICE OF 322" | |
| 323 | 05:98 | FEDERAL OFFICE OF 323" | |
| 324 | 05:99 | FEDERAL OFFICE OF 324" | |
| 325 | 06:00 | FEDERAL OFFICE OF 325" | |
| 326 | 06:01 | FEDERAL OFFICE OF 326" | |
| 327 | 06:02 | FEDERAL OFFICE OF 327" | |
| 328 | 06:03 | FEDERAL OFFICE OF 328" | |
| 329 | 06:04 | FEDERAL OFFICE OF 329" | |
| 330 | 06:05 | FEDERAL OFFICE OF 330" | |
| 331 | 06:06 | FEDERAL OFFICE OF 331" | |
| 332 | 06:07 | FEDERAL OFFICE OF 332" | |
| 333 | 06:08 | FEDERAL OFFICE OF 333" | |
| 334 | 06:09 | FEDERAL OFFICE OF 334" | |
| 335 | 06:10 | FEDERAL OFFICE OF 335" | |
| 336 | 06:11 | FEDERAL OFFICE OF 336" | |
| 337 | 06:12 | FEDERAL OFFICE OF 337" | |
| 338 | 06:13 | FEDERAL OFFICE OF 338" | |
| 339 | 06:14 | FEDERAL OFFICE OF 339" | |
| 340 | 06:15 | FEDERAL OFFICE OF 340" | |
| 341 | 06:16 | FEDERAL OFFICE OF 341" | |
| 342 | 06:17 | FEDERAL OFFICE OF 342" | |
| 343 | 06:18 | FEDERAL OFFICE OF 343" | |
| 344 | 06:19 | FEDERAL OFFICE OF 344" | |
| 345 | 06:20 | FEDERAL OFFICE OF 345" | |
| 346 | 06:21 | FEDERAL OFFICE OF 346" | |
| 1 | DATE: 1994 | POTATO: 1995 | ORDER BY: 1996 |
| 26 | ALL | 20-30 | AMG. COLOSTIC CNTS CNTS CNTS CNTS |
| 27 | ALL | 20-30 | AMG. COLOSTIC CNTS CNTS CNTS CNTS |
| 28 | ALL | 20-30 | AMG. COLOSTIC CNTS CNTS CNTS CNTS |
| 29 | SILV | 35-45 | AMG. COLOSTIC CNTS CNTS CNTS CNTS |
| 30 | ALL | 35-45 | AMG. COLOSTIC CNTS CNTS CNTS CNTS |
| 31 | ALL | 35-45 | AMG. COLOSTIC CNTS CNTS CNTS CNTS |
| 32 | LX | 30-45 | AMG. COLOSTIC CNTS CNTS CNTS |
| 33 | LX | 30-45 | AMG. COLOSTIC CNTS CNTS CNTS |
| 34 | LX | 30-45 | AMG. COLOSTIC CNTS CNTS CNTS |
| 35 | LX | 30-45 | AMG. COLOSTIC CNTS CNTS CNTS |
| 36 | ALL | 25-30 | AMG. COLOSTIC CNTS CNTS CNTS CNTS |
| 37 | ALL | 25-30 | AMG. COLOSTIC CNTS CNTS CNTS CNTS |
| 38 | ALL | 25-30 | AMG. COLOSTIC CNTS CNTS CNTS CNTS |
| 39 | ALL | 25-30 | AMG. COLOSTIC CNTS CNTS CNTS CNTS |
| 40 | ALL | 25-30 | AMG. COLOSTIC CNTS CNTS CNTS CNTS |
| 41 | ALL | 25-30 | AMG. COLOSTIC CNTS CNTS CNTS CNTS |
| 42 | ALL | 25-30 | AMG. COLOSTIC CNTS CNTS CNTS CNTS |
| 43 | ALL | 25-30 | AMG. COLOSTIC CNTS CNTS CNTS CNTS |
| 44 | ALL | 25-30 | AMG. COLOSTIC CNTS CNTS CNTS CNTS |
| 45 | ALL | 25-30 | AMG. COLOSTIC CNTS CNTS CNTS CNTS |
| 46 | ALL | 25-30 | AMG. COLOSTIC CNTS CNTS CNTS CNTS |
| 47 | ALL | 25-30 | AMG. COLOSTIC CNTS CNTS CNTS CNTS |
| 48 | ALL | 25-30 | AMG. COLOSTIC CNTS CNTS CNTS CNTS |
| 49 | ALL | 25-30 | AMG. COLOSTIC CNTS CNTS CNTS CNTS |
| 50 | ALL | 25-30 | AMG. COLOSTIC CNTS CNTS CNTS CNTS |
| 51 | ALL | 25-30 | AMG. COLOSTIC CNTS CNTS CNTS CNTS |
| 52 | ALL | 25-30 | AMG. COLOSTIC CNTS CNTS CNTS CNTS |
| 53 | ALL | 25-30 | AMG. COLOSTIC CNTS CNTS CNTS CNTS |
| 54 | ALL | 25-30 | AMG. COLOSTIC CNTS CNTS CNTS CNTS |
| 55 | ALL | 25-30 | AMG. COLOSTIC CNTS CNTS CNTS CNTS |
| 56 | ALL | 25-30 | AMG. COLOSTIC CNTS CNTS CNTS CNTS |
| 57 | ALL | 25-30 | AMG. COLOSTIC CNTS CNTS CNTS CNTS |
| 58 | ALL | 25-30 | AMG. COLOSTIC CNTS CNTS CNTS CNTS |
| 59 | ALL | 25-30 | AMG. COLOSTIC CNTS CNTS CNTS CNTS |
| 60 | ALL | 25-30 | AMG. COLOSTIC CNTS CNTS CNTS CNTS |
| 61 | ALL | 25-30 | AMG. COLOSTIC CNTS CNTS CNTS CNTS |
| 62 | ALL | 25-30 | AMG. COLOSTIC CNTS CNTS CNTS CNTS |
| 63 | ALL | 25-30 | AMG. COLOSTIC CNTS CNTS CNTS CNTS |
| 64 | ALL | 25-30 | AMG. COLOSTIC CNTS CNTS CNTS CNTS |
| 65 | ALL | 25-30 | AMG. COLOSTIC CNTS CNTS CNTS CNTS |
| 66 | ALL | 25-30 | AMG. COLOSTIC CNTS CNTS CNTS CNTS |
| 67 | ALL | 25-30 | AMG. COLOSTIC CNTS CNTS CNTS CNTS |
| 68 | ALL | 25-30 | AMG. COLOSTIC CNTS CNTS CNTS CNTS |
| 69 | ALL | 25-30 | AMG. COLOSTIC CNTS CNTS CNTS CNTS |
| 70 | ALL | 25-30 | AMG. COLOSTIC CNTS CNTS CNTS CNTS |
| 71 | ALL | 25-30 | AMG. COLOSTIC CNTS CNTS CNTS CNTS |
| 72 | ALL | 25-30 | AMG. COLOSTIC CNTS CNTS CNTS CNTS |
| 73 | ALL | 25-30 | AMG. COLOSTIC CNTS CNTS CNTS CNTS |
| 74 | ALL | 25-30 | AMG. COLOSTIC CNTS CNTS CNTS CNTS |
| 75 | ALL | 25-30 | AMG. COLOSTIC CNTS CNTS CNTS CNTS |
| 76 | ALL | 25-30 | AMG. COLOSTIC CNTS CNTS CNTS CNTS |
| 77 | ALL | 25-30 | AMG. COLOSTIC CNTS CNTS CNTS CNTS |
| 78 | ALL | 25-30 | AMG. COLOSTIC CNTS CNTS CNTS CNTS |
| 79 | ALL | 25-30 | AMG. COLOSTIC CNTS CNTS CNTS CNTS |
| 80 | ALL | 25-30 | AMG. COLOSTIC CNTS CNTS CNTS CNTS |
| 81 | ALL | 25-30 | AMG. COLOSTIC CNTS CNTS CNTS CNTS |
| 82 | ALL | 25-30 | AMG. COLOSTIC CNTS CNTS CNTS CNTS |
| 83 | ALL | 25-30 | AMG. COLOSTIC CNTS CNTS CNTS CNTS |
| 84 | ALL | 25-30 | AMG. COLOSTIC CNTS CNTS CNTS CNTS |
| 85 | ALL | 25-30 | AMG. COLOSTIC CNTS CNTS CNTS CNTS |
| 86 | ALL | 25-30 | AMG. COLOSTIC CNTS CNTS CNTS CNTS |
| 87 | ALL | 25-30 | AMG. COLOSTIC CNTS CNTS CNTS CNTS |
| 88 | ALL | 25-30 | AMG. COLOSTIC CNTS CNTS CNTS CNTS |
| 89 | ALL | 25-30 | AMG. COLOSTIC CNTS CNTS CNTS CNTS |
| 90 | ALL | 25-30 | AMG. COLOSTIC CNTS CNTS CNTS CNTS |
| 91 | ALL | 25-30 | AMG. COLOSTIC CNTS CNTS CNTS CNTS |
| 92 | ALL | 25-30 | AMG. COLOSTIC CNTS CNTS CNTS CNTS |
| 93 | ALL | 25-30 | AMG. COLOSTIC CNTS CNTS CNTS CNTS |
| 94 | ALL | 25-30 | AMG. COLOSTIC CNTS CNTS CNTS CNTS |
| 95 | ALL | 25-30 | AMG. COLOSTIC CNTS CNTS CNTS CNTS |
| 96 | ALL | 25-30 | AMG. COLOSTIC CNTS CNTS CNTS CNTS |
| 97 | ALL | 25-30 | AMG. COLOSTIC CNTS CNTS CNTS CNTS |
| 98 | ALL | 25-30 | AMG. COLOSTIC CNTS CNTS CNTS CNTS |
| 99 | ALL | 25-30 | AMG. COLOSTIC CNTS CNTS CNTS CNTS |
| 100 | ALL | 25-30 | AMG. COLOSTIC CNTS CNTS CNTS CNTS |
| 101 | ALL | 25-30 | AMG. COLOSTIC CNTS CNTS CNTS CNTS |
| 102 | ALL | 25-30 | AMG. COLOSTIC CNTS CNTS CNTS CNTS |
| 103 | ALL | 25-30 | AMG. COLOSTIC CNTS CNTS CNTS CNTS |
| 104 | ALL | 25-30 | AMG. COLOSTIC CNTS CNTS CNTS CNTS |
| 105 | ALL | 25-30 | AMG. COLOSTIC CNTS CNTS CNTS CNTS |
| 106 | ALL | 25-30 | AMG. COLOSTIC CNTS CNTS CNTS CNTS |
| 107 | ALL | 25-30 | AMG. COLOSTIC CNTS CNTS CNTS CNTS |
| 108 | ALL | 25-30 | AMG. COLOSTIC CNTS CNTS CNTS CNTS |
| 109 | ALL | 25-30 | AMG. COLOSTIC CNTS CNTS CNTS CNTS |
| 110 | ALL | 25-30 | AMG. COLOSTIC CNTS CNTS CNTS CNTS |
| 111 | ALL | 25-30 | AMG. COLOSTIC CNTS CNTS CNTS CNTS |
| 112 | ALL | 25-30 | AMG. COLOSTIC CNTS CNTS CNTS CNTS |
| 113 | ALL | 25-30 | AMG. COLOSTIC CNTS CNTS CNTS CNTS |
| 114 | ALL | 25-30 | AMG. COLOSTIC CNTS CNTS CNTS CNTS |
| 115 | ALL | 25-30 | AMG. COLOSTIC CNTS CNTS CNTS CNTS |
| 116 | ALL | 25-30 | AMG. COLOSTIC CNTS CNTS CNTS CNTS |
| 117 | ALL | 25-30 | AMG. COLOSTIC CNTS CNTS CNTS CNTS |
| 118 | ALL | 25-30 | AMG. COLOSTIC CNTS CNTS CNTS CNTS |
| 119 | ALL | 25-30 | AMG. COLOSTIC CNTS CNTS CNTS CNTS |
| 120 | ALL | 25-30 | AMG. COLOSTIC CNTS CNTS CNTS CNTS |
| 121 | ALL | 25-30 | AMG. COLOSTIC CNTS CNTS CNTS CNTS |
| 122 | ALL | 25-30 | AMG. COLOSTIC CNTS CNTS CNTS CNTS |
| 123 | ALL | 25-30 | AMG. COLOSTIC CNTS CNTS CNTS CNTS |
| 124 | ALL | 25-30 | AMG. COLOSTIC CNTS CNTS CNTS CNTS |
| 125 | ALL | 25-30 | AMG. COLOSTIC CNTS CNTS CNTS CNTS |
| 126 | ALL | 25-30 | AMG. COLOSTIC CNTS CNTS CNTS CNTS |
| 127 | ALL | 25-30 | AMG. COLOSTIC CNTS CNTS CNTS CNTS |
| 128 | ALL | 25-30 | AMG. COLOSTIC CNTS CNTS CNTS CNTS |
| 129 | ALL | 25-30 | AMG. COLOSTIC CNTS CNTS CNTS CNTS |
| 130 | ALL | 25-30 | AMG. COLOSTIC CNTS CNTS CNTS CNTS |
| 131 | ALL | 25-30 | AMG. COLOSTIC CNTS CNTS CNTS CNTS |
| 132 | ALL | 25-30 | AMG. COLOSTIC CNTS CNTS CNTS CNTS |
| 133 | ALL | 25-30 | AMG. COLOSTIC CNTS CNTS CNTS CNTS |
| 134 | ALL | 25-30 | AMG. COLOSTIC CNTS CNTS CNTS CNTS |
| 135 | ALL | 25-30 | AMG. COLOSTIC CNTS CNTS CNTS CNTS |
| 136 | ALL | 25-30 | AMG. COLOSTIC CNTS CNTS CNTS CNTS |
| 137 | ALL | 25-30 | AMG. COLOSTIC CNTS CNTS CNTS CNTS |
| 138 | ALL | 25-30 | AMG. COLOSTIC CNTS CNTS CNTS CNTS |
| 139 | ALL | 25-30 | AMG. COLOSTIC CNTS CNTS CNTS CNTS |
| 140 | ALL | 25-30 | AMG. COLOSTIC CNTS CNTS CNTS CNTS |
| 141 | ALL | 25-30 | AMG. COLOSTIC CNTS CNTS CNTS CNTS |
| 142 | ALL | 25-30 | AMG. COLOSTIC CNTS CNTS CNTS CNTS |
| 143 | ALL | 25-30 | AMG. COLOSTIC CNTS CNTS CNTS CNTS |
| 144 | ALL | 25-30 | AMG. COLOSTIC CNTS CNTS CNTS CNTS |
| 145 | ALL | 25-30 | AMG. COLOSTIC CNTS CNTS CNTS CNTS |
| 146 | ALL | 25-30 | AMG. COLOSTIC CNTS CNTS CNTS CNTS |
| 147 | ALL | 25-30 | AMG. COLOSTIC CNTS CNTS CNTS CNTS |
44 45 CARE & USE/INSTALLATION
MODEL-SPECIFIC BTU OUTPUTS & MAX. RUNS FOR APPLIANCES
| MODEL-SPECIFIC BTU OUTPUTS | |||
| MODEL CERAMIC BURNER (Btu) ROTISSERIE (Btu) TRIDENT TM(Btu) TOTAL INPUT | |||
| L27R 2 @ 25,000 1 @ 14,000 64,000 Btu/Hr | |||
| L27TR(F) 1 @ 25,000 1 @ 14,000 1 @ 21,000 62,000 Btu/Hr | |||
| L30R(F) 2 @ 25,000 1 @ 14,000 64,000 Btu/Hr | |||
| L30TR(F) 1 @ 25,000 1 @ 14,000 1 @ 21,000 62,000 Btu/Hr | |||
| L36R 3 @ 25,000 1 @ 14,000 89,000 Btu/Hr | |||
| L36TR(F) 2 @ 25,000 1 @ 14,000 1 @ 21,000 87,000 Btu/Hr | |||
| L42R 3 @ 25,000 1 @ 16,000 91,000 Btu/Hr | |||
| L42TR(F) 2 @ 25,000 1 @ 16,000 1 @ 21,000 89,000 Btu/Hr | |||
| L54TR(F) 3 @ 25,000 2 @ 14,000 1 @ 21,000 126,000 Btu/Hr | |||
| MAXIMUM RUNS FOR ALL APPLIANCES ON SUPPLY LINE | |
| Run Length3/4" Pipe (in feet) | Max STU for allAppliances on line |
| 10 360,000 | |
| 20 245,000 | |
| 30 198,000 | |
| 40 169,000 | |
| 50 150,000 | |
| 60 135,000 | |
| 70 123,000 | |
| 80 115,000 | |
INSULATED JACKET INSTALLATION INSTRUCTIONS
IMPORTANT: Before you build the frame, you must take into consideration the total weight of the liner, grill and any finishing materials.
Refer to the table below for the proper framing dimensions for the insulation jacket. Determine the entry point for both the gas inlet and electrical connections. Make the 4" square holes for gas and electrical connections (rear or bottom access) based on your requirements. Note that the electrical connections are located on the left side and the gas connections are located on the right side.
A Carpenter's "spirit level" should be used to assure that the framing is level, both front to back and side to side.
Note: Never under any circumstance should you install the transformer, run wiring or run a quick disconnect hose in between the grill and the Inside of the Insulating jacket.
| Model | A | B | C | D | E | F | ||||
| LIJ27 | 33 | 5 | 24 | 4 | 1/2 | 3 | 1 | 5/8 | ||
| LIJ30 | 36 | 5 | 26 | 1/2 | 4 | 1/2 | 3 | 11 | 5/8 | |
| LIJ36 | 42 | 5 | 24 | 4 | 1/2 | 3 | 1 | 5/8 | ||
| LIJ42 | 48 | 5 | 26 | 1/2 | 4 | 1/2 | 3 | 11 | 5/8 | |
| LIJ54 | 60 | 5 | 26 | 1/2 | 4 | 1/2 | 3 | 11 | 5/8 |
LINER INSTALLATION
Position the liner into the frame. No part of the combustible enclosure can protrude above the top surface or in front of the face surface of the liner. Shim the liner if necessary.
GRILL INSTALLATION
Use the proper equipment to support the grill. Place the grill into the liner and engage it over the liner lip across the back and sides. The liner is designed to support the grill without additional fasteners.
FINISHING
If desired any gap remaining between the liner and the combustible enclosure may be filled with a non-combustible sealant or caulk.
Note: for service the grill must be removable.

4" square holes for gas and electrical connections both left and right sides (rear or bottom access). Make these holes in the frame based on your requirements.
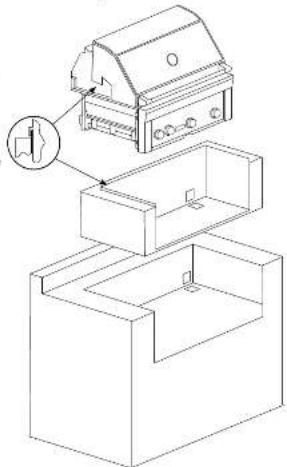
CARE & USE/INSTALLATION
INDEX
B Lighting Rotisserie Burner 7,25
Before Each Use 25 Low Heat Burner Adjustment 19
Before You Start 8 LP Cylinder Requirements 15
BTU Outputs, Model Specific 45 L Gas 13
Bank Adjustment, Low M Bumper Adjustment, Main 19
Bumer Appearance 20 Manual Lighting 26
Burner Placement 37 Match Lighting 20 Maximum Runs for all appliances on supply line 45
c
Checklist Before Each Use.... 21 Obtaining Service From LYNX.... 37
Clean the Ceramic Burner 32
Cleaning Your Lynx Grill .... 31 F Clearance to Combustibles .... 9 Parts List .... 44
Contacting LYNX 37 Parts View, Exploced 43
Cut-out Dim., Built-in Grills 10 Pre-Heating Trident TM Burner 28
Pre-Heating the Grill 27
Purging the Gas Line 16
Concealed 8 R
Visible 8 Regulator Conversion 15
Direct Heat Cooking 27 Required Maintenance 33
Chip May 5
E Schematic, L27 & L30 40
Electrical Connections 18 Schematic, L36 & L42 41
Exploxed Perts View 43 Schematic, 204 42 Service Contacting Livery 37
F
Final Checks 19
Flame, Correct Size 20 Technical Support 37
G H. ADJALI MOING ...... 4.5
Gas Connections 14 U
Gas Line Purging 16 Unpacking & Assembly 12
Gas Requirements 14 Using Your Grill 24
Gas Supply Line Runs 43 W Grilling in Weekly Conditions 22
Warranty:
1 Warranty, Limited 38
Important Safety Precautions 22 Warranty, Common Area Limited 39
Indirect Heat Cooking 27 Windy Conditions, Crilling in 23
Insulated Jacket Installation....46
L
Leak Test Procedure 19
Lighting, Manual 26
Lighting Your Grill 7,25
The best outdoor kitchen products come from:
Lynx Grills, Inc. 7300 Flores Street Downey, CA 90242
Service: (888)-289-5969 Fax: (562) 299-6978
www.lynxgrills.com


- WARNINGS
- WARNING
- DANGER
- IF YOU SMELL GAS
- S'IL Y A UNE ODEUR DE GAZ
- STATE OF MASSACHUSETTS
- USE & CARE GUIDELINES
- HOW TO LIGHT YOUR ROTISSERIE BURNER
- BEFORE YOU START
- IF SHIPMENT ARRIVES DAMAGED
- VISIBLE LOSS OR DAMAGE
- CONCEALED LOSS OR DAMAGE
- IMPORTANT NOTES
- WHERE'S THE WIND
- HOW LONG IS YOUR RUN
- ARE YOU "ON-THE-LEVEL
- BEFORE YOU START ...CONTINUED
- BUILT-IN INSTALLATIONS
- CLEARANCE TO COMBUSTIBLE MATERIALS
- REAR HOOD CLEARANCE
- SPECIFICATIONS & INSTALLATION
- UNCONVENTIONAL ISLAND INSTALLS
- UNPACKING & ASSEMBLY
- WARNING: EXCESSIVE WEIGHT HAZARD
- CRATE & CARTON
- HOW TO REMOVE THE CARTON
- INTERIOR PACKING
- GAS CONNECTIONS
- NATURAL GAS
- GAS CONNECTIONS ...CONTINUED
- LP GAS
- LP CYLINDER REQUIREMENTS
- LP CONNECTIONS
- GAS LINE PURGING
- NG AND BULK LP BUILT-IN INSTALLATION
- GAS CONVERSION KITS
- NG AND BULK PROPANE CART INSTALLATION
- LP BOTTLE CART INSTALLATION
- ELECTRICAL CONNECTIONS
- WARNING: ELECTRICAL GROUNDING
- CONNECTION TO AC
- FINAL CHECKS
- LEAK TESTING
- LEAK TEST PROCEDURE
- FIXING A GAS LEAK
- LOW HEAT BURNER ADJUSTMENT
- TO ADJUST THE BURNER TO A LOW SETTING
- FINAL CHECKS ...CONTINUED
- ONE LAST THING
- IMPORTANT
- CHECKLIST BEFORE EACH USE (FOR YOUR SAFETY)
- A MESSAGE TO OUR CUSTOMERS
- IMPORTANT SAFETY PRECAUTIONS
- PLEASE REVIEW THESE IMPORTANT SAFETY PRECAUTIONS BEFORE YOU USE YOUR GRILL
- GRILLING IN WINDY CONDITIONS
- USING YOUR LYNX GRILL
- MAIN CERAMIC BURNER
- TRIDENT TM BURNER
- ROTISSERIE BURNER
- PRE-GRILL CHECKLIST
- BEFORE YOUR FIRST USE
- IF YOUR GRILL DOES NOT LIGHT IN 4 TO 5 SECONDS
- AT EACH NEW SEASON
- PRE-GRILL CHECKLIST ...CONTINUED
- BEFORE EACH USE
- LIGHTING YOUR GRILL
- ELECTRIC IGNITION
- FOR THE MAIN CERAMIC BURNER OR TRIDENT TM BURNER
- FOR THE ROTISSERIE BURNER
- COLD WEATHER WARNING: PROPANE
- MANUAL LIGHTING
- BASIC GRILLING
- PRE-HEATING
- TYPES OF COOKING
- DIRECT HEAT
- INDIRECT HEAT
- USING THE TRIDENT™ BURNER
- PRE-HEATING THE TRIDENT TM BURNER
- HOW TO SEAR
- SAFETY PRECAUTIONS
- TRIDENT™ BURNER CLEANING
- USING THE ROTISSERIE BURNER
- ROTISSERIE
- THE MOTOR
- THE SPIT ROD & FORKS
- USING THE ROTISSERIE BURNER ...CONTINUED
- CAUTION
- CLEANING YOUR LYNX GRILL (INCLUDING REQUIRED MAINTENANCE)
- STAINLESS STEEL
- DRIP TRAY
- CLEANING YOUR LYNX GRILL (INCLUDING REQUIRED MAINTENANCE)...CONTINUED
- GRILLING RACKS
- CERAMIC BRIQUETTES
- MAIN CERAMIC BURNERS
- TO REMOVE CERAMIC BURNERS
- TO CLEAN THE CERAMIC BURNER
- CLEANING YOUR LYNX GRILL. (INCLUDING REQUIRED MAINTENANCE)...CONTINUED
- TRIDENT™ BURNER
- WARNING: REQUIRED MAINTENANCE
- TROUBLESHOOTING YOUR LYNX GRILL
- BEFORE YOU CALL FOR SERVICE
- POTENTIAL PROBLEMS
- GRILL WON'T LIGHT
- CHECK THE IGNITERS
- CHECK THE BURNERS
- SMELL OF GAS WHILE COOKING
- YELLOW FLAMES
- LOW OR INSUFFICIENT HEAT
- IF THE LOW HEAT PROBLEM PERSISTS
- POTENTIAL PROBLEMS ...CONTINUED
- LP (PROPANE) UNITS
- TO RESET THE FLOW CONTROL
- BULK LP CYLINDER USERS
- NATURAL GAS UNITS
- WIND HITTING GRILL
- BURNER GOES OUT
- BURNER GOES OUT ONLY WHEN SET TO "LOW
- ROTISSERIE WON'T LIGHT
- ROTISSERIE LIGHTS BUT GOES OUT AS SOON AS CONTROL IS RELEASED
- LIGHTS WILL NOT ILLUMINATE
- CONTACTING LYNX CUSTOMER CARE
- THE LYNX STORY
- LYNX SATISFIED CUSTOMERS
- LYNX LIMITED WARRANTY
- LIMITED LIFETIME WARRANTY
- LIMITED FIVE-YEAR WARRANTY
- LIMITED TWO-YEAR WARRANTY
- LIMITED ONE-YEAR WARRANTY
- LIMITATIONS & EXCLUSIONS
- WHAT IS NOT COVERED: LYNX SHALL NOT BE RESPONSIBLE FOR AND SHALL NOT PAY FOR THE FOLLOWING
- LYNX COMMON AREA LIMITED WARRANTY
- THIS PROVISION EXCLUDES ALL COMMERCIAL APPLICATIONS, INCLUDING, BUT NOT LIMITED TO RESTAURANTS AND INSTITUTIONAL FOOD SERVICE LOCATIONS
- LIMITED PARTS & LABOR WARRANTY
- WIRING SCHEMATICS
- LYNX PROFESSIONAL GRILLS EXPLODED PARTS VIEW
- INSULATED JACKET INSTALLATION INSTRUCTIONS
- LINER INSTALLATION
- GRILL INSTALLATION
- FINISHING
- INDEX
Brand : LYNX
Model : Professional L42TR
Category : Grill plate