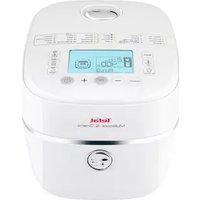
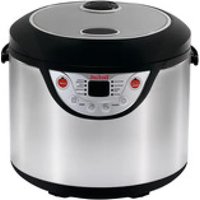
Multicook & Grains RK9001 - Rice cooker TEFAL - Free user manual and instructions
Find the device manual for free Multicook & Grains RK9001 TEFAL in PDF.


| Product Type | Multi-Grain Rice Cooker |
| Brand | Tefal |
| Model | Multicook & Grains RK9001 |
| Capacity | 1.8 L (uncooked rice) |
| Dimensions (W x D x H) | 25 x 25 x 26 cm |
| Weight | 2.5 kg |
| Power Consumption | 700 W |
| Voltage | 220-240 V, 50-60 Hz |
| Cooking Programs | White Rice, Brown Rice, Quinoa, Mixed Grains, Porridge, Steam, Slow Cook, Keep Warm |
| Control Type | Digital touch panel with LCD display |
| Inner Pot Material | Non-stick coated aluminum |
| Lid Type | Hinged with steam vent |
| Accessories Included | Rice measuring cup, spatula, steaming basket |
| Safety Features | Auto shut-off, overheat protection, locking lid |
| Maintenance & Cleaning | Non-stick pot dishwasher safe; wipe exterior with damp cloth |
| Spare Parts Availability | Replacement inner pot, lid seal, measuring cup available from Tefal |
| Repairability | Modular design; user-replaceable parts; service centers in major cities |
| Warranty | 2 years |
| Certifications | CE, ETL, RoHS |
| Manufacturer | Tefal (Groupe SEB) |
| Country of Origin | China |
Frequently Asked Questions - Multicook & Grains RK9001 TEFAL
User questions about Multicook & Grains RK9001 TEFAL
0 question about this device. Answer the ones you know or ask your own.
Ask a new question about this device
Download the instructions for your Rice cooker in PDF format for free! Find your manual Multicook & Grains RK9001 - TEFAL and take your electronic device back in hand. On this page are published all the documents necessary for the use of your device. Multicook & Grains RK9001 by TEFAL.
USER MANUAL Multicook & Grains RK9001 TEFAL
A - Steam basket
B - Soaking basket
C - Rice and grains measuring cup
D - Measuring cup for water
E - Spatula
F - Inner lid
G - Micro pressure valve
H - Condensation collector
I - Power cord
J - Carry handle
K - Removable inner bowl
L - Lid opening button
MENU LIST

CONTROL PANEL DESCRIPTION

- Menu button
- Temperature / Timer button
- My recipes button
- Cancel button
- « - » decrease button
-
OK button
-
« + » increase button
- On/Off button
- Delayed Start button
- Keep Warm button
- Reheat button
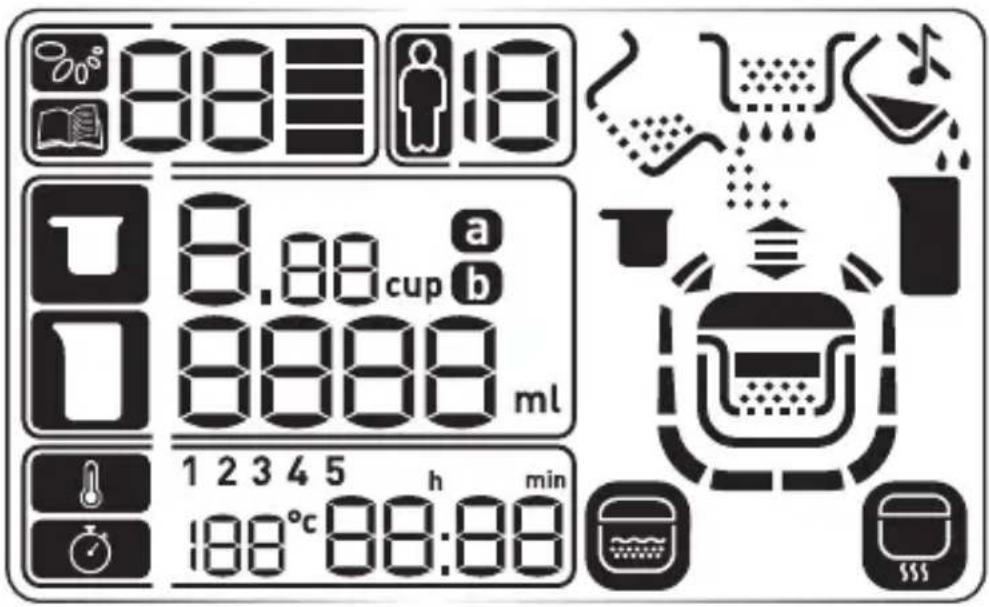
- LCD Screen
EN
NUTRITION MENU
 | Nutrition Menu |
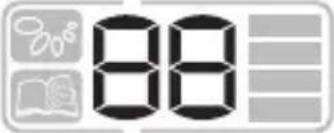 | Program number |
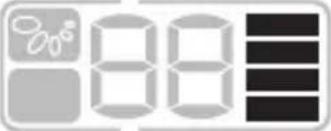 | Texture |
 | Number of servings |
 | Number of rice or grain measuring cups |
 | Quantity of water (measured using water measuring cup) |
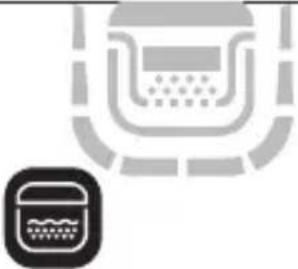 | Soaking mode |
  | Cooking mode |
 | Automatic cooking mode |
MULTICOOK MENU
 | Multicook menu |
 | Program number |
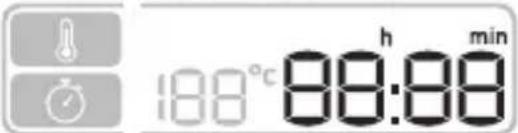 | Time setting |
 | Temperature setting |
 | Cooking mode |
 | Automatic cooking mode |
SAFETY INSTRUCTIONS
- Read and follow the instructions for use. Keep them safe.
- This appliance is not intended to be operated by means of an external timer or a separate remote control system.
- This appliance can be used by children aged from 8 years and above if they have been given supervision or instruction concerning use of the appliance in a safe way and if they understand the hazards involved. Cleaning and user maintenance shall not be made by children unless they are older than 8 years and supervised. Keep the appliance and its cord out of reach of children aged less than 8 years.
- Appliances can be used by persons with reduced physical, sensory or mental capabilities or lack of experience and knowledge if they have been given supervision or instruction concerning use of the appliance in a safe way and understand the hazards involved.
• Children shall not play with the appliance. - This appliance is not intended for use by persons (including children) with reduced physical, sensory or mental capabilities, or lack of experience and knowledge, unless they have been given supervision or instruction concerning use of the appliance by a person responsible for their safety.
- Children should be supervised to ensure that they do not play with the appliance.
- As this appliance is for household use only, it is not intended for use in the following applications and the guarantee will not apply for:
- Staff kitchen areas in shops, offices and other working environments
- Farm houses
- By clients in hotels, motels and other residential type environments
-Bed and breakfast type environments
- If the power cord is damaged, it must be replaced by a special cord or unit available from an authorised service centre.
- The appliance must not be immersed in water or any other liquid
- Use a damp cloth or sponge with washing-up liquid to clean the accessories and parts in contact with food. Rinse with a damp cloth or sponge. Dry accessories and parts in contact with food with a dry cloth.
- If the symbol ⚠ is marked on the appliance, this symbol means “Caution: surfaces may become hot during use”.
- Caution: the surface of the heating element is subject to residual heat after use.
- Caution: risk of injury due to improper use of the appliance.
- Caution: your appliance has a removable power cord, do not spill liquid on the connector.
• Always unplug the appliance: - immediately after use
- when moving it
- prior to any cleaning or maintenance
- if it fails to function correctly
- Do not leave the appliance unattended whilst in operation.
- Burns can occur by touching the hot surface of the appliance, the hot water, steam or the food.
- During cooking, the appliance gives out heat and steam. Keep face and hands away.
- The door or the outer surface may get hot when the appliance is operating.
- Do not get face and hands close to the steam outlet. Do not obstruct the steam outlet.
- For any problems or queries please contact our Customer Relations Team or consult our web site.
-
The appliance can be used up to an altitude of 4000 m.
-
For your safety, this appliance complies with the safety regulations and directives in effect at the time of manufacture (Low-voltage Directive, Electromagnetic Compatibility, Food Contact Materials Regulations, Environment...).
- Check that the power supply voltage corresponds to that shown on the appliance (alternating current).
- Given the diverse standards in effect, if the appliance is used in a country other than that in which it is purchased, have it checked by an approved service centre.
Connecting to the power supply
- Do not use the appliance if:
- the appliance or the cord is damaged.
- the appliance has fallen or shows visible damage or does not work properly.
-
In the event of the above, the appliance must be sent to an approved Service Centre. Do not take the appliance apart yourself.
-
Do not let the power cord hang where children may reach it.
- Do not leave the power cord close to or in contact with sources of heat or sharp edges.
• Always plug the appliance into an earthed socket. - Do not use an extension lead. If you accept liability for doing so, only use an extension lead which is in good condition, has an earthed plug and is suited to the power of the appliance.
- Do not unplug the appliance by pulling on the cord.
Using
- Use a flat, stable, heat-resistant work surface away from any water splashes.
- Do not allow the base of the appliance to come into contact with water or any other liquid.
- Never try to operate the appliance when the bowl is empty or without the bowl.
- The control panel buttons must be allowed to operate freely.
- Do not remove the bowl while the appliance is working.
- Do not put the appliance directly onto a hot surface, or any other source of heat or flame, as it will cause a failure or danger.
- The bowl and the heating plate should be in direct contact. Any object or food inserted between these two parts would interfere with the correct operation and may damage the appliance.
- Do not place the appliance or bowl near a heat source or in a hot oven, as serious damage could result.
- Do not put any food or water into the appliance until the bowl is in place.
-
Respect the levels indicated in the recipes.
-
Should any part of your appliance catch fire, do not attempt to put it out with water. To smother the flames use a damp tea towel.
- Any intervention should only be made by an approved service centre with original spare parts.
Protect the environment
- Your appliance has been designed to run for many years. However, when you decide to replace it, remember to think about how you can contribute to protecting the environment.

Protect the environment
i Your appliance contains a number of materials that may be recovered or recycled.
Leave it at a local civic waste collection point.
BEFORE THE FIRST USE
EN
Unpack the appliance
Remove the appliance from the packaging and unpack all the accessories and printed documents.
Open the lid by pushing the button on the housing.
Read the Instructions and carefully follow the operation method.
Clean the appliance:
Remove the bowl, inner lid (fig 1 and fig 2) and the pressure valve (fig 5).
Clean the bowl, the valve and the inner lid with a sponge.
Wipe the outside of the appliance and the lid with a damp cloth.
Dry off carefully.
Put all the elements back in their original position. Place inner lid back into position, lining up the grooves (fig 3) and gently press lid back into place (fig 4). Check the condensation collector is is fitted. Fit the detachable cord into the socket on the cooker base.


USING YOUR APPLIANCE
- Carefully wipe the outside of the bowl (especially the bottom). Make sure that there are no foreign residues or liquid underneath the bowl and on the heating element
- Place the bowl into the appliance, making sure that it is correctly positioned
• Make sure that the inner lid is correctly in position. - Close the lid and press down until a "click" is heard.
• Install the power cord into the socket of the multicooker base and then plug into the power outlet. - The default program is 01-White rice.
- Do not touch the heating element when the product is plugged in or after cooking. Do not carry the product while in use or just after cooking.
- This appliance is only intended for indoor use.
- Oven gloves must be used when handling the bowl and baskets when hot.
- It is recommended to remove the bowl and the soaking basket at the same to wait for the steam to disperse before separating the bowl and soaking basket.
- The soaking basket and the steam basket must only be used for the function they are designed for.
- Do not block the steam vents during cooking.
- Do not use the bowl outside the appliance (on the gas, on the heating plate, in an oven ...).
- Do not use metal utensils to stir the food in the bowl.
- The condensation collector must be emptied after each cooking.
- Do not use this appliance for deep frying.
Never place your hand on the steam vent during cooking, as there is a danger of burns
Only use the inner pot provided with the appliance.
Do not pour water or put ingredients in the appliance without the bowl inside.
The maximum quantity of water + ingredients should not exceed the "MAX" mark inside the bowl
If you want to cancel the "beep" sound, press 📄 buttons together for 5 seconds. The pictogram

appears. Note that the start and end cooking beeps can not be cancelled.
To reactivate the beep, press again 🖼 button for 5 seconds. The pictogram ✗ disappears.
The setting is kept in the memory.
If you leave your finger on + and - buttons, it allows you to increase or decrease the parameters quickly.
The buttons are only activated when the lid is closed.
The buttons cannot be adjusted if you are wearing oven gloves.
You can turn off your appliance by pressing ⏻ button for 5 seconds, it sounds a long beep.
To reactivate your appliance press on any button.
To cancel a cooking program currently in use, press ⏻ button for 5 seconds. You can also cancel a program by a long press on the "Cancel" button.
To cancel a current setting, press "Cancel" button.
NUTRITION MENU

The “Nutrition menu” is an automatic cooking mode. You can also adjust the cooking mode for different textures of food and the number of servings (min/max), refer to the table below.
| N° program | Program Texture Automatic Manual | Approximate soaking time | Approximate cooking time | Number of servings (min/max) | |||
| 1 White rice | Nutri + 1 40 – 50 min | 2 – 12 | |||||
| Quick 1 20 – 30 min | |||||||
| Normal 1 30 – 40 min | |||||||
| Soft 1 40 – 50 min | |||||||
| 2 Brown rice | Nutri + 1 1 h – 1 h 10 min | 2 – 12 | |||||
| Quick 1 40 – 50 min | |||||||
| Normal 1 50 min – 1 h | |||||||
| Soft 1 50 min – 1 h | |||||||
| 3 Chickpeas Nutri + 1 | 1 h 40 min | 50 min – 1 h 2 – 6 | |||||
| 4 Quinoa | Nutri + 1 | 2 h 20 min – | 2 h 30 min | 2 – 8 | |||
| Quick 1 20 – 30 min | |||||||
| Normal 1 20 – 30 min | |||||||
| 5 | Lentils | Nutri + 1 50 min – 1 h | 40min - 1 h – 1 h | 50min | 2 – 10 | ||
| Quick 1 | |||||||
| Soft 1 | 0 min | ||||||
| 6 | Dried beans | Nutri + | 1 | 50 min | 1 h 30 min - 1 h 40 min | 2 – 6 | |
| Normal 1 | 50 min | 2 h 15 min | 2 h 30 min | ||||
| 7 | Baby Porridge | 1 (4 - 6 months*) | 1 20 – 30 min | 2 | |||
| 2 (7 – 9 months) | 1 1 h – 1 h 10 min | ||||||
| 3 (10 – 12 months) | 1 50 min – 1 h | ||||||
| 4 (13 – 14 months) | 1 40 – 50 min | ||||||
| 8 | Brown Rice + Green Lentils | Nutri + | 1 | 1 h 20 min – 1 h 30 min | 2 – 8 | ||
| TOTAL NO. OF PROGRAMS | 22 | * For the UK only: follow your UK health professionals advice on what age and type of food to introduce solids to your baby, which is usually from 6 months. | |||||
White rice (01) / Brown rice (02) / Quinoa (04) / Lentils (05)
EN

Choose the number of the required program by pressing the - and +buttons. Validate by pressing ☑.

Choose the desired texture by pressing and + buttons. Validate by pressing

Choose the number of servings by pressing – and buttons. Validate by pressing
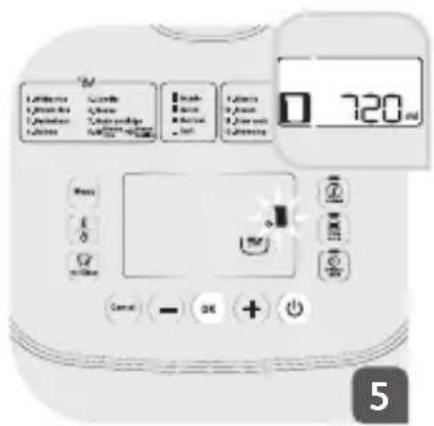
The picto flashes on the screen. It indicates quantity of rice, quinoa or lentils (number of cups) to pour in the bowl. Once you have poured them in the bowl, close the lid and validate by pressing
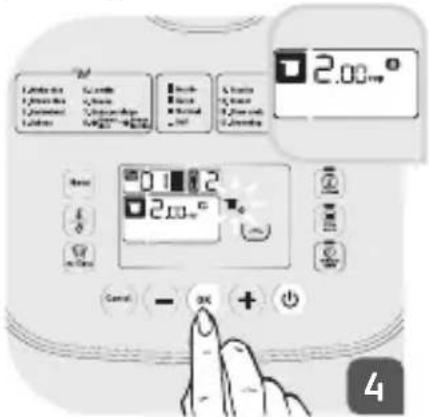
The picto-flickers on the screen. It indicates the quantity of cold water to add. Use the measuring cup for water provided with the appliance to measure the water quantity.

The picto appears on the screen, it indicates that you have to close the lid and the Delayed start button flashes. You can start the cooking immediately or delay the start (see the Delayed Start section for instructions). Press button to start the cooking immediately. The appliance sounds a long beep to indicate the beginning of the cooking.

The appliance enters into automatic cooking: the picto RUD, and appear on the screen.
The picto Ruds appears before the end of cooking, the appliance sounds 2 beeps and the screen displays the remaining cooking time. This time can differ according to the chosen program and the desired texture.
At the end of the cooking, the appliance sounds 3 beeps and enters into keep warm (the keep warm button illuminates).
Note: Water quantities for rice cooking can be adjust depending on your taste: add a little extra water for fluffier rice and a little less water for firmer rice.
Chickpeas (03)

Choose the number of the program by pressing the - and +. buttons. Validate by pressing ⏻.

Choose the number of servings by pressing and + . buttons. Validate by pressing

The appliance indicates that you need to put the soaking basket in the bowl. The picto √ flashes on the screen.

Press once you have put in the soaking basket.
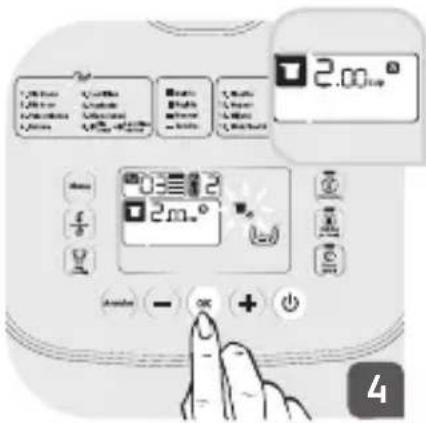
The picto ■ flashes on the screen. It indicates the quantity of dried chickpeas (number of cups) to pour in the bowl. Once you have poured them in the bowl, close the lid and validate by pressing

The picto -flashes on the screen. It indicates the quantity of cold water to add. Use the measuring cup for water provided with the appliance to measure the water quantity. Close the lid and validate by pressing

The appliance sounds a long beep to indicate the beginning of the cooking. The appliance enters into automatic soaking: the picto , and appear on the screen.
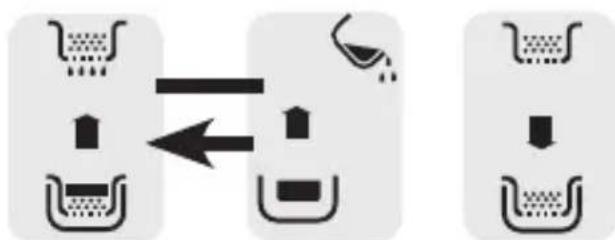
At the end of soaking time, the appliance sounds 2 beeps and the picto below flashes. This indicates that you have to drain the soaking water.
flowchart
graph TD
    A["Shopping Cart"] --> B["Product Box"]
    C["Shopping Cart"] --> D["Product Box"]
    E["Shopping Cart"] --> F["Product Box"]
    G["Shopping Cart"] --> H["Product Box"]
    I["Shopping Cart"] --> J["Product Box"]
    K["Shopping Cart"] --> L["Product Box"]
    M["Shopping Cart"] --> N["Product Box"]
    O["Shopping Cart"] --> P["Product Box"]
    Q["Shopping Cart"] --> R["Product Box"]
    S["Shopping Cart"] --> T["Product Box"]
    U["Shopping Cart"] --> V["Product Box"]
    W["Shopping Cart"] --> X["Product Box"]
    Y["Shopping Cart"] --> Z["Product Box"]
    AA["Shopping Cart"] --> AB["Product Box"]
    AC["Shopping Cart"] --> AD["Product Box"]
    AE["Shopping Cart"] --> AF["Product Box"]
    AG["Shopping Cart"] --> AH["Product Box"]
    AI["Shopping Cart"] --> AJ["Product Box"]
    AK["Shopping Cart"] --> AL["Product Box"]
    AM["Shopping Cart"] --> AN["Product Box"]
    AO["Shopping Cart"] --> AP["Product Box"]
    AQ["Shopping Cart"] --> AR["Product Box"]
    AS["Shopping Cart"] --> AT["Product Box"]
    AU["Shopping Cart"] --> AV["Product Box"]
    AW["Shopping Cart"] --> AX["Product Box"]
Once you have drained the soaking water and well rinsed the chickpeas under running water, place the soaking basket into the bowl to begin the cooking phase.

The appliance indicates the quantity of water to add in the bowl. Press ☺ to start the cooking phase.
Note: The condensation collector must be emptied between the 2 steps (soaking and cooking) to avoid overflow during the last cooking.

The picto 📄appears on the screen, it indicates that you have to close the lid and the Delayed start button flashes. You can start the cooking immediately or delay the start (see the Delayed Start section for instructions)..
Press button ☑ to start the cooking immediately. The appliance sounds a long beep
to indicate the beginning of the cooking.
The appliance enters into automatic cooking: the picto Auto, and and appear on the screen.
The picto AUCO disappears before the end of cooking, the appliance sounds 2 beeps and the screen displays the remaining cooking time. This time can differ according to the chosen program and the desired texture.
At the end of the cooking, the appliance sounds 3 beeps and enters into keep warm (the keep warm button illuminates).
Beans (06)
Note: The Beans program (06) is suitable for cooking dried beans such as red kidney beans, cannellini beans, black beans, etc.

Choose the number of the program by pressing the - and + buttons. Validate by pressing ☑.
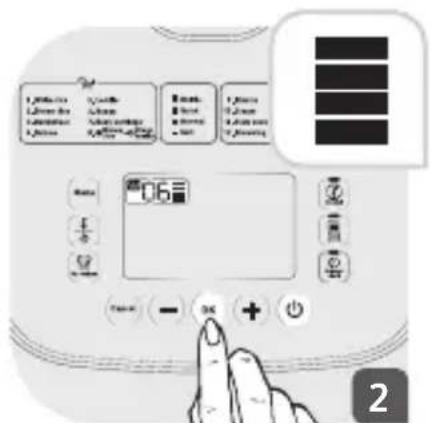
Choose the desired texture by pressing and + buttons. Validate by pressing

Choose the number of servings by pressing - and buttons. Validate by pressing 😊
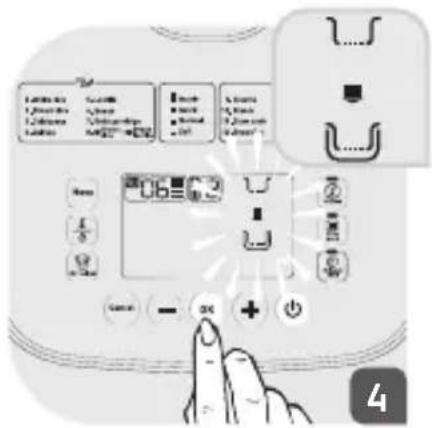
The appliance indicates that you need to put the soaking basket in the bowl. The picto flashes on the screen. Press once you have put in the soaking basket.
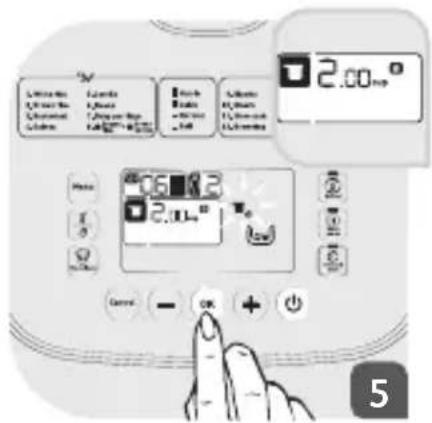
The picto ■ flashes on the screen. It indicates the quantity of dried beans (number of cups) to pour in the bowl. Once you have poured them in the bowl, close the lid and validate by pressing 📞
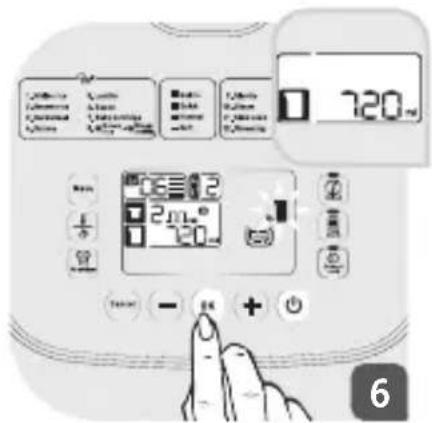
The picto-1 flashes on the screen. It indicates the quantity of cold water to add. Use the measuring cup provided with the appliance to measure the required water quantity. Close the lid and validate by pressing

The appliance sounds a long beep to indicate the beginning of the cooking.
The appliance enters into automatic soaking: the picto Auto, and appear on the screen.
At the end of soaking time, the appliance sounds 2 beeps and the picto below flashes. This indicates that you have to drain the soaking water.

flowchart
graph TD
    A["Shopping Cart"] --> B["Basket"]
    C["Product Box"] --> D["Order Box"]
    B <--> D

Once you have drained the soaking water and well rinse the beans under running water. Place the soaking basket into the bowl to begin the cooking phase.

The appliance indicates the quantity of water to add to the bowl. Press to start the cooking phase.
Note: The condensation collector must be emptied between the 2 steps (soaking and cooking) to avoid overflow during the last cooking.
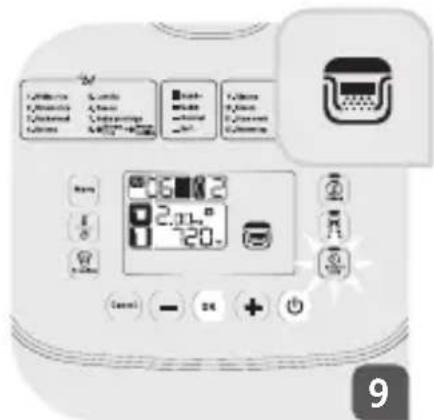
The picto appears on the screen, it indicates that you have to close the lid and the Delayed start button flashes. You can start the cooking immediately or delay the start (see the Delayed Start section for instructions). Press button to start the cooking immediately. The appliance sounds a long beep to indicate the beginning of the cooking.
The appliance enters into automatic cooking: the picto AULO, and appear on the screen.
The picto disappears before the end of cooking, the appliance sounds 2 beeps and the screen displays the remaining cooking time. This time can differ according the chosen program and the desired texture.
At the end of the cooking, the appliance sounds 3 beeps and enters into keep warm (the keep warm button illuminates).
Baby Porridge (07)

Choose the number of the program by pressing the - and + buttons. Validate by pressing ☑.

Choose the number corresponding to the age of your baby by pressing - and buttons. Validate by pressing 😊.
1 => 4 to 6 months
(see note below)
2 => 7 to 9 months
3 => 10 to 12 months
4 => 13 to 14 months
For the UK only: follow your UK health professionals advice on what age and type of food to introduce solids to your baby.

The appliance enters into automatic cooking: the chosen program number, the picto AU=0 and appear on the screen.
The picto A.0 disappears before the end of cooking, the appliance sounds 2 beeps and the screen displays the remaining cooking time. This time can differ according to the chosen program and the desired texture.
At the end of the cooking, the appliance sounds several beeps and enters into keep warm (the keep warm button illuminates).
Brown Rice + Green Lentils (08)

Choose the number of the program by pressing the - and + buttons. Validate by pressing ☑.

Choose the number of servings by pressing - and buttons. Validate by pressing

The appliance indicates:
a) the brown rice quantity (number of cups) to pour in the bowl. Once you have poured your brown rice in the bowl, close the lid and validate by pressing ☺.
b) the green lentils quantity (number of cups) to pour in the bowl. Once you have poured your green lentils in the bowl, close the lid and validate by pressing ⏻.

The picto ■flashes on the screen. It indicates the quantity of cold water to add. Use the measuring cup provided to measure the required water quantity. Close the lid and validate by pressing

The picto appears on the screen, it indicates that you have to close the lid and the Delayed start button flashes. You can start the cooking immediately or delay the start (see the Delayed Start section for the instructions). Press button to start the cooking immediately. The appliance sounds a long beep to indicate the beginning of the cooking.
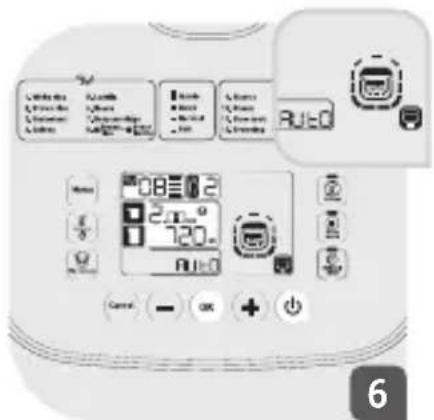
The appliance sounds a long beep to indicate the beginning of the cooking.
The appliance enters into automatic soaking: the picto AUTO, and appear on the screen.
The picto disappears before the end of cooking, the appliance sounds 2 beeps and the screen displays the remaining cooking time. This time can differ according to the chosen program and the desired texture.
At the end of the cooking, the appliance sounds 3 beeps and enters into keep warm (the keep warm button illuminates).
| N° program | Programs Automatic | Manual (adjust temp. setting) | Temperature (°C) Cooking Time | Delayed Start | |||
| Default Range | Default Range | ||||||
| 9 Pilaf/Risotto1 Automatic Automatic Automatic Automatic * | |||||||
| 10 Steam 1 Automatic Automatic 30 min 5 min - 3 h * | |||||||
| 11 | Slow Cook | 3 | 100°C | 80°C - 100°C | 1 h 30 min | 5 min - 9 h | |
| 12 | Browning | 13 | 160°C | 100°C - 160°C | 20 min | 5 min - 1 h 30 | |
| 13 | Pasta | 1 | Automatic | Automatic | 8 min | 3 min - 1 h | |
| 14 | Bake | 13 | 145°C | 100°C - 160°C | 40 min | 5 min - 4 h | |
| 15 | Soup | 1 | Automatic | Automatic | 40 min | 5 min - 3 h | |
| 16 | Bread Rising | 2 | 40°C | 30°C - 40°C | 30 min | 5 min - 9 h | |
| 17 | Dessert | 13 | 140°C | 100°C - 160°C | 45 min | 5min - 2 h | |
| 18 | Cream Cheese | 2 | Automatic | Automatic | 2 h | 30 min - 4 h | |
| 19 | Yogurt | 1 | Automatic | Automatic | 8 h | 1 h - 24 h | |
| 20 | Jam | 1 | Automatic | Automatic | 30 min | 5 min - 2 h | |
| Reheat | 2 | 100°C | 80°C - 100°C | 20 min | 5 min - 1 h | ||
| Keep warm | 1 | 75°C | - | - | - | ||
| My Recipes | 5 | 100°C | 40°C - 100°C | 30 min | 1 min - 9 h | ||
| 105°C - 160°C | 1 min - 2 h | ||||||
| Programs | 7 | 53 | |||||
| TOTAL NO. MULTICOOK PROGRAMS | 60 | ||||||
Risotto/Pilaf (09)

Choose the number of the program by pressing the - and + buttons. Validate by pressing ☑.

The picto 📄 appears on the screen, you can add your ingredients. Close the lid. Then press button. The Delayed start button flickers. flashes. You can start the cooking immediately or delay the start (see the section Delayed Start for the instructions). instructions) or immediately. Press button to start the cooking immediately.

The appliance enters into automatic cooking: the picto AUTO, and appear on the screen.
At the end of the cooking, the appliance sounds 3 beeps and enters into keep warm (the keep warm button illuminates).
Steam (10) / Slow Cook (11) / Browning (12) / Bake (14) /
Soup (15) / Bread rising (16) / Dessert (17) /
Cream Cheese (18) / Yogurt (19) / Jam (20)

Choose the number of the program by pressing the - and + buttons. Validate by pressing ☐.
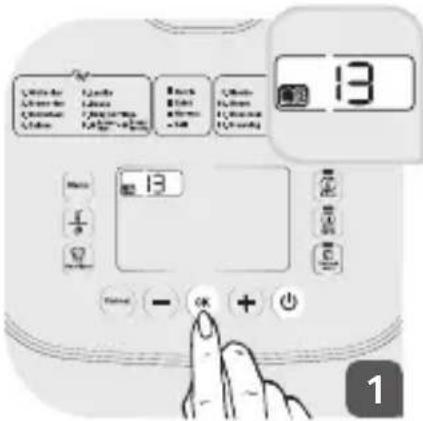
The default cooking time appears on the screen. You can adjust the time by pressing the button. Then press and buttons to adjust the time. Validate by pressing ☉

For some programs, you can adjust the temperature (refer to the table) but do it before setting the time. Press the button and adjust the desired temperature by pressing and buttons. Validate by pressing. Then set the time setting as explained before.
The picto appears on the screen, you can add the ingredients. Then press button. The Delayed start button flashes. You can start the cooking immediately or delay the start, but only for the programs mentioned in the table (see the Delayed Start section for the instructions). Press button to start the cooking immediately.
The appliance sounds a long beep to indicate the beginning of the cooking. The picto appears on the screen. The remaining time and temperature (when available) appear on the screen too.

For all these functions except Browning and Jam, the picto appears on the screen. It indicates that the lid should be closed.

For Browning and Jam, the picto appears on the screen, it indicates that the lid must remain open.
At the end of the cooking, the appliance sounds 3 beeps and enters into keep warm (the keep warm button illuminates).
Warning: For Jam program the lid must be open. Do not cook more than 500g of fruits.
CHOICE OF INGREDIENTS FOR YOGURT
Milk
What milk should you use?
All our recipes (unless otherwise stated) are prepared using cow's milk. You can use plant milk such as soya milk. As well as sheep or goat's milk but, in this case, the firmness of the yogurt may vary depending on the milk used. Raw milk or long-life milks and all the milks described below are suitable for your appliance:
- Long-life sterilised milk: UHT whole milk results in firmer yogurt. Using semi-skimmed milk will result in less firm yogurt. However, you can use semi-skimmed milk and dissolve 2 - 5 tablespoons of dried skimmed milk powder per 1 litre of milk to give a thicker consistency.
- Pasteurised milk:
Whole milk give a more creamy yogurt with a little bit of skin on the top. Semi-skimmed and
skimmed milk will result in a fluid consistency yogurt.
Pasteurised milk still contains some heat-resistant germs not eliminated by pasteurisation. It must be boiled first, cooled to hand-hot (36 °C) and then strained through a fine sieve to remove any skin, before making yogurt. For a thicker consistency yogurt, before boiling the milk add 2 to 5 tablespoon dried skimmed milk powder per 1 litre of milk.
- Untreated milk (farm milk): It is essential this type of milk is boiled for a long time and it is dangerous not to do this.
After boiling let it cool down to 36 °C before making yogurt the sieve to remove the skin. Using yogurt made form untreated farm milk as a culture starter is not recommend..
- Powdered milk:
Using skimmed milk powder reconstituted with water will
result in very creamy yogurt. Follow the manufacturer's, instructions on reconstitution.
The ferment
Use one of the following ferments:
- One small pot (100 g - 150 g) shop-bought natural yogurts with the longest expiry date possible; your yogurt will therefore contain more active ferment for a firmer yogurt.
- From a freeze-dried ferment. In this case, follow the activation time specified on the ferment instructions. You can find these ferments in supermarkets, pharmacies and in certain health product stores. - From one of your recently prepared yogurt – this must be natural and recently prepared. This is called culturing. After five culturing processes, the yogurt used loses active ferments and therefore risks giving a less firm consistency. You then need to start again using a shopbought
yogurt or freeze-dried ferment. If you have boiled the milk, wait until it has reached room temperature before adding the ferment.
Too high a heat may destroy the properties of your ferment.
Fermentation time
- Your yogurt will need between 6 and 12 hours of fermentation,
depending on the basic ingredients and the result you are after.

- Once the yogurt heating process is finished, the yogurt should be cooled completely, covered with cling film or lid and placed in a refrigerator for
at least 4 hours or preferably longer. They can be kept max 7 days in refrigerator. Yogurts with jam or additional ingredients will keep up to 3 days.
A clear liquid (whey) may form on top of the yogurt and this is best stirred back in. Alternatively, you can pour it off.
Pasta (13)
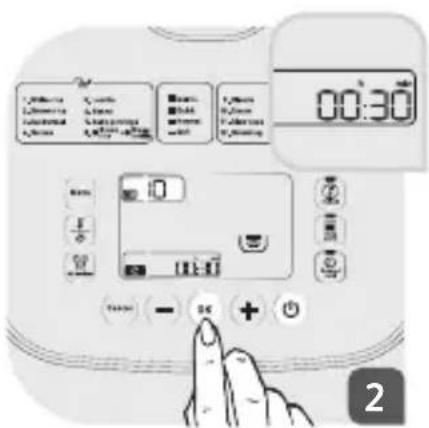
1 Choose the number of the program by pressing the - and + buttons. Validate by pressing ⏻.
Note: You have 2 steps for this mode water boiling and Pasta cooking.

2 You have the possibility to change the time of the Pasta cooking. Press the 510 button. Then press – and buttons to adjust your time. Close the lid. Validate by pressing. Then you begin step 1.

3 Step 1: Water boiling The picto RUT and 🌐 appear on the screen.
When the boiling temperature is reached, the appliance sounds two beeps every 10 seconds until you open the lid and add the pasta. You can proceed to the second step.
4 Step 2: Pasta cooking
Open the lid and add the pasta into the boiling water. Once you have put your pasta in the bowl press to begin the cooking mode.
To avoid overflow, the lid should remain open for this step.
The appliance enters into cooking mode. The picto, 📄 and 🌐 appear on the screen. The set cooking time appears
on the screen and starts to countdown.
At the end of the cooking, the appliance sounds 3 beeps.
There is no keep warm for this function.
MY RECIPES
EN
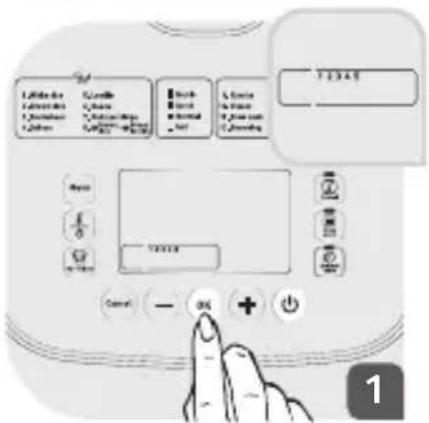
You have the possibility to store 5 favourite settings in the memory. You can set an existing menu or your own parameters (time and temperature).
Press 🔒 button.
The number 1 flashes, press to enter into the first recipe setting.
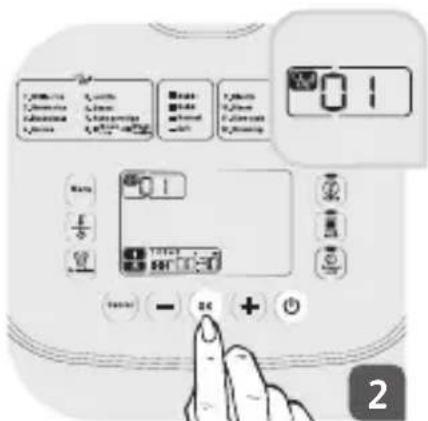
The screen displays the default menu ☐ and also the default temperature and cooking time if you want to make your own adjustments to the setting.
Choice of an existing cooking program
You can change the menu number by pressing [Menu] and and to choose the desired program.
You can change the time
and temperature (refer to the tables to check if adjustment is possible for the selected program) by pressing button and
adjust by pressing - and + buttons. Once you have set your adjustments, press - to start your recipe.
Choice of setting your own parameters

The number 1 flashes, press to enter into the first recipe setting.

The screen displays the default menu, temperature and time. To set your own parameters, press ⏻. The number of the menu disappears and you can
change the temperature and time by pressing - and + buttons. Once you have set your adjustments, press ⏻ to start your recipe.
Note: you can change the "My recipes" number by pressing - and ⏻ buttons.
REHEAT FUNCTION
This function is intended to only reheat cooked food.
Press 📄 button. The lights of , and are flickering.
The default cooking temperature and time appear on the screen. If you want to change these parameters, press ⏚ button and adjust by pressing and buttons to change the temperature.
Note: You have only 2 temperatures for Reheat 80°C and 100°C.
When you have changed the temperature, press 12 . You can adjust the cooking time by pressing and buttons.
Once you have adjusted the parameters, press to start reheat function.
The appliance sounds a long beep to indicate the beginning of the cooking. The light Ⓞ illuminates.
The picto 📋 appears on the screen. The remaining time appears on the screen.
At the end of the cooking, the appliance sounds 3 beeps and enters into keep warm (the keep warm button illuminates).
CAUTION
Cold food should not exceed 1/2 of the cooker bowl's volume. Too much food cannot be thoroughly heated. For small quantities of food, repeated use of the reheat program may lead to burnt food and a hard layer at the base of the bowl.
It is recommended not to reheat porridge or oatmeal, or it may become thick and paste like in consistency.
It is recommended to stir the food during reheating in order to have a more homogeneous temperature.
Never use the reheat function to defrost food.
Never use the reheat function to reheat frozen food.
KEEP WARM FUNCTION
- You can select the keep warm function manually.
Press 📄 button, the light flashes green. Then press 📄 button to validate.
The appliance sounds a long beep to indicate the beginning of keep warm and the light illuminates.
The keep warm time appears on the screen.
- To cancel the keep warm, press button ⏻ for 5 seconds. You can also cancel the keep warm function by a long press on the “Cancel” button.
- You can remove the automatic keep warm only for the next programmed cooking.
To cancel the automatic keep warm, press 📄 button for 5 seconds. The appliance sounds a long beep and the green light on 📄 button disappears. If you want to restore the automatic keep warm, press the button again for 5 seconds. The green light turns on.
Note: Never use this function to defrost food.
DELAYED START FUNCTION
- To use the delayed start function, choose a cooking program and the cooking time first. Once you have chosen these parameters and before you start your cooking the light 📄 flashes.
Then, press the button ☑ the cooking time flickers on the screen. For the automatic cooking program, it is the default cooking that appears on the screen. Set the desired preset time by pressing - and + buttons.
EN
This setting time is including the cooking time.
CLEANING AND MAINTENANCE
- Ensure the appliance is unplugged and completely cooled down before cleaning and maintenance.
- It is strongly advised to clean the appliance after each use as directed below.
- The bowl, the inner lid, the cups and the spatula are dishwasher safe.
Bowl, steam basket, soaking basket and inner lid
- Remove the bowl from the appliance. Clean the bowl, steam basket, soaking basket and inner lid with warm water, washing up liquid and a sponge.
- Scouring powders and metal scourers are not recommended.
- If food has stuck to the inside of the cooking bowl, you may put water in the bowl to soak the food residue before washing.
- Dry the bowl carefully
Taking care of the bowl
For the bowl, carefully follow the instructions below:
- Do not cut food in the cooking bowl.
- Make sure you put the bowl back into the appliance after use.
- Use the spoon provided or a wooden spoon and not a metal utensils to avoid damaging the bowl surface
- To avoid any risk of corrosion, do not pour vinegar into the bowl.
- The colour of the bowl surface may change after using for the first time or after multiple uses. This change in colour is due to the action of steam and water and does not have any effect on the use of the appliance, nor is it dangerous for your health, it is perfectly safe to continue using it.
Cleaning the micro pressure valve
- When cleaning the micro-pressure valve, remove it from the lid – and open it by rotating in the direction “open” (see diagrams page 11). After cleaning it, wipe it dry and place it back within the lid
Cleaning and care of the other parts of the appliance
- Clean the outside of the appliance, the inside of the lid and the cord with a damp cloth and wipe dry.
- Do not use abrasive products.
- Do not use water to clean the interior of the appliance body as it could damage the heat sensor.
- Remove the inner lid after each use to avoid the smell of strong foods lingering in the appliance. Clean in warm water and washing up liquid.
TECHNICAL TROUBLESHOOTING GUIDE
| Problem Causes Solutions | ||
| Control panel lights off and no heating. | Appliance not plugged in. | Check the power cord is plugged in at the socket and on at the mains. Check the power cord is firmly pushed into the base of the appliance. |
| Control panel lights off and heating. | Problem with the connection of the indicator light or indicator light is damaged. | Send to an authorised service centre for repair. |
| Steam leakage during using. | Lid is badly closed. | Open and close the lid again.If the problem persists, send to an authorised service centre for repair. |
| Micro pressure valve not well positioned or assembled incorrectly. | Stop cooking and unplug the appliance.Check the valve is assembled correctly (two parts locked together) and well positioned in it's seating. | |
| Lid or micro pressure valve gasket is damaged. | Send to an authorised service centre for repair. | |
| The inner lid is incorrectly positioned. | Remove and insert the inner lid in correct position, re-start cooking. | |
| Rice half cooked or overcooked. | Too much or not enough water compared to rice quantity. | Refer to recipe book for correct water quantity.Change type or brand of rice used. |
| Rice half cooked. Insufficiently | simmered. | Incorrect quantity of water used. See recipe book for water quantities.Always add water to the cooking bowl after adding the rice. |
| Automatic keep warm fails (no keep warm mode after cooking program or appliance stays on cooking program). | The keep warm program has accidentally been cancelled by the user when setting the appliance (see section «Keep Warm Function» page 24) | Read the section «Keep Warm Function» in the instructions. The automatic keep warm does not operate with programs Yogurt, Cream cheese, Dessert and Pasta.If the problem persists, please contact Tefal. |
| E0 | The temperature sensor on the lid is damaged. | Please contact Tefal Customer Service. |
| E1 | The temperature sensor under the bowl is damaged. | If the problem continues, please contact Tefal customer service. |
| E3 Missing bowl or empty bowl. | Put the inner bowl inside the appliance then unplug and re-connect the appliance to the mains. Next restart the program. | |
Note: If the inner bowl is deformed, do not use it anymore and get a replacement from an authorised service centre.
ENp. 3 - 27
ZHp. 28 - 53
MSp. 54 - 81
THp. 82 - 110



- MENU LIST
- SAFETY INSTRUCTIONS
- Connecting to the power supply
- Using
- Protect the environment
- BEFORE THE FIRST USE
- Unpack the appliance
- Clean the appliance:
- USING YOUR APPLIANCE
- NUTRITION MENU
- White rice (01) / Brown rice (02) / Quinoa (04) / Lentils (05)
- Chickpeas (03)
- Beans (06)
- Baby Porridge (07)
- Brown Rice + Green Lentils (08)
- The appliance indicates:
- Risotto/Pilaf (09)
- Steam (10) / Slow Cook (11) / Browning (12) / Bake (14) /
- Soup (15) / Bread rising (16) / Dessert (17) /
- Cream Cheese (18) / Yogurt (19) / Jam (20)
- CHOICE OF INGREDIENTS FOR YOGURT
- Milk
- The ferment
- Fermentation time
- Pasta (13)
- Step 2: Pasta cooking
- MY RECIPES
- Choice of an existing cooking program
- Choice of setting your own parameters
- REHEAT FUNCTION
- CAUTION
- KEEP WARM FUNCTION
- DELAYED START FUNCTION
- CLEANING AND MAINTENANCE
- Bowl, steam basket, soaking basket and inner lid
- Taking care of the bowl
- Cleaning the micro pressure valve
- Cleaning and care of the other parts of the appliance
Brand : TEFAL
Model : Multicook & Grains RK9001
Category : Rice cooker