
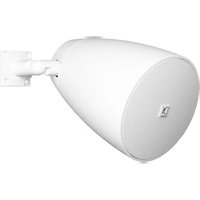
ATEO4 MK2 - Loudspeaker Audac - Free user manual and instructions
Find the device manual for free ATEO4 MK2 Audac in PDF.


| Product Type | Passive Speaker |
| Model | ATEO4 MK2 |
| Brand | Audac |
| Dimensions (W x H x D) | 150 x 240 x 150 mm |
| Weight | 3.5 kg |
| Woofer | 4" (100 mm) |
| Tweeter | 1" (25 mm) dome |
| Power Handling (RMS) | 100 W |
| Impedance | 8 Ω |
| Sensitivity | 90 dB (1W/1m) |
| Frequency Response | 70 Hz - 20 kHz |
| Enclosure Type | Bass reflex |
| Material | MDF |
| Mounting | Wall bracket included |
| Input | Screw terminals |
| Color | Black |
| Use | Indoor |
| Maintenance & Cleaning | Wipe with a dry cloth. Do not use solvents. |
| Safety | Do not expose to moisture or extreme temperatures. |
| Repairability & Spare Parts | Contact authorized Audac service center for repairs. |
| General Information | Designed for professional audio installations. |
Frequently Asked Questions - ATEO4 MK2 Audac
User questions about ATEO4 MK2 Audac
0 question about this device. Answer the ones you know or ask your own.
Ask a new question about this device
Download the instructions for your Loudspeaker in PDF format for free! Find your manual ATEO4 MK2 - Audac and take your electronic device back in hand. On this page are published all the documents necessary for the use of your device. ATEO4 MK2 by Audac.
USER MANUAL ATEO4 MK2 Audac
natural_image
Simple line drawing of a 3D cube with arrows indicating flow or movement (no text or symbols)Introduction
2-Way speaker with Clevermount™
The ATEO is a series of extraordinary loudspeakers especially designed for fixed install in indoor applications, ranging from modern residential applications to the most demanding designer applications in environments such as retail stores, pubs, restaurants or even clubs.
It features a stunningly designed and elegant looking ABS housing which is fitted with High–Quality components. What makes this loudspeaker range so exceptional is the specially designed mounting bracket using the Clevermount™ technology, making the loudspeakers cabinet flow together with the mounting bracket providing a great ease for installing the loudspeaker in one good-looking entity.
The mounting and connection of the loudspeaker simply happens by attaching the included metal wall—plate to the desired location. When mounted, the wires must be connected to the desired terminal of the custom connection block. The desired power tap for 100 Volt or 8 Ohm can be selected by picking the right terminal. After this is done, only five seconds of work is left for clipping the loudspeaker onto the wall—plate, tightening the safety screw and you're ready to rock!
This way, it's really child's play to install a large number of loudspeakers in no—time. Even if you're working all alone while people are watching your fingers or when installing the speakers up high, when you're standing on a ladder.
All Ateo series speakers are available in Black (/B) or White (/W).
Precautions
READ FOLLOWING INSTRUCTIONS FOR YOUR OWN SAFETY
- ALWAYS KEEP THESE INSTRUCTIONS FOR FUTURE REFERENCE. NEVER THROW THEM AWAY
• ALWAYS HANDLE THIS UNIT WITH CARE - CLEAN ONLY WITH DRY CLOTH
• HEED ALL WARNINGS AND FOLLOW ALL INSTRUCTIONS - NEVER EXPOSE THIS EQUIPMENT TO RAIN, MOISTURE, ANY DRIPPING OR SPLASHING LIQUID. AND NEVER PLACE AN OBJECT FILLED WITH LIQUID ON TOP OF THIS DEVICE
- DO NOT INSTALL THIS UNIT NEAR ANY HEAT SOURCES SUCH AS RADIATORS OR OTHER APPARATUS THAT PRODUCE HEAT
- DO NOT PLACE THIS UNIT IN ENVIRONMENTS WITH A HIGH LEVEL OF DUST, HEAT, MOISTURE OR VIBRATION
- THIS UNIT IS DEVELOPED FOR INDOOR USE ONLY. DO NOT USE IT OUTDOORS
• ONLY USE ATTACHMENTS & ACCESSORIES SPECIFIED BY THE MANUFACTURER. - ONLY INSTALL THE SPEAKER IN LOCATIONS THAT CAN STRUCTURALLY SUPPORT THE WEIGHT OF THE SPEAKER. IGNORING THIS CAN BRING THE SPEAKER DOWN.
- DO NOT USE ANY OTHER METHOD THAN SPECIFIED TO MOUNT THE SPEAKER. IF EXTREME FORCE IS APPLIED TO THE SPEAKER, IT COULD FALL DOWN
- ATTACH A SAFETY WIRE TO THE SPEAKER WHEN IT IS MOUNTED HIGH UP. ONLY USE INDUSTRY—ACCEPTED RIGGING TOOLS AND METHODS
- CAREFULLY CHECK THE UNIT'S CONDITION AFTER UNPACKING. IF THERE IS ANY DAMAGE TO THE CARTON BOX OR THE UNIT ITSELF, INFORM YOUR VENDOR IMMEDIATELY.
- ALWAYS FOLLOW THE LOCAL REGULATIONS AND REQUIREMENTS REGARDING INSTALLATION, SUSPENSION AND CONNECTION OF THIS LOUDSPEAKER. EVEN WHEN OTHERWISE SPECIFIED IN THIS DOCUMENT.
- THE INSTALLATION OF THIS LOUDSPEAKER SHALL BE DONE BY QUALIFIED PERSONNEL ONLY.
CAUTION
• USE CABLES OF THE RIGHT GAUGE TO CONNECT THE LOUDSPEAKER
- USE CABLES WITH CLEAR COLOUR CODING INDICATING THE POLARITY AND MAINTAIN THE SAME POLARITY THROUGHOUT THE WHOLE SYSTEM.
- ONLY USE THE CORRECT AMPLIFIER OUTPUT VOLTAGE AND IMPEDANCE. EXCEEDING THESE LIMITS COULD CAUSE FIRE OR OTHER FAILURES. AVOID EXPLOSIONS: DO NOT USE THE SPEAKER AROUND GASOLINE, THINNER OR OTHER COMBUSTIBLES
- AVOID ELECTRIC SHOCKS: SWITCH OFF THE AMPLIFIER WHEN CONNECTING THE LOUDSPEAKER
- DO NOT USE THE LOUDSPEAKER FOR AN EXTENDED PERIOD OF TIME AT DISTORTED SOUND. THIS COULD CAUSE PERMANENT DAMAGE.

CAUTION - SERVICING
This product contains no user serviceable parts. Refer all servicing to qualified service personnel. Do not perform any servicing (unless you are qualified to do so.)
EC DECLARATION OF CONFORMITY
This product conforms to all the essential requirements and further relevant specifications described in following directives: 2014/30/EU (EMC) and 2014/35/EU (LVD)
WASTE ELECTRICAL AND ELECTRONIC EQUIPMENT (WEEE)
The WEEE marking indicates that this product should not be disposed with regular household waste at the end of its product life. This regulation is created to protect both the environment and human health.
This product is developed and manufactured with high quality materials and components which can be recycled and/or reused. Please dispose this product to your local collection point or recycling centre for electrical and electronic waste. This will make to sure that it will be recycled on an environmentally friendly manner, and will help to protect the environment in which we all live.
Installing the ATEO Clevermount™ Technology
Every Ateo speaker uses the unique Clevermount™ technology, making the loudspeakers cabinet flow together with the mounting bracket and providing a great ease for installing the loudspeaker in one good-looking entity.
Using this technology, the speaker can be installed at any location in both a horizontal and vertical way, providing the possibility for pointing the speaker into the desired direction, even after the speaker is already mounted and connected.
The horizontal installation method provides an additional advantage when the installation height on the wall or ceiling is limited, while the directional capabilities make it easy to determine and adjust the distribution of sound throughout the area.
The installation of the loudspeaker should be done according to a simple 5-step procedure, which is described below:
Optional step: Cable adapter plate
In most cases, the speaker cable will be provided through the wall, making the cable completely invisible from the outer side. In case the cabling is not provided through the wall, the included cable adapter plate can be used. After breaking out one of the four cable slots provided with thinner material, the plate can be mounted onto the wall. Now the clevermount can be mounted onto the cable adapter plate using the four included bolts.

ATE04

ATE06
The optional WMA40/60 30° incline angle extension mount is also available and offers horizontal and vertical angles up to 60°. This way the sound experience can be optimized in every environment.
Step 1: Attach the Wall Plate
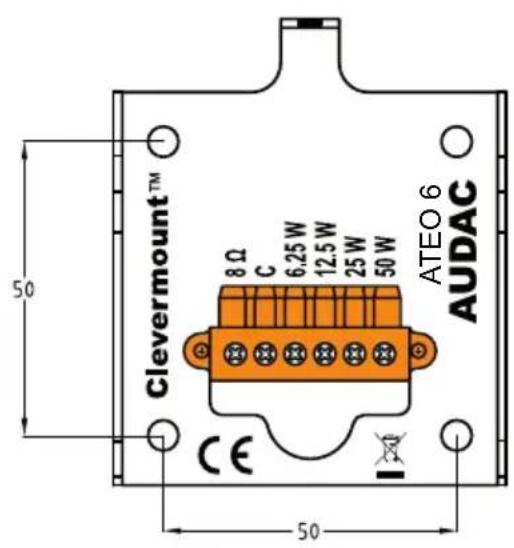
The first step which should be taken is the mounting of the supplied wall plate to the desired location on the wall. The wall plate has to be fixed by four screws in a quad-rangular shape. The mutual distance is 30 mm horizontally and 55 mm vertically for the ATE04 and 50 mm horizontally and 50 mm vertically for the ATE06 as indicated in the following drawing. The used fasteners should be chosen depending to the mounting surface (brick, concrete, wood, ...)

Step 2: Make the connections
After the wall plate is installed, the connections can be made. The Ateo speaker can be connected in Low Impedance (8 Ohm) or High Impedance (100 V) Systems. For use in High Impedance (100 V) systems, different power taps are available.
The wires coming from the amplifier have to be connected to the corresponding terminals of the special 6-pin Terminal block connector on the wall plate. The common ('COM' or '-'') output of the amplifier should always be connected to the 'C' terminal of the connector, while the positive ('Sig' or '+') should be connected to one of the other terminals, depending on the power or impedance.
Depending whether the speaker will be used in 8 Ohm or 100 Volt applications, a jumper on the rear side of the loudspeaker has to be moved. When the speaker will be used in 8 Ohm applications, the jumper should be placed in left position, while using in 100 Volt applications, the jumper should be placed in the right position.
Mind the polarity markings when wiring the loudspeaker cables.

Step 3: Attach the speaker
After the wall plate is mounted and the wires are connected, the loudspeaker can be fixed to the wall plate. This should be done by sliding the hooks of the wall plate into the slots on the back side of the speaker, followed by a downwards movement of the loudspeaker (about 1 cm). Now, the loudspeaker is fixed and connected.
To prevent the loudspeaker from falling down under any circumstance, the security screw on top of the circular bracket should be tightened.

natural_image
Illustration of a device emitting signal waves into a blue panel (no text or symbols)Step 4: Position the loudspeaker
The last step in the mounting procedure of the speaker is pointing it into the desired direction. This can be done after (carefully) removing the logo in the center of the front grill and untightening the allen-key bolt which is located behind it. After this bolt is untightened by a few turns, the speaker will be in a free state, making it possible to move it into the left (30°), right (30°), up (5°) and down (30°) position. It can also be rotated from vertical to horizontal position (rotate counter-clockwise).
Once the speaker is placed in position and pointing into the right direction, it can be locked by tightening the allen-key bolt. Subsequently the logo should be placed again in front of the allen-key bolt.

natural_image
Illustration of a shield-shaped device with directional arrows indicating flow or movement (no text or symbols)Step 5: Enjoy the music!
After the Ateo loudspeakers have been installed correctly, you deserve to have a short break, relax and enjoy the sound of the Ateo speakers!
Additional Information
Technical specifications
ATEO 4 MK2 ATEO 6
Max Power 70 Watt 120 Watt
RMS Power 35 Watt 60 Watt
Nominal impedance 8 Ohm 8 Ohm
Line Transformer Taps 24 Watt / 417 Ohm 50 Watt / 200 Ohm
12 Watt / 833 Ohm 25 Watt / 400 Ohm
6 Watt / 1667 Ohm 12.5 Watt / 800 Ohm
3 Watt / 3333 Ohm 6.25 Watt / 1600 Ohm
Sensitivity (1W/1m) 86 dB
89 dB
Sound Pressure (Max W/1m)
@ 8 Ohm
Sound Pressure (Max W/1m)
@ 100 V
Frequency Response ( ± 3 dB)
Drivers
101 dB
106 dB
100 dB
105 dB
100 Hz – 20 kHz
65 Hz – 20 kHz
1" HF Dome tweeter
1" HF Dome tweeter
4" MF / LF Woofer
6" MF / LF Woofer
6-pin custom Terminal-Block
6-pin custom Terminal-Block
Mounting bracket
Clevermount™
Clevermount™
Construction
ABS
ABS
Front finish
Fine perforated steel grill
Fine perforated steel grill
Incline Angle
Left & Right
30^
30^
Bottom
30^
30^
Top
5^
5^
Colour
White
ATE04/W (RAL9003)
ATE06/W (RAL9003)
Black
ATE04/B (RAL9005)
ATE06/B (RAL9005)
Dimensions (W x H x D)
137 x 244 x 146 mm
194×350×220mm
Weight
2.05 Kg
3.82 Kg
Packaging
Carton box (pair)
Carton box (pair)
Shipping weight & Volume
5 Kg - 0.015 Cbm (pair)
8.2 Kg - 0.038 Cbm (pair)
Accessories included
Allen-key wrench
Allen-key wrench
Notes
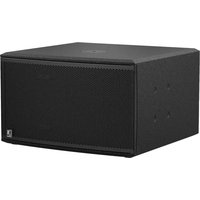

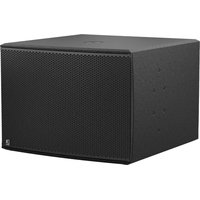
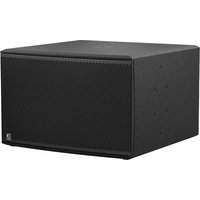
- Introduction
- 2-Way speaker with Clevermount™
- Precautions
- READ FOLLOWING INSTRUCTIONS FOR YOUR OWN SAFETY
- CAUTION
- CAUTION - SERVICING
- EC DECLARATION OF CONFORMITY
- WASTE ELECTRICAL AND ELECTRONIC EQUIPMENT (WEEE)
- Installing the ATEO Clevermount™ Technology
- Optional step: Cable adapter plate
- Step 1: Attach the Wall Plate
- Step 2: Make the connections
- Step 3: Attach the speaker
- Step 4: Position the loudspeaker
- Step 5: Enjoy the music!
- Additional Information
- Technical specifications
- Notes
Brand : Audac
Model : ATEO4 MK2
Category : Loudspeaker