
SC-HT888 - DVD player PANASONIC - Free user manual and instructions
Find the device manual for free SC-HT888 PANASONIC in PDF.
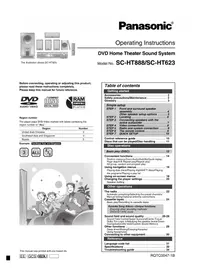


| Product Type | DVD Player |
| Brand | Panasonic |
| Model | SC-HT888 |
| Dimensions (W x H x D) | Approx. 430 x 82 x 280 mm |
| Weight | Approx. 3.5 kg |
| Power Supply | AC 120 V, 60 Hz |
| Power Consumption | 45 W |
| Disc Compatibility | DVD-Video, DVD-R, DVD-RW, CD, CD-R, CD-RW |
| Video Output | Composite, S-Video, Component, HDMI |
| Audio Output | 2-channel analog, Digital optical, Coaxial |
| Playback Features | Progressive Scan, Zoom, Repeat, A-B Repeat |
| Remote Control | Included |
| Maintenance | Clean with soft dry cloth; do not use solvents |
| Safety | Class 1 laser product; do not open casing |
| Accessories | Remote control, batteries, audio/video cables, manual |
| Reparability | Refer to qualified service personnel; no user-serviceable parts |
Frequently Asked Questions - SC-HT888 PANASONIC
User questions about SC-HT888 PANASONIC
0 question about this device. Answer the ones you know or ask your own.
Ask a new question about this device
Download the instructions for your DVD player in PDF format for free! Find your manual SC-HT888 - PANASONIC and take your electronic device back in hand. On this page are published all the documents necessary for the use of your device. SC-HT888 by PANASONIC.
USER MANUAL SC-HT888 PANASONIC
The illustration shows SC-HT623.
Operating Instructions
DVD Home Theater Sound System
Model No. SC-HT888/SC-HT623
Before connecting, operating or adjusting this product, please read these instructions completely. Please keep this manual for future reference.


Region number
The player plays DVD-Video marked with labels containing the region number or "ALL".
| Region | Number |
| United Arab Emirates | 2 |
| Southeast Asia and Singapore | 3 |
| Russia | 5 |
Example: Southeast Asia and Singapore


This manual was printed with soy based ink.

Table of contents
Getting started
Accessories 2
Safety precautions/Maintenance 3
Glossary 3
Simple setup
STEP 1 Front and surround speaker assembly....4 Other speaker setup options ....5
STEP 2 Locating 6
STEP 3 Connecting speakers with the active subwoofer....7
STEP 4 Video connections....8
STEP 5 Radio and system connection ..... 9
STEP 6 The remote control....9
STEP 7 QUICK SETUP....10
Control reference guide 10
Discs that can be played/Disc handling ..... 11
Disc operations
Basic play (DISC)....12
Convenient functions 14
Position memory/Zoom/Audio/Subtitle/Quick replay/ Page skip/A-B Repeat play/Repeat play/ All group, random and program play
Using navigation menus.... 16
Playing data discs/Playing HighMAT™ discs/Playing the programs/Playing a play list
Using on-screen menus 18
Changing the player settings 20
Speaker Setting
Other operations
The radio.... 22
Automatic presetting/Selecting the preset channels/Manual tuning/Optional antenna connections
Cassette tapes 24
Basic play/Recording to cassette tapes
Karaoke Song Album—Unique functions Enjoying other recording methods/ DVD/CD-TAPE mode
Sound field and sound quality .....26-28
Sound Field Control/Super Surround/Center Focus/Dolby Pro Logic II/Adjusting the speaker levels/Down-mixing/Subwoofer level/Custom Sound Memory
Other functions 29
Sleep timer/Muting/Enjoying Karaoke/Using headphones
Connecting to other equipment 30
Reference
Language code list 31
Specifications 32
Troubleshooting guide 34
Dear customer
Thank you for purchasing this product. For optimum performance and safety, please read these instructions carefully.
• These operating instructions are applicable to models SC-HT888 and SC-HT623 for a variety of regions. - Unless otherwise indicated, illustrations in these operating instructions are of SC-HT623 for Southeast Asia and Singapore. - Operations in these instructions are described mainly with the remote control, but you can do the operations on the main unit if the controls are the same.
HT888: indicates features applicable to SC-HT888 only.
HT623: SC-HT623 only.
| System SC-HT888 SC-HT623 | |
| Main unit SA-HT888 SA-HT623 | |
| Front speakers SB-FS888 SB-FS623 | |
| Center speaker SB-PC888 SB-PC623 | |
| Surround speakers SB-FS888 SB-FS623 | |
| Active subwoofer SB-WA888 SB-WA623 |
CAUTION!
THIS PRODUCT UTILIZES A LASER. USE OF CONTROLS OR ADJUSTMENTS OR PERFORMANCE OF PROCEDURES OTHER THAN THOSE SPECIFIED HEREIN MAY RESULT IN HAZARDOUS RADIATION EXPOSURE. DO NOT OPEN COVERS AND DO NOT REPAIR YOURSELF. REFER SERVICING TO QUALIFIED PERSONNEL.
WARNING:
TO REDUCE THE RISK OF FIRE, ELECTRIC SHOCK OR PRODUCT DAMAGE, DO NOT EXPOSE THIS APPARATUS TO RAIN, MOISTURE, DRIPPING OR SPLASHING AND THAT NO OBJECTS FILLED WITH LIQUIDS, SUCH AS VASES, SHALL BE PLACED ON THE APPARATUS.
CAUTION!
- DO NOT INSTALL OR PLACE THIS UNIT IN A BOOKCASE, BUILT-IN CABINET OR IN ANOTHER CONFINED SPACE. ENSURE THE UNIT IS WELL VENTILATED. TO PREVENT RISK OF ELECTRIC SHOCK OR FIRE HAZARD DUE TO OVERHEATING, ENSURE THAT CURTAINS AND ANY OTHER MATERIALS DO NOT OBSTRUCT THE VENTILATION VENTS.
- DO NOT OBSTRUCT THE UNIT'S VENTILATION OPENINGS WITH NEWSPAPERS, TABLECLOTHS, CURTAINS, AND SIMILAR ITEMS.
- DO NOT PLACE SOURCES OF NAKED FLAMES, SUCH AS LIGHTED CANDLES, ON THE UNIT.
- DISPOSE OF BATTERIES IN AN ENVIRONMENTALLY FRIENDLY MANNER.
For Southeast Asia, Singapore and United Arab Emirates THIS UNIT IS INTENDED FOR USE IN TROPICAL CLIMATES. For Russia THIS UNIT IS INTENDED FOR USE IN MODERATE CLIMATES.
The socket outlet shall be installed near the equipment and easily accessible or the mains plug or an appliance coupler shall remain readily operable.
This product may receive radio interference caused by mobile telephones during use. If such interference is apparent, please increase separation between the product and the mobile telephone.

(Inside of product)


For Southeast Asia, Singapore and United Arab Emirates CAUTION:
The AC voltage is different according to the area. Be sure to set proper voltage in your area before use. (For details, please refer to page 9)
Accessories

Please check and identify the supplied accessories.
□ 1 Remote control (EUR7722060)

□ 2 Remote control batteries

□ 1 Video cable

□ 1 AC mains lead

1 AM loop antenna

1 FM indoor antenna

1 System cable

1 Sheet of rubber feet HT623

1 Sheet of speaker-cable stickers

12 Screws HT888

Speaker cables 3×4-m cables 2×10-m cables

Note
The included AC mains lead is for use with this unit only. Do not use it with other equipment.
Safety precautions
Placement
Set the unit up on an even surface away from direct sunlight, high temperatures, high humidity, and excessive vibration. These conditions can damage the cabinet and other components, thereby shortening the unit's service life.
Do not place heavy items on the unit.
Voltage
Do not use high voltage power sources. This can overload the unit and cause a fire.
Do not use a DC power source. Check the source carefully when setting up the unit on a ship or other places where DC is used.
AC mains lead protection
Ensure the AC mains lead is connected correctly and not damaged. Poor connection and lead damage can cause fire or electric shock. Do not pull, bend, or place heavy items on the lead.
Grasp the plug firmly when unplugging the lead. Pulling the AC mains lead can cause electric shock.
Do not handle the plug with wet hands. This can cause electric shock.
Foreign matter
Do not let metal objects fall inside the unit. This can cause electric shock or malfunction.
Do not let liquids get into the unit. This can cause electric shock or malfunction. If this occurs, immediately disconnect the unit from the power supply and contact your dealer.
Do not spray insecticides onto or into the unit. They contain flammable gases which can ignite if sprayed into the unit.
Service
Do not attempt to repair this unit by yourself. If sound is interrupted, indicators fail to light, smoke appears, or any other problem that is not covered in these instructions occurs, disconnect the AC mains lead and contact your dealer or an authorized service center. Electric shock or damage to the unit can occur if the unit is repaired, disassembled or reconstructed by unqualified persons.
Extend operating life by disconnecting the unit from the power source if it is not to be used for a long time.
Maintenance
Clean this unit with a soft, dry cloth.
Never use alcohol, paint thinner or benzine to clean this unit. Before using chemically treated cloth, read the instructions that came with the cloth carefully.
Before moving the unit, ensure the disc tray is empty.
Failure to do so will risk severely damaging the disc and the unit.
For a cleaner, crisper sound
Clean the heads regularly to assure good quality playback and recording.
Use a cleaning tape (not included).
Glossary
Decoder
A decoder restores the coded audio signals on DVDs to normal. This is called decoding.
Dolby Digital
This is a method of coding digital signals developed by Dolby Laboratories. Apart from stereo (2-channel) audio, these signals can also be multi-channel audio. A large amount of audio information can be recorded on one disc using this method.
DTS (Digital Theater Systems)
This surround system is used in many movie theaters around the world. There is good separation between the channels, so realistic sound effects are possible.
Dynamic range
Dynamic range is the difference between the lowest level of sound that can be heard above the noise of the equipment and the highest level of sound before distortion occurs.
Frame still and field still
Frames are the still pictures that go together to make a moving picture. There are about 30 frames shown each second. One frame is made up of two fields. A regular television shows these fields one after the other to create frames.
A still is shown when you pause a moving picture. A frame still is made up of two alternating fields, so the picture may appear blurred, but overall quality is high.
A field still is not blurred, but it has only half the information of a frame still so picture quality is lower.
I/P/B
MPEG 2, the video compression standard adopted for use with DVD-Video, codes frames using these 3 picture types.
I: Intra coded picture This picture has the best quality and is the best to use when adjusting the picture.
P: Predictive coded picture This picture is calculated based on past I or P-pictures.
B: Bidirectionally-predictive coded picture This picture is calculated by comparing past and future I and P-pictures so it has the lowest volume of information.
Linear PCM (pulse code modulation)
These are uncompressed digital signals, similar to those found on CDs.
Playback control (PBC)
If a Video CD has playback control, you can select scenes and information with menus.
Sampling frequency
Sampling is the process of converting the heights of sound wave (analog signal) samples taken at set periods into digits (digital encoding). Sampling frequency is the number of samples taken per second, so larger numbers mean more faithful reproduction of the original sound.
Simple setup
Preparation
HT623 (Front and surround speakers only)
Attach the rubber feet to prevent vibration causing the speakers to move or fall over.
Use 3 or 4 feet per speaker.

STEP
1
HT888
Make sure you have all the indicated components before starting the assembly, setup, and connection.
4 speaker boxes
4 bases
12 screws


Front and surround speaker assembly
Preparation
- To prevent damage or scratches, lay a soft cloth and perform assembly on it.
- For assembly, use a Phillips-head screwdriver.
1. Turn the speaker box upside down.
Bottom of the speaker box / Top of the speaker box
2. Place the base on the bottom of the speaker box.
3. Align the holes in the base with those in the speaker.
3. Secure the base to the speaker box.
Ensure the base is fastened straight by lightly tightening the 3 screws alternately until fully tightened.
4. Turn the assembled speaker upright.
■ Preventing the front and surround speakers from falling over Preparation
- You will need to obtain appropriate screw eyes to match the walls to which they will be fastened. ●The walls should be capable of supporting 30 kg per screw.

Note
Consult a qualified housing contractor for the appropriate procedure when attaching to a concrete wall or a surface that may not have strong enough support. Improper attachment may result in damage to the wall or speakers.
Other speaker setup options
HT888 (Center speaker only) HT623
■ Attaching to a wall
① Drive a screw (not included) into a wall. ② Fit the speaker securely onto the screw(s) using the hole(s).
- The wall or pillar on which the speakers are to be attached should be capable of supporting 10 kg per screw. Consult a qualified building contractor when attaching the speakers to a wall. Improper attachment may result in damage to the wall and speakers.

e.g. Center speaker HT888 HT623

STEP2
Locating
How you set up your speakers can affect the bass and the sound field. Note the following points.
- Place speakers on flat secure bases.
- Placing speakers too close to floors, walls, and corners can result in excessive bass. Cover walls and windows with thick curtains.
- Place the front, center, and surround speakers at approximately the same distance from the seating position. The angles in the diagrams are approximate.
HT888 1 FRONT (L, R)
2 SURROUND (L, R)
3 CENTER
4 ACTIVE
SUBWOOFER
HT623
1 FRONT (L, R)
2 SURROUND (L, R)
3 CENTER
4 ACTIVE SUBWOOFER
Setup example
Setup example
- The left and right front, and left and right surround speakers are all identical.
- Use only supplied speakers
Using other speakers can damage the unit and sound quality will be negatively affected. - Set the speakers up on an even surface to prevent them from falling. Take proper precautions to prevent the speakers from falling if you cannot set them up on an even surface.
Main unit
Note
Keep your speakers at least 10 cm away from the main unit for proper ventilation.
Center speaker
- Vibration caused by the center speaker can disrupt the picture if it is placed directly on the television. Put the center speaker on a rack or shelf.
- To prevent the speakers from falling, do not place directly on top of the television.
Active subwoofer
Place to the right or left of the television, on the floor or a sturdy shelf so that it won't cause vibration. Leave 10 cm at the rear for ventilation.
Caution
Hold the speakers by the sides. Applying pressure to the front net can damage the speaker.
e.g. HT623

Notes on speaker use
- You can damage your speakers and shorten their useful life if you play sound at high levels over extended periods.
- Reduce the volume in the following cases to avoid damage.
- When playing distorted sound.
- When the speakers are receiving howling from a record player, noise from FM broadcasts, or continuous signals from an oscillator, test disc, or electronic instrument.
- When adjusting the sound quality.
- When turning the unit on or off.
If irregular coloring occurs on your television
The supplied speakers are designed to be used close to a television, but the picture may be affected with some televisions and setup combinations.
If this occurs, turn the television off for about 30 minutes. The television's demagnetizing function should correct the problem. If it persists, move the speakers farther away from the television.
Caution
- The main unit and supplied speakers are to be used only as indicated in this setup. Failure to do so may lead to damage to the amplifier and/or the speakers, and may result in the risk of fire. Consult a qualified service person if damage has occurred or if you experience a sudden change in performance.
- Do not attempt to attach these speakers to walls using methods other than those described in this manual.
STEP 3: Connecting speakers with the active subwoofer
Attach the speaker-cable stickers to make connection easier.
Note
- Never short-circuit positive (+) and negative (−) speaker wires.
- Be sure to connect only positive (copper) wires to positive (+) terminals and negative (silver) wires to negative (−) terminals. Incorrect connection can damage the speakers.
5 speaker cables
- 3×4-m cables: For front and center speakers

- 2×10-m cables: For surround speakers

Sheet of speaker-cable stickers

HT888
![graph TD A["ACTIVE SUBWOOFER"] --> B["Speaker-cable sticker"] B --> C["① FRONT (L)"] B --> D["② FRONT (R)"] B --> E["③ SURROUND (L)"] B --> F["④ SURROUND (R)"] B --> G["⑤ CENTER"] G --> H["+ : Copper - : Silver"] G --> I["+ : Copper - : Silver"] J["Insert the wire fully."] --> K["Click!"]](/content/2026/06/1330249/images/0ee146484103597f9ee893aea5cf50392c695086e3bebf64722b821aeae9405c.jpg)
HT623
![graph TD A["Speaker-cable sticker"] --> B["① FRONT (L)"] A --> C["② FRONT (R)"] A --> D["③ SURROUND (L)"] A --> E["④ SURROUND (R)"] A --> F["⑤ CENTER"] G["ACTIVE SUBWOOFER"] --> H["Insert the wire fully."] H --> I["Click!"] J["Copper"] --> K["+ : Copper"] L["Silver"] --> M["+ : Silver"]](/content/2026/06/1330249/images/d007bc0fd0224e94101df6b984d817d889c8560574ae23581547173661664bfa.jpg)
STEP 4
Video connections
- Do not connect through the video cassette recorder. Due to copy guard protection, the picture may not display properly.
- Turn the television off before connecting, and refer to the television's operating instructions.
■ Television with a VIDEO IN terminal
■ Television with an S-VIDEO IN terminal
Video cable
■ Television with COMPONENT VIDEO IN terminals
S VIDEO OUT terminal
The S VIDEO OUT terminal achieves a more vivid picture than the VIDEO OUT terminal by separating the chrominance (C) and luminance (Y) signals. (Actual results depend on the television.)
COMPONENT VIDEO OUT terminals
These terminals can be used for either interlace or progressive output and provide a purer picture than the S VIDEO OUT terminal. Connection using these terminals outputs the color difference signals (P_B/P_R) and luminance signal (Y) separately in order to achieve high fidelity in reproducing colors.
- The description of the component video input terminals depends on the television or monitor (e.g. Y/PB/PR, Y/B-Y/R-Y, Y/CB/CR). Connect to terminals of the same color.
To enjoy progressive video
Connect to the component video input terminals on a 480P compatible television. (Video will not be displayed correctly if connected to an incompatible television.)
- Select "Enable (NTSC Disc Only)" in the progressive output setting in QUICK SETUP (→ page 10). Then play an NTSC disc.
- When playing NTSC discs, change video output mode to "480P" (→ page 19) so "PROG." appears on the display.
All Panasonic televisions that have 480P input connectors are compatible. Consult the manufacturer if you have another brand of television.
Note
Output from this unit is interlaced if you have connected to the television through the VIDEO OUT or S VIDEO OUT terminal, or when playing PAL discs, even if "PROG." is on the display.
STEP 5: Radio and system connection
System cable

AM loop antenna

FM indoor antenna

AC mains lead

- Connect the AC mains lead after all other connections are complete.
- Optional antenna connections (→ page 23).
![graph TD A["FM indoor antenna"] --> B["Main unit"] B --> C["Catch up"] C --> D["System cable"] D --> E["To disconnect Press the catch and pull out."] E --> F["AM loop antenna"] F --> G["Black Red White"] F --> H["Black"] F --> I["Loosen with a Phillips-head screwdriver."] F --> J["Tighten again."] F…](/content/2026/06/1330249/images/20104da36956c3638fd76fb8372b88065141665f786d50068194bb42b905ee82.jpg)
Conserving power
The main unit consumes a small amount of power, even when it is turned off (approx. 1 W). To save power when the unit is not to be used for a long time, unplug it from the household mains socket.
You will need to reset some memory items after plugging in the unit.
STEP 6: The remote control
Remote control

Batteries

Insert so the poles (+ and -) match those in the remote control.

Do not use rechargeable type batteries.
Do not:
- mix old and new batteries.
- use different types at the same time.
- heat or expose to flame. ●take apart or short circuit.
- attempt to recharge alkaline or manganese batteries.
- use batteries if the covering has been peeled off.
Mishandling of batteries can cause electrolyte leakage which can damage items the fluid contacts and may cause a fire.
Remove if the remote control is not going to be used for a long period of time. Store in a cool, dark place.
Use
Aim at the sensor (→ page 10), avoiding obstacles, at a maximum range of 7 m directly in front of the unit.
STEP 7
QUICK SETUP
The QUICK SETUP screen assists you to make necessary settings.
Turn on the television and select the appropriate video input on the television.
1

Turn the unit on.
2

Select "DVD/CD".
3

Shows QUICK SETUP screen.
4

Follow the messages and make the settings.

Press to finish QUICK SETUP.
5
6

Press to exit.
To change these settings later
Select "QUICK SETUP" in "Others" tab (→ page 21).
Control reference guide
See reference pages in brackets.
Standby/on indicator
When the unit is connected to the AC mains supply, this indicator lights red in standby mode and lights green when the unit is turned on.
Source select button [SELECTOR] (22)
DVD/CD → TAPE → FM → AM → TV → VCR/AUX → Return to DVD/CD

Remote control signal sensor
Standby/on switch [⏻/l]
Press to switch the unit from on to standby mode or vice versa.
In standby mode, the unit is still consuming a small amount of power.
AC supply
indicator (AC IN)
This indicator lights when the unit is connected to the AC mains supply.

To use functions labeled in orange: While pressing [SHIFT], press the corresponding button.
| Disc Logo | Indication used in operating instructions | Remarks | |
| DVD-RAM |  | RAM | Recorded using Version 1.1 of the Video Recording Format (a unified video recording standard). |
| JPEG | Recorded using the DCF (Design rule for Camera File system) standard. | ||
| DVD-Audio |  | DVD-A — | |
| DVD-V | Some DVD-Audio discs contain DVD-Video content.To play DVD-Video content, select “Play as DVD-Video” in Other Menu (→ page 19) | ||
| DVD-Video |  | DVD-V | — |
| DVD-R |  | Panasonic DVD-R recorded and finalized* on Panasonic DVD-Video recorders or DVD-Video cameras are played as DVD-Video on this unit. | |
| Video CD |  | VCD | — |
| SVCD |  | Conforming to IEC62107 | |
| CD CD |  | This unit is compatible with HDCD, but does not support the Peak Extend function.(A function which expands the dynamic range of high level signals)HDCD-encoded CDs sound better because they are encoded with 20 bits, as compared with 16 bits for all other CDs.During HDCD play, “HDCD” lights on the unit’s display. | |
| CD-RCD-RW | — | WMAMP3JPEGCDVCD | This unit can play CD-R/RW (audio recording disc) recorded with the formats on the left. Close the sessions or finalize* the disc after recording.HighMAT discsWMA, MP3 or JPEG files only.To play without using the HighMAT function, select “Play as Data Disc” in Other Menu (→page 19). |
* A process that allows play on compatible equipment. - It may not be possible to play the above discs in all cases due to the type of disc or condition of the recording.
■ Discs that cannot be played
DVD-ROM, CD-ROM, CDV, CD-G, DVD+R, +RW, DVD-RW, SACD, Divx Video Discs and Photo CD, DVD-RAM that cannot be removed from their cartridge, 2.6-GB and 5.2-GB DVD-RAM, and "Chaoji VCD" available on the market including CVD, DVCD and SVCD that do not conform to IEC62107.
■ Audio format of DVDs
This unit automatically recognizes and decodes discs with these symbols.


■ Video systems
- This unit can play PAL and NTSC, but your television must match the system used on the disc.
- PAL discs cannot be correctly viewed on an NTSC television.
- This unit can convert NTSC signals to PAL 60 for viewing on a PAL television (→ page 20, "NTSC Disc Output" in "Video" tab).

HighMAT™ and the HighMAT logo are either trademarks or registered trademarks of Microsoft Corporation in the United States and/or other countries.
Disc handling
■ To clean discs
DVD-A DVD-V VCD CD
Wipe with a damp cloth and then wipe dry.

RAM DVD-R
- Clean with an optional DVD-RAM/PD disc cleaner (LF-K200DCA1, where available).
- Never use cloths or cleaners for CDs, etc.
■ Disc handling precautions
- Do not attach labels or stickers to discs (This may cause disc warping, rendering it unusable).
- Do not write on the label side with a ball-point pen or other writing instrument.
- Do not use record cleaning sprays, benzine, thinner, static electricity prevention liquids or any other solvent.
- Do not use scratch-proof protectors or covers.
- Do not use the following discs:
– Discs with exposed adhesive from removed stickers or labels (rented discs, etc.). – Discs that are badly warped or cracked. - Irregularly shaped discs, such as heart shapes.
RQTC0047

![The position is memorized while "RESUME" is on the display. •Press [► DVD/CD] to resume. DVD-V To review the previous chapters (→page 14, Position memory) •Press [■ STOP] to clear the position. STOP Pause PAUSE •Press [► DVD/CD] to start play.](/content/2026/06/1330249/images/a6f5e1a4fbd1d2ebdc6f4e681a10622c79e9b0d3cb7d74980838c36969c14fe7.jpg)
![Skip SKIP WMA MP3 JPEG [▲,▼]: Group skip during play [◀,▶]: Content skip during play Search (during play) Slow-motion (during pause) SLOW/SEARCH Up to 5 steps. Press [▶ DVD/CD] to start play. VCD Slow motion, forward direction only. Press and hold [|◀◀/◀◀] or [▶▶/▶▶] on the main unit to start search…](/content/2026/06/1330249/images/e5cd1be42677d047bb1497dfe2775d9f9c989b6fdcf015ecdab28af2de90e817.jpg)
Note
Discs continue to rotate while menus are displayed. Press [■ STOP] when you finish to preserve the unit's motor and your television screen.
If you are experiencing problems, refer to troubleshooting (→ page 34, 35).


![graph TD A["Select"] --> B["Register"] C["Other Options"] --> D["Select"] style A fill:#f9f,stroke:#333 style B fill:#ccf,stroke:#333 style C fill:#cfc,stroke:#333 style D fill:#fcc,stroke:#333](/content/2026/06/1330249/images/a3b64cca4ed3885a6517bb0dfdac529c70de8e7133f731b6e50b5316e287a1cc.jpg)
![RAM DVD-A DVD-V VCD CD e.g. To select 12: [≥10] → [1] → [2] VCD with playback control While stopped, press the numbered buttons. WMA MP3 JPEG e.g. To select 123: [1] → [2] → [3] → [ENTER] ● Press [CANCEL] to cancel the number(s). Enter number ① ② ③ ④ ⑤ ⑥ ⑦ ⑧ ⑨ 0 ⋅10 ENTER CANCEL](/content/2026/06/1330249/images/607a4d5be6d32eedc6123971a4aa500c23365a61c52d66927c2d18dfb2d3023a.jpg)


See below for details.
Position memory
(Only when the elapsed play time can be displayed.
JPEG: Works with all JPEG content.)
This position is memorized even after turning off the unit, changing the source, or changing the disc.
Press [POSITION MEMORY].
![PANASONIC SC-HT888 - Press [POSITION MEMORY]. - 1](/content/2026/06/1330249/images/935508833077d94c17155414aa2fc2fc0a27676e1fd62e00885a939ffeca2cd3.jpg)
- Up to 5 discs.
- When the sixth disc is memorized, the earliest position is replaced. When the unit is turned on, "DVD/CD" is reselected, or the disc is inserted, "RESUME" displays.
Press [▶ DVD/CD] to start play from that position.
To review the previous chapters DVD-V
Press [▶ DVD/CD] while the following message is displayed.
or![PANASONIC SC-HT888 - Press [▶ DVD/CD] to start play from that position. - 1](/content/2026/06/1330249/images/538a8926d169e7a036ced4b37ae944ba22035d9ff61ac2505fda44d259d993cd.jpg)
Press PLAY to Chapter Review
The beginning portions of each chapter up to the current one are played.
- Do not press [▶ DVD/CD] if you want to cancel review.
Zoom
RAM DVD-V VCD
Press [SHIFT]+[ZOOM] several times to select the preset aspect ratio or "Auto". (Just Fit Zoom)

Fine adjustments (Manual Zoom)
Press [◀,▶].
- from ×1.00 to ×1.60 (in 0.01 units) - from ×1.60 to ×2.00 (in 0.02 units) - Press and hold [◀,▶] to alter faster.
Audio
DVD-A DVD-V (with multiple soundtracks) RAM VCD
Press [AUDIO] several times to select the soundtrack.
RAM VCD
You can use this button to select "L", "R" or "LR".

Subtitle
DVD-V (with multiple subtitles) VCD (SVCD only)
RAM (On/Off only)
Press [SHIFT] + [SUBTITLE] several times to select the subtitle language.
To clear/display the subtitles
Press [◀,▶] to select "On" or "Off".

Quick replay
(Only when the elapsed play time can be displayed.)
Press [QUICK REPLAY] to skip back a few seconds.
Page skip
DVD-A
During play or while paused
Press [SHIFT] + [PAGE].
The page changes each time you do this.
- Press [RETURN] to go back to page 1.
A-B Repeat play
Except JPEG RAM (Still picture part)
1 During play Press [A-B REPEAT] at the starting point (A).
2 Press [A-B REPEAT] at the ending point (B).
- Press [A-B REPEAT] again to cancel.


Repeat play
All group, random and program play
DVD-A DVD-V WMA MP3 JPEG
VCD CD (There is no on-screen display.)
Each time you press [PLAY MODE] while stopped:
All group (DVD-A)→Program→Random→off (Normal play)
To exit all group, program and random mode
Press [PLAY MODE] several times while stopped.
- Disable HighMAT disc play to use random and program play. Select "Play as Data Disc" in Other Menu (→ page 19).
- DVD-A Some discs contain bonus groups. If a password screen appears after selecting a group, enter the password with the numbered buttons to play the bonus group. Refer also to the disc's jacket.
See below for details.

Repeat play
(Only when the elapsed play time can be displayed.
JPEG: Works with all JPEG content.)
During play
Press [SHIFT] + [REPEAT] several times to select an item to be repeated.

RAM
PG REPEAT → ALL REPEAT (Entire disc) → REPEAT OFF
- During play list play
SCENE REPEAT > PL REPEAT > REPEAT OFF
DVD-A
TRACK REPEAT > GROUP REPEAT* > REPEAT OFF
DVD-V
CHAPTER REPEAT > TITLE REPEAT* > REPEAT OFF
VCD CD (There is no on-screen display.)
TRACK REPEAT > ALL REPEAT (Entire disc) > REPEAT OFF
WMA MP3 (There is no on-screen display.)
CONTENT REPEAT → GROUP REPEAT → REPEAT OFF
JPEG (There is no on-screen display.)
GROUP REPEAT* > REPEAT OFF
*During all group (DVD-A), program and random play "ALL REPEAT" is displayed.
All group, random and program play
■ All group play
DVD-A
Press [▶ DVD/CD].

■ Random play
1 DVD-A DVD-V WMA MP3 JPEG Press the numbered buttons to select a title or a group (WMA MP3 JPEG then press [ENTER]).

DVD-A
- To enter all groups, press [◀,▶] to select "All" and press [ENTER].
- To deselect a group, press the numbered buttons corresponding to the group you want to clear.
2 Press [▶ DVD/CD].
- You can play a maximum of 999 audio/picture contents in random order.
■ Program play (up to 24 items)
1 Press the numbered buttons to select the items (WMA MP3 JPEG then press [ENTER])
•To select a 2-digit number
e.g. To select 25:


- Repeat this step to program other items.
e.g. CD
e.g. DVD-V

2 Press [▶ DVD/CD].
To select all the items DVD-A DVD-V WMA MP3 JPEG
(on the disc or in the title or group)
Press [ENTER] and [▲,▼] to select "ALL", then press [ENTER] again to register.
To change the program
DVD-A DVD-V WMA MP3 JPEG
Press [▲,▼] to select an item.
- To change an item, repeat step 1.
- To clear an item, press [CANCEL] (or select "Clear" and press [ENTER]).
- Press [SHIFT]+[PAGE] to skip page by page.
VCD CD
Each time [CANCEL] is pressed, the displayed item is cleared.
To clear the whole program
DVD-A DVD-V WMA MP3 JPEG
Press [▲,▼,◄,►] to select "Clear all" and press [ENTER].
VCD CD
While stopped, press [■ STOP] to clear all.
The whole program is also cleared when the unit is turned off, the disc tray is opened or another source is selected.
VCD CD The program is retained in memory.

Playing data discs
WMA MP3 JPEG
You can play JPEG files on DVD-RAM or play HighMAT discs without using the HighMAT function (→ page 19, “Play as Data Disc” in Other Menu).
■ Using playback menus (except JPEG files on DVD-RAM)
1 Press [TOP MENU]. 2 Press [▲,▼] to select "All", "Audio" or "Picture" and press [ENTER]. • To exit the screen Press [TOP MENU] ■ Using navigation menus 1 Press [MENU]. 2 Press [▲,▼,◀,▶] to select the group or audio/picture content and press [ENTER].

- To enjoy listening to WMA/MP3 contents while showing a JPEG image on the screen
Select a JPEG file first, and then select tracks. (The opposite order is not effective.)
- To exit the screen Press [MENU].
To use the contents screen to find a track CD (CD text only)
1 Press [TOP MENU] or [MENU].
- Press [DISPLAY] to switch between guide messages and the elapsed play time indicator.

2 Press [▲,▼] to move through the tracks and press [ENTER].
- Press [SHIFT]+[PAGE] to skip page by page.
Using the submenu WMA MP3 JPEG
1 While the menu is displayed
Press [DISPLAY].
Items shown differ depending on the type of software.

2 Press [▲,▼] to select the sub menu and press [ENTER].
■ Searching by content or group title WMA MP3 JPEG
Place the cursor on the group title to search a group, or place the cursor on the content title to search contents.
1 Select "Find" ( → above).

2 Press [▲,▼] to select a character and press [ENTER].
- Repeat to enter another characters. ●Lower case is also searched.
- Press [◀◀,▶▶, SLOW/SEARCH] to skip between A, E, I, O and U.
- Press [◀] to erase a character.
- Erase the asterisk (×) to search for the titles starting with that character.
3 Press [▶] to select "Find" and press [ENTER].
The search result screen appears.
4 Press [▲,▼] to select the content or group and press [ENTER].
Playing HighMAT™ discs
WMA MP3 JPEG
1 While stopped
Press [TOP MENU].
2 Press [▲,▼,◀,▶] to select the item following the on-screen instructions.
e.g.![graph TD A["New Playlist from Long Name Display To"] --> B["Men1"] A --> C["Men2"] A --> D["Play list"] A --> E["PCM"] A --> F["Host"]](/content/2026/06/1330249/images/99e7b995cc06edbe22863b361265e8bf7d877f22f92f0e715da9d8fb21a48b7e.jpg)
Menu: Takes you to the next menu which shows play lists or another menu
Play list: play starts
- To change the menu background
Press [DISPLAY].
The background changes to the one recorded on the disc.
- To exit the screen
Press [■ STOP].
■ Selecting from the list
1 During play
Press [MENU].
2 Press [◀] then
[▲,▼] to switch among Playlist, Group and Content lists.

3 Press [▶] then [▲,▼] to select an item and press [ENTER].
- Press [SHIFT]+[PAGE] to skip page by page.
- To exit the screen
Press [MENU].
Tips for making WMA/MP3 and JPEG discs (For CD-R, CD-RW)
- Discs must conform to ISO9660 level 1 or 2 (except for extended formats).
- This unit is compatible with multi-session but if there are a lot of sessions it takes more time for play to start. Keep the number of sessions to a minimum to avoid this.
Naming folders and files
At the time of recording, prefix folder and file names with 3-digit numbers in the order you want to play them (this may not work at times).
Files must have the extension:
".WMA" or ".wma"
".MP3" or ".mp3"
".JPG", ".jpg", ".JPEG" or ".jpeg"
e.g. MP3 root![graph TD A["001 group"] --> B["001 track.mp3"] A --> C["002 track.mp3"] A --> D["003 track.mp3"] A --> E["002 group"] F["003 group"] --> G["001 track.mp3"] F --> H["002 track.mp3"] F --> I["003 track.mp3"] F --> J["004 track.mp3"]](/content/2026/06/1330249/images/fa69e473615c2f6cd15097c286c22cd50c339c679b75302506e6dd1fc9cfdad3.jpg)
Playing the programs
RAM
1 Press [DIRECT NAVIGATOR].
- Titles appear only if you have entered them.
- You cannot change program and disc titles.
2 Press [▲,▼] or the numbered buttons to select the
program.
- Press [SHIFT]+[PAGE] to skip page by page. •To select a 2-digit number e.g. 23: [≥10] → [2] → [3]
- Press [▶] to show the contents of the program and the disc.
3 Press [ENTER].
- To exit the screen
Press [DIRECT NAVIGATOR].

Playing a play list
RAM
(Only when the disc contains a play list)
1 Press [PLAY LIST]. 2 Press [▲,▼] or the numbered buttons to select the play list.
- Press [SHIFT]+[PAGE] to skip page by page. • To select a 2-digit number e.g. 23: [≥10] → [2] → [3]
3 Press [ENTER].
• To exit the screen
Press [PLAY LIST].

WMA
- You cannot play WMA files that are copy protected.
- You cannot play WMA files that use incompatible compression rates with this unit.
MP3
●This unit is not compatible with ID3 tags. - Compatible sampling rate: 8, 11.02, 12, 16, 22.05, 24, 32, 44.1 and 48 kHz
JPEG
- To view JPEG files on this unit:
- Take them on a digital camera that meets the DCF Standard (Design rule for Camera file System) Version 1.0. Some digital cameras have functions that are not supported by the DCF Standard Version 1.0 like automatic picture rotation which may render a picture un-viewable.
- Do not alter the files in any way or save them under a different name.
- This unit cannot display moving pictures, MOTION JPEG and other such formats, still pictures other than JPEG (e.g. TIFF) or play associated sound.
(Refer to page 10 for remote control button positions.)
1

Press once.
(When pressed twice, the elapsed play time indicator appears → below.)
Items shown differ depending on the type of software.
2

Select the menu. Make the
3

settings. Press twice to exit.

Main Menu
| Program GroupTitleChapterTrackPlaylistContent | To start from a specific item |
| Time | To skip incrementally or decrementally (Time Slip)1 Press [ENTER] twice to show Time Slip indicator.2 Press [▲,▼] to select the time and press [ENTER].●Press and hold [▲,▼] to alter faster.To start from a specific time (Time Search)To change remaining/elapsed time display |
| Audio | (→page 14) |
| WMA MP3To display the current bitrate or sampling frequency |
| Still Picture | To switch still picture |
| Thumbnail | To show thumbnail images |
| Subtitle | (→page 14) |
| Marker (VR) | RAMTo recall a marker recorded on DVD-Video recordersTo recall a marker: [▲,▼] → [ENTER] |
| Angle | (with multiple angles)To select the angle |
| Rotate Picture | To rotate pictures |
| Slideshow | To turn on/off slideshowTo change the slideshow timing (0–30 sec) |
■Elapsed play time indicator
(Except JPEG)
Condition—play, pause, or slow/search
![or slow/search Current position 2 2 1:23:54; Current playback item Press [▲,▼] to select the elapse play time or the remaining time.](/content/2026/06/1330249/images/4c3674631b9e6d02e38bd3b94e1189e2cf696f00f8fbc2b4cbb63ced3d7109cc.jpg)
Other Settings
| Play Speed | DVD-A (Motion picture part) RAM DVD-VTo change play speed– from × 0.6 to × 1.4 (in 0.1 unit steps)● After you change the speed– Output is in stereo.– Sampling frequency of 96 kHz is converted to 48 kHz. |
Play Menu
(Only when the elapsed play time can be displayed.
JPEG: Works with all JPEG content.)
| Repeat | (→page 15) |
| A-B Repeat | (→page 14) |
| Marker | Except RAMTo mark up to 5 positions to play again[ENTER] (The unit is now ready to accept markers.)To mark a position: [ENTER] (at the desired point)To mark another position: [◀,▶] → [ENTER]To recall a marker: [◀,▶] → [ENTER]To erase a marker: [◀,▶] → [CANCEL]●This feature does not work during program and random play. |
■ Picture Menu
| Picture Mode | NormalCinema1: Mellows images and enhances detail in dark scenes.Cinema2: Sharpens images and enhances detail in dark scenes heads AnimationDynamicUser (Press [ENTER] to select "Picture Adjustment") (→ below) |
| Picture AdjustmentContrastBrightnessSharpnessColourGamma (Adjusts the brightness of dark parts.)Depth EnhancerReduces the rough noise in the background to give a greater feeling of depth. | |
| Video Output Mode | When playing NTSC discs●480I (Interlace) ←→ 480P (Progressive) |
| Transfer Mode | If you have chosen "480P" (→ above), select the method of conversion for progressive output to suit the type of material.Auto1(normal): For viewing film materialAuto2: For viewing film material (the same as Auto1, but able to convert 30-frame-per-second progressive video)Video: For video material |
Audio Menu
| Dolby Pro Logic II | (→page 26) |
| Dialogue Enhancer | To make the dialogue in movies easier to hearDVD-V(Dolby Digital, DTS, MPEG, 3-channel or over, with the dialogue recorded in the center channel)On ←→ Off |
| Multi Re-master | RAM DVD-V (Discs recorded with 48 kHz only)DVD-A (Discs recorded with 44.1 kHz and 48 kHz only)VCD CD●During 2ch output of these discs, this feature gives you a more natural sound by adding the higher frequency signals not recorded on the disc, for example, playing DVD-Video recorded with 48 kHz at 96 kHz. (Sampling frequency →page 3)●During multi-channel output of these discs, this feature reproduces the frequencies lost during recording to give you a sound closer to the original.WMA MP3 (Disc recording is other than 8 kHz, 16 kHz, 32 kHz)This feature reproduces the higher frequencies lost during recording to give you a sound closer to the original.1 → 2 → 3 →Off↑DVD-A DVD-V CD (LPCM/PPCM)1 High tempo (e.g., pop and rock)2 Various tempos (e.g., jazz)3 Low tempo (e.g., classical)Other discs1 Light effect2 Medium effect3 Strong effect |
■ Display Menu
| Information | On Off(JPEG: Off, Date, Details) |
| Subtitle Position | 0 to -60 (in 2 unit steps) |
| Subtitle Brightness | Auto, 0 to -7 |
| 4:3 Aspect | To select how to show images made for 4:3 aspect screens on a 16:9 aspect televisionNormal: Horizontally stretches images.Auto: Expands 4:3 letterbox images to fill more of the screen.Other images appear in full in the center of the screen.Shrink: Images appear in the center of the screen.Zoom: Expands all images to fill the screen.If your television has a similar feature, use it instead for a better effect. |
| Just Fit Zoom | To select the appropriate screen size to fit your TV screen |
| Manual Zoom | To zoom in and out manually |
| Bitrate Display | RAM DVD-V VCDDVD-A (Motion picture part)On Off |
| GUI See-through | On Off |
| GUI Brightness | -3 to +3 |
■ Other Menu
| Play as DVD-Video or Play as DVD-Audio | While stopped●Select “Play as DVD-Video” to play DVD-Video contents of DVD-Audio. |
| Play as DVD-VR, Play as HighMAT or Play as Data Disc | While stopped●Select “Play as Data Disc” to play JPEG files on DVD-RAM or to play a HighMAT disc without using the HighMAT function. |
Signal type/data
LPCM/PPCM/DIG Digital/DTS/MPEG: Signal type
kHz (Sampling frequency) / bit / ch (Number of channels)
Example: 3/2.1ch
| .1: Low frequency effect(not displayed if there is no signal) |
| 0: No surround1: Mono surround2: Stereo surround (left/right) |
| 1: Center2: Front left+Front right3: Front left+Front right+Center |
Changing the player settings
(Refer to page 10 for remote control button positions.)
1

Shows Setup menu. Se
2

lect the tab. Select th
3

item. Make the se
4

ings. Press to exit.
5


- The settings remain intact even if you switch the unit to standby.
● Underlined items are the factory preset.
The QUICK SETUP enables successive settings of the items in the shaded area.
■ "Disc" tab
| AudioChoose the audio language. | ●English ●(Language options) *1 ●Original *2 ●Other* * * * *3 |
| SubtitleChoose the subtitle language. | ●Automatic *4 ●English ●(Language options) *1 ●Other* * * * *3 |
| MenusChoose the language for disc menus.Changing the menu language from QUICK SETUP also changes this setting. | ●English ●(Language options) *1 ●Other* * * * *3 |
| RatingsSet a ratings level to limit DVD-Video play.●Follow the on-screen instructions. | Setting ratings (When level 8 is selected)●8 No Limit ●1 to 7 ●0 Lock All: To prevent play of discs without ratings levels. |
| Changing ratings (When level 0–7 is selected)●Unlock Player ●Change Password ●Change Level ●Temporary Unlock |
1 Language options Southeast Asia and Singapore: Chinese Russia and United Arab Emirates: French, German, Italian, Spanish, Portuguese, Swedish and Dutch 2 The original language designed on the disc is selected. *3 Input a code number referring to the table on page 31. *4 If the language selected for "Audio" is not available, subtitle appears in that language (If available on the disc).
■ "Video" tab
| TV AspectChoose the setting to suit your television and preference. | ●4:3 Pan&Scan: Regular aspect television (4:3)The sides of the widescreen picture are cut off so it fills the screen (unless prohibited by the disc).●4:3 Letterbox: Regular aspect television (4:3)Widescreen picture is shown in the letterbox style. |   |
| ●16:9: Widescreen television (16:9) | ||
| Progressive Out (Component) | ●Disable: Interlace output●Enable (NTSC Disc Only): Progressive output | |
| TV TypeSelect to suit the type of television. | ●Standard (Direct View TV)●CRT Projector ●LCD TV/Projector●Projection TV ●Plasma TV | |
| Time DelayWhen connected with a Plasma display, adjust if you notice the audio is out of sync with the video. | ●0ms ●20ms ●40ms ●60ms ●80ms ●100ms | |
| Still ModeSpecify the type of picture shown when paused. | ●Automatic●Field: The picture is not blurred, but picture quality is lower.●Frame: Overall quality is high, but the picture may appear blurred. | |
| NTSC Disc OutputChoose PAL 60 or NTSC output when playing NTSC discs (→ page 11) | ●PAL60: When connected to a PAL television●NTSC: When connected to an NTSC television(Southeast Asia and Singapore: “NTSC” is the factory preset.) | |
■ "Audio" tab
| Dynamic Range Compression | ●Off●On: Adjust for clarity even when the volume is low through compressing the range of the lowest sound level and the highest sound level. Convenient for late night viewing. (Only works with Dolby Digital) |
| Audio during Search | ●On●Off |
| Speaker Setting (→ below)Set the delay time for your center and surround speakers or adjust the speaker levels. | Delay time●Center: 0.0/1.0/2.0/3.0/4.0/5.0 ms ●Surround (L/R): 0.0/5.0/10.0/15.0 msSpeaker level●Center, Surround (L/R): -6 dB to +6 dB |
■“Display” tab
| Menu Language | ×5●English●中文 |
| ≈6●English●Français●Deutsch●Italiano●Español●Português●Svenska●Nederlands | |
| On-Screen Messages | ●On●Off |
※5 Southeast Asia and Singapore ※6 Russia and United Arab Emirates
■ "Others" tab
| FL Dimmer | ●Bright ●Dim●Auto: The display is dimmed during play, but brightens when you perform some operations. |
| HighMAT | ●Enable ●Disable (Unable to use the HighMAT function) |
| QUICK SETUP | ●Yes ●No |
| Re-initialize SettingThis returns all values in the Setup menus to the default settings. | ●Yes: The password screen is shown if Ratings (→ page 20) are set. Please enter the same password. After “INIT” on the display disappears, turn the unit off and on again.●No |
Speaker Setting
Changing the delay time
(Effective when playing multi-channel audio)
(Center and surround speakers only)
For optimum listening with 5.1-channel sound, all the speakers, except for the subwoofer, should be the same distance from the seating position. If you have to place the center or surround speakers closer to the seating position, adjust the delay time to make up for the difference.
1 Press [▲,▼,◀,▶] to select the delay time box and press [ENTER].
Center delay time
2 Press [▲,▼] to adjust the delay time and press [ENTER].
If either distance Ⓐ or ⓑ is less than ⓒ, find the difference in the relevant table and change to the recommended setting.
□: Recommended placement![graph TD A["Central Box"] --> B["L"] A --> C["C"] A --> D["R"] A --> E["RS"] A --> F["LS"] A --> G["SW"] A --> H["a"] A --> I["b"] A --> J["c"]](/content/2026/06/1330249/images/a0c252c6cbf10aab03efa74fc726602bc48ef7c47a135cfb20408e1b5bf4df81.jpg)
a Center speaker
| Difference Setting | |
| Approx. 34 cm | 1.0 ms |
| Approx. 68 cm | 2.0 ms |
| Approx. 102 cm | 3.0 ms |
| Approx. 136 cm | 4.0 ms |
| Approx. 170 cm | 5.0 ms |
⑥ Surround speakers
| Difference | Setting |
| Approx. 170 cm | 5.0 ms |
| Approx. 340 cm | 10.0 ms |
| Approx. 510 cm | 15.0 ms |
Adjusting the speaker levels
(Center and surround speakers only)
This is one of the ways to get appropriate surround effects. Adjust the speaker level to the same level as the front speakers.
1 While stopped
Press [▲,▼,◀,▶] to select "Test" and press [ENTER].
Test signal is output from each speaker in clockwise.

2 Press [▲,▼] to select the desired level for each speaker while test signal is being output.
● Center, Surround (L/R): -6 dB to +6 dB
For your reference
You can also adjust the speaker levels during play (→ page 27).
To finish the speaker level setting
Press [■ STOP] to select "Exit" and press [ENTER].


Automatic presetting
Up to 15 stations can each be set in the FM and AM bands. Main unit only
1 Press [SELECTOR] to select "FM" or "AM". 2 Press [TUNE MODE] to select "MANUAL".
Each time you press the button: MANUAL←→PRESET
3 Press [√ TUNING ∧] to tune to the lowest frequency (FM: 87.50, AM: 522).
Southeast Asia, Singapore and United Arab Emirates : (AM: 522 or 520)
4 Press and hold [MEMORY].
Release the button when "FM AUTO" or "AM AUTO" is displayed.
The tuner presets all the stations it can receive into the channels in ascending order.
- "SET OK" is displayed when the stations are set. The last station to be set is then played.
- "ERROR" is displayed when automatic presetting is unsuccessful. Preset the channels manually (→ page 23).
Selecting the preset channels
1 Press [TUNER/BAND] to select "FM" or "AM". 2 Press the numbered buttons to select the channel.
Alternatively, press [^ CH v].
To select a 2-digit number
e.g., 12: [≥10] → [1] → [2]

When a stereo FM broadcast is being received.

■ If noise is excessive in FM Main unit only
Press [FM MODE] to display "MONO".

Press [FM MODE] again to cancel the mode.
The mode is also canceled when you change the frequency.
Manual tuning
Main unit only
1 Press [SELECTOR] to select "FM" or "AM". 2 Press [TUNE MODE] to select "MANUAL". 3 Press [v TUNING ∧] to select the frequency.
Press and hold [v TUNING ∧] until the frequency starts scrolling to start automatic tuning. Tuning stops when a station is found.
Presetting the channel one by one
1 Tune to the station (→ above). 2 Press [ENTER]. 3 While the frequency and "PGM" are flashing on the display
Press the numbered buttons to select a channel.
Alternatively, press [^ CH v], then press [ENTER].

The station occupying a channel is erased if another station is preset to that channel.
■ AM frequency step
Main unit only
Southeast Asia, Singapore and United Arab Emirates
The step is factory-set to 9 kHz, but you can change it to receive broadcasts allocated in 10-kHz steps.
1 Press [SELECTOR] to select "FM". 2 Press and hold [SELECTOR].
After a few seconds, the display changes to show the current minimum frequency. Continue to hold the button down. The minimum frequency changes and the step is changed.
To return to the original step, repeat the above steps.
Note
Any FM/AM frequencies preset in channels will be changed by this procedure. Preset them again.
Optional antenna connections
Use outdoor antennas if radio reception is poor.
- Disconnect the antenna when the unit is not in use.
- Do not use the outdoor antenna during an electrical storm.

AM outdoor antenna (Using a vinyl wire)
Run a piece of vinyl wire horizontally across a window or other convenient location.
FM outdoor antenna (Using a television antenna)
- Disconnect the FM indoor antenna.
- The antenna should be installed by a competent technician.
Cassette tapes

Basic play
Note
Only normal position (TYPE 1) tapes can be played correctly.
Cassette tape selection and care
- Tapes exceeding 100 minutes are thin and can break or get caught up in the cassette mechanism.
- Excess tape slack should be wound up before the tape is played.
- Endless tapes can get caught up in the cassette mechanism if used incorrectly. Use tapes that are compatible with the reverse mode.
Caution
Sound quality may be affected and cassette tape may become stuck if you do not adhere to the following: - Do not use other stickers not included with the cassette tape. - Place stickers on the cassette tape only as indicated.
1 Press [TAPE] to select "TAPE".
2 Insert the cassette tape.

The tape is pulled in automatically.
3 Press [◀▶ TAPE] to start play.
Each time you press the button:

4 Adjust the volume.
To stop the tape
Press [■ STOP].
To eject the tape
Press [▲ EJECT] on the main unit.
To select the reverse mode
With the cassette tape inserted
Press [REV MODE].
Each time you press the button:
← : One side is played
→: Both sides are played.
(forward → reverse)
Play stops at the end of the reverse side.
C→D: Both sides are played repeatedly until [■ STOP] is pressed.

Finding a place on a tape
To fast-forward and rewind
Press [◀◀ REW] (rewind) or [▶▶ FF] (fast-forward) while the tape is stopped.
To resume play, press [◀▶ TAPE].
To find the beginning of a track (TPS: Tape Program Sensor)
Press [◀◀ REW] (rewind) or [▶▶ FF] (fast-forward) during play.
Each press increases the number of tracks skipped, up to a maximum of 9.
e.g. Skipping in the forward direction

- The first skip backward takes you to the beginning of the current track.
Note
TPS may not operate correctly in the following situations: - If the interval between tracks is less than 4 seconds. - If noise has been recorded between the interval. - If there are silent segments within tracks.
Recording to cassette tapes
Note
Only normal position (TYPE 1) tapes can be used for recording.
Volume, sound quality and surround effects
- Recording level is set automatically.
- Multi-channel sources (3 to 5.1 channels) are automatically down-mixed to 2 channels during recording.
Turn on Dynamic Range Compression (→ page 21) if sound is distorted.
Sound effects (→ pages 26–28) are automatically set to flat.
Wind up the leader tape so recording can start immediately.
Preparation
1 Insert the cassette to be recorded on.
The tape direction is automatically set to "F ▷".
• To record on the reverse side
Press [◀▶ TAPE] twice to select “◀R”, and then press [■ STOP].
2 Press [REV MODE] to select the reverse mode.
Each time you press the button:
→: Only one side is
recorded on.
→ or (→): Both sides are recorded on. (forward → reverse)
Recording stops at the end of the reverse side.
- “←→” automatically changes to “→→” when recording starts.
Recording audio from a disc
Preparation
Press [DVD/CD] to select "DVD/CD".
1 Press [SHIFT]+[REC ●/II].
Recording starts.
2 Play the disc you want to record (→ page 12).
- To minimize the silent portion of the recording, play should be started immediately after step 1.

To pause recording
Press [SHIFT]+[REC ●/■].
Pressing again restarts recording.
To stop recording
Press [■ STOP]. (The disc continues playing.)
To record programmed tracks or contents
1 Program the tracks or contents (→ page 15, “Program play”, step 1).
2 Press [SHIFT]+[REC ●/■].
3 Press [▶ DVD/CD].
Recording the radio
1 Tune to the required station (→ page 22, 23).
2 Press [SHIFT]+[REC ●/■■] to start recording.
To pause recording
Press [SHIFT]+[REC ●/II].
Pressing again restarts recording.
To stop recording
Press [■ STOP].
- Erasing recordings
1 Press [TAPE] to select "TAPE". 2 Press [REV MODE] to select the reverse mode (→ above). 3 Press [SHIFT]+[REC ●/■].
- Erasure prevention
Tab for side B Tab for side A

Re-recording
e.g. To re-record on side A
Cover with adhesive tape
Karaoke Song Album — Unique functions
Enjoying other recording methods
You can record your voice accompanied by audio from a DVD, CD, TV or VCR.
Preparation
- Refer to page 30 for the TV or VCR connections.
- Connect the microphone and adjust the microphone volume (→page 29, "Enjoying Karaoke").
- Select the source to be played and adjust the main volume (→page 12, 30).
1 Press [SHIFT]+[REC ●/II].
Recording starts.
2 Play the source.
The microphone sound is now ready to be recorded with accompaniment.
To pause recording
Press [SHIFT]+[REC ●/■].
Pressing again restarts recording.
To stop recording
Press [■ STOP]. (The disc continues playing.)
To record programmed tracks or contents
1 Program the tracks or contents ( → page 15, "Program play", step 1). 2 Press [SHIFT]+[REC ●/■]. 3 Press [ ▶ DVD/CD].
DVD/CD-TAPE mode
It is possible to enjoy the video from a disc and audio from a cassette tape at the same time. JPEG contents can accompany your Karaoke tape like DVD Karaoke discs, for instance.
Preparation
- Press [DVD/CD] to select "DVD/CD"
- Refer also to "Enjoying Karaoke" on page 29.
1 Play a disc (see page 12).
2 Play a cassette tape.
Sound output from the speakers switches to the tape. When the tape is stopped, sound output switches back to the disc.
Note
Some functions related to disc play (see pages 12–19) are also available during DVD/CD-TAPE mode.


Sound Field Control
Changes the sound quality.

Super Surround
Adds surround effects to stereo sound.
+

Center Focus
For clearer dialogues.

Dolby Pro Logic II
Changes stereo sound to surround sound.
Note
- When connected with headphones and microphone(s), the following sound field systems cannot be used. (Excluding Sound Field Control)
- You may experience a reduction in sound quality when these sound field systems are used with some sources. If this occurs, turn the sound field system off.
See below for details.

Sound Field Control
Press [SFC].
Each time you press the button:
HEAVY: Adds punch to rock.
CLEAR: Clarifies higher sounds.
SOFT: For background music.
DISCO: Reverberates sound to make you feel like you are in a disco.
LIVE: Makes vocals more alive.
HALL: Expands sound to make you feel like you are in a hall.
FLAT: Cancel (no effect is added) (factory preset)
To check the current setting
Press [SFC].
![PANASONIC SC-HT888 - Press [SFC]. - 1](/content/2026/06/1330249/images/9004250d02ccecd40b1a67116199e70de1252b89d2e17e79f753f4b403019009.jpg)
Super Surround
Press [SUPER SRND].
Each time you press the button:
MUSIC: Adds surround effects to stereo sources.
MOVIE: Use this mode when playing movie software.
PARTY: Sound is in stereo regardless of the direction you are facing.
OFF: Cancel
![PANASONIC SC-HT888 - Press [SUPER SRND]. - 1](/content/2026/06/1330249/images/b992dea72bc5aaa6ea450dd64ede92ed027a1c4c95c68a75cc3c1dc9efdc872c.jpg)
- You can adjust the level of the surround speakers to get the best surround effect (→ page 21, 27, Adjusting the speaker levels).
- Super Surround does not work when playing a DVD recorded with 5.1-channel Dolby Digital or DTS.
- When Super Surround is on, Dolby Pro Logic II (→ right) turns off.
Center Focus
(Discs where the dialogue is recorded in the center channel)
You can make the sound of the center speaker seem like it is coming from within the television.
Press [SHIFT]+[C.FOCUS].
![PANASONIC SC-HT888 - Press [SHIFT]+[C.FOCUS]. - 1](/content/2026/06/1330249/images/71617e5cec101180e59a21b087b1dd9c0523df040c233375869d5a41080d073f.jpg)
![PANASONIC SC-HT888 - Press [SHIFT]+[C.FOCUS]. - 2](/content/2026/06/1330249/images/cfc825411b0775d5dc941aa8991966b6f237330c35883a113d5a9d17cf7c8a90.jpg)
CENTER FOCUS ON ←→ CENTER FOCUS OFF
- This does not work when Super Surround is turned on.
- This works when Dolby Pro LogicII is turned on.
Dolby Pro Logic II
(Only in DVD/CD mode)
Dolby Pro Logic II is an advanced decoder that derives 5-channel surround (Left and Right Front, Center, Left and Right Surround) from any stereo program material, whether or not it has been specifically Dolby Surround encoded.
Press [☐☐PLII].
Each time you press the button:
Movie: Movie software, recorded in Dolby Surround.
Music: Stereo sources
Off: Cancel
![PANASONIC SC-HT888 - Press [☐☐PLII]. - 1](/content/2026/06/1330249/images/09132e6d7a0c1b046cd0b0a0cab56224d5da75c47663f1626c4cb0d2d98504a1.jpg)
- “☐☐PLII” lights when there is effect.

Adjusting the speaker levels
This is one of the ways to get appropriate surround effects. Adjust the speaker level to the same level as the front speakers.
Preparation
Press [DVD/CD].
1 While stopped
Press [SHIFT]+[TEST] to output a test signal.
L: Front left
C: Center
R: Front right
RS: Right surround
LS: Left surround
2 Press [^VOLUME∨] to set the volume level normally used for listening.
3 Press [▲] (increase) or [▼] (decrease) to adjust the speaker level for each speaker.
C, RS, LS: -6 dB to +6 dB
To stop the test signal
Press [SHIFT]+[TEST] again.
Note
There is no output from SW (subwoofer) channel.
■ To adjust speaker level during play
(Effective only when playing multi-channel audio or when Dolby Pro Logic II or Super Surround is on.)
1 Press [CH SELECT] to select the speaker.
L, R (displayed at the same time) → C → RS → LS → SW
SW: Subwoofer
- S appears instead of RS and LS on the display when "MUSIC" or "MOVIE" is selected with Super Surround (→ page 26). In this case, you can adjust both surround speaker levels at the same time. S: -6 dB to +6 dB
- When "PARTY" is selected with Super Surround, only L, R balance is adjustable.
2 Press [▲] (increase) or [▼] (decrease) to adjust the speaker level for each speaker.
C, RS, LS, SW: -6 dB to +6 dB
(L, R: Only the balance is adjustable.)
- To adjust the balance of the front speakers While L, R is selected, press [◀,▶].
For your reference
You can also adjust the speaker levels by using the SETUP screen (→page 21).


See below for details.
Down-mixing
You can output the down-mixed 2 channel signals when necessary.
Press [SHIFT]+[MIX 2CH].

When "D.MIX" flashes on the display, the disc contains multiple-channel signals that cannot be down-mixed. DVD-A
Subwoofer level
Press [SUBWOOFER LEVEL].
SUB W 1→SUB W 2→SUB W 3→SUB W 4 (factory preset)
SUB W I
Custom Sound Memory
DVD-A DVD-V VCD CD
Available sound setting:
Subwoofer level, Center Focus, Sound Field Control, Super Surround
After making the sound field or sound quality settings, press and hold [SHIFT]+[C.S.M].

■ Recall the settings
The unit recalls the settings when you play the disc again.
●The settings are replaced if you change them. - When you store settings for the 31st disc, the settings for the earliest disc are cleared. - Press [SHIFT]+[C.S.M] while "CSM" is displayed to cancel the sound setting for the disc. - Press [SHIFT]+[C.S.M] while "CSM" is out to recall the sound setting for the disc.

SLEEP
Sleep timer
Turns the unit off after a set time.

Muting
See below for details.

Sleep timer
Press [SLEEP] to select the time (in minutes).

SLEEP 30 → SLEEP 60 → SLEEP 90 ↑ OFF ← SLEEP120 ←
To cancel the timer
Press [SLEEP] to select "OFF".
To confirm the remaining time
Press [SLEEP] again.
To change the setting
Repeat the procedure from the beginning.
Muting
Press [MUTING].
"MUTING" flashes on the unit's display.
≡MUTING≡
To cancel
- Press [MUTING] again or reduce the volume to minimum (— dB), then raise it to the required level.
- Muting is canceled when you switch the unit to standby.
Enjoying Karaoke
1 Turn [MIC VOL] to "MIN" and connect the microphone(s) (not included).
Microphone plug type: 6.3 mm monaural

2 Select the source and start play (→page 12, 24, 30).
Multi-channel audio is automatically down-mixed.
3 Adjust the main volume with [VOLUME].
4 Adjust the microphone volume.
To activate the echo function
1 Press [KARAOKE]. (Karaoke indicator is turned on.)
2 Press [SHIFT] +[ECHO] to adjust the echo level.
OFF, ECHO 1 (Light effect) to ECHO 7 (Strong effect)
To turn the vocals on or off
DVD-V
1 Press [AUDIO] during play.
2 Press [◀,▶] to select the mode.
Solo discs
Duet discs
Off: Vocals off
Off: Vocals off
On: Vocals on
V1+V2: Both parts
V1: Part 1 only
V2: Part 2 only
VCD
Press [AUDIO] during play.
Each time you press the button:
LR: Vocals and accompaniment
L: Accompaniment only
R: Vocals only
- Select "L" for karaoke. (R and L may be reversed on some discs.)
Using headphones
1 Reduce the volume and connect the headphones (not included).
Headphone plug type: 6.3 mm stereo

2 Adjust headphone volume with [VOLUME].
●Audio is automatically switched to stereo (2-channel).
Note
Avoid listening for prolonged periods of time to prevent hearing damage.
Connecting to other equipment
■ Connection example
![graph TD A["Television (not included)"] --> B["AUDIO OUT L R"] C["Video cassette recorder (not included)"] --> D["VIDEO OUT L R"] B --> E["TV/TV cassette recorder"] D --> E E --> F["Video cassette recorder"] G["Tape deck (not included)"] --> H["REC IN L R"] H --> I["TV/TV cassette recorder"] I --> J…](/content/2026/06/1330249/images/1170a545559912f3e3f9e67da3814bd8b5926d3bd6a72f9b134253b00299c923.jpg)

Listening to the video cassette recorder
Press [SHIFT]+[VCR/AUX] to select "VCR/AUX" as the source.
Listening to TV
Press [SHIFT]+[TV] to select "TV" as the source.
Connecting a laser disc or record player
Connect instead of a video cassette recorder (see above) and select "VCR/AUX" as the source.
We recommend using a record player with a built-in phono equalizer. If your player doesn't have a built-in equalizer, connect it first to a separate equalizer and then to the unit.
| Abkhazian: 6566 | Lingala: | 7678 | |
| Afar: 6565 | Lithuanian: | 7684 | |
| Afrikaans: 6570 | Macedonian: | 7775 | |
| Albanian: 8381 | Malagasy: | 7771 | |
| Ameharic: 6577 | Malay: | 7783 | |
| Arabic: 6582 | Malayalam: | 7776 | |
| Armenian: 7289 | Maltese: | 7784 | |
| Assamese: 6583 | Maori: | 7773 | |
| Aymara: 6588 | Marathi: 7782 | ||
| Azerbaijani: 6590 | Moldavian: | 7779 | |
| Bashkir: 6665 | Mongolian: | 7778 | |
| Basque: 6985 | Nauru: | 7865 | |
| Bengali; Bangla: 6678 | Nepali: 7869 | ||
| Bhutani: 6890 | Norwegian: | 7879 | |
| Bihari: 6672 | Oriya: | 7982 | |
| Breton: 6682 | Pashto, Pushto: | 8083 | |
| Bulgarian: 6671 | Persian: 7065 | ||
| Burmese: 7789 | Polish: | 8076 | |
| Byelorussian: 6669 | Portuguese: 8084 | ||
| Cambodian: 7577 | Punjabi: 8065 | ||
| Catalan: | 6765 | Quechua: 8185 | |
| Chinese: | 9072 | Rhaeto-Romance: | 8277 |
| Corsican: | 6779 | Romanian: | 8279 |
| Croatian: | 7282 | Russian: | 8285 |
| Czech: 6783 | Samoan: | 8377 | |
| Danish: | 6865 | Sanskrit: | 8365 |
| Dutch: | 7876 | Scots Gaelic: | 7168 |
| English: | 6978 | Serbian: | 8382 |
| Esperanto: | 6979 | Serbo-Croatian: | 8372 |
| Estonian: 6984 | Shona: | 8378 | |
| Faroese: | 7079 | Sindhi: | 8368 |
| Fiji: | 7074 | Singhalese: 8373 | |
| Finnish: | 7073 | Slovak: 8375 | |
| French: | 7082 | Slovenian: 8376 | |
| Frisian: 7089 | Somali: | 8379 | |
| Galician: | 7176 | Spanish: | 6983 |
| Georgian: | 7565 | Sundanese: | 8385 |
| German: | 6869 | Swahili: | 8387 |
| Greek: | 6976 | Swedish: | 8386 |
| Greenlandic: | 7576 | Tagalog: | 8476 |
| Guarani: | 7178 | Tajik: | 8471 |
| Gujarati: | 7185 | Tamil: | 8465 |
| Hausa: | 7265 | Tatar: | 8484 |
| Hebrew: | 7387 | Telugu: 8469 | |
| Hindi: | 7273 | Thai: | 8472 |
| Hungarian: | 7285 | Tibetan: 6679 | |
| Icelandic: | 7383 | Tigrinya: | 8473 |
| Indonesian: | 7378 | Tonga: | 8479 |
| Interlingua: 7365 | Turkish: | 8482 | |
| Irish: | 7165 | Turkmen: | 8475 |
| Italian: | 7384 | Twi: | 8487 |
| Japanese: 7465 | Ukrainian: 8575 | ||
| Javanese: 7487 | Urdu: | 8582 | |
| Kannada: | 7578 | Uzbek: 8590 | |
| Kashmiri: 7583 | Vietnamese: | 8673 | |
| Kazakh: 7575 | Volapük: | 8679 | |
| Kirghiz: | 7589 | Welsh: | 6789 |
| Korean: | 7579 | Wolof: | 8779 |
| Kurdish: 7585 | Xhosa: 8872 | ||
| Laotian: | 7679 | Yiddish: | 7473 |
| Latin: | 7665 | Yoruba: | 8979 |
| Latvian, Lettish: | 7686 | Zulu: | 9085 |
Windows Media, and the Windows logo are trademarks, or registered trademarks of Microsoft Corporation in the United States and/or other countries. WMA is a compression format developed by Microsoft Corporation. It achieves the same sound quality as MP3 with a file size that is smaller than that of MP3.

MPEG Layer-3 audio decoding technology licensed from Fraunhofer IIS and Thomson multimedia.
Manufactured under license from Dolby Laboratories. "Dolby", "Pro Logic" and the double-D symbol are trademarks of Dolby Laboratories.
"DTS" and "DTS Digital Surround" are registered trademarks of Digital Theater Systems, Inc.
This product incorporates copyright protection technology that is protected by method claims of certain U.S. patents and other intellectual property rights owned by Macrovision Corporation and other rights owners. Use of this copyright protection technology must be authorized by Macrovision Corporation, and is intended for home and other limited viewing uses only unless otherwise authorized by Macrovision Corporation. Reverse engineering or disassembly is prohibited.

HDCD, High Definition Compatible Digital and Pacific Microsonics are either registered
trademarks or trademarks of Pacific Microsonics, Inc. in the United States and/or other countries.
HDCD system manufactured under license from Pacific Microsonics, Inc. This product is covered by one or more of the following: In the USA: 5,479,168, 5,638,074, 5,640,161, 5,808,574, 5,838,274, 5,854,600, 5,864,311, 5,872,531, and in Australia: 669114, with other patents pending.
■ AMPLIFIER SECTION
HT888
RMS TTL POWER OUTPUT 600 W
1 kHz 10 % total harmonic distortion
Active subwoofer 240 W (4 Ω)
Input sensitivity/Input impedance
AUX 600 mV/20 kΩ
MIC 3.15 mV/10 kΩ
HT623
RMS TTL POWER OUTPUT 500 W
1 kHz 10 % total harmonic distortion
Active subwoofer 200 W (4 Ω)
Input sensitivity/Input impedance
AUX 600 mV/20 kΩ
MIC 3.15 mV/10 kΩ
■ FM TUNER SECTION
Default frequency 87.5–108 MHz (50 kHz steps)
Antenna terminals 75 Ω (unbalanced)
■ AM TUNER SECTION
AM Frequency range
Russia 522–1629 kHz (9 kHz steps)
Southeast Asia, Singapore and United Arab Emirates
522–1629 kHz (9 kHz steps)
520–1630 kHz (10 kHz steps)
(can be changed by user)
■ DISC SECTION
Playable disc types:
DVD-Audio
DVD-Video
DVD-R (DVD-Video formatted discs)
DVD-RAM (DVD-VR compatible, JPEG formatted discs) (4
CD (CD-DA)
Video-CD, SVCD
CD-R/RW (CD-DA, Video-CD, SVCD, MP3, WMA, JPEG
formatted discs)
Audio
Number of channels 5.1 (FL, FR, SL, SR, C, SW)
Video
Signal system PAL, PAL60/NTSC
Output terminal RCA (composite video)
S terminal (Y, C)
RCA (Y, Pr, Pb)
Pick up W (4)
Beam Source Semiconductor Laser
Wavelength
CD/V-CD 785 nm
DVD 662 nm
■ CASSETTE DECK SECTION (AUTO REVERSE)
Motor DC servo motor
Tape speed 4.8 cm/s
Wow and flutter 0.15 % (WRMS)
Fast forward and rewind time
Approx. 120 seconds with C-60 cassette tape
SPEAKER SECTION
Front/Surround speakers SB-FS888 HT888
Type 2 way 2 speaker Bass reflex type
Fullrange 8 cm x 2 CONE TYPE
Impedance
Input power IEC 60 W (MAX)
Out sound pressure 81 dB/W (1 m)
Frequency range 80 Hz–22 kHz (−16 dB)
110 Hz–20 kHz (−10 dB)
Dimensions (W x H x D) 296 mm x 1116 mm x 296 mm
Weight Approx. 6.4 kg
Center speaker SB-PC888 HT888
Type 2 way 2 speaker Bass reflex type
Fullrange 8 cm x 2 CONE TYPE
Impedance
Input power IEC 120 W (MAX)
Out sound pressure 82 dB/W (1 m)
Frequency range 100 Hz–22 kHz (−16 dB)
150 Hz–20 kHz (−10 dB)
Dimensions (W x H x D) 276 mm x 103 mm x 110.5 mm
Weight
Approx. 1.62 kg
Active subwoofer SB-WA888 HT888
Type 1 way 1 speaker Bass reflex type
Woofer 17 cm CONE TYPE
Impedance
Input power IEC 240 W (MAX)
Out sound pressure 80 dB/W (1 m)
Frequency range 38 Hz–200 Hz (−16 dB)
42 Hz–160 Hz (−10 dB)
Dimensions (W x H x D) 209 mm x 361 mm x 433 mm
Weight
Approx. 11.7 kg
Front/Surround speaker SB-FS623 HT623
Type 1 way 1 speaker Bass reflex type
Fullrange 8 cm CONE TYPE
Impedance 4
Input power IEC 60 W (MAX)
Output sound pressure 80 dB/W (1 m)
Frequency range 110 Hz–22 kHz (−16 dB)
140 Hz–20 kHz (−10 dB)
Dimensions (W x H x D) 102 mm x 150 mm x 110.5 mm
Weight Approx. 0.90 kg
Center speaker SB-PC623 HT623
Type 2-way 2-speaker Bass reflex type
Fullrange 8 cm x 2 CONE TYPE
Impedance 4
Input power IEC 60 W (MAX)
Output sound pressure 82 dB/W (1 m)
Frequency range 100 Hz–22 kHz (−16 dB)
150 Hz–20 kHz (−10 dB)
Dimensions (W x H x D) 276 mm x 103 mm x 110.5 mm
Weight Approx. 1.62 kg
Active subwoofer SB-WA623 HT623
Type 1 way 1 speaker Bass reflex type
Woofer 17 cm CONE TYPE
Impedance 4
Input power IEC 200 W (MAX)
Out sound pressure 80 dB/W (1 m)
Frequency range 38 Hz–200 Hz (−16 dB)
42 Hz–160 Hz (−10 dB)
Dimensions (W x H x D) 209 mm x 361 mm x 433 mm
Weight Approx. 11.7 kg
GENERAL
Power consumption 185 W
Power consumption in standby mode 1 W
Power supply
Southeast Asia, Singapore and United Arab Emirates
110 V/127 V/220–230 V/240 V, 50 Hz/60 Hz
Russia
230–240 V, 50 Hz
Dimensions (W x H x D) of player: 430 mm x 100 mm x 341 mm
Weight of player: Approx. 3.9 kg
Note
- Specifications are subject to change without notice. Weight and dimensions are approximate.
- Total harmonic distortion is measured by the digital spectrum analyzer. Ω
Ω
Ω
Ω
Ω
Troubleshooting guide
Before requesting service, make the following checks. If you are in doubt about some of the check points, or if the remedies indicated in the chart do not solve the problem, consult your dealer for instructions.
Power Page
| No power. | ●Insert the AC mains lead and system cable securely. | 9 |
| The unit is automatically switched to the standby mode. | ●The Sleep timer activated. 29 |
Unresponsive or inoperable function
| No response when any button is pressed. | ●This unit cannot play discs other than the ones listed in these operating instructions.●The unit may not be operating properly due to lightning, static electricity or some other external factor. Turn the unit off and then back to ON. Alternatively, turn the unit off, disconnect the AC mains lead, and then reconnect it.●Condensation has formed: Wait 1 to 2 hours for it to evaporate. | 11— |
| No response when remote control buttons are pressed. | ●Check that the batteries are installed correctly.●The batteries are depleted. Replace them with new ones.●Aim the remote control at the remote control sensor and operate. | 9910 |
| No picture or sound. | ●Check the video or audio connection.●Check the power or input setting of the connected equipment.●Check that the DVD-RAM has something recorded on it. | 7-9,30— |
| You have forgotten your ratings password.Reset all the settings to Factory Preset. | ●While stopped and “DVD/CD” is the source, press and hold [■] on the main unit and [≥10] on the remote control until “Initialized” disappears from the television. Turn the unit off and on again. All settings will return to the default values. | — |
Specific operation undesirable or unexpected
| It takes time before play starts. MP3 | ●Play may take time to begin when an MP3 track has still picture data. Even after the track starts, the correct play time will not be displayed, however this is normal. | — |
| Folders deeper than the eighth layer on a data CD are not displayed correctly. WMA MP3 JPEG | ●Folders deeper than the eighth layer are displayed as the eighth layer. | — |
| A menu screen appears during skip or search. VCD | ●This is normal for Video CDs. — | |
| Programmed items are not played. DVD-V | ●Some items cannot be played even if you have programmed them. | — |
| The on-screen menu shows “2” as a soundtrack option when [AUDIO] is pressed, but the audio does not change. DVD-A | ●Even if a second soundtrack isn’t recorded, two numbers will normally be shown. | — |
| Play restarts from the beginning of the track when soundtrack is changed. DVD-A | ●This is normal for DVD-Audio. — |
Subtitle
| Subtitle position is wrong. | ●Adjust the position. (“Subtitle Position” in Display Menu) | 19 |
| No subtitles. | ●Display the subtitles. | 14 |
Marker
| Cannot add markers. | ●You cannot add markers with DVD-RAM.●If the disc's elapsed play time doesn't appear on the unit's display, you cannot add markers. | — |
A-B repeat
| Point B is automatically set. | ●The end of an item becomes point B when it is reached. | — |
| A-B repeat is automatically canceled. | ●A-B repeat is canceled when you press [QUICK REPLAY]. | — |
Sound abnormal or improper
| Sound distorted. | ●Noise may occur when playing WMA files. | — |
| Effects do not work. | ●Some audio effects do not work or have less effect with some discs.●Multi Re-master and Dolby Pro Logic II do not work if you have changed the play speed. | —— |
| Humming heard during play. | ●An AC mains lead or fluorescent light is near the active subwoofer. Keep other appliances and cables away from the active subwoofer. | — |
Menus
| The Setup menu cannot be accessed. | ●Select “DVD/CD” as the source. ●Cancel all group, program and random play. | — 15 |
Picture abnormal or un-viewable Page
| Picture distorted. | ●Ensure that the unit is connected directly to the television, and is not connected through a video cassette recorder. | 8 |
| Picture size doesn't fit the screen. | ●Change “TV Aspect” in “Video” tab.●Use the television to change the aspect. If your television does not have that function, change “4:3 Aspect” in Display Menu.●Change the Zoom setting. | 201914 |
| The television may display incorrectly or colors appear faded. | ●The unit and television are using different video systems.Southeast Asia and Singapore Use a multi-system or NTSC television.Russia and United Arab Emirates Use a multi-system or PAL television.●The system used on the disc does not match your television.-PAL discs cannot be correctly viewed on an NTSC television.-This unit can convert NTSC signals to PAL 60 for viewing on a PAL television (“NTSC Disc Output” in “Video” tab). | ——20 |
| Menu not displayed correctly. | ●Restore the zoom ratio to ×1.00.●Set “Subtitle Position” in Display Menu to “0”.●Set “4:3 Aspect” in Display Menu to “Normal”. | 141919 |
| Auto zoom function does not work well. | ●Turn off TV’s zoom function.●Use the other preset aspect ratios or manual adjustment.●Zoom function may not work well, especially in dark scenes and may not work depending on the type of disc. | —14— |
| The picture on the television disappears or stripes appear on the screen. | ●Mobile telephone chargers can cause some disturbance.●If you are using a TV indoor antenna, change to an outdoor antenna.●The television antenna wire is too close to the unit. Separate the antenna wire of the television from the unit. | —— |
Progressive video
| There is ghosting when progressive output is on. | ●Change “Video Output Mode” in Picture Menu to “480I”. This problem is caused by the editing method or material used on DVD-Video, but should be corrected if you use interlace output. | 19 |
| Pictures not in progressive output. | ●Select “Enable (NTSC Disc Only)” in “Progressive Out (Component)” in “Video” tab. Then play an NTSC disc.●When playing NTSC discs, select “480P” in “Video Output Mode” in Picture Menu so “PROG.” is displayed.●If the unit is connected to the television through VIDEO OUT or S VIDEO OUT, output will be interlace. | 20198 |
Listening to the radio
| Noise is heard.“ST” flickers or doesn’t light.Sound is distorted. | ●Adjust the position of the FM or AM antenna.●Use an outdoor antenna. | —23 |
| A beat sound is heard. | ●Turn the television off or move it away from the unit. | — |
| A low hum is heard during AM broadcasts. | ●Separate the antenna from other cables. — |
Listening to tapes
| Poor quality sound. | ●Clean the head with cleaner tape on sale. | — |
| Recording is not possible. | ●If the erasure prevention tabs have been removed, cover the holes with adhesive tape. | 25 |
Unit displays
| The display is dark. | ●Select “Bright” in “FL Dimmer” in “Others” tab. | 21 |
| “NO PLAY” | ●You inserted a disc which the unit cannot play; insert one it can.●You inserted a blank disc. | 11— |
| “NO DISC” | ●You haven’t inserted a disc; insert one.●You haven’t inserted the disc correctly; insert it correctly. | —12 |
| “F61” | ●Check and correct the speaker cord connections.If this does not fix the problem, there is a power supply problem. Consult the dealer. | 7 |
| “DVD U11” | ●Disc is dirty. Wipe it clean. | 11 |
| “ERROR” | ●Incorrect operation performed. Read the instructions and try again. | — |
| “DVD H□□”□□ stands for a number. | ●Trouble may have occurred. The number following “H” depends on the status of the unit. Turn the unit off and then back to ON. Alternatively, turn the unit off, disconnect the AC mains lead, and then reconnect it.●If the service numbers fail to clear, note the service number and contact a qualified service person. | —— |
Television displays
| “ ” | ●The operation is prohibited by the unit or disc. | — |
| “Cannot display group xx, content xx” | ●You are trying to display incompatible contents. | — |
| “This disc may not be played in your region” | ●You can only play DVD-Video if their region number is the same or includes the same region number as the unit or if the DVD-Video is marked “ALL”. Confirm the region number for the unit on the rear panel. | Cover |
| No on-screen display. | ●Select “On” in “On-Screen Messages” in “Display” tab. | 21 |


- OPERATING INSTRUCTIONS
- DVD HOME THEATER SOUND SYSTEM
- MODEL NO. SC-HT888/SC-HT
- REGION NUMBER
- TABLE OF CONTENTS
- GETTING STARTED
- SIMPLE SETUP
- DISC OPERATIONS
- OTHER OPERATIONS
- REFERENCE
- DEAR CUSTOMER
- CAUTION
- WARNING
- ACCESSORIES
- NOTE
- SAFETY PRECAUTIONS
- PLACEMENT
- VOLTAGE
- AC MAINS LEAD PROTECTION
- FOREIGN MATTER
- SERVICE
- MAINTENANCE
- CLEAN THIS UNIT WITH A SOFT, DRY CLOTH
- FOR A CLEANER, CRISPER SOUND
- GLOSSARY
- DECODER
- DOLBY DIGITAL
- DTS (DIGITAL THEATER SYSTEMS)
- DYNAMIC RANGE
- FRAME STILL AND FIELD STILL
- I/P/B
- LINEAR PCM (PULSE CODE MODULATION)
- PLAYBACK CONTROL (PBC)
- SAMPLING FREQUENCY
- PREPARATION
- FRONT AND SURROUND SPEAKER ASSEMBLY
- PREVENTING THE FRONT AND SURROUND SPEAKERS FROM FALLING OVER PREPARATION
- OTHER SPEAKER SETUP OPTIONS
- HT888 (CENTER SPEAKER ONLY) HT
- ATTACHING TO A WALL
- E.G. CENTER SPEAKER HT888 HT
- STEP
- LOCATING
- HT
- USE ONLY SUPPLIED SPEAKERS
- MAIN UNIT
- CENTER SPEAKER
- ACTIVE SUBWOOFER
- NOTES ON SPEAKER USE
- IF IRREGULAR COLORING OCCURS ON YOUR TELEVISION
- STEP 3: CONNECTING SPEAKERS WITH THE ACTIVE SUBWOOFER
- SPEAKER CABLES
- SHEET OF SPEAKER-CABLE STICKERS
- VIDEO CONNECTIONS
- S VIDEO OUT TERMINAL
- COMPONENT VIDEO OUT TERMINALS
- TO ENJOY PROGRESSIVE VIDEO
- STEP 5: RADIO AND SYSTEM CONNECTION
- CONSERVING POWER
- STEP 6: THE REMOTE CONTROL
- DO NOT
- USE
- QUICK SETUP
- CONTROL REFERENCE GUIDE
- STANDBY/ON INDICATOR
- STANDBY/ON SWITCH [⏻/L]
- AC SUPPLY
- INDICATOR (AC IN)
- DISCS THAT CANNOT BE PLAYED
- AUDIO FORMAT OF DVDS
- VIDEO SYSTEMS
- DISC HANDLING
- TO CLEAN DISCS
- RAM DVD-R
- DISC HANDLING PRECAUTIONS
- POSITION MEMORY
- PRESS [POSITION MEMORY]
- PRESS [▶ DVD/CD] TO START PLAY FROM THAT POSITION
- ZOOM
- AUDIO
- SUBTITLE
- QUICK REPLAY
- PAGE SKIP
- A-B REPEAT PLAY
- REPEAT PLAY
- ALL GROUP, RANDOM AND PROGRAM PLAY
- PLAYING DATA DISCS
- PLAYING HIGHMAT™ DISCS
- NAMING FOLDERS AND FILES
- PLAYING THE PROGRAMS
- PLAYING A PLAY LIST
- PLAY MENU
- SIGNAL TYPE/DATA
- CHANGING THE PLAYER SETTINGS
- SPEAKER SETTING
- CHANGING THE DELAY TIME
- ADJUSTING THE SPEAKER LEVELS
- AUTOMATIC PRESETTING
- SELECTING THE PRESET CHANNELS
- MANUAL TUNING
- MAIN UNIT ONLY
- PRESETTING THE CHANNEL ONE BY ONE
- AM FREQUENCY STEP
- OPTIONAL ANTENNA CONNECTIONS
- AM OUTDOOR ANTENNA (USING A VINYL WIRE)
- FM OUTDOOR ANTENNA (USING A TELEVISION ANTENNA)
- CASSETTE TAPES
- BASIC PLAY
- CASSETTE TAPE SELECTION AND CARE
- PRESS [TAPE] TO SELECT "TAPE
- INSERT THE CASSETTE TAPE
- PRESS [◀▶ TAPE] TO START PLAY
- ADJUST THE VOLUME
- FINDING A PLACE ON A TAPE
- TO FAST-FORWARD AND REWIND
- RECORDING TO CASSETTE TAPES
- INSERT THE CASSETTE TO BE RECORDED ON
- PRESS [REV MODE] TO SELECT THE REVERSE MODE
- RECORDING AUDIO FROM A DISC
- PRESS [SHIFT]+[REC ●/II]
- PLAY THE DISC YOU WANT TO RECORD (→ PAGE 12)
- TO PAUSE RECORDING
- TO STOP RECORDING
- TO RECORD PROGRAMMED TRACKS OR CONTENTS
- RECORDING THE RADIO
- TUNE TO THE REQUIRED STATION (→ PAGE 22, 23)
- PRESS [SHIFT]+[REC ●/■■] TO START RECORDING
- ERASING RECORDINGS
- ERASURE PREVENTION
- RE-RECORDING
- KARAOKE SONG ALBUM — UNIQUE FUNCTIONS
- ENJOYING OTHER RECORDING METHODS
- PLAY THE SOURCE
- DVD/CD-TAPE MODE
- PLAY A DISC (SEE PAGE 12)
- PLAY A CASSETTE TAPE
- SOUND FIELD CONTROL
- SUPER SURROUND
- CENTER FOCUS
- DOLBY PRO LOGIC II
- PRESS [SFC]
- PRESS [SUPER SRND]
- PRESS [SHIFT]+[C.FOCUS]
- PRESS [☐☐PLII]
- DOWN-MIXING
- SUBWOOFER LEVEL
- CUSTOM SOUND MEMORY
- RECALL THE SETTINGS
- SLEEP TIMER
- MUTING
- ENJOYING KARAOKE
- DVD-V
- VCD
- USING HEADPHONES
- CONNECTING TO OTHER EQUIPMENT
- CONNECTION EXAMPLE
- CONNECTING A LASER DISC OR RECORD PLAYER
- AMPLIFIER SECTION
- RMS TTL POWER OUTPUT 600 W
- INPUT SENSITIVITY/INPUT IMPEDANCE
- RMS TTL POWER OUTPUT 500 W
- FM TUNER SECTION
- AM TUNER SECTION
- AM FREQUENCY RANGE
- DISC SECTION
- PLAYABLE DISC TYPES
- VIDEO
- CASSETTE DECK SECTION (AUTO REVERSE)
- SPEAKER SECTION
- GENERAL
- TROUBLESHOOTING GUIDE
Brand : PANASONIC
Model : SC-HT888
Category : DVD player