
KX-TS880FX - Phone Accessories PANASONIC - Free user manual and instructions
Find the device manual for free KX-TS880FX PANASONIC in PDF.
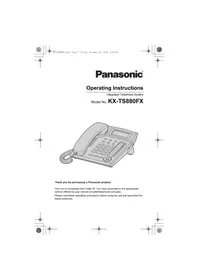


| Product Type | Corded Telephone with Speakerphone |
| Brand | Panasonic |
| Model | KX-TS880FX |
| Dimensions (approx.) | 200 x 150 x 100 mm (L x W x H) |
| Weight (approx.) | 0.5 kg |
| Power Supply | Powered via telephone line (no AC adapter required) |
| Battery Backup | 1 x 9V alkaline battery (for clock and memory retention) |
| Display | LCD with backlight for caller ID and call information |
| Caller ID | Yes, with call waiting caller ID support |
| Speakerphone | Full-duplex speakerphone with volume control |
| Redial | Last number redial (up to 32 digits) |
| Mute | Mute function during conversation |
| Ringer Volume Control | Adjustable ringer volume with off option |
| Flash / Recall | Flash button for call waiting or PBX functions |
| Wall Mountable | Yes, with optional wall mounting bracket |
| Hearing Aid Compatible (HAC) | Yes, handset compatible with hearing aids |
| Cleaning and Care | Clean with a soft, dry cloth. Do not use liquids or abrasive cleaners. |
| Safety Precautions | Do not expose to moisture, extreme temperatures, or direct sunlight. |
| Spare Parts | Handset cord, 9V battery (optional), wall bracket (sold separately) |
| Warranty | 1 year limited warranty |
| Manual | Free PDF manual available for download |
Frequently Asked Questions - KX-TS880FX PANASONIC
User questions about KX-TS880FX PANASONIC
0 question about this device. Answer the ones you know or ask your own.
Ask a new question about this device
Download the instructions for your Phone Accessories in PDF format for free! Find your manual KX-TS880FX - PANASONIC and take your electronic device back in hand. On this page are published all the documents necessary for the use of your device. KX-TS880FX by PANASONIC.
USER MANUAL KX-TS880FX PANASONIC

Panasonic®
Operating Instructions
Integrated Telephone System
Model No. KX-TS880FX


Thank you for purchasing a Panasonic product.
This unit is compatible with Caller ID. You must subscribe to the appropriate service offered by your service provider/telephone company.
Please read these operating instructions before using the unit and save them for future reference.


Table of Contents
Introduction
Accessory information......3
For your safety 4
Important safety instructions .....4
For best performance....5
Other information ....5
Specifications 6
Preparation
Controls....7
Display 8
Battery installation and
replacement 9
Connections 10
Symbols used in these
operating instructions......11
Setting up the unit before
use 12
Making/Answering Calls
Making calls 13
Answering calls 14
Useful features during a call.....15
Dial lock....16
One-Touch Dialler
One-touch dialler.....17
Speed Dialler
Speed dialler 19
Phonebook
Phonebook....20
Chain dial 21
Programming
Programmable settings .....22
Special instructions for
programmable settings.....24
Caller ID Service
Using Caller ID service.....25
Caller list 26
Useful Information
Optional Headset...... 28
Desk mount setup.... 29
Wall mount setup.... 30
Troubleshooting.... 32
Index
Index 34


For your future reference
We recommend keeping a record of the following information to assist with any repair under warranty.
Serial No. Date of purchase
(found on the bottom of the unit)
Name and address of dealer
Attach your purchase receipt here.
Note:
- This equipment is designed for use on the Czech Republic and Slovakia analogue telephone network.
- In the event of problems, you should contact your equipment supplier in the first instance.
- For use in other countries, please contact your equipment supplier.
Declaration of Conformity:
For information on compliance with EU relevant regulatory directives,
Contact the Authorised Representative:
Panasonic Testing Centre
Panasonic Marketing Europe GmbH
Winsbergring 15, 22525 Hamburg, Germany
http://www.ptc.panasonic.eu/doc

Accessory information
Supplied accessories
| No. | Accessory item Quantity | |
| 1 | Handset 1 | |
| 2 | Handset cord 1 | |
| 3 | Telephone line cord 1 |
①
②
③


3



Introduction
For your safety
To prevent severe injury and loss of life/property, read this section carefully before using the product to ensure proper and safe operation of your product.
WARNING
Installation
- To prevent the risk of fire or electrical shock, do not expose the product to rain or any type of moisture.
Operating safeguards
• Do not disassemble the product. - Do not spill liquids (detergents, cleansers, etc.) onto the telephone line cord plug, or allow it to become wet at all. This may cause a fire. If the telephone line cord plug becomes wet, immediately pull it from the telephone wall jack, and do not use. - Excessive sound pressure from earphones and headphones can cause hearing loss.
CAUTION
Installation and location
- Never install telephone wiring during an electrical storm.
- Never install telephone line jacks in wet locations unless the jack is specifically designed for wet locations.
- Never touch uninsulated telephone wires or terminals unless the telephone line has been disconnected at the network interface.
- Use caution when installing or modifying telephone lines.
- This product is unable to make calls when:
- the dial lock feature is turned on.
- the call restriction feature is turned on (only phone numbers stored in the unit as emergency numbers can be called.)
Battery
• We recommend using the batteries noted on page 9. • Do not mix old and new batteries.
Important safety instructions
When using your product, basic safety precautions should always be followed to reduce the risk of fire, electric shock, and injury to persons, including the following:
- Do not use this product near water, for example, near a bathtub, washbowl, kitchen sink or laundry tub, in a wet basement or near a swimming pool.
- Avoid using a telephone (other than a cordless type) during an electrical storm. There may be a remote risk of electric shock from lightning.
- Do not use the telephone to report a gas leak in the vicinity of the leak.
- Use only the batteries indicated in this manual. Do not dispose of batteries in a fire. They may explode. Check with local codes for possible special disposal instructions.
SAVE THESE INSTRUCTIONS
4


Introduction
For best performance
Environment
- The product should be kept free from excessive smoke, dust, high temperature, and vibration.
- The product should not be exposed to direct sunlight.
- Do not place heavy objects on top of the product.
- The product should be kept away from heat sources such as radiators, cookers, etc. It should not be placed in rooms where the temperature is less than 0°C or greater than 40°C. Damp basements should also be avoided.
Routine care
- Wipe the outer surface of the product with a soft moist cloth.
- Do not use benzine, thinner, or any abrasive powder.
Other information
Notice for product disposal, transfer, or return
- This product can store your private/confidential information. To protect your privacy/confidentiality, we recommend that you erase information such as phonebook, one-touch dial, speed dial or caller list entries from the memory before you dispose of, transfer, or return the product.
Information for Users on Collection and Disposal of Old Equipment and used Batteries

These symbols (①, ②, ③) on the products, packaging, and/or accompanying documents mean that
used electrical and electronic products and batteries should not be mixed with general household waste. For proper treatment, recovery and recycling of old products and used batteries, please take them to applicable collection points, in accordance with your national legislation and the Directives 2002/96/EC and 2006/66/EC. By disposing of these products and batteries correctly, you will help to save valuable resources and prevent any potential negative effects on human health and the environment which could otherwise arise from inappropriate waste handling.
For more information about collection and recycling of old products and batteries, please contact your local municipality, your waste disposal service or the point of sale where you purchased the items.
Penalties may be applicable for incorrect disposal of this waste, in accordance with national legislation.
For business users in the European Union
If you wish to discard electrical and electronic equipment, please contact your dealer or supplier for further information.
Information on Disposal in other Countries outside the European Union
These symbols (①, ②, ③) are only valid in the European Union. If you wish to discard these items, please contact your local authorities or dealer and ask for the correct method of disposal.
Note for the battery symbol
This symbol (②) might be used in combination with a chemical symbol (③). In this case it complies with the requirement set by the Directive for the chemical involved.

Introduction
Specifications
Power source:
From telephone line
From 3 AA (LR6, R6, UM-3) batteries
Dimensions (H x W x D):
Approx. 93 mm × 172 mm × 220 mm
Mass (Weight):
Approx. 550 g
Operating conditions:
0 °C–40 °C, 20 %–80 % relative air humidity (dry)
Note:
- Design and specifications are subject to change without notice.
- The illustrations in these instructions may vary slightly from the actual product.

6




Preparation
Controls

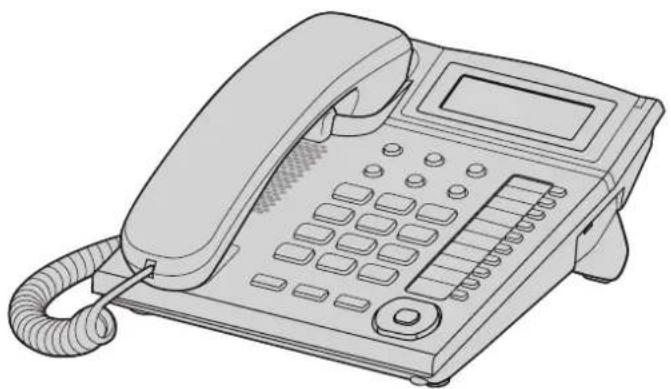
① 【?DIAL LOCK/HOLD】 (page 15, 16) ② 【PROGRAM/EXIT】(page 12, 17, 19, 22, 24) ③ 【REDIAL】(page 13) ④ 【CLEAR】(page 13, 19, 20, 21, 24) ⑤ 【AUTO/LOWER】(page 17, 19) ⑥ 【PAUSE】(page 14) ⑦ Display (page 8) ⑧ RINGER indicator (page 14) ⑨ 【*】(TONE) (page 15)
⑩ 【FLASH】(page 15) ⑪ 【MUTE】(page 15) ⑫ 【SP-PHONE】(Speakerphone) (page 13, 14, 17, 19, 26) 【HEADSET】(page 28) ⑬ Navigator key ([▲], [▼], [◀], [▶]) (page 20, 21, 26) ⑭ 【OK】(page 12, 17, 22, 24, 26) ⑮ One-touch dial buttons (page 17) ⑯ Dial key buttons/memory station numbers (page 19) ⑰ RINGER selector (page 14)
How to use the Navigator key and [OK] button
This key has five active areas that are indicated by arrows and [OK].
![PANASONIC KX-TS880FX - How to use the Navigator key and [OK] button - 1](/content/2026/06/1330114/images/322c6609f13ee5ef4d1ef988a9cdb615d161903c944df9dc002d747cc288e8db.jpg)
- Pressing the up and down arrows allows you to enter the Caller List and scroll through the function menu.
- Pressing the right and left arrows allows you to enter the Phonebook and move the cursor when entering items. The right arrow is also used to select the desired item.
- The [OK] button is used to select and confirm the desired item.
Throughout these Operating Instructions, the navigator key is indicated by the arrows [▼], [▲], [◀] or [▶] and [OK].
7
![PANASONIC KX-TS880FX - How to use the Navigator key and [OK] button - 2](/content/2026/06/1330114/images/e095cba966105f3195644ac4f22ce578174a8b33ec4071050b7bd87106a3b8a9.jpg)
![PANASONIC KX-TS880FX - How to use the Navigator key and [OK] button - 3](/content/2026/06/1330114/images/7edf16d9ca47866b822482838be346de85efc90742b809057f4bd46fff268196.jpg)


![PANASONIC KX-TS880FX - How to use the Navigator key and [OK] button - 6](/content/2026/06/1330114/images/15d7fba1fe2982324d466f0b128bac1e8565ad42c6c9a7373a1b9af7c4806daf.jpg)

Preparation
Display
Display items
| Item Meaning | |
| The dial lock mode is set (page 16). | |
| You have checked this caller information, answered the call or called back the caller from the caller list (page 26). | |
| The phone line is in SP-PHONE (speakerphone) call mode (page 13). | |
| The display flashes when the battery power is low. To replace the batteries, see page 9. | |
| [PAUSE] was pressed while dialling or storing phone numbers. | |
| [FLASH] was pressed while storing phone numbers. | |
| [*] was pressed while dialling. | |
| [#] was pressed while dialling. | |
| The phone line is in headset call mode. | |


Preparation
Battery installation and replacement
Installing the batteries
1 Press down in the direction of the arrow and open the cover (①). 2 Install the batteries in the proper order as shown (②), matching the correct polarity. 3 Close the battery cover.
- After battery installation, the unit will reset and "Set clock" will always display until the time is set. • To set the clock, see page 12.
- Batteries are not included with the unit.
- Install three high quality "AA" size Alkaline (LR6) or Manganese (R6, UM-3) batteries. We recommend using Panasonic batteries. Battery life is: —about six months when using Alkaline batteries. —about three months when using Manganese batteries.
- Battery life may depend on usage conditions and ambient temperature.
- Make sure batteries are inserted properly in phase to ensure the functionality of this unit.
THE UNIT MAY NOT WORK PROPERLY WITHOUT BATTERIES.
Replacing the batteries
If "flashes, the battery power is low. Install new batteries as soon as possible. If batteries are not replaced even after the "fl" is displayed, the unit may not work properly.
- Store the desired items in the phonebook, because after the battery replacement, the information stored in the redial list will be cleared. 1. Disconnect the telephone line cord from the unit. 2. Press down in the direction of the arrow and open the cover. 3. Replace the batteries with new ones using correct polarity (+, -), and close the cover. 4. Connect the telephone line cord to the unit.
Battery precautions:
The batteries should be used correctly, otherwise the unit may be damaged by battery leakage.
- Do not mix different types of batteries.
- Do not charge, short-circuit, disassemble, heat or dispose of in fire.
- Remove all the batteries when replacing.
Note:
- If you do not install the batteries or if the battery power is low, the display will become blank. Readjust the time after the battery replacement.
- Replace all the batteries every six months if using Alkaline batteries, or misoperation may occur. (When you use Manganese batteries, replace all of them every three months.)
- Do not use nickel-cadmium batteries.




Preparation
Connections
Connect the handset cord (1) to the handset and the unit. Connect the telephone line cord until it clicks into the unit and telephone line jack (2). After line connection, lift the handset to check for a dial tone.

To single-line telephone jack
• Use only a Panasonic handset for KX-TS880FX. - Use only the supplied telephone line cord. Using another telephone line cord may not allow the unit to work properly.
* For DSL/ADSL service users
Please attach a DSL/ADSL filter (contact your DSL/ADSL provider) to the telephone line between the unit and the telephone line jack in the event of the following:
— noise is heard during conversations. — Caller ID features do not function properly.


Preparation
Symbols used in these operating instructions
| Symbol Meaning | |
| 【】The words in the brackets indicate button names on the unit. | |
| → Proceed to the next operation. | |
| “”The words in quotations indicate the menu on the display.Example: “Save phonebook ?” | |
| [▼]/[▲]:“” | Press [▼] or [▲] to select the words in quotations.Example: [▼]/[▲]: “Off” |


11


Preparation
Setting up the unit before use
Display language
You can select "English" (English), "Română" (Romanian), "Čeština" (Czech), "Slovenčina" (Slovak), "Srpski" (Serbian) and "Slovenščina" (Slovene) as the display language. The default setting is "English" (English).
1 [PROGRAM/EXIT] → [▼] / [▲]: "Change language?" → [OK] 2 [▼] / [▲]: Select the desired setting → [OK] → [PROGRAM/EXIT]
Date and time
1 [PROGRAM/EXIT] → [▼] / [▲]: "Set clock?" → [OK]
2 Enter the current year by selecting 2 digits. Example: 2010 [1] [0] • You can select the year from 2000 to 2099.
3 [OK]
4 Enter the current hour and minute by selecting 2 digits for each. Example: 9:30 [0] [9] [3] [0]
5 [OK]
- If numbers between 0000 and 0059, or 1300 and 2359 are entered, the time will automatically set using the 24-hour clock. Skip steps 6 and 7, and go to step 8.
6 Press [#] to select "AM", "PM" or 24-hour clock.
![graph TD A["(Blank display)"] --> B["AM"] B --> C["PM"] D["24-hour clock"] -.-> E["AM"] F["PM"] -.-> G["PM"]](/content/2026/06/1330114/images/d0f73a9be116719cdb15ea65ccb45c6cacd13ec8182f5bfb4cfea51e01f1bb3c.jpg)
• Each time you press [#], the selection will change on the display.
7[OK]
8 Enter the current day and month by selecting 2 digits for each. Example: 15 July [1] [5] [0] [7]
9[OK] → [PROGRAM/EXIT]
- If the date and time are entered wrong, "ERROR" will be displayed and you cannot continue with the setting. Enter the correct date and time.
For Caller ID service users (page 25)
If a time display service is available with the Caller ID service:
- The Caller ID information will re-set the clock after the ring if: — the adjusted time and/or date is incorrect.
- the time adjustment set to ON.
Dialling mode
If you cannot make calls, change this setting according to your telephone line service.
The default setting is "Tone".
"Tone": For tone dial service.
"Pulse": For rotary/pulse dial service.
1[PROGRAM/EXIT]
2[▼] / [▲]: "Program ?" → [OK]
3 [▼] / [▲]: "Set dial mode?" → [OK]
4 [▼] / [▲]: Select the desired setting → [OK] → [PROGRAM/EXIT]
Making/Answering Calls
Making calls
1 Lift the handset and dial the phone number. 2 When you finish talking, place the handset on the cradle.
Using the speakerphone
1 [SP-PHONE] → Dial a phone number.
OR
Dial a phone number
→ [SP-PHONE]
- Speak alternately with the other party.
- If you have misdialled, press [SP-PHONE] and start again from step 1.
2 When you finish talking, press [SP-PHONE].
Note:
- For best performance, use the speakerphone in a quiet environment. If necessary, adjust the speaker volume.
- You can switch to the handset by lifting it up. To switch back to the speakerphone, press [SP-PHONE] and place the handset on the cradle.
Adjusting the handset or the speaker volume
Press [▼] or [▲] repeatedly while talking.
- " shows one level.
Making a call using the redial list
The last 20 phone numbers dialled are stored in the redial list.
1[REDIAL]
2 [▼] / [▲]: Select the desired phone number.
- You can also scroll through the list by pressing [REDIAL].
- To exit the list, press [PROGRAM/EXIT].
3 Lift the handset or press [SP-PHONE] to start calling.
Automatic redial:
If you use the speakerphone when redial and the other party's line is engaged, the unit will automatically redial the number up to 15 times. While the unit is waiting to redial, "Waiting redial" will be displayed. While the unit is redialling, mute is automatically turn on.
• Automatic redial is cancelled when [FLASH] is pressed. - If mute does not turn off after the line is connected, press [MUTE].
Erasing a number in the redial list
1 [REDIAL] 2 [▼] / [▲]: Select the desired phone number.
3 [CLEAR]
- If "No items stored" is displayed, the list is empty.
4 [PROGRAM/EXIT]

Making/Answering Calls
Pause (for PBX/long distance service users)
A pause is sometimes required when making calls using a PBX or long distance service. When storing a calling card access number and/or PIN in the phonebook, one-touch dial or speed dial, a pause is also needed. Example: If you need to dial the line access number "9" when making outside calls with a PBX:
1 [9] → [PAUSE]
2 Dial the phone number.
3 Lift the handset or press [SP-PHONE] to start calling.
Note:
- A 3.5 second pause is inserted each time [PAUSE] is pressed. Repeat as needed to create longer pauses.
Answering calls
When a call is being received, the unit rings, the ringer indicator flashes quickly and "Incoming call" is displayed. You can answer a call by simply lifting the handset.
Using the speakerphone
1 [SP-PHONE]
2 When you finish talking, press [SP-PHONE].
Note:
• The ringer indicator will flash when — a telephone number is dialled in "Pulse" mode, or — someone picks up or hangs up another phone connected to the same phone line. This is normal.
Adjusting the unit ringer volume
You can select the ringer volume to HIGH, LOW or OFF. The default setting is HIGH.

Making/Answering Calls
Useful features during a call
Hold
This feature allows you to put an outside call on hold.
1 Press [?DIAL LOCK/HOLD] during an outside call.
- If using the handset, you can place it on the cradle.
- During the hold, both parties will hear music. For cancelling music, see page 22.
2 To release hold, lift the handset if the handset is on the cradle. OR
Press [?DIAL LOCK/HOLD] if the handset is off the cradle. OR
Press [SP-PHONE] if using the speakerphone.
Note:
- If another phone is connected to the same line, you can also take the call by lifting its handset.
Mute
While mute is turned on, you can hear the other party, but the other party cannot hear you.
1 During an outside call, press [MUTE].
2 To return to the conversation, press [MUTE].
Flash
[FLASH] allows you to use the special features of your host PBX such as transferring an extension call, or accessing optional telephone services.
Note:
• To change the flash time, see page 22.
For call waiting service users
To use call waiting, you must first subscribe to the call waiting service of your service provider/telephone company. This feature allows you to receive calls while you are already talking on the phone. If you receive a call while on the phone, you will hear a call waiting tone.
1 Press [FLASH] to answer the 2nd call.
To switch between calls, press [FLASH].
Note:
- Please contact your service provider/telephone company for details and availability of this service in your area.
Temporary tone dialling (for rotary/pulse service users)
You can temporarily switch the dialling mode to tone when you need to access touch-tone services (for example, answering services, telephone banking services, etc.). Press 【*】(TONE) before entering access numbers which require tone dialling.

Making/Answering Calls
Dial lock
This feature prohibits making outside calls.
The default setting is OFF.
Important:
- When dial lock or call restriction (page 24) is turned on, only phone number stored as emergency numbers (numbers stored with a # at the beginning of the name) can be dialled. We recommend storing emergency numbers in the phonebook, one-touch dial or speed dial before using this feature.
- When dial lock is turned on, you cannot store, edit, or erase the emergency numbers begin with # in the phonebook, one-touch dial and speed dial.
To turn the dial lock on/off
1 [♀DIAL LOCK/HOLD]
Enter the unit password (default "1111") → [OK]
Note:
- If dial lock is turned on, the unit displays
- "DIAL LOCKED" will be displayed if the dial buttons are pressed before/after: — lifting the handset. — pressing [SP-PHONE].

One-Touch Dialler
One-touch dialler
You can store up to 20 phone numbers in the one-touch dial buttons (10 numbers in UPPER memory locations and 10 numbers in LOWER memory locations). Do not press any one-touch dial buttons before storing to prevent misoperation.
Note:
- If a phone number is stored in a one-touch dial button which already contains a phone number, the old number will be erased.
- To store a number as an emergency number, see page 20.
UPPER memory locations
Storing phone numbers
1 [PROGRAM/EXIT] → [▼] / [▲]: "Save one touch?" → [OK]
2 Enter the party's name (15 characters max.) → [OK]
3 Enter the party's phone number (32 digits max.) → [OK]
4Press the one-touch dial button. • A long beep sounds.
5[PROGRAM/EXIT]
Note:
- We recommend you program an emergency number in the EMERGENCY button.
Erasing a stored number
1 Press the one-touch dial button.
2 [CLEAR] → [OK]
• A long beep sounds.
Dialling a stored number
1 Lift the handset or press [SP-PHONE]. 2Press the one-touch dial button. 3 When you finish talking, place the handset on the cradle or press [SP-PHONE].
OR
1 Press the one-touch dial button. 2 Lift the handset or press [SP-PHONE]. 3 When you finish talking, place the handset on the cradle or press [SP-PHONE].
LOWER memory locations
Storing phone numbers
1 [PROGRAM/EXIT] → [▼]/[▲]: "Save one touch ?" → [OK] 2Enter the party's name (15 characters max.) → [OK] 3Enter the party's phone number (32 digits max.) → [OK] 4 [AUTO/LOWER] → Press the one-touch dial button. • A long beep sounds.
5[PROGRAM/EXIT]
Erasing a stored number
1 [AUTO/LOWER] → Press the one-touch dial button. 2 [CLEAR] → [OK] • A long beep sounds.
Dialling a stored number
1 Lift the handset or press [SP-PHONE]. 2 [AUTO/LOWER] → Press the one-touch dial button. 3 When you finish talking, place the handset on the cradle or press [SP-PHONE].
OR
1 [AUTO/LOWER] → Press the one-touch dial button. 2 Lift the handset or press [SP-PHONE]. 3 When you finish talking, place the handset on the cradle or press [SP-PHONE].




Speed Dialler
Speed dialler
You can store up to 10 numbers in the memory stations. The dialling buttons [0] to [9] function as memory station numbers. Do not press any memory stations before storing to prevent misoperation.
Note:
- If a phone number is stored in a dialling button which already contains a phone number, the old number will be erased.
- To store a number as an emergency number, see page 20.
Storing phone numbers
1 [PROGRAM/EXIT] → [▼] / [▲]: "Save speed dial?" → [OK]
2 Enter the party's name (15 characters max.) → [OK]
3 Enter the party's phone numbers (32 digits max.) → [OK]
4 Press the memory station number ([0] to [9]). A long beep sounds.
5 [PROGRAM/EXIT]
Erasing a stored number
1 [AUTO/LOWER] → Press the memory station number ([0] to [9]) for the phone number to be erased.
2 [CLEAR] → [OK] • A long beep sounds.
Dialling a stored number
1 Lift the handset or press [SP-PHONE]. 2 [AUTO/LOWER] → Press the memory station number ([0] to [9]). 3 When you finish talking, place the handset on the cradle or press [SP-PHONE].
OR
1 [AUTO/LOWER] → Press the memory station number ([0] to [9]).
2 Lift the handset or press [SP-PHONE].
3 When you finish talking, place the handset on the cradle or press [SP-PHONE].
Phonebook
Phonebook
The phonebook allows you to make calls without having to dial manually. You can add 50 names and phone numbers.
Adding entries
1[PROGRAM/EXIT]
2 [▼]/[▲]→"Save phonebook?" →[OK]
- The display will show the number of stored items.
3Enter the party's name (15 characters max.) → [OK]
4Enter the party's phone number (32 digits max.) → [OK]
• To add other entries, repeat from step 2. - If the display shows "Phonebook full" in step 2, press [PROGRAM/EXIT] to exit the list. To erase other stored items from the phonebook, see page 21.
5[PROGRAM/EXIT]
To store emergency numbers
Emergency numbers are numbers stored in the phonebook, one-touch dial and speed dial that can be dialled even when dial lock (page 16) or call restriction (page 24) is turned on. To store a number as an emergency number, add # at the beginning of the party's name except the number at EMERGENCY button.
Character table for entering names
| Key | Character |
| [1] | & ' ( ) , - . / 1 |
| [2] | abc ABC 2 |
| [3] | def DEF 3 |
| [4] | gh i GH I 4 |
| [5] | j k l J K L 5 |
| [6] | m n o M N O 6 |
| [7] | p q r s P Q R S 7 |
| [8] | t u v T U V 8 |
| [9] | w x y z W X Y Z 9 |
| [0] | 0 Space |
| [*] | * |
| [#] | # |
- To enter another character that is located on the same dial key, press [▶] to move the cursor to the next space.
Correcting a mistake
Press [◀] or [▶] to move the cursor to the character or number you want to erase, then press [CLEAR]. Enter the appropriate character or number.
- Press and hold [CLEAR] to erase all characters or numbers.
Phonebook
Finding and calling a phonebook entry
Scrolling through all entries
1 Press [◀] or [▶] to enter the phonebook list. 2 [▼]/[▲]: Select the desired entry. - Item with # at the beginning will be displayed with first priority if dial lock (page 16) or call restriction (page 24) is turned on. 3 Lift the handset or press [SP-PHONE] to start calling.
Searching by first character (alphabetically)
1 Press [◀] or [▶] to enter the phonebook list. 2 Press the dial key ([0]–[9], [∗] or [#]) which contains the character you are searching for (page 20). - Press the same dial key repeatedly to display the first entry corresponding to each character located on that dial key. - If there is no entry corresponding to the character you selected, the next entry is displayed. 3 [▼]/[▲]: Scroll through the phonebook if necessary. 4 Lift the handset or press [SP-PHONE] to start calling.
Editing entries
1 Press [◀] or [▶] to enter the phonebook list. 2 [▼] / [▲]: Select the desired entry → [OK] 3 Edit the name if necessary (15 characters max.: page 20) → [OK] 4 Edit the phone number if necessary (32 digits max) → [OK] → [PROGRAM/EXIT]
Erasing entries
1 Press [◀] or [▶] to enter the phonebook list. 2 [▼] / [▲]: Select the desired entry → [CLEAR] → [OK] • A beep sounds.
3[PROGRAM/EXIT]
Chain dial
This feature allows you to dial phone numbers in the phonebook while you are on a call. This feature can be used, for example, to dial a calling card access number or bank account PIN that you have stored in the phonebook, without having to dial manually.
1 During an outside call, press [◀] or [▶]. 2 [▼] / [▲]: Select the desired entry → [OK]
Note:
- When storing a calling card access number and your PIN in the phonebook as one phonebook entry, press [PAUSE] to add pauses after the number and PIN as necessary (page 14).
- If you have rotary/pulse service, you need to press [✗] before pressing [◀] or [▶] in step 1 to change the dialling mode temporarily to tone.


Programming
Programmable settings
You can customize the unit by programming the following features.
Make sure that the handset is on the cradle and "or" is not displayed.
Programming by scrolling through the display menus
1[PROGRAM/EXIT]
2 [▼]/[▲]: Select the desired item in main menu → [OK]
3 [▼]/[▲]: Select the desired setting → [OK]
• This step may vary depending on the feature being programmed. - To exit the operation, press [PROGRAM/EXIT] or wait for 60 seconds.
Note:
- In the following table, < > indicates the default settings.
- The current item or setting is highlighted on the display.
| Main menu Sub-menu | Setting Page | ||
| Save phonebook ? | - | - | |
| Save one touch ? | - | - | |
| Save speed dial? | - | - | |
| Program ? Change | password? | <1111> | 2 |
| Call restrict ? | - 24 | ||
| Set flash time ?*1 | 900/700/600/400/300/250/200/160/110/100/90/80<100> | - | |
| Set dial mode ? Tone /Pulse | 12 | ||
| LCD contrast ?*2 | ○○○/○○/○○/○<○○> | - | |
| Set hold music ?*3 | On/Off | - | |
| Time adjustment?*4 | On/Off | - | |
| Set clock ? | - | - | 12 |
| Change language? | - | English/Română/Cestina/Slovensky/srpski/Slovenscina | 12 |
20 17 19
![PANASONIC KX-TS880FX - 1[PROGRAM/EXIT] - 1](/content/2026/06/1330114/images/1a871cb3d03d01c607c2fee300568fcea77dbf0539be853dc2964a1057803bbe.jpg)
![PANASONIC KX-TS880FX - 1[PROGRAM/EXIT] - 2](/content/2026/06/1330114/images/0784865eeefdf0ca4de92b79bd514d25b23ab6b74aa85b3922bde44e92abba4e.jpg)
22

![PANASONIC KX-TS880FX - 1[PROGRAM/EXIT] - 4](/content/2026/06/1330114/images/820f61d888026ea6e13d6428e274f9b61a5826998b805e4ba49fcb357ee32318.jpg)
![PANASONIC KX-TS880FX - 1[PROGRAM/EXIT] - 6](/content/2026/06/1330114/images/3775574cc639b10290349a71c64feb723a685e071f985865fd84a4cc31654dab.jpg)
Programming
*1 The flash time (ms) depends on your telephone exchange or host PBX. Contact your PBX supplier if necessary. *2 “☐” shows one level. To make the display clearer, set to high level. *3 You can set music play during the hold. *4 If the Caller ID time and date display service is available in your area, this feature allows the unit to automatically adjust the date and time setting when caller information is received. To use this feature, set the date and time first.



23


Programming
Special instructions for programmable settings
Call restriction
You can restrict the unit from dialling phone numbers beginning with specified digit(s) (1 digit or 2 digits). Phone numbers with the restricted leading digits cannot be dialled out, except the emergency numbers (#) stored in the phonebook, one-touch dial and speed dial.
- When call restriction is turned on, you cannot store, edit, or erase the emergency numbers begin with # in the phonebook, one-touch dial and speed dial.
Setting the call restriction
1[PROGRAM/EXIT]
2 [▼]/[▲]: "Program ?" → [OK]
3 [▼]/[▲]: "Call restrict?" → [OK]
- If you have not changed the unit password (default: 1111), go to step 5.
4 Enter the unit password → [OK]
5 Enter the number(s) (1 digit or 2 digits) you want to restrict ([0] to [9]) → [OK] → [PROGRAM/EXIT]
Erasing the restricted number
1 [PROGRAM/EXIT]
2 [▼]/[▲]: "Program ?" → [OK]
3 [▼]/[▲]: "Call restrict ?" → [OK]
- If you have not changed the unit password (default: 1111), go to step 5.
4 Enter the unit password → [OK]
5 Press and hold [CLEAR]
→ [OK] → [P R O G R A M / E X I T]
Changing the unit password
Important:
- If you change the password, please make note of your new password. The unit will not reveal the password to you. If you forget your password, consult your nearest Panasonic service centre.
1[PROGRAM/EXIT]
2 [▼]/[▲]: "Program ?" → [OK]
3 [▼]/[▲]: "Change password?" → [OK]
4Enter the current 4-digit password (default: "1111") → [OK]
- If you have entered the wrong password, "ERROR" and "----" will be displayed. Enter the correct password.
5Enter the new 4-digit password → [OK] → [PROGRAM/EXIT]
Caller ID Service
Using Caller ID service
Important:
- This unit is Caller ID compatible. To use Caller ID features, you must subscribe to Caller ID service. Contact your service provider / telephone company for details.
Caller ID features
When an outside call is being received, the name and phone number is displayed.
Caller information for the last 50 callers is logged in the caller list from the most recent call to the oldest. When the 51st call is received, the oldest call is deleted.
- If the unit cannot receive caller information, the following is displayed: — "out of area": The caller dialled from an area which does not provide Caller ID service.
- "Private caller": The caller requested not to send caller information.
- "Long distance": The caller made a long distance call.
- If the unit is connected to a PBX system, caller information may not be received properly. Contact your PBX supplier.
- If the batteries installed in the unit have expired, Caller ID services will not be available.
Missed calls
If a call is not answered, the unit treats the call as a missed call. The display shows the number of missed calls, while the unit is not in use. This lets you know if you should view the caller list to see who called while you were away. If you have entered the caller list before and there is no new missed call coming in after that, number of missed calls will not be displayed in standby mode.
- If there are unviewed missed calls, number of missed calls will be displayed when you enter the caller list.
Private name display
When caller information is received and it matches a phone number stored in the phonebook, one-touch and speed dial, the stored name is displayed and logged in the caller list.
Caller ID Service
Caller list
Important:
- Make sure the unit's date and time setting is correct (page 12).
Viewing the caller list and calling back
1 Press [▼] or [▲] to enter the caller list. 2 Press [▼] to search from the most recent call, or [▲] to search from the oldest call. 3To call back, lift the handset or press [SP-PHONE]. To exit, press [PROGRAM/EXIT]
Note:
- If the item has already been viewed or answered, “” is displayed.
- If "No items stored" is displayed in step 1, the caller list is empty.
Editing a caller's phone number before calling back
1 Press [▼] or [▲] to enter the caller list. 2 [▼]/[▲]: Select the desired entry → [OK] or [▶]. 3 Add or erase digits to the beginning of the number as necessary.
- To add a digit, press the desired dial key.
- To erase a digit, press [CLEAR] or [#].
4 To call back, lift the handset or press [SP-PHONE].
Erasing selected caller information
1 Press [▼] or [▲] to enter the caller list. 2 [▼] / [▲]: Select the desired entry.
3 [CLEAR]
• A long beep sounds.
4 [PROGRAM/EXIT]
Erasing all caller information
1 [CLEAR]
2 "All erase?" → [OK]
• A long beep sounds.
3[PROGRAM/EXIT]
Storing caller information into the phonebook
1 Press [▼] or [▲] to enter the caller list.
2 [▼] / [▲]: Select the desired entry → [OK] or [▶].
• Edit the number if necessary.
3[OK]
- If there is name information for the caller, go to step 5.
4 Enter the party's name (15 character max.: page 20) → [OK]
5"▼ Phonebook?" → [OK] • A long beep sounds.
6[PROGRAM/EXIT]
Caller ID Service
Storing caller information into the one touch dial
1 Press [▼] or [▲] to enter the caller list.
2 [▼] / [▲]: Select the desired entry → [OK] or [▶].
- Edit the number if necessary.
3[OK]
- If there is name information for the caller, go to step 5.
4 Enter the party's name
(15 characters max.: page 20) → [OK]
5 Press [▼] → "▼▲One touch?" → [OK]
6 Press the one-touch dial button.
- If a phone number is stored in a one-touch dial button which already contains a phone number, the old number will be erased.
• A long beep sounds.
7[PROGRAM/EXIT]
Storing caller information into the speed dial
1 Press [▼] or [▲] to enter the caller list.
2 [▼]/[▲]: Select the desired entry → [OK] or [▶].
- Edit the number if necessary.
3[OK]
- If there is name information for the caller, go to step 5.
4 Enter the party's name
(1 5 characters max.: page 20) → [OK]
5 Press [▼] twice → "▲Speed dial?" → [OK]
6 Press the memory station number ([0] to [9])
- If a phone number is stored in a dialling button which already contains a phone number, the old number will be erased.
• A long beep sounds.
7 [PROGRAM/EXIT]

Useful Information
Optional Headset
Plugging the optional headset into the unit allows a hands-free phone conversation. Please use only a Panasonic KX-TCA94EX.
Connecting the Optional Headset to the Unit
Connect the optional headset to the headset jack as shown below.

If you want to have a normal conversation, disconnect the headset.
Making/Answering calls
Make sure to install the batteries.
1 Press [HEADSET] to make or answer a call.
OR
Dial the number and press [HEADSET] to make a call.
- If you misdial during pre-dialling, press [CLEAR] and enter the correct number. Then press [HEADSET] for dialling.
2 To hang up, press [HEADSET].
To adjust the headset receiver volume (4 levels):
While using the headset, press [▲] or [▼].
- During a conversation using the headset, you cannot switch the call to the handset by lifting it off the cradle.
- If you disconnect the optional headset during a conversation with the handset on the cradle, the call will be switched to the speakerphone.
- During a conversation using the speakerphone, you can switch the call to the headset by connecting the headset.




Useful Information
Desk mount setup
This unit can be used in 2 positions.
Low desk position (default)

High desk position
— You can adjust the wall mount adaptor to slope this unit.

— Changing to the high desk position.
- Press the tab in the direction of the arrow (①), then remove the wall mount adaptor (②).
- To attach the wall mount adaptor to high
( ) push it in the direction of arrows ((①) and (②)) as shown.


29


KX TS880FX.book Page 30 Friday, November 26, 2010 3:49 PM
Useful Information
Wall mount setup
This unit can be mounted on a wall phone plate.

1 Pull down the handset hook until it locks, so the tabs hold the handset.
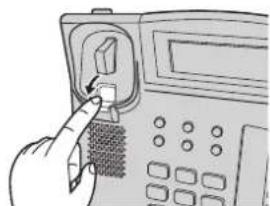
2 Press the tabs in the direction of the arrows (1), then remove the wall mount adaptor (2).


High desk position Low desk position
3 Tuck the telephone line cord inside the wall mount adaptor, and push it in the direction of the arrow.

30


Useful Information
4 Drive screws (not included) into the wall using the wall template below. Connect the telephone line cord. Mount the unit, and then slide it down.


To temporarily set the handset down during a conversation, place it as shown in this picture.

Useful Information
Troubleshooting
| Problem Cause/solution | |
| The unit does not work. | Check the connections (page 10).Remove the batteries and reinstall them to reset the unit. |
| The unit does not ring. | The RINGER selector is set to OFF. Set to HIGH or LOW (page 14). |
| The display is blank. | Install new batteries (page 9). |
| LCD display response is slow. | Change LCD contrast setting to higher level (page 22).Batteries are running low.Install or replace the batteries. |
| You cannot dial. | Check the dial tone. If there is no dial tone, check the connections (page 10).The dialling mode may be set incorrectly.Change the settings (page 12).Dial lock is turned on. To turn it off, see page 16.The dialled number is restricted. To cancel, see page 24. |
| The other party suddenly cannot hear your voice during a conversation. | [MUTE] may have been pressed during the conversation.To cancel, press [MUTE] again (page 15). |
| You cannot program items such as the dialling mode. | Programming is not possible when:the handset is off the cradle.viewing caller information.is displayed."is displayed.Do not pause for over 60 seconds while programming. |
| Caller information is not displayed. | You need to subscribe to Caller ID service.Consult your service provider/telephone company for details.Install or replace the batteries.If your unit is connected to any additional telephone equipment such as a Caller ID box or cordless telephone line jack, plug the unit directly into the wall jack.If you use a DSL /ADSL service, we recommend connecting a DSL/ADSL filter between the unit and the telephone line jack. Contact your DSL/ADSL provider for details.Other telephone equipment may be interfering with your phone. Disconnect it and try again. |
| Number of missed calls does not display during standby mode. | You have entered the caller list before and there is no new missed call coming in after that.If there are unviewed missed calls, number of missed calls will be displayed when you enter the caller list. |


Useful Information
| Problem Cause/solution | |
| You cannot store a name and phone number in memory. | Programming is not possible when:the handset is off the cradle.dis displayed."is displayed.Check that the batteries are installed in the unit and the battery power is not low.Do not pause for over 60 seconds while storing.Do not enter a phone number more than 32 digits long.When using the dial lock (page 16) or call restriction feature (page 24), you cannot store emergency numbers (#).If Phonebook full" is displayed, erase other stored items from the phonebook memory (page 21). |
| While programming or searching, the unit starts to ring and stops the program/search. | A call is being received. Answer the call and start again after hanging up. |
| The display exits the caller list. | Do not pause for over 60 seconds while searching. |
| You cannot redial by pressing [REDIAL]. | If the last number dialled was more than 32 digits long, the number will not be redialed correctly. |
| Information stored in the redial list is erased. | If "flashes, replace the batteries as soon as possible. Otherwise, information stored in the redial list will be erased. Store the desired item in the phonebook, one-touch dial or speed dial memory before the battery replacement. |
Liquid damage
| Problem Cause/solution | |
| Liquid or other form of moisture has entered the unit. | Disconnect the telephone line cord from the unit.Remove the batteries from the unit and leave to dry for at least 3 days. After the unit is completely dry, reconnect the telephone line cord. Insert the batteries. |
Caution:
- To avoid permanent damage, do not use a microwave oven to speed up the drying process.
Index
Index
A Accessories: 3
Answering calls: 14
B Battery: 9
C Call restriction: 24
Call waiting: 15
Caller ID service: 25
Caller list: 26
Chain dial: 21
Connections: 10
Controls: 7
D Date and time: 12
Desk mount setup: 29
Dial lock: 16
Dialling mode: 12
Display: 8
DSL/ADSL service users: 10
F Flash: 15
H Headset: 28
Hold: 15
I Index card: 18
L LOWER memory: 17
M Making calls: 13
Mute: 15
N Navigator key: 7
One-touch dialler: 17
P Password: 24
Pause: 14
Phonebook: 20
R Redial: 13
Rotary/pulse service: 15
S Speed dialler: 19
T Temporary tone dialling: 15
Troubleshooting: 32
U UPPER memory: 17
V Volume
Handset: 13
Ringer: 14
W Wall mount setup: 30

Sales Department
■ Czech
This material is copyrighted by Panasonic System Networks Malaysia Sdn. Bhd., and may be reproduced for internal use only. All other reproduction, in whole or in part, is prohibited without the written consent of Panasonic System Networks Malaysia Sdn. Bhd.
© Panasonic System Networks Malaysia Sdn. Bhd. 2010

PNQX2840XA FM1210NK20517 FX - 1/2


- PANASONIC®
- OPERATING INSTRUCTIONS
- TABLE OF CONTENTS
- INTRODUCTION
- PREPARATION
- MAKING/ANSWERING CALLS
- ONE-TOUCH DIALLER
- SPEED DIALLER
- PHONEBOOK
- PROGRAMMING
- CALLER ID SERVICE
- USEFUL INFORMATION
- INDEX
- FOR YOUR FUTURE REFERENCE
- ATTACH YOUR PURCHASE RECEIPT HERE
- NOTE
- DECLARATION OF CONFORMITY
- CONTACT THE AUTHORISED REPRESENTATIVE
- ACCESSORY INFORMATION
- FOR YOUR SAFETY
- WARNING
- INSTALLATION
- OPERATING SAFEGUARDS
- CAUTION
- INSTALLATION AND LOCATION
- BATTERY
- IMPORTANT SAFETY INSTRUCTIONS
- SAVE THESE INSTRUCTIONS
- FOR BEST PERFORMANCE
- ENVIRONMENT
- ROUTINE CARE
- OTHER INFORMATION
- NOTICE FOR PRODUCT DISPOSAL, TRANSFER, OR RETURN
- INFORMATION FOR USERS ON COLLECTION AND DISPOSAL OF OLD EQUIPMENT AND USED BATTERIES
- FOR BUSINESS USERS IN THE EUROPEAN UNION
- INFORMATION ON DISPOSAL IN OTHER COUNTRIES OUTSIDE THE EUROPEAN UNION
- NOTE FOR THE BATTERY SYMBOL
- SPECIFICATIONS
- CONTROLS
- HOW TO USE THE NAVIGATOR KEY AND [OK] BUTTON
- DISPLAY
- BATTERY INSTALLATION AND REPLACEMENT
- THE UNIT MAY NOT WORK PROPERLY WITHOUT BATTERIES
- REPLACING THE BATTERIES
- BATTERY PRECAUTIONS
- CONNECTIONS
- SETTING UP THE UNIT BEFORE USE
- DISPLAY LANGUAGE
- DATE AND TIME
- [OK]
- FOR CALLER ID SERVICE USERS (PAGE 25)
- DIALLING MODE
- MAKING CALLS
- USING THE SPEAKERPHONE
- ADJUSTING THE HANDSET OR THE SPEAKER VOLUME
- MAKING A CALL USING THE REDIAL LIST
- AUTOMATIC REDIAL
- ERASING A NUMBER IN THE REDIAL LIST
- PAUSE (FOR PBX/LONG DISTANCE SERVICE USERS)
- [9] → [PAUSE]
- ANSWERING CALLS
- [SP-PHONE]
- ADJUSTING THE UNIT RINGER VOLUME
- USEFUL FEATURES DURING A CALL
- HOLD
- MUTE
- FLASH
- FOR CALL WAITING SERVICE USERS
- TEMPORARY TONE DIALLING (FOR ROTARY/PULSE SERVICE USERS)
- DIAL LOCK
- IMPORTANT
- TO TURN THE DIAL LOCK ON/OFF
- [♀DIAL LOCK/HOLD]
- UPPER MEMORY LOCATIONS
- STORING PHONE NUMBERS
- [PROGRAM/EXIT]
- ERASING A STORED NUMBER
- DIALLING A STORED NUMBER
- LOWER MEMORY LOCATIONS
- ADDING ENTRIES
- TO STORE EMERGENCY NUMBERS
- CORRECTING A MISTAKE
- FINDING AND CALLING A PHONEBOOK ENTRY
- SCROLLING THROUGH ALL ENTRIES
- SEARCHING BY FIRST CHARACTER (ALPHABETICALLY)
- EDITING ENTRIES
- ERASING ENTRIES
- CHAIN DIAL
- PROGRAMMABLE SETTINGS
- PROGRAMMING BY SCROLLING THROUGH THE DISPLAY MENUS
- SPECIAL INSTRUCTIONS FOR PROGRAMMABLE SETTINGS
- CALL RESTRICTION
- SETTING THE CALL RESTRICTION
- ERASING THE RESTRICTED NUMBER
- CHANGING THE UNIT PASSWORD
- USING CALLER ID SERVICE
- CALLER ID FEATURES
- MISSED CALLS
- PRIVATE NAME DISPLAY
- CALLER LIST
- VIEWING THE CALLER LIST AND CALLING BACK
- EDITING A CALLER'S PHONE NUMBER BEFORE CALLING BACK
- ERASING SELECTED CALLER INFORMATION
- [CLEAR]
- ERASING ALL CALLER INFORMATION
- STORING CALLER INFORMATION INTO THE PHONEBOOK
- STORING CALLER INFORMATION INTO THE ONE TOUCH DIAL
- STORING CALLER INFORMATION INTO THE SPEED DIAL
- OPTIONAL HEADSET
- CONNECTING THE OPTIONAL HEADSET TO THE UNIT
- DESK MOUNT SETUP
- HIGH DESK POSITION
- WALL MOUNT SETUP
- LIQUID DAMAGE
- SALES DEPARTMENT
- CZECH
Brand : PANASONIC
Model : KX-TS880FX
Category : Phone Accessories