
DMR-EZ45 - DVD Recorder PANASONIC - Free user manual and instructions
Find the device manual for free DMR-EZ45 PANASONIC in PDF.
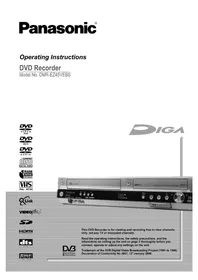


| Product Type | DVD Recorder |
| Brand | Panasonic |
| Model | DMR-EZ45 |
| Dimensions (approx.) | 430 mm x 249 mm x 59 mm |
| Weight (approx.) | 2.4 kg |
| Power Consumption | 18 W (operating), 0.5 W (standby) |
| Power Supply | AC 220-240 V, 50 Hz |
| Recording Formats | DVD-R, DVD-RW, DVD+R, DVD+RW, DVD-RAM |
| Playback Formats | DVD-Video, DVD-R, DVD-RW, DVD+R, DVD+RW, CD, CD-R, CD-RW |
| Video Recording System | MPEG2 |
| Audio Recording System | Dolby Digital, Linear PCM |
| Inputs | Composite (RCA), S-Video, RF Antenna, DV (i.LINK) |
| Outputs | Composite (RCA), S-Video, Component, HDMI (upscaling to 1080p), Optical Audio |
| Hard Disk Drive | Not available (no HDD model) |
| Timer Recording | Up to 16 programs per month |
| Playback Features | JPEG slideshow, MP3 playback |
| Maintenance | Clean lens with soft cloth; avoid liquids. Do not use abrasive cleaners. |
| Safety | Do not expose to moisture or extreme temperatures. Unplug during storms. |
| Spare Parts & Repairability | Contact Panasonic service center for replacement parts. Device should be repaired by qualified personnel. |
Frequently Asked Questions - DMR-EZ45 PANASONIC
User questions about DMR-EZ45 PANASONIC
0 question about this device. Answer the ones you know or ask your own.
Ask a new question about this device
Download the instructions for your DVD Recorder in PDF format for free! Find your manual DMR-EZ45 - PANASONIC and take your electronic device back in hand. On this page are published all the documents necessary for the use of your device. DMR-EZ45 by PANASONIC.
USER MANUAL DMR-EZ45 PANASONIC
Operating Instructions
DVD Recorder
Model No. DMR-EZ45VEBS


This DVD Recorder is for viewing and recording free to view channels only, not pay TV or encrypted channels.
Read the operating instructions, the safety precautions, and the information on setting up the unit on page 3 thoroughly before you connect, operate or adjust any settings on the unit.
Trademark of the DVB Digital Video Broadcasting Project (1991 to 1996) Declaration of Conformity No.3957, 12th January 2006
Table of contents
Page Page Page
Safety Precautions 3 Changing the audio channel 27 Change Profile 42
Subtitles 27 Automatic SP/LP switching during a VHS
Information about the unit 4 recording 42
Licence information 4 Playback (VHS) 28-29 Checking or changing Timer Recordings 43
| Preparation | 28 Timer Off/On | 43 | ||
| Before you start | 5 | Playing a video cassette | 28 Delete | 43 |
| Included accessories 5 Repeat playback | 28 Stop Recording | 43 | ||
| Inserting batteries | 5 | Stopping playback | 28 Drive Space | 43 |
| Sales and Support Information | 5 Pausing playback | 28 | ||
| Slow-motion playback, Frame playback | 28 Delete (DELETE Navigator) | 44 | ||
| Remote Control | 6-7 | Forwards or backwards search | 28 | |
| Fast forward / Jet rewind | 28 Copy | 45-47 | ||
| Front Panel, Display | 8 | JET REW; VHS Index Search System (VISS) | 28 Copy pictures | 45 |
| S-VHS Quasi Playback (SQPB) | 29 Copying with a copy list | 46 | ||
| Rear Panel | 9 | Manual tracking | 29 Time-triggered copying | 47 |
| Automatic tracking | 29 | |||
| Connections | 10-18 | Handling video cassettes | 29 COPYING (front of unit) | 48 |
| Connecting to a television only | 10 Write-protecting cassettes | 29 | ||
| Auto-Setup | 11 | Cleaning video heads | 29 TV Guide | 49-51 |
| DVB Auto Setup (Tuning digital channels) | 11 | Landscape view | 49 | |
| Auto-Setup (Tuning analogue channels) | 11 | Recording | 30-32 Portrait view | 50 |
| Owner ID | 11 | Before recording | 30 Prog. Type Display according to topic areas | 50 |
| Connecting to a television and satellite receiver | 12-13 | Disc Protection, CPRM | 30 Display according to Category | 50 |
| Formatting, For recording | 30 Programming the Timer in the TV Guide | 51 | ||
| Auto-Setup | 13 | Record | 31 Deleting a Timer programming | 51 |
| Connection with HDMI cable | 14-15 | Pause the recording | 31 Stopping a current Timer Recording | 51 |
| Connection to COMPONENT VIDEO terminal | 16-17 | DVD recording of TV programmes | 31 Automatic title transfer | 51 |
| Connection with Video cable or S Video cable | 18 | Changing the recording mode | 31 | |
| VHS recording of TV programmes | 31VIDEO Plus+ Record | 52 | ||
| External units 19 | Timer Recording with the television set | 31 | ||
| Connecting a digital amplifier | 19 | Specifying a time as the recording duration | 32 Timer Recording via external units | 53 |
| Connecting an analogue amplifier | 19 | DVD playback during recording | 32 | |
| Connection to AV3 (e.g. camcoder) | 19 | Direct TV recording | 32 Playlists | 54-56 |
| Connection to DV input | 19 | Recording from an external unit, e.g. a camera | 32 Creating a playlist | 54 |
| Selecting the sound track to record for programmes with dual-channel sound | 32 Launching the Playlists menu | 55 | ||
| Status displays | 20 | Programming in dual-channel audio | 32 Editing playlists in the SUB MENU | 55 |
| Banner | 21 | 32 Editing chapters in the SUB MENU | 56 | |
| Digital Text | 21 | |||
| FUNCTIONS | 33-69 Copy All Pictures | 57 | ||
| Disc formats | 22-23 Notes on the menus | 33 | ||
| Playback and recording discs | 22 | Entering text / Symbols | 34 Flexible Rec (FR) | 58 |
| Playback discs 23 | ||||
| Handling discs | 23 | DIRECT NAVIGATOR | 35-37 DV Auto Rec | 58 |
| Overview of DIRECT NAVIGATOR | 35 | |||
| SD Card | 24 | Delete | 35 Setup | 59-67 |
| Properties | 35 Tuning 59-61 | |||
| Playback (DVD) | 25-27 | Album View | 35 Disc | 61 |
| Preparation | 25 | Enter Name | 36 List of language codes | 61 |
| Playback | 25 | Set up Protection/ Cancel Protection | 36 Picture | 62 |
| Playback of a selected title | 25 | Partial Delete | 36 Sound | 63 |
| Playback starts automatically | 25 Change Thumbnail 36 Display | 63 | ||
| Selecting programmes/titles for playback | 25 | Divide Title | 36 Connection | 64 |
| Auto finalize | 25 | Editing chapters in the SUB MENU | 37 HDMI | 65 |
| Pausing playback | 26 | Delete Chapter | 37 VHS | 65 |
| Stopping playback | 26 Create Chapter | 37 Others 66-67 | ||
| Saving the playback position | 26 Combine Chapters | 37 | ||
| Slow-motion playback | 26 | Title View | 37 DVD Management | 68-69 |
| Fast forward/rewind 26 | ||||
| Dividing a recording into chapters | 26 | Picture Playback | 38-41 Card Management | 69 |
| Skipping | 26 | JPEG/TIFF playback of DVD-RAM/SD | 38-40 | |
| MANUAL SKIP | 26 | JPEG/TIFF playback of CD/DVD-R | 41 Picture and sound settings | 70-71 |
| Frame playback | 26 If you need help | 72-76 | ||
| TIME SLIP | 27 | MP3 playback | 41 What can I do with which disc? | 77 |
| Delayed playback | 27 Folder structure JPEG/MP3/SD Card | 78 | ||
| Quick View (Play/x1.3) | 27 | Timer Recording | 42-43 Specifications | 79 |
| Simultaneous recording and playback | 27 | Manual programming | 42 Index | last page |
Safety Precautions

Important Safety Warnings
- The moulded three pin mains plug is supplied for your safety and convenience and must NOT be cut off.
- A 5 amp fuse is fitted in the mains plug. If the fuse has to be replaced, it must be of the same rating and approved by ASTA or BSI to BS1362. Check for the ASTA mark or the BSI mark on the body of the fuse.
To replace the fuse, open the fuse compartment with a screwdriver as shown and replace the fuse and the cover securely.


Inside of product
| DANGER -VISIBLE AND INVISIBLE LASERRADIATION WHEN OPEN, AVOID DIRECTEXPOSURE TO BEAM.FDA 21 CFR/Class IIIb | |
| 注意 | 一打开时有可见及不可见激光辐射。避免光束照射。 |
| 注意 | 一ごとを聞くと可視及び不可視レーザ光が出ます。ピームを見たり、飽れたりしなくてください。 |
| CAUTION- | CLASS 3B VISIBLE AND INVISIBLE LASER RADIATION WHEN OPEN, AVOID EXPOSURE TO THE BEAM.IEC0825-1+A2/Class 3B |
| ATTENTION- | RAYONNEMENT LASER VISIBLE ET INVISIBLE, CLASSE 3B, EN CAS D'OUVERTURE, EVITER UNE EXPOSITION AU FAISCEAU. |
| FORSIGTIGN- | SYNLIG OG USYNJG LASERSTRALING KLASSE 3B, NAR LÄGET ER ABENT, UNDGA AT BLVE USAT FOR STRÄLEN. |
| VARO- | AWATRESSA OLET ALTINA LIOKAN 3B NAKYVAA JAKNYMATONTA LASERSTELYA, VARO ALISTUMISTA SATEELLE. |
| WARNING- | Klass 3B SYNLOG OCH OSYNJG LASERSTRALING NAR DENNA DEL AR ÖPPNAD, UNDWK EXPOENING FOR STRÄLEN. |
| VORSICHT- | SICHTBAIRE UNSICHTBAIRE LASERSTRALUNG KLASSE 3B, WENN ABDECKUNG GEÖFFNET, NICHT DEM STRAH, AUSETZEN. |
| CAUTION- | VISIBLE AND INVISIBLE LASER RADIATION WHEN OPEN, AVOID EXPOSURE TO THE BEAM.IEC0825-1 |
| ATTENTION- | RAYONNEMENT LASER VISIBLE ET INVISIBLE EN CAS D'OUVERTURE, EXPOSITION DANGEREUSE AU FAISCEAU. |
| ADVARSEL- | SYNLIG OG USYNJG LASERSTRALING VED ABNING, UNDGA UDS/ETTELSE FOR STRÄLEN. |
| VARO! | AWATRESSA OLET ALTINA NAKYVAA JAKNYMATON LASERSTELYLLE, ALA KATSO SATEESEN. |
| WARNING- | SYNLIG OCH OSYNJG LASERSTRALING NAR DENNA DEL AR ÖPPNAD, BETRAKTA EJ STRÄLEN. |
| VORSICHT- | SICHTBAIRE UNSICHTBAIRE LASERSTRALUNG, WENN ABDECKUNG GEÖFFNET, NICHT DEM STRAH, AUSETZEN. |
| ADVARSEL- | SYNLIG OG USYNJG LASERSTRALING NAR DEKSEL APNES, UNDGA EKSPONERING FOR STRÄLEN.VQL1J67 |
- To prevent electric shock, do not remove cover. No user serviceable parts inside. Refer servicing to qualified service engineer only.
- WARNING: To reduce the risk of fire, electric shock or product damage, do not expose this apparatus to rain, moisture, dripping or splashing and that no objects filled with liquids, such as vases, shall be placed on the apparatus.
- Do not insert metal object into the slots or openings of the unit.
- This unit is not disconnected from a.c. mains while it remains connected to a live mains outlet, even if it has been turned off.
- The socket outlet shall be installed near the equipment and easily accessible or the mains plug or an appliance coupler shall remain readily operable.
- This unit is intended for use in moderate climates.

Caution
- Avoid exposing the unit to direct sunlight or other heat sources.
- Avoid sudden change in temperature or humidity, dew or condensation may form, causing malfunction.
- Dispose of batteries in accordance with the instructions given in this book.
- Place the unit on a flat, stable surface. Do not place heavy object on top of the unit.
- Your attention is drawn to the fact that recording of pre-recorded tapes or discs or other published or broadcast materials may infringe copyright laws.
- This unit is designed for indoor use only.
- Do not use in areas with strong magnetic fields, e.g., near transmitting antennas.
- This product may receive radio interference caused by mobile telephones during use. If such interference is apparent, please increase the separation between the product and the mobile telephone.
- Do not install or place this unit in a bookcase, built-in cabinet, or another confined space. Ensure the unit is well ventilated. To prevent risk of electric shock or fire hazard due to overheating, ensure that curtains and any other materials do not obstruct the ventilation vents.
- Do not obstruct the unit's ventilation openings with newspapers, tablecloths, curtains, and similar items.
- Do not place sources of naked flames, such as lighted candles, on the unit.
- Dispose of batteries in an environmentally friendly manner.
- This product utilizes a laser. Use of controls or adjustments or performance of procedures other than those specified herein may result in hazardous radiation exposure. Do not open covers and do not repair by yourself. Refer servicing to qualified personnel.

Back of product, see page 9

If you see this symbol, read page 4.

Care and Maintenance
- The cabinet can be wiped clean with a damp cloth. Disconnect from mains before cleaning. Do not use detergent or solution containing benzol or petroleum.
Information about the unit
FUNCTIONS menu

- Press FUNCTIONS on the remote to open the FUNCTIONS menu.
- Use the navigation buttons ▲▼▼ENTER to select the unit menu.
- Press RETURN to exit the menu.

DVB-T
Digital Video Broadcasting. This unit is a DVD recorder with an integrated tuner. You can receive and record both analog and terrestrial digital channels (DVB-T) without an additional reception unit (set-top box).
GUIDE
The TV Guide provides a preview of TV programs for the next 7 days from your digital stations. Simply select each program to store it for timer programming.
HDMI
The HDMI connection makes it easy to connect your multimedia devices. A single cable transmits both digital video and digital audio data. HDMI is the world's first complete digital consumer AV interface that complies with a non-compression standard.
DV interface
You can connect your digital camcorder directly to this unit via the DV IN connection. This makes it easy to copy your movies.
License information
This product incorporates copyright protection technology that is protected by method claims of certain U.S. patents and other intellectual property rights owned by Macrovision Corporation and other rights holders. Use of this copyright protection technology must be authorized by Macrovision Corporation, and is intended for home and other limited viewing uses only unless otherwise authorized by Macrovision Corporation. Reverse engineering or disassembly is prohibited.

Dolby Digital
DIGITAL Method of encoding digital signals. The signals are very much compressed in the process to enable recordings of large volumes of data. Manufactured under license from Dolby Laboratories. Dolby and the double-D symbol are registered trademarks of Dolby Laboratories.

DTS (Digital Theater Systems)
23-DIGITAL OUT Sound system used in cinemas or movie theaters all over the world. "DTS" and "DTS 2.0 + Digital Out" are trademarks of Digital Theater Systems, Inc.
MP3 or MPEG 1 Audio Layer 3 is a file compression format used for digital audio files. It provides files of an extremely small size and may cause a consequential loss of quality. MPEG Layer-3 audio decoding technology licensed from Fraunhofer IIS and Thomson multimedia.
HDAVI Control™ is a trademark of Matsushita Electric Industrial Co., Ltd.

SD Logo is a trademark.
miniSD™ is a trademark of SD Card Association.

HDMI, the HDMI logo and High-Definition Multimedia Interface are trademarks or registered trademarks of HDMI Licensing LLC.
-If you see this symbol-
Information on Disposal for Users of Waste Electrical & Electronic Equipment (private households)

This symbol on the products and/or accompanying documents means that used electrical and electronic products should not be mixed with general household waste.
For proper treatment, recovery and recycling, please take these products to designated collection points, where they will be accepted on a free of charge basis. Alternatively, in some countries you may be able to return your products to your local retailer upon the purchase of an equivalent new product.
Disposing of this product correctly will help to save valuable resources and prevent any potential negative effects on human health and the environment which could otherwise arise from inappropriate waste handling.
Please contact your local authority for further details of your nearest designated collection point. Penalties may be applicable for incorrect disposal of this waste, in accordance with national legislation.
For business users in the European Union
If you wish to discard electrical and electronic equipment, please contact your dealer or supplier for further information.
Information on Disposal in other Countries outside the European Union. This symbol is only valid in the European Union.
If you wish to discard this product, please contact your local authorities or dealer and ask for the correct method of disposal.
Before you start
Dear customer
Thank you for your trust and your decision to purchase this top-quality unit. Panasonic is one of the leading manufacturers of entertainment electronics units. We are sure that you will be completely satisfied with this unit.
Matsushita Electric Industrial Co., Ltd.
Please check and identify the supplied accessories.
Use numbers when asking for replacement parts.
(Product numbers correct as of March 2006. These may be subject to change.)

Operating Instructions

Quick Setup Guide

Reference Guide

Guarantee Card
Included Accessories

| □ Remote ControlEUR7659YN0 | □ AC mains leadRJA0044-3C orK2CT3C, |
□ Batteries for Remote Con‘’AA, UM3 or F | [ -  |
□ RF coaxial cables (black)K1TWACC00001 | □ RF coaxial cable (grey)K1TWACA00001 |

R6/LR6, AA
Inserting batteries
- The batteries last for about a year, depending on how often you use the remote control unit.
- Do not mix old with new batteries, or batteries of different types.
- Only use batteries without any harmful substances (lead, cadmium, mercury).
- Do not use rechargeable type batteries.
- Remove the batteries if the remote control unit will remain unused for longer periods of time.
- Do not heat or short-circuit the batteries. Immediately remove used-up batteries and replace with batteries of type AA, UM3 or R6.
- Be sure to put in the batteries the right way round + and -.
Dispose of batteries, packaging material and the unit according to statutory regulations. They must not be thrown into the household refuse.

Panasonic®
Sales and Support Information
Customer Care Centre
• For customers within the UK: 08705 357357 - Visit our website for product information: www.panasonic.co.uk
• E-mail: customer.care@panasonic.co.uk
Direct Sales at Panasonic UK
- Order accessory and consumable items for your product with ease and confidence by phoning our Customer Care Centre Thursday 9:00am - 5:30pm, Friday 9:30am - 5:30pm (Excluding public holidays)
- Or go online through our Internet Accessory ordering application at www.panasonic.co.uk
- Most major credit and debit cards accepted.
- All enquiries, transactions and distribution facilities are provided directly by Panasonic UK Ltd.
- It couldn't be simpler!
- Also available through our Internet is direct shopping for a wide range of finished products, take a browse on our website for further details.
Interested in purchasing an extended guarantee?
Please call 0870 240 6284 or visit our website www.panasonic.co.uk/guarantee
Remote Control

Point the remote control at the sensor of the unit. Avoid obstacles along the transmission path. The maximum reach of the remote control is 7 metres directly in front of the unit. Make sure that the transmission window and the sensor on the unit are clean. The process can be impaired by direct sunlight and glass cabinet doors.
Child protection
You can lock the buttons on the unit and the remote control.
- Press and hold the RETURN and ENTER buttons until [X HOLD] appears in the display. The buttons on the unit are locked. • To unlock the child protection, repeat the process until [X HOLD] disappears.
Operating a television
Change the code on the remote control to control your TV.
- Press and hold the TV on/off button.
- Enter the two-digit code for your television.
You must repeat this process after changing the batteries.
| Trademark | Code | Trademark | Code | Trademark | Code | Trademark | Code |
| Panasonic | 01-04,45 | GOODMANS | 05,06,31 | NOKIA | 25-27 | SANYO | 21 |
| AIWA | 35 | GRUNDIG 09 | NORDMENDE | 10 | SBR | 06 | |
| AKAI | 27,30 | HITACHI 22,23,31,40-42 | ORION | 37 | SCHNEIDER | 05,06,29-31 | |
| BLAUPUNKT | 09 | INNO HIT 34 | PHILIPS | 05,06 | SELECO | 06,25 | |
| BRANDT | 10,15 | IRRADIO | 30 | PHONOLA 31,33 | SHARP | 18 | |
| BUSH | 05,06 | ITT 25 | PIONEER | 38 | SIEMENS | 09 | |
| CURTIS | 31 | JVC | 17,39 | PYE | 05,06 | SINUDYNE | 05,06,33 |
| DESMET | 05,31,33 | LOEWE | 07 | RADIOLA | 05,06 | SONY | 08 |
| DUAL | 05,06 | METZ | 28,31 | SABA | 10 | TELEFUNKEN | 10-14 |
| ELEMIS | 31 | MITSUBISHI | 06,19,20 | SALORA | 26 | THOMSON | 10,15,44 |
| FERGUSON | 10 | MIVAR | 24 | SAMSUNG | 31,32,43 | TOSHIBA | 16 |
| GOLDSTAR/LG | 31 | NEC 36 | SANSUI | 05,31,33 | WHITE WESTINGHOUSE 05,06 | ||
Some television models of the listed brands (e.g., older Panasonic units) cannot be controlled via the remote control.
Switching to AV input on your Panasonic television
- Press AV.
Switches between TV reception and AV input each time the button is pressed.

Setting up the remote control
If you are using another Panasonic unit at the same location, change the setting of the remote control so that you can operate the units independently of each other.
Set up the remote control for the unit.
- Press FUNCTIONS.
- Select [To Others] with ▲ and confirm with ENTER.
- Select [Setup] with ▲ and confirm with ENTER.
- Select [Others] with ▲, [Remote Control] with ▶, and confirm with ENTER.
- Select [DVD 1, 2 or 3] with ▲ and confirm with ENTER.
Apply the selected setting [DVD 1, 2 or 3] to the remote control.
- Press and hold ENTER and press the appropriate number button 1, 2 or 3 for at least 2 seconds.
- Exit the menu with RETURN.
If the remote control setting does not match that of the unit, [DVD 1, 2 or 3] appears on the unit's display.
- Press ENTER and press the appropriate number key 1, 2 or 3 simultaneously for at least 2 seconds.
If you want to operate two units independently of each other using the same remote control, then change the remote control setting.
Remote Control

Standby/on switch
Press to switch the unit from on to standby mode or vice versa. In standby mode, the unit is still consuming a small amount of power.

DRIVE SELECT
Select the DVD, VHS or SD drive.
Direct entry using the number buttons Selection of channels, title numbers, etc.

5:05 15:15 5:005 15:015 5:0005 15:0015

Delete a function.
VHS: RESET = Reset the tape counter.

SKIP = Skip chapters, titles or pictures.

VHS: INDEX = Find the beginning of a recording.


Stop a recording or playback.
VHS: Stop jet rewind.
Press for more than 3 seconds to eject the cassette.

Select the banner and information about the programme, also in the TV Guide.


Direction buttons in the menu guide. Select ▲groups or titles.

Launch the sub-menu.
DIRECT NAVIGATOR = Launch the Title View. 35

RED button: menu guide (Profile, GUIDE, Digital TEXT, Manual Tuning)

GREEN button: menu guide (Profile, GUIDE, Digital TEXT)

Recording.


Record mode button (XP, SP, LP, EP)


Launch the ServiceDigital TEXT


Display subtitles


ENTER/OK = Select or save a setting.
◀◀ ▶▶ = Frame or slow-motion playback.


Switch the TV on and off.
Select the AV input on the TV set.
CH = Select the programme position on the TV set.
VOLUME = TV volume control.
TRACKING-LOCKPAGE

CH = Programme selection button
PAGE = Page in the electronic TV Guide.
VHS: TRACKING/V-LOCK+/- = Optimise the playback picture.


VIDEO Plus+ Record menu


Delete a title.

Select button to switch AV input between tuner, A1, A2, A3 (Front), A4 and DV.
SLOW/SEARCH

SLOW = Slow-motion playback SEARCH = Search during playback.
VHS: REW = Jet rewind

FF = Fast forward from STOP mode.
REW = Rewind
FF = Forward search during playback.

Pause a recording or playback.

Press and hold for more than 2 seconds for low-motion playback.

PLAY: Start playback.

RAM Quick View: You can increase the playback speed.

VHS: Playback or repeat playback


Check or change a Timer Recording


Return to the previous menu.
GUIDE: Launch the TV Guide.

FUNCTIONS: Launch the selection menu.


YELLOW button: menu guide (Profile, GUIDE, Digital TEXT) DVD: Dividing a recording into chapters.

MANUAL SKIP

Digital TEXT)


Timer Recording with external recording control.


Direct TV recording.


DVD: Picture and sound settings.


DVD: TIME SLIP = Select the time frame.

VHS: ← JET REW = Jet rewind to the beginning of the tape.

Front Panel
1 Standby/on switch Ⓗ/I : Press to switch the unit from on to standby mode or vice versa. In standby mode, the unit is still consuming a small amount of power. Switching this unit into standby mode does not disconnect it from the mains.
| 1 Standby/on switch | ?EJECT: Eject the cassette.OPEN/CLOSE: Open and close the disc tray. | Forward/rewindSearch during playback | 4 Channel select button |
| 5 DRIVE SELECTDrive select | 6 STOP ■ | PLAY▶ PlaybackY23T RAM Quick View | 8 [402K] ●REC: Record ●REC: Record |
| 9 S VIDEO input AV3 | 10AV3 VIDEO IN LMONC-LDO IN-RAV3 input terminal | DV input[HTAT][T72K] | 12  VHS COPY/W4 VHS COPY/W4  Copy Copy |
Display
| [Com] | Shows Timer standby or Timer Recording. | ||
| DVDSDVHS | The selected drive is being displayed. | XP, SPLP, EP | Recording mode / All on: FR modeFlexible recordings/Timer Recordings. |
| SD | The inserted medium is being shown. | D | Digital channel |
| [TCB8] | The selected drive is recording.Flashes shortly before a Timer Recording starts. | EXT-L | External-Link: A Timer Recording is being made from an external unit. |
| PLAY | The selected drive is playing. | Current time, recording/playback counter, various messages. | |
Other messages
PLEASE WAIT Please wait.
DVD 1, 2, 3 Wrong remote control code.
SETUP You are in the Setup menu.
READ Disc is being read.
No READ Disc cannot be read.
FINAL DVD is being finalized.
No CASSETTE No cassette has been inserted.
No DISC No disc has been inserted.
PROTECT Disc is write-protected.
RETURN Cancellation of a function.
JETREW A cassette is being jet-rewound.
OFF0:30 The recording time is set to 30 minutes.
REPEAT Repeat playback is on.
START A function (copying) is beginning.
COPY Copying is taking place.
STOP A function has been stopped (copying).
PROG FULL All 16 timer programme positions are full.
UNSUPPORT Disc format is not supported.
UNFORMAT Disc is unformatted.
SW-DL Software Download.
X HOLD Child protection is active.
GUIDE EPG Download
Error messages
72
Rear Panel

1 | AC IN~ = Power supplyConnection for the AC mains lead. | 2 | OPTICALDigital audio output |
| 3[brond] | HDMI AV OUTDigital audio output | 4  AUDIO OUT AUDIO OUT | Audio output, right/left channel |
| 5VIDEO OUT | Video output | 6 AV2 (EXT) AV2 (EXT) | AV2 (EXT) = 21-pin Scart terminalExternal unit connection |
7 AV1 (TV) AV1 (TV) | AV1 (TV) = 21-pin Scart terminalTV connection | 8 | S VIDEO OUTS VIDEO output terminal |
9   | COMPONENT VIDEO OUTY = Luminance signal (brightness) PB = Chrominance signal (colour difference) PR = Chrominance signal (colour difference) | ||
10 | RF OUTAerial output | 11() | RF INAerial input |
The outputs of 3, 4, 5, 8 and 9 are dedicated to modules of digital signal processing (DVD).
The video and audio outputs of 6 and 7 are dedicated to modules of digital (DVD) or analogue (VHS) signal processing.
Both groups of outputs are used for analogue and digital sources. But there are limitations, e.g.: During recording or scheduled recording on DVD, the VHS playback is only possible on outputs of 6 and 7.
For a conventional tube television, we recommend using the Scart terminal.
You retain a high-quality RGB video picture with an RGB-compatible television.
- If you want to use a progressive-capable LCD/plasma television or LCD projector, connect it to COMPONENT VIDEO OUT to get a high quality progressive video picture.
21-pin Scart terminal
The 21-pin Scart terminal transmits both input and output signals for picture and sound.
TVs equipped with the same type of terminal can be connected here.
This type of terminal is also called Peritel, Euro Connector and Euro AV.

AV1 Scart terminal (TV)
1 Audio output CH2 (R) 2 Audio input CH2 (R) 3 Audio output CH1 (L) 4 Audio ground 5 Blue ground 6 Audio input CH1 (L) 7 Blue output 8 Switching voltage 9 Green ground 10 Q Link control signal 11 Green output 12 Reserved 13 Red ground 14 Blanking ground 15 Red output / chrominance output 16 Blanking output 17 Video output ground 18 Video input ground 19 Video output / luminance output 20 Video input 21 Ground
AV2 Scart terminal (EXT)
1 Audio output CH2 (R) 2 Audio input CH2 (R) 3 Audio output CH1 (L) 4 Audio ground 5 Blue ground 6 Audio input CH1 (L) 7 Blue input 8 Switching voltage 9 Green ground 10 Reserved 11 Green input 12 Reserved 13 Red ground 14 Blanking ground 15 Red input / chrominance input 16 Blanking input 17 Video output ground 18 Video input ground 19 Video output 20 Video input / luminance input 21 Ground
Basic connections
Before connection, turn off all connected equipment and read the appropriate operating instructions.
BE SURE TO READ THE CAUTION FOR THE AC MAINS LEAD

Choose from one of the connection types A-B that suits your requirement.
Use of the supplied RF coaxial cable
To prevent interference patterns from appearing on your TV, use only the supplied RF coaxial cables when you connect this unit to your TV and aerial outlet or aerial cable and satellite receiver, as shown in connection types A-B.
- Keep the RF coaxial cables as far away as possible from other cables.
- Do not roll up the RF coaxial cables.
Connecting to a television only

Connection with 21-pin Scart cable (not included)
You can enjoy high-quality viewing by connecting the unit to an RGB compatible TV.
1 Connect the aerial to RF IN (Aerial input) of the DVD Recorder. 2 Connect RF OUT (Aerial output) of the DVD Recorder with the aerial input of the TV. 3 Connect the AV1 terminal (21-pin Scart terminal) of the DVD Recorder with the Scart input of the TV.
4 Connect the DVD Recorder and the television to the household mains socket. After completing the above connections, proceed to the Auto-Setup to tune in TV channels.
![graph TD A["Use one of the included RF coaxial cable (black or grey) to connect this unit's RF IN terminal to your aerial socket or aerial cable."] --> B["To the aerial To this unit"] B --> C["RF coaxial cable (included, grey)"] C --> D["RF in"] D --> E["Class 1 Laser Product"] E --> F["AC IN ~"] F…](/content/2026/06/1329865/images/67ccc03b579539afdf79429f8f9a24b82f313065664e7095f8dfdbd3a10875f4.jpg)
RF coaxial cable (included, black)
The RF cable cannot be used for showing pictures from the DVD Recorder. The unit must be connected by another means e.g. Scart cable to show pictures from the DVD Recorder on the television set.
Auto-Setup
Automatic setup of the unit
After being switched on for the first time, the unit proceeds with an automatic station search for digital channels. This is followed by the search for analogue channels.
- Turn on the television and select the AV input that this unit is connected to.
- Switch the unit on using the Standby/on-switch.
① DVB Auto-Setup (Tuning digital channels)

Depending on different countries or regions, the digital TV programme has its own selection of operating frequency channels, frequency bands, transmission parameters and frequencies. The unit automatically searches for all available digital stations.
You can repeat the station search again.
59
② Auto-Setup (Tuning analogue channels)

Analogue Auto-Setup (without Q Link)
The auto setup tunes in all available analogue television stations. This takes approximately 5 minutes.
![graph TD A["Download in progress.(with Q Link)"] --> B["Download in Progress. Please wait. RETURN : to cancel"] B --> C{?} C -->|Yes| D["Checking Broadcaster's data. (with Q Link)"] C -->|No| E["Checking Broadcaster's data. Please wait. RETURN : to cancel"]](/content/2026/06/1329865/images/f612ad146557881c96d72ad4ebbdcc35adcb2377644fdfe1a5e06d54fb660fb8.jpg)
Q Link Download from TV with Q Link
If your television is equipped with the Q Link feature, it will start to download TV tuning information to this unit. In order to be able to use Q Link, the unit must be connected to a TV with Q Link or a similar feature via a fully wired 21-pin Scart cable.

Checking Broadcaster's data (with Q Link)
Once the station data have been adopted from the television set, the analogue stations are sorted accordingly.
You can repeat the station search again.
Setting the date and time (if not found automatically)
If the Date and Time are not transferred via a television station, the Clock menu appears.
- Set the clock manually.
An incorrect date or time affects the programmed recording of television programmes (note summer and winter time).
3 Owner ID

You can complete the Owner ID now. To skip this step and do it later, press the RETURN button. Your DVD Recorder is now ready to use. You can later set the Owner ID in the Setup Menu.
67
• To enter the Owner ID, press ENTER. - Press ▶. To set the Owner ID now, use ☐ to enter a four-digit PIN number. Press ▲ to correct the digit. - Make sure that you will remember the PIN number (make a note of it). - Press the ENTER button to confirm. - Select [Yes] with ◀ and confirm with ENTER. - Press ▶. Enter the [Name], [House No] and [Postcode] in the same way, using ▲◀◀ - Press the ENTER button to confirm each entry. - Press the RETURN button to leave the Owner ID screen. You will now see the TV picture. Your DVD Recorder is now ready to use.

Auto-Setup for your unit is complete. The availability of stations may differ regionally. You can now select your favourite stations and store them in the required order in the profiles.
59
![graph TD A["To household mains socket"] --> B["AC IN"] B --> C["AC mains lead (included)"] C --> D["Connect only after all other connections are complete."] D --> E["To household mains socket (AC 220 V to 240 V, 50 Hz)"] E --> F["To household mains socket"] F --> G["Television's rear panel"] G --> H…](/content/2026/06/1329865/images/a67018cce8a258d8388539b20f56136afd79f00d6249818f7e7f7f7cd574ea68.jpg)
If you receive your television programme via a satellite receiver (digital/analogue), connect your DVD Recorder as shown in connection type B.
If your television supports Q Link, use a fully wired 21-pin Scart cable to connect it to the TV.
The analogue stations automatically downloaded through [Download from TV].
If your television supports RGB, set the AV1 Output to [RGB 1] or [RGB 2] in the Setup menu.
64
1 Connect the aerial to the RF IN (aerial input) and/or the dish (satellite) to the LNB IN of the external unit. 2 Connect the RF OUT (aerial output) of the external unit with the RF IN (aerial input) of the DVD Recorder. 3 Connect the RF OUT (aerial output) of the DVD Recorder with the RF IN (aerial input) of the television unit. 4 Connect the AV1 terminal (21-pin Scart terminal) of the DVD Recorder with the Scart input of the television unit. 5 Connect the external unit with a 21-pin Scart cable to the AV2 terminal of the DVD Recorder. 6 Connect the DVD Recorder, the TV and the external unit to the household mains socket.
Auto-Setup

Auto-Setup with connected Satellite Receiver and aerial
After completing the above connections, proceed to the Auto-Setup.
11
Auto-Setup with connected Satellite Receiver
Turn on the television and select the AV input that this unit is connected to. Switch on the external unit and DVD Recorder.
[Auto-Setup] follows automatically and if it ends with the note: [No stations found !].
- Select [No] with ▶ and confirm with ENTER.
- You can complete the Owner ID now. To skip this step and do it later, press the RETURN button.
67
The TV Guide does not show any information if you have connected the unit to a satellite receiver only.
The date and time are not set automatically. Set them manually.
66
An incorrect date or time affects the programmed recording of television programmes (note summer and winter time).
Your DVD Recorder is now ready to use.
- Switch the DVD Recorder to AV2 with CH◇.
You see the television picture from the external unit.
View / record satellite programmes
Press INPUT SELECT to select the input channel AV2 or put this unit in standby mode.
To record satellite programmes, refer to "VIDEO Plus+ codes for satellite receivers".
Connection with HDMI cable (not included)
The HDMI connection can be used only with units that are suited for HDMI.
1. Connect the aerial to RF IN (Aerial input) of the DVD Recorder. 2. Connect RF OUT (Aerial output) of the DVD Recorder to the aerial input of the TV. 3. Connect HDMI AV OUT of the DVD Recorder to the HDMI input of the TV.
For Q Link functions:
Connect the AV1 terminal (21-pin Scart terminal) of the DVD Recorder to the Scart input of the TV.
4. Connect the DVD Recorder and the television to the power supply system.
After completing the above connections, proceed to the Auto-Setup to tune in TV channels.
![graph TD A["To household mains socket"] --> B["AC 220 V to 240 V, 50 Hz"] B --> C["AC mains lead (included)"] C --> D["Connect only after all other connections are complete."] D --> E["HDMI cable"] E --> F["Only use fully wired HDMI showing the HDMI logo. Use cable of max. 5 m in length to avoid int…](/content/2026/06/1329865/images/bef2de340e00c2cf862be6dc7c2fe4dc3ef0c28f86d5c2c19aa40698324f4e3c.jpg)
Connection with HDMI cable (not included)
Connection to an amplifier![graph TD A["Television set"] --> B["HDMI IN"] B --> C["HDMI OUT"] C --> D["HDMI IN"] D --> E["Amplifier"] E --> F["VIDEO OUT"] F --> G["OUTPUT"] style A fill:#f9f,stroke:#333 style B fill:#ccf,stroke:#333 style C fill:#cfc,stroke:#333 style D fill:#fcc,stroke:#333 style E fill:#cff,stroke:#333 style…](/content/2026/06/1329865/images/407c15d25aea0567c75ffdb30277efdca40d3e9546efeb28a6de230020c4779a.jpg)
DVD Recorder
HDMI™ (High Definition Multimedia Interface)
If you connect the DVD Recorder to an HDMI-compatible unit, just one cable transfers a high quality digital audio and video signal without interference.
- Once an HDAVI Control compatible unit has been connected to the HDMI terminal, switch the units on and automatically selects the input channel for the DVD Recorder. Repeat the procedure if there is any change to the HDMI terminal.
The audio signal cannot be transmitted via HDMI if an externally connected unit does not support CPPM (Content Protection for Prerecorded Media), or when playing a DVD audio with copy protection. In this case, use an audio cable.
If a connected TV only supports dual-channel audio, then an audio signal with 3 or more channels is down-converted, with output through 2 audio channels.
It is not always possible to down-convert all discs.
Titles where down-converting is not possible can only be reproduced via HDMI through an amplifier which corresponds to the HDMI Ver. 1.1 standard or higher and is CPPM compatible.
Connect an amplifier complying with the HDMI Ver. 1.1 standard and adjust the setting in the [Setup] menu to [HDMI and Optical].
Now you can enjoy the full audio sound.


For HDCP (High-Bandwidth Digital Content Protection) compatible units with DVI (Digital Visual Interface) connection (e.g. PC monitors): depending on the unit, it is possible that a DVI/HDMI adapter does not reproduce the video signal perfectly. The audio signal is not transmitted in this case.
If you connect this unit with an HDMI cable to a Panasonic television set with HDAVI control function, then both units can be controlled.
If you connect this unit with an fully wired 21 pin scart cable you can use the Q Link functions to control the television and this unit. You can use both kinds of connection at the same time.
Settings for control with
HDMI and Q Link:

The following systems from other manufacturers have similar function to Q Link from Panasonic.
- Easy Link (Trademark of Philips)
- SMARTLINK (Trademark of Sony)
- DATA LOGIC (Trademark of Metz)
- Megalogic (Trademark of Grundig)
For details, refer to your television's operating instructions or consult your dealer.
A TV takes a certain time to change over the input channel for the DVD Recorder automatically. It is therefore possible that the television set does not display the playback at the start of the title. Press SKIP ◄◀ or SLOW/SEARCH ◄▶.
Control via Q Link and HDMI (HDAVI Control)
| Automatic input changeover (Easy Playback)If you start the playback function or select a menu (e.g. Direct Navigator, Timer Recording), the TV automatically switches to the input channel for the DVD Recorder.If you are recording on the DVD drive, the TV does not automatically change to the input channel. | ||
 | Direct TV recordingPress DIRECT TV REC to directly record the programme you are currently watching. You do not need to enter anything else. | |
 | HDMI | Power on linkIf you start the playback function or e.g. select the menu Direct Navigator or Timer Recording or by inserting a disc, the television set switches on and automatically selects the input channel for the DVD Recorder.If you are recording on the DVD drive, the TV does not automatically change to the input channel.TV/DVD automatic switch-onIf the TV set and DVD Recorder are switched off (in standby), both units are switched on automatically by pressing PLAY, DIRECT NAVIGATOR, GUIDE,VIDEO Plus+ or PROG/CHECK. |
 | HDMI | Power off linkIf the television set is switched off, this unit automatically switches off as well.The unit also switches off while the menu FUNCTIONS, DISPLAY or status messages are being displayed, and even when a Timer-controlled recording has been programmed or during playback.The unit does not switch off during a recording with the ●REC button, the Copying function or while a disc is being finalized. |
 | Download from TV (analogue channels only)Station transfer from television set. During [data transfer from TV], data for the station list are automatically downloaded from the TV set. The stations are stored in the same presets of the DVD Recorder as on your TV set.This unit allows for Timer Recordings using the programming function of the television (e.g. IDTV). | |
Connection to COMPONENT VIDEO terminal
The terminal can be used for INTERLACE or PROGRESSIVE output and deliver a clearer picture than S VIDEO OUT terminal.
The Q Link functions are not available with this kind of connection.
1 Connect the aerial to RF IN (Aerial input) of the DVD Recorder.
2 Connect RF OUT (Aerial output) of the DVD Recorder with the aerial input of the TV.
3 Connect the COMPONENT VIDEO OUT terminal of the unit with the COMPONENT VIDEO IN of the TV unit. Use a video cable.
Always connect terminals with the same colour.
Connect the audio cables to the corresponding audio input terminals on the TV.
4 Connect the DVD Recorder and the television to the power supply system.
After completing the above connections, proceed to the Auto-Setup.
11
![graph TD A["To the aerial"] --> B["RF coaxial cable (included, grey)"] B --> C["RF in"] D["To this unit"] --> E["RF in"] F["To household mains socket"] --> G["AC mains lead (included)"] G --> H["Connect only after all other connections are complete."] I["To household mains socket"] --> J["Television…](/content/2026/06/1329865/images/7cbaf44c64583c6d08968858c98068145fccc481302bfc145fc424933287bfaf.jpg)
Connection to COMPONENT VIDEO terminal
COMPONENT VIDEO OUT terminal
The terminals can be used for INTERLACE or PROGRESSIVE output and deliver a clearer picture than the S VIDEO OUT terminal. Connections via these terminals output the colour difference signals (PB/PR) and the brightness signal (Y) separately. Colours can be reproduced true to the original colour. The properties of the COMPONENT VIDEO input terminal are dependent on the TV or screen.

Connecting a TV with COMPONENT VIDEO input terminals
If your TV with LCD or plasma screen supports the progressive process, connect it to the COMPONENT VIDEO OUT terminals.
If you want to enjoy full progressive video, set Progressive to [On].
If the AV1 Output setting in the Setup menu is set to [RGB 1/2 (without component)], there is no output to the COMPONENT VIDEO OUT terminals.
Set this option to [Video (with component)].

If the unit is connected to the TV via the S VIDEO OUT or the AV1 terminal, output is Interlace regardless of the settings.

- Press FUNCTIONS.
- Select [To Others] with ▲ and confirm with ENTER.
- Select [Setup] with ▲ and confirm with ENTER.
- Select [Connection] with ▲[Progressive] with ▶ and confirm with ENTER.
- Select the option [On] with ▲ and confirm with ENTER.
Progressive television picture
The progressive picture aspect ratio (height to width) is set to 16:9. DVD-Video with a picture aspect ratio of 16:9 is properly displayed. However, video material with an image aspect ratio of 4:3 is shown stretched from right to left. If it is possible to adjust the picture aspect ratio on your television, select the setting [Progressive - On].
Progressive-compatible televisions (PAL)
To use progressive output, select in the setup menu [Progressive - ON] for component output, or [576p or 720p] for HDMI output. This may cause flickering of TV Guide, information banner, or subtitles display on some televisions (CRT, LCD, or plasma).

In this case, change progressive mode to OFF for component output, or select 576i or 1080i video format for HDMI output.
Connection with Video cable or S-Video cable
You can use this frequently used standard connection with the provided accessories (Video cable). Depending on the television, the connection with the S-Video cable results in a higher quality picture than the connection with an Audio/Video cable.
The Q Link functions are not available with this kind of connection.
1. Connect the aerial to RF IN (Aerial input) of the DVD Recorder. 2. Connect RF OUT (Aerial output) of the DVD Recorder with the aerial input of the TV. 3. Connect the AUDIO OUT (L-white/R-red) of the DVD Recorder with the audio of the television. Connect the VIDEO OUT or S-VIDEO OUT of the DVD Recorder with the input of the television. 4. Connect the DVD Recorder and the television to the power supply system.
After completing the above connections, proceed to the Auto-Setup to tune in TV channels.

If the unit is connected via S-Video output, select the setting S-Video (with component) in the Setup menu under [Connection] - [AV1 Output].


External units

Optical digital audio cable

L - White, R - Red
Push the jack all the way into the terminal with this side facing up.
S VIDEO-cable
The Ground Truth image displays a single, solid horizontal line. According to Rule 2 (UNDERSCORE & LINE RULES), this is a stylistic or background line, not a placeholder underscore. Therefore, the OCR result must ignore it and output nothing or only meaningful text. The provided OCR content is "____", which consists of four underscores. This is an incorrect interpretation of the line as a placeholder, violating the rule that stylistic lines must be ignored. The OCR has hallucinated underscores where none should exist based on the GT's visual context. Hence, the OCR result is inconsistent with the Ground Truth. Audio cable Audio Ca L - White R - Red
AVS VIDEO IN VIDEO IN LMOND AUDIO IN R
Audio/Video cable Video - Yellow L - White R - Red
It is not possible to copy to a VHS cassette via DV input.
For all connections described:
Before you connect cables, make sure that all units are switched off. Switch on the units after you have connected the cables.
Connecting a digital amplifier or a digital system component
If an amplifier equipped with Dolby Digital, DTS or an MPEG-decoder is connected, a DVD-Video-Disc with multi-channel surround sound can be played back.
- Connect an amplifier with a Dolby Digital, DTS or an MPEG decoder. • Use an Optical digital audio cable.
- Change the [Digital Audio Output] setting in the Setup menu [Sound] according to your connected digital amplifier.
- You cannot use DTS Digital Surround decoders that are not suitable for DVD.

If the unit is connected to the television set with an HDMI cable and you are using the DIGITAL AUDIO OUT (Optical) for audio output, change the setting [Digital Audio Output] to [Optical Only] in the Setup menu.

Connecting an analogue amplifier or an analogue system component
In order to enjoy stereo or Dolby Pro Logic, connect a corresponding amplifier or an analogue audio component.
- Connect the AUDIO OUT (L/R) output, for example, to a Dolby Pro Logic amplifier.
- Connect the audio cable according to the colors and markings on the connection terminal (white/L, red/R).
Connect this unit to a device with a DTS decoder in order to be able to play DVDs with this symbol.
This unit can record and play back stereo sound in Dolby Digital (dual channel). DVD-Vs can be played back in multi-channel sound.
Connection to AV3 (e.g., camcorder)
If the audio output of the other unit is mono, connect it to the L/MONO terminal. Both the left and right channels will be recorded.
- Select one of the two connection options.
The connection with an S-Video cable and audio cable (L/R) delivers the best quality.
Connection to DV input
DV means digital video and is a video standard.
You can connect a DV-compatible camcorder to the DVD Recorder. The DV IN connection is available for this purpose.
The DVD Recorder cannot be controlled via an external unit that is connected to the DV IN terminal.
Before you connect the DV cable, make sure that all units are switched off. After you have connected the cable, switch on the units.
- Connect the DV output of the DV unit (e.g., digital camcorder) to the DV input terminal of the DVD Recorder. Use a DV cable. • After you have connected the cable, switch on both units.
The DV input of this unit is only intended for DV units. For example, a computer cannot be connected. Some DV units do not allow for proper input of the picture and sound signal.
Status displays

Status display of other media


Screen information
Every time you change the station, a status display and banner appear automatically. They disappear again after a short time.
You can change how long they appear for in the setup menu.
63
- Press ① to show the screen information again.
- The display changes every time a button is pressed, depending on the function, e.g. PLAY, REC or REC PLAY.
- Also press ⓘ to leave the display.
Status displays
1: Current medium 2: Current recording playback status and remaining time 3: Current station position. DVB shows a digital station. 4: Current station 5: Status display and recording status of other media.
| REC Record | Fast forward (5 stages) | Rewind (5 stages) |
| PAUSE Pause | Slow motion (5 stages) | Slow-motion rewind (5 stages) |
| PLAY Playback | PLAY/x1.3 Quick View | Pause playback |
You can display detailed information only during playback or recording (VHS only recording). They are not recorded.
6: Current date and time 7: Available recording time and recording mode: e.g. 0:50 SP shows 50 minutes in SP mode. 8: Title number: shows the recording mode and the elapsed play time of the title. VHS: Current tape counter. 9: Title number: shows the recording mode and the recording time of the title.
VHS screen information
- Press (during playback press) the display switches between tape counter and remaining tape time
| VHS | Current medium |
| L R SP | LR, L, R: The soundtrack can be changed with the DISPLAY button. SP: Selected recording mode. |
| REMAIN: 0:24 | Remaining tape time: The display depends on the correct setting of the tape length. |
| ▷ 0:21.29 | Tape counter: It is automatically set to 0:00.00 when a video cassette is inserted. Use */ RESET to reset the counter to 0:00.00. |
| RD 0:21.29 | Repeat |


When selecting a radio station, or if the banner shows [No Signal], [Bad Signal], [Encrypted], or [No Service], the banner cannot be dismissed and will be included in any ongoing recording.

The banner displays information about the current (NOW) and next (NEXT) program. It cannot be selected during playback or recording. Banners are only available for digital channels.
- Press ⓘ to display the banner.
- Use ◀ to switch between NOW and NEXT.
- Use CH ◇ to select available channels. The TV picture of the selected channel appears with the corresponding banner.
- Use ▲▼ to select the banner of available channels. The TV picture does not change to the corresponding channel. The current channel is highlighted in yellow.
- Press ENTER to watch the selected channel.
Additional information about a program
For these programs, ⓘ appears in the banner.
- Select the detailed program information with ① This information remains visible until you press ① again.
Change Category
- Press ① to display the banner
- Press the BLUE button to change the category.
| 1 | Programme position and name of the current station. |
| 2 | Title and airtime of the current programme. |
| 3 | Signal quality of the current station: No signal;60Bad signal. No service = a programme is not transmitted at the moment. |
| 4 | The current time. |
| 5 | Selected Category: All Service, TV, Radio, Profile 1-450 |
| 6 | Press theBLUEbutton to change the category. |
| 7 | Detailed information on the current programme. |
| 8 | NOW: Information on the current programme.NEXT: Information on the next programme. |
| 9 | Programme is broadcast in multi-channel sound.PressDISPLAY. Select Audio - [DVD Multi Audio].71 |
| 10 | Station with an encrypted signal. |
No banners with information are displayed for analog channels.
- Press ⓘ to launch a banner to change the profile.
- Press the BLUE button to change the profile. The banner disappears after 5 seconds.
Digital TEXT

Digital TEXT is a digital teletext service provided by various broadcast organisations (not for analogue channels). Stations that offer the Digital TEXT can be identified by the [TXT] in the Banner.
- Press TEXT to launch the Digital TEXT. It may take some time for the information to load and display. Please be patient.
- Use ▲ page up and down or use numeric buttons to select a specific page number. The features depend on the respective station.
- The coloured buttons allow you to quickly access certain topic areas and the navigation to the Digital TEXT pages. The features depend on the respective station.
- Press TEXT to exit the Digital TEXT service.
Digital Teletext cannot be recorded. When subtitle is on or additional information in the banner is displayed, Digital Teletext does not work. During a recording the Digital TEXT function is not possible.
Subtitles

If the programme provider of digital programmes offers subtitles, these can be displayed with STTL. The preset subtitle language can be changed in the Setup menu.
63
- Press STTL to show or conceal subtitles.
| DVD-RAM: DVD Video Recording format | |
| DVD-RAMRAM4.7 | 4.7 GB 12 cm9.4 GB 12 cm2.8 GB 8 cmrewritable |
| DVD-R: DVD-Video format+R : +VR format | |
| DVD-R4.7 R4.7 | DVD-R4.7 GB 12 cm1.4 GB 8 cm recordable |
| -- | +R4.7 GB 12 cm recordable |
| DVD-RW : DVD-Video format+RW : +VR format | ||
| DVD-RW(V)4.7 GB, 12 cm1.4 GB, 8 cmrewritable | -RW(V) | |
| -- | +RW4.7 GB, 12 cm1.4 GB, 8 cmrewritable | +RW |
| DVD-R DL: DVD-Video format+R DL : +VR format | |
| DVD-R DL8.5 GB 12 cm, writable | -R DL |
| - - +R DL8.5 GB 12 cm, writable | +R DL |
Playback and recording discs
DVD-RAM
The DVD-RAM can be compared with the hard disc and can be written to 100,000 times on average. The disc can only be played on DVD-RAM-compatible players.
The recording occurs in DVD Video Recording format (VR). Movies and parts of movies can be edited and deleted. The deletion of movies frees previously used storage space.
The creation of playlists does not require any additional storage space.
Dual-channel sound and 16:9 format are supported in addition to the TIME SLIP function.
DVD Video Recording format (VR)
This format enables recording and playback.
Programmes limited to "one-time recording" can be recorded to a CPRM-compatible disc.
You can record to a CPRM-compatible DVD-RAM.
Playback is only possible with a compatible DVD player. Use a DVD-RAM to record in DVD Video Recording format.
DVD-R/+R (Recordable)
The DVD-R/+R can only be recorded once. Movies or parts of them can be deleted during processing, but storage space is still taken up and cannot be used for other movies.
Through finalization, the DVD-R/+R becomes DVD-V that can be played on other units.
| DVD-R/+R/-R DL/+R DL R +R -R DL +R DL | Finalization On the recording unit | → | DVD VIDEO | 69 |
| The movies can no longer be edited after finalization. | ||||
| Recording with this recorder | → | Playback on another unit | ||
| Recording with another unit | → | Playback on this recorder | ||
DVD-RW(V)/+RW (Rewritable)
DVD-RW(V)/+RW is rewritable and erasable. You must format the disc to be able to rewrite it again. Through finalization, the DVD-RW(V) becomes a DVD-V that can be played on other units. A finalized DVD-RW(V) can be reformatted and rewritten.
Formatting deletes all data!
A +RW becomes a DVD-V by creating a Top Menu.
| DVD-RW(V) → Finalization → DVD - Formatting → DVD-RW(V) -RW(V) On the recording unit VIDEO -RW(V) The movies can no longer be edited after finalization. | ||
| Recording with this recorder | →→→ | Playback on another unit |
| Recording with another unit | →→→ | Playback on this recorder |
DVD-R DL/+R DL (Double Layer DVD/Dual Layer DVD)
The data are saved on two parallel layers. They have more space available. If the laser changes layers during playback, brief interruptions to the image and sound may occur.
You cannot switch layers during a recording. The recording stops when the storage space on the first layer is full. You must close the first layer to be able to record on the second layer.

DVD-Video format (V)
This recording format is the standard DVD-Video. Digital programmes that are limited to "one-time recording" cannot be recorded. Not for recording and playback of still pictures.
+VR format
Digital programmes limited to "one-time recording" cannot be recorded. Not for recording and playback of still pictures.
| [IMAGE] | DVD-RW(DVD-VR format)12 cm/ 8 cm, playable only | -RW(VR) |
| [IMAGE] | DVD-Video12 cm/ 8 cm, playable only | DVD-V |
| [IMAGE] | DVD-Audio12 cm/ 8 cm, playable only | DVD-A |
| [IMAGE] | CDCD-R/RW12 cm/ 8 cm, playable only | CD |
| [IMAGE] | Video CDCD-R/RW12 cm/ 8 cm, playable only | VCD |
Regional codes


DVD-Video only
DVD-Videos with the regional code 2 or ALL can be played with this unit. The code is listed on the backside of the unit. England and Continental Europe: 2.

Only play round discs.

Do not touch the disc recording surface.
Cartridge discs

With active write-protection, you can neither record to the disc nor edit or delete content.

Cartridge write-protection
Remove the 8-cm disc from the cartridge before using it with this unit.

Playback discs
A DVD-RW that was recorded on another DVD recorder is played back in DVD-RW (VR) format on this unit. Programmes limited on "one-time recording" can be played back. If you format the disc, you can record and play it in DVD-Video format with this unit.
High-quality video and music discs.
Digital-quality music discs. Playback in stereo.
Music and audio recordings, music in MP3 format, pictures in JPEG and TIFF format.
Music and video recordings.
SVCD in compliance with IEC62107.
MP3 JPEG You can play MP3 and JPEG/TIFF data from a finalized CD-R, CD-RW or DVD-R. Depending on the recording conditions, playback may nonetheless be faulty.
Some DVD-Audio discs with multi-channel sound are designed by the manufacturer to prevent inter-mixing on the entire disc or at certain places. Depending on the disc type, the regional code and the recording conditions, it may not be possible to play the discs in some cases.
See the jewel case for more information.
Non playable discs
- 2.6 GB and 5.2 GB DVD-RAM, 12 cm.
- 3.95 GB and 4.7 GB DVD-R for Authoring.
- DVD-R that was recorded in DVD Video Recording format (VR).
- DVD-R (V), DVD-R DL, DVD-RW(V), +R, +R DL that was recorded on another unit and not finalized.
- Blu-ray, DVD-ROM, +R (8 cm), CD-ROM, CDV, CD-G, photo CD, CVD, SACD, MV disc, PD, "Chaoji VCD" that can be purchased in stores, including CVD, DVCD and SVCD that are not IEC62107-compliant, etc.
Handling discs
If the surface of a disc, which has no Cartridge or was removed from one, is scratched, dirty, dusty or has finger prints, playback or processing can be impaired. Such impairments can also occur when the disc is placed back in the Cartridge.
Note: Only write on the label side of the disc. Use a soft, oil-based felt-tip pen. Do not use a ball-point pen or any other hard writing instrument. Do not affix stickers or labels to the disc. When not in use, put the disc in its case or Cartridge.
Cleaning the DVD-RAM
Clean the disc with a special DVD-RAM cleaner (optional) and read the cleaner instructions thoroughly before use. Bad scratches and stubborn dirt may not be able to be removed so that recording, editing or playback is still compromised even after cleaning. The disc should then no longer be used.
Do not use benzine, alcohol, water, cleaning sprays, household cleaners or other solvents.
DVD lens cleaner (RP-CL720E)
Compatible models: Only for Panasonic's DVD recorders.
Do NOT use this cleaner with any other Panasonic DVD products or with the DVD products of any other companies since doing so may damage the products.
Cleaning DVD-Videos, Video-CDs and CDs
Wipe with a moist and then with a dry cloth.
SD Memory Card miniSD™Card MultimediaCard
SD
8 MB to 2 GB (Maximum) Pictures
Inserting the storage card


Removing the storage card


Write-protection

Use an appropriate adapter for miniSD™ cards.

Do not touch the memory card contacts.
Use an SD card for playback and transfer (copying) pictures taken for example with a Digital Camera.
If the SD Memory Card was formatted with another unit, under certain circumstances you may possibly not be able to use it with this unit.
In this case, reformat the card with this unit.
Caution! All saved data are deleted during formatting.
The usable memory can deviate from the card capacity.
Inserting the storage card
- Opening the cover. Press the protruding section to open the cover to the slot.
- Press on the centre of the card until it clicks into place. Insert the card label up with the cut-off corner on the right.
Removing the storage card
- Press on the centre of the card. Pull it straight out.
- Closing the cover. Press down.
Only insert or remove the SD card after turning the unit off.
When the card indicator SD on the unit's display is flashing, the card is being read from or written to. Do not turn off the unit or remove the card.
Such action may result in malfunction or loss of the card's contents.
When the write-protection device is activated, you can neither record nor edit or delete the contents of the SD Card.
This unit supports SD Memory Cards that are formatted with FAT 12 and FAT 16 systems (based on SD Memory Card spec.).
Additional information is available on the Internet
http://panasonic.co.jp/pavc/global/cs
Keep the small memory cards such as the SD Memory Card out of reach of children. If swallowed, seek medical advice immediately.
Insert with label facing upwards. In the case of double-sided discs, the label of the side that you want to play should be facing upwards.

Insert a Cartridge disc in the direction of the arrow, label facing upwards.

Preparation
- Turn on the television and select the AV input that this unit is connected to.
- Switch on the DVD Recorder.
Press OPEN/CLOSE ▲ on the unit to open the disc tray.
Insert a disc in the disc tray and close it.
It may take some time to read the disc!

Playback
- Press PLAY ▶ to start playback. Playback begins with the last title recorded.
RAM -R -R DL -RW(V) +R +R DL +RW Disc playback stops when a Timer Recording starts.
Playback of a selected title
- During playback, use the number buttons to select the desired title, chapter or piece and confirm with ENTER. DVD-A When the screen saver is shown, you can enter a group number. On some discs, this function is only available when playback stops.
Direct input via the number buttons
| 5:05 | 15:15 |
| 5:005 | 15:015 |
| 5:0005 | 15:0015 |
Playback starts automatically
DVD-A DVD-V VCD
Playback always starts at the beginning of the disc. If the disc has its own disc menu, then this is displayed. The operation of the disc menu depends on the inserted disc.
Due to the programme structure determined by the manufacturer, all described functions may not be available.
- In the case of VCD, use the number buttons to select the number of the title.
- In the case of DVD-A/DVD-V, use the number buttons to select a title and confirm with ENTER.
Use the following buttons to launch the disc menu again:
DVD-V: SUB MENU, DVD-A: DIRECT NAVIGATOR, VCD: RETURN
If ⊙ appears on the television unit, the procedure is interrupted by the unit or the disc.

Selecting programmes/titles for playback
Use the DIRECT NAVIGATOR button to launch the menu during playback, recording and in STOP mode.
- Press DIRECT NAVIGATOR.
- Select the desired title with ▲ and confirm with ENTER. Playback starts.
- Press RETURN to exit the menu. You can select other pages with SKIP ◀ Previous or ▶ Next.

Auto finalize
-R -RW(V) +R -R DL +R DL
Auto finalization is always offered before an unfinalized disc is ejected. You can only play an unfinalized disc on this DVD Recorder.
- Press OPEN/CLOSE ▲ on the unit.
- Press REC on the unit to start the finalization. • After successful finalization, the disc is ejected automatically. It can now be played on any DVD unit.
- If you do not want to finalize the disc, press OPEN/CLOSE ▲ on the unit again.

Pausing playback
- Press PAUSE II to pause playback.
- Press PAUSE II again to resume playback.

Stopping playback
- Press STOP ■. Playback stops and the television picture appears.
- During playback of DVD-A, DVD-V, VCD and CD, press STOP ■ twice to return to the television picture.
Saving the playback position
- Press STOP ■ during playback. The unit saves the position. The position is deleted if you switch off the unit.
- Press PLAY ▶ to resume playback from the saved position.
- To cancel this function, press STOP ■ several times. This function is not available if playback was started from DIRECT NAVIGATOR or from Playlists.
SLOW/SEARCH

Slow-motion playback
Not CD
- Press SLOW/SEARCH ←→ PAUSE mode. The speed can be controlled in 5 levels. With some disc formats, the PAUSE function is switched on after 5 minutes.
- Press PLAY ▶ to resume normal playback.
VCD Forwards only.
MOVDA pictures only.
SLOW/SEARCH

Fast forward
- Press SLOW/SEARCH ◀ during playback. Each time the button is pushed, the fast forward speed increases by one level up to a maximum of five levels. Max Run/Run levels.
- Press PLAY▶ to resume playback. The sound is only output at the first fast forward speed. With DVD-Audio (except for moving pictures), CDs and MP3s, the sound is output at all fast forward speeds.
CREATE
CHAPTER
Dividing a recording into chapters
RAM
- Press CREATE CHAPTER during playback. During playback, press SKIP or SKIP skip a chapter.


Skipping
- SKIPINDEX^* - Press SKIP ◀◀▶ during playback or PAUSE mode to skip chapters, titles or pictures.
MANUAL SKIP
Not CD

MANUAL SKIP
- Press MANUAL SKIP during playback. Playback jumps forward approx. 30 seconds.
Frame playback
Not CD
- Press ◀InRAUSE mode Each time the button is pressed, the next or the previous frame is displayed.
- Press PLAY▶ to resume playback.
vcd Forwards only.
Mo DVD pictures only.


TIME SLIP
Not DVD-V DVD-A VCD CD
- Press TIME SLIP during playback.
- Use ▲b select the time span by which playback is to jump forward or backward. Each time the button is pressed, the time span increases or decreases in minute increments. For recordings that are longer than 10 minutes, the time span increases or decreases in 10-minute increments when the button is held down longer.
- Press ENTER to confirm the selected time.
Delayed playback
RAM
Playback can be started while the unit is still recording. You can watch the recording without stopping the current recording.
- Press STOP ■ to end playback. • After 2 seconds, press STOP ■ again to stop the recording. If a Timer Recording is to be stopped, use ◀ to select [Stop Recording] and confirm with ENTER.

Quick View (PLAY/x1.3)
RAM
You can increase the playback speed without negative effects on the sound.
- Press and hold PLAY▶ during playback.
- Press PLAY▶ again to return to normal speed.
With a digital connection, playback is in PCM.
Quick View is paused if you press PAUSE II or the playback of a programme begins, which was not recorded with Dolby Digital. Quick View does not function during simultaneous recording and playback in XP or FR mode.

Simultaneous recording and playback
You can play a different title during the current recording.
Recording to DVD-RAM - Playback from DVD-RAM
- Press DIRECT NAVIGATOR during the recording or Timer Recording. The title view appears.
- Select a title with ▲ and confirm with ENTER. Playback of the selected title begins.
- Use STOP ■ to end playback. Playback during recording standby Ⓐ does not affect Timer Recordings. Recording begins at the programmed time.
Recording to DVD - Playback from VHS
- Select the VHS drive with DRIVE SELECT.
- Select PLAY ▶ to start playback.
- Select STOP ■ to end playback.
Recording to VHS - Playback from DVD
- Select the DVD drive with DRIVE SELECT.
- Select DIRECT NAVIGATOR.
- Select a title with ▲ and confirm with ENTER. Playback of the selected title starts.
- Select STOP ■ to end playback.
Changing the audio channel

For disc formats DVD-A, DVD-V
- Press DISPLAY during playback.
- Depending on the disc, select the audio channel or the sound track. LR => L => R

The tape automatically rewinds when the end is reached. This function is not available during a Timer Recording.
Preparation
- Switch on the DVD Recorder and use DRIVE SELECT to select the VHS drive.
- Insert a recorded video cassette.

Playing a video cassette
- Press PLAY ▶ to start playback.
Playback starts automatically if a video cassette was inserted and its write-protection strip was removed.
Repeat playback
The video recorder repeats the recording until the end is reached.
- Press PLAY ▶ for more than 5 seconds. R ▶ and the tape play time or remaining tape play time appears on the screen.

Stopping playback
- Press STOP

Pausing playback
- Press PAUSE II during playback.
Press PAUSE II again to resume playback.
Slow-motion playback during playback
- Press PAUSE II for more than 2 seconds.
- Press PLAY▶ to resume playback.
Slow-motion playback is automatically cancelled after 10 minutes.
Frame playback during playback
- Press PAUSE II.
- Press PLAY▶ to resume playback.
Frame playback is automatically cancelled after 5 minutes.
SLOW/SEARCH


Forwards ▶ or backwards ◀ search
- Press ▶ or ◀ during playback.
Press the button twice (JET SEARCH) to increase the search speed. If you press and hold the button, the search starts for the length that the button is pressed.
- Press PLAY▶ to resume playback.
The forwards/backwards search is cancelled after 10 minutes.
FF/REW Fast forward / ◀ Jet rewind
- In STOP mode, press ▶ or ◀.
- Press STOP ■ to end the forward/rewind function.
JET REW
To quickly rewind to the beginning of the cassette.
Approx. 50 seconds for a E180 cassette.
Depending on the video cassette or the operating condition, the rewind speed may vary.
If the tape rewinds to the beginning, the counter is reset to 0:00.00.


VHS Index Search System (VISS)
This unit records special index signals to the cassette tape for each recording. The index search function uses these signals to quickly find the beginning of the desired recording. Up to 20 index signals can be used.
- Press INDEX during playback or in STOP mode.
▶ tape forwards / ▶ tape rewinds. If an index signal was found, the unit automatically begins playback. With each push of the button, the number of jumps is increased.
- Press STOP ■ to end the search.
If the index signals are too close together, the feature may fail. The recordings should be at least 5 minutes long.
S-VHS Quasi Playback (SQPB)
It is possible to play cassettes that were recorded on an S-VHS unit. The picture quality is the same as a VHS recording. Depending on the video tape used, slight picture distortions may occur.
An S-VHS recording is not possible with this unit.
Manual tracking
The unit sets tracking automatically. If a cassette was recorded on another unit, it may be necessary to set tracking manually.

The picture shows interference or is blurred during playback.
- During normal playback or in slow motion, press TRACKING/V-LOCK +/- until the blurriness disappears. If freeze frames are blurry, first switch the unit to slow motion and then adjust the tracking. Tracking cannot be controlled on some video cassettes. This does not indicate functional problems.
Automatic tracking
- Press TRACKING/V-LOCK + and - at the same time to return to automatic tracking. On some TVs, the picture can move up or down when special playback functions are used. This does not indicate functional problems.
Handling video cassettes
If the video cassette is not in use, remove it from the unit and store it in its jacket. Avoid recording on the same tape section multiple times in order to avoid wearing out the video tape prematurely.
Carefully insert the cassette into the video recorder to avoid damage.
Do not expose the video cassette to high humidity, temperature or dust particles. Do not store the video cassette near magnetic waves, such as television sets.
Do not use defective cassettes and do not try to repair them.
Do not open the housing or the protective flap on the front side of the cassette and do not touch the tape.
Use high-quality name-brand cassettes, such as those made by Panasonic.
When playing cassettes recorded on another VHS-Recorder, there may be a slight decrease in picture quality.

Write-protecting cassettes
Remove the write-protection tab to protect cassettes from accidentally being erased. If you want to record to a protected cassette, cover the gap with adhesive tape.
Cleaning video heads
Use a cleaning tape to clean the video heads.
| Maximum number of recordable titles | |
| RAM -R -RW(V) -R DL | +R +RW +R DL |
| 99 | 49 |
Programmes in 16:9 format are recorded in 4:3 format.
16:9 format is used to record to DVD-RAM.
Titles in PAL or NTSC format can be displayed on the following TV sets:
| TV type | Disc | Yes/No |
| Multi system TV | PAL | Yes |
| NTSC | Yes | |
| NTSC-TV | PAL | No |
| NTSC | Yes | |
| PAL-TV | PAL | Yes |
| NTSC | Yes (PAL60) |
Before recording
You can record to DVD-RAM, DVD-R, DVD-RW(V), -R DL, +R DL, +R or +RW with this unit. DVD-R/-RW(V) is the most common medium.
DVD-Video format is used to record to discs. The format is compatible with most DVD-Video players and DVD-ROM drives in computers.
Disc protection
Protect your recordings from accidental deletion or overwriting.
Title: 44 Pictures: 44 Recordings: 36 The entire disc: 68
If you activated write-protection, remove it before processing.
Conventional DVD-Vs are usually equipped with copy protection and cannot be copied.
CPRM (Content Protection for Recordable Media)
RAM
This unit is compatible with the CPRM copy-protection system for recordable media. When using a CPRM-compatible disc, a programme can be recorded once.
Programmes broadcast with this copy-protection system cannot be recorded to DVD-R or 2.8 GB DVD-RAM.
Formatting
68
If using an unformatted disc, you must format it before the first recording. Formatting prepares the media, such as a recordable DVD-RAM, for recording.
All data is irreversibly erased.
For recording
The recording is saved to free areas on the disc. If there is no more space left on the disc, you must delete recordings or use a new disc.
Continuous recording or playback of both sides of a double-sided disc is not possible. After the end of the recording, the unit needs approx. 30 seconds to record data for recording management.
Discs suitable for recording
| Rewritable | Writable | |||||
| RAM | -RW(V) | +RW | -R +R | -R DL | +R DL | |
| x2 | x1 | x2.4 | x1 | x2.4 | x4 | x2.4 |
| x3 | x2 | x4 | x4 | x4 | ||
| x5 | x4 | x8* | x8 | x8 | ||
| x6 | x16 | x16 | ||||
* Playback only
Under certain circumstances, digital sound signals may not be recorded in their original format. Digital programmes limited to "one-time recording" can only be recorded to 12-cm DVD-RAM.

* Only if Recording time in EP mode is set to [EP (6 Hours)] in the Setup menu. 61
Recording a 90-minute title to a disc with 4.7 GB of storage space.

It is not possible to record a 90-minute title in XP mode.
The available storage space is used optimally in FR mode. The title is recorded in the best possible quality.
You cannot record to DVD and VHS at the same time.
DVD: Insert a disc.
If you activated write-protection, cancel it.
RAM
VHS: Insert a video cassette with an intact write-protection tab.
65
- Press FUNCTIONS.
- In the Setup menu, select the appropriate tape length under VHS.
- Confirm with ENTER.
- Press RETURN several times, in order to return to the television picture.
- Select the DVD or VHS drive with DRIVE SELECT.

Record
- Press ●REC to start a recording.
After the recording is complete, it takes some time for the unit to process the unit control information.

Pause the recording
- Press PAUSE II to pause the recording. If the recording is paused for more than 5 minutes, the unit switches to STOP mode.
- Press PAUSE II again or ● REC to resume recording.
The title is not divided.
Approx. recording times in hours
| DVD-RAM | -R,-RW+R,+RW | ||
| 4.7 GB | 9.4 GB | 4.7 GB | |
| XP | 1 | 2 | 1 |
| SP | 2 | 4 | 2 |
| LP | 4 | 8 | 4 |
| EP: 6 h | 6 | 12 | 6 |
| EP: 8 h | 8 | 16 | 8 |
Approx. recording times in hours
| -R DL+R DL8.5 GB | |||
| Total | 1th Layer | 2nd Layer | |
| XP | 1:45 | 0:55 | 0:50 |
| SP | 3:30 | 1:50 | 1:40 |
| LP | 7:00 | 3:40 | 3:20 |
| EP: 6h | 10:45 | 5:30 | 5:15 |
| EP: 8h | 14:15 | 7:25 | 6:50 |
It is not possible to record continuously from the first layer to the second layer.
Recording time for E-240 cassettes
SP-Normal mode: approx. 4 hrs.
LP-Long-play mode: approx. 8 hrs.
EP-Extra long-play mode: approx. 12 hrs.
Use SP if you value a high-quality picture.
DVD recording of TV programmes
- Select the station with CH ◇ or the number buttons.
- Select the recording mode with REC MODE. Switch between SP, LP, EP and XP with each push of the button.
- Press REC to start the recording.
- Select STOP ■ to stop the recording. If you resume recording, a new title will be created.
- Press • REC again to resume recording. You can play VHS cassettes while recording. The recording to DVD is not impaired.
REC MODE
Changing the recording mode
- Press REC MODE in PAUSE or STOP mode. Switch between SP, LP, EP and XP (XP only with DVD) each time the button is pressed. The material is recorded as a separate title with each switch.
RAM With the [EP mode (8Hours)] setting, playback on DVD-RAM-compatible DVD players may not be possible.
Select [EP mode (6Hours)].
61
VHS recording of TV programmes
- Select the station with CH or the number buttons.
- Select the tape speed with REC MODE. Switch between SP, LP and EP each time the button is pressed.
- Press REC to start the recording.
- Select STOP ■ to stop the recording.
- Press • REC again to resume recording. You can playback discs while recording. The recordings to VHS are not impaired. When using an S-VHS cassette, the recording is in conventional VHS.
Timer Recording with the television set
If your television set is equipped with the Q Link function and the possibility of programming with Timer Recording, then you can do a Timer Recording with the television set. To do so, connect the DVD Recorder with a fully wired 21-pin Scart cable to the television set.
- Program the Timer Recording on your television set.
- Press DRIVE SELECT on the DVD Recorder to select the HDD or DVD drive.
- Switch the DVD Recorder to the Standby mode. The television set controls the beginning and end of the recording.
- Press STOP ■ to end the recording.
The recording will not start if the DVD Recorder is in Timer or EXT LINK standby. If several Timer Recordings follow on in quick succession, they are recorded as one title.
Specifying a time as the recording duration
This function is not available for Timer Recordings.
- Press • REC on the unit during recording. The recording time changes each time the button is pressed on the unit display:
OFF → 0:30 → 1:00 → 3:30 2:00 3:00 4:00 OFF
- Press STOP ■. The recording is paused and the time setting is deleted.
The unit switches itself off at the end of the recording if no functions are being executed on another drive.
DVD: This function is not possible with Flexible Rec. If the channel or recording mode (XP, SP, LP, EP) is changed while recording is paused, the time is deleted.
VHS: If the tape speed is changed during the recording, a slight picture distortion will occur at that point.
DVD playback during recording
RAM
During the recording, you can play back from the beginning of the programme.
- Press PLAY▶ during recording or Timer Recording
At least 2 seconds must have elapsed since the beginning of the recording.

Direct TV recording
If your TV is equipped with Q Link, you can record a TV programme that you are currently watching. Other settings are not necessary. The recorder automatically switches to the appropriate station.
- Press DIRECT TV REC for 3 seconds. Recording begins.
- Press STOP ■ to stop the recording.
S VIDEO-cable


Audio/Video cable Video - Yellow L - White R - Red
Recording from an external unit, e.g. a camera
- Connect the external unit to the AV3 input terminal on the front side of the unit.
- Select one of the two connection options.
The S VIDEO-cable and audio cable (L/R) connection delivers the best quality.
You cannot receive signals from PCs with this unit.
Recording to VHS: Insert a video cassette with an intact write-protection tab.
- Select the VHS drive with DRIVE SELECT.
- Select the recording mode with REC MODE.
- In STOP mode, use INPUT SELECT to select input channel AV3.
- Press PLAY▶.
- At the point where you wish to start recording press PAUSE II.
- Press ● REC.
- Start playback on the external unit.
- Then press PAUSE II to start the recording.
- Use STOP ■ to stop the recording.
Recording to DVD: Insert a recordable disc.
If you activated the write-protection, cancel it.
RAM
- Select the DVD drive with DRIVE SELECT.
- Select the recording mode with REC MODE.
- In STOP mode, use INPUT SELECT to select input channel AV3.
- Start playback on the external unit.
- Press ● REC at the point where you want to start the recording.
- Use STOP ■ to stop the recording.
Selecting the sound track to record for programmes with dual-channel sound Not RAM
Analogue channels
- Before recording, select Sound setting Bilingual Audio Selection [M1] or [M2] in the Setup menu.
Select [M1] or [M2] on an external unit before recording.
- If the output signal of the external unit is an NTSC signal, set the TV System to [NTSC] in the Setup menu.
Digital channels
- Press DISPLAY and select Audio setting [Multi Audio].
Recording in dual-channel audio
On DVD-RAM, both channels of a programme in dual-channel sound are recorded.
Use DISPLAY to switch between the two recorded sound tracks.


You can access the main functions via FUNCTIONS.
The illustrations show DVD-RAM menus. The menu entries may differ depending on the disc or the medium.
- Press FUNCTIONS. During Recording or Timer Recording, some menus have a grey background and cannot be selected.
- Select a menu with ▲ and confirm with ENTER.
- Select the following page with ▲▼ [To Others] and confirm with ENTER. Press RETURN to return to the first page.
- Press FUNCTIONS to exit the selection menu.
| Playback | DIRECT NAVIGATOR menu | 35 |
| Recording | Timer programming in the Timer Recording menu | 42 |
| Delete | DELETE Navigator | 44 |
| Copy | Copy menu | 45 |
| TV Guide | TV Guide menu | 49 |
| VIDEO Plus+ Record | VIDEO Plus+ Record menu | 52 |
| Playlists | Playlists menu | 54 |
| Copy All Pictures | Copy pictures (only for SD card) | 57 |
| Flexible Rec | Record in FR-Modus | 58 |
| DV Auto Rec | Record the DV signal | 58 |
| Setup | Change the unit setup | 59 |
| DVD Management | Format and finalize discs, write-protection | 68 |
| Card Management | Format SD cards | 69 |
The FUNCTIONS menu cannot be launched during playback.
Stop playback with STOP ■

TAB: Select submenu with .
SELECT: Select setting or option.
CHANGE: Change the option

ENTER: Select or save a setting.
RETURN: Back to the previous screen. Exit a menu.
Notes on the menus
Selecting a title or chapter
- Select a title or chapter with ▲ or ▶. 0–9
Selecting other pages
- Select [Previous] or [Next] with ▲ and confirm with ENTER.
Cancelling a function
- Depending on the specific entry, select [No] or [Cancel] with ▲ and confirm with ENTER.
You can also cancel a function with RETURN.
Starting playback
- Start playback of the selected title or chapter with ENTER.
For faster processing
In addition to fast forward, slow motion playback and frame playback, there are other functions available for faster processing.
Jump to the beginning/end of a title/chapter with PAUSE II and SKIP
Find the position for a marking with SKIP ◀◀▶, SLOW/SEARCH ◀◀▶, TIME SLIP, MANUAL SKIP or ◀◀
You can jump between set markers with SKIP
Editing several elements
You can process several chapters or titles at the same time.
Functions such as Copy, Set up Protection or Delete are marked with the symbol ▼.
- Select the desired title with ▲▼ and press PAUSE II. A check appears. Repeat this process to select other titles.
- Press PAUSE III again to clear the selection.
![Enter Name Terra X_1 Delete Add to List List Names Set SELECT ENTER RETURN 1 2 3 & 5 6 88 D A B C a b c + - . D E F d e f / = % G H I g h i # $ & J K L / k l < > # M N O m n o [ ] - P Q R S P q r s ( / T U V t u v { } w X y z w x y z i . ? ! ' : ' A Space](/content/2026/06/1329865/images/25f28e70463c4bb7a2dff775394322b97683e6eebe8d9a553f09c7ecde815e0b.jpg)


Entering text
You can give titles to your programmes or discs in the different menus and while setting up the Timer Recording.
Entering a title or disc name using the menu
- Select the desired character with ▲▼◀▶ and confirm with ENTER. By inserting spaces, hyphens or dashes, you can enter the title you want. Select PAUSE II to delete a letter.
- Press STOP ■ to apply the name/title.
Enter a title using the number buttons, e.g.: the letter "R"
- Press [7] to switch to the 7th line.
- Press [7] twice to select "R" and confirm with ENTER.
Top Menu Preview

In the DIRECT NAVIGATOR, select the setting [Enter Name]. The Top Menu Preview also appears. The later display of the title is shown. Add blanks, hyphens etc. to write the title as you want it.
Working with List Names
In the case of recurring programmes, save time entering the title by saving it in the title list.
Save a disc name or title in List Names
• After entering a title, press SKIP ▶. - In the next screen, select [Add] with ◀ and confirm with ENTER.
Using a disc name or title from List Names
- Open List Names with ◀SKIP
- Select the disc names or title with ▲ and press ENTER.
- Press STOP ■ to apply the name/title.
Deleting a disc name or title from the List Names
- Open List Names with SKIP
- Select the title or name with ▲ and press SUB MENU.
- Confirm [Delete Name] with ENTER.
- In the next screen, select [Delete] with ◀ and confirm with ENTER.
Symbols
| The title is being recorded. | |
| Timer mode is active. | |
| A daily or weekly Timer Recording was stopped. The icon disappears when next Timer Recording starts. | |
| The title overlaps other recordings. | |
| DVD was full. The title could not be recorded. | |
| The programme cannot be played due to damaged data or could not be recorded for another reason. | |
| The title is write-protected. | |
| The programme was copy-protected; the title was not recorded. | |
| Title that can only be copied once. | |
| The title has been selected. | |
| The title or the playlist was recorded with a TV system other than the one currently selected. Title and playback lists with these markings cannot be played back.To playback this title/playlist, switch your TV system. |
FUNCTIONS

Playback

DIRECT NAVIGATOR
Overview of DIRECT NAVIGATOR
You can archive, edit, or start playback after selecting a title in DIRECT NAVIGATOR.
The DIRECT NAVIGATOR cannot be called if the VHS drive is selected.

VIDEO
RED button: Title View
PICTURE
GREEN button: Album View (JPEG)
![graph LR A["Title View"] --> B["Sub Menu"] B --> C["Delete"] B --> D["Properties"] B --> E["Edit"] B --> F["Chapter View"] B --> G["Album View"] H["Chapter View"] --> I["Enter Name"] H --> J["Set up Protection"] H --> K["Cancel Protection"] H --> L["Partial Delete"] H --> M["Change Thumbnail"] H -->…](/content/2026/06/1329865/images/d803455bebe5457a943868fa2ad97a473bce703083cb1d2dec95e5460e281f80.jpg)
Launching the DIRECT NAVIGATOR menu
- Press FUNCTIONS.
- Confirm [Playback] with ENTER.
The DIRECT NAVIGATOR menu appears.
Playback
- Select a title with ▲ and start playback with ENTER.
Edit
- Press SUB MENU to edit a title.
- Select the desired option with ▲ and confirm with ENTER.


Delete
Not -RW(VR)
When you execute this process, the title will be deleted and cannot be restored.
- Confirm [Delete] with ENTER.
- Select [Delete] with ◀ and confirm with ENTER.
The available recording time may remain the same after deleting a short title.
RAM The storage space of a deleted title becomes available for a new recording.
-R -R DL +R +R DL The storage space is not released by deleting titles.
-RW(V) +RW Available recording space increases only when the last recorded title is deleted.
Properties
Information on the title, such as name, date and time, is displayed.
- Select [Properties] with ▲ and confirm with ENTER.
Album View: VIDEO (Green button) / PICTURE (Red button)
Change to Album View.
Editing several elements
Select the desired title with ▲ and press PAUSE . II
A check appears. Repeat this process to select other titles.
Press PAUSE II again to clear the selection.
FUNCTIONS
FUNCTIONS


Enter Name Set up Protection Cancel Protection Partial Delete Change Thumbnail Divide Title


Playback
DIRECT NAVIGATOR
Editing titles in the SUB MENU
- Select [Edit] with ▲ and confirm with ENTER.
- In the submenu, select the desired option with ▲▼ and confirm with ENTER.
Enter Name
Not -RW(VR)

Enter or change the title of the programmes.
The full name is displayed in the Properties submenu.
Set up Protection
- Select [Yes] with ◀ and confirm with ENTER. 🔒 is displayed.


Cancel Protection
- Select [Yes] with ◀ and confirm with ENTER. 🔒 disappears.


Partial Delete

Make sure that you really want to delete parts of the recording.
- At the desired start point, confirm [Start] with ENTER.
- At the desired end point, confirm [End] with ENTER.
- If you want to carry out the deletion, select [Exit] with ▲ and confirm with ENTER.
- In the next screen, select [Delete] with ◀ and confirm with ENTER.
You exit the menu after the deletion.
• To delete other parts, confirm [Next] with ENTER. - Select [Delete] with ◀ and confirm with ENTER.
After each deletion, you can select the next start and end point.
- To exit the menu, select [Exit] with ▲ and press ENTER.
You may not be able to identify a start and end point if they are less than 3 seconds apart or if the recorded image is a still picture. The unit switches to PAUSE mode at the end of the title. The available recording time on the disc may remain the same after deletion.
Change Thumbnail
Not-RW(VR)
You can select any position in a title as the thumbnail for the title view.
- Press PLAY▶ to start playback.
- At the position which is to be displayed as the new thumbnail, confirm [Change] with ENTER. The selected thumbnail is displayed.
- Confirm [Exit] with ENTER. The selected thumbnail is displayed in the title view.
Divide Title

You can divide a selected title. A divided title cannot be joined together again.
- At the position where the title is to be divided, confirm [Divide] with ENTER.
- Confirm [Preview] with ENTER. A section will be played back from 10 seconds before to 10 seconds after the dividing point.
- Confirm [Exit] with ENTER.
- In the next screen, select [Divide] with ◀ and confirm with ENTER.
A short section of the recording right before the dividing point may be lost. The divided titles retain the name of the original title.
You cannot use this function if the resulting sections are extremely short or if you have saved more than 99 titles to DVD-RAM.
You can jump to the beginning/end of a title/chapter with PAUSE II and SKIP
Find the position for a marker with SKIP ◀↓↓↓/SEARCH ,
TIME SLIP, MANUAL SKIP or ◀▶
You can jump between set markers with SKIP
Editing several elements
Select the desired title with ▲◀▶ and press PAUSE II.
A check appears. Repeat this process to select other titles.
Press PAUSE II again to clear the selection.
FUNCTIONS

FUNCTIONS


Playback

DIRECT NAVIGATOR


Editing chapters in the SUB MENU
RAM
- Press FUNCTIONS.
- Confirm [Playback] with ENTER.
- Select the desired title with ▲ in the Title View menu.
- Press SUB MENU.
- Select [Chapter View] with ▲ and confirm with ENTER.
- Select the desired chapter with ▲▼◀▶.
- Press SUB MENU.
Select the desired option with ▲▼ in the submenu and confirm with ENTER.
Delete Chapter
Select [Delete] with ◀ and confirm with ENTER.
Create Chapter
Divide the title into chapters. Determine the points where a new chapter needs to begin. The chapters can be selected later during playback with SKIP.
- Press ENTER at the position where you want to create the chapter.
- Repeat this step to create additional chapters.
- Select [Exit] with ▼ and confirm with ENTER.
A short section right before the dividing point may be lost.
Combine Chapters
- Select [Combine] with ◀ and confirm with ENTER.
The selected chapter is combined with the following chapter.

Title View Return to Title View
You can jump to the beginning/end of a title/chapter with PAUSE II and SKIP
Find the position for a marker with SKIP ◀SLOW/SEARCH .
TIME SLIP, MANUAL SKIP or ◀▶.
You can jump between set markers with SKIP
Editing several elements
Select the desired title with ▲◀▶ and press PAUSE II.
A check appears. Repeat this process to select other titles.
Press PAUSE II again to clear the selection.
![graph TD A["Album View"] --> B["ENTER"] B --> C["Picture (JPEG) View"] C --> D["ENTER"] D --> E["Playback"] E --> F["SUB MENU S"] F --> G["ROT: Rotate RIGHT\nRotate LEFT\nZoom in\nENTER\nRETURN"] G --> H["13:30:49 6/3\nFolder-Picture No. 101-0001\nDate 6/3/2006 No. 1/4"] H --> I["GREEN Button: Pictu…](/content/2026/06/1329865/images/52165037b32835107468d7053d4f0b32474a25eb0fd2fde439c07e7ed0cc04b7.jpg)
If TIFF fixed images are played back or if there are a lot of files, sessions and/or folders, it can take a relatively long time to display the data.
JPEG/TIFF playback from DVD-RAM/SD
JPEG (Joint Photographic Experts Group), a system for compressing/decoding colour still pictures. Despite strong compression, there is only a slight loss of picture quality.
TIFF (Tag Image File Format), a system for compressing/decoding colour still pictures.
It enables digital cameras and other units to save high-quality pictures.
Picture playback
RAM SD
If you have saved pictures in JPEG format on DVD-RAM, you can playback and edit these using the Album View function.
The albums are displayed with preview pictures. To playback the pictures, an album must be selected and opened.
- Press DIRECT NAVIGATOR.
- RAM In the title view, press SUB MENU. Select [Album View] with ▲ and press ENTER to confirm.
- In the Album View select the required album with ▲ and ▶ press ENTER to confirm.
- Select the required picture in the Picture (JPEG) View with ▲▼r▲▶ and0-9 press ENTER to start the playback
- Press STOP ■ to stop the playback.
SUB MENU during picture playback
RAM SD -R CD
- Press SUB MENU.
- Select the required option with ▲ and press ENTER to confirm.
Rotate pictures
- Press SUB MENU during playback.
- Select the desired setting with ▲ and confirm with ENTER.
Zoom in/Zoom out (Only available for pictures smaller than 640 x 480 pixels.)
- Press SUB MENU during playback.
- Select [Zoom in] with ▲ and confirm with ENTER.
- To switch back to the original size, confirm [Zoom out] with ENTER. The rotation and zooming of pictures is not saved.
Display picture properties
- During playback, press ① twice to launch the display.
- Press ⓘ again to exit the display.
- Press RETURN to return to the Album View.
FUNCTIONS


Album View
RAM SD
Slide Show from the Album View
- Select the required Album from the Album View with ▲▼◀▶
- Press PLAY▶.
SUB MENU in the Album View
- Press SUB MENU
- Select the required option with ▲ and press ENTER to confirm.
Start Slide Show
The pictures of the selected folder are played back automatically in succession in the selected display interval. The Slide Show is repeated if you have set [Repeat Play] to [On] in the Slide Show.
- Press STOP ■ to stop the Slide Show.
Slide Show Settings
You can set the Display Interval for each picture, together with Repeat Play of the Slide Show.
- Select [Display interval] with ◀ for each picture.
- For Repeat Play of the Slide Show select [Repeat Play] with ▲ and change the setting with ◀
- Press ENTER to confirm
Add Pictures
RAM SD
Pictures are assigned to the selected album from other albums.
- Select [Start] with ◀ and press ENTER to confirm.
Step 1 • Select the required album with ▲▼◀▶ and press ENTER to confirm. Step 2 Use Copy Pictures to copy individual pictures or Copy Album to copy a complete album.
- Select [Copy Pictures] or [Copy Album] with ▲▼.
- Press ENTER to confirm.
- Copy pictures: select the pictures you want to copy and press ENTER to confirm.
Step 3 The pictures of the selected Album are copied.
Step 4 • To continue copying, select [Yes] with ◀ and press ENTER to confirm. Repeat steps 1-3. • To end copying, press ENTER to confirm [No].
Create Album
To create a new album, pictures must already exist on the disc or SD card. Pictures from the selected album are copied into the new album on being created.
- Select [Yes] with ◀ and press ENTER to confirm. Step 1 • Select the required Album which you would like to copy the pictures with ▲▼▲▼ press ENTER to confirm. Step 2 Use Copy Pictures to copy individual pictures or Copy Album to copy a complete album.
- Select [Copy Pictures] or [Copy Album] with ▲▼.
- Press ENTER to confirm.
- Copy pictures: select the pictures you want to copy and press ENTER to confirm.
Step 3: The pictures of the selected Album are copied.
Step 4: • To continue copying, select [Yes] with ◀ and press ENTER to confirm. Repeat steps 1-3.
• To end copying, press ENTER to confirm [No].
Select [Yes] to give the Album a name.
Enter the Album name.
If you select [No], then the date is saved as name of the Album.
Editing several elements
Select the desired title with ▲ and press PAUSE. II
A check appears. Repeat this process to select other titles.
Press PAUSE II again to clear the selection.


SUB MENU in the Album View
- Press SUB MENU.
- Select the required option with ▲ and press ENTER to confirm.
Edit Album
- Select [Edit Album] with ▲ and press ENTER to confirm.
- Select the required option with ▲ and press ENTER to confirm.
Enter Album Name. Enter the Album name.
34
Delete Album

The selected Album is deleted and cannot be recovered.
- Select [Delete] with ◀ and press ENTER to confirm.
Set up Protection/Cancel Protection
You can set up or remove cancel protection for pictures.
- Select [Yes] with ◀ and press ENTER to confirm.

SUB MENU in the Picture (JPEG) View
RAM SD
- Select an Album in the Album View with ▲▼▲▼ and press ENTER to confirm.
- Press SUB MENU in the Picture (JPEG) View
- Select the required option with ▲ and press ENTER to confirm.
Delete Picture
The selected picture is deleted and cannot be recovered. - Select [Delete] with ◀ and press ENTER to confirm.
Set up Protection/Cancel Protection
You can set up or remove cancel protection for pictures. - Select [Yes] with ◀ and press ENTER to confirm.
SD
DPOFD
The number of desired picture copies in the selected folder is determined.
- Use ◀ or the numeric buttons to select the number and confirm with ENTER.
The pictures are marked in Picture (JPEG) View.
The number 0 resets the setting. Settings previously made with other units are reset.
DPOF (Digital Print Order Format) is the standard format for printing pictures recorded with a digital camera etc. It enables automatic printing in a photo shop or on your own printer.
The print settings (DPOF) made with this unit may not be able to be viewed on other units. If the folder or the files are not compatible with the DCF standard or there is not enough space on the card, the setting cannot be performed.
Album View
Return to Album View.
In the Album View, you can select an overriding folder under [Select Folder].
Select the required folder with ◀▶ and press ENTER to confirm.
Editing several elements
Select the desired title with ▲◀▶ and press PAUSE II.
A check appears. Repeat this process to select other titles.
Press PAUSE II again to clear the selection.


JPEG/TIFF playback from CD/DVD-R
If your disc contains other formats such as MP3 in addition to JPEG, a message regarding the preset play mode will appear after the disc has been inserted.
- Confirm the message with ENTER.
- Press FUNCTIONS and confirm [Menu] with ENTER.
- Select the desired file type with ▲ and confirm with ENTER.
Press DIRECT NAVIGATOR. The Picture (JPEG) View appears on the screen.
Picture playback
- Select the desired picture with ▲▼◀▶ or 0-9 and start playback with ENTER. End playback with STOP ■ or DIRECT NAVIGATOR.
Folder
- Use ▲ to select [Folder].
- Press SUB MENU
Select the desired option with ▲ and confirm with ENTER.
Start Slide Show

Slide Show Setting

Change Folder
- Select [Folder] with ▲ and press ENTER to confirm. The available folders are shown.
- Select the required folder with ▲ and press ENTER to confirm. You can select a folder directly and open it. It may be possible that you cannot open folders not created with this unit.


MP3 playback

This unit can play MP3 that were recorded with a computer. Files are captured as tracks and folders as groups.
"TOTAL" includes all pieces in all groups on the disc.
In addition to MP3 data, the disc also contains JPEG data:
After a disc is inserted, a message appears regarding the preset playback mode.
- Confirm the message with ENTER.
- Press FUNCTIONS and confirm [Menu] with ENTER.
- Select the desired file type with ▲ and confirm with ENTER.
Starting playback
- Press DIRECT NAVIGATOR to launch the Menu screen.
- Select the desired track with ▲▼ or 0-9 and confirm with ENTER. Playback takes place up to the last track in the selected group.
- Press STOP ■ to end playback. Use DIRECT NAVIGATOR or RETURN to exit the screen. Browse through the pages with SKIP ◀◀◀. The lists of groups follow one after the other.
Shows the track currently being played. TOTAL: Selected track number / Total number of tracks.
G: Group number. No.: Selected group number.
T: Track number in the group. Group: Selected group name.
Selecting a group
- Press ▶ to switch to the Tree menu.
- Select the desired group with ▲▼◀▶ and confirm with ENTER. The contents of the selected group are displayed.


STTL Function: DVB channels only.


The remaining time of a VHS cassette will only be displayed after using a function like playback, fast forward or such.
If you did not insert a cassette or disc, the following message appears:

Recording
Manual programming
Make sure that there is a recordable disc or cassette in the selected drive. Otherwise, the Timer Recording will not run.
- Press FUNCTIONS.
- Select [Recording] with ▲ and confirm with ENTER. The Timer Recording screen appears.
- Confirm [New Timer Programme] with ENTER.
- Switch to the next entry with ◀ and change the setting with ▲▼.
Name : Select the programme position/name of the TV station with ▲▼. Date : One-time, daily or weekly programming.
Start/Stop : Start time/end of recording. If you press and hold the ▲▼ buttons, the time increases/decreases in 30-minute intervals. You can also use the number buttons for these entries.
Drive : Select the drive.
Mode : Recording mode DVD: XP, LP, EP, SP, FR
: Recording mode VHS: SP, LP, EP, AUTO
: Subtitles [On] or [Off]. Recorded subtitles cannot be deleted later.
- To enter the title of the recording, select [Programme Name] with ◀ and confirm with ENTER.
- Enter the desired name in the Programme Name menu.
- Press STOP ■ to apply the name. • After you have made your changes, save the programming with ENTER. • To enter other programmes, select [New Timer Programme].
The unit automatically switches to timer standby mode at the start time. REC flashes in the unit's display one minute before the recording is set to start.
A Timer Recording does not start while a disc is being formatted, deleted, or finalized. The recording begins afterwards.
RAM: If you programmed the Timer programmes one after the other in sequential order, the first few seconds of the second Timer Recording are not recorded. With other types of discs, it is approximately 30 seconds.
If you receive your TV programme via a satellite receiver (digital/analogue):
On the external unit, select the station with the programme that you want to record. The station must not be changed during the recording.
It is always the programme on this set station which is recorded.
Name: Select AV2 as the name of the TV station with ▲▼.
Change Profile
To change the station name manually, you can select the station from the preset categories and profiles.
- Press the BLUE button in the Name box to see the first station of the corresponding category or preset profile.
- Select the required station with ▲ and press ENTER to confirm.
Automatic SP/LP switching during a VHS recording
AUTO: If there is insufficient recording time left on a video cassette, the SP/LP function switches the video recording speed to LP (NTSC to EP). This ensures that the programme is recorded in full. Should the remaining recording time on the video cassette still not be sufficient even in LP mode, then the programme will not be recorded in full. Automatic switching to EP mode is not possible.
PROG/CHECK
○ Checking or changing Timer Recordings
Check the settings and correct them if necessary.
- Press PROG/CHECK.
Checking or changing
- Select the desired Timer programming with ▲▼ and press ENTER.
- Select the position that you want to change with ▲▼◀▶ and confirm with ENTER.
Programmes that are currently being recorded cannot be changed.
![Timer Recording Remain DVD 0:02 SP VHS --: - 12:40:46 24/2 FRI No. Date Start Stop Drive STTL Drive space 01 BBC1 6/3 MON 17:00 17:15 DVD SP OFF OK 02 ITV1 10/3 MON 20:45 21:30 DVD SP OFF OK New Timer Programme [Chan. Name] ITV1 BITER RETURN SUB MENU Delete Timer Off](/content/2026/06/1329865/images/f45acb31a3c8be4e992b27add85032d8a4dfe8be994c8aaf48bd2941b255985f.jpg)

Timer Off/On
If you have regular e.g. weekly Timer programmings, you can suspend the recording if you wish to record another programme at the same time, for example.
Your Timer programming is retained. You do not need to delete and re-enter it later on.
The recording is suspended just once.
- Select the desired Timer programming with ▲▼.
- Press SUB MENU.
- Select [Timer Off] and confirm with ENTER.
- To switch the Timer back on, press SUB MENU.
- Select [Timer On] and press ENTER.
You can also press the RED button to interrupt or switch on a Timer programming.
If you want to interrupt a weekly Timer programming for a longer period, delete it using *.
The programming is suspended just once with [Timer Off]. The unit then switches to [Timer On] and continues to record the subsequent schedule.
Delete
- Select the desired Timer programming with ▲▼.
- Press SUB MENU
- Select [Delete] and confirm with ENTER.
Programmes that are currently being recorded cannot be deleted. First stop the recording.
You can also delete a Timer programming using *.

Stop Recording
You can stop a current Timer Recording.
- Select the current Timer Recording with ▲▼.
- Press SUB MENU.
- Select [Stop Recording] and confirm with ENTER.
The Timer Recording ends and is thereby deleted.
If you stop a regular Timer programming (e.g. a weekly recording), it is marked as stopped and not deleted.
The programming is retained for the following recordings.
Description of the symbols on page 34.
Drive space
OK: There is sufficient storage space available for the programmed recording.
— : Storage space will not be calculated.
→ (Date): The existing storage space is displayed for daily or weekly recordings.
! : The disc was not inserted, it is write-protected or there is insufficient storage space available.
FUNCTIONS


Deleting titles and pictures
You can delete titles or write-protect recordings so that they are not accidentally deleted or overwritten.
- Press FUNCTIONS.
- Select [Delete] with ▲ and confirm with ENTER.
- Select the title that you want to delete with ▲▼◀▶ and confirm with ENTER.
- Select [Delete] with ◀ and confirm with ENTER.
Deleted titles cannot be restored later on.
- Press SUB MENU to edit a title.
Properties
Information on a title is displayed, such as name, date and time.
- Confirm [Properties] with ENTER.
Set up Protection/Cancel Protection of titles
- Select [Edit] with ▲ and confirm with ENTER.
- Select the desired option with ▲ and confirm with ENTER.
- Select [Yes] with ◀ and confirm with ENTER.
Deleting pictures
- Select [Album View] with ▲▼◀▶ [Album View] and press ENTER to confirm.
- Select an album with ▲▼◀▶ and press ENTER to confirm.
- Select the picture that you want to delete with ▲▼◀▶ and press ENTER to confirm.
- Select [Delete] with ◀ and press ENTER to confirm.
Deleting albums
- Select an album in the [Album View] menu with ▲▼◀▶ and press SUB MENU.
- Press ENTER to confirm [Delete Album].
- Select [Delete] with ◀ and press ENTER to confirm.
Set up Protection/Cancel Protection of pictures or albums
- Select the desired option with ▲ and confirm with ENTER.
- Select [Yes] with ◀ and confirm with ENTER.
Album View/Title View: Change between Album View (PICTURE) and Title View (VIDEO)
Editing several elements

Select the desired title with ▲ and press PAUSE .
A check appears. Repeat this process to select other titles.
Press PAUSE III again to clear the selection.
FUNCTIONS

DVD

SD

FUNCTIONS


Copy
RAM SD ↔ RAM SD
Copy pictures
Pictures can be put together in the required order in a copy list and then copied.
![graph TD A["1 Copy Direction"] --> B["2 Copy Mode"] B --> C["3 Create List"] C --> D["Start Copying"] E["Source"] --> F["DVD"] G["Destination"] --> H["SD CARD"] I["Select the copy direction."] --> J["Start Copying"]](/content/2026/06/1329865/images/702d77618c51003e78f460dfd328b63ff4aa6a19d027c0ca43da672080f72b99.jpg)


- Press FUNCTIONS.
- Select [Copy] with ▲ and confirm with ENTER.
- Select the desired option with ▲▼.
Cancel All
All created settings are deleted!
- Select [Yes] with ◀ and confirm with ENTER.
1 Copy Direction
- Select [Source] with ▶ and press ENTER to confirm.
- Select DVD or SD CARD with ▲ and press ENTER to confirm.
- Select [Destination] with ▼ and press ENTER to confirm.
- Select DVD or SD CARD with ▲ and press ENTER to confirm.
- Return to [Copy Direction] with ◀ and select [Create List] with ▼
2 Copy Mode
Pictures are copied automatically in the High Speed mode.
3 Create List
You can create a copy list from the existing pictures or from the existing folders.
- Select [New item] with ▶ and confirm with ENTER.
- In the Create List screen, use ▲ to select the desired picture and confirm with ENTER. The picture is applied to the copy list.
Change Folder
- To change to another folder, select [Folder] with ▲ and press ENTER to confirm.
- Select the required folder with ▲ and press ENTER to confirm.
SUB MENU in the copy list
- Press SUB MENU to edit the selected element of the copy list.
Deleting all elements
You can delete all elements of a copy list.
- Confirm [Delete all] with ENTER.
- In the next screen, use ◀ to select [Yes] and confirm with ENTER.
Editing individual elements
- Use ▲ to select the desired option and confirm with ENTER.
Add: Select the desired picture or folder with ▲▼◀▶ and confirm with ENTER. Delete: Select [Yes] with ◀ and confirm with ENTER.
- Return with ◀ to [Create List] and select [Start Copying] with ▼
Start Copying
- Press ENTER to start copying.
- Select [Yes] with ◀ and confirm with ENTER.
- Press RETURN for 3 seconds to prematurely end copying.
Editing several elements
Select the desired title with ▲▼◀▶ and press PAUSE II. A check appears. Repeat this process to select other titles. Press PAUSE II again to clear the selection.
FUNCTIONS


Press ENTER to change the setting.

Press ENTER to change the setting.


Copying with a copy list

- Press FUNCTIONS.
- Select [Copy] with ▲ and confirm with ENTER.
- Select the desired option with ▲▼
Cancel All
All created settings are cancelled!
- Select [Yes] with ◀ and confirm with ENTER.
1 Copy Direction
- Select [Source] with ▶ and confirm with ENTER.
- Select DVD with ▲ and confirm with ENTER. The destination drive is detected automatically.
- Return to [Copy Direction] with ◀ and select [Copy Mode] with ▼
2 Copy Mode
- Select [Recording Mode] with ▶ and confirm with ENTER.
- Select the desired recording mode [SP, LP, EP; NTSC: SP, EP] with ▲ and confirm with ENTER. The format is detected automatically.
- Return to [Copy Mode] with ◀ and select [Create List] with ▼
3 Create List
You can create a copy list from existing titles/playlist.
- Select [New Item] with ▶ and confirm with ENTER.
- In the Create List screen, select the desired title with ▲▼◀▶ and confirm with ENTER. The title is saved in the copy list.
- Press SUB MENU to edit the selected element of the copy list.
Deleting all elements
You can delete all elements of the copy list.
- Confirm [Delete All] with ENTER.
- In the next screen, select ◀ with [Yes] and confirm with ENTER.
Editing individual elements
- Select the desired option with ▲ and confirm with ENTER. Add: Select the desired title with and confirm with ENTER. Delete: Select [Yes] with ◀ and confirm with ENTER. Move: Select a new position with ▲ and confirm with ENTER.
- Return to [Create List] with ◀ and select [Start Copying] with ▼.
Start Copying
- Press ENTER to start copying.
- Select [Yes] with ◀ and confirm with ENTER.
- Press RETURN for 3 seconds to stop copying.
You can display the recording properties in the Create List screen or switch between VIDEO and Playlists.
- Press SUB MENU.
Display properties
- Confirm [Properties] with ENTER.
Other View
- Select [Other View] with ▲ and confirm with ENTER.
- Confirm Playlists or VIDEO with ENTER. You can also switch between VIDEO and Playlists with the RED and GREEN buttons.
Editing several elements √ Select the desired title with ▲◀▶ and press PAUSE II. A check appears. Repeat this process to select other titles. Press PAUSE II again to clear the selection.
FUNCTIONS


Time-triggered copying

- Press FUNCTIONS.
- Select [Copy] with ▲ and confirm with ENTER.
- Select the desired option with ▲▼
Cancel All
All created settings are cancelled!
- Select [Yes] with ◀ and confirm with ENTER.
1 Copy Direction
- Select [Source] with ▶ and confirm with ENTER.
- Select VHS with ▲ and confirm with ENTER. The destination drive is detected automatically.
- Return to [Copy Direction] with ◀ and select [Copy Mode] with ▼
2 Copy Mode
- Select [Recording Mode] with ▶ and confirm with ENTER.
- Select the desired recording mode [XP, SP, LP, EP or FR] with ▼ and confirm with ENTER. The format is detected automatically.
- Return to [Copy Mode] with ◀ and select [Copy Time] with ▼.
3 Copy Time
- Select [Time Setting] with ▶ and confirm with ENTER.
- Select [On] or [Off] with ▲ and confirm with ENTER. [On]: Select [Copy Time] with ▼ and confirm with ENTER. Change the time setting with ▲ and confirm with ENTER. [Off]: When the copy time is switched off, the entire disc is copied if there is sufficient space on the destination drive.
- Return to [Copy Time] with ◀ and select [Start Copying] with ▼.
Recording mode FR and time setting [Off]
Copying starts after the tape rewinds to the beginning. Titles are automatically created for each index signal.
Start Copying
- Press ENTER to start copying.
- Select [Yes] with ◀ and confirm with ENTER.
Finalizing
-R -RW(V) +R -R DL +R DL
Before copying starts, you can select whether you want to finalize the disc after copying.
- Confirm [Copy Only] with ENTER if the disc just needs to be copied.
- Select [Copy&Finalize] with ◀ and confirm with ENTER if the disc needs to be finalized after copying. Finalization cannot be cancelled.
- Press RETURN for 3 seconds to end copying.
The screen displays are also recorded during copying. In the case of a DVD-Video, the original picture and sound quality may not be fully achieved.
On the front of the unit
VHS

COPYING
You can copy the contents of a cassette to disc or the contents of a disc to cassette at the push of a button.
COPYING of a disc starts with the first title and copies till the end of the disc.
Copying VHS to DVD starts at the selected position and copies till the end of the cassette.
If you start copying from DVD to VHS during playback, the current title and all subsequent titles up to the end of the disc are copied.
The copying button at the front of the unit lights during copying.
Copying from VHS to DVD

Insert a video cassette and a recordable disc.
- Select the VHS drive with DRIVE SELECT. Find the desired start position on the VHS cassette.
- Select the DVD drive with DRIVE SELECT.
- Select the recording mode (XP, SP, LP, EP) for DVD with REC MODE. For RAM and -RW(V), select the desired audio channel for dual channel sound with DISPLAY.
- Press COPYING DVD for the desired copy direction. START flashes on the unit's display.
- Press COPYING DVD for approx. 3 seconds. START disappears from the display and copying begins.
- To cancel copying, press STOP ■ or RETURN for 3 seconds.
Copy
Do you want to finalize the disc after copying completes?
Finalizing is to allow the disc to be played on other DVD players. The disc becomes play-only.

Press REC to start finalizing after copying completes.

Press PLAY to start copying only.

Press STOP to cancel copying.
Finalizing

Before copying starts, you can select whether you want to automatically finalize the disc after copying.
- Press PLAY if you only want to copy on the disc.
- Press REC if the disc needs to be finalized after copying. Finalization cannot be cancelled.
- Press STOP to stop copying.
Copying from DVD to VHS

Insert a disc and a recordable video cassette.
- Select the VHS drive with DRIVE SELECT. • Find the desired start position on the VHS cassette.
- Select the recording mode (SP, LP, EP; NTSC: SP, EP) for VHS with REC MODE.
- Select the DVD drive with DRIVE SELECT. RAM -RW(V) Select the desired audio channel for dual channel sound with DISPLAY.
- Press COPYING VHS for the desired copy direction. START flashes on the unit's display.
- Press COPYING VHS for approximately 3 seconds. START disappears and copying begins.
- To stop COPYING, press STOP ■ or RETURN for 3 seconds.
The TV Guide provides a 7-day preview of programs for your digital television and radio stations. For many of these programs, you can select additional information provided by the stations.
You can sort the program preview by various topics such as sport, films, etc., and by categories such as TV or radio.
- Press FUNCTIONS.
- Select [To Others] with ▲ and press ENTER to confirm.
- Select [TV Guide] with ▲ and press ENTER to confirm.
The TV Guide program preview now appears.
- Press RETURN to return to the television picture.
The program preview is available immediately if your DVD Recorder has found a digital station and loaded the information into memory. This process can take a while depending on the particular station.
The program preview data are continuously downloaded in the background when the unit is switched on. This means that the program preview can sometimes change while you are viewing it.
If the unit is disconnected from the power, all program data are lost.
No program preview is broadcast for analogue stations. The display shows [No info for analogue programs]. You can recognize analogue stations by the station number. Example: 1 BBC - digital station
901 (A) BBC - analog station

Landscape view
The TV Guide offers you a Landscape view and a Portrait view.
When you select the TV Guide for the first time, the Landscape view appears.
In the upper part of the screen there is a time bar divided into 30 minute steps. When you select a programme, the detailed title and the air time appear in the line above the time bar.
Moving in the Landscape view
- Move around in the programme preview with ▲▼◀▶. The programme preview only shows current and future programmes.
- Scroll through the programme preview page for page with PAGE ◊.
Go forward 24 hours:
- Press the GREEN button to go forwards one day.
Go back 24 hours:
- Press the RED button. You can only go back as far as the current date.
Changing station in the Landscape view
- Use ▲▼ to select a currently running programme. The selected programme is marked with a yellow frame.
- Press ENTER to see the programme.
![TV Guide Mon 06/03/06 19:35 Fri 10th Spending Other People's Money BBC ONE Wales, Lifestyle 19:30-20:00, 30min. A flashy car salesman loses his cool when his stingy friend takes over his wallet. He's forced to sell his possessions at a car boot sale to pay for food. [S] TVER REC Return to List: RETU…](/content/2026/06/1329865/images/a61e9023c9090c761539328724806625c298ba30d54e4d3a889b47b0ac7f310f.jpg)
Additional information about a programme
The selected programme appears in the title bar. Press ① to see additional information about a programme. You will then see ② at these programmes in the title bar. You can have this information displayed. The contents of the information depends on the particular station and cannot be influenced by the unit.
- Press ① The information about the programme appears.
- Scroll through the longer information sentence by sentence with ▲ or section by section with PAGE ♦
- Press ⏻ to leave the information.
Changing between the views
- Press GUIDE to change between Landscape view and Portrait view.

Portrait view
The station bar is positioned horizontally over the programme preview. You can see the programme of one station at a time. The programme that is currently running is at the top of the list when you select this function.
Moving in the Portrait view
- Move around in the programme preview of the selected station with ▲▼. Only current and future programmes are shown.
- Scroll through the programme page by page with PAGE ◊.
Go forwards 24 hours:
- Press the GREEN button to go forwards one day.
Go back 24 hours:
- Press the RED button. You can only go back as far as the current date.
Changing station in the Portrait view
- Use ▲▼ to select a currently running programme. The selected programme is marked with a yellow frame.
- Press ENTER to see the programme.

Prog. Type Display according to topic areas
You can limit the TV Guide display with [Prog. Typ]. That means that you can select a programme preview sorted according to topic areas (e.g. Movies, Sport).
- Press the BLUE button.
- Select the required topic area with ▲▼. Select between: All Types, Movies, News and Factual, Entertainment, Sport, Children's, Education, Lifestyle, Drama.
- Press ENTER to confirm. The selected topic area is marked pale in the programme display. The Landscape view shows all programmes which do not belong to your choice in grey. The Portrait view only shows you the programmes which match your selection.
The station companies allocate individual programmes to topic areas. If the selection is not complete, this is not an error in the unit.

Display according to Category
You can sort your programme preview according to categories, using the Category function for this purpose. You can limit the view for example to All Services, Radio or a Profile which you have put together yourself.
You can put together your favourite stations and sort them in a Profile. The sub-points Profile 1 to 4 can only be selected if these have been created first. If you have given the profiles names, these appear in the display.
- Press the YELLOW button to select the Category function.
- Select the required Category or Profile with ▲: Choose between: All Services, Free TV, Radio, Information, Profile 1, Profile 2, Profile 3, Profile 4.
- Press ENTER to confirm.

Programming the timer in the TV Guide
The TV Guide makes it easy to set a programme for recording.

Timer Recording menu for digital stations
The data required for programming have been taken from the TV Guide.
- Press ENTER to confirm the programming. After the message [This programme has been stored], the new TV Guide appears again. The set programme is marked with a ⏻. Timer Recording starts automatically at the set time.
- Changing the preset data:
42
• Change Programme Name:
34
Analogue stations (A)
Timer Recording menu for analogue stations (A)
- Select the required programme in the programme preview.
- Press ENTER to confirm. The Timer Recording screen now appears.
The TV Guide does not contain information for analogue programmes.
You can set programmes broadcast by analogue stations with the
Timer Recording menu.

Deleting a Timer programming
You can delete a Timer Recording which has not started yet, directly in the TV Guide.
- Select the set programme in the programme preview with ▲ and ▶, then press ENTER to confirm.
- Press ENTER to confirm [Yes]. The setting is deleted.
Stopping a current Timer Recording
- Press STOP ■ during the Timer Recording.
- In the following screen, select [Stop Recording] with ◀ and press ENTER to confirm. The recording is stopped and the Timer programming is deleted.
Marking for a Timer-set programme
Automatic title transfer
When programmes are recorded from the TV Guide, the name of the selected programme is transferred automatically for the recording. If an analogue station broadcasts teletext, the unit automatically records the name of the programme and the station, on condition that the TEXT page setting has been entered correctly in the station table. It can take approx. 10 minutes to find the title with this unit, and sometimes this fails.


VIDEO Plus+ Record
Entering a VIDEO Plus+ Code causes the data for programmes provided by broadcasters to be saved. The appropriate codes can be found in newspapers and TV guides. You can programme up to 16 programmes per month in advance.
- Press FUNCTIONS.
- Select [To Others] with ▲ and confirm with ENTER.
- Confirm [VIDEO Plus+ Record] with ENTER.
- Enter the VIDEO Plus+ Code with the number buttons.
Delete a number with ◀.
Confirm the VIDEO Plus+ Code with ENTER.

The Timer Recording screen appears with the transferred data. Missing or incorrectly transferred data can be corrected as described on page 42.
Press ENTER to save the programme.
VIDEOPlus+
VIDEO Plus+ and PlusCode are registered trademarks of Gemstar Development Corporation. The VIDEO Plus+ system is manufactured under license from Gemstar Development Corporation.

VIDEO Plus+ codes for satellite receivers
This DVD Recorder is not designed to control (switch on or change channel) your satellite receiver, however, it can be taught to recognise VIDEO Plus+ Codes for satellite stations. The satellite receiver must be switched on and the correct station selected. Some receivers have their own timer facility for this purpose. Please refer to your satellite receiver instructions for use of such timer facilities.
For your DVD Recorder to recognise the VIDEO Plus+ Codes for each satellite station, you must teach your DVD Recorder which channel or AV input to record from for the first time. Otherwise when setting a VIDEO Plus+ recording, the [- -] symbol will appear in the channel position indicating that the DVD Recorder does not know which channel position to set. Once you have set the channel/AV input the DVD Recorder will remember it whenever you use a VIDEO Plus+ Code for the station again.
- Press the VIDEO Plus+ button.
- Enter a VIDEO Plus+ Code from a satellite TV guide for a satellite channel, e.g. Sky 1 using the Numeric buttons. Press ◀ to correct any mistakes.
- Press the ENTER button. [--] will appear instead of a channel number/AV input.
- Press the CH button to select the channel or AV input that is to be used for recording from the satellite channel.
- Press the ENTER button to memorise the setting. The DVD Recorder will now automatically set the programme position or AV input correctly when a VIDEO Plus+ recording is set for this satellite station in the future.
- Press ▲ to select the programme that you have just set. Now press the RESET button to delete it from the Timer Recording list. It is no longer needed.
- Repeat the steps above until you have set and deleted dummy Timer Recordings for each of the satellite stations that you will make VIDEO Plus+ recordings from.
- Press RETURN when you have finished.


Timer Recording via external units
Setting for external units (EXT LINK)
You control the recording function via an external unit (e.g. a receiver) with EXT LINK.
Connect the unit to the AV2 terminal with a 21-pin Scart cable.
- Press FUNCTIONS, select [To Others] with ▲ and press ENTER.
- Select [Setup] with ▲ and press ENTER.
- Select [Connection] with ▲ and [AV2 Settings] with ▶ and press ENTER.
- Select [Ext Link] with ▲ and confirm with ENTER.
- Select [Ext Link 1] or [Ext Link 2] with ▲ and confirm with ENTER.
Ext Link 1: For digital receivers that send a special recording control signal, e.g. the F.U.N. receiver (TU-DSF41).
Ext Link 2: External recording control for satellite or digital receivers (video signal).
The Ext Link 2 setting cannot be used if the input signal is in NTSC format.
The beginning of the recording may not be recorded correctly.
Recording programming on an external unit
The programming for a Timer Recording takes place on an external unit. Read the operating instructions for your external unit.

Switching the DVD Recorder to recording standby mode
- Select recording drive DVD or VHS with DRIVE SELECT.
- Press EXT LINK.
Recording standby mode for EXT LINK-controlled recordings is activated. The selected drive and EXT-L appear on the display.
The recording begins if an appropriate signal is received from a connected unit. As long as a video picture is transmitted by the external unit, the selected drive will record it.
Switching off recording standby mode
- Press EXT LINK to switch off recording standby mode. EXT-L disappears from the display.
Prematurely cancelling recording
- Stop the transfer of the recording signal on the external unit.
- Press EXT LINK to switch off recording standby mode. EXT-L disappears from the display.
Playback during Ext Link mode
RAM
- Press DIRECT NAVIGATOR.
- Select a title with ▲ and start playback with ENTER.
- Press STOP ■ or DIRECT NAVIGATOR to end playback.
- Press RETURN to leave the DIRECT NAVIGATOR.

Use this function to edit your movies/recordings made by a recorder or camcorder.
You can remove unwanted scenes (e.g. commercials) or change the sequence.
You can also divide your recordings (titles) into chapters.
You can create a playlist with your favourite chapters and edit this later.
![graph TD A["Source Title: Title 1"] --> B["Chapter 1"] A --> C["Chapter 2"] A --> D["Chapter 3"] A --> E["Chapter 4"] F["Source Chapter: Title 2"] --> G["Chapter 1 of Title 2"] F --> H["Chapter 3 of Title 1"] F --> I["Chapter 4 of Title 1"] F --> J["Chapter 2 of Title 2"] F --> K["Chapter 1 of Title…](/content/2026/06/1329865/images/7e010ee6758fb6bf26df29894dee73f3e75e21d2858d1a2121de0867a764a865.jpg)

Insert a recorded disc.
If you activated write-protection, deactivate it.
RAM
- Press FUNCTIONS.
- Select [To Others] with ▲ and confirm with ENTER.
- Select [Playlists] with ▲ and confirm with ENTER.
Creating a playlist
RAM
You can create a playlist from both source titles and source chapters.

- Select the free field [Create] with ▲ and confirm with ENTER.
1 Selecting a Source Title
- Select the desired source title with ◀ and press SUB MENU.
- Confirm [Create Chapter] with ENTER.
A complete source title can be inserted directly into Chapters in Playlists with ENTER.

2 Creating a Source Chapter
- Select the chapter section with ENTER. The length of the chapter sections is displayed as a time entry.
- Stop playback with PAUSE II.
- Locate the position for an exact chapter marker with ◀◀◀
- Select [Exit] with ▼ and confirm with ENTER.

3 Inserting a chapter into the playlist
- Switch from Source Title to Source Chapter with ▼.
- Select a source chapter that you want to add to the playlist with ◀ and confirm with ENTER.
- Select the position where the source chapter should be inserted into the Chapters in Playlists with ◀ and confirm with ENTER. You cannot select a position when inserting the first chapter. Repeat step 3 to add another chapter.
- Return to the Playlist View with RETURN.
You can also insert a Source Title as a chapter into the playlist.
- Select a Source Title with ▲ and confirm with ENTER.
- Select the position where the Source Title should be inserted in Chapters in Playlists with ◀ and confirm with ENTER.
Jump to the beginning/end of a title/chapter with PAUSE II and SKIP
Locate the position for a marker with SKIP ◀◀▶, SLOW/SEARCH ◀◀▶,
TIME SLIP, MANUAL SKIP or ◀▶
You can jump between set markers with SKIP

Launching the Playlists menu
- Press FUNCTIONS.
- Select [To Others] with ▲ and confirm with ENTER.
- Select [Playlists] with ▲ and confirm with ENTER.
Playback
RAM -RW(VR)
Select a playlist with ▲ and start playback with ENTER.

Edit
RAM
- Select a playlist with ▲▼◀▶
- Press SUB MENU.

Delete
This procedure deletes the playlist and it cannot be restored. The source titles are retained.
- Confirm [Delete] with ENTER.
- Select [Delete] with ◀ and confirm with ENTER.

Properties
RAM -RW(VR)
Information on the playlist, such as chapter, date and time, is displayed.
Select [Properties] with ▲ and confirm with ENTER.

Editing playlists in the SUB MENU.
RAM
- Select [Edit] with ▲ and confirm with ENTER.
- Select the desired option in the sub menu.
Create
Please read Creating a playlist.
Copy
- Select [Copy] with ◀ and confirm with ENTER.
Enter Name
34
Change or enter the title of the programme. If you enter a long name, it is only partially displayed.

Change Thumbnail
You can select any position in a title as the thumbnail for the Playlist View.
- Press PLAY▶ to start playback.
- At the position to be displayed as the new thumbnail, confirm [Change] with ENTER. The selected thumbnail is displayed.
- Confirm [Exit] with ENTER. The selected thumbnail is added to the Playlist View.
Jump to the beginning/end of a title/chapter with PAUSE II and SKIP
Locate the position for a marker with SKIP | SLOW/SEARCH ,
TIME SLIP, MANUAL SKIP or ◀
You can jump between set markers with SKIP
Editing several elements
Select the desired title with ▲ and press PAUSE . II
A check appears. Repeat this process to select other titles.
Press PAUSE II again to clear the selection.


Editing chapters in the SUB MENU
RAM
- Press FUNCTIONS.
- Use [To Others] with ▲ and confirm with ENTER.
- Select [Playlists] with ▲ and confirm with ENTER.
- Select a playlist in the Playlist View with ▲▼◀▶
- Press SUB MENU.
- Select [Chapter View] with ▲ and confirm with ENTER.
- Select the desired chapter with ▲ and ▶, then press SUB MENU again.
- Select the desired option in the sub menu with ▲▼ and confirm with ENTER.
Add Chapter
You can create a new chapter from the Source Title.
- Select a Source Title with ▲ and ▶, then press .
- Select a Source Chapter with ◀ and confirm with ENTER. Cancel the process with ▲
- Select the position where the chapter is to be inserted with ◀ and confirm with ENTER.
- Repeat the steps to add another chapter. You can select other source titles with ▲
- Exit the menu with RETURN.
Move Chapter
- Select the position where the chapter is to be moved to with ▲ and confirm with ENTER.
Create Chapter
Divide the title into chapters. Identify the points where a new chapter is to start. The chapters can be selected later during playback with SKIP.
- Press ENTER at the position where you want to create the chapter. Repeat this step to create a chapter at another location.
- Select [Exit] with ▼ and confirm with ENTER. A short section of the recording right before the separation point may be lost.
Combine Chapters
- Select [Combine] with ◀ and confirm with ENTER. The selected chapter is combined with the next chapter.
Delete Chapter
- Select [Delete] with ◀ and confirm with ENTER. The original title is not deleted when the chapter is deleted.
Playlist View: Return to Playlist View.
Jump to the beginning/end of a title/chapter with PAUSE II and SKIP.
Locate the position for a marker with SKIP |←SLOW/SEARCH .
TIME SLIP, MANUAL SKIP or ◀
You can jump between set markers with SKIP.
Editing several elements
Select the desired title with ▲ and press PAUSE . II
A check appears. Repeat this process to select other titles.
Press PAUSE II again to clear the selection.


Copying all pictures of an SD card
SD → RAM
You can copy the entire contents of the SD card onto DVD with the function [Copy All Pictures].
- Press FUNCTIONS.
- Select [To Others] with ▲ and confirm with ENTER.
- Select [Copy all pictures] with ▲ and confirm with ENTER.
- Select [Copy] with ◀ and press ENTER to confirm.
- To stop copying prematurely, press and hold RETURN for 3 seconds. • To exit copying, press ENTER. • To do another copy, press RETURN.
- Repeat the steps stated above.

Automatic detection of an SD card
SD cards are detected automatically on being inserted.
- Place the SD card in the SD card slot.
For viewing pictures from your SD Card: - Confirm [Album View] with ENTER. For copying pictures from your SD Card: - Select [Copy Pictures (JPEG)] with ▼ and press ENTER to confirm.
The copied folders are placed behind the folders already on the DVD.
The print setting DPOF is not transferred during copying. The order in which the pictures are registered in the copying list may possibly not correspond to the order in the copying target.
If you copy the pictures folder for folder or card for card, all other files in this folder will be copied as well as the picture files. However, this does not apply to sub-folders contained in the folder.
If the target folder already contains pictures, the new pictures are recorded after the existing ones.
If the target drive does not have enough capacity or the number of files/folders being copied exceeds the maximum, then the copying process is stopped prematurely.
If the copying source folder has no name, this folder may be given another name on the copying target. Give the folder a name before copying.

Select Folder
In the Album View, you can select another folder in the submenu under [Select Folder]. You can select a folder directly and open it. It may be possible that folders which were not created with this unit cannot be opened.
- Select [Album View] with ▲ and press ENTER to confirm.
- Press SUB MENU and press ENTER to confirm [Select Folder].
- Select the required folder with ◀▶ and press ENTER to confirm.


When a Timer Recording starts, recording in FR mode is cancelled.
Flexible recording mode (FR)
The unit calculates the best possible recording quality between XP and EP. It is adjusted for the space available on the disc.
This function is not available during an EXT LINK recording.
! Select the station with CH ◇ or the number buttons. ! Press FUNCTIONS. ! Select [To Others] with ▲ and confirm with ENTER. ! Select [Flexible Rec] with ▲ and confirm with ENTER. ! Select [Hour] or [Min.] with ◀ and change the recording time with ▲▼. ! Go back to [Set rec. time] with ◀▶. ! Select [Start] with ▲ and confirm with ENTER. Recording begins. ! Press STOP ■ to cancel the recording before it has ended. ! The channel and recording mode cannot be changed in PAUSE mode.
Displaying the available recording time
! Press Ⓛ multiple times.


This unit cannot be controlled from a connected DV unit. The DV input of this unit is only designed for DV units. (A computer etc. cannot be displayed.) The name of the DV unit may not be displayed correctly. Some DV units do not enable proper input of the picture and sound signal. The date and time information on the tape in the DV unit is not recorded. Simultaneous recording and playback is not possible.
Automatic detection of a camcorder at DV IN
RAM
! Connect your Camcorder with a DV cable to the DV IN input of the DVD Recorder. The DVD Recorder automatically detects the Camcorder. ! Select [Rec to DVD] with ◀ and confirm with ENTER. ! Confirm [Rec] with ENTER. Recording begins. Not all DV units are detected automatically. In this case, copy with the [DV Auto Rec] function in the FUNCTIONS menu.
Recording via DV input
RAM -R +RRW(V) □ +RW
The programmes (e.g. via a digital video unit) are recorded as one title.
RAM Each time the picture is interrupted, a chapter is created and a playlist is automatically created.
Switch off this unit and the DV unit (e.g. digital camcorder) before you connect it to the DV terminal.
If the VHS drive is selected, change to the DVD drive with DRIVE SELECT.
In the Setup menu under Audio Mode for DV Input, select [Stereo 1/2] or [Mix]. Set the DV unit to Pause at the desired start position. Press REC MODE to select the recording mode SP, LP, EP, XP. Press FUNCTIONS. Select [To Others] with ▲ and confirm with ENTER. Select [DV Auto Rec] with ▲ and confirm with ENTER. Confirm [Rec] with ENTER. Recording begins. Confirm the message at the end of the recording with ENTER. To prematurely stop the recording, press STOP ■. Confirm the message to prematurely stop the recording with ENTER or RETURN.
Manual recording via DV input
RAM -R +RRW(V) □ +RW
Start playback on your external DV unit. Press Pause at the desired start position. Select the DV channel with INPUT SELECT. Select the recording mode with REC MODE. Press REC on the DVD Recorder. Start playback on the external DV unit. End the recording on the DVD Recorder with STOP ■. End playback on the DV unit.
Recording cannot be cancelled with PAUSE II.


Setup menu overview
- Press FUNCTIONS.
- Select [To Others] with ▲ and confirm with ENTER.
- Select [Setup] with ▲ and confirm with ENTER.
- Select the desired sub menu with ▲ and switch to setup with ▶
- Select the desired setting with ▲ and confirm with ENTER.
- Select the desired option with ▲ and confirm with ENTER. Follow the menu guide. The unit saves your settings.
- Press RETURN multiple times to exit the menus.

Creating new profiles

You can create four different profiles where you can put together your favourite analogue and digital TV stations (99 entries).
The profiles are stored in the TV Guide.
- Use PAGE ◇ to scroll backwards or forwards page by page through the two tables.
Profile Select
Four different profiles are available.
- Use the GREEN button to select a profile.
Add
- Select the required station in the left table with ▲▼
- Use the YELLOW button to accept the selected station. Every station can only be added to the profile once.
- Press ENTER to save the profile.
Add All
- Use the BLUE button to add all available stations to the profile.
- Press ENTER to save the profile.
Edit profile
- Use ▶ to go to the column of the selected profile. Use the coloured buttons to edit the profiles.

Profile Name
- Press the RED button to change the profile name.
Move
You can change the order of stations in the selected profile.
- Select the required station with ▲▼
- Use the GREEN button to mark the station.
- Move the station to the required position with ▲▼
- Press the GREEN button again to insert the station.
- Press ENTER to save the profile.
Delete
- Select the required station with ▲▼
- Use the YELLOW button to delete the station from the profile.
- Press ENTER to save the profile.
Delete All
- Use the BLUE button to delete all stations from the profile.
- Press ENTER to save the profile.

Auto-Setup Restart
- Select [Yes] with ◀ and confirm with ENTER. The station search begins.
- To cancel the process, select [No] with ▶ and confirm with ENTER or press RETURN.
- Press RETURN to prematurely end the station search. All station settings and all adjusted profiles are deleted.


Add New DVB Service
The unit looks for new digital stations.
The station search is automatic.
The bar over the table shows you the search progress. At the end of the search, the number of found new digital stations appears.
- Press RETURN to stop the station search prematurely. The channels found before stopping are not saved.

Signal Condition
The display in the [Signal Condition] menu shows the quality and strength of the selected digital station.
- You can select and check the stations consecutively with CH◇.
Signal Quality
Display red: signal quality below 2: the signal quality is poor so that there may be interference in the pictures and sound.
Display orange; signal quality 2-5: the signal quality is basically adequate, but brief interference in the pictures and sound is possible in isolated cases.
Display green; signal quality over 5: optimum picture and sound quality.
Signal Strength
The display for signal strength is grey. 0 means signal strength = 0 %, 10 means signal strength = 100%.
The signal strength can also be > 100 % (> 10). In this case, the display is red.

Entering a new television station
- Select a free station location with ▲ and confirm with ENTER.
- Enter the channel with ▲r 0 - 9
- The channel tuning starts. Wait a moment until the desired station is set and confirm the setting with ENTER.
| Options available for tuning the channels | ||
| Pos | Station position in the station table. | |
| Name ▶ | [ A-Z, 0-9, -, +, * ] ENTER | Set the station name. |
| Channel ◀▶ | [21-68] ENTER | Set the channel. |
| NICAM ◀▶ | [Auto] [Off] ENTER | Automatic NICAM detection / Mono |
| Title Page ◀▶ | [100-899] ENTER | Select the video text page which supplies the title information. |
Your digital channels can be found at positions 1 - 900.
Your analogue channels can be found at positions 901 - 999.
Changing the name of the television station
- Select the name of the television station with ▲ and confirm with ENTER.
- Select [Name] with ▲ and the name field with ▶. The cursor jumps to the first letter BBC1.
- Change the letter with ▲
- Select the next letter with ▶, BBC1.
- Press ENTER. The new name is saved in the station table.
Deleting television stations
- Select the station that you want to delete with ▲▼◀▶
- Press the RED button to delete the station.
The station position settings are deleted.


Download from TV (with Q Link or similar functions)
- Select [Yes] with ◀ and confirm with ENTER. Data transfer begins.
- To cancel the procedure, use to select [No] with ▶ and confirm with ENTER or press RETURN. • To prematurely end the data transfer, press RETURN.

| ▲▼ Disc ▶ ▲▼ Setting ENTER ▲▼ Option ENTER | |
| Ratings | [8] [1-7] [0] |
| You can restrict the playback of DVD-Video after entering a password. 8 Allows all titles. 1-7 Prevents the playback of DVD-Video with the registered security levels. 0 Blocks all titles. Changing the security level Unlock Recorder Return to level 8 Change Password Change the password Change Level Change the authorisation level Temporary Unlock You can temporarily authorise a disc for playback. The security level is retained if you switch to standby or open the disc tray. | |
| DVD-Audio Video mode Playback | [On] [Off] |
| On: You want to play DVD-Video content from a DVD-Audio. If you change the disc or switch off the unit, the setting is reset to [Off]. | |
| Soundtrack Subtitle Menus DVD-V | |
| Select the language for audio, subtitles and disc menus. Under [Other], enter the language code for another language. | |
| Recording time in EP mode | [EP (6Hours)] [EP (8Hours)] |
| Select the maximum number of hours for recording in EP mode. EP (6 Hours): Recording time on a 4.7 GB disc. EP (8 Hours): Recording time on a 4.7 GB disc. The sound quality is lower. | |

| List of language codes | Frisian 7089 Javanese 7487 Marathi 7782 Scots Gaelic 7168 Thai 8472 | ||||||||||||
| Abkhazian | 6566 | Burmese | 7789 | Galician | 7176 | Kannada | 7578 | Moldavian | 7779 | Serbian | 8382 | Tibetan | 6679 |
| Afar | 6565 | Byelorussian | 6669 | Georgian | 7565 | Kashmiri | 7583 | Mongolian | 7778 | Serbo-Croat. | 8372 | Tigrinya | 8473 |
| Afrikaans | 6570 | Cambodian | 7577 | German | 6869 | Kazakh | 7575 | Nauru | 7865 | Shona | 8378 | Tonga | 8479 |
| Albanian | 8381 | Catalan | 6765 | Greek | 6976 | Kirghiz | 7589 | Nepali | 7869 | Sindhi | 8368 | Turkish | 8482 |
| Ameharic | 6577 | Chinese | 9072 | Greenlandic | 7576 | Korean | 7579 | Norwegian | 7879 | Singhalese | 8373 | Turkmen | 8475 |
| Arabic | 6582 | Corsican | 6779 | Guarani | 7178 | Kurdish | 7585 | Oriya | 7982 | Slovak | 8375 | Twi | 8487 |
| Armenian | 7289 | Croatian | 7282 | Gujarati | 7185 | Laotian | 7679 | Pashto | 8083 | Slovenian | 8376 | Ukrainian | 8575 |
| Assamese | 6583 | Czech | 6783 | Hausa | 7265 | Latin | 7665 | Persian | 7065 | Somali | 8379 | Urdu | 8582 |
| Aymara | 6589 | Danish | 6865 | Hebrew | 7387 | Latvian | 7686 | Polish | 8076 | Spanish | 6983 | Uzbek | 8590 |
| Azerbaijani | 6590 | Dutch | 7876 | Hindi | 7273 | Lingala | 7678 | Portuguese | 8084 | Sudanese | 8385 | Vietnamese | 8673 |
| Bashkir | 6665 | English | 6978 | Hungarian | 7285 | Lithunian | 7684 | Punjabi | 8065 | Swahili | 8387 | Volapuk | 8679 |
| Basque | 6985 | Esperanto | 6979 | Icelandic | 7383 | Macedonian | 7775 | Quechua | 8185 | Swedish | 8386 | Welsh | 6789 |
| Bengali | 6678 | Estonia | 6984 | Indonesian | 7378 | Malagasy | 7771 | Rhaeto-Rom. | 8277 | Tagalog | 8476 | Wolof | 8779 |
| Bhutani | 6890 | Faroese | 7079 | Interlingua | 7365 | Malay | 7783 | Romanian | 8279 | Tajik | 8471 | Xhosa | 8872 |
| Bihari | 6672 | Fiji | 7074 | Irish | 7165 | Malayalam | 7776 | Russian | 8285 | Tamil | 8465 | Yiddish | 7473 |
| Breton | 6682 | Finnish | 7073 | Italian | 7384 | Maltese | 7784 | Samoan | 8377 | Tatar | 8484 | Yoruba | 8979 |
| Bulgarian | 6671 | French | 7082 | Japanese | 7465 | Maori | 7773 | Sanskrit | 8365 | Telugo | 8469 | Zulu | 9085 |

FUNCTIONS
To Others

Setup

| Comb Filter | [On] [Off] |
| On: The picture is clear and contour-rich. The setting is always set to [On] if you selected [TV System - NTSC].Off: If the picture to be recorded is distorted. | |
| Still Mode | [Automatic] [Field] [Frame] |
| Select how the still picture should be displayed.Field: Select this function if the picture is distorted with the setting [Automatic].Frame: Select this function if small text or line structures are not displayed clearly with the setting [Automatic].Full pictures are still pictures that, displayed one after the other, create a moving picture. A full picture is made up of 2 half pictures. The picture can appear blurry, but the overall quality is very good.A half picture only contains half the information of a full picture and the picture quality is poorer. | |
| Seamless Play | [On] [Off] |
| Seamless playback of a chapter in a playlist.On: The chapter in a playlist are playback seamlessly. This is only possible if the playlist contains the same audio types. This function is not possible with Quick View.The position of the chapter segments may change slightly.Off: The boundaries of the chapters in the playlist are followed exactly, but the picture may freeze for a short period of time. | |


| ▲▼ Sound ▶ ▲▼ Setting ENTER ▲▼ Option ENTER | |
| Dynamic Range Compression DVD-V [On] [Off] (Dolby Digital Only) | |
| On: The level of quieter passages increases and the level of louder passages decreases. The audio can be clearly understood even when the volume is lowered. | |
| Bilingual Audio Selection R R DL RW(V) +R +R DL +RW [M 1] [M 2] | |
| If you want to record programmes that are broadcast in dual-channel sound, you can select between the original language [M1] or another available language [M2]. If you are copying from an external source or from a tape position, select the sound track on the other unit. | |
| Digital Audio Output [PCM Down Conversion] [Dolby Digital] [DTS] [MPEG] | |
| Select the appropriate setting if you have connected an external unit to the DIGITAL AUDIO OUT of the DVD Recorder. | |
| PCM Down Conversion [On] [Off] | |
| Select the audio output mode for a scan frequency of 96 kHz or 88.2 kHz. Despite this setting, signals are converted to 48 kHz or 44.1 kHz if they have a scan frequency over 96 kHz or 88.2 kHz or if the disc is copy-protected.On: The connected unit cannot process signals with a scan frequency of 96 kHz or 88.2 kHz. Signals are converted with 48 kHz or 44.1 kHz.Off: The connected unit can process signals with a scan frequency of 96 kHz or 88.2 kHz. Signals are output as 96 kHz or 88.2 kHz. | |
| Dolby Digital, DTS, MPEG [Bitstream] [PCM] | |
| Bitstream: The connected unit can decode the corresponding signal.PCM: If the connected unit cannot decode the corresponding signal, the setting must be changed to [PCM]. Otherwise, the loud noise can lead to damage to your hearing or loudspeakers. Make the necessary changes depending on your audio system. | |
| Audio Mode for XP Recording [Dolby Digital] [LPCM] | |
| Selection of the audio type when copying in XP mode.The picture quality of LPCM recordings may be worse than with normal recordings in XP mode. | |
| Audio Mode for DV Input R R DL RW(V) +R +R DL +RW [Stereo 1] [Stereo 2] [Mix] | |
| Select the audio type when copying from the DV input.Stereo 1: Original sound; Stereo 2: Voice-over, Mix: Original sound + voice-over |
| ▲▼ Display ▶ | ▲▼ Setting ENTER | ▲▼ Option ENTER |
| DVB Preferred Subtitles | [English] [Welsh] [Gaelic] | |
| Select the language of the subtitles. | ||
| On-Screen Messages | [Off] [3 sec] [5 sec] [7 sec] [10 sec] | |
| Automatic: The on-screen displays are displayed on the screen. | ||
| Grey Background | [On] [Off] | |
| On: The grey background is displayed when there is no television reception. | ||
| FL Display | [Bright] [Dim] | |
| Dim: The display goes dark during playback. It lights up again when a button is pushed. If the unit is switched off, the display turns off. | ||
| New Service Message | [Automatic][Off] | |
| Off: The Service Messages are not shown. | ||


| TV Aspect | [16:9] [4:3] [Letterbox] |
| Select the TV screen format of your television. Programmes in 16:9 format are recorded in 4:3 format. 16:9 format is used to record to RAM.Letterbox: Black bars appear on the upper and lower edges of the screen (16:9). | |
| Progressive | [On] [Off]17 |
| On: The signal is displayed in full-picture quality using COMPONENT VIDEO OUT.Changeover not possible when HDMI Video Format is set to [Automatic] and when using the HDMI connection. | |
| TV System | [PAL] [NTSC] |
| PAL: You connect the unit to a PAL or multi-system television. Programmes that were recorded with NTSC are played as PAL60.NTSC: You connect the unit to an NTSC television. Programmes that were recorded with NTSC are played as NTSC. | |
| HDMI Settings | |
| HDMI (High Definition Multimedia Interface) is a digital interface for Audio and Video.One single cable transfers both digital video data (picture data) and also digital audio data. HDMI is the world's first complete AV interface complying with a non-compression standard. | |
| AV1 Output | [Video (with component)][RGB 1 (without component)][RGB 2 (without component)] |
| Video (with component): If RGB 1 or 2 is set, there is no signal available on COMPONENT VIDEO OUT.If the unit is connected to HDMI, [Video (with component)] is switched on automatically.RGB 1 (without component): RGB output is available all the time while this unit is on.RGB 2 (without component): RGB output is available only during playback or on-screen display. | |

| AV2 Settings | AV2 Input | Perform the settings in the following submenus for the connected unit. |
| Ext Link | ||
| AV2 Input | [RGB / Video] [RGB] [Video] [S Video] | |
| RGB / Video: Is detected automatically when receiving or recording RGB output from external equipment (not NTSC).RGB, Video, S Video: Input is switched to the selected signal (S Video not NTSC). | ||
| Ext Link | [Ext Link1] [Ext Link 2] | |
| Ext Link 1: For digital receivers that send a special recording control signal, for example, the F.U.N. receiver (TU-DSF41)Ext Link 2: External recording control for satellite or digital receivers (video signal). | ||


| ▲▼ Connection ▶ | ▲▼ HDMI | ENTER | ▲▼ Option | ENTER |
| HDMI Video Format | [Automatic] [576i / 480i] [576p / 480p] [720p] [1080i] | |||
| Select the screen resolution of your connected television set.Automatic: automatically selects the setting belonging to the connected unit. If you are not satisfied with the picture quality, a change in the setting may possibly result in an improvement. You can only select the settings supported by the connected unit. | ||||
| Aspect for 4:3 Video | [4:3] [16:9] | |||
| Use this setting if you want to replay videos in 4:3 format on the connected television set in 16:9 format. (Only possible for an HDMI resolution of [720p] or [1080i].)4:3: Picture is output as original aspect.16:9: Picture is output as 16:9 aspect with side panels. | ||||
| Digital Audio Output | [HDMI/Optical] [Optical Only] | |||
| HDMI/Optical: Both outputs are activated with one signal.Optical Only: Only the optical output is activated with one signal. | ||||
| Control with HDMI / Q Link | [HDMI and Q Link] [Q Link Only] | |||
| HDMI and Q Link: Simultaneous interaction of HDMI and Q Link functions. Select this setting if you have connected a unit via HDMI.Q Link Only: If your TV set is equipped with the Q Link function, select this setting for the link.Select the screen resolution of your connected television set. | ||||
| HDMI and Q Link | only Q Link (via AV1) | only HDMI | ||
| Easy Playback | √ | √ | √ | |
| Direct TV recording | √ (not via HDMI) | √ | — | |
| Power on link | √ | √ | √ | |
| Power off link | √ | √ | √ | |
| Download from TV | √ (not via HDMI) | √ | — | |

| ▲▼ VHS ▶ | ▲▼ Setting ENTER | ▲▼ Option ENTER |
| Tape Length | [Auto (E-240)] [E-195] [E-260] [E-300] | |
| Setting for the tape length of the cassette in use. | ||
| SQPB | [Automatic] [On] [Off] | |
| Automatic: The unit detects the recording type.On: Playback of an S-VHS cassette in quasi S-VHS format.Off: Playback of recordings in VHS format. | ||


| ▲▼ Others ▶ ▲▼ Setting ENTER ▲▼ Option ENTER | |
| Remote Control | [DVD 1] [DVD 2] [DVD 3] |
| Setting the remote controlIf you use another Panasonic unit at the same location, change the mode of the remote control so that you can operate the units independently of each other.Change the code of the remote control so that you can simultaneously operate another Panasonic DVD unit.Set up the remote control for the unit.Select [DVD 1, 2 or 3] with ▲▼nd confirm with ENTER.Apply the selected setting [DVD 1, 2 or 3] to the remote control.Press and hold ENTER and press the appropriate number button 1, 2 or 3 for at least 2 seconds.Exit the menu with RETURN.If the remote control setting does not match that of the unit, DVD 1, 2 or 3 appears on the unit's display.Press ENTER and press the appropriate number key 1, 2 or 3 simultaneously for at least 2 seconds.If you want to operate two units independently of each other using the same remote control, then change the the remote control setting. | |
| Clock | |
| Clock settingThe clock will normally be set correctly during Auto-Setup however, under certain circumstances the DVD Recorder cannot set the clock automatically. In this case follow the operation steps below to manually set the clock.Switch with ▲Automatic mode to [Off] and confirm with ENTER.Change with ▲nd Time and Date.Confirm the change with ENTER.Don't forget to change summer time and winter time.Activating the automatic time correction functionThe correct time for the clock can be automatically maintained when the DVD Recorder is tuned to a station that transmits a time signal.Switch with ▲Automatic mode to [On] and confirm with ENTER.The automatic setting of the clock begins.Under adverse reception conditions, etc., the Automatic time correction function may not work. In this case the indication for Clock setting is automatically reset to [Off]. If the reception conditions improve later on, it is possible to activate this function.If the Clock setting is set to [On], do not set it to [Off], otherwise the automatic time correction function is deactivated.This DVD Recorder uses a 24-hour-clock.In the event of a power failure an automatic back-up system maintains the clock for approximate 60 minutes.When the Clock setting is set to [On], the automatic time correction function checks and if necessary adjusts the time several times every day. The automatic time correction function only works when the DVD Recorder is in standby, it does not work in the Timer Recording mode. | |

FUNCTIONS
To Others

Setup

![Owner ID • To set the PIN number press ▶. Use □-e-enter a four-digit PIN number. Press ▲-dorrect the digit. • Make sure that you will remember the PIN number (make a note of it). • Press the ENTER button to confirm. • Select [Yes] with ◀ and confirm with ENTER. • Press ▶. Enter the [Name], [House No…](/content/2026/06/1329865/images/e81ab613cf460bd1bee4efbbc611fdaf81c2d63976942295592b28e543623475.jpg)

| System Update | |
| EPG Download im Standby-Modus | [On] [Off] |
| On: EPG data are loaded in standby mode. | |
| Software Update in Standby | [On] [Off] |
| The software is automatically updated when the unit is in standby mode. This is shown in the unit display. If the unit is in standby to record, the timer-controlled recordings are not affected. If you want to prevent the automatic updates, select the setting [Software Update in Standby - Off]. | |
| Software Update Search Now | |
| Start the search for new software manually. A new software version is announced by a message. Do not switch your unit off during the update. This could result in the loss of data. A message shows that the update has finished. If a new software version is not going to be broadcast until the next few days, a corresponding message also appears. | |

![Initialize [Shipping Condition] [Default Settings] Shipping Condition: All settings, except for the security levels with the associated password and the time settings and the owner ID, are reset to the factory-default settings. Default Settings: All settings, except for the programmed channels, time…](/content/2026/06/1329865/images/b41c9b802c0e25553d632ab575204d62cb36216c5d5109211df9d4c1261e520a.jpg)


If you activated write-protection, deactivate it.
RAM
- Press FUNCTIONS.
- Select [To Others] with ▲ and confirm with ENTER.
- Select [DVD Management] with ▲ and confirm with ENTER.
- Select the desired menu with ▲ and confirm with ENTER.
- Return to the FUNCTIONS menu with FUNCTIONS.
Disc Name
34
- Enter the name. The name is displayed in the DVD Management window. You cannot name a disc after it has been finalized.
Disc Protection
RAM
This procedure makes it possible to activate or deactivate write-protection.
- Select [Yes] with ◀ and confirm with ENTER. Disc Protection On: The padlock is closed.
- To deactivate write-protection, select [Yes] with ◀ and confirm with ENTER. Disc Protection Off: The padlock is opened.

Delete all Titles
RAM
- Confirm [Delete all Titles] with ENTER.
- In the next screen, select [Yes] with ◀ and confirm with ENTER.
- In the security question, select [Start] with ◀ and confirm with ENTER. All titles and playlists are deleted and cannot be restored. Protected discs or titles cannot be deleted. If at least one title is protected, it cannot be deleted.

Format Disc
RAM -RW(V) +RW -RW(VR)
+R +R DL Only for new discs
Some discs are not formatted. They must be formatted before they can be used in this unit. The formatting process deletes all data from the disc. The estimated duration of the formatting process is displayed in the menu.
- Select [Yes] with ◀ and confirm with ENTER.
- Select [Start] with ◀ and confirm with ENTER. The formatting process begins. A message appears upon completion.
- Press ENTER.
Do not unplug the unit while the disc is being formatted or finalized.
The formatting process deletes all data, including the recordings created with this unit.


Auto-Play Select
-R +RW(V) □ -R DL +R DL +RW
Before finalization, you can select whether playback should start from the beginning of the disc or whether it should be launched from a disc menu.
- Select [Top Menu] or [Title 1] with ▲ and confirm with ENTER. If [Top Menu] is selected, the disc menu appears first. If [Title 1] is selected, playback begins at the beginning of the disc.
Finalize
-R +RW(V) □ -R DL +R DL
The discs become DVD-Videos in DVD-Video format through finalization. They can be played on all DVD Players that support DVD-Video format.
- Select [Yes] with ◀ and confirm with ENTER.
- Select [Start] with ◀ and press ENTER. The finalization process begins. A message is displayed upon completion.
- Press ENTER.
You can only finalize DVDs that were recorded on this unit. You can no longer record to DVDs that have already been finalized. A finalized DVD-RW(V) can be recorded again after it is reformatted.
Close First Layer
-R DL +R DL
The second Layer can only be recorded after the first Layer has been written and finalized.
- To close the first Layer, select [Yes] with ◀ and confirm with ENTER.
- Select [Start] ◀ and confirm with ENTER.
Create Top Menu
+RW
With a +RW, you have the option of creating a Top Menu.
The Top Menu created can be used for playback on another DVD-Player.
- Select [Create Top Menu] with ▲ and confirm with ENTER.
- In the following menu, select [Yes] with ◀ and confirm with ENTER.
- Select [Start] with ◀ and confirm with ENTER. The Top Menu is created. The procedure concludes with the message: Top Menu was created. Return to DVD Management with ENTER.


If you activated write-protection, deactivate it.
- Press FUNCTIONS.
- Select [To Others] with ▲ and confirm with ENTER.
- Select [Card Management] with ▲ and confirm with ENTER.
- Select the desired menu with ▲ and confirm with ENTER.
- Return to the FUNCTIONS menu with FUNCTIONS.
Format Card
The formatting process deletes all data from the card.
- Select [Yes] with ◀ and confirm with ENTER.
- Select [Start] with ◀ and confirm with ENTER. The formatting process begins. A message appears upon completion.
- Press ENTER.
Picture and sound settings
DISPLAY menus contain information on the disc or the unit. With DVD-Videos, you can use the repeat function, change subtitles and the angle, change the picture and sound settings for DVD playback. Depending on the status of the unit (playback, STOP), there are some entries that cannot be selected or changed.

- Press DISPLAY to launch the menu.
- Press DISPLAY again to exit the menu.

Subtitles, sound track and recording angle can only be selected if they were recorded on the disc. For some discs, they can only be changed via the disc menus. When bilingual recordings are played back, "1+1 ch" is displayed.
| ▲▼ Disc ▶ | ▲▼ Option ▶ | ▲▼ Setting |
| Soundtrack | Soundtrack lang. DVD-A DVD-VSelect the sound and the language. | |
| Sound properties RAM -R -R DL -RW(V) +R +R DL +RW |-RW(VR)The disc sound properties are displayed.LPCM/PPCM/Dolby Digital, DTS and MPEG: signal type, ch (channel): number of channels, k (kHz): scan frequency, b (bit): number of bitsVCDSelect the audio channel. | ||
| Subtitle | [On] [Off] DVD-A DVD-VSwitch subtitles on or off, select the language.RAM -R -R DL -RW(V) +R +R DL +RW |-RW(VR)Only for discs with the Subtitle On/Off setting. The Subtitle On/Off setting cannot be recorded with this unit.VCDSwitch subtitles on or off, select the number of the subtitle. | |
| Language ENG: English DAN: Danish THA : ThaiFRA : French POR: Portuguese POL : PolishDEU: German RUS: Russian CES : CzechITA : Italian JPN : Japanese SLK : SlovakESP : Spanish CHI : Chinese HUN: HungarianNLD : Dutch KOR: Korean FIN : FinnishSVE : Swedish MAL: Malay * : OthersNOR: Norwegian VIE : Vietnamese* Others: Enter the appropriate language code.61 | ||
| Audio Channel | L+R / L / R RAM -RW(VR) VCDChange audio during playback. | |
| Angle | DVD-A DVD-VSelect another recording angle. | |
| Still Picture | [DVD-A Select the still image playback type.[Slide Show]Disc playback in the original sequence.[Page] Select the still image number and playback. RANDOM: Playback in random order.Return to the standard page: Select [Return] and press ENTER. | |
| PBC | VCDPBC shows whether the menu playback control is on/off. | |
| ▲▼ Play ▶ | ▲▼ Option ▶ | ▲▼ Setting |
| Repeat Play | [On] [Off] The function is only available if the elapsed time is displayed.CD VCDTrack ↔ All ↔ OffRAM -R +R DL -RW(V) □ +R DL +RW DVD-V -RW(VR)Title ↔ Chapter ↔ OffDVD-AMP3Track ↔ Group ↔ OffDuring playback of a playlistPL (Playlists) ↔ OffIf the Video-CD has playback control, select a track in STOP mode with the number buttons. RAM -RW(VR) |
| ▲▼ Picture ▶ | ▲▼ Option ▶ | ▲▼ Setting | |
| Playback NR | [On] [Off] | Reduces screen interference. | |
| Progressive | [On] [Off] | Select [On] to activate full picture output. | |
| Transfer. | [Progressive - On] | Select the appropriate conversion method for full-picture output.PAL output signal[Auto] Film and video content is detected and converted appropriately.[Video] If problems occur with the [Auto] setting.[Film] Select Video or Film if the video content is not displayed correct with the Auto setting.NTSC output signal[Auto 1] Film and video content is detected and converted appropriately.[Auto 2] Movies with different picture frequencies are converted[Video] If content does not display correct with the [Auto 1] or [Auto 2] settings. | |
| Copy NR | [Automatic][On][Off] | Reduces noise during tape recording. Only for AV1, AV2, AV3 or DV.Only with picture input from a video cassette.Noise reduction is activated for video input.The input signal can be recorded unchanged. | |
| Sound ▶ | Option ▶ | Setting | |
| DVB Multi Audio | [Other 1][Other 2] | If more than one audio channel is broadcast, you can set the desired channel here (only applies to digital channels). | |
| V.S.S. | [Natural][Emphasis][Off] | RAM -R -R DL -RW(V) +R +R DL +RW DVD-A DVD-V -RW(VR)Surround sound effect with 2 front speakers. Only with Dolby Digital with 2 or more channels. Switch off V.S.S. if this causes problems. V.S.S. does not work with recordings in dual-channel sound. | |
| Dialog Enhancer | [On] [Off] | RAM -R -R DL -RW(V) +R +R DL +RW DVD-A DVD-V -RW(VR)Dolby Digital, only with 3 or more channels, including a center channel. The volume is increased so that dialogue is easier to understand. | |
| ▲▼ Other ▶ | ▲▼ Option ▶ | ▲▼ Setting | |
| Position | [1 - 5] | Position of the OSD displays on the screen. | |
If you need help
CUSTOMER SERVICE
Should problems occur, please try to resolve them by referring to the error sources described here. If this does not help, you should contact your dealer or customer service.
Normal disc revolution sounds, atmospheric interference during reception, picture interference while fast-forwarding, and limited reception of the satellite programs are not signs of a defective unit.
If the disc cannot be played due to poor quality, try it again with a disc from Panasonic.
Page
| ERROR MESSAGES | ▸ The unit is malfunctioning. | |
| The error code H □□, U □□ or F□□ appears. | ▸ The numbers following H, U or F indicate the status of the unit.Switch the unit to Standby mode with ◎/IIf the unit does not switch to Standby mode, press ◎ for approx. 10 seconds or unplug it for a minute and then plug it back in.Press ◎ to switch on the unit. If this does not solve the problem, contact customer service with the displayed error code. | |
| Error code U59 | ▸ The unit is hot and switches to Standby mode for safety reasons.Wait approx. 30 minutes until the message disappears. Place the unit in a well ventilated location. Do not block the vents at the back of the unit. | |
| Error code U61 | ▸ The unit has found an error during recording or playback without an inserted disc. The unit proceeds with the recovery procedure.This procedure restores the normal operating mode. The unit is not defect. Please wait until the message goes off. | |
| Error code U71 | ▸ The connected unit is not suitable for connection to HDMI. | |
| Error code U72 Error code U73 | ▸ The HDMI connection does not work perfectly.The connected unit is not suitable for connection to HDMI.The HDMI cable is too long.The HDMI cable is broken. | |
| Error code U88 | ▸ A problem occurred during recording or playback of a disc. The unit is not defective, but is performing a restore procedure.Wait until the error message disappears from the display. | |
| HARD ERR | ▸ The unit is not functioning properly.Switch the unit off and back on again.If this does not solve the problem, contact customer service. | |
| The unit automatically switches to Standby mode. | ▸ One of the unit's safety devices may have been activated.Press ◎/tb switch on the unit. | |
| FUNCTIONNo functions possible. | ▸ Check the connection to the power supply.The unit is in Standby mode for a Timer programming via external units. EXT-L appears in the display.Press EXT LINK to switch off recording standby mode.To cancel a recording prematurely, stop the transfer of the recording signal on the external unit.Press EXT LINK to switch off recording standby mode. | 53 |
| The disc cannot be ejected. | ▸ The unit is currently recording.With the unit switched off, press STOP ■and CH ∧ on the unit at the same time and hold for about 5 seconds. Contact your dealer.The above procedure cannot be executed if the child-protection feature is activated.Switch off the child-protection feature. | 6 |
If you need help
| Page | ||
| PICTURENo picture. | ▸ Check the connection to the TV, e.g. AV1. | 10 |
| ▸ The PROGRESSIVE output is activated, but the connected TV is not progressive-capable. | 17 | |
| There is picture interference. | ▸ Press and hold STOP ▪ and PLAY ▶ on the unit at the same time for more than 5 seconds. The function is switched to half-picture (INTERLACE).▸ The [TV System] setting does not match that on the disc.▸ In STOP mode, press and hold STOP ▪ and OPEN/CLOSE ▲ on the unit for more than 5 seconds. This switches the unit from PAL to NTSC or vice versa. | 1764 |
| Television reception worsens when the unit is connected. | ▸ Check the aerial connection and the alignment of your aerial.You may need to use a signal amplifier. | |
| The TV picture format is not set correctly. | ▸ Check the [TV Aspect] setting in the Connection Setup menu. | 64 |
| The picture flickers. | ▸ Adjust the picture. Read the operating instructions for the TV. | |
| No on-screen messages. | ▸ Change the [On-Screen Messages] setting the Display Setup menu. | 63 |
| Poor picture in spite of good signal quality. | ▸ Overmodulation makes the signal strength display go to red.▸ Readjust the picture with your room aerial until the picture quality improves. | |
| SOUNDNo sound. Distorted sound.Volume set to quiet. | ▸ Check the connections.▸ If you connected an amplifier, check the input mode.▸ Switch off the V.S.S. function if it causes problems. | 1971 |
| It is not possible to hear the desired sound type. | ▸ Press DISPLAY to select the desired sound type.▸ Change the appropriate setting in the Sound Setup menu.▸ The sound cannot be switched on some discs. | 63 |
| The sound cannot be set for stereo or NICAM broadcasts. | ▸ Connect external units with audio cables even if you use a digital connection.▸ You can change the sound type when using DVD-RAM. | 19 |
| REMOTE CONTROLNo functions. | ▸ An incorrect remote control code was selected.▸ Check the batteries.▸ Point the remote control at the sensor on the unit.▸ The child protection feature has been activated. | 6566 |
| The TV cannot be operated. | ▸ An incorrect remote control code was selected. | 6 |
| DISPLAYThe display light is weak. | ▸ Change the [FL Display] setting in the Display Setup menu. | 63 |
| "0:00" blinks on the unit display. | ▸ No time. Set the time in the Others [Clock] Setup menu. | 66 |
If you need help
| PLAYBACKPlayback does not start. | ▸ No disc or video cassette inserted.▸ The disc is dirty or badly scratched.▸ You inserted a disc that is not suitable for playback.▸ You inserted a blank disc. | 23 |
| DVD-Video will not play. | ▸ Some DVD-Videos cannot be played if the security level has been changed. | 61 |
| No reaction when PLAY▶is pressed. | ▸ 🔒appears on the screen. The procedure is being prevented by the unit or the disc.▸ The child protection feature has been activated. | 6 |
| A title or chapter is not played back after being selected. | ▸ Some titles or chapters of DVD-Videos are not played back if the security level has been changed. | 61 |
| Soundtrack/subtitles cannot be selected or do not match the language selected in the Setup menu. | ▸ The subtitles were not recorded on the disc or are not switched on.▸ The languages were not recorded on the disc.▸ You may need to use the disc menu to select the languages. | 63 |
| The angle cannot be changed. | ▸ The angle perspective can only be changed for scenes that were recorded from different angles. | 70 |
| You forgot your security password. | ▸ Select the DVD drive and, while the disc tray is open, press and hold ▶REC and PLAY▶ on the unit for at least 5 seconds. | |
| RECORDINGCannot record. | ▸ The video cassette is write-protected.▸ Check whether the inserted disc is suitable for recording.▸ The disc is not formatted. Format the disc.▸ The write-protection device on the cartridge is set to "PROTECT".Deactivate the write-protection.▸ Deactivate the write-protection in the DVD Management menu.▸ The material that you want to record is copy-protected. The number of possible copies is limited with some programmes.▸ Discs containing PAL and NTSC signals cannot be recorded. | 29686823 |
| Some or all recorded programmes were lost. | ▸ If there is a power cut during recording or processing or if the unit is unplugged from the power supply the programme may be lost or the disc may be damaged. Reformat the disc or use a new disc. | 68 |
| Timer Recording is not functioning. | ▸ The Timer programming is defective, different Timer programmes overlap each other. Correct the programming.▸ Check the clock setting. | 4366 |
| Timer Recording cannot be cancelled. | ▸ With anEXT LINK-controlled recording via an external unit, pressEXT LINK.The EXT-L display disappears.▸ If you want to cancel the recording prematurely, stop the transfer of recording signal on the external unit. PressEXT LINKto switch off recording standby. | 53 |
| SOFTWARE UPDATEWhen are the software updates broadcast ? | ▸ The unit shows automatically when a software update has been broadcast, and also automatically updates the software if thus function has not been switched off in the Setup menu. | 67 |
If you need help
| TV GUIDE | ||
| The displayed information is wrong. | ▸ The broadcasting companies are responsible for the information. Deviations are possible when changes are made at the last minute. | |
| No or incomplete data. | ▸ Date/time incorrectly set.▸ The signal is too weak or no signal was found.Check the aerial. Realign the aerial and check the values with the signal quality in the [Setup] menu.▸ The broadcasting companies are responsible for the information. Deviations are possible when changes are made at the last minute. | 6660 |
| EPG database empty or incomplete after switching on. | ▸ Downloading the data was not possible. Switch the unit to standby over night.▸ Activate the EPG Download in the [Setup] menu. | 67 |
| No current data in spite of active EPG download function. | ▸ Downloading the data was not possible. Switch the unit to standby over night▸ Make sure that no Timer Recording was carried out during the time chosen for the EPB download. | |
| DVB-T | ||
| No station found.Time not set. | ▸ The signal is too weak or no signal was found.Check the aerial. Realign the aerial and check the values with the signal quality in the [Setup] menu.▸ Repeat the auto setup. | 6059 |
| Date/time incorrectly set. | ▸ The transfer did not work.Repeat the Automatic Time Setting. | 66 |
| Unusual station sorting. | ▸ The station sorting of this unit is pre-defined. Use profiles to sort the stations as you want them. | |
| No teletext | ▸ This DVD Recorder does not support teletext. | |
| No automatic station allocation in VIDEO Plus+. | ▸ No unique code for the digital stations. Allocate the stations manually when programming for the first time. The DVD Recorder will then recognise the stations correctly in future. | |
| Which aerial is suitable for receiving DVB-T? | ▸ Any (terrestrial) roof aerial can be used. Room rod aerials are also suitable. Use an active room aerial if the reception is poor. | |
| After the auto setup, there aren't any stations in the station list although found stations were displayed during auto setup. | ▸ [Shipping Condition] was performed or the unit was in the delivery status. The auto setup was then started and interrupted.Do an auto setup again and let it continue right through to the end. The data are only saved after this has been completed. | |
| EXTERNAL INPUT | ||
| Video or audio is not recorded from an external unit. | ▸ The external unit is not connected correctly.▸ The incorrect input channel AV2, AV3 or DV IN was selected. | 1919 |
| HDMIWhich accessories are required to hear multi-channel Surround Sound? | Multi-channel sound can only be played back with this unit if it is connected with an HDMI cable or a digital audio optical fibre cable to an amplifier with an integrated decoder. | |
| Switching on takes longer in spite of the Quick Start function. | All units connected by HDMI are checked while switching on.This can take a while. | |
| No picture on the television set. | Check whether the television set and DVD Recorder are connected correctly with the HDMI cable. If the external unit has been connected correctly, the HDMI message appears briefly on the display of the DVD Recorder.If more than four units are connected with HDMI cables, you may possibly not be able to see a picture. Reduce the number of connected units.If the unit is connected via COMPONENT VIDEO OUT to a television unit which is not progressive-compatible, no unit can be connected with HDMI. The [Progressive] setting is automatically switched to [On] in the Setup if a unit is connected up with HDMI. | 65 |
| Wrong screen format. | If a television set is connected via HDMI AV OUT, in the [Setup] menu, set the setting [HDMI Aspect] to [4:3].Check the setting [TV Aspect] in the [Setup] menu. | 6564 |
| Part of the picture appears duplicated some of the time when using the output.COMPONENT VIDEO OUT | Do not connect this unit to the television set with an HDMI cable.In the Setup menu, set the [Progressive] setting to [Off]. | 65 |
| No sound.Low volume.Sound with interference.The required audio type cannot be heard. | The amplifier connected via HDMI does not support CPPM and the HDMI Ver. 1.1.Standard. No Multi Audio-Disc can be played back.The sound is not played back if the Bitstream Signal is output from HDMI AV OUT or OPTICAL DIGITAL AUDIO OUT.If more than four units are connected with HDMI cables, you may possibly not hear any sound. Reduce the number of connected units.If the unit is connected with an HDMI cable to a television set and OPTICAL DIGITAL AUDIO OUT is used as audio output, in the [Setup] menu, set the setting [Digital Audio Output] to [Off].When one or several units are connected via HDMI AV OUT, it is possible for there to be interference with the sound. Select another connection type. | 65 |
| HDAVI Control is not working. | In the [Setup] menu, change the setting [Control with HDMI / Q Link] to [HDMI and Q Link].Use a fully wired HDMI cable.The connected unit possibly does not support HDAVI control. | 65 |
What can I do with which disc?
The table shows an overview of the most important functions which can be recorded, played back and edited with the various formats on this unit. Not all functions are available to the same extent for all formats. Restrictions are stated separately in the corresponding description of the function.
| Playback Functions | RAM -R | BR/RA | DVB-DL | VCDCD | -RW(V) | -RW(VR) | +RW | SD | |||||
| Playback of a recorded title (DIRECT NAVIGATOR) | √ | √ | √ | √ | √ | √ | √ | √ | |||||
| Starting playback with Disc menu | √ | √ | √ | ||||||||||
| Playback starts with the last recorded title | √ | √ | √ | √ | √ | √ | √ | √ | |||||
| Playback starts from the beginning of the disc | √ | √ | √ | √ | √(MP3) | ||||||||
| Changing the audio channel (DISPLAY) | √ | √ | √ | √ | √ | ||||||||
| Quick View (PLAY/x1.3) | √ | ||||||||||||
| TIME SLIP | √ | √ | √ | √ | √ | √ | √ | √ | |||||
| MANUAL SKIP | √ | √ | √ | √ | √ | √ | √ | √ | |||||
| CREATE CHAPTER | √ | ||||||||||||
| Slow-motion/Frame playback | √ | √* | √ | √** | √ | √ | √ | √ | √ | √ | √ | ||
√ - Moving pictures only, √ - Forwards only
| Recording | RAM -R | BRDRAD | DYB-DL | VCDCD | -RW(VR) | +RW | SD-RW(V) | ||||||
| Flexible Rec | √ | √ | √ | √ | √ | √ | √ | ||||||
| Playback during recording | √ | ||||||||||||
| Timer Recording | √ | √ | √ | √ | √ | √ | √ | ||||||
| Timer Recording with Ext Link | √ | √ | √ | √ | √ | √ | √ | ||||||
| Recording via DV input | √ | √ | √ | √ | √ | ||||||||
| Manual recording via DV input | √ | √ | √ | √ | √ | √ | √ |
| Functions of the DIRECT NAVIGATOR | RAM | R | D | E | R | D | VL | VCDCD | -RW(V) | -RW(VR) | +RW | SD | ||||
| Playback | ✓ | ✓ | ||||||||||||||
| Delete | ✓ | ✓ | ✓ | ✓ | ✓ | ✓ | ✓ | ✓ | ||||||||
| Properties | ✓ | ✓ | ✓ | ✓ | ✓ | ✓ | ✓ | ✓ | ✓ | ✓ | ||||||
| Edit | ✓ | ✓ | ✓ | ✓ | ✓ | ✓ | ✓ | ✓ | ||||||||
| Enter Name | ✓ | ✓ | ✓ | ✓ | ✓ | ✓ | ✓ | ✓ | ||||||||
| Set up Protection/Cancel Protection | ✓ | ✓ | ✓ | ✓ | ✓ | |||||||||||
| Partial Delete | ✓ | |||||||||||||||
| Change Thumbnail | ✓ | ✓ | ✓ | ✓ | ✓ | ✓ | ✓ | |||||||||
| Divide Title | ✓ | |||||||||||||||
| Playlist | ✓ | ✓ | ||||||||||||||
| Edit Playlist | ✓ |
√ - only Playback and Properties
| Functions of the DVD/Card Management | RAM -R | BRORAD | DVB-DL | VCDCD | -RW(V) | -RW(VR) | +RW | SD | ||||
| Disc Name | √ | √ | √ | √ | √ | √ | ||||||
| Disc Protection | √ | |||||||||||
| Delete all titles | √ | |||||||||||
| Format Disc | √ | √ | √ | √ | √ | √ | ||||||
| Auto-Play Select | √ | √ | √ | √ | √ | √ | ||||||
| Finalize | √ | √ | √ | √ | √ | |||||||
| Create Top Menu | √ | |||||||||||
| Close First Layer | √ | √ |
Folder structure
 | DVD(JPEG), CD(JPEG)Format ISO9660 level 1 or 2 (except for extended formats),JolietCompatible pixels between 34x34 and 6144x4096 pixelsSub Sampling 4:2:2 or 4:2:0This unit is not compatible with MOTION JPEG.Maximum number of folders 300 Recognizable folders per disc on this unit(including the root folder)Maximum number of JPEG files 3000 Recognizable JPEG files per disc on this unit*This unit is compatible with multi-session.This unit is not compatible with packet writing.*Total number of recognizable files including MP3, JPEG and other type of files is 4000. |
 | DVD(MP3), CD(MP3)Format ISO9660 level 1 or 2 (except for extended formats),JolietCompatible compression rate 32kbps ~320kbpsCompatible sampling rate 16kHz, 22.05kHz, 24kHz, 32kHz, 44.1kHz, 48kHzThis unit is not compatible with ID3 tags.Maximum number of folders 300 Recognizable folders per disc on this unit(including the root folder)Maximum number of MP3 files 3000 Recognizable MP3 files per disc on this unit*This unit is compatible with multi-session.This unit is not compatible with packet writing.*Total number of recognizable files including MP3, JPEG and other type of files is 4000. |
 | SD Card Slot Still Picture SD Memory Card Slot 1pc Compatible media SD Memory Card (includes mini SD Cards), Multi Media Card Format FAT12,FAT16Image File Format JPEG conform DCF (Design rule for Camera File system)TIFF (Uncompressed RGB chunky), DPOF Compatible Sub sampling 4:2:2, 4:2:0Number of pixels between 34x34 and 6144x4096Thawing Time Approx. 3sec (6M pixels)This unit can display the following folder names:***: figures / XXX : letters |
| SVCD Format IEC62107This unit is not compatible with "Chaoji VCD" available on the market including CVD, DCVD and SVCD that do not conform to IEC62107. |
Specifications
| Power source AC 220V-240V 50 HzPower consumption 30 W | Dimensions approx. 430 mm (W) x 84 mm (H) x 351 mm (D)Weight approx. 5.4 kgOperating temperature 5°C - 40°COperating humidity 35% - 80% RH no condensation | |||
| VHSRecording format Heads | VHS Video Cassette System Standard with FM audio4 Helical Scan Heads for Video2 Helical Scan Heads for FM audio1 Fixed Head for Normal audio | Tape Speed/Recording Time(with E-240 tape) | PAL,MESECAM: SP: 23.39 mm/s 240 min.LP: 11.7 mm/s 480 min.EP: 7.8 mm/s 720 min.NTSC: SP: 33.35 mm/s 168 min.EP: 11.12 mm/s 505 min. | |
| Television system Tuner System Antenna reception input | PAL 625 lines, 50Fields, NTSC, 525 lines, 60 FieldsPAL-I, DVB-TUHF: CH 21 - 68 75Ohm Termination | Audio systemRecording system (for DVD) Dolby Digital (2ch)Analog InputAV1 SCART AV2 SCART AV3 RCA Analog OutputAV1 SCART AV2 SCART Line RCA Number of channels (for DVD)Number of track (for VHS)Digital output | Reference: -6dBV, at 1kHzFull scale: +6dBV, at 1kHzInput Impedance > 10kOhmReference: -6dBV, at 1kHzFull scale: +6dBV, at 1kHzOutput Impedance < 1kOhmRecording: 2 channelsPlayback: 2 channelsHiFi: 2 trackNormal: 1 track1 Digital Audio Optical Connector(PCM, Dolby Digital, DTS, MPEG) | |
| Video system Recording System (DVD) MPEG 2 (Hybrid VBR) Input(PAL, NTSC)(RGB: PAL)OutputComponent Video Output | AV1 SCART AV2 SCART AV3 RCAS VIDEOAV1 SCART AV2 SCART Line RCACVBS: 1.0 Vpp; 75OhmCVBS: 1.0 Vpp; 75OhmY: 1.0 Vpp, C: 0.3 Vpp; (PAL); 75OhmRV: 0.7 Vpp; (PAL); 75OhmCVBS: 1.0 Vpp; 75OhmY: 1.0 Vpp, C: 0.3 Vpp; (PAL); 75OhmCVBS: 1.0 Vpp; 75OhmRV: 0.7 Vpp; (PAL); 75OhmCVBS: 1.0 Vpp; 75OhmRV: 0.7 Vpp; (PAL); 75OhmRV: 0.7 Vpp; (PAL); 75OhmRV: 0.7 Vpp; (PAL); 75OhmRV: 0.7 Vpp; (PAL); 75OhmRV: 0.7 Vpp; (PAL); 75OhmRV: 0.7 Vpp; (PAL); 75OhmRV: 0.7 Vpp; | HDMI outputDV Input (PAL, NTSC)SD Card Slot | 19 pin type AVersion 1.2a (EDID Ver. 1.3)IEEE1394 Standard 4PinMemory Card Slot | |
| Recording System | DVD-RAMDVD-RDVD-R DL (Dual Layer)DVD-RW+R, +R DL (Double Layer), +RW | Playable Disc | DVD-RAMDVD-RDVD-R DL (Dual Layer)DVD-RW+R, +R DL (Double Layer), +RWDVD-VIDEO, DVD-AudioCD-Audio (CD-DA), Video CCD-R/CD-RW (CD-DA,Video CD, SVCD, MP3, JPEG formatted discs)SVCD | DVD-RAMDVD-RDVD-VIDEO, DVD-AudioCD-Audio (CD-DA), Video CCD-R/CD-RW (CD-DA,Video CD, SVCD, MP3, JPEG formatted discs)SVCD |
| Recording Time | Max. 8 hours (using 4.7 GB disc)XP: Approx. 1hour LP: Approx. 4hours EP: Approx. 6 / 8 hours | |||
| Recordable discs DVD-RAM Ver.2.0DVD-R for General Ver.2.0DVD-RW Ver.1.1 | Ver.2.1/3X-SPEED DVD-RAM Revision 1.0Ver.2.2/5X-SPEED DVD-RAM Revision 2.0for General Ver.2.0/4X-SPEED DVD-R Revision 1.0for General Ver.2.x/8X-SPEED DVD-R Revision 3.0for General Ver.2.x/16X-SPEED DVD-R Revision 6.0for DL Ver.3.0for DL Ver.3.x/4X-SPEED DVD-R for DL Revision 1.0Ver.1.x/2X-SPEED DVD-RW Revision 1.0Ver.1.x/4X-SPEED DVD-RW Revision 2.0Ver.1.x/6X-SPEED DVD-RW Revision 3.0+R Ver.1.0, Ver.1.1, Ver.1.2, Ver.1.3, for DL Ver.1.0+RW Ver.1.1, Ver.1.2/4X-SPEED | |||
Note: The values given for weight and dimension are approximate values. The technical data can be changed without advanced notice.
Index
| AC IN 9 DTS 4,19,63,70 Profile 59 | |||||
| Add New DVB Services 60 Dual-channel audio 32 Prog Type 50 | |||||
| Album 39 DV IN 4,19,58,63 Progressive 17,64,71 | |||||
| Angle 70 DVB Multi Audio 71 | |||||
| Audio Channel 27,32,70 DVB Preferred Subtitles 63 Q Link 15,65 | |||||
| Audio Mode for DV Input | 63 | DVD Video Recording format | 22 | Quick View | 27 |
| Audio Mode for XP Recording | 63 | DVD-Audio Video mode Playback | 61 | ||
| Auto finalize | 25 | DVD-Video format (V) | 22 | Ratings (Change Level) | 61 |
| Auto-Play Select | 69 | Dynamic Range Compression | 63 | Ratings (Change Password) | 61 |
| Auto-Setup Restart | 59 | Ratings (Temporary Unlock) | 61 | ||
| AV1 Output | 64 | Entering text | 34 | Ratings (Unlock Recorder) | 61 |
| AV2 Input | 64 | EPG Download in Standby | 67 | Recording discs | 22,30 |
| Ext Link | 53,64 | Recording mode | 31 | ||
| Bilingual Audio Selection | 63 | Recording time | 30,31 | ||
| Bitstream | 63 | Field | 62 | Recording time in EP mode | 61 |
| Finalizing 47,69 Regional codes | 23 | ||||
| Camcorder | 4,19,58 | FL Display | 63 | Repeat Play | 71 |
| Cartridge Discs | 23 | Flexible Rec | 58 RGB 64 | ||
| Category | 50 | Folder 41 | |||
| Changing batteries | 5 | Formatting | 30,68,69 | SVIDEO | 9,18 |
| Chapter (DIRECT NAVIGATOR) | 37 | Frame | 62 | S Video | 64 |
| Chapter (Playlists) | 56 | Satellite receiver | 12,64 | ||
| Child protection | 6 | Grey Background | 63 | Seamless Play | 62 |
| Clock | 11,66 | Set Top Box | 12,64 | ||
| Close First Layer | 69 | HDMI | 4,14,64,65 | Shipping Condition | 67 |
| Code of remote control | 6,66 | Signal Condition | 60 | ||
| Comb Filter | 62 | Initialize | 67 | Slide Show | 39,41,70 |
| COMPONENT VIDEO OUT | 17,64 | Interlace | 17 | Software Update in Standby | 67 |
| Copy Direction 45,46,47 | Software Update Search Now | 67 | |||
| Copy Mode | 45,46,47 | JET REW | 28 | Sound properties | 70 |
| Copy NR | 71 | JET SEARCH | 28 | Soundtrack | 61,70 |
| Copy Time | 47 | JPEG | 38 | Soundtrack lang. | 70 |
| COPYING | 48 | Source Chapter | 54 | ||
| CPRM | 30 | Landscape View | 49 | Source Title | 54 |
| Create List | 45,46 | Language codes | 61 SP/LP switching 42 | ||
| LASER | 3 SQPB | 29,65 | |||
| Date | 11,66 | Letterbox | 64 | Still Mode | 62 |
| Default Settings | 67 | LPCM | 63 | Still Picture | 70 |
| Delete (album) | 40,44 | Subtitle | 61,70 | ||
| Delete (chapter) | 37,56 | Menus | 61 | Subtitle Language | 70 |
| Delete (partial) | 36 | MP3 | 41 | System Update | 67 |
| Delete (picture) | 40,44 | MPEG | 4,19,63,70 | ||
| Delete (playlists) | 55 | Tape length | 65 | ||
| Delete (Profile) | 59 | New Service Message | 63 | TIFF | 38 |
| Delete (Timer) | 43,51 | NICAM | 60 | Time | 11,66 |
| Delete (title) | 35,44,68 | NTSC | 30,63,70 | TIME SLIP | 27 |
| Delete (TV stations) | 60 | Title Page | 60 | ||
| Dialog Enhancer | 71 | On-Screen Messages | 63 | Top Menu | 69 |
| Digital Audio Output | 63,65 | OPTICAL | 9 | Tracking | 29 |
| Disc Formats | 22,23 | Optical digital audio cable | 19 | TRACKING/V-LOCK | 29 |
| Disc Name | 68 | Owner ID | 66 | Transfer. | 71 |
| Disc Portection (VHS) | 29 | TV Aspect 64 | |||
| Disc Protection (Cartridge) | 23 | PAL | 17,30,64,71 | TV Codes | 6 |
| Disc Protection (Disc) | 68 | PBC | 70 | TV System | 64 |
| Disc Protection (Recording) | 36 | PCM Down Conversion | 63 | ||
| Dolby Digital | 4,19,63,70 | Playback discs | 23 | V.S.S. | 71 |
| Double-Layer-DVD | 22 | Playback NR | 71 | VHS Index Search System (VISS) | 28 |
| Download from TV | 11,61 | Portrait View | 50 Video 64 | ||
| DPOF | 40 | Position | 71 VIDEO Plus+ | 52 | |
- OPERATING INSTRUCTIONS
- DVD RECORDER
- TABLE OF CONTENTS
- SAFETY PRECAUTIONS
- IMPORTANT SAFETY WARNINGS
- CAUTION
- CARE AND MAINTENANCE
- INFORMATION ABOUT THE UNIT
- DVB-T
- GUIDE
- HDMI
- DV INTERFACE
- LICENSE INFORMATION
- DOLBY DIGITAL
- DTS (DIGITAL THEATER SYSTEMS)
- IF YOU SEE THIS SYMBOL
- INFORMATION ON DISPOSAL FOR USERS OF WASTE ELECTRICAL & ELECTRONIC EQUIPMENT (PRIVATE HOUSEHOLDS)
- FOR BUSINESS USERS IN THE EUROPEAN UNION
- BEFORE YOU START
- DEAR CUSTOMER
- INCLUDED ACCESSORIES
- INSERTING BATTERIES
- PANASONIC®
- CUSTOMER CARE CENTRE
- DIRECT SALES AT PANASONIC UK
- REMOTE CONTROL
- CHILD PROTECTION
- OPERATING A TELEVISION
- SWITCHING TO AV INPUT ON YOUR PANASONIC TELEVISION
- SETTING UP THE REMOTE CONTROL
- STANDBY/ON SWITCH
- DRIVE SELECT
- OTHER MESSAGES
- REAR PANEL
- PIN SCART TERMINAL
- AV1 SCART TERMINAL (TV)
- AV2 SCART TERMINAL (EXT)
- BASIC CONNECTIONS
- BE SURE TO READ THE CAUTION FOR THE AC MAINS LEAD
- USE OF THE SUPPLIED RF COAXIAL CABLE
- CONNECTING TO A TELEVISION ONLY
- CONNECTION WITH 21-PIN SCART CABLE (NOT INCLUDED)
- RF COAXIAL CABLE (INCLUDED, BLACK)
- AUTO-SETUP
- AUTOMATIC SETUP OF THE UNIT
- ① DVB AUTO-SETUP (TUNING DIGITAL CHANNELS)
- ② AUTO-SETUP (TUNING ANALOGUE CHANNELS)
- ANALOGUE AUTO-SETUP (WITHOUT Q LINK)
- Q LINK DOWNLOAD FROM TV WITH Q LINK
- CHECKING BROADCASTER'S DATA (WITH Q LINK)
- SETTING THE DATE AND TIME (IF NOT FOUND AUTOMATICALLY)
- OWNER ID
- AUTO-SETUP WITH CONNECTED SATELLITE RECEIVER AND AERIAL
- AUTO-SETUP WITH CONNECTED SATELLITE RECEIVER
- VIEW / RECORD SATELLITE PROGRAMMES
- CONNECTION WITH HDMI CABLE (NOT INCLUDED)
- HDMI™ (HIGH DEFINITION MULTIMEDIA INTERFACE)
- CONNECTION TO COMPONENT VIDEO TERMINAL
- COMPONENT VIDEO OUT TERMINAL
- CONNECTING A TV WITH COMPONENT VIDEO INPUT TERMINALS
- PROGRESSIVE TELEVISION PICTURE
- PROGRESSIVE-COMPATIBLE TELEVISIONS (PAL)
- CONNECTION WITH VIDEO CABLE OR S-VIDEO CABLE
- EXTERNAL UNITS
- FOR ALL CONNECTIONS DESCRIBED
- CONNECTING A DIGITAL AMPLIFIER OR A DIGITAL SYSTEM COMPONENT
- CONNECTING AN ANALOGUE AMPLIFIER OR AN ANALOGUE SYSTEM COMPONENT
- CONNECTION TO AV3 (E.G., CAMCORDER)
- CONNECTION TO DV INPUT
- STATUS DISPLAYS
- SCREEN INFORMATION
- VHS SCREEN INFORMATION
- ADDITIONAL INFORMATION ABOUT A PROGRAM
- CHANGE CATEGORY
- DIGITAL TEXT
- SUBTITLES
- PLAYBACK AND RECORDING DISCS
- DVD-RAM
- DVD VIDEO RECORDING FORMAT (VR)
- DVD-R/+R (RECORDABLE)
- DVD-RW(V)/+RW (REWRITABLE)
- DVD-R DL/+R DL (DOUBLE LAYER DVD/DUAL LAYER DVD)
- DVD-VIDEO FORMAT (V)
- VR FORMAT
- REGIONAL CODES
- CARTRIDGE DISCS
- PLAYBACK DISCS
- NON PLAYABLE DISCS
- HANDLING DISCS
- CLEANING THE DVD-RAM
- DVD LENS CLEANER (RP-CL720E)
- CLEANING DVD-VIDEOS, VIDEO-CDS AND CDS
- INSERTING THE STORAGE CARD
- REMOVING THE STORAGE CARD
- PREPARATION
- PLAYBACK
- PLAYBACK OF A SELECTED TITLE
- DIRECT INPUT VIA THE NUMBER BUTTONS
- PLAYBACK STARTS AUTOMATICALLY
- SELECTING PROGRAMMES/TITLES FOR PLAYBACK
- AUTO FINALIZE
- PAUSING PLAYBACK
- STOPPING PLAYBACK
- SAVING THE PLAYBACK POSITION
- SLOW-MOTION PLAYBACK
- FAST FORWARD
- DIVIDING A RECORDING INTO CHAPTERS
- SKIPPING
- MANUAL SKIP
- FRAME PLAYBACK
- TIME SLIP
- DELAYED PLAYBACK
- QUICK VIEW (PLAY/X1.3)
- SIMULTANEOUS RECORDING AND PLAYBACK
- CHANGING THE AUDIO CHANNEL
- PLAYING A VIDEO CASSETTE
- REPEAT PLAYBACK
- FORWARDS ▶ OR BACKWARDS ◀ SEARCH
- JET REW
- VHS INDEX SEARCH SYSTEM (VISS)
- S-VHS QUASI PLAYBACK (SQPB)
- MANUAL TRACKING
- THE PICTURE SHOWS INTERFERENCE OR IS BLURRED DURING PLAYBACK
- AUTOMATIC TRACKING
- HANDLING VIDEO CASSETTES
- WRITE-PROTECTING CASSETTES
- CLEANING VIDEO HEADS
- BEFORE RECORDING
- DISC PROTECTION
- CPRM (CONTENT PROTECTION FOR RECORDABLE MEDIA)
- FORMATTING
- FOR RECORDING
- RECORDING A 90-MINUTE TITLE TO A DISC WITH 4.7 GB OF STORAGE SPACE
- RECORD
- PAUSE THE RECORDING
- RECORDING TIME FOR E-240 CASSETTES
- DVD RECORDING OF TV PROGRAMMES
- REC MODE
- CHANGING THE RECORDING MODE
- VHS RECORDING OF TV PROGRAMMES
- TIMER RECORDING WITH THE TELEVISION SET
- SPECIFYING A TIME AS THE RECORDING DURATION
- DVD PLAYBACK DURING RECORDING
- DIRECT TV RECORDING
- RECORDING FROM AN EXTERNAL UNIT, E.G. A CAMERA
- SELECTING THE SOUND TRACK TO RECORD FOR PROGRAMMES WITH DUAL-CHANNEL SOUND NOT RAM
- ANALOGUE CHANNELS
- DIGITAL CHANNELS
- RECORDING IN DUAL-CHANNEL AUDIO
- NOTES ON THE MENUS
- SELECTING A TITLE OR CHAPTER
- CANCELLING A FUNCTION
- STARTING PLAYBACK
- FOR FASTER PROCESSING
- EDITING SEVERAL ELEMENTS
- ENTERING TEXT
- ENTERING A TITLE OR DISC NAME USING THE MENU
- TOP MENU PREVIEW
- WORKING WITH LIST NAMES
- OVERVIEW OF DIRECT NAVIGATOR
- LAUNCHING THE DIRECT NAVIGATOR MENU
- DELETE
- PROPERTIES
- FUNCTIONS
- EDITING TITLES IN THE SUB MENU
- ENTER NAME
- SET UP PROTECTION
- CANCEL PROTECTION
- PARTIAL DELETE
- CHANGE THUMBNAIL
- DIVIDE TITLE
- EDITING CHAPTERS IN THE SUB MENU
- DELETE CHAPTER
- CREATE CHAPTER
- COMBINE CHAPTERS
- JPEG/TIFF PLAYBACK FROM DVD-RAM/SD
- PICTURE PLAYBACK
- SUB MENU DURING PICTURE PLAYBACK
- ROTATE PICTURES
- DISPLAY PICTURE PROPERTIES
- ALBUM VIEW
- SLIDE SHOW FROM THE ALBUM VIEW
- SUB MENU IN THE ALBUM VIEW
- START SLIDE SHOW
- SLIDE SHOW SETTINGS
- ADD PICTURES
- CREATE ALBUM
- EDIT ALBUM
- DELETE ALBUM
- SET UP PROTECTION/CANCEL PROTECTION
- SUB MENU IN THE PICTURE (JPEG) VIEW
- DELETE PICTURE
- DPOFD
- JPEG/TIFF PLAYBACK FROM CD/DVD-R
- FOLDER
- CHANGE FOLDER
- MP3 PLAYBACK
- SELECTING A GROUP
- RECORDING
- MANUAL PROGRAMMING
- IF YOU RECEIVE YOUR TV PROGRAMME VIA A SATELLITE RECEIVER (DIGITAL/ANALOGUE)
- CHANGE PROFILE
- AUTOMATIC SP/LP SWITCHING DURING A VHS RECORDING
- ○ CHECKING OR CHANGING TIMER RECORDINGS
- CHECKING OR CHANGING
- TIMER OFF/ON
- STOP RECORDING
- DRIVE SPACE
- DELETING TITLES AND PICTURES
- SET UP PROTECTION/CANCEL PROTECTION OF TITLES
- DELETING PICTURES
- DELETING ALBUMS
- SET UP PROTECTION/CANCEL PROTECTION OF PICTURES OR ALBUMS
- COPY PICTURES
- CANCEL ALL
- COPY DIRECTION
- COPY MODE
- CREATE LIST
- SUB MENU IN THE COPY LIST
- DELETING ALL ELEMENTS
- EDITING INDIVIDUAL ELEMENTS
- START COPYING
- COPYING WITH A COPY LIST
- DISPLAY PROPERTIES
- OTHER VIEW
- TIME-TRIGGERED COPYING
- COPY TIME
- FINALIZING
- COPYING
- COPYING FROM VHS TO DVD
- COPY
- COPYING FROM DVD TO VHS
- LANDSCAPE VIEW
- MOVING IN THE LANDSCAPE VIEW
- CHANGING STATION IN THE LANDSCAPE VIEW
- ADDITIONAL INFORMATION ABOUT A PROGRAMME
- CHANGING BETWEEN THE VIEWS
- PORTRAIT VIEW
- MOVING IN THE PORTRAIT VIEW
- CHANGING STATION IN THE PORTRAIT VIEW
- PROG. TYPE DISPLAY ACCORDING TO TOPIC AREAS
- DISPLAY ACCORDING TO CATEGORY
- PROGRAMMING THE TIMER IN THE TV GUIDE
- TIMER RECORDING MENU FOR DIGITAL STATIONS
- TIMER RECORDING MENU FOR ANALOGUE STATIONS (A)
- DELETING A TIMER PROGRAMMING
- STOPPING A CURRENT TIMER RECORDING
- AUTOMATIC TITLE TRANSFER
- VIDEO PLUS+ RECORD
- VIDEOPLUS
- VIDEO PLUS+ CODES FOR SATELLITE RECEIVERS
- TIMER RECORDING VIA EXTERNAL UNITS
- SETTING FOR EXTERNAL UNITS (EXT LINK)
- RECORDING PROGRAMMING ON AN EXTERNAL UNIT
- SWITCHING THE DVD RECORDER TO RECORDING STANDBY MODE
- SWITCHING OFF RECORDING STANDBY MODE
- PREMATURELY CANCELLING RECORDING
- PLAYBACK DURING EXT LINK MODE
- CREATING A PLAYLIST
- SELECTING A SOURCE TITLE
- CREATING A SOURCE CHAPTER
- INSERTING A CHAPTER INTO THE PLAYLIST
- LAUNCHING THE PLAYLISTS MENU
- EDIT
- EDITING PLAYLISTS IN THE SUB MENU
- CREATE
- ADD CHAPTER
- MOVE CHAPTER
- COPYING ALL PICTURES OF AN SD CARD
- AUTOMATIC DETECTION OF AN SD CARD
- SELECT FOLDER
- FLEXIBLE RECORDING MODE (FR)
- DISPLAYING THE AVAILABLE RECORDING TIME
- AUTOMATIC DETECTION OF A CAMCORDER AT DV IN
- RECORDING VIA DV INPUT
- MANUAL RECORDING VIA DV INPUT
- SETUP MENU OVERVIEW
- CREATING NEW PROFILES
- PROFILE SELECT
- ADD
- ADD ALL
- EDIT PROFILE
- PROFILE NAME
- MOVE
- DELETE ALL
- AUTO-SETUP RESTART
- ADD NEW DVB SERVICE
- SIGNAL CONDITION
- SIGNAL QUALITY
- SIGNAL STRENGTH
- ENTERING A NEW TELEVISION STATION
- CHANGING THE NAME OF THE TELEVISION STATION
- DELETING TELEVISION STATIONS
- DISC NAME
- DELETE ALL TITLES
- FORMAT DISC
- AUTO-PLAY SELECT
- FINALIZE
- CLOSE FIRST LAYER
- CREATE TOP MENU
- FORMAT CARD
- PICTURE AND SOUND SETTINGS
- IF YOU NEED HELP
- CUSTOMER SERVICE
- WHAT CAN I DO WITH WHICH DISC
- FOLDER STRUCTURE
- INDEX
Brand : PANASONIC
Model : DMR-EZ45
Category : DVD Recorder