
DMR-EH56 - DVD Recorder PANASONIC - Free user manual and instructions
Find the device manual for free DMR-EH56 PANASONIC in PDF.
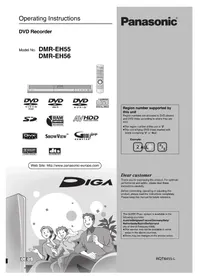


| Product Type | DVD Recorder with HDD |
| Brand | Panasonic |
| Model | DMR-EH56 |
| Hard Drive Capacity | 80 GB |
| Dimensions (W x H x D) | 430 x 78 x 300 mm |
| Weight | 4.0 kg |
| Power Supply | AC 220-240 V, 50/60 Hz |
| Power Consumption | 30 W (standby: 0.8 W) |
| Recording Media | DVD-RAM, DVD-R, DVD-RW, DVD+R, DVD+RW, CD-R, CD-RW |
| Playback Media | DVD-Video, DVD-RAM, DVD-R, DVD-RW, DVD+R, DVD+RW, CD, CD-R, CD-RW, MP3, JPEG, DivX |
| Video Outputs | HDMI, Component, Composite, S-Video |
| Audio Outputs | HDMI, Digital Optical, Analog Stereo |
| Inputs | Composite, S-Video, Analog Audio, USB, SD Card Slot |
| HDD Recording Features | Simultaneous Record and Play, Time Slip, Quick View |
| DVD Recording Features | One Touch Recording, Timer Recording, Auto Chapter |
| Editing Functions | Divide, Delete, Playlist, Title Edit |
| Safety | Class 1 Laser Product, Auto Power Off |
| Maintenance | Clean with a soft, dry cloth. Do not use liquid cleaners. |
| Spare Parts / Accessories | Remote Control (EUR7653K5), Power Cord, HDMI Cable (optional) |
| Repairability Index | 6.5 / 10 (based on availability of spare parts and service documentation) |
Frequently Asked Questions - DMR-EH56 PANASONIC
User questions about DMR-EH56 PANASONIC
0 question about this device. Answer the ones you know or ask your own.
Ask a new question about this device
Download the instructions for your DVD Recorder in PDF format for free! Find your manual DMR-EH56 - PANASONIC and take your electronic device back in hand. On this page are published all the documents necessary for the use of your device. DMR-EH56 by PANASONIC.
USER MANUAL DMR-EH56 PANASONIC
Operating Instructions
DVD Recorder
Model No. DMR-EH55 DMR-EH56


Web Site: http://www.panasonic-europe.com

Panasonic®
Region number supported by this unit
Region numbers are allocated to DVD players and DVD-Video according to where they are sold.
• The region number of this unit is "2". - The unit will play DVD-Video marked with labels containing "2" or "ALL".
Example:
Dear customer
Thank you for purchasing this product. For optimum performance and safety, please read these instructions carefully.
Before connecting, operating or adjusting this product, please read the instructions completely. Please keep this manual for future reference.
The GUIDE Plus+ system is available in the following countries:
Austria/Belgium/France/Germany/Italy/Netherlands/Spain/Switzerland
(As of end of February 2006)
- This service may not be available in some areas in the above countries.
- There may be changes in the service areas.
CAUTION!
THIS PRODUCT UTILIZES A LASER. USE OF CONTROLS OR ADJUSTMENTS OR PERFORMANCE OF PROCEDURES OTHER THAN THOSE SPECIFIED HEREIN MAY RESULT IN HAZARDOUS RADIATION EXPOSURE. DO NOT OPEN COVERS AND DO NOT REPAIR YOURSELF REFER SERVICING TO QUALIFIED PERSONNEL.
WARNING:
TO REDUCE THE RISK OF FIRE, ELECTRIC SHOCK OR PRODUCT DAMAGE, DO NOT EXPOSE THIS APPARATUS TO RAIN, MOISTURE, DRIPPING OR SPLASHING AND THAT NO OBJECTS FILLED WITH LIQUIDS, SUCH AS VASES, SHALL BE PLACED ON THE APPARATUS.
CAUTION!
- DO NOT INSTALL OR PLACE THIS UNIT IN A BOOKCASE, BUILT-IN CABINET OR IN ANOTHER CONFINED SPACE. ENSURE THE UNIT IS WELL VENTILATED. TO PREVENT RISK OF ELECTRIC SHOCK OR FIRE HAZARD DUE TO OVERHEATING, ENSURE THAT CURTAINS AND ANY OTHER MATERIALS DO NOT OBSTRUCT THE VENTILATION VENTS.
- DO NOT OBSTRUCT THE UNIT'S VENTILATION OPENINGS WITH NEWSPAPERS, TABLECLOTHS, CURTAINS, AND SIMILAR ITEMS.
- DO NOT PLACE SOURCES OF NAKED FLAMES, SUCH AS LIGHTED CANDLES, ON THE UNIT.
- DISPOSE OF BATTERIES IN AN ENVIRONMENTALLY FRIENDLY MANNER.
THIS UNIT IS INTENDED FOR USE IN MODERATE CLIMATES.
This product may receive radio interference caused by mobile telephones during use. If such interference is apparent, please increase separation between the product and the mobile telephone.
The socket outlet shall be installed near the equipment and easily accessible or the mains plug or an appliance coupler shall remain readily operable.

CLASS 1 LASER PRODUCT

| DANGER - VISIBLE AND INVISIBLE LASERRADIATION WHEN OPEN. AVOID DIRECTEXPOSURE TO BEAM.FDA 21 CPR/Class Bb | |
| 注意 | - 打开时有可见及不可见激光辐射,避免光束照射。 |
| 注意 | - 一ごを除くと可视及び不可視レープ気が発示る。 |
| - ピームを見たか。無たりしないでください。 | |
| CAUTION - CLASS 38 VISIBLE AND INVISIBLE LASER RADIATION WHEN OPEN.AVOID EXPOSURE TO THE BEAM.EG0925-1-A2/Class 38 | |
| ATTENTION- RAYONNEMENT LASER VIRIBLE ET INVISIBLE, CLASSE 38. ENCAS D'OUVERTURE, EVITER UNE EXPUESTION AU FAUSEAU. | |
| FORSIGTIG - SYNUG OG USYNLG LASERSTRALUNG KLASSE 38. NAR LAGETER ABENT. UNDGA AT BLVE LOSAT FOR STRÄLEN. | |
| VARO - AVIATESSA OLET ALTTINA LUOKAN 38 NAKVYÄA JA NAKYMÄTONTÄLASERATEKLYA. VARO ALISTUMASTA SATELLLE. | |
| VARNING - KLASB 38 SYNUG OCH OSYNLG LASERSTRALING NAR DENNADEL AR OPPNAD UNIVK EXPOONERING FOR STRÄLEN. | |
| VORSICHT - SICHTBARE UND UNSICHTBARE LASERSTRALHUNG KLASSE 38.WENN ANDECKUNG GEÖFFNET, NICHT DEM STRAHL. AUSSETZEN. | |
| CAUTION - VISIBLE AND INVISIBLE LASER RADIATION WHEN OPEN.AVOID EXPOSURE TO THE BEAM.EG0925-2.1 | |
| ATTENTION- RAYONNEMENT LASER VIRIBLE ET INVISIBLE EN CAS D'OUVERTURE,EXPOSITION DANSERESSE AU FAUSEAU. | |
| ADVARSEL - SYNUG OG USYNLG LASERSTRALING VED ABNING.UNDA UDDRAELSE FOR ASSETS. | |
| VARO! - AVIATESSA OLET ALTTINA NAKVYÄA JA NAKYMÄTONLASERATEKLYLE. ÄLA KAI SO SATEEISEN. | |
| VARNING - SYNUG OG OSYNLG LASERSTRALING NAR DENNA DELAR OPPNAD BETRAKTA EJ STRÄLEN. | |
| VORSICHT - SICHTBARE UND UNSICHTBARE LASERSTRALING, WENNEABDECKUNG GEÖFFNET, NICHT DEM STRAHL. AUSSETZEN. | |
| ADVARSEL - SYNUG OG USYNLG LASERSTRALING NAR DEKSEL. APNES.UNNGA EXPOONERING FOR STRÄLEN.VQL1J67 | |
Keep the small memory cards such as the SD Memory Card out of reach of children. If swallowed, seek medical advice immediately.
FINNISH
WARNING!
USING THE DEVICE IN A WAY OTHER THAN DESCRIBED IN THIS USER MANUAL MAY EXPOSE THE USER TO INVISIBLE LASER RADIATION EXCEEDING SAFETY CLASS 1.
WARNING:
TO REDUCE THE RISK OF FIRE, ELECTRIC SHOCK, OR OTHER DAMAGE TO THE PRODUCT, DO NOT EXPOSE THE DEVICE TO RAIN, MOISTURE, WATER DROPS, OR SPLASHES, AND DO NOT PLACE OBJECTS FILLED WITH LIQUIDS, SUCH AS VASES, ON TOP OF THE DEVICE.
WARNING!
- DO NOT INSTALL OR PLACE THIS DEVICE IN A CABINET-TYPE BOOKCASE OR OTHER ENCLOSED SPACE TO ENSURE PROPER VENTILATION. MAKE SURE THAT CURTAINS OR ANY OTHER MATERIAL DO NOT IMPAIR VENTILATION TO AVOID THE RISK OF ELECTRIC SHOCK OR FIRE CAUSED BY OVERHEATING.
- DO NOT COVER THE DEVICE'S VENTILATION OPENINGS WITH NEWSPAPERS, TABLECLOTHS, CURTAINS, OR SIMILAR ITEMS.
- DO NOT PLACE A BURNING CANDLE OR OTHER OPEN FLAME SOURCE ON TOP OF THE DEVICE.
• DISPOSE OF BATTERIES IN AN ENVIRONMENTALLY FRIENDLY MANNER.
THIS DEVICE IS INTENDED FOR USE IN A TEMPERATE CLIMATE.
HDD, disc and card information ....4
Important notes for recording 8
HDD (Hard disk drive) handling care .....9
Disc and card handling 10
Unit care 10
Included accessories 11
The remote control information .....11
Control reference guide 12
Remote control 12
Main unit 13
The unit's display 13
STEP 1 Connection....14
STEP 2 Channel reception settings and TV aspect settings ....18
GUIDE Plus+ system settings 19
GUIDE Plus+ data download 20
Editing programme lists 20
Changing the settings 21
Set up to match your television and remote control . .22
To enjoy progressive video 22
Recording
Recording television programmes .....24
Disc Insertion/Ejection 25
To specify a time to stop recording—One Touch Recording . . . 26
Recording settings for High Speed Copy 26
Flexible Recording 27
Playing while you are recording 27
Timer recording 28
Using the GUIDE Plus+ system to make timer recordings .... 28
Operations in the GUIDE Plus+ system 29
Using SHOWVIEW number to make timer recordings ..... 30
Manually programming timer recordings 30
To cancel recording when recording has already begun ..... 31
To release the unit from recording standby 31
Notes on timer recording 31
Check, change or delete a programme 31
Relief Recording 32
Auto Renewal Recording 32
VPS/PDC function 32
Recording broadcasts from external equipment . . .33
Making timer recordings on the television 33
Recording from digital/satellite receiver or decoder 33
Linked timer recordings with
external equipment (digital/satellite receiver) — EXT LINK .. 33
Playing back
Playing recorded video contents/
Playing play-only discs ....34
Operations during play 35
Changing audio during play 36
Playing DivX discs,
MP3 discs and still pictures (JPEG/TIFF) .....37
Regarding DivX discs, MP3 discs and still pictures (JPEG/TIFF) 37
Selecting file type to play 38
Playing DivX discs 38
Playing MP3 discs 39
Playing still pictures 40
Useful functions during still picture play 41
Using on-screen menus/Status message.... 42
Using on-screen menus 42
Status messages 43
Editing
Editing titles/chapters 44
Editing titles/chapters and playing chapters 44
Title operations 45
Chapter operations 45
Creating, editing and playing playlists 46
Creating playlists 46
Editing and playing playlists/chapters 47
Playlist operations 47
Chapter operations 47
Editing still pictures 48
Album and picture operation 49
Delete Navigator 50
Using the DELETE Navigator to delete 50
Deleting titles or pictures during play 50
Copying
Copying titles or playlists 51
Copy 52
Copying using the copying list-Advanced Copy . . . . . . . . . . . . . . 53
Copying a finalized DVD-R, DVD-R DL,
DVD-RW (DVD-Video format), +R and +R DL 55
Copying MPEG2 moving pictures from an SD card ..... 55
Copying still pictures 56
Copying using the copying list 56
Copying all the still pictures on a card—Copy All Pictures ..... 57
Copying from a video cassette recorder 58
Manual recording 58
DV automatic recording (DV Auto Rec) 58
Convenient functions
Linked operations with the TV (Q Link) 59
HDD, disc and card management 60
Common procedures....60
Setting the protection 60
Providing a name for a disc 60
Deleting all titles and playlists—Delete all titles ....61
Deleting all the contents of a disc or card—Format ..... 61
Selecting the background style—Top Menu 62
Selecting whether to show the Top Menu first —Auto-Play Select. 62
Enabling discs to be played on other equipment —Finalize 62
Creating Top Menu—Create Top Menu 62
Entering text 63
FUNCTIONS window.... 64
Child Lock 64
Changing the unit's settings 65
Common procedures 65
Summary of settings 66
Tuning 69
TV System 70
Manual Clock Setting 71
Reference
Messages 72
Frequently asked questions 74
Troubleshooting guide 76
Glossary 81
Specifications 82
Safety precautions 83
Index Back cover
HDD and discs you can use for recording and play
| Disc type | Hard disk drive (HDD)●160 GB | DVD-RAM●4.7 GB/9.4 GB, 12 cm●2.8 GB, 8 cm |
| Logo - |  RAMRAM4.7 RAMRAM4.7 | |
| Indicated in these instructions by | HDD RAM | |
| Recording format | DVD Video Recording formatThis is a recording method which allows you to record and edit television broadcasts and so on.You can delete unwanted parts of a title, create playlists, etc.Digital broadcasts that allow “One time only recording” can be recorded to a CPRM compatible disc. | |
| Data that can be recorded and played | VideoStill pictures | VideoStill pictures |
| Re-writable*1 | √ | √ |
| Play on other players*2 | - Only on DVD-RAM compatible players. | |
| Compatible with high speed recording*3 | - Up to 5X recording speed discs. | |
| What you can do on this unit (√: Can do, X: Cannot do) | ||
| Recording broadcasts that allow one copy | √ | √ [CPRM (→ 81) compatible discs only.] |
| Recording both M 1 and M 2 for bilingual broadcasts*4 | √ | √ |
| Recording 16:9 aspect picture*4 | √ | √ |
| Creating and editing playlists | √ | √ |
| Disc type | DVD-R●4.7 GB, 12 cm●1.4 GB, 8 cm | DVD-R DL(dual layer on single side)●You cannot directly record to a DVD-R DL disc on this unit (→ 8) | DVD-RW●4.7 GB, 12 cm●1.4 GB, 8 cm |
| Logo |  |  R DL R DL |  |
| Indicated in these instructions by | -R before finalization | -R DL before finalization | -RW(V) before finalization |
| DVD-V after finalization | DVD-V after finalization | DVD-V after finalization | |
| Recording format | DVD-Video formatThis recording method is the same as commercially available DVD-Video.●Digital broadcasts that allow “One time only recording” cannot be recorded. | ||
| Data that can be recorded and played | Video Video Video | ||
| Re-writable*1 | × | × | √ |
| Play on other players*2 | Only after finalizing the disc (→ 62, 81). | Only on DVD-R DL compatible players after finalizing the disc (→ 62, 81). | Only after finalizing the disc (→ 62, 81). |
| Compatible with high speed recording*3 | Up to 16X recording speed discs. | Up to 4X recording speed discs. | Up to 6X recording speed discs. |
| What you can do on this unit (V: Can do, X: Cannot do) | |||
| Recording broadcasts that allow one copy | × | × | × |
| Recording both M 1 and M 2 for bilingual broadcasts*4 | × [Only one is recorded.(→ 67, Bilingual Audio Selection)] | × [Only one is recorded.(→ 67, Bilingual Audio Selection)] | × [Only one is recorded.(→ 67, Bilingual Audio Selection)] |
| Recording 16:9 aspect picture*4 | × (The picture is recorded in 4:3 aspect.) | × (The picture is recorded in 4:3 aspect.) | × (The picture is recorded in 4:3 aspect.) |
| Creating and editing playlists | × | × | × |
HDD and discs you can use for recording and play
(continued)
| Disc type | +R*5●4.7 GB, 12 cm | +R DL(double layer on single side)●You cannot directly record to a +R DL disc on this unit (→8) | +RW |
| Logo - | - | - | |
| Indicated in these instructions by | +R before finalization | +R DL before finalization | +RW |
| DVD-V after finalization | DVD-V after finalization | ||
| Recording format | +VR format●Digital broadcasts that allow “One time only recording” cannot be recorded. | ||
| Data that can be recorded and played | Video Video Video | ||
| Re-writable*1 | × | × | √ |
| Play on other players*2 | Only after finalizing the disc (→62, 81). | Only on +R DL compatible players after finalizing the disc (→62, 81). | Only on +RW compatible players. |
| Compatible with high speed recording*3 | Up to 16X recording speed discs. Up to 2.4X recording speed discs. | Up to 4X recording speed discs.*6 | |
| What you can do on this unit (√: Can do, ×: Cannot do) | |||
| Recording broadcasts that allow one copy | × | × | × |
| Recording both M 1 and M 2 for bilingual broadcasts*4 | × [Only one is recorded.(→67, Bilingual Audio Selection)] | × [Only one is recorded.(→67, Bilingual Audio Selection)] | × [Only one is recorded.(→67, Bilingual Audio Selection)] |
| Recording 16:9 aspect picture*4 | × (The picture is recorded in 4:3 aspect.) | × (The picture is recorded in 4:3 aspect.) | × (The picture is recorded in 4:3 aspect.) |
| Creating and editing playlists | × | × | × |
*1 The amount of the recordable disc space doesn't increase even if the programme is deleted when you use one time recording disc. *2 RAM Can be played on Panasonic DVD recorders and DVD-RAM compatible DVD players. If you play a DVD-R DL, +R DL or +RW, use compatible equipment. *3 The high speed recording discs listed here are compatible with this unit. However, this is not the copy speed. *4 For further information (→ 8, Important notes for recording) *5 +R discs recorded with this unit and +R discs recorded with another Panasonic DVD recorder may be incompatible. However, discs that are finalized are compatible and can be played. *6 You can play 8X recording speed discs recorded on another equipment. - We recommend using Panasonic discs and cards. We also recommend using DVD-RAM discs with cartridges to protect them from scratches and dirt. - You may not be able to record depending on the condition of the discs and you may not be able to play due to the condition of the recording. - You cannot record programmes that allow "One time only recording" to CPRM compatible DVD-R and DVD-RW on this unit. You can record other programmes as DVD-Video format. - This unit cannot record to discs containing both PAL and NTSC signals. (However, both types of programmes can be recorded onto the HDD.) Play of discs recorded with both PAL and NTSC on another unit is not guaranteed.
Note
When "Rec for High Speed Copy" is set to "On", the restrictions on secondary audio recording etc. are also applied to DVD-RAM. Turn this setting "Off" if high speed copy to DVD-R, etc. is not necessary when recording a programme (→ 26).
Finalize
A process that makes play of a recorded disc possible on equipment that can play such media. After finalizing, the disc becomes play-only and you can no longer record or edit. (→ 62)
Formatting
Formatting is the process of making media such as DVD-RAM recordable on recording equipment. (→ 61)
You cannot directly record to a DVD-R DL and +R DL disc on this unit.
Record to the HDD and then copy to the disc.
When playing DVD-R DL (Dual Layer, single-sided) and +R DL (Double Layer, single-sided)
DVD-R DL (Dual Layer, single-sided) and +R DL (Double Layer, single-sided) discs have two writable layers on one side. If there is not enough space on the first layer to record a programme, the balance is recorded on the second layer. When playing a title recorded on both layers, the unit automatically switches between layers and plays the title in the same way as a normal programme. However, video and audio may momentarily cut out when the unit is switching layers.
![graph TD A["First recordable layer"] -->|Playback direction| B["Second recordable layer"] B -->| Outer section of the disc| C["When switching layers: Video and audio may momentarily cut"] style A fill:#ccc,stroke:#333 style B fill:#ccc,stroke:#333 style C fill:#ccc,stroke:#333](/content/2026/06/1328297/images/c1f157e22f6e0c4fc4459d01d37caed98b7912822ba5f1e53c71a06c7855e91f.jpg)
Play-only discs (12 cm/8 cm)
| Disc type | DVD-Video | DVD-Audio | DVD-RW (DVD Video Recording format) | ||
| Logo |  |  |  |  | |
| Indicated in these instructions by | DVD-V DVD-A -RW(VR) | ||||
| Instructions High quality movie and music discs High fidelity music discs●Played on this unit in 2 channels. | DVD-RW recorded on another DVD Recorder● You can play programmes that allow “One time only recording” if they have been recorded to a CPRM compatible disc.● By formatting (→ 61) the disc, you can record to it in DVD-Video format and play it on this unit.● It may be necessary to finalize the disc on the equipment used for recording. | ||||
| Disc type DVD-R CD Video CD | SVCD*2 | ||||
| Logo |  |  | - |  |  |
| Indicated in these instructions by | DivX, MP3, JPEG/TIFF | CD | DivX, MP3, JPEG/TIFF | VCD | |
| Instructions | ●DVD-R *1 with video recorded in DivX●DVD-R *1 with music recorded in MP3●DVD-R *1 with still pictures recorded in JPEG and TIFF | Recorded audio and music (including CD-R/RW*1) | ●CD-R and CD-RW*1 with video recorded in DivX●CD-R and CD-RW*1 with music recorded in MP3●CD-R and CD-RW*1 with still pictures recorded in JPEG and TIFF | Recorded music and video (including CD-R/RW*1) | |
*1 Close the session after recording. Play may be impossible on some discs due to the condition of the recording. *2 Conforming to IEC62107. - The producer of the disc can control how discs are played. So you may not always be able to control play as described in these operating instructions. Read the disc's instructions carefully. ●Operation and sound quality of CDs that do not conform to CD-DA specifications (copy control CDs, etc.) cannot be guaranteed.
Regarding DVD-Audio
Some multi-channel DVD-Audio will prevent down-mixing (→ 81) of all or part of their contents if this is the manufacturer's intention. Tracks that are prevented from being down-mixed will not play properly on this unit (e.g. audio is played from the front two channels only). Refer to the disc's jacket for more information.
Discs that cannot be played
●2.6 and 5.2 GB DVD-RAM, 12 cm ●3.95 and 4.7 GB DVD-R for Authoring ●DVD-R recorded in DVD Video Recording format - DVD-R (DVD-Video format), DVD-R DL, DVD-RW (DVD-Video format), +R, +R DL recorded on another unit and not finalized (81). ●DVD-Video with a region number other than "2" or "ALL" - Blu-ray - DVD-ROM, +R (8 cm), CD-ROM, CDV, CD-G, Photo CD, CVD, SACD, MV-Disc, PD.
"Chaoji VCD" available on the market including CVD, DVCD and SVCD that do not conform to IEC62107, etc.
Types of disc or title recorded on HDD for the type of connected TV
When you use the discs recorded either PAL or NTSC, or playback a title recorded on HDD using PAL or NTSC, refer to this table. (√: Possible to view, ×: Impossible to view)
| TV type | Disc/Titles recorded on HDD | Yes/No |
| Multi-system TV | PAL | √ |
| NTSC | √*1 | |
| NTSC TV | PAL | × |
| NTSC | √*2 | |
| PAL TV | PAL | √ |
| NTSC | √*3 (PAL60) |
※1 If you select "NTSC" in "TV System" (→ 70), the picture may be clearer. ×2 Select "NTSC" in "TV System" (→ 70). *3 If your television is not equipped to handle PAL 525/60 signals the picture will not be shown correctly. - When playing back a title recorded on the HDD, ensure that you match the "TV System" setting to the title (→ 70).
Cards you can use on this unit
| Type | SD Memory CardminiSDTM Card*MultiMediaCard |
| Indicated in these instructions by | SD |
| Data that can be recorded and played | Still picturesVideo (MPEG2) |
| Instructions You can insert directly | into the SD card slot.* A miniSDTM card adaptor included with the miniSDTM card is necessary.You can play and copy still pictures taken on a digital camera etc. (→ 40, 56).You can set the DPOF (Digital Print Order Format) for automatic printing on your home printer or at a photo developing store (→ 49, 81).MPEG2 moving pictures shot with a Panasonic SD Video camera, etc. can be copied to the HDD or DVD-RAM. (→ 55)MPEG2 moving pictures cannot be played directly from the SD card. |
- Compatible with: FAT 12 or FAT 16
Suitable SD Memory Cards
- You can use SD Memory Cards with the following capacities (from 8 MB to 2 GB).
8 MB, 16 MB, 32 MB, 64 MB, 128 MB, 256 MB, 512 MB, 1 GB, 2 GB (Maximum)
- Useable memory is slightly less than the card capacity.
- Please confirm the latest information on the following website.
http://panasonic.co.jp/pavc/global/cs
(This site is in English only.)
- If the SD Memory Card is formatted on other equipment, the time spent for recording may become longer. Also if the SD Memory Card is formatted on a PC, you may not be able to use it on this unit. In these cases, format the card on this unit (61, 81).
- This unit supports SD Memory Cards formatted in FAT 12 system and FAT 16 system based on SD Memory Card Specifications.
- We recommend using a Panasonic SD card.
Structure of folders displayed by this unit
The following can be displayed on this unit.
***: Numbers XXX: Letters
DVD-RAM![graph TD A["JPEG"] --> B["DCIM ××× (Higher folder)"] B --> C["XXXXX (Picture folder)"] C --> D["XXXX* * * * *.JPG"] C --> E["XXXX* * * * *.TIF"] F["DCIM"] --> G["XXXXX"] G --> H["XXXX* * * * *.JPG"] G --> I["XXXX* * * * *.TIF"]](/content/2026/06/1328297/images/0dbd7045e43268bcecf1459aaa72381efd459e9860052f9fb938e02a2a901a12.jpg)
![graph TD A["Card"] --> B["DCIM (Higher folder)"] B --> C["XXXXX (Picture folder)"] C --> D["XXXX*XXXX.JPG"] C --> E["XXXX*XXXX.TIF"] F["IM**CDPF or IMEXPORT"] --> G["XXXXX*XXXX.JPG"] F --> H["XXXXX*XXXX.TIF"] I["SD_VIDEO"] --> J["PRG*** (MPEG2 folder)"] J --> K["MOV* * * * MOD"] J --> L["MOV* * * *…](/content/2026/06/1328297/images/a085d08ea53d4e7afa37900aa5e3dd257a53cdc2702c60415371667fe6ebe78e.jpg)
* Folders can be created on other equipment. However, these folders cannot be selected as a copying destination.
- The folder cannot be displayed if the numbers are all "0" (e.g., DCIM000, etc.).
- If a folder name or file name has been input using other equipment, the name may not be displayed properly or you may not be able to play or edit the data.
| When recording a bilingual programme | HDD RAMBoth main and secondary audio can be recorded.You can change the audio during playback.(→36, Changing audio during play)However in the following cases, select whether to record the main or secondary audio:-Recording sound in LPCM (→67, Audio Mode for XP Recording)-“Rec for High Speed Copy” is set to “On” (→26) If you record from external equipment-Select both “M 1” and “M 2” on the external equipment. If you record from external equipment-Select both “M 1” and “M 2” on the external equipment. | -R -RW(V) +R +RWSelect the main or secondary audio before recording(→67, Bilingual Audio Selection) The selected audio only is recorded.If you record from external equipment-Select “M 1” or “M 2” on the external equipment. The selected audio only is recorded.If you record from external equipment-Select “M 1” or “M 2” on the external equipment. |
| When recording 16:9 aspect (Widescreen) programmes | HDD RAM16:9 aspect (Widescreen) |  Recorded in 4:3 aspect Recorded in 4:3 aspect |
| When you want to copy titles in high speed mode from the HDD to DVD-R, etc. | Set “Rec for High Speed Copy” to “On” before recording to the HDD (→26).You can copy titles in high speed mode (max. speed is 86X*); however, the following settings are necessary before recording to the HDD.* Depending on the disc, max. speed may vary.  | |
| When recording digital broadcasts | It is not possible to record digital broadcasts that allow “One time only recording” onto DVD-R, DVD-RW, +R, +RW or 8 cm DVD-RAM discs. Use the HDD or CPRM (→81) compatible DVD-RAM.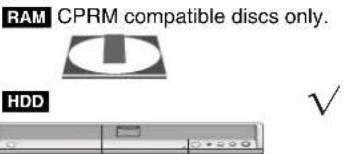  (√: Can do, ×: Cannot do)●“One time only recording” titles can only be transferred from the HDD to CPRM compatible DVD-RAM (They are deleted from the HDD). They cannot be copied.●Even when copying to videotape the title may not be copied correctly because of the copy guard.●You cannot copy a playlist created from “One time only recording” titles. (√: Can do, ×: Cannot do)●“One time only recording” titles can only be transferred from the HDD to CPRM compatible DVD-RAM (They are deleted from the HDD). They cannot be copied.●Even when copying to videotape the title may not be copied correctly because of the copy guard.●You cannot copy a playlist created from “One time only recording” titles. | |
| Playing the disc on other DVD players | -R -R DL -RW(V) +R +R DLThe disc must be finalized after recording or copying (→62).It is necessary to finalize DVD-R, etc. on this unit after recording or copying titles to them. You can then play them as a commercially sold DVD-Video. However, the discs become play-only and you can no longer record or copy.*You can record and copy again if you format DVD-RW.  Finalize Finalize  | |
| Recording to DVD-R DL and +R DL | You cannot directly record to a DVD-R DL and +R DL disc on this unit.Record to the HDD and then copy to the disc. | |
- It is not possible to record to both HDD (Hard Disk Drive) and DVD drive simultaneously.
The HDD is a high precision recording instrument and because of its long recording capability and high speed operation it is a very special device that is easily susceptible to damage.
As a basic rule, save important content to a disc as backup.
■ The HDD is a device that is not built to withstand vibration/shock or dust
Depending on the setup environment and handling of the HDD some content may become damaged and play and recording may no longer be possible. Especially during operation, do not subject the unit to any vibration, shock, or remove the AC mains lead from the household mains socket. In the event of a power failure during recording or play, the content may be damaged.
■ The HDD is a temporary storage device
The HDD is not an everlasting storage device for recorded content. Use the HDD as a temporary storage place for one-off viewing, editing, or saving recorded content to a disc.
■ Immediately save (backup) all content as soon as you feel there may be a problem with the HDD
If there is an irregularity within the HDD, repetitive strange sounds or problems with picture (block noise, etc.) may result. Using the HDD in this condition may worsen the problem and in the worst case the HDD may no longer become usable. As soon as you notice this type of problem, copy all content to disc and request service. Recorded content (data) on a HDD that has become unusable is unrecoverable.
- When the HDD has been automatically placed in the SLEEP mode (see below), or the unit is turned on or off, there may be an unexpected sound. This does not indicate a problem with this unit.
■ Setup precautions
- Do not place in an enclosed area so the rear cooling fan and the cooling vents on the side are covered up.
- Place the unit on a surface that is flat and not subject to vibration or impact.
- Do not place on anything that generates heat like a video cassette recorder, etc.
- Do not place in an area often subject to temperature changes.
- Place in an area where condensation does not occur. Condensation is a phenomenon where moisture forms on a cold surface when there is an extreme change in temperature. Condensation may cause internal damage to the unit.
- Conditions where condensation may occur
- When there is an extreme change in temperature (moving from a very hot location to a very cold location, or vice versa, or when subjected to an air conditioner or when cooled air directly impacts the unit). When the HDD (warms during operation) is subjected to cold air, condensation may form on the inside of the HDD and may cause damage to the HDD heads, etc.
- When there is high humidity or a lot of steam in the room.
- During the rainy season.
In the above situation, without turning the unit on, let the unit adjust to the room temperature and wait 2–3 hours until condensation is gone.

■ Cigarette smoke etc. causes malfunction or breakdown
The unit may breakdown if cigarette smoke or bug spray/vapor, etc. gets inside the unit.
■ While operating
- Do not move the unit or subject it to vibration or impact. (The HDD may become damaged.)
- Do not remove the AC mains lead from the household mains socket, or flip the power breaker switch.
While the unit is on, the HDD is rotating at high speed. Sound or movement due to rotation is normal.
■ When moving the unit
① Turn the unit off. (Wait until "BYE" disappears from the display.)
② Remove the AC mains lead from the household mains socket.
③ Move only after the unit has come to a complete stop (approx. 2 minutes) in order to avoid subjecting it to vibration and shock. (Even after turning the unit off, the HDD continues operating for a short time.)
■ HDD recording time remaining
This unit records using a VBR (Variable bit rate) data compression system to vary recorded data segments to match video data segments which may cause differences in the displayed amount of time and space remaining for recording.
If the remaining amount of time is insufficient, delete any unwanted titles to create enough space before you start recording. (Deleting a playlist will not increase the amount of time.)
■ When "SLEEP" appears on the unit's display
The HDD has been automatically placed in the SLEEP mode. (The HDD continues to rotate at high speed while the unit is on. In order to extend the life of the HDD, the HDD will be placed in the SLEEP mode if no operation has been performed for 30 minutes while there is no disc on the disc tray.)
- While in SLEEP mode, play or recording may not start right away because the HDD takes time to be re-activated.
- When not using the unit, we recommend removing the disc in the tray in order to set the HDD to the SLEEP mode.
■ Indemnity concerning recorded content
Panasonic does not accept any responsibility for damages directly or indirectly due to any type of problems that result in loss of recording or edited content (data), and does not guarantee any content if recording or editing does not work properly. Likewise, the above also applies in a case where any type of repair is made to the unit (including any other non-HDD related component).
Disc and card handling
■ How to hold a disc or card
Do not touch the recorded surface or the terminal surface.

■ Concerning non-cartridge discs
Be careful about scratches and dirt.
■ If there is dirt or condensation on the disc
Wipe with a damp cloth and then wipe dry.

■ Handling precautions
- Do not attach labels or stickers to discs. (This may cause disc warping and un-balanced rotation, rendering it unusable.)
- Write on the label side of the disc only with a soft, oil-based felt pen. Do not use ballpoint pens or other hard writing implements.
- Do not use record cleaning sprays, benzine, thinner, static electricity prevention liquids or any other solvent.
- Do not use scratch-proof protectors or covers.
- Do not expose the terminals of the card to water, garbage or other strange things.
- Do not drop stack, or impact discs. Do not place objects on them.
- Do not use the following discs:
- Discs with exposed adhesive from removed stickers or labels (rental discs, etc.).
- Discs that are badly warped or cracked. - Irregularly shaped discs, such as heart shapes.

- Do not place in the following areas:
- In direct sunlight. - In very dusty or humid areas. - Near a heater. - Locations susceptible to significant difference in temperature (condensation can occur). - Where static electricity or electromagnetic waves occur. - To protect discs from scratches and dirt, return them to their cases or cartridges when you are not using them.
The manufacturer accepts no responsibility and offers no compensation for loss of recorded or edited material due to a problem with the unit or recordable media, and accepts no responsibility and offers no compensation for any subsequent damage caused by such loss.
Examples of causes of such losses are:
● A disc recorded and edited with this unit is played in a DVD Recorder or computer disc drive manufactured by another company. ● A disc used as described above and then played again in this unit. ● A disc recorded and edited with a DVD Recorder or computer disc drive manufactured by another company is played in this unit.
Unit care
The precision parts in this unit are readily affected by the environment, especially temperature, humidity, and dust. Cigarette smoke also can cause malfunction or breakdown.
To clean this unit, wipe with a soft, dry cloth.
- Never use alcohol, paint thinner or benzine to clean this unit.
- Before using chemically treated cloth, carefully read the instructions that came with the cloth.
Observe the following points to ensure continued listening and viewing pleasure.
Dust and dirt may adhere to the unit's lens over time, making it impossible to record or play discs.
Use the DVD lens cleaner about once every year, depending on frequency of use and the operating environment. Carefully read the lens cleaner's instructions before use.
DVD lens cleaner: RP-CL720E
Do not place the unit on amplifiers or equipment that may become hot.
The heat can damage the unit.

Note
Do not obstruct the rear panel's internal cooling fan.
Before moving the unit, ensure the disc tray is empty. Failure to do so will risk severely damaging the disc and the unit.
Included accessories

Please check and identify the supplied accessories.
(Product numbers correct as of January 2006. These may be subject to change.)

(EUR7659Y60)


1 Remote control 1 AC mains lead
- For use with this unit only. Do not use it with other equipment. Also, do not use cords for other equipment with this unit.
2 RF coaxial cables 2 Batteries
for remote control
1 Audio/video cable
The remote control information
Batteries
- Insert so the poles (+ and -) match those in the remote control.
- When closing the lid, insert it from the - (minus) side.

R6/LR6, AA
- Do not use rechargeable type batteries.
- Do not mix old and new batteries.
- Do not use different types at the same time.
- Do not heat or expose to flame.
- Do not take apart or short circuit.
- Do not attempt to recharge alkaline or manganese batteries.
- Do not use batteries if the covering has been peeled off.
Mishandling of batteries can cause electrolyte leakage which can damage items the fluid contacts and may cause a fire.
Remove if the remote control is not going to be used for a long period of time. Store in a cool, dark place.
Remote control operations (→ 12)
Use
Remote control signal sensor

Note
If you cannot operate the unit or television using the remote control after changing the batteries, please re-enter the codes (→ 23).
Remote control
Instructions for operations are generally described using the remote control.

① Turn the unit on (→ 18) ② Select drive (HDD, DVD or SD) (→ 24, 34, 40) ③ Select channels and title numbers, etc./Enter numbers ④ Cancel ⑤ Basic operations for recording and play ⑥ Show programme information in the GUIDE Plus+ system ⑦ Selection/Enter, Frame-by-frame (→ 36) ⑧ Show Top menu/Direct Navigator (→ 34, 35, 44) ⑨ Show sub menu (→ 44) ⑩ Colour buttons for switching between Video/Picture and Video/Playlists, selecting character type when entering text, manual tuning settings and GUIDE Plus+ operations (29, 34, 53, 63, 69) ⑪ Start recording (→ 24) ⑫ Change recording mode (→ 24) ⑬ Select audio (→ 36) ⑭ Show status messages (→ 43) ⑮ Transmit the remote control signal ⑯ Television operations (→ 23) ⑰ Channel select/Change pages in the GUIDE Plus+ system (→ 24, 29) ⑱ Show SHOWVIEW screen (→ 30) ⑲ Input select (AV1, AV2, AV3, AV4 or DV) (→ 33, 58) ⑳ Delete items (→ 50) ②1 Show timer recording programme screen (→ 30) ②2 Show the GUIDE Plus+ screen (→ 19, 28) ②3 Show FUNCTIONS window (→ 64) ⑳ Return to previous screen ⑲ Create chapter (→ 36) ②6 Skip 30 seconds forward (→ 36) ② Direct TV recording (→ 59) ⑳ Linked timer recordings with external equipment (→ 33) ⑲ Skip the specified time (→ 36) ③0 Show on-screen menu (→ 42) 31 Recording functions
Note
- Buttons such as the [● REC] button do not protrude as much as other buttons to stop them from being pressed accidentally.
- If you press [EXT LINK] accidentally, the unit turns off and switches to recording standby mode. Press [EXT LINK] again to cancel recording standby.
- The word "button" is not used in these operating instructions so "Press the [ENTER] button." is shown as "Press [ENTER]."
- You can use this remote control to operate your television if you set the television manufacturer code (→ 23).
Main unit

① Standby/on switch (⏻/l) (→ 18) Press to switch the unit from on to standby mode or vice versa. In standby mode, the unit is still consuming a small amount of power. ② Disc tray (→ 24, 34) ③ Connection for digital video (DV) camcorder (→ 58) ④ SD card slot (→ below) ⑤ Display (→ below) ⑥ Connection for camcorder etc. (→ 58) ⑦ Linked timer recordings with external equipment (→ 33) ⑧ Channel select (→ 24)
⑨ Open/close disc tray (→ 24, 34) ⑩ Select drive (→ 24, 34, 40) Drive changes each time you press [DRIVE SELECT]. ⑪ Stop (→ 24, 35) ⑫ Start play (→ 34) ⑬ Start recording (→ 24)/Specify a time to stop recording (→ 26) ⑭ Remote control signal sensor
Rear panel terminals (→ 14, 15)
Inserting, Removing the SD card
When the card indicator ("SD") on the unit's display is flashing, the card is being read from or written to. Do not turn off the unit or remove the card. Such action may result in malfunction or loss of the card's contents.
- Inserting foreign objects can cause a malfunction.
- You can use SD Memory Cards with capacities from 8 MB to 2 GB (→ 7).
Opening the cover Inserting the card
Press the protruding part to open the cover.

Press on the centre of the card until it clicks into place.

If you are using a miniSD™ card, insert it into the miniSD™ card adaptor that comes with the card. Insert and remove this adaptor from the unit.
Insert the card label up with the cut-off corner on the right.
(Do not forget to close the cover. → right)
Removing the card Closing the cover
① Press on the centre of the card. ② Pull it straight out.

Press down.

Automatic drive select function
If you insert an SD card while the unit is stopped, the "SD Card" screen is displayed. Select an item and press [ENTER] to switch to the SD drive (→ 40, 56).
If you remove an SD card, the HDD drive is automatically selected.
The unit's display

① Linked timer recordings with external equipment indicator
②
Recording

Playback
PLAY
Recording/Playback

③ Timer recording indicator ④ Lights when the SD card is inserted in the card slot. ⑤ Lights when a disc that is supported by this unit is inserted in the tray.
⑥ Lights when the HDD, DVD or SD drive is selected ⑦ Main display section ⑧ Recording mode
STEP 1 Connection
Make sure to use the pair of supplied RF coaxial cables
Use the pair of supplied RF coaxial cables only when you make connections to the unit through its RF IN and RF OUT terminals. Striping may appear and disrupt images on the TV if you use different cables for connection.
Using a 21-pin Scart cable
- You can use a variety of Q Link functions by connecting the unit to a Q Link compatible television (→ 59).
- You can enjoy high-quality viewing by connecting the unit to an RGB compatible television (→ 81).
Required setting "AV1 Output" in the Setup menu (→ 68)
- Before connection, turn off all equipment and read the appropriate operating instructions.
- Select the connection pattern that matches your environment from pattern A–D. Confirm connections not listed below with your dealer.
A Connecting a television

B Connecting a television and VCR

Connect the unit directly to the television
If you connect the unit through an AV selector or video cassette recorder to the television, video signal will be affected by copyright protection systems and the picture may not be shown correctly.
![graph TD A["Television"] --> B["This unit"] B --> C["VCR"] D["Television"] --> E["VCR"] E --> F["This unit"]](/content/2026/06/1328297/images/1055337209a64e9f0e411519da83abad1fbeb08917c24e548001bd9d441ea351.jpg)
- When connecting to a television with a built-in VCR
Connect to the input terminals on the television side if there are both television and VCR input terminals.

Connecting a television and digital/satellite receiver or decoder

Connecting a television and VCR, digital/satellite receiver or decoder
Required setting "AV2 Input" and "AV2 Connection" settings in the Setup menu (→ 68) Connect the unit directly to the television (→ 14, B)
Other connections
Connecting a television with AUDIO/VIDEO terminals
Television's rear panel
This unit's rear panel
Connecting a television with S VIDEO terminals
The S VIDEO OUT terminal achieves a more vivid picture than the VIDEO OUT terminal. (Actual results depend on the television.)
Television's rear panel
This unit's rear panel
Connecting a television with COMPONENT VIDEO terminals
Television's rear panel
This unit's rear panel
COMPONENT VIDEO terminals can be used for either interlace or progressive output (→ 81) and provide a purer picture than the S VIDEO OUT terminal.
- Connect to terminals of the same colour.
If you have a regular television (CRT: cathode ray tube)
Use component output with progressive "Off" (Factory setting ⇒ 68), even if it is progressive compatible, because progressive output can cause some flickering. This is the same for multi system televisions using PAL mode.
![graph LR A["COMPONENT VIDEO OUT"] --> B["This unit"] C["CRT"] --> D["COMPONENT VIDEO IN"] D -->|Progressive output| B](/content/2026/06/1328297/images/69bcfde1f2257c70cd519538b42fa079078f289e352e570917d3f806889332a3.jpg)
For progressive output (→ 22)
Connecting an amplifier or system component
■ Connecting an amplifier with a digital input terminal
- To enjoy multi-channel surround sound DVD-Video, connect an amplifier with Dolby Digital, DTS and MPEG decoders.
Required setting
"Digital Audio Output" in the Setup menu (→ 67)
- Before purchasing an optical digital audio cable (not included), check the terminal shape of the connected equipment.
- You cannot use DTS Digital Surround decoders not suited to DVD.
- Even if using this connection, output will be only 2 channels when playing DVD-Audio.

This unit's rear panel
■ Connecting a stereo amplifier

This unit's rear panel
When the unit is not to be used for a long time
To save power, unplug it from the household mains socket. This unit consumes a small amount of power, even when it is turned off [approx. 2 W (Power Save mode)]
When "Power Save" is set to "On", the "Quick Start" function does not work.
STEP 2 Channel reception settings and TV aspect settings

1 Turn on the television and select the appropriate AV input to suit the connections to this unit.
2 Press [⏻ DVD] to turn the unit on.
When connecting to a television that has the Q Link functions (→ 59), downloading from the television starts.

You can download the tuning positions from the television. This unit's Auto Clock Setting function synchronizes the time when the TV channel that is broadcasting time and date information is tuned.
- If the Country setting menu appears on the television.
e.g., DMR-EH55
Press [▲, ▼, ◀, ▶] to select the country and press [ENTER].
If you select "Schweiz", "Suisse" or "Svizzera" in the Country setting, or when the television tuning setting has been set to Switzerland, the "Power Save" setting menu appears. Select "On" or "Off" (→ 68).
Auto-Setup starts. This takes about 8 minutes.
After set up is complete, TV aspect setting screen appears.

•16:9: 16:9 widescreen television
●4:3: 4:3 aspect television
HDD RAM Titles are recorded as they appear on screen. DVD-V Video recorded for a widescreen is played as Pan
Video recorded for a widescreen is played as Pan & Scan (unless prohibited by the producer of the disc) (→ 81).
- Letterbox: 4:3 aspect television
Widescreen picture is shown in the letterbox style (→ 81)
3 Press [▲, ▼] to select the TV aspect and press [ENTER].
When television type and aspect is set, the GUIDE Plus+ setting screen appears.

(The above message also appears in countries where GUIDE Plus+ system is not available. However, set up is not possible.)
- If you want to set up the GUIDE Plus+ system Press [◀, ▶] to select "Yes" and press [ENTER]. Proceed to step 2 (→ 19, GUIDE Plus+ system settings)
- If you do not want to set up the GUIDE Plus+ system or if you live in a country where GUIDE Plus+ system is not available (→ 19, Regarding the GUIDE Plus+ system) Press [◀, ▶] to select "No" and press [ENTER]. Television picture appears. Set up is complete.
To stop partway
Press [RETURN].
■ If the clock setting menu appears, set the clock manually (→ 71). ■ To confirm that stations have been tuned correctly (→ 69) ■ To restart set up (→ 70)
Regarding the GUIDE Plus+ system
The GUIDE Plus+ system provides programme information from the host station displayed on the television like a TV programme magazine. Setting up to record a broadcast is easy too. Simply select the desired programme from the displayed list. You can also search for desired programmes by displaying only the programmes in a certain category.
The GUIDE Plus+ system is available in the following countries: Austria/Belgium/France/Germany/Italy/Netherlands/Spain/Switzerland
(As of end of February 2006)
- This service may not be available in some areas in the above countries.
- There may be changes in the service areas.
Note
You will need to complete Channel reception settings (→ 18) to setup the GUIDE Plus+ system.
- The GUIDE Plus+ system setup will not work if the clock is not set correctly.
- The receipt of the GUIDE Plus+ system data is only possible via the antenna input of this unit. The receipt of the GUIDE Plus+ data via externally connected satellite receivers or digital set-top boxes is not possible.
Visit the following homepage for more information. http://www.europe.guideplus.com
1 Press [GUIDE].

2 Press [▲, ▼] or the numbered buttons to enter the Postal Code of your location and press [ENTER].

It may take up to 2 hours to set up the GUIDE Plus+ system.
- If you want to set up the GUIDE Plus+ system, press [◀, ▶] to select "Yes" and press [ENTER].
- If you do not want to set up the GUIDE Plus+ system, press [◀, ▶] to select "No" and press [ENTER]. To download the GUIDE Plus+ data later (▶ 20, GUIDE Plus+ data download)
3 One of the following screens will appear.
Confirm the message on the screen.

If "No Data" appears (→ 20, Editing programme lists, Reference)
GUIDE Plus+ download is completed.

GUIDE Plus+ system is not available. Check the host channel of your country. (→ 21, Host Channel)

To download GUIDE Plus+ data, turn off your unit at the time displayed on the screen or download the data manually from "Data Download" in the Setup menu at that time. (→ 21, Changing the settings)
To stop partway
Press [RETURN].
- For further information about operating the GUIDE Plus+ programme list, refer to "Operations in the GUIDE Plus+ system". (→ 29)
Note
If your Postal Code changes, you can update this information later in the Setup of the GUIDE Plus+ system (→ 21, Changing the settings).
Refer to the control reference on page 18.
GUIDE Plus+ data download
The GUIDE Plus+ data is transmitted from the Host Channel (the television station transmitting the television programme list) several times a day. Data will be transmitted at 2:50 AM every day. It takes approximately 2 hours to complete data download.
There are 2 ways to download GUIDE Plus+ data.
-Download automatically when the unit is turned off.
-Download manually from "Data Download" in the Setup menu.
Download data automatically
- The GUIDE Plus+ data is downloaded automatically when the unit is turned off.
During download, "GUIDE" appears in the display of your unit.

If you turn on the unit while "GUIDE" appears, the data update is interrupted.
- If the GUIDE Plus+ data download at 2:50 AM and a timer recording overlap, you can select which will be given priority. To ensure the GUIDE Plus+ data is downloaded, you can disable the timer recordings during data transmission. (→ 21, left column, Night Download)
Download data manually
At the data transmission time, you can download the data manually from "Data Download" in the Setup menu (→ 21).
Note
- Depending on when you set up this unit, it may take approximately one day before you can display the television programme list.
- The stations displayed in the television programme list are determined according to geographical areas.
- A station that is not registered in your area is not displayed in the television programme list even if a signal can be received.
- Once you have downloaded the programme list, reception of data is required regularly to update and maintain the programme list.
- Do not disconnect the AC mains lead during data download.
- During data download, the HDD rotates and will make operating sounds.
Editing programme lists
1 Press [GUIDE]. 2 Press [SUB MENU].

3 Press [▲, ▼] to select "Editor" and press [ENTER].

4 Press [▲, ▼] to select the desired "Name" and press [▶].
You can also press [^ v CH] to browse through the station list.
| On/Off To select the stations to be displayed on the programme list.Only stations set to “On” are displayed in the GUIDE Plus+ list.Press [▲, ▼] to change the “On/Off” settings and press [ENTER]. |
Reference To set the appropriate Reference manuallyIf “No Data” appears in the GUIDE Plus+ list for a station, this station is either not supported by the GUIDE Plus+ data or a GUIDE Plus+ Reference could not be clearly assigned (“----” appears in the Reference field of this station). In this case, set the appropriate Reference manually.You can also manually assign the appropriate Reference even if a station name was not recognized (e.g. ***06). Press [▲, ▼] to change the “Reference” setting of the appropriate station and press [ENTER].NoteThe station names in the Reference list can deviate from the station list. Press [▲, ▼] to change the “Reference” setting of the appropriate station and press [ENTER].NoteThe station names in the Reference list can deviate from the station list. |
Note
Changes in the station list in the Setup menu (→ 69) of your unit will cause all Editor settings to return to the initial condition.
Changing the settings
You can change the basic settings for your GUIDE Plus+ list.
1 Press [GUIDE].
2 Press [SUB MENU].

3 Press [▲, ▼] to select "Setup" and press [ENTER].

4 Press [▲, ▼] to select an item and press [ENTER].
| Postal Code | To enter the Postal CodeThe entry of the Postal Code is required to receive regional data.1 Press [◀, ▶] to select “Yes” and press [ENTER].2 Press [▲, ▼, ◀, ▶] or the numbered buttons to enter your Postal Code and press [ENTER]. |
| Host Channel | To change the Host Channel manuallyThe GUIDE Plus+ System information is transferred via the Host Channel. The “Auto” setting is recommended. A Host Channel is then set by the system automatically.1 Press [▲, ▼] to select the desired station and press [ENTER].2 Press [◀, ▶] to select “Yes” and press [ENTER].●The setting of the Host Channel can take some time.●To check the host channels of your country→ right column, Host Channel |
| Data Download | To download GUIDE Plus+ data manuallyPress [◀, ▶] to select “Yes” and press [ENTER].The update can take approximately 2 hours.●For further informations ➔ 20, GUIDE Plus+ data download |
| Night Download | To select the priority during midnightThe GUIDE Plus+ data is downloaded at 2:50 AM every day. It takes approximately 2 hours to complete data download.If the GUIDE Plus+ data download at 2:50 AM and a timer recording overlap, you can select which will be given priority.On: Data DownloadTimer recording does not start or is interrupted for data download.Off: Timer programmingGUIDE Plus+ data will not be downloaded.After recording finishes, we recommend you to change this setting to “On”.Press [◀, ▶] to select “On” or “Off” and press [ENTER]. |
Note
- Existing information can be lost by changing the Postal Code or Host Channel.
- Entry of the wrong Postal Code or Host channel can lead to the receipt of wrong or no data.
Host Channel
It is not possible to receive GUIDE Plus+ data in all countries (→ below).
Check whether the right Host Channel has been input.
List of Host Channel (as of end of February, 2006)
| Country Host Channel | Display of the Host Channel | |
| Germany Eurosport EUROS | ||
| Austria Eurosport EUROS | ||
| Switzerland *1 | Eurosport EUROS | |
| France | Canal+ *2 | CANAL |
| Spain Tele5 TELE5 | ||
| Italy Sport Italia SI | ||
| Netherlands ※3 | Eurosport/Music Factory (TMF) | EUROS / TMF |
| Belgium *4 | RTL-TVI/Music Factory (TMF) | RTLTV/TMF |
| Luxembourg *5 | RTL-TVI | RTLTV |
*1 German-speaking regions only. *2 Analogue terrestrial broadcast only. *2 Eurosport now covers the whole Dutch region. TMF will cease transmitting GUIDE Plus+ data in May/June 2006. When TMF ceases transmitting GUIDE Plus+ data, change the Host Channel to Eurosport manually. *4 RTL-TVI will be available from January 2006, and will cover the whole of Belgium. TMF covers only Flemish speaking regions and will cease transmitting GUIDE Plus+ data in May/June 2006. When TMF ceases transmitting GUIDE Plus+ data, change the Host Channel to RTL-TVI manually. *5 RTL-TVI will be available from January 2006. The Luxembourg line-up is available by setting up GUIDE Plus+ as country=Belgium with the postal code 9999 (→ 19, step 2). • To change the Host Channel manually → left
Note
- Which channels appear in the GUIDE Plus+ list depends on local reception conditions. Sub-optimum reception quality can result in missing or incomplete GUIDE Plus+ data.
Set up to match your television and remote control

To enjoy progressive video
You can enjoy progressive video by connecting this unit's COMPONENT VIDEO OUT terminals to an LCD/plasma television or LCD projector compatible with progressive scan (→ 81).
1 While stopped
Press [FUNCTIONS].

2 Press [▲, ▼] to select "To Others" and press [ENTER]. 3 Press [▲, ▼] to select "Setup" and press [ENTER].

4 Press [▲, ▼] to select "Connection" and press [▶].

5 Press [▲, ▼] to select "Progressive" and press [ENTER].

6 Press [▲, ▼] to select "On" and press [ENTER].
Output becomes progressive.
Note
- When connected to a regular television (CRT: Cathode ray tube) or a multi-system television using PAL mode, even if it is progressive compatible, progressive output can cause some flickering. Turn off "Progressive" if this occurs (→ 43). ●Picture will not be displayed correctly if connected to an incompatible television.
- There is no output from the COMPONENT VIDEO OUT terminals if "AV1 Output" in the Setup menu is set to "RGB 1 (without component)" or "RGB 2 (without component)".
To return to the previous screen
Press [RETURN].
To exit the screen
Press [RETURN] several times.
Television operation
You can configure the remote control TV operation buttons to turn the television on/off, change the television input mode, select the television channel and change the television volume.

1 Point the remote control at the television
While pressing [💡 TV], enter the code with the numbered buttons.
e.g., 0 1: [0] ⇒ [1] 1 0: [1] ⇒ [0]
Manufacturer and Code No.
| Brand Code | Brand Code | ||
| Panasonic 01/02/ | 03/04/ | NOKIA 25/26/27 | |
| 45 | |||
| AIWA 35 NORDM | ENDE 10 | ||
| AKAI | 27/30 | ORION | 37 |
| BLAUPUNKT | 09 PHILIPS 05/06 | ||
| BRANDT | 10/15 | PHONOLA | 31/33 |
| BUSH | 05/06 | PIONEER | 38 |
| CURTIS | 31 PYE | 05/06 | |
| DESMET | 05/31/33 | RADIOLA | 05/06 |
| DUAL | 05/06 | SABA | 10 |
| ELEMIS | 31 | SALORA | 26 |
| FERGUSON | 10 SAMSUNG | 31/32/43 | |
| GOLDSTAR/LG | 31 | SANSUI | 05/31/33 |
| GOODMANS 05/ | 06/31 SANYO 21 | ||
| GRUNDIG | 09 | SBR | 06 |
| HITACHI | 22/23/31/40/ | SCHNEIDER | 05/06/29/ |
| 41/42 | 30/31 | ||
| INNO HIT | 34 | SELECO | 06/25 |
| IRRADIO | 30 SHARP 18 | ||
| ITT | 25 | SIEMENS | 09 |
| JVC | 17/39 | SINUDYNE | 05/06/33 |
| LOEWE | 07/46 | SONY | 08 |
| METZ | 28/31 | TELEFUNKEN | 10/11/12/ |
| 13/14 | |||
| MITSUBISHI | 06/19/20 | THOMSON | 10/15/44 |
| MIVAR | 24 TOSHIBA 16 | ||
| NEC | 36 WHITE | WESTINGHOUSE | 05/06 |
2 Test by turning on the television and changing channels.
- Repeat the procedure until you find the code that allows correct operation.
- If your television brand is not listed or if the code listed for your television does not allow control of your television, this remote control is not compatible with your television.
Note
- If your television brand has more than one code listed, select the one that allows correct operation.
When other Panasonic products respond to this remote control
Change the remote control code on the main unit and the remote control (the two must match) if you place other Panasonic products close together.
Use "DVD 1", the factory set code, under normal circumstances.
1 While stopped
Press [FUNCTIONS].
2 Press [▲, ▼] to select "To Others" and press [ENTER]. 3 Press [▲, ▼] to select "Setup" and press [ENTER]. 4 Press [▲, ▼] to select “Others” and press [▶]. 5 Press [▲, ▼] to select "Remote Control" and press [ENTER]. 6 Press [▲, ▼] to select the code (“DVD 1”, “DVD 2” or “DVD 3”) and press [ENTER].

To change the code on the remote control
7 While pressing [ENTER], press and hold the numbered button ([1], [2] or [3]) for more than 2 seconds. 8 Press [ENTER].
- When the following indicator appears on the unit's display

The unit's remote control code
Change the code on the remote control to match the main unit's (→ step 7).
Note
Executing "Shipping Condition" in the Setup menu returns the main unit code to "DVD 1". Change the remote control code to 1 (→ step 7).
To return to the previous screen
Press [RETURN].
To exit the screen
Press [RETURN] several times.

See also "Important notes for recording" (→ 8).
- RAM: It is not possible to record continuously from one side of a double-sided disc to the other. You will need to eject the disc and turn it over.
- +RW: You can create a Top Menu using "Create Top Menu" (→ 62). Recording or editing on the disc may delete the menu. In that case, create the menu again.
HDD
- You can record up to 500 titles on HDD. (When continuously recording for long durations, titles are automatically divided every 8 hours.)
RAM -R -RW(V)
- You can record up to 99 titles on one disc.
+R +RW
- You can record up to 49 titles on one disc.
SD
- It is not possible to record onto a card.
Preparation
- Turn on the television and select the appropriate video input to suit the connections to this unit.
- Turn on this unit.
1 Press [DRIVE SELECT] to select the HDD or DVD drive.
The HDD or DVD indicator lights up on the unit's display.
2 If you selected the DVD drive
Press [▲ OPEN/CLOSE] on the main unit to open the tray and insert a disc.
- Press the button again to close the tray.
- When using 8 cm DVD-RAM, or 8 cm DVD-R, remove the disc from the cartridge.
Insert label-up. ■ Cartridge disc
Automatic drive select function
RAM [Only for discs with the write-protect tab on the cartridge set to "PROTECT" (→ 60, Cartridge-protection)]
DVD-V DVD-A VCD CD
- If the unit is recording to the HDD or stopped, it automatically switches to the DVD drive when a disc is inserted.
- If you eject a disc and close the disc tray, the HDD drive is automatically selected.
3 Press [∧ ∨ CH] to select the channel.
To select with the numbered buttons:
e.g., 5: [0] → [5]
15: [1] → [5]![PANASONIC DMR-EH56 - Press [∧ ∨ CH] to select the channel. - 1](/content/2026/06/1328297/images/475a2391b0294b82b1bb6f71ed8f56607c100049479e0847630aef12cac6d9cf.jpg)
4 Press [REC MODE] to select the recording mode (XP, SP, LP or EP).

- To record sound using LPCM (XP mode only): Set the "Audio Mode for XP Recording" to "LPCM" in the Setup menu (→ 67).
5 Press [● REC] to start recording.
Recording will take place on open space on the HDD or on disc. Data will not be overwritten.![PANASONIC DMR-EH56 - Press [● REC] to start recording. - 1](/content/2026/06/1328297/images/676ba60d9fb30c86787c00fe3fefb90581ac6963921cee056137d5d51361e64a.jpg)
- You cannot change the channel or recording mode during recording. You can change the channel or recording mode while paused; however, the recording will then be as a separate title.
- You can record while the unit is in standby for timer recording, but once the time for the timer recording to begin is reached, any recording taking place will stop and the timer recording will begin.
- HDD RAM You can change the audio being received by pressing [AUDIO] during recording. (Does not affect the recording of audio.)
■ To pause recording
Press [11].
Press again to restart recording.
You can also press [● REC] to restart.
(Title is not split into separate titles.)
■ To stop recording
Press [■].
From the start to the end of the recording is called one title.
- -R -RW(V) +R +RW It takes about 30 seconds for the unit to complete recording management information after recording finishes.
In order to play DVD-R, DVD-RW (DVD-Video format) and +R (recorded with this unit) on other DVD players, it is necessary to finalize them (→ 62).
If a station broadcasts Teletext information
The unit automatically records the programme's and station's name if the station's Title Page is correctly set (→ 69).
Note
The unit may take some time in retrieving titles (up to 30 minutes) and may fail in some cases.
Quick Start (→ 68)
1 Sec. Quick Start for Recording & EPG Display
From the power on, recording starts in about 1 second after the REC button is pressed. If the GUIDE button is pressed while the unit is off, the Electronic Program Guide (EPG) displays in less than 1 second. (Quick Start Mode) Only when recording to the HDD or DVD-RAM
"Quick Start" is set to "On" at the time of purchase.
Note
Startup takes up to a minute when:
- You play a disc or start recording to discs other than DVD-RAM. - You want to make other operations. - The clock has not been set.
Recording modes and approximate recording times
Depending on the content being recorded, the recording times may become shorter than indicated.
(The times provided on this chart are an estimate.)
| Recording Mode | HDD(160 GB) | DVD-RAM DVD-R | DVD-RW+R+RW(4.7 GB) | DVD-R DL *3 (8.5 GB) | +R DL *3 (8.5 GB) | |
| Single-sided(4.7 GB) | Double-sided *1 (9.4 GB) | |||||
| XP (High picture quality recording mode) | 36 hours 1hour | 2 hours 1 hour 1 | hour 45 min. 1 hour | 45 min. | ||
| SP (Standard recording mode) | 70 hours 2 hours | 4 hours 2 hours | 3 hours | 35 min. | 3 hours 35 min. | |
| LP (Long recording mode) | 138 hours | 4 hours | 8 hours | 4 hours | 7 hours 10 min. | 7 hours 10 min. |
| EP (Extra long recording mode) *4 | 284 hours(212 hours *2 ) | 8 hours(6 hours *2 ) | 16 hours(12 hours *2 ) | 8 hours(6 hours *2 ) | 14 hours 20 min.(10 hours 45 min. *2 ) | |
| FR (Flexible Recording Mode) *4 | 284 hours maximum | 8 hours maximum | 8 hours maximum for one side | 8 hours maximum | 14 hours 20 min. | 9 hours maximum |
21 It is not possible to record or play continuously from one side of a double-sided disc to the other. 2 When "Recording time in EP mode" is set to "EP (6 Hours)" in the Setup menu (→ 66). The sound quality is better when using "EP (6 Hours)" than when using "EP (8 Hours)". 3 You cannot record directly to DVD-R DL and +R DL discs with this unit. The table shows the recording time when copying. +R DL You cannot copy in EP mode. 4 When recording to the HDD in "EP" or "FR (recordings 5 hours or longer)" mode, you cannot perform high-speed copy to +R, +R DL or +RW discs. - RAM When recording to DVD-RAM using "EP (8 Hours)" mode, play may not be possible on DVD players that are compatible with DVD-RAM. Use "EP (6 Hours)" mode if playback may be on other equipment.
FR (Flexible Recording Mode)
You can set FR (Flexible Recording) mode when copying or programming timer recordings.
The unit automatically selects a recording rate between XP and EP (8 Hours) that will enable the recordings to fit in the remaining disc space with the best possible recording quality.
For example, with a 90-minute recording to an unused DVD-RAM, the picture quality is adjusted to between "XP" and "SP". - When recording to the HDD, picture quality is automatically adjusted to precisely fit a copied title on a 4.7 GB disc. - All the recording modes from XP to EP appear in the display.

Disc Insertion/Ejection
When the format confirmation screen is displayed
RAM -RW(V) +R +R DL +RW
When you insert a new disc or a disc recorded on a computer or other equipment, a format confirmation screen is displayed. Format the disc to use it. However, all the recorded contents are deleted.

Press [◀, ▶] to select "Yes" and press [ENTER].
To format a disc
"Deleting all the contents of a disc or card—Format" (→ 61)
When removing a recorded disc
-R -R DL -RW(V) +R +R DL
The following screen appears when you have not processed the disc for play on other equipment.

■ To finalize the disc
Press [● REC] on the main unit.
- You cannot stop this process once you have started it.
- If you want to set the background, play menu select or provide a disc name, select "Top Menu (→ 62)", "Auto-Play Select (→ 62)" or "Disc Name (→ 60)" in "DVD Management" before finalizing.
■ To open the tray without disc finalization
Press [▲ OPEN/CLOSE] on the main unit.

To specify a time to stop recording— One Touch Recording
HDD RAM -R -RW(V) +R +RW
During recording
Press [● REC] on the main unit to select the recording time.
- You can specify up to 4 hours later. ●The unit display changes as shown below. OFF 0:30 → OFF 1:00 → OFF 1:30 → OFF 2:00 Counter (cancel) ← OFF 4:00 ← OFF 3:00
- This does not work during timer recordings (→ 28) or while using Flexible Recording (→ 27).
- If you change the channel or recording mode while recording is paused, the time specified to stop recording is cancelled.
- The unit turns off automatically after the time to stop recording is reached.
To cancel
Press [● REC] on the main unit several times until the counter appears.
- The time to stop recording is cancelled; however, recording continues.
To stop recording
Press [■].
Recording settings for High Speed Copy
When copying in high speed mode to DVD-R, DVD-R DL, DVD-RW (DVD-Video format), +R, +R DL and +RW after you have recorded to the HDD
If copying a title using the high speed mode to a DVD-R, etc., set "Rec for High Speed Copy" to "On" before recording to the HDD.
However, the following restrictions apply:
- When recording bilingual broadcasts, either the main or secondary audio can be recorded.
- If you do not connect external equipment Select "M 1" or "M 2" in "Bilingual Audio Selection" in the Setup menu (→67).
- If you connect external equipment Select "M 1" or "M 2" on the external equipment.
- Even 16:9 aspect (Widescreen) programmes are recorded in 4:3 aspect.
Refer to the "Important notes for recording" for more information (→ 8).
1 While stopped, press [FUNCTIONS]. 2 Press [▲, ▼] to select "To Others" and press [ENTER]. 3 Press [▲, ▼] to select "Setup" and press [ENTER]. 4 Press [▲, ▼] to select "Disc" and press [▶]. 5 Press [▲, ▼] to select "Settings for Recording" and press [ENTER]. 6 Press [▲, ▼] to select "Rec for High Speed Copy" and press [ENTER]. 7 Press [▲, ▼] to select "On" and press [ENTER]. 8 Press [◀, ▶] to select "Yes" and press [ENTER].
To return to the previous screen
Press [RETURN].
To exit the screen
Press [RETURN] several times.
To start recording
- Recording television programmes (→ 24)
- Timer recording (→ 28) ● Copying from a video cassette recorder (→ 58)
Note
If you do not intend to copy titles in high speed mode to DVD-R, DVD-R DL, DVD-RW (DVD-Video format), +R, +R DL and +RW, set "Rec for High Speed Copy" to "Off".
Flexible Recording
(Recording that fits the remaining disc space)
HDD RAM -R -RW(V) +R +RW
The unit sets the best possible picture quality that fits the recording within the remaining disc space. The recording mode becomes FR mode.
■ Using “Flexible Rec” is convenient in these kinds of situations.
RAM -R -RW(V) +R +RW
- When the amount of free space on the disc makes selecting an appropriate recording mode difficult
- When you want to record a long programme with the best picture quality possible
HDD
- When you want to record a title to HDD so that it can then be copied to fit one 4.7 GB disc perfectly
- You do not need to edit the recorded title, or change the recording mode when copying, to fit the disc space
e.g., Recording a 90 minute programme to disc
If you select XP mode, the programme will not fit one disc.


If you try to record a 90 minute programme in XP mode, only the first 60 minutes will fit on the disc and the 30 minute balance will not get recorded.
●Another disc is necessary.
If you select SP mode, the programme will fit one disc.

However there will be 30 minutes remaining disc space.
If you select "Flexible Rec" the programme will fit one disc perfectly.

- Necessary space for recording
Preparation
- Select the channel or the external input to record.
- Press [DRIVE SELECT] to select the HDD or DVD drive.
1 While stopped
Press [FUNCTIONS].
2 Press [▲, ▼] to select "To Others" and press [ENTER]. 3 Press [▲, ▼] to select "Flexible Rec" and press [ENTER].

Maximum recording time
This is the maximum recording time in EP (8 Hours) mode.
4 Press [◀, ▶] to select "Hour" and "Min." and press [▲, ▼] to set the recording time.
- You can also set the recording time with the numbered buttons.
- You cannot record more than 8 hours.
5 When you want to start recording
Press [▲, ▼, ◀, ▶] to select "Start" and press [ENTER].
- Recording starts.
- All the recording modes from XP to EP appear in the display.

To exit the screen without recording
Press [RETURN].
To stop recording partway, press [■].
To show the remaining time, press [STATUS].
e.g., HDD
Remaining time of recording

Playing while you are recording
HDD RAM
Playing from the beginning of the title you are recording—Chasing playback
Press [▶] (PLAY) during recording.
There is no sound output while searching forward or backward.
To stop play
Press [■].
To stop recording
2 seconds after play stops, press [■].
To stop timer recording
2 seconds after play stops
1 Press [■]. 2 Press [◀, ▶] to select "Stop Recording" and press [ENTER].
Playing a title previously recorded while recording—Simultaneous rec and play
- You can also change the drive and play while recording. Press [DRIVE SELECT].
1 Press [DIRECT NAVIGATOR] during recording. 2 Press [▲, ▼, ◀, ▶] to select a title and press [ENTER].
- There is no sound output while searching forward or backward.
To stop play
Press [■].
To exit the Direct Navigator screen
Press [DIRECT NAVIGATOR].
To stop recording
After play stops
1 Press [DIRECT NAVIGATOR] to exit screen. 2 If the recording is on the other drive Press [DRIVE SELECT] to select the recording drive.
Press [■].
To stop timer recording
After play stops
1 Press [DIRECT NAVIGATOR] to exit screen. 2 If the recording is on the other drive, press [DRIVE SELECT] to select the recording drive. 3 Press [■]. 4 Press [◀, ▶] to select "Stop Recording" and press [ENTER].
Note
"Chasing playback" and "Simultaneous rec and play" can only be used with programmes of the same encoding system (PAL/NTSC).

See also "Important notes for recording" (→ 8).
HDD RAM -R -RW(V) +R +RW
- You can enter up to 32 programmes up to a month in advance. (Each daily or weekly programme is counted as one programme.)
Preparation
- Turn on the television and select the appropriate video input to suit the connections to this unit.
- If recording to DVD, insert a disc that you can use for recording (→ 24).
- Make sure that the clock settings are correct (→ 71).
Using the GUIDE Plus+ system to make timer recordings
You can perform timer recordings by simply selecting the desired programme from the television programme list.
Before using the GUIDE Plus+ system
- The television programme list is not displayed immediately after purchasing this unit.
- You must complete initial setup for the GUIDE Plus+ system.
Refer to "GUIDE Plus+ system settings" (→ 19) for more information.
1 Press [GUIDE].

2 Press [▲, ▼, ◀, ▶] to select the programme.
3 Press [ENTER].

- Confirm the programme and make corrections if necessary using [▲, ▼, ◀, ▶] (→ 30, right column, step 3).
- When "-- --" appears in the "Name" column, you cannot set timer recording. Press [▲, ▼] to select desired programme position. After you have entered the information of a TV station, it is kept in the unit's memory.
4 Press [ENTER].
The settings are stored and the timer programme is on.

"◎" lights on the unit's display to indicate timer recording standby has been activated.

Repeat steps 2–4 to programme other recordings.
Note
- If "NTSC" has been selected for "TV System" (→ 70), the GUIDE Plus+ system cannot be used.
■ To cancel recording when recording has already begun (→ 31) ■ To release the unit from recording standby (→ 31) ■ Notes on timer recording (→ 31)
Operations in the GUIDE Plus+ system
Basic operations
Press [GUIDE] to switch between Landscape view and Portrait view.
Landscape view
Portrait view


| To change stations Landscape view | |
| 1 Press [◀] until the station list is highlighted.2 Press [▲, ▼] to select a station.3 • To view the current programme in the preview screen:Press the “Red” button.• To see the full-screen view of the current programme:Press [ENTER].Press [GUIDE] to return to the Landscape view. | |
| Portrait view1 Press [▲] until the station list is highlighted.2 Press [◀, ▶] to select a station.3 • To view the current programme in the preview screen:Press the “Red” button.• To see the full-screen view of the current programme:Press [ENTER].Press [GUIDE] to return to the Portrait view. | |
| To view a programme for another day | • Jump ahead 24 hoursPress the “Green” button to jump ahead by one day.• Jump back 24 hoursPress the “Red” button.You can only jump back to the current date. |
| To navigate within the GUIDE Plus+ list. | Press [▲, ▼, ◀, ▶]Only current and future programmes are shown. |
| To browse through the GUIDE Plus+ list. | Press [^ v CH]. |
| To see programme information(Programmes with the i symbol) | Additional information (programme name, programme duration, broadcast time, short description) is available for these programmes.Press [¶to show and hide the information. |
Selecting the programme from the desired category
The Programme Type function lets you display a GUIDE Plus+ list sorted by main category (e.g. Movies, Sport). Each main category will contain individual subcategories. The GUIDE Plus+ list for the selected main category only appears in the Portrait view.
1 Press the "Blue" button to display the list of main categories. 2 Press [▲, ▼] to select the desired main category.

The submenu for the selected main category appears. Example: Press [▲, ▼] to select the main category Movies. The subcategory with several movie categories appears (e.g. All Types, Action, Animation, Comedy, Drama, Romance, Sci Fi, Thriller, Adventure).
3 Press [◀] to go to the subcategory menu. 4 Press [▲, ▼] to make your selection. 5 Press [ENTER].

(e.g., Action)
A list appears with all programmes of the selected main category and the selected subcategory.
6 Press [▲, ▼] to go through the GUIDE Plus+ list.
If you want to change the station, press [▲] until the station list is highlighted and then press [◀, ▶].
The GUIDE Plus+ list appears for the selected categories for this station.
To return to the previous screen
Press [RETURN].
To exit the screen
Press [RETURN] several times.
Refer to the control reference on page 28.
Using SHOWVIEW number to make timer recordings
Entering SHOWVIEW numbers is an easy way of timer recording. You can find these numbers in TV listings in newspapers or magazines.
1 Press [ShowView].

2 Press the numbered buttons to enter the SHOWVIEW number.
Press [◀] to move back to correct a digit.
3 Press [ENTER].

- Confirm the programme and make corrections if necessary using [▲, ▼, ◀, ▶] (→ right column, step 3).
- When “-- ----” appears in the “Name” column, you cannot set timer recording. Press [▲, ▼] to select desired programme position. After you have entered the information of a TV station, it is kept in the unit’s memory.
4 Press [ENTER].
The settings are stored and the timer programme is on. Timer icon is displayed in left column.

The "💡" lights on the unit's display to indicate timer recording standby has been activated.

Repeat steps 1–4 to programme other recordings.
■ To cancel recording when recording has already begun (→ 31) ■ To release the unit from recording standby (→ 31) ■ Notes on timer recording (→ 31)
Manually programming timer recordings
1 Press [PROG/CHECK].

2 Press [▲, ▼] to select "New Timer Programme" and press [ENTER].
3 Press [▶] to move through the items and change the items with [▲, ▼].

- Press and hold [▲, ▼] to alter the Start (Start time) and Stop (Finish time) in 30-minute increments.
- You can also set Name (Programme position/TV Station Name), Date, Start (Start time), and Stop (Finish time) with the numbered buttons.
- Date
→ Date: Current date up to one month later minus ↓ ↑ one day Daily timer: SUN-SAT→MON-SAT→MON-FRI ↓ ↑ → Weekly timer: SUN→----SAT
- You can also press [DRIVE SELECT] to select the recording drive. When the recording drive is "DVD" and there is not enough remaining space, recording automatically switches to the "HDD" (→ 32, Relief Recording).
- You can also press [REC MODE] to change the recording mode.
•VPS/PDC (→ 32)
ON←→OFF (---)
If the broadcasting station is not transmitting VPS/PDC signals, “—” appears in the menu for timer programming under “VPS/PDC”.
- HDD RENEW (Auto Renewal Recording) (→ 32) ON←→OFF
- Programme Name
Press [◀, ▶] to select "Programme Name" and press [ENTER]. (→ 63, Entering text)
4 Press [ENTER].
The settings are stored and the timer programme is on. Timer icon is displayed in left column.

“💡” lights on the unit's display to indicate timer recording standby has been activated.
![PANASONIC DMR-EH56 - Press [ENTER]. - 2](/content/2026/06/1328297/images/8d7162b5aa5ecc1148dd3e4bf1253885f593360e12f6abadcee19daba53f6199.jpg)
Check to make sure "OK" is displayed (→ 31).
Repeat steps 2–4 to programme other recordings.
■ To cancel recording when recording has already begun (→ 31) ■ To release the unit from recording standby (→ 31) ■ Notes on timer recording (→ 31)
To cancel recording when recording has already begun
1 While the unit is on
Press [DRIVE SELECT] to select the recording drive and press [■].

2 Press [◀, ▶] to select "Stop Recording" and press [ENTER].
If you stop a timer recording, it will be cancelled. However, if you have set a weekly or daily timer recording, the recording will start from the next time the timer recording is set.
To release the unit from recording standby
- Even when the unit is turned off, you can display the timer recording list by pressing [PROG/CHECK].
1 Press [PROG/CHECK].
2 Press [▲, ▼] to select the programme and press the "Red" button.
- The timer icon “②” (→ right) disappears from the timer recording list.
- You cannot cancel timer recording standby mode as long as even one timer icon “①” (→ right) remains in the timer recording list.
- Press the "Red" button again to activate timer recording standby.
Notes on timer recording
- “①” flashes on the unit's display for about 5 seconds when the unit cannot go to timer recording standby.
- Timer recordings are activated regardless of whether the unit is turned on/off.
- Timer recordings begin when the set time is reached even when playing.
- Timer recordings do not begin while editing or copying in normal speed mode (→ 51).
- If the unit is turned on when timer recording begins, it remains turned on after recording finishes. It does not turn off automatically. You can turn the unit off during timer recording.
- If the unit is not put in the timer recording standby mode at the last 10 minutes before the programmed timer recording starting time, the “◎” flashes on the unit’s display.
- When you programme successive timer recordings to start immediately one after the other, the unit cannot record the part at the beginning of the later programmes.
![graph LR A["Recorded Recorded"] --> B["Programme"] B --> C["Not recorded"]](/content/2026/06/1328297/images/71fa3553240c8b845ccf54aa7a9eccfb72bdb6599e1b0f394b7d771fd70799ea.jpg)
- (If the GUIDE Plus+ system is set) The GUIDE Plus+ data is downloaded at 2:50 AM every day. It takes approximately 2 hours to complete data download. If you want to make timer recordings during this time, set "Night Download" in the GUIDE Plus+ system setup menu to "Off" (→ 21).
- If the actual broadcasting times of timer recordings overlap [regardless of whether they are VPS/PDC (→ 32) controlled], the recording that starts first always has priority, and the recording of the later programme will start only after the first timer recording has finished.
Check, change or delete a programme
- Even when the unit is turned off, you can display the timer recording list by pressing [PROG/CHECK].
Press [PROG/CHECK].
Icons
② Timer recording standby is activated. ● This programme is currently recording. w The times overlap those in another programme. Recording of the programme with the later start time starts when the earlier programme finishes recording. - You stopped a weekly or daily timer recording. The icon disappears the next time the timer programme starts recording. F The disc was full so the programme failed to record. The material was copy-protected so it was not recorded. The programme did not complete recording because the disc is dirty or some other reason. Timer programmes set to Auto Renewal Recording (→ 32). Titles that have been rerouted to the HDD (Displayed while recording.) HDD Recording drive is set to HDD DVD Recording drive is set to DVD

Message displayed in the "Drive space" line
OK: Displayed if the recording can fit in the remaining space.
→ (Date): For recordings made daily or weekly, the display will show until when recordings can be made (up to a maximum of one month from the present time) based on the time remaining on the disc.
! : It may not be possible to record because:
●there is not enough space left - the number of possible titles has reached its maximum.
Relief: Timer programmes that will be relief recorded to the HDD.
■ To change a programme
Press [▲, ▼] to select the programme and press [ENTER].
(→ 30, right column, step 3)
■ To delete a programme
Press [▲, ▼] to select the programme and press [*].
You can also delete a programme with the following steps
1 Press [▲, ▼] to select the programme and press [SUB MENU]. 2 Press [▲, ▼] to select "Delete" and press [ENTER].
■ To exit the timer recording list
Press [PROG/CHECK].
Programmes that failed to record are deleted from the timer recording list at 4 a.m. two days later.
Refer to the control reference on page 28.
Relief Recording
When the recording drive is "DVD" and there is not enough remaining space, recording automatically switches to the "HDD". If there is no disc in the tray or the disc cannot be recorded on or when timer recording starts while copying, the recording drive will be altered to the HDD.
- The Direct Navigator shows which programmes were relief-recorded ("Γ") is displayed.) (→ 34).
- If the time remaining on the HDD is insufficient, as much of the programme as possible will be recorded onto the HDD.
- Relief recording is not activated when recording the programme with VPS/PDC and it is extended so that it no longer fits on the disc.
Auto Renewal Recording
HDD
If you record a programme onto HDD repeatedly every day or every week using timer recording, the unit will record the new programme over the old one.
This function can be used only when weekly recording or daily recording is selected.
1 Press [PROG/CHECK]. 2 Press [▲, ▼] to select the programme and press [ENTER]. 3 Press [◀, ▶] to select "RENEW" column. 4 Press [▲, ▼] to select "ON" and press [ENTER].

Note
- If a programme set for Auto Renewal Recording is protected or while playback is taking place from the HDD, or while copying, the programme will not be overwritten. Instead, the programme set for recording will be saved as a separate programme, and this programme will be the one to be overwritten when the next Auto Renewal Recording takes place.
- Playlists made from programmes that were set for Auto Renewal Recording are deleted along with auto renewal.
- When there is not enough space on the HDD, the programme may not be recorded completely.
VPS/PDC function
VPS (Video Programme System) or PDC (Programme Delivery Control) is a very convenient system which records exactly from beginning to end of the TV programmes set in timer recording, even if the actual broadcasting time differs from the scheduled time due to delayed start or extension of the programme duration. Also, if a programme is interrupted, for example, some special news is inserted, the recording will be paused automatically and resumed when the programme continues.
| When VPS/PDC recording | ●Use VPS/PDC time for recording the TV programmes.●Set “VPS/PDC” to “OFF” when recording time is not VPS/PDC time.●VPS/PDC recording is not performed when VPS/PDC time is incorrect, even if only by one minute. To find out VPS/PDC time, consult Teletext, a newspaper or magazine, or other source.-If a programme listed in a newspaper or magazine has twoSHOWVIEWnumbers, use theSHOWVIEWnumber for VPS/PDC if you wish to proceed with VPS/PDC recording usingSHOWVIEWprogramming.-The default settings for “VPS/PDC” is “OFF”. |
| When the VPS/PDC signal drops out because the broadcast signal is weak.When a TV station does not transmit a regular VPS/PDC signal. | Timer recording will be performed in the normal mode (without VPS/PDC) even if it was programmed for VPS/PDC.In this case, even if the timer recording is performed, whatever has been programmed will not be cancelled at that particular time but at 4 a.m. two days later. |
| If the start times of scheduled programmes listed in the newspaper or magazine change at a later date. | Set “VPS/PDC” to “OFF” when programming a programme whose start time has been subsequently changed. |
Note
●The beginnings of recordings may not be recorded correctly in some cases. - Depending on the signals sent from the TV stations, the VPS/PDC system may not work properly even when "VPS/PDC" has been set to "ON". - Please check with the broadcasters in your area for details. - VPS/PDC does not activate while this unit is on. The system stays inactive under the condition even its setting is "ON". In such cases, recording starts and finishes at times you set initially.
HDD RAM -R -RW(V) +R +RW
See also "Important notes for recording" (→ 8).
Making timer recordings on the television
(e.g., of digital broadcasts)
To make a timer recording with your television, connect to a television with a Q Link function (→ 59) that you can use for setting timer recordings using a fully wired 21-pin Scart cable (→ 14).
1 Make timer programming on the TV.
2 Press [DRIVE SELECT] to select the HDD or DVD drive.
If you selected the DVD drive, insert a disc (→ 24).
3 Turn off this unit.
The start and end of recording is controlled by the TV.
To stop recording
Press ■].
Note
- When this unit is in timer recording standby or EXT LINK standby ("①" or "EXT-L" is shown on the unit's display), recording from television does not start.
- Programmes are recorded as one title on this unit when the end time of the earlier timer recording and the start time of the later timer recording are close to each other.
HDD RAM To divide the titles, go to "Divide Title" (→ 45).
Recording from digital/satellite receiver or decoder
Preparation
- Connect a digital/satellite receiver or decoder to this unit's input terminals (→ 15).
- When the output signal from the external equipment is NTSC, change the "TV System" to "NTSC" in the Setup menu (70). This unit cannot record to discs containing both PAL and NTSC signals. (However, both types of programmes can be recorded onto the HDD.)
- Press [DRIVE SELECT] to select the HDD or DVD drive.
1 While stopped
Press [INPUT SELECT] to select the input channel for the equipment you have connected.
e.g., If you have connected to AV2 input terminals, select "AV2".
2 Press [REC MODE] to select the recording mode. 3 Select the channel on the other equipment. 4 Press [● REC].
Recording starts.
To skip unwanted parts
Press [11] to pause recording. (Press again to restart recording.)
To stop recording
Press [■].
Linked timer recordings with external equipment (digital/satellite receiver) — EXT LINK
To record programmes from digital/satellite receiver using timer programming
Preparation
- Make sure you connect the AV2 input terminal of this unit to the Scart terminal of a VCR or a digital/satellite receiver with a 21-pin Scart cable (→ 15).
- Set "AV2 Input" to match the connected equipment in the Setup menu (→ 68).
- Set the "Ext Link" to match the connected equipment in the Setup menu (→ 68).
1. Make timer programming on the external equipment.
2. Press [DRIVE SELECT] to select the HDD or DVD drive.
If you selected the DVD drive, insert a disc (→ 24).
3. Press [EXT LINK].
The unit turns off and "EXT-L" lights on the unit's display to indicate timer recording standby has been activated.
To cancel the external control
Press [EXT LINK] to stop recording or to cancel linked timer recording standby.
- In order to prevent accidental operation, press [EXT LINK] to cancel the setting after recording is finished.
Note
- This function does not work with some equipment. Refer to the equipment's operating instructions.
- The beginnings of recordings may not be recorded correctly in some cases.
- When "Ext Link" is set to "Ext Link 2", this function does not work if the input signal is NTSC system.
- When "AV2 Connection" is set to "Decoder", EXT LINK is not available (→ 68).
- Programmes are recorded as one title on this unit when the end time of the earlier timer recording and the start time of the later timer recording are close to each other.
HDD RAM To divide the titles, go to "Divide Title" (→ 45).
- When this unit is in EXT LINK standby ("EXT-L" is shown on the unit's display), The GUIDE Plus+ data cannot downloaded.
- While the unit is in EXT LINK standby mode or recording, video picture is from the AV2 input terminal irrespective of "AV1 Output" setting (→ 68).
- During EXT LINK standby mode or recording, playback is only available from the drive performing the recording.
Playing recorded video contents/Playing play-only discs

16:9 aspect programmes are recorded in 4:3 aspect in the following cases.
-If you recorded to the HDD or a DVD-RAM and "Rec for High Speed Copy" was set to "On" in the Setup menu (→ 66).
-If you recorded or copied to a DVD-R, DVD-R DL, DVD-RW (DVD-Video format), +R, +R DL or +RW.
It may be possible to adjust the display mode on the TV. Refer to your television's operating instructions.
Preparation
- Turn on the television and select the appropriate video input to suit the connections to this unit.
- Turn on this unit.
1 Press [DRIVE SELECT] to select the HDD or DVD drive.
The HDD or DVD indicator lights up on the unit's display.
- It is possible to watch playback from one drive while recording on another (editing is not possible).
2 If you selected the DVD drive
Press [▲ OPEN/CLOSE] on the main unit to open the tray and insert a disc.
- Press the button again to close the tray. - When using 8 cm DVD-RAM, or 8 cm DVD-R, remove the disc from the cartridge.

3 Press [▶] (PLAY).
HDD RAM -R -R DL -RW(V) +R +R DL +RW -RW(VR)
Play starts from the most recently recorded title. DVD-V DVD-A CD VCD and MP3
Play starts from the beginning of the disc. DivX
DivX Menu screen appears (→ 38)
- When using cartridge discs with the write-protect tab in the protect position (→ 60), play automatically starts when inserted in the unit.
Selecting recorded programmes (titles) to play—Direct Navigator
HDD RAM -R -R DL -RW(V) +R +R DL +RW -RW(VR)
1 Press [DIRECT NAVIGATOR].
- Thumbnail Display
![PANASONIC DMR-EH56 - Press [DIRECT NAVIGATOR]. - 1](/content/2026/06/1328297/images/3db2e5af2896806776881dd3ae77650ebc283144d4fc6c6a9ac6c27b28c5ad1c.jpg)
- Table Display
![PANASONIC DMR-EH56 - Press [DIRECT NAVIGATOR]. - 2](/content/2026/06/1328297/images/c269fc3ea1833a940f3b9eb286c1f0e27dd52abee3c14f94639e7b58b86fe1f1.jpg)
Switching the Direct Navigator appearance
① Press [SUB MENU] while Thumbnail Display is displayed.
② Press [▲, ▼] to select "Table Display" and press [ENTER].
- The display appearance last used is saved even after the unit is turned off.
2 HDD RAM
Press the "Red" button to select "VIDEO".

HDD To sort Title View for easy searching (Table Display only)
This function is convenient when searching for one title to playback from many titles.
① Press [SUB MENU]. ② Press [▲, ▼] to select "Sort" and press [ENTER]. ③ Press [▲, ▼] to select the item and press [ENTER]. If you select an item other than "No."
- The Direct Navigator screen will reappear after playback of the selected title has finished. (You cannot play titles continuously.)
- Skip and Time Slip will only function with the title currently being played back.
- If you exit the Direct Navigator screen, or switch to "PICTURE" Direct Navigator screen, the sorted Title View will be cancelled.
3 Press [▲, ▼, ◀, ▶] to select the title and press [ENTER].
You can also select titles with the numbered buttons.
| e.g., | HDD | RAM | -R | -R DL | -RW(V) | +R | |
| +R DL | +RW | -RW(VR) | |||||
| 5: | [0] → [0] → [5] | 5: | [0] → [5] | ||||
| 15: | [0] → [1] → [5] | 15: | [1] → [5] | ||||
| 115: | [1] → [1] → [5] | ||||||
To show other pages
Press [▲, ▼, ◀, ▶] to select "Previous" or "Next" and press [ENTER]. (Thumbnail Display only) - You can also press [◀◀, ▶▶] to show other pages.
To exit the screen
Press [DIRECT NAVIGATOR].
Direct Navigator screen icons
| ● | Currently recording. |
| Title protected. | |
| Title that was not recorded due to recording protection (Digital broadcasts etc.) | |
| × | Title cannot be played [When copying a title to the HDD, or when data is damaged etc.] |
| Titles that have been rerouted to the HDD (→ 32, Relief Recording) | |
| Title with “One time only recording” restriction (→ 81, CPRM) | |
| N (NTSC) | Title recorded using a different encoding system from that of the TV system currently selected on the unit. |
| P (PAL) | ●Alter the “TV System” setting on this unit to suit (→ 70). |
■ When a menu screen appears on the television
DVD-V DVD-A
Press [▲, ▼, ◀, ▶] to select the item and press [ENTER].
Some items can also be selected using the numbered buttons.
VCD
Press the numbered buttons to select the item.
e.g., 5: [0] → [5] 15: [1] → [5]
•To return to the menu screen
DVD-V Press [DIRECT NAVIGATOR] or [SUB MENU].
DVD-A: Press [DIRECT NAVIGATOR].
VCD: Press [RETURN].
Note
- It is not possible to play continuously from one side of a double-sided disc to the other. You will need to eject the disc and turn it over.
- Depending on the disc, it may take time for the menu screen, pictures, sound, etc. to start.
- Discs continue to rotate while menus are displayed. Press [■] when you have finished playback to protect the unit's motor, your television screen, and so on.
- The producer of the disc can control how discs are played. So you may not always be able to control play as described in these operating instructions. Read the disc's instructions carefully.
- When playing back a title recorded on the HDD, ensure that you match the "TV System" setting to the recorded title (→ 70).
Operations during play
| Stop | Press [■].The stopped position is memorized.Resume play functionPress [►] (PLAY) to restart from this position.Stopped position●If [■] is pressed several times, the position is cleared.●The position is cleared if the tray is opened.●DVD-A CD VCD and MP3/DivX :The position is cleared if the unit is turned off. |
| Pause | Press [■].Press [■] again or [►] (PLAY) to restart play. |
| Search | Press [◄◄] or [►►].●The speed increases up to 5 steps. (+R +R DL +RW up to 3 steps)●Press [►] (PLAY) to restart play.●Audio is heard during first level search forward.DVD-A (excluding motion picture parts) CD and MP3 : Audio is heard during all levels of search.DivX : Audio is not heard during all levels of search.●Depending on the disc, Search may not be possible. |
| Skip | During play or while paused, press [◄◄] or [►►].Skip to the title, chapter or track you want to play.●Each press increases the number of skips.●DivX : Backward direction [◄◄] only. |
| Starting from a selected title | Press the numbered buttons.Play starts from the selected title, chapter or track.●HDDe.g., 5: [0] → [0] → [5]15: [0] → [1] → [5]●MP3 and JPEG/TIFFe.g., 5: [0] → [0] → [0] → [5]15: [0] → [0] → [1] → [5]●DVD-ASelecting groupsWhile stopped (screen saver is displayed on the television ➔ right)Input a 1-digit numbere.g., 5: [5]●Other discs (You can select a track with DVD Audio.)Input a 2-digit numbere.g., 5: [0] → [5]15: [1] → [5]●This works only when stopped (screen saver is displayed on the television ➔ above) with some discs.●VCD (with playback control)If you press the numbered buttons while stopped (the above screen saver is displayed on the television) you can cancel PBC. (Elapsed play time appears on the unit's display.) |
| Quick ViewHDD RAM | Press and hold [►] (PLAY/×1.3).Play speed is quicker than normal.●Press again to return to normal speed. |
Refer to the control reference on page 34.
Operations during play
| Slow-motionHDD RAM -R -R DL -RW(V) +R+R DL +RW DVD-VDVD-A (Motion picture parts only)-RW(VR) VCD | While paused, press [◀◀] or [▶▶].The speed increases up to 5 steps.Press [▶] (PLAY) to restart play.VCD Forward direction [▶▶] only.The unit will pause if slow-motion play is continued for approximately 5 minutes (excluding DVD-V DVD-A VCD). |
| Frame-by-frameHDD RAM -R -R DL -RW(V) +R+R DL +RW DVD-VDVD-A (Motion picture parts only)-RW(VR) VCD | While paused, press [◀] (◀III) or [▶] (II▶).Each press shows the next frame.Press and hold to change in succession forward or backward.Press [▶] (PLAY) to restart play.VCD Forward direction [▶] (II▶) only. |
| Skipping the specified time (Time Slip)HDD RAM -R -R DL -RW(V) +R+R DL +RW -RW(VR) | 1 Press [TIME SLIP].2 Press [▲, ▼] to select the time and press [ENTER].Play skips the specified time.Each time you press [▲, ▼], the time increases [▲] or decreases [▼] by 1 minute intervals. (Press and hold for 10-minute intervals.)  – This automatically disappears after approximately 5 seconds. To show the screen again press [TIME SLIP] again. – This automatically disappears after approximately 5 seconds. To show the screen again press [TIME SLIP] again. |
| Manual SkipHDD RAM -R -R DL -RW(V) +R+R DL +RW -RW(VR) | Press [MANUAL SKIP].Each time you press, play restarts approximately 30 seconds later. |
| Create Chapter(→ 44, Title/Chapter)HDD RAM | Press [CREATE CHAPTER].Chapters are divided at the point pressed.Press [◀◀, ▶▶▶] to skip to the start of a chapter.Chapters cannot be created during EXT LINK standby. |
Changing audio during play
Press [AUDIO].
HDD, RAM, -RW(VR), VCD, and DivX
![PANASONIC DMR-EH56 - Press [AUDIO]. - 1](/content/2026/06/1328297/images/e752e8e9781f08f030c22d376d98216af4e151dfbbdaaad3afb3a7f2db903eb9.jpg)

DVD-V, DVD-A
You can change the audio channel number each time you press the button. This allows you to change things like the soundtrack language (→ 42, Soundtrack).

Note
You cannot change the audio type in the following cases.
- When a DVD-R, DVD-R DL, DVD-RW (DVD-Video format), +R, +R DL or +RW disc is in the disc tray while DVD drive is selected.
- When the recording mode is XP and "Audio Mode for XP Recording" is set to "LPCM" (→ 67).
- When "Rec for High Speed Copy" is set to "On" (→ 26).
Regarding DivX discs, MP3 discs and still pictures (JPEG/TIFF)
DivX
| Playable discs | -R CD |
| File format | DivX●Files must have the extension“.DIVX”,“.divx”,“.AVI” or“.avi”.  |
| Number of folders | Maximum number of folders recognizable: 300 folders (including the root folder) |
| Number of files | Maximum number of files recognizable*1: 200 files |
| Support version | DivX ver.3.11, 4.x, 5.xVideo-Number of stream: Up to 1-Codec: DIV3, DIV4, DIVX, DV50-Picture size: 32 x 32 to 720 x 576-FPS(Frame Per Second): Up to 30 fpsAudio-Number of stream: Up to 8-Format: MP3, MPEG, AC3-Multi channel: AC3 is possible. MPEG multi is 2 ch conversion.GMC (Global Motion Compensation) is not supported. |
MP3
| Playable discs | -R CD |
| File format | MP3●Files must have the extension “.mp3” or “.MP3”. |
| Number of folders (groups) | Maximum number of folders (groups) recognizable: 300 folders (groups)(including the root folder) |
| Number of files (tracks) | Maximum number of files (tracks) recognizable 1 : 3000 files (tracks) |
| Bit rates 32 | kbps to 320 kbps |
| Sampling frequency | 16 kHz/22.05 kHz/24 kHz/32 kHz/44.1kHz/48 kHz |
| ID3 tags not compatible | |
- If there is a large amount of still picture data etc. within a MP3 file, play may not be possible.
Still pictures (JPEG, TIFF2)
| Playable discs and cards | HDD RAM -R CD SD |
| File format | File format: JPEG, TIFF (non-compressed RGB chunky format)●Files must have the extension “.jpg”, “.JPG”, “.tif” or “.TIF”. |
| Number of pixels | 34×34 to 6144×4096(Sub sampling is 4:2:2 or 4:2:0) |
| Number of folders | -R CD Maximum number of foldersrecognizable:300 folders (including the root folder)HDD RAM SD This unit can handle a maximum of 300 folders (including higher folders) |
| Number of files | -R CD Maximum number of filesrecognizable*1:3000 filesHDD RAM SD This unit can handle a maximum of 3000 files |
| MOTION JPEG | not supported |
*1 Total number of recognizable file including MP3, JPEG, DivX and other type of files is 4000. 2 Operation may take time to complete when playing TIFF format still pictures, or when there are many files and/or folders, some files may not display or be playable.
-R CD
- Compatible formats: ISO9660 level 1 or 2 (except for extended formats) and Joliet
- This unit is compatible with multi-session but reading or play of the disc may take time if there are a lot of sessions.
- Operation may take time to complete when there are many files (tracks) and/or folders (groups) and some files (tracks) may not display or be playable.
- English alphabet and Arabic numerals are displayed correctly. Other characters may not be displayed correctly.
- The display order on this unit may differ from how the order is displayed on a computer.
- Depending on how you create the disc (writing software), files (tracks) and folders (groups) may not play in the order you numbered them.
- This unit is not compatible with packet-write format.
- Depending on the recording conditions, the disc may not play.
HDD RAM SD
- Compatible formats: DCF ※3 compliant (Content recorded on a digital camera, etc.) * Design rule for Camera File system: unified standard established by Japan Electronics and Information Technology Industries Association (JEITA).
You can play MP3 and still pictures (JPEG/TIFF) on this unit by making folders as shown below. However depending on how you create the disc (writing software), play may not be in the order you numbered the folders.
-R CD
Structure of MP3 folders
Prefix with 3-digit numbers in the order you want to play them.
![graph TD A["Root"] --> B["001 (folder=group)"] A --> C["002 group"] A --> D["003 group"] B --> E["001track.mp3 (file=track)"] B --> F["002track.mp3"] B --> G["003track.mp3"] C --> H["001track.mp3"] C --> I["002track.mp3"] C --> J["003track.mp3"] D --> K["001track.mp3"] D --> L["002track.mp3"] D -->…](/content/2026/06/1328297/images/93f860c8e72755d033323657fa2fb14741cebf216413e4c1068d220fba6aec95.jpg)
-R CD Structures of still pictures Files inside a folder are displayed in the order they were updated or taken. - When the highest level folders are "DCIM" folders, they are displayed first on the tree.
![graph TD A["Root"] --> B["P0000001.jpg"] A --> C["P0000002.jpg"] A --> D["002 Folder"] D --> E["P0000003.jpg"] D --> F["P0000004.jpg"] D --> G["P0000005.jpg"] A --> H["003 Folder"] H --> I["P0000006.jpg"] H --> J["P0000007.jpg"] H --> K["P0000008.jpg"] H --> L["004 Folder"] L --> M["P0000010.jpg"] L…](/content/2026/06/1328297/images/55c263ca98944ea9f236539a56f830586f5142ccfee4517c4fa7d2d8e50b8303.jpg)

Selecting file type to play
-R CD
You can play DVD-R and CD-R/CD-RW discs which contain MP3 files, DivX video contents or still pictures that have been recorded on a computer.
The screen shown below is displayed when you insert a disc containing DivX video contents, MP3 files and still pictures (JPEG/TIFF).
e.g.,
Play mode is set to DivX. To play another type of file, select the file type from Menu in FUNCTIONS.
- When playing the file displayed on the screen, press [ENTER].
- When you want to play files other than the one displayed on the screen, follow the steps below.
To select file type
1 Press [RETURN]. 2 Press [FUNCTIONS].

3 Press [▲, ▼] to select "Menu" and press [ENTER].

4 Press [▲, ▼] to select playback mode and press [ENTER].
If "DivX" is selected: Go to "Playing DivX discs" step 2 in the right column. If "MP3" is selected: Go to "Playing MP3 discs" step 2 on page 39. If "JPEG" is selected: Go to "Playing still pictures" step 4 on page 40.
Playing DivX discs
-R CD
You can play DVD-R and CD-R/CD-RW discs which contain DivX video contents that have been recorded on a computer.
Preparation
Press [DRIVE SELECT] to select the DVD drive.
1 Press [DIRECT NAVIGATOR].

- Files are treated as titles.
- When the MP3 or JPEG Menu is displayed, perform steps 1–4 in "To select file type" on the left column selecting "DivX" in step 4 to change the playback mode.
2 Press [▲, ▼] to select the title and press [ENTER].
Play starts on the selected title.
- You can also select the title with the numbered buttons. e.g., 5: [0] => [0] => [5] 15: [0] => [1] => [5]
To stop playing
Press [■].
To show other pages
Press [◀◀, ▶▶].
To exit the screen
Press [DIRECT NAVIGATOR].
Note
●Picture sizes set at the recording time may prevent the unit from showing pictures in the adequate aspect. You may be able to adjust the aspect through the TV. ●Successive play is not possible. - Playback is not possible if recording is performed on the HDD drive.
Using the tree screen to find a folder
1 While the file list is displayed
Press [▶] while a title is highlighted to display the tree screen.
F: Selected folder no./Total folder no. including DivX title.

You cannot select folders that contain no compatible files.
2 Press [▲, ▼] to select a folder and press [ENTER].
The file list for the folder appears.
To return to the previous screen
Press [RETURN].
Regarding DivX VOD content
DivX Video-on-Demand (VOD) content is encrypted for copyright protection. In order to play DivX VOD content on this unit, you first need to register the unit.
Follow the online instructions for purchasing DivX VOD content to enter the unit's registration code and register the unit. For more information about DivX VOD, visit www.divx.com/vod
Display the unit's registration code.
(→ 68, "DivX Registration" in "Others" tab)

- After playing DivX VOD content for the first time, another registration code is then displayed in "DivX Registration". Do not use this registration code to purchase DivX VOD content. If you use this code to purchase DivX VOD content, and then play the content on this unit, you will no longer be able to play any content that you purchased using the previous code.
- If you purchase DivX VOD content using a registration code different from this unit's code, you will not be able to play this content. ("Authorization Error." is displayed.)
Regarding DivX content that can only be played a set number of times
Some DivX VOD content can only be played a set number of times. When you play this content, the remaining number of plays is displayed. You cannot play this content when the number of remaining plays is zero. ("Rental Expired" is displayed.)
When playing this content
●The number of remaining plays is reduced by one if you press [⏻ DVD], press [■], press [|◀◀] or [◀◀, ▶▶] etc. and arrive at another content or the start of the content being played, timer recording starts on the HDD, or you press [DRIVE SELECT] to change the drive. Resume functions do not work.
Playing MP3 discs
-R CD
You can play DVD-R and CD-R/CD-RW discs which contain MP3 files that have been recorded on a computer.
Preparation
Press [DRIVE SELECT] to select the DVD drive.
1 Press [DIRECT NAVIGATOR].
G: Group No.
T: Track No. in the group
TOTAL: Track No./Total tracks in all groups

- Files are treated as tracks and folders are treated as groups.
- When the DivX or JPEG Menu is displayed, perform steps 1–4 in "To select file type" on page 38, selecting "MP3" in step 4 to change the playback mode.
2 Press [▲, ▼] to select the track and press [ENTER].
Playback starts on the selected track.
- “☐” indicates the track currently playing.
- You can also select the track using the numbered buttons.
e.g., 5: [0] → [0] → [0] → [5]
15: [0] → [0] → [1] → [5]
To stop playback
Press [■].
To show other pages
Press [|◀◀, ▶▶▶].
To exit the screen
Press [DIRECT NAVIGATOR].
Using the tree screen to find a group
1 While the file list is displayed
Press [▶] while a track is highlighted to display the tree screen.
Selected group No. / Total groups
If the group has no track, “—” is displayed as group number.

You cannot select groups that contain no compatible files.
Press [▲, ▼, ◀, ▶] to select a group and press [ENTER].
The file list for the group appears.
To return to the previous screen
Press [RETURN].
Refer to the control reference on page 38.
Playing still pictures
HDD RAM -R CD SD
- You can use SD Memory Cards with capacities from 8 MB to 2 GB (→ 7).
- You can playback still pictures recorded onto a DVD-R or CD-R/CD-RW on a PC.
- You cannot playback still pictures while recording or copying.
- Inserting, Removing the SD card (→ 13)
While stopped, insert the card into the slot, and the menu (see below) is automatically displayed.
Press [▲, ▼] to select "Album View", press [ENTER], and then go to step 2 below.

Selecting file type to play → 38
1 Press [DRIVE SELECT] to select the HDD, DVD, or SD drive.
The indicator lights up on the unit's display.
2 Press [DIRECT NAVIGATOR].
- HDD RAM SD
![PANASONIC DMR-EH56 - Press [DIRECT NAVIGATOR]. - 1](/content/2026/06/1328297/images/824f9e5570868e584086de6a784f170fbb96cef72cf2e845452e7e911d1aac4e.jpg)
Album View screen
Recording date of the first picture in the album / number of pictures / album name.
Depending on the digital camera, the editing software on the PC, etc., the information about the recording date may not be displayed. In this case, the date will appear as [--/--/--].
HDD RAM If "VIDEO" is selected, press the "Green" button to select "PICTURE".
-R CD
Picture (JPEG) View screen (→ Go to step 4)
Direct Navigator screen icons
![PANASONIC DMR-EH56 - Press [DIRECT NAVIGATOR]. - 3](/content/2026/06/1328297/images/47e88b9545526c5a1994f45e5abc1941269380911544c8a47f3beff251f47aab.jpg)
Picture and folder protected.
![PANASONIC DMR-EH56 - Press [DIRECT NAVIGATOR]. - 4](/content/2026/06/1328297/images/82aff58020733833e794524a5f0290c5779a2cddaaca29b4920dcd67fd9bcfbf.jpg)
Picture in which the number of prints is set (DPOF) (→ 49, 81).
To show other pages
Press [▲, ▼, ◀, ▶] to select "Previous" or "Next" and press [ENTER].
- You can also press [◀◀, ▶▶] to show other pages.
To select the still pictures in another folder ⇒ 41
3 Press [▲, ▼, ◀, ▶] to select the album and press [ENTER].

e.g., HDD
You can also select album with the numbered buttons.
e.g.,
5: [0] → [0] → [5]
15: [0] → [1] → [5]
115: [1] → [1] → [5]
- Press [◀, ▶] to select the previous or next album.
4 Press [▲, ▼, ◀, ▶] to select the still picture and press [ENTER].
You can also select still pictures with the numbered buttons.
e.g..
5: [0] → [0] → [0] → [5] 115: [0] → [1] → [1] → [5] 15: [0] → [0] → [1] → [5] 1115: [1] → [1] → [1] → [5]
- Press [◀, ▶] to display the previous or next still picture.
- Useful functions during still picture play (→ 41)
To return to the Album View screen or Picture (JPEG) View screen
Press [RETURN].
To exit the screen
Press [DIRECT NAVIGATOR].
Useful functions during still picture play
| Start Slide ShowSlide Show Setting | You can display still pictures one by one at a constant interval.HDD RAM SD1 While the Album View screen is displayedPress [▲, ▼, ◀, ►] to select the album.2 Press [►] ( P L A Y ).You can also start Slide Show with the following steps.While the Album View screen is displayed1 Press [▲, ▼, ◀, ►] to select the desired album and press [SUB MENU].2 Press [▲, ▼] to select “Start Slide Show” and press [ENTER].R CDWhile the Picture (JPEG) View screen is displayed1 Press [▲, ▼, ◀, ►] to select “Folder” and press [SUB MENU].2 Press [▲, ▼] to select “Start Slide Show” and press [ENTER].●To change the display interval1 Press [▲, ▼] to select “Slide Show Setting” in step 2 and press [ENTER].2 Press [▲, ▼] to select “Display interval”.3 Press [◄, ►] to select the desired interval (0–30 seconds) and press [ENTER].●Repeat Play1 Press [▲, ▼] to select “Slide Show Setting” in step 2 and press [ENTER].2 Press [▲, ▼] to select “Repeat Play”.3 Press [◄, ►] to select “On” or “Off” and press [ENTER]. | ![PANASONIC DMR-EH56 - Press [▲, ▼, ◀, ▶] to select the still picture and press [ENTER]. - 1](/content/2026/06/1328297/images/60d5fd47fc9655dd75f5917afac2a60661f466a9173d7aa696248e32c626dc9f.jpg) |
| Rotate | While playing1 Press [SUB MENU].2 Press [▲, ▼] to select “Rotate RIGHT” or “Rotate LEFT” and press [ENTER].●Rotation information will not be stored.-R CD Still pictures-When disc or album is protected-When played on other equipment-When copying pictures●If you remove the SD card while the DIRECT NAVIGATOR screen is displayed, picture rotation information may not be properly stored. Remove the SD card after you exit the DIRECT NAVIGATOR screen. | Rotate RIGHTRotate LEFT |
| Zoom inZoom out | While playing1 Press [SUB MENU].2 Press [▲, ▼] to select “Zoom in” and press [ENTER].●To return the picture to its original size, press [▲, ▼] to select “Zoom out” in step 2 and press [ENTER].●When zooming in, the picture may be cut off.●The enlargement information will not be stored.●The “Zoom in/Zoom out” function is only available for still pictures smaller than 640 × 480 pixels. | Rotate RIGHTRotate LEFTZoom in |
| Properties | While playingPress [STATUS] twice.18:53:50 11.10.Folder - Picture No. 103 - 0006Date 1.1.2005 No. 3/9Shooting dateTo exit the picture properties screenPress [STATUS]. |
■ To select the still pictures in another folder
(→ 7, Structure of folders displayed by this unit)
RAM SD
To switch to another higher folder
(Only if there is a multiple number of higher folders recognizable)
① While the Album View screen is displayed Press [SUB MENU].
② Press [▲, ▼] to select "Select Folder" and press [ENTER].

③ Press [◀, ▶] to select the higher folder and press [ENTER].
-R CD
① While the Picture (JPEG) View screen is displayed, press [▲, ▼, ◀, ▶] to select "Folder" and press [ENTER]. ② Press [▲, ▼] to select the folder and press [ENTER].

→

Using on-screen menus
Common procedures
1 Press [DISPLAY].

Menu Item Setting
- Depending on the condition of the unit (playing, stopped, etc.) and disc contents, there are some items that you cannot select or change.
2 Press [▲, ▼] to select the menu and press [▶].
3 Press [▲, ▼] to select the item and press [▶].
4 Press [▲, ▼] to select the setting.
- Some items can be changed by pressing [ENTER].
To clear the on-screen menus
Press [DISPLAY].
Disc menu—Setting the disc content
Soundtrack*
HDD RAM -R -R DL -RW(V) +R +R DL +RW -RW(VR)
The disc's audio attributes appear.
DVD-V DVD-A
Select the audio and language ( → below, Audio attribute, Language).
VCD (SVCD) and DivX
Select the soundtrack number.
- Soundtrack numbers are displayed even when there is only one audio type.
Subtitle
DVD-V DVD-A
Turn the subtitle on/off and select the language ( → below, Language).
HDD RAM -R -R DL -RW(V) +R +R DL +RW -RW(VR) (Only discs that contain subtitle on/off information)
Turn the subtitle on/off.
- Subtitle on/off information cannot be recorded using this unit.
VCD (SVCD) and DivX
Turn the subtitle on/off and select the subtitle number.
- Subtitle numbers are displayed even if there are not multiple subtitles.
Angle * DVD-V DVD-A
Change the number to select an angle.
Audio channel HDD RAM -RW(VR) VCD and DivX
→ 36, Changing audio during play
STILL-P (Still picture) DVD-A
Selects the play method for still pictures.
Slide Show: Plays according to the default order on the disc.
Page: Select the still picture number and play.
•RANDOM: Plays in random order.
- Return: Returns to the default still picture on the disc.
Source Select (DivX)
●Automatic: The constructing method of the DivX contents is automatically distinguished and output.
- Interlace: Select when the disc contents were recorded using interlace.
- Progressive: Select when the disc contents were recorded using progressive.
PBC (Playback control → 81) VCD
Indicates whether menu play (playback control) is on or off.
* With some discs, you may only be able to make changes using the menus (→ 35) on the disc.
●The display changes according to the disc content. You cannot change when there is no recording.
Audio attribute
LPCM/PPCM/□□Digital/DTS/MPEG: Signal type
k (kHz): Sampling frequency
b (bit): Number of bits
ch (channel): Number of channels
Language
ENG: English SVE: Swedish CHI: Chinese
FRA: French NOR: Norwegian KOR: Korean
DEU: German, DAN: Danish, MAL: Malay
ITA: Italian, POR: Portuguese, VIE: Vietnamese
ESP: Spanish, RUS: Russian, THA: Thai
NLD: Dutch, JPN: Japanese, ×: Others
Play menu—Change the play sequence
This function works only when the elapsed play time is displayed. Select the item for repeat play. Depending on the disc, the items that can be selected will differ.
Repeat Play
| ●All | CD | VCD | |||||
| ●Chapter | HDD | RAM | -R | -R | DL | -RW(V) | +R +R DL |
| +RW | DVD-V | -RW(VR) | |||||
| ●Group | DVD-A and MP3 | ||||||
| ●PL (Playlist) | HDD | RAM | -RW(VR) | ||||
| ●Title | HDD | RAM | -R | -R | DL | -RW(V) | +R +R DL |
| +RW | DVD-V | -RW(VR) | |||||
| ●Track | DVD-A | CD | VCD and MP3 | ||||
Select "Off" to cancel.
Picture menu—Change the picture quality
Playback NR: Reduces noise and picture degradation. Progressive* (→ 81)
| Select "On" to enable progressive output. |
| Select "Off" if the picture is stretched horizontally. |
Transfer* [When "Progressive" (→ above) is set to "On".]
Select the method of conversion for progressive output to suit the type of title being played (→ 81, Film and video).
When the output signal is PAL
(When the tray is opened, the setting will return to "Auto".)
●Auto: Automatically detects the film and video content, and appropriately converts it. - Video: Select when using "Auto", and the content is distorted. - Film: Select this if the edges of the film content appear jagged or rough when "Auto" is selected. However, if the video content is distorted as shown in the illustration to "Auto".

When the output signal is NTSC
●Auto1 Automatically detects the film and video (normal) content, and appropriately converts it. - Auto2: In addition to "Auto1", automatically detects film contents with different frame rates and appropriately converts it. - Video: Select when using "Auto1" and "Auto2", and the content is distorted.
AV-in NR (Only when AV1, AV2, AV3, AV4 or DV is selected)
Reduces video tape noise while copying.
●Automatic: Noise reduction only works on picture input from a video tape. - On: Noise reduction works for input video. - Off: Noise reduction is off. You can record the input signal as it is.
* Only when you have set “Progressive” to “On” in the Setup menu ( → 22).
Sound menu—Change the sound effect
v.s.s.
HDD RAM -R -R DL -RW(V) +R +R DL +RW DVD-V DVD-A -RW(VR)
(Dolby Digital, MPEG, 2-channel or over only)
Enjoy a surround-like effect if you are using two front speakers only.
- Turn V.S.S. off if it causes distortion. (Check the surround function on the connected equipment.) ●V.S.S. does not work for bilingual recordings.
Dialog Enhancer
HDD RAM -R -R DL -RW(V) +R +R DL +RW DVD-V DVD-A -RW(VR) and DivX
(Dolby Digital, 3-channel or over only, including a centre channel)
The volume of the centre channel is raised to make dialogue easier to hear.
Other menu—Change the display position
Position
1-5: The higher the setting the lower the on-screen menu moves.
Status messages
Press [STATUS].
The display changes each time you press the button.
![graph TD A["HDD"] --> B["Selected drive/type of disc"] C["REC"] --> D["The remaining time appears here while stopped."] E["PLAY"] --> F["Recording or play status/input channel"] G["STEREO"] --> H["TV audio type being received (→ below)"] I["LR"] --> J["Selected audio type"] K["DVD REC"] --> L["Recor…](/content/2026/06/1328297/images/27be69ed4e813fb84b58c83713aae5b490a2ecad94a9b99fb642a0e57075c2bf.jpg)
•TV audio type
STEREO: STEREO stereo broadcast
M 1 / M 2 : Bilingual dual-sound broadcast
M 1 : Monaural broadcast
Editing titles/chapters

HDD RAM -R -R DL -RW(V) +R +R DL +RW -RW(VR) (You cannot edit finalized discs.)
Title/Chapter
Programmes are recorded as a single title consisting of one chapter.

HDD RAM You can divide a title into multiple chapters. Each section between the division points becomes a chapter.
(→ 36, 45, Create Chapter)

HDD RAM You can change the order of chapters and create a playlist (→ 46).
●The maximum number of items on a disc:
HDD
-Titles: 500
—Chapters: Approx. 1000 per title
(Depends on the state of recording.)
RAM -R -R DL -RW(V) +R +R DL +RW
-Titles: 99 (+R +R DL +RW 49 titles)
-Chapters: Approx. 1000 (+R +R DL +RW Approx. 254)
(Depends on the state of recording.)
Note
- Once deleted, divided or partially deleted, recorded content cannot be restored to its original state. Make certain before proceeding.
- You cannot edit during recording or copying, etc.
- Restricted recording information remains even after editing (e.g., dividing a title, etc.).
- +R +R DL Each time you edit a title, the information is saved to the free space on the disc. If you do this numerous times, the amount of free space decreases.
We recommend that you edit on the HDD and then copy to disc.
Editing titles/chapters and playing chapters
You can modify (remove unnecessary parts, divide, etc.) recorded programmes.
Preparation
- Turn on the television and select the appropriate video input to suit the connection to this unit.
- Turn the unit on.
- Press [DRIVE SELECT] to select the drive containing the recorded title to be edited. • RAM Release protection (→ 60).
1 During play or while stopped Press [DIRECT NAVIGATOR].
2 HDD RAM
Press the "Red" button to select "VIDEO".
3 Press [▲, ▼, ◀, ▶] to select the title.

Title View screen
To show other pages
Press [▲, ▼, ◀, ▶] to select "Previous" or "Next" and press [ENTER]. - You can also press [◀◀, ▶▶] to show other pages.
Multiple editing
Select with [▲, ▼, ◀, ▶] and press [■]. (Repeat.)
A check mark appears. Press [11] again to cancel.
4 Press [SUB MENU]. 5 Press [▲, ▼] to select the operation and press [ENTER].
- If you select "Edit", press [▲, ▼] to select the operation and press [ENTER]. (→ 45)
![graph TD A["Delete"] --> B["Properties"] B --> C["Edit"] C --> D["Chapter View"] D --> E["Table Display"] E --> F["Album View"] F --> G["Switching the Direct Navigator appearance → 34"] G --> H["Playing still pictures → 40, step 3"] I["Enter Name"] --> J["Set up Protection"] I --> K["Cancel Protecti…](/content/2026/06/1328297/images/4ad6bee6cb57487063cfb903da8e252433634f089156c45949f2e5e7f23d28a4.jpg)
■ If you select "Chapter View"
6 Press [▲, ▼, ◀, ►] to select the chapter.
To start play ⇒ Press [ENTER].
To edit → Step 7.

Chapter View screen
• To show other pages/Multiple editing (→ above)
7 Press [SUB MENU], then [▲, ▼] to select the operation and press [ENTER].
![graph TD A["Delete Chapter"] --> B["Create Chapter"] B --> C["Combine Chapters"] C --> D["Title View"] D --> E["Refer to "Chapter operations" (→ 45)."]](/content/2026/06/1328297/images/172196260dea4065e359013603391c2c24a4fb4f447a2e620c5fca540b3fee77.jpg)
- You can go back to Title View.
To return to the previous screen
Press [RETURN].
To exit the screen
Press [DIRECT NAVIGATOR].
Title operations
| After performing steps 1-5 (→44) | |
| Delete* HDD RAM -R -R DL -RW(V) +R +R DL +RW | Press [◀, ▶] to select “Delete” and press [ENTER].●Once deleted, the recorded contents are lost and cannot be restored. Make certain before proceeding.●The available recording space on DVD-R, DVD-R DL, +R or +R DL does not increase when you delete titles.●Available recording space on DVD-RW (DVD-Video format) and +RW increases only when the last recorded title is deleted. It does not increase if other titles are deleted. |
| Properties HDD RAM -R -R DL -RW(V) +R +R DL +RW -RW(VR) | Information (e.g., time and date) is shown.●Press [ENTER] to exit the screen. |
| Enter Name HDD RAM -R -R DL -RW(V) +R +R DL +RW | You can give names to recorded titles.→63, Entering text |
| Set up Protection* Cancel Protection* HDD RAM +R +R DL +RW | If set, this will protect the title from accidental deletion.Press [◀, ▶] to select “Yes” and press [ENTER].The lock symbol appears when the title is protected. |
| Partial Delete HDD RAM (→below, For your reference) | You can remove unnecessary part of the recording.1 Press [ENTER] at the start point and end point of the section you want to delete.2Press [▲, ▼] to select “Exit” and press [ENTER].●Select “Next” and press [ENTER] to delete other sections.3Press [◀, ▶] to select “Delete” and press [ENTER]. |
| Change Thumbnail HDD RAM -R -R DL -RW(V) +R +R DL +RW (→below, For your reference) | You can change an image to be shown as the thumbnail picture in the Title View.1Press [▶] (PLAY) to start play.2Press [ENTER] when the image you want to use as a thumbnail is shown.To change the thumbnailRestart play and press [▲, ▼] to select “Change”, then press [ENTER] at the point you want to change.3Press [▲, ▼] to select “Exit” and press [ENTER]. |
| Divide Title HDD RAM (→below, For your reference) | You can divide a title into two.1Press [ENTER] at the point you want to divide the title2Press [▲, ▼] to select “Exit” and press [ENTER].3Press [◀, ▶] to select “Divide” and press [ENTER].To confirm the division pointPress [▲, ▼] to select “Preview” and press [ENTER]. (The unit plays 10 seconds before and after the division point.)To change the division pointRestart play and press [▲, ▼] to select “Divide”, then press [ENTER] at the point where you want to divide the title.Note●The divided titles retain the title name and CPRM property (→81) of the original title.●Video and audio just before and after the dividing point may momentarily cut out. |
Multiple editing is possible.
Chapter operations
| After performing steps 1–7 (⇨ 44) | ||
| Delete Chapter※HDD RAM | Press [◀, ▶] to select “Delete” and press [ENTER].●Once deleted, the recorded contents are lost and cannot be restored. Make certain before proceeding.●Select “Combine Chapters” (⇨ below) when you only want to delete the division point between chapters.(The recorded contents will not be deleted.) | |
| Create ChapterHDD RAM(⇨ below, For your reference) | Select the point where you want to start a new chapter while viewing the title.1 Press [ENTER] at the point you want to divide.●Repeat this step to divide at other points.2Press [▲, ▼] to select “Exit” and press [ENTER]. |  |
| Combine ChaptersHDD RAM | Press [◀, ▶] to select “Combine” and press [ENTER].●The selected chapter and following chapter are combined. | |
Multiple editing is possible.
For your reference
- Use search (→ 35), Time Slip (→ 36) to find the desired point.
- To find the desired point correctly, use Slow-motion (→ 36) and Frame-by-frame (→ 36).
- To skip to the start or end of a title, press [◀◀] (start) or [▶▶] (end).
Creating, editing and playing playlists

![graph TD A["You can arrange the chapters (→ 44) to create a playlist."] --> B["Title"] B --> C["Chapter"] C --> D["Chapter Chapter"] D --> E["Chapter Chapter"] E --> F["Title"] F --> G["Title"] G --> H["Title"] H --> I["Title"] I --> J["Title"] J --> K["Title"] K --> L["Title"] L --> M["Title"] M --…](/content/2026/06/1328297/images/2c6fadfc7f6c7f922e2f065b1fb6be2459735beb9dcf55e893dbd61ae3b80506.jpg)
- Playlists are not recorded separately so this doesn't use much capacity.
- Editing chapters in a playlist does not modify the source titles and source chapters.
- You cannot create or edit playlists while recording or copying.
HDD RAM
- The maximum number of items on a disc: -Playlists: 99 -Chapters in playlists: Approx. 1000 (Depends on the state of recording.)
- If you exceed the maximum numbers of items for a disc, all the items entered will not be recorded.
Creating playlists
HDD RAM
Preparation
- Turn on the television and select the appropriate Video input to suit the connection to this unit.
- Turn the unit on.
- Press [DRIVE SELECT] to select the drive containing the recorded title to be edited. • RAM Release disc or cartridge protection (→ 60).
- You cannot create or edit a playlist while recording or while copying.
- Playlists must be made in accordance with the encoding system currently selected in "TV System" (→ 70).
1 While stopped
Press [FUNCTIONS].
2 Press [▲, ▼] to select "To Others" and press [ENTER].

3 Press [▲, ▼] to select "Playlists" and press [ENTER]. 4 Press [▲, ▼, ◀, ▶] to select "Create" and press [ENTER].
![PANASONIC DMR-EH56 - Press [▲, ▼] to select "To Others" and press [ENTER]. - 2](/content/2026/06/1328297/images/cb899d6472e8557eac08d64c5f4bc0099d76249f27f9dda19a158c4899ff5cab.jpg)
5 Press [◀, ▶] to select the source title and press [▼].
- Press [ENTER] to select all the chapters in the title, then skip to step 7.

6 Press [◀, ▶] to select the chapter you want to add to a playlist and press [ENTER].
Press [▲] to cancel.

- You can also create a new chapter from the source title. Press [SUB MENU] to select "Create Chapter" and press [ENTER] (→ 45, Create Chapter)
7 Press [◀, ▶] to select the position to insert the chapter and press [ENTER].

- Press [▲] to select other source titles.
- Repeat steps 6–7 to add other chapters.
8 Press [RETURN].
All the selected scenes become the playlist.
To return to the previous screen
Press [RETURN].
To exit the screen
Press [RETURN] several times.
Editing and playing playlists/chapters
HDD RAM
-RW(VR) (Play only)
1 While stopped
Press [FUNCTIONS].
2 Press [▲, ▼] to select "To Others" and press [ENTER]. 3 Press [▲, ▼] to select "Playlists" and press [ENTER]. 4 Press [▲, ▼, ◀, ▶] to select the playlist.
To start play: Press [ENTER].
To edit: Step 5.
Playlist View screen
- To show other pages/Multiple editing (→ 44)
5 Press [SUB MENU], then [▲, ▼] to select the operation and press [ENTER].
- If you select "Edit", press [▲, ▼] to select the operation and press [ENTER].
![graph TD A["Delete"] --> B["Properties"] B --> C["Edit"] C --> D["Chapter View"] E["Create"] --> F["Copy"] F --> G["Enter Name"] G --> H["Change Thumbnail"] I["Refer to "Playlist operations""].](/content/2026/06/1328297/images/f06a58588574e42aaea114c4ce5db9eed32a5625be62fc13ff688512ec2b1075.jpg)
■ If you select "Chapter View"
6 Press [▲, ▼, ◀, ▶] to select the chapter.
To start play: Press [ENTER].
To edit: Step 7.

Chapter View screen
- To show other pages/Multiple editing (→ 44)
7 Press [SUB MENU], then [▲, ▼] to select the operation and press [ENTER].
![graph TD A["Add Chapter"] --> B["Move Chapter"] B --> C["Create Chapter"] C --> D["Combine Chapters"] D --> E["Delete Chapter"] E --> F["Playlist View"] F --> G["Refer to "Chapter operations"."]](/content/2026/06/1328297/images/d52a72101f247ff9488a8a7b4b77f012ded8c6aff253fe48cb982c028e21910d.jpg)
- You can go back to Playlist View.
To return to the previous screen
Press [RETURN].
To exit the screen
Press [RETURN] several times.
Playlist operations
After performing steps 1–5 (→ left)
| Delete※HDD RAM | Press [◀, ▶] to select “Delete” and press [ENTER].Once deleted, the playlists are lost and cannot be restored.Make certain before proceeding. |
| PropertiesHDD RAM-RW(VR) | Playlist information (e.g., total time and date) is shown.Press [ENTER] to exit the screen. |
| CreateHDD RAM | → 46, Creating playlists, Step 5–8 |
| Copy※HDD RAM | Press [◀, ▶] to select “Copy” and press [ENTER].The copied playlist becomes the newest one in the playlist view screen. |
| Enter NameHDD RAM | You can give names to playlists.→ 63, Entering text |
| Change ThumbnailHDD RAM | → 45, Change Thumbnail |
* Multiple editing is possible.
Chapter operations
HDD RAM
After performing steps 1–7 (→ left)
- Editing chapters in a playlist does not modify the source titles and source chapters.
| Add Chapter | → 46, Creating playlists, Step 5–7 |
| Move Chapter | Press [▲, ▼, ◀, ►] to select the position to insert the chapter and press [ENTER]. |
| Create Chapter | → 45, Create Chapter |
| Combine Chapters | → 45, Combine Chapters |
| Delete Chapter※ | → 45, Delete ChapterThe playlist itself is deleted if you delete all the chapters in it. |
* Multiple editing is possible.

HDD RAM SD
- You can edit pictures and albums.
- You can use SD Memory Cards with capacities from 8 MB to 2 GB (→ 7).
- You cannot edit still pictures recorded on DVD-R and CD-R/CD-RW.
Preparation
- Press [DRIVE SELECT] to select the HDD, DVD or SD drive.
- RAM SD Release protection (→ 60, Setting the protection).
1 Press [DIRECT NAVIGATOR].
2 HDD RAM
Press the "Green" button to select "PICTURE".
3 Editing an album:
Select the album to be edited and press [SUB MENU].
- When you want to create an album using "Create Album", press [SUB MENU] without selecting album.
Editing a still picture:
1 Select the album which contains the still picture to edit and press [ENTER]. 2 Select the still pictures to edit and press [SUB MENU].
To show other pages
Press [▲, ▼, ◀, ▶] to select "Previous" or "Next" and press [ENTER].
- You can also press [◀◀, ▶▶] to show other pages.
Multiple editing
Select with [▲, ▼, ◀, ▶] and press [■]. (Repeat.)
A check mark appears. Press [11] again to cancel.
• To switch to another higher folder (→ 41)
4 Press [▲, ▼] to select the operation and press [ENTER].
■To edit the album![graph TD A["Start Slide Show\nSlide Show Setting"] --> B["Add Pictures\nCreate Album\nEdit Album"] B --> C["Select Folder"] C --> D["RAM SD"] E["Enter Album Name\nDelete Album\nSet up Protection\nCancel Protection"] -.-> B F["Useful functions during still picture play (→ 41)"] --> E G["Album and pic…](/content/2026/06/1328297/images/936abb1758552df2236ff07be6e6e53ae70a244dec5d65841be024cc79465c8a.jpg)
■To edit still picture (e.g., SD)![graph TD A["Delete Picture"] --> B["Set up Protection"] B --> C["Cancel Protection"] C --> D["DPOF"] D --> E["Album View"] E --> F["Album and picture operation (→ 49)"] F --> G["You can go back to Album View."]](/content/2026/06/1328297/images/db20a2598394ef029f94e993fd3734ffd91d74361308b684b514e82dfa6caab5.jpg)
| Album and picture operation | |
| After performing steps 1–4, page 48 | |
| Delete Picture*Delete Album*HDD RAM SD | Press [◀, ▶] to select “Delete” and press [ENTER].●Once deleted, the recorded contents are lost and cannot be restored. Make certain before proceeding.●When deleting an album, files other than the still picture files inside the album will also be deleted. (This does not apply to folders under the album concerned.) |
| Enter Album NameHDD RAM SD | You can give names to albums.⇨ 63, Entering text●Album names input using this unit may not be displayed on other equipment. |
| Set up Protection*Cancel Protection*HDD RAM SD | If set, this will protect the still picture or album from accidental deletion.Press [◀, ▶] to select “Yes” and press [ENTER].The lock symbol appears when the still picture or album is protected.●Even if the protection setting is used by this unit to protect an album, the album may be deleted by another unit. |
| DPOF*SD | You can select individual pictures for printing and specify the number of prints to be made.Press [◀, ▶] to select number of print (0 to 9) and press [ENTER].The DPOF mark appears.To cancel the print settingSet the number of print to “0”.●Print settings (DPOF) made using this unit may not be viewable on other equipment.●When this is set by this unit, any settings established by other units will be released.●Settings cannot be made for files not in accordance with DCF standards or if there is no remaining space on the card. |
| Add PicturesCreate AlbumHDD RAM SD | 1Press [◀, ▶] to select “Start” or “Yes” and press [ENTER].e.g.,2Press [▲, ▼, ◀, ▶] to select the album that contains the still picture you want to add and press [ENTER].e.g.,RAM SDTO switch to another higher folder1 Press [SUB MENU].2 Select “Select Folder” and press [ENTER].3 Press [◀, ▶] to select the higher folder and press [ENTER].3Press [▲, ▼] to select the item and press [ENTER].●If “Copy Pictures” is selectedSelect the still picture you want to add and press [ENTER].●If “Copy Album” is selectedAll the still pictures in the album will be copied.4Press [◀, ▶] to select “Yes” or “No” and press [ENTER].●If you want to continue copying, select “Yes” and go to step 2.Only for “Create Album”5Press [◀, ▶] to select “Yes” or “No” and press [ENTER].●If “Yes” is selected:You can give names to albums. (⇨ 63, Entering text)●If “No” is selected:The recording date of the first picture in the album becomes the album name. (If there is no recording date information, the date will appear as [--/--/--].) |
| Copy to DVD-RAMHDDCopy to HDDRAM | Press [◀] to select “Start” and press [ENTER].You cannot copy if multiple albums are selected. |
* Multiple editing is possible. Note - Timer recordings do not start when performing "Add Pictures", "Create Album", "Copy to DVD-RAM" or "Copy to HDD". - You cannot perform "Add Pictures" or "Create Album" to a higher folder.

HDD RAM -R -R DL -RW(V) +R +R DL +RW SD
(You cannot delete items on finalized discs.)
- A title or a picture cannot be restored once it is deleted. Make certain before proceeding.
- You cannot delete while recording or copying.
Preparation
- Press [DRIVE SELECT] to select the HDD, DVD or SD drive.
- RAM SD Release protection (→ 60, Setting the protection).
■ Available disc space after deleting
- HDD RAM SD If you delete a recorded title (or a still picture), the space deleted becomes available for recording.

- -RW(V) +RW Available recording space increases only when the last recorded title is deleted.

- -R -R DL +R +R DL Available space does not increase even after the contents are deleted.
Using the DELETE Navigator to delete
1 While stopped
Press [FUNCTIONS].
2 Press [▲, ▼] to select "Delete" and press [ENTER].

HDD RAM To switch to the other view
Press the "Green" button to select "PICTURE". Press the "Red" button to select "VIDEO".
3 If you want to delete a title:
Press [▲, ▼, ◀, ▶] to select the title and press [ENTER].
If you want to delete an album:
Press [▲, ▼, ◀, ►] to select the album and press [DELETE].
If you want to delete a still picture:
① Press [▲, ▼, ◀, ▶] to select the album that contains the still picture you want to delete and press [ENTER]. ② Press [▲, ▼, ◀, ▶] to select the still picture and press [ENTER].
You can confirm the titles or pictures etc. that you have selected using the sub menu.
- Refer to sub menu operations for the "Title View" (→ 44, step 5).
- Refer to sub menu operations for the "Album View" (→ 48, step 4).
- Refer to sub menu operations for the "Picture (JPEG) View" (→ 48, step 4).
To show other pages
Press [◀◀, ▶▶] to show other pages.
Multiple editing
Select with [▲, ▼, ◀, ▶] and press [■]. (Repeat.)
A check mark appears. Press [11] again to cancel.
4 Press [◀] to select "Delete" and press [ENTER].
The title, album, or picture is deleted.
To return to the previous screen
Press [RETURN].
To exit the screen
Press [RETURN] several times.
Deleting titles or pictures during play
1 While playing
Press [DELETE].
You cannot delete a picture during a Slide Show.
2 Press [◀, ▶] to select "Delete" and press [ENTER].
The title or the picture is deleted.
| Copy Advanced Copy | |||||
| Features | Easy copying from HDD to DVD with no difficult settings. | Make a copy list and then copy.You can set the unit to copy titles or playlists in the way you want. | |||
| Copy direction | HDD → DVD √ | √ | |||
| DVD → HDD × | √RAM -RW(VR) +RDWDVD-V (Only from a finalized disc) | ||||
| High speed mode copy*1 | √ | √DVD-V You cannot perform high-speed copy with finalized discs.+RDW You cannot perform high-speed copy from +RW to HDD. | |||
| Changing recording mode × | √*2 | ||||
| Finalize*3 | -R -R DL -RW(V) +R +R DLAutomatically finalized | -R -R DL -RW(V) +R +R DLCan be selected | |||
| High speed mode | Normal speed mode | High speed mode | Normal speed mode | ||
| Copying MPEG2 moving pictures on an SD card (→ 55) | × | × | √HDD RAM only | × | |
| Copying playlists*4 | × | × | √ | ||
| Are chapters maintained? √ | ×*5 | √ | ×*5 | ||
| Are thumbnails maintained? | √ | ×*6 | √*7 | ×*6 | |
| Recording and Playing while Copying | × | × | √*8 | × | |
*1 To high speed copy titles (or playlists created from those titles), set "Rec for High Speed Copy" to "On" before recording to the HDD (→ 26). However in the following cases, copying to DVD-R, DVD-R DL, DVD-RW (DVD-Video format), +R, +R DL and +RW using the high speed mode does not work. - Playlists created from titles using a variety of recording modes ●Playlists created from multiple titles using FR recording mode - Playlists mixed with a variety of audio types (Dolby Digital and LPCM, etc.) - Titles that contain many deleted segments ●MPEG2 moving picture titles copied to the HDD from an SD card • +R +R DL +RW Titles recorded in "EP" mode and "FR (recordings 5 hours or longer)" mode. (Displayed ▶▶!) *2 If you select a recording mode with better picture quality than the original, the picture quality does not improve. (However it does prevent against degradation of picture quality.) +R DL You cannot copy in EP mode. 3 You cannot select "Top Menu" or "Auto-Play Select". If you want to set auto-play select or the background colour, select "Top Menu" or "Auto-Play Select" in "DVD Management" before copying (→62). ※4 You cannot copy playlists with a play time more than 8 hours. When you copy a playlist, it will become a title in the destination drive. 5 RAM -R DL +R DL +RW : One title becomes one chapter. -R -RW(V) +R : Chapters are created automatically (-R -RW(V) about 5-minutes +R about 8-minutes) when finalizing after copying the disc. 6 Thumbnails return to the default position. 7 When copying playlists, the thumbnails may not reflect changes made to them. ※8 Possible only with titles on the HDD (However it is not possible when copying with automatic finalization or when copying MPEG2 moving pictures on an SD card.) -You cannot perform chasing play or edit, etc. while copying. -You cannot play a playlist while copying titles with "One time only recording" restriction (→ 8). -Still pictures cannot be played.
■ Approximate copying times (Max. speed) (excludes time required to write data management information)
| HDD | 5X Speed DVD-RAM | 16X Speed DVD-R | 4X Speed DVD-R DL | 4X Speed *1 DVD-RW | 8X Speed *2 +R | 2.4X Speed +R DL | 4X Speed +RW | ||||||||
| Rec mode | Rec time | Required time | Speed | Required time | Speed | Required time | Speed | Required time | Speed | Required time | Speed | Required time | Speed | Required time | Speed |
| XP | 1 hour | 12 min. | 5x | 6 min. | 10x | 15 min. | 4x | 15 min. | 4x | 8 min. 35 s. | 7x | 25 min. | 2.4x | 15 min. | 4x |
| SP | 6 min. | 10x | 2 min. 25 s. | 25x | 7 min. 30 s. | 8x | 7 min. 30 s. | 8x | 4 min. 10 s. | 14x | 12 min. 30 s. | 4.8x | 7 min. 30 s. | 8x | |
| LP | 3 min. | 20x | 1 min. 15 s. | 48x | 3 min. 45 s. | 16x | 3 min. 45 s. | 16x | 2 min. 25 s. | 25x | 6 min. 15 s. | 7.2x | 3 min. 45 s. | 16x | |
| EP (6H) | 2 min. | 30x | 52 sec. | 69x | 2 min. 30 s. | 24x | 2 min. 30 s. | 24x | |||||||
| EP (8H) | 1 min. 30 s. | 40x | 42 sec. | 86x | 1 min. 53 s. | 32x | 1 min. 53 s. | 32x | |||||||
- The above values indicate the quickest possible times and speeds to high speed copy a one hour title recorded on the HDD to a high speed recording compatible disc. Depending on what part of the disc is being written to, the features of the disc, etc., the times and speeds will vary. 1 In this unit, copying with a 6X Speed DVD-RW disc will be performed at the same speed as with a 4X Speed DVD-RW disc. 2 In this unit, copying with a 16X Speed +R disc will be performed at the same speed as with a 8X Speed +R disc.
Note
- When recording or playing while copying, the unit may not use the maximum recording speed.
- Depending on the condition of the disc, the unit may not copy using the maximum speed.
Regarding copying to DVD-R DL (single-sided, Dual Layer) and +R DL (single-sided, Double Layer)
When not copying in high speed mode, titles are temporarily copied at normal speed to the HDD and then copied at high speed to DVD-R DL and +R DL. The titles that were temporarily copied to the HDD are then deleted.
You cannot copy to DVD-R DL and +R DL in the following cases.
- When there is not enough free space on the HDD. (When copying to a new blank disc, if you intend to fill a new disc when copying to it, the equivalent of up to 4 hours of free space in SP mode is needed on the HDD.)
- When the number of titles recorded to the HDD and the number of titles to be copied to the DVD-R DL and +R DL is greater than 500 in total.
When playing a title recorded on both layers, video and audio may momentarily cut out when the unit is switching layers. (→ 5)
Regarding copying of digital broadcasts that allow "One time only recording"
You can copy a recorded title to a CPRM (→ 81) compatible DVD-RAM, however, the title is deleted from the HDD.
- Titles or playlists cannot be copied from DVD-RAM to the HDD.
- Titles will not be copied if they are protected (→ 45).
- You cannot copy playlists created from "One time only recording" titles.
- Titles with recording limitations and playlists cannot be registered on the same copying list.

■ Speed and recording mode when copying
HDD → RAM: High speed
HDD → -R -R DL -RW(V) +R +R DL +RW: Refer to the following table.
| Rec for High Speed Copy (→ 66) | Copy speed |
| Only titles recorded with “Rec for High Speed Copy” set to “On”. | High speed |
| Only titles recorded with “Rec for High Speed Copy” set to “Off”. | Normal speed(Recording mode is FR.) |
| When making a copy of multiple titles that were recorded with “Rec for High Speed Copy” set to “On” and “Off”. |
- +R +R DL +RW When making a copy that contains titles recorded in "EP"
mode or "FR (recordings 5 hours or longer)" mode (Displayed), copy will be performed at normal speed (Recording mode is FR).
- If the copy destination disc space is exceeded, copy will be performed at normal speed (Recording mode is FR).
Before copying
When copying a title with main and secondary audio
- Select the audio type for recording bilingual broadcast from "Bilingual Audio Selection" (→ 67) when:
-Copying to a DVD-R, DVD-R DL, DVD-RW (DVD-Video format), +R, +R DL and +RW.
-When "Audio Mode for XP Recording" is set to "LPCM" (→ 67) and you are copying in XP mode.
Copying 16:9 aspect titles
The titles are copied in 4:3 aspect if you copy to a DVD-R, DVD-R DL, DVD-RW (DVD-Video format), +R, +R DL or +RW.
Note
Titles and playlists recorded using a different encoding system (PAL or NTSC) from the TV system currently selected on the unit cannot be copied.
Preparation
- Insert a disc that you can use for copying (→ 4, 5).
- Confirm that there is enough remaining disc space.
Copy
DVD-R, DVD-R DL, DVD-RW (DVD-Video format), +R and +R DL are automatically finalized (→ 81). After finalizing, the discs become play-only and you can also play them on other DVD equipment. However, you can no longer record or edit.
HDD → RAM -R -R DL -RW(V) +R +R DL +RW
(You cannot copy to finalized discs.)
1 While stopped
Press [FUNCTIONS].
2 Press [▲, ▼] to select "Copy" and press [ENTER].

3 Press [▲, ▼] to select the title you want to copy and press [ENTER].
To show other pages
Press [◀◀, ▶▶] to show other pages.
Multiple editing
Select with [▲, ▼] and press [■]. (Repeat.)
Press [ENTER] to register
●A check mark appears. Press [11] again to cancel.
4 After you start copying DVD-R, DVD-R DL, DVD-RW (DVD-Video format), +R and +R DL discs, they become play-only and you can no longer record or edit.
Press [◀, ▶] to select "Start" and press [ENTER].
Copy starts.
To return to the previous screen
Press [RETURN].
■ To stop copying → 54
■ COPY Navigator/Copying list icons and functions → 54
■ To check the properties of a title and sort COPY Navigator
1 Press [▲, ▼] to select the title and press [SUB MENU].

2 Press [▲, ▼] to select "Properties" or "Sort" and press [ENTER].
Properties:
The name, recording date, channel etc. of the selected title are shown.
Sort:
Press [▲, ▼] to select the item and press [ENTER].
This changes the way that titles are displayed. You can select to display titles by No., recording date, day, channel, recording start time and title name. (You cannot select a title if it has a check mark.) If you close the COPY Navigator screen, the display order is cancelled.
Note
- When copying titles in high speed mode to 5x high speed recording compatible DVD-RAM or 8x high speed recording compatible DVD-R or +R, the sound of the disc rotating becomes louder than normal.
If you want copy to perform more quietly, select "Normal (Silent)" in "DVD Speed for High Speed Copy" in the Setup menu (→ 66).
- If you register multiple titles, they are copied in order from the title at the top of the screen and not in the order you registered them. To change the order that titles are copied, create a copying list and then copy the contents of the list (→ 53).
Copying using the copying list—Advanced Copy
HDD ↔ RAM +RW
-RW(VR) → HDD
HDD → -R -R DL -RW(V) +R +R DL
SD → HDD RAM
You can order titles and playlists as desired for copy to disc.
See also the notes "Before copying" (→ 52).
1 While stopped
Press [FUNCTIONS].
2 Press [▲, ▼] to select "To Others" and press [ENTER].
3 Press [▲, ▼] to select “Advanced Copy” and press [ENTER].

- If you are not going to change the registered list, press [▼] several times (→ step 7).
4 Set the copy direction.
- If you are not going to change the copying direction, press [▼] (→ step 5).
① Press [▲, ▼] to select "Copy Direction" and press [▶].
② Press [▲, ▼] to select "Source" and press [ENTER].
③ Press [▲, ▼] to select the drive and press [ENTER].
④ Press [▲, ▼] to select "Destination" and press [ENTER].
⑤ Press [▲, ▼] to select the drive and press [ENTER]. The same drive as the copy source cannot be selected.
⑥ Press [◀] to confirm.
5 Set the recording mode.
- If you are not going to change the recording mode, press [▼] (→ step 6).
① Press [▲, ▼] to select "Copy Mode" and press [▶].
② Press [▲, ▼] to select "Format" and press [ENTER].
③ Press [▲, ▼] to select "VIDEO" and press [ENTER].
④ Press [▲, ▼] to select "Recording Mode" and press [ENTER].
⑤ Press [▲, ▼] to select the mode and press [ENTER].
⑥ Press [◀] to confirm.
6 Register titles and playlists for copy.
- If you are going to copy a registered list without making any changes to it (→ step 7).
① Press [▲, ▼] to select "Create List" and press [▶].

② Press [▲, ▼] to select "New item" and press [ENTER]. ③ Press the "Red" button to select "VIDEO" or press the "Green" button to select "Playlists".

④ Press [▲, ▼, ◀, ▶] to select the titles or playlists and press [ENTER].
- When copying to a disc using high speed mode,
-R -R DL -RW(V) : only items indicated with "▶" or " " can be registered.
+R +R DL +RW : only items indicated with "▶▶▶" can be registered.
- To select a multiple number of items together, press [III] to add the check mark and press [ENTER] (→ below, Multiple editing).
- To show other pages (→ below)
- To edit the copying list (→ 54)
You can register a multiple number of titles and playlists on the copying list by repeating steps ②–④.
You cannot start copying when the value of the "Size" (→ 54) exceeds 100% ("Destination Capacity" is not sufficient).
⑤ Press [◀] to confirm.
7 Press [▲, ▼] to select "Start Copying" and press [ENTER].
When copying titles in high speed mode to 5x high speed recording compatible DVD-RAM or 8x high speed recording compatible DVD-R or +R, the sound of the disc rotating becomes louder than normal.
If you want copy to perform more quietly, select "Normal (Silent)" in "DVD Speed for High Speed Copy" in the Setup menu (→ 66).
8 Press [◀, ▶] to select "Yes" and press [ENTER] to start copying.
HDD → -R -R DL -RW(V) +R +R DL
Press [◀, ▶] to select "Copy & Finalize" or "Copy Only" and press [ENTER].
- If "Copy & Finalize" is selected
After finalizing, the discs become play-only and you can also play them on other DVD equipment. However, you can no longer record or edit.
To show other pages
Press [▲, ▼, ◀, ▶] to select "Previous" or "Next" and press [ENTER].
- You can also press [◀◀, ▶▶] to show other pages.
Multiple editing
Select with [▲, ▼, ◀, ▶] and press [■]. (Repeat.)
Press [ENTER] to register to the list.
- A check mark appears. Press [III] again to cancel.
- When you switch between the "VÍDÉO" and "Playlists" tab, the check mark is cancelled.
(Continued)
Refer to the control reference on page 52.
■ To stop copying
Press and hold [RETURN] for 3 seconds. (You cannot stop while finalizing)
When High-speed copying
All titles that have completely copied at the point cancelled are copied.
When Normal Speed copying
Copies until the point cancelled. However titles with "One time only recording" restriction, only titles that have completely copied at the point cancelled are copied to the disc. Titles that are cancelled before the copy is complete are not copied and remain on the HDD.
- When copying to a DVD-R DL or +R DL only the titles that have completely copied at the point cancelled are copied.
Even if the title was not copied to the DVD-R, DVD-R DL, DVD-RW (DVD-Video format), +R, +R DL or +RW, the amount of remaining writable disc space becomes less.
■ To return to the previous screen
Press [RETURN].
Recording and playing while copying
You can record and play using the HDD while high speed copying. (Only when high speed copying without finalizing)
Still pictures cannot be played. Press [ENTER] to cancel the screen display. To confirm the current progress
Press [STATUS].
Note
Timer recordings executed while copying are recorded to the HDD regardless of the recording drive settings. (Only when high speed copying without finalizing)
To play DVD-R, DVD-R DL, DVD-RW (DVD-Video format), +R and +R DL on other players, it is necessary to finalize them after copy.
COPY Navigator/Copying list icons and functions
COPY Navigator/Copying list indicators

Titles and playlists that can be copied in high speed mode to DVD-R, DVD-R DL, DVD-RW (DVD-Video format), +R, +R DL, +RW (→ 26)

Titles and playlists that can be copied in high speed mode to DVD-R, DVD-R DL, DVD-RW (DVD-Video format) (→ 26) (However, titles and playlists cannot be copied in high speed mode to +R, +R DL, +RW)

Title with "One time only recording" restriction (→ 8, When recording digital broadcasts)

Titles deleted from the HDD by "One time only recording" restriction after copying. (→ 8, When recording digital broadcasts)

Title or playlist contains still picture(s) - Still picture(s) cannot be copied.

Title or playlist recorded using a different encoding system from that of the TV system currently selected on the unit.

- Titles and playlists displaying these marks cannot be selected.
Data size of each registered item

Size:
Data size recorded to the copy destination
- When copying at normal speed, the total data size will change according to the recording mode.
- The total data size shown may be larger than the sum of the data sizes for each registered item, because of data management information being written to the copy destination, etc.
■ To edit the copying list
Select the item in step 6-④ (→ 53, right column) 1 Press [SUB MENU]. 2 Press [▲, ▼] to select the operation and press [ENTER].
Delete All:
Delete all items registered on the copying list.
Press [◀, ▶] to select "Yes" and press [ENTER].
Add:
Add new items to the copying list.
Press [▲, ▼, ◀, ▶] to select the playlists and titles to be added and press [ENTER].
Delete:
Delete the selected items.
Press [◀, ▶] to select "Yes" and press [ENTER].
You can also delete multiple items (→ 53, Multiple editing).
Move:
Move selected items or change the order of items on the copying list. Press [▲, ▼] to select the destination and press [ENTER].
To cancel all registered copying settings and lists
After performing steps 1–3 (→ 53, left column)
1 Press [▲, ▼] to select "Cancel All" and press [ENTER]. 2 Press [◀, ▶] to select "Yes" and press [ENTER]. - The settings and lists may be cancelled in the following situations. - When a title, still picture, etc. has been recorded or deleted at the copy source - When steps have been taken, for instance, to turn off the unit, open the tray, change the copy direction, etc.

Copying a finalized DVD-R, DVD-R DL, DVD-RW (DVD-Video format), +R and +R DL
DVD-V → HDD
You can copy the content of finalized DVD-R, DVD-R DL, DVD-RW (DVD-Video format), +R, and +R DL to the HDD and re-edit.
While playing a disc, the content being played is copied to the HDD according to the set time.
- If you perform search, frame-by-frame or pause while copying, that portion of title is not recorded.
- Operations and on-screen displays during copy are also recorded.
- Almost all DVD-Video on sale have been treated to prevent illegal copying, and cannot be copied.
- The following cannot be copied: DVD-Audio, Video CD, Audio CD and so on.
Preparation
- Insert the finalized disc (→ 34).
After performing steps 1–5 ("Format" is automatically set to "DVD-Video") (→ 53, Copying using the copying list—Advanced Copy)
6 Set "Copy Time".
- If you are not going to change the setting (→ step 7).
■ Setting the unit to copy according to the set time
① Press [▲, ▼] to select "Copy Time" and press [▶]. ② Press [▲, ▼] to select "Time Setting" and press [ENTER].
- Setting the unit to copy all the content on the disc
③ Press [▲, ▼] to select "Off" and press [ENTER]. ④ Press [◀] to confirm.
Copy will continue until there is not enough available recording space on the HDD.
- Setting the copying time
③ Press [▲, ▼] to select "On" and press [ENTER]. ④ Press [▲, ▼] to select "Copy Time" and press [ENTER].

⑤ Press [◀, ▶] to select "Hour" and "Min." and press [▲, ▼] to set the recording time. ⑥ Press [ENTER]. ⑦ Press [◀] to confirm.
Copying to the HDD continues for the set time even after the content being played finishes.
- Set a few minutes longer than the source title, in order to include the operation time before play begins.
- You can also set the recording time with the numbered buttons.
Press [▲, ▼] to select "Start Copying" and press [ENTER].
Press [◀, ▶] to select "Yes" and press [ENTER] to start copying.
The disc top menu is displayed.
- Disc play automatically begins from title 1 when "Title 1" is selected from the "Auto-Play Select" menu when finalizing the disc (→ 62).
8 When the top menu is displayed
Press [▲, ▼, ◀, ▶] to select the title you want to start copying, and press [ENTER].
![PANASONIC DMR-EH56 - Press [▲, ▼, ◀, ▶] to select the title you want to start copying, and press [ENTER]. - 1](/content/2026/06/1328297/images/ca7b058e565ee8b637ada17e058c51772ef6a87cedfc81383529b4e9f5e602f6.jpg)
While playing in order, all the titles after the selected title are recorded until the set time. (After the last title on the disc has finished playing the top menu is recorded until the set time is reached.)
To return to the previous screen
Press [RETURN].
To stop copying
Press [■]. You can also press and hold [RETURN] for 3 seconds to stop copying. - If stopped partway, copying will be up to that point.
Note
- The screen saver on the right is recorded at the beginning.
- The content is recorded as 1 title from the start of copy to the end.
- If play does not begin automatically or if the top menu does not display automatically, press [▶] (PLAY) to start.
- Even if you copy a high quality video/audio DVD, the original picture and audio quality cannot be exactly replicated.
- If you want to copy a title from a finalized DVD-RW (DVD Video Recording format), create a copy list and then copy (→ 53, Copying using the copying list–Advanced Copy).

Copying MPEG2 moving pictures from an SD card
Motion pictures encoded in the MPEG2 format, which have been taken by a Panasonic SD Video Camera, digital video camera etc, can be stored on HDD or DVD-RAM.
(All the recordings on the same date become a title.) - You cannot playback MPEG2 moving pictures on an SD card with this unit. You must copy the files to the HDD or a DVD-RAM. - You cannot playback or record while copying MPEG2.
![graph LR A["MPEG2"] --> B["+"] B --> C["HD"] C --> D["VIDEO*"] D --> E["DVD-RAM"]](/content/2026/06/1328297/images/d5ade56a3a34b497b91a80385b54083e5dfdda9f0d48284f45388201b1a8733e.jpg)
* Conventionally recorded programmes
The display below automatically appears when you insert a card into the SD card slot while stopped.
Press [▲, ▼] to select "Copy Video (MPEG2)" and press [ENTER]. Then go to step 7 on page 53.

How to copy
Refer to "Copying using the copying list-Advanced Copy" (→ 53) Please set the items in step 4 and 5 as shown below.
Copy Direction:
Source→SD Card
Copy Mode:
Format: VIDEO
- MPEG2 moving pictures on an SD card are automatically registered on the copy list.
- If there are no MPEG2 moving pictures on an SD card, "Copy Video (MPEG2)" is not displayed.

HDD RAM SD
- You can use SD Memory Cards with capacities from 8 MB to 2 GB (→ 7).
- You cannot copy pictures recorded to DVD-R or CD-R/CD-RW.
SD
While stopped, put the card in the slot, and the menu (→ below) is automatically displayed.
Press [▲, ▼] to select "Copy Pictures (JPEG)", press [ENTER], and then go to step 4 on page 57, "Copying all the still pictures on a card—Copy All Pictures".

Press [RETURN] to exit the screen.
Copying using the copying list
1 While stopped
Press [FUNCTIONS].
2 Press [▲, ▼] to select "To Others" and press [ENTER]. 3 Press [▲, ▼] to select "Advanced Copy" and press [ENTER].

- If you are not going to change the registered list, press [▼] several times (→ step 7).
4 Set the copy direction.
If you are not going to change the copying direction, press [▼] (→ step 5).
① Press [▲, ▼] to select "Copy Direction" and press [▶]. ② Press [▲, ▼] to select "Source" and press [ENTER]. ③ Press [▲, ▼] to select the drive and press [ENTER]. ④ Press [▲, ▼] to select "Destination" and press [ENTER]. ⑤ Press [▲, ▼] to select the drive and press [ENTER]. The same drive as the copy source can be selected. ⑥ Press [◀] to confirm.
5 Set the recording mode.
- If you are not going to change the recording mode, press [▼] (→ step 6). ① Press [▲, ▼] to select "Copy Mode" and press [▶]. ② Press [▲, ▼] to select "Format" and press [ENTER]. ③ Press [▲, ▼] to select "PICTURE" and press [ENTER]. "Recording Mode" is automatically set to "High Speed". ④ Press [◀] to confirm.
6 Register still pictures for copy.
- If you are going to copy a registered list without making any changes to it (→ step 7). You can register still pictures or still picture folders.
- Still pictures and folders cannot be registered on the same list.

■ To register individual still pictures
① Press [▲, ▼] to select "Create List" and press [▶]. ② Press [▲, ▼] to select "New item" and press [ENTER]. ③ Press [▲, ▼, ◀, ▶] to select the still picture and press [ENTER].
- To select a multiple number of items together, press [III] to add the check mark and press [ENTER] (→ 57, Multiple editing). • To show other pages (→ 57)
- To select the still pictures in another folder (→ 57) • To edit the copying list (→ 57)
You can register a multiple number of still pictures on the copying list by repeating steps ②–③.
④ Press [◀] to confirm.
■ To register on a folder by folder basis
① Press [▲, ▼] to select "Create List" and press [▶]. ② Press [▲, ▼] to select "Picture/Folder" and press [ENTER].

③ Press [▲, ▼] to select "Folder" and press [ENTER]. ④ Press [▲, ▼] to select "New item" and press [ENTER]. ⑤ Press [▲, ▼] to select the folder and press [ENTER].
- To select a multiple number of items together, press [III] to add the check mark and press [ENTER] (= 57, Multiple editing).
• To show other pages (→ 57) - To switch to another higher folder (→ 57) • To edit the copying list (→ 57)
You can register a multiple number of folders on the copying list by repeating steps ④–⑤.
⑥ Press [◀] to confirm.
⑦ Press [▲, ▼] to select "Start Copying" and press [ENTER].
● For individual still pictures only
When specifying another folder as the copying destination, select "Folder".

⑧ Press [◀, ▶] to select "Yes" and press [ENTER] to start copying.
To stop copying
Press and hold [RETURN] for 3 seconds.
To return to the previous screen
Press [RETURN].
To show other pages
Press [▲, ▼, ◀, ▶] to select "Previous" or "Next" and press [ENTER].
You can also press [◀◀, ▶▶] to show other pages.
Multiple editing
Select with [▲, ▼, ◀, ▶] and press [■]. (Repeat.)
Press [ENTER] to register to the list.
A check mark appears. Press [11] again to cancel.
■ To edit the copying list
Select the item in step 6-③ (for a still picture) or 6-⑤ (for a folder) (→ 56, right column)
1 Press [SUB MENU].
2 Press [▲, ▼] to select the operation and press [ENTER].
Delete All:
Delete all items registered on the copying list.
Press [◀, ▶] to select "Yes" and press [ENTER].
Add:
Add new items to the copying list.
Press [▲, ▼, ◀, ▶] to select the still picture or folder to be added and press [ENTER].
Delete:
Delete the selected items.
Press [◀, ▶] to select "Yes" and press [ENTER].
You can also delete multiple items (→ above, Multiple editing).
To cancel all registered copying settings and lists
After performing steps 1–3 (→ 56)
1 Press [▲, ▼] to select "Cancel All" and press [ENTER].
2 Press [◀, ▶] to select "Yes" and press [ENTER].
●The settings and lists may be cancelled in the following situations.
-When a title or still picture has been recorded or deleted at the copy source
-When steps have been taken, for instance, to turn off the unit, remove the card, open the tray, change the copy direction, etc.
■ To select another folder
(→ 7, Structure of folders displayed by this unit)
① Press [▲, ▼, ◀, ▶] to select "Folder" and press [ENTER]. If you want to switch to another higher folder (→ below).
② Press [▲, ▼] to select the folder and press [ENTER].

You can also select folders with the numbered buttons.
5: [0] → [0] → [5]
15: [0] → [1] → [5]
115: [1] → [1] → [5]
- The still pictures of different folders cannot be registered on the same list.
To switch to another higher folder
- Only when selecting the source folder. If there is a multiple number of higher folders recognizable, while the screen on the right appears

1 Press [SUB MENU] and press [ENTER].
2 Press [◀, ▶] to select the higher folder and press [ENTER]. You cannot register a folder with a different higher folder to the same list.
3 Press [▲, ▼] to select the desired folder and press [ENTER].

Copying all the still pictures on a card—Copy All Pictures
SD → HDD or RAM
Preparation
Press [DRIVE SELECT] to select the SD drive.
1 While stopped
Press [FUNCTIONS].
2 Press [▲, ▼] to select "To Others" and press [ENTER].
3 Press [▲, ▼] to select "Copy All Pictures" and press [ENTER].

4 Press [▲, ▼] to select "Copy to" and press [◀, ▶] to select the drive.
5 Press [▲, ▼, ◀, ▶] to select "Copy" and press [ENTER].
To stop copying
Press and hold [RETURN] for 3 seconds.
To return to the previous screen
Press [RETURN].
Note
- When copying the still pictures on a folder by folder basis (→ 56) or card by card basis (→ above, Copy All Pictures), files other than the still picture files inside the folder will also be copied. (This does not apply to the lower folders contained inside the folders.)
- If still pictures are already contained inside the copy destination folder, the new still pictures are recorded following the existing still pictures.
- If the space on the destination drive runs out or the number of files/folders to be copied exceeds the maximum (→ 37), copying will stop partway through.
- When a name has not been input for the copy source folder, it is possible that this folder's name will not be the same on the copy destination. It is recommended that you input a folder name before copying (→ 49, Enter Album Name).
- You cannot copy the information about the print number setting (DPOF) or the picture rotation.
- The sequence in which the still pictures are registered on the copy list may not be the same at the copy destination.

HDD RAM -R -RW(V) +R +RW
e.g., Connecting to the AV3 or DV input terminals on the front You can also connect to the AV4 input terminals on the rear.
- Turn off the unit and other video equipment before connecting.

If the audio output of the other equipment is monaural
Connect to L/MONO on the AV3 input terminals at the front.
* The S VIDEO terminal achieves a more vivid picture than the VIDEO terminal.
When recording from the unit's DV terminal
Select the type of audio recording from "Audio Mode for DV Input" in the Setup menu (→ 67).
When recording from DV equipment (e.g., digital video camcorder), you can record audio/video recordings from DV tape only.
Note
If it becomes time for a timer recording to start while copying, the recording will start and the copying will stop.
Manual recording
Preparation
- Press [DRIVE SELECT] to select the HDD or DVD drive.
- Press [REC MODE] to select the recording mode.
- When recording bilingual programmes (→ 8, Important notes for recording)
- When the output signal from the external equipment is NTSC, change the "TV System" to "NTSC" in the Setup menu (→ 70). This unit cannot record to discs containing both PAL and NTSC signals. (However, both types of programmes can be recorded onto the HDD.)
- To reduce noise in input from a video cassette recorder, set "AV-in NR" to "On" in the on-screen menu (→ 43).
- Check the time on the unit is correct.
1 While stopped
Press [INPUT SELECT] to select the input channel for the equipment you have connected.
e.g., If you have connected to AV3 input terminals, select "AV3".
2 Start play on the other equipment.
3 When you want to start recording
Press [● REC].
Recording starts.
To skip unwanted parts
Press [11] to pause recording. (Press again to restart recording.)
To stop recording
Press [■].
Almost all videos and DVD-Video on sale have been treated to prevent illegal copying. Any software that has been so treated cannot be recorded using this unit.
- Using Flexible Recording (→ 27), you can record the content of a video cassette (approx. 1–8 hours) to a 4.7 GB disc with the best possible quality of recording without wasting disc space.
DV automatic recording (DV Auto Rec)
HDD RAM When the "DV Auto Rec" function is used, programmes are recorded as a title while at the same time chapters are created at each break in the images and the play list is created automatically.
Preparation
1 Turn off the main unit and DV equipment, then connect the equipment with the unit's DV input terminal (→ left column). 2 Turn on the main unit and DV equipment. 3 Press [REC MODE] to select the recording mode. 4 Pause play of the DV equipment at the point you want recording to start. - When the output signal from the external equipment is NTSC, change the "TV System" to "NTSC" in the Setup menu (→ 70).
After preparation is completed, the following screen appears.

Press [◀, ▶] to select "Rec to HDD" or "Rec to DVD" and press [ENTER].
You can proceed to step 4.
- When the screen is not displayed, press [DRIVE SELECT] to select HDD or DVD and then continue from step 1. 1 While stopped Press [FUNCTIONS]. 2 Press [▲, ▼] to select "To Others" and press [ENTER]. 3 Press [▲, ▼] to select "DV Auto Rec" and press [ENTER]. 4 Press [◀, ▶] to select "Rec" and press [ENTER].
Recording starts.
When recording finishes
The confirmation screen appears. Press [ENTER] to finish DV automatic recording.
To stop recording
Press [■].
Note
- Only one piece of DV equipment (e.g., digital video camcorder) can be connected to the unit via the DV input terminal.
- It is not possible to operate the unit from the connected DV equipment.
- The DV input on this unit is for use with DV equipment only. (It cannot be connected to a computer, etc.) ●The DV equipment name may not be shown correctly.
- Depending on the DV equipment, the images or audio may not be input properly.
- The date and time information on the tape of the DV equipment will not be recorded.
- You cannot record and play simultaneously.
If the DV automatic recording function does not work properly, check the connections and DV equipment settings, and turn the unit off and back on.
If that does not work, follow the instructions for manual recording (→ left column).
Linked operations with the TV (Q Link)
What is Q Link?
Q Link enables you to connect this unit to a Q Link equipped Panasonic TV and perform various linked functions.
The following systems from other manufacturers have similar function to Q Link from Panasonic.
For details, refer to your television's operating instructions or consult your dealer.
●Q Link (registered trademark of Panasonic)
●Megalogic (registered trademark of Grundig)
●DATA LOGIC (registered trademark of Metz)
●SMARTLINK (registered trademark of Sony)
● Easy Link (registered trademark of Philips)
Preparation
- Connect this unit to your TV with a fully wired 21-pin Scart cable (→ 14).
| Download from the TV | When you connect the unit to a TV, the station list data is automatically copied from the TV to the unit, and the TV stations are assigned to the programme positions on the unit in the same order as on the TV (→ 18). |
| TV/DVD Auto On | When you press the following buttons, linked operations with the TV activate and corresponding screens appear.When this unit is on:Press [FUNCTIONS][▶] ( P L A Y )[DIRECT NAVIGATOR][GUIDE][ShowView][PROG/CHECK]When this unit is off (standby mode):Press [▶] ( P L A Y )[DIRECT NAVIGATOR][GUIDE][ShowView][PROG/CHECK]• DVD-V DVD-A CD and MP3The TV is automatically turned on and corresponding screen appear when you insert the discs. |
| DVD Auto Standby | When you turn the TV off, the unit is turned off as well. However, this function works in the stop mode.This function does not work during the following operations: Preset Download, Auto-Setup, Auto Clock Setting, Child Lock and Manual Tuning. |
| Direct TV Recording | You can at once record the same programme that you are watching on the TV.•This function allows you to immediately start recording the programme that you are viewing on the TV without having to change the channels on this unit.1 Press [DRIVE SELECT] to select the HDD or DVD drive.The selected drive lights up on the unit's display.2 If you selected the DVD driveInsert a disc. (→ 24)3 Press and hold [● DIRECT TV REC] for 1 second.Recording starts.To stop recordingPress [■]. |

HDD RAM -R -R DL -RW(V) +R +R DL +RW -RW(VR) SD - You can use SD Memory Cards with capacities from 8 MB to 2 GB (→ 7).
Common procedures
1 While stopped
Press [FUNCTIONS].
2 Press [▲, ▼] to select "To Others" and press [ENTER].

3 Press [▲, ▼] to select "HDD Management", "DVD Management" or "Card Management" and press [ENTER].
e.g., RAM
- When HDD has been selected, "Delete all titles" and "Format HDD" are displayed.
- When SD has been selected, "Format Card" only is displayed.
Setting the protection
RAM
Preparation
- Press [DRIVE SELECT] to select the DVD drive.
After performing steps 1–3 ( → left)
4 Press [▲, ▼] to select “Disc Protection” and press [ENTER].
5 Press [◀, ▶] to select "Yes" and press [ENTER].

The lock symbol appears closed when the disc is write-protected.
To return to the previous screen
Press [RETURN].
To exit the screen
Press [RETURN] several times.
Cartridge-protection
For a DVD-RAM with a cartridge
With the write-protect tab in the protect position, playback automatically starts when the disc is inserted in the unit.

SD
Switch the write-protect switch to the "LOCK" position.

Providing a name for a disc
RAM -R -R DL -RW(V) +R +R DL +RW
You can provide a name for each disc.
Preparation
Press [DRIVE SELECT] to select the DVD drive.
• RAM Release protection (→ above).
After performing steps 1–3 (→ left)
4 Press [▲, ▼] to select "Disc Name" and press [ENTER].
→ 63, Entering text. The disc name is displayed in the DVD Management window. - -R -R DL -RW(V) +R +R DL With a finalized disc, the name is displayed on the Top Menu. - +RW The disc name is displayed only if you play the disc on other equipment.


To return to the previous screen
Press [RETURN].
To exit the screen
Press [RETURN] several times.
Deleting all titles and playlists—Delete all titles
HDD RAM
Preparation
- Press [DRIVE SELECT] to select the HDD or DVD drive.
- Release protection (→ 60).
After performing steps 1–3 (→ 60)
4 Press [▲, ▼] to select "Delete all titles" and press [ENTER]. 5 Press [◀, ▶] to select "Yes" and press [ENTER]. 6 Press [◀, ▶] to select "Start" and press [ENTER].
A message appears when finished.
7 Press [ENTER].
To return to the previous screen
Press [RETURN].
To exit the screen
Press [RETURN] several times.
Note
- Once deleted, the recorded contents are lost and cannot be restored. Make certain before proceeding.
- Deleting all video titles will result in all playlists also being deleted.
- Still picture data (JPEG, TIFF) or computer data cannot be deleted.
- Delete does not work if one or more titles are protected.
Deleting all the contents of a disc or card—Format
HDD RAM -RW(V) +RW -RW(VR) SD
+R +R DL (New disc only)
Preparation
- Press [DRIVE SELECT] to select the HDD, DVD or SD drive.
- Release protection (→ 60).
Note
Formatting deletes all contents (including computer data), and they cannot be restored. Check carefully before proceeding. The contents are deleted when you format a disc or card even if you have set protection.
After performing steps 1–3 (→ 60)
4 Press [▲, ▼] to select "Format HDD", "Format Disc" or "Format Card" and press [ENTER]. 5 Press [◀, ▶] to select "Yes" and press [ENTER]. 6 Press [◀, ▶] to select "Start" and press [ENTER].
A message appears when formatting is finished.
Note
- Formatting normally takes a few minutes; however, it may take up to a maximum of 70 minutes (RAM).
- Do not disconnect the AC mains lead while formatting. This can render the disc or the card unusable.
7 Press [ENTER].
Note
- When a disc or card has been formatted using this unit, it may not be possible to use it on any other equipment.
- -R -R DL CD Formatting cannot be performed on the disc.
- You can format DVD-RW only as DVD-Video format on this unit.
To stop formatting RAM
Press [RETURN].
- You can cancel formatting if it takes more than 2 minutes. The disc must be reformatted if you do this.
To return to the previous screen
Press [RETURN].
To exit the screen
Press [RETURN] several times.
Refer to the control reference on page 60.
Selecting the background style—Top Menu
-R -R DL -RW(V) +R +R DL +RW
You can select the background that will be displayed as the DVD-Video top menu after finalizing.
Preparation
Press [DRIVE SELECT] to select the DVD drive.
After performing steps 1–3 (→ 60)
4 Press [▲, ▼] to select "Top Menu" and press [ENTER].
5 Press [▲, ▼, ◀, ▶] to select the background and press [ENTER].

- You can change thumbnails displayed in the top menu. (→ 45, Change Thumbnail)
Selecting whether to show the Top Menu first - Auto-Play Select
-R -R DL -RW(V) +R +R DL +RW
You can select whether to show the top menu after finalizing.
Preparation
Press [DRIVE SELECT] to select the DVD drive.
After performing steps 1–3 (→ 60)
4 Press [▲, ▼] to select "Auto-Play Select" and press [ENTER].
5 Press [▲, ▼] to select "Top Menu" or "Title 1" and press [ENTER].
Top Menu: The top menu appears first.
Title 1: The disc content is played without displaying the top menu.
Enabling discs to be played on other equipment–Finalize
-R -R DL -RW(V) +R +R DL
Make selections from "Top Menu" and "Auto-Play Select" (→ above) before finalizing the disc.
Preparation
Press [DRIVE SELECT] to select the DVD drive.
After performing steps 1–3 (→ 60)
4 Press [▲, ▼] to select "Finalize" and press [ENTER].
5 Press [◀, ▶] to select "Yes" and press [ENTER].
6 Press [◀, ▶] to select "Start" and press [ENTER].
A message appears when finalizing is finished.
Note
- You cannot cancel finalizing.
● Finalizing takes up to 15 minutes.
(-R DL +R DL Finalizing takes up to 60 minutes.)
- Do not disconnect the AC mains lead while finalizing.
This will render the disc unusable.
7 Press [ENTER].
Note
When finalizing a high-speed recording compatible disc, it may take longer than displayed on the confirmation screen (approximately four times).
After finalizing
- -R -R DL +R +R DL The disc becomes play-only and you can no longer record or edit.
- -RW(V) You can record and edit the disc after formatting (→ 61) although it becomes play-only after finalizing.
- When copying in high speed, chapters will be replicated.
- -R -RW(V) Titles are divided into about 5-minute (+R 8-minute)* chapters, if
- The titles were directly recorded to the disc.
- The titles were copied using any mode other than the high speed mode (excluding -R DL +R DL).
* This time varies greatly depending on the condition and mode of recording.
- There is a pause of several seconds between titles and chapters during play.
| Before finalizing | After finalizing | |
| Recording/Editing/Entering name √ | × | |
| Play on other players × | √ |
- You cannot finalize discs recorded on other manufacturer's equipment.
- If you finalize discs recorded on Panasonic equipment other than this unit, the background selected as "Top Menu" may not be displayed.
- Discs finalized on this unit may not be playable on other players due to the condition of the recording.
Visit Panasonic's homepage for more information about DVDs. http://www.panasonic-europe.com
Creating Top Menu—Create Top Menu
+RW
+RW discs contain no Top Menu data. Top Menu is a convenient function. We recommend you create the menu before playing a +RW disc on other equipment.
Make selections from "Top Menu" and "Auto-Play Select" (→ left column) before creating top menu.
Preparation
Press [DRIVE SELECT] to select the DVD drive.
After performing steps 1–3 (→ 60)
4 Press [▲, ▼] to select "Create Top Menu" and press [ENTER]. 5 Press [◀, ▶] to select "Yes" and press [ENTER]. 6 Press [◀, ▶] to select "Start" and press [ENTER].
Creating Top Menu starts. You cannot cancel creating. Creating Top Menu can take a few minutes.
7 Press [ENTER].
Note
- You can record or edit discs after creating the Top Menu. But the created menu is deleted when you record or edit disc. In such cases, create the Top Menu again by using "Create Top Menu".
- You cannot use the Top Menu for playing on this unit.

HDD RAM -R -R DL -RW(V) +R +R DL +RW SD
You can give names to recorded titles, etc.
The maximum number of characters:
HDD RAM Characters
| Title | 64 (44*) |
| Playlist 64 | |
| Album of still pictures 36 | |
| Disc (RAM) | 6 |
* Title name for timer recording
| -R | -R DL | -RW(V) | +R | +R DL | +RW | Characters |
| Title 44 | ||||||
| Disc 40 | ||||||
SD Characters
Album of still pictures 36
Note
If a name is long, parts of it may not be shown in some screens.
1 Show Enter Name screen.
Title (timer recording)
Select "Programme Name" in step 3 on page 30, right column.
Title
Select "Enter Name" in step 5 on page 44.
Playlist
Select "Enter Name" in step 5 on page 47.
Disc
Select "Disc Name" in step 4 of "Providing a name for a disc" on page 60.
Album of still pictures
Select "Enter Album Name" in step 4 on page 48, "To edit the album".
Name field: shows the text you have entered
Press the "Red" button or "Green" button to select character type and press [ENTER].
"Standard Characters": (→ left, Alphabet characters, etc.)
"Other Characters": (→ below, Umlaut characters, accented characters, etc.)
![PANASONIC DMR-EH56 - Press the "Red" button or "Green" button to select character type and press [ENTER]. - 1](/content/2026/06/1328297/images/07c58cf0ffded001431530a7e9787e2add49b2bfc2c1778dceeb817b7e5047bc.jpg)
2 Press [▲, ▼, ◀, ▶] to select a character and press [ENTER].
Repeat this step to enter other characters.
•To delete a character
Press [▲, ▼, ◀, ▶] to select the character in the name field and press [■]. (The selected characters are deleted.)
- Using the numbered buttons to enter characters
e.g., entering the letter "R"
① Press [7] to move to the 7th row.
② Press [7] twice to highlight "R".
③ Press [ENTER].
- To enter a space
Press [×] and press [ENTER].
- Add/recall names (→ below)

3 Press [■] (Set).
"Writing..." appears then the screen returns to the Title view screen and so on.
To end partway
Press [RETURN].
Text is not added.
■ To add a name
You can add frequently used names and recall them later. Maximum number of added names: 20
Maximum number of characters per name: 20
After entering the name (steps 1–2).
1 Press [▲, ▼, ◀, ▶] to select "Add to List" and press [ENTER].
- You can also press [▶▶] to select "Add to List".
2 Press [◀, ▶] to select "Add" and press [ENTER].
- Press [RETURN] to cancel.
■ To recall an added name
1 Press [▲, ▼, ◀, ▶] to select "List Names" and press [ENTER].
- You can also press [◀◀] to select "List Names".
2 Press [▲, ▼, ◀, ▶] to select the name to be recalled and press [ENTER].
■ To delete an added name
1 Press [▲, ▼, ◀, ▶] to select "List Names" and press [ENTER]. - You can also press [◀◀] to select "List Names". 2 Press [▲, ▼, ◀, ▶] to select the name to be deleted. 3 Press [SUB MENU] to show "Delete Name" and press [ENTER]. 4 Press [◀, ▶] to select "Delete" and press [ENTER]. 5 Press [RETURN].
For your reference
If you enter a long name, only part of it is shown in the Top Menu after finalization (→ 62). When entering a title name, the name that will appear in the Top Menu can be previewed in the "Top Menu Preview" window.


By using the FUNCTIONS window you may access the main functions quickly and easily.
1 While stopped
Press [FUNCTIONS].
Functions displayed depend on the selected drive or type of disc.

2 Press [▲, ▼] to select an item and press [ENTER].
- If you select "To Others" and press [ENTER], the following screen appears. Press [▲, ▼] to select an item and press [ENTER].

"Timer Recording" appears in countries where the GUIDE Plus+ system is available.
- If you press [RETURN], you can return to the previous screen.
To exit the FUNCTIONS window
Press [FUNCTIONS].
Child Lock

The Child Lock deactivates all buttons on the unit and remote control. Use it to prevent other people from operating the unit.
Press and hold [ENTER] and [RETURN]
simultaneously until "X
HOLD" appears on the unit's display.

If you press a button while the Child Lock is on, "X HOLD" appears on the unit's display and operation is impossible.
To cancel the Child Lock
Press and hold [ENTER] and [RETURN] simultaneously until "X HOLD" disappears.

Common procedures
1 While stopped
Press [FUNCTIONS].
2 Press [▲, ▼] to select "To Others" and press [ENTER]. 3 Press [▲, ▼] to select "Setup" and press [ENTER]. 4 Press [▲, ▼] to select the tab and press [▶].

5 Press [▲, ▼] to select the menu and press [ENTER]. 6 Press [▲, ▼] to select the option and press [ENTER].
To return to the previous screen
Press [RETURN].
To exit the screen
Press [RETURN] several times.
Note
There may be differences in operation methods. If this happens, follow the on-screen instructions for the operation.
(continued on the next page)
(continued)
Refer to the control reference on page 65.
Summary of settings
The settings remain intact even if you switch the unit to standby.
Tabs Menus Options (Underlined items are the factory presets.)
| Tuning | Manual (→ 69) | |
| Auto-Setup Restart (→ 70) | ||
| Download from TV (→ 70) | ||
| Disc | Settings for playback●Press [ENTER] to show the following settings. | |
| RatingsSet a ratings level to limit DVD-Video play.Follow the on-screen instructions. Enter a 4-digit password with the numbered buttons when the password screen is shown.●Do not forget your password. | ●8 No Limit: All DVD-Video can be played.●1 to 7: Prohibits play of DVD-Video with corresponding ratings recorded on them.●0 Lock All: Prohibits play of all DVD-Video.●Unlock Recorder ●Change Password●Change Level ●Temporary Unlock | |
| DVD-Audio Video mode PlaybackSelect “On” to play DVD-Video content on some DVD-Audio. | ●On: The setting returns to “Off” when you change the disc or turn the unit off.●Off | |
| Soundtrack Choose the language for audio, subtitle and disc menus. DVD-V●Some discs start in a certain language despite any changes you make here.●In case of English/French/German/Italian/ Spanish/Dutch languages, when you make download from TV, and Country setting of Auto-Setup in plug-in, the language (“Soundtrack”/“Menus”) will be same and “Subtitle” will set to “Automatic”.●Enter a code (→ 71) with the numbered buttons when you select “Other ××××”.When the selected language is not available on the disc, the default language is played. There are discs where you can only switch the language from the menu screen (→ 35). | ●English ●German ●French ●Italian●Spanish ●Dutch●Original: The original language of each disc will be selected.●Other ××××————: If the language selected for “Soundtrack” is not available, subtitles of that language will automatically appear if available on that disc.●English ●German ●French ●Italian●Spanish ●Dutch●Other ××××●English ●German ●French ●Italian●Spanish ●Dutch●Other ×××× | |
| Subtitle ●Autoro Spanish/Dutch languages, when you make download from TV, and Country setting of Auto-Setup in plug-in, the language (“Soundtrack”/“Menus”) will be same and “Subtitle” will set to “Automatic”.●Enter a code (→ 71) with the numbered buttons when you select “Other ××××”.When the selected language is not available on the disc, the default language is played. There are discs where you can only switch the language from the menu screen (→ 35). | ||
| Menus | ||
| Settings for Recording●Press [ENTER] to show the following settings. | ||
| Recording time in EP modeSelect the maximum number of hours for recording in EP mode (→ 25, Recording modes and approximate recording times). | ●EP (6 Hours):You can record for 6 hours on an unused 4.7 GB disc.●EP (8 Hours):You can record for 8 hours on an unused 4.7 GB disc.The sound quality is better when using “EP (6 Hours)” than when using “EP (8 Hours)”. | |
| Rec for High Speed CopyWhen high speed copying a title to DVD-R, DVD-R DL, DVD-RW (DVD-Video format), +R, +R DL and +RW, it is necessary to turn this setting “On” before recording to the HDD; however, the screen size, etc. is restricted (→ right). We recommend turning the setting “Off” if high speed copy to DVD-R, etc. is not necessary when recording a programme. | ●On: Makes high speed mode copying to DVD-R, etc. possible. Press [◀, ▶] to select “Yes” and press [ENTER].-Pictures are saved in 4:3.-Select the type of audio in advance from “Bilingual Audio Selection” (→ 67).●Off | |
| DVD Speed for High Speed CopySelect the speed of high-speed copying (When using high-speed copy compatible DVD-RAM 5X, DVD-R, +R 8X or +RW 4X discs). | ●Maximum●Normal (Silent):Selecting “Normal (Silent)” means the noise generated by this unit is less than “Maximum”, however the time required for copying will double (approximately). | |
| Picture | Comb FilterSelect the picture sharpness when recording.The setting is fixed with “On” if you set “TV System” to “NTSC” (→ 70). | ●On: Pictures become clear and vivid. Normally, use this setting.●Off: Select it when recording noisy pictures. |
| Still ModeSelect the type of picture shown when you pause play (→ 81, Frames and fields). | ●Automatic●Field: Select if jittering occurs when “Automatic” is selected. (The picture is coarser.)●Frame: Select if small text or fine patterns cannot be seen clearly when “Automatic” is selected. (The picture is clearer and finer.) | |
| Seamless PlaySelect the play mode between playlist chapter segments and partially deleted titles. | ●On: The chapters in playlists are played seamlessly. This does not work when there are several audio types included on the playlist and when using Quick View. Additionally, the positioning of chapter segments may change slightly.●Off: The points where chapters in playlists change are played accurately, but the picture may freeze for a moment. | |
Tabs Menus Options (Underlined items are the factory presets.)
| Sound | Dynamic Range Compression DVD-V (Dolby Digital only)Change the dynamic range for late night viewing. | ●On●Off |
| Bilingual Audio SelectionSelect whether to record the main or secondary audio type when:-Recording or copying to a DVD-R, DVD-R DL, DVD-RW (DVD-Video format), +R, +R DL and +RW.-“Rec for High Speed Copy” is set to “On” (→ 26).-Recording or copying sound in LPCM (→ below, “Audio Mode for XP Recording”). | ●M 1●M 2You cannot select the audio on this unit when recording from an external source, such as when copying from a video cassette recorder (except from DV equipment connected to this unit’s DV input terminal). Select on the other equipment.When recording from the unit’s DV terminal, select the type of audio recording from “Audio Mode for DV Input” (→ below). | |
| Digital Audio OutputChange the settings when you have connected equipment through this unit’s DIGITAL AUDIO OUT terminal (→ 17).●Press [ENTER] to show the following settings. | ||
| PCM Down ConversionSelect how to output audio with a sampling frequency of 96 kHz or 88.2 kHz.●Signals are converted to 48 kHz or 44.1 kHz despite the settings across if the signals have a sampling frequency of over 96 kHz or 88.2 kHz, or the disc has copy protection. | ●On: Signals are converted to 48 kHz or 44.1 kHz. (Choose when the connected equipment cannot process signals with a sampling frequency of 96 kHz or 88.2 kHz.)●Off: Signals are output as 96 kHz or 88.2 kHz. (Choose when the connected equipment can process signals with a sampling frequency of 96 kHz or 88.2 kHz.) | |
| Dolby Digital Select how to output the signal.DOLBY DIGITAL Select “Bitstream” if the connected equipment decodes the signal.Select “PCM” if this unit decodes the signal and outputs it as 2 channels. | ●Bitstream:When connecting to equipment displaying the Dolby Digital logo.●PCM: When connecting to equipment not displaying the Dolby Digital logo. | |
| DTS ●BitstreamNot making the proper settings may result in noise or some trouble for digital recording. | ——: When connecting to equipment displaying the DTS logo.●PCM: When connecting to equipment not displaying the DTS logo. | |
| MPEG ●Bitstream: When connected to equipment with a built-in MPEG decoder.●PCM: When connected to equipment without a built-in MPEG decoder. | ||
| Audio Mode for XP RecordingChoose the audio type when recording or copying with XP mode. | ●Dolby Digital (→ 81)●LPCM (→ 81)-The picture quality of LPCM recordings may be lower than that of normal XP mode recordings.-The audio recording becomes Dolby Digital even if you selected LPCM when using a recording mode other than XP.-When recording a bilingual broadcast, select the type of audio in advance from “Bilingual Audio Selection” (→ above). | |
| Audio Mode for DV InputYou can select the kind of audio when recording from the unit’s DV input terminal (→ 58). | ●Stereo 1: Records audio (L1, R1).●Stereo 2: Records added audio such as narration (L2, R2) subsequent to original recording.●Mix: Records both Stereo 1 and Stereo 2.When recording bilingual broadcast, select the type of audio in advance from “Bilingual Audio Selection” (→ above). | |
| Display | LanguageChoose the language for these menus and on-screen messages. | ●English ●Deutsch ●Français ●Italiano●Español ●Nederlands |
| On-Screen MessagesChoose whether to show status messages automatically. | ●Automatic●Off | |
| Grey BackgroundSelect “Off” if you do not want to have the unit show the grey background when tuner reception is weak. | ●On●Off | |
| FL DisplayChanges the brightness of the unit’s display.This setting is fixed with “Automatic” if you set “Power Save” (→ 68) to “On”. | ●Bright ●Dim●Automatic: The display turns dark during play and disappears when the unit is turned off. It reappears momentarily if a button is pressed. While using this mode, the standby power consumption can be reduced. | |
Refer to the control reference on page 65. Tabs Menus Options (Underlined items are the factory presets.)
| Connection | TV Aspect (→ 18) | Set to match the type of television connected. | ●16:9 ●4:3 _ | ●Letterbox | |
| Progressive (→ 22)This setting is fixed with “Off” if you set “AV1 Output” to “RGB 1 (without component)” or “RGB 2 (without component)”. | ●On ●Off | ||||
| TV System (→ 70) | ●PAL | ●NTSC | |||
| AV1 OutputSelects the output from the AV1 terminal.Select “RGB 1 (without component)” or “RGB 2 (without component)” for RGB output.Select “Video (with component)” or “S Video (with component)” for component output (progressive output).Set according to the signal and terminal of the connected TV.When a decoder is connected, do not set to “RGB 1 (without component)”. | ●Video (with component):Select when a TV is connected that can receive a composite signal.S Video (with component):Select when a TV is connected that can receive an S Video signal.RGB 1 (without component):Select when a TV is connected that can receive an RGB signal. If you always would like to view the picture from the unit in RGB signal, select this mode. The TV screen will automatically switch to display the picture from the unit when the unit is turned on.RGB 2 (without component):Select when a TV is connected that can receive an RGB signal. If you would like to switch to display the picture from the unit only when playback or viewing menus, select this mode. | ||||
| AV2 SettingsSet to match the connected equipment.Press [ENTER] to show the following settings. | |||||
| AV2 InputSet to “RGB/Video” or “RGB” when receiving or recording RGB output from external equipment. | ●RGB/Video●RGB●Video●S Video | ||||
| AV2 ConnectionThis setting is fixed with “Ext” if you set “TV System” to “NTSC” (→ 70). | ●Decoder: When a decoder is connected to descramble the scrambled signals (e.g., C+decoder).●Ext: When the VCR or a digital/satellite receiver is connected. | ||||
| Ext LinkThis setting cannot be made when the “TV System” is set to “NTSC” (→ 70). | ●Ext Link 1: When a digital/satellite receiver which transmits a special control signal recordings via the 21-pin Scart cable is connected.Start and stop timings of recording are controlled by the control signal.●Ext Link 2: When external equipment with a timer function is connected.When it turns on, recording starts.When it turns off, recording stops. | ||||
| Others | Remote Control (→ 23)Clock (→ 71) | ●DVD 1 | ●DVD 2 | ●DVD 3 | |
| Power Save●Refer to the following when “Power Save” is set to “On”.-“FL Display” is automatically set to “Automatic” (→ 67).-The “Quick Start” function does not work. (It is automatically turned to “Off”.)-When the unit is off, Pay TV programmes cannot be watched on the TV because the signal from the connected decoder is not looped through. To watch them, turn on the unit.If “Quick Start” is set to “On”, “Power Save” is automatically turned to “Off”. | ●On: Power consumption is minimized when the unit is turned to standby (→ 82).●Off | ||||
| Quick StartThe Quick Start feature enables this unit to be ready to start recording as quick as approx. 1 second* after turning it on. You can start recording soon after deciding you want to record something.*Only when recording to the HDD or DVD-RAM.If this is set to “On”, “Power Save” is automatically turned to “Off”.Startup takes up to a minute when:-You play a disc or start recording to discs other than DVD-RAM.-You want to make other operations.-The clock has not been set. | ●On●Off: Standby power consumption is less than when this is set to “On”. | ||||
| DivX Registration | ●You need this registration code to purchase and play DivX Video-on-Demand (VOD) content (→ 39). | ||||
| Initialize●Press [ENTER] to show the following settings. | |||||
| Shipping ConditionAll the settings except for the ratings level, ratings password and time settings return to the factory preset. The timer recording programmes are also cancelled. | ●Yes●No | ||||
| Default SettingsAll the settings other than the programmed channels, time settings, country settings, language settings, disc language settings, ratings level, ratings password, remote control code, return to the factory presets. | ●Yes●No | ||||
Tuning
1 While stopped
Press [FUNCTIONS].
2 Press [▲, ▼] to select "To Others" and press [ENTER]. 3 Press [▲, ▼] to select "Setup" and press [ENTER]. 4 Press [▲, ▼] to select "Tuning" and press [▶].

Manual
You can add or delete channels, or change programme positions.
5 Press [▲, ▼] to select "Manual" and press [ENTER].

If you select "Yes" and press [ENTER], the following screen appears.

To delete a programme position
Press [▲, ▼, ◀, ▶] to select a programme position and press the "Red" button.
To add a blank programme position
Press [▲, ▼, ◀, ▶] to select a programme position and press the "Green" button.
To move a TV station to another programme position
① Press [▲, ▼, ◀, ▶] to select a programme position and press the "Yellow" button. ② Press [▲, ▼, ◀, ▶] to select the new programme position to which you want to assign the TV station and press [ENTER].
Note
- When the unit is connected to a Q Link compatible TV with a fully wired 21-pin Scart cable, it sets itself automatically (→ 18); only deletion of the programme position can be performed.
- If you delete the programme position of the Host Channel, the GUIDE Plus+ data is also deleted.
■ To change the tuning settings for individual programme positions
6 Press [▲, ▼, ◀, ▶] to select a programme position and press [ENTER].

Press [▲, ▼] to select an item and press [▶].
| Pos To change | the programme position in which the TV stations are assignedPress [▲, ▼] or numbered buttons to select the number of the desired programme position and press [ENTER]. |
| Name To enter | or change the name of a TV stationPress [▲, ▼, ◀, ▶] to enter station name and press [ENTER].If the station name needs a blank space, select the blank between “Z” and “*”. |
| Channel To enter newly available TV stations or change the channel number of an already tuned TV stationPress [▲, ▼] or the numbered buttons to enter the channel number of the desired TV station.Wait a few moments until the desired TV station has been tuned.After the desired TV station is tuned, press [ENTER]. | |
| Fine Tuning To obtain the best tuning conditionPress [▲, ▼] to adjust the best tuning condition and press [ENTER].●Press [▶] to return to “Auto”. | |
| Video System | To select the video system typePress [▲, ▼] to select “PAL” or “SECAM” if the picture lacks colour, and press [ENTER].Auto: This unit automatically distinguishesPAL and SECAM signals.PAL: For receiving PAL signals.SECAM: For receiving SECAM signals. |
| Audio Mode*1 | To select the audio reception typeIf sound quality is poor, press [▲, ▼] to select “BG” or “L” and press [ENTER].BG: PAL B.G.H/SECAM B.GL: SECAM L, L’ |
| Mono | To select the type of sound to be recordedPress [▲, ▼] to select “On” if the stereo sound is distorted due to inferior reception conditions, or if you want to record the normal (mono) sound during a stereo, bilingual or NICAM*2 broadcast, and press [ENTER]. |
| Title Page | To enter the Teletext title page for a channelEntering title page number allows the unit to automatically record programme and station names.Press [▲, ▼] or numbered buttons to enter the number and press [ENTER].●To find the correct title page for the station, refer to its Teletext TV guide. |
You can make the following two settings by selecting the external input channel (AV1, AV2, AV3, AV4) in step 5. ●Video System (Auto/PAL/SECAM)
In order to record properly, make the appropriate settings to match the connected equipment.
•Title Page (Auto/Off)
*1 It is not displayed in Germany. Audio reception type is fixed at "BG". *2 Not provided for Germany.
Refer to the control reference on page 65.
Restart set up
You can restart auto channel setting if set up (→ 18) fails for some reason. After performing steps 1–4 (→ 69)
5 Press [▲, ▼] to select "Auto-Setup Restart" or "Download from TV" and press [ENTER].
The confirmation screen appears.
Select "Download from TV" when you connect the unit to a Q Link compatible TV with a fully wired 21-pin Scart cable. (Programme positions are downloaded from the TV and copied through this convenient function.)
6 Press [◀, ▶] to select "Yes" and press [ENTER].
- If the country setting menu appears on the television Press [▲, ▼, ◀, ▶] to select the country and press [ENTER].
You can also use the following method to restart Auto-Setup. When the unit is on and stopped
Press and hold [v CH] and [CH ∧] on the main unit until the country setting screen appears.
All the settings except for the ratings level, ratings password and time settings return to the factory preset. The timer recording programmes are also cancelled.
To return to the previous screen
Press [RETURN].
To exit the screen
Press [RETURN] several times.
When the GUIDE Plus+ system setting message appears.
- If you want to setup the GUIDE Plus+ system
Press [◀, ▶] to select "Yes" and press [ENTER].
Go to step 2 on page 19.
- If you do not want to setup the GUIDE Plus+ system
Press [◀, ▶] to select "No" and press [ENTER].
Television picture appears. Setup is complete.
List of TV Reception Channels
| Channel indication | TV Channel | ||
| Germany/Italy | France | Other Countries | |
| 2 – 4 | E2 – E10 | 2 – 4 | E2 – E12 |
| 5 – 10 | 5 – 10, G – J (172.00 to 220.00 MHz) (INTER BANDE) | ||
| 11 – 12 | E11 – E12 (Germany) H1 – H2 (Italy) | — | |
| 13 – 20 | A – H (Only Italy) | — | — |
| 21 – 69 E21 | – E69 E21 – E69 | E21 – E69 | |
| 74 – 78 S01 | – S05 — S1 – S5 | ||
| 80 S1 — | M1 | ||
| 81 – 89 | S2 – S10 | B – F (100.00 to 172.00 MHz) (INTER BANDE) | M2 – M10 |
| 90 – 99 S11 | – S20 | K – Q (220.00 to 300.00 MHz) (INTER BANDE) | U1 – U10 |
| 121 – 141 | S21 – S41* (Hyperband) | S21 – S41 (299.25 to 467.25 MHz) (INTER BANDE) | S21 – S41 (Hyperband) |
* Only for 8 MHz channel raster
TV System
Change the setting to match the equipment you are connecting with, or to match the title when there are both PAL and NTSC titles on the HDD.
1 While stopped
Press [FUNCTIONS].
2 Press [▲, ▼] to select "To Others" and press [ENTER]. 3 Press [▲, ▼] to select "Setup" and press [ENTER]. 4 Press [▲, ▼] to select "Connection" and press [▶]. 5 Press [▲, ▼] to select "TV System" and press [ENTER]. 6 Press [▲, ▼] to select the TV system and press [ENTER].

- PAL (factory preset)
-Select when connecting to a PAL or Multi-system television. Titles recorded using NTSC are played as PAL 60. -Select to record television programmes and PAL input from other equipment.
—HDD Select when playing a PAL input title recorded on the HDD.
•NTSC
-Select when connecting to a NTSC television. Television programmes cannot be recorded properly. -Select to record NTSC input from other equipment. —HDD Select when playing a NTSC input title recorded on the HDD.
7 Press [◀, ▶] to select "Yes" and press [ENTER].
To return to the previous screen
Press [RETURN].
To exit the screen
Press [RETURN] several times.
■ To change the setting all at once (PAL←→NTSC)
While stopped, keep pressing [■] and [▲ OPEN/CLOSE] on the main unit for 5 or more seconds.
Note
- This unit cannot record to discs containing both PAL and NTSC signals. (However, both types of programmes can be recorded onto the HDD.)
- If "NTSC" has been selected, the GUIDE Plus+ system cannot be used.
Manual Clock Setting
Usually, the unit's setup function (=> 18) automatically adjusts the clock to correct time. Under some reception conditions, however, the unit cannot set the clock automatically.
In this case, follow the operation steps below to manually set the clock.
- In the case of a power failure, the clock setting remains in memory for approximately 60 minutes.
1 While stopped
Press [FUNCTIONS].
2 Press [▲, ▼] to select "To Others" and press [ENTER]. 3 Press [▲, ▼] to select "Setup" and press [ENTER]. 4 Press [▲, ▼] to select "Others" and press [▶]. 5 Press [▲, ▼] to select "Clock" and press [ENTER]. 6 Press [▲, ▼] to select "Off" of "Automatic" and press [ENTER].

7 Press [◀, ▶] to select the item you want to change.
The items change as follows:
Hour←→Minute←→Second←→Day←→Month←→Year ↑ ↑
8 Press [▲, ▼] to change the setting.
You can also use the numbered buttons for setting.
9 Press [ENTER] when you have finished the settings.
The clock starts.
To return to the previous screen
Press [RETURN].
To exit the screen
Press [RETURN] several times.
Note
If a TV station transmits a time setting signal, and when "Automatic" in the Clock setting menu is set to "On", the automatic time correction function checks the time and if necessary it is adjusted several times every day.
Language code list Enter the code with the numbered buttons.
| Abkhazian: 6566 | Catalan: 6765 | Gujarati: 7185 | Lingala: 7678 | Rhaeto-Romance: | Tamil: 8465 | ||
| Afar: 6565 | Chinese: 9072 | Hausa: 7265 | Lithuanian: 7684 | 8277 | Tatar: 8484 | ||
| Afrikaans: 6570 | Corsican: 6779 | Hebrew: 7387 | Macedonian: 7775 | Romanian: 8279 | Telugu: 8469 | ||
| Albanian: 8381 | Croatian: 7282 | Hindi: 7273 | Malagasy: 7771 | Russian: 8285 | Thai: 8472 | ||
| Ameharic: 6577 | Czech: 6783 | Hungarian: 7285 | Malay: 7783 | Samoan: 8377 | Tibetan: 6679 | ||
| Arabic: 6582 | Danish: 6865 | Icelandic: 7383 | Malayalam: 7776 | Sanskrit: 8365 | Tigrinya: 8473 | ||
| Armenian: 7289 | Dutch: 7876 | Indonesian: 7378 | Maltese: 7784 | Scots Gaelic: 7168 | Tonga: 8479 | ||
| Assamese: 6583 | English: 6978 | Interlingua: 7365 | Maori: 7773 | Serbian: 8382 | Turkish: 8482 | ||
| Aymara: 6589 | Esperanto: 6979 | Irish: 7165 | Marathi: 7782 | Serbo-Croatian: 8372 | Turkmen: 8475 | ||
| Azerbaijani: 6590 | Estonian: 6984 | Italian: 7384 | Moldavian: 7779 | Shona: 8378 | Twi: 8487 | ||
| Bashkir: 6665 | Faroese: 7079 | Japanese: 7465 | Mongolian: 7778 | Sindhi: 8368 | Ukrainian: 8575 | ||
| Basque: 6985 | Fiji: 7074 | Javanese: 7487 | Nauru: 7865 | Singhalese: 8373 | Urdu: 8582 | ||
| Bengali; Bangla: 6678 | Finnish: 7073 | Kannada: 7578 | Nepali: 7869 | Slovak: 8375 | Uzbek: 8590 | ||
| French: 7082 | Kashmiri: 7583 | Norwegian: 7879 | Slovenian: 8376 | Vietnamese: 8673 | |||
| Bhutani: 6890 | Frisian: 7089 | Kazakh: 7575 | Oriya: 7982 | Somali: 8379 | Volapük: 8679 | ||
| Bihari: 6672 | Galician: 7176 | Kirghiz: 7589 | Pashto, Pushto: 8083 | Spanish: 6983 | Welsh: 6789 | ||
| Breton: 6682 | Georgian: 7565 | Korean: 7579 | Persian: 7065 | Sundanese: 8385 | Wolof: 8779 | ||
| Bulgarian: 6671 | German: 6869 | Kurdish: 7585 | Polish: 8076 | Swahili: 8387 | Xhosa: 8872 | ||
| Burmese: 7789 | Greek: 6976 | Laotian: 7679 | Portuguese: 8084 | Swedish: 8386 | Yiddish: 7473 | ||
| Byelorussian: 6669 | Greenlandic: 7576 | Latin: 7665 | Punjabi: 8065 | Tagalog: 8476 | Yoruba: 8979 | ||
| Cambodian: 7577 | Guarani: 7178 | Latvian, Lettish: 7686 | Quechua: 8185 | Tajik: 8471 | Zulu: 9085 | ||
On the television Page
| Authorization Error. | ●You are trying to play the DivX VOD content that was purchased with a different registration code. You cannot play the content on this unit. (DivX) | 38, 39 |
| Cannot finish recording completely. | ●The programme was copy-protected.●The HDD or disc may be full.●The maximum number of times you can record the program is exceeded. | — — 24 |
| Cannot playback.TV system is different from the setting.To playback, please change the TV System in Setup. | ●You tried to play a title recorded using a different encoding system from that of the TV system currently selected on the unit.Alter the “TV System” setting on this unit to suit. | 70 |
| Cannot record on the disc. | ●The disc may be dirty or scratched. | 10 |
| Unable to format. | ||
| Cannot play on this unit. | ●You tried to play a non-compatible image.●Turn the unit off and re-insert the card. | 37 13 |
| Cannot record. Disc is full. | ●HDD RAM -RW(V) +RW Create space by deleting any unnecessary titles.[Even if you delete recorded content from the DVD-R, DVD-R DL, +R or +R DL there is no increase in disc space. Available space on DVD-RW (DVD-Video format) and +RW increases only when the last recorded title is deleted.]●Use a new disc. | 45, 50, 61 — |
| Cannot record. Maximum number of titles exceeded. | ||
| No Disc | ●The disc may be upside down. | — |
| No folders. | ●There is no compatible folder in this unit. | 7, 37 |
| No SD CARDNo valid SD card. | ●The card is not inserted. If this message is displayed with a compatible card already inserted, turn off the unit, remove and then re-insert the card.●The card inserted is not compatible or the card format does not match. | 13 7 |
| Not enough space in the copy destination. | ●Create space by deleting any unnecessary items.●Delete one or more items registered on the copy list to ensure that the “Destination Capacity” is not exceeded. | 45, 49, 50, 61 54, 57 |
| This is a non-recordable disc. | ●The unit cannot record on the disc you inserted. Insert a DVD-RAM or unfinalized DVD-R, DVD-RW (DVD-Video format), +R or +RW.●You inserted an unformatted DVD-RAM, DVD-RW, +R, +R DL or +RW.●You cannot directly record to a DVD-R DL and +R DL disc on this unit. Record to the HDD and then copy to the disc. | 4–5 61 — |
| This disc is not formatted properly.Format it using DVD Management in FUNCTIONS menu. | ||
| Not enough space on HDD. Space of 4 hours (in SP mode) is necessary.Maximum number of titles is recorded on HDD. Please delete unnecessary titles. | ●-R DL +R DL It is not possible to copy when there is not enough free space on the HDD or when the total number of the recorded titles on the HDD and the titles to be copied are greater than 500.Delete unwanted titles from the HDD. | 50 |
| Rental Expired. | ●The DivX VOD content has zero remaining plays. You cannot play it. (DivX) | 39 |
| ⊗ | ●The operation is prohibited by the unit or disc. | — |
On the unit's display The following messages or service numbers appear on the unit's display when something unusual is detected during startup and use.
| DVD☐(“☐”stands for a number.) | ●The remote control and main unit are using different codes. Change the code on the remote control. Press and hold [ENTER] and the indicated number button at the same time for more than 2 seconds. Press and hold [ENTER] and the indicated number button at the same time for more than 2 seconds. | 23 |
| GUIDE | ●GUIDE Plus+ data is being downloaded. | 20 |
| HARD ERR* | ●If there is no change after turning the unit on and off, consult the dealer where the unit was purchased. | — |
| NoERAS ●You cannot delete | items on this disc.The disc may be damaged. Use a new disc. | — |
| NoREAD | ●The disc is dirty or badly scratched. The unit cannot record, play, or edit.●This message may appear when the DVD-RAM lens cleaner has finished cleaning.Press [▲ OPEN/CLOSE] on the main unit to eject the disc. | 1010 |
| NoWRIT ●You cannot write to | this disc.The disc may be damaged. Use a new disc. | — |
| PLEASE WAIT* | ●There was a power failure or the AC plug was disconnected while the unit was on. The unit is carrying out its recovery process. This process restores the unit to normal operation. The unit is not broken.Wait until the message disappears. | — |
| PROG FULL* | ●There are already 32 timer programmes. Delete unnecessary timer programmes. | 31 |
| SLEEP | ●In order to extend HDD life, the HDD is in SLEEP mode. | 9 |
| SP 35:50LP 151h“SP”,“LP” and the numbers are examples. | ●Available space on the HDD or disc.The example “SP 35:50” is displayed when less than 100 hours are available and the example “LP 151h” is displayed when over 100 hours are available.“SP” and “LP” are recording modes, “35:50” means “35 hours 50 minutes” and “151h” means “151 hours”. | — |
| UNFORMAT* | ●You inserted an unformatted DVD-RAM, DVD-RW, +RW, an unused +R, +R DL or DVD-RW (DVD-Video format) that has been recorded on other equipment.Format the disc to use it.However all the recorded contents on the disc are deleted. | 61 |
| UNSUPPORT* | ●You have inserted a disc the unit cannot play or record on. | 4-6 |
| U59 ●The unit is hot. | The unit switches to standby for safety reasons. Wait for about 30 minutes until the message disappears.Select a position with good ventilation when installing the unit. Do not block the cooling fan on the rear of the unit. | — |
| U61 | ●(When a disc is not inserted) Displays when a malfunction has occurred during recording, playback or copy. This is displayed when the unit is in the recovery process to return to normal operation; it is not broken. Once the display clears you can use the unit again. | — |
| U88 | ●(When a disc is inserted) Displays when there was something unusual detected with the disc while recording, playback or copy. This is displayed when the unit is in the recovery process to return to normal operation; it is not broken. Once the display clears you can use the unit again. | 76 |
| U99 | ●The unit fails to operate properly. Press [∅/l] on the main unit to switch the unit to standby. Now press [∅/l] on the main unit again to turn the unit on. | — |
| H☐☐ or F☐☐ | ●There is something unusual. (The service number displayed after H and F depends on the unit's condition.)●Check the unit using the troubleshooting guide. If the service number does not disappear, do the following.1. Disconnect the plug from the household mains socket, wait a few seconds, then reconnect it.2. Press [∅/l] to turn the power on. (The unit may be fixed.)If the service number does not disappear despite after doing the above, request service from the dealer. Inform the dealer of the service number when requesting service. | —76-80 |
| X HOLD | ●The Child Lock function is activated.Press and hold [ENTER] and [RETURN] simultaneously until “X HOLD” disappears. | 64 |
*The message are alternately displayed.
Frequently asked questions
Refer to the following items if you have any doubts about unit operations.
Set up Page
| What equipment is necessary to play multi channel surround sound? | ●DVD-Video:You can play DVD-Video multi channel surround by digitally connecting an amplifier equipped with a Dolby Digital, DTS or MPEG decoder.●DVD-Audio:This unit plays DVD-Audio in 2 channels. You cannot play multi channel surround sound. | 17— |
| Are the headphones and speakers directly connected to the unit? | ●You cannot directly connect them to the unit. Connect through the amplifier etc. | 17 |
| The television has a Scart terminal and component video input terminal. Which should I connect with? | ●If you have a regular television (CRT: cathode ray tube) we recommend using the Scart terminal. You can enjoy high-quality RGB video from this unit by connecting to an RGB compatible television.If you have an LCD/plasma television or LCD projector compatible with progressive scan, connect through the component video terminals for high-quality progressive video.If you have a CRT television or a multi system television using PAL mode that is compatible with progressive scan, we cannot recommend progressive output as some flickering can occur. | 14–16 |
| Is my television progressive output compatible? | ●All Panasonic televisions that have 625 (576)/50i · 50p, 525 (480)/60i · 60p input terminals are compatible. Consult the manufacturer if you have another brand of television. | — |
Disc
| Can I play DVD-Video, DVD-Audio and Video CDs bought in another country? | ●You cannot play DVD-Video if their region number does not include “2” or “ALL”. Refer to the disc's jacket for more information. | Cover |
| Can a DVD-Video that does not have a region number be played? | ●The DVD-Video region number indicates the disc conforms to a standard. You cannot play discs that do not have a region number. You also cannot play discs that do not conform to a standard. | — |
| Please tell me about disc compatibility with this unit. | ●This unit records and plays DVD-R, DVD-RW (DVD-Video format), +R, and +RW, and plays DVD-RW (DVD Video Recording format). However you cannot directly record to a DVD-R DL or +R DL disc on this unit (playback and copy are possible).●This unit also records and plays high speed recording compatible DVD-R, DVD-R DL, DVD-RW, +R, +R DL, +RW discs. | 4–6— |
| Please tell me about CD-R and CD-RW compatibility with this unit. | ●This unit plays CD-R/CD-RW discs which have been recorded in one of the following standards: CD-DA, Video CD, SVCD (conforming to IEC62107), DivX, MP3 and still pictures (JPEG/TIFF).●You cannot write to a CD-R or CD-RW with this unit. | 6, 37— |
Recording
| Can I record from a commercially purchased video cassette or DVD? | ●Most commercially sold video cassettes and DVD are copy protected; therefore, recording is usually not possible. | — |
| Can DVD-R, DVD-R DL, DVD-RW (DVD-Video format), +R, +R DL and +RW recorded on this unit be played on other equipment? | ●You can play on compatible equipment such as DVD players after finalizing the disc on this unit. However, depending on the condition of the recording, the quality of the disc and capabilities of the DVD player, play may not be possible.●If you play a DVD-R DL, +R DL or +RW, use compatible equipment. | — |
| Can I record digital audio signals using this unit? | ●You cannot record digital signals. The digital audio terminals on this unit are for output only. (The audio recorded using the unit's DV input terminal from a digital video camcorder, for example, is recorded digitally.) | — |
| Can a digital audio signal from this unit be recorded to other equipment? | ●You can record if using the PCM signal. When recording DVD, change the “Digital Audio Output” settings to the following in the Setup menu.-PCM Down Conversion: On-Dolby Digital/DTS/MPEG: PCMHowever, only as long as digital recording from the disc is permitted and the recording equipment is compatible with a sampling frequency of 48 kHz.●You cannot record MP3 signals. | 67 |
| Can I switch to bilingual broadcast during recording? | ●With HDD and DVD-RAM, you can. Just press [AUDIO].●With DVD-R, DVD-RW (DVD-Video format), +R, +RW you cannot. Change before recording with “Bilingual Audio Selection” in the Setup menu. | 3667 |
| Can I high speed copy to a disc? ●Yes, you can.Depending on the disc type, the maximum speed varies. | 51 | |
GUIDE Plus+
| Why is the GUIDE Plus+ system only available after approx. 2 hours? | ●The data rate, at which GUIDE Plus+ is sent, is limited. Depending on the country, signal quality and number of channels received, the time until the GUIDE Plus+ system is ready can vary. | — |
| The Host Channel in France is Canal Plus. Do I have to sign a contract with Canal Plus in order to be able to use the GUIDE Plus+ system? | ●No, you can use the GUIDE Plus+ system without a contract. — | |
| How often is the GUIDE Plus+ data updated and when? | ●The GUIDE Plus+ data is transmitted from the Host Channel (the television station transmitting the television programme list) several times a day. Data will be transmitted at 2:50 AM every day.It takes approximately 2 hours to complete data download.The GUIDE Plus+ data is downloaded automatically when the unit is turned off. | 20 |
| Is it possible to programme a recording, with a start and end time that are different from the GUIDE Plus+ system? | ●You can manually change the start and end time of programmes in the Timer Recording menu. | 30 |
| Does the GUIDE Plus+ system support VPS/PDC? | ●The GUIDE Plus+ system works independently of VPS/PDC. However, you can programme TIMER recordings with VPS/PDC in the Timer Recording menu. | 32 |
| How can I cancel a TIMER programming? | ●The “◎” symbol appears in the GUIDE Plus+ when a Timer Recording is programmed with the GUIDE Plus+ system. To cancel a Timer Recording programming, press [PROG/CHECK]. Select the desired entry and press [*]. | 31 |
| Can I receive GUIDE Plus+ system data via a connected satellite receiver or a Set Top Box? | ●No, only via the built-in tuner. To perform timer recordings with satellite receivers or Set Top Boxes, please use the External Link feature or your unit's manual timer programming. | 30, 33 |
| What happens when I unplug my unit from the power outlet? | ●The GUIDE Plus+ system data will not be updated. If the unit is disconnected from the power supply for a longer period of time, then the GUIDE Plus+ data is lost. Make sure that the time is set again appropriately. | — |
| What happens if my postal code changes, e.g. if I move? | ●Change the postal code in the GUIDE Plus+ Setup menu. If necessary, perform a full Auto-Setup. Saved GUIDE Plus+ data may be lost. | 21 |
Troubleshooting guide
Before requesting service, make the following checks. If you are in doubt about some of the check points, or if the solutions indicated in the chart do not solve the problem, consult your dealer for instructions.
The following do not indicate a problem with this unit:
| ●Regular disc rotating sounds.●Poor reception due to atmospheric conditions.●Image disturbance during search.●Interruptions in reception due to periodic satellite broadcasting breaks.●A sound is heard when the HDD goes into SLEEP mode, or operations are slow to respond in SLEEP mode. | ●Operations do not work due to a poor-quality disc. (Try again using a Panasonic disc.)●The unit freezes due to one of its safety devices being activated. (Press and hold [⏻/l] on the main unit for 10 seconds.)●When the HDD has been automatically placed in the SLEEP mode (→9), or the unit is turned on or off, there may be an unexpected sound. This does not indicate a problem with this unit. |
Power Page
| No power.The unit does not turn on pressing [IMAGE] | ●Insert the AC mains lead securely into a known active household mains socket.●Linked timer recordings with external equipment is in recording standby (“EXT-L” on the unit’s display blinks when [IMAGE] is pressed). Press [EXT LINK] to cancel the recording standby. | 14, 1533 |
| The unit switches to standby mode. | ●One of the unit’s safety devices is activated. Press [IMAGE] on the main unit to turn the unit on. | — |
Displays
| The display is dim. | ●Change “FL Display” in the Setup menu. | 67 |
| “0:00” is flashing on the unit’s display. | ●Set the clock. 71 | |
| The time recorded on the disc and the available time shown do not add up.The play time shown for MP3 does not agree with the actual time. | ●Times shown may disagree with actual times.●Available recording space on DVD-RW (DVD-Video format) or +RW increases only when the last recorded title is deleted. It does not increase if other titles are deleted.●Even if you delete recorded content from the DVD-R, DVD-R DL, +R or +R DL, there is no increase in disc space.●More disc space than the actual recording time is used after recording or editing the DVD-R, DVD-R DL, +R or +R DL 200 times or more.●While searching, the elapsed time may not display correctly. | ——— |
| The clock is not correct. | ●Under adverse reception conditions, etc., the automatic time correction function may not work. In this case, “Automatic” is automatically turned to “Off”. If re-setting the Auto Clock Setting does not work, set the time manually. | 71 |
| Compared to the actual recorded time, the elapsed time displayed is less.(Only when recording in NTSC) | ●The displayed recording/play time is converted from the number of frames at 29.97 frames (equal to 0.999 seconds) to one second. There will be a slight difference between the time displayed and the actual elapsed time (e.g., actual one-hour elapsed time may display as approximately 59 minutes 56 seconds). This does not affect the recording. | — |
| “U88” is displayed and the disc cannot be ejected. | ●The unit is carrying out the recovery process. Do the following to eject the disc.1 Press [⏻/l] on the main unit to switch the unit to standby.If the unit doesn’t switch to standby, press and hold [⏻/l] on the main unit for about 10 seconds. The unit is forcibly switched to standby.2 While the unit is off, press and hold [■] and [CH ∧] on the main unit at the same time for about 5 seconds. Remove the disc. | — |
TV screen and video
| Television reception worsens after connecting the unit. | ●This can occur because the signals are being divided between the unit and other equipment. It can be solved by using a signal booster, available from audio-visual suppliers. If it is not solved by using a signal booster, consult the dealer. | — |
| Status messages do not appear. | ●Select “Automatic” in “On-Screen Messages” in the Setup menu. | 67 |
| The grey background does not appear. | ●Select “On” in “Grey Background” in the Setup menu. | 67 |
| Picture does not appear during timer recording. | ●Timer recordings work regardless whether the unit is on or off. To confirm the timer recording is going to work properly, turn the unit on. | — |
| The 4:3 aspect ratio picture expands left and right. | ●Use the television to change the aspect. If your television does not have that function, set “Progressive” in the Picture menu to “Off”. | 43 |
| ●Check the settings for “TV Aspect” in the Setup menu. | 68 | |
| Screen size is wrong. | ||
| The recorded title is stretched vertically. | ●16:9 aspect programmes are recorded in 4:3 aspect in the following cases.-If you recorded to the HDD or a DVD-RAM and “Rec for High Speed Copy” was set to “On” in the Setup menu.-If you recorded or copied to a DVD-R, DVD-R DL, DVD-RW (DVD-Video format), +R,+R DL or +RW.It may be possible to adjust the display mode on the TV. Refer to your television’s operating instructions. | 66 |
| There is a lot of after-image when playing video. | ●Set “Playback NR” in the Picture menu to “Off”. | 43 |
| When playing DVD-Video using progressive output, one part of the picture momentarily appears to be doubled up. | ●Set “Progressive” in the Picture menu to “Off”. This problem is caused by the editing method or material used on DVD-Video, but should be corrected if you use interlace output. | 43 |
| There is no apparent change in picture quality when adjusted with the Picture menu in the on-screen menus. | ●The effect is less perceivable with some types of video. | — |
| The images from this unit do not appear on the television. | ●Make sure that the television is connected to the AV1 terminal, VIDEO OUT terminal,S VIDEO OUT terminal or COMPONENT VIDEO OUT terminals on this unit. | 14–16 |
| ●Make sure that the television’s input setting (e.g., AV 1) is correct. | — | |
| Picture is distorted. | ●Progressive output is set to on but the connected television is not progressive compatible.Press and hold [■] and [▶] (PLAY) on the main unit at the same time for more than 5 seconds to cancel this setting. The setting will change to interlace.●The unit’s “TV System” setting differs from the TV system used by the disc now playing. While stopped, keep pressing [■] and [▲ OPEN/CLOSE] on the main unit for 5 or more seconds.The system switches from PAL to NTSC or vice versa. | 70 |
Sound Page
| No sound.Low volume.Distorted sound.Cannot hear the desired audiotype. | ●Check the connections and the “Digital Audio Output” settings. Check the input mode on the amplifier if you have connected one.●Press [AUDIO] to select the audio.●Turn off V.S.S. in the following cases.-When using discs that do not have surround sound effects such as Karaoke discs.-When playing bilingual broadcast programmes.●DVD-AThe disc may have a restriction on the method of audio output. When playing multi-channel DVD-Audio, only audio for the two front channels will be output. Refer to the disc’s jacket.●Audio may not be output due to how files were created. (DivX)●If recording to the HDD or a DVD-RAM when “Rec for High Speed Copy” is set to “On”, you can only record either the main or secondary audio of a bilingual broadcast.If you do not intend to copy the title to a DVD-R, DVD-R DL, DVD-RW (DVD-Video format), +R, +R DL or +RW set “Rec for High Speed Copy” in the Setup menu to “Off”. | 14–17,673643—26 |
| Cannot switch audio. | ●You cannot switch the audio in the following cases.-When a DVD-R, DVD-R DL, DVD-RW (DVD-Video format), +R, +R DL or +RW disc is in the disc tray while DVD drive is selected.-When the recording mode is XP and “Audio Mode for XP Recording” is set to “LPCM”.-When “Rec for High Speed Copy” is set to “On”.●When connecting an amplifier using an optical digital cable, you cannot switch the audio if “Dolby Digital” is set to “Bitstream”. Set “Dolby Digital” to “PCM” or connect using audio cables.●There are discs for which audio cannot be changed because of how the disc was created. | —— |
Operation
| Cannot operate the television.The remote control doesn't work. | ●Change the manufacturer code. Some televisions cannot be operated even if you change the code.●The remote control and main unit are using different codes. Change the code on the remote control. | 23 |
| 23 | ||
| Press and hold [ENTER] and the indicated number button at the same time for more than 2 seconds. | ||
| ●The batteries are depleted. Replace them with new ones.●You are not pointing the remote control at the main unit's remote control signal sensor during operation.●Coloured glass may obstruct the signal reception/transmission.●Don't place the signal sensor in direct sunlight or in areas that may be subject to sunlight exposure.●It may be necessary to set the code on the remote control again after changing the batteries.●It may be necessary to set the manufacturer code again after changing the batteries.●The child lock function is activated. | 11——232364 | |
| The unit is on but cannot be operated. | ●Recording drive or playback drive has not been selected properly.●Some operations may be prohibited by the disc.●The unit is hot ("U59" appears on the display). Wait for "U59" to disappear.●One of the unit's safety devices may have been activated. Reset the unit as follows:1 Press [∅/I] on the main unit to switch the unit to standby.If the unit doesn't switch to standby, press and hold [∅/I] on the main unit for about 10 seconds. The unit is forcibly switched to standby.Alternatively, disconnect the AC mains lead, wait one minute, then reconnect it.2 Press [∅/I] on the main unit to switch it on. If the unit still cannot be operated, consult the dealer. | 24, 34—— |
| HDD activation is slow. | ●The HDD is in SLEEP mode. ("SLEEP" appears in the unit's display.) | 9 |
| Cannot eject disc. ●The unit is recording. | ●Linked timer recordings with external equipment is in recording standby ("EXT-L" on the unit's display blinks when [∅ DVD] is pressed). Press [EXT LINK] to cancel the recording standby.●The unit may have a problem. While the unit is off, press and hold [■] and [CH ∧] on the main unit at the same time for about 5 seconds. Remove the disc and consult the dealer. If the Child Lock function is activated, above operation does not work. Cancel the Child Lock function. | —3364 |
| Cannot tune channels. | ●Check the connections.●You must connect to a television equipped with the Q Link function with a fully wired 21-pin Scart cable to download channel presets. | 14–15— |
| Cannot download channel presets from the television. | ||
| Startup is slow. | ●Make sure that "Quick Start" is set to "On".●Startup takes time in the following situations:A disc other than a DVD-RAM is inserted.-The clock is not set.-Immediately after a power failure or the AC mains lead is connected.-For a few minutes after 5:15 am due to system maintenance of this unit. | 68— |
| Takes time to read DVD-RAM. | ●It may take time to read a disc if it is being used for the first time in this unit or it has not been used for a long time. | — |
Recording, timer recording and copying Page
| Cannot record.Cannot copy. | You haven't inserted a disc or the disc you inserted cannot be recorded on. Insert a disc the unit can record onto.The disc is unformatted. Format the disc.RAM-RW(V)+R+R DL+RWThe write-protect tab on the cartridge is set to PROTECT, or the disc is protected with DVD Management.Some programmes have limitations on the number of times they can be recorded (CPRM).You cannot record when there is not enough space or when the number of titles has reached its limit. Delete unwanted titles or use a new disc.You cannot directly record to a DVD-R DL or +R DL disc on this unit.Record to the HDD and then copy to the disc.-R DL+R DLIn the following situations, you cannot copy. Delete unnecessary titles from the HDD and then copy.-If there is not enough space available on the HDD (If you will copy titles from the HDD to a blank disc and fill the entire disc, HDD disc space equivalent to 4 hours of SP mode recording is necessary).-If the number of recorded titles and the number of titles to be copied has exceeded 500.You cannot record and copy on finalized discs. However, you can record and copy again if you format DVD-RW.Due to peculiarities of DVD-R, DVD-R DL, DVD-RW (DVD-Video format), +R, +R DL and +RW you may be unable to record onto them if you either insert and remove the disc or switch the unit on and off while a disc is loaded, a total of fifty times.DVD-R, DVD-R DL, DVD-RW (DVD-Video format), +R, +R DL and +RW recorded on this unit may not be recordable on other Panasonic DVD Recorders.This unit cannot record to discs containing both PAL and NTSC signals. (However, both types of programmes can be recorded onto the HDD.) Play of discs recorded with both PAL and NTSC on another unit is not guaranteed. | 4, 561608145, 50, 61—45, 50, 61——— |
| Cannot record from external equipment. | Check that the connection is correct.Select the input channel ("AV2", "AV3", "AV4" or "DV") for the equipment you have connected. | 14–15, 58— |
| Timer recording does not work properly.ShowView programming does not work properly. | The timer programme is incorrect or different timer programme times overlap. Correct the programme.The programme is not in timer recording standby. (The timer icon “◎” in the timer recording list is not on.)1 Press [PROG/CHECK].2 Press [▲, ▼] to select the programme and press the "Red" button.Set the clock.(If the GUIDE Plus+ system is set)The GUIDE Plus+ data is downloaded at 2:50 AM every day. It takes approximately 2 hours to complete data download. If you want to make timer recordings during this time, set "Night Download" in the GUIDE Plus+ system setup menu to "Off". | 31317121 |
| Timer recording does not stop even when [■] is pressed. | Make sure that the recording drive is selected. Press [DRIVE SELECT] to select the recording drive.When using the linked timer recording with external equipment, press [EXT LINK]. ("EXT-L" disappears.)If you start recording immediately after turning on the unit while "Quick Start" is set to "On", you cannot then stop recording for a few seconds. | 3133— |
| The timer programme remains even after recording finishes. | The timer programme remains if set to daily or weekly. | 30 |
| A part or whole of a recorded title has been lost. | If there is a power failure or the plug is disconnected from the household mains socket while recording or editing, the title may be lost or the HDD/disc may become unusable.You will have to format the disc (HDD RAM-RW(V)+RW) or use a new disc. We cannot offer any guarantee regarding lost programmes or discs. | —61 |
| The programme name and the recorded title do not match. | There was a programme change after timer recording was set but the recorded title still has the old programme name. | — |
| Cannot copy to a DVD-R, etc. disc using the high speed mode. | When recording to the HDD, set "Rec for High Speed Copy" to "On" in the Setup menu.+R+R DL+RWIf recorded in EP or FR (recordings 5 hours or longer) mode, you cannot perform high-speed copy.+R+R DL+RWTitles recorded on other Panasonic DVD recorders with "Rec for High Speed Copy" set to "On", and then copied to the HDD on this unit may not copy to +R, +R DL or +RW discs with high-speed copy. | 26— |
| When copying, it takes a long time even when high speed mode is selected. | Use a disc that is compatible with high speed recording. Even if the disc is high speed recording compatible, the maximum speed may not be possible due to the condition of the disc.It takes longer than normal to copy many titles.You cannot high speed copy to DVD-R titles longer than 6 hours when using other Panasonic DVD Recorders that are not compatible with EP (8 Hours) mode recording. | —— |
| An unusually loud sound is coming from the rotating DVD-R, etc. | When recording or high speed copying to a DVD-R, DVD-R DL, DVD-RW (DVD-Video format), +R, +R DL and +RW the sound of the disc rotating may be louder than normal, however, this is not a problem. | — |
| The DV automatic recording function does not work. | If images cannot be recorded or if the recording is aborted, check the connections and DV equipment settings.You cannot start recording until the images from the DV equipment appear on the television.Recording may not be performed as desired if the time codes on the tape in the DV equipment are not successive.Depending on the equipment, the DV automatic recording may not operate properly.The audio/video recordings are recorded on other than a DV tape. | 58——58 |
Play Page
| Play fails to start even when [▶] (PLAY) is pressed.Play starts but then stops immediately. | ●Insert the disc correctly with the label facing up.●The disc is dirty.●You tried to play a blank disc or disc unplayable on this unit.●You tried to play a +RW that needs to be finalized on the equipment used for recording.●You may be able to copy a “One time only recording” title that was recorded to DVD-RAM using a different Panasonic DVD Recorder to this unit’s HDD, but play is not possible due to copyright protection.●When recording to DVD-RAM using “EP (8 Hours)” mode, play may not be possible on DVD players that are compatible with DVD-RAM. In this case use “EP (6 Hours)” mode.●You cannot play discs during DV automatic recording.●If playing DivX VOD content, refer to the homepage where you purchased it. (DivX) | 34104-6——66——39 |
| Audio and video momentarily pause. | ●This occurs between playlist chapters.●This occurs between chapters and with partially deleted titles on finalized DVD-R, DVD-R DL, DVD-RW (DVD-Video format), +R, +R DL and +RW that have been copied using the high speed mode.●This occurs as scenes change during Quick View.●-R DL +R DL When playing a title recorded on both layers, the unit automatically switches between layers and plays the title in the same way as a normal programme. However, video and audio may momentarily cut out when the unit is switching layers. | ——5 |
| DVD-Video is not played. | ●You have set a ratings level to limit DVD-Video play. Change this setting. | 66 |
| Alternative soundtrack and subtitles cannot be selected. | ●The languages are not recorded on the disc.●You may not be able to use the on-screen menus to change the soundtrack and subtitles on some discs. Use the disc’s menus to make changes. | ——35 |
| No subtitles. ●Subtitles are not recorded on the disc.●Turn the subtitles on. Set “Subtitle” on the on-screen menu to “On”. | ——42 | |
| Angle cannot be changed. | ●Angles can only be changed during scenes where different angles are recorded. | — |
| You have forgotten your ratings password.You want to cancel the ratings level. | ●The ratings level returns to the factory preset. While the disc tray is open, press [DRIVE SELECT] to select the DVD drive, then press and hold [● REC] and [▶] (PLAY) on the main unit at the same time for 5 or more seconds (“INIT” will appear on the unit’s display). | — |
| Quick View does not work. | ●This does not work when audio is other than Dolby Digital.●This does not work when recording is in XP or FR mode. | —— |
| The resume play function does not work. | ●Memorized positions are cancelled when—press [■] several times.—open the disc tray (excluding HDD).—DVD-A CD VCD SD turn off the power.—if a recording or timer recording was executed. | — |
| The Video CD picture does not display properly. | ●When connecting to Multi-system TV, select “NTSC” in “TV System” in the Setup menu.●When connecting to PAL TV, the lower part of the picture cannot be displayed correctly during search. | 70— |
| Time Slip does not work. | ●Time Slip does not work when the unit’s “TV System” settings are different from the title recorded on the disc. | 70 |
| It takes time before play starts. | ●This is normal on DivX video. (DivX) | — |
| Picture stops. | ●Picture may stop if the DivX files are greater than 2 GB. (DivX) | — |
Edit
| Available disc space does not increase even after deleting a title. | ●Available disc space does not increase after deleting on DVD-R, DVD-R DL, +R or +R DL.●Disc space increases only when the last recorded title is deleted on DVD-RW (DVD-Video format) and +RW. The disc space does not increase when any other titles are deleted. | 50— |
| Cannot edit. | ●You may not be able to edit on the HDD if there is no available space.Delete any unwanted titles to create empty space. | 50 |
| Cannot format. | ●The disc is dirty. Wipe with a damp cloth and then wipe dry.●You tried formatting a disc that you may not be able to use in this unit. | 104–6 |
| Cannot create chapters. | ●The unit writes the chapter division information to the disc when you turn it off or remove the disc. The information is not written if there is an interruption to the power before this. | — |
| Cannot mark the start point or the end point during “Partial Delete” operation. | ●These operations are not possible with still pictures.●You cannot set points if they are too close to each other. You cannot set an end point before a start point. | — |
| Cannot delete chapters. | ●When the chapter is too short to delete, use “Combine Chapters” to make the chapter longer. | 45 |
| Cannot create a playlist. | ●You cannot select all the chapters at once in a title if the title also includes still pictures. Select them individually. | — |
Still pictures
| Cannot display Direct Navigator screen. | ●This screen cannot be displayed during recording or copy or while the unit is standing by for linked timer recording with external equipment. | — |
| Cannot edit or format a card. | ●Release the card's protection setting. (With some cards, the “Write Protection Off” message sometimes appears on the screen even when protection has been set.) | 60 |
| The contents of the card cannot be read. | ●The card format is not compatible with the unit. (The contents on the card may be damaged.) Format using FAT 12 or FAT 16 with other equipment or format the card with this unit. ●The card contains a folder structure and/or file extensions that are not compatible with this unit. ●Turn off and then turn on the unit again. ●You can use SD Memory Cards with capacities from 8 MB to 2 GB. | 7, 37617—— |
| Copying, deleting and setting protection takes a long time. | ●When there are a lot of folders and files, it may sometimes take a few hours. ●When repeating copying or deleting, it may sometimes take a long time. Format the disc or card. | —61 |
GUIDE Plus+
| The GUIDE Plus+ System does not receive any data. | ●Check whether GUIDE Plus+ system setup was performed in full.The GUIDE Plus+ system data is updated several times each day. When the unit is first connected, the GUIDE Plus+ system is not yet ready to receive data.It takes approximately 2 hours to complete data download.Depending on when you set up this unit, it may take approximately one day before you can display the television programme list.●Check whether the clock is properly set.●If signal quality is bad (ghost images or limited reception), the GUIDE Plus+ system may not be able to receive any data. | 19–2171— |
| “No Data” is displayed for some or all stations. | ●These stations may not have been able to be identified automatically.For these stations, select the “On” in the SUB MENU under “Editor” and assign the correct reference station manually.●Some stations are not supported by the GUIDE Plus+ system. | 20— |
| The GUIDE Plus+ information is not displayed properly. | ●The reference station is not assigned correctly in “Editor”.Select the correct reference station.●There was a programme change.Check the current programme, e.g. on the Web site for the GUIDE Plus+ system provider or station provider. | 20— |
| The GUIDE Plus+ data transfer was interrupted. | ●The GUIDE Plus+ system shows the data that was received up to the interruption.●The programme information may be incomplete. | —— |
| The GUIDE Plus+ data is not updated. | ●The unit must be in standby mode in order to update the data. If the unit is in EXT LINK mode (EXT-L lights up in the display), then the data update may also not work.●Make sure that the time is set correctly.●Check whether “Off” is set under “Night Download” and change the setting in GUIDE Plus+. | ——21 |
| “No Data” is displayed in the GUIDE Plus+ system. | ●Programme the Timer recording manually or via SHOWVIEW. | 30 |
To reset this unit
| To return all the settings other than the main ones to the factory preset | ●Select “Yes” in “Shipping Condition” in the Setup menu. All the settings except for the ratings level, ratings password and time settings return to the factory preset. The timer recording programmes are also cancelled.●Select “Yes” in “Default Settings” in the Setup menu. All the settings other than the programmed channels, time settings, country settings, language settings, disc language settings, ratings level, ratings password, remote control code, return to the factory presets.●Press and hold [√ CH] and [CH ∧] on the main unit until the Country setting screen appears. All the settings except for the ratings level, ratings password and time settings return to the factory preset. The timer recording programmes are also cancelled. | 68 |
| 68 | ||
| — | ||
| To reset the ratings level settings | ●While the disc tray is open, press [DRIVE SELECT] to select the DVD drive, then press and hold [● REC] and [▶] (PLAY) on the main unit at the same time for 5 or more seconds. | — |
| To restore the unit if it freezes due to one of the safety devices being activated | ●Press and hold [∅/I] on the main unit for 10 seconds. (The settings remain.) | — |
Bitstream
This is the digital form of multi-channel audio data (e.g., 5.1 channel) before it is decoded into its various channels.
CPRM (Content Protection for Recordable Media)
CPRM is technology used to protect broadcasts that are allowed to be recorded only once. Such broadcasts can be recorded only with CPRM compatible recorders and discs.
Decoder
A decoder restores the coded audio signals on DVDs to normal. This is called decoding.
DivX
A video compression format developed by DivXNetworks, Inc. that compresses video files without any considerable loss of video quality.
Dolby Digital
This is a method of coding digital signals developed by Dolby Laboratories. Apart from stereo (2-channel) audio, these signals can also be multi-channel audio. A large amount of audio information can be recorded on one disc using this method. When recording on this unit Dolby Digital (2 channel) is the default audio.
Down-mixing
This is the process of remixing the multi-channel audio found on some discs into two channels. It is useful when you want to listen to the 5.1-channel audio recorded on DVDs through your television's speakers. Some discs prohibit down-mixing and this unit can then only output the front two channels.
DPOF (Digital Print Order Format)
DPOF is the standard printing format for still picture data taken by a digital camera, etc. It is used for automatic printing at a photo developing store or on your home printer.
Drive
In the instance of this unit, this refers to the hard disk (HDD), disc (DVD) and SD card (SD). These perform the reading and writing of data.
DTS (Digital Theater Systems)
This surround system is used in many movie theaters. There is good separation between the channels, so realistic sound effects are possible.
Dynamic range
Dynamic range is the difference between the lowest level of sound that can be heard above the noise of the equipment and the highest level of sound before distortion occurs.
Dynamic range compression means reducing the gap between the loudest and softest sounds. This means you can listen at low volumes but still hear dialogue clearly.
Electronic Programme Guide (EPG)
This is a system used to display the television programme list on televisions, computers and cellular phones. Data is transmitted using the internet or television waves. This unit is compatible with the method using television waves. You can use the television programme list for functions such as timer recording.
Film and video
DVD-Videos are recorded using either film or video. This unit can determine which type has been used, then uses the most suitable method of progressive output.
Film: Recorded at 25 frames per second (PAL discs) or 24 frames per second (NTSC discs). (NTSC discs recorded at 30 frames per second as well.) Generally appropriate for motion picture films.
Video: Recorded at 25 frames/50 fields per second. (PAL discs) or 30 frames/60 fields per second (NTSC discs). Generally appropriate for TV drama programmes or animation.
Finalize
A process that makes playback of a recorded CD-R, CD-RW, DVD-R, etc. possible on equipment that can play such media. You can finalize DVD-R, DVD-R DL, DVD-RW (DVD-Video format), +R, +R DL on this unit.
After finalizing, the disc becomes play-only and you can no longer record or edit. However, finalized DVD-RW can be formatted to become recordable.
Folder
This is a place on the hard disk or memory card where groups of data are stored together. In the case of this unit, it refers to the place where still pictures (JPEG, TIFF) and MPEG2 are stored.
Formatting
Formatting is the process of making media such as DVD-RAM recordable on recording equipment.
You can format DVD-RAM, DVD-RW (only as DVD-Video format), +RW, SD Memory Cards and the HDD or unused +R and +R DL on this unit. Formatting deletes irrevocably all contents.
Frames and fields
Frames refer to the single images that constitute the video you see on your television. Each frame consists of two fields.

- A frame still shows two fields, so there may be some blurring, but picture quality is generally better.
- A field still shows less picture information so it may be rougher, but there is no blurring.
HDD (Hard disk drive)
This is a mass data storage device used in computers, etc. A disk with a surface that has been treated with magnetic fluid is spun and a magnetic head is brought in close proximity to facilitate the reading and writing of large amounts of data at high speed.
JPEG (Joint Photographic Experts Group)
This is a system used for compressing/decoding colour still pictures. If you select JPEG as the storage system on digital cameras, etc., the data will be compressed to 1/10–1/100 of its original size. The benefit of JPEG is less deterioration in picture quality considering the degree of compression.
LPCM (Linear PCM)
These are uncompressed digital signals, similar to those found on CDs. LPCM sound is available when recording in XP mode.
MPEG2 (Moving Picture Experts Group)
A standard for efficiently compressing and expanding colour video. MPEG2 is a compression standard used for DVD and satellite based digital broadcasting. This unit records programmes using MPEG2. MPEG2 moving picture files shot with a Panasonic SD multi-camera, etc. can be copied to the HDD or a DVD-RAM disc.
MP3 (MPEG Audio Layer 3)
An audio compression method that compresses audio to approximately one tenth of its size without any considerable loss of audio quality. You can play MP3 you have recorded onto CD-R and CD-RW.
Pan&Scan/Letterbox
In general, DVD-Video are produced with the intention that they be viewed on a widescreen television (16:9 aspect ratio), so images often don't fit regular (4:3 aspect ratio) televisions. Two styles of picture, "Pan & Scan" and "Letterbox", deal with this problem.
Pan & Scan: The sides are cut off so the picture fills the screen.
Letterbox: Black bands appear at the top and bottom of the picture so the picture itself appears in an aspect ratio of 16:9.

Playback control (PBC)
If a Video CD has playback control, you can select scenes and information with menus.
(This unit is compatible with version 2.0 and 1.1.)
Progressive/Interlace
The PAL video signal standard has 625 (or 576) interlaced (i) scan lines, whereas progressive scanning, called 625p (or 576p), uses twice the number of scan lines. For the NTSC standard, these are called 525i (or 480i) and 525p (or 480p) respectively.
Using progressive output, you can enjoy the high-resolution video recorded on media such as DVD-Video.
Your television must be compatible to enjoy progressive video.
Panasonic televisions with 625 (576)/50i · 50p, 525 (480)/60i · 60p input terminals are progressive compatible.
Protection
You can prevent accidental deletion by setting writing protection or deletion protection.
RGB
This refers to the three primary colours of light, red (R), green (G), and blue (B) and also the method of producing video that uses them. By dividing the video signal into the three colours for transmission, noise is reduced for even higher quality images.
Sampling frequency
Sampling is the process of converting the heights of sound wave (analog signal) samples taken at set periods into digits (digital encoding). Sampling frequency is the number of samples taken per second, so larger numbers mean more faithful reproduction of the original sound.
Thumbnail
This refers to a miniature representation of a picture used to display multiple pictures in the form of a list.
TIFF (Tag Image File Format)
This is a system used for compressing/decoding colour still pictures, a common format for storing high quality images on digital cameras and other devices.
Recording system DVD-RAM : DVD Video Recording format
DVD-R : DVD-Video format
DVD-R DL (Dual Layer): DVD-Video format
DVD-RW: DVD-Video format
+R
+R DL (Double Layer)
+RW
Recordable discs
DVD-RAM: Ver. 2.0
Ver. 2.1/3X-SPEED DVD-RAM Revision 1.0
Ver.2.2/5X-SPEED DVD-RAM Revision 2.0
DVD-R: for General Ver. 2.0
for General Ver. 2.0/4X-SPEED DVD-R Revision 1.0
for General Ver.2.x/8X-SPEED DVD-R Revision 3.0
for General Ver.2.x/16X-SPEED DVD-R Revision 6.0
for DL Ver.3.0
for DL Ver.3.x/4X-SPEED DVD-R for DL Revision 1.0
DVD-RW: Ver. 1.1
Ver. 1.x/2X-SPEED DVD-RW Revision 1.0
Ver. 1.x/4X-SPEED DVD-RW Revision 2.0
Ver. 1.x/6X-SPEED DVD-RW Revision 3.0
+R: Ver. 1.0
Ver. 1.1
Ver. 1.2
Ver. 1.3
for DL Ver.1.0
+RW: Ver. 1.1
Ver.1.2/4X-SPEED
Recording time Maximum 8 hours (using 4.7 GB disc)
XP: Approx. 1 hour, SP: Approx. 2 hours
LP: Approx. 4 hours, EP: Approx. 6 hours/8 hours
Maximum Approx. 284 hours with 160 GB HDD (EP 8 hours mode)
XP: Approx. 36 hours, SP: Approx. 70 hours
LP: Approx. 138 hours, EP: Approx. 212 hours/284 hours
Playable discs
DVD-RAM: DVD Video Recording format
DVD-R: DVD-Video format, MP3, JPEG, DivX
DVD-R DL (Dual Layer): DVD-Video format
DVD-RW: DVD-Video format, DVD Video Recording format
+R, +R DL (Double Layer), +RW
DVD-Video, DVD-Audio, CD-Audio (CD-DA), Video CD,
CD-R/CD-RW (CD-DA, Video CD, SVCD*1, MP3, JPEG, DivX formatted discs)
SVCD *1
Internal HDD capacity: 160 GB
Optical pick-up system with 1 lens, 2 integration units
(662 nm wavelength for DVDs, 780 nm wavelength for CDs)
LASER specification
Class 1 LASER Product (Pickup)
Wavelength:
CD 780 nm wavelength
DVD 662 nm wavelength
Laser power:
No hazardous radiation is emitted with the safety protection
NORSK
Wavelength:
CD
780
DVD
662 nm
Laser power:
Recording system: Dolby Digital 2ch, Linear PCM (XP mode)
Audio in: AV1/AV2 (21 pin), AV3/AV4 (pin jack)
Input level: Standard: 0.5 Vrms, Full scale: 2.0 Vrms at 1 kHz
Input impedance: More than 10 kΩ
Audio out: AV1/AV2 (21 pin), Audio Out (pin jack)
Output level: Standard: 0.5 Vrms, Full scale: 2.0 Vrms at 1 kHz
Output impedance: Less than 1 kΩ
Digital audio out: Optical terminal (PCM, Dolby Digital, DTS, MPEG)
Video
Video system:
SECAM (only input)/PAL colour signal, 625 lines, 50 fields
NTSC colour signal, 525 lines, 60 fields
Recording system:
MPEG2 (Hybrid VBR)
Video in (SECAM/PAL/NTSC):
AV1/AV2 (21 pin), AV3/AV4 (pin jack) 1 Vp-p 75 Ω, termination
S-Video in (SECAM/PAL/NTSC):
AV2 (21 pin), AV3/AV4 (S terminal) 1 Vp-p 75 Ω, termination
RGB in (PAL): AV2 (21 pin) 0.7 Vp-p (PAL) 75 Ω, termination
Video out (PAL/NTSC):
AV1/AV2 (21 pin), Video Out (pin jack) 1 Vp-p 75 Ω, termination
S-Video out (PAL/NTSC):
AV1 (21 pin), S-Video Out (S terminal) 1 Vp-p 75 Ω, termination
RGB out (PAL/NTSC):
AV1 (21 pin) 0.7 Vp-p (PAL) 75 Ω, termination
Component video output (NTSC 480p/480i, PAL 576p/576i)
Y: 1.0 Vp-p 75 Ω, termination
PB: 0.7 Vp-p 75 Ω, termination
PR: 0.7 Vp-p 75 Ω, termination
Television system
| Tuner system | Channel coverage |
| PAL-BGHSECAM-BG(CCIR) | VHF: E2-E12, A-H2 (Italy)UHF: 21-69CATV: S01-S05 (S1-S3),S1-S20 (M1-U10), S21-S41 |
| SECAM-L, L 2 (France) | VHF: 2-10UHF: 21-69CATV: B-Q (100.5 to 299.5 MHz),S21-S41 (299.5 to 467.25 MHz) |
RF converter output:
Not provided
SD card slot
Still picture (JPEG, TIFF) SD Memory Card slot: 1 pc
Compatible media: SD Memory Card, MultiMediaCard
Format: FAT12, FAT16
Image file format:
JPEG conforming to DCF (Design rule for Camera File system),
TIFF (Uncompressed RGB chunky), DPOF Compatible
Number of pixels: 34 × 34 to 6144 × 4096
Thawing time: Approx. 3 sec (6 M pixels, JPEG)
SD Video (MPEG2)
Compatible media: SD Memory Card, MultiMediaCard
Codec: MPEG 2 (SD-Video Entertainment Video Profile)
File Format: SD-Video format conforming
Video Recording conversion and transfer is possible from card to HDD or DVD-RAM disc.
After Video Recording conversion and transfer to HDD or DVD-
RAM disc, the playback is possible.
DV input (PAL/NTSC) IEEE 1394 Standard, 4 pin: 1 pc
Others
Region code: # 2
Operating temperature: 5 to 40 °C
Operating humidity range: 10 to 80 % RH (no condensation)
Power supply: AC 220 to 240 V, 50 Hz
Power consumption: Approx. 31 W
Dimensions (W×D×H): Approx. 430 mm×329 mm×58 mm
Mass: Approx. 4.2 kg
Power consumption in standby mode:
Approx. 2 W (Power Save mode)
Note
Specifications are subject to change without notice.
Mass and dimensions are approximate.
*1 Conforming to IEC62107
2 Not provided for Germany.
*3 Includes miniSD TM cards. (A miniSD TM adaptor needs to be inserted.)
- Usable capacity will be less (SD Memory Card).
Safety precautions
Placement
Set the unit up on an even surface away from direct sunlight, high temperatures, high humidity, and excessive vibration. These conditions can damage the cabinet and other components, thereby shortening the unit's service life.
Do not place heavy items on the unit.
Voltage
Do not use high voltage power sources. This can overload the unit and cause a fire.
Do not use a DC power source. Check the source carefully when setting the unit up on a ship or other place where DC is used.
AC mains lead protection
Ensure the AC mains lead is connected correctly and not damaged. Poor connection and lead damage can cause fire or electric shock. Do not pull, bend, or place heavy items on the lead.
Grasp the plug firmly when unplugging the lead. Pulling the AC mains lead can cause electric shock.
Do not handle the plug with wet hands. This can cause electric shock.
Foreign matter
Do not let metal objects fall inside the unit. This can cause electric shock or malfunction.
Do not let liquids get into the unit. This can cause electric shock or malfunction. If this occurs, immediately disconnect the unit from the power supply and contact your dealer.
Do not spray insecticides onto or into the unit. They contain flammable gases which can ignite if sprayed into the unit.
Service
Do not attempt to repair this unit by yourself. If sound is interrupted, indicators fail to light, smoke appears, or any other problem that is not covered in these instructions occurs, disconnect the AC mains lead and contact your dealer or an authorized service centre. Electric shock or damage to the unit can occur if the unit is repaired, disassembled or reconstructed by unqualified persons.
Extend operating life by disconnecting the unit from the power source if it is not to be used for a long time.
Information on Disposal for Users of Waste Electrical & Electronic Equipment (private households)

This symbol on the products and/or accompanying documents means that used electrical and electronic products should not be mixed with general household waste.
For proper treatment, recovery and recycling, please take these products to designated collection points, where they will be accepted on a free of charge basis. Alternatively, in some countries you may be able to return your products to your local retailer upon the purchase of an equivalent new product.
Disposing of this product correctly will help to save valuable resources and prevent any potential negative effects on human health and the environment which could otherwise arise from inappropriate waste handling. Please contact your
local authority for further details of your nearest designated collection point.
Penalties may be applicable for incorrect disposal of this waste, in accordance with national legislation.
For business users in the European Union
If you wish to discard electrical and electronic equipment, please contact your dealer or supplier for further information.
Information on Disposal in other Countries outside the European Union
This symbol is only valid in the European Union.
If you wish to discard this product, please contact your local authorities or dealer and ask for the correct method of disposal.
Manufactured under license from Dolby Laboratories. "Dolby" and the double-D symbol are trademarks of Dolby Laboratories.
"DTS" and "DTS 2.0+Digital Out" are trademarks of Digital Theater Systems, Inc.
MPEG Layer-3 audio decoding technology licensed from Fraunhofer IIS and Thomson multimedia.
This product incorporates copyright protection technology that is protected by U.S. patents and other intellectual property rights. Use of this copyright protection technology must be authorized by Macrovision, and is intended for home and other limited consumer uses only unless otherwise authorized by Macrovision. Reverse engineering or disassembly is prohibited.
- SD logo is a trademark.
- Portions of this product are protected under copyright law and are provided under license by ARIS/SOLANA/4C.
Official DivX Certified™ product.
Plays DivX®5, DivX®4, DivX®3, and DivX®VOD video content (in compliance with DivX Certified™ technical requirements).
DivX, DivX Certified, and associated logos are trademarks of DivXNetworks, Inc. and are used under license.
GUIDE Plus+, SHOWVIEW are (1) registered trademarks or trademarks of, (2) manufactured under license from and (3) subject of various international patents and patent applications owned by, or licensed to, Gemstar-TV Guide International, Inc. and/or its related affiliates.
GEMSTAR-TV GUIDE INTERNATIONAL, INC. AND/OR ITS RELATED AFFILIATES ARE NOT IN ANY WAY LIABLE FOR THE ACCURACY OF THE PROGRAM SCHEDULE INFORMATION PROVIDED BY THE GUIDE PLUS+ SYSTEM. IN NO EVENT SHALL GEMSTAR-TV GUIDE INTERNATIONAL, INC. AND/OR ITS RELATED AFFILIATES BE LIABLE FOR ANY AMOUNTS REPRESENTING LOSS OF PROFITS, LOSS OF BUSINESS, OR INDIRECT, SPECIAL, OR CONSEQUENTIAL DAMAGES IN CONNECTION WITH THE PROVISION OR USE OF ANY INFORMATION, EQUIPMENT, OR SERVICES RELATING TO THE GUIDE PLUS+ SYSTEM.
Album
Edit 48
Play 40
Angle 42
Aspect. 18
Audio
Attribute 42
Language 42
Playback 36
Receiving 43
Auto Renewal Recording 32
AV2 68
AV-in NR 43
Change Thumbnail 45
Channel
Audio 42
Settings 69
Chapter 36, 44
Chasing playback 27
Child Lock 64
Cleaning
Disc 10
Lens 10
Main unit 10
Clock settings 71
Connection
Aerial 14, 15
Amplifier, system component ..... 17
Digital receiver,
satellite receiver, decoder ..... 15
DV input terminal 58
Television 14–16
Video cassette recorder ..... 14, 15
Copy
SD card (MPEG2)....55
Still picture 56
Title/Playlist 51
Copy (playlist) 47
Country setting 18
CPRM 81
Create Chapter 36,45
Create playlists 46
Default Settings 68
Delete
Album 49
All titles 61
Chapter 45, 47
Playlist 47
Still picture 49
Title 45
DELETE Navigator....50
Dialog Enhancer 43
Direct Navigator ..... 34, 40, 44, 48
Direct TV Recording 59
Discs 4-6
Divide Title 45
DivX. 37–39, 81
DPOF 49,81
DV automatic recording ..... 58
Enabling discs to be played on other equipment—Finalize 62
Ext Link 33,68
Finalize 5,62,81
Flexible Recording 27
Format 5,61,81
FR (Flexible Recording Mode) ..... 25
FUNCTIONS window 64
GUIDE Plus+.... 19–21, 28–29
Important notes for recording ..... 8
JPEG 37,81
Language
Audio 66
Code list 71
On-screen 67
Soundtrack 42,66
Subtitle 42,66
LPCM 67,81
Manual Skip 36
Menu
DivX 38-39
MP3 39
On-screen 42
Setup 65
Mode
Recording 25
Still Mode 66
MP3 37,39
Name
Album 49
Disc 60
Entering text 63
Playlist 47
Title 30,45
Noise reduction (NR)
AV-in NR 43
Playback NR 43
On-screen
Language 67
Menus 42
Status messages 43
Partial Delete 45
PCM Down Conversion 67
Picture settings 43,66
Playback NR 43
Playlist 46
Power Save 68
Progressive 22,43,81
Properties
Playlist 47
Still picture 41
Title 45
Protection
Album 49
Card 60
Cartridge 60
Disc 60
Still picture 49
Title 45
Q Link 59
Quick Start 24
Quick View 35
Ratings level 66
Rec for High Speed Copy ..... 26, 66
Recording 24
Auto Renewal 32
Direct TV Recording 59
DV automatic recording ..... 58
External Link 33
Flexible Recording 27
Mode 25
Relief 32
Timer 28-32
Relief Recording 32
Remote control code 23
Repeat Play 43
Resume play function 35
RGB
Input 68
Output 68
SD card 7,13
Setup menu 65
Shipping Condition 68
SHOWVIEW 30
Simultaneous rec and play .....27
Soundtrack 42
Status messages 43
Still picture
Copy 56
Edit 48
Play 40
Subtitle 42
Teletext 24
TIFF 37,81
Time Slip 36
Timer recording 28–32
Transfer 43
Tuning
Manual 69
Settings 70
TV System (PAL/NTSC) 70
VPS/PDC 32
V.S.S. 43
Environment friendly printed on chlorine free bleached paper.
- OPERATING INSTRUCTIONS
- DVD RECORDER
- PANASONIC®
- REGION NUMBER SUPPORTED BY THIS UNIT
- DEAR CUSTOMER
- CAUTION
- WARNING
- CLASS 1 LASER PRODUCT
- FINNISH
- RECORDING
- PLAYING BACK
- EDITING
- COPYING
- CONVENIENT FUNCTIONS
- REFERENCE
- HDD AND DISCS YOU CAN USE FOR RECORDING AND PLAY
- NOTE
- FINALIZE
- FORMATTING
- YOU CANNOT DIRECTLY RECORD TO A DVD-R DL AND +R DL DISC ON THIS UNIT
- WHEN PLAYING DVD-R DL (DUAL LAYER, SINGLE-SIDED) AND +R DL (DOUBLE LAYER, SINGLE-SIDED)
- REGARDING DVD-AUDIO
- DISCS THAT CANNOT BE PLAYED
- TYPES OF DISC OR TITLE RECORDED ON HDD FOR THE TYPE OF CONNECTED TV
- SUITABLE SD MEMORY CARDS
- STRUCTURE OF FOLDERS DISPLAYED BY THIS UNIT
- THE HDD IS A DEVICE THAT IS NOT BUILT TO WITHSTAND VIBRATION/SHOCK OR DUST
- THE HDD IS A TEMPORARY STORAGE DEVICE
- IMMEDIATELY SAVE (BACKUP) ALL CONTENT AS SOON AS YOU FEEL THERE MAY BE A PROBLEM WITH THE HDD
- SETUP PRECAUTIONS
- CONDITIONS WHERE CONDENSATION MAY OCCUR
- CIGARETTE SMOKE ETC. CAUSES MALFUNCTION OR BREAKDOWN
- WHILE OPERATING
- WHEN MOVING THE UNIT
- HDD RECORDING TIME REMAINING
- WHEN "SLEEP" APPEARS ON THE UNIT'S DISPLAY
- INDEMNITY CONCERNING RECORDED CONTENT
- DISC AND CARD HANDLING
- HOW TO HOLD A DISC OR CARD
- CONCERNING NON-CARTRIDGE DISCS
- IF THERE IS DIRT OR CONDENSATION ON THE DISC
- HANDLING PRECAUTIONS
- UNIT CARE
- DO NOT PLACE THE UNIT ON AMPLIFIERS OR EQUIPMENT THAT MAY BECOME HOT
- INCLUDED ACCESSORIES
- REMOTE CONTROL 1 AC MAINS LEAD
- RF COAXIAL CABLES 2 BATTERIES
- THE REMOTE CONTROL INFORMATION
- BATTERIES
- USE
- REMOTE CONTROL
- MAIN UNIT
- INSERTING, REMOVING THE SD CARD
- OPENING THE COVER INSERTING THE CARD
- REMOVING THE CARD CLOSING THE COVER
- AUTOMATIC DRIVE SELECT FUNCTION
- THE UNIT'S DISPLAY
- STEP 1 CONNECTION
- MAKE SURE TO USE THE PAIR OF SUPPLIED RF COAXIAL CABLES
- USING A 21-PIN SCART CABLE
- A CONNECTING A TELEVISION
- B CONNECTING A TELEVISION AND VCR
- CONNECT THE UNIT DIRECTLY TO THE TELEVISION
- OTHER CONNECTIONS
- CONNECTING A TELEVISION WITH S VIDEO TERMINALS
- CONNECTING A TELEVISION WITH COMPONENT VIDEO TERMINALS
- IF YOU HAVE A REGULAR TELEVISION (CRT: CATHODE RAY TUBE)
- CONNECTING AN AMPLIFIER OR SYSTEM COMPONENT
- CONNECTING AN AMPLIFIER WITH A DIGITAL INPUT TERMINAL
- REQUIRED SETTING
- CONNECTING A STEREO AMPLIFIER
- WHEN THE UNIT IS NOT TO BE USED FOR A LONG TIME
- STEP 2 CHANNEL RECEPTION SETTINGS AND TV ASPECT SETTINGS
- TURN ON THE TELEVISION AND SELECT THE APPROPRIATE AV INPUT TO SUIT THE CONNECTIONS TO THIS UNIT
- PRESS [⏻ DVD] TO TURN THE UNIT ON
- PRESS [▲, ▼] TO SELECT THE TV ASPECT AND PRESS [ENTER]
- REGARDING THE GUIDE PLUS+ SYSTEM
- THE GUIDE PLUS+ SYSTEM IS AVAILABLE IN THE FOLLOWING COUNTRIES: AUSTRIA/BELGIUM/FRANCE/GERMANY/ITALY/NETHERLANDS/SPAIN/SWITZERLAND
- PRESS [GUIDE]
- PRESS [▲, ▼] OR THE NUMBERED BUTTONS TO ENTER THE POSTAL CODE OF YOUR LOCATION AND PRESS [ENTER]
- ONE OF THE FOLLOWING SCREENS WILL APPEAR
- CONFIRM THE MESSAGE ON THE SCREEN
- TO STOP PARTWAY
- REFER TO THE CONTROL REFERENCE ON PAGE
- GUIDE PLUS+ DATA DOWNLOAD
- DOWNLOAD DATA AUTOMATICALLY
- DOWNLOAD DATA MANUALLY
- EDITING PROGRAMME LISTS
- CHANGING THE SETTINGS
- HOST CHANNEL
- SET UP TO MATCH YOUR TELEVISION AND REMOTE CONTROL
- TO ENJOY PROGRESSIVE VIDEO
- TELEVISION OPERATION
- POINT THE REMOTE CONTROL AT THE TELEVISION
- TEST BY TURNING ON THE TELEVISION AND CHANGING CHANNELS
- WHEN OTHER PANASONIC PRODUCTS RESPOND TO THIS REMOTE CONTROL
- HDD
- RAM -R -RW(V)
- R +RW
- SD
- PREPARATION
- PRESS [DRIVE SELECT] TO SELECT THE HDD OR DVD DRIVE
- IF YOU SELECTED THE DVD DRIVE
- PRESS [▲ OPEN/CLOSE] ON THE MAIN UNIT TO OPEN THE TRAY AND INSERT A DISC
- DVD-V DVD-A VCD CD
- PRESS [∧ ∨ CH] TO SELECT THE CHANNEL
- PRESS [REC MODE] TO SELECT THE RECORDING MODE (XP, SP, LP OR EP)
- PRESS [● REC] TO START RECORDING
- TO PAUSE RECORDING
- PRESS [11]
- TO STOP RECORDING
- PRESS [■]
- IF A STATION BROADCASTS TELETEXT INFORMATION
- QUICK START (→ 68)
- SEC. QUICK START FOR RECORDING & EPG DISPLAY
- RECORDING MODES AND APPROXIMATE RECORDING TIMES
- FR (FLEXIBLE RECORDING MODE)
- DISC INSERTION/EJECTION
- WHEN THE FORMAT CONFIRMATION SCREEN IS DISPLAYED
- RAM -RW(V) +R +R DL +RW
- TO FORMAT A DISC
- WHEN REMOVING A RECORDED DISC
- R -R DL -RW(V) +R +R DL
- TO FINALIZE THE DISC
- PRESS [● REC] ON THE MAIN UNIT
- TO OPEN THE TRAY WITHOUT DISC FINALIZATION
- TO SPECIFY A TIME TO STOP RECORDING— ONE TOUCH RECORDING
- HDD RAM -R -RW(V) +R +RW
- DURING RECORDING
- TO CANCEL
- RECORDING SETTINGS FOR HIGH SPEED COPY
- TO RETURN TO THE PREVIOUS SCREEN
- TO EXIT THE SCREEN
- TO START RECORDING
- FLEXIBLE RECORDING
- (RECORDING THAT FITS THE REMAINING DISC SPACE)
- USING “FLEXIBLE REC” IS CONVENIENT IN THESE KINDS OF SITUATIONS
- RAM -R -RW(V) +R +RW
- IF YOU SELECT XP MODE, THE PROGRAMME WILL NOT FIT ONE DISC
- IF YOU SELECT SP MODE, THE PROGRAMME WILL FIT ONE DISC
- WHEN YOU WANT TO START RECORDING
- TO EXIT THE SCREEN WITHOUT RECORDING
- PLAYING WHILE YOU ARE RECORDING
- HDD RAM
- TO STOP PLAY
- TO STOP TIMER RECORDING
- TO EXIT THE DIRECT NAVIGATOR SCREEN
- USING THE GUIDE PLUS+ SYSTEM TO MAKE TIMER RECORDINGS
- BEFORE USING THE GUIDE PLUS+ SYSTEM
- PRESS [▲, ▼, ◀, ▶] TO SELECT THE PROGRAMME
- PRESS [ENTER]
- OPERATIONS IN THE GUIDE PLUS+ SYSTEM
- BASIC OPERATIONS
- SELECTING THE PROGRAMME FROM THE DESIRED CATEGORY
- USING SHOWVIEW NUMBER TO MAKE TIMER RECORDINGS
- PRESS [SHOWVIEW]
- PRESS THE NUMBERED BUTTONS TO ENTER THE SHOWVIEW NUMBER
- MANUALLY PROGRAMMING TIMER RECORDINGS
- PRESS [PROG/CHECK]
- PRESS [▲, ▼] TO SELECT "NEW TIMER PROGRAMME" AND PRESS [ENTER]
- PRESS [▶] TO MOVE THROUGH THE ITEMS AND CHANGE THE ITEMS WITH [▲, ▼]
- DATE
- TO CANCEL RECORDING WHEN RECORDING HAS ALREADY BEGUN
- WHILE THE UNIT IS ON
- PRESS [◀, ▶] TO SELECT "STOP RECORDING" AND PRESS [ENTER]
- TO RELEASE THE UNIT FROM RECORDING STANDBY
- PRESS [▲, ▼] TO SELECT THE PROGRAMME AND PRESS THE "RED" BUTTON
- NOTES ON TIMER RECORDING
- CHECK, CHANGE OR DELETE A PROGRAMME
- ICONS
- MESSAGE DISPLAYED IN THE "DRIVE SPACE" LINE
- TO CHANGE A PROGRAMME
- TO DELETE A PROGRAMME
- TO EXIT THE TIMER RECORDING LIST
- RELIEF RECORDING
- AUTO RENEWAL RECORDING
- VPS/PDC FUNCTION
- MAKING TIMER RECORDINGS ON THE TELEVISION
- RECORDING FROM DIGITAL/SATELLITE RECEIVER OR DECODER
- LINKED TIMER RECORDINGS WITH EXTERNAL EQUIPMENT (DIGITAL/SATELLITE RECEIVER) — EXT LINK
- PLAYING RECORDED VIDEO CONTENTS/PLAYING PLAY-ONLY DISCS
- PRESS [▶] (PLAY)
- SELECTING RECORDED PROGRAMMES (TITLES) TO PLAY—DIRECT NAVIGATOR
- HDD RAM -R -R DL -RW(V) +R +R DL +RW -RW(VR)
- PRESS [DIRECT NAVIGATOR]
- SWITCHING THE DIRECT NAVIGATOR APPEARANCE
- PRESS THE "RED" BUTTON TO SELECT "VIDEO
- HDD TO SORT TITLE VIEW FOR EASY SEARCHING (TABLE DISPLAY ONLY)
- PRESS [▲, ▼, ◀, ▶] TO SELECT THE TITLE AND PRESS [ENTER]
- TO SHOW OTHER PAGES
- WHEN A MENU SCREEN APPEARS ON THE TELEVISION
- DVD-V DVD-A
- VCD
- CHANGING AUDIO DURING PLAY
- PRESS [AUDIO]
- DVD-V, DVD-A
- REGARDING DIVX DISCS, MP3 DISCS AND STILL PICTURES (JPEG/TIFF)
- R CD
- HDD RAM SD
- SELECTING FILE TYPE TO PLAY
- TO SELECT FILE TYPE
- PLAYING DIVX DISCS
- PRESS [▲, ▼] TO SELECT THE TITLE AND PRESS [ENTER]
- USING THE TREE SCREEN TO FIND A FOLDER
- PRESS [▲, ▼] TO SELECT A FOLDER AND PRESS [ENTER]
- REGARDING DIVX VOD CONTENT
- REGARDING DIVX CONTENT THAT CAN ONLY BE PLAYED A SET NUMBER OF TIMES
- PLAYING MP3 DISCS
- PRESS [▲, ▼] TO SELECT THE TRACK AND PRESS [ENTER]
- TO STOP PLAYBACK
- USING THE TREE SCREEN TO FIND A GROUP
- WHILE THE FILE LIST IS DISPLAYED
- PRESS [▲, ▼, ◀, ▶] TO SELECT A GROUP AND PRESS [ENTER]
- PLAYING STILL PICTURES
- HDD RAM -R CD SD
- PRESS [DRIVE SELECT] TO SELECT THE HDD, DVD, OR SD DRIVE
- PRESS [▲, ▼, ◀, ▶] TO SELECT THE ALBUM AND PRESS [ENTER]
- PRESS [▲, ▼, ◀, ▶] TO SELECT THE STILL PICTURE AND PRESS [ENTER]
- TO SELECT THE STILL PICTURES IN ANOTHER FOLDER
- RAM SD
- USING ON-SCREEN MENUS
- COMMON PROCEDURES
- PRESS [DISPLAY]
- MENU ITEM SETTING
- DISC MENU—SETTING THE DISC CONTENT
- SOUNDTRACK
- SUBTITLE
- HDD RAM -R -R DL -RW(V) +R +R DL +RW -RW(VR) (ONLY DISCS THAT CONTAIN SUBTITLE ON/OFF INFORMATION)
- VCD (SVCD) AND DIVX
- ANGLE * DVD-V DVD-A
- AUDIO CHANNEL HDD RAM -RW(VR) VCD AND DIVX
- STILL-P (STILL PICTURE) DVD-A
- SOURCE SELECT (DIVX)
- PBC (PLAYBACK CONTROL → 81) VCD
- AUDIO ATTRIBUTE
- LANGUAGE
- PLAY MENU—CHANGE THE PLAY SEQUENCE
- PICTURE MENU—CHANGE THE PICTURE QUALITY
- SOUND MENU—CHANGE THE SOUND EFFECT
- V.S.S
- HDD RAM -R -R DL -RW(V) +R +R DL +RW DVD-V DVD-A -RW(VR)
- DIALOG ENHANCER
- HDD RAM -R -R DL -RW(V) +R +R DL +RW DVD-V DVD-A -RW(VR) AND DIVX
- OTHER MENU—CHANGE THE DISPLAY POSITION
- POSITION
- STATUS MESSAGES
- PRESS [STATUS]
- EDITING TITLES/CHAPTERS
- TITLE/CHAPTER
- RAM -R -R DL -RW(V) +R +R DL +RW
- EDITING TITLES/CHAPTERS AND PLAYING CHAPTERS
- MULTIPLE EDITING
- FOR YOUR REFERENCE
- CREATING, EDITING AND PLAYING PLAYLISTS
- CREATING PLAYLISTS
- WHILE STOPPED
- PRESS [▲, ▼] TO SELECT "TO OTHERS" AND PRESS [ENTER]
- PRESS [RETURN]
- EDITING AND PLAYING PLAYLISTS/CHAPTERS
- PLAYLIST OPERATIONS
- CHAPTER OPERATIONS
- EDITING AN ALBUM
- EDITING A STILL PICTURE
- PRESS [▲, ▼] TO SELECT THE OPERATION AND PRESS [ENTER]
- AVAILABLE DISC SPACE AFTER DELETING
- USING THE DELETE NAVIGATOR TO DELETE
- PRESS [◀] TO SELECT "DELETE" AND PRESS [ENTER]
- DELETING TITLES OR PICTURES DURING PLAY
- REGARDING COPYING TO DVD-R DL (SINGLE-SIDED, DUAL LAYER) AND +R DL (SINGLE-SIDED, DOUBLE LAYER)
- REGARDING COPYING OF DIGITAL BROADCASTS THAT ALLOW "ONE TIME ONLY RECORDING
- SPEED AND RECORDING MODE WHEN COPYING
- BEFORE COPYING
- WHEN COPYING A TITLE WITH MAIN AND SECONDARY AUDIO
- COPYING 16:9 ASPECT TITLES
- COPY
- HDD → RAM -R -R DL -RW(V) +R +R DL +RW
- PRESS [▲, ▼] TO SELECT "COPY" AND PRESS [ENTER]
- PRESS [▲, ▼] TO SELECT THE TITLE YOU WANT TO COPY AND PRESS [ENTER]
- AFTER YOU START COPYING DVD-R, DVD-R DL, DVD-RW (DVD-VIDEO FORMAT), +R AND +R DL DISCS, THEY BECOME PLAY-ONLY AND YOU CAN NO LONGER RECORD OR EDIT
- PRESS [▲, ▼] TO SELECT THE TITLE AND PRESS [SUB MENU]
- PRESS [▲, ▼] TO SELECT "PROPERTIES" OR "SORT" AND PRESS [ENTER]
- PROPERTIES
- SORT
- PRESS [▲, ▼] TO SELECT THE ITEM AND PRESS [ENTER]
- COPYING USING THE COPYING LIST—ADVANCED COPY
- TO STOP COPYING
- WHEN HIGH-SPEED COPYING
- WHEN NORMAL SPEED COPYING
- RECORDING AND PLAYING WHILE COPYING
- COPY NAVIGATOR/COPYING LIST ICONS AND FUNCTIONS
- SIZE
- TO EDIT THE COPYING LIST
- DELETE ALL
- ADD
- DELETE
- MOVE
- TO CANCEL ALL REGISTERED COPYING SETTINGS AND LISTS
- COPYING A FINALIZED DVD-R, DVD-R DL, DVD-RW (DVD-VIDEO FORMAT), +R AND +R DL
- DVD-V → HDD
- SET "COPY TIME
- SETTING THE UNIT TO COPY ACCORDING TO THE SET TIME
- PRESS [▲, ▼] TO SELECT "START COPYING" AND PRESS [ENTER]
- WHEN THE TOP MENU IS DISPLAYED
- PRESS [▲, ▼, ◀, ▶] TO SELECT THE TITLE YOU WANT TO START COPYING, AND PRESS [ENTER]
- COPYING MPEG2 MOVING PICTURES FROM AN SD CARD
- HOW TO COPY
- COPY DIRECTION
- COPY MODE
- COPYING USING THE COPYING LIST
- REGISTER STILL PICTURES FOR COPY
- TO REGISTER INDIVIDUAL STILL PICTURES
- TO REGISTER ON A FOLDER BY FOLDER BASIS
- ⑦ PRESS [▲, ▼] TO SELECT "START COPYING" AND PRESS [ENTER]
- ⑧ PRESS [◀, ▶] TO SELECT "YES" AND PRESS [ENTER] TO START COPYING
- TO SELECT ANOTHER FOLDER
- TO SWITCH TO ANOTHER HIGHER FOLDER
- COPYING ALL THE STILL PICTURES ON A CARD—COPY ALL PICTURES
- WHEN RECORDING FROM THE UNIT'S DV TERMINAL
- MANUAL RECORDING
- START PLAY ON THE OTHER EQUIPMENT
- TO SKIP UNWANTED PARTS
- DV AUTOMATIC RECORDING (DV AUTO REC)
- AFTER PREPARATION IS COMPLETED, THE FOLLOWING SCREEN APPEARS
- WHEN RECORDING FINISHES
- LINKED OPERATIONS WITH THE TV (Q LINK)
- WHAT IS Q LINK
- SETTING THE PROTECTION
- RAM
- CARTRIDGE-PROTECTION
- PROVIDING A NAME FOR A DISC
- DELETING ALL TITLES AND PLAYLISTS—DELETE ALL TITLES
- DELETING ALL THE CONTENTS OF A DISC OR CARD—FORMAT
- TO STOP FORMATTING RAM
- SELECTING THE BACKGROUND STYLE—TOP MENU
- SELECTING WHETHER TO SHOW THE TOP MENU FIRST - AUTO-PLAY SELECT
- ENABLING DISCS TO BE PLAYED ON OTHER EQUIPMENT–FINALIZE
- AFTER FINALIZING
- CREATING TOP MENU—CREATE TOP MENU
- RW
- SHOW ENTER NAME SCREEN
- TITLE (TIMER RECORDING)
- TITLE
- PLAYLIST
- DISC
- ALBUM OF STILL PICTURES
- PRESS THE "RED" BUTTON OR "GREEN" BUTTON TO SELECT CHARACTER TYPE AND PRESS [ENTER]
- PRESS [▲, ▼, ◀, ▶] TO SELECT A CHARACTER AND PRESS [ENTER]
- PRESS [■] (SET)
- TO END PARTWAY
- TO ADD A NAME
- TO RECALL AN ADDED NAME
- TO DELETE AN ADDED NAME
- PRESS [FUNCTIONS]
- PRESS [▲, ▼] TO SELECT AN ITEM AND PRESS [ENTER]
- CHILD LOCK
- PRESS AND HOLD [ENTER] AND [RETURN]
- SIMULTANEOUSLY UNTIL "X
- HOLD" APPEARS ON THE UNIT'S DISPLAY
- SUMMARY OF SETTINGS
- TUNING
- MANUAL
- RESTART SET UP
- PRESS [▲, ▼] TO SELECT "AUTO-SETUP RESTART" OR "DOWNLOAD FROM TV" AND PRESS [ENTER]
- PRESS [◀, ▶] TO SELECT "YES" AND PRESS [ENTER]
- WHEN THE GUIDE PLUS+ SYSTEM SETTING MESSAGE APPEARS
- TV SYSTEM
- TO CHANGE THE SETTING ALL AT ONCE (PAL←→NTSC)
- MANUAL CLOCK SETTING
- FREQUENTLY ASKED QUESTIONS
- TROUBLESHOOTING GUIDE
- BITSTREAM
- CPRM (CONTENT PROTECTION FOR RECORDABLE MEDIA)
- DECODER
- DIVX
- DOLBY DIGITAL
- DOWN-MIXING
- DPOF (DIGITAL PRINT ORDER FORMAT)
- DRIVE
- DTS (DIGITAL THEATER SYSTEMS)
- DYNAMIC RANGE
- ELECTRONIC PROGRAMME GUIDE (EPG)
- FILM AND VIDEO
- FOLDER
- FRAMES AND FIELDS
- HDD (HARD DISK DRIVE)
- JPEG (JOINT PHOTOGRAPHIC EXPERTS GROUP)
- LPCM (LINEAR PCM)
- MPEG2 (MOVING PICTURE EXPERTS GROUP)
- MP3 (MPEG AUDIO LAYER 3)
- PAN&SCAN/LETTERBOX
- PLAYBACK CONTROL (PBC)
- PROGRESSIVE/INTERLACE
- PROTECTION
- RGB
- SAMPLING FREQUENCY
- THUMBNAIL
- TIFF (TAG IMAGE FILE FORMAT)
- RECORDABLE DISCS
- PLAYABLE DISCS
- LASER SPECIFICATION
- NORSK
- VIDEO
- SD CARD SLOT
- OTHERS
- SAFETY PRECAUTIONS
- PLACEMENT
- VOLTAGE
- AC MAINS LEAD PROTECTION
- FOREIGN MATTER
- SERVICE
- INFORMATION ON DISPOSAL FOR USERS OF WASTE ELECTRICAL & ELECTRONIC EQUIPMENT (PRIVATE HOUSEHOLDS)
- FOR BUSINESS USERS IN THE EUROPEAN UNION
- INFORMATION ON DISPOSAL IN OTHER COUNTRIES OUTSIDE THE EUROPEAN UNION
- ALBUM
- AUDIO
- CHANNEL
- CLEANING
- CONNECTION
- MENU
- MODE
- NAME
- NOISE REDUCTION (NR)
- ON-SCREEN
Brand : PANASONIC
Model : DMR-EH56
Category : DVD Recorder