
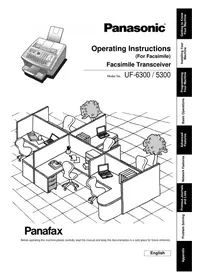
Panafax UF-5300 - Fax machine PANASONIC - Free user manual and instructions
Find the device manual for free Panafax UF-5300 PANASONIC in PDF.


| Product Type | Fax Machine |
| Manufacturer | Panasonic |
| Model | Panafax UF-5300 |
| Technology | Plain Paper Laser |
| Dimensions (W x D x H) | 355 x 265 x 150 mm |
| Weight | Approx. 7 kg |
| Power Supply | 220-240 V AC, 50 Hz |
| Power Consumption | Standby: 10 W, Transmission: 20 W |
| Paper Handling | Up to A4/Letter, Automatic Document Feeder (ADF) for up to 30 sheets |
| Transmission Speed | Up to 14.4 kbps (approx. 6 sec/page) |
| Memory Capacity | Up to 30 pages for memory transmission |
| Resolution | Standard: 203 x 98 dpi, Fine: 203 x 196 dpi, Superfine: 203 x 392 dpi |
| Gray Scale | 64 levels |
| Auto Redial | Yes, up to 3 times at 5-minute intervals |
| One-Touch Dialing | Up to 20 numbers |
| Speed Dialing | Up to 60 numbers |
| Activity Log | Up to 30 transactions |
| Maintenance & Cleaning | Clean scanner glass with soft, lint-free cloth; replace toner cartridge when low |
| Safety Precautions | Unplug before cleaning; avoid exposure to moisture; use only in a well-ventilated area |
| Spare Parts & Repairability | Replaceable toner cartridge (Model: KX-FA30), ADF roller kit available |
| General Information | Compatible with public switched telephone networks (PSTN); designed for office use |
Frequently Asked Questions - Panafax UF-5300 PANASONIC
User questions about Panafax UF-5300 PANASONIC
0 question about this device. Answer the ones you know or ask your own.
Ask a new question about this device
Download the instructions for your Fax machine in PDF format for free! Find your manual Panafax UF-5300 - PANASONIC and take your electronic device back in hand. On this page are published all the documents necessary for the use of your device. Panafax UF-5300 by PANASONIC.
USER MANUAL Panafax UF-5300 PANASONIC
Panasonic®
Operating Instructions
(For Facsimile)
Facsimile Transceiver
Model No. UF-6300 / 5300

Panafax
Before operating this machine, please carefully read this manual, and keep this documentation in a safe place for future reference.
English
Main Unit and Accessories
Unpack the carton and check that you have all the accessories illustrated. (Accessories included in the Main Unit may be different depending on the destinations.)


■ Installing the Accessories
![Recording Paper Tray: Hook the projections into the square holes on the machine. Handset [Available as an Option], Handset Cord [Available as an Option], Handset Cradle [Available as an Option]: Hook the projections into the square holes on the machine. Connect the cable into the HANDSET jack on the…](/content/2026/06/1328210/images/5e5e0dae8efd1d1e9ff4f6816fbcc53ae044e0d6dca3b9ca8174e3853ad414d5.jpg)
NOTE
- The shape of the telephone line cable and power cord may differ depending on each country's regulation or specification.
- The Telephone Line Cable Adapter is available in certain countries only.
- For some countries, the handset may not be available because of the country's regulation or specification.
Table of Contents
Getting to Know Your Machine
Main Unit and Accessories.... 2
Safety Information 7
Precautions.... 12
External View 13
Control Panel 14
Function Key.... 16
Connecting the Telephone Line Cable and Power Cord.... 17
Installing Your Machine
Installing the Toner Cartridge 18
Loading the Recording Paper 20
How to Load the Recording Paper 20
Adjusting the Paper Cassette for the Paper Length 22
How to Adjust the Paper Cassette for the Paper Length.... 22
Adjusting the Paper Cassette for the Paper Width 23
How to Adjust the Paper Cassette for the Paper Width 23
Setting the Dialling Method (Tone or Pulse) 24
Adjusting the Volume 25
User Parameters.... 26
General Description.... 26
Setting the Date and Time.... 26
Setting Your LOGO 27
Setting Your Character ID 28
Setting Your ID Number (Fax Telephone Number) 29
Programming Your Machine
One-Touch/Abbreviated Dialling Numbers 30
Entering One-Touch/Abbreviated Dialling Numbers 30
Editing One-Touch/Abbreviated Dialling Numbers 32
Printing Out a Directory Sheet.... 34
Customizing Your Machine 35
General Description.... 35
Setting the Fax Parameters.... 35
Fax Parameter Table.... 36
Basic Operations
Loading Documents.... 42
Documents You Can Send.... 42
Documents You Cannot Send.... 42
How to Load Documents.... 43
Basic Transmission Settings 44
General Description.... 44
Contrast.... 44
Resolution 44
Verification Stamp 45
Communication Journal (COMM. JOURNAL) 46
Table of Contents
Basic Operations
Sending Documents.... 47
General Description 47 Memory Transmission.... 49 Wrong Transmission Prevention Function 54 Direct Transmission 57 Voice Mode Transmission.... 60 Transmission Reservation 62 Redialling 65
Receiving Documents.... 66
■ Reception Modes 66 Telephone Mode 67 Fax / Tel Auto Switching Mode 68 Fax Mode 69 TAM (Telephone Answering Machine) Interface Mode.... 70 Print Reduction 72 Receiving Oversize Documents.... 73 Substitute Memory Reception.... 74 Print Collation Mode.... 74
Making Copies 75
Copies.... 75
Advanced Features
Timer Controlled Communications 76
General Description 76 Deferred Transmission.... 76 Deferred Polling 77
Polling 78
General Description 78 Setting the Polling Password 78 Preparing to be Polled 79 To Poll Documents from Another Station.... 80
Program Keys 81
General Description 81 Setting for Group Dialling.... 81 Setting for Deferred Transmission 82 Setting for Deferred Polling 83 Setting for Normal Polling 84 Setting for One-Touch Key 85 Changing or Erasing the Program Key Settings 86
Edit File Mode 87
General Description 87 Printing a File List 87 Viewing the Contents of a File List 88 Changing the Start Time or the Station of a File 89 Deleting a File 90 Printing Out a File 91 Adding Documents into a File 92 Retry an Incomplete File 93
Table of Contents
Access Code 94
General Description 94 Setting the Access Code 94 Operating Your Machine with the Access Code (Restrict all operations) 95 Operating Your Machine with the Access Code (Restrict access of Fax Parameters only) 95
Receive To Memory 96
General Description 96 Setting the RCV To Memory Password 96 Setting RCV To Memory 96 Printing Out Documents 97
Possibility of filtering unnecessary incoming faxes 98
General Description 98 Set the Filter 99 Receive without ID 100 Received ID Print 101 Register Junk Fax Number 102
Distinctive Ring Detector (DRD) 103
General Description 103
Fax Cover Sheet 104
General Description 104 To use the Fax Cover Sheet 104
PIN Code Access 106
General Description 106 Selecting the Access Method (Prefix or Suffix) 106 Dialling with a PIN Code 107
Fax Forward 108
Setting Fax Forward.... 108
Network Features
Selective Reception 109
General Description.... 109 Setting the Selective Reception 109
Password Communications 110
General Description.... 110 Compatibility with Other Machines.... 110 Setting Password Transmission.... 111 Setting Password Reception 112 Using Password Transmission 113 Using Password Reception 114
Table of Contents
Confidential Mailbox 115
General Description 115 Confidential Mailbox.... 115 Sending a Confidential Document to a Remote Station's Mailbox.... 116 Polling a Confidential Document from a Remote Station's Mailbox 117 Receiving a Confidential Document to Your Machine's Mailbox.... 118 Storing a Confidential Document in Your Machine's Mailbox 119 Printing Out a Confidential Document from Your Machine's Mailbox 120 Deleting a Confidential Document Stored in Your Machine's Mailbox 121
Sub-addressing 122
General Description 122 To set the Sub-address into a One-Touch/ABBR. Dialling Numbers.... 123 To send a Document with Sub-address.... 124
Printout Journals and Lists
Journals and Lists......125
General Description 125 Transaction Journal 125 Individual Transmission Journal (IND. XMT JOURNAL) 126 Communication Journal (COMM. JOURNAL) 129 One-Touch/Abbreviated and Directory Search List 131 Program List.... 134 FAX Parameter List.... 135 Toner Cartridge Order Forms 136
Problem Solving
Troubleshooting 137
Troubleshooting 137 Information Codes.... 141 Clearing a Recording Paper Jam.... 144 Clearing a Document Jam 145 Cleaning the Document Scanning Area.... 146 Cleaning the Printer Roller.... 147 Adjusting the Automatic Document Feeder (ADF) 148 Verification Stamp 149 Checking the Telephone Line 150
Appendix
Specifications....151
Recording Paper Specifications 153
Options and Supplies 154
Regulatory Information....155
Glossary 158
ITU-T Image No. 1 161
Index 162
For Your Safety
To prevent severe injury and loss of life, read this section carefully before using your machine to ensure proper and safe operation of your machine.
■ This section explains the Warnings and Cautions used in this Operating Instructions manual.

WARNING
Denotes a potential hazard that could result in serious injury or death.

CAUTION
Denotes hazards that could result in minor injury or damage to the machine.
This section also explains the graphic symbols used in this Operating Instructions manual.


These symbols are used to alert operators to a specific operating procedure that must not be performed.


These symbols are used to alert operators to a specific operating procedure that must be emphasized in order to operate the machine safely.

This symbol is used to alert operators to a heated surface that may cause burns and requires close attention.

WARNING
Power and Ground Connection Cautions

Ensure that the plug connection is free of dust. In a damp environment, a contaminated connector can draw a significant amount of current that can generate heat and eventually cause fire if left unattended over an extended period of time.

Always use the power cord provided with your machine.
If you use a cord with an unspecified current rating, the machine or plug may emit smoke or become hot to the touch.

Do not attempt to repair, pull, bend, chafe, or otherwise damage the power cord. Do not place a heavy object on the cord. A damaged cord can cause fire or electric shocks.

Never touch a power cord with wet hands. Danger of electric shock exists.

If the power cord is broken or insulated wires are exposed, contact the authorized Panasonic dealer for a replacement. Using a damaged cord can cause fire or electric shocks.

When disconnecting the machine, grasp the plug instead of the cord. Pulling on a cord forcibly can damage it and cause fire, or electric shock.

Stop operation immediately if your machine emits smoke, excessive heat, unusual noise or smell, or if water is spilt onto the machine. These conditions can cause fire. Immediately unplug the machine and contact the authorized Panasonic dealer.

When the machine is not used over an extended period of time, unplug it. If an unused machine is left connected to a power source for a long period, degraded insulation can cause electric shocks, current leakage or fire.

Be sure to unplug the machine before accessing the interior of the machine for cleaning, maintenance or fault clearance. Access to a live machine's interior can cause electric shock.

Once a month, unplug the machine and check the power cord for the following. If you notice any unusual condition, contact the authorized Panasonic dealer.
● The power cord is plugged firmly into the receptacle. ● The plug is not excessively heated, rusted, or bent. ● The plug and receptacle are free of dust. ● The cord is not cracked or frayed.
Operating Safeguards

Do not touch areas where these caution labels are attached to, the surface may be very hot and may cause severe burns.

Do not place any liquid container such as a vase or coffee cup on the machine. Spilt water can cause fire or shock hazard.

Do not place any metal parts such as staples or clips on the machine. If metal and flammable parts get into the machine, they can short-circuit internal components and cause fire or electric shocks.

If debris (Metal or liquid) gets into the machine, unplug the machine immediately.
Contact the authorized Panasonic dealer. Operating a debris-contaminated machine can cause fire or electric shock.

Never open or remove machine covers that are secured with screws unless specifically instructed in the "Operating Instructions". A high-voltage component can cause electric shocks.

Do not try to alter the machine configuration or modify any parts. An unauthorized modification can cause smoke or fire.
Consumable Safeguards

Never dispose of toner, Toner Cartridge, or a Toner Waste Container into an open flame. Toner remaining in the cartridge can cause an explosion, burns, and/or injuries. For disposal or recycling information, contact your local authorities or your local waste officials.

Keep stamp out of the reach of children. If a stamp is swallowed accidentally, get medical treatment immediately.

CAUTION
Installation and Relocation
Cautions

Do not place the machine near heaters or volatile, flammable, or combustible materials such as curtains that may catch fire.

Do not place the machine in a hot, humid, dusty, or poorly ventilated environment. Prolonged exposure to these adverse conditions can cause fire or electric shocks.

Place the machine on a level and sturdy surface that can withstand the weight of the machine. (The machine weight without optional unit: 9.3 kg) If tilted, the machine may tip over and cause injuries.

When relocating the machine, contact the authorized Panasonic dealer.

When moving the machine, be sure to unplug the power cord from the outlet. If the machine is moved with the power cord attached, it can cause damage to the cord which could result in fire or electric shock.
Operating Safeguards

Do not place a magnet near the safety switch of the machine. A magnet can activate the machine accidentally, resulting in injuries.

Do not use a highly flammable spray or solvent near the machine. It can cause fire.

Never touch a labelled area. You can get burnt. If a sheet of paper is wrapped around the heat roller, do not try to remove it yourself to avoid injuries or burns. Unplug the machine immediately and contact the authorized Panasonic dealer.

Do not use conductive paper, e.g., carbon paper, and coated paper. When a misfeed occurs, they can cause a short-circuit and fire.

Do not place any heavy object on the machine. An off-balance machine can tip over or the heavy object can fall, causing damage and/or injuries.

Keep the room ventilated when using the machine for an extended period of time to minimize the ozone density in the air.

When copying with the ADF open, do not look directly at the exposure lamp. Direct eye exposure can cause eye fatigue or eye injury.

When removing misfed paper, make sure that no pieces of torn paper are left in the machine. A piece of paper remaining in the machine can cause fire. If a sheet of paper is wrapped around the heat roller or when clearing a misfed paper that is difficult or impossible to see, do not try to remove it by yourself. Doing so can cause injuries or burns. Unplug the machine immediately and contact the authorized Panasonic dealer.

If accessing the inner components of the machine to clear misfed paper, etc., exercise care not to touch heated areas, or you may get burned.
For Your Safety

CAUTION
Caution on Toner Use
■Avoid ingestion, inhalation, eye or skin contact. - If ingestion occurs, drink several glasses of water to dilute stomach contents. - If inhalation occurs, exit the area immediately into the fresh air. - If skin contact occurs, wash thoroughly with soap and water. - If eye contact occurs, flush thoroughly with water. - In all cases, seek medical treatment if adverse symptoms occur.
■When the toner cartridge is at the end of its life, do not dispose of it into a fire. It can cause an explosion and you can get burnt.
- Keep the toner cartridge out of children's reach. Store in a cool and dry place (low humidity). Do not unseal the toner cartridge unless you are ready to use it.
Black Toner
INGREDIENTS:
Stylenes / butylacrylate copolymer Mn-Mg-Sr ferrite powder Polyethyele Carbon Black (1333-86-4) Amorphous silica
Others
The machine has a built-in circuit for protection against lightning-induced surge current. If lightning strikes in your neighborhood, maintain ample distance from the machine and do not touch it until the lightning has stopped. If you notice flickering or distorted images or noises on your audio-visual units, your machine may be causing radio interference. Unplug the machine and if the interference disappears, the machine is the cause of the radio interference. Perform the following procedure until the interference is corrected: - Move the machine and the TV and/or radio away from each other. - Reposition or reorient the machine and the TV and/or radio. - Unplug the machine, TV and/or radio, and replug them into outlets operating on different circuits. - Reorient the TV and/or radio antennas and cables until the interference stops. For an outdoor antenna, ask your local electrician for support. - Use a coaxial cable antenna.

CAUTION
Denotes hazards that could result in minor injury or damage to the machine.
- DISCONNECT ALL POWER TO THE MACHINE BEFORE COVER(S) ARE REMOVED. REPLACE THE COVER(S) BEFORE THE MACHINE IS RE-ENERGIZED.

CAUTION
Denotes hazards that could result in minor injury or damage to the machine.

Do not place the machine near heaters or volatile, flammable, or combustible materials such as curtains that may catch fire.

Avoid exposure to direct sunlight.

Install the machine on a flat surface, leave at least 4 inches (10 cm) of space between the machine and other objects.

Do not block the ventilation openings.

Do not place any heavy object on the machine. An off-balance machine can tip over or the heavy object can fall, causing damage and/or injuries.
Installation
The maximum power consumption is approx. 490 W. A properly wired (grounded), dedicated, 10A, 220-240V AC outlet is required. Do not use an extension cord. The power cord on this machine must be used to disconnect the main power. Please ensure that the machine is installed near a wall outlet and is easily accessible.
The machine should not be installed in areas with the following conditions:
Extremely high or low temperature and humidity. The machine should be installed under the following ambient conditions:
Temperature: 10-35°C
Relative Humidity: 15-70%
● In areas with chemical fume concentration.
● With unstable or uneven conditions (floors, etc.).
● Direct exposure to sunlight or fluorescent light.
● In areas of high dust concentration.
● Directly in the air conditioning flow.
● In areas of poor ventilation.
● In areas with extreme vibration.
Supplies
■ Store the toner and paper in a cool area with low humidity. ■ Use of other than genuine Panasonic supplies can damage the machine. This may void the warranty of the machine and supplies. Be sure to use only genuine Panasonic Toner designed for the machine. ■ Dispose of Toner Cartridge according to your local regulations.
Illegal Copies
It is unlawful to make copies of certain documents.
Copying certain documents may be illegal in your country. Penalties of fines and/or imprisonment may be imposed on those found guilty. The following are examples of items that may be illegal to copy in your country.
Currency ● Bank notes and cheques ● Bank and government bonds and securities ● Passports and identification cards ● Copyright material or trademarks without the consent of the owner ● Postage stamps and other negotiable instruments
This list is not inclusive and no liability is assumed for either its completeness or accuracy. In case of doubt, contact your legal counsel.
Notice:
Install your machine near a supervised area to prevent illegal copies from being made.
Others
Panasonic is not responsible for data loss and any consequence caused by computer virus infection or external shocks.

Precautions
■ Laser Safety
LASER SAFETY
This unit employs a laser. Only qualified service personnel should attempt to service this device due to possible eye injury.
CAUTION:
USE OF CONTROLS, ADJUSTMENTS OR PERFORMANCE PROCEDURES OTHER THAN THOSE SPECIFIED HEREIN MAY RESULT IN HAZARDOUS RADIATION EXPOSURE.

■ Caution Label


IMPORTANT SAFETY INSTRUCTIONS
When using your telephone equipment, basic safety precautions should always be followed to reduce the risk of fire, electric shock, and injury to persons, including the following:
DO NOT USE THIS PRODUCT NEAR WATER, FOR EXAMPLE, NEAR A BATH TUB, WASH BOWL, KITCHEN SINK OR LAUNDRY TUB, IN A WET BASEMENT OR NEAR A SWIMMING POOL. ● AVOID USING A TELEPHONE (OTHER THAN A CORDLESS TYPE) DURING AN ELECTRICAL STORM. THERE MAY BE A REMOTE RISK OF ELECTRIC SHOCK FROM LIGHTNING. ● DO NOT USE THE TELEPHONE TO REPORT A GAS LEAK IN THE VICINITY OF THE LEAK.
SAVE THESE INSTRUCTIONS.

NOTE
- The handset may not be available in some countries because of the country's regulation or specification.

| No. | Icon Contents No. Icon Contents | |||
| 1 | Enerav Saver[4T2T] | - Used to switch the machine into energy saving mode.Parameter No.34 (ENERGY SAVER MODE) (See page 38) | 2 | Contrast- Used to set to Normal, Lighter or Darker. (See page 44) |
| 3 |  | - Used to turn the verification stamp ON or OFF.Lights when the verification stamp is set to ON. | 4 | Resolution- Used to set to Standard, Fine, Super-Fine or Halftone.(See page 44) |
| 5 | [C70D] | - Use this button when resetting all the previously set functions. | 6 | Function- Start or select the function.(See page 16) |
| 7 | Director Search | Used for the following:- Used to carry out setting operations.- Search for a station name. (See pages 52 to 59)- Adjust the monitor and ringer volume. (See page 25)- Move the cursor while entering numbers and characters.- Search the station name for Directory Search Dialling.- Confirm the entered station for multi-station communication.- Confirm the current communication modes (Ex: Page number, ID, Dialled Telephone number, File number) when the unit is ON LINE. | ||
| No. | Icon Contents No. Icon Contents | ||
| 8 | N[X4X6] - Used to start On-Hook Dialling. (See page 61) | 9 | [60Y2] - Used to separate the Sub-Address from the telephone number. |
| 101 | [XT4X6] - Used to start Abbreviated Dialling.(See pages 51 and 58) | ○ |  - Used to enter a pause when entering or dialling a telephone number, or to redial the last dialled number. - Used to enter a pause when entering or dialling a telephone number, or to redial the last dialled number. |
| 12 |  Keypad- Used for manual number dialling, entering phone numbers, and numerical entries.* Key- Used to temporarily change the dialling mode to Tone when Pulse mode is set. Keypad- Used for manual number dialling, entering phone numbers, and numerical entries.* Key- Used to temporarily change the dialling mode to Tone when Pulse mode is set. | ||
| 1314 | Start - Press this key to start activation. - Press this key to start activation. | ○ | Copy - Used for copy operations. (See page 75) - Used for copy operations. (See page 75) |
| 15 | Stop - Press this button when you want to stop communication, registration operation, or audible tone. - Press this button when you want to stop communication, registration operation, or audible tone. | 16 | [5037] Active LED lamp (GREEN) Flashes: When machine is active.Lights: When the received fax message is in memory. |
| 17 | Status LED lamp (RED)- Lights/Flashes when trouble occurs.Lights: Machine has detected a trouble status- No paper in the selected tray or toner has run out.- Machine has detected trouble, such as paper misfed or jammed.Flashes: Machine detected an alarm status- No paper in the tray. (Tray not selected)- Toner is getting low, etc. | ||
| 18 | One-Touch Keys (01-32)- Used for One-Touch Dialling. (See pages 51 and 58)Program Keys (P1-P8)- Used to enter long dialling procedures or Group Dialling Number keys.(See pages 81 to 86)Character Keys- The One-Touch Keys and Program Keys serve as character and symbol input keys which are used to enter your LOGO, character ID and station name.+-%- Used to enter a symbol for LOGO, character ID and station name.Use ▼ or ▲ to select the symbols.- Used to insert a space while entering LOGO, character ID and station name.▲- Used to switch between upper and lower character set. | ||
Any function can be started by first pressing and then entering the function number, or by pressing the ▼ scroll keys repeatedly until the desired function appears on the display.
![graph TD A["Function"] --> B["1 Deferred Communication"] A --> C["2 Advanced Communication"] A --> D["3 Polling"] A --> E["6 Print List"] A --> F["7 Set Mode"] A --> G["8 Select Mode"] A --> H["9 Edit File Mode"] B --> B1["1 = XMT\n2 = Polling"] C --> C1["1 = Not Used\n2 = Confidential Communication…](/content/2026/06/1328210/images/baa0ed4e2502ff08f4731c25bb5dc1e0062f2db1c1cc77bea38a0287fc2d5f1f.jpg)
Connecting the Telephone Line Cable and Power Cord

■ Telephone Line Cable
Plug one end of the telephone line cable into the telephone jack supplied by the telephone company and the other end into the LINE jack on the left side of the machine.
NOTE
- The shape of the telephone line cable and power cord may differ according to regulations and specifications in the specific country.
- The Telephone Line Cable Adapter is available in certain countries only.
Installing the Toner Cartridge
1
Unpack the Toner Cartridge and rock it back and forth as shown for 5 or 6 times to even the toner inside.
2
Remove the protective seal.
Note: Pull on the seal slowly and straight out.
3
Open the Printer Cover.
4
Align the projections on both sides of the Toner Cartridge with the grooves in the machine as shown and insert the Toner Cartridge into the machine.
Note: Lock the Toner Cartridge into place by pressing the handle down and then pushing towards the rear of the machine.
5
Close the Printer Cover.
6
If you are replacing the Toner Cartridge, it is recommended to clean the Printer Roller to maintain good printing quality. To clean the Printer Roller, follow the procedure on page 147.
NOTE
- Used toner cartridge should be disposed of properly according to local regulations.
Loading the Recording Paper
How to Load the Recording Paper
Paper Specifications
In general, most bond papers will produce excellent results. Most photocopy papers will also work very well. There are many "name" and "generic" brands of paper available. We recommend that you test various papers until you obtain the desired results. For detailed recommended paper specifications, (See page 153).
1
Lift up the Paper Cassette slightly and slide it out of the machine.
2
Remove the Paper Cassette Cover.
3
- Remove the Shipping Screw securing the Pressure Plate.
- Store the screw by attaching it to the post provided under the Paper Cassette Cover for future use.
4
- Load the paper into the Paper Cassette. Slide the paper width guide to the left until it lightly touches the stack of paper without bending the paper. The paper must fit squarely and firmly between the Paper Width Guide and the right side of tray. If it does not, the paper may feed into the printer incorrectly resulting in a paper jam.
Caution: Make sure that the paper is set under the metal Paper Separation Clips and that it does not exceed the Maximum Paper Capacity Mark. You can load about 250 sheets (75g/m² weight). For paper specifications. (See page 153)
- Re-install the Paper Cassette Cover.
- Slide the Paper Cassette into the machine.
Adjusting the Paper Cassette for the Paper Length
How to Adjust the Paper Cassette for the Paper Length
The factory default Paper Length setting for the Paper Cassette is A4 size. To change the paper length to Letter or Legal size, follow the steps below.
1
- Remove the paper from the Paper Cassette and place the cassette upside down on a flat surface.
- While pushing down on the release latch, pull out the Paper Length Guide.
- Turn the Paper Cassette upright.
- Insert the Paper Length Guide hooks into the appropriate paper length slots (Letter or Legal) and slide the guide towards the back of the cassette until it locks in place.
- Load the paper into the Paper Cassette.
Slide the paper width guide to the left until it lightly touches the stack of paper without bending the paper. The paper must fit squarely and firmly between the Paper Width Guide and the right side of the tray. If it does not, the paper may feed into the printer incorrectly, resulting in a paper jam.
Caution: Make sure that the paper is set under the metal Paper Separation Clips and that it does not exceed the Maximum Paper Capacity Mark. You can load about 250 sheets (75g/m² weight). For paper specifications, see page 153.
- Replace the Paper Cassette Cover to the appropriate paper position (LTR, A4, or LGL).
- Slide the Paper Cassette into the machine.
2
Set it with the Control Panel of the machine. The Recording Paper Size setting of the Fax
Parameter No. 23 must match the paper loaded in the cassette. If you change the Recording Paper Size, please change the setting accordingly in Parameter No. 23 (REC. PAPER SIZE). (See page 37)
NOTE
- If you forget to change the Recording Paper Size setting in Fax Parameter No. 23 when different paper is installed in the cassette, the unit will stop printing after the 1st page of an incoming fax and display a "PAPER SIZE MISMATCH" error. Then, the Recording Paper Size setting automatically adjusts to the proper size and the unit resumes printing the incoming fax from the 1st page.
Adjusting the Paper Cassette for the Paper Width
How to Adjust the Paper Cassette for the Paper Width
The factory default Paper Width setting for the Paper Cassette is A4 size. To change the paper width to Letter/Legal size, follow the steps below.
Set it with the Control Panel of the machine.
- Release the left Paper Separation Clip latch.
- Pull up the Paper Separation Clip to remove it.
- Reposition the Paper Separation Clip into the LTR/LGL slot.
- Swing the Paper Separation Clip downward to latch it in place.
- Load the paper into the Paper Cassette. Slide the paper width guide to the left until it lightly touches the stack of paper without bending the paper. The paper must fit squarely and firmly between the Paper Width Guide and the right side of tray. If it does not, the paper may feed into the printer incorrectly resulting in a paper jam.
Caution: Make sure that the paper is set under the metal Paper Separation Clips and that it does not exceed the Maximum Paper Capacity Mark. You can load about 250 sheets (75g/m² weight). For paper specifications. (See page 153)
- Replace the Paper Cassette Cover to the appropriate paper position (LTR, A4 or LGL).
- Slide the Paper Cassette into the machine.
The Recording Paper Size setting of the Fax Parameter No. 23 must match the paper loaded in the cassette. If you change the Recording Paper Size, please change the setting accordingly in the Parameter No.23 (REC. PAPER SIZE). (See page 37)
NOTE
- If you forget to change the Recording Paper Size setting in Fax Parameter No. 23 when different paper is installed in the cassette, the unit will stop printing after the 1st page of an incoming fax and display a "PAPER SIZE MISMATCH" error. Then, the Recording Paper Size setting automatically adjusts to the proper size and the unit resumes printing the incoming fax from the 1st page.
Setting the Dialling Method (Tone or Pulse)
Your machine can operate with either of two dialling methods (Tone or Pulse), depending on the type of telephone line you are connected to. If you need to change the dialling method to Tone or Pulse, follow the procedure below.

SET MODE (1-8)
ENTER NO. OR ∨ ∧
FAX PARAMETER (1-137)
NO.=
06 DIALLING METHOD
2:TONE
06 DIALLING METHOD
1:PULSE
or
![graph TD A["Set"] --> B["Volume"] B --> C["Directory Search"] C --> D["Stop"]](/content/2026/06/1328210/images/c8c6c66472f1d14f4634044d7a7393f5aaba5038060c0912eee53db2c3d48b17.jpg)
06 DIALLING METHOD
2:TONE
NOTE
- This feature is not available in some countries due to local regulations. The display may not show this feature.
Adjusting the Volume
You can adjust the monitor and ringer volume on your machine. The built-in speaker enables you to hear the dial tone, dialling signals, and busy tone. The ringer sounds when your machine receives a call.
Setting the Monitor Volume
1


You will hear the dial tone through the speaker.
2

repeatedly to raise the volume.
or

repeatedly to lower the volume.

3

Setting the Ringer Volume
1
Standby

2

repeatedly to raise the volume.

or

3
Stop

NOTE
- You can also adjust the volume of the key touch tone and the volume of the buzzer in the Fax Parameter No. 10 (KEY/BUZZER VOLUME). (See page 36)
User Parameters
General Description
Your facsimile machine has several basic settings (User Parameters) to help you keep records of the documents you send or receive. For example, the built-in clock keeps the current date and time, and your LOGO and ID Number help to identify you when you send or receive documents.
Setting the Date and Time
At standby the display will show the date and time. Once the standby display is set, it will automatically be updated.

SET MODE (1-8) ENTER NO. OR ∨ ∧

1: USER PARAMETERS? PRESS SET TO SELECT
![graph TD A["Set"] --> B["Volume"] A --> C["Directory Search"]](/content/2026/06/1328210/images/c34dbb2e00d3a9c03f5cd5a83bbb66b0b783ab10f561fe1891b3a56bebf495fa.jpg)
DATE & TIME ■2-08-2008 00:00
4 Enter the new date and time. Ex: ①② Date : 12th ⑥⑧ Month : August ②00○⑧ Year : 2008 ①500○ Time : 3:00 PM
DATE & TIME 12-08-2008 15:00
If you made a mistake, use ▶ to move the cursor over the incorrect number, then overwrite it with the correct one.
![graph TD A["Volume"] --> B["Set"] C["Directory Search"] --> B D["Stop"] --> E["✓"]](/content/2026/06/1328210/images/3284101339d4f410040eb71565645ed7465b19c2c28dddd46aad0647f2a4fc9d.jpg)
NOTE
On occasion, the clock may need adjustment. (Lunar inequality : ±1 minute)
Setting Your LOGO
When you send a document, your LOGO appears on the top of the copy printed out at the other station. The LOGO helps to identify you to someone who receives your document.
1
Function


SET MODE (1-8)
ENTER NO. OR V ∧
2

1: USER PARAMETERS?
PRESS SET TO SELECT
3

LOGO

4
Enter your LOGO (Up to 25 characters and digits) by using the Character keys.
Ex: PANASONIC □□
If you made a mistake, use ▶ to move the cursor one space beyond the incorrect character, press Clear and then re-enter the new character. If more than 19 characters are entered, the left side characters will scroll off the display.
LOGO
PANASONIC
5

Stop

User Parameters
Setting Your Character ID
If the remote machine has Character ID capabilities, when you are sending or receiving, your Character ID will appear on the remote machine's display and the remote machine's Character ID will appear on your display.

SET MODE (1-8) ENTER NO. OR ∨ ∧

1:USER PARAMETERS? PRESS SET TO SELECT
![graph TD A["Set"] --> B["Volume"] A --> C["Directory Search"] A --> D["Arrow pointing inward"]](/content/2026/06/1328210/images/1e339a1543a598149a0b659f5bf43a462fe9b88fb1edabb00608ae5a009ad917.jpg)
CHARACTER ID
4 Enter your Character ID (Up to 16 characters and digits) by using the Character keys.
Ex: H E A D O ICE □ □ □ If you made a mistake, use ▶ to move the cursor beyond the incorrect character, press ▶ and then re-enter the new character.
CHARACTER ID HEAD OFFICE
![graph TD A["Set"] --> B["Volume"] B --> C["Directory Search"] C --> D["Stop"]](/content/2026/06/1328210/images/204f1cb31a930f97e53e4589e7a471bbad63cef2982c2baab41dedde0b05ebfe.jpg)
NOTE
- The special characters of Å, Ä, Ö, Ü, Æ, è and é cannot be used for Character ID.
Setting Your ID Number (Fax Telephone Number)
If the remote machine does not have a Character ID but has an ID Number, when sending or receiving, your ID Number will appear on the remote machine's display and their ID Number will appear on your display.
We suggest you use your facsimile telephone number as your ID number. (Up to 20 digits)
1


SET MODE (1-8) ENTER NO. OR ∨ ∧
2

1:USER PARAMETERS? PRESS SET TO SELECT
3

ID NO.
4
Enter your ID (up to 20 digits) using the keypad and press the 📋 key to enter a space between numbers.
ID NO. 201 555 1212
If you make a mistake, use ▶ to move the cursor one space beyond the incorrect number, press Clear, and then re-enter the new number.
5

NOTE
- You may use ⓞ to enter a "+" character at the beginning of the ID number to indicate the following digit(s) for your country code.
One-Touch/Abbreviated Dialling Numbers
Entering One-Touch/Abbreviated Dialling Numbers
One-Touch and Abbreviated Dialling are two fast ways of dialling full telephone numbers. To use these dialling methods, you must first store the telephone number using the following procedure.
To enter a One-Touch key, follow the steps below

SET MODE (1-8) ENTER NO. OR ∨ ∧

1:ONE-TOUCH 2:ABBR NO.

5 Enter the telephone number (up to 36 digits including pauses and spaces).
Ex: ⑨ Redial/Pause ⑤5⑤1② 🙏 ○○③④
![graph TD A["Set"] --> B["Volume"] A --> C["Directory Search"]](/content/2026/06/1328210/images/3af6bc5a65fd1fb1736a672469361ba8d8a54b7ce32c50d42d39b268b92fa225.jpg)
<01> 9-555 1234
7 Enter the station name using character keys (Up to 15 characters).
Ex: S A L E S □ E P T D
<01> ENTER NAME 9-555 1234
![graph TD A["Set"] --> B["Volume"] A --> C["Directory Search"] style A fill:#f9f,stroke:#333 style B fill:#ccf,stroke:#333 style C fill:#cfc,stroke:#333](/content/2026/06/1328210/images/51b8d1d9d430a108576039f65b9af16d5c11f9b5ec0992d7b3648620e7f77899.jpg)
<01> SALES DEPT 9-555 1234
To record another number, repeat steps 4 to 8. To return to standby, press . Stop
To set an Abbreviated Dialling Number, follow the steps below
1
Function

SET MODE (1-8)
ENTER NO. OR ∨ ∧
2


1:ONE-TOUCH
2:ABBR NO.
3

ABBR. [■]
ENTER ABBR NO.
4
Ex: (0212 to 300)
[022]
ENTER TEL. NO.
5
Enter the telephone number
(Up to 36 digits including pauses and spaces).
[022]
9-555 2345
6
Ex: ⑨ Redial/Pause ⑤5⑤2 📄 ○ ③ ④ ⑤
[022] ENTER NAME
9-555 2345
7

[022] ACCOUNTING
9-555 2345
8
Enter the station name using character keys (Up to 15 characters).
ABBR. [■]
ENTER ABBR NO.
Ex: ACCOUNTING

To record another number, repeat steps 4 to 8.
To return to standby, press . Stop
NOTE
- If you require a special access number to get an outside line, enter it first and then press Redial/Pause. A hyphen "-" is displayed for pause.
- If you are using Pulse dialling and you wish to change to Tone dialling in the middle of dialling, press ⚙ (Represented by a"/"). The dialling method will be changed from Pulse to Tone after dialling the digit "/".
Ex: 9 PAUSE * 5551234
- You can search for an unused One-Touch key or ABBR. number by pressing ▲ in step 3 or 4.
One-Touch/Abbreviated Dialling Numbers
Editing One-Touch/Abbreviated Dialling Numbers
If you have to change or delete any of the One-Touch/Abbreviated dialling numbers, follow the steps below.
To change the settings of a One-Touch/ABBR dialling number
1


1:ONE-TOUCH 2:ABBR NO.
2
Select for One-Touch Dialling number Select for ABBR. Dialling Number
Ex: ①
3
Enter the station you wish to change.
Ex:

then enter a new telephone number. (See Note 1)
Ex: ⑨ Redial/Pause ⑤ ⑤ ⑤ ○ ③ ④ ⑤ ⑥
<01> SALES DEPT 9-555 1234
<01> SALES DEPT ENTER TEL. NO.
<01> SALES DEPT 9-555 3456
5

<01> SALES DEPT 9-555 3456
6

then enter a new station name. (See Note 1)
Ex: P A N A F A X
<01> ENTER NAME 9-555 3456
<01> PANAFAX 9-555 3456
7

To return to standby, press Stop.
- If you made a mistake, use 🔒 to move the cursor beyond the incorrect number, press
Clear and then re-enter the new number.
To delete the settings of One-Touch/ABBR Dialling number
1
Function


1:ONE-TOUCH
2:ABBR NO.
2
Select for One-Touch Dialling number
Select ☑ for ABBR. Dialling Number
Ex:①
3
Enter the station you wish to delete.
Ex:

One-Touch/Abbreviated Dialling Numbers
Printing Out a Directory Sheet
After programming a one-touch dialling number, you can print out the directory sheet which includes the first 12 characters of each station name. Cut along the dotted line and place it over the One-Touch key under the Directory Sheet Cover. To print out a directory sheet, follow the steps below.


Your machine prints out the directory sheet.


Customizing Your Machine
General Description
Your facsimile machine has a variety of adjustable Fax Parameters. These parameters, listed in the Parameter Table, are preset for you and do not need to be changed. If you do want to make a change, read the table carefully. Some parameters, such as the Resolution and Contrast parameters, can be temporarily changed by simple key operations just before a transmission is made. When the transmission ends, however, these parameters return to their preset values (Home position). Other parameters can only be changed by the procedure described below.
Setting the Fax Parameters
1


SET MODE (1-8) ENTER NO. OR ∨ ∧
2


FAX PARAMETER(1-137) NO.=■
3
Enter Fax Parameter number from the Parameter Table. Ex: for CONTRAST
FAX PARAMETER(1-137) NO.=01
4

01 CONTRAST 1:NORMAL
5
Enter the new setting value. Ex: for LIGHTER
01 CONTRAST 2: LIGHTER
6

02 RESOLUTION 1: STANDARD
To set another parameter, press to return to step 3 or press to return to standby.
NOTE
Fax Parameter Table
| No. | Parameter | Setting Number | Setting C | Comments |
| 01 | CONTRAST (HOME) 1 NORMAL Setting the home position of the CONTRAST key. | |||
| 02 | RESOLUTION (HOME) | 1 STANDARD Setting the home position for the RESOLUTION. | ||
| 2 | FINE | - F I N E | ||
| 3 | S | |||
| 4 HALFTONE (FINE) | ||||
| 5 | HALFTONE (S-FINE) | |||
| 04 | STAMP (HOME) | 1 | OFF | Setting the home position of the STAMP key.To select the stamp function when document is stored in memory, see Fax Parameter No. 28. |
| 2 | ON | |||
| 05 | MEMORY (HOME) | 1 | OFF | Setting the home position for memory transmission/copy mode. (This setting can be temporarily changed by using F8-9 (MEMORY XMT)) |
| 2 | ON | |||
| 06 | DIALLING METHOD | 1 | PULSE | Selecting the dialling method. |
| 2 | TONE | |||
| 07 | HEADER PRINT | 1 | INSIDE | Selecting the printing position of the header.INSIDE: Inside TX copy area.OUTSIDE: Outside TX copy area.NO PRINT: Header is not printed. |
| 2 | OUTSIDE | |||
| 3 | NO PRINT | |||
| 08 | HEADER FORMAT | 1 | LOGO, ID NO. | Selecting the header format. |
| 2 | FROM TO | |||
| 09 | RCV'D TIME PRINT | 1 | INVALID | Selecting whether the machine prints the received date & time, remote ID, percentage of reduction and page number on the bottom of each received page. |
| 2 | VALID | |||
| 10 | KEY/BUZZER VOLUME | 1 | OFF | Selecting the volume of the Key/Buzzer tone. |
| 2 | SOFT | |||
| 3 | LOUD | |||
| 12 | COMM. JOURNAL (HOME) | 1 | OFF | Selecting the home position of printout mode for COMM.Journal Off/Always/INC.OFF: Does not printALWAYS: Always printsINC. ONLY: Prints only when communication has failed. |
| 2 | ALWAYS | |||
| 3 | INC. ONLY | |||
| 13 | AUTO JRNL PRINT | 1 | INVALID | Selecting whether the machine prints the journal automatically after every 32 transactions. |
| 2 | VALID | |||
| 17 | RECEIVE MODE | 1 | TEL | Setting the receive mode. |
| 2 | FAX | |||
| 3 | FAX/TEL SW. | |||
| 4 | TAM/FAX | |||
| No. | Parameter | Setting Number | Setting | Comments |
| 18 | OP CALL TIMER 1 20SEC | Selecting the | length of time | that your machine signals(rings) for an incoming voice call in Fax/Tel Auto Switching mode. (See page 68) |
| 2 | 3 | |||
| 3 | 4 | 0 S E C | ||
| 4 | 5 | 0 S E C | ||
| 19 | OGM LENGTH(TAM I/F) | 1 1SEC | Setting for the | OGM length of your TAM from 1 to 60 seconds. The machine will not start to detect SILENCE until the time setting has lapsed.(Default = 20 sec.) |
| --- --- | ||||
| 60 60SEC | ||||
| 20 | SILENT DETECTION(TAM I/F) | 1 INVALID Selecting | the Silent Detection Mode. | |
| 2 | VALID | |||
| 22 | SUBSTITUTE RCV | 1 | INVALID | Selecting whether the machine receives to memory when recording paper runs out, toner runs out or recording paper is jammed. |
| 2 | VALID | |||
| 23 | REC. PAPER SIZE | 1 | A4 | Setting the recording paper size installed in your machine. |
| 2 | LETTER | |||
| 3 | L | EGA L | ||
| 24 | PRINT REDUCTION | 1 | FIXED | Selecting print reduction mode.FIXED: Reduce received document according to setting of Parameter No. 25.AUTO: Reduce received document according to the length of received documents. |
| 2 | AUTO | |||
| 25 | REDUCTION RATIO | 70 | 70% | Selecting fixed print reduction ratio from 70% to 100%. This parameter functions only when fixed print reduction is selected on Fax Parameter No. 24. |
| ---- | ---- | |||
| 100 100% | ||||
| 26 | POLLING PASSWORD | (----) | Setting a 4-digit password for secured polling. | |
| 27 | POLLED FILE SAVE | 1 | INVALID | Selecting whether the machine retains the polled document in memory even after the document is polled once. |
| 2 | VALID | |||
| 28 | STAMP AT MEMORY XMT | 1 INVALID Selecting | whether the machine stamps the original documents when storing the documents into memory.(Depending on the Stamp setting on the Control Panel) | |
| 2 | VALID | |||
| 30 | DRD | 1 | INVALID | Selecting whether or not the machine is available "DRD Service". If this parameter is set to "VALID", your machine detects the specified ring pattern only to receive a document automatically. |
| 2 | VALID | |||
| 31 | INC. FILE SAVE | 1 | INVALID | Selecting whether the machine retains the document in memory if the document is not successfully transmitted. |
| 2 | VALID | |||
| 32 | COPY REDUCTION | 1 | MANUAL | Selecting whether the machine performs the copy reduction ratio automatically or manually.MANUAL: The machine will prompt you for the Zoom ratio (100% to 70%) when making copies.AUTO: The machine will automatically determine the reduction ratio according to the length of the original document. |
| 2 | AUTO | |||
Continued on the next page...
Fax Parameter Table
| No. | Parameter | Setting Number | Setting | Comments | |
| 34 | ENERGY SAVER MODE | 1 OFF | To reduce the | power consumption in standby, select eitherEnergy-Saver or Sleep mode and specify the Delay Time (1 to 120 minutes) for the machine to enter into the selected mode.The Delay Timer setting is only available in the Energy-Saver or Sleep Modes.OFF: The unit will remain in standby modeand consume more energy than when in Energy-Saver or Sleep modes.ENERGY SAVER: Saves energy by consuming less power than when in standby mode by turning off the fuser unit after the specified time.SLEEP: This is the lowest power state that the machine enters after the specified time without actually turning off. | |
| 2 ENERGY SAVER | |||||
| 3 SLEEP | |||||
| 35 | DAYLIGHT TIME 1 INVALID | ID Selecting | whether the clock adjusts for Daylight SavingTime automatically. The built-in clock will advance 1 hour at 2:00 am on the last Sunday in March and go back 1 hour at 3:00 am on the last Sunday in October. | ||
| 2 | VALID | ||||
| 37 | RCV TO MEMORY | (----) | Enter a 4-digit password used to print out the received document in memory by using F8-5 (RCV TO MEMORY).When F8-5 is set to ON, this parameter will not be shown on the LCD display. (See page 96) | ||
| 38 | ACCESS CODE | (----) | Enter a 4-digit Access Code to secure the machine from unauthorized use. (See page 94) | ||
| 39 | PIN CODE ACCESS | 1 | NONE | Selecting the access method (Prefix or Suffix) to dial a number with PIN Code. (See page 106) | |
| 2 | SUFFIX | ||||
| 3 | PREFIX | ||||
| 42 | CONF. POLLED FILE SAVE | 1 INVALID | Selecting whether the machine saves the confidential polled file even after the file is polled once. | ||
| 2 | VALID | ||||
| 43 | PASSWORD-XMT | 1 | OFF | Setting a 4-digit XMT-Password and selecting whether the machine performs and checks the XMT-Password of the receiving station when transmitting. (See page 111) | |
| 2 | ON | ||||
| 44 | PASSWORD-RCV | 1 | OFF | Setting a 4-digit RCV-Password and selecting whether the machine performs and checks the RCV-Password of the transmitting station when receiving. (See page 112) | |
| 2 | ON | ||||
| 46 | SELECT RCV | 1 | INVALID | Selecting whether the machine performs selective reception. (See page 109) | |
| 2 | VALID | ||||
| 47 | REMOTE RCV | 1 | INVALID | Selecting whether or not the machine accepts remote reception command. (See page 67) | |
| 2 | VALID | ||||
| 48 | TELEPHONE LINE | 1 | PSTN | Selecting the type of line connected. | |
| 2 | PBX | ||||
| 49 | PSTN ACCESS CODE | (----) | Setting PSTN Access Code. (Up to 4 digits) | ||
| 51 | REMOTE DIAGNOSTIC | 1 INVALID | LID Selecting | whether or not the machine accepts to update the firmware or Remote Diagnostics from the remote station. Please ask your Panasonic Authorized Dealer for details. | |
| 2 | V | ||||
| 52 | DIAGNOSTIC PASSWORD | (----) Setting | ng the password for Remote Diagnostic Mode. Please ask your Panasonic Authorized Dealer for details. | ||
| 53 | SUB-ADDRESS PSWD | (----) Setting | ng a 20-digit password for secured sub-address communication. | ||
| 54 | FAX FORWARD 1 INVALID | Selecting w | whether the machine performs Fax Forwarding to the specified destination. (See page 108) | ||
| 2 | V | ||||
| 56 | COVER SHEET 1 OFF Setting the home | position of the position of the position of the position of the position of the position of the position of the position of the position of the position of the position of the position of the position of the position of the position of the position of the position of the position of the position of the position of the position of the position of the position of the position of the position of the position of the position of the position of the position of the position of the position of the position of the position of the position of the position in the Select Mode. (See page 104) | |||
| 2 | ON | ||||
| 58 | LANGUAGE | Selecting the language to be shown on the display and reports. | |||
| 63 | PC-FAX RCV MODE (For UF-6300 only) | 1 PRINT | Selecting | how the machine will execute the received Fax document(s). If the setting is set to either "Upload" or "Upload & Print" the machine cannot enter the Sleep Mode.PRINT: Print the received document(s).UPLD&PRT: Print the received document(s) and upload it's file.UPLOAD: Upload the received document file. | |
| 2 | UPLD&PRT | ||||
| 3 | UPLOAD | ||||
| 65 | PRINT COLLATION | 1 | INVALID | Selecting whether the machine prints out documents in sequence. (See page 74)A D | |
| 2 | V | ||||
| 82 | QUICK MEMORY XMT | 1 | INVALID | Selecting whether the machine performs Quick Memory Transmission. (See pages 49 to 52).INVALID: Stores all documents into memory first before dialling the telephone number.VALID: Starts dialling the telephone number immediately after storing the first page.Is not available when the No.133 Job Build is set to "2:ON". | |
| 2 | V | ||||
| 99 | MEMORY SIZE (Flash Memory) | - | - | Displays the memory size. | |
| 117 | MULTI STATION (HOME) | 1 INVALID Set the default setting for the Multi Station function. | |||
| 2 | V | INVALID: The document is sent to a single destination only.VALID: Allows sending the document to multiple destinations. | |||
| 125 | CONFIRM STATIONS | 1 | INVALID | Set whether to confirm the destinations.When set to Valid the document cannot be sent unless the destination is confirmed.This function also operates when the addresses are specified with Group Dialling or Program Dialling function. If an address has been altered (Added or removed) when confirming addresses, address confirmation message will appears again when transmitting the documents (Pressing the start key). | |
| 2 | V | ||||
Fax Parameter Table
| No. | Parameter | Setting Number | Setting | Comments |
| 133 | JOB BUILD 1 OFF Selecti ng whether the machine per forms Job Build when the total number of documents exceed the maximum capacity of the ADF, or when scanning the documents manually one at a time. If you place the documents on the ADF within 5 seconds after the ADF scan, the ADF scan will continue for the current scan. (Maximum number of scanning papers is 255 pages for one job.) The Quick Memory Transmission feature (Fax Parameter No. 82) is not available when the Job Build is set to "2:ON". Up to 250 pages can be stored. When the number of pages exceeds 255, the memory overfull message will be displayed. Select "Yes" to start transmitting, or "No" to cancel. If no action is taken within 5 seconds, the machine will start transmitting the stored originals. | |||
| 135 | JUNK FAX FILTER Functi on to prevent direct mail FAX and unnecessary FAX messages. | |||
NOTE
- The standard settings are printed on the Fax Parameter List. To print out Fax Parameter List. (See page 135)
- The contents of Fax Parameter may differ depending on regulations and specifications in the countries.
memo
Loading Documents
Documents You Can Send
In general, your machine will send any document printed on A4 size paper.
Document Size
Document Thickness
Maximum Size Minimum Size

Single sheet:
0.06 mm, 45 g/m² to
0.15 mm, 112 g/m²
Multiple sheets:
0.06 mm, 45 g/m² to
0.12 mm, 75 g/m²
Note: The maximum document width that can be sent through the machine is 257mm.
However, the effective scanning width is 208mm.
Documents You Cannot Send
You must never try to send documents that are:

Wet, covered with wet ink or paste

Too thin (e.g., onionskin, airmail paper, pages from certain magazines, etc.)

Wrinkled, curled, or folded

Coated (e.g., glossy paper, etc.)

Chemically processed (e.g., pressure-sensitive paper, carbon-coated paper, etc.) or made of cloth or metal
To transmit these kinds of documents, make a photocopy first and then transmit the copy instead.
How to Load Documents
- Be sure the document(s) is free of staples, paper clips, and is not torn, greasy, or covered by foreign objects.
- Place the document(s) FACE DOWN on the Automatic Document Feeder (ADF) until the leading edge inserted in the machine stops. You can also stack up to 30 PAGES on the ADF at one time. If you are sending more than 30 pages of the document(s) (up to 50 pages), make sure that the bottom sheet of the document(s) enters first.
- Adjust the Document Guides to center the document on the ADF.

When you set a document on the ADF, the display message will change from date and time (Standby) to the following message. You can now change basic transmission settings or begin the dialling procedure.
ENTER STATION(S) THEN PRESS START 00%
NOTE
- The document limitation to send multiple pages is as follows.
| Document Size Document Thickness | |
| Up to 20 pages Up to 257mm X 364mm 0.06 mm to 0.12 mm | |
| Up to 30 pages* A4 size 0.06 mm to 0.10 mm | |
* Please note that although the size and thickness meets the specifications, you might not be able to set 30 pages with some types of paper. If you are sending more than 30 pages (up to 50 pages), the document size and thickness limitation is A4 and 0.06 mm to 0.10 mm.
- If you send more than 50 pages, it is recommended to use the Job Build function. (See page 40)
- Transmitting documents longer than 356 mm requires user's assistance.
- When transmitting documents longer than A4, please extend the document sub tray.

Document Sub Tray
Basic Transmission Settings
General Description
You can temporarily change the transmission settings either before or after you place the document on the ADF.
These settings are as follows:
- Contrast
- Resolution
- Stamp
- Communication Journal
After your document(s) have been sent, your machine will automatically return to the preset settings.
Contrast
Your machine is preset to Normal contrast. If you wish to send a document with lighter contrast, change the setting to Lighter. If you wish to send a document with darker contrast, change the setting to Darker.
Press Contrast to:
![graph LR A["CONTRAST: NORMAL"] --> B["CONTRAST: LIGHTER"] B --> C["CONTRAST: DARKER"] D["CONTRAST = Normal"] --> A E["CONTRAST = Lighter"] --> B F["CONTRAST = Darker"] --> C](/content/2026/06/1328210/images/9419140dfb89994fa1af02af5a01d9554d0db9b579c34879c387c3d0ffa9d609.jpg)
Resolution
Your machine is preset to Standard resolution, which is suitable for most documents. If you want to send it with more detail, change the setting to Fine, Super Fine or Halftone.
Press Resolution to:
![graph TD A["RESOLUTION: STANDARD\nRESOLUTION = Standard"] --> B["RESOLUTION: FINE\nRESOLUTION = Fine"] B --> C["RESOLUTION: S-FINE\nRESOLUTION = Super Fine"] C --> D["RESOLUTION: HALFTONE (S-FINE)\nRESOLUTION = Halftone (S-Fine)"] D --> E["RESOLUTION: HALFTONE (FINE)\nRESOLUTION = Halftone (Fine)"]](/content/2026/06/1328210/images/1b91092cc7bcd7edd8f3c53433f23bed78a7c515008949aea8116c5ea3a6fc66.jpg)
NOTE
- To change the preset Contrast position, change the setting of Fax Parameter No. 01. (See page 36)
- To change the preset Resolution position, change the setting of Fax Parameter No. 02. (See page 36)
Verification Stamp
The Verification Stamp helps you to confirm successful transmissions by stamping the bottom of each successfully transmitted page with a small mark.
Press Stamp
to:
![graph TD A["Stamp"] --> B["○"] B --> C["Stamp"] C --> D["STAMP = Off STAMP = On"] D --> E["STAMP : ON"] E --> F["STAMP : OFF"]](/content/2026/06/1328210/images/9378a8451577e3a9e0c9f3cb48faaefc0dbcb88e43b63a54f0dc59dee043336d.jpg)
NOTE
- When you store a document in memory, the Verification Stamp will stamp on the document if it is successfully stored in memory. In this case the Verification Stamp is not a confirmation that the document was successfully transmitted. If you wish to disable the use of the Verification Stamp when storing document in memory, change the setting of Fax Parameter No. 28. (See page 37)
- To change the preset Verification Stamp position, change the setting of Fax Parameter No. 04. (See page 36)
Basic Transmission Settings
Communication Journal (COMM. JOURNAL)
A Communication Journal lets you verify if the transmission was successful. You can select the condition to print out the Communication Journal as follows.
When you set COMM. JOURNAL = OFF
When you set COMM. JOURNAL = ON
When you set COMM. JOURNAL = INC.
: A Communication Journal will not be printed out. : A Communication Journal is printed out automatically after every communication. : A Communication Journal is printed out automatically only if the communication has failed.
1


SELECT MODE (1-9) ENTER NO. OR ∨ ∧
2


COMM. JOURNAL=INC 1:OFF 2:ON 3:INC
3

for "OFF".
COMM. JOURNAL=OFF 1:OFF 2:ON 3:INC
or

for "ON" (Always print out).
or
COMM. JOURNAL=ON 1:OFF 2:ON 3:INC
or

for "INCOMPLETE" only.
or
COMM. JOURNAL=INC 1:OFF 2:ON 3:INC
4

NOTE
- To change the preset Comm. Journal condition, change the setting of Fax Parameter No. 12. (See page 36)
Sending Documents
General Description
You can choose either Memory or Direct Transmission.
Use Memory Transmission if:
- You want to send the document to multiple stations.
- You have to retrieve the document immediately.
- You want to take advantage of Dual Operation design.
Use Direct Transmission if:
• The memory is full. - You want to send the document immediately.
Use Voice Mode Transmit if:
- You want to send the document after talking with the other party.
- You want to send the document after listening to a voice prompting.
Your machine quickly stores the document into the machine's memory.
It then starts to dial the telephone number.
If the transmission fails, your machine will re-transmit the remaining unsuccessful page(s) automatically.
![graph TD A["Store document in memory"] --> B["Printer"] B --> C["Transmit Receive Destination A"] C --> D["Destination B"] D --> E["Transmit Receive Destination B"] E --> F["End"]](/content/2026/06/1328210/images/cd5b78b5d5431c94f4e55becda2dde3d3e32148c3954f793842484b6f859834e.jpg)
NOTE
- The File Number of the document being stored is shown at the upper right corner of the display while storing the document. It is also printed on the Communication Journal (COMM. JOURNAL), Transaction Journal and File List. The percentage of memory used is shown on the lower right corner of the display after each page is stored.

Continued on the next page...
General Description
- If memory overflow occurs while storing documents, the remaining documents on the ADF will be ejected. The machine prompts you whether to transmit the successfully stored documents or to cancel the transmission. Press to cancel or press to transmit.
MEMORY OVERFLOW INFO. CODE=870
See the Specifications on page 152 for the image memory capacity.
If no action is taken within 10 seconds, the machine will start transmitting the stored documents.
15 PAGES COMPLETED DELETE? 1:YES 2:NO
- An Information Code will be displayed if the transmission has failed or if there is no answer at the receiving side after the last automatic redial.
The document stored for this transmission will be deleted from the memory automatically and the information code is printed for the transmission on the Communication Journal (COMM. JOURNAL).
If you need to retain the incomplete documents even after the last redial, change Fax Parameter No. 31 (INC. FILE SAVE) to "VALID" in advance. (See page 37) To retry the incomplete documents, refer to page 93.
INCOMPLETE INFO.CODE=XXX
- To stop the transmission, press Stop.
The display shows:
COMMUNICATION STOP ? 1: YES 2: NO
Press to stop the transmission. The document you stored will be deleted automatically. If you do not want to delete the documents, change the setting of Fax Parameter No. 31 (INC. FILE SAVE) to "VALID" in advance. (See page 37)
Then the following display will appear and you can select whether to save the file as an incomplete file for editing and retry, or delete the file manually.
SAVE AS INCOMP.FILE? 1: YES 2: NO
- If you would like to print a Communication Journal (COMM. JOURNAL) after stopping a transmission, press ☐ when the display shows:
PRINT COMM. JOURNAL? 1: YES 2: NO
- If the file memory capacity reaches 10 files or 50 files (10 files/UF-5300) (50 files/UF-6300) and you try to store another file, the following display appears and the machine will not accept additional files until a file is completed and becomes available.
FILE STORAGE IS FULL PLEASE WAIT!
Memory Transmission
Manual Number Dialling
To dial the telephone number manually, follow the steps below.
1

Set document(s) face down.
ENTER STATION(S) THEN PRESS START 00%
2
Enter a telephone number from the keypad. (Up to 36 digits)
You can also designate more than one destination.
TEL. NO. 5551234
Ex: ⑤5⑤12○○③④
3

The document is stored into memory with a file number. It then starts dialling the telephone number immediately after storing the first page. (See Note 3) The remaining page(s) continue to be stored into memory.
* STORE * NO.002 PAGES=001 05%
* DIALLING * NO.002 5551234
NOTE
- If you need a special access number to get an outside line, dial it first then press Redial/Pause to enter a pause (represented by a "-") before dialling the full number. Ex: 9 PAUSE 5551234
- If you are using Pulse dialling and you wish to change to Tone dialling in the middle of dialling, press ⚙ (represented by a "/"). The dialling method will be changed from Pulse to Tone after dialling the digit "/". Ex: 9 PAUSE * 5551234
- This feature is called "Quick Memory Transmission". If you wish to store all the document(s) into memory first before transmitting, change the Fax Parameter No. 82 (QUICK MEMORY XMT) to "INVALID". (See page 39)
Sending Documents
Memory Transmission
Dialling Re-enter Function
This function has the function of preventing transmission of a document to a wrong address.
When using direct dialling, the re-enter screen will be displayed. Input the destination Tel No. again and if both match, start dialing.
This function operates if setting "137 RE-ENTER D. DIAL" of Fax Parameter set to "VALID". (See page 40)
1 Operate "Manual Number Dialling". (See page 49)

2 Re-enter the same telephone number from the keypad.


3 If the telephone number is correct, transmission is started. If the telephone number is incorrect, repeat the steps, starting with the first step of inputting the telephone number.
NOTE
- When telephoning from an external telephone, the re-enter screen is not displayed.
- If setting "136 RESTRICT D. DIAL" of the system registration is set to "VALID", even if you set to "VALID" with this function, the re-enter screen of the address is not displayed.
One-Touch Dialling
One-Touch Dialling allows you to dial a full telephone number by pressing a single key. To set up the One-Touch keys, see page 30.
1

Set document(s) face down.
ENTER STATION(S) THEN PRESS START 00%
2
Press a One-Touch key.
Ex:

<01>(Station name) 5551234
3

The document is stored into memory with a file number. Then the machine starts dialling the telephone number immediately after storing the first page. (See Note 1) The remaining page(s) continue to be stored into memory.
* STORE * NO.002 PAGES=001 05%
* DIALLING * NO.002 (Station name)
Abbreviated Dialling
Abbreviated dialling is a speedy way to dial a frequently dialled telephone number by preprogramming the telephone number into the built-in auto-dialler with a 3-digit abbreviated code. To program an abbreviated dialling number, see page 31.
1

Set document(s) face down.
ENTER STATION(S) THEN PRESS START 00%
2
Press Author Enter a 3-digit code.
Ex: Abbr


[010] (Station name) 5553456
3

The document is stored into memory with a file number. Then the machine starts dialling the telephone number immediately after storing the first page. (See Note 1) The remaining page(s) continue to be stored into memory.
* STORE * NO.002 PAGES=001 05%
* DIALLING * NO.002 (Station name)
NOTE
- This feature is called "Quick Memory Transmission". If you wish to store all the document(s) into memory first before transmitting, change the Fax Parameter No. 82 (QUICK MEMORY XMT) to "INVALID". (See page 39)
Sending Documents
Memory Transmission
Directory Search Dialling
Directory Search dialling allows you to dial a full telephone number by searching the station name entered with One-Touch keys or Abbreviated dialling numbers.
1

Set document(s) face down.
ENTER STATION(S) THEN PRESS START 00%
2

ENTER LETTER(S)
3
Enter the full station name or part of the station name by using the Character keys.
ENTER LETTER(S) PANA
Ex: for searching PANASONIC
4
![graph TD A["Volume"] --> B["Directory Search"] B --> C["Set"] style A fill:#f9f,stroke:#333 style B fill:#ccf,stroke:#333 style C fill:#cfc,stroke:#333](/content/2026/06/1328210/images/86440b7f89ac0476abfc52bf7c47db6420f480114cbb1c4ad5f62c10137efadf.jpg)
[010] PANASONIC 5553456
repeatedly until the display shows the station name you want to send to.
5

* STORE * NO.002 PAGES=001 05%
The document is stored into memory with a file number. Then the machine starts dialling the telephone number immediately after storing the first page. (See Note 1) The remaining page(s) continue to be stored into memory.
* DIALLING * NO.002 PANASONIC
NOTE
- This feature is called "Quick Memory Transmission". If you wish to store all the document(s) into memory first before transmitting, change the Fax Parameter No. 82 (QUICK MEMORY XMT) to "INVALID". (See page 39)
Multi-Station Transmission (Broadcasting)
If you have to send the same document(s) to multiple stations, you can save time when feeding the document(s) by using memory transmission. That is, you can store the document(s) into the memory and then send it to the station(s) automatically.
1

ENTER STATION(S) THEN PRESS START 00%
Set document(s) face down.
2
Dial by any combination of the following methods:
- One-Touch Dialling
- Abbreviated Dialling
- Manual Number Dialling, press after each station is entered (Up to 12 stations)
- Directory Search Dialling, press after each station is entered (For details, see pages 49 to 52.)

<01>(Station name) 5551234
[010] (Station name) 5553456

2 STN(S) ARE SET ADD MORE OR START
- If you want to confirm the number of stations you have entered, press . Set
3

* STORE * NO.001 PAGES=001 01%
* STORE * COMPLETED TOTAL PAGES=005 25%
* DIALLING * NO.001 (Station name)
The document is stored into memory with a file number. Then the machine starts dialling the telephone numbers in sequence.
NOTE
- You can review the stations you entered in step 3 before storing your document into memory by pressing ▼. Press to clear a corrected station or group shown on the display if needed.
- The "Quick Memory Transmission" is disabled if multiple stations are set.
Sending Documents
Wrong Transmission Prevention Function
The following functions have been provided to prevent transmission to a wrong address.
These include the dial re-enter function to prohibit direct dialling or multiple addresses, and a function to confirm the address.
Direct Dial Restriction Function
This function prohibits all designations of addresses by direct dialling (Including manual transmission). This function operates if Fax Parameter "136 RESTRICT D. DIAL" of the system registration is "VALID". (See page 40)
- If this function is set, even when telephoning from an external device, it is not possible to use direct dialling. • However, if direct dialling standby is displayed, press Redlar Pardial.
If keypad or Recycle Be the following message will appear on your display.
DIRECT DIAL IS NOT AVAILABLE
Multiple Address Prohibit Function
With this device, it is possible to combine direct dialling and AUTO dialling, etc. to send the same document by fax to multiple addresses. If you do not wish to send to multiple addresses, set setting "117 MULTI STATION" of the system registration to "INVALID" and the system will be set to transmit to only one address. This is useful to prevent an operation of mistakenly transmitting to multiple addresses.
If you specify multiple addresses, the following message will appear on your display.
NOT AVAILABLE. ONLY 1 STN PERMITTED
NOTE
- If multiple address designation is set to "INVALID", it is not possible to transmit to multiple addresses.
- If multiple address designation is set to "INVALID", it is not possible to use group dial.
- If multiple address designation is set to "INVALID", it is possible to use the program dial in which multiple addresses are set.
Dialling Re-enter Function
If the address is designated with direct dialling, the re-enter screen of the address is displayed. With this function, transmission is only started if the addresses for the first and second time agree with each other.
This function operates if setting "137 RE-ENTER D. DIAL" of the system registration is "VALID". (See page 40)
1 Enter the telephone number. Ex: 5553456○○○
TEL. NO. 555 3456
2 Volume Directory Search Set
RE-ENTER TEL. NO.
3 Re-enter the same telephone number and press . Set If the telephone number is incorrect, repeat the steps, starting with the first step of inputting the telephone number.
If the telephone number is correct, transmission is started.
If the telephone number is incorrect, the message "STN DOES NOT MATCH" will appear. In this case, start with the first step of inputting the telephone number.
NOTE
- When dialing from an external telephone, the re-enter screen is not displayed.
- If setting "136 RESTRICT D. DIAL" of the system registration is set to "VALID", even if you set to "VALID" with this function, the re-enter screen of the address is not displayed.
Wrong Transmission Prevention Function
Address Confirmation Function
Settings can be made so that transmission will always start after confirming the address.
When iStashed and address confirmation has been set, a message prompting operations to confirm the address will be displayed if the address has not been confirmed first.
This function operates if setting "125 CONFIRM STATIONS" of system registration is "VALID". (See page 39)
When telephoning from an external telephone, address confirmation is not displayed.
1 Operate "Manual Number Dialling". (See page 49) This function is also available if you send documents with following methods:
• One-Touch Dialing (See pages 51 and 85) • Abbreviated Dialing (see page 51) • Group Dialing (See page 81)
CONFIRM STN WITH ∨ ∧ THEN PRESS START
2 Press ▲ or ▼ to confirm stations. It is possible to add or remove addresses. To add an address, input the address for addition. To remove an address, display the address for removal and press Clear (See Note 1). 3 Start
The document is stored with a file number in the memory. Following this, the telephone numbers are dialed in sequence.
* DIALLING * NO.002 5551234
NOTE
- If an address has been added or removed when confirming addresses, address confirmation is required again.
Direct Transmission
If your machine's memory is full or you wish to send the document immediately, use Direct Transmission.
Manual Number Dialling (Direct Transmission)
Without storing the image into memory, follow the steps below.
1

Set document(s) face down.
ENTER STATION(S) THEN PRESS START 00%
2


MEMORY XMT=ON 1:OFF 2:ON
3


ENTER STATION 00%
4
Enter the telephone number from the keypad.
Ex: ⑤⑤⑤①②○○③④
PRESS START TO DIAL 5551234
5

Your machine starts to dial the telephone number.
* DIALLING * 5551234
NOTE
- If you need a special access number to get an outside line, dial it first and then press
Redial/Pause to enter a pause (represented by a "-" before dialling the full number.
Ex: 9 PAUSE 5551234
- If you are using Pulse dialling and you wish to change to Tone dialling in the middle of dialling, press ⚙ (represented by a "/"). The dialling method will be changed from Pulse to Tone after dialling the digit "/".
Ex: 9 PAUSE * 5551234
- To stop the transmission, press . Stop
The display shows:
COMMUNICATION STOP ? 1: YES 2: NO
Press ☐ stop the transmission. The Communication Journal will not print out regardless of the printout mode setting of the Communication Journal.
Direct Transmission
One-Touch Dialling (Direct Transmission)
One-Touch Dialling allows you to dial a full telephone number by pressing a single key. To set up the One-Touch keys, see page 30.

ENTER STATION(S) THEN PRESS START 00%

MEMORY XMT=ON 1:OFF 2:ON

ENTER STATION 00%

<01>(Station name) 5551234
The display will show the One-Touch number and station name. The full number (e.g., 5551234) will then be dialled.
* DIALLING * (Station name)
Abbreviated Dialling (Direct Transmission)
Abbreviated dialling is a speedy way to dial a frequently dialled telephone number by preprogramming the telephone number into the built-in auto-dialler with a 3-digit abbreviated code. To program an abbreviated dialling number, see page 31.

ENTER STATION(S) THEN PRESS START 00%

MEMORY XMT=ON 1:OFF 2:ON

ENTER STATION 00%

010 5553456 * DIALLING * (Station name)
The display will show the ABBR number and station name. The full number (Ex: 5553456) will then be dialled.
Directory Search Dialling (Direct Transmission)
Directory Search dialling allows you to dial a full telephone number by searching the station name entered in One-Touch keys or Abbreviated dialling numbers.
1

Set document(s) face down.
ENTER STATION(S)
THEN PRESS START 00%
2
Function


MEMORY XMT=ON
1:OFF 2:ON
3


ENTER STATION
00%
4

ENTER LETTER(S)
5
Enter the full station name or part of a station name by using the Character keys. (See page 14)
ENTER LETTER(S)
PANA
6


[010] PANASONIC
5553456
7
Start

The full number (Ex: 5553456) will be dialled.
* DIALLING *
PANASONIC
Sending Documents
Voice Mode Transmission
If you wish to send the document after talking with the other party, use Voice Mode Transmission. Your machine requires an optional fax handset or an external telephone.
Off-Hook Dialling
For Off-Hook Dialling, follow the steps below.
1

Set document(s) face down.
2
Lift the fax handset or the external telephone and dial the telephone number from the keypad.
Ex: ⑤5⑤1②○○③④
ENTER STATION(S) THEN PRESS START 00%
* PHONE OFF HOOK *
* DIALLING * 5551234
3
When you hear the voice of the other party, tell the other party to prepare to receive a document.
Then, when you hear a beep,

and hang up the handset.
ON LINE * XMT *
NOTE
- To stop the transmission, press The display shows:
Stop
COMMUNICATION STOP ? 1: YES 2: NO
Press ① to stop the transmission. The Communication Journal will not print out regardless of the printout mode setting of the Communication Journal.
- For some countries, the handset may not be available because of the country's regulation or specification.
On-Hook Dialling
For On-Hook Dialling, follow the steps below.
1

Set document(s) face down.
ENTER STATION(S) THEN PRESS START 00%
2

You will hear dial tone through the monitor speaker.

3
Dial the telephone number from the keypad.
Ex: 555-1234

4
When you hear a beep,
Start


NOTE
- If you need a special access number to obtain an outside line, dial it first and then press
Redial/Pause to enter a pause (represented by a "-") before dialling the full number.
Ex: 9 PAUSE 5551234
- If you are using Pulse dialling and you wish to change to Tone dialling in the middle of dialling, press ⚙ (represented by a "/"). The dialling method will be changed from Pulse to Tone after dialling the digit "/".
Ex: 9 PAUSE * 5551234
Sending Documents
Transmission Reservation
You can do the following jobs while sending a document from memory or receiving a document.
- Reserve the next transmission in the memory. (Up to 10 different files)
- Reserve a priority transmission.
Memory Transmission Reservation (Multi-tasking)
If your machine is on-line, busy transmitting from memory, receiving or printing received documents, you can reserve a transmission by the following procedure.
1. Your machine is on-line, printing received documents.


Set document(s) face down.
Dial by any combination of the following methods:
- One-Touch Dialling
- Abbreviated Dialling
- Manual Number Dialling, press Set after each station is entered (Up to 12 stations)
- Directory Search Dialling, press after each station is entered (For details, see pages 49 to 52.)
Ex:
Abbr


- If you want to confirm the number of stations you have entered, press Set.
 5553456](/content/2026/06/1328210/images/b4adabfbc742b20d625e8850c47ca8a39abf66994bbb10526b0a1913ad89c7b6.jpg)

Your machine will store the document(s) into memory.

NOTE
- To cancel the memory transmission reservation. (See page 90)
Direct Transmission Reservation (Priority Transmission Reservation)
If you are in a rush to send an urgent document, but there are many files in the memory, use Direct Transmission Reservation to send the urgent document. The urgent document will be sent immediately after the current communication is finished.
Note that you cannot send documents to multiple stations.
To reserve your machine for sending the urgent documents
1 Your machine is on-line, printing received documents.


2 Set document(s) face down. 3 Function 8 9 Volume Directory Search Set 4 1 Volume Directory Search Set 5 Dial by using any one of the following methods:
- One-Touch Dialling
- Abbreviated Dialling
- Manual Number Dialling and press Start
- Directory Search Dialling and press Start (For details, see pages 57 to 59.)


You can reserve sending of an urgent document to a single station only.
A message "DIRECT XMT RESERVED" will be shown on the display.
Sending Documents
Transmission Reservation
To cancel the direct transmission reservation
1
Make sure the document is on the ADF.
DIRECT XMT RESERVED <01>(Station name)
2
Stop

CANCEL XMT RESERVE ? 1: YES 2: NO
3

and then remove the document from ADF.
Redialling
Automatic Redialling
If a busy line is detected, the machine will redial the number up to 3 times at 3 minutes interval. During that time, a message will appear as shown at right.
WAIT TO DIAL NO.001 <01>(Station name)
A file number is shown in the upper right hand corner of the display if it is a memory transmission file.
Manual Redialling
You can also redial the last dialled number manually by pressing Redial/Pause
To redial the last dialled number through memory

To redial the last dialled number through ADF

NOTE
- While the unit is displaying "WAIT TO DIAL", you can press Redial/Redating immediately.
Reception Modes
You can select one of the four modes as shown below.
| Conditions Suggested Reception Mode Settings | ||
| You normally receive only voice calls. | Telephone ModeYou can answer the incoming call via an External Telephone (Optional). If you receive a fax calling signal, simply press START to receive manually. (See page 67) | Fax Parameter No. 17 set to 1: Tel |
| You receive both voice and fax calls. | Fax / Tel Auto Switching ModeUnit will answer the incoming call and then distinguish whether it is voice or fax call. If it is a fax call, the unit will receive automatically. if it is a voice call, the unit will signal (ring) through the speaker for your attention. (See page 68) | Fax Parameter No. 17 set to 3: Fax / Tel SW. |
| You normally receive fax calls only. | Fax ModeUnit will receive the document automatically. All incoming calls (including voice calls) are answered by the fax machine. (See page 69) | Fax Parameter No. 17 set to 2: Fax |
| You receive both voice and fax calls and a Telephone Answering Machine (TAM) is connected. | TAM Interface ModeThe TAM answers the incoming call. During that time, the unit also monitors whether it is a voice call, the TAM continues to operate. If it is a fax call, the unit will automatically switch the line to the Fax and begin receiving document. (See page 70) | Fax Parameter No. 17 set to 4: TAM/FAX. |
NOTE
- Depending on the model of the Telephone Answering Machine (TAM) that is connected, some of the features may not be compatible with your fax machine operating in the TAM Interface mode.
- If you are using the "Distinctive Ring Service" provided by your local telephone company, please note that the ring pattern for your fax number must match with the setting of Fax Parameter No. 30 (DRD). (See page 37)
If the setting does not match with the ring pattern, your machine will not receive a document automatically and the telephone will continue to ring.
Furthermore, if your TAM does not support the "Distinctive Ring Detector" service, it may not function properly in TAM Interface.
Telephone Mode
When your machine is set to this mode, your machine will not receive documents automatically. If you receive a fax call, follow the procedure below to receive documents manually.
Setting the Telephone Mode
1. Change Fax Parameter No. 17 (RECEIVE MODE) to 1: Tel. (See page 36)
Operation of Telephone Mode
1. When your telephone rings, lift the handset of the External Telephone. If you hear a beep from the phone, it means someone wants to send a fax. Or, if the caller answers and says he/she wants to send a fax, then...
2. Remove any document from the ADF.
3a. If you answered the call using the External Telephone, press Start
3b. If you answered the call on an Extension phone, press Start
or within 1 second from the telephone key pad. (See Note 1)

4. Hang up the phone.
NOTE
- This procedure is called "REMOTE RCV" and will only work on a touch tone phone. If your extension phone is not a touch tone phone, press Start on the control panel of your fax machine.
Receiving Documents
Fax / Tel Auto Switching Mode
When your machine is set to this mode, your machine will switch to document reception or voice communication automatically.
Setting the Fax / Tel Auto Switching Mode
1 Change Fax Parameter No. 17 (RECEIVE MODE) to 3: Fax / Tel SW. (See page 36)
Operation of Fax / Tel Auto Switching Mode
If it is a Fax call,
1 Your machine will answer the call when a call is received, and then distinguish whether it is a voice or fax call.
2 Your machine begins to receive the documents.
If it is a Voice call,
1 Your machine will answer the call when a call is received, and then distinguish whether it is a voice or fax call.
2 Your machine begins to signal (ringing) through the machine's speaker for your attention. (See Note 1)
3 Lift the handset of the External Telephone and press Stop.
4 Begin the conversation.
NOTE
- The length of time the machine signals can be changed by Fax Parameter No.18 (OP CALL TIMER) (See page 37).
- To adjust the Ringer Volume refer to page 25.
Fax Mode
When your machine is set to this mode, it will immediately begin to receive documents automatically when a call is received.
Setting the Fax Mode
1. Change Fax Parameter No. 17 (RECEIVE MODE) to 2: Fax. (See page 36)
Operation of Fax Mode
Your machine will begin receiving automatically when a fax call is received.
Receiving Documents
TAM (Telephone Answering Machine) Interface Mode
Your machine is equipped with a unique feature called TAM Interface which enables it to automatically switch a single telephone line either to Fax or TAM. You can connect most TAMs in the market to your machine and use your existing telephone line very efficiently. However, some TAMs may not be compatible with this machine. Answering Services (Voice Mail) provided by your Local Phone company are not compatible with this feature. For the operation of your TAM, please refer to the User's Guide of the TAM.
Installing your TAM Ex:1
Ex:2
Ex:3
Ex:4
- Remove the telephone line cable of your TAM from the wall jack.
- Plug the telephone line cable of your TAM into the TEL jack on the rear of the fax machine as shown.
Note: The connecting method for TAM may differ depending on regulations in the individual country. Please follow the appropriate method for your country. For details, consult your local Panasonic dealer.
Setting the TAM Interface Mode
1. Change Fax Parameter No. 17 (RECEIVE MODE) to 4: TAM/FAX. (See page 36)
Operation of TAM Interface Mode
If it is a Fax call:
1. When your TAM and Fax receive an incoming call, the TAM always answers the call first and then plays the OGM (Outgoing Message) recorded in your TAM to the calling station. During the time the TAM is answering the call, your fax machine will be monitoring the line to distinguish whether it is a voice or fax call. 2. Your machine will switch the line to the fax and then begin to receive the documents immediately from the calling station.
If it is a Voice call:
1. When your TAM and Fax receive an incoming call, the TAM always answers the call first and then plays the OGM (Outgoing Message) recorded in your TAM to the calling station. During the time the TAM is answering the call, your fax machine will be monitoring the line to distinguish whether it is a voice or fax call. 2. Your TAM continues to record a message (ICM) after playing the OGM.
Sample of OGM
Hello, this is Smith. Sorry I am unable to take your call. Please leave your message after the beep or if you are calling to send a fax, press the asterisk button twice on your touch tone phone now and start your machine. Thank you for calling.
Silent Detection Mode
Enables your Fax machine to switch to the Fax Mode when receiving from units that do not send fax signals (short beep) and prevents your TAM from recording blank (long silence) incoming message.
To activate this feature:
- Change Fax Parameter No. 20 (SILENT DETECTION) to 2: VALID. (See page 37)
- Set the time length of the OGM recorded in your TAM with the Fax Parameter No. 19 (OGM LENGTH). (See page 37)
[We recommend setting the time length 5 or 6 seconds longer than the actual time length of the OGM.]
Receiving Documents
Print Reduction
This machine can use Letter, Legal or A4 size plain paper for recording. Sometimes, oversized documents sent to you by the other parties cannot be printed on a single page. When this occurs, the document will be divided into separate pages.
This machine is equipped with a Print Reduction function to solve this problem. You can select the most appropriate setting from the selections described below.
1. Automatic Reduction
Each page of a received document is first stored in the memory. Based on the document length, your machine will automatically calculate the suitable reduction ratio (70% to 100%) to print the entire document on a single page. If the received document is extremely long (over 39% longer than the recording paper), the document will be divided into separate pages and printed without reduction.
2. Fixed Reduction
You can pre-determine the reduction ratio from 70% to 100% in 1% steps. The document(s) you receive will be reduced to the fixed ratio regardless of size.
Selecting the Print Reduction Mode
Set Fax Parameters as shown below. PRINT REDUCTION
- To set Automatic Reduction mode.
1) No. 24 Print Reduction set to "Auto".
- To set Fixed Reduction mode.
1) No. 24 Print Reduction set to "Fixed". 2) No. 25 Reduction Ratio set to any number between 70% and 100%. (See Note 1)
Ex: A4 to A4 - 96%
A4 to Letter - 90%
Letter to Letter - 96%
Legal to Letter - 75%
NOTE
- If the sending side is set to print the header on the outside of the copy area, a larger reduction ratio will be required.
Receiving Oversize Documents
If the received document is extremely long (over 39% longer than the recording paper), the document will be divided into separate pages. When printing on separate pages, the bottom 10 mm of the first page will be overlapped on the top of the next page.
Transmitted Document Received Document![graph TD A["Document Layout"] --> B["Layout"] B --> C["Overlap Print: 10 mm (0.4 in)"]](/content/2026/06/1328210/images/160bc1f5469b6415914fb44883eb3decdc34170eee35f4fac6fd7e8fd5bce80a.jpg)
The received document is divided into two sheets with overlap printing.
NOTE
- If the reduction method is set to the Automatic Reduction mode, the document is printed out with no reduction when printing out separate pages. If the reduction method is set to the Fixed Reduction mode, the document is printed out by the ratio you set in Fax Parameter No. 25. (See page 37)
Substitute Memory Reception
If the recording paper runs out or jams or if the toner runs out during reception, the machine automatically starts receiving documents in its image data memory. Stored documents are printed automatically after replacing the recording paper or the toner cartridge. (See Note 1 and 2)
1 When the machine finishes the memory reception and there is no recording paper or toner, an Information Code appears on the display.

2 Install the recording paper (See page 20) or replace the toner cartridge (See page 18).

The machine will automatically start printing the document stored in the memory.
Print Collation Mode
The printing mechanism of the UF-6300/5300 features a Reverse Order Stacking construction. The UF-6300/5300 has a Print Collation Mode that stacks received documents in the correct order. When the Print Collation Mode is enabled, all received documents are stored into the memory first, and then printed out in Correct Order Stacking.
The requirements for the Print Collation Mode to be active are:
1) Fax Parameter No. 65 (PRINT COLLATION) set to VALID (See page 39) 2) Sufficient remaining memory
The unit will print in Reverse Order Stacking (Non-Collation Mode) whenever one of the above requirements is not met.
| Sending Document Order Stacking Document Order | ||
 | Correct Order Stacking (Collation Mode) | Reverse Order Stacking (Non-Collation Mode) |
 |  | |
NOTE
- If the memory overflows, the machine will stop receiving and release the communication line. The document(s) stored in the memory up to that moment will be printed out.
- If you wish to turn off the substitute reception function, change the setting of Fax Parameter No.22 (SUBSTITUTE RCV) to "INVALID". (See page 37)
Copies
Your machine has a copy function for single or multiple copies.
1

Set document(s) face down.
ENTER STATION(S)
THEN PRESS START 00%
2
Copy

COPY
NO. OF COPY=1
3
Enter the number of copies.
Ex: ① ①
COPY
NO. OF COPY=10
4
Start

* STORE * NO.005
PAGES=001 01%
* COPY *
NO. OF COPY=01/10
The machine stores the document, and then prints the copies.
NOTE
- The copy will be reduced automatically depending on the length of the original document. If you wish to be prompted for the reduction ratio when making copies, change the setting of Fax Parameter No. 32 (COPY REDUCTION) to "MANUAL". (See page 37)
If Copy Reduction is set to Manual, press ▼ or ▶ to adjust the zoom ratio in 1% steps. (100% to 70%)
- If you made a copy with Super Fine resolution, it will be reduced slightly even if the reduction ratio is set to 100% in order to fit the data on one page.
- You can change the Contrast and Resolution without Standard Resolution in Copy Mode.
- If you experience a memory overflow error while making copies, you may set the Memory XMT to "INVALID" feature temporarily "INVALID" by pressing Function ⑧ ⑨ Set
①. However, the printed copies will not be collated.
Timer Controlled Communications
General Description
You can send a document to one or multiple stations at any preset time within the next 24 hours. Up to 10 built-in timers can be set for deferred transmission and deferred polling.
Deferred Transmission

Set document(s) face down.
ENTER STATION(S) THEN PRESS START 00%


DEFERRED COMM. (1-2) ENTER NO. OR ∨ ∧


DEFERRED XMT START TIME :
Enter the start time from the keypad. (Use a 4-digit, 24-hour clock)
ENTER STATION(S) THEN PRESS START
Ex: 21330 p.m.) and
Set
Dial by any combination of the following methods:
- One-Touch Dialling
- Abbreviated Dialling
- Manual Number Dialling, press Set after each station is entered (Up to 12 stations)
- Directory Search Dialling, press after each station is entered (For details, see pages 49 to 52.)

<01>(Station name) 5551234
6

to store documents into the memory.
* STORE * NO.002 PAGES=001 05%
* STORE * COMPLETED TOTAL PAGES=005 30%
NOTE
- If you entered a wrong number in Step 4, press and then re-enter the right number.
- To change or cancel the Deferred Communication settings. (See pages 89 and 90)
- When you reserve a deferred transmission without storing a document into the memory, the following message will be shown on the display after pressing in the last step.
DEF DIRECT XMT RSV'D <01>(Station name)
Timer Controlled Communications
Deferred Polling
1
Function

2


3
Enter the start time from the keypad.
(Use a 4-digit, 24-hour clock)
Ex: (3:30 a.m.) and
Set
4
Enter a 4-digit polling password.
Ex: ① and ⑦ ⑥
Set
5
Dial by any combination of the following methods:
• One-Touch Dialling
- Abbreviated Dialling
- Manual Number Dialling, press after each station is entered (Up to 12 stations)
- Directory Search Dialling, press after each station is entered (For details, see pages 49 to 52.)
Ex:
6

DEFERRED COMM. (1-2)
ENTER NO. OR ∨ ∧
DEFERRED POLLING
START TIME :
DEFERRED POLLING
PASSWORD=
ENTER STATION(S)
THEN PRESS START
<01>(Station name)
5551234
* STORE * NO.001
NOTE
- If you entered a wrong number in Step 3, press Clear, and then re-enter the right number.
- To change or cancel the Deferred Communication settings, see pages 89 and 90.
General Description
Polling means calling other station(s) to retrieve a document. The other station must know in advance that you will call and must have a document set on the ADF or stored in the memory. You may need to set a polling password shared by the other station to ensure security.
Setting the Polling Password
If the polling password does not match with the polled station, your polling request will be refused automatically.
To set the polling password, follow the steps below.


![graph TD A["Set"] --> B["Volume"] B --> C["Directory Search"] C --> D["Stop"]](/content/2026/06/1328210/images/df8b354043b2361fa6b7f4d3a4bf511cc5647560cd7aa4368f4fac793166ede6.jpg)
NOTE
- Polling might not function with all fax machines. We suggest you attempt a trial polling before you actually poll important documents.
- If a password is not set in the polled station, you may poll the other station even though your machine has a password.
Preparing to be Polled
In order to let other stations poll your machine, you must prepare your machine with a document stored in memory. Be sure to set the polling password before storing the document into memory. After being polled, the documents stored in the memory will be deleted automatically. To retain the documents in memory so that they can be polled repeatedly, change Fax Parameter No. 27 (POLLED FILE SAVE) to "VALID". (See page 37)

Set document(s) face down.
ENTER STATION(S) THEN PRESS START 00%


POLLING NO.=1:POLLING 2:POLLED

Enter a 4-digit polling password. (See Note 3) Ex: ④ ③ ② ①
POLLED PASSWORD=1234

The document(s) will be stored into the memory.
POLLED PASSWORD=4321
* STORE * NO.015 PAGES=001 01% * STORE * COMPLETED TOTAL PAGES=005 24%
NOTE
- You can still send or receive documents even when the unit is set for polling.
- Only 1 polled file can be stored in the memory. If you need to add document(s) into the same polled file. (See page 92)
- If you have set the polling password in Fax Parameter No. 26, the password will appear on the display. You can still change the password temporarily by overwriting it with a new one. (See page 37)
To Poll Documents from Another Station
The following procedure lets you poll a document from one or multiple stations. Be sure to set the polling password before polling. (See page 78)


![graph TD A["Set"] --> B["Volume"] A --> C["Directory Search"]](/content/2026/06/1328210/images/9791d24b25e1815f79c86bf70ff1bf7ba481b166b4012e583653b803886d7b5b.jpg)


NOTE
- You can review the entered stations in step 5 by pressing the ▼ key and then pressing
Clear to delete the displayed station or group as needed.
- If you have set the polling password in Fax Parameter No. 26, the password will appear on the display.
You can still change the password temporarily by overwriting it with a new one.
Program Keys
General Description
Your fax machine has special Program Keys. These keys are useful if you frequently need to send or poll the same group of stations. You can use these keys to store a One-Touch group key, a sequence of stations to be polled, a deferred transmission or polling sequence, or an additional One-Touch key.
Setting for Group Dialling
To set a Program Key for Group Dialling
1


PROGRAM (1-4)
ENTER NO. OR ∨ ∧
2


PROGRAM [P] PRESS PROGRAM KEY
3

4
Enter the station name (up to 15 characters) using the character keys. (See page 14)
PROGRAM [P1] NAME ENTER NAME
Ex: PROG.A and Set
ENTER STATION(S) THEN PRESS START
5
Enter the station numbers using One-Touch Key or Abbr Dial and 3-digit code.


<01> (Station name) 5551234
[010] (Station name) 5553456
You may use the ▼ keys to review the entered station(s) before going to the next step. If you find an error, press to delete the displayed station.
6

You can now set other Program Keys by repeating the procedures from Step 3, or return to standby by pressing Stop.
PROGRAM[P] PRESS PROGRAM KEY
Setting for Deferred Transmission
To set a Program Key for deferred transmission
1


PROGRAM (1-4) ENTER NO. OR ∨ ∧
2


PROGRAM[P] PRESS PROGRAM KEY
3
Ex:

PROGRAM[P1] NAME ENTER NAME
4
Enter the station name (Up to 15 characters) by using the Character keys. (See page 14)
Ex: PROG.A and Set
PROGRAM[P1] PRESS FUNCTION KEY
5


DEFERRED XMT START TIME:
6
Enter the starting time using 4 digits.
Ex: ①30 p.m) and
Set
ENTER STATION(S) THEN PRESS START
7
Enter the station by any combination of the following methods:
- One-Touch Dialling
- Abbreviated Dialling
- Directory Search Dialling, press after each station is entered (For details, see pages 49 to 52.)
<01>(Station name) 5551234
Ex:

PROGRAM[P] PRESS PROGRAM KEY

You can now set other Program Keys by repeating the procedures from Step 3, or return to standby by pressing Stop.
Setting for Deferred Polling
To set a Program Key for deferred polling
1
Function


PROGRAM (1-4)
ENTER NO. OR V ∧
2

Directory Search
PROGRAM[P]
PRESS PROGRAM KEY
3
Ex:
PROGRAM [P1] NAME
ENTER NAME
4
Enter the station name (up to 15 characters) using the character keys. (See page 14)
Ex: PROG.A and
Set
PROGRAM [P1]
PRESS FUNCTION KEY
5
Function


DEFERRED POLLING
START TIME :
6
Enter the starting time.
Ex: (22:00 p.m.) and
Set
DEFERRED POLLING
PASSWORD=
7
Enter a 4-digit polling password.
Ex: and 1 1
Set
ENTER STATION(S)
THEN PRESS START
8
Enter the station by any combination of the following methods:
- One-Touch Dialling
- Abbreviated Dialling
- Directory Search Dialling, press after each station is entered
(For details, see pages 49 to 52.)
<01>(Station name)
5551234
Ex:
PROGRAM [P]
PRESS PROGRAM KEY
9
Start
You can now set other Program Keys by repeating the procedures from Step 3, or return to standby by pressing Stop.
Setting for Normal Polling
To set a Program Key for normal polling
1


PROGRAM (1-4) ENTER NO. OR ∨ ∧
2


PROGRAM[P] PRESS PROGRAM KEY
3
Ex:

PROGRAM[P1] NAME ENTER NAME
4
Enter the station name (Up to 15 characters) by using the Character keys. (See page 14)
Ex: PROG.A and Set
PROGRAM[P1] PRESS FUNCTION KEY
5


POLLING PASSWORD=
6
Enter a 4-digit polling password.
Ex: and 1 1
Set
The polling password appears if it has been previously set.
ENTER STATION(S) THEN PRESS START
7
Enter the station by any combination of the following methods:
• One-Touch Dialling - Abbreviated Dialling - Directory Search Dialling, press after each station is entered (For details, see pages 49 to 52.)
<01>(Station name) 5551234

8

PROGRAM[P] PRESS PROGRAM KEY
You can now set other Program Keys by repeating the procedures from Step 3, or return to standby by pressing Stop.
Setting for One-Touch Key
To set a Program Key for One-Touch Key
1


PROGRAM (1-4) ENTER NO. OR ∨ ∧
2


PROGRAM[P] PRESS PROGRAM KEY
3

4
Enter the station name (Up to 15 characters) by using the Character keys. (See page 14)
Ex: PROG.A and Set
PROGRAM[P1] NAME ENTER NAME
5
Enter a telephone number (up to 36 digits including pauses and spaces).
Ex: ⑨ Redial/Pause ⑤⑤⑤② ○○③④
[P1] PROG.A ENTER TEL. NO.
6

You can now set other Program Keys by repeating the procedures from Step 3, or return to standby by pressing Stop.
[P1] PROG.A 9-555 1234
PROGRAM[P] PRESS PROGRAM KEY
Changing or Erasing the Program Key Settings
To change the settings in a Program Key, follow the procedure on setting a Program Key on pages 81 to 85.
- Start time or station(s) for deferred transmission • Station(s) for normal polling
- Start time or station(s) for deferred polling • Station(s) for group dialling
- Telephone number and station name for One-Touch key
To delete the settings in a Program Key
1
Function


PROGRAM (1-4)
ENTER NO. OR ∨ ∧
2


PROGRAM[P] PRESS PROGRAM KEY
3
Press the Program key you want to delete.
Ex:

PROGRAM[P1] DELETE? 1:YES 2:NO
4

* DELETING * PROGRAM[P1]
5
You can now delete other Program Keys by repeating the procedures from Step 3, or return to standby by pressing Stop.
PROGRAM[P] PRESS PROGRAM KEY
General Description
Your machine has a document image memory which enables you to reserve memory transmission, memory deferred transmission, memory polling and so on.
After reserving the communications in memory, you may need to change the settings of the communication(s) while it is still in memory. This section describes how to use the file editing features.
Printing a File List
The contents of the communication settings may have to be modified or deleted. To verify the contents, follow the steps below to print out a file list.

EDIT FILE MODE (1-6) ENTER NO. OR ∨ ∧

1: FILE LIST? PRESS SET TO SELECT
![graph TD A["Set"] --> B["Volume"] A --> C["Directory Search"] style A fill:#f9f,stroke:#333 style B fill:#ccf,stroke:#333 style C fill:#cfc,stroke:#333](/content/2026/06/1328210/images/c1786c327ec17d4ea4510069ed87d4f91ff90fa5babff149fcc29a34af02affa.jpg)
FILE LIST 1:PRINT 2:VIEW

* PRINTING * FILE LIST
Sample File List
*************************** -FILE LIST-****************************** DATE dd-mmm-yyyy ***** TIME 15:00 **************************
(1)
FILE No.
(2)
COMM. TYPE
(3)
CREATED TIME
(4)
START TIME
(5)
PAGES
(6)
DESTINATION(S)
001
DEFERRED XMT
DD-MMM 13:20
20:30
[001]
002
MEM. DEF. XMT
Explanation of Contents
(1) File number: If the file is now being executed, an "*" is indicated on the left of the file number. (2) Communication type. (3) Stored date/time: Date/time that the files were stored. (4) Executing time: If the file is a Timer Controlled Communication, the start time is printed in this column.
If the file is an incomplete file, "INCOMP" is printed in this column.
(5) Number of stored page(s). (6) Destination ABBR. No./One-Touch No./Manual Dialling No.
Viewing the Contents of a File List
To view the contents of a file list on the display without printing it, follow the steps below.
1
Function


EDIT FILE MODE (1-6) ENTER NO. OR V ^
2

1:FILE LIST? PRESS SET TO SELECT
3

FILE LIST 1:PRINT 2:VIEW
4

USE THE ∨ ∧ KEYS TO SCROLL EACH FILE
5


or repeatedly until the
display shows a file you want to edit.
Sample display
Type of File
XMT: Transmission
POLL: Polling
POLLED: Polled
RCV TO MEM: Receive to Memory
CONF. MAIL: Conf. RCV / Conf. Polled
PC JOB: PC Interface Job
JOURNAL: Journal / Report
Status
nn:nn: Start time
IN PRG: In progress
REDIAL: Waiting to redial
INCOMP: Incomplete file
001 XMT 10:00 P010
<01>(Station name) ∧
File Number Entered station Number of pages
6
Stop

Changing the Start Time or the Station of a File
To change the start time and/or stations in a communication file, follow the steps below.
1


EDIT FILE MODE (1-6) ENTER NO. OR ∨ ∧
2


ENTER FILE NO. OR ∨ ∧ FILE NO.=■■■
3
Enter the file number or use ▼ to ▲ select the file that you want to change.
ENTER FILE NO. OR ∨ ∧ FILE NO.=001
Ex: ①01◯
4

(See Note 2)
DEFERRED XMT START TIME 22:30
5
Enter a new start time.
DEFERRED XMT START TIME 06:00
Ex: ⑥:06 a.m.)0
(If you do not have to change the time, skip to step 6.)
6

<01>(Station name) 5551234
7
To delete the station(s), press ▼ until the station you want to delete appears. Then press Clear or Enter the station(s) you want to add.
ENTER STATION(S) THEN PRESS START

1 STN(S) ARE SET ADD MORE OR START
8

* STORE * NO.005
NOTE
- Your machine cannot change the start time and/or stations in the file while stored document is being sent or the machine is waiting to redial.
- If the file is not a Deferred Communication File, the following message is shown in the display.
SET DEFERRED COMM.? 1: YES 2: NO
Press ② to change the type of the file for deferred communication file.
Deleting a File
To delete the file in memory, follow the steps below.
1


EDIT FILE MODE (1-6) ENTER NO. OR ∨ ∧
2


ENTER FILE NO. OR ∨ ∧ FILE NO.=■■■
3
Enter the file number or use ▼ to ▲ select the file that you want to delete.
ENTER FILE NO. OR V A FILE NO.=001
Ex: (See Note 2)
4

DELETE FILE NO.001? 1:YES 2:NO
5

* DELETING * FILE NO.=001
Enter the next file number you want to delete or press Stop to return to standby.
ENTER FILE NO. OR ∨ ∧ FILE NO.=■■■
NOTE
- Your machine cannot delete the file while it is being sent.
- Enter as the file number and press to delete all files (except when there is a file in progress). The following message is shown in the display.
DELETE ALL FILES? 1: YES 2: NO
Press to delete all files.
Printing Out a File
To print the contents of the communication file, follow the steps below.
1


EDIT FILE MODE (1-6) ENTER NO. OR ∨ ∧
2


ENTER FILE NO. OR ∨ ∧ FILE NO.=■■■
3
Enter the file number or use ▼ to ▲ select the file that you want to print.
ENTER FILE NO. OR ∨ ∧ FILE NO.=001
Ex: 001
4

Your machine will print the file. The document(s) will remain in the memory even after printing the file.
* PRINTING * PAGE=001/003
Edit File Mode
To add documents into the file, follow the steps below.
1 ENTER STATION(S) THEN PRESS START 05%
Set document(s) face down.
2 9 EDIT FILE MODE (1-6) ENTER NO. OR ∨ ∧
3 5 ENTER FILE NO. OR ∨ ∧ FILE NO.=■■■
Enter the file number or use ∨ or ∧ to select the file that you want to add.
Ex: 001
4 * STORE * NO.001 PAGES=002 10%
Your machine will start storing the document(s) into a file.
NOTE
- Your machine cannot add the document to a file while it is being sent or while the machine is waiting to redial.
Retry an Incomplete File
If a memory communication has been unsuccessful due to a busy line or no answer, the document you stored is automatically deleted from the memory after the last redial.
If you need to retain the document even if the communication failed, change the setting of Fax Parameter No. 31 (INC. FILE SAVE) to "VALID" in advance. (See page 37)
To retry the incomplete file, print a File List first to verify the file number. (See page 87) Then follow the steps below.
1
Function


EDIT FILE MODE (1-6)
ENTER NO. OR V ∧
2


ENTER FILE NO. OR ∨ ∧
FILE NO.=■■■
3
Enter the file number or use ▼ to ▲ select the file that you want to retry.
ENTER FILE NO. OR ∨ ∧
FILE NO.=001
4
Start

Your machine will retry the file and start dialling immediately.
* STORE * NO.001
<01>(Station name)
* DIALLING * NO.001
(Station name)
NOTE
- To confirm or change the entered telephone number for the file. (See page 87 and 89)
General Description
The Access Code prevents an unauthorized user from operating the machine. Once a 4-digit Access Code is registered, no one can operate the machine without entering the correct access code.
Automatic Receiving, however, is always available. After you complete any operation, such as mode setting or transmission, and the display returns to standby, you have to re-enter the access code in order to use the machine again. Registering the Access Code does not affect the use of the machine in any other way.
Setting the Access Code
1
Function

SET MODE (1-8)
ENTER NO. OR V A
2


FAX PARAMETER(1-137)
NO.=■
3


38 ACCESS CODE
■ ■ ■ ■
4
Enter a 4-digit Access Code.
Ex: ① ② ③ ④
38 ACCESS CODE
1234
5

38 ACCESS CODE
1:ALL 1234
6
Select Restriction Level.
① for All operations
or
② for Setting and Printing the Fax Parameters only.
Ex: ②
38 ACCESS CODE
2:PARAMETERS 1234
7

NOTE
- To delete the Access Code, enter the Access Code and press and follow the
procedure above to step 3, then press Clear. Set Stop
Operating Your Machine with the Access Code (Restrict all operations)
1 Enter the Access Code. Ex: ①②③④
DD-MMM-YYYY 15:00 ACCESS CODE=
2 Volume Directory Search Set
DD-MMM-YYYY 15:00 ACCESS CODE=****
Now you can operate the machine normally.
DD-MMM-YYYY 15:00 00%
Operating Your Machine with the Access Code (Restrict access of Fax Parameters only)
The machine can restrict the operation of setting/printing the Fax Parameters only.
Ex: When setting the Fax Parameter.

SET MODE (1-8) ENTER NO. OR ∨ ∧

Now you can operate the machine normally.
Receive To Memory
General Description
This feature is used to secure all received documents by storing them into the memory. To print out the document from memory, the authorized operator must enter the correct password.
Setting the RCV To Memory Password
![graph TD A["1 Function"] --> B["2"] B --> C["3"] C --> D["4"] D --> E["5"] E --> F["6"] F --> G["7"] style A fill:#fff,stroke:#000 style B fill:#fff,stroke:#000 style C fill:#fff,stroke:#000 style D fill:#fff,stroke:#000 style E fill:#fff,stroke:#000 style F fill:#fff,stroke:#000 style G fill:#fff,s…](/content/2026/06/1328210/images/4d6035dcd8c0668da0d71983ea63ae4c74a961fab1d9deb5ccdd44c0999fbcaf.jpg)


![graph TD A["Set"] --> B["Volume"] B --> C["Directory Search"] C --> D["Stop"]](/content/2026/06/1328210/images/a4bdb418d079c3538cea8dadeccb68aa4fd86721d17ed796ef1aa788c8b768b5.jpg)

Setting RCV To Memory
![graph TD A["1 Function"] --> B["2"] B --> C["3"] C --> D["4"] subgraph Step 1 E["Hand icon"] --> F["Hand icon"] G["Function"] --> H["8"] I["5"] --> J["Hand icon"] K["2"] --> L["Hand icon"] M["Volume"] --> N["Directory Search"] O["Set"] --> P["Volume"] Q["Volume"] --> R["Directory Search"] end](/content/2026/06/1328210/images/62d06b433d243ae4a95233a68cacc76755a811ebe812064e42789792005301c4.jpg)


NOTE
- When the memory overflows, the machine will stop receiving and release the line. The machine will not answer the next incoming call until there is space available in the memory.
Printing Out Documents
After receiving a document with the Receive To Memory feature, the following message will appear on the display.
MESSAGE IN MEMORY < RCV TO MEMORY >
To print the document, follow the steps below.
1
Function


SELECT MODE (1-9)
ENTER NO. OR V A
2


RCV TO MEMORY=ON
1: OFF 2: ON 3: PRINT
3

RCV TO MEMORY = PRINT
1: OFF 2: ON 3: PRINT
4

INPUT PASSWORD

5
Enter the password to print the documents. (See Note 1)
Ex: ①②③④◯◯
INPUT PASSWORD 1234
6

* PRINTING * MEMORY RCV'D DOC
Machine will start to print the documents.
NOTE
- If the password has not been set, your machine will not prompt you to enter the password and the documents will be printed immediately after pressing in Step 4.
- Once the RCV TO MEMORY feature is set to "VALID", the password cannot be changed (Fax Parameter No. 37 will not be shown on the LCD display). If you wish to change the password, set RCV TO MEMORY feature to "INVALID" first. Then change the password. (See page 96)
Possibility of filtering unnecessary incoming faxes
General Description
This machine can filter incoming faxes to prevent receipt of unnecessary documents (Junk fax, etc.).
Before receiving the document, the sender's numeric ID (Fax number) will be compared to the numbers registered as junk fax numbers in the receiving station. If the fax number is found in the registry, the machine will cancel the reception.
![graph TD A["Receiver"] --> B["Printer"] B --> C["Sender A (ID No: 123456789)"] C --> D["Printer"] D --> E["Sender B (ID No: 9876543210)"] E --> F["Printer"] F --> G["Sender A (ID No: 123456789)"] G --> H["Printer"] H --> I["Sender B (ID No: 9876543210)"] I --> J["Printer"] J --> K["Sender A (ID No:…](/content/2026/06/1328210/images/689f416301a0c074144cebeff8e3722c187587de2eb94f387e9463cdc6996bf6.jpg)
NOTE
1. The standard setting of the Fax Parameter "135 JUNK FAX FILTER (1. JUNK FAX FILTER)" is set to "VALID". For instructions on how to enable the Junk Fax Filter feature, see page 40. 2. This feature requires the registration of junk fax numbers. 3. This machine receives documents from senders whose fax numbers are not registered in the numeric ID if "135 JUNK FAX FILTER (2. RECEIVE WITHOUT ID NO.)" is set to "VALID". 4. The sender's numeric ID and received time can be printed on the faxes. 5. The remote machines you send faxes to may also have set the Junk Fax Filter function.
Possibility of filtering unnecessary incoming faxes
Set the Filter
Set the Junk Fax Filter to prevent receiving unnecessary documents. When set to "VALID", the machine will not receive faxes from senders whose numeric ID has been registered as junk fax number. It is necessary to register the junk fax number (up to 30 fax numbers) for reception refusal to make this function effective. (See page 40)
1
Function


2


3


4

5

6

for INVALID.
or

for VALID.
7

Stop

SET MODE (1-8) ENTER NO. OR ∨ ∧
FAX PARAMETER(1-137) NO.=■
135 JUNK FAX FILTER PRESS SET TO SELECT
JUNK FAX FILTER(1-4) ENTER NO. OR ∨ ∧
01 JUNK FAX FILTER 1: INVALID
01 JUNK FAX FILTER 2:VALID
Possibility of filtering unnecessary incoming faxes
Receive without ID
When set to "VALID", the machine will receive faxes from senders without a registered numeric ID. When set to "INVALID", reception is denied in cases where it is not possible to receive number IDs. This setting is available only when "135 JUNK FAX FILTER (1. JUNK FAX FILTER)" is set to "VALID".
1 Same as procedures 1 to 4 of "Set the Filter" (See page 99)
JUNK FAX FILTER(1-4) ENTER NO. OR ∨ ∧
2 2
02 RCV WITHOUT ID 2:VALID
3 1 or for INVALID.
02 RCV WITHOUT ID 1: INVALID
2 for VALID.
4 Volume Directory Search Set Stop
Possibility of filtering unnecessary incoming faxes
Received ID Print
When set to "VALID", the sender's numeric ID and received time are printed at the bottom of the received faxes. If the sender's numeric ID is not registered, only the received time is printed.
This setting is available only when "135 JUNK FAX FILTER (1. JUNK FAX FILTER)" is set to "VALID".
1 Same as procedures 1 to 4 of "Set the Filter" (See page 99)
JUNK FAX FILTER(1-4) ENTER NO. OR ∨ ∧

03 RECEIVED ID PRINT 1: INVALID

03 RECEIVED ID PRINT 2: VALID

for VALID.
![graph TD A["Set"] --> B["Volume"] B --> C["Directory Search"] C --> D["Stop"]](/content/2026/06/1328210/images/9fab9a8757f5396ed001ea6dbc759e2e95638f9a487ec048bbff5188c81e35ea.jpg)
Sample Transaction Journal
| ********** -JOURNAL- ******* DATE dd-mmm-yyyy ****** TIME 15:00 ******* | |||||||||
| NO. | COMM. | PAGES | FILE | DURATION | X/R | IDENTIFICATION | DATE | TIME | DIAGNOSTIC |
| 01 | OK | 005/005 | 001 | 00:00:22 | XMT | SERVICE DEPT. | dd-mmm | 17:35 | C0044903C0000 |
| 02 | OK | 003 | 002 | 00:01:17 | RCV | 111 222 333 | dd-mmm | 17:41 | C0044903C0000 |
| 03 | JUNK | 000 | 003 | 00:00:31 | RCV | 1234567890 | dd-mmm | 17:50 | C0044903C0000 |
| 04 | 630 | 000/005 | 004 | 00:00:00 | XMT | 342345676 | dd-mmm | 17:57 | 0800420000000 |
| 05 | STOP | 000 | 005 | 00:00:34 | XMT | 12324567 | dd-mmm | 18:35 | 0210260200000 |
| -PANASONIC | |||||||||
| ********** -HEAD OFFICE -***** - 201 555 1212- ******* | |||||||||
Possibility of filtering unnecessary incoming faxes
Register Junk Fax Number
Register fax numbers as junk fax numbers.
Up to 30 ID numbers can be registered as junk fax numbers. (Including numerals "0-9", blank space, and + symbol.)
When comparing the sender's numeric ID to the registered junk fax numbers, blank spaces between numbers and "0" at the beginning of the number are ignored.
1 Same as procedure 1 to 4 of "Set the Filter" (See page 99)
JUNK FAX FILTER(1-4) ENTER NO. OR V ^
2 4
04 ID NO. REGIST. PRESS SET TO SELECT
3 Volume Directory Search Set
ID NO. REGISTRATION ENTER NO. OR ∨ ∧
4 Enter the ID number you wish to register.
ENTER ID NO. 15
Ex: ①⑤
5 Enter the junk fax number you wish to register.
ENTER ID NO. 15 555 3456
Ex: ⑤⑤⑤ ○ ⚡ ③④⑤⑥
6 Volume Directory Search Set Stop
Distinctive Ring Detector (DRD)
General Description
This function is only effective for companies in countries which offer the DRD Service.
Your machine has a special feature in conjunction with an optional service provided by many local telephone companies. It can distinguish up to 2 telephone numbers with a corresponding ring pattern identifying each number. "DRD" lets you provide multiple phone numbers, one for your fax, business or personal use with just a single phone line.
Please check with your local telephone company on the availability of this service in your area.
Your machine can be programmed to respond to the specified ring pattern only for the DRD Service. To enable your machine to detect the ring pattern only for fax communication, change the setting of Fax Parameter No. 30 (See page 37).
The following table shows a typical example with 2 telephone numbers on a single phone line.
Ex: Specified Ring Pattern = Double Ring
| Telephone No. | Usage Distinctive Ring Sound Ring Pattern | ||
| 555-1111 | Business | Riing......Riing...... | Standard Ring |
| 555-2222 | Fax | Ring...Ring......Ring...Ring...... | Specified Ring(Double Ring) |
The following illustration shows a typical setup, with your machine set to detect Specified Ring (Double Ring).
![graph TD A["At Your Location with Distinctive Ring Service"] --> B["Dialling "555-2222""] B --> C1["Ring..Ring......Ring..Ring\nA person recognizes that the call is for the fax machine by the double ring pattern sound."] B --> C2["Ring..Ring......Ring..Ring\nThe fax machine distinguishes t…](/content/2026/06/1328210/images/83f2df3b43a769770640544d6fee374eb7a7cd66ddb80cec74fe35620e32b9c4.jpg)
NOTE
1 "Riiling" means a long ringing sound and "Ring" means a short ringing sound. 2. The specified ring pattern may differ depending on the each country's regulation or specification.
Fax Cover Sheet
General Description
A Fax Cover Sheet can be automatically attached to your transmit document(s) that shows the recipient's name, originator's name and the number of pages attached.
![graph LR A["Page 1"] --> B["Page 2"] B --> C["Fax Cover Sheet"] C --> D["Header P.01"] D --> E["Header P.02"] E --> F["Page 2"] F --> G["Total P.02"]](/content/2026/06/1328210/images/1fcd50a4a7b39a8afddc955781846580514416c9d42af33484cb86db88bb172c.jpg)
To use the Fax Cover Sheet
To attach a Fax Cover Sheet to a transmission, follow the procedure below.


NOTE
- To change the preset Fax Cover Sheet Setting, change the setting of Fax Parameter No. 56. (See page 39).
- This function is available for memory or direct transmission modes.
- The Fax Cover Sheet is not counted in the number of pages column of the journals.
To use the Fax Cover Sheet
Fax Cover Sheet Sample
***** FACSIMILE COVER SHEET *****
(1)
dd-mmm-yyyy 15:00
(2)
Message To:
SALES DEPT.
(3)
Message From:
PANASONIC
201 555 1212
(4)
02
Page (s)
Following This Cover Page
Explanation of Contents
(1) Starting time of communication. (2) Recorded name in the One-Touch, ABBR. No. or dialled telephone number. (3) Your LOGO (Up to 25 characters) and ID Number. (Up to 20 digits) (4) The number of pages to follow. This information is not shown when transmitting by Direct Transmission Mode.
General Description
If your PBX requires a PIN (Personal Identification Number) code to get an outside line, your machine can be set to prompt the user to enter a PIN code before any dialling.
Selecting the Access Method (Prefix or Suffix)
1
Function


SET MODE (1-8) ENTER NO. OR ∨ ∧
2


FAX PARAMETER(1-137) NO.=■
3


39 PIN CODE ACCESS 1:NONE
4

for suffix code.

for prefix code.
39 PIN CODE ACCESS 2:SUFFIX
or
39 PIN CODE ACCESS 3:PREFIX
5

Stop

NOTE
- This feature is available in certain countries only.
Dialling with a PIN Code
1

Set document(s) face down.
ENTER STATION(S) THEN PRESS START 00%
2
Dial by any combination of the following methods:
- One-Touch Dialling • Abbreviated Dialling
- Manual Number Dialling, press after each station is entered (Up to 12 stations)
- Directory Search Dialling, press after each station is entered (For details, see pages 49 to 52.)


If you want to confirm the number of stations you have entered, press . Set
(Station name) 5551234
[010] (Station name) 5553456
2 STN(S) ARE SET ADD MORE OR START
3

Ex: (Up to 36 digits)
ENTER PIN CODE
4
5

Your machine stores the document and starts dialling the PIN code and telephone number as you specified.
ENTER PIN CODE 9876
* STORE * NO.002 PAGES=001 05%
* DIALLING * NO.002 (Station name)
NOTE
- The PIN code is shown as " ■" on the display when dialling the number.
- This feature is not available when dialling a number by using Off-Hook or On-Hook Direct dialling mode.
Setting Fax Forward
This feature allows all incoming faxes to be forwarded to the station registered in the one-touch or abbreviated dialling number. Once the faxes are received in the memory, the machine will forward the received document(s) to the telephone number registered in the one-touch or abbreviated dialling number.
This function is convenient when you would like to receive faxes in another location (Ex: your home) at night or during a holiday.


6 Enter the station to which the received faxes should be forwarded to by assigning a one-touch key or an abbreviated dialling number.

NOTE
- When the Fax Forward feature is set, the one-touch or abbreviated dialling number is restricted from editing. Please change this function to "INVALID" if you would like to edit the telephone number.
- If the communication to transfer a received document(s) fails, the received document will print out and is then deleted from the memory even if the Fax Parameter No. 31 (INC. FILE SAVE) is set to "VALID".
If you wish to save the document into the memory in case of communication failure, set your machine to Receive To Memory. (See page 96)
- It is not possible to receive a document if the memory of your machine overflows or is about 95% used.
Selective Reception
General Description
Your machine has a special feature known as Selective Reception which can prevent receipt of unnecessary documents (Ex: junk fax, direct mail, etc.).
Before receiving the document, the last 4 digits of the ID Number received from the sending machine will be compared with the last 4 digits of the telephone number programmed in each One-Touch or Abbreviated station. When a match is found, your machine will start receiving the document. If a match is not found, your machine will cancel the reception and an Information Code 406 will be recorded on the Journal.
Setting the Selective Reception
1


SET MODE (1-8) ENTER NO. OR ∨ ∧
2


FAX PARAMETER(1-137) NO.=■
3


46 SELECT RCV 1: INVALID
4

46 SELECT RCV 2: VALID
5

NOTE
- When the Selective Reception is set, your machine can receive only from those stations which are programmed in the built-in auto-dialler.
- If your ID number has not been set, your machine might not be able to receive from some models.
To set your ID number, see page 29.
Password Communications
General Description
Password Communications, including Password Transmission and Password Reception, will prevent your machine from sending a fax to a wrong station or receiving a fax from an unauthorized station. You can set Password Transmission and Password Reception independently, or both together.
To use Password Transmission, you must set a 4-digit transmission password in advance. The password must be shared with other compatible Panafax machine(s). If the transmission password in your machine does not match the transmission password in the other compatible Panafax machine(s), the transmission will fail. You can select password transmission by setting Function 8-4 (PASSWORD-XMT) to "ON" when you send a document.
To use Password Reception, you must set a 4-digit receiving password in advance. The password must be shared with the other compatible Panafax machine(s). If the password in your machine does not match the receiving password in the other compatible Panafax machine(s), the reception will fail. Once you set password reception and set the parameter to "ON", it stays that way until you change the setting to "OFF".
Compatibility with Other Machines
You can only use password transmission and reception with the Panafax compatible machine(s) listed below.
• DF-1100 • DP-180 • DP-190 - DP-1810F • DP-1820E • DP-1820P • DP-2000 • DP-2310 • DP-2500 • DP-3000 • DP-3010 • DP-3510 • DP-3520 • DP-4510 • DP-4520 - DP-6010 · DP-6020 - DX-600 • DX-800 - FP-D250F • FP-D350F • UF-160 • UF-160M • UF-170 • UF-260 • UF-270 • UF-270M • UF-280M • UF-300 • UF-312 • UF-322 • UF-550 • UF-560 • UF-585 • UF-590 • UF-595 • UF-650 • UF-733 • UF-745 • UF-750 • UF-750D • UF-755 • UF-755e • UF-766 • UF-770 • UF-780 • UF-788 • UF-790 • UF-880 • UF-885 • UF-890 • UF-895 • UF-990 • UF-5100 • UF-5300 - UF-6000 - UF-6100 - UF-6300 - UF-9000 - UF-M500
NOTE
Setting Password Transmission
To set transmission password and parameter,
1


SET MODE (1-8) ENTER NO. OR ∨ ∧
2


FAX PARAMETER(1-137) NO.=■
3


43 PASSWORD-XMT
4
Enter a 4-digit Transmission Password.
Ex: and press 4
Set
43 PASSWORD-XMT 1:OFF 1234
5

for "OFF" (Password is not checked)
or
43 PASSWORD-XMT 1:OFF 1234

for "ON" (Password is checked)
or
43 PASSWORD-XMT 2:ON 1234
6

Stop
NOTE
- You can change the setting temporarily by using FUNCTION 8-4 (PASSWORD-XMT) for each transmission. (See page 113)
- To change the password, press in clear 4. Then re-enter a new one.
Password Communications
Setting Password Reception
To set the receiving password and parameter,
1

SET MODE (1-8) ENTER NO. OR ∨ ∧
2

FAX PARAMETER(1-137) NO.=■
3

44 PASSWORD-RCV
4
Enter a 4-digit Transmission Password.
Ex: and press 4
Set
44 PASSWORD-RCV 1:OFF 1234
5

for "OFF" (Password is not checked)
or

44 PASSWORD-RCV 1:OFF 1234
or
44 PASSWORD-RCV 2:ON 1234
6

NOTE
- Once you set the parameter, you cannot select the parameter, "OFF" or "ON" for each reception. It is always "OFF" or "ON" until you change the setting.
- To change the password, press in C#ar 4. Then re-enter a new one.
Using Password Transmission
To use Password Transmission, you can select PASSWORD-XMT "OFF" or "ON" for each Transmission by following the procedure below.
1

Set document(s) face down.
ENTER STATION(S) THEN PRESS START 00%
2
Function

SELECT MODE (1-9) ENTER NO. OR ∨ ∧
3


PASSWD-XMT=OFF 1:OFF 2:ON
4

for "OFF" (Password is not checked)
PASSWD-XMT=OFF 1:OFF 2:ON
or
or

for "ON" (Password is checked)
PASSWD-XMT=ON 1:OFF 2:ON
5

ENTER STATION(S) THEN PRESS START 00%
6
Dial by any combination of the following methods:
- One-Touch Dialling
- Abbreviated Dialling
- Manual Number Dialling, press after each station is entered (Up to 12 stations)
- Directory Search Dialling, press after each station is entered (For details, see pages 49 to 52.)
Ex:

<01>(Station name) 5551234
Password Communications
Using Password Transmission
7

If your machine's Transmission Password coincides with the other station's Transmission Password, your machine starts sending the document.
When transmission is completed, PASSWORD-XMT returns to standard setting ("OFF" or "ON").
Using Password Reception
There is no additional operation required once you set the parameter by following the procedure on page 112. The parameter, "OFF" or "ON", cannot be selected for each reception. It is always "OFF" or "ON" until you change the setting.
Confidential Mailbox
General Description
Your machine is equipped with two Confidential Communication features which ensure that the Confidential information you send is received only by the person with the correct confidential code.
Confidential Mailbox
The confidential mailbox feature can be used as a mailbox to communicate with other compatible models using a 4-digit confidential code. The Confidential Mailbox feature receives document(s) with a confidential code into memory. These documents can only be printed by the person who has the correct confidential code.
![graph TD A["Panasonic Compatible Model"] -->|Send with Conf.Code 1000| B["Panasonic Compatible Model"] C["Panasonic Compatible Model"] -->|Send with Conf.Code 2000| B B --> D["MAILBOX Document "A" and "B" are stored into memory."] D --> E["Panasonic Compatible Model"] E --> F["Po…](/content/2026/06/1328210/images/519a171883d154555876b29f03ed94c0951d72c7e8b31c5b52999b614c9140a0.jpg)
Compatibility with Other Machines
Table 1 shows a list of compatible Panafax models which have the Confidential Mailbox feature. It also shows whether or not special settings are required.
Table 1 : Confidential Mailbox Requirement
| Compatible Model Special Settings | |
| DF-1100 DP-180 DP-190 DP-1810F DP-1820PDP-1820EDP-2000DP-2310 DP-2500 DP-3000 DP-3010 DP-3510 DP-3520 DP-4510DP-4520 DP-6010 DP-6020 DX-600 DX-800 UF-280M UF-312 UF-322UF-332 UF-333 UF-342 UF-344 UF-550 UF-560 UF-585 UF-590UF-595 UF-733 UF-744 UF-745 UF-755 UF-755e UF-766 UF-770UF-780 UF-788 UF-790 UF-880 UF-885 UF-890 UF-895 UF-990UF-5100 UF-5300 UF-6000 UF-6100 UF-6300 UF-9000 | Not required. |
NOTE
- If your machine receives two confidential faxes with same confidential code, both documents are stored together in the same confidential mailbox.
- Up to 10 Mailbox files can be stored in memory. That means you can receive the confidential fax using 10 different confidential codes.
- If the memory overflows, the machine will stop receiving and release the line.
- If confidential faxes were received in the mailbox of UF-733, you cannot poll those documents. The UF-733 is designed to print out the received confidential document locally only.
Sending a Confidential Document to a Remote Station's Mailbox
1

Set document(s) face down.
ENTER STATION(S) THEN PRESS START 00%
2


CONF. COMM. (1-5) ENTER NO. OR ∨ ∧
3


CONFIDENTIAL XMT CONF. CODE=■■■■
4
Enter a 4-digit Confidential Code.
Ex: ② ② ③ ③
CONFIDENTIAL XMT CONF. CODE=2233
5

ENTER STATION THEN PRESS START
6
Dial by any one of the following methods:
• One-Touch Dialling - Abbreviated Dialling • Manual Number Dialling - Directory Search Dialling
Ex:

<01>(Station name) 5551234
7

If necessary, inform the receiving person and provide the Confidential Code.
Polling a Confidential Document from a Remote Station's Mailbox
After you have been informed that someone has transmitted a confidential document to a remote station's mailbox, you can poll the confidential document from the remote station by following the procedure below.
1
Function


CONF. COMM. (1-5)
ENTER NO. OR ∨ ∧
2


CONFIDENTIAL POLL
CONF.CODE=■■■■
3
Enter a 4-digit Confidential Code.
Ex: ② ② ③ ③
CONFIDENTIAL POLL
CONF.CODE=2233
4

ENTER STATION
THEN PRESS START
5
Dial by any one of the following methods:
- One-Touch Dialling
- Abbreviated Dialling
- Manual Number Dialling
- Directory Search Dialling
Ex:

<01>(Station name)
5551234
6
Start

NOTE
- The confidential file will be deleted automatically at the center station after being polled.
Receiving a Confidential Document to Your Machine's Mailbox
No special setting is required, as your machine comes with this feature ready to use. Your machine receives a confidential fax the same way it receives a normal fax message. When receiving the confidential fax, the display shows the following message (CONF. RCV REPORT) and prints out the Confidential Receive Report.
MESSAGE IN MAIL BOX
Sample CONF. RCV Report

Explanation of Contents
(1) File number 001 to 999 (2) Received remote station's ID Character ID or Numeric ID (3) Number of pages received (4) Received date and time
NOTE
- If your machine receives two confidential faxes with the same confidential code, both documents are stored together in the same confidential mailbox.
- Up to 10 Mailbox files can be stored in memory. So, you can receive the confidential fax using 10 different confidential codes.
- If the memory overflows, the machine will stop receiving and release the line.
- You can verify whether the unit has received a confidential fax by printing out the File List. (See page 87)
Storing a Confidential Document in Your Machine's Mailbox
Use the following procedure to store a document in a confidential mailbox in your machine. Once the confidential document is stored in your machine, it can be polled by another machine.
1

Set document(s) face down.
ENTER STATION(S) THEN PRESS START 00%
2
Function


CONF. COMM. (1-5) ENTER NO. OR ∨ ∧
3


CONFIDENTIAL POLLED CONF. CODE=■■■■
4
Enter a 4-digit Confidential Code.
Ex: ②2③3◯◯
CONFIDENTIAL POLLED CONF. CODE=2233
5

The document(s) will be stored into memory.
If necessary, inform the receiving party of the confidential document and supply the confidential code needed to poll the document.
NOTE
- The confidential file will be deleted automatically after being polled. If you wish to retain the confidential file even after being polled, change the setting of Fax Parameter No. 42 (CONF. POLLED FILE SAVE) to "VALID".
Confidential Mailbox
Printing Out a Confidential Document from Your Machine's Mailbox
After you have been notified that someone has transmitted a confidential document to your machine's mailbox, use the following procedure to print out the confidential document.
![graph TD A["Function"] --> B["2"] B --> C["2"] C --> D["Set"] style A fill:#fff,stroke:#000 style B fill:#fff,stroke:#000 style C fill:#fff,stroke:#000 style D fill:#fff,stroke:#000 note right of D Volume Directory Search end](/content/2026/06/1328210/images/7c35e4c412be809042fd3eb3806dfbdfdb21120ee8b03a0399748fe4a5a4c960.jpg)


The machine will print out the confidential documents.
NOTE
- The confidential file will be deleted automatically after being printed out even if the setting of Fax Parameter No. 42 (CONF. POLLED FILE SAVE) is changed to "VALID".
Deleting a Confidential Document Stored in Your Machine's Mailbox
If your memory becomes full, or you just want to clean out your confidential documents, you may delete one or more confidential faxes stored in your machine by using the following procedure.
There are two types of confidential file deletions, one is to delete the file individually by its Confidential Code, and the other is to delete all confidential files in memory.
To delete a file using Confidential Code
1
Function


CONF. COMM. (1-5) ENTER NO. OR ∨ ∧
2


DELETE CONF. FILE CONF. CODE=■■■■
3
Enter a 4-digit Confidential Code.
Ex: 2233

DELETE CONF. FILE CONF. CODE=2233
4

* DELETING * CONF. CODE=2233
To delete all confidential files in memory
1
Function


CONF. COMM. (1-5) ENTER NO. OR ∨ ∧
2


DELETE CONF. FILE CONF. CODE=■■■■
3

DELETE ALL CONF. FILES? 1:YES 2:NO
4

* DELETING * ALL CONF. FILES
Sub-addressing
General Description
The Sub-Addressing function allows you further routing, forwarding or relaying of document(s) to the desired recipient(s) when used in combination with Panasonic Internet Fax capable models and/or the Networking version of HydraFax/LaserFAX software. This function conforms to the ITU-T recommendation for T. Routing-Facsimile Routing utilizing the Sub-Address.
Example of a Network![graph TD A["G3 Fax"] -->|Telephone Line| B["Panasonic Internet Fax capable models"] C["Dial to: 555 1234\nSub-address: 0001\nTSI: 555 9999"] --> A D["G3 Fax"] -->|Telephone Line| B B --> E["PC1"] B --> F["PC2"] E --> G["Fax1"] F --> H["bbb"] I["Dial to: 555 1234\nSub-address: None\nTSI: 555 6789"] -…](/content/2026/06/1328210/images/409bace7014b48d0186b492e1280ef760d0357387cebb38b94a8a5602e4ec254.jpg)
Compatibility with Other Machines
- Sub-Addressing Transmission:
DF-1100/DP-135FP/150FP/150FX/190/1810F/1820E/1820P/2000/2310/2330/2500/3000/3010/3030/3510/3520/3530/4510/4520/4530/6010/6020/6030/DX-600/800/1000/2000/FPD250F/D350F/UF-332/333/342/344/490/550/560/585/590/595/770/788/790/880/885/890/895/990/4000/4100/5100/5300/6000/6100/6300/7000/7100/8000/8100/9000 (See Note 1)
- Sub-Addressing Reception:
DX-600/800/UF-4000/4100/5100/5300/6000/6100/6300/7000/7100/8000/8100/9000 and DP-1810F/1820E/1820P/2000/2310/2330/2500/3000/3010/3030/3510/3520/3530/4510/4520/4530/6010/6020/6030 with Internet Fax.
Sub-addressing Transmission Methods
You can send a document with Sub-address information to the desired recipient by the following methods.
- By registering the Sub-address information into One-Touch/ABBR. Dialling Numbers.
- By specifying the Sub-address information in the Manual Number Dialling Mode.
Setting of Routing, Forwarding or Relaying
You can customize the Automatic Routing to any combination of LAN (Local Area Network), PSTN (Public Switched Telephone Network) or PBX Extension with Panasonic Internet Fax capable models.
NOTE
- UF-788 with PC Interface Option or the Option ROM installed.
To set the Sub-address into a One-Touch/ABBR. Dialling Numbers
1
Function


1:ONE-TOUCH
2:ABBR NO.
2

to select "One-Touch".
or

to select "ABBR.NO.".
then enter the Sub-address. (Up to 20 digits)
(Up to 36 digits including telephone number, pauses, spaces, FLASH and Sub-address)
Ex: Telephone number = 5551234, Sub-address = 2762
<01> 5551234s2762
Enter as: 555 ○ 1234
Flash/Sub-addr ② ⑦ ⑥ ②
5

Enter the station name. (See page 30)
Ex: SALES DEPT
<01> SALES DEPT 5551234s2762
6

NOTE
- separates the Sub-address from the Telephone number and is indicated by an "s" in the display.
To send a Document with Sub-address
Using One-Touch/ABBR. Number Dialling
The operation is the same as for normal dialling
1

Set document(s) face down.
ENTER STATION(S) THEN PRESS START 00%
2

<01>(Station name) 5551234s2762
3

* STORE * NO.001 PAGES=001 01%
The document is stored into the memory and your machine starts to dial the number of the station and sends the document(s) with Sub-addressing information.
Using Manual Number Dialling
Use To separate the Telephone number and the Sub-address.
1

ENTER STATION(S) THEN PRESS START 00%
Set document(s) face down.
2
Enter the telephone number, press then/Sub-addr
enter the Sub-address (Up to 20 digits).
(Up to 36 digits including telephone number, pauses, spaces, FLASH and Sub-address)
Ex: Telephone number = 5551234, Sub-address = 2762
Enter as: 55512 ○ ○ 34
Flash/Sub-addr 2762
TEL. NO. 5551234s2762
3

* STORE * NO.001 PAGES=001 01%
The document is stored into the memory and your machine starts to dial the number of the station and sends the document(s) with Sub-addressing information.
NOTE
- separates the Sub-address from the Telephone number and is indicated by an "s" in the display.
- Manual Off-Hook or On-Hook Dialling cannot be used with the Sub-addressing Transmission.
- The Sub-address is not transmitted during Manual Redial Mode.
Journals and Lists
General Description
To help you maintain records of the documents you sent and received, as well as lists of the numbers you record, your facsimile machine can print the following journals and lists: Transaction Journal, Individual Transmission Journal, Communication Journal, One-Touch/Abbreviated/Directory Search No. List, Program List, Fax Parameter List, Directory Sheet and File List.
Transaction Journal
The "Journal" is a record of the last 32 transactions. (A transaction is recorded each time you send or receive a document.) It is printed out automatically after every 32 transactions (See Note 1) or you can print or view it manually by using the following procedure:
1


PRINT OUT (1-7) ENTER NO. OR ∨ ∧
2


JOURNAL 1:PRINT 2:VIEW
3a
① To print a Journal Machine will start to print the documents.
* PRINTING * JOURNAL
3b
② To view a Journal, proceed to Step 4.
JOURNAL VIEW 1: XMT ONLY 2: ALL
4
Select the viewing mode. ① to view transmission transactions only ② to view all transactions Ex: ② You can view the transactions in the journal by pressing ▼ or ▲. Press to return to standby.
USE THE ∨ ∧ KEYS TO SCROLL EACH RECORD
![graph TD A["Date & Time"] --> B["12/12 10:00 OK P01 XMT 5551234 ^"] B --> C["Type of Communication"] C --> D["XMT : Transmission"] C --> E["RCV : Reception"] C --> F["POL : Polling"] C --> G["PLD : Polled"] C --> H["FWD : Fax Forward"] C --> I["RMT : Remote Diagnostic/Firmware Update"] B --> J["Rece…](/content/2026/06/1328210/images/395de9e650f4394535fba59d1fc3f15cf0dbd8942c773a601b1fb37cbbe8a9cd.jpg)
NOTE
- If you wish to disable the automatic printout of the Transaction Journal, change the setting of Fax Parameter No. 13 to "INVALID". (See page 36)
Individual Transmission Journal (IND. XMT JOURNAL)
An Individual Transmission Journal contains the information on the latest transmission.

PRINT OUT (1-7) ENTER NO. OR ∨ ∧
6: IND. XMT JOURNAL? PRESS SET TO PRINT
* PRINTING * IND. XMT JOURNAL
Sample Transaction Journal
| (1) | (2) | ||||||||
| ********** -JOURNAL-********** DATE dd-mmm-yyyy**** TIME 15:00********** | |||||||||
| (3) | (4) | (5) | (6) | (7) | (8) | (9) | (10) | (11) | (12) |
| NO. | COMM. | PAGES | FILE | DURATION | X/R | IDENTIFICATION | DATE | TIME | DIAGNOSTIC |
| 01 | OK | 005/005 | 001 | 00:00:22 | XMT | SERVICE DEPT. | dd-mmm | 17:35 | C0044903C0000 |
| 02 | OK | 003 | 002 | 00:01:17 | RCV | 111 222 333 | dd-mmm | 17:41 | C0044903C0000 |
| 03 | OK | 001 | 003 | 00:00:31 | XMT | ACCOUNTING DEPT. | dd-mmm | 17:50 | C0044903C0000 |
| 04 | 630 | 000/005 | 004 | 00:00:00 | XMT | 342345676 | dd-mmm | 17:57 | 0800420000000 |
| 05 | STOP | 000 | 005 | 00:00:34 | XMT | 12324567 | dd-mmm | 18:35 | 0210260200000 |
| 06 | OK | 001/001 | 006 | 00:00:20 | XMT | 44567345 | dd-mmm | 18:44 | C8044B03C0000 |
| 07 | 408 | *003 | 007 | 00:02:14 | XMT | 2345678 | dd-mmm | 18:55 | 0040440A30080 |
| 31 | OK | 002/002 | 050 | 00:00:31 | XMT | 0245674533 | dd-mmm | 08:35 | C8044B03C1000 |
| 32 | OK | 003/003 | 051 | 00:01:32 | XMT | 0353678980 | dd-mmm | 08:57 | C8044B03C1000 |
| (13) | |||||||||
| -PANASONIC | - | ||||||||
| ********** -HEAD OFFICE -***** - | 201 | 555 | 1212-********** | ||||||
| (15) | (14) | ||||||||
Sample Individual Transmission Journal (IND. XMT JOURNAL)
| (1) | (2) | ||
| ********** -IND. XMT JOURNAL-********** DATE dd-mmm-yyyy***** TIME 15:00********** | |||
| (10) (11) | DATE/TIME = dd-mmm-yyyy 09:00 | ||
| (3) | JOURNAL No. = 21 | ||
| (4) | COMM. RESULT = OK | ||
| (5) | PAGE(S) = 001/001 | ||
| (7) | DURATION = 00:00:16 | ||
| (6) | FILE No. = 010 | ||
| (16) | MODE = MEMORY TRANSMISSION | ||
| (17) | DESTINATION = [001] / 555 1234 /ABCDEFG | ||
| (18) | RECEIVED ID = | ||
| (19) | RESOLUTION = STD | ||
| (13) | |||
| -PANASONIC | - | ||
| **********-HEAD OFFICE -**********- 201 555 1212-********** | |||
| (15) | (14) | ||
Individual Transmission Journal (IND. XMT JOURNAL)
Explanation of Contents
(1) Printout date (2) Printout time (3) Journal number (4) Communication results "OK" indicates that the communication was successful.
"BUSY" indicates that the communication has failed because of busy line. "STOP" indicates that STOP was pressed during communication. "M-OK" indicates that the substitute reception message in memory was not printed out. "P-OK" indicates that memory overflow or document misfeeding occurred while storing the documents into the memory for transmission but successfully stored document(s) was sent. "R-OK" indicates that the Confidential Communication was successful. "--" indicates LAN transmission. (See Note 1) "3-digit Info Code" (See page 141) indicates that the communication has failed.
(5) Number of pages transmitted or received
The 3-digit number is the number of pages successfully transmitted or received.
When the documents are stored into the memory two 3-digit numbers will appear.
The first 3-digit number represents the number of pages successfully transmitted. The second 3-digit number represents the total number of pages for which transmission was attempted.
Asterisk *** indicates that the quality of some received copies was poor.
(6) File number 001 to 999 (If the communication is stored into the memory, a file number is assigned for each communication.) (7) Duration of communication (8) Type of communication "XMT" means Transmission
"RCV" means Reception "POL" means Polling "PLD" means Polled "FWD" means Fax Forward "RMT" means Remote Diagnostic/Firmware Update
(9) Remote station identification
Name : Recorded name in One-Touch or ABBR. Numbers or remote station's Character ID.
number : Dialled telephone number Number : Remote station's ID number. Email address (See Note 1)
(10) Communication date (11) Communication Start time (12) Diagnostic For service personnel only
The 2-digit number is the number of final destinations.
"STN(S) LAN" indicates LAN transmission. "(MDN) LAN" indicates LAN transmission with Delivery Notice. "(Comm. JNL) LAN" indicates LAN transmission for Communication Journal.
(13) Own LOGO Up to 25 characters (14) Own ID number Up to 20 digits (15) Own Character ID Up to 16 characters (16) Type of communication Transmission or memory transmission (17) Destination If a One-Touch or ABBR was used for the transmission:
One-Touch or ABBR. No./Telephone Number (Or Email address: See Note 1)/ Recorded Name If not: Telephone number (Or Email address: See Note 1)
(18) Received remote station's ID Character ID or ID number
(19) Resolution "STD" means standard resolution
"FINE" means fine resolution "S-FINE" means super fine resolution
NOTE
Communication Journal (COMM. JOURNAL)
The Communication Journal (COMM. JOURNAL) lets you verify whether the transmission or polling was successful. You may select the printout condition (Off/Always/Inc. only) in Function 8-1 or Fax Parameter No. 12.
Sample COMM. JOURNAL
| ********** -COMM. JOURNAL-********** DATE dd-mmm-yyyy ***** TIME 15:00 ********** | |||||
| (1) MODE = MEMORY TRANSMISSION | (2) START=dd-mmm 14:50 | (3) END=dd-mmm 15:00 | |||
| FILE NO.= 050 (4) | |||||
| (5) | (6) | (7) | (8) | (9) | (10) |
| STN NO. | COMM. | ONE-TOUCH/ABBR NO. | STATION NAME/TEL NO. | PAGES | DURATION |
| 001 | OK | <01> | SERVICE DEPT. | 001/001 | 00:01:30 |
| 002 | OK | <02> | SALES DEPT. | 001/001 | 00:01:25 |
| 003 | 407 | <03> | ACCOUNTING DEPT. | 000/001 | 00:01:45 |
| 004 | BUSY | 021 111 1234 | 000/001 | 00:00:00 | |
| - PANASONIC | - | ||||
| ********** - HEAD OFFICE | - ***** - 201 555 1212 - ********** | ||||
THE SLEREXE COMPANY LIMITED
SAPORS LANE - BOOLE - DORSET - BH 25 8 ER
TELEPHONE BOOLE (945 13) 51617 - TELEX 123456
Our Ref. 350/PJC/EAC
18th January, 1972.
Dr. P.N. Cundall, Mining Surveys Ltd
Variations of print density cause the photocell to generate an analogous electrical video signal. This signal is used to modulate a carrier, which is transmitted to a remote destination over a radio or cable communications link.
At the remote terminal, demodulation reconstructs the video signal, which is used to modulate the density of print produced by a printing device. This device scans in a raster scan synchronized with that at the transmitting terminal. As a result, a facsimile copy of the subject document is produced.
Probably you have uses for this facility in your organisation.
Yours sincerely,

P.J. CROSS
Group Leader - Facsimile Research
Communication Journal (COMM. JOURNAL)
Explanation of Contents
(1) Indication of communication mode
(2) Start time of communication
(3) End time of communication
(4) File number 001 to 999 (When the communication is stored into the memory, a file number is assigned for each communication.)
(5) Station number Sequential number of the Stations.
(6) Communication result "OK" indicates that the communication was successful. "BUSY" indicates that the communication has failed because of busy line. "STOP" indicates that STOP was pressed during communication. "M-OK" indicates that the substitute reception message in the memory was not printed out.
"P-OK" indicates that memory overflow or document misfeeding occurred while storing the documents into the memory for transmission, but that successfully stored document(s) was sent.
"R-OK" indicates that the Confidential Communication was successful. "3-digit Info Code" (See page 141) Information Codes indicates that the communication has failed. In this case, the machine will print out the attached report with first page of your document as shown on the previous page.
(7) Abbreviated number or ▲ mark ▲ mark indicates dialled by direct number dial.
(8) Recorded name in One-Touch, ABBR. or direct dialling number
(9) Number of pages transmitted or received
(10) Duration of Communication
The 3-digit number is the number of pages successfully transmitted or received. When the documents are stored into the memory, two 3-digit numbers will appear. The first 3-digit number represents the number of pages successfully transmitted. The second 3-digit number represents the total number of pages for which transmission was attempted.
One-Touch/Abbreviated and Directory Search List
To print a One-Touch/Abbreviated Number and Directory Search List of the telephone numbers you have stored.
1
Function


PRINT OUT (1-7)
ENTER NO. OR V ∧
2
2

3

2: ONE-TOUCH/ABBR. LIST?
PRESS SET TO PRINT
4
1

for One-Touch/ABBR. Number List
for Directory Search List
One-Touch/Abbreviated and Directory Search List
Sample One-Touch List
Sample ABBR. Number List![*************************** -ABBR NO. LIST- ******************************* DATE dd-mmm-yyyy ***** TIME 15:00 ************************** (1) (2) (3) ABBR NO. STATION NAME TELEPHONE NO. [001] ENG. DEPT. 888 555 1234 [002] PURCHASE DEPT. 999 666 2345 [003] REGULATION DEPT 777 333 3456 NO. OF STATIONS…](/content/2026/06/1328210/images/c9379c5c57f4e8bf9b8d41c4b67c8a2062a0c2fd4d062430110a9b3f56cd9c18.jpg)
Sample Directory Search List
| ********** -DIR. SEARCH LIST-********** DATE dd-mmm-yyyy ***** TIME 15:00 ********** | |||
| (5) | (2) | (1) | (3) |
| STATION NAME | ABBR NO. | TELEPHONE NO. | |
| [A] | ACCOUNTING DEPT | <03> | 313 333 3456 |
| [E] | ENG. DEPT. | [001] | 888 555 1234 |
| [P] | PURCHASE DEPT | [002] | 555 666 2345 |
| [R] | REGULATION DEPT | [003] | 777 333 3456 |
| [S] | SALES DEPT. | <01> | 121 555 1234 |
| SERVICE DEPT | <02> | 222 666 2345 | |
| NO. OF STATIONS = 006(4) | |||
| -PANASONIC - | |||
| ********** -HEAD OFFICE -***** - 201 555 1212 -********** | |||
Explanation of Contents
(1) One-Touch number or Abbreviated number: = One-Touch number, [nnn] = Abbreviated number (2) Station name recorded in the machine: Up to 15 characters (3) Telephone number recorded in the machine: Up to 36 digits (4) Number of recorded One-Touch and ABBR. numbers (5) The first letter of station name recorded in your machine
Program List
To print a Program List of the Dialling Patterns that you have previously entered into the Program Keys.

PRINT OUT (1-7) ENTER NO. OR ∨ ∧
3:PROGRAM LIST? PRESS SET TO PRINT
* PRINTING * PROGRAM LIST
Sample Program List
![*************************** -PROGRAM LIST- *************************** DATE dd-mmm-yyyy ****** TIME 15:00 ************************** (1) (2) (3) (4) (5) PROGRAM PROGRAM NAME TYPE TIMER ABBR NOS. [P1] TIMER XMT XMT 12:00 [001] [P2] TIMER POLL POLL 19:00 [002] [P3] PROG. A POLL ---- [001] [002] -PANAS…](/content/2026/06/1328210/images/6a68db1dd13df1fe9c742f8be33f16815d895ec85ab16f94532df7fac0359d9e.jpg)
Explanation of Contents
(1) Program key (2) Program name Up to 15 characters (3) Type of communication "XMT" indicates transmission. "POLL" indicates polling. "ABBR/GRP" indicates that the Program key is programmed as a group key. "ONE-TOUCH" indicates that the Program key is programmed as a One-Touch key. (4) Timer Indicates the starting time. "----" indicates that the Program key contains "non-deferred" program. (5) Numbers recorded in the program One-Touch/ABBR. numbers
FAX Parameter List
1
Function

2

3

PRINT OUT (1-7)
ENTER NO. OR ∨ ∧
4: FAX PARAM. LIST?
PRESS SET TO PRINT
* PRINTING *
FAX PARAMETER LIST
Sample FAX Parameter List
*************************** -FAX PARAMETER LIST-***************************** DATE dd-mmm-yyyy ***** TIME 15:00 **************************
(1)
PARAMETER
NUMBER
(2)
DESCRIPTION
(3)
SELECTION
(4)
CURRENT
SETTING
(5)
STANDARD
SETTING
(7) 001 CONTRAST (HOME) (1:Normal 2:Lighter 3:Darker) 1 1
* 002 RESOLUTION (HOME) (1:Standard 2:Fine 3:S-Fine 4:Halftone(Fine) 5:Halftone(S-Fine)) 2
( )
099 MEMORY SIZE
(8MB) (6)
-PANASONIC
-HEAD OFFICE
201 555 1212- *
Explanation of Contents
(1) Parameter number (2) Description: "(HOME)" means home position setting. (3) Selection (4) Current setting: "(----)" indicates code or password is not set. When the code or password is set, it is shown in parenthesis. (5) Standard setting: Factory preset standard setting (6) Memory size (7) Changed setting: "*" indicates that the Factory preset setting was changed.
Toner Cartridge Order Forms
To print the Toner Cartridge Order Forms
1
Function


1: CLEAN ROLLER?
3: PRINT ORDER FORM?
2

* PRINTING *
TONER ORDER FORM
Sample Toner Cartridge Order Form
******************************
TONER CARTRIDGE ORDER FORM
****************************************************************************************
**** The toner supply in your machine is running low ****
To order a replacement Cartridge from your Authorized Dealer
by Phone:
by Fax:
Thank you for your order.
Customer Name and Address
Ship to: ____ Bill to: ____
Attention: Attention:
Phone No.: ____ Phone No.: ____
Customer ID: P.O. No. (if required):
Toner Cartridge: UG-3380 Serial No.:
Print your name and title
Signature & Date
Troubleshooting
If You Have Any of These Problems
| Mode Symptom Cause / Action page | |||
| During Transmission Document doesn't feed/multiple feed | 1. Check that your document is free of staples and paper clips, and that it is not greasy or torn.2. Check that your document is the right type to send through a fax machine by consulting the list on "Documents You Cannot Send". If your document has the characteristics listed, make a photocopy of your document and send the copy instead.3. Check that the document is loaded properly.4. Adjust the ADF Pressure. | 4243148 | |
Continued on the next page...
Troubleshooting
Troubleshooting
| Mode Symptom Cause / Action page | |||
| Print Copy Quality Vertical lines printing on the received document | Print out a Journal report (Ex: FUNCTION, 6, 1, SET and 1) and check quality to make sure whether your machine has trouble.If Journal report quality is OK, your machine has no problem, report to the sending party that they have a problem.If copy is NG, replace the Toner Cartridge. | 12518 | |
| Fuzzy print 1. Make sure you are using the correct paper for the best possible print quality.2. Try reversing the recording paper to the other side. | 153 | ||
| Missing dots or lines/ inconsistent darkness within print | 1. Make sure you are using the correct paper for the best possible print quality.2. Replace the Toner Cartridge. | 15318 | |
| Fading print Your Toner | Cartridge may be running out of toner. Replace the Toner Cartridge. | 18 | |
| Faint print You may need to choose a different paper type for the best possible print quality. | 153 | ||
| Communication No dial tone 1. Check the connection of the telephone line.2. Check the telephone line. | 150 | ||
| No auto answer | 1. Check the connection of the telephone line.2. Check the Reception mode setting.3. If the Fax Parameter No. 13 (AUTO JRNL PRINT) is set to "VALID" (Default setting) and the machine is printing the received document from memory, which also happens to be the 32th transaction, the machine will not auto answer until the Transaction Journal completes printing. | 15066 | |
| Cannot transmit or receive | An information code will be shown on the display. Refer to the information code table to find out the trouble. | 141 | |
| No Unit Operation No unit operation To reset the machine, unplug the Power Cord for a few seconds then plug it in again. | 17 | ||
| TAM Interface Trouble in Unattended TAM I/F Mode (OUT Mode) | Cannot utilize the remote turn-on feature of the telephone answering machine (TAM). The fax machine always answers after the 8th ring. | This feature is not compatible. The fax machine is designed to answer after 8 rings if the TAM does not answer. | -- |
| Fax machine will not start up when the telephone answering machine is set to give only an outgoing message (OGM). | TAM that gives outgoing announcement only is not compatible. The fax machine will work with a TAM that will record Incoming message (ICM). | -- | |
| A beep...beep sound is recorded on the telephone answering machine. | Speak a little slower between each word while recording an outgoing message (OGM). | -- | |
| Fax machine starts up in the middle of the outgoing message even though the caller wants to leave a voice message. | Make sure the outgoing message (OGM) does not have a silent pause longer than 5 seconds. | -- | |
| Cannot record any incoming message (ICM). The fax machine always starts up at the end of the OGM and before the tape advances to the end of last ICM. (Your TAM only uses a single cassette tape to give OGM and record ICM.) | Set Fax Parameter No. 20 (SILENT DETECTION) to "INVALID". And, instruct the calling party to press twice on their touch-tone phone during the OGM to start up your fax machine remotely. | 37 | |
| Cannot receive from a machine that does not send CNG signal (a short beep tone every 3 seconds) after dialling. | Set Fax Parameter No. 20 (SILENT DETECTION) to "VALID". Or, Instruct the calling party to press twice on their touch-tone phone during the OGM to start up your fax machine remotely. | 37 | |
| Cannot retrieve message from the answering machine remotely, the fax machine always starts up after the command code is entered. | Set Fax Parameter No. 20 (SILENT DETECTION) to "INVALID". | 37 | |
| Cannot receive a fax message, but can record voice message. | Check your outgoing message, if it is too long, the calling fax machine may have timed out. Try shortening your outgoing message to less than 15 seconds, or ask the calling party to program your telephone number in their fax machine with 3 pauses and a "#" at the end. (Ex: 5551212 PAUSE PAUSE PAUSE #) | -- | |
Troubleshooting
Troubleshooting
| Mode Symptom | Cause / Action page | ||
| TAM Interface Trouble In Unattended Fax Mode (OUT Mode) | Fax machine will not start to receive with the telephone answering machine in the auto-answer mode. | Increase the ring count for detection on the telephone answering machine. | -- |
Information Codes
When something unusual occurs, the display may show one of the Information Codes listed below. These will help you to identify and correct the problem.
| Info. Code | Meaning Action page | ||
| 001 Recording paper jammed when feeding from the 1st cassette. | Remove the jammed paper. 144 | ||
| 002 Recording paper jammed when feeding from the 2nd cassette. | Remove the jammed paper. 144 | ||
| 007 Recording paper did not completely exit from machine. | Remove the Toner Cartridge and remove the jammed paper. | 144 | |
| 010 No recording paper. Load the recording paper. 20 | |||
| 011 Recording Paper Cassette is not installed properly. Install the Recording Paper Cassette. -- | |||
| 030 Document is misfeeding. 1. Reload the document properly. | 2. Remove the document jam.3. Adjust ADF. | 43145148 | |
| 031 Document paper is too long or jammed.Document length exceeds 2 meters. | 1. Reload the document properly.2. Remove the document jam. | 43145 | |
| 041 Out of toner. Replace the Toner Cartridge. 18 | |||
| 043 Toner is getting low. | |||
| 045 | Toner Cartridge is not installed. | Install the Toner Cartridge. | 18 |
| 060 Printer Cover is open. | Close the Printer Cover. | -- | |
| 061 ADF Door is open. | Close the ADF Door. | -- | |
| 400 During initial handshake, receiving station did not respond or communication error occurred. | 1. Check with the other party.2. Reload the document and send again. | -- | |
| 401 Remote station required a Receiving Password to receive the document.Remote station does not have Confidential Mailbox.Remote station requires the sending unit's ID Number.(Fax Telephone Number) | Check the remote station.Program your ID Number (Fax Telephone Number). | 29 | |
| 402 During initial handshake, communication error occurred. | Reload the document and send again. | -- | |
| 403 | No polling capability at the remote side. | Ask remote side to set "POLLED=ON". | -- |
| 404/405 | During initial handshake, communication error occurred. | Reload the document and send again. | -- |
| 406 Transmission Password does not match.Receiving Password does not match.Received from an unauthorized station in Selective Reception mode. | Check the password or the telephone number in One-Touch or Abbreviated station. | 109111112 | |
| 407 No confirmation from the receiving station for the previous page sent. | Wait a few minutes and send again. | -- | |
| 408/409 | Remote side confirmation of previous page is illegible. | Wait a few minutes and send again. | -- |
| 410 | Communication aborted by the transmitting side. | Check with the other party. | -- |
| 411 | Polling password does not match. | Check the polling password. | 78 |
Information Codes
| Info. Code | Meaning | Action | page |
| 412 No | data from the transmitting side. Check with the other party. -- | ||
| 414 Polling password does not match. Check the polling password. 78 | |||
| 415 Polling transmission error. Check the polling password. 78 | |||
| 416/417 418/419 | Received data has too many errors. Check with the other party. -- | ||
| 420/421 | Machine goes to receiving mode, but receives no command from the transmitting side. | 1. Remote side misdial.2. Check with the other party. | -- |
| 422/427 | Interface is incompatible. Check with the other party. -- | ||
| 434 Communication error occurred while receiving. Check with the other party. -- | |||
| 436/456 490 | Received data has too many errors. Check with the other party. -- | ||
| 456 • Unit received a confidential document or was requested to be polled of a confidential document under any of following conditions.1. Not enough space in memory to receive the confidential document.2. Confidential Mailbox is full.3. While printing received document.• Unit was requested to relay a document. | 1. Print a File List and check the contents.2. Wait until unit finishes printing. | 87 | |
| 492/493 494 | Communication error occurred while receiving. Check with the other party. -- | ||
| 495 Telephone line disconnected. Check with the other party. -- | |||
| 501/502 | Communication error occurred using the internal V.34 Modem. | Check with the other party. -- | |
| 540/541 542/543 544 | Communication error occurred while transmitting. | 1. Reload the document and send again.2. Check with the other party. | -- |
| 550 Telephone line disconnected. Check with the other party. -- | |||
| 554/555 | Communication error occurred while receiving. Check with the other party. -- | ||
| 580 Sub-address transmission to a unit that has no Sub-address function. | Check the remote station. | 122 | |
| 581 Sub-address Password transmission to a unit that has no Password Sub-address function. | Check the remote station. | 122 | |
| 623 | No document loaded on the ADF. | Reload the document and send again. | -- |
| 630 | Redial was not successful due to a busy line. | Reload the document and send again. | -- |
| 631 | During dialling, STOP was pressed. | Reload the document and send again. | -- |
| 634 Redial was not successful due to no response from the called station or wrong number dialled.Note: If busy tone was not detected, the machine will only redial once. | Check the telephone number and send again. | -- | |
| 638 | Power failure occurred during the communication. | Check the power cord and plug. | 17 |
| 800/816 825 | Unit was requested to relay a document or Confidential Communication but has no capability. | Check with the other party. -- | |
| Info. Code | Meaning Action page | ||
| 815 Mailbox is full. Install Optional Flash Memory Card. -- | |||
| 870 Memory overflow occurred while storing documents into memory for transmission. | Transmit documents without storing into memory. | 57 | |
NOTE
- After identifying the problem and verifying the recommended action, if the Information Codes keep reoccurring or if you need help on Information Codes that appear on your machine but are not listed above, please contact your local Panasonic Authorized Dealer.
Troubleshooting
Clearing a Recording Paper Jam
If the recording paper becomes jammed in the machine, the display will show an Information Code 001, 002, 007 or 008.
To clear the jam, Info. Code 001, 002 or 008
1
To clear the jam, Info. Code 007
(1) Slide out the Paper Cassette and remove the Paper Cassette Cover. (2) Remove the jammed or wrinkled paper and reload the recording paper into the paper cassette.
1
(1) Open the Printer Cover. (2) Remove the Toner Cartridge. (3) Remove the jammed paper.
Note: 1. If at all possible, try removing the jammed paper from inside of the unit first (as shown in the upper figure) to prevent toner that has not been fused on the paper from rubbing off and dirtying the Fuser Roller.
2. To remove the jammed paper from the rear of the unit (as shown in the lower figure), remove the Recording Paper Tray Assembly first and gently pull the jammed paper straight out, taking care not to tear it.
NOTE
- The Recording Paper Jam message display is reset only by opening and closing of the Printer Cover.
Clearing a Document Jam
If a document becomes jammed in the machine, the display will show the Information Code 030 or 031. To clear the jam, Info. Code 030 or 031
1
(1) Open the ADF Door. (2) Remove the jammed document.
Troubleshooting
Cleaning the Document Scanning Area
If the receiving party reports that the received documents were black, or contained black lines, try making a copy on your unit to verify. If the copy is black or has black lines, the document Scanning Area is probably dirty and must be cleaned.
To clean the Scanning Area
1
Open the ADF Door.
2
Wipe the Scanning Area gently with a soft cloth gauze moistened with ethyl alcohol. Be sure to use a clean cloth as the scanning area can be easily scratched.
Cleaning the Printer Roller
If you find toner on the back of the recording paper, the printer roller in the fuser unit is probably dirty.
To clean the Printer Rollers
1
Function


1: CLEAN ROLLER?
3:PRINT ORDER FORM?
2

The machine will print out 3 Cleaning Charts.
Then, return to standby.
* PRINTING * CLEANING CHARTS
![HOW TO LOAD THE CLEANING CHARTS 1. REMOVE THE PAPER CASSETTE (If multiple cassette configuration, REMOVE THE UPPER PAPER CASSETTE) 2. SET THESE 3 CLEANING CHARTS IN THE CASSETTE FACE DOWN 3. RE-INSTALL THE PAPER CASSETTE 4. PRESS [FUNCTION][7][8][SET][1][2] TO START CLEANING 5. DISPOSE OF THE CLEANI…](/content/2026/06/1328210/images/6b858fcbbee231c977df000b676525d45956084efdabd3993c4890c46ab96dc5.jpg)
3
Load the Cleaning Charts into the cassette face down.
(See Note 1)
4
Function


1: CLEAN ROLLER?
3:PRINT ORDER FORM?
5

The Machine will feed out the charts and clean the printer roller.
* CLEANING * PRINTER ROLLER
NOTE
- If you have installed the optional cassette(s), load the Cleaning Charts into the upper cassette.
Troubleshooting
Adjusting the Automatic Document Feeder (ADF)
If document misfeeding occurs frequently, we suggest you adjust the ADF.
To adjust the ADF
1

Slide the Pressure Adjusting Lever to the desired position depending on the condition.
| Position Condition | |
| 1 | To prevent no-feed trouble |
| 2 | Standard position |
| 3 | To prevent multiple-feed trouble |
Verification Stamp
The Verification Stamp contains ink. When the stamp mark appears faded or is hard to see, the stamp should be replaced or refilled with ink.
To remove the stamp
1
Open the ADF Door.
2
(1) Remove by pulling the Stamp Assembly upward.
(2) Remove the Stamp. Replace the stamp with a new one.
NOTE
- Please contact your local Panasonic dealer to purchase a new stamp. (See page 154) Verification Stamp for order number.
Troubleshooting
Checking the Telephone Line
- If you do not hear a dial tone through the telephone connected to the machine or if the telephone does not ring (No automatic receive).
1
Unplug the telephone line cable from the telephone jack that was supplied by the telephone company.
2
Plug a different regular telephone into the same telephone jack.
3
Check for dial tone through the handset. If there is still no dial tone, report the problem to your local telephone company.
or
Call from another telephone to this number. If the telephone does not ring, report the problem to your local telephone company.
NOTE
- The shape of the telephone line cable and power cord may differ according to regulations and specifications in the specific country.
Compatibility ITU-T Group 3
Coding Scheme MH, MR, MMR (Conforms to ITU-T Recommendations)
Modem Type ITU-T T.30, V.34, V.17, V.29, V.27ter, and V.21
Modem Speed 33600 - 2400 bps
Document Size Max.: 257 x 2000 mm
(With operator's assistance)
Min.: 148 x 128 mm
Document Thickness
Single page: 0.06 mm (45 g/m²) to 0.15 mm (112 g/m²)
Multiple pages: 0.06 mm (45 g/m²) to 0.12 mm (75 g/m²)
ADF Capacity
(Automatic Document Feeder)
Built-in, up to 30 sheets
Note: If you are sending more than 30 pages of the document(s) (up to 50 pages), make sure that the bottom sheet of the document(s) enters first. The document limitation to send multiple pages is as follows.
Document Size Document Thickness
Up to 20 pages 257 x 364 mm 0.06 to 0.12 mm
Up to 30 pages A4 or Letter size 0.06 to 0.10 mm
* Please note that although the size and thickness meets the specifications, you might not be able to set 30 pages with some types of papers. If you are sending more than 30 pages (up to 50 pages), limitation of document size and thickness is A4 or Letter and 0.06 mm to 0.10 mm.
Effective Scanning Width
208 mm (A4), 212 mm (Letter, Legal)
Scanner Resolution
Standard: 8 pels/mm x 3.85 lines/mm
Fine: 8 pels/mm x 7.7 lines/mm
Super Fine: 8 pels/mm x 15.4 lines/mm
Recording Method
Laser printer
Recording Paper
Plain Paper
Recording Paper Size
Letter, A4 or Legal
Printer Resolution
Fax/Copy Mode: 406 x 391 dpi
Printer Mode: 600 x 600 dpi
300 x 300 dpi
Effective Recording Size
Recording Paper Capacity
One-Touch/Abbreviated Dialling Memory Capacity
Image Memory Capacity 480 pages
Approx. 250 sheets (Using 75g/m² paper)
340 stations
(Including 32 One-Touch keys and 8 Program keys)
Each station can register up to 36 digits for each telephone number (Including pauses and spaces) and up to 15 characters for each station name
(Based on ITU-T Image No.1 using Standard Resolution)
Power Supply 220-240 VAC, 50/60 Hz, Single Phase
Power Consumption Standby (Sleep Mode : On) Less than 2.4 Wh
Standby (Energy-Saver : On) Approx. 6.5 Wh
Standby (Energy-Saver : Off) Approx. 22 Wh
[Room temperature : 25°C]
Transmission Approx. 17 W
Reception Approx. 480 W
Copy
Approx. 480 W
Maximum
Approx. 490 W
Dimensions
(Excluding Projections and optional Paper Cassette)
Mass (Weight)
Approx. 9.3 kg
(Excluding consumable supplies and options)
Operating Environment
Temperature: 10 to 35°C
Relative Humidity: 15 to 70%
NOTE
- The left and right print margin is 4 mm when printing a Letter, A4 or Legal size document with 600 dpi from a PC.
Recording Paper Specifications
In general, most photocopy papers will also work very well. There are many "name" and "generic" brands of paper available. We recommend that you test various papers until you obtain the desired results.
The following table summarizes the major specifications to consider when selecting white or coloured paper.
Basic Weight
60 to 90 g/m²
Cut Edge Conditions: Cut with sharp blades, no visible frayed edges
Packing: Polylaminated moisture-proof ream wrap
Sizes: Letter: 216 mm x 279 mm
A4: 210 mm x 297 mm
Legal: 216 mm x 356 mm
Type: Cut sheet
NOTE
- It is possible that the paper could meet all of the specifications listed above and still not print well because of the variations in paper manufacturing. Therefore, we recommend that you test the paper thoroughly before purchasing.
Options and Supplies
Please contact your local Panasonic dealer for availability.
A. Options:
| Order No. Picture Description | ||
| UE-403186 |  | Handset Kit* * For some countries, the handset may not be available because of the country's regulation or specification. |
| UE-409090 |  | 2nd Paper Feed Module(For UF-6300 only.) |
| UE-404094 |  | Internet Fax Module* * For some countries, the Internet FAX Option may not be available because of the country's specifications. |
B. Supplies:
| Order No. Picture Description | ||
DZHT000004 Verification Stam | ||
| UG-3380 Toner Car |  | |
CE
Declaration of Conformity (DoC)
Panasonic Communications Co., Ltd. declares that this G3 Facsimile equipment is in compliance with the essential requirements and other relevant provisions of Directive 1999/5/EC. If you want to get a copy of the original Declaration of Conformity of our products which relates to Directive 1999/5/EC, please contact our web address: http://www.doc.panasonic.de
Contact to Authorised representative:
Panasonic Testing Centre
Panasonic Marketing Europe GmbH
Winsbergring 15, 22525 Hamburg, Germany
Network Compatibility
This product, Model UF-6300/5300** (** means country suffixes as table below), is designed to work with an analogue Public Switched Telephone Network (PSTN) in each country.
| ** Country ** Country ** Country ** | Country | ||||||
| AT Turkey AJ Spain AR Belgium AG Germany | |||||||
| EN Denmark AM Switzerland | EN Sweden YG Greece | ||||||
| EN | Finland | AP | Portugal | AV | France | EN | Nordic Model |
| AH | The Netherlands | EE | Italy | AB | U.K./Ireland | ||

WARNING
Denotes a potential hazard that could result in serious injury or death.
- Plug power supply cord into ordinary AC outlet before connecting telephone line cord. Disconnect telephone line cord before unplugging power supply cord from AC outlet.
- Disconnect the equipment immediately should it ever suffer physical damage which results in the internal parts becoming accessible in normal use. In this instance users should have the equipment repaired or dispose of.
- If the power supply cord and/or telephone line cord of this equipment are damaged, they must be replaced by the special cords supplied by an authorized Panasonic service centre.

CAUTION
denotes hazards that could result in minor injury or damage to the machine.
- This equipment may not necessarily provide for the effective hand-over of a call to or from a telephone connected to the same line.
- The operation of this equipment on the same line as telephones or other equipment with audible warning devices or automatic ring detectors will give rise to bell tinkle or noise and may cause false tripping of the ring detector. Should such problem occur, the user is not to contact telecom (Telephone company) faults service.
This appliance is supplied with a moulded three pin mains plug for your safety and convenience.
A 5 amp fuse is fitted in this plug.
Should the fuse need to be replaced please ensure that the replacement fuse has a rating of 5 amps and that it is approved by ASTA or BSI to BS1362.
Check for the ASTA mark or the BSI mark on the body of the fuse.
If the plug contains a removable fuse cover you must ensure that it is refitted when the fuse is replaced.
If you lose the fuse cover the plug must not be used until a replacement cover is obtained.
A replacement fuse cover can be purchased from your local Panasonic Dealer.
IF THE FITTED MOULDED PLUG IS UNSUITABLE FOR THE SOCKET OUTLET IN YOUR OFFICE THEN THE FUSE SHOULD BE REMOVED AND THE PLUG CUT OFF AND DISPOSED OF SAFELY. THERE IS A DANGER OF SEVERE ELECTRICAL SHOCK IF THE CUT OFF PLUG IS INSERTED INTO ANY 13 AMP SOCKET.
If a new plug is to be fitted please observe the wiring code as shown below.
If in any doubt please consult a qualified electrician.
WARNING: THIS APPLIANCE MUST BE EARTHED.
IMPORTANT: The wires in this mains lead are colored in accordance with the following code:
Green and Yellow: Earth
Blue: Neutral
Brown: Live
As the colors of the wires in the mains lead of this appliance may not correspond with the colored markings identifying the terminals in your plug, proceed as follows:
The wire which is colored GREEN-AND-YELLOW must be connected to the terminal in the plug which is marked by the letter E or by the safety Earth symbol "⊥" or colored GREEN or GREEN-AND-YELLOW.
The wire which is colored BLUE must be connected to the terminal in the plug which is marked with the letter N or colored BLACK.
The wire which is colored BROWN must be connected to the terminal in the plug which is marked with the letter L or colored RED.
How to replace the fuse.
Open the fuse compartment with a screwdriver and replace the fuse.
Ex:

Machine Noise Information - Regulation 3. GPSGV: The highest acoustic pressure level is 70 dB or less according to EN ISO 7779.
The grant of a Telepermit for any item of terminal equipment indicates only that Telecom has accepted that the item complies with the minimum conditions for connection to its network.
It indicates no endorsement of the product by Telecom, nor does it provide any sort of warranty. Above all, it provides no assurance that any item will work correctly in all respects with another item of Telepermitted equipment of a different make or model, nor does it imply that any product is compatible with all of Telecom's network services.
The automatic calling functions of this equipment must not be used to cause a nuisance to other telecom customers.
Only telepermitted equipment may be connected to the auxiliary telephone port. The auxiliary telephone port is specifically designed for 3-wire connected equipment. 3-wire connected equipment might not respond to incoming ringing when attached to this port.
Different characteristics of the equipment at the other end of the call, and/or variations in line conditions, may mean that it will not always be possible to communicate at the higher speeds for which this machine has been designed. Neither Telecom nor Panasonic New Zealand can accept responsibility should this situation arise.
IMPORTANT NOTICE.
Under power failure conditions, this telephone may not operate. Please ensure that a separate telephone, not dependent on local power, is available for emergency use.
This equipment should not be used under any circumstances which may constitute a nuisance to other Telecom customers.
This equipment shall not be set to make automatic calls to the Telecom '111' Emergency Service.
Not all telephones will respond to incoming ringing when connected to the extension socket.

As an ENERGY STAR® Partner, Panasonic has determined that this product meets the ENERGY STAR® guidelines for energy efficiency.
This voluntary program specifies certain energy consumption and usage standards. This product will automatically "power down" after a specified period of non-use. The use of this ENERGY STAR® compliant product will reduce energy consumption and ultimately benefit the environment.
The default functions can be adjusted depending on your office requirements. Please ask your Authorized Panasonic dealer for more details.
| ABBR. No.(Abbreviated Number) | The ability to store full phone numbers into the dialler and then utilizing a short series of keystrokes to speed dial that number in the future. |
| Access code | A 4-digit programmable access code that prevents unauthorized operation of your Fax. |
| ADF(Automatic Document Feeder) | The mechanism that delivers a stack of document pages to the scanner one page at a time. |
| Automatic reception | The mode that allows you to receive fax documents without user intervention. |
| Auto print reduction | The method of automatically reducing a received document so that it can be printed onto a standard size piece of plain paper.Ex:your machine will reduce an incoming legal size page to 75% of its original size so it can fit on a letter size page. |
| BPS (Bits Per Second) | The amount of data that is transmitted over the phone line. Your machine can start at each Max. Modem speed and automatically step down to suitable speed depending on the phone line condition and the receiving machine's capabilities. |
| C.C.I.T.T. | Consultative Committee on International Telegraph and Telephone. This organization has presently developed four groups of industry standards that insure facsimile compatibility. |
| Character ID | A programmed proprietary code name that allows up to 16 alphanumeric characters identifying your facsimile machine. |
| Character keys | The keys that are used to enter letters and symbols for various programming functions. |
| Coding scheme | The data compression method used by facsimile machines. Your machine utilizes Modified Huffman (MH), Modified Read (MR) and Modified Modified Read (MMR) coding schemes. |
| COMM. JOURNAL | Refers to either the Communication Journal, Relay Transmission Report, or the Confidential XMT Report. |
| CONTRAST | Signifies the scanning sensitivity in terms of lightness and darkness of your original transmitting pages. |
| Cover Sheet | A Fax Cover Sheet can be attached to your transmit document(s) that shows the recipient's name, originator's name and number of pages attached. |
| DDD(Direct Distance Dialling) | A telephone service that allows unassisted dialling; no operator assistance is required. |
| Deferred polling | The ability to retrieve documents from other stations at a later time. |
| Deferred transmission | The ability to send documents to other stations at a later time. |
| Direct Dialling | The method of dialling where you enter the entire telephone number through the keypad. |
| Directory Search Dialling | Allows you to dial a full telephone number by searching the station's name entered in the One-Touch keys or Abbreviated dialling numbers. |
| Directory Sheet | The list that contains the station names that are programmed into your unit. |
| DTMF (Dual Tone Multi-Frequency) | Dialling method that sends a different set of frequencies for each digit of the telephone keypad. Commonly refers to touch tone dialling. |
| ECM (Error Correction Mode) | The ability to correct transmission errors as detected during the transmitting phone call. |
| Energy-Saver Mode | Saves energy by consuming less power than when in standby mode by turning off the fuser unit after the specified time. |
| End receiving station | In a relay network, the final station designated to receive the document. |
| FAX Forward | The ability to forward all incoming faxes to the registered station in the specified ABBR No. |
| FAX Parameter List | The list that contains the home FAX parameters settings that you have programmed into your machine. |
| FAX/TEL Auto Switching | The ability to share a single telephone line for both fax and voice usage. |
| File | A task that has been stored into the memory of your unit. Examples are deferred transactions. |
| Fixed print reduction | The method that allows you to determine one reduction rate, such as 75%, for all incoming documents. |
| FUNCTION | The control panel key that will be utilized to begin an operation or configuration of a feature. |
| G3 mode (Group 3) | Refers to the standards and transmission capabilities of the current generation of facsimile machines. |
| Group dialling | The ability to program many telephone numbers into a single station so that many locations can be dialled in sequence utilizing a single keystroke. |
| HALFTONE | A scanning technique to distinguish levels of gray from black and white. Your machine can detect up to 64 levels of gray in halftone mode. |
| Handshaking | The exchange of a group of control signals that communicate between the transmitter and receiver. These signals determine the condition at which communication can occur. |
| Header | A row of information that is transmitted by the sending machine and printed at the top of each page by the receiving unit. This identifies the transmitting unit and information about the transmission, such as time and date. |
| ITU-T | International Telecommunication Union - Telecommunication, formerly known as C.C.I.T.T. |
| ITU-T Image No.1 | An industry standard document that allows comparisons of the transmission speeds and capabilities of facsimile machines. |
| ID A programmable address of up to 20 digits identifying your machine. | |
| Image memory capacity | This signifies the amount of memory available in your unit capable of storing pages of documents. All page units of measure are based on the ITU-T Image No.1. |
| Individual Transmission Journal | A report that is printed by the transmitting unit stating information regarding the last document transaction. |
| Information code | A code that is internally generated by your Fax stating a specific operational error or machine failure. |
| Initial sending station | In a relay network, the station that is originating the document transmission. |
| Journal | A report that is printed by your unit listing the last 32 transactions. |
| Keypad | A group of numeric keys located on your control panel. |
| LCD | Liquid Crystal Display. The display area of your machine. |
| LOGO | Your programmed company name or identification up to 25 alphanumeric characters. |
| Multiple Logo | The user can select one of 25 preset LOGOs before a transmission. |
| Manual reception | A mode that requires operator intervention to receive an incoming document. |
| Memory transmission | The documents are scanned into memory before actual connection to the phone line for transmission. |
| Modem | A device that converts signals from your fax machine into signals that can be transmitted over telephone lines. |
| Multi-station transmission | The ability to broadcast the same set of documents to a programmed number of locations. |
| Network address | An individual 4-digit addressing number assigned to a One-Touch/ Abbreviated number that identifies a particular station in a relay network. |
| Network password | A 4-digit password assigned to a network address to prevent unauthorized stations from accessing a relay station. |
| Off-hook dialling | The direct dialling of a telephone number with the handset out of the cradle or "off the hook." |
| On-hook dialling | The direct dialling of a telephone number with the handset in the cradle or "on the hook." |
| One-Touch dialling | The ability to dial an entire telephone number by pressing one key. |
| Overlap Printing | Documents too long to be reduced are automatically printed on two pages with approximately 10 mm overlap. |
| Panasonic Super Smoothing | An electronic image enhancement (Panasonic Super Smoothing) that will create a particular pattern for the improvement of copy quality. |
| Polling The ability to retrieve a document from another facsimile machine. | |
| Polling password | A 4-digit programmed code that enables the security of a document being polled. |
| Power Saver Mode | To reduce the power consumption of the machine in standby, select the time period to turn OFF the high temperature fuser unit when the printer is idle. |
| Print Collation The ability to stack received documents in the correct order. | |
| Print reduction modes | The methods used to determine how an incoming document will be reduced to print onto the paper loaded in your machine. |
| Program keys | Keys that are defined for storing a sequence of stations to be dialled or polled. |
| Protocol | A protocol is the special set of rules for communicating used by the end points in a telecommunication connection when they send signals back and forth. Both end points must recognize and observe the protocol. |
| PSTN | Public Switched Telephone Network. Network of interconnected switching equipment and transmission facilities. |
| Receiving password A 4-digit password that is checked before a document is received. | |
| RESOLUTION | Relates to the number of dots scanned or printed per certain square. The quality of the image increases as the number of dots per certain square increases. |
| Selective reception | A function that can be set so that your unit will receive from only those machines programmed into your dialler. |
| Sleep Mode | The lowest power state that the machine enters after the specified time without actually turning off. |
| Station name | Alphanumeric ID which can be programmed for each One-Touch dialling and Abbreviated dialling number. |
| Stored documents | Documents that have been scanned and now are stored in your machine's memory. |
| Sub-address | ITU-T recommendation for further routing, forwarding or relaying of incoming faxes. |
| Sub-address Password | ITU-T recommendation for additional security that corresponds to the Sub-address. |
| Substitute memory reception | Your machine's ability to store an incoming document into its memory, when it runs out of recording paper or toner. |
| Transmission reservation | The ability to preset a telephone number so that you may reserve a transmission while your unit is performing another function. |
| TAM Interface | A capability of your unit to be connected and operate with a Telephone Answering Machine (TAM). |
| Transmission password | A 4-digit password that is checked when a document is transmitted. |
| User parameter | Programmed parameters that provide information to other stations. Examples are logo, character ID, date and time. |
| Verification stamp | A user selectable transmission verification stamp can be placed on scanned documents that are successfully transmitted or stored in the memory. |
| View Mode - File List | Allows you to view the brief contents of the memory files through the LCD display without having to print the Memory File List. |
| View Mode - Journal | Allows you to view the brief contents of the journal through the LCD display without having to print the journal. |
All specifications are based on the ITU-T Image No. 1 (The sample shown below is not to scale).

THE SLEREXE COMPANY LIMITED
SAPORS LANE - BOOLE - DORSET - BH 25 & ER
TELEPHONE BOOLE (945 13) 51617 - TELEX 123456
Our Ref. 350/PJC/EAC
18th January, 1972.
Dr. P.N. Cundall, Mining Surveys Ltd., Holroyd Road, Reading, Berks.
Dear Pete,
Permit me to introduce you to the facility of facsimile transmission.
In facsimile a photocell is caused to perform a raster scan over the subject copy. The variations of print density on the document cause the photocell to generate an analogous electrical video signal. This signal is used to modulate a carrier, which is transmitted to a remote destination over a radio or cable communications link.
At the remote terminal, demodulation reconstructs the video signal, which is used to modulate the density of print produced by a printing device. This device is scanning in a raster scan synchronised with that at the transmitting terminal. As a result, a facsimile copy of the subject document is produced.
Probably you have uses for this facility in your organisation.
Yours sincerely,

P.J. CROSS
Group Leader - Facsimile Research
Registered in England: No. 2038 Registered Office: 80 Vicars Lane, Ilford, Essex.
ABBR. Number List ....132
Abbreviated Dialling....51, 58
Abbreviated Dialling Number 31
Access Code....94
Address Confirmation....56
ADF Capacity....151
Adjusting the Automatic Document Feeder (ADF) 148
Adjusting the Volume 25
Automatic Document Feeder 43
Automatic Reduction....72
C
Character ID 28
Cleaning the Document Scanning Area.....146
Cleaning the Printer Roller 147
Communication Journal (COMM. JOURNAL) 46, 129
Confidential Mailbox 115
Contrast 44
Control Panel 14
Copy 75
Cover Sheet....104
D
Date and Time....26
Deferred Polling 77
Deferred Transmission 76
Dialling Method (Tone or Pulse) 24
Dialling Re-enter Function....50, 55
Dimensions....152
Direct Dial Restriction Function ....54
Direct Transmission....57
Direct Transmission Reservation 63
Directory Search Dialling 52, 59
Directory Search List....133
Directory Sheet....34
Distinctive Ring Detector (DRD) 103
Document Jam 145
Document Size 42
Document Thickness 42
E
Edit File Mode 87
F
Fax / Tel Auto Switching Mode....68
Fax Forward....108
Fax Mode 69
FAX Parameter List ....135
Fax Parameter Table 36
File List 87
Fixed Reduction....72
Function Key List 16
Group Dialling 81
ID Number....29
Image Memory Capacity....152
IND. XMT Journal....126
Information Codes....141
ITU-T Image No. 1....161
Journal....125
Loading Documents....42
LOGO....27
Manual Number Dialling 49, 57
Mass (Weight) 152
Memory Transmission....49
Memory Transmission Reservation 62
Monitor Volume 25
Multiple Address Prohibit Function ....54
Multi-Station Transmission (Broadcasting)......53
0
Off-Hook Dialling....60
One-Touch Dialling....51, 58
One-Touch key 30
One-Touch List 132
On-Hook Dialling....61
Operating Environment....152
Overlap Printing....73
P
Paper Specifications ....153
Password Reception 112
Password Transmission....111
Pause....14, 15
PIN Code 106
Polling 78
Polling Password 78
Possibility of filtering unnecessary incoming faxes 98
Power Consumption 152
Print Collation....74
Print Margin 152
Print Reduction....72
Priority Transmission Reservation......63
Program Keys 81
Program List 134
R
Receive To Memory....96
Receiving Password 112
Reception Modes 66
Recording Paper Jam 144
Redialling 65
Resolution 44
Retry an Incomplete File 93
Ringer Volume......25
S
Scanner Resolution ......151
Selective Reception....109
Sub-Addressing 122
Substitute Memory Reception 74
T
TAM Interface Mode ....70
Telephone Mode....67
Toner Cartridge 18
Toner Cartridge Order Forms....136
Transaction Journal 125
Transmission Password....111
Transmission Reservation....62
U
User Parameters....26
V
Verification Stamp 45, 149
Viewing the Contents of a File List 88
W
Wrong Transmission Prevention Function......54
memo
IMPORTANT INFORMATION
When requesting information, supplies or service always refer to the model and serial number of your machine. The model and serial number plate (Main Name Plate) is located on the machine as shown below. For your convenience, space is provided below to record information you may need in the future.
Model No.
Serial No.
Date of Purchase
Dealer
Address
Telephone Number ( ) -
Supplies Telephone Number ( ) -
Service Telephone Number ( ) -

Model and Serial Number
Microsoft, Windows, Windows Server, Windows Vista, Outlook & Windows logo are registered trademarks of Microsoft Corporation in the USA and other countries.
Microsoft product screen shot(s) reprinted with permission from Microsoft Corporation.
Adobe, Acrobat Reader & Adobe logo are either registered trademarks or trademarks of Adobe Systems Incorporated.
All other trademarks identified herein are the property of their respective owners.
In these Operating Instructions, some TM and ® marks are omitted from the main text.
libtiff is a software written by Sam Leffler while working for Silicon Graphics.
Copyright © 1988-1997 Sam Leffler
Copyright © 1991-1997 Silicon Graphics, Inc.
zlib is a library written by Jean-loup Gailly and Mark Adler.
Copyright © 1995-2005 Jean-loup Gailly and Mark Adler
libjpeg is a library maintained by the Independent JPEG Group.
Copyright © 1991-1998, Thomas G. Lane
Information for Users on Collection and Disposal of Old Equipment and used Batteries


These symbols on the products, packaging, and/or accompanying documents mean that used electrical and electronic products and batteries should not be mixed with general household waste.
For proper treatment, recovery and recycling of old products and used batteries, please take them to applicable collection points, in accordance with your national legislation and the Directives 2002/96/EC and 2006/66/EC.
By disposing of these products and batteries correctly, you will help to save valuable resources and prevent any potential negative effects on human health and the environment which could otherwise arise from inappropriate waste handling.
For more information about collection and recycling of old products and batteries, please contact your local municipality, your waste disposal service or the point of sale where you purchased the items.
Penalties may be applicable for incorrect disposal of this waste, in accordance with national legislation.
For business users in the European Union
If you wish to discard electrical and electronic equipment, please contact your dealer or supplier for further information.
Information on Disposal in other Countries outside the European Union
These symbols are only valid in the European Union. If you wish to discard these items, please contact your local authorities or dealer and ask for the correct method of disposal.
Note for the battery symbol (bottom two symbol examples):
This symbol might be used in combination with a chemical symbol. In this case it complies with the requirement set by the Directive for the chemical involved.
For Service, Call:
- PANASONIC®
- OPERATING INSTRUCTIONS
- (FOR FACSIMILE)
- FACSIMILE TRANSCEIVER
- PANAFAX
- MAIN UNIT AND ACCESSORIES
- INSTALLING THE ACCESSORIES
- NOTE
- TABLE OF CONTENTS
- GETTING TO KNOW YOUR MACHINE
- INSTALLING YOUR MACHINE
- PROGRAMMING YOUR MACHINE
- BASIC OPERATIONS
- SENDING DOCUMENTS
- RECEIVING DOCUMENTS
- MAKING COPIES
- ADVANCED FEATURES
- TIMER CONTROLLED COMMUNICATIONS
- POLLING
- PROGRAM KEYS
- EDIT FILE MODE
- ACCESS CODE
- RECEIVE TO MEMORY
- POSSIBILITY OF FILTERING UNNECESSARY INCOMING FAXES
- DISTINCTIVE RING DETECTOR (DRD)
- FAX COVER SHEET
- PIN CODE ACCESS
- FAX FORWARD
- NETWORK FEATURES
- SELECTIVE RECEPTION
- PASSWORD COMMUNICATIONS
- CONFIDENTIAL MAILBOX
- SUB-ADDRESSING
- PRINTOUT JOURNALS AND LISTS
- JOURNALS AND LISTS
- PROBLEM SOLVING
- TROUBLESHOOTING
- APPENDIX
- SPECIFICATIONS
- RECORDING PAPER SPECIFICATIONS
- OPTIONS AND SUPPLIES
- REGULATORY INFORMATION
- GLOSSARY
- ITU-T IMAGE NO
- INDEX
- FOR YOUR SAFETY
- WARNING
- CAUTION
- POWER AND GROUND CONNECTION CAUTIONS
- OPERATING SAFEGUARDS
- CONSUMABLE SAFEGUARDS
- INSTALLATION AND RELOCATION
- CAUTIONS
- CAUTION ON TONER USE
- BLACK TONER
- INGREDIENTS
- OTHERS
- INSTALLATION
- SUPPLIES
- ILLEGAL COPIES
- NOTICE
- PRECAUTIONS
- LASER SAFETY
- CAUTION LABEL
- IMPORTANT SAFETY INSTRUCTIONS
- CONNECTING THE TELEPHONE LINE CABLE AND POWER CORD
- TELEPHONE LINE CABLE
- INSTALLING THE TONER CARTRIDGE
- LOADING THE RECORDING PAPER
- HOW TO LOAD THE RECORDING PAPER
- PAPER SPECIFICATIONS
- ADJUSTING THE PAPER CASSETTE FOR THE PAPER LENGTH
- HOW TO ADJUST THE PAPER CASSETTE FOR THE PAPER LENGTH
- ADJUSTING THE PAPER CASSETTE FOR THE PAPER WIDTH
- HOW TO ADJUST THE PAPER CASSETTE FOR THE PAPER WIDTH
- SETTING THE DIALLING METHOD (TONE OR PULSE)
- ADJUSTING THE VOLUME
- SETTING THE MONITOR VOLUME
- SETTING THE RINGER VOLUME
- USER PARAMETERS
- GENERAL DESCRIPTION
- SETTING THE DATE AND TIME
- SETTING YOUR LOGO
- SETTING YOUR CHARACTER ID
- SETTING YOUR ID NUMBER (FAX TELEPHONE NUMBER)
- ONE-TOUCH/ABBREVIATED DIALLING NUMBERS
- ENTERING ONE-TOUCH/ABBREVIATED DIALLING NUMBERS
- TO ENTER A ONE-TOUCH KEY, FOLLOW THE STEPS BELOW
- TO SET AN ABBREVIATED DIALLING NUMBER, FOLLOW THE STEPS BELOW
- EDITING ONE-TOUCH/ABBREVIATED DIALLING NUMBERS
- TO CHANGE THE SETTINGS OF A ONE-TOUCH/ABBR DIALLING NUMBER
- TO DELETE THE SETTINGS OF ONE-TOUCH/ABBR DIALLING NUMBER
- PRINTING OUT A DIRECTORY SHEET
- CUSTOMIZING YOUR MACHINE
- SETTING THE FAX PARAMETERS
- LOADING DOCUMENTS
- DOCUMENTS YOU CAN SEND
- DOCUMENTS YOU CANNOT SEND
- HOW TO LOAD DOCUMENTS
- BASIC TRANSMISSION SETTINGS
- CONTRAST
- RESOLUTION
- VERIFICATION STAMP
- COMMUNICATION JOURNAL (COMM. JOURNAL)
- MEMORY TRANSMISSION
- MANUAL NUMBER DIALLING
- DIALLING RE-ENTER FUNCTION
- ONE-TOUCH DIALLING
- ABBREVIATED DIALLING
- DIRECTORY SEARCH DIALLING
- MULTI-STATION TRANSMISSION (BROADCASTING)
- WRONG TRANSMISSION PREVENTION FUNCTION
- DIRECT DIAL RESTRICTION FUNCTION
- MULTIPLE ADDRESS PROHIBIT FUNCTION
- ADDRESS CONFIRMATION FUNCTION
- DIRECT TRANSMISSION
- MANUAL NUMBER DIALLING (DIRECT TRANSMISSION)
- ONE-TOUCH DIALLING (DIRECT TRANSMISSION)
- ABBREVIATED DIALLING (DIRECT TRANSMISSION)
- DIRECTORY SEARCH DIALLING (DIRECT TRANSMISSION)
- VOICE MODE TRANSMISSION
- OFF-HOOK DIALLING
- ON-HOOK DIALLING
- TRANSMISSION RESERVATION
- MEMORY TRANSMISSION RESERVATION (MULTI-TASKING)
- DIRECT TRANSMISSION RESERVATION (PRIORITY TRANSMISSION RESERVATION)
- TO RESERVE YOUR MACHINE FOR SENDING THE URGENT DOCUMENTS
- TO CANCEL THE DIRECT TRANSMISSION RESERVATION
- REDIALLING
- AUTOMATIC REDIALLING
- MANUAL REDIALLING
- TO REDIAL THE LAST DIALLED NUMBER THROUGH MEMORY
- TO REDIAL THE LAST DIALLED NUMBER THROUGH ADF
- RECEPTION MODES
- TELEPHONE MODE
- SETTING THE TELEPHONE MODE
- OPERATION OF TELEPHONE MODE
- FAX / TEL AUTO SWITCHING MODE
- SETTING THE FAX / TEL AUTO SWITCHING MODE
- OPERATION OF FAX / TEL AUTO SWITCHING MODE
- FAX MODE
- SETTING THE FAX MODE
- OPERATION OF FAX MODE
- TAM (TELEPHONE ANSWERING MACHINE) INTERFACE MODE
- SETTING THE TAM INTERFACE MODE
- OPERATION OF TAM INTERFACE MODE
- SAMPLE OF OGM
- SILENT DETECTION MODE
- PRINT REDUCTION
- AUTOMATIC REDUCTION
- FIXED REDUCTION
- SELECTING THE PRINT REDUCTION MODE
- RECEIVING OVERSIZE DOCUMENTS
- SUBSTITUTE MEMORY RECEPTION
- PRINT COLLATION MODE
- COPIES
- DEFERRED TRANSMISSION
- DEFERRED POLLING
- SETTING THE POLLING PASSWORD
- PREPARING TO BE POLLED
- TO POLL DOCUMENTS FROM ANOTHER STATION
- SETTING FOR GROUP DIALLING
- TO SET A PROGRAM KEY FOR GROUP DIALLING
- SETTING FOR DEFERRED TRANSMISSION
- TO SET A PROGRAM KEY FOR DEFERRED TRANSMISSION
- EX
- SETTING FOR DEFERRED POLLING
- TO SET A PROGRAM KEY FOR DEFERRED POLLING
- SETTING FOR NORMAL POLLING
- TO SET A PROGRAM KEY FOR NORMAL POLLING
- SETTING FOR ONE-TOUCH KEY
- TO SET A PROGRAM KEY FOR ONE-TOUCH KEY
- CHANGING OR ERASING THE PROGRAM KEY SETTINGS
- TO DELETE THE SETTINGS IN A PROGRAM KEY
- PRINTING A FILE LIST
- SAMPLE FILE LIST
- EXPLANATION OF CONTENTS
- VIEWING THE CONTENTS OF A FILE LIST
- CHANGING THE START TIME OR THE STATION OF A FILE
- DELETING A FILE
- PRINTING OUT A FILE
- RETRY AN INCOMPLETE FILE
- SETTING THE ACCESS CODE
- OPERATING YOUR MACHINE WITH THE ACCESS CODE (RESTRICT ALL OPERATIONS)
- OPERATING YOUR MACHINE WITH THE ACCESS CODE (RESTRICT ACCESS OF FAX PARAMETERS ONLY)
- SETTING THE RCV TO MEMORY PASSWORD
- SETTING RCV TO MEMORY
- PRINTING OUT DOCUMENTS
- SET THE FILTER
- RECEIVE WITHOUT ID
- RECEIVED ID PRINT
- REGISTER JUNK FAX NUMBER
- TO USE THE FAX COVER SHEET
- FAX COVER SHEET SAMPLE
- SELECTING THE ACCESS METHOD (PREFIX OR SUFFIX)
- DIALLING WITH A PIN CODE
- SETTING FAX FORWARD
- SETTING THE SELECTIVE RECEPTION
- COMPATIBILITY WITH OTHER MACHINES
- SETTING PASSWORD TRANSMISSION
- SETTING PASSWORD RECEPTION
- USING PASSWORD TRANSMISSION
- USING PASSWORD RECEPTION
- SENDING A CONFIDENTIAL DOCUMENT TO A REMOTE STATION'S MAILBOX
- POLLING A CONFIDENTIAL DOCUMENT FROM A REMOTE STATION'S MAILBOX
- RECEIVING A CONFIDENTIAL DOCUMENT TO YOUR MACHINE'S MAILBOX
- SAMPLE CONF. RCV REPORT
- STORING A CONFIDENTIAL DOCUMENT IN YOUR MACHINE'S MAILBOX
- PRINTING OUT A CONFIDENTIAL DOCUMENT FROM YOUR MACHINE'S MAILBOX
- DELETING A CONFIDENTIAL DOCUMENT STORED IN YOUR MACHINE'S MAILBOX
- TO DELETE A FILE USING CONFIDENTIAL CODE
- TO DELETE ALL CONFIDENTIAL FILES IN MEMORY
- SUB-ADDRESSING TRANSMISSION METHODS
- SETTING OF ROUTING, FORWARDING OR RELAYING
- TO SET THE SUB-ADDRESS INTO A ONE-TOUCH/ABBR. DIALLING NUMBERS
- TO SEND A DOCUMENT WITH SUB-ADDRESS
- USING ONE-TOUCH/ABBR. NUMBER DIALLING
- USING MANUAL NUMBER DIALLING
- TRANSACTION JOURNAL
- INDIVIDUAL TRANSMISSION JOURNAL (IND. XMT JOURNAL)
- THE SLEREXE COMPANY LIMITED
- ONE-TOUCH/ABBREVIATED AND DIRECTORY SEARCH LIST
- PROGRAM LIST
- SAMPLE PROGRAM LIST
- FAX PARAMETER LIST
- SAMPLE FAX PARAMETER LIST
- TONER CARTRIDGE ORDER FORMS
- TO PRINT THE TONER CARTRIDGE ORDER FORMS
- SAMPLE TONER CARTRIDGE ORDER FORM
- INFORMATION CODES
- CLEARING A RECORDING PAPER JAM
- CLEARING A DOCUMENT JAM
- CLEANING THE DOCUMENT SCANNING AREA
- CLEANING THE PRINTER ROLLER
- TO CLEAN THE PRINTER ROLLERS
- ADJUSTING THE AUTOMATIC DOCUMENT FEEDER (ADF)
- CHECKING THE TELEPHONE LINE
- CE
- DECLARATION OF CONFORMITY (DOC)
- CONTACT TO AUTHORISED REPRESENTATIVE
- NETWORK COMPATIBILITY
- IMPORTANT NOTICE
- C
- D
- E
- F
- P
- R
- S
- T
- U
- V
- W
- IMPORTANT INFORMATION
Brand : PANASONIC
Model : Panafax UF-5300
Category : Fax machine