
MW-20 - Digital photo frame PANASONIC - Free user manual and instructions
Find the device manual for free MW-20 PANASONIC in PDF.
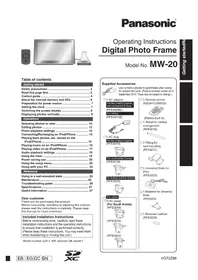


| Product Type | Digital Photo Frame |
| Brand | Panasonic |
| Model | MW-20 |
| Display Size | 7 inches (diagonal) |
| Display Resolution | 800 x 480 pixels |
| Aspect Ratio | 16:9 |
| Memory Card Support | SD, SDHC, MMC |
| Internal Memory | 128 MB (approx.) |
| Photo Formats | JPEG, BMP, PNG |
| Slideshow Functions | Transition effects, adjustable speed |
| Clock and Calendar | Yes |
| Connectivity | USB 2.0 (for data transfer) |
| Power Source | AC adapter (100-240V, 50/60Hz) |
| Power Consumption | ≈ 5W |
| Dimensions (W x H x D) | Approx. 7.6 x 5.1 x 1.2 inches |
| Weight | Approx. 0.55 lbs (250 g) |
| Mounting Options | Tabletop stand, wall-mountable (bracket included) |
| Operating Temperature | 32°F to 104°F (0°C to 40°C) |
| Maintenance | Clean with a soft, dry cloth; avoid abrasive cleaners |
| Safety Precautions | Do not expose to moisture or extreme temperatures |
| Spare Parts Availability | Contact Panasonic support for replacement accessories |
Frequently Asked Questions - MW-20 PANASONIC
User questions about MW-20 PANASONIC
0 question about this device. Answer the ones you know or ask your own.
Ask a new question about this device
Download the instructions for your Digital photo frame in PDF format for free! Find your manual MW-20 - PANASONIC and take your electronic device back in hand. On this page are published all the documents necessary for the use of your device. MW-20 by PANASONIC.
USER MANUAL MW-20 PANASONIC
Operating Instructions Digital Photo Frame
Model No. MW-20
Table of contents
Getting started
Safety precautions 2
Read this page first 3
Control guide 4
About the internal memory and SDs 6
Preparation for power source 7
Setting the clock 7
Switching the screen display 8
Displaying photos vertically 9
Operations
Selecting photos to view 10
Editing photos 12
Photo playback settings 14
Connecting/Recharging an iPod/iPhone 15
Playing back photos, etc. stored on the iPod/iPhone 16
Playing music on an iPod/iPhone 16
Playing video on an iPod/iPhone 17
Audio playback settings 18
Using the timer 18
Power saving use 20
Using the setup menu 20
Using with your PC 22
Reference
Using in a wall-mounted state 23
Maintenance....25
Troubleshooting guide 26
Specifications 27
Useful Information 27
Dear customer,
Thank you for purchasing this product.
Before connecting, operating, or adjusting this product, please read the instructions completely. Please keep this manual for future reference.
Included Installation Instructions
Before commencing work, carefully read these installation instructions and the operating instructions to ensure that installation is performed correctly. (Please keep these instructions. You may need them when maintaining or moving this unit.)
Model number suffix "EB" denotes UK model.
Supplied Accessories

Use numbers indicated in parentheses when asking for replacement parts. (Product numbers correct as of September 2010. These may be subject to change.)
□1 AC adaptor
For the United Kingdom, and continental Europe
(RFEA609E)
For others
(RFEA610Z)

□1 AC plug
For the United Kingdom (RFE0219)

For continental Europe (RFE0218)

For Australia and New Zealand (RFE0220)

For others
□3 AC plugs
(For Saudi Arabia) (RFE0219)

(RFE0218)

(RFE0224)

□1 Remote control (N2QAYC000032)

(Battery built-in)
□ 1 Stand for vertical arrangement (RFE0216)

□1 Fitting for wall-mounting (RFA3217)

□1 Universal Dock for iPod (RFE0223)

□1 Backrest for Universal Dock (RFE0225)

□1 Backrest cushion (RFE0226)

Safety precautions
Placement
Set the unit up on an even surface away from direct sunlight, high temperatures, high humidity, and excessive vibration. These conditions can damage the cabinet and other components, thereby shortening the unit's service life. Do not place heavy items on the unit.
Voltage
Do not use high voltage power sources. This can overload the unit and cause a fire.
Do not use a DC power source. Check the source carefully when setting the unit up on a ship or other place where DC is used.
AC mains lead protection
Ensure the AC mains lead is connected correctly and not damaged. Poor connection and lead damage can cause fire or electric shock. Do not pull, bend, or place heavy items on the lead.
Grasp the plug firmly when unplugging the lead. Pulling the AC mains lead can cause electric shock.
Do not handle the plug with wet hands. This can cause electric shock.
Foreign matter
Do not let metal objects fall inside the unit. This can cause electric shock or malfunction.
Do not let liquids get into the unit. This can cause electric shock or malfunction. If this occurs, immediately disconnect the unit from the AC mains supply and contact your dealer. Do not spray insecticides onto or into the unit. They contain flammable gases which can ignite if sprayed into the unit.
Service
Do not attempt to repair this unit by yourself. If sound is interrupted, indicators fail to light, smoke appears, or any other problem that is not covered in these instructions occurs, disconnect the AC mains lead and contact your dealer or an authorized service centre. Electric shock or damage to the unit can occur if the unit is repaired, disassembled or reconstructed by unqualified persons.
Extend operating life by disconnecting the unit from the AC mains if it is not to be used for a long time.
■ For the United Kingdom and Republic of Ireland customers
(Sales and Support Information)
Customer Care Centre
• For customers within the UK: 0844 844 3852 - For customers within the Republic of Ireland: 01 289 8333 - Visit our website for product information www.panasonic.co.uk • E-mail: customer.care@panasonic.co.uk
Technical Support for AV Software
• For customers within the UK: 0844 844 3869 • For customers within the Republic of Ireland: 01 289 8333
Direct Sales at Panasonic UK
• For customers: 0844 844 3856 - Order accessory and consumable items for your product with ease and confidence by phoning our Customer Care Centre Monday–Thursday 9:00 a.m.–5:30 p.m., Friday 9:30 a.m.–5:30 p.m. (Excluding public holidays)
- Or go on line through our Internet Accessory ordering application at www.pas-europe.com.
- Most major credit and debit cards accepted.
- All enquiries transactions and distribution facilities are provided directly by Panasonic UK Ltd.
- It couldn't be simpler!
- Also available through our Internet is direct shopping for a wide range of finished products, take a browse on our website for further details.
Read this page first
Descriptions in these operating instructions
SD memory card, SDHC memory card, SDXC memory card, miniSD card, microSD card, microSDHC card and microSDXC memory card
→ SD or SD card
Playable media and file formats
■ Playable photos (JPEG)
(Playback may not be possible in some cases.)
| File format JPEG | |
| Number of pixels | Max. 5120 × 3840 pixelsMin. 64 × 64 pixels |
| Maximum fi le size 10 MB | |
| Approximate number of folders practically usable | 1000 folders |
| Approximate number of fi les practically usable | 10000 fi les(1000 fi les per folder) |
- Files in folders lower than the sixth hierarchy cannot be played back.
- Files in folder "SD_VIDEO" and "SD_AUDIO" cannot be played back.
■ Usable SD cards (as of September, 2010)
Panasonic SD cards are recommended.
| SD memory cardminiSD card*microSD card*(8 MB to 2 GB) | Formatted in FAT12 format or FAT16 format compliant with the SD standard |
| SDHC memory cardmicroSDHC card*(4 GB to 32 GB) | Formatted in FAT32 format compliant with the SD standard |
| SDXC memory cardmicroSDXC card*(48 GB, 64 GB) | Formatted in exFAT format compliant with the SD standard |
* Be sure to attach the dedicated adaptor when using on this unit.
■ Types of iPod/iPhone that can be used on this unit (as of August, 2010)
| Name Memory size | |
| iPod touch 3rd generation 32 GB, | 64 GB |
| iPod nano 5th generation (video camera) | 8 GB, 16 GB |
| iPod touch 2nd generation 8 GB, | 16 GB, 32 GB |
| iPod classic 120 GB, 160 GB (2009) | |
| iPod nano 4th generation (video) | 8 GB, 16 GB |
| iPod classic 160 GB (2007) | |
| iPod touch 1st generation 8 GB, | 16 GB, 32 GB |
| iPod nano 3rd generation (video) | 4 GB, 8 GB |
| iPod classic 80 GB | |
| iPod nano 2nd generation (aluminum) | 2 GB, 4 GB, 8 GB |
| iPod 5th generation (video) | 60 GB, 80 GB |
| iPod 5th generation (video) | 30 GB |
| iPod nano 1st generation | 1 GB, 2 GB, 4 GB |
| Name Memory size | |
| iPhone 4 | 16 GB, 32 GB |
| iPhone 3GS | 16 GB, 32 GB |
| iPhone 3G | 8 GB, 16 GB |
| iPhone | 4 GB, 8 GB, 16 GB |
Note
- Playback of motion pictures is available only for the type iPod/iPhone compatible with video playback.
- You cannot record/save data onto the iPod/iPhone using this unit.
- Depending on the iPod/iPhone in use or its version, operations or displays may differ from the normal ones, but this will not affect the basic playback. Use the latest version if possible.
- When the iPhone receives a call while connected to this unit, playback, etc. of the iPhone may stop. To prioritize the operation with the iPhone connected to this unit, make the setting so that the iPhone does not receive calls.
Control guide
Main unit

1 Display 2 Remote control signal sensor (→P5) 3 Panasonic Logo (→P21) 4 Speakers 5 Light sensor (→P20) 6 Cursor buttons (▲, ▼, ◀, ▶ and OK) Selecting to confirm 7 [MENU] Displaying/closing the menu screen 8 [←RETURN] Returning to the previous screen, displaying the thumbnail screen (→P11), displaying track list (→P17) 9 [DISPLAY MODE] Displaying the display mode selection screen (→P8, 9) 10 [VOLUME +]/[VOLUME -] Adjusting the volume 11 SD card slot 12 Stand 13 Terminal for the Universal Dock (→P15) 14 [☐/I] Standby/on switch (For Latin America, Asia and Middle East, [POWER ☐/I] is used.) 15 USB port (→P22) 16 AC adaptor terminal (→P7)
■ Button operation display on the main unit

- When [MENU], [RETURN] and [DISPLAY MODE] are pressed once, the guide (®) is displayed. When these buttons are pressed while the button guide is displayed, they will function normally as buttons.
- You can operate [VOLUME +] and [VOLUME -] regardless of the button guide display status.
Installation of this unit

⑧ Adjustable with the angle of between approx. 50 degrees and 75 degrees for comfortable viewing.
■ For better sound effects
The sound quality changes depending on the setup of this unit. Enjoy better sound quality according to the instructions below.
• Install the unit on a flat and stable place. - Make the surrounding conditions of the speakers as balanced as possible. Make the surrounding reflection as low as possible.
Note
- These speakers do not have magnetic shielding. Do not place a clock or magnetic cards (credit card, etc.) near this unit, or do not place this unit near a TV or a computer.
- Using this unit at high volume for a long period of time may deteriorate the speaker characteristics or extremely shorten speaker life.
- When the sound is distorted, turn down the volume even in normal use. (Failure to do so may cause the speakers to be damaged.)
Inserting an SD card
Back of product

Face (the side with the corner cut) (©) up and insert straight to the end.
■ To remove an SD card
Press the centre of the SD card. When the card slightly pops out, pull it out with your fingers.
Note
- Never remove the SD card while the SD card is reading. Otherwise, the data may be destroyed.
- Keep the Memory Card out of reach of children to prevent swallowing.
This manual explains operations using the remote control in most sections.
Remote control

1 [∅] Standby/on switch 2 [iPod/PLAY MENU] Displaying the iPod menu screen (→P16, 17) 3 [SELECT PHOTOS] Displaying the photo selection menu screen (→P10, 11) 4 [▲, ▼, ◀, ▶]/[OK] Selecting to confirm, switching the photos (→P11, 16), skipping/searching a track (→P17) 5 [DISPLAY MODE] Displaying the display mode selection screen (→P8, 9) 6 [SLIDESHOW] Viewing the slideshow (→P11), switching the remote control mode (→P21) 7 [iPod/▶/■] Play/Stop (Pause) (→P17) 8 [CLOCK] Switching to the clock screen (→P8), switching the remote control mode (→P21) 9 [iPod/DISPLAY] Switching to the iPod Display screen 10 [MENU] Displaying/closing the menu screen 11 [→ RETURN] Returning to the previous screen, displaying the thumbnail screen (→P11), displaying track list (→P17) 12 [ROTATE/-ZOOM] Rotating photos (→P11), switching the volume button to the zoom in/out button (→P11) 13 [+ IN/VOL]/[- OUT/VOL] Adjusting the volume, zooming in/out photos (→P11)
To use the remote control
Extract the insulation sheet ( ① ) before use.

Dispose of the extracted insulation sheet properly.
■ Usable range
⑤ Remote control signal sensor: within approx. 7 metres at the front. ⑥ Transmission window: approx. 30° horizontal, approx. 20° vertical.
Caution
- Do not place an object between the signal sensor and the remote control.
- Do not place the signal sensor under direct sunlight or the strong light of an inverter fluorescent lamp.
- Keep the transmission window and the unit's sensor free from dust.
Note
- When you set the unit in a cabinet, the remote controlling range may decrease depending on the thickness or colours of glass cabinet doors.
■ When inserting the battery
① Pull out while pressing. ② Button-type battery (Lithium battery) (CR2025): Face “+” upward. - Do not heat or expose to flame. - Do not leave the battery in an automobile exposed to direct sunlight for a long period of time with doors and windows closed. - Remove the battery if the remote control is not going to be used for a long period of time. Store in a cool, dark place. - Keep the Button-type battery out of reach of children to prevent swallowing.
About the internal memory and SDs
About the internal memory
Back up the internal memory periodically.
It is recommended that you back up the internal memory to your PC or an SD card periodically to prevent the data from being lost due to static electricity, electromagnetic wave, damage, malfunctions, etc.
- Note that Panasonic assumes no liability for indemnification for any damage of the internal memory contents caused by use of this product, failures, malfunctions, etc.
- If this unit is repaired, the internal memory may be restored to the factory default conditions.
About SDs
Usable SD cards (→ P3)
- Multimedia cards (MMC) cannot be used.
- The usable area will be less than the indicated capacity.
- SDHC memory cards and SDXC memory cards can be used on equipment that supports respective cards. (SDHC memory cards can also be used on equipment that supports SDXC memory cards.) Using those cards with incompatible equipment may format the cards or delete recorded contents.
When using those cards on computer or equipment incompatible with SDXC memory cards, a message asking you to format the card may appear. Do not format the card because your important data will be deleted and cannot be restored.
See the following site for using SDXC memory cards. http://panasonic.net/avc/sdcard/information/SDXC.html
■ Write-Protect switch
When the switch is slid to the "LOCK" side, it is not possible to write or delete data on the card and format it. When the switch is unlocked, these functions become available.
Ⓐ Write-protect ⑧ When recording/editing


■ Handling cautions
- Be sure to store the card in the case when not in use.
- Do not disassemble or modify the card.
- Do not remove the attached label.
- Do not attach a new label or seal.
- Do not touch the metal terminal on the back side with hand or metal.
Cautions when disposing of/transferring SD cards and the unit
"Format" and "Delete" functions of this unit or a PC only change the file management information and cannot completely erase data stored on the SD card or in the internal memory of this unit.
- When disposing of/transferring SD cards, it is recommended that you physically destroy the SD card itself or completely erase the data on the SD card using a commercially available data erasing software for PCs.
- When disposing of/transferring the unit, perform physical format. (see below)
Manage data on the SD card and in the internal memory under your responsibility.
■ To completely delete data in the internal memory using the physical format (approx. 10 minutes)
- Press [MENU].
- Press [▲, ▼, ◀, ▶] to select "Settings Menu" and press [OK].
- Press [▲, ▼, ◀, ▶] to select "Format Internal Memory" and press [OK].
- Press [◀, ▶] to select "Yes" and press [OK].
- Press and hold [MENU] for 3 seconds or more when "Photos set as protected will also be deleted. Do you really want to perform this operation?" is displayed.
- Press [◀, ▶] to select "Yes" and press [OK].
Preparation for power source

- Use the appropriate AC plug for your country.
Back of product
■ To remove the AC adaptor from the household mains socket
Hold the AC adaptor firmly and pull it out straight.

Note
- While using this unit, the AC adaptor may become a little hot. This is not a malfunction.
- The included AC adaptor is for use with this unit only. Do not use it with other equipment. Also, do not use AC adaptor from other equipment with this unit.
- Do not use any other AC adaptors except the supplied one.
- The unit is in the standby condition when the AC adaptor is connected. The primary circuit is always "live" as long as the AC adaptor is connected to an electrical outlet.
Setting the clock
This unit is equipped with the clock/calendar and timer functions. Set the time first.
1. Press [○].
- You can also press [∅/l] on the main unit. (For Latin America, Asia and Middle East, [POWER ∅/l] is used.)
2. Press [MENU].

3. Press [▲, ▼, ◀, ▶] to select "Settings Menu" and press [OK].

- Press [▲, ▼, ◀, ▶] to select "Clock/Calendar Settings" and press [OK].
- Press [▲, ▼] to select "Set Clock" and press [OK].
- Press [◀, ▶] to select the items (Date, Month, Year, Hour and Minute*), and press [▲, ▼] to set.
- Press [OK]. The clock starts from 00 second.
■ When the introduction screen for the time setting appears
If you attempt to operate a function that requires time setting while the time is not set, the introduction screen for the time setting appears.
- Press [▲, ▼] to select "Set time" and press [OK].
- Press [◀, ▶] to select the items (Date, Month, Year, Hour and Minute*), and press [▲, ▼] to set.
- Press [OK].
* "AM/PM" is displayed when "12-hour System" is selected. (→P20)
■ To display the clock
- Press [MENU].
- Press [▲, ▼, ◀, ▶] to select "Clock" and press [OK].
Note
• Period that can be set: January 2000 to December 2099. - There is a small precision error of the clock. Periodical time correction is recommended.
Switching the screen display
This unit has display categories of "Slideshow", "Single View", "Clock" and "iPod Display".
Each display category has a variety of display modes. You can select a display according to your preferences and moods.
Factory settings are indicated with underlines.
| Slideshow Switching photos automatically | |
| Single View | Displaying one photo fixed |
| Clock Displaying date, clock or calendar | |
| iPod Display Displaying audio information, etc. | |
- Press [DISPLAY MODE].

Ⓐ Current display category ⑧ Current display mode © Cursor
- Press [▲, ▼, ◀, ▶] to select the display category or display mode and press [OK].
- You can also select the display categories of "Slideshow", "Clock" and "iPod Display" by pressing [SLIDESHOW], [CLOCK] and [iPod/DISPLAY] respectively.
Types of display mode
■ Slideshow
| Normal | Slideshow with 1 photo per slide in normal size |
| Full Screen | Slideshow with 1 photo per slide in full screen size |
| Frame 1 to 3 | Slideshow with 2 or 3 framed photos per slide |
| Frame 4 (Random) | Slideshow with random photos using the frame 1 to 3 |
| Multi Slideshow with 2 or 3 photos per slide | |
| Clock 1 to 3 | Slideshow with 1 photo per slide displaying the clock |
| Calendar 1 to 3 | Slideshow with 1 photo per slide displaying the calendar |
| Normal + Date Indication | Slideshow with 1 photo per slide displaying the date of photo* |
| Full Screen + Date Indication | Slideshow with 1 photo per slide in full screen size displaying the date of photo* |
| Normal (Vertical View) | Slideshow with 1 photo per slide displayed vertically |
| Full Screen (Vertical View) | Slideshow with 1 photo per slide displayed vertically in full screen size |
■ Single View
| Normal | Displaying a photo in normal size |
| Full Screen | Displaying a photo in full screen size |
| Normal + Photo Info | Displaying a photo and photo information (folder name, file name, number of pixels, etc.) |
| Full Screen + Photo Info | Displaying a photo in full screen size and photo information (folder name, fi le name, number of pixels, etc.) |
| Normal + Date Indication | Displaying a photo and the date of photo* |
| Full Screen + Date Indication | Displaying a photo in full screen size and the date of photo* |
| Normal (Vertical View) | Displaying a photo vertically |
| Full Screen (Vertical View) | Displaying a photo vertically in full screen size |
Clock

Clock 1 to 7 Displaying the clock
Calendar 1 to 7 Displaying the calendar
- To view a calendar of a different month, press [◀, ▶] while the calendar is displayed.
■ iPod Display

| Track List Displaying track list | |
| Album Artwork + Track List | Displaying album artwork (an image attached with a track) and track list |
| Album Artwork Displaying album artwork | |
When selecting "Videos" or "All (iPod display)" in the iPod menu
| iPod Normal | Displaying the iPod/iPhone screen in normal size |
| iPod Full Screen | Displaying the iPod/iPhone screen with approx. 1.33 times the normal size |
* If photo shooting date information is not present for some photos, the updated date information of photo files is displayed.
Displaying photos vertically
Photos are displayed vertically by switching the display mode.
- Press [DISPLAY MODE].
- Press [▲, ▼, ◀, ▶] to select "Normal (Vertical View)" or "Full Screen (Vertical View)" in the "Slideshow" or "Single View" and press [OK]. The photo is displayed vertically.
- Turn the unit off and remove the AC adaptor from the unit.
- Fold the stand part.
- Insert the stand for vertical arrangement into the screw hole on the bottom face of this unit. Tighten the screw firmly to attach it. ① Stand for vertical arrangement ② Screw hole ③ Cloths, etc.
- Connect the AC adaptor and turn the unit on.

■ To restore the horizontal arrangement
- Turn the unit off, remove the AC adaptor and the stand for vertical arrangement.
- Open the stand part of the unit, connect the AC adaptor and turn the unit on.
Note
- Use a cloth, etc. to prevent damage of the product or floor when attaching the stand for vertical arrangement.
- Check if the stand for vertical arrangement is screwed firmly. Otherwise, the stand may fall.
- Only photos are displayed vertically. The menu, etc. are displayed in the horizontal setting state.
- The sound quality during music playback differs from that in the horizontal setting state.
Selecting photos to view
You can play back photos on the SD or in the internal memory.
- Playable photos (JPEG) → P3
- Insert the SD card containing photo files. If the SD card is inserted while each display mode screen is displayed, the SD card menu screen appears.

- Press [▲, ▼] to select "Select Photo to View" and press [OK].
- If "View Most Recent Photos" is selected, the newly dated photo in "Date Search" is played back.
- Press [▲, ▼, ◀, ▶] to select photo category (→right) and press [OK].
- Repeat the above step as necessary.

Media information (→P11). To switch to the internal memory.
- Press [▲, ▼, ◀, ▶] to select the photo and press [OK].
The photo is displayed with single view.
■ When the SD card menu screen is not displayed or the SD card is already inserted
Perform the following steps instead of the above steps 1 and 2.
- Press [SELECT PHOTOS].
- Press [▲, ▼] to select "Switch to SD Card" and press [OK].
Note
- After extracting the SD card, the selector automatically selects "Internal Memory".
- Import photo data into the internal memory. (→P12)
The following explains how to select and play photos in the internal memory.
- Press [SELECT PHOTOS].
- You can also select from "Select Photos" in the "Menu".

Media information (→P11). To switch to the SD card.
- Press [▲, ▼] to select photo category (see below) and press [OK].
Repeat the above step as necessary.
- Press [▲, ▼, ◀, ▶] to select the photo and press [OK].
The photo is displayed in single view.
Note
- Displaying photos may take time.
■ Photo categories
Factory setting is indicated with underline.
| All Photos | Select from all photos in the SD or the internal memory. |
| Recently Imported Photos | (Only for the internal memory)Select from 100 photos imported to the internal memory recently.• Photos directly copied from a computer are not included. (→P22) |
| Date Search Select photos by shooting date. | |
| Folder Search Select from the folder. | |
| SDFavourite 1 to 10*1 | (Only for the SD)Select from photos registered as “Favourite” on the Panasonic digital camera LUMIX, etc.LUMIX: SD Favourite 4• For details on how to register “Favourite” on the LUMIX, etc., see those operating instructions. |
| Favourites(Favourite 1 to 10) | (Only for the internal memory)Select from photos registered as “Favourite” on this unit. (→P13) |
| LUMIX Scene Mode | Photos taken with a Panasonic digital camera LUMIX can be selected among the similar categories on this unit to those of LUMIX such as “Intelligent Auto Mode” and “Scene Mode”.■Scene mode categoriesPortrait etc./Scenery etc./Night Scenery etc./Events/Baby/Pet/Food/Others |
*1 Displayed only if photos are present.
Note
- The “SD Favourite” is classified based on the DPOF setting information, which means the Favourite set on units other than Panasonic products may be classified as “SD Favourite”.
- A date for Date Search can be selected from January 2000 to December 2099.
- If photo shooting date information is not present for some photos, the Date Search classifies such photos according to the updated date information of photo files.
- The “LUMIX Scene Mode” categories displayed on this unit may differ from the “LUMIX Scene Mode” categories displayed on Panasonic digital camera LUMIX.
- If photos have scene mode information which is not applicable, such photos are classified as "Others" of "LUMIX Scene Mode".
■ Operations during playback
| Playing back slideshow | Press [SLIDESHOW] when displaying with the single view or thumbnail view.You can also select from “Slideshow” in the “Menu” by pressing [MENU]. |
| Viewing single | Press [OK] while playing the slideshow.You can also select from “Single View” in the “Menu” by pressing [MENU]. |
| Selecting photos | Press [◀, ▶]. |
| Selecting photos from the thumbnail*2 view | 1. Press [◀RETURN].2. Press [▲, ▼, ◀, ▶] to select the photo and press [OK]. |
| Selecting photos by scrolling*3 | Press and hold [◀, ▶], when playing the photo or thumbnail view.When you release your fi nger, scrolling stops and the photo displayed in the centre is displayed with the single view. |
| Rotating photos | Press [ROTATE/-ZOOM], when displaying with the single view.Each time you press, the photo rotates anticlockwise by 90°. |
| Zooming photos | When displaying with the single view1. Press and hold [ROTATE/ -ZOOM] for more than 1 second.(The photo is enlarged to ×1.5.)2. Press [+ IN/VOL].×2 → ×3 → ×4While zoomed, you can move to preferred position using [▲, ▼, ◀, ▶].Press [− OUT/VOL] to reduce the enlarged photo. |
| Confirming media information | Press [SELECT PHOTOS].• The used capacity, remaining capacity and number of photos of the SD card and internal memory are displayed on the photo selection menu screen. |
*2 Thumbnail is a reduced image of multiple pictures to view them as a list. *3 Scrolling is a function to display images with right and left movement.
Note
- When photos are being played back in display mode "Frame 1 to 3" or "Multi" and if you press [◀, ▶] to switch photos, the combinations of photos are also changed.
- If some images cannot be displayed with the thumbnail view, "☐" is displayed.
- Depending on the photo, the scrolling thumbnail images may be displayed as "
- Scrolling is not possible when the slideshow order is set to Random (→P14). Also, [◀] is disabled during playing back slideshow.
- If the unit is turned off or SD card is removed, the image rotation setting for SD is cancelled.
■ Searching screen
The searching screen may be displayed in the following cases till the photo is displayed.
- When "Date Search" or "LUMIX Scene Mode" in the photo category is selected
- When "Date Search" or "LUMIX Scene Mode" has been selected when the unit is turned on
![SD Date Search: Searching photo files. 50%. [RETURN]: Cancel.](/content/2026/06/1325551/images/27d7f065f531fc63daf46afe2b8021b3b190f5519c1ded75d282067a140c66cc.jpg)
- Pressing [◀RETURN] will stop the photo search and exit the above screen.
Note
- When the unit is turned on, if the above screen is cancelled, the first photo in "All Photos" is automatically selected.
Editing photos
Copying photos
You can import and export photos between the internal memory (2 GB) and the SD card.
- Due to the restriction of the file system, the displayed internal memory capacity does not accord to the amount of file data that can be copied.
- If copied, the file names and folder names of photos are named as below.
| Import | Example: If copied on October 4, 2010Folder name: 101004_1File name: 10040001.JPG |
| Export | Folder name: 100_PSDVFile name: P1000001.JPG(Number indications are examples.) |
- Insert the SD card. (If the SD card menu is displayed, select "Copy Photo" and perform the below operation from step 4.)
- Select the photo category. (→ P10)
- Press [MENU].
- Press [▲, ▼, ◀, ▶] to select "Photo Menu" and press [OK].
- Press [▲, ▼] to select "Copy Photo" and press [OK].
- Press [▲, ▼] to select "Import from SD Card" or "Export to SD Card" and press [OK].
- Press [▲, ▼, ◀, ▶] to select the photo and press [OK].
- “☑” is displayed on the selected photos.
- Repeat the above step as necessary.
- To cancel, press [OK] again.
- If you press [MENU], you can select "Select All" or "Clear All" of photos, or switch to single view to select photos.
- Press [MENU], press [▲, ▼] to select "Copy" and press [OK].
- Press [◀, ▶] to select "Yes" and press [OK].
■ To stop copying
Press [RETURN].
- Photos already copied remain in the SD or the internal memory.
■ Compressing data when imported
The number of photos that can be copied will be increased.
- Select "Import from SD Card with Compression" in step 4 (→ left) and press [OK].
- Press [▲, ▼, ◀, ▶] to select the photo and press [OK].
- Press [MENU], press [▲, ▼] to select "Copy with Compression" and press [OK].
- Press [◀, ▶] to select "Yes" and press [OK].
Note
- Even if photos are set to Favourite or protected, the information is not copied.
- If the photo media is "Internal Memory", the newly created folder by copying is automatically selected.
- The size of the compressed photo cannot be recovered to the original data size.
- It may be impossible to compress data depending on photos.
- The audio will be stopped (paused) automatically, during playback.
Collecting favourite photos
(Only for the internal memory)
By registering photos to Favourite 1 to 10, you can play back registered photos only, or rearrange the order of photos.
- Select the photo category. (→P10)
- Press [MENU].
- Press [▲, ▼, ◀, ▶] to select "Photo Menu" and press [OK].
- Press [▲, ▼] to select "Edit Photo" and press [OK].
- Press [▲, ▼] to select "Add to Favourite" and press [OK].
- Press [▲, ▼, ◀, ▶] to select the photo and press [OK].
- "☑" is displayed on the selected photos.
- Repeat the above step as necessary.
- To cancel, press [OK] again.
- If you press [MENU], you can select "Select All" or "Clear All" of photos, or switch to single view to select photos.
- Press [MENU], press [▲, ▼] to select "Select Favourite Destination" and press [OK].
- Press [▲, ▼, ◀, ▶] to select favourite photos to register and press [OK].
■ Rearranging the order of registered photos
- After the above step 3, press [▲, ▼] to select "Edit Favourites" and press [OK].
- Press [▲, ▼, ◀, ▶] to select favourite photos and press [OK].
- Press [▲, ▼, ◀, ▶] to select photo to be moved and press [OK].
- Press [MENU], press [▲, ▼] to select "Select Move Destination" and press [OK].
- Press [▲, ▼, ◀, ▶] to select the move destination and press [OK].
■ Cancelling the registration
- After the above step 3, press [▲, ▼] to select "Edit Favourites" and press [OK].
- Press [▲, ▼, ◀, ▶] to select a favourite and press [OK].
- Press [▲, ▼, ◀, ▶] to select the photo and press [OK].
- Press [MENU], press [▲, ▼] to select "Remove Favourite" and press [OK].
Note
- Up to 999 photos can be registered with "Favourites" respectively.
- Some photos may not be registered.
- The audio will be stopped (paused) automatically during playback.
Deleting photos
(Only for the internal memory)
The deleted photos cannot be recovered.
- Select the photo category. (→ P10)
- Press [MENU].
- Press [▲, ▼, ◀, ▶] to select "Photo Menu" and press [OK].
- Press [▲, ▼] to select "Edit Photo" and press [OK].
- Press [▲, ▼] to select "Delete Files" and press [OK].
- Press [▲, ▼, ◀, ▶] to select the photo and press [OK].
- ☑s are displayed on the selected photos.
- Repeat the above step as necessary. • To cancel, press [OK] again.
- If you press [MENU], you can select "Select All" or "Clear All" of photos, or switch to single view to select photos.
- Press [MENU], press [▲, ▼] to select "Delete" and press [OK].
- Press [◀, ▶] to select "Yes" and press [OK].
■ To stop deleting
Press [RETURN].
Note
- To delete completely, perform "Format Internal Memory" (→P21) or the physical format (→P6).
- Deleting all photos in the folder automatically deletes the folder itself.
- The audio will be stopped (paused) automatically during playback.
Protecting photos
(Only for the internal memory)
You can protect photos to prevent them from being deleted by mistake.
- Select the photo category. (→ P10)
- Press [MENU].
- Press [▲, ▼, ◀, ▶] to select "Photo Menu" and press [OK].
- Press [▲, ▼] to select "Edit Photo" and press [OK].
- Press [▲, ▼] to select "Set Protection" and press [OK].
- Press [▲, ▼, ◀, ▶] to select the photo and press [OK].
- "" is displayed on the selected photos.
- Repeat the above step as necessary.
- To cancel, press [OK] again.
- If you press [MENU], you can select "Select All" or "Clear All" of photos, or switch to single view to select photos.
- Press [MENU], press [▲, ▼] to select "End Protection Setting" and press [OK].
■ Cancelling the protection
- In the above step 5, press [▲, ▼, ◀, ▶] to select photos to cancel protection and press [OK].
- Press [MENU], press [▲, ▼] to select "End Protection Setting" and press [OK].
Note
- Even if protection is set to photos, they will be deleted if the internal memory is formatted (→P21).
- The audio will be stopped (paused) automatically, during playback.
Photo playback settings
You can make the settings for image quality for photo playback, settings for slideshow playback method, etc. according to your preferences.
■ Basic operation
- Press [MENU].
- Press [▲, ▼, ◀, ▶] to select "Photo Menu" and press [OK].

- Press [▲, ▼] to select "Image Quality Settings" or "Photo Playback Settings" and press [OK].

- Press [▲, ▼] to select the item (→below, right) and press [◀, ▶] to select the setting.
- Press [MENU] to close the menu screen.
■ Image quality settings
Factory settings are indicated with underlines.
| Image Quality Mode | Standard:Standard image qualitySoft:Eye-friendly image qualityDynamic:Vivid image quality with clear distinction of bright and dark |
| Adjust Brightness | Brightness is adjusted with the range from “1” to “10”.• Setting “1” will make the unit assume the use in a dark room (bed room etc.) and greatly reduce the screen brightness. (Panasonic Logo will automatically turn off.) |
■ Photo playback settings
Factory settings are indicated with underlines.
| Slideshow Order | Normal:Photos in the selected category are played in order of file names.Random:Photos in the selected category are played at random. |
| Slideshow Effects | Fade:Photos are switched gradually.Motion:Plays while enlarging and moving the photo up and down, right and left, and in the diagonal direction.When “Motion” is set, the “Slideshow Interval” setting is disabled.Slide-in:Photos are switched with fl owing movement either from right or left.Wipe 1/Wipe 2:The displayed photo is switched to the next photo in wiping motion.Dissolve:Photos are switched as the next photo gradually overlaps the currently displayed photo.Centre Cross:Cross-shaped switching from centre towards outsideBlind:The photos are switched by the horizontal band from top to bottom.Checker Wipe:Check-shaped switching from left to rightRandom:Various slideshow effects are used randomly for switching photos. |
| Slideshow Interval | 5 sec/10 sec/30 sec/1 min/5 min/10 min/30 min/1 hour/3 hours/12 hours/24 hoursChange On The Hour:Photos are switched on the hour every hour.Change Daily:Photos are switched when the calendar date is changed.Sync Music:Photos are switched every time “Music” or “Videos” on the iPod/iPhone is switched. |
| Colour Effects | Setting a colour tone of photo for the single view or slideshow playback.Colour/Black and White/SepiaWhen photos are displayed with the thumbnail view, they are displayed with the original colour tone. |
Note
- When the display mode for "Slideshow" is set to "Multi" (→P8), the "Motion" and "Slide-in" effects cannot be selected.
- When the "Slideshow Effects" is set to "Motion" or "Slide-in" with the display mode set to "Multi", the "Fade" effect is automatically assigned to "Motion" and "Slide-in".
- When the slideshow playback is performed for a small number of photos with a short interval, the photos may not be normally displayed.
- Reading photos may require longer time than the set slideshow interval. Also, when the display mode for "Slideshow" is set to "Frame 1 to 3" (→P8), it may require longer time than the set slideshow interval.
Connecting/Recharging an iPod/iPhone
A compatible iPod/iPhone can be connected to this unit.
No warranty is provided against any trouble about the iPod/iPhone data management.
Usable iPods/iPhones →P3
- Turn the unit off.
- Turn off the iPod/iPhone before connecting.
- Remove the iPod/iPhone if it is in the iPod/iPhone case.
1. Attach the Dock Adaptor (supplied with iPod/iPhone)* to the Universal Dock for iPod.
- Insert the hook (®) of the Dock Adaptor (®) from front and push in until it clicks.

* When the Dock Adaptor is not supplied with the iPod/iPhone, purchase it from Apple Inc.
2. (Only when connecting an iPod touch/iPhone) Attach the Universal Dock backrest to the Universal Dock for iPod.

3. Connect the Universal Dock for iPod with this unit (①) and insert the iPod/iPhone main unit to the Universal Dock for iPod (②).
Back of product
![graph TD A["Laptop"] --> B["DC OUT BY: iPod MAX"] B --> C["iPod"] C --> D["Terminal for the Universal Dock"] C --> E["Universal Dock for iPod"] F["iPhone"] --> G["Device"]](/content/2026/06/1325551/images/e3822114d23a068a06154e9b291b4ae4c9af096d79787815b3eb075a4feac111.jpg)
- Bringing the unit and the Universal Dock for iPod closer to each other may weaken the sensitivity of electric wave reception for iPhone. Using them apart from each other is recommended.
Recharging starts when the iPod/iPhone is connected.
When the unit is off, "iPod Charging" appears on the right bottom of the unit's screen.
(The recharging indicator may not disappear depending on the type of iPod/iPhone even if the recharging is complete.)
■ When operating iPod touch or iPhone
Support the iPod/iPhone and Universal Dock for iPod with hand to prevent them from falling down.

Note
- The supplied Universal Dock for iPod is exclusively for this unit's use. Do not use it with other equipment. Do not use other connection devices for connecting iPod/iPhone to this unit.
- Before connection, make sure to confirm that there is no dust or foreign objects stuck to the connection part.
- Insert/remove the iPod/iPhone slowly. Otherwise, the connector may be damaged.
- Disconnect the iPod/iPhone from the Universal Dock for iPod after recharging is complete when you will not use it for a long period of time. Even if the battery is discharged naturally after recharging, the battery is not additionally charged.
- If you connect iPods other than iPod touch/iPhone, make sure to remove the Universal Dock backrest.
- Make sure to turn the main unit off before connecting/disconnecting the Universal Dock for iPod.
- The iPod/iPhone cannot be charged while connecting with the computer.
- Please read the operating instructions supplied with the iPod/iPhone.
- Keep the backrest cushion out of reach of children to prevent swallowing.
Made for

iPod iPhone
"Made for iPod" and "Made for iPhone" mean that an electronic accessory has been designed to connect specifically to iPod, or iPhone, respectively, and has been certified by the developer to meet Apple performance standards.
Apple is not responsible for the operation of this device or its compliance with safety and regulatory standards.
Please note that the use of this accessory with iPod or iPhone may affect wireless performance.
iPhone, iPod, iPod classic, iPod nano, and iPod touch are trademarks of Apple Inc., registered in the U.S. and other countries.
Playing back photos, etc. stored on the iPod/iPhone
You can view photos, videos, YouTube motion pictures, music, etc. on the display of this unit by operating the iPod/iPhone.
- Turn down the volume of this unit.
- Connect the iPod/iPhone.
1. Press [iPod/PLAY MENU].
- You can also select from "iPod Play Menu" in the "Menu" by pressing [MENU].
2. Press [▲, ▼] to select "All (iPod display)" and press [OK].

- "Please refer to the iPod display for operations." appears on the screen.
3. Play back photos, videos, YouTube motion pictures, or music, etc. by operating the iPod/iPhone.
■ When operating on the main unit
| Music | →right |
| Videos | →P17 |
| List of Currently Playing Tracks | The track list is displayed during audio playback. (→right) |
■ Operations available on the remote control of this unit
| Switching photos, etc. | Press [◀, ▶]. |
| Select and OK on the menu screen, etc. | Press [▲, ▼] to select and press [OK]. |
Note
- If some images flicker during iPod/iPhone photo playback, setting the "Image Quality Mode" (→P14) to "Soft" may remedy the problem.
Playing music on an iPod/iPhone
Operating this unit enables you to listen to the music on an iPod/iPhone connected to this unit.
- Turn down the volume of this unit.
- Connect the iPod/iPhone.
1. Press [iPod/PLAY MENU].
- You can also select from "iPod Play Menu" in the "Menu" by pressing [MENU].
2. Press [▲, ▼] to select "Music" and press [OK].

3. Press [▲, ▼] to select the track selection method (→P17) and press [OK].
Repeat the above step as necessary.
4. Press [▲, ▼, ◀, ▶] to select tracks and press [OK].
Playback will start.
■ iPod Display screen
(Album Artwork + Track List)
Ⓐ Album Artwork (When there is no information, a temporary image is displayed.) ® Album name
Artist name
Track name
Playback status ① Repeat: ALL
One 1
Shuffle: Songs
Albums

Current track number/Total number of tracks ⑤ Elapsed playback time
iPod/iPhone track selection menu for "Music"
| Playlists Searching from all playlists | |
| Artists | Searching from artist names |
| Albums Searching from album titles | |
| Songs | Searching from all tracks registered to the iPod/iPhone |
| Podcasts | Searching from episodes of radio programme obtained at iTunes store |
| Audiobooks | Searching from titles in Audiobooks purchased at iTunes store or “audible.com” |
Operations available on the remote control of this unit during audio playback
| Stop (Pause) | Press [iPod/▶/■].Press again to resume. |
| Skip | While displaying “iPod Display”, press [◀, ▶]. |
| Fast backward/Fast forward (Search) | While displaying “iPod Display”, press and hold [◀, ▶]. |
| Adjusting the volume | Press [+ IN/VOL], [− OUT/VOL].• 0 (Min.) to 20 (Max.)• You can also press [VOLUME +]/[VOLUME −] on the main unit. |
| Return to track list | While displaying “iPod Display”, press [◀RETURN]. |
| ShuffleTracks or albums are played at random. | 1. Press [MENU].2. Press [▲, ▼, ◀, ▶] to select “Audio Menu” and press [OK].3. Press [▲, ▼] to select “Play Mode” (→below) and press [◀, ▶] to select the setting.4. Press [MENU]. |
| Repeat• Selecting from “Off”, “One” and “All” | 1. Press [MENU].2. Press [▲, ▼, ◀, ▶] to select “Audio Menu” and press [OK].3. Press [▲, ▼] to select “Repeat” and press [◀, ▶] to select the setting.4. Press [MENU]. |
Play Mode
| Shuffle e: Off Normal playback. | |
| Shuffle e: Songs | Songs in the selected playlist are played at random. |
| Shuffle e: Albums | Albums in the album playlist are played at random.(The tracks in the album are played back in the proper order.) |
Note
- The settings for the playback position, shuffle playback and repeat playback remain unchanged even if the iPod/iPhone is disconnected from this unit. Also, the settings made on the iPod/iPhone before connected to this unit remain unchanged.
- If video is played back (→below), the Shuffle setting may automatically become "Off".
- When the play mode is switched, the track list on the "iPod Display" screen may be different from the tracks played back. If this occurs, select tracks from the track selection menu again.
Playing video on an iPod/iPhone
When an iPod/iPhone compatible with video playback is connected to this unit, you can view videos on this unit.
- Turn down the volume of this unit.
- Connect the iPod/iPhone.
1. Press [iPod/PLAY MENU].
- You can also select from "iPod Play Menu" in the "Menu" by pressing [MENU].
2. Press [▲, ▼] to select "Videos" and press [OK].

- Press [▲, ▼, ◀, ▶] to select the type of videos and press [OK].
- Press [▲, ▼, ◀, ▶] to select the video and press [OK].
Video playback will start.
■ Operations available on the remote control of this unit during playback of motion pictures
| Stop (Pause) | Press [iPod/▶/■].Press again to resume.• |
| Skip | While displaying “iPod Display”, press [◀, ▶]. |
| Fast backward/Fast forward (Search) | While displaying “iPod Display”, press and hold [◀, ▶]. |
| Adjusting the volume | Press [+ IN/VOL], [- OUT/VOL].• 0 (Min.) to 20 (Max.)• You can also press [VOLUME +]/[VOLUME −] on the main unit. |
Audio playback settings
You can make the settings for display at the time of audio playback of the iPod/iPhone. You can also set the sound quality for your preference.
■ Basic operation
- Press [MENU].
- Press [e, r, w, q] to select "Audio Menu" and press [OK].

- Press [e, r] to select the item (see below) and press [w, q] to select the setting.
- Press [MENU] to close the menu screen.
Factory settings are indicated with underlines.
| Play Mode | →P17 |
| Repeat | →P17 |
| Audio Information | Displays audio information currently playing while the display categories other than “iPod Display” are set.On: DisplayOff: No display |
| Equalizer | Flat:When the sound quality effect is not used.Heavy:Emphasises the bass sound with sharp sound quality.Clear:Emphasises the treble range with clear sound quality. |
| iPod Information | Displays the model name and version of the connected iPod/iPhone. |
Note
- Depending on the track for playback, the equalizer effect may be less noticeable even if the "Equalizer" setting is changed.
Using the timer
The power is automatically turned on at the set time and photos or audio are played. The power is automatically turned off at the end time.
"Timer 1", "Timer 2" and "Timer 3" can be set.
The following explains the case when setting "Timer 1" as an example.
- Set the clock. (See P7)
- Select the photo category.
- Prepare playback sources on an iPod/iPhone.
- Press [MENU].
- Press [e, r, w, q] to select "Settings Menu" and press [OK].
- Press [e, r, w, q] to select "Timer" and press [OK].
- Press [w, q] to select "Timer 1 Settings" and press [OK].

- Press [e, r] to select "Standby" and press [OK].
- Press [e, r] to select "Enable This Timer" and press [OK].
- Press [e, r] to select "Day" and press [OK].
- Press [e, r] to select the day, add the check mark with [w, q] and press [OK].
- Press [e, r] to select "Time" and press [OK].
- Press [e, r, w, q] to set the start/end time and press [OK].
- Press [e, r] to select "Confirm" and press [OK]. If the operation time overlaps other timer settings, "The set time overlaps with another timer. Do you want to give priority to this timer and register it?" appears.
- If "Yes" is selected, other timers with the overlapped time are disabled.
- If "No" is selected, the previous screen is restored with the timer setting contents saved.

Ⓐ To set audio playback → P19
- Press [MENU] to close the menu screen.
To set audio playback■
- After performing step 10 (→P18), press [▲, ▼] to select "Audio Playback" and press [OK].
- Press [▲, ▼] to select "Audio Playback" and press [◀, ▶] to select "On". If you select "Off", proceed to the below step 7.
- Press [▲, ▼] to select "Playback Time" and press [◀, ▶] to select the playback time.
10 minutes/30 minutes/1 hour/2 hours/3 hours/No Limit
- If the audio playback time is set longer than the length of time from timer start time to timer end time, the timer end time takes priority.
- Press [▲, ▼] to select "Update Source/Volume" and press [OK].
- Press [+ IN/VOL], [− OUT/VOL] to adjust the volume.
(You can also press [VOLUME +]/[VOLUME -] on the main unit.)
- Press [iPod/▶/■] and you can play audio and confirm the volume.

- Press [◀, ▶] to select "Yes" and press [OK].
- Press [▲, ▼] to select "Confirm" and press [OK].
- Perform steps 11 and 12 (→ P18).
■ To disable the set timer
- Select "Disable This Timer" in step 6 (→P18) and press [OK].
- Press [▲, ▼] to select "Confirm" and press [OK].
■ To delete the timer setting
- Select "Initialise This Timer" in step 6 (→P18) and press [OK].
- Press [▲, ▼] to select "Confirm" and press [OK].
■ When the timer is set
- When the unit is off, the unit is automatically turned on at the timer start time, and the timer playback starts.
- At the timer end time, the unit is automatically turned off.
- If the audio playback is “On”, “☐” is displayed on the bottom right of the screen one minute before the timer start time. (Only for “iPod Display” screen when the unit is on)
At the timer start time, the sound is faded in to the set volume (gradually increased) and audio is played back. "∅" blinks during audio playback. (Only for "iPod Display" screen)
Note
- The timer less than 10 minutes is displayed with 10 minute-width on the timer setting menu screen.
- The timer operates at the set time unless you set it to disable.
- The setting status such as the playback mode is reflected in audio playback.
- The timer audio playback does not start when the menu screen is being displayed and when audio selection screen is being displayed.
- The timer does not start even at the timer start time if the audio selector selecting “Audio Playback” and the audio selector selected at the timer start time are the same and if the iPod/iPhone is being played or searched.
Power saving use Using the setup menu
Using the light sensor, adjust the brightness of the main unit's display according to the surrounding brightness and set the auto power off when the surrounding area becomes dark.

Ⓐ Light sensor
- Press [MENU].
- Press [▲, ▼, ◀, ▶] to select "Settings Menu" and press [OK].
- Press [▲, ▼, ◀, ▶] to select "Power Save Settings" and press [OK].
- Press [▲, ▼] to select "C.A.T.S." or "Auto Power Off" and press [◀, ▶] to select the setting.
- Press [MENU] to close the menu screen.
Setting items
Factory settings are indicated with underlines.
| C.A.T.S.(Contrast Automatic Tracking System) | When this is set to On, the darker the surrounding area becomes, the darker the screen becomes. (3 levels)On (Display):When the power consumption is reduced, the number of “” increases (up to 3).On (No display):“” is not displayed.Off:The screen brightness is fixed. |
| Auto Power Off | Enable:When the surrounding area becomes dark and the following conditions continue 1 minute or more, the power is automatically turned off.- No operation- Not during audio playback of iPod/iPhoneDisable:The power is not automatically turned off. |
■ When the auto power off is set to Enable
- “The power will soon be turned off automatically.” is displayed at the bottom of the screen 1 minute before the auto power off function is activated.
Note
• “” presents approximation.
- While copying photos, etc., "Auto Power Off" does not function even without operation.
- If the light sensor is blocked with finger, etc., brightness cannot be detected.
- With the power save setting enabled, when you set the unit at a place where light is difficult to reach the rear side of the unit, such as in a cabinet or near a dark-coloured wall, the screen may become dark automatically or the power may be turned off automatically, even if the surrounding area is bright.
You can format the internal memory, initialise this unit, etc.
■ Basic operation
- Press [MENU].
- Press [▲, ▼, ◀, ▶] to select "Settings Menu" and press [OK].
- Press [▲, ▼, ◀, ▶] to select the item (→below and P21) and press [OK].

- Press [▲, ▼, ◀, ▶] to select the item or setting.
- Press [MENU] to close the menu screen.
Factory settings are indicated with underlines.
| Power Save Settings | →left |
| Timer | →P18 |
| Clock/Calendar Settings | This adjust the clock, set different colours for holidays and Saturdays, etc.■ Set Clock (→P7)■ Holiday SettingsSelect the date you want to set and set the same colour as that for Sundays.1. Select “Holiday Settings” in step 4 in the basic operation and press [OK].2. Set “Date”, “Month” and “Year” and press [OK].3. Select “On” in “Holiday Setting”.4. Select “Every Year” or “No” in “Repeat”.Every Year:Set the same colour for the same date/month every year as that for Sundays.No:Set the same colour for the set date/month/year as that for Sundays.Saturday Setting (On/Off)Displayed with a different colour from that for Monday to Friday when it is On.■ Set Date IndicationSelect “Date/Month/Year” or “Month/Date/Year”.■ Set Clock IndicationSelect “24-hour System” or “12-hour System”. |
| View Demo* | When “View Demo” is selected in the basic operation (→P20), the Demo is displayed.And the demo function is automatically activated when the following conditions continues 2 minutes or more without operation.When the SD card is not insertedWhen the iPod/iPhone is not connectedWhen there are no photos in the internal memoryTo stop displaying the demo, press any of the buttons other than the power button on the main unit or the remote control. |
| Remote Control Mode | Change the remote control mode when malfunction occurs on this unit while using the remote control of other devices.Remote Control 1 / Remote Control 2Example: When setting the remote control mode to 2Select “Remote Control 2” in step 4 in the basic operation (→P20) and press [OK].(“Simultaneously press [CLOCK] and [OK] on your remote control for at least 2 seconds, and change the mode on your remote control.” is displayed.)Press and hold [OK] on the remote control without aiming it at this unit, and press and hold [CLOCK] for more than 2 seconds.Press [OK]. |
| Wall-mount Setting* | →P23 |
| Panasonic Logo | Select “On” or “Off” in step 4 in the basic operation (→P20) and press [OK].On:Lights up logoOff:Lights off logo |
| (For the United Kingdom and continental Europe only)Language Setting | English / Deutsch / Français |
| Initialise Settings* | This unit’s settings are restored to the factory defaults. The clock setting, wall-mount setting and photo fi les in the internal memory remain unchanged.Select “Yes” in step 4 in the basic operation (→P20) and press [OK].Select “Yes” again and press [OK]. |
| Format Card* | All the data in the SD card will be deleted.1. Select “Yes” in step 4 in the basic operation (→P20) and press [OK].2. Select “Yes” again and press [OK]. |
| Format Internal Memory* | You can initialise (format) the internal memory. All photo data in the internal memory will be deleted.1. Select “Yes” in step 4 in the basic operation (→P20) and press [OK].2. “Photos set as protected will also be deleted. Do you really want to perform this operation?” is displayed, and then select “Yes” again and press [OK].• Protected photos are also deleted.• For using the physical format, see page 6. |
| System Software Info | You can confi rm the system software information (version) of this unit. |
| Update System Software* | This is a function when updating the system software is necessary in the future to improve the performance.Please make sure to complete user registration which is necessary to receive information related to the system software update. |
* The audio is automatically stopped (paused) if it is being played back.
■ When setting the remote control mode to 1
- Select "Remote Control 1" in step 4 in the basic operation (→ P20) and press [OK].
- Press and hold [OK] on the remote control without aiming it at this unit, and press and hold [SLIDESHOW] for more than 2 seconds.
- Press [OK].
Note
- When the same date/month/year is set for “Holiday Settings” and “Saturday Setting”, “Holiday Settings” takes priority.
- When the display mode is set to vertical arrangement (→P8), or “Adjust Brightness” (→P14) is set to “1”, the Panasonic logo does not light on even if “Panasonic Logo” is set to “On”.
- For the latest version of information, see the following homepage. http://panasonic.jp/support/global/cs/audio/
Using with your PC
Photo files can be exchanged among this unit's internal memory, SD and computer.
Always use a genuine Panasonic USB connection cable (K2KZ4CB00015; optional).
System configurations required
OS for PC
- Windows® 7
- Windows Vista®
- Windows® XP
- Mac OS X
Port
- USB port
- Operations are not necessarily guaranteed for all computers.
- Data exchange with iPod/iPhone is not possible.
■ To connect to a PC
- Turn the unit off.
- Start up the computer.
- Confirm the direction of the USB connection cable and insert it to the USB port of this unit.

Ⓐ USB port ® USB connection cable (optional)
- Insert the USB connection cable into the computer.
- Turn on this unit.
- Press [▲, ▼] to select the USB connection memory (“Internal Memory” or “SD Card”) and press [OK].
This unit functions as a reader/writer and is recognized as an external device of the computer.
■ To remove the USB connection cable
Remove the cable using the safely remove hardware option on the task tray of the PC.
If the remove icon is not displayed, check that "ACCESS" is not displayed on the unit and remove it.
Note
- Keep the USB connection cable as far away as possible from other electric appliances when using.
- The iPod/iPhone cannot be charged while connecting with the computer.
- You cannot operate this unit while connecting with the computer. If the USB connection cable is removed, this unit is turned off.
- When switching the USB connection memory, remove the USB connection cable once, then reconnect it and perform from the beginning.
■ To exchange photo files with a computer
- Open the folder to exchange photo files on the computer.
- Connect this unit to the PC.
- Insert the SD card.
- Select "Internal Memory" or "SD Card" in step 4 (see left).
- Open "Removable Disk" in "My Computer" on your PC.
- There is the photo folder of this unit or SD card.
- For Windows Vista® or Windows® 7, open "Removable Disk" in "Computer".
- For Macintosh, this unit's drive is displayed on the desktop.
- Open the photo folder on this unit and exchange files between the folders.
Folders and files can be dragged and dropped.
Note
- If you remove and insert the USB connection cable or SD card while the "Accessing Do not remove the card or cable." message is displayed, the data on the SD card may be lost or damaged.
- If you make multiple USB connections or use hubs with 1 computer, malfunction may occur.
- If you are using the 10.2 or older version of Mac OS X, set the write-protect switch of SDHC memory card to the "LOCK" side when importing photos from the SDHC card to the computer.
- When this unit is connected, do not use the format function of the computer to format this unit's internal memory or SD card.
Recording and operating problems may occur on some computer systems.
Please note that Panasonic and Panasonic dealers cannot be held liable for any lost photo data or other direct or indirect damage except in cases of intentional or gross negligence.
Using in a wall-mounted state
The specific setting is required to use the main unit in a wall-mounted state. Make the wall-mount settings on the menu and install it on the wall.
Make sure to ask a professional mounter or a dealer for installation/uninstallation.
Notes for installation
- Do not install this unit at the following locations to ensure this unit's performance and to prevent potential troubles.
- Locations other than vertical walls
- Locations near a sprinkler or a sensor – Locations near high-voltage lines or power sources
- Locations where wind from a heating device hits the unit
- Locations where the unit is subject to vibration or impact
- Locations near sources of magnetism, heat, vapour, oil smoke, etc.
- Locations of high temperature, such as near ceiling lights (spotlight, halogen light, etc.)
- Locations where there may be water droplet (i.e. under an air conditioner) – High places where the SD insertion part cannot be reached easily
- Use a proper installation method that suits the structure and material of the installing location.
- Use a cloth, etc. to prevent damage to the product or floor during installation.
- When tightening screws, make sure the screws are not loosely-tightened or overtightened.
- Secure safety in the surrounding areas and pay enough attention during installation.
Prepare commercially available screws that match the screw holes of the unit's bottom face.

■ Recommended type of screw
• 2 screws for wall-mounting - 2 screws for the fitting for wall-mounting
A length which supports the strength of 5 kg or more must be kept for each screw.

Use commercially available screws with the nominal diameter of 4 mm or equivalent which are suitable for materials of the wall (i.e. wood, steel, concrete, etc.)
Note
- Panasonic is not liable for incidental or consequential damages resulting from improper installation or operation.
- Keep the screws out of reach of children to prevent swallowing.
Wall-mount settings
- Press [MENU].
- Press [▲, ▼, ◀, ▶] to select "Settings Menu" and press [OK].
- Press [▲, ▼, ◀, ▶] to select "Wall-mount Setting" and press [OK].
- Press [▲, ▼] to select "Yes" and press [OK].

- Press [◀, ▶] to select "Yes" and press [OK]. The power will be turned off and on automatically. When the power is turned on, the main unit's screen display is turned upside down.
Note
- The audio will be stopped (paused) automatically, during playback.
■ When using with the wall-mount setting
The following buttons and functions that can be used will be restricted.
| Unusable buttons on the main unit | Except [∅/l](For Latin America, Asia and Middle East, [POWER ∅/l] is used.) |
| Unusable buttons on the remote control | • [iPod/PLAY MENU]• [iPod/DISPLAY]• [iPod/▶/ll] |
| Timer audio playback function | Automatically disabled (with the setting contents preserved) |
| Menu items “iPod Play/Pause”• “iPod Display”• “iPod Play Menu”• “Audio Menu”• “Sync Music” in the “Photo Playback Settings” | |
| Panasonic Logo Automatically turned off | |
| Power Save Settings Automatically disabled | |
| iPod/iPhone connection | Cannot be used |
| USB connection Cannot be used | |
Using in a wall-mounted state
Attaching to a wall
- Make sure to turn the unit off and unplug the AC adaptor.
- Remove the Universal Dock for iPod.
- Attach the screws for wall-mounting according to the illustration below.

- Attach the screws for wall-mounting.

Ⓐ Screw for wall-mounting ⑧ Fix with the screws stuck out 3 mm to 4 mm from the wall. - Make sure to attach 2 screws for wall-mounting. - Use a level guide, etc. so the screws for wall-mounting become horizontal when attaching.
- Connect the AC adaptor to the unit, and then insert the fitting for wall-mounting.

© Fold the stand part and turn upside down. ① AC adaptor © Fitting for wall-mounting
- Hook the main unit on the screws for wall-mounting with the fitting for wall-mounting inserted into the main unit.

⑤ Set the 2 screws firmly to this position.
- Fix the fitting for wall-mounting to the wall.

⑥ Make sure to attach 2 screws for the fitting.
Note
- The vertical arrangement of the main unit is not available when using in the wall-mounted state.
■ When using the unit on a desk after removing from the wall
- Select "No" for "Wall-mount Setting" in the setup menu (→P23) and press [OK].
- Turn the unit off and remove the unit from the wall.
Note
- When the "Wall-mount Setting" is changed to "No", the setting automatically returns to the previous state in which the wall-mount setting was not set.
– Timer audio playback settings - Power Save Settings - Panasonic Logo
Safety cautions
WARNING!
Only a qualified building contractor shall install or uninstall this unit.
Improper installation may cause the unit to fall, resulting in injury.
To prevent injury, the unit must be securely attached to the wall in accordance with the installation instructions.
Do not install the unit where it cannot support the load. If the mounting parts are not strong enough, this may cause the unit to fall, resulting in injury.
Do not use installation methods other than instructed. This may cause the unit to fall and be damaged, resulting in injury.
Do not install the unit at locations other than vertical walls.
This may cause the unit to fall and be damaged, resulting in injury.
Take the safety factor for mounting strength into account (approx. 10 times the product weight).
Insufficient strength will cause the unit to fall, resulting in injury.
The wall on which the unit is to be attached to should be capable of supporting 5 kg per screw.
Insufficient strength of the walls will cause the unit to fall in the long run.
Do not disassemble or modify the wall-mounting hanger.
This will cause the unit to fall and be damaged, resulting in injury.
CAUTION!
Do not install this unit at humid or dusty locations, or locations where airborne grease or steam may come into contact with the unit, or under an air conditioner where water may drip onto the unit.
This may have negative impact on the unit, resulting in fire or electric shock.
Secure enough space of more than 25.4 mm above the main unit and more than 25.4 mm on the left and right sides respectively. Keep space between the wall and rear of the unit clear of obstructions.
Blocking the exhaust holes on the main unit may result in fire.
Use the designated components for installation.
Otherwise, the main unit may fall and be damaged, resulting in injury.
Prevent the mounting screws or power cord from coming into contact with metal parts inside the wall during installation.
Failure to do so may cause electric shock.
When removing the main unit, remove the wall mounting screws as well.
Otherwise the wall mounting screws may hit a person and lead to injury.
Install the unit at a height where the SD card slot can be seen for safe operation.
Operating at improper position may cause the unit to fall and be damaged, resulting in injury.
Maintenance
Unplug the AC adaptor from the household mains socket and wipe it using a soft and dry cloth.
- When the dirt is heavy, wring water out of a wet cloth to wipe the dirt and then wipe with a dry cloth.
- Do not use solvents including benzine, thinner, alcohol, kitchen detergent, etc. This might cause the exterior case to be deformed or the coating to come off.
- Before using chemically treated cloth, read the instructions that come with the cloth carefully.
Information for Users on Collection and Disposal of Old Equipment and used Batteries

These symbols on the products, packaging, and/or accompanying documents mean that used electrical and electronic products and batteries should not be mixed with general household waste.
For proper treatment, recovery and recycling of old products and used batteries, please take them to applicable collection points, in accordance with your national legislation and the Directives 2002/96/EC and 2006/66/EC.
By disposing of these products and batteries correctly, you will help to save valuable resources and prevent any potential negative effects on human health and the environment which could otherwise arise from inappropriate waste handling.
For more information about collection and recycling of old products and batteries, please contact your local municipality, your waste disposal service or the point of sale where you purchased the items.
Penalties may be applicable for incorrect disposal of this waste, in accordance with national legislation.

For business users in the European Union
If you wish to discard electrical and electronic equipment, please contact your dealer or supplier for further information.
[Information on Disposal in other Countries outside the European Union]
These symbols are only valid in the European Union. If you wish to discard these items, please contact your local authorities or dealer and ask for the correct method of disposal.

Note for the battery symbol (bottom two symbol examples):
This symbol might be used in combination with a chemical symbol. In this case it complies with the requirement set by the Directive for the chemical involved.
Troubleshooting guide
Before requesting service, make the following checks. If you are in doubt about some of the check points, or if the remedies indicated in the chart do not solve the problem, consult your dealer for instructions.
This unit may become hot if used for a long period of time, however, this is not a problem for use.
Common problems with the whole system
| All operations are ignored. | Press [ ∅/l ]* of the main unit for more than 10 seconds to turn the unit off. If the problem persists, do the following operations and return the settings to the factory defaults.Remove the AC adaptor from the household mains socket once. Then connect the AC adaptor while pressing down [ ∅/l ]* of the main unit.Press and hold [ ∅/l ]* of the main unit until “The settings have been reset.” appears on the display.* For Latin America, Asia and Middle East, [POWER ∅/l ] is used. |
| When the unit is turned on, “Please wait.”is displayed for a long period of time. | When photos are present in the internal memory or the SD card has been inserted, it may take long time for the unit to become operable after it is turned on. |
| Booming noise occurs during audio playback. | There may be the AC mains lead of another device or fluorescent light near this unit.→ Keep the electric appliances as far away as possible from this unit. |
SD
| Data on the SD card cannot be read. | Use an SD card compatible with this unit. The file format and the folder hierarchy in the SD card must conform to the specifications of this unit. |
| Photos cannot be played or copied etc. | Insert the SD card compatible with this unit. (→P3)Insert the SD card correctly. (→P4)Cancel the write protection switch if it is on the “LOCK” side. (→P6) |
iPod/iPhone
| The iPod/iPhone is not recognized even if connected, or unexpected operations occur in use. | Check if the iPod/iPhone is compatible with this unit. (→P3)Connect the iPod/iPhone again. (→P15) |
| Video playback becomes impossible on the iPod/iPhone. | Confirm the iPod/iPhone video settings. |
| The display of the iPod/iPhone video playback shows an unexpected one. | Confirm the iPod/iPhone video settings.Example: Set the TV signal to “NTSC” on the iPod/iPhone video setting. |
| iPod/iPhone videos cannot be played back. | Check your iPod/iPhone version. |
| Only images on iPod/iPhone videos cannot be displayed. | Select “Videos” in the iPod menu again. |
Photo
| Photos are not displayed on the thumbnail screen. | Photos edited on the computer, etc. may not be displayed.• |
| The date displayed using the Date Search differs from the shooting date. | • A date when a file was updated may be displayed for photos edited on the computer, etc. |
| Editing (copying, etc.) takes long time. | When there are many fi les and folders, editing may take long time.• |
| Photos are not played back in the order of fi le names even if the “Slideshow Order” is set to “Normal”. | • If 9 or more characters are assigned as a photo file name (excluding the file extension) on a computer, etc., the files may not be played back in order of file names. |
Remote control
| Cannot operate the remote control. | • Insert (+, −) of battery correctly. (→P5)• Replace with the new battery. (→P5)• If the remote control mode on the main unit does not match the one on the remote control, match the mode of the remote control to the one of the main unit. (→P21) |
| • Another device does not operate properly when using the remote control of this unit.• The unit does not operate properly when using the remote control of another device. | • Change the remote control mode of this unit so another device does not interfere with this unit's operation. (→P21) |
Error message
| A communication error occurred. | Connect the iPod/iPhone correctly. (→P15)• |
| Set the mode on your remote control to “Mode 1” (or “Mode 2”). | • The remote control mode settings do not match the main unit settings. Change the remote control mode on the remote control. (→P21) |
| F76 The unit turns off after the message. | Abnormal power circuit. If the message still remains even if the power is turned on again, consult your dealer. |
Specifications
■ PHOTO
LCD screen
LCD size: 9 inch TFT
Number of pixels: 800 × 480
Screen size
(W × H): 199.2 mm × 110.2 mm
Aspect ratio: 16 : 9
Maximum number
of pixels: 5120 × 3840
Minimum number
of pixels: 64 × 64
Maximum decode
file size: 10 MB
Usable file format
(SD/internal memory): JPEG: Exif 2.2, JFIF *1 • Progressive JPEG: Not supported
Internal memory
capacity: 2 GB
Compatible media: SD/SDHC/SDXC
iPod/iPhone*2
Internal memory
MUSIC
Compatible media: iPod/iPhone *2
RMS output Power
Stereo mode: Both ch driven 1 W Per channel
8 Ω, 1 kHz 10 % THD
Total RMS Stereo mode power 2 W
Speaker: Semi-dome type
VIDEO
Compatible media: iPod/iPhone *2
INTERFACE
SD card slot
Terminal for Universal Dock
Main set rating: DC 6 V, 1.8 A Max
Power consumption
Normal *3: Approx. 4.5 W
Maximum*4: Approx. 13 W
Power consumption in standby mode *5: Approx. 0.2 W
Dimensions
(W x H x D): 244.2 mm x 154 mm x 88.7 mm*6
At the thinnest point: Approx. 9.4 mm
Mass: Approx. 583 g
Permissible operating
temperature: 0 °C to 35 °C
Permissible relative
humidity: 35 % to 80 % RH (No condensation)
*1 4:2:0, 4:2:2, 4:4:4 type base line JPEG *2 Refer to the list of compatible types. *3 Factory setting or when playing the internal memory. *4 Slideshow, iPod/iPhone charge and when playing back audio with maximum volume. *5 Without iPod/iPhone charge. *6 For horizontal arrangement, maximum open angle (75°) of LCD panel.
- Specifications are subject to change without notice.
- Some characters are not displayed on this unit due to the restrictions of font data.
- Since the internal memory includes area that contains management information such as file system, the actual capacity that can be used is less. Also, the memory capacity in general is calculated as 1GB = 1,000,000,000 bytes, however, on this unit, it is calculated as 1GB = 1,024 x 1,024 x 1,024 = 1,073,741,824 bytes. Therefore, the displayed capacity is less than the general value.
Auto power save: This unit is equipped with the Auto power save function that automatically reduces power consumption when operations such as audio playback are not performed for approximately 10 minutes.
The LCD display on the display part is made with high-precision technology, but black dots may sometimes appear on the LCD display or the display may always light (with red, blue and green dots). This is not a malfunction. The pixels on the LCD display are managed with more than 99.99% accuracy; however, pixel deficiency may occur within 0.01% probability. We assure you that these dots are not recorded on the SD card or internal memory.
For Latin America Countries only
Useful Information
Customer Service
Customer Service Directory
Obtain product information and operative assistance; locate the closest distributor or Service Center; buy spare parts and accessories through our website for Latin America:
http://www.lar.panasonic.com
You may also contact us directly through our Contact Center:
Panama 800-PANA (800-7262)
Colombia 01-8000-94PANA (01-8000-947262)
Ecuador 1800-PANASONIC (1800-726276)
Costa Rica 800-PANA737 (800-7262737)
El Salvador 800-PANA (800-7262)
Guatemala 1-801-811-PANA (1-801-811-7262)
Chile 800-390-602
From a cell phone: 797-5000
Venezuela 800-PANA-800 (800-7262-800)
Uruguay 0-800-PANA (0-800-7262)
Peru 0800-00726
Argentina 0800-333-PANA (0800-333-7262)
0810-321-PANA (0810-321-7262)
Mexico Service
To obtain information in the Republic of Mexico contact us at:
Or you may contact us at the following phone numbers:
01800-VIP-PANA (01800-847-7262) - Interior
(55) 5000-1200 - Mexico D.F. and Metropolitan Area
WARNING:
TO REDUCE THE RISK OF FIRE, ELECTRIC SHOCK OR PRODUCT DAMAGE,
- DO NOT EXPOSE THIS APPARATUS TO RAIN, MOISTURE, DRIPPING OR SPLASHING AND THAT NO OBJECTS FILLED WITH LIQUIDS, SUCH AS VASES, SHALL BE PLACED ON THE APPARATUS. ● USE ONLY THE RECOMMENDED ACCESSORIES.
- DO NOT REMOVE THE COVER (OR BACK); THERE ARE NO USER SERVICEABLE PARTS INSIDE. REFER SERVICING TO QUALIFIED SERVICE PERSONNEL.
CAUTION
Danger of explosion if battery is incorrectly replaced. Replace only with the same or equivalent type recommended by the manufacturer. Dispose of used batteries according to the manufacturer's instructions.
THE SOCKET OUTLET SHALL BE INSTALLED NEAR THE EQUIPMENT AND SHALL BE EASILY ACCESSIBLE.
This product may receive radio interference caused by mobile telephones during use. If such interference is apparent, please increase separation between the product and the mobile telephone.
Warning
Keep the Button-Type battery out of the reach of children. Never put Button-Type battery in mouth. If swallowed call your doctor.
Warning
Risk of fire, explosion and burns. Do not recharge disassemble, heat above 60°C or incinerate.
Product Identification Marking is located on the bottom of unit.
SDXC Logo is a trademark of SD-3C, LLC.
Macintosh and Mac OS are registered trademarks or trademarks of Apple Inc.
Other names, company names and product names appearing in this document are the registered trademarks or trademarks of the respective developer companies. Note that TM and ® mark do not appear in this document in some cases.
Safety information for customers in Finland and Norway.
NORSK
WARNING:
TO REDUCE THE RISK OF FIRE, ELECTRIC SHOCK OR PRODUCT DAMAGE,
- DO NOT EXPOSE THIS APPARATUS TO RAIN, MOISTURE, DRIPPING OR SPLASHING, AND DO NOT PLACE OBJECTS FILLED WITH LIQUIDS, SUCH AS VASES, ON THE APPARATUS. ● ONLY USE RECOMMENDED ACCESSORIES.
- DO NOT REMOVE THE COVER (OR BACK); THERE ARE NO USER-SERVICEABLE PARTS INSIDE. REFER SERVICING TO QUALIFIED SERVICE PERSONNEL.
THE POWER OUTLET MUST BE LOCATED NEAR THE EQUIPMENT AND BE EASILY ACCESSIBLE.
FINNISH
WARNING:
TO REDUCE THE RISK OF FIRE, ELECTRIC SHOCK OR PRODUCT DAMAGE:
- DO NOT EXPOSE THIS DEVICE TO RAIN, MOISTURE, DRIPPING LIQUID OR SPLASHES. DO NOT PLACE OBJECTS FILLED WITH LIQUID, SUCH AS VASES, ON TOP OF THE DEVICE.
- USE ONLY RECOMMENDED ACCESSORIES.
- DO NOT REMOVE THE COVER (OR BACK COVER). THERE ARE NO USER-SERVICEABLE PARTS INSIDE. LEAVE SERVICING TO QUALIFIED SERVICE PERSONNEL.
THE POWER OUTLET SHOULD BE INSTALLED NEAR THE DEVICE IN AN EASILY ACCESSIBLE LOCATION.
EU
Panasonic Corporation
Web Site: http://panasonic.net
EU
Pursuant to Directive 2004/108/EC, Article 9(2)
Panasonic Testing Centre
Panasonic Marketing Europe GmbH
Winsbergring 15, 22525 Hamburg, Germany
En
- OPERATING INSTRUCTIONS DIGITAL PHOTO FRAME
- TABLE OF CONTENTS
- GETTING STARTED
- OPERATIONS
- REFERENCE
- DEAR CUSTOMER
- INCLUDED INSTALLATION INSTRUCTIONS
- SUPPLIED ACCESSORIES
- FOR OTHERS
- SAFETY PRECAUTIONS
- PLACEMENT
- VOLTAGE
- AC MAINS LEAD PROTECTION
- FOREIGN MATTER
- SERVICE
- FOR THE UNITED KINGDOM AND REPUBLIC OF IRELAND CUSTOMERS
- (SALES AND SUPPORT INFORMATION)
- READ THIS PAGE FIRST
- DESCRIPTIONS IN THESE OPERATING INSTRUCTIONS
- PLAYABLE MEDIA AND FILE FORMATS
- PLAYABLE PHOTOS (JPEG)
- USABLE SD CARDS (AS OF SEPTEMBER, 2010)
- TYPES OF IPOD/IPHONE THAT CAN BE USED ON THIS UNIT (AS OF AUGUST, 2010)
- NOTE
- CONTROL GUIDE
- MAIN UNIT
- BUTTON OPERATION DISPLAY ON THE MAIN UNIT
- INSTALLATION OF THIS UNIT
- FOR BETTER SOUND EFFECTS
- INSERTING AN SD CARD
- TO REMOVE AN SD CARD
- REMOTE CONTROL
- TO USE THE REMOTE CONTROL
- CAUTION
- ABOUT THE INTERNAL MEMORY AND SDS
- ABOUT THE INTERNAL MEMORY
- BACK UP THE INTERNAL MEMORY PERIODICALLY
- ABOUT SDS
- USABLE SD CARDS (→ P3)
- WRITE-PROTECT SWITCH
- HANDLING CAUTIONS
- CAUTIONS WHEN DISPOSING OF/TRANSFERRING SD CARDS AND THE UNIT
- TO COMPLETELY DELETE DATA IN THE INTERNAL MEMORY USING THE PHYSICAL FORMAT (APPROX. 10 MINUTES)
- PREPARATION FOR POWER SOURCE
- TO REMOVE THE AC ADAPTOR FROM THE HOUSEHOLD MAINS SOCKET
- SETTING THE CLOCK
- PRESS [○]
- PRESS [MENU]
- PRESS [▲, ▼, ◀, ▶] TO SELECT "SETTINGS MENU" AND PRESS [OK]
- WHEN THE INTRODUCTION SCREEN FOR THE TIME SETTING APPEARS
- TO DISPLAY THE CLOCK
- SWITCHING THE SCREEN DISPLAY
- TYPES OF DISPLAY MODE
- CLOCK
- IPOD DISPLAY
- WHEN SELECTING "VIDEOS" OR "ALL (IPOD DISPLAY)" IN THE IPOD MENU
- DISPLAYING PHOTOS VERTICALLY
- TO RESTORE THE HORIZONTAL ARRANGEMENT
- SELECTING PHOTOS TO VIEW
- PLAYABLE PHOTOS (JPEG) → P
- WHEN THE SD CARD MENU SCREEN IS NOT DISPLAYED OR THE SD CARD IS ALREADY INSERTED
- THE FOLLOWING EXPLAINS HOW TO SELECT AND PLAY PHOTOS IN THE INTERNAL MEMORY
- PHOTO CATEGORIES
- SEARCHING SCREEN
- EDITING PHOTOS
- COPYING PHOTOS
- COMPRESSING DATA WHEN IMPORTED
- COLLECTING FAVOURITE PHOTOS
- (ONLY FOR THE INTERNAL MEMORY)
- REARRANGING THE ORDER OF REGISTERED PHOTOS
- CANCELLING THE REGISTRATION
- DELETING PHOTOS
- TO STOP DELETING
- PROTECTING PHOTOS
- CANCELLING THE PROTECTION
- PHOTO PLAYBACK SETTINGS
- BASIC OPERATION
- IMAGE QUALITY SETTINGS
- CONNECTING/RECHARGING AN IPOD/IPHONE
- USABLE IPODS/IPHONES →P
- ATTACH THE DOCK ADAPTOR (SUPPLIED WITH IPOD/IPHONE)* TO THE UNIVERSAL DOCK FOR IPOD
- (ONLY WHEN CONNECTING AN IPOD TOUCH/IPHONE) ATTACH THE UNIVERSAL DOCK BACKREST TO THE UNIVERSAL DOCK FOR IPOD
- CONNECT THE UNIVERSAL DOCK FOR IPOD WITH THIS UNIT (①) AND INSERT THE IPOD/IPHONE MAIN UNIT TO THE UNIVERSAL DOCK FOR IPOD (②)
- RECHARGING STARTS WHEN THE IPOD/IPHONE IS CONNECTED
- WHEN OPERATING IPOD TOUCH OR IPHONE
- PLAYING BACK PHOTOS, ETC. STORED ON THE IPOD/IPHONE
- PRESS [IPOD/PLAY MENU]
- PRESS [▲, ▼] TO SELECT "ALL (IPOD DISPLAY)" AND PRESS [OK]
- PLAY BACK PHOTOS, VIDEOS, YOUTUBE MOTION PICTURES, OR MUSIC, ETC. BY OPERATING THE IPOD/IPHONE
- OPERATIONS AVAILABLE ON THE REMOTE CONTROL OF THIS UNIT
- PLAYING MUSIC ON AN IPOD/IPHONE
- PRESS [▲, ▼] TO SELECT "MUSIC" AND PRESS [OK]
- PRESS [▲, ▼] TO SELECT THE TRACK SELECTION METHOD (→P17) AND PRESS [OK]
- PRESS [▲, ▼, ◀, ▶] TO SELECT TRACKS AND PRESS [OK]
- IPOD DISPLAY SCREEN
- PLAYING VIDEO ON AN IPOD/IPHONE
- PRESS [▲, ▼] TO SELECT "VIDEOS" AND PRESS [OK]
- AUDIO PLAYBACK SETTINGS
- USING THE TIMER
- TO SET AUDIO PLAYBACK
- TO DISABLE THE SET TIMER
- TO DELETE THE TIMER SETTING
- WHEN THE TIMER IS SET
- POWER SAVING USE USING THE SETUP MENU
- SETTING ITEMS
- WHEN THE AUTO POWER OFF IS SET TO ENABLE
- WHEN SETTING THE REMOTE CONTROL MODE TO
- USING WITH YOUR PC
- SYSTEM CONFIGURATIONS REQUIRED
- TO CONNECT TO A PC
- TO REMOVE THE USB CONNECTION CABLE
- TO EXCHANGE PHOTO FILES WITH A COMPUTER
- USING IN A WALL-MOUNTED STATE
- NOTES FOR INSTALLATION
- RECOMMENDED TYPE OF SCREW
- WALL-MOUNT SETTINGS
- WHEN USING WITH THE WALL-MOUNT SETTING
- ATTACHING TO A WALL
- WHEN USING THE UNIT ON A DESK AFTER REMOVING FROM THE WALL
- SAFETY CAUTIONS
- WARNING
- MAINTENANCE
- INFORMATION FOR USERS ON COLLECTION AND DISPOSAL OF OLD EQUIPMENT AND USED BATTERIES
- TROUBLESHOOTING GUIDE
- SPECIFICATIONS
- PHOTO
- LCD SCREEN
- MUSIC
- VIDEO
- INTERFACE
- POWER CONSUMPTION IN STANDBY MODE *5: APPROX. 0.2 W
- FOR LATIN AMERICA COUNTRIES ONLY
- USEFUL INFORMATION
- CUSTOMER SERVICE
- CUSTOMER SERVICE DIRECTORY
- HTTP://WWW.LAR.PANASONIC.COM
- MEXICO SERVICE
- PANASONIC CORPORATION
Brand : PANASONIC
Model : MW-20
Category : Digital photo frame