
Darksiders II (PS3) - Video game SONY - Free user manual and instructions
Find the device manual for free Darksiders II (PS3) SONY in PDF.
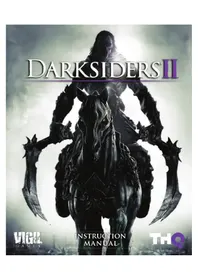


| Product Type | Video Game (PS3) |
| Platform | PlayStation 3 |
| Genre | Action-Adventure, Hack and Slash |
| Developer | Vigil Games |
| Publisher | THQ |
| Release Year | 2012 |
| ESRB Rating | M (Mature 17+) |
| Language | English, French, Spanish, German, Italian |
| Number of Players | 1 |
| Storage Requirement | At least 12 GB free hard drive space |
| Controller Support | DualShock 3, Sixaxis |
| Online Features | Leaderboards, downloadable content |
| Save File Size | Up to 8 MB |
| Installation | Required (partial installation) |
| Media Format | Blu-ray Disc |
| Manual Included | Yes (digital PDF) |
Frequently Asked Questions - Darksiders II (PS3) SONY
User questions about Darksiders II (PS3) SONY
0 question about this device. Answer the ones you know or ask your own.
Ask a new question about this device
Download the instructions for your Video game in PDF format for free! Find your manual Darksiders II (PS3) - SONY and take your electronic device back in hand. On this page are published all the documents necessary for the use of your device. Darksiders II (PS3) by SONY.
USER MANUAL Darksiders II (PS3) SONY
© 2012 THQ Inc. Developed by Vigil Games. Uses Wwise © 2006-2012 Audiokinetic Inc. All rights reserved. Uses Bink Video. Copyright © 1997-2012 by RAD Game Tools, Inc. Wwise ©2006-2012 Audiokinetic Inc. Darksiders, Vigil Games, THQ and their respective logos are trademarks and/or registered trademarks of THQ Inc. All rights reserved. All other trademarks, logos and copyrights are property of their respective owners.
ICU
Copyright (c) 1995-2012 International Business Machines Corporation and others. All rights reserved.
Permission is hereby granted, free of charge, to any person obtaining a copy of this software and associated documentation files (the "Software"), to deal in the Software without restriction, including without limitation the rights to use, copy, modify, merge, publish, distribute, and/or sell copies of the Software, and to permit persons to whom the Software is furnished to do so, provided that the above copyright notice(s) and this permission notice appear in all copies of the Software and that both the above copyright notice(s) and this permission notice appear in supporting documentation.
THE SOFTWARE IS PROVIDED "AS IS", WITHOUT WARRANTY OF ANY KIND, EXPRESS OR IMPLIED, INCLUDING BUT NOT LIMITED TO THE WARRANTIES OF MERCHANTABILITY, FITNESS FOR A PARTICULAR PURPOSE AND NONINFRINGEMENT OF THIRD PARTY RIGHTS. IN NO EVENT SHALL THE COPYRIGHT HOLDER OR HOLDERS INCLUDED IN THIS NOTICE BE LIABLE FOR ANY CLAIM, OR ANY SPECIAL INDIRECT OR CONSEQUENTIAL DAMAGES, OR ANY DAMAGES WHATSOEVER RESULTING FROM LOSS OF USE, DATA OR PROFITS, WHETHER IN AN ACTION OF CONTRACT, NEGLIGENCE OR OTHER TORTIOUS ACTION, ARISING OUT OF OR IN CONNECTION WITH THE USE OR PERFORMANCE OF THIS SOFTWARE.
Except as contained in this notice, the name of a copyright holder shall not be used in advertising or otherwise to promote the sale, use or other dealings in this Software without prior written authorization of the copyright holder.
SIMD
Copyright (c) 2006,2007 Mutsuo Saito, Makoto Matsumoto and Hiroshima University. All rights reserved.
Redistribution and use in source and binary forms, with or without modification, are permitted provided that the following conditions are met:
- Redistributions of source code must retain the above copyright notice, this list of conditions and the following disclaimer.
- Redistributions in binary form must reproduce the above copyright notice, this list of conditions and the following disclaimer in the documentation and/or other materials provided with the distribution.
- Neither the name of the Hiroshima University nor the names of its contributors may be used to endorse or promote products derived from this software without specific prior written permission.
THIS SOFTWARE IS PROVIDED BY THE COPYRIGHT HOLDERS AND CONTRIBUTORS "AS IS" AND ANY EXPRESS OR IMPLIED WARRANTIES, INCLUDING, BUT NOT LIMITED TO, THE IMPLIED WARRANTIES OF MERCHANTABILITY AND FITNESS FOR A PARTICULAR PURPOSE ARE DISCLAIMED. IN NO EVENT SHALL THE COPYRIGHT OWNER OR CONTRIBUTORS BE LIABLE FOR ANY DIRECT, INDIRECT, INCIDENTAL, SPECIAL, EXEMPLARY, OR CONSEQUENTIAL DAMAGES (INCLUDING, BUT NOT LIMITED TO, PROCUREMENT OF SUBSTITUTE GOODS OR SERVICES, LOSS OF USE, DATA, OR PROFITS; OR BUSINESS INTERRUPTION) HOWEVER CAUSED AND ON ANY THEORY OF LIABILITY, WHETHER IN CONTRACT, STRICT LIABILITY, OR TORT (INCLUDING NEGLIGENCE OR OTHERWISE) ARISING IN ANY WAY OUT OF THE USE OF THIS SOFTWARE, EVEN IF ADVISED OF THE POSSIBILITY OF SUCH DAMAGE.
DARKSIDERS II
TABLE OF CONTENTS
GETTING STARTED 2
GAME CONTROLS 2
STARTING UP 5
MENUS....6
ABILITIES AND GEAR 8
GAME SCREEN ....10
LIMITED WARRANTY ....11
CUSTOMER SUPPORT
Telephone: +44 (0)87 06080047
(national/international call rates apply)
(Mon-Fri 8.00 am to 7.00 pm, Sat 9.00 am to 5.00 pm)
NOTICES:
Video output in HD requires cables and an HD-compatible display, both sold separately. Voice chat requires a headset, sold separately. Compatible with most Bluetooth and USB wired headsets. Some limitations apply.
GETTING STARTED
PlayStation®3 SYSTEM
Starting a game: Before use, carefully read the instructions supplied with the PlayStation®3 computer entertainment system. The documentation contains information on setting up and using your system as well as important safety information.
Check that the MAIN POWER switch (located on the system rear) is turned on. Insert the Darksiders® II disc with the label facing up into the disc slot. Select the icon for the software title under 📋 in the XMB™ menu, and then press the ✗ button. Refer to this manual for information on using the software.
Quitting a game: During gameplay, press and hold down the Ⓐ button on the wireless controller for at least 2 seconds. Then select "Quit Game" from the screen that is displayed.
Hint

To remove a disc, touch the eject button after quitting the game.
Trophies: Earn, compare and share trophies that you earn by making specific in-game accomplishments. Trophies access requires a PlayStation®Network account.
SAVED DATA
Saved data is saved on the system's hard disk. The data is displayed under "Saved Data Utility" in the menu.
GAME CONTROLS

MENU CONTROLS
| Start game | START |
| Select/Change menu item left stick | |
| Confirm/Accept selection | ✕ |
| Previous screen | ◎ |
| Transition between screens | L1 or R1 |
ON FOOT CONTROLS
| Move Death left stick | |
| Move the camera around Death (when not targeting) right stick | |
| Jump | ✕ |
| Interact/Drop down | ◎ |
| Scythe Attack | ☐ |
| Secondary Weapon Attack | △ |
| Evade | R1 |
| Use equipped Gear | R2 |
| Show available Wrath Abilities/Gear | L1 |
| Show objectives (hold) SELECT | |
| Reaper Form | L1 + R2 |
| Use Wrath Ability | L1 + ✗/◎/☐/△ |
| Use Health / Wrath potion | directional button ←/ directional button → |
| Summon Despair (Note: Despair may not always be available) | L1 + R1 |
| Recentre camera or target enemy | L2 |
| Bring up the aiming reticle (Fine-aim mode) | R3 |
| Switch targets (while targeting enemies) Move the right stick | |
| Access Map/Objectives/Inventory/Skill Trees | SELECT |
| Pause Menu | ▶ START |
| Access Radial Menu | directional button ↓ |
| Assign ability/gear to Hotkey (in Radial Menu) | L1 + ✗/◎/☐/△ |
| Summon Dust (Note: Dust may not always be available) | (hold) L3 |
HORSEBACK CONTROLS
| Move Despair left stick | |
| Scythe Attack | |
| Bring up the aiming reticle (Fine-aim mode) | R3 |
| Recentre camera or target enemies | L2 |
| Fire Strife's gun, Redemption | R2 |
| Make Despair dash R1 + left stick | |
| Charge attack | R1 + left stick |
| Make Despair jump | |
| Banish Despair | L1 + R1 |
CONSTRUCT CONTROLS
| Move the Construct left stick | |
| Recentre camera or target enemies | L2 |
| Construct Attack | |
| Construct heavy attack | |
| Bring up the aiming reticle (Fine-aim mode) | R3 |
| Fire Construct Fist | R2 |
| Detach the Construct Fist from a grab point | R2 |
| Jump off the Construct or onto an extended chain |
UNDERWATER CONTROLS
| Swim in a direction left stick | |
| Speed burst | R1 |
| Swim up | ✕ |
| Swim down | △ |
FLIGHT CONTROLS
| Camera Controls right stick |
STARTING UP
THQ SIGN IN
The first time you start Darksiders® II while logged in to PlayStation® Network, you are asked to login or create a THQ Community account in order to access special online features.
AUTOSAVE NOTIFICATION
This game supports an autosave feature. Do not turn off your PlayStation®3 system when you see the autosave icon.
TITLE SCREEN
Pressing ▶ opens the Load Game menu. Select a slot to start a new game or continue an existing save. When starting a new game, you are presented with the following options:
Subtitles – Toggle subtitles on or off.
Difficulty – Choose between Easy, Normal, and Apocalyptic difficulties.
Gamma - Adjust the gamma level so that the outer runes of the image are faintly visible, but not entirely black.
Once a Darksiders® II save has been created and selected, you are taken to the Main Menu:
Continue - This selection is where you resume where you left off.
Options - This selection is where you change the game settings.
Credits – This selection displays a list of the fine people who made Darksiders® II.
Downloadable Content – This selection is where you view and purchase new downloadable content on the PlayStation®Store. You can also redeem your Online Pass or Promotional Codes. If you do not have an Online Pass, one may be purchased from this menu.
DESPAIR
Despair is Death's noble steed. Death can ride his beastly companion to quickly traverse great distances. To summon Despair, press L1 and R1 while the horse icon is on-screen.
DUST
Besides his trusty steed, a mysterious crow known as Dust also accompanies Death during his quest. Press and hold L3 to have Dust show Death the way to his next objective. Note that Dust may not be available in every situation.
LOOT
In Darksiders® II, Death can collect, equip and sell equipment found on dead enemies and treasure chests scattered throughout the world. Equipment can make Death more powerful and change the way he looks.
PRIMARY AND SECONDARY WEAPONS
Death is the master of all tools of destruction, but he prefers his Scythes. The Scythes are always on hand as his primary weapon. However, Death can use Secondary Weapons such as glaives, hammers, maces, and axes, as well as “hand weapons” such as arm blades, claws, bucklers, and gauntlets. Because of their respective sizes, large weapons take longer to swing but yield massive damage, while hand weapons offer less damage but attack much faster. Keep a sharp eye out for Possessed Weapons, the most powerful weapons available. They can be customised and upgraded by feeding them other weapons and armour.
REAPER FORM
Death feeds upon the demise of his foes. Upon collecting enough energy, Death can transform into a fearsome Reaper that is virtually immune to all damage and mercilessly slays those who dare oppose him. Death gains access to his Reaper Form when he reaches level 6.
TOMES
Throughout the Realms, Death can gain access to a series of Tomes. These Tomes allow you to send and receive Gear via an Offline Inbox and an Online Inbox. The Offline Inbox is where DLC Gear is received, as well as items sent to Death by NPCs, such as Tarot Cards and Legendary Gear. The Online Inbox is used to send and receive messages, weapons, and armour to and from online Friends who are playing Darksiders® II.
The Crucible Pass DLC must be installed to gain access to the Tomes' Online Inbox.
MENUS
PAUSE MENU
Pressing ▶ during gameplay brings up the Pause Menu.
Resume – Exit the Pause Menu and return to gameplay.
Save – Saves your current progress.
Options – This menu allows you to change the game settings and is identical to the Option menu at the title screen.
Quit Game – Exit the game and return to the Title Screen. Any unsaved game progress will be lost.
CHARACTER MENU
Pressing SELECT during gameplay brings up the Character Menu.
CHARACTER
This screen shows the Abilities and Gear that are available to Death. It also shows Death's statistics:
Level – This indicates Death's current level. Each level gained awards a Skill Point that can be used to unlock or improve Death's abilities.
Experience – This indicates how much experience Death has accumulated and how much experience he needs to gain the next level.
Health – This indicates Death's current and total amount of Health.
Wrath – This indicates Death's current and total amount of Wrath. Wrath is consumed when Death uses any of his unlocked spells.
Strength – This indicates how powerful Death's physical attacks are when using his Scythes or Secondary Weapons.
Defence – This indicates how resistant Death is to physical attacks.
Arcane – This indicates how powerful Death's Wrath Abilities and Elemental effects are.
Resistance - This indicates how resistant Death is to physical or elemental attacks.
Primary Weapon – This is the amount of damage Death deals when using his Scythes.
Secondary Weapon – This is the amount of damage Death deals when using the equipped Secondary Weapon.
INVENTORY
This screen displays Death's stats along with the weapons and armour he currently has equipped. Press ☐ to see additional stats and press L2 or R2 to cycle through your inventory. Some loot requires Death be a certain level to equip it.
Scythes – Death's signature weapon can be found in many variations. View stats and equip the best Scythe for the task at hand.
Secondary Weapons – Equip any acquired Secondary Weapons.
Shoulders – View and equip shoulder armour found on Death's journey.
Armour – Death's main source of defence, view and equip body armour on this menu.
Gloves – Cycle through any gloves Death has found and equip them to boost his defence.
Boots – Keep Death on his feet by equipping a good pair of boots. Any boots Death acquires are found here.
Talismans – View and equip acquired Talismans. Although they don't usually provide additional armour, Talismans can make Death more powerful in other ways.
Quest Items – Death can come across many objects that are specifically related to quests, including collectable items. View those items here.
SKILLS
This screen shows the various Wrath Abilities that can be unlocked or upgraded by spending the Skill Points earned from gaining levels. Many Wrath Abilities cannot be unlocked until Death achieves a certain level. There are two distinct Skill branches offering different play styles.
HARBINGER
Teleport Slash – Death leaps with blinding speed to strike at his enemies, inflicting massive damage and restoring a portion of Death's health.
Harvest – Death's true incarnation appears and unleashes a spinning Scythe attack around himself, dealing damage to any enemies struck by the deadly blades.
Unstoppable – Death's Strength swells, making all of his physical attacks even more deadly.
Reaper Storm – Death's form rips apart into a tornado of debris and fragments of ancient bone, laying waste to those caught in the maelstrom.
NECROMANCER
Exhume – Death summons ghouls to fight for him for a short period of time.
Aegis Guard – Death's Defence and Resistance are raised, allowing him to withstand more damage.
Murder – Death summons a murder of crows to sweep across the battlefield dealing damage as they go.
Frenzy – Death channels his Wrath reserves to attack his enemies. Frenzy increases in power depending on the amount of Wrath available.
QUEST
This screen shows a map of your current location, and provides detailed information about Death's surrounding area. A list of the quests Death has accepted can be toggled on and off by pressing ▲. To actively track a quest and display a waypoint on the mini-map, highlight a quest on the list and press □.
Death – The dagger on the map represents Death and the direction he is facing.
Dust – The purple dot icon indicates Dust's current location.
Primary Quest (Gold) – Represents the main story quest objective.
Secondary Quest (Grey) – Represents other quest objectives that you have accepted.
Open Door – Most doors you find are open and marked with a green band.
Locked Doors – Some doors are locked and marked with a red band.
Skeleton Key Door – Any doors marked overhead with a red lock icon and a skull icon requires a special key to unlock.
Skeleton Key – In the case of Locked Skeleton Key Doors, a Skeleton Key is needed to unlock them. Once found, you can press Ⓞ at a locked door to open it using a Skeleton Key.
Chest – Throughout the Realms, chests can be discovered and opened. Chests may possess both Gilt and valuable equipment!
Fast Travel – Fast Travel is available to Death once he unlocks key locations throughout the world. To Fast Travel, open the Quest Screen, move the cursor to a previously discovered Fast Travel point, and press ☐. Death may Fast Travel in the open world or within dungeons. Fast Travel is unavailable if any enemies are nearby.
STATS
Track various stats that are monitored during gameplay such as Total Blood Spilled and Reaper Form kills. If you have the Crucible Pass installed and are logged into PlayStation®Network, you can view the Leaderboards and compare your stats against Friends and the rest of the Darksiders®II community.
MOVES LIST
Quickly review Death's various combo attacks. Switch between attack methods by pressing L2 or R2.
ABILITIES AND GEAR
DEATH'S ABILITIES AND GEAR
As Death travels through the Realms, he will acquire new abilities to aid him in his quest to prove his brother's innocence.
REDEMPTION
Early in his quest, Death acquires Redemption. This fearsome weapon can be used to strike Death's enemies from afar. Hold L2 to lock on to enemies and press R2 to fire the gun.
DEATHGRIP
Deathgrip is an ephemeral claw that can be used for travelling across seemingly impossible gaps, drawing small enemies to Death, or pulling him towards larger enemies. Equip Deathgrip in the Radial Menu and activate it by pressing R2. During certain segments of traversal, you may be prompted to use it without needing to aim or lock on to a target.
INTERDICTION STONE
Death will eventually acquire the ability to summon and command the Dead Lords. These powerful spirits can be called on special summoning pads found throughout the Realm. They can be commanded to trigger pressure plates, or cancel their current action and return. Press R3 to aim and press R2 to command, or press R2 while aiming at the Dead Lord (after he has reached the destination he was commanded to) to cancel a command. The Dead Lords can help fight off foes as well.
SOUL SPLITTER
Some situations require more than one Death! The Soul Splitter helps Death overcome challenges by splitting his soul in two. When the Soul Splitter is activated, Death's body becomes a Reaper statue and you take control of one of the recently released souls. If a soul is within range of the statue, the Deathgrip can be used to pull the soul to the statue.
While split, you can hold Ⓞ to swap control between the two souls. To return both souls to Death's body, activate the Soul Splitter a second time. Be careful though—if a soul travels too far from Death's body, Death will exit splitter form. Souls are susceptible to damage from enemies as well.
VOIDWALKER
This magical relic allows Death to travel instantaneously between two points by stepping through a shortcut in space. Like other ranged abilities, the Voidwalker can be aimed by pressing R3 and fired by pressing R2. To create a charged shortcut, out of which Death's exit will be greatly accelerated, press and hold R2. To cancel any shortcut, press L2. Note that only specific areas in the environment can serve as points of passage between the shortcuts.
PHASEWALKER
When the Voidwalker is upgraded to the Phasewalker, Death can place shortcuts not just through space, but through time as well. With this upgrade, Death can now travel to the distant past to make changes to the present world.
GAME SCREEN

1. REAPER METER
This indicates if Death is able to transform into his Reaper Form.
2. HEALTH BAR
This indicates how many hit points Death has.
3. WRATH METER
This indicates how much Wrath Death has.
4. EXPERIENCE BAR
This shows how much experience Death has accumulated, and how much more experience is needed to level up. When the bar is fully filled, Death gains a level.
5. EQUIPPED GEAR
This shows the Gear Death currently has equipped. Press R2 to use it.
6. SUMMON DESPAIR/DESPAIR STAMINA
When the L2 + R2 symbol is pulsing, Despair can be summoned to ride upon. While mounted, Despair's stamina is displayed here instead. Stamina is consumed any time Despair dashes.
7. MAP
This shows Death's current location in the environment.
8. GILT/BOATMAN COINS
This area shows the amount of Gilt and Boatman Coins Death currently possesses.
9. ABILITY/GEAR
This overlay shows the Wrath Abilities/Gear Death has assigned to his Hotkey slots. Hold L1 to access this overlay and select what you wish to use by pressing the appropriate button.
WARRANTY
THQ (UK) LIMITED warrants to the original purchaser of this THQ (UK) LIMITED product that the medium on which the computer program is recorded is free from defects in materials and workmanship for a period of ninety (90) days from the date of purchase. This THQ (UK) LIMITED software is sold “as is”, without express or implied warranty of any kind resulting from use of this program. THQ (UK) LIMITED agrees for a period of ninety (90) days to either repair or replace, at its option, free of charge, any THQ (UK) LIMITED product, postage paid, with proof of purchase, at its Customer Service centre. Replacement of this Game Disc, free of charge to the original purchaser is the full extent of our liability. Please mail to THQ (UK) LIMITED, Ground Floor; Block A, Dukes Court, Duke Street, Woking, Surrey, GU21 5BH. Please allow 28 days from dispatch for return of your Game Disc. This warranty is not applicable to normal wear and tear. This warranty shall not be applicable and shall be void if the defect in the THQ (UK) LIMITED product has arisen through abuse, unreasonable use, mistreatment or neglect.
THIS WARRANTY IS IN LIEU OF ALL OTHER WARRANTIES AND NO OTHER REPRESENTATIONS OR CLAIMS OF ANY NATURE SHALL BE BINDING OR OBLIGATE THQ (UK) LIMITED. ANY IMPLIED WARRANTIES OF APPLICABILITY TO THIS SOFTWARE PRODUCT, INCLUDING WARRANTIES OF MERCHANTABILITY AND FITNESS FOR A PARTICULAR PURPOSE, ARE LIMITED TO THE NINETY (90) DAY PERIOD DESCRIBED ABOVE. IN NO EVENT WILL THQ (UK) LIMITED BE LIABLE FOR ANY SPECIAL, INCIDENTAL OR CONSEQUENTIAL DAMAGES RESULTING FROM POSSESSION, USE OR MALFUNCTION OF THIS THQ (UK) LIMITED PRODUCT. THIS IN NO WAY AFFECTS YOUR STATUTORY RIGHTS.
This computer program and its associated documentation and materials are protected by both National and International copyright law. Storage in a retrieval system, reproduction, translation, hiring, lending, broadcasting and public performances are prohibited without express written permission of THQ (UK) LIMITED.
THQ (UK) LIMITED Ground Floor, Block A, Dukes Court, Duke Street, Woking, Surrey, GU21 5BH


- DARKSIDERS II
- TABLE OF CONTENTS
- CUSTOMER SUPPORT
- NOTICES
- GETTING STARTED
- PLAYSTATION®3 SYSTEM
- HINT
- SAVED DATA
- GAME CONTROLS
- STARTING UP
- THQ SIGN IN
- AUTOSAVE NOTIFICATION
- TITLE SCREEN
- DESPAIR
- DUST
- LOOT
- PRIMARY AND SECONDARY WEAPONS
- REAPER FORM
- TOMES
- MENUS
- PAUSE MENU
- CHARACTER MENU
- CHARACTER
- INVENTORY
- SKILLS
- HARBINGER
- NECROMANCER
- QUEST
- STATS
- MOVES LIST
- ABILITIES AND GEAR
- DEATH'S ABILITIES AND GEAR
- REDEMPTION
- DEATHGRIP
- INTERDICTION STONE
- SOUL SPLITTER
- VOIDWALKER
- PHASEWALKER
- GAME SCREEN
- REAPER METER
- HEALTH BAR
- WRATH METER
- EXPERIENCE BAR
- EQUIPPED GEAR
- SUMMON DESPAIR/DESPAIR STAMINA
- MAP
- GILT/BOATMAN COINS
- ABILITY/GEAR
- WARRANTY
Brand : SONY
Model : Darksiders II (PS3)
Category : Video game