
NUTID MCW6 - Oven IKEA - Free user manual and instructions
Find the device manual for free NUTID MCW6 IKEA in PDF.


| Product Type | Built-in Electric Oven |
| Brand | IKEA |
| Model | NUTID MCW6 |
| Dimensions (HxWxD) | 595 x 595 x 548 mm |
| Net Weight | 30 kg |
| Energy Efficiency Class | A+ |
| Power Consumption (Conventional) | 0.9 kWh |
| Power Consumption (Fan Forced) | 0.7 kWh |
| Number of Functions | 8 (Multifunction) |
| Temperature Range | 50°C - 250°C |
| Control Type | Rotary knobs and digital display |
| Inner Capacity | 65 litres |
| Cleaning Method | Pyrolytic |
| Safety Features | Child lock, cool door, automatic shut-off |
| Included Accessories | 1 baking tray, 1 wire shelf |
| Installation | Professional installation required |
| Warranty | 2 years |
| Repairability | Spare parts available via IKEA |
Frequently Asked Questions - NUTID MCW6 IKEA
User questions about NUTID MCW6 IKEA
0 question about this device. Answer the ones you know or ask your own.
Ask a new question about this device
Download the instructions for your Oven in PDF format for free! Find your manual NUTID MCW6 - IKEA and take your electronic device back in hand. On this page are published all the documents necessary for the use of your device. NUTID MCW6 by IKEA.
USER MANUAL NUTID MCW6 IKEA
MOUNTING THE APPLIANCE

Follow the supplied separate mounting instructions when installing the appliance.

PRIOR TO CONNECTING

Check that the voltage on the rating plate corresponds to the voltage in your home.
Ensure the oven cavity is empty before mounting.
Ensure that the appliance is not damaged. Check that the oven door closes firmly against the door support. Empty the oven and clean the interior with a soft, damp cloth.

Do not operate this appliance if it has a damaged mains cord or plug, if it is not working properly, or if it has been damaged or dropped. Do not immerse the mains cord or plug in water. Keep the cord away from hot surfaces. Electrical shock, fire or other hazards may result.
AFTER CONNECTING
The oven can be operated only if the oven door is firmly closed.

The earthing of this appliance is compulsory. The manufacturer will accept no responsibility for injury to persons, animals or damage to objects arising from the non-observance of this requirement.
The manufacturers are not liable for any problems caused by the user's failure to observe these instructions.

IMPORTANT SAFETY INSTRUCTIONS

Read carefully and keep for future reference.

Do not heat, or use flammable materials in or near the oven. Fumes can create a fire hazard or explosion.

Only allow children to use the appliance under adult supervision and after adequate instructions have been given, so that the child is able to use the appliance in a safe way and understands the hazards of improper use.

Do NOT use your microwave oven for drying textiles, paper, spices, herbs, wood, flowers, fruit or other combustible materials. Fire could result.
This appliance is not intended for use by persons (including children) with reduced physical, sensory or mental capabilities, unless used under the supervision of a person responsible for their safety. Accessible parts may become hot during use. Young children should be kept away.

If material inside or outside the oven should ignite or smoke is observed, keep the oven door closed and turn the oven off. Disconnect the power cord or shut off power at the fuse or circuit breaker panel.

Do not over-cook food. Fire could result.

Do not use your microwave oven for heating anything in airtight sealed containers. The pressure increases and may cause damage when opening or may explode.

Do not leave the oven unattended, especially when using paper, plastic or other combustible materials in the cooking process. Paper can char or burn and some plastics can melt if used when heating foods.

The door seals and the door seal areas must be regularly inspected for damage. If these areas are damaged, the appliance should not be operated until it has been repaired by a trained service technician.

Do not use corrosive chemicals or vapors in this appliance. This type of oven is specifically designed to heat or cook food. It is not designed for industrial or laboratory use.
Eggs
Do not use your microwave oven for cooking or reheating whole eggs with or without shell, since they may explode even after microwave heating has ended.


Precautions

General
This appliance is designed for domestic use only!
The appliance should not be operated without food in the oven when using microwaves. Operation in this manner is likely to damage the appliance.
If you practice operating the oven, put a glass of water inside. The water will absorb the microwave energy and the oven will not be damaged.
Do not use the cavity for any storage purposes.
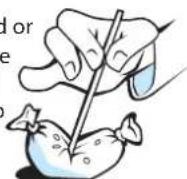
Remove wire twist-ties from paper or plastic bags before placing the bag in the oven.

Deep-Frying
Do not use your microwave oven for deep-frying, because the oil temperature cannot be controlled.
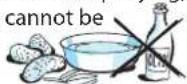

Use hot pads or oven mitts to prevent burns when touching containers, oven parts, and pans after cooking.
Liquids
E.g., beverages or water. Overheating the liquid beyond boiling point can occur without evidence of bubbling.
This could result in a sudden boil over of the hot liquid.
To prevent this possibility, the following steps should be taken:

- Avoid using straight-sided containers with narrow necks.
- Stir the liquid before placing the container in the oven and let the teaspoon remain in the container.
- After heating, allow standing for a short time, stirring again before carefully removing the container from the oven.
CAREFUL
ALWAYS REFER to a microwave cookbook for details. Especially, if cooking or reheating food that contains alcohol.
AFTER HEATING BABY FOOD or liquids in a baby bottle or in a baby food jar, always stir and check the temperature before serving.

This will ensure that the heat is evenly distributed and the risk of scalding or burns can be avoided.
Ensure the Lid and the Teat is removed before heating!
PUSH - PUSH KNOBS
THE KNOBS OF THIS OVEN are aligned with the buttons on the panel, at delivery. The knobs will slide out if pushed and their various functions can be accessed. It
is not necessary to have them protruding from the panel during operation. Simply push them back into the panel when you are done with the setting and continue to operate the oven.


ACCESSORIES

GENERAL
THERE ARE a number of accessories available on the market. Before you buy, ensure they are suitable for microwave use.
ENSURE THAT THE UTENSILS YOU USE are oven proof and allow microwaves to pass through them before cooking.

WHEN YOU PUT FOOD AND ACCESSORIES in the microwave oven, ensure that they do not come in contact with the interior of the oven.
This is especially important with accessories made of metal or metal parts.
IF ACCESSORIES CONTAINING METAL comes in contact with the oven interior, while the oven is in operation, sparking can occur and the oven could be damaged.
ALWAYS ENSURE that the turntable is able to turn freely before starting the oven.
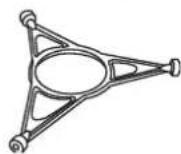
TURNTABLE SUPPORT
USE THE TURNTABLE SUPPORT under the Glass turntable. Never put any other utensils on the turntable support.

Fit the turntable support in the oven.
GLASS TURNTABLE
USE THE GLASS TURNTABLE with all cooking methods. It collects the dripping juices and food particles that otherwise would stain and soil the interior of the oven.
- Place the Glass turntable on the turntable support.
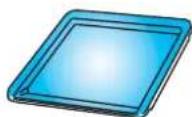
BAKING PLATE
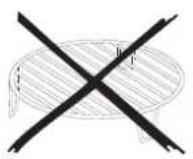
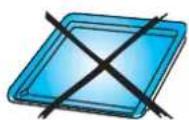
USE THE BAKING PLATE when cooking in forced air only or when grilling. Never use
it in combination with microwaves.
WIRE RACK
USE THE WIRE RACK when cooking and baking with Forced Air, Grill, Forced Air Combi, Auto Forced Air Combi or Turbo Grill
WHEN GRILLING WITHOUT MICRO-
WAVES, place the wire rack on the baking plate in order to elevate the food closer to the grill element in the ceiling.


BABY BOTTLE HOLDER
USE THE BABY BOTTLE HOLDER when heating baby food in bottles that are too tall to stand alone in the oven.
Please also see the chapter "Precautions" for more information about heating baby food.


START PROTECTION / CHILD LOCK
THIS AUTOMATIC SAFETY FUNCTION IS ACTIVATED ONE
MINUTE AFTER the oven has returned to "stand by mode". (The oven is in "stand by" when the 24-hour clock is displayed or if the clock has not been set, when the display is blank).

THE DOOR MUST BE OPENED AND CLOSED, e.g. putting food into it, before the safety lock is released. Else the display will show "DOOR".

PAUSE OR STOP COOKING
To pause cooking:
THE COOKING CAN BE PAUSED to check, turn or stir the food by opening the door. The setting will be maintained for 10 minutes.
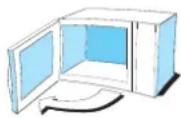
IF YOU DON'T WANT TO CONTINUE COOKING:
REMOVE THE FOOD, close the door and press the STOP button

To continue cooking:
CLOSE THE DOOR and press the Start button ONCE. The cooking is resumed from where it was paused.
PRESSING THE START BUTTON TWICE will increase the time by 30 seconds.

A BEEP WILL SIGNAL once a minute for 10 min-
utes when the cooking is finished. Press the STOP button or open the door to cancel the signal.

NOTE: The oven will only hold the settings for 60 seconds if the door is opened and then closed after the cooking is finished.
DONENESS
DONENESS IS AVAILABLE IN THE FOLLOWING FUNCTIONS:
AUTO REHEAT
Auto Cook
AUTO FORCED AIR COMBI
IN THE ABOVE functions, you have the possibility to personally control the end result through the Adjust doneness feature. This feature enables you to achieve higher or lower end temperature compared to the default standard setting.
| DONENESS | |
| LEVEL EFFECT | |
| H,2 | YIELDS HIGHEST END TEMPERATURE |
| H,1 | YIELDS HIGHER END TEMPERATURE |
| ---- | DEFAULT STANDARD SETTING |
| Lo1 | YIELDS LOWER END TEMPERATURE |
| Lo2 | YIELDS LOWEST END TEMPERATURE |
WHEN USING one of these functions the oven chooses the default standard setting. This setting normally gives you the best result. But if the food you heated became too warm to eat at once, you can easily adjust this before you use that function the next time. This is done by selecting a Doneness level with the adjust knob right after you have pressed the Start button.
Note:
THE DONENESS can only be set or altered during the first 20 seconds of operation.

COOLING DOWN
WHEN A FUNCTION IS FINISHED, the oven carries out a cooling procedure. This is normal.
After this procedure the oven switches off automatically.

THE COOLING PROCEDURE can be interrupted without any harm to the oven by opening the door.

KITCHEN TIMER

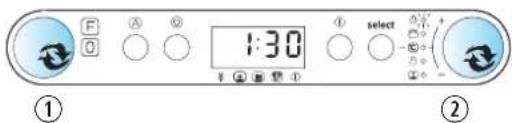
USE THIS FUNCTION when you need a kitchen timer to measure exact time for various purposes such as cooking eggs or letting the dough rise before baking etc.
1 TURN THE MULTIFUNCTION KNOB to the zero position. 2 TURN THE ADJUST KNOB to set the time to measure.
THE TIMER AUTOMATICALLY STARTS the countdown after 1 second. AN ACOUSTIC SIGNAL will be heard when the timer has finished to count down.

CLOCK


WHEN THE APPLIANCE IS FIRST PLUGGED IN or after a power failure, the display is blank. If the clock is not set, the display will remain blank until the cooking time is set.
1 TURN THE MULTIFUNCTION KNOB to the zero position. 2 PRESS THE SELECT BUTTON (3 seconds) until the left-hand digit (hour's) flicker. 3 TURN THE ADJUST KNOB to set the hours. 4 PRESS THE SELECT BUTTON again. (The two right hand digits (minutes) flicker). 5 TURN THE ADJUST KNOB to set the minutes. 6 PRESS THE SELECT BUTTON again.
THE CLOCK IS SET and in operation.
IF YOU WISH TO REMOVE THE CLOCK from the display once it has been set, simply press the Select button again for 3 seconds and then press the Stop button.
To REINSTATE THE CLOCK, follow the above procedure.
NOTE: KEEP THE DOOR OPEN WHILE SETTING THE CLOCK. This gives you 10 minutes to complete the setting of the Clock. Otherwise, each step must be accomplished within 60 seconds.

COOK & REHEAT WITH MICROWAVES


USE THIS FUNCTION for normal cooking and reheating, such as vegetables, fish, potatoes and meat.
1 TURN THE MULTIFUNCTION KNOB to the microwave position. 2 TURN THE ADJUST KNOB to set the cooking time. 3 PRESS THE SELECT BUTTON to select power level. 4 TURN THE ADJUST KNOB to set the preferred power level. 5 PRESS THE START BUTTON.

ONCE THE COOKING PROCESS HAS BEEN STARTED:
The time can easily be increased in 30-second steps by pressing the Start button. Each press increases the time with 30 seconds. You may also alter the time by turning the adjust knob to increase or decrease the time.
BY PRESSING THE SELECT BUTTON you may switch between cooking time and power level. Both can be altered during cooking by turning the adjust knob after selection.
CHOOSING POWER LEVEL
| MICROWAVES ONLY | |
| POWER | SUGGESTED USE: |
| JET(900 W) | REHEATING OF BEVERAGES, water, clear soups, coffee, tea or other food with a high water content. If the food contains egg or cream choose a lower power. |
| 750 W C | OOKING OF fish, meat, vegetables etc. |
| 650 W C | OOKING dishes not possible to stir. |
| 500 W | MORE CAREFUL COOKING e.g. high protein sauces, cheese and egg dishes and to finish cooking casseroles. |
| 350 W S | IMMERING STEWS, melting butter. |
| 160 W D | EFROSTING. Softening butter, cheeses. |
| 90 W K | EEP WARM |
| 0 W SETTING | the standing time. |

JET START


THIS FUNCTION IS USED for quick reheating of food with a high water content such as clear soups, coffee or tea.
1 TURN THE MULTIFUNCTION KNOB to the microwave position. 2 PRESS THE START BUTTON.
THIS FUNCTION AUTOMATICALLY STARTS with maximum microwave power level and the cooking time set to 30 seconds. Each additional press increases the time with 30 seconds. You may also alter the time by turning the adjust knob to increase or decrease the time after the function has started.


MANUAL DEFROST

FOLLOW THE PROCEDURE for "cook & reheat with microwaves" and choose power level 160 W when defrosting manually.
CHECK AND INSPECT THE FOOD REGULARLY. Experience will give you the times needed for various amounts.
FROZEN FOOD IN PLASTIC BAGS, plastic films or cardboard packages can be placed directly in the oven as long as the package has no metal parts (e.g. metal twist ties).
THE SHAPE OF THE PACKAGE alters the defrosting time. Shallow packets defrost more quickly than a deep block.
SEPARATE PIECES as they begin to defrost. Individual slices defrost more easily.
SHIELD AREAS OF FOOD with small pieces of aluminum foil if they start to become warm (e.g. chicken legs and wing tips).

TURN LARGE JOINTS halfway through the defrosting process.
BOILED FOOD, STEWS AND MEAT SAUCES defrost better if stirred during defrosting time.
WHEN DEFROSTING it is better to under-thaw the food slightly and allow the process to finish during standing time.
STANDING TIME AFTER DEFROSTING ALWAYS IMPROVES
the result since the temperature will then be evenly distributed throughout the food.


JET DEFROST


USE THIS FUNCTION only if the net weight is between 100 g-3 Kg.
ALWAYS PLACE THE FOOD on the glass turntable.
①
6
③
1 TURN THE MULTIFUNCTION KNOB to the Auto position. 2 PRESS THE AUTO BUTTON to select the desired auto function. 3 TURN THE ADJUST KNOB to choose desired food class. 4 PRESS THE SELECT BUTTON (DEFAULT WEIGHT IS DISPLAYED). 5 TURN THE ADJUST KNOB to set the weight of the food. 6 PRESS THE START BUTTON.
MIDWAY THROUGH THE DEFROSTING PROCESS the oven stops and prompts you to TURN FOOD.
Open the door. Turn the food.
Close the door and restart by pressing the Start button.
Note: The oven continues automatically after 2 min. if the food hasn't been turned. The defrosting time will be longer in this case.
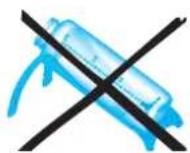

JET DEFROST

THIS FUNCTION NEEDS TO KNOW the net weight of the food.
FROZEN FOODS:
IF THE WEIGHT IS LESSER OR GREATER THAN RECOMMENDED WEIGHT: Follow the procedure for "Cook & Reheat with microwaves" and choose 160 W when defrosting.
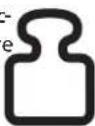
FROZEN FOODS:
IF THE FOOD IS WARMER than deep-freeze temperature (-18°C), choose lower weight of the food. IF THE FOOD IS COLDER than deep-freeze temperature (-18°C), choose higher weight of the food.

| FOOD AMOUNT HINTS | |||
 | 1 MEAT | 100g - 2Kg | Minced meat, cutlets, steaks or roasts. |
 | 2 POULTRY | 100g - 3Kg | Chicken whole, pieces or fillets. |
 | 3 FISH | 100g - 2Kg | Whole, steaks or fillets. |
 | 4 VEGETABLES | 100g - 2Kg Mixed vegetables, peas, broccoli etc. | |
 | 5 BREAD | 100g - 2Kg Loaf, buns or rolls. | |
| FOR FOOD NOT LISTED IN THIS TABLE and if the weight is lesser or greater than recommended weight,you should follow the procedure for “Cook and reheat with microwaves” and choose 160 W when defrosting. | |||

GRILL

USE THIS FUNCTION TO quickly give a pleasant brown surface to the food.
FOR FOOD LIKE CHEESE, TOAST, STEAKS AND SAUSAGES, place the wire grid on top of the baking plate.
1 TURN THE MULTIFUNCTION KNOB to the grill position.
2 TURN THE ADJUST KNOB to set the cooking time.
3 PRESS THE START BUTTON.
Do NOT LEAVE THE OVEN DOOR OPEN for long periods when the Grill is in operation, as this will cause a drop in temperature.
Ensure that the utensils used are heat resistant and ovenproof before grilling with them.
Do not use plastic utensils when grilling. They will melt. Items of wood or paper are not suitable either.


GRILL COMBI


Use this function to quickly give a pleasant brown surface to the food at the same time as the food is cooked by the microwaves.
1. Turn the multifunction knob to the Grill Combi position.
2. Turn the adjust knob to set the power level.
3. Press the select button to select cooking time.
4. Turn the adjust knob to set the cooking time.
5. Press the start button.

Ensure that the utensils used are heat resistant and ovenproof before grilling with them.
Do not use plastic utensils when grilling. They will melt. Items of wood or paper are not suitable either.
The maximum possible microwave power level when using the Grill is limited to a factory-preset level.
Use the wire rack to put food on to allow the air to circulate properly around the food.
Choosing power level
| GRILL COMBI | |
| POWER | SUGGESTED USE: |
| 650 W C | OOKING Vegetables & Gratins |
| 350 - 500 W C | OOKING Poultry & Lasagne |
| 160 - 350 W C | OOKING Fish & frozen gratins |
| 160 W C | OOKING Meat |
| 90 W G | RATINATING fruit |

Turbo Grill Combi


USE THIS FUNCTION TO COOK SUCH FOOD AS GRATINS, LASAGNE, POULTRY, AND BAKED POTATOES. PLACE FOOD ON THE WIRE RACK OR ON THE GLASS TURNTABLE WHEN COOKING WITH THIS FUNCTION.
1. TURN THE MULTIFUNCTION KNOB TO THE TURBO GRILL POSITION. 2. TURN THE ADJUST KNOB TO SET THE POWER LEVEL. 3. PRESS THE SELECT BUTTON TO SELECT COOKING TIME. 4. TURN THE ADJUST KNOB TO SET THE COOKING TIME. 5. PRESS THE START BUTTON.
THE MAXIMUM POSSIBLE MICROWAVE POWER LEVEL WHEN USING THE GRILL IS LIMITED TO A FACTORY-PRESET LEVEL.
CHOOSING POWER LEVEL
| TURBOGRILL COMBI | |
| POWER | SUGGESTED USE: |
| 650 W C | OOKING Vegetables & Gratins |
| 350 - 500 W | C OOKING Poultry & Lasagne |
| 160 - 350 W | C OOKING Fish & frozen gratins |
| 160 W C | OOKING Meat |
| 90 W G | RATINATING fruit |
| 0 W B | ROWNING only during cooking |


QUICK HEAT

USE THIS FUNCTION TO PREHEAT THE EMPTY OVEN. DO NOT PLACE FOOD BEFORE OR DURING PREHEATING IN THE OVEN. IT WILL BE BURNED FROM THE INTENSE HEAT.
1. TURN THE MULTIFUNCTION KNOB TO THE QUICK HEAT POSITION. 2. TURN THE ADJUST KNOB TO SET THE TEMPERATURE. 3. PRESS THE START BUTTON.
DURING THE HEATING PROCESS, THE DIGITS FLICKER AND "PRE-HEAT" IS DISPLAYED AT INTERVALS UNTIL THE SET TEMPERATURE IS REACHED.
ONCE THE HEATING PROCESS HAS BEEN STARTED, THE TEMPERATURE CAN EASILY BE ADJUSTED BY TURNING THE MULTIFUNCTION KNOB.
THE OVEN THEN KEEPS THE SET TEMPERATURE FOR 10 MINUTES BEFORE SWITCHING OFF. DURING THIS TIME, IT IS WAITING FOR YOU TO INSERT FOOD AND CHOOSE A FORCED AIR FUNCTION TO BEGIN COOKING.
PREHEATING IS ALWAYS DONE WITH THE OVEN EMPTY.


FORCED AIR


USE THIS FUNCTION to cook meringues, pastry, sponge cakes, soufflés, poultry and roast meats.
1 TURN THE MULTIFUNCTION KNOB to the Forced Air position. 2 TURN THE ADJUST KNOB to set the temperature. 3 PRESS THE SELECT BUTTON to select cooking time. 4 TURN THE ADJUST KNOB to set the cooking time. 5 PRESS THE START BUTTON.
THE DEFAULT SETTING when selecting Forced Air is 175°C
USE THE WIRE RACK to put food on to allow the air to circulate properly around the food.
USE THE BAKING PLATE when baking small items like cookies or rolls.
DURING THE HEATING PROCESS the digits flicker until the set temperature is reached.
ONCE THE HEATING PROCESS HAS BEEN STARTED THE TEMPERATURE CAN EASILY BE ADJUSTED BY TURNING THE ADJUST KNOB.


FORCED AIR COMBI


USE THIS FUNCTION to cook roast meats, poultry, and jacket potatoes, frozen convenience foods, sponge cakes, pastry, fish and puddings.
1 TURN THE MULTIFUNCTION KNOB to the Forced Air Combi position. 2 TURN THE ADJUST KNOB to set the temperature. 3 PRESS THE SELECT BUTTON to select microwave power. 4 TURN THE ADJUST KNOB to set the power level. 5 PRESS THE SELECT BUTTON to select cooking time. 6 TURN THE ADJUST KNOB to set the cooking time. 7 PRESS THE START BUTTON.
USE THE WIRE RACK to put food on to allow the air to circulate properly around the food.
DURING THE HEATING PROCESS the digits flicker until the set temperature is reached.
ONCE THE HEATING PROCESS HAS BEEN STARTED the temperature can easily be adjusted by turning the Adjust knob. Also the microwave power level is possible to change. The Max. possible microwave power level when using the Forced air is limited to a factory-preset level.
CHOOSING POWER LEVEL
| FORCED AIR COMBI | |
| POWER | SUGGESTED USE: |
| 350 W C | OOKING Poultry, Fish & Gratins |
| 160 W C | OOKING Roasts |
| 90 W B | AKING Bread & Cakes |


AUTO REHEAT


USE THIS FUNCTION when reheating ready-made food either frozen or chilled.
PLACE FOOD onto a microwave-safe heat proof dinner plate or dish.
1 TURN THE MULTIFUNCTION KNOB to the Auto position. 2 PRESS THE AUTO BUTTON to select the desired auto function. 3 PRESS THE START BUTTON.
MIDWAY THRU THE COOKING PROCESS the oven stops and prompts you to Stir Food.
Open the door. Stir or turn the food.
Close the door and restart by pressing the Start button.
NOTE: THE OVEN CONTINUES AUTOMATICALLY AFTER 2 MIN if the food hasn't been turned / stirred.

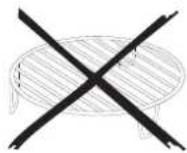

WHEN YOU ARE SAVING a meal in the refrigerator or "plating" a meal for reheating, arrange the

thicker, denser food to the outside of the plate and the thinner or less dense food in the middle.
1-2 MINUTES STANDING TIME ALWAYS IMPROVES the result, especially for frozen food.

PLACE THIN SLICES of meat on top of each other or interlace them.
THICKER SLICES such as meat loaf and sausages have to be placed close to each other.

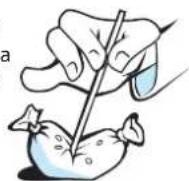
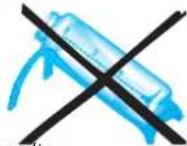
PLASTIC FOIL should be scored or pricked with a fork, to relieve the pressure and to prevent bursting, as steam builds-up during cooking.


AUTO REHEAT


| FOOD HINTS | ||
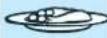 | 1DINNER PLATE (250g - 600g) | PREPARE FOOD in line with recommendations above. Heat under cover. |
 | 2SOUP (200g - 800g) | REHEAT UNCOVERED in separate bowls or in a large one. |
*** | 3FROZEN PORTION (250g - 600g) | FOLLOW THE DIRECTIONS ON PACKAGE, IE. ventilation, pricking and so on. |
 | 4MILK (100g - 500 g) | HEAT UNCOVERED and use a metal spoon in a mug or cup. |
 | 5CASSEROLE (200g - 800g) | REHEAT UNDER COVER. |
| FOR FOOD NOT LISTED IN THIS TABLE and if the weight is lesser or greater than recommended weight, you should follow the procedure for "Cook & Reheat with microwaves". | ||


AUTO COOK


USE THIS FUNCTION FOR COOKING ONLY. Auto Cook can only be used for food belonging to the categories listed in the table.
PLACE FOOD onto a microwave-safe heatproof dinner plate or dish.
1. TURN THE MULTIFUNCTION KNOB to the Auto position. 2. PRESS THE AUTO BUTTON to select the desired auto function. 3. TURN THE ADJUST KNOB to choose the desired food class. 4. PRESS THE SELECT BUTTON (default weight is displayed). 5. TURN THE ADJUST KNOB to set the weight of the food. 6. PRESS THE START BUTTON.


MIDWAY THROUGH THE COOKING PROCESS, the oven stops and prompts you to STIR FOOD or TURN FOOD.
Open the door. Stir or turn the food.
Close the door and restart by pressing the Start button.
NOTE: THE OVEN CONTINUES AUTOMATICALLY AFTER 2 MIN if the food hasn't been turned or stirred.
WHEN YOU ARE SAVING a meal in the refrigerator or "plating" a meal for reheating, arrange the

thicker, denser food to the outside of the plate and the thinner or less dense food in the middle.

ALWAYS USE A COVER with this function except when reheating chilled soups, in which case the cover is not needed! If the food is pack-
aged in such a way that it isn't possible to use a cover, the package should be cut with 2-3 scores to allow for excess pressure to escape during reheating.
PLACE THIN SLICES of meat on top of each other or interlace them.
THICKER SLICES such as meat loaf and sausages have to be placed close to each other.
1-2 MINUTES STANDING TIME ALWAYS IMPROVES the result, especially for frozen food.

PLASTIC FOIL should be scored or pricked with a fork, to relieve the pressure and to prevent bursting, as steam builds-up during cooking.
AUTO COOK

| FOOD AMOUNT | HINTS | ||
 | 1BAKED POTATOES | 200g - 1Kg | PRICK THE POTATOES and place them in a microwave safe and oven proof dish. Turn the potatoes when the oven beeps. Please be aware that the oven, dish and food are hot. |
 | 2FRESH VEGETABLES | 200g - 800g | CUT VEGETABLES into even size pieces. Add 2-4 table spoons water and cover. Stir when oven beeps. |
 | 3FROZEN VEGETABLES | 200g - 800g | COOK UNDER COVER. Stir when oven beeps. |
 | 4CANNED VEGETABLES | 200g - 600g | POUR AWAY most of the liquid and cook in a microwave safe dish with cover. |
 | 5POPCORN | 90g - 100g | ONLY COOK ONE BAG at the time. If more popcorn is needed, cook the bags one after another. |
| FOR FOOD NOT LISTED IN THIS TABLE and if the weight is lesser or greater than recommended weight, you should follow the procedure for "Cook & Reheat with microwaves". | |||


AUTO FORCED AIR COMBI


USE THIS FUNCTION for cooking from raw or frozen.
1 TURN THE MULTIFUNCTION KNOB to the Auto position. 2 PRESS THE AUTO BUTTON to select the desired auto function. 3 TURN THE ADJUST KNOB to choose desired food class. 4 PRESS THE SELECT BUTTON (DEFAULT WEIGHT IS DISPLAYED). 5 TURN THE ADJUST KNOB to set the weight of the food. 6 PRESS THE START BUTTON.

FOR CHICKEN AND LASAGNE; ensure that the dish you use, is oven proof and allow microwaves to pass through it before cooking. Else, you may obtain a poor end result.
ALWAYS USE the baking plate when making cookies and canned or frozen rolls.
GREASE THE BAKING PLATE lightly or cover it with baking paper.

DURING USE OF THE PROGRAMS for cookies and canned or frozen rolls the oven needs to pre-heat before you can put food in it. When the correct temperature is reached, the oven will prompt you to put the
food in.
\~:Open the door.
Place the baking plate with food on the guides situated on the cavity walls. Close the door and restart by pressing the Start button.


AUTO FORCED AIR COMBI


| RECOMMENDED WEIGHTS | ||
 | 1 CHICKEN (800G - 1 1/2 Kg) | SPRINKLE THE CHICKEN with salt and spices. Brush with oil if needed. Place on an oven-proof and microwave safe dish. Place the dish on the wire rack. |
 | 2 FROZEN LASAGNE (400G - 1Kg) | PLACE IN an ovenproof and microwave safe dish. Place the dish on the wire rack. |
 | 3 COOKIES (9-12 pieces) | PLACE ON the lightely greased baking plate. Put the plate in the oven when it prompts you to "Add Food". |
 | 4 CANNED BREAD DOUGH | TO BE USED FOR items like croissants and rolls. Place the unbaked bread on the baking plate. Put the plate in the oven when it prompts you to "Add Food". |
 | 5 FROZEN ROLLS | TO BE USED FOR ready baked frozen rolls. Place the rolls on the baking plate. Put the plate in the oven when it prompts you to "Add Food". |
| FOR FOOD NOT LISTED IN THIS TABLE and if the weight is lesser or greater than recommended weight, you should follow the procedure for "Forced air or Forced Air Combi" | ||
MAINTENANCE & CLEANING
CLEANING IS THE ONLY MAINTENANCE normally required.
FAILURE TO MAINTAIN THE OVEN in a clean condition could lead to deterioration of the surface that could adversely affect the life of the appliance and possibly result in a hazardous situation.

DO NOT USE METAL SCOURING PADS, ABRASIVE
CLEANSERS, steel-wool pads, grit-
ty washcloths, etc. which can damage the control panel, and the interior and exterior oven surfac-

es. Use a sponge with a mild detergent or a paper towel with spray glass cleaner. Apply spray glass cleaner to a paper towel.
Do not spray directly on the oven.
At REGULAR INTERVALS, especially if spill overs have occurred, remove the turntable, the turntable support and wipe the base of the oven clean.
THIS OVEN IS DESIGNED to operate with the turntable in place.

Do not operate the microwave oven when the turntable has been removed for cleaning.
USE A MILD DETERGENT, water and a soft cloth to clean the interior surfaces, front and rear of the door and the door opening.

Do NOT ALLOW GREASE or food particles to build up around the door.
FOR STUBBORN STAINS, boil a cup of water in the oven for 2 or 3 minutes. Steam will soften the marks.
Adding some lemon juice to a cup of water, placing this on the turntable and boiling for a few minutes can eliminate odors inside the oven.

Do not use steam cleaning appliances when cleaning your microwave oven.
The grill element does not need cleaning since the intense heat will burn off any splashes, but the ceiling above it may need regular cleaning. This should be done with warm water, detergent, and a sponge. If the grill is not used regularly, it should be run for 10 minutes a month
to burn off any splashes in order to reduce the risk of fire.
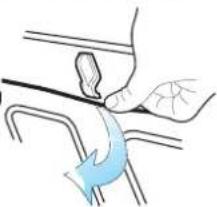
Push the fastening thread gently towards the back of the ceiling and then lower it to release the grill element.
Return the fastening thread to its original position after cleaning.

DISHWASHER SAFE:
TURNTABLE SUPPORT.
GLASS TURNTABLE.
WIRE RACK.
BAKING PLATE.
BABY BOTTLE HOLDER.



TROUBLESHOOTING GUIDE.
IF THE OVEN DOES NOT WORK, do not make a service call until you have made the following checks:
The turntable and turntable support are in place. The plug is properly inserted in the wall socket. The door is properly closed. Check your fuses and ensure that there is power available. Check that the oven has ample ventilation. Wait for 10 minutes, then try to operate the oven once more. Open and then close the door before you try again.
THIS IS TO AVOID UNNECESSARY CALLS FOR WHICH YOU WILL BE CHARGED.
When calling for service, please give the serial number and type number of the oven (see service label). Consult your warranty booklet for further advice.

IF THE MAINS CORD NEEDS REPLACING it should
be replaced by the original mains cord, which is available via our service organization. The mains cord may only be replaced by a trained service technician.


SERVICE ONLY TO BE CARRIED OUT
BY A TRAINED SERVICE TECHNICIAN.
It is hazardous for anyone other than a trained person to carry out any service or repair operation, which involves the removal of any cover, which gives protection against exposure to microwave energy.
Do not remove any cover.
ENVIRONMENTAL HINTS
THE PACKING BOX may be fully recycled as confirmed by the recycling symbol. Follow local disposal regulations. Keep potentially hazardous packaging (plastic bags, polystyrene etc.) out of the reach of children.
THIS APPLIANCE is marked according to the European directive 2002/96/EC on Waste Electrical and Electronic Equipment (WEEE). By ensuring this product is disposed of correctly, you will help prevent potential negative consequences for the environment and human health, which could otherwise be caused by inappropriate waste handling of this product.

THE SYMBOL on the product, or on the docu-
ments accompanying the product, indicates that this appliance may not be treated as household waste. Instead it shall be handed over to the applicable collection point for the recycling of electrical and electronic equipment.
DISPOSAL must be carried
out in accordance with local environmental regulations for waste disposal.


FOR MORE DETAILED INFORMATION about treatment, recovery and recycling of this product, please contact your local city office, your household waste disposal service or the shop where you purchased the product.
BEFORE SCRAPPING, cut off the mains cord so that the appliance cannot be connected to the mains.
IN ACCORDANCE WITH IEC 60705.
THE INTERNATIONAL ELECTROTECHNICAL COMMISSION has developed a standard for comparative testing of heating performance of different microwave ovens. We recommend the following for this oven:
| Test A | Amount Approx. time Power level Container | |||
| 12.3.1 | 1000 g 11 min 750 W Pyrex 3.227 | |||
| 12.3.2 | 475 g 5 min 750 W Pyrex 3.827 | |||
| 12.3.3 | 900 g 15 min 750 W Pyrex 3.838 | |||
| 12.3.4 | 1100 g 28-30 min Forced air 200 °C + 350 W Pyrex 3.827 | |||
| 12.3.5 | 700 g 25 min Forced air 200 °C + 90 W Pyrex 3.827 | |||
| 12.3.6 | 1000 g 30-32 min Forced air 225 °C + 350 W Pyrex 3.827 | |||
| 13.3 | 500 g | 2 min 12 sec | Jet defrost | |
TECHNICAL SPECIFICATION
| SUPPLY VOLTAGE | 230 V/50 Hz |
| RATED POWER INPUT | 2800 W |
| FUSE | 16 A (UK 13 A) |
| MW OUTPUT POWER | 900 W |
| OUTER DIMENSIONS (HxWxD) | 455 x 595 x 560 |
| INNER DIMENSIONS (HxWxD) | 210 x 450 x 420 |


- IMPORTANT SAFETY INSTRUCTIONS
- READ CAREFULLY AND KEEP FOR FUTURE REFERENCE
- EGGS
- PRECAUTIONS
- GENERAL
- DEEP-FRYING
- LIQUIDS
- CAREFUL
- PUSH - PUSH KNOBS
- ACCESSORIES
- THIS IS ESPECIALLY IMPORTANT WITH ACCESSORIES MADE OF METAL OR METAL PARTS
- TURNTABLE SUPPORT
- GLASS TURNTABLE
- BAKING PLATE
- WIRE RACK
- BABY BOTTLE HOLDER
- START PROTECTION / CHILD LOCK
- THIS AUTOMATIC SAFETY FUNCTION IS ACTIVATED ONE
- PAUSE OR STOP COOKING
- TO PAUSE COOKING
- TO CONTINUE COOKING
- DONENESS
- DONENESS IS AVAILABLE IN THE FOLLOWING FUNCTIONS
- AUTO REHEAT
- AUTO COOK
- AUTO FORCED AIR COMBI
- NOTE
- COOLING DOWN
- KITCHEN TIMER
- CLOCK
- COOK & REHEAT WITH MICROWAVES
- ONCE THE COOKING PROCESS HAS BEEN STARTED
- JET START
- MANUAL DEFROST
- JET DEFROST
- GRILL COMBI
- TURBO GRILL COMBI
- FORCED AIR
- FORCED AIR COMBI
- MAINTENANCE & CLEANING
- TROUBLESHOOTING GUIDE
- ENVIRONMENTAL HINTS
- IN ACCORDANCE WITH IEC
Brand : IKEA
Model : NUTID MCW6
Category : Oven