
MBP43-2 - Baby monitor MOTOROLA - Free user manual and instructions
Find the device manual for free MBP43-2 MOTOROLA in PDF.


| Product Type | Video Baby Monitor |
| Brand | Motorola |
| Model | MBP43-2 |
| Display | 2.8-inch color LCD screen (parent unit) |
| Video Resolution | 640x480 pixels |
| Night Vision | Infrared LEDs, automatic activation |
| Audio | Two-way talk with noise reduction |
| Range | Up to 900 feet (outdoors), up to 150 feet (indoors) |
| Frequency | 2.4 GHz FHSS |
| Temperature Sensor | Yes, displays room temperature on parent unit |
| Lullabies | 5 built-in lullabies |
| Power Source (Parent Unit) | AC adapter (100-240V) or rechargeable NiMH battery |
| Power Source (Camera) | AC adapter (100-240V) |
| Dimensions (Parent Unit) | 7.5 x 4.5 x 2.2 inches |
| Dimensions (Camera) | 4.5 x 3.5 x 3.0 inches |
| Weight (Parent Unit) | 0.5 lbs |
| Weight (Camera) | 0.4 lbs |
| Mounting Options | Tabletop or wall-mountable (bracket included) |
| Battery Life (Parent Unit) | Up to 10 hours (continuous use, backlight off) |
| Certifications | FCC, IC |
| What's in the Box | 1 parent unit, 1 camera, 2 AC adapters, 1 wall mount bracket, screws, user manual |
| Cleaning | Wipe with a dry, soft cloth. Do not use harsh chemicals. |
| Repair & Spare Parts | Contact Motorola support; spare parts available through authorized dealers |
Frequently Asked Questions - MBP43-2 MOTOROLA
User questions about MBP43-2 MOTOROLA
0 question about this device. Answer the ones you know or ask your own.
Ask a new question about this device
Download the instructions for your Baby monitor in PDF format for free! Find your manual MBP43-2 - MOTOROLA and take your electronic device back in hand. On this page are published all the documents necessary for the use of your device. MBP43-2 by MOTOROLA.
USER MANUAL MBP43-2 MOTOROLA
natural_image
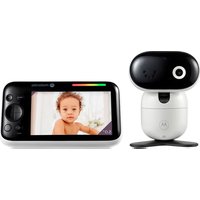
Front view of a white motorola with circular head and control buttons (no visible text or symbols on the device body)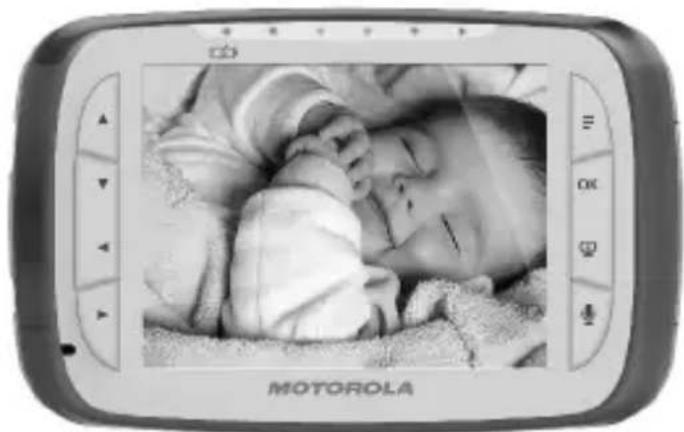
natural_image
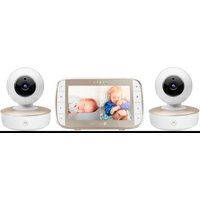
Black-and-white photo of a newborn baby on a blanket displayed in a motorola smartphone (no visible text or symbols on the device screen)
MOTOROLA
USER'S GUIDE
MBP43, MBP43/2, MBP43/3, MBP43/4
BABY MONITOR
USER'S GUIDE
The features described in user's guide are subject to modifications without prior notice.
Welcome...
to your new Motorola Baby Monitor!
Thank you for purchasing the MBP43, MBP43/2, MBP43/3, MBP43/4. Now you can see and hear your baby sleeping in another room or. you can monitor your older children in their playroom.
Please retain your original dated sales receipt for your records. For warranty service of your Motorola product, you will need to provide a copy of your dated sales receipt to confirm warranty status.
Registration is not required for warranty coverage.
For product related questions, please call:
US and Canada 1-888-331-3383
On the Web: www.motorola.com
This User's Guide provides you with all the information you need to get the most from your product.
Before you can use the baby monitor, we recommend you insert and fully charge the battery in the parent unit, so that it continues to work if you disconnect it from the power supply to carry it to another location. Please read the Safety Instructions on page 6 before you install the units.
Got everything?
- Parent unit
- Camera unit(s)
• Rechargeable Ni-MH battery pack
• Power adapter for the Parent unit
• Power adapter(s) for the Camera unit
In multi-camera packs, you will find one or more additional camera units with power adapter units.
Overview of the Parent Unit

- Display (LCD screen)
- Up Key ▲ Normal Mode: Tilt Up Menu Mode: Scroll
- Down Key ▼ Normal Mode: Tilt Down Menu Mode: Scroll
- Left Key ▲ Normal Mode: Pan Left Menu Mode: Left
- Right Key ▶ Normal Mode: Pan Right Menu Mode: Right
- Menu Key ≡ Press to open the Menu options
- OK Key OK
- Video ON/OFF Key 📋 In monitor mode, press to turn OFF the LCD display Press again to turn ON the LCD display
-
Talk Key Press and hold to speak to your baby
-
Power indicator BLUE when mains adapter power on. RED when battery low.
- Unit ON/OFF LED (Green)
- Audio Level LED (Green, Orange, Red, Red)
- Microphone
- Power Key ⏻ Press and Hold to turn the unit ON/OFF
- Antenna Lift the antenna for optimal reception
- Battery cover
- Stand
- Speaker
- Power Adapter Socket
Parent unit menu icons
| Signal Level (5 Levels) | |
| Night Vision Mode (Screen changes to Black/White) | |
| Talk Mod e | |
| Battery Level Control (4 Levels) | |
| Pan Left | |
| Pan Right | |
| Tilt Up | |
| Tilt Down |
Parent unit menu icons (cont'd)
| Volume Level Control (8 Levels) | |
 | Brightness Level Control (8 Levels) |
 | Lullaby Control (5 Song Selections) |
 | Zoom Level Control (1X, 2X) |
 | Alarm Setting (6h, 4h, 2h, OFF) |
 | Cam Control (scan, view, add, del) |
| Temperature Reading (HH °C / °F or LL °C / °F)Icon & readings turn RED > 29°C / 84°F, and reading display HH °C / °F > 36°C / 97 °F)Icon & readings turn RED < 14°C / 57°F, and reading display LL °C / °F < 1°C / 34 °F) |
| Temperature Reading (HH °C / °F or LL °C / °F) | |
| Icon & readings turn RED > 29°C / 84°F, and reading display HH °C / °F > 36°C / 97 °F) | |
| Icon & readings turn RED < 14°C / 57°F, and reading display LL °C / °F < 1°C / 34 °F) |
Overview of Your Baby Unit

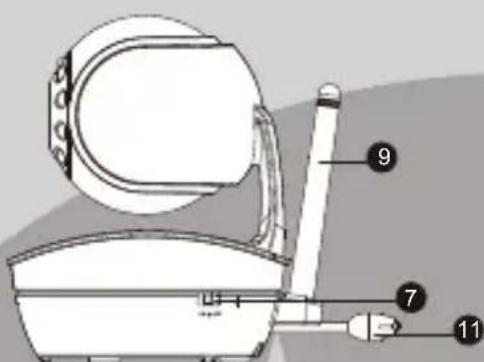
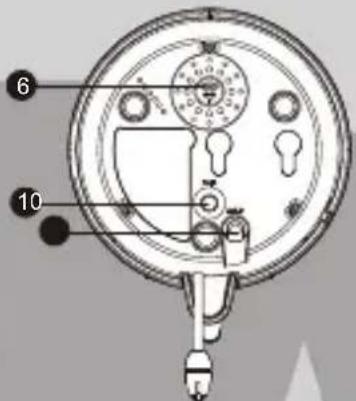
- Photo Sensor (Night Vision Mode)
- Camera Lens
- Infrared LEDs
- Power LED
-
Microphone
-
Speaker
- ON/OFF Switch
- Power Adapter Socket
- Antenna
- Pair Key
- Temperature Sensor
Important guidelines for installing your Baby Monitor
- To use your Video Monitor Baby and Parent Unit together, you must be able to establish a radio link between them, and the range will be affected by environmental conditions.
- Any large metal object, like a refrigerator, a mirror, a filing cabinet, metallic doors or reinforced concrete between the Baby and Parent Unit may block the radio signal.
- The signal strength may also be reduced by other solid structures, like walls, or by radio or electrical equipment, such as TVs, computers, cordless or mobile phones, fluorescent lights or dimmer switches.
- Use of other 2.4GHz products, such as wireless networks (Wi-Fi® routers), Bluetooth® systems, or microwave ovens, may cause interference with this product, so keep the baby monitor away at least 5ft (1.5m) from these types of products, or turn them off if they appear to be causing interference.
- If the signal is weak, try moving the Parent and/or the Baby Unit to different positions in the rooms.
Table of contents
- Safety Instructions .... 6
- Getting Started 8
2.1 Baby Unit Power Supply....8
2.2 Parent Unit Battery Installation 8
2.3 Parent Unit Power Supply 9
2.4 Registration (Pairing)....10
- Using the Baby Monitor 11
3.1 Setting up ....11
3.2 Pan and Tilt 11
3.3 Night Vision Mode 11
3.4 Talk Mode....11
3.5 Video ON/OFF....11
3.6 Temperature Display (HH °C / °F or LL °C / °F)....12
- Parent Unit Menu☐2 SWLRQV 13
4.1 Volume 13
4.2 Brightness....13
4.3 Lullaby 13
4.4 Zoom 13
4.5 Alarm....14
4.6 Camera Control 14
4.6.1 Add (pair) a camera 14
4.6.2 View a camera 14
4.6.3 Delete a camera 15
4.6.4 Scan the cameras 15
4.7 Temperature....15
- Disposal of The Device (environment) 16
- Cleaning 17
- Help....18
- General Information ...... 20
1. Safety Instructions

WARNING:
STRANGULATION HAZARD - Keep the unit and adapter cord more than 3 feet from the crib out of the baby's reach. NEVER place camera or cords within the crib. Secure the cord more than 3 feet away from the baby's reach. Never use extension cords with AC Adapters. Only use the AC Adapters provided.
CAMERA SET UP & USE:
●Determine a location for the CAMERA that will provide the best view of your baby in his crib.
●Place the CAMERA on a flat surface, such as a dresser, bureau, or shelf.
●NEVER place camera or cords within the crib.
WARNING
This baby monitor is compliant with all relevant standards regarding electromagnetic fields and is, when handled as described in the User's Guide, safe to use. Therefore, always read the instructions in this User's Guide carefully before using the device.
- Adult assembly is required. Keep small parts away from children when assembling.
• This product is not a toy. Do not allow children to play with it. - This baby monitor is not a substitute for responsible adult supervision.
- Keep this user's guide for future reference.
- Do not place the baby unit or cords in the crib or within reach of the baby (the unit should be no feet away).
- Keep the cords out of reach of children.
-
Do not cover the baby monitor with a towel or blanket.
-
Never use extension cords with power adapters. Only use the power adapters provided.
- Test this monitor and all its functions so that you are familiar with it prior to actual use.
- Do not use the baby monitor near water.
- Do not install the baby monitor near a heat source.
- Only use the chargers and power adapters provided. Do not use other chargers or power adapters as this may damage the device and battery pack.
- Only insert a battery pack of the same type.
- Do not touch the plug contacts with sharp or metal objects.
CAUTION
Risk of explosion if battery is replaced by an incorrect type.
Dispose of used batteries according to the instructions.
2. Getting Started
2.1 Baby Unit Power Supply

natural_image
Line drawing of a portable electronic device connected to a cable and a mounted device (no text or symbols visible)- Connect the small plug of the power adapter to the baby unit and the other end to the electrical outlet.
NOTE
Only use the enclosed power adapter (5.9V DC / 1000mA).
-
Slide the ON/OFF switch to the ON position. The power LED will light up in green.
-
Slide the ON/OFF switch to the OFF position to turn the Baby Unit off.
2.2 Parent Unit Battery Installation

- Insert the wire tab of the rechargeable battery pack into the contact slot as shown above and fit the battery pack into the compartment.
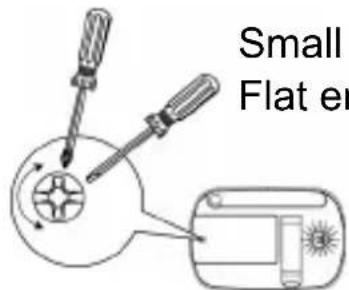
- Replace the battery cover over the compartment and gently tighten the screw in a clockwise direction using a Small cross head or Flat end screw drivers.
2.3 Parent Unit Power Supply

natural_image
Diagram of a wall-mounted device connected to a cable, showing wiring and components (no text or symbols)IMPORTANT
Installing the rechargeable battery pack and charging it fully before use is recommended. This will allow the unit to operate on battery in the event of a power failure.
-
Connect the small plug of the power adapter to the parent unit and the other end to the electrical outlet. Only use the enclosed power adapter (6V DC/500mA).
-
Press and hold the ⏻ POWER ON/OFF button for 1 second to turn ON the parent unit.
-
Once the baby and parent units are switched on, the display on the parent unit will show the video captured by the baby unit.
-
If there is no connection or you are out of range, the video display will go off and the words No Signal will be shown on the LCD display, and the unit will beep every 5 seconds. Move the parent unit closer to the baby unit until the link is re-established.
-
Press and hold the ⏻ POWER ON/OFF button, until the progress bar finishes scrolling, to turn OFF the parent unit.
NOTE
The battery icon turns RED to indicate that the battery is low, and it gives a beep every 16 seconds. The battery needs to be recharged. The battery pack takes about 16 hours to charge fully.
When charging
-
If the parent unit is turned OFF, when the adapter is plugged in, a mains plug logo will display briefly, followed by a large battery icon with internal segments cycling for 45 seconds. The Blue LED in the top left corner lights up to indicate the adapter is plugged in.
-
If the parent unit is turned ON, when the adapter is plugged in, the battery icon in the screen's top right corner will show that the battery is charging by cycling the internal segments, The Blue LED in the top left corner lights up to indicate the adapter is plugged in.
2.4 Registration (Pairing)
The Baby monitor is pre-registered to your Parent Unit. You do not need to register it again unless the Baby Unit loses its link with the Parent Unit.
To re-register your Baby Unit, or register a new Baby Unit, follow the procedure below:
-
Press the menu button of the parent unit and the menu bar will pop up.
-
Press the ◀ LEFT button or ▶ RIGHT button until Ⓞ is highlighted, and the del/add/view/scan menu will pop up.
-
Press the ▲ UP button or ▼ DOWN button to select ADD, and press the OK button to confirm.
-
CAM 1 / CAM 2 / CAM 3 / CAM 4 will pop up, press the ▲ UP button or ▼ DOWN button to select the desired CAM and press the OK button to start searching for a camera unit. The green audio level LED will flash rapidly while searching.
-
Press and hold the PAIR button underneath the baby unit until the parent unit finds the camera, beeps and the video from the camera appears.
NOTE
If a particular Baby Unit was registered previously, registering this current Baby Unit again will overwrite the old registration.
3. Using the Baby Monitor
3.1 Setting up
- Place the baby unit in a convenient location (e.g. on a table) and point the camera lens towards the area you want to monitor.
- Adjust the baby unit's head angle by using the parent unit to pan and tilt the camera up, down, left and right until you are satisfied with the image in the parent unit.
NOTE
Do not place the baby unit within the baby's reach! If there is interference with the picture or sound, try moving the units to different locations, and ensure they are not close to other electrical equipment.
3.2 Pan and Tilt
The camera can be remotely controlled from the parent unit when in normal video mode.
- Press the ▲ UP button or ▼ DOWN button to tilt upward or downward.
- Press the ◀ LEFT button or ▶ RIGHT button to pan left or right.
3.3 Night Vision Mode
The baby unit has 8 high-intensity infrared LEDs for picking up clear images in the dark. When the built-in photo sensor detects a low level of ambient light, the LEDs will automatically activate and the screen on the parent unit will display in black and white. The icon will be displayed on the screen.
3.4 Talk Mode
Press and hold the 🔔 TALK button on the parent unit to talk to your baby through the baby unit's loudspeaker. The 🔔 icon will be displayed at the top of the LCD screen.
3.5 Video ON/OFF
Press the ➕ VIDEO ON/OFF key to turn the LCD display on or off, but still leave the audio monitor on.
3.6 Temperature Display (HH °C / °F or LL °C / °F)
The temperature reading from the temperature sensor at the back of the Baby Unit will be displayed at the top of the LCD screen. The readings will turn RED if the temperature goes above 29^ C / 84^ F or below 14^ C / 57^ F. The reading will change to HH ^ C / ^ F if the temperature goes above 36^ C / 97^ F. The reading will change to LL ^ C / ^ F if the temperature goes below 1^ C / 34^ F.
4.□3 DUHQW□8 QLW□0 HQX□2 SWLRQV
4.1 Volume
- Press the ≡ Menu button and the menu bar will pop up.
- If necessary, press the ◀ LEFT button or ▶ RIGHT button until ◀» is highlighted.
- Press the ▲ UP button or ▼ DOWN button to select the desired volume level from level 1 \~ 8. (The default volume level setting is level 4.)
4.2 Brightness
- Press the ≡ Menu button and the menu bar will pop up.
- Press the ◀ LEFT button or ▶ RIGHT button until ✿ is highlighted.
- Press the ▲ UP button or ▼ DOWN button to select the desired brightness level from level 1 \~ 8. (The default brightness level setting is level 4.)
4.3 Lullaby
- Press the ≡ Menu button and the menu bar will pop up.
- Press the ◀ LEFT button or ▶ RIGHT button until ♪ is highlighted.
-
Press the ▲ UP button or ▼ DOWN button to select the desired song from the 5 lullabies available, or the cycle option to play all 5 songs in turn. If an individual song is selected it will play repeatedly. (The default setting is lullaby OFF)
-
Press MENU to return to the normal camera view with the lullaby playing or off, as selected.
NOTE
,WKH7\$/. EXWWRQLVSUHVVHG□DQ\□OXOODE\□ZLQQVVRS□SOD\LQJ□DXWRP DWLFD001
4.4 Zoom
- Press the ≡ Menu button and the menu bar will pop up.
- Press the ◀ LEFT button or ▶ RIGHT button until ⊕ is highlighted.
- Press the ▲ UP button or ▼ DOWN button to select the 1X or 2X Zoom. (The default setting is 1X.)
4.5 Alarm
- Press the ≡ Menu button and the menu bar will pop up.
- Press the ◀ LEFT button or ▶ RIGHT button until 🔔 is highlighted.
- Press the ▲ UP button or ▼ DOWN button to select the alarm time (6h, 4h, 2h). (The default setting is Alarm OFF.)
If an alarm is set, the parent unit will beep for about 45 seconds after every 6, 4 or 2 hour period, and the alarm icon will flash red.
4.6 Camera Control
4.6.1 Add (pair) a camera
- Press the ≡ Menu button and the menu bar will pop up.
- Press the ◀ LEFT button or ▶ RIGHT button until Ⓧ is highlighted, and the del/add/view/scan menu will pop up.
- Press the ▲ UP button or ▼ DOWN button to select ADD, and press the OK button to confirm.
- CAM 1 / CAM 2 / CAM 3 / CAM 4 will pop up, press the ▲ UP button or ▼ DOWN button to select the desired CAM, and press the OK button to start searching for a camera unit. The green audio level LED will flash rapidly while searching.
- Press and hold the PAIR button under the baby unit until the parent unit finds the camera, beeps and the camera picture appears.
NOTE
A camera can only be registered to one parent unit at a time.
4.6.2 View a camera
- Press the ≡ Menu button and the menu bar will pop up.
- Press the ◀ LEFT button or ▶ RIGHT button until Ⓧ is highlighted and the del/add/view/scan menu pops up.
- Press the ▲ UP button or ▼ DOWN button to select VIEW, and press the OK button to confirm.
- CAM 1 / CAM 2 / CAM 3 / CAM 4 will pop up, press the ▲ UP button or ▼ DOWN button to select desired CAM, and press the OK button to view the picture from that camera.
TIP
Press OK repeatedly for a quick way to View cameras without the menu.
4.6.3 Delete a camera
- Press the ≡ Menu button and the menu bar will pop up.
- Press the ◀ LEFT button or ▶ RIGHT button until Ⓞ is highlighted, and the del/add/view/scan menu will pop up.
- Press the ▲ UP button or ▼ DOWN button to select DEL, and press the OK button to confirm.
- CAM 1/CAM 2/CAM 3/CAM 4 will pop up, press the ▲ UP button or ▼ DOWN button to select the desired CAM, and press the OK button to select.
- Press the ▲ UP button or ▼ DOWN button to select ×, and press the OK button to delete that registration.
4.6.4 Scan the cameras
- Press the ≡ Menu button and the menu bar will pop up.
- Press the ◀ LEFT button or ▶ RIGHT button until Ⓧ is highlighted, and the del/add/view/scan menu will pop up.
- Press the ▲ UP button or ▼ DOWN button to select SCAN, and press the OK button to confirm.
- The screen will then display images from each registered camera in a loop, changing about every 12 seconds.
TIP
Press OK repeatedly for a quick way to go to 6FDQ□P RGH without XVLOJ□ the menu.
NOTE
, WKH SDUHQW XQLW L V LQ VFDQ P RGH DQG RQH RI WKH UHJL VWHUHG FDP HUDV LV WXUQHG RI RU RX M RI UDQJH WK H VFDQ Z LOO VWS D W WKH PLVVLQJ FDP HUD GLVS D I QR VLJQD FKHFN RU GH FDP FDP HUD D L V PLVVLQJ DQG HP LW D Z DUQLQJ E HHS HYHU VHFRQGV
WARNING
&KHFN□WKH□FDP HUD□DQG□FRUUHFM□WKH□IDXOW□LP P HGLDWH0\ □LI□\ RX□DUH□XVLQJ□WKDW□FDP HUD□WR□PRQLWRU□\ RXU□EDE\ □□□ ,□ RX□ZDQW□WR□FRQWLQXH□LQ□FDP HUD□VFDQ□PRGH□ZLWKRXW□WKDM□FDP HUD□GH0HNH□WKH□FDP HUD□VHH□□□□□□□' HOHNH□D□FDP HUD□DQG□VWDUM□WKH□VFDQ□DJDLQ□
4.7 Temperature
- Press the ≡ Menu button and the menu bar will pop up.
- Press the ◀ LEFT button or ▶ RIGHT button until ↓ is highlighted.
- Press the ▲ UP button or ▼ DOWN button to select °C or °F.
5. Disposal of The Device (environment)
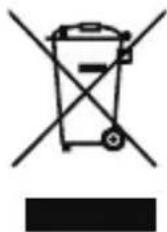
At the end of the product lifecycle, you should not dispose of this product with normal household waste. Take this product to a collection point for the recycling of electrical and electronic equipment. The symbol on the product, user's guide and/or box indicates this.
Some of the product materials can be reused if you take
them to a recycling point. By reusing some parts or raw materials from used products you make an important contribution to the protection of the environment.
Please contact your local authorities in case you need more information on the collection points in your area.
Dispose of the battery pack in an environmentally-friendly manner according to your local regulations.
6. Cleaning
Clean the MBP43, MBP43/2, MBP43/3, MBP43/4 with a slightly damp cloth or with an anti-static cloth. Never use cleaning agents or abrasive solvents.
Cleaning and care
- Do not clean any part of the product with thinners or other solvents and chemicals -- this may cause permanent damage to the product which is not covered by the warranty.
- Keep your MBP43, MBP43/2, MBP43/3, MBP43/4 away from hot, humid areas or strong sunlight, and don't let it get wet.
- Every effort has been made to ensure high standards of reliability for your MBP43, MBP43/2, MBP43/3, MBP43/4. However, if something does go wrong, please do not try to repair it yourself -- contact Customer Service for assistance.
7. Help
Display
No display
- Try recharging or replacing the battery pack.
- Reset the units. Disconnect the battery pack of the parent unit and unplug both the units' electrical power, then plug them back in.
• Is the unit turned on?
Press and hold the ON/OFF key ⏻ on the parent unit to turn it ON.
• Is the correct camera selected?
Change the camera number, if necessary.
• Is the video display turned on?
Press the VIDEO ON/OFF key 🔒 to turn it on.
- When operating using batteries only, the Display will go blank after 2 minutes to save power. The unit is still active and will give you audio alerts. You can reactivate the screen by pressing any key.
Registration
If the Baby Unit has lost its link with the Parent Unit
- Try recharging or replacing the battery pack.
- If the Baby Unit is too far away it may be going out of range, so move the Baby Unit closer to the Parent Unit.
- Reset the units by disconnecting them from the battery and electrical power. Wait about 15 seconds before reconnecting. Allow up to one minute for the Baby Unit and the Parent Unit to synchronize.
• See 2.4 Registration (Pairing), if there is a need to re-register the units.
Interference
Noise interference on your parent unit
- Your baby and parent units may be too close. Move them farther apart.
- Make sure there is at least 3 to 6 feet between the 2 units to avoid audio feedback.
- If the baby unit is too far away it may be out of range, so move the baby unit closer to the parent unit.
- Make sure the baby and parent units are not near other electrical equipment, such as a television, computer or cordless/mobile telephone.
- Use of other 2.4GHz products, such as wireless networks (Wi-Fi ^ routers), Bluetooth ^ systems, or microwave ovens, may cause interference with this product, so keep the baby monitor away at least 5ft (1.5m) from these types of products, or turn them off if they appear to be causing interference.
- If the signal is weak, try moving the Parent and/or Baby Unit to different positions in the rooms.
8. General Information
If your product is not working properly....
-
Read this User's Guide or the Quick Start Guide.
-
Visit our website: www.motorola.com
-
Contact Customer Service: US and Canada 1-888-331-3383
To order a replacement battery pack, contact customer service or visit our website.
Consumer Products and Accessories Limited Warranty ("Warranty")
Thank you for purchasing this Motorola branded product manufactured under license by Binatone Electronics International LTD ("BINATONE").
What Does this Warranty Cover?
Subject to the exclusions contained below, BINATONE warrants that this Motorola branded product ("Product") or certified accessory ("Accessory") sold for use with this product that it manufactured to be free from defects in materials and workmanship under normal consumer usage for the period outlined below. This Warranty is your exclusive warranty and is not transferable.
Who is covered?
This Warranty extends only to the first consumer purchaser, and is not transferable.
What will BINATONE do?
BINATONE or its authorized distributor at its option and within a commercially reasonable time, will at no charge repair or replace any
Products or Accessories that do not conform to this Warranty. We may use functionally equivalent reconditioned/ refurbished/ pre-owned or new Products, Accessories or parts.
What Other Limitations Are There?
ANY IMPLIED WARRANTIES, INCLUDING WITHOUT LIMITATION THE IMPLIED WARRANTIES OF MERCHANTABILITY AND FITNESS FOR A PARTICULAR PURPOSE, SHALL BE LIMITED TO THE DURATION OF THIS LIMITED WARRANTY, OTHERWISE THE REPAIR OR REPLACEMENT PROVIDED UNDER THIS EXPRESS LIMITED WARRANTY IS THE EXCLUSIVE REMEDY OF THE CONSUMER, AND IS PROVIDED IN LIEU OF ALL OTHER WARRANTIES, EXPRESS OR IMPLIED. IN NO EVENT SHALL MOTOROLA OR BINATONE BE LIABLE, WHETHER IN CONTRACT OR TORT (INCLUDING NEGLIGENCE) FOR DAMAGES IN EXCESS OF THE PURCHASE PRICE OF THE PRODUCT OR ACCESSORY, OR FOR ANY INDIRECT, INCIDENTAL, SPECIAL OR CONSEQUENTIAL DAMAGES OF ANY KIND, OR LOSS OF REVENUE OR PROFITS, LOSS OF BUSINESS, LOSS OF INFORMATION OR OTHER FINANCIAL LOSS ARISING OUT OF OR IN CONNECTION WITH THE ABILITY OR INABILITY TO USE THE PRODUCTS OR ACCESSORIES TO THE FULL EXTENT. THESE DAMAGES MAY BE DISCLAIMED BY LAW.
Some jurisdictions do not allow the limitation or exclusion of incidental or consequential damages, or limitation on the length of an implied warranty, so the above limitations or exclusions may not apply to you. This Warranty gives you specific legal rights, and you may also have other rights that vary from one jurisdiction to another.
| Products Covered Length of Coverage | |
| Consumer Products One (1) year | from the date of the products original purchase by the first consumer purchaser of the product. |
| Consumer Accessories Ninety (90) days | from the date of the accessories original purchase by the first consumer purchaser of the product. |
| Consumer Products and Accessories that are Repaired or Replaced | The balance of the original warranty or for Ninety (90) days from the date returned to the consumer, whichever is longer. |
Exclusions
Normal Wear and Tear. Periodic maintenance, repair and replacement of parts due to normal wear and tear are excluded from coverage.
Batteries. Only batteries whose fully charged capacity falls below 80% of their rated capacity and batteries that leak are covered by this Warranty.
Abuse & Misuse. Defects or damage that result from: (a) improper operation, storage, misuse or abuse, accident or neglect, such as physical damage (cracks, scratches, etc.) to the surface of the product resulting from misuse; (b) contact with liquid, water, rain, extreme humidity or heavy perspiration, sand, dirt or the like, extreme heat, or food; (c) use of the Products or Accessories for commercial purposes or subjecting the Product or Accessory to abnormal usage or conditions; or (d) other acts which are not the fault of MOTOROLA or BINATONE, are excluded from coverage.
Use of Non-Motorola branded Products and Accessories. Defects or damage that result from the use of Non-Motorola branded or certified Products or Accessories or other peripheral equipment are excluded from coverage.
Unauthorized Service or Modification. Defects or damages resulting from service, testing, adjustment, installation, maintenance, alteration, or modification in any way by someone other than MOTOROLA, BINATONE or its authorized service centers, are excluded from coverage.
Altered Products. Products or Accessories with (a) serial numbers or date tags that have been removed, altered or obliterated; (b) broken seals or that show evidence of tampering; (c) mismatched board serial numbers; or (d) nonconforming or non-Motorola branded housings, or parts, are excluded from coverage.
Communication Services. Defects, damages, or the failure of Products or Accessories due to any communication service or signal you may subscribe to or use with the Products or Accessories is excluded from coverage.
How to Obtain Warranty Service or Other Information?
To obtain service or information, please call:
US and Canada 1-888-331-3383
You will receive instructions on how to ship the Products or Accessories at your expense and risk, to a BINATONE Authorized Repair Center.
To obtain service, you must include: (a) the Product or Accessory; (b) the original proof of purchase (receipt) which includes the date, place and seller of the Product; (c) if a warranty card was included in your box, a completed warranty card showing the serial number of the Product; (d) a written description of the problem; and, most importantly; (e) your address and telephone number.
These terms and conditions constitute the complete warranty agreement between you and BINATONE regarding the Products or Accessories purchased by you, and supersede any prior agreement or representations, including representations made in any literature publications or promotional materials issued by BINATONE or representations made by any agent, employee or staff of BINATONE, that may have been made in connection with the said purchase.
FCC and IC regulations
FCC Part I5
NOTE: This equipment has been tested and found to comply with the limits for a Class B digital device, pursuant to Part 15 of the Federal Communications Commission (FCC) rules. These limits are designed to provide reasonable protection against harmful interference in a residential installation. This equipment generates, uses and can radiate radio frequency energy and, if not installed and used in accordance with the instructions, may cause harmful interference to radio
communications. However, there is no guarantee that interference will not occur in a particular installation. If this equipment does cause harmful interference to radio or television reception, which can be determined by turning the equipment off and on, the user is encouraged to try to correct the interference by one or more of the following measures:
• Reorient or relocate the receiving antenna.
- Increase the separation between the equipment and receiver.
- Connect the equipment into an outlet on a circuit different from that to which the receiver is connected.
- Consult the dealer or an experienced radio/TV technician for help.
Changes or modifications to this equipment not expressly approved by the party responsible for compliance could void the user's authority to operate the equipment.
This device complies with Part 15 of the FCC rules. Operation is subject to the following two conditions: (1) this device may not cause harmful interference, and (2) this device must accept any interference received, including interference that may cause undesired operation. Privacy of communications may not be ensured when using this device.
To ensure safety of users, the FCC has established criteria for the amount of radio frequency energy that can be safely absorbed by a user or bystander according to the intended usage of the product. This product has been tested and found to comply with the FCC criteria. The Baby unit shall be installed and used such that parts of the user's body other than the hands are maintained at a distance of approximately 20 cm (8 inches) or more.
This Class B digital apparatus complies with Canadian ICES-003.
WARNING
Changes or modifications, to this equipment not expressively approved by the party responsible for compliance could void the user's authority to operate the equipment.
Industry Canada
This device complies with Industry Canada licence-exempt RSS standard(s): Operation is subject to the following Two conditions:(1) this device may not cause interference, and (2) this device must accept any interference, including interference that may cause undesired operation of the device.
The term "IC:" before the certification/registration number only signifies that the Industry Canada technical specifications were met. This product meets the applicable Industry Canada technical specifications.
Technical Specifications
Baby unit (Model: MBP43BU)
Frequency 2.4GHz to 2.48GHz
Image sensor color CMOS 0.3M Pixels
Lens f 2.5mm, F 2.8
IR LED 8 pcs
Power Adapter: 5E-AD059100-U; Input: 100-240V,
50/60Hz 150mA; Output: 5.9V, 1000mA
OR
Adapter: BLJ5W059100P; Input: 100-240V,
50/60Hz 150mA; Output: 5.9V, 1000mA
WARNING
Use only with provided power supply.
Parent unit (Model: MBP43PU)
| Frequency 2.4GHz to 2.48GHz | |
| Display 3.5" diagonal TFT LCD | |
| Display colours / colors | 16.7M colour / color LCD |
| Brightness control 8 steps | |
| Volume control 8 steps | |
| Power Adapter: 5E-AD060050-U; Input: 100-240V, 50/60Hz 150mA; Output: 6.0V, 500mAORAdapter: BLJ5W060050P; Input: 100-240V, 50/60Hz 150mA; Output: 6.0V, 500mAWARNINGUse only with provided power supply.ORBattery: Model - DESAY Ni-MH AAA 3 x 1.2V 900mAh rechargeable battery packWARNINGDo not use non-rechargeable batteries for the Parent Unit. Risk of explosion if battery is replaced by an incorrect type. Dispose of used batteries according to the instructions. | |

MOTOROLA
Manufactured, distributed or sold by Binatone Electronics International LTD., official licensee for this product.
MOTOROLA and the Stylized M Logo, are trademarks or registered trademarks of Motorola Trademark Holdings, LLC. and are used under license. All other trademarks are the property of their respective owners.
© 2013 Motorola Mobility LAC rights reserved.

Version 7.0
Printed in China


- MOTOROLA
- Welcome...
- to your new Motorola Baby Monitor!
- Got everything?
- Overview of the Parent Unit
- Parent unit menu icons (cont'd)
- Overview of Your Baby Unit
- Important guidelines for installing your Baby Monitor
- Table of contents
- Safety Instructions
- WARNING:
- CAMERA SET UP & USE:
- WARNING
- CAUTION
- Getting Started
- Baby Unit Power Supply
- NOTE
- Parent Unit Battery Installation
- Parent Unit Power Supply
- IMPORTANT
- When charging
- Registration (Pairing)
- Using the Baby Monitor
- Setting up
- Pan and Tilt
- Night Vision Mode
- Talk Mode
- Video ON/OFF
- Temperature Display (HH °C / °F or LL °C / °F)
- 4.□3 DUHQW□8 QLW□0 HQX□2 SWLRQV
- Volume
- Brightness
- Lullaby
- Zoom
- Alarm
- Camera Control
- Add (pair) a camera
- View a camera
- TIP
- Delete a camera
- Scan the cameras
- Temperature
- Disposal of The Device (environment)
- Cleaning
- Cleaning and care
- Help
- Display
- No display
- Registration
- If the Baby Unit has lost its link with the Parent Unit
- Interference
- Noise interference on your parent unit
- General Information
- If your product is not working properly....
- Consumer Products and Accessories Limited Warranty ("Warranty")
- What Does this Warranty Cover?
- Who is covered?
- What will BINATONE do?
- What Other Limitations Are There?
- Exclusions
- How to Obtain Warranty Service or Other Information?
- FCC and IC regulations
- FCC Part I5
- Industry Canada
- Technical Specifications
Brand : MOTOROLA
Model : MBP43-2
Category : Baby monitor