
MBP662CONNECT - Baby monitor MOTOROLA - Free user manual and instructions
Find the device manual for free MBP662CONNECT MOTOROLA in PDF.


| Product Type | Video Baby Monitor |
| Brand | Motorola |
| Model | MBP662CONNECT |
| Display Size | 2.8-inch color LCD |
| Camera Features | Pan, tilt, zoom (remote), infrared night vision |
| Audio | Two-way talk, sound activation |
| Temperature Sensor | Yes, room temperature display |
| Lullabies | Built-in lullabies |
| Range | Up to 1000 ft (300 m) outdoors |
| Power - Parent Unit | Rechargeable lithium-ion battery, AC adapter |
| Power - Camera | AC adapter only |
| Dimensions - Parent Unit | 2.9 x 1.6 x 4.5 in (74 x 41 x 115 mm) |
| Dimensions - Camera | 2.8 x 2.6 x 4.9 in (71 x 66 x 124 mm) |
| Weight - Parent Unit | 0.57 lb (260 g) |
| Weight - Camera | 0.44 lb (200 g) |
| Connectivity | 2.4 GHz FHSS digital encrypted |
| Safety Features | Out-of-range alarm, low battery alert, secure transmission |
| Cleaning | Wipe with soft dry cloth; do not use liquids |
| Spare Parts | Replacement batteries (parent unit), chargers |
| Repairability | Not user-serviceable; contact Motorola support |
Frequently Asked Questions - MBP662CONNECT MOTOROLA
User questions about MBP662CONNECT MOTOROLA
0 question about this device. Answer the ones you know or ask your own.
Ask a new question about this device
Download the instructions for your Baby monitor in PDF format for free! Find your manual MBP662CONNECT - MOTOROLA and take your electronic device back in hand. On this page are published all the documents necessary for the use of your device. MBP662CONNECT by MOTOROLA.
USER MANUAL MBP662CONNECT MOTOROLA
natural_image
Abstract black and white geometric logo resembling a stylized letter 'M' (no text or symbols)motorola

natural_image
White mobile phone with black camera and circular logo (no visible text or symbols)
natural_image
Digital infant care device displaying a photo of a sleeping baby on a bed, with control buttons and display screen (no readable text or symbols)User's Guide
Digital Video Baby Monitor With Wi-Fi® Internet Viewing
Models: MBP662CONNECT, MBP662CONNECT-2, MBP662CONNECT-3, MBP662CONNECT-4
Welcome...
to your new Motorola Digital Video Baby Monitor!
Thank you for purchasing the Digital Video Baby Monitor. Now you can see and hear your baby sleeping in another room or you can monitor your older children in their play room.
Please retain your original dated sales receipt for your records. For warranty service of your Motorola product, you will need to provide a copy of your dated sales receipt to confirm warranty status. Registration is not required for warranty coverage.
For product-related questions, please call:
US and Canada 1-888-331-3383
Email: support@motorolamonitors.com
On the Web: www.motorolamonitors.com
This User's Guide provides you with all the information you need to get the most from your product.
Before you use the Digital Video Baby Monitor, we recommend that you insert and fully charge the battery in the Parent Unit, so that it continues to work if you disconnect it from the power supply. Please read the Safety Instructions on pages 7 - 9 before you install the Units.
Got everything?
- 1x Parent Unit
- 1 x Baby Unit (Camera)
- 1 x Rechargeable Ni-MH battery pack for the Parent Unit
- 1 x Power adapter for Parent Unit
- 1 x Power adapter for Baby Unit
In multi-camera packs, you will find one or more additional Camera Units with power adapters.
Overview of the Parent Unit


- Display (LCD screen)
- Scroll Up/Volume+ Button
Press to increase volume in monitor mode.
- Scroll Down/Volume- Button
Press to decrease volume in monitor mode.
- Scroll Left/Video On-Off Button

In monitor mode, press to turn the video display ON or OFF.
- Scroll Right/Switch Camera Button

Press to switch between Camera Units (if paired with more than one camera).
- Menu Button MENU
Press to open the menu options.
- Talk 🖱 /OK Button OK
Press and hold to speak to your baby.
In menu mode, press to confirm a selection.

- Power Indicator LED (Blue)
Lights up in blue when the power adapter is plugged in. - Device ON/OFF LED (Green)
Lights up in green when the device is switched on. - Audio Level LED (Green, Orange, Red, Red)
- Power On-Off Button
Press and hold to switch the Unit ON or OFF. - Battery cover
- Stand
- Speaker
- Power Adapter Socket
Parent Unit menu icons
 | Signal Level Indication (4 Levels) |
 | Night Vision Mode (Video also changes to Black/White) |
 | Battery Level Indication (4 Levels) |
 | Volume Level Control (5 Levels) |
 | Camera Control (scan, view, add, delete) |
 | Set Video On Timer (OFF, 5min, 30min, 60min) |
 | Brightness Level Control (5 Levels) |
 | Zoom Level Control (1X, 2X) |
 | Lullaby Control (5 Song Selection or OFF) |
 | Alarm Setting (6h, 4h, 2h, OFF) |
 | Temperature Reading (HH °C / °F or LL °C / °F)Icon & readings turn RED if >29°C / 84°F, and readings display HH °C / °F >36°C / 97°FIcon & readings turn RED if <14°C / 57°F, and readings display LL °C / °F <1°C / 34 °F |
Overview of the Baby Unit

-
Power/Status Indicator LED
-
Microphone
-
Light Sensor (for night mode detection)
-
Camera Lens
-
Infrared LEDs (for night vision)

-
Speaker
-
Power ON/OFF switch
-
Temperature Sensor
-
Micro USB socket
-
PAIR Button
Important guidelines for installing your Digital Video Baby Monitor
• To use your Baby Unit and Parent Unit together, you must be able to establish a radio link between them, and the range will be affected by environmental conditions.
- Any large metal object, like a refrigerator, a mirror, a filing cabinet, a metallic door or reinforced concrete, between the Baby Unit and Parent Unit may block the radio signal.
- The signal strength may also be reduced by other solid structures, like walls, or by radio or electrical equipment, such as TVs, computers, cordless or mobile phones, fluorescent lights or dimmer switches.
- Other 2.4GHz products, such as wireless networks (Wi-Fi ^ routers), Bluetooth ^TM systems, microwave ovens or other Baby Monitors, may cause interference with this product, so keep the Baby Monitor at least 5ft (1.5m) away from these types of product, or turn them off if they appear to be causing interference.
- If the signal is weak, try moving the Parent and/or the Baby Unit to different positions in the rooms.
• Always ensure that you have a good Wi-Fi ^® connection available.
Table of contents
- Safety Instructions....7
- Getting Started....10
2.1 Baby Unit Power Supply.... 10
2.2 Parent Unit Battery Installation....10
2.3 Parent Unit Power Supply 11
2.4 Registration (Pairing) 12
- Using the Baby Monitor....14
3.1 Setting Up.... 14
3.2 Night Vision Mode 14
3.3 Video ON/OFF 14
3.4 Talk Mode....14
3.5 Temperature Display (HH °C / °F or LL °C / °F)....14
- Parent Unit Menu Options 15
4.1 Volume 15
4.2 Brightness....15
4.3 Lullaby 15
4.4 Zoom 15
4.5 Alarm 15
4.6 Camera Control 16
4.7 Temperature 17
4.8 Power Saving Mode.... 17
- Wi-Fi ^® Internet Viewing.....18
5.1 Minimum System Requirements 18
5.2 Getting Started - Connecting Devices.... 19
5.3 User Account and Camera Setup on Android™ Devices....20
5.4 User Account and Camera Setup on iPhone ^® /iPad ^® 24
5.5 Camera Functions: 30
5.6 Working with PC/Notebook 33
5.7 Procedure for Resetting the Camera.... 33
-
Disposal of the Device (Environment)....34
-
Cleaning 35
- Help....36
- General Information ....44
- Technical Specifications ....50
1. Safety Instructions

WARNING:
Strangulation Hazard: Children have STRANGLED in cords. Keep this cord out of the reach of children (more than 3ft (1m) away). Never use extension cords with AC Adapters. Only use the AC Adapters provided.

CAMERA SET UP & USE:
- Choose a location for the Baby Unit that will provide the best view of your baby in his/her crib.
- Place the Baby Unit on a flat surface, such as a dresser, bureau or shelf, or mount the Baby Unit on a wall securely using the keyhole slots in the underside of the stand.
- NEVER place the Baby Unit or cords within the crib.
WARNING
This Digital Video Baby Monitor is compliant with all relevant standards regarding electromagnetic fields and is, when handled as described in the User's Guide, safe to use. Therefore, always read the instructions in this User's Guide carefully before using the device.
- Adult assembly is required. Keep small parts away from children when assembling.
- This product is not a toy. Do not allow children to play with it.
- This Digital Video Baby Monitor is not a substitute for responsible adult supervision.
- Keep this user's guide for future reference.
- Keep the cords out of reach of children.
- Do not cover the Digital Video Baby Monitor with a towel or blanket.
- Test this monitor and all its functions so that you are familiar with it prior to actual use.
- Do not use the Digital Video Baby Monitor in damp areas or close to water.
- Do not install the Digital Video Baby Monitor in extreme cold or heat, direct sunlight, or close to a heat source.
- Only use the chargers and power adapters provided. Do not use other chargers or power adapters as this may damage the device and battery pack.
- Only insert a battery pack of the same type.
- Do not touch the plug contacts with sharp or metal objects.
- Connect the power adapters to easily accessible mains power socket.
CAUTION
There is a risk of explosion if the battery is replaced by an incorrect type.
Dispose of used batteries according to the instructions.
The Unit shall be setup and used so that parts of the user's body other than the hands are maintained at a distance of approximately 8 inches (20 cm) or more.
2. Getting Started
2.1 Baby Unit Power Supply
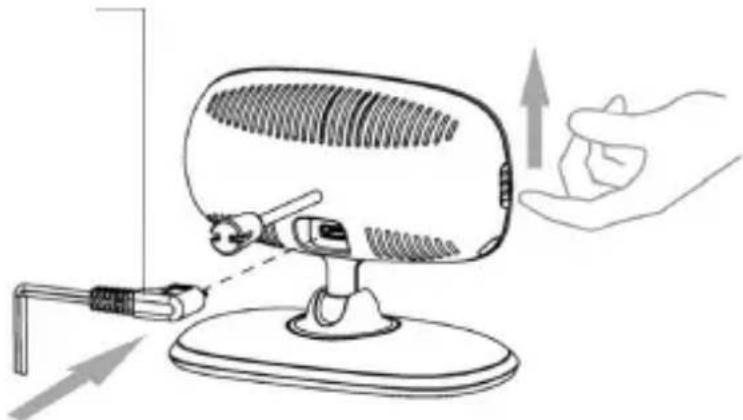
Micro USB plug
natural_image
Illustration of a handheld device with a hand gesture and directional arrows indicating action (no text or symbols)- Connect the power adapter to an electrical outlet and insert the plug into the micro USB socket on the back of the Baby Unit (Camera).
NOTE
Only use the enclosed Power Adapter (5V DC / 1000mA) with the Micro USB plug.
-
Slide the ON/OFF switch to the ON position. The power indicator LED will light up in blue.
-
To switch off the Baby Unit, slide the ON/OFF switch to the OFF position.
2.2 Parent Unit Battery Installation
The rechargeable battery pack supplied should be installed so that the Parent Unit can be moved without losing the link and picture with the Baby Unit(s). Charge the battery in the Parent Unit before using it for the first time or when the Parent Unit indicates that battery is low.


Small cross-head or flat-head screwdriver.
- Insert the wire tabs of the rechargeable battery pack into the contact slots as shown above and fit the battery pack into the compartment.
- Place the battery cover over the compartment and gently tighten the screw in a clockwise direction using a small cross-head or flat-head screwdriver.
2.3 Parent Unit Power Supply

natural_image
Illustration of a portable electronic device connected to a cable and a rectangular device (no text or symbols visible)IMPORTANT
It is recommended that the rechargeable battery pack be installed and charged fully before use. This will allow the Unit to operate on battery in the event of a power failure, or when moving it to a different room.
- Connect the small plug of the power adapter to the Parent Unit and the other end to the electrical outlet. Only use the enclosed power adapter (5V DC/600mA).
- Press and hold the POWER ON/OFF button for 1 second to switch on the Parent Unit.
-
Once the Baby and Parent Units are switched on, the display on the Parent Unit will show the video captured by the Baby Unit.
-
If there is no connection or the Units are out of range with each other, the video display will go off, the symbol 📄 will flash on the LCD display, and the Unit will beep every 9 seconds. Move the Parent Unit closer to the Baby Unit to re-establish the link.
- To switch off the Parent Unit, press and hold the POWER ON/OFF button ⏻ until the progress bar scrolls across fully.
NOTE
The battery icon will turn Red, flash and beep approximately every 5 seconds to indicate that battery is low and needs to be recharged. The battery pack will take approximately 16 hours to charge.
When charging
-
If the Parent Unit is switched OFF when the power adapter is plugged in, an adapter icon will appear on-screen, followed by a large battery icon with internal segments cycling for 60 seconds, before the display goes blank. Note that the Parent Unit will continue to charge. The power indicator LED on the top left corner will light up in blue to indicate that the adapter is plugged in.
-
If the Parent Unit is switched ON when the adapter is plugged in, the battery icon on the top right corner of the screen will show that the battery is charging (with internal segments cycling). The segments stop cycling when the battery is fully charged. The power indicator LED on the top left corner will light up in blue to indicate that the adapter is plugged in.
2.4 Registration (Pairing)
The Baby Unit (Camera) is pre-registered to your Parent Unit. You do not need to register it again unless the Baby Unit loses its link with the Parent Unit.
To re-register your Baby Unit, or register a new Baby Unit, follow the procedure below:
- Press the MENU button and the menu bar will pop up.
- Press the ▲ UP button or ▼ DOWN button until 📄 is highlighted. The ✗ / ✕ menu with pop up.
-
Press the ◀ LEFT button or ▶ RIGHT button to select + , and press the OK button to confirm.
-
Camera *1 2 3 4 will pop up. Press the ◀ LEFT button or ▶ RIGHT button to select the desired Camera number, and press the OK button to start searching for a Camera Unit. The Audio Level LED will light up in Blue while searching.
- Press and hold the PAIR button on the bottom left edge of the Baby Unit until the Parent Unit finds the camera, beeps and the picture from the camera appears.
NOTE
If a particular Baby Unit was registered previously, registering this current Baby Unit again will overwrite the old registration.
If a Baby Unit is not found within about 30 seconds, the search will end and the Parent Unit will return to its previous mode.
3. Using the Baby Monitor
3.1 Setting Up
- Place the Baby Unit in a convenient location (e.g. on a table) and point the camera lens towards the area you want to monitor.
- Adjust the Baby Unit's camera angle by rotating it up, down, left and right until you are satisfied with the image that appears on the Parent Unit.
NOTE
Do not place the Baby Unit within reach of a child or baby. If there is interference with the picture or sound, try moving the Units to different locations, and ensure that they are not close to any other electrical equipment.
3.2 Night Vision Mode
The Baby Unit has 7 high-intensity infrared LEDs for picking up clear images in the dark. When the built-in photo sensor on the top of the Unit detects a low level of ambient light, the LEDs will automatically activate and the screen on the Parent Unit will display in black and white. The 📄 icon will be displayed at the top of the screen.
3.3 Video ON/OFF
Press the VIDEO On/Off button 📄 on the Parent Unit to turn the LCD display on or off, but still leaving the audio monitor on.
3.4 Talk Mode
Press and hold the TALK button 🎯 on the Parent Unit to talk to your baby through the Baby Unit’s loudspeaker. The 🔔 icon will be displayed at the top of the LCD screen.
3.5 Temperature Display (HH °C / °F or LL °C / °F)
The temperature reading from the temperature sensor at the back of the Baby Unit will be displayed at the top of the LCD screen. The readings will turn RED if the temperature goes above 29^ C / 84^ F or below 14^ C / 57^ F. The reading will change to HH ^ C / ^ F if the temperature goes above 36^ C / 97^ F. The reading will change to LL ^ C / ^ F if the temperature falls below 1^ C / 34^ F.
4. Parent Unit Menu Options
4.1 Volume
-
Press the volume button ◀- or ◀+ to adjust the volume level.
-
The icon w pop up and you can select the desired volume level from level 1\~5. (The default volume level setting is level 3.)
4.2 Brightness
-
Press the MENU button and the menu bar will pop up.
-
Press the ▲ UP button or ▼ DOWN button until ⚙ is highlighted.
-
Press the ◀ LEFT button or ▶ RIGHT button to select the desired brightness level from level1\~5. (The default brightness level setting is level 3.)
4.3 Lullaby
-
Press the MENU button and the menu bar will pop up.
-
Press the ▲ UP button or ▼ DOWN button until 月 is highlighted.
-
Press the ◀ LEFT button or ▶ RIGHT button to select the desired song from the 5 lullabies available, or the cycle option to play all 5 songs in turn. If an individual song is selected, it will only play once. (The default setting is lullaby OFF.)
-
Press OK on the selected lullaby to select the desired song sound level.
4.4 Zoom
-
Press the MENU button and the menu bar will pop up.
-
Press the ▲ UP button or ▼ DOWN button until 📄 is highlighted.
-
Press the ◀ LEFT button or ▶ RIGHT button to select 1X or 2X zoom. (The default setting is 1X).
-
Press the OK button to return to normal mode.
4.5 Alarm
-
Press the MENU button and the menu bar will pop up.
-
Press the ▲ UP button or ▼ DOWN button until 🔒 is highlighted.
-
Press the ◀ LEFT button or ▶ RIGHT button to select the alarm time (6H, 4H, 2H) (The default setting is Alarm X (Off).)
-
If an alarm time is selected, the Parent Unit will beep for about 45 seconds after every 6, 4 or 2 hour period.
4.6 Camera Control
4.6.1 Add (Pair) a camera
- Press the MENU button and the menu bar will pop up.
- Press the ▲ UP button or ▼ DOWN button until 📄 is highlighted. The ✗ / + menu will pop up.
- Press the ◀ LEFT button or ▶ RIGHT button to select + , and press the OK button to confirm.
- Camera will pop up Press the ◀ LEFT button or ▶ RIGHT button to select the desired Camera number, and press the OK button to start searching for a Camera Unit. The red audio level LED will flash rapidly while searching.
- Press and hold the PAIR button on the bottom left edge of the Baby Unit until the Parent Unit finds the camera, beeps and the picture from the camera appears.
NOTE
A Camera can only be registered to one Parent Unit at any one time.
4.6.2 View a Camera
- Press the MENU button and the menu bar will pop up.
- Press the ▲ UP button or ▼ DOWN button until 📷 is highlighted. The ✗ / + menu will pop up.
- Press the ◀ LEFT button or ▶ RIGHT button to select 🔒, and press the OK button to confirm.
- Camera will pop up Press the ◀ LEFT button or ▶ RIGHT button to select the desired Camera number, and press the OK button to view the picture from that Camera.
TIP
Quick Method to View Cameras instead of using the menu.
Directly press button repeatedly to select Camera

4.6.3 Delete a Camera
-
Press the MENU button and the menu bar will pop up.
-
Press the ▲ UP button or ▼ DOWN button until 🔒 is highlighted. The
X / + menu will pop up. - Press the ◀ LEFT button or ▶ RIGHT button to select X, and press the OK button to confirm.
- Camera will pop up Press the ← LEFT button or ► RIGHT button to select the desired Camera number, and press the OK button to delete that registration.
NOTE
You are not allowed to delete the camera if there is only one registered camera in the system.
4.6.4 Scan camera
- Press the MENU button and the menu bar will pop up.
- Press the ▲ UP button or ▼ DOWN button until 📄 is highlighted. The ✗ / ✕ menu will pop up.
- Press the ◀ LEFT button or ▶ RIGHT button to select ⚙, and press the OK button to confirm.
- The screen will then display images from each registered Camera *1 *2 *3 *4 in a loop, changing once about every 10 seconds.
TIP
Quick Method to View Cameras instead of using the menu.
Directly press button repeatedly to select Camera

4.7 Temperature
- Press the MENU button and the menu bar will pop up.
- Press the ▲ UP button or ▼ DOWN button until ↓ is highlighted.
- Press the ◀ LEFT button or ▶ RIGHT button to select °C or °F.
4.8 Power Saving Mode
- Press the MENU button and the menu bar will pop up.
- Press the ▲ UP button or ▼ DOWN button until 🔒 is highlighted.
- Press the ◀ LEFT button or ▶ RIGHT button to select auto video off after 5 mins, 30 mins or 60 mins if the Unit is not in charging mode.
5. Wi-Fi ^® Internet Viewing
5.1 Minimum System Requirements
Web Portal
- Windows® 7
- Mac OS ^ 10.7
- Chrome™ 24
- Internet Explorer® 9
- Safari® 6
- Java™ 7
- Firefox®18.0
- Adobe ^ Flash ^ Player 15.0
Android™ System
- Version 4.2 or above
iPhone ^® /iPad ^® iOS
- Version 7.0 or above
High Speed (Wi-Fi ^® ) Internet
- At least 0.6 Mbps upload bandwidth per camera (you can test your internet speed on this site: http://www.speedtest.net)
5.2 Getting Started - Connecting Devices
How does it work?

flowchart
graph TD
    A["MBP662CONNECT Camera"] --> B["Wi-Fi Router"]
    B <--> C["Access your Camera locally."]
    C --> D["Hubble Service"]
    D --> E["View your Camera from any compatible device remotely."]
When a user tries to access the Camera, the Hubble server will authenticate the user's identity before it grants access to the Camera.
5.2.1 Setup
- Connect the power adapter to an electrical outlet and insert the plug into the micro USB socket on the back of the Camera Unit.
- Slide the ON/OFF switch to the ON position.
- The Camera Unit must be within range of the Wi-Fi ^ router with which you want to connect. Make sure that you have the password of the router for the setup process.
Behavior of the status Indicator LED:
Pairing and setting up Flashes slowly in red and blue
Unconnected Flashes slowly in red
Connected Lights up in blue
Ready for connection Flashes slowly in blue
Note
You can only setup via a compatible smartphone or tablet, and not via a PC.
5.3 User Account and Camera Setup on Android™ Devices
What you need
- Baby Unit (Camera)
• Power adapter for the Camera
• Device with Android™ system version 4.2 and above
5.3.1 Power ON and Connect the Camera
- Connect the power adapter to an electrical outlet and insert the plug into the micro USB socket on the back of the Camera Unit.
- Make sure that the ON/OFF switch is in the ON position.
- The Camera's Red LED flashes after the Camera has finished booting. When you hear one beep, this means that the Camera is ready for setup.
5.3.2 Download Hubble for Motorola Monitors App
- Go to Google Play™ Store to search for "Hubble for Motorola Monitors".
- Download "Hubble for Motorola Monitors" App from Google Play™ Store and install it on your Android™ device
5.3.3 Run Hubble for Motorola Monitors App on Android™ device
- Ensure that your Android™ device is connected to your Wi-Fi® router.
- Run "Hubble for Motorola Monitors" App, enter your account information, read through the Terms of Service, then select "I agree to the Terms of Use" before you tap Create. (Picture A1)
Note
If you already have a Hubble App account, please select Already have an Account? to go to the next step.

A1
5.3.4 Add the Camera to your account
- Tap off the top right corner of the screen to add camera. (Picture A2)
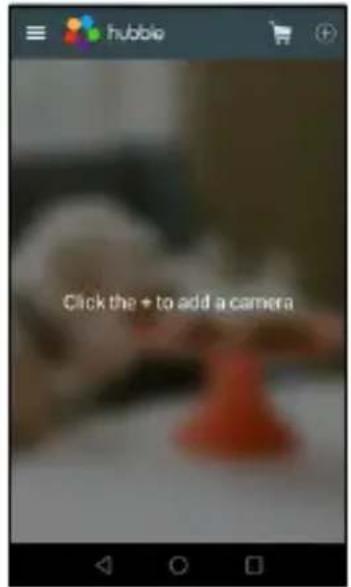
A2
• The following setup instructions will appear on the screen. (Picture A3)
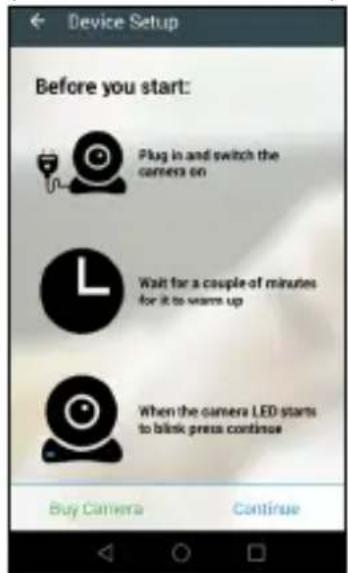
A3
- Plug in and switch on the camera, and wait for a couple of minutes for it to warm up.
- Tap Continue when the Camera LED starts to blink.
- The following setup instructions will appear on the screen. (Picture A4)

A4
- Press and hold the PAIR button on the bottom left edge of the Camera Unit for 3 seconds. You will then hear a beep tone, followed by a voice prompt indicating that the Camera is ready for pairing.
- Tap Continue.
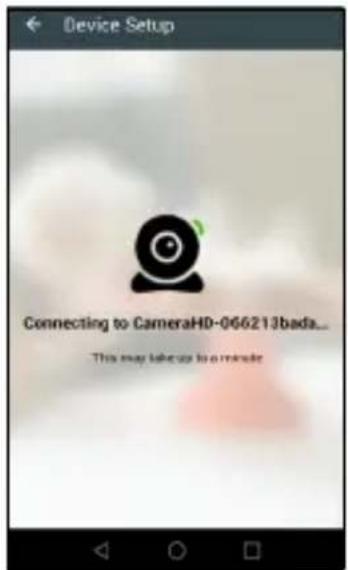
- The App will automatically search for and connect to your Camera as shown in the pictures below. (Pictures A5, A6)
- The blue/red color LED on the Camera Unit will flash.
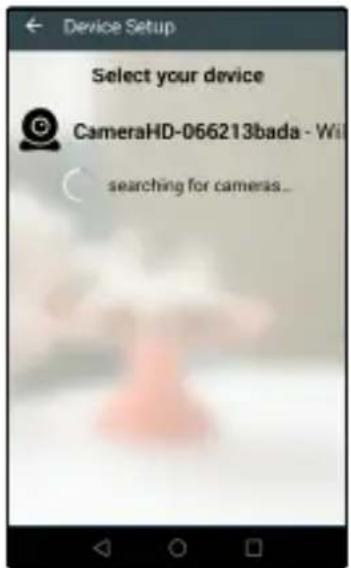
A5
A6
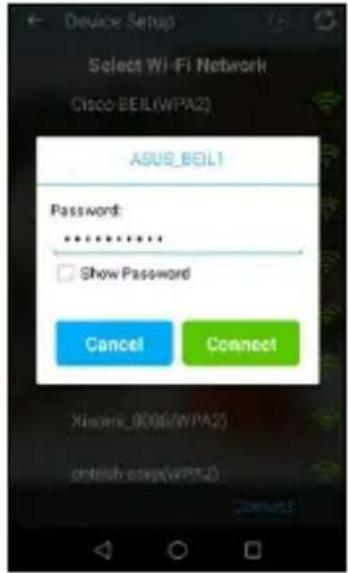
- Select your Wi-Fi ^ Network, enter your password and then tap Connect. (Pictures A7, A8)

A7
A8
- It will take a few minutes for the Camera to connect to the Wi-Fi ^ network before showing the connection status. (Pictures A9, A10)
- If connection fails, please tap Retry and repeat the steps starting from 5.3.4.

A9

A10
- Tap View Camera to view the video captured by the Camera Unit. The status indicator LED on the Camera Unit will flash in red/blue.
5.4 User Account and Camera Setup on iPhone ^® /iPad ^®
What you need
- Baby Unit (Camera)
• Power adapter for the Camera - iPhone® / iPad® with iOS version 7.0 and above
5.4.1 Power ON and Connect the Camera
- Connect the power adapter to an electrical outlet and insert the plug into the micro USB socket at the back of the Camera.
- Make sure that the ON/OFF switch is in the ON position.
- The Camera's red LED flashes after the Camera has finished booting. When you hear one beep, this means that the Camera is ready for setup.
5.4.2 Download Hubble for Motorola Monitors App
- Go to App Store to search for "Hubble for Motorola Monitors".
- Download "Hubble for Motorola Monitors" App and install it on your iPhone ^ /iPad ^ .
5.4.3 Run Hubble App on your iPhone ^® /iPad ^®
- Ensure that your iPhone ^ /iPad ^ is connected to your Wi-Fi ^ Router.
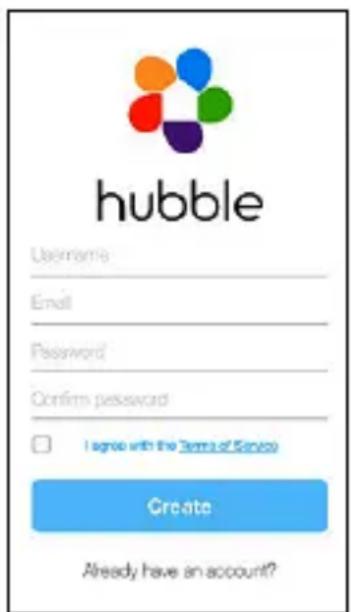
- Run the "Hubble for Motorola Monitors" App, enter your account information, read through the Terms of Service, and then select "I agree to the Terms of Service" before you tap Create. (Picture i1)
Note:
If you already have a Hubble App account, please select Already have an Account? to go to the next step (Picture i1).
il
5.4.4 Add the Camera to your account
- Tap + on the top right corner of the screen to add camera. (Picture i2)

i2
- The following Bluetooth setup instructions will appear on the screen. (Picture i3)

i3
- Tap Settings and activate Bluetooth on your iPhone ^® /iPad ^® . (Pictures i4, i5)

i4

i5
- Press the HOME key to return to the home screen, then tap on "Hubble for Motorola Monitors" App to resume setup.
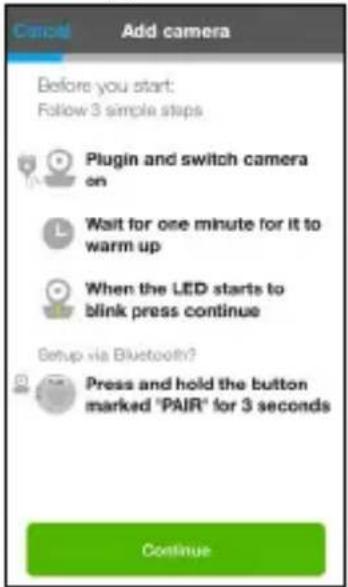
• The following setup instructions will appear on the screen. (Picture i6) Note that if Bluetooth was on, you will be brought to this step directly.
i6
- Wait for a couple of minutes for the Camera Unit to warm up and tap Continue when the Camera LED indicator starts to blink.
• The following will appear on the screen. (Pictures i7, i8)

i7

i8
- Name the location of your Camera Unit and tap Continue. (Pictures i9, i10)

i9

i10
- The Camera Unit will search for the Wi-Fi ^ network (Picture i11) and display a list of available networks. (Picture i12)

i11

i12
- Select your Wi-Fi ^ network and tap Continue. (Picture i13)
- Enter your Wi-Fi password and tap Next. (Picture i14)

i13
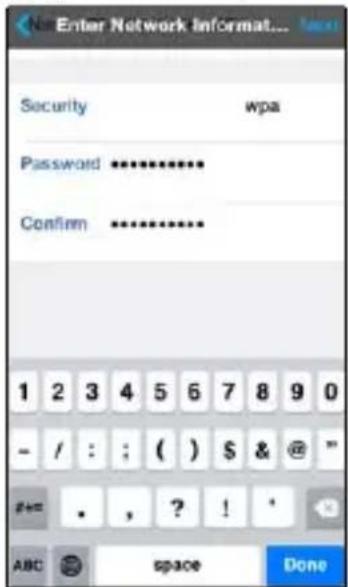
i14
- It will take a few minutes for the Camera Unit to connect to the Wi-Fi ^® network before showing the connection status. (Pictures i15, i16)
- If connection fails, tap Retry and repeat the steps starting from 5.4.4.

i15

i16
- Tap View Live Camera to view the video captured by the Camera Unit. The LED indicator on the Camera Unit will light up in blue.
5.5 Camera Functions:
5.5.1 Connecting the Camera Unit to power
- Connect the power adapter to an electrical outlet and insert the plug into the micro USB socket on the back of the Camera Unit.
- Slide the ON/OFF switch to the ON position. The power indicator LED will light up in green. (Note: To switch off the device, slide the ON/OFF switch to OFF.)
- Run the Hubble App on your smart device.
5.5.2 Overview of the Features on Hubble App
 | Menu • Tap | Cameras to access the camera list.TapEvent Log to access the video record list that is triggered by Motion or Sound detection.TapAccount to access user Profile, subscription Plan, Notifications setting, Remote Connection Setting and About Hubble |
  | Photo/Video • Take a photo or record a video from your Camera.Tap the Video icon to activate Video function. Tap and hold the red button to start recording and release to stop.Tap the Camera icon to switch to Camera mode. You can capture photos from Camera view.Note:Photos and videos will be stored in the internal flash memory of your smart device, and can be accessed via the Gallery or Media Player (AndroidTM Device). To play videos, please use the Hubble App.Lullaby Tap to access the Melody menu and select one of the 5 pre-set melodies you wish to play on your Camera Unit. | |
 | Temperature Measure | The temperature reading from the temperature sensor at the back of the Camera Unit will display on the screen of your Android^TM device. The readings will turn RED if the temperature goes beyond the High/Low temperature that was set in your Account. |
 | Two-way communication | Tap to activate the function. Press the round button once to speak through the Camera Unit. Toggle the button again to listen to the audio feedback from the Camera Unit. |
 | Speaker Tap to toggle speaker on or off. | |
 | Zoom Slide the scroll bar on the right hand side of the screen to zoom in or zoom out.You can also use the pinch-in and pinch-out gestures to zoom out or zoom in a picture.To use pinch-to-zoom gesture, your device must support multi-touch technology. | |
 | Camera Setting You can change the Camera settings by tapping on the ⚙Settings icon. TapDetails to review Camera Name, Cloud Subscription, Change Image, Timezone, Camera Model, Firmware Version and Delete All Events. TapNotifications to set the sensitivity of Sound Detection, Motion Detection and to set Alerts for High temperature (Up to 33°C or 91°F) / Low temperature (down to 10°C or 50°F). TapSettings to set Ceiling mount, Brightness and Volume. | |
 | Add Camera Enter | Add Camera procedures. |
| ⋮ | Delete All Events Tap to delete all events. | |
 | Select Events Check the box to select recorded event(s). | |
 | Edit Events Tap to select and delete event(s). | |
 | Delete Events | Tap to delete selected event(s). |
5.6 Working with PC/Notebook
- Go to https://app.hubbleconnected.com/#login
Enter your User Name and Password, and then click Login if you have already created an account.
- Click on the Camera list paired in your account via Android™ device or iPhone®/iPad®, and the Camera view will appear on screen. You can easily stay connected with your favorite people, places and pets with live video streaming.
- On the website, you can change the Settings by following the menu instructions.
5.7 Procedure for Resetting the Camera
Note: If your Camera is moved from one router (e.g. home) to another (e.g. office) or you have Camera setup issues, then the Camera must be reset. Please reset the Camera with the following procedures:
- Slide the ON/OFF switch to OFF.
- Press and hold the PAIR button, then slide the ON/OFF switch to ON.
- Release the PAIR button when you hear a confirmation beep and wait for the Camera Unit to compete an internal reset procedure. The LED indicator will turn red and flash slowly when the Camera Unit is reset successfully.
- You can add your Camera again by following the steps in section 5.3.4 for Android ^TM devices or in section 5.4.4 for iOS devices.
6. Disposal of the Device (Environment)
At the end of the product life cycle, you should not dispose of this product with normal household waste. Take this product to a collection point for the recycling of electrical and electronic equipment. The symbol on the product, user's guide and/or box indicates this.

Some of the product materials can be re-used if you take them to a recycling point. By reusing some parts or raw materials from used products you make an important contribution to the protection of the environment.
Please contact your local authorities in case you need more information on the collection points in your area.
Dispose of the battery pack in an environmentally-friendly manner according to your local regulations.
7. Cleaning
Clean your Digital Video Baby Monitor with a slightly damp cloth or with an anti-static cloth. Never use cleaning agents or abrasive solvents.
Cleaning and care
- Do not clean any part of the Digital Video Baby Monitor with thinners or other solvents and chemicals - this may cause permanent damage to the product which is not covered by the warranty.
- Keep your Digital Video Baby Monitor away from hot, humid areas or strong sunlight, and do not let it get wet.
- Every effort has been made to ensure high standards of reliability of your Digital Video Baby Monitor. However, if something does go wrong, please do not try to repair it yourself - contact Customer Service for assistance.
IMPORTANT
Always switch off and disconnect the power adapter before cleaning your Digital Video Baby Monitor.
8. Help
Display
No display
- Try recharging or replacing the battery pack.
- Reset the Units. Disconnect the battery pack of the Parent Unit and unplug both the Units' electrical power, then plug them back in.
- Is the Unit turned on?
Press and hold the ON/OFF button on the Parent Unit to turn it ON. - Is the correct camera selected? Change the camera number, if necessary.
- Is the video display turned on? Press the VIDEO ON/OFF button ☑ to turn it ON.
- When operating using batteries only, the display will go blank after 5 minutes or 30 minutes or 60 minutes to save power (depending on video settings). The Unit is still active and will give you audio alerts. You can reactivate the screen by pressing any button.
Registration
If the Baby Unit has lost its link with the Parent Unit
- Try recharging or replacing the battery pack.
- If the Baby Unit is too far away it may be going out of range, so move the Baby Unit closer to the Parent Unit.
- Reset the Units by disconnecting them from the battery and electrical power. Wait about 15 seconds before reconnecting. Allow up to one minute for the Baby Unit and the Parent Unit to synchronize.
• See 2.4 Registration (Pairing), if there is a need to re-register the Units.
Interference
Noise interference on your Parent Unit
- Your Baby and Parent Units may be too close. Move them further apart.
- Make sure there is at least 3 to 6ft (1 to 2m) between the 2 Units to avoid audio feedback.
- If the Baby Unit is too far away, it may be out of range. Move the Baby Unit closer to the Parent Unit.
• Make sure that the Baby and Parent Units are not near other electrical equipment, such as a television, computer or cordless/mobile telephone.
- Use of other 2.4 GHz products, such as wireless networks (Wi-Fi ^ routers), Bluetooth ^TM systems, or microwave ovens, may cause interference with this product. Keep the Baby Monitor at least 5ft (1.5m) away from these types of products, or turn them off if they appear to be causing interference.
- If the signal is weak, try moving the Parent and/or Baby Unit to different positions in the rooms.
Noise interference on your device
- To avoid background noise or echoes, ensure that there is enough distance between your device and the Wi-Fi® Camera Unit.
- Use of other 2.4 GHz products, such as Bluetooth ^TM systems or microwave ovens, may cause interference with this product. Keep the Wi-Fi ^® Camera Unit at least 5ft (1.5m) away from these types of products, or turn them off if they appear to be causing interference.
Lost connection
- Check your Wi-Fi settings. If necessary, reconnect your Wi-Fi®. Ensure that the Wi-Fi® Camera Unit is switched ON. Wait a few minutes to make the connection with the Wi-Fi® system.
If you forgot your password
- If you do not remember your password, tap Forgot Password and submit your e-mail address. A new password will be sent to your e-mail address immediately.
Troubleshooting for Wi-Fi® Internet Viewing
| Category Problem Description / Error | Solution |
| Account I am unable to login even after registration. | Please check your user name and password. |
| Account I receive an error message saying: "Email ID is not registered". | Please ensure that you have registered with us. Tap Create Account to create an account. |
| Account What do I do if I forget my password? | Click on the "Forgot Password" link on https://app.hubbleconnected.com/#lostpassword OR on your AndroidTM or iOS application. An email will be sent to your registered email address. |
| Account I am unable to receive a new password although I have used the "Forgot password" option. | 1. The e-mail might have been sent to your Junk Mail Folder. Please check your Junk Mail Folder.2. There might be a delay in getting your e-mail. Please wait a few minutes and refresh your email account. |
| Connectivity Issues I get a message: We are having problems accessing your Camera. This could be due to the lack of an internet connection. Please wait and try again later. | 1. Please try again in a few minutes. This could be because of any issue with your internet connection.2. If the problem remains, please restart your Camera to check if this fixes the problem.3. Please restart your Wireless Router. |
| Viewing Camera | When I am in "remote mode", the video stops after 5 minutes. How do I view for longer? | When you are accessing your Camera via a network different from your home network (over the internet) your video times out after 5 minutes.You can click on the Camera again from the AndroidTM/iOS application to start streaming again.If you are accessing from your web-browser, then you can press on theReloadbutton to start viewing your Camera video stream again. |
| Features The sound alert setting threshold is not right. | You can Adjust Sound Sensitivity to trigger notifications under Camera Setting menu. | |
| Setting Up While I am adding a new Camera to my account, I am not able to find any Cameras to add. | If you are trying to add a Camera which has previously been added into your account or another account, you will first have to reset the Camera. This can be done by pressing and holding the PAIR button at the bottom of the Camera for 5 seconds. | |
| General What are the supported browsers for accessing from my PC/Mac? | We recommend using Google Chrome 24 or above. However the following browsers are also supported: Internet Explorer 9.0 or above (for PC), Safari 6.0 or above (for Mac) or Firefox 18.0 or above (both PC or Mac). | |
| General What | is the significance of LED flashing? | A flashing LED indicates the following status:Slow flashing: 1. Your Camera is in setup mode. You can add the Camera to your account in this mode. Out of the box, the Camera is in Setup mode. To reset to Setup mode, press and hold the PAIR button on the bottom of the Camera until you hear a beep.Slow flashing: 2. The Camera is either connecting to the router or has lost the link to the router. Please ensure that the Camera is in the Wi-Fi®signal range.LED is stable: The Camera is connected to the Wi-Fi®network. |
| Connectivity Issues | I am not able to access my Camera. | Please check if the Camera is within Wi-Fi®range. If the LED on your Camera is flashing slowly, please try to move the Camera closer to the router for better Wi-Fi®connectivity and try again. |
| Setting Up During | ing setup on devices for AndroidTM and iOS, I am not able to find my Camera during the last step and the setup fails. | Please reset the Camera to setup mode and try again. Press and hold the PAIR button on the bottom of the Camera until you hear a beep. Wait for a minute for the Camera to restart. When the Camera LED is flashing, this indicates that it is in setup mode. Now restart the setup from your smartphone again. |
| Connectivity Issues | Even though I am accessing my Camera from the same Wi-Fi® network, I still find my Camera is shown as remote. I can only access it for 5 minutes at a time. | Please check your wireless router settings. For example, for Buffalo brand routers there is an option called Wireless Isolation. Please disable this option. |
| Camera When | I try to view the Camera, I get a prompt for Camera firmware upgrade. What should I do? | Please upgrade your firmware. This takes around 5 minutes. We push upgrades from time to time to improve Camera features. |
| General Which | platforms are supported for accessing my Camera? | Minimum requirement: Windows®7* *Java browser plug-in needed Mac OS®version 10.7 ChromeTM version 24 Internet Explorer®version 9 Safari®version 6 JavaTM version 7 Firefox®version 18.0 Adobe®Flash Player 15.0 AndroidTM 4.2 iPhone®iPad iOS version 7.0 |
| General I do not | not hear any sound when I am accessing a remote Camera. | You can tap on the speaker icon in the video stream screen to hear audio. By default the audio is not ON when you are accessing a remote Camera. |
| General What is the meaning of "Local Camera" and "Remote Camera"? | When you are accessing your Camera from the same wireless network (Home) in which it is configured, it is a Local Camera. When you are accessing your Camera away from your home it is a Remote Camera. You may be using 3G, 4G or 4G LTE or a Wi-Fi® connection outside of your home. |
| General How do I download the App for AndroidTM and iOS devices? | AndroidTM:- Open the Google Play Store on your AndroidTM device.- Select Search- Type in "Hubble for Motorola Monitors"- The results will show the Hubble App- Select to install itiOS Device:- Open the App Store- Select Search- Type in "Hubble for Motorola Monitors"- The results will show the Hubble App- Select to install it |
| Setting up When the video is cut off, the application attempts to reconnect and this results in lost sound and choppy video. | You will need to turn off the Auto Lock function of your device to ensure continuous video/audio streaming. |
| Features How | many users can access the Camera at one time? | If you are accessing in Local Mode, two users are supported, after two users all streaming will go through the remote server. This allows for unlimited user access to a single Camera at one time. |
| Connectivity issues | I found interference caused by my other webcam devices. | Video streaming performance is related to internet bandwidth, especially if you have 2 or more video streaming devices that are working through the same router. |
9. General Information
If your product is not working properly...
- Read this User's Guide or the Quick Start Guide.
- Visit our website: www.motorolamonitors.com
- Contact Customer Service at
US and Canada 1-888-331-3383
Email: support@motorolamonitors.com
To order a replacement battery pack for parent Unit, contact customer service.
Consumer Products and Accessories Limited Warranty ("Warranty")
Thank you for purchasing this Motorola branded product manufactured under license by Binatone Electronics International LTD ("BINATONE")
What Does this Warranty Cover?
Subject to the exclusions contained below, BINATONE warrants that this Motorola branded product ("Product") or certified accessory ("Accessory") sold for use with this product that it manufactured to be free from defects in materials and workmanship under normal consumer usage for the period outlined below. This Warranty is your exclusive warranty and is not transferable.
Who is covered?
This Warranty extends only to the first consumer purchaser, and is not transferable.
What will BINATONE do?
BINATONE or its authorized distributor at its option and within a commercially reasonable time, will at no charge repair or replace any Products or Accessories that do not conform to this Warranty. We may use functionally equivalent reconditioned/ refurbished/ pre-owned or new Products, Accessories or parts.
What Other Limitations Are There?
ANY IMPLIED WARRANTIES, INCLUDING WITHOUT LIMITATION THE IMPLIED WARRANTIES OF MERCHANTABILITY AND FITNESS FOR A PARTICULAR PURPOSE, SHALL BE LIMITED TO THE DURATION OF THIS LIMITED WARRANTY, OTHERWISE THE REPAIR OR REPLACEMENT PROVIDED UNDER THIS EXPRESS LIMITED WARRANTY IS THE EXCLUSIVE REMEDY OF THE CONSUMER, AND IS PROVIDED IN LIEU OF ALL OTHER WARRANTIES, EXPRESS OR IMPLIED. IN NO EVENT SHALL MOTOROLA OR BINATONE BE LIABLE, WHETHER IN CONTRACT OR TORT (INCLUDING NEGLIGENCE) FOR DAMAGES IN EXCESS OF THE PURCHASE PRICE OF THE PRODUCT OR ACCESSORY, OR FOR ANY INDIRECT, INCIDENTAL, SPECIAL OR CONSEQUENTIAL DAMAGES OF ANY KIND, OR LOSS OF REVENUE OR PROFITS, LOSS OF BUSINESS, LOSS OF INFORMATION OR OTHER FINANCIAL LOSS ARISING OUT OF OR IN CONNECTION WITH THE ABILITY OR INABILITY TO USE THE PRODUCTS OR ACCESSORIES TO THE FULL EXTENT THESE DAMAGES MAY BE DISCLAIMED BY LAW.
Some jurisdictions do not allow the limitation or exclusion of incidental or consequential damages, or limitation on the length of an implied warranty, so the above limitations or exclusions may not apply to you. This Warranty gives you specific legal rights, and you may also have other rights that vary from one jurisdiction to another.
| Products Covered Length of Coverage | |
| Consumer Products One (1) year from | the date of the products original purchase by the first consumer purchaser of the product. |
| Consumer Accessories | Ninety (90) days from the date of the accessories original purchase by the first consumer purchaser of the product. |
| Consumer Products and Accessories that are Repaired or Replaced | The balance of the original warranty or for ninety (90) days from the date returned to the consumer, whichever is longer. |
Exclusions
Normal Wear and Tear. Periodic maintenance, repair and replacement of parts due to normal wear and tear are excluded from coverage.
Batteries. Only batteries whose fully charged capacity falls below 80% of their rated capacity and/or batteries that leak are covered by this Warranty.
Abuse & Misuse. Defects or damage that result from: (a) improper operation, storage, misuse or abuse, accident or neglect, such as physical damage (cracks, scratches, etc.) to the surface of the product resulting from misuse; (b) contact with liquid, water, rain, extreme humidity or heavy perspiration, sand, dirt or the like, extreme heat, or food; (c) use of the Products or Accessories for commercial purposes or subjecting the Product or Accessory to abnormal usage or conditions; or (d) other acts which are not the fault of MOTOROLA or BINATONE, are excluded from coverage.
Use of Non-Motorola branded Products and Accessories. Defects or damage that result from the use of Non-Motorola branded or certified Products or Accessories or other peripheral equipment are excluded from coverage.
Unauthorized Service or Modification. Defects or damages resulting from service, testing, adjustment, installation, maintenance, alteration, or modification in any way by someone other than MOTOROLA, BINATONE or its authorized service centers, are excluded from coverage.
Altered Products. Products or Accessories with (a) serial numbers or date tags that have been removed, altered or obliterated; (b) broken seals or that show evidence of tampering; (c) mismatched board serial numbers; or (d) nonconforming or non-Motorola branded housings, or parts, are excluded from coverage.
Communication Services. Defects, damages, or the failure of Products or Accessories due to any communication service or signal you may subscribe to or use with the Products or Accessories is excluded from coverage.
How to Obtain Warranty Service or Other Information?
To obtain service or information, please call:
US and Canada 1-888-331-3383
Email: support@motorolamonitors.com
You will receive instructions on how to ship the Products or Accessories at your expense and risk, to a BINATONE Authorized Repair Center.
To obtain service, you must include: (a) the Product or Accessory; (b) the original proof of purchase (receipt) which includes the date, place and seller of the Product; (c) if a Warranty card was included in your box, a completed Warranty card showing the serial number of the Product; (d) a written description of the problem; and, most importantly; (e) your address and telephone number.
These terms and conditions constitute the complete warranty agreement between you and BINATONE regarding the Products or Accessories purchased by you, and supersede any prior agreement or representations, including representations made in any literature publications or promotional materials issued by BINATONE or representations made by any agent, employee or staff of BINATONE, that may have been made in connection with the said purchase.
FCC and IC regulations
FCC Part I5
NOTE: This equipment has been tested and found to comply with the limits for a Class B digital device, pursuant to Part 15 of the Federal Communications Commission (FCC) rules. These limits are designed to provide reasonable protection against harmful interference in a residential installation. This equipment generates, uses and can radiate radio frequency energy and, if not installed and used in accordance with the instructions, may cause harmful interference to radio communications. However, there is no guarantee that interference will not occur in a particular installation. If this equipment does cause harmful interference to radio or television reception, which can be determined by turning the equipment off and on, the user is encouraged to try to correct the interference by one or more of the following measures:
- Reorient or relocate the receiving antenna.
- Increase the separation between the equipment and receiver.
- Connect the equipment into an outlet on a circuit different from that to which the receiver is connected.
- Consult the dealer or an experienced radio/TV technician for help.
Changes or modifications to this equipment not expressly approved by the party responsible for compliance could void the user's authority to operate the equipment.
This device complies with Part 15 of the FCC rules. Operation is subject to the following two conditions: (1) this device may not cause harmful interference, and (2) this device must accept any interference received, including interference that may cause undesired operation. Privacy of communications may not be ensured when using this device.
To ensure the safety of users, the FCC has established criteria for the amount of radio frequency energy that can be safely absorbed by a user or bystander according to the intended usage of the product. This product has been tested and found to comply with the FCC criteria. The Baby Unit shall be installed and used such that parts of the user's body other than the hands are maintained at a distance of approximately 8 inches (20 cm) or more.
This Class B digital apparatus complies with Canadian ICES-003.
CANICES-3(B)/NMB-3(B).
WARNING
Changes or modifications to this equipment not expressively approved by the party responsible for compliance could void the user's authority to operate the equipment.
The socket-outlet shall be installed near the equipment and shall be easily accessible.
Industry Canada
This device complies with Industry Canada licence-exempt RSS standard(s): Operation is subject to the following Two conditions:(1) this device may not cause interference, and (2) this device must accept any interference, including interference that may cause undesired operation of the device.
The term "IC:" before the certification/registration number only signifies that the Industry Canada technical specifications were met. This product meets the applicable Industry Canada technical specifications.
10. Technical Specifications
BABY UNIT (Model: MBP662BU)
Frequency 2.4GHz to 2.48 GHz
Image sensor color CMOS 1M Pixels
Lens f2.5mm, F2.4
IR LED 8 pcs
Power Adapter Ten Pao International Ltd.
S005ANU0500100
Input 100-240V AC, 50/60Hz, 300mA;
Output: 5.0V DC, 1000mA
WARNING
Use only with provided power supply.
PARENT UNIT (Model: MBP662PU)
Frequency 2.4 GHz to 2.48 GHz
Display 2.4" diagonal
Display colors 16M color LCD
Brightness control 8 steps
Volume control 8 steps
Power Adapter Ten Pao International Ltd.
S003GU050060
Input: 100-240V AC, 50/60Hz, 150mA;
Output: 5.0V DC, 600mA
WARNING
Use only with provided power supply.
OR
Battery: Model - JUSTHIGH Ni-MH AAA 3.6V 900mAh rechargeable battery pack
WARNING
Do not use non-rechargeable batteries for the Parent Unit. You risk the chance of explosion if the battery is replaced by an incorrect type. Dispose of used batteries according to the instructions.
Specifications are subject to change without prior notice.

motorola
Manufactured, distributed or sold by Binatone Electronics International LTD., official licensee for this product. MOTOROLA and the Stylized M logo are trademarks or registered trademarks of Motorola Trademark Holdings, LLC. and are used under license. Apple logo and Safari are trademarks of Apple Inc., registered in the U.S. and other countries. App Store is a service mark of Apple Inc. Google Play, Android, and Chrome are trademarks of Google Inc. Wi-Fi is a trademark of the Wi-Fi Alliance. Internet Explorer and Windows are trademarks of the Microsoft group of companies. Firefox is a registered trademark of the Mozilla Foundation. Adobe and Flash are either registered trademarks or trademarks of Adobe Systems Incorporated. Java is a registered trademark of Oracle and/or its affiliates. All other trademarks are the property of their respective owners. © 2015 Motorola Mobility LLC. All rights reserved.

US_EN Version 9.0
Printed in China


- User's Guide
- Welcome...
- to your new Motorola Digital Video Baby Monitor!
- Got everything?
- Overview of the Parent Unit
- Overview of the Baby Unit
- Important guidelines for installing your Digital Video Baby Monitor
- Table of contents
- Safety Instructions
- WARNING:
- CAMERA SET UP & USE:
- WARNING
- CAUTION
- Getting Started
- Baby Unit Power Supply
- NOTE
- Parent Unit Battery Installation
- Parent Unit Power Supply
- IMPORTANT
- When charging
- Registration (Pairing)
- Using the Baby Monitor
- Setting Up
- Night Vision Mode
- Video ON/OFF
- Talk Mode
- Temperature Display (HH °C / °F or LL °C / °F)
- Parent Unit Menu Options
- Volume
- Brightness
- Lullaby
- Zoom
- Alarm
- Camera Control
- Add (Pair) a camera
- View a Camera
- TIP
- Delete a Camera
- Scan camera
- Temperature
- Power Saving Mode
- Wi-Fi ® Internet Viewing
- Minimum System Requirements
- Web Portal
- Android™ System
- iPhone ® /iPad ® iOS
- High Speed (Wi-Fi ® ) Internet
- Getting Started - Connecting Devices
- How does it work?
- Setup
- Behavior of the status Indicator LED:
- User Account and Camera Setup on Android™ Devices
- What you need
- Power ON and Connect the Camera
- Download Hubble for Motorola Monitors App
- Run Hubble for Motorola Monitors App on Android™ device
- Add the Camera to your account
- User Account and Camera Setup on iPhone ® /iPad ®
- Power ON and Connect the Camera
- Download Hubble for Motorola Monitors App
- Run Hubble App on your iPhone ® /iPad ®
- Note:
- Add the Camera to your account
- Camera Functions:
- Connecting the Camera Unit to power
- Working with PC/Notebook
- Procedure for Resetting the Camera
- Disposal of the Device (Environment)
- Cleaning
- Cleaning and care
- Help
- Display
- No display
- Registration
- If the Baby Unit has lost its link with the Parent Unit
- Interference
- Noise interference on your Parent Unit
- Noise interference on your device
- Lost connection
- If you forgot your password
- General Information
- Consumer Products and Accessories Limited Warranty ("Warranty")
- What Does this Warranty Cover?
- Who is covered?
- What will BINATONE do?
- What Other Limitations Are There?
- Exclusions
- How to Obtain Warranty Service or Other Information?
- FCC and IC regulations
- FCC Part I5
- Industry Canada
- Technical Specifications
- PARENT UNIT (Model: MBP662PU)
- motorola
Brand : MOTOROLA
Model : MBP662CONNECT
Category : Baby monitor