
SB4400 - Blender AEG - Free user manual and instructions
Find the device manual for free SB4400 AEG in PDF.


| Product Type | Blender |
| Brand | AEG |
| Model | SB4400 |
| Dimensions (H x W x D) | 40 x 20 x 20 cm |
| Weight | 3.0 kg |
| Power Consumption | 800 W |
| Capacity | 1.5 L |
| Bowl Material | Glass |
| Number of Speeds | 5 + Pulse |
| Functions | Mixing, chopping, pureeing, crushing ice |
| Cord Length | 1.0 m |
| Dishwasher Safe Parts | Bowl, lid, measuring cap |
| Safety Lock | Yes, motor only operates when bowl is correctly locked |
| Non-slip Feet | Yes |
| Replacement Parts Available | Bowl, lid, blade assembly, measuring cap |
| Warranty | 2 years |
| Manual Language | English (EN) |
Frequently Asked Questions - SB4400 AEG
User questions about SB4400 AEG
0 question about this device. Answer the ones you know or ask your own.
Ask a new question about this device
Download the instructions for your Blender in PDF format for free! Find your manual SB4400 - AEG and take your electronic device back in hand. On this page are published all the documents necessary for the use of your device. SB4400 by AEG.
USER MANUAL SB4400 AEG
BLENDER POWERMIX SILENT MODEL SB4xxx D • GR • NL • F • GB
AEG
GB Instruction book .....15-20
Before using the appliance for the first time, please read the safety advice on page 16 carefully.


- Processing hot liquids: Allow hot liquids to cool until lukewarm before filling the container. Fill the container only halfway and start processing at a low speed. The blender container can become very hot. Protect your hands and allow steam to escape through the filling opening. Always put the lid on before use.
- Processing hot liquids: Allow hot liquids to cool slightly before placing them in the container. Fill the container halfway and start processing at a low speed. The blender container may become quite hot – protect your hands and ensure steam can escape through the filling opening. Always put the lid on before use.
- Processing hot liquids: Allow hot liquids to cool until lukewarm before pouring them into the container. Fill the container only halfway and run the blender at a low speed. The blender container can become very hot – protect your hands and ensure steam can escape through the filling opening. Always place the lid on the blender before use.
- Processing hot liquids: Allow hot liquids to cool until lukewarm before filling the bowl. Fill the bowl only halfway and start at a low speed. The blender bowl can reach a high temperature: protect your hands and be careful of steam escaping from the filling opening. Before use, always put the lid back in place.

- Start the blender by turning the speed selector to the right. Begin at a low speed and increase it if necessary. To use the PULSE function, turn the speed selector to the PULSE position and press the PULSE button. With soft ingredients, the motor may automatically reduce its speed to optimize energy consumption.
- Start the blender by turning the speed selector to the right. Begin at a low speed and then increase the speed if required. To use the PULSE function, turn the speed selector to the PULSE position and press the PULSE button. Note: If the combined ingredients are soft, the blender motor may lower its speed to optimize power consumption.
- Start the blender by turning the speed selector to the right. Begin at a low speed and then set the blender to a higher speed if necessary. To use the PULSE function, set the speed selector to the PULSE position and press the PULSE button. Note: If the ingredients are soft, the motor will adjust its speed in relation to energy consumption.
- Turn the blender on by turning the speed selector to the right. Start at a low speed, then increase the speed if necessary. To use the PULSE (Turbo) function, turn the speed selector to PULSE (Turbo) and press the PULSE (Turbo) button. Note: For less consistent ingredients, the blender motor automatically slows down its rotation speed to limit energy consumption.

- Cleaning instructions, filter: Remove the filter lock. Clean the filter lock and the filter and rinse them under running water. (Filter and filter lock are not dishwasher safe.)
- Cleaning instructions for the filter: Remove the filter lock. Clean the filter lock and the filter and rinse them under running water (the filter and filter lock are not dishwasher safe).
- Cleaning instructions, filter: Remove the filter lock from the blender. Clean the filter lock and the filter and rinse them under running water. (The filter and filter lock are not dishwasher safe.)
- Cleaning instructions for the filter: Remove the filter lock, clean it, as well as the filter, and rinse these parts under running water. (The filter and filter lock cannot be washed in the dishwasher.)
Components
A. Jug B. Spout C. Lid with filler hole D. Measuring cup E. Blade assembly, detachable F. Motor housing G. Speed selector and PULSE button H. Cord storage device (underside of appliance) I. Non-slip feet J. Filter* K. Filter lock* L. Mini chopper*
*Depending on model
Safety advice
Read the following instructions carefully before using the appliance for the first time.
- This appliance is not intended for use by persons (including children) with reduced physical, sensory or mental capabilities, or lack of experience and knowledge, unless they have been given supervision or instruction concerning use of the appliance by a person responsible for their safety. • Children should be supervised to ensure that they do not play with the appliance. • The appliance may only be connected to a power supply whose voltage and frequency comply with the specifications on the rating plate!
- Never use or pick up the appliance if
- the supply cord is damaged,
- the housing is damaged.
- The appliance must only be connected to an earthed socket. If necessary an extension cable suitable for 10 A can be used.
- If the appliance or the supply cord is damaged, it must be replaced by the manufacturer, its service agent or similarly qualified person, in order to avoid hazard. • Always place the appliance on a flat, level surface. • Always disconnect the appliance from the supply if it is left unattended and before assembling, disassembling or cleaning.
- Never touch the blades or inserts with your hand or any tools while the appliance is plugged in.
- The blades and inserts are very sharp! Danger of injury! Caution when assembling, disassembling after use or when cleaning! Ensure that the appliance is disconnected from the mains supply.
- Do not immerse the appliance in water or any other liquid.
- Do not let the blender run for more than 2 minutes at a time using heavy loads. After running for 2 minutes with heavy loads, the blender should be left to cool for at least 10 minutes.
- Do not exceed the maximum filling volume as indicated on the appliances.
- Never process hot liquids (max 90 degrees).
- Do not use this appliance to stir paint. Danger, could result in an explosion!
- Never operate appliance without lid.
- This appliance is intended for domestic use only. The manufacturer cannot accept any liability for possible damage caused by improper or incorrect use.
Getting started

GB
- Before using the blender for the first time, wash all parts except for the motor housing. Assembling: place the rubber seal on the blade assembly and (A) insert it holding the blender downwards. Use the measuring cup and (B) turn clockwise to fasten the blade assembly. Caution! The blades are very sharp!
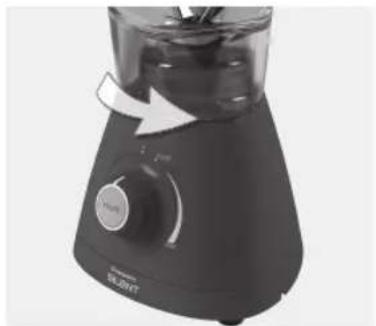
- Place the blender on a flat surface and lock the jug into position on the motor housing. Put the ingredients in the jug. (Do not exceed the maximum capacity of 1.75 litres.)
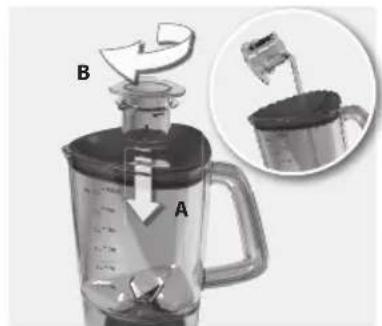
- Close the lid and (A) insert the measuring cup in the filler hole and (B) lock into position. (You can use the measuring cup to add ingredients while the blender is running. Close the filler hole immediately after, to avoid splashing.) Caution! When processing hot liquids, see paragraph 4.
D GR NL F
GB


- Processing hot liquids: allow hot liquids to cool down until lukewarm before filling the jug. Fill the jug only half full and start processing on low speed. The blender jug can become very warm – take care to protect your hands and to ventilate steam out through the filler hole. Always replace the lid before use.

- Start the blender by turning the speed selector to the right. Start at low speed, then progress to a higher speed if required. To use the PULSE function, turn the speed selector to PULSE position and press the PULSE button. NB. If the blended ingredients are soft, the blender engine may lower its speed to optimize power consumption.

- Ice crushing: press the PULSE button for 3-5 seconds several times until you obtain a satisfactory result. You can add more ice through the filler hole while the blender is running.
Cleaning and care

GB
- Quick cleaning: Pour warm water into the jug, add a few drops of detergent. Mix water and detergent by pushing the PULSE button briefly. Finally, rinse the jug under running water.

- Thorough cleaning: Turn the blender off and unplug the power cord. Wipe the motor housing with a damp cloth. Never immerse the motor housing in water or clean it under running water!
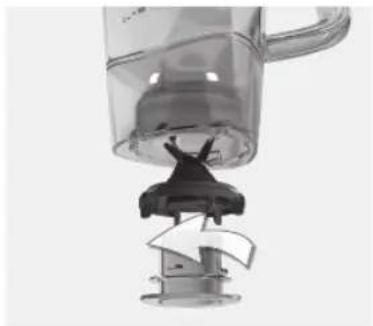
- Remove the lid and jug. Turn the blade assembly counter-clockwise and remove it by using the measuring cup. Rinse the blade assembly in water and detergent. Caution! Handle carefully, the blades are very sharp! The lid and measuring cup can be washed in the dishwasher.

Additional features*

- Fill the mini chopper* with adequate ingredients. Place the blade assembly on top and lock into position. After use, clean the mini chopper container and the blade assembly. (The mini chopper is not dishwasher proof). Caution! The blades are very sharp!

- To make juice: Insert the filter* (see Filter guide for position) before use. Place the filter lock on the filter and lock by turning clockwise. Place the filter in the jug with the lock facing up. Make sure it fits correctly. Add fruits in the filter (do not use the blender to mash large seeds such as those in plums or avocados).

- Cleaning instruction, filter: Take out the filter lock. Clean the filter lock and filter and rinse it under running water (the filter and filter lock are not dishwasher proof).
*Depending on model
Troubleshooting, Blending guide and Additional features guide
| Troubleshooting | ||
| Symptom Cause Solution | ||
| The blender does not switch on. | Components are not fixed properly. Check if all the components are properly locked into position. | |
| The speed selector is not on the right position. | Choose the appropriate speed. To use PULSE function, make sure the speed selector is on PULSE position. | |
| The jug is overfliled. Empty the jug so you do not exceed the maximum level (1.75 litres). | ||
| The plug is not properly connected to the power outlet. | Check the connection of the plug to the outlet or try another outlet. | |
| Power outage. Wait until power outage is over. | ||
| Functional problem. Contact authorized service. | ||
| Recommended blending speed | |||
| Setting 1(speeds 1-3*/low speed)Whipping creamPuree vegetables & fruitCurry pastesCoff ee beansMayonnaise | Setting 2(speeds 4-6*/medium speed)Smoothies with fruitSoupsRaw vegetablesCake batters | Setting 3(speeds 7-8*/high speed)CocktailsLaksa pastesMilkshakes | PULSEIce cubesFrozen foodMeatBreadcrumbsBiscuitsFinely ground nutsChocolateSelf cleaning the unit |
| Mini Chopper* guide | Filter* guide | |
| The mini chopper allows you to make small quantities of food, for example baby meals, easily and without mess.The chopper can also be used for grinding and chopping spices, for example. | The fi Iter may be used in three different positions:A. Foam separator: In this position, the juice will be served separately from the foam, making the juice lighter and tastier.B. Partial separator: partially separates the content.C. Full opening: allows for pouring of whole juice.Please note: you must select position before fi tting the fi Iter into the jug. | B C C |
Disposal
Disposal
Packaging materials
The packaging materials are environmentally friendly and can be recycled. The plastic components are identified by markings, e.g. >PE<, >PS<, etc. Please dispose of the packaging materials in the appropriate container at the community waste disposal facilities.
Old appliance
The symbol on the product or on its packaging indicates that this product may not be treated as household waste. Instead it shall be handed over to the applicable collection point for the recycling of electrical and electronic equipment. By ensuring this product is disposed of correctly, you
will help prevent potential negative consequences for the environment and human health, which could otherwise be caused by inappropriate waste handling of this product. For more detailed information about recycling of this product, please contact your local city office, your household waste disposal service or the shop where you purchased the product.


www.aeg-home.com


Printed on recycled paper
3483A SB4xxx 02020312
With Electrolux, the choice of professionals.
AEG

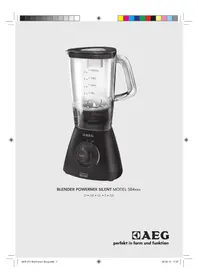

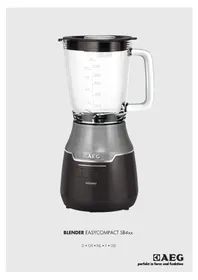
Brand : AEG
Model : SB4400
Category : Blender