
ZMC 30 QA - Microwave ZANUSSI - Free user manual and instructions
Find the device manual for free ZMC 30 QA ZANUSSI in PDF.
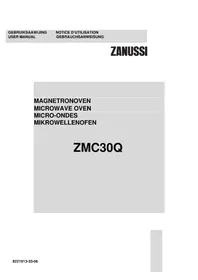


| Product Type | Microwave Oven |
| Brand | Zanussi |
| Model | ZMC 30 QA |
| Capacity | 30 Liters |
| Dimensions (H x W x D) | 280 x 510 x 400 mm |
| Weight | 12 kg |
| Power Consumption | 1350 W |
| Microwave Power Output | 900 W |
| Functions | Defrost, Auto Cook, Timer, Child Lock |
| Control Type | Digital Touch |
| Turntable | Yes |
| Interior Light | Yes |
| Door Type | Drop Down |
| Color | White |
| Energy Efficiency Class | A |
| Safety Features | Child Lock, Overheating Protection |
| Cleaning | Easy-clean Interior |
| Spare Parts Availability | Serviceable by Zanussi |
| Warranty | 2 Years |
Frequently Asked Questions - ZMC 30 QA ZANUSSI
User questions about ZMC 30 QA ZANUSSI
0 question about this device. Answer the ones you know or ask your own.
Ask a new question about this device
Download the instructions for your Microwave in PDF format for free! Find your manual ZMC 30 QA - ZANUSSI and take your electronic device back in hand. On this page are published all the documents necessary for the use of your device. ZMC 30 QA by ZANUSSI.
USER MANUAL ZMC 30 QA ZANUSSI
Before using your microwave oven 4
Technical data 4
Safety instructions 5
- Utensil safety 5 – Safety Instructions when Cooking with Grill 5
- Testing suitability of 6
- Food safety 6
- Oven utensils and accessories guide 7
Getting Started 8
- Unpacking 8
Installation 8
- Building in 8 – Electrical Connections 11
- Turntable Installation 11
How to operate your microwave oven 12
- Name and function of parts 12
- Control panel 13
- Installing the Side Rails 14
- Setting the Clock 15 – Child Safety Lock 15 - To Stop the Oven 15
- Turntable Stop Key 16
- Kitchen Timer 16 - Quick Start 16
- Manual Defrosting 16
- Microwave Power Setting Guide 16
- Microwave Cooking....17 – Cooking with Grill 17 - Convection Cooking 18
- Combination Cooking 19
- Defrost 20
- Two Stage Cooking 21 - Auto Cook 22
Charts 23
- Recommendations for Cooking with Grill 23 – Recommendations for Cooking with Microwave and Grill 23
- Recommendations for Manual Defrost 24 – Auto Cook Programmes Chart 25
Microwave Hints 26
Care and Cleaning 27
- Cleaning the accessories (turntable and support). 27
- Cleaning the interior 27 – Cleaning the Grill 27 – Cleaning the exterior 27
Guarantee Conditions 28
Congratulations on the purchase of your new Microwave Oven
Thank you for choosing a Zanussi product. We are confident that you will find your new microwave oven very useful and that it will be of great help to you. As with all new kitchen appliances, it will take some time to learn all the new functions and features, but with time, this oven will become indispensable to you.
Before using your Microwave Oven
Read through the instruction manual carefully. In order that you can get the best from your new Zanussi Microwave Oven, the following instructions have been prepared. Please make sure you read them carefully. It is important that this instruction book is retained with the appliance for future reference. Should the appliance be sold or transferred to another owner, or if you move house and leave the appliance, always ensure that the book is supplied with the appliance or that the new owner can be acquainted with the functioning of the appliance and the relevant warnings.
Please ensure you have read the whole instruction book before using the appliance and that you follow the recommendations given.
Technical data
| Overall dimension Weight 30 kg | |
| Width 595 mm | Volume 30 Litre |
| Depth 560 mm | |
| Height 458 mm | Power source 230V, 50 Hz |
| Cavity dimension Fuse 16A | |
| Width 360 mm | Power consumption 3000W |
| Depth 350 mm | |
| Height 235 mm | Power output 1000W |
| Grill 1550W |
Safety Instructions
- The built-in safety interlock switches prevent the microwave oven from operating when the door is open.
- Do not tamper with them, or attempt to operate the oven with the door open as open door operation can result in exposure to microwave energy.
- Do not allow food spills or cleaner residue to accumulate on door sealing surfaces. See the Cleaning and Care section for cleaning instructions.
- Do not operate the oven if it is damaged until it has been repaired by qualified service personnel.
- It is particularly important that the oven door closes properly and that there is no damage to the: (1) door (warped), (2) hinges and latches (broken or insecure), (3) door seals and sealing surface.
- Under no circumstances should you attempt to repair the appliance yourself. Repairs carried out by inexperienced persons may cause injury or serious malfunctioning. Contact your local Service Force Centre.
- Do not remove the outer case, door, or control panel at any time. Doing so may cause exposure to extremely high voltage.
- Install or locate this oven only in accordance with the "INSTALLATION INSTRUCTIONS" found in this manual.
- Use the appliance for its intended use as described in this manual. Do not use corrosive chemicals in this appliance. This type of oven is specifically designed to heat, cook, or defrost food. It is not designed for industrial or laboratory use, nor for commercial use, as this will invalidate the guarantee.
- Do not operate the oven empty. If food or water is not present to absorb the microwave energy, the magnetron tube can be damaged.
- Close supervision is necessary when the oven is used by children.
- Do not store this appliance outdoors. Do not use this product near water.
- Do not attempt to dry clothing or newspapers in the microwave oven. These items can ignite.
- Do not use the cavity for storage purposes. Do not leave paper products, cooking utensils, or food in the cavity when not in use.
Utensil safety
Most glass, glass ceramic, and heat-resistant glassware utensils are excellent for use in the microwave oven. Although microwave energy will not heat most glass and ceramic items, these utensils can become hot as heat transfers from the food to the container. The use of oven gloves to remove dishes is recommended.
Safety instructions when cooking with grill, convection, or combination modes.
- The glass viewing window may break if water is spilled on it during grilling or convection cooking.
- Be sure to use an oven glove when loading and unloading the oven. Containers get very hot in the oven, so be careful not to burn yourself. The turntable and metal rack also get very hot, so be sure to use an oven glove when handling them.
- Do not touch the inner or outer viewing window with metal components when loading or unloading the oven. The inside of the door and oven get very hot, so take care when attending to food in the oven.
- Do not put the turntable or containers in cold water or try to cool them quickly after use.
- Do not place items on top of the cabinet. The top of the cabinet gets very hot, so anything placed on it may be damaged by the heat.
- Preheat your oven only when using the Grill or Convection modes, never when using microwave or combination modes (Microwave + Grill or Microwave + Convection).
It is quite normal for steam to be emitted around the door, or for misting to occur on the door, or even for water droplets to appear below the door during the cooking cycle. This is merely condensation from the heat of the food and does not affect the safety of your oven. The door is not intended to seal the oven cavity completely.
- Do not force the turntable to rotate by hand. This may cause malfunctioning.
- Arcing in the oven during microwave operation usually occurs from use of metallic utensils. Continuous arcing, however, can damage the unit. Stop the programme and check the utensil.
- Care should be taken not to obstruct any air vents located on the top, rear, side and bottom of the oven.
⚠ Do not use this oven for commercial purposes. This oven is made for domestic use only.
Testing suitability of cookware Food safety
- Place the cookware in the microwave along with a glass half full of water. Heat on 1000 W (100%) for one minute. If the cookware feels hot, you should not use it. If it is just slightly warm, you can use it for reheating but not for cooking. If the dish is room temperature, it is suitable for microwave cooking.
- Paper napkins, wax paper, paper towels, plates, cups, cartons, freezer wrap and cardboard are great convenience utensils. Always be sure containers are filled with food to absorb energy and thus avoid the possibility of overheating.
- Many plastic dishes, cups, freezer containers and plastic wraps may be used in the microwave oven. Follow manufacturer's instructions when using plastics in the oven. Avoid using plastic utensils with foods that have high fat or sugar content since these foods reach high temperatures and could melt some plastics.
- Metal utensils and utensils with metallic trim should not be used in the microwave oven, unless specifically recommended for microwave use.
- Containers with restricted openings, such as bottles, should not be used for microwave cooking.
- Use caution when removing a lid or cover from a dish to avoid steam burns.
WARNING: Do not leave the oven unattended, and check it from time to time when heating or cooking food in plastic, paper, or other combustible containers. If smoke is observed, keep the door closed, switch the oven off, or disconnect the oven until the smoke stops.
- Do not heat food in a can in the microwave oven. Always remove the food to a suitable container.
- Deep fat frying should not be done in the microwave oven, because the fat temperature cannot be controlled, and hazardous situations can result.
- Popcorn may be prepared in the microwave oven, but only in special packages or utensils designed specifically for this purpose. This cooking operation should never be left unattended.
- Pierce foods with non-porous skins or membranes to prevent steam build-up and bursting. Apples, potatoes, chicken livers, and egg yolks are examples of items that should be pierced.
WARNING: When heating liquids, e.g., soups, sauces, and beverages in your microwave oven, overheating the liquid beyond boiling point can occur without evidence of bubbling. This could result in a sudden boil over of the hot liquid. To prevent this possibility, the following steps should be taken:
- Avoid using straight-sided containers with narrow necks.
- Do not overheat.
- Stir the liquid before placing the container in the oven and again halfway through the heating time.
- After heating, allow it to stand in the oven for a short time, stirring again before carefully removing the container.
- Some products such as whole eggs and sealed containers – for example, closed glass jars – may explode and should not be heated in this oven. Occasionally, poached eggs may explode during cooking. Always pierce the yolk, then cover and allow the standing time of one minute before removing the cover.
NOTE:
- Do not force the turntable to rotate by hand. This may cause malfunctioning.
- Arcing in the oven during microwave operation usually occurs from the use of metallic utensils. Continuous arcing, however, can damage the unit. Stop the programme and check the utensil.
- Care should be taken not to obstruct any air vents located on the top, rear, side, and bottom of the oven.
Do not use this oven for commercial purposes.
This oven is made for domestic use only.
Keep these instructions
Oven utensils and accessories guide
A variety of utensils and materials may be used for cooking in your microwave oven. For your safety and to prevent damaging utensils and your oven, choose appropriate utensils and materials for each cooking method. The list below is a general guide.
| Material Utensils | Mode of operation | ||||
| Microwave Grill Convection Combination | |||||
| Ceramic & Glass | Corning ware YES YES YES YES | ||||
| Heat resistant glass ware | YES*1 YES YES YES*1 | ||||
| Glass ware with metal decoration | NO NO NO NO | ||||
| Lead crystal glass NO NO NO NO | |||||
| China | Without metal decoration | YES YES YES NO | |||
| Pottery*2 YES YES YES YES YES YES YES YES YES YES YES YES YES YES YES YES YES YES YES YES YES YES YES YES YES YES YES YES YES YES YES YES YES YES YES YES YES YES YES YES YES YES YES YES YES YES YES YES YES YES YES YES YES YES YES YES YES YES YES YES YES YES YES YES YES YES YES YES YES YES YES YES YES YES YES YES YES YES YES YES YES YES YES YES YES YES YES YES YES YES YES YES YES YES YES YES YES YES YES YES Yes YES YES YES YES YES YES YES YES YES YES YES YES YES YES YES YES YES YES YES YES YES YES YES YES YES YES YES YES YES YES YES YES YES YES YES YES YES YES YES YES YES YES YES YES YES YES YES YES YES YES YES YES YES YES YES YES YES YES YES YES YES YES YES YES YES YES YES YES YES YES YES YES YES YES YES YES YES YES YES YES YES YES YES YES YES YES YES YES YES YES YES YES YES YES YES YES YES YES YES YOY YES YES YES YES YES YES YES YES YES YES YES YES YES YES YES YES YES YES YES YES YES YES YES YES YES YES YES YES YES YES YES YES YES YES YES YES YES YES YES YES YES YES YES YES YES YES YES YES YES YES YES YES YES YES YES YES YES YES YES YES YES YES YES YES YES YES YES YES YES YES YES YES YES YES YES YES YES YES YES YES YES YES YES YES YES YES YES YES YES YES YES YES YES YES YES YES YES YES YESYes YES YES YES YES YES YES YES YES YES YES YES YES YES YES YES YES YES YES YES YES YES YES YES YES YES YES YES YES YES YES YES YES YES YES YES YES YES YES YES YES YES YES YES YES YES YES YES YES YES YES YES YES YES YES YES YES YES YES YES YES YES YES YES YES YES YES YES YES YES YES YES YES YES YES YES YES YES YES YES YES YES YES YES YES YES YES YES YES YES YES YES YES YES YES YES YES YES YES YESYES YES YES YES YES YES YES YES YES YES YES YES YES YES YES YES YES YES YES YES YES YES YES YES YES YES YES YES YES YES YES YES YES YES YES YES YES YES YES YES YES YES YES YES YES YES YES YES YES YES YES YES YES YES YES YES YES YES YES YES YES YES YES YES YES YES YES YES YES YES YES YES YES YES YES YES YES YES YES YES YES YES YES YES YES YES YES YES YES YES YES YES YES YES YES YES YES YES YES YES | MICrowave Grill Convection Combination | ||||
| Corning ware YES YES YES YES YES YES YES YES YES YES YES YES YES YES YES YES YES YES YES YES YES YES YES YES YES YES YES YES YES YES YES YES YES YES YES YES YES YES YES YES YES YES YES YES YES YES YES YES YES YES YES YES YES YES YES YES YES YES YES YES YES YES YES YES YES YES YES YES YES YES YES YES YES YES YES YES YES YES YES YES YES YES YES YES YES YES YES YES YES YES YES YES YES YES YES YES YES YES YES | |||||
YES: Utensils and accessories to use
NO: Utensils and accessories to avoid
*1 Only if there is no metal trim. *2 Only if it does not have a glaze containing metal. *3 NOTE: Use aluminium foil only for shielding purposes; overuse may cause arcing.
Unpacking
N.B. When you unpack the oven, check that the product is free from damage. Any damage or missing parts must be reported immediately to the retailer. The oven, parts of the oven, or the accessories may be wrapped in protective foil. If so, you must remove this foil before using the oven. Do not leave packing material where small children can play with it. This can be hazardous.
Installation
Building In

Inside the oven there is a plastic bag with fixing material. Take this bag out of the oven.
- Remove the two screws 'X' from the fastening bar under the microwave oven.
- Fasten metal strip 'A' using the two screws 'X' that have just been removed.
The appliance needs sufficient ventilation. Make an opening in the plinth at least 280 cm² large for this purpose.
Building In

- Fit the fastening bar 'B' at the correct position in the recess. Make sure that there is the same amount of free space at each side of the fastening bar. Fasten the bar with screws 'H'.
Fix the fastening bar such that the two lips stick out over the edge of the bottom of the recess and rest against it at the front.
Building In

- Open the lid of the warm air ventilation duct 'C' fully.
- Slide the appliance into the recess. Slide the front of the appliance over the fastening bar 'B'. Keep sliding it until the front of the oven 'G' is resting against the cupboard and the holes 'D' under the oven are aligned with the holes 'E' in the fastening bar 'B'.
- Fasten the appliance to the fastening bar 'B' using screws 'F'.
Attention.
The plug for the appliance should be accessible at all times.
Electrical connections
WARNING! THIS APPLIANCE MUST BE EARTHED.
The manufacturer declines any liability should this safety measure not be observed.
- If the plug that is fitted to your appliance is not suitable for your socket outlet, it must be cut off and the appropriate plug fitted.
- Remove the fuse from the cut off plug. The cut off plug should then be disposed of to prevent the hazard of shocks in case it should be plugged into a 13 Amp socket in another part of your home.
Turntable Installation
- Place the turntable support on the cavity bottom.
- Place the turntable on top of the turntable support as shown in the diagram. Make sure that the turntable hub is securely locked in the turntable shaft. Never place the turntable upside down.
- Both the turntable and the turntable support must always be used during cooking.
- All food and containers of food are always placed on this turntable for cooking.
- This turntable rotates clockwise and anticlockwise; this is normal.

Turntable
Roller rest
Turntable shaft
How to operate your microwave oven

Name and function of parts
- Cooking compartment. Wipe the compartment clean after using the oven.
- Viewing window. Food can be checked while the microwave oven is in operation.
- Oven door. The door must always be firmly closed while cooking.
- Control panel.
- Drive shaft for turntable.
- Grill Element.
- Fan for Convection
- Turntable.
- Turntable support.
- Grilling racks, one high and one low, used for most cooking and browning/grilling.
IMPORTANT - Use either high or low grill rack only. Do not use both grill racks at the same time.
- Rectangular Grilling Rack. (Only for use with the conventional oven)
- Side Rails.
- 'PYREX' Dish
- Glass Roasting Dish
The square glass dish supplied with this Zanussi Microwave Oven can be used for general roasting and combination cooking. It may also be used as a drip tray if placed below the square grilling rack during Convection cooking or Grilling.
The square glass dish may also be used during Microwave Only cooking.
During Microwave only cooking the square glass dish may be used in any position. Please ensure that you stir your food at least twice during microwave only cooking.
Remember to turn the food in the oven occasionally to ensure even cooking, the roasting dish is square and can therefore be removed, rotated and repositioned.
WARNING :- The square roasting dish must only be used in the lower shelf position during Convection, Grilling or Combination cooking to ensure even heating.
Control Panel

- Display Window
To view either Cook time, Power level, Temperature and time of day.
- Potato Function
Used to automatically cook potatoes
- Popcorn
Used to automatically cook popcorn
- Beverages
Used to automatically ReHeat beverages
- Pizza
Used to automatically cook pizza
- Ready Meals
Used to automatically cook ready meals
- Function
To select Microwave, Grill, Convection and combination modes.
- Convection
Temperature setting for Convection Cooking
- Clock
To set the time of day
- Power
To set the desired Microwave power level
- Turntable Stop Key
To Stop the turntable
- Stop/Clear
To stop or pause your Microwave
- Quick Start
To start your microwave
- Setting Control Knob
Used to set desired cooking times.
Installing the Side Rails

- Slide into rear bracket first.

- Clip over front bracket to complete installation.
Warning: Only for use with Convection mode.
Setting the Clock
When your oven is plugged in for the first time or when power resumes after a power interruption, the display window flashes and shows "----".
Example: To set 4:30
- Touch the Clock button.
- Set the time to "4:00" using the setting control knob.
- Touch the Clock button.
- Set the time to "4:30" using the setting control knob.
- Touch the Clock button. (The time will now be set.)
NOTE: It is possible to display the current time even after starting the mode set, by pressing the Clock button (the time is displayed for 2 seconds).
Child safety lock
The oven is equipped with a safety device which prevents pre-set cooking times from being tampered with while the cooking is underway, in order to avoid accidental and dangerous extensions to the cooking time which might cause the food to burn.
To set:
- Touch and hold the 'Stop' button for 5 seconds; a beep will be heard.
To cancel the child lock, simply touch and hold the 'Stop' button for 5 seconds; a beep will be heard.
To Stop the Oven
There are two ways to stop the oven while it is in use.
- Press the Stop/Clear button.
• You may restart the oven by pressing the Start button. Pressing Stop/Clear again will reset the current programme.
- Open the door.
• You may restart the oven by closing the door and pressing the Start button. Pressing Stop/Clear again will cancel the current programme.
This model is equipped with an automatic cooling cycle which comes into action whenever the oven is very hot (for example after something has been cooked for a long time). During this cycle the word "COOL" will appear on the display. The fans and the oven light will come on (they will go off automatically).
At the end of each cooking cycle, the cooling fan will remain in operation until the oven door is opened.
Turntable Stop Key
When using large-sized containers or recipients (or containers with handles) that are not able to rotate, the movement of the turntable can be stopped. Press the TURNTABLE STOP key (15), after having first set a cooking function: the LED in the top right will start flashing.
After having pressed START, the LED will flash a further 5 times, and will then remain on for the entire set time; for best results, the food should be mixed or stirred a number of times during cooking. The TURNTABLE STOP function will remain on the next time the oven is used, that is until the TURNTABLE STOP key is pressed again.
For the microwave-only function, the maximum power available is 750W (reduced automatically by the electronic controller when pressing the TURNTABLE STOP key).
Kitchen Timer
This function allows for the use of the timer, with the oven NOT functioning, for up to 60 minutes.
- Press the FUNCTION key until 3 dashes appear on the (lower) temperature display.
- Select the desired time by turning the setting control knob.
- Press START.
At the end, 3 beeps will be heard and the "end" warning will appear on display 1.
Quick Start
Pressing the 'Start' button allows you to start your microwave at full power (1000W) for 30 seconds.
Each time you press the 'Start' button you will increase the cooking time by 30 seconds, up to a maximum of 3 minutes.
This mode is activated only if it is carried out within 1 minute after the food has been placed in the oven.
Microwave Power Setting Guide
| Power Setting Suggested use | |
| Keeping warm: Keeping foods warm150W | |
| Thawing frozen foods. | |
| 300W | Simmer: Completing the cooking cycle of some pot roasts. Casseroles and stews. |
| Baked custards or cheesecakes. | |
| Medium: Faster defrosting for casseroles and stews.500W | |
| Baking cakes and sponge puddings | |
| 750W | Reheat: Reheating of casseroles and stews.. |
| Reheating pre-cooked foods. | |
| Roasting joints of meat and poultry. | |
| 1000W | Max Power; Boiling or reheating liquids. Cooking vegetables. |
| Preheating a browning dish. |
Microwave Cooking
- Open the door, place the food on the turntable. Close the door.
- Press the Function Key once.
- Press the 'Power' button until the desired power level is reached.
- Set the desired time by turning the setting control knob.
- Press Start (The oven begins cooking.)
To turn off the oven during cooking, simply touch the Stop/Clear button.
Note: After use, be sure to press the Stop/Clear button twice, as this will ensure that you have reset the microwave.
Example: To cook at 500W for 15 minutes
- Press the function key once.
- Touch the Power button 3 times ('500' should now be showing in the display window).
- Turn the setting control knob ('15:00' should now be showing in the display window).
- Press start. The oven will now start cooking.
Cooking with Grill
- Open the door, place the food on the high rack. Close the door.
- Press the Function key 6 times.
- Set the desired time by turning the setting control knob.
- Press Start (the oven begins cooking).
To turn off the oven during cooking, simply touch the Stop/Clear button.
Note: After use, be sure to press the Stop/Clear button twice to ensure that you have reset the microwave.
Example: To cook with Grill for 15 minutes
- Touch the Function button 6 times ('☐' should now be showing in the display window).
- Turn the setting control knob ('15:00' should now be showing in the display window).
- Press Start. The oven will now start.
Convection Cooking
- Press the Function button four times.
- Press the 'Temp' button until the desired cooking temperature is reached.
- Set the desired time by turning the setting control knob.
- Press Start (the oven begins to pre-heat).
When Pre-heat has finished the oven will beep three times and the temperature will be shown in the display window.
- Open the door, place the food on the Low Rack. Close the door.
- Press Start (The oven begins cooking.)
To turn off the oven during cooking, simply touch the Stop/Clear button.
Note: After use, be sure to press the Stop/Clear button Twice as this will ensure that you have reset the microwave.
Example: To cook with Convection (180°C) for 45 minutes (With pre-heat)
- Touch the Function Button X 5 (the convection icon should now be showing in the display window).
- Touch the 'TEMP' Button X 2 ('180° C' should now be showing in the display window).
- Turn the setting control knob ('45:00' should now be showing in the display window).
- Press start.
When Pre-heat has finished the oven will beep three times and '180° C' will appear in the display window.
- Press start.
NOTE : Convection Temperature cycles in the following sequence
60 °C, 100 °C, 130 °C, 160 °C, 170 °C, 180 °C, 190 °C, 200 °C, 210 °C, 220 °C.
Combination Cooking
This oven offers you a choice of two methods of Combination cooking. These are 'Microwave and Convection oven' and 'Microwave and Grill'.
- Open the door, place the food on the Low Rack. Close the door. To turn off the oven during cooking, simply touch the Stop/Clear button.
- Press the 'Function' button until the desired programme is reached. NOTE: After use, be sure to press the Stop/Clear button twice as this will ensure that you have reset the microwave.
- Set the desired time by turning the setting control knob.
- Press Start (The oven begins cooking.)
NOTE: During both of these modes the Microwave power can be altered by pressing the Power Button.
NOTE: During the Combination 'Microwave and Convection cooking' mode the Convection temperature can be altered by pressing the 'Temp' button.
Example: To cook with 'Microwave and Grill' for 29 minutes.
- Touch the 'Function' button 4 times. (" should now be showing in the display window).
- Set the desired time by turning the setting control knob. ('29:00' should now be showing in the display window)
- Press start. The Oven will now start cooking.
Example: To cook with 'Microwave and Convection' for 29 minutes.
- Touch the 'Function' button 3 times. (' should now be showing in the display window).
- Set the desired time by turning the setting control knob. ('29:00' should now be showing in the display window)
- Press start. The Oven will now start cooking.
Defrost
For manual defrosting, use the defrost function. To speed up the defrosting of dense foods over 450g (1lb), the oven may be started on 1000W (100%) power for 1-3 minutes, then reduced to 100W until defrosting is complete.
- Open the door, place the food on the turntable, and close the door.
- Press the function button twice.
- Set the desired time by turning the setting control knob.
- Press Start (the oven begins defrosting).
To turn off the oven during defrosting, simply touch the Stop/Clear button.
NOTE: After use, be sure to press the Stop/Clear button twice to ensure that you have reset the microwave.
Example: To defrost some food for 12 minutes.
- Touch the function button twice.
- Set the desired time by turning the setting control knob.
- Press Start. The oven will now start defrosting.
Defrosting Tips
- It is better to underestimate defrosting time if you are unsure. Food will continue to defrost during the standing time.
- Separate food as soon as possible.
- Turn large items, e.g. joints, halfway through the defrosting time.
- Remove any thawed food as soon as possible.
- Remove or open any packaging before defrosting.
- Place food in a larger container than that which it was frozen in, this will allow for easy stirring.
- Begin thawing poultry, breast side down and turn over halfway through defrosting time or at pause. Delicate areas such as wing tips can be shielded with small pieces of smooth foil.
- Standing time is very important, particularly for large, dense foods which cannot be stirred to ensure that the centre is completely defrosted before cooking.
Two Stage Cooking
Most frozen foods should be defrosted before cooking. This oven can be set for Two Stage Cooking which will allow you to defrost your food and then cook it in one easy step.
- Open the door, place the food on the turntable. Close the door.
- Set the desired time by turning the setting control knob.
- Press the Function button twice.
- Press Start (The oven begins cooking.)
- Set the desired time by turning the setting control knob.
Note: After use, be sure to press the Stop/Clear button twice, as this will ensure that you have reset the microwave.
- Set the desired cooking mode.
Example: To defrost for 12 minutes and then cook at 750W for 29 minutes.
- Touch the function button twice.
- Set the desired time by turning the setting control knob. (12:00 should now be showing in the display window).
- Touch the function button once.
- Touch the power button 4 times (750 W should now be showing in the display window).
- Set the desired time by turning the setting control knob. (29:00 should now be showing in the display window).
- Press Start. The oven will now start cooking.
NOTE: For two-stage cooking, after you have set the defrost time, you can select any of the five cooking modes (Microwave, Microwave and Grill, Microwave and Convection, Convection only, Grill only).
Auto Cook
This oven can be used to automatically reheat drinks, potatoes, chilled ready meals, frozen pizza/ready meals, and popcorn.
- Open the door, place the food on the turntable. Close the door.
To turn off the oven during cooking, simply touch the Stop/Clear button.
- Press the desired 'Auto Cook' button until the desired programme is reached.
NOTE: After use, be sure to press the Stop/Clear button twice to ensure that you have reset the microwave.
- Press Start (the oven begins cooking).
NOTE: For details, see the table below.
NOTE: During AUTO COOK, the oven will automatically select the required microwave power and cooking time.
Selection chart for Auto Cook functions:
| Auto Programme Press | Button Programme Description | |
| Beverage | Once Reheat one small cup (50cc) (room temperature) | |
| Twice Reheat one medium cup (125cc) (room temperature) | ||
| Three Times Reheat one large cup (200cc) (room temperature) | ||
| Four Times Reheat 1 soup bowl (300cc) (chilled) | ||
| Potato | Once Cook 200 g of potatoes | |
| Twice Cook 400 g of potatoes | ||
| Three Times Cook 600 g of potatoes | ||
| Chilled Ready Meals | Once Reheat 1 portion (250-350 g) | |
| Twice Reheat 2 portion (450-550 g) | ||
| Frozen Pizza / Ready Meals | Once Reheat 1 frozen pizza (250-500 g) | |
| Twice Reheat 1 portion (250-350 g) | ||
| Three Times | Reheat 2 portion (450-550 g) | |
| Popcorn | Once | Cook 1 100 g packet of microwave popcorn |
Example: To automatically cook 600g of potatoes.
- Touch the potato button 3 times.
- Press Start. The oven will now start cooking.
See the Auto Cook Programme Chart for further details.
Charts
Recommendations for cooking with Grill
All foods should be placed on the high rack with a non-metal dish placed underneath to catch any food spillage or juices to minimise cleaning. Turn all food halfway through the cooking time.
| Food | QTY. (Weight) | Cooking time | Special notes |
| Toast 2 Slices 4 – 5 min | |||
| Cheese on Toast 4 Slices | 6 – 7 min 4 – 5 min. to toast. 2 min. with topping | ||
General recommendations for cooking with Microwave and Grill
Use the low rack on the turntable for roast beef and pork, shield thin parts and edges. Place a non-metal dish on the turntable under the grill rack to catch food spillage and juices. Turn food, as appropriate, during the cooking time.
| Food QTY (Weight) | Power Selector position | Cooking time | Special notes | |
| Bacon 4 (100 g) Microwave 750W | + Grill | 7-9 min | ||
| Roast Beef (Boned) 900 g | Microwave only 750W | 25 min | Brush with oil. Season with salt and pepper. Allow 15 – 20 minutes standing | |
| Microwave 750W | ||||
| Roast Pork (Loin) 900 g | + Grill | 5 - 6 min | time after cooking. | |
| Microwave 750W | Brush with oil. Season | |||
| Pork Chops 2 - 3(450 g) | + Grill | 20 - 25 min | with salt, pepper and paprika. | |
| Chicken, Halved lengthways | 450 g | Microwave only 750W | 15 - 20 min | Brush with oil. Season |
| Legs | 800 g | Microwave 750W + Grill | 25 - 30 min | with salt, pepper and paprika. |
| Frozen Hamburger 4 | (200 g) Microwave | 750W + Grill | 12 - 15 min | |
| Sausages | 450 g Only | Microwave 750W + Grill | 10 - 15 min | |
| Fish Steak | 2 (350 g) | Microwave 750W + Grill | 22 – 24 min | Brush with oil, Season with salt and pepper. |
| Frozen Potato, Hash Brown | 2 (150 g) | Microwave 750W + Grill | 16 – 18 min. | |
Recommendations for Manual Defrost
Some foods such as bread and fruit can be successfully thawed manually by using this power setting (100W).
| FOOD PREPARATION | Defrost time | STANDING TIME | |
| Bread | |||
| Small loaf | Place on microwave-proof rack or kitchen paper.Turn over halfway through defrosting time. | 8–10 min. 10–15 min. | |
| Sliced large loaf | Place on microwave-proof rack or kitchen paper.Turn over halfway through defrosting time. | 10–13 min. 10 min | |
| 2 slices | Place on kitchen paper. | 45–60 sec. | 5 min. |
| 1 bread roll | Place on kitchen paper. 45–60 sec. 5 min. | ||
| 2 bread rolls | Place on kitchen paper. 1–11/2 min. 5 min. | ||
| Cakes and Pastry | |||
| Gateau 450g/1 lb | Remove from packaging, place on plate. | 9–11 min. | 15–30 min. |
| Cheesecake 450g/1 lb | Remove from packaging, place on plate. 9–11 min. 15–30 min. | ||
| Pie (cooked) 450g/1 lb | Remove from packaging, place on plate. 7–9 min. 15–30 min. | ||
| Pastry 450g/1 lb | Remove from packaging, place on plate. | 7–9 min. | 15–30 min. |
| Butter | |||
| 250g/8.8 oz(1 packet) | If foil wrapped, remove from wrapper and place on a plate | 3–4 min. 5–10 min. | |
| Fruit | |||
| 225g/8 oz | Place in a single layer in a shallow dish. 5–6 min. 5–10 min. | ||
| Soft berry fruits | |||
| 450g/1 lb | Place in a single layer in a shallow dish. | 7–8 min. 5–10 min. | |
| Soft berry fruits | |||
| Plated meal | |||
| 400g/14 oz | Cover with a plate or non P.V.C. cling film.To reheat, microwave on 100% (1000W)for 3–4 minutes. | 7–8 min 5–10 min. | |
| Vegetables | |||
| It is not necessary to defrost vegetables before cooking.All vegetables can be thawed and cooked on100% (1000W) | |||
Auto Cook Programmes Chart
| Auto Programme Press Button | Programme Description | Special Notes | |
| Beverage | Once Reheat one small cup (50cc) (room temperature) | After reheating the liquid, stir well to spread the temperature evenly | |
| Twice Reheat one medium cup (125cc) (room temperature) | |||
| Three Times Reheat one large cup (200cc) | |||
| Four Times Reheat 1 soup bowl (300cc) (chilled) | |||
| Potato | Once Cook 200 g of potatoes | Wash the potatoes thoroughly in their jackets, pierce them and put them on the turntable. They can be served stuffed with butter or cheese | |
| Twice Cook 400 g of potatoes | |||
| Three Times Cook 600 g of potatoes | |||
| Chilled Ready Meals | Once Reheat 1 portion (250-350 g) | Suitable for cooked portions of food, stored in the refrigerator on the plate (the one from which the food is to be eaten). In the case of pre-cooked food products, remove the food from any aluminium packaging/containers and place it on an ovenproof plate. | |
| Twice Reheat 2 portions (450-550 g) | |||
| Frozen Pizza / Ready Meals | Once Reheat 1 frozen | Place the pizza directly on the low wire rack. | |
| pizza (250-500 g) | Place the packet on the turntable, being careful to remove any covers (film, bags). If the packet is not suitable for microwaves, however, (e.g. metal pans), remove the food from the packet on to the serving dish, placing it uncovered on the turntable. | ||
| Twice Reheat 1 portion (250-350 g) | |||
| Three Times Reheat 2 portions (450-550 g) | |||
| Popcorn | Once Cook 1 x 100 g packet of microwave popcorn | Follow the instructions written on the box closely and place it on the turntable. | |
Microwave Hints
- Always keep the oven clean – avoid spill-overs and do not forget to clean under the glass tray and the inside of the door.
- Preferably use round or oval casseroles with a lid when cooking in your microwave oven.
- Do not use metal or metal-decorated casseroles. Certain plastic materials can melt and be warped by hot food. Cover the food when cooking. Use a glass lid, a plate, or greaseproof paper.
- Pastry, bread, and the like can be defrosted directly in a bread basket or on a paper towel.
- If frozen food is heated in its packaging, the packaging should be opened. Packaging containing metal or metal decoration must not be used unless specifically recommended for use in the microwave. Remove metal clips and wire ties.
- Smaller pieces of aluminium foil can be used to cover parts that easily overcook, such as chicken legs.
- Food with peel or skin should be pierced with a fork – e.g., potatoes and sausages. Do not boil eggs in the microwave oven as they can explode.
- Put large, thick pieces close to the edge of the casserole and try to cut the food into even-sized pieces. Always place the food in the centre of the oven.
- The food will be evenly cooked if you stir or turn it a few times.
- Always set a shorter cooking time than indicated in your recipe to avoid overcooking. The larger the amount of food, the longer it takes. Use little or no water for vegetables. Use less salt and spices than for 'normal' cooking.
- Season afterwards.
- Allow a few minutes 'standing' time after the oven has switched off to ensure complete and even cooking results. Always ensure food is piping hot throughout before serving.
- Use pot holders or gloves when taking dishes and food from the oven.
Microwave Tips
Softening Honey
If you have a jar of honey which has crystallised, remove the lid and place the jar in the oven, microwave on medium power for 2 minutes.
Melting Chocolate
Break 100g of chocolate into squares, place in a bowl and heat on high power for 1-2 minutes and stir well.
Softening or Melting Butter
Melting takes a few seconds on high power. Softening is best done more gently on low power.
Freshen or Warm Bread
Use medium power for a few seconds.
Peeling Garlic Easily
Heat 3 or 4 cloves of garlic on high power for 15 seconds. Squeeze at one end until the clove pops out.
- Fruit Juice
Citrus fruits will yield more juice if they are heated on high power for 15 seconds before squeezing.
• Cooking Porridge
Porridge is easily cooked in the serving dish with no sticky pan to wash. Follow food manufacturers' recommendations.
Care and cleaning
The oven must always be clean. Residue of food from spillovers or spatters will attract microwave energy causing it to burn on. This could reduce the efficiency of the oven and may cause bad odours. Do not attempt to tamper with or make any adjustments or repairs to any part of the oven. Repairs should only be done by a qualified service technician.
Be sure the oven is disconnected from the electricity supply before cleaning.
Cleaning the accessories (turntable and support)
Clean them with mild detergent after removing them from the cavity. The turntable support should be carefully handled.
CAUTION: The inside of the oven and turntable get very hot, so do not touch them immediately after use.
Cleaning the interior
Always keep the inside of the oven clean. Wipe up spill-overs and food spatters immediately. Deposits that are allowed to remain on the oven walls, door seal and door surface will absorb microwave energy, reduce the efficiency of the oven, and possibly damage the oven interior. Use mild, liquid detergent, warm water and a soft, clean cloth to remove deposits.
NEVER USE ABRASIVE CLEANERS, COMMERCIAL OVEN CLEANERS OR STEEL WOOL PADS ON ANY PART OF THE MICROWAVE OVEN.
To loosen difficult deposits, boil a cup of water in the microwave oven for 2 or 3 minutes.
NEVER USE A KNIFE OR ANY UTENSIL TO REMOVE DEPOSITS FROM OVEN SURFACES.
To remove odours from the oven interior, boil a cup of water plus 2 tablespoons of lemon juice for 5 minutes.
Cleaning the Grill
The element may be stained with spattered fat or oil while the oven is in use. Wait until the cavity cools down and wipe off the spattered oil before next using of the oven. Stains grill may cause unpleasant odours and smoke.
The turntable motor is sealed. Nevertheless, be careful to avoid the water penetrating under the turntable spindle (D) when the bottom of the oven is being cleaned.
To make the cleaning of the inside of the oven easier, the upper heating element can be lowered by turning the ceramic hook.
Cleaning the exterior
Open the oven door when cleaning the control panel. This will prevent the oven from being turned on accidentally. You should clean outside surfaces of the oven with mild liquid detergent and water followed by a wiping with clear water to remove any excess detergent. Dry with a soft cloth.
Spray-on window cleaners or all purpose spray-on kitchen cleaners can also be used. Never use abrasive cleaners, scouring pads or harsh chemicals on outside surfaces of your oven. To prevent damage to the working parts, do not allow water to seep into ventilation openings.
DECLARATION OF GUARANTEE TERMS.
Our appliances are produced with the greatest of care. However, a defect may still occur. Our consumer services department will repair this upon request, either during or after the guarantee period. The service life of the appliance will not, however, be reduced as a result.
This declaration of guarantee terms is based on European Union Directive 99/44/EC and the provisions of the Civil Code. The statutory rights that the consumer has under this legislation are not affected by this declaration of guarantee terms.
This declaration does not affect the vendor's statutory warranty to the end user. The appliance is guaranteed within the context of and in adherence with the following terms:
- In accordance with provisions laid down in paragraphs 2 to 15, we will remedy free of charge any defect that occurs within 24 months from the date the appliance is delivered to the first end user.
These guarantee terms do not apply in the event of use for professional or equivalent purposes.
- Performing the guarantee means that the appliance is returned to the condition it was in before the defect occurred. Defective parts are replaced or repaired. Parts replaced free of charge become our property.
- So as to avoid more severe damage, the defect must be brought to our attention immediately.
- Applying the guarantee is subject to the consumer providing proof of purchase showing the purchase and/or delivery date.
- The guarantee will not apply if damage caused to delicate parts, such as glass (vitreous ceramic), synthetic materials and rubber, is the result of inappropriate use.
- The guarantee cannot be called on for minor faults that do not affect the value or the overall reliability of the appliance.
- The statutory warranty does not apply when defects are caused by:
- a chemical or electrochemical reaction caused by water, • abnormal environmental conditions in general, • unsuitable operating conditions,
- contact with harsh substances.
- The guarantee does not apply to defects due to transport which have occurred outside of our responsibility. Nor will the guarantee cover those caused by inadequate installation or assembly, lack of maintenance or failure to respect the assembly instructions or directions for use.
- Defects that result from repairs or measures carried out by people who are not qualified or expert or defects that result from the addition of non-original accessories or spare parts are not covered by the guarantee.
- Appliances that are easy to transport may be delivered or sent to the consumer services department. Home repairs are only anticipated for bulky appliances or built-in appliances.
- If the appliances are built-in, built-under, fixed or suspended in such a way that removing and replacing them in the place where they are fitted takes more than half an hour, the costs that result therefrom will be charged for. Connected damage caused by these removal and replacement operations will be the responsibility of the user.
- If, during the guarantee period, repairing the same defect repeatedly is not conclusive, or if the repair costs are considered disproportionate, in agreement with the consumer, the defective appliance may be replaced with another appliance of the same value. In this event, we reserve the right to ask for a financial contribution calculated according to the length of time it has been used.
- A repair under guarantee does not mean that the normal guarantee period will be extended nor that a new guarantee period begins.
- We give a twelve month guarantee for repairs, limited to the same defect.
- Except in the event where liability is legally imposed, this declaration of guarantee terms excludes any compensation for damage outside the appliance for which the consumer wishes to assert his rights. In the event of legally admitted liability, compensation will not exceed the purchase price paid for the appliance.
These guarantee terms are only valid for appliances purchased and used in Belgium. For exported appliances, the user must first make sure that they satisfy the technical conditions (e.g.: voltage, frequency, installation instructions, type of gas, etc.) for the country concerned and that they can withstand the local climatic and environmental conditions. For appliances purchased abroad, the user must first ensure that they meet the qualifications required in Belgium. Non-essential or requested adjustments are not covered by the guarantee and are not possible in all cases.
Our consumer services department is always at your disposal, even after the guarantee period has expired.
Address for our consumer services department:
ELECTROLUX HOME PRODUCTS BELGIUM Bergensesteenweg, 719 – 1502 LEMBEEK Tel. 02.3630444

From the Electrolux Group. The world's No.1 choice.
The Electrolux Group is the world's largest producer of powered appliances for kitchen, cleaning and outdoor use. More than 55 million Electrolux Group products (such as refrigerators, cookers, washing machines, vacuum cleaners, chain saws and lawn mowers) are sold each year to a value of approx. USD 14 billion in more than 150 countries around the world.

- BEFORE USING YOUR MICROWAVE OVEN
- TECHNICAL DATA
- SAFETY INSTRUCTIONS
- GETTING STARTED
- INSTALLATION
- HOW TO OPERATE YOUR MICROWAVE OVEN
- CHARTS
- MICROWAVE HINTS
- CARE AND CLEANING
- GUARANTEE CONDITIONS
- CONGRATULATIONS ON THE PURCHASE OF YOUR NEW MICROWAVE OVEN
- UTENSIL SAFETY
- SAFETY INSTRUCTIONS WHEN COOKING WITH GRILL, CONVECTION, OR COMBINATION MODES
- TESTING SUITABILITY OF COOKWARE FOOD SAFETY
- NOTE
- OVEN UTENSILS AND ACCESSORIES GUIDE
- UNPACKING
- BUILDING IN
- ATTENTION
- ELECTRICAL CONNECTIONS
- WARNING! THIS APPLIANCE MUST BE EARTHED
- THE MANUFACTURER DECLINES ANY LIABILITY SHOULD THIS SAFETY MEASURE NOT BE OBSERVED
- TURNTABLE INSTALLATION
- NAME AND FUNCTION OF PARTS
- CONTROL PANEL
- INSTALLING THE SIDE RAILS
- SETTING THE CLOCK
- EXAMPLE: TO SET
- CHILD SAFETY LOCK
- TO SET
- TO STOP THE OVEN
- TURNTABLE STOP KEY
- KITCHEN TIMER
- QUICK START
- MICROWAVE COOKING
- EXAMPLE: TO COOK AT 500W FOR 15 MINUTES
- COOKING WITH GRILL
- EXAMPLE: TO COOK WITH GRILL FOR 15 MINUTES
- CONVECTION COOKING
- EXAMPLE: TO COOK WITH CONVECTION (180°C) FOR 45 MINUTES (WITH PRE-HEAT)
- COMBINATION COOKING
- EXAMPLE: TO COOK WITH 'MICROWAVE AND GRILL' FOR 29 MINUTES
- EXAMPLE: TO COOK WITH 'MICROWAVE AND CONVECTION' FOR 29 MINUTES
- DEFROST
- EXAMPLE: TO DEFROST SOME FOOD FOR 12 MINUTES
- DEFROSTING TIPS
- TWO STAGE COOKING
- EXAMPLE: TO DEFROST FOR 12 MINUTES AND THEN COOK AT 750W FOR 29 MINUTES
- AUTO COOK
- NOTE: FOR DETAILS, SEE THE TABLE BELOW
- EXAMPLE: TO AUTOMATICALLY COOK 600G OF POTATOES
- RECOMMENDATIONS FOR COOKING WITH GRILL
- GENERAL RECOMMENDATIONS FOR COOKING WITH MICROWAVE AND GRILL
- RECOMMENDATIONS FOR MANUAL DEFROST
- MICROWAVE TIPS
- SOFTENING HONEY
- MELTING CHOCOLATE
- SOFTENING OR MELTING BUTTER
- FRESHEN OR WARM BREAD
- PEELING GARLIC EASILY
- FRUIT JUICE
- COOKING PORRIDGE
- CLEANING THE ACCESSORIES (TURNTABLE AND SUPPORT)
- CLEANING THE INTERIOR
- NEVER USE ABRASIVE CLEANERS, COMMERCIAL OVEN CLEANERS OR STEEL WOOL PADS ON ANY PART OF THE MICROWAVE OVEN
- NEVER USE A KNIFE OR ANY UTENSIL TO REMOVE DEPOSITS FROM OVEN SURFACES
- CLEANING THE GRILL
- CLEANING THE EXTERIOR
- DECLARATION OF GUARANTEE TERMS
Brand : ZANUSSI
Model : ZMC 30 QA
Category : Microwave