
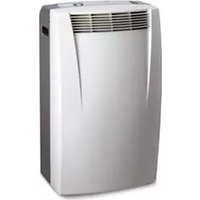
Pinguino PAC L41AH - Air Conditioning DELONGHI - Free user manual and instructions
Find the device manual for free Pinguino PAC L41AH DELONGHI in PDF.


| Product Type | Portable Air Conditioner |
| Model | Pinguino PAC L41AH |
| Brand | DeLonghi |
| Cooling Capacity (BTU) | 14,000 BTU/h |
| Power Supply | 220-240V ~ 50Hz |
| Power Consumption (Cooling) | 1300 W |
| Energy Efficiency Class (Cooling) | A |
| Dimensions (W x H x D) | 45 x 77.5 x 40.5 cm |
| Weight | 32 kg |
| Refrigerant Type | R290 (Propane) |
| Air Flow Rate (Max) | 320 m³/h |
| Noise Level (Max) | 65 dB(A) |
| Operating Modes | Cooling, Fan, Dehumidification, Heating (optional) |
| Thermostat Control | Electronic with remote control |
| Timer Function | 24-hour programmable timer |
| Castors / Wheels | Yes, 4 castors |
| Water Tank Capacity | 1.5 L (or continuous drainage) |
| Filter Type | Washable dust filter |
| Cleaning and Maintenance | Clean filter every 2 weeks; empty tank as needed |
| Safety Features | Overheat protection, anti-freeze thermostat |
| Accessories Included | Exhaust hose, window kit, remote control |
| Repairability Index | 7.5/10 (estimated) |
Frequently Asked Questions - Pinguino PAC L41AH DELONGHI
User questions about Pinguino PAC L41AH DELONGHI
0 question about this device. Answer the ones you know or ask your own.
Ask a new question about this device
Download the instructions for your Air Conditioning in PDF format for free! Find your manual Pinguino PAC L41AH - DELONGHI and take your electronic device back in hand. On this page are published all the documents necessary for the use of your device. Pinguino PAC L41AH by DELONGHI.
USER MANUAL Pinguino PAC L41AH DELONGHI
- This appliance is designed for home air conditioning and must not be used for other purposes.
- It is dangerous to modify or alter the characteristics of the appliance in any way.
- The appliance must be installed in conformity with legislation in force in the country concerned.
- If the appliance requires repair, contact a Service Centre authorised by the manufacturer only.
• Repairs carried out by unauthorised personnel may be dangerous. - if the power cable is damaged, it must be replaced by a qualified professional authorised by the manufacturer only.
- This air conditioning unit must be used by adults only. Never allow children to play with the appliance.
- This appliance is designed for home air conditioning and must not be used for other purposes.
- Do not allow children to play with the appliance.
- The appliance must be connected to an efficient earth system.
- Have your electrical circuit checked by a qualified electrician.
- Do not use extension cables.
- Before cleaning or maintenance operations, always unplug the appliance from the mains socket.
- Do not move the appliance by pulling the power cable.
- Do not install the appliance in rooms containing gas, oil or sulphur. Do not install near sources of heat. .
- Do not rest heavy or hot objects on top of the appliance.
- Clean the anti-microbial filters at least once a week.
• A void using heating appliances near the air conditioning unit. - A Iways transport the appliance upright or resting on one side.
- Use the appliance as described in this instruction manual only.
- As with any electrical appliance, while the instructions aim to cover as many eventualities as possible, caution and common sense should be used when operating and installing this air conditioning unit.
- At the end of its working life, take the appliance to a special collection centre.
- The materials used for packaging can be recycled.
- You are therefore recommended to dispose of them in special differentiated waste collection containers.
- When putting the appliance away, do not cover with plastic bags.
- The refrigerant gas R410a conforms to EC regulations on the environment.
Avoid perforating the refrigerant circuit of the appliance. - Keep the appliance at least 50 cm away from flammable substances (alcohol etc) or pressurised containers (e.g. aerosol cans).
DESCRIPTION
1 air outlet grille
2 control panel
3 castors
4 handles
5 evaporator air intake grille
6 air exhaust hose housing
7 condenser air intake grille
8 drain hose cover
9 power cable
10 flange cap
11 air exhaust hose
12 window outlet
13 suckers
14 castor locks
15 remote control unit (certain models only)
16 adjustable window bar (certain models only)
What is the Pinguino
During the summer, you feel comfortable at a temperature of between 24 and 27ircC with a relative humidity of about 50% .
During the summer, you feel comfortable at a temperature of between 24 and 27ircC with a relative humidity of about 50% .
Compared with installed models, portable air conditioning units have the advantage that they can be moved from one room to another in the home or be transported from one building to another.
Hot air from the room is passed through a coil cooled by refrigerant gas. Excess heat and moisture are removed before the air is re-emitted into the room.
In single unit models (Pinguino), a small part of this air is used to cool the refrigerant gas and then, when hot and damp, is discharged outside.
In models with case, the circuit is cooled using air from outside.
All Pinguino models can also be used in fan-only mode.

Preparing for use
ELECTRICAL CONNECTIONS
Before plugging the appliance into the mains socket, check that:
- the mains power supply corresponds to the value indicated on the rating plate on the back of the appliance;
- the mains socket and electrical circuit are adequate for the appliance;
- the mains socket matches the plug. If this is not the case, have the plug replaced;
- the mains socket is adequately earthed.
Failure to follow these important safety instructions absolves the manufacturer of all liability.
The power cable must be replaced by a qualified professional only.
The instructions below will enable you to prepare your air conditioning unit for operation as efficiently as possible.
The instructions below will enable you to prepare your air conditioning unit for operation as efficiently as possible.
AIR-CONDITIONING WITHOUT INSTALLATION
Just a few simple steps and your comfort is ensured with Pinguino:
- Fit the air exhaust hose in the housing 6 at the back of the appliance. Insert it as shown in figure A.

natural_image
Line drawing of a portable air conditioner unit with ventilation grilles and control knobs (no text or symbols)- Fit the window outlet 12 the window outlet 11.
- Place the air conditioning unit near a window or French window.
- Make sure the air exhaust hose is unobstructed.
- Open the window or French window slightly and position the outlet □ shown in figure B.
Keep air hoses as short and free of curves as possible to avoid constrictions.

natural_image
Line drawing of a mechanical device with a coiled cable or hose, no text or symbols present
- If you have a double window, use the suckers provided to hold the two parts of the window together (fig. C).

natural_image
Technical line drawing of a coiled cable or hose assembly with mounting brackets and a vertical support (no text or symbols)
Preparing for use
Using the adjustable bar (certain models only)
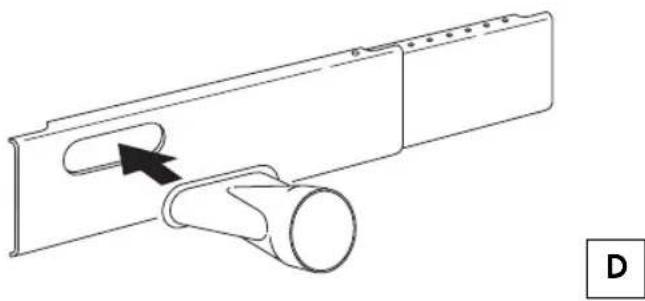
- Some models are provided with an adjustable bar which can be useful if your home is fitted with roller blinds.
To fit the bar, proceed as follows:
- fit the window outlet in the housing in the bar (fig. D).
natural_image
Technical line drawing of a mechanical component with a curved arrow indicating direction (no text or symbols)- position the bar on the window sill
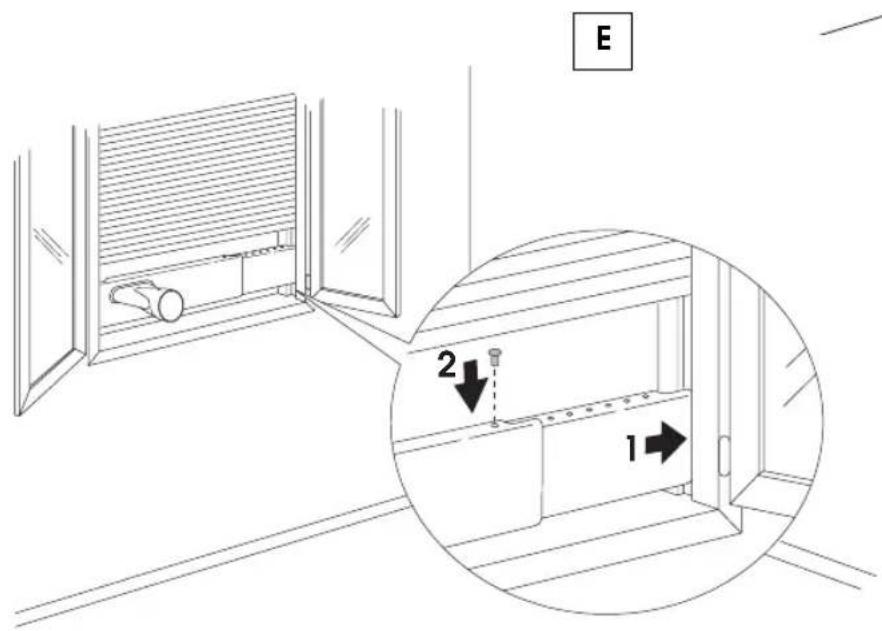
- extend the bar for the full length of the window and fit it into the roller blind guides.
If you wish, you can block the bar in place using the pin supplied (fig. E), then lower the blind onto the bar.
- fit the air exhaust hose 1d the window outlet 12d insert the other end of the hose into the back of the air conditioner (figure F).

Preparing for use
AIR-CONDITIONING WITH INSTALLATION
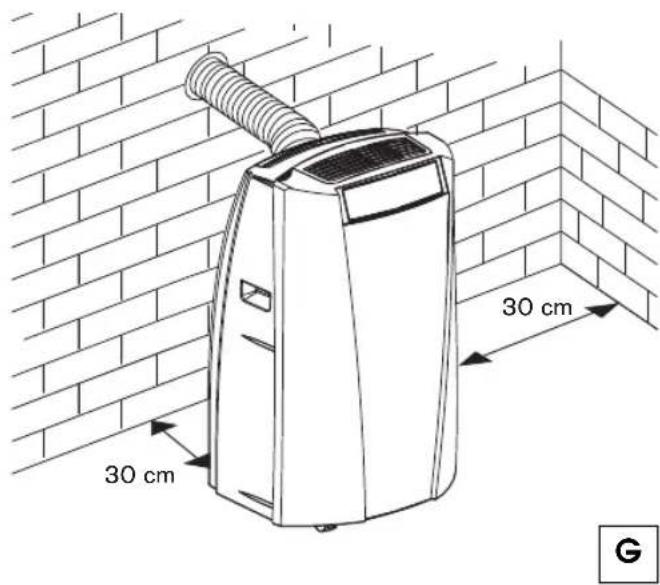
If required, the Pinguino can also be installed semi-permanently (Fig. G).
Proceed as follows:
- Drill a hole in an outside wall or through a window pane. Respect the dimensions of the hole and heights shown in figures H and I.
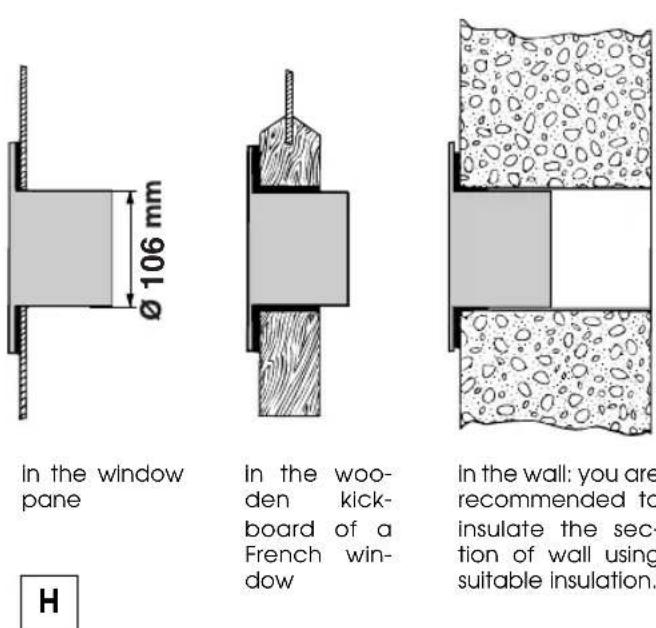
H
- Fit the flange accessory provided in the hole.
- Fit the hose in the housing at the back of the appliance (fig. A page 22).
- Fit the end of the hose to the flange 10 as shown in fig. 1.
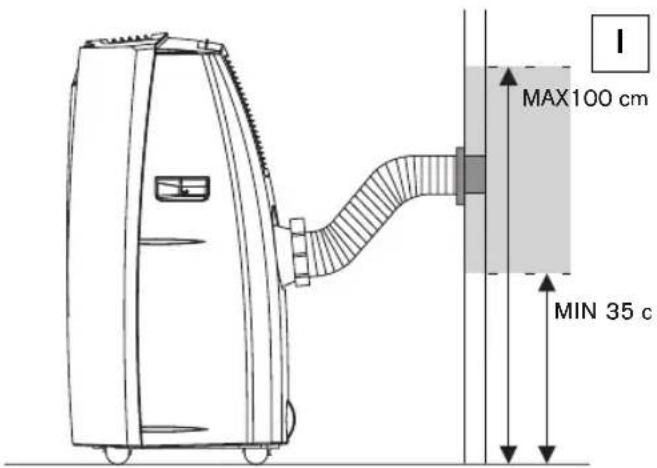
When the hose is hot fitted, the hole can be closed with the flange cap 10
NOTE:
When installing the air conditioning unit semi-permanently, you should leave a door slightly open (as little as 1 cm) to guarantee correct ventilation.
Keep the air hoses as short and free of curves as possible to avoid constrictions.
Control panel
Control panel

DESCRIPTION OF THE CONTROL PANEL
A ON/STAND-BY button
B Heating mode light (certain models only)
C Fan mode light
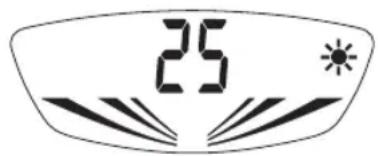
D Display Displays the temperature values set and the programmed operating time
E Dehumidifying mode light
F Air conditioning light
G Increase temperature/programmed operating time button
H T i mer button
I Reduce temperature/programmed operating time button
L Fan speed lights
M Remote control receiver
N T ime indicator
O MODE selection button
Air conditioning, dehumidifying, fan, heating (certain models only)
P Fan speed selection button
Operation
TURNING THE APPLIANCE ON
Plug the appliance into the mains.
Two lines appear on the display indicating that the appliance is in stand-by.
Press the ON/STAND-BY button (A) (when turned on, the air conditioner starts operating in the same mode as when it was turned off). Press the MODE button (O) until the indicator light corresponding to the required mode lights up:
Light (F) ✱: air-conditioning mode
Light (E) : dehumidifying mode
Light (C): fan mode
Light (B) ⚙ : heating mode (certain models only)

natural_image
Simple line drawing of a bowl with two small dots inside (no text or symbols)AIR-CONDITIONING MODE " \* "
Ideal for hot muggy weather when you need to cool and dehumidify the room.
To set this function correctly, press the "MODE" button until the " ✳ " light comes on, then press the + (G) or - (I) buttons until the required temperature is displayed.
Then select the fan speed by pressing the FAN button (P) until the indicator light corresponding to the required fan speed lights up:

(HIGH) the air conditioner operates at maximum to reach the required temperature as rapidly as possible.

(MED) reduces noise levels but still maintains a good level of comfort.

(LOW) for silent operation
AUTO: the appliance automatically selects the most suitable fan speed in relation to the temperature set on the digital display (the graphics on the display move).
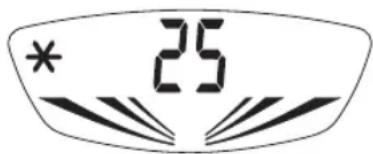
The most suitable temperature for the room during the summer varies from 24 to 27°C. You are recommended, however, not to set a temperature much below the outdoor temperature.
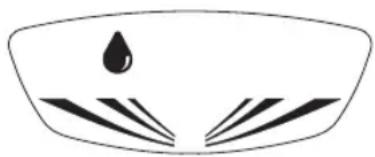
DEHUMIDIFYING MODE
Ideal for reducing the humidity in a room without lowering or raising the temperature (spring or autumn, damp rooms, rainy spells, etc).
In dehumidifying mode, the appliance selects fan speed automatically.
natural_image
Simple line drawing of a bowl with a droplet and leaf-like patterns (no text or symbols)Fan mode
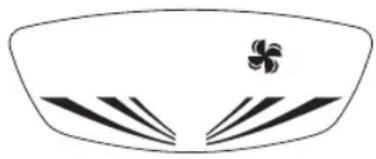
Adjust fan speed by pressing the FAN button (P).
The fan speed selected will be displayed (HIGH, MED, LOW).
In this mode, AUTO cannot be selected.
natural_image
Simple line drawing of a bowl with a flower inside, flanked by diagonal stripes (no text or symbols)HEATING MODE (CERTAIN MODELS ONLY)
To set operation of the appliance correctly, press the "+" (G) or "-" (I) buttons until the desired temperature is displayed.
In heating mode, the fan speed is selected automatically by the appliance.
SETTING THE TIMER
The timer can be used to delay appliance start up or shut down.
This avoids wasting electricity by optimising operating periods
How to programme delayed start up
- Plug the appliance into a mains socket and press the ON/STAND-BY button (A), then select the required operating mode and other settings (temperature, fan speed, etc).
- Press the ON/STAND-BY button (A) again. The appliance switches to stand-by mode.
- Press the TIMER button (H): the last timer setting or the preset value 6.0 h flashes on the display. 6.0 h.
- Use the + (G) or - (I) buttons to set the number of hours delay before the appliance comes on. During the first ten hours, you can select half hour intervals.
For times greater than ten hours, one hour intervals can be selected.
If the "+" (G) or "-" (I) buttons are pressed for more than 2 seconds, the time runs rapidly up to a maximum of 24 hours.
Press the timer button again within a few seconds to confirm the setting.
If the setting is not confirmed within a few seconds, the display resets to stand-by.
With the timer activated, the countdown before the programmed start up time is displayed.
To cancel the timer programme, press the timer button (H).
How to programme delayed shutdown
- Delayed shutdown can be set with the appliance in any operating mode - air conditioning/dehumidifying/fan/heating (certain models only).
- Press the Timer button (H) the last timer setting or the preset value 5.0 h. flashes on the display.
- Use the + (G) or - (I) button to set the number of hours delay before the appliance goes off. During the first ten hours, you can select half hour intervals.
For times greater than ten hours, one hour intervals can be selected.
If the "+" (G) or "-" (I) buttons are pressed for more than 2 seconds, the time runs rapidly up to a maximum of 24 hours.
Press the timer button again within a few seconds to confirm the setting.
At the set time, the air conditioner shuts down and remains in stand-by.
To cancel the timer programme, press the timer button (H).
Self-diagnosis
SELF-DIAGNOSIS
The appliance has a self diagnosis system to identify a number of malfunctions.
| IF ... IS DISPLAYED ...WHAT SHOULD YOU DO? | |
| LT LOW TEMPERATURE(FROST PREVENTION) | When the appliance is operating in air conditioning or dehumidifying mode, this device prevents the formation of ice. The appliance starts up again automatically when the defrosting process is completed. |
| PFPROBE FAILURE(SENSOR DAMAGED) | If this is displayed, contact your service centre. |
| FT FULL TANK | Empty the internal safety tank, through the drain hoses.see page 33 "end of season operations" |
Using the remote control unit
USING THE REMOTE CONTROL (certain models only)
CORRECT USE OF THE REMOTE CONTROL
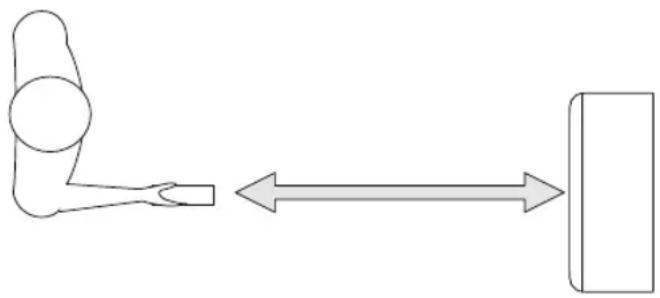
- Point the remote control at the receiver (M) on the air-conditioner.
- Maximum distance: around 7 metres (without any obstacles between the remote control and the receiver.
- The remote control should be handled with extreme care. Do not drop it, expose it to direct sunlight, or leave it near sources of heat.
DESCRIPTION OF THE REMOTE CONTROL
Inserting or replacing the batteries
- Remove the cover on the rear of the remote control;
- Remove the flat batteries if present.
- Insert two new R03 "AAA" 1.5V batteries, inserting them correctly (see the instructions inside the battery compartment);
- Replace the cover.
If the remote control unit is replaced or discarded, the batteries must be removed and disposed of in accordance with current legislation as they are harmful to the environment.
(Do not use a combination of rechargeable and disposable batteries)
TURNING THE APPLIANCE ON
Plug the appliance into the mains.
Press the ON/OFF button (18) (when turned on, the air conditioner starts operating in the same mode as when it was turned off).
Press the MODE (19) button to select the required mode
AIR-CONDITIONING (COOL)
DEHUMIDIFYING (DRY)
FAN ONLY (FAN)
HEATING (HEAT) (certain models only)
An arrow on the display indicates the selected mode.
natural_image
Simple line drawing of a person sitting at a desk with an arrow indicating direction (no text or symbols)
Using the remote control unit
AIR-CONDITIONING MODE (COOL)
Ideal for hot humid weather when you need to cool and dehumidify the room.
In air-conditioning mode, use the buttons to select the desired temperature
The display shows the set temperature.
To change the fan speed, use the FAN button (17) on the remote control, choosing from the available speeds:
AUTO: the appliance automatically selects the most suitable fan speed in relation to the temperature set on the digital display.
HIGH: the air conditioning unit operates at maximum to reach the required temperature as rapidly as possible
MED: reduces noise levels but still maintains a good level of comfort
LOW: for silent operation
Two arrows on the display indicate respectively "COOL" and the fan speed.
The most suitable temperature for the room during the summer varies from 24 to 27ircC . You are recommended, however, not to set a temperature much below the outdoor temperature.
DEHUMIDIFYING MODE
Ideal to reduce room humidity while avoiding temperature variations (spring and autumn, damp rooms, rainy periods, etc).
In dehumidifying mode, the appliance selects fan speed automatically.
Two arrows on the remote control display indicate "DRY" and "AUTO" respectively.
FAN MODE ONLY (FAN)
In fan mode, fan speed can be set by pressing the FAN button (17).
To set operation of the appliance correctly, press the 🔒 buttons until the desired temperature is displayed. In heating mode, the fan speed is selected automatically by the appliance.
SETTING THE TIMER
The timer can be used to delay appliance start up or shutdown. This avoids wasting electricity by optimising operating periods.
How to programme delayed shutdown
- With the air-conditioning unit on, press the TIMER button (20). The time is displayed and the "h" symbol flashes, with a flashing arrow indicating "TIMER OFF".
- Set the time when you want the appliance to go off using the ⏻ buttons (from 30 minutes to 24 hours). During the first ten hours, you can select half hour intervals. For times greater than ten hours, one hour intervals can be selected.
- Press the TIMER button again to confirm the selection. A beep sounds and the time set is also displayed on the control panel, confirming setting of the timer. A countdown of the time left is displayed on both the air conditioner and remote control displays. At the end of the set time the appliance switches off automatically.
- To cancel the timer programme, press the TIMER button again. The appliance emits a beep and both displays reset to display the settings prior to activation of the timer.
Using the remote control unit
Programming delayed start-up
- With the air-conditioning unit stand-by, press the TIMER button. The display shows a flashing arrow indicating "TIMER ON". Now make all the desired settings for when the appliance will switch on (operating mode, fan speed and temperature).
Confirm the settings by pressing the TIMER button. The time is displayed and the "h" symbol flashes. Set the time when you want the appliance to switch off using the 🔊 buttons (from 30 minutes to 24 hours).
During the first ten hours, you can select half hour intervals.
For times greater than ten hours, one hour intervals can be selected.
- Press the TIMER button again to confirm the start-up time.
A beep sounds and the time set is also displayed on the control panel, confirming setting of the timer.
A countdown of the time left is displayed on both displays.
- At the end of the set time the appliance switches on automatically, with the settings made previously.
- T o cancel the timer programme, press the TIMER button again.
The appliance emits a beep and both displays reset to stand-by.
Tips
To get the best from your air conditioning unit, follow these recommendations:
- c lose the windows and doors in the room to be air conditioned.
The only exception is when the appliance is installed through a hole in the wall.
In this case, you are recommended to leave a slight draught through a door or window to guarantee correct ventilation.
- Never use the appliance in very damp rooms (laundries for example).
- Never use the appliance outdoors.

- P rotect the room from direct exposure to the sun by partially closing curtains and/or blinds to make the appliance much more economical to run;
- Never rest objects of any kind on the air conditioning unit;
- Never obstruct the air intake or outlet 1 grilles;
• Make sure there are no heat sources in the room.

natural_image
Line drawing of a kitchen appliance with crossed blades (no text or symbols)do not cover the appliance

natural_image
Line drawing of a window with curtains and sheer curtains, no text or symbols presentclose blinds or curtains
- Make sure the air conditioning unit is on a level floor. If necessary, place the two castor locks under the front wheels 3.
Cleaning
Before cleaning or maintenance, turn the appliance off by pressing the ON/STAND-BY button (A) or button (18) on the remote control (certain models only). Always unplug the appliance from the mains socket.
CLEANING THE CABINET
You should clean the appliance with a slightly damp cloth then dry with a dry cloth.
For safety reasons, never wash the air conditioning unit with water.
Precautions
Never use petrol, alcohol or solvents to clean the appliance. Never spray insecticide liquids or similar.
CLEANING THE AIR FILTERS
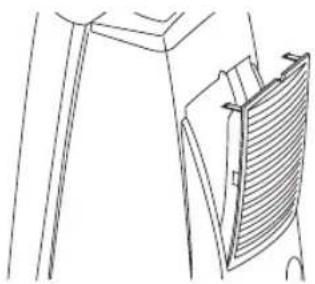
To keep your air conditioner working efficiently, you should clean the dust filter every week of operation. The filter is housed in the intake grille. To clean the filters, proceed as follows:
- Remove the intake grille by rotating outwards (Fig. L).
natural_image
Line drawing of a mechanical component with layered structure and internal structure (no text or symbols)L
- Remove the dust filter by detaching it from the grille (Fig. M).

Use a vacuum cleaner to remove the dust collected on the filter.
If it is very dirty, immerse in warm water and rinse a number of times.
The water should never be hotter than 40°C.
After washing, leave the filter to dry.
To replace, put the filters back in the intake grille then attach the intake grille to the appliance.
START OF SEASON CHECKS
Make sure the power cable and plug are undamaged and the earth system is efficient.
Follow the installation instructions precisely.
END OF SEASON OPERATIONS
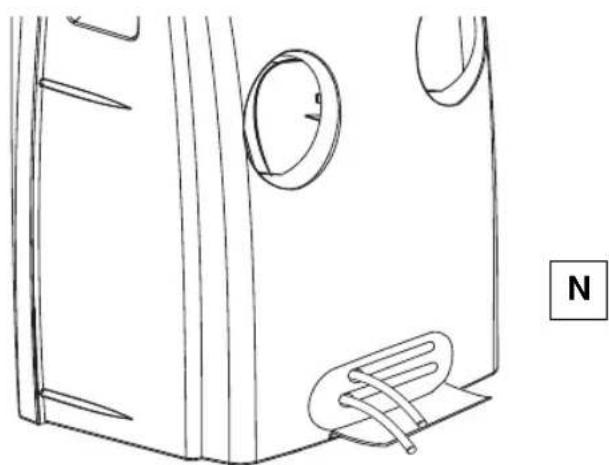
To empty the internal circuit completely of water, open the cover 8n the rear of the appliance.
Pull out the 2 drain hoses, take off the caps and let all the residual water flow out (figure N).
When all the water has been drained, place the caps back on the hoses and put the hoses back inside.
Clean the filters and dry thoroughly before putting them back.
natural_image
Technical line drawing of a mechanical component with circular features and a labeled 'N' (no text or symbols beyond basic lines)Troubleshooting
PROBLEM
CAUSE
REMEDY
| The air conditioning unit does not start | no electricityit is not plugged into the mainsthe safety device has tripped | waitplug into the mainscontact your service centre |
| The air conditioning unit works for a short time only | the air exhaust hose has a constrictionthe air exhaust hose is blockedthere are bends in the air exhaust hose | position the exhaust hose correctlycheck there are no obstacles obstructing air dischargeeliminate the bends |
| The air conditioning unit works, but does not cool the room | window openthere are heat sources in the room (burner, lamp, etc)the exhaust hose is detachedair filters cloggedthe air conditioning unit is not powerful enough for the conditions or size of the room | close the windoweliminate the heat sourceconnect the exhaust hosec lean or replace the filters |
| Particular odour in the room | air filter clogged | c lean or replace the filter |
| The air conditioning unit does not operate for about three minutes after turning it on | the safety device has tripped wait for three minutes | |
| appears on the displayLE/PF/FE | See "self-diagnosis" section | |
Guarantee/technical specification
GUARANTEE AND TECHNICAL ASSISTANCE
The conditions of the guarantee and technical assistance are given on the certificate supplied with your appliance.
LIMIT CONDITIONS
Room temperature for air conditioning 21 ÷ 35ircC
Room temperature for heating (certain models only) 25irc C max.
TECHNICAL CHARACTERISTICS:
Power supply voltage see rating plate
Max. power input during air conditioning "
Absorbed power heating
(certain models only): "
Refrigerant
Cooling capacity "
Appliance dimensions:
- width 505 mm
- height 825 mm
- depth 440 mm
- weight 34 kg
Transport, filling, cleaning, recovery and disposal of refrigerant should be performed by a technical service centre appointed by the manufacturer only.
The appliance should be disposed of by a specialist centre appointed by the manufacturer only.
IMPORTANT INFORMATION FOR CORRECT DISPOSAL OF THE PRODUCT IN ACCORDANCE WITH EC DIRECTIVE 2002/96/EC.
At the end of its working life, the product must not be disposed of as urban waste. It must be taken to a special local authority differentiated waste collection centre or to a dealer providing this service.
Disposing of a household appliance separately avoids possible negative consequences for the environment and health deriving from inappropriate disposal and enables the constituent materials to be recovered to obtain significant savings in energy and resources. As a reminder of the need to dispose of household appliances separately, the product is marked with a crossed-out wheeled dustbin.


- DESCRIPTION
- What is the Pinguino
- Preparing for use
- ELECTRICAL CONNECTIONS
- AIR-CONDITIONING WITHOUT INSTALLATION
- Using the adjustable bar (certain models only)
- AIR-CONDITIONING WITH INSTALLATION
- NOTE:
- Control panel
- DESCRIPTION OF THE CONTROL PANEL
- Operation
- TURNING THE APPLIANCE ON
- AIR-CONDITIONING MODE " \* "
- DEHUMIDIFYING MODE
- Fan mode
- HEATING MODE (CERTAIN MODELS ONLY)
- SETTING THE TIMER
- How to programme delayed start up
- How to programme delayed shutdown
- Self-diagnosis
- Using the remote control unit
- USING THE REMOTE CONTROL (certain models only)
- CORRECT USE OF THE REMOTE CONTROL
- DESCRIPTION OF THE REMOTE CONTROL
- Inserting or replacing the batteries
- AIR-CONDITIONING (COOL)
- DEHUMIDIFYING (DRY)
- FAN ONLY (FAN)
- HEATING (HEAT) (certain models only)
- AIR-CONDITIONING MODE (COOL)
- FAN MODE ONLY (FAN)
- Programming delayed start-up
- Tips
- Cleaning
- CLEANING THE CABINET
- Precautions
- CLEANING THE AIR FILTERS
- START OF SEASON CHECKS
- END OF SEASON OPERATIONS
- Troubleshooting
- PROBLEM
- CAUSE
- REMEDY
- Guarantee/technical specification
- GUARANTEE AND TECHNICAL ASSISTANCE
- LIMIT CONDITIONS
- TECHNICAL CHARACTERISTICS:
- IMPORTANT INFORMATION FOR CORRECT DISPOSAL OF THE PRODUCT IN ACCORDANCE WITH EC DIRECTIVE 2002/96/EC.
Brand : DELONGHI
Model : Pinguino PAC L41AH
Category : Air Conditioning