
EP2302 - Coffee machine Lavazza - Free user manual and instructions
Find the device manual for free EP2302 Lavazza in PDF.


| Product Type | Capsule Coffee Machine |
| Brand | Lavazza |
| Model | EP2302 |
| Dimensions (H x W x D) | 27.5 cm x 13.0 cm x 36.0 cm |
| Weight | 4.7 kg |
| Power Supply | 220-240 V / 50-60 Hz / 1250 W |
| Water Tank Capacity | 1.0 L |
| Pump Pressure | 15 bar |
| Capsule System | Lavazza A Modo Mio |
| Milk Frother | Integrated steam wand |
| Functions | Espresso, long coffee, hot milk, steam |
| Control Type | Push-button with indicator lights |
| Descaling Indicator | Yes |
| Auto Shut-Off | After 9 minutes |
| Removable Drip Tray | Yes |
| Used Capsule Container | Capacity: 8 capsules |
| Cleaning | Semi-automatic rinsing cycles; removable parts dishwasher safe |
| Descaling | Every 3-6 months with Lavazza descaling solution |
| Safety Features | Overheat protection, pressure relief valve, auto shut-off |
| Spare Parts Available | Water tank, drip tray, capsule container, steam wand |
| Warranty | 2 years (depending on country) |
Frequently Asked Questions - EP2302 Lavazza
User questions about EP2302 Lavazza
0 question about this device. Answer the ones you know or ask your own.
Ask a new question about this device
Download the instructions for your Coffee machine in PDF format for free! Find your manual EP2302 - Lavazza and take your electronic device back in hand. On this page are published all the documents necessary for the use of your device. EP2302 by Lavazza.
USER MANUAL EP2302 Lavazza

SECURX
OCS Controller
Lavazza Espresso Point EP2100 – EP2302 – EP2100 24V
User's Guide
TABLE OF CONTENTS
GENERAL WARNINGS .... 3
DESCRIPTION 4
SPECIFICATIONS....4
INSTALLATION 5
FUNCTIONS....5
CONFIGURATION 6
RECHARGING SELECTIONS 6
AUDIT DATA....6
PALMTOP APPLICATION "DATA TRANSFER" 7
INSTALLING SECURX ON "LAVAZZA ESPRESSO POINT - EP2100" 8
INSTALLING SECURX ON "LAVAZZA ESPRESSO POINT - EP2302" 10
INSTALLING SECURX ON "LAVAZZA ESPRESSO POINT - EP2100 24V"...... 12
This guide is not binding for PAYTEC and information therein may be subject to change without prior notice.
This document contains information on property, all rights reserved.
You may not copy, transmit, store or translate any part of this document without prior written consent by PAYTEC, except where allowed by local legislation.
General warnings
The current document is valid for sw. rev. 1.01.00 and sw. rev. 2.00.00
- Read this guide carefully before use.
• This guide is only valid for :
- SECURX – OCS Controller.
- SECURX is a system intended for internal electrical/mechanical equipment on coffee capsules machines Lavazza Epresso Point EP2100 - EP2302 - EP2100 24V.
- Cut power before working on electrical and/or mechanical components.
- Dispose of the device in accordance with environmental laws (DO NOT burn).
- Always read labels.
- Do not tie the system main cables or cables belonging to slave units.
- Periodically check cables are correctly plugged on their connectors.
- Do not use extension cables.
- Cut power before maintaining and/or cleaning.
- Use a damp cloth to clean plastic elements.
Paytec SECURX OCS Controller is a special system designed to inhibit, when necessary, one of the following coffee capsules machines : Lavazza Espresso Point EP2100 - EP2302 - EP2100 24V.
This motherboard is an evolution of the old OCS Controller and permits operators to
- transfer configuration files from a PalmTop (via IrDA)
- control a de-counter field to inhibit coffee dispensing operations.
SECURX motherboard has been specially designed for coffee machines "Lavazza Espresso Point EP2100-EP2302-EP2100 24V", in which drinks in capsules are dispensed by an electronic-controlled system: an automatic counter is decremented whenever a signal is transmitted to the selection counter and a coffee is dispensed; when the max. number of drinks available has been reached, the machine is inhibited.
The summary report of the drinks dispensed can be downloaded with protocol EVA-DTS (via optical IrDA). The non-volatile memory on the motherboard contains the above-mentioned de-counter, 2 totalizers (general/partial), machine serial number (alphanumeric format), date and time of last readout, date and time of previous readout and total readouts.
Configuration can only be uploaded/downloaded with a Palmtop via optical IrDA (the same is true for Audit readout).
Specifications
| Power supply ...... | Direct current supplied by the electronics of coffee machines “Lavazza Espresso Point EP2100-EP2302-EP2100 24V” (12 Vdc to 16 Vdc unstabilized). |
| Absorption ...... | 4 / 5 mA in standby; 40 / 50 mA when downloading data (fully compatible with coffee machines “Lavazza Espresso Point EP2100-EP2302-EP2100 24V”). |
| Digital inputs ...... | 1 input for coffee dispensing counter derived from the output which operates the piece counter (12 Vdc). |
| Digital outputs ...... | 1 output connected with the micro-switch and detecting whenever a coffee capsule has been inserted (the system is inhibited once the de-counter has reached “0”).1 LED red is present and clearly visible to indicate “LOW” level (de-counter below the minimum level). |
| Optical IrDA ...... | IrDA optical module (Audit readout and Configuration transfer). |
| Other ...... | Firmware upgrade is only possible with dedicated tools. |
| Dimensions ...... | Motherboard : 50x35x15 (connector included) |
The motherboard SECURX OCS Controller has been expressly designed to be housed inside coffee machines "Lavazza Espresso Point EP2100-EP2302-EP2100 24V" (no protruding elements are visible on the machine walls). Any SECURX motherboard is already installed on the "left side cover" of the machine, duly modified so that the motherboard can be fixed and the following elements are visible:
- Led RED ("low" indicator)
- Infrared interface (data download via IrDA)
A special cable is delivered with the motherboard for connection with the machine.
When installing the motherboard, remember to replace the left side cover and plug the special cable on the dedicated connectors.
Functions
Once SECURX OCS Controller has been installed on the coffee dispenser, the machine is ready for use but inhibited until a value is set (with the Palmtop) for the de-counter.
Operating status :
- Stand-by. The motherboard is in standby mode and waiting for a signal to be transmitted to the selection counter, or for data to be downloaded via IrDA (the Led RED is OFF).
- "LOW". The Led RED is flashing because the de-counter is below a minimum value (such value is 30, it is a predefined value and CANNOT be adjusted). The dispenser is ready for use (see Stand-by).
- Inhibit. Once the de-counter has reached "0" (all the coffees available have been dispensed), the Led RED is steady ON and the dispenser is inhibited (even if a coffee capsule is inserted, the "dispense" buttons are inhibited). The coffee machine remains inhibited until a new value is programmed for the de-counter.
- Dispensing. The "dispense" button has been pressed. The motherboard on SECURX OCS Controller detects a signal has been transmitted to the selection counter: the de-counter is decremented and dispensing totals (partial/total) are incremented.
- Audit download. The system starts transferring data after it has received valid characters via IrDA port. You should not press the "dispense" button while Audit data are being downloaded.
Configuration transfer. The following parameters can be adjusted :
- de-counter : selections available (quantity of coffee capsules the client has received);
- machine number : 20 alphanumeric characters max.;
- numeric password (0 to 65535): the password prevents unauthorized Audit/Configuration transfer (de-counter included).
The same instructions are valid as for Audit download.
Configuration
The system has to be configured with a Palmtop before it is ready for use (configuration is transferred via IrDA optical Port and includes machine number, password and de-counter).
Configuration is uploaded on the Palmtop with Paytec "Configurator" (via PC serial Port).
Recharging Selections
The number of selections available has to be updated whenever a client receives coffee capsules (the current number of selections available is increased by the number of new capsules received).
Such an operation is only possible with a Palmtop (via optical IrDA interface): first, the Palmtop reads and displays the number of selections still available on the machine, then the Palmtop application automatically calculates and uploads new selections (the selections uploaded are added to the residual ones).
Audit Data
Audit data can be only downloaded via an optical IrDA interface using protocol "Data Transfer Standard EVA-DTS 6.0". Here below are the parameters for the Serial port :
2400 Baud Rate, 8 Data Bits, Parity None, 1 Stop Bit
Position the Palmtop so that its optical reader is facing the transparent Port on the machine and start downloading. The file contains the following data:
| File format | Field | Description |
| DXS*FAG*VA*1 | DXS | Audit header |
| ID1*FAGABCDEFGHLMOP12345678* FAG SECURX*10000*0*1.00.00*1 | ID1 *FAG + machine no.*model no.*sw.rev.***1 | |
| EA3*2*101013*1033**101013*1033 | EA3 | *No. readout * date current readout * time current readout * date last readout * time last readout |
| EA7*0*9 | EA7 | *No. power ON since last readout * No. power ON since initialization |
| VA1**8**5 | VA1 | ** No. total selections ** No. selections since last readout * |
| SA1**30 | SA1 | ** No. Selections available (de-counter) |
| DXE*1*1 | DXE | End Audit data |
Notes
• Data meet the standards of EVA-DTS protocol.
- Date/time are taken from the Palmtop used (the Palmtop clock/calendar should be checked periodically).
- Machine number is taken from the configuration downloaded with the Palmtop.
When using Palmtops equipped with Windows CE, Paytec will supply the application "DTCE Rev. 2.00". Such application permits operators to
- transfer / download machine configuration
- download Audit
• recharge selections (de-counter)
When using PSION Palmtops, Paytec will supply the application "Data Transfer Rev. 2.12". Such application permits operators to
- transfer / download machine configuration
-
download Audit
-
Use cable CB.03102
- Cut power and unplug power cable 230V.

- First remove the machine back panel, then unscrew and remove the "motherboard cover" (read the instructions on machine user's guide for a correct installation).
-
The power motherboard of EP2100 coffee dispenser appears as in the picture (see left). Connect the SecurX motherboard, so that its cables are hidden behind the machine motherboard.
-
SECURX motherboard with cables (CB.03102).

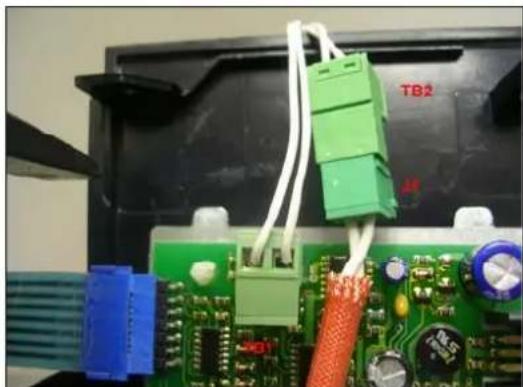
- Unplug J1 from the machine power motherboard and connect it with TB2.
- Plug TB1 on the machine power motherboard where J1 was previously plugged.

-
Unplug J2 from the machine power motherboard and connect it with TB4.
-
Plug TB3 on the machine power motherboard where J2 was previously plugged.
-
Once the SecurX motherboard has been correctly installed, the inside machine presents itself as evidenced in the picture here below. Follow the instructions on the machine user's guide to assemble all the components again.

- Use cable CB.03103.
SECURX motherboard with cables (see right).

- Cut power and unplug power cable 230V.

- First remove the machine back panel, then unscrew and remove the "motherboard cover" (read the instructions on machine user's guide for a correct installation).
The power motherboard of EP2302 coffee dispenser appears as in the picture (see left).
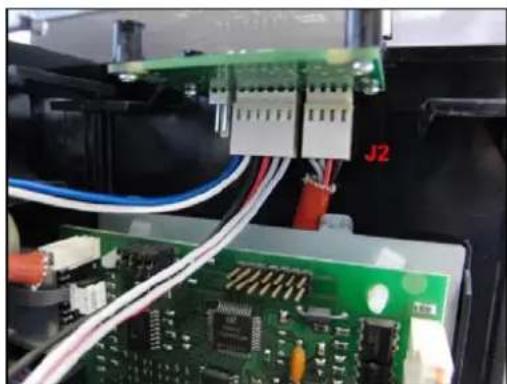
- Unplug J2 from EP2302 power motherboard and pull it down (cut the cable ties), then let it slide up again behind the machine power motherboard.
Plug J2 on the 4-pin connector on Securx motherboard (see picture).
- Plug TB2 (4 pins – cable from Securx motherboard) on the machine powerboard where J2 was previously connected.


- Unplug J1 from EP2302 power motherboard and plug it on Securx motherboard (2-pin connector).

-
Plug TB1 (2-pin white/blue cable from Securx motherboard) on EP2302 power motherboard where J1 was previously connected.
-
Once the Securx module has been installed, the inside machine of EP2302 presents itself as from the picture below. Follow the instructions on the machine user's guide to assemble all the components again.
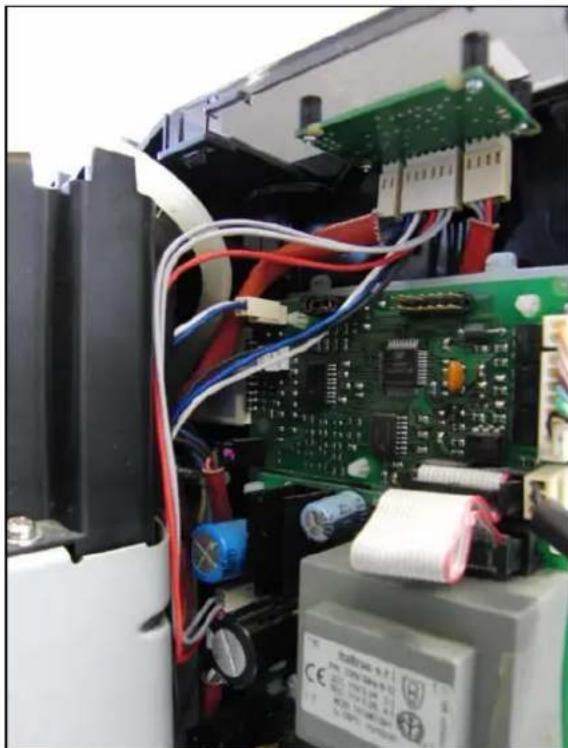
- Use cable CB.03104
- Cut power and unplug power cable 24Vdc.
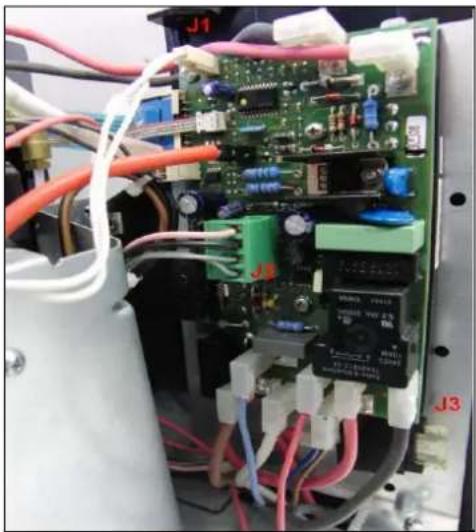
-
SECURX motherboard with cables (CB.03104).
-
First remove the machine back panel, then unscrew and remove the "motherboard cover" (read the instructions on machine user's guide for a correct installation).
- The power motherboard of EP2100-24V appears as in the picture (left). Connect the cables of Securx motherboard (hide them behind the machine motherboard).


- Unplug J1 from EP2100-24V power motherboard and plug it on Securx motherboard (2-pin connector).
- Plug TB1 (2-pin white/blue cable from Securx motherboard) on EP2100 power motherboard where J1 was previously connected.

-
Unplug J2 from EP2100-24V power motherboard and connect it with TB4 (cable from Securx motherboard).
-
Plug TB3 from Securx motherboard on the machine power motherboard where J2 was previously connected.


- Unplug faston FC1 (black wire) from the machine power motherboard and insert it in the male faston TB2 (brown-wired faston from Securx motherboard), then plug it again on the motherboard.
NB. Insert the female edge of faston PGB; the brown cable must be hidden behind the motherboard.
- Once the Securx module has been installed, the inside machine of EP2100-24V presents itself as from the picture below. Follow the instructions on the machine user's guide to assemble all the components again.


PAYTEC
ITALY
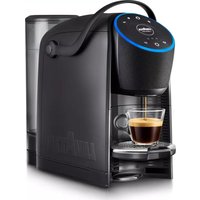
Brand : Lavazza
Model : EP2302
Category : Coffee machine