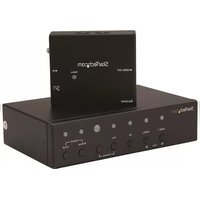
STDHVHDBT - Audio/video extension StarTech.com - Free user manual and instructions
Find the device manual for free STDHVHDBT StarTech.com in PDF.


| Product Type | Audio/Video Extender |
| Model Number | STDHVHDBT |
| Brand | StarTech.com |
| Dimensions (without cables) | 8.5 x 6.5 x 2.5 cm |
| Weight | 210 g (including power adapter) |
| Power Supply | External 5V DC, 2A power adapter |
| Supported Video Resolution | Up to 1920x1080 @ 60Hz |
| Maximum Transmission Distance | 50 m over CAT 6 cable |
| Connector Type (Transmitter) | 1x HDMI Input, 1x RJ-45 Output |
| Connector Type (Receiver) | 1x RJ-45 Input, 1x HDMI Output |
| Audio Support | Embedded HDMI audio, up to 7.1 channels |
| Operating Temperature | 0°C to 40°C |
| Storage Temperature | -20°C to 60°C |
| Humidity (Operating) | 20% to 80% non-condensing |
| Certifications | CE, FCC, RoHS |
| Included Accessories | Transmitter and receiver units, 2x power adapters, user manual |
| Spare Parts Availability | Contact StarTech.com support for replacement units |
| Care and Cleaning | Wipe with dry cloth; avoid liquids and abrasive cleaners |
| Safety Warnings | Use only with provided power adapter; do not expose to moisture |
| Warranty | 2 years limited warranty |
Frequently Asked Questions - STDHVHDBT StarTech.com
User questions about STDHVHDBT StarTech.com
0 question about this device. Answer the ones you know or ask your own.
Ask a new question about this device
Download the instructions for your Audio/video extension in PDF format for free! Find your manual STDHVHDBT - StarTech.com and take your electronic device back in hand. On this page are published all the documents necessary for the use of your device. STDHVHDBT by StarTech.com.
USER MANUAL STDHVHDBT StarTech.com
Multi-Input HDBaseT Extender - 230 ft
STDHVHDBT

*actual product may vary from photos
For the latest information, technical specifications, and support for this product, please visit www.startech.com/STDHVHDBT.
FCC Compliance Statement
This equipment has been tested and found to comply with the limits for a Class A digital device, pursuant to Part 15 of the FCC rules. These limits are designed to provide reasonable protection against harmful interference when the equipment is operated in a commercial environment. This equipment generates, uses and can radiate radio frequency energy and, if not installed and used in accordance with the instruction manual, may cause harmful interference to radio communications. Operation of this equipment in a residential area is likely to cause harmful interference in which case the user will be required to correct the interference at his own expense.
This device complies with part 15 of the FCC Rules. Operation is subject to the following two conditions: (1) This device may not cause harmful interference, and (2) this device must accept any interference received, including interference that may cause undesired operation. Changes or modifications not expressly approved by StarTech.com could void the user's authority to operate the equipment.
Industry Canada Statement
This Class A digital apparatus complies with Canadian ICES-003.
Use of Trademarks, Registered Trademarks, and other Protected Names and Symbols
This manual may make reference to trademarks, registered trademarks, and other protected names and/or symbols of third-party companies not related in any way to StarTech.com. Where they occur these references are for illustrative purposes only and do not represent an endorsement of a product or service by StarTech.com, or an endorsement of the product(s) to which this manual applies by the third-party company in question. Regardless of any direct acknowledgement elsewhere in the body of this document, StarTech.com hereby acknowledges that all trademarks, registered trademarks, service marks, and other protected names and/or symbols contained in this manual and related documents are the property of their respective holders.
Table of contents
Product diagram ....1
Front view .... 1
Rear view....1
Introduction......2
Packaging contents....2
System requirements....2
Technical support....4
Warranty information....4
Transmitter diagram Front view

- Selected port LEDs
- Input selection buttons
-
IR sensor
-
Function buttons
- Status LED
- Output buttons
Rear view

- DC 12V power port
- (Control) RJ11 serial jack
- IR Out/In ports
- HDMI output port
- HDBaseT output port
- Audio In 3.5mm port (for VGA)
-
VGA input port
-
DP input port
- HDMI 1 input port
- HDMI 2 input port
- Mode switch
- Auto Inventory EDID switch
- EDID COPY button
Receiver diagram
Front view

- HDMI output
- Status LED
Rear view

- DC power port
- HDBaseT input port
- Grounding bolt
Introduction
Packaging contents
• 1 x multi-input HDBaseT extender
- 1 x HDBaseT receiver
- 1 x IR remote control
• 1 x universal power adapter (NA/ EU/ UK / EU)
- 2 x mounting brackets
• 1 x RJ11-to-RS232 converter
- 1 x RJ11 cable
- 8 x foot pads
- 1 x screw kit
- 1 x quick-start guide
System requirements
• 1 x local HDMI video display with cabling
- 1 x remote HDMI display with cabling
- 1 x DisplayPort video source with cabling
• 1 x VGA video source with cabling
• 2 x HDMI video sources with cabling
Preparing your site
- Set up your local HDMI, DisplayPort and VGA video sources in your desired local location.
- Set up your remote display in your desired location.
Notes:
- Ensure that the extender switch and each receiver are all located near an AC power outlet.
- Ensure all devices are powered off.
Installation
- Connect each of your video sources to the input ports on the video extender switch, using the required cabling (not included).
- Connect an HDMI cable (not included) to your local HDMI display and to the extender switch's HDMI output port.
- Connect the power adapter port on the extender switch to your AC outlet using the power adapter, and press the power button to power on the extender switch.
- Connect an RJ45 terminated CAT5e or CAT6 cable (sold separately) to the HDBaseT output on the extender switch and to the HDBaseT input port on the receiver.
Important Notes:
- Use only the receivers included with this kit. The included HDBaseT receivers use 12V POC, mixing hardware with a different HDBaseT kit can damage your equipment.
-
Do not route the cable through any networking equipment.
-
Power up each of your devices. The image from your video source will now appear on your remote display.
- (Optional for serial control) Connect the the RJ11 cable (included) to the (Control) RJ11 serial jack on the extender switch and to the RJ11-to-RS232 serial converter. Then connect a 9-pin serial cable (not included) to the RJ11-to-RS232 converter and to 9-pin serial connector on your computer.
Note: The resolution performance of this extender switch will vary depending on the length of your cabling. Please review the chart below to determine the best solution for your setup. For best results, StarTech.com recommends shielded CAT6 cable.
Distance Maximum resolution
| 35 m (115 ft.) or less 4K x 2K at 30 Hz |
| Up to 70 m (230 ft.) 1080p at 60 Hz |
Operation
Mode selection and switch operation
This HDBaseT switch features multiple operating modes. Review the description and operating steps for each mode in this section, then use the Mode switch to the set the HDBaseT switch to your desired operating mode.
Switch mode operation (1. Switch)
Switch mode enables you to switch between video sources by pressing the Input selection button that corresponds with your desired video source. The active selected port LEDs will light up indicating which port is selected.
Priority-A mode operation (3. Pri-A)
Priority-A mode prioritizes the HDMI #1, DisplayPort, VGA, and HDMI #2 input ports respectively. When you turn on a video source that is connected to a higher prioritized input port, that video source will automatically be selected. Turning off the device will automatically switch back to the lower prioritized video source.
Priority B mode prioritizes the HDMI #2, VGA, DisplayPort, and HDMI #1 input ports respectively. When you turn on a video source that is connected to a higher prioritized input port, that video source will automatically be selected. Turning off the device will automatically switch back to the lower prioritized video source.
Manual operation with remote control
- Press buttons 1 through 4 on the right side of the IR remote control to switch between the HDMI #1, HDMI#2, DisplayPort, and VGA ports respectively.
- The active selected port LEDs will light up on the extender switch, indicating which port is selected, and your desired video source will appear on the HDMI and HDBaseT displays.

Set EDID
When a video source is connected to a display, the display's EDID is communicated to the video source. The display's EDID is comprised of it's video and audio capabilities. Displays sharing their EDID ensures optimal performance, by enabling the source to automatically align it's video and audio settings to your display. Improper EDID can cause issues with your display.
As this switch enables you to connect two displays (one local, one remote) to your video sources, it's possible that each display will have a variance of audio and video capabilities.
To ensure optimal performance across both displays, this HDBaseT switch features EDID emulation and EDID copy. These features enable you choose which settings will best harmonize across both of your displays, to ensure optimal performance. Follow the below steps to emulate and/or copy EDID audio and video.
- Determine whether your ideal setup will be based on emulating 1080p video and 2-channel audio across both displays, or sharing one of the displays video and/or audio capabilities across each attached display.
Note: You can copy EDID from either your local or remote display. However, you cannot copy audio from one and video from the other.
- Set the Auto Inventory EDID switch to your desired setting based on your determination in step 1.
The Auto Inventory EDID switch lets you set whether you emulate (Auto) or copy (Inventory) your EDID settings.
Review the table below to determine what the switch should be set to.
| Position | Video Audio EDID Status | |
| 1 | Emulate (1080p) Emulate (2-CH) Emulates video and audio | |
| 2 | Emulate (1080p) Copy Emulates video and copies audio | |
| 3 | Copy Emulate (2-CH) Copies video and emulates audio | |
| 4 | Copy Copy Copies video and audio |
- If you intend to copy EDID from your remote display, press and hold the EDID copy button for three seconds until the Remote LED flashes GREEN.
If you intend to copy EDID from your local display, press and hold the EDID copy button for six seconds until the Local LED flashes Green.
Manual operation with serial control
- Configure the settings on your serial port according to the values shown below.
Baud Rate: 38400 bps
Data Bits: 8
Parity: None
Stop Bits: 1
Flow control: None
- Open your terminal software to communicate through the serial port that the switch is connected to, and use the on-screen commands displayed below to operate and configure your switch.
Booting ..
Digital Switch Splitter 4 x 1 (MIC30)
H/W version: 01 ^F /W version: 003-14
RC ID: none
CE=n.a1.a2 - Copy EDID (Inventory) to all input ports n: Method. a1 . a2: Options
- Copy from specified monitor a1
-
Copy from corresponding monitor (1 on 1)
-
Make 1024 x 768 EDID
-
Make 1280 x 800 EDID
-
Make 1280 x 1024 EDID
-
Make 1360 x 768 EDID
-
Make 1400 x 1050 EDID
-
Make 1440 x 900 EDID
-
Make 1600 x 900 EDID
-
Make 1600 x 1200 EDID
-
Make 1680 x 1050 EDID
-
Make 1920 x 1080 EDID
-
Make 1920 x 1200 EDID
-
Make 1920 x 1440 EDID
15 Make 2048 x 1152 EDID
when = 1:
a1: monitor index (1\~2). a2: not required
when n = 2:
a1.a2: not required
when n = 3\~15:
a1: video options
- DVI, 2. HDMI(2D) 3. HDMI(3D)
a2: audio options
-
LPCM 2 ch, 8. DTS 5.1 ch
-
LPCM 5.1 ch 9. DTS HD 5.1 ch
-
LPCM 7.1 ch 10. DTS HD 7.1 ch
-
Dolby AC3 5.1 ch 11. MPEG4 AAC 5.1 ch
-
Dolbý TrueHD 5.1 ch 12. 5.1 ch combination
-
Dolbý TrueHD 7.1 ch 13. 7.1 ch combination
-
Dolbý E-AC3 7.1 ch
AVI=n - Select input port n as the source of all output ports
AV0EN=n - Enable output port n
n : 1\~max - output port n. - All ports
VS - View current settings
Eq=n - Set EQ level as ñ(1\~8)
FACTORY - Reset as factory default setting
REBOOT - Reboot the device
RCID=n - Set Remote Control ID as n
n: 0 - Reset as null (Always on)
1\~16 - Valid ID
IT=n - Set terminal interface n: 0 - Human 167 - Machine
LCK=n - Lock / Unlock device n: 0 - Unlock 167 - Lock
000
Technical support
StarTech.com's lifetime technical support is an integral part of our commitment to provide industry-leading solutions. If you ever need help with your product, visit www.startech.com/support and access our comprehensive selection of online tools, documentation, and downloads.
For the latest drivers/software, please visit www.startech.com/downloads
Warranty information
This product is backed by a two-year warranty.
StarTech.com warrants its products against defects in materials and workmanship for the periods noted, following the initial date of purchase. During this period, the products may be returned for repair, or replacement with equivalent products at our discretion. The warranty covers parts and labor costs only. StarTech.com does not warrant its products from defects or damages arising from misuse, abuse, alteration, or normal wear and tear.
Limitation of liability
In no event shall the liability of StarTech.com Ltd. and StarTech.com USA LLP (or their officers, directors, employees or agents) for any damages (whether direct or indirect, special, punitive, incidental, consequential, or otherwise), loss of profits, loss of business, or any pecuniary loss, arising out of or related to the use of the product exceed the actual price paid for the product. Some states do not allow the exclusion or limitation of incidental or consequential damages. If such laws apply, the limitations or exclusions contained in this statement may not apply to you.
Hard-to-find made easy. At StarTech.com, that isn't a slogan. It's a promise.
StarTech.com is your one-stop source for every connectivity part you need. From the latest technology to legacy products — and all the parts that bridge the old and new — we can help you find the parts that connect your solutions.
We make it easy to locate the parts, and we quickly deliver them wherever they need to go. Just talk to one of our tech advisors or visit our website. You'll be connected to the products you need in no time.
Visit www.startech.com for complete information on all StarTech.com products and to access exclusive resources and time-saving tools.
StarTech.com is an ISO 9001 Registered manufacturer of connectivity and technology parts. StarTech.com was founded in 1985 and has operations in the United States, Canada, the United Kingdom and Taiwan servicing a worldwide market.


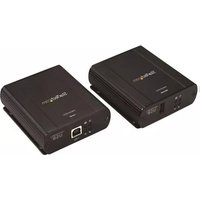


- Multi-Input HDBaseT Extender - 230 ft
- STDHVHDBT
- FCC Compliance Statement
- Industry Canada Statement
- Use of Trademarks, Registered Trademarks, and other Protected Names and Symbols
- Table of contents
- Product diagram ....1
- Introduction......2
- Technical support....4
- Warranty information....4
- Transmitter diagram Front view
- Rear view
- Receiver diagram
- Front view
- Introduction
- Packaging contents
- System requirements
- Preparing your site
- Notes:
- Installation
- Important Notes:
- Operation
- Mode selection and switch operation
- Switch mode operation (1. Switch)
- Priority-A mode operation (3. Pri-A)
- Manual operation with remote control
- Set EDID
- Manual operation with serial control
- Baud Rate: 38400 bps
- Data Bits: 8
- Parity: None
- Stop Bits: 1
- Flow control: None
- Technical support
- Warranty information
- Limitation of liability
Brand : StarTech.com
Model : STDHVHDBT
Category : Audio/video extension