
SPCAMFHD2 - Camcorder T'nB - Free user manual and instructions
Find the device manual for free SPCAMFHD2 T'nB in PDF.


| Product Type | Digital Camcorder |
| Brand | T'nB |
| Model | SPCAMFHD2 |
| Video Resolution | Full HD 1080p (1920 x 1080) |
| Sensor | 5 Megapixel CMOS |
| Optical Zoom | 10x |
| Digital Zoom | 20x |
| Screen | 2.7-inch LCD |
| Storage | SD/SDHC Card (up to 32 GB) |
| Power Supply | Rechargeable Lithium-ion Battery (3.7V, 1200mAh) |
| Battery Life | Approximately 2 hours |
| Dimensions | 110 x 55 x 55 mm |
| Weight | 180 g (with battery) |
| Input/Output | USB 2.0, Mini HDMI, Headphone Jack |
| Image Stabilization | Digital |
| Face Detection | Yes |
| Additional Features | Loop Recording, Timer, Auto Shut-off |
| Maintenance and Cleaning | Clean with a soft dry cloth; avoid chemical products |
| Safety | Do not expose to water or extreme temperatures |
| Spare Parts and Repairability | Battery, charger, USB cable, remote control available as options |
| General Information | User manual downloadable from T'nB website |
Frequently Asked Questions - SPCAMFHD2 T'nB
User questions about SPCAMFHD2 T'nB
0 question about this device. Answer the ones you know or ask your own.
Ask a new question about this device
Download the instructions for your Camcorder in PDF format for free! Find your manual SPCAMFHD2 - T'nB and take your electronic device back in hand. On this page are published all the documents necessary for the use of your device. SPCAMFHD2 by T'nB.
USER MANUAL SPCAMFHD2 T'nB
Congratulations on your purchase and thank you for the confidence you have shown in T'nB. Our products comply with the regulations and standards currently in force. Before using this device we recommend that you read the instructions and safety advice carefully and retain this manual.
FR
• The power supply used with your device must correspond to its original requirements.
- Never use your device in the rain, in a wet environment
or dose in sources of water without its waterproof gas
• Never place an entire object, explore but turns or dangerous object class to very devies.
- Only use the accessories and connectors supply
The use of any other type of accessory not speci
cally designed for the purpose may cause impa-
able damage to your device,
where the temperature is between 1° C and 35° C.
- Keep your device out of the reach of children.
• Do not dismantle your device or try to repair it you
• Do not use your device if it has been subject to impact or damage.
• To avoid any risk of electrification, und um your de
vice from the main power supply.
FR - CRESIGNES DE SECURITÉ IMPORTANTES
ES -O CNS GNASOT SOLUTIONS IMPORTANCE
Whether you have to get a portion that
DE -'N'CHTIGE SICHERNETANWEISE
SV - VICTRA/SPENHETS/CHESRIFTER
Equity as a result of the future.
RO • Masari resettlement « Сверд»
- Pset of opatal data that semi-ets magnetic range


Principes de base
FR
MARCHE ET ARRÊT
Mode configuration (Setup)

SETUP

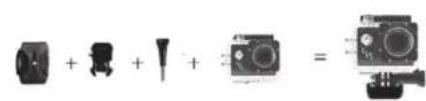
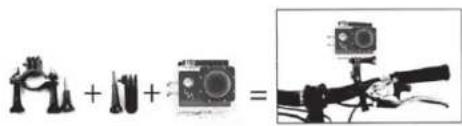
Tubular camera mount for bicycle

Vertical surface buckle mount

Buckle
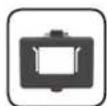
Mounting frame
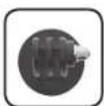
Tripod mount

Universal screw adapter

Flat adhesive mounts

Straps

Mounting system

Self-adhesive 3M®

Cable
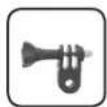
Mounting system

Clamps Microfibr
cloth


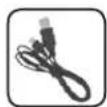
USB cable
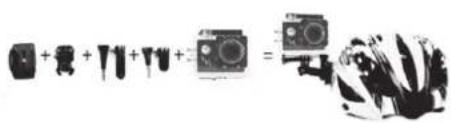
Examples

Features of the Camera (front)
EN
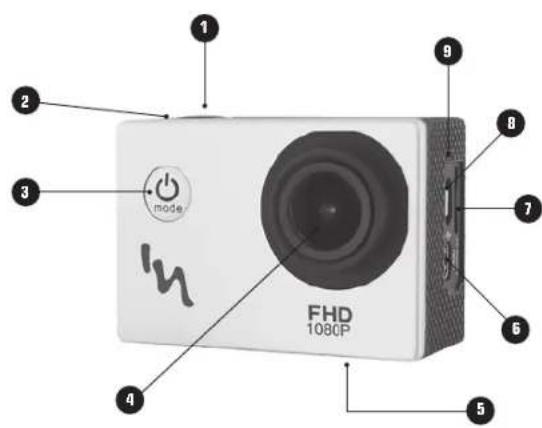
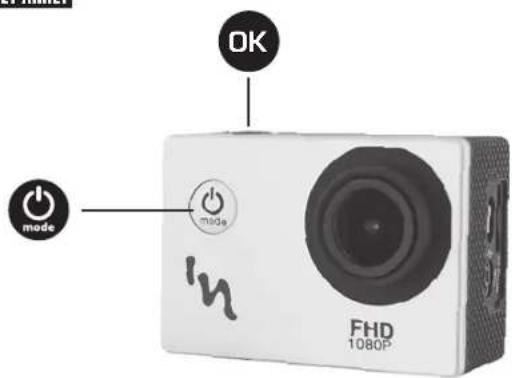
1 - Record button / OK button
2 - Functioning indicator light
3 - On / off button / Mode selector dial
4 - Lens
5 - Battery
6 - Micro HDMI port
7 - Memory card slot
8 - Micro USB port
9 - Microphone
Features of the Camera (back)

10 - Battery indicator light
11 - Functioning indicator light
12 - Screen
13 - Top
14 - Loudspeaker
15 - Bottom
LCD status screen of the camera
EN
The LCD displays the following information regarding the modes and settings:
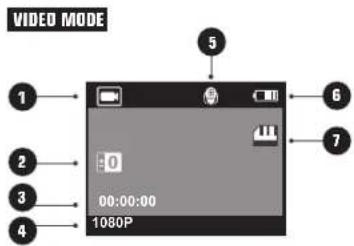
1- Camera mode
2- Exposure
3- Remaining recording capacity
4- Resolution in thousands of pixels
5- Microphone
6- Battery status
7- Micro SD Card OK
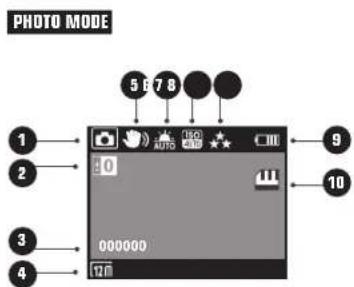
1- Photo Mode
2- Exposure
3- Remaining capacity of shot.
4- Resolution in thousands of pixels
5- Stabilizer
6- White balance
7- ISO standard
8- Quality
9- Battery status
10- Micro SD Card OK
PLAYBACK MODE

1- Video playback mode
2- Duration of the video sequence
3- Video sequence number
4- Date of the video sequence
5- Time of the video sequence
SETUP MODE
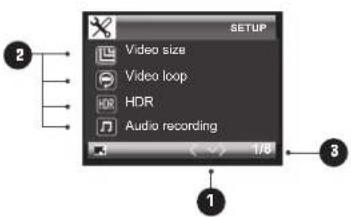
1- List of settings
2- Different settings
3- Indication of the settings page
How to scroll?
With buttons 13 and 14
How to validate?
With the «OK» button
How to return to the previous menu?
«MENU» button
Basic principles
EN
TO START
Before using your Camera « Adrenalin » for the first time :
Insert a microSD, microSDHC™ or microSDXC™ card into the slot of the card with the label facing the front. We recommend using the card of Class 10 or higher speed.
Charge the battery. The lithium-ion battery comes partially charged.
To charge it, connect the USB cable that is provided for this purpose to the camera and the other end of the cable to a power supply such as a computer or a USB charger.
To maximise your battery life, operate a full charge before the first use.
To charge the battery :
- Connect the camera to a computer or a source of USB power supply by using 1 micro USB / USB cable.
- The red battery indicator light stays on when the battery is charging.
- The battery indicator light turns off when the battery is fully charged.
![graph TD A["USB"] --> B["Device with router"] A --> C["Device with power plug"] A --> D["Device with capacitor"] A --> E["Device with laptop"]](/content/2026/06/1283747/images/d762bd488548d66a0c636e9556a49b65c1441768c897881beddacd7fc2014fbb.jpg)
Basic principles
ON AND OFF

To turn on the device :
Press 📍 and release the pressure. A home screen lights up, accompanied by an audible indicator.
To turn off the device :
Press two seconds and release the pressure. The home screen is turned off, accompanied by an audible indicator.
Basic principles
EN
OVERVIEW
Your camera « Adrenalin » offers several features.
To switch from one mode to another, short press on
The modes are in the following order :
![graph TD A["VIDEO"] --> B["Video recording"] B --> C["PHOTO"] C --> D["Shot"] D --> E["PLAYBACK"] E --> F["Playback of the video recordings"] F --> G["SETUP"] G --> H["Configuration\n(See the list of the multiple possible settings on the next page)"]](/content/2026/06/1283747/images/ada070c7d4f87d736695d057964b5d819435717c55d4c345cdc995d642dca12e.jpg)
Camera user interface diagram
![graph TD A["VIDEO PHOTO PLAYBACK"] --> B["MODE"] C["CONFIGURATION"] --> B B --> D["Under menu mode > Setup"] D --> E["Video size"] D --> F["Video loop"] D --> G["HDR"] D --> H["Audio recording"] D --> I["Date stamp"] D --> J["Resolution"] D --> K["Exposure"] E --> L["Video quality"] E --> M["AWB"] E…](/content/2026/06/1283747/images/556d1294b800a3fd9326c9c359516231ad0ec5a877e9c73de5b454241ab1e698.jpg)
VIDEO mode
EN

VIDEO
To record a video, make sure that the camera is in video mode.
If the Video icon is not displayed on the LCD screen of your camera, press multiple times until it appears.
To start recording :
Press C#d release the pressure. The camera emits a beep and the red and green status indicator lights blink during the recording, a red dot also appears on the LCD screen.
To stop recording :
Press OKd release the pressure. The camera emits a beep and the red and green status indicator lights stay on, but do not blink, the recording is then interrupted.

You can modify the size of the display format
Setup > Film size > 1080p or 720p

Film size
Full HD - 1080p
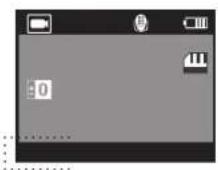
Film size
HD - 720p
Your camera is equipped with a high resolution mode «HDR»
Setup > HDR
Activated «HDR» mode
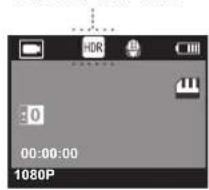
Shot Mode (Photo)
EN

PHOTO
To take a Photo, make sure that the camera is in Photo mode. If the Photo icon is not displayed on the LCD screen of your camera, press multiple times until it appears.
To take a photo :
Press OKd release the pressure. The camera emits a beep, the red status indicator light blinks for each captured shot.
Select the resolution of your photos :
Your camera can take some shots with resolution up to 5 Megapixels. You have the choice of four possible types of resolution (Setup > Resolution).
Indicator of the chosen resolution
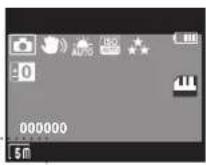
Take several photos at once :
In «Burst» mode, your camera takes several photos in a single click. To take a burst of photos, make sure that the camera is in «Burst» mode (Setup > Burst). You just have to select the number of shots that you want for a single click: 3, 5 or 10 photos.

Activated «Photo burst»
Playback mode

PLAYBACK
To view the videos and photos, make sure that the camera is in Playback mode.
If the Playback icon ▶ is not displayed on the LCD screen of your camera, press multiples times until it appears.
To read a sequence :
Press OKd release the pressure. The camera will start the playback of the selected file
During the playback of a sequence, you can accelerate the reading, go back, pause or stop.
The opposite diagram shows you the connections of the buttons to be activated for the choice of your actions.
(P.S: The OK button has the double function «Playback» and «Pause»)

Playback on an HDMI screen
Connect the micro HDMI cable / HDMI to the screen
The camera screen turns off
The playback control of the external display will be on the camera
Configuration mode (Setup)
EN

SETUP
To access the list of the different possible configuration options, press multiple times until the settings page appears.
Scroll through the options, select, and activate the ones that you want.
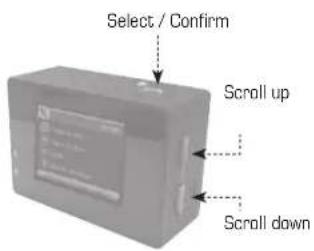


If you want to exit the configuration menu, press on the ⏻ button.
Specifications
| LCD Screen | |
| Lens | ns 6 elements / Wide angle 170° |
| Languages | , Portuguese |
| Video Resolutions | 080) 30FPS720P (1280°720) 30FPS |
| Video Format | |
| Video compression format | |
| Resolution of Photos | MP, 6MP, 8MP,10MP,12MP |
| Memory | B (not included) |
| Photo modes | / burst |
| Frame frequency | |
| USB interface | |
| Power supply | |
| Battery capacity | |
| Recording time | + and 30 minutes |
| Charging time | minutes |
| Operating System | Windows XP/Vista or Above/Win7/Mac OS |
| Dimension of the camera | 59.27*41.13*29.28 |
Note: the specifications are subject to change as part of product improvement.
Notice to users:
The device delivers exceptional images and videos. Therefore, only the micro SD cards of minimum class 10 are accepted by the device
Prevention of damage due to the water in your camera
The rubber seal that covers the inside of the housing forms a waterproof barrier that protects your sport camera in wet conditions and under the water. Make sure that the rubber seal remains clean. A single hair or a grain of sand can cause a leak. After each use in the salt water, you must rinse the outside of the housing with some fresh water and dry it. Otherwise, the pivot may rust and the salt accumulates in the seal, which can cause some failures. To clean the seal, rinse it in the fresh water and shake it dry (wiping with a cloth may leave fluff and compromise the seal). Reinstall the seal into the slot of the back door of the housing.
CAUTION: If you do not follow these precautions whenever you use your sport camera, the leaks can damage or destroy your camera. The warranty does not cover the damage caused by user error.
Accesorios

Ejemplos


10 - Indicador de bateria
11 - Indicador de funcionamento
12 - Ecrã
13 - Parte superior
14 - Altifalante
15 - Parte Inferior
Principios básicos
LIGAR E DESLIGAR

ENGLISH: This symbol indicates that this product conforms to RoHS specifications, which restricts the level of substances known to be dangerous and harmful to the environment, in all electrical and electronic devices.
Exposure WARRING: You should not expose of this device with your household vehicle. A system of selective selection has been set up by the local authorities for this type of product and you should find out where such sites are located from your electrical hall. In effect, electric and electronic products may contain dangerous substances that have harmful effects on the environment or human traits and must be required. The symbol opposes to indicate electrical and electronic equipment is subject to selective collection; it shows a waste bin on a waste bin with a one through it.
Customer satisfaction is important to us. You may contact us at info@t-nb.com. Maintenance, repair or product information, consult our website: www.l-nb.com.
FR - Besond'ade ?
o'ŋ line www.t-nb.com


- FR
- PRINCIPES DE BASE
- MARCHE ET ARRÊT
- MODE CONFIGURATION (SETUP)
- SETUP
- FEATURES OF THE CAMERA (BACK)
- LCD STATUS SCREEN OF THE CAMERA
- BASIC PRINCIPLES
- TO START
- TO CHARGE THE BATTERY
- TO TURN ON THE DEVICE
- TO TURN OFF THE DEVICE
- OVERVIEW
- VIDEO MODE
- VIDEO
- TO START RECORDING
- TO STOP RECORDING
- YOU CAN MODIFY THE SIZE OF THE DISPLAY FORMAT
- YOUR CAMERA IS EQUIPPED WITH A HIGH RESOLUTION MODE «HDR
- SHOT MODE (PHOTO)
- TO TAKE A PHOTO
- SELECT THE RESOLUTION OF YOUR PHOTOS
- TAKE SEVERAL PHOTOS AT ONCE
- PLAYBACK MODE
- PLAYBACK
- TO READ A SEQUENCE
- THE OPPOSITE DIAGRAM SHOWS YOU THE CONNECTIONS OF THE BUTTONS TO BE ACTIVATED FOR THE CHOICE OF YOUR ACTIONS
- PLAYBACK ON AN HDMI SCREEN
- CONFIGURATION MODE (SETUP)
- NOTICE TO USERS
- PREVENTION OF DAMAGE DUE TO THE WATER IN YOUR CAMERA
- ACCESORIOS
- PRINCIPIOS BÁSICOS
- LIGAR E DESLIGAR
Brand : T'nB
Model : SPCAMFHD2
Category : Camcorder