
SRD-1653D - Voice recorder SAMSUNG - Free user manual and instructions
Find the device manual for free SRD-1653D SAMSUNG in PDF.


| Product Type | Digital Voice Recorder |
| Brand | Samsung |
| Model | SRD-1653D |
| Recording Format | MP3 |
| Storage Capacity | 16 GB |
| Recording Time | Up to 288 hours (8 kbps) |
| Dimensions | 110 x 40 x 15 mm |
| Weight | 80 g (with battery) |
| Power Source | Built-in rechargeable Li-ion battery |
| Playback Speed | Variable (0.5x to 2.0x) |
| Voice Activation | Yes |
| Microphone | Built-in stereo |
| Speaker | Built-in |
| Connectivity | USB 2.0 |
| Supported OS | Windows, Mac, Linux (as mass storage) |
| Material | Plastic |
| Color | Black |
| Maintenance | Wipe with a soft dry cloth |
| Safety Precautions | Do not immerse in water or expose to moisture |
| Spare Parts and Repairability | Battery replaceable by service center; other parts not available separately. Contact Samsung support. |
Frequently Asked Questions - SRD-1653D SAMSUNG
User questions about SRD-1653D SAMSUNG
0 question about this device. Answer the ones you know or ask your own.
Ask a new question about this device
Download the instructions for your Voice recorder in PDF format for free! Find your manual SRD-1653D - SAMSUNG and take your electronic device back in hand. On this page are published all the documents necessary for the use of your device. SRD-1653D by SAMSUNG.
USER MANUAL SRD-1653D SAMSUNG
©2012 Samsung Techwin Co., Ltd. All rights reserved.
Trademark

SAMSUNG TECHWIN is the registered logo of Samsung Techwin Co., Ltd.
The name of this product is the registered trademark of Samsung Techwin Co., Ltd.
Other trademarks mentioned in this manual are the registered trademark of their respective company.
Restriction
Samsung Techwin Co., Ltd shall reserve the copyright of this document. Under no circumstances, this document shall be reproduced, distributed or changed, partially or wholly, without formal authorization of Samsung Techwin.
Disclaimer
Samsung Techwin makes the best to verify the integrity and correctness of the contents in this document, but no formal guarantee shall be provided. Use of this document and the subsequent results shall be entirely on the user's own responsibility. Samsung Techwin reserves the right to change the contents of this document without prior notice.
◆ Design and specifications are subject to change without prior notice.
The default password can be exposed to a hacking threat, so it is recommended to change the password after installing the product. Set a password for your wireless network if you use the product with a wireless router. Being not protected with a password or using the default wireless router password may expose your video data to potential threat.
Note that the security and other related issues caused by the unchanged password shall be the user's responsibility.
IMPORTANT SAFETY INSTRUCTIONS
Read these operating instructions carefully before using the unit.
Follow all the safety instructions listed below.
Keep these operating instructions handy for future reference.
1) Read these instructions. 2) Keep these instructions. 3) Heed all warnings. 4) Follow all instructions. 5) Do not use this apparatus near water. 6) Clean only with dry cloth. 7) Do not block any ventilation openings. Install in accordance with the manufacturer's instructions. 8) Do not install near any heat sources such as radiators, heat registers, stoves, or other apparatus (including amplifiers) that produce heat. 9) Do not defeat the safety purpose of the polarized or grounding-type plug. A polarized plug has two blades with one wider than the other. A grounding type plug has two blades and a third grounding prong. The wide blade or the third prong are provided for your safety. If the provided plug does not fit into your outlet, consult an electrician for replacement of the obsolete outlet.
10) Protect the power cord from being walked on or pinched particularly at plugs, convenience receptacles, and the point where they exit from the apparatus.
11) Only use attachments/accessories specified by the manufacturer.
12) Use only with the cart, stand, tripod, bracket, or table specified by the manufacturer, or sold with the apparatus. When a cart is used, use caution when moving the cart/apparatus combination to avoid injury from tip-over.
13) Unplug this apparatus during lightning storms or when unused for long periods of time.
14) Refer all servicing to qualified service personnel. Servicing is required when the apparatus has been damaged in any way, such as power-supply cord or plug is damaged, liquid has been spilled or objects have fallen into the apparatus, the apparatus has been exposed to rain or moisture, does not operate normally, or has been dropped.

BEFORE START
This manual provides operational information necessary for using the product and contains a description about each component part and its function as well as menu or network settings.
You have to keep in mind the following notices:
• SAMSUNG retains the copyright on this manual. - This manual cannot be copied without SAMSUNG's prior written approval. - We are not liable for any or all losses to the product incurred by your use of non-standard product or violation of instructions mentioned in this manual. - Prior to opening the case, please consult a qualified technician first. Whenever this is needed power must be removed from the unit. - Before installing additional HDD or connecting the SATA device to this product, check if it is compatible with the product.
Warning
Battery
It is essential that when changing the battery in the unit, the replacement battery must be of the same type otherwise there may be a possibility of an explosion.
The following are the specifications of the battery you are using now.
- Normal voltage: 3V • Normal capacity: 220mAh • Discharge current: 0.2mA
- Operating temperature: -20°C to +85°C (-4°F to +185°F)
CALIFORNIA USA ONLY
This perchlorate warning applies only to primary CR (manganese dioxide) lithium coin cells in the product sold or distributed only in California, USA. "Perchlorate material - special handling may apply. See www.dtsc.ca.gov/hazardouswaste/perchlorate."
Caution
- Connect the power cord into a grounded outlet.
- The mains plug is used as a disconnect device and shall stay readily operable at any time.
- Batteries shall not be exposed to excessive heat such as sunshine, fire or the like.
- Risk of explosion if battery is replaced by an incorrect type. Dispose of used batteries according to the instructions.
System Shutdown
Turning off the power while the product is in operation, or undertaking improper actions may cause damage or malfunction to the hard drive or the product.
To safely cut off power, press the front power button on the product to display the confirmation message. Click and then unplug the power cable.
You may want to install a UPS system for safe operation in order to prevent damage caused by an unexpected power stoppage. (Any questions concerning UPS, consult your UPS retailer.)
Operating Temperature
The guaranteed operating temperature range of this product is 0°C to 40°C (32°F to 104°F).
This product may not work properly if you run it right after a long period of storage at a temperature below the guaranteed one.
Prior to using a device that has been stored for a long period in low temperatures, allow the product to stand at room temperature for a period.
Especially for the built-in HDD in the product, its guaranteed temperature range is 5°C \~ 55°C (41°F \~ 131°F).
Likewise, the hard drive may not work at a temperature below the guaranteed one.
Ethernet Port
This equipment is for indoor use and all the communication wirings are limited to inside of the building.
Security Precautions
The default password can be exposed to a hacking threat so it is recommended to change the password after installing the product.
Set password for your wireless network if you use the product with a wireless router. Being not protected with password or using the default wireless router password may expose your video data to potential threat.
Note that the security and other related issues caused by the unchanged password shall be responsible for the user.
CONTENTS
OVERVIEW

3 Important Safety Instructions 4 Before Start 6 Contents 8 Features 10 Part Names and Functions (Front) 12 Part Names and Functions (Rear) 14 Remote Control
INSTALLATION

16 Checking the installation environment 17 Rack Installation 17 Installing The HDD
CONNECTING WITH OTHER DEVICE

22 Connecting External Devices 25 Connecting the Network
LIVE

27 Getting Started 30 Live Screen Configuration 35 Live Mode 37 Spot Out 38 Zoom 38 Audio ON/OFF 38 Freeze 39 Event Monitoring
MAIN MENU

40 System Setup 50 Setting the Device 60 Setting the Recording 63 Setting the Event 66 Backup 68 Network Configuration 77 Controlling a PTZ device
SEARCH & PLAY

80 Search
83 Playback
WEB VIEWER

85 Introducing Web Viewer
86 Connecting Web Viewer
88 Using Live Viewer
93 Controlling a Connected Network Camera
96 Using Search Viewer
99 Viewer Setup
110 About
111 Mobile Viewer
BACKUP VIEWER

112 SEC Backup Viewer
APPENDIX

114 Product Specification
117 Product Overview
119 Default Setting
122 Troubleshooting
125 Open Source Announcement
FEATURES
The product compresses camera inputs from 8/16 channels with H.264 video codec, and supports simultaneous recording and playback of 8/16-channel audio input to/from HDD.
These DVRs also support network connectivity, providing remote monitoring from a remote PC transferring video and audio data.
- Provides a convenient User Interface • 8/16 CH Composite Input Connectors • Supports CIF(S)/2CIF(M)/4CIF(L)/WD1 recording formats
- With the network-specific codec, network transfer is enabled regardless of the recording conditions.
- Display of HDD information and status using HDD SMART.
- HDD overwrite function • Mass storage HDD backup through high-speed USB 2.0.
- Simultaneous recording and playback of 8/16-channel video data.
- Various search modes (time, event, backup, position, motion detection).
- Various recording modes (manual, event, scheduled recording).
- Alarm interface.
- Remote monitoring function via Network Viewer, Smart Viewer, and Mobile Viewer • Supports coaxial protocols.
- Tampering detection.
FC CE

This equipment has been tested and found to comply with the limits for a Class A digital device, pursuant to part 15 of the FCC Rules. These limits are designed to provide reasonable protection against harmful interference when the equipment is operated in a commercial environment.
This equipment generates, uses, and can radiate radio frequency energy and, if not installed and used in accordance with the instruction manual, may cause harmful interference to radio communications. Operation of this equipment in a residential area is likely to cause harmful interference, in which case the user will be required to correct the interference at his own expense.
Package Contents
Please unwrap the product and place it on a flat surface or in the location where it will be installed. Please check that the following items are included in addition to the main unit.

PART NAMES AND FUNCTIONS (FRONT)
SRD-873D
SRD-1653D/1673D
| Part Names Functions | ||
| 1 | Channel | Used to select channel numbers directly in the Live Mode, or numbers in the numeric input mode. |
| 2 | REC Starts or ends the recording. | |
| ◀/◀◀ | Step Rewind (◀I): Used for backward frame-by-frame search while in PAUSE.Fast Rewind (◀◀): Used for quick backward search while in Play. | |
| ■ | Stop: Used to stop the playback. | |
| ▶/II | Play/Pause: Used to pause or resume the screen. | |
| ▶▶/I▶ | Fast Forward (▶▶): Used for quick forward playback.Step Forward (I▶): Used for forward frame-by-frame search while in PAUSE. | |
| 3 | LED Indicator | REC: Lights on when recording is in progress. |
| HDD: Displays the normal access to HDD.Upon access to HDD, LED repeats on and off. | ||
| ALARM: Lights on when an event occurs. | ||
| NETWORK: Displays both network connection and data transfer status. | ||
| POWER: Displays the power ON/OFF status. | ||
| 4 | Direction /Select Button | Used to change a value or move the cursor up/down/left/right (▲▼◄►). Selects a menu item or executes the selected menu. |
| Jog shuttle | When a scroll bar appears in each menu, acts as a scrolling.In Play mode, - Jog : Pauses the playback and steps backward or forward.- Shuttle : Fast playback forward or backward. | |
| 5 | Power | Used to turn the DVR ON/OFF.■ Functions only if the button was held for 2 seconds. |
| 6 | USB Port 1 / 2 Connects the USB devices. | |
| 7 | MODE | Each time you press the button in Live mode, the screen mode will be switched in sequence. Each time you press the button in play mode, the screen mode will be switched in sequence. |
| AUDIO Sets Audio ON/OFF. | ||
| ALARM | Cancels the ALARM LED and the audible alarm when the alarm is going off, and to remove the icon. | |
| MENU/⊃ | Either goes to the system menu screen or moves to the upper menu from the lower menu. | |
| ENTER | Runs selected menu function. | |
| 8 | Camera Control | ZOOM: Sets the screen to the x2 digital zoom. |
| FREEZE: Runs the FREEZE function in the Live Mode. | ||
| BACKUP: Runs the BACKUP function. | ||
| SEARCH: Goes to the search screen. | ||
| 9 | OPEN/CLOSE Used | to open and close the DVR-RW disc tray. |
Using the jog shuttle
■ Jog starts from the right point and shuttle starts from the left point.
| < Jog > | |
 |  |
| In play mode, DVR playback steps forward video by 1 frame. In play mode, DVR playback steps backward video by 1 frame. | |
| < Shuttle > | |
 |  |
| In play mode, DVR plays fast forward. In play mode, DVR plays fast reverse. | |
PART NAMES AND FUNCTIONS (REAR)
SRD-873D
SRD-1653D/1673D
| Part Names Functions | ||
| 1 | AUDIO IN Audio input signal port (RCA jack) and port for optional audio extension cable. | |
| 2 | ALARM | - ALARM IN : Alarm Input port.SRD-873D : 1~8 CHSRD-1653D/1673D : 1~16 CH- ALARM RESET : Alarm Reset port.- ALARM OUT 1~4 : Alarm Output port. |
| RS-485 Used for RS-485 communication. (TX+, TX-, RX+, RX-) | ||
| 3 | HDMI HDMI connector port. | |
| 4 | eSATA Ports used for external storage device connections. | |
| 5 | NETWORK NETWORK connector port. | |
| 6 | Power cable holder | To fix the cable, hang the cable on the holder.■ For more information, refer to the drawing. (Page 13) |
| 7 | Power Power connection port. | |
| 8 | VIDEO OUT Composite Video Signal Output Port (VGA type connector). | |
| 9 | SERIAL Serial port for connecting to a POS device. | |
| 10 | SPOT1/2 BNC type of output port for the Spot signal. | |
| 11 | VIDEO IN Video Signal Input Port (BNC type connector). | |
| 12 | AUDIO OUT Audio Signal Output Port (RCA jack). | |

■ [CONSOLE] is designed for the service repair purpose only.
How to insert the power cable on the holder


REMOTE CONTROL
![SEARCH: Displays the search menu. MODE: Changes the screen mode. POWER: Displays the Exit pop up screen. NUMBER [0~+10]: Used as the numeric input keys, or displays a single channel. Skip Backward (by unit time), Slow Rewind, Slow Forward, Skip Forward (by unit time) T/W: Zooms in or out. MENU: Goes…](/content/2026/06/1283506/images/14b68d2304d0a4fd93f16aa9aa80b36c0f341a9091abfd6fe0b813821fcb7874.jpg)
Using the Numeric buttons
| CHANNEL 1–9 Press each button between 1 to 9. | |
| CHANNEL 10 | Press the [+10] button first, then press the 0 button again within 3 seconds. |
| CHANNEL 11–16 | Press the [+10] button first, then press any number between 1 to 6 within 3 seconds. |
Changing the Remote Control ID
Remote control's ID and DVR's ID should be matched for proper operation.
- Press the [ID] button of the remote control and check the ID displayed on the DVR screen. The factory default ID of the remote control is 00.
- Enter 2 digits of your selection in order, while pressing the system [ID] button.
- When ID input is done, press the system [ID] button again to check the setting.

If you want to change the remote control ID to 08: Press 0 and 8 in order while the system [ID] button is pressed. Refer to "Remote Devices". (Page 56)
Installation
Please take note of the following before using this product.
- Do not use the product outdoors.
- Do not spill water or liquid on the connection part of the product.
- Do not subject the system to excessive shock or force.
- Do not pull out the power plug forcefully.
- Do not disassemble the product on your own.
- Do not exceed the rated input/output range.
- Use a certified power cord only.
- For the product with an input ground, use a grounded power plug.
CHECKING THE INSTALLATION ENVIRONMENT
This product is a top-notch security device that is equipped with a high-capacity HDD and other key circuit boards.
When the temperature rises inside the product, the product may break down and the product life be shortened. Please pay attention to the following recommendations before installation.

[Figure 1]
When mounting the product on a rack, comply with the following instructions.
- Please ensure that the rack inside is not sealed.
- Please ensure the air is circulated through the inlet/outlet as shown in the picture.
- If you pile up the products or other rack-mount devices as shown in figure 2, secure room for ventilation or install a vent.
- For natural air convection, place the inlet at the bottom of the rack and the outlet on top.
- It is strongly recommended that a fan motor is installed at the inlet and the outlet for air circulation. (Please fit a filter at the inlet to screen dust or foreign substances.)
- Please maintain the temperature inside the rack or surrounding areas between 0° C \~ 40° C ( 32° F \~ 104° F) as shown in the figure 1.
Rack Mount Instructions - The following or similar rack-mount instructions are included with the installation instructions :
A) Elevated Operating Ambient - If installed in a closed or multi-unit rack assembly, the operating ambient temperature of the rack environment may be greater than room ambient. Therefore, consideration should be given to installing the equipment in an environment compatible with the maximum ambient temperature (Tma) specified by the manufacturer. B) Reduced Air Flow - Installation of the equipment in a rack should be such that the amount of air flow required for safe operation of the equipment is not compromised. C) Mechanical Loading - Mounting of the equipment in the rack should be such that a hazardous condition is not achieved due to uneven mechanical loading. D) Circuit Overloading - Consideration should be given to the connection of the equipment to the supply circuit and the effect that overloading of the circuits might have on overcurrent protection and supply wiring. Appropriate consideration of equipment nameplate ratings should be used when addressing this concern.
E) Reliable Earthing - Reliable earthing of rack-mounted equipment should be maintained. Particular attention should be given to supply connections other than direct connections to the branch circuit (e.g. use of power strips).


[Figure 2]
Install the Bracket-Rack as shown in the figure, and then fasten the screws on both sides (2 screws on each side).
- Fix the screws not to be loosened by vibrations.

Cautions when Installing in the Rack
To install multiple DVRs in the rack, make sure to separate the FOOT at the bottom of each DVR.
- There are four FOOTs at the bottom of a DVR. Press the projected parts at both ends of each "FOOT" and turn it counterclockwise.

- "FOOT" is separated from the main body when it is turned to the end of the fastening groove.


INSTALLING THE HDD
Make sure to unplug the power cord from the wall outlet to prevent possible electric shock, injury, or product damage.
Please consult your provider for further information on HDD installation since improper installation or settings may damage the product.
■ Make sure to unplug the power cord from the wall outlet before proceeding with the installation.
Cautions for data loss (HDD care)
Please pay attention so that the data inside the HDD is not damaged. Before adding a HDD, please check the compatibility with this product. HDD is vulnerable to malfunction due to its sensitive nature, especially against shock when operating. Please ensure that the HDD is free from such shock. We are not liable for any damage to the HDD incurred by user's carelessness or misuse.
■ Cases might cause damage to HDD or recorded data
To minimize the risk of data loss from a damaged HDD, please backup data as often as possible.
If exposed to shock when disassembling or installing, data stored in the hard disk may be damaged.
A sudden power failure or turning off the product while in HDD operation may damage the hard disk drive.
HDD or files stored inside may be damaged if the main body is moved or impacted during the HDD operation.
Cautions on HDD installation
- When adding a new HDD, make sure to fasten screws tightly and use appropriate parts if required to fix the HDD. Otherwise, the product may be damaged or does not operate properly.
- Please check the HDD compatibility before adding a HDD.
- Please contact your nearest dealer to obtain the list of compatible devices.
- When adding an HDD, make sure to separate SUPPORT HDD first to separate HDD bracket.
- Remove "SUPPORT HDD" by pressing left and right parts (indicated in figure) of "SUPPORT HDD", and disassemble and replace the HDD.

Installing the HDD

If the installed HDD had been used with other devices, it will be automatically formatted.
• Installing HDD by opening the cover
- Remove the product's cover by pushing backward after removing the screws on both sides and rear side.

- Separate the HDD bracket by pushing it backwards.

- Attach the HDD onto the bracket, and fasten the screws on both sides to fix it.

- Align the bracket with installed HDD to the guide of the case, push it toward the board, and connect to the board's power and data ports.

- You can check the HDD map directly on the DVR. Refer to "Storage Device > HDD Map". (Page 53)

- Attach the cover and fasten the screws on both sides and rear side.

Installation
• Installing HDD by separating the rear panel
- Remove screws on the rear panel, and pull the panel's hook to separate it.

- Separate the HDD bracket by pushing it backwards.

- Attach the HDD onto the bracket, and fasten the screws on both sides to fix it.

- Align the bracket with installed HDD to the guide of the case, push it toward the board, and connect to the board's power and data ports.
- Attach the rear panel, and fasten screws to fix it.
Connecting with other device
CONNECTING EXTERNAL DEVICES

■ The following figures are based on Model SRD-1673D.

Connecting the USB
- By factory default, a USB port is provided for external connection.
- You can connect a USB HDD, USB CD/DVD player, USB memory or mouse to the USB port.
- If a USB HDD is connected to the system, recognition and settings are available in "Main Menu > Device > Storage Device". (Page 53)
- The product supports hot plugging function that enables connecting/disconnecting USB devices while in operating the system.

If the USB storage media for backup is not formatted by the product, format it as FAT32 file system with a PC.
Connecting External SATA HDD (eSATA)
External SATA port is provided on the rear panel.
If connected to the system, the external SATA HDD (eSATA) can be recognized and configured in "Main Menu > Device > Storage Device".

■ Use a cable shorter than 1 m for the external SATA HDD (eSATA) connections.
- Unexpected disconnection to a device in use which is connected via eSATA may restart the system. Check whether the device is in use before disconnecting it.
Connecting POS Device
You can connect a POS device to the RS-232C port on the product's rear side when you connect it directly with a RS-232C cable.
Connection setup for the RS-232C port is available in "Main Menu > Device > POS Devices", press the button and set . (Page 57)
Connecting the Alarm Input/Output
The Alarm In/Out port at the back is composed of the following.
SRD-873D

• ALARM IN 1~8: Alarm Input Port - ALARM RESET: On receiving an Alarm Reset signal, the system cancels the current Alarm Input and resumes sensing. • ALARM OUT 1~4: Alarm Output Port

Connecting with other device
SRD-1653D/1673D

• ALARM IN 1~16: Alarm Input Port - ALARM RESET: On receiving an Alarm Reset signal, the system cancels the current Alarm Input and resumes sensing. • ALARM OUT 1~4: Alarm Output Port

Connect the [TX/RX +, -] device through the back port.

You can connect and control the PTZ camera which supports the RS-485 communication.
- Check if the RS-485 device is compatible with the product first.
- Pay attention not to change the polarity (+/-) of the RS-485 device when connecting it.
- Depending on camera's type, connection polarity can be different. For further information, refer to the respective PTZ Camera's documentation.
CONNECTING THE NETWORK
Connecting to Network through Ethernet (10/100/1000BaseT)
![graph TD A["Router"] -->|RJ-45 Ethernet Cable (Direct Cable)| B["Hub/Switcher"] B -->|Back Bone| C["Network"] C --> D["Hub/Switcher"] D --> E["Windows Network Viewer"] E --> F["Computer"]](/content/2026/06/1283506/images/fbbb4d341dd7b0faa990b5eaa5668708663c4a5c06ed2f209dd6e88ad30f5cd5.jpg)
Connecting with other device
Connecting to the Network using the router![graph TD A["Network"] --> B["xDSL or Cable Modem"] A --> C["DDNS Server (Data Center)"] A --> D["Broadband Router"] A --> E["xDSL or Cable Modem"] E --> F["External Remote PC"]](/content/2026/06/1283506/images/123f4b8d2f04ea2e7cf3b7355f114644ce9079d35d276c805545de980bb29580.jpg)
Connecting to Network through PPPoE![graph TD A["Router"] -->|DJ-45 Ethernet Cable (Direct Cable)| B["PPPoE MODEM"] B <-->|Phone(PPPoE) Line| C["Network"] C --> D["Hub/Switcher"] D --> E["Windows Network Viewer"] E --> F["Computer"]](/content/2026/06/1283506/images/ef523401083137f06bda924920502d43ea0713ab69f4b4f1e7209f4b89872e72.jpg)
GETTING STARTED
Starting the system
- Connect the power cable to the product's rear.
- Touch and hold the front power button for over 2 seconds.

- It takes about 10 seconds to display the start screen after booting.

- The boot up screen appears. Booting up may take about 1 minute, as it indicates progress with icons. If a new HDD is installed, the initialization process may take longer.

- The live screen appears with a beep.

Shutting Down the System
You can shut down the system only if you have logged in to the DVR. You require permission to shut down the system if you are not logged in as admin.
- Hold the [POWER] button on the front or the remote control for over 2 seconds, or right click and click .
- The "Shutdown" confirmation window appears.
- Use the arrow keys on the remote control or the front panel to move to and press the [ENTER] button or click . The system will shut down.
For the permission management, refer to "Permission Management > Setting Permissions". (Page 45)

Login
To access a DVR or restricted menu, you should have logged in to the DVR.
- In live mode, right-click any area of the screen. You will see the context sensitive menu as in the right figure.

- Click .
The login dialog appears. You can also see the login dialog to access a desired menu by pressing the [MENU] button on the remote control or the front panel.
The login dialog will also appear if you press a menu button on the remote control or the front panel of the DVR when the corresponding menu requires logging in.
■ After logged in, press [RETURN] on the remote control to display the logout dialog.
- By default, initial ID and password are set to "admin", and "4321".


- The default password can be exposed to a hacking threat, so it is recommended to change the password after installing the product.
- Set a password for your wireless network if you use the product with a wireless router. Being not protected with a password or using the default wireless router password may expose your video data to potential threat.
Note that the security and other related issues caused by the unchanged password shall be the responsibility of the user.
For the restricted permission, refer to "Permission Management > Setting Permissions". (Page 45)

Locking All Buttons
This will restrict access to all buttons available in the DVR.
- In Live mode, press buttons in the order of [STOP (■)]→[FREEZE]→[STOP (■)]→[FREEZE]→[MENU]. A confirmation window appears.
- Select . All keys are locked.
- In the lock condition, press any button to display a dialog where you are prompted to enter the password for unlocking the buttons. The button lock will be released if you enter the admin password.

Icons on the Live Screen
You can check the status or operation of the DVR with the icons on the live screen.
![graph TD A["Camera"] --> B["Display"] B --> C{Switch} C -->|1| D["2012-01-01 01:10:25"] C -->|2| E["Control Panel"] C -->|3| F["Monitor"] C -->|4| G["Display & Check"] C -->|5| H["Warning Panel"] C -->|6| I["Camera"] C -->|7| J["Playoff"] C --> K["Radio"] style C stroke:#000,stroke-width:2px](/content/2026/06/1283506/images/4b7e7c3449d4f9d925199ed9e0a23d8864e1715edff088342166d101e8246615.jpg)
| Part Names Functions | |||
| 1 | Current Date, Time Displays the current time and date. | ||
| 2 | Login Information | When you are logged in, the “LOG ON” icon will be displayed. | |
| 3 | Screen Mode |  | Displayed if the zoom function is activated. |
| [DB2C] | Displayed if you press the Pause button. | ||
 | Displayed in Auto Sequence mode where all channels are switched at the specific time interval. | ||
 | Displayed if the recording is in process.■ To cancel the recording, enter the password. | ||
| 4 | System Operation | [OKTA] | Displayed if there is a problem with the cooling fan. |
 | Displayed if the HDD is full and the DVR has an insufficient space to record. | ||
 | Displayed if no HDD is installed or the existing HDD should be replaced. | ||
 | Displayed if the HDD needs a technical examination. | ||
 | Displayed while the backup is in process or if the backup data is played. | ||
 | Displayed if a new firmware is found from the network. | ||
| 5 | Video Input Status | Displayed if no input is entered in the condition that the camera is set to. | |
| Nothing will be displayed on the screen if the camera is set to. | |||
| 6 | Camera Name/ Channel Displays the camera name and the changed channel, if any. | ||
| 7 | Camera Operation | Displayed in PTZ setting, and highlighted yellow if PTZ is in operation. | |
| Displays AUDIO ON/MUTE.Not displayed in video mode if deactivated. | |||
| If the sensor is set to, the input signal will be displayed on the screen of the connected channel. | |||
| Displayed if a motion detected in the condition that the motion detection is set to. | |||
| Appears when the Tampering Detection is set toand a tampering attempt is detected. | |||
| ®/®/® | Displays the current record mode from Record/Event/Schedule. | ||
Error Information
- If the internal HDD is not connected, the "NO HDD"(☐) message will appear; if there occurs a problem, you will see the "HDD FAIL"(☐) message in the top left corner. In this case, make sure you contact the service center for assistance as this may cause a failure of recording, playback or backup.
- If the cooling fan does not work properly or has a problem, the window will appear and the fan error icon ( ) will be displayed on the top left corner. In this case, check to see if the internal fan works. As a fan error can shorten the product life, make sure you contact the service center for assistance.

If you see the fan error icon or No HDD, HDD FAIL icons on the screen, contact the service center for more details.
Live Screen Menu
In addition to the buttons on the front panel or the remote control, you can access a desired menu by right-clicking the mouse any area in live mode.
Right click opens the context menu which shows different menu items according to the situation, such as logged in/out state, split screen mode, and various operational conditions.

■ Menu items of Search, Record, Backup, Shutdown and PTZ can be deactivated, depending on the user permission.

< Split Mode Menu >

< Single Mode Menu >
Split Mode Menu
The context-sensitive menu in split mode differs depending on the login/logout status.

| Menu Functions | ||
| 1 | Scene Mode | Refer to “Live Mode”. (Page 35) |
| 2 | Spot Out1/2 | Refer to “Spot Out”. (Page 37) |
| 3 | Audio On/Off | Refer to “Audio ON/OFF”. (Page 38) |
| 4 | Freeze | Refer to “Freeze”. (Page 38) |
| 5 | Stop Alarm | Stops the alarm output and the event monitoring. Refer to “Event Monitoring”. (Page 39) |
| 6 | Record/Stop Starts/stops the standard recording. | |
| 7 | Play | Plays the search result (data). Refer to “Search & Play > Play”. (Page 83) |
| 8 | Search | Refer to “Search & Play > Search”. (Page 80) |
| 9 | Backup | Refer to “Main Menu > Setting the Backup”. (Page 66) |
| 10 | Main Menu | Accesses the main menu. Refer to the Using the DVR section. (Page 40) |
| 11 | Shutdown Turns down the DVR. | |
| 12 | Show/Hide Launcher | Shows or hides the launcher. Refer to “View the Launcher Menu”. (Page 34) |
| 13 | Login/Logout | You can log in or out. |
Single Mode Menu
The single mode menu is available only in Single Mode.
The context-sensitive menu for One Channel mode in Split mode is different from that of Single mode.

| Menu Functions | ||
| 1 | Full Screen | Select and click a desired channel in Split mode to switch to the full screen of the selected channel. |
| 2 | PTZ Control | Accesses the PTZ Control menu.The PTZ menu is activated only in One-Channel Live mode. (Page 77) |
| 3 | Zoom In | Enlarges the selected image. (Page 38) |
View the Launcher Menu
The Launcher menu appears at the bottom of the live screen.
- In Live mode, right-click to display the context menu and select an item.
- Move the cursor to the bottom and click a desired item in the Launcher menu.

If no input is entered for 10 seconds, the menu will disappear.
■ The Launcher menu can be accessed only by using the mouse.
■ SRD-873D does not support the 16-split screen mode.


| Menu Functions | ||
| 1 | Date/Time | Displays the current time and date.The indication of AM/PM is displayed if you set 12 hours for the time format in “System > Date/Time/Language > Time”. (Page 40) |
| 2 | Screen Mode | Press this button to switch the screen mode in sequence.The current mode is highlighted in white. |
| 3 | Menu Expansion Button Click to display the hidden menu to the right. | |
| 4 | Audio Turns ON/OFF the sound of the selected channel. | |
| 5 | Zoom Enlarges the selected area. This is available only in Single Live mode. | |
| 6 | PTZ | Runs the PTZ Control launcher.The PTZ control launcher will be active on the Live screen after you select a single channel. |
| 7 | Alarm Stops the alarm if it's activated. | |
| 8 | Freeze Freezes the Live screen temporarily. | |
| 9 | Play Enters Play mode if a file to play exist, and if not, enters Search mode. | |
| 10 | Record Start/End recording the Live screen. | |
SRD-1653D/1673D display live images from 16 channels in a total of 8 split screen layouts.
Switching the screen mode
To switch the split mode, select a screen mode in the launcher menu, or right-click to select a screen mode in the context menu.
Press the [MODE] button on the front panel or the remote control to switch the mode in the sequence of the launcher menu items.

■ SRD-873D does not support the 16-split screen mode.
| CH1 | CH2 | CH3 | CH4 |
| CH5 | CH6 | CH7 | CH8 |
| CH9 | CH10 | CH11 | CH12 |
| CH13 | CH14 | CH15 | CH16 |
Switching the split mode
SRD-1653D/1673D display 16 Live images in the sequence of Single, 4-split and 9-split modes.
Auto Sequence

Single mode
![graph TD A["1-4"] --> B["5-8"] B --> C["9-12"] C --> D["13-16"] D --> E["✓"] E --> F["✓"] F --> G["✓"] G --> H["✓"] H --> I["✓"] I --> J["✓"] J --> K["✓"] K --> L["✓"] L --> M["✓"] M --> N["✓"] N --> O["✓"]](/content/2026/06/1283506/images/5a7ed31c2a079cb9b9a30e1c64d863c7411a6b8cd6ff0d61749c82dc3cab1ee1.jpg)
4-split mode

9-split mode

In Single mode, if you have set in "Setting the Device > Camera", Auto Sequence will be conducted at the set interval. (Page 50)
In a split mode, if you have set in "Setting the Device > Monitor", Auto Sequence will be conducted at the set interval. (Page 58)
Manual Switching
Press the left/right button on the front panel or the remote control, or click the arrow <◀/▶> key to move to the next split mode.
- If pressing the right [▶] button in 9-split mode:
9-split (CH 1~9) mode → 9-split (CH 10~16) mode → Auto Sequence
![graph LR A["CH1 CH3"] --> B["CH2"] C["CH4 CH5"] --> D["CH6"] E["CH7 CH8 CH9"] --> F["CH8"] B --> G["CH10 CH12"] D --> H["CH13 CH14"] F --> I["CH18"] G --> J["CH11"] H --> K["CH15"] I --> L["CH16"] J --> M["10-16"] K --> N["1-9"] L --> M M --> O["Output"]](/content/2026/06/1283506/images/d7263021b60963a1eaac6b006704409b020ad3c69b2af0d544d53a1f3e625b32.jpg)
- If pressing the right [▶] button in 4-split mode :
Channel (CH 1~4) → Channel (CH 5~8) → Channel (CH 9~12) → Channel (CH 13~16) → Auto Sequence
![graph LR A["CH1 CH2"] --> B["CH5 CH6"] C["CH3 CH4"] --> B B --> D["CH6 CH10"] D --> E["CH11"] E --> F["CH12"] F --> G["CH13"] G --> H["CH14"] H --> I["CH15"] I --> J["CH16"]](/content/2026/06/1283506/images/0d239a71b31827aa4fd2cdb37cee79b11ddfd15d0cb012ebaea438c147e0a0cd.jpg)
![graph TD A["1-4"] --> B["5-8"] B --> C["9-12"] C --> D["13-16"] D --> E["↓"] F["Q1"] --> G["Q2"] G --> H["Q3"] H --> I["Q4"] I --> J["↓"] style A fill:#f9f,stroke:#333 style B fill:#ccf,stroke:#333 style C fill:#cfc,stroke:#333 style D fill:#fcc,stroke:#333 style E fill:#ffc,stroke:#333 style F fill…](/content/2026/06/1283506/images/de2783619b22ceefdcaddfb593019e696298e52359a922cb64527fa5bc0c05e7.jpg)
Channel Setting
You can display the channel in a desired area of a split screen.
- Place the cursor over the camera name of each channel to display the <▼> key to the right on the screen.
- Click a camera name to display a channel list where you can select a different channel.
- Select a desired channel and click it.
The current channel will be switched to the selected one.
Use the cursor to select a channel to move, and drag and drop it to a desired channel; this can also change the channel position.
Ex : if switching CH 1 to CH 7

Switching to Single Mode
When in split mode, select and double-click a desired channel to switch to its Single mode.
Press the number corresponding to a desired channel on the front panel or the remote control to switch to its Single mode.
Refer to "Remote Control > Using the numeric buttons". (Page 15)
Example: If double-clicking CH 3 or pressing the number "3" on the remote control or the front panel.

SPOT OUT
The Spot Out monitoring is independent of the Live mode, which monitors a specific channel through the Spot Out port.
Selecting a Spot Out mode
If an event occurs such as sensor, motion or alarm from the Spot Out port in connection with a monitor, you can select an output screen mode.
- In Live mode, right-click any area on the screen. The Live menu appears.
- Click Spot Out. The split screen appears according to the Spot Out source. (Page 59)
- Spot Out 1: It supports auto sequence and single mode by default, and additionally supports 16-split, 9-split and 4-split modes if selected multi-spot out.
- Spot Out 2: It supports auto sequence and single mode.

ZOOM
This is available only in Single Live mode. In Single mode, select a desired area and use the Zoom function to enlarge it twice.
- Select in the right-click menu.
Press the [ZOOM] button on the front panel or the remote control, or simply click < 🔒 > in the launcher menu. The zoom box appears.
- Use the direction keys, or drag and drop to specify an area to enlarge.
- Press the [ENTER] button, or double-click the selected area to enlarge it twice.
In the enlarged image, use the direction buttons (▲▼◀▶) on the remote control or the front panel to move the enlarged area.
- Press the [ZOOM] button on the front panel or the remote control, or simply click < > in the launcher menu to release the zoom.

AUDIO ON/OFF
You can turn the sound on/off corresponding to the channel in Live mode.
AUDIO ON/OFF in Single mode
Click the audio icon (💡) on the screen, or press the [AUDIO] button on the front panel or the remote control to turn it on/off.

Only the channel where is set to in "Device > Camera" displays the audio icon (☐) in Live mode that you can use to turn the sound on/off.
FREEZE
This is available only in Live mode, this pauses playing the Live image temporarily.
- Press the [FREEZE] button on the front panel or the remote control, or click < * > in the launcher menu. The playback of the image is stopped temporarily.
- Press the [FREEZE] button again, or click < *>. This will release the freeze.
This will display the channel in sync with a specific event (Sensor/Motion/Video Loss) if it occurs.
In "Monitor > Event Display", set the event monitoring to ON/OFF and specify the event display time. (Page 58)
- If multiple events occur simultaneously, the screen will switch to a split mode.
2~4 events : 4-split mode
-5~9 events : 9-split mode
-10~16 events : 16-split mode
- If the second event occurs within the set time of , the first event will last until the second one is terminated. (Page 58)
- Ex : If you set to 5 seconds, and only one event occurs in CH 1.
![graph TD A["Event occurrence 5 seconds"] --> B["Stop alarm"] B --> C["CH1"]](/content/2026/06/1283506/images/a1f843304048e11e7c7bed5d616143b8c955a82c648e961f55be71da5708daf5.jpg)
Ex : If you set to 5 seconds, and the second event occurs in CH 2 within the set time after the first event occurred in CH 1.
![graph TD A["Event occurrence 4 seconds 9 seconds"] --> B["CH1"] A --> C["CH1 CH2"] D["Stop alarm"] --> E["End"]](/content/2026/06/1283506/images/bdf266827f85e77b833f60a3e98ed287c664a55307244ec5e1f3d7679dd04e68.jpg)

- Press the [ALARM] button to reset the alarm settings and to release the event mode.
If an alarm activates in the condition you have set the event record, and pre/post alarm times, the event record will be performed.
■ This will also apply to the Spot Out monitor.

In case of continuous events such as motion detection, switching to another split mode display may not be immediate if concatenating events follow, even when you have stopped the alarm of the event.
You can set up the system properties, devices, and options for recording, event, backup, and network.
SYSTEM SETUP
You can set up Date/Time/Language, Permission, System Properties, and Log.
Date/Time/Language
You can check and set up the current Date/Time and time-related properties, as well as the language used for the interface on the screen.
Setting the Date/Time/Language
Set the Date/Time/Language
Using the mouse may help make setup easier.
- Press the [MENU] button on the remote control or on the front panel.
If not logged in, it prompts with a login window. Refer to "Login". (Page 28)
- Use the left/right buttons (◀▶) to select the System property setup menu.
- Use the up/down buttons (▲▼) to select and press the [ENTER] button.
- Select . A dialog to setup Date, Time and Language.
- Use direction buttons (▲▼◀▶) to select an item to set and make your changes.

- Date: Sets the date that will appear on the screen. You can select the date format.
- Time: Sets the time and its format that will appear on the screen. Select either one from <24 Hours, 12 Hours (AM/PM)>.
- Time Zone: Sets the time zone of your area based on the Greenwich Mean Time (GMT). ■GMT (Greenwich Mean Time) is standard World Time and the basis of world time zone.

- Time Sync.: You can set the DVR's current time synchronized to a selected regularly if you select to use . In this case, setup does not allow time adjustment.
- Time Server: Enter an IP or URL address of the time server.
- Last Sync Time: Displays the most recent synchronization time from the selected time server.
- Activate as Server: Set to to allow the DVR to act as a Time Server for other DVRs.
- DST: Set up Daylight Saving Time with its period to make the time earlier than the GMT of its time zone by 1 hour during the set period.
- Language: Select your language. Sets the language for the interface.
English, French, German, Spanish, Italian, Chinese(Simplified), Russian, Korean, Polish, Japanese, Dutch, Portuguese, Turkish, Czech, Danish, Swedish, Thai, Romanian, Serbian, Croatian, Hungarian, Greek, Chinese (Traditional), Finnish and Norwegian are available.

- When the Date/Time/Language setup is done, press .

- You can also use the numeric buttons on the remote control or front panel to enter values for Date, Time, and other numeric fields.
Setting Holiday
You can set specific dates as Holidays according to your preferences.
Holidays are applied to and too.
Using the mouse may help make setup easier.
- Use the up/down buttons (▲▼) in the window to select , and press the [ENTER] button.
- Select .
A calendar for Holiday setup appears.
- Use the left/right <◀▶> buttons to select year or month, and press the [ENTER] button.

- Use the direction buttons (▲▼◀▶) to select a desired date, and press the [ENTER] button.
You will see the "Setting Holiday" screen.
Ex: Select January 9th and check on <1/9> only to make every January 9th a holiday. Check both on <1/9> and to make every January 9th and the 2nd Monday of January holidays.

- When the Holiday setup is done, press .
Using the Calendar
Using the mouse may help make setup easier.
① Select year and month. Select the left/right <◀ ▶> key on the left/right side of year/month and press [ENTER] button to adjust by 1 year/month.
② Use direction buttons to select a date and press [ENTER] button. A date with recorded data to be searched will appear in yellow in the System Log, Event Log, Time Search and Event Search.
Permission Management
You can set permissions of each user over the DVR's specific function and settings.
Setting the Administrator
You can set and change Administrator's ID and password. The administrator can use and set all menu items and functions. Using the mouse may help make setup easier.
- Use the up/down buttons (▲▼) in window to move to , and press [ENTER] button.
- Select . A dialog for Admin ID and Password input appears.
- Use direction buttons (▲▼◀▶) to move to a desired item, and set the ID and password.
By default, initial ID and password are set to "admin", and "4321".

- The default password can be exposed to a hacking threat, so it is recommended to change the password after installing the product. Note that the security and other related issues caused by the unchanged password shall be the user's responsibility.
- When the administrator setup is done, press .
Using Virtual Keyboard
① For alphanumeric inputs, the virtual keyboard window appears. ② Use direction buttons (▲▼◀▶) to move to a desired character, and press the [ENTER] button. ③ In the upper text input box of the virtual keyboard, there displays a list of candidate words containing the selected character.
④ Select a word from the list, or use the keyboard to enter the whole word.
If there are many candidate words, use <#, > buttons to move between them forward and backward. - You can use mouse wheel and jog shuttle button too.
⑤ Select . Entered word is applied.
■ For upper case letters, use button. ■ For special characters, use button. ■ Using the virtual keyboard is the same as a normal keyboard use in your region. - You can enter the ID with case-insensitive alphanumeric characters only. For the password, use alphabets and special characters excluding <> and "<">. - You can use number buttons on the remote control or front panel.
![1 2 3 4 5 6 7 8 9 0 - = ← q w e r t v u l o p [ ] i Del a s d f g h j k l ; Caps Lock z x c v a n m , . Shift Space Ctrl OK Cancel](/content/2026/06/1283506/images/ccb953496a17fcc08876645261f10a8be7282e9d3417402921099de94d389233.jpg)
Setting the Group
You can create user groups and setup permissions for those user groups.
You can register a user for each group in .
Using the mouse may help make setup easier.
- Use the up/down buttons (▲▼) in window to move to , and press [ENTER] button.
- Select . A window for , , , and setup appears.
- Use direction buttons (▲▼◀▶) to move to a desired item, and set the value.
- Add, Delete, Rename: You can add, delete, rename a group or modify the permissions given to the group.
The virtual keyboard appears when or was selected.

- Add: When you first run the DVR with the admin account, only the admin account exists. Add has already been deactivated. Select to display the virtual keyboard. Enter a group name. You can add up to 10 groups.
- Delete: Deletes a user group that is already registered. Selecting Delete will delete all user accounts belonging to that group.
- Rename: Renames a group that is already registered. Select to display the virtual keyboard. ■ For entering a group name, refer to "Using Virtual Keyboard". (Page 42)
- Group Authority: Sets permissions to access menu items of each group. Users of a group can access checked functions.
- When the group setup is done, press .
To set the group authority
You can set the permissions of the group users to access the menu according to the channel.
- Select a menu to which the group permission is assigned. The menu where the group permission is assigned will be displayed in the Live menu when a group user logs in.
• Live View: You can set the permission to access the Live screen according to the channel. - Search: You can set the permission to access the Search menu according to the channel. - Backup: You can set the permission to access the Backup menu according to the channel. - Menu: You can set menus accessible with a specific permission.
Group users can access the permitted menus only. Select a menu to display the Menu Permission screen.
- Bi-directional audio: You will be given permission to use two-way audio features.
- Record Lock, PTZ, Remote Alarm Out, Shutdown: Select an item so that the item will be added to the permissions.
- Select .
Select and assign a group user so that the user can access the specified menu.


To restrict the user permissions
If the admin restricts all permissions of an added group, the users belonging to that group can access only the default minimum menus and can change the user's own password only.
- Start the DVR. If all permissions are restricted, only the Login dialog should appear.
- Log in with a registered user ID.

- Right-click any area on the screen. If all permissions are restricted, only the accessible context menus should appear.

To change the user password
If you log in with a user account that is restricted to access the menu, you can change your own password only.
- Log in with your account.
- Select . The Permission Management setup screen appears.
- Select . The Password setup dialog appears.
- Enter a new password.
- Select . You change to the password will be applied.

Setting the User
You can add a user and edit information of a registered user.
Users can be added only if a group was created in menu.
Using the mouse may help make setup easier.
- Use the up/down buttons (▲▼) in the window to move to the desired option, and press the [ENTER] button.
- Select the desired option.
A window for Add User appears.
- Use the direction buttons (▲▼◀▶) to select from the window.
A window for "Add User" appears.
You can configure the Network Viewer settings including name, ID, viewer, Select Group, and password.
The result of the user setup appears in the window. To change the user properties, use "Edit User".
The "Edit User" window appears when you select a desired item to be changed in the window.
- Viewer: If you select this option, you will be given access to the Web Viewer and Network Viewer.
■ Refer to "Connecting Web Viewer" (Page 86).
■ For more information about the use of Network Viewer, refer to the Network Viewer's user guide.
- When the user setup is done, press the appropriate button.


Setting Permissions
You can set restricted access for all general users. Items with restrictions will require logging in for use.
Using the mouse may help make setup easier.
- Use the up/down buttons (▲▼) in the window to move to an item, and press the [ENTER] button.
- Select . The Restricted Access, Restriction on Network Access, Auto Log out, Manual Input of ID setup screens appear.
- Use the direction buttons (▲▼◀▶) to move to a desired item, and set the value.
- Restricted Access: All menu items allowed for a user can be set with restricted access.
- Checked (☑): Restricted
- Not checked (☐): Accessible
If it is not checked (☐) in , any user can access the item no matter what the setting. If it is checked (☑) in , a user can access the item only if the user has permission in the setting.
- Restriction on Network Access: Restricts remote access from a network.
- All Network: Restricts all access instances via Network Viewer and Web Viewer.
- Web Viewer: Restricts access via the Web Viewer.
- Auto Log out: A user will be automatically logged out if there is no operation on the DVR for over a set period of time.

main menu
- Manual Input of ID: Prompts you to enter the user ID manually for the login process. - Checked (☑): Encloses the registered user IDs with the [*] symbols. Use the virtual keyboard to enter the user ID.
- Touch Button Sound: You can set whether to sound a beep on use of front touch buttons. - Touch Button: You can set whether to use the front touch buttons or not.
- When the permission setup is done, press .

System Management
You can check the system version, update to a newer version, as well as data backup and initialization.
Checking the System Information
You can check the current system version, broadcasting system, MAC address. You can update the system. Using the mouse may help make setup easier.
- Use the up/down buttons (▲▼) in window to move to , and press [ENTER] button.
- Check the Software Version, Broadcast Format and MAC Address.
- System Information: Shows the current system's information. The values can not be changed by a user.
- S/W Upgrade: Updates the DVR's software up to date.
- DVR Name: Assigned name will be displayed in Network Viewer, when connected to the DVR.

- Updating the Software
- Connect a device storing the software to be updated. (It may take about 10 seconds to recognize the device.)
■ Upgradeable devices include USB memory, CD/DVD and network device. - To update the network, the current DVR should have been connected to the network. Upgrade via the proxy server may not be enabled due to the restricted access.
- Select from window.
- Select .
- Press button to display updated image, then the button switches to .
The button will be activated only if the current of the is same to or older than that of .
- Press button to display confirmation popup for upgrading.
Press in the "System Upgrade" window.
■ While updating, it shows the progress.


- When the updating is done, it automatically restarts. Do not turn the power off until it finishes restarting.

If "Upgrade Failed" appears, retry from the step 4. When you experience continued failure, consult the service center for assistance. - When you perform S/W update remotely using Smart Viewer, it may take a max of 3 minutes to complete the update since Smart Viewer popped up a confirmation message. This is to guarantee that the DVR set operates stably. For a faster update, use the USB cable to connect to the DVR set.

Settings
You can copy and import the DVR settings by using a storage media.
Using the mouse may help make setup easier.
- Use the up/down buttons (▲▼) in window to move to , and press [ENTER] button.
- Select . A window of storage device and load factory default appears.
- Use direction buttons (▲▼◀▶) to move to a desired item, and export or import settings data to a storage device.
- Storage Device : Shows the connected storage device.
- Export : All logs recorded in the DVR are exported to the storage media.
- Import : Imports DVR settings from the storage device and applies to the DVR. ■If is checked, the network settings will be imported too.
- Load Factory Default : If is selected, a confirmation dialog for “Load Factory Default” prompts. Press to initialize the system to the factory default.
- To move to the previous menu, press .


Log Information
You can browse logs on the system and events.
System Log
System Log shows log and timestamp on every system start up, system shutdown, and changes on system settings.
Using the mouse may help make setup easier.
- Use the up/down buttons (▲▼) in the window to move to the desired item, and press the [ENTER] button.
- Select the desired option.
■ Refer to "Using the Calendar". (Page 41)
Click on the calendar < >> to display the calendar window.
- Type: When there are too many logs, you can display logs of the desired format by selecting the type.
- Export: All logs recorded in the DVR are exported to the storage media.

- Use the direction buttons (▲▼◀▶) to move to a desired item, and press the [ENTER] button.
Event Log
Event log shows recorded events on alarms, motion detections, and video loss.
It also shows the log and its timestamp.
Using the mouse may help make setup easier.
- Use the up/down buttons (▲▼) in the window to move to the desired item, and press the [ENTER] button.
- Select the desired option.
- Use the direction buttons (▲▼◀▶) to move to the desired item.
- Set Search Day, Channel and Type, then press .
■ Refer to "Using the Calendar". (Page 41)
Click on the calendar <>> to display the calendar window.
![Log Information System Log Event Log Backup Log Search Day 2012-03-1 Search First Page Last Page CH All CHs Type View all No. Log List Data/Time 7 Motor Detection [CH 7] 2012-01-31 00:02:18 6 Motor Detection [CH 6] 2012-01-31 00:02:18 5 Motor Detection [CH 5] 2012-01-31 00:02:18 4 Motor Detection [C…](/content/2026/06/1283506/images/b4c2fbec888dc70261368496c8b3c1bfbe36536db485179aa09e852b1f583273.jpg)
Backup Log
You can find out who backed up and the details (backup time, channel, device used, file format, etc.).
Using the mouse may help make setup easier.
- Use the up/down buttons (▲▼) in the window to move to , and press [ENTER] button.
- Select .
- Use the four direction buttons (▲▼◀▶) to move to a desired item.
- Specify a search term and select in the right corner.
Backup details for the search term will be listed.

SETTING THE DEVICE
You can set up Camera, Storage Device, Remote Device, POS Device, and Monitor.
Camera
Setting the Camera
You can set Video, Audio, Channel Name and Dwell Time of a Camera.
Using the mouse may help make setup easier.
- Press the [MENU] button on the remote control or front panel.
- Use the left/right button (◀▶) to select. Device setting menu is selected.
- Use the up/down buttons (▲▼) to move to, and press [ENTER] button.

- Select. Displays settings window for Video, Audio, CH Name, SEQ-Dwell Time, Screen Setup and Privacy Region.
- Use direction buttons (▲▼◀▶) to move to a desired item, and set the value.
- Video
- : You can turn ON/OFF the selected channel's camera.
- : Shows information other than the video of the selected channel.

■ For privacy protection, it does not display the video while the recording continues.
- : Shows nothing but an empty screen while the recording continues.

If the channel is set to or mode, the channel's sound is not hearable. However, the channel's sound is recorded if its Audio setting is set to, even the sound is not heard in Live mode.
- Audio
- If set to , you can turn the audio of the channel ON/OFF on the Live screen.
- If set to , the channel's audio is off on the Live screen and not recorded.
■ Audio output is available for only 1 channel.
- CH Name : Up to 15 characters including blanks are allowed. (The first character should not be empty.) ■Refer to "Using Virtual Keyboard". (Page 42)
- SEQ-Dwell Time : You can set the dwell time between channels for the Live screen and Spot Out. ■If set to , the channel is not listed in the Auto Sequence mode.
- Screen Setup : The video appeared on the screen may vary depending on the channel's camera, configure the DVR display to your preferences.
Select a channel and adjust the , , and of the selected channel. Press the to initialize settings back to the default 50.
- Privacy Region: You can specify a certain area of the camera video to be protected for your privacy.
- When the camera setup is done, press .

To set the privacy zone
① Select . ② When "Privacy Region" window appears, select a channel for detection and set the area of motion detection. - To set the area in "Privacy Region" window In the "Privacy Region" window, select desired region from <□□□□□□> - Privacy Region
You can specify up to 4 privacy zones for each channel, which can be identified by the color.

1 ■ Purple 2 ■ Green 3 ■ Blue 4 Yellow - To set the area using selection In the "Privacy Region" window, you can select cells individually by using . When selected , "Privacy Region" window disappears and you can select cells one by one. When the motion area setup is done, Right-click to select in the context menu or the [MENU] button on the remote control to display the "Privacy Region" window again.
- Clear All : Selected cell is removed from the Privacy Region.
- Menu: After selecting individual motion areas, move to the "Privacy Region" window. - If selected, the selected motion area is applied to all channels.

③ When completing the privacy zone settings, click .
Setting the PTZ
To use the camera's PTZ functions, the ID and protocols of each camera and DVR should be matched.
For other settings, refer to the settings. (Page 56)
Using the mouse may help make setup easier.
- Use the up/down buttons (▲▼) in the window to move to , and press [ENTER] button.
- Select . A window of PTZ settings appears.
- Use the direction buttons (▲▼◀▶) to move to a desired item, and select it.
- Port: Select a port control method for the camera that is connected to a channel. - You have two choices: and .

- ID: Set the ID of the connected camera of each channel. You can easily set it up by using the numeric buttons on the remote control or front panel.
- Protocol: Set the protocol of the connected camera of each channel.

- You can check the camera's ID and protocol if you turn the camera off and on after connecting it to the DVR. (Page 79) For the type, CCVC and PELCO-C protocols are supported.
- When the PTZ setup is done, press .
You can check information on storage devices.
Confirming Devices
You can check storage devices and their free space, usage as well as status.
Devices available are HDD, and USB devices (Memory, HDD, CD/DVD).
Using the mouse may help make setup easier.
- Use the up/down buttons (▲▼) in window to move to , and press [ENTER] button.
- Select .
• No.: Shows the assigned number of the internal HDD.
■To see the detailed positioning of the HDD according to the number, refer to .
- Used/Total: Shows the used/total capacity of the storage device.
- Usage: Sets the storage device's usage.
- USB memory is used only for backups.
■External USB HDD, SATA HDD are used for extension and backup.
A maximum of 2TB for each port is supported for backup on a high capacity SATA HDD such as RAID equipment (ex: SVS-5R), and a maximum of 4TB for extension purposes.
■SVS-5R supports only RAID1 and RAID5.
■If an eSATA HDD device is used for extended storage or backup purposes, disconnecting eSATA device may restart the system.
For backup use, the device can be disconnected if it's not in use.

- Status/Management: Shows the current status of the HDD, as in Normal/Check/Replace.
- Normal: Available to use
- Check: Available to use but recommended to replace
- Replace: Requires immediate replacement.
- HDD Map: Shows the internal HDD's locations according to assigned numbers.
■Refer to this for servicing or additional HDD installation.
- To move to the previous menu, press .

Formatting
You can format a storage device.
Using the mouse may help make setup easier.
- Use the up/down buttons (▲▼) in the window to move to , and press [ENTER] button.
- Select .
A window for selection of device for formatting appears.
- Use direction buttons (▲▼◀▶) to select a device to be formatted.

- Select on the bottom of the screen.
Press on the "Manage" confirmation window will start formatting the selected device.
- When the formatting is done, press .

HDD Alarm
You can set alarm settings for HDD defects such as Check Alarm Output Port, Replace Alarm Output Port, and its duration.
Using the mouse may help make setup easier.
- Use the up/down buttons (▲▼) in the window to move to the desired item, and press the [ENTER] button.
- Select the item.
A window for setting HDD check and replace alarm output ports and their durations appears.
- Use the direction buttons (▲▼◀▶) to move to the desired item.
- Alarm
- The alarm signal will output through the alarm out port on the rear side when <1>, <2>, <3>, and <4> are selected.
- If 'Beep' was selected, a beep will sound.
- If 'Alarm & Beep' was selected, both the beep sound and the alarm signal through the rear side ports will output.

- Check Alarm Output Port: If the HDD generates a check alarm, the alarm signal will output to the specified alarm output port.
- Replace Alarm Output Port: If the HDD generates a replace alarm, the alarm signal will output to the specified alarm output port.
- Duration: Sets the alarm duration for the alarm signal and beep sound.
- Check Alarm and Replace Alarm signals will output through the selected alarm out ports (1, 2, 3, and 4).
- If 'Beep' was selected, a beep will sound.
- If 'Alarm & Beep' was selected, both the beep sound and the alarm signal through the rear side ports will output.

'Warning' status means that the HDD is operating but has problems that require technical examination. ( ) appears on the Live screen. - 'Critical' status means that the HDD has a defect and requires immediate replacement. ( ) appears on the Live screen. If the installed HDD is not recognized properly, a confirmation popup will appear.
- When the HDD Alarm setup is done, press .
Remote Devices
You can set the RS-485 communication for use of PTZ Camera and system keyboard with the DVR.
Using the mouse may help make setup easier.
- Use the up/down buttons (▲▼) in window to move to , and press [ENTER] button.
- Use direction buttons (▲▼◀▶) to move to the desired item, and press [ENTER] button.
- Set the values of each communication setup of the remote device.
- Baudrate: Baud rate settings of the DVR, PTZ camera and system keyboard should be matched for proper operations.
- Make sure to match IDs of the DVR, System Keyboard and Remote Control, and press .


For changing the remote control's ID, refer to "Changing the Remote Control ID". (Page 15)
POS Devices
You can set properties of POS devices connected to the DVR.
A POS device connection requires channel, preset, and Port/Ethernet settings.
Using the mouse may help make setup easier.
- Use the up/down buttons (▲▼) in window to move to , and press [ENTER] button.
- Use direction buttons (▲▼◀▶) to move to a desired item, and set the value.
- POS USE: When selected, DVR and POS will be connected.
If you change settings for the device and press while the is not checked, the changes for POS device will not be saved.

- POS Device Setup: Sets the communication setups for the POS device and DVR.
■It is independent to the Remote Device setup.

- CH: Select the camera to be synchronized to the POS device.
If selected a channel input field, "Sync Channel Setup" window appears. ■One POS device can be synchronized to up to 16 cameras (channels), however one channel cannot be synchronized to multiple POS devices. - Channels to be synchronized to a POS device should be set to "Event" in "Main Menu > Record > Recording Schedule". (Page 60)
- Preset: Sets the name, start and end strings of the receipt for the preset.
■Preset name should be unique.
■Use button to display "Add Preset" window, and set its name, start string, and end string.
- Port/Ethernet: Sets the port number for the DVR and POS device connection.
■COM1: For RS-232C connections ■7001~7016: For Ethernet connections


- When the POS Device setup is done, press .
Monitor
You can configure information to be displayed and its format for Spot Out monitor.
Setting the Monitor
Using the mouse may help make setup easier.
- Use the up/down buttons (▲▼) in the window to move to , and press the [ENTER] button.
- Select .
- Use the direction buttons (▲▼◀▶) to move to a desired item, and set the value.
- Event Display : Sets the dwell time of the event channel display on the monitor when an event occurs. If selected , it displays the channel until you press the [ALARM] button to release it.
- Display : Displays only checked items on the monitor screen.
- Multi CH SEQ Time : Sets the interval between automatic display switching in 4-split and 9-split mode of the Live screen.
- VGA/HDMI : Set your preferred screen resolution to or . If the monitor does not support the selected resolution of or , it may not display video properly.
- When the monitor setup is done, press .

Screen Setup
Some monitors may not display information (camera name, icon, time information, etc.) about the DVR, depending on the condition. Then, you can change the display position of the data.
- In the window, press the up/down (▲▼) button to move to and press the [ENTER] button.
- Select the item.
- Select in the bottom. You will move to the window.
- Use the four direction buttons or the number buttons on the front panel or the remote control to adjust the data position.

Setting the Spot Out
You can set the DVR to output information/video apart from the monitor out.
Using the mouse may help make setup easier.
- Use the up/down buttons (▲▼) in the window to move to , and press [ENTER] button.
- Select .
■ The number of Spot Out terminals differs according to the model.
- Use direction buttons (▲▼◀▶) to move to a desired item, and set the value.

- Spot Out 1: It supports auto sequence and single mode by default, and additionally supports 16-split, 9-split, and 4-split modes if multi-spot out is selected.
- Spot Out 2: It supports auto sequence and single mode.
- Set Mode: A window for "Set Spot Out" appears and you can set the channel for it.
You can set the dwell time between screen switching in
"Setting the Device > Camera > SEQ-Dwell Time".
(Page 50)
- Event Display: Sets the duration for the Spot Out on an event.
If selected, an event will not output to the Spot Out.


■ You can set up using the mouse right button in Live screen.
Refer to "Spot Out". (Page 37)
If selected, double frame function is deactivated.
- When the Spot Out is done, press .
Setting the Screen Mode
You can configure the Live screen and Split Screens.
Using the mouse may help make setup easier.
- Use the up/down buttons (▲▼) in window to move to , and press [ENTER] button.
- Select .
- Use direction buttons (▲▼◀▶) to move to a desired item, and set the value.
- Live Screen: Select split modes for the Live screen. 16-, 9-, and 4-split screens are included by default.
- Play Screen: Select split modes for the playback screen. Only the 13-split screen is optional.
Black shows the playback while white shows the Live screen.
- When the screen mode setup is done, press .

SETTING THE RECORDING
You can setup scheduled recording, event recording and other recording related settings.
Recording Schedule
Make your reservation on a date and time to schedule the recording on specified time.
Using the mouse may help make setup easier.
- Press the [MENU] button on the remote control or front panel.
- Use the left/right button (◀▶) to select . Record menu is selected.
- Use the up/down buttons (▲▼) to move to , and press [ENTER] button.

- Select . A window of scheduled recording setup appears.
- Use direction buttons (▲▼◀▶) to move to a desired item, and set the value.

- Apply to All CH: If selected, the "Apply to All CH" window appears. Press to apply the setup to all channels.
- When the recording schedule setup is done, press .

Event recording and scheduled recording starts about 3 seconds prior to the event/schedule for guaranteed recording.

Recording Color Tags
| Color Part | Names Functions | |
| White No | Recording No schedule / event recording | |
| Orange | Continuous Scheduled recording only | |
| Blue Event | Event recording only | |
| Green Both | (Cont&Evnt) Both scheduled / event recordings |
Each press of a selected cell will cycle through - - -<Both(Cont&Evt).
Event Record Duration
You can set the beginning and ending point of a recording on an event.
Using the mouse may help make setup easier.
- Use the up/down buttons (▲▼) in window to move to , and press [ENTER] button.
- Use direction buttons (▲▼◀▶) to move to a desired item, and set the value.
- Pre Event : The recording of an event will start at a pre-determined time prior to the actual occurrence of the event. If it is set to 5 seconds, the recording begins from 5 seconds before the event.
- POST Event : The recording will continue for a pre-determined time after the actual end of an event. If it is set to 5 seconds, the recording ends in 5 seconds after an event.

- When the event recording duration setup is done, press .
REC Quality / Resolution
You can set resolution, FPS, and quality of recordings by channel, and by recording type of standard / event.
For more information about the resolution, refer to the "Product Specification" section. (Page 114)
Setting Standard Recording Properties
You can set each channel's resolution, quality and FPS for normal recordings.
Using the mouse may help make setup easier.
- Use the up/down buttons (▲▼) in window to move to , and press [ENTER] button.
- Select .
- When the recording setup is done, press .

Setting Event Recording Properties
You can set each channel's resolution, quality and FPS for event recordings.
Using the mouse may help make setup easier.
- Use the up/down buttons (▲▼) in window to move to , and press [ENTER] button.
- Select the option. The event recording setup window appears.
- Use the direction buttons (▲▼◀▶) to move to a desired item, and select it.
- Resolution: Sets the resolution of the recorded screen.
- Record Rate: Image Per Second, meaning the frames recorded per second.
- Record Quality: Sets the recording quality.


The estimated total remaining count means the total number of remaining recordings for both standard and event recordings. (SRD-1653D) - You cannot increase the remaining count if the current remaining count has reached zero or there is no available remaining count from any other page. If this is the case, reduce the remaining count for the current page, or do so for the same channel on any other page.
- When the event recording setup is done, press the appropriate button.
Record Option
You can set the recording to stop or overwrite when the HDD is full.
Using the mouse may help make setup easier.
- Use the up/down buttons (▲▼) in the window to move to the desired option, and press the [ENTER] button.
- Use the direction buttons (▲▼◀▶) to move to a desired item, and set the value.
- Disk End Mode: If selected, recording will continue despite the HDD being full, overwriting the oldest data. If selected, the recording will stop when the HDD is full.
- Disk End Beep: If selected, the button is activated. If you check it, the beep will sound when the disk is full and recording stops.
- Auto Delete: If you check it, the Record Period setup is activated. If you specify the auto deletion period, the recording data before the period will be deleted automatically. ■This option will be enabled only if Disk End Mode is set to .
- HDD Free Space: Shows the remaining free space available on the HDD. - Recordable (days/hours): Shows the estimation of remaining days and hours for recording, based on the remaining free space.
- When the recording option setup is done, press .

You can set recording options for sensor, motion, and video loss events.
Sensor Detection
You can set the sensor's operating condition and connected camera, as well as alarm output and its duration. Using the mouse may help make setup easier.
- Press the [MENU] button on the remote control or front panel.
- Use the left/right buttons (◀▶) to select . The Event setting menu is selected.

- Use the up/down buttons (▲▼) to move to , and press the [ENTER] button. A window for sensor detection setup appears.
- Use the direction buttons (▲▼◀▶) to move to a desired item, and set the value.
- Sensor Operation: Sets the operation mode of sensors.
- < OFF>: Sensor does not operate.
- N.O> : Sensor is opened.
If the sensor is closed, it generates alarm.
- N.C> : Sensor is closed.
If the sensor is open by interruption, it generates alarm.
- Cam : Select a channel to be connected to the sensor. If selected camera, "Cam Preset setup" window appears. Select a channel and setup the preset.
■ Preset setup can be done in PTZ mode. Refer to "Preset Setting". (page 79)


- Alarm: Sets the alarm output method. ■ For further information on alarm output, refer to "HDD Alarm > Alarm". (Page 55)
- Duration: Sets the duration of alarm signal and alarm sound.
- When the sensor detection setup is done, press .

Motion Detection
You can set target detection region and motion, as well as the alarm signal output. When the motion detection region is set, it detects motion within the area.
Using the mouse may help make setup easier.
- Use the up/down buttons (▲▼) in window to move to , and press [ENTER] button. A window of motion detection area setup appears.
- Use the direction buttons (▲▼◀▶) to move to a desired item, and set the value.
- Mode: Sets whether to activate motion detection.
- Sensitivity: Sets the sensitivity level of the motion detection.
- Alarm: Sets the alarm output method.
■For further information on alarm output, refer to "HDD Alarm > Alarm". (Page 55)

- Alarm Duration: Sets the duration of alarm signal and alarm sound.
- When the motion detection setup is done, press the [ENTER] button.
Setting the Motion Detection Area
① Select the desired option.
② When the "Motion Region" window appears, select a channel for detection and set the area of motion detection.
- To set the area in the "Motion Region" window: In the "Motion Region" window, select the desired region from <□□□□>.
- To set the area using selection: In the "Motion Region" window, you can select cells individually by using the direction buttons.

When selected, the "Motion Region" window disappears and you can select cells one by one. When the motion area setup is done, press the on-screen button or the [MENU] button on the remote control or front panel to display the "Motion Region" window again.
- Select: Selected cell is set to be a part of motion detection area.
- Unselect: Selected cell is removed from the motion detection area.
- Inverse: Unselected cells are set to be the motion detection area.
- Menu: After selecting individual motion areas, move to the "Motion Region" window. ■If selected, the selected motion area is applied to all channels.
Select Unselect Inverse Menu
③ When the motion detection setup is done, press .
You can set the alarm to be generated on a camera disconnection, which causes a video loss. Using the mouse may help make setup easier.
- Use the up/down buttons (▲▼) in the window to move to , and press [ENTER] button. A window of video loss detection area setup appears.
- Use direction buttons (▲▼◀▶) to move to a desired item, and set the value.
• Video Loss State: Sets whether to activate video loss detection. - Alarm: Sets the alarm output method.
■For further information on alarm output, refer to "HDD Alarm > Alarm". (Page 55)

- Alarm Duration: Sets the duration of alarm signal and alarm sound.
- When the video loss detection setup is done, press .
Tampering Detection
You can set to detect tampering attempts and trigger events, such as sudden change of camera's framing direction, blocked lens and other overall change of scenes from the video.
Using the mouse may help make setup easier.
- Use the up/down buttons (▲▼) in window to move to , and press [ENTER] button.
Tampering detection settings screen appears.
- Use direction buttons (▲▼◀▶) to move to a desired item, and set the value.
- Mode: Set whether to use Tampering Detection or not.
- Sensitivity: Set the sensitivity level of tampering detection.
- Alarm : Set the alarm output method.
- Duration: Set the alarm signal output and its dwell time.
- When the tampering detection setup is done, press .


Since the tampering detection is designed and optimized to function in accordance with the user-defined sensitivity level, it may not render a significant difference in detection with varied sensitivity in general monitoring situations.
When the tampering detection mode is set, it is recommended that the pre-event recording time of the corresponding channel should be set to 10 seconds or longer.
Alarm Schedule
You can set the conditions and operating hours for scheduled alarms.
Using the mouse may help make setup easier.
- Use the up/down buttons (▲▼) in the window to move to the desired item, and press [ENTER] button.
- Use the direction buttons (▲▼◀▶) to move to a desired item, and set the value.
- Alarm: Sets the alarm output method.
For further information on alarm output, refer to "HDD Alarm > Alarm". (Page 55)
- : Marked in orange, and always generates alarm on scheduled time.
- : Marked in white, no alarm is generated even if an event occurs.
- Event Sync : Marked in blue, generates alarm only when an event occurs.
- Apply to All Alarm: Applies the configured schedule to all alarms.

When the alarm is generated at the scheduled time, you can stop the alarm by canceling the schedule.
- When the Alarm Schedule setup is done, press .


BACKUP
You can check the backup device and set the backup schedule by channel or by time.
The product only supports external HDD of USB memory, CD/DVD and USB/SATA type. (Page 114)
Setting the Backup
You can backup the desired data to a connected device.
Using the mouse may help make setup easier.
- Press the [MENU] button on the remote control or front panel.
- Use the left/right button (◀▶) to select . Backup menu is selected.

3. Press the [ENTER] button.
A backup window appears.
You can directly access it from the "Live screen menu". (Page 31)
- Use the direction buttons (▲▼◀▶) to move to a desired item, and set the value.
- Backup Range: Sets the date and time for the backup.
- Channel: Sets the channel to backup.
You can select multiple channels.
- Device: Select a backup device from the recognized devices.
- Type: Sets the backup data format.
- DVR: Saved data can be played back only by the DVR.
- SEC: Saves data in Samsung's proprietary format with a built-in viewer, which supports immediate playback on a PC.
- Filename: You can set the backup file name.
■ Refer to "Using Virtual Keyboard". (Page 42)
- Check capacity: Shows the size of the selected backup data, and the used and available capacity of the selected backup device. • Overlap: Shows a list of overlapping data on the same time according to the number of data.
It appears when one channel has multiple data on a certain time point due to changing of time or time zone settings, etc.
■ Refer to time and time zone of "Setting the Date/Time/Language". (Page 40)
5. When the backup setup is done, press .
If no available device is recognized for backup, the button is not activated.
!
■ The application may slow down during the backup.
- You can switch to the menu screen during the backup in operation, but playback of data is not available.
- When a CD/DVD or memory device is used for backup, it is not available to use the full capacity of the media since the system consumes a part of its capacity. If a CD or DVD media causes errors, the disc tray opens and closes a several times, and eventually backup process will fail. In this case, replace the CD/DVD media and try again. If backup has failed, select "Device > Storage Device" and check the free space of the HDD and check also if the HDD is properly connected.
- Pressing the during the backup will return to the previous menu, while the backup progresses.

It provides networked monitoring of Live screen from a remote place, and supports mail forwarding function with events. You can configure the network environment which enables such functions.
Connection Mode
You can set the network connection route and protocol.
Setting the Connection
Sets the protocol and environment of the network.
Using the mouse may help make setup easier.
- Press the [MENU] button on the remote control or front panel.
- Use the left/right button (◀▶) to select. The Network menu is selected.
- Use the up/down buttons (▲▼) to move to the desired option, and press the [ENTER] button.

- Select <Interface>. A window for connection mode setup appears.
- Use the direction buttons (▲▼◀▶) to move to a desired item, and set the value.
- IP Type: Sets the network connection mode.
- Transfer Bandwidth: Sets the maximum data flow to be transferred (upload speed). Options will vary depending on the selected connection mode.
- For Static: Select one from 50 kbps to 2 Mbps, or Unlimited.
- For PPPoE: Select one from 50 kbps to 600 kbps.

- IP Address, Gateway, Subnet Mask, and DNS
- For Static: You can directly input IP Address, Gateway, Subnet Mask, and DNS.
- For DHCP: IP Address, Gateway, and Subnet Mask are set automatically.
- For PPPoE: IP Address, Gateway, and Subnet Mask are set automatically.
- ID, Password: In case you selected PPPoE, provide the "ID" and its "Password".

DNS server for and can be set by user only if you selected .
- When the connection setup is done, press .
Setting the Port
- Use the up/down buttons (▲▼) in window to move to , and press [ENTER] button.
- Select .
- Use direction buttons (▲▼◀▶) to move to a desired item, and set the value.
- Protocol Type : Select the protocol type between TCP and UDP.
- TCP : If compared to UDP, TCP connection is more stable but slow. Recommended for Internet connection.

- UDP : If compared to TCP, UDP connection is less stable but fast. Recommended for use in LAN environment.
■ If selected UDP, selections of Device Port, UDP Port and Unicast/Multicast are activated. ■If setting the connection mode to PPPoE, you cannot select UDP for the protocol type.
- Device Port : Initially, <4520\~4524> is set. It increases / decreases by 5.
- TCP: It has better stability and lower speed when compared to UDP, and recommended for internet environments.
- UDP Port : Initially, <8000\~8160> is set. It increases / decreases by 160.
- Unicast/Multicast : Select one between UDP-Unicast and UDP-Multicast. If selected Multicast, Multicast IP and TTL are activated.
- UDP- Unicast: Transfers data packet to an individual client.
- UDP-Multicast: Allows data communication to multiple clients causing no additional traffic to the network.
- Multicast IP Address: User can directly input.
- Multicast TTL: Select from 0 \~ 255. Initial value for the TTL is set to <5>.
- HTTP Port: Enter the port number for the Web Viewer. Initially, it is set to <80>.
- Multi Browser Support: The Web Viewer can be used with a browser that supports Silverlight. The multi viewer can be used only if the HTTP port is set to 80, protocol type is TCP, and device ports range within 4505-4530.
This is for Silverlight's security purposes.
- When the protocol setup is done, press .
Connecting and Setting the Network
Networking may differ from the connection method, check your environment before setting the connection mode.
When no router is used
- Static mode
- Internet connection: StaticPPPoE, leased line, and LAN environments allow connection between the DVR and remote user.
- DVR Network Settings: Set the in menu of the connected DVR to .
- Consult your network manager for IP Address, Gateway and Subnet Mask.
- DHCP mode
- Internet connection: Connect the DVR directly to a cable modem, DHCP PPPoE modem, or FTTH network.
- DVR Network Settings: Set the in menu of the connected DVR to .

- PPPoE mode
- Internet connection: A PPPoE modem is directly connected to the DVR, where the PPPoE connection requires user ID and password.
- DVR Network Settings: Set the in menu of the connected DVR to .
- and should be the same as the PPPoE user information.
If you don't know the ID and password, consult your PPPoE service provider.

When a router is used
To avoid IP address conflict with the DVR's static IP, check the following:
- Setting the DVR with a static IP
- Internet connection: You can connect the DVR to a router which is connected to an ADSL/Cable modem or a router in a Local Area Network (LAN) environment.
- Setting the DVR Network
- Set the in menu of the connected DVR to .
- Check whether the set IP address is in the static IP range provided by the Broadband Router. IP Address, Gateway, and Subnet Mask: Consult your network manager.
Check whether the set IP address is in the static IP range provided by the Broadband Router.
If a DHCP server is configured with starting address (192.168.0.100) and end address (192.168.0.200), you should set the IP address out of the configured DHCP range (192.168.0.2 ~ 192.168.0.99 and 192.168.0.201 ~ 192.168.0.254).
- Check the Gateway address and subnet mask are equal to those set in the Broadband Router.
- Setting the DHCP IP Address of the Broadband Router
- To access the Broadband Router's configurations, open a web browser on the local PC that is connected to the Broadband Router and enter the router's address (ex: http://192.168.1.1).
- At this stage, make the local PC's windows network configurations to the below example: Ex) IPAddress: 192.168.1.2
Subnet Mask: 255.255.255.0
- Once connected to the Broadband Router, it prompts with password. While entering nothing to the User Name field, enter "admin" into the password field and press to access the router configurations.
- Access the router's DHCP configuration menu and set its DHCP server activation, and provide the start and end address.
Set the start address (192.168.0.100) and end address (192.168.0.200).

■ Above steps may differ from the router devices depending on the manufacturer.
- Setting Router's Port Forwarding
- Set the protocol to .
- External Port Range: Enter the TCP port set in the menu of the connected DVR. If more than one DVR is connected to the router, the TCP port can be different.
- Internal PC IP Address: Enter the IP address set in the menu of the connected DVR.
- Internal Port Range: Set the same as the "External Port Range".

The above steps may differ depending on the router manufacturer. Port forwarding is required when you want to access the DVR connected to the router from outside the router's network.
DDNS
You can set the DDNS site for a remote user's network connection.
Using the mouse may help make setup easier.
- Use the up/down buttons (▲▼) in the window to move to , and press [ENTER] button. The DDNS Setup screen appears.
- Use the virtual keyboard to enter the .
■ Refer to "Using Virtual Keyboard" (Page 42). If selected, input fields are deactivated. If selected, the server name field is disabled.
- DDNS Site: Set whether to use DDNS or not, and select the DDNS site if enabled.

- Server Name: Enter the server name of the selected DDNS site.
- Product ID: Enter the product ID that was registered to the DDNS site.
- Quick Connect: Appears if the is set to . To use this feature, connect the DVR to a UPnP router and set to .

If the quick connect setup has been cancelled while progressing, it is automatically set to .
- When the DDNS setup is done, press .
DDNS Setting
DDNS is a short form of Dynamic Domain Naming System.
DNS (Domain Name System) is a service that routes a domain name consisting of user-friendly characters (e.g., www.google.com) to an IP address consisting of numbers (e.g., 64.233.189.104).
DDNS (Dynamic DNS) is a service that registers a domain name and the floating IP address with the DDNS server so that the domain name can be routed to the IP address even if the IP is changed in a dynamic IP system.
- Setting DDNS in the DVR
Set in the menu of the connected DVR to the following:
Ex) Protocol Type: TCP
Device Port: 4520~4524
DDNS Site: iPOLIS
• DDNS Settings of the Router
Select the corresponding menu for the network transfer protocol of the router.
Live Transfer
Sets the quality of the image that is transferred from the DVR to the network.
Using the mouse may help make setup easier.
- Use the up/down buttons (▲▼) in the window to move to , and press [ENTER] button. The Live Transfer window appears.
- Use direction buttons (▲▼◀▶) to move to a desired item, and set the value.
- Resolution: Shows the selected network profile's resolution setting.
- Quality: Shows the selected network profile's image quality setting.
- When the live transfer is done, press .

Mailing Service
You can send an e-mail to a DVR-registered user at a specific time interval, or if an event occurs.

If an event occurs with a channel where the camera's video is set to or the remaining recording count is set to , only the text notification will be sent to the applicable email address.

If you set the interval of the e-mail notice too short, the e-mail server may consider it as spam that will not be transferred normally.
SMTP Setting
Sets the SMTP mail server.
Using the mouse may help make setup easier.
- Use the up/down buttons (▲▼) in the window to move to an item, and press [ENTER] button.
- Select . You will see the SMTP setting window.
- Use direction buttons (▲▼◀▶) to move to a desired item, and set the value.
- ServerType : Displays the connected server type.
- Server Address : Enter a server to connect to.
- Port : Sets the communication port.
- Use Authentication : Check this if the SMTP server uses user authentication. The account input box will be activated.
- ID : Enter a user to use authentication when connecting to the SMTP server.
- Password : Enter the password of the SMTP server user.
- Secure Transfer : Select one from the options.
- Sender Address: Use the virtual keyboard to enter the sender's e-mail address. Refer to "Using Virtual Keyboard" (Page 42).
- E-mail Test: Conducts a test on the server settings.
- When the SMTP setup is done, press .

Event Setting
You can set the interval and type of the event that will be sent to the user.
Using the mouse may help make setup easier.
- Use the up/down buttons (▲▼) in the window to move to , and press the [ENTER] button.
- Select .
- Use the direction buttons (▲▼◀▶) to move to a desired item, and set the value. • Event Interval: Set the event interval.
If a series of events occurs, the e-mail will be sent at the specified interval, not on each event.
- Use Event Transfer: Select an event type to send if an event occurs.

If the selected event occurs, the e-mail will be sent to the group that has the recipient authority.
- When the event setup is done, press .
Group Setting
You can set the group to whom the e-mail is sent, and specify the permission for each group.
You can add recipients for each group in the menu item.
The recipient is set separately from the DVR user group.
Using the mouse may help make setup easier.
- Use the up/down buttons (▲▼) in the window to move to an item, and press [ENTER] button.
- Select.
- Use direction buttons (▲▼◀▶) to move to a desired item, and set the value.
- Add: Select and use the virtual keyboard to add a group.
■Refer to "Using Virtual Keyboard". (Page 42)
- Delete: Deletes the selected group.
- Rename: You can reset the recipient permission of an existing group.
- Recipient Permission: Set the permission of the recipient group.
- When the group setup is done, press .

Recipient Setting
You can add or remove recipient(s) to/from the specified group and edit the group if necessary.
Using the mouse may help make setup easier.
- Use the up/down buttons (▲▼) in the window to move to the desired item, and press [ENTER].
- Select the item.
- Use the direction buttons (▲▼◀▶) to move to a desired item, and set the value.

- Add: You can select a recipient name, e-mail address, or group.
You should have created a group in the menu item before you can add a user to the group.
■ For inputting the recipient name and email address, refer to "Using Virtual Keyboard" (Page 42).
- When the recipient setup is done, press [ENTER].

SNMP
You can configure the settings for the SNMP protocol.
Using the mouse may help make setup easier.
- Use the up/down buttons (▲▼) in the window to move to the desired item, and press [ENTER]. The SNMP setup screen appears.
- Use the direction buttons (▲▼◀▶) to move to a desired item, and set the value.
- Enable SNMP v1: SNMP version 1 will be active.
- Enable SNMP v2c: SNMP version 2 will be active.
- Read Community: Read community where you can access objects that support the SNMP protocols.
- Write Community: Write community where you can access objects that support the SNMP protocols.
- When the SNMP setup is done, press .

The DVR enables you to adjust the settings of a PTZ camera as well as an ordinary one to your preference.
PTZ Device
The PTZ device can be activated only if a channel in connection with the PTZ camera is selected.
Getting started with PTZ
The PTZ camera is available, only if a channel is selected, in the following way:
■ Using the remote control buttons Press the [PTZ] button on the remote control. ■ Using the launcher menu Click < PTZ > to display the live launcher. - Using the right-click menu in Live mode Right-click any area on the screen to display the context menu, and select . ■ Using icons on the live screen Click the <▶> icon on the live screen.
The PTZ function is available only if the PTZ camera is connected so that the <▶>icon is displayed on the screen.


Using the PTZ camera
You can use one camera to perform all functions of PAN, TILT and ZOOM for monitoring multiple places and set the preset to your preference in a desired mode.
- Launch the menu.
As the icon on the bottom right corner turns yellow, you access the "PTZ Control" mode to display the "PTZ Control" menu.
Be sure to configure PTZ working environments before operation, since the PTZ Working (Active) mark can appear to be activated even when PTZ is not operative.
- Use the PTZ wheel in the launcher menu to adjust the monitoring area, or use the direction buttons (▲▼◀▶) on the remote control to move the camera to a desired place.

- PTZ Wheel: Clicking a point nearer to the center will move in that direction slowly; clicking a point farther from the center will move fast.
- Keep clicking left to rotate the lens counterclockwise; keep clicking right to rotate the lens clockwise.
- Zoom (🔒): You can use the Zoom function of the PTZ camera.
- IRIS (☐): Adjusts the intensity of radiation incoming to the iris.
- Focus (📁): Enables you to adjust the focus manually.
- Swing: Moves between the preset start point and end point.
- Group: Moves in the path specified by combining the preset, pattern, and auto pan.
- Trace: Moves camera's framing in the predefined path.
- Preset: Sets the preset position for camera framing and moves to designated preset position when selecting a desired preset.
- Tour: Moves in the path specified by combining multiple groups.
■ For coaxial communications, the operation may differ depending on the protocol.

Before entering the PTZ device control mode, set the values of the PTZ device in the menu. (Page 52)
For camera specifications that support PTZ control depending on communication method, refer to our web site.
Preset Setting
A preset is a set of specific target points of a PTZ camera, and up to 127 presets per camera can be stored. Using the mouse may help make setup easier.
- In PTZ Control mode, use the direction buttons to adjust the camera in a desired direction.
- Select the key.
The virtual keyboard for inputting the preset will appear.
■ Refer to "Using Virtual Keyboard". (Page 42)
- Save: You can add and save the preset.
- Rename: You can change the settings of the existing presets.
- Delete: Deletes the selected preset.
- Delete All: Deletes all existing presets.

If you replace the camera of the channel that stores the preset list with a new one, you should reset the preset accordingly.
- Press .
The preset will be saved as a name that you entered.
Camera Setting
A PTZ camera has its own menu system. Optimize the PTZ camera according to the DVR. Using the mouse may help make setup easier.
- Select in the PTZ Control menu. The camera-specific menu appears. You can configure the settings of only those cameras that support the protocols of Samsung, Pelco D/P, AD and Panasonic. If you are setting Auto Pan or Pattern in the camera menu, press and hold the appropriate button for a certain time so that the button operation can be different from that in normal PTZ setting.

SEARCH
You can perform the search for recorded data by the time or by the search criteria such as an event.
You can access the menu directly in Live mode.
- In Live mode, right-click any area of the screen.
The Live menu appears.
- Select .
Or, press the [SEARCH] button on the remote control or the front panel.

- The Search menu appears.
If you have not checked "POS USE" in the "Main Menu > Device > POS Device" menu, the Search menu does not include the "POS Search" item. (Page 56)
- The search can be restricted by the Auto Delete function.
Refer to "Setting the Recording > Record Option". (Page 62)
Overlapped data: It only appears if there exists overlapped data on a certain time, produced due to the change of DVR's time setup. The latest data comes first, from . It does not appear in .

Time Search
You can search for recorded data of a desired time.
As the time to display may be different depending on the time zone and the DST standard time, the time of data recorded in the same time can be displayed differently depending on time zone and DST settings.
Using the mouse may help make setup easier.
- Select in the menu.
- Select a date to search.
■ Refer to "Using the Calendar". (Page 41)
- The record data on the specific date will be listed.
The display bar is different according to the data type.
So check the data type for the color in the left pane.
- Use direction buttons (▲▼◀▶) to set the search criteria and press the [ENTER] button.
- Go to First : Moves to the earliest date.
- Go to Last: Moves to the most recent date.
- Time: Enter a time to perform the search or use the up/down button <◆> to select one.
- Previous/Next Page: Moves to the previous / next page. (Use the remote control or the buttons on the front panel.)

- Zoom In: The map enlarges in detail. It will switch in the sequence of 24 hours - 16 hours - 8 hours - 4 hours.
- Zoom Out: The map will switch in the reverse order of the detailed mode above.
It will switch in the sequence of 4 hours - 8 hours - 16 hours - 24 hours.
Double-click a desired time to zoom it in/out.

- Preview: Click and select (click, drag) a time in to display a still image for the portion.
- If the selected channel does not contain any recorded data, it will be marked black.
- Select a data item and click .
The screen switches to the data playback mode.
Event Search
You can search for events by the channel and play them. Using the mouse may help make setup easier.
- Select in the menu.
- Use direction buttons (▲▼◀▶) to set the search criteria and press the [ENTER] button.
- All record events on a specific date will be found. (Normal/Schedule recording included)
- Date/Time Preview: If you select a data item in the list, the still image of the selected data will be displayed in the left preview pane. • Event: Displays the type of the event that occurred.
- Select a data item and click . The screen switches to the event data playback mode.

Backup Search
Searches for backup data in the connected backup device. Only data in the format of DVR is included in the search. Refer to in "Backup > Setting the Backup". (Page 66) Using the mouse may help make setup easier.
- Select in the menu.
- Use direction buttons (▲▼◀▶) to set the search criteria and press the [ENTER] button.
- Record Period: Displays the record period.
- Channel info: Displays the recorded channel.
- Play Start Time: Select a time that you start playing.
- Select a data item and click . The screen switches to the backup data playback mode.

POS Search
You can search for data in the POS device that is connected to the DVR.
You can use the mouse to select the related items.
- Select in the menu.
- Use direction buttons (▲▼◀▶) to set the search criteria and press the [ENTER] button.
■ You can enter specific text to refine your search.
- Keyword: Use the virtual keyboard to enter a keyword.
- Search Criteria :
- : If selected, search will be performed case-sensitively.
- : If selected, only the exact matches with the keyword will be found.
- Preview : Select a data item in the list to display the preview image. Information about the image will be displayed on the bottom of the screen. • : You can use these buttons to accelerate your search if you have a huge list of search results.
- Select a data item and click .
The screen switches to the POS data playback mode.

Motion Search
If a motion is detected in each channel, you can set a desired area to perform the search.
You can use the mouse to select the related items.
- Select in the menu.
- Use direction buttons (▲▼◀▶) to set the search criteria and press the [ENTER] button.
If you set the motion area to , the button will be activated.
- Motion Region: Select an area to perform the search.
- All Area : Searches for all areas of the selected channel.
- Current Area : Searches for the motion area for each channel specified in "Motion Detection > Setting the Motion Detection Area". (Page 64)
- Manual Area : You can set the motion area manually.
- Setup : The Setup button will be activated only if you have set the motion area to Manual. Press this button to display the area setting window.
- Date/Time : The Date/Time will be automatically set by the hour, and the end time will be automatically set to one hour later than the start time if it is set.
- Preview: Select a data item in the list to display the still image of the item.
- Select a data item and click . The screen switches to the motion data playback mode.


Play
You can play data stored in the HDD and back up a desired portion of the data.
Using the mouse may help make setup easier.
- In Live mode, click in the right-click menu or <▶> in the launcher menu, or press the Play button on the remote control or the front panel.
- Use the up/down button (▲▼) to select a menu.
■ For data search, refer to . (Page 80)

- Select a data item and click in the Search menu. The selected data is played and the play launcher appears on the screen.
If there is existing data, playback will start immediately without performing the search.
- Playback Information : Displays the date and time of the current data in the top corner.

- Backup : Click < 📋 > to set the current time as the start time of backup; you can specify a backup area using the mouse (yellow triangle).
Click < ▶ > again to set the current time as the end time of the backup and the "Backup Range" window appears.
- Type : Supports formats of DR and SEC. Refer to a list of formats in "Setting the Backup". (Page 66)
- Device : Select a backup device.
- Check Capacity: Enables you to check the capacity of the selected storage device.

- If you want to return to the Live screen in Play mode, click < ■ > in the launcher menu or press the [■] button on the remote control or the front panel.
Search & Play
Using the Playback Button
| Part Names Functions | ||
| 1 | Play Timeline Indicates the current playback point, and can be used to move. | |
| 2 | Skip Backward Moves backward by unit time. | |
| 3 | Backward Fast Play | Used for quick backward playback. |
| 4 | Backward Slow Play | Used for backward frame-by-frame search while in PAUSE. |
| 5 | Step Backward Moves backward by one frame at a time. | |
| 6 | Pause Stops playing the current video temporarily. | |
| 7 | Stop Stops playback and moves to the live screen. | |
| 8 | Step Forward Moves forward by one frame at a time. | |
| 9 | Forward Slow Play | Ensured to play forward up to 4 channels simultaneously at a low speed.In a split mode, the real time playback may not be supported, depending on the record quality, resolution and number of channels. And some frame rates may be supported. |
| 10 | Forward Fast Play | Used for quick forward playback. |
| 11 | Skip Forward Moves forward by unit time. | |
| 12 | Return Return to the search setup screen. | |
| 13 | Audio Sets Audio ON/OFF. | |
| 14 | REC | Records all channels in Live mode. |
| 15 | Partial Backup | Begins backup of the selected section of the video being played, with the specified starting/ending point. |
| 16 | Mode Switch | Click a desired playback mode or press [MODE] to switch the screen mode in sequence.The grey area in the center of the 13-split mode plays the Live channel.The default channel of the Live mode is CH1, which can be changed later. |
Introducing Web Viewer
What is Web Viewer?
Web Viewer allows remote access to your DVRs. You have access to live video, archived video, PTZ control (if configured), etc.
Product Features
- Remote access from a standard browser • Supports PTZ camera controls • Supports 1, 4, 9, 16 camera viewing formats (maximum of 16 cameras in the list).
- Gets JPEG format images to print and save to "Print or Save JPEG format images".
- Record video in AVI format-compatible with popular media players. (needed the H.264 codec)
![graph TD A["Web Viewer"] --> B["Network"] B --> C["DVR"]](/content/2026/06/1283506/images/d6285dcd88bd029b9fe7adf4d97011bbf1fce6d89f583981b4b988090f59fa30.jpg)
System Requirements
The following lists the minimum suggested hardware and operating system requirements needed to run the Web Viewer.
| OS | Windows XP ProfessionalWindows 2000Windows Vista Home Basic /PremiumWindows 7 |
| Web Browser Internet Explorer | 7.0 or later |
| CPU Intel Pentium 4.2 GHz | |
| Memory 512 MB | |
| Monitor High Color 16-bit 1024 x 768 | |
| HDD | 50 MB(Installation space required)* Additional HDD space required for recording.Recorded file size will vary depending on recording quality settings. |
Connecting Web Viewer
- Open your web browser and type the IP address or URL of DVR into the URL address box.


■ "192.168.1.200" is set as the default IP.
■ Set to an available IP address in IP Installer or via "Network > Connection Mode".
■ The URL connection will be enabled only when the DDNS connection settings have been completed.
- A user with admin permissions should provide the admin ID and password. A registered user should provide the user ID and password.


■ The default password can be exposed to a hacking threat, so it is recommended to change the password after installing the product.
- Set a password for your wireless network if you use the product with a wireless router. Being unprotected or using the default wireless router password may expose your video data to potential threats.
Note that the user is responsible for security and other related issues caused by an unchanged password.

Allows up to 10 simultaneous accesses, including the Admin and general users.
It does not allow multiple logins of the Admin user.
■ The initial password of the Admin user is set to "4321".
■ The password of the Admin and general users can be changed in the DVR's menu.
Normal users should have "Use" set under [User] before connecting to the Web Viewer. (Page 45)
■ All settings are applied by the DVR's settings.
If you change settings such as permissions while logged in to the Web Viewer, you may be returned to the login screen.
- Click [OK].

- When the installation confirmation message appears, click the [Yes] button.

- When the program installation wizard window appears, press the [Install] button to install the program.

- Open the Web Viewer after installing the software, and log in again.
The Live Viewer's main screen appears when you log in successfully after installing the program.

USING LIVE VIEWER
The Live Viewer screen consists of the following:

| Menu Functions | ||
| 1 | Menu Selection | Switches into corresponding menu screen by clicking each menu. |
| 2 | Address, Name, Time | Displays the IP, model name, time, etc. of connected DVR. |
| 3 | DVR Time, PC Time | Selectorfor the OSD time information display setting of the Live Viewer. |
| 4 | Split Mode Selection | Selects the type of split screen and specify the channel displayed in Display Pane. |
| 5 | Change Channel | Switches into previous/next channel or perform Auto Sequence.Click Auto Sequence button to display the Time Interval Selection menu. |
| 6 | CAPTURE | Saves current video for selected channel in designated path. |
| Prints current video image for selected channel through designated printer. | ||
| AVI Save | Records the live video in AVI file format in designated path, and then stops recording.Recording status icon is displayed on screen during recording. | |
| Audio | Sets the sound connected to each channel to ON/OFF. | |
| OSD | Select the format of OSD information that will be displayed. | |
| 7 | PTZ | Controls connect PTZ camera(s). |
| Menu | Goes to the relevant menu screen of a camera, which supports OSD menu and changes the menu. | |
| 8 | Display Pane | Displays the video of camera connected to DVR. |
OSD Information Display
① The channel numbers of the connected DVR are displayed. ② Either the date or the time will be displayed as the current date and time, according to your configuration. ③ It displays whether the PTZ controls are active. ④ Shows Audio On/Off status. ⑤ Alarm icon appears when an alarm is issued. It disappears when the [ALARM] button of the DVR is pressed. ⑥ Shows the recording status.

If you have set PTZ cameras for the DVR, "PTZ" is displayed on the screen. Select a PTZ camera channel and use the [PTZ] button for camera control.

Connected DVR
This displays the IP address and the status of the connecting DVR.

■Connection failure message
No Response: Appears when the DVR does not respond.
Access Denied: Appears when the maximum number of users is exceeded.
■The number of simultaneous connections is limited to 10.

Setting the Display of the OSD Time Information
Select the option for the OSD time information display setting.
• DVR Time: Based on the time of the connected DVR - PC Time: Based on the time of the PC currently running the Web Viewer.

Split-Screen
Click the split mode selection button to switch to the corresponding screen mode.


SINGLE MODE QUAD MODE NINE MODE SIXTEEN MODE
To switch to full screen mode
Click < □>.
The current split screen appears in full screen.
Press the [ESC] key to exit the full screen mode.

Changing the Live Screen Mode
■16-split mode does not support "SEQUENCE", "PREVIOUS" and "NEXT".
- When this button is clicked, the previous screen appears.
- In SINGLE MODE, the channel numbers are switched in reverse order.

- In QUAD MODE, the screens are changed like 1st 4 channels (1~4) → 2nd 4 channels (13~16) → 3rd 4 channels (9~12) → 4th 4 channels (5~8).
- In NINE MODE, the screens are changed from 9 channels (1~9) to 7 channels (10~16).
- : When this button is clicked, the next screen appears.
- In SINGLE MODE, the channel numbers are sequentially switched from 1 to 16.
- In QUAD MODE, the screens are changed like 1st 4 channels (1~4) → 2nd 4 channels (5~8) → 3rd 4 channels (9~12) → 4th 4 channels (13~16).
- In NINE MODE, the screens are changed from 9 channels (1~9) to 7 channels (10~16).
■ If a 16-channel DVR is connected, clicking "NEXT" in QUAD MODE changes the screen as shown in the picture.
- ☐: When this button is clicked, screens are switched at a preset interval.
- In SINGLE MODE, the channel numbers are sequentially switched from 1 to 16.
- In QUAD MODE, the screens are changed like 1st 4 channels (1~4) → 2nd 4 channels (5~8) → 3rd 4 channels (9~12) → 4th 4 channels (13~16).
- In NINE MODE, the screens are changed from 9 channels (1~9) to 7 channels (10~16).
■ Preset interval (10 seconds)

To capture a screen
- Click the <button>. When a pop-up window appears, select the saving path for the captured image.
- Select the path and name the file. Then click the button.
- Save the current camera's video image as a .bmp, .jpg, or .png file.


If the viewer is running without administrator permission
in Windows Vista/7, you may not be able to save the captured image as a .bmp, .jpg, or .png file.
To print a screen
- Click the < ▲ > button.
- Print the current camera's video image using the printer connected to the PC running the Web Viewer.

To save as AVI
- Click the < □ > button.
When the "AVI Setup" window appears, select the recording save path and capacity.
- Select a desired path, enter the maximum recording capacity, and then click the button.
■ Save the current channel's video as an .avi file. To play a video clip, you can use a free video player to play the video. (e.g., GOM Player, KM Player, etc.)

■ After saving an AVI file, install the CODEC when playing it in Windows Media Player. However, the video may not play properly, depending on the CODEC compliance of the player. At least 1GB of free space is required for recording.

■ While recording current data in Web Viewer, you cannot select Split Mode buttons, switch to the previous/next screen, or activate the Auto Sequence function. If the viewer is running without administrator permission in Windows Vista/7, you may not be able to change a folder when saving a video as an AVI file.
Audio
- Sets audio of each connected channel to On/Off.
OSD
- Select Show OSD on the Live screen.
Controlling PTZ
If a PTZ camera is connected, the <PTZ> icon appears on screen. When selecting the corresponding camera channel, the PTZ tab is provided to allow you to control the PTZ.

| Part Names Functions | ||
| 1 | Direction Adjustment | Adjusts the direction of a camera. |
| 2 | PT Speed | Adjusts the PAN, TILT reaction speed. |
| 3 | Preset | Sets the preset position for camera framing and moves to designated preset position when selecting a desired preset. |
| 4 | Swing | Moves between the preset start point and end point. |
| 5 | Group | Moves in the path specified by combining the preset, pattern and auto pan. |
| 6 | Tour | Moves in the path specified by combining multiple groups. |
| 7 | Trace | Moves camera's framing in the predefined path. |
| 8 | PowerPTZ | Click or drag on the screen to control PTZ. |
| 9 | FOCUS | Adjusts the focus of the camera. |
| 10 | IRIS | Adjusts image's brightness by controlling the camera's iris. |
| 11 | ZOOM | Zooms in/out the image by controlling camera's zoom. |
To set a preset
- Click the <icon> button to display the "Preset" window.
- Click <▼> to select a desired preset number.
- Enter the name of the preset.
- Use direction keys to adjust the direction the camera aims at.
- Click the button.
To activate the preset
- Click the <📋> button to display the "Preset" window.
- Select a desired preset to activate from the list. The camera's framing moves to the preset position.

To activate Swing, Group, Tour, and Trace
You can activate listed functions in the same manner as using a preset. For more information, refer to the corresponding user manual of the applicable camera.

■Only selective functions of the camera can be supported, depending on the camera.
If the connected network camera supports the OSD menu, press the button to enter the camera's menu screen to change its settings.

| Part Names Functions | ||
| 1 | Direction Adjustment | You can go to a desired menu. |
| ENTER | Selects a desired item. | |
| 2 | Menu On/Off | You can On/Off camera's OSD menu settings. |

■For more information about the camera's OSD menu, refer to the corresponding user manual of each camera.
USING SEARCH VIEWER
The Search Viewer screen consists of the following:
Up to 3 users can access simultaneously.

| Menu Functions | ||
| 1 | Menu Selection | Switches to the corresponding menu screen by clicking each menu. |
| 2 | Address, Name, Time | Displays the IP, model name, time, etc. of connected DVR. |
| 3 | Split Mode Selection | Selects the type of split screen and selects the channel displayed in Display Pane. |
| 4 | CAPTURE | Saves current video for selected channel in designated path. |
| Prints current video image for selected channel through designated printer. | ||
| AVI Save | Records and saves currently playing video image as AVI filie in designated path and then stops. | |
| Audio | Sets the sound connected to each channel to ON/OFF. | |
| OSD | Select the format of OSD information that will be displayed. | |
| 5 | Calendar | Displays the video-recorded date in blue and today in white. Click the date in blue color to display the recorded video information in timeline. |
| 6 | Overlapped Data | Displays and zooms in/out recorded video data. If overlapping data found, this function selects one of them to play. |
| 7 | Play Control | Adjusts current video's playback speed and played time position. |
| 8 | Recording Color | Displays the corresponding color depending on recorded data type if you place your mouse cursor on that area. |
| 9 | Display Pane | Plays corresponding data on the screen if you select a search result. |
Searching the Recorded Video in the Calendar
Dates having recorded video are marked in blue.
Click a date marked blue to display video information on the timeline. When you click, it will be synchronized with the system time (date) of the current PC.
To search by date
You can select the search date by using the calendar.
- Click < «> or < »> to select the year to search.
- Click < □> or < ▶> to select the month to search. The date including data appears in blue and today appears in red.
| Jan 2012 | ||||||
| « | < | Today | > | » | ||
| S | M | T | W | T | F | S |
| 1 | 2 | 3 | 4 | 5 | 6 | 7 |
| 8 | 9 | 10 | 11 | 12 | 13 | 14 |
| 15 | 16 | 17 | 18 | 19 | 20 | 21 |
| 22 | 23 | 24 | 25 | 26 | 27 | 28 |
| 29 | 30 | 31 | 1 | 2 | 3 | 4 |
| 5 | 6 | 7 | 8 | 9 | 10 | 11 |
- Click the date to search in calendar. The first image of searched video data on the date is displayed on screen and the data is displayed in the timeline.
- To search video data on today, click . Today's date is selected.
To adjust timeline
If searched data are overlapping, you can select a desired data, move its playback time point, and zoom in/out the timeline.
- Select the number of data to search if data is overlapping. It appears only when data are overlapped and assigns <0> to the most recent data.
- Click your desired time point to play on the timeline.
The playback start point is moved.
- Click < + >, < → to zoom in/out the zoom factor to display time.
- To show the previous/next timeline in zoomed-in status, click <◀> or<▶> to go to the left or right.
Names and Functions of Play Buttons
① Moves backward by 10 minutes from the current playing point.
② Plays in reverse at doubled speed. The playback speed is doubled up to x64 speed.
③ Moves backward by 1 second from current playing point.
④ Moves forward by 1 second from current playing point.
⑤ Plays at doubled speed. The playback speed is doubled up to x64 speed.
⑥ Moves forward by 10 minutes from the current playing point.
⑦ Moves to the recording start point on the corresponding timeline.
⑧ Plays in reverse.
⑨ Stops playing. When resuming playback, it is played from the recording start point.
⑩ Pauses playing. When resuming playback, it is played from the stopped point.
⑪ Plays normally.
⑫ Moves to the recording end point on the corresponding timeline.

You can configure the DVR settings remotely on the network.
To configure the DVR settings, click .
System
You can configure the various settings of the DVR system.
Date/Time/Language
For more information, refer to in the menu. (Page 40)
- Select in the System menu.
- Configure the DVR settings according to your system environment.
- Date/Time Set the date and time.

• Time Synchronization Setup Set the time synchronization. - Display Date Format : Set the date type. Time : Select a time format to display on the screen. • DST (Daylight Saving Time) DST is displayed an hour ahead of the standard time of the time zone. - Language Select a preferred language for the DVR.

Holiday
You can set specific dates to Holidays according to your preferences. For more information, refer to in the menu. (Page 41)

Permission Management
For more information, refer to in the menu. (Page 42)
- Admin
You can change the admin ID or the password.
You can type the ID with alphanumeric characters only.
For the password, use alphabets and special characters excluding < and ">.

- Group
Users are classified into groups and the permission can be set according to the group.
First of all, add a group.

- User
You can add, change or remove a user or users.

- Setup
You can set the user permission.

System Management
For more information, refer to in the menu. (Page 46)
- System Information
You can see information of the current system.
Check the Software Version, Broadcast Format and MAC Address.

Device
You can check a list of devices that are connected to the DVR and configure the necessary settings.
Click in the menu screen.
For more information, refer to "Setting the Device". (Page 50)
Camera
- Camera
You can configure the settings of the camera that is connected to the DVR.

You can specify a certain area of the camera video to be protected for your privacy.

• PTZ
You can configure the settings of the PTZ camera that is connected to the DVR.
Set the ID and protocol.

Storage Device
You can check and change the settings of the storage device.
- Device
You will see a list of storage devices that are connected to the DVR. You can check the type, used/total, usage and status of the device.

- HDD Alarm
You can set the alarm output channel and the alarm duration for an error.

Remote Device
You can see a list of remote devices including PTZ cameras and system keyboards that are connected to the RS-485 port of the DVR and configure the necessary settings.

POS Device
You can set the channel, preset and communication port of the POS device that is connected to the DVR.

■You cannot set to use the POS device remotely.

Monitor
- Monitor
You can configure the monitoring screen settings and set the output system.

- Mode
You can switch between live mode and play mode.

Record
For more information, refer to . (Page 60)
Recording Schedule
If you set a recording schedule for a specific date and time, the recording will start at that specific time.

- Apply to All CH : Click to display the confirmation window.

Event Record Duration
You can set the start and end times of recording that will be activated if an event occurs.

REC Quality & Resolution
- Standard/Event
You can set the resolution, frame rate and recording quality for each channel.

Record Option
You can set the Disk End Mode.

Event
For more information, refer to . (Page 63)
Sensor Detection
You can set the sensor operation mode and the synchronized camera as well as the alarm output type and the duration.

Motion Detection
You can set the motion detection mode and the sensitivity as well as the alarm output type and the duration.

- Motion Region
Set the target motion detection area

Video Loss Detection
You can set the alarm output time if a video loss occurs.

Tampering Detection
You can set whether to generate an alarm and its dwell time for video tampering events.

Alarm Schedule
You can schedule the alarm output according to the day of the week and the time.
The default setting is Event Sync, which activates the alarm only if an event occurs.

Network
For more information, refer to . (Page 68)
Connection Mode
A remote user can access the DVR via the network to check the current mode and the IP address.
- Interface
You can set the network connection route.

- Port
You can configure the protocol related settings.

DDNS
You can check the DDNS settings.

Live Transfer
You can set the network camera's network transfer settings.
- Live Transfer
A remote user can set the image resolution of the transferred data.

Mailing Service
You can specify the SMTP server that sends a mail if an event occurs and set the recipient group and users.
- SMTP
You can set the server that sends mails and specify if you use the authentication process.

- Event
You can set the event interval and specify which events the server sends mails for.

web viewer
- Group
You can add a group to receive the mail if an event occurs and set the permission to receive the event mail for each group.

- Recipient
You can add a user or users who will receive the mail.

SNMP
You can configure the settings for the SNMP protocol.

ABOUT
Click .
Displays the model name of connected DVR and the version of Web Viewer.
What is Mobile Viewer?
Mobile Viewer is management software that enables you to connect to DVR (Digital Video Recorder) remotely and control the video playback and PTZ operations (if configured) in real time.
Key Features
- Remote access via Smart phone
- Voice Recognition • 1-split and 4-split modes supported in Live Viewer • Supports single channel search function
- Switch channels using the touch-sensitive LCD panel
- PTZ camera operations supported (complies with the protocol of the connected DVR)
- Up to 16 channels supported
Compatible Smartphone
This application is optimized for
- iPhone OS v4.3.5, v5.1.1 • Android 2.3.x, 3.2, 4.0.1 (Galaxy S2 is recommended)

■For more information, refer to the user manual.
(http://www.samsungcctv.com)

SEC BACKUP VIEWER
You can play a file that is backed up in the format of SEC.
Backup in SEC format produces backup data file, library file and self-executable viewer file.
If you run the backup file viewer, the backup data file will be automatically played.

Recommended System Requirements
PCs with a lower specification than the recommended below may not fully support forward/backward and high-speed playback.
• OS : Windows XP professional, Windows Vista, Windows 7 • CPU : Intel i5 2.8GHz or faster • RAM : DDR PC-3200 1G or more • VGA : Geforce 6200 or higher
| Part Names Functions | |||
| 1 | Split Screen |  | Set the screen's aspect ratio to be displayed. |
| [KBY3] | The screen switches to the selected split screen mode. | ||
| 2 | Screen Printout |  | Saves the current video's image as in an image file. Supports JPEG file format. |
 | Prints out the current screen. You should have installed the appropriate printer driver before you can print out the screen. | ||
| 3 | Audio | [DB4A] | A toggle button. Each time you press this button, the audio output will toggle between activated and deactivated. |
 | You can adjust the volume level from 0 to 100. | ||
| 4 | Watermark |  | Press the button to enable file tampering detection, to detect data file forging. |
| 5 | Deinterlace You can enable the De-interlace function. | ||
| 6 | Show OSD | [XXY3] | Check the OSD checkbox to display the OSD information on the backup playback screen.Information such as backup date, day of the week, time, model name, and channel number will be displayed on the screen. |
| 7 | Enlarge / Reduce Timeline |  | Collapses the time range that is displayed on the range bar of the storage time. You can collapse the range bar until the overall range is shortened to 24 hours. |
 | Enlarges the time range that is displayed on the range bar of the storage time. You can enlarge the range bar until the overall range is extended to 1 minute. | ||
| 8 | Restore Timeline Restores the timeline to the default. | ||
| 9 | Display of storage time range | Displays the time range of a stored video file.You can move the gridline of the range bar to select a time point to play. | |
| 10 | Playback Control Yo  | Video playback of the timeline. | |
PRODUCT SPECIFICATION
| Item | Details | |||
| SRD-873D SRD-1653D SRD-1673D | ||||
| Video | Inputs | 16(8) composite video 0.5–1 Vpp, 75 ohm automatic termination | ||
| Resolution | 960x480 NTSC, 960x576 PAL / 720x480 NTSC, 720x576 PAL | |||
| Live | Frame rate | 480fps NTSC, 400fps PAL | ||
| Resolution | 960x480 NTSC, 960x576 PAL(704x480 NTSC, 704x576 PAL) | |||
| Multi Screen display | 1 / 4 / 7 / 9 / 13 / PIP /Sequence | 1 / 4 / 7 / 9 / 13 / 16 / 16(A) / PIP / Sequence | ||
| Performance | ||||
| OS | Embedded | Linux | ||
| Recording | Compression | H.264 | ||
| Record Rate | • SRD-873DNTSC: Up to 240fps @ 960x480 / PAL: Up to 200fps @ 960x576NTSC: Up to 240fps @ 704x480 / PAL: Up to 200fps @ 704x576NTSC: Up to 240fps @ 704x240 / PAL: Up to 200fps @ 704x288NTSC: Up to 240fps @ 352x240 / PAL: Up to 200fps @ 352x288• SRD-1653DNTSC: Up to 120fps @ 960x480 / PAL: Up to 120fps @ 960x576NTSC: Up to 120fps @ 704x480 / PAL: Up to 120fps @ 704x576NTSC: Up to 240fps @ 704x240 / PAL: Up to 200fps @ 704x288NTSC: Up to 480fps @ 352x240 / PAL: Up to 400fps @ 352x288• SRD-1673DNTSC: Up to 480fps @ 960x480 / PAL: Up to 400fps @ 960x576NTSC: Up to 480fps @ 704x480 / PAL: Up to 400fps @ 704x576NTSC: Up to 480fps @ 704x240 / PAL: Up to 400fps @ 704x288NTSC: Up to 480fps @ 352x240 / PAL: Up to 400fps @ 352x288※ WD1 : 960x480 / 4CIF : 704x480 / 2CIF : 704x240 / CIF : 352x240 (NTSC)WD1 : 960x576 / 4CIF : 704x576 / 2CIF : 704x288 / CIF : 352x288 (PAL) | |||
| Mode | NTSC : Manual, Schedule (Continuous / Event), Event(Pre / Post), Time lapse (1~30fps) | |||
| PAL : Manual, Schedule (Continuous / Event), Event(Pre / Post), Time lapse (1~25fps) | ||||
| Event Video Loss, Motion(Level 1~10), Alarm, Tampering | ||||
| Overwrite modes Continuous | ||||
| Pre-alarm | Up to 30 sec (5, 10, 20, 30 Sec) | |||
| Post-Alarm Up to 6 hour (5, 10, 20, 30 sec, 1, 3, 5, 10, 20 min, 1, 2, 3, 4 ,5, 6 hour) | ||||
| Search & Playback | Search mode Date/time, Event, Back up, Pos, Motion ( ※ All Search Included Preview Function) | |||
| Playback function Fast Forward/Backward, Slow Forward/Backward, Step Forward/Backward | ||||
| Network (IPv4) | Transmission speed | 4CIF/2CIF/CIF120/240/240fps NTSC,100/200/200fps PAL | 4CIF/2CIF/CIF 120/240/480fps NTSC,100/200/400fps PAL | |
| Bandwidth Up to 32Mops | ||||
| Bandwidth control Selectable | ||||
| Stream H.264(4CIF/2CIF/CIF Selectable) | ||||
| Remote users Maximum | Search(3)/Live Unicast(10)/Live Multicast(20) | |||
| Protocol support TCP/IP, DHCP, PPPoE, SMTP, NTP, HTTP, DDNS, RTP, RTSP, SNMP | ||||
| Monitoring NET-i Viewer, Smart viewer, Webviewer | ||||
| Smart phone | Smart Phone Android, iOS | |||
| Protocol support RTP, RTSP, HTTP, CGI | ||||
| Remote users Maximum | Live(1) | |||
| Storage | Internal HDD Up to 4 SATA HDDs | |||
| External HDD Up to 2 expansion bay (※Model: SVS-5R/5E) | ||||
| DVD Writer (Back-up) | YES | |||
| USB (Back-up) 2 USB Ports | ||||
| File Format (Back-up) | BU(DVR Player), EXE(Include Player) | |||
| Security | Password Protection 1 Admin, 10 Group, 10 User per 1 Group | |||
| Data Authentication Watermark | ||||
| Interface | ||||
| Monitors | VGA | 1 VGA (1280x720, 1280x1024, 1920x1080) | ||
| HDMI | 1 HDMI (1280x720, 1280x1024, 1920x1080) | |||
| Main Composite | - | |||
| Spot Composite | Digital Spot (2 BNC, 1 Vp-p, 75 ohm)※Included OSD On Screen | |||
| Loop Outputs - | ||||
| Audio | Inputs / Output | 16(8)CH line in (Built in 4CH, Option: Audio Extension Cable)/ 1CH line out | ||
| Compression | G.711 | |||
| Sampling rate | 8KHz | |||
appendix
| Item | Details | |||
| SRD-873D SRD-1653D SRD-1673D | ||||
| Alarm | Inputs / Output | Terminal 16(8) Inputs (NO/NC) / Terminal 4 relay Outputs (NO/NC), Rating: 30V DC/2A, 250V AC/0.25A | ||
| Remote notification Notification via e-mail | ||||
| Connections | Ethernet 1 RJ45 10/100/1000 Base-T | |||
| Serial interface RS-232/RS-485 for PTZ, Samsung System Keyboard | ||||
| USB USB 2.0, 2 ports | ||||
| e-SATA 2 External SATA ports | ||||
| Application Supoort Mouse, Remote Controller | ||||
| Protocol support | RS-485 : Supports 14 serial inputsSamsung-E / Samsung-T / Pelco-D / Pelco-p / Panasonic / Phillips / AD /DIAMOND / ERNA / KALATEL / VCL TP / VICON / ELMO / GECoaxial Cable : Supports 2 serial inputsSamsung CCVC / Pelco-C | |||
| General | ||||
| Electrical | Input Voltage /Current | 100 to 240 VAC ±10%; 50/60 Hz, Autoranging | ||
| Power consumption Max. 60 W (with 1x HDD) | ||||
| Environmental | Operating Temperature / Humidity | +0°C to +40°C (+32°F to +104°F) / 20% to 85% RH | ||
| Mechanical | Dimension (W x H x D)H (leg not included) | W440 x H88 x D246.8 mm (17.32" x 3.46" x9.72") | ||
| Weight (With hard disks) | 5.2 kg (11.46 lb) | |||
| Rack mount kit 2 EA | ||||
| Lauguage | Korean, Japanese, Chinese (Simplified), English, French, German, Spanish, Italian,Russian, Polish, Czech, Turkish, Netherlands, Portuguese, Swedish, Danish,Thailandais, Rumania, Serbia, Croatia, Hungary, Greek, Chinese (Traditional) Finnish,Norwegian (25 Language) | |||
- SRD-873D
unit: mm (inches)

![SAMSUNG 1 2 3 4 5 6 7 8 9 10 REC HDA AUP1 ENERK RAG 0 0 0 0 0 * REC 4" 0 > 0 HDC AWD LAM FOS > SICCI* ZEN FREE GROUP GPROJ 88.0 [3.46"] 95.9 [3.78"]](/content/2026/06/1283506/images/8eb1cf069e55511417962964a7d61b2b44454fb6a9ab57f779dce5cff62ccf1c.jpg)
- SRD-1653D/1673D
unit: mm (inches)

![440.0 [17.32"] 246.8 [9.72"] 265.2 [10.44"]](/content/2026/06/1283506/images/dc1316d40e8b4cfcd39927b8c7a42d4662956c1e0303d2e5f8d08b4f447e1e79.jpg)
![表式開本回路器 1 2 3 4 REC HCP ALAM MATHON PUM 5 6 7 8 * REC SMM 0 1/8 HDP 9 10 11 12 RON NCOO LPM NAVD GNDP 13 14 15 16 COM MODE SOUP INFOI 88.0 [3.46"] 95.9 [3.78"]](/content/2026/06/1283506/images/09df51d8107879b7da0c578586a299ac3676c1fe9a0930e9584255db29b37b93.jpg)
This returns the factory default settings.
The settings are made as follows:
• Use System/Load Factory Default in MENU
The default settings are based on SRD-1673D.
The default password can be exposed to a hacking threat, so it is recommended to change the password after installing the product. Note that the security and other related issues caused by the unchanged password shall be the user's responsibility.
| Category Details Factory Default | ||||
| System Settings | Date/Time/Language Date/Time/Language | Date YYYY-MM-DD | ||
| Time Format 24 hours | ||||
| Time Zone GMT | ||||
| Time Synchronize OFF | ||||
| DST OFF | ||||
| Language English | ||||
| Permission Management | Admin | ID admin | ||
| New Password 4321 | ||||
| User Group All Setting | Group | |||
| Setting | Restricted Access | Backup/Record Lock/ Search/PTZ/Remote Alarm Out/Shutdown | ||
| Auto Logout | OFF | |||
| Manual Input of ID | OFF | |||
| Touch Button Sound | ON | |||
| Touch Button | ON | |||
| System Management | System Information | Broadcast Format | NTSC/PAL | |
| Device | Camera | Camera | Video | ON |
| Audio | OFF | |||
| CH Name | CAM 01 ~ CAM 16 | |||
| SEQ-Dwell Time | 5sec | |||
| PTZ | ID | Camera No. | ||
| Protocol None | ||||
| Screen Setup | Brightness 50 | |||
| Contrast | 50 | |||
| Color | 50 | |||
| Storage Device | HDD Alarm | Check Alarm Output Port | OFF | |
| Duration | OFF | |||
| Replace Alarm Output Port | OFF | |||
| Duration | OFF | |||
| Device | Remote Device | Baudrate 9600 | ||
| Parity None | ||||
| Data 8 | ||||
| Stop bit 1 | ||||
| System Keyboard OFF | ||||
| Remote Control ON(00) | ||||
| POS Device OFF | ||||
| Monitor | Monitor | Event Display OFF | ||
| Display All | ||||
| Multi CH SEQ Time 5 sec | ||||
| VGA/HDMI 1280X720 | ||||
| Spot Out | Multi Spot OFF | |||
| Spot Out 1 | SEQ | |||
| Spot Out 2 | SEQ | |||
| Event Display OFF | ||||
| Mode | Live Mode ALL | |||
| Play Mode | ALL | |||
| Recording | Recording Schedule | CH1~CH16 | Both(Cont&Evnt) | |
| Event Record Duration | PRE Event | OFF | ||
| POST Event | 1 min | |||
| REC Quality/Resolution | Normal Recording | Resolution | CIF | |
| Frame Rate | 7fps | |||
| Record Quality | Level 4 | |||
| Event | Resolution | 4CIF | ||
| Frame Rate | 7fps | |||
| Record Quality | Level 4 | |||
| Record Option | Disk End Mode | Setup | Overwrite | |
| Disk End Beep | OFF | |||
| Auto Delete | OFF | |||
| Event | Sensor Detection | Sensor Operation OFF | ||
| Camera | Camera No. | |||
| Alarm | None | |||
| Duration | 10 sec | |||
| Category Details | Factory Default | |||
| Event | Motion Detection | Mode OFF | ||
| Sensitivity Level10(high) | ||||
| Alarm None | ||||
| Duration 10 sec | ||||
| Motion Region All Area | ||||
| Video Loss Detection | Video Loss State OFF | |||
| Alarm None | ||||
| Duration 10 sec | ||||
| Tampering Detection | Mode OFF | |||
| Sensitivity Medium | ||||
| Alarm None | ||||
| Duration 10 sec | ||||
| Alarm Schedule Alarm1 Event Sync | ||||
| Network | Connection Mode | Interface | IP Type Static | |
| Transfer Bandwidth | 2Mbps | |||
| IP Address 192.168.1.200 | ||||
| Gateway 192.168.1.1 | ||||
| Subnet Mask | 255.255.255.0 | |||
| DNS | 168.126.63.1 | |||
| Port | Protocol Type | TCP | ||
| Device Port | 4520~4524 | |||
| HTTP Port | 80 | |||
| DDNS | DDNS Site | OFF | ||
| Live Transfer | Resolution | CIF | ||
| Quality | Low | |||
| Mailing Service | SMTP | Server | OFF | |
| Port | 25 | |||
| Use Authentication | OFF | |||
| Secure Transfer Never | ||||
| Event | Event Interval | 10 min | ||
| Use Event Transfer | OFF | |||
| Group | Group | OFF | ||
| Recipient Permission | OFF | |||
| SNMP | Enable SNMP v1 | OFF | ||
| Enable SNMP v2c | OFF | |||
TROUBLESHOOTING
| Symptom Countermeasures | |
| The system does not turn on and the indicator on the front panel does not work at all. | Check if the power supply system is properly connected.Check the system for the input voltage from the power source.If the problem persists even after you have taken the above actions, check the power supplier and replace it with a new one if necessary. |
| Some channels display just a black screen even if they receive video sources. | Check if the camera connected to the system properly displays the image. Sometimes, this problem may occur on a camera that is not properly connected to the video source.Check if the camera is properly supplied with power.Sometimes, this problem may occur on a channel with weak video signal from a video distributor that is connected to multiple systems. In this case, input the video source of the camera directly into the DVR. This may find the cause and solve the problem. |
| If I press the [REC] button on the front panel, the REC indicator does not flash, nor the player start recording. | Check if there is a free space on the HDD for the recording.Check if the record mode is set to ON in the record mode setting. |
| The screen displays the logo image repeatedly. | This may occur from a problem with the main board, or the related software is corrupt.Contact the nearest service center for more information. |
| The Channel button does not work on the Live screen. | The Channel button does not work if the current screen is in the event monitoring mode.In the event monitoring screen, press the [ALARM] button to exit the screen and select a channel. |
| The cursor will not move to the Start button when I start the calendar search. | Check if the channel and the date that you want to play are marked with the V symbol.Both channel and date should be checked before you can start playing with the Start button. |
| When the alarm sounds, I press the [ALARM] button on the front panel to release the alarm but it does not work. The alarm persists and I could not set it off in any way. | Press the [MENU] button on the front panel to release the alarm in the following way:1) To release the event monitoring mode : Monitoring Mode - set the duration of the event monitoring to Off.2) To release the alarm sound : Event Record Mode - Alarm (Motion Detection/Video Loss/Tampering Detection) - deactivate the alarm sound.3) To release the event : Event Record Mode - Alarm (Motion Detection/Video Loss/Tampering Detection) - set the mode to Off. |
| No response is made even if I press the [PTZ] button on the Live screen. | Menu → Camera → Check if the current protocols and other settings in the PTZ device are properly configured according to the PTZ camera. |
| I've found that the DVR does not recognize as many disks as installed when I have connected multiple external HDDs to the DVR. | It takes time for the DVR to recognize multiple external HDDs. Try again in a moment and if the problem (of failure to recognize as many HDDs as connected) persists, it may occur due to a mechanical error of the HDD installed. Try again with a different HDD. |
| A message of "Need to reset date/time." Is displayed on the screen. | This message is displayed if there occurs a problem with the time setting of the internal clock or an error in the clock itself.Contact the retailer or the service center for more information. |
| The time bar is not displayed in Search mode. | The timeline can switch between normal and extension mode.In extension mode, the time bar may not be displayed in the current timeline. Switch to normal mode or use the left or right button to navigate through the time bar. |
| The "NO HDD" icon and an error message are displayed. | Check the HDD for connection. If the problem persists in a normal condition, contact the nearest service center to have the HDD checked by the service personnel. |
| I have installed an additional HDD on the DVR but it does not recognize the HDD. | See the compatibility list to check if the additional HDD is supported by the DVR. For the compatibility list, contact the retailer where you purchased the DVR. |
| I have connected an external storage device (external SATA HDD) to the DVR but the DVR seems not to recognize it. | See the compatibility list of external storage devices to check if the connected device is supported by the DVR.For the compatibility list, contact the retailer where you purchased the DVR. |
| If I press the ESC key in full screen mode of the WebViewer, the system does not switch to a normal split mode. | Press the ALT+TAB keys to select 'ACTIVE MOVIE' and press the ESC key again. The system will switch to a normal split mode. |
| I found it difficult to configure the network settings if using the default search, backup and router settings. | For more information, refer to the user manual.If you want to check the basics of the product for a quick start, refer to the quick start guide (backup, search).If you use the router for network connection, refer to the "Connecting to the Internet using the router" section in this manual. |
| I forgot the password. | Contact the DVR administrator for help. |
| Backup data is just not played by the PC or DVR. | When you are backing up data, you have choices about the player either: PC or DVR. Make your selection before proceeding.If you are using the PC to play the data, the format of the backup file should be either SEC.If you are using the DVR for this purpose, formatting backup files should be done by the DVR. |
| My player does not switch to Live mode while in playback. | Press the Stop [■] button on the DVR or the remote control, or click the [■] icon on the launcher to switch to Live mode. |
| Recording does not work. | ·If your player does not display a Live image at all, that indicates recording does not work so first check if you see an image on the screen.·Recording does not work if the recording settings are not properly configured.1) Manual Record: Press the [REC] button on the front panel of the DVR or on the remote control to start recording.2) Scheduled Record: Specify a desired time in Menu - Record - Recording Schedule. Recording will start at the specified time.-Record: Recording will proceed in any conditions at the specified time.-Record: When an event occurs, recording will perform only if the event is of alarm, motion detection, video loss and Tampering DetectionIf there is no event found, recording will not perform.-Record: If there is no event found, Continuous recording will perform. Whereas, if an event occurs, Event recording will perform. |
| The image quality of the recording data is not good. | ·Increase the resolution and quality level in Menu - Record - Quality / Resolution.1) Resolution: Select a bigger size when specifying the recording size. (WD1>4CIF>2CIF>CIF)The recording image in the CIF format shows a deteriorated quality as it is enlarged from a small-sized image.2) Record Quality: Specify a bigger level for the recording quality.·If you increase the resolution and the recording quality, the data size increases accordingly. So the HDD will be filled faster. Overwriting will overwrite the existing data so recording will proceed at a shorter interval. |
Some software components of this product incorporate source code covered under the BSD license as follows.
Component Name License License URL
lighttpd 1.4.26 BSD 2.0 http://www.opensource.org/licenses/bsd-license.html
lighttpd is a secure, fast, compliant, and very flexible web server that has been optimized for high-performance environments. It has a very low memory footprint compared to other web servers and takes care of CPU load.
Its advanced feature-set (FastCGI, CGI, Auth, Output-Compression, URL-Rewriting and many more) make lighttpd the perfect web server software for every server that suffers from load problems.
For more additional information, send email to help.cctv@samsung.com.
Copyright (c) 2004, Kneschke, incremental
Copyright (C) 2004, Kneschke, incremental
All rights reserved.
Redistribution and use in source and binary forms, with or without modification, are permitted provided that the following conditions are met:
- Redistributions of source code must retain the above copyright notice, this list of conditions and the following disclaimer.
- Redistributions in binary form must reproduce the above copyright notice, this list of conditions and the following disclaimer in the documentation and/or other materials provided with the distribution.
- Neither the name of the 'incremental' nor the names of its contributors may be used to endorse or promote products derived from this software without specific prior written permission. THIS SOFTWARE IS PROVIDED BY THE COPYRIGHT HOLDERS AND CONTRIBUTORS "AS IS" AND ANY EXPRESS OR IMPLIED WARRANTIES, INCLUDING, BUT NOT LIMITED TO, THE IMPLIED WARRANTIES OF MERCHANTABILITY AND FITNESS FOR A PARTICULAR PURPOSE ARE DISCLAIMED. IN NO EVENT SHALL THE COPYRIGHT OWNER OR CONTRIBUTORS BE LIABLE FOR ANY DIRECT, INDIRECT, INCIDENTAL, SPECIAL, EXEMPLARY, OR CONSEQUENTIAL DAMAGES (INCLUDING, BUT NOT LIMITED TO, PROCUREMENT OF SUBSTITUTE GOODS OR SERVICES; LOSS OF USE, DATA, OR PROFITS; OR BUSINESS INTERRUPTION) HOWEVER CAUSED AND ON ANY THEORY OF LIABILITY, WHETHER IN CONTRACT, STRICT LIABILITY, OR TORT (INCLUDING NEGLIGENCE OR OTHERWISE) ARISING IN ANY WAY OUT OF THE USE OF THIS SOFTWARE, EVEN IF ADVISED OF THE POSSIBILITY OF SUCH DAMAGE.
Some software components of this product incorporate source code covered under the BSD license as follows.
Component Name License License URL
librtp 1.20 BSD 2.0 http://www.opensource.org/licenses/bsd-license.html
For more additional information, send email to help.cctv@samsung.com.
Copyright (c) 1998-2000 University College London
All rights reserved.
Redistribution and use in source and binary forms, with or without modification, is permitted provided that the following conditions are met:
- Redistributions of source code must retain the above copyright notice, this list of conditions and the following disclaimer.
- Redistributions in binary form must reproduce the above copyright notice, this list of conditions and the following disclaimer in the documentation and/or other materials provided with the distribution.
- All advertising materials mentioning features or use of this software must display the following acknowledgement: This product includes software developed by the Computer Science Department at University College London
- Neither the name of the University nor of the Department may be used to endorse or promote products derived from this software without specific prior written permission.
THIS SOFTWARE IS PROVIDED BY THE AUTHORS AND CONTRIBUTORS "AS IS" AND ANY EXPRESSED OR IMPLIED WARRANTIES, INCLUDING, BUT NOT LIMITED TO, THE IMPLIED WARRANTIES OF MERCHANTABILITY AND FITNESS FOR A PARTICULAR PURPOSE ARE DISCLAIMED. IN NO EVENT SHALL THE AUTHORS OR CONTRIBUTORS BE LIABLE FOR ANY DIRECT, INDIRECT, INCIDENTAL, SPECIAL, EXEMPLARY, OR CONSEQUENTIAL DAMAGES (INCLUDING, BUT NOT LIMITED TO, PROCUREMENT OF SUBSTITUTE GOODS OR SERVICES; LOSS OF USE, DATA, OR PROFITS; OR BUSINESS INTERRUPTION) HOWEVER CAUSED AND ON ANY THEORY OF LIABILITY, WHETHER IN CONTRACT, STRICT LIABILITY, OR TORT (INCLUDING NEGLIGENCE OR OTHERWISE) ARISING IN ANY WAY OUT OF THE USE OF THIS SOFTWARE, EVEN IF ADVISED OF THE POSSIBILITY OF SUCH DAMAGE.
Some software components of this product incorporate source code covered under the BSD license as follows.
Component Name License License URL
net-snmp-5.4.1 BSD http://www.net-snmp.org/about/license.html
Simple Network Management Protocol (SNMP) is an Internet standard protocol for managing devices on IP networks. It is used mostly in network management systems to monitor the devices attached to the network for conditions that need administrative attention. Net-SNMP is a suite of applications used to implement SNMP v1, SNMP v2c and SNMP v3 using both IPv4 and IPv6.
For more additional information, send email to help.cctv@samsung.com.
Various copyrights apply to this package, listed in various separate parts below. Please make sure that you read all the parts.
Part 1: CMU/UCD copyright notice: (BSD like)
Copyright 1989, 1991, 1992 by Carnegie Mellon University
Derivative Work - 1996, 1998-2000
Copyright 1996, 1998-2000 The Regents of the University of California
All Rights Reserved
Permission to use, copy, modify and distribute this software and its documentation for any purpose and without fee is hereby granted, provided that the above copyright notice appears in all copies and that both that copyright notice and this permission notice appear in supporting documentation, and that the name of CMU and The Regents of the University of California not be used in advertising or
publicity pertaining to distribution of the software without specific written permission.
CMU AND THE REGENTS OF THE UNIVERSITY OF CALIFORNIA DISCLAIM ALL WARRANTIES WITH REGARD TO THIS SOFTWARE, INCLUDING ALL IMPLIED WARRANTIES OF MERCHANTABILITY AND FITNESS. IN NO EVENT SHALL CMU OR THE REGENTS OF THE UNIVERSITY OF CALIFORNIA BE LIABLE FOR ANY SPECIAL, INDIRECT OR CONSEQUENTIAL DAMAGES OR ANY DAMAGES WHATSOEVER RESULTING FROM THE LOSS OF USE, DATA OR PROFITS, WHETHER IN AN ACTION OF CONTRACT, NEGLIGENCE OR OTHER TORTIOUS ACTION, ARISING OUT OF OR IN CONNECTION WITH THE USE OR PERFORMANCE OF THIS SOFTWARE.
Part 2: Networks Associates Technology, Inc copyright notice (BSD)
Copyright (c) 2001-2003, Networks Associates Technology, Inc. All rights reserved.
Redistribution and use in source and binary forms, with or without modification, are permitted provided that the following conditions are met:
- Redistributions of source code must retain the above copyright notice, this list of conditions and the following disclaimer.
- Redistributions in binary form must reproduce the above copyright notice, this list of conditions and the following disclaimer in the documentation and/or other materials provided with the distribution
- Neither the name of the Networks Associates Technology, Inc nor the names of its contributors may be used to endorse or promote products derived from this software without specific prior written permission.
THIS SOFTWARE IS PROVIDED BY THE COPYRIGHT HOLDERS AND CONTRIBUTORS "AS IS" AND ANY EXPRESS OR IMPLIED WARRANTIES, INCLUDING, BUT NOT LIMITED TO, THE IMPLIED WARRANTIES OF MERCHANTABILITY AND FITNESS FOR A PARTICULAR PURPOSE ARE DISCLAIMED. IN NO EVENT SHALL THE COPYRIGHT HOLDERS OR CONTRIBUTORS BE LIABLE FOR ANY DIRECT, INDIRECT, INCIDENTAL, SPECIAL, EXEMPLARY, OR CONSEQUENTIAL DAMAGES (INCLUDING, BUT NOT LIMITED TO, PROCUREMENT OF SUBSTITUTE GOODS OR SERVICES; LOSS OF USE, DATA, OR PROFITS; OR BUSINESS INTERRUPTION) HOWEVER CAUSED AND ON ANY THEORY OF LIABILITY, WHETHER IN CONTRACT, STRICT LIABILITY, OR TORT (INCLUDING NEGLIGENCE OR OTHERWISE) ARISING IN ANY WAY OUT OF THE USE OF THIS SOFTWARE, EVEN IF ADVISED OF THE POSSIBILITY OF SUCH DAMAGE.
Part 3: Cambridge Broadband Ltd. copyright notice (BSD)
Portions of this code are copyright (c) 2001-2003, Cambridge Broadband Ltd.
All rights reserved.
Redistribution and use in source and binary forms, with or without modification, are permitted provided that the following conditions are met:
- Redistributions of source code must retain the above copyright notice, this list of conditions and the following disclaimer.
- Redistributions in binary form must reproduce the above copyright notice, this list of conditions and the following disclaimer in the documentation and/or other materials provided with the distribution.
- The name of Cambridge Broadband Ltd. may not be used to endorse or promote products derived from this software without specific prior written permission.
THIS SOFTWARE IS PROVIDED BY THE COPYRIGHT HOLDER "AS IS" AND ANY EXPRESS OR IMPLIED WARRANTIES, INCLUDING, BUT NOT LIMITED TO, THE IMPLIED WARRANTIES OF MERCHANTABILITY AND FITNESS FOR A PARTICULAR PURPOSE ARE DISCLAIMED. IN NO EVENT SHALL THE COPYRIGHT HOLDER BE LIABLE FOR ANY DIRECT, INDIRECT, INCIDENTAL, SPECIAL, EXEMPLARY, OR CONSEQUENTIAL DAMAGES (INCLUDING, BUT NOT LIMITED TO, PROCUREMENT OF SUBSTITUTE GOODS OR SERVICES; LOSS OF USE, DATA, OR PROFITS; OR BUSINESS INTERRUPTION) HOWEVER CAUSED AND ON ANY THEORY OF LIABILITY, WHETHER IN CONTRACT, STRICT LIABILITY, OR TORT (INCLUDING NEGLIGENCE OR OTHERWISE) ARISING IN ANY WAY OUT OF THE USE OF THIS SOFTWARE, EVEN IF ADVISED OF THE POSSIBILITY OF SUCH DAMAGE.
Part 4: Sun Microsystems, Inc. copyright notice (BSD)
Copyright © 2003 Sun Microsystems, Inc., 4150 Network Circle, Santa Clara, California 95054, U.S.A.
All rights reserved.
Use is subject to license terms below. This distribution may include materials developed by third parties. Sun, Sun Microsystems, the Sun logo and Solaris are trademarks or registered trademarks of Sun Microsystems, Inc. in the U.S. and other countries. Redistribution and use in source and binary forms, with or without modification, are permitted provided that the following conditions are met:
- Redistributions of source code must retain the above copyright notice, this list of conditions and the following disclaimer.
- Redistributions in binary form must reproduce the above copyright notice, this list of conditions and the following disclaimer in the documentation and/or other materials provided with the distribution.
- Neither the name of the Sun Microsystems, Inc. nor the names of its contributors may be used to endorse or promote products derived from this software without specific prior written permission. THIS SOFTWARE IS PROVIDED BY THE COPYRIGHT HOLDERS AND CONTRIBUTORS "AS IS" AND ANY EXPRESS OR IMPLIED WARRANTIES, INCLUDING, BUT NOT LIMITED TO, THE IMPLIED WARRANTIES OF MERCHANTABILITY AND FITNESS FOR A PARTICULAR PURPOSE ARE DISCLAIMED. IN NO EVENT SHALL THE COPYRIGHT HOLDERS OR CONTRIBUTORS BE LIABLE FOR ANY DIRECT, INDIRECT, INCIDENTAL, SPECIAL, EXEMPLARY, OR CONSEQUENTIAL DAMAGES (INCLUDING, BUT NOT LIMITED TO, PROCUREMENT OF SUBSTITUTE GOODS OR SERVICES; LOSS OF USE, DATA, OR PROFITS; OR BUSINESS INTERRUPTION) HOWEVER CAUSED AND ON ANY THEORY OF LIABILITY, WHETHER IN CONTRACT, STRICT LIABILITY, OR TORT (INCLUDING NEGLIGENCE OR OTHERWISE) ARISING IN ANY WAY OUT OF THE USE OF THIS SOFTWARE, EVEN IF ADVISED OF THE POSSIBILITY OF SUCH DAMAGE.
Part 5: Sparta, Inc copyright notice (BSD)
Copyright (c) 2003-2009, Sparta, Inc
All rights reserved.
Redistribution and use in source and binary forms, with or without modification, are permitted provided that the following conditions are met:
- Redistributions of source code must retain the above copyright notice, this list of conditions and the following disclaimer.
- Redistributions in binary form must reproduce the above copyright notice, this list of conditions and the following disclaimer in the documentation and/or other materials provided with the distribution.
- Neither the name of Sparta, Inc nor the names of its contributors may be used to endorse or promote products derived from this software without specific prior written permission.
THIS SOFTWARE IS PROVIDED BY THE COPYRIGHT HOLDERS AND CONTRIBUTORS "AS IS" AND ANY EXPRESS OR IMPLIED WARRANTIES, INCLUDING, BUT NOT LIMITED TO, THE IMPLIED WARRANTIES OF MERCHANTABILITY AND FITNESS FOR A PARTICULAR PURPOSE ARE DISCLAIMED. IN NO EVENT SHALL THE COPYRIGHT HOLDERS OR CONTRIBUTORS BE LIABLE FOR ANY DIRECT, INDIRECT, INCIDENTAL, SPECIAL, EXEMPLARY, OR CONSEQUENTIAL DAMAGES (INCLUDING, BUT NOT LIMITED TO, PROCUREMENT OF SUBSTITUTE GOODS OR SERVICES; LOSS OF USE, DATA, OR PROFITS; OR BUSINESS INTERRUPTION) HOWEVER CAUSED AND ON ANY THEORY OF LIABILITY, WHETHER IN CONTRACT, STRICT LIABILITY, OR TORT (INCLUDING NEGLIGENCE OR OTHERWISE) ARISING IN ANY WAY OUT OF THE USE OF THIS SOFTWARE, EVEN IF ADVISED OF THE POSSIBILITY OF SUCH DAMAGE.
Part 6: Cisco/BUPTNIC copyright notice (BSD)
Copyright (c) 2004, Cisco, Inc and Information Network Center of Beijing University of Posts and Telecommunications.
All rights reserved.
Redistribution and use in source and binary forms, with or without modification, are permitted provided that the following conditions are met:
- Redistributions of source code must retain the above copyright notice, this list of conditions and the following disclaimer.
- Redistributions in binary form must reproduce the above copyright notice, this list of conditions and the following disclaimer in the documentation and/or other materials provided with the distribution.
- Neither the name of Cisco, Inc, Beijing University of Posts and Telecommunications, nor the names of their contributors may be used to endorse or promote products derived from this software without specific prior written permission.
THIS SOFTWARE IS PROVIDED BY THE COPYRIGHT HOLDERS AND CONTRIBUTORS "AS IS" AND ANY EXPRESS OR IMPLIED WARRANTIES, INCLUDING, BUT NOT LIMITED TO, THE IMPLIED WARRANTIES OF MERCHANTABILITY AND FITNESS FOR A PARTICULAR PURPOSE ARE DISCLAIMED. IN NO EVENT SHALL THE COPYRIGHT HOLDERS OR CONTRIBUTORS BE LIABLE FOR ANY DIRECT, INDIRECT, INCIDENTAL, SPECIAL, EXEMPLARY, OR CONSEQUENTIAL DAMAGES (INCLUDING, BUT NOT LIMITED TO, PROCUREMENT OF SUBSTITUTE GOODS OR SERVICES; LOSS OF USE, DATA, OR PROFITS; OR BUSINESS INTERRUPTION) HOWEVER CAUSED AND ON ANY THEORY OF LIABILITY, WHETHER IN CONTRACT, STRICT LIABILITY, OR TORT (INCLUDING NEGLIGENCE OR OTHERWISE) ARISING IN ANY WAY OUT OF THE USE OF THIS SOFTWARE, EVEN IF ADVISED OF THE POSSIBILITY OF SUCH DAMAGE.
Part 7: Fabasoft R&D Software GmbH & Co KG copyright notice (BSD)
Copyright (c) Fabasoft R&D Software GmbH & Co KG, 2003 oss@fabasoft.com
Author: Bernhard Penz
Redistribution and use in source and binary forms, with or without modification, are permitted provided that the following conditions are met:
- Redistributions of source code must retain the above copyright notice, this list of conditions and the following disclaimer.
- Redistributions in binary form must reproduce the above copyright notice, this list of conditions and the following disclaimer in the documentation and/or other materials provided with the distribution.
- The name of Fabasoft R&D Software GmbH & Co KG or any of its subsidiaries, brand or product names may not be used to endorse or promote products derived from this software without specific prior written permission.
THIS SOFTWARE IS PROVIDED BY THE COPYRIGHT HOLDER "AS IS" AND ANY EXPRESS OR IMPLIED WARRANTIES, INCLUDING, BUT NOT LIMITED TO, THE IMPLIED WARRANTIES OF MERCHANTABILITY AND FITNESS FOR A PARTICULAR PURPOSE ARE DISCLAIMED. IN NO EVENT SHALL THE COPYRIGHT HOLDER BE LIABLE FOR ANY DIRECT, INDIRECT, INCIDENTAL, SPECIAL, EXEMPLARY, OR CONSEQUENTIAL DAMAGES (INCLUDING, BUT NOT LIMITED TO, PROCUREMENT OF SUBSTITUTE GOODS OR SERVICES; LOSS OF USE, DATA, OR PROFITS; OR BUSINESS INTERRUPTION) HOWEVER CAUSED AND ON ANY THEORY OF LIABILITY, WHETHER IN CONTRACT, STRICT LIABILITY, OR TORT (INCLUDING NEGLIGENCE OR OTHERWISE) ARISING IN ANY WAY OUT OF THE USE OF THIS SOFTWARE, EVEN IF ADVISED OF THE POSSIBILITY OF SUCH DAMAGE.
Part 8: Apple Inc. copyright notice (BSD)
Copyright (c) 2007 Apple Inc.
All rights reserved.
Redistribution and use in source and binary forms, with or without modification, are permitted provided that the following conditions are met:
- Redistributions of source code must retain the above copyright notice, this list of conditions and the following disclaimer.
- Redistributions in binary form must reproduce the above copyright notice, this list of conditions and the following disclaimer in the documentation and/or other materials provided with the distribution.
- Neither the name of Apple Inc. ("Apple") nor the names of its contributors may be used to endorse or promote products derived from this software without specific prior written permission.
THIS SOFTWARE IS PROVIDED BY APPLE AND ITS CONTRIBUTORS "AS IS" AND ANY EXPRESS OR IMPLIED WARRANTIES, INCLUDING, BUT NOT LIMITED TO, THE IMPLIED WARRANTIES OF MERCHANTABILITY AND FITNESS FOR A PARTICULAR PURPOSE ARE DISCLAIMED. IN NO EVENT SHALL APPLE OR ITS CONTRIBUTORS BE LIABLE FOR ANY DIRECT, INDIRECT, INCIDENTAL, SPECIAL, EXEMPLARY, OR CONSEQUENTIAL DAMAGES (INCLUDING, BUT NOT LIMITED TO, PROCUREMENT OF SUBSTITUTE GOODS OR SERVICES; LOSS OF USE, DATA, OR PROFITS; OR BUSINESS INTERRUPTION) HOWEVER CAUSED AND ON ANY THEORY OF LIABILITY, WHETHER IN CONTRACT, STRICT LIABILITY, OR TORT (INCLUDING NEGLIGENCE OR OTHERWISE) ARISING IN ANY WAY OUT OF THE USE OF THIS SOFTWARE, EVEN IF ADVISED OF THE POSSIBILITY OF SUCH DAMAGE.
Part 9: ScienceLogic, LLC copyright notice (BSD)
Copyright (c) 2009, ScienceLogic, LLC
All rights reserved.
Redistribution and use in source and binary forms, with or without modification, are permitted provided that the following conditions are met:
- Redistributions of source code must retain the above copyright notice, this list of conditions and the following disclaimer.
- Redistributions in binary form must reproduce the above copyright notice, this list of conditions and the following disclaimer in the documentation and/or other materials provided with the distribution.
- Neither the name of ScienceLogic, LLC nor the names of its contributors may be used to endorse or promote products derived from this software without specific prior written permission.
THIS SOFTWARE IS PROVIDED BY THE COPYRIGHT HOLDERS AND CONTRIBUTORS "AS IS" AND ANY EXPRESS OR IMPLIED WARRANTIES, INCLUDING, BUT NOT LIMITED TO, THE IMPLIED WARRANTIES OF MERCHANTABILITY AND FITNESS FOR A PARTICULAR PURPOSE ARE DISCLAIMED. IN NO EVENT SHALL THE COPYRIGHT HOLDERS OR CONTRIBUTORS BE LIABLE FOR ANY DIRECT, INDIRECT, INCIDENTAL, SPECIAL, EXEMPLARY, OR CONSEQUENTIAL DAMAGES (INCLUDING, BUT NOT LIMITED TO, PROCUREMENT OF SUBSTITUTE GOODS OR SERVICES; LOSS OF USE, DATA, OR PROFITS; OR BUSINESS INTERRUPTION) HOWEVER CAUSED AND ON ANY THEORY OF LIABILITY, WHETHER IN CONTRACT, STRICT LIABILITY, OR TORT (INCLUDING NEGLIGENCE OR OTHERWISE) ARISING IN ANY WAY OUT OF THE USE OF THIS SOFTWARE, EVEN IF ADVISED OF THE POSSIBILITY OF SUCH DAMAGE.
The software included in this product contains copyrighted software that is licensed under the GPL/LGPL. You may obtain the complete Corresponding Source code from us for a period of three years after our last shipment of this product by sending email to help.cctv@samsung.com. If you want to obtain the complete Corresponding Source code in the physical medium such as CD-ROM, the cost of physically performing source distribution might be charged.
- GPL Software: linux kernel, Sysvinit, dosfstools, wget, msmtp, busybox, cdrtools, dvd+rw-tools, iconv, smartctl, uboot, minicom, openssl, bash, lm_sensors. LGPL Software: glibc, vmstat, inetutils.
- OpenSSL License: OpenSSL
- Boost Software License: Boost-1.43.0 (http://www.boost.org/)
GNU GENERAL PUBLIC LICENSE
Version 2, June 1991
Copyright (C) 1989, 1991 Free Software Foundation, Inc.
51 Franklin Street, Fifth Floor, Boston, MA 02110-1301, USA
Everyone is permitted to copy and distribute verbatim copies of this license document, but changing it is not allowed.
Preamble
The licenses for most software are designed to take away your freedom to share and change it. By contrast, the GNU General Public License is intended to guarantee your freedom to share and change free software to make sure the software is free for all its users. This General Public License applies to most of the Free Software Foundation's software and to any other program whose authors commit to using it. (Some other Free Software Foundation software is covered by the GNU Lesser General Public License instead.) You can apply it to your programs, too.
When we speak of free software, we are referring to freedom, not price. Our General Public Licenses are designed to make sure that you have the freedom to distribute copies of free software (and charge for this service if you wish), that you receive source code or can get it if you want it, that you can change the software or use pieces of it in new free programs; and that you know you can do these things.
To protect your rights, we need to make restrictions that forbid anyone to deny you these rights or to ask you to surrender the rights. These restrictions translate to certain responsibilities for you if you distribute copies of the software, or if you modify it.
For example, if you distribute copies of such a program, whether gratis or for a fee, you must give the recipients all the rights that you have. You must make sure that they, too, receive or can get the source code. And you must show them these terms so they know their rights.
We protect your rights with two steps:
(1) copyright the software, and (2) offer you this license which gives you legal permission to copy, distribute and/or modify the software.
Also, for each author's protection and ours, we want to make certain that everyone understands that there is no warranty for this free software. If the software is modified by someone else and passed on, we want its recipients to know that what they have is not the original, so that any problems introduced by others will not reflect on the original authors' reputations.
Finally, any free program is threatened constantly by software patents. We wish to avoid the danger that redistributors of a free program will individually obtain patent licenses, in effect making the program proprietary. To prevent this, we have made it clear that any patent must be licensed for everyone's free use or not licensed at all. The precise terms and conditions for copying, distribution and modification follow.
TERMS AND CONDITIONS FOR COPYING, DISTRIBUTION AND MODIFICATION
Version 2, June 1991
Copyright (C) 1989, 1991 Free Software Foundation, Inc. 51 Franklin S
- This License applies to any program or other work which contains a notice placed by the copyright holder saying it may be distributed under the terms of this General Public License. The "Program", below, refers to any such program or work, and a "work based on the Program" means either the Program or any derivative work under copyright law: that is to say, a work containing the Program or a portion of it, either verbatim or with modifications and/or translated into another language. (Hereinafter, translation is included without limitation in the term "modification".) Each licensee is addressed as "you".
Activities other than copying, distribution and modification are not covered by this License; they are outside its scope. The act of running the Program is not restricted, and the output from the Program is covered only if its contents constitute a work based on the Program (independent of having been made by running the Program). Whether that is true depends on what the Program does.
- You may copy and distribute verbatim copies of the Program's source code as you receive it, in any medium, provided that you
conspicuously and appropriately publish on each copy an appropriate copyright notice and disclaimer of warranty; keep intact all the notices that refer to this License and to the absence of any warranty; and give any other recipients of the Program a copy of this License along with the Program.
You may charge a fee for the physical act of transferring a copy, and you may at your option offer warranty protection in exchange for a fee.
- You may modify your copy or copies of the Program or any portion of it, thus forming a work based on the Program, and copy and distribute such modifications or work under the terms of Section 1 above, provided that you also meet all of these conditions:
a) You must cause the modified files to carry prominent notices stating that you changed the files and the date of any change. b) You must cause any work that you distribute or publish, that in whole or in part contains or is derived from the Program or any part thereof, to be licensed as a whole at no charge to all third parties under the terms of this License. c) If the modified program normally reads commands interactively when run, you must cause it, when started running for such interactive use in the most ordinary way, to print or display an announcement including an appropriate copyright notice and a notice that there is no warranty (or else, saying that you provide a warranty) and that users may redistribute the program under these conditions, and telling the user how to view a copy of this License. (Exception: if the Program itself is interactive but does not normally print such an announcement, your work based on the Program is not required to print an announcement.)
These requirements apply to the modified work as a whole. If identifiable sections of that work are not derived from the Program, and can be reasonably considered independent and separate works in themselves, then this License, and its terms, do not apply to those sections when you distribute them as separate works. But when you distribute the same sections as part of a whole which is a work based on the Program, the distribution of the whole must be on the terms of this License, whose permissions for other licensees extend to the entire whole, and thus to each and every part regardless of who wrote it.
Thus, it is not the intent of this section to claim rights or contest your rights to work written entirely by you; rather, the intent is to exercise the right to control the distribution of derivative or collective works based on the Program.
In addition, mere aggregation of another work not based on the Program with the Program (or with a work based on the Program) on a volume of a storage or distribution medium does not bring the other work under the scope of this License.
- You may copy and distribute the Program (or a work based on it, under Section 2) in object code or executable form under the terms of Sections 1 and 2 above provided that you also do one of the following:
a) Accompany it with the complete corresponding machine-readable source code, which must be distributed under the terms of Sections 1 and 2 above on a medium customarily used for software interchange; or, b) Accompany it with a written offer, valid for at least three years, to give any third party, for a charge no more than your cost of physically performing source distribution, a complete machine-readable copy of the corresponding source code, to be distributed under the terms of Sections 1 and 2 above on a medium customarily used for software interchange; or, c) Accompany it with the information you received as to the offer to distribute corresponding source code. (This alternative is allowed only for noncommercial distribution and only if you received the program in object code or executable form with such an offer, in accord with Subsection b above.)
The source code for a work means the preferred form of the work for making modifications to it. For an executable work, complete source code means all the source code for all modules it contains, plus any associated interface definition files, plus the scripts used to control compilation and installation of the executable. However, as a special exception, the source code distributed need not include anything that is normally distributed (in either source or binary form) with the major components (compiler, kernel, and so on) of the operating system on which the executable runs, unless that component itself accompanies the executable.
If distribution of executable or object code is made by offering access to copy from a designated place, then offering equivalent access to copy the source code from the same place counts as distribution of the source code, even though third parties are not compelled to copy the source along with the object code.
- You may not copy, modify, sublicense, or distribute the Program except as expressly provided under this License. Any attempt otherwise to copy, modify, sublicense or distribute the Program is void, and will automatically terminate your rights under this License. However, parties who have received copies, or rights, from you under this License will not have their licenses terminated so long as such parties remain in full compliance.
- You are not required to accept this License, since you have not signed it. However, nothing else grants you permission to modify or distribute the Program or its derivative works. These actions are prohibited by law if you do not accept this License. Therefore, by modifying or distributing the Program (or any work based on the Program), you indicate your acceptance of this License to do so, and all its terms and conditions for copying, distributing or modifying the Program or works based on it.
- Each time you redistribute the Program (or any work based on the Program), the recipient automatically receives a license from the original licensor to copy, distribute or modify the Program subject to these terms and conditions. You may not impose any further restrictions on the recipients' exercise of the rights granted herein. You are not responsible for enforcing compliance by third parties to this License.
- If, as a consequence of a court judgment or allegation of patent infringement or for any other reason (not limited to patent issues), conditions are imposed on you (whether by court order, agreement or otherwise) that contradict the conditions of this License, they do not excuse you from the conditions of this License. If you cannot distribute so as to satisfy simultaneously your obligations under this License and any other pertinent obligations, then as a consequence you may not distribute the Program at all. For example, if a patent license would not permit royalty-free redistribution of the Program by all those who receive copies directly or indirectly through you, then the only way you could satisfy both it and this License would be to refrain entirely from distribution of the Program.
If any portion of this section is held invalid or unenforceable under any particular circumstance, the balance of the section is intended to apply and the section as a whole is intended to apply in other circumstances.
It is not the purpose of this section to induce you to infringe any patents or other property right claims or to contest validity of any such claims; this section has the sole purpose of protecting the integrity of the free software distribution system, which is implemented by public license practices. Many people have made generous contributions to the wide range of software distributed through that system in reliance on consistent application of that system; it is up to the author/donor to decide if he or she is willing to distribute software through any other system and a licensee cannot impose that choice.
This section is intended to make thoroughly clear what is believed to be a consequence of the rest of this License.
- If the distribution and/or use of the Program is restricted in certain countries either by patents or by copyrighted interfaces, the original copyright holder who places the Program under this License may add an explicit geographical distribution limitation excluding those countries, so that distribution is permitted only in or among countries not thus excluded. In such case, this License incorporates the limitation as if written in the body of this License.
- The Free Software Foundation may publish revised and/or new versions of the General Public License from time to time. Such new versions will be similar in spirit to the present version, but may differ in detail to address new problems or concerns.
Each version is given a distinguishing version number. If the Program specifies a version number of this License which applies to it and "any later version", you have the option of following the terms and conditions either of that version or of any later version published by the Free Software Foundation. If the Program does not specify a version number of this License, you may choose any version ever published by the Free Software Foundation.
- If you wish to incorporate parts of the Program into other free programs whose distribution conditions are different, write to the author to ask for permission. For software which is copyrighted by the Free Software Foundation, write to the Free Software Foundation; we sometimes make exceptions for this. Our decision will be guided by the two goals of preserving the free status of all derivatives of our free software and of promoting the sharing and reuse of software generally.
NO WARRANTY
- BECAUSE THE PROGRAM IS LICENSED FREE OF CHARGE, THERE IS NO WARRANTY FOR THE PROGRAM, TO THE EXTENT PERMITTED BY APPLICABLE LAW. EXCEPT WHEN OTHERWISE STATED IN WRITING THE COPYRIGHT HOLDERS AND/OR OTHER PARTIES PROVIDE THE PROGRAM "AS IS" WITHOUT WARRANTY OF ANY KIND, EITHER EXPRESSED OR IMPLIED, INCLUDING, BUT NOT LIMITED TO, THE IMPLIED WARRANTIES OF MERCHANTABILITY AND FITNESS FOR A PARTICULAR PURPOSE. THE ENTIRE RISK AS TO THE QUALITY AND PERFORMANCE OF THE PROGRAM IS WITH YOU. SHOULD THE PROGRAM PROVE DEFECTIVE, YOU ASSUME THE COST OF ALL NECESSARY SERVICING, REPAIR OR CORRECTION.
- IN NO EVENT UNLESS REQUIRED BY APPLICABLE LAW OR AGREED TO IN WRITING WILL ANY COPYRIGHT HOLDER, OR ANY OTHER PARTY WHO MAY MODIFY AND/OR REDISTRIBUTE THE PROGRAM AS PERMITTED ABOVE, BE LIABLE TO YOU FOR DAMAGES, INCLUDING ANY GENERAL, SPECIAL, INCIDENTAL OR CONSEQUENTIAL DAMAGES ARISING OUT OF THE USE OR INABILITY TO USE THE PROGRAM (INCLUDING BUT NOT LIMITED TO LOSS OF DATA OR DATA BEING RENDERED INACCURATE OR LOSSES SUSTAINED BY YOU OR THIRD PARTIES OR A FAILURE OF THE PROGRAM TO OPERATE WITH ANY OTHER PROGRAMS), EVEN IF SUCH HOLDER OR OTHER PARTY HAS BEEN ADVISED OF THE POSSIBILITY OF SUCH DAMAGES.
END OF TERMS AND CONDITIONS
How to Apply These Terms to Your New Programs
If you develop a new program, and you want it to be of the greatest possible use to the public, the best way to achieve this is to make it free software which everyone can redistribute and change under these terms.
To do so, attach the following notices to the program. It is safest to attach them to the start of each source file to most effectively convey the exclusion of warranty; and each file should have at least the "copyright" line and a pointer to where the full notice is found.
one line to give the program's name and an idea of what it does.
Copyright (C) yyyy name of author
This program is free software; you can redistribute it and/or modify it under the terms of the GNU General Public License as published by the Free Software Foundation; either version 2 of the License, or (at your option) any later version.
This program is distributed in the hope that it will be useful, but WITHOUT ANY WARRANTY; without even the implied warranty of MERCHANTABILITY or FITNESS FOR A PARTICULAR PURPOSE. See the GNU General Public License for more details.
You should have received a copy of the GNU General Public License along with this program; if not, write to the Free Software Foundation, Inc., 51 Franklin Street, Fifth Floor, Boston, MA 02110-1301, USA.
Also add information on how to contact you by electronic and paper mail. If the program is interactive, make it output a short notice like this when it starts in an interactive mode:
Gnomovision version 69, Copyright (C) year name of author Gnomovision comes with ABSOLUTELY NO WARRANTY; for details type 'show w'. This is free software, and you are welcome to redistribute it under certain conditions; type 'show c' for details.
The hypothetical commands 'show w' and 'show c' should show the appropriate parts of the General Public License. Of course, the commands you use may be called something other than 'show w' and 'show c'; they could even be mouse-clicks or menu items--whatever suits your program.
You should also get your employer (if you work as a programmer) or your school, if any, to sign a "copyright disclaimer" for the program, if necessary. Here is a sample; alter the names:
Yoyodyne, Inc., hereby disclaims all copyright interest in the program 'Gnomovision' (which makes passes at compilers) written by James Hacker.
Signature of Ty Coon, 1 April 1989. Ty Coon, President of Vice. This General Public License does not permit incorporating your program into proprietary programs. If your program is a subroutine library, you may consider it more useful to permit linking proprietary applications with the library. If this is what you want to do, use the GNU Lesser General Public License instead of this License.
GNU GENERAL PUBLIC LICENSE
Version 3, 29 June 2007
Copyright © 2007 Free Software Foundation, Inc. http://fsf.org/ Everyone is permitted to copy and distribute verbatim copies of this license document, but changing it is not allowed.
Preamble
The GNU General Public License is a free, copyleft license for software and other kinds of works.
The licenses for most software and other practical works are designed to take away your freedom to share and change the works. By contrast, the GNU General Public License is intended to guarantee your freedom to share and change all versions of a program--to make sure it remains free software for all its users. We, the Free Software Foundation, use the GNU General Public License for most of our software; it applies also to any other work released this way by its authors. You can apply it to your programs, too.
When we speak of free software, we are referring to freedom, not price. Our General Public Licenses are designed to make sure that you have the freedom to distribute copies of free software (and charge for them if you wish), that you receive source code or can get it if you want it, that you can change the software or use pieces of it in new free programs, and that you know you can do these things.
To protect your rights, we need to prevent others from denying you these rights or asking you to surrender the rights. Therefore, you have certain responsibilities if you distribute copies of the software, or if you modify it: responsibilities to respect the freedom of others.
For example, if you distribute copies of such a program, whether gratis or for a fee, you must pass on to the recipients the same freedoms that you received. You must make sure that they, too, receive or can get the source code. And you must show them these terms so they know their rights.
Developers that use the GNU GPL protect your rights with two steps: (1) assert copyright on the software, and (2) offer you this License giving you legal permission to copy, distribute and/or modify it.
For the developers' and authors' protection, the GPL clearly explains that there is no warranty for this free software. For both users' and authors' sake, the GPL requires that modified versions be marked as changed, so that their problems will not be attributed erroneously to authors of previous versions.
Some devices are designed to deny users access to install or run modified versions of the software inside them, although the manufacturer can do so. This is fundamentally incompatible with the aim of protecting users' freedom to change the software. The systematic pattern of such abuse occurs in the area of products for individuals to use, which is precisely where it is most unacceptable. Therefore, we have designed this version of the GPL to prohibit the practice for those products. If such problems arise substantially in other domains, we stand ready to extend this provision to those domains in future versions of the GPL, as needed to protect the freedom of users.
Finally, every program is threatened constantly by software patents. States should not allow patents to restrict development and use of software on general-purpose computers, but in those that do, we wish to avoid the special danger that patents applied to a free program could make it effectively proprietary. To prevent this, the GPL assures that patents cannot be used to render the program non-free.
The precise terms and conditions for copying, distribution and modification follow.
TERMS AND CONDITIONS
0. Definitions.
"This License" refers to version 3 of the GNU General Public License.
"Copyright" also means copyright-like laws that apply to other kinds of works, such as semiconductor masks.
"The Program" refers to any copyrightable work licensed under this License. Each licensee is addressed as "you". "Licensees" and "recipients" may be individuals or organizations.
To "modify" a work means to copy from or adapt all or part of the work in a fashion requiring copyright permission, other than the making of an exact copy. The resulting work is called a "modified version" of the earlier work or a work "based on" the earlier work.
A "covered work" means either the unmodified Program or a work based on the Program.
To "propagate" a work means to do anything with it that, without permission, would make you directly or secondarily liable for infringement under applicable copyright law, except executing it on a computer or modifying a private copy. Propagation includes copying, distribution (with or without modification), making available to the public, and in some countries other activities as well.
To "convey" a work means any kind of propagation that enables other parties to make or receive copies. Mere interaction with a user through a computer network, with no transfer of a copy, is not conveying.
An interactive user interface displays "Appropriate Legal Notices" to the extent that it includes a convenient and prominently visible feature that (1) displays an appropriate copyright notice, and (2) tells the user that there is no warranty for the work (except to the extent that warranties are provided), that licensees may convey the work under this License, and how to view a copy of this License. If the interface presents a list of user commands or options, such as a menu, a prominent item in the list meets this criterion.
1. Source Code.
The “source code” for a work means the preferred form of the work for making modifications to it. “Object code” means any non-source form of a work.
A “Standard Interface” means an interface that either is an official standard defined by a recognized standards body, or, in the case of interfaces specified for a particular programming language, one that is widely used among developers working in that language.
The “System Libraries” of an executable work include anything, other than the work as a whole, that (a) is included in the normal form of packaging a Major Component, but which is not part of that Major Component, and (b) serves only to enable use of the work with that Major Component, or to implement a Standard Interface for which an implementation is available to the public in source code form. A “Major Component”, in this context, means a major essential component (kernel, window system, and so on) of the specific operating system (if any) on which the executable work runs, or a compiler used to produce the work, or an object code interpreter used to run it.
The "Corresponding Source" for a work in object code form means all the source code needed to generate, install, and (for an executable work) run the object code and to modify the work, including scripts to control those activities. However, it does not include the work's System Libraries, or general-purpose tools or generally available free programs which are used unmodified in performing those activities but which are not part of the work. For example, Corresponding Source includes interface definition files associated with source files for the work, and the source code for shared libraries and dynamically linked subprograms that the work is specifically designed to require, such as by intimate data communication or control flow between those subprograms and other parts of the work.
The Corresponding Source need not include anything that users can regenerate automatically from other parts of the Corresponding Source.
The Corresponding Source for a work in source code form is that same work.
2. Basic Permissions.
All rights granted under this License are granted for the term of copyright on the Program, and are irrevocable provided the stated conditions are met. This License explicitly affirms your unlimited permission to run the unmodified Program. The output from running a covered work is covered by this License only if the output, given its content, constitutes a covered work. This License acknowledges your rights of fair use or other equivalent, as provided by copyright law.
You may make, run and propagate covered works that you do not convey, without conditions so long as your license otherwise remains in force. You may convey covered works to others for the sole purpose of having them make modifications exclusively for you, or provide you with facilities for running those works, provided that you comply with the terms of this License in conveying all material for which you do not control copyright. Those thus making or running the covered works for you must do so exclusively on your behalf, under your direction and control, on terms that prohibit them from making any copies of your copyrighted material outside their relationship with you.
Conveying under any other circumstances is permitted solely under the conditions stated below. Sublicensing is not allowed; section 10 makes it unnecessary.
3. Protecting Users' Legal Rights From Anti-Circumvention Law.
No covered work shall be deemed part of an effective technological measure under any applicable law fulfilling obligations under article 11 of the WIPO copyright treaty adopted on 20 December 1996, or similar laws prohibiting or restricting circumvention of such measures.
When you convey a covered work, you waive any legal power to forbid circumvention of technological measures to the extent such circumvention is effected by exercising rights under this License with respect to the covered work, and you disclaim any intention to limit operation or modification of the work as a means of enforcing, against the work's users, your or third parties' legal rights to forbid circumvention of technological measures.
4. Conveying Verbatim Copies.
You may convey verbatim copies of the Program's source code as you receive it, in any medium, provided that you conspicuously and appropriately publish on each copy an appropriate copyright notice; keep intact all notices stating that this License and any non-permissive terms added in accord with section 7 apply to the code; keep intact all notices of the absence of any warranty; and give all recipients a copy of this License along with the Program.
You may charge any price or no price for each copy that you convey, and you may offer support or warranty protection for a fee.
5. Conveying Modified Source Versions.
You may convey a work based on the Program, or the modifications to produce it from the Program, in the form of source code under the terms of section 4, provided that you also meet all of these conditions:
a) The work must carry prominent notices stating that you modified it, and giving a relevant date. b) The work must carry prominent notices stating that it is released under this License and any conditions added under section 7. This requirement modifies the requirement in section 4 to "keep intact all notices". c) You must license the entire work, as a whole, under this License to anyone who comes into possession of a copy. This License will therefore apply, along with any applicable section 7 additional terms, to the whole of the work, and all its parts, regardless of how they are packaged. This License gives no permission to license the work in any other way, but it does not invalidate such permission if you have separately received it. d) If the work has interactive user interfaces, each must display Appropriate Legal Notices; however, if the Program has interactive interfaces that do not display Appropriate Legal Notices, your work need not make them do so.
A compilation of a covered work with other separate and independent works, which are not by their nature extensions of the covered work, and which are not combined with it such as to form a larger program, in or on a volume of a storage or distribution medium, is called an "aggregate" if the compilation and its resulting copyright are not used to limit the access or legal rights of the compilation's users beyond what the individual works permit. Inclusion of a covered work in an aggregate does not cause this License to apply to the other parts of the aggregate.
6. Conveying Non-Source Forms.
You may convey a covered work in object code form under the terms of sections 4 and 5, provided that you also convey the machine-readable Corresponding Source under the terms of this License, in one of these ways:
a) Convey the object code in, or embodied in, a physical product (including a physical distribution medium), accompanied by the Corresponding Source fixed on a durable physical medium customarily used for software interchange. b) Convey the object code in, or embodied in, a physical product (including a physical distribution medium), accompanied by a written offer, valid for at least three years and valid for as long as you offer spare parts or customer support for that product model, to give anyone who possesses the object code either (1) a copy of the Corresponding Source for all the software in the product that is covered by this License, on a durable physical medium customarily used for software interchange, for a price no more than your reasonable cost of physically performing this conveying of source, or (2) access to copy the Corresponding Source from a network server at no charge. c) Convey individual copies of the object code with a copy of the written offer to provide the Corresponding Source. This alternative is allowed only occasionally and noncommercially, and only if you received the object code with such an offer, in accord with subsection 6b. d) Convey the object code by offering access from a designated place (gratis or for a charge), and offer equivalent access to the Corresponding Source in the same way through the same place at no further charge. You need not require recipients to copy the Corresponding Source along with the object code. If the place to copy the object code is a network server, the Corresponding Source may be on a different server (operated by you or a third party) that supports equivalent copying facilities, provided you maintain clear directions next to the object code saying where to find the Corresponding Source. Regardless of what server hosts the Corresponding Source, you remain obligated to ensure that it is available for as long as needed to satisfy these requirements. e) Convey the object code using peer-to-peer transmission, provided you inform other peers where the object code and Corresponding Source of the work are being offered to the general public at no charge under subsection 6d.
A separable portion of the object code, whose source code is excluded from the Corresponding Source as a System Library, need not be included in conveying the object code work.
A "User Product" is either (1) a "consumer product", which means any tangible personal property which is normally used for personal, family, or household purposes, or (2) anything designed or sold for incorporation into a dwelling. In determining whether a product is a consumer product, doubtful cases shall be resolved in favor of coverage. For a particular product received by a particular user, "normally used" refers to a typical or common use of that class of product, regardless of the status of the particular user or of the way in which the particular user actually uses, or expects or is expected to use, the product. A product is a consumer product regardless of whether the product has
substantial commercial, industrial or non-consumer uses, unless such uses represent the only significant mode of use of the product.
"Installation Information" for a User Product means any methods, procedures, authorization keys, or other information required to install and execute modified versions of a covered work in that User Product from a modified version of its Corresponding Source. The information must suffice to ensure that the continued functioning of the modified object code is in no case prevented or interfered with solely because modification has been made.
If you convey an object code work under this section in, or with, or specifically for use in, a User Product, and the conveying occurs as part of a transaction in which the right of possession and use of the User Product is transferred to the recipient in perpetuity or for a fixed term (regardless of how the transaction is characterized), the Corresponding Source conveyed under this section must be accompanied by the Installation Information. But this requirement does not apply if neither you nor any third party retains the ability to install modified object code on the User Product (for example, the work has been installed in ROM).
The requirement to provide Installation Information does not include a requirement to continue to provide support service, warranty, or updates for a work that has been modified or installed by the recipient, or for the User Product in which it has been modified or installed. Access to a network may be denied when the modification itself materially and adversely affects the operation of the network or violates the rules and protocols for communication across the network.
Corresponding Source conveyed, and Installation Information provided, in accord with this section must be in a format that is publicly documented (and with an implementation available to the public in source code form), and must require no special password or key for unpacking, reading or copying.
7. Additional Terms.
“Additional permissions” are terms that supplement the terms of this License by making exceptions from one or more of its conditions. Additional permissions that are applicable to the entire Program shall be treated as though they were included in this License, to the extent that they are valid under applicable law. If additional permissions apply only to part of the Program, that part may be used separately under those permissions, but the entire Program remains governed by this License without regard to the additional permissions.
When you convey a copy of a covered work, you may at your option remove any additional permissions from that copy, or from any part of it. (Additional permissions may be written to require their own removal in certain cases when you modify the work.) You may place additional permissions on material, added by you to a covered work, for which you have or can give appropriate copyright permission.
Notwithstanding any other provision of this License, for material you add to a covered work, you may (if authorized by the copyright holders of that material) supplement the terms of this License with terms:
a) Disclaiming warranty or limiting liability differently from the terms of sections 15 and 16 of this License; or b) Requiring preservation of specified reasonable legal notices or author attributions in that material or in the Appropriate Legal Notices displayed by works containing it; or c) Prohibiting misrepresentation of the origin of that material, or requiring that modified versions of such material be marked in reasonable ways as different from the original version; or d) Limiting the use for publicity purposes of names of licensors or authors of the material; or e) Declining to grant rights under trademark law for use of some trade names, trademarks, or service marks; or
f) Requiring indemnification of licensors and authors of that material by anyone who conveys the material (or modified versions of it) with contractual assumptions of liability to the recipient, for any liability that these contractual assumptions directly impose on those licensors and authors.
All other non-permissive additional terms are considered “further restrictions” within the meaning of section 10. If the Program as you received it, or any part of it, contains a notice stating that it is governed by this License along with a term that is a further restriction, you may remove that term. If a license document contains a further restriction but permits relicensing or conveying under this License, you may add to a covered work material governed by the terms of that license document, provided that the further restriction does not survive such relicensing or conveying.
If you add terms to a covered work in accord with this section, you must place, in the relevant source files, a statement of the additional terms that apply to those files, or a notice indicating where to find the applicable terms.
Additional terms, permissive or non-permissive, may be stated in the form of a separately written license, or stated as exceptions; the above requirements apply either way.
8. Termination.
You may not propagate or modify a covered work except as expressly provided under this License. Any attempt otherwise to propagate or modify it is void, and will automatically terminate your rights under this License (including any patent licenses granted under the third paragraph of section 11).
However, if you cease all violation of this License, then your license from a particular copyright holder is reinstated (a) provisionally, unless and until the copyright holder explicitly and finally terminates your license, and (b) permanently, if the copyright holder fails to notify you of the violation by some reasonable means prior to 60 days after the cessation.
Moreover, your license from a particular copyright holder is reinstated permanently if the copyright holder notifies you of the violation by some reasonable means, this is the first time you have received notice of violation of this License (for any work) from that copyright holder, and you cure the violation prior to 30 days after your receipt of the notice.
Termination of your rights under this section does not terminate the licenses of parties who have received copies or rights from you under this License. If your rights have been terminated and not permanently reinstated, you do not qualify to receive new licenses for the same material under section 10.
9. Acceptance Not Required for Having Copies.
You are not required to accept this License in order to receive or run a copy of the Program. Ancillary propagation of a covered work occurring solely as a consequence of using peer-to-peer transmission to receive a copy likewise does not require acceptance. However, nothing other than this License grants you permission to propagate or modify any covered work. These actions infringe copyright if you do not accept this License. Therefore, by modifying or propagating a covered work, you indicate your acceptance of this License to do so.
10. Automatic Licensing of Downstream Recipients.
Each time you convey a covered work, the recipient automatically receives a license from the original licensors, to run, modify and propagate that work, subject to this License. You are not responsible for enforcing compliance by third parties with this License.
An “entity transaction” is a transaction transferring control of an organization, or substantially all assets of one, or subdividing an organization, or merging organizations. If propagation of a covered work results from an entity transaction, each party to that transaction who receives a copy of the work also receives whatever licenses to the work the party’s predecessor in interest had or could give under the previous paragraph, plus a right to possession of the Corresponding Source of the work from the predecessor in interest, if the predecessor has it or can get it with reasonable efforts.
You may not impose any further restrictions on the exercise of the rights granted or affirmed under this License. For example, you may not impose a license fee, royalty, or other charge for exercise of rights granted under this License, and you may not initiate litigation (including a cross-claim or counterclaim in a lawsuit) alleging that any patent claim is infringed by making, using, selling, offering for sale, or importing the Program or any portion of it.
11. Patents.
A “contributor” is a copyright holder who authorizes use under this License of the Program or a work on which the Program is based. The work thus licensed is called the contributor’s “contributor version”.
A contributor's "essential patent claims" are all patent claims owned or controlled by the contributor, whether already acquired or hereafter acquired, that would be infringed by some manner, permitted by this License, of making, using, or selling its contributor version, but do not include claims that would be infringed only as a consequence of further modification of the contributor version. For purposes of this definition, "control" includes the right to grant patent sublicenses in a manner consistent with the requirements of this License.
Each contributor grants you a non-exclusive, worldwide, royalty-free patent license under the contributor's essential patent claims, to make, use, sell, offer for sale, import and otherwise run, modify and propagate the contents of its contributor version.
In the following three paragraphs, a “patent license” is any express agreement or commitment, however denominated, not to enforce a patent (such as an express permission to practice a patent or covenant not to sue for patent infringement). To “grant” such a patent license to a party means to make such an agreement or commitment not to enforce a patent against the party.
If you convey a covered work, knowingly relying on a patent license, and the Corresponding Source of the work is not available for anyone to copy, free of charge and under the terms of this License, through a publicly available network server or other readily accessible means, then you must either (1) cause the Corresponding Source to be so available, or (2) arrange to deprive yourself of the benefit of the patent license for this particular work, or (3) arrange, in a manner consistent with the requirements of this License, to extend the patent license to downstream recipients. "Knowingly relying" means you have actual knowledge that, but for the patent license, your conveying the covered work in a country, or your recipient's use of the covered work in a country, would infringe one or more identifiable patents in that country that you have reason to believe are valid.
If, pursuant to or in connection with a single transaction or arrangement, you convey, or propagate by procuring conveyance of, a covered work, and grant a patent license to some of the parties receiving the covered work authorizing them to use, propagate, modify or convey a specific copy of the covered work, then the patent license you grant is automatically extended to all recipients of the covered work and works based on it.
A patent license is “discriminatory” if it does not include within the scope of its coverage, prohibits the exercise of, or is conditioned on the non-exercise of one or more of the rights that are specifically granted under this License. You may not convey a covered work if you are a party to an arrangement with a third party that is in the business of distributing software, under which you make payment to the third party based on the extent of your activity of conveying the work, and under which the third party grants, to any of the parties who would receive the covered work from you, a discriminatory patent license (a) in connection with copies of the covered work conveyed by you (or copies made from those copies), or (b) primarily for and in connection with specific products or compilations that contain the covered work, unless you entered into that arrangement, or that patent license was granted, prior to 28 March 2007.
Nothing in this License shall be construed as excluding or limiting any implied license or other defenses to infringement that may otherwise be available to you under applicable patent law.
12. No Surrender of Others' Freedom.
If conditions are imposed on you (whether by court order, agreement or otherwise) that contradict the conditions of this License, they do not excuse you from the conditions of this License. If you cannot convey a covered work so as to satisfy simultaneously your obligations under this License and any other pertinent obligations, then as a consequence you may not convey it at all. For example, if you agree to terms that obligate you to collect a royalty for further conveying from those to whom you convey the Program, the only way you could satisfy both those terms and this License would be to refrain entirely from conveying the Program.
13. Use with the GNU Affero General Public License.
Notwithstanding any other provision of this License, you have permission to link or combine any covered work with a work licensed under version 3 of the GNU Affero General Public License into a single combined work, and to convey the resulting work. The terms of this License will continue to apply to the part which is the covered work, but the special requirements of the GNU Affero General Public License, section 13, concerning interaction through a network will apply to the combination as such.
14. Revised Versions of this License.
The Free Software Foundation may publish revised and/or new versions of the GNU General Public License from time to time. Such new versions will be similar in spirit to the present version, but may differ in detail to address new problems or concerns.
Each version is given a distinguishing version number. If the Program specifies that a certain numbered version of the GNU General Public License "or any later version" applies to it, you have the option of following the terms and conditions either of that numbered version or of any later version published by the Free Software Foundation. If the Program does not specify a version number of the GNU General Public License, you may choose any version ever published by the Free Software Foundation.
If the Program specifies that a proxy can decide which future versions of the GNU General Public License can be used, that proxy's public statement of acceptance of a version permanently authorizes you to choose that version for the Program.
Later license versions may give you additional or different permissions. However, no additional obligations are imposed on any author or copyright holder as a result of your choosing to follow a later version.
15. Disclaimer of Warranty.
THERE IS NO WARRANTY FOR THE PROGRAM, TO THE EXTENT PERMITTED BY APPLICABLE LAW. EXCEPT WHEN OTHERWISE STATED IN WRITING THE COPYRIGHT HOLDERS AND/OR OTHER PARTIES PROVIDE THE PROGRAM "AS IS" WITHOUT WARRANTY OF ANY KIND, EITHER EXPRESSED OR IMPLIED, INCLUDING, BUT NOT LIMITED TO, THE IMPLIED WARRANTIES OF MERCHANTABILITY AND FITNESS FOR A PARTICULAR PURPOSE. THE ENTIRE RISK AS TO THE QUALITY AND PERFORMANCE OF THE PROGRAM IS WITH YOU. SHOULD THE PROGRAM PROVE DEFECTIVE, YOU ASSUME THE COST OF ALL NECESSARY SERVICING, REPAIR OR CORRECTION.
16. Limitation of Liability.
IN NO EVENT UNLESS REQUIRED BY APPLICABLE LAW OR AGREED TO IN WRITING WILL ANY COPYRIGHT HOLDER, OR ANY OTHER PARTY WHO MODIFIES AND/OR CONVEYS THE PROGRAM AS PERMITTED ABOVE, BE LIABLE TO YOU FOR DAMAGES, INCLUDING ANY GENERAL, SPECIAL, INCIDENTAL OR CONSEQUENTIAL DAMAGES ARISING OUT OF THE USE OR INABILITY TO USE THE PROGRAM (INCLUDING BUT NOT LIMITED TO LOSS OF DATA OR DATA BEING RENDERED INACCURATE OR LOSSES SUSTAINED BY YOU OR THIRD PARTIES OR A FAILURE OF THE PROGRAM TO OPERATE WITH ANY OTHER PROGRAMS), EVEN IF SUCH HOLDER OR OTHER PARTY HAS BEEN ADVISED OF THE POSSIBILITY OF SUCH DAMAGES.
17. Interpretation of Sections 15 and 16.
If the disclaimer of warranty and limitation of liability provided above cannot be given local legal effect according to their terms, reviewing courts shall apply local law that most closely approximates an absolute waiver of all civil liability in connection with the Program, unless a warranty or assumption of liability accompanies a copy of the Program in return for a fee.
END OF TERMS AND CONDITIONS
GNU LESSER GENERAL PUBLIC LICENSE
Version 2.1, February 1999
Copyright (C) 1991, 1999 Free Software Foundation, Inc.
51 Franklin Street, Fifth Floor, Boston, MA 02110-1301 USA
Everyone is permitted to copy and distribute verbatim copies of this license document, but changing it is not allowed.
[This is the first released version of the Lesser GPL. It also counts as the successor of the GNU Library Public License, version 2, hence the version number 2.1.]
Preamble
The licenses for most software are designed to take away your freedom to share and change it. By contrast, the GNU General Public Licenses are intended to guarantee your freedom to share and change free software to make sure the software is free for all its users.
This license, the Lesser General Public License, applies to some specially designated software packages--typically libraries--of the Free Software Foundation and other authors who decide to use it. You can use it too, but we suggest you first think carefully about whether this license or the ordinary General Public License is the better strategy to use in any particular case, based on the explanations below.
When we speak of free software, we are referring to freedom of use, not price. Our General Public Licenses are designed to make sure that you have the freedom to distribute copies of free software (and charge for this service if you wish); that you receive source code or can get it if you want it; that you can change the software and use pieces of it in new free programs; and that you are informed that you can do these things.
To protect your rights, we need to make restrictions that forbid distributors to deny you these rights or to ask you to surrender these rights. These restrictions translate to certain responsibilities for you if you distribute copies of the library or if you modify it.
For example, if you distribute copies of the library, whether gratis or for a fee, you must give the recipients all the rights that we gave you. You must make sure that they, too, receive or can get the source code. If you link other code with the library, you must provide complete object files to the recipients, so that they can relink them with the library after making changes to the library and recompiling it. And you must show them these terms so they know their rights.
We protect your rights with a two-step method: (1) we copyright the library, and (2) we offer you this license, which gives you legal permission to copy, distribute and/or modify the library.
To protect each distributor, we want to make it very clear that there is no warranty for the free library. Also, if the library is modified by someone else and passed on, the recipients should know that what they have is not the original version, so that the original author's reputation will not be affected by problems that might be introduced by others.
Finally, software patents pose a constant threat to the existence of any free program. We wish to make sure that a company cannot effectively restrict the users of a free program by obtaining a restrictive license from a patent holder. Therefore, we insist that any patent license obtained for a version of the library must be consistent with the full freedom of use specified in this license.
Most GNU software, including some libraries, is covered by the ordinary GNU General Public License. This license, the GNU Lesser General Public License, applies to certain designated libraries, and is quite different from the ordinary General Public License. We use this license for certain libraries in order to permit linking those libraries into non-free programs.
When a program is linked with a library, whether statically or using a shared library, the combination of the two is legally speaking a combined work, a derivative of the original library. The ordinary General Public License therefore permits such linking only if the entire combination fits its criteria of freedom. The Lesser General Public License permits more lax criteria for linking other code with the library.
We call this license the "Lesser" General Public License because it does Less to protect the user's freedom than the ordinary General Public License. It also provides other free software developers Less of an advantage over competing non-free programs. These disadvantages are the reason we use the ordinary General Public License for many libraries. However, the Lesser license provides advantages in certain special circumstances.
For example, on rare occasions, there may be a special need to encourage the widest possible use of a certain library, so that it becomes a de-facto standard. To achieve this, non-free programs must be allowed to use the library. A more frequent case is that a free library does the same job as widely used non-free libraries. In this case, there is little to gain by limiting the free library to free software only, so we use the Lesser General Public License.
In other cases, permission to use a particular library in non-free programs enables a greater number of people to use a large body of free software. For example, permission to use the GNU C Library in non-free programs enables many more people to use the whole GNU operating system, as well as its variant, the GNU/Linux operating system.
Although the Lesser General Public License is Less protective of the users' freedom, it does ensure that the user of a program that is linked with the Library has the freedom and the wherewithal to run that program using a modified version of the Library.
The precise terms and conditions for copying, distribution and modification follow. Pay close attention to the difference between a "work based on the library" and a "work that uses the library". The former contains code derived from the library, whereas the latter must be combined with the library in order to run.
TERMS AND CONDITIONS FOR COPYING, DISTRIBUTION AND MODIFICATION
- This License Agreement applies to any software library or other program which contains a notice placed by the copyright holder or other authorized party saying it may be distributed under the terms of this Lesser General Public License (also called "this License"). Each licensee is addressed as "you".
A "library" means a collection of software functions and/or data prepared so as to be conveniently linked with application programs (which use some of those functions and data) to form executables.
The "Library", below, refers to any such software library or work which has been distributed under these terms. A "work based on the Library" means either the Library or any derivative work under copyright law: that is to say, a work containing the Library or a portion of it, either verbatim or with modifications and/or translated straightforwardly into another language. (Hereinafter, translation is included without limitation in the term "modification").
"Source code" for a work means the preferred form of the work for making modifications to it. For a library, complete source code means all the source code for all modules it contains, plus any associated interface definition files, plus the scripts used to control compilation and installation of the library.
Activities other than copying, distribution and modification are not covered by this License; they are outside its scope. The act of running a program using the Library is not restricted, and output from such a program is covered only if its contents constitute a work based on the Library (independent of the use of the Library in a tool for writing it). Whether that is true depends on what the Library does and what the program that uses the Library does.
- You may copy and distribute verbatim copies of the Library's complete source code as you receive it, in any medium, provided that you conspicuously and appropriately publish on each copy an appropriate copyright notice and disclaimer of warranty; keep intact all the notices that refer to this License and to the absence of any warranty; and distribute a copy of this License along with the Library.
You may charge a fee for the physical act of transferring a copy, and you may at your option offer warranty protection in exchange for a fee.
- You may modify your copy or copies of the Library or any portion of it, thus forming a work based on the Library, and copy and distribute such modifications or work under the terms of Section 1 above, provided that you also meet all of these conditions:
a) The modified work must itself be a software library. b) You must cause the files modified to carry prominent notices stating that you changed the files and the date of any change. c) You must cause the whole of the work to be licensed at no charge to all third parties under the terms of this License.
d) If a facility in the modified Library refers to a function or a table of data to be supplied by an application program that uses the facility, other than as an argument passed when the facility is invoked, then you must make a good faith effort to ensure that, in the event an application does not supply such function or table, the facility still operates, and performs whatever part of its purpose remains meaningful.
(For example, a function in a library to compute square roots has a purpose that is entirely well-defined independent of the application. Therefore, Subsection 2d requires that any application-supplied function or table used by this function must be optional: if the application does not supply it, the square root function must still compute square roots.)
These requirements apply to the modified work as a whole. If identifiable sections of that work are not derived from the Library, and can be reasonably considered independent and separate works in themselves, then this License, and its terms, do not apply to those sections when you distribute them as separate works. But when you distribute the same sections as part of a whole which is a work based on the Library, the distribution of the whole must be on the terms of this License, whose permissions for other licensees extend to the entire whole, and thus to each and every part regardless of who wrote it.
Thus, it is not the intent of this section to claim rights or contest your rights to work written entirely by you; rather, the intent is to exercise the right to control the distribution of derivative or collective works based on the Library.
In addition, mere aggregation of another work not based on the Library with the Library (or with a work based on the Library) on a volume of a storage or distribution medium does not bring the other work under the scope of this License.
- You may opt to apply the terms of the ordinary GNU General Public License instead of this License to a given copy of the Library. To do this, you must alter all the notices that refer to this License, so that they refer to the ordinary GNU General Public License, version 2, instead of to this License. (If a newer version than version 2 of the ordinary GNU General Public License has appeared, then you can specify that version instead if you wish.) Do not make any other change in these notices.
Once this change is made in a given copy, it is irreversible for that copy, so the ordinary GNU General Public License applies to all subsequent copies and derivative works made from that copy.
This option is useful when you wish to copy part of the code of the Library into a program that is not a library.
- You may copy and distribute the Library (or a portion or derivative of it, under Section 2) in object code or executable form under the terms of Sections 1 and 2 above provided that you accompany it with the complete corresponding machine-readable source code, which must be distributed under the terms of Sections 1 and 2 above on a medium customarily used for software interchange.
If distribution of object code is made by offering access to copy from a designated place, then offering equivalent access to copy the source code from the same place satisfies the requirement to distribute the source code, even though third parties are not compelled to copy the source along with the object code.
- A program that contains no derivative of any portion of the Library, but is designed to work with the Library by being compiled or linked with it, is called a "work that uses the Library". Such a work, in isolation, is not a derivative work of the Library, and therefore falls outside the scope of this License.
However, linking a “work that uses the Library” with the Library creates an executable that is a derivative of the Library (because it contains portions of the Library), rather than a “work that uses the library”. The executable is therefore covered by this License. Section 6 states terms for distribution of such executables.
When a “work that uses the Library” uses material from a header file that is part of the Library, the object code for the work may be a derivative work of the Library even though the source code is not. Whether this is true is especially significant if the work can be linked without the Library, or if the work is itself a library. The threshold for this to be true is not precisely defined by law.
If such an object file uses only numerical parameters, data structure layouts and accessors, and small macros and small inline functions (ten lines or less in length), then the use of the object file is unrestricted, regardless of whether it is legally a derivative work. (Executables containing this object code plus portions of the Library will still fall under Section 6.)
Otherwise, if the work is a derivative of the Library, you may distribute the object code for the work under the terms of Section 6. Any executables containing that work also fall under Section 6, whether or not they are linked directly with the Library itself.
- As an exception to the Sections above, you may also combine or link a "work that uses the Library" with the Library to produce a work containing portions of the Library, and distribute that work under terms
of your choice, provided that the terms permit modification of the work for the customer's own use and reverse engineering for debugging such modifications.
You must give prominent notice with each copy of the work that the Library is used in it and that the Library and its use are covered by this License. You must supply a copy of this License. If the work during execution displays copyright notices, you must include the copyright notice for the Library among them, as well as a reference directing the user to the copy of this License. Also, you must do one of these things:
a) Accompany the work with the complete corresponding machine-readable source code for the Library including whatever changes were used in the work (which must be distributed under Sections 1 and 2 above); and, if the work is an executable linked with the Library, with the complete machine readable "work that uses the Library", as object code and/or source code, so that the user can modify the Library and then relink to produce a modified executable containing the modified Library. (It is understood that the user who changes the contents of definitions files in the Library will not necessarily be able to recompile the application to use the modified definitions.)
b) Use a suitable shared library mechanism for linking with the Library. A suitable mechanism is one that (1) uses at run time a copy of the library already present on the user's computer system, rather than copying library functions into the executable, and (2) will operate properly with a modified version of the library, if the user installs one, as long as the modified version is interface-compatible with the version that the work was made with.
c) Accompany the work with a written offer, valid for at least three years, to give the same user the materials specified in Subsection 6a, above, for a charge no more than the cost of performing this distribution.
d) If distribution of the work is made by offering access to copy from a designated place, offer equivalent access to copy the above specified materials from the same place.
e) Verify that the user has already received a copy of these materials or that you have already sent this user a copy.
For an executable, the required form of the "work that uses the Library" must include any data and utility programs needed for reproducing the executable from it. However, as a special exception, the materials to be distributed need not include anything that is normally distributed (in either source or binary form) with the major components (compiler, kernel, and so on) of the operating system on which the executable runs, unless that component itself accompanies the executable.
It may happen that this requirement contradicts the license restrictions of other proprietary libraries that do not normally accompany the operating system. Such a contradiction means you cannot use both them and the Library together in an executable that you distribute.
- You may place library facilities that are a work based on the Library side-by-side in a single library together with other library facilities not covered by this License, and distribute such a combined library, provided that the separate distribution of the work based on the Library and of the other library facilities is otherwise permitted, and provided that you do these two things:
a) Accompany the combined library with a copy of the same work based on the Library, uncombined with any other library facilities. This must be distributed under the terms of the Sections above.
b) Give prominent notice with the combined library of the fact that part of it is a work based on the Library, and explaining where to find the accompanying uncombined form of the same work.
- You may not copy, modify, sublicense, link with, or distribute the Library except as expressly provided under this License. Any attempt otherwise to copy, modify, sublicense, link with, or distribute the Library is void, and will automatically terminate your rights under this License. However, parties who have received copies, or rights, from you under this License will not have their licenses terminated so long as such parties remain in full compliance.
- You are not required to accept this License, since you have not signed it. However, nothing else grants you permission to modify or distribute the Library or its derivative works. These actions are prohibited by law if you do not accept this License. Therefore, by modifying or distributing the Library (or any work based on the Library), you indicate your acceptance of this License to do so, and all its terms and conditions for copying, distributing or modifying the Library or works based on it.
- Each time you redistribute the Library (or any work based on the Library), the recipient automatically receives a license from the original licensor to copy, distribute, link with or modify the Library subject to these terms and conditions. You may not impose any further restrictions on the recipients' exercise of the rights granted herein. You are not responsible for enforcing compliance by third parties with this License.
- If, as a consequence of a court judgment or allegation of patent infringement or for any other reason (not limited to patent issues), conditions are imposed on you (whether by court order, agreement or otherwise) that contradict the conditions of this License, they do not excuse you from the conditions of this License. If you cannot distribute
so as to satisfy simultaneously your obligations under this License and any other pertinent obligations, then as a consequence you may not distribute the Library at all. For example, if a patent license would not permit royalty free redistribution of the Library by all those who receive copies directly or indirectly through you, then the only way you could satisfy both it and this License would be to refrain entirely from distribution of the Library.
If any portion of this section is held invalid or unenforceable under any particular circumstance, the balance of the section is intended to apply, and the section as a whole is intended to apply in other circumstances.
It is not the purpose of this section to induce you to infringe any patents or other property right claims or to contest validity of any such claims; this section has the sole purpose of protecting the integrity of the free software distribution system which is implemented by public license practices. Many people have made generous contributions to the wide range of software distributed through that system in reliance on consistent application of that system; it is up to the author/donor to decide if he or she is willing to distribute software through any other system and a licensee cannot impose that choice.
This section is intended to make thoroughly clear what is believed to be a consequence of the rest of this License.
- If the distribution and/or use of the Library is restricted in certain countries either by patents or by copyrighted interfaces, the original copyright holder who places the Library under this License may add an explicit geographical distribution limitation excluding those countries, so that distribution is permitted only in or among countries not thus excluded. In such case, this License incorporates the limitation as if written in the body of this License.
- The Free Software Foundation may publish revised and/or new versions of the Lesser General Public License from time to time. Such new versions will be similar in spirit to the present version, but may differ in detail to address new problems or concerns.
Each version is given a distinguishing version number. If the Library specifies a version number of this License which applies to it and "any later version", you have the option of following the terms and conditions either of that version or of any later version published by the Free Software Foundation. If the Library does not specify a license version number, you may choose any version ever published by the Free Software Foundation.
- If you wish to incorporate parts of the Library into other free programs whose distribution conditions are incompatible with these, write to the author to ask for permission. For software which is copyrighted by the Free Software Foundation, write to the Free Software Foundation; we sometimes make exceptions for this. Our decision will be guided by the two goals of preserving the free status of all derivatives of our free software and of promoting the sharing and reuse of software generally.
NO WARRANTY
- BECAUSE THE LIBRARY IS LICENSED FREE OF CHARGE, THERE IS NO WARRANTY FOR THE LIBRARY, TO THE EXTENT PERMITTED BY APPLICABLE LAW. EXCEPT WHEN OTHERWISE STATED IN WRITING THE COPYRIGHT HOLDERS AND/OR OTHER PARTIES PROVIDE THE LIBRARY "AS IS" WITHOUT WARRANTY OF ANY KIND, EITHER EXPRESSED OR IMPLIED, INCLUDING, BUT NOT LIMITED TO, THE IMPLIED WARRANTIES OF MERCHANTABILITY AND FITNESS FOR A PARTICULAR PURPOSE. THE ENTIRE RISK AS TO THE QUALITY AND PERFORMANCE OF THE LIBRARY IS WITH YOU. SHOULD THE LIBRARY PROVE DEFECTIVE, YOU ASSUME THE COST OF ALL NECESSARY SERVICING, REPAIR OR CORRECTION.
- IN NO EVENT UNLESS REQUIRED BY APPLICABLE LAW OR AGREED TO IN WRITING WILL ANY COPYRIGHT HOLDER, OR ANY OTHER PARTY WHO MAY MODIFY AND/OR REDISTRIBUTE THE LIBRARY AS PERMITTED ABOVE, BE LIABLE TO YOU FOR DAMAGES, INCLUDING ANY GENERAL, SPECIAL, INCIDENTAL OR CONSEQUENTIAL DAMAGES ARISING OUT OF THE USE OR INABILITY TO USE THE LIBRARY (INCLUDING BUT NOT LIMITED TO LOSS OF DATA OR DATA BEING RENDERED INACCURATE OR LOSSES SUSTAINED BY YOU OR THIRD PARTIES OR A FAILURE OF THE LIBRARY TO OPERATE WITH ANY OTHER SOFTWARE), EVEN IF SUCH HOLDER OR OTHER PARTY HAS BEEN ADVISED OF THE POSSIBILITY OF SUCH DAMAGES.
END OF TERMS AND CONDITIONS
How to Apply These Terms to Your New Libraries
If you develop a new library, and you want it to be of the greatest possible use to the public, we recommend making it free software that everyone can redistribute and change. You can do so by permitting redistribution under these terms (or, alternatively, under the terms of the ordinary General Public License).
To apply these terms, attach the following notices to the library. It is safest to attach them to the start of each source file to most effectively convey the exclusion of warranty; and each file should have at least the "copyright" line and a pointer to where the full notice is found. one line to give the library's name and an idea of what it does.
Copyright (C) year name of author
This library is free software; you can redistribute it and/or modify it under the terms of the GNU Lesser General Public License as published by the Free Software Foundation; either version 2.1 of the License, or (at your option) any later version.
This library is distributed in the hope that it will be useful, but WITHOUT ANY WARRANTY; without even the implied warranty of MERCHANTABILITY or FITNESS FOR A PARTICULAR PURPOSE. See the GNU Lesser General Public License for more details.
You should have received a copy of the GNU Lesser General Public License along with this library; if not, write to the Free Software Foundation, Inc., 51 Franklin Street, Fifth Floor, Boston, MA 02110-1301 USA Also add information on how to contact you by electronic and paper mail.
You should also get your employer (if you work as a programmer) or your school, if any, to sign a "copyright disclaimer" for the library, if necessary. Here is a sample; alter the names:
Yoyodyne, Inc., hereby disclaims all copyright interest in the library 'Frob' (a library for tweaking knobs) written by James Random Hacker. signature of Ty Coon, 1 April 1990 Ty Coon, President of Vice.
OpenSSL LICENSE
Copyright (c) 1998-2006 The OpenSSL Project. All rights reserved. Redistribution and use in source and binary forms, with or without modification, are permitted provided that the following conditions are met:
- Redistributions of source code must retain the above copyright notice, this list of conditions and the following disclaimer.
- Redistributions in binary form must reproduce the above copyright notice, this list of conditions and the following disclaimer in the documentation and/or other materials provided with the distribution.
- All advertising materials mentioning features or use of this software must display the following acknowledgment: "This product includes software developed by the OpenSSL Project for use in the OpenSSL Toolkit. (http://www.openssl.org/)"
- The names "OpenSSL Toolkit" and "OpenSSL Project" must not be used to endorse or promote products derived from this software without prior written permission. For written permission, please contact openssl-core@openssl.org.
- Products derived from this software may not be called "OpenSSL" nor may "OpenSSL" appear in their names without prior written permission of the OpenSSL Project.
- Redistributions of any form whatsoever must retain the following acknowledgment: "This product includes software developed by the OpenSSL Project for use in the OpenSSL Toolkit (http://www.openssl.org/)"
THIS SOFTWARE IS PROVIDED BY THE OpenSSL PROJECT "AS IS" AND ANY EXPRESSED OR
IMPLIED WARRANTIES, INCLUDING, BUT NOT LIMITED TO, THE IMPLIED WARRANTIES OF MERCHANTABILITY AND FITNESS FOR A PARTICULAR PURPOSE ARE DISCLAIMED. IN NO EVENT SHALL THE OpenSSL PROJECT OR ITS CONTRIBUTORS BE LIABLE FOR ANY DIRECT, INDIRECT, INCIDENTAL, SPECIAL, EXEMPLARY, OR CONSEQUENTIAL DAMAGES (INCLUDING, BUT NOT LIMITED TO, PROCUREMENT OF SUBSTITUTE GOODS OR SERVICES; LOSS OF USE, DATA, OR PROFITS; OR BUSINESS INTERRUPTION) HOWEVER CAUSED AND ON ANY THEORY OF LIABILITY, WHETHER IN CONTRACT, STRICT LIABILITY, OR TORT (INCLUDING NEGLIGENCE OR OTHERWISE) ARISING IN ANY WAY OUT OF THE USE OF THIS SOFTWARE, EVEN IF ADVISED OF THE POSSIBILITY OF SUCH DAMAGE. This product includes cryptographic software written by Eric Young (eay@cryptsoft.com). This product includes software written by Tim Hudson (tjh@cryptsoft.com).
Original SSLeay License
Copyright (C) 1995-1998 Eric Young (eay@cryptsoft.com) All rights reserved. This package is an SSL implementation written by Eric Young (eay@cryptsoft.com). The implementation was written so as to conform with Netscapes SSL. This library is free for commercial and non-commercial use as long as the following conditions are aheared to. The following conditions apply to all code found in this distribution, be it the RC4, RSA, lhash, DES, etc., code; not just the SSL code. The SSL documentation included with this distribution is covered by the same copyright terms except that the holder is Tim Hudson (tjh@cryptsoft.com).
Copyright remains Eric Young's, and as such any Copyright notices in the code are not to be removed.
If this package is used in a product, Eric Young should be given attribution as the author of the parts of the library used. This can be in the form of a textual message at program startup or in documentation
(online or textual) provided with the package. Redistribution and use in source and binary forms, with or without modification, are permitted provided that the following conditions are met:
- Redistributions of source code must retain the copyright notice, this list of conditions and the following disclaimer.
- Redistributions in binary form must reproduce the above copyright notice, this list of conditions and the following disclaimer in the documentation and/or other materials provided with the distribution.
- All advertising materials mentioning features or use of this software must display the following acknowledgement: "This product includes cryptographic software written by Eric Young (eay@cryptsoft.com)" The word 'cryptographic' can be left out if the routines from the library being used are not cryptographic related :-).
- If you include any Windows specific code (or a derivative thereof) from the apps directory (application code) you must include an acknowledgement: "This product includes software written by Tim Hudson (tjh@cryptsoft.com)"
THIS SOFTWARE IS PROVIDED BY ERIC YOUNG "AS IS" AND ANY EXPRESS OR IMPLIED WARRANTIES, INCLUDING, BUT NOT LIMITED TO, THE IMPLIED WARRANTIES OF MERCHANTABILITY AND FITNESS FOR A PARTICULAR PURPOSE ARE DISCLAIMED. IN NO EVENT SHALL THE AUTHOR OR CONTRIBUTORS BE LIABLE FOR ANY DIRECT, INDIRECT, INCIDENTAL, SPECIAL, EXEMPLARY, OR CONSEQUENTIAL DAMAGES (INCLUDING, BUT NOT LIMITED TO, PROCUREMENT OF SUBSTITUTE GOODS OR SERVICES; LOSS OF USE, DATA, OR PROFITS; OR BUSINESS INTERRUPTION) HOWEVER CAUSED AND ON ANY THEORY OF LIABILITY, WHETHER IN CONTRACT, STRICT LIABILITY, OR TORT (INCLUDING NEGLIGENCE OR OTHERWISE) ARISING IN ANY WAY OUT OF THE USE OF THIS SOFTWARE, EVEN IF ADVISED OF THE POSSIBILITY OF SUCH DAMAGE. The licence and distribution terms for any publicly available version or derivative of this code cannot be changed. i.e. this code cannot simply be copied and put under another distribution licence (including the GNU Public Licence).
Boost Software License
Boost Software License - Version 1.0 - August 17th, 2003 Permission is hereby granted, free of charge, to any person or organization obtaining a copy of the software and accompanying documentation covered by this license (the "Software") to use, reproduce, display, distribute, execute, and transmit the Software, and to prepare derivative works of the Software, and to permit third-parties to whom the Software is furnished to do so, all subject to the following: The copyright notices in the Software and this entire statement, including the above license grant, this restriction and the following disclaimer, must be included in all copies of the Software, in whole or in part, and all derivative works of the Software, unless such copies or derivative works are solely in the form of machine-executable object code generated by a source language processor.
THE SOFTWARE IS PROVIDED "AS IS", WITHOUT WARRANTY OF ANY KIND, EXPRESS OR IMPLIED, INCLUDING BUT NOT LIMITED TO THE WARRANTIES OF MERCHANTABILITY, FITNESS FOR A PARTICULAR PURPOSE, TITLE AND NON-INFRINGEMENT. IN NO EVENT SHALL THE COPYRIGHT HOLDERS OR ANYONE DISTRIBUTING THE SOFTWARE BE LIABLE FOR ANY DAMAGES OR OTHER LIABILITY, WHETHER IN CONTRACT, TORT OR OTHERWISE, ARISING FROM, OUT OF OR IN CONNECTION WITH THE SOFTWARE OR THE USE OR OTHER DEALINGS IN THE SOFTWARE.

Correct Disposal of This Product (Waste Electrical & Electronic Equipment)
(Applicable in the European Union and other European countries with separate collection systems)
This marking on the product, accessories or literature indicates that the product and its electronic accessories (e.g. charger, headset, USB cable) should not be disposed of with other household waste at the end of their working life. To prevent possible harm to the environment or human health from uncontrolled waste disposal, please separate these items from other types of waste and recycle them responsibly to promote the sustainable reuse of material resources.
Household users should contact either the retailer where they purchased this product, or their local government office, for details of where and how they can take these items for environmentally safe recycling.
Business users should contact their supplier and check the terms and conditions of the purchase contract. This product and its electronic accessories should not be mixed with other commercial wastes for disposal.

Correct disposal of batteries in this product
(Applicable in the European Union and other European countries with separate battery return systems.)
This marking on the battery, manual or packaging indicates that the batteries in this product should not be disposed of with other household waste at the end of their working life. Where marked, the chemical symbols Hg, Cd or Pb indicate that the battery contains mercury, cadmium or lead above the reference levels in EC Directive 2006/66. If batteries are not properly disposed of, these substances can cause harm to human health or the environment.
To protect natural resources and to promote material reuse, please separate batteries from other types of waste and recycle them through your local, free battery return system.
SAMSUNG
SALES NETWORK
SAMSUNG TECHWIN CO., LTD.
Samsungtechwin R&D Center, 701, Sampyeong-dong, Bundang-gu, Seongnam-si, Gyeonggi-do, Korea, 463-400
TEL: +82-70-7147-8740~60 FAX: +82-31-8018-3745
100 Challenger Rd. Suite 700 Ridgefield Park, NJ 07660
Toll Free : +1-877-213-1222 Direct : +1-201-325-6920
Fax: +1-201-373-0124
www.samsungcctvusa.com
SAMSUNG TECHWIN EUROPE LTD.
Samsung House, 1000 Hillswood Drive, Hillswood Business
Park Chertsey, Surrey, UNITED KINGDOM KT16 OPS
TEL: +44-1932-45-5300 FAX: +44-1932-45-5325
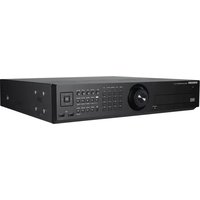


- TRADEMARK
- RESTRICTION
- DISCLAIMER
- IMPORTANT SAFETY INSTRUCTIONS
- BEFORE START
- WARNING
- BATTERY
- CALIFORNIA USA ONLY
- CAUTION
- SYSTEM SHUTDOWN
- OPERATING TEMPERATURE
- ETHERNET PORT
- SECURITY PRECAUTIONS
- CONTENTS
- OVERVIEW
- INSTALLATION
- CONNECTING WITH OTHER DEVICE
- LIVE
- MAIN MENU
- SEARCH & PLAY
- WEB VIEWER
- BACKUP VIEWER
- APPENDIX
- FEATURES
- FC CE
- PACKAGE CONTENTS
- PART NAMES AND FUNCTIONS (FRONT)
- USING THE JOG SHUTTLE
- PART NAMES AND FUNCTIONS (REAR)
- REMOTE CONTROL
- USING THE NUMERIC BUTTONS
- CHANGING THE REMOTE CONTROL ID
- CHECKING THE INSTALLATION ENVIRONMENT
- CAUTIONS WHEN INSTALLING IN THE RACK
- INSTALLING THE HDD
- CAUTIONS FOR DATA LOSS (HDD CARE)
- CASES MIGHT CAUSE DAMAGE TO HDD OR RECORDED DATA
- CAUTIONS ON HDD INSTALLATION
- CONNECTING EXTERNAL DEVICES
- CONNECTING THE USB
- CONNECTING EXTERNAL SATA HDD (ESATA)
- CONNECTING POS DEVICE
- CONNECTING THE ALARM INPUT/OUTPUT
- CONNECTING THE NETWORK
- CONNECTING TO NETWORK THROUGH ETHERNET (10/100/1000BASET)
- GETTING STARTED
- STARTING THE SYSTEM
- SHUTTING DOWN THE SYSTEM
- LOGIN
- LOCKING ALL BUTTONS
- ICONS ON THE LIVE SCREEN
- ERROR INFORMATION
- LIVE SCREEN MENU
- SPLIT MODE MENU
- SINGLE MODE MENU
- VIEW THE LAUNCHER MENU
- SWITCHING THE SCREEN MODE
- SWITCHING THE SPLIT MODE
- AUTO SEQUENCE
- MANUAL SWITCHING
- CHANNEL SETTING
- SWITCHING TO SINGLE MODE
- SPOT OUT
- SELECTING A SPOT OUT MODE
- ZOOM
- AUDIO ON/OFF
- AUDIO ON/OFF IN SINGLE MODE
- FREEZE
- SYSTEM SETUP
- DATE/TIME/LANGUAGE
- SETTING THE DATE/TIME/LANGUAGE
- SETTING HOLIDAY
- USING THE CALENDAR
- PERMISSION MANAGEMENT
- SETTING THE ADMINISTRATOR
- USING VIRTUAL KEYBOARD
- SETTING THE GROUP
- TO SET THE GROUP AUTHORITY
- TO RESTRICT THE USER PERMISSIONS
- TO CHANGE THE USER PASSWORD
- SETTING THE USER
- SETTING PERMISSIONS
- SYSTEM MANAGEMENT
- CHECKING THE SYSTEM INFORMATION
- UPDATING THE SOFTWARE
- SETTINGS
- LOG INFORMATION
- SYSTEM LOG
- EVENT LOG
- BACKUP LOG
- SETTING THE DEVICE
- CAMERA
- SETTING THE CAMERA
- TO SET THE PRIVACY ZONE
- SETTING THE PTZ
- CONFIRMING DEVICES
- FORMATTING
- HDD ALARM
- REMOTE DEVICES
- POS DEVICES
- MONITOR
- SETTING THE MONITOR
- SCREEN SETUP
- SETTING THE SPOT OUT
- SETTING THE SCREEN MODE
- SETTING THE RECORDING
- RECORDING SCHEDULE
- RECORDING COLOR TAGS
- EVENT RECORD DURATION
- REC QUALITY / RESOLUTION
- SETTING STANDARD RECORDING PROPERTIES
- SETTING EVENT RECORDING PROPERTIES
- RECORD OPTION
- SENSOR DETECTION
- MOTION DETECTION
- SETTING THE MOTION DETECTION AREA
- TAMPERING DETECTION
- ALARM SCHEDULE
- BACKUP
- SETTING THE BACKUP
- PRESS THE [ENTER] BUTTON
- WHEN THE BACKUP SETUP IS DONE, PRESS
- CONNECTION MODE
- SETTING THE CONNECTION
- SETTING THE PORT
- CONNECTING AND SETTING THE NETWORK
- WHEN NO ROUTER IS USED
- STATIC MODE
- DHCP MODE
- PPPOE MODE
- WHEN A ROUTER IS USED
- SETTING ROUTER'S PORT FORWARDING
- DDNS
- DDNS SETTING
- LIVE TRANSFER
- MAILING SERVICE
- SMTP SETTING
- EVENT SETTING
- GROUP SETTING
- RECIPIENT SETTING
- SNMP
- PTZ DEVICE
- GETTING STARTED WITH PTZ
- USING THE PTZ CAMERA
- PRESET SETTING
- CAMERA SETTING
- SEARCH
- TIME SEARCH
- EVENT SEARCH
- BACKUP SEARCH
- POS SEARCH
- MOTION SEARCH
- PLAY
- INTRODUCING WEB VIEWER
- WHAT IS WEB VIEWER
- PRODUCT FEATURES
- SYSTEM REQUIREMENTS
- CONNECTING WEB VIEWER
- USING LIVE VIEWER
- OSD INFORMATION DISPLAY
- CONNECTED DVR
- SETTING THE DISPLAY OF THE OSD TIME INFORMATION
- SPLIT-SCREEN
- TO SWITCH TO FULL SCREEN MODE
- CHANGING THE LIVE SCREEN MODE
- TO CAPTURE A SCREEN
- TO PRINT A SCREEN
- TO SAVE AS AVI
- AUDIO
- OSD
- CONTROLLING PTZ
- TO SET A PRESET
- TO ACTIVATE THE PRESET
- TO ACTIVATE SWING, GROUP, TOUR, AND TRACE
- USING SEARCH VIEWER
- SEARCHING THE RECORDED VIDEO IN THE CALENDAR
- TO SEARCH BY DATE
- TO ADJUST TIMELINE
- NAMES AND FUNCTIONS OF PLAY BUTTONS
- SYSTEM
- HOLIDAY
- ADMIN
- GROUP
- DEVICE
- PTZ
- STORAGE DEVICE
- REMOTE DEVICE
- POS DEVICE
- MODE
- RECORD
- REC QUALITY & RESOLUTION
- STANDARD/EVENT
- EVENT
- VIDEO LOSS DETECTION
- NETWORK
- INTERFACE
- PORT
- RECIPIENT
- ABOUT
- WHAT IS MOBILE VIEWER
- KEY FEATURES
- COMPATIBLE SMARTPHONE
- SEC BACKUP VIEWER
- RECOMMENDED SYSTEM REQUIREMENTS
- COPYRIGHT (C) 2004, KNESCHKE, INCREMENTAL
- COMPONENT NAME LICENSE LICENSE URL
- COPYRIGHT (C) 1998-2000 UNIVERSITY COLLEGE LONDON
- PART 1: CMU/UCD COPYRIGHT NOTICE: (BSD LIKE)
- PART 2: NETWORKS ASSOCIATES TECHNOLOGY, INC COPYRIGHT NOTICE (BSD)
- PART 3: CAMBRIDGE BROADBAND LTD. COPYRIGHT NOTICE (BSD)
- PART 4: SUN MICROSYSTEMS, INC. COPYRIGHT NOTICE (BSD)
- PART 5: SPARTA, INC COPYRIGHT NOTICE (BSD)
- PART 6: CISCO/BUPTNIC COPYRIGHT NOTICE (BSD)
- PART 7: FABASOFT R&D SOFTWARE GMBH & CO KG COPYRIGHT NOTICE (BSD)
- PART 8: APPLE INC. COPYRIGHT NOTICE (BSD)
- PART 9: SCIENCELOGIC, LLC COPYRIGHT NOTICE (BSD)
- GNU GENERAL PUBLIC LICENSE
- PREAMBLE
- TERMS AND CONDITIONS FOR COPYING, DISTRIBUTION AND MODIFICATION
- NO WARRANTY
- END OF TERMS AND CONDITIONS
- HOW TO APPLY THESE TERMS TO YOUR NEW PROGRAMS
- TERMS AND CONDITIONS
- DEFINITIONS
- SOURCE CODE
- BASIC PERMISSIONS
- PROTECTING USERS' LEGAL RIGHTS FROM ANTI-CIRCUMVENTION LAW
- CONVEYING VERBATIM COPIES
- CONVEYING MODIFIED SOURCE VERSIONS
- CONVEYING NON-SOURCE FORMS
- ADDITIONAL TERMS
- TERMINATION
- ACCEPTANCE NOT REQUIRED FOR HAVING COPIES
- AUTOMATIC LICENSING OF DOWNSTREAM RECIPIENTS
- PATENTS
- NO SURRENDER OF OTHERS' FREEDOM
- USE WITH THE GNU AFFERO GENERAL PUBLIC LICENSE
- REVISED VERSIONS OF THIS LICENSE
- DISCLAIMER OF WARRANTY
- LIMITATION OF LIABILITY
- INTERPRETATION OF SECTIONS 15 AND
- GNU LESSER GENERAL PUBLIC LICENSE
- HOW TO APPLY THESE TERMS TO YOUR NEW LIBRARIES
- OPENSSL LICENSE
- ORIGINAL SSLEAY LICENSE
- BOOST SOFTWARE LICENSE
- CORRECT DISPOSAL OF THIS PRODUCT (WASTE ELECTRICAL & ELECTRONIC EQUIPMENT)
- CORRECT DISPOSAL OF BATTERIES IN THIS PRODUCT
- SAMSUNG
- SALES NETWORK
Brand : SAMSUNG
Model : SRD-1653D
Category : Voice recorder