
Design Multicook Plus 42526 - Multi-cooker Gastroback - Free user manual and instructions
Find the device manual for free Design Multicook Plus 42526 Gastroback in PDF.


| Product Type | Multi-cooker |
| Brand | Gastroback |
| Model | Design Multicook Plus 42526 |
| Dimensions (W x D x H) | 30 x 30 x 32 cm |
| Weight | 5.3 kg |
| Power Supply | 220-240 V, 50/60 Hz, 900 W |
| Capacity | 6.0 L |
| Inner Pot Material | Non-stick coated aluminum |
| Functions | Pressure cook, slow cook, rice, porridge, steam, sauté, soup, stew, yogurt, keep warm |
| Preset Programs | 12 automatic programs |
| Display | LED with timer and pressure indicator |
| Pressure Levels | High (70 kPa) and low (40 kPa) |
| Time Settings | Delayed start up to 24 hours, keep warm up to 12 hours |
| Safety Features | Overheat protection, lid lock safety valve, pressure release button, anti-block shield |
| Cleaning & Maintenance | Removable inner pot and steam rack dishwasher safe; wipe exterior with damp cloth |
| Accessories Included | Measuring cup, rice paddle, steam basket, condensation collector |
| Spare Parts Availability | Replacement pots, gaskets, and steam valves available via manufacturer |
| Warranty | 2 years |
Frequently Asked Questions - Design Multicook Plus 42526 Gastroback
User questions about Design Multicook Plus 42526 Gastroback
0 question about this device. Answer the ones you know or ask your own.
Ask a new question about this device
Download the instructions for your Multi-cooker in PDF format for free! Find your manual Design Multicook Plus 42526 - Gastroback and take your electronic device back in hand. On this page are published all the documents necessary for the use of your device. Design Multicook Plus 42526 by Gastroback.
USER MANUAL Design Multicook Plus 42526 Gastroback
Operating Instructions
DESIGN MULTICOOK PLUS
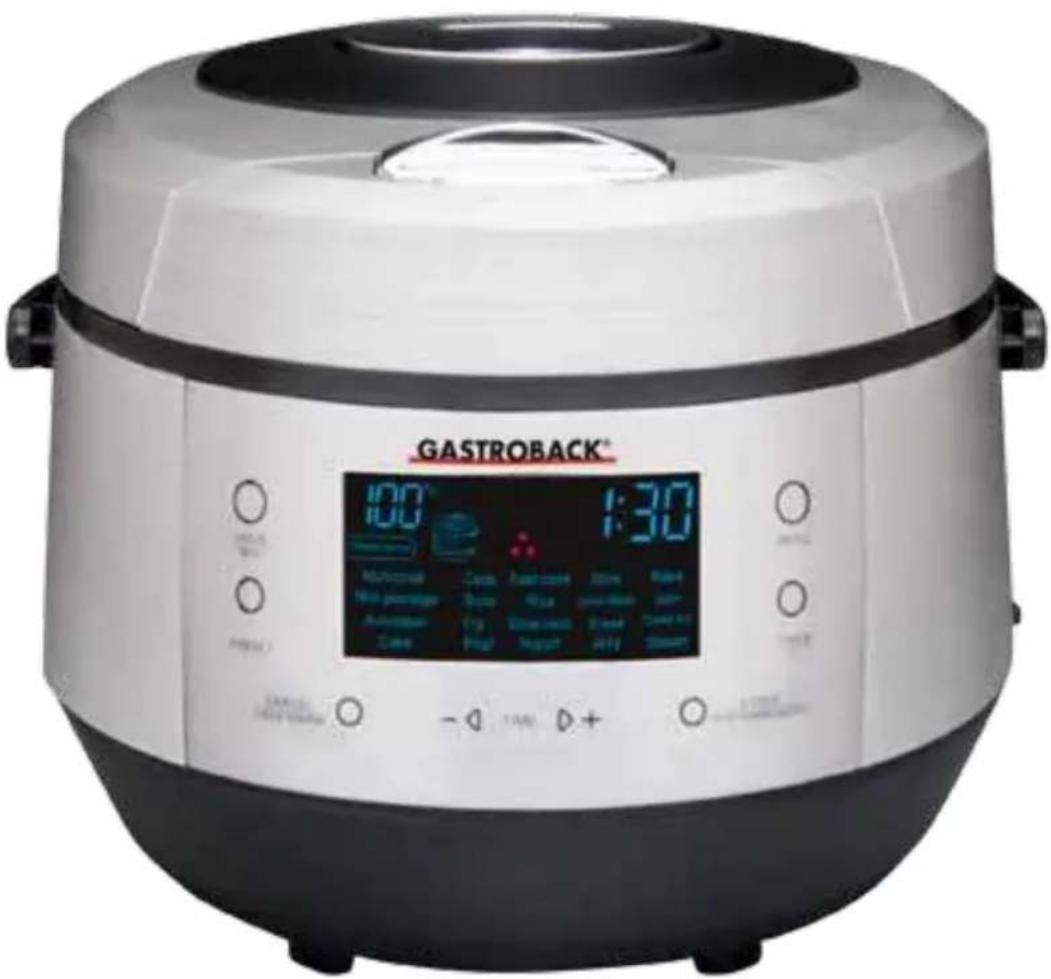
Art.-No. 42526 Design Multicook Plus
Read all provided instructions before first usage!
Model and attachments are subject to change!
For household use only!

Carefully read all provided instructions before you start running the appliance and pay attention to the warnings mentioned in these instructions.
Table of Contents
Knowing Your Design Multicook Plus 46
Important Safeguards....49
Important Safeguards for Electrical Appliances 50
High Temperatures—Risk of Burns 51
Non-Stick Coating....51
Technical Specifications 52
Before First Use....52
Operation 52
Acoustic Signal....52
Alternation of the Cooking Time....53
Auto-Start-Function....53
Keep-Warm-Function ....53
Warm-Up-Function....54
Program Multicook....54
Program Cook 55
Program Fast Cook....56
Program Stew....56
Program Bake....57
Program Milk Porridge....58
Program Soup 59
Program Rice....60
Program Grain/Bean....61
Program Jam 61
Program Autoclean....62
Program Fry 63
Program Slow Cook 64
Program Bread 64
Program Deep Fry....65
Program Cake 66
Program Pilaf....67
Program Yogurt 68
Program Jelly....68
Program Steam....69
Further Possible Applications ....70
Tips and further Information....72
Troubleshooting 75
Care and Cleaning 77
Storage....78
Notes for Disposal....78
Information and Service 79
Warranty 79
Dear Customer!
Congratulations! A series of new possibilities come with your new Gastroback Design Multicook Plus.
The Gastroback Design Multicook Plus is a modern multi-functional appliance of a new cooking generation. With this Multicook you can prepare healthy and varied dishes, saving much time. In addition, the Gastroback Design Multicook Plus replaces many kitchen appliances, as it combines many functions, such as stove, oven, rice cooker, steamer, yoghurt maker, bread maker, deep fryer, slow cooker, egg cooker and other kitchen appliances.
20 automatic programs give you a variety of ways to prepare your food as steaming, boiling, stewing, roasting, baking, frying. You will appreciate the advantages of the timer function to delay the start and Fast Cook function to warm up your dishes.
Please read this manual carefully. These instructions for use will inform you about the various functions and features, which make it easy to take pleasure in your new multicook.
We hope that you will enjoy your new Design Multicook Plus.
Your Gastroback GmbH
KNOWING YOUR DESIGN MULTICOOK PLUS
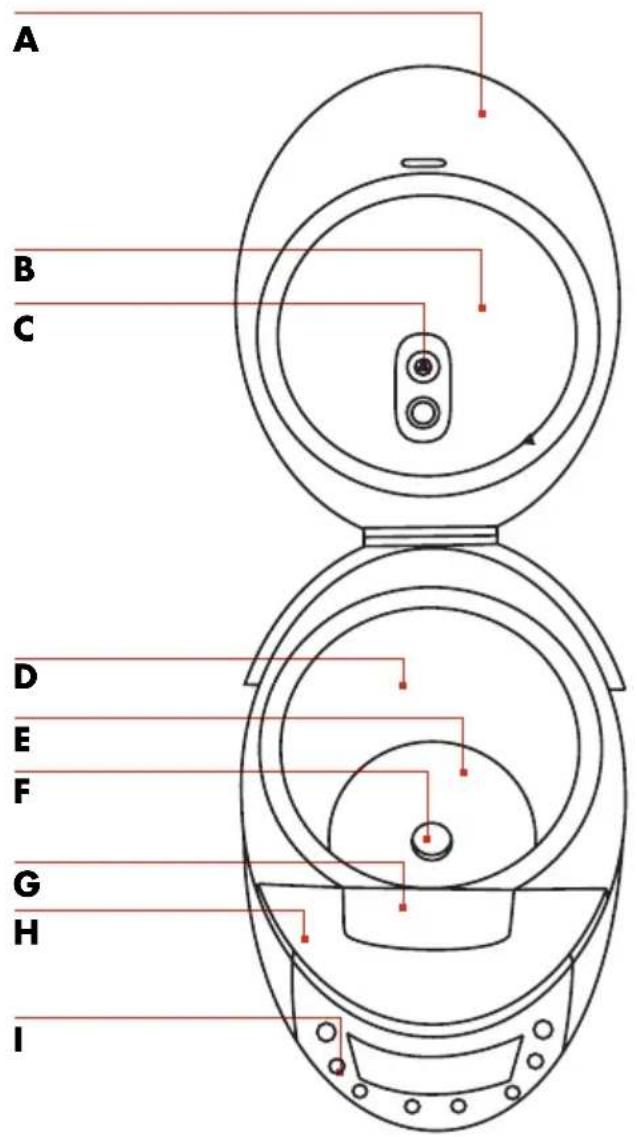
A lid
B inner lid with sealing ring
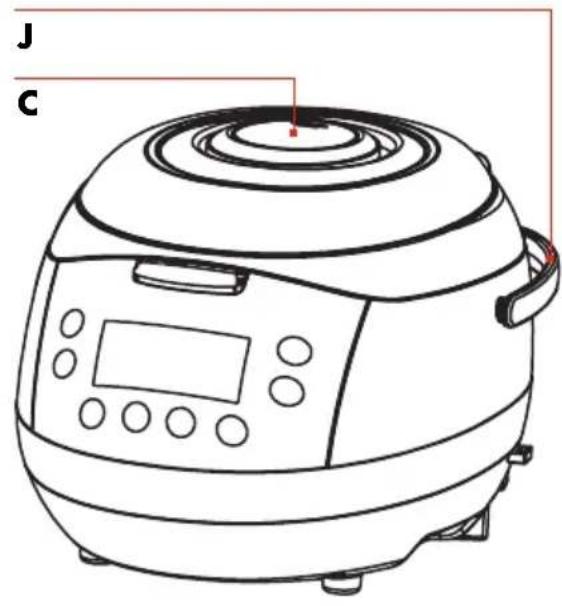
C removable steam vent
Dovencompartment
E heating plate
F temperature sensor - prevents overheating and ensures a steady cooking temperature
Gopeningbutton
H housing
I control panel and LED-display (see pages 47, 48)
J handle
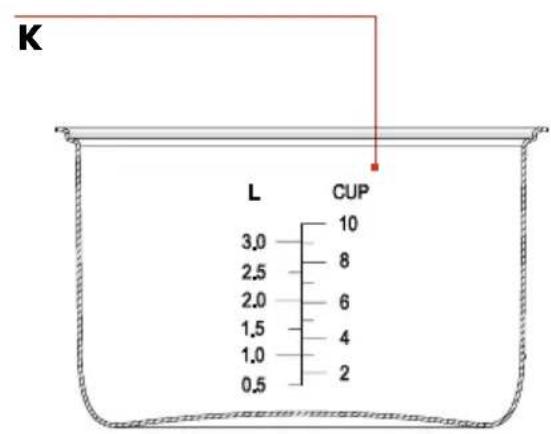
K removable inner pot, 5 litre, non-stick coated, with level indicator
EXTENSIVE ACCESSORIES
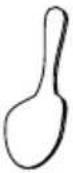
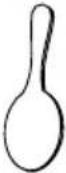
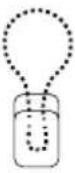
| rice spoon | soup ladle | spoon shelf | measuring cup | steam insert | yogurt insert with 6 cups | frying basket | inner pot handle | power cord |
 |  |  | 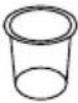 | 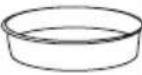 |  | 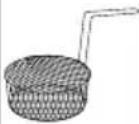 |  | 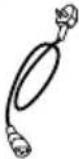 |
CONTROL PANEL
![graph TD A["Input"] --> B["HOUR MIN"] B --> C["PRESER"] C --> D["CANCEL KEEP WARM"] D --> E["TIME"] E --> F["START KEEP WARM ON/OFF"] F --> G["TIMER t°C"] G --> H["MENU"]](/content/2026/06/1282136/images/8cbaf6309852af72bd0e0849e7ac7676509d296b0927aebded27acbbbb0561a6.jpg)
D
A Hour/Min-button switches between hours and minutes for the time adjustment, controls the acoustic signal
B Preset-button controls the Auto-Start-function
C Cancel/Keep Warm-button
Cancel interrupts the running program
Keep Warm switches directly to the Keep-Warm-function
D Time +/- -buttons for setting the minutes and hours for the selected program or the Auto-Start-function
E Menu-button opens the main menu and selects a program
F Timer/ t °C -button adjusts cooking time and temperature
G Start/Keep Warm on/off-button launches the selected program and controls the Keep-Warm-function
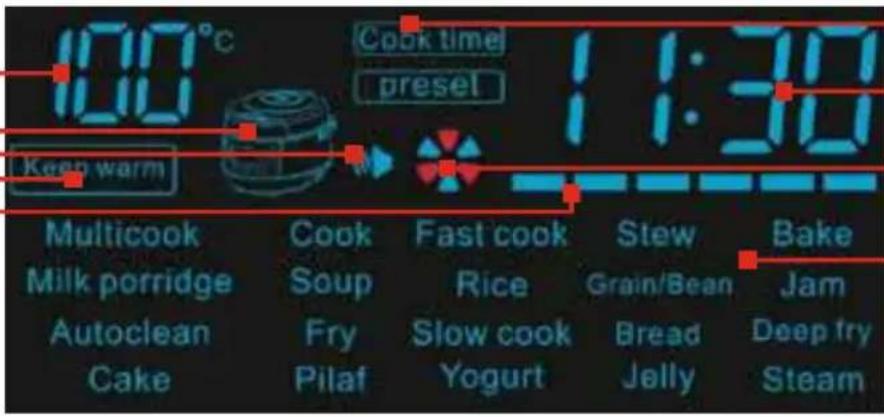
progress bar
shows the progress of the current program
Keep warm
specifies if the Keep-Warm-function is activated
Display of the acoustic signal
lights up when the acoustic signal is switched on
power indicator
lights up when the appliance is plugged in
temperature indicator
shows the selected temperature
program indicator
gives an overview of all programs; during operation, only the selected program is lit up
activity indicator
shows that the appliance is in operation
time indicator
indicates the remaining time of the current program or when the Auto-Start-function is activated, the time remaining until the program starts
Cook time / Preset
the respective indicator shows whether the countdown of the cooking time or the remaining time of the Auto-Start-function is displayed

IMPORTANT SAFEGUARDS
Carefully read all instructions before operating this appliance and save for further reference. Do not attempt to use this appliance for any other than the intended use described in these instructions. Any other use, especially misuse, can cause severe injuries or damage by electric shock, heat or fire.
Any operation, repair and technical maintenance of the appliance or any part of it other than described in these instructions may only be performed at an authorised service centre. Please contact your vendor.
- This appliance is for household use only and not intended for use in moving vehicles. Do not operate or store the appliance in humid or wet areas or outdoors. Any use of accessories, attachments or spare parts not recommended by the manufacturer may result in damage and / or injuries to persons.
- Check the entire appliance regularly for proper operation — especially the power cord. Do not use the appliance if the non-stick coating is damaged in any way (e.g. scratched, or peeling off). Do not operate the appliance, when liquids are in the housing of the appliance or accumulate under the appliance or overflow. Do not operate the appliance, when the appliance or any part of it is likely to be damaged, to avoid risk of fire, electric shock or any other damage and / or injuries to persons. The appliance is likely to be damaged if the appliance was subject to inadmissible strain (e.g. overheating, mechanical or electric shock), or if there are any cracks, excessively frayed or melted parts, or distortions, or if the appliance is leaking or not working properly. In this case, immediately unplug the appliance and return the entire appliance (including all parts and accessories) to an authorised service centre for examination and repair.
- During operation keep the appliance in an appropriate distance of at least 20 cm on each side and 1 m above to furniture, walls, boards, curtains, and other objects. Do not operate the appliance beneath or below any heat-sensitive or moisture-sensitive materials, boards, or drop-lights to avoid damage caused by steam, heat, or condensate. Operate the appliance on a well accessible, stable, level, dry, heat-resistant, water-resistant and suitable large table or counter. Do not place the appliance over a power cord, or near the edge of the table or counter, or on wet or inclined surfaces, or where it can fall. Always keep the appliance and the table or counter clean and dry, and wipe off spilled liquids immediately.
- Do not place any clothes or tissues or other objects under or on the appliance during operation, to avoid risk of fire, electric shock and overheating. Before operation, always ensure that there are no foreign objects under the pot or the appliance itself, and the appliance is assembled properly and not leaking with the lid and upper cover firmly in place. Solely use the appliance for processing edible food. Immediately unplug the appliance, if there is any kind of malfunction or problem (e.g. leaking, overheating).
- This appliance is not intended for use by persons (including children) with reduced physical, sensory or mental capabilities, or lack of experience and knowledge, unless they have been given supervision or instruction concerning use of the appliance by a person responsible for their safety. Children must be supervised to ensure that they do not play with the appliance or any parts of the appliance or the packaging. Do not leave the appliance unattended, when it is in reach of young children. Always keep the appliance where it is dry and clean and where young children cannot reach it. Do not place any hard and / or heavy objects on the appliance or any part of it. Take care that no one will pull the appliance by the power cord.
- Do not leave any cooking utensils or other foreign objects in the pot of the appliance during operation. Do not use any hard, sharp or edged objects (e.g. knives, forks) with the appliance. Only use wooden or heat-resistant plastic cooking utensils to stir and serve the food (e.g. supplied serving spoon). Do not use the inner pot for mixing ingredients to avoid excessive wear of the non-stick coating. Do not handle the appliance or any part of it with violence.
- The appliance is heated by built-in electric heating elements. The appliance or power cord may never touch hot surfaces. Do not place the appliance or any part of it on or near hot surfaces (e.g. burner, heater or oven). Do not use any part of the appliance (e.g. pot, steamer) with any other appliance.
- Do not move or tilt the appliance with the pot filled and inserted in the appliance to avoid that the liquid will be spilled. Always switch off, and unplug the appliance when it is not in use and let the appliance cool down sufficiently before moving, cleaning, or for storage. Always grasp the appliance on both handles for moving or lifting.
- Always observe the maximum filling level marks, when filling the pot, especially when heating foodstuffs that could froth. Otherwise hot liquids and foods could overflow or drip on the appliance and cause injuries and damage. Before starting operation, always ensure that there is a sufficient amount of liquid or foodstuffs in the pot, the pot is inserted correctly and the upper cover is assembled and closed properly. (See: >Operation<)
- Do not use abrasive cleaners or cleaning pads (e.g. metal scouring pads) for cleaning. Do not clean the appliance with any corrosive chemicals (e.g. bleach). Do not immerse the appliance or power cord in water or any other liquid. Do not spill or drip any liquids on the appliance or on the power cord to avoid risk of fire and electric shock. When liquids are spilled in the appliance, immediately switch off, unplug the power cord and wait for the appliance to cool down. Thereafter, clean and dry the appliance thoroughly (See: >Care and Cleaning<).
- DO NOT place the appliance or power cord in an automatic dishwasher.
- Do not leave any food to dry on the appliance. Always clean the appliance after each use to prevent a build up of baked-on foods (See: >Care and Cleaning<). Always keep the appliance and the accessories clean.
- This appliance is intended to be used in household and similar applications such as:
– staff kitchen areas in shops, offices and other working environments;
- farm houses;
– by clients in hotels, motels and other residential type environments;
– bed and breakfast type environments.
Important Safeguards for Electrical Appliances
The appliance is heated electrically. Place the appliance near a suitable wall power socket to connect the appliance directly to a protected mains power supply with protective conductor (earth / ground) connected properly. Ensure that the voltage rating of your mains power supply corresponds to the voltage requirements of the appliance (220 - 240 V, 50 Hz, AC, rated for at least 8 A).
The installation of a residual current operated circuit breaker (r.c.c.b.) with a maximum rated residual operating current of 30 mA in the supplying electrical circuit is strongly recommended. If in doubt, contact your electrician for further information. In various foreign countries, the specifications for power supplies are subject to incompatible norms. Therefore it is possible that power supplies in foreign countries do not meet the requirements for safe operation of
the appliance. Thus, before operating the appliance abroad, ensure that safe operation is possible.
- Do not to use any extension cords or multisocket outlets.
- Always handle the power cord with care. Always completely unwind the power cord before use. Do not place the appliance on a power cord. Power cords may never be knotted, twisted, pulled, strained or squeezed. Do not let the plug or power cord hang over the edge of the table or counter. The power cord may not touch hot surfaces. Ensure that no one will pull the appliance by the power cord. Take care not to entangle in the power cord. Always grasp the plug to disconnect the power cord. Do not touch the power plug with wet hands when the appliance is connected to the power supply.
- Do not place or immerse the appliance or the power cord in water or any other liquid. Do not spill or drip any liquids on the power cord or exterior of the appliance. When liquids are spilled on the appliance or power cord, immediately switch off and unplug the appliance.
High Temperatures – Risk of Burns

The multicook is designed for cooking and heating a variety of foods and, therefore, the interior of the appliance will get very hot during operation.
- Because inner pot, lid and interior of the appliance are very hot during operation and shortly thereafter, do not touch these parts with your hands, arms or any other
parts or your body or any heat- or moisture-sensitive objects. Do not place the pot on any heat-sensitive surfaces, shortly after operation. If required, protect your hands and arms with pot holders or oven gloves.
- Even with the lid properly closed, steam will escape from the steam vent during operation and shortly thereafter. During operation and immediately thereafter do not hold your hands, arms or face over the appliance to avoid scalds caused by steam escaping from the steam vent in the lid. In the steam vent and at the interior of the lid condensate could accumulate and drip and, additionally, large amounts of steam could escape from under the lid, when opening the lid. When opening the appliance, keep a sufficient distance to avoid scalds.
Non-stick Coating
The inner pot of your multicook is provided with a non-stick coating. Do not use hard or sharp objects for scratching, mixing or cutting on the coatings. Do not use the inner pot as a mixing bowl. Always remove your foods from the pot, before mixing or cutting. We will not be liable for damage to the non-stick coating, if metal utensils or similar objects have been used.
Please adhere to the following precautions:
- Do not use the inner pot with the non-stick coating being scratched, cracked or detached due to overheating.
- Only use wooden or heat-resistant plastic cooking utensils to stir and serve the food. Do not use any spray-on non-stick coatings.
- The non-stick surface minimises the effort of cleaning. Do not use abrasive scourers or abrasive cleaners for cleaning. Even stubborn residues can be removed via a soft sponge or soft nylon brush and warm dishwater.
TECHNICAL SPECIFICATIONS
| Model: Art. No. 42526 Design Multicook Plus | |
| Power supply: 220 - 240 V, 50 Hz | |
| Power consumption: 950 W | |
| Length of power cord: ca. 110 cm | |
| Weight: ca. 4.3 kg | |
| Dimensions: ca. 32 cm x 39,5 cm x 24 cm (width x depth x height) | |
| Capacity: max. 5 Litre | |
| Certification: |  |
BEFORE FIRST USE
WARNING: DO NOT let young children play with the appliance, or any part of it, or the packaging!
Remove the appliance and all accessories from the packaging and make sure that all components and accessories are included and undamaged. Some of the accessories could be arranged inside the appliance. Before first use, remove all packaging materials and promotional labels. But do not remove the rating label of the appliance. Make sure especially that no foreign objects (packing material) are located inside the appliance. Clean the appliance according to instructions in the section >Care and Cleaning>. During the first use of the appliance odours may develop, this is not a malfunction of the appliance. In this case, a thorough cleaning is recommended.
Place the appliance on a stable, moisture-and heat-resistant work surface. Never operate the appliance under cabinets, hanging lamps and near sensitive objects to avoid damage caused by steam, splashes and condensation. Never operate the appliance on inclined surfaces! Do not move or tilt the appliance during operation. Before turning on the appliance, make sure that all edges of the inner pot are clean and the lid is securely closed. Do not let liquids run above or below the appliance. If liquids are spilled onto or into the appliance, turn off the power immediately and unplug the power cord from the wall outlet. Allow the appliance to cool and clean the appliance (see >Care and Cleaning).
OPERATION
Acoustic signal
Your Design Multicook Plus is equipped with an acoustic signal. This will sound when keys are pressed or when the cooking process is finished. The signal is always enabled at start-up. You can turn off the signal by holding the >Hour / Min<-button for a few seconds. You will find the acoustic signal indicator in the LED-display. When you

turn off the acoustic signal, the indicator switches off. During the countdown of the Auto-Start-Function, or if one of the programs is in operation, you cannot turn off or on the acoustic signal.
Alteration of the cooking time
During operation of the Design Multicook Plus you can adjust the cooking time regardless of the pre-set time of the program. The steps and the total time depend on the selected program.
To change the cooking time:
- After selecting a cooking program, you can use the >Timer/t°C<-button to reach the time selection mode. The time indicator flashes.
- Press the >Hour / Min<-button to select hours or minutes. The selected position flashes.
- Press the >+<-button to increase the time, or press the >-<button to decrease the time. By holding the button, you can accelerate the changing of the time.
- After finishing the time setting (display continues to flash), you can make further adjustments, for example, by pressing the >Preset<button for a few seconds.
To cancel your settings, press the >Cancel / Keep Warm<-button and select the desired cooking mode again.
The Auto-Start-Function
With this function, you can set a time interval after which the selected program will start. The start of the program can be delayed from 5 minutes to 24 hours, each in 5 minutes steps.
- Select a cooking program with the desired settings.
- Press the >Preset<button to enter the time setting mode of the Auto-Start-Function. The minutes of the time indicator flash.
- By pressing the >Hour/Min<-button choose to set hours or minutes. The selected position flashes.
- Press the >+<-button to increase the time, or press the >-< button to decrease the time. By holding the button, you can accelerate the changing of the time.
- After setting the time, press and hold the >Start/Keep Warm on/off<button for a few seconds. The time display will stop flashing and the appliance starts to operate and shows the countdown until the start of the selected program.
- To cancel your settings, press the >Cancel / Keep Warm<-button. Then select the desired cooking mode again.
The Auto-Start-Function is available for all programs except >Fast Cook< and >Deep Fry<.
It is not recommended to set the Auto-Start-Function for a longer period of time, if your recipe contains perishable foods (eggs, fresh milk, meat, cheese, and so on).
When setting the time for the Auto-Start-Function you should take into account that countdown of the program >Steam< begins only after reaching the required operating temperature (boiling water).
During the countdown of the Auto-Start-Function, you cannot turn on or off the acoustic signal.
Keep-Warm-Function
The Keep-Warm-Function turns on automatically immediately after the program is over, and keeps the temperature of the prepared meal in the range 70 - 80 °C for 24 hours. The corresponding indicator on the LED display lights up, and the time display shows the elapsed time.
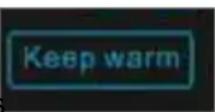
If necessary, this function can be switched off by pressing and holding the >Start / Keep Warm on / off<button. The corresponding indicator will switch off. This function can also be turned on or off during operation at any time.
Warm-up Function
With the Design Multicook Plus you can also reheat cold food.
- Place the food in the inner pot and insert it into the appliance.
-
Close the lid, and connect the appliance to the power outlet.
-
Press and hold the >Cancel / Keep Warm<-button for a few seconds. Keep Warm indicator on the display and the LED button will be light on. The time indicator will start shows the elapsed heating time.
The appliance heats the dish to 70 - 80 °C and will keep it in its state for 24 hours. This function can also be turned on or off during operation at any time by pressing and holding the >Start / Keep Warm on / off<button. The corresponding indicator will switch off.
Although the appliance can keep the food in a heated state up to 24 hours, it is not recommended to warm up your dish for more than two or three hours, as this can lead to a change in taste and consistency.
Program Multicook
This program is suitable for almost any kind of food, because you can adjust the temperature and cooking time required. The setting range of the temperature is 35\ °C - 180\ °C in steps of 5\ °C . The setting range of the time is 2 minutes to 15 hours in 1-minute steps (for the range up to 1 hour) or 5 minutes steps (for a time interval of more than 1 hour).
Note: The appliance does not switch to keep warm mode when the cooking temperature is selected below 75 °C. When the cooking temperature is more than 140 °C, the cooking time may not exceed 2 hours.
The 24-hour Auto-Start-Function is available for this program.
- Prepare the ingredients according to the recipe. Place these evenly in the inner pot and insert the inner pot into the housing. Please make sure that all ingredients, including liquids, are below the maximum mark (10 Cup) on the inner surface of the inner pot. Make sure that the inner pot is firmly in contact with the heating element.
-
Close the lid until it clicks into place. Connect the appliance to the power outlet.
-
Press the >Menu<-button or the >+ < and >- <-buttons to select the program >Multicook>. Once >Multicook< flashes on the LED-display the program is selected. The LED-display shows the default values for the temperature and cooking time. (The pre-set cooking time is 30 minutes, the pre-set cooking temperature is 100 °C.)
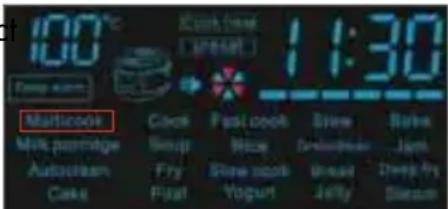
-
Use the >Timer/t°C<-button to reach the time selection mode. The minute indicator flashes. Use the >+< and >-<-buttons to adjust the time. With the >Hour / Min<-button you can switch between hours and minutes. The LED-display shows the pre-set cooking time 30 min. You can adjust the cooking time from 2 minutes to 15 hours.
-
Press again the >Timer/t°C<-button to adjust the temperature. The temperature indicator flashes. The LED-display shows the pre-set temperature 100 °C. Use the >+ < and >- <-buttons to select the desired temperature.
- If necessary, adjust the Auto-Start-Function to start cooking later.
- Press and hold for a few seconds the >Start/Keep Warm on/off
- The Keep-Warm-Function turns on automatically, immediately after the program is over. If necessary, this function can be switched off by pressing and holding the >Start / Keep Warm on / off<button at any time.
- After completion of the program an acoustic signal will sound. Depending on the settings of the appliance, the Keep-Warm-Function will launch (the LED-display counts up the time) or the appliance will return to standby mode.
- To cancel the selected program, to interrupt the cooking process or the Keep-Warm-Function press and hold the >Cancel / Keep Warm<button for a few seconds.
With the program >Multicook<, you can prepare many different dishes. Use our recipe book or the table with the recommended temperatures for cooking various dishes.
Program Cook
Recommended for the preparing vegetables and legumes. The setting range of the time is 2 minutes to 8 hours in 5-minute steps.
The 24-hour Auto-Start-Function is available for this program.
- Prepare the ingredients according to the recipe. Place these evenly in the inner pot and insert the inner pot into the housing. Please make sure that all ingredients, including liquids, are below the maximum mark (10 Cup) on the inner surface of the inner pot. Make sure that the inner pot is firmly in contact with the heating element.
- Close the lid until it clicks into place. Connect the appliance to the power outlet.
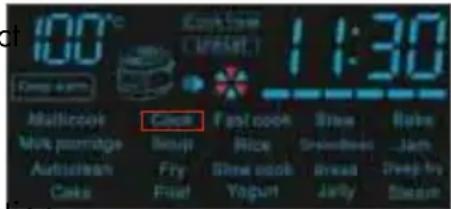
- Press the >Menu<-button or the > + < and > - <-buttons to select the program >Cook<. Once >Cook< flashes on the LED-display the program is selected. The LED-display shows the default values for the temperature and cooking time.
- Use the >Timer / t °C<-button to reach the time selection mode. The minute indicator flashes. Use the > + < and > - <-buttons to adjust the time. With the >Hour / Min<-button you can switch between hours and minutes. The LED-display shows the pre-set cooking time 40 min. You can adjust the cooking time from 2 minutes to 8 hours.
- If necessary, adjust the Auto-Start-Function to start cooking later.
- Press and hold for a few seconds the >Start/Keep Warm on/off-button to start the appliance. The >Start/Keep Warm on/off-button lights up and the countdown of the cooking time is shown in the time indicator.
-
The Keep-Warm-Function turns on automatically, immediately after the program is over. If necessary, this function can be switched off by pressing and holding the >Start / Keep Warm on / off<button at any time.
-
After completion of the program an acoustic signal will sound. Depending on the settings of the appliance, the Keep-Warm-Function will launch (the LED display counts up the time) or the appliance will return to standby mode.
-
To cancel the selected program, to interrupt the cooking process or the Keep-Warm-Function press and hold the >Cancel / Keep Warm<-button for a few seconds.
Program Fast Cook
This program is intended for heating ready meals or for cooking convenience side dishes. The pre-set cooking time is 15 minutes. The cooking time cannot be changed in this program.
The 24-hour Auto-Start-Function is not available for this program.
-
Prepare the ingredients according to the recipe. Place these evenly in the inner pot and insert the inner pot into the housing. Please make sure that all ingredients, including liquids, are below the maximum mark (10 Cup) on the inner surface of the inner pot. Make sure that the inner pot is firmly in contact with the heating element.
-
Close the lid until it clicks into place. Connect the appliance to the power outlet.
-
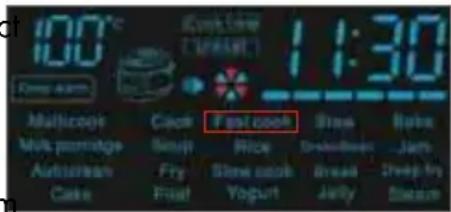
Press the >Menu<-button or the > + < and > - <-buttons to select the program >Fast Cook>. Once > Fast Cook< flashes on the LED-display the program is selected. The LED-display shows the default values for the temperature and cooking time.
-
Press and hold for a few seconds the >Start / Keep Warm on / off
-
The Keep-Warm-Function turns on automatically, immediately after the program is over. If necessary, this function can be switched off by pressing and holding the >Start / Keep Warm on / off<button at any time.
-
After completion of the program an acoustic signal will sound. Depending on the settings of the appliance, the Keep-Warm-Function will launch (the LED display counts up the time) or the appliance will return to standby mode.
-
To cancel the selected program, to interrupt the cooking process or the Keep-Warm-Function press and hold the >Cancel / Keep Warm<-button for a few seconds.
Program Stew
Recommended for stewing vegetables, meat, poultry and seafood. The setting range of the time is 10 minutes to 12 hours in 5-minute steps.
The 24-hour Auto-Start-Function is available for this program.
-
Prepare the ingredients according to the recipe. Place these evenly in the inner pot and insert the inner pot into the housing. Please make sure that all ingredients, including liquids, are below the maximum mark (10 Cup) on the inner surface of the inner pot. Make sure that the inner pot is firmly in contact with the heating element.
-
Close the lid until it clicks into place. Connect the appliance to the power outlet.
-
Press the >Menu<-button or the > + < and > - <-buttons to select the program >Stew<. Once >Stew< flashes on the LED-display
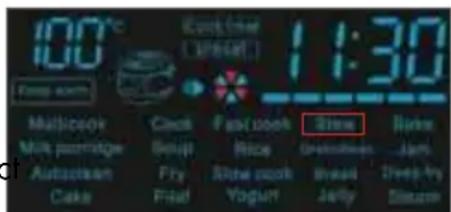
the program is selected. The LED-display shows the default values for the temperature and cooking time.
- Use the >Timer/t°C<-button to reach the time selection mode. The minute indicator flashes. Use the >+< and >-<-buttons to adjust the time. With the >Hour / Min<-button you can switch between hours and minutes. The LED-display shows the pre-set cooking time 1 hour. You can adjust the cooking time from 10 minutes to 12 hours.
- If necessary, adjust the Auto-Start-Function to start cooking later.
- Press and hold for a few seconds the >Start/Keep Warm on/off
- The Keep-Warm-Function turns on automatically, immediately after the program is over. If necessary, this function can be switched off by pressing and holding the >Start / Keep Warm on / off<button at any time.
- After completion of the program an acoustic signal will sound. Depending on the settings of the appliance, the Keep-Warm-Function will launch (the LED-display counts up the time) or the appliance will return to standby mode.
- To cancel the selected program, to interrupt the cooking process or the Keep-Warm-Function press and hold the >Cancel / Keep Warm<-button for a few seconds.
Program Bake
Recommended for baking various dishes. The setting range of the time is 20 minutes to 8 hours in 5-minute steps.
The 24-hour Auto-Start-Function is available for this program.
- Prepare the ingredients according to the recipe. Place these evenly in the inner pot and insert the inner pot into the housing. Please make sure that all ingredients, including liquids, are below the 1/2 -mark (2 l) on the inner surface of the inner pot. Make sure that the inner pot is firmly in contact with the heating element.
- Close the lid until it clicks into place. Connect the appliance to the power outlet.
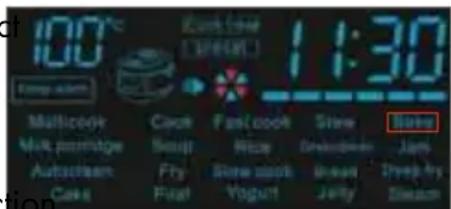
- Press the >Menu<-button or the > + < and > - <-buttons to select the program >Bake<. Once >Bake< flashes on the LED-display the program is selected. The LED-display shows the default values for the temperature and cooking time.
- Use the >Timer / t °C<-button to reach the time selection mode. The minute indicator flashes. Use the > + < and > - <-buttons to adjust the time. With the >Hour / Min<-button you can switch between hours and minutes. The LED-display shows the pre-set cooking time 60 min. You can adjust the cooking time from 20 minutes to 8 hours.
- If necessary, adjust the Auto-Start-Function to start cooking later.
- Press and hold for a few seconds the >Start/Keep Warm on/off
-
The Keep-Warm-Function turns on automatically, immediately after the program is over. If necessary, this function can be switched off by pressing and holding the >Start / Keep Warm on / off<button at any time.
-
After completion of the program an acoustic signal will sound. Depending on the settings of the appliance, the Keep-Warm-Function will launch (the LED-display counts up the time) or the appliance will return to standby mode.
-
To cancel the selected program, to interrupt the cooking process or the Keep-Warm-Function press and hold the >Cancel / Keep Warm<-button for a few seconds.
Program Milk Porridge
Recommended for preparing milk porridge, oatmeal and other milk puddings. The setting range of the time is 5 minutes to 4 hours in 1-minute steps (for the range up to 1 hour) or 5 minutes steps (for a time interval of more than 1 hour).
The 24-hour Auto-Start-Function is available for this program.
-
Prepare the ingredients according to the recipe. Place these evenly in the inner pot and insert the inner pot into the housing. Please make sure that all ingredients, including liquids, are below the maximum mark (10 Cup) on the inner surface of the inner pot. Make sure that the inner pot is firmly in contact with the heating element.
-
Close the lid until it clicks into place. Connect the appliance to the power outlet.
-
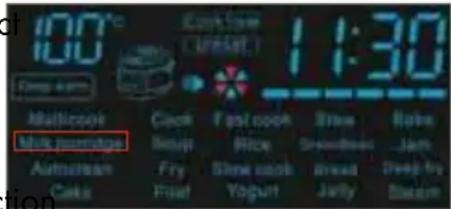
Press the >Menu<-button or the >+ < and >- <-buttons to select the program >Milk Porridge<. Once >Milk Porridge< flashes on the LED-display the program is selected. The LED-display shows the default values for the temperature and cooking time.
-
Use the >Timer / t °C<-button to reach the time selection mode. The minute indicator flashes. Use the >+ < and >- <-buttons to adjust the time. With the >Hour / Min<-button you can switch between hours and minutes. The LED-display shows the pre-set cooking time 35 min. You can adjust the cooking time from 5 minutes to 4 hours.
-
If necessary, adjust the Auto-Start-Function to start cooking later.
-
Press and hold for a few seconds the >Start/Keep Warm on/off
-
The Keep-Warm-Function turns on automatically, immediately after the program is over. If necessary, this function can be switched off by pressing and holding the >Start / Keep Warm on / off<button at any time.
-
After completion of the program an acoustic signal will sound. Depending on the settings of the appliance, the Keep-Warm-Function will launch (the LED-display counts up the time) or the appliance will return to standby mode.
-
To cancel the selected program, to interrupt the cooking process or the Keep-Warm-Function press and hold the >Cancel / Keep Warm<-button for a few seconds.
Recommendations for the preparation of Milk Porridge in your Multicook
The program »Milk Porridge«, was developed to prepare porridge or oatmeal made from pasteurized milk with low fat content. To avoid boiling over of milk, and to get the desired result, please observe the following tips:
- Wash thoroughly all whole grain cereals (rice, buckwheat, millet, etc.) until the water is clear;
- Spread the inner pot with a little butter before cooking;
- adhere strictly to the information about amounts of ingredients in the recipe;
- if you want to reduce or increase the amount of the ingredients, do so always proportional and do not exceed the maximum quantity;
The properties of milk and cereals, are dependent on the origin and the manufacturer, and can therefore vary, which sometimes affects the results.
If the desired result with the >Milk Porridge< program was not reached, you can also use the general-purpose >Multi Cook<-program. The optimum temperature for the preparation of Milk Porridge is 95 °C. Follow the quantities of the ingredients and the cooking time in the recipe.
Program Soup
The program is recommended for the preparation of soups and appetizers, as well as compotes and drinks. The setting range of the time is 10 minutes to 8 hours in 5-minute steps.
The 24-hour Auto-Start-Function is available for this program.
-
Prepare the ingredients according to the recipe. Place these evenly in the inner pot and insert the inner pot into the housing. Please make sure that all ingredients, including liquids, are below the maximum mark (10 Cup) on the inner surface of the inner pot. Make sure that the inner pot is firmly in contact with the heating element.
-
Close the lid until it clicks into place. Connect the appliance to the power outlet.
-
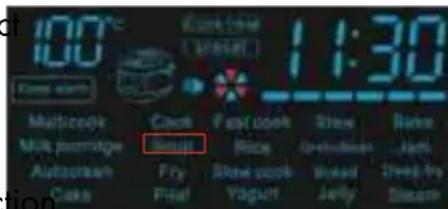
Press the >Menu<-button or the > + < and > - <-buttons to select the program >Soup<. Once >Soup< flashes on the LED-display the program is selected. The LED-display shows the default values for the temperature and cooking time.
-
Use the >Timer / t °C<-button to reach the time selection mode. The minute indicator flashes. Use the > + < and > - <-buttons to adjust the time. With the >Hour / Min<-button you can switch between hours and minutes. The LED-display shows the pre-set cooking time 60 min. You can adjust the cooking time from 10 minutes to 8 hours.
-
If necessary, adjust the Auto-Start-Function to start cooking later.
-
Press and hold for a few seconds the >Start/Keep Warm on/off-button to start the appliance. The >Start / Keep Warm on / off-button lights up and the countdown of the cooking time is shown in the time indicator.
-
The Keep-Warm-Function turns on automatically, immediately after the program is over. If necessary, this function can be switched off by pressing and holding the >Start / Keep Warm on / off<button at any time.
-
After completion of the program an acoustic signal will sound. Depending on the settings of the appliance, the Keep-Warm-Function will launch (the LED-display counts up the time) or the appliance will return to standby mode.
-
To cancel the selected program, to interrupt the cooking process or the Keep-Warm-Function press and hold the >Cancel / Keep Warm<-button for a few seconds.
Program Rice
Recommended for cooking rice and various side dishes. The setting range of the time is 5 minutes to 4 hours in 1-minute steps (for the range up to 1 hour) or 5 minutes steps (for a time interval of more than 1 hour).
The 24-hour Auto-Start-Function is available for this program.
- Prepare the ingredients according to the recipe. Place these evenly in the inner pot and insert the inner pot into the housing. Please make sure that all ingredients, including liquids, are below the maximum mark (10 Cup) on the inner surface of the inner pot. Make sure that the inner pot is firmly in contact with the heating element.
Tip:
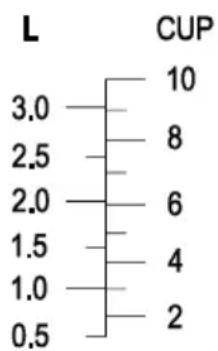
The numbers to the right of the level marks identify the number of servings of rice ( >Cup< scale). The numbers on the left are in litres.
Example:
For 4 measuring cups of rice, fill the inner pot up to the level mark 4 Cup with water.
-
Close the lid until it clicks into place. Connect the appliance to the power outlet.
-
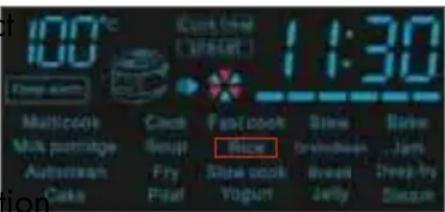
Press the >Menu<-button or the > + < and > - <-buttons to select the program >Rice<. Once >Rice< flashes on the LED-display the program is selected. The LED-display shows the default values for the temperature and cooking time.
-
Use the >Timer / t °C<-button to reach the time selection mode. The minute indicator flashes. Use the > + < and > - <-buttons to adjust the time. With the >Hour / Min<-button you can switch between hours and minutes. The LED-display shows the pre-set cooking time 25 min. You can adjust the cooking time from 5 minutes to 4 hours.
-
If necessary, adjust the Auto-Start-Function to start cooking later.
-
Press and hold for a few seconds the >Start/Keep Warm on/off
-
The Keep-Warm-Function turns on automatically, immediately after the program is over. If necessary, this function can be switched off by pressing and holding the >Start / Keep Warm on / off<button at any time.
-
After completion of the program an acoustic signal will sound. Depending on the settings of the appliance, the Keep-Warm-Function will launch (the LED-display counts up the time) or the appliance will return to standby mode.
-
To cancel the selected program, to interrupt the cooking process or the Keep-Warm-Function press and hold the >Cancel / Keep Warm<-button for a few seconds.
Note: Depending on your desired consistency and different types of rice you may need a little bit more or less water.
Program Grain/Bean
Recommended for cooking various types of single-and multi-grains (including couscous, bulgur, buckwheat, etc.) and various side dishes. The setting range of the time is 5 minutes to 4 hours in 1-minute steps (for the range up to 1 hour) or 5 minutes steps (for a time interval of more than 1 hour).
The 24-hour Auto-Start-Function is available for this program.
- Prepare the ingredients according to the recipe. Place these evenly in the inner pot and insert the inner pot into the housing. Please make sure that all ingredients, including liquids, are below the maximum mark (10 Cup) on the inner surface of the inner pot. Make sure that the inner pot is firmly in contact with the heating element.
- Close the lid until it clicks into place. Connect the appliance to the power outlet.
- Press the >Menu<-button or the > + < and > - <-buttons to lect the program >Grain / Bean<. Once >Grain / Bean< flash on the LED-display the program is selected. The LED-display shows the default values for the temperature and cooking time.
- Use the >Timer / t °C
- If necessary, adjust the Auto-Start-Function to start cooking later.
- Press and hold for a few seconds the >Start/Keep Warm on/off
- The Keep-Warm-Function turns on automatically, immediately after the program is over. If necessary, this function can be switched off by pressing and holding the >Start / Keep Warm on / off<button at any time.
- After completion of the program an acoustic signal will sound. Depending on the settings of the appliance, the Keep-Warm-Function will launch (the LED-display counts up the time) or the appliance will return to standby mode.
- To cancel the selected program, to interrupt the cooking process or the Keep-Warm-Function press and hold the >Cancel / Keep Warm<-button for a few seconds.
Program Jam
Suitable for making jam, marmalade, etc. The setting range of the time is 5 minutes to 2 hours in 5-minute steps.
The 24-hour Auto-Start-Function is available for this program.
- Prepare the ingredients according to the recipe. Place these evenly in the inner pot and insert the inner pot into the housing. Please make sure that all ingredients, including liquids, are below the maximum mark (10 Cup) on the inner surface of the inner pot. Make sure that the inner pot is firmly in contact with the heating element.
- Close the lid until it clicks into place. Connect the appliance to the power outlet.
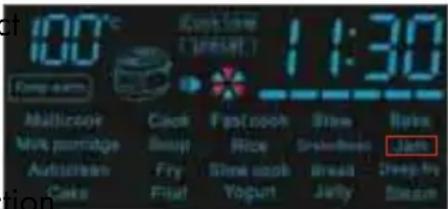
- Press the >Menu<-button or the >+ < and >- <-buttons to select the program >Jam<. Once >Jam< flashes on the LED-display the program is selected. The LED-display shows the default values for the temperature and cooking time.
- Use the >Timer / t °C<-button to reach the time selection mode. The minute indicator flashes. Use the > + < and > - <-buttons to adjust the time. With the >Hour / Min<-button you can switch between hours and minutes. The LED-display shows the pre-set cooking time 35 min. You can adjust the cooking time from 5 minutes to 2 hours.
- Press again the >Timer/t°C<-button to adjust the temperature. The temperature indicator flashes. The LED-display shows the preset temperature 100 °C. Use the > + < and > - <-buttons to select the desired temperature.
- Press and hold for a few seconds the >Start/Keep Warm on/off
- The Keep-Warm-Function turns on automatically, immediately after the program is over. If necessary, this function can be switched off by pressing and holding the >Start / Keep Warm on / off<button at any time.
- After completion of the program an acoustic signal will sound. Depending on the settings of the appliance, the Keep-Warm-Function will launch (the LED-display counts up the time) or the appliance will return to standby mode.
- To cancel the selected program, to interrupt the cooking process or the Keep-Warm-Function press and hold the >Cancel / Keep Warm<button for a few seconds.
Program Autoclean
It is recommended to use this program to clean your Multicook. The setting range of the time is 5 minutes to 2 hours in 5-minute steps.
The countdown of this program will start after reaching operating temperature (boiling water and steam development).
The 24-hour Auto-Start-Function is available for this program.
- Pour about 600-1000 ml of water into the inner pot. Place the steam insert inside the inner pot.
- Insert the inner pot into the housing. Make sure that the inner pot is firmly in contact with the heating element.
-
Close the lid until it clicks into place. Connect the appliance to the power outlet.
-
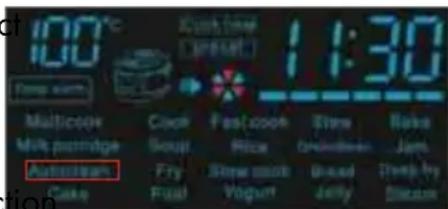
Press the >Menu<-button or the > + < and > - <-buttons to select the program >Autoclean>. Once >Autoclean< flashes on the LED-display the program is selected. The LED-display shows the default values for the temperature and cooking time.
-
Use the >Timer / t °C<-button to reach the time selection mode. The minute indicator flashes. Use the > + < and > - <-buttons to adjust the time. With the >Hour / Min<-button you can switch between hours and minutes. The LED-display shows the pre-set cooking time 30 min. You can adjust the cooking time from 5 minutes to 2 hours.
-
If necessary, adjust the Auto-Start-Function to start process later.
-
Press and hold for a few seconds the >Start/Keep Warm on/off-button to start the appliance. The >Start / Keep Warm on / off-button lights up. The countdown of the operating time will start after reaching operating temperature (boiling water and steam development).
- The Keep-Warm-Function turns on automatically, immediately after the program is over. If necessary, this function can be switched off by pressing and holding the >Start / Keep Warm on / off<button at any time.
- After completion of the program an acoustic signal will sound. Depending on the settings of the appliance, the Keep-Warm-Function will launch (the LED-display counts up the time) or the appliance will return to standby mode.
- To cancel the selected program, to interrupt the cooking process or the Keep-Warm-Function press and hold the >Cancel / Keep Warm<-button for a few seconds.
Program Fry
Suitable for cooking or frying of meat, vegetables, poultry, fish and seafood. The setting range of the time is 5 minutes to 2 hours in 5-minute steps.
The 24-hour Auto-Start-Function is available for this program.
- Prepare the ingredients according to the recipe. Place these evenly in the inner pot and insert the inner pot into the housing. Please make sure that all ingredients, including liquids, are below the maximum mark (10 Cup) on the inner surface of the inner pot. Make sure that the inner pot is firmly in contact with the heating element.
- Close the lid until it clicks into place. Connect the appliance to the power outlet.
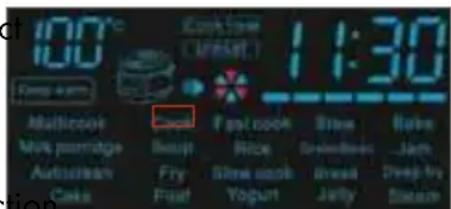
- Press the >Menu<-button or the > + < and > - <-buttons to select the program >Fry<. Once >Fry< flashes on the LED-display the program is selected. The LED-display shows the default values for the temperature and cooking time.
- Use the >Timer / t °C
- If necessary, adjust the Auto-Start-Function to start cooking later.
- Press and hold for a few seconds the >Start/Keep Warm on/off
- The Keep-Warm-Function turns on automatically, immediately after the program is over. If necessary, this function can be switched off by pressing and holding the >Start / Keep Warm on / off<button at any time.
- After completion of the program an acoustic signal will sound. Depending on the settings of the appliance, the Keep-Warm-Function will launch (the LED-display counts up the time) or the appliance will return to standby mode.
- To cancel the selected program, to interrupt the cooking process or the Keep-Warm-Function press and hold the >Cancel / Keep Warm<-button for a few seconds.
In order not to burn the ingredients, we recommend you to follow the instructions of the recipe and occasionally to stir the ingredients in the inner pot.
Program Slow Cook
Recommended for Slow Cooking recipes as for the preparation of corned beef. The setting range of the time is 10 minutes to 8 hours in 10-minute steps.
The 24-hour Auto-Start-Function is available for this program.
- Prepare the ingredients according to the recipe. Place these evenly in the inner pot and insert the inner pot into the housing. Please make sure that all ingredients, including liquids, are below the maximum mark (10 Cup) on the inner surface of the inner pot. Make sure that the inner pot is firmly in contact with the heating element.
- Close the lid until it clicks into place. Connect the appliance to the power outlet.
- Press the >Menu<-button or the > + < and > - <-buttons to select the program >Slow Cook>. Once >Slow Cook< flashes on the LED-display the program is selected. The LED-display shows the default values for the temperature and cooking time.
- Use the >Timer / t °C
- If necessary, adjust the Auto-Start-Function to start cooking later.
- Press and hold for a few seconds the >Start/Keep Warm on/off
- The Keep-Warm-Function turns on automatically, immediately after the program is over. If necessary, this function can be switched off by pressing and holding the >Start / Keep Warm on / off<button at any time.
- After completion of the program an acoustic signal will sound. Depending on the settings of the appliance, the Keep-Warm-Function will launch (the LED-display counts up the time) or the appliance will return to standby mode.
- To cancel the selected program, to interrupt the cooking process or the Keep-Warm-Function press and hold the >Cancel / Keep Warm<-button for a few seconds.
Program Bread
Recommended for baking of different kinds of bread made from wheat flour with an addition of rye flour. The program provides a full cycle from ferment to baking. Now you can bake your own delicious bread at home. The setting range of the time is 10 minutes to 6 hours in 5-minute steps.
- Prepare the dough, as indicated in the selected recipe. Place the dough evenly into the inner pot.
- Insert the inner pot into the housing. Please make sure that all ingredients, including liquids, are below the 1/2 mark (2 l) on the inner surface of the inner pot. Make sure that the inner pot is firmly in contact with the heating element.
- Close the lid until it clicks into place. Connect the appliance to the power outlet.
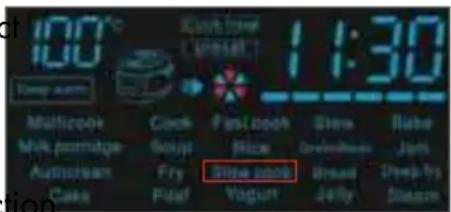
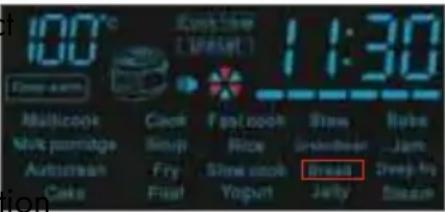
- Press the >Menu<-button or the > + < and > - <-buttons to select the program >Bread<. Once >Bread< flashes on the LED-display the program is selected. The LED-display shows the default values for the temperature and cooking time.
-
Use the >Timer / t °C<-button to reach the time selection mode. The minute indicator flashes. Use the > + < and > - <-buttons to adjust the time. With the >Hour / Min<-button you can switch between hours and minutes. The LED-display shows the pre-set cooking time 2 hours. You can adjust the cooking time from 10 minutes to 6 hours.
-
Keep in mind that during the first hour of the program, the ferment takes place. Thereafter the baking begins.
-
Press and hold for a few seconds the >Start/Keep Warm on/off
-
The Keep-Warm-Function turns on automatically, immediately after the program is over. If necessary, this function can be switched off by pressing and holding the >Start / Keep Warm on / off<button at any time.
-
After completion of the program an acoustic signal will sound. Depending on the settings of the appliance, the Keep-Warm-Function will launch (the LED-display counts up the time) or the appliance will return to standby mode.
-
To cancel the selected program, to interrupt the cooking process or the Keep-Warm-Function press and hold the >Cancel / Keep Warm<button for a few seconds.
Before baking, we recommend sift the flour, to remove any foreign matter and to enrich the flour with oxygen.
We do not recommend to use Auto-Start-Function, as this may lead to impairment of baking quality.
Do not open the appliance until the baking process is complete, as this can also lead to impairment of baking quality.
To save time and simplify the preparation, we recommend the use of ready mixes for bread.
Program Deep Fry
This program is suitable for deep-frying. The setting range of the temperature is 120 °C - 180 °C in steps of 5 °C. The setting range of the time is 5 minutes to 30 minutes 5-minute steps. The countdown of the program will start after reaching operating temperature.
The 24-hour Auto-Start-Function is not available for this program.
-
Prepare the ingredients according to the recipe. Assemble the frying basket by inserting the handle into the holder provided from above. Add the oil into the inner pot and insert the inner pot into the housing. Please make sure that all ingredients, including liquids, are below the maximum mark (10 Cup) on the inner surface of the inner pot. Make sure that the inner pot is firmly in contact with the heating element.
-
Close the lid until it clicks into place. Connect the appliance to the power outlet.
-
Press the >Menu<-button or the > + < and > - <-buttons to select the program >Deep Fry<. Once >Deep Fry< flashes on the LED-
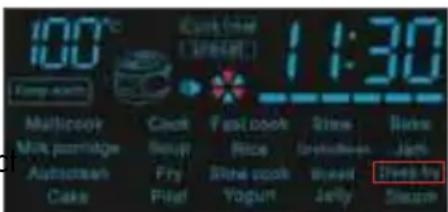
display the program is selected. The LED-display shows the default values for the temperature and cooking time.
- Use the >Timer/t°C<-button to reach the time selection mode. The minute indicator flashes. Use the >+< and >-<-buttons to adjust the time. With the >Hour / Min<-button you can switch between hours and minutes. The LED-display shows the pre-set cooking time 30 min. You can adjust the cooking time from 5 minutes to 30 minutes.
- Press again the >Timer/t°C<-button to adjust the temperature. The temperature indicator flashes. The LED-display shows the pre-set temperature 180 °C. Use the >+ < and >- <-buttons to select the desired temperature.
- Press and hold for a few seconds the >Start/Keep Warm on/off-button to start the appliance. The >Start/Keep Warm on/off-button lights up and the countdown of the cooking time is shown in the time indicator.
- Place the prepared ingredients in the frying basket. Once the oil has reached the selected temperature and the count down of the cooking time starts, you can carefully open the lid and insert the frying basket. Then loosen and remove the handle. Close the lid.
WARNING: the oil is very hot! Be careful not to burn yourself during lowering of the frying basket. Make sure that all components, including the liquid are below the maximum mark (10 Cup) on the inner surface of the inner pot.
- The Keep-Warm-Function turns on automatically, immediately after the program is over. If necessary, this function can be switched off by pressing and holding the >Start / Keep Warm on / off<button at any time.
- After completion of the program an acoustic signal will sound. Depending on the settings of the appliance, the Keep-Warm-Function will launch (the LED-display counts up the time) or the appliance will return to standby mode.
- Carefully open the lid. Reattach the handle on the frying basket, lift the basket with the food and fix this on the edge of the inner pot. Allow the oil to drain. Thereafter remove the food from the inner pot insert and the frying basket.
WARNING: the oil is very hot!
Program Cake
Recommended for baking sponge cake, casseroles, cakes and yeast pastry. The setting range of the time is 10 minutes to 8 hours in 5-minute steps. The 24-hour Auto-Start-Function is available for this program.
-
Prepare the ingredients according to the recipe. Place these evenly in the inner pot and insert the inner pot into the housing. Please make sure that all ingredients, including liquids, are below the 1/2 mark (2 l) on the inner surface of the inner pot. Make sure that the inner pot is firmly in contact with the heating element.
-
Close the lid until it clicks into place. Connect the appliance to the power outlet.
-
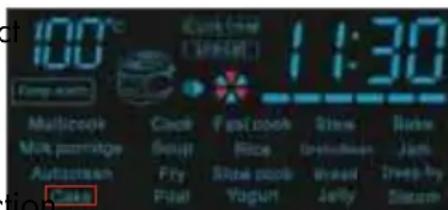
Press the >Menu<-button or the >+ < and >- <-buttons to select the program >Cake<. Once >Cake< flashes on the LED-display the program is selected. The LED-display shows the default values for the temperature and cooking time.
-
Use the >Timer / t °C<-button to reach the time selection mode. The minute indicator flashes. Use the > + < and > - <-buttons to adjust the time. With the >Hour / Min<-button you can switch between hours and minutes. The LED-display shows the pre-set cooking time 50 minutes. You can adjust the cooking time from 10 minutes to 8 hours.
- If necessary, adjust the Auto-Start-Function to start cooking later.
- Press and hold for a few seconds the >Start/Keep Warm on/off
- The Keep-Warm-Function turns on automatically, immediately after the program is over. If necessary, this function can be switched off by pressing and holding the >Start / Keep Warm on / off<button at any time.
- After completion of the program an acoustic signal will sound. Depending on the settings of the appliance, the Keep-Warm-Function will launch (the LED-display counts up the time) or the appliance will return to standby mode.
- To cancel the selected program, to interrupt the cooking process or the Keep-Warm-Function press and hold the >Cancel / Keep Warm<-button for a few seconds.
You can use a wooden skewer or toothpick to check the doneness of your cake. If there is no dough sticking to the toothpick after inserting into the cake, your cake is ready.
During preparation of bread, disable the >Keep Warm<-Function at all stages of the cooking process.
Program Pilaf
The program is recommended for the preparation of various types of pilaf (long cooked stew with rice, meat and carrots). The setting range of the time is 10 minutes to 2 hours in 5-minute steps. The 24-hour Auto-Start-Function is available for this program.
- Prepare the ingredients according to the recipe. Place these evenly in the inner pot and insert the inner pot into the housing. Please make sure that all ingredients, including liquids, are below the maximum mark (10 Cup) on the inner surface of the inner pot. Make sure that the inner pot is firmly in contact with the heating element.
- Close the lid until it clicks into place. Connect the appliance to the power outlet.
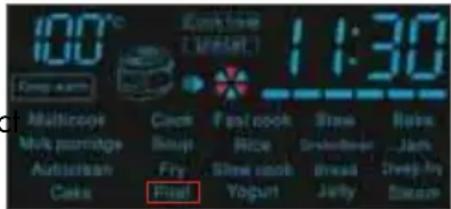
- Press the >Menu<-button or the > + < and > - <-buttons to select the program >Pilaf<. Once >Pilaf< flashes on the LED-display the program is selected. The LED-display shows the default values for the temperature and cooking time.
- Use the >Timer/t°C<-button to reach the time selection mode. The minute indicator flashes. Use the >+< and >-<-buttons to adjust the time. With the >Hour / Min<-button you can switch between hours and minutes. The LED-display shows the preset cooking time 1 hour. You can adjust the cooking time from 10 minutes to 2 hours.
- If necessary, adjust the Auto-Start-Function to start cooking later.
- Press and hold for a few seconds the >Start/Keep Warm on/off
-
The Keep-Warm-Function turns on automatically, immediately after the program is over. If necessary, this function can be switched off by pressing and holding the >Start / Keep Warm on / off<button at any time.
-
After completion of the program an acoustic signal will sound. Depending on the settings of the appliance, the Keep-Warm-Function will launch (the LED-display counts up the time) or the appliance will return to standby mode.
- To cancel the selected program, to interrupt the cooking process or the Keep-Warm-Function press and hold the >Cancel / Keep Warm<-button for a few seconds.
In order not to burn the ingredients, we recommend you to follow the instructions of the recipe and occasionally stir the ingredients in the inner pot.
Program Yogurt
With the help of the program >Yogurt< you can prepare a variety of delicious and healthy yogurts at home. The setting range of the time is 10 minutes to 12 hours in 5-minute steps. The >Keep Warm<-Function is not available for this program.
-
Prepare the ingredients according to the recipe. You can fill these either into the inner pot or into the provided yogurt cups. If you use the yoghurt cups, place these into the inner pot. Insert the inner pot into the housing. Please make sure that all ingredients, including liquids, are below the 1/2 mark (2 l) on the inner surface of the inner pot. Make sure that the inner pot is firmly in contact with the heating element.
-
Close the lid until it clicks into place. Connect the appliance to the power outlet.
-
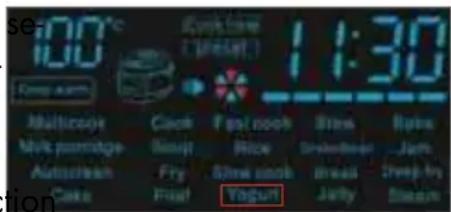
Press the >Menu<-button or the > + < and > - <-buttons to lect the program >Yogurt>. Once >Yogurt< flashes on the LED-display the program is selected. The LED-display shows the default values for the temperature and cooking time.
- Use the >Timer / t °C
- If necessary, adjust the Auto-Start-Function to start cooking later.
- Press and hold for a few seconds the >Start/Keep Warm on/off
- After completion of the program an acoustic signal will sound. The appliance will return to standby mode.
- To cancel the selected program, to interrupt the cooking process press and hold the >Cancel / Keep Warm<button for a few seconds.
Program Jelly
Recommended not only for the preparation of jellies, but also for the preparation of aspic, etc. The setting range of the time is 1 hour to 8 hours in 30-minute steps.
- Prepare the ingredients according to the recipe. Place these evenly in the inner pot and insert the inner pot into the housing. Please make sure that all ingredients, including liquids, are below the maximum mark (10 Cup) on the inner surface of the inner pot. Make sure that the inner pot is firmly in contact with the heating element.
- Close the lid until it clicks into place. Connect the appliance to the power outlet.
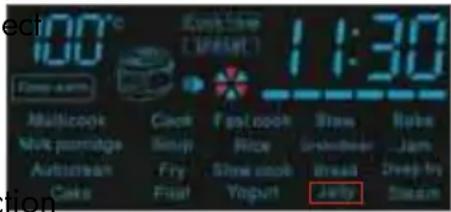
- Press the >Menu<-button or the > + < and > - <-buttons to select the program >Jelly>. Once >Jelly< flashes on the LED-display the program is selected. The LED-display shows the default values for the temperature and cooking time.
- Use the >Timer / t °C<-button to reach the time selection mode. The minute indicator flashes. Use the > + < and > - <-buttons to adjust the time. With the >Hour / Min<-button you can switch between hours and minutes. The LED-display shows the pre-set cooking time 6 hours. You can adjust the cooking time from 1 hour to 8 hours.
- If necessary, adjust the Auto-Start-Function to start cooking later.
- Press and hold for a few seconds, the >Start/Keep Warm on/off-button to start the appliance. The >Start/Keep Warm on/off-button lights up and the countdown of the cooking time is shown in the time indicator.
- The Keep-Warm-Function turns on automatically immediately after the program is over. If necessary, this function can be switched off by pressing and holding the >Start / Keep Warm on / off<button at any time.
- After completion of the program an acoustic signal will sound. Depending on the settings of the appliance, the Keep-Warm-Function will launch (the LED display counts up the time) or the appliance will return to standby mode.
- To cancel the selected program, to interrupt the cooking process or the Keep-Warm-Function press and hold the >Cancel / Keep Warm<-button for a few seconds.
Program Steam
Recommended for steaming vegetables, fish, meat, dumplings, etc. The setting range of the time is 5 minutes to 2 hours in 5-minute steps. The countdown of the program will start after reaching the operating temperature (boiling water and steam development).
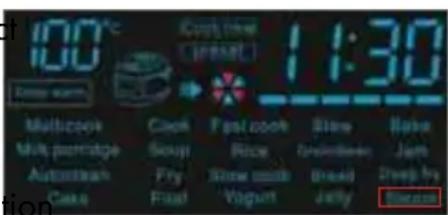
- Pour about 600-1000 ml of water into the inner pot. Place the steam insert inside the inner pot.
- Prepare the ingredients according to the recipe. Place these evenly in the steam insert and install the inner pot into the housing. Make sure that the inner pot is firmly in contact with the heating element.
- Close the lid until it clicks into place. Connect the appliance to the power outlet.
- Press the >Menu<-button or the > + < and > - <-buttons to select the program >Steam<. Once >Steam< flashes on the LED-display the program is selected. The LED-display shows the default values for the temperature and cooking time.
- Use the >Timer / t °C
- If necessary, adjust the Auto-Start-Function to start cooking later.
-
Press and hold for a few seconds the >Start/Keep Warm on/off
-
The Keep-Warm-Function turns on automatically, immediately after the program is over. If necessary, this function can be switched off by pressing and holding the >Start / Keep Warm on / off<-button at any time.
-
After completion of the program an acoustic signal will sound. Depending on the settings of the appliance, the Keep-Warm-Function will launch (the LED-display counts up the time) or the appliance will return to standby mode.
-
To cancel the selected program, to interrupt the cooking process or the Keep-Warm-Function press and hold the >Cancel / Keep Warm<-button for a few seconds.
If you are not following a recipe, use the table of the recommended cooking times for steaming.
Further possible applications
Letting dough to rise
Letting the dough to rise, or proofing, is the most important phase of the preparation of the dough just before baking. Proofing should occur in an area that is free of drafts and is of a constant temperature. The dough will rise to about double in size, but this may differ according to the recipe.
-
Prepare the dough according to the recipe. Place the dough evenly in the inner pot and insert the inner pot into the housing. Please make sure that all ingredients, including liquids, are below the 1/2 mark (2 l) on the inner surface of the inner pot. Make sure that the inner pot is firmly in contact with the heating element.
-
Close the lid until it clicks into place. Connect the appliance to the power outlet.
-
Press the >Menu<-button or the >+< and >-<-buttons to select the program >Multicook>. Once >Multicook< flashes on the LED-display the program is selected. (The pre-set cooking time is 30 minutes, the pre-set cooking temperature is 100 °C.) The LED-display shows the default values for the temperature and cooking time.
-
Use the >Timer / t°C<-button to reach the time selection mode. The minute indicator flashes. Use the >+ < and >- <-buttons to adjust the time. With the >Hour / Min<-button you can switch between hours and minutes. The LED-display shows the pre-set cooking time 30 min. You can adjust the cooking time from 2 minutes to 15 hours.
-
Press again the >Timer/t°C<-button to adjust the temperature. The temperature indicator flashes. The LED-display shows the preset temperature 100 °C. Use the > + < and > - <-buttons to select the desired temperature.
-
In this case, it is not recommended to use the Auto-Start-Function, as this may have a negative effect on the fermentation process.
-
Press and hold for a few seconds the >Start/Keep Warm on/off-button to start the appliance. The >Start / Keep Warm on / off-button lights up and the countdown of the cooking time is shown in the time indicator.
-
The Keep-Warm-Function turns on automatically, immediately after the program is over. Switch off the Keep-Warm-Function by pressing and holding the >Start / Keep Warm on / off-button, since this may also have a negative effect on the fermentation process.
-
After completion of the program an acoustic signal will sound. The appliance will return to standby mode.
-
To cancel the selected program, to interrupt the cooking process press and hold the >Cancel / Keep Warm<button for a few seconds.
Please note that during the process the dough increases in volume or even doubles in volume. To keep the dough from overflowing, the volume of the original ingredients should be located under the 1/2 mark (2 l) on the inner surface of the inner pot.
During the proofing process of the dough it is nessesary to maintain a constant temperature and humidity. For best results, do not open the appliance before the end of the program.
Preparing fondue
With your Design Multicook Plus and the >Mulicook<-program you can easily prepare fondue at home.
-
Prepare the ingredients or the mixture according to the recipe. Fill these into the inner pot and insert the inner pot into the housing. Please make sure that all ingredients, including liquids, are below the maximum mark (10 Cup) on the inner surface of the inner pot. Make sure that the inner pot is firmly in contact with the heating element.
-
Close the lid until it clicks into place. Connect the appliance to the power outlet.
-
Press the >Menu<-button or the >+< and >-<-buttons to select the program >Multicook>. Once >Multicook< flashes on the LED-display the program is selected. (The pre-set cooking time is 30 minutes, the preset cooking temperature is 100 °C.) The LED-display shows the default values for the temperature and cooking time.
-
Use the >Timer/t°C<-button to reach the time selection mode. The minute indicator flashes. Use the >+< and >-<-buttons to adjust the time. With the >Hour / Min<-button you can switch between hours and minutes. The LED-display shows the pre-set cooking time 30 min. You can adjust the cooking time from 2 minutes to 15 hours.
-
Press again the >Timer/t°C<-button to adjust the temperature. The temperature indicator flashes. The LED-display shows the pre-set temperature 100 °C. Use the >+ < and >- <-buttons to select the desired temperature.
-
If necessary, adjust the Auto-Start-Function to start cooking later.
-
Press and hold for a few seconds the >Start/Keep Warm on/off
-
The Keep-Warm-Function turns on automatically, immediately after the program is over, if the selected temperature was over 75 °C. If necessary, this function can be switched off by pressing and holding the >Start / Keep Warm on / off<button at any time.
-
After completion of the program an acoustic signal will sound. Depending on the settings of the appliance, the Keep-Warm-Function will launch (the LED-display counts up the time) or the appliance will return to standby mode.
-
To cancel the selected program, to interrupt the cooking process or the Keep-Warm-Function press and hold the >Cancel / Keep Warm<-button for a few seconds.
TIPS AND FURTHER INFORMATION
Steaming
Steamed foods retain most of their nutritional value when cooked in the multicook. Foods may be steamed by placing food in the steam insert over stock or water. Keep lid closed while steaming food unless the recipe or chart specifically states to open the lid. By opening the lid unnecessarily steam is lost and the cooking time will be extended.
Recommended preparation time for steaming
Note that the following table contains general recommendations. The actual time may very depending on the quality of the product and your taste preferences.
| Ingredients Weight or Ammount Water Volume ml Cooking Time min | |||
| Fillet of pork or beef (diced 1.5 x 1.5 cm) | 500 g 500 20-30 | ||
| Lamb fillet (diced 1.5 x 1.5 cm) 500 g 500 25 | |||
| Chicken fillet (diced 1.5 x 1.5 cm) 500 g 500 15 | |||
| Meatballs 180 g (6 pcs) 500 10 | |||
| Fillet of fish 500 g 500 10 | |||
| Shrimps for a salad (peeled, cooked or frozen) | 500 g 500 5 | ||
| Dumplings or large ravioli 500 g 500 15 | |||
| Potatoes (diced 1.5 x 1.5 cm) | 500 g 500 15 | ||
| Carrots (diced 1.5 x 1.5 cm) | 500 g | 1000 | 35 |
| Vegetables (frozen) | 500 g 500 10 |
Recommended temperature settings for your Design Multicook Plus
| Ingredients | Temperature |
| Proofing of dough | 35°C |
| Preparation of yoghurt | 40°C |
| Preparation of baby food | 60°C |
| Sous-vide cooking (cooking of vacuum-packed ingredients) | 65°C |
| Preparation of punch | 70°C |
| Preparation of mulled wine | 80°C |
| Production of curd cheese or preparation of food, that requires a long cooking time | 85°C |
| Preparation of porridge | 95°C |
| Preparation of meringues or jam | 100°C |
| Preparation of aspic | 105°C |
| Ingredients Temperature | |
| Preparation of sugar syrup 115°C | |
| Preparation of stews 125°C | |
| Preparation of casseroles 130°C | |
| Sautéing cooked dishes 135°C | |
| Smoking sth. 140°C | |
| Preparation of vegetables and fish (in aluminum foil) 145°C | |
| Preparation of meat (in aluminum foil) 150°C | |
| Baking cakes with yeast dough 155°C | |
| Roasting poultry 160°C | |
| Frying steaks 165°C | |
| Deep-frying180°C |
Overview of program features and settings
| Program Recommended Use | Pre-set Time | Range of cooking time | Auto-Start-Function | Keep Warm | |
| Multi Cook | Preparation of various dishes with the ability to set the temperature and cooking time | 30 min | 2 min - 1 hour with 1-min steps1 hour - 15 hours5-min steps | √ | √ |
| Cook | Cooking vegetables and legumes | 40 min | 5 min - 8 hours in 5-min steps | √ | √ |
| Fast Cook | Short reheating of finished dishes | 15 min | not available | ✕ | ✕ |
| Stew | Stewing meat, fish, vegetables, side dishes | 1 hour | 10 min - 12 hours in 5-min steps | √ | √ |
| Bake | Baking various dishes | 60 min | 30 min - 8 hours in 5-min steps | √ | √ |
| Milk Porridge | Preparation of pulpy dishes like porridge or oatmeal with milk | 35 min | 5 min - 1 hour in 1-min steps | √ | √ |
| Soup | Cooking of soups, broth | 1 hour | 10 min - 8 hours in 5-min steps | √ | √ |
| Rice | Cooking of rice | 25 min | 5 min - 1 hour in 1-min steps | √ | √ |
| Grain/Bean | Preparation of various types of grains and side dishes | 45 min | 5 min - 1 hour in 1-min steps | √ | √ |
| Jam | Preparation of jams, jellies, etc. | 35 min | 5 min - 12 hours in 5-min steps | √ | √ |
| Autoclean | Cleaning of the inner pot and lid | 30 min | 5 min - 2 hours in 5-min steps | √ | √ |
| Fry | Searing meat, fish, vegetables etc. | 15 min | 5 min - 2 hours in 5-min steps | √ | √ |
| Slow Cook | preparation of Slow Cook dishes / stews | 5 hours | 10 min - 8 hours in 10-min steps | √ | √ |
| Bread Baking | bread 2 hours | 10 min - 6 hours in 5-min steps | √ | √ | |
| Deep Fry | Deep Frying 30 min | 10 min - 30 Min in 5-min steps | ✕ | √ | |
| Cake | Baking of cakes, biscuits, casseroles, cakes of different yeast and puff dough | 50 min | 10 min - 8 hours in 5-min steps | √ | √ |
| Pilaf | Preparation of various types of pilaf (meat, fish, poultry, vegetables) | 1 hour | 10 min - 2 hours in 5-min steps | √ | √ |
| Yogurt | Preparation of different kinds of yogurt | 8 hours | 10 min - 12 hours in 5-min steps | √ | ✕ |
| Jelly | Preparation of jelly or aspic | 6 hour | 1 - 12 hours in 30-min steps | √ | √ |
| Steam | Steaming of meat, fish, vegetables, etc. | 20 min | 5 min - 2 hours in 5-min steps | √ | √ |
TROUBLESHOOTING
If any problems occur while operating the appliance, you will find some suggestions here.
| Problem Possible | Cause Solution of the | problem |
| The cooking temperature is not high enough | You forgot to close the lid of the appliance or the lid was not tightly enough closed, so that the cooking temperature was not able to develop high enough. | Do not open unnecessary the lid of the appliance during cooking.Close the lid until it clicks into place. Make sure that nothing interferes with the closing of the lid and the sealing ring on the inside of the lid is not deformed. |
| The cooking bowl and the heating element had poor contact, so that the coo-king temperature could not be high enough. | The inner pot has to be horizontally inserted into the housing and to fit snugly on the heating element.Make sure that there are no foreign objects in the interior of the appliance. Check if the heating element is clean. | |
| The dishes do not turn out well. | The selection of ingre-dients, the way they were cut and prepared, the program selection and the cooking time must correspond to the selected recipe. | The ingredients are not suitable for the selected program.The ingredients are cut too large, or the general amount of ingredients was not observed.You have set a wrong cooking time.The selected recipe is not suitable for the preparation with this appliance. |
| - when steaming: | There is too little water in the inner pot to ensure a sufficient vapour density. | Pour necessarily the recommended amount of water in the recipe into the inner pot. When in doubt, check the water level during the cooking process. |
| - when frying and deep-frying: | You have filled too much oil into the inner pot. | Usually it is sufficient for frying to wet the bottom of the inner pot with a thin coat of oil.Do not close the lid while frying, unless it is so specified in the recipe.When frying, follow the instructions of your recipe.Excess water is in the inner pot.Necessarily defrost frozen foods before cooking and drain the water. |
| - when cooking: e. g. broth boils over during coo-king process | The correct amounts of ingredients have not been observed. | Follow the instructions and amounts as described in your recipe. Make sure that all ingredients, are below the maximum mark (10 Cup) on the inner surface of the inner pot. |
| - when baking: e. g. the dough is not cooked well baked | During the baking process, a portion of the dough has stuck to the inside of the lid and was blo-cking the steam vent. | There is too much dough in the inner pot. Adhere to the recipes for this appliance. |
| The result is over-cooked | You have made a mistake in the selection of ingredients or their size (the pieces are too small) or the setting of the cooking time. | Stick exactly to the recipes for the appliance.Selection of ingredients, the way they are cut, program selection and cooking time must be in accordance with the recommendations in the recipe. |
| After cooking, the finished dish was kept too long in the >Keep Warm<mode. | A longer period of use of the >Keep Warm< function is undesirable. This function can be switched off by pressing and holding the >Start/Keep Warm on/off<button. | |
| When cooking porridge milk boils over | The quality and the properties of the milk are dependent on the storage, and its production conditions.We recommend the use of ultra-pasteurized milk with a fat content of up to 2.5%. If necessary, the milk may be diluted somewhat with water. | |
| The dishes scorch | The inner pot was used after being poorly cleaned during previous cooking. The non-stick coating of the inner pot is damaged. | Before you start cooking, make sure that the inner pot is carefully cleaned and the non-stick coating is not damaged. |
| The total amount of food falls below the recommended amount in the recipe. | Use a recipe that has been adapted for use with this appliance. | |
| You have set a too long cooking time. | Reduce the cooking time. | |
| - when frying: • You forgot to put oil into the inner pot.• You have stirred the food not often enough or it was turned over too late. | Usually when frying, pour a little vegetable oil - so that the bottom of the inner pot is wetted with a thin layer of oil. Stir regularly the food in the inner pot, for an even browning of the ingredients. | |
| - when steaming: There is not enough liquid in the inner pot. | Add more liquid into the inner pot. Do not open the appliance unnecessarily during the cooking process. | |
| - when cooking: • not enough liquid in the inner pot.• the ratio of the ingredients was not observed. | Observe the proper ratio of liquid and solid components. | |
| - when baking: You have not greased the interior of inner pot prior to baking. | Prior to filling of the dough grease the bottom and the inner sides of the inner pot with butter or vegetable oil.Attention: do not pour oil into the inner pot! | |
| Problem Possible Cause Solution of the problem | ||
| The baking result is moist | Wrong ingredients were used, which increase the amount of moisture e. g. juicy vegetables or fruits, frozen berries, cream, etc. | Select ingredients for recipes that are provided for this appliance.Try to avoid ingredients that contain too much moisture, or use minimum quantity of these ingredients. |
| The finished pastry was kept too long after completion of baking process in the closed appliance. | Try to remove the finished pastry immediately after baking from the appliance. Use theKeep Warm<function only for a short operiod of time. | |
| The baking result has not risen | Eggs with sugar were not beaten well enough.The dough mixed with baking soda was left too long.You have not sifted the flour or the dough is not kneaded enough.There was a mistake layering the ingredients.Your chosen recipe is not suitable for baking in a multicook. | Use a recipe that has been adapted for use with this appliance. Selection of ingredients, the type of preparation and the quantity proportions must match the recipe. |
CARE AND CLEANING
- Unplug the power cord from the power outlet.
- Allow all parts to cool before removing the removable inner pot. Wash the removable inner pot, steam insert and lid in hot, soapy water, rinse and dry thoroughly.
- Gastroback does not recommend that any parts of your multicook are washed in a dish-washer as harsh detergents and hot water temperatures may stain or distort the removable inner pot and accessories.
- Do not use abrasive cleaners, steel wool, or metal scouring pads as these can damage the non-stick coating.
- The housing can be wiped over with a damp cloth and then dried thoroughly. To prevent damage to appliance do not use alkaline cleaning agents when cleaning, use a soft cloth and a mild detergent.
NOTE: If rice has cooked onto the bottom of the inner pot, fill the inner pot with hot, soapy water and leave to stand for approximately 10 minutes before cleaning.
WARNING: The power cord must be removed before the multicook is cleaned and that the oven department must be dried before the multicook is used again.
To prevent damage to the appliance do not use alkaline cleaning agents when cleaning, use a soft cloth and mild detergent.
Do not use chemicals, steel wool, metal scouring pad or abrasive cleaners to clean the outside
of the appliance housing or inner pot as these can damage the housing or the coating of the inner pot.
Do not immerse housing or power cord in water or any other liquid as this may cause electrocution.
STORAGE
WARNING: Young children must be supervised that they do not play with the appliance or any part of it. When the appliance is not in use, always unplug the appliance. Do not leave the appliance unattended while connected to the power supply to avoid risk of electric shock or fire. Always clean the appliance before storing to avoid accumulation of dried-on food. Operate according to the instructions >Care and cleaning>. Make sure that there are no foreign substances on the heating plates and close the lid for storing. Ensure to store the appliance where it is clean, dry and safe from frost, direct sunlight and inadmissible strain (mechanical or electric shock, heat, moisture) and where it is out of reach of young children. Place the appliance on a clean and stable surface, where it cannot fall. Do not place any hard or heavy objects on the appliance or any part of it.
- Clean the appliance according to the instructions >Care and cleaning<.
- Make sure there are no foreign objects on the heating plates.
- Close the lid and move the appliance by the handle. Store the appliance on a clean and stable surface, where it cannot fall.
CAUTION: Do not hold the appliance by the power cord for moving the appliance. To move the appliance, always grasp the appliance on both handles, to avoid damage.
Always handle power cord with care. Electric cables may never be knotted, twisted, pulled, strained or squeezed.
Do not use any parts or accessories of the appliance for any other purpose than operating the appliance. It is good advice to store the parts of the appliance with the appliance.
NOTES FOR DISPOSAL

Dispose of the appliance and packaging must be effected in accordance with the corresponding local regulations and requirements for electrical appliances and packaging. Please contact your local disposal company.
Do not dispose of electrical appliances as unsorted municipal waste, use separate collection facilities. Contact your local government for information regarding the collection systems available. If electrical appliances are disposed of in landfills or dumps, hazardous substances can leak into the groundwater and get into the food chain, damaging your health and wellbeing. When replacing old appliances with new ones, the retailer is legally obligated to take back your old appliance for disposal at least for free of charge.
INFORMATION AND SERVICE
Please check www.gastroback.de for further information. For technical support, please contact Gastroback Customer Care Center by phone: +49 (0)4165/22 25-0 or e-mail: info@gastroback.de.
WARRANTY
We guarantee that all our products are free of defects at the time of purchase. Any demonstrable manufacturing or material defects will be to the exclusion of any further claim and within warranty limits of the law free of charge repaired or substituted. There is no warranty claim of the purchaser if the damage or defect of the appliance is caused by inappropriate treatment, over loading or installation mistakes. The warranty claim expires if there is any technical interference of a third party without an written agreement.
The purchaser has to present the sales slip in assertion-of-claim and has to bear all charges of costs and risk of the transport.
GASTROBACK GmbH
- DESIGN MULTICOOK PLUS
- TABLE OF CONTENTS
- DEAR CUSTOMER
- KNOWING YOUR DESIGN MULTICOOK PLUS
- GOPENINGBUTTON
- EXTENSIVE ACCESSORIES
- CONTROL PANEL
- PROGRESS BAR
- KEEP WARM
- DISPLAY OF THE ACOUSTIC SIGNAL
- POWER INDICATOR
- TEMPERATURE INDICATOR
- PROGRAM INDICATOR
- ACTIVITY INDICATOR
- TIME INDICATOR
- COOK TIME / PRESET
- IMPORTANT SAFEGUARDS
- IMPORTANT SAFEGUARDS FOR ELECTRICAL APPLIANCES
- HIGH TEMPERATURES – RISK OF BURNS
- NON-STICK COATING
- TECHNICAL SPECIFICATIONS
- BEFORE FIRST USE
- WARNING: DO NOT LET YOUNG CHILDREN PLAY WITH THE APPLIANCE, OR ANY PART OF IT, OR THE PACKAGING
- OPERATION
- ACOUSTIC SIGNAL
- ALTERATION OF THE COOKING TIME
- TO CHANGE THE COOKING TIME
- THE AUTO-START-FUNCTION
- KEEP-WARM-FUNCTION
- WARM-UP FUNCTION
- PROGRAM MULTICOOK
- PROGRAM COOK
- PROGRAM FAST COOK
- PROGRAM STEW
- PROGRAM BAKE
- PROGRAM MILK PORRIDGE
- RECOMMENDATIONS FOR THE PREPARATION OF MILK PORRIDGE IN YOUR MULTICOOK
- PROGRAM SOUP
- PROGRAM RICE
- TIP
- EXAMPLE
- PROGRAM GRAIN/BEAN
- PROGRAM JAM
- PROGRAM AUTOCLEAN
- PROGRAM FRY
- PROGRAM SLOW COOK
- PROGRAM BREAD
- PROGRAM DEEP FRY
- PROGRAM CAKE
- PROGRAM PILAF
- PROGRAM YOGURT
- PROGRAM JELLY
- PROGRAM STEAM
- FURTHER POSSIBLE APPLICATIONS
- LETTING DOUGH TO RISE
- PREPARING FONDUE
- TIPS AND FURTHER INFORMATION
- STEAMING
- RECOMMENDED PREPARATION TIME FOR STEAMING
- TROUBLESHOOTING
- CARE AND CLEANING
- STORAGE
- NOTES FOR DISPOSAL
- INFORMATION AND SERVICE
- WARRANTY
- GASTROBACK GMBH
Brand : Gastroback
Model : Design Multicook Plus 42526
Category : Multi-cooker