
N720 DM PRO - Telephone GIGASET - Free user manual and instructions
Find the device manual for free N720 DM PRO GIGASET in PDF.


| Type of product | DECT VoIP Base Station |
| Brand | Gigaset |
| Model | N720 DM PRO |
| Dimensions (W x H x D) | 105 x 105 x 30 mm |
| Weight | Approx. 110 g |
| Power supply | Power over Ethernet (PoE) IEEE 802.3af or 5V DC adapter |
| Max. handsets supported | 6 |
| Handset compatibility | Gigaset DECT, GAP compatible handsets |
| DECT standard | DECT (Digital Enhanced Cordless Telecommunications) |
| Frequency band | 1880-1900 MHz (Europe) |
| Range outdoors | Up to 300 m |
| Range indoors | Up to 50 m |
| ECO DECT | Yes (radiation reduced when idle) |
| HDSP (High Definition Sound Performance) | Yes |
| VoIP protocols | SIP (RFC 3261), multiple profiles |
| Codecs | G.711, G.722, G.729 |
| Call functions | Call waiting, call transfer, conference, 3-way conference |
| Phonebook capacity | Up to 500 entries |
| Installation | Wall mount or desktop |
| Cleaning and maintenance | Wipe with a soft, dry cloth. Do not use solvents or abrasive cleaners. |
| Safety | Use only supplied power adapter. Do not expose to moisture or extreme temperatures. |
| Spare parts and repairability | No user-serviceable parts. Contact authorized service for repairs. |
| Operating temperature | 5°C to 45°C |
| Storage temperature | -20°C to 60°C |
Frequently Asked Questions - N720 DM PRO GIGASET
User questions about N720 DM PRO GIGASET
0 question about this device. Answer the ones you know or ask your own.
Ask a new question about this device
Download the instructions for your Telephone in PDF format for free! Find your manual N720 DM PRO - GIGASET and take your electronic device back in hand. On this page are published all the documents necessary for the use of your device. N720 DM PRO by GIGASET.
USER MANUAL N720 DM PRO GIGASET
Roles in the provisioning process 5
Server in the provisioning process 6
Gigaset server 6
Provisioning server 6
Provisioning methods 7
Provisioning data 9
Provisioning tool 10
Provisioning methods ...... 11
Manual Gigaset VoIP phone set-up – standard procedure 11
Methods for providing the provisioning server URL 12
Setting up redirection information using the web user interface 12
Setting up redirection information using the XML-RPC interface 15
Providing the provisioning server URL via the SIP multicast mechanism 24
DHCP option (dhcp_url) 25
File upload via HTTP server 25
MAC based provisioning 26
Message flow 27
HTTP request 28
Auto-provisioning via activation code 29
Message flow 31
HTTP request 32
Subscription list – supporting multiple accounts 33
Updating the configuration data 34
Auto-provisioning with plain XML content 36
Security aspects 37
Certificates in PEM format 37
Download TLS certificates via a link in a profile 38
Starting the provisioning tool 38
XML provisioning file 39
Configuration file editor (provisioning tool) 39
Starting 39
Creating a configuration file 40
XML files 42
XSD schema files 43
Configuration parameters 43
XML template - example 43
Special parameters 46
Setting up an own provisioning server 48
Provisioning package editor (provisioning tool) 48
Starting 49
Creating a provisioning package 49
Installing the auto-provisioning application 52
Preparing the file system 52
Required libraries 52
Installing the gigaset_profile_gen application 52
Setting the access rights for the auto-provisioning files and script 53
Auto-provisioning example script 54
Content
Testing the installation 60
The gigaset_profile_gen application 61
File system structure 62
Index 64
Introduction
Gigaset VoIP phones are delivered to the end-user requiring minimal user interaction for set-up and keeping up-to-date. The end-user experiences the same "plug & play" behaviour as for analogue phones. Unlike classic phones using a PSTN connection, VoIP phones require a variety of configuration parameters which have to be loaded automatically when the device is connected to the Internet.
Provisioning
Provisioning is the process for uploading the necessary configuration and account data to the phone. This is done by means of profiles. A profile is a configuration file that contains Gigaset VoIP phone-specific settings, VoIP provider data as well as user-specific content. It has to be available on an HTTP provisioning server which is accessible for the phone in the public (Internet) or local network.
A profile is loaded to the phone via its Ethernet interface.
Auto-provisioning
Auto-provisioning is defined as the mode of operation by which the Gigaset VoIP phone connects automatically to a server and downloads both provider-specific parameters (such as the URL of the SIP server) and user-specific parameters (such as the user name and password) and stores them in its non-volatile memory.
Auto-provisioning is not necessarily limited to the parameters required for doing VoIP telephony. Auto-provisioning can also be used to configure other parameters, e.g. the eMail settings, if the Gigaset VoIP phones support these features. However, for technical reasons auto-provisioning is not possible for all configuration parameters of the phone.
XML-provisioning
Gigaset offers XML-provisioning to the customer, i.e. Gigaset VoIP phones can be supplied with the necessary configuration data via XML content. Existing XML-tooling can be used.
There are two procedures to provide Gigaset VoIP phones with configuration data:
◆ An XML file containing the configuration data is directly uploaded onto the phone.
- The XML file is used by a profile generation tool to generate a binary file that is supported by the phones.
The following Gigaset VoIP phones are supported for auto-provisioning:
| XML-provisioning with binary P | Plain XML-provisioning | |
| Gigaset DE900 IP PRO Yes 8/2012 | ||
| Gigaset DE700 IP PRO Yes 8/2012 | ||
| Gigaset DE410 IP PRO Yes 8/2012 | ||
| Gigaset DE310 IP PRO Yes 8/2012 | ||
| Gigaset DX800A all in one Yes No | ||
| Gigaset C610 IP/N300 IP Yes 8/2012 | ||
| Gigaset N510 IP PRO Yes 8/2012 | ||
| Gigaset N720 DECT IP Multicell System Yes | Q3/Q4 2012 |
Roles in the provisioning process
![graph TD A["Update server"] --> B["Redirection server"] C["Provider"] --> D["Provisioning server"] E["End-user"] --> F["ProvisionerGigaset"] F --> G["SIP server"] B --> H["Network / Internet"] D --> H G --> H H --> A H --> C H --> E](/content/2026/06/1279918/images/58eed35701790f32ffc245582a55fd5492c7f982cbe508c38351c67a8be0c97d.jpg)
Roles in the provisioning process
Gigaset Communications GmbH – the manufacturer
◆ Gigaset is the manufacturer of the VoIP phones which are the subject of this document. For Gigaset VoIP phones the MAC address including a check sum is used for identification. Gigaset ensures that this MAC ID is printed on all phone boxes. This is necessary for assigning a specific phone to a specific provider in order to provide the phone with SIP account data.
◆ Each device is preconfigured with the same parameters. By default, all Gigaset VoIP phones contact the Gigaset update server when they are connected to the Internet for the first time to get further information, e.g. the URL of the responsible provisioning server.
◆ Gigaset provides a web or XML-RPC interface which can be used by provisioners to deploy redirection data on the Gigaset redirection server (→ page 12).
◆ Gigaset provides a provisioning tool which can be used by provisioners to facilitate the provisioning process. It provides an editor to create device-specific valid configuration files easily as well as an editor to create provisioning packages which can be uploaded to the phones.
The provider
- The provider hosts the SIP servers required to offer a complete VoIP telephony service to the end-user. Occasionally, the provider simultaneously assumes the role of provisioner and can host his own provisioning server.
The provisioner
- The provisioner has direct contact to the end-user and actually manages the VoIP configuration parameters for each individual end-user VoIP phone. The provisioner has to provide the content and perhaps even to operate the server that will be accessed by the phone in order to download the end-user's configuration parameters.
- When using the Gigaset redirection service the provisioner can operate an own provisioning server. If not, the provisioner is responsible for creating redirection data on the Gigaset server. The MAC ID printed on the device's box can be read by a barcode scanner by the provisioner who has to deploy this information on the Gigaset redirection database using the web interface.
The provisioner is also responsible for storing the custom-built data on the provisioning server. If a VoIP phone requests this server, an end-user specific profile is generated and sent to the device. - Last but not least, the provisioner has to keep the custom-built data up-to-date.
Introduction
The end-user
The end-user has to connect the VoIP phone to the Internet only. All related information will be downloaded automatically and there is no need for the end-user to configure parameters manually.
Server in the provisioning process
The following servers are part of the provisioning process:
Gigaset server
◆Update server
The update server is responsible for providing the Gigaset VoIP phones with
– provider profiles (user-independent data),
- firm ware updates,
– language files for the Web user interface (optional),
– help texts (language-specific) for the Web user interface (optional).
Gigaset VoIP phones establish a connection to the Gigaset server when connected to the Internet for the first time and then periodically in order to check if there is an updated configuration file for the Gigaset VoIP phone-specific settings.
By default the Gigaset server profile.gigaset.net/device is used as update server.
◆Redirection server
When the VoIP phone contacts the Gigaset server, in order to get all the necessary configuration data, the redirection server supplies the URL of the provisioning server which is responsible for providing the VoIP phone with the provider data (SIP account).
To enable auto-provisioning (i.e. the end-user does not need to select the provider manually) the provisioner must add the redirection information for the VoIP phones to the redirection database.
The URL of the Gigaset redirection server is prov.gigaset.net.
Provisioning server
The provisioning server stores custom-built data for providing the VoIP phones with the VoIP specific data (e.g. SIP account).
For many reasons it is possible to use a customised provisioning sever, e.g.:
- The phone has no possibility to reach the Gigaset server via the web (e.g. closed network without HTTP proxy).
The phone is used behind a VoIP PBX and the provisioning has to be independent from the LAN/WAN infrastructure.
◆The provider wants to handle profiles and firmware himself.
◆ The provider wants to use an auto-provisioning procedure to support the VoIP phones.
The Gigaset auto-provisioning methods are scalable over a wide area. This means – for example – that it is possible to set up a system completely independent from the Gigaset server or to use the Gigaset server for redirecting to a provider-specific provisioning server.
Setting up a customised provisioning server
The following is required to set up an own provisioning server:
◆HTTP server (e.g. Apache)
The provisioner has to provide a system with an operative HTTP server, where the specific Gigaset software package can be installed. In the case of binary XML provisioning this must be a Linux system.
◆Provisioning package provided by Gigaset
Gigaset provides the customer with a provisioning software package. The package includes all the necessary files, scripts, tools and the manual for setting up a provisioning server. The provisioner only has to create a connection between the provisioning script and its database containing the user-specific account data. For detailed information please refer to the chapter Setting up an own provisioning server (→ page 48).
◆Database (e.g. MySQL)
The use of a database is optional but it is the usual way for providing custom-built data. Furthermore, the use of a database administration tool (e.g. phpMyAdmin) is helpful to manage the database content.
Provisioning methods
For implementing auto-provisioning of the VoIP phones it must first be ensured that the device receives the address (URL) of the server responsible for provisioning ( → page 6). As the provisioning server location cannot be anticipated – in the case of a private PBX it may be located within the phone's local network, in the case of a hosted PBX it may be located somewhere in the Internet – the phones use a Gigaset server (profile.gigaset.net/device) by default which must be changed according to the provisioner's requirements.
The following methods are provided for the provisioning server URL update, depending on the prevailing network infrastructure (see figure Provisioning process → page 8):
◆ Gigaset redirection service (→ page 12)
The provisioner can use either the Gigaset provider/provisioner portal to enter the provisioning server URL for the phones to be managed or use the XML-RPC interface.
◆ SIP multicast mechanism (→ page 24)
The phone requests the provisioning server address from a local network instance via SIP multicast. This method is predominantly used by local PBX systems.
◆ DHCP option 114 (→ page 25)
The phone requests the provisioning server address via a DHCP request with option 114 (dhcp_url). This method is predominantly used by stand-alone provisioning servers within the same LAN.
◆Manually using the device's Web UI
The following methods are provided for auto-provisioning:
◆ MAC-based auto-provisioning (→ page 26)
The VoIP phone requests the provisioning data from the provisioning server based on its MAC address. No user input is necessary. This method is used for VoIP phones connected to (hosted) PBX systems.
◆ Auto-provisioning based on an activation code (→ page 29)
The VoIP phone requests the provisioning data from the provisioning server based on an activation code manually entered by the user. This method is used for devices distributed via retail sales.
Introduction
Profile download can only be started from the VoIP phone, i.e. that the phone must be triggered to perform an update when new configuration data is provided. This can be carried out as follows:
◆VoIP phone restart
◆Manually by the user via the device's Web UI
◆Regular version checks initiated daily by the phone
◆ SIP check-sync mechanism (→ page 34)
![graph TD A["Enter redirection data"] --> B["Redirection server"] B --> C["SIP multicast"] B --> D["DHCP option 114"] C --> E["Connect redirection server"] D --> F["Supply provisioning URL"] G["Provisioning server"] --> H["MAC address or activation code"] G --> I["SIP account and configuration data"]…](/content/2026/06/1279918/images/2841a5104c0ab98776682c55a7500089e983a3a842b60afc578ca62770ff6835.jpg)
Provisioning process
1 The phone sends a DHCP request including the DHCP option 114. If an URL is known by the DHCP server, it will be returned within the DHCP response.
Otherwise:
2 The phone sends a SIP multicast to the local network with a SUBSCRIBE request. If a SIP server supporting SIP multicast is available and the device can be identified, the URL of the provisioning server is supplied.
Otherwise:
3 The phone connects to the Gigaset server profile.gigaset.net/device. If redirection information is available for the device (identified by the MAC ID) the URL of the provisioning server is supplied.
4 The URL of the provisioning server is supplied.
5 The phone connects to the provisioning server and requests the SIP account and configuration data.
6 The provisioning server provides the phone with the required data.
The following methods are supported by the specific devices:
| MAC-based auto-provisioning | Auto-provisioning with activation code | SIP multicast and check-sync | DHCP option 114 | |
| Gigaset DE900 IP PRO Yes – | Yes Yes | |||
| Gigaset DE700 IP PRO Yes – | Yes Yes | |||
| Gigaset DE410 IP PRO Yes – | Yes Yes | |||
| Gigaset DE310 IP PRO Yes – | Yes Yes | |||
| Gigaset DX800A all in one Yes | Yes Yes Planned 2012 | Yes | ||
| Gigaset C610 IP/N300 IP Yes | Yes Yes | Yes | ||
| Gigaset N510 IP PRO | Yes Yes Yes | Yes | ||
| Gigaset N720 DECT IP Multicell System | Yes | Yes | Yes | Yes |
Provisioning data
The following are provisioning data:
Parameters
Gigaset VoIP phones have many configuration parameters but only a small subset is required for provisioning.
◆General device data
This data is supplied statically via a template and comprises
– general settings for the SIP account, e.g. proxy, registration and STUN server address, port numbers, etc.
– NTP settings, e.g. a time server address
– settings for Info services
◆User-specific data
It can be extracted from the provisioning database ( → page 48) and comprises, for example
- SIP username and password
- LAN settings
– voice mail settings, e.g mail account data
– settings for network directories, e.g. online phone books
WebUI texts (optional)
For Gigaset DECT IP phones (e.g. Gigaset N510 IP PRO) only the English language is implemented by default in the firmware. All other languages have to be downloaded from the provisioning server when selected by the user.
Firmware update files (optional)
The provisioner can decide to also host the firmware files on the provisioning server. Gigaset delivers a package with all the current firmware files for the VoIP phones.
Introduction
Provisioning tool
The provisioning tool is a web interface designed to assist the provisioner when creating a configuration file or a provisioning package for Gigaset IP phones.
The provisioning tool provides the following components:
◆ A configuration editor to create a valid XML file (→ page 39).
◆ A provisioning package editor to create packages that can be uploaded to the phones (→ page 48).
A link to the Gigaset web interface for entering redirection information ( → page 12) is planned for a future release.
Provisioning methods
When the phone is connected to the network for the first time, it needs to connect to a server in the local or public network in order to download the necessary data to be able to make VoIP calls. By default, this is a Gigaset server but it could also be a customer provisioning server, e.g. on a PBX.
Below, the standard manual procedure is described in short.
The following methods are available for automatic provisioning (see also introduction on page 7):
◆For providing the provisioning server URL
– Gigaset redirection service ( → page 12)
– SIP multicast mechanism ( → page 24)
- DHCP option 114 ( → page 25)
◆For auto-provisioning
- Mac-based auto-provisioning ( → page 26)
- Auto-provisioning based on an activation code ( → page 29)
◆For profile update
- SIP check-sync mechanism ( → page 34)
Manual Gigaset VoIP phone set-up – standard procedure
A Gigaset VoIP phone can be set up manually via the phone's user interface – in the case of a DECT VoIP phone via the handset. The use of a PC is not required but possible using a Web user interface which is available for all Gigaset VoIP phones.
The default manual registration procedure for a Gigaset VoIP phone is as follows:


Provisioning methods
If the phone establishes a connection to the Gigaset server to download a provider profile, this download is carried out in two steps: - All countries for which a provider profile is available are listed for the user to select the location 4. - All providers of the selected country for which a profile is available are displayed for the user to select the provider 5. The profile is loaded from the Gigaset server onto the VoIP phone. In this case Gigaset acts as a provisioner for general (user-independent) SIP settings. The user enters the authentication name 6 and the password 7 according to the rules given by the provider profile.Methods for providing the provisioning server URL
The following methods are available to provide the VoIP phones with redirection information: ◆Web user interface for registering/deregistering and list devices ◆ XML-RPC interface (→ page 15) ◆ SIP multicast (→ page 24) ◆ DHCP option 114 (→ page 25)Setting up redirection information using the web user interface
To add the redirection data to the redirection database, Gigaset provides a web user interface for provisioners. You need a user account (user name and password) which has to be provided by Gigaset Communications GmbH. i There is also an XML-RPC interface available to provide redirection data. The XML-RPC calls are described in detail → page 15. ▶ Open the web user interface: http://prov.gigaset.net - Login using the user name and password provided by Gigaset. If the login is successful, the main menu is opened. The following functions are available: ◆ Registration, control and deregistration of single devices ◆Display of devices list ◆Upload of prepared XML filesRegistering VoIP phones
To register a Gigaset VoIP phone, enter the MAC ID of the device, the URL of the provisioning server and the Provider for the device configuration.   URL and Provider can be entered manually or selected from a list of known provisioner URLs and providers. ▶ Click on the Register button to save the entry. The corresponding parameters are checked and – if approved – saved in the Gigaset redirection database. The provisioner is informed accordingly.Searching for and deregistering VoIP phones
The Deregister tab can be used to query single redirection data records using the MAC ID or MAC address. To search for a specific redirection data set, open the Deregister tab, enter the MAC ID or MAC address of the device and click on the Search button.  If the MAC ID or MAC address matches, the redirection data for a specific device appears. ▶ To deregister the redirection data record for the device click on the Deregister button. You need to confirm this action. It is therefore not possible to delete entries accidentally.| i | If the Provisioning URL is not changed, e.g. by resetting it to the default value, the device can no longer be updated. |
Provisioning methods
List devices
The List Devices tab can be used to search for redirection data sets of all devices or all devices of a specific provider. ▶ Open the List Devices tab ▶ Click on the List button to list the redirection data sets of all devices. or ▶ Enter the name of a provider or select it from the list and click on the Search button.| MAC address: | Provider's name: | Provisioning URL: | Last request: |
| 7C2F8016F926 | Provider | http://192.168.2.161:82/gigaset/c/2011-05-11 | |
| 7C2F8016FAF3 | Provider | http://192.168.137.106/gigaset/c/2011-09-10 | |
| 7C2F801D1121 | Provider | http://192.168.178.51/chagall/42/2011-12-14 | |
| 7C2F80207541 | Provider | http://192.168.178.51/gigaset/62/2011-11-29 |
Uploading an XML File
It is also possible to upload an XML file containing many redirection data bundles. This option is most useful for provisioners whose end-user profiles are generated automatically by any script and who want to keep using the web user interface instead of direct interfaces for clients. However, more than just uploading redirection data can be carried out. Depending on the structure of the XML file, any function provided by the interfaces may be possible. For detailed information on the XML parameter values please refer to the section Setting up redirection information using the XML-RPC interface (→ page 15). ▶ Open the Upload tab, browse your file system for the appropriate XML file and click on the Upload button. Setting up redirection information using the XML-RPC interface
The most comfortable Gigaset server interface is the XML-RPC interface. XML-RPC is subject to a procedure call protocol, which means that functions can be accessed at different places. XML-RPC requests are encoded in XML syntax and dispatched via HTTP. The Gigaset XML-RPC web interface is based on Apache XML-RPC libraries and can be accessed by any XML-RPC client. The client can call different remote procedure methods. The parameter values and the function names are converted into XML syntax simultaneously and transferred to the XML-RPC server via HTTP. The XML file is parsed through the Apache XML-RPC libraries and again, the suitable remote method with its corresponding parameter values is called. The response of this remote method is again converted into XML syntax, sent back to the client and processed by the XML-RPC client libraries. The XML-RPC service can be accessed using the following address: http://prov.gigaset.net/apxml/rpc.do An XML-RPC call for an XML-RPC client could be as follows:Object[] params = new Object[]{"#MAC-ID#","#PROVISIONING_URL#","#PROVIDERNAME#"};
List<Object> list1 = Arrays.asList((Object[])client.execute("autoprov.registerDevice", params));
public List<Object> registerDevice(String macID, String url, String name) {
    use parameter values and create response list
    return myList;
}
Provisioning methods
XML syntax
Whenever an XML-RPC client requests a remote method on the Gigaset XML-RPC server, an XML file is created consisting of the method's name and the parameters. Both the file and the response are transferred via HTTP. The upload of XML files via FileUpload has to look exactly like this as well. The uploaded XML file, depending on the method for registering a redirection data set, can for example appear as follows:<?xml version="1.0" encoding="UTF-8"?>
<methodCall>
<methodName>autoprov.registerDevice</methodName>
<params>
<param>
<value>FFFFFFFF-1234</value>
</param>
<param>
<value>http://my.provisioning.server.com/gigaset/ap.php</value>
</param>
<param>
<value>MyProvider</value>
</param>
</params>
</methodCall>
<?xml version="1.0" encoding="UTF-8"?>
<methodResponse xmlns:ex="http://ws.apache.org/xmlrpc/namespaces/extensions">
    <params>
    <param>
    <value><array><data>
    <value><boolean>0</boolean></value>
    <value>macalready_in_use:FFFFFFFFFFFFFFFF</value>
    </data></array></value>
    </param>
    </params>
</methodResponse>
XML-RPC Commands
If an XML-RPC client calls a remote procedure function on the Gigaset XML-RPC server, an XML file consisting of the XML-RPC method and the corresponding parameter values is created and is transferred via HTTP. The response is transferred the same way. The respective XML-RPC methods as well as the relevant parameter values, return values and XML formats are illustrated below:autoprov.registerDevice
Registering a device at the provisioning server:Call: autoprov.registerDevice(String macID, String url, String name)
macID MAC ID of the device
url URL of the provisioning server
name Provider name
Return: Return value (1) (Boolean) 1 | 0 1 = true, 0 = false
    Return value (2) (String) if true:    OK: password
    if false:    mac_already_in_use:
    mac_invalid:
    url_invalid:
    name_invalid:
Request: <?xml version="1.0" encoding="UTF-8"?>
<methodCall>
    <methodName>autoprov.registerDevice</methodName>
    <params>
    <param>
    <value>FFFFFFFF-1234</value>
    </param>
    <param>
    <value>https://my.provisioning.server.com/gigaset/ap.php</value>
    </param>
    <param>
    <value>MyProvider</value>
    </param>
    </params>
</methodCall>
Response: <?xml version="1.0" encoding="UTF-8"?>
<methodResponse xmlns:ex="http://ws.apache.org/xmlrpc/namespaces/extensions">
<params>
<param>
<value><array><data>
<value><boolean>0</boolean></value>
<value>macalready_in_use:FFFFFFFFFFFFFFFF</value>
</data></array></value>
</param>
</params>
</methodResponse>
Provisioning methods
autoprov.deregisterDevice
Deregistering a device from the provisioning server.Call: autoprov.deregisterDevice(String mac)
mac MAC ID or MAC address of the device
Return: Return value (1) (Boolean) 1 | 0 1 = true, 0 = false
    Return value (2) (String) if true:    OK
    if false: mac_not_found:
    mac_invalid:
Request: <?xml version="1.0" encoding="UTF-8"?>
<methodCall>
    <methodName>autoprov.deregisterDevice</methodName>
    <params>
    <param>
    <value>FFFFFFFFFFFFFFFF</value>
    </param>
    </params>
</methodCall>
Response: <?xml version="1.0" encoding="UTF-8"?>
<methodResponse xmlns:ex="http://ws.apache.org/xmlrpc/namespaces/extensions">
<params>
<param>
<value><array><data>
<value><boolean>1</boolean></value>
<value>OK</value>
</data></array></value>
</param>
</params>
</methodResponse>
Return: Return value (0-n)
(Object[])
[MAC, NAME, URL, DATE]
Request: <?xml version="1.0" encoding="UTF-8"?>
<methodCall>
    <methodName>autoprov.listDevices</methodName>
    <params />
</methodCall>
Response: <?xml version="1.0" encoding="UTF-8"?>
<methodResponse xmlns:ex="http://ws.apache.org/xmlrpc/namespaces/extensions">
<params>
<param>
<value><array><data>
<value><array><data>
<value>BBBBBBBBBBBBB</value>
<value>MyProvider1</value>
<value>https://my.provisioning.server.com/gigaset/ap.php</value>
<value>2009-11-29</value>
</data></array></value>
<value><array><data>
<value>EEEEEEEEEEE</value>
<value>MyProvider2</value>
<value>https://my.provisioning.server.com/gigaset/ap.php</value>
<value>2009-11-27</value>
</data></array></value>
</data></array></value>
</param>
</params>
</methodResponse>
Provisioning methods
autoprov.listDevices - list devices of a specific provider Supply MAC address, provider name, provisioning server URL and registration date for all registered devices of a given provider:Call: autoprov.listDevices(String name)
name Provider name
Return: Return value (0-n)
(Object[])
[MAC, NAME, URL, DATE]
Request: <?xml version="1.0" encoding="UTF-8"?>
<methodCall>
    <methodName>autoprov.listDevices</methodName>
    <params />
</methodCall>
Response: <?xml version="1.0" encoding="UTF-8"?>
<methodResponse xmlns:ex="http://ws.apache.org/xmlrpc/namespaces/extensions">
<params>
<param>
<value><array><data>
<value><array><data>
<value>BBBBBBBBBBBBB</value>
<value>MyProvider1</value>
<value>https://my.provisioning.server.com/gigaset/ap.php</value>
<value>2009-11-29</value>
</data></array></value>
</data></array></value>
</param>
</params>
</methodResponse>
Call: autoprov.checkDevice(String mac)
mac MAC ID or MAC address of the device
Return: Return value (1) (Boolean) 1 | 0 1 = true, 0 = false
    Return value (2) (String) if true: [MAC]
    if false: max_not_found:
    mac_invalid:
    Return value (3) (String) if true: [NAME]
    Return value (4) (String) if true: [URL]
    Return value (5) (String) if true: [DATE]

Request: <?xml version="1.0" encoding="UTF-8"?>
<methodName>autoprov.checkDevice</methodName>
<params>
<param>
<value>BBBBBBBBBBBBB</value>
</param>
</params>
</methodCall>

Response: <?xml version="1.0" encoding="UTF-8"?>
<methodResponse xmlns:ex="http://ws.apache.org/xmlrpc/namespaces/extensions">
<params>
<param>
<value><array><data>
<value><boolean>1</boolean></value>
<value>BBBBBBBBBBBBB</value>
<value>MyProvider1</value>
<value>https://my.provisioning.server.com/gigaset/ap.php</value>
<value>2009-11-29</value>
</data></array></value>
</param>
</params>
</methodResponse>
Call: autoprov.registerDeviceList(List<String> macList, String url, String name)
macList List of MAC IDs
url URL of the provisioning server
name Provider name
Return: Return value (1) (Boolean) 1 | 0 1 = true, 0 = false
    Return value (2-n) (String) if true:    OK: Passwort
    mac_already_in_use:
    mac_not_exist:
    if false: mac_invalid:
    url_invalid:
    name_invalid:
Request: <?xml version="1.0" encoding="UTF-8"?>
<methodCall>
    <methodName>autoprov.registerDeviceList</methodName>
    <params>
    <param>
    <value><array><data>
    <value>11111111111-ABCD</value>
    <value>22222222222-BCDE</value>
    <value>333333333333-CDEF</value>
    <value>4444444444444-DEFA</value>
    </data></array></value>
    </param>
    <param>
    <value>https://my.provisioning.server.com/gigaset/ap.php</value>
    </param>
    <param>
    <value>MyProvider</value>
    </param>
    </params>
</methodCall>
Response: <?xml version="1.0" encoding="UTF-8"?>
<methodResponse xmlns:ex="http://ws.apache.org/xmlrpc/namespaces/extensions">
<params>
<param>
<value><array><data>
<value><boolean>1</boolean></value>
<value>OK</value>
</data></array></value>
</param>
</params>
</methodResponse>
Another <?xml version="1.0" encoding="UTF-8"?>
Response: <methodResponse xmlns:ex="http://ws.apache.org/xmlrpc/namespaces/extensions">
<params>
<param>
<value><array><data>
<value>macalready_in_use:11111111111111111111111111111111111111111111111111111
<value>macalready_in_use:3333333333333333333333333333333333333333333333333333333333333333333333333333333333333333
</data></array></value>
</param>
</params>
</methodResponse>
autoprov.deregisterDeviceList
Deregister a list of registered devices:Call: autoprov.deregisterDeviceList(List<String> macList)
macList List of MAC IDs or MAC addresses
Return: Return value (1) (Boolean) 1 | 0 1 = true, 0 = false
    Return value (2-n) (String) if true: OK
    mac_not_found:
    if false: mac_invalid:
Request: <?xml version="1.0" encoding="UTF-8"?>
<methodCall>
    <methodName>autoprov.deregisterDeviceList</methodName>
    <params>
    <param>
    <value><array><data>
    <value>111111111111</value>
    <value>222222222222</value>
    <value>3333333333333</value>
    <value>4444444444444</value>
    </data></array></value>
    </param>
    </params>
</methodCall>
Response: <?xml version="1.0" encoding="UTF-8"?>
<methodResponse xmlns:ex="http://ws.apache.org/xmlrpc/namespaces/extensions">
<params>
<param>
<value><array><data>
<value><boolean>1</boolean></value>
<value>OK</value>
</data></array></value>
</param>
</params>
</methodResponse>
Another <?xml version="1.0" encoding="UTF-8"?>
Response: <methodResponse xmlns:ex="http://ws.apache.org/xmlrpc/namespaces/extensions">
<params>
<param>
<value><array><data>
<value>mac_not_found:111111111111</value>
<value>mac_not_found:333333333333333333333333333333333333333333333333333333333333
</data></array></value>
</param>
</params>
</methodResponse>
Providing the provisioning server URL via the SIP multicast mechanism
This mechanism is an easy method for loading the URL of the provisioning server, on which the configuration files (profiles) and/or the firmware files of the different Gigaset VoIP phones are located. The mechanism is designed for VoIP PBXs offering an own provisioning server for the connected VoIP phones. Before an answer is sent to the initiator of the SIP multicast, the PBX (or SoftSwitch) has to identify the phone type. This is done via the SIP User-Agent header which starts with the product name. The following example flow chart shows the principle of this mechanism:  The SIP multicast mechanism is supported by most of the Gigaset VoIP phones and by the Gigaset T300 PRO and Gigaset T500 PRO PBX as well (it is also supported by some products from other companies).DHCP option (dhcp_url)
As an alternative option for assigning the provisioning server URL to the VoIP phones, the DHCP option 114 (dhcp_url) can be used. The following example flow chart shows the principle of this mechanism: File upload via HTTP server
There is also another interface which allows the upload of XML files without using the web user interface. ◆Commons FileUpload is used (http://commons.apache.org) at the server end. ◆An HTTP client is necessary at the client end. Principally, this process is similar to the remote procedure calls described in section Setting up redirection information using the XML-RPC interface ( → page 15). The difference between the versions is that on the one hand XML-RPC clients request remote methods and transfer parameters in order to create an XML file, while on the other hand HTTP clients upload an XML file directly. The latter method – like the XML file upload via the web user interface – is suitable for users whose XML files are created through scripts but who do not want to use the web user interface. Please refer to paragraph XML syntax ( → page 16) for further details regarding the structure of XML files.File upload
The HTTP XML file upload can be accessed using the following address: https://prov.gigaset.net/apxml/basic.doContent type for XML FileUpload
The default content type used in most cases is application/x-www-form-urlencoded But if a provisioner wants to upload an XML file either via the web user interface or via an HTTP client it would be very inefficient to use the default content type. For this reason, XML files are uploaded with the content type multipart/form-data which is suitable for sending large data. Commons FileUpload corresponds exactly to this format.Provisioning methods
MAC based provisioning
User-specific profiles are loaded without any user interaction. The database containing the user-specific data can be hosted on a provider/PBX related server. When the phone contacts the provisioning server, it identifies itself by means of its own MAC address. Each phone has a globally unique MAC address that was assigned to it in the factory. This method has the advantage that, ideally, the end-user does not even have to be aware of the need for provisioning: he simply plugs in the phone, and the rest happens automatically in the background. For this to be successful, the provisioner has to create the association between the MAC address and the end-user prior to delivering the phone to the end-user. This is done efficiently if the MAC ID (containing MAC address and a 4-digit part of a unique password) is printed on the phone's box as barcode, so that the provisioner can scan the address, assign this with the provisioner's URL on the Gigaset server (optional) and enter it in its database. Because the phone periodically queries for configuration updates (every 24h), this method gives the provisioner the means to effectively control the end-user's phone configuration.  Auto-provisioning via MAC addressPrinciple of operation - MAC-based provisioning with redirection
1 Gigaset prints the MAC address barcode on the housing and the box. 2 The provisioner scans the MAC address and associates it with the user data, e.g. the SIP account. The MAC ID consists of the MAC address plus a random ID (4 characters) that is added to the MAC address and has the following syntax: lt; MAC - address gt; - lt; ID gt;, e.g. 001122334455 - ABCD 3 The provisioner enters the redirection data on the Gigaset server. The device's MAC ID and the URL of the provisioning server have to be provided. Gigaset therefore provides a web interface as well as an XML-RPC interface. Redirection data describes a connection between the MAC address, the provisioning server's URL and the provider's name. This configuration bundle is created by the provisioner and has to be stored on the Gigaset redirection database. 4 The end-user connects the phone to the network and the phone contacts the Gigaset server. 5 The Gigaset server checks the MAC ID. If the MAC ID is available in the Gigaset provisioning database of the redirection server it transfers the provisioning server address for this device to the phone. 6 The phone connects to the provisioning server providing its MAC address. 7 The provisioning server uploads the custom-built data to the phone. The provisioner is responsible for creating the custom-built data to store this information on the provisioning server and to keep it up-to-date. 8 The phone is now ready to initiate the first call. 9 Periodically, the phone connects to the provisioning server in order to check if there is new custom-built data available (once a day).Message flow
The following diagram shows – in a simplified manner – the message flow between a Gigaset VoIP phone and the involved servers from the auto-provisioning point of view.  The message flow illustrates the steps 4 to 7 of the image on page 26.Provisioning methods
Communication takes place by means of HTTP requests. Profiles are stored in a binary format on the provisioning server depending on the device variant. The Gigaset server uses the phone's variant ID to upload the matching configuration. For example, http://profile.gigaset.net/device/42/2/master.bin refers to the configuration files of a Gigaset N510 IP PRO phone (→ page 62). The Gigaset redirection server uses the phone's MAC ID to search for the responsible provisioning server for this phone.HTTP request
When the phone contacts the provisioning server in order to download the auto-provisioning file, it performs an HTTP : :GET for a URL with the following format:http://<server domain>/<directory>/<ap>?mac=<mac address>
<server domain> DNS name (or IP address) of the provisioning server.
<directory> Path to the auto-provisioning script within the server domain.
The script is a CGI application, i.e. it runs inside the HTTP server (→ page 54). It constructs a personalised XML configuration file for the requesting phone, then calls an application which creates the binary configuration file (gigaset_profile_gen, → page 61), and finally returns the configuration data to the phone.
<ap> Name of the auto-provisioning script: ap (auto-provision).
<mac address> MAC address of the VoIP phone generating the request, in the 6 hex digit-pair textual representation, with or without a colon between each digit pair; for example: 06:55:AF:3A:05:AA or 0655AF3A05AA
Example of a request:
http://my.server.domain.com/gigaset/cgi/ap?mac=06:55:AF:3A:05:AA
URI format
The URL where the ap script is performed is determined by an additional query to get a so- called URI format string. The server for this query is the same server which is used for firmware updates (normally - not necessarily, but recommended - the Gigaset server). The query is done with a 3-digit provisioner code. This code is preprogrammed in the factory and is used by the phone to get the file with the format string. This format string is also used by the phone to build the command to get the profile from the provisioner's server. The format string contains fixed text (used for the query as it is) and format specifier (with a leading % ) which will be replaced by the phone. The relevant configuration possibilities of the URI-format string are the following:Format specifiers:
%DVID Device ID, composed by build variant and provisioning ID. Example: 42/2
%MACC MAC with colons. Example: .00:01:E3:12:34:56.
%MACD MAC without colons. Example: .0001E3123456.
%% To represent the percent character.
Example:
The URI-format string:http://my.server.domain.com /%DVID/cgi/ap?mac=%MACC
GET http://my.server.domain.com/42/2/cgi/ap?mac=00:01:E3:12:34:56
Auto-provisioning via activation code
With this method the end-user has to enter a unique code – the activation code – on the phone when setting it up. For the provisioner, this method is similar to the MAC address one, but it has the advantage that the phones does not need to be handled before sending it to end-user. It just has to be ensured that a unique activation code is created by which the end-user can be identified unambiguously. For the Gigaset VoIP phones the activation code can be a numeric string with a maximum of 32 characters. Depending on the configuration, the phone downloads the configuration parameters only once ("one-shot provisioning". The end-user thus has the freedom to modify all configuration parameters and/or load other profiles. Alternatively, the phone downloads the profile periodically using the activation code entered initially and stores the parameter when the profile is changed.The activation code
The activation code is realised as a key. It consists of two parts that are concatenated as follows:Activation Code = <Gigaset part><Provisioner part>
Gigaset part = Identifies the provisioner for the related phone.
3 decimal numbers.
Provisioner part = <user id>[#<password>]
Max. 29 decimal numbers.
user id Identifies the end-user unambiguously.
#password Optional password, which is preceded by the # character as separator. The parameter is used for the HTTP digest authentication algorithm.
Examples of activation codes:
12387426549864#0815 provider = 123, user id = 87426549864, password = 0815. 0159039885893 provider = 015, user id = 9039885893, no password The end-user receives the complete activation code directly from the provisioner, by eMail or during registration at the provisioner's web site, for example. When generating a new activation code, the provisioner must always prepend the Gigaset part (which is defined by Gigaset Communications when a new provisioner requests this feature). Apart from respecting the basic syntax described above, the provisioner is free to design the provisioner part of the code as desired.  Auto-provisioning via activation codePrinciple of operation
1 The end-user buys a phone, installs it and enters the activation code either via the handset procedure (installation assistant) or via the web user interface. 2 The phone extracts the Gigaset part of the activation code and uses it to request the URL of the provisioning server, normally at the central (Gigaset) server, where the download profiles and firmware files are located. The provisioning (Gigaset) server sends the provisioner's URL to the phone. 3 The phone now sends the user id part of the activation code to the provisioner's URL. 4 If the provisioner requests authentication of the user, the request is denied with 401 (Unauthorised). In this case the phone must re-issue the request and provide the authorisation header – the content of which must be calculated using the password part of the activation code. The password part is of course never transmitted directly. 5 The provisioner uses the user id to feed a CGI application which searches its database for the given users and then constructs and returns the encrypted user profile. The received profile also contains the name of the profile which is stored in the phone. From now on, the phone will periodically check for a changed profile by using the stored profile name ("one-shot provisioning"). This means that the profile, (normally) located at the Gigaset server, can be the same one used for manually downloading the profile. It therefore has to be guaranteed that the name of the received profile is identical with the one on the (Gigaset) server. Depending on the configuration within the downloaded profile the phone can alternatively download the profile periodically using the activation code entered initially.Message flow
The following diagram shows – in a simplified manner – the message flow between a Gigaset VoIP phone and the involved servers from the auto-provisioning point of view. Use Case: The VoIP phone is prepared for auto-provisioning with an activation code (locked or non-locked [One-Shot]) and the customer feeds in the activation code 12387426549864#0815 via the handset or WEB-UI.  The message flow illustrates steps 3 to 7 of the image on page 30. Communication takes place by means of HTTP requests. Profiles are stored in a binary format on the provisioning server depending on the phone variant. The Gigaset server uses the phone's variant ID to upload the matching configuration. For example, http://profile.gigaset.net/device/42/2/master.bin refers to the configuration files of a Gigaset N510 IP PRO phone (→ page 62).Provisioning methods
HTTP request
When the phone contacts the provisioning server in order to download the auto-provisioning file, it performs an HTTP::GET for a URL with the following format: http://Example:
http://my.server.domain.com/gigaset/cgi/ap?ac=0159039885893URI format
The URL, where the ap script is performed, is determined by an additional query to get a so- called URI format string. The server for this query is the same server which is used for firmware updates (normally - not necessarily, but recommended - the Gigaset server). The query is done with a 3-digit provisioner code. This code is preprogrammed in the factory or is part of the activation code which was entered manually and is used by the phone to get the file with the format string. This format string will be used again by the phone to build the command to get the profile from the provisioner's server. The format string contains fixed text (used for the query as it is) and a format specifier (with a leading % ) which will be replaced by the phone. The relevant configuration possibilities of the URI-format string are the following:Format specifiers:
%ACTC Provisioner part of the activation code. Example: 87426549864 %DVID Device ID, composed of build variant and provisioning ID. Example: 42/2 %MACC MAC with colons. Example: .00:01:E3:12:34:56. %MACD MAC without colons. Example: .0001E3123456. % To represent the percent character.Example:
The URI-format string: http://my.server.domain.com/gigaset/cgi/ap?ac=%ACTC and the activation code 12387426549864#0815 leads to a request with the command: GET http://my.server.domain.com/gigaset/cgi/ap.cgi?ac=87426549864Subscription list – supporting multiple accounts
For devices which allow multiple accounts, the optional placeholder %SUBLIST is supported for use within an auto-provisioning URL to inform e.g. a PBX about the registered handsets. At present, %SUBLIST is supported for the following devices:| Gigaset C610 IP/N300 IP |
| Gigaset N510 IP PRO |
| Gigaset N720 DECT IP Multicell System |
Maximum number of subscriptions
The maxSub value represents the number of subscriptions supported by the device. Gigaset N720 DECT IP Multicell System = 100, Gigaset N510 IP PRO = 6. maxSub is defined as follows:◆Short form
\- maxSub is represented by 1 Byte \- Bit 8 is set to 0 \- Bit 1-7 contains the maximum number of subscriptions (bits). This means: max. 127 subscriptions. This is sufficient for the devices currently supported◆Long form
- maxSub is represented by 2 or 3 bytes (up to 127) - Bit 8 of the 1st byte is set to "1" - Bit 1-7 of the 1st byte contains the number of the following bytes (at present: 2) - The following bytes (hex, base 256) contain the number of supported subscriptions (bits).Subscription list, bit array
The meaning of the term subscription depends on the device-specific handset. Gigaset N720 DECT IP Multicell System Subscription corresponds to the index of one handset/VoIP account pair. Gigaset C610 IP/N300 IP Subscription corresponds to the internal number of a registered handset. Gigaset N510 IP PRO ◆ The bit array contains ((maxSub div 8)+1) bytes. ◆ Each bit within the bit array corresponds to one subscription. ◆ A bit which is set to 1 represents a subscription which is assigned with a handset. ◆ The MSB of the 1st byte corresponds to subscription with index 0. ◆The LSB of the 1st byte corresponds to subscription with index 7. ◆ The LSB of the 2nd byte corresponds to subscription 8 ... (MSB = Most Significant Bit, LSB = Least Significant Bit)Provisioning methods
Examples:
URL=http://%DURL%DVID/cgi/ap?mac=%MACD&sublist=%SUBLIST Max. 100 subscriptions, 20 handsets are assigned to subscriptions with index 0-19: http://192.168.1.100/70/1/cgi/ap?mac=FFFFFFFF& sublist=64FFFFFF00000000000000000000 Max. 20 subscriptions, index 1 and the last 5 are assigned with a handset: http://192.168.1.100/70/1/cgi/ap?mac=FFFFFFFFF&sublist=148001F0 Max. 6 subscriptions, index 1-3 are assigned with a handset: http://192.168.1.100/70/1/cgi/ap?mac=FFFFFFFF&sublist=06A0 Max. 100 accounts, each odd subscription is assigned with a handset: http://192.168.1.100/70/1/cgi/ap?mac=FFFFFFFF& sublist=64AAAAAAAAAAA18 AAAAAAAAAAAAAA0Updating the configuration data
For transferring changed settings from e.g. a VoIP PBX to a VoIP phone an additional method is necessary for triggering the provisioning procedure, because the real profile download can only be started from the VoIP phone. The Gigaset VoIP phones automatically ask for new updates when they are restarted. To initiate a configuration update from the provisioner's side the SIP check-sync mechanism can be used.SIP check-sync mechanism
The check-sync mechanism is used as a trigger within a SIP NOTIFY message to initiate a profile update or to check for new firmware. The following pictures show the principle of this mechanism and protocol details: Session Initiation Protocol
Request-Line: NOTIFY sip:1002.NS10IP@172.29.1.51:5060 SIP/2.0
Method: NOTIFY
Request-URI: sip:1002.NS10IP@172.29.1.51:5060
[Resent Packet: False]
Message Header
Via: SIP/2.0/UDP 127.0.0.1:5060;branch=z9hG4bk69448a0c;rport
From: "Gigaset" <sip:Gigaset@127.0.0.1>;tag=as39b0fcab
To: <sip:1002.NS10IP@172.29.1.51:5060>
Contact: <sip:Gigaset@127.0.0.1>
Call-ID: 5f7fe6183735ef2b607bd7da0aaf12d0@127.0.0.1
CSeq: 102 NOTIFY
User-Agent: Gigaset PRO
Max-Forwards: 70
Event: check-sync
Content-Length: 0
| Gigaset DE900 IP PRO enabled | |
| Gigaset DE700 IP PRO enabled | |
| Gigaset DE410 IP PRO enabled | |
| Gigaset DE310 IP PRO enabled | |
| Gigaset DX800A all in one disabled | |
| Gigaset C610 IP/N300 IP disabled | |
| Gigaset N510 IP PRO enabled | |
| Gigaset N720 DECT IP Multicell System enabled |
REBOOT parameter
If an IP phone needs to be rebooted after a profile download in order to put the changes into effect, the REBOOT parameter can be set optionally within a profile. i Information about the parameters that require a system reboot after being changed can be taken from the parameter description ( → page 42).XML syntax
| Tag Name Value Meaning | ||
| REBOOT true | 1 | A reboot is performed after the profile was downloaded. |
| false0 | No reboot after profile download. | |
Binary representation
The reboot information is encoded as a type-length-value (TLV):| Tag Name Tag | Code Contents | |
| reboot 0x50 | Optional tag: boolean value coded in one byte. Thus, this TLV has a length of 3 bytes:0 No reboot after profile download.!=0 A reboot is performed after the profile was downloaded. | |
Binary coding example
0x50, 0x01, 0x01 // reboot, len=1, content = 1 => reboot At present, reboot is supported for the following devices:| Gigaset DE900 IP PRO |
| Gigaset DE700 IP PRO |
| Gigaset DE410 IP PRO |
| Gigaset DE310 IP PRO |
Provisioning methods
Auto-provisioning with plain XML content
The benefit of uploading a file with plain XML content directly to the phone is that the provisioner does not need to install and handle the gigaset_profile_gen application (as described in chapter Setting up an own provisioning server → page 48). To ensure that a wrong XML file content will not result in problems concerning the phone functions or even disable the phone and to ensure that possible encrypted XML and legacy encrypted binary profiles are identified, the XML content is evaluated by the configuration client (the phone) itself according to the following rules:  The content and the handling of the profiles is the same, regardless of whether the format is a binary or an XML format. Plain XML will be supported only in the profiles themselves. Other server configuration files like country lists, provider lists, etc do not support the plain XML format. The file ending (*.bin or *.xml) can be chosen freely. It will not be evaluated in the configuration client (the IP phone), but it is sensible to choose the file suffix which reflects the file content.Security aspects
- HTTPS (TLS) is supported by most of the Gigaset VoIP phones. Server root certificates are used. ◆ The profile can be encrypted with AES 128 using a specific encryption key. - The MAC address is sent during the provisioning process and this MAC address can be used for comparing the address with a data base containing all allowed MAC addresses. Therefore only known phones receive provisioning data. ◆The activation code string contains an optional password. ◆The use of HTTP Digest Authentication is possible. i It is not possible to use TLS client certificates.Client authentication via HTTP Digest Authentication
Gigaset VoIP phones can use https (HTTP over TLS) but without client certification only. Consequently, there is no information to check the authenticity of the client. Anyone can send a request to the Gigaset redirection server or a provisioning server with a randomly faked MAC address. If the random MAC address is correct, that person would be redirected to a provisioning server and receive an end-user profile configuration. In order to avoid such a scenario, an additional HTTP digest authentication as defined in RFC 2617 can be used by the phones. The use of HTTP digest authentication is strongly recommended for all networks that are easily eavesdropped, because otherwise a hacker could easily access the user account information by simply recording and replicating the phones GET request to the provisioning server. Because the HTTP digest authentication is based on a shared secret (which is contained in the password component of the activation code), an attacker who wishes to hijack the phone by providing a fake provisioner's URL will still not be able to find out what the shared secret is – because it is never transmitted in clear text. The HTTP digest authentication algorithm implemented in Gigaset VoIP phones only supports the following context and therefore should be taken into consideration by the provisioner's HTTP implementation: algorithm = "MD5" and qop = "auth". Furthermore, the uri= part of the authorisation header is built in the format described in RFC 2616 (i.e., without the domain portion of the URI), e.g.: uri="/phone/cgi/ap?ac=87426549864"Certificates in PEM format
Basically, PEM is a frame (starting with BEGIN CERTIFICATE and ending with END CERTIFICATE) containing a binary X.509 certificate. PEM was intended for the transport of certificates within e-mails. Some servers use this format as the default format to store certificates. At present, PEM format is supported for the following devices: Gigaset C610 IP/N300 IP Gigaset N510 IP PRO PEM format can be configured via the phone's WEB UI or by download via auto provisioning. After download, the profile is converted to the DER format (Distinguished Encoding Rules) and stored in the Tevero file system.Provisioning methods
Download TLS certificates via a link in a profile
To download a TLS certificate via a link, the CERTIFICATE parameter is supported. This parameter enables e.g. a provider to force a download of a certificate without any user interaction. CERTIFICATE is only supported in plain XML profiles.XML syntax
| Tag Name Value Meaning | ||
| CERTIFICATE | URL The U | RL which refers to the certificate file. It must be complete, i.e. contain the host and file name. |
| Gigaset C610 IP/N300 IP |
| Gigaset N510 IP PRO |
Starting the provisioning tool
The provisioning tool is designed to assist you in preparing the provisioning process and consists of the configuration file editor and the provisioning package editor. It is provided as Web user interface. Information on how to access the provisioning tool user interface can be found at http://wiki.gigaset.com or contact the Gigaset Technical Sales. To register you need a user account (user name and password) which is provided by Gigaset Technical Sales. Account requests can be sent to sys_engineering_ip_pro.gc@gigaset.com. If available, you can also use the login credentials for the Gigaset redirection server (prov.gigaset.net). If the login is successful, the main window is opened. You can now start - the configuration file editor ( → page 39) or – the provisioning package editor ( → page 48).XML provisioning file
Configuration data for Gigaset VoIP phones is provided by means of XML files. XML files are used – as direct input (plain XML-provisioning) for Gigaset VoIP phones or - a s i n p gigaset_profile_gen application which converts the configuration into a binary format comprehensible for Gigaset VoIP phones (→ page 61). XML files can be created - using the Gigaset provisioning tool providing configuration data (a subset of the available configuration parameters) which are specific for the device or - manually based on templates that are delivered by Gigaset ( → page 42).Configuration file editor (provisioning tool)
The configuration file editor is used to create a configuration file for Gigaset IP phones of a specific device type (XML and binary). The configuration files can be uploaded to Gigaset IP phones in the case of plain XML provisioning or can be used as input file for a provisioning package. The result of the editing is stored on the Gigaset server. In order to use the file for provisioning it has to be downloaded and saved on the provisioning server. When downloading the configuration file, a ZIP archive is created, that contains: – an XML file with configuration parameters and parameter placeholders specific for the selected provisioning method (via MAC address or activation code), – an XSD scheme file for validation, and - a binary configuration file.Starting
The configuration file editor is provided as Web user interface. It is – together with the provisioning package editor – part of the provisioning tool (→ page 10). - Login to the provisioning tool (→ page 38). If the login is successful, the main window is opened. To create or edit a configuration file, click on Configuration file editor. Already existing configuration files are listed. For each configuration file the following information is available: No. Number of the configuration file. Configuration file Name including a timestamp. Comment Comment to identify the file. Change on Date of last change. The following options are possible: Add new Create a new configuration file. Edit Revise an existing configuration file. Delete Delete an existing configuration file. Download Download an existing configuration file. Back Exit the configuration file editor and return to the main window. If the maximum number of configuration files is reached, it is not possible to add a new file or to edit an existing one before deleting some file(s).i
To navigate within the tool, use the links and buttons available on the pages, e.g. Next or Back. You should not use the browser navigation buttons. To exit the configuration use the logout button which is located top right on each page. Creating a configuration file
▶ Click Add new to create a new configuration file. The editor is opened and will guide you through all necessary steps. ▶ Click Next to save the settings and precede to the next step. ▶ Click Back to return to the previous step. - Click Clear all to reset all your changes on the current page. ▶ Click Cancel to exit the editor without saving your settings and to return to the main window.Select device
On the first page you have to select the device type for which a configuration is to be created. The page is not shown when an existing configuration file is edited. In this case the part number and firmware version stay untouched. ▶ Select a device type from the Part number drop down list. The list provides all part numbers of device types which are available for the supported devices. Once a part number is selected the information about device type, variant and provisioning ID is shown. ▶ Select the Firmware version from the drop down list. Only available versions for the selected part number are provided. After starting the edition of an already existing configuration file, you can change the firmware version if needed. The part number cannot be changed.Editing parameters
The configuration file editor provides access to all available configuration parameters for the selected device type/part number.  The navigation bar on the left contains the available configuration pages. Some pages may have sub-pages (e.g. Telephony). ▶ Click on an entry to open the desired page. The pages only contain parameters for the selected device type/part number. If an existing configuration file has been opened, the previously stored parameter values are loaded. For a new configuration file the parameters are initially in disabled state (check box unchecked). Default values are set, if available. Though, if parameters are set in disabled state the default values are not set even if they are available. In this case the parameter is not included in the resulting configuration file (neither XML nor binary). This means that the value of this parameter will not be changed in the device being provisioned. For the parameters the following elements are available: ◆Parameter name A check box on the left of the parameter value. It has to be enabled in order to put the changed value of the parameter into effect. If the check box is not checked, the resulting configuration file will not change the value for this parameter within the devices.  ◆Editor control, depending on the parameter: Radio buttons To enable or disable the parameter. Drop-down list To select one entry from a list. Check box group To select multiple options from a option group. Edit box To enter text, e.g. names, numbers ...XML provisioning file
◆Information/validation icon, with the following states:  Info state: Shown when the parameter is not enabled.  OK state: Shown when the parameter is enabled and the value/state is valid.  Error state: Shown when the parameter is enabled and the value/state is not valid. Note: Only the validity of a single parameter is checked. Cross-checking with other parameter values to ensure a plausible configuration is not performed. ◆A validation hint showing the possible value range. It shows information about the allowed range for numerical parameters and about the maximum number of characters for strings. 1 - 65535 ◆ An Action button providing the following options: Edit parameter Select this option to edit the parameter value. Insert default setting The default value for the parameter is inserted (if the parameter has a default value). Afterwards the value can be changed. Insert placeholder A placeholder value for the parameter is inserted. This should be used to allow the insertion of user-specific values via the ap script ( → page 54).Help information
▶ Move the cursor over a parameter and wait for a moment. A popup is opened containing information about the parameter. ▶ Click on the information/validation icon to open a popup with additional information regarding the parameter.Saving the configuration file
▶ If you have set all configuration values as desired, click Next. ▶ Enter a File Name and a comment for the configuration. The filename must not consist of more than 14 characters. Only lowercase letters, digits and underscore characters are allowed. The full file name will be created automatically using the file name and a time stamp. If you have edited an existing file you can change the file name. Click Save to store the changes. A new configuration file containing your changes will be created.XML files
Instead of using the provisioning tool you can also create the XML configuration files manually. XML files can be created based on templates that are delivered by Gigaset and stored within the gigaset file system. A general template is provided in the subordinate /gigaset/cgi/shop directory (→ page 53). The following template files are available: template.xml Template for auto-provisioning using the MAC method. actc_template.xml Template for auto-provisioning using an activation code. Device-specific templates are available in the device's cgi subdirectories (→ page 62). The XML file syntax may be different depending on the device's functionality and date of manufacture. To get information on the correct XML syntax for a specific device please refer to the appropriate template in the device's subdirectory. Gigaset supplies a template XML file which has to be adapted by the auto-provisioning script to provide the real provisioning data.XSD schema files
To make sure that the XML file contains only configuration parameters the phone understands, it has to be validated against a fixed schema file (referred to inside the XML file). Schema files are also provided by Gigaset and available in the general cgi directory as well as the device-specific cgi directories ( → page 62). The following schema files are available: provider.xsd XML schema file for validating the template.xml file. actc_provider.xsd XML schema file for validating the actc_template.xml file.Configuration parameters
The parameters used for provisioning are described in general on page 9. Each Gigaset IP phone has a lot of further configuration parameters which can be provided by the XML input file additionally to the provider data. Details of the parameters mentioned here and a list of all possible configuration parameters are available at http://wiki.gigaset.com.| i | The list of modifiable parameters can change if further features are added to the phone in the future. Therefore, please refer to the template files (template.xml /actc_template.xml) and the schema files (provider.xsd/actc_provider.xsd) which are supplied.Attention:You should never change the provider schema file – any changes you might desire in the schema file must be provided by Gigaset. The schema file is the only guarantee that the XML file is compatible with the Gigaset phone you are marketing. |
XML template – example
The following is a short extract from the template.xml file. To view the total file or the actc_template.xml file you can open it from the gigaset/cgi/shop directory (→ page 62). The template provided by Gigaset for the XML file contains two types of parameters: ◆A large set of parameters which have to be adapted for a specific provider. \- A smaller set of parameters intended to be adapted (by the provisioner's ap.cgi script) to tailor the file for an individual end customer. The latter set of parameters has been highlighted in the fragment shown below.<Provider>
<MAC_ADDRESS value="insert MAC_ADDRESS here"/>
<VERSION value="insert VERSION here"/>
<PROFILE_NAME class="string" value="insert PROFILE_ID">
<S_SIP_LOGIN_ID class="string" value="insert S_SIP_LOD">
<S_SIP_PASSWORD class="string" value="insert S_SIP_USER">
<S_SIP_USER_ID class="string" value="insert S_SIP_USER_1">
<S_SIP_DOMAIN class="string" value="192.168.2.1"/>
<!-- optional (and obsolete)
<S_SIP_REALM class="string" value="">
-->
<S_SIP_SERVER class="string" value="192.168.2.1"/>
<I_SIP_SERVER_PORT class="integer" value="5060"/>
<S_SIP_REGISTERAR class="string" value="192.168.2.1"/>
<I_SIP_REGISTERAR_PORT class="integer" value="5060"/>
<B_SIP_USE_STUN class="boolean" value="false"/>
<S_STUN_SERVER class="string" value=""/>
<I_STUN_SERVER_PORT class="integer" value="3478"/>
<!-- optional
<I_NAT_REFRESH_TIME class="integer" value="20"/>
-->
<I_OUTBOUND_PROXY_MODE class="string" value="auto"/>
<S_OUTBOUND_PROXY class="string" value="192.168.2.1"/>
<I_OUTBOUND_PROXY_PORT class="integer" value="5060"/>
<I_RE_REGISTRATION_TIMER class="integer" value="180"/>
<I_RE_STUN_TIMER class="integer" value="240"/>
<!-- optional; loudness values: 0 = normal, 1 = loud, 255 = low
<I_LOUDNESS_1 class="integer" value="0"/>
-->
<!-- more optional parameters for account 1
<S_SIP_DISPLAYNAME class="string" value="anything"/>
-->
<S_SIP_PROVIDER_NAME class="string" value="PBX"/>
<!-- more optional parameters for account 1
<I_SIP_ACCOUNT_MT_RCV_1 class="integer" value="63"/>
<I_SIP_ACCOUNT_MT_SND_1 class="integer" value="1"/>
-->
<B_SIP_ACCOUNT_IS_ACTIVE_1 class="boolean" value="true"/>
<!-- more optional parameters for account 1
<S_VOIP_NET_AM_NUMBER_1 class="string" value=""/>
<B_VOIP_NET_AM_ENABLED_1 class="boolean" value="true"/>
-->
<!-- optional; codec list for account 1 with 5 elements, values: 0 = PCMU G.711 μ law, 1 = PCMA G.711 a law, 2 = G726, 3 = G729, 4 = G726 AAL2, 5 = G722
<I_SIP_PREFERRED_VOCODER class="array">
<ARRAYELEMENT class="integer" value="5"/>
<ARRAYELEMENT class="integer" value="1"/>
<ARRAYELEMENT class="integer" value="0"/>
<ARRAYELEMENT class="integer" value="2"/>
<ARRAYELEMENT class="integer" value="3"/>
</I_SIP_PREFERRED_VOCODER>
-->
<!-- optional: parameters for account 2
...
-->
<!-- optional; codec list for account 2 with 5 elements, values: 0 = PCMU G.711 μ law, 1 = PCMA G.711 a law, 2 = G726, 3 = G729, 4 = G726 AAL2, 5 = G722
... -->
<!-- optional: parameters for account 3
...
-->
<!-- Bit-Masks for I_DTMF_TX_MODE_BITS: Audio=1, RFC2833=2, SIP-INFO=4-->
<I_DTMF_TX_MODE_BITS class="integer" value="1"/>
<I_DTMF_TX_RTP_PAYLOAD_TYPE class="integer" value="101"/>
<B_SHOW_USERID_DURING_WIZARD class="boolean" value="true"/>
<!-- optional parameters:
<S_DATA_SERVER class="string" value="gigaset.siemens.com/gigaset"/>
<S_EMAIL_SERVER class="string" value="192.168.2.55"/>
<S_MESSENGER_SERVER class="string" value="192.168.2.55"/>
<I_MESSENGER_SERVER_PORT class="integer" value="1"/>
<S_TIME_NTP_SERVER class="string" value="192.168.2.55"/>
<B_REDIRECT_EMERGENCY_TO_PSTN class="boolean" value="true"/>
-->
<!-- optional; allows to add a text to the UA header in SIP messages:
    <S_USERAGENT_STRING class="string" value="additional_text"/>
-->
<!-- optional-->
    <B_SIP_SHC_ACCOUNT_IS_ACTIVE class="boolean" value="true"/>
<!-- optional online phonebook settings -->
    <S_TDS_SERVICE_URL class="string" value +/->
<S_TDS_LOGIN class="string" value +/->
    <S_TDS_LOGIN_PASS class="string" value +/->
<S_TDS_TXT_MENU class="string" value +/->
<S_TDS_TXT_HEADER class="string" value +/->
<S_TDS_TXT_SEARCH_1 class="string" value +/->
<S_TDS_TXT_SEARCH_2 class="string" value +/->
<S_TDS_TXT_DEP_MENU class="string" value +/->
<S_TDS_TXT_DEP_HEADER class="string" value +/->
<S_TDS_TXT_DEP_SEARCH_1 class="string" value +/->
<S_TDS_TXT_DEP_SEARCH_2 class="string" value +/->
<S_TDS_TXT_PTD_MENU class="string" value +/->
<S_TDS_TXT_PTD_HEADER class="string" value +/->
<S_TDS_TXT_PTD_SEARCH_1 class="string" value +/->
<S_TDS_TXT_PTD_SEARCH_2 class="string" value="0"/>
<I_TDS_CAPABILITIES class="integer" value="0"/>
<S_TDS_ISO_3166_1 class="string" value +/->
    <B_TDS_TRANSMIT_MAC_ADDRESS class="boolean" value="1"/>
<!-- optional online phonebook settings end-->
</Provider>
</ProviderFrame>
In the case of the MAC method:
<?xml version="1.0" encoding="ISO-8859-1"?>
<ProviderFrame xmlns:xsi="http://www.w3.org/2001/XMLSchema-instance" xsi:noNamespaceSchema
Location="mac_provider.xsd">
    <Provider>
    <MAC_ADDRESS value="filled out by the ap script"/>
    <VERSION value="insert VERSION here"/>
    <PROFILE_NAME class="string" value="insert PROFILE_NAME here"/>
    <S_SIP_LOGIN_ID class="string" value="insert S_SIP_LOGIN_ID here"/>
    <S_SIP_PASSWORD class="string" value="insert S_SIP_PASSWORD here"/>
    <S_SIP_USER_ID class="string" value="insert S_SIP_USER_ID here"/>
    <S_SIP_PROVIDER_NAME class="string" value="Sipgate"/>
    <S_SIP_DOMAIN class="string" value=""/>
    <S_SIP_REALM class="string" value="sipgate.de"/>
    <S_SIP_SERVER class="string" value="sipgate.de"/>
    <I_SIP_SERVER_PORT class="integer" value="5060"/>
    <S_SIP_REGISTERAR class="string" value="sipgate.de"/>
    <I_SIP_REGISTERAR_PORT class="integer" value="5060"/>
    ...
    ...
</Provider>
</ProviderFrame>
<?xml version="1.0" encoding="ISO-8859-1"?>
<ProviderFrame xmlns:xsi="http://www.w3.org/2001/XMLSchema-instance" xsi:noNamespaceSchemaLocation="actc_provider.xsd">
    <Provider>
    <ACTIVATION_CODE value="filled out by the ap script"/>
</Provider>
<VERSION value="insert VERSION here"/>
<PROFILE_NAME class="string" value="insert PROFILE_NAME here"/>
<S_SIP_LOGIN_ID class="string" value="insert S_SIP_LOGIN_ID here"/>
<S_SIP_PASSWORD class="string" value="insert S_SIP_PASSWORD here"/>
<S_SIP_USER_ID class="string" value="insert S_SIP_USER_ID here"/>
<S_SIP_PROVIDER_NAME class="string" value="Sipgate"/>
<S_SIP_DOMAIN class="string" value="">
<S_SIP_REALM class="string" value="sipgate.de"/>
<S_SIP_SERVER class="string" value="sipgate.de"/>
<I_SIP_SERVER_PORT class="integer" value="5060"/>
<S_SIP_REGISTERAR class="string" value="sipgate.de"/>
<I_SIP_REGISTERAR_PORT class="integer" value="5060"/>
...
</Provider>
</ProviderFrame>
Special parameters
VERSION – identifying configuration changes
The VERSION parameter in the XML file is somewhat special because it is not really a configuration item, but instead is used by the phone to detect whether there have been any changes in the configuration since the last time it was changed. The parameter is a time string with the following mandatory format: ddmmyyhhmm where dd, mm, yy, hh and mm represent the decimal numeric values for day, month, year, hours and minutes respectively. Because the phone converts this string into an equivalent integer value, it is important to choose valid date & time values. In the phone, the change detection algorithm works as follows: - Whenever the phone has requested and processed an auto-provisioning file, it converts the string contained in the VERSION parameter into an integer, which is saved in the non-volatile RAM. In future, the phone compares this saved integer with the value of the integer calculated from the VERSION parameter contained in any newly requested auto-provisioning file. As long as the two integers are equal, the phone assumes that the auto-provisioning file is identical with the old one, and will ignore it. If, however, the integers are different, the phone assumes that a new auto-provisioning file has been issued and updates its configuration accordingly, replacing its saved copy of the integer with the one calculated from the new file. For the auto-provisioning system, this means that whenever it wishes the phone to update its configuration, it must generate a new value of the VERSION parameter. The design assumes that the auto-provisioning system will store this version string in the database entry belonging to a given end-customer, thus indicating the last time the configuration for that particular end-customer was changed.| i | Changing the VERSION string too often (e.g. on a daily basis or even more often) is not to be recommended, as it will force the phone to update its non-volatile memory unnecessarily. As this memory is implemented using FLASH or EEPROM technology, which has a limited number of write cycles, the phone’s useful lifetime will suffer! |
EXTENDED_PROFILE – additional profile download via link in profile
The EXTENDED_PROFILE parameter enables providers e.g. to split their profile into user-specific data from secure storage and common or server-specific data. The parameter is used in a profile element to refer to another profile. Only one EXTENDED_PROFILE tag is allowed per profile. A maximum of three profiles can be carried out sequentially, one main profile and two extended profiles. For easier understanding the first profile is called main profile and the others are called extended profiles. The EXTENDED_PROFILE parameter will be supported only in plain XML profiles.XML syntax
| Tag Name Value Meaning | ||
| EXTENDED_PROFILE | URL The URL which refers to the next profile. It must be complete, i.e. contain the host and file name. | |
| Gigaset C610 IP/N300 IP |
| Gigaset N510 IP PRO |
Setting up an own provisioning server
The general procedure for setting up auto-provisioning of Gigaset IP phones is as follows: ◆Installing a Linux server Currently, systems with i386 architecture (and newer, compatible ones) are supported. The installation file is distributed as a Linux RPM file, i.e. the Linux system used, must support this packaging format. ◆Preparing the Linux server \- Installing an Apache HTTP server The Apache HTTP server is an open source web server for UNIX and Windows systems. It is used to handle the HTTP requests of the Gigaset IP phones. \- Adapting the web server configuration file for connecting the Gigaset auto-provisioning script To enable the auto-provisioning script ( → page 54) to be executed successfully the web server configuration file has to be adapted as follows: Add the gigaset/cgi directory to the Apache directories. \- Installing PHP script language PHP is a general scripting language designed for web development to produce dynamic web pages. The code is interpreted by a web server with a PHP processor module which generates the resulting web page. It also has evolved to include a command-line interface capability and can be used in standalone graphical applications. \- Setting up a MySQL server (optional) MySQL is the recommended instrument for providing the auto-provisioning script with the user-related data. ◆Installing the auto-provisioning application – Preparing the file system \- Installing the application \- Creating the auto-provisioning script or adapting the sample script (→ page 54)Provisioning package editor (provisioning tool)
The package editor is used to create a customer-specific provisioning package which can be uploaded to Gigaset IP phones. A provisioning package can contain the configuration for different device types. If a configuration file is to be added to the package it must have been created previously ( → page 39). The result of the editing process is a ZIP archive. It can be used to set up the file system structure of a provisioning server. The content depends on the package definition, for details → page 51. It is stored on the Gigaset update server. In order to use the file for provisioning it has to be downloaded and saved on the provisioning server.Notes on MAC address or activation code based provisioning mode
During the creation of your user account a three digits activation code (the Gigaset part of the activation code → page 29) should be assigned to the account. In the case it has been assigned, this code is shown by the tool and the provisioning packages created with the tool will support both: MAC code based and activation code based provisioning. In the case the code has not been assigned, an appropriate message is output and the provisioning packages will support only MAC code based provisioning. Please contact sys_engineering_ip_pro.gc@gigaset.com for having an activation code assigned.Starting
The provisionig package editor is provided as Web user interface. It is – together with the configuration file editor – part of the provisioning tool (→ page 10). - Login to the provisioning tool (→ page 38). If the login is successful, the main window is opened. ▶ To create or edit a provisioning package, click on Provisioning package editor. Already existing provisioning packages are listed. For each provisioning package the following information is available No. Number of the provisioning package. Package name Name including a timestamp. Comment Comment to identify the package. Change on Date of last change. Prov. server URL Address of the provisioning server configured by the user. The following options are possible: Add new Create a new provisioning package. Edit Revise an existing provisioning package. Delete Delete an existing provisioning package. Download Download an existing provisioning package. Back Exit the provisioning package editor and return to the main window. Information about created packages is stored on the server. In order to use the package for provisioning it has to be downloaded and saved on the provisioning server. The packages can be downloaded on demand via the Download button. If the maximum number of provisioning packages is reached it is not possible to add a new package or to edit an existing one before deleting some package(s). i To navigate within the tool, use the links and buttons available on the pages, e.g. Next or Back. You should not use the browser navigation buttons. To exit the configuration use the logout button which is located top right on each page. Creating a provisioning package
▶ Click Add new to create a new provisioning package. The package editor is opened and will guide you through all necessary steps. ▶ Click Next to save the settings on a page and precede to the next step. ▶ Click Back to return to the previous step. \- Click Cancel to exit the editor without saving your settings and to return to the main window.Device-independent settings
▶ Enter the Provisioning server address. You only need to provide the address (IP or DNS) of the root folder on the server. This address will automatically be completed with the common part. If no address is provided, the default http://%DURL/%DVID/cgi/ap?mac=%MACD&ac=%ACTC is used.Setting up an own provisioning server
Device Selection
On this page the device types that are supported by the package are listed with the following information:| No. | Device | Firmware | Comment | Variant | Provisioning | Add FW. | Sup. Downgr. |
| 1 | CG10 IP DUO | 42.051 | Merkur | 42 | 1 | No | No |
| 2 | DE900 IP IM | 01.01.13 | Hawking | 60 | 1 | Yes | Yes |
| 3 | N720 IP PRO | 70.035 | Einstein | 70 | 1 | No | No |
Profile configuration files
On this page the configuration files are assigned to the device types previously defined. For each device type select the configuration file from the drop down list. The drop down list contains the configuration files already created and stored on the Gigaset server that match the variant and provisioning ID of the selected device type. Only configuration files for the selected firmware versions or for older firmware versions are presented. Select None if you do not want to have a configuration file assigned. If there are no matching configuration files No profile available is shown and the drop down list is disabled. Click Edit to open the configuration file editor ( → page 39) to directly edit the configuration file that is assigned to the package. As usual when editing a configuration file, a new configuration file will be created and the old one will be kept (it can be deleted afterwards if no longer needed).Store provisioning package
Enter a File Name and a comment for the package. The version number will be created automatically using the file name and a time stamp. ▶ Click Save to store the package on the Gigaset update server.Content of the provisioning package
The provisioning packages are stored on the Gigaset update server. They contain the following: ◆ A sifs folder containing the files that are responsible for redirection:- sifsroot.bin
- sih_###.bin
- sit_###.bin
Installing the auto-provisioning application
Preparing the file system
Before installing the auto-provisioning application the file system has to be prepared. i.e. you have to create the necessary directories and copy the files into the file system structure.Creating directories
▶ Create a new directory gigaset/cgi/shop within the web server document path, e.g. /var/www/html:cd /var/www/html/ Change to the web server document directory
mkdir gigaset Create a new directory gigaset
cd gigaset Change to the gigaset directory
mkdir cgi Create a new directory cgi
cd cgi Change to the cgi directory
mkdir shop Create a new directory shop
cd / Return to the root directory
Copying the files to the provisioning server
▶ Copy the following files from the CD into the appropriate directories:File Copy into the directory:
ap → var/www/html/gigaset/cgi
key → var/www/html/gigaset/cgi/shop
provider.xsd → var/www/html/gigaset/cgi/shop
template.xml → var/www/html/gigaset/cgi/shop
gigaset_profil_gen-<version>.i386.rpm → /usr/bin
Required libraries
Besides the usual libc libraries required by any standard Linux application, gigaset_profile_gen needs the libxml2 library. You can download the latest version of libxml2 from http://xmlsoft.org The RPM installation will inform you if the required libraries are not installed on your system.Installing the gigaset_profile_gen application
To install the application perform the following steps: ▶ Change to the /usr/bin directory. cd /usr/bin ▶ Install the software. rpm -Uhv gigaset_profile_gen-Setting the access rights for the auto-provisioning files and script
When the package is installed, the following files are available in the /gigaset directory located in the HTTP server document directory.| File Description | |
| cgi/ap | Auto-provisioning script. |
| cgi/shop/template.xml | Template for auto-provisioning using the MAC method containing the configuration data for the phone. |
| cgi/shop/actc_template.xml | Template for auto-provisioning using an activation code containing the configuration data for the phone. |
| cgi/shop/gigaset_profile_gen | Auto-provisioning tool. |
| cgi/shop/key | Contains the secret key used to encrypt the configuration file to be sent to the phone. |
| cgi/shop/provider.xsd | XML schema file required by the gigaset_profile_gen application in order to validate the template.xml file. |
| cgi/shop/actc_provider.xsd | XML schema file required by the gigaset_profile_gen application in order to validate the actc_template.xml files. |
| i | Access rights are set using the chmod 755 command.This sets the access rights as follows: Read, write and execute rights for the owner (root), read and execute for all other user users. |
Auto-provisioning example script
The auto-provisioning script (ap) is responsible for the following tasks: 1 Looking for the given MAC address or activation code and finding the corresponding user and profile data. 2 Editing a copy of the template XML file with the given user data. 3 Running the gigaset_profile_gen program which generates the desired configuration file (→ page 60). 4 Sending the configuration file to the requesting phone. Gigaset provides an example script written in Perl because it has powerful text manipulation instructions and is the usual choice for writing CGI scripts. This script can be found in the /gigaset/cgi directory. Our simple script does all of the above. However, our task 1 is very primitive, because it maps only a few MAC addresses to fixed users. In real life, this task will probably be implemented by a database application. Here is the sample script. It is stored in the /gigaset/cgi directory:#!/usr/bin/perl
#*****
#** Copyright (c) 2008
#** Gigaset Communications GmbH
#** Author(s): LC, HJL / GC PD D SD RP
#
<h1 id="this-is-a-demo-cgi-script-that-shows-how-to-interface">This is a DEMO CGI script that shows how to interface</h1>
<h1 id="the-gigaset-application-gigaset_profile_gen-inside">the Gigaset application 'gigaset_profile_gen' inside</h1>
<h1 id="a-cgi-application-written-in-perl">a CGI application written in Perl.</h1>
#
<h1 id="redistribution-and-use-in-source-and-binary-forms-with-or-without">** Redistribution and use in source and binary forms, with or without</h1>
<h1 id="modification-are-permitted-provided-that-the-following-conditions">** modification, are permitted provided that the following conditions</h1>
<h1 id="are-met">** are met:</h1>
#
<h1 id="1-redistributions-of-source-code-must-retain-the-above-copyright">** 1. Redistributions of source code must retain the above copyright</h1>
<h1 id="notice-this-list-of-conditions-and-the-following-disclaimer">** notice, this list of conditions and the following disclaimer.</h1>
<h1 id="2-redistributions-in-binary-form-must-reproduce-the-above-copyright">** 2. Redistributions in binary form must reproduce the above copyright</h1>
<h1 id="notice-this-list-of-conditions-and-the-following-disclaimer-in-the">** notice, this list of conditions and the following disclaimer in the</h1>
<h1 id="documentation-andor-other-materials-provided-with-the-distribution">** documentation and/or other materials provided with the distribution.</h1>
#
<h1 id="this-software-is-provided-by-the-author-as-is-and-any-express-or">** THIS SOFTWARE IS PROVIDED BY THE AUTHOR "AS IS" AND ANY EXPRESS OR</h1>
<h1 id="implied-warranties-including-but-not-limited-to-the-implied">** IMPLIED WARRANTIES, INCLUDING, BUT NOT LIMITED TO, THE IMPLIED</h1>
<h1 id="warranties-of-merchantability-and-fitness-for-a-particular-purpose-are">** WARRANTIES OF MERCHANTABILITY AND FITNESS FOR A PARTICULAR PURPOSE ARE</h1>
<h1 id="disclaimed">** DISCLAIMED.</h1>
<h1 id="in-no-event-shall-the-author-be-liable-for-any-direct-indirect">** IN NO EVENT SHALL THE AUTHOR BE LIABLE FOR ANY DIRECT, INDIRECT,</h1>
<h1 id="incidental-special-exemplary-or-consequential-damages-including-but">** INCIDENTAL, SPECIAL, EXEMPLARY, OR CONSEQUENTIAL DAMAGES (INCLUDING, BUT</h1>
<h1 id="not-limited-to-procurement-of-substitute-goods-or-services-loss-of-use">** NOT LIMITED TO, PROCUREMENT OF SUBSTITUTE GOODS OR SERVICES; LOSS OF USE,</h1>
<h1 id="data-or-profits-or-business-interruption-however-caused-and-on-any">** DATA, OR PROFITS; OR BUSINESS INTERRUPTION) HOWEVER CAUSED AND ON ANY</h1>
<h1 id="theory-of-liability-whether-in-contract-strict-liability-or-tort">** THEORY OF LIABILITY, WHETHER IN CONTRACT, STRICT LIABILITY, OR TORT</h1>
<h1 id="including-negligence-or-otherwise-arising-in-any-way-out-of-the-use-of">** (INCLUDING NEGLIGENCE OR OTHERWISE) ARISING IN ANY WAY OUT OF THE USE OF</h1>
<h1 id="this-software-even-if-advised-of-the-possibility-of-such-damage">** THIS SOFTWARE, EVEN IF ADVISED OF THE POSSIBILITY OF SUCH DAMAGE.</h1>
#*****
use CGI
$q = new CGI();
use File::Temp qw/ tempfile /;
use File::stat;
#
<h1 id="1-get-the-requesting-devices-mac-address-or-activation-code">1. Get the requesting device's MAC address or activation code</h1>
MacAddress =q->param(mac);
ActivationCode =q->param(ac);

if (MacAddress eq '' andActivationCode eq '')
{
    # no parameter, assume MAC-method
    $MacAddress = 'FF:FF:FF:FF:FF:FF';# for testing
}

<h1 id="2-associate-a-user-profile-depending-on-the-provisioning-method">2. Associate a user profile depending on the provisioning method</h1>
if ($MacAddress ne '')
{
    # 2a In case of MAC Autoproviosioning
    # print("MAC method!!\n");
    # simple check for a valid MAC-address (with or without colons)
    if(length($MacAddress) != 17)
    {
    if(length($MacAddress) != 12)
    {
    die "invalid MAC-format";
    }
    # convert a MAC-address without colons (e.g. 123456789012)
    # to a MAC-address with colons (e.g. 12:34:56:78:90:12)
    MacAddress= s/../B/&:/gi
    }
    # Associate requestor's MAC address with a user profile:
    # Create a temporary xml file from the template:
    (InFileH,TheXmlInputFile) = tempfile('TmpXXXXXX', '.xml');
    close($InFileH);
    if (&Customize_For_MAC_Method('template.xml', TheXmlInputFile,MacAddress) != 0)
    {
    die "Customize MAC subroutine failed";
    }
}
elsif($ActivationCode ne '')
{
    # 2b In case of Provisioning using Activation Code
    # print("Activation Code method!!\n");

    # Associate requestor's Activation Code with a user profile:
    # Create a temporary xml file from the template:
    (InFileH,TheXmlInputFile) = tempfile('TmpXXXXXX', '.xml');
    close($InFileH);
    if (&Customize_For_ActivationCode_Method('actc_template.xml', TheXmlInputFile,ActivationCode) != 0)
    {
    die "Customize Activation Code subroutine failed";
    }
}

<h1 id="3convert-the-xml-user-profile-created-in-2-into-an-encrypted">3.Convert the XML user profile created in 2) into an encrypted</h1>
<h1 id="binary-profile">binary profile:</h1>

<h1 id="create-a-temporary-output-file-in-the-current-directory">Create a temporary output file in the current directory</h1>
(OutputFileH,TheOutputFileName) = tempfile('TmpXXXXXX', '.bin');
close($OutputFileH);
<h1 id="important-call-generator-with-the-s-argument-so-it-wont-output">Important: call generator with the -s argument, so it won't output</h1>
<h1 id="anything-on-stdout">anything on stdout!</h1>
<h1 id="moreover-if-you-need-to-generate-a-non-encrypted-autoprovisioning-file">Moreover, if you need to generate a non encrypted autoprovisioning file,</h1>
<h1 id="enter-the-option-noencrypt-as-shown-below">enter the option '-noencrypt', as shown below:</h1>
<h1 id="exitstatus-systemgigaset_profile_gen-thexmlinputfile-theoutputfilename">ExitStatus = system("./gigasetprofilegenTheXmlInputFile $TheOutputFileName</h1>
<h1 id="s-noencrypt">-s -noencrypt");</h1>
ExitStatus = system("./gigasetprofilegenTheXmlInputFile $TheOutputFileName -s");
print $ExitStatus
unlink ($TheXmlInputFile);
if ($ExitStatus != 0)
{
    die "Could not generate the binary profile";
    unlink ($TheOutputFileName);
}
4. Send the config file to the requesting device:
open (OUTFILE, $TheOutputFileName) or die "The bin file to output could not be found";
print "Content-type: application binary\n\n";
while (1)
{
    ByteCnt = read (OUTFILE,Bytes, 100);
    print $Bytes;
    if ($ByteCnt != 100)
    {
    last;
    }
}
close OUTFILE;
unlink ($TheOutputFileName);
###
<h3 id="subroutine-to-customize-the-xml-template-for-mac-autoprovisioning-method">Subroutine to customize the XML template for MAC-Autoprovisioning method ###</h3>
###
###
sub Customize_For_MAC_Method
{
    my(TemplateFileName,OutputFileName, $MacAddr) = @_;
    # This subroutine is a *very* primitive example of how to customize
    # the xml template file for a specific end customer.
    # This examples assumes that there are only 4 end customers to
    # service :-))
    # In the real world, this subroutine would interface to a huge
    # database of users who are identified by their MAC address!
####### Customer "Database" for MAC method #####
<h1 id="customer-1-customer-2-customer-3">Customer 1 Customer 2 Customer 3 #</h1>
my(@UserVersion) = ('3011061455', '3011061455' '3011061455');
my(@UserMacAddr) = ('00:01:E3:75:F1:72', '00:01:E3:67:60:77', '00:0A:5E:55:02:8F');
my(@UserLoginId) = ('1234567', '1234567', '1234568');
my(@UserPassword) = ('abcdef', 'aa123456', 'bb123456');
my(@UserId) = ('1234567', '1234567', '1234568');
my(@UserProfName) = ('d_default_de.bin', 'd_default_de.bin', 'd_default_de.bin');
###
###
###
###
###
###
###
###
###
###
###
###
###
###
###
###
###
###
###
###
###
###
###
###
###
###
###
###
###
###
###
###
###
###
###
###
###
###
###
###
###
###
###
###
###
###
###
###
###
###
###
###
###
###
###
###
###
###
###
###
###
###
###
###
###
###
###
###
###
###
###
###
###
###
<h1 id="find-user-associated-with-given-mac-address">find user associated with given MAC address:</h1>
my \(UserIndex = 0\);
while (\(UserIndex <= \)#UserMacAddr)
{
    if (@UserMacAddr[\(UserIndex\)] eq \(MacAddr\))
    {
    last;
    }
    \(UserIndex++\)
}
if (\(UserIndex > \)#UserMacAddr)
{
    return -1; # Failure: no match for MAC addr found
}

<h1 id="load-the-whole-template">load the whole template:</h1>
open (INFILE, \(TemplateFileName\)) or die "Could not open \(TemplateFileName\)\";
my(\(st\)) = stat(\(TemplateFileName\)) or die "No file \)!";
read (INFILE, my \(Block\), \(st->size\));
close(INFILE);

<h1 id="substitute-the-place-holders-in-the-template-with-the">substitute the place holders in the template with the</h1>
<h1 id="actual-values-assigned-to-the-end-customer">actual values assigned to the end customer:</h1>
\(Block\) =~ s/insert MAC_ADDRESS here/@UserMacAddr[\(UserIndex\)]/g;
\(Block\) =~ s/insert VERSION here/@UserVersion[\(UserIndex\)]/g;
\(Block\) =~ s/insert PROFILE_NAME here/@UserProfName[\(UserIndex\)]/g;
\(Block\) =~ s/insert S_SIP_LOGIN_ID here/@UserLoginId[\(UserIndex\)]/g;
\(Block\) =~ s/insert S_SIP_PASSWORD here/@UserPassword[\(UserIndex\)]/g;
\(Block\) =~ s/insert S_SIP_USER_ID here/@UserId[\(UserIndex\)]/g;

<h1 id="store-the-customized-xml-file">store the customized xml file:</h1>
open (OUTFILE, ">\(OutputFileName\)) or die "Could not open \(OutputFileName\)\";
print OUTFILE \(Block\);
close(OUTFILE);
return 0; # Success
}

###
<h3 id="subroutine-to-customize-the-xml-template-for-activation-code-provisioning">Subroutine to customize the XML template for Activation Code Provisioning ###</h3>
<h3 id="method">method ###</h3>
###
###
###
###
###
###
###
###
###
###
###
###
###
###
###
###
###
###
###
###
###
###
###
###
###
###
###
###
###
###
###
###
###
###
###
###
###
###
###
###
###
###
###
###
###
###
###
###
###
###
###
###
###
###
###
###
###
###
###
###
###
###
###
###
###
###
###
###
###
###
###
###
###
###
###
###
###
###
###
###
###
###
###
###
###
###
###
###
###
###
###
###
###
###
###
###
###
###
###
###
####
###
###
###
###
###
###
###
###
###
###
###
###
###
###
###
###
###
###
###
###
###
###
###
###
###
###
###
###
###
###
###
###
###
###
###
###
###
###
###
###
###
###
###
###
###
###
###
###
###
###
###
###
###
###
###
###
###
###
###
###
###
###
###
###
###
###
###
###
###
###
###
###
!,
<h1 id="find-user-associated-with-given-activation-code">find user associated with given Activation Code:</h1>
my $UserIndex = 0;
while (UserIndex <=#UserActCode)
{
    if (@UserActCode[UserIndex] eqActCode)
    {
    last;
    }
    $UserIndex++
}
if (UserIndex >#UserActCode)
{
    return -1; # Failure: no match for Activation Code found
}

<h1 id="load-the-whole-template-2">load the whole template:</h1>
open (INFILE, TemplateFileName) or die "Could not openTemplateFileName";
my(st) = stat(TemplateFileName) or die "No file $!";
read (INFILE, my Block,st->size);
close(INFILE);

<h1 id="substitute-the-place-holders-in-the-template-with-the-2">substitute the place holders in the template with the</h1>
<h1 id="actual-values-assigned-to-the-end-customer-2">actual values assigned to the end customer:</h1>
Block = s/insert ACTIVATIONCODE here/@UserActCode[UserIndex]/g;
Block = s/insert VERSION here/@UserVersion[UserIndex]/g;
Block = s/insert PROFILENAME here/@UserProfName[UserIndex]/g;
Block = s/insert SSIPLOGINID here/@UserLoginId[UserIndex]/g;
Block = s/insert SSIPPASSWORD here/@UserPassword[UserIndex]/g;
Block = s/insert SSIPUSERID here/@UserId[UserIndex]/g;

<h1 id="store-the-customized-xml-file-2">store the customized xml file:</h1>
open (OUTFILE, ">OutputFileName") or die "Could not openOutputFileName";
print OUTFILE $Block;
close(OUTFILE);
return 0; # Success
}
Adapting the ap script for MySQL database input (optional)
Usually, the user data is imported from a database. The following is an example for implementing MySQL access within the ap script. When the ap script should access a MySQL database for importing the user-related data adapt the script analogous to the following: ▶ At the beginning of the script change the following section: use CGI q = new CGI(); use File::Temp qw/ tempfile /; use File::stat; ▶ Add the following lines:<h3 id="use-mysql-for-database-connection">use Mysql for database connection</h3>
use Mysql;
<h3 id="encode-will-be-used-for-encoding-and-decoding-results-from-database">Encode will be used for encoding and decoding results from database</h3>
use Encode;
###
<h3 id="subroutine-to-customize-the-xml-template-for-mac-autoprovisioning-method-2">Subroutine to customize the XML template for MAC-Autoprovisioning method ###</h3>
###
<h3 id="with-mysql-connection">with Mysql Connection ###</h3>
###
###
###
sub Customize_For_MAC_Method_MYSQL
{
my(TemplateFileName,OutputFileName, $MacAddr) = @_;
##########
<h1 id="mysql-connection">MySQL Connection</h1>
#######
<h1 id="mysql-configuration">Mysql Configuration</h1>
$host="localhost";
$database="GigasetAutoProvisioning";
$tablename = "UserConnectionValues";
$user="root";
$pw="gigaset";
<h1 id="mysql-connet">MySQL Connet</h1>
connect = Mysql->connect(host,database,user,$pw);
#Select DB
connect ->selectdb(database);
#Define a Mysql Query
myquery = "SELECT *FROMtablename WHERE MAC = '\($MacAddress\' LIMIT 0,30";
#Execute the Query Function
execute =connect->query($myquery);
<h1 id="turn-results-from-db-into-variables">Turn results from DB into Variables</h1>
while (@results = $execute->fetchrow())
{
    MAC =results[0];
    # convert UTF8 (DB) to Iso-8859-1(Latin) for the template(Endconfing Iso-8859-1
    octets = encode("utf8",Mac);
    Mac = decode("iso-8859-1",octets);
    Version =results[1];
    octets = encode("utf8",Version);
    Version = decode("iso-8859-1",octets);
    Profil =results[2];
    octets = encode("utf8",Profil);
    Profil = decode("iso-8859-1",octets);
    LOGINID =results[3];
    octets = encode("utf8",LOGINID);
    LOGINID = decode("iso-8859-1",octets);
    USERID =results[4];
    octets = encode("utf8",USERID);
    USERID = decode("iso-8859-1",octets);
    PW =results[5];
    octets = encode("utf8",PW);
    PW = decode("iso-8859-1",octets);
}

<h1 id="load-the-whole-template-3">load the whole template:</h1>
open (INFILE, TemplateFileName) or die "Could not openTemplateFileName";
my(st) = stat(TemplateFileName) or die "No file $!";
read (INFILE, my Block,st->size);
close(INFILE);

<h1 id="substitute-the-place-holders-in-the-template-with-the-3">substitute the place holders in the template with the</h1>
<h1 id="actual-values-assigned-to-the-end-customer-3">actual values assigned to the end customer:</h1>
\(Block =~ s/insert MAC_ADDRESS here/\(MAC/g\);
\(Block =~ s/insert VERSION here/\(Version/g\);
\(Block =~ s/insert PROFILE_NAME here/\(Profil/g\);
\(Block =~ s/insert S_SIP_LOGIN_ID here/\(LOGINID/g\);
\(Block =~ s/insert S_SIP_PASSWORD here/\(PW/g\);
\(Block =~ s/insert S_SIP_USER_ID here/\(USERID/g\);
<h1 id="store-the-customized-xml-file-3">store the customized xml file:</h1>
open (OUTFILE, ">\(OutputFileName\)) or die "Could not open \(OutputFileName\)";
print OUTFILE \(Block\);
close (OUTFILE);
return 0;
<h1 id="success">Success</h1>
}
Testing the installation
When the installation and adjustment are finished, you should test to see if the auto-provisioning process works properly. You can use a standard web browser to test the correct setup of the auto-provisioning system.To check if your installation has been successful enter the following URL in your browser: http://<provisioning server>/gigaset/cgi/ap?mac=<MAC address>
<provisioning server> Domain name or IP address of the provisioning server
<MAC address> MAC address of an IP phone known by the ap script.
Example:
Your host has the domain cfg.provisioner.com. ▶ Enter the following URL:http://cfg.provisioner.com/gigaset/cgi/ap?mac=00:11:22:33:44:55
The gigaset_profile_gen application
gigaset_profile_gen is a console application intended to be called from a CGI script. Chapter Auto-provisioning example script (→ page 54) describes how this script has to be designed and provides an ap example script.Synopsis
gigaset_profile_gen XML_INPUT_FILE OUTPUT_FILE [-s] [-noencrypt]Description
Generates the encrypted configuration file from the given XML_INPUT_FILE and places it in OUTPUT_FILE.Mandatory arguments
| XML_INPUT_FILE | File containing the configuration data for the phone to be provisioned(→page 43). |
| OUTPUT_FILE | Binary, encrypted version of the configuration, ready to be sent to the phone. |
Optional arguments
| -s | Silent operation: suppresses any output by the program to STDOUT; when called from a CGI application, this argument must be used, because the CGI standard uses STDOUT to gather the response that HTTP will send to the client. Without this parameter, the HTTP response would contain unwanted text, such as the sign-on message generated by the program! |
| -noencrypt | Don't encrypt the output fileThis argument must only be used if the phone does not require a secret key – otherwise, it will not understand the configuration file! |
Remarks
In order to encrypt the configuration file, gigaset_profile_gen usually needs a secret key, which is contained in a file named key. This file must be located in the same directory as the application. The secret key must coincide with the one used in the phone. Therefore, the key file is customised by Gigaset for the provisioner. In certain closed network scenarios, the provisioner might desire to work with an unencrypted configuration file. In this case, the phone has to be customised by Gigaset accordingly ("no secret key"), and the argument -noencrypt shown above must be given when invoking the gigaset_profile_gen application for building the file. Note that for security reasons Gigaset recommends using encrypted configuration files only. To make sure that the XML_INPUT_FILE contains only configuration parameters the phone understands, the gigaset_profile_gen validates it against a fixed schema file (referred to inside the XML file). This schema file is provided by the Gigaset. It must be located in the same directory as the XML_INPUT_FILE. If the validation fails, the application returns an error.Return values
gigaset_profile_gen returns 0 on success. All other values indicate an error. Error messages are sent to STDERR. In the case of errors, an empty OUTPUT_FILE is generated.File system structure
Usually, the configuration data for the VoIP phones is provided by Gigaset, taking a determined data structure within the HTTP server file system into consideration. If the primary URL is changed (e.g. via the DHCP option 114 or via SIP NOTIFY, → page 24), the data structure has to be stored at the HTTP server according to the new URL. When using an own provisioning server the data has to be provided by the provisioner itself. The data structure is as follows: Within the HTTP server file system the gigaset directory is created containing a subdirectory for each device type. The numbers used as directory names correspond to the device or the device variant of the Gigaset IP phones.gigaset/41 41 = Gigaset DX800A
42 42 = Gigaset C610 IP/N300 (1), Gigaset N510 IP PRO (2)
60 60 = Gigaset DE900 IP PRO
61 61 = Gigaset DE700 IP PRO
62 62 = Gigaset DE410 IP PRO
63 63 = Gigaset DE310 IP PRO
70 70 = Gigaset N720 DM PRO
71 71 = Gigaset N720 IP PRO
gigaset/42/2/ cgi/shop/gigaset_profile_gen
cgi/shop/key
cgi/shop/merkur_mac_template.xml
cgi/shop/merkur_mac_template.xsd
cgi/ap
c_0811101406_eng.bin
c_0811101406_fre.bin
c_0811101406_ger.bin
...
d_default_de.bin
l_0811101406.bin
master.bin
pde_0811101406_eng.bin
pde_0811101406_fre.bin
pde_0811101406_ger.bin
...
A
Access rights 53 Activation code authentication....29 auto-provisioning method....29 format....29 generating....29 Gigaset part....29 provisioner part....29 security hints....37 Activation code provisioning via provisioning package editor ..... 48 ap script see auto-provisioning script Apache HTTP server configuration file.... 48 directories.... 48 installing.... 48 autoprov.checkDevice 21 autoprov.checkDeviceList 22 autoprov.deregisterDevice.... 18 autoprov.deregisterDeviceList.... 23 autoprov.listDevices.... 20 autoprov.listDevices, all.... 19 autoprov.registerDevice 17 Auto-provisioning template....53 URL....62 via activation code....29 Auto-provisioning script....54 example....54 MySQL connection....58 Auto-provisioning via activation code message flow 31 Auto-provisioning via MAC address message flow 31 Auto-provisioning, definition ....4 Auto-provisioning script....28, 32C
Certificate PEM .... 37 TLS .... 38 CERTIFICATE parameter.... 38 check-sync.... 34 chmod 53 Command check-sync .... 34 chmod .... 53 Configuration file Apache......48 assign to provisioning package......50 encryption key......53 Configuration file editor .... 39 editing parameters.... 41 help information.... 42 starting .... 39 Configuration update 34D
Database, character format UTF-8......60 DER format (Distinguished Encoding Rules)....37 Deregistering a list of devices.... 23 Deregistering a device via web UI .... 13 via XML-RPC call .... 18 Device deregistering a list of.... 23 listing all at a specific provider registered.... 20 listing all registered.... 19 listing all registered devices at a specific provider .... 21, 22 Device type in configuration file editor.... 40 in provisioning package editor.... 50 DHCP option 114 ....7,25 dhcp_url ....25 Directory cgi....52 gigaset....52 HTTP server....53 shop....52E
Editor configuration file .... 39 provisioning package.... 48 End-user, role in provisioning process .....6 EXTENDED_PROFILE parameter.....47F
File system preparing for installation.... 52 File system structure .... 62 device variants.... 62 Files, provisioning 39 Firmware version in configuration file editor ..... 40 in provisioning package editor ..... 50 for XML configuration file.... 42G
Gigaset redirection server....6 update server....6 gigaset directory.... 52 Gigaset wiki ....38, 43 gigaset_profile_gen arguments....61 installing....52 link to shop directory....52 required libraries....52 return values....61 usage....61 Gigaset, role in provisioning process.....5 /gigaset/cgi....52 /gigaset/cgi/shop....52H
HTTP Digest Authentication.... 37 HTTP requests....28, 32|
Installation test 60 Installing Apache HTTP server.... 48 gigaset_profile_gen .... 52 PHP.... 48 IP phone set-up manually 11K
Key 53L
libc library 52 Libraries....52 libxml2 library....52 List devices via web user interface .... 14M
MAC address 26 MAC based provisioning via provisioning package editor ..... 48 MAC ID 26 MAC-based auto-provisioning 26 Main menu 12,39,49 main menu 12 Manual IP phone set-up.... 11 master.bin 62 maxSub .... 33 long form.... 33 short form.... 33 Message flow auto-provisioning via activation code 31 auto-provisioning via MAC address .. 31 MySQL in ap script.... 58P
Parameter in configuration file editor.... 41 state in configuration file editor.... 42 Part number in configuration file editor.... 40 in provisioning package editor.... 50 PEM format 37 Perl script 54 Phone variant ID ....28, 31 PHP install.... 48 Plain XML content 36 Profile ....4 splitting....47 Provider, role in provisioning process.....5 Provisioner, role in provisioning process.....5 Provisioning activation code .... 29 get URL .... 28, 32 MAC-based.... 26 Provisioning data 9 Provisioning files, XML 39 Provisioning methods....7 Provisioning package .... 48 adding firmware.... 50 content .... 51 Provisioning package editor....48 activation code provisioning....48 MAC based provisioning....48Index
starting 49 Provisioning server....6 customised....7 Provisioning t ....5 Provisioning tool....5 access data....38 components....10 configuration file editor....39 main menu....39,49 starting....38 Provisioning, definition ....4R
Reboot .... 35 binary representation.... 35 XML representation.... 35 REBOOT parameter.... 35 Redirection web user interface.... 12 Redirection data deregistering via web user interface. 13 Redirection data record registering via web user interface .... 12 Redirection server ....6 Redirecton service....7 Registering via web user interface .... 12 Roles, in provisioning process....5s
Schema file for XML template.... 43 Secret key....61 Security using activation code method..... 37 Security aspects.... 37 Server provisioning ....6 redirection ....6 update....6 SIP check-sync mechanism.... 34 SIP multicast mechanism ..... 7,24 SIP NOTIFY message.... 34 %SUBLIST.... 33 Subscription list.... 33 bit array.... 33 examples.... 34 maximum number of subscriptions.. 33T
Template.... 42 Template, auto-provisioning .... 53 TLS certificate 38U
Unicode....60 Update configuration 34 Update server 6 URI format string....28, 32 User account for provisioner web UI .... 12 for provisioning tool .... 38 UTF-8....60v
VERSION parameter, in XML file....46W
Web user interface.... 12 for redirection data.... 12 provisioning tool.... 38 Wiki....38,43X
X.509 certificate....37 XML file .... 39 content evaluation .... 36 plain XML content.... 36 storing via configuration file editor .. 42 uploading directly.... 25 uploading vie web UI .... 14 XML FileUpload 25 XML parameter CERTIFICATE....38 EXTENDED_PROFILE....47 REBOOT....35 VERSION....46 XML schema file for template ..... 53 XML template 42 XML-provisioning....4 plain....4 with binary....4 XML-RPC 15 XML-RPC command autoprov.checkDevice.... 21 autoprov.checkDeviceList.... 22 autoprov.deregisterDevice.... 18 autoprov.deregisterDeviceList..... 23 autoprov.listDevices 20 autoprov.listDevices, all 19 autoprov.registerDevice.... 17 XML-RPC commands.... 17 XSD schema file.... 43 Issued by Gigaset Communications GmbH Frankenstraße 2a, D-46395 Bocholt © Gigaset Communications GmbH 2012 All rights reserved. Subject to availability. Rights of modification reserved. www.gigaset.com A31008-M2212-R910-3-7643
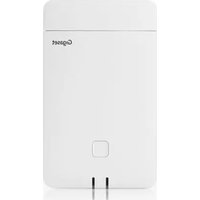
- PROVISIONING METHODS ...... 11
- XML PROVISIONING FILE 39
- SETTING UP AN OWN PROVISIONING SERVER 48
- CONTENT
- INTRODUCTION
- PROVISIONING
- AUTO-PROVISIONING
- XML-PROVISIONING
- ROLES IN THE PROVISIONING PROCESS
- GIGASET COMMUNICATIONS GMBH – THE MANUFACTURER
- THE PROVIDER
- THE PROVISIONER
- THE END-USER
- SERVER IN THE PROVISIONING PROCESS
- GIGASET SERVER
- ◆UPDATE SERVER
- ◆REDIRECTION SERVER
- PROVISIONING SERVER
- SETTING UP A CUSTOMISED PROVISIONING SERVER
- PROVISIONING METHODS
- PROVISIONING DATA
- PARAMETERS
- WEBUI TEXTS (OPTIONAL)
- FIRMWARE UPDATE FILES (OPTIONAL)
- PROVISIONING TOOL
- MANUAL GIGASET VOIP PHONE SET-UP – STANDARD PROCEDURE
- METHODS FOR PROVIDING THE PROVISIONING SERVER URL
- SETTING UP REDIRECTION INFORMATION USING THE WEB USER INTERFACE
- REGISTERING VOIP PHONES
- SEARCHING FOR AND DEREGISTERING VOIP PHONES
- LIST DEVICES
- UPLOADING AN XML FILE
- SETTING UP REDIRECTION INFORMATION USING THE XML-RPC INTERFACE
- XML SYNTAX
- XML-RPC COMMANDS
- AUTOPROV.REGISTERDEVICE
- AUTOPROV.DEREGISTERDEVICE
- AUTOPROV.DEREGISTERDEVICELIST
- PROVIDING THE PROVISIONING SERVER URL VIA THE SIP MULTICAST MECHANISM
- DHCP OPTION (DHCP_URL)
- FILE UPLOAD VIA HTTP SERVER
- FILE UPLOAD
- CONTENT TYPE FOR XML FILEUPLOAD
- MAC BASED PROVISIONING
- PRINCIPLE OF OPERATION - MAC-BASED PROVISIONING WITH REDIRECTION
- MESSAGE FLOW
- HTTP REQUEST
- EXAMPLE OF A REQUEST
- URI FORMAT
- FORMAT SPECIFIERS
- EXAMPLE
- AUTO-PROVISIONING VIA ACTIVATION CODE
- THE ACTIVATION CODE
- EXAMPLES OF ACTIVATION CODES
- PRINCIPLE OF OPERATION
- SUBSCRIPTION LIST – SUPPORTING MULTIPLE ACCOUNTS
- MAXIMUM NUMBER OF SUBSCRIPTIONS
- ◆SHORT FORM
- ◆LONG FORM
- SUBSCRIPTION LIST, BIT ARRAY
- EXAMPLES
- UPDATING THE CONFIGURATION DATA
- SIP CHECK-SYNC MECHANISM
- REBOOT PARAMETER
- BINARY REPRESENTATION
- BINARY CODING EXAMPLE
- AUTO-PROVISIONING WITH PLAIN XML CONTENT
- SECURITY ASPECTS
- CLIENT AUTHENTICATION VIA HTTP DIGEST AUTHENTICATION
- CERTIFICATES IN PEM FORMAT
- DOWNLOAD TLS CERTIFICATES VIA A LINK IN A PROFILE
- STARTING THE PROVISIONING TOOL
- XML PROVISIONING FILE
- CONFIGURATION FILE EDITOR (PROVISIONING TOOL)
- STARTING
- I
- CREATING A CONFIGURATION FILE
- SELECT DEVICE
- EDITING PARAMETERS
- HELP INFORMATION
- SAVING THE CONFIGURATION FILE
- XML FILES
- XSD SCHEMA FILES
- CONFIGURATION PARAMETERS
- XML TEMPLATE – EXAMPLE
- SPECIAL PARAMETERS
- VERSION – IDENTIFYING CONFIGURATION CHANGES
- EXTENDED_PROFILE – ADDITIONAL PROFILE DOWNLOAD VIA LINK IN PROFILE
- SETTING UP AN OWN PROVISIONING SERVER
- PROVISIONING PACKAGE EDITOR (PROVISIONING TOOL)
- NOTES ON MAC ADDRESS OR ACTIVATION CODE BASED PROVISIONING MODE
- CREATING A PROVISIONING PACKAGE
- DEVICE-INDEPENDENT SETTINGS
- DEVICE SELECTION
- PROFILE CONFIGURATION FILES
- STORE PROVISIONING PACKAGE
- CONTENT OF THE PROVISIONING PACKAGE
- INSTALLING THE AUTO-PROVISIONING APPLICATION
- PREPARING THE FILE SYSTEM
- CREATING DIRECTORIES
- COPYING THE FILES TO THE PROVISIONING SERVER
- FILE COPY INTO THE DIRECTORY
- REQUIRED LIBRARIES
- INSTALLING THE GIGASET_PROFILE_GEN APPLICATION
- SETTING THE ACCESS RIGHTS FOR THE AUTO-PROVISIONING FILES AND SCRIPT
- AUTO-PROVISIONING EXAMPLE SCRIPT
- SEND THE CONFIG FILE TO THE REQUESTING DEVICE
- ADAPTING THE AP SCRIPT FOR MYSQL DATABASE INPUT (OPTIONAL)
- TESTING THE INSTALLATION
- THE GIGASET_PROFILE_GEN APPLICATION
- SYNOPSIS
- DESCRIPTION
- MANDATORY ARGUMENTS
- OPTIONAL ARGUMENTS
- REMARKS
- RETURN VALUES
- FILE SYSTEM STRUCTURE
- A
- C
- D
- E
- F
- G
- H
- K
- L
- M
- P
- INDEX
- R
- S
- T
- U
- V
- W
- X
Brand : GIGASET
Model : N720 DM PRO
Category : Telephone