
Premacy (2002) - Car MAZDA - Free user manual and instructions
Find the device manual for free Premacy (2002) MAZDA in PDF.


| Product Type | Compact MPV (Multi-Purpose Vehicle) |
| Brand | Mazda |
| Model | Premacy (2002) |
| Overall Length | 4500 mm (177.2 in) |
| Overall Width | 1750 mm (68.9 in) |
| Overall Height | 1600 mm (63.0 in) |
| Wheelbase | 2700 mm (106.3 in) |
| Curb Weight | Approx. 1500 kg (3307 lb) |
| Engine Options | 1.8L I4 (91 hp) or 2.0L I4 (130 hp) petrol; 2.0L turbodiesel (90 hp) |
| Transmission | 5-speed manual or 4-speed automatic |
| Drive Type | Front-wheel drive (FWD) |
| Fuel Tank Capacity | 60 L (15.9 US gal) |
| Fuel Economy (Combined) | Approx. 8.5 L/100 km (27.7 mpg US) |
| Seating Capacity | 5 or 7 passengers |
| Safety Features | Front airbags, side airbags, ABS, traction control |
| Maintenance Interval | Oil change every 10,000 km or 12 months |
| Tire Pressure (Front/Rear) | 2.2 bar / 2.2 bar (32 psi) |
| Battery Voltage | 12V |
| Recommended Fuel | Unleaded 95 RON |
| Engine Oil Capacity | 4.0 L (with filter) |
| Coolant Capacity | 6.5 L |
| Spare Tire | Compact temporary (space saver) |
Frequently Asked Questions - Premacy (2002) MAZDA
User questions about Premacy (2002) MAZDA
0 question about this device. Answer the ones you know or ask your own.
Ask a new question about this device
Download the instructions for your Car in PDF format for free! Find your manual Premacy (2002) - MAZDA and take your electronic device back in hand. On this page are published all the documents necessary for the use of your device. Premacy (2002) by MAZDA.
USER MANUAL Premacy (2002) MAZDA
A Word to Mazda Owners
Thank you for choosing a Mazda. We at Mazda design and build vehicles with complete customer satisfaction in mind.
To help ensure enjoyable and trouble-free operation of your Mazda, read this manual carefully and follow its recommendations.
An Authorised Mazda Dealer knows your vehicle best. So when maintenance or service is necessary, that's the place to go.
Our nationwide network of Mazda professionals is dedicated to providing you with the best possible service.
We assure you that all of us at Mazda have an ongoing interest in your motoring pleasure and in your full satisfaction with your Mazda product.
Mazda Motor Corporation HIROSHIMA, JAPAN
Important Notes About This Manual
Keep this manual in the glove box as a handy reference for the safe and enjoyable use of your Mazda. Should you resell the vehicle, leave this manual with it for the next owner.
All specifications and descriptions are accurate at the time of printing. Because improvement is a constant goal at Mazda, we reserve the right to make changes in specifications at any time without notice and without obligation.
Please be aware that this manual applies to all models, equipment and options. As a result, you may find some explanations for equipment not installed on your vehicle.
©2002 Mazda Motor Corporation Printed in Japan Aug. 2002(Print1)




How to Use This Manual
We want to help you get the most driving pleasure from your vehicle. Your owner's manual, when read from cover to cover, can do that in many ways.
Illustrations complement the words of the manual to best explain how to enjoy your Mazda. By reading your manual, you can find out about the features, important safety information, and driving under various road conditions.
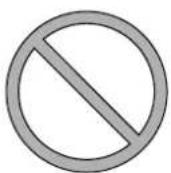
The above symbol in this manual means "Do not do this" or "Do not let this happen".
References to left hand and right hand are made as if facing in the same direction the vehicle faces. Although this manual explains a left-hand-drive model, it also applies to right-hand-drive models.
Index: A good place to start is the Index, an alphabetical listing of all information in your manual.
You'll find several WARNINGS, CAUTIONs, and NOTES in the manual.

WARNING
A WARNING indicates a situation in which serious injury or death could result if the warning is ignored.

CAUTION
A CAUTION indicates a situation in which bodily injury or damage to your vehicle, or both, could result if the caution is ignored.
NOTE
A NOTE provides information and sometimes suggests how to make better use of your vehicle.

The above symbol, located on some parts of the vehicle, indicates that this manual contains information related to the part. Please refer to the manual for a detailed explanation.
Table of Contents
| Your Mazda at a GlanceInterior, exterior views and part identification of your Mazda. | 1 |
| Essential Safety EquipmentUse of safety equipment, including seats, seat belt system, SRS air bags and child-restraint systems. | 2 |
| Knowing Your MazdaExplanation of basic operations and controls; opening/closing and adjustment of various parts. | 3 |
| Before Driving Your MazdaImportant information about driving your Mazda. | 4 |
| Driving Your MazdaExplanation of instruments and controls. | 5 |
| Interior ComfortUse of various features for drive comfort, including air-conditioning and audio system. | 6 |
| In Case of an EmergencyHelpful information on what to do in an emergency. | 7 |
| Maintenance and CareHow to keep your Mazda in top condition. | 8 |
| Customer InformationImportant consumer information including warranties and add-on equipment. | 9 |
| SpecificationsTechnical information about your Mazda. | 10 |
| Index | 11 |


J54L_8R34_EE_02H.BOOK Page 4 Monday, July 15, 2002 9:03 AM




1 Your Vehicle at a Glance
Interior, exterior views and part identification of your Mazda.
Instrument Panel Overview 1-2
Interior Overview 1-3
Exterior Overview 1-4
Your Vehicle at a Glance
Instrument Panel Overview
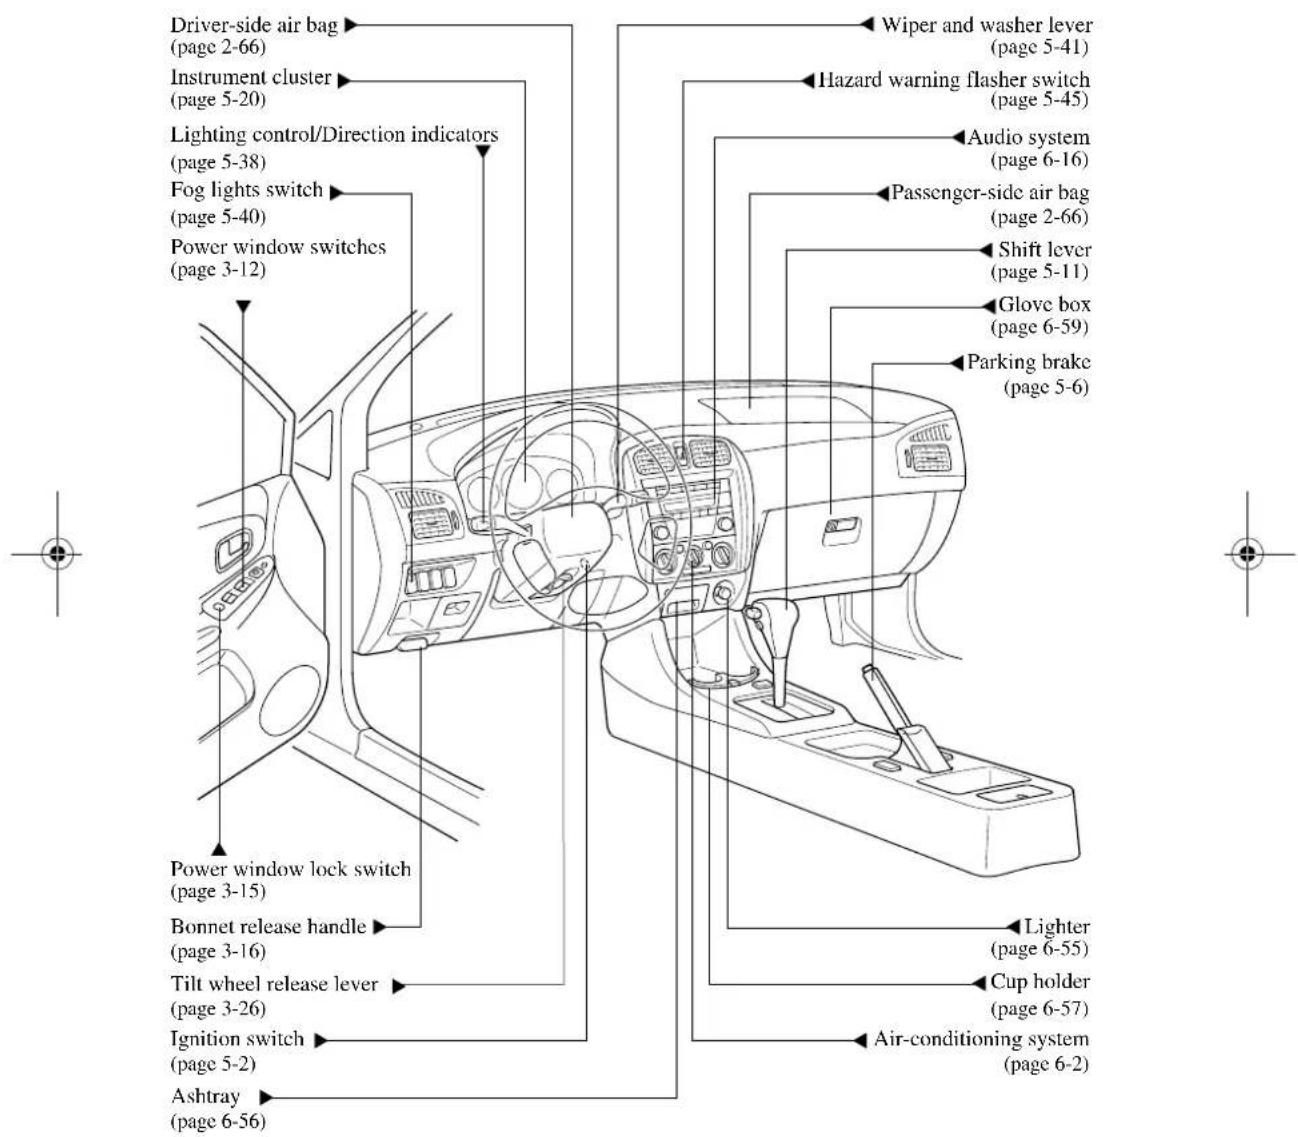
1-2
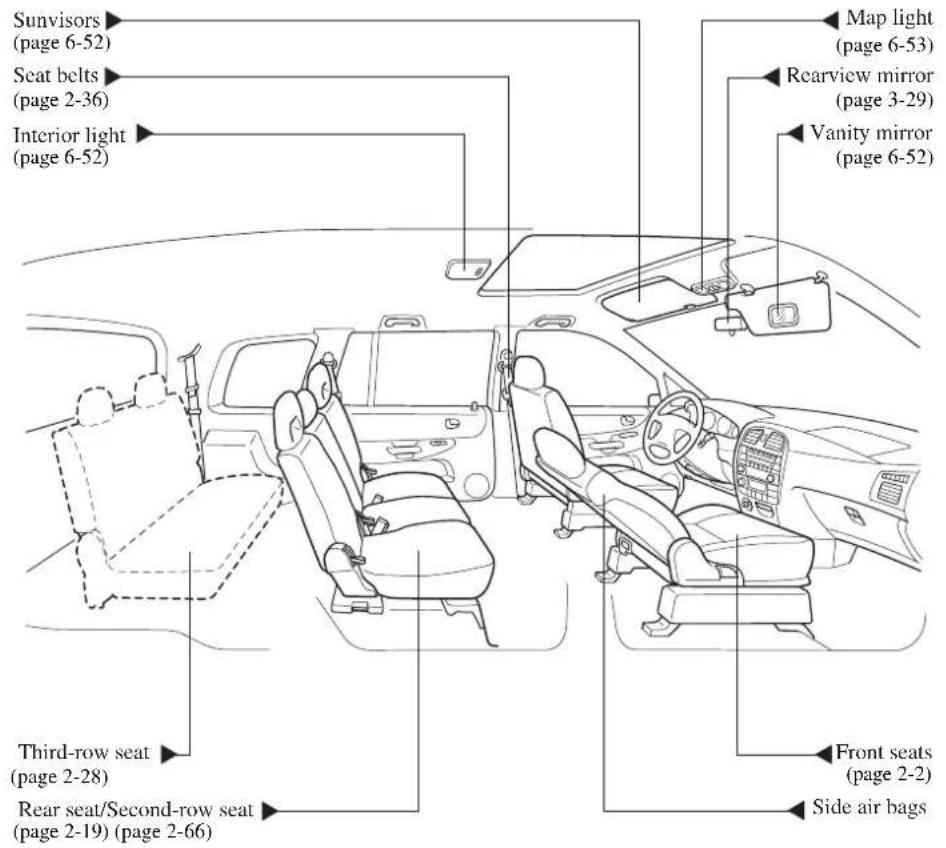
Your Vehicle at a Glance
Exterior Overview

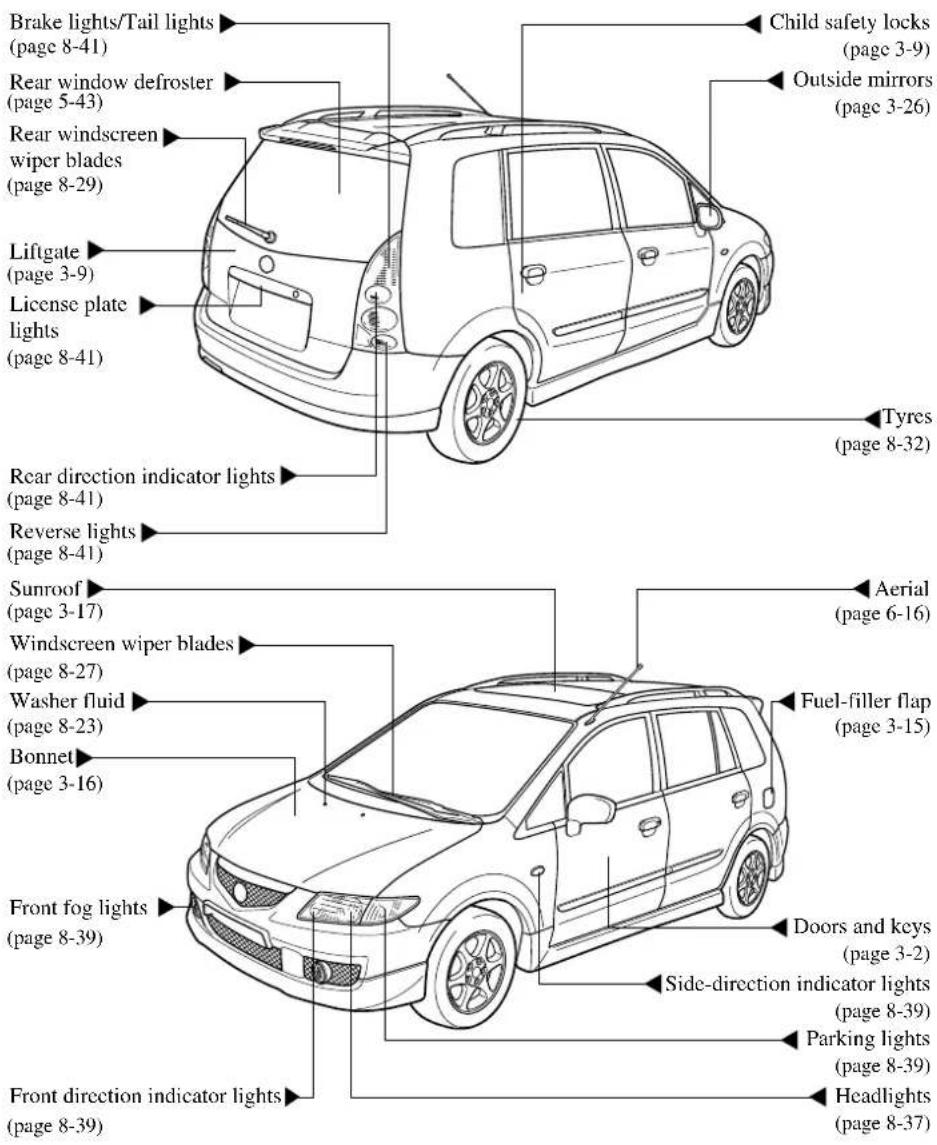

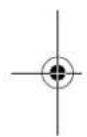
1-4


natural_image
Pure geometric diagram with intersecting lines and a central circle, no text or symbols present2 Essential Safety Equipment
Use of safety equipment, including seats, seat belt system, SRS air bags and child-restraint systems.
Seats 2-2
Front Seats 2-2
Rear Seats (5-Passenger Model) 2-9
Second-Row Seats (7-Passenger Model) 2-19
Third-Row Seat (7-Passenger Model) 2-28
Flat Folding (7-Passenger Model) 2-35
Seat Belt Systems 2-36
Seat Belt Precautions 2-36
3-Point Type Seat Belt 2-40
Front Seat Belt Pretensioner and Load Limiting Systems ..... 2-42
Rear Centre Position Seat Belt (5-Passenger Model) 2-44
2-Point Type Seat Belt (7-Passenger Model) 2-47
Seat Belt Warning Light (Except European Model) 2-48
Child Restraint 2-49
Child Restraint Precautions 2-49
Categories of Child-Restraint Systems (Europe) 2-52
Child-Restraint System Installation Position (Europe) 2-53
Child-Restraint System Suitability for Various Seat Positions Table (Europe) 2-58
Installing Child-Restraint Systems 2-59
Air Bag Cut-Off System 2-62
ISOFIX Bar-Secured Child-Restraint Systems 2-62
SRS Air Bags 2-66
Supplementary Restraint Systems (SRS) Precautions ...... 2-66
Air Bag System Description 2-70
Front Seats
WARNING
Securing the Seats:
Adjustable seats and seatbacks that are not securely locked are dangerous. In a sudden stop or collision, the seat or seatback could move, causing injury. Make sure the adjustable components of the seat are locked in place by attempting to slide the seat forward and backward and rocking the seatback.
▼ Seat Slide
WARNING
Driver's Seat Adjustment:
Adjusting the driver's seat while the vehicle is moving is dangerous. The driver could lose control of the vehicle and have an accident. Adjust the driver's seat only when the vehicle is stopped.
To move a seat forward or backward, raise the lever and slide the seat to the desired position and release the lever.
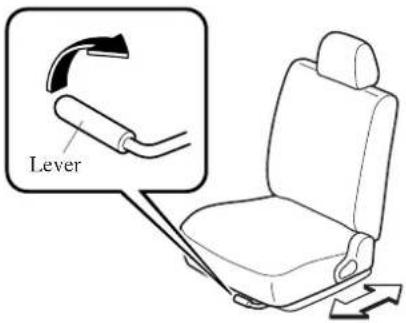
Make sure the lever returns to its original position and the seat is locked in place by attempting to push it forward and backward.
2-2


▼Seat Recline
WARNING
Reclining:
Sitting in a reclined position while the vehicle is moving is dangerous because you don't get the full protection from seat belts. During sudden braking or a collision, you can slide under the lap belt and suffer serious internal injuries. For maximum protection, sit well back and upright.
Unlocked Seatback:
A seatback plays an important role in your protection in a vehicle. Leaving the seatback unlocked is dangerous as it can allow passengers to be ejected or thrown around and baggage to strike occupants in a sudden stop or collision, resulting in severe injury. After adjusting the seatback at any time, even when there are no other passengers, rock the seatback to make sure it is locked in place.
(Type A)
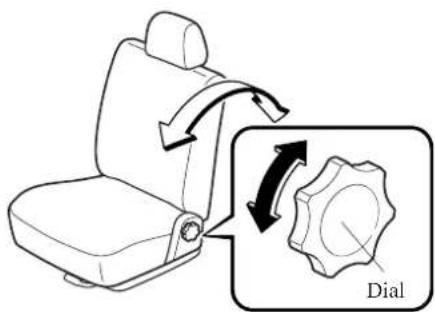
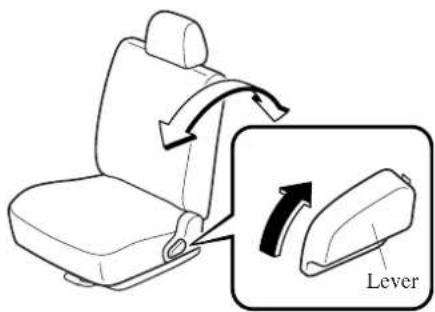
To change the seatback angle, lean forward slightly while rotating the dial. Then lean back to the desired position.
(Type B)
To change the seatback angle, lean forward slightly while raising the lever. Then lean back to the desired position and release the lever.
Essential Safety Equipment
Seats
Make sure the lever returns to its original position and the seatback is locked in place by attempting to push it forward and backward.

CAUTION
When returning a rear-reclined seatback to its upright position, make sure you support the seatback while operating the seatback lever. If the seatback is not supported, it will flip forward suddenly and could cause injury.
▼Seat Tilt (Driver's Seat)
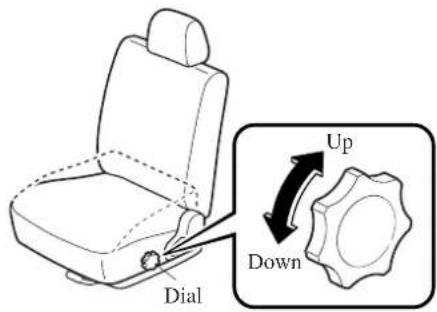
The seat-bottom angle can be adjusted by rotating the dial.
▼Head Restraint

WARNING
Head Restraints Adjustment: Driving with the head restraints adjusted too low or removed is dangerous. With no support behind your head, your neck could be seriously injured in a collision. Always drive with the head restraints inserted when seats are being used and make sure they are properly adjusted.
Height adjustment
To raise a head restraint, pull it up to the desired position.
To lower the head restraint, press the stop-catch release, then push the head restraint down.
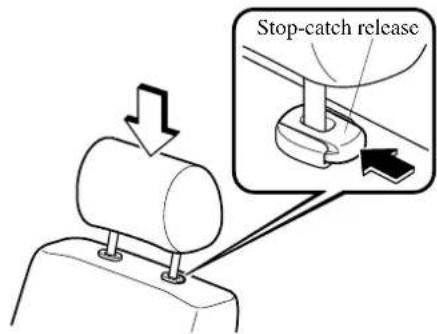
Adjust the head restraint so that the top is parallel with the top of the passenger's ears, never the passenger's neck.
Removal
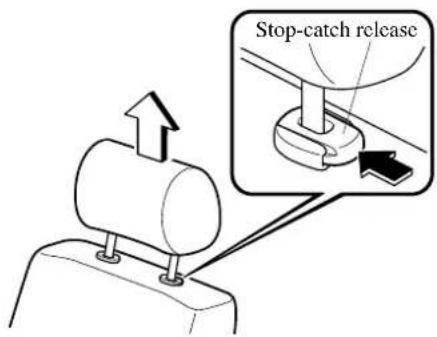
To remove the head restraint, press the stop-catch release, then pull up on the head restraint.
▼ Folding the Passenger's Seat
The passenger's seatback can be folded down and used as a table while the vehicle is not moving.
The front and rear passenger's seatbacks can be folded down for placement of long objects. Make sure the object is secure.

WARNING
Using Folded Seatback as a Table While the Vehicle is Moving: Using the folded seatback as a table while driving is dangerous. During sudden braking or a collision, objects placed on the folded seatback could become projectiles that could hit and injure someone. Never use the folded seat as a table while the vehicle is moving.
Unsecured Objects:
Not securing objects placed on the folded seatback is dangerous. During sudden braking or a collision, the objects could hit passengers and cause serious injuries, or the objects could hit the shift lever, forcing you to lose control of the vehicle. When placing objects on the folded seatback, always make sure they are secure.
Essential Safety Equipment
Seats
WARNING
Passenger on the Folded Seatback: Driving with a passenger on the folded seatback is dangerous. Allowing a child to sit up on the folded seatback while the vehicle is moving is particularly dangerous. In a sudden stop or even a minor collision, a child not in a proper seat or child-restraint system and seat belt could be thrown forward, back or even out of the car resulting in serious injuries or death. The child or other objects in the baggage area could be thrown into other occupants and cause serious injury. Never allow a passenger to sit or stand on the folded seatback while the vehicle is moving.
To fold the seatback
CAUTION
Folding the seatback without tucking the seat belt buckle down could damage the seatback.
- Tuck the seat belt buckle all the way down.
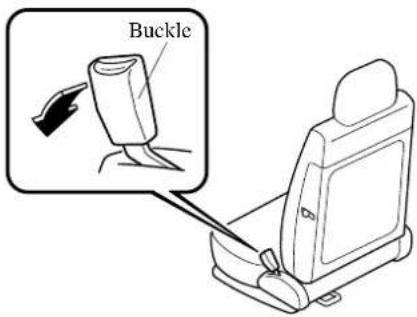
- Raise the reclining lever or pull the lean forward lever. Make sure the seatback is at its maximum forward reclined position.
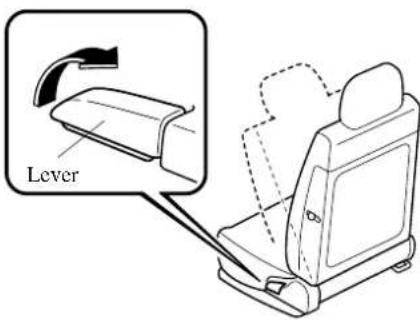
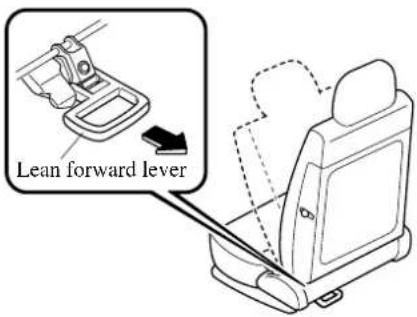
- Push the fold-down lever forward and push the seatback all the way down. Make sure the seatback is locked.
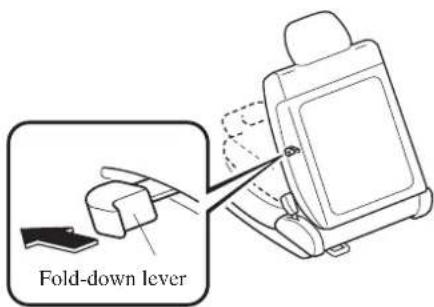
To return the seatback to the upright position
- Push the fold-down lever down to unlock the seat.
- Push the seatback to the upright position. Make sure the seatback is locked.
▼ Pull-up Seatback Trays

WARNING
Using Seatback Trays While Vehicle is Moving
Using the seatback trays while the vehicle is moving is dangerous. During sudden braking or a collision, rear seat passengers could be thrown forward into a tray causing serious injury. Objects placed on a seatback tray could become projectiles that could hit and injure someone. Always collapse and secure the trays before driving the vehicle.
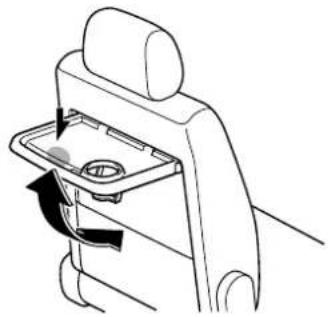
Pull-up trays are available in the seatbacks of the front seats and can be used when the vehicle is parked.
Grasp the front, central part of the tray when setting up or collapsing it.
natural_image
Diagram of a car interior showing a tray with a handle and directional arrow indicating rotation (no text or symbols)2-7




Essential Safety Equipment
Seats

CAUTION
- Do not place heavy objects on a seatback tray. Heavy objects could cause the tray to collapse and injure someone.
- Do not recline the front seats when the seatback trays are in use. Hot liquids may cause scalding if spilled, or objects could fall causing injury.
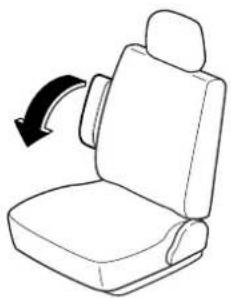
Armrest
The armrest can be used or placed upright.
natural_image
Line drawing of a car seat with an arrow indicating rotation (no text or symbols)
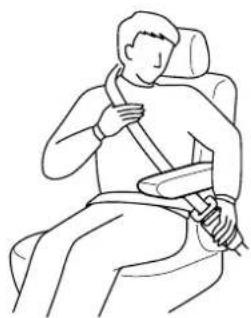
WARNING
Positioning the Shoulder Belt Over the Armrest:
Positioning the shoulder portion of a front seat belt over the armrest is dangerous as it cannot provide adequate protection in a collision and could result in serious injuries. Never position the shoulder portion of a front seat belt over the armrest.
natural_image
Line drawing of a person sitting in a car seat with a seatbelt (no text or symbols)▼Seat Warmer
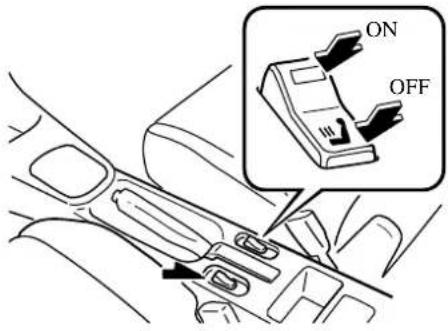
The front seats are electrically heated. The ignition switch must be in the ON position.
Press the switch to turn the seat warmer on or off. When the switch is in the ON position, the indicator light will come on.
NOTE
The thermostat regulates seat temperature by turning the current on and off.
Rear Seats
(5-Passenger Model)

WARNING
Stacking Cargo:
Stacking luggage or other cargo higher than the seatbacks, and putting things on the rear package tray is dangerous. During sudden braking or a collision, objects can become projectiles that may hit and injure passengers. Don't stack things higher than the seatbacks or put things on the rear package tray.
Securing Seats:
Adjustable seats and seatbacks that are not securely locked are dangerous. In a sudden stop or collision, the seat or seatback could move, causing injury. Make sure the adjustable components of the seat are locked in place by attempting to slide the seat forward and backward and rocking the seatback.
Seat Adjustment:
Adjusting the seat while the vehicle is moving is dangerous. Sudden braking or a collision could cause serious injury. Adjust the seat only when the vehicle is stopped.
WARNING
Unlocked Seatback:
A seatback plays an important role in your protection in a vehicle. Leaving the seatback unlocked is dangerous as it can allow passengers to be ejected or thrown around and baggage to strike occupants in a sudden stop or collision, resulting in severe injury. After adjusting the seatback at any time, even when there are no other passengers, rock the seatback to make sure it is locked in place.
Passenger on the Folded Seatback:
Driving with a passenger on the folded seatback is dangerous. Allowing a child to sit up on the folded seatback while the vehicle is moving is particularly dangerous. In a sudden stop or even a minor collision, a child not in a proper seat or child-restraint system and seat belt could be thrown forward, back or even out of the car resulting in serious injuries or death. The child or other objects in the baggage area could be thrown into other occupants and cause serious injury. Never allow a passenger to sit or stand on the folded seatback while the vehicle is moving.
WARNING
Children and the Folding Rear Seats: Playing with the folding rear seats is dangerous. The folding rear seatbacks cannot be folded down from inside the luggage compartment. Do not give the car keys to children and do not allow them to play in the vehicle.
NOTE
When returning a rear seat to its original position, also replace the seat belt to its normal position. Verify that the seat belt pulls and retracts.
▼Seat Recline
WARNING
Reclining:
Sitting in a reclined position while the vehicle is moving is dangerous because you don't get the full protection from seat belts. During sudden braking or a collision, you can slide under the lap belt and suffer serious internal injuries. For maximum protection, sit well back and upright.
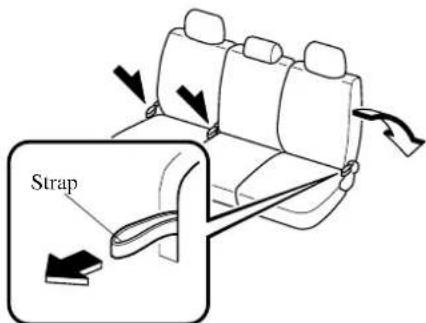
To change the seatback angle, lean forward slightly while pulling the strap. Then lean back to the desired position and release the strap. Make sure the seat is securely latched.
CAUTION
- When returning a rear-reclined seatback to its upright position, make sure you support the seatback while operating the strap. If the seatback is not supported, it will flip forward suddenly and could cause injury.
- Reclining the rear seat when the luggage compartment cover is in the first position could damage the seat and cover. Remove the cover or move it to the second position.
▼Head Restraint
WARNING
Head Restraints Adjustment: Driving with the head restraints adjusted too low or removed is dangerous. With no support behind your head, your neck could be seriously injured in a collision. Always drive with the head restraints inserted when seats are being used and make sure they are properly adjusted.
Height adjustment
To raise a head restraint, pull it up to the desired position.
To lower the head restraint, press the stop-catch release, then push the head restraint down.
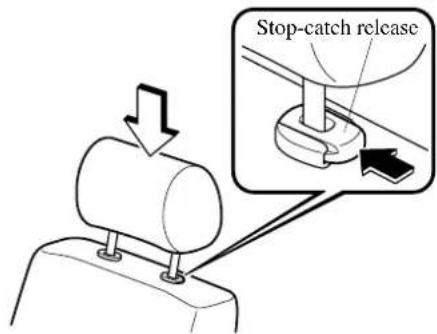
Adjust the head restraint so that the top is parallel with the top of the passenger's ears, never the passenger's neck.
2-11
Essential Safety Equipment
Seats
Removal
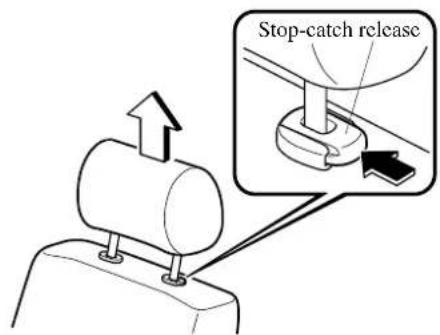
To remove the head restraint, press the stop-catch release, then pull up on the head restraint.
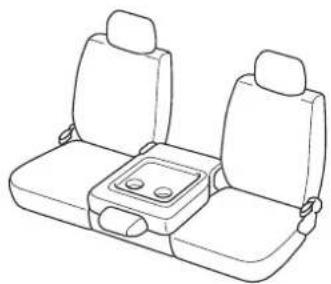
▼ Folding the Centre-Rear Seat
WARNING
Using Folded Seatback as a Table While the Vehicle is Moving: Using the folded seatback as a table while driving is dangerous. During a sudden stop or collision, objects placed on the folded seatback could become projectiles that could hit and injure someone. Never use the folded seat as a table while the vehicle is moving.
The centre-rear seatback can be folded down and used as a table while the vehicle is not moving.
natural_image
Line drawing of a two-seater car seat with front seats and a central vent (no text or symbols)CAUTION
Don't sit or lie on the folded seatback. The seat could be damaged.
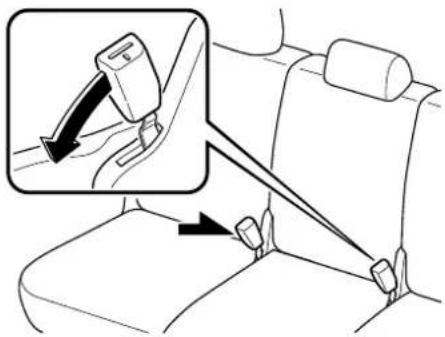
To fold the centre-rear seatback
- Unfasten the lap portion of the centre-rear seat belt (page 2-46).
- Secure the centre-rear seat belt in the seat belt retainer (page 2-46).
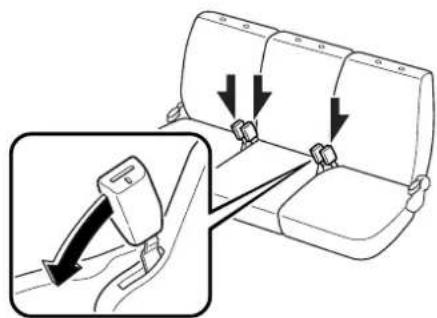
- Tuck the rear seat's seat belt buckle down.
natural_image
Diagram of a car seatbelt buckle with an inset showing the seatbelt being inserted (no text or symbols present)2-12




CAUTION
Lowering the seatback without tucking the seat belt buckle down could damage the seatback.
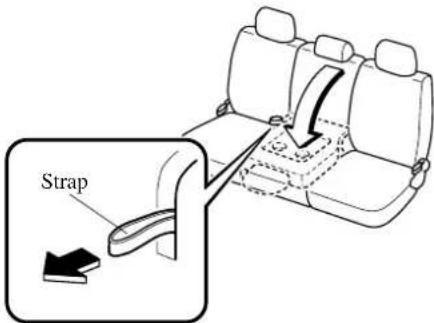
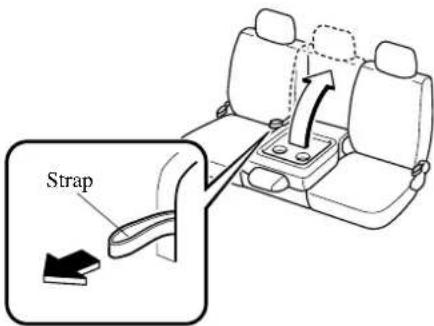
- Pull the strap of the centre-rear seat and lower the seatback forward. Make sure the seatback is locked.
To return the seatback to the upright position
- Pull the strap of the centre-rear seat and lift the seatback upright. Attempt to move the seatback forward and backward to make sure it is locked.
- Fasten the lap portion of the centre-rear seat belt before a passenger sits in the seat (page 2-44).
NOTE
Make sure the centre-rear seat belt is routed between the centre-rear and the left-rear seat.
▼Folding and Stowing Rear Seats
All the rear seats can be flipped and stowed forward to provide more cargo space.
To fold and stow a rear seat
- Unfasten the lap portion of the centre-rear seat belt (page 2-46).
- Secure the centre-rear seat belt in the seat belt retainer (page 2-46).
- Remove the head restraint (page 2-11).
- Tuck the rear seat's seat belt buckles down.




Essential Safety Equipment
Seats
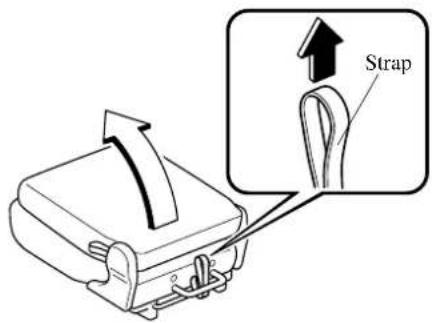
- Pull the strap and lower the seatback forward. Make sure the seatback is locked.
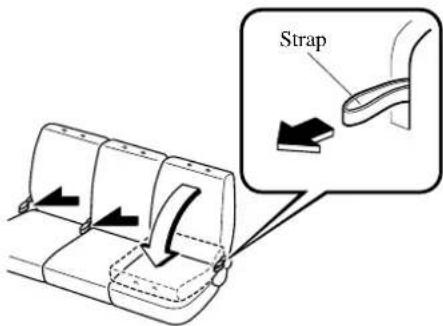
- Work only on one seat at a time to avoid one seat falling while working on another.
- Pull the strap and raise the entire seat up and forward.
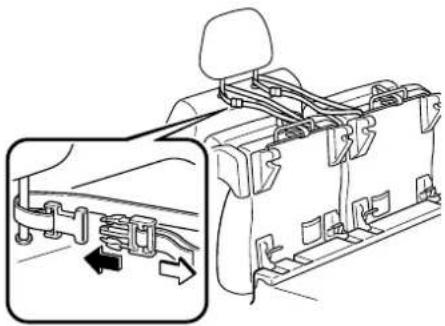
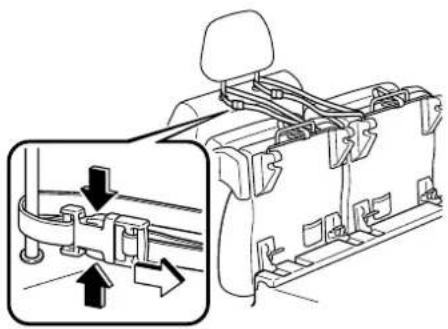
- To prevent the rear seats from falling back down, thread the holding strap for each seat around one of the front head restraint uprights and fasten with the buckles.
natural_image
Diagram of a car interior showing a seatbelt switch and directional arrow (no text or symbols)
WARNING
Loose Seat:
A seat not secured with a holding strap is dangerous. The seat could fall down and cause serious injury.
Ensure that each stowed seat is secured with a holding strap.
- Adjust the holding straps to tighten them securely on the head restraint uprights.
NOTE
When stowing the left-rear or centre-rear seats, fasten the holding straps on the head-restraint upright of the left-front seat.
For the right-rear seat, fasten the holding strap on the head restraint upright of the right-front seat.
2-14




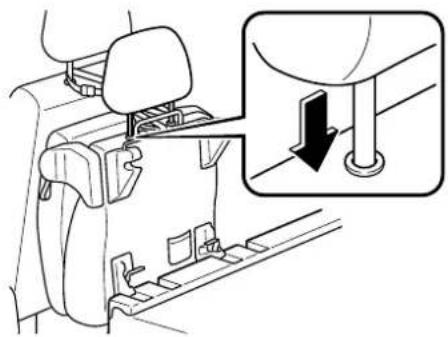
- Insert the head restraints into the alternate storage holes at the top of the uprighted seat bottom.
natural_image
Diagram of car backrest and seat assembly with a magnified inset showing a downward force (no text or symbols)To return a rear seat to its original position
- Remove the head restraint from the back of the uprighted seat bottom.
- Support the seat while unfastening the holding strap from the head restraint upright so that the seat doesn't fall down.
natural_image
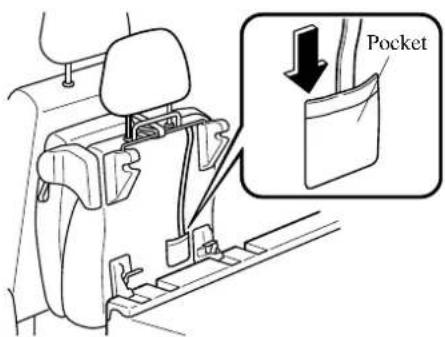
Diagram of a car interior showing structural components and directional arrows (no text or symbols)- Tuck the holding strap in the pocket.
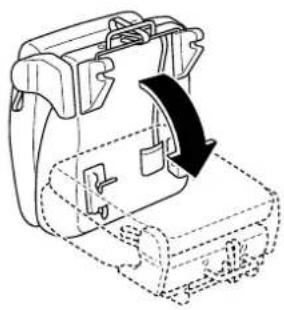
- Carefully lower the seat backward until it locks in place. Attempt to lift the seat up to make sure it is firmly locked down.
natural_image
Technical line drawing of a mechanical device with a curved arrow indicating rotation or movement (no text or symbols)2-15
Essential Safety Equipment
Seats
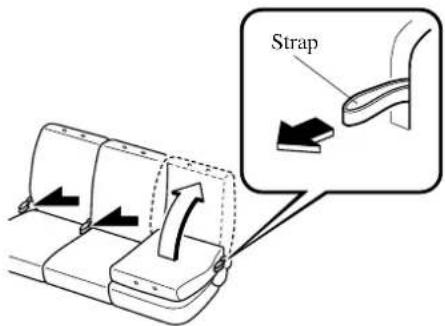
- Pull the strap and raise the seatback to the upright position. Make sure the seatback is locked.
- Reinsert the head restraint to its normal position.
- Fasten the lap portion of the centre-rear seat belt before a passenger sits in the seat (page 2-44).
NOTE
Make sure the centre-rear seat belt is routed between the centre-rear and left-rear seats.
▼Removal of Rear Seats
All the rear seats can be removed to provide more cargo space.

WARNING
Seat Removal or Installation While Vehicle is Moving or on a Slope: Removing or installing the rear seats while the vehicle is moving or on a slope is dangerous. The seats are heavier than they appear and could suddenly detach causing serious injury. Remove or install the seats with the vehicle parked on a level surface.
Riding on The Floor Space: Riding on the floor space created by the removal of the rear seats is dangerous. Sudden braking or a collision could cause serious injury. Do not sit or lie in the floor space for the rear seats while the vehicle is moving. Never ride in a vehicle where you can't sit in the seat and wear the seat belt.
Pinching Fingers or Hands: Placing your hands around the seat anchors when removing or installing the rear seats is dangerous. You could pinch your hands or fingers between the seat anchor and the seat. Hold the edge of the seat when lowering it into place. Never place your hands between the seat anchor and the seat.
2-16




WARNING
Unsecured Seats:
Driving with the seat unsecured is dangerous. The seat may become detached while the vehicle is moving causing serious injury. After installing the seat, attempt to push it forward and backward to make sure it is securely locked.
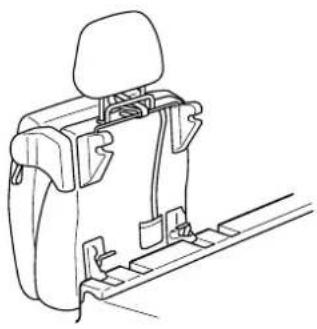
To remove a rear seat
- Remove one seat at a time following procedure 1 through 7 of "To fold and stow a rear seat" (page 2-13).
- While supporting the seat, insert the head restraint into the alternate storage holes at the top of the uprighted seat bottom.
natural_image
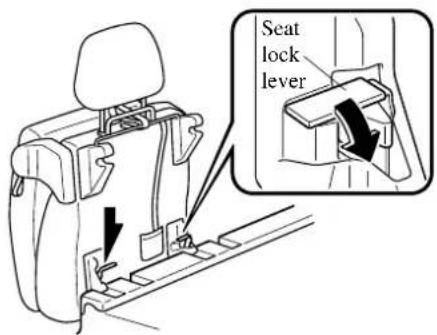
Line drawing of a car seat assembly with neck, rear seats, and front panel (no text or symbols)- Press down each seat lock lever.
- Remove the seat by tilting it backward to free it from the floor anchors.
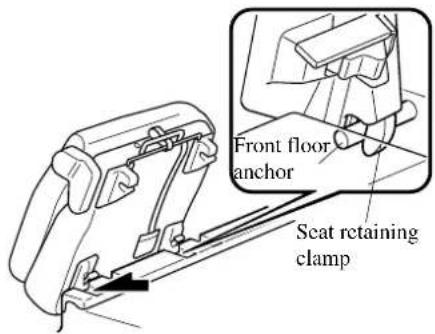
To install a rear seat
- If the head restraint is inserted in the seat bottom, pull the head restraint and remove it.
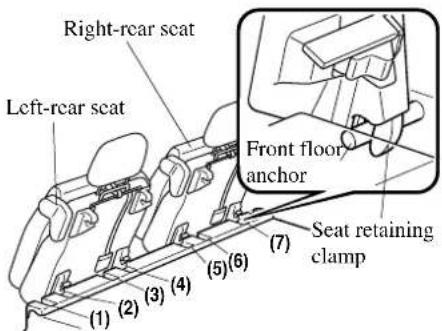
- Align the seat retaining clamps with the front floor anchors.
Essential Safety Equipment
Seats
- Supporting the seat with your hand, raise the seat lock levers on the left and right to lock it in place.
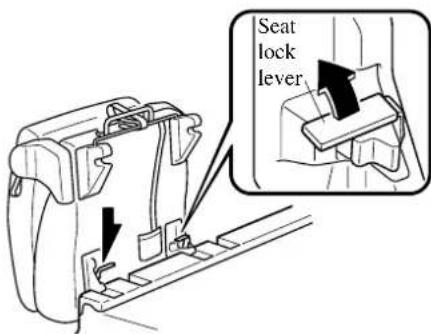
- Return the rear seat to its original position following procedure 4 through 7 of "To return a rear seat to its original position"
▼ Four-Passenger Seating Arrangement
WARNING
Rear-Passenger Seating and Seat Belts:
Using the centre-rear seat belt while seated in the left-rear or right-rear seat is dangerous. In a collision or sudden stop, the centre-rear seat belt cannot provide protection for a passenger in the left-rear or right-rear seat. When the centre-rear seat is not in use, stow its seat belt in the retainer and use the appropriate left-rear or right-rear seat belt.
If you plan on carrying only four people and will not need the fifth seat during a trip, your Mazda design allows you to give the rear seat passengers a roomier feeling by taking out the centre-rear seat and moving the remaining two seats inboard for a four passenger vehicle. Make sure the seat belt buckles point inboard for the seats to be properly located.
- Remove all the rear seats (page 2-16).
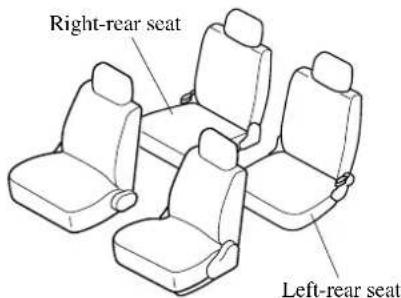
- Align the seat retaining clamps of the outside seats with the front floor anchors. Align the left-rear seat with the second (2) and fourth (4) positions. Align the right-rear seat with the fifth (5) and seventh (7) positions.
- Install the left-rear seat and right-rear seats following procedures 1 through 6 of "To install a rear seat" (page 2-17).
2-18


Second-Row Seats (7-Passenger Model)

WARNING
Stacking Cargo:
Stacking luggage or other cargo higher than the seatback is dangerous. During a sudden stop or collision, objects can become projectiles that could hit and injure passengers. Don't stack things higher than the seatback.
Securing Seats:
Adjustable seats and seatbacks that are not securely latched are dangerous. In a sudden stop or collision, the seat or seatback could move, causing injury. Make sure the adjustable components of the seat are locked in place by attempting to slide the seat forward and backward and rocking the seatback.
Seat Adjustment:
Adjusting the seat while the vehicle is moving is dangerous. Sudden braking or a collision could cause serious injury. Adjust the seat only when the vehicle is stopped.

WARNING
Unlocked Seatback:
A seatback plays an important role in your protection in a vehicle. Leaving the seatback unlocked is dangerous as it can allow passengers to be ejected or thrown around and baggage to strike occupants in a sudden stop or collision, resulting in severe injury. After adjusting the seatback at any time, even when there are no other passengers, rock the seatback to make sure it is locked in place.
Passenger on the Folded Seatback: Driving with a passenger on the folded seatback is dangerous.
Allowing a child to sit up on the folded seatback while the vehicle is moving is particularly dangerous. During sudden braking or even a minor collision, a child not in a proper seat or child-restraint system and seat belt could be thrown forward, back or even out of the car resulting in serious injuries or death. The child or other objects in the baggage area could be thrown into other occupants and cause serious injury. Never allow a passenger to sit or stand on the folded seatback while the vehicle is moving.
NOTE
When returning a second-row seat to its original position, also replace the seat belt to its normal position. Verify that the seat belt pulls and retracts.
Essential Safety Equipment
Seats
▼ Seat Slide
To move the seat forward or backward, raise the bar and slide the seat to the desired position.
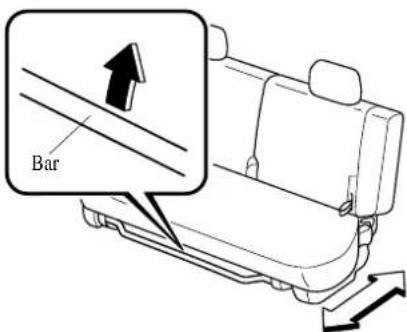
Make sure the bar returns to its original position and the seat is locked in place by attempting to push it forward and backward.

CAUTION
Be careful when moving the second-row seat while a passenger is seated on the third-row seat. The passenger's legs could be pinched or otherwise injured.
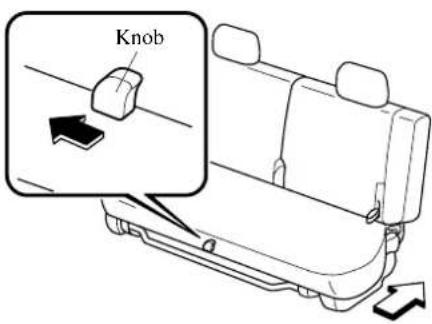
To slide the seat further back, raise the bar and slide the knob to the right at the same time. Slide the seat all the way back, then release the bar and the knob.
▼Seat Recline

WARNING
Reclining:
Sitting in a reclined position while the vehicle is moving is dangerous because you don't get the full protection from seat belts. During sudden braking or a collision, you can slide under the lap belt and suffer serious internal injuries. For maximum protection, sit well back and upright.
Reclining the Second-Row Seatback: Reclining the second-row seatback when the third-row seat is occupied is dangerous. The second-row seatback may hit and injure the occupants in the third-row seat. Don't recline the second-row seatback when the third-row seat is occupied.
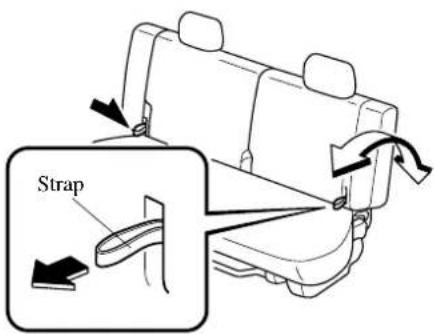
To change the seatback angle, lean forward slightly while pulling the strap. Then lean back to the desired position and release the strap.
2-20


Form No. 8R34-EE-02H
Make sure the strap returns to its original position and the seatback is locked in place by attempting to push it forward and backward.

CAUTION
When returning a rear-reclined seatback to its upright position, make sure you support the seatback while operating the seatback strap. If the seatback is not supported, it will flip forward suddenly and could cause injury.
▼Head Restraint

WARNING
Head Restraints Adjustment: Driving with the head restraints adjusted too low or removed is dangerous. With no support behind your head, your neck could be seriously injured in a collision. Always drive with the head restraints inserted when seats are being used and make sure they are properly adjusted.
Height adjustment
To raise a head restraint, pull it up to the desired position.
To lower the head restraint, press the stop-catch release, then push the head restraint down.
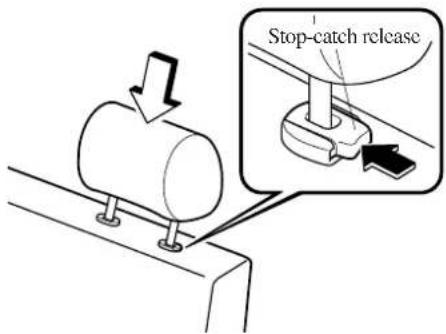
Adjust the head restraint so that the top is parallel with the top of the passenger's ears, never the passenger's neck.
Removal
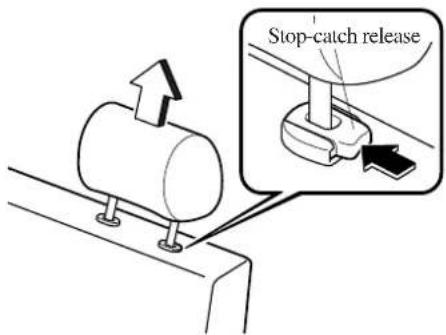
To remove the head restraint, press the stop-catch release, then pull up on the head restraint.
2-21
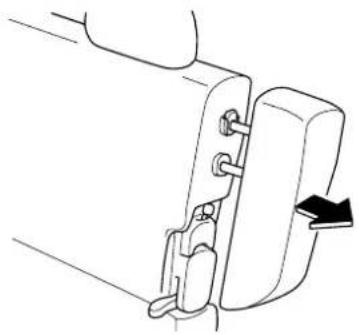
▼Removing Shoulder Restraint
To fold the second-row seat and the front seats flat, remove the shoulder restraints.
natural_image
Mechanical assembly diagram showing a bracket with a directional arrow (no text or symbols)▼ Third-row Seat Access
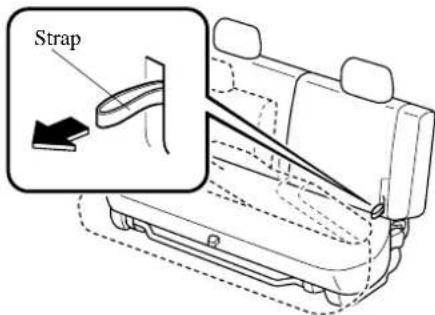
To reach the third-row seat, pull the strap on the second-row seat, fold the seatback forward and slide the seat forward.
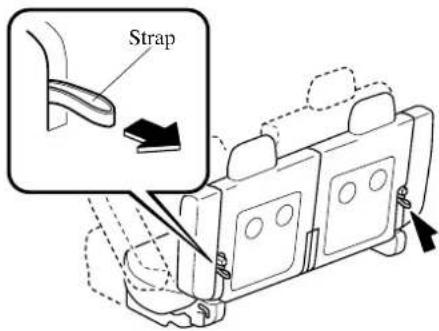
The third-row passengers have a similar strap on the back side of the second-row seat. Pull the strap to fold the seatback of the second-row seat forward and slide the seat forward.
To return the second-row seat to its original position, slide the seat to the desired position and raise the seatback upright.
▼ Folding the Second-Row Seat
WARNING
Using Folded Seatback as a Table While the Vehicle is Moving:
Using the folded seatback as a table while driving is dangerous. During a sudden stop or collision, objects placed on the folded seatback could become projectiles that could hit and injure someone. Never use the folded seat as a table while the vehicle is moving.
The second-row seatback can be folded down and used as a table when the vehicle is not in motion.
Long objects can be also placed inside when the front passenger seat is folded down as well. Make sure objects are secured.
2-22


CAUTION
Don't sit or lie on the folded seatback. The seat could be damaged.
To fold second-row seat
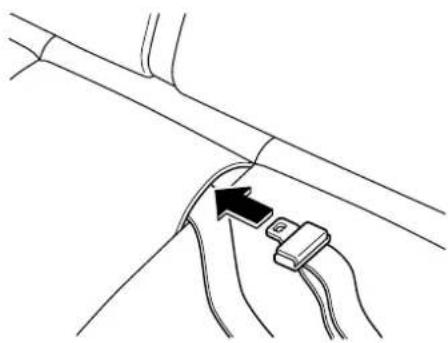
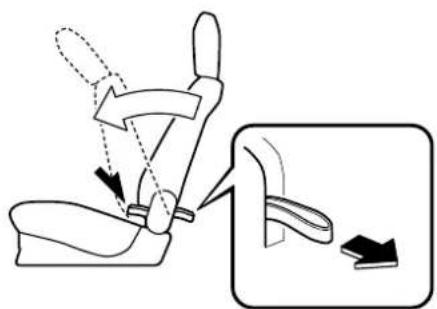
- Insert the lap belt into the pocket of the seat bottom.
natural_image
Line drawing of a cable clamp securing a cable with a black arrow indicating the hook (no text or symbols present)- Pull the strap and lower the seatback forward.
natural_image
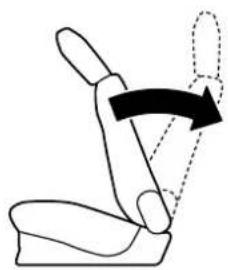
Diagram showing a car seatbelt buckle being lifted, with an inset illustrating the seatbelt mechanism (no text or symbols present)- Raise the seatback to the upright position. Attempt to move the seatback forward and backward to ensure it is locked.
natural_image
Diagram of a seated leg with a hand holding a curved object, showing motion direction (no text or symbols)NOTE
If the seatback is not first raised to the upright position, the seatback will not be locked when the seatback is folded forward for other uses.
- Lower the head restraint to the lowest position (page 2-21).
- Push the knob on the back of the seatback and fold the seatback forward.
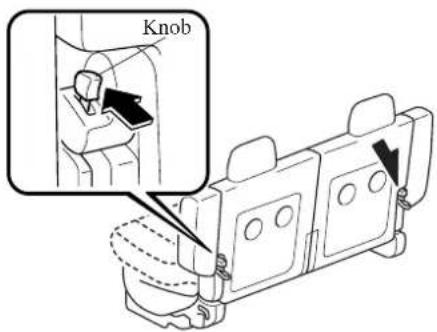
- Make sure the seatback is locked.
2-23
Essential Safety Equipment
Seats
To return the seat to the upright position
-
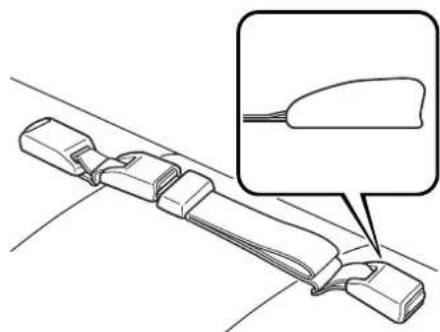
Press and hold the knob on the back of the seatback and lift the seatback upright. Then release the knob and continue pushing the seatback to the upright position. Attempt to move the seatback forward and backward to make sure it is locked.
-
Place the seat belt buckles face up.
natural_image
Technical line drawing of a mechanical component with an inset showing a close-up detail (no text or symbols)To fold and stow second-row seat (European model)
The second-row seat can be flipped forward to provide more cargo space.
-
Fold down the left and right seatbacks to the table position (page 2-22).
-
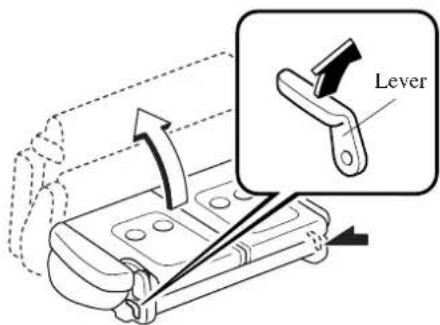
To unlock the seat, pull the lever on the left or right and raise the rear portion of the seat bottom forward.
- To prevent the seat from falling back down, remove the support bar from the pocket.
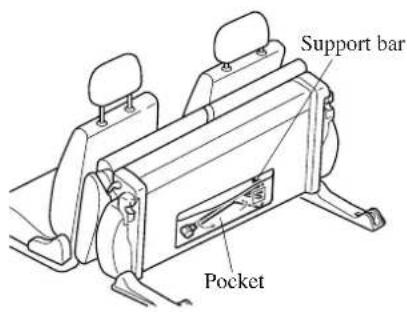
NOTE
The support bar is kept in the pocket under the seat.
2-24



- Attach the support bar to the floor anchor.
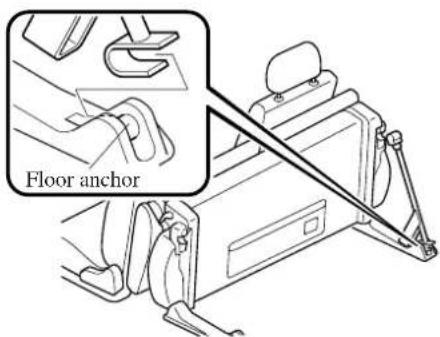
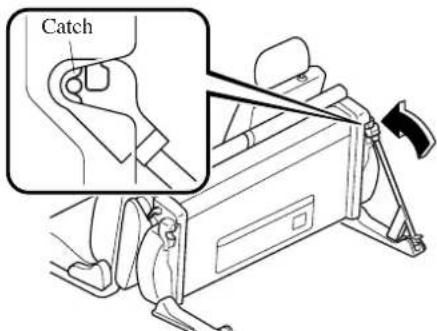
- Attach the opposite end of the support bar to the catch on the seat bottom. Attempt to pull the seat towards the rear (liftgate) to make sure the support bar is securely latched.
To fold and stow second-row seat (Except European model)
The second-row seat can be flipped forward to provide more cargo space.
-
Fold down the left and right seatbacks to the table position (page 2-22).
-
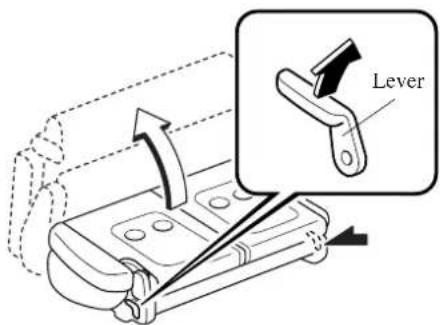
To unlock the seat, pull the lever on the left or right and raise the rear portion of the seat bottom forward.
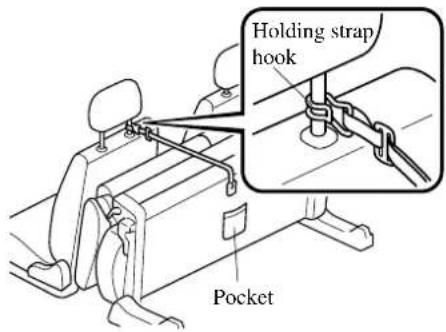
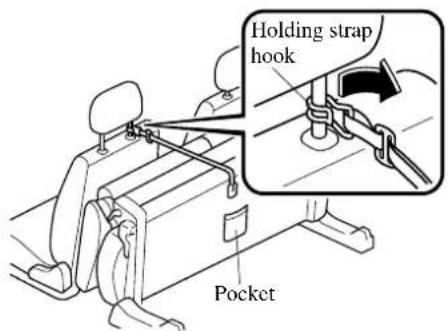
- To prevent the seat from falling back down, attach the holding strap hook to the left head restraint upright.

WARNING
Loose Seat:
A seat not secured with a holding strap is dangerous. The seat could fall down and cause serious injury.
Ensure that stowed seats are secured with holding straps.
Essential Safety Equipment
Seats
- Adjust the holding strap to tighten it securely on the head restraint upright.
NOTE
The holding strap hook is kept in the pocket under the seat.
To return second-row seat to the original position (European model)
- To detach the support bar, pull the lever on the left while supporting the seat.
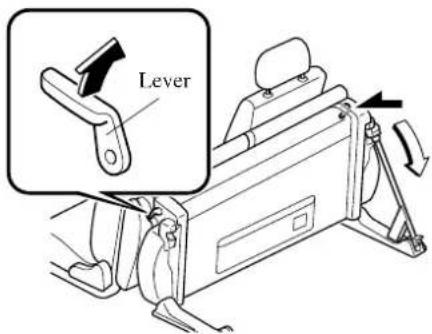
- Tuck the support bar in the pocket.
NOTE
The support bar is kept in the pocket under the seat.
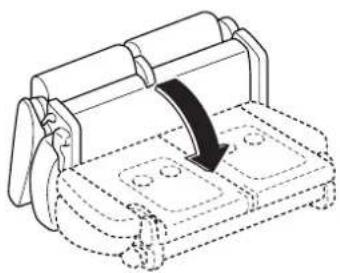
- Carefully lower the seat backward until it locks in place. Attempt to lift the seat up to make sure it is firmly locked down.
natural_image
Technical line drawing of a mechanical component with a curved arrow indicating rotation (no text or symbols)- Press and hold the knob on the back of the seatback and raise the seatback upright. Then release the knob and continue pushing the seatback to the upright position. Rock the seatback to make sure it is locked.
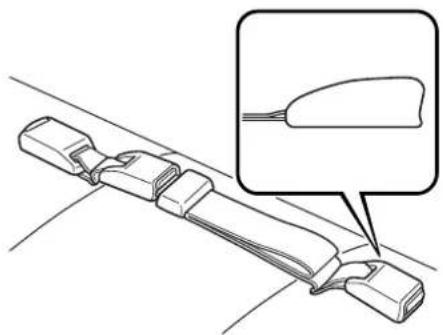
- Place the seat belt buckles face up.
natural_image
Technical line drawing of a mechanical buckle assembly with an inset showing a close-up detail (no text or symbols)2-26


natural_image
Pure geometric diagram with intersecting lines and a central circle, no text or symbols presentTo return second-row seat to the original position (Except European model)
- Support the seat while detaching the holding strap hook from the head restraint upright so that the seat doesn't fall down.
- Tuck the holding strap hook in the pocket.
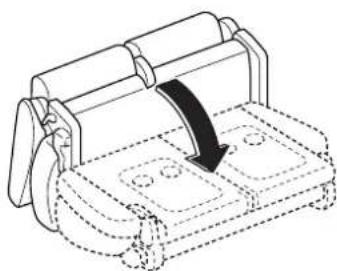
- Carefully lower the seat backward until it locks in place. Attempt to lift the seat up to make sure it is firmly locked down.
natural_image
Technical line drawing of a mechanical device with a curved arrow indicating rotation or movement (no text or symbols)- Press and hold the knob on the back of the seatback and raise the seatback upright. Then release the knob and continue pushing the seatback to the upright position. Rock the seatback to make sure it is locked.
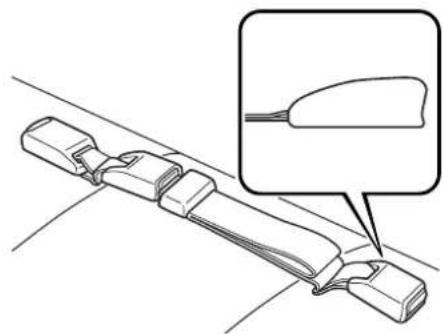
- Place the seat belt buckles face up.
natural_image
Technical line drawing of a belt buckle assembly with an inset showing the same component (no text or symbols present)Third-Row Seat (7-Passenger Model)
WARNING
Stacking Cargo:
Stacking luggage or other cargo higher than the seatback is dangerous. During a sudden stop or collision, objects can become projectiles that could hit and injure passengers. Don't stack things higher than the seatback.
Securing Seats:
Adjustable seats and seatbacks that are not securely latched are dangerous. In a sudden stop or collision, the seat or seatback could move, causing injury. Make sure the adjustable components of the seat are locked in place by attempting to rock the seatback.
Unlocked Seatback:
A seatback plays an important role in your protection in a vehicle. Leaving the seatback unlocked is dangerous as it can allow passengers to be ejected or thrown around and baggage to strike occupants in a sudden stop or collision, resulting in severe injury. After adjusting the seatback at any time, even when there are no other passengers, rock the seatback to make sure it is locked in place.
CAUTION
Before using the third-row seat, remove the luggage compartment cover and install the caps. Sitting in the third-row seat without the caps installed could result in injury if you were to hit them.
NOTE
When returning a third-row seat to its original position, also replace the seat belt to its normal position. Verify that the seat belt pulls and retracts.
▼Head Restraint
WARNING
Head Restraints Adjustment: Driving with the head restraints adjusted too low or removed is dangerous. With no support behind your head, your neck could be seriously injured in a collision. Always drive with the head restraints inserted when seats are being used and make sure they are properly adjusted.
Height adjustment
(European model)
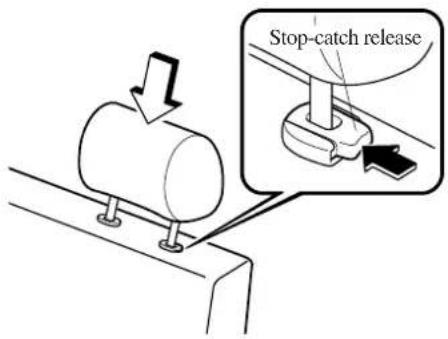
To use a head restraint, pull it up to the locked position.
To lower the head restraint, press the stop-catch release, then push the head restraint down.
(Except European model)
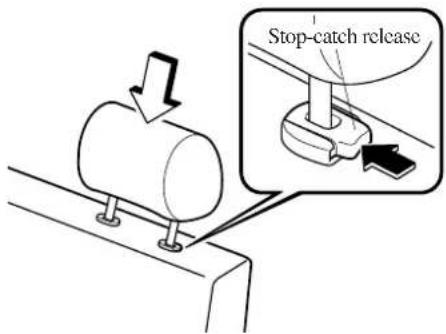
To raise a head restraint, pull it up to the desired position.
To lower the head restraint, press the stop-catch release, then push the head restraint down.
Adjust the head restraint so that the top is parallel with the top of the passenger's ears, never the passenger's neck.
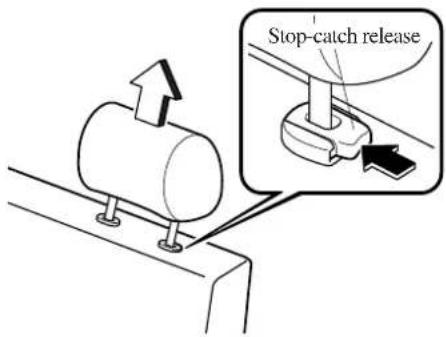
Removal
To remove the head restraint, press the stop-catch release, then pull up on the head restraint.
2-29
Essential Safety Equipment
Seats
▼Folding the Third-Row Seat
The third-row seat can be flipped and stowed forward to provide more cargo space.

CAUTION
Do not sit or lie on the folded seatback. The seat could be damaged.
To fold and stow third-row seat
- Slide the second-row seat all the way forward.
- Remove the head restraint (page 2-29).
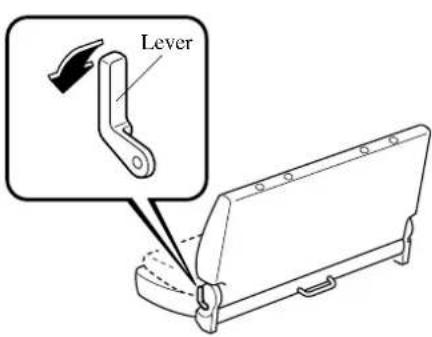
- Push the lever forward to unlock and lower the seatback forward.
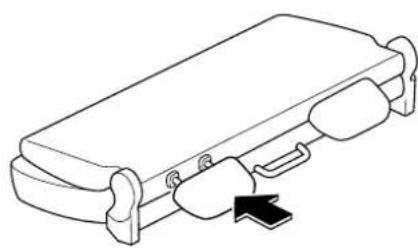
- Reinstall the head restraints of the seat into the back of the seatback.
natural_image
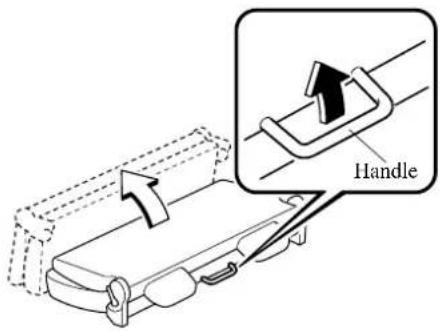
Line drawing of a briefcase with handle and clasp (no text or symbols)- To unlock the seat, pull the handle and raise the rear portion of the seat bottom upright.
2-30


natural_image
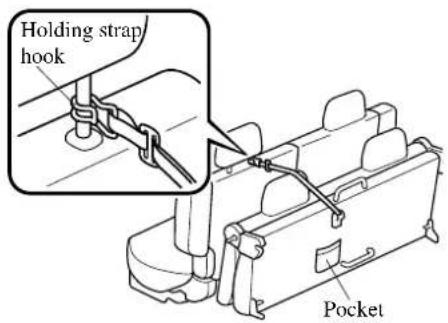
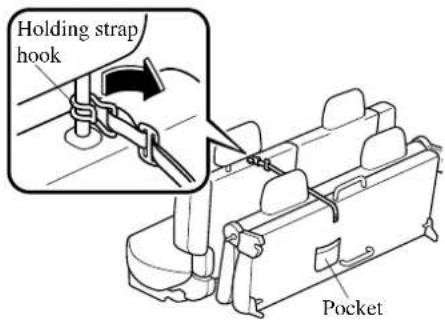
Pure geometric diagram with intersecting lines and a central circular pattern (no text or symbols)- To prevent the seat from falling back down, attach the holding strap hook to the left head restraint upright of the second-row seat.
WARNING
Loose Seat:
A seat not secured with a holding strap is dangerous. The seat could fall down and cause serious injury. Ensure that the stowed seat is secured with the holding strap.
- Adjust the holding strap to tighten it securely on the head restraint upright.
NOTE
The holding strap hook is kept in the pocket under the seat.
To return third-row seat to its original position
- Support the third-row seat while detaching the holding strap hook from the head restraint upright so that the seat doesn't fall down.
- Tuck the holding strap hook into its pocket.
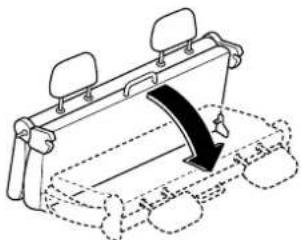
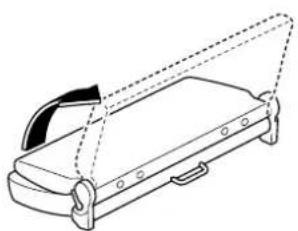
- Lower the third-row seat backward. Attempt to lift the seat up to make sure it is firmly locked down.
natural_image
Diagram of a vehicle seatbelt with a curved arrow indicating force or movement (no text or symbols)- Remove the head restraints from the back of the seatback.
Essential Safety Equipment
Seats
- Raise the seatback to its upright position. Make sure the seatback is locked.
natural_image
Line drawing of a mechanical device with a handle and mounting bracket (no text or symbols)- Reinsert the head restraints to their normal positions.
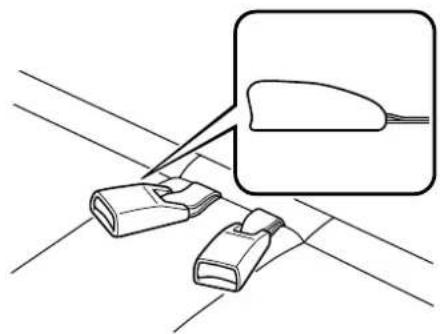
- Place the seat belt buckles face up.
natural_image
Diagram showing two connector clips on a diagonal surface with an inset magnified view of the clip (no text or symbols)▼Removal of Third-Row Seat
The third-row seat can be removed to provide more cargo space.

WARNING
Seat Removal or Installation While Vehicle is Moving or on a Slope: Removing or installing the third-row seat while the vehicle is moving or on a slope is dangerous. The seat is heavier than it appears and could suddenly detach causing serious injury. Remove or install the seat with the vehicle parked on a level surface.
Riding on the Floor Space:
Riding on the floor space created by the removal of the third-row seat is dangerous. Sudden braking or a collision could cause serious injury. Do not sit or lie in the floor space for the third-row seat while the vehicle is moving. Never ride in a vehicle where you can't sit in the seat and wear the seat belt.
Pinching Fingers or Hands:
Placing your hands around the seat anchors when removing or installing the third-row seat is dangerous. You could pinch your hands or fingers between the seat anchor and the seat. Hold the edge of the seat when lowering it into place. Never place your hands between the seat anchor and the seat.
2-32


WARNING
Unsecured Seats:
Driving with the seat unsecured is dangerous. The seat may become detached while the vehicle is moving causing serious injury. After installing the seat, attempt to push it forward and backward to make sure it is securely locked.
To remove third-row seat
- Remove the head restraint (page 2-29)
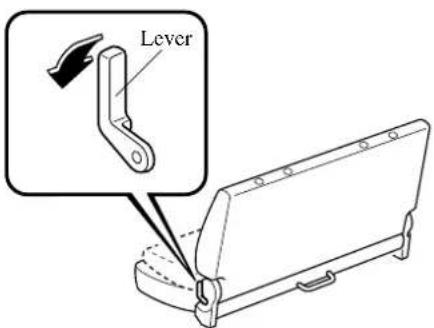
- Push the lever forward to unlock and fold the seatback forward.
- Reinstall the head restraints of the seat into the back of the seatback.
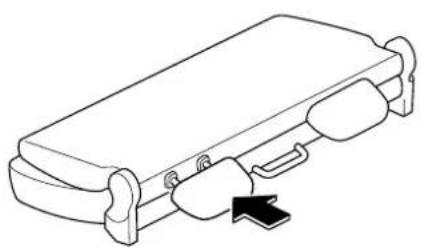
natural_image
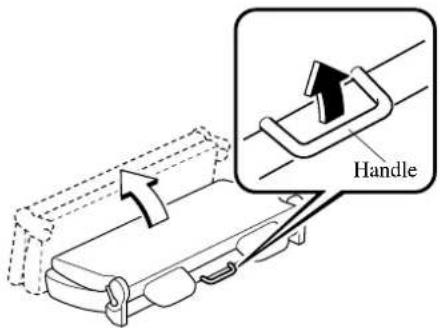
Line drawing of a mechanical component with a black arrow pointing to a detail (no text or symbols)- To unlock the seat, pull the handle and raise the rear position of the seat bottom upright.
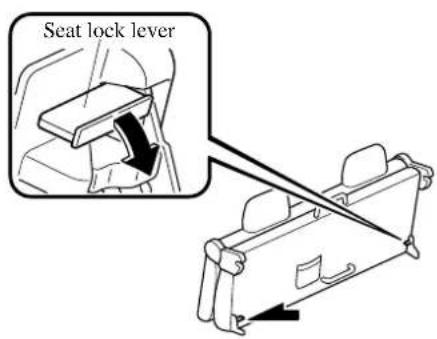
- Supporting the third-row seat with your hand and press down each seat lock lever.


Essential Safety Equipment
Seats
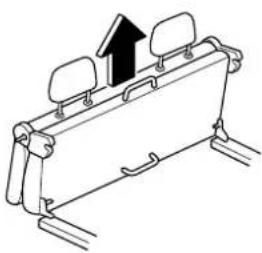
- Remove the seat from the front floor anchors.
natural_image
Technical line drawing of a mechanical component with an upward arrow indicating motion (no text or symbols)To install third-row seat
- Press the seat lock levers on the left and right all the way down.
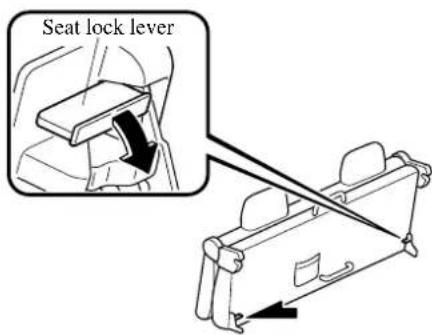
- Align the seat retaining clamps with the front floor anchors.
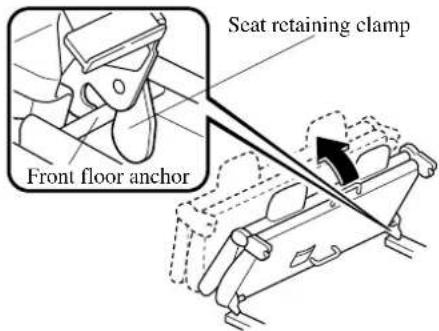
- Supporting the seat with your hand, raise the seat lock levers on the left and right to lock the seat in place.
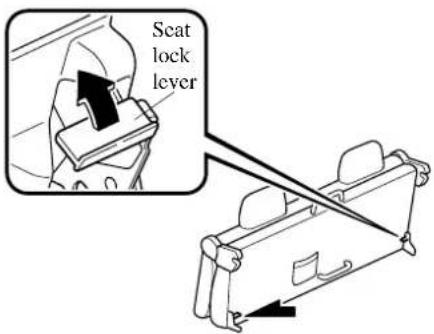
- Return the third-row seat to its original position following procedure 3 through 7 of "To return third-row seat to its original position."
2-34


natural_image
Pure geometric diagram with intersecting lines and a central circular pattern (no text or symbols)Flat Folding (7-Passenger Model)
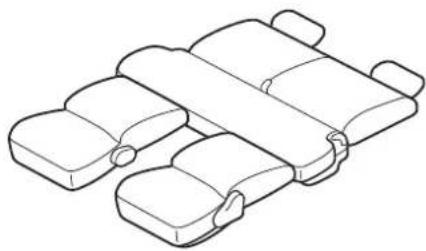
The second-row and front seats can be folded down for use as beds when the vehicle is safely parked.
natural_image
Line drawing of a multi-segment car seat assembly (no text or symbols)WARNING
Folded-Flat Seats:
Sitting or lying on seats folded flat is a dangerous way to ride. During sudden braking or a collision you could be thrown around inside the vehicle and seriously injured. Don't ride on seatbacks folded flat.
Removing and Installing Third-Row Seat:
Removing and installing the third-row seat alone is dangerous. Because the seat is heavy, you could be injured. Always have the help of at least one other person when removing or installing the seat.
▼ To Fold the Seats Flat
- Remove the third-row seat (page 2-32).
- Remove the shoulder restraints of the second-row seat (page 2-22).
- Pull the seat slide bar and slide the second-row seat all the way back (page 2-20).
- Pull the reclining strap and fold down the second-row seatbacks rearward until they lock (page 2-20).
- Remove the head restraints from the front seats (page 2-4).
- Pull the seat slide levers and slide the front seats all the way forward (page 2-2).
- Raise the reclining levers and push the front seatbacks as far down as possible (page 2-3).
To return the seats to their road positions, reverse the procedures for folding the second-row and front seats flat.
Seat Belt Precautions
Seat belts help to decrease the possibility of severe injury during accidents and sudden stops. Mazda recommends that the driver and all passengers always wear seat belts.
The front seats have lap/shoulder belts. These belts have retractors with inertia locks that keep them out of the way when not in use. The locks allow the belts to remain comfortable on users, but they'll lock in position during a collision.
(5-passenger model)
The rear seats have lap/shoulder belts. These belt retractors operate in two modes, emergency locking mode and, for child-restraint systems, automatic locking mode.
(7-passenger model)
The second-row seat has lap/shoulder belts with retractors, and a manual adjustable lap belt. The second-row seat lap/shoulder belt retractors operate in two modes, emergency locking mode and, for child-restraint systems, automatic locking mode. The lap belt is manually adjusted.
The third-row seat has lap/shoulder belts that have retractors with inertia locks.

WARNING
Not Wearing Seat Belts:
Not wearing a seat belt is extremely dangerous. During a collision, occupants not wearing seat belts could hit someone or things inside the vehicle or even be thrown out of the vehicle. They could be seriously injured or even killed. In the same collision, occupants wearing seat belts would be much safer. Always wear your seat belt and make sure all occupants are properly restrained.
Seat Belt Damaged During an Accident:
Using a damaged seat belt is dangerous. An accident could damage the belt webbing of the seat belt in use. A damaged seat belt cannot provide adequate protection in a collision. Have an Authorised Mazda Dealer inspect all seat belt systems in use during an accident before they are used again.

WARNING
Twisted Seat Belts:
Twisted seat belts are dangerous. In a collision, the full width of the belt isn't available to absorb the impact. This puts more force on the bones beneath the belt, which could break them or cause other serious injury or death. Don't wear twisted seat belts.
One Belt, One Passenger:
Using one seat belt for more than one person at a time is dangerous. A seat belt used in this way can't spread the impact forces properly and the two passengers could be crushed together and seriously injured or even killed. Never use one belt for more than one person at a time.
Instructions for Use of Seat Belt Assemblies:
- Seat belts are designed to bear upon the bony structure of the body, and should be worn low across the front of the pelvis, or the pelvis, chest and shoulders, as applicable; wearing the lap section of the belt across the abdominal area must be avoided.
- Seat belts should be adjusted as firmly as possible, consistent with comfort, to provide the protection for which they have been designed. A slack belt will greatly reduce the protection afforded to the wearer.
- Care should be taken to avoid contamination of the webbing with polishes, oils and chemicals, and particularly battery acid. Cleaning may safely be carried out using mild soap and water. The belt should be replaced if webbing becomes frayed, contaminated, or damaged.
- It is essential to replace the entire assembly after it has been worn in a severe impact even if damage to the assembly is not obvious.
- Belts should not be worn with straps twisted.
- Each seat belt assembly must only be used by one occupant; it is dangerous to put a belt around a child being carried on the occupant's lap.
- No modifications or additions should be made by the user which will either prevent the seat belt adjusting devices from operating to remove slack, or prevent the seat belt assembly from being adjusted to remove slack.
Essential Safety Equipment
Seat Belt Systems
CAUTION
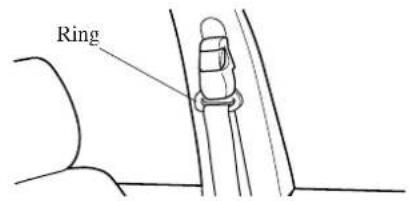
Belt retraction may become difficult if the belts and rings are soiled, so try to keep them clean.
▼ Pregnant Women and Persons with Serious Medical Conditions
Pregnant women should wear seat belts. Ask your doctor for specific recommendations. The lap belt should be worn SNUGLY AND AS LOW AS POSSIBLE OVER THE HIPS. The shoulder belt should be worn across your shoulder properly, but never across the stomach area.
Persons with serious medical conditions also should wear seat belts. Check with your doctor for any special instructions regarding specific medical conditions.

▼Emergency Locking Mode
If the belt has fully retracted, it will always be in the emergency locking mode until you move it into automatic locking mode by pulling the belt all the way out to its full length. In the emergency locking mode, the belt remains comfortable on the occupant and the retractor will lock in position during a collision.
If the belt feels tight and hinders comfortable movement while the vehicle is stopped or in motion, you may be in the automatic locking mode because you have pulled the belt too far out. To return to the more comfortable emergency locking mode, wait until you can stop the vehicle in a safe area, retract the belt fully to convert it back to emergency locking mode and then again extend it around you.
2-38



▼ Automatic Locking Mode
Always use the automatic locking mode to keep the child-restraint system from shifting to an unsafe position in the event of an accident. To get the seat belt into the automatic locking mode, pull it all the way out and connect it as instructed on the child-restraint system. It will retract down to the child-restraint system and stay locked on it. See the section on child restraint (page 2-49).


2-39

Essential Safety Equipment
Seat Belt Systems
3-Point Type Seat Belt
NOTE
When using the rear centre seat belt, refer to "Rear Centre Position Seat Belt" (page 2-44).
▼ Fastening the Seat Belts
- Grasp the buckle and tongue.
- Slowly pull out the lap/shoulder belt.
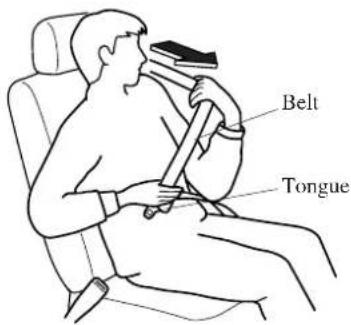
- Insert the tongue into the buckle until you hear a click.
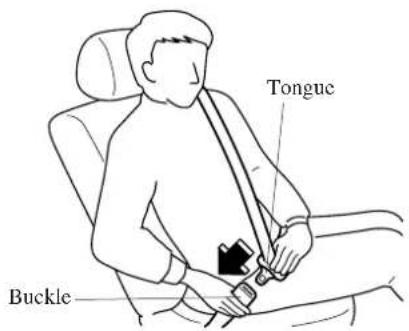
WARNING
Positioning the Shoulder Portion of the Seat Belt:
Improper positioning of the shoulder portion of the seat belt is dangerous. An improperly positioned belt will provide little or no protection in a collision. Always make sure the shoulder portion of the seat belt is positioned across your shoulder and near your neck, but never under your arm, on your neck, or on your upper arm.
- Make sure the shoulder belt is snugly fitted against your body.
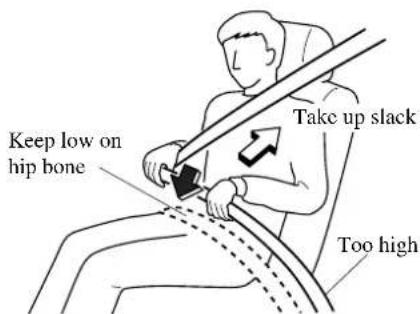
WARNING
Positioning the Lap Portion of the Seat Belt:
The lap portion of the seat belt worn too high is dangerous. In a collision, this would concentrate the impact force directly on the abdominal area, causing serious injury. Wear the lap portion of the belt snugly and as low as possible.
2-40




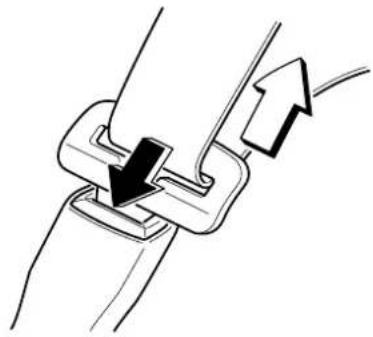
▼ Unfastening the Seat Belts
Depress the button on the buckle.
natural_image
Diagram of a mechanical clamp or clamping mechanism with directional arrows indicating movement (no text or symbols)NOTE
If a belt does not fully retract, inspect it for kinks and twists.
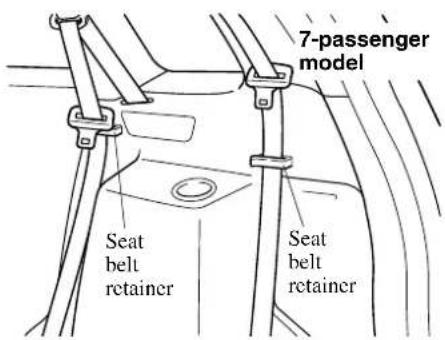
To secure the outboard-rear seat belts when not in use, insert the belts in their seat belt retainers.
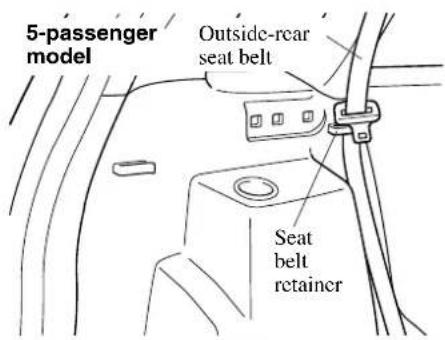
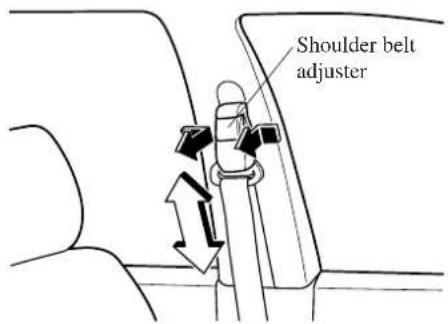
▼Shoulder Belt Adjuster
Adjust the height of the shoulder belt if the seat belt touches your neck, or if it crosses your arm instead of your shoulder. Simply grip and pull the adjuster, move it to the desired position, and then release it. Make sure the adjuster is locked.
2-41
Essential Safety Equipment
Seat Belt Systems
WARNING
Positioning the Shoulder Portion of the Seat Belt:
Improper positioning of the shoulder portion of the seat belt is dangerous. An improperly positioned belt will provide little or no protection in a collision. Always make sure the shoulder portion of the seat belt is positioned across your shoulder and near your neck, but never under your arm, on your neck, or on your upper arm.
Front Seat Belt Pretensioner and Load Limiting Systems
For optimum protection, the driver and front passenger seat belts are equipped with pretensioner and load limiting systems. ^*1
In moderate or greater frontal or near-frontal accidents, the front air bag and pretensioner systems deploy simultaneously. The pretensioners take up slack in the front seat belts as the air bags are expanding. The load limiting system releases belt webbing in a controlled manner to reduce belt force on the occupant's chest.
*1: Some models are equipped with the pretensioner system only, and do not have the load limiting system.
WARNING
Incorrect Positioning of the Driver and Front Passenger Seat Belts: Incorrect positioning of the driver and passenger seat belts is dangerous. Without proper positioning, the pretensioner and load limiting systems cannot provide adequate protection in an accident and this could result in serious injury. Wear seat belts only as recommended in this owner's manual.
WARNING
Expended Seat Belt Pretensioners:
Use of front seat belts with the pretensioner system expended is dangerous.
The seat belt pretensioners will only function once. After they are expended, they will not work again and must be replaced immediately, even if there was no front seat occupant seated at the time.
If the seat belt pretensioners are not replaced, the risk of injury in a collision will increase.
Always have an Authorised Mazda Dealer inspect and replace the seat belt pretensioners after a collision.
Modification or Testing of the
Pretensioner System:
Modifying the components or wiring of the pretensioner system, including the use of electronic testing devices is dangerous. You could accidentally activate it or make it inoperable which would prevent it from activating in an accident. The occupants could be seriously injured. Never modify the components or wiring, or use electronic testing devices on the pretensioner system.
Pretensioner System Disposal:
Improper disposal of the pretensioner system or a vehicle with non-deactivated pretensioners is dangerous. Unless all safety procedures are followed, injury could result. Ask an Authorised Mazda Dealer how to safely dispose of the pretensioner system or how to scrap a pretensioner-equipped vehicle.
NOTE
- The pretensioner system will only activate in a moderate or greater frontal or near-frontal collision. It will not activate in side or rear impacts.
- Some smoke (non-toxic gas) will be released when the air bags and pretensioners deploy. This does not indicate a fire. This gas normally has no effect on occupants, however, those with sensitive skin may experience light skin irritation. If residue from the deployment of the air bags or the front pretensioner system gets on the skin or in the eyes, wash it off as soon as possible.
Essential Safety Equipment
Seat Belt Systems
▼ Air Bag/Front Seat Belt Pretensioner Systems Warning Light
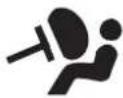
If the air bag/front seat belt pretensioner system is OK, the warning light comes on when the ignition switch is turned to the ON position or after the engine is cranked. After about 6 seconds it goes out.
A system malfunction is indicated when the warning light constantly flashes, stays on or doesn't come on at all. If any of these occur, consult an Authorised Mazda Dealer as soon as possible. The system may not work in an accident.
WARNING
Self-Servicing the Air Bag/ Pretensioner Systems: Self-servicing or tampering with the systems is dangerous. An air bag/pretensioner could accidentally activate or become disabled. This could cause serious injuries. Never tamper with the systems and always have an Authorized Mazda Dealer perform all servicing and repairs.
Rear Centre Position Seat Belt (5-Passenger Model)
Before using the rear-centre lap/shoulder belt make sure tongue (A) and anchor buckle (B) are fastened.
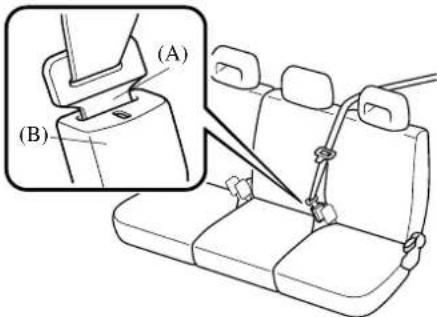
▼ Fastening the Seat Belt
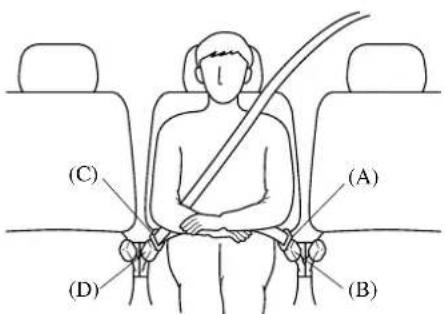
- Grasp the buckle (D) and tongue (C).
- Slowly pull out the lap/shoulder belt.
- Insert the tongue (C) into the buckle (D) until you hear a click.
WARNING
Fastening the Rear-Center Seat Belt with Only One Buckle:
Fastening the rear-center seat belt with only one buckle is dangerous. If only one pair of seat belt tongue and buckle, either tongue (A) and anchor buckle (B) or tongue (C) and anchor buckle (D), is fastened, the seat belt cannot provide full protection. In a sudden stop or collision, the user could slide under the belt and suffer serious injuries. Always make sure that both pairs of seat belt tongues and buckles are fastened properly.
Positioning the Shoulder Portion of the Seat Belt:
Improper positioning of the shoulder portion of the seat belt is dangerous. An improperly positioned belt will provide little or no protection in a collision. Always make sure the shoulder portion of the seat belt is positioned across your shoulder and near your neck, but never under your arm, on your neck, or on your upper arm.
Using Centre-Rear Seat Belt: Using the centre-rear seat belt with the left-rear head restraint removed is dangerous. The seat belt will not provide adequate protection with the left-rear head restraint removed because the seat belt is not positioned properly. The user could be seriously injured in an accident. Always use the centre-rear seat belt with the left-rear head restraint installed.
- Make sure the shoulder belt is snugly fitted against your body.
WARNING
Positioning the Lap Portion of the Seat Belt:
The lap portion of the seat belt worn too high is dangerous. In a collision, this would concentrate the impact force directly on the abdominal area, causing serious injury. Wear the lap portion of the belt snugly and as low as possible.
▼ Unfastening the Seat Belt
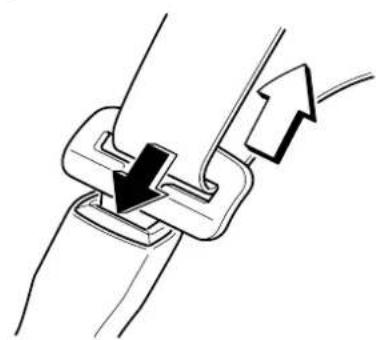
Depress the button on the buckle.
natural_image
Diagram of a mechanical clamp or clamping mechanism with directional arrows indicating movement (no text or symbols)Essential Safety Equipment
Seat Belt Systems
▼ Unfastening the Lap Portion of the Seat Belt
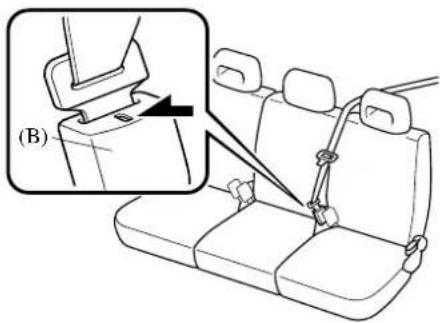
Insert a small object in the anchor buckle (B) slot, such as a key.
▼ Fastening the Lap Portion of the Seat Belt
Grasp tongue (A) and insert it into the anchor buckle (B) until you hear a click. It is now secure for passenger use.
NOTE
After returning the rear-left seatback to its upright position, fasten the lap portion of the belt.
CAUTION
Always unfasten the lap portion of the belt before folding the rear-left seatback. Leaving the lap portion of the belt fastened could cause damage to the seat belt, buckle and seatback.
To secure the centre-rear seat belt when not in use, insert the belt in the seat belt retainer.
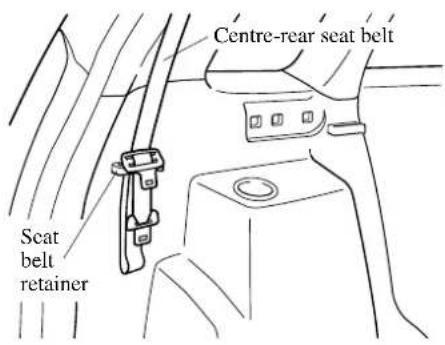
2-46
2-Point Type Seat Belt (7-Passenger Model)
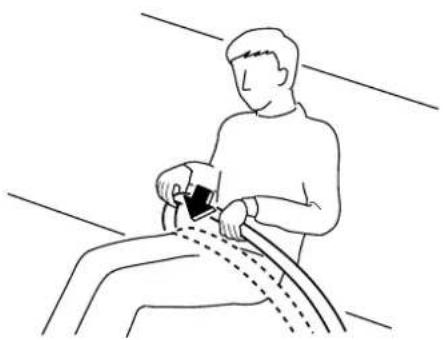
▼Fastening the Seat Belts
- Pull the tongue to the desired length.
- Insert it into the buckle until you hear a click.
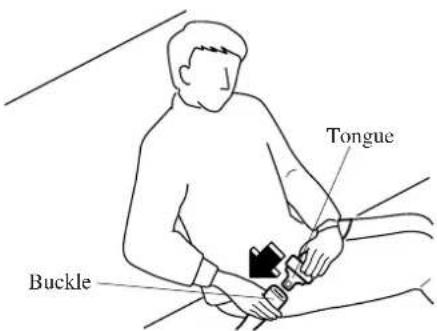
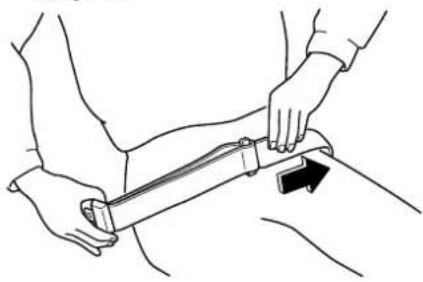
- Adjust the belt length.
• To lengthen the belt, hold the tongue at a right angle to the webbing and pull.
Lengthen
natural_image
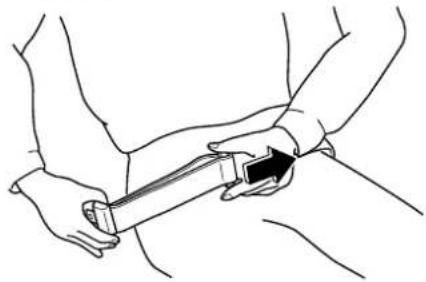
Line drawing of hands performing a medical or physical procedure on a patient's arm (no text or symbols present)• To shorten, pull the loose end of the webbing.
Shorten
natural_image
Line drawing of a person performing a medical or physical procedure on a belt, with no visible text or symbols.- Make sure the lap belt is snugly fitted against your body.
natural_image
Line drawing of a person using a cable to lift a person's seat (no text or symbols)
WARNING
Wearing the Lap Belt:
A lap belt worn too high is dangerous. In a collision, this would concentrate the impact force directly on the abdominal area, causing serious injury. Wear the lap belt snugly and as low as possible.
Essential Safety Equipment
Seat Belt Systems
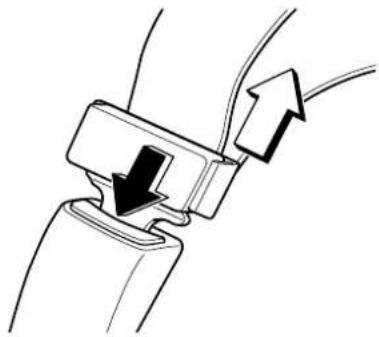
▼ Unfastening the Seat Belts
Depress the button on the buckle.
natural_image
Diagram of a car seatbelt buckle being inserted into a seatbelt, showing black arrows indicating direction (no text or symbols present)Seat Belt Warning Light (Except European Model)
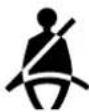
If the driver's seat belt is not fastened when the ignition switch is turned to the ON position, the seat belt warning light will remain on until the belt is fastened. If the system does not operate correctly, consult an Authorised Mazda Dealer.
2-48



Child Restraint Precautions
Mazda strongly urges the use of child-restraint systems for children small enough to use them.
Mazda recommends use of a Mazda genuine child-restraint system or one that complies with European regulations (ECE R44). If you would like to purchase a Mazda genuine child-restraint system, please contact an Authorised Mazda Dealer.
Check your local and state or provincial laws for specific requirements regarding the safety of children riding in your vehicle.
Whatever child-restraint system you consider, please pick the appropriate one for the age and size of the child, obey the law and follow the instructions that come with the individual child-restraint system.
A child who has outgrown child-restraint systems should sit in the rear and use seat belts.
Statistics confirm that the rear seat is the best place for all children up to 12 years of age—the more so with a supplementary restraint system (air bags).
A rear-facing child-restraint system should NEVER be used in the front seat because it would be too close to the air bag. The front passenger's seat is also the least preferred seat for other child-restraint systems.

WARNING
Proper Size of Child-Restraint System:
For effective protection in vehicle accidents and sudden stops, a child must be properly restrained using a seat belt or child-restraint system depending on age and size. If not, the child could be seriously injured or even killed in an accident.
Follow the Manufacturer's Instructions and Always Keep the Child-Restraint System Buckled Down:
An unsecured child-restraint system is dangerous. In a sudden stop or a collision it could move causing serious injury or death to the child or other occupants. Make sure the child-restraint system is properly secured in place according to the child-restraint system manufacturer's instructions. When not in use, remove it from the vehicle or fasten it with a seat belt, or latch it down to BOTH ISOFIX bars.
Essential Safety Equipment
Child Restraint

WARNING
Holding a Child While the Vehicle is Moving:
Holding a child in your arms while the vehicle is moving is extremely dangerous. No matter how strong the person may be, he or she cannot hold onto a child in a sudden stop or collision and it could result in serious injury or death to the child or other occupants. Even in a moderate accident, the child may be exposed to air bag forces that could result in serious injury or death to the child, or the child may be slammed into the adult, injuring the adult. Always secure a child in a proper child-restraint system.
Rear-Facing Child-Restraint System:
Extreme Hazard! Do not use a rear-facing child-restraint system on a seat protected by an air bag in front of it.
The child-restraint system can be hit by a deploying air bag and moved violently backward resulting in serious injury or death to the child. NEVER use a rear-facing child-restraint system in the front seat with an air bag that could deploy.
Deploying air bag
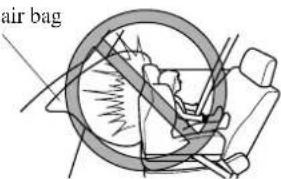
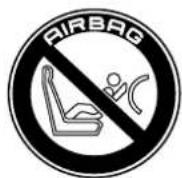
If your vehicle is equipped with a passenger air bag, a warning label as shown below is attached. The warning label reminds you not to put a rear-facing child-restraint system on the front passenger's seat at any time.
2-50



WARNING
Children and Seating Position with Side Air Bag:
Allowing anyone to lean over or against the front door is dangerous. If the vehicle is equipped with side air bags, the impact of an inflating side air bag could cause serious injury or death to the person. Children are more likely to sleep in the vehicle; when they do, they are more at risk in the front passenger's seat that has a side air bag because they may slump over into the path of the seatback-mounted air bag.
Furthermore, leaning over or against the doors could block the side air bag and eliminate the advantages of supplementary protection. With the front air bag and the additional side air bag that comes out of the front seat, the rear seat is always a better location for children who are prone to sleeping. If a child can't be seated in the rear, do not allow the child to lean over or against the front door, even if the child is seated in a child-restraint system.
One Belt, One Passenger:
Using one seat belt for more than one person at a time is dangerous. A seat belt used in this way can't spread the impact forces properly and the two passengers could be crushed together and seriously injured or even killed. Never use one belt for more than one person at a time.

CAUTION
A seat belt or child-restraint system can become very hot in a closed vehicle during warm weather. To avoid burning yourself or a child, check them before you or your child touches them.
NOTE
Your Mazda is equipped with ISOFIX bars for attachment of Mazda genuine child-restraint systems in the rear (or second-row) outboard seats. When using these bars to secure a child-restraint system, refer to "ISOFIX Bar-Secured Child-Restraint Systems" (page 2-62).
Essential Safety Equipment
Child Restraint
Categories of Child-Restraint Systems (Europe)
Child-restraint systems are classified into the following 5 groups according to European regulations (ECE R44).
| Group Age Weight | ||
| 0 Up to 9 months old | Less than 10 kg (less than 22 lb) | |
| 0^+ | Up to 2 years old Less than 13 kg (less than 29 lb) | |
| 1 | 8 months to 4 years old | 9 kg — 18 kg (20 lb — 40 lb) |
| 2 | 3 to 7 years old | 15 kg — 25 kg (33 lb — 55 lb) |
| 3 | 6 to 12 years old | 22 kg — 36 kg (48 lb — 79 lb) |
NOTE
When purchasing, ask the manufacturer of the child-restraint system which type of child-restraint system is appropriate for your child and vehicle.
Child-Restraint System Installation Position (Europe)
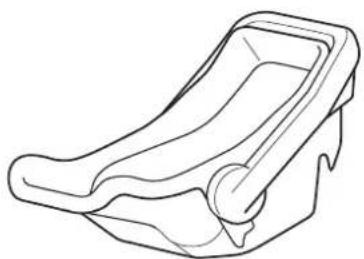
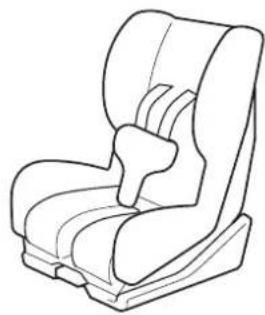
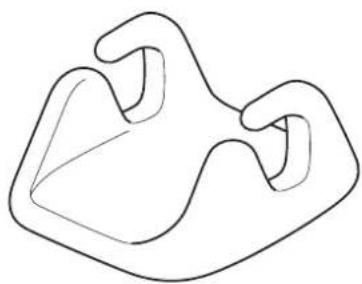
In this owner's manual, explanation of child-restraint systems secured with seat belts is provided for the following three types of popular child-restraint systems: baby seat, child seat, booster seat.
NOTE
Installation position is determined by the type of child-restraint system. Always read the manufacturer's instructions and this owner's manual carefully.
Baby seat
Equal to Group 0 and 0+of European regulations (ECE R44).
natural_image
Line drawing of a baby seat with a curved handle and seat (no text or symbols)Child seat
Equal to Group 1 of European regulations (ECE R44).
natural_image
Line drawing of a car seat with neck and seatbelt (no text or symbols)Booster seat
Equal to Group 2 and 3 of European regulations (ECE R44).
natural_image
Simple line drawing of a symmetrical abstract shape resembling a stylized letter or symbol (no text or symbols present)2-53
Essential Safety Equipment
Child Restraint
▼ Baby Seat Installation Position
A baby seat is used in the rear-facing position only.
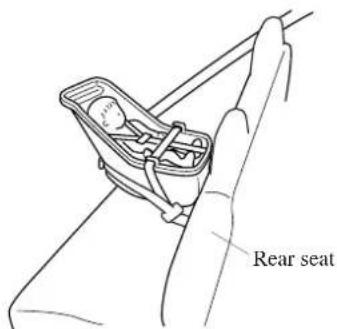
Refer to the table, "Child-Restraint System Suitability for Various Seat Positions" for baby seat installation position (page 2-58).

WARNING
Baby Seat Installation:
Installing a baby seat without first consulting the table "Child-Restraint System Suitability for Various Seat Positions" is dangerous. A baby seat installed on the wrong seat position cannot be properly secured. In a collision, the child could hit something or someone in the vehicle and be seriously injured or even killed. Never install a baby seat in the wrong seat position.
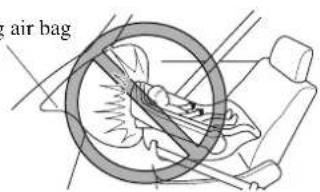
Rear-Facing Child-Restraint System: Extreme Hazard! Do not use a rear-facing child-restraint system on a seat protected by an air bag in front of it. The child-restraint system can be hit by the deploying air bag and knocked out of position. A child in the child-restraint system could be seriously injured or killed. Never use a rear-facing child-restraint system on the front passenger's seat protected by an air bag.
Deploying air bag
2-54


▼Child Seat Installation Position
A child seat is used in front-facing and rear-facing positions depending on the age and size of the child. When installing, follow the manufacturer's instructions in accordance with the appropriate age and size of the child as well as the directions for installing the child-restraint system.
Rear-facing type
Refer to the table, "Child-Restraint System Suitability for Various Seat Positions" for rear-facing child seat installation position (page 2-58).

WARNING
Rear-facing Child Seat Installation: Installing a rear-facing child seat without first consulting the table "Child-Restraint System Suitability for Various Seat Positions" is dangerous. A rear-facing child seat installed on the wrong seat position cannot be properly secured. In a collision, the child could hit something or someone in the vehicle and be seriously injured or even killed. Never install a rear-facing child seat in the wrong seat position.
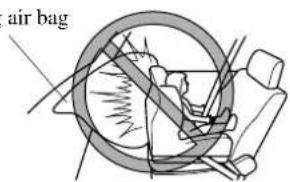
Rear-Facing Child-Restraint System: Extreme Hazard! Do not use a rear-facing child-restraint system on a seat protected by an air bag in front of it. The child-restraint system can be hit by the deploying air bag and knocked out of position. A child in the child-restraint system could be seriously injured or killed. Never use a rear-facing child-restraint system on the front passenger's seat protected by an air bag.
Deploying air bag
2-55
Essential Safety Equipment
Child Restraint
Front-facing type
Refer to the table, "Child-Restraint System Suitability for Various Seat Positions" for front-facing child seat installation position (page 2-58).
WARNING
Front-facing Child Seat Installation: Installing a front-facing child seat without first consulting the table "Child-Restraint System Suitability for Various Seat Positions" is dangerous. A front-facing child seat installed on the wrong seat position cannot be properly secured. In a collision, the child could hit something or someone in the vehicle and be seriously injured or even killed. Never install a front-facing child seat in the wrong seat position.
Front Passenger's Seat Position: If your vehicle is equipped with a passenger air bag, a front-facing child-restraint system could be put on the front seat only when it is unavoidable. Always move the seat as far back as possible, because the force of a deploying air bag could cause serious injury or death to the child.
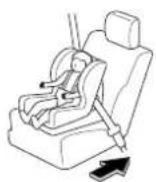
▼ Booster Seat Installation Position
A booster seat is used in the front-facing position only.
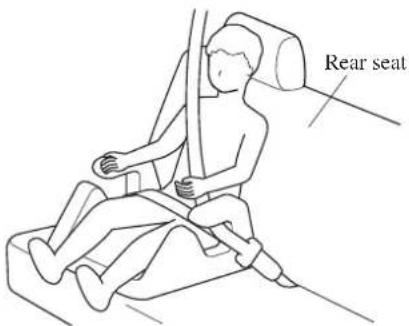
Refer to the table, "Child-Restraint System Suitability for Various Seat Positions" for booster seat installation position (page 2-58).
WARNING
Booster Seat Installation:
Installing a booster seat without first consulting the table "Child-Restraint System Suitability for Various Seat Positions" is dangerous. A booster seat installed on the wrong seat position cannot be properly secured. In a collision, the child could hit something or someone in the vehicle and be seriously injured or even killed. Never install a booster seat in the wrong seat position.
Front Passenger's Seat Position:
If your vehicle is equipped with a passenger air bag, a front-facing child-restraint system could be put on the front seat only when it is unavoidable. Always move the seat as far back as possible, because the force of a deploying air bag could cause serious injury or death to the child.
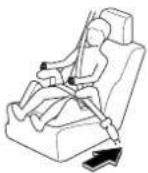
Child-Restraint System Suitability for Various Seat Positions Table (Europe)
This table contains information on the suitability of Mazda genuine child-restraint systems. For installation suitability of other manufacturer child-restraint system, carefully consult the manufacturer's instructions which accompany the child-restraint system.
| European regulation (ECE R44) Child-restraint system groups | Age group | Weight group | Child-restraint system type | Position | Seating position | |||||||
| Front passenger's scat | 5-passenger model | 7-passenger model | ||||||||||
| Without passenger air bag | With passenger air bag | Rear scat (outside) | Rear scat (centre) | Second-row scat (outside) | Second-row seat (centre) | Third-row seat | ||||||
| Without air bag cut-off system | With air bag cut-off system | |||||||||||
| GROUP 0 | Up to 9 months old | Less than 10 kg (less than 22 lb) | Baby seat | Rear-facing | S | X | S^*2 | S | S | S | X | S |
| GROUP 0' | Up to 2 years old | Less than 13 kg (less than 29 lb) | Baby seat | Rear-facing | S | X | S^*2 | S | S | S | X | S |
| GROUP 1 | 8 months to 4 years old | 9 kg — 18kg (20 lb — 40 lb) | Child seat | Front-facing | S | X | S^*3 | S^*4 | S | S^*4 | X | S |
| Rear-facing | X | X | X | X | X | X | X | |||||
| GROUP 2 | 3 to 7 years old | 15 kg — 25 kg (33 lb — 55 lb) | Booster seat | Front-facing | S | S^*1 | S^*3 | S | S | S | X | S |
| GROUP 3 | 6 to 12 years old | 22 kg — 36 kg (48 lb — 79 lb) | Booster seat | Front-facing | S | S^*1 | S^*3 | S | S | S | X | S |
X
S: Seat position is suitable for child-restraint system in this group.
X: Seat position is not suitable for child in this group.
*1: Move the front passenger's seat as far as back possible.
*2: Use only a Mazda genuine child-restraint system designed for Mazda's air bag cut-off system (page 2-62).
*3: Use a Mazda genuine child-restraint system designed for Mazda's air bag cut-off system or move passenger's seat as far as back possible (page 2-62).
*4: ISOFIX bar-secured child-restraint systems can be used.
2-58




Installing Child-Restraint Systems
When installing a child-restraint system, follow the manufacturer's instructions.
(5-passenger model)
All the rear seat belts can be easily converted to the automatic locking mode, which must be done to secure the child-restraint system.
(7-passenger model)
The second-row outboard seat belts can be easily converted to the automatic locking mode, which must be done to secure the child-restraint system.
▼Rear Seat Child-Restraint System Installation (Using Automatic Locking Mode)
Follow these instructions when using the automatic locking mode for a child-restraint system.
- If the seat in which you install a child-restraint system has a seat slide function, slide the seat as far back as possible.
-
Secure the child-restraint system with the lap portion of the lap/shoulder belt. See the instructions on the child-restraint system for belt routing instructions.
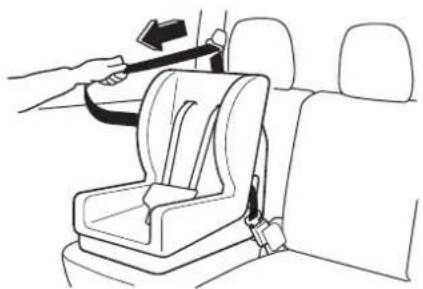
-
To get the retractor into the automatic locking mode, pull the shoulder belt portion of the seat belt until the entire length of the belt is out of the retractor.
natural_image
Line drawing of a car seatbelt buckle being lifted by a hand, showing seat and seat details (no text or symbols)- Push the child-restraint system firmly into the vehicle seat. Be sure the belt retracts as snugly as possible. Clicking from the retractor will be heard during retraction if the system is in the automatic locking mode. If the belt does not lock the seat down tight, repeat this step.
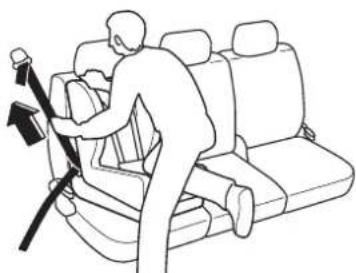
natural_image
Line drawing of a person sitting in a car seat with a belt adjusting the seat (no text or symbols)



Essential Safety Equipment
Child Restraint
NOTE
Inspect this function before each use of the child-restraint system. You should not be able to pull the shoulder belt out of the retractor while the system is in the automatic locking mode. When you remove the child-restraint system, be sure the belt fully retracts to return the system to emergency locking mode before occupants use the seat belts.
- If your child-restraint system requires the use of a tether strap, hook and tighten the tether strap by following the manufacturer's instructions.
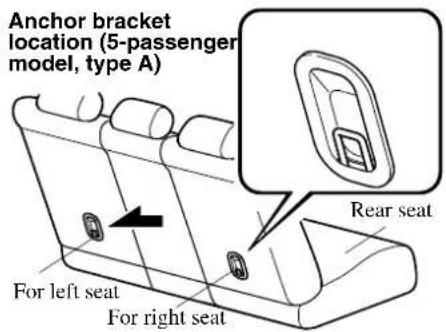
Tether strap position (5-passenger model, type A)
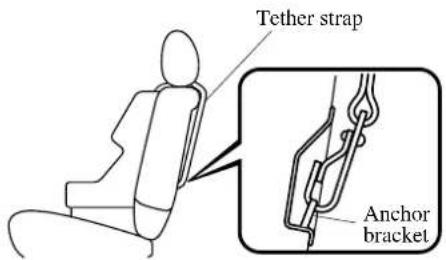
Anchor bracket location (5-passenger model, type B)
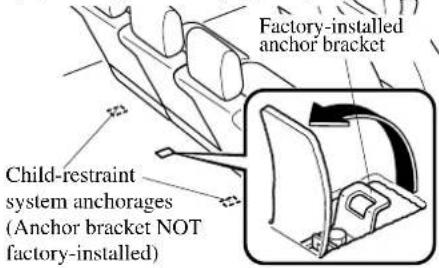
Tether strap position (5-passenger model, type B)
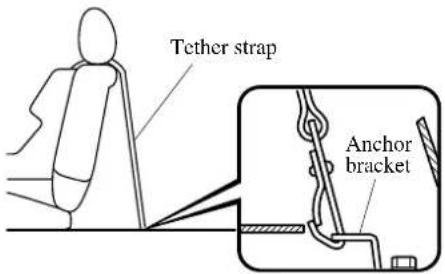
NOTE
(5-passenger model, type B)
- To use the child-restraint system anchor bracket, peel back the pre-cut portion of the carpeting behind the centre seat position.
- There are no factory-installed child-restraint system anchor brackets at the outboard seat positions. To use an anchor bracket in one of the outboard seat positions, remove the anchor bracket for the centre seat position and install it in the outboard position. For additional assistance, consult an Authorised Mazda Dealer.
2-60




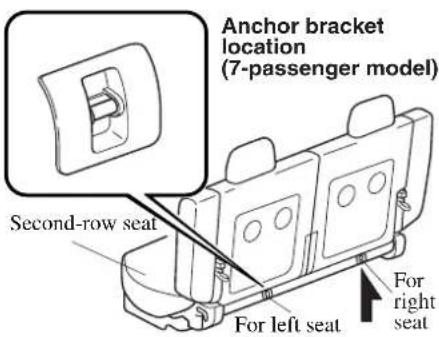
Tether strap position (7-passenger model)
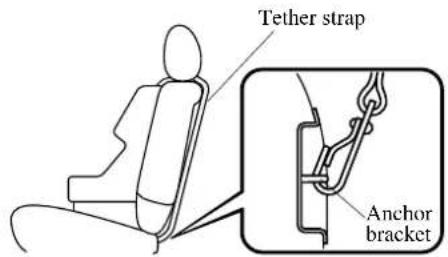

WARNING
Child-Restraint Tether Usage: Child-restraint system anchorages are designed to withstand only those loads imposed by correctly installed child-restraint systems. Under no circumstances are they to be used for adult seat belts, harnesses, or for attaching other items or equipment to the vehicle.
Incorrect Positioning of the Tether Strap:
Positioning the tether strap on top of the head restraint is dangerous. In a collision, the head restraint could bend or break. This will cause the strap to loosen. The child-restraint system could move and injure the child or someone else. Always position the tether strap between the head restraint and the seatback.
Essential Safety Equipment
Child Restraint
Air Bag Cut-Off System
If your vehicle is equipped with an air bag cut-off system, and a child-restraint system designed for Mazda's air bag cut-off system is installed, the front passenger's seat supplementary restraint system (air bag system) will be deactivated (page 2-76).

NOTE
If you would like to purchase a Mazda genuine child-restraint system designed for the Mazda's air bag cut-off system, please contact an Authorised Mazda Dealer.
ISOFIX Bar-Secured Child-Restraint Systems
Your Mazda is equipped with ISOFIX bars for attachment of Mazda genuine child-restraint systems in the outboard rear (or second-row) seats.
Contact your Authorised Mazda Dealer for further information on the Mazda genuine child-restraint system.

WARNING
Manufacturer's Instructions for Child-Restraint System:
An unsecured child-restraint system is dangerous. In a sudden stop or a collision it could move causing serious injury or death to the child or other occupants. Make sure the child-restraint system is properly secured in place according to the manufacturer's instructions.
Unsecured Child-Restraint System: A child-restraint system that is not secured is dangerous. In a sudden stop or collision, it can become a projectile and hit someone, causing serious injury. When not in use, remove it from the vehicle, put it in the luggage compartment or at least make sure it is securely fastened to the ISOFIX bars.
WARNING
ISOFIX Bar-Secured Child-Restraint Systems:
Not following the child-restraint system manufacturer's instructions when installing the child-restraint system is dangerous. If seat belts or a foreign object prevent the child-restraint system from being securely attached to the ISOFIX bars and the child-restraint system is installed improperly, the child-restraint system could move in a sudden stop or collision causing serious injury or death to the child or other occupants. When installing the child-restraint system, make sure there are no seat belts or foreign objects near or around the ISOFIX bars. Always follow the child-restraint system manufacturer's instructions.
▼ Child-Restraint System Installation Procedure
- If the seat in which you install a child-restraint system has a seat slide function, slide the seat as far back as possible.
- Make sure the seatback is securely latched by rocking the seatback.
- Expand the area between the seat bottom and the seatback slightly to verify the locations of the ISOFIX bar.
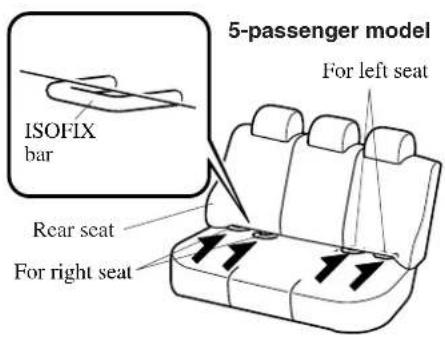
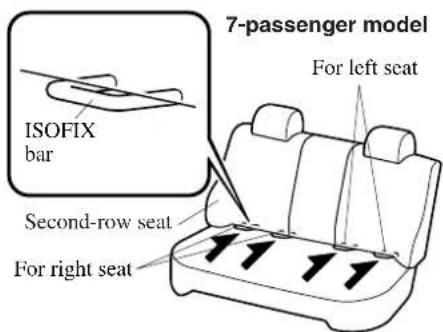
- Secure the child-restraint system using ISOFIX bar, following the child-restraint system manufacturer's instruction.
Essential Safety Equipment
Child Restraint
- If your child-restraint system came equipped with a tether, that probably means it is very important to properly secure the tether for child safety, please carefully follow the child-restraint system manufacturer's instructions when installing tethers.
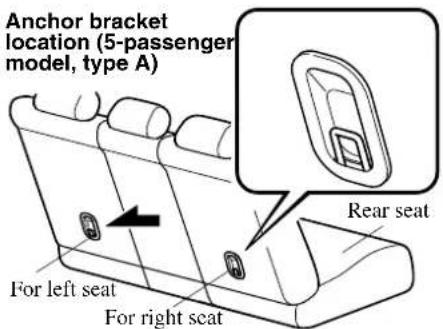
Tether strap position (5-passenger model, type A)
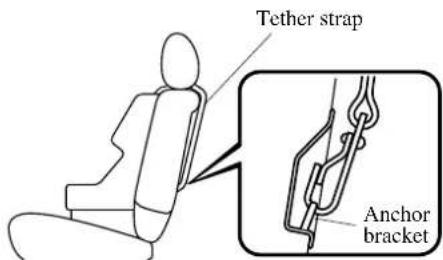
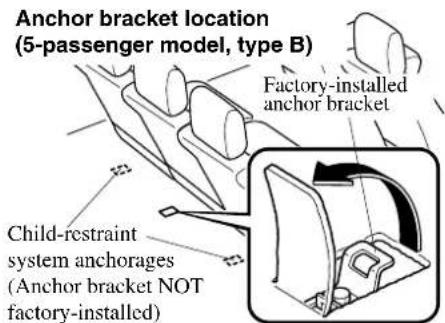
Tether strap position (5-passenger model, type B)
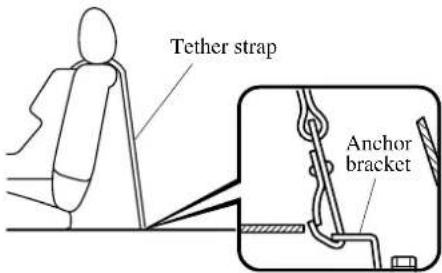
NOTE
(5-passenger model, type B)
There are no factory-installed child-restraint system anchor brackets at the outboard seat positions. To use an anchor bracket in one of the outboard seat positions, peel back the pre-cut portion of the carpeting behind the centre seat position and remove the anchor bracket and install it in the outboard position. For additional assistance, consult an Authorised Mazda Dealer.
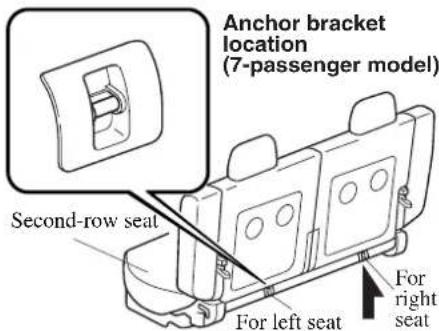
2-64
Tether strap position (7-passenger model)
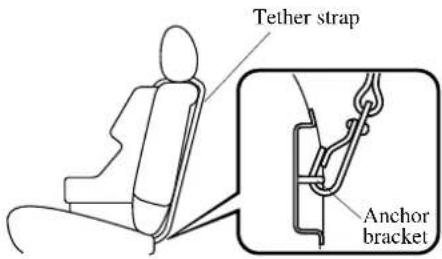
WARNING
Child-Restraint Tether Usage:
Child-restraint system anchorages are designed to withstand only those loads imposed by correctly installed child-restraint systems. Under no circumstances are they to be used for adult seat belts, harnesses, or for attaching other items or equipment to the vehicle.
Incorrect Positioning of the Tether Strap:
Positioning the tether strap on top of the head restraint is dangerous. In a collision, the head restraint could bend or break. This will cause the strap to loosen. The child-restraint system could move and injure the child or someone else. Always position the tether strap between the head restraint and the seatback.
Supplementary Restraint Systems (SRS) Precautions
Read this owner's manual carefully to verify what air bags (driver-side air bag, passengers-side air bag, side air bags) are equipped in your vehicle.
The front and side supplementary restraint systems (SRS) include 4 air bags (verify "SRS AIR BAG" location indicator marks).
They are located in:
• The steering wheel hub
• The passenger side instrument panel
• The outboard sides of the front seatbacks
These systems operate independently depending on the type of accident encountered; if you have side air bags, the side air bags are not likely to deploy on both sides in the same accident because a vehicle is not often hit from both sides. The side air bags work together but they and the frontal air bag system will not normally deploy during the same type of accident unless a combination of frontal and side impacts occur.
The air bag supplementary restraint systems are designed to provide only supplementary protection only in the front seats in a few modes, so seat belts become important in the following ways:
Without seat belt usage, the air bags cannot provide adequate protection during an accident. Seat belt usage is necessary to:
- Keep the passenger away from an inflating air bag.
- Reduce the possibility of injuries during an accident that is not designed for air bag inflation, such as roll-over or rear impact.
- Reduce the possibility of injuries in frontal or side collisions that are not severe enough to activate the air bags.
- Reduce the possibility of being thrown from your vehicle.
- Reduce the possibility of injuries to lower body and legs during an accident because the air bags provide no protection to these parts.
- Hold the driver in a position which allows better control of the vehicle.
A child who is too small to use a seat belt must be properly secured using a child-restraint system (page 2-49).
2-66





Carefully consider which child-restraint system is necessary for your child and follow the installation directions in this Owner's Manual as well as the child-restraint system manufacturer's instructions.

WARNING
Air Bags without Seat Belts:
Depending only on the air bags for protection during an accident is dangerous. Alone, air bags may not prevent serious injuries. The appropriate air bags can be expected to inflate only in collisions with frontal, near frontal or side forces that are at least moderate. Vehicle occupants should always wear seat belts.
Child in the Front Seat:
Placing a child, 12 years or under, in the front seat is dangerous. The child could be hit by a deploying air bag and be seriously injured or even killed. A sleeping child is more likely to lean against the door and be hit by the side air bag in moderate, right-side collision. Whenever possible, always secure a child 12 years and under on the rear seats with an appropriate child-restraint system for the child's age and size.
Rear-Facing Child-Restraint System:
Extreme Hazard! Do not use a rear-facing child-restraint system on a seat protected by an air bag in front of it. The child-restraint system can be hit by a deploying air bag and moved violently backward resulting in serious injury or death to the child. NEVER use a rear-facing child-restraint system in the front seat with an air bag that could deploy.
Deploying air bag
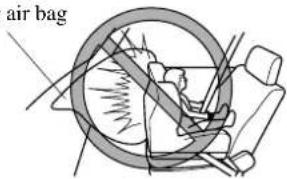
Seating Position with Front Air Bags:
Sitting too close to the air bag storage compartments or placing hands or feet on them is extremely dangerous. Front Air bags inflate with great force and speed. Serious injuries could occur if someone is too close. The driver should always hold onto only the rim of the steering wheel. The front seat passenger should keep both feet on the floor. Front seat occupants should adjust their seats as far back as possible and always sit upright against the seatbacks with seat belts worn properly.

WARNING
Seating Position with Side Air Bags:
Sitting too close to the side air bag storage compartments or placing hands on them is extremely dangerous. A side air bag inflates with great force and speed directly out of the outboard shoulder of the front seat and expands along the front door on the side the car is hit.
Serious injury could occur if someone is sitting too close to the door or leaning against a window in the front seats or if rear seat occupants grab the sides of the front seatbacks. Furthermore, sleeping up against the door or hanging out the driver's-side window while driving could block the side air bag and eliminate the advantages of supplementary protection. Give the side airbags room to work by sitting in the centre of the seat while the vehicle is moving with seat belts worn properly.
Front Air Bag Storage Areas:
Attaching an object to a front air bag storage area or placing something in front of it is dangerous. In an accident, the object could interfere with front air bag inflation and injure the occupants.
Always keep the front air bag storage areas free of objects.
Side Air Bag Storage Areas:
Attaching things to the front seat in such a way as to cover the outboard side of the seat in any way is dangerous. In an accident the object could interfere with the side air bag, which inflates from the outboard side of the front seats, impeding the added protection of the side air bag system or redirecting the air bag in a way that is dangerous. Furthermore, the bag could be cut open spewing exhaust.
Do not hang net bags, map pouches or back pads with side straps on the front seats. Never use seat covers on the front seats. Always keep the side air bag storage areas in your front seats free to deploy in the event of a side collision.
Hot Air Bag Inflators:
Hot air bag inflators are dangerous. Immediately after inflation, the inflators in the steering wheel, instrument panel or the seatbacks are very hot. You could get burned. Don't touch the internal components of the air bag storage areas after the bags have inflated.
Installation of Front-End Equipment:
Installation of front-end equipment, such as frontal protection bar (kangaroo bar, bull bar, push bar, etc.), snowplow, or winches, is dangerous. The air bag crash sensor system could be affected. This could cause air bags to inflate unexpectedly, or it could prevent the air bags from inflating during an accident. Front occupants could be seriously injured. Never install any front-end equipment to your vehicle.

WARNING
Suspension Adjustment:
Adjusting the vehicle suspension is dangerous. If the vehicle's height or the suspension is changed, the vehicle will be unable to accurately detect a collision resulting in incorrect or unexpected air bag deployment and the possibility of serious injuries.
Modification of the Supplementary Restraint System:
Modifying the components or wiring of the supplementary restraint system is dangerous. You could accidentally activate it or make it inoperable. Don't make any modifications to the supplementary restraint system. This includes installing trim, badges, or anything else over the air bag storage areas. It also includes installing extra electric equipment on or near system components or wiring. An Authorised Mazda Dealer can provide the special care needed in the removal and installation of front seats. It is important to protect the side air bag wiring and connections to assure that the bags do not accidentally deploy and that the seats retain an undamaged air bag connection.

CAUTION
To prevent damage to the side air bag wiring, don't place luggage or other objects under the front seats.
NOTE
- When an air bag deploys, a loud inflation noise can be heard and some smoke will be released. Neither is likely to cause injury, however, the texture of the air bags may cause light skin injuries on body parts not covered with clothing through friction.
- Should you sell your Mazda, we urge you to tell the new owner of its air bag systems and that familiarization with all instructions about them, from the Owner's Manual, is important.
- This highly-visible label warns against the use of rear-facing child-restraint systems in the front seat.
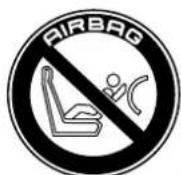
Air Bag System Description
The supplementary restraint systems (SRS) have two basic subsystems:
• The air bag system with inflators and air bags.
- The electric system with crash sensors and diagnostic module.
The air bags are mounted in the following locations: the centre of the steering wheel, the passenger-side of the instrument panel, and in the outboard sides of the front seatbacks. They are out of sight until activated.
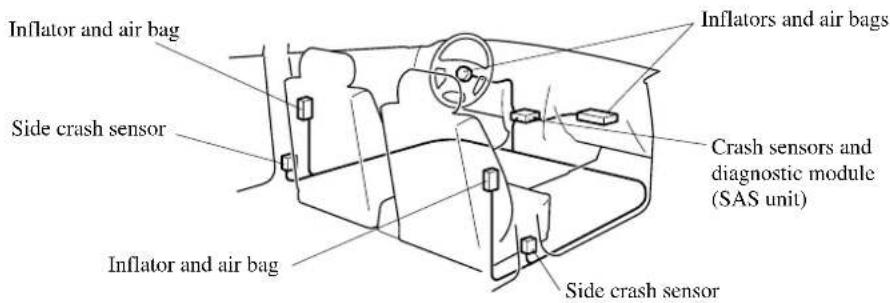
▼How the Air Bags Work
When air bag crash sensors detect a frontal or side impact of greater than moderate force, an electrical current is sent to the inflators.
Gases are produced to inflate the air bags and after the inflation, the air bags quickly deflate.
The air bags will function only once. After that, the air bags will not work again and must be replaced.
Only an Authorised Mazda Dealer can replace the systems.
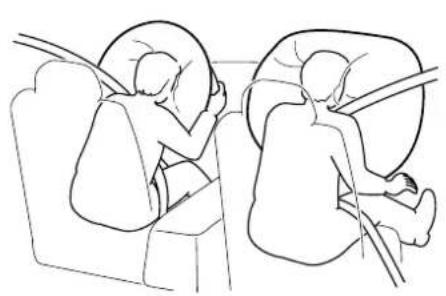
natural_image
Line drawing of two seated individuals in a seat, one holding a cushioned object (no text or symbols)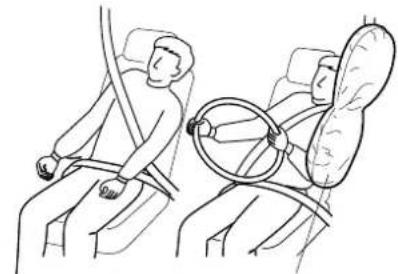
natural_image
Line drawing of a person seated in a car seatbelt with a steering wheel, no text or symbols presentThe side air bag will deploy only on the side the vehicle receives the force of the impact.
2-70





▼ Air Bag Activation/Deactivation
Front air bag activation
A greater than moderate impact will cause the front air bags to inflate in the following cases:
Hitting a solid wall straight on at greater than about 22 km/h (14 mph).
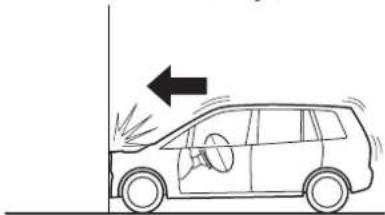
natural_image
Line drawing of a car with exhaust flames and a bell, showing motion direction (no text or symbols)Frontal impact within about a 30 degree range from head-on to the vehicle.
Hitting a curb, pavement edge or hard object.
natural_image
Line drawing of a car with exhaust flames and a left-pointing arrow (no text or symbols)Driving into a big hole or hitting the far side of a hole.
natural_image
Line drawing of a car on a ramp with motion arrows indicating speed (no text or symbols)Landing hard or the vehicle falling.
natural_image
Line drawing of a car on a slope with an arrow indicating motion direction (no text or symbols)2-71
Essential Safety Equipment
SRS Air Bags
Limitations to front air bag activation
Depending on the severity of impact, the front air bags may not inflate in the following cases:
Impacts involving trees or poles cause severe cosmetic damage but may not have enough impact to activate the air bag.
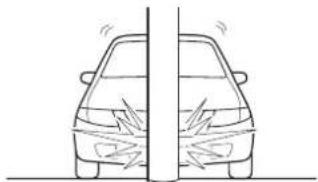
natural_image
Line drawing of a car viewed from front and side, showing no text or symbolsFrontal offset impact to the vehicle may not provide the stopping force necessary for air bag deployment.
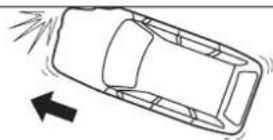
Rear-ending or running under a truck's tail gate may not provide the stopping force necessary for air bag deployment.
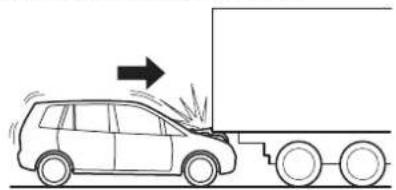
natural_image
Diagram of a car on a flatbed truck with an arrow indicating motion or force (no text or symbols)Non-activation of front air bags
Front air bags will not normally inflate in the following cases:
Collision from the rear.
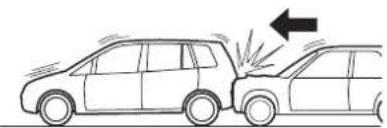
natural_image
Side-by-side line drawing of two cars with exhaust flames and a black arrow indicating direction (no text or symbols)Impact to the side, but it may deploy a side air bag.
Vehicle roll-over, may deploy the side air bag(s) but not the front air bags.
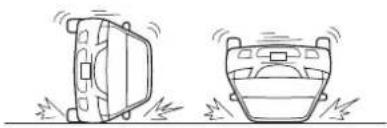
natural_image
Two identical line drawings of a car with visible exhaust plumes, no text or symbols present.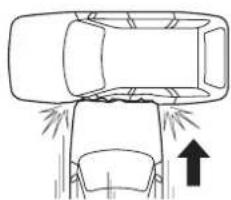
natural_image
Top-down diagram of a car with exhaust flames and an upward arrow indicating direction (no text or symbols)2-72




natural_image
Pure geometric diagram with intersecting lines and a central circle, no text or symbols presentForm No. 8R34-EE-02H
Side air bag activation
Greater than moderate impact to one side of the vehicle (driver or passenger side areas) will cause a side air bag to inflate, but it will not normally deploy the front air bags.
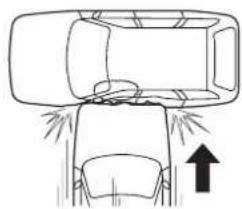
natural_image
Diagram of a car interior with arrows indicating upward motion (no text or symbols)Limitations to side air bag activation
Depending on the severity of impact, a side air bag may not inflate in the following cases:
Frontal offset impact may not provide enough side impact to deploy a side air bag.
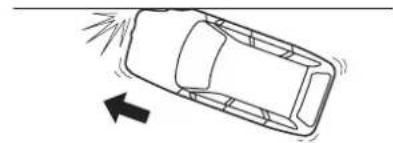
natural_image
Simple line drawing of a car with motion lines indicating speed or wind direction (no text or symbols)Side impacts involving trees or poles can cause severe cosmetic damage but may not have enough impact force to activate a side air bag.
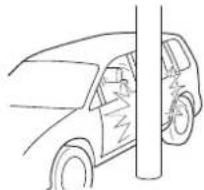
Vehicle roll-over may not provide enough side force to deploy the side air bags.
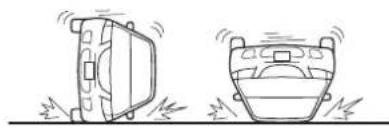
natural_image
Two identical line drawings of a vehicle with motion indicators, showing front and side views (no text or symbols)Side impacts with two-wheeled vehicles may not provide enough force to deploy a side air bag.
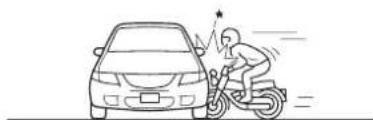
natural_image
Line drawing of a person riding a scooter with motion lines indicating speed (no text or symbols)2-73





J54L_8R34_EE_02H.BOOK Page 74 Monday, July 15, 2002 9:03 AM

Essential Safety Equipment
SRS Air Bags
Non-activation of side air bag
A side air bag will not normally inflate in the following cases:
Collision from the rear. Collision from the front, but it may deploy the front air bags.
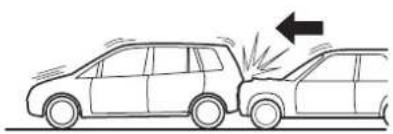
natural_image
Diagram showing two cars with exhaust lines and a black arrow indicating direction (no text or symbols)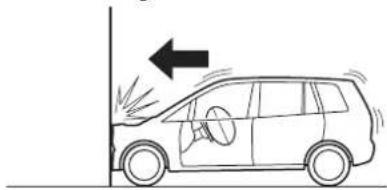
natural_image
Line drawing of a car with exhaust cone and directional arrow (no text or symbols)
2-74


natural_image
Pure geometric diagram with intersecting lines and a central circular pattern (no text or symbols)Form No. 8R34-EE-02H
▼ Constant Monitoring
The following components of the air bag systems are monitored by a diagnostic system:
- SAS unit
- Air bag modules
- Side air bag crash sensor
- Front seat belt pretensioners
- Related wiring
• Air bag cut-off system
A diagnostic module continuously monitors the systems' readiness. This begins when the ignition switch is turned to the ON position and continues while the vehicle is being driven.
▼ Air Bag/Front Seat Belt Pretensioner Systems Warning Light
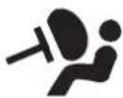
If the air bag/front seat belt pretensioner system is OK, the warning light comes on when the ignition switch is turned to the ON position or after the engine is cranked. After about 6 seconds it goes out.
A system malfunction is indicated when the warning light constantly flashes, stays on or doesn't come on at all. If any of these occur, consult an Authorised Mazda Dealer as soon as possible. The system may not work in an accident.

WARNING
Self-Servicing the Air Bag/Pretensioner Systems:
Self-servicing or tampering with the systems is dangerous. An air bag/pretensioner could accidentally activate or become disabled. This could cause serious injuries. Never tamper with the systems and always have an Authorised Mazda Dealer perform all servicing and repairs.
▼ Air Bag Cut-Off System
When a child-restraint system designed for Mazda's air bag cut-off system is installed on the front passenger seat or if the front passenger seat isn't occupied, the air bag cut-off system deactivates the front and side air bags and the seat belt pretensioner system of the front passenger seat.
If you would like to purchase a Mazda genuine child-restraint system designed for Mazda's air bag cut-off system, consult an Authorised Mazda Dealer.
▼ Air Bag Cut-Off System Indicator Light

This light comes on when the ignition switch is turned to the ON position.
After about 6 seconds it goes out if a child-restraint system designed for Mazda's air bag cut-off system is not installed on the front passenger seat.
This light comes on and stays on when a child-restraint system designed for Mazda's air bag cut-off system is installed on the front passenger seat. The front passenger seat's front and side air bags and the seat belt pretensioner system are also turned off.
The air bag cut-off indicator light doesn't come on when:
- There is no passenger on the front passenger seat. (The front passenger seat's front and side air bags and the seat belt pretensioner system are turned off.)
- A regular child-restraint system is installed on the front passenger seat, or luggage or cargo is placed on the seat. (The air bag cut-off indicator light isn't on, the front passenger seat's front and side air bags and the seat belt pretensioner system can still activate in an accident.)
WARNING
Sitting on Additional Seat Cushion: Sitting on an additional seat cushion on the front passenger seat is dangerous. The air bag cut-off system may not function properly because the additional seat cushion could cause sensor interference. During an accident, the front seat passenger will not have the supplementary protection of the air bag. This could result in serious injuries. Do not sit on an additional seat cushion on the front passenger seat.
CAUTION
To prevent damage to the seat sensors installed in the seat bottom, don't place anything sharp on the seat bottom or leave heavy luggage on it for a long time.
NOTE
The system requires about 7 seconds to alternate between turning the air bag system on or off.
▼ Maintenance
The air bag systems do not require regular maintenance. But if any of the following occurs, take your vehicle to an Authorised Mazda Dealer as soon as possible:
- The air bag system warning light flashes.
- The air bag system warning light stays on.
- The air bag system warning light stays off when the ignition switch is turned to the ON position.
• The air bags inflate. - The air bag cut-off system indicator light comes on when:
- A child-restraint system designed for Mazda's air bag cut-off system is not installed on the front passenger seat.
- A passenger is sitting in the front passenger seat or there is nothing placed on the front passenger seat.
- The air bag cut-off indicator light doesn't come on when a child-restraint system designed for Mazda's air bag cut-off system is installed on the front passenger seat.
WARNING
Damaged Air Bag Sensors:
Driving with damaged air bag sensors is dangerous. A collision, even one not strong enough to inflate the air bags, could damage the sensors. If there was a subsequent collision, a damaged sensor would not inflate the air bags. Always have an Authorised Mazda Dealer inspect the air bag systems after a collision.
Removing Interior Parts:
Removing any components such as the front seat, front instrument panel, the steering wheel or parts containing air bag parts or sensors is dangerous. These parts contain essential air bag parts. The air bag could accidentally activate and cause serious injuries. Always have an Authorised Mazda Dealer remove these parts.
Air Bag Disposal:
Improper disposal of an air bag or a vehicle with live air bags in it can be extremely dangerous. Unless all safety procedures are followed, injury can result. Ask an Authorised Mazda Dealer how to safely dispose of an air bag or how to scrap an air bag equipped vehicle.
Essential Safety Equipment
SRS Air Bags
NOTE
Should you sell your Mazda, we urge you to tell the new owner of its supplementary restraint systems and that familiarization with all instructions about them, from the Owner's Manual, is important.
2-78



3 Knowing Your Mazda
Explanation of basic operations and controls; opening/closing and adjustment of various parts.
Doors and Locks 3-2
Keys 3-2
Keyless Entry System 3-3
Door Locks 3-6
Liftgate 3-9
Power Windows 3-12
Fuel-Filler Flap and Cap 3-15
Bonnet 3-16
Sunroof 3-17
Security System 3-20
Immobilizer System 3-20
Theft-Deterrent System 3-22
Double Locking System 3-24
Steering Wheel and Mirrors 3-26
Steering Wheel 3-26
Mirrors 3-26
Knowing Your Mazda
Doors and Locks
Keys
WARNING
Keys and Children:
Leaving children in a vehicle with the ignition key is dangerous. This could result in someone being badly injured or even killed. They could play with power windows or other controls, or even make the vehicle move. Don't leave the keys in your vehicle with children.
CAUTION
(With immobilizer system)
• To avoid damage to the key, do not:
- Drop the key.
- Get the key wet.
- Expose the key to any kind of magnetic field.
- Expose the key to high temperatures on places such as the instrument panel or bonnet, under direct sunlight.
- When starting the engine, do not let the following materials touch the key grip. The engine may not start:
- Spare keys.
- Keys for other vehicles equipped with an immobilizer system.
• Metal objects that touch or pass through the hole in the key.
• Devices for electronic purchases, and security passage.
The keys operate all locks.
Without immobilizer system
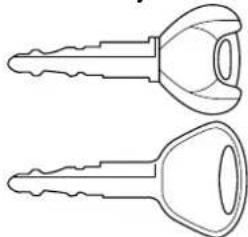
natural_image
Line drawing of two key illustrations (no text or symbols)
Key code number plate
With immobilizer system
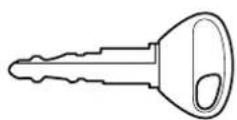

Key code number plate
A code number is stamped on the plate attached to the key set; detach this plate and store it in a safe place (not in the vehicle) for use if you need to make a replacement key.
Also write down the code number and keep it in another safe and handy place, but not in the vehicle.
If your key is lost, consult your Authorised Mazda Dealer with the code number ready.
Keyless Entry System
This system locks and unlocks the doors and the liftgate. Press the button slowly and accurately.
CAUTION
To avoid damage to the transmitter, do not:
- Drop it.
- Get it wet.
- Disassemble it.
- Expose it to heat or sunlight.
NOTE
- The keyless entry system is designed to operate up to 1 m (3 ft) from around the vehicle, but this may vary because of local conditions.
- The system doesn't operate when the ignition switch is in the ON position.
- If the transmitter does not operate when pressing a button or the operation range becomes too small, the battery may be dead. To install a new battery, refer to Maintenance (page 3-4).
- Additional transmitters can be obtained at an Authorised Mazda Dealer. Up to 3 transmitters can be used with the keyless entry system per vehicle. Bring all transmitters to an Authorised Mazda Dealer when the electronic codes need to be reset.
▼Transmitter
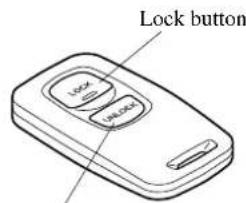
Unlock button
NOTE
- If the LOCK and UNLOCK button are pressed sequentially, the hazard warning flasher may not flash correctly.
- If your vehicle has a theft-deterrent system, the hazard warning light only flashes when the system is armed or turned off.
Refer to the theft-deterrent system (page 3-22).
Lock button
To lock the doors and the liftgate, press the LOCK button and the hazard warning lights will flash once.
NOTE
• Make sure all doors and the liftgate are locked after pressing the button.
- If your vehicle has a double locking system, pressing the LOCK button twice within 3 seconds will activate the system.
Refer to the double locking system(page 3-24).




Knowing Your Mazda
Doors and Locks
Unlock button
To unlock the doors and the liftgate, press the UNLOCK button and the hazard warning lights will flash twice.
NOTE
After unlocking with the transmitter, all doors and the liftgate will automatically lock if one of the doors or the liftgate is not opened within about 30 seconds.
▼ Transmitter Maintenance
CAUTION
- Make sure the battery is installed with the correct pole facing upward. Battery leakage could occur if it is not installed correctly.
- When replacing the battery, be careful not to bend the electrical terminals or get oil on them. Also be careful not to get dirt in the transmitter as it could damage it.
- Danger of explosion if battery is incorrectly replaced.
- Replace only with the same type battery (CR2025 or the equivalent).
- Dispose of used batteries according to the following instructions.
• Insulate the plus and minus terminals of the battery using cellophane or equivalent tape. - Never disassemble.
- Never throw the battery into fire and/or water.
- Never deform or crush.
Replacing the transmitter battery
- Insert a small screwdriver into the slot and gently pry open the transmitter.
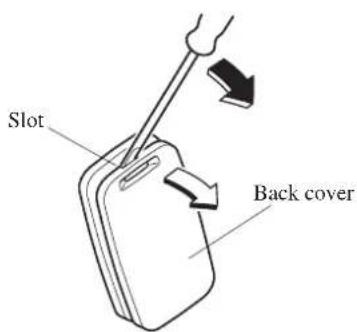
-
Remove the battery.
-
Put in the new battery (CR2025 or the equivalent) with the positive pole (+ facing down.
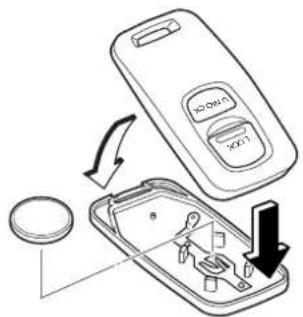
CAUTION
Do not press any buttons when replacing the battery. The electronic code could be altered and cause the keyless entry system to malfunction. If the keyless entry system fails to operate, contact an Authorised Mazda Dealer.
- Align the front and back covers and snap the transmitter shut.
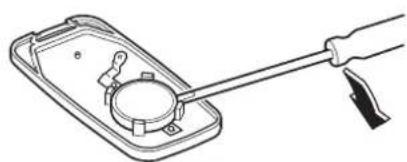
natural_image
Line drawing of a hand holding a tool interacting with a device inside a tray (no text or symbols)Knowing Your Mazda
Doors and Locks
▼Service
If you have a problem with the keyless entry system, consult an Authorised Mazda Dealer.
If your transmitter is lost or stolen, bring all remaining transmitters to an Authorised Mazda Dealer as soon as possible for a replacement and to make the lost or stolen transmitter inoperative.

CAUTION
- Changes or modifications could void your right to operate the keyless entry system.
- Damage to your keyless entry system will affect the vehicle warranty coverage.
Door Locks

WARNING
Unattended Children and Pets: Leaving a child or an animal unattended in a parked vehicle is dangerous. In hot weather, temperatures inside a vehicle can become high enough to cause brain damage or even death. Always take all children and animals with you or leave a responsible person with them.
Keys and Children:
Leaving children in a vehicle with the ignition key is dangerous. This could result in someone being badly injured or even killed. They could play with power windows or other controls, or even make the vehicle move. Don't leave the keys in your vehicle with children.
NOTE
Always remove the key from the ignition switch, close all windows, and lock all doors when leaving your vehicle unattended. This discourages intruders and thieves.
▼Locking, Unlocking with Key
Either front door can be locked or unlocked with a key. Turn the key toward the front to unlock, toward the back to lock.
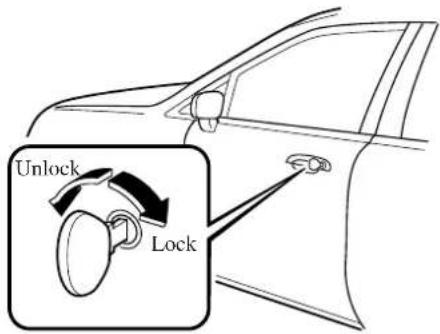
▼Locking, Unlocking with Transmitter
The doors can be locked/unlocked by operating the keyless entry system transmitter, refer to keyless entry system (page 3-3).
▼Locking, Unlocking with Door-Lock Button
To lock any door from the inside, push down its door-lock button. To unlock, pull it up.
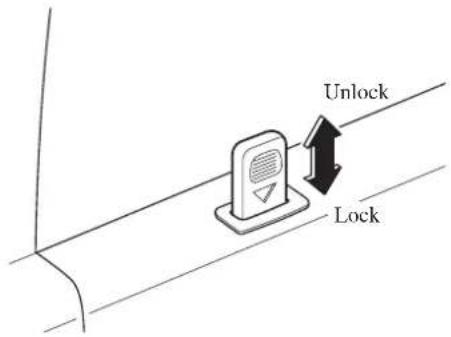
To lock any door with the door-lock button from the outside, push down its door-lock button, hold the handle raised, and close the door.
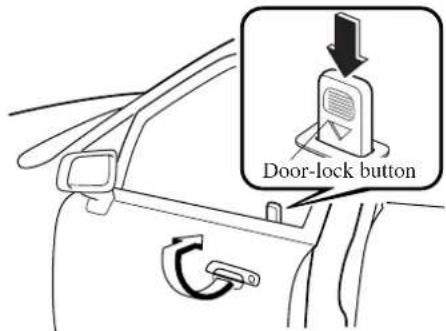
NOTE
When locking the door this way:
- Be careful not to leave the key inside the vehicle.
- The rear and front passenger doors (double-locking system-equipped vehicles only) can be locked by pushing down the door-lock buttons and closing the doors (holding the door handle raised is not required).
NOTE
(All models except general right-hand model)
The driver's door on power door-lock equipped vehicles can only be locked from the outside using the key.
Knowing Your Mazda
Doors and Locks
▼Power Door Locks
Locking, unlocking with key
All doors and the liftgate lock automatically when the driver's door is locked with the key. They all unlock when the driver's door is unlocked with the key.
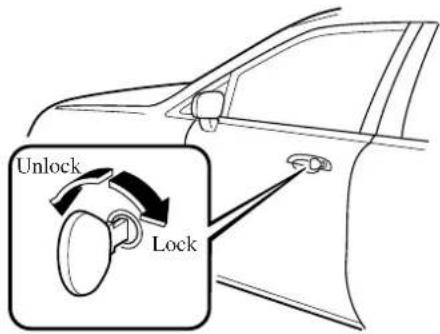
NOTE
If the front passenger door has a key cylinder, all doors and the liftgate can be locked/unlocked automatically with the key.
Locking, unlocking with door-lock button
All doors and the liftgate lock automatically when the driver's door-lock button is pushed down. They all unlock when the driver's door-lock button is pulled up.
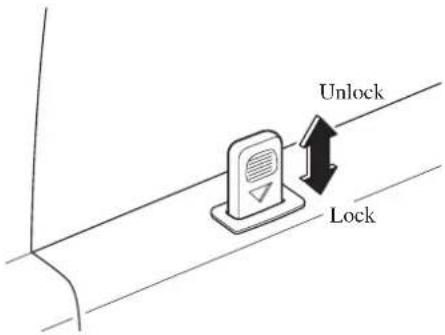
NOTE
(All models except general right-hand model)
If you try to lock the driver's door-lock button when any door is open, the lock button will unlock automatically.
▼Rear Door Child Safety Locks
These locks are intended to help prevent children from accidentally opening the rear doors. Use them both whenever a child rides in the vehicle.
If you slide the child safety lock to the lock position before closing that door, the door cannot be opened from the inside. The door can be opened only by lifting the outside handle.
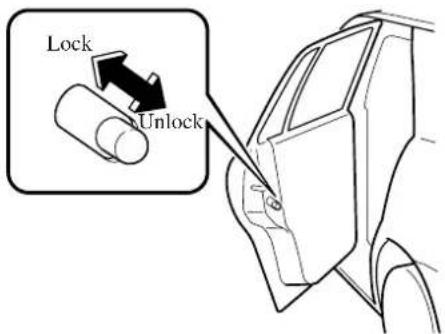
Liftgate

WARNING
Open Liftgate:
An open liftgate in a moving vehicle will cause exhaust gas to be drawn into the cabin. This gas contains CO (carbon monoxide), which is colourless, odourless, and highly poisonous, and it can cause loss of consciousness and death. Moreover, an open liftgate could cause occupants to fall out in accident. Do not drive with the liftgate open.
▼Locking, Unlocking with Key
To lock the liftgate with the key, insert the key and turn it anticlockwise.
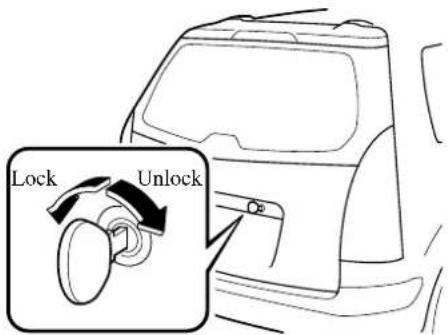
To unlock the liftgate with the key, insert the key and turn it clockwise.
NOTE
(All models except general right-hand model)
All doors simultaneously lock or unlock when the liftgate is locked or unlocked with the key.
Knowing Your Mazda
Doors and Locks
The liftgate can be locked/unlocked by inserting the key into the driver's door key slot, refer to Power Door Locks (page 3-8).
▼Locking, Unlocking with Transmitter
The liftgate can be locked/unlocked by operating the keyless entry system transmitter, refer to Keyless Entry System (page 3-3).
▼Locking, Unlocking with Door-Lock Button
The liftgate can be locked/unlocked by operating the driver's door-lock button, refer to Power Door Locks (page 3-8).
▼ Opening and Closing the Liftgate
Opening the liftgate
Pull up on the handle.
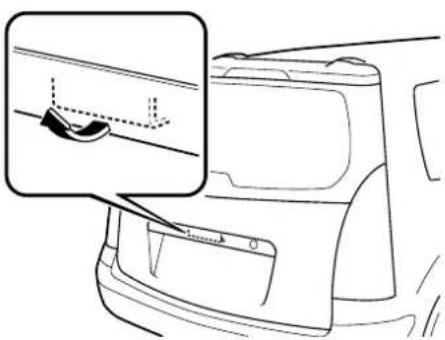
natural_image
Line drawing of a car interior showing a door, seat, and dashboard with a magnified inset highlighting the handle area (no text or symbols)Closing the liftgate
Use both hands to push the liftgate down until the lock snaps shut. Do not slam it. Pull up on the liftgate to make sure it is secure.
▼Luggage Compartment

WARNING
Placing Cargo on the Cover: Placing luggage or other cargo on top of the luggage compartment cover is dangerous. During sudden braking or a collision, the cargo could become a projectile that could hit and injure someone. Don't place anything on top of the cover.

CAUTION
- Make sure the luggage compartment cover is firmly secured. If it is not firmly secured, it could unexpectedly disengage resulting in injury.
- Before using the third-row seat, remove the luggage compartment cover and install the caps. Sitting in the third-row seat without the caps installed could result in injury if you were to hit them.
3-10


Luggage compartment cover
Installing the cover
- For 7-passenger vehicles, remove the luggage compartment cover caps by inserting a flathead screwdriver or similar tool in the cover gap and gently prying off.
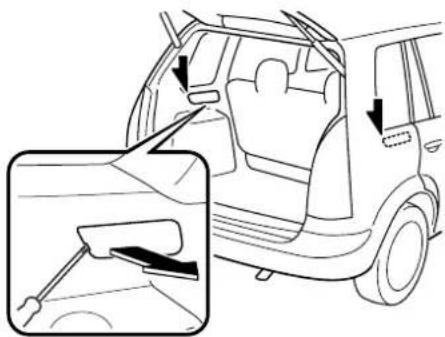
natural_image
Diagram of a car interior showing the side panel and side door, with an inset close-up highlighting the steering wheel (no text or symbols present)- Squeeze spring holders on both ends of retractor bar inward.
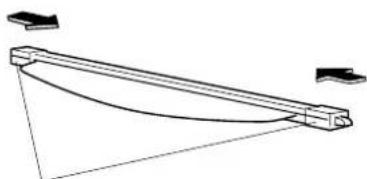
natural_image
Pure technical line drawing of a mechanical linkage or beam assembly without any text, numbers, or symbolsSpring holders
- Depending on the rear seat recline position or the quantity of luggage, insert the retractor bar into one of the three positions.
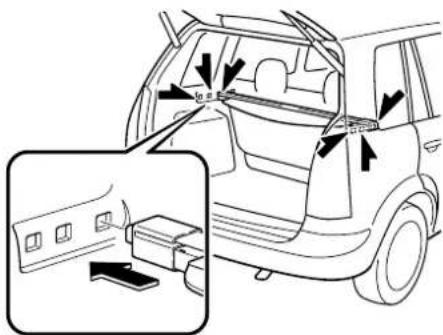
- Slowly pull out the cover and insert it into the hooks.
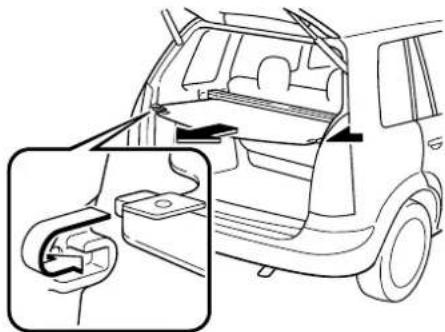
natural_image
Line drawing of a car trunk showing the rear window and side panel, with an inset close-up of the front compartment (no text or symbols)Removing the cover
Reverse the procedure for installation.
3-11
Knowing Your Mazda
Doors and Locks
Power Windows
The ignition switch must be in the ON position for the power windows to operate.
WARNING
Closing Power Windows:
Closing power windows are dangerous. A person's hands, head, or even neck could be caught by the window and result in serious injury or even death.
This warning applies especially to children. Make sure the opening is clear before closing a window.
Children and Power Windows:
Leaving the power window switches unlocked while children are in the vehicle is dangerous. Power window switches that are not locked with the power window lock switch would allow children to operate power windows unintentionally which could result in serious injury if a child's hands, head or neck becomes caught by the window. Always lock all passenger power windows with the power window lock switch on the driver's side while children are in the vehicle, and never allow children to play with power window switches.
CAUTION
To prevent burning out the fuse and damaging the power window system, don't open or close more than two windows at once.
▼Operating the Driver's Side Power Window
To open the window, push down the switch. To close the window, pull up the switch.
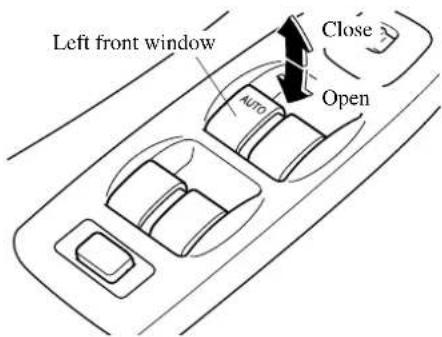
Two-step down function
With the window completely closed, press the switch lightly and the window will open and stop about 3 cm (1 in) from the top.
If you continue to press and hold the switch, the window will resume opening all the way.
NOTE
Pressing the power window switch once when the window is fully closed will only open it about 3 cm (1 in) to allow convenient ventilation of the cabin.
3-12


Cancelling the two-step down function
- Turn the ignition switch to the ON position and complete the following procedure within 5 seconds: Press the power window switch two times firmly, then pull it 2 times firmly.
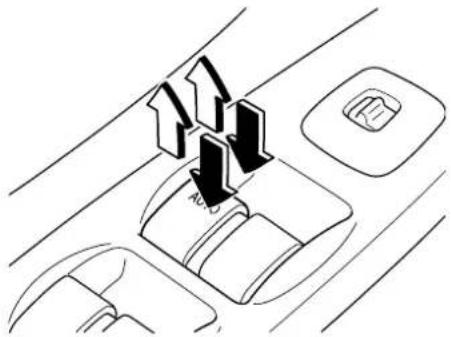
natural_image
Diagram of car interior showing directional arrows and a vehicle seat (no text or symbols)-
Turn the ignition switch to the LOCK position.
-
With the ignition switch in the LOCK position, and within 40 seconds, turn the ignition switch to the ON position and complete the following procedure within 5 seconds: Press the power window switch 2 times firmly, then pull two times firmly.
NOTE
- The two-step down function cannot be cancelled if the procedure is not completed within the specified times, or the procedure is changed along the way. To redo the procedure, first turn the ignition switch to the LOCK position and proceed from the beginning.
- If you are unable to cancel the function despite doing the cancellation procedure, consult an Authorised Mazda Dealer.
Restoring the two-step down function
With the two-step down function in the cancelled state, repeat the previous procedure for cancelling the function and it will be restored.
NOTE
If you are unable to restore the function despite doing the restore procedure, consult an Authorised Mazda Dealer.
Auto-opening/closing
To fully open or close the window automatically: Push the switch completely down to open or pull it completely up to close.
To stop the window partway, pull or push the switch in the opposite direction and then release it.
Jam-safe window
If a person's hands, head or an object blocks the window during the auto-closing operation, the window will stop and open halfway.
3-13




Knowing Your Mazda
Doors and Locks
WARNING
Blocking the Driver's Door Power Window:
Blocking the driver's side power window just before it reaches the fully closed position is dangerous.
The jam-safe function cannot prevent the window from stopping just before it reaches the fully closed position. If fingers are caught, serious injuries could occur. Make sure nothing blocks the window just before it reaches the fully closed position.
NOTE
Depending on driving conditions, a closing power window could stop and start opening when the window feels a shock that is similar to something blocking it.
Engine-off power window operation
The power window can be operated about 40 seconds after the ignition switch is turned from the ON position to the ACC or LOCK position with all doors closed. If any door is opened, the power window will be inoperable.
NOTE
- For engine-off operation of the power window, the switch must be held up firmly throughout window closure because the auto-closing function will be inoperable.
- The two-step down function is inoperable during engine-off operation.
▼ Operating the Passenger Power Windows
The power windows may be operated when the power window lock switch on the driver's door is in the unlocked position.
The passenger windows may be opened or closed by the power window master control switches on the driver's door.
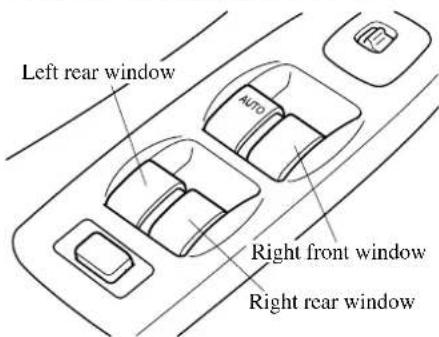
To open the window, push down the switch. To close the window, pull up the switch.
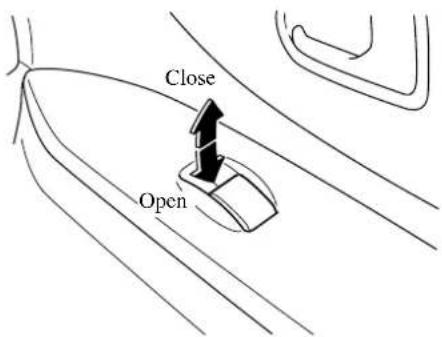
3-14
▼Power Window Lock Switch
With the lock switch in the unlocked position, all power windows on each door can be operated.
With the lock switch in the locked position, only the driver's side power window can be operated.
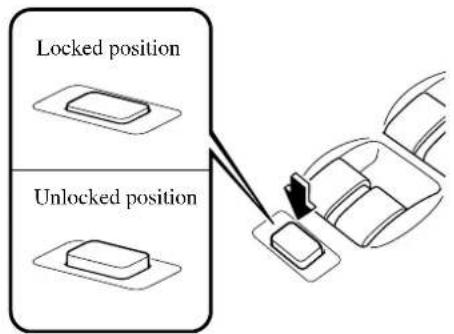
WARNING
Unintentional Window Operation: Unintentional window operation is dangerous. A person's hands, head, or neck could be caught by the window and result in serious injury. Unless a passenger needs to operate a window, keep the power window lock switch in the locked position.
Fuel-Filler Flap and Cap
WARNING
Fuel Spray:
Fuel spray is dangerous. Fuel can burn skin and eyes and cause illness when ingested. Fuel spray is released when there is pressure in the fuel tank and the fuel cap is removed too quickly. When removing the fuel cap, loosen the cap slightly and wait for any hissing to stop. Then remove it.
Fuel Vapour:
Fuel vapour is dangerous. It could be ignited by sparks or flames causing serious burns and injuries. Before refueling, stop the engine, and always keep sparks and flames away from the filler neck.
CAUTION
Always use only a designated Mazda fuel cap or an approved equivalent, available at Authorised Mazda Dealers. The wrong cap can result in a serious malfunction of the fuel and emission control systems.
Knowing Your Mazda
Doors and Locks
▼Fuel-Filler Flap
To open, pull up the remote fuel-filler flap release.
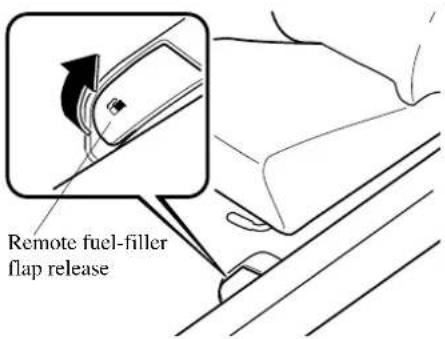
▼Fuel-Filler Cap
To remove the filler cap, turn it anticlockwise.
To replace the filler cap, turn it clockwise until it clicks.
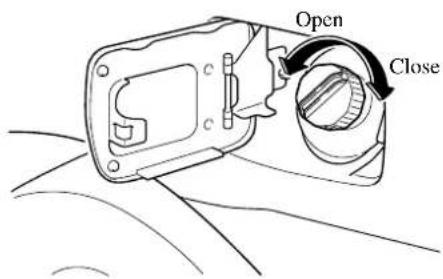
Bonnet
▼ Opening the Bonnet
- With the vehicle parked, pull the release handle to unlock the bonnet.
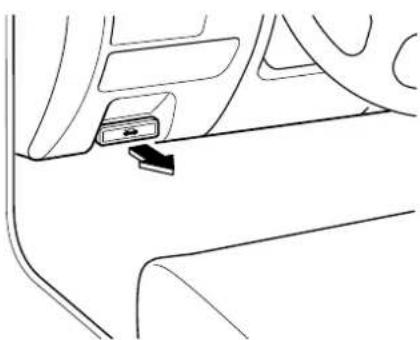
natural_image
Line drawing of a car interior showing a vehicle's side panel with a black arrow pointing to the lower panel (no text or symbols)- Pull the safety catch up and lift the bonnet.
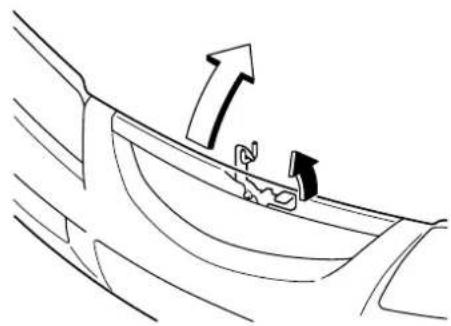
natural_image
Line drawing of a car interior with an upward arrow and a small object on the surface (no text or symbols)3-16




- Use the support rod to hold the bonnet open.
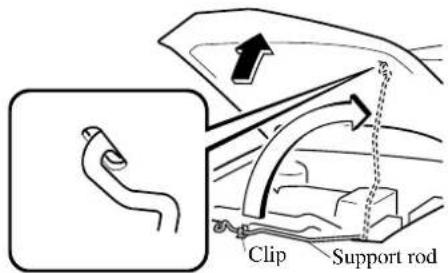
▼ Closing the Bonnet
- Check under the bonnet area to make certain all filler caps are in place and all loose items (e.g. tools, oil containers, etc.) have been removed.
- Secure the rod in its clip.
- Close the bonnet so that it locks securely.
Sunroof
The sunroof can be opened or closed electrically only when the ignition switch is in the ON position.
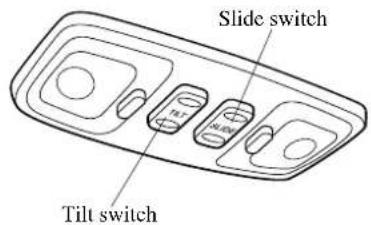
WARNING
Extending the Head or Arms Through the Sunroof:
Extending the head, arms, or other parts of the body through the sunroof is dangerous. The head or arms could hit something while the vehicle is moving. This could cause death or serious injury. Don't let passengers stand up or extend anything through the open sunroof while the vehicle is moving.
Closing the Sunroof:
A closing sunroof is dangerous. The hands, head, or even neck of a person—especially a child—could be caught in it as it closes, causing serious injury or even death. Make sure the opening is clear before closing the sunroof.
Knowing Your Mazda
Doors and Locks
NOTE
After washing your Mazda or after a rain, wipe the water off the sunroof before operating it.
▼ Tilt Operation
The rear of the sunroof can be tilted open to provide more ventilation.
To tilt, push the rear of the tilt switch.
To close, push the front of the tilt switch.
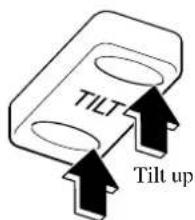
Close
▼Slide Operation
To open to any position, press the rear of the slide switch.
To close, press the front of the slide switch.
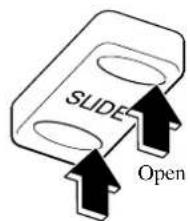
Close
NOTE
- The sunroof automatically stops approximately 5 cm (2 in) short of fully opening to reduce wind noise. To fully open, release the switch and press it again.
- For safety reasons, the sunroof stops moving approximately 20 cm (8 in) prior to completely closing. After you are sure it is unobstructed, resume closing the sunroof by pressing the switch again.
3-18




Sunshade
The sunshade can be opened and closed by hand.
The sunshade opens automatically when the sunroof is opened, but must be closed by hand.
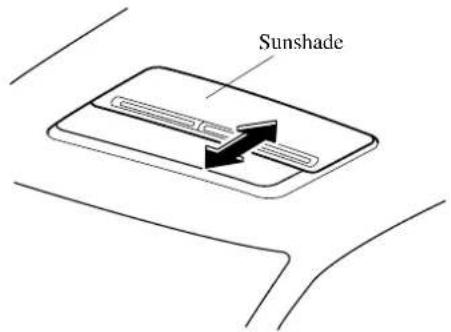
CAUTION
The sunshade doesn't tilt. To avoid damaging the sunshade, don't push up on it.
3-19
Knowing Your Mazda
Security System
Immobilizer System
The optional immobilizer system allows the engine to start only with a key the system recognizes.
If someone attempts to start the engine with an unrecognized key, the engine will not start, thereby helping to prevent the theft of your vehicle.

CAUTION
Changes or modifications not expressly approved by Mazda could void the user's authority to operate the equipment.
▼Immobilizer System Warning Light
If the immobilizer system is working properly, the light will come on when the ignition switch is turned to the ON or START position. The light will go out when confirmation by the immobilizer system is completed.
If the light flashes rapidly, fails to come on, or comes on and stays on, it indicates a system malfunction. If any of these occur, contact an Authorised Mazda Dealer as soon as possible.
NOTE
- If the warning light comes on and stays on when the ignition switch is turned to the ON position, the engine will not start.
- Signals from a TV or radio station, or from a transceiver or a mobile telephone, could interfere with your immobilizer system. If you are using the proper key and your engine fails to start, check the warning light. If it is flashing, remove the ignition key and wait 2 seconds or more, then reinsert it and try starting the engine again. If it doesn't start after 3 or more tries, contact an Authorised Mazda Dealer.
- If the warning light flashes continuously while you are driving, don't shut off the engine. Go to an Authorised Mazda Dealer and have it checked. If you shut off the engine while the light is flashing you won't be able to restart it.
3-20


▼ Maintenance
If you have a problem with the immobilizer system or the key, consult an Authorised Mazda Dealer.
CAUTION
• To avoid damage to the key, do not:
- Drop the key.
- Get the key wet.
- Expose the key to any kind of magnetic field.
- Expose the key to high temperatures on places such as the instrument panel or bonnet, under direct sunlight.
- When starting the engine, do not let the following materials touch the key grip. The engine may not start:
- Spare keys.
- Keys for other vehicles equipped with an immobilizer system.
• Metal objects that touch or pass through the hole in the key.
• Devices for electronic purchases, and security passage.
NOTE
- The keys carry a unique electronic code. For this reason, and to assure your safety, replacement keys require some waiting time to obtain. They are only available through an Authorised Mazda Dealer.
- Always keep a replacement key, in case one is lost. If a key is lost, contact an Authorised Mazda Dealer as soon as possible.
- If you lose a key, an Authorised Mazda Dealer will reset the electronic codes of your remaining keys and immobilizer system. Starting the vehicle with a key that has not been reset is not possible.
▼Modification and Add-On Equipment
Mazda cannot guarantee the system's operation if the system has been modified or if any add-on equipment has been installed to it.
CAUTION
To avoid damage to your vehicle, do not modify the system or install any add-on equipment to it.
Theft-Deterrent System
The optional theft-deterrent system is designed to prevent your vehicle or its contents from being stolen when all the doors, bonnet, and liftgate are locked.
If forcible entry is attempted, the system sounds the horn and flashes the hazard warning lights.
NOTE
The theft-deterrent system operates without the keyless entry system transmitter, as well.
The system won't function unless it's properly armed. So when you leave the vehicle, lock all the doors and the liftgate, close all the windows, take your key, your transmitter, and make sure the security indicator light is flashing.
▼Operation
What turns it on:
- Forcing open a door, the bonnet or the liftgate.
- Opening a door or the bonnet by operating an inside door-lock button or the bonnet release handle.
What it does:
- The horn sounds intermittently for about 25 seconds and the hazard warning lights flash for about 5 minutes.
If the system is triggered again after the horn stops sounding, the hazard warning lights and horn will activate until a door or the liftgate is unlocked with the key or with the transmitter.
▼How to Arm the System
- Remove the key from the ignition switch.
- Close the bonnet. Then close all doors and the liftgate and lock them from the outside using the key in the door or the liftgate. If you have the keyless entry system, press the LOCK button on the transmitter. The hazard warning lights will flash one time to indicate that the system is armed.
- The indicator light flashes once every 3 seconds to indicate that the system is fully armed. It continues to flash until the theft-deterrent system is turned off.
▼To Turn off an Armed System
An armed system can be turned off by any one of the following methods:
- Unlock a door or the liftgate with the key.
- Press the UNLOCK button on the keyless entry system transmitter.
- Insert the key into the ignition switch and turn it to the ON position.
3-22
▼To Stop an Alarm
A triggered alarm can be turned off by any one of the following methods:
- Unlock a door or the liftgate with the key.
- Press the UNLOCK button on the keyless entry system transmitter.
NOTE
If you have any problem with the theft-deterrent system, consult an Authorised Mazda Dealer.
▼Modification and Add-On Equipment
Mazda cannot guarantee the system's operation if the system has been modified or if any add-on equipment has been installed to it.
CAUTION
To avoid damage to your vehicle, do not modify the system or install any add-on equipment to it.
▼Theft-Deterrent Labels

Labels indicating that your vehicle is equipped with a Theft-Deterrent System are in the glove box.
Mazda recommends that you affix them to the lower rear corner of the front door windows.
3-23
Knowing Your Mazda
Security System
Double Locking System
The optional double locking system is designed to prevent someone who has broken into your vehicle from opening the door from the inside.
WARNING
Activating the System with
Passengers Inside:
Activating the system with passengers, especially children, still inside the vehicle is dangerous. The passengers cannot open the doors from inside. They would be trapped and subjected to extreme temperatures. This could result in serious injuries or even death. Never activate the system with passengers, especially children, still inside the vehicle.
▼How to Activate the System
-
Remove the key from the ignition switch, and if your vehicle has a keyless entry system, take the transmitter with you.
-
Close all the windows, doors and liftgate.
-
Insert the key in a door or the liftgate, turn the key to the lock position, and return it to the centre position. Then turn it to the lock position again within 3 seconds.
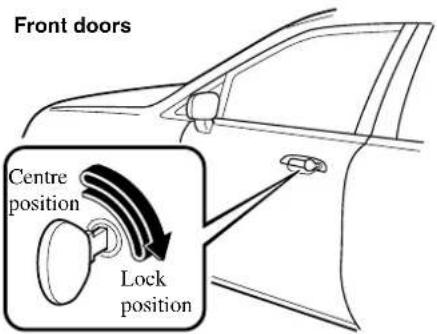
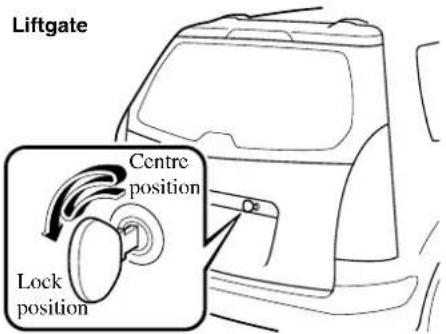
(With keyless entry system)
You can also activate the system by pressing the LOCK button twice within 3 seconds.
- The indicator light comes on for about 3 seconds to indicate that the system has been activated.
NOTE
The system cannot be activated when any door or the liftgate is open.
▼How to Deactivate the System
Unlock a door or the liftgate with the key or the transmitter, or turn the ignition switch to the ON position.
NOTE
- If the power supply is interrupted (fuse blows or the battery is disconnected), the system can only be deactivated by unlocking a door with the key.
- If you have any problems with the double locking system, consult an Authorised Mazda Dealer.
Steering Wheel and Mirrors
Steering Wheel
WARNING
Adjusting the Steering Wheel: Adjusting the steering wheel while the vehicle is moving is dangerous. Moving it can very easily cause the driver to abruptly turn to the left or right. This can lead to loss of control or an accident. Never adjust the steering wheel while the vehicle is moving.
▼ Tilt Steering Wheel
To change the angle of the steering wheel, stop the vehicle, pull the tilt wheel release lever under the steering column down, adjust the wheel, then push the release lever up to lock the column.
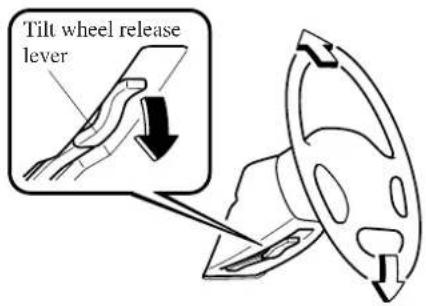
After adjusting, push the wheel up and down to be certain it's locked before driving.
Mirrors
▼ Outside Mirrors
Check the mirrors' angles before driving.
WARNING
Convex Mirrors:
Changing lanes without taking into account the actual distance of the vehicle in the convex mirror is dangerous. You could have a serious accident. What you see in the convex mirror is closer than it appears. Be sure to look over your shoulder or to check your inside mirror before changing lanes.
NOTE
(Driver's Side Wide Angle Mirror)
- The wide angle mirror has two curvatures on its surface separated by a region line into outer and inner regions. The inner region is a standard convex mirror whereas the outer region allows for a wider range of visibility within the same sweep. This combination allows for better assurance when making lane changes.
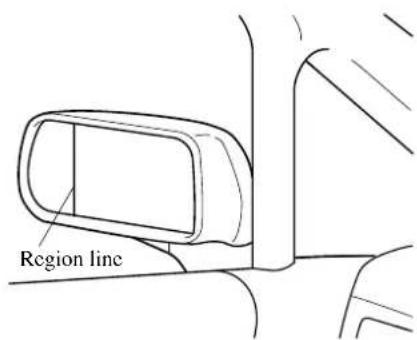
- The perceived distance of objects in the outer and inner regions of the wide angle mirror is different. Objects appearing in the outer region are actually further away than they are in the inner region.
Power control mirror
The ignition switch must be in the ACC or ON position.
To adjust:
-
Move the selector switch to the left or right to choose the mirror.
-
Depress the perimeter switch in the appropriate direction.
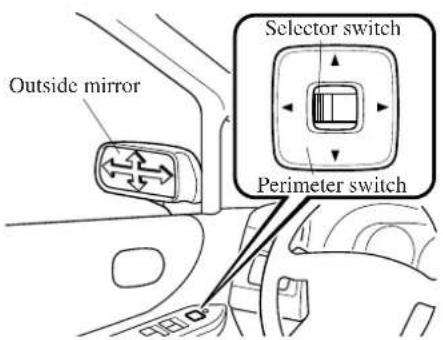
After adjusting the mirror, lock the control by moving the selector switch to the middle position.
Manual folding mirror
Fold the outside mirror rearward until it is flush with the vehicle.
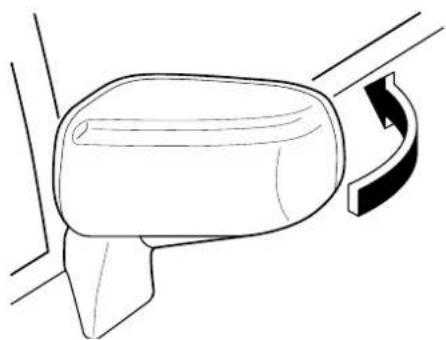
natural_image
Line drawing of a car door handle and seat (no text or symbols)Knowing Your Mazda
Steering Wheel and Mirrors
WARNING
Driving with Mirrors Folded In: Driving with the outside mirrors folded in is dangerous. Your rear view will be restricted, and you could have an accident. Always return the outside mirrors to the driving position before you start driving.
Power folding mirror
The ignition switch must be in the ACC or ON position.
To fold, press the switch. To return the mirror to the driving position, press the switch again.
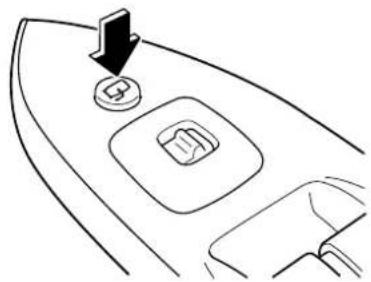
natural_image
Line drawing of a car interior with a button and handle, no text or symbols presentWARNING
Driving with Mirrors Folded In: Driving with the outside mirrors folded in is dangerous. Your rear view will be restricted, and you could have an accident. Always return the outside mirrors to the driving position before you start driving.
Touching the Moving Power Fold-in Mirror:
Touching the power fold-in mirror when it's moving is dangerous. Your hand could be pinched and injured or the mirror could be damaged. Do not touch the power fold-in mirror when it is moving.
Setting the Power Fold-in Mirror to On-road Position by Hand: Setting the power fold-in mirror to the on-road position by hand is dangerous. The mirror will not lock in position and will prevent effective rearview visibility. Although the power fold-in mirror can be folded-in by hand, use the power fold-in switch to set the mirror to the on-road position.
Operating the Power Fold-in Mirror While the Vehicle is Moving: Operating the power fold-in mirror while the vehicle is moving is dangerous. Wind blast on the mirror will cause them to collapse and you will be unable to return it to the on- road position, preventing rearview visibility. Only operate the power fold- in mirror with the vehicle safely parked.
Mirror defroster
To turn on the mirror defrosters, turn the ignition on and push the rear window defroster switch (page 5-43).
▼Rearview Mirror (With Antidazzle Function)
Before driving, adjust the rearview mirror to centre on the scene through the rear window. Do this with the antidazzle lever in the day position.
Push the lever forward for day driving. Pull it back to reduce glare from headlights.
Antidazzle lever
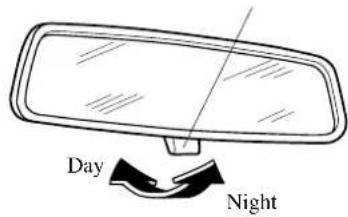
WARNING
Blocked View:
Cargo stacked higher than the seatbacks is dangerous. It can block your view in the rearview mirror, which might cause you to hit another car when changing lanes. Don't stack things higher than the seatbacks.
Form No. 8R34-EE-02H
4 Before Driving Your Mazda
Important information about driving your Mazda.
Fuel and Engine Exhaust Precautions 4-2
Fuel Requirements (Petrol Engine) 4-2
Fuel Requirements (Diesel Engine) 4-3
Emission Control System (Petrol Engine) 4-4
Engine Exhaust (Carbon Monoxide) 4-5
Before Starting the Engine 4-6
Before Getting In 4-6
After Getting In 4-6
Driving Tips 4-7
Running-In 4-7
Money-Saving Suggestions 4-7
Hazardous Driving 4-8
Rocking the Vehicle 4-8
Winter Driving 4-9
Driving In Flooded Area 4-11
Turbocharger Information (Diesel Engine) 4-12
Towing 4-13
Towing Caravan and Trailers (Europe) 4-13
Towing Caravan and Trailers (Australia) 4-18
Before Driving Your Mazda
Fuel and Engine Exhaust Precautions
Fuel Requirements (Petrol Engine)
Vehicles with catalytic converters or oxygen sensors must use ONLY UNLEADED FUEL, which will reduce exhaust emissions and keep spark plug fouling to a minimum.
Fuel with a lower rating could cause the emission control system to lose effectiveness. It could also cause engine knocking and serious engine damage.
Your Mazda will perform best with fuel listed in the table.
| Fuel Research Octane Number Country | ||
| Premium unleaded fuel | 95 or above (confirming to DIN 51 607) *1 | Except Australia and New Zealand |
| Australia and New Zealand (FS engine only) | ||
| Regular unleaded fuel 90 | or above Australia and New Zealand | (FP engine only) |
*1 Europe
CAUTION
• USE ONLY UNLEADED FUEL.
Leaded fuel is harmful to the catalytic converter or the oxygen sensor. The lead will accumulate on the oxygen sensor and the catalyst inside the converter. This will result in a malfunction of the emission control system, causing poor performance.
- Never add fuel system additives. Never add cleaning agents other than those specified by Mazda. Other cleaning agents and additives may damage the system. Consult an Authorised Mazda Dealer.
Fuel Requirements (Diesel Engine)
When the engine is adjusted to factory specifications, your Mazda will operate efficiently on diesel fuel with a cetane number of 51 or above.
CAUTION
- Never use fuel other than what is specified for your vehicle. Use of petrol or paraffin in diesel engines will result in engine damage.
- Never add fuel system additives or cleaning agents. These may damage the system.
Before Driving Your Mazda
Fuel and Engine Exhaust Precautions
Emission Control System (Petrol Engine)
Your vehicle is equipped with an emission control system (the catalytic converter is part of this system) that enables your vehicle to comply with existing exhaust emissions requirements.

WARNING
Parking Over Things That Burn:
Parking over or near anything inflammable, such as dry grass, is dangerous. Even with the engine turned off, the exhaust system could ignite it because the exhaust system gets very hot during normal use. A resulting fire could cause serious injury or death. Never park over or near anything inflammable.

CAUTION
Ignoring the following precautions could cause lead to accumulate on the catalyst inside the converter or cause the converter to get very hot. Either condition will damage the converter and cause poor performance.
• USE ONLY UNLEADED FUEL.
- Don't drive your Mazda with any sign of engine malfunction.
- Don't coast with the ignition switch turned off.
- Don't descend steep grades in gear with the ignition switch turned off.
- Don't operate the engine at high idle for more than 5 minutes.
- Don't tamper with the emission control system. All inspections and adjustments must be made by a qualified technician.
- Don't try to push-start or pull-start your vehicle.
Engine Exhaust (Carbon Monoxide)
WARNING
Carbon Monoxide:
Engine exhaust gas is dangerous. This gas contains carbon monoxide (CO), which is colourless, odourless, and poisonous. When inhaled, it can cause loss of consciousness and death. If you smell exhaust gas inside your vehicle, keep all windows fully open and contact an Authorised Mazda Dealer immediately.
Exhaust Gas in Enclosed Area:
Running the engine inside an enclosed area, such as a garage, is dangerous. Exhaust gas, which contains poisonous carbon monoxide, could easily enter the cabin. Loss of consciousness or even death could occur. Don't run the engine when inside an enclosed area.
Idling with the Windows Closed:
Exhaust gas is dangerous. When your vehicle is stopped with the windows closed and the engine running for a long time in an open area, exhaust gas, which contains poisonous carbon monoxide, could enter the cabin. Loss of consciousness or even death could occur. Open the windows or adjust the heating or cooling system to draw fresh air.
Snow Blocking the Exhaust Gas:
Running the engine when a vehicle is stopped in deep snow is dangerous. The exhaust pipe could be blocked by the snow, allowing exhaust gas to enter the cabin. Because exhaust gas contains poisonous carbon monoxide, anyone in the cabin could be injured or killed. Clear the snow from underneath and around your vehicle before starting the engine.
Before Starting the Engine
Before Getting In
- Be sure the windows, outside mirror(s), and outside lights are clean.
- Inspect inflation pressures and condition of tyres.
- Look under the vehicle for any sign of a leak.
- If you plan to back up, make sure nothing will be in your way.
NOTE
Engine oil, engine coolant, brake/clutch fluid, washer fluid, and other fluid levels should be inspected daily, weekly, or at refuelling, depending on the fluid. See Maintenance, Section 8.
After Getting In
- Are all doors closed?
- Are the inside and outside mirrors adjusted?
- Is everyone's seat belt fastened?
- Do all the lights work?
- Check all gauges.
- Check all warning lights when the ignition switch is turned to the ON position.
- Release the parking brake and make sure the brake warning light goes off.
Always be thoroughly familiar with your Mazda.
Running-In Money-
No special running-in is necessary, but a few precautions in the first 1,000 km (600 miles) may add to the performance, economy, and life of your Mazda.
- Don't race the engine.
- Don't maintain one constant speed for long.
- Don't drive constantly at full-throttle or high engine rpm for extended periods of time.
- Avoid unnecessary hard stops.
- Avoid full-throttle starts.
- Don't tow a trailer.
ng Suggestions
How you operate your Mazda determines how far it will travel on a tank of fuel. Use these suggestions to help save money on fuel and repairs.
- Avoid long warm-ups. Once the engine runs smoothly, begin driving.
- Avoid fast starts.
- Keep the engine tuned. Follow the maintenance schedule (page 8-3) and have an Authorised Mazda Dealer perform inspections and servicing.
- Use the air conditioner only when necessary.
- Slow down on rough roads.
- Keep the tyres properly inflated.
- Don't carry unnecessary weight.
- Don't rest your foot on the brake pedal while driving.
- Keep the wheels in correct alignment.
- Keep windows closed at high speeds.
- Slow down when driving in crosswinds and headwinds.

WARNING
Coasting:
Turning off the engine to coast down a hill is dangerous. This causes the loss of power steering and power brake control. Any loss of steering or braking control could cause an accident. Never turn off the engine and coast down a hill.
Hazardous Driving
WARNING
Downshifting on Slippery Surfaces: Downshifting into lower gear while driving on slippery surfaces is dangerous. The sudden change in tyre speed could cause the tyres to skid. This could lead to loss of vehicle control and an accident. If it is necessary to downshift on slippery surfaces, be very careful.
When driving on ice or in water, snow, mud, sand, or similar hazard:
- Be cautious and allow extra distance for braking.
- Avoid sudden braking and quick steering.
- If your vehicle is not equipped with ABS, brake with the pedal by using a light up-down motion. Don't hold the pedal down constantly. If your vehicle is equipped with ABS, don't pump the brakes. Continue to press down on the brake pedal.
- If you get stuck, shift to 1 (L) or 2 (S) and accelerate slowly. Don't spin the front wheels.
- For more traction in starting, use sand, rock salt, chains, carpeting, or other nonslip material under the front wheels.
NOTE
Use snow chains only on the front wheels.
Rocking the Vehicle
WARNING
Spinning the Wheels: When the vehicle is stuck, spinning the wheels at high speed is dangerous. The spinning tyre could overheat and explode. This could cause serious injuries. Don't spin the wheels at high speed, and don't allow anyone to stand behind a wheel when pushing the vehicle.
CAUTION
Too much rocking may cause engine overheating, transaxle failure, and tyre damage.
If you must rock the vehicle to free it from snow, sand, or mud, depress the accelerator slightly and slowly move the shift lever from 1 (D) to R.
Winter Driving
- Carry emergency gear, including tyre chains, window scraper, flares, a small shovel, jumper leads, and a small bag of sand or salt.
Ask a Mazda dealer to perform the following precautions:
- Have the proper ratio of antifreeze in the radiator.
- Inspect the battery and its leads. Cold reduces battery capacity.
- Use only cold-weather engine oil (page 8-14).
- Inspect the ignition system for damage and loose connections.
- Use washer fluid made with antifreeze—but don't use engine coolant antifreeze for washer fluid (page 8-23).
- Don't use the parking brake in freezing weather as the parking brake may freeze. Instead, shift to P with an automatic transaxle and to 1 or R with a manual transaxle. Block the rear wheels.
▼Snow Tyres
WARNING
Mixing Tyre Types:
Using tyres different in size or type is dangerous. Your vehicle's handling could be greatly affected and result in an accident. Use only the same size and type tyres (snow, radial, or non-radial) on all four wheels.
CAUTION
Check local regulations before using studded tyres.
Use snow tyres on all four wheels
Europe
Use snow tyres of specified size and construction (page 10-9).
Please also note the inflation pressure recommended by the tyre-maker or from the specifications.
Except Europe
Don't go faster than 160 km/h (100 mph). Inflate snow tyres 30 kPa (0.3 kgf/cm ^2 , 4.3 psi) more than recommended on the tyre pressure label (driver's door), but never more than the maximum cold-tyre pressure shown on the tyres.
▼ Tyre Chains
CAUTION
- Chains may scratch or chip aluminium wheels. Install tyre chains on steel wheels only.
• Chains may affect handling. - Don't go faster than 50 km/h (30 mph) or the chain manufacturer's recommended limit, whichever is lower.
- Drive carefully and avoid bumps, holes, and sharp turns.
- Avoid locked-wheel braking.
- Don't use chains on the temporary tyre; it may result in damage to the vehicle and to the tyre.
- Don't use chains on roads that are free of snow or ice. The tyres and chains could be damaged.
Check local regulations before using tyre chains.
Install the chains on the front tyres.
Don't use chains on the rear tyres.
Tyre chain selection (Europe)
Mazda recommends ladder type or hexagon type steel ring chains. Select the proper type according to your tyre size.
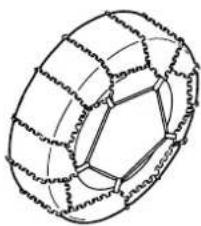
natural_image
Line drawing of a mechanical component with layered structure (no text or symbols)Hexagon typeLadder type
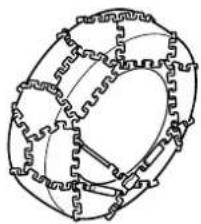
natural_image
Abstract geometric pattern with interlocking gears and lines (no text or symbols)| Tyre and rim size Tyre chain | |
| 185/65R14 Ladder type | |
| 195/55R15 | Hexagon type |
| 195/60R15 | |
| 195/50R16 | |
NOTE
Although Mazda recommends ladder type or hexagon type steel ring chains, all chains within installation specification may be used.
Installation specification (Europe)
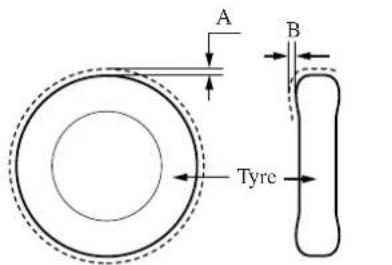
Side view
4-10


When installing tyre chains, the distance between the tyre tread and the chain must be within the prescribed limits in the following table.
| Tyre and rim size | Distance [Unit: mm (inch)] | |
| A | B | |
| 185/65R14 | MAX 16.0(0.63) | MAX 24.0(0.94) |
| 195/55R15195/60R15195/50R16 | MAX 14.0(0.55) | MAX 14.0(0.55) |
Installing the chains
- Remove the wheel covers, or the chain bands will scratch them.
- Secure the chains on the front tyres as tightly as possible. Always follow the chain manufacturer's instructions.
- Retighten the chains after driving 1/2—1 km (1/4—1/2 mile).
Driving In Flooded Area

WARNING
Driving with Wet Brakes: Driving with wet brakes is dangerous. Increased stopping distance or the vehicle pulling to one side when braking could result in a serious accident. Light braking will indicate whether the brakes have been affected. Dry the brakes by driving very slowly and applying the brakes lightly until brake performance returns to normal.

CAUTION
Make sure water does not enter the vehicle interior or the engine area. The vehicle interior could become wet or the engine could be damaged.
Turbocharger Information (Diesel Engine)
CAUTION
- After driving at freeway speeds or up a long hill, idle the engine at least 30 seconds before stopping it. Otherwise, the turbocharger could be damaged.
- Racing or overreving the engine, particularly after it's just been started, can damage the turbocharger.
- To protect the engine from damage, the engine is designed so that it cannot be raced just after starting the engine in extremely cold weather.
Mazda's turbocharger greatly enhances engine power. Its advanced design provides better operation and requires minimum maintenance.
To get the most from it, observe the following.
- Change engine oil and filter according to Scheduled Maintenance (page 8-3).
- Use only recommended engine oil (page 8-14). Extra additives are NOT recommended.





natural_image
Pure geometric diagram with intersecting lines and a central circle, no text or symbols presentTowing Caravan and Trailers (Europe)
Your Mazda was designed and built primarily to carry passengers and cargo.
If you must tow a trailer, follow these instructions because driver and passenger safety depends on proper equipment and safe driving habits. Towing a trailer will affect handling, braking, durability, performance, and economy.
Never overload vehicle or trailer. Consult an Authorised Mazda Dealer if you need further details.
CAUTION
Don't tow a trailer during the first 1,000 km (600 miles) of your new Mazda. If you do, you may damage the engine, transaxle, differential, wheel bearings, and other power train components.
▼ Weight Limits
The total trailer weight, gross combined weight and trailer nose weight must be within the prescribed limits in the Trailer Towing-Load Table.
In a high-altitude operating environment, the engine loses power as elevation increases. In these conditions, a reduction of 10% per 1,000 m (3,280 ft) in total trailer weight and gross combined weight is recommended.


4-13


Before Driving Your Mazda
Towing
TRAILER TOWING-LOAD TABLE
Because vehicle weights vary, adjustments must be made to meet the requirements in this table.
Unit: kg (lb)
| Model\Item | TOTAL TRAILER WEIGHT (MAX) | GROSS COMBINED WEIGHT (MAX) | TRAILER NOSE WEIGHT (MAX) | |||
| Trailer without brake | Trailer with brake | |||||
| Petrol engine | FP engine 400 (882) 1,300 (2,866) 2,970 (6,548) 75 (165) | |||||
| FS engine | MTX 400 (882) 1,300 (2,866) 3,095 (6,823) 75 (165) | |||||
| ATX 400 (882) 1,300 (2,866) 2,965 (6,537) 75 (165) | ||||||
| Diesel engine 500 (1,102) 1,400 (3,086) 3,095 (6,823) 75 (165) | ||||||
TOTAL TRAILER WEIGHT: Sum of weights of the trailer and its load.
GROSS COMBINED WEIGHT: Sum of total trailer weight and towing vehicle weight; including trailer hitch, vehicle passengers, and vehicle load.
TRAILER NOSE WEIGHT: The weight exerted on the trailer tongue. It is varied by changing the weight distribution when loading the trailer.
MTX: Manual transaxle
ATX: Automatic transaxle

WARNING
Tow Loads:
Attempting to tow loads greater than those specified is dangerous as it may cause serious handling and performance problems that could result in personal injury or vehicle damage, or both. Always keep tow loads within specified limits in the Trailer Towing- Load Table.
Trailer Loading:
Loading the trailer with more weight in the rear than in the front is dangerous. This could cause loss of vehicle control and an accident. Always keep the trailer nose weight within the specified limits in the Trailer Towing-Load Table.
NOTE
The total trailer weight and nose weight can be determined by weighing the trailer on platform scales at a highway weighing station or a trucking company to prevent the danger of trailer sway from crosswinds, rough roads, or other causes.
4-14




▼ Trailer Hitch
When towing a trailer, use a genuine Mazda trailer hitch. Bolt holes for securing the trailer hitch must be drilled. Contact your Authorised Mazda Dealer for more information.
Trailer hitch installation area
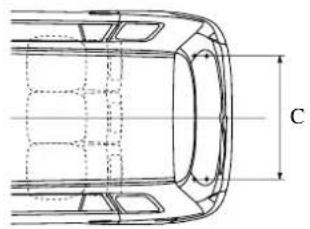
natural_image
Technical line drawing of a car's side profile with no visible text or symbolsUnit:mm(in)
A:350\~420 (13.8\~16.5)
B:880 (34.6)
C:1060 (41.7)
MAX 75 kg (165 lb)
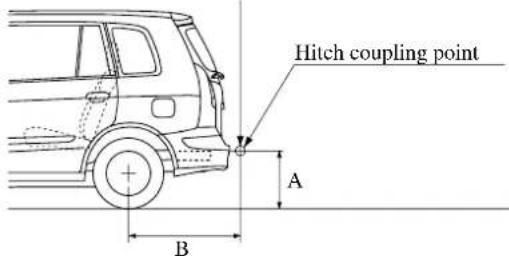
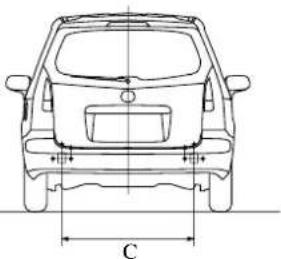
natural_image
Top-down line drawing of a car front view with dimension label C (no text or symbols on the car itself)▼ Tyres
When towing a trailer, make sure all tyres are inflated to the recommended cold-tyre pressure, as indicated on the tyre pressure chart on the driver's door. Trailer tyre size, load rating, and inflation pressures should conform to tyre manufacturer specifications.

WARNING
Using a Temporary Spare Tyre when Towing:
Using a temporary spare tyre on your vehicle when towing a trailer is dangerous as it could result in tyre failure, loss of control, and injury to vehicle occupants. Never use a temporary spare when towing.
4-15




▼Safety Chains
Safety chains must be used as a precautionary measure should the trailer become unintentionally unhitched. They should cross under the trailer tongue and attach to the hitch. Leave enough slack to allow full turns. Consult literature published by your trailer or hitch manufacturer for more details.

WARNING
Towing Without Safety Chain:
Towing a trailer without using a safety chain securely attached to both the trailer and the vehicle is dangerous. If damage occurs to the coupling unit or hitch ball, the trailer could wander into another lane and cause a collision. Make sure the safety chain is securely attached to both the trailer and the vehicle prior to departure.
▼ Trailer Lights

CAUTION
Don't connect a trailer lighting system directly to the lighting system of your Mazda. This may damage your vehicle's electrical system and lighting systems. To connect the lighting system, consult an Authorised Mazda Dealer.
▼ Trailer Brakes
If the total trailer weight exceeds ^1 400kg (882lb), ^2 500kg (1,102lb) trailer brakes are required.
If your trailer has brakes, make sure they meet regulations.
*1: Petrol engine
*2: Diesel engine

WARNING
Hydraulic Trailer-Brake System:
Connecting a hydraulic trailer-brake system directly to the vehicle brake system is dangerous and will result in inadequate braking and possible injury. Don't connect a hydraulic trailer-brake system to your vehicle's brake system.
▼ Trailer Towing Tips
Before driving
- Verify that your Mazda maintains a near-normal attitude when a loaded or unloaded trailer is connected. Don't drive if it has an abnormal front-up or front-down position. Inspect for incorrect nose weight, worn suspension parts, and trailer overloading. Have the vehicle inspected by an Authorised Mazda Dealer.
- Make sure the trailer cargo is secure to prevent it from shifting.
- Make sure the mirrors meet all government regulations. Inspect them.
- Before starting out, inspect the operation of all vehicle and trailer lights and all vehicle-to-trailer connections. Stop and re-inspect all lights and connections after driving a short distance.
Driving
- Your Mazda will handle differently with a trailer in tow, so practice turning, backing, and stopping in a traffic-free area.
• Take time to get accustomed to the extra weight and length. - Do not exceed 100 km/h (62 mph) with a trailer in tow. If the local legal maximum speed with a trailer in tow is less than 100 km/h (62 mph), do not exceed the legal speed.
CAUTION
If the vehicle exceeds 100 km/h (62 mph) with a trailer in tow, the vehicle could be damaged.
- When ascending a hill, shift into a lower gear to reduce the possibility of overloading or overheating the engine, or both.
- When descending a hill, shift into a lower gear and use engine compression as a braking effect. Pay constant attention to speed and use the brakes only as needed. Holding the brake pedal down for a prolonged period may cause the brakes to overheat and lose power.
Towing Caravan and Trailers (Australia)
A Mazda-approved towing package used properly will not invalidate your vehicle warranty. This means you must not overload your Mazda or the vehicle being towed, and you must follow all other instructions for tow-bar and vehicle use.
▼Load Limits
The load in a towed vehicle must not exceed the following: Trailer with brakes 1,300 kg (2,866 lb) Trailer without brakes 400 kg (882 lb)
The downward load on the tow ball must not exceed 10 % of the total load in tow.
When the total towed weight exceeds 600 kg (1,322 lb), use a Mazda approved load levelling device in combination with an appropriate tow bar to accommodate a tow ball down load of up to 10 % of the maximum towing load limit.
▼ Towing Instructions
Your Mazda is designed primarily as a passenger vehicle; handling, durability, and economy may be affected by towing. Always use correct equipment and make sure it fits.
Your Authorised Mazda Dealer will supply and properly install the towing equipment you need.
Follow these instructions to make your towing as safe and efficient as possible.
- Use only a Mazda-approved tow bar. Don't use a bumper hitch.
- Never exceed recommended load limits.
- Before towing, inflate all tyres to the maximum recommended pressures. You'll find these pressures on the edge of the driver's door.
- When on a hill, always use a lower gear, whether your transaxle is manual or automatic. This helps maintain speed. It also prevents engine and transaxle overloading on upgrades and reduces the need for braking on downgrades.
- Always allow a greater stopping distance than normal to prevent excessive braking, and avoid sudden stops that could cause loss of control.
• Frequently inspect oil and fluid levels. - Because of the extra stress on your Mazda from towing, more frequent maintenance than usual is necessary.
4-18





- Break in your new Mazda and have it serviced at 1,000 km (600 miles) before using it for towing. If you must tow before this, don't exceed 80 km/h (50 mph).
- Your Mazda's behavior changes while towing. Get accustomed to these changes over a short and safe trial distance before starting a long trip.
- Headlights may need re-aiming after a towed vehicle has been attached, especially if a load equalizing hitch is not used.
- The airflow to the radiator must not be restricted in any way.
- Make sure the towed vehicle complies with all local regulations, especially in regard to lighting, mirrors, and safety chains. The tow bar should not obscure the rear license plate.
- Whenever you remove the tow bar, seal all mounting holes in the underbody to prevent the entry of exhaust fumes, dust, and water.

4-19


Form No. 8R34-EE-02H
5 Driving Your Mazda
Explanation of instruments and controls.
Starting and Driving 5-2
Ignition Switch 5-2
Starting the Engine 5-3
Brake System 5-5
Manual Transaxle Operation 5-10
Automatic Transaxle Controls 5-11
Power Steering 5-16
Traction Control System (TCS) 5-16
Dynamic Stability Control (DSC) 5-18
Instrument Cluster and Indicators 5-20
Meters and Gauges 5-20
Warning/Indicator Lights and Beeps 5-27
Warning/Indicator Lights 5-27
Beeps 5-37
Switches and Controls 5-38
Lighting Control 5-38
Turn and Lane-Change Signals 5-39
Front Fog Lights 5-40
Rear Fog Light 5-40
Windscreen Wipers and Washer 5-41
Rear Window Wiper and Washer 5-42
Headlight Washer 5-43
Rear Window Defroster 5-43
Horn 5-44
Hazard Warning Flasher 5-45
Driving Your Mazda
Starting and Driving
Ignition Switch
▼Ignition Switch Positions
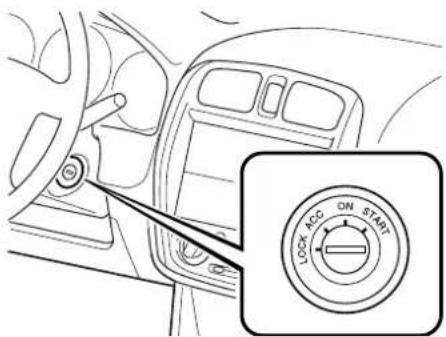
LOCK
The steering wheel locks to protect against theft. Only in this position can the key be removed.
WARNING
Removing the Key:
It's dangerous to remove the key from the ignition switch while the vehicle is moving. Removing the key allows the steering wheel to lock. You will lose steering control and a serious accident could occur.
Remove the key only when the vehicle is parked.
Not Setting the Parking Brake:
Leaving the driver's seat without setting the parking brake is dangerous. Unexpected vehicle movement could occur if the parking brake is not set. This could cause an accident. Before leaving the driver's seat, always set the parking brake and make sure the shift lever is in P with an automatic transaxle or in 1 or R with a manual transaxle.
NOTE
If turning the key is difficult, jiggle the steering wheel from side to side.
ACC (Accessory)
The steering wheel unlocks and some electrical accessories will operate.
ON
This is the normal running position after the engine is started. The warning lights should be inspected before the engine is started (page 5-27).
START
The engine is started in this position. It will crank until you release the key; then it returns to the ON position.
▼Ignition Key Reminder (Except European model)
If the ignition switch is in the LOCK or ACC position, a beep will sound when any door is opened.
Starting the Engine
Petrol engine
- Occupants should fasten their seat belts.
- Make sure the parking brake is on.
-
Depress the brake pedal.
-
(Manual transaxle)
Depress the clutch pedal all the way and shift into neutral.
Keep the pedal depressed while cranking the engine.
(Automatic transaxle)
Put the vehicle in park (P). If you must restart the engine while the vehicle is moving, shift into neutral (N).
NOTE
The starter will not operate if the shift lever is not in P or N.
- Turn the ignition switch to the START position and hold (up to 10 seconds at a time) until the engine starts.
CAUTION
Don't try the starter for more than 10 seconds at a time. If the engine stalls or fails to start, wait 10 seconds before trying again. Otherwise, you may damage the starter and drain the battery.
- After starting the engine, let it idle for about 10 seconds (prohibited in Germany).
Driving Your Mazda
Starting and Driving
NOTE
- In extremely cold weather, below -18^ ( 0^ ), or after the vehicle has stood idle several days, let the engine warm up without operating the accelerator (prohibited in Germany).
- Whether cold or warm, the engine should be started without use of the accelerator.
• (Germany)
Drive immediately after starting the engine. However don't use high engine speeds until reaching the operating temperature.
Diesel engine
- Occupants should fasten their seat belts.
- Make sure the parking brake is on.
- Depress the brake pedal.
- Depress the clutch pedal all the way and shift into neutral. Keep the pedal depressed while cranking the engine.
- Turn the ignition switch to the ON position. The glow plug indicator will come on. Wait a few seconds for the glow plug indicator to go out.
- Turn the ignition switch to the START position and hold it there without depressing the accelerator until the engine starts. If the engine fails to start, turn the ignition switch to the LOCK or ACC position, then try again.
CAUTION
Don't try the starter for more than 30 seconds at a time. If the engine stalls or fails to start, wait 30 seconds before trying again. Otherwise, you may damage the starter and drain the battery.
- After starting the engine, let it idle for about 10 seconds (prohibited in Germany).
NOTE
- For easier starting, all the accessories should be OFF.
- The engine may not start when trying to start the engine with the glow plug indicator on.
- If the glow plug indicator stays on or doesn't come on at all, the glow plug control system could have an electrical problem. If one of these happens, consult an Authorised Mazda Dealer as soon as possible.
• (Germany)
Drive immediately after starting the engine. However don't use high engine speeds until reaching the operating temperature.
Brake System
▼Foot Brake
Your Mazda has power-assisted brakes that adjust automatically through normal use.
Should power-assist fail, you can stop by applying greater force than normal to the brake pedal. But the distance required to stop will be greater than usual.
WARNING
Driving with the Engine Off:
Continuing to drive when the engine is stalled or turned off is dangerous. Braking will require more effort, and the brake's power-assist could be depleted if you pump the brake. This will cause longer stopping distances or even an accident. Don't continue driving when the engine is stalled or turned off, find a safe place to stop.
Riding the Brakes:
Driving with your foot continuously on the brake pedal or steadily applying the brakes for long distances is dangerous. This causes overheated brakes, resulting in longer stopping distances or even total brake failure. This could cause loss of vehicle control and a serious accident. Avoid continuous application of the brakes. Shift to a lower gear when going down steep hills.
Driving with Wet Brakes:
Driving with wet brakes is dangerous. Increased stopping distance or the vehicle pulling to one side when braking could result in a serious accident. Light braking will indicate whether the brakes have been affected. Dry the brakes by driving very slowly and applying the brakes lightly until brake performance is normal.
Driving Your Mazda
Starting and Driving
▼ Parking Brake
CAUTION
Driving with the parking brake on will cause excessive wear of the brake linings or pads.
Lever type
Setting the parking brake
Depress the brake pedal, then pull the brake handle fully upward.
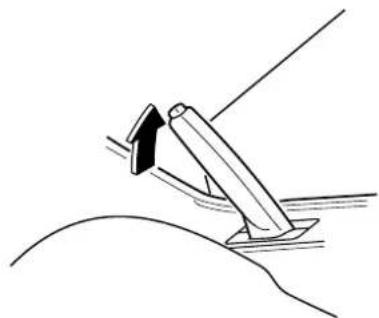
natural_image
Simple line drawing of a lever with an upward arrow indicating motion (no text or symbols)Releasing the parking brake
Depress the brake pedal, then pull the handle up and press the button. Lower the handle to the release position while holding in the button.
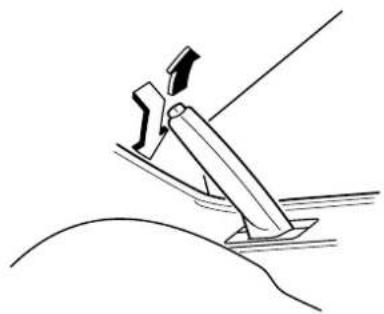
natural_image
Simple line drawing of a mechanical lever or fulcrum with a fulcrum and pivot point (no text or symbols)Pedal type
Setting the parking brake
Depress the brake pedal, then depress the parking brake pedal fully.
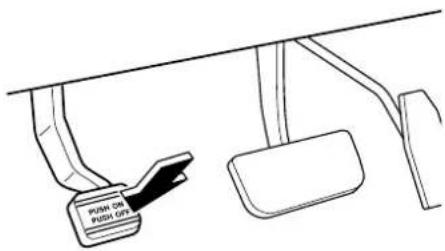
Releasing the parking brake
Depress the brake pedal, then depress the parking brake pedal until it releases. Gradually let up on the parking brake pedal.
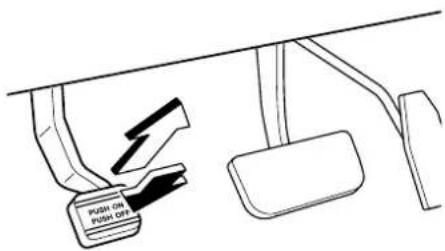
NOTE
Release the parking brake once before trying to reapply it.
5-6

▼Brake System Warning Light
This warning has the following functions:
Parking brake warning
The light comes on when the parking brake is applied with the ignition switch in the START or ON position. It goes off when the parking brake is fully released.
Low brake fluid level warning/ Electronic brake force distribution system warning
If the light stays on after the parking brake is fully released, you may have a brake problem.
Drive to the side of the road and park off the right-of-way.
Low brake fluid level warning
You may notice that the pedal is harder to push or that it may go closer to the floor. In either case, it will take longer to stop the vehicle.
- With the engine stopped, check the brake fluid level immediately and add fluid as required (page 8-19).
- After adding fluid, check the light again.
If the warning light remains on, or if the brakes do not operate properly, do not drive the vehicle. Have it towed to an Authorised Mazda Dealer.
Even if the light goes off, have your brake system inspected as soon as possible.
Electronic brake force distribution system warning
If the electronic brake force distribution control unit determines that some components are operating incorrectly, the control unit may turn the brake system warning light on.
In this case, the ABS warning light comes on at the same time (page 5-31).

WARNING
Brake Warning Light:
Driving with the brake system warning light on is dangerous. It indicates that your brakes may not work at all or that they could completely fail at any time. If this light remains on, have the brakes inspected immediately. Don't drive with this light on, and contact an Authorised Mazda Dealer to have the brakes inspected as soon as possible.
ABS Warning Light and Brake Warning Light on at the Same Time: Driving when the brake system warning light and ABS warning light are on at the same time is dangerous. When both lights are on, the rear wheels could lock more quickly in an emergency stop than under normal circumstances.
Don't drive with both lights on, and contact an Authorised Mazda Dealer to have the brakes inspected as soon as possible.
Driving Your Mazda
Starting and Driving
Brake booster vacuum warning (Diesel engine)
NOTE
If the brake pedal is depressed quickly and repeatedly, the warning light may come on and remain on a few seconds as a result of a momentary decrease in the brake booster vacuum. This does not indicate a system problem.
If the light illuminates when the engine is running, perform the following:
- Carefully park your vehicle out of traffic.
- Stop the engine.
- Make sure that the parking brake was not set.
- Check the brake fluid level.
- Check the vacuum pump drive belt for tension or breakage.
▼ Anti-Lock Brake System (ABS)
The ABS control unit continuously monitors the speed of each wheel. If one is about to lock up, the ABS responds by automatically releasing and reapplying that wheel's brake.
The driver will feel a slight vibration in the brake pedal and may hear a chattering noise from the brake system. This is normal when the ABS operates. Don't pump the brakes, continue to press down on the brake pedal.
WARNING
ABS:
The ABS cannot compensate for unsafe and reckless driving, excessive speed, tailgating (following another vehicle too closely), and hydroplaning (reduced tyre friction and road contact because of water on the road surface). You can still have an accident. So don't rely on ABS as a substitute for safe driving.
NOTE
Braking distances may be longer on loose surfaces (snow or gravel, for example) which usually have a hard foundation. A vehicle with a normal braking system may require less distance to stop under these conditions because the tyres will build up a wedge of surface layer when the wheels skid.
▼ABS Warning Light
The warning light stays on for a few seconds when the ignition switch is turned to the ON position.
If the ABS warning light stays on while you're driving, the ABS control unit has detected a system malfunction. If this occurs, your brakes will function normally as if the vehicle had no ABS.
Should this happen, consult an Authorised Mazda Dealer as soon as possible.
WARNING
ABS Warning Light and Brake Warning Light on at the Same Time: Driving when the brake system warning light and ABS warning light are on at the same time is dangerous. When both lights are on, the rear wheels could lock more quickly in an emergency stop than under normal circumstances. Don't drive with both lights on, and contact an Authorised Mazda Dealer to have the brakes inspected as soon as possible.
NOTE
When the engine is jump-started to charge the battery, uneven rpm occurs and the ABS warning light comes on. This is due to a weak battery, not a malfunction. Recharge the battery.
▼Brake Pad Wear Indicator
When the disc brake pads become worn, the built-in wear indicators contact the disc plates. This causes a screeching noise to warn that the pads should be replaced.
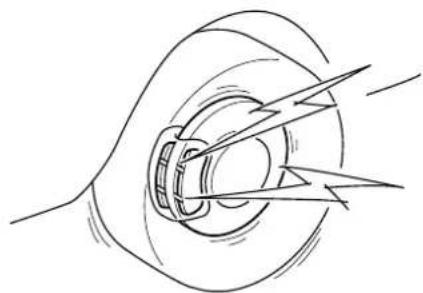
natural_image
Diagram of a mechanical or electrical component with internal components and directional arrows (no text or symbols)When you hear this noise, consult an Authorised Mazda Dealer as soon as possible.
WARNING
Driving with Worn Disc Pads: Driving with worn disc pads is dangerous. The brakes could fail and cause a serious accident. As soon as you hear a screeching noise consult an Authorised Mazda Dealer.
Driving Your Mazda
Starting and Driving
Manual Transaxle Operation
▼ Manual Transaxle Shift Pattern
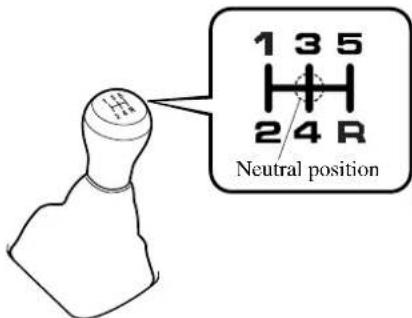
The shift pattern of the transaxle is conventional, as shown.
Press the clutch pedal all the way down while shifting; then release it slowly.
A safety feature prevents accidental shifting from 5 to reverse. The shift lever must be put in neutral before being shifted to reverse.

WARNING
Sudden Engine-Braking:
Shifting down while driving on wet, snowy, or frozen roads, or driving at high speeds causes sudden engine braking, which is dangerous. The sudden change in tyre speed could cause the tyres to skid. This could lead to loss of vehicle control and an accident. Do not use sudden engine braking on slippery road surfaces or at high speeds.

CAUTION
- Keep your foot off the clutch pedal except when shifting gears. Also, don't use the clutch to hold the vehicle on an upgrade. This will avoid needless clutch wear and damage.
• Make sure the vehicle comes to a complete stop before shifting to reverse.
Shifting to reverse while the vehicle is still moving may damage the transaxle.
NOTE
If shifting to reverse is difficult, shift into neutral, release the clutch pedal, and try again.
5-10


Automatic Transaxle Controls
Floor shift model
Lock-release button
To prevent unsafe shifting
Hold button
Pushing this button activates the hold mode.
Pushing this again deactivates this mode.
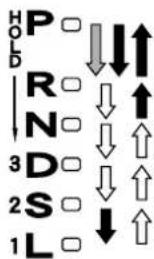
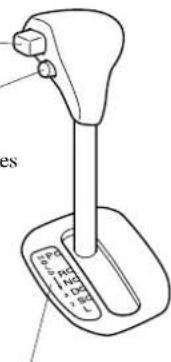
Shift pattern indicator
Shows shift lever position
↓ Australia model
Various Lockouts:
| Indicates that you must depress the brake pedal and hold in the lock-release button to shift. | |
| Indicates the shift lever can be shifted freely into any position. | |
| Indicates that you must hold in the lock-release button to shift. |
Column shift model
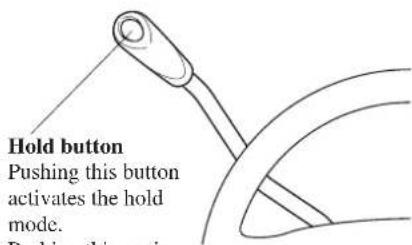
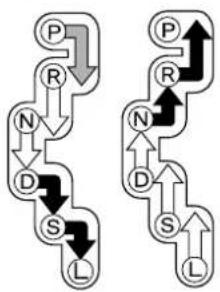
flowchart
graph TD
    P --> R
    R --> N
    N --> D
    D --> S
    S --> L
    L --> S
    S --> D
    D --> N
    N --> P
    P --> R
    R --> N
    N --> D
    D --> S
    S --> L
Various Lockouts:
 | Indicates that you must depress the brake pedal and pull the shift lever toward you to shift (The ignition switch must be in the ON position). |
 | Indicates the shift lever can be shifted freely into any position. |
 | Indicates that you must pull the shift lever toward you to shift. |
5-11


Driving Your Mazda
Starting and Driving
▼Transaxle Ranges
The shift lever must be in P or N to operate the starter.
P (Park)
P locks the transaxle and prevents the front wheels from rotating.
WARNING
Holding the Vehicle with P: Setting the shift lever to the P position without using the parking brake to hold the vehicle is dangerous. If P fails to hold, the vehicle could move and cause an accident. To hold the vehicle, set the shift lever to P AND set the parking brake.
CAUTION
- Shifting into P, N or R while the vehicle is moving can damage your transaxle.
- Shifting into a driving gear or reverse when the engine is running faster than idle can damage the transaxle.
R (Reverse)
In position R, the vehicle moves only backward. You must be at a complete stop before shifting to or from R, except as explained under Rocking the Vehicle (page 4-8).
N (Neutral)
In N, the wheels and transaxle are not locked. The vehicle will roll freely even on the slightest incline unless the parking brake or brakes are on.
WARNING
Shifting from N or P: It's dangerous to shift from N or P into a driving gear when the engine is running faster than idle. If this is done, the vehicle could move suddenly, causing an accident or serious injury. If the engine is running faster than idle, don't shift from N or P into a driving gear.
Shifting into N while Driving: Shifting into N while driving is dangerous. Engine braking cannot be applied when decelerating which could lead to an accident or serious injury. Do not shift into N when driving the vehicle.
D (Drive)
D is the normal driving position. From a stop, the transaxle will automatically shift through a 4-gear sequence.
S (Second)
The S position is helpful when driving in slow-moving traffic and when climbing a hill.
L (Low)
Use the L position when pulling heavy loads and climbing steep grades.
Shift patterns without hold mode:
| D 1st, 2nd, 3rd, 4th | |
| S 1st, 2nd, 3rd | |
| L 1st, 2nd | |
WARNING
Sudden Engine-Braking:
Shifting down while driving on wet, snowy, or frozen roads, or driving at high speeds causes sudden engine braking, which is dangerous. The sudden change in tyre speed could cause the tyres to skid. This could lead to loss of vehicle control and an accident. Do not use sudden engine braking on slippery road surfaces or at high speeds.
▼Shift-Lock System
Floor shift, Australia model
The shift-lock system prevents shifting out of P unless the brake pedal is depressed.
To shift from P:
- Depress and hold the brake pedal.
- Start the engine.
- Push and hold the lock-release button.
- Move the shift lever.
Column shift model
The shift-lock system prevents shifting out of P unless the brake pedal is depressed.
To shift from P:
- Depress and hold the brake pedal.
-
Start the engine.
-
Move the shift lever.
NOTE
- If the brake is pumped with the shift lever in P, a chattering near the shift lever may be heard. This does not indicate an abnormality.
- When the ignition switch is in the ACC or LOCK position, the transaxle cannot be shifted from P.
- (Except Indonesia) To be sure the vehicle is in park, the ignition key cannot be removed unless the shift lever is in P.
▼Shift-Lock Override (Column shift model)
If the shift lever won't move from P with the brake pedal depressed, continue to hold down the pedal.
- Remove the shift-lock override cover with a screwdriver or similar tool.
- Push the shift-lock override button down.
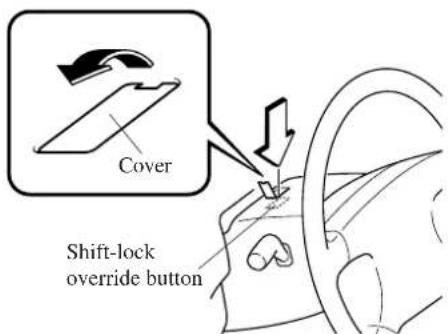
- Move the shift lever.
Driving Your Mazda
Starting and Driving
- Take the vehicle to an Authorised Mazda Dealer to have the system checked.
▼Hold Mode
The hold mode stops the automatic speed-change operation and has three positions: third (D), second (S), and first (L).
Hold operation
Use the hold mode when starting from a stop on slippery surfaces, when driving up steep inclines, and for braking assistance on downgrades.
Push the hold button to activate the hold mode. Push it again to deactivate it.
Floor shift model
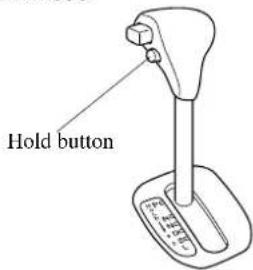
Column shift model
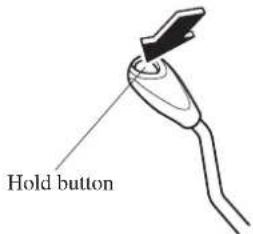
When the hold mode is on
D (Drive)
The transaxle is held in third. It automatically downshifts to a lower gear at a stop, however, and returns to third for smoother acceleration.
S (Second)
The transaxle is held in second. Don't drive faster than the speeds indicated in the following:
| FP engine 100km/h (60mph) |
| FS engine 106km/h (66mph) |
L (Low)
The transaxle is held in first. Don't drive faster than the speeds indicated in the following:
| FP engine 51km/h | (30mph) |
| FS engine 54km/h | (33mph) |
Shift-up patterns with hold mode on
| D-Hold | 3rd (temporarily lowers gears for standing start) |
| S-Hold 2nd (fixed) | |
| L-Hold 1st (fixed) | |
| NOTE |
| The hold mode is automatically cancelled when the ignition is switched off. |
5-14


natural_image
Pure geometric diagram with intersecting lines and a central circle, no text or symbols presentHold indicator
HOLD
This light comes on when the hold mode is selected.
CAUTION
If the hold indicator light flashes, the transaxle has an electrical problem. Continuing to drive your Mazda in this condition could cause damage to your transaxle. Consult an Authorised Mazda Dealer as soon as possible.
▼Driving Tips
Passing
For extra power when passing another vehicle or climbing steep grades, depress the accelerator fully. The transaxle will shift to a lower gear, depending on vehicle speed.
Climbing steep grades from a stop
To climb a steep grade from a stopped position:
- Depress the brake pedal.
- Shift to D, S, or L, depending on the load weight and grade steepness.
- Release all brakes while gradually accelerating.
Descending steep grades
When descending a steep grade, shift to S, or L, depending on load weight and grade steepness. Descend slowly, using the brakes only occasionally to prevent them from overheating.
Driving Your Mazda
Starting and Driving
Power Steering
Power steering is only operable when the engine is running. If the engine is off or if the power steering system is inoperable, you can still steer, but it requires more physical effort.
If the steering feels rigid during normal driving, consult an Authorised Mazda Dealer.

CAUTION
Never hold the steering wheel to the extreme left or right for more than 5 seconds with the engine running. This could damage the power steering system.
Traction Control System (TCS)
The Traction Control System (TCS) enhances traction and safety by regulating engine torque. When the TCS detects driving wheel slippage, it lowers engine torque to prevent loss of traction.
This means that on a slick surface, the engine adjusts automatically to provide optimum power to the drive wheels without causing them to spin and lose traction.

WARNING
TCS and Unsafe Driving:
The traction control system (TCS) cannot compensate for unsafe and reckless driving, excessive speed, tailgating (following another vehicle too closely), and hydroplaning (reduced tyre friction and road contact because of water on the road surface). You can still have an accident. So don't rely on the traction control system as a substitute for safe driving.
TCS and Snow and Ice:
Driving without proper traction devices on snow and ice-covered roads is dangerous. The traction control system (TCS) alone cannot provide adequate traction and you could still have an accident. Use snow tyres or tyre chains and drive at reduced speeds when roads are covered with ice and snow.
▼TCS/DSC Indicator Light
This indicator light stays on for a few seconds when the ignition switch is turned to the ON position. If the TCS or DSC is operating, the indicator light flashes.
If the light stays on, the TCS or DSC may have a malfunction and they may not operate correctly. Take your vehicle to an Authorised Mazda Dealer.
NOTE
- In addition to the indicator light flashing, a slight labouring sound will come from the engine. This indicates that the TCS is operating properly.
- On slippery surfaces, such as fresh snow, it will be impossible to achieve high rpm when the TCS is on.
▼TCS OFF Indicator Light
TCS OFF
This light comes on when the ignition switch is turned to the ON position. It goes off when the engine is started. It also comes on when you switch off the traction control system or when the system has a malfunction.
NOTE
After starting the engine on very cold days, the TCS OFF indicator will remain on and TCS will not operate until the engine is warm.
Driving Your Mazda
Starting and Driving
▼TCS OFF Switch
Press the TCS OFF switch to turn off the TCS. The TCS OFF indicator light will illuminate.
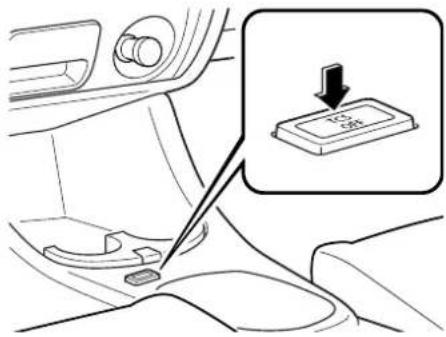
Press the switch again to turn the TCS back on. The TCS OFF indicator light will go out.
NOTE
- When TCS is on and you attempt to free the vehicle when it is stuck, or drive it out of freshly fallen snow, the TCS will activate. Depressing the accelerator will not increase engine power and freeing the vehicle may be difficult. When this happens, turn off the TCS.
- If the TCS is off when the engine is turned off, it automatically activates when the ignition switch is turned on.
• Leaving the TCS on will provide the best traction.
Dynamic Stability Control (DSC)
The Dynamic Stability Control (DSC) automatically controls braking and engine torque in conjunction with systems such as ABS and TCS to control side slip when driving on slippery surfaces, or during sudden or evasive manoeuvring, enhancing vehicle the safety.
Refer to ABS (page 5-8) and TCS (page 5-16).
DSC operation is possible at speeds greater than 20 km/h (12 mph).

WARNING
DSC and Unsafe Driving:
The dynamic stability control (DSC) cannot compensate for unsafe and reckless driving excessive speed, tailgating (following another vehicle too closely), and hydroplaning (reduced tyre friction and road contact because of water on the road surface). You can still have an accident. So don't rely on the dynamic stability control as a substitute for safe driving.
▼TCS/DSC Indicator Light
This indicator light stays on for a few seconds when the ignition switch is turned to the ON position. If the TCS or DSC is operating, the indicator light flashes.
If the light stays on, the TCS or DSC may have a malfunction and they may not operate correctly. Take your vehicle to an Authorised Mazda Dealer.
5-19




Driving Your Mazda
Instrument Cluster and Indicators
Meters and Gauges
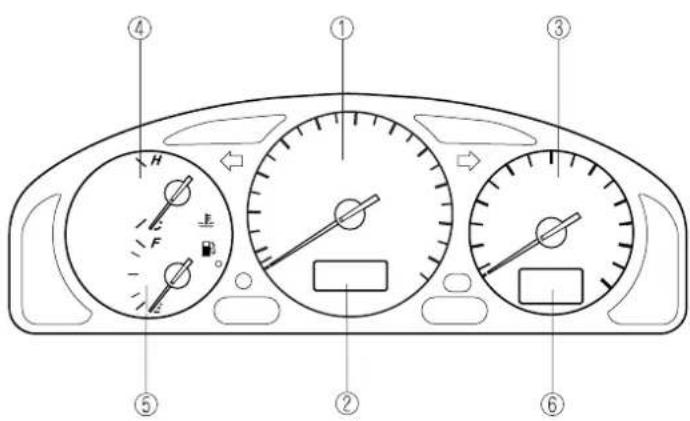
①Speedometer 5-21
② Odometer and Trip Meter ....5-21
③Tachometer 5-22
④Engine Coolant Temperature Gauge 5-22
⑤Fuel Gauge 5-23
⑥Trip Computer 5-23
5-20




natural_image
Pure geometric diagram with intersecting lines and a central circle, no text or symbols presentInstrument Cluster and Indicators
▼Speedometer
The speedometer indicates the speed of the vehicle.
▼ Odometer and Trip Meter
The display mode can be changed from odometer to trip meter A to trip meter B and then back to odometer by pressing the selector while they are displayed. The selected mode will be displayed.
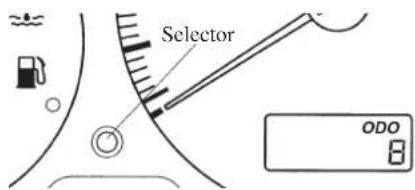
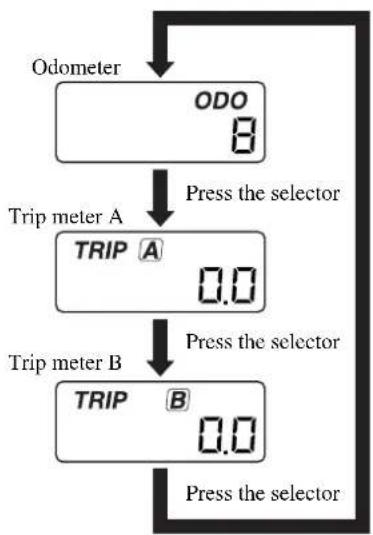
flowchart
graph TD
    A["Odometer"] --> B["ODO 8"]
    B --> C["Trip meter A"]
    C --> D["TRIP A 0.0"]
    D --> E["Trip meter B"]
    E --> F["TRIP B 0.0"]
    F --> G["Press the selector"]
NOTE
The odometer and trip meter can be displayed as follows even when the ignition switch is in the ACC or LOCK position.
- Displays for 10 minutes after the ignition switch is turned to the ACC or LOCK position from the ON position.
- Displays for 10 minutes after any door is opened.
Odometer
When this mode is selected, ODO will be displayed.
The odometer records the total distance the vehicle has been driven.
Trip meter
The trip meter can record the total distance of two trips. One is recorded in trip meter A, and the other is recorded in trip meter B.
For instance, trip meter A can record the distance from the point of origin, and trip meter B can record the distance from where the fuel tank is filled.
When trip meter A is selected, pressing the selector again within one second will change to trip meter B mode.
When trip meter A is selected, TRIP A will be displayed. When trip meter B is selected, TRIP B will be displayed.
Driving Your Mazda
Instrument Cluster and Indicators
The trip meter records the total distance the vehicle is driven until the meter is again reset. Return it to "0.0" by holding the selector depressed for more than 1 second. Use this meter to measure trip distances and to compute fuel consumption.
NOTE
- Only the trip meters record tenths of kilometres (miles).
• The trip record will be erased when;
• The power supply is interrupted (blown fuse or the battery is disconnected).
• The vehicle is driven over 999.9 km (mile).
▼Tachometer
The tachometer shows engine speed in thousands of revolutions per minute (rpm).
Petrol engine
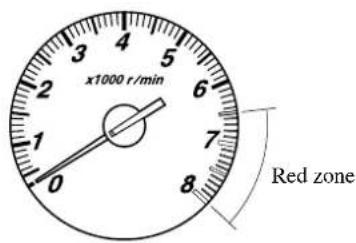
Diesel engine
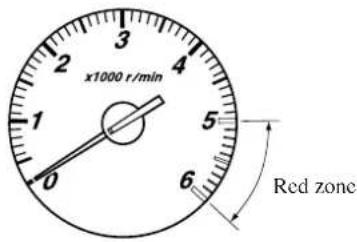
CAUTION
Don't run the engine with the tachometer needle in the RED ZONE. This may cause severe engine damage.
▼Engine Coolant Temperature Gauge
The engine coolant temperature gauge shows the temperature of the engine coolant.
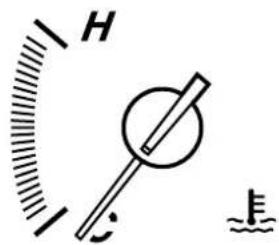
If the needle exceeds normal range toward H, it indicates overheating.
CAUTION
Driving with an overheated engine can cause serious engine damage (page 7-12).
5-22


Instrument Cluster and Indicators
▼Fuel Gauge
The fuel gauge shows approximately how much fuel is in the tank. We recommend keeping the tank over 1/4 full. When the low fuel warning light illuminates or when the needle is near E, refuel as soon as possible.
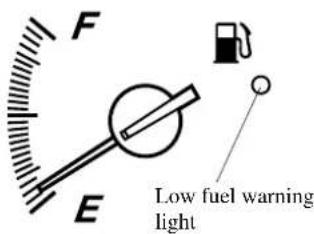
▼Instrument Panel Illumination
When the headlight switch is in the 2005 or position, rotate the thumb-wheel to adjust the brightness of the instrument panel lights.
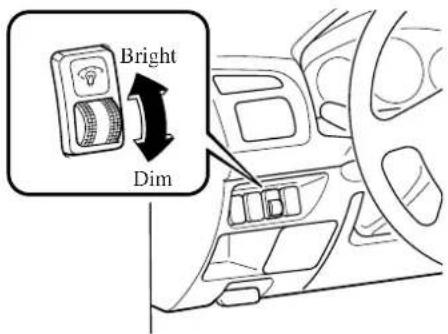
▼Trip Computer
The trip computer display is located in the instrument cluster.
The trip computer can display the following:
• The outside temperature.
• The current fuel economy.
• The average fuel economy.
- The approximate distance you can travel on the available fuel.
• The average vehicle speed.
The ignition switch must be in the ON position.
Press the INFO switch to change the display mode.
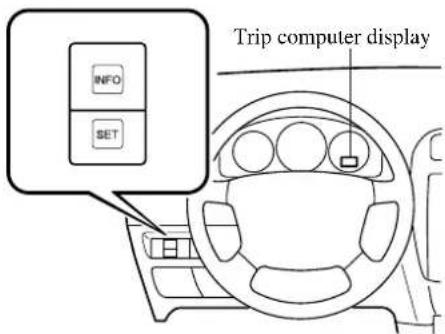
If you have any problems with your trip computer, consult an Authorised Mazda Dealer.
Driving Your Mazda
Instrument Cluster and Indicators
Outside temperature display
This mode displays the outside temperature.
AMB
25°C
NOTE
The outside temperature displayed may differ from the actual temperature on account of surrounding conditions, driving conditions.
Current fuel economy mode
This mode displays the current fuel economy by calculating the amount of fuel consumed and the distance travelled.
Current fuel economy will be calculated and displayed every 2 seconds.
When this mode is selected, CONSUM CUR will be displayed.
CONSUM
CUR
10.5 L/100 km
When you've slowed to about 5 km/h (3mph), ---- L/100km (----L/100 mile) will be displayed.
5-24



Instrument Cluster and Indicators
Average fuel economy mode
This mode displays the average fuel economy by calculating the fuel and the distance travelled since pressing the SET switch or since connecting the battery.
Average fuel economy will be calculated and displayed every minute.
When this mode is selected, CONSUM AV will be displayed.
CONSUM AV
9.5 L/100 km
To clear the data being displayed, press the SET switch for more than 1 second. After pressing the SET switch, ---- L/100km (---- L/100mile) will be displayed for about 1 minute before the fuel economy is recalculated and displayed.
Distance-to-empty mode
This mode displays the approximate distance you can travel on the remaining fuel based on the fuel economy for the last 32 km (20 mile).
The distance-to-empty will be calculated and displayed every minute.
When this mode is selected, REMNG will be displayed.
REMNG
3 18km
When the remaining travel distance is 50 km (31 mile) or less, ---- km (---- mile) will be displayed.
Driving Your Mazda
Instrument Cluster and Indicators
NOTE
- Even through the distance-to-empty display may indicate a sufficient amount of remaining mileage before refuelling is required, refuel as soon as possible if the fuel gauge needle nears E or the low fuel warning light illuminates.
- The distance-to-empty display will not change after refuelling until you resume driving.
- The display won't change unless you add more than 20 L of fuel.
- After the battery is connected, ---- km (---- mile) will be displayed for a travel distance of 100 km (62 mile).
Average vehicle speed mode
This mode displays the average vehicle speed by calculating the distance and the time travelled since connecting the battery or resetting the data.
Average vehicle speed will be calculated and displayed every 10 seconds.
When this mode is selected, AV will be displayed.
AV
70km/h
To clear the data being displayed, press the SET switch for more than 1 second. After pressing the SET switch, ---- km/h (---- mile/h) will be displayed for about 1 minute before the vehicle speed is recalculated and displayed.
Driving Your Mazda
Warning/Indicator Lights and Beeps
Warning/Indicator Lights
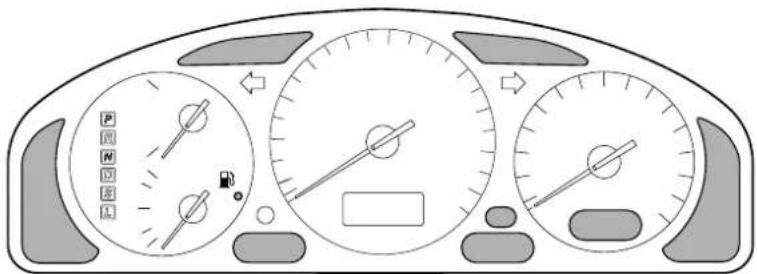
Warning/Indicator lights will appear in any of the highlighted areas
| Signal Warning/Indicator Lights Page | ||
 | Brake System Warning Light 5-29 | |
 | Charging System Warning Light 5-30 | |
 | Engine Oil Pressure Warning Light 5-30 | |
 | Check Engine Light 5-31 | |
 | ABS Warning Light 5-31 | |
 | Air Bag/Front Seat Belt Pretensioner System Warning Light 5-32 | |
 | Low Fuel Warning Light 5-32 | |
5-27
Driving Your Mazda
Warning/Indicator Lights and Beeps
| Signal | Warning/Indicator Lights | Page |
 | Seat Belt Warning Light 5-32 | |
 | Door-Ajar Warning Light 5-33 | |
 | Sedimentor Warning Light 5-33 | |
 | Low Washer Fluid Level Warning Light 5-33 | |
 | Immobilizer System Warning/Security Indicator Light 5-33 | |
 | Air Bag Cut-Off System Indicator Light 5-34 | |
 | Headlight Main-Beam Indicator Light 5-35 | |
| [WCDS] | Front Fog Lights Indicator Light 5-35 | |
| [YS33] | Rear Fog Light Indicator Light 5-35 | |
 | Hold Indicator Light 5-35 | |
 | Shift Position Indicator Light 5-35 | |
 | Glow Plug Indicator Light 5-36 | |
 | TCS/DSC Indicator Light | 5-36 |
 | TCS OFF Indicator Light | 5-36 |
Warning/Indicator Lights and Beeps
▼Brake System Warning Light
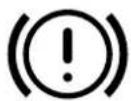
This warning has the following functions:
Parking brake warning
The light comes on when the parking brake is applied with the ignition switch in the START or ON position. It goes off when the parking brake is fully released.
Low brake fluid level warning/ Electronic brake force distribution system warning
If the light stays on after the parking brake is fully released, you may have a brake problem.
Drive to the side of the road and park off the right-of-way.
Low brake fluid level warning
You may notice that the pedal is harder to push or that it may go closer to the floor. In either case, it will take longer to stop the vehicle.
- With the engine stopped, check the brake fluid level immediately and add fluid as required (page 8-19).
- After adding fluid, check the light again.
If the warning light remains on, or if the brakes do not operate properly, do not drive the vehicle. Have it towed to an Authorised Mazda Dealer.
Even if the light goes off, have your brake system inspected as soon as possible.
Electronic brake force distribution system warning
If the electronic brake force distribution control unit determines that some components are operating incorrectly, the control unit may turn the brake system warning light on.
In this case, the ABS warning light comes on at the same time (page 5-31).

WARNING
Brake Warning Light:
Driving with the brake system warning light on is dangerous. It indicates that your brakes may not work at all or that they could completely fail at any time. If this light remains on, have the brakes inspected immediately. Don't drive with this light on, and contact an Authorised Mazda Dealer to have the brakes inspected as soon as possible.
ABS Warning Light and Brake Warning Light on at the Same Time: Driving when the brake system warning light and ABS warning light are on at the same time is dangerous. When both lights are on, the rear wheels could lock more quickly in an emergency stop than under normal circumstances.
Don't drive with both lights on, and contact an Authorised Mazda Dealer to have the brakes inspected as soon as possible.
Driving Your Mazda
Warning/Indicator Lights and Beeps
Brake booster vacuum warning (Diesel engine)
NOTE
If the brake pedal is depressed quickly and repeatedly, the warning light may come on and remain on a few seconds as a result of a momentary decrease in the brake booster vacuum. This does not indicate a system problem.
If the light illuminates when the engine is running, perform the following:
- Carefully park your vehicle out of traffic.
- Stop the engine.
- Make sure that the parking brake was not set.
- Check the brake fluid level.
- Check the vacuum pump drive belt for tension or breakage.
▼ Charging System Warning Light
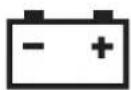
This warning light comes on when the ignition switch is turned to the ON position and goes off when the engine is started.
If the warning light comes on while driving, it indicates a malfunction of the alternator or of the charging system. Drive to the side of the road and park off the right-of-way. Consult an Authorised Mazda Dealer.
CAUTION
Don't continue driving when the charging system warning light is illuminated.
▼Engine Oil Pressure Warning Light
This warning light indicates low engine oil pressure.
If the light comes on while driving:
- Drive to the side of the road and park off the right-of-way.
- Turn off the engine and inspect the engine oil level (page 8-17). If it's low, add oil.
- Check the light.
If the light remains on even after you add oil, have your vehicle towed to the nearest service station or to an Authorised Mazda Dealer.
5-30





Warning/Indicator Lights and Beeps
CAUTION
Don't run the engine if oil pressure is low. It could result in extensive engine damage.
▼ Check Engine Light
If this light comes on while driving, the vehicle may have a problem. It is important to note the driving conditions when the light came on and consult an Authorised Mazda Dealer.
The check engine light may come on in the following cases:
- The fuel tank level being very low or approaching empty.
- The engine's electrical system has a problem.
- The emission control system has a problem.
If the check engine light flashes continuously, decrease your speed and consult an Authorised Mazda Dealer as soon as possible.
▼ABS Warning Light
The warning light stays on for a few seconds when the ignition switch is turned to the ON position.
If the ABS warning light stays on while you're driving, the ABS control unit has detected a system malfunction. If this occurs, your brakes will function normally as if the vehicle had no ABS. Should this happen, consult an Authorised Mazda Dealer as soon as possible.
WARNING
ABS Warning Light and Brake Warning Light on at the Same Time:
Driving when the brake system warning light and ABS warning light are on at the same time is dangerous. When both lights are on, the rear wheels could lock more quickly in an emergency stop than under normal circumstances.
Don't drive with both lights on, and contact an Authorised Mazda Dealer to have the brakes inspected as soon as possible.
Driving Your Mazda
Warning/Indicator Lights and Beeps
NOTE
When the engine is jump-started to charge the battery, uneven rpm occurs and the ABS warning light comes on. This is due to a weak battery, not a malfunction. Recharge the battery.
▼ Air Bag/Front Seat Belt Pretensioner System Warning Light

If the air bag/front seat belt pretensioner system is OK, the warning light comes on when the ignition switch is turned to the ON position or after the engine is cranked. After about 6 seconds it goes out.
A system malfunction is indicated when the warning light constantly flashes, stays on or doesn't come on at all. If any of these occur, consult an Authorised Mazda Dealer as soon as possible. The system may not work in an accident.
WARNING
Self-Servicing the Air Bag/Pretensioner Systems:
Self-servicing or tampering with the systems is dangerous. An air bag/pretensioner could accidentally activate or become disabled. This could cause serious injuries. Never tamper with the systems and always have an Authorised Mazda Dealer perform all servicing and repairs.
▼Low Fuel Warning Light


This warning light in the fuel gauge signals that the fuel tank will soon be empty. Get fuel as soon as possible.
▼Seat Belt Warning Light (Except European Model)
If the driver's seat belt is not fastened when the ignition switch is turned to the ON position, the seat belt warning light will remain on until the belt is fastened. If the system does not operate correctly, consult an Authorised Mazda Dealer.
5-32


Warning/Indicator Lights and Beeps
▼Door-Ajar Warning Light
This warning light comes on when any door isn't securely closed.
▼ Sedimentor Warning Light (Diesel engine)
The fuel filter acts as a sedimentor that separates water from the fuel.
If 0.05 L (0.052 US qt, 0.044 Imp qt) of water accumulates in this filter, the warning light will come on. When it does, drain the water (page 8-26).
▼Low Washer Fluid Level Warning Light
This warning light reveals that little windscreen washer fluid remains. Add fluid (page 8-23).
▼Immobilizer System Warning/Security Indicator Light
Immobilizer system warning light
When the key is in the ignition switch, this light serves as the immobilizer system warning light.
If the immobilizer system is working properly, the light will come on when the ignition switch is turned to the ON or START position. The light will go out when confirmation by the immobilizer system is completed.
If the light flashes rapidly, fails to come on, or comes on and stays on, it indicates a system malfunction. If any of these occur, contact an Authorised Mazda Dealer as soon as possible.
Security indicator light
With theft-deterrent system
When there is no key in the ignition switch, and the theft-deterrent system has been armed, the light will flash once every 3 seconds. This indicates that the system is working properly.
With double-locking system
After the double-lock system has been activated, the light comes on for about 3 seconds. This indicates that the system has been activated properly.
Driving Your Mazda
Warning/Indicator Lights and Beeps
▼ Air Bag Cut-Off System Indicator Light

This light comes on when the ignition switch is turned to the ON position.
After about 6 seconds it goes out if a child-restraint system designed for Mazda's air bag cut-off system is not installed on the front passenger seat.
This light comes on and stays on when a child-restraint system designed for Mazda's air bag cut-off system is installed on the front passenger seat. The front passenger seat's front and side air bags and the seat belt pretensioner system are also turned off.
The air bag cut-off indicator light doesn't come on when:
- There is no passenger on the front passenger seat. (The front passenger seat's front and side air bags and the seat belt pretensioner system are turned off.)
- A regular child-restraint system is installed on the front passenger seat, or luggage or cargo is placed on the seat. (The air bag cut-off indicator light isn't on, the front passenger seat's front and side air bags and the seat belt pretensioner system can still activate in an accident.)
WARNING
Sitting on Additional Seat Cushion: Sitting on an additional seat cushion on the front passenger seat is dangerous. The air bag cut-off system may not function properly because the additional seat cushion could cause sensor interference. During an accident, the front seat passenger will not have the supplementary protection of the air bag. This could result in serious injuries. Do not sit on an additional seat cushion on the front passenger seat.
CAUTION
To prevent damage to the seat sensors installed in the seat bottom, don't place anything sharp on the seat bottom or leave heavy luggage on it for a long time.
NOTE
The system requires about 7 seconds to alternate between turning the air bag system on or off.
5-34


natural_image
Pure geometric diagram with intersecting lines and circles, no text or symbols presentDriving Your Mazda
Warning/Indicator Lights and Beeps
▼Headlight Main-Beam Indicator Light
This light indicates one of two things:
• The main-beam headlights are on.
- The direction indicator lever is in the flash-to-pass position.
▼Front Fog Lights Indicator Light
This light comes on when the front fog lights are operating.
▼Rear Fog Light Indicator Light
This light comes on when the rear fog light is operating.
▼HOLD Indicator Light (Automatic transaxle)
HOLD
This light comes on when the hold mode is selected.
CAUTION
If the hold indicator light flashes, the transaxle has an electrical problem. Continuing to drive your Mazda in this condition could cause damage to your transaxle. Consult an Authorised Mazda Dealer as soon as possible.
5-35




Driving Your Mazda
Warning/Indicator Lights and Beeps
▼Shift Position Indicator Light
This indicates the selected shift position when the ignition switch is in the ON position.

▼Glow Plug Indicator Light (Diesel engine)
This light comes on when the ignition switch is in the ON position. It goes out when the glow plug is warm.
▼TCS/DSC Indicator Light
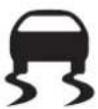
This indicator light stays on for a few seconds when the ignition switch is turned to the ON position. If the TCS or DSC is operating, the indicator light flashes.
If the light stays on, the TCS or DSC may have a malfunction and they may not operate correctly. Take your vehicle to an Authorised Mazda Dealer.
▼TCS OFF Indicator Light

This light comes on when the ignition switch is turned to the ON position. It goes off when the engine is started. It also comes on when you switch off the traction control system or when the system has a malfunction.
NOTE
After starting the engine on very cold days, the TCS OFF indicator will remain on and TCS will not operate until the engine is warm.
5-36


Driving Your Mazda
Warning/Indicator Lights and Beeps
Beeps
▼Ignition Key Reminder (Except European model)
If the ignition switch is in the LOCK or ACC position, a beep will sound when any door is opened.
▼Lights-On Reminder
If lights are on and the key is removed from the ignition switch, a beep will sound when any door is opened.
5-37
Driving Your Mazda
Switches and Controls
Lighting Control
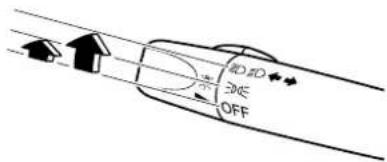
▼Headlights
To turn on the lights, turn the knob on the end of the control lever.
| Lever Position OFF | ≡00≡ | ≡D≡D | |
| Headlights Off On | |||
| Tail LightsParking lightsNumber plate lights | Off On On | ||
NOTE
To prevent discharging the battery, don't leave the lights on while the engine is off.
▼Lights-On Reminder
If lights are on and the key is removed from the ignition switch, a beep will sound when any door is opened.
▼Headlight Main-Low Beam
Push the lever forward for main beam. Pull it back for low.
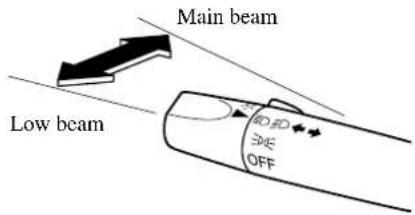
▼Flashing the Headlights
To flash the headlights, pull the lever fully toward you. The headlight switch need not be on, and the lever will return to the normal position when released.
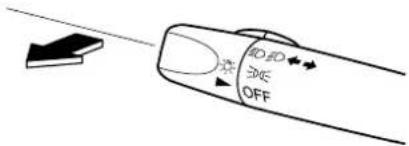
▼Headlight Levelling
The number of riders and weight of cargo in the luggage compartment change the angle of the headlights.
The headlight levelling switch adjusts this angle.
5-38





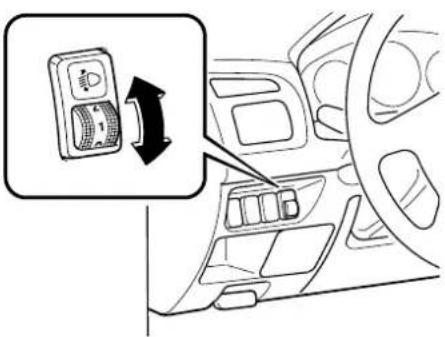
Select the proper setting from the following chart.
| Front seat | Rearseat | Load | Switch Position | |
| Driver Passenger | ||||
| × | — | — | — | 0 |
| × | × | — | — | 0 |
| × | × | × | — | 1 |
| × | × | × | × | 2 |
| × | — | — | × | 3 |
x: Yes —: No
▼ Running Lights
Some countries require moving vehicles to have their lights on (running lights) during the daytime.
Running lights come on automatically when the ignition switch is in the ON position.
They turn off when the parking lights are turned on.
Turn and Lane-Change Signals
▼Direction Indicator
Move the signal lever down (for a left turn) or up (for a right turn) to the stop position. The signal will self-cancel after the turn is completed.
If the indicator light continues to flash after a turn, manually return the lever to its original position.
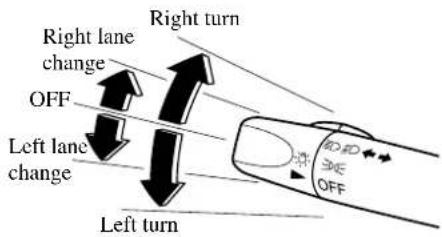
Green indicators on the instrument panel show which signal is working.
Lane-change signals
Move the lever slightly toward the direction of the change —until the indicator flashes— and hold it there. It will return to the off position when released.
NOTE
If an indicator light stays on without flashing or if it flashes abnormally, the direction indicator bulb may be burned out.
Driving Your Mazda
Switches and Controls
Front Fog Lights Rear
Use this switch to turn on the front fog lights. They help you to see as well as to be seen.
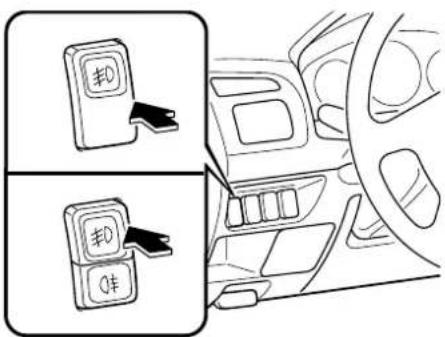
To turn on the front fog lights, first turn on the headlight switch. Then press the front fog light switch.
To turn the front fog lights off, press the front fog light switch again or turn the headlight switch off.
Light
Use this switch to turn on the rear fog light. The rear fog light helps your vehicle to be seen.
To turn on the rear fog light, turn the headlights on and then press the rear fog light switch.
To turn it off, press it again or turn the headlights off.
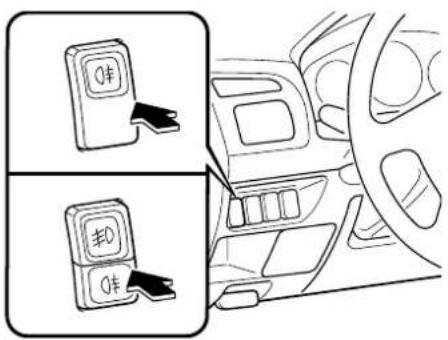
NOTE
If your vehicle has front fog lights, you can turn on the rear fog light when the front fog lights are on.
Windscreen Wipers and Washer
The ignition switch must be in the ON position.
WARNING
Frozen Washer Fluid:
Using windscreen washer fluid in freezing temperatures is dangerous. The washer fluid could freeze on the windscreen and block your vision. You could have an accident. Don't use the washer without first warming the windscreen.
NOTE
Because heavy ice and snow can jam the wiper blades, the wiper motor is protected by a circuit breaker. This mechanism will automatically stop operation of the blades, but only for about 5 minutes.
If this happens, turn off the wiper switch and park off the right-of-way, and remove the snow and ice.
After 5 minutes, turn on the switch and the blades should operate normally. If they don't resume functioning, consult an Authorised Mazda Dealer as soon as possible.
▼Windscreen Wipers
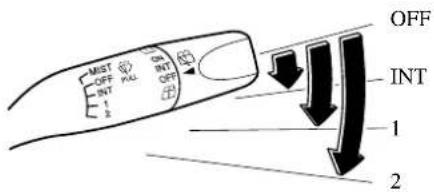
Turn the wipers on by pulling the lever down.
INT — Intermittent
1—Normal
2 — Fast
Variable-speed intermittent wipers
Set the lever to INT and choose the interval timing by rotating the ring.
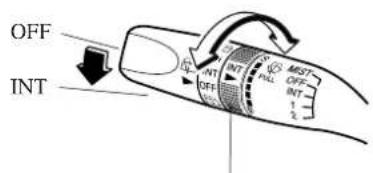
INT ring
5-41




Driving Your Mazda
Switches and Controls
One-touch wipers
For a single wiping cycle, push the lever up to MIST.
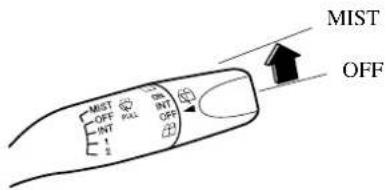
▼Windscreen Washer
Pull the lever toward you and hold it to spray washer fluid.
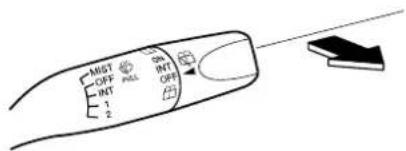
NOTE
In the OFF or INT position, the wipers will be activated until the lever is released.
If the washer doesn't work, inspect the fluid level (page 8-23). If it's OK, consult an Authorised Mazda Dealer.
Rear Window Wiper and Washer
The ignition switch must be in the ON position.
▼Rear Window Wiper
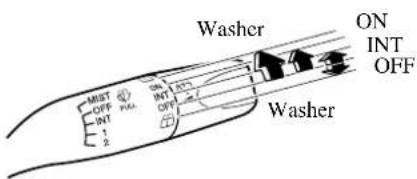
Turn the wiper on by turning the knob.
ON — Normal
INT — Intermittent
▼Rear Window Washer
To spray washer fluid, turn the knob to the position. After the knob is released, the washer will stop.
NOTE
There are two washer positions: up and down. In the down washer position, the wiper will not be activated.
If the washer doesn't work, inspect the fluid level (page 8-23). If it's OK and the washer still doesn't work, consult an Authorised Mazda Dealer.
5-42





Headlight Washer
The ignition switch must be in the ACC or ON position.
Rotate the ring forward to wash the headlights.
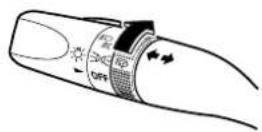
CAUTION
Do not operate the headlight washer for more than 10 seconds at a time to avoid damaging the pump.
Rear Window Defroster
The rear defroster clears frost, fog, and thin ice from the rear window.
The ignition switch must be in the ON position.
Push the switch to turn on the rear window defroster; the indicator light will come on.
Push the switch again to turn it off.
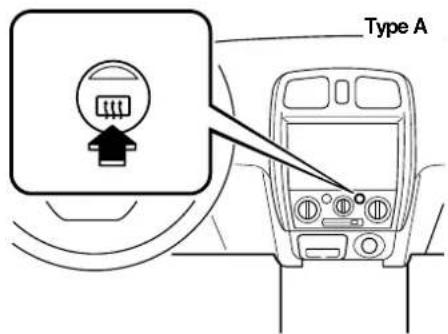
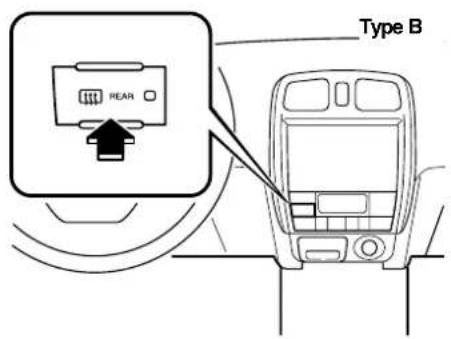
5-43



Driving Your Mazda
Switches and Controls

CAUTION
Don't use sharp instruments or window cleaners with abrasives to clean the inside of the rear window surface. They may damage the defroster grid inside the window.
NOTE
This defroster is not designed for melting snow. If there is an accumulation of snow on the rear window, brush it off before using the defroster.
Horn
To sound the horn, press around the mark of the steering wheel.
Hazard Warning Flasher
The hazard warning lights should always be used when you stop on or near a roadway.
The hazard warning lights warn other drivers that your vehicle is a traffic hazard and that they must take extreme caution when near it.
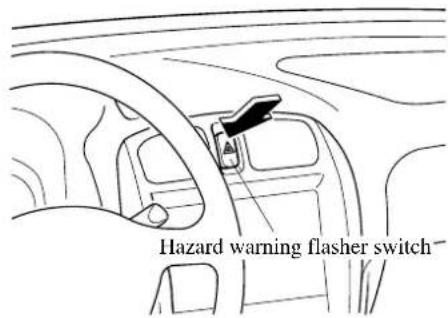
Depress the hazard warning switch and all four direction indicators will flash at once.
NOTE
- The direction indicators don't work when the hazard warning lights are on.
- Check local regulations about the use of hazard warning lights while the vehicle is being towed. They may forbid it.
Form No. 8R34-EE-02H
6 Interior Comfort
Use of various features for drive comfort, including air-conditioning and audio system.
Air-Conditioning System 6-2
Operating Tips 6-2
Vent Operation 6-3
Types of the Air-Conditioning System 6-5
Manual Type 6-6
Fully Automatic Type 6-11
Audio System 6-16
Aerial 6-16
Operating Tips for Audio System 6-16
Audio Set 6-23
Audio Control Lever Operation 6-50
Interior Equipment 6-52
Sunvisors 6-52
Interior Lights 6-52
Clock 6-54
Lighter 6-55
Ashtray 6-56
Cup Holder 6-57
Storage Compartments 6-59
Accessory Socket 6-61


6-1


Interior Comfort
Air-Conditioning System
Operating Tips
▼Operating the Air-Conditioning System
Operate the air-conditioning system with the engine running.
▼ Clearing the Air Inlet
Clear all obstructions like leaves, snow and ice from the bonnet and the air inlet in the cowling grille to improve the system efficiency.
▼Foggy Windows
The windows may fog up easily in humid weather. Use the air-conditioning system to defog the windows.
To help defog the windows, operate the air conditioner to dehumidify the air.
▼ Outside/Recirculated Air Position
Use the outside air position in normal conditions. The recirculated air position can be used temporarily when driving on dusty roads or for quick cooling of the interior.
▼ Parking in Direct Sunlight
If the vehicle has been parked in direct sunlight during hot weather, open the windows to let warm air escape, then run the air-conditioning system.
▼Not Using for a Long Period
Run the air conditioner at least once a month to keep internal parts lubricated.
▼ Check the Refrigerant before Weather Gets Hot
Have the air conditioner checked before the weather gets hot. Lack of refrigerant may make the air conditioner less efficient. Consult an Authorised Mazda Dealer for refrigerant inspection.
The optional air conditioner is filled with HFC134a (R134a), a refrigerant that will not damage the ozone layer. If the air conditioner is low on refrigerant or has a malfunction, consult an Authorised Mazda Dealer.
▼ Replacement of the Cabin Air Filter
If your vehicle is equipped with an air filter for the air conditioner, it is necessary to change the filter periodically as indicated in scheduled maintenance (page 8-3). Consult an Authorised Mazda Dealer for replacement of the cabin air filter.
Vent Operation
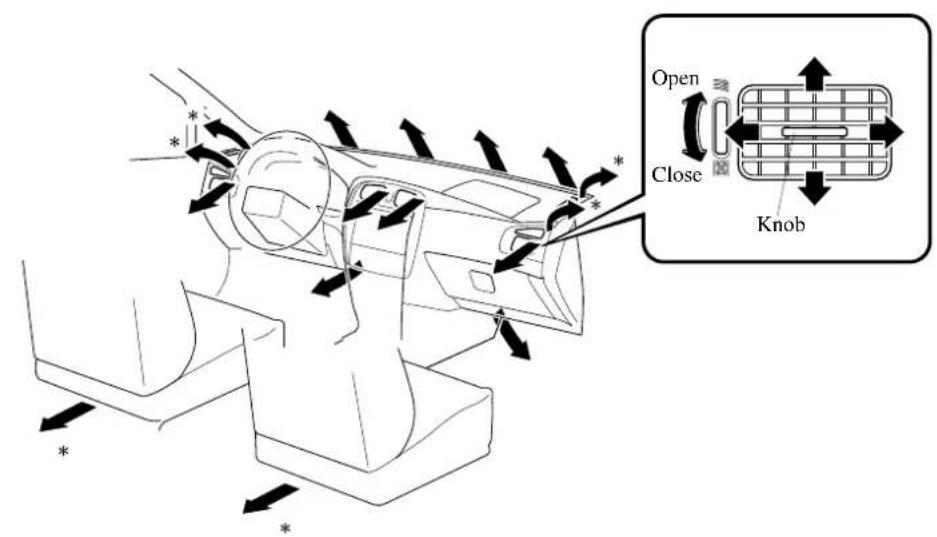
* Depending on the model some vents may not be available.
▼Adjusting the Vents
Directing airflow
You can direct air flow by moving the adjustment knob.
Adjusting the amount of airflow (Left-hand drive model)
These vents can be opened and closed with wheel.
NOTE
When using the air conditioner, mist may come out from the vents. This is not a sign of trouble but a result of humid air being suddenly cooled.
6-3




J54L_8R34_EE_02H.BOOK Page 4 Monday, July 15, 2002 9:03 AM


Interior Comfort
Air-Conditioning System
▼Selecting the Airflow Mode
Instrument panel Vents Defroster and Floor Vents
Instrument panel and Floor Vents Defroster Vents
natural_image
Diagram of a vehicle interior showing a car with directional arrows indicating movement or movement (no text or symbols present)
Floor Vents
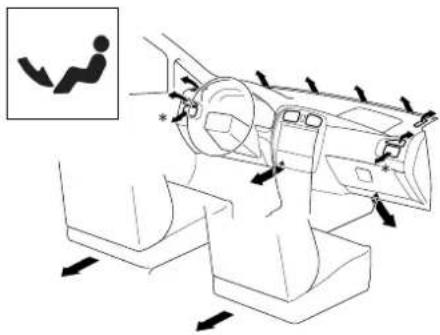
* Left-hand drive model only.
6-4


natural_image
Pure geometric diagram with intersecting lines and a central circle, no text or symbols presentForm No. 8R34-EE-02H
Types of the Air-Conditioning System
Manual type and full-automatic type air-conditioning systems are explained separately. Check your vehicle's air-conditioning type and read the appropriate pages.
Manual Type 6-6
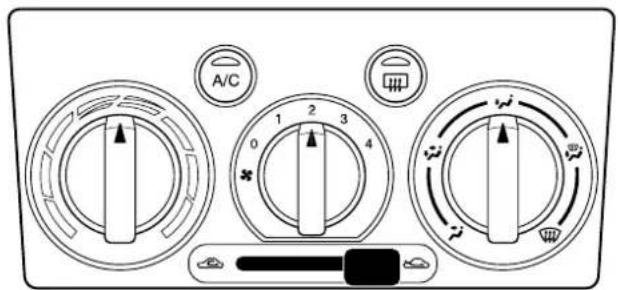
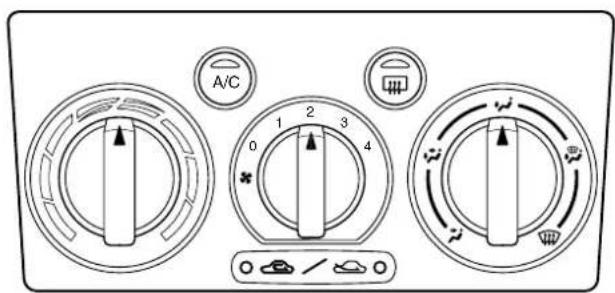
Fully Automatic Type....6-11
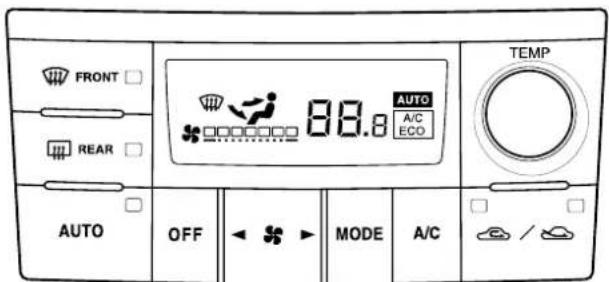


6-5


Interior Comfort
Air-Conditioning System
Manual Type
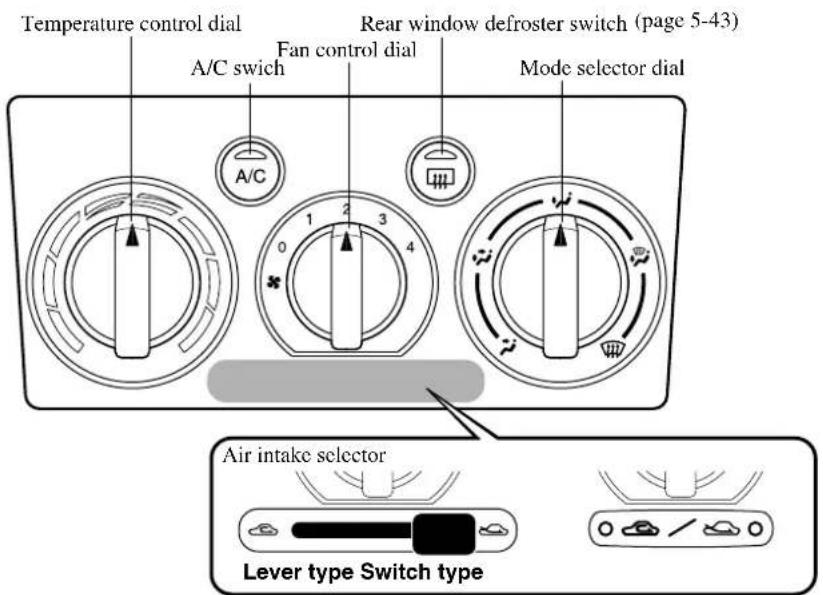
▼ Control Switches
Temperature control dial
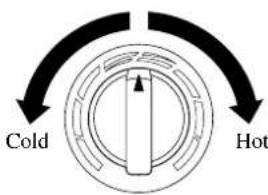
This dial controls temperature. Turn it clockwise for hot and anticlockwise for cold.
Fan control dial
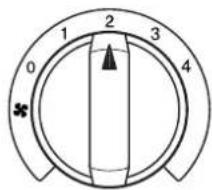
This dial allows variable fan speeds.
0—Fan off
1—Low speed
2—Medium low speed
3—Medium high speed
4—High speed
6-6


natural_image
Pure geometric diagram with intersecting lines and a central circular pattern (no text or symbols)Form No. 8R34-EE-02H
Mode selector dial
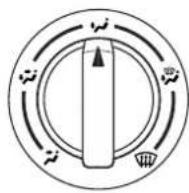
Turn the mode selector dial to select airflow mode (page 6-4).
A/C switch
Push the switch to turn the air conditioner on. An indicator light on the switch will illuminate when the fan control dial is on.
Push the switch once again to turn the air conditioner off.
NOTE
The air conditioner may not function when the outside temperature approaches 0 ^ ( 32 ^ ).
Air intake selector
Lever type

This lever controls the source of air entering the vehicle.
It is recommended that under normal conditions the lever be kept in the outside air position.
Switch type
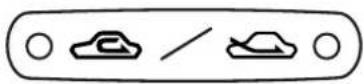
This switch controls the source of air entering the vehicle.
Press the switch to alternate between the and positions. The
indicator light for the selected mode will illuminate.
It is recommended that under normal conditions the switch be kept in the outside air position.
Outside air position ( )
Outside air is taken into the vehicle. Use this position for normal ventilation and heating.
Interior Comfort
Air-Conditioning System
Recirculated air position ( )
Outside air is shut off. Air within the vehicle is recirculated.
This position can be used when driving on a dusty road or in similar conditions. It also helps to provide quicker cooling of the interior.
WARNING
The Recirculated Air Position:
Using the position in cold or rainy weather will cause the glass to fog up. Your vision will be hampered, which could lead to a serious accident. Do not use the position in cold or rainy weather.
▼ Heating
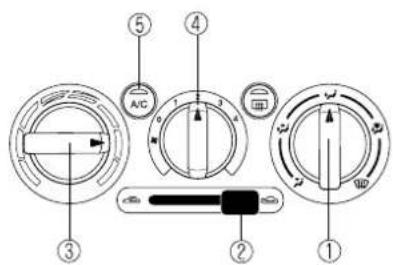
- Set the mode selector dial to the position.
- Set the air intake selector to the position.
- Set the temperature control dial to the hot position.
- Set the fan control dial to the desired speed.
6-8
- If dehumidified heating is desired, turn on the air conditioner.
NOTE
- If the windscreen fogs up easily, set the mode selector dial to the position.
- If cooler air is desired at face level, set the mode selector dial at the position and adjust the temperature control dial to maintain maximum comfort.
- The air to the floor is warmer than air to the face (except when the temperature control dial is set at the extreme hot or cold position).
▼Cooling (With Air Conditioner)
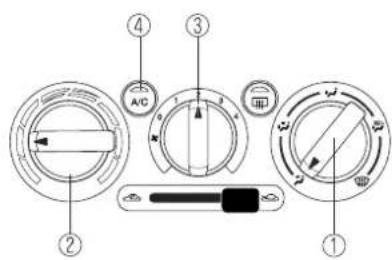
- Set the mode selector dial to the position.
- Set the temperature control dial to the desired position.
- Set the fan control dial to the desired speed.
-
Turn on the air conditioner.
-
Adjust the fan control dial and temperature control dial to maintain maximum comfort.
CAUTION
When using the air conditioner while driving up long hills or in heavy traffic, closely monitor the temperature gauge (page 5-22).
The air conditioner may cause engine overheating. If the gauge indicates overheating, turn the air conditioner off.
NOTE
- When maximum cooling is desired, set the temperature control dial to the extreme cold position and set the air intake selector to the position, then set the fan control dial to the position 4.
- If warmer air is desired at floor level, set the mode selector dial at the position and adjust the temperature control dial to maintain maximum comfort.
- The air to the floor is warmer than air to the face (except when the temperature control dial is set at the extreme hot or cold position).
▼ Ventilation
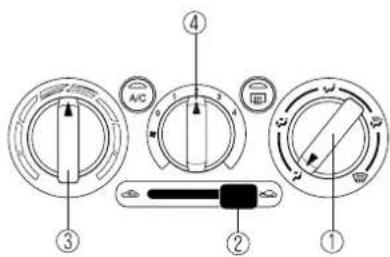
- Set the mode selector dial to the position.
- Set the air intake selector to the position.
- Set the temperature control dial to the desired position.
- Set the fan control dial to the desired speed.
▼Windscreen Defrosting and Defogging
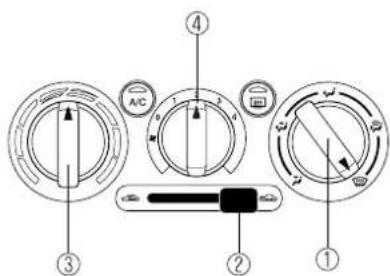
- Set the mode selector dial to the position.
- Set the air intake selector to the position (Lever type).
6-9




Interior Comfort
Air-Conditioning System
- Set the temperature control dial to the desired position.
- Set the fan control dial to the desired speed.
WARNING
Foggy Windscreen:
Using the position with the temperature control set to the cold position will cause the outside of the glass to fog up. Your vision will be hampered, which could lead to a serious accident. Set the temperature control to the hot or warm position when using the position.
NOTE
- For maximum defrosting, turn on the air conditioner, set the temperature control dial to the extreme hot position and the fan control dial to position 4.
- If warm air is desired at the floor, set the mode selector dial to the position.
NOTE
(Switch type)
In the position, outside air is automatically selected.
▼Dehumidifying
(With Air Conditioner)
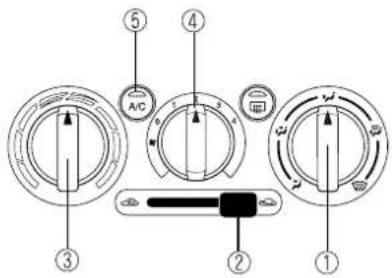
Operate the air conditioner in cool or cold weather to help defog the windscreen and side windows.
- Set the mode selector dial to the desired position.
- Set the air intake selector to the position.
- Set the temperature control dial to the desired position.
- Set the fan control dial to the desired speed.
- Turn on the air conditioner.
6-10




Fully Automatic Type
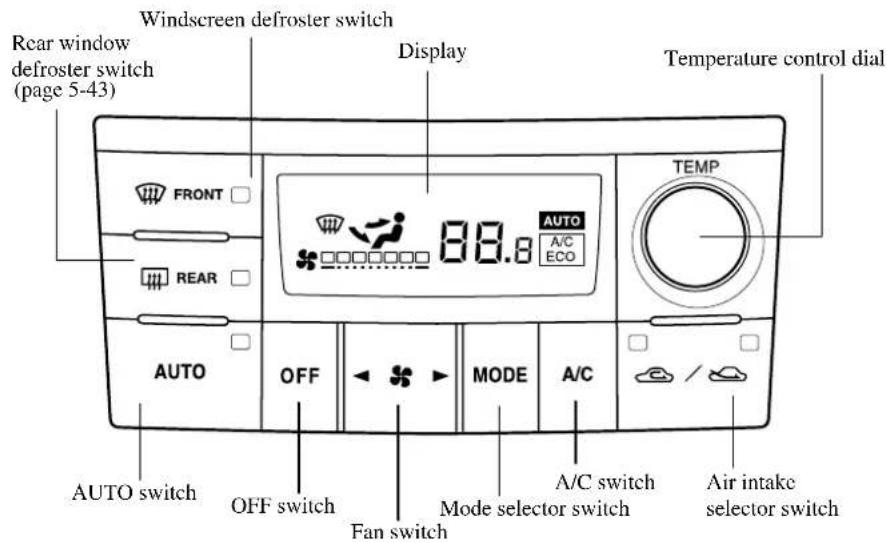
▼ Control Switches
AUTO switch
By pressing the AUTO switch the following functions will be automatically controlled in accordance with the set temperature:
- Airflow temperature
-
Amount of airflow
-
Selection of airflow mode
• Outside/Recirculated air selection
• Air conditioner operation
NOTE
AUTO switch indicator light
- When on, it indicates AUTO operation, and the system will function automatically.
- When off, indicates the operation of other switches such as the mode selector switch, fan switch, A/C switch and windscreen defroster switch. Other functions will continue to operate automatically.
6-11




Interior Comfort
Air-Conditioning System
OFF switch
OFF
Pressing the OFF switch shuts off the air-conditioning system.
Temperature control dial
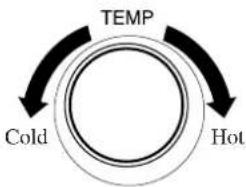
flowchart
graph TD
    A["Temp"] --> B["Cold"]
    B --> C["Hot"]
This dial controls temperature. Turn it clockwise for hot and anticlockwise for cold.
Fan switch
The fan has seven speeds. The selected speed will be displayed.
Mode selector switch
MODE
The desired airflow mode can be selected (page 6-4).
NOTE
With the airflow mode set to √ position and the temperature control dial set at a medium temperature, heated air is directed to the feet and a comparably lower air temperature will flow through the central, left and right vents.
A/C switch
A/C
With the AUTO or fan switch ON, press the A/C switch to select the air conditioning (cooling/dehumidifying functions) on or off. Successively pressing the switch will display the following: A/C→A/C ECO→off (not displayed)
6-12




Air-Conditioning System
NOTE
- Although air conditioning and defogging ability is reduced, the A/C ECO function is designed to economize use of the air conditioning system.
- The air conditioner may not function when the outside temperature approaches 0 °C (32 °F). (Indicator remains on even when system is off.)
Air intake selector switch
Outside or recirculated air positions can be selected. Press the switch to select outside/recirculated air positions.
Recirculated air position ( )
Use this position when going through tunnels, driving in congested traffic (high engine exhaust areas) or when quick cooling is desired.
Outside air position (
Use this position for normal conditions and defogging.

WARNING
The Recirculated Air Position: Using the position in cold or rainy weather will cause the glass to fog up. Your vision will be hampered, which could lead to a serious accident. Do not use the position in cold or rainy weather.
▼ Standard Use
- Press the AUTO switch. Selection of the airflow mode, air intake selector and amount of airflow will be automatically controlled.
- Use the temperature control dial to select a desired temperature.
flowchart
graph TD
    A["Hot"] --> B["Cold"]
    B --> C["TEMP"]
    C --> A
To turn off the system, press the OFF switch.
6-13




Interior Comfort
Air-Conditioning System
NOTE
- Setting the temperature to maximum high or low will not provide the desired temperature at a faster rate.
- To prevent cool air blowing from the vents when heating right after starting the engine, the amount of airflow is reduced until the air warms up.
NOTE
(European model)
First set the temperature to 22.0 (°C), then adjust to the desired temperature.
NOTE
(Except European model)
First set the temperature to 25.0 (°C), then adjust to the desired temperature.
▼Windscreen Defrosting and Defogging
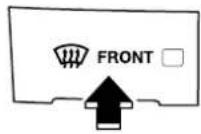
Press the windscreen defroster switch. In this position, the outside air position is automatically selected, and the air conditioner automatically turned on. The air conditioner will direct dehumidified air to the front windscreen and side windows (page 6-4). Airflow amount will be increased.
To turn off the system press the windscreen defroster switch again.

WARNING
Foggy Windscreen:
Using the position with the temperature control set to the cold position will cause the outside of the glass to fog up. Your vision will be hampered, which could lead to a serious accident. Set the temperature control to hot or warm position when using the position.
NOTE
Use the temperature control dial to increase the air flow temperature and defog the glass more quickly.
▼ Sunlight/Temperature Sensor
The fully automatic air conditioner function measures inside and outside temperatures, and sunlight. It then sets temperatures inside the passenger compartment accordingly. Don't obstruct the sensor.
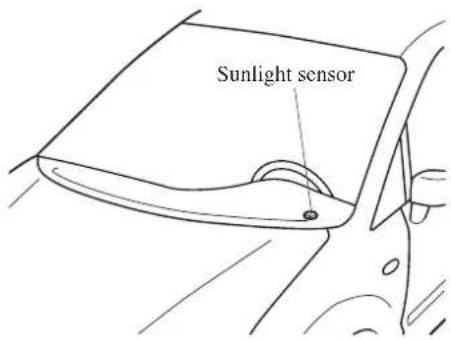
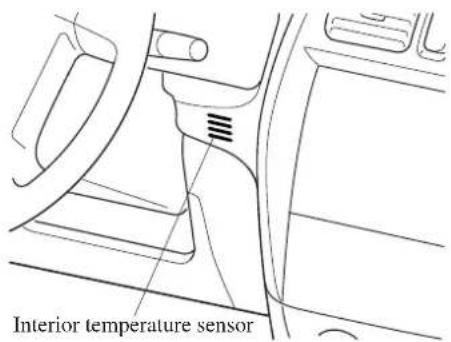
6-15
Interior Comfort
Audio System
Aerial
▼Manual Type
The manual aerial must be raised and lowered by hand.
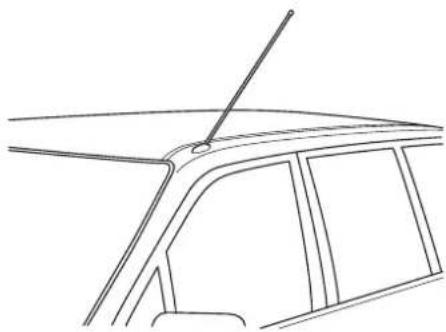
natural_image
Line drawing of a car's front and side panels showing structural details (no text or symbols)
CAUTION
To prevent damage to the aerial, retract it before entering a car wash facility or passing beneath a low overhead clearance.
Operating Tips for Audio System
▼ Radio Reception
AM characteristics
AM signals bend around such things as buildings or mountains and bounce off the ionosphere. Therefore, they can reach longer distances than FM signals. Because of this, two stations may sometimes be picked up on the same frequency at the same time.
Station 1 Station 2
FM characteristics
An FM broadcast range is usually about 40—50 km (25—30 miles) from the source. Because of extra coding needed to break the sound into two channels, stereo FM has even less range than monaural (non-stereo) FM.
6-16


Signals from an FM transmitter are similar to beams of light because they do not bend around corners, but they do reflect. Unlike AM signals, FM signals cannot travel beyond the horizon.
Therefore, FM stations cannot be received at the great distances possible with AM reception.
Atmospheric conditions can also affect FM reception. High humidity will cause poor reception. However, cloudy days may provide better reception than clear days.
Multipath noise
Since FM signals can be reflected by obstructions, it is possible to receive both the direct signal and the reflected signal at the same time. This causes a slight delay in reception and may be heard as a broken sound or a distortion. This problem may also be encountered when in close proximity to the transmitter.
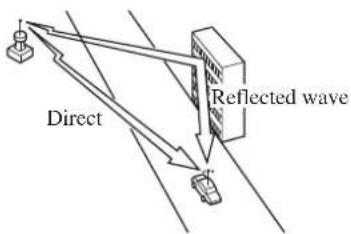
Flutter/Skip noise
Signals from an FM transmitter move in straight lines and become weak in valleys between tall buildings, mountains, and other obstacles. When a vehicle passes through such an area, the reception conditions may change suddenly, resulting in annoying noise.
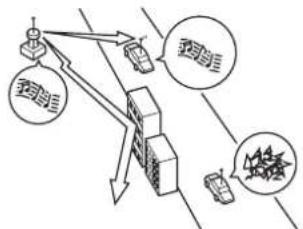
flowchart
graph TD
    A["Router"] --> B["Switch"]
    B --> C["Equipment"]
    C --> D["Switch"]
    D --> E["Equipment"]
    E --> F["Switch"]
    style A fill:#f9f,stroke:#333
    style B fill:#ccf,stroke:#333
    style C fill:#cfc,stroke:#333
    style D fill:#fcc,stroke:#333
    style E fill:#cff,stroke:#333
    style F fill:#ffc,stroke:#333
Weak signal noise
In suburban areas, broadcast signals become weak because of distance from the transmitter. Reception in such fringe areas is characterised by sound breakup.
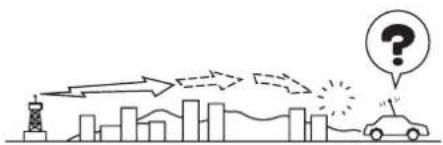
natural_image
Illustration of a traffic scene with a car, a building, and a question mark (no text or symbols)Strong signal noise
This occurs very close to a transmitter tower. The broadcast signals are extremely strong, so the result is noise and sound breakup at the radio receiver.
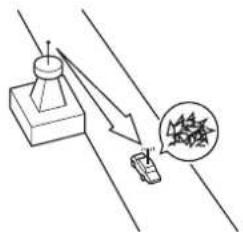
Interior Comfort
Audio System
Station drift noise
When a vehicle reaches the area of two strong stations broadcasting at similar frequencies, the original station may be temporarily lost and the second station picked up. At this time there will be some noise from this disturbance.
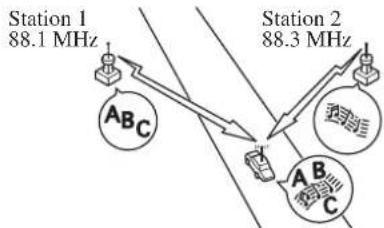
▼ Operating Tips for Cassette Tape Player
Cleaning the cassette tape player
The tape head, capstans, and pinch rollers will gather oxide residue from cassette tapes. This can cause weak or wavering sounds and damage to the cassette tapes and player. Use a good quality head-cleaning tape or a liquid cleaner cassette tape to remove it. Should the unit not operate normally, consult an Authorised Mazda Dealer. Never attempt to repair it or insert a screwdriver or anything else.
Handling the cassette tape player
The following precautions should be observed.
- Do not spill any liquid on the audio system.
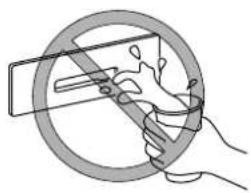
natural_image
Illustration of a hand holding a tool inside a circular ring (no text or symbols)- Do not insert any objects, other than cassette tape, into the slot.
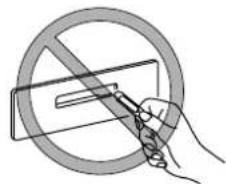
natural_image
Hand holding a pen crossed out of a circular diagram with a diagonal line (no text or symbols)- If the cassette tape is loose, it may produce poor sound or performance during playback. Use a pencil or something similar to remove any slack.
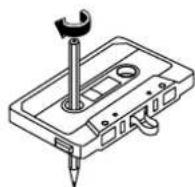
- Only cassette tapes that play no longer than 90 minutes should be used. Cassette tape exceeding 90 minutes are thin and may easily break.
- Do not leave a cassette tape in the tape player slot when not in use. Remove it completely to permit the slot door to close and to protect the mechanism from dust.
- Store cassette tapes away from extreme heat, magnetic fields, and direct sunlight. Protect the exposed cassette tape from dirt and damage. Store cassette tapes in their original cases or other protective cases.
- Insert only cassette tapes into the slot. If objects other than cassette tapes are inserted, they may damage the player.
▼ Operating Tips for Mini Disc (MD) Player
- The MD player has been designed to play MDs bearing the identification logo as shown. No other MDs can be played.

- When inserting the MD, make sure the MD label is facing up, and the MD is oriented to the insertion slot in the direction of the arrow. If not inserted correctly, the MD will be ejected, or may remain stuck in the MD deck.
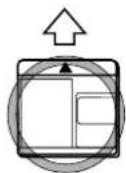
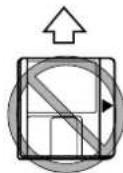
- Do not touch the internal part of the MD. If the MD shutter is slid open for no reason, it may be broken.
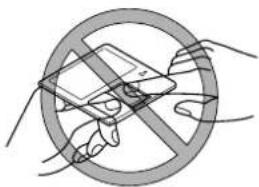
- Store MDs in their cases and away from direct sunlight.
- Do not insert fingers or foreign objects in the MD insertion slot as it could damage the MD deck.
Interior Comfort
Audio System
▼ Operating Tips for CD Player/In-Dash CD Changer
Condensation phenomenon
Immediately after turning on the heater when the vehicle is cold, the CD or optical components (prism and lens) in the CD player/changer may become clouded with condensation. At this time, the CD will eject immediately when placed in the unit. A clouded CD can be corrected simply by wiping it with a soft cloth. Clouded optical components will clear naturally in about an hour. Wait for normal operation to return before attempting to use the unit.
Handling the CD player/In-dash CD changer
The following precautions should be observed.
- Do not spill any liquid on the audio system.
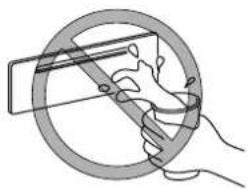
natural_image
Illustration of a hand holding a circular object with a diagonal line crossing through it (no text or symbols)- Do not insert any objects, other than CDs, into the slot.
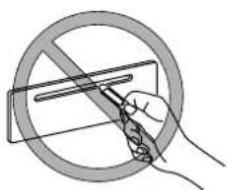
natural_image
Hand holding a pen crossed out of a circular sign with a diagonal line (no text or symbols)- The CD revolves at high speed within the unit. Defective (cracked or badly bent) CDs should never be used.
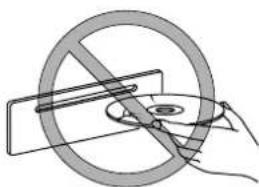
natural_image
Diagram of a hand holding a circular object with a diagonal line, no text or symbols present- Do not use non-conventional discs such as heart-shaped, octagonal discs, etc. The CD player/changer could be damaged.
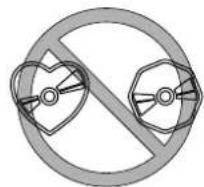
- A new CD may have rough edges on its inner and outer perimeters. If a disc with rough edges is used, proper setting will not be possible and the CD player/changer will not play the CD. Remove the rough edges in advance by using a ball-point pen or pencil as shown below. To remove the rough edges, rub the side of the pen or pencil against the inner and outer perimeter of the CD.
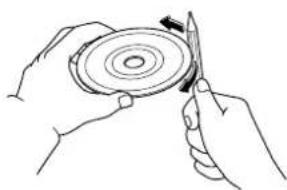
natural_image
Line drawing of hands holding a circular object with a pencil, no text or symbols present6-20


- When driving over uneven surfaces, the sound will jump.
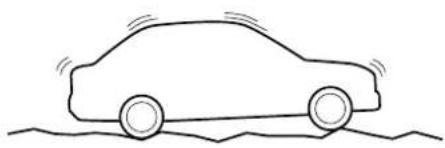
natural_image
Simple line drawing of a car on a surface with motion lines indicating speed (no text or symbols)- The CD player/changer has been designed to play CDs bearing the identification logo as shown. No other discs can be played.

- Be sure never to touch the signal surface when handling the CDs. Pick up a CD by grasping the outer edge or the edge of the hole and the outer edge.
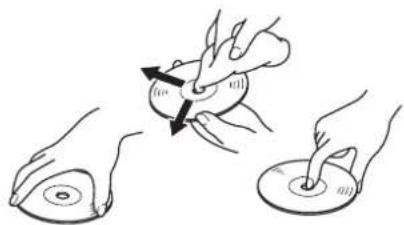
natural_image
Illustration of hands performing a medical procedure on a patient's abdomen (no text or symbols present)- Do not stick paper or tape on the CD. Avoid scratching the reverse side (the side without a label).
- Dust, finger smudges, and dirt can decrease the amount of light reflected from the signal surface, thus affecting sound quality. If the CD should become soiled, gently wipe it with a soft cloth from the centre of the CD to the edge.
- Do not use record sprays, antistatic agents, or household spray cleaners. Volatile chemicals such as benzine and thinner can also damage the surface of the CD and must not be used. Anything that can damage, warp, or fog plastic should never be used to clean CDs.
- CDs, like traditional audio records, are made of plastic. To avoid warping, keep the CDs in their cases and do not store them where they will be exposed to direct sunlight.
- The CD player/changer ejects the CD if the CD is inserted upside down. Also dirty and/or defective CDs may be ejected.
- 8 cm (3 in) CDs and CD accessories (e.g. 8 cm disc adapter) cannot be used in the CD player/changer.
- Do not insert cleaning discs in the CD player/changer.
- Do not insert any disc with a peel-off or seal on it.


J54L_8R34_EE_02H.BOOK Page 22 Monday, July 15, 2002 9:03 AM

Interior Comfort
Audio System
6-22



Audio Set
CD Player In-dash CD Changer


TYPE A TYPE B
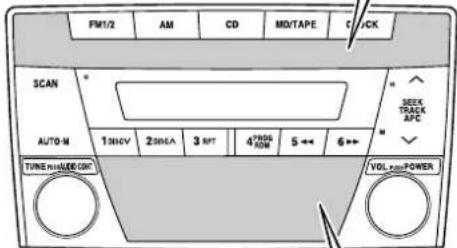
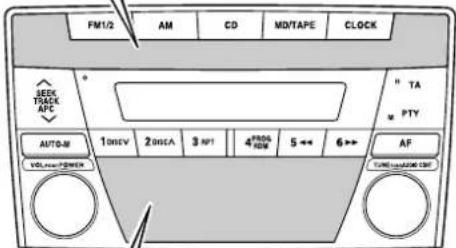
Cassette Tape Player
natural_image
Pure diagram of a vehicle dashboard layout without any text, numbers, or symbolsMini Disc (MD) Player
natural_image
Front view of a vehicle dashboard with control buttons (no text or symbols visible)Illustration is of a representative audio unit.
Antitheft System (European model with Radio Data System, Australia model) 6-24
Power/Volume/Sound Controls 6-28
Clock 6-30
Operating the Radio (Type A) 6-32
Operating the Radio (Type B) 6-34
Operating the Cassette Tape Player 6-38
Operating the Mini Disc (MD) Player 6-42
Operating the Compact Disc (CD) Player 6-44
Operating the In-Dash CD Changer 6-46
Error Indications 6-49
6-23




Interior Comfort
Audio System
▼ Antitheft System (European model with Radio Data System, Australia model)
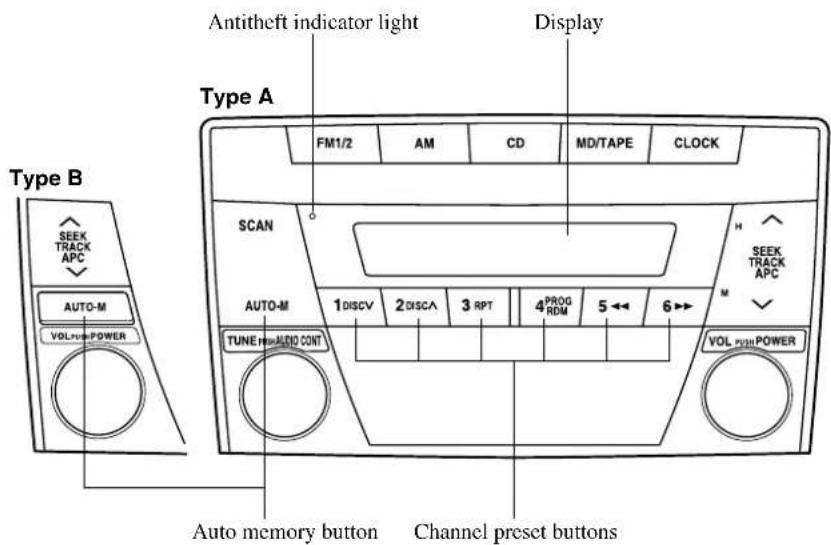
To deter theft of your vehicle's audio unit, it has an integrated antitheft system. The system is designed to accept a code number that makes the unit inoperable if it is stolen.
This system will be activated if the power source is ever disconnected from or in any way interrupted to the audio unit. When the system is activated, the audio system will not operate when reconnected to a power supply, and "CODE" will flash on the display until the correct code number is input. If the antitheft system is activated, reset the unit.
CAUTION
Read and understand all code setting procedures before attempting to input your personal code number.
The personal code number is only shown on the audio unit display while it is being set. Once it is input and stored by the unit, it is never again displayed. For that reason, be very careful to immediately record your personal code number, and never let an unauthorised person set a code.
NOTE
Although the audio unit is operable without the code number being set, we recommend that you set your personal code number.
6-24


Setting procedure
- Begin with the audio unit off and the ignition switch is in the ACC position.
- Press the auto memory button (AUTO-M and the channel preset button 6 simultaneously for about 2 seconds until "CODE" is displayed.
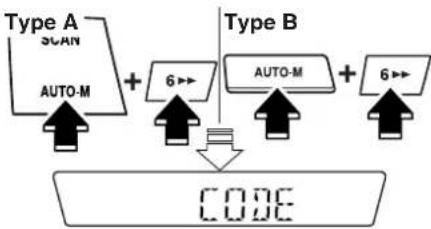
flowchart
graph TD
    A["Type A"] --> B["AUTO-M"]
    C["Type B"] --> D["AUTO-M"]
    E["Code"] --> F["6→"]
    style A fill:#f9f,stroke:#333
    style C fill:#f9f,stroke:#333
    style E fill:#f9f,stroke:#333
    style B fill:#ccf,stroke:#333
    style D fill:#ccf,stroke:#333
    style F fill:#dfd,stroke:#333
- Again press the auto memory button (AUTO) the channel preset button 6 while "CODE" is displayed (within 10 seconds). The display will exhibit bars.
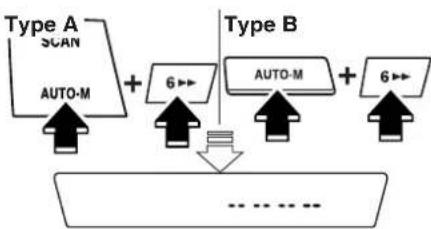
flowchart
graph TD
    A["Type A"] -->|SCAN| B["+"]
    C["Type B"] -->|AUTO-M| D["+"]
    E["..."] --> F["Output"]
    style A fill:#f9f,stroke:#333
    style C fill:#f9f,stroke:#333
    style E fill:#f9f,stroke:#333
- While the bars are displayed, input your personal code number by pressing channel preset buttons 1, 2, 3, and 4.
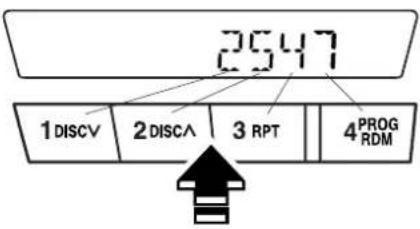
Press 1 for the first digit, 2 for the second, 3 for the third, and 4 for the last digit. For example, if your number is 2547, press 1 twice, 2 five times, 3 four times, and 4 seven times. If the display goes off while inputting, begin from Step 1.
NOTE
We recommend that your code number be associated with something easy to remember. You should also file a copy of the code numbers with your important papers.
- While the code number is displayed, press the auto memory button (AUTO-M and the channel preset button 6 for about 2 seconds and "CODE" begins to flash. After about 5 seconds, "CODE" will disappear. This indicates the system is set.
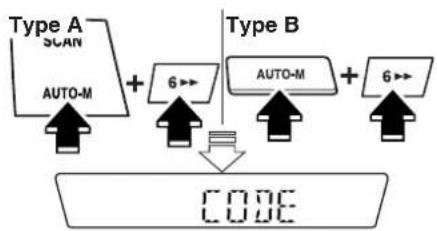
flowchart
graph TD
    A["Type A"] --> B["SCAN"]
    B --> C["AUTO-M"]
    C --> D["Code"]
    E["Type B"] --> F["AUTO-M"]
    F --> G["Code"]
    H["Down Arrow"] --> I["CODE"]
Interior Comfort
Audio System
Cancelling code number
- Begin with the audio unit off and the ignition switch is in the ACC position.
- Press the auto memory button (AUTO-M and the channel preset button 6 simultaneously for about 2 seconds until "CODE" is displayed.
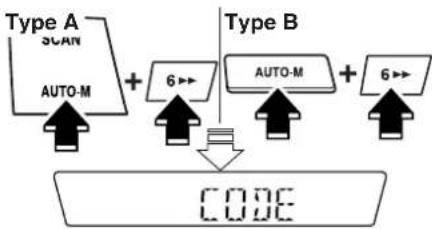
flowchart
graph TD
    A["Type A"] -->|AUTO-M| B["Code Display"]
    C["Type B"] -->|AUTO-M| D["Code Display"]
    E["6"] --> F["Code Display"]
    G["6"] --> H["Code Display"]
- Again press the auto memory button (AUTO) the channel preset button 6 simultaneously while "CODE" is displayed (within 10 seconds). The display will exhibit bars.
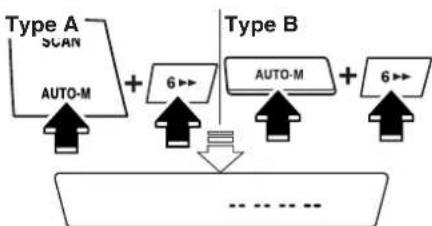
flowchart
graph TD
    A["Type A\nSCAN"] --> B["+"]
    C["Type B"] --> D["+"]
    E["Auto-M"] --> F["6→"]
    G["Auto-M"] --> H["6→"]
    I["..."] --> J["... ... ..."]
- While the bars are displayed, input the current code number as described in setting procedure Step 4. (2547, for example).
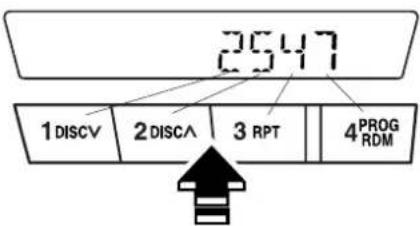
6-26
- While the code number is displayed, press the auto memory button (AUTO-M and the channel preset button 6 for about 2 seconds and "CODE" appears.
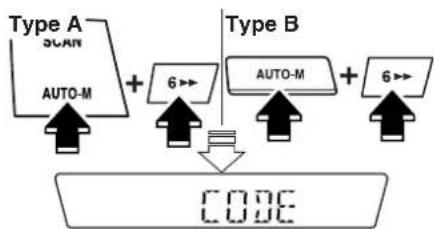
flowchart
graph TD
    A["Type A"] -->|AUTO-M| B["Code Display"]
    C["Type B"] -->|AUTO-M| D["Code Display"]
    E["6"] --> F["Code Display"]
    style A fill:#f9f,stroke:#333
    style C fill:#f9f,stroke:#333
    style E fill:#f9f,stroke:#333
- After 5 seconds, "CODE" will disappear. This indicates the code number is cancelled.
NOTE
If ERR (error) appears on the display, begin from Step 4.
Changing code number
To change the code number, first cancel the number. Then set the new number by following the setting procedures.
System activation
When the power supply is disconnected or interrupted, the antitheft system is activated and the unit is rendered inoperative. In this condition, when power is again supplied, "CODE" will be displayed and flash unless the correct code number is input.
To deactivate the antitheft system and reset the audio unit, input your personal code number.
-
Press the auto memory button (AUTO-M) and the channel preset button 6 simultaneously for about 2 seconds until bars are displayed.
-
Press the auto memory button (AUTO-M and the channel preset button 6 for about 2 seconds. "CODE" will be flashed for 5 seconds, then disappear to indicate that the system is operable. If ERR (error) appears, begin from Step 1.
flowchart
graph TD
    A["Type A SCAN"] --> B["+"]
    C["Type B AUTO-M"] --> D["+"]
    E["Code"] --> F["↓"]
    style A fill:#f9f,stroke:#333
    style C fill:#f9f,stroke:#333
    style E fill:#f9f,stroke:#333
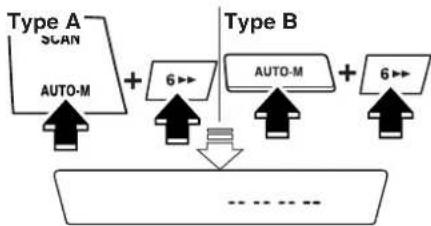
flowchart
graph TD
    A["Type A"] -->|SCAN| B["+"]
    C["Type B"] -->|AUTO-M| D["+"]
    E["..."] --> F["Output"]
    style A fill:#f9f,stroke:#333
    style C fill:#f9f,stroke:#333
    style E fill:#f9f,stroke:#333
- While the bars are displayed, input the code number as described in the setting procedure.
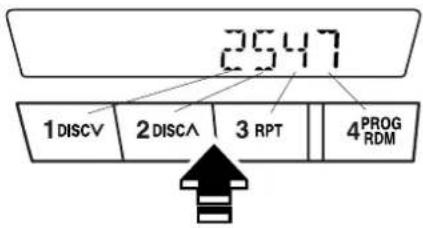
CAUTION
- Three consecutive errors will activate the antitheft system, and the audio unit will be completely inoperable and ERR (error) will flash. When this happens, the unit must be replaced by an Authorised Mazda at the owner's expense.
- Do not allow an unauthorised person to attempt to input a code number.
Interior Comfort
Audio System
▼Power/Volume/Sound Controls
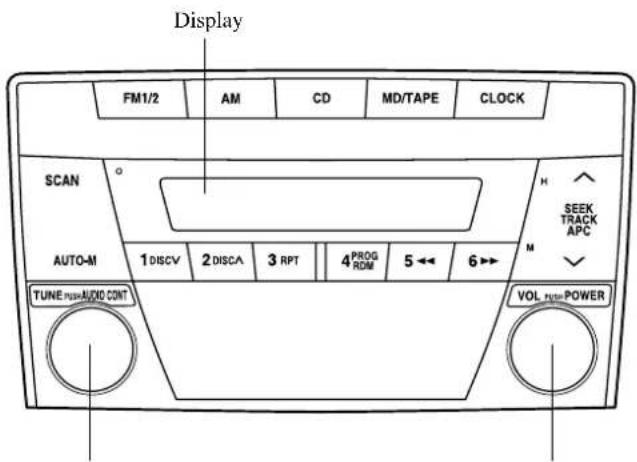
Audio control knob Power/Volume knob
Power ON/OFF
Turn the ignition switch to the ACC or ON position.
Press the power/volume knob to turn the audio system on.
Press the power/volume knob again to turn the audio system off.
NOTE
To prevent the battery from being discharged, do not leave the audio system on for a long period when the engine is not running.
Volume adjustment
To adjust the volume, turn the power/volume knob.
Turn the power/volume knob to the right to increase volume, to the left to decrease it.
6-28





Audio sound adjustment
- Press the audio control knob to select bass, mid-range, treble, fade or balance control. The selected function will be indicated.
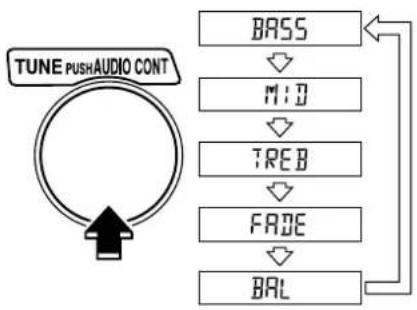
flowchart
graph TD
    A["TUNE PUSHAUDIO CONT"] --> B["BASS"]
    B --> C["MID"]
    C --> D["TREB"]
    D --> E["FADE"]
    E --> F["BAL"]
    F --> G["Output"]
- Turn the audio control knob to adjust the selected functions as follows:
| Indication Turn Left Turn Right | ||
| BASS | Decrease bass Increase bass | |
| MID | Decreasemid-range | Increasemid-range |
| TREB | Decreasetreble Increasetreble | |
| FADE | Shift the soundto the front | Shift the soundto the rear |
| BAL | Shift the soundto the left | Shift the soundto the right |
NOTE
About 5 seconds after selecting any mode, the volume function will be automatically selected. To reset bass, mid-range, treble, fade, and balance, press the audio control knob for 2 seconds. The unit will beep and "CLEAR" will be displayed.
Interior Comfort
Audio System
▼Clock
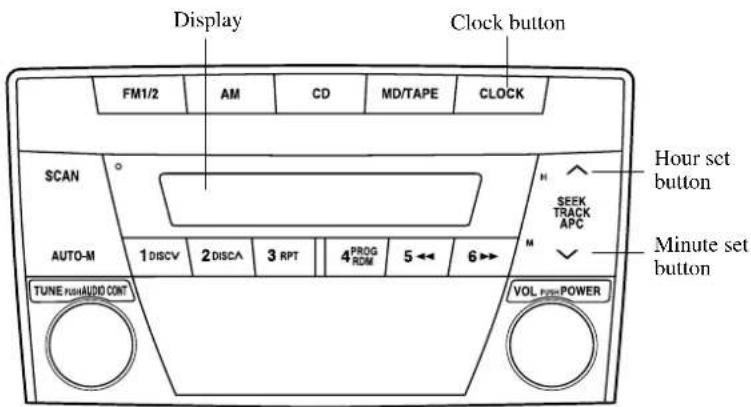
Setting the time
The clock can be set at any time when the ignition switch is in the ACC or ON position.
- To adjust the time, press the clock button (clock about 2 seconds until a beep is heard. The clock's current time will flash.
- To advance the hours, press the hour set button (M) To advance the minutes, press the minute set button (M) while the time is flashing.
- Press the clock button (cupon to start the clock.
Exact hour adjustment
- To set the exact hour, press the clock button (clockabout 2 seconds until a beep is heard. The clock's current time will flash.
- Press the clock button (cagon) and the time will be adjusted as follows: (Example) 12:01—12:29→12:00 12:30—12:59→1:00
NOTE
If the power supply to the unit is interrupted (if the fuse blows or the vehicle's battery is disconnected), the clock will need to be reset.
6-30





Changing the display mode
The display on the unit can be changed by pressing the clock button (OLOBK) alternates the display between time and audio. When the clock mode has been selected, the time will be displayed.
NOTE
If audio operation is selected while the time mode is on, the selected audio mode will be displayed for 10 seconds, then the display will revert to the time mode.
6-31
Interior Comfort
Audio System
▼Operating the Radio (Type A)
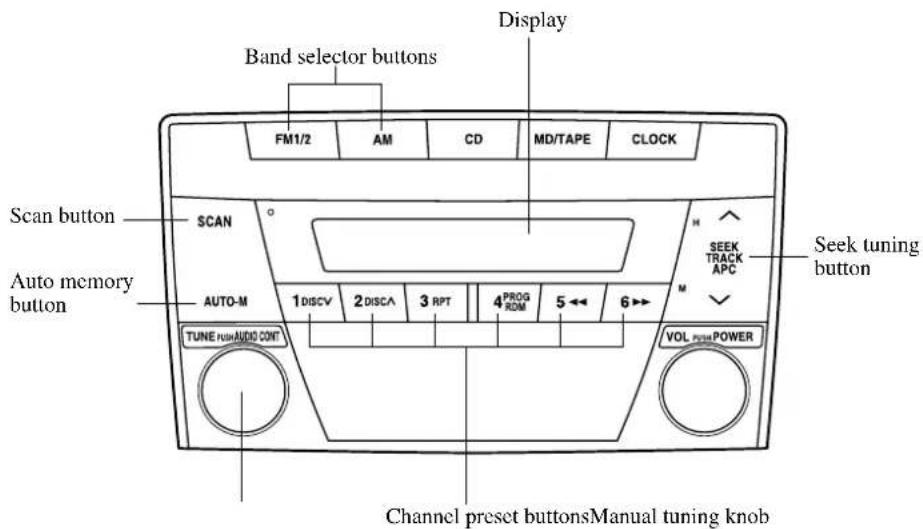
Radio ON
Press a band selector button (AM FM1/2) to turn the radio on.
Band selection
Choose AM by pressing the AM button (AMnd FM by pressing the FM1/2 button (FM1/2
The selected mode will be indicated. If FM stereo is being received, "ST" will be displayed.
NOTE
If the FM broadcast signal becomes weak, reception automatically changes from STEREO to MONO for reduced noise, and the "ST" indicator will go out.
Tuning
The radio has the following tuning methods: Manual, Seek, Scan, Preset channel, and Auto memory tuning. The easiest way to tune stations is to set them on preset channels.
NOTE
If the power supply is interrupted (fuse blows or the battery is disconnected), the preset channels will be cancelled.
Manual tuning
Turning the manual tuning knob will change the frequency higher or lower.
6-32





Seek tuning
Pressing the seek tuning button ( ) will cause the tuner to seek a higher or lower frequency automatically.
NOTE
If you continue to press and hold the button, the frequency will continue changing without stopping.
Scan tuning
Press the scan button (SCAN
automatically sample strong stations.
Scanning stops at each station for about 5 seconds. To hold a station, merely press the scan button (SCAN) in during this interval.
Preset channel tuning
The 6 preset channels can be used to store 6 AM and 12 FM stations.
- To set a channel first select AM, FM1, or FM2. Tune to the station you want.
- Depress a channel preset button for about 2 seconds until a beep is heard. The preset channel number and station frequency will be displayed. The station is now held in the memory.
- Repeat this operation for the other stations and bands you want to store. To tune one in the memory, select AM, FM1, or FM2 and then press its channel preset button. The station frequency and the channel number will be displayed.
NOTE
If the power supply is interrupted (fuse blows or the battery is disconnected), the preset channels will be cancelled.
Auto memory tuning
This is especially useful when driving in an area where the local stations are not known. Additional AM/FM stations can be stored without disturbing the previously set channels.
Press and hold the auto memory button (AUTO-M) about 2 seconds until a beep is heard; the system will automatically scan and temporarily store up to 6 stations with the strongest frequencies in each selected band in that area.
After scanning is completed, the station with the strongest frequency will be tuned and its frequency displayed. Press and release the auto memory button (AUTO-M) all stations from the auto-stored stations. One stored station will be selected each time; its frequency and channel number will be displayed.
NOTE
If no stations can be tuned after scanning operations, "A" will be displayed.
Interior Comfort
Audio System
▼Operating the Radio (Type B)
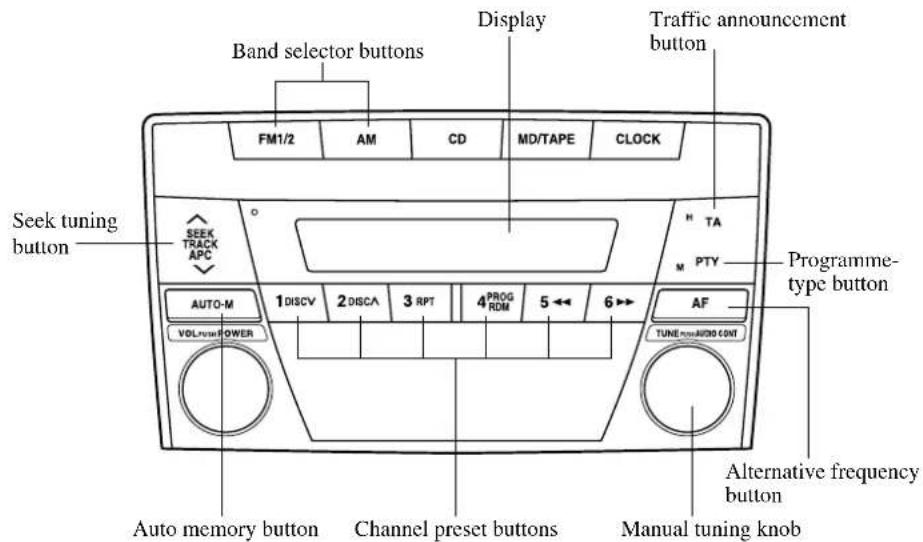
Radio ON
Press a band selector button (AM FM1/2) to turn the radio on.
Band selection
Press the AM button (AM) change MW and LW. Press the FM1/2 button (FM1) change FM1 and FM2.
The selected mode will be indicated. If FM stereo is being received, "ST" will be displayed.
NOTE
If the FM broadcast signal becomes weak, reception automatically changes from STEREO to MONO for reduced noise, and the "ST" indicator will go out.
Tuning
The radio has the following tuning methods: Manual, Seek, Preset channel, and Auto memory tuning. The easiest way to tune stations is to set them on preset channels.
NOTE
If the power supply is interrupted (fuse blows or the battery is disconnected), the preset channels will be cancelled.
6-34





Manual tuning
Turning the manual tuning knob will change to the frequency higher or lower.
Seek tuning
Pressing the seek tuning button ( ) will cause the tuner to seek a higher or lower frequency automatically.
NOTE
If you continue to press and hold the button, the frequency will continue changing without stopping.
Preset channel tuning
The 6 preset channels can be used to store 6 MW, 6 LW and 12 FM stations.
- To set a channel first select MW, LW, FM1, or FM2. Tune to the station you want.
- Depress a channel preset button for about 2 seconds until a beep is heard. The preset channel number and station frequency will be displayed. The station is now held in the memory.
- Repeat this operation for the other stations and bands you want to store. To tune one in the memory, select MW, LW, FM1, or FM2 and then press its channel preset button. The station frequency and the channel number will be displayed.
NOTE
If the power supply is interrupted (fuse blows or the battery is disconnected), the preset channels will be cancelled.
Auto memory tuning
This is especially useful when driving in an area where the local stations are not known.
Press and hold the auto memory button (AUTO-Mabout 2 seconds until a beep is heard; the system will automatically scan and temporarily store up to 6 stations with the strongest frequencies in each selected band in that area.
After scanning is completed, the station with the strongest frequency will be tuned and its frequency displayed. Press and release the auto memory button (AUTO-M) to recall stations from the auto-stored stations. One stored station will be selected each time; its frequency and channel number will be displayed.
NOTE
If no stations can be tuned after scanning operations, "A" will be displayed.
Interior Comfort
Audio System
Radio Data System (RDS)
Alternative frequency (AF)
AF functions on FM stations. Press the alternative frequency button (A) to turn it on and "AF" will be displayed. When an RDS station is received, the station's call sign will then be displayed.
If you wish to continue a regional programme, press the alternative frequency button (AFor 2 seconds until a beep is heard and "REG ON" will be displayed. To cancel it, press the alternative frequency button (A again for 2 seconds until a beep is heard and "REG OFF" will be displayed.
Traffic announcement (TA)
Press the traffic announcement button (TW) while in any mode other than MW/LW. The unit will then switch to TA stand-by mode and "TA" and "TP" will be displayed. If the currently tuned radio station is not broadcasting a traffic announcement (TA) the unit will seek one in another network and the system will return to stand-by mode.
When a TA broadcast is received, the TA broadcast will supercede other radio, tape, MD or CD play. "TRA INFO" will be displayed for about 7 seconds. During a TA broadcast, press the traffic announcement button (TA) end the broadcast and return to the previous mode. To cancel the TA stand-by mode, press the traffic announcement button (TA) while the unit is in TA stand-by mode.
To set the TA broadcast volume:
- Press and hold the traffic announcement button (TA) for about 2 seconds while in FM mode.
- Turn the power/volume knob to adjust the volume.
Programme-type information (PTY)
Some FM stations transmit programme-type codes. This code enables alternative stations transmitting the same programme-type code to be found quickly.
Press the Programme-type information button (p) while in FM mode. "PTY" will be displayed. To choose a programme type, press a channel preset button (1\~6) with previously stored programme types, or press the seek tuning button (SEEK scan programme types. The unit will then switch to PTY stand-by mode.
When a programme-type broadcast is received while in PTY stand-by mode, it will supercede any other mode except MW/LW. During a programme-type broadcast, press the Programme-type information button (PTY) end the broadcast and return to the previous mode.
To scan for programme types, press and hold the seek tuning button (SEEK about 2 seconds until a beep is heard. The unit will scan for broadcasts, if none are found, the unit will return to the previously tuned band and PTY stand-by mode.
To cancel PTY stand-by mode, press the Programme-type information button (PTY) about 2 seconds and "PTY" will disappear from the display.
To store programme types in channel preset buttons:
- Press the seek tuning button (SEEK and select a programme type.
- While the programme type is displayed, press a channel preset button for about 2 seconds.
Emergency broadcast
When an emergency broadcast is received, the emergency broadcast will supercede other radio (FM), tape MD or CD play. "ALARM" will be displayed. When the emergency broadcast ends, the unit will return to the previous mode.
6-37




Interior Comfort
Audio System
▼ Operating the Cassette Tape Player
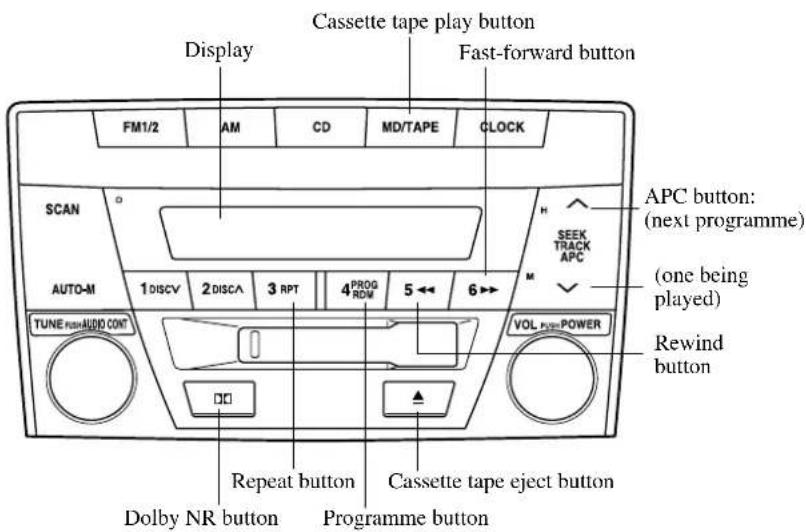
Cassette tape insert
Insert the cassette tape into the slot, open edge to the right and cassette tape will begin play and "TAPE" will be displayed. At the end of the cassette tape, the unit automatically reverses cassette tape play. When ▲s lit, the cassette tape's top side is playing. When ▼s lit, the bottom side is on.
NOTE
When a metal tape is inserted, the player will automatically compensate for it and "MTL" will be displayed.
Playing
Press the cassette tape play button (MDTAPE) playing when a cassette tape is in the unit. If there isn't a cassette tape in the unit when the cassette tape play button (MDTAPE) ed, "NO TAPE" will flash on and off in sequence.
6-38


Form No. 8R34-EE-02H


natural_image
Pure geometric diagram with intersecting lines and a central circular pattern (no text or symbols)Dolby noise reduction
When using a tape with Dolby NR*, push the Dolby NR button (The symbol will be displayed. To play a tape without Dolby NR, push the button once again.
* Noise reduction system manufactured under license from Dolby Laboratories Licensing Corporation.
Dolby and the double-D symbol □re trademarks of Dolby Laboratories Licensing Corporation.
Ejecting the cassette tape
Press the cassette tape eject button (▲to eject the cassette tape.
NOTE
The cassette tape can be ejected when the ignition switch is in the OFF position.
Fast-forward/Rewind
Press the fast-forward button (▶▶▶ fast-forward. Press the rewind button (▶◀◀️rewind. To stop this operation and play the cassette tape, press the button again.
NOTE
When the cassette tape ends during fast forward or rewind, it automatically stops and starts playing.
Reversing
Press the programme button (PROG change cassette tape-playing direction.
NOTE
When the cassette tape ends, the unit automatically reverses play.
Automatic programme control (APC)
APC is used to find the beginning of either the next programme or the one being played.
Press the APC button (No the beginning of the next selection. Press the APC button (No the beginning of the one being played. To stop this operation and play the cassette tape, press the button again.
If APC detects 15 seconds of blank space it will automatically advance the tape to the next selection.
NOTE
APC may not operate properly if
• A tape was recorded at a low level.
• A tape has long, silent intervals.
• A tape is a live recording.
- A tape has very short intervals of less than 3 seconds.
Interior Comfort
Audio System
Repeat play
This operation makes it possible to listen to a selection repeatedly.
Press the repeat button (RPTuring play. The current selection playing will be repeated ("RPT" will be displayed). Press the repeat button (RPTnce again to cancel repeat play.
NOTE
RPT may not operate properly if
• A tape was recorded at a low level.
• A tape has long, silent intervals.
• A tape is a live recording.
- A tape has very short intervals of less than 3 seconds.
6-40





J54L_8R34_EE_02H.BOOK Page 41 Monday, July 15, 2002 9:03 AM

Interior Comfort
Audio System

6-41

Interior Comfort
Audio System
▼Operating the Mini Disc (MD) Player
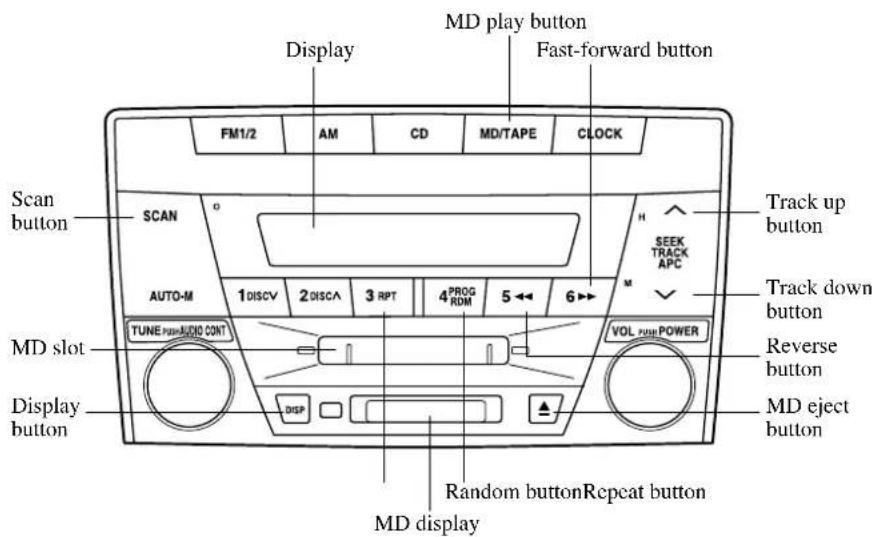
Inserting the MD
Insert the MD, label-side up with the arrow pointed to the slot. The auto-loading mechanism will set the MD and begin play. There will be a short lapse before play begins while the player reads the digital signals on the MD.
Playing
Press the MD play button (MD/TAPE) start playing when a MD is in the unit.
Ejecting the MD
Press the MD eject button (▲to eject the MD.
Fast-forward/Reverse
Press and hold the fast-forward button (▶) advance through a track at high speed.
Press and hold the reverse button (◀◀) to reverse through a track at high speed.
Track search
Press the track up button ( ) once to skip forward to the beginning of the next track.
Press the track down button ( ) once to skip back to the beginning of the current track.
Music scan(Type A)
This feature helps to find a programme by playing about the first 10 seconds of each track.
Press the scan button (SCANing play to start scan play operation (the track number will flash).
6-42




natural_image
Pure geometric diagram with intersecting lines and a central circular pattern (no text or symbols)Press the scan button (SCAN) re again to cancel scan play.
NOTE
If the unit is left in scan, normal play will resume where scan was selected.
Repeat play
This feature makes it possible to listen to a selection repeatedly.
Press the repeat button (ARTuring play. The current selection will be repeated ("RPT" will be displayed). Press the repeat button (APOnce again to cancel repeat play.
Random play
This feature allows the MD player to randomly select the order of the songs.
Press the random button (RDM) ring play. The next selection will be randomly selected ("RDM" will be displayed). Press the random button (RDM) ce again to cancel random play.
Changing the MD display
To change the MD display during MD play, press and hold the display button (DISPr about half a second to advance through each of the following displays:
→Song title No displayDisc title
NOTE
If there is no song or disc title recorded on the MD, "NO TITLE" will be displayed.
Long disc or song titles
When disc or song titles exceed 10 letters or numerals, press the display button (DISP) display the remaining part of the title.
Interior Comfort
Audio System
▼Operating the Compact Disc (CD) Player
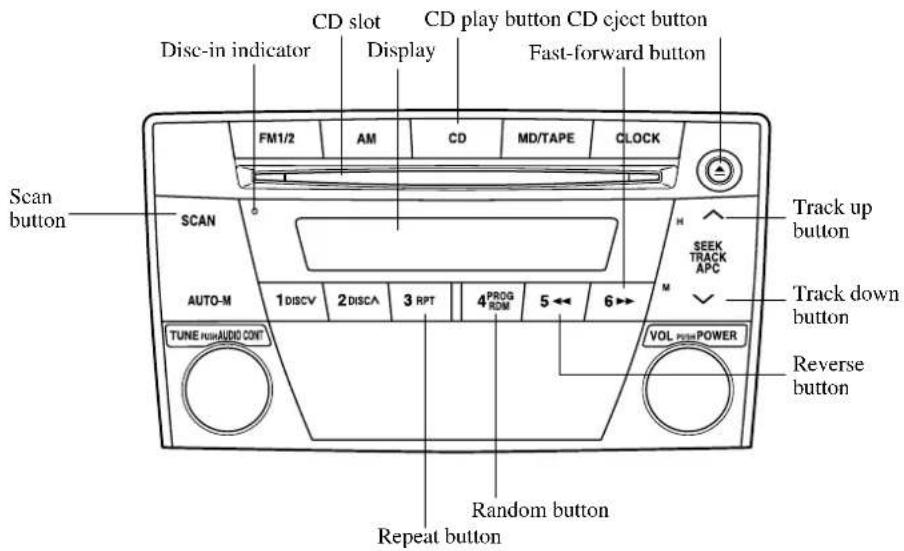
Inserting the CD
Insert the CD into the slot, label-side up. The auto-loading mechanism will set the CD and begin play. There will be a short lapse before play begins while the player reads the digital signals on the CD. The disc-in indicator will illuminate and the track number will be displayed.
Playing
Press the CD play button (do start playing when a CD is in the unit.
Ejecting the CD
Press the CD eject button (▲to eject the CD.
Fast-forward/Reverse
Press and hold the fast-forward button (▶) advance through a track at high speed.
Press and hold the reverse button (◀◀) to reverse through a track at high speed.
Track search
Press the track up button ( ) once to skip forward to the beginning of the next track.
Press the track down button ( ) once to skip back to the beginning of the current track.
6-44





Music scan(Type A)
This feature helps to find a programme by playing about the first 10 seconds of each track.
Press the scan button (SCAN) ing play to start scan play operation (the track number will flash).
Press the scan button (SCAN) re again to cancel scan play.
NOTE
If the unit is left in scan, normal play will resume where scan was selected.
Repeat play
This feature makes it possible to listen to a selection repeatedly.
Press the repeat button (RTuring play. The current selection will be repeated ("RPT" will be displayed).
Press the repeat button (AP)nce again to cancel repeat play.
Random play
This feature allows the CD player to randomly select the order of the songs.
Press the random button (RDM) ring play. The next selection will be randomly selected ("RDM" will be displayed).
Press the random button (RDMce again to cancel random play.
▼Operating the In-Dash CD Changer
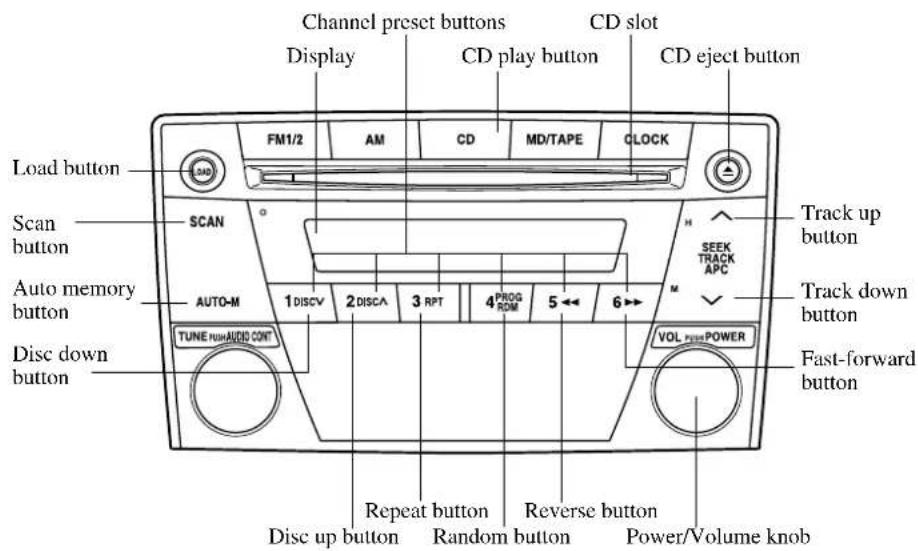
Inserting the CD
The CD must be label-side up when inserting. The auto-loading mechanism will set the CD and begin play. There will be a short lapse before play begins while the player reads the digital signals on the CD.
The disc number and the track number will be displayed.
NOTE
A CD cannot be inserted while the display reads "WAIT". A beeping sound can be heard during this waiting time. Simultaneously pressing the power/volume knob and the load button (LOAD) about 2 seconds will turn this beeping sound ON or OFF.
Normal insertion
- Press the load button (LOAD)
- When "In" is displayed, insert the CD.
Inserting CDs into desired tray number
- Press and hold the load button (LOAD) for about 2 seconds until a beep is heard.
- Press the channel preset button for the desired tray number within 5 seconds after the beep is heard.
- When "In" is displayed, insert the CD.
NOTE
The CD cannot be inserted to the desired tray number if the number is already occupied.
6-46





Multiple insertion
- Press and hold the load button (LOAD for about 2 seconds until a beep is heard.
- When "In" is displayed, insert the CD.
- When "In" is displayed again, insert the next CD.
NOTE
The first-inserted CD will be played automatically when:
- No CD is inserted within 15 seconds after "In" is displayed.
- The CD trays are full.
Ejecting the CD
Normal ejection
-
Press the CD eject button (▲The disc number and "OUT" will be displayed.
-
Pull out the CD.
NOTE
When the CD is ejected during play, the next CD will be played automatically.
Ejecting CDs from desired tray number
- Press and hold the CD eject button (▲) for about 2 seconds until a beep is heard.
- Press the channel preset button for the desired CD number within 5 seconds after the beep is heard.
- Pull out the CD.
Multiple ejection
- Press and hold the CD eject button (▲) for about 2 seconds until a beep is heard.
- Wait 5 seconds or press the CD eject button (▲again within 5 seconds after the beep is heard.
- Pull out the CD, then the next CD will be ejected.
NOTE
• CDs will be ejected starting with the one with the lowest number.
- All CDs in the tray will be ejected continuously.
- CDs can be ejected when the ignition switch is off. Press and hold the CD eject button (▲for about 2 seconds and all CDs will eject.
Playing
Press the CD play button (do start playing when a CD is in the unit.
Fast-forward/Reverse
Press and hold the fast-forward button (▶) advance through a track at high speed. Press and hold the reverse button (◀) to reverse through a track at high speed.
Track search
Press the track up button ( ) once to skip forward to the beginning of the next track. Press the track down button ( ) once to skip back to the beginning of the current track.
Interior Comfort
Audio System
Disc search
Press the disc up button (DISC)kip forward to the beginning of the next CD. Press the disc down button (DISCV) skip back to the beginning of the previous CD.
Music scan (Type A)
This feature helps to find a programme by playing about the first 10 seconds of each track.
Press the scan button (SCAN)ing play to start scan play operation (the track number will flash).
Press the scan button (SCAN) re again to cancel scan play.
NOTE
If the unit is left in scan, normal play will resume where scan was selected.
Repeat play
This feature makes it possible to listen to a selection repeatedly.
Press the repeat button (RPTuring play. The current selection will be repeated ("RPT" will be displayed). Press the repeat button (RPTnce again to cancel repeat play.
Random play
This feature allows the CD player to randomly select the order of the songs.
Press the random button (RDM ring play. The next selection will be randomly selected ("RDM" will be displayed). Press the random button (RDM once again to cancel random play.
6-48


▼Error Indications
If you see an error indication on the display, find the cause in the chart. If you cannot clear the error indication, take the vehicle to an Authorised Mazda Dealer.
| Indication Cause | Solution | |
| CHECK MD MD is inserted upside down | Insert the MD properly. If the error indication does not disappear, consult an Authorised Mazda Dealer | |
| CHECK MD MD is defective | Insert another MD properly. If the error indication does not disappear, consult an Authorised Mazda Dealer | |
| CHECK CD CD is inserted upside down | Insert the CD properly. If the error indication does not disappear, consult an Authorised Mazda Dealer | |
| CHECK CD CD is defective Check the CD for scratches or soiling | ||
Audio Control Lever Operation
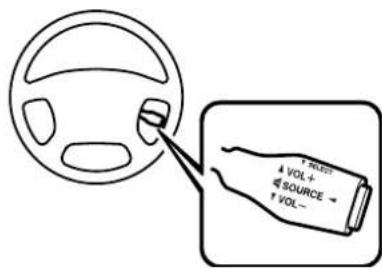
NOTE
Mazda installed this system to help you avoid being too distracted using audio controls on the instrument panel. Always make safe driving your first priority.
▼Adjusting the Volume
Move the audio control lever up to increase the volume. Move the lever down to decrease the volume.
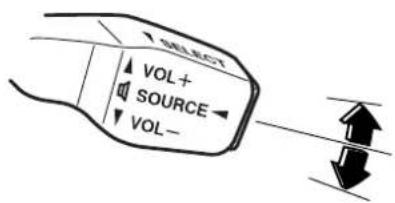
▼Changing the Source
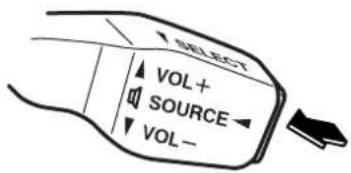
AM reception type
Press the end of the audio control lever to change the audio source (AM radio>FM1 radio>FM2 radio>Cassette tape or MD player>CD player or CD changer>cyclical).
MW and LW reception type
Press the end of the audio control lever to change the audio source (LW radio>MW radio>FM1 radio>FM2 radio>Cassette tape or MD player>CD player or CD changer>cyclical).
▼SELECT Switch
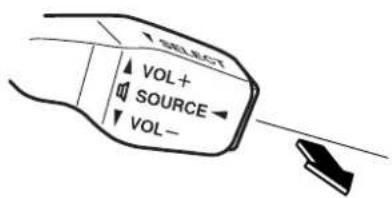
6-50


When listening to the radio
Pull the audio control lever to seek a higher frequency automatically.
When playing a cassette tape
Pull the audio control lever, release, and it will advance to the next selection.
When playing a CD or MD
Pull the audio control lever to skip to the next track.
Interior Comfort
Interior Equipment
Sunvisors
When you need a sunvisor, lower it for use in front or swing it to the side.
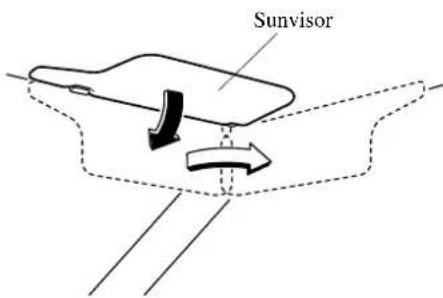
▼ Vanity Mirrors
To use the vanity mirror, lower the sunvisor.
Interior Lights
▼Illuminated Entry System
When the switch is in the DOOR position, the overhead light comes on for:
- about 30 seconds after the driver's door is unlocked and the ignition key is removed.
- about 15 seconds after all doors are closed.
- about 15 seconds after the key is removed from the ignition.
The light also goes out when:
- the ignition switch is turned to the ON position and all doors are closed.
- the driver's door is locked.
NOTE
If any door is left opened, the light goes out after about 5 minutes.
The light turns on again when the ignition switch is turned to the ON position, or when any door is opened after all doors have been closed.
6-52





▼Overhead Lights
Type A
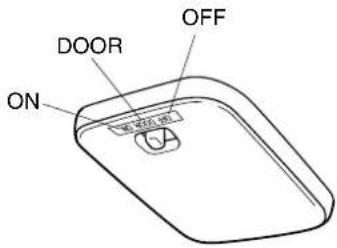
| OFF Light off | |
| DOOR | Light on when any door is openLight on or off when the illuminated entry system is on |
| ON Light on | |
▼Map Lights
The map lights are switched on or off by pressing the switches.
Type A
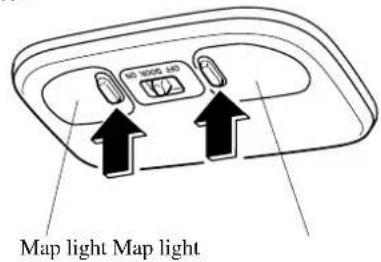
Type B
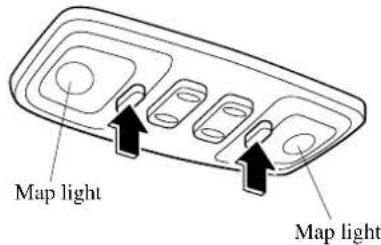
Interior Comfort
Interior Equipment
▼Luggage Compartment Light
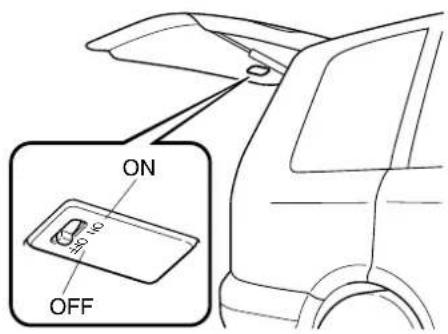
OFF Light off
ON Light on when the liftgate is open
Clock
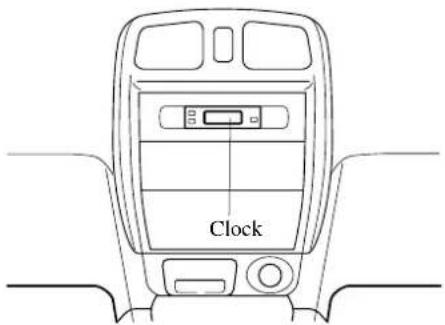
To set the hour
Press the H (hour) button to change the hour.
To set the minutes
Press the M (minute) button to change the minutes.
Press the RESET button to clear minutes. The clock will be set on the hour.
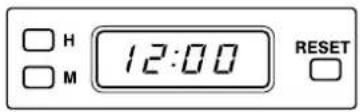
6-54


natural_image
Pure geometric diagram with intersecting lines and circles, no text or symbols presentIf the RESET button is pressed from 12:01 to 12:29, for example, the time will be reset to 12:00. If pressed from 12:30 to 12:59, the time will be reset to 1:00.
(Example)
12:01—12:29→12:00
12:30—12:59→1:00
NOTE
- When the power is disconnected, the time is automatically set at 1:00.
- If the vehicle has an audio system, the clock is built into the audio system (page 6-30).
Lighter
The ignition switch must be in the ACC or ON position.
Press the lighter in and release it. When ready for use, it automatically pops out.
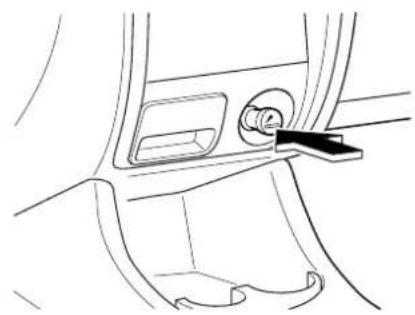
natural_image
Line drawing of a car interior showing a handle and seat (no text or symbols)CAUTION
- Don't touch the metal part of the lighter, you may burn yourself.
- Don't hold the lighter in because it will overheat.
- Don't use the lighter socket for plug-in accessories such as shavers and coffee pots. They may damage it or cause electrical failure. Use only a genuine Mazda lighter or the equivalent.
- If the lighter doesn't pop out within 30 seconds, remove it to prevent overheating.
Interior Comfort
Interior Equipment
Ashtray
CAUTION
Don't use the ashtray for rubbish. You might start a fire.
▼Front
To remove, open and push down on the lock spring.
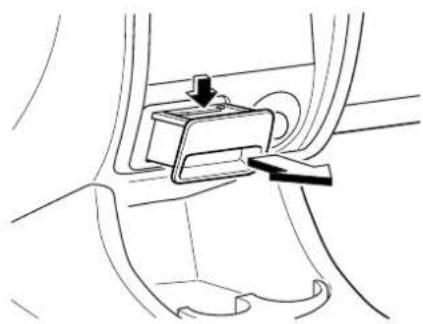
natural_image
Line drawing of a mechanical component with a downward arrow and handle, no text or symbols present▼Rear
CAUTION
Using an ashtray removed from its fixed position or not completely inserted is dangerous. Cigarettes could roll around or spill out of the ashtray into the vehicle and start a fire. Moreover, cigarette stubs will not extinguish themselves completely even if the ashtray lid is closed. Only use a rear ashtray in its fixed position, and make sure it is completely inserted.
To remove, open the cover and pull the ashtray upward.
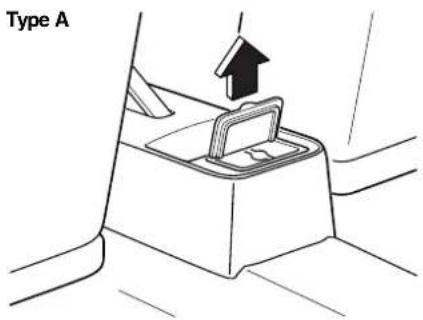
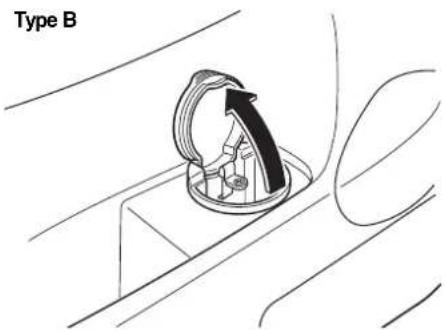
6-56


Form No. 8R34-EE-02H
Cup Holder
WARNING
Using Cup Holder:
Using a cup holder to hold hot liquids while the vehicle is moving is dangerous. If the contents spill, you could be scalded. Never use a cup holder to hold hot liquids while the vehicle is moving.
Don't Put Anything Other Than Cups or Drink-cans in Cup Holder:
Putting objects other than cups or drink-cans in a cup holder is dangerous. During sudden braking or manoeuvring, occupants could be hit and injured, or objects could be thrown around the vehicle, causing interference with the driver and the possibility of an accident. Only use a cup holder for cups or drink-cans.
CAUTION
To reduce the possibility of injury in an accident or a sudden stop, keep a cup holder closed when not in use.
▼ Front
Type A
To use, pull the tray out.
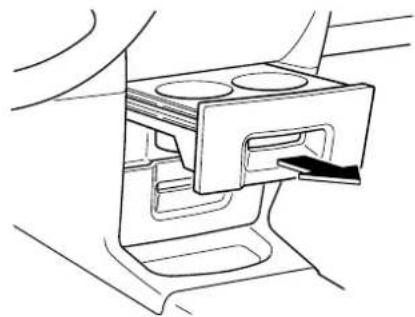
natural_image
Line drawing of a car intake manifold with four circular components and a handle (no text or symbols)Type B
To use the cup holder, push the release button.
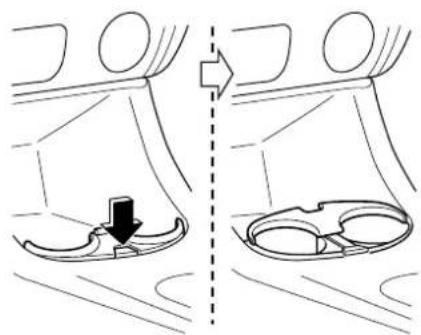
natural_image
Diagram showing a car interior with a downward arrow indicating movement or change, no text or symbols presentInterior Comfort
Interior Equipment
▼Rear
Type A
- Raise the pull-up seatback tray. (page 2-7)
- Push down the cup retainer bar.
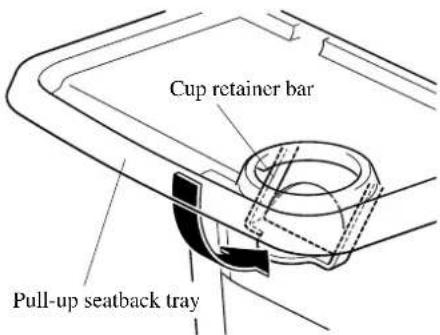
Type B
The rear cup holders are in the side-trim of both the left and right doors.
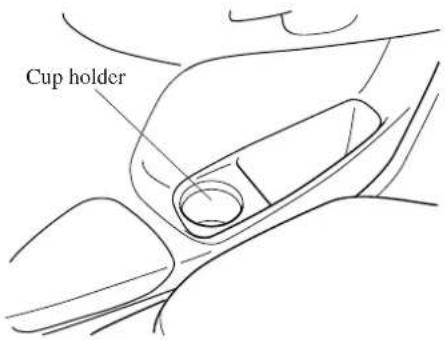
If an ashtray is equipped, pull it out and use the hole for an additional cup holder.
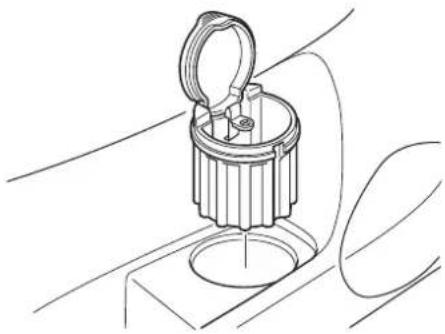
natural_image
Line drawing of a mechanical component with a circular base and looped top, no text or symbols presentType C
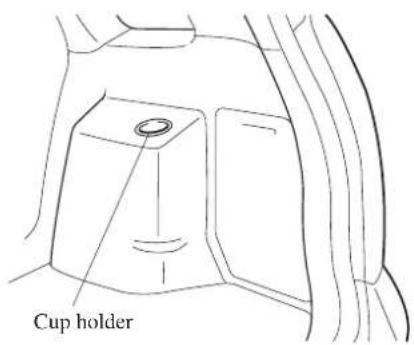
6-58





Storage Compartments
WARNING
Open Storage Boxes:
Driving with the storage boxes open is dangerous. To reduce the possibility of injury in an accident or a sudden stop, keep the storage boxes closed when driving.
CAUTION
In hot weather, don't leave combustible materials or objects which will deform in extreme heat such as lighters and glasses in the vehicle.
▼Glove Box
To open the glove box, pull the latch toward you.
If the door has a lock, insert the key and turn it clockwise to lock, anticlockwise to unlock.
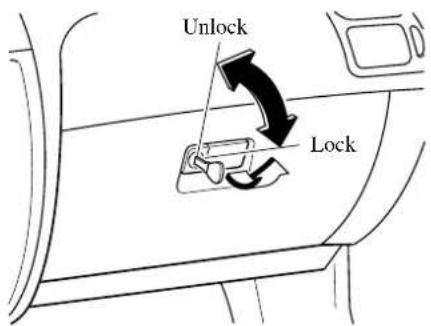
▼Front Console
Pull out the storage tray.
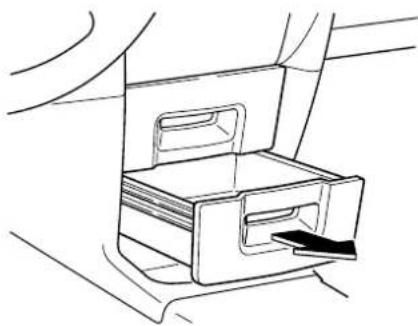
natural_image
Line drawing of a small rectangular device with a handle and lid, no text or symbols present▼ Under Seat Tray
Pull the tray forward.
Front-passenger seat
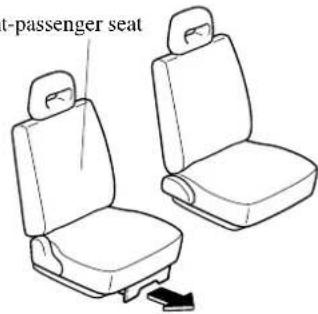
Interior Comfort
Interior Equipment
▼ Cargo Securing Loops
WARNING
Not Securing Cargo:
Not securing cargo while driving is dangerous. The cargo could move or be crushed in sudden braking or a collision and cause injury. Make sure the luggage is secured before driving.
Use the loops in the luggage compartment to secure cargo with a rope or net. The tensile strength of the loops is 196N (20 kgf, 44 lbf). Do not apply excessive force to the loops as it will damage them.
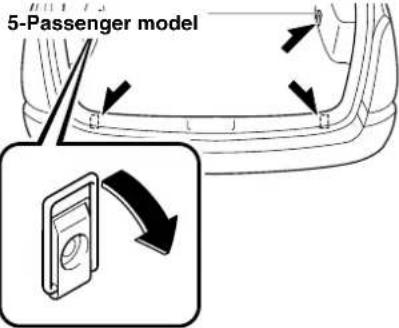
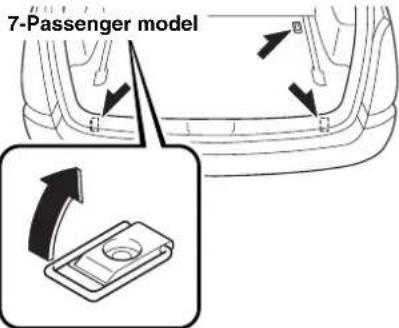
7-Passenger model
The four loops are available in the 7-passenger model after folding down the third-row seat (page 2-28).
▼ Cargo Sub-Compartment
5-Passenger model (With conventional spare tyre)
Lift the cover.
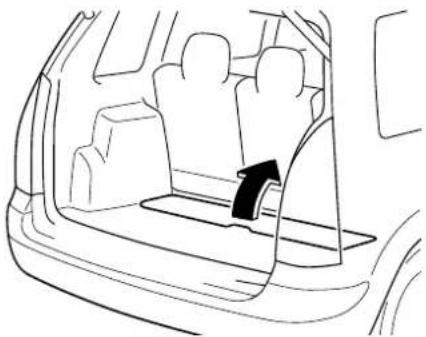
natural_image
Line drawing of a car backrest with a black arrow indicating direction (no text or symbols)7-Passenger model
To access the forward cargo sub-compartment, fold the third-row seat (page 2-28).
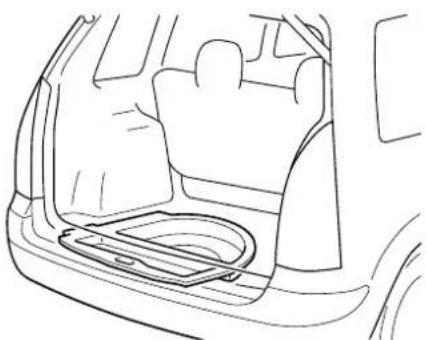
natural_image
Line drawing of a car interior showing the rear seat, side seats, and dashboard (no text or symbols)6-60


To open the rear cargo sub-compartment, pull the strap and open the cover.
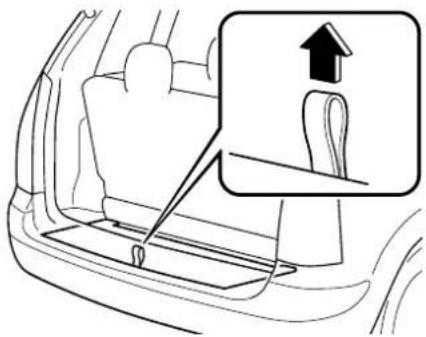
natural_image
Line drawing of a car interior showing a seatbelt and handrail, with an inset highlighting the upward arrow (no text or symbols)To use the side cargo sub-compartments, pull the straps and open the covers.
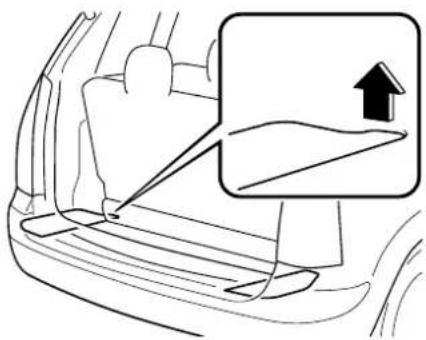
natural_image
Line drawing of a car interior showing a hand pressing down on the seat, with an inset highlighting a curved arrow labeled '↑' (no text or symbols present)Accessory Socket
The ignition switch must be in the ACC or ON position.
Only use genuine Mazda accessories or the equivalent requiring no greater than 12V—10A.
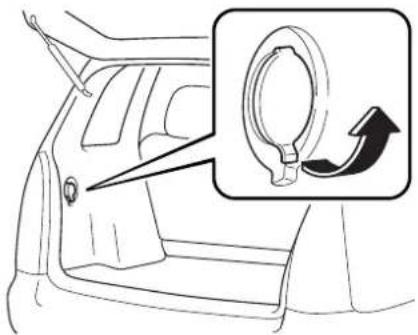
CAUTION
To prevent accessory socket damage or electrical failure, pay attention to the following;
- Don't use accessories that require more than 12V—10A.
- Don't use accessories that are not genuine Mazda accessories or the equivalent.
- Close the cover when the accessory socket is not in use.
- Correctly insert the plug into the accessory socket.
NOTE
To prevent discharging the battery, don't use the socket for long periods with the engine off or idling.
Form No. 8R34-EE-02H
7 In Case of an Emergency
Helpful information on what to do in an emergency.
Parking in an Emergency 7-2
Parking in an Emergency 7-2
Flat Tyre 7-3
Spare Tyre and Tool Storage 7-3
Changing a Flat Tyre 7-7
Overheating 7-12
Overheating 7-12
Emergency Starting 7-14
Starting a Flooded Engine (Petrol Engine) 7-14
Jump-Starting 7-14
Push-Starting 7-16
Running Out of Fuel (Diesel Engine) 7-17
Emergency Towing 7-18
Towing Description 7-18
Towing Hooks 7-19


7-1


In Case of an Emergency
Parking in an Emergency
Parking in an Emergency
The hazard warning lights should always be used when you stop on or near a roadway.
The hazard warning lights warn other drivers that your vehicle is a traffic hazard and that they must take extreme caution when near it.
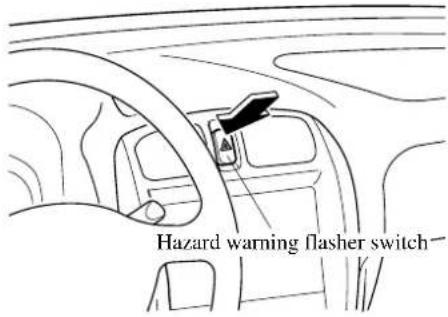
Depress the hazard warning switch and all four direction indicators will flash at once.
NOTE
- The direction indicators don't work when the hazard warning lights are on.
- Check local regulations about the use of hazard warning lights while the vehicle is being towed. They may forbid it.
7-2


natural_image
Pure geometric diagram with intersecting lines and circles, no text or symbols presentSpare Tyre and Tool Storage
Spare tyre and tools are stored in the locations illustrated in the diagram.
5-Passenger model (With temporary spare tyre)
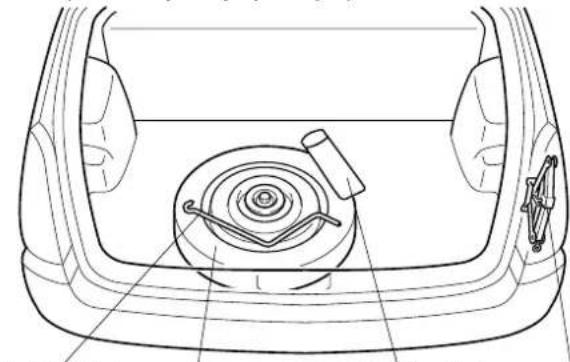
natural_image
Technical line drawing of a car front view showing internal components like wheel, valve, and handle (no text or labels)Jack handle Spare tyre
Tool bag Jack
5-Passenger model (With conventional spare tyre, Type A)
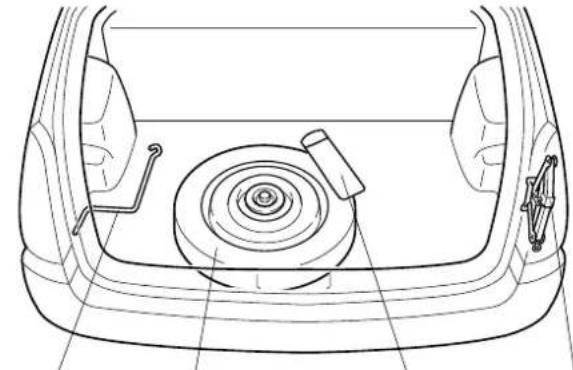
natural_image
Technical line drawing of a car rear view showing internal components like wheel, dashboard, and steering wheel (no text or labels)Jack handle Spare tyre
Tool bag Jack
7-3




J54L_8R34_EE_02H.BOOK Page 4 Monday, July 15, 2002 9:03 AM

In Case of an Emergency
Flat Tyre
5-Passenger model (With conventional spare tyre, Type B)
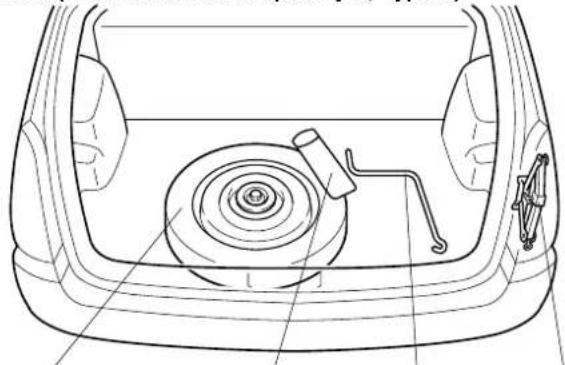
natural_image
Technical line drawing of a car interior showing the wheel, handle, and seat (no text or symbols)Tool bag Jack Jack handleSpare tyre
7-Passenger model
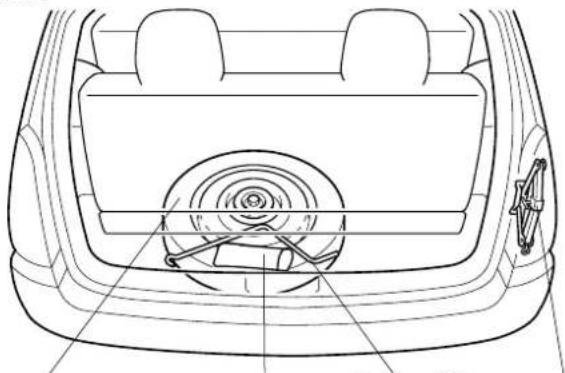
natural_image
Technical line drawing of a car rear vent and dashboard (no text or symbols)Tool bag Jack Jack handleSpare tyre
7-4


natural_image
Pure geometric diagram with intersecting lines and a central circle, no text or symbols presentForm No. 8R34-EE-02H
▼Jack
To remove the jack
- Remove the cover.
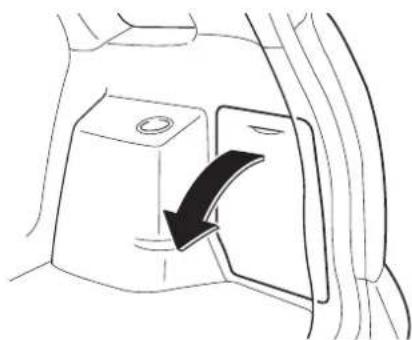
natural_image
Diagram of a car interior showing a door with a black arrow indicating direction (no text or symbols)- Turn the wing bolt anticlockwise.
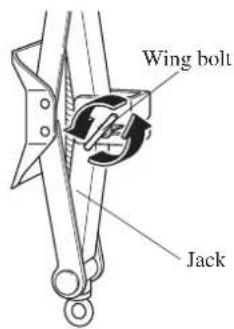
To secure the jack
Perform the removal procedure in reverse.
▼Spare Tyre
Your Mazda has either a conventional or a temporary spare tyre.
Conventional
The conventional spare is the same type and size as the tyres provided on the four wheels as original equipment. Use it as a spare or in normal tyre rotation (page 8-34).
Temporary
The temporary spare is lighter and smaller than a conventional tyre, and is designed only for emergency use and should be used only for VERY short periods. Temporary spares should NEVER be used for long drives or extended periods.

WARNING
Driving with a Temporary Spare Tyre on Ice or Snow:
Driving with a spare tyre on the front (driving) wheels on ice or snow is dangerous. Handling will be affected. You could lose control of the vehicle and have an accident. Put the spare tyre on the rear axle and move a regular tyre to the front.
CAUTION
To avoid damage to the temporary spare or to the vehicle, observe the following precautions:
- Don't exceed 80 km/h (50 mph).
- Avoid driving over obstacles. Also, don't drive through an automatic car wash. This tyre's diameter is smaller than a conventional tyre's; so the ground clearance is reduced about 25 mm (1 in).
- Don't use a tyre chain on this tyre because it won't fit properly.
- Don't use your temporary spare on any other vehicle; it has been designed only for your Mazda.
- Use only one temporary spare tyre on your vehicle at the same time.
To remove the spare tyre
(5-Passenger model)
Turn the tyre hold-down bolt anticlockwise with the wheel brace.
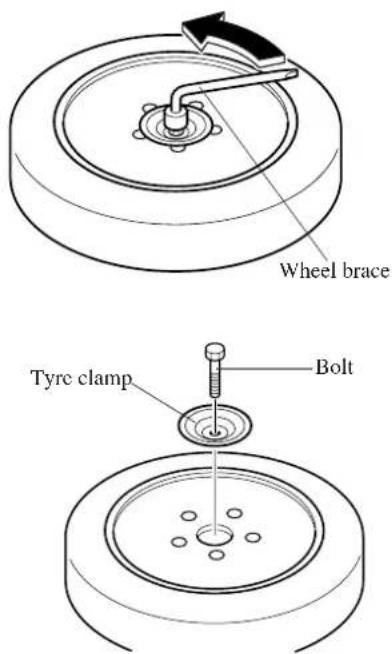
(7-Passenger model)
-
Fold the third-row seat (page 2-28).
-
Remove the cover and the cargo sub-compartment.
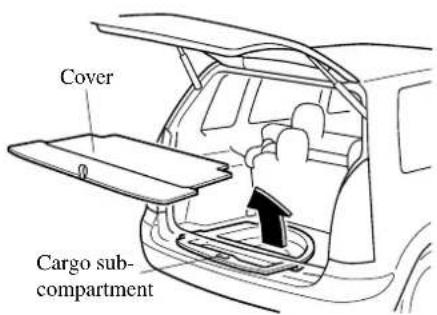
- Turn the tyre hold-down bolt anticlockwise with the wheel brace.
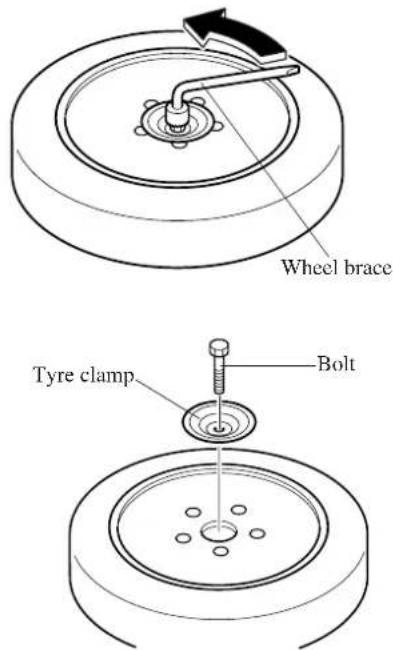
To secure the spare tyre
Perform the removal procedure in reverse.
Changing a Flat Tyre
NOTE
If the following occurs while driving, it could indicate a flat tyre.
• Steering becomes difficult.
- The vehicle begins to vibrate excessively.
• The vehicle pulls in one direction.
If you have a flat tyre, drive slowly to a level spot that is well off the road and out of the way of traffic to change the tyre. Stopping in traffic or on the shoulder of a busy road is dangerous.

WARNING
Jacking a Vehicle:
Changing a tyre is dangerous if not done properly. The vehicle can slip off the jack and seriously injure someone.
Be sure to follow the directions for changing a tyre, and never get under a vehicle that is supported only by a jack.
Passenger in Vehicle Supported by a Jack:
Allowing someone to remain in a vehicle supported by a jack is dangerous. The occupant could cause the vehicle to fall resulting in serious injury. Never allow anyone inside a vehicle supported by a jack.
In Case of an Emergency
Flat Tyre
NOTE
Make sure the jack is well lubricated before using it.
- Park on a level surface off the right-of-way and firmly set the parking brake.
- Put a vehicle with an automatic transaxle in Park (P), a manual transaxle in Reverse (R) or 1, and turn off the engine.
- Turn on the hazard warning flasher.
- Have everyone get out of the vehicle and away from the vehicle and traffic.
- Remove the jack, tool, and spare tyre (page 7-3).
- Block the wheel diagonally opposite the flat tyre. When blocking a front wheel, place the block both in front and behind the tyre. When blocking a rear wheel, place the block both in front and behind the tyre.
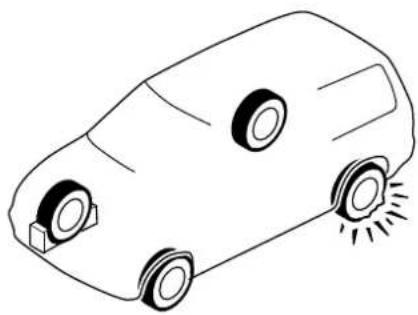
natural_image
Line drawing of a car with two wheels and a small sunburst on the side (no text or symbols)▼Removing a Flat Tyre
- Pry off the wheel cover with the bevelled end of the wheel brace.
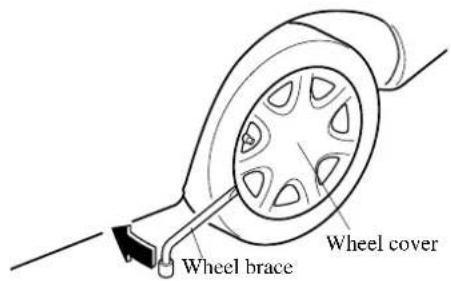
NOTE
Force the end of the wheel brace firmly between wheel and cover, or removal will be difficult.
CAUTION
Align the notch on the wheel cover with the valve stem when installing it.
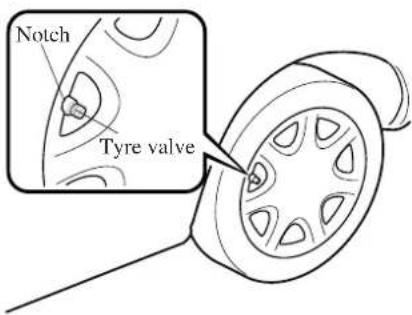
Damage could occur during installation if the wheel cover is not properly aligned.
- Loosen the wheel nuts by turning them anticlockwise one turn each, but don't remove any until the tyre has been raised off the ground.
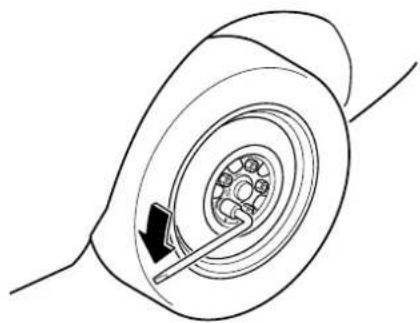
natural_image
Diagram of a car wheel assembly with a gear and directional arrow (no text or labels)- Place the jack under the jacking position closest to the tyre being changed.
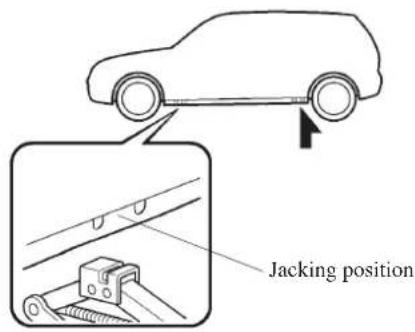

WARNING
Incorrect Jacking Position:
Attempting to jack the vehicle in positions other than those recommended in this manual is dangerous. The vehicle could slip off the jack and seriously injure or even kill someone. Use only the front and rear jacking positions recommended in this manual.
Improper Jack:
Using a jack that isn't designed for your Mazda is dangerous. The vehicle could slip off the jack and seriously injure someone. Use only the jack provided with your Mazda.
Placing Objects Under the Jack:
Jacking the vehicle with an object under the jack is dangerous. The jack could slip and someone could be seriously injured by the jack or the falling vehicle. Never place objects under the jack.
- Insert the jack handle into the jack.
In Case of an Emergency
Flat Tyre
- Turn the jack handle clockwise and raise the vehicle high enough so that the spare tyre can be installed. Before removing the wheel nuts, make sure your Mazda is firmly in position and that it cannot slip or move.
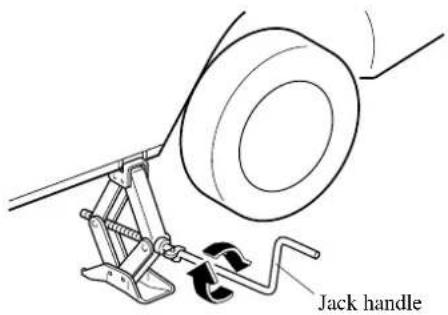
- Remove the wheel nuts by turning them anticlockwise; then remove the wheel.
▼Mounting the Spare Tyre
- Remove dirt and grime from the mounting surfaces of the wheel and hub, including the hub bolts, with a cloth.
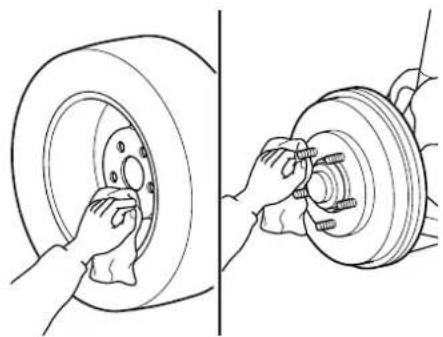
natural_image
Technical illustration showing hands adjusting a tire and brake disc components (no text or symbols)7-10

WARNING
Removing Dirt and Grime from Wheels, Hubs and Hub Bolts: When changing or replacing a tyre, not removing dirt and grime from the mounting surfaces of the wheel, hub and hub bolts is dangerous. The wheel nuts could loosen while driving and cause the tyre to come off, resulting in an accident. Make sure the mounting surfaces of the wheel, hub and wheel nuts are clean before changing or replacing tyres.
- Mount the spare tyre.
- Install the wheel nuts with the bevelled edge inward; tighten them by hand.
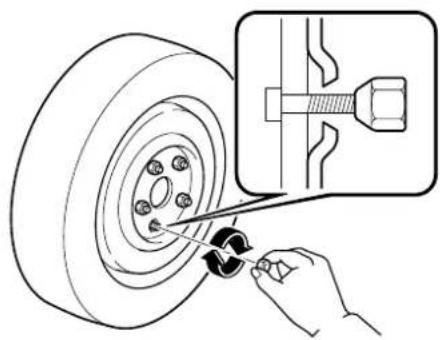
natural_image
Line drawing of a hand using a screwdriver to adjust a tire (no text or symbols present)WARNING
Don't apply Oil or Grease to Wheel Nuts, Bolts:
Applying oil or grease to wheel nuts and bolts is dangerous. The wheel nuts could loosen while driving and cause the tyre to come off, resulting in an accident. In addition, wheel nuts and bolts could be damaged if tightened more than necessary. Do not apply oil or grease to wheel nuts and bolts and do not tighten the wheel nuts beyond the recommended tightening torque.
- Turn the jack handle anticlockwise and lower the vehicle. Use the wheel brace to tighten the nuts in the order shown.
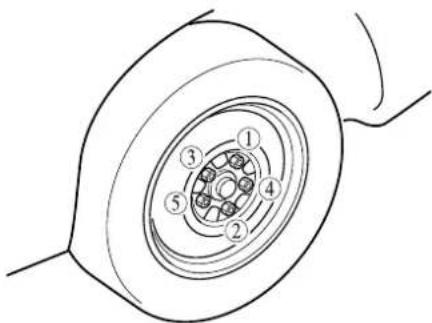
If you're unsure of how tight the nuts should be, have them inspected at a service station.
Nut tightening torque:
Improperly or loosely tightened wheel nuts are dangerous. The wheel could wobble or come off. This could result in loss of vehicle control and cause a serious accident. Always securely and correctly tighten the wheel nuts.
Metric Studs and Wheel Nuts: Because the wheel studs and wheel nuts on your Mazda have metric threads, using a non-metric nut is dangerous. On a metric stud, it would not secure the wheel and would damage the stud, which could cause the wheel to slip off and cause an accident. Be sure to reinstall the same nuts you removed or replace them with metric nuts of the same configuration.
Incorrect Tyre Air Pressure:
Driving on tyres with incorrect air pressure is dangerous. Tyres with incorrect pressure could affect handling and result in an accident. Don't drive with any tyres that have incorrect air pressure. When you check the regular tyres' air pressure, check the spare tyre, too.
- Store the damaged tyre in the luggage compartment.
Have the damaged tyre repaired as soon as possible.
NOTE
To prevent the jack and tool from rattling, store them properly.
In Case of an Emergency
Overheating
Overheating
If the temperature gauge indicates overheating, the vehicle loses power, or you hear a loud knocking or pinging noise, the engine is probably too hot.
If this happens:
- Drive safely to the side of the road and park off the right-of-way.
- Put a vehicle with an automatic transaxle in park (P), a manual transaxle in neutral. Apply the parking brake.
- Turn off the air conditioner.
WARNING
Steam from Overheated Engine: Steam from an overheated engine is dangerous. The escaping steam could seriously burn you. Open the bonnet ONLY after steam is no longer escaping from the engine.
- Check whether coolant or steam is escaping from under the bonnet or from the engine compartment.
If steam is coming from the engine compartment:
Don't go near the front of the vehicle. Stop the engine. Then turn the ignition switch to the ON position without starting the engine. The radiator cooling fans will start to cool the engine.
If neither coolant nor steam is escaping:
Open the bonnet and idle the engine until it cools. If this doesn't lower the temperature, stop the engine and let it cool.
7-12


- Check the coolant level.
If it's low, look for leaks in the radiator hoses and connections, heater hoses and connections, radiator, and water pump.
If you find a leak or other damage, or if coolant is still leaking, stop the engine and call an Authorised Mazda Dealer.
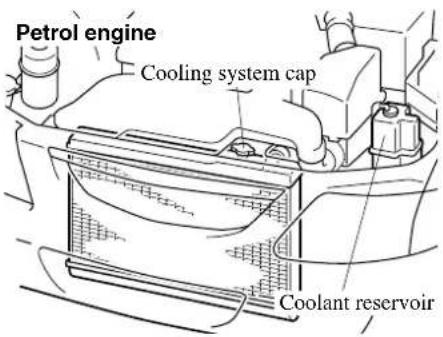
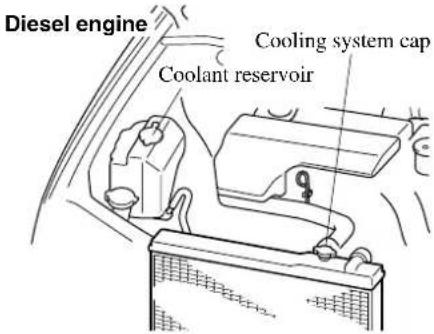
If you find no problems, the engine is cool, and no leaks are obvious, carefully add coolant as required (page 8-18).

WARNING
Cooling System Caps:
When the engine and radiator are hot, scalding coolant and steam may shoot out under pressure and cause serious injury. Don't remove either cooling system cap when the engine and radiator are hot.

CAUTION
If the engine continues to overheat or frequently overheats, have the cooling system inspected. The engine could be seriously damaged unless repairs are made.
In Case of an Emergency
Emergency Starting
Starting a Flooded Engine (Petrol Engine)
If the engine fails to start, it may be flooded (excessive fuel in the engine).
When the engine is cold
Follow this procedure:
- Depress the accelerator all the way and hold it there.
- Turn the ignition switch to the START position and hold it there—for up to 10 seconds. If the engine starts, release the key and accelerator immediately because the engine will suddenly rev up.
- If the engine fails to start, crank it without using the accelerator—for up to 10 seconds.
When the engine is warm
The above procedure should not be performed because it will make starting even more difficult. If the engine is unusually difficult to restart when it is warm (fails to start after repeated attempts without depressing the accelerator), depress the accelerator about halfway to start it.
Jump-Starting
Jump-starting is dangerous if done incorrectly. So follow the procedure carefully. If you feel unsure about jump-starting, we strongly recommend that you have a competent service technician do the work.

WARNING
Battery-Related Explosion: Flames and sparks near open battery cells are dangerous. Hydrogen gas, produced during normal battery operation, could ignite and cause the battery to explode. An exploding battery can cause serious burns and injuries. Keep all flames, including cigarettes, and sparks away from open battery cells.
Low Fluid Level or Frozen Battery: Jump-starting a frozen battery or one with a low fluid level is dangerous. It may rupture or explode, causing serious injury. Don't jump-start a frozen battery or one with a low fluid level.

CAUTION
Use only a 12 V booster system. You can damage a 12 V starter, ignition system, and other electrical parts beyond repair with a 24 V power supply (two 12 V batteries in series or a 24 V motor generator set).
-
Make sure the booster battery is 12 V and that its negative terminal is grounded.
-
If the booster battery is in another vehicle, don't allow the vehicles to touch. Turn off the engine of the vehicle with the booster battery and all unnecessary electrical loads in both vehicles.
-
Connect the jumper leads in the exact sequence as in the illustration.
-
Connect one end of a lead to the positive terminal on the discharged battery (1).
- Attach the other end to the positive terminal on the booster battery (2).
- Connect one end of the other lead to the negative terminal of the booster battery (3).
- Connect the other end to a solid, stationary, exposed metallic point (for example, the engine hanger) away from the discharged battery (4).
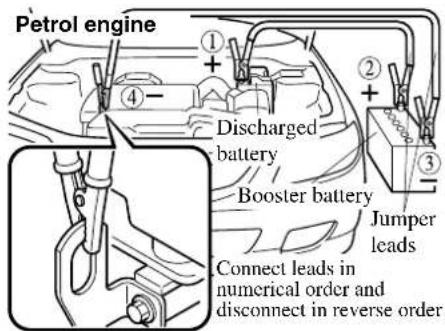
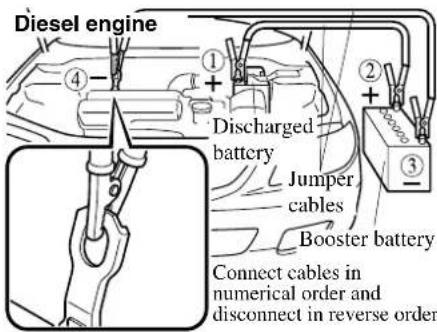

WARNING
Connecting to Negative Terminal: Connecting the end of the second lead to the negative ( ) terminal of the discharged battery is dangerous. A spark could cause the gas around the battery to explode and injure someone. Connect the lead to a point away from the battery.
Connecting Jumper Lead to a Moving Part:
Connecting a jumper lead near or to a moving parts (cooling fans, belts) is dangerous. The lead could get caught when the engine starts and cause serious injury. Never connect a jumper lead to or near any part that moves.
- Start the engine of the booster vehicle and run it a few minutes. Then start the engine of the other vehicle.
- When finished, carefully disconnect the leads in the reverse order described in Step 3.
In Case of an Emergency
Emergency Starting
Push-Starting
WARNING
Towing a Vehicle to Start It: Towing a vehicle to start it is dangerous. The vehicle being towed could surge forward when its engine starts, causing the two vehicles to collide. The occupants could be injured. Never tow a vehicle to start it.
Petrol engine
You can't start a vehicle with an automatic transaxle by pushing it.
CAUTION
You shouldn't push-start a vehicle that has a manual transaxle. It can damage the emission control system.
Diesel engine
If the battery isn't dead, you may push-start a vehicle, but carefully follow these steps:
- Turn off all unneeded electrical accessories.
- Turn the ignition switch to the ON position.
- Depress the clutch pedal and shift into third before push starting.
- Slowly release the clutch pedal when speed reaches about 15 km/h (9 mph), then depress the accelerator halfway until the engine starts.
NOTE
If the battery is low, the following may occur and the engine won't start:
- The glow plug won't operate (temperature lower than about 20^ (68^) ).
• The fuel-cut valve stays closed.
7-16




Running Out of Fuel (Diesel Engine)
If your vehicle runs out of fuel, add fuel, pump the priming pump several times, and try to restart it. Because air can get into fuel lines when a vehicle runs out of fuel, your engine may take longer to start.
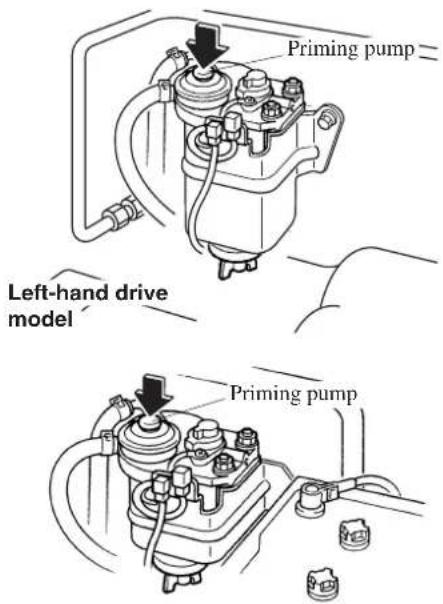
Right-hand drive model
If the engine doesn't start the first time, try starting it several more times. If it still doesn't start, contact an Authorised Mazda Dealer.
CAUTION
Don't try starting the engine for more than 30 seconds at a time. Doing so, could damage the starter. If the engine doesn't start on the first try wait about 10 seconds before trying again.
In Case of an Emergency
Emergency Towing
Towing Description
We recommend that towing be done only by an Authorised Mazda Dealer or a commercial tow-truck service.
Proper lifting and towing are necessary to prevent damage to the vehicle. Government and local laws must be followed.
A towed vehicle usually should have its front wheels off the ground. If excessive damage or other conditions prevent this, use wheel dollies.
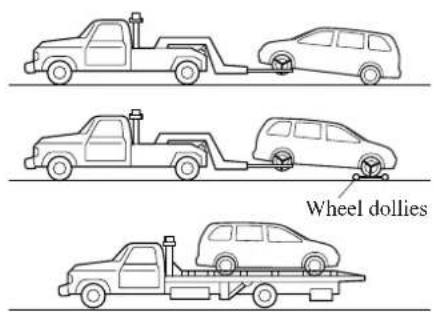
When towing with the rear wheels on the ground, release the parking brake.
CAUTION
Don't tow the vehicle pointed backward with driving wheels on the ground. This may cause internal damage to the transaxle.
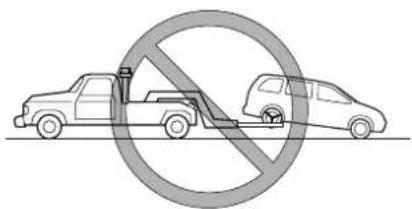
CAUTION
Don't tow with sling-type equipment. This could damage your vehicle. Use wheel-lift or flatbed equipment.
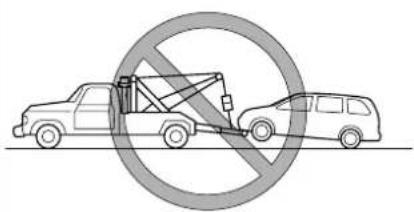
natural_image
Prohibition sign showing a truck lifting a car with no text or symbolsIf towing service is not available in an emergency, the vehicle may be towed with all four wheels on the ground using the towing hook at the front of the vehicle. Only tow the vehicle on paved surfaces for short distances at low speeds.
7-18


CAUTION
Follow these instructions when towing the vehicle with all wheels on the ground.
- Shift to neutral.
- Turn the ignition switch to the ACC position.
- Release the parking brake.
Remember that power assist for the brakes and steering will not be available when the engine is not running.
Towing Hooks
CAUTION
- The towing hook should be used in an emergency (to get the vehicle out of a ditch or a snow bank, for example).
- When using the towing hooks, always pull the lead or chain in a straight direction with respect to the hook. Apply no sideways force.
NOTE
When towing with chain or wire rope, wrap the chain or wire rope with a soft cloth near the bumper to prevent damage to the bumper.
▼Towing Hook-Front
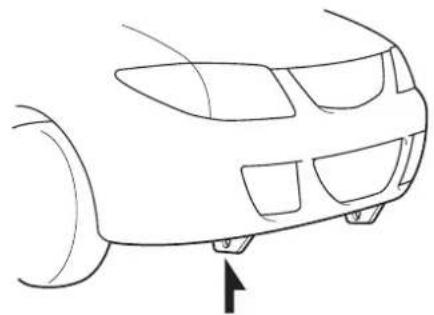
natural_image
Front view line drawing of a car head with no text or symbols7-19


J54L_8R34_EE_02H.BOOK Page 20 Monday, July 15, 2002 9:03 AM

In Case of an Emergency
Emergency Towing
▼ Towing Hook-Rear
Without rear under spoiler
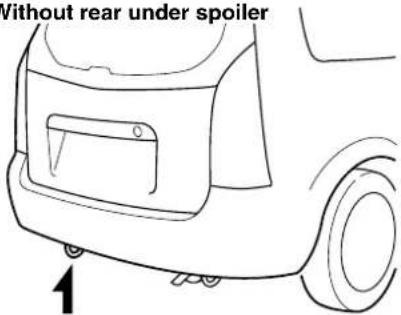
With rear under spoiler
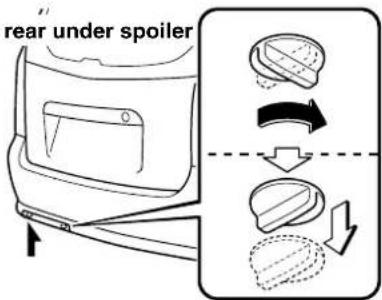
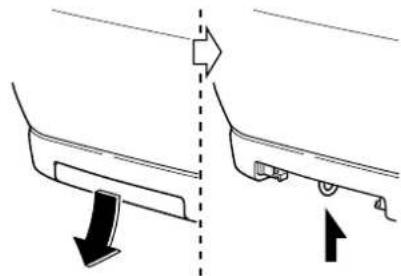
natural_image
Diagram showing two mechanical components with arrows indicating motion, no text or symbols present7-20




Form No. 8R34-EE-02H
8
Maintenance and Care
How to keep your Mazda in top condition.
Introduction 8-2
Introduction 8-2
Scheduled Maintenance 8-3
Scheduled Maintenance 8-3
Owner Maintenance 8-11
Owner Maintenance Schedule 8-11
Owner Maintenance Precautions 8-12
Engine Compartment Overview 8-13
Engine Oil 8-14
Engine Coolant 8-18
Brake/Clutch Fluid 8-19
Power Steering Fluid 8-20
Automatic Transaxle Fluid (ATF) 8-21
Window and Headlight Washer Fluid 8-23
Body Lubrication 8-23
Air Filter 8-24
Fuel Filter (Diesel Engine) 8-26
Wiper Blades 8-27
Battery 8-30
Tyres 8-32
Light Bulbs 8-36
Fuses 8-42
Emission Control Maintenance (Australia) 8-46
Appearance Care 8-49
How to Minimize Environmental Paint Damage 8-49
Exterior Care 8-51
Interior Care 8-54
Maintenance and Care
Introduction
Introduction
Be extremely careful and prevent injury to yourself and others or damage to your vehicle when using this manual for inspection and maintenance.
If you're unsure about any procedure it describes, we strongly urge you to have a reliable and qualified service shop perform the work, preferably an Authorised Mazda Dealer.
Factory-trained Mazda technicians and genuine Mazda parts are best for your vehicle. Without this expertise and the parts that have been designed and made especially for your Mazda, inadequate, incomplete, and insufficient servicing may result in problems. This could lead to vehicle damage or an accident and injuries.
For expert advice and quality service, consult an Authorised Mazda Dealer.
The owner should retain evidence that proper maintenance has been performed as prescribed.
A claim against a warranty will not qualify if it results from lack of maintenance and not from defective material or authorised Mazda workmanship.
Scheduled Maintenance
NOTE
- After the prescribed period, continue to follow the described maintenance at the recommended intervals.
- As the result of visual examination or functional measurement of a system's operation (performance), correct, clean, or replace as required. (Inspect, and if necessary replace the air filter)
Emission control and related systems
The ignition and fuel systems are highly important to the emission control system and to efficient engine operation. Don't tamper with them.
All inspections and adjustments must be made by a qualified technician. We strongly recommend that all servicing related to these systems be done by an Authorised Mazda Dealer.
Maintenance and Care
Scheduled Maintenance
(Europe)
I : Inspect: Inspect and clean, repair, adjust, or replace if necessary.
(Oil-permeated air filter cannot be cleaned using the air-blow method.)
R : Replace
C: Clean
| Maintenance Interval(Number of monthsor kilometres (miles),whichever comesfirst) | Months 12 24 36 48 60 72 84 96 108 120 132 144 | ||||||||||||
| ×1000 km 15 | 30 45 | 60 75 | 90 105 | 120 | 135 15 | 50 165 | 180 | ||||||
| ×1000 miles 9 | 18 | 27 36 | 45 54 | 63 72 | 81 90 | 99 108 | |||||||
PETROL ENGINE
| Engine valve clearance | Inspect every 90,000 km (54,000 miles) | ||||||||||||
| Engine timing belt | FP engine*1 | Replace every 90,000 km (54,000 miles) | |||||||||||
| FS engine*2 | Inspect at 90,000 km (54,000 miles)Replace every 150,000 km(90,000miles) | ||||||||||||
| Idle speed | I | I | I | I | I | I | |||||||
| Spark plugs | I | I | I | I | |||||||||
| Air filter*6 | I | I | R | I | I | R | I | I | R | I | I | R | |
| Evaporative system | I | I | I | ||||||||||
DIESEL ENGINE
| Engine valve clearance | I | I | I | I | I | I | |||||||
| Engine timing belt | (Finland, Sweden, Norway)*3 | Replace every 75,000 km (45,000 miles) | |||||||||||
| Others^*1 | Replace every 90,000 km (54,000 miles) | ||||||||||||
| Fuel filter | R | R | R | R | |||||||||
| Air filter^*6 | C | C | R | C | C | R | C | C | R | C | C | R | |
PETROL and DIESEL ENGINE
| Drive belts*4 | I | I | I | I | I | I | I | I | I | I | I |
| Engine oil*5 | R | R | R | R | R | R | R | R | R | R | R |
| Engine oil filter*5 | R | R | R | R | R | R | R | R | R | R | R |
* Replacement of the timing belt is required at every 90,000 km (54,000 miles). Failure to replace the timing belt may result in damage to the engine.
*2 Replacement of the timing belt is required at every 150,000 km {90,000 miles}. If the vehicle is operated in cold districts { below -18 degrees C (0 degrees F) }, replace the timing belt at 90,000 km {54,000 miles}. Failure to replace the timing belt may result in damage to the engine.
*3 Replacement of the timing belt is required at every 75,000 km {45,000 miles}. Failure to replace the timing belt may result in damage to the engine.
*4 Also inspect and adjust the power steering and air conditioner drive belts, if installed.
*5 If the vehicle is operated under any of the following conditions, change the engine oil and the engine oil filter every 10,000 km [6,000 miles] or shorter.
a) Driving in dusty conditions.
b) Extended periods of idling or low speed operation.
c) Driving for long period in cold temperatures or driving regularly at short distance only.
If the vehicle is operated in very dusty or sandy areas, inspect and if necessary, replace the air filter more often than the recommended intervals.
I : Inspect: Inspect and clean, repair, adjust, or replace if necessary.
R : Replace
T: Tighten
L:Lubricate
| Maintenance Interval(Number of monthsor kilometres (miles),whichever comesfirst) | Months 12 24 36 48 60 72 84 96 108 120 132 144 | ||||||||||||
| ×1000 km 15 | 30 45 | 60 75 | 90 105 | 120 | 135 150 | 165 | 180 | ||||||
| ×1000 miles 9 | 18 27 | 36 45 | 54 63 | 72 81 | 90 99 | 108 | |||||||
PETROL and DIESEL ENGINE
| Cooling system (Including coolant level adjustment) | I | I | I | I | I | I | ||||||
| Engine coolant | Replace at first 4 years or 90,000 km (54,000 miles); after that, every 2 years | |||||||||||
| Fuel lines and hoses | I | I | I | I | I | I | ||||||
| E.G.R. system | I | I | I | |||||||||
| Battery electrolyte level and specific gravity | I | I | I | I | I | I | I | I | I | I | I | I |
| All electrical system*7 | I | I | I | I | I | I | I | I | I | I | I | I |
| Head light alignment | I | I | I | I | I | I | ||||||
| Brake and clutch pedals | I | I | I | I | I | I | I | I | I | I | I | I |
| Clutch fluid | I | I | I | I | I | I | I | I | I | I | I | I |
| Brake lines, hoses and connections | I | I | I | I | I | I | I | I | I | I | I | I |
| Brake fluid *8 | I | R | I | R | I | R | I | R | I | R | I | R |
| Parking brake | I | I | I | I | I | I | I | I | I | I | I | I |
| Power brake unit and hoses | I | I | I | I | I | I | I | I | I | I | I | I |
| Disc brakes | I | I | I | I | I | I | I | I | I | I | I | I |
| Power steering fluid and lines | I | I | I | I | I | I | I | I | I | I | I | I |
| Steering operation and gear housing | I | I | I | I | I | I | ||||||
| Steering linkage tie rod ends and arms | I | I | I | I | I | I | ||||||
| Manual transaxle oil | ||||||||||||
| Automatic transaxle fluid level | I | I | I | I | I | I | ||||||
| Front and rear suspension and ball joints | I | I | I | I | I | |||||||
| Driveshaft dust boots | I | I | I | I | I | |||||||
| Exhaust system heat shields | I | I | I | I | I | I | ||||||
| Wheel nuts | T | T | T | T | T | T | T | T | T | T | T | T |
| Bolts and nuts on chassis and body | T | T | T | T | T | T | T | T | T | T | T | T |
| Body condition (for rust, corrosion and perforation) | I | I | I | I | I | I | I | I | I | I | I | I |
| Tyres (including spare tyre) (with inflation pressure adjustment) | I | I | I | I | I | I | I | I | I | I | I | I |
| Hinges and catches | L | L | L | L | L | L | L | L | L | L | L | L |
| Road test | I | I | I | I | I | I | I | I | I | I | I | I |
| Cabin air filter | R | R | R | R | R | R | R | R | R | R | R | R |
*7 This is a full function check of electrical systems such as lights, wiper and washer systems (including wiper blades), and power windows.
*8 If the brakes are used extensively (for example, continuous hard driving or mountain driving) or if the vehicle is operated in extremely humid climates, change the brake fluid annually.
8-5




R
Maintenance and Care
Scheduled Maintenance
(Israel)
I : Inspect: Inspect and clean, repair, adjust, or replace if necessary.
| (Oil-permeated air filter cannot be cleaned using the air-blow method.) |
| R : Replace |
| Maintenance Interval (Number of months or kilometres (miles), whichever comes first) | Months 12 24 36 48 60 72 84 96 108 120 132 144 × 1000 km 15 30 45 60 75 90 105 120 135 150 165 180 × 1000 miles 9 18 27 36 45 54 63 72 81 90 99 108 | |||||||||
| Engine valve clearance | Inspect every 90,000 km (54,000 miles) | |||||||||
| Engine timing belt*1 | Replace every 90,000 km (54,000 miles) | |||||||||
| Idle speed | I | I | I | I | I | |||||
| Fuel filter | R | R | ||||||||
| Spark plugs | I | I | I | I | ||||||
| Evaporative system | I | I | I | |||||||
| Drive belts*2 | I | I | I | I | I | I | I | I | I | I |
| Engine oil*3 | R | R | R | R | R | R | R | R | R | R |
| Engine oil filter*3 | R | R | R | R | R | R | R | R | R | R |
| Cooling system (Including coolant level adjustment) | I | I | I | I | I | |||||
| Engine coolant | Replace at first 4 years or 90,000 km (54,000 miles) ; after that, every 2 years | |||||||||||
| Air filter*4 | I | I | R | I | I | R | I | I | R | I | I | R |
| Fuel lines and hoses | I | I | I | I | I | I | ||||||
| E.G.R. system | I | I | I | |||||||||
| Battery electrolyte level and specific gravity | I | I | I | I | I | I | I | I | I | I | I | I |
| All electrical system*5 | I | I | I | I | I | I | I | I | I | I | I | I |
| Head light alignment | I | I | I | I | I | I | ||||||
| Brake pedals | I | I | I | I | I | I | I | I | I | I | I | I |
| Brake lines, hoses and connections | I | I | I | I | I | I | I | I | I | I | I | I |
| Brake fluid*6 | I | R | I | R | I | R | I | R | I | R | I | R |
| Parking brake | I | I | I | I | I | I | I | I | I | I | I | I |
| Power brake unit and hoses | I | I | I | I | I | I | I | I | I | I | I | I |
| Disc brakes | I | I | I | I | I | I | I | I | I | I | I | I |
| Power steering fluid and lines | I | I | I | I | I | I | I | I | I | I | I | I |
| Steering operation and gear housing | I | I | I | I | I | I | ||||||
* Replacement of the timing belt is required at every 90,000 km {54,000 miles}. Failure to replace the timing belt may result in damage to the engine.
*2 Also inspect and adjust the power steering and air conditioner drive belts, if installed.
*3 If the vehicle is operated under any of the following conditions, change the engine oil and the engine oil filter every 10,000 km {6,000 miles} or shorter.
a) Driving in dusty conditions.
b) Extended periods of idling or low speed operation.
c) Driving for long period in cold temperatures or driving regularly at short distance only.
*4 If the vehicle is operated in very dusty or sandy areas, inspect and if necessary, replace the air filter more often than the recommended intervals.
*5 This is a full function check of electrical systems such as lights, wiper and washer systems (including wiper blades), and power windows.
*6 If the brakes are used extensively (for example, continuous hard driving or mountain driving) or if the vehicle is operated in extremely humid climates, change the brake fluid annually.
I : Inspect: Inspect and clean, repair, adjust, or replace if necessary.
R : Replace
T: Tighten
L:Lubricate
| Maintenance Interval(Number of months orkilometres (miles),whichever comes first) | Months 12 24 36 48 60 7 | 2 84 96 108 | 120 132 144 | |||||||||||
| ×1000 km 15 | 30 45 | 60 75 | 90 10 | 5 120 | 135 1 | 50 165 | 180 | |||||||
| ×1000 miles 9 | 18 27 | 36 45 | 54 63 | 72 81 | 90 99 | 108 | ||||||||
| Steering linkage tie rod ends and arms | I | I | I | I | I | I | ||||||||
| Automatic transaxle fluid level | I | I | I | I | I | I | ||||||||
| Front and rear suspension and ball joints | I | I | I | I | I | |||||||||
| Driveshaft dust boots | I | I | I | I | I | |||||||||
| Exhaust system heat shields | I | I | I | I | I | I | ||||||||
| Wheel nuts | T | T | T | T | T | T | T | T | T | T | T | T | T | |
| Bolts and nuts on chassis and body | T | T | T | T | T | T | T | T | T | T | T | T | T | |
| Body condition (for rust, corrosion andperforation) | Inspect annually | |||||||||||||
| Tyres (including spare tyre)(with inflation pressure adjustment) | I | I | I | I | I | I | I | I | I | I | I | I | I | |
| Hinges and catches | L | L | L | L | L | L | L | L | L | L | L | L | L | |
| Road test | I | I | I | I | I | I | I | I | I | I | I | I | I | |
| Cabin air filter (if installed) | R | R | R | R | R | R | R | R | R | R | R | R | R | |




Maintenance and Care
Scheduled Maintenance
(Except Europe, Israel)
I : Inspect: Inspect and clean, repair, adjust, or replace if necessary.
(Oil-permeated air filter cannot be cleaned using the air-blow method.)
R : Replace
C: Clean
| Maintenance Interval(Number of months or kilometres (miles), whichever comes first) | M o n | t h s | 6 | 1 | 2 1 | 8 | 2 | 4 3 | 0 | 3 | 6 4 | 2 | 4 | 8 | 5 | 4 | |
| ×1000 km 10 | 20 | 30 40 | 50 | 60 70 | 80 90 | 100 | 110 | 120 | 130 | 140 | 150 | 160 | |||||
| ×1000 miles | 6 12 | 18 24 | 30 | 36 42 | 48 54 | 60 | 66 72 | 78 | 84 90 | 96 |
6 0 6 6 7 2 7 8 8 4
PETROL ENGINE
| Engine valve clearance | Inspect every 100,000 km (60,000 miles) or 60 months | ||||||||||||||||
| Idle speed | I | I | I | I | I | I | I | I | |||||||||
| Fuel filter | except Australian model | R | R | R | R | ||||||||||||
| Australian model | R | R | |||||||||||||||
| Spark plugs | R | R | R | R | R | ||||||||||||
| Air filter*4 | I | R | I | R | I | R | I | R | |||||||||
| Evaporative system | I | I | I | I | I | I | I | I | |||||||||
DIESEL ENGINE
| Engine valve clearance | I | I | I | I | I | I | I | I | ||||||||
| Fuel filter | R | R | R | R | ||||||||||||
| Air filter*4 | C | R | C | R | C | R | C | R |
PETROL and DIESEL ENGINE
| Drive belts*1 | I | I | I | I | I | I | I | I | I | I | I | I | I | I | I | |
| Engine timing belt*2 | Replace every 100,000 km (60,000 miles) | |||||||||||||||
| Engine oil*3 | R | R | R | R | R | R | R | R | R | R | R | R | R | R | R | |
| Engine oil filter *3 | R | R | R | R | R | R | R | R | R | R | R | R | R | R | R | |
| Cooling system (Including coolant level adjustment) | I | I | I | I | I | I | I | |||||||||
| Engine coolant | Replace every 2 years | |||||||||||||||
| Fuel line and hoses | I | I | I | I | I | I | I | |||||||||
| E.G.R. system | I | I | I | I | I | I | I | |||||||||
| Battery electrolyte level and specific gravity | except Australian model | I | I | I | I | I | I | I | ||||||||
| Australian model | I | I | I | I | I | I | I | I | I | I | I | I | I | I | I | |
^*1 Also inspect and adjust the power steering and air conditioner drive belts, if installed.
*2 Replacement of the timing belt is required at every 100,000 km {60,000 miles}. Failure to replace the timing belt may result in damage to the engine.
^3 If the vehicle is operated under any of the following conditions, change the engine oil and the engine oil filter more often than recommended intervals.
a) Driving in dusty conditions.
b) Extended periods of idling or low speed operation.
c) Driving for long period in cold temperatures or driving regularly at short distance only.
If the vehicle is operated in very dusty or sandy areas, inspect and if necessary, replace the air filter more often than the recommended intervals.
8-8


I : Inspect: Inspect and clean, repair, adjust, or replace if necessary.
R : Replace
T: Tighten
L:Lubricate
| Maintenance Interval(Number of months or kilometres (miles), whichever comes first) | M o n | t h s | 6 | 1 | 2 1 | 8 | 2 | 4 3 | 0 | 3 | 6 4 | 2 | 4 | 8 5 | 4 | |||
| ×1000 km 10 | 20 | 30 | 40 | 50 | 60 | 70 | 80 | 90 | 100 | 110 | 120 | 130 | 140 | 150 | 160 | |||
| ×1000 miles | 6 | 12 | 18 | 24 | 30 | 36 | 42 | 48 | 54 | 60 | 66 | 72 | 78 | 84 | 90 | 96 | ||
6 0 6 6 7 2 7 8 8
PETROL and DIESEL ENGINE
| Brake and clutch pedals | I | I | I | I | I | I | I | I | I | I | I | I | I | I | I | |
| Brake lines, hoses and connections | I | I | I | I | I | I | I | I | ||||||||
| Brake fluid*5 | I | I | I | R | I | I | I | R | I | I | I | R | I | I | I | R |
| Clutch fluid | I | I | I | I | I | I | I | I | I | I | I | I | I | I | I | I |
| Parking brake | I | I | I | I | I | I | I | I | I | I | I | I | I | I | I | I |
| Power brake unit and hoses | I | I | I | I | I | I | I | I | ||||||||
| Disc brakes | I | I | I | I | I | I | I | I | I | I | I | I | I | I | I | I |
| Drum brakes (if installed) | I | I | I | I | I | I | I | I | ||||||||
| Power steering fluid and lines | I | I | I | I | I | I | I | I | I | I | I | I | I | I | I | I |
| Steering operation and gear housing | I | I | I | I | I | I | I | I | ||||||||
| Steering linkage tie rod ends and arms | I | I | I | I | I | I | I | I | ||||||||
| Manual transaxle oil | R | R | ||||||||||||||
| Automatic transaxle fluid level | I | I | I | I | I | I | I | |||||||||
| Automatic transaxle fluid | R | R | R | |||||||||||||
| Front and rear suspension and ball joints | I | I | I | I | ||||||||||||
| Driveshaft dust boots | I | I | I | I | ||||||||||||
| Exhaust system heat shields | I | I | I | I | ||||||||||||
| Wheel nuts | T | T | T | T | T | T | T | T | ||||||||
| Bolts and nuts on chassis and body | T | T | T | T | T | T | T | T | ||||||||
| All electrical system*6 | I | I | I | I | I | I | I | I | ||||||||
| Head light alignment | I | I | I | I | I | |||||||||||
| Cabin air filter (if installed) | R | R | R | R | R | R | R | R | ||||||||
| Body condition (for rust, corrosion and perforation)(except Australian model) | Inspect annually | |||||||||||||||
| Tyres(including spare tyre)(with inflation pressure adjustment) | I | I | I | I | I | I | I | I | ||||||||
| Hinges and catches | L | L | L | L | L | L | L | L | ||||||||
| Road test | I | I | I | I | I | I | I | I | I | I | I | I | I | I | I | I |
*5 If the brakes are used extensively (for example, continuous hard driving or mountain driving) or if the vehicle is operated in extremely humid climates, change the brake fluid annually.
^*6 This is a full function check of electrical systems such as lights, wiper and washer systems (including wiper blades), and power windows.
8-9



Maintenance and Care
Scheduled Maintenance
▼ Approximate Service Times (Australia)
| Maintenance Interval Maintenance Item | Number of months or km (miles), whichever comes first | ||||||||||||||||||
| M o n | t h s | 6 | 1 | 2 1 8 | 2 | 4 3 0 | 3 | 6 4 2 | 4 | 8 5 | 4 | ||||||||
| ×1000 Km 1 | 0 20 | 30 40 | 50 60 | 70 | 80 90 | 100 | 110 | 120 | 130 1 | 40 15 | 0 160 | ||||||||
| (×1000 Miles) | (6) | (12) | (18) | (24) | (30) | (36) | (42) | (48) | (54) | (60) | (66) | (72) | (78) | (84) | (90) | (96) | |||
| Approximate time to complete this maintenance service in HOURS | 1.4 | 2.2 1.7 | 2.7 | 2.1* | 2.8 | 1.4 2.8 | 1.7 | 4.3* | 1.4 | 3.3 1.4 | 2.2 | 2.4* | 2.8 | ||||||
6 0 6 6 7 2 7 8 8 4
*Reduce by 0.7hrs for manual transaxle equipped vehicles.
8-10



Owner Maintenance Schedule
▼Routine Service
We highly recommend that these items be inspected at least every week.
• Engine Oil Level (page 8-14)
• Engine Coolant Level (page 8-18)
- Brake and Clutch Fluid Level (page 8-19)
- Washer Fluid Level (page 8-23)
• Battery Maintenance (page 8-31)
• Tyre Inflation Pressure (page 8-33)
Maintenance and Care
Owner Maintenance
Owner Maintenance Precautions
Improper or incomplete service may result in problems. This section gives instructions only for items easy to perform.
As explained in the Introduction (page 8-2), several procedure can be done only by a qualified service technician with special tools.
Improper do-it yourself maintenance during the warranty period may affect warranty coverage. For details, read the separate Mazda Warranty statement provided with the vehicle. If you're unsure about any servicing or maintenance procedure, have it done by an Authorised Mazda Dealer.
There are strict environmental laws regarding the disposal of waste oil and fluids. Please dispose of your waste carefully and with due regard to the environment.
We recommend that you entrust the oil and fluid changes of your vehicle to an Authorised Mazda Dealer.

WARNING
Maintenance Procedures:
Performing maintenance work on a vehicle is dangerous if not done properly. You can be seriously injured while performing some maintenance procedure. If you lack sufficient knowledge and experience or the proper tools and equipment to do the work, have it done by a qualified technician.
Running the Engine:
Working under the bonnet with the engine running is dangerous. It becomes even more dangerous when you wear jewellery or loose clothing.
Either can become entangled in moving parts and result in injury.
Therefore, if you must run the engine while working under the bonnet, make certain that you remove all jewellery (especially rings, bracelets, watches, and necklaces) and all neckties, scarves, and similar loose clothing before getting near the engine or cooling fan, with may turn on unexpectedly.
Electrical Fan and Engine Inspection:
Inspecting the engine with the ignition switch in the ON position is dangerous. The cooling fan could come on unexpectedly even when the engine isn't running. You could be seriously injured by the fan. Turn the ignition switch off and remove the key from the ignition switch when you inspect the engine.
8-12





Engine Compartment Overview
Petrol engine
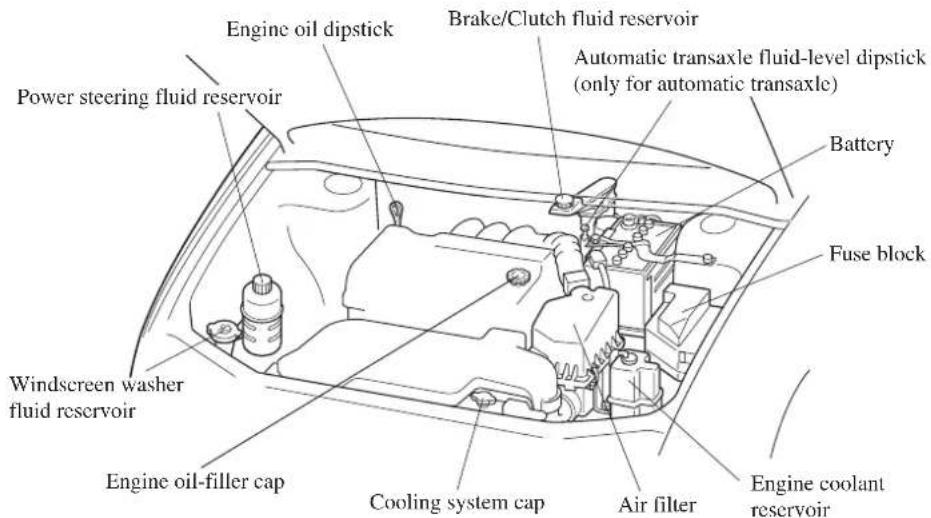
Diesel engine
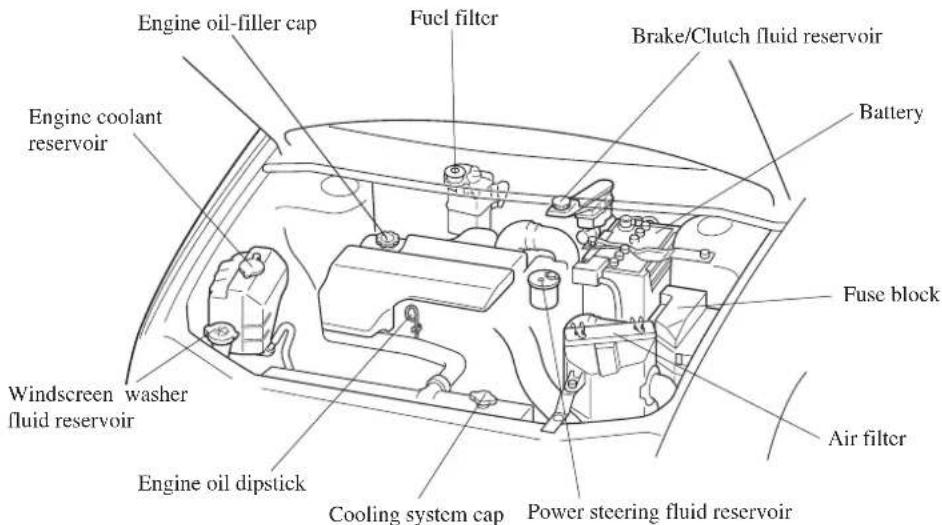
8-13




Maintenance and Care
Owner Maintenance
Engine Oil
NOTE
Changing the engine oil should be done by an Authorised Mazda Dealer.
▼Recommended Oil
The maintenance intervals can only be supported by the use of following oils (page 8-3).
Europe
Petrol engine
| Temperature Range SAE Viscosity Numbers | ||
| Grade | Recommended oils | °C -30-20-1 0 0 1 0 2 0 3 0 °F -20 0 20 40 60 80 100 120 |
| API SJ ACEA A1 or A3 | Mazda genuine DEXELIA oil | 5W-30 |
| API SJ ACEA A3 | 10W-40 | |
Diesel engine
| Temperature Range SAE Viscosity Numbers | ||
| Grade | Recommended oils | ^ -30-20-1 0 0 1 0 2 0 3 0 ^ -20 0 20 40 60 80 100 120 |
| API CFACEA B1 or B3 | Mazda genuine DEXELIA oil | 5W-30 |
| API CFACEA B3 | 10W-40 | |
Except Europe
Petrol engine
| Temperature Range SAE Viscosity Numbers | |
| Grade | °C -30-20-1 0 0 1 0 2 0 3 0 °F -20 0 20 40 60 80 100 120 |
| API SG, SH, SJ or SL. ILSAC GF-IIor GF-III | |
Diesel engine
| Temperature Range SAE Viscosity Numbers | |
| Grade | °C-30-20-1 0 0 1 0 2 0 3 0°F-20 0 20 40 60 80 100 120 |
| API CD, CE or CF-4 | 5W-3010W-30 |
4 0 5 0
4 0 5 0
4 0 5 0
4 0 5 0
8-15




Maintenance and Care
Owner Maintenance
Engine oil viscosity, or thickness, has an effect on fuel economy and cold-weather operation (starting and oil flow).
Low-viscosity engine oils can provide improved fuel economy and cold-weather performance.
But high-temperature weather conditions require higher-viscosity engine oils for satisfactory lubrication.
When choosing an oil, consider the temperature range your vehicle will operate in before the next oil change.
Then select the recommended viscosity from this chart above.
CAUTION
Using oils of viscosity besides those recommended for specific temperature ranges could result in engine damage.
▼ Inspecting Engine Oil Level
- Be sure the vehicle is on a level surface.
- Warm up the engine to normal operating temperature.
- Turn it off and wait 5 minutes for the oil to return to the sump.
- Pull out the dipstick, wipe it clean, and reinsert it fully.
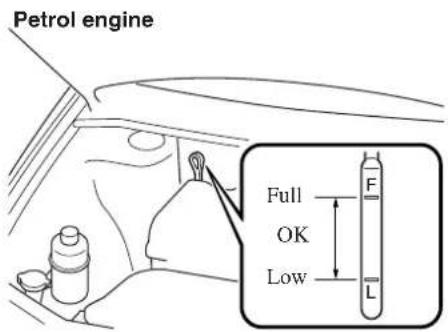
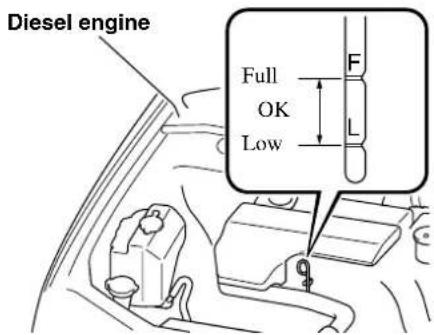
- Pull it out again and examine the level. It's OK between L and F. But if it's near or below L, add enough oil to bring the level to F.
| CAUTION |
| Don’t add engine oil over F. This may cause engine damage. |
- Make sure the O-ring is positioned properly before reinserting the dipstick.
The distance between L and F on the dipstick represents the following:
Petrol engine
| L (US qt, Imp qt) | 1.0 (1.05, 0.87) |
| Diesel engine | |
| L (US qt, Imp qt) | 1.2 (1.26, 1.05) |
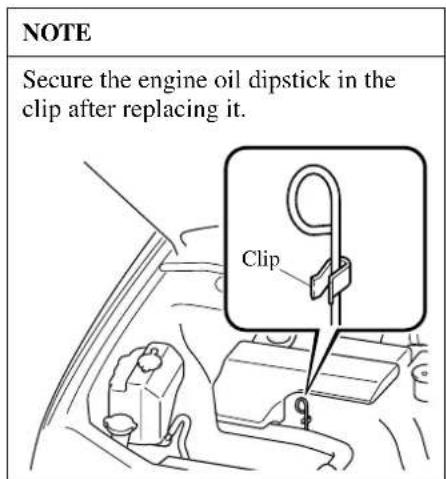


Maintenance and Care
Owner Maintenance
Engine Coolant
▼ Inspecting Coolant Level
WARNING
Hot Engine:
A hot engine is dangerous. If the engine has been running, parts of the engine compartment can become very hot. You could be burned. Don't inspect the coolant system or add coolant when the engine is hot.
NOTE
Changing the coolant should be done by an Authorised Mazda Dealer.
Inspect the antifreeze protection and coolant level in the coolant reservoir at least once a year—at the beginning of the winter season—and before travelling where temperatures may drop below freezing.
Inspect the condition and connections of all cooling system and heater hoses. Replace any that are swollen or deteriorated.
The coolant should be at full in the radiator and between the FULL and LOW marks on the coolant reservoir when the engine is cool.
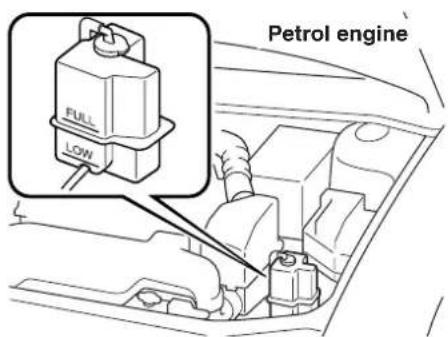
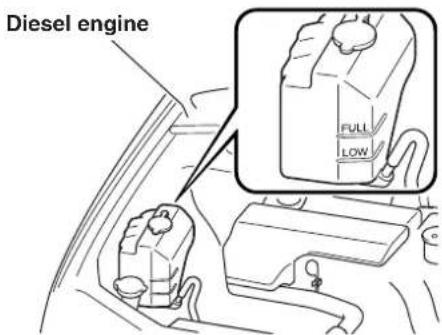
If the coolant reservoir is empty, consult an Authorised Mazda Dealer. If it's at or near LOW, add enough coolant to the coolant reservoir to provide freezing and corrosion protection and to bring the level to FULL.
CAUTION
Radiator coolant will damage paint. Rinse it off quickly.
Do not overfill.
If new coolant is required frequently, consult an Authorised Mazda Dealer.
8-18


Brake/Clutch Fluid
▼ Inspecting Brake/Clutch Fluid Level
The brakes and clutch draw fluid from the same reservoir.
Inspect the fluid level in the reservoir regularly. It should be kept at MAX.
The level normally drops with accumulated distance, a condition associated with wear of brake and clutch linings. If it is excessively low, have the brake/clutch system inspected by an Authorised Mazda Dealer.
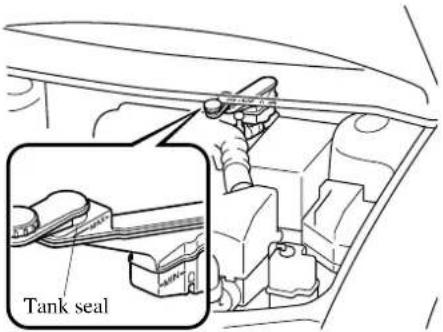
▼ Adding Brake/Clutch Fluid

WARNING
Spilled Brake Fluid:
Spilled brake fluid is dangerous. If it gets in your eyes, they could be seriously injured. If this happens, immediately flush your eyes with water and get medical attention. Brake fluid spilled on a hot engine could cause a fire. Be careful not to spill brake fluid on yourself or on the engine.
Low Brake/Clutch Fluid Levels: Low brake/clutch fluid levels are dangerous. Low levels could signal brake lining wear or a brake system leak. Your brakes could fail and cause an accident. If you find a low fluid level, have the brakes and clutch inspected.
If the fluid level is low, add fluid until it reaches MAX.
Before adding fluid, thoroughly clean the area around the cap.
Maintenance and Care
Owner Maintenance

CAUTION
- Do not add excessive force with your hand to the brake/clutch fluid reservoir cap. Excessive force on the cap could damage the tank seal.
- Brake and clutch fluid will damage painted surfaces. If brake or clutch fluid does get on a painted surface, wipe it off immediately.
- Using nonspecified brake and clutch fluids (page 10-7) will damage the systems. Mixing different fluids will also damage them. If the brake/clutch system frequently requires new fluid, consult an Authorised Mazda Dealer.
Power Steering Fluid
▼ Inspecting Power Steering Fluid Level

CAUTION
To avoid damage to the power steering pump, don't operate the vehicle for long periods when the power steering fluid level is low.
NOTE
Use specified power steering fluid (page 10-7).
Petrol engine
Inspect the fluid level in the reservoir at each engine oil change with the engine off and cold. Add fluid if necessary; it does not require periodic changing.
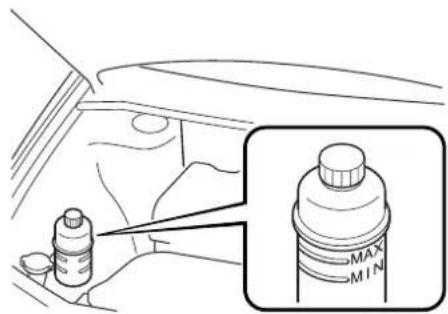
The level must be kept between MIN and MAX.
Visually examine the lines and hoses for leaks and damage.
If new fluid is required frequently, consult an Authorised Mazda Dealer.
Diesel engine
Inspect the fluid level at each engine oil change. Add fluid if necessary; it does not require periodic changing.
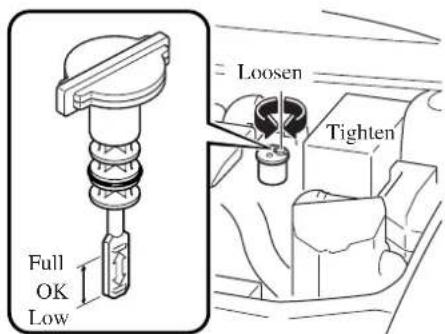
The level must be kept between the Full and Low marks.
Visually examine the lines and hoses for leaks and damage.
- Park on a level surface, well off the right-of-way, and set the parking brake firmly.
- Turn off the engine and allow it to cool.
- Remove the filler cap and attached dipstick.
- Wipe them clean and put them back.
- Remove again and inspect the level.
- It must be between Full and Low. Add fluid if necessary.
Don't overfill.
If new fluid is required frequently, consult an Authorised Mazda Dealer.
Automatic Transaxle Fluid (ATF)
▼ Inspecting Automatic Transaxle Fluid Level
The automatic transaxle fluid level should be inspected regularly. Measure it as described below.
The volume of fluid changes with the temperature. Fluid must be checked at idle without driving at normal operating temperature.
CAUTION
- Low fluid level causes transaxle slippage. Overfilling can cause foaming, loss of fluid, and transaxle malfunction.
-
Use specified fluid (page 10-7). A nonspecified fluid could result in transaxle malfunction and failure.
-
Park on a level surface and set the parking brake firmly.
- Idle the engine about two minutes. Push down on the brake pedal.
- Move the shift lever through all ranges and set it at P.




Maintenance and Care
Owner Maintenance
WARNING
Sudden Vehicle Movement: Shifting the shift lever without first depressing the brake pedal is dangerous. The vehicle could move suddenly and cause an accident. Make sure the brake pedal is applied before shifting the shift lever.
- With the engine still idling, pull out the dipstick, wipe it clean, and put it back.
- Pull it out again. The proper fluid level is marked on the dipstick as follows.
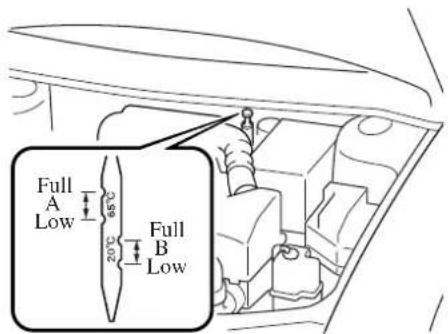
Fluid hot scale A
When the vehicle has been driven and the fluid is at normal operating temperature, about 65^ C ( 150^ F), the level must be between Full and Low.
Fluid cold scale B
When the engine has not been running and the outside temperature is about 20^ C ( 70^ F), the level must be between Full and Low.
CAUTION
- Use the cold scale only as a reference.
- If outside temperature is lower than about 20^ C ( 70^ F), start the engine and inspect the fluid level after the engine reaches operating temperature.
- If the vehicle has been driven for an extended period at high speeds or in city traffic in hot weather, inspect the level only after stopping the engine and allowing the fluid to cool for 30 minutes.
Fully insert the dipstick. When adding fluid, inspect with the dipstick to make sure it doesn't pass full.
NOTE
Inspect both sides of the dipstick for accurate reading.
8-22




natural_image
Pure geometric diagram with intersecting lines and a central circular pattern (no text or symbols)Window and Headlight Washer Fluid
▼ Inspecting Washer Fluid Level
WARNING
Substitute Washer Fluid:
Using radiator antifreeze as washer fluid is dangerous. If sprayed on the windscreen, it will dirty the windscreen, affect your visibility, and could result in an accident. Use only windscreen washer fluid or plain water in the reservoir.
Inspect fluid level in the washer fluid reservoir; add fluid if necessary.
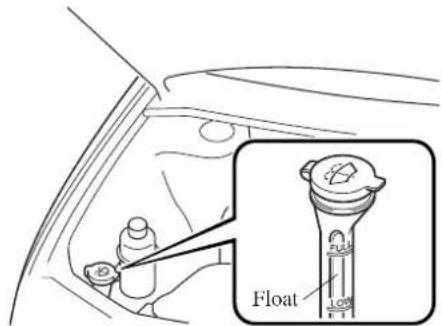
The top of the float should be between FULL and LOW.
Use plain water if washer fluid is unavailable.
But use only washer fluid in cold weather to prevent it from freezing.
Body Lubrication
All moving points of the body, such as door and bonnet hinges and locks, should be lubricated each time the engine oil is changed. Use a nonfreezing lubricant on locks during cold weather.
Make sure the engine bonnet's secondary latch keeps the bonnet from opening when the primary latch is released.
Air Filter
CAUTION
Don't drive without an air filter. This could result in excessive engine wear.
Petrol engine
A viscous paper air filter fits inside the air cleaner housing, as shown. It's been specially treated and should not be cleaned and reused. Replace it when necessary.
Diesel engine
This air filter may be cleaned with compressed air and reused, or replaced, depending on its condition. Unless it is very dirty, simply shake it to remove foreign particles. Each time you inspect it, wipe inside the air cleaner housing with a damp cloth.
▼ Replacing the Air Filter
NOTE
If the vehicle is operated in very dusty or sandy areas, replace the filter more often than recommended intervals.
Petrol engine
- Unfasten the clamps.
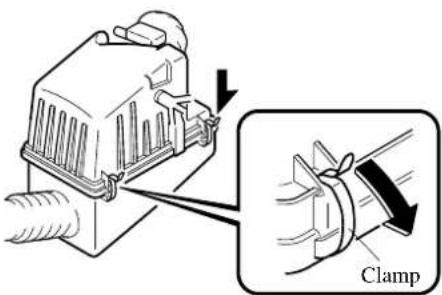
- Lift off the air filter cover and remove the filter.
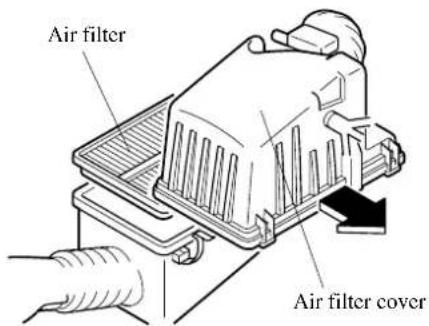
8-24


- Wipe inside the air cleaner housing with a damp cloth.
- Replace the filter.
- Install in the reverse order of removal.
Replace the filter according to Scheduled Maintenance (page 8-3).
Diesel engine
- Unfasten the clamps.
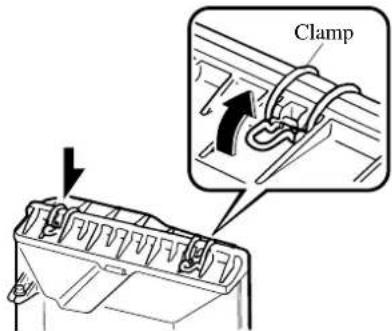
- Slide the air filter assembly and lift it off.
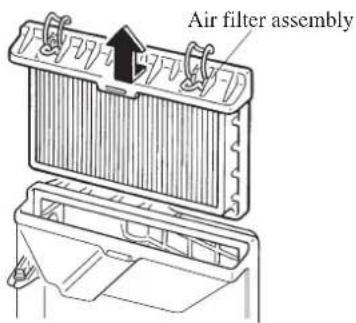
- Remove the filter.
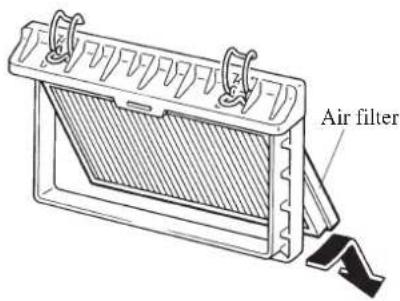
- Wipe inside the air cleaner housing with a damp cloth.
- Clean or replace the filter.
- Install in the reverse order of removal.
Replace the filter according to Scheduled Maintenance (page 8-3).
Maintenance and Care
Owner Maintenance
Fuel Filter (Diesel Engine)
The fuel filter acts as a sedimentor that separates water from fuel.
If 0.05 L (0.052 US qt, 0.044 Imp qt) of water accumulates in this filter, the warning light will come on.
When it does, drain the water:
- Remove the nuts.
- Lift the fuel filter.
- Loosen the drain plug on the underside of the filter about one turn by hand.
- Pump the priming pump at least 7 times to expel the water.
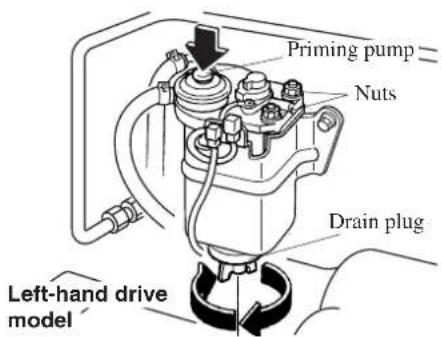
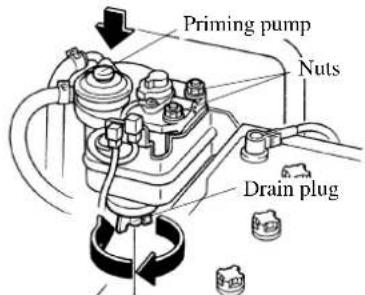
Right-hand drive model
- After pumping out all the water, tighten the plug securely by hand. Use the priming pump to inspect for leaks.
- Reinstall the fuel filter in the reverse order of removal.
8-26





Wiper Blades
CAUTION
Hot waxes applied by automatic car washes have been known to affect the cleanability of windows.
Contamination of either the windscreen or the blades with foreign matter can reduce wiper effectiveness. Common sources are insects, tree sap, and hot wax treatments used by some commercial car washes.
If the blades are not wiping properly, clean the window and blades with a good cleaner or mild detergent; then rinse thoroughly with clean water. Repeat if necessary.
CAUTION
To prevent damage to the wiper blades, don't use petrol, paraffin, paint thinner, or other solvents on or near them.
▼ Replacing Windscreen Wiper Blades
When the wipers no longer clean well, the blades are probably worn or cracked. Replace them.
CAUTION
To prevent damage to the wiper arms and other components, don't move the wipers by hand.
- Raise the wiper arm and turn the blade assembly to expose the plastic locking clip.
Compress the clip and slide the assembly downward; then lift it off the arm.
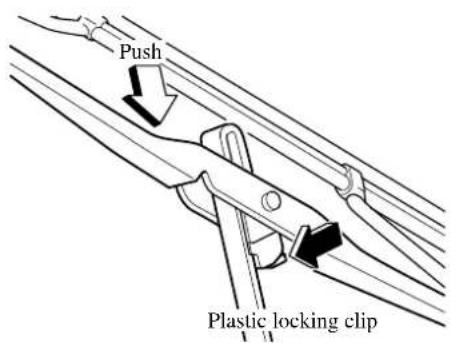
CAUTION
To prevent damage to the windscreen, don't let the wiper arm fall on it.
Maintenance and Care
Owner Maintenance
- Hold the end of the rubber and pull until the tabs are free of the metal support.
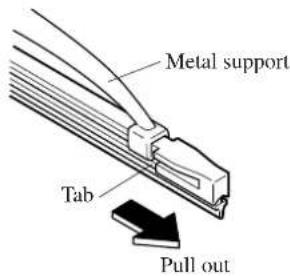
- Remove the metal stiffeners from the blade rubber and install them in new blades.
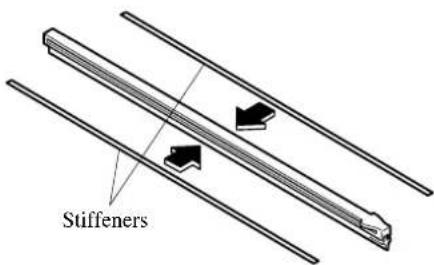
CAUTION
- Don't bend the stiffeners. You need to use them again.
- If the metal stiffeners are switched, the blade's wiping efficiency could be reduced.
So don't use the driver's side metal stiffeners on the passenger's side, or vice versa. -
Be sure to reinstall the metal stiffeners in the new blade rubber so that the curve is the same as it was in the old blade rubber.
-
Carefully insert the new blade rubber. Then install the blade assembly in the reverse older of removal.
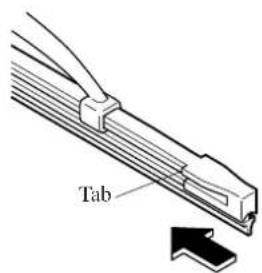
NOTE
Install the blade so that the tabs are toward the bottom of the wiper arm.
8-28




▼ Replacing Rear Window Wiper Blade
When the wiper no longer cleans well, the blade is probably worn or cracked. Replace it.
CAUTION
To prevent damage to the wiper arm and other components, don't move the wiper by hand.
- Raise the wiper arm and turn the blade assembly to expose the plastic locking clip.
Compress the clip and slide the assembly downward; then lift it off the arm.
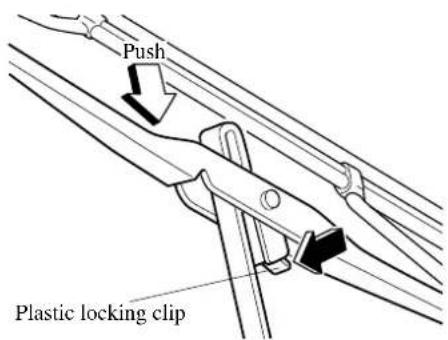
CAUTION
To prevent damage to the rear window, don't let the wiper arm fall on it.
- Pull down the blade rubber and slide it out of the blade holder.
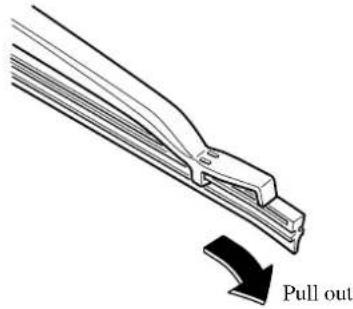
- Remove the metal stiffeners from the blade rubber and install them in new blades.
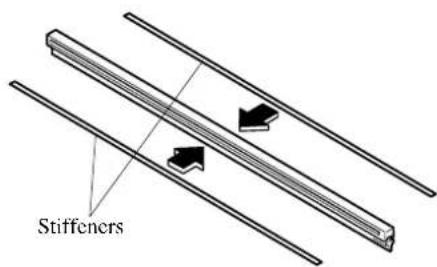
CAUTION
Don't bend the stiffeners. You need to use them again.
Maintenance and Care
Owner Maintenance
- Carefully insert the new blade rubber. Then install the blade assembly in the reverse order of removal.
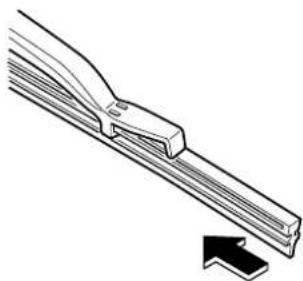
natural_image
Technical line drawing of a mechanical clamp or bracket with an arrow indicating direction (no text or symbols)Battery

WARNING
Spilled Battery Fluid:
Spilled battery fluid is dangerous.
Battery fluid contains SULPHURIC ACID which could cause serious injuries, if it gets in your eyes or on your skin. If this happens, immediately flush your eyes with water for 15 minutes or wash your skin thoroughly and get medical attention. Be careful not to get battery fluid on yourself.
Battery-Related Explosion: Flames and sparks near open battery cells are dangerous. Hydrogen gas, produced during normal battery operation, could ignite and cause the battery to explode. An exploding battery can cause serious burns and injuries. Keep all flames, including cigarettes, and sparks away from open battery cells.
Children and Batteries: Allowing children to play near batteries is dangerous. Battery fluid could cause serious injuries if it gets in the eyes or on the skin. Always keep batteries out of the reach of children.
▼Battery Maintenance
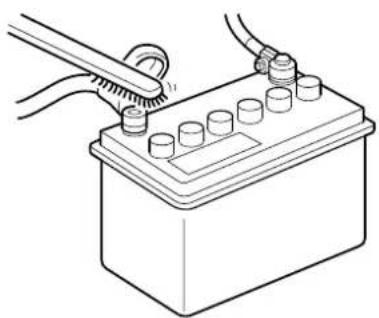
natural_image
Diagram of a battery with a tool inserted, showing terminal connections and battery casing (no text or symbols)To get the best service from a battery:
- Keep it securely mounted.
- Keep the top clean and dry.
- Keep terminals and connections clean, tight, and coated with petroleum jelly or terminal grease.
- Rinse off spilled electrolyte immediately with a solution of water and baking soda.
- If the vehicle will not be used for an extended time, disconnect the battery leads and charge the battery every six weeks.
▼ Inspecting Electrolyte Level
A low level of electrolyte fluid will cause the battery to discharge quickly.
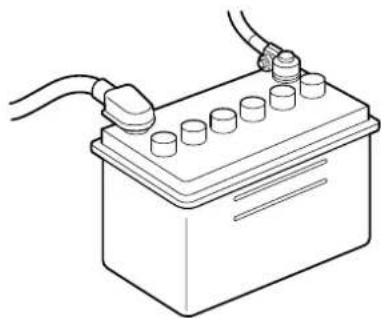
natural_image
Line drawing of a battery with two cables above it (no text or symbols)Inspect the electrolyte level at least once a week. If it's low, add enough distilled water to bring the level between upper and lower level (illustration).
Don't overfill.
Examine the specific gravity of the electrolyte with a hydrometer, especially during cold weather. If it's low, recharge the battery.



Maintenance and Care
Owner Maintenance
▼Battery Recharging
- If the battery quickly discharges because, for example, the lights were left on too long with the engine off, slow-charge it as required by battery size and charger capacity.
- If the battery gradually discharges because of high electric load while the vehicle is being used, recharge it as required by battery size and charger capacity.
NOTE
- Before performing maintenance or recharging the battery, turn off all accessories and stop the engine.
- To disconnect the battery, remove the negative lead first. Install it last when connecting the battery.
Tyres
For reasons of proper performance, safety, and better fuel economy, always maintain recommended tyre inflation pressures and stay within the recommended load limits and weight distribution.

WARNING
Using Different Tyre Types: Driving your vehicle with different types of tyres is dangerous. It could cause poor handling and poor braking; leading to loss of control. Except for the limited use of the temporary spare tyre, use only the same type tyres (radial, bias-belted, bias-type) on all four wheels.
Using Wrong-Sized Tyres: Using any other tyre size than what is specified for your Mazda (page 10-9) is dangerous. It could seriously affect ride, handling, ground clearance, tyre clearance, and speedometer calibration. This could cause you to have an accident. Use only tyres that are the correct size specified for your Mazda.
▼ Tyre Inflation Pressure
WARNING
Incorrect Tyre Inflation: Overinflation or underinflation of tyres is dangerous. Adverse handling or unexpected tyre failure could result in a serious accident. Always inflate the tyres to the correct pressure (page 10-9).
Inspect all tyre pressures monthly (including the spare) when the tyres are cold. Maintain recommended pressures for the best ride, top handling, and minimum tyre wear.
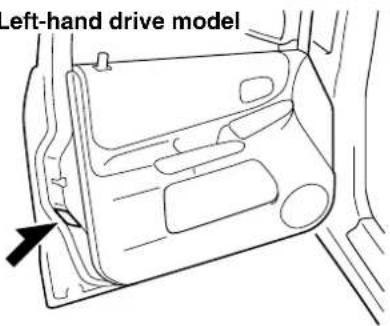
Right-hand drive model
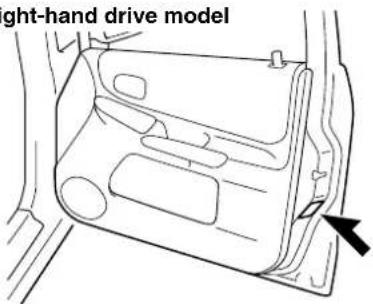
Refer to the specification charts (page 10-9).
NOTE
- Warm tyres normally exceed recommended pressures. Don't release air from warm tyres to adjust the pressure.
- Underinflation can cause reduced fuel economy and poor sealing of the tyre bead, which will deform the wheel and cause separation of tyre from rim.
• Overinflation can produce a harsh ride and a greater possibility of damage from road hazards. Keep your tyre pressure at the correct levels. If one frequently needs inflating, have it inspected.
Maintenance and Care
Owner Maintenance
▼ Tyre Rotat ion
To equalize tread wear, rotate the tyres every 10,000 km (6,000 miles)/6,000 km* (3,750 miles) or sooner if irregular wear develops. During rotation, inspect them for correct balance.
*Except Europe, Australia
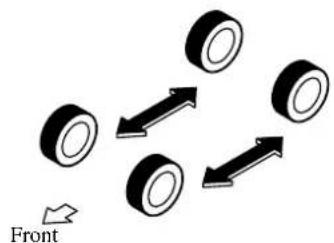
Do not include (TEMPORARY USE ONLY) spare tyre in rotation.
Also, inspect them for uneven wear and damage. Abnormal wear is usually caused by one or a combination of the following:
- Incorrect tyre pressure
- Improper wheel alignment
- Out-of-balance wheel
- Severe braking
After rotation, inflate all tyre pressures to specification (page 10-9) and inspect the wheel nuts for tightness.
CAUTION
Rotate unidirectional tyres and radial tyres that have an asymmetrical tread pattern or studs only from front to rear, not from side to side. Tyre performance will be weakened if rotated from side to side.
8-34


▼ Replacing a Tyre
WARNING
Worn Tyres:
Driving with worn tyres is dangerous. Reduced braking, steering, and traction could result in an accident. Always use tyres that are in good condition.
If a tyre wears evenly, a wear indicator will appear as a solid band across the tread.
Replace the tyre when this happens.
New tread
Tread wear indicator
Worn tread
You may need to replace it before the band is across the entire tread.

▼ Temporary Spare Tyre
Inspect the temporary spare tyre at least monthly to make sure it's properly inflated and stored.
The temporary spare tyre is easier to handle because of its construction. It is lighter and smaller than a conventional tyre and should be used only for an emergency and only for a short distance.
Use the temporary only until the conventional tyre is repaired, which should be as soon as possible.
Maintain its pressure at 420 kPa (4.2 kgf/cm ^2 or bar, 60 psi).
CAUTION
- Don't use your temporary spare tyre rim with a snow tyre or a conventional tyre. Neither will properly fit and could damage both tyre and rim.
- The temporary spare tyre has a tread life of up to 5,000 km (3,000 miles), depending on road conditions and driving habits.
- The temporary spare tyre is for limited use, however, if the tread wear solid-band indicator appears, replace the tyre with the same type of temporary spare (page 8-34).
▼Replacing a Wheel
When replacing a wheel, make sure the new one is the same as the original factory wheel in diameter, rim width, and offset.
Proper tyre balancing provides the best riding comfort and helps reduce tread wear. Out-of-balance tyres can cause vibration and uneven wear, such as cupping and flat spots.
WARNING
Using a Wrong-Sized Wheel: Using a wrong-sized wheel is dangerous. Braking and handling could be affected, leading to loss of control and an accident. Always use wheels of the correct size on your vehicle.
CAUTION
A wrong-sized wheel may adversely affect
- Tyre fit
- Wheel and bearing life
- Ground clearance
- Snow-chain clearance
• Speedometer calibration - Headlight aim
- Bumper height
Maintenance and Care
Owner Maintenance
Light Bulbs
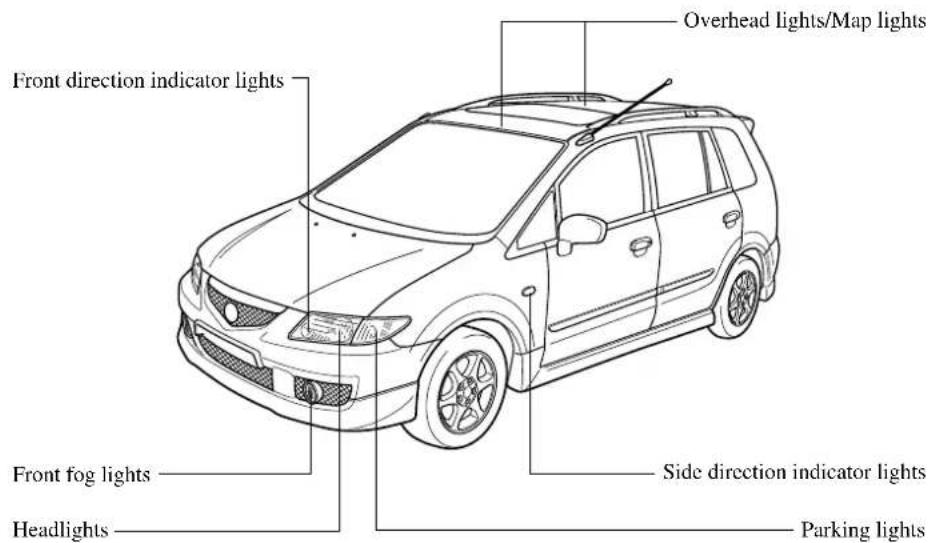
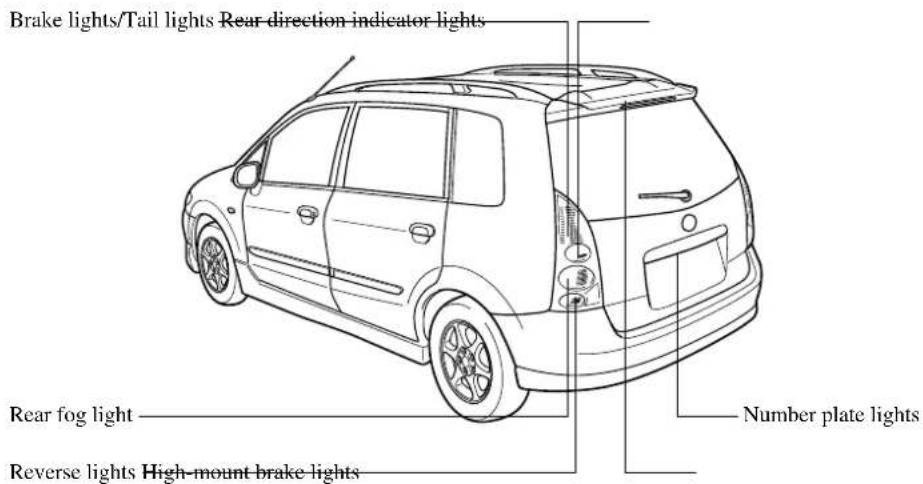
8-36


natural_image
Pure geometric diagram with intersecting lines and a central circular pattern (no text or symbols)Form No. 8R34-EE-02H
Your Mazda's headlights have replaceable halogen bulbs.
WARNING
Handling Halogen Bulbs:
When a halogen bulb breaks, it is dangerous. These bulbs contain pressurised gas. If one is broken, it will explode and serious injuries could be caused by the flying glass. If the glass portion is touched with bare hands, body oil could cause the bulb to overheat and explode when lit. Never touch the glass portion of the bulb with your bare hands and always wear eye protection when handling or working around halogen bulbs.
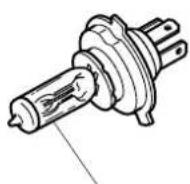
Do not touch the glass surface
Children and Halogen Bulbs:
Playing with a halogen bulb is dangerous. Serious injuries could be caused by dropping a halogen bulb or breaking it some other way. Always keep halogen bulbs out of the reach of children.
▼ Replacing a Headlight Bulb
- Make sure the headlight switch is off.
- Lift the bonnet and find the bulb in the rear of the headlight body.
- Detach the electrical connector from the bulb by pulling it to the rear.
natural_image
Diagram of a car's front panel showing internal components and a close-up inset of the connector (no text or symbols)- Pull off the sealing cover.
- Unhook the bulb retaining spring.
-
Swing the retaining spring out and away to free the headlight bulb.
-
Carefully remove the headlight bulb from the socket by pulling it straight back.
Maintenance and Care
Owner Maintenance
- Replace the bulb.
- Install in the reverse order of removal.
NOTE
- When reinstalling the sealing cover, make sure faces up.
- Use the protective cover and carton of the replacement bulb to dispose of the old bulb promptly out of the reach of children.
8-38



▼ Replacing a Bulb (Front)
Front direction indicator lights
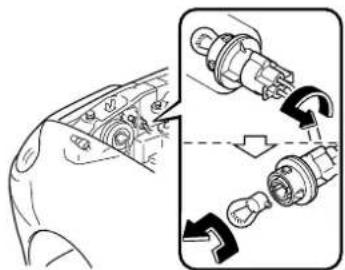
Front fog lights
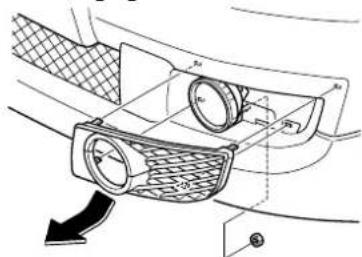
natural_image
Diagram of a car air intake system showing airflow path and component placement (no text or labels)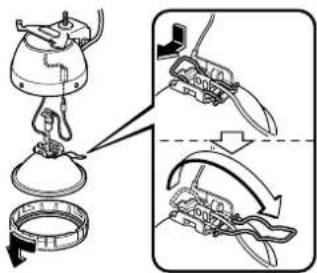
Parking lights
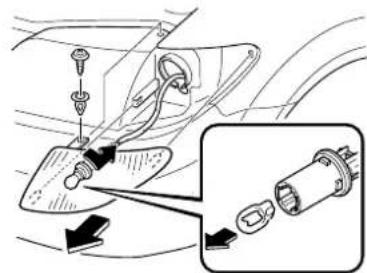
Side direction indicator lights
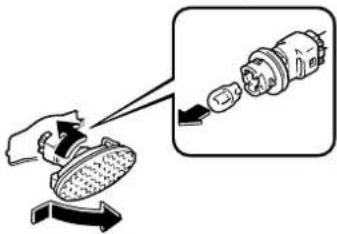




J54L_8R34_EE_02H.BOOK Page 40 Monday, July 15, 2002 9:03 AM
Maintenance and Care
Owner Maintenance
▼ Replacing a Bulb (Interior)
① Overhead light (Front, Type B) ② Map lights (Type A)
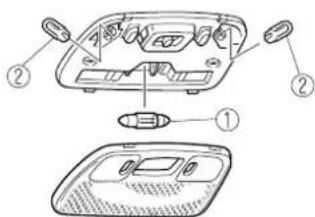
Overhead light (Front, Type A)
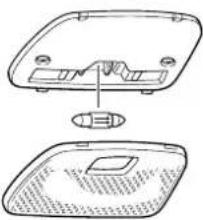
natural_image
Technical line drawing of a two-part electronic device with internal components and a close-up view (no text or symbols)Overhead light (Rear)
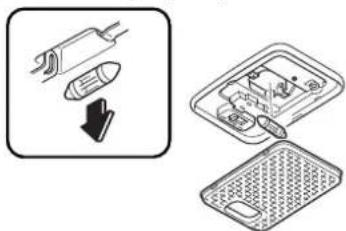
natural_image
Diagram showing two steps of a device installation: one with a plug and arrow, the other with a grid device (no text or symbols)Map lights (Type B)
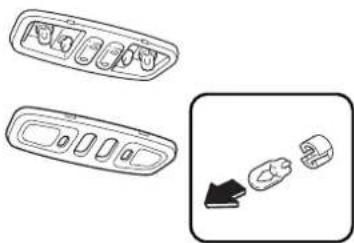
natural_image
Diagram showing two rectangular panels with internal compartments and a separate diagram with arrows indicating movement or transformation (no text or symbols)Luggage compartment light
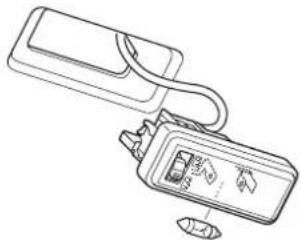
natural_image
Line drawing of a medical or laboratory device with tubing and a control panel (no text or symbols)8-40


Form No. 8R34-EE-02H
▼ Replacing a Bulb (Rear)
①Brake lights/Tail lights
②Rear direction indicator lights
③Rear fog light (Driver's side)
④ Reverse lights
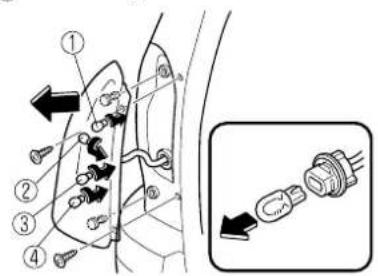
Number plate lights
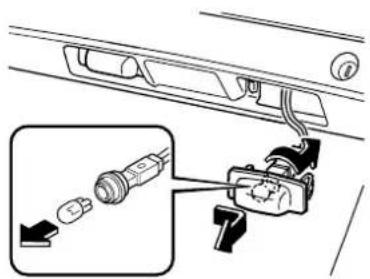
High-mount brake lights
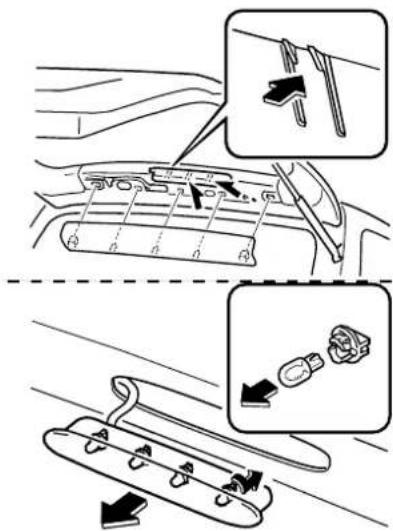
An unsecured high-mount brake lights will allow water to leak into the vehicle. Make sure the high-mount brake light is tightly fastened to the vehicle and if water still leaks, consult an Authorised Mazda Dealer.




Maintenance and Care
Owner Maintenance
Fuses
Your vehicle's electrical system is protected by fuses.
If any lights, accessories, or controls don't work, inspect the appropriate circuit protector. If a fuse has blown, the inside element will be melted.
If the same fuse blows again, avoid using that system and consult an Authorised Mazda Dealer as soon as possible.
▼Fuse Replacement
If the electrical system doesn't work, first inspect fuses on the driver's side.
- Turn off the ignition switch and other switches.
- Open the fuse panel cover.
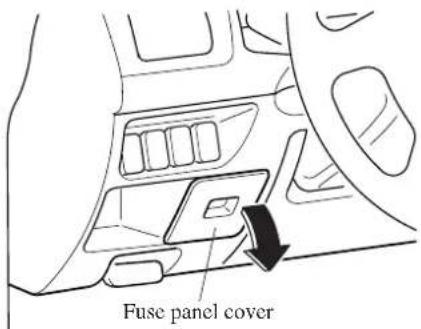
- Pull the fuse straight out with the fuse puller provided on the fuse panel.
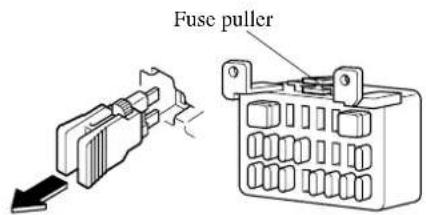
- Inspect it and replace if it's blown.
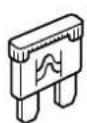
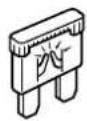
Normal Blown
- Push in a new fuse of the same rating, and make sure it fits tightly. If it doesn't, have an Authorised Mazda Dealer install it. If you have no spare fuses, borrow one of the same rating from a circuit not essential to vehicle operation, such as the RADIO circuit.
CAUTION
Always replace a fuse with one of the same rating. Otherwise you may damage the electric system.
8-42


If the headlights or other electrical components don't work and the fuses in the cabin are OK, inspect the fuse block under the bonnet. If a fuse is blown, it must be replaced. Follow these steps:
- Turn off the ignition switch and all other switches.
- Remove the fuse block cover.
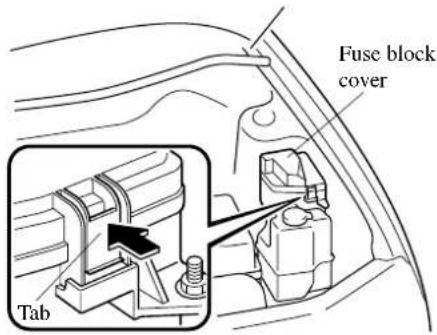
- If a fuse is blown, replace it with a new one of the same rating.
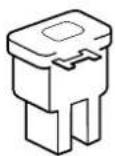
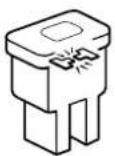
Normal Blown
NOTE
To replace the MAIN fuse, contact an Authorised Mazda Dealer (page 8-44).
8-43




Maintenance and Care
Owner Maintenance
▼Fuse Panel Description
Fuse block (Engine compartment)
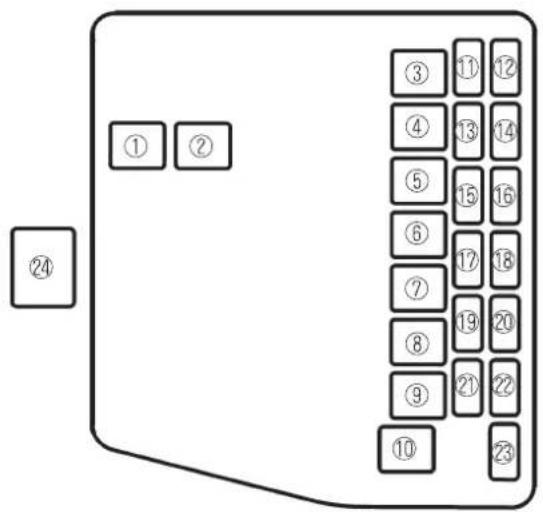
| DESCRIPTION | FUSE RATING | PROTECTED COMPONENT | |
| 1 HEATER 40 A Heater | |||
| 2 ABS 60 A | Antilock brake system | ||
| 3 IG KEY 1 40 A | For protection of various circuits | ||
| 4 PTC 30 A PTC heater | |||
| 5 GLOW 40 A Glow plug | |||
| 6 IG KEY 2 40 A | For protection of various circuits | ||
| 7 COOLING FAN | 30 A Cooling fan | ||
| 8 BTN 40 A | Interior lights, Power door locks | ||
| 9 AD FAN | 30 A | Additional cooling fan for air conditioner, For protection of various circuits | |
| 10 INJ OR FIP | 30 A | Engine control system | |
| 11 A/C | 10 A | Air conditioner, For protection of various circuits | |
| DESCRIPTION | FUSE RATING | PROTECTED COMPONENT | |
| 12 | — | — | |
| 13 | HORN | 10 A Horn | |
| 14 | HAZARD 10 A | Hazard warning flashers | |
| 15 | TAIL | 15 A | Tail lights, Parking light, Number plate light, Illumination |
| 16 | HEAD C/U | 10 A | For protection of various circuits |
| 17 | FOG 15 A | — | |
| 18 | F.FOG & DEISER | 15 A Front fog light | |
| 19 | STOP | 15 A Brake lights | |
| 20 | HEAD-R | 15 A Headlight-right | |
| 21 | HEAD-L | 15 A Headlight-left | |
| 22 | — | — | |
| 23 | HEAD HI | 7.5 A | — |
| 24 | MAIN | 100 A | For protection of all circuits |
8-44
Fuse panel (Driver's side)
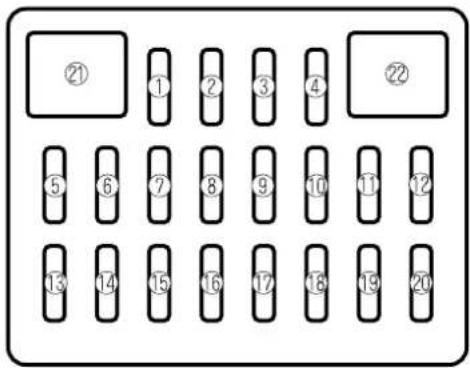
| DESCRIPTION | FUSE RATING | PROTECTED COMPONENT | |
| 1 — | — | — | |
| 2 — | — | — | |
| 3 — | — | — | |
| 4 M/DEF 7.5 A | Mirror defroster, For protection of various circuit | ||
| 5 S/W 15 A | Seat warmer, For protection of various circuit | ||
| 6 A/C 15 A | Air conditioner, For protection of various circuit | ||
| 7 — | — | — | |
| 8 — | — | — | |
| 9 — | — | — | |
| 10 METER 10 A Instrument cluster | |||
| 11 LNG 10 A | Engine control system | ||
| 12 R.WIP 10 A | Rear window wiper and washer | ||
| 13 | RADIO | 15 A | Audio system, For protection of various circuit |
| 14 | OPT | 15 A Accessory socket | |
| DESCRIPTION | FUSE RATING | PROTECTED COMPONENT | |
| 15 | H/CLN 20 A | Headlight cleaner, For protection of various circuit | |
| 16 | ST.SIG | 7.5 A | Engine control system |
| 17 | — | — | — |
| 18 P/W 30 A | Power windows, For protection of various circuit | ||
| 19 D/L 30 A | Power door locks, For protection of various circuit | ||
| 20 | ROOM 10 A | Interior lights, Liftgate light | |
| 21 | WIPER | 20 A | Windscreen wiper and washer |
| 22 P/W 30 A | Power windows, For protection of various circuit | ||
Maintenance and Care
Owner Maintenance
Emission Control Maintenance (Australia)
Emission control maintenance is periodically required to ensure proper emission control and engine performance. Refer to scheduled maintenance (page 8-3) for information on when and how to perform the following inspections and servicing items.
For owners with a Mazda Workshop Manual, refer to the sections on Predelivery Inspection and Scheduled Maintenance.
▼Engine
Drive belts
Inspect the belts for cracks and other damage. Replace if necessary.
Adjust belt deflections to specified amounts at regular intervals. A replacement belt should be inspected and adjusted after 1,000 km (600 miles) of use.
Engine oil
When changing the engine oil, use only API Service SG, SH, SJ or SL oil of the proper viscosity for your climate.
Change it more frequently during heavy use under any of these conditions:
- Dusty environment
- Extended idling or low-speed operations
- Driving for a prolonged period in cold temperatures or in an extremely humid climate
- Repeated short-distance driving
Oil filter
Don't fail to change the oil filter as prescribed. As with the engine oil, under severe driving conditions, the filter should be changed more frequently.
Cooling system
When inspecting hoses (including the heater hose), connections, and clamps, look for leaks, swellings, cracks, and other damage. Replace any defective hose or part.
Engine coolant
Change the coolant and flush the cooling system as prescribed.
▼Fuel System and Air-Intake Control System
Idle speed
Adjusting the idle speed and related ignition timing requires special equipment; this work should be done by a qualified technician.
Fuel filter
The cartridge filter in your Mazda cannot be cleaned. When you replace it, be certain that installation is correct.
Fuel lines and hoses
When inspecting the fuel pipes, hoses, connections and clamps, look for leaks, deterioration, and other damage.
Replace any defective hose or part.
Air filter
Besides replacing the filter regularly, always replace it if it's torn or otherwise damaged. Inspect and replace it more often than prescribed if the vehicle is used in very dusty or sandy areas.
▼Ignition System
Ignition timing
Adjusting the ignition timing requires special equipment; this work should be done by a qualified technician.
Spark plugs
When inspecting the spark plugs, look for burned or eroded electrodes, fouling (carbon deposits), and cracked porcelain. Clean the electrodes and, if necessary, adjust the gaps to specification.
To maintain proper engine operation and emission control, spark plugs must always be in good condition.
▼Evaporative Emission Control System
When inspecting evaporative line hoses and connections (including the fuel tank and filler cap), apply pressure to determine pressure-holding capacity. Replace any damaged or deteriorated parts.
Maintenance and Care
Owner Maintenance
▼ Exhaust Emission Control System
E.G.R. system
The EGR valve must function properly and no leaks can be evident in the pipes and connections. Replace any damaged part.
Clean the valve, pipes, and connections from time to time.

WARNING
Hot Surfaces:
EGR pipes are extremely hot during engine operation and for a while after operation. Touching them could cause severe burns. Don't touch these pipes while the engine is running or until they have cooled off after the engine is stopped.
How to Minimize Environmental Paint Damage
The paintwork on your Mazda represents the latest technical developments in composition and methods of application.
Environmental hazards, however, can harm the paint's protective properties, if proper care is not taken.
Here are some examples of possible damage, with tips on how to prevent them.
▼ Etching Caused by Acid Rain or Industrial Fallout
Occurrence
Industrial pollutants and vehicle emissions drift into the air and mix with rain or dew to form acids. These acids can settle on a vehicle's finish. As the water evaporates, the acid becomes concentrated and can damage the finish. And the longer the acid remains on the surface, the greater the chance is for damage.
Prevention
It is necessary to wash and wax your vehicle to preserve its finish according to the instructions in this section. These steps should be taken immediately after you suspect that acid rain has settled on your vehicle's finish.
▼Damage Caused by Bird Dropping, Insects, or Tree Sap
Occurrence
Bird droppings contain acids. If these aren't removed they can eat away the clear and colour base coat of the vehicle's paintwork.
When insects stick to the paint surface and decompose, corrosive compounds form. These can erode the clear and colour base coat of the vehicle's paintwork if they are not removed.
Tree sap will harden and adhere permanently to the paint finish. If you scratch the sap off while it is hard, some vehicle paint could come off with it.
Prevention
It is necessary to have your Mazda washed and waxed to preserve its finish according to the instructions in this section. This should be done as soon as possible.
Bird droppings can be removed with a soft sponge and water. If you are travelling and these are not available, a moistened tissue may also take care of the problem.
The cleaned area should be waxed according to the instructions in this section.
Insects and tree sap are best removed with a soft sponge and water or a commercially available chemical cleaner.
Another method is to cover the affected area with dampened newspaper for one to two hours. After removing the newspaper, rinse off the loosened debris with water.
Maintenance and Care
Appearance Care
▼ Water Marks
Occurrence
Rain, fog, dew, and even tap water can contain harmful minerals such as salt and lime. If moisture containing these minerals settles on the vehicle and evaporates, the minerals will concentrate and harden to form white rings. The rings can damage your vehicle's finish.
Prevention
It is necessary to wash and wax your vehicle to preserve its finish according to the instructions in this section. These steps should be taken immediately after you find water marks on your vehicle's finish.
▼Paint Chipping
Occurrence
Paint chipping occurs when gravel thrown in the air by another vehicle's tyres hits your vehicle.
How to avoid paint chipping
Keeping a safe distance between you and the vehicle ahead reduces the chances of having your paint chipped by flying gravel.
NOTE
- The paint chipping zone varies with the speed of the vehicle. For example, when travelling at 90 km/h (56 mph), the paint chipping zone is 50 m (164 ft).
- In low temperatures a vehicle's finish hardens. This increases the chance of paint chipping.
- Chipped paint can lead to rust forming on your Mazda. Before this happens, repair the damage by using Mazda touch-up paint according to the instructions in this section. Failure to repair the affected area could lead to serious rusting and expensive repairs.
Exterior Care
Follow all label and container directions when using a chemical cleaner or polish. Read all warnings and cautions.
▼Maintaining the Finish
Washing
To help protect the finish from rust and deterioration, wash your Mazda thoroughly and frequently, at least once a month, with lukewarm or cold water.
If the vehicle is washed improperly, the paint surface could be scratched. Here are some examples of how scratching could occur.
Scratches occur on the paint surface when:
- The vehicle is washed without first rinsing off dirt and other foreign matter.
- The vehicle is washed with a rough, dry, or dirty cloth.
- The vehicle is washed at a car wash that uses brushes that are dirty or too stiff.
- Cleansers or wax containing abrasives are used.
NOTE
- Mazda is not responsible for scratches caused by automatic car washes or improper washing.
- Scratches are more noticeable on vehicles with darker paint finishes.
To minimize scratches on the vehicle's paint finish:
- Rinse off any dirt or other foreign matter using lukewarm or cold water before washing.
- Use plenty of lukewarm or cold water and a soft cloth when washing the vehicle. Do not use a nylon cloth.
- Rub gently when washing or drying the vehicle.
• Take your vehicle only to a car wash that keeps its brushes well maintained. - Don't use abrasive cleansers or wax that contain abrasives.
CAUTION
- Don't use steel wool, abrasive cleaners, or strong detergents containing highly alkaline or caustic agents on chrome-plated or anodised aluminium parts. This may damage the protective coating; also, cleaners and detergents may discolour or deteriorate the paint.
- To prevent damaging the aerial, retract it before entering a car wash facility or passing beneath a low overhead clearance.
Pay special attention to removing salt, dirt, mud, and other foreign material from the underside of the wings, and make sure the drain holes in the lower edges of the doors and rocker panels are clean.
8-51
Maintenance and Care
Appearance Care
Insects, tar, tree sap, bird droppings, industrial fallout, and similar deposits can damage the finish if not removed immediately. When prompt washing with plain water is ineffective, use a mild soap made for use on vehicles.
Thoroughly rinse off all soap with lukewarm or cold water. Don't allow soap to dry on the finish.
After washing the vehicle, dry it with a clean chamois to prevent water spots from forming.
WARNING
Driving with Wet Brakes: Driving with wet brakes is dangerous. Increased stopping distance or the vehicle pulling to one side when braking could result in a serious accident. Light braking will indicate whether the brakes have been affected. Dry the brakes by driving very slowly and applying the brakes lightly until brake performance is normal.
Waxing
Your vehicle needs to be waxed when water no longer beads on the finish. Always wash and dry the vehicle before waxing it. In addition to the vehicle body, wax the metal trim to maintain its lustre.
- Use wax which contains no abrasives. Waxes containing abrasive will remove paint and could damage bright metal parts.
-
Use a good grade of natural wax for metallic, mica, and solid colours.
-
When waxing, coat evenly with the sponge supplied or a soft cloth.
- Wipe off the wax with a soft cloth.
NOTE
A spot remover to remove oil, tar, and similar materials will usually also take off the wax. Rewax these areas even if the rest of the vehicle doesn't need it.
▼Paint Damage Touch-up
Repair damage to the finish caused by stone chipping, damage during parking etc., by using Mazda touch-up paint before rust begins to form. First, remove the dirt and grease with a clean soft cloth.
If rust has already begun to form:
- Remove rust completely with sandpaper.
- Wipe with a clean soft cloth.
- Apply rust preventive primer to the area.
- After drying it completely, apply a suitable top coat material to the area.
Of course there will be no problem if you assign the work to an Authorised Mazda Dealer.
▼Cavity Protection
Cavities are treated for protection at the factory, but additional protective treatment after the vehicle has been put into use will extend the life of the body. We recommend that you consult an Authorised Mazda Dealer concerning this additional precaution.
8-52
▼Bright-Metal Maintenance
- Use tar remover to remove road tar and insects. Never do this with a knife or similar tool.
- To prevent corrosion on bright-metal surfaces, apply wax or chrome preservative and rub it to a high lustre.
- During cold weather or in coastal areas, cover bright-metal parts with a coating of wax or preservative heavier than usual. It would also help to coat them with noncorrosive petroleum jelly or some other protective compound.
CAUTION
Don't use steel wool, abrasive cleaners, or strong detergents containing highly alkaline or caustic agents on chrome-plated or anodised aluminium parts. This may result in damage to the protective coating and cause discolouration or paint deterioration.
▼ Undercoating
This special coating is applied to the critical parts of the underside to protect vehicles from damage caused by chemicals or stones. This coating is liable to be damaged with time. Check this coating periodically.
Mazda Dealers are well informed on how repairs should be made. We recommend that you consult with a Mazda Dealer.
WARNING
Driving with Wet Brakes: Driving with wet brakes is dangerous. Increased stopping distance or the vehicle pulling to one side when braking could result in a serious accident. Light braking will indicate whether the brakes have been affected. Dry the brakes by driving very slowly and applying the brakes lightly until brake performance is normal.
▼ Aluminium Wheel Maintenance
A protective coating is provided over the aluminium wheels. Special care is needed to protect this coating.
NOTE
- Don't use a wire brush or any abrasive cleaner, polishing compound, or solvent on aluminium wheels. They may damage the coating.
- Only use a mild soap or neutral detergent and always use a sponge or soft cloth to clean the wheels. Rinse thoroughly with lukewarm or cold water. Also, be sure to clean the wheels after driving on dusty or salted roads. This helps prevent corrosion.
- Avoid washing your vehicle in an automatic car wash that uses high-speed or hard brushes.
- If your aluminium wheels lose lustre, wax the wheels.
Maintenance and Care
Appearance Care
Interior Care
▼Instrument Panel Precautions
Prevent caustic solutions such as perfume and cosmetic oils from contacting the instrument panel. They'll damage and discolour it. If these solutions get on the instrument panel, wipe them off immediately.

CAUTION
Do not use glazing agents. Glazing agents contain ingredients which may cause discoloration, wrinkling, cracks and peeling.
▼Cleaning the Interior and Floors
Keeping the interior clean — especially the floor — is important to help prevent rust.
Remove mud and salt from the cabin floor as soon as possible.
If you transport salt, chemicals, or other toxic cargo in the cabin or luggage compartment, be very careful not to spill it. If you do, clean it up immediately.
From time to time, dry the cabin floor and the floor luggage compartment. Moisture may collect there and generate a rusting process.
▼Cleaning the Upholstery and Interior Trim
Vinyl
Remove dust and loose dirt from vinyl with a whisk broom or vacuum cleaner. Clean vinyl with a leather-and-vinyl cleaner.
Leather
Real leather isn't uniform and may have scars, scratches, and wrinkles. Clean it with a leather cleaner or mild soap.
Wipe it with a damp soft cloth; then dry and buff it with a dry soft cloth.
Fabric
Remove dust and loose dirt from fabric with a whisk broom or vacuum cleaner. Clean it with a mild soap solution good for upholstery and carpets. Remove fresh spots immediately with a fabric spot cleaner.
To keep the fabric looking clean and fresh, take care of it. Otherwise its colour will be affected, it can be stained easily, and its fire-resistance may be reduced.

CAUTION
Use only recommended cleaners and procedures. Others may affect appearance and fire-resistance.
▼ Cleaning the Lap/Shoulder Belt Webbing
Clean the webbing with a mild soap solution recommended for upholstery or carpets. Follow instructions. Don't bleach or dye the webbing; this may weaken it.
After cleaning the belts, thoroughly dry the belt webbing and make sure there is no remaining moisture before retracting them.
WARNING
Damaged Seat Belt: Using damaged seat belts is dangerous. In a collision, damaged belts cannot provide adequate protection. Have your Authorised Mazda Dealer replace damaged belts immediately.
▼Cleaning the Window Interiors
If the windows become covered with an oily, greasy, or waxy film, clean them with glass cleaner. Follow the directions on the container.
CAUTION
Don't scrape or scratch the inside of the rear window. You may damage the rear window defroster grid.
Form No. 8R34-EE-02H
9 Customer Information
Important consumer information including warranties and add-on equipment.
Warranty 9-2
Registering Your Vehicle in A Foreign Country 9-2
Add-On Non-Genuine Parts and Accessories 9-3
Cell Phones 9-4
Cell Phones Warning 9-4
Declaration of Conformity 9-5
Declaration of Conformity 9-5
Customer Information
Warranty
Registering Your Vehicle in A Foreign Country
Government regulations in your country could require that automobiles meet specific emission and safety standards.
Vehicles built for your country may differ from those built for other countries. In addition to registration problems, satisfactory service may be difficult or even impossible in another country.
The fuel specified for your vehicle may be unavailable.
Parts, servicing techniques, and tools necessary to maintain and repair your vehicle may be unavailable.
There might not be an Authorised Mazda Dealer in the country you plan to take your vehicle.
The Mazda warranty is valid only in certain countries.
9-2




Add-On Non-Genuine Parts and Accessories
Non-genuine parts and accessories for Mazda vehicles can be found in stores. These may fit your vehicle, but they are not approved by Mazda for use with Mazda vehicles. When you install non-genuine parts or accessories, they could affect your vehicle's performance or safety system; the Mazda warranty doesn't cover this. Before you install any non-genuine parts or accessories, consult an Authorised Mazda Dealer.

WARNING
Installation of Non-Genuine Parts or Accessories:
Installation of non-genuine parts or accessories is dangerous. Improperly designed parts or accessories could seriously affect your vehicle's performance or safety system. This could cause you to have an accident or increase your chances of injuries in an accident. Always consult an Authorised Mazda Dealer before you install non-genuine parts or accessories.
Add-On Electrical and Electronic Equipment:
Incorrectly choosing or installing improper add-on equipment or choosing an improper installer is dangerous. Essential systems could damaged, causing engine stalling, air-bag (SRS) activation, ABS inactivation, or a fire in the vehicle. Be very careful in choosing and installing add-on electrical equipment, such as mobile telephones, two-way radios, stereo systems, and car alarm systems.
Mazda assumes no responsibility for death, injury, or expenses that may result from the installation of add-on non-genuine parts or accessories.


9-3


Customer Information
Cell Phones
Cell Phones Warning

WARNING
Use of Cell Phones and Other Devices by Driver:
Although not Mazda products, use of any electrical devices such as cell phones, computers, portable radios, vehicle navigation or other devices by the driver while the vehicle is moving is dangerous. Dialing a number on a cell phone while driving also ties-up the driver's hands. Use of these devices will cause the driver to be distracted and could lead to a serious accident. If a passenger is unable to use the device, pull off the right-of-way to a safe area before use. If use of a cell phone is necessary despite this warning, use a hands-free system to at least leave the hands free to drive the vehicle. Never use a cell phone or other electrical device while the vehicle is moving and, instead, concentrate on the full-time job of driving. Please comply to the legal regulations concerning the use of communication equipment in vehicles in your country.
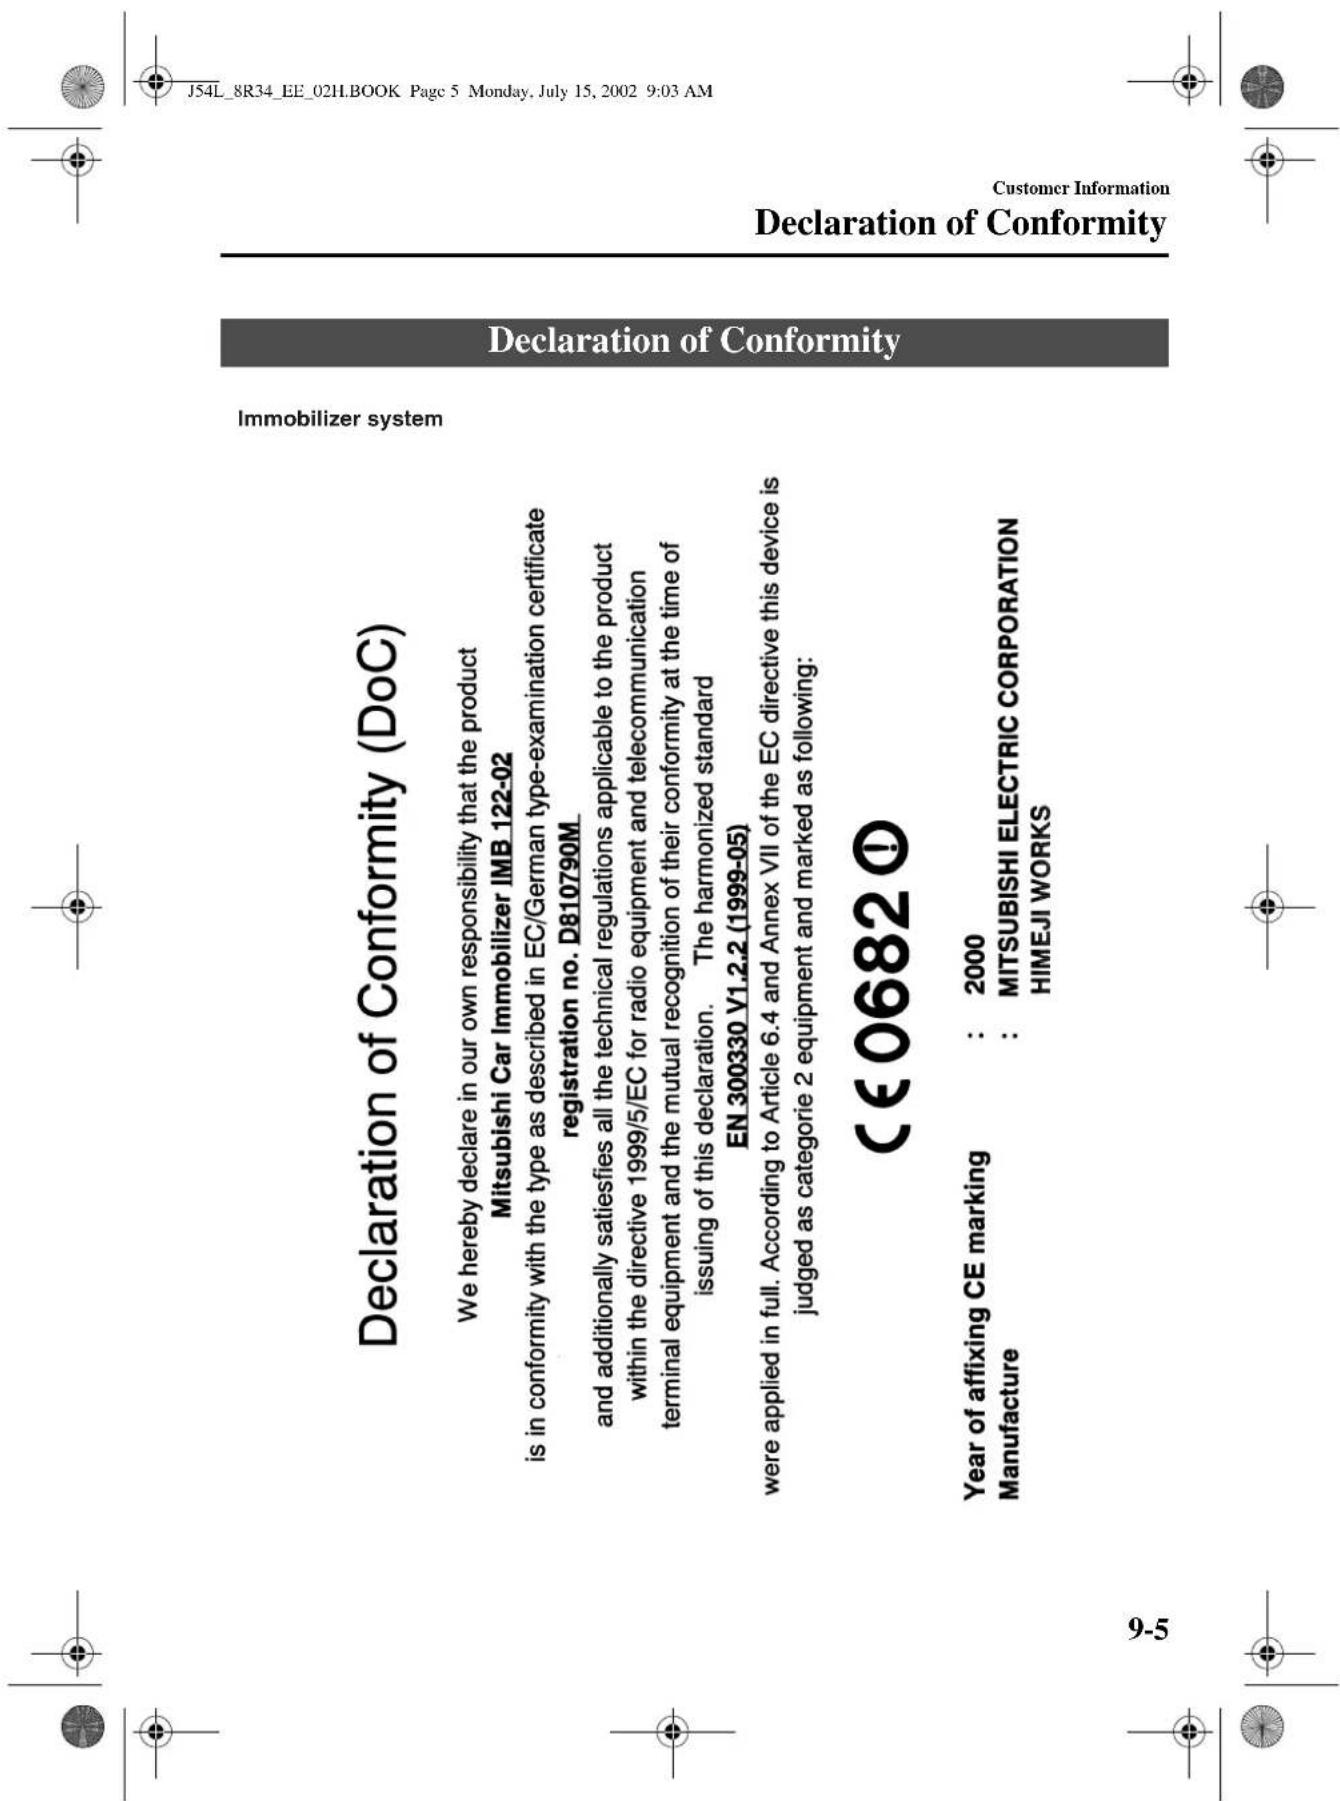
Form No. 8R34-EE-02H
Customer Information
Declaration of Conformity
Keyless entry system
| DECLARATION of CONFORMITY | |||
| We, OMRON Corporation, ELECTRONICS COMPONENTS COMPANY of the above address, hereby declare, at our sole responsibility, that the following product conforms to the Essential Requirements of the Radio and Telecommunications Terminal Equipment Directive 1999/5/EC | in accordance with the tests conducted to the appropriate requirements of the relevant standards, as listed herewith. | ||
| Product: | Keyless Entry System for Vehicle | Directive and Standards used: | Radio EN 300 220-1 V.1.2.1: 1997* |
| Model/ Type Number: | G8D-322A-A/G8D-327A-A for Transmitter | EMC: ETS 300 683: 1997, 95/54/EC & ISO 7637-1: 1990 | |
| G8D-322A-B/G8D-327A-B for Receiver | Safety: EN 60065: 1998 | ||
| Authorized representative: | Year of affixing CE marking: | 2000 | |
| - Name | OMRON Electronic Components Ltd. | Signature: | ### |
| - Address | Vantage Point, The Pensnett Estate | Name: | : Takao Matsui |
| Kingswinford, West Midlands ,DY6 7FP U.K | Position: | : General Manager | |
| - Telephone number | +44(0)1384-405500 | Date: | :02, JUL. 2001 |
| - Fax number | +44(0)1384-405508 | ||
CE0891
Air bag cut-off system
CE _0499
EC Declaration of Conformity according to Annex III of Directive 1999/5/EC
Manufacturer: Siemens Automotive AG Access Control & Security Systems
Address: Wernerwerkstrasse 2 D-93049 Regensburg Germany
Product type designation: 5WK4 174
Intended use: Child Seat Presence and Occupant Detection (CPOD / SBE / AKSE) system
The product mentioned above complies with the following European Directive: 1999/5/EC: Directive of the European Parliament and of the Council on radio equipment and telecommunications terminal equipment and the mutual recognition of their conformity, dated 0th March 1999
We, the undersigned, hereby declare that our above-mentioned product complies with all essential radio test suites according to Annex III of Directive 1999/5/EC. Proof is shown by: • test report no. 97000423, I-ETS 300 330, 12/1994 issued by the accredited test laboratory m. dude hochfrequenz - technik.
Form No. 8R34-EE-02H
10 Specifications
Technical information about your Mazda.
Identification Numbers 10-2
Vehicle Information Labels 10-2
Specifications 10-6
Specifications 10-6


J54L_8R34_EE_02H.BOOK Page 2 Monday, July 15, 2002 9:03 AM

Identification Numbers
Vehicle Information Labels
▼Model Plate
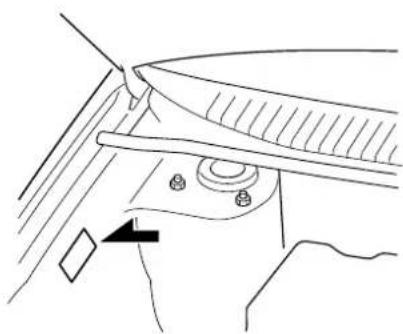
natural_image
Technical line drawing of a mechanical component with a tool and arrow indicating direction (no text or symbols)▼ Chassis Number
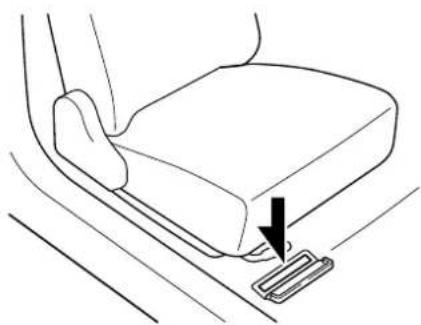
natural_image
Line drawing of a car seatbelt buckle with a black arrow indicating the seatbelt buckle (no text or symbols present)10-2


natural_image
Pure geometric diagram with intersecting lines and a central circular pattern (no text or symbols)Form No. 8R34-EE-02H
Identification Numbers
▼Vehicle Emission Control Information Label
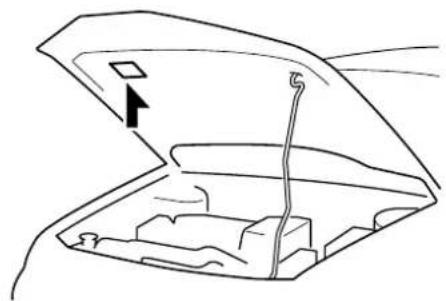
natural_image
Line drawing of an open car hood with a handle and arrow indicating direction (no text or symbols)Label contents applicable only to Australia
VEHICLE EMISSION CONTROL INFORMATION (BK1R) ENGINE TUNE UP SPECIFICATIONS AND ADJUSTMENTS :
(A) IGNITION TIMING
MANUAL TRANSMISSION : 10°±1° BTDC AT IDLE SPEED AUTOMATIC TRANSMISSION : 10°±1° BTDC AT IDLE SPEED (WITH TEST CONNECTOR FOR IDLE SETTING CONNECTED) (B) IDLE SPEED
MANUAL TRANSMISSION : 700 ± 50 RPM (NEUTRAL) AUTOMATIC TRANSMISSION : 700 ± 50 RPM (P RANGE) (WITH TEST CONNECTOR FOR IDLE SETTING CONNECTED)
NOTE) IF THE ELECTRIC COOLING FAN IS OPERATING, THE ADJUSTMENT SHOULD NOT BE MADE UNTIL IT STOPS. THIS ENGINE IS EQUIPPED WITH AUTOMATIC IDLE SPEED CONTROL.
(C) SPARK PLUG
SPARK PLUG GAP : 1.0\~1.1 MM
FOR DETAILED MAINTENANCE INFORMATION, PLEASE REFER TO THE WORKSHOP MANUAL
10-3

J54L_8R34_EE_02H.BOOK Page 4 Monday, July 15, 2002 9:03 AM
Identification Numbers
▼ Tyre Pressure Label
Left-hand drive model
▼Engine Number
Petrol engine
Right-hand drive model
Diesel engine
10-4


Form No. 8R34-EE-02H


natural_image
Pure geometric diagram with intersecting lines and a central circle, no text or symbols presentIdentification Numbers
▼Built Date (Australia)
The "Built Date" is the calendar month and the year in which the body shell and power train sub-assemblies are conjoined and the vehicle is driven or moved from the production line.
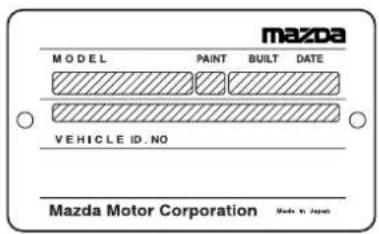
10-5



Specifications
Specifications
▼Engine
| Item | Model | |||
| Petrol engine (FP engine) | Petrol engine (FS engine) | Diesel engine | ||
| Type | DOHC-16V in-line, 4-cylinder | DOHC-16V in-line, 4-cylinder | SOHC-16V in-line, 4-cylinder | |
| Bore×Stroke | 83.0×85.0 mm(3.27×3.35 in) | 83.0×92.0 mm(3.27×3.62 in) | 86.0×86.0 mm(3.39×3.39 in) | |
| Displacement | 1,840 ml (1,840 cc, 112.2 cu in) | 1,991 ml (1,991 cc, 121.5 cu in) | 1,998 ml(1,998 cc, 121.9 cu in) | |
| Compression ratio | Type A 9.7 9.7 18.8 | |||
| Type B 9.1 9.7 18.8 | ||||
▼ Electrical System
| Item Model | ||||
| Battery | Petrol engine | Australia | Voltage 12 V | |
| Cold cranking amperes 306 A | ||||
| Reserve capacity 78 min | ||||
| Except Australia | 12V-40AH/5HR, 12V-48AH/5HR, 12V-52AH/5HR* | |||
| Diesel engine | 12V-64AH/5HR, 12V-70AH/5HR* | |||
| Alternator 12 V-80 A | ||||
| Starter | Petrol engine 12 V-1.0 kW | |||
| Diesel engine 12 V-2.2 kW | ||||
* Cold area
| Item | Petrol engine | ||
| Check engine light not equipped vehicle | Check engine light equipped vehicle | ||
| Spark-plug number | MAZDA BP13 18 110, BP14 18 110 — | ||
| NGK | BKR5E-11, BKR6E-11 | ZFR5F-11, ZFR6F-11 | |
| DENSO | K16PR-U11, K20PR-U11 | KJ16CR11, KJ20CR11 | |
| CHAMPION | RC8YC4, RC10YC4 | — | |
| Spark-plug gap | 1.0-1.1 mm (0.040-0.043 in) | ||
Specifications
▼ Lubricant Quality
| Lubricant Classification | |||||
| Engine oil* | Europe | Petrol engine | API SJ/ACEA A1 or A3 5W-30 | Mazda genuine DEXELIA oil | |
| API SJ/ACEA A3 10W-40 | Mazda genuine DEXELIA oil | ||||
| Diesel engine | API CF/ACEA B1 or B3 5W-30 | Mazda genuine DEXELIA oil | |||
| API CF/ACEA B3 10W-40 | Mazda genuine DEXELIA oil | ||||
| Except Europe | Petrol engine | API SG, SH, SJ or SL, or ILSAC GF-II or GF-III | |||
| Diesel engine | API CD, CE or CF-4 | ||||
* Refer to the recommended SAE viscosity numbers on page 8-14.
| Lubricant Classification | ||||
| Manual transaxle oil | Any temperature | API Service GL-4 | or GL-5 | |
| SAE 75W-90 | ||||
| Above 10°C (50°F) | API Service GL-4 | or GL-5 | ||
| SAE 80W-90 | ||||
| Automatic transaxle fluid ATF M-V | ||||
| Power steering fluid | ATF M-III or equivalent (e.g. Dexron® II) | |||
| Brake/Clutch fluid | European model SAE J1703 or FMVSS116 DOT-3 or DOT-4 | |||
| Except European model | SAE J1703 or FMVSS116 DOT-3 | |||
▼ Capacities
(Approximate Quantities)
| Item | Unit | ||||
| L | US qt | Imp qt | |||
| Engine oil | Petrol engine | With oil filter replacement 3.5 | 3.7 | 3.1 | |
| Without oil filter replacement | 3.3 | 3.5 | 2.9 | ||
| Diesel engine | With oil filter replacement 4.7 | 5.0 | 4.1 | ||
| Without oil filter replacement | 4.5 | 4.8 | 4.0 | ||
| Coolant | Petrol engine | With heater | 7.5 | 7.9 | 6.6 |
| Without heater | 6.9 | 7.3 | 6.1 | ||
| Diesel engine | With heater | 9.0 | 9.5 | 7.9 | |
| Without heater | 8.5 | 9.0 | 7.5 | ||
| Transaxle oil | Manual transaxle | 2.7 | 2.9 | 2.4 | |
| Automatic transaxle | 7.2 | 7.6 | 6.3 | ||
| Fuel tank | 58 | 15.3 (US gal) | 12.8 (Imp gal) | ||
Check oil and fluid levels with dipsticks or reservoir gauges.
Specifications
▼Dimensions
| Item mm (in) | ||
| Overall length 4,340 (170.8) | ||
| Overall width 1,705 (67.1) | ||
| Overall height | With roof rail 1,600 (63.0) | |
| Without roof rail 1,570 (61.8) | ||
| Front tread | 14 inch wheel 1,475 (58.1) | |
| 15 inch wheel 1,465 (57.7) | ||
| 16 inch wheel 1,465 (57.7) | ||
| Rear tread | 14 inch wheel 1,480 (58.3) | |
| 15 inch wheel 1,470 (57.9) | ||
| 16 inch wheel 1,470 (57.9) | ||
| Wheelbase 2,670 (105.1) | ||
▼Light Bulbs
| Light bulb Wattage | ||
| Headlights 60/55 | ||
| Front direction indicator lights 21 | ||
| Side direction indicator lights 5 | ||
| Parking lights 5 | ||
| Front fog lights 55 | ||
| Rear direction indicator lights | 21 | |
| Brake lights/Tail lights | 21/5 | |
| High-mount brake light | 5 | |
| Reverse lights | 18 | |
| Rear fog lights | 21 | |
| Number plate lights | 5 | |
| Overhead light | Front | 8 |
| Rear | 10 | |
| Map lights | 5 | |
| Luggage compartment light | 8 | |
Specifications
▼ Tyres
Sample tyre mark and its meaning
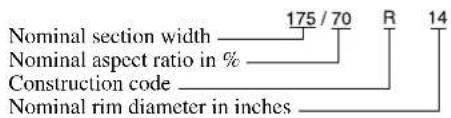
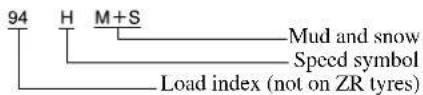
Tyre mark information
Choose the proper tyres for your vehicle using the following tyre mark information.
| Speed symbol Maximum permissible speed |
| Q Up to 160 km/h (100 mph) |
| R Up to 170 km/h (106 mph) |
| S Up to 180 km/h (112 mph) |
| T Up to 190 km/h (118 mph) |
| U Up to 200 km/h (125 mph) |
| H Up to 210 km/h (131 mph) |
| V Up to 240 km/h (150 mph) |
| W Up to 270 km/h (168 mph) |
| Y Up to 300 km/h (187 mph) |
| ZR Over 240 km/h (150 mph) |


10-9


Specifications
Tyre and inflation pressure
Check the tyre pressure label for tyre size and inflation pressure. Refer to Tyre Inflation Pressure on page 8-33.
(Except Australian model)
| Tyre size | Inflation pressure | ||
| Up to 3 persons —Full load | |||
| 185/65R14 86T | Front | 210 kPa (2.1kgf/cm2or bar, 30 psi) | 220 kPa (2.2kgf/cm2or bar, 32 psi) |
| Rear | 210 kPa (2.1kgf/cm2or bar, 30 psi) | 280 kPa (2.8kgf/cm2or bar, 41 psi) | |
| Front | 220 kPa (2.2kgf/cm2or bar, 32 psi) | 240 kPa (2.4kgf/cm2or bar, 35 psi) | |
| Rear | 210 kPa (2.1kgf/cm2or bar, 30 psi) | 280 kPa (2.8kgf/cm2or bar, 41 psi) | |
| 195/55R15 84V | Front | 220 kPa (2.2kgf/cm2or bar, 32 psi) | 240 kPa (2.4kgf/cm2or bar, 35 psi) |
| Rear | 210 kPa (2.1kgf/cm2or bar, 30 psi) | 280 kPa (2.8kgf/cm2or bar, 41 psi) | |
| 195/55R15 85V | Front | 220 kPa (2.2kgf/cm2or bar, 32 psi) | 240 kPa (2.4kgf/cm2or bar, 35 psi) |
| Rear | 220 kPa (2.2kgf/cm2or bar, 32 psi) | 280 kPa (2.8kgf/cm2or bar, 41 psi) | |
| Front | 230 kPa (2.3kgf/cm2or bar, 33 psi) | 250 kPa (2.5kgf/cm2or bar, 36 psi) | |
| Rear | 220 kPa (2.2kgf/cm2or bar, 32 psi) | 280 kPa (2.8kgf/cm2or bar, 41 psi) | |
| Front | 240 kPa (2.4kgf/cm2or bar, 35 psi) | 250 kPa (2.6kgf/cm2, 2.5 bar, 36 psi) | |
| Rear | 230 kPa (2.3kgf/cm2or bar, 33 psi) | 290 kPa (3.0kgf/cm2, 2.9 bar, 42 psi) | |
| 195/60R15 88V | Front | 220 kPa (2.2kgf/cm2or bar, 32 psi) | 240 kPa (2.4kgf/cm2or bar, 35 psi) |
| Rear | 220 kPa (2.2kgf/cm2or bar, 32 psi) | 280 kPa (2.9kgf/cm2, 2.8 bar, 41 psi) | |
| 195/50R16 84V | Front | 220 kPa (2.2kgf/cm2or bar, 32 psi) | 240 kPa (2.4kgf/cm2or bar, 35 psi) |
| Rear | 220 kPa (2.2kgf/cm2or bar, 32 psi) | 280 kPa (2.8kgf/cm2or bar, 41 psi) | |
1 person's weight: About 75kg
(Except Diesel engine, 7-Passenger model)
Before driving at high speeds, increase the tyre pressure. For speeds above 160 km/h (100 mph), increase the tyre pressure by 30 kPa (0.3 kgf/cm ^2 , 4.3 psi).
(Diesel engine, 7-Passenger model)
Before driving at high speeds, increase the tyre pressure. For speeds above 160 km/h (100 mph), increase the tyre pressure by 20 kPa (0.2 kgf/cm ^2 , 2.9 psi).
(Australia model)
| Item | Model | |
| Front Rear | ||
| Tyre size 195/55R15 84V | ||
| Rim size 6JJ | ||
| Inflation pressure 220 kPa (32 psi) 2 | 10 kPa (30 psi) | |
Temporary spare tyre
| Tyre size Inflation pressure | |
| T115/70 D15 | 420 kPa (4.2 kgf/cm ^2 or bar, 60 psi) |
10-10
Specifications
Winter tyre
(Europe)
| Tyre size | Inflation pressure | ||||
| Up to 3 persons —Full load | |||||
| Petrol engine | FP engine | 185/65R14 86*M+S | Front | 210 kPa (2.1 kgf/cm2or bar, 30 psi) | 220 kPa (2.2 kgf/cm2or bar, 32 psi) |
| Rear | 230 kPa (2.3 kgf/cm2or bar, 33 psi) | 280 kPa (2.8 kgf/cm2or bar, 41 psi) | |||
| 195/55R15 85*M+S | Front | 220 kPa (2.2 kgf/cm2or bar, 32 psi) | 240 kPa (2.4 kgf/cm2or bar, 35 psi) | ||
| Rear | 240 kPa (2.4 kgf/cm2or bar, 35 psi) | 280 kPa (2.8 kgf/cm2or bar, 41 psi) | |||
| FS engine | 195/55R15 85*M+S | Front | 220 kPa (2.2 kgf/cm2or bar, 32 psi) | 240 kPa (2.4 kgf/cm2or bar, 35 psi) | |
| Rear | 240 kPa (2.4 kgf/cm2or bar, 35 psi) | 280 kPa (2,8 kgf/cm2or bar, 41 psi) | |||
| 195/60R15 88*M+S | Front | 220 kPa (2.2 kgf/cm2or bar, 32 psi) | 240 kPa (2.4 kgf/cm2or bar, 35 psi) | ||
| Rear | 240 kPa (2.4 kgf/cm2or bar, 35 psi) | 280 kPa (2.8 kgf/cm2or bar, 41 psi ) | |||
| 195/50R16 84*M+S | Front | 220 kPa (2.2 kgf/cm2or bar, 32 psi) | 240 kPa (2.4 kgf/cm2or bar, 35 psi) | ||
| Rear | 240 kPa (2.4 kgf/cm2or bar, 35 psi) | 280 kPa (2.8 kgf/cm2or bar, 41 psi | |||
| Diesel engine | 185/65R14 86*M+S | Front | 220 kPa (2.2 kgf/cm2or bar, 32 psi) | 240 kPa (2.4 kgf/cm2or bar, 35 psi) | |
| Rear | 230 kPa (2.3 kgf/cm2or bar, 33 psi) | 280 kPa (2.9 kgf/cm2or bar, 41 psi) | |||
| 195/55R15 85*M+S | Front | 230 kPa (2.3 kgf/cm2or bar, 33 psi) | 250 kPa (2.5 kgf/cm2or bar, 36 psi) | ||
| Rear | 240 kPa (2.4 kgf/cm2or bar, 35 psi) | 280 kPa (2.8 kgf/cm2or bar, 41 psi) | |||
| Front | 240 kPa (2.4 kgf/cm2or bar, 35 psi) | 250 kPa (2.6 kgf/cm2, 2.5 bar, 35 psi) | |||
| Rear | 250 kPa (2.5 kgf/cm2or bar, 36 psi) | 290 kPa (3.0 kgf/cm2, 2.9 bar, 42 psi) | |||
*Speed Symbol (The speed symbols for winter tyres are Q, T, and H only.)
1 person's weight: About 75kg
Before driving at high speeds, increase the tyre pressure. For speeds above 160 km/h (100 mph), increase the tyre pressure by 30 kPa (0.3 kgf/cm ^2 , 4.3 psi).
▼Fuses
Refer to the fuse rating on page 8-42.
10-11
Form No. 8R34-EE-02H
Form No. 8R34-EE-02H
Index
A
Accessory Socket 6-61
Add-On Non-Genuine Parts and
Accessories 9-3
Aerial 6-16
Air Bag Systems 2-66
Air Filter 8-24
Air-Conditioning System 6-2
Anti-Lock Brake System (ABS) ..... 5-8
Warning light 5-8
Ashtray 6-56
Audio System 6-16
Audio control lever 6-50
Audio set 6-23
Operating tips for audio
system 6-16
Automatic Transaxle
Driving tips 5-15
Fluid 8-21
Hold mode 5-14
Shift-lock override 5-13
Shift-lock system 5-13
Transaxle ranges 5-12
B
Battery
Emergency Starting 7-14
Maintenance 8-30
Specifications 10-6
Beeps
Ignition key reminder 5-37
Lights-on reminder 5-37
Before Starting the Engine 4-6
After getting in 4-6
Before getting in 4-6
Body Lubrication 8-23
Bonnet Release 3-16
B
Brake/Clutch
Fluid 8-19
Brakes
Anti-lock brake system (ABS) ....5-8
Foot brake 5-5
Pad wear indicator 5-9
Parking brake 5-6
Warning light 5-7
Bulb Replacement 8-36
C
Capacities 10-7
Carbon Monoxide 4-5
Cargo Securing Loops 6-60
Cargo Sub-Compartment 6-60
Catalytic Converter 4-4
Cell Phones 9-4
Child Restraint
Categories of child-restraint
systems 2-52
Child restraint precautions .....2-49
Child-restraint system
installation position .....2-53
Child-restraint system
suitability for various seat
positions table 2-58
Installing child-restraint
systems 2-59
ISOFIX bar-secured
child-restraint systems .....2-62
Child Safety Locks for Rear Door .....3-9
Cigarette Lighter 6-55
Clock 6-54
Cup Holder 6-57
11-2




D
Defroster
Rear window 5-43
Dimensions 10-8
Door Locks 3-6
Double Locking System ....3-24
Driving In Flooded Area .....4-11
Driving Tips
Automatic transaxle .....5-15
Driving in flooded area .....4-11
Hazardous driving 4-8
Money-saving suggestions .....4-7
Rocking the vehicle 4-8
Running-in 4-7
Winter driving 4-9
Dynamic Stability Control (DSC) ....5-18
TCS/DSC Indicator light .....5-19
E
Emergency Starting 7-14
Flooded engine 7-14
Jump-starting 7-14
Push-starting 7-16
Running out of fuel 7-17
Emergency Towing 7-18
Emission Control Maintenance .....8-46
Air-intake control system .....8-47
Engine 8-46
Evaporative emission
control system 8-47
Exhaust emission
control system 8-48
Fuel system 8-47
Ignition system 8-47
Emission Control System ....4-4
E
Engine
Bonnet release 3-16
Coolant 8-18
Exhaust gas 4-5
Oil 8-14
Overheating 7-12
Starting 5-3
Engine Compartment Overview .....8-13
Engine Coolant
Overheating 7-12
Engine Coolant Temperature
Gauge 5-22
Exhaust Gas 4-5
Exterior Care 8-51
F
Flasher
Hazard warning 5-45
Headlights 5-38
Flat Tyre 7-3
Changing 7-7
Spare tyre and tool storage .....7-3
Fluids
Classification 10-7
Owner maintenance 8-11
Fog Lights
Front 5-40
Rear 5-40
Foot Brake 5-5
Front Console 6-59
Front seats 2-2
11-3




Index
F
Fuel
Filler flap and cap 3-15
Filter 8-26
Gauge 5-23
Requirements 4-2
Tank capacity 10-7
Fuses 8-42
Panel description 8-44
Replacement 8-42
G
Gauges 5-20
Glove Box 6-59
H
Hazard Warning Flasher 5-45
Hazardous Driving 4-8
Headlight Washer 5-43
Headlights
Control 5-38
Flashing 5-38
Levelling 5-38
Main-low beam 5-38
On reminder 5-38
Running lights 5-39
Horn 5-44
I
Ignition
Keys 3-2
Switch 5-2
Illuminated Entry System 6-52
Immobilizer System 3-20
In Case of Emergency 7-1
I
Indicator Lights 5-27
Air bag cut-off system ....5-34
Front fog light 5-35
Glow plug 5-36
Headlight main-beam 5-35
HOLD 5-35
Rear fog light 5-35
Security 5-33
Shift position 5-36
TCS OFF 5-36
TCS/DSC 5-36
Instrument Cluster 5-20
Instrument Panel Illumination .....5-23
Interior Care 8-54
Interior Lights 6-52
J
Jump-Starting 7-14
K
Keyless Entry System 3-3
Keys 3-2
L
Label Information 10-2
Lane-Change Signals 5-39
Liftgate 3-9
Luggage compartment ....3-10
Light Bulbs
Replacement 8-36
Specifications 10-8
Lighter 6-55
Lighting Control 5-38
Lubricant Quality 10-7
Luggage Compartment Light ......6-54
11-4




M
Maintenance 8-1
Approximate service time .....8-10
Introduction 8-2
Owner maintenance precautions ....8-12
Owner maintenance schedule ...8-11
Scheduled 8-3
Manual Transaxle Operation .....5-10
Map Lights 6-53
Meters and Gauges 5-20
Mirrors Outside mirrors ....3-26
Rearview mirror 3-29
Money-Saving Suggestions ....4-7
0
Odometer and Trip Meter ....5-21
Outside Mirrors 3-26
Overhead Lights 6-53
Overheating 7-12
P
Paint Damage 8-49
Parking Brake 5-6
Parking in an Emergency 7-2
Power Door Locks 3-8
Power Steering 5-16
Fluid 8-20
Power Windows 3-12
Push-Starting 7-16
R
Rear Door Child Safety Locks ......3-9
Rear Seat 2-9
Rear Window Defroster 5-43
Rear Window Washer 5-42
Rear Window Wiper 5-42
Rearview Mirror 3-29
Registering Your Vehicle
in A Foreign Country 9-2
Rocking the Vehicle 4-8
Running-In 4-7
S
Seat Belt System 2-point type ....2-47
3-point type 2-40
Automatic locking 2-39
Emergency locking 2-38
Pregnant women 2-38
Pretensioner and load limiting ..2-42
Rear-centre lap/shoulder .....2-44
Seat belt precautions .....2-36
Warning light 2-48
Seats Flat folding .....2-35
Front seat 2-2
Rear seat 2-9
Second-row seats 2-19
Third-Row Seat 2-28
Second-row seats 2-19
Security System Double locking system ....3-24
Immobilizer system ....3-20
Theft-deterrent system ....3-22
Spare Tyre and Tool Storage .....7-3
Specifications 10-6
Speedometer 5-21
11-5




Index
S
SRS Air Bags
Air bag system description ..... 2-70
Supplementary restraint systems
precautions 2-66
Warning light 2-75
Starting the Engine ....5-3
Steering Wheel 3-26
Horn 5-44
Storage Compartments ......6-59
Cargo securing loops 6-60
Cargo sub-compartment ......6-60
Front console 6-59
Glove box 6-59
Under seat tray 6-59
Sunroof 3-17
Sunshade 3-19
Sunvisors 6-52
T
Tachometer 5-22
Temporary Spare Tyre 8-35
Theft-Deterrent System 3-22
Third-row seat 2-28
Tool 7-3
Towing
Description 7-18
Emergency towing 7-18
Hook 7-19
Towing caravan and trailers
(Australia) 4-18
Towing Caravan and Trailers
(Europe) 4-13
Traction Control System (TCS) ..... 5-16
TCS OFF indicator light .....5-17
TCS OFF switch 5-18
TCS/DSC indicator light .....5-17
Trip Computer 5-23
T
Trip Meter 5-21
Turn and Lane-Change Signals .....5-39
Tyres
Flat tyre 7-3
Inflation pressure 8-33
Replacement 8-34
Rotation 8-34
Snow tyres 4-9
Spare tyre and tool storage .....7-3
Specifications 10-9
Tyre chains 4-10
U
Under Seat Tray 6-59
V
Vanity Mirrors 6-52
Vehicle Information Labels .....10-2
W
Warning Lights 5-27
ABS 5-31
Air bag system 5-32
Brake system 5-29
Charging system 5-30
Check engine 5-31
Door-ajar 5-33
Engine oil pressure 5-30
Front seat belt pretensioner
system 5-32
Immobilizer system 5-33
Low fuel 5-32
Low washer fluid level 5-33
Seat belt 5-32
Sedimentor 5-33
11-6




Index
W
Warranty 9-2
Washer Fluid 8-23
Wheel Replacement 8-35
Windows
Power windows 3-12
Windscreen Washer 5-42
Windscreen Wipers 5-41
Blades replacement 8-27
Winter Driving 4-9
11-7



Form No. 8R34-EE-02H
- A Word to Mazda Owners
- Important Notes About This Manual
- How to Use This Manual
- WARNING
- CAUTION
- NOTE
- Your Vehicle at a Glance
- Instrument Panel Overview
- Exterior Overview
- Essential Safety Equipment
- Front Seats
- ▼ Seat Slide
- ▼Seat Recline
- Reclining:
- Unlocked Seatback:
- (Type A)
- (Type B)
- Seats
- ▼Seat Tilt (Driver's Seat)
- ▼Head Restraint
- Height adjustment
- Removal
- ▼ Folding the Passenger's Seat
- Unsecured Objects:
- To fold the seatback
- To return the seatback to the upright position
- ▼ Pull-up Seatback Trays
- Armrest
- ▼Seat Warmer
- Rear Seats
- (5-Passenger Model)
- Stacking Cargo:
- Securing Seats:
- Seat Adjustment:
- Passenger on the Folded Seatback:
- To fold the centre-rear seatback
- ▼Folding and Stowing Rear Seats
- To fold and stow a rear seat
- Essential Safety Equipment
- Loose Seat:
- To return a rear seat to its original position
- ▼Removal of Rear Seats
- Unsecured Seats:
- To remove a rear seat
- To install a rear seat
- ▼ Four-Passenger Seating Arrangement
- Rear-Passenger Seating and Seat Belts:
- Second-Row Seats (7-Passenger Model)
- Passenger on the Folded Seatback: Driving with a passenger on the folded seatback is dangerous.
- ▼Removing Shoulder Restraint
- ▼ Third-row Seat Access
- ▼ Folding the Second-Row Seat
- Using Folded Seatback as a Table While the Vehicle is Moving:
- To fold second-row seat
- To return the seat to the upright position
- To fold and stow second-row seat (European model)
- To fold and stow second-row seat (Except European model)
- To return second-row seat to the original position (European model)
- To return second-row seat to the original position (Except European model)
- Third-Row Seat (7-Passenger Model)
- (European model)
- (Except European model)
- ▼Folding the Third-Row Seat
- To fold and stow third-row seat
- To return third-row seat to its original position
- ▼Removal of Third-Row Seat
- Riding on the Floor Space:
- Pinching Fingers or Hands:
- To remove third-row seat
- To install third-row seat
- Flat Folding (7-Passenger Model)
- Folded-Flat Seats:
- Removing and Installing Third-Row Seat:
- ▼ To Fold the Seats Flat
- Seat Belt Precautions
- (7-passenger model)
- Not Wearing Seat Belts:
- Seat Belt Damaged During an Accident:
- Twisted Seat Belts:
- One Belt, One Passenger:
- Instructions for Use of Seat Belt Assemblies:
- Seat Belt Systems
- ▼ Pregnant Women and Persons with Serious Medical Conditions
- ▼Emergency Locking Mode
- ▼ Automatic Locking Mode
- 3-Point Type Seat Belt
- ▼ Fastening the Seat Belts
- ▼ Unfastening the Seat Belts
- ▼Shoulder Belt Adjuster
- Front Seat Belt Pretensioner and Load Limiting Systems
- Expended Seat Belt Pretensioners:
- Modification or Testing of the
- Pretensioner System:
- Pretensioner System Disposal:
- ▼ Air Bag/Front Seat Belt Pretensioner Systems Warning Light
- Rear Centre Position Seat Belt (5-Passenger Model)
- ▼ Fastening the Seat Belt
- ▼ Unfastening the Lap Portion of the Seat Belt
- ▼ Fastening the Lap Portion of the Seat Belt
- 2-Point Type Seat Belt (7-Passenger Model)
- ▼Fastening the Seat Belts
- Seat Belt Warning Light (Except European Model)
- Child Restraint Precautions
- Proper Size of Child-Restraint System:
- Follow the Manufacturer's Instructions and Always Keep the Child-Restraint System Buckled Down:
- Child Restraint
- Holding a Child While the Vehicle is Moving:
- Rear-Facing Child-Restraint System:
- Children and Seating Position with Side Air Bag:
- Categories of Child-Restraint Systems (Europe)
- Child-Restraint System Installation Position (Europe)
- Baby seat
- Child seat
- Booster seat
- ▼ Baby Seat Installation Position
- Baby Seat Installation:
- ▼Child Seat Installation Position
- Rear-facing type
- Front-facing type
- ▼ Booster Seat Installation Position
- Child-Restraint System Suitability for Various Seat Positions Table (Europe)
- Installing Child-Restraint Systems
- ▼Rear Seat Child-Restraint System Installation (Using Automatic Locking Mode)
- (5-passenger model, type B)
- Air Bag Cut-Off System
- ISOFIX Bar-Secured Child-Restraint Systems
- ISOFIX Bar-Secured Child-Restraint Systems:
- ▼ Child-Restraint System Installation Procedure
- Supplementary Restraint Systems (SRS) Precautions
- Air Bags without Seat Belts:
- Child in the Front Seat:
- Seating Position with Front Air Bags:
- Seating Position with Side Air Bags:
- Front Air Bag Storage Areas:
- Side Air Bag Storage Areas:
- Hot Air Bag Inflators:
- Installation of Front-End Equipment:
- Suspension Adjustment:
- Modification of the Supplementary Restraint System:
- Air Bag System Description
- ▼How the Air Bags Work
- ▼ Air Bag Activation/Deactivation
- Front air bag activation
- SRS Air Bags
- Limitations to front air bag activation
- Non-activation of front air bags
- Side air bag activation
- Limitations to side air bag activation
- Non-activation of side air bag
- ▼ Constant Monitoring
- Self-Servicing the Air Bag/Pretensioner Systems:
- ▼ Air Bag Cut-Off System
- ▼ Air Bag Cut-Off System Indicator Light
- ▼ Maintenance
- Damaged Air Bag Sensors:
- Removing Interior Parts:
- Air Bag Disposal:
- Knowing Your Mazda
- Doors and Locks
- Keys
- Keys and Children:
- (With immobilizer system)
- Keyless Entry System
- ▼Transmitter
- Lock button
- Unlock button
- ▼ Transmitter Maintenance
- Replacing the transmitter battery
- ▼Service
- Door Locks
- ▼Locking, Unlocking with Key
- ▼Locking, Unlocking with Transmitter
- ▼Locking, Unlocking with Door-Lock Button
- ▼Power Door Locks
- Locking, unlocking with key
- Locking, unlocking with door-lock button
- (All models except general right-hand model)
- ▼Rear Door Child Safety Locks
- Liftgate
- Open Liftgate:
- ▼ Opening and Closing the Liftgate
- Closing the liftgate
- ▼Luggage Compartment
- Luggage compartment cover
- Installing the cover
- Power Windows
- Closing Power Windows:
- Children and Power Windows:
- ▼Operating the Driver's Side Power Window
- Two-step down function
- Cancelling the two-step down function
- Restoring the two-step down function
- Auto-opening/closing
- Jam-safe window
- Engine-off power window operation
- ▼ Operating the Passenger Power Windows
- ▼Power Window Lock Switch
- Fuel-Filler Flap and Cap
- Fuel Spray:
- Fuel Vapour:
- ▼Fuel-Filler Flap
- ▼Fuel-Filler Cap
- Bonnet
- ▼ Opening the Bonnet
- ▼ Closing the Bonnet
- Sunroof
- Extending the Head or Arms Through the Sunroof:
- Closing the Sunroof:
- ▼ Tilt Operation
- ▼Slide Operation
- Sunshade
- Security System
- Immobilizer System
- ▼Immobilizer System Warning Light
- ▼Modification and Add-On Equipment
- Theft-Deterrent System
- ▼Operation
- What turns it on:
- What it does:
- ▼How to Arm the System
- ▼To Turn off an Armed System
- ▼To Stop an Alarm
- ▼Theft-Deterrent Labels
- Double Locking System
- Activating the System with
- Passengers Inside:
- ▼How to Activate the System
- (With keyless entry system)
- ▼How to Deactivate the System
- Steering Wheel and Mirrors
- Steering Wheel
- ▼ Tilt Steering Wheel
- Mirrors
- ▼ Outside Mirrors
- Convex Mirrors:
- (Driver's Side Wide Angle Mirror)
- Power control mirror
- Manual folding mirror
- Power folding mirror
- Touching the Moving Power Fold-in Mirror:
- Mirror defroster
- ▼Rearview Mirror (With Antidazzle Function)
- Blocked View:
- Before Driving Your Mazda
- Fuel and Engine Exhaust Precautions 4-2
- Before Starting the Engine 4-6
- Driving Tips 4-7
- Towing 4-13
- Fuel and Engine Exhaust Precautions
- Fuel Requirements (Petrol Engine)
- Fuel Requirements (Diesel Engine)
- Emission Control System (Petrol Engine)
- Parking Over Things That Burn:
- Engine Exhaust (Carbon Monoxide)
- Carbon Monoxide:
- Exhaust Gas in Enclosed Area:
- Idling with the Windows Closed:
- Snow Blocking the Exhaust Gas:
- Before Starting the Engine
- Before Getting In
- After Getting In
- Running-In Money-
- ng Suggestions
- Coasting:
- Hazardous Driving
- Rocking the Vehicle
- Winter Driving
- ▼Snow Tyres
- Mixing Tyre Types:
- Use snow tyres on all four wheels
- Europe
- Except Europe
- ▼ Tyre Chains
- Tyre chain selection (Europe)
- Installing the chains
- Driving In Flooded Area
- Turbocharger Information (Diesel Engine)
- Towing Caravan and Trailers (Europe)
- ▼ Weight Limits
- Towing
- TRAILER TOWING-LOAD TABLE
- Tow Loads:
- Trailer Loading:
- ▼ Trailer Hitch
- ▼ Tyres
- ▼Safety Chains
- Towing Without Safety Chain:
- ▼ Trailer Lights
- ▼ Trailer Brakes
- Hydraulic Trailer-Brake System:
- ▼ Trailer Towing Tips
- Before driving
- Driving
- Towing Caravan and Trailers (Australia)
- ▼Load Limits
- ▼ Towing Instructions
- Driving Your Mazda
- Starting and Driving 5-2
- Instrument Cluster and Indicators 5-20
- Warning/Indicator Lights and Beeps 5-27
- Switches and Controls 5-38
- Starting and Driving
- Ignition Switch
- ▼Ignition Switch Positions
- LOCK
- Removing the Key:
- Not Setting the Parking Brake:
- ACC (Accessory)
- ON
- START
- ▼Ignition Key Reminder (Except European model)
- Starting the Engine
- Petrol engine
- (Automatic transaxle)
- Diesel engine
- Brake System
- ▼Foot Brake
- Driving with the Engine Off:
- Riding the Brakes:
- Driving with Wet Brakes:
- ▼ Parking Brake
- Lever type
- Setting the parking brake
- Releasing the parking brake
- Pedal type
- ▼Brake System Warning Light
- Parking brake warning
- Low brake fluid level warning/ Electronic brake force distribution system warning
- Low brake fluid level warning
- Electronic brake force distribution system warning
- Brake Warning Light:
- Brake booster vacuum warning (Diesel engine)
- ▼ Anti-Lock Brake System (ABS)
- ABS:
- ▼ABS Warning Light
- ▼Brake Pad Wear Indicator
- Manual Transaxle Operation
- ▼ Manual Transaxle Shift Pattern
- Sudden Engine-Braking:
- Automatic Transaxle Controls
- Floor shift model
- Various Lockouts:
- Column shift model
- ▼Transaxle Ranges
- P (Park)
- R (Reverse)
- N (Neutral)
- D (Drive)
- S (Second)
- L (Low)
- ▼Shift-Lock System
- Floor shift, Australia model
- ▼Shift-Lock Override (Column shift model)
- ▼Hold Mode
- Hold operation
- When the hold mode is on
- Shift-up patterns with hold mode on
- Hold indicator
- HOLD
- ▼Driving Tips
- Passing
- Climbing steep grades from a stop
- Descending steep grades
- Power Steering
- Traction Control System (TCS)
- TCS and Unsafe Driving:
- TCS and Snow and Ice:
- ▼TCS/DSC Indicator Light
- ▼TCS OFF Indicator Light
- TCS OFF
- ▼TCS OFF Switch
- Dynamic Stability Control (DSC)
- DSC and Unsafe Driving:
- Instrument Cluster and Indicators
- Meters and Gauges
- ▼Speedometer
- ▼ Odometer and Trip Meter
- Odometer
- Trip meter
- ▼Tachometer
- ▼Engine Coolant Temperature Gauge
- ▼Fuel Gauge
- ▼Instrument Panel Illumination
- ▼Trip Computer
- Outside temperature display
- Current fuel economy mode
- Average fuel economy mode
- Distance-to-empty mode
- Average vehicle speed mode
- Warning/Indicator Lights and Beeps
- Warning/Indicator Lights
- ▼ Charging System Warning Light
- ▼Engine Oil Pressure Warning Light
- ▼ Check Engine Light
- ABS Warning Light and Brake Warning Light on at the Same Time:
- ▼ Air Bag/Front Seat Belt Pretensioner System Warning Light
- ▼Low Fuel Warning Light
- ▼Seat Belt Warning Light (Except European Model)
- ▼Door-Ajar Warning Light
- ▼ Sedimentor Warning Light (Diesel engine)
- ▼Low Washer Fluid Level Warning Light
- ▼Immobilizer System Warning/Security Indicator Light
- Immobilizer system warning light
- Security indicator light
- With theft-deterrent system
- With double-locking system
- ▼Shift Position Indicator Light
- ▼Glow Plug Indicator Light (Diesel engine)
- Beeps
- ▼Lights-On Reminder
- Switches and Controls
- Lighting Control
- ▼Headlights
- ▼Headlight Main-Low Beam
- ▼Flashing the Headlights
- ▼Headlight Levelling
- ▼ Running Lights
- Turn and Lane-Change Signals
- ▼Direction Indicator
- Lane-change signals
- Front Fog Lights Rear
- Light
- Windscreen Wipers and Washer
- Frozen Washer Fluid:
- ▼Windscreen Wipers
- Variable-speed intermittent wipers
- One-touch wipers
- ▼Windscreen Washer
- Rear Window Wiper and Washer
- ▼Rear Window Wiper
- ▼Rear Window Washer
- Headlight Washer
- Rear Window Defroster
- Horn
- Hazard Warning Flasher
- Interior Comfort
- Air-Conditioning System 6-2
- Audio System 6-16
- Interior Equipment 6-52
- Air-Conditioning System
- Operating Tips
- ▼Operating the Air-Conditioning System
- ▼ Clearing the Air Inlet
- ▼Foggy Windows
- ▼ Outside/Recirculated Air Position
- ▼ Parking in Direct Sunlight
- ▼Not Using for a Long Period
- ▼ Check the Refrigerant before Weather Gets Hot
- ▼ Replacement of the Cabin Air Filter
- ▼Adjusting the Vents
- Directing airflow
- Adjusting the amount of airflow (Left-hand drive model)
- ▼Selecting the Airflow Mode
- Types of the Air-Conditioning System
- ▼ Control Switches
- Mode selector dial
- A/C switch
- Air intake selector
- Switch type
- Outside air position ( )
- Recirculated air position ( )
- The Recirculated Air Position:
- ▼ Heating
- ▼Cooling (With Air Conditioner)
- ▼ Ventilation
- ▼Windscreen Defrosting and Defogging
- Foggy Windscreen:
- (Switch type)
- ▼Dehumidifying
- (With Air Conditioner)
- Fully Automatic Type
- AUTO switch
- OFF switch
- Temperature control dial
- Fan switch
- Mode selector switch
- Air intake selector switch
- Outside air position (
- ▼ Standard Use
- ▼ Sunlight/Temperature Sensor
- Audio System
- Aerial
- ▼Manual Type
- Operating Tips for Audio System
- ▼ Radio Reception
- AM characteristics
- FM characteristics
- Multipath noise
- Flutter/Skip noise
- Weak signal noise
- Strong signal noise
- Station drift noise
- ▼ Operating Tips for Cassette Tape Player
- Cleaning the cassette tape player
- Handling the cassette tape player
- ▼ Operating Tips for Mini Disc (MD) Player
- ▼ Operating Tips for CD Player/In-Dash CD Changer
- Condensation phenomenon
- Handling the CD player/In-dash CD changer
- Audio Set
- Setting procedure
- Cancelling code number
- Changing code number
- System activation
- ▼Power/Volume/Sound Controls
- Power ON/OFF
- Volume adjustment
- Audio sound adjustment
- ▼Clock
- Setting the time
- Exact hour adjustment
- Changing the display mode
- Radio ON
- Band selection
- Tuning
- Manual tuning
- Seek tuning
- Scan tuning
- Preset channel tuning
- Auto memory tuning
- Radio Data System (RDS)
- Alternative frequency (AF)
- Traffic announcement (TA)
- Programme-type information (PTY)
- Emergency broadcast
- ▼ Operating the Cassette Tape Player
- Cassette tape insert
- Playing
- Dolby noise reduction
- Ejecting the cassette tape
- Fast-forward/Rewind
- Reversing
- Automatic programme control (APC)
- Repeat play
- ▼Operating the Mini Disc (MD) Player
- Inserting the MD
- Ejecting the MD
- Fast-forward/Reverse
- Track search
- Music scan(Type A)
- Random play
- Changing the MD display
- Long disc or song titles
- ▼Operating the Compact Disc (CD) Player
- Inserting the CD
- Ejecting the CD
- ▼Operating the In-Dash CD Changer
- Normal insertion
- Inserting CDs into desired tray number
- Multiple insertion
- Normal ejection
- Ejecting CDs from desired tray number
- Multiple ejection
- Disc search
- Music scan (Type A)
- ▼Error Indications
- Audio Control Lever Operation
- ▼Adjusting the Volume
- ▼Changing the Source
- AM reception type
- MW and LW reception type
- ▼SELECT Switch
- When listening to the radio
- When playing a cassette tape
- When playing a CD or MD
- Interior Equipment
- Sunvisors
- ▼ Vanity Mirrors
- Interior Lights
- ▼Illuminated Entry System
- ▼Overhead Lights
- ▼Map Lights
- To set the hour
- To set the minutes
- Lighter
- Ashtray
- ▼Front
- ▼Rear
- Cup Holder
- ▼ Front
- Type A
- Type B
- Storage Compartments
- ▼Glove Box
- ▼Front Console
- ▼ Under Seat Tray
- ▼ Cargo Securing Loops
- Not Securing Cargo:
- 7-Passenger model
- ▼ Cargo Sub-Compartment
- 5-Passenger model (With conventional spare tyre)
- Accessory Socket
- In Case of an Emergency
- Parking in an Emergency
- Spare Tyre and Tool Storage
- Flat Tyre
- ▼Jack
- To remove the jack
- To secure the jack
- ▼Spare Tyre
- Conventional
- Temporary
- To remove the spare tyre
- To secure the spare tyre
- Changing a Flat Tyre
- Jacking a Vehicle:
- Passenger in Vehicle Supported by a Jack:
- ▼Removing a Flat Tyre
- ▼Mounting the Spare Tyre
- Overheating
- If steam is coming from the engine compartment:
- If neither coolant nor steam is escaping:
- Emergency Starting
- Starting a Flooded Engine (Petrol Engine)
- When the engine is cold
- When the engine is warm
- Jump-Starting
- Push-Starting
- Running Out of Fuel (Diesel Engine)
- Emergency Towing
- Towing Description
- Towing Hooks
- ▼Towing Hook-Front
- 8
- Maintenance and Care
- Introduction
- Scheduled Maintenance
- Emission control and related systems
- (Europe)
- (Except Europe, Israel)
- Owner Maintenance Schedule
- ▼Routine Service
- Owner Maintenance
- Owner Maintenance Precautions
- Maintenance Procedures:
- Running the Engine:
- Electrical Fan and Engine Inspection:
- Engine Compartment Overview
- Engine Oil
- ▼Recommended Oil
- ▼ Inspecting Engine Oil Level
- Engine Coolant
- ▼ Inspecting Coolant Level
- Hot Engine:
- Do not overfill.
- Brake/Clutch Fluid
- ▼ Inspecting Brake/Clutch Fluid Level
- ▼ Adding Brake/Clutch Fluid
- Power Steering Fluid
- ▼ Inspecting Power Steering Fluid Level
- Don't overfill.
- Automatic Transaxle Fluid (ATF)
- ▼ Inspecting Automatic Transaxle Fluid Level
- Fluid hot scale A
- Fluid cold scale B
- Window and Headlight Washer Fluid
- ▼ Inspecting Washer Fluid Level
- Body Lubrication
- Air Filter
- ▼ Replacing the Air Filter
- Fuel Filter (Diesel Engine)
- Wiper Blades
- ▼ Replacing Windscreen Wiper Blades
- ▼ Replacing Rear Window Wiper Blade
- Battery
- ▼Battery Maintenance
- ▼ Inspecting Electrolyte Level
- ▼Battery Recharging
- Tyres
- ▼ Tyre Inflation Pressure
- ▼ Tyre Rotat ion
- ▼ Replacing a Tyre
- Worn Tyres:
- ▼ Temporary Spare Tyre
- ▼Replacing a Wheel
- Handling Halogen Bulbs:
- Children and Halogen Bulbs:
- ▼ Replacing a Headlight Bulb
- ▼ Replacing a Bulb (Front)
- ▼ Replacing a Bulb (Interior)
- ▼ Replacing a Bulb (Rear)
- Fuses
- ▼Fuse Replacement
- ▼Fuse Panel Description
- Fuse block (Engine compartment)
- Fuse panel (Driver's side)
- Emission Control Maintenance (Australia)
- ▼Engine
- Drive belts
- Oil filter
- Cooling system
- ▼Fuel System and Air-Intake Control System
- Idle speed
- Fuel filter
- Fuel lines and hoses
- ▼Ignition System
- Ignition timing
- Spark plugs
- ▼Evaporative Emission Control System
- ▼ Exhaust Emission Control System
- E.G.R. system
- Hot Surfaces:
- How to Minimize Environmental Paint Damage
- ▼ Etching Caused by Acid Rain or Industrial Fallout
- Occurrence
- Prevention
- ▼Damage Caused by Bird Dropping, Insects, or Tree Sap
- Appearance Care
- ▼ Water Marks
- ▼Paint Chipping
- How to avoid paint chipping
- Exterior Care
- ▼Maintaining the Finish
- Washing
- Waxing
- ▼Paint Damage Touch-up
- ▼Cavity Protection
- ▼Bright-Metal Maintenance
- ▼ Undercoating
- ▼ Aluminium Wheel Maintenance
- Interior Care
- ▼Instrument Panel Precautions
- ▼Cleaning the Interior and Floors
- ▼Cleaning the Upholstery and Interior Trim
- Vinyl
- Leather
- Fabric
- ▼ Cleaning the Lap/Shoulder Belt Webbing
- ▼Cleaning the Window Interiors
- Customer Information
- Warranty
- Registering Your Vehicle in A Foreign Country
- Add-On Non-Genuine Parts and Accessories
- Cell Phones Warning
- Declaration of Conformity
- CE0891
- CE _0499
- Specifications
- Identification Numbers
- ▼Vehicle Emission Control Information Label
- Label contents applicable only to Australia
- ▼Built Date (Australia)
- Specifications
- ▼ Capacities
- Tyre mark information
- Tyre and inflation pressure
- (Except Diesel engine, 7-Passenger model)
- (Diesel engine, 7-Passenger model)
- ▼Fuses
- Index
- A
- B
- C
- D
- E
- F
- G
- H
- I
- J
- K
- L
- M
- 0
- P
- R
- S
- T
- U
- V
- W
Brand : MAZDA
Model : Premacy (2002)
Category : Car