
Age of Empires III (PC) - Video game MICROSOFT - Free user manual and instructions
Find the device manual for free Age of Empires III (PC) MICROSOFT in PDF.


| Product Type | Video Game |
| Brand | Microsoft |
| Model | Age of Empires III (PC) |
| Genre | Real-time Strategy |
| Platform | PC (Windows) |
| Release Year | 2005 |
| ESRB Rating | Teen |
| Game Media | DVD-ROM (2 discs) |
| Minimum System Requirements | Windows XP, 1.4 GHz CPU, 256 MB RAM, 64 MB Video Card, 2 GB HDD |
| Recommended System Requirements | Windows XP, 2.2 GHz CPU, 512 MB RAM, 128 MB Video Card |
| Multiplayer Support | Up to 8 players online via LAN or GameSpy |
| Language | English (other languages available) |
| Installation | Requires CD or DVD and product key |
| Manual | 80 pages PDF, freely downloadable |
| Accessibility | Supports subtitles |
| Expansion Packs | The WarChiefs, The Asian Dynasties |
| User Account | Optional Games for Windows Live |
Frequently Asked Questions - Age of Empires III (PC) MICROSOFT
User questions about Age of Empires III (PC) MICROSOFT
0 question about this device. Answer the ones you know or ask your own.
Ask a new question about this device
Download the instructions for your Video game in PDF format for free! Find your manual Age of Empires III (PC) - MICROSOFT and take your electronic device back in hand. On this page are published all the documents necessary for the use of your device. Age of Empires III (PC) by MICROSOFT.
USER MANUAL Age of Empires III (PC) MICROSOFT
AGE of EMPIRES
III
USER'S MANUAL

0805 Part No. X11-35580
ENSEMBLE STUDIOS
Microsoft game studios
Safety Warning
About Photosensitive Seizures
A very small percentage of people may experience a seizure when exposed to certain visual images, including flashing lights or patterns that may appear in video games. Even people who have no history of seizures or epilepsy may have an undiagnosed condition that can cause these "photosensitive epileptic seizures" while watching video games.
These seizures may have a variety of symptoms, including lightheadedness, altered vision, eye or face twitching, jerking or shaking of arms or legs, disorientation, confusion, or momentary loss of awareness. Seizures may also cause loss of consciousness or convulsions that can lead to injury from falling down or striking nearby objects.
Immediately stop playing and consult a doctor if you experience any of these symptoms. Parents should watch for or ask their children about the above symptoms—children and teenagers are more likely than adults to experience these seizures.
The risk of photosensitive epileptic seizures may be reduced by taking the following precautions:
- Play in a well-lit room.
- Do not play when you are drowsy or fatigued.
If you or any of your relatives have a history of seizures or epilepsy, consult a doctor before playing.
Information in this document, including URL and other Internet Web site references, is subject to change without notice. Unless otherwise noted, the example companies, organizations, products, domain names, e-mail addresses, logos, people, places, and events depicted herein are fictitious, and no association with any real company, organization, product, domain name, e-mail address, logo, person, place, or event is intended or should be inferred. Complying with all applicable copyright laws is the responsibility of the user. Without limiting the rights under copyright, no part of this document may be reproduced, stored in or introduced into a retrieval system, or transmitted in any form or by any means (electronic, mechanical, photocopying, recording, or otherwise), or for any purpose, without the express written permission of Microsoft Corporation.
Microsoft may have patents, patent applications, trademarks, copyrights, or other intellectual property rights covering subject matter in this document. Except as expressly provided in any written license agreement from Microsoft, the furnishing of this document does not give you any license to these patents, trademarks, copyrights, or other intellectual property.
© © 2005 Microsoft Corporation. All rights reserved. Microsoft, Age of Empires, The Age of Kings, DirectX, Ensemble Studios, the Microsoft Game Studios logo, and Windows are either registered trademarks or trademarks of Microsoft Corporation in the United States and/or other countries.
© 2005 Havok and Havok 3 are registered trademarks of Havok and Telekinesys Research Limited. All other products, company names and logos are trademarks or registered trademarks of their respective owners.
Uses Bink Video. Copyright © 1997-2005 by RAD Game Tools, Inc.
The names of actual companies and products mentioned herein may be the trademarks of their respective owners.
AGE of EMPIRES III
USER'S MANUAL
natural_image
Pencil sketch of a historical figure in 18th-century attire holding a sword, framed by decorative borders (no text or symbols)Table of Contents
Getting Started
What's New? 9
Installing the Game 9
Starting a New Game 10
Getting Help 11
Learning to Play 12
Setting Options & Using Hotkeys 13
Using the In-Game Menu 14
Saving, Loading, & Quitting a Game 15
Winning a Game 16
Improving Game Performance 17
Key Concepts
Choosing a Civilization 21
Colony Screen 24
Navigating the Colony Screen 26
Navigating the Home City Screen 29
Ways to Play Age of Empires III 31
Exploring the New World 33
Assembling an Army 34
Home City
What Is a Home City? 41
Managing Your Home City 43
Working with Your Home City 47
Your Home City's Strategic Value 50
Single-Player Campaign
Morgan Black 53
Elisabet Ramsey 54
John Black 55
Kanyenke 56
Amelia Black 57
Pierre Beaumont 58
Starting & Saving Campaign Scenarios 59
Multiplayer
Making the Multiplayer Connection 62
Multiplayer Game Types 64
The Home City & Multiplayer 65
Economy
Finding & Gathering Resources 68
Villagers 74
Upgrading Your Civilization's Units 79
Advancing Through the Ages 80
Forming Alliances with Native Americans 81
Military
Creating Military Units 85
Engaging in Combat 92
Choosing a Strategy 95
Civilizations
Spanish 100
British 101
French 102
Portuguese 103
Dutch 104
Russian 105
German 106
Ottoman 107
Buildings & Units
Buildings III
Explorers 115
Infantry 116
Cavalry 119
Artillery 121
Civilian Units 123
Ships 125
Native Americans 126
Mercenaries 129
Credits
natural_image
Pencil sketch of a bearded armored warrior holding a sword, framed with ornate border (no text or symbols)Getting Started
Once again, the Age of Empires® game series sets a new standard for innovative technology and gameplay in real-time strategy (RTS) gaming.
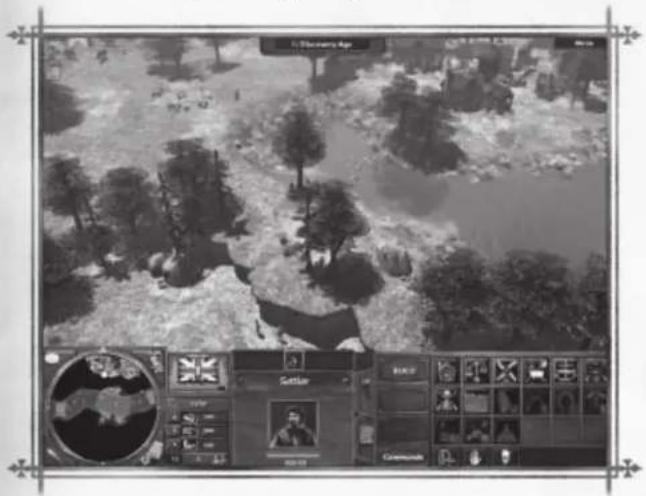
Picking up where Age of Empires II: The Age of Kings ^® leaves off, the latest installment, Age of Empires III, gives you command of a European power determined to explore, colonize, and conquer the New World.
Spectacular combat awaits you in a world with units like rifled infantry, heavy cavalry, and tall ships bristling with cannon. You'll be captivated by breathtaking scenes of discovery and power: towering European cathedrals, courageous Native Americans, and massive armies bent on destruction.
What's New?
Age of Empires III includes several new gameplay features, such as:
The Home City Specific to each civilization, your Home City gives you more control over how your civilization's technology advances.
Single-Player An intricate storyline transports Campaign you back in time to an age of conquest and intrigue.
Graphical A new display engine renders scenery Environment and action with lifelike detail.
Real-World The new physics engine adds an Physics exciting level of realism to the game—ships can shoot holes in each others' sails, cannon balls careen and bowl over infantry, and damaged buildings crumble to pieces without warning.
Installing the Game
Insert the Age of Empires III installation disc into your disc drive, and then follow the on-screen instructions. If Setup doesn't start automatically, complete these steps on Microsoft® Windows® XP:
- On the Start menu, click Control Panel.
- In the Category View, under Pick a Category, click Add or Remove Programs.
-
Under Pick a Task, click Add a Program.
-
In the Add or Remove Programs dialog box, click the CD or Floppy button, and then follow the on-screen instructions to install the game.
Starting a New Game
To open the Main menu, double-click the Age of Empires III icon on your desktop.
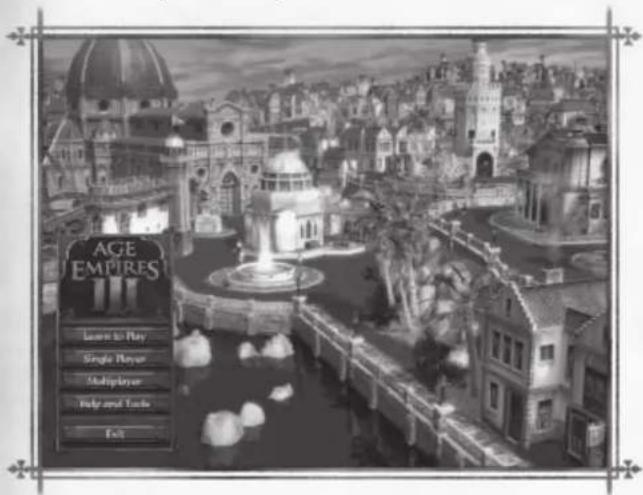
The Main menu provides the following options:
Learn to Play Learn basic gameplay principles and experience what's new in Age of Empires III.
Single Player Play the Campaign or a random map Skirmish; load a Custom Scenario or a Saved Game.
Multiplayer Start a multiplayer game with your friends using Ensemble Studios® Online (ESO) or a local area network (LAN).
Help and Tools Download game updates, get information about specific units and technologies, create custom scenarios, adjust display and other game options, or view a list of those who worked tirelessly to create this amazing game.
Exit Close the game and return to Windows.
Getting Help
To get additional information while playing the game, go to the Stats tab, and then click the Detailed Help button. You can also use tooltips by placing your mouse pointer over an icon or unit to display a brief description of that item and its capabilities.
For updates and to interact with the Age of Empires III community, visit: http://www.ageofempires3.com.
Learning to Play
The easiest way to learn Age of Empires III is by using the tutorials. You'll master gameplay basics and learn about some of the new features in the game.
To learn basic and advanced features, on the Main menu, click Learn to Play.
If you're a new player, click Master the Basics, and then complete the practice scenario to learn the core game features.
If you're a more experienced player, click Try a Game to dive right in and find out what's new.
Setting Options & Using Hotkeys
You can configure Age of Empires III in many different ways. By using the Options screen you can fine-tune such elements as in-game graphics, audio, and multiplayer settings.
For example, to improve the frame-rate performance, adjust the settings under Graphics Options. By selecting Use Low Poly Models and reducing the Texture settings, you can improve the game's performance—particularly on slower computers.
Hotkeys allow experienced players to find, build, and task units quickly and efficiently. For example, pressing the T key finds your Town Center. If you want to achieve proficiency with Age of Empires III, knowing how and when to use hotkeys is critical. You'll find many useful hotkey combinations on the Quick Reference Card.
natural_image
Black-and-white ink sketch of a mountainous landscape with waterfall and small trees, no text or symbols presentUsing the In-Game Menu
At any time during gameplay you can pause the game and display the In-Game menu by clicking the Menu button (in the upper-right of the screen) or pressing F10.
The In-Game menu offers the following choices:
Player Options Fine-tune in-game settings.
Resign Leave the current game.
Player Summary Offer tribute and resources to allies.
Save Preserve the current game state so you can reload it later.
Saved Game Start a previously saved game.
Restart Return to the beginning of the current game.
Saving, Loading, & Quilting a Game
Saving On the In-Game menu, click Save. In the Save File dialog box, type a name in the Filename box, and then click Save.
Loading On the In-Game menu, click Saved Game. In the Open File dialog box, select the filename of the game you want to play, and then click Open.
Quitting To leave a game while playing, you must first resign from your current game. On the In-Game menu, click Resign, click Yes, and then click the Quit button in the upper-right of the screen.
natural_image
Sketch of a horse-drawn carriage with wooden crates and a soldier nearby (no text or symbols)Winning a Game
The bottom line: You win by commanding more territory and resources than your opponents. Age of Empires III offers multiple variations on this theme, depending on how you decide to play.
Single-Player Campaign
To win, you must successfully complete all the missions in the Campaign.
Skirmish
In a single-player or multiplayer Skirmish, whoever conquers first is the winner. There are two types of game rules for a Skirmish—Supremacy and Deathmatch—each with different starting conditions. In Supremacy, you start with no resources; in Deathmatch, you start with a stockpile of resources and play at high speed.
While a Deathmatch always ends with either resignation or conquest, Supremacy offers a way to win without combat—Four of a Kind. You get Four of a Kind by building four Trading Posts either along a Trade Route or at Native American settlements.
Improving Game Performance
Here are some suggestions for improving the quality and performance of Age of Empire III.
Install the Latest Device Drivers
Your computer's graphics adapter (also known as a video or display adapter) is critical to a great Age of Empires III visual experience. For the game to run properly, you must ensure that your computer has the latest version of the graphics adapter's driver installed.
You can obtain the latest driver from the manufacturer of your graphics adapter.
To learn who manufactured your graphics adapter
- On the Start menu, click Run.
- Type dxdiag, and then click OK.
- In the DirectX Diagnostic Tool dialog box, click the Display tab.
- Record the name of the manufacturer listed under Device, and then click Exit.
Go to the manufacturer's Web site for more information on determining whether you have the latest driver version and how to upgrade should you need to.
Install the Latest Version of DirectX
Installing the latest version of DirectX ^® can prevent performance problems with Age of Empires III and may also enhance the quality and performance of games on your computer.
To download the latest version of DirectX, go to: http://www.microsoft.com/windows/directx/downloads/default.asp.
Additional Suggestions
Shut Down Other Programs
Close any other open programs to free up more of your computer's processing power.
Install More RAM
Random access memory (RAM) is your computer's short-term memory. Generally, the more there is, the faster your computer can process data. Your computer needs to have at least 256 MB of RAM to run Age of Empires III.
Upgrade Your System to a Faster Processor
To run Age of Empires III, your computer needs to have at least a Pentium 4 1.4 GHz processor. But the faster, the better!
Upgrade Your Graphics Adapter
You can improve your game's video performance by installing a more powerful graphics adapter. The minimum recommended hardware is a 64MB graphics adapter with HW T&L (Hardware Transform and Lightening). HW T&L technology offloads some of the graphics processing from your CPU. This enables the CPU to process additional instructions, which causes the game to execute faster.
Your goal in Age of Empires III is to build a powerful empire capable of conquering any and all enemy civilizations.
You build your civilization by gathering natural resources, constructing buildings, creating an army, researching technological improvements, and advancing through the five Ages:
Discovery Age
Colonial Age
Fortress Age
Industrial Age
Imperial Age
With each Age advancement you can build different buildings, create more powerful military units, and research and acquire more valuable technologies.
You face many challenges. You can see only a small part of a land hidden in darkness. You don't know where your opponents wait and how they plan to attack you. And you must overcome your greatest challenge: learning how to best adapt and grow the units and resources specific to your civilization.
Choosing a Civilization
You can choose from eight different civilizations (shown below in order of easiest to hardest to play):
Spanish
British
French
Portuguese
Dutch
Russian
German
Ottoman
Each civilization has its own strengths and weaknesses. For example, the British have a strong economy and can get Settlers quickly. You'll find the best British unit is the Musketeer, but if you want to leverage other units, such as the Longbowman, you have that flexibility.
Although they don't have as many villagers as the British, the French form alliances with Native Americans more easily. The French also have a special villager, the Coureur, that is more resistant to attacks.
If you play as the Spanish, you'll find that you get more resources and support from your Home City.
Try out the different civilizations to identify those that best suit your style of play and strategy.
Forming Alliances with Native Americans
Your playable civilization can also form alliances with the Native American nations in the New World:
Aztec Iroquois
Carib Lakota
Cherokee Maya
Comanche Nootka
Cree Seminole
Inca Tupi
By forming alliances, you gain their help during battle and can acquire extra resources such as Food or Coin. (You only battle Native Americans when they're allied with enemy civilizations.)
You form an alliance by building a Trading Post next to a Native American settlement.
To ally with a Native American nation
- Have your Settlers gather sufficient resources to build a Trading Post.
- Send your Explorer or Settler to find a Native American settlement.
- Select your Explorer or Settler and then click the Trading Post button on the Command panel.
You can now leverage military units and other improvements offered by that nation. (Trading Posts you build on Trade Routes will offer different benefits. They generate experience points for your Home City and can create Stagecoaches and other improvements to enhance the flow of commerce across their routes.)
The Home City
Adding a persistent Home City is a significant difference in gameplay between Age of Empires III and other games in the Age of Empires franchise. Your Home City provides your colony with resources, establishes the improvements and units you can leverage, and gives you a level of control over your own destiny.
You grow your Home City over time through the acquisition of experience points, which you earn each time your civilization does one of the following:
‡ Discovers Treasure.
◆ Defeats enemy units (including Treasure guardians) or buildings.
Builds or trains units.
Achieves certain milestones (most Treasures, most kills, and so on) that garner postgame awards.
Completes objectives in the single-player Campaign.
As your experience points mount, your Home City level steadily advances. Higher-level Home Cities can provide more powerful shipments of units, resources, or improvements.
Your time spent in advancing the level of your Home City during the single-player Campaign will hone your skills for multiplayer games. By sticking with a civilization and learning the intricacies of its capabilities and limits, you'll be able to take this knowledge and experience with you online to compete with other Age of Empires III players.
Navigating the Colony Screen
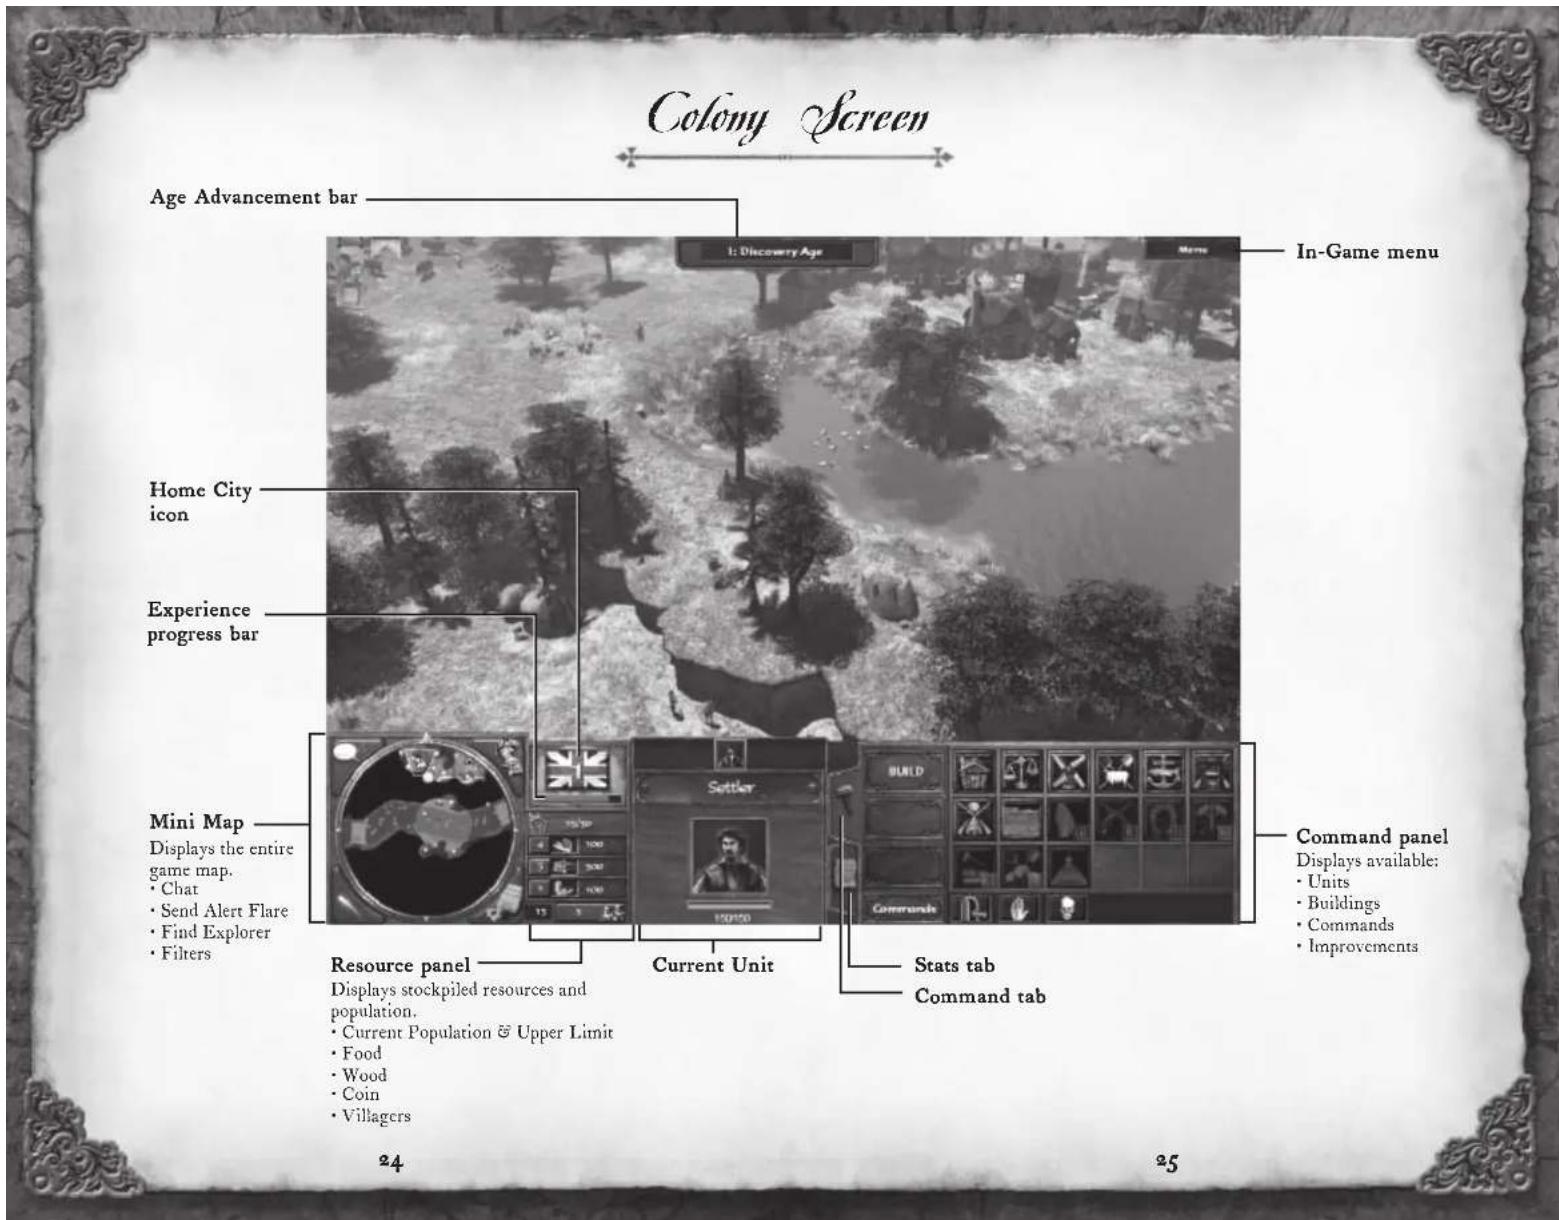
If you've already played a game from the Age of Empires series, you'll find the Colony screen familiar.
In-Game Menu
To pause the game and open the In-Game menu, click the Menu button (in the upper-right of the screen) or press Fro. You can select from the following menu items.
Player Options Fine-tune various in-game settings.
Resign Leave the current game.
Player Offer tribute and resources to allies. Summary
Save Preserve the current game state so you can reload it later.
Saved Game Start a previously saved game.
Restart Return to the beginning of the current game.
Tooltips
When you move your mouse pointer over different game units, a tooltip displays information about resource or unit statistics (such as name, hitpoints, cost, and so on). You can use tooltips to quickly find information about practically anything that appears on-screen.
Resource Panel
Shows current stockpiled resources, number of villagers, and population limit. This helps you ensure that you're not too low in one resource while spending too much effort gathering another. Unless you are stockpiling for a specific reason, such as advancing your Age, keeping your resources in relative balance is a good strategy.
Command Panel
Displays the available tasks, units, buildings, commands, and improvements for the currently selected object. For example, if you select a Settler, the Command panel will display buttons for buildings and improvements that your civilization's Settlers can generate.
Stats Tab
Displays statistical information about the currently selected unit or building. For example, if you select an Explorer, the Stats tab will show such information as name, hitpoints (total and remaining), and unit classification.
Age Advancement Bar
Displays the current Age and your civilization's flag.
Production Queue
Shows the units you have selected to train and their progress towards completion. Because units train over time, you'll find the queue particularly useful when your units are engaged in multiple activities that require quick action once they become ready.
Home City Icon
Toggles between the Colony screen and the Home City screen. You'll need to go back and forth between your colony and your Home City to manage improvements and to identify and transport resources.
Settlement Mini Map
Provides a high-level view of the territory surrounding your settlement and lets you quickly locate the following items.
Town Center
Treasures
Explorer
Native American settlements
Trading Post locations
Resources (Food, Wood, and Coin)
Fog of War limits
Use the Mini Map regularly during gameplay to identify the next resource to acquire, to jump to a new location, and to locate your Explorer.
The Mini Map also acts as a control panel for both navigation and communications.
To quickly move your view from the Colony screen to a specific location on the Mini Map, click that location on the Mini Map.
The Mini Map also includes buttons to filter its display, as well as buttons for communications (Send Flare and Chat). The communications buttons allow you to interact with other players during a multiplayer game--to share information, discuss strategy, or just ask for help.
Navigating the Home City Screen
To view the Home City screen, click the Home City icon on the Main menu.
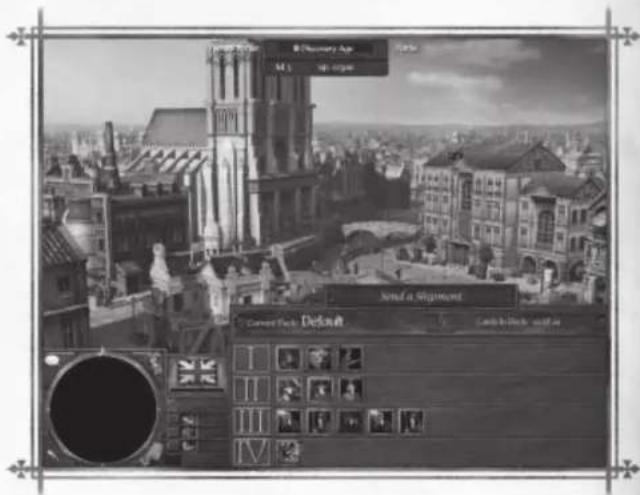
Home City Mini Map
Provides a high-level view of your settlement. The Mini Map works the same on the Home City screen as it does on the Colony screen; simply click anywhere on the Mini Map to go to that location.
Resource Panel
Displays your current stockpile of resources as they update. Check your available resources here as you choose from the units available for transfer from your Home City.
Shipment Panel
Displays the contents of your Deck.
Every Home City provides different improvements and resources (also known as Cards) from which you can choose. You manage these resources by creating a Deck of the Cards you want to use during that game.
The Shipment panel displays the contents of your Deck: the economic units, military units, and resources currently available for shipment back to your colony. Click the units and/or resources you want to select. If you lack sufficient resources or population, or you haven't yet reached the right Age, the game will indicate why the unit or resource cannot be shipped.
For more information about the Card and Deck system and how it works, see the "Home City" chapter on page 39.
Home City Icon
Toggles between the Home City screen and the Colony screen.
Ways to Play Age of Empires III
Age of Empires III gives you several different ways to play:
Single-Player Campaign
Single-Player Skirmish
Multiplayer Skirmish
Single-Player Campaign
By accepting the challenge of the single-player Campaign, you enter into a historical storyline that spans multiple continents and generations.
Follow the adventures of three generations of the Black family as they explore the New World, meet famous figures from history, and battle a mysterious international conspiracy.
With different missions crisscrossing the Americas, you'll face a series of challenges woven within a dramatic storyline. Varying levels of difficulty and choices in Home City upgrades make the Campaign an adventure you can enjoy time and again.
Single-Player Skirmish
When you don't feel the need to explore an entire continent, you can always test your skills against an area (or map) in the New World.
You can set the following characteristics of your skirmish:
Your civilization.
The number of computer opponents and their civilizations.
How the civilizations divide into teams.
The map on which you play.
The game rules (Supremacy or Deathmatch).
The starting Age.
The difficulty level.
The game speed.
Your player color.
Once you set up the Skirmish, click the Play button to start the battle.
Multiplayer Skirmish
You can also play against human and AI opponents over a local area network (LAN) or on Ensemble Studios Online (ESO). When playing online, you get access to the same online features you've come to love—taunt, flares, and chat—while still engaging in a wide-ranging, winner-take-all battle across two continents.
You can choose from a couple different formats for multiplayer, each of which offers different starting and winning conditions:
Supremacy, where every player starts with nothing and continues until final conquest or surrender.
Deathmatch, a fast-paced game where all players begin with a stockpile of resources.
Exploring the New World
The first thing you should do is search for sources of Food, Wood, and Coin. You can explore the map by moving your Settlers and Explorers into the black area.
Gathering Food is important, as you need Food to train (create) more Settlers.
Gathering Wood is important, as you need Wood to construct buildings (such as houses, barracks, and others).
To select a unit
Click the unit you want to select.
-or-
Drag a bounding outline around the unit (or units) you want to select. (This method also lets you select multiple units.)
You can tell a unit is selected by the circle around its base and the Health Bar indicator above its head.
To deselect a unit
Click anywhere else on the map terrain.
The selection indicators (Health Bar and circle) will no longer appear with the previously selected units.
To move a unit
Click the unit, and then right-click any location on the map or on the Mini Map (in the lower-left of the screen).
The unit will move to that location.
Assembling an Army
Combat plays a major role in Age of Empires III as multiple civilizations struggle to control the New World. You'll need to muster a military capable of defending your territory and taking the offensive as necessary.
Creating Military Units
Every civilization has slightly different military units and weapons, each with unique advantages and disadvantages.
Before you can create an army, your civilization must have advanced to the Colonial Age; only then can you start constructing military buildings, such as the Barracks and Stable. Each of these buildings creates (trains) different types of military units and weaponry.
As an example to get started, let's first construct a Barracks.
To build a Barracks
Click a Settler, click the Barracks button, and then click a location on the map.
After the Barracks is built, you can create infantry units there. The specific infantry units you can create depend on your civilization.
To create an infantry unit
Click the Barracks, and then click the button for the infantry unit you want to create.
After a few seconds, your infantry unit will appear next to your Barracks. As you advance through the Ages, you gain access to additional and upgraded infantry units with more capabilities.
Use the same process to create cavalry and other military units and improvements.
Balancing Strengths and Weaknesses
One key to success in Age of Empires III is learning the different strengths and weaknesses for each civilization and then choosing the appropriate strategies and countermeasures during gameplay.
All military units relate to one another using a built-in hierarchy based on hitpoints, range, and speed.
In general, long-range units are better than short-range, units with high hitpoints are better than those with lower hitpoints, and fast units are better than slow units.
Also, slow units are generally beaten by long-range units, which in turn are generally beaten by fast units. And fast units are generally beaten by units with high hitpoints (unless the fast units run away).
Deciding which units to build is crucial. You should learn the strengths and weaknesses of every unit in your civilization, pay attention to which units your opponent builds, and build your army to counter their strengths. Above all, try different unit strategies to see what works.
natural_image
Isometric illustration of a rustic wooden house with a gate and fence (no text or symbols)Understanding the Postgame Screens
After you finish your game session, you can view a series of postgame screens that compare your performance with that of your competition in the following areas.
| Awards | Factors the many different aspects of how you play (units lost, resources gathered, total experience points, and so on). |
| Resources | Shows how well you did in acquiring different kinds of resources. |
| Economy | Details how you spent your resources during gameplay. |
| Military | Shows how well you managed your military both offensively and defensively. |
| Experience | Details how you earned your experience points (e.g., by fighting or building). |
| Timeline | Provides a graphical overview of your performance in a variety of areas across the entire timeline of the game session. |
Use this information to pinpoint specific areas you can improve. By examining your performance against the competition, you can learn to adjust your strategy for gathering resources, advancing through the Ages, or handling your military.
To quit a game and view the postgame screens
- Click Resign on the In-Game menu, and then click Yes.
- Click the View Postgame button in the upper-right of the screen.
natural_image
Sketch of a historic stone castle with twin towers and a bridge, surrounded by trees and landscape (no text or symbols)
natural_image
Illustration of a historical warrior in 18th-century attire holding a rifle, framed by ornate border (no text or symbols)
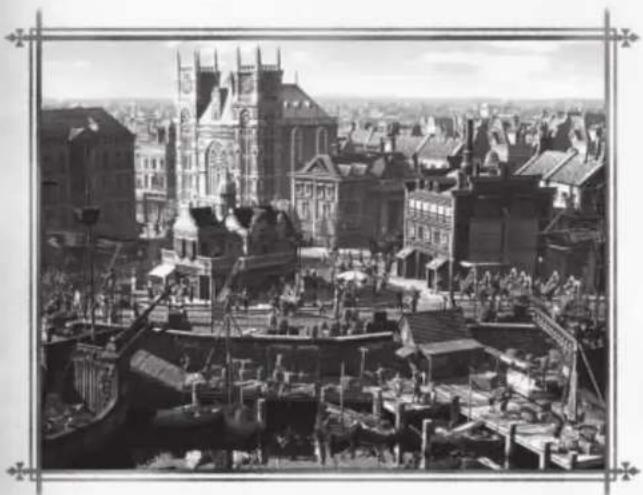
The addition of the Home City is probably the most significant new feature in Age of Empires III.
natural_image
Historic black-and-white photograph of a European city harbor with historic buildings and boats, no visible text or signageYour Home City is a critical element of your overall gameplay and strategy. The more you develop your Home City, the greater the rewards—improved access to resources, better equipped units, and more advanced improvements.
Over time, every player's Home City evolves into something uniquely their own. Players using the same civilization can have entirely different capabilities. The choices you make over time define the unique character of your Home City.
What Is a Home City?
Every civilization has its own Home City, which acts as a unique symbol for that civilization—it looks different from other Home Cities and it offers different improvements. As such, the Home City doesn't represent an actual real-world city. In fact, you can choose any name you want for your Home City.
As each game progresses, you'll return to your Home City to retrieve a range of resources. The way you use your Home City's Inventory and Deck system will guide how your civilization advances.
Using Cards and Decks
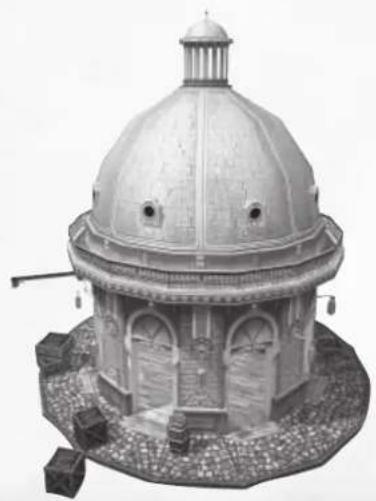
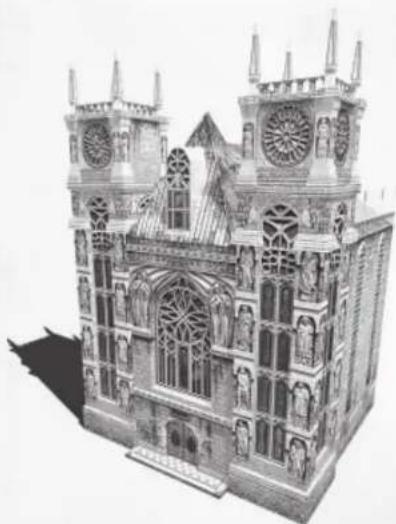
Every Home City has a unique assortment of improvements and resources (also known as Cards) from which you can choose. The higher your Home City level, the more Cards are available for your use. There are five categories of Cards, each represented by a building in the Home City:
Trading Company—Economic units and resources.
Military Academy—Soldiers and military upgrades.
Cathedral—Building improvements.
Manufacturing Plant—Advanced economic upgrades.
Harbor—Naval upgrades and mercenaries.
Not all Cards are available at the same time, and many require that your Home City attain a specific level before they become available to you. Still others require that you already have certain Cards available (for example, you need Card B before you can get Card C).
You store available Cards in your Inventory. Each civilization's Inventory can hold up to 120 Cards, many of which you unlock as your Home City level increases, but you can only play a maximum of 20 cards per game.
You can gather a selection of Cards into a Deck both before and after a game, but not during a game. This Deck then determines which improvements and resources get shipped from the Home City to your Town Center.
A Deck can contain up to 20 Cards. Your Home City comes with a default Deck of 15 Cards. You can modify this Deck or create multiple new Decks, each configured for a specific style of play. For instance, you could create a Deck primarily of military upgrade Cards for a combative style, or you could create a Deck weighted for an economic style. Once a game starts, you can choose only one Deck to use and you cannot switch Decks during the game.
As you play more games and your Home City grows in capabilities, your Decks continue to advance and change. Creating and managing multiple Decks gives you tremendous flexibility to test new strategies and explore how best to advance your Home City.
Managing Your Home City
Use the Home City Options menu to create, upgrade, and customize your Home City and Card Deck. You can create and use many different Home Cities and Decks.
When starting a new game session, you choose which Home City and Deck to use. (In the single-player Campaign, you are assigned a specific Home City in each Act.)
To access the Home City Options menu, you must first select one of the four styles of play from the game's Main menu:
Skirmish
Campaign
LAN
ESO
Selecting a Home City
When you choose Manage a Home City on the Home City Options menu, a dialog box gives you the following options:
View an existing Home City.
◆ Create a new Home City.
Delete a Home City.
Upgrading Your Home City Inventory
The Home City Options menu also lets you add new Cards to your Home City Inventory. The Choose New Cards window lists the five Card categories along with the resources and improvements available for each category.
The number of available upgrade Cards appears in the upper-left corner of the Card Tree panel in the Choose New Cards window. This number increases or decreases as you use available Cards or unlock new Cards.
To add Cards to your Inventory, click the Cards you want from the various Card categories. A green check mark next to the Card indicates that it was added to your Inventory. To remove it, simply click the Card again. The first few cards you unlock appear automatically in your Deck--you don't have to manually add them.
natural_image
Architectural model of a domed building with arched windows and a central dome (no text or symbols visible)Using the Deck Builder
The Build a Deck window shows the improvements and resources that you can use in creating Decks for your civilization. From this window, you can add or delete Cards in your Deck. You can also create multiple Decks. This allows you to design Decks that support specific styles of play, such as economic or military.
How you choose specific Cards requires planning. One improvement might help in your current game session, whereas another could provide greater strategic advantages in a future game session.
The Inventory panel shows all the Cards you have available for your Deck. Click a Card to place it in the currently active Deck.
You start your first game with 15 Cards already in your Inventory. These Cards are also added automatically to your starting Deck. As you spend more time in the game and gain experience points, additional improvements that you can use to update an existing Deck or to create a new Deck become available. You cannot, however, update a Deck while it's being used in a game session.
No civilization can amass all the possible improvements—some have better soldiers, whereas others have better cavalry, ships, or economies. You must play each civilization differently to overcome its weaknesses and exploit its strengths.
Learning your civilization and all its available units, improvements, and upgrades is essential to mastering Decks in single-player and multiplayer games.
Customizing Your Home City
In the Customize window, you can create a unique and distinctive Home City. For example, you can change the appearance of buildings such as the Manufacturing Plant or Trading Company.
Much like unlocking upgrades, every time your Home City gains a level, new customizations become available. These customizations are purely visual and do not serve a strategic purpose or form part of your Deck.
natural_image
Architectural sketch of a Gothic cathedral with twin towers and arched windows (no text or symbols)46
Working with Your Home City
The Shipment panel, located in the lower-right of the Home City screen, displays the resources and units available to your colony from your Home City.
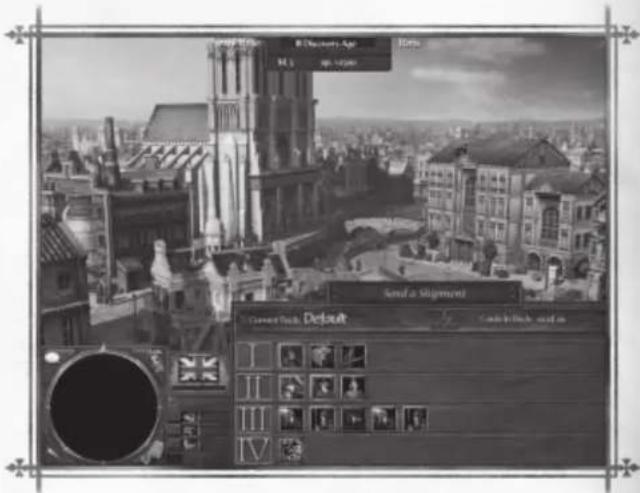
The units and resources available for shipment correspond to the Cards in the Deck that you are using in the current game session.
Whenever you acquire sufficient experience points, you can receive military and economic units and resources from your Home City—just select the Card you want and it will be shipped from the Home City.
47
The choices that you make depend on such factors as:
Current Your colony must have sufficient
Population population available for the units and
Limit resources chosen.
Resources Mercenary units require the expenditure
Required of Coin; all other Shipments are free once you acquire enough experience points.
Experience Before you can select any units or
Points resources, you must build up enough experience points.
Shipping Economic Units and Resources
You can choose from a wide variety of economic units, resources, and improvements, including Settlers, Food Crates, and animals. Each unit delivers a unique economic asset to your colony. For example, if you ship a Furrier, your hunting rates will improve once that Shipment arrives. Over time, you'll learn how to strategically choose and build up your units and resources.
To select an economic unit or resource
- On the Colony screen, click the Home City icon to display the Home City screen.
- Place your pointer over an available unit or resource. (A tooltip appears describing the unit's or resource's name, cost, and benefits and whether it's available.)
- Click the units and resources you want to add to your Shipment.
Your Shipment of units and resources arrives at your colony shortly after you complete these steps.
Shipping Military Units
You can choose from a large number of military units, including ships, cavalry, infantry, and even foreign mercenaries. The specific military units available to your colony is determined by your choice of civilization and by the Cards you chose for your Deck.
To select a military unit for Shipment
- On the Colony screen, click the Home City icon to display the Home City screen.
- Place your pointer over an available military unit.
- Click the military units you want to add to your Shipment.
Your Shipment of military units arrives at your colony shortly.
Increasing the Level of Your Home City
More improvements that you can add to your Inventory are unlocked as your Home City advances in level. Your Home City level increases with experience points that you earn by:
Discovering Treasure.
◆ Defeating enemy units or buildings.
Building or training units.
Achieving milestones that garner postgame awards.
Completing objectives in the single-player Campaign.
The more experience points you acquire, the faster your Home City level increases.
Multiplayer and Your Home City
As your Home City level advances, it becomes a resource that you can use in multiplayer games. The improvements, units, and even the customizations that you've unlocked carry over to multiplayer mode.
Multiplayer mode allows you to have multiple Decks and Home Cities tied to your ESO account, providing the opportunity to test your skills at playing with a range of civilizations and upgrade strategies.
There isn't a direct relation between your multiplayer rating and your Home City level. A Home City with a higher level simply offers more improvement options. Skill and strategy are much more critical in determining who wins, especially in game sessions between seasoned players.
Multiplayer hosts can choose to restrict game sessions to certain Home City levels. You can also choose to play with a less powerful Deck. This is a useful option if you want to play with a friend who has a lower Home City level and you both want a more competitive game.
Your Home City's Strategic Value
The new Home City in Age of Empires III offers you many more ways to adjust your strategies for managing an economy and a military. Now more than ever, you must master the basic fundamentals of gameplay, learn the strengths and weaknesses of your civilization, and make strategic decisions across all your game sessions.
Single-Player
COPFECTSLETT
The single-player Campaign weaves an imaginative tale of action and adventure set in early America.
You'll follow the story of three generations of the Black family--fictional adventurers with a passion for the New World and all its opportunity. You'll join them as they take part in wars, revolutions, and conquests.
Through their adventures, you'll uncover secret stories of revenge, treachery, and a malignant conspiracy that spans the Americas.
natural_image
Pencil sketch of a male knight in a period costumes holding a sword (no text or symbols)52
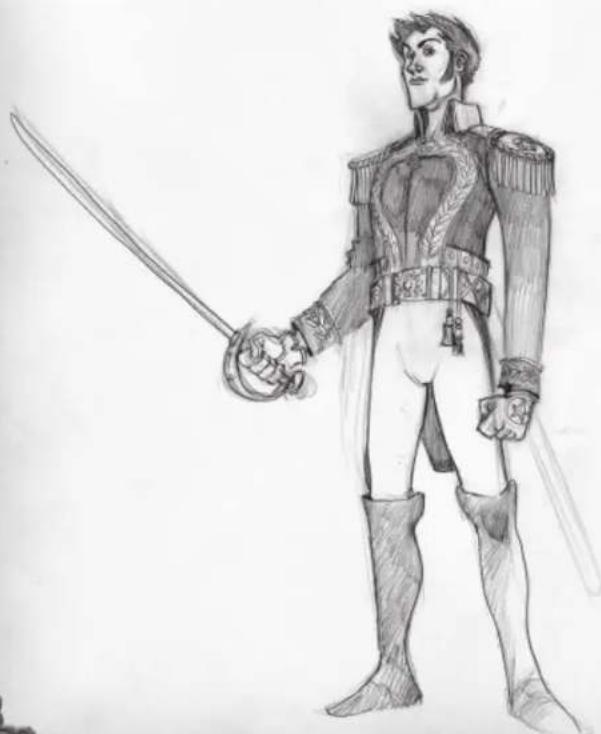
Morgan Black
Morgan Black is a Scotsman and a mid-level commander in the Knights of St. John. The son of a village smith, he was driven at an early age by a burning religious fervor and joined the Knights of St. John. Morgan quickly gained favor as a brutal warrior who carried out his duties swiftly and silently.
Unmarried and with no family ties to bind him, he dreams of restoring the Knights of St. John to their former glory. Although the Order's time has passed, Morgan remains a devoted knight.
natural_image
Black-and-white statue of a warrior in armor holding a sword and shield (no text or symbols visible)53
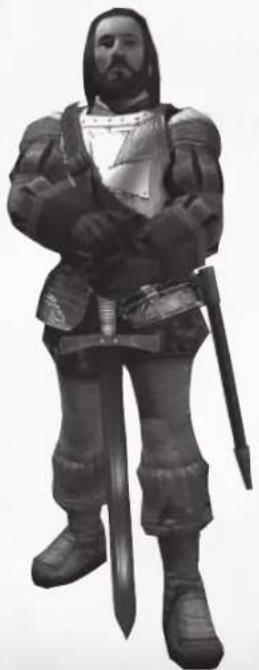
Elisabet Ramsey
The daughter of an English nobleman, Elisabet Ramsey fled her home at an early age—unwilling to trade her freedom for an arranged marriage. The Americas offered her the chance to steer her own course.
For several years, Elisabet sailed the Caribbean alongside famous English and Dutch privateers. Eventually, she rose to command her own pirate fleet, which she captains from the warship Paris Burning.

natural_image
Black-and-white illustration of a female character in historical attire holding a rifle (no text or symbols visible)54
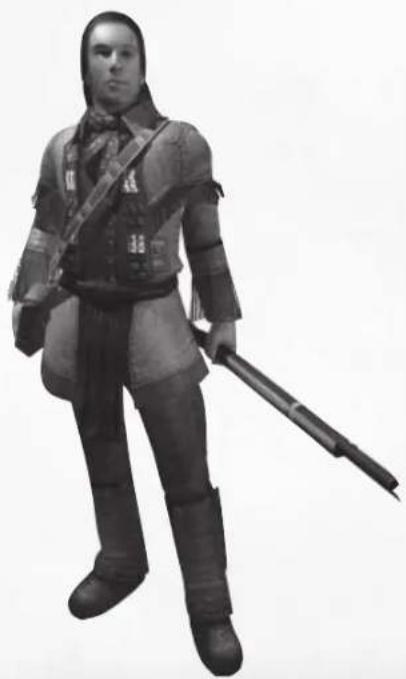
John Black
John Black, grandson of Morgan, is a fierce frontiersman and mercenary with a reputation as a cold-blooded fighter. Renowned for his chilling calm in battle, you never want to face John Black's musket and blade in combat. Even in the worst of circumstances, nothing seems to faze him—except a desire for vengeance that can erupt to overtake him and everyone in his path.
natural_image
Black-and-white illustration of a person in a tactical outfit holding a rifle (no text or symbols visible)55
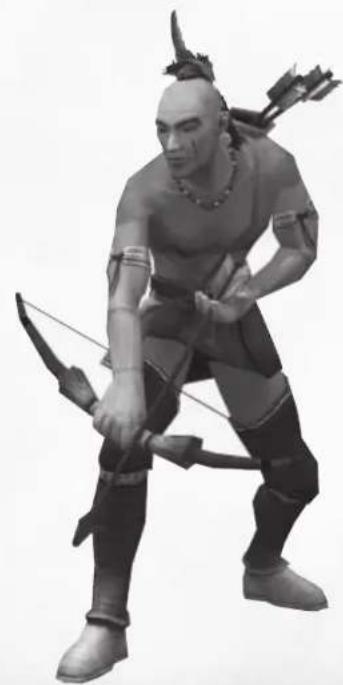
Kamyenke
Kanyenke is a proud Iroquois warrior. Smart, savvy, and strong, he is a master at using a bow for ranged attacks and delivers a lethal, lightning-fast swipe with his tomahawk in close combat. As John Black's faithful friend and ally, Kanyenke has fought fierce battles and eluded dangers alongside Black to share the spoils from many victories.
natural_image
3D-rendered character holding a bow and arrow, no text or symbols visible56
Amelia Black
Amelia Black, granddaughter of John, is the last living member of the Black family. A successful industrialist and owner of the Falcon Company, Amelia is an intense competitor. She embodies the forceful, fiery spirit of her ancestors.
A gifted sharpshooter in combat, Amelia's gun delivers a deadly sting. Even the bravest foe trembles when her piercing gaze places him in her crosshairs.

natural_image
Black-and-white illustration of a person wearing a wide-brimmed hat, overalls, and boots (no text or symbols)57
Pierre Beaumont
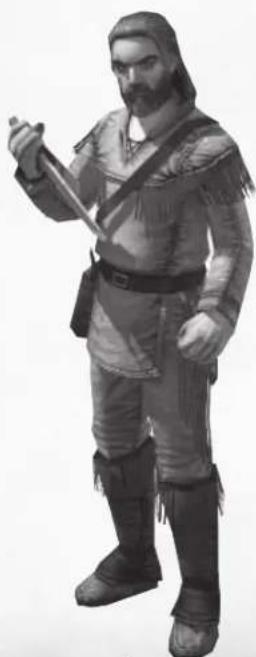
With his matted hair and unkempt beard, Pierre Beaumont looks like he's never left the backcountry. Far from it—Beaumont once moved among New Orleans' sophisticated set. World-weary, he abandoned that life for the rugged existence of a hunter and trapper.
When weighing whether Beaumont's the guy to get you out of a scrape, don't underestimate him. He's clever, driven, and skilled in the use of many weapons—with a particular preference for a pair of well-worn long knives.
natural_image
Illustration of a historical figure in armor holding a sword (no text or symbols visible)58
Starting & Saving Campaign Scenarios
To start the single-player Campaign
- On the Main menu, click Single Player and then click Campaign.
- In the Campaign window, select an available scenario, select a Difficulty Level, and then click Play.
Completing a scenario unlocks the next scenario. You can also go back and play any previously unlocked scenarios.
You can pause the game to save the current scenario at any point during gameplay, after which you can resume the game.
To save a Campaign scenario
- Click the Menu button in the upper-right of the screen to display the In-Game menu, and then click Save.
- In the Save File dialog box, type a name for the scenario in the Filename box, and then click Save.
To restart a previously saved scenario
- On the In-Game menu, click Saved Game.
- In the Open File dialog box, select the scenario you want to play from the list of saved scenarios, and then click Open. (The scenario will restart from the point that it was saved.)
natural_image
Black-and-white sketch of a warrior in armor holding a sword, framed by ornate borders (no text or symbols)Multiplayer
In multiplayer games, you and your friends can connect across a network or the Internet to play against each other or to team up against nonplayer characters (NPCs). Age of Empires III supports several unique types of multiplayer games through Ensemble Studios Online (ESO).
Ensemble Studios has significantly enhanced its ESO service for Age of Empires III so that you can more easily join the throng of multiplayer enthusiasts. With ESO, you can hone your game skills by playing fans worldwide.
Making the Multiplayer Connection
To join a multiplayer game, click Multiplayer on the Main menu, and then choose one of the following connections:
Ensemble Studios Online (ESO)
Local Area Network (LAN)
62
ESO
To play using ESO, you must first create an ESO account by completing the ESO registration. Next, type your nickname and associated password at the ESO logon screen to open the ESO Home.
On your first visit to ESO, you're assigned a default player level. This level adjusts over time based on how well you play the game—as your skills improve, your level advances. You can use your player level to find players with a similar level or to gauge another player's skills.
Chat with your friends over ESO, and create teams for competitions that can span the globe.
LAN
You can also play a multiplayer game over a LAN. This connection type is generally recommended for advanced players who are comfortable with LAN technologies.
63
Multiplayer Game Types
In multiplayer, you can play two types of games that require quite different skills and strategies to win:
Supremacy Players begin their game without any resources and must achieve victory by conquest or surrender.
Deathmatch Players begin their game with a stockpile of resources and move through the game at a high speed.
natural_image
Illustration of a historical cannon with two cannons and a warrior figure (no text or symbols)64
The Home City & Multiplayer
Central to the multiplayer experience in Age of Empires III is the new Home City, which puts a player's economic and military strategy skills to the test.
Before the inclusion of the Home City, a player with a weaker economy could win simply by building a massive military and overwhelming other players. The Home City concept requires that players understand their civilization's strengths and weaknesses, develop strategies, and execute on those strategies—good or bad—during gameplay.
Home City Levels Versus Player Level
In multiplayer mode, you can manage multiple Home Cities, just like in a single-player Campaign, but they are tied to your ESO account. Each Home City in multiplayer also has its own Home City level, as in single player, but note that your Home City level doesn't necessarily reflect your skills as a player.
Home City Determines the resources and Level improvements available to you during a game.
Player Level Represents how well you currently play the game.
65
A player with a higher-level Home City does have some advantages over players with lower-level Home Cities. Mainly, Home Cities with a high level offer more options and greater choices. Nevertheless, players who do not take advantage of these strengths, develop solid strategies, and execute on those strategies will quickly lose their edge.
A player with a higher-level Home City can play a more evenly matched game against a player with a lower-level Home City simply by playing with a less powerful Deck, such as the initial default Deck.
Even with the addition of Home City levels, skill will always play the decisive role in determining who wins, especially among the more advanced gamers. That said, when choosing opponents, you should always consider another player's Home City level and Player level. Only during gameplay, however, will you discover whether or not you chose a worthy opponent.
Economy
Three principal resources—Food, Wood, and Coin—form the foundation of your economy.
Villagers farm for Food, forage for Wood, and mine for Coin.
Explorers gather Treasure that contains Food, Wood, or Coin. Oftentimes, Explorers must battle a Treasure guardian before claiming the Treasure.
Finding & Gathering Resources
As your villagers and Explorers explore the landscape, you'll discover sources of Food (such as sheep, deer, and fish), Wood (trees), and Coin (mines).
Stockpiled resources of Food, Wood, and Coin help you pay for improvements that make your civilization more powerful.
Tracking Your Current Resources
The Resource panel, at the lower-left of your screen, monitors the real-time values and levels of your Food, Wood, and Coin stockpiles. It also tracks your village's real-time population against its population limit.
Using Your Explorer
An Explorer is a unique unit with specialized capabilities:
Sharpshooter Your Explorer can pick off Treasure guardians with a single shot.
Trading Posts An Explorer can construct Trading Posts on Trade Routes to boost your economy.
Immortal Your Explorer can be hit and wounded but never dies.
Click the Find Explorer icon on the Mini Map to locate your Explorer.
Use your Explorer to reveal the uncharted areas of your map and seek out:
Treasure.
◆ Enemy or allied-player encampments.
Key territorial locations, such as mines.
Sites for new Town Centers.
By keeping your Explorer and military units together and forming Explorer parties, they can back each other up when taking out a Treasure guardian or taking on an enemy scouting party.
Determining Where to Place Your Town Center
Your first Town Center is placed automatically at a site that's near resources. If you add another Town Center later, you choose that site yourself. Nomad mode—the exception to this—requires players to choose all their Town Center sites.
When placing your Town Center, use your Explorer and soldiers, also called an Explorer party, to search out the most strategic location.
There are several factors to consider when choosing a site for your Town Center:
Are resources readily accessible? Look for access to animals and fishing for Food, timber for Wood, and mines for Coin.
Can the site be defended? Look for natural defenses, including rocky outcroppings or shoreline.
Can you develop alliances and conduct trade? Look for nearby settlements and places for Trading Posts.
To place a Town Center
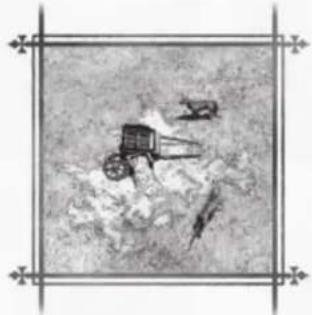
- Click your Covered Wagon, which contains all the raw materials needed to set up your Town Center.
- Place your pointer on the site for your Town Center, and then right-click the location.
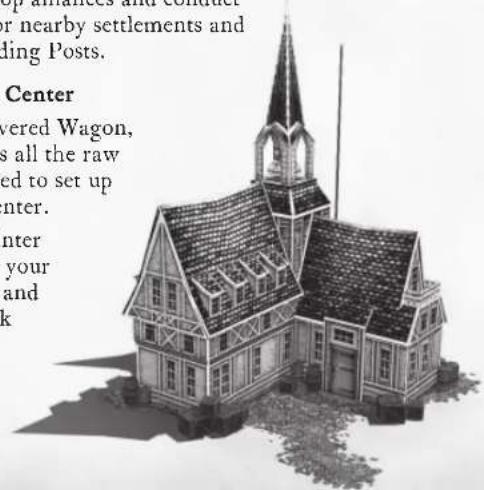
A Covered Wagon will travel to your site, build your Town Center, unload your villagers and resources, and then disappear. The villagers will immediately stockpile your Food, Wood, and Coin resources.
Exploring a Map
When you land in a new territory, most of the map is hidden. Your civilian units (villagers, soldiers, and Explorers) must venture into the unknown territory to reveal what's hidden beneath the map's blacked-out areas. You may find units, resources, or be surprised by enemy encampments.
Designed for exploring and Treasure gathering, Explorers excel at uncovering resources and discovering enemies. By using your Explorer in this way, you can expand your civilization and gain power. But beware—Explorers are vulnerable to your territory's hidden dangers. Bears, cougars, wolves, and enemy soldiers can damage your Explorer.
To explore hidden areas of the map using your Explorer
Select your Explorer or an Explorer party, and then right-click the area to explore on your map or Mini Map.
Fog of War
Whenever your Explorer party departs an area, a semi-transparent fog—the Fog of War—creeps in, obscuring everything in its path. The fog remains until your unit returns to that area on your map.
For example, if your party discovers an enemy building, the Fog of War descends over the building as you depart to conceal all real-time activity at the site. When your unit returns, the fog lifts and you may find all sorts of changes to the site—the building could be more heavily fortified or even destroyed.
Gathering Treasure
While scouting territory, your Explorer can gather Treasure to increase your stockpiles of Food, Wood, and Coin.
Gathering Treasure is tricky because it may be guarded. When it's guarded—typically by a powerful animal or vicious outlaws—your Explorer must defeat the Treasure guardian before collecting the Treasure.
natural_image
Black-and-white illustration of a military vehicle with two aircraft in the background, framed by decorative borders (no text or symbols)To gather unguarded Treasure
Click your Explorer, and then right-click the Treasure.
Your Explorer gathers the Treasure and adds it to your stockpiles.
To gather guarded Treasure
- Select an Explorer and soldiers to create an Explorer party. (How big you make your Explorer party depends on how heavily the Treasure is guarded.)
- Right-click the Treasure guardian to begin the battle.
- After your Explorer party defeats the Treasure guardian, right-click the Treasure.
Your Explorer gathers the Treasure and adds it to your stockpiles.
Villagers
Villagers are vital to your civilization. Their work forms the backbone of your economy. Without them, you would have no economy and your civilization would collapse.
Villagers are superior gatherers and stockpilers of Food, Wood, and Coin. The more villagers you have gathering resources, the faster your stockpiles grow and, in turn, the faster your civilization grows in wealth and power.
Creating Villagers
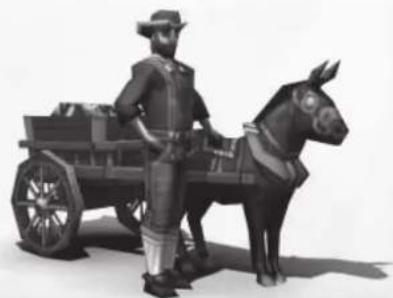
Creating villagers requires an investment that differs for each civilization. For instance, some civilizations create one villager at a time, requiring a time investment, whereas others create multiple villagers at once but for a cost, requiring a resource investment.
To create a villager

Click your Town Center, and then click the Create Villager button in the Command panel.
Your newly created villager or villagers will appear near your Town Center. You should immediately put them to work gathering resources.
natural_image
Illustration of a historical figure standing beside a horse-drawn cart (no text or symbols)74
Keeping Your Villagers Busy
Villagers add to your experience points and enhance your economy only when they're working—gathering Food, chopping Wood, mining Coin, constructing buildings, and so on. When idle, villagers contribute nothing to your civilization. It's best to keep them adding to your stockpiles by checking in on them often.
Gathering Food and Wood
Villagers can gather Food and Wood at any time. To find out if an animal (Food) or tree (Wood) is a resource that can be gathered, simply place your pointer on it and, if it is a resource, a tooltip appears identifying it.
You can gather the Food or Wood by selecting a villager, and then right-clicking the animal or tree. The villager gathers the resource and adds it to your stockpile.
As you add resources to your stockpiles, they increase in value. Conversely, as you use your stockpiles or are unable to add to them, they decrease. For instance, if you gather all the Wood from your forest, you can no longer stockpile it, and your stockpile values decrease. This makes it important to strategically manage your resources throughout the game.
Gathering Coin
You must find a silver or gold mine before gathering Coin.
When you find a mine, select a villager (or villagers) and right-click the mine to gather the Coin.
Constructing Buildings
A Town Center without buildings doesn't do much for your economy. That said, you can't construct a building without using resources—usually Wood, Coin, or a combination of the two. So, you must first build your stockpiles of Wood and Coin before you can construct any buildings.
Along with Houses for your villagers, your Town Center can have Mills to stockpile Food, Stables to train cavalry, Markets to conduct trade, and other structures that can help you advance your civilization.
As you advance your civilization through the Ages and as your Home City increases in level, the types and number of buildings available to you also increases.
natural_image
Grayscale image of a small animal-like object with textured surface, framed by decorative borders (no text or symbols)To construct a building
-
Select a unit to construct the building you want. (For example, select a villager if you want to build a House.)
-
In the Command panel, click the building type that you want to construct.
-
Place your pointer where you want your building on the map and click. (Note that if the building turns red when you try to place it, then it cannot be built on that terrain and you should try another location.)
Increasing Your Population
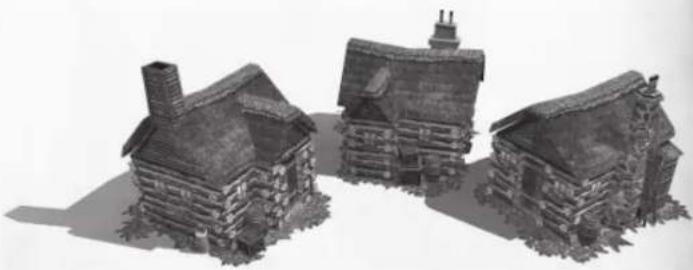
Each civilization has a population limit that applies to soldiers, villagers, and other such units. Before adding any new units and increasing your population, you must build additional Houses to support that increase.
natural_image
3D rendering of three rustic wooden houses with visible grain and shadows (no text or symbols)Protecting Your Villagers from Attack
Attacking villagers is a highly effective way to impede the gathering of Food, Wood, and Coin, which can devastate an economy, so it's important you protect your villagers when they come under enemy attack. One of the best ways to do this is by garrisoning them in your Town Center.
To garrison specific villagers
- Select the villager or villagers you want to garrison.
- Click the Garrison button at the lower-right of the screen.
- Click your Town Center.
The selected villagers will disappear into your Town Center.
To put garrisoned villagers back to work
- Click the Town Center.
- Click the Garrison button at the lower-right side of the screen.
The garrisoned villagers emerge from your Town Center and resume gathering Food, Wood, and Coin.
To garrison all your villagers at one time, click the Town Bell button. Click it again to have all your villagers leave the Town Center.
Upgrading Your Civilization's Units
You can use upgrades to gather Food faster, add hitpoints, increase the rate of trade, and so forth. Each upgrade, however, has its price—typically, Food, Wood, Coin, or a combination of resources. The Command panel displays the upgrades available to you at any given time.
While most units have upgrades, the upgrades available to you depend on both your unit and your civilization.
To upgrade a unit
- Select the building associated with the unit you want to upgrade. The Command panel will display the upgrades currently available to that unit.
- Make sure you have enough Food, Wood, and Coin resources for the upgrade.
- Click the Upgrade button for that unit in the Command panel.
Advancing Through the Ages
Advancing to the next Age lets you build different buildings, create more powerful military units, and research more valuable technologies.
The five Ages are the:
Discovery Age
Colonial Age
Fortress Age
Industrial Age
Imperial Age
As you gain experience points and stockpile resources, you earn opportunities to advance your civilization through all five of the Ages. How well you use these opportunities determines how quickly and successfully you advance your civilization.
Forming Alliances with Native Americans
You form alliances with Native Americans by building Trading Posts, which helps you earn experience points and provides other useful benefits.
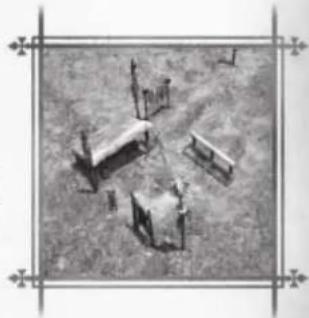
Explorers and villagers can build Trading Posts on Trading Post sites near Native American settlements and along Trade Routes.
To build a Trading Post
- Locate a Trading Post site.
- Select a unit that can build a Trading Post (for example, your Explorer).
- In the Command panel, click the Trading Post button.
-
Move your pointer to drag the Trading Post building to your site.
-
Click that location to place the Trading Post.
The unit you selected builds the Trading Post at the chosen location.
natural_image
Aerial view of a construction site with workers and equipment (no visible text or symbols)Creating Native American Warriors for Battle
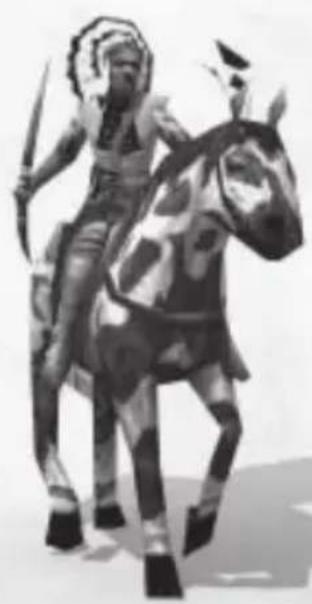
Trading Posts built next to a Native American settlement are able to train Native American warriors for battle. (Your population limit does not apply to Native American warriors.)
The Native American warriors available to you depends on a variety of factors, including the map and the Age that you're in. Each warrior you train will cost a certain amount of resources, typically Food, Wood, or a combination of the two.
To create a Native American warrior

Click your Trading Post, and then click the appropriate Warrior button on the Command panel.
natural_image
Illustration of a warrior on horseback, no text or symbols present
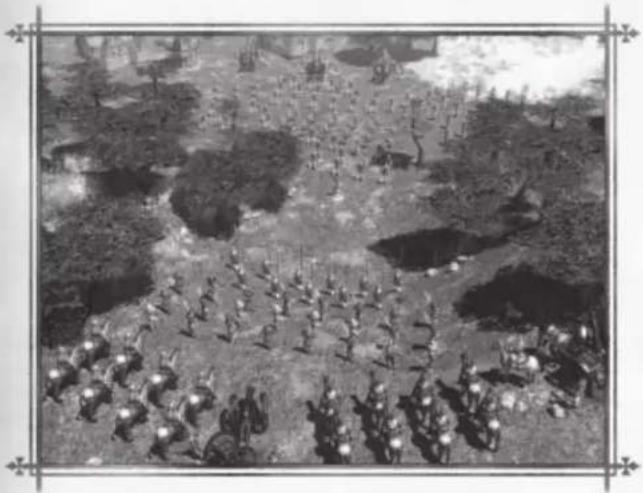
Executing on military strategy and leveraging your civilization's inherent strengths in combat is critical to your success. This chapter discusses how to build your military to achieve its maximum effectiveness.
natural_image
Black-and-white aerial view of a battlefield scene with soldiers, cavalry, and artillery pieces (no visible text or symbols)84
Creating Military Units
There are three basic types of military units in Age of Empires III:
Infantry
Cavalry
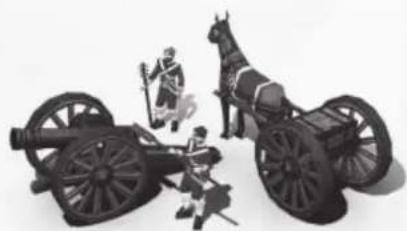
Artillery
Although some military units can only come from your Home City, most are created from buildings that are located in your colony. You cannot build any military units until you've built the necessary buildings:
The Barracks creates infantry units.
The Stable creates cavalry units.
The Artillery Foundry creates artillery units.
85
To create a military unit
- Click the appropriate building for the type of unit you want to create.
- In the Command panel, click the Create Unit button for that unit.
- Repeat Step 2 to queue up and create additional units, or hold down the SHIFT key and left-click to queue up to five military units at one time.
The military unit (or units) you created will appear near its building.
You can train different units at the same building at the same time. Units are created in the order in which you queued them. The appropriate resources are deducted from your stockpiles when you add the unit to the queue.
Choosing Where New Units Gather
All buildings that create units also let you choose where the new units gather. As an example, if you're creating villagers at your Town Center, you can set the silver mine as a Gather Point, so that as your villagers are created they automatically gather Coin from the mine.
Many buildings have economic and military Gather Points, allowing you to have different units go to different places.
To set a Gather Point
- Click the building you want to create units for.
- On the lower-right of the screen, click the appropriate Set Gather Point icon (economy unit or military unit).
- Move the pointer to the location where you want the units to gather, and then click that location to set the Gather Point Flag.
Units generated from that building will now gather at the location you specified. Setting a new Gather Point moves the Gather Point from its original location to a new location.
Reconnaissance
It's important that you continue to explore your map during gameplay. Until you send your Explorer or other units into the hidden areas, large parts of your map will remain unexplored.
Enemy buildings, walls, and units will remain hidden until you explore your map and discover the areas where they're located. Only by uncovering your enemy's locations and military unit choices can you devise an effective counter-strategy.
After you've explored an area, its buildings and units will remain visible. Ongoing changes to those buildings and units, however, will not be visible to you, unless they are within sight of a unit or building from your civilization.
Moving Units
When you select two or more units and order them to move or attack, they automatically maneuver into positions to create a formation.
Fast units, like cavalry, are at the front of the formation. Ranged units are placed behind them. And weaker units get placed at the rear—typically behind the ranged units.
The entire formation moves at the speed of the slowest unit.
When you order a group to attack, it falls into a line formation. The units then break formation to attack.
For example, if you order a group of Pikemen, Musketeers, and Falconets to attack, the Musketeers and Falconets will start the attack from a distance as the Pikemen close in on the target.
To move a unit
Click the unit (or select a group of units), and then right-click the location.
How quickly your units move depends on their speed and the types of units that make up the formation.
Grouping Military Units
Grouping units lets you command several military units at the same time.
To select multiple units
Drag your pointer around the military units you want to group.
-or-
Hold down the CTRL key, and then click the individual units you want to group.
To group all visible units of the same type
Double-click a unit. (For example, double-click a Musketeer to select all visible Musketeers.)
To create a group of units
- Select all the units you want to group.
- Hold down the CTRL key and press the number you want to assign to the group. For example, to assign the number 2 to the group, press CTRL+2.
A Group Banner will appear at the top of the screen for each group you create. Once you've assigned a number to a group, you can just click the Banner or press that number key to select the group. For example, to select group 2, press the 2 key.
To add units to a group
- Select the unit or units you want to add to the group.
- Hold down the SHIFT key, and then press the number key of the group you want the units added to.
Moving a Unit Using Waypoints
You can move a unit, such as a Musketeer or Falconet, along a precise course using Waypoints.
To move a unit using Waypoints
- Click the unit (or units) you want to move.
-
Hold down the SHIFT key, and then right-click the terrain to set a Waypoint. (Repeat this step until all your Waypoints are set, mapping the course you want your unit to take.)
-
At the last Waypoint, release the SHIFT key, and then right-click. Your unit now moves along the Waypoints.
natural_image
Black-and-white photo of a person standing on a pole in a wooded area, framed by decorative borders (no visible text or symbols)Transporting Units Across Water
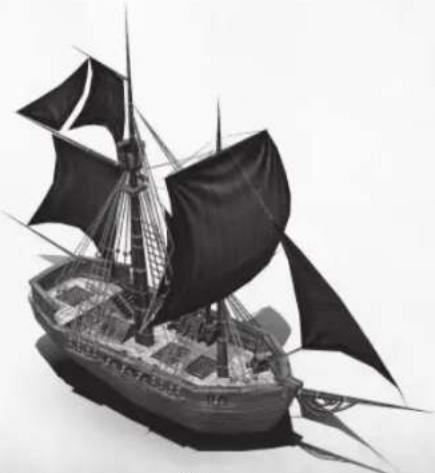
When you need to cross deep bodies of water, you can transport your units by loading them onto a ship, such as a Caravel.
You can load any unit onto a ship. If you're in a multiplayer game, allies can transport each other's units. Each ship carries a limited number of units.
To load a ship
Select the unit (or units), and then right-click the ship. Your units board that ship.
To unload a ship
- Click the ship you previously loaded. The units the ship contains appear as icons in the lower-right of the screen.
- Click the unit icons one at a time to unload your units onto shore in a specific order, or simply click the Eject button to unload them all at once.
natural_image
Black-and-white illustration of a historical sailing ship with multiple masts and sails (no text or symbols)Engaging in Combat
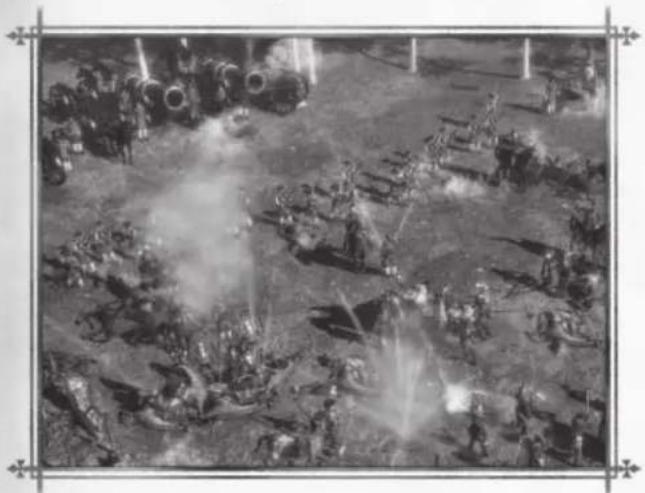
Even though you can get satisfaction from building Mills, gathering Coin, and chopping Wood, there's nothing like proving your mettle in combat. After all, why include muskets and cannon if you don't use them?
natural_image
Black-and-white aerial photo of a battlefield scene with soldiers, tanks, and explosions (no visible text or symbols)Age of Empires III was designed to provide you with many different choices in how you develop and use your military. The Inventory and Deck system offers multiple paths through the different units and resources available.
We strongly advise you to try many different configurations until you find those that work best with your particular strategies, interests, and individual style of play.
Building Your Military
When choosing the specific units that define your military, it's important to understand and weigh several factors:

Your civilization's strengths and weaknesses relative to other civilizations.

Your preferred strategy against each civilization.
For example, the British are economically quite strong in the early game, not gaining their full military power until later on. In contrast, even though the Spanish military ramps up quickly, they don't achieve their full economic potential until late in the game.
It's also important to keep tabs on your opponents through scouting and reconnaissance. Check to see how their military evolves. Choose units that can effectively counter their units. For example, if you discover an enemy army with a superior cavalry, counter with a strong Musketeer force.
Learn and leverage the balance of forces that underlie all military unit relationships in Age of Empires III. By creating a fighting force that can balance effectively against your opponents, you increase your odds of success.
Ordering an Attack
After building up your forces and deciding on a strategy, it's time to make a move. Your opponent stands before you. Charge!
Your military units, warships, and towers automatically attack enemy units within their line of sight, unless you order them to attack a different unit.
To order an attack
- Select the unit (or units) you want to use in your attack.
- Right-click all the enemy units to attack.
And thus, the battle begins!
Attack Notification
Whenever your military units attack or come under attack, a battle horn sounds. Whenever your civilian units or buildings are attacked, the Town Center bell rings. These alerts allow you to quickly react to a range of threats and are especially useful when your Explorer is away scouting hidden areas of your map.
Choosing a Strategy
Age of Empires III gives you total flexibility in choosing how to balance economic development versus military advancement. The game continually provides you with meaningful choices that can both define and undermine your style of play.
Over the years, several core strategies have emerged as useful tools for experienced gamers: Rushing, Booming, and Turtling.
Rushing
This strategy focuses on building up your military quickly for early attacks. The goal of Rushing is to catch your enemies unprepared.
By taking out your opponent's core economic resources—such as villagers, Houses, and Markets—you dramatically impede your enemy's ability to advance their civilization.
Booming
Instead of focusing on your military, Booming involves turning your civilization into an economic powerhouse. To be successful at Booming, you establish multiple Town Centers with a huge population of villagers, all gathering resources at a high rate.
By maximizing your economy in this manner early on, you build immense resources that you can later spend on creating a massive military.
Turtling
Turtling is a strategy that involves immediately taking strong defensive measures. From the start, you begin walling off your Town Centers and protecting your economic resources from a potential Rush.
To use Turtling successfully, you build your defensive and economic resources first, while your attacks come later in the game.
natural_image
Black-and-white illustration of two historical figures operating a decorated cart and a spear, with no visible text or symbols.Civilizations
natural_image
Historical black-and-white aerial view of a European town with houses, a church tower, and people gathered (no visible text or symbols)Age of Empires III is set during a time of massive growth, exploration, and opportunity in the world. Fortunes are pursued and forsaken. Empires emerge and vanish. It is a time of sweeping challenge and change, when rapid advances in technology overturn many of the long-held traditions and tactics of warfare.
In Age of Empires III, you play as a civilization. You can play as any one of the following civilizations, which are listed in order of least to most difficult to play:
Spanish
Dutch
British
Russian
French
German
Portuguese
Ottoman
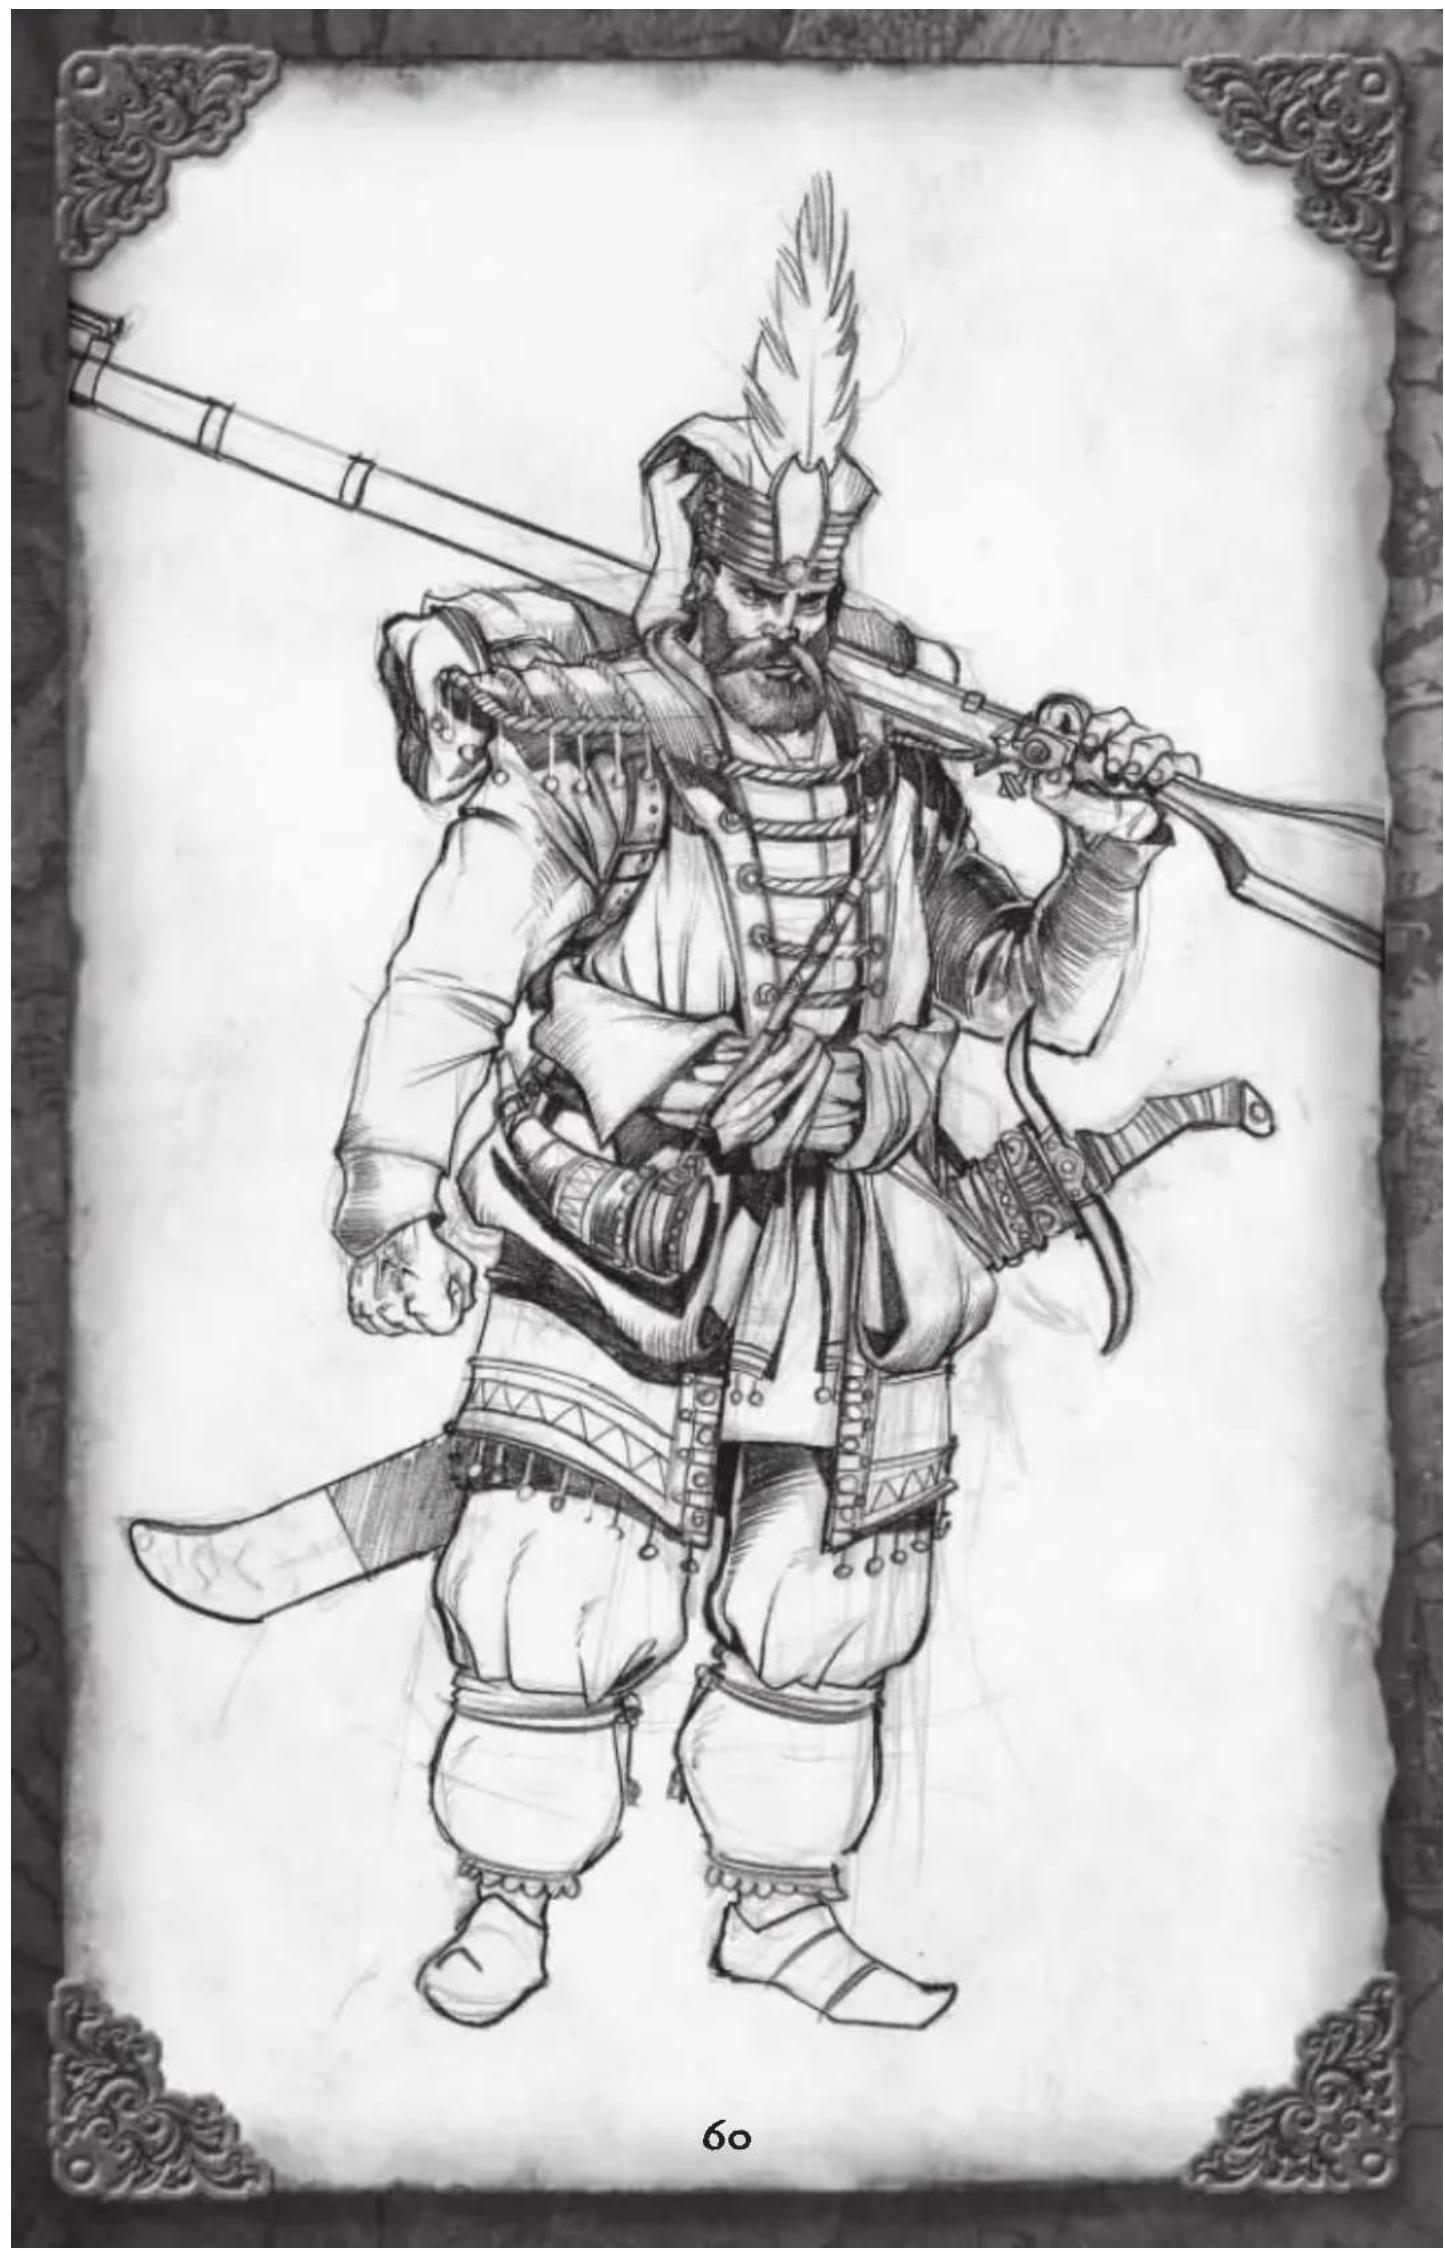
While most of the civilizations share several key units—such as the Musketeer and the Hussar—each civilization comes with its own unique units as well. You'll find that the units and their upgrade paths are carefully crafted to achieve an overall balance of powers, while offering a range of strategic choices.
For example, when considering between playing as the British or French civilization, you must contemplate the following factors:
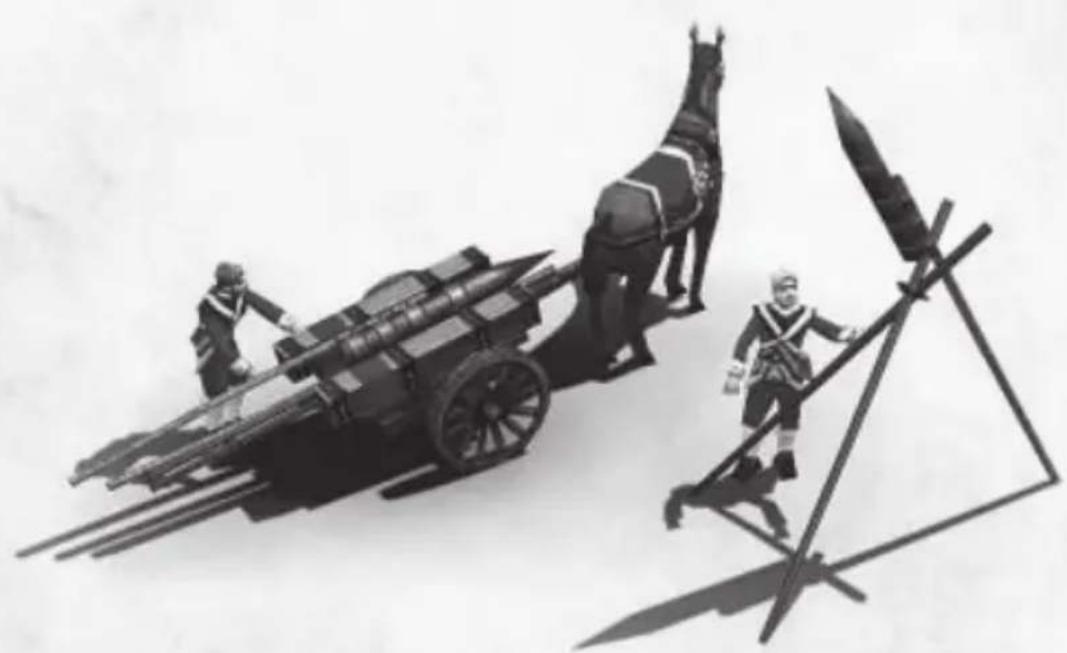
The British have the Congreve Rocket, while the French have the mighty Cuirassier—the heaviest cavalry unit in the game.
The British have the strongest Musketeers in the game, while the French have better Skirmishers.
You also do not want to ignore the Native Americans as potential allies. By forming a strategic alliance with a Native American nation, such as the Iroquois or the Lakota, you essentially play as two civilizations.

| Civilization Bonus | Home City Shipments are earned faster |
| Unique Units | Rodelero, Lancer, War Dog |
| Royal Guard Units | Pikeman, Rodelero, Lancer |
| Home City Ruler | Queen Isabella |
The Spanish have a strong military, particularly their hand infantry and cavalry. Because of their ability to earn early Shipments and the flexibility of those Shipments, they can attack early or build a strong economy later in the game.
Their Explorer's ability to train War Dogs gives the Spanish added flexibility, especially early in the game.
The Spanish have many unique Home City improvements that benefit their soldiers, buildings, and navy.
100

| Civilization Bonus | Extra Manor Houses that spawn villagers |
| Unique Units | Longbowman, Rocket |
| Royal Guard Units | Musketeer, Hussar |
| Home City Ruler | Queen Elizabeth |
The speed at which the British spawn villagers gives them one of the strongest economies in the game. The British can focus early on gathering Wood for Manor Houses that create villagers at a fast rate.
The British military is formidable, particularly later in the game, due to two mainline units—the Musketeer and the Hussar—that can be upgraded to Royal Guard level.
The British Home City is flexible, emphasizing both technology and its navy.
101
French

natural_image
Three stylized fleur-de-lis symbol patterns on a dark background (no text or symbols)| Civilization Bonus | Coureurs gather faster and fight better |
| Unique Units | Coureur, Cuirassier |
| Royal Guard Units | Cuirassier, Skirmisher |
| Home City Ruler | Napoleon |
The French economy builds slowly but steadily improves over time—thanks to the power of the Coureur. And because the Coureurs fight better than standard Settlers, this makes the French difficult to attack early in the game.
The French Cuirassier is easily the strongest cavalry unit; however, it takes a robust economy to field a large army of them.
The French are also the best civilization at forging alliances with Native American nations.
Portuguese

natural_image
Monochrome emblem featuring a crown and shield with engraved text (no readable document content)| Civilization Bonus | Extra Covered Wagonwhenever you advance an Age |
| Unique Units | Cassador, Organ Gun |
| Royal Guard Units | Musketeer, Dragoon |
| Home City Ruler | Prince Henry the Navigator |
The Portuguese gain an extra Covered Wagon whenever they advance an Age, enabling them to establish a new Town Center.
The Portuguese Explorer has a unique Spyglass that lets him quickly explore the map or spy on enemies.
The Portuguese also have a strong navy, strong light infantry, and the best Dragoons in the game.
Dutch

natural_image
Abstract pattern of horizontal gray stripes with a thin line and small diamond markers at top (no text or symbols)| Civilization Bonus | Villagers cost Coin, Banks produce Coin |
| Unique Units | Envoy, Ruyter, Fluyt |
| Royal Guard Units | Halberdier, Ruyter |
| Home City Ruler | Maurice of Orange |
The Dutch Home City offers powerful defensive and economic upgrades. The Dutch tend to begin their games by playing defensively, however, all that changes after they establish several Banks—typically later in the Ages. They then explode onto the map.
Dutch villagers cost Coin, which greatly limits their numbers. The Dutch economy makes up for this by constructing Banks that generate Coin automatically.
They have a unique civilian—the Envoy—who has great scouting capabilities but is defenseless. While they lack a Musketeer, the Dutch make up for it with two strong counter-units—the Halberdier and the Ruyter.
Russian

natural_image
Symmetrical emblem design featuring a central bird with wings and a crown, flanked by decorative elements (no text or symbols)| Civilization Bonus | Villagers and infantry are trained in groups, low-cost military |
| Unique Units | Strelet, Cossack, Oprichnik |
| Royal Guard Units | Grenadier, Cavalry Archer |
| Home City Ruler | Ivan the Terrible |
The Russians begin the game with extra resources but fewer villagers. This lets them immediately turn their resources into villagers or create a raiding army earlier in the game.
Russian soldiers tend to be weaker, but they cost less and can be deployed in greater numbers. This is particularly true of the Strelet—the weakest and least expensive soldier in the game.
All Russian infantry and villagers are trained in groups. While this allows the Russians to train these units faster, group training requires more resources.
Russians train their infantry out of a building called a Blockhouse, which defends territory in the same manner as an Outpost.
German
natural_image
Stylized eagle emblem with wings and sword, no text or symbols present| Civilization Bonus | Free Uhlans arrive with every Home City Shipment |
| Unique Units | Uhlan, Settler Wagon, Doppelsoldner, War Wagon |
| Royal Guard Units | Skirmisher, Uhlan |
| Home City Ruler | Frederick the Great |
The Germans have fewer villagers and therefore a slower economy. They make up for this by receiving Uhlans at no cost with every Home City Shipment.
While a German military will always have cavalry, their late-developing army is surprisingly diverse. For instance, you might have an army made up of strong Skirmishers, the pike-cleaving Doppelsoldner, or the mighty War Wagon.
Germans have the added ability to send Mercenaries from their Home City well before other civilizations.
Ottoman

natural_image
Flag with crescent moon and star, no text or symbols present| Civilization Bonus | Town Centers that spawn villagers at no cost |
| Unique Units | Abus Gun, Janissary, Spahi, Galley, Great Bombard |
| Royal Guard Units | Grenadier, Hussar |
| Home City Ruler | Suleiman the Magnificent |
Like the German economy, the Ottoman economy tends to start somewhat slowly. They make up for this by being able to create villagers at no cost from the Town Center.
To keep villager production constant, the Ottomans must build a Mosque early in the game and continually research improvements for it.
The Ottomans have more unique units than any other civilization. They can build an Artillery Foundry before other civilizations, giving them earlier access to artillery.
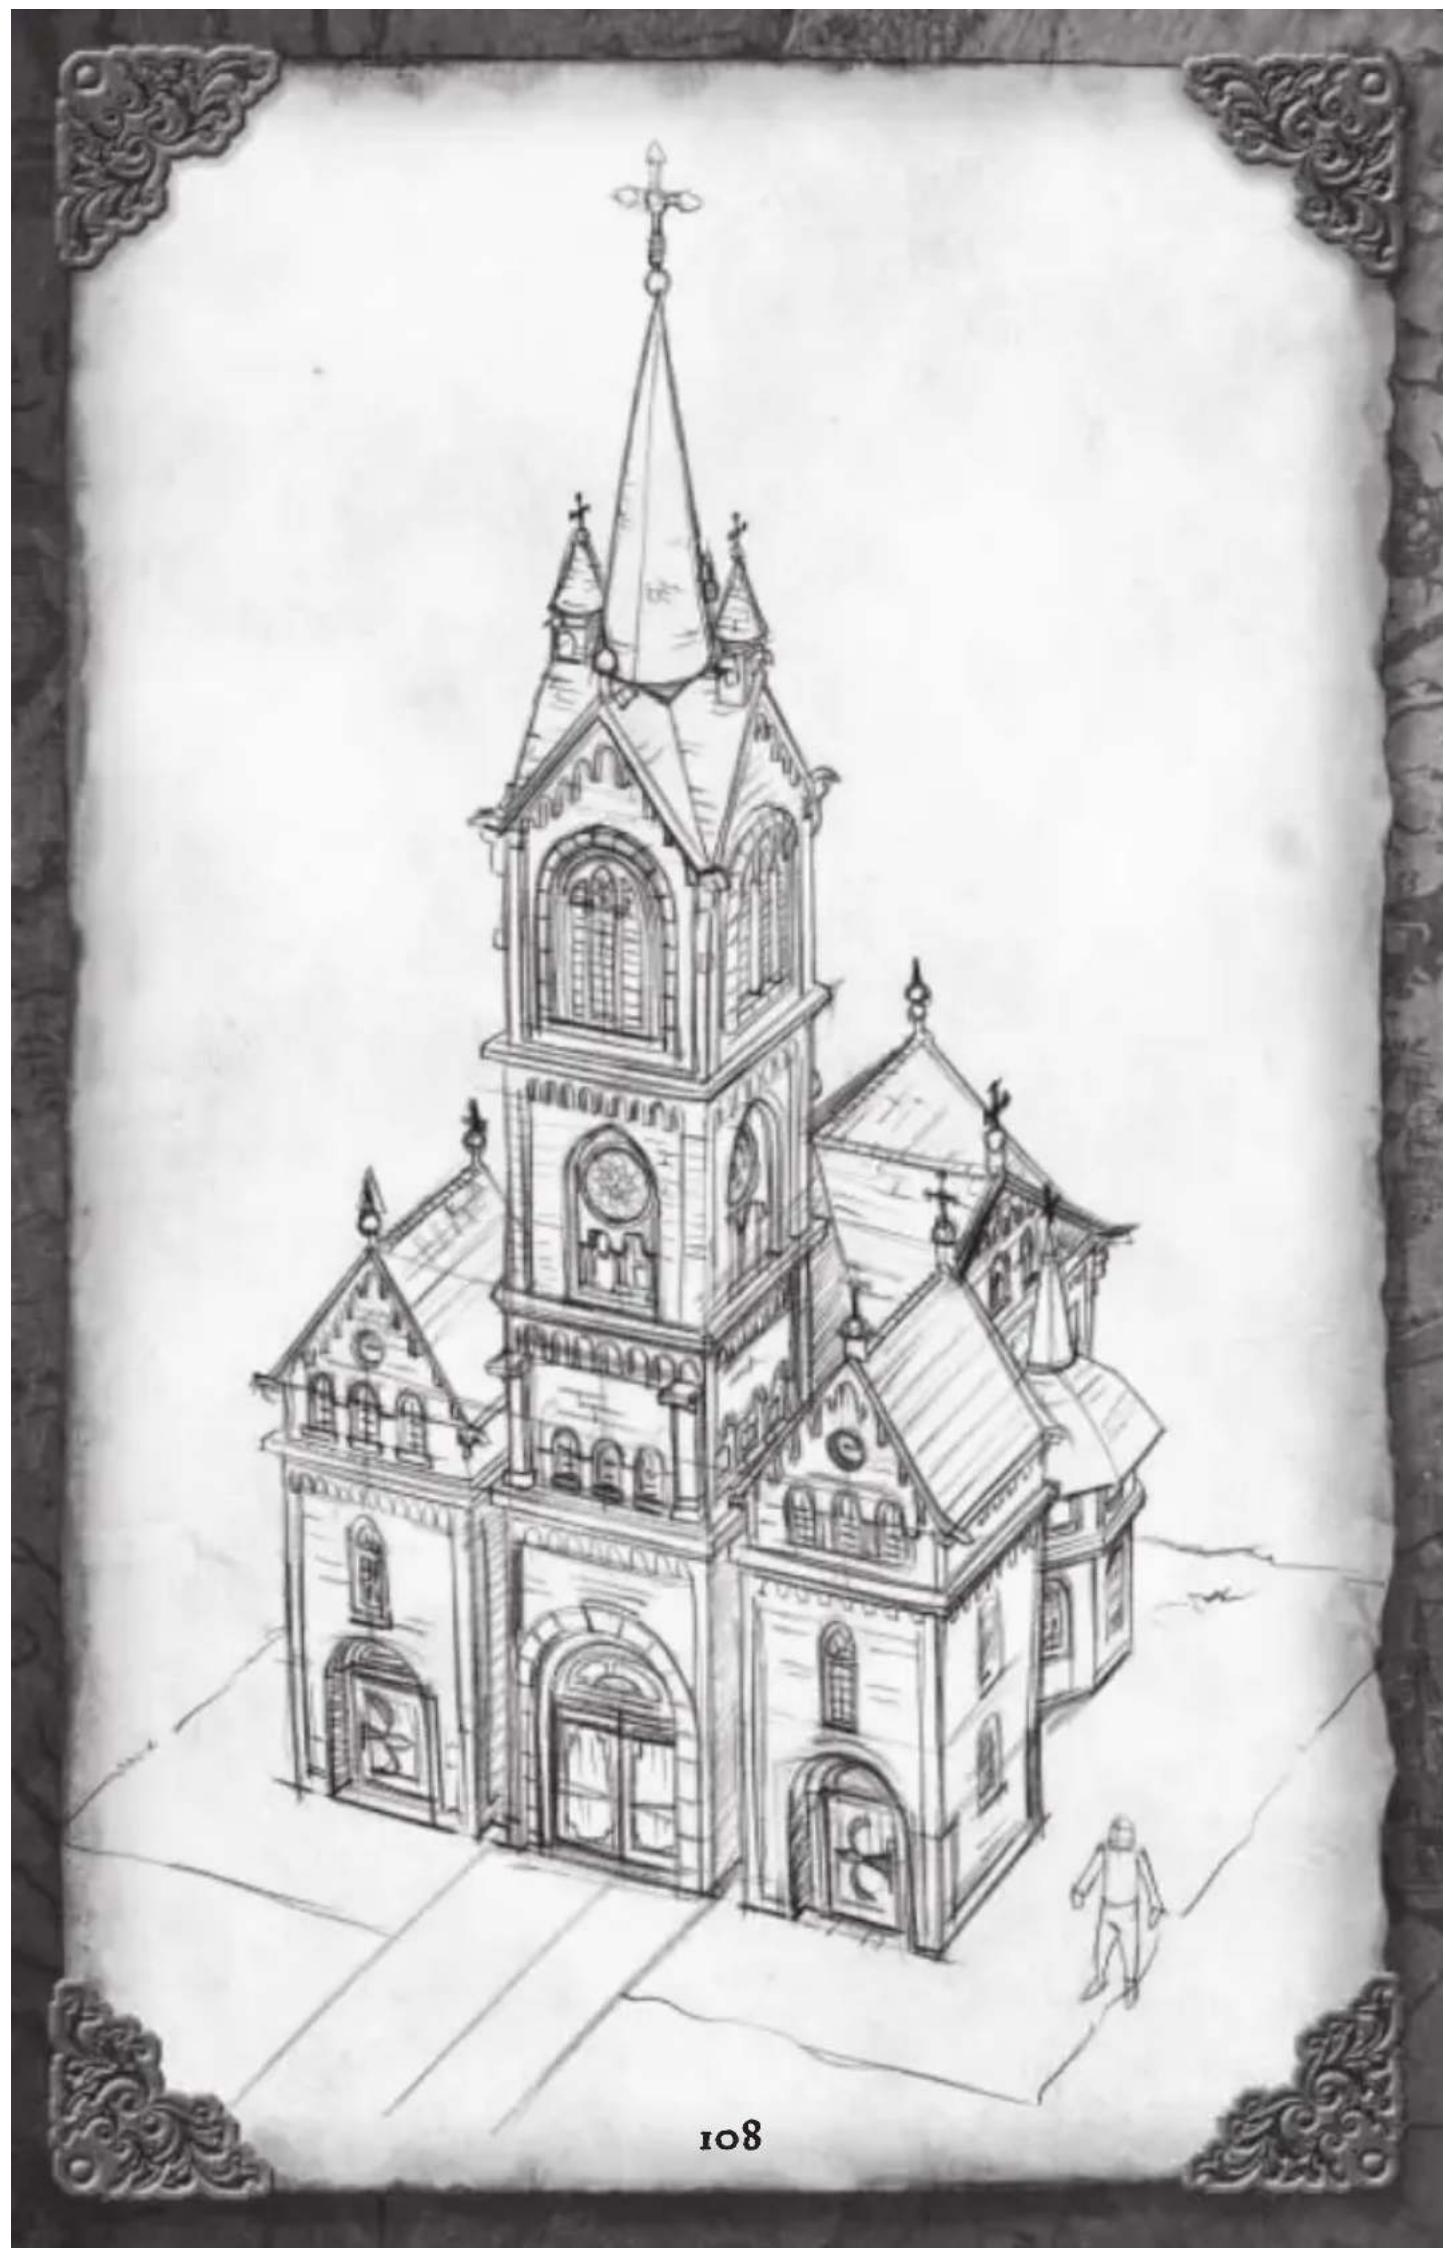
natural_image
Pencil sketch of a Gothic-style church with spire and arched windows, framed by ornate borders (no text or symbols)Buildings & Units
You advance the capabilities of your colony—economically and militarily—by creating a variety of buildings and units. Cost, upgrade capabilities, and other building and unit attributes can vary by civilization.
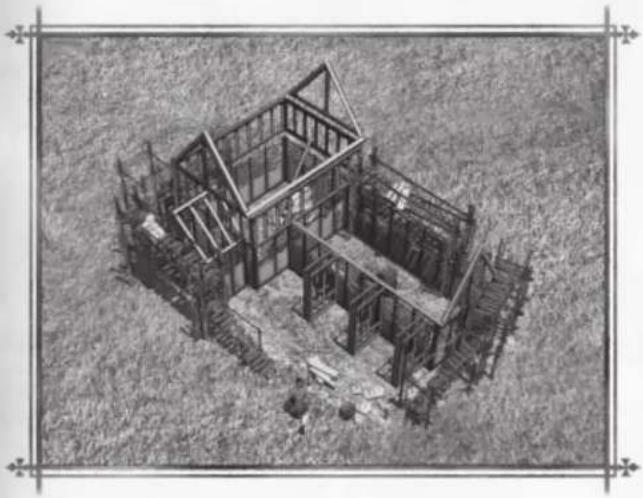
natural_image
Architectural sketch of a two-story house under construction, surrounded by grass and pathways (no text or symbols visible)Buildings
Buildings form an essential part of your colony and civilization. You'll use your buildings to manage resources, create and upgrade your military and its arsenal, and establish the daily operations and economic vitality of your colony.
Despite minor differences, the following buildings are common to all civilizations.

Town Center
Forms the heart and soul of every colony. The Town Center provides the primary link to your Home City--by default, all units and goods sent from the Home City arrive here. You can build multiple Town Centers.
The Town Center supports a population of up to 10; trains villagers, Covered Wagons, and Minutemen; and offers other colony improvements. When your colony is under attack, garrison your villagers inside the Town Center.

House
Supports up to 10 villagers or military units. Construct Houses as necessary when you need to expand your colony to the maximum allowed by your population limit.

Church
Provides unique improvements for your civilization. Churches train healers and offer economic, defensive, and military benefits.

Capitol
Provides powerful Imperial Age economic and military upgrades that help you make the final push to victory.
Market
Provides economic improvements for hunting, gathering, and mining. Building a Market lets you exchange Food and Wood for Coin and vice versa.
Setting up a Market gives you more options in managing your economy. For example, if a technology upgrade costs more Coin than you have stockpiled, you can sell some Food or Wood at the Market to raise enough Coin for the upgrade.
Mill
Doesn't increase your Food stockpile as fast as herding or hunting, but does provide a steady, unending source of Food.
Factory
Can be built once you've reached the Industrial Age. They produce either Food, Wood, Coin, or Cannon, and you'll want to leverage their high output capabilities to build your economy.

Plantation
Generates Coin and can be built anywhere in your colony. You may find Plantations very useful later in a game—once your mines are depleted.
Arsenal
Provides military improvements that can change the speed, range, hitpoints, and damage of infantry, cavalry, and artillery.
Barracks
Trains and upgrades infantry units, which are a core component of every civilization's military. (The Russians have the Blockhouse, which is a combination Barracks and Outpost.)
Dock
Produces boats and ships for fishing, combat, and transporting units across bodies of water.
Outpost
Can be built anywhere in the wilderness. Each has a long line of sight for defense and a decent attack. Several units, such as villagers, Coureurs, and Settler Wagons, can garrison inside an Outpost.
Livestock Pen
Stores sheep and cows that you find while exploring or obtain as Shipments from your Home City. Sheep and cows fatten over time, which means the longer they live, the more Food they provide. Sheep and cows fatten much faster in a Livestock Pen.
Fort
Spawns a variety of military units and offers walls, towers, and gates that provide a strong defense. You may have to unlock your civilization's ability to create a Fort.
Field Hospital
Built and used by Surgeons to heal nearby units.
Trading Post
Built along Trade Routes or near Native American settlements by Explorers and villagers. When on a Trade Route, a Trading Post is a location where goods get delivered. When near a Native American settlement, it establishes an alliance with a Native American nation.
Stable
Trains cavalry and counter-cavalry units—essential elements to your military. As your civilization advances through the Ages, you'll return to the Stable to research and upgrade your cavalry units.
Artillery Foundry
Trains and upgrades artillery units for your military, such as Falconets and Mortars.
Explorers
Every colony in Age of Empires III gets established through the support and leadership of its Explorer.
As the leader of your New World colony, your Explorer will scout new territory, build Trading Posts, battle outlaws and Treasure guardians, establish new colonies, and recover Treasures.
Your Explorer has a special Sharpshooter attack that enables him to kill with a single shot. You'll find this skill quite useful when gathering Treasure protected by guardians.
Note that your Explorer can't die. If he falls in battle, he can be rescued and healed.
Explorer Dog
Acts as your Explorer's loyal companion. Explorer Dogs make gathering Treasures easier.
Powerful in combat, the Explorer Dog cannot be killed. Just like the Explorer, it may fall in battle but can be revived.
War Dog
Obeys your commands and fights Treasure guardians. The Spanish start off with this fierce mastiff and their Explorer can train additional War Dogs (which is good since these canines can be killed).
Infantry
Infantry are foot soldiers used for hand-to-hand combat. They are relatively cheap and quick to create. You can create and upgrade infantry at the Barracks (or Blockhouse for the Russians).
Pikeman
A basic foot unit armed with a long pike. Pikemen are archaic infantry particularly good at defending against cavalry. Because they are slow and lack a ranged attack, they have difficulty chasing down cavalry. Pikemen can be countered by light infantry or artillery.
Halberdier
An infantry unit armed with a halberd. Strong against buildings and cavalry, Halberdiers act as more powerful Pikemen. They move slowly but have a strong attack.
Rodelero
A Spanish sword-and-buckler man with a strong attack. Rodeleros beat cavalry but lose to artillery and light infantry.
Doppelsoldner
A flamboyant infantry unit armed with two-handed swords. They can defeat cavalry, counter Pikemen, and are good when attacking buildings.
Janissary
A highly trained, though slow marching, infantry unit that fulfills the role of the Musketeer from other civilizations. Janissaries are strong against cavalry but weak against such artillery and light infantry, such as Crossbowmen or Skirmishers.
Musketeer
The standard infantry unit. Armed with a smoothbore musket, they're relatively inaccurate with a slow rate of fire. On the plus side, they're inexpensive. Strong against cavalry, they're weak against artillery and light infantry.

Minuteman
A quick-training Musketeer who loses hitpoints quickly over time. Use them for temporary battles when you need to react quickly to an immediate crisis.
Crossbowman
A light-infantry unit good at defeating infantry, such as Musketeers, but weak against cavalry and artillery.

Longbowman
Longbowmen are a unique British light infantry unit. They have a long range and a fast rate of fire but are expensive. Longbows beat infantry, such as Musketeers, but lose to cavalry and artillery.

Strelet
A weak Russian light infantry unit. They are inexpensive and can only be trained in groups. Strelets act like Crossbowmen or Skirmishers; they are good against infantry, such as Musketeers, but lose to cavalry and artillery.
Skirmisher
A more advanced unit who fills the same light-infantry role as Crossbowmen. They excel at defeating infantry but lose to cavalry and artillery.
Cassador
A Portuguese light-infantry unit. They work like Skirmishers; they are good at defeating infantry but are weak against cavalry and artillery.
Cavalry
Placing a warrior on a horse was the early equivalent of today's tank. Fast and mobile, cavalry units revolutionized warfare by providing the means to quickly overwhelm less capable foot soldiers.
You'll use your cavalry for both scouting and combat. You create and upgrade cavalry units at the Stable.
Hussar
A fast-moving light cavalry. They defeat artillery but lose to infantry, such as Musketeers and especially Pikemen.
Cuirassier
An expensive French heavy cavalry. They do heavy damage by trampling.

Cossack
An inexpensive and fast Russian light cavalry.
Uhlan
A heavy, hard-hitting (but not very durable) mounted soldier armed with cold steel.
Lancer
A heavy Spanish horseman armed with a lance for killing infantry. Lancers are a cavalry unit unique to the Spanish. They are stronger and more resistant to infantry than are Hussars.

natural_image
Six black-and-white illustrations of horseback riders, including a warrior and a cart (no text or symbols)Oprichnik
A heavy cavalry unit that does extra damage to villagers and buildings. They are unique to the Russian civilization.
Spahi
A heavy Ottoman cavalry unit that you can only receive from your Home City. Spahis are good against light infantry and artillery but lose to infantry and counter-cavalry.
Cavalry Archer
A fast-moving counter-cavalry unit.
Dragoon
Another type of ranged counter-cavalry unit. They beat other cavalry but lose to infantry such as Musketeers.
Ruyter
A Dutch cavalry unit armed with pistols.
War Wagon
A German unit comprised of a horse-drawn wagon outfitted with cannon. They're very good against heavy cavalry.
Artillery
The addition of artillery enabled units to pack a lot more punch at longer distances than previously possible with earlier ranged weapons such as bows and arrows. You create and upgrade your artillery units at the Artillery Foundry.

Grenadier
An expensive artillery unit with a lot of hitpoints. They are resilient to artillery but vulnerable to light infantry, such as Crossbowmen and Skirmishers.
Falconet
A simple artillery unit. They're better at countering groups of infantry than they are at besieging buildings.
Abus Gun
An Ottoman bronze artillery unit used to counter infantry.

Organ Gun
A gun that can fire multiple projectiles into a large area, making it particularly good at defeating groups of infantry. They are not as good against buildings.
Mortar
A long-ranged piece of artillery that is very good at destroying buildings but less effective against infantry.
Culverin
An artillery unit that is particularly good at countering other artillery. Because they do not have a large area effect, they are not as good at countering infantry as are other artillery. They are effective against ships.
Heavy Cannon
An effective weapon against both infantry and buildings. You can obtain Heavy Cannon at no cost from your Home City or Factory.
Great Bombard
A slow, expensive, unique artillery used by the Ottomans. These weapons excel at destroying buildings. You can obtain Great Bombards for free from your Home City or Factory.
Rocket
A unique British artillery piece that can only be used once. They are erratic and explode spectacularly in combat. They are good against infantry and buildings.
Civilian Units
Along with your military units, you'll have a variety of other units that offer services such as gathering resources, creating buildings, exploring territory, and healing the wounded.
Settler
The primary economic resource of your colony. Settlers and other villagers do the work that provides the basis for your colony's expansion and success. Each Settler can construct buildings and gather resources.

Coureur
The French have Coureurs instead of Settlers. Coureurs are more expensive than Settlers because they gather resources faster and can double as infantry, which is unique to the French.
Settler Wagon
A unit that gathers resources more quickly than a Settler can.
Covered Wagon
A unit that provides the resources necessary to start a new colony. To convert your Covered Wagon into a Town Center, move your Covered Wagon to an unobstructed area.

Envoy
A Dutch reconnaissance unit with a good line of sight but no attack. Use him with your Explorer to investigate new territory.

Priest
A religious leader who can heal damaged units.
Missionary
A mounted, Spanish religious leader who can move quickly and heal injured units.

Imam
An Ottoman religious leader who can heal damaged units.

Surgeon
A battlefield medic who can heal injured units quicker than Priests and can build Field Hospitals.

Hot Air Balloon
A unit that can be produced from the Home City and sent aloft to roam and provide a huge line of sight. Balloons are vulnerable to attack by ranged units.

Use ships to fish, transport units, and engage in combat. You build and upgrade ships at the Dock.
Fishing Boat
A boat used for gathering fish as Food resources. Place your Fishing Boats to gather fish and add to your Food stockpile.
Caravel
An early warship that's good at exploring, fishing, or transporting units and goods.
Galleon/Fluyt
A slow, powerful Treasure ship that can train units and is resistant to fire.
Frigate
The most powerful warship in the game.
Galley
A maneuverable ship powered by oars and sails.
Monitor
A warship that's good at bombarding buildings at long range.
Native Americans
You'll want to form alliances with the different Native American nations that inhabit the New World. By creating Trading Posts, you'll uncover a wide-ranging assortment of different warriors and resources.
Aztec Eagle Warrior
An infantry unit that flings javelins from an atl-atl. They have a good attack with a decent range but are not as effective in melee combat.
Aztec Jaguar Warrior
A swordsman armed with an obsidian macana. They are especially good at melee combat and in defeating hand infantry.
Canoe
A relatively inexpensive Native boat that can attack, fish, or transport units. The warriors within have a decent short-range attack.

Carib Blowgunner
An infantry unit with good hitpoints and a decent ranged attack using poison darts.
Cherokee Rifleman
A ranged infantry unit that is accurate to a long range. It's good to maintain this range whenever possible.

Comanche Horse Archer
A Native cavalry unit armed with an accurate bow, good speed, and a good ranged attack. They are particularly effective against hand cavalry.

Cree Tracker
A rifleman with decent hitpoints, a good line of sight, and long range.
Incan Bolas Warrior
A missile unit who's very effective at immobilizing enemies.
Incan Huaminca
An infantry unit who uses a long flexible spear, like a pike. They have a strong attack, a lot of hitpoints, and no range. They are particularly effective against buildings.
Iroquois Mantlet
A siege unit who's good against buildings.

Iroquois Tomahawk
A ranged infantry unit who's strong against hand infantry but weak against cavalry and artillery.
Maya Holcan Spearman
A siege and anti-cavalry unit who uses a barbed spear. They are effective at close-range melee combat.


Nootka Clubman
A relatively weak, but inexpensive to produce, infantry unit. Clubmen are effective in melee combat.
Scout
A unit that supports your Explorer in investigating new territory.
Seminole Sharktooth Bowman
A ranged Native infantry unit that is effective for short-range situations where you need to inflict high damage.
Lakota Axe Rider
A Native cavalry unit armed with an axe. They are effective at close-range melee combat.
Lakota Dog Soldier
An elite cavalry unit known as a "Dog Soldier." They are highly esteemed by friends and enemies alike.
Tupi Blackwood Archer
A Native unit that is accurate for long-range attacks. They have good range but limited hitpoints.
Mercenaries
Mercenaries are elite troops who can be sent from the Home City in exchange for Coin. Hiring mercenaries costs more than purchasing other military units, but they are more powerful.



Barbary Corsair
A pirate mercenary infantry unit from the Barbary Coast of North Africa.
Black Rider
A heavy German cavalry unit armed with pistols. Unlike most ranged cavalry, these guys pack on the armor.
Hackapell
An expensive but powerful heavy cavalry unit from Finland. The name came from their battle cry, which roughly translates to "hack them down."
Highlander
A powerful, ranged infantry unit from Scotland. These are essentially super Musketeers.
Jaeger
A fast-moving rifleman who sacrifices damage for accuracy. Britain used Hessian Jaeger mercenaries in the United States Revolutionary War.
Landsknecht
A proud, flamboyant mercenary armed with a halberd. They were hired out throughout the Renaissance.
Mameluke
A bold cavalry mercenary who controlled Egypt from the 1200s to 1800s.
Manchu
A fierce mounted archer from China. The Manchurians formed the Qing dynasty, which replaced the Ming dynasty in the 1600s.
Ronin
A masterless samurai who has no lord and often wanders or works for the highest bidder.
Stradiot
An aggressive light cavalry unit originally from Albania. They favor a spear with a point at both ends.
Swiss Pikeman
An elite mercenary armed with a pike. In an age of gunpowder, the Swiss Pikemen recalled the era of the Greek phalanx.
Privateer
A mercenary warship for combat and transport. They are manned by pirates who work for a particular government and are authorized to pirate the fleets of enemy nations.
Credits
ENSEMBLE STUDIOS
PROGRAMMING
Dave "Bigdog" Pottinger
1.ean Programmer
John Evanson - Asst. Lead
Shawn "Strobe" Lohstrah
- Asst. Lead
Jeff "DrJest" Ruediger
Asst. Lead
Michael Bean
Tom Bean
David "Hiro" Bettner
Paul Betner
Michael Cup
Mike "limmes"
Mike Jinnay Cozer
(Ⅲ) 1965.
Andrew "Voltron" Foster
Rica Geldreich
Richard "LoserBoy" Gyger
Marc Hanson
Chris "DarthCoder" Hockenberry
Bill Jackson
Bills Erkan Khan
Mike "Canto" Kidd
1
Dota "Disven" Monk
Dusty Dlangar Moha Maurin "Lange"
March 15, 2013
Sergio Taccom
Celeste "Celestipoo" Torrales
DESIGN
Greg "DeathShrimp" Street
Lead Designer
Jerome K. Jones "Bugsqir"
Asst. Lead
Jeff "Quasta" Brown
Joseph D. "Joeyjojo" Gilium
Vance Hampton
David "Learemy" Learv
Karen "Scour" McMullan
Sandy "Honcho" Petersen
Justin "Bear" Rouse
Brust C. "blues, sierry" Sariley
Karen Swanson
Kevin Whire
ART
Lance Hoke - Art Producer
Brad Crow - Art/Animation Lead
Dave Kobalak - Character Lead
"sPanky" Shusser
Environments Lead
Brett "Sparky" Brite
David A. "Icarus" Cherry
Andy Cohn
Don Gagen
Bryan Lehmann
Dion Hopkins
Zach Jaguars
Paul "Verbinator" Jaquays
Gene Kohler
Juan "monster" Martinez
Duncan McKissick
Тверг. Намаопла
Chen "T. R. U. C. K" O'Neill
Pete Furisi
- 2017年
Jason Benchbach
Ding, Mancas
Austin Schlmpr
Mark Sinclair
Brian "Zeus" Sousa
Nathan Stefan
Bart "Rice and Eggs" Tiongson
Chris Van Doren
Bob Walden
Paul "The BirD" Warzecha
Scott Winsett
MUSIC & EFFECTS
Stephen "Big Al" Rippy
- Music Composition &
Sound Design
Kevin "plaistow" McMullan
Music Composition
MANAGEMENT
Tony "GreedySmart" Goodman
Studio Head
Ian M. Fischer
Lance Hoke
Patrick Hudson
Angelo Landon
Dr. "Bioder" Portinger
Dave Mugaug Poteniger Chris "Scapocarter" Biny
D. 110
2014.10.07
Harter HanerPaster Ryan
Druze C. Brues sherry, Moliney
Greg "DeataSarship" Street
PRODUCTION
David Rippy - Lead Producer
Wallace II. Wachi, Jr.
Brian Lemon
Timothy R "the InzstaGator"
Russler
Matty "maimin_matty" Scadding
INFORMATION
TECHNOLOGY
Roy "Royster" Rabcy
Dwayne Gravitt
Jake "D_Dawg" Dotson
ADDITIONAL
PLAYTESTING
& HELP
Tim "Timotron" Deen
Robert "Xenue" Fernici
Ian M. Fischer
Marc Tare Holmes
Angelo "Desperado" Laudon
Chris "Scancegater" Rippy
ADMINISTRATION
Lizette Atkinson
Nique Gardner
BALANCE
Kevin "the Sheriff" Holme
Nick "The Moon Coast" Curtis
Brian "Voss" Delinger
Brack "Pima Sars" Meada
-
-
- 10.
-
WEB & COMMUNITY
SUPPORT
Ben "The Donger" Donges
Mike "Archangel" McCarr
INTERNAL QA
David "MilkmanDan" Lewis
Robert "Mr Anderson"
Anderson
Mike "Yeti" Brown
SPECIAL THANKS
Stephane Dugnay
Herb Ellwood
Gage R. Galinger
Byron Goodman
Brian Jones
Sean Wolff
MICROSOFT
CORPORATION
MGS MANAGEMENT
Shane Kim
Phil Spencer
A.J.Redner
David C. Ho
Ma= Whiting
Dave Luchmann
Dennis Wixan
Korey Krauskopf
Kyle Shannon
Joanne Williams
2.2报告期末前十名股票明细表
MARKETING & PR
Chris Lee
Albert Kanan
Simon Marks
Nancy Ramsey
Nate Brooling
Raja Subramoni
PRINT DESIGN
- User Experience Manager
Brent Mercalife Editor
Jack Turk - Write
Jon Seal Editor
Heidi Wartelle - 1
Laura Hamilton - Editor
LOCALIZATION
Virgini
Fred L. Norton II - Test Lead
Bill Metters
David Lao "Wibble"
Doug Jelen
Kevin Bowen "Bowser"
Kevin Verboort "Verb"
Mike Cody "Boris"
Ryan Hylland
Tony Bradley
RESERVES INFANTRY
TEST TEAM
Joe Djorger - Lead
Anthony Ervin
Brian Rowe
Dane Egenes ■
Derek Webb
Dustin Darcy
Eric Bougaton • "Ninja"
James Kirst
Julie Appleton
Kory Riley
Kyle Casperson
Lenny Lim ●"Zippy"
Maurice Campbell
Michael Tom
Rahsam Green
"Mr RaHgers"
Rene Holt
Rick James Rispoli
Rogelo Andres Fuentes
Treat Buys
RECON TEST TEAM
Craig Marshall - Lead
Daniel Bach
Matthew Giddings
Nick Zuzlich ●“EmperorX”
Wesley Juc
Sean Roffe
Zack Moxley "ZeeMox"
Nathan Gilbert ●
CONFIG LAB
Patrick Ascolese Lead
Blake Dodson
Titus Lowell
Michael Osgood-Graver
MULTIPLAYER LAB
TJ Duez - Lead "Taygee"
John Thomas ● "Craet"
Joseph Ezell • "paradox"
Eodore Lankford
Ritexon
SETUP
Craig Henry
LOC / UX IRELAND
Brian Fox
Ian Walsh
Steve Belton
John O'Sullivan
Mick Ivory
Declan Mac Hugh
Barry Comyn
Keywords Test Team
Giovanzi Manzari ✗
David Skreiner
Daimen Lahte ✗
Tomas Riolobos ★
Giselle de Castro
Paul Vigneron
LOC / UX JAPAN
Kazuyuki Kumai
Manager
Kaoru Iro
Localization Project
Manager
Miyuki Nouguchi
UX reviewer
Mihoko Yamazawa
LX reviewer
Yetaka Hasegawa
Lead Software Design
ing their
Munetaka Fise
Software Design
Engineer
Sachiko Nagasawa
- Software Yes Engineer
Masaki Kokupin
Botriare Ten Engineer Mariko Kibashi
Software T
Tokoniki Tomakio
Program Manage
Hirofarni Matsamura
Program Manager
c
LOC / UX KOREA
Jac Youn Kim
Program Manager
II Jin Park
- Software Test Engineer
Whi Young Youn
Localization Program
Manager
LOC / UX TAIWAN
Cheng Te Tony Lin
Program Manager
Technical Support
In the U.S., visit http://support.microsoft.com/games.
In Canada, visit http://www.microsoft.ca/support.
Outside the U.S. and Canada, visit http://support.microsoft.com/international.aspx.
On these Web sites, you can:
• Download the latest updates.
• Find Microsoft Knowledge Base articles that target specific issues.
• View "Show Me How" videos for solving common problems.
- Access other support services.
Microsoft support services are for technical issues only—please do not use them to request game hints, codes, or cheats.
Chat & E-mail Support: To chat immediately with a Microsoft Support Professional, or to submit your issue by e-mail (e-mail responses may be delayed by several hours), visit the location-appropriate Web site listed above.
Phone Support: To speak with a Microsoft Support Professional (long hold times may be experienced), in the U.S. call (800) 537-8324 and in Canada call (800) 876-8533.
TTY Support: To use Microsoft text telephone, in the U.S. call (800) 892-5234 and in Canada call (866) 857-9850.
Conditions: Microsoft's support services are subject to then-current prices, terms, and conditions, which are subject to change without notice.

NSIST ON NVIDIA

BETTER PHOTOS

BETTER VIDEOS

BETTER GAMES

BETTER PERFORMANCE
AGE of EMPIRES
III
Age of Empires III™ uses some of the most advanced rendering techniques available today for real-time cinematic special effects and achieves excellent performance for a great game playing experience. The game was largely developed and tested on NVIDIA GeForce 6 and 7 Series graphics cards and the intended experience can be more fully realized on NVIDIA GeForce 7 Series graphics hardware. On a GeForce 6800 or better you will be able to turn on all the NVIDIA special effect features at higher resolutions in the game.
Microsoft game studios
ENSEMBLE STUDIOS

www.microsoft.com/games/
www.ensemblestudios.com
www.nZone.com
© 2010 NVIDIA Corporation, NVIDIA, the NVIDIA logo. GeForce, and The way it's meant to be played on trademarks and/or registered trademarks of NVIDIA Corporation. All rights reserved © 2015 Microsoft Corporation. All rights reserved. Microsoft, the Microsoft Games Studio logo, Windows, the Windows logo, Enterprise Studio, Age of Empire, and the Age of Years on either trademarks of Microsoft Corporation in the United States or other countries.
Coming January 2006 to your Nintendo DS™!
AGE of EMPIRES
THE AGE OF KINGS
PRE-ORDER NOW
at www.ageofempiresDS.com
BACKBONE

ENTERTAINMENT

GENERAL STATUS IN ESRE
Visit www.esrb.org for more ratings information.
Age of Empires: The Age of Kings: Published by Majesco Entertainment Company © 2005. All Rights Reserved. © 2005 Microsoft Corporation. All rights reserved. Microsoft, the Microsoft Game Studios logo, Age of Empires, and Ensemble Studies are either registered trademarks or trademarks of Microsoft Corporation in the United States and/or other countries. All other trademarks, logos and copyrights are property of their respective owners. ^™ ,© and Nintendo DS are trademarks of Nintendo. © 2004 Nintendo.
Discover Game Precision
with Microsoft® Laser Mouse 6000.

natural_image
Close-up of a black computer mouse with a visible scroll wheel and cable (no text or symbols)Advanced Laser Technology
for superior gaming performance

THIN, FLEXIBLE CABLE
The responsiveness of wired, the feel of wireless.
SCROLL WHEEL WITH DETENTS
For enhanced gaming control.
PRECISION BOOSTER
Switch between preferred speed and precision mode
for targeting
GAMING TOGGLE
Quickly select and switch weapons or actions in real time.
www.microsoft.com/hardware
Microsoft
© 2005 Microsoft Corporation. All rights reserved. Microsoft is a registered trademark of Microsoft Corporation in the United States and/or other countries.
- AGE of EMPIRES
- III
- Safety Warning
- About Photosensitive Seizures
- AGE of EMPIRES III
- Table of Contents
- Getting Started
- Key Concepts
- Home City
- Single-Player Campaign
- Multiplayer
- Economy
- Military
- Civilizations
- Buildings & Units
- Credits
- What's New?
- Installing the Game
- Starting a New Game
- Getting Help
- Learning to Play
- Setting Options & Using Hotkeys
- Using the In-Game Menu
- Saving, Loading, & Quilting a Game
- Winning a Game
- Skirmish
- Improving Game Performance
- Install the Latest Device Drivers
- To learn who manufactured your graphics adapter
- Install the Latest Version of DirectX
- Additional Suggestions
- Shut Down Other Programs
- Install More RAM
- Upgrade Your System to a Faster Processor
- Upgrade Your Graphics Adapter
- Choosing a Civilization
- Forming Alliances with Native Americans
- To ally with a Native American nation
- The Home City
- Navigating the Colony Screen
- In-Game Menu
- Tooltips
- Resource Panel
- Command Panel
- Stats Tab
- Age Advancement Bar
- Production Queue
- Home City Icon
- Settlement Mini Map
- Navigating the Home City Screen
- Home City Mini Map
- Shipment Panel
- Ways to Play Age of Empires III
- Single-Player Skirmish
- Multiplayer Skirmish
- Exploring the New World
- To select a unit
- To deselect a unit
- To move a unit
- Assembling an Army
- Creating Military Units
- To build a Barracks
- To create an infantry unit
- Balancing Strengths and Weaknesses
- Understanding the Postgame Screens
- To quit a game and view the postgame screens
- What Is a Home City?
- Using Cards and Decks
- Managing Your Home City
- Selecting a Home City
- Upgrading Your Home City Inventory
- Using the Deck Builder
- Customizing Your Home City
- Working with Your Home City
- Shipping Economic Units and Resources
- To select an economic unit or resource
- Shipping Military Units
- To select a military unit for Shipment
- Increasing the Level of Your Home City
- Multiplayer and Your Home City
- Your Home City's Strategic Value
- Single-Player
- COPFECTSLETT
- Morgan Black
- Elisabet Ramsey
- John Black
- Kamyenke
- Amelia Black
- Pierre Beaumont
- Starting & Saving Campaign Scenarios
- To start the single-player Campaign
- To save a Campaign scenario
- To restart a previously saved scenario
- Making the Multiplayer Connection
- ESO
- LAN
- Multiplayer Game Types
- The Home City & Multiplayer
- Home City Levels Versus Player Level
- Finding & Gathering Resources
- Tracking Your Current Resources
- Using Your Explorer
- Determining Where to Place Your Town Center
- To place a Town Center
- Exploring a Map
- To explore hidden areas of the map using your Explorer
- Fog of War
- Gathering Treasure
- To gather unguarded Treasure
- To gather guarded Treasure
- Villagers
- Creating Villagers
- To create a villager
- Keeping Your Villagers Busy
- Gathering Food and Wood
- Gathering Coin
- Constructing Buildings
- To construct a building
- Increasing Your Population
- Protecting Your Villagers from Attack
- To garrison specific villagers
- To put garrisoned villagers back to work
- Upgrading Your Civilization's Units
- To upgrade a unit
- Advancing Through the Ages
- To build a Trading Post
- Creating Native American Warriors for Battle
- To create a Native American warrior
- To create a military unit
- Choosing Where New Units Gather
- To set a Gather Point
- Reconnaissance
- Moving Units
- Grouping Military Units
- To select multiple units
- To group all visible units of the same type
- To create a group of units
- To add units to a group
- Moving a Unit Using Waypoints
- To move a unit using Waypoints
- Transporting Units Across Water
- To load a ship
- To unload a ship
- Engaging in Combat
- Building Your Military
- Ordering an Attack
- To order an attack
- Attack Notification
- Choosing a Strategy
- Rushing
- Booming
- Turtling
- Dutch
- Russian
- Buildings
- Town Center
- House
- Church
- Capitol
- Market
- Mill
- Factory
- Plantation
- Arsenal
- Barracks
- Dock
- Outpost
- Livestock Pen
- Fort
- Field Hospital
- Trading Post
- Stable
- Artillery Foundry
- Explorers
- Explorer Dog
- War Dog
- Infantry
- Pikeman
- Halberdier
- Rodelero
- Doppelsoldner
- Janissary
- Musketeer
- Minuteman
- Crossbowman
- Longbowman
- Strelet
- Skirmisher
- Cassador
- Cavalry
- Hussar
- Cuirassier
- Cossack
- Uhlan
- Lancer
- Oprichnik
- Spahi
- Cavalry Archer
- Dragoon
- Ruyter
- War Wagon
- Artillery
- Grenadier
- Falconet
- Abus Gun
- Organ Gun
- Mortar
- Culverin
- Heavy Cannon
- Great Bombard
- Rocket
- Civilian Units
- Settler
- Coureur
- Settler Wagon
- Covered Wagon
- Envoy
- Priest
- Missionary
- Imam
- Surgeon
- Hot Air Balloon
- Fishing Boat
- Caravel
- Galleon/Fluyt
- Frigate
- Galley
- Monitor
- Native Americans
- Aztec Eagle Warrior
- Aztec Jaguar Warrior
- Canoe
- Carib Blowgunner
- Cherokee Rifleman
- Comanche Horse Archer
- Cree Tracker
- Incan Bolas Warrior
- Incan Huaminca
- Iroquois Mantlet
- Iroquois Tomahawk
- Maya Holcan Spearman
- Nootka Clubman
- Scout
- Seminole Sharktooth Bowman
- Lakota Axe Rider
- Lakota Dog Soldier
- Tupi Blackwood Archer
- Mercenaries
- Barbary Corsair
- Black Rider
- Hackapell
- Highlander
- Jaeger
- Landsknecht
- Mameluke
- Manchu
- Ronin
- Stradiot
- Swiss Pikeman
- Privateer
- ENSEMBLE STUDIOS
- PROGRAMMING
- DESIGN
- ART
- MUSIC & EFFECTS
- MANAGEMENT
- PRODUCTION
- INFORMATION
- ADDITIONAL
- ADMINISTRATION
- BALANCE
- WEB & COMMUNITY
- INTERNAL QA
- SPECIAL THANKS
- MICROSOFT
- CORPORATION
- MARKETING & PR
- PRINT DESIGN
- LOCALIZATION
- RESERVES INFANTRY
- RECON TEST TEAM
- CONFIG LAB
- MULTIPLAYER LAB
- SETUP
- LOC / UX IRELAND
- LOC / UX JAPAN
- LOC / UX KOREA
- LOC / UX TAIWAN
- Technical Support
- Coming January 2006 to your Nintendo DS™!
- THE AGE OF KINGS
- Discover Game Precision
Brand : MICROSOFT
Model : Age of Empires III (PC)
Category : Video game