
bizhub c300 - Printer KONICA MINOLTA - Free user manual and instructions
Find the device manual for free bizhub c300 KONICA MINOLTA in PDF.


| Product Type | Color Multifunction Printer (Print, Copy, Scan, Fax) |
| Print Technology | Color Laser |
| Print Speed | Up to 30 ppm (color and black) |
| Resolution | Up to 1200 x 1200 dpi |
| Paper Capacity | Standard 1150 sheets, maximum 3650 sheets |
| Media Sizes | A3, A4, A5, B4, B5, Legal, Letter, Envelopes, Custom up to 320 x 457 mm |
| Duplex Printing | Automatic (standard) |
| Dimensions (W x D x H) | 615 x 685 x 771 mm |
| Weight | Approximately 85 kg |
| Power Supply | 220-240 V AC, 50/60 Hz |
| Power Consumption | Max 1500 W, Standby < 50 W |
| Digital Front End | Integrated controller with 8.5" color touch panel |
| Security Features | Secure Print, User Authentication, HDD Encryption |
| Scanning | Up to 70 ipm (color, 300 dpi) with duplex ADF |
| Fax | Super G3, up to 33.6 kbps |
| Network Connectivity | Ethernet 10/100/1000, optional Wi-Fi |
| Mobile Printing | AirPrint, Mopria, Konica Minolta Mobile Print |
| Maintenance Parts | Toner cartridges, imaging unit, waste toner box, fuser unit |
| Repairability | Modular design with replaceable units; service manual available |
| Cleaning | Clean exterior with soft dry cloth; use cleaning sheet for scanner glass |
| Operating Environment | Temperature: 10-30°C, Humidity: 15-85% RH |
Frequently Asked Questions - bizhub c300 KONICA MINOLTA
User questions about bizhub c300 KONICA MINOLTA
0 question about this device. Answer the ones you know or ask your own.
Ask a new question about this device
Download the instructions for your Printer in PDF format for free! Find your manual bizhub c300 - KONICA MINOLTA and take your electronic device back in hand. On this page are published all the documents necessary for the use of your device. bizhub c300 by KONICA MINOLTA.
USER MANUAL bizhub c300 KONICA MINOLTA
User's Guide [Print Operations]
![KONICA MINOLTA bizhub c300 - User's Guide [Print Operations] - 1](/content/2026/06/1277641/images/86088cb0ab613ed7eddc132f05b1719f70afc559f8a7cf18c7b86c54c2ba1b0e.jpg)
natural_image
Illustration of a multi-level computer printer with open lid and control panel (no visible text or symbols)Welcome
Thank you for purchasing the Konica Minolta bizhub C300.
The bizhub C300 is equipped with an integrated printer controller that allows you to print directly from Windows-compatible computers or Macintosh computers.
This User's Guide describes the printing functions, operations, usage, and safety precautions of the printer controller. In order to ensure that this machine is used efficiently, carefully read this manual before using the machine. In order to ensure that this machine is used safely, carefully read “Installation and Operation Precautions” in the User’s Guide [Copy Operations] before using the machine.
The illustrations used in this User's Guide may differ from the actual model.
Trademarks and copyright
- KONICA MINOLTA, the KONICA MINOLTA logo, and The essentials of imaging are registered trademarks of KONICA MINOLTA HOLDINGS, INC.
- PageScope and bizhub are registered trademarks of KONICA MINOLTA BUSINESS TECHNOLOGIES.
●Netscape Communications, the Netscape Communications logo, Netscape Navigator, Netscape Communicator, and Netscape are trademarks of Netscape Communications Corporation.
●Novell and Novell NetWare are registered trademarks of Novell, Inc.
- Microsoft, Windows, and Windows NT are registered trademarks of Microsoft Corporation.
- IBM is a registered trademark of International Business Machines, Inc.
- Apple, Macintosh, and Mac are registered trademarks of Apple Computer, Inc.
- Adobe, the Adobe logo, Acrobat, the Acrobat logo, PostScript, and the PostScript logo are either registered trademarks or trademarks of Adobe Systems Incorporated.
- Ethernet is a registered trademark of Xerox Corporation.
- PCL is a registered trademark of Hewlett-Packard Company Limited.
- All other product and brand names are trademarks or registered trademarks of their respective companies or organizations.
- This machine and PageScope Box Operator are based in part on the work of the Independent JPEG Group.
- Compact-VJE Copyright 1986-2003 VACS Corp.
- RC4 ^® is a registered trademark or trademark of RSA Security Inc. in the United States and/or other countries.
- RSA ^® is a registered trademark or trademark of RSA Security Inc. RSA BSAFE ^® is a registered trademark or trademark of RSA Security Inc. in the United States and/or other countries.

License information
This product includes RSA BSAFE Cryptographic software from RSA Security Inc.
OpenSSL statement
OpenSSL license
Copyright © 1998-2000 The OpenSSL Project. All rights reserved.
Redistribution and use in source and binary forms, with or without modification, are permitted provided that the following conditions are met:
- Redistributions of source code must retain the above copyright notice, this list of conditions and the following disclaimer.
- Redistributions in binary form must reproduce the above copyright notice, this list of conditions and the following disclaimer in the documentation and/or other materials provided with the distribution.
- All advertising materials mentioning features or use of this software must display the following acknowledgment:
"This product includes software developed by the OpenSSL Project for use in the OpenSSL Toolkit. (http://www.openssl.org/) - The names "OpenSSL Toolkit" and "OpenSSL Project" must not be used to endorse or promote products derived from this software without prior written permission. For written permission, please contact openssl-core@openssl.org.
- Products derived from this software may not be called "OpenSSL" nor may "OpenSSL" appear in their names without prior written permission of the OpenSSL Project.
- Redistributions of any form whatsoever must retain the following acknowledgment:
"This product includes software developed by the OpenSSL Project for use in the OpenSSL Toolkit (http://www.openssl.org/)
THIS SOFTWARE IS PROVIDED BY THE OpenSSL PROJECT "AS IS" AND ANY EXPRESSED OR IMPLIED WARRANTIES, INCLUDING, BUT NOT LIMITED TO, THE IMPLIED WARRANTIES OF MERCHANTABILITY AND FITNESS FOR A PARTICULAR PURPOSE ARE DISCLAIMED. IN NO EVENT SHALL THE OpenSSL PROJECT OR ITS CONTRIBUTORS BE LIABLE FOR ANY DIRECT, INDIRECT, INCIDENTAL, SPECIAL, EXEMPLARY, OR CONSEQUENTIAL DAMAGES (INCLUDING, BUT NOT LIMITED TO, PROCUREMENT OF SUBSTITUTE GOODS OR SERVICES; LOSS OF USE, DATA, OR
PROFITS; OR BUSINESS INTERRUPTION) HOWEVER CAUSED AND ON ANY THEORY OF LIABILITY, WHETHER IN CONTRACT, STRICT LIABILITY, OR TORT (INCLUDING NEGLIGENCE OR OTHERWISE) ARISING IN ANY WAY OUT OF THE USE OF THIS SOFTWARE, EVEN IF ADVISED OF THE POSSIBILITY OF SUCH DAMAGE.
This product includes cryptographic software written by Eric Young (eay@crypt-Soft.com). This product includes software written by Tim Hudson (tjh@cryptsoft.com).
Original SSLeay license
Copyright © 1995-1998 Eric Young (eay@cryptsoft.com) All rights reserved. This package is an SSL implementation written by Eric Young (eay@crypt-soft.com).
The implementation was written so as to conform with Netscapes SSL.
This library is free for commercial and non-commercial use as long as the following conditions are aheared to. The following conditions apply to all code found in this distribution, be it the RC4, RSA, Ihash, DES, etc., code; not just the SSL code.
The SSL documentation included with this distribution is covered by the same copyright terms except that the holder is Tim Hudson (tjh@crypt-soft.com).
Copyright remains Eric Young's, and as such any Copyright notices in the code are not to be removed. If this package is used in a product, Eric Young should be given attribution as the author of the parts of the library used. This can be in the form of a textual message at program startup or in documentation (online or textual) provided with the package.
Redistribution and use in source and binary forms, with or without modification, are permitted provided that the following conditions are met:
-
Redistributions of source code must retain the copyright notice, this list of conditions and the following disclaimer.
-
Redistributions in binary form must reproduce the above copyright notice, this list of conditions and the following disclaimer in the documentation and/or other materials provided with the distribution.
-
All advertising materials mentioning features or use of this software must display the following acknowledgement:
"This product includes cryptographic software written by Eric Young (eay@crypt-soft.com)"
The word ‘cryptographic’ can be left out if the rouines from the library being used are not cryptographic related.
- If you include any Windows specific code (or a derivative thereof) from the apps directory (application code) you must include an acknowledgement:
"This product includes software written by Tin Hudson (tjh@crypt-soft.com)"
THIS SOFTWARE IS PROVIDED BY ERIC YOUNG "AS IS" AND ANY EXPRESS OR IMPLIED WARRANTIES, INCLUDING, BUT NOT LIMITED TO, THE IMPLIED WARRANTIES OF MERCHANTABILITY AND FITNESS FOR A PARTICULAR PURPOSE ARE DISCLAIMED. IN NO EVENT SHALL THE AUTHOR OR CONTRIBUTORS BE LIABLE FOR ANY DIRECT, INDIRECT, INCIDENTAL, SPECIAL, EXEMPLARY, OR CONSEQUENTIAL DAMAGES (INCLUDING, BUT NOT LIMITED TO, PROCUREMENT OF SUBSTITUTE GOODS OR SERVICES; LOSS OF USE, DATA, OR PROFITS; OR BUSINESS INTERRUPTION) HOWEVER CAUSED AND ON ANY THEORY OF LIABILITY, WHETHER IN CONTRACT, STRICT LIABILITY, OR TORT (INCLUDING NEGLIGENCE OR OTHERWISE) ARISING IN ANY WAY OUT OF THE USE OF THIS SOFTWARE, EVEN IF ADVISED OF THE POSSIBILITY OF SUCH DAMAGE.
The licence and distribution terms for any publicly available version or derivative of this code cannot be changed. i.e. this code cannot simply be copied and put under another distribution licence [including the GNU Public Licence.]
Copyright
© 2006 Konica Minolta Business Technologies, Inc. All Rights Reserved.
Note
- This User's Guide may not be reproduced in part or in full without permission.
- Konica Minolta Business Technologies, Inc. will not be held liable for any incidents caused by using this printing system or User's Guide.
- Information included in this User's Guide is subject to change without notice.
- Konica Minolta Business Technologies, Inc. maintains the copyright of the printer drivers.
SOFTWARE LICENSE AGREEMENT
This package contains the following materials provided by Konica Minolta Business Technologies, Inc. (KMBT): software included as part of the printing system, the digitally-encoded machine-readable outline data encoded in the special format and in the encrypted form (“Font Programs”), other software which runs on a computer system for use in conjunction with the Printing Software (“Host Software”), and related explanatory written materials (“Documentation”). The term “Software” shall be used to describe Printing Software, Font Programs and/or Host Software and also include any upgrades, modified versions, additions, and copies of the Software.
The Software is being licensed to you under the terms of this Agreement.
KMBT grants to you a non-exclusive sublicense to use the Software and Documentation, provided that you agree to the following:
- You may use the Printing Software and accompanying Font Programs for imaging to the licensed output de-vice(s), solely for your own internal business purposes.
- In addition to the license for Font Programs set forth in Section 1 (“Printing Software”) above, you may use Roman Font Programs to reproduce weights, styles, and versions of letters, numerals, characters and symbols (“Typefaces”) on the display or monitor for your own internal business purposes.
- You may make one backup copy of the Host Software, provided your backup copy is not installed or used on any computer. Notwithstanding the above restrictions, you may install the on any number of computers solely for use with one or more printing systems running the Printing Software.
- You may assign its rights under this Agreement to an assignee of all of Licensee's right and interest to such Software and Documentation ("Assignee") provided you transfer to Assignee all copies of such Software and Documentation Assignee agrees to be bound by all of the terms and conditions of this Agreement.
- You agree not to modify, adapt or translate the Software and Documentation.
- You agree that you will not attempt to alter, disassemble, decrypt, reverse engineer or decompile the Software.
- Title to and ownership of the Software and Documentation and any reproductions thereof shall remain with KMBT and its licensor.
-
Trademarks shall be used in accordance with accepted trademark practice, including identification of the trademark owner's name. Trademarks can only be used to identify printed output produced by the Software. Such use of any trademark does not give you any rights of ownership in that trademark.
-
You may not rent, lease, sublicense, lend or transfer versions or copies of the Software Licensee does not use, or Software contained on any unused media, except as part of the permanent transfer of all Software and Documentation as described above.
-
IN NO EVENT WILL KMBT OR ITS LICENSOR BE LIABLE TO YOU FOR ANY CONSEQUENTIAL, INCIDENTAL INDIRECT, PUNITIVE OR SPECIAL DAMAGES, INCLUDING ANY LOST PROFITS OR LOST SAVING, EVEN IF KMBT HAS BEEN ADVISED OF THE POSSIBILITY OF SUCH DAMAGES, OR FOR ANY CLAIM BY ANY THIRD PARTY. KMBT OR ITS LICENSOR DISCLAIMS ALL WARRANTIES WITH REGARD TO THE SOFTWARE, EXPRESS OR IMPLIED, INCLUDING, WITHOUT LIMITATION IMPLIED WARRANTIES OF MERCHANTABILITY, FITNESS FOR A PARTICULAR PURPOSE, TITLE AND NON-INFRINGEMENT OF THIRD PARTY RIGHTS. SOME STATES OR JURISDICTIONS DO NOT ALLOW THE EXCLUSION OR LIMITATION OF INCIDENTAL, CONSEQUENTIAL OR SPECIAL DAMAGES, SO THE ABOVE LIMITATIONS MAY NOT APPLY TO YOU.
-
Notice to Government End Users: The Software is a “commercial item,” as that term is defined at 48 C.F.R.2.101, consisting of “commercial computer software” and “commercial computer software documentation,” as such terms are used in 48 C.F.R. 12.212. Consistent with 48 C.F.R. 12.212 and 48 C.F.R. 227.7202-1 through 227.7202-4, all U.S. Government End Users acquire the Software with only those rights set forth herein.
-
You agree that you will not export the Software in any form in violation of any applicable laws and regulations regarding export control of any countries.
Contents
Welcome
Copyright x-4
SOFTWARE LICENSE AGREEMENT ...... x-5
Contents ...... x-7
About this user's guide ...... x-18
C300 User's Guides x-18
Notations x-18
Screen images in this user's guide ...... x-18
Using this user's guide ...... x-19
1 Overview
1.1 Printer controller ....1-1
Role of the printer controller ....1-1
Available printer controller functions 1-1
Machine modes 1-2
Printing flow 1-3
Flow of the computer faxing operation 1-4
1.2 Operation environment ....1-5
Compatible computers and operating systems ....1-5
Compatible interfaces 1-6
1.3 Setting up the system 1-8
To set up the printing system 1-8
2 Installing the printer driver
2.1 Printer drivers and supported operating systems ......2-1
2.2 When used with Windows 2-2
Automatic installation using the installer 2-3
To install the printer driver 2-4
Installing the printer driver using the Add Printer Wizard .....2-6
For Windows XP/Server 2003 2-6
For Windows 98SE/Me/2000/NT 4.0 ....2-9
Installing the printer driver using Plug and Play 2-11
For Windows 98SE 2-11
For Windows Me/2000 2-12
For Windows XP/Server 2003 2-13
Uninstalling the printer driver 2-14
2.3 When used with Macintosh 2-16
Installing the printer driver 2-16
For Mac OS X 2-16
Selecting a printer 2-18
For Mac OS X 2-18
For Mac OS 9.2 2-21
Uninstalling the printer driver 2-23
For Mac OS X 2-23
For Mac OS 9.2 2-24
3 Setting up network printing
3.1 Overview of network functions ......3-1
Network functions ......3-1
Features of the network functions ....3-2
Network connection methods that can be selected in each Windows operating system 3-3
Network printing from a Windows operating system ....3-3
Network printing in a NetWare environment 3-4
3.2 Setting the IP address for this machine ....3-5
Setting the IP address 3-5
3.3 Accessing PageScope Web Connection ....3-7
To access PageScope Web Connection ....3-7
3.4 SMB printing 3-8
Operations on this machine 3-8
Printer driver settings 3-10
For Windows 98SE/Me 3-10
For Windows 2000/XP/Server 2003 ....3-10
3.5 LPR printing ....3-11
Operations on this machine 3-11
Printer driver settings 3-11
For Windows 2000/XP/Server 2003 ....3-11
For Windows NT 4.0 ....3-12
3.6 Port 9100 Printing (Windows 98SE/Me/2000/XP/Server 2003) ....3-13
Operations on this machine 3-13
Printer driver settings (Windows 2000/XP/server 2003) ......3-13
Installing the Peer to Peer Printing Tool to connect using Port 9100 (Windows 98SE/Me) ....3-14
Printer driver settings when installing the Peer to Peer Printing Tool to connect using Port 9100 (Windows 98SE/Me) ....3-14
3.7 IPP printing (Windows 2000/XP/Server 2003) ....3-16
Operations on this machine 3-16
Installing the printer driver 3-18
3.8 Printing with NetWare ....3-20
Network printing in a NetWare environment 3-20
For Remote Printer mode with NetWare 4.x Bindery
Emulation 3-20
For Print Server mode with NetWare 4.x Bindery Emulation .....3-22
For NetWare 4.x Remote Printer mode (NDS) ......3-23
For NetWare 4.x/5.x/6 Print Server mode (NDS) 3-25
For NetWare 5.x/6 Novell Distributed Print Service (NDPS) ...... 3-26
Setting up a client (Windows) settings when using the NetWare
Server 3-27
3.9 Printing with Macintosh ....3-29
Operations on this machine 3-29
Specifying the AppleTalk settings 3-29
Specifying the Bonjour Settings 3-30
Setting the Macintosh computer 3-32
For Mac OS X 3-32
For Mac OS 9.2 3-33
4 Various printing methods
4.1 Printing operations 4-1
For Windows 4-1
Test printing 4-2
For Macintosh 4-3
For Mac OS X 4-3
For Mac OS 9.2 4-4
4.2 Setting the printing functions ....4-5
Function list 4-5
Function overview 4-7
Orientation 4-7
Original Size and Output Size 4-8
Zoom (enlargement and reduction) 4-9
Input Tray (Paper Source) 4-10
Paper Type 4-10
Print Type (duplex printing/booklet printing) 4-11
Printing multiple pages on one page 4-12
Stapling and hole punching 4-13
Output Method (Job Management) 4-14
Sorting (Collating) and Classifying (Offset) 4-14
Skip Blank Pages (saving paper) 4-15
Front Cover, Back Cover, and Transparency Interleave .....4-15
Per Page Setting 4-15
Chapter 4-16
Overlay 4-16
Watermark 4-17
Copy Protect 4-17
Quality Adjustment 4-17
Use Printer Fonts (substitute fonts) 4-18
User Authentication 4-18
Account Track 4-18
4.3 Specifying the printer driver basic settings .....4-19
For Windows 4-19
For Macintosh 4-21
For Mac OS X 4-22
For Mac OS 9.x 4-23
5 Setting up the PCL driver
5.1 Settings ....5-1
Common settings 5-1
Setup tab 5-2
Per Page Setting tab 5-2
Overlay tab 5-3
Watermark tab 5-3
Quality tab 5-3
Font tab 5-3
FAX tab 5-3
Version tab ....5-4
Option tab ....5-4
5.2 Specifying the Setup tab settings ....5-5
Printing to suit the paper size 5-5
Saving a custom size 5-6
Selecting the paper source 5-7
Setting the paper source of the paper type 5-7
Specifying duplex/booklet printing 5-8
Printing multiple pages on one page (N in 1) ....5-9
Setting the file margin 5-10
Stapling 5-11
Hole punching 5-11
Fold & Staple 5-12
Selecting the output method ....5-13
Save in User Box 5-15
Proof and printing 5-15
Specifying user authentication settings 5-16
Specifying account track settings 5-17
5.3 Specifying the Per Page Setting tab settings ....5-19
Printing documents with a front cover/back cover ....5-19
Printing multiple pages 5-20
Chapter 5-20
Per Page Setting 5-20
5.4 Specifying the Overlay tab settings ....5-22
Printing different original documents together (Overlay) .....5-22
Editing forms 5-24
5.5 Specifying the Watermark tab settings 5-26
Printing a watermark 5-26
Editing a watermark 5-26
Printing the document number 5-27
Copy Protect 5-28
5.6 Specifying the Quality tab settings ....5-30
Specifying settings 5-30
5.7 Specifying the Font tab settings ....5-32
Specifying settings 5-32
5.8 Specifying the FAX tab settings ....5-33
Sending a fax 5-33
Creating a cover sheet 5-38
Registering a recipient in the phonebook 5-42
Registering recipient information 5-42
Registering a group 5-45
5.9 Specifying the Option tab settings ....5-47
Specifying settings 5-47
5.10 Saving the driver settings ....5-49
Saving the driver settings 5-49
Deleting the settings 5-50
6 Setting up the PostScript driver (Windows)
6.1 Settings 6-1
Common settings 6-1
Setup tab 6-2
Layout tab 6-3
Per Page Setting tab 6-3
Watermark tab 6-3
Quality tab 6-4
Advanced tab 6-4
Device Settings tab 6-4
Option tab 6-5
Settings tab 6-6
6.2 Specifying the Setup tab settings 6-7
Printing to suit the paper size 6-7
Saving a custom size 6-9
Selecting the output method 6-10
Secured Printing 6-11
Save in User Box 6-12
Proof and printing 6-12
Specifying user authentication settings 6-13
Specifying account track settings 6-15
6.3 Specifying the Layout tab settings 6-16
Printing multiple pages on one page (N in 1) ......6-16
Duplex printing 6-18
Setting the file margin 6-18
Stapling 6-18
Fold & Staple 6-19
Hole punching 6-19
6.4 Specifying the Per Page Setting tab settings 6-20
Printing documents with a front cover/back cover 6-20
6.5 Specifying the Watermark tab settings 6-21
Printing a watermark 6-21
Editing a watermark 6-22
6.6 Specifying the Quality tab settings 6-23
Specifying settings 6-23
Font settings 6-24
6.7 Specifying the Option tab settings 6-25
Specifying settings 6-25
6.8 Saving the driver settings 6-28
Saving the driver settings 6-28
Changing the settings 6-30
7 Setting up the PPD driver (Windows)
7.1 Settings 7-1
Paper tab 7-1
Graphics tab 7-2
Device Options tab 7-2
PostScript tab 7-3
Fonts tab 7-3
7.2 Specifying the Paper tab settings 7-4
Specifying settings 7-4
7.3 Specifying the Device Options tab settings ....7-5
Specifying setting 7-5
7.4 Specifying the options 7-7
Specifying settings 7-7
8 Setting up the PPD driver (Mac OS 9.2)
8.1 Settings 8-1
Page Setup dialog box 8-1
Print dialog box 8-3
8.2 Page Setup 8-6
Page Attributes (basic settings) 8-6
Custom Page Sizes 8-7
PostScript Options 8-8
8.3 Printing 8-9
General (basic settings) 8-9
Layout (printing multiple pages on one page) 8-10
Printer specific options (Finishing Options 1 to 4) ......8-11
8.4 Setting options 8-13
Specifying settings 8-13
9 Setting up the PPD driver (Mac OS X)
9.1 Settings 9-1
Page Setup dialog box 9-1
Print dialog box 9-2
9.2 Page Setup 9-6
Page Attributes (basic settings) 9-6
Custom Paper Size 9-8
9.3 Printing 9-9
Copies & Pages (general settings) 9-9
Layout (printing multiple pages on one page) 9-10
Paper Feed 9-11
Security 9-11
Finishing 9-14
Quality 9-16
Setup 9-17
9.4 Setting options ......9-18
Specifying settings 9-18
9.5 Saving the driver settings 9-19
Saving the driver settings 9-19
Restore the settings 9-19
Changing the settings 9-20
10 Various settings
10.1 Print settings in Utility mode ....10-1
Default settings 10-1
To display the Utility Setting screen 10-1
PDL Setting 10-2
Number of Sets 10-3
Original Direction ....10-4
Spool Setting 10-5
Paper Size Change 10-6
Banner Setting 10-7
Paper Tray 10-8
Default Paper Size 10-10
2-Sided Print 10-11
Bind Direction ....10-12
Staple 10-13
Hole-Punch 10-14
Banner Paper Tray 10-15
Font Setting 10-15
Symbol Set 10-17
Font Size 10-18
Line/Page 10-19
CR/LF Mapping 10-20
PS Error Print 10-21
Print Reports ....10-22
10.2 Printer settings in Administrator mode ....10-23
To display the Administrator Setting screen 10-23
To delete secure print documents 10-25
To specify the "Auto Delete Secure Document" parameter ..... 10-26
Print/Fax Output Settings 10-26
I/F Timeout 10-28
Parallel I/F 10-29
IEEE 1284/USB ....10-30
Capture Print Data 10-30
10.3 Using PageScope Web Connection ....10-32
System requirements ....10-32
Accessing PageScope Web Connection ....10-32
Page structure 10-33
Cache function of Web browsers .....10-35
On Internet Explorer 10-35
On Netscape Navigator 10-35
Logging In and logging out 10-36
Logging out 10-36
Logging in to the User mode (public user) 10-38
Logging in to the User mode (registered user) 10-40
Logging in to the Administrator mode ....10-42
User mode 10-44
System tab 10-44
System tab — Device Information — Consumables .....10-45
System tab — Device Information — Input Tray ......10-47
System tab — Device Information — Output Tray ......10-48
System tab — Device Information — Configuration
Summary 10-49
System tab — Device Information — HDD ......10-50
System tab — Device Information — Interface Information .....10-51
System tab — Device Information — Administrator
Information 10-52
System tab — Meter Count 10-53
System tab — Online Assistance 10-54
System tab — User Authentication — User Password
Change 10-55
System tab — User Authentication — User Information ......10-56
System tab — Account Track Information ....10-57
Job Tab 10-57
Job tab — Current Job 10-58
Job tab — Job History ....10-60
Print tab 10-61
Print Tab — General Settings ....10-61
Print tab — Print Reports ....10-62
Administrator mode ....10-63
Basic operation 10-63
System tab 10-63
System tab — Import/Export ....10-64
System tab — Date/Time — Manual Setting .....10-66
System tab — Date/Time — Time Adjustment Setting ......10-67
System tab — Machine Setting ....10-68
System tab — Device Information ....10-69
System tab — ROM Version ....10-70
System tab — Meter Count ....10-71
System tab — Online Assistance 10-73
System tab — Maintenance — Network Setting Clear .....10-74
System tab — Maintenance — Reset 10-75
System tab — Status Notification Setting .....10-76
System Tab — Total Counter Report Setting ......10-78
System tab — User Authentication — User Registration ......10-79
System tab — User Authentication — Default Function
Permission 10-81
System tab — Account Track Registration .....10-82
Job tab — Job History 10-84
Print tab 10-85
Print tab — Interface 10-85
Print tab — Default Settings — General Settings ....10-86
Print tab — Default Settings — PCL Settings ....10-87
Print tab — Default Settings — PS Settings ....10-88
Scan Tab 10-88
Network tab 10-89
Network tab — TCP/IP — TCP/IP 10-89
Network tab — TCP/IP — IP Address Filtering ....10-91
Network tab — NetWare — NetWare ....10-93
Network tab — NetWare — NetWare Status ....10-95
Network tab — IPP Setting 10-96
Network tab — SNMP Setting 10-98
Network tab — SMB Setting — WINS Setting ......10-99
Network tab — SMB — Print 10-100
Network tab — AppleTalk 10-101
Network tab — Bonjour Setting 10-102
Network tab — SSL/TLS 10-103
Network tab — Authentication 10-103
10.4 Print job management 10-104
Specifying job operations 10-104
Specifying settings (for Windows) 10-104
Specifying settings (for Mac OS X) 10-106
Job storage 10-107
Recalling jobs (Proof and Print) 10-107
Recalling jobs (Secure Print) 10-109
When "Secure Document Access Method" is set to "Mode 1" 10-109
When “Secure Document Access Method” is set to “Mode 2” 10-111
Printing when the User Authentication Is Specified on This Machine ....10-113
Specifying Settings (for Windows) 10-114
Specifying Settings (for Mac OS X) 10-115
Printing with this machine when account track settings have been applied 10-116
Specifying settings (for Windows) 10-117
Specifying settings (for Mac OS X) 10-118
Job operations in PageScope Web Connection 10-118
10.5 Printing on banner paper 10-119
Paper 10-119
Paper types 10-119
Printer drivers and supported operating systems 10-119
Specifying printer driver settings 10-120
To specify printer driver settings 10-120
Printing 10-121
To print 10-121
11 Troubleshooting
11.1 Unable to Print ....11-1
11.2 Unable to specify desired settings or unable to print as specified ....11-3
11.3 Error message 11-5
12 Appendix
12.1 Specifications ....12-1
12.2 Configuration page 12-3
12.3 Font list .... 12-4
PCL font list .... 12-4
PS font list .... 12-5
Demo page .... 12-6
12.4 Glossary 12-7
12.5 Index 12-12
About this user's guide
This User's Guide contains information for using the printing functions of the Konica Minolta printer controller. For details on the copy functions, scanning functions, box functions, and fax functions, refer to the respective User's Guide.
This User's Guide is aimed at users who already have a basic knowledge of computer and copier operations. For Windows or Macintosh operating system and application operations, refer to the operation manual of the respective product.
C300 User's Guides
The User's Guides for this machine are divided by function and consist of the following:
| User's guide Details | |
| Print Operations This User's Guide. | Read this guide when using this machine as a printer. |
| Print Operations Quick Guide Read | this guide when using this machine as a printer. |
| Network Scanner Operations Read | this guide when using this machine as a scanner. |
| Box Operations Read this guide when using this machine's box functions. | |
| Facsimile Operations Please read this guide when using this machine's fax functions. | |
| Network Facsimile Operations Read | this guide when using this machine's network fax (Internet fax, SIP fax, IP address fax) functions. |
Notations
| Product name | |
| KONICA MINOLTA C300This machine | This machine, copier, or printer |
| Integrated network controller Network controller | |
| Printer controller, including this machine, and printing system | Printing system |
| Microsoft Windows Windows | |
Screen images in this user's guide
Unless stated otherwise, the printer driver functions are described using the printer driver for Windows XP.
Using this user's guide
![Various Printing Methods 4 4 Various Printing Methods 4.1 Printing Operations For Windows Data can be printed from an application. Print jobs are specified from the application software. Explains the operation procedure. 1 Open the data in the application, "File", and then click "Pri nt". 2 Check that the printer name has been selected. If the printer is not selected, click the [▼] and select the printer. Windows, dialog boxes, icons, and function names displayed on the screen are enclosed in " ." Button names displayed on the screen are enclosed in[ .] Contents displayed on a screen. 3 Specify the page range and the number of copies to print. Additional explanation of the text is given. Note The Print dialog box differs d epending on the application. C300 4-1](/content/2026/06/1277641/images/f0d118238253f5b76ada1f6e93e92987e149faafdccf612cac01222301097e2f.jpg)
(The page shown above is an example only.)
1 O v e r v i e w
1.1 Printer controller
The printer controller is a device for performing printing functions and network printing functions with this machine.
Role of the printer controller
The printer controller is built into the machine.
You can print from applications on the computer connected to the printing system. When using this machine as a network printer, you can print from applications on the computer.
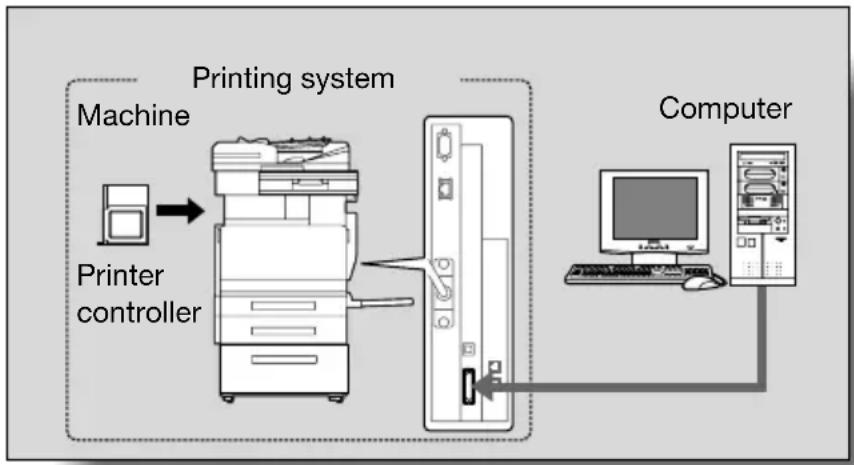
flowchart
graph TD
    A["Printer controller"] --> B["Printing system"]
    B --> C["Computer"]
    B --> D["Machine"]
Available printer controller functions
The printer controller provides the following functions.
- Printing from a computer (using the PCL printer driver or PS printer driver)
●Support of network protocols including TCP/IP, NetBEUI, IPX/SPX, and AppleTalk - Direct printing over a network using SMB (Windows), LPR, and IPP printing
- Access to settings for this machine and the printer controller from a client computer over the network (using a Web browser)
- Control of the number of pages printed ("User Authentication" and "Account Track" functions)
●Fax operations using a computer (fax transmission)

Note
To perform fax operations, optional fax kit FK-502 is required.
Machine modes
The printer driver settings are mainly set using a computer, however, the font list can be printed, and the printer controller settings and default print settings can be set using the control panel of this machine. In addition, fax and scanning operations can be used by switching the mode.
To switch between modes, press the mode keys on the control panel.
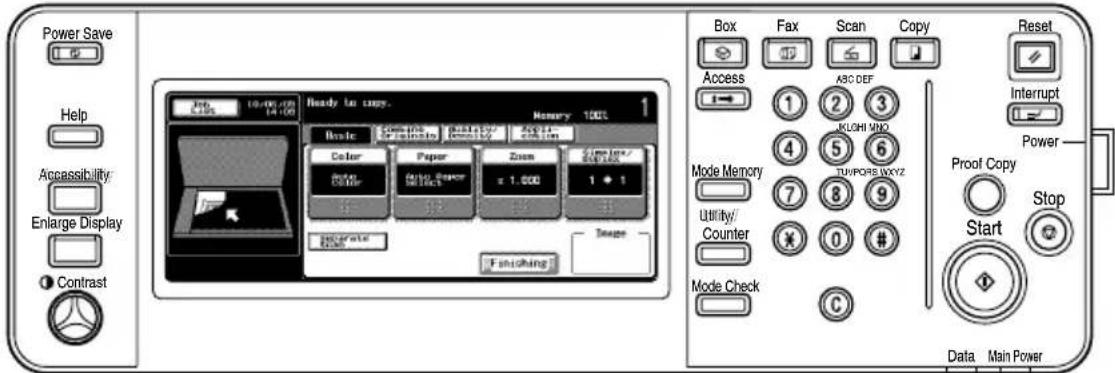
[Copy]
This machine can be used as a copier.
[Scan]
This machine can be used as a scanner.
[Fax]
This machine can be used for faxing.
[Box]
This machine can be used to store jobs and as a document folder for forwarding data to a computer over the network.

Note
You can use this machine as a printer in all modes.
Change the default print settings in the Utility mode.
Printing flow
When using this printing system as a printer, the flow of the main process is described below.
Print commands transmitted from the application are received by the printer driver.
Data is transmitted to this machine over a parallel interface (IEEE 1284) when this machine is used as a local printer, over a USB interface when this machine is used as a USB printer, or over an Ethernet interface (TCP/IP, IPX/SPX, AppleTalk) when this machine is used as a network printer. The data is then delivered from this machine to the printer controller, which performs image rasterization (development of output characters and images to bitmap data). Finally, this data is printed from this machine.

Note
The parallel and USB interfaces cannot be used simultaneously.
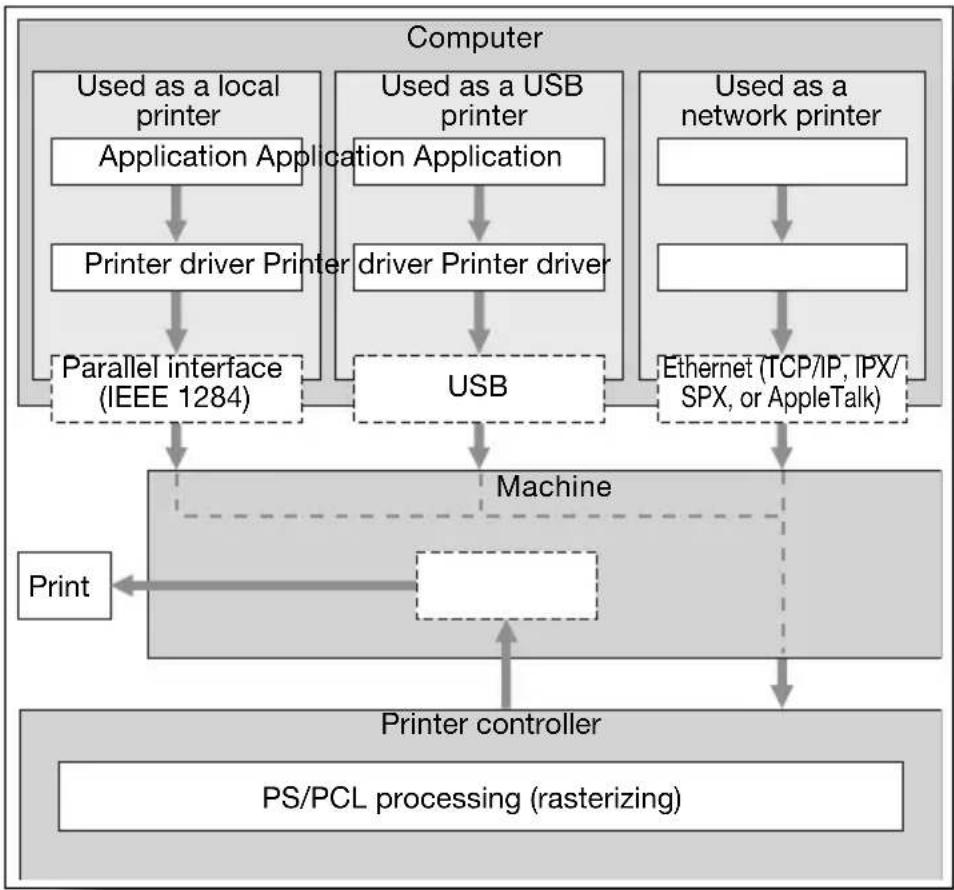
flowchart
graph TD
    A["Computer"] --> B["Used as a local printer"]
    A --> C["Used as a USB printer"]
    A --> D["Used as a network printer"]
    B --> E["Application Application"]
    C --> F["Application Application"]
    D --> G["Network"]
    E --> H["Printer driver Printer"]
    F --> I["Driver Printer driver"]
    G --> J["Ethernet (TCP/IP, IPX/SPX, or AppleTalk)"]
    H --> K["Parallel interface (IEEE 1284)"]
    I --> L["USB"]
    J --> L
    K --> M["Machine"]
    L --> M
    M --> N["Print"]
    N --> O["Printer controller"]
    O --> P["PS/PCL processing (rasterizing)"]
Original documents can be scanned in the copy function or network scan function while this machine is operating as a printer.
To use this machine as a copier, press the [Copy] key on the control panel.
When a print job is received during copying, the data is stored in the memory of this machine. When copying is complete, the print job is automatically printed.
Flow of the computer faxing operation
Conventionally, faxes are sent by loading an original into a fax machine and sending it.
With computer faxing, you can send a fax directly from your computer without using any paper.
Transmission commands sent from the application are received by the printer driver.
Data is transmitted to this machine over a parallel interface (IEEE 1284) when this machine is used as a local printer, over a USB interface when this machine is used as a USB printer, or over an Ethernet interface (TCP/IP, IPX/SPX, AppleTalk) when this machine is used as a network printer. The data is then delivered from this machine to the printer controller, which performs image rasterization (development of output characters and images to bitmap data). Finally, this data is stored in the memory of this machine and transmitted like a conventional fax job.
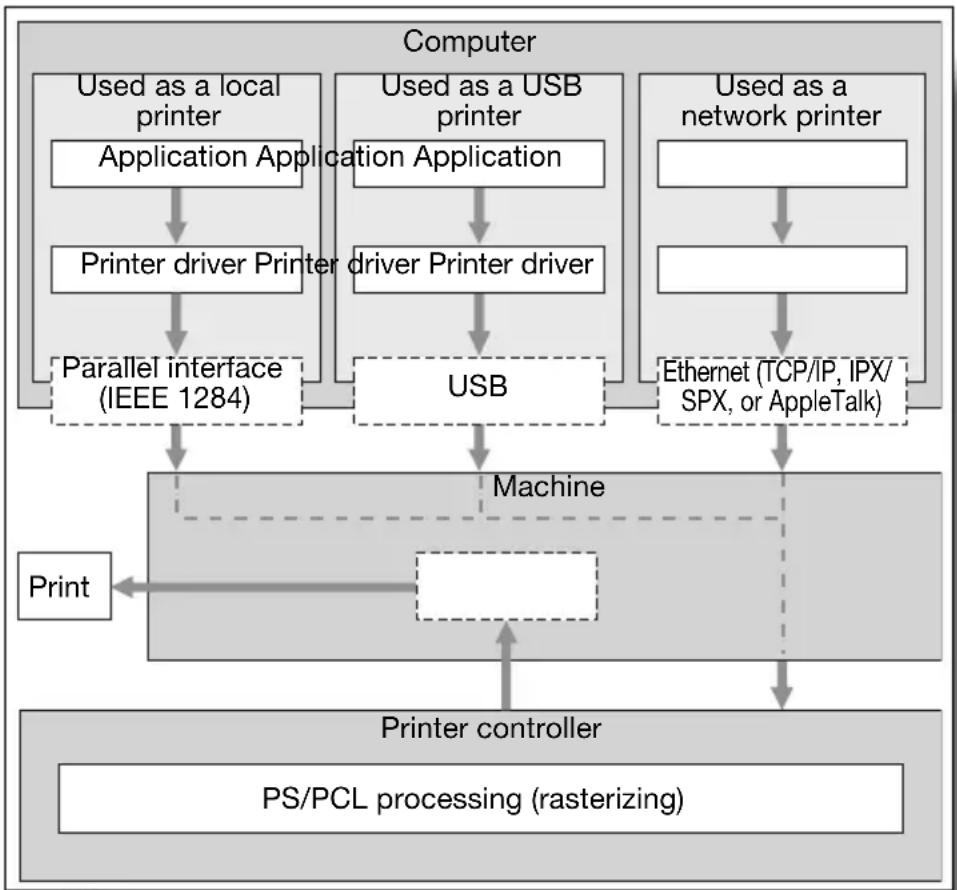
flowchart
graph TD
    A["Computer"] --> B["Used as a local printer"]
    A --> C["Used as a USB printer"]
    A --> D["Used as a network printer"]
    B --> E["Application Application"]
    C --> F["Application Application"]
    D --> G["Network"]
    E --> H["Printer driver Printer driver"]
    F --> I["Printer driver Printer driver"]
    G --> J["Ethernet (TCP/IP, IPX/SPX, or AppleTalk)"]
    H --> K["Parallel interface (IEEE 1284)"]
    I --> L["USB"]
    J --> M["Machine"]
    K --> N["Print"]
    L --> O["Print controller"]
    M --> P["PS/PCL processing (rasterizing)"]
1.2 Operation environment
The system requirements for using this printing system and the interfaces used for connection are explained below.
Compatible computers and operating systems
Check that the computer being connected meets the following conditions.
Windows
| Item Operating environment | |
| Operating System Windows 98 | Second Edition, Windows Me, Windows NT 4.0(Service Pack 6a or later), Windows 2000 Professional (Service Pack 4 or later), Windows XP Home Edition/Windows XP Professional (Service Pack 2 or later), or Windows Server 2003 |
| Processor Pentium or higher | |
| Memory Capacity recommended | for the operating systemWith sufficient memory resources in the operating system and application being used |
| Drive CD-ROM | |
| Web Browser (when using PageScope Web Connection) | Microsoft Internet Explorer 6 or later recommended (JavaScript enabled, Cookies enabled)Microsoft XML Parser MSXML3.X must be installed when using Internet Explorer 5.5.Netscape Navigator 7.02 or later (JavaScript enabled, Cookies enabled)Macromedia ^ Flash ^ (If “Flash” is selected in View Mode, version 7.0 or later plugin is required.) |
Macintosh
| Item Operating environment | |
| Operating System Mac OS 9.2, | Mac OS X 10.2, Mac OS X 10.3, or Mac OS X 10.4 |
| Processor PowerPC, Intel Processor | |
| Memory Capacity recommended | for the operating system |
| Drive CD-ROM | |
| Web Browser (when using PageScope Web Connection) | Netscape Navigator 7.02 or later (JavaScript enabled, Cookies enabled)Macromedia® Flash® (If “Flash” is selected in View Mode, version 7.0 or later plugin is required.) |
Compatible interfaces
The various interfaces that can be used to connect this printing system to a computer are described below.
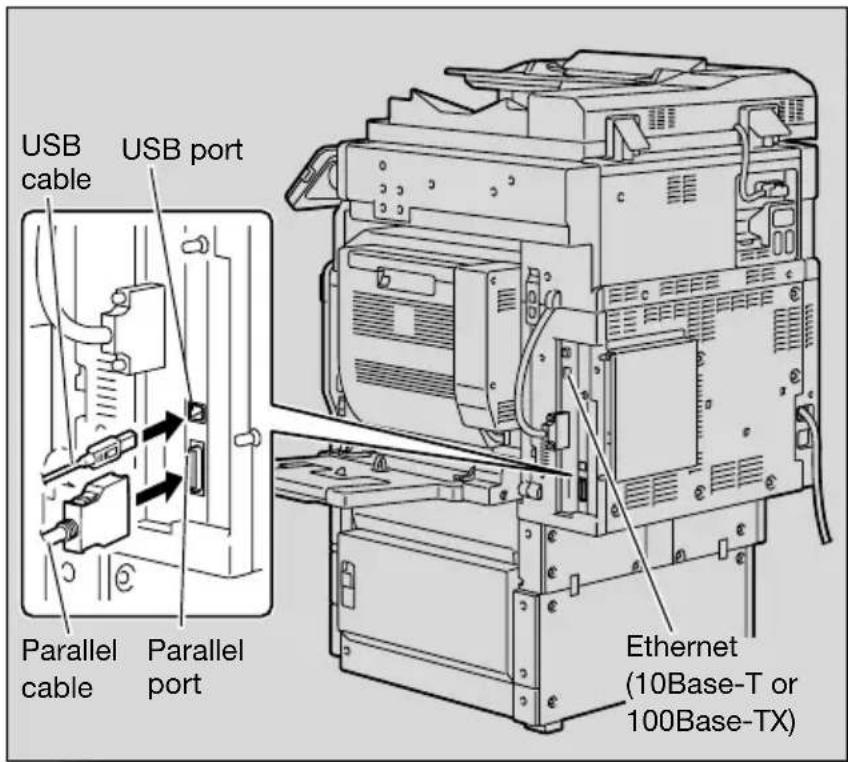
Ethernet interface
Connect when using this printing system as a network printer.
Supports 10Base-T and 100Base-TX standards. In addition, the Ethernet interface supports the TCP/IP (LDP/LPR, peer-to-peer), IPX/SPX (NetWare), and AppleTalk (EtherTalk).
Parallel interface (optional)
Connect when using this printing system as a local printer.
A computer running Windows and an IEEE 1284 parallel cable are required for connection. Use a parallel cable that uses a terminal with an Amphenol 36-pin male connector.
The parallel interface supports the compatible, nibble, and ECP modes.
USB interface (optional)
Connect when using this printing system as a network printer.
The USB interface can be connected to a computer running Windows. A USB cable is required for connection. Use a type A (4 pin, male) or type B (4 pin, male) USB cable. A USB cable measuring 3 meters or less is recommended.
The parallel and USB interfaces cannot be used simultaneously. You can switch the interfaces in the administrator mode.
Connection diagram
The printer cables can be connected to each port at the back of this machine.
Machine (rear view)
1.3 Setting up the system
In order to use this printing system, it must first be set up.
Setup consists of connecting this machine to a computer and installing the printer driver onto the computer being used.
To set up the printing system
Setup of the printing system as described below.
1 Connect this machine to a computer. (Refer to “Compatible interfaces” on page 1-6.)
2 Install the printer driver. (Refer to "Installing the printer driver" on page 2-1.)
3 When using a network connection, set up the network. (Refer to "Setting up network printing" on page 3-1.)
4 Check the setup by printing a test page. (Refer to "Test printing" on page 4-2.)
5 Install the screen fonts.
- The User Software CD-ROM and the PostScript Printer Driver CD-ROM contain the Latin TrueType fonts as screen fonts.
- Install the screen fonts after adding the operating system standard fonts.
- For details, refer to Help of the operating system.
- The CD-ROM "Screenfont" or "Screenfonts" folder contains the screen fonts.
- The Macintosh fonts are compressed. Install the fonts after decompressing them.
Installation of the printer driver may differ depending on the connection method used with this machine in addition to the operating system of the computer and the type of printer driver being used.

Detail
For details on connecting this machine to a computer, refer to “Compatible interfaces” on page 1-6.

Note
To update an existing printer driver, delete the existing printer driver first. For details, refer to “Uninstalling the printer driver” on page 2-14 and page 2-23.
As necessary, set the interface timeout settings and parallel interface mode (Compatible, Nibble, or ECP) in the Utility mode on the control panel. For details, refer to “Printer settings in Administrator mode” on page 10-23.
When using the parallel or USB local port, you must select the port being used. For details, refer to "IEEE 1284/USB" on page 10-30.
2 Installing the printer driver
2.1 Printer drivers and supported operating systems
In order to use this printing system, the printer driver must be installed. The printer driver is a program that controls the processing of data for output. Install the printer driver onto the computer from the provided CD-ROM.
The printer drivers included on the CD and the supported computer operating systems are listed below. Install the required printer driver.
| Printer driver Page description language | Supported operating systems | |
| Konica Minolta PCL Driver | PCL (PCL XL) | Windows 98 Second Edition, Windows Me, Windows NT 4.0 (Service Pack 6a), Windows 2000 Professional (Service Pack 4 or later), Windows XP Home Edition/Professional (Service Pack 2 or later), and Windows Server 2003 |
| Konica Minolta PostScript Driver | PostScript 3 Emulation | Windows NT 4.0 (Service Pack 6a), Windows 2000 Professional (Service Pack 4 or later), Windows XP Home Edition/Professional (Service Pack 2 or later), Windows XP Professional x64, Windows Server 2003, and Windows Server 2003 x64 |
| PostScript PPD Driver | Windows 98 Second Edition | ition, Windows Me |
| Mac OS 9.2 or later, Mac OS X 10.2, Mac OS X 10.3, and Mac OS X 10.4 | ||
* The User Software CD-ROM contains the PCL printer driver, and the PostScript Printer Driver CD-ROM contain the PostScript driver.
2.2 When used with Windows
The installation procedure for the Windows printer driver differs depending on how this machine is connected to the computer and depending on which printer driver is used. The installation method also differs depending on the version of Windows that you are using. Refer to the table below for the appropriate procedure for installing the printer driver on your computer.
| Printer driver Connection method Refer to | ||
| Konica Minolta PCL DriverKonica Minolta PostScript Driver | All connection methods “Automatic installation using the installer” on page 2-3 | |
| Konica Minolta PCL DriverKonica Minolta PostScript DriverPostScript PPDDriver | Network connection “Installing the printer driver using the Add Printer Wizard” on page 2-6“For Windows 98SE/Me/2000/NT 4.0” on page 2-9“For Windows XP/Server 2003” on page 2-6 | |
| Parallel connection “Installing the printer driver using Plug and Play” on page 2-11“For Windows 98SE” on page 2-11“For Windows Me/2000” on page 2-12“For Windows XP/Server 2003” on page 2-13 | ||
| USB connection “Installing the printer driver using Plug and Play” on page 2-11“For Windows 98SE” on page 2-11“For Windows Me/2000” on page 2-12“For Windows XP/Server 2003” on page 2-13 | ||

Note
For details on installing the printer driver in a network environment, refer to “Setting up network printing” on page 3-1. Because it is necessary to specify other network settings in advance when installing the printer driver using a network connection, install it using a local connection at this time.
To install the printer driver under Windows XP, Windows Server 2003, Windows 2000, or Windows NT 4.0, log on using a user name that is authorized by the administrator.
To connect this machine to a computer using a parallel connection or a USB connection, the optional local interface kit is required.
Automatic installation using the installer
With the installer, this machine is detected to determine whether it is connected by USB or is on the same TCP/IP network as the computer, and then the required printer driver is automatically installed. You can also manually specify the printer driver to be installed.

Note
Since this machine is automatically detected with a network connection, be sure to set the IP address of this machine before connecting it. For details on specifying the settings, refer to “Setting the IP address for this machine” on page 3-5.
When installing on Windows NT 4.0, 2000, XP, or Server 2003, administrator permissions are required.
If the wizard starts up in order to add new hardware with a USB or parallel connection, click [Cancel].
For IPP printing, it is not necessary to install the printer driver at this time since IPP printing setup is performed when the printer driver is installed. For further details on IPP printing, refer to “IPP printing (Windows 2000/XP/Server 2003)” on page 3-16.
Installer operating environment
| Item Operating environment | |
| Operating System Windows | 98 Second Edition, Windows Me, Windows NT 4.0 (Service Pack 6a or later)*, Windows 2000 Professional (Service Pack 4 or later), Windows XP Home Edition/Windows XP Professional (Service Pack 2 or later), or Windows Server 2003 |
| Processor Pentium 300 MHz or higher recommended | |
| Memory 64 MB or more (128 MB or more recommended) | |
* With Windows NT 4.0, in order to install a machine that is connected directly to a network using the TCP/IP protocol, Windows TCP/IP Printing Services must first be installed on the computer being used.
To install the printer driver
1 Insert the Windows printer driver CD-ROM into the computer's CD-ROM drive.
- For the User Software CD-ROM (for a PCL driver), check that the installer starts up, and then continue with step 2.
- For the PostScript Printer Driver CD-ROM (Win) (for a PS driver), double-click "UserInst.exe" in the Driver folder on the CD-ROM, and then continue with step 3.
2 Click "Printer Install".
The installation of the printer driver starts.
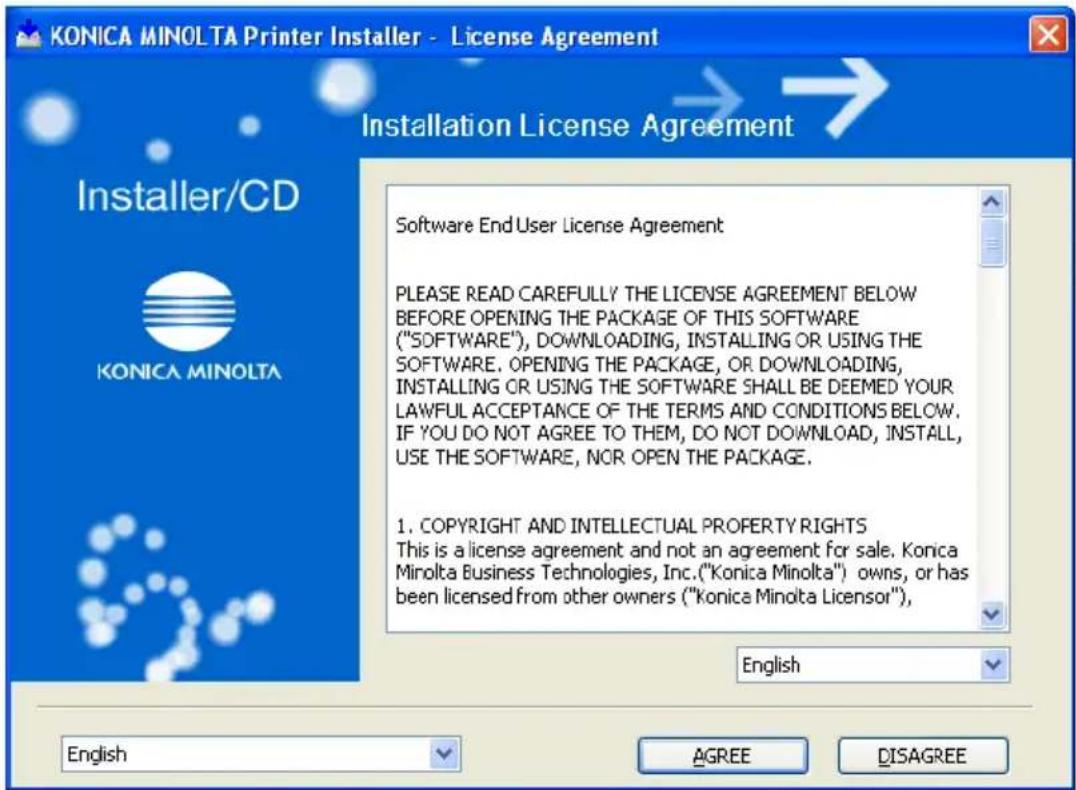
3 Click the [AGREE] button if you agree with all terms and conditions of the license agreement.
- If you do not agree with the terms and conditions of the license agreement, the software cannot be installed.
- You can change the display language of the installer box in the lower-left corner.
4 When the setup selection dialog box appears, click the "Install printers/MFPs" button, and then click the [Next] button.
The connected printers and copiers are detected.
5 Select this machine and proceed with the installation. Follow the on-screen instructions to complete the installation.
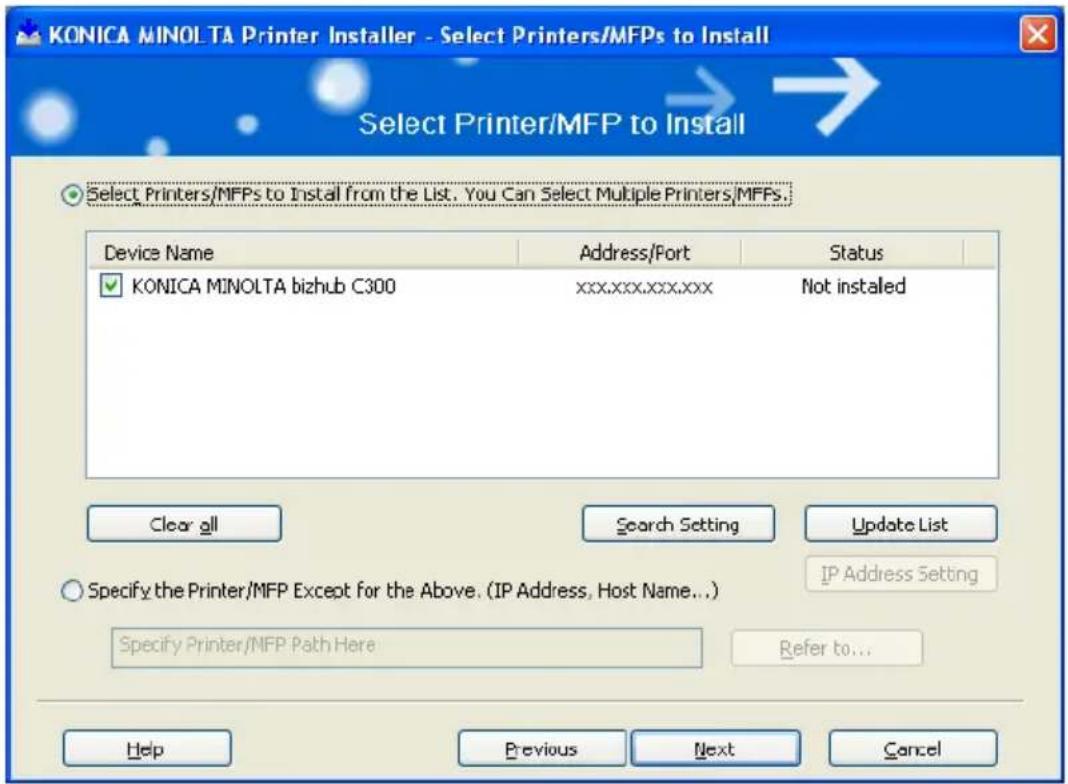
- If the connection of this machine cannot be recognized or for parallel connections, the machine will not be listed. When this occurs, select "Specify the Printer/MFP Except for the Above. (IP Address, Host Name)", and then specify this machine directly.
Installing the printer driver using the Add Printer Wizard

Note
For IPP printing, it is not necessary to install the printer driver at this time since IPP printing setup is performed when the printer driver is installed.
For further details on IPP printing, refer to "IPP printing (Windows 2000/XP/Server 2003)" on page 3-16.

Note
For details on installing the printer driver in a network environment, refer to “Setting up network printing” on page 3-1. Because it is necessary to specify other network settings in advance when installing the printer driver using a network connection, install it using a local connection at this time.
For Windows XP/Server 2003
1 Insert the Windows printer driver CD-ROM into the computer's CD-ROM drive.
- Konica Minolta PCL Driver: User Software CD-ROM
- Konica Minolta PostScript Driver: PostScript Printer Driver CD-ROM
2 Click the [Start] button, and then click "Printers and Faxes".
- If “Printers and Faxes” does not appear in the Start menu, open the Control Panel from the Start menu, select “Printers and Other Hardware”, and then select “Printers and Faxes”.
3 For Windows XP, click "Add a printer" on the "Printer Tasks" menu. – For Windows Server 2003, double-click the "Add Printer" icon.
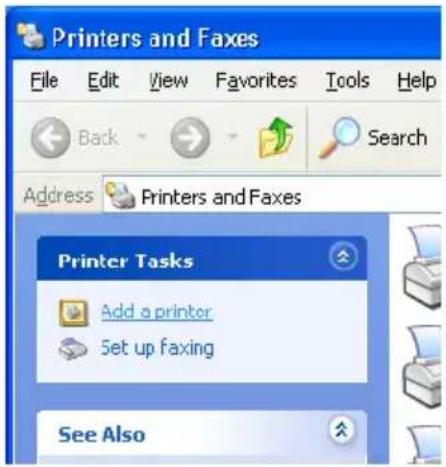
Windows XP Windows Server 2003
The Add Printer Wizard starts up.
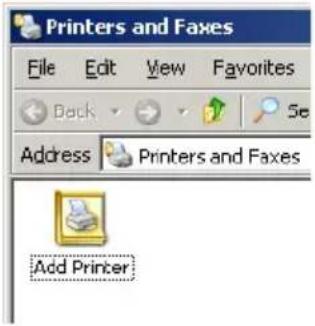
4 Click the [Next] button.
5 Select "Local printer attached to this computer", and then click the [Next] button.
- Clear the "Automatically detect and install my Plug and Play printer" check box.
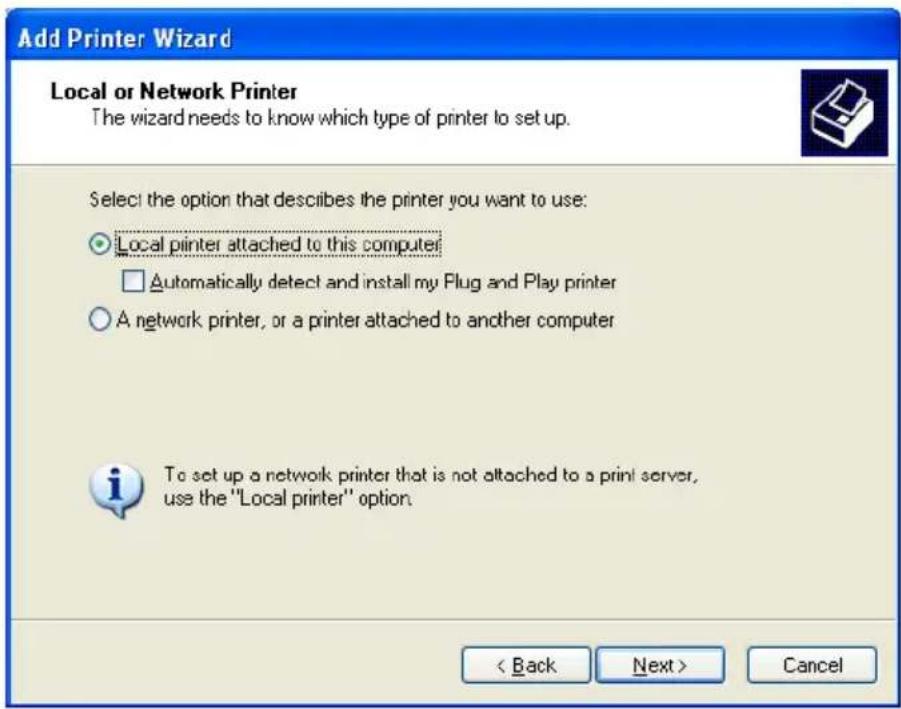
6 The Select Printer Port dialog box appears. Select "LPT1" here, and then click the [Next] button.
7 Click the [Have Disk] button.
8 Click the [Browse] button.
9 Specify the folder on the CD-ROM that contains the printer driver for the operating system that you are using, and then click the [OK] button.
- Konica Minolta PCL Driver: User Software CD-ROM "Driver\bizhubC352" folder
- Konica Minolta PostScript Driver: PostScript Printer Driver CD-ROM "Driver\bizhubC352" folder
10 Click the [OK] button.
- The "Printers" list appears.
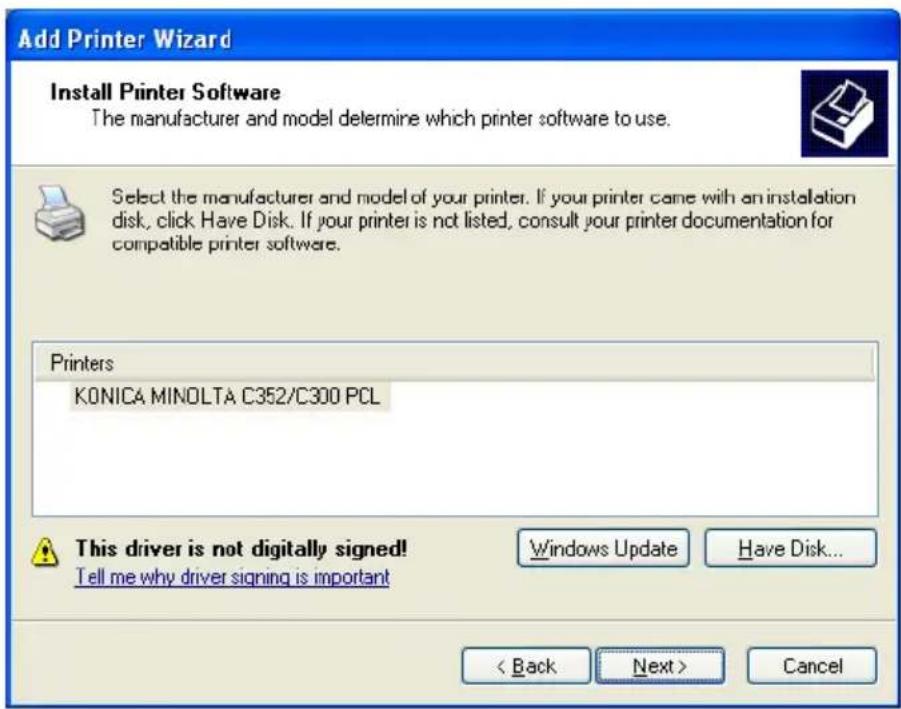
11 Click the [Next] button.
12 Follow the on-screen instructions.
- When the Digital Signature message appears, click the [Continue] button.
- When using a network connection, perform a test print after the network settings have been specified.
13 When installation is complete, make sure that the icon of the installed printer appears in the Printers and Faxes window.
14 Remove the CD-ROM from the CD-ROM drive.
This completes the printer driver installation.
For Windows 98SE/Me/2000/NT 4.0
1 Insert the Windows printer driver CD-ROM into the computer's CD-ROM drive.
- Konica Minolta PCL Driver: User Software CD-ROM
- Konica Minolta PostScript Driver: PostScript Printer Driver CD-ROM
2 Click the [Start] button, point to "Settings", and then click "Printers". The Printers window appears.
3 Double-click the "Add Printer" icon. The Add Printer Wizard starts up.
4 Follow the on-screen instructions.
5 On the screen for selecting the printer connection, select "Local Printer".
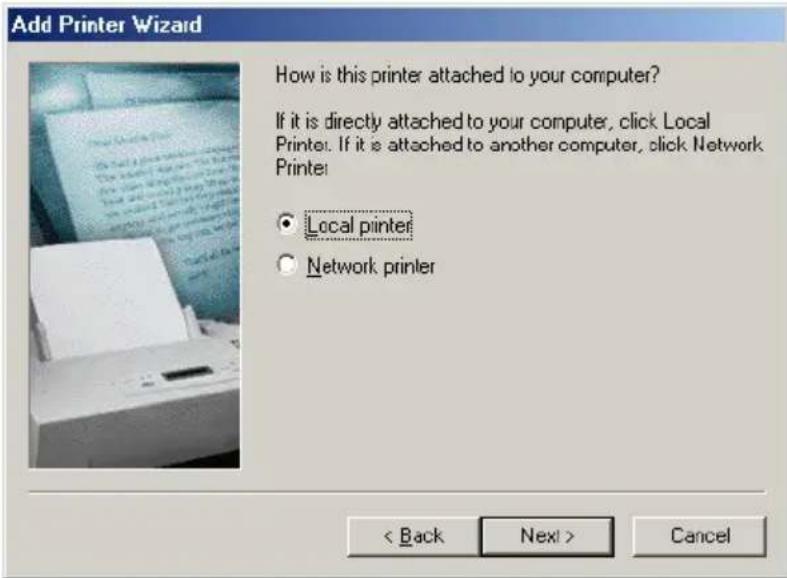
6 Click the [Next] button.
7 Click the [Have Disk] button.
8 Click the [Browse] button.
9 Specify the directory on the CD-ROM that contains the printer driver for the operating system that you are using, and then click the [OK] button.
- For Windows 98SE/Me
Konica Minolta PCL driver: User Software CD-ROM
"Driver\bizhubC352" folder
PostScript PPD driver: PostScript Printer Driver CD-ROM
"Driver\PS-PPD" folder - For Windows 2000
Konica Minolta PCL driver: User Software CD-ROM
"Driver\bizhubC352" folder
Konica Minolta PostScript driver: PostScript Printer Driver CD-
ROM "Driver\bizhubC352" folder - For Windows NT 4.0
Konica Minolta PCL driver: User Software CD-ROM
"Driver\bizhubC352" folder
Konica Minolta PostScript driver: PostScript Printer Driver CD-
ROM "Driver\bizhubC352" folder
10 Click the [OK] button.
The "Printers" list appears.
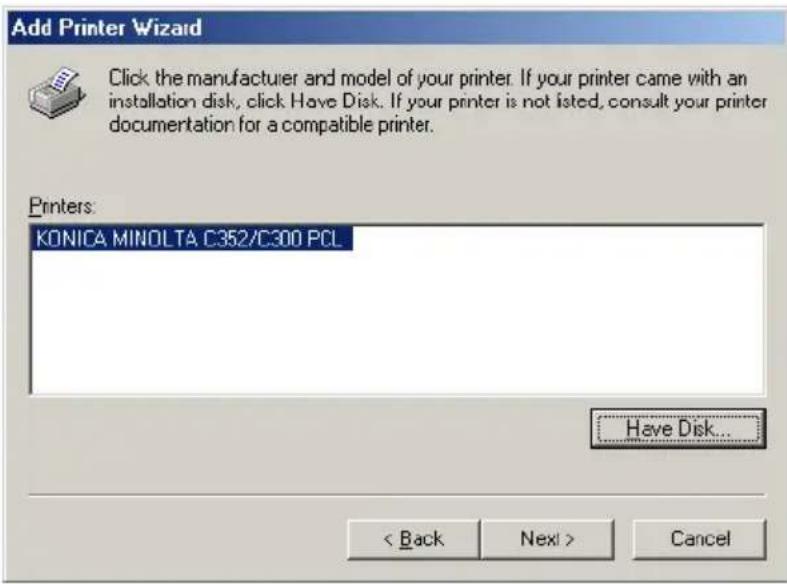
11 Click the [Next] button.
12 Specify the connection port. Select "LPT1" here.
13 Follow the on-screen instructions.
- When using a network connection, perform a test print after the network settings have been specified.
14 When installation is complete, make sure that the icon of the installed printer appears in the Printers window.
15 Remove the CD-ROM from the CD-ROM drive.
This completes the printer driver installation.
Installing the printer driver using Plug and Play
For Windows 98SE
1 After using a parallel cable or a USB cable to connect this machine to a computer, turn on the computer.
- Do not disconnect or connect the cable while the computer is starting up.
2 Insert the Windows printer driver CD-ROM into the computer's CD-ROM drive.
- Konica Minolta PCL Driver: User Software CD-ROM
- Konica Minolta PostScript Driver: PostScript Printer Driver CD-ROM
3 Turn the main power of this machine on.
The Add New Hardware Wizard starts up.
4 Click the [Next] button.
5 Select "Search for the best driver for your device (Recommended)", and then click the [Next] button.
6 Select "Specify a location", and then click the [Browse] button.
7 Specify the folder on the CD-ROM that contains the printer driver for the operating system that you are using, and then click the [OK] button.
- Konica Minolta PCL Driver: User Software CD-ROM "Driver\bizhubC352" folder
- PostScript PPD driver: PostScript Printer Driver CD-ROM "Driver\PS-PPD" folder
8 Click the [Next] button, and then follow the on-screen instructions. If using a parallel connection, proceed to step 10.
9 The Add New Hardware Wizard dialog box appears again. Repeat steps 4 through 8.
10 When installation is complete, make sure that the icon of the installed printer appears in the Printers window.
11 Remove the CD-ROM from the CD-ROM drive.
This completes the printer driver installation.
For Windows Me/2000
1 After using a parallel cable or a USB cable to connect this machine to a computer, turn on the computer.
- Do not disconnect or connect the cable while the computer is starting up.
2 Insert the Windows printer driver CD-ROM into the computer's CD-ROM drive.
- Konica Minolta PCL Driver: User Software CD-ROM
- Konica Minolta PostScript Driver: PostScript Printer Driver CD-ROM
3 Turn the main power of this machine on.
- For Windows Me
The Add New Hardware Wizard starts up.
- For Windows 2000
The Found New Hardware Wizard starts up.
4 Select "Search for a suitable driver for my device (recommended)" (for Windows Me, select "Automatic search for a better driver (Recommended)"), and then click the [Next] button.
5 For Windows 2000, select "Specify a location", and then click the [Next] button.
For Windows Me, select "Specify a Location", and then click the [Browse] button.
6 Specify the folder on the CD-ROM that contains the printer driver for the operating system that you are using, and then click the [OK] button.
Printer drivers that can be selected:
- For Windows Me
Konica Minolta PCL driver: User Software CD-ROM
"Driver\bizhubC352" folder
Postscript PPD: PostScript Printer Driver CD-ROM
"Driver\PS-PPD" folder
- For Windows 2000
Konica Minolta PCL driver: User Software CD-ROM
"Driver\bizhubC352" folder
Konica Minolta PostScript driver: PostScript Printer Driver CD-ROM
"Driver\bizhubC352" folder
7 Click the [OK] button (for Windows Me, click the [Next] button), and then follow the on-screen instructions.
8 Click the [Finish] button.
9 When installation is complete, make sure that the icon of the installed printer appears in the Printers window.
10 Remove the CD-ROM from the CD-ROM drive.
This completes the printer driver installation.
For Windows XP/Server 2003
1 After using a parallel cable or a USB cable to connect this machine to a computer, turn on the computer.
- Do not disconnect or connect the cable while the computer is starting up.
2 Insert the Windows printer driver CD-ROM into the computer's CD-ROM drive.
- Konica Minolta PCL Driver: User Software CD-ROM
- Konica Minolta PostScript Driver: PostScript Printer Driver CD-ROM
3 Turn the main power of this machine on.
The Found New Hardware Wizard starts up.
If the Add New Hardware Wizard does not appear, turn the power of this machine off, then on again.
When turning the power off, then on again, be sure to turn the sub-power switch off first, then the main power switch. In addition, wait at least 10 seconds before turning the power on again; otherwise, this machine may not function properly.
4 Select "Install from a list or specific location (Advanced)", and then click the [Next] button.
5 Under "Search for the best driver in these locations", select "Include this location in the search", and then click the [Browse] button.
6 Depending on the operating system and printer driver that you are using, specify the folder on the CD-ROM that contains the printer driver, and then click the [OK] button.
- Konica Minolta PCL driver: User Software CD-ROM "Driver\bizhubC352" folder
- Konica Minolta PostScript driver: PostScript Printer Driver CD-ROM "Driver\bizhubC352" folder
7 Click the [Next] button, and then follow the on-screen instructions.
- When the Digital Signature dialog box appears, click the [Continue] button.
8 Click the [Finish] button.
9 When installation is complete, make sure that the icon of the installed printer appears in the Printers and Faxes window.
10 Remove the CD-ROM from the CD-ROM drive.
This completes the printer driver installation.
Uninstalling the printer driver
If it becomes necessary to delete the printer driver, for example, when you want to reinstall the printer driver, follow the procedure below to delete the driver.
1 For Windows 98SE/Me/2000/NT 4.0, click the [Start] button, point to "Settings", and then click "Printers".
For Windows XP/Server 2003, click the [Start] button, and then click "Printers and Faxes".
- If “Printers and Faxes” does not appear in the Start menu, open the Control Panel from the Start menu, select “Printers and Other Hardware”, and then select “Printers and Faxes”.
2 In the Printers window (for Windows XP/Server 2003, Printers and Faxes window), select the icon of the printer that you want to delete.
3 Press the [Delete] key on the computer keyboard to delete the printer driver.
4 Follow the on-screen instructions.
When the printer driver has been deleted, the printer icon will disappear from the Printers window (for Windows XP/Server 2003, Printers and Faxes window).
For Windows 98 Second Edition/Me/NT 4.0, this completes the uninstallation procedure.
For Windows 2000/XP/Sever 2003, delete the driver from the server properties.
5 Click the "File" menu, and then click "Server Properties".
6 Click the Driver tab.
7 Select the printer driver to be deleted from the Installed Printer Drivers list, and then click [Delete].
8 On the Deletion Confirmation dialog box, click the [Yes] button.
9 Close the Print Server Properties dialog box and Printers window (for Windows XP/Server 2003, "Printers and Faxes" window).
10 Restart the computer.
This completes the uninstallation procedure.

Note
Even if the printer driver is deleted using the method described above, the model information file will remain in the computer. Therefore, the driver may not be able to be overwritten when reinstalling the same version of the printer driver. When installing the same version of the printer driver, be sure to also delete the files described below.
Check the "C:\WINDOWS\system32\spool\drivers\w32x86" folder and delete the folder of the corresponding model if it is available. If the Konica Minolta PCL driver and Konica Minolta PostScript driver are both installed, the model information of both drivers is deleted. If one driver is remaining, do not delete it.
Delete the "oem*.inf" and "oem*.PNF" files in the "C:\WINDOWS\inf" folder. (The asterisk (*) in the file name displays a number, and the number varies according to the environment of the computer.) Before deleting the files, open the INF file, check that the model name is described in the last several lines, and then check that the file of the corresponding model is available.
The PNF file is the same number as the INF file.
2.3 When used with Macintosh
The installation procedure for the Macintosh printer driver differs depending on the Mac OS version and printer driver being used. Refer to the table below for the appropriate procedure for installing the printer driver on your Macintosh computer.
| Mac OS Printer driver Refer to | ||
| Mac OS X 10.2, Mac OS X 10.3, and Mac OS X 10.4 | PostScript PPD “Installing the printer driver” on page 2-16 | |
| Mac OS 9.2 or later | PostScript PPD “Selecting a printer” on page 2-18 | |
Installing the printer driver
For Mac OS X
1 Turn the Macintosh computer on.
2 Insert the Macintosh printer driver CD-ROM into the Macintosh computer's CD-ROM drive.
- Quit all running applications that may have started when the Macintosh computer was turned on.
3 Open the "OS10_2_X" or "OS10_3_X" folder from "English"—"Driver" on the CD-ROM.
4 Select the Mac OS version being used, and then copy the drive file onto the desktop.
Mac OS X 10.2: KONICAMINOLTA_C352_102.pkg
Mac OS X 10.3: KONICAMINOLTA_C352_103.pkg
Mac OS X 10.4: KONICAMINOLTA_C352_103.pkg
5 Double-click the file copied onto the desktop.
- Enter the requested administrator's name and password.
- For the administrator's name and password, ask your network administrator.
- To quit the installation, click the [Cancel] button.
6 Click the [Continue] button and follow the on-screen instructions until the Installation dialog box appears.
7 On the Installation dialog box, click the [Install] button.
- From the second time the printer driver is installed and thereafter, the [Install] button may appear as the [Upgrade] button.
The printer driver is installed onto the Macintosh computer. When installation is complete, a message appears.
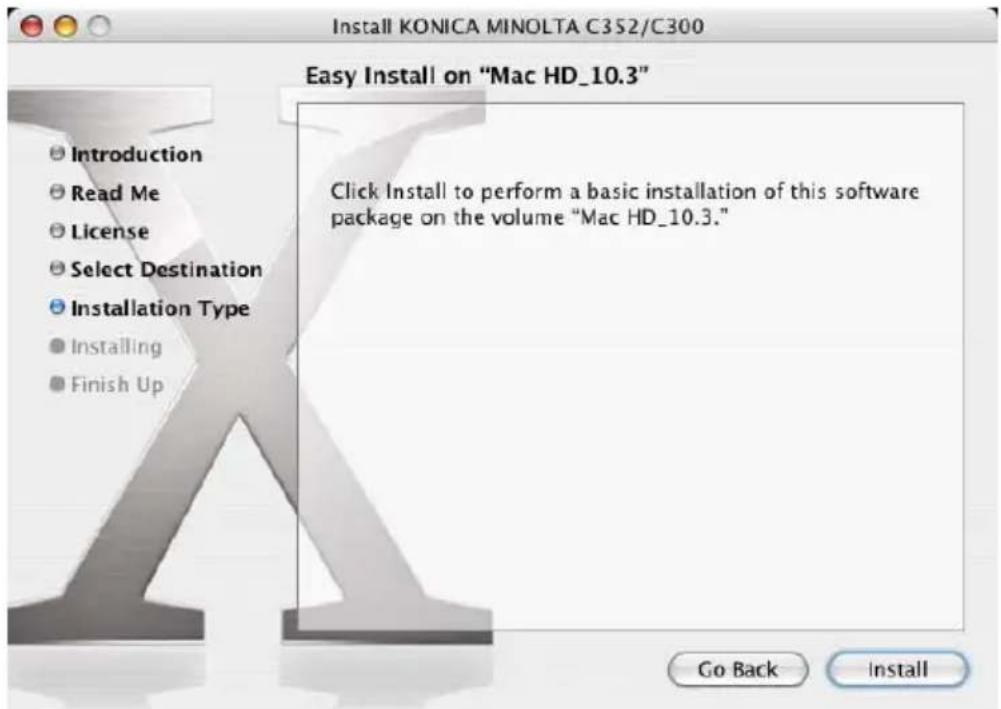
8 Click the [Close] button.
This completes the printer driver installation. Next, select the printer.
Selecting a printer

Note
If connecting using AppleTalk, the AppleTalk settings on this machine must be specified. For specifying the AppleTalk settings, refer to “Printing with Macintosh” on page 3-29.
If connecting using Bonjour with Mac OS X 10.4, the Bonjour settings must be specified on this machine. For specifying the Bonjour settings, refer to “Printing with Macintosh” on page 3-29.
If connecting using Rendezvous with Mac OS X 10.3, the Bonjour settings must be specified on this machine. For specifying the Bonjour settings, refer to “Printing with Macintosh” on page 3-29.
For Mac OS X
After connecting this machine to a Macintosh computer, it can be used as a printer by selecting it in Print Center or the Printer Setup Utility as the printer to be used.
1 Open Print Center or Printer Setup Utility, located in "Applications"—"Utilities" of "Hard Disk".
2 When the Add Printer dialog box appears, click the [Add] button. When the printer list appears, click the [Add] button.
- For Mac OS X 10.4, proceed to step 3.
- For Mac OS X 10.2 and Mac OS X 10.3, proceed to step 4.
- If usable printers have already been set up, the Add Printer dialog box does not appear.
3 If this machine appears as a printer of a Bonjour connection, select "KONICA MINOLTA" from the "Print Using" drop-down list, select "KONICA MINOLTA C352/C300 PS(P)" in the model list, and then click the [Add] button.
- If the selected printer is registered in the printer list, this completes the setting procedure.
- When connecting with AppleTalk and this machine does not appear as a printer, click the [More Printers] button, and then proceed to step 4.
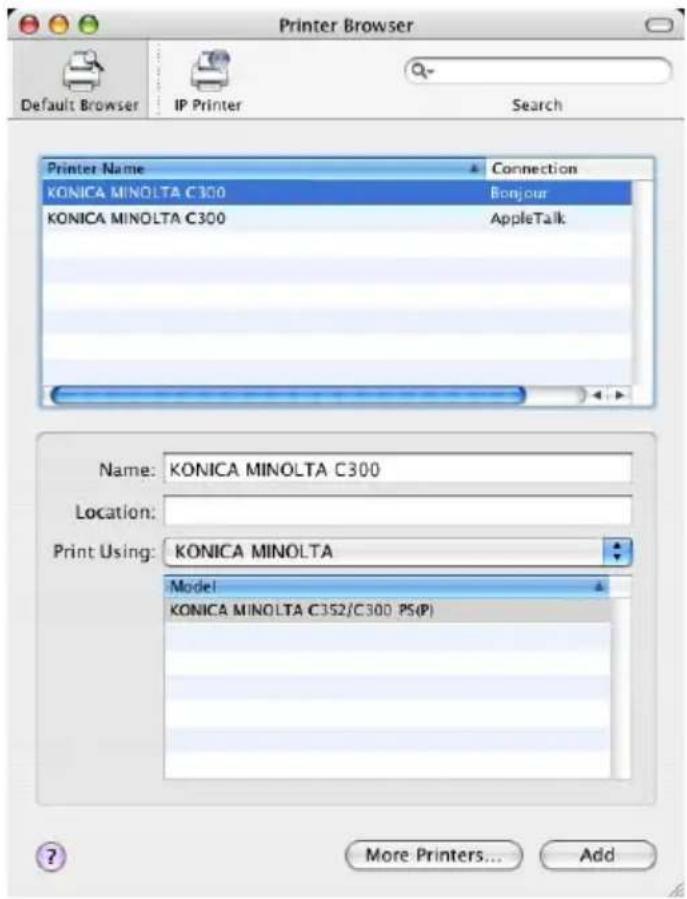
4 Select the applicable connection method and printer name.
- To specify an AppleTalk zone for an AppleTalk connection, select "Local AppleTalk Zone".
- When "IPP" is selected as the protocol in IP Printer, the text box for entering the queue name appears.
For Mac OS 10.3, leave the queue name text box empty.
For Mac OS 10.4, enter "ipp" in the queue name text box.
5 Select "KONICA MINOLTA" from the "Printer Model" drop-down list.
6 Select "KONICA MINOLTA C352/C300 PS(P)", and then click the [Add] button.
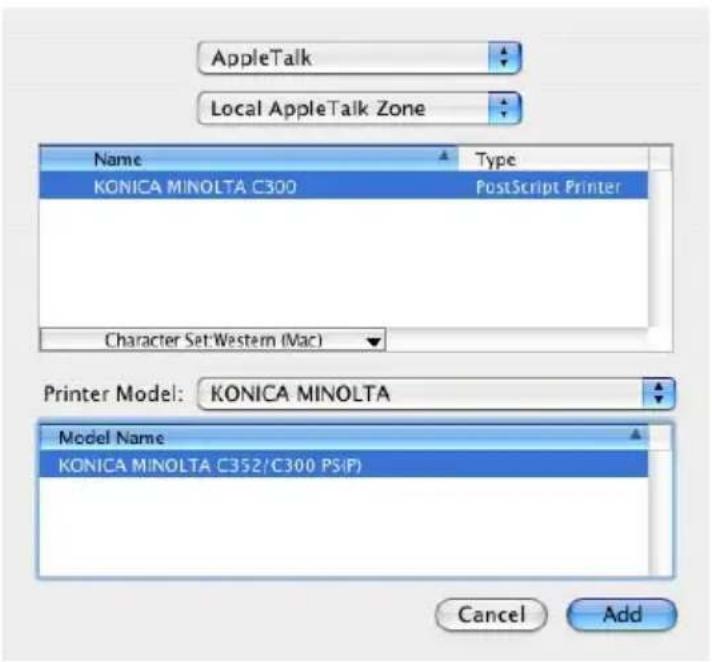
- The selected printer is registered in the printer list.
For Mac OS 9.2
After connecting this machine, it can be used as a printer by selecting “Post-Script printer” under “Chooser” and by specifying the printer description (PPD) file.
First, copy the printer description (PPD) file onto the Macintosh computer.
1 Insert the Macintosh printer driver CD-ROM into the Macintosh computer's CD-ROM drive.
2 Open the "OS 9_x" folder in "English"—"Driver" on the CD-ROM.
3 Select PPD file "KONICAMINOLTAC352UVxxx.ppd", and then copy it into the "Printer Descriptions" folder in "System Folder"—"Extensions" of "Hard Disk".
- Next, select a printer.
The printer driver can use a standard Macintosh LaserWriter.
4 On the Apple menu, click "Chooser".
5 Make sure that "AppleTalk" is set to "Active", and then click the "LaserWriter" icon.
6 From the "Select a PostScript Printer" list, click the applicable printer for the printing system, and then click the [Create] button.
- If a different PPD file has already been selected, click the [Setup] button, and then click the [Select PPD] button from the screen that is already displayed.
The PostScript printer description (PPD) file selection screen appears.
7 Select the applicable PPD file, and then click the [Select] button or the [Open] button.
The setting screen for adding Options appears.
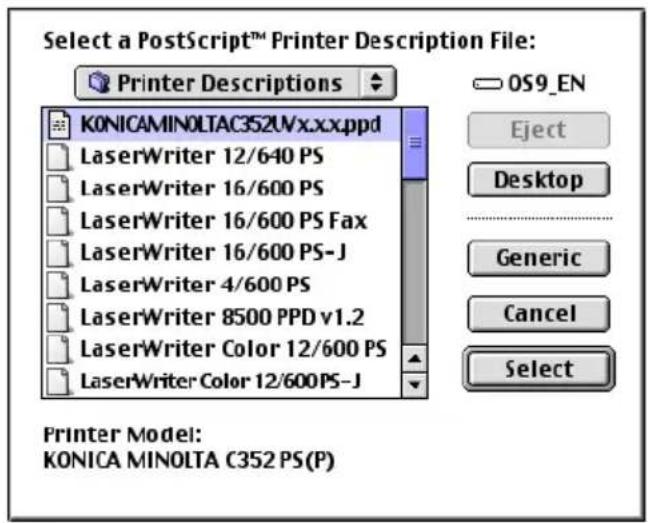
8 Select the option that is installed on this machine from Options Installed 1 and Options Installed 2.
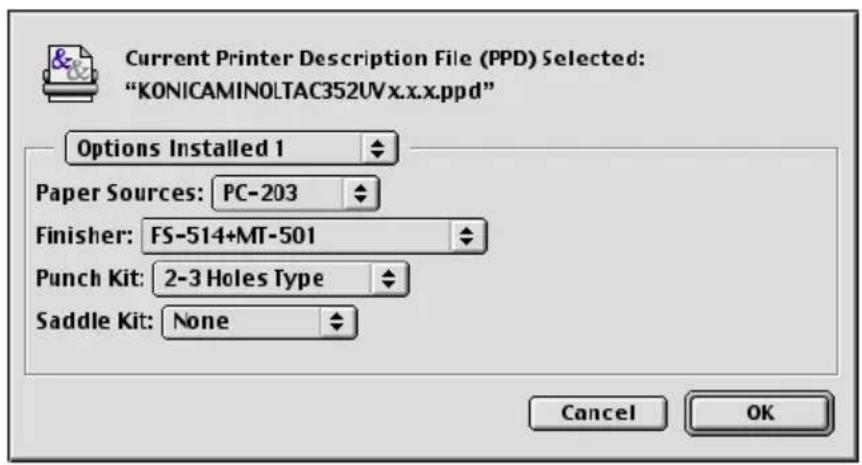
9 Click the [OK] button.
The Chooser window appears again.
10 Close the Chooser window.
Uninstalling the printer driver
If it becomes necessary to delete the printer driver, for example, when you want to reinstall the printer driver, follow the procedure below to delete the driver.

Note
Quit all running applications that may have started when the Macintosh computer was turned on.
For Mac OS X
1 Open Print Center or Printer Setup Utility, located in "Applications"—"Utilities" of "Hard Disk".
2 Select the name of the printer to be deleted, and then click the [Delete] button.
The selected printer is deleted.
3 Close the printer list.
4 Drag the following file, which is located in “Library”—“Printers”—“PPDs”—“Contents”—“Resources”—“en.Iproj” of “Hard Disk”, to the “Trash” icon.
- "KONICA MINOLTA C352.gz"
5 Delete the unnecessary files from "Library"—"Printers".
6 For Mac OS 10.3 and Mac OS 10.4, drag the “***c352” file, which is located in “Library”—“Printers”—“KONICAMINOLTA”—“filter”, and the following files, which are located in “Library”—“Printers”—“KONICAMINOLTA”—“PDEs”, to the “Trash” icon.
- KONICAMINOLTAC352 Finishing.plugin
- KONICAMINOLTAC352 ImageLayout.plugin
- KONICAMINOLTAC352 Security.plugin
- KONICAMINOLTAC352 Setup.plugin
7 For Mac OS 10.2, drag the following files, which are located in "Library"—"Printers"—"PPD Plugins", to the "Trash" icon.
- KONICAMINOLTAC352 Finishing.plugin
- KONICAMINOLTAC352 ImageLayout.plugin
- KONICAMINOLTAC352 Security.plugin
- KONICAMINOLTAC352 Setup.plugin
Enter "/usr" in "Go"- "Go to Folder" to move to the "/usr" folder, and then drag the "pstokm352" folder, which is located in "libexec"- "cups"- "filter", to the "Trash" icon.
8 Restart the Macintosh computer.
This completes the uninstallation procedure.
For Mac OS 9.2
1 Drag PPD file "KONICAMINOLTAC352UVxxx.ppd", which is located in "System Folder"—"Extensions"—"Printer Descriptions" of "Hard Disk", to the "Trash" icon.
The related printer driver files are deleted.
2 Restart the Macintosh computer.
This completes the uninstallation procedure.
3 Setting up network printing
3.1 Overview of network functions
Network functions
By connecting this machine to a network through the Ethernet port, this printing system can be used as a network printer.
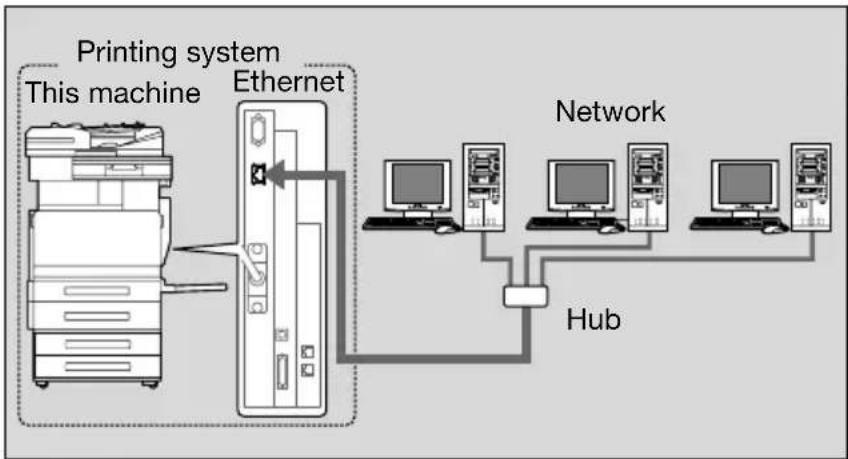
flowchart
graph TD
    A["Printing system"] --> B["This machine"]
    B --> C["Ethernet"]
    C --> D["Network"]
    D --> E["Hub"]
    E --> D
    style A fill:#f9f,stroke:#333
    style B fill:#ccf,stroke:#333
    style C fill:#cfc,stroke:#333
    style D fill:#fcc,stroke:#333
    style E fill:#cff,stroke:#333
This printing system supports 10Base-T and 100Base-TX standards. In addition, the Ethernet interface supports the TCP/IP (LDP/LPR, IPP, SMB), NetBEUI (SMB), IPX/SPX (NetWare), and AppleTalk (EtherTalk) protocols.

Note
When setting up the network, the administrator password is required to enter Administrator mode.
Ask the administrator of this machine for the administrator password.
Features of the network functions
This printing system is equipped with the following network functions to flexibly support various network environments.
●Automatic selection of 10Base-T or 100Base-TX (Fast Ethernet)
- Obtains the IP address automatically from DHCP or BOOTP
- Printing with SMB printing (Windows 98SE/Me/2000/XP/Server 2003) You can print in Windows 98SE, Windows Me, Windows 2000, Windows XP, or Windows Server 2003 using SMB.
- Printing with LPR printing (Windows NT 4.0/2000/XP/Server 2003) You can print with LPD/LPR using Windows NT 4.0, Windows 2000, Windows XP, or Windows Server 2003. Windows 98SE and Windows Me cannot be used.
LPR (Line Printer Request): This print request system can be used under Windows NT 4.0, Windows 2000, Windows XP, or Windows Server 2003. Enter the queue name as [Print].
●Printing with Port 9100 (Windows 98SE/Me/2000/XP/Server 2003)
You can print (Raw print) using Port 9100 under Windows 98 Second Edition, Windows Me, Windows 2000, Windows XP, or Windows Server 2003.
When using a Port 9100 connection under Windows 98 Second Edition or Windows Me, it may be necessary to install the Peer to Peer Printing Tool.
To obtain the Peer to Peer Printing Tool, consult the dealer where you purchased this machine.
●Supports Novell NetWare Pserver and Rprinter (Nprinter)
●Supports the Novell NetWare print server functions and supports both bindery mode and Novell Directory Service (NDS)
With NetWare
The Novell NetWare 4.x—6 print server functions are supported.
You can connect this printing system to a network using Novell NetWare 4.x—6 as the network operating system and send print jobs from the client to the print server (network controller). The three modes supported are as follows:
●Nprinter
•Pserver
•NDS/NDPS

Note
For details on the NetWare functions, refer to the NetWare operation manual.
With Macintosh
You can print from your Macintosh computer using LPR, AppleTalk, or Bonjour/Rendezvous.
You can connect this printing system to a print server in an AppleTalk or a Bonjour/Rendezvous environment and send print jobs from the Macintosh computer to this machine.
Network connection methods that can be selected in each Windows operating system
This chapter describes the settings that must be specified for network printing.
Setting procedures differ depending on the method of networking printing used (SMB, LPR, or IPP printing). Select the best method of network printing for your Windows environment.
Network printing from a Windows operating system
| Protocol used | Windows 98 Second Edition | Windows Me | Windows 2000 | Windows XP | Windows NT 4.0 | Windows Server 2003 | |
| SMB Printing | TCP/IP, NetBEUI | ○ | ○ | ○ | ○ | ○ | |
| LPR Printing | TCP/IP ○ | ○ | ○ | ○ | |||
| IPP Printing | TCP/IP ○ | ○ | ○ | ||||
| Port 9100 Printing | TCP/IP ▲ | * | ▲* | ○ | ○ | ○ |
* When using Port 9100 printing under Windows 98 Second Edition or Windows Me, the Peer to Peer Printing Tool must be installed. For the details, refer to the table below.
Conditions when the Peer to Peer Printing Tool must be installed while using Port 9100
| Operating System | ||||
| Windows 98SE/Me Windows 2000/XP/2003 | ||||
| Driver type Using installer Not using | installer | Required Not | Using installer Not using installer | |
| Konica Minolta PCL Not required *1 | *1 | Required Not | required *4 | |
| Konica Minolta PostScript | - *2 | |||
| PostScript PPD - | *3 | Required | - *2 | |
*1 If the printer driver is installed using the installer while this machine is connected to the network, the required Peer to Peer Printing Tool is also installed automatically, and Port 9100 is created.
*2 The printer driver is not compatible with the operating system.
*3 Installing the printer driver using the installer is not applicable.
*4 Not required since standard operating system functions are used.
To obtain the Peer to Peer Printing Tool, consult the dealer where you purchased this machine.
To specify the driver settings when installing the Peer to Peer Printing Tool, refer to “Port 9100 Printing (Windows 98SE/Me/2000/XP/Server 2003)” on page 3-13.
When using SMB printing, you can perform network printing without installing the Peer to Peer Printing Tool software. For details, refer to “SMB printing” on page 3-8.

Reminder
Before setting up network printing, install the printer driver. For details on installing the printer driver, refer to “Installing the printer driver” on page 2-1.
To perform network printing, change the printer port for the installed printer driver to one for a network connection, and then change the settings on this machine as necessary. For an IPP connection, it is necessary to install the printer driver first.
Network printing in a NetWare environment
| NetWare version | Protocol used | Emulation | Service mode |
| NetWare 4.x IPX NDS | Bindery Pserver/Nprinter | ||
| NetWare 5.x/6 IPX NDS | Pserver | ||
| TCP/IP NDPS(lpr) |
3.2 Setting the IP address for this machine
Use this machine's control panel to assign an IP address to this machine.

Reminder
When specifying network settings, follow the instructions of the network administrator.
Setting the IP address
1 Press the [Utility/Counter] key on this machine's control panel, touch [Administrator Setting], and then enter the administrator password.
- The administrator password is required in order to enter Administrator mode. Ask the administrator of this machine for the administrator password.
2 Touch [Network Setting], then [TCP/IP Setting].
3 Touch [ON].
The next screen appears.
If the next screen does not appear automatically, touch [Fwd.].
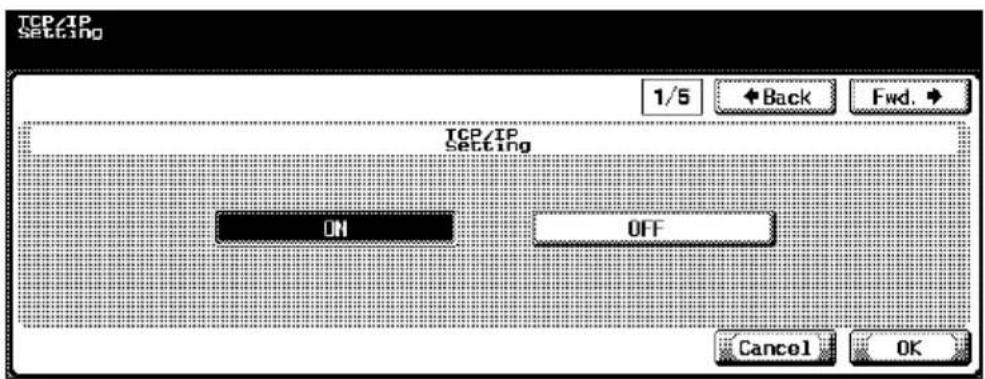
4 Specify "Manual Input" under "IP Address Setting Method".
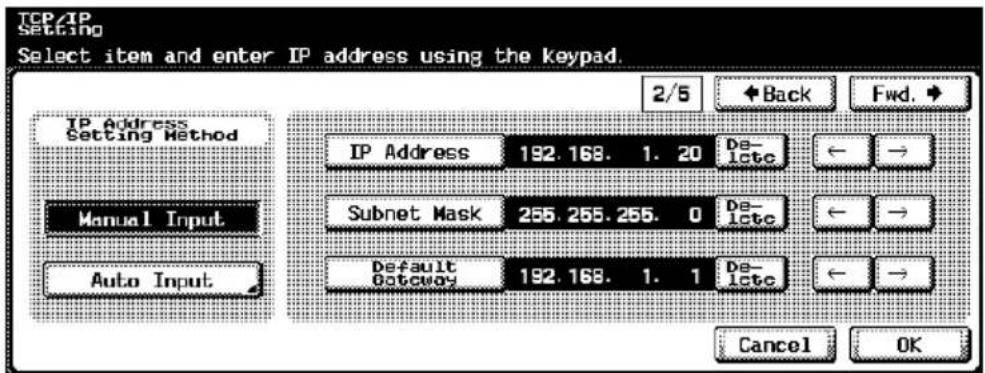
5 Specify settings for the following:
IP Address: Set the IP address of this machine.
Subnet Mask: Set the subnet mask for the network to which you are connecting.
Default Gateway: Set the default gateway address for the network to which you are connecting.
6 Touch [OK].
7 To apply the settings, restart this machine (turn it off, then on again).
- When turning the power off, then on again, be sure to turn the sub-power switch off first, then the main power switch. In addition, wait at least 10 seconds before turning the power on again; otherwise, this machine may not function properly.
Turn this machine back on to apply the IP address.

Detail
Although a fixed IP address is entered without using the DHCP server in the procedure described here, it is also possible to automatically assign the IP address from the DHCP server. When “IP Address Setting Method” is specified as “Auto Input” and “DHCP Setting” is set to “ON” on the setting screen that is displayed, the IP address, subnet mask, and gateway address settings are automatically assigned from the DHCP server on the network, so it is not necessary to assign them manually. However, note the following when setting “DHCP Setting” to “ON”.
Check with the network administrator that the DHCP server exists. If the DHCP server does not exist, be sure to specify settings for "IP Address", "Subnet Mask", and "Default Gateway".
If the settings for the IP address and other items have been assigned using the DHCP server, there is a possibility that they may be automatically changed. When the settings for the IP address and other items are changed, if the IP address has been used to specify a printer on the network for printing, there is a possibility that printing may not be possible because this machine cannot communicate with the network. If “DHCP Setting” has been set to “ON”, it is recommended that the IP address assigned to this machine be fixed in the DHCP server settings.
3.3 Accessing PageScope Web Connection
Setting the IP address for this machine enables you to access PageScope Web Connection.
Use your Web browser to directly access PageScope Web Connection.
To access PageScope Web Connection
1 Start up the Web browser.
2 In the "Address" bar, enter the IP address for this machine as shown below, and then press the [Enter] key.
- http://
Example: If the IP address for this machine is 192.168.1.20
http://192.168.1.20/
The initial page of PageScope Web Connection appears.
For further details on PageScope Web Connection, refer to "Using Page-Scope Web Connection" on page 10-32.

Note
If the user authentication function is enabled, you must enter a user name and password.
3.4 SMB printing
You can use SMB printing (Windows printing) to print directly over the Microsoft network from computers running Windows 98SE or Windows Me.
Operations on this machine
Set the IP address for this machine. For the setting procedure, refer to "Setting the IP address for this machine" on page 3-5.
In PageScope Web Connection, specify the settings described below for Windows printing.
1 Start up PageScope Web Connection.
- To log out if the login page does not appear, click the [Logout] button.
2 In the login page, select [Administrator], and then click the [Login] button.
3 Enter the administrator password, and login to the Administrator mode.
4 On the Network tab, click "SMB", and then click "Print" in the submenu that appeared.
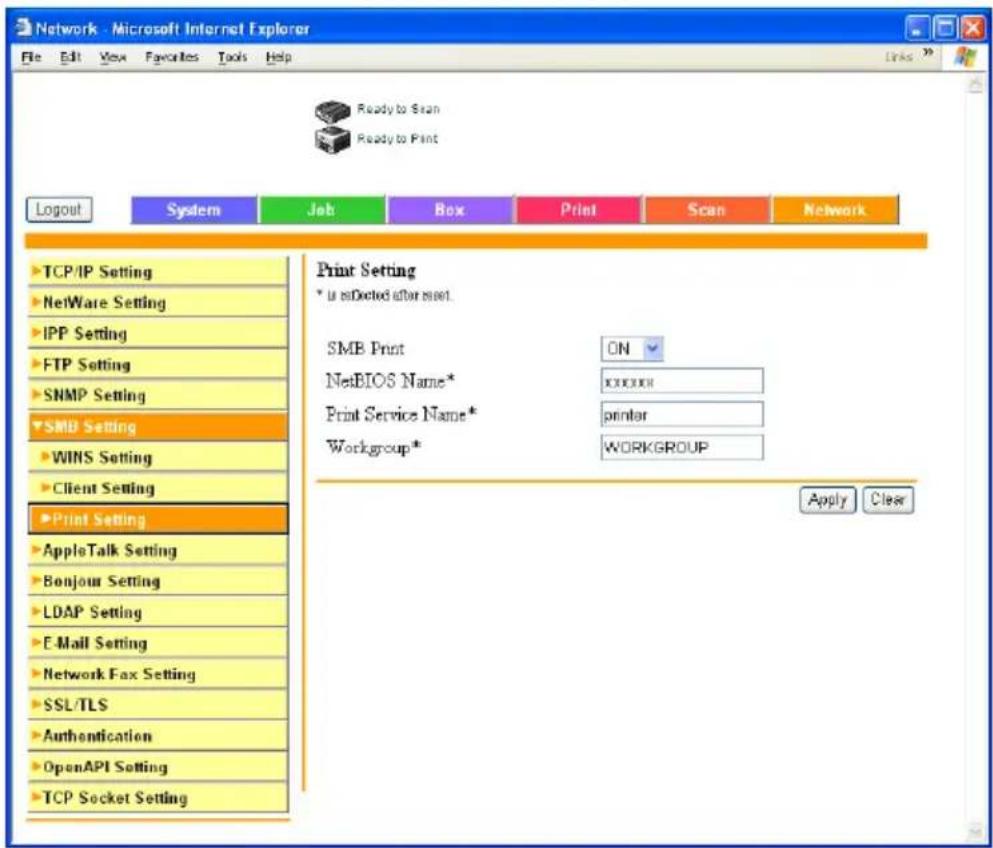
5 Specify settings for the following:
SMB Print: Set whether to use the SMB printing service. Select "ON" here.
NetBIOS Name: Specify the NetBIOS name (up to 15 characters, including - only).
Print Service Name: Specify the printing service name (up to 12 characters, excluding / ).
Work Group: Specify the work group name (up to 15 characters, excluding "\ ; :, * <> | += ?).
6 To apply the settings, restart this machine (turn it off, then on again).
- When turning the power off, then on again, be sure to turn the sub-power switch off first, then the main power switch. In addition, wait at least 10 seconds before turning the power on again; otherwise, this machine may not function properly.
Printer driver settings
For Windows 98SE/Me
1 Click the [Start] button, point to "Settings", and then click "Printers".
2 Right-click the icon of the installed printer, and then click "Properties".
3 On the Details tab, click the [Add Port] button.
4 Select "Network", and then click the [Browse] button. In the network configuration window that appears, select the appropriate printer icon.
For Windows 2000/XP/Server 2003
1 For Windows 2000, click the [Start] button, point to "Settings", and then click "Printers".
For Windows XP/Server 2003, click the [Start] button, and then click "Printers and Faxes".
- If “Printers and Faxes” does not appear in the Start menu, open the Control Panel from the Start menu, select “Printers and Other Hardware”, and then select “Printers and Faxes”.
2 Right-click the icon of the installed printer, and then click "Properties".
3 Click the [Add Port] button on the Ports tab, double-click "Local Port" or select "Local Port" and click the [New Port] button, and then enter "
- Enter the same NetBIOS name and printing service name that you entered in PageScope Web Connection. For the setting procedure, refer to “Operations on this machine” on page 3-8.
4 Click the [Close] button to apply the setting.
3.5 LPR printing
The LPR print service is supported as standard in Windows 2000, Windows XP, Windows NT 4.0, and Windows Server 2003. TCP/IP is used as the network protocol.
Operations on this machine
→Set the IP address for this machine.
- For the setting procedure, refer to “Setting the IP address for this machine” on page 3-5.
Printer driver settings
For Windows 2000/XP/Server 2003
1 For Windows 2000, click the [Start] button, point to "Settings", and then click "Printers".
For Windows XP/Server 2003, click the [Start] button, and then click "Printers and Faxes".
- If “Printers and Faxes” does not appear in the Start menu, open the Control Panel from the Start menu, select “Printers and Other Hardware”, and then select “Printers and Faxes”.
2 Right-click the icon of the installed printer, and then click "Properties".
3 On the Ports tab, click the [Add Port] button.
4 In the “Available Printer Ports” list, select “Standard TCP/IP Port”, and then click the [New Port] button.
5 When the Add Standard TCP/IP Printer Port Wizard starts up, click the [Next] button.
6 In the "Name of printer or IP address" box, enter the IP address for this machine, and then click the [Next] button.
7 Select "Custom", and then click the [Settings] button.
8 Select "LPR", enter "Print" in the "Queue Name" box, and then click the [OK] button.
The capital letters and lowercase letters must be entered correctly.
9 Click the [Next] button, and then click the [Finish] button to apply the setting.
For Windows NT 4.0
1 Click the [Start] button, point to "Settings", and then click "Printers".
2 Right-click the icon of the installed printer, and then click "Properties".
3 On the Ports tab, click the [Add Port] button.
4 In the "Available Printer Ports" list, select "LPR Port", and then click the [New Port] button.
- If “LPR Port” is not in the list, click the [Start] button, point to “Control Panel”, and then click “Network”. Then, on the Service tab, click the [Add] button and install the Microsoft TCP/IP Printing service.
5 In the "Name or address of server providing lpd" box on the Add LPR Compatible Printer dialog box, enter the IP address for this machine.
6 In the "Name of printer or print queue on that server" box, enter "Print". The capital letters and lowercase letters must be entered correctly.
7 Click the [OK] button to apply the setting.
3.6 Port 9100 Printing (Windows 98SE/Me/2000/XP/Server 2003)
The Port 9100 print service is supported as standard in Windows 2000, Windows XP, and Windows Server 2003. TCP/IP is used as the network protocol. When using Port 9100 printing under Windows 98 Second Edition or Windows Me, it may be necessary to install the Peer to Peer Printing Tool. For details on the conditions when the Peer to Peer Printing Tool must be installed, refer to “Network printing from a Windows operating system” on page 3-3.
Operations on this machine
Set the IP address for this machine. For the setting procedure, refer to “Setting the IP address for this machine” on page 3-5.
Printer driver settings (Windows 2000/XP/server 2003)
When using Port 9100 to print, change the printer driver port to the Port 9100 port.
1 For Windows 2000, click the [Start] button, point to "Settings", and then click "Printers".
For Windows XP/Server 2003, click the [Start] button, and then click "Printers and Faxes".
- If “Printers and Faxes” does not appear in the Start menu, open the Control Panel from the Start menu, select “Printers and Other Hardware”, and then select “Printers and Faxes”.
2 Right-click the icon of the installed printer, and then click "Properties".
3 On the Ports tab, click the [Add Port] button.
4 In the “Available Printer Ports” list, select “Standard TCP/IP Port”, and then click the [New Port] button.
5 When the Add Standard TCP/IP Printer Port Wizard starts up, click the [Next] button.
6 In the "Name of printer or IP address" box, enter the IP address for this machine, and then click the [Next] button.
7 Select "Custom", and then click the [Settings] button.
8 Click [RAW], and then enter the RAW port number (the default setting is "9100") in the Port Number box.
9 Click the [Next] button, and then click the [Finish] button to apply the setting.

Note
If the RAW port is not specified to be used in the TCP/IP setting, printing cannot be performed.
Installing the Peer to Peer Printing Tool to connect using Port 9100 (Windows 98SE/Me)
To connect using Port 9100 and to obtain the Peer to Peer Printing Tool, consult the dealer where you purchased this machine.
To connect to the network using Port 9100, specify the driver settings described below after installing the Peer to Peer Printing Tool.

Detail
To uninstall the Peer to Peer Printing Tool, delete the printer driver using the Peer to Peer port first, and then delete the Peer to Peer Tool in "Add or Remove Programs" in the "Control Panel".

Note
If multiple printer drivers are connected to the network and use the Peer to Peer Printing Tool, all printer drivers connected to the network with the Peer to Peer Printing Tool can no longer be connected to the network if the Peer to Peer Printing Tool is uninstalled.
Printer driver settings when installing the Peer to Peer Printing Tool to connect using Port 9100 (Windows 98SE/Me)
After the Peer to Peer Printing Tool is installed to connect using Port 9100 under Windows 98 Second Edition or Windows Me, the printer driver port must be changed to the Peer to Peer port.
1 Click the [Start] button, point to "Settings", and then click "Printers".
2 Right-click the icon of the installed printer, and then click "Properties".
3 On the Details tab, click the [Add Port] button.
4 Click "Others", select "KONICA MINOLTA Peer to Peer Port" from the list, and then click the [OK] button.
The Peer to Peer setup dialog box appears. The printer connected to the network is automatically detected.
5 Select the printer from the device list, enter the port number, and then click the "Add Port" button.
- The port is added. Skip to step 8.
- If the desired printer does not appear in the device list, proceed to step 6.
6 Click the [Manual setup] button.
7 Enter the TCP/IP or IPX setting for the network being connected, and then click the "Add Port" button.
- The port is added. Skip to step 8.
8 Click the [OK] button when the confirmation message appears.
The port is added.
9 Click the [OK] button to complete the operation.
3.7 IPP printing (Windows 2000/XP/Server 2003)
The IPP (Internet Printing Protocol) print service is supported as standard in Windows 2000, Windows XP, and Windows Server 2003. TCP/IP is used as the network protocol.
Operations on this machine
Set the IP address for this machine. For the setting procedure, refer to “Setting the IP address for this machine” on page 3-5.
Also, specify the IPP printing settings in PageScope Web Connection. (Printing can be performed with the default settings.)
1 Start up PageScope Web Connection.
- To log out if the login page does not appear, click the [Logout] button.
2 In the login page, select [Administrator], and then click the [Login] button.
3 Enter the administrator password, and Log in to the Administrator mode.
4 On the Network tab, click "IPP Setting".
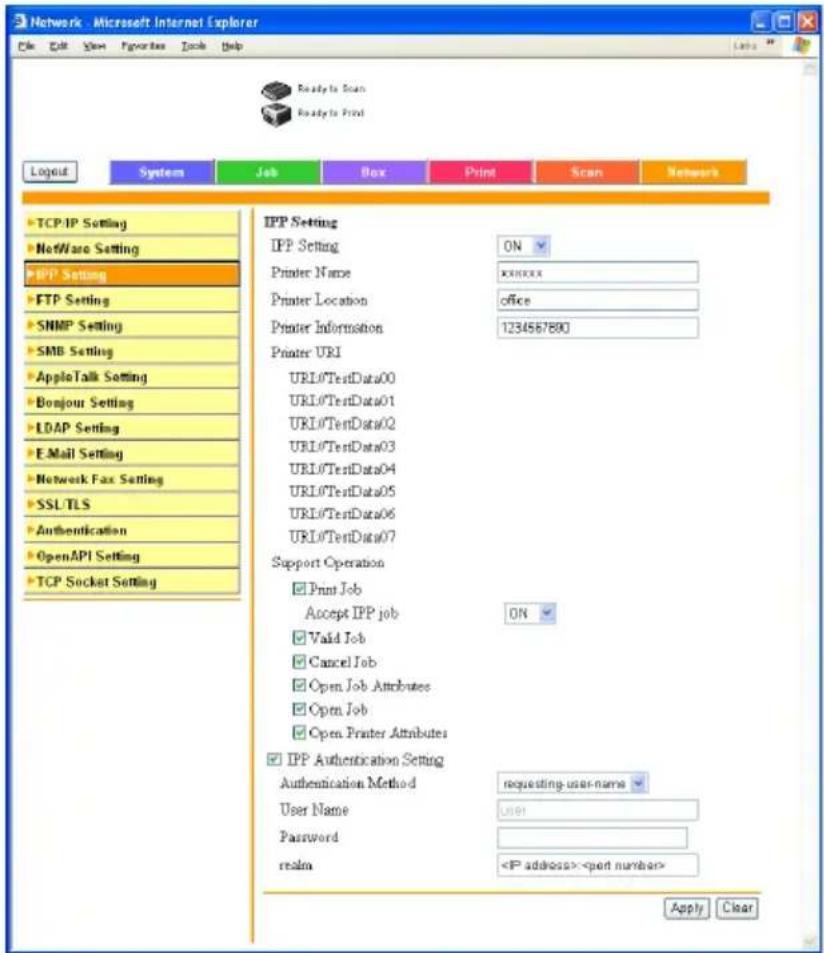
5 Specify settings for the following:
IPP Setting: Set whether to perform IPP printing. Select "ON" here.
Printer Name: Specify the printer name (up to 127 alphanumeric characters).
Printer Location: Specify the printer location (up to 127 alphanumeric characters).
Printer Information: Specify the printer manufacturer details (up to 127 alphanumeric characters).
Printer URI: The URI of the printer that can be used for IPP printing is displayed.
Support Operation: Specify print operations supported by IPP.
Accept IPP Job: Set whether to use the IPP reception function.
IPP Authentication Setting: Specify the authentication method, user name, and password for the IPP connection.
Installing the printer driver
For IPP printing, reinstall the printer driver.
1 Insert the Windows printer driver CD-ROM into the computer's CD-ROM drive.
- Konica Minolta PCL Driver: User Software CD-ROM
- Konica Minolta PostScript Driver: PostScript Printer Driver CD-ROM
2 For Windows 2000, click the [Start] button, point to "Settings", and then click "Printers".
For Windows XP/Server 2003, click the [Start] button, and then click "Printers and Faxes".
- If “Printers and Faxes” does not appear in the Start menu, open the Control Panel from the Start menu, select “Printers and Other Hardware”, and then select “Printers and Faxes”.
3 For Windows 2000/Server 2003, double-click the "Add Printer" icon.
For Windows XP, click "Add a printer" on the "Printer Tasks" menu.
The "Add Printer Wizard" starts up.
4 Click the [Next] button.
5 In the Local or Network Printer dialog box, select "Network printer", and then click the [Next] button.
6 In the Locate Your Printer dialog box, select "Connect to a printer on the Internet or on your intranet".
7 In the "URL" field, enter the URL for this machine in the following format, and then click the [Next] button.
- http://
Example: If the IP address for this machine is 192.168.1.20
http://192.168.1.20/ipp
8 When the confirmation dialog box appears, click the [OK] button.
9 Click the [Have Disk] button.
10 Click the [Browse] button, specify the folder on the CD-ROM that contains the printer driver, and then click the "OK" button.
Konica Minolta PCL driver: User Software CD-ROM
"Driver\bizhubC352" folder
Konica Minolta PostScript driver: PostScript Printer Driver CD-ROM
"Driver\bizhubC352" folder
11 Check that the printer name is displayed in the "Printers" list, and then click the [Next] button.
12 Select whether to set the printer as the default printer, and then click the [Next] button.
13 Click the [Finish] button to exit the Add Printer Wizard.
Once the settings for the printer have been specified, you can use the printer in the same way as a default local printer. Also, if you set up the printer for sharing in Windows, it can be used as a network printer by other Windows computers over the network.
3.8 Printing with NetWare
The printer controller supports the following environments.
Network printing in a NetWare environment
| NetWare version | Protocol used | Emulation | Service mode |
| NetWare 4.x IPX NDS/ | Bindery Pserver/Nprinter | ||
| NetWare 5.x/6 IPX NDS | Pserver | ||
| TCP/IP NDPS(Ipr) |

Note
Before using bindery emulation, check that bindery emulation is compatible with the NetWare server.
For Remote Printer mode with NetWare 4.x Bindery Emulation
1 From a client computer, log on with Supervisor permissions to access the NetWare server where the Pserver is registered.
2 Start up Pconsole.
3 From the "Available Options" list, select "Quick Setup", and then click the [Enter] button.
4 Enter the appropriate names in the “Printer Server Name”, “Printer Name”, “Print Queue Name”, and “Print Queue Volume” fields, select “Other/Unknown” from the “Printer type” field, and then save the specified settings.
5 Click the [Esc] button to quit Pconsole.
6 Use the NetWare server console to load PSERVER.NLM.
7 For queue user privileges, printer notification option, assignment of multiple queues, and passwords, refer to the NetWare documentation, and specify settings as necessary.
8 In Administrator mode of PageScope Web Connection, select "Net-Ware Setting" from the Network tab, and then specify the following settings.
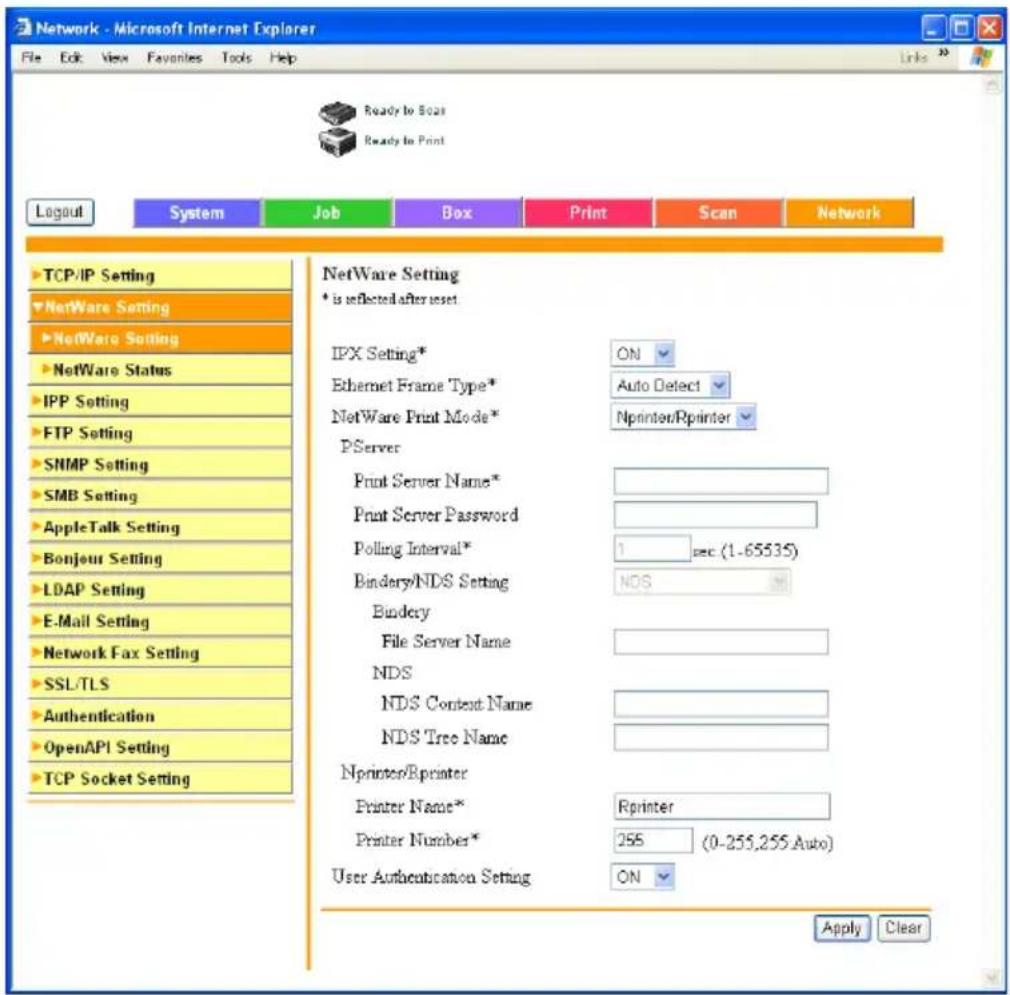
IPX Setting: Select "ON".
Ethernet Frame Type: Select "Auto". (Select the frame type according to the network environment.)
NetWare Print Mode: Select "Nprinter/Rprinter".
Printer Name: Specify the printer name.
Printer Number: Specify the printer number (0-255). When 255 is specified, the setting is "Auto".
9 Restart this machine (turn it off, then on again).
- When turning the power off, then on again, be sure to turn the sub-power switch off first, then the main power switch. In addition, wait at least 10 seconds before turning the power on again; otherwise, this machine may not function properly.
10 Use the NetWare server console to display the print server screen, and then check that the created printer is shown as "Waiting for Job" for the connected printer (0).
For Print Server mode with NetWare 4.x Bindery Emulation
Before using bindery emulation, check that bindery emulation is compatible with the NetWare server.
1 From a client computer, log on with Supervisor permissions to access the NetWare server where the Pserver is registered.
2 Start up Pconsole.
3 From the "Available Options" list, select "Quick Setup", and then click the [Enter] button.
4 Enter the appropriate names in the “Printer Server Name”, “Printer Name”, “Print Queue Name”, and “Print Queue Volume” fields, select “Other/Unknown” from the “Printer type” field, and then save the specified settings.
5 Click the [Esc] button to quit Pconsole.
6 In Administrator mode of PageScope Web Connection, select "Net-Ware Setting" from the Network tab, and then specify the following settings.
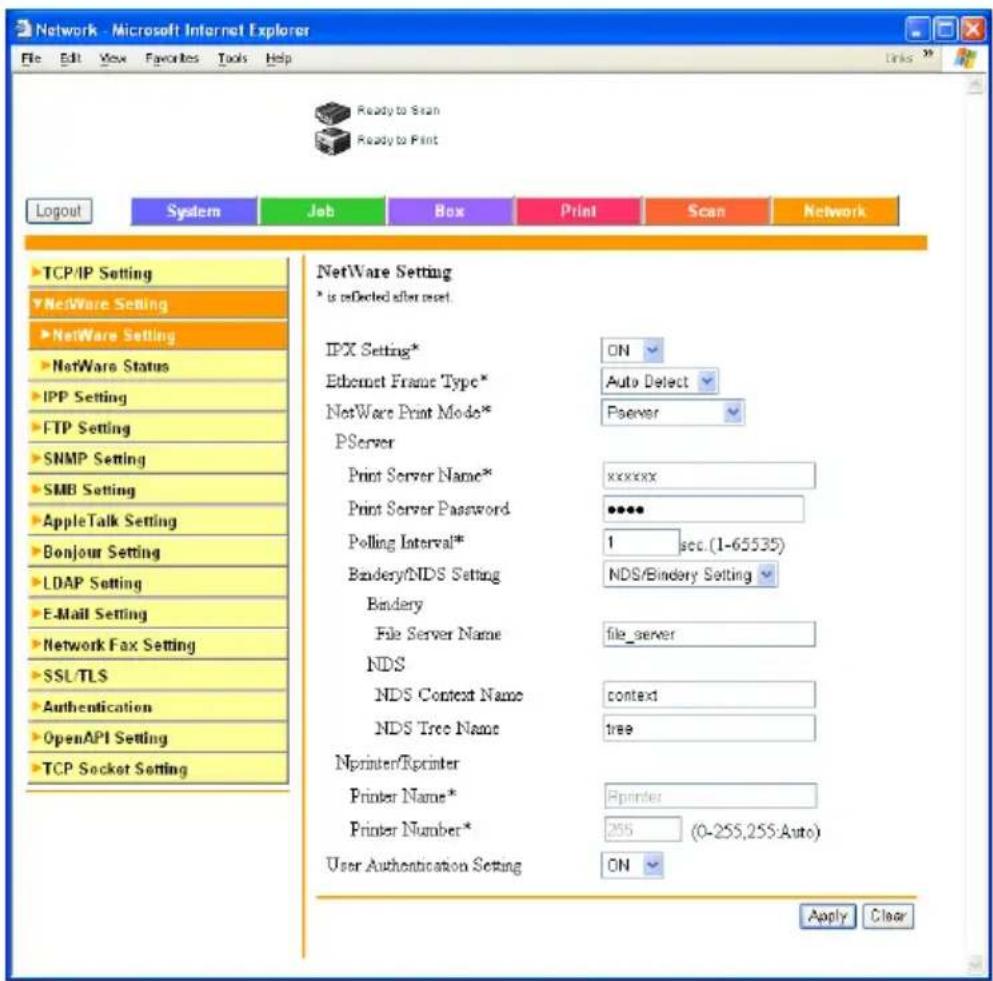
IPX Setting: Select "ON".
Ethernet Frame Type: Select "Auto Detect". (Select the frame type according to the network environment.)
NetWare Print Mode: Select "Pserver".
Print Server Name: Specify the print server name created in step 4.
Print Server Password: Specify only when setting from the NetWare server. (Displayed by “●●●●”.)
Polling Interval: Specify "1". (Change as necessary.)
Bindery/NDS Setting: Select "Bindery/NDS".
File Server Name: Specify the name of the file server that connects to the Pserver.
7 Restart this machine (turn the main power off, then on again).
- When turning the power off, then on again, be sure to turn the sub-power switch off first, then the main power switch. In addition, wait at least 10 seconds before turning the power on again; otherwise, this machine may not function properly.
8 Use the NetWare server console to load MONITOR.NLM.
9 Select the connection information and, in the active connection column, check that the created Pserver is connected.
For NetWare 4.x Remote Printer mode (NDS)
1 Log on to NetWare as an administrator from a client computer.
2 Start up NWadmin.
3 Select either the organization or organizational unit container that offers the print service, and then click "Print Services Quick Setup" on the "Tools" menu.
4 Enter the appropriate names in the “Printer Server Name”, “Printer Name”, “Print Queue Name”, and “Print Queue Volume” fields, select “Other/Unknown” from the “Printer type” field, and then save the specified settings.
5 For queue user privileges, printer notification option, assignment of multiple queues, and passwords, refer to the NetWare documentation, and specify settings as necessary.
6 In Administrator mode of PageScope Web Connection, select "Net-Ware Setting" from the Network tab, and then specify the following settings.
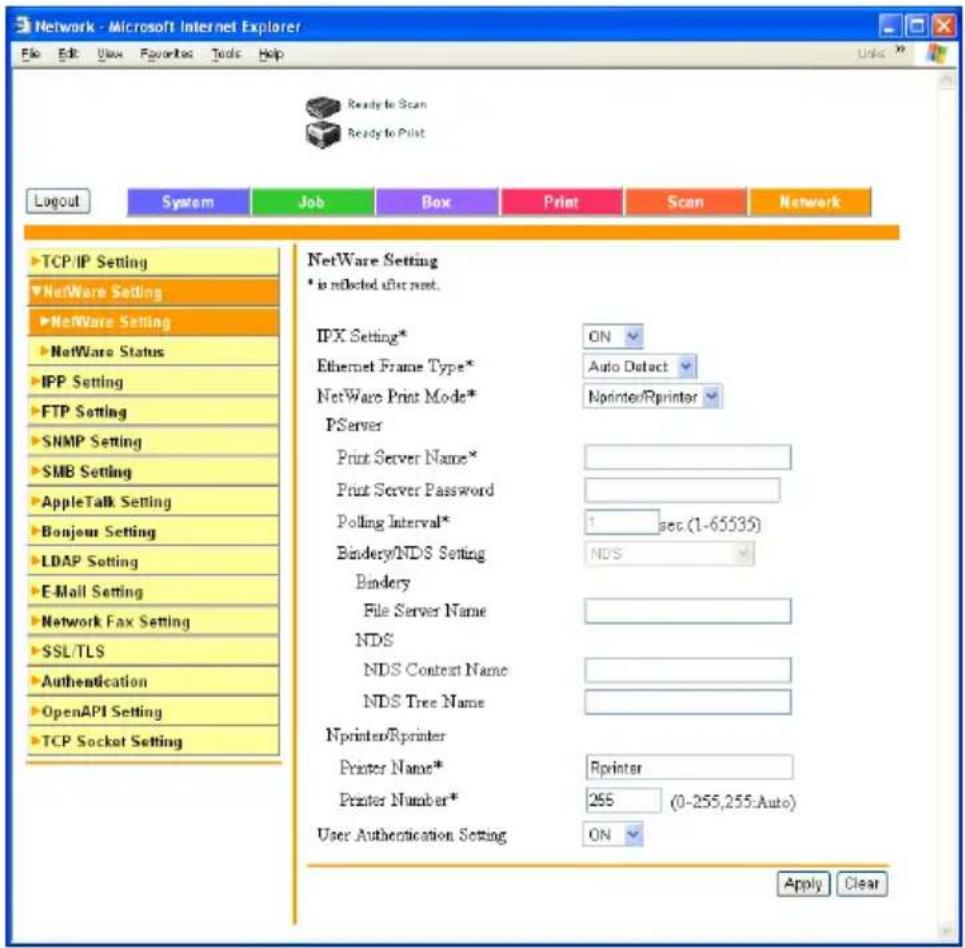
IPX Setting: Select "ON".
Ethernet Frame Type: Select "Auto Detect". (Select the frame type according to the network environment.)
NetWare Print Mode: Select "Nprinter/Rprinter".
Printer Name: Specify the printer name.
Printer Number: Specify the printer number (0-255). When 255 is specified, the setting is "Auto Detect".
7 Restart this machine (turn the main power off, then on again).
- When turning the power off, then on again, be sure to turn the sub-power switch off first, then the main power switch. In addition, wait at least 10 seconds before turning the power on again; otherwise, this machine may not function properly.
8 Use the NetWare server console to load PSERVER.NLM.
9 Use the NetWare server console to display the print server screen, and then check that "C300" (created printer) is shown as "Waiting for Job" for the connected printer (0).
For NetWare 4.x/5.x/6 Print Server mode (NDS)
To use the Print Server mode, the IPX protocol must be loaded on the NetWare server.
1 Log on to NetWare as an administrator from a client computer.
2 Start up NWadmin.
3 Select either the organization or organizational unit container that offers the print service, and then click "Print Services Quick Setup (non-NDPS)" on the "Tools" menu.
4 Enter the appropriate names in the “Printer Server Name”, “Printer Name”, “Print Queue Name”, and “Print Queue Volume” fields, select “Other/Unknown” from the “Printer Type” field, and then click the [Create] button.
5 For queue user privileges, printer notification option, assignment of multiple queues, and passwords, refer to the NetWare documentation, and specify settings as necessary.
6 In Administrator mode of PageScope Web Connection, select "NetWare Setting" from the Network tab, and then specify the following settings.
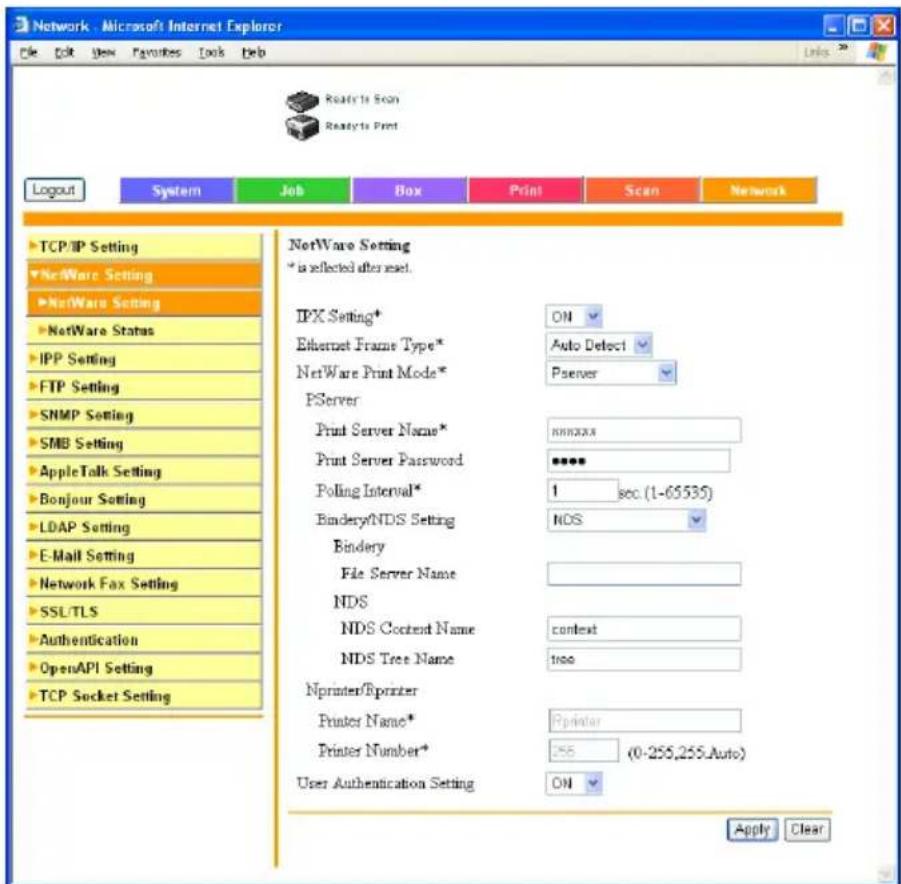
IPX Setting: Select "ON".
Ethernet Frame Type: Select "Auto Detect". (Select the frame type according to the network environment.)
NetWare Print Mode: Select "Pserver".
Print Server Name: Specify the print server name created in step 4.
Print Server Password: Specify only when setting from the NetWare server. (Displayed by “●●●●”.)
Polling Interval: Specify "1". (Change as necessary.)
Bindery/NDS Setting: Select "NDS".
NDS Context Name: Specify the name of the context that connects to Pserver.
NDS Tree Name: Specify the name of the tree that Pserver logs on to.
7 Restart this machine (turn the main power off, then on again).
- When turning the power off, then on again, be sure to turn the sub-power switch off first, then the main power switch. In addition, wait at least 10 seconds before turning the power on again; otherwise, this machine may not function properly.
8 Use the NetWare server console to load MONITOR.NLM.
9 Select the connection information and, in the active connection column, check that the created Pserver is connected.
For NetWare 5.x/6 Novell Distributed Print Service (NDPS)
Before specifying settings for NDPS, check that the NDPS broker and NDPS manager have been created and loaded.
Also, before performing the following procedure, check that the TCP/IP protocol has been set in the NetWare server, and check that the IP address has been set for this machine and that this machine is on.
1 Log on to NetWare as an administrator from a client computer.
2 Start up NWadmin.
3 Right-click the organization or organizational unit container where you will create the printer agent, and then click "NDPS Printer" on the "Create" sub-menu.
4 In the "NDPS Printer Name" box, enter the printer name.
5 In the "Printer Agent Source" column, select "Create a New Printer Agent", and then click the "Create" button.
6 Check the printer agent name, and then in the "NDPS Manager Name" box, browse through the NDPS manager names, and register one.
7 In the “Gateway Types”, select “Novell Printer Gateway”, and then register it.
8 In the Configure Novell PDS for Printer Agent window, select “(None)” for the printer type and “Novell Port Handler” for the port handler type, and then register the settings.
9 In "Connection type", select "Remote (LPR on IP)", and then register it.
10 Enter the IP address set for this machine as the host address, enter "Print" as the printer name, and then click the [Finish] button to register the settings.
11 The printer driver registration screen appears. Select "None" for each operating system to complete the registration.

Note
For settings for the queue user rights, printer notification option, assignment of multiple queues, and passwords, refer to the NetWare documentation, and set them as necessary.
Setting up a client (Windows) settings when using the NetWare Server
1 For Windows 98SE/Me/2000/NT 4.0, click the [Start] button, point to "Settings", and then click "Printers".
For Windows XP/Server 2003, click the [Start] button, and then click "Printers and Faxes".
- If “Printers and Faxes” does not appear in the Start menu, open the Control Panel from the Start menu, select “Printers and Other Hardware”, and then select “Printers and Faxes”.
2 For Windows 98SE/Me/2000/NT 4.0/Server 2003, double-click the "Add Printer" icon.
For Windows XP, click "Add a printer" on the "Printer Tasks" menu.
The "Add Printer Wizard" starts up.
3 In the port settings, browse the network, and specify the name of the created queue (or NDPS printer name).
4 In the "Printer Model" list, specify the folder on the CD-ROM that contains the printer driver for the operating system and printer driver to be used.
- For Windows 98SE/Me
Konica Minolta PCL driver: User Software CD-ROM
"Driver\bizhubC352" folder
PostScript driver: PostScript Printer Driver CD-ROM "Driver\PS-PPD" folder - For Windows NT4.0/2000/XP/Server 2003
Konica Minolta PCL driver: User Software CD-ROM
"Driver\bizhubC352" folder
PostScript driver: PostScript Printer Driver CD-ROM "Driver\bizhubC352" folder
5 Follow the on-screen instructions to complete the installation.
3.9 Printing with Macintosh
This section describes this machine's settings and the Macintosh network settings.
Specify the printer network port settings after installing the printer driver and when selecting a printer. To select a printer, refer to “Selecting a printer” on page 2-18.
Operations on this machine
Set the IP address for this machine. For the setting procedure, refer to “Setting the IP address for this machine” on page 3-5.
In PageScope Web Connection, specify the AppleTalk or Bonjour settings.
Specifying the AppleTalk settings
When connecting this machine to a Macintosh computer using AppleTalk, the AppleTalk settings must be specified.
1 Start up PageScope Web Connection.
- To log out if the login page does not appear, click the [Logout] button.
2 In the login page, select [Administrator], and then click the [Login] button.
3 Enter the administrator password, and log in to the Administrator mode.
4 On the Network tab, click "AppleTalk Setting".
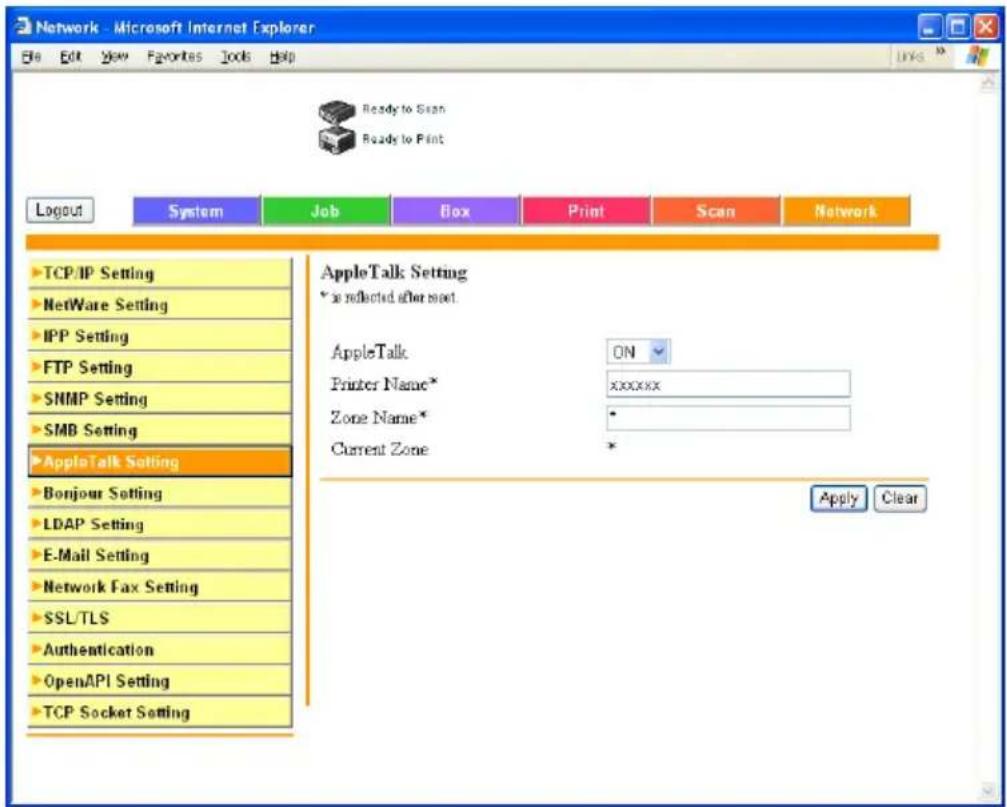
5 Specify settings for the following:
AppleTalk: Set whether to use AppleTalk. Select "ON" here.
Printer Name: Specify the printer name (up to 31 alphanumeric characters).
Zone Name: Specify the zone being connected to (up to 31 alphanumeric characters).
6 To apply the settings, restart this machine (turn it off, then on again).
- When turning the power off, then on again, be sure to turn the sub-power switch off first, then the main power switch. In addition, wait at least 10 seconds before turning the power on again; otherwise, this machine may not function properly.
Specifying the Bonjour Settings
When connecting this machine to a Macintosh computer using Bonjour/Rendezvous, the Bonjour settings must be specified.
1 Start up PageScope Web Connection.
- To log out if the login page does not appear, click the [Logout] button.
2 In the login page, select "Administrator", and then click the [Login] button.
3 Enter the administrator password, and login to the Administrator mode.
4 On the Network tab, click "Bonjour Setting".
5 Specify settings for the following:
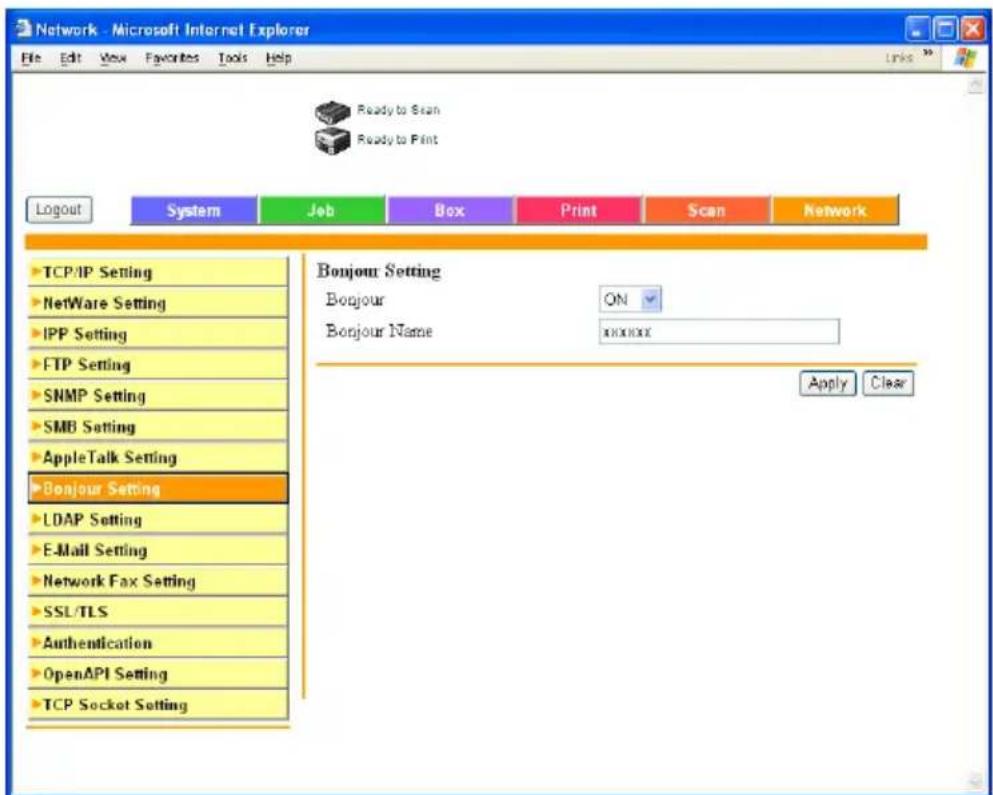
- Bonjour: Specify whether to use a Bonjour/Rendezvous connection. Select "ON" here.
- Bonjour Name: Specify the Bonjour name that is to appear as the connected device name (up to 63 alphanumeric characters and symbols).
6 To apply the settings, restart this machine (turn it off, then on again).

Note
The Bonjour connection is a Mac OS X 10.4 function, it is the same function as the Rendezvous connection in Mac OS 10.3 or earlier.
When turning the power off, then on again, be sure to turn the sub-power switch off first, then the main power switch. In addition, wait at least 10 seconds before turning the power on again; otherwise, this machine may not function properly.
Setting the Macintosh computer
Use the Macintosh computer that is connected to specify the TCP/IP and AppleTalk settings.

Reminder
For network settings, consult the network administrator.
For printer driver installation, refer to "Installing the printer driver" on page 2-1.
Since Bonjour (a Mac OS X 10.4 function) is always enabled, it is not required to change the settings. Bonjour/Rendezvous is a Mac OS X function. For Mac OS 9.2, connect using AppleTalk.
For Mac OS X
1 On the Apple menu, select "System Preferences".
2 Click the "Network" icon.
3 From "Show", select "Built-in Ethernet".
4 Click the TCP/IP tab.
5 Select the items from "Configure" that correspond to the network settings for the Macintosh computer that is connected to the network, and then set the IP address and subnet mask.
6 If using an AppleTalk connection, click the AppleTalk tab, and then check that the "Make AppleTalk Active" check box is selected.
7 Click the close button at the top left of the dialog box.
The “Apply configuration changes?” message appears.
8 Click the [Apply] button.
The changed settings are saved.
For Mac OS 9.2
1 On the Apple menu, point to "Control Panel", and then click "Apple-Talk".
2 From the "Connect via" drop-down list, select "Ethernet".
3 On the Apple menu, point to "Control Panel", and then click "TCP/IP".
4 From the "Connect via" drop-down list, select "Ethernet".
5 Select the items from "Configure" that correspond to the network settings for the Macintosh computer that is connected to the network, and then set the IP address and subnet mask.
6 Click the close button at the top left of the dialog box.
The “Save changes to the current configuration?” message appears.
7 Click the [Save] button.
4 Various printing methods
4.1 Printing operations
For Windows
Data can be printed from an application.
Print jobs are specified from the application software.
1 Open the data in the application, "File", and then click "Print".
2 Check that the printer name has been selected in "Printer Name" or "Select Printer".
- If the printer is not selected, click to select the printer.
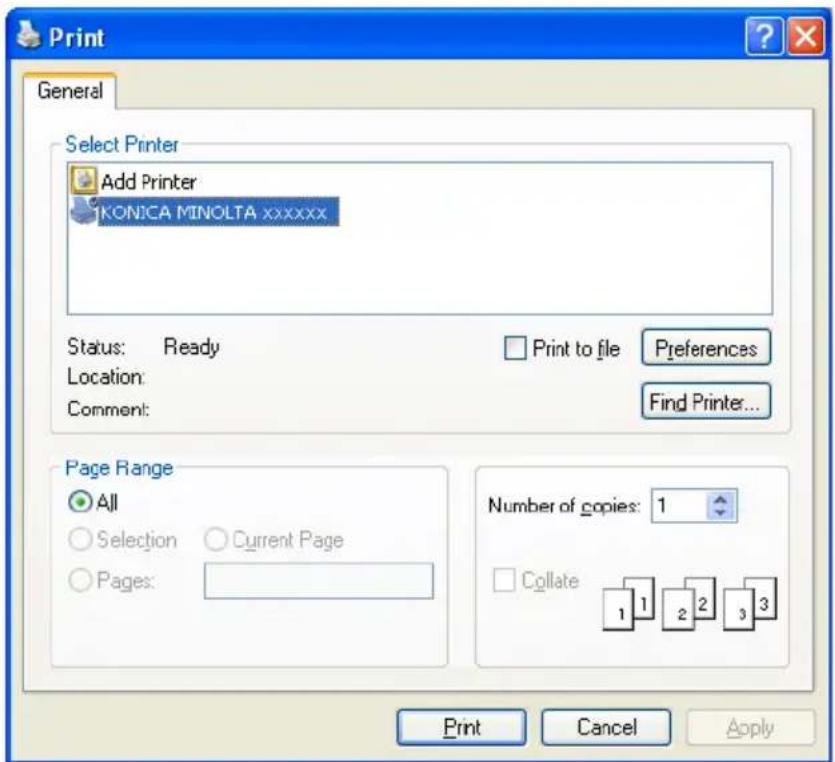
3 Specify the page range and the number of copies to print. - The Print dialog box differs depending on the application.
4 Click the [Preferences] button or the [Properties] button to change the printer driver settings as necessary.
- By clicking the [Preferences] button or the [Properties] button on the Print dialog box, you can specify the settings of each model on the printer driver dialog box that appears. For details, refer to “Setting up the PCL driver” on page 5-1, “Setting up the PostScript driver (Windows)” on page 6-1 or “Setting up the PPD driver (Windows)” on page 7-1. If the changed settings are not saved in the Print dialog box, the original settings are restored when the application is quit.
5 Click the [Print] button.
The Data indicator of this machine flashes.
Test printing
Printing is possible when the printer driver is installed and the network settings have been specified. To check that connection has been made properly, you can print the standard Windows test page.
Print a test page from the printer driver Properties dialog box.
1 For Windows 98SE/Me/2000/NT 4.0, click the [Start] button, point to "Settings", and then click "Printers". For Windows XP/Server 2003, click the [Start] button, and then click "Printers and Faxes". - If "Printers and Faxes" does not appear in the Start menu, open the Control Panel from the Start menu, select "Printers and Other Hardware", and then select "Printers and Faxes".
2 Right-click the icon of the installed printer, and then click "Properties".
3 Click the General tab, and then click the [Print Test Page] button or the [Print Test] button.
The test page is printed and the confirmation dialog box appears.
4 Check the printout, and then click the [OK] button or the [Yes] button.

Note
If the test page is not printed properly, check that the printer driver has been installed properly and that the network settings are complete.
For Macintosh
Printing is possible when the printer driver is installed and the network settings have been specified. Print jobs are specified from the application software.
For Mac OS X
1 Open the data in the application, "File", and then click "Print".
2 Check that the printer name has been selected.
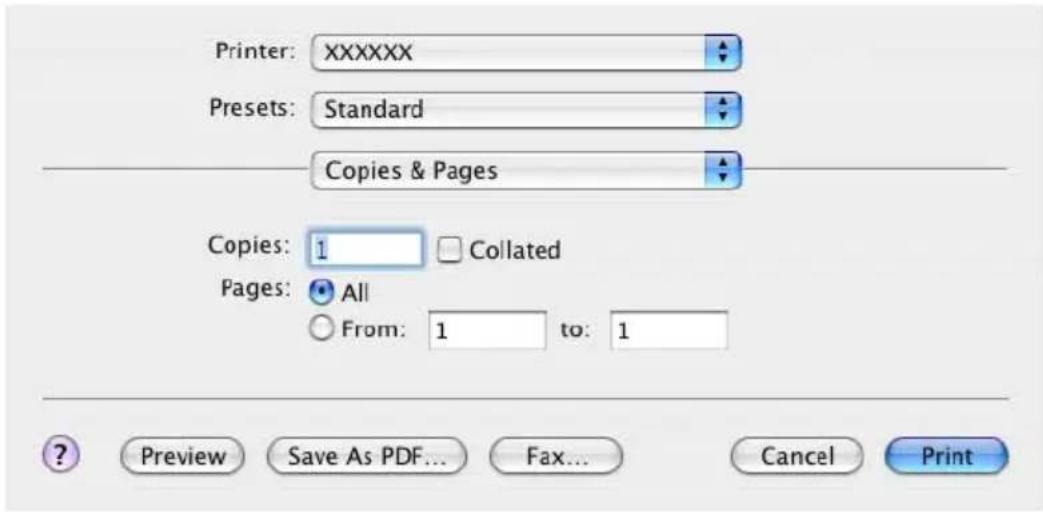
3 Specify the print range and the number of copies to print, and then click the [Print] button.
The Data indicator of this machine flashes.

Note
If the printer name does not appear in the list, select the printer in Print Center or the Printer Setup Utility. For details, refer to "Selecting a printer" on page 2-18.
The Print dialog box differs depending on the application.
For Mac OS 9.2
1 Open the data in the application, "File", and then click "Print".
2 Check that the printer name has been selected.
3 Select "General".
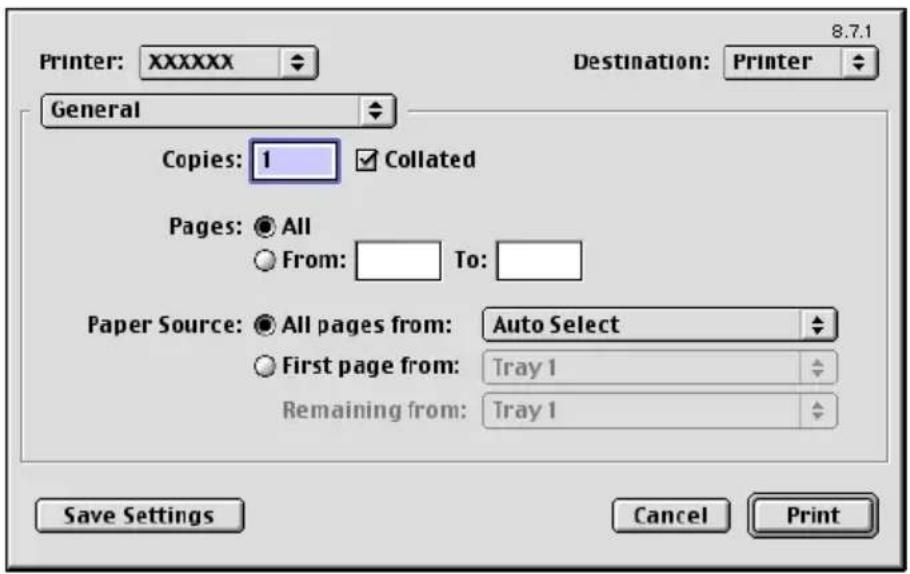
4 Specify the Pages and the number of copies to print, and then click the [Print] button.
The Data indicator of this machine flashes.

Note
If the printer name does not appear in the list, select the printer from the Chooser window. For details, refer to "Selecting a printer" on page 2-18.
The Print dialog box differs depending on the application.
The settings can be saved by clicking the [Save Settings] button.
4.2 Setting the printing functions
The functions of this machine such as sorting and folding can be set when printing from a computer. Depending on the operating system running on the connected computer, the setting procedure of this machine's functions may differ.
Function list
The function list contains a summary of the main settings related to printing and printer driver support.

Note
The function names in this list are based on those displayed by the PCL printer driver in Windows XP. In addition, the items and setting values displayed may differ depending on whether the options are installed or the settings are available.
| Function Overview | Printer driver | |||
| PCL Post Script | PPD | |||
| Orientation Selects the original document paper orientation. | ○ | ○ | ○ | |
| Original Size Specifies the size of the original document. ○ | ||||
| Output Size Specifies the output paper size. ○ ○ | ||||
| Zoom Prints enlarged or reduced. ○ ○ | ||||
| Paper Source Selects the paper source for printing. ○ | ○ | |||
| Paper Type Settings Specifies the paper type of the paper source. | ○ | ○ | ○ | |
| Binding Position | Selects the binding position. | ○ | ○ | ○ |
| Print Type | Selects the print type (simplex, duplex, or booklet). | ○ | ○ | ○ |
| Combination | Prints multiple pages on one page. | ○ | ○ | ○ |
| File Margin Sets Margins for punch holes and staples. ○ | ||||
| Staple | Staples documents. | ○ | ○ | ○ |
| Hole-Punch | Punches holes in documents. | ○ | ○ | ○ |
| Center Staple and Fold | Center staples printed documents. | ○ | ○ | ○ |
| Output Method (Job Management) | For non-conventional printing, selects the special output format for secured documents or saves data in a box. | ○ | ○ | (Mac OS X only) |
| Copies | Specifies the number of copies to print. | ○ | ○ | ○ |
| Function Overview | Printer driver | ||
| PCL | Post Script | PPD | |
| Output Tray Selects the tray where to output the printed pages. | ○ | ○ | ○ |
| Collate Specifies whether to print multiple copies in sets. | ○ | ○ | ○ |
| Offset When printing multiple copies, shifts the output position of each set. | ○ | ○ | ○ |
| Skip Blank Pages Does not print blank pages in data. ○ | |||
| Front Cover Page Attaches a front cover page. ○ ○ ○ | |||
| Back Cover Page Attaches a back cover page. ○ ○ ○ | |||
| Transparency Interleave Inserts interleaves between overhead projector transparencies. | ○ | ○ | ○ |
| Per Page Setting Switches the paper and trays per page. ○ | |||
| Chapter Specifies the page to be printed on the front side. | ○ | ||
| Overlay Prints the original document on top of form data that was created separately. | ○ | ||
| Watermark Prints a watermark (text stamp) on the page being printed. | ○ | ○ | |
| Distribution Number Stamping Prints the number of the copy. | ○ | ||
| Copy Protect Prints a special pattern and prevents copying. | ○ | ||
| Select Color Selects color printing and monochrome printing. | ○ | (No two color selec-tion) | (No two color selec-tion) |
| Glossy Mode Prints using a gloss finish. | ○ | ○ | ○ |
| Original Image Type Prints with a quality suitable for the selected original document. | ○ | ○ | ○ |
| Quality Adjustment Adjusts the image quality. | ○ | ○ | ○ |
| Pattern Specifies the graphic pattern details. ○ | |||
| Use Printer Fonts Specifies the replacement of TrueType fonts with printer fonts. | ○ | ○ | ○ |
| FAX Sends data as a fax. | ○ | ||
| User Authentication/ Account Track Printing is performed after the registered user name and password are entered. | ○ | ○ | (Mac OS X only) |
| Account Track Performs account track operations. | ○ | ○ | (Mac OS X only) |
Function overview
An overview of each function is summarized in this section.
Orientation
You can specify “Portrait” or “Landscape” as the orientation of the page being printed.
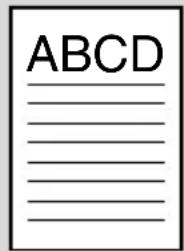
Portrait
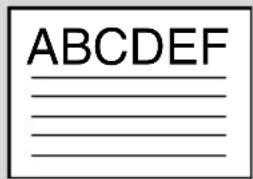
Landscape
| Operating system | Printer driver Refer to | |
| Windows Konica Minolta PCL “Specifying the Setup tab settings” on page 5-5 | ||
| Mac OS X PostScript PPD “Page Attributes (basic settings)” on page 9-6 | ||
| Mac OS 9.2 “Page Attributes (basic settings)” on page 8-6 | ||
Original Size and Output Size
You can specify the original document size and the output paper size. By specifying each size, you can specify the enlargement and reduction ratio.
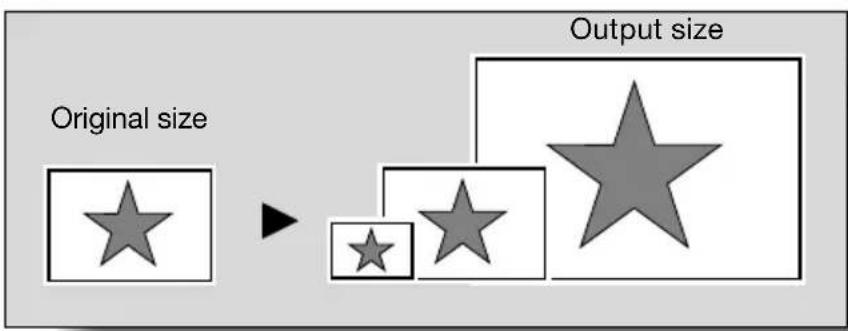
| Operating system | Printer driver Refer to | |
| Windows Konica Minolta PCL “Specifying the Setup tab settings” on page 5-5 | ||
| Mac OS X PostScript PPD “Page Attributes (basic settings)” on page 9-6 | ||
| Mac OS 9.2 “Page Attributes (basic settings)” on page 8-6 | ||

Note
Only the output paper sizes can be specified with the PostScript PPD driver for Windows and the Macintosh.
Zoom (enlargement and reduction)
You can specify the enlargement or reduction ratio using numeric values.
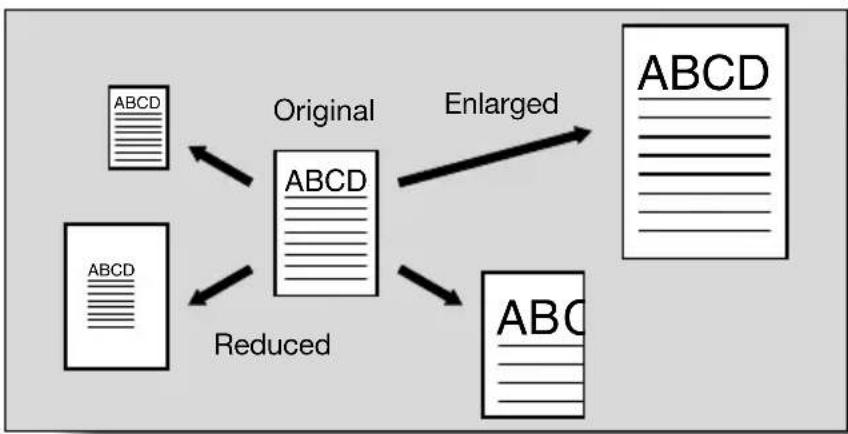
flowchart
graph TD
    A["ABCD"] --> B["Original"]
    C["ABCD"] --> D["Reduced"]
    B --> E["Enlarged"]
    D --> E
    E --> F["ABCD"]
| Operating system | Printer driver Refer to | |
| Windows Konica Minolta PCL “Specifying the Setup tab settings” on page 5-5 | ||
| Mac OS X PostScript PPD “Page Attributes (basic settings)” on page 9-6 | ||
| Mac OS 9.2 “Page Attributes (basic settings)” on page 8-6 | ||
Input Tray (Paper Source)
You can select the input tray as the paper source for printing. When changing the paper type, you can select an input tray according to the paper type.
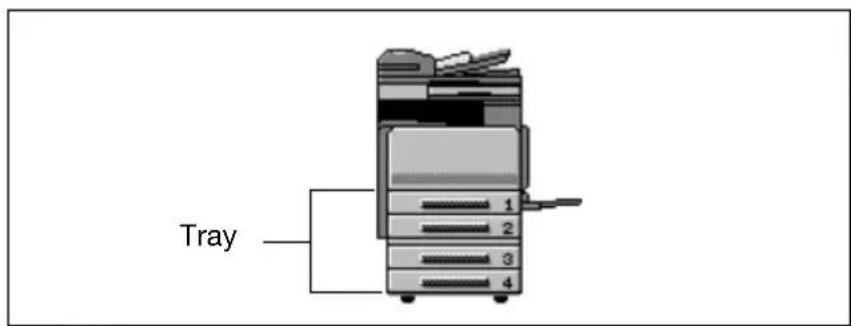
| Operating system | Printer driver Refer to | |
| Windows Konica Minolta PCL “Specifying the Setup tab settings” on page 5-5 | ||
| Mac OS X PostScript PPD “Paper Feed” on page 9-11 | ||
| Mac OS 9.2 “General (basic settings)” on page 8-9 | ||
Paper Type
You can specify the paper type being printed.
| Operating system | Printer driver Refer to | |
| Windows Konica Minolta PCL “Specifying the Setup tab settings” on page 5-5 | ||

Note
With the Konica Minolta PCL driver for Windows, the paper type settings can be pre-set by specifying the paper type of the paper tray.
Print Type (duplex printing/booklet printing)
You can print onto both sides of a page or in a booklet format (two facing pages or center binding). This comes in handy when you want to bind multiple-page documents.
The binding area can be specified by specifying the binding position.
Duplex printing
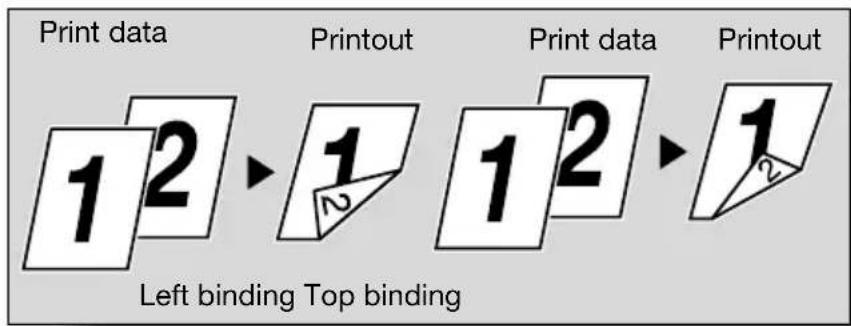
flowchart
graph LR
    A["12"] --> B["1"]
    B --> C["12"]
    C --> D["12"]
    style A fill:#f9f,stroke:#333
    style B fill:#ccf,stroke:#333
    style C fill:#cfc,stroke:#333
    style D fill:#fcc,stroke:#333
Booklet printing
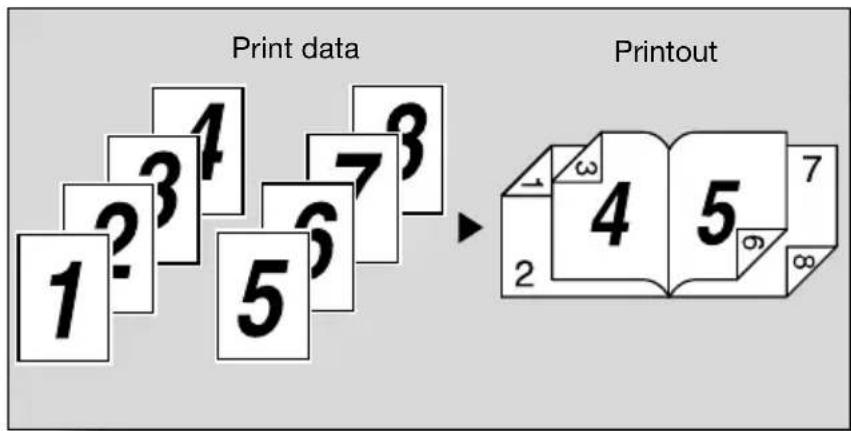
flowchart
graph LR
    A["Print data"] --> B["Printout"]
    A --> C["1 2 3 4 5 6 7 8 9 10"]
    B --> D["4 5 7 8 9"]
| Operating system | Printer driver Refer to | |
| Windows Konica Minolta PCL “Specifying the Setup tab settings” on page 5-5 | ||
| Mac OS X PostScript PPD “Finishing” on page 9-14 | ||
| Mac OS 9.2 “Printer specific options (Finishing Options 1 to 4)” on page 8-11 | ||

Note
The duplex printing and booklet printing functions are available only when the optional ADU is installed.
Printing multiple pages on one page
You can print multiple document pages on one page. This comes in handy when you want to reduce the number of output pages.
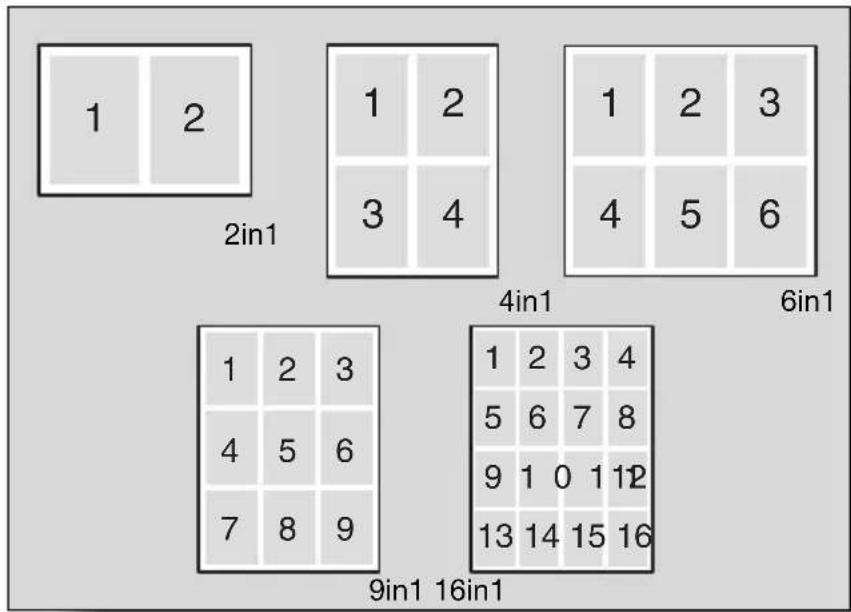
| Operating system | Printer driver Refer to | |
| Windows Konica Minolta PCL “Specifying the Setup tab settings” on page 5-5 | ||
| Mac OS X PostScript PPD “Layout (printing multiple pages on one page)” on page 9-10 | ||
| Mac OS 9.2 “Layout (printing multiple pages on one page)” on page 8-10 | ||
Stapling and hole punching
Documents can be stapled together or holes can be punched into the document.
By specifying the file margin, you can specify the margin for stapling or hole punching.
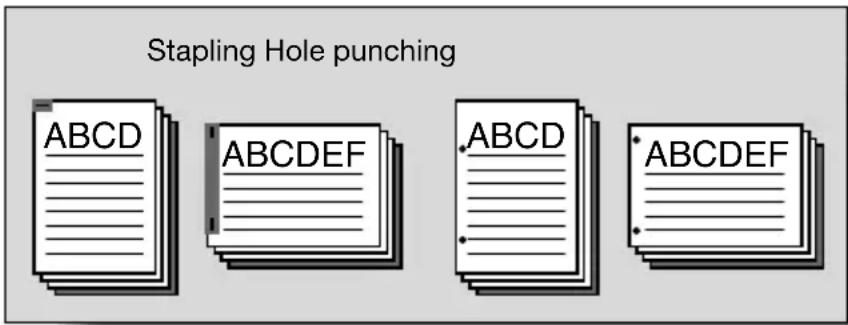

Note
The staple function is available only when the optional finisher FS-514 is installed.
The hole punch function is available only when optional finishers FS-514 and punch kit PK-510 are installed.
| Operating system | Printer driver Refer to | |
| Windows Konica Minolta PCL “Specifying the Setup tab settings” on page 5-5 | ||
| Mac OS X PostScript PPD “Finishing” on page 9-14 | ||
| Mac OS 9.2 “Printer specific options (Finishing Options 1 to 4)” on page 8-11 | ||
Output Method (Job Management)
You can select “Secured Print”, which requires a password to print, or “Save in User Box”, which saves documents in a document folder.
| Operating system | Printer driver Refer to | |
| Windows Konica Minolta PCL “Specifying the Setup tab settings” on page 5-5 | ||
| Mac OS X “Security” on page 9-11 | ||
Sorting (Collating) and Classifying (Offset)
You can print the complete document sets the specified number of times or each page the specified number of times.
By specifying offset, the output position can be shifted and output to the front and back for each copy. (Multiple paper sources are used when a shifting finisher is installed and when no finisher is installed.)
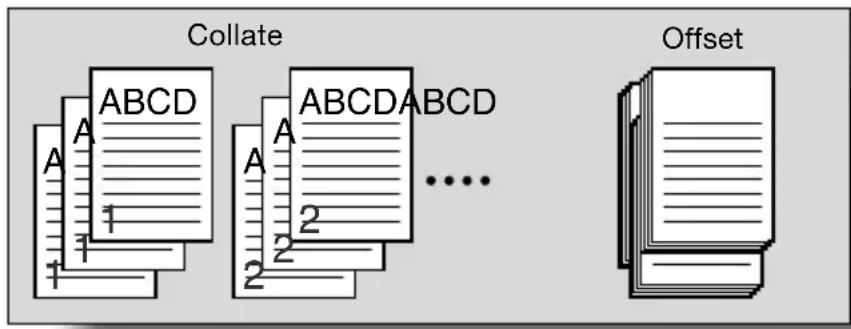
flowchart
graph TD
    A["Collate"] --> B["1"]
    A --> C["2"]
    D["Offset"] --> E["Stacked 10+ 10"]
    style A fill:#f9f,stroke:#333
    style B fill:#ccf,stroke:#333
    style C fill:#ccf,stroke:#333
    style D fill:#cfc,stroke:#333
    style E fill:#fcc,stroke:#333
| Operating system | Printer driver Refer to | |
| Windows Konica Minolta PCL “Specifying the Setup tab settings” on page 5-5 | ||
| Mac OS X PostScript PPD “Copies & Pages (general settings)” on page 9-9 and “Finishing” on page 9-14 | ||
| Mac OS 9.2 “Copies & Pages (general settings)” on page 9-9 and “Printer specific options (Finishing Options 1 to 4)” on page 8-11 | ||
Skip Blank Pages (saving paper)
Does not print blank pages in the data.
| Operating system | Printer driver Refer to | |
| Windows Konica Minolta PCL “Specifying the Setup tab settings” on page 5-5 | ||
Front Cover, Back Cover, and Transparency Interleave
A front cover and back cover can be added and interleaves between overhead projector transparencies can be inserted.
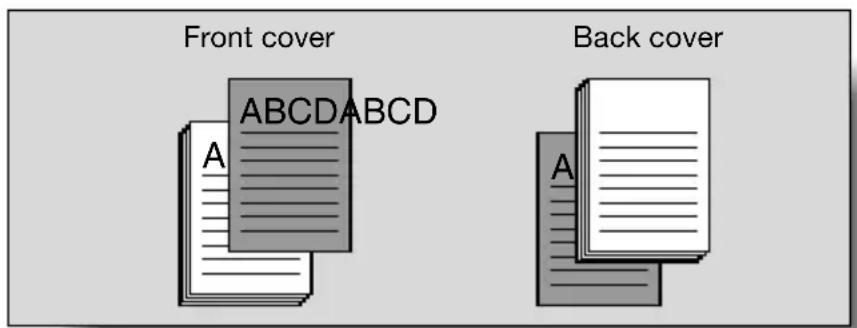
| Operating system | Printer driver Refer to | |
| Windows Konica Minolta PCL “Specifying the Per | Page Setting tab settings” on page 5-19“Specifying the Setup tab settings” on page 5-5 | |
| Konica Minolta PostScript “Specifying the Per Page Setting tab settings” on page 6-20 | ||
| PostScript PPD “Specifying the Device Options tab settings” on page 7-5 | ||
| Mac OS X PostScript PPD “Setup” on page 9-17 | ||
| Mac OS 9.2 “Printer specific options (Finishing Options 1 to 4)” on page 8-11 | ||
Per Page Setting
You can specify to have paper inserted between pages and specify simplex printing or duplex printing and the paper for printing for each page.
| Operating system | Printer driver Refer to | |
| Windows Konica Minolta PCL “Specifying the Per | Page Setting tab set- tings” on page 5-19 | |
Chapter
You can specify the page that you want to print on the front side when duplex printing or booklet printing.
Even if a specified page comes up to be printed on the back side in duplex printing or booklet printing, the specified page is moved and printed on the front side.
| Operating system | Printer driver Refer to | |
| Windows Konica Minolta PCL “Specifying the Per | Page Setting tab set- tings” on page 5-19 | |
Overlay
Prints the original document on top of form data that was created separately.
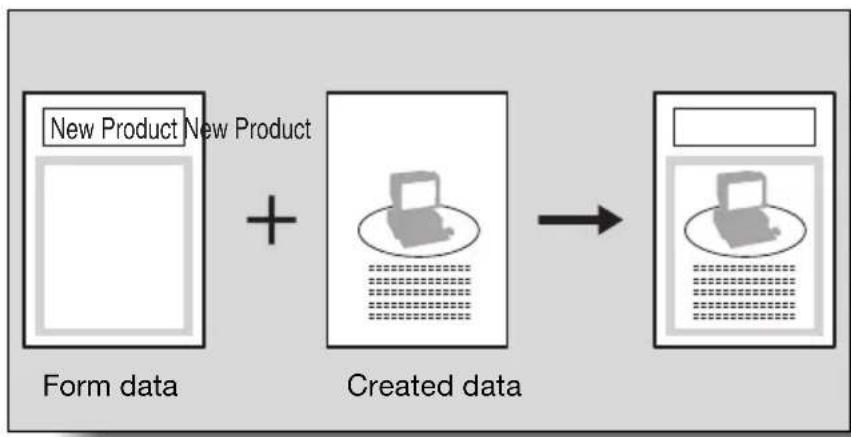
flowchart
graph LR
    A["Form data\nNew Product\nNew Product"] --> B["Created data"]
    B --> C["Output image with printer icon"]
| Operating system | Printer driver Refer to | |
| Windows Konica Minolta PCL “Specifying the Overlay tab settings” on page 5-22 | ||
Watermark
Prints a watermark (text stamp) on the page being printed.
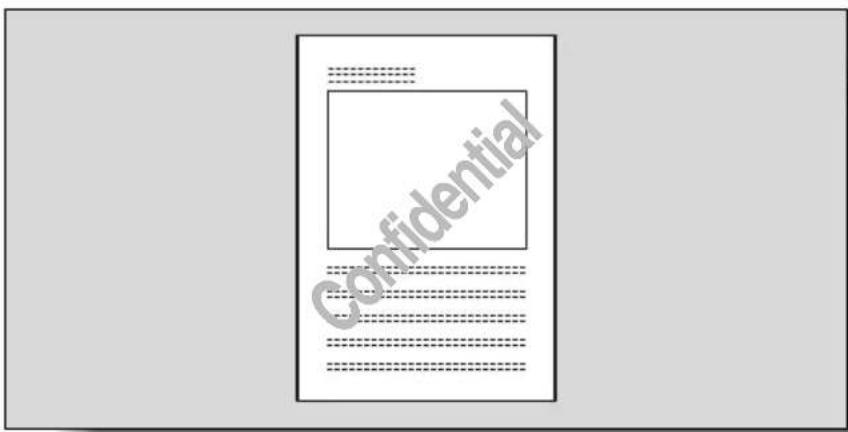
| Operating system | Printer driver Refer to | |
| Windows Konica Minolta PCL “Specifying the Watermark tab settings” on page 5-26 | ||
Copy Protect
You can print a special pattern on an entire page while printing.
When the pattern on the printed page is copied, the characters embedded in the pattern appear to prevent an illegal copy.
| Operating system | Printer driver Refer to | |
| Windows Konica Mir | olta PCL “Specifying the Watermark tab settings” on page 5-26 | |
Quality Adjustment
Adjusts the image quality.
| Operating system | Printer driver Refer to | |
| Windows Konica Minolta PCL “Specifying the Quality tab settings” on page 5-30 | ||
| Mac OS X PostScript | PPD “Quality” on page 9-16 | |
| Mac OS 9.2 “Printer | specific options (Finishing Options 1 to 4)” on page 8-11 | |
Use Printer Fonts (substitute fonts)
Specifies the replacement of TrueType fonts with printer fonts.
| Operating system | Printer driver Refer to | |
| Windows Konica Minolta PCL “Specifying the Font tab settings” on page 5-32 | ||
| Mac OS 9.2 PostScript PPD “PostScript Options” on page 8-8 | ||
User Authentication
When the authentication settings have been applied on this machine, you must enter the required user name and password.
| Operating system | Printer driver Refer to | |
| Windows Konica Minolta PCL “Specifying the Setup tab settings” on page 5-5 | ||
| Mac OS X PostScript PPD “Security” on page 9-11 | ||
Account Track
Specifies when this machine is operating in Account Track.
| Operating system | Printer driver Refer to | |
| Windows Konica Minolta PCL “Specifying the Setup tab settings” on page 5-5 | ||
| Mac OS X PostScript | PPD “Security” on page 9-11 | |
4.3 Specifying the printer driver basic settings
The settings specified for the functions of this machine when printing can only be applied while using the application. When the application is exited, the settings return to their default settings.
When registering the settings, change the printer driver basic settings (default settings) or use the function for saving settings.
For Windows
The functions of this machine that can be used when printing can be specified in the printer driver setup dialog box, which can be displayed from the Printers window (for Windows XP/Server 2003, Printers and Faxes window).
Settings specified in the printer driver setup dialog box displayed using the procedure described below will be applied when printing from any application.
1 For Windows 98SE/Me/2000/NT 4.0, click the [Start] button, point to "Settings", and then click "Printers".
For Windows XP/Server 2003, click the [Start] button, and then click "Printers and Faxes".
- If “Printers and Faxes” does not appear in the Start menu, open the Control Panel from the Start menu, select “Printers and Other Hardware”, and then select “Printers and Faxes”.
2 For Windows 98SE/Me, right-click the icon of the installed printer, and then click "Properties".
For Windows 2000/XP/Server 2003, right-click the icon of the installed printer, and then click "Printing Preferences".
For Windows 4.0, right-click the icon of the installed printer, and then click "Document Default".
The following printer driver setting dialog box appears.
For the settings that can be specified with each printer driver, refer to the following:
- Konica Minolta PCL Driver: "Setting up the PCL driver" on page 5-1
- Konica Minolta PostScript Driver: "Setting up the PostScript driver (Windows)" on page 6-1
- PostScript PPD Driver: “Setting up the PPD driver (Windows)” on page 7-1
PCL driver
![xooxxx Printing Preferences Setup Per Page Setting Overlay Washmark Quality Font FAX Version Paper Orientation ● Poutset ○ Landscape A Original Size 81/2x11 Output Size Same as Original Size Zoom 100 S Paper Source Auto Paper Type Settings... Binding Binding Position Auto Print Type Single-Sided Combination 2 in 1 File Margin Details... Staple 1 Staple Hole Punch 2 Holes Fold & Staple Details... Output Output Method Print Copies 1 (1-999) Output Trap Default Coliate Offset Skip Blank Pages User Authentication/Account Track... Sayer/Restore Setting... View: ○ Paper ○ Printer 81/2x11 [8.5x11inch] Restore Defaults OK Cancel Apply Help](/content/2026/06/1277641/images/07a06b3911d40e85d7b699a3de8e7c82981e277e4186059a3e8d1e03f0a2cc4b.jpg)
PostScript driver
![XXXXXX PS Printing Preferences Advanced Setup Layout Per Page Setting Watermark Quality Version 8 1/2x11 [215.9x279.4mm] 8 1/2x11 [215.9x279.4mm] Easy Set Defaults Orientation Portrait Landscape Original Size 8 1/2x11 Output Size Same as Original Size Zoom Auto Manual 100 % Paper Source Auto Paper Type Plain Paper Copyes 1 [1_999] Collate Offset Output Tray Default Output Method Print User Authentication/Account Track... Printer View OK Cancel Apply Help](/content/2026/06/1277641/images/8fd02cc33fa380a6b5935f21a4c694110b844623a869d860a01ac2a00eaeb161.jpg)
PostScript PPD driver
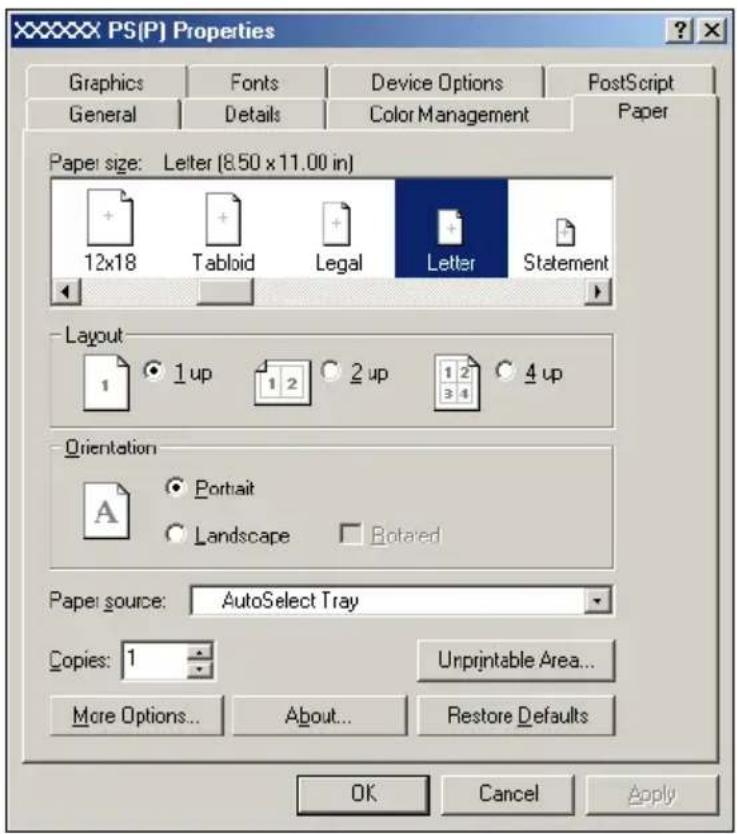

Note
Use each tab in the dialog box to set up the printer driver.
To specify custom settings, click Print in the application, and then click the [Properties] button or the [Preferences] button on the Print dialog box. The settings specified on the Print dialog box apply only to the current file.
For the function for saving settings, refer to the pages described below.
- Konica Minolta PCL driver: "Saving the driver settings" on page 5-49
- Konica Minolta PostScript driver: "Saving the driver settings" on page 6-28
For Macintosh
The functions of this machine that can be used when printing can be specified in the Print dialog box or the Page Setup dialog box.
The settings can only be applied while using the application. When the application is exited, the settings return to their default settings.
For Mac OS X
In the Print dialog box, save the settings from the "Presets" function.
For saving the settings, refer to "Saving the driver settings" on page 9-19.
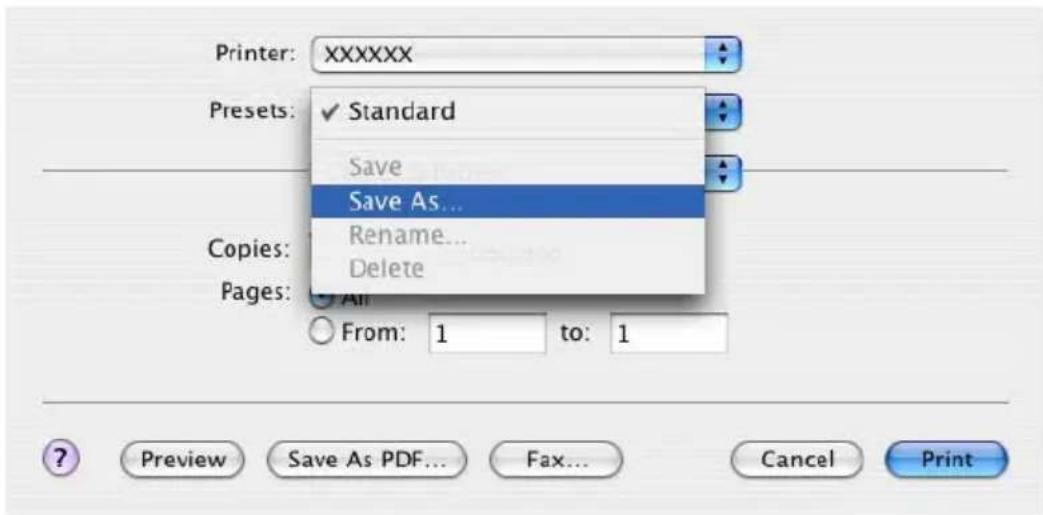
In the Page Setup dialog box, save the settings by selecting "Save As Default" from "Settings".
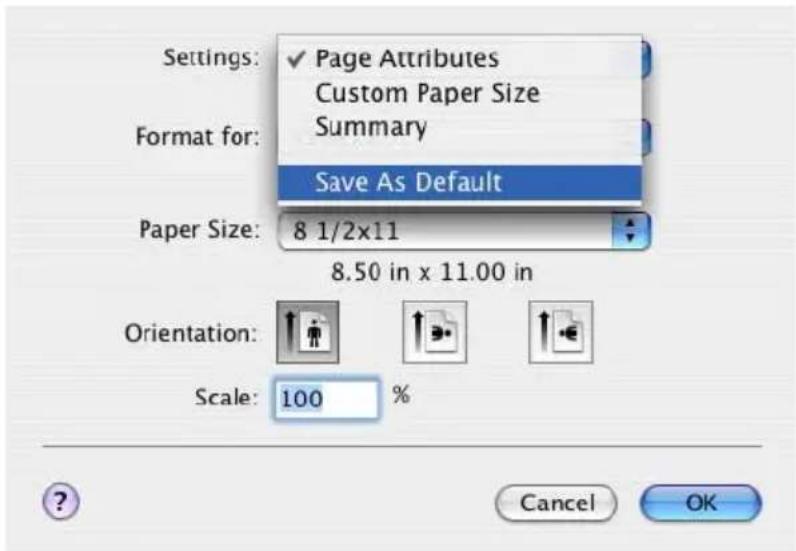

Note
For details on the items that can be specified in the printer driver, refer to "Setting up the PPD driver (Mac OS X)" on page 9-1.
For Mac OS 9.x
In the Print dialog box, save the settings by clicking the [Save Settings] button.
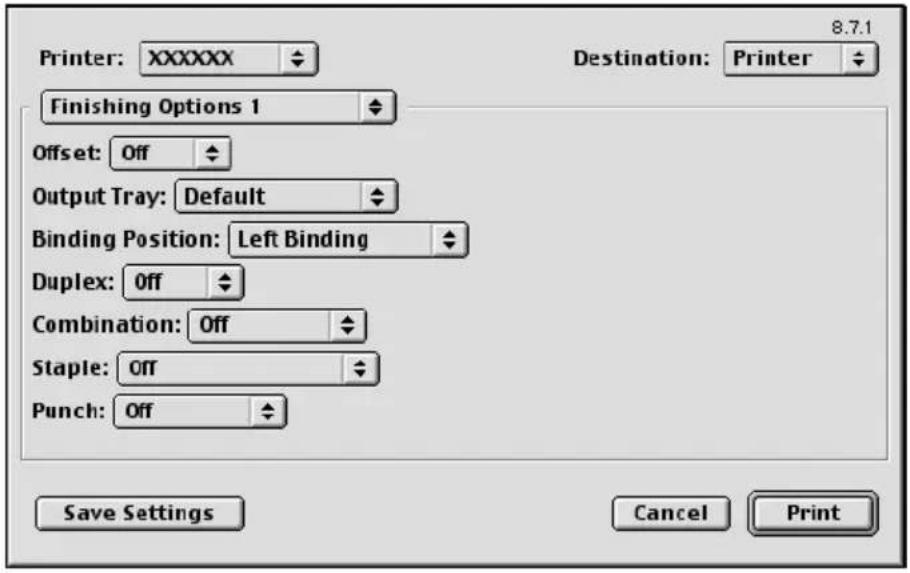

Note
The settings cannot be saved from the Page Setup dialog box.
"General" cannot be saved from the Print dialog box.
For details on the items that can be specified in the printer driver, refer to "Setting up the PPD driver (Mac OS 9.2)" on page 8-1.
5 Setting up the PCL driver
5.1 Settings
Common settings
The following describes the common settings and buttons that are displayed on all tabs.
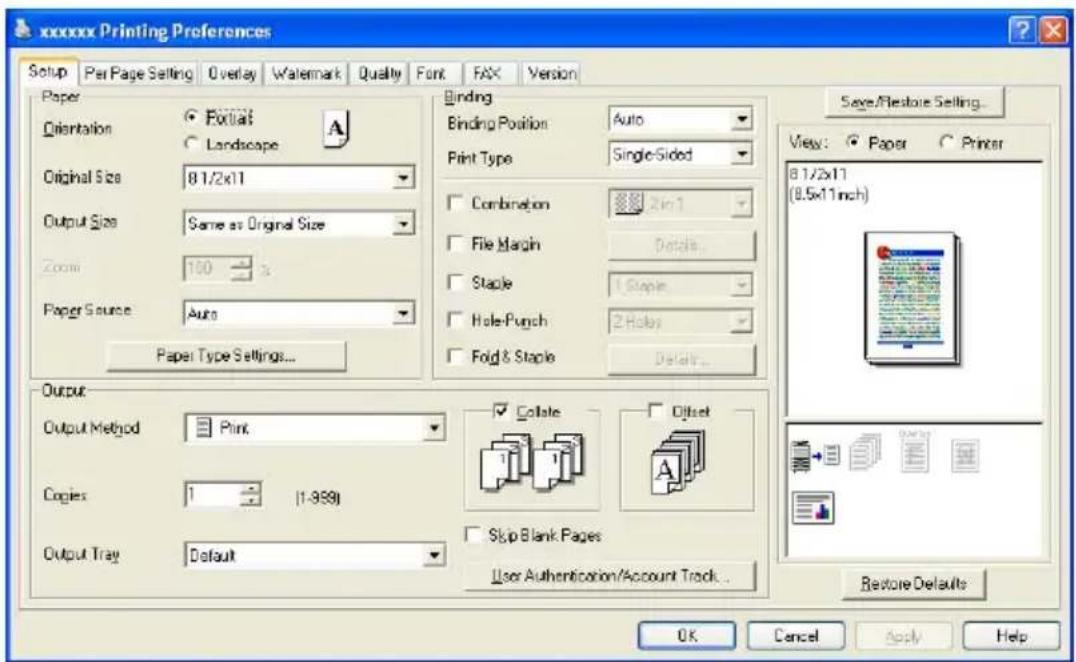
| Button Function | |
| OK Click this button to close the dialog box and apply any settings that have been changed. | |
| Cancel Click this button to cancel any settings that have been changed and close the dialog box. | |
| Help Click this button to display the help for each item on the currently displayed dialog box. | |
| Save/Restore Setting Click this button to save the current settings and to view them at a later time. | |
| Restore Defaults Click this button to return the settings to their defaults, which were selected when the driver was installed. | |
| Button Function | ||
| View When “Paper” is selected, a preview of the page layout as specified in the current settings is displayed and a preview image of the print job can be checked.When “Printer” is selected, a printer figure is displayed showing any options, such as the paper tray, that are installed on this machine. | 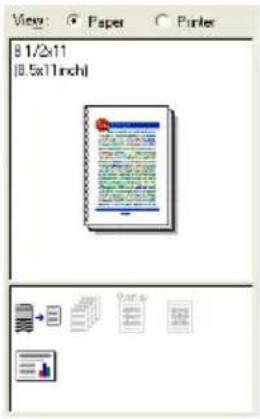 | 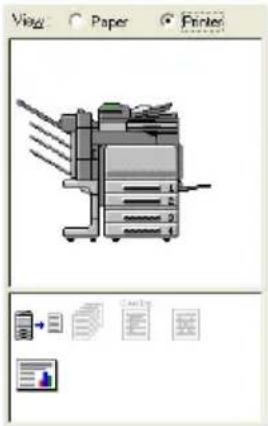 |
| Paper | Printer | |


Note
To enable any installed options, you must specify the Option settings. For details, refer to "Specifying the Option tab settings" on page 5-47.
Setup tab
| Item Function | |
| Paper Specifies the orientation of the original document, original size, output size, paper source, and paper type. | |
| Binding Specifies the folding format | such as the binding position, duplex printing, booklet printing, printing multiple pages on one page, file margin, stapling, or hole punching. |
| Output Specifies the output format | such as the output method, number of copies, output tray, collate, or offset. |
Per Page Setting tab
| Item Function | |
| Front Cover Page Attaches a front | cover page. |
| Back Cover Page Attaches a back | cover page. |
| Per Page Setting Inserts paper between pages and switches simplex/duplex and paper for each page. | |
| Chapter Specifies the page to be printed on the front side. | |
Overlay tab
| Item Function | |
| Overlay Specifies overlay printing. |
Watermark tab
| Item Function | |
| Watermark Prints a watermark (text) | stamp) on the document being printed. |
| Distribution Number Stamping Prints | the number of the copy. |
| Copy Protect Prints a special pattern and prevents copying. | |
Quality tab
| Item Function | |
| Select Color Specifies the color for printing. | |
| Original Image Type Specifies the contents of the original document. Prints with a quality suitable for the original document. | |
| Quality Adjustment Adjusts the image quality. You can select “Simple” to adjust entire documents and “Detailed” to adjust the characters, photos, and charts of each document. | |
| Glossy Mode Prints using a gloss finish. | |
| Pattern Selects the print pattern. | |
Font tab
| Item Function | |
| Use Printer Fonts Selects whether to use TrueType fonts or the printer fonts when printing. | |
| Download Font Format Selects whether the fonts are downloaded to the printer as bitmap or outline. | |
FAX tab
| Item Function | |
| Mode Selection Selects whether to print or send a fax. | |
| Fax Mode Settings | Specifies the fax resolution and transmission conditions. |
| FAX Cover Sheet | Specifies the fax cover sheet. |
| Recipients | Enters the recipient. |
| Phone Book Registers recipients in the Phonebook. | |
| Recipients Displays registered numbers for the recipient or Phone-book. | |
Version tab
| Item Function | |
| Version Displays the version of the printer driver. | |
Option tab
| Item Function | |
| Option Specifies the options that are installed on this machine. | |
| Option Information Automatically specifies the printer driver option settings. | |
| Model Specifies the model to be used. | |

Note
To display the Option tab in Windows 2000/XP/NT 4.0/Server 2003, right-click the icon of the installed printer, and then click "Properties".
5.2 Specifying the Setup tab settings
![wwwoox Printing Preferences Setup Per Page Setting Overlay Watermark Quality Font FAV Version Paper Orientation ● 打印 ○ Landscape Original Size 0 1/2x11 Output Size Some as Original Size Zoom 100% Paper Source Auto Paper Type Settings... Binding Binding Position Auto Print Type Single-Sided Combination 8.0 x 1 File Margin Cancel Staple 1 Staple Hole Punch 2 Holes Fold & Staple Cancel Output Output Method Print Copies 1 [1-999] Output Tray Default Collate Offset Slip Blank Pages User Authentication/Account Track... Save/Restore Setting... View: ○ Paper ○ Printer 0 1/2x11 (8.5x11inch) Restore Defaults OK Cancel Apply Help](/content/2026/06/1277641/images/c83e0112d3eb83f25ee7632c63892aba99c5674a8723687da4338dc4fe9f0555.jpg)
Printing to suit the paper size
You can enlarge or reduce documents created when printing to match the output paper size.
1 Click the Setup tab.
2 From the "Original Size" and "Output Size" drop-down lists, select the desired settings.
- You can also specify any enlargement or reduction ration in the "Zoom" box.

Note
If the paper size is other than the custom size, select the desired settings after specifying the settings in Custom Size.
When "W" is selected for each standard paper size in the printer driver, the data can be centered and printed.
For example, if A4 size data is created and you want to center and print on A3 size paper, specify "A4 W" as the paper size in the printer driver and specify "Tray 1" or "Bypass Tray" as the paper source.
To print, load A3 size paper in the tray ("Tray 1" or "Bypass Tray") of this machine that is specified in the printer driver, and then specify the settings described below from [Basic Screen (Paper)] — [Change Tray Settings] — [Oversized Paper] on the control panel.
Select [A4W].
Enter the A3 paper size (420.0 × 297.0) in [Change Size].
Saving a custom size
A custom size can be specified and saved in advance as described below.
1 From the "Original Size" or "Output Size" drop-down list, select "Custom Size Settings".
The Custom Size Settings dialog box appears.
2 Specify settings for the following:
List of Custom Sizes: Select the size for the custom size being set. Custom Size Name: Input the name of the custom size being registered.
Size: Specify the width and length of the custom size according to the selected measurement units.
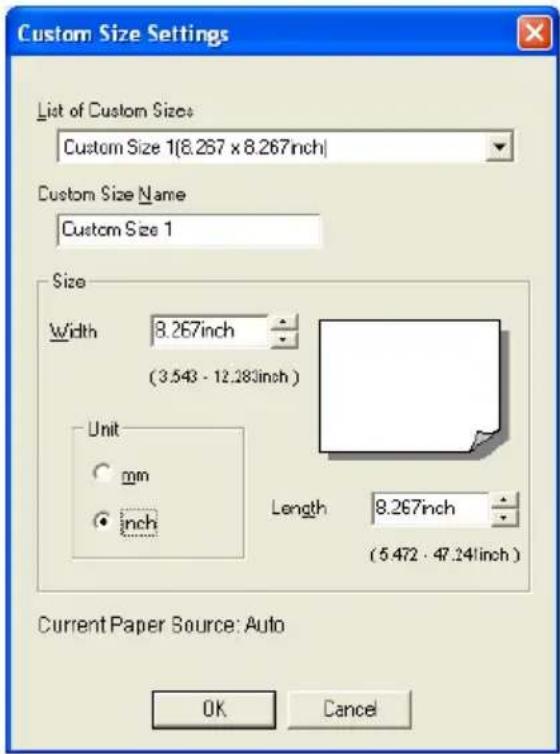
3 Click the [OK] button.

Note
The custom size settings can only be specified from the printer driver setup dialog box, which can be displayed from the Printers window (for Windows XP/Server 2003, Printers and Faxes window).
If using long paper, specify the size of the long paper in Custom Size. For details, refer to “Printing on banner paper” on page 10-119.
Selecting the paper source
When changing the paper type, you can register it to an input tray and you will be able to select the input tray according to the desired paper type.
1 Click the Setup tab.
2 From the "Paper Source" drop-down list, select the paper tray that contains the paper to be used.
Setting the paper source of the paper type
Follow the procedure described below to assign a paper type to a paper tray.
1 Click the [Paper Type Settings] button.
2 Select the "Paper Source" being changed, and then click the [Edit Paper Type] button.
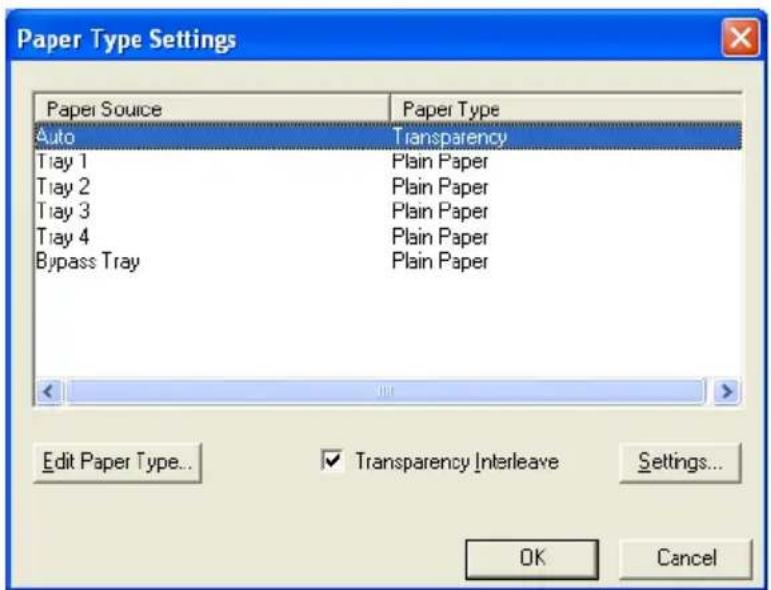
3 Select the desired setting from the "Paper Type" drop-down list, and then click the [OK] button. Only the paper types that can be selected in each input tray are displayed.
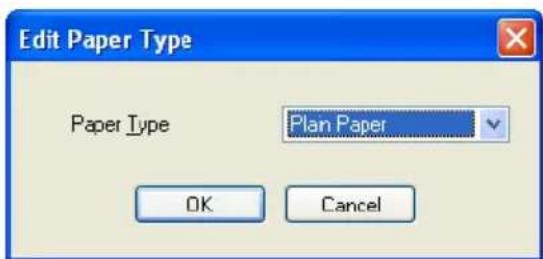
If "Transparency" is selected as the paper type, you can specify transparency interleaving.
When the “Transparency Interleave” check box is selected, the Transparency Interleave Settings dialog box appears, allowing you to select the source of the interleaf paper.
The Transparency Interleave Settings dialog box can also be displayed by clicking the [Settings] button.
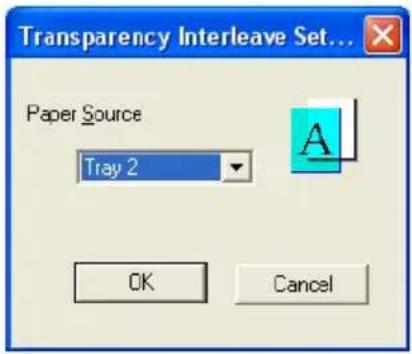

Note
Thick 1, Thick 2, and Thick 3 cannot be selected for Tray 2, Tray 3, and Tray 4 and LCT.
Letterhead paper can only be selected when optional ADU is installed.
Specifying duplex/booklet printing
You can print a document onto both sides of a page or in a booklet format (two facing pages). This comes in handy when you want to bind multiple-page documents.
The duplex printing and booklet printing functions are available only when the optional ADU is installed.
1 Click the Setup tab.
2 From the "Print Type" drop-down list, select "Double-sided" or "Booklet".

Note
The binding orientation can be specified from the "Binding Position" drop-down list.
Printing multiple pages on one page (N in 1)
You can print multiple-page documents on one page. This comes in handy when you want to reduce the number of output pages.
1 Click the Setup tab.
2 Select the "Combination" check box.
3 From the "Combination" drop-down list, select the number of pages to be printed on one page.
To change the border line and printing order settings, select "Details", and then change the settings in the dialog box that appears.
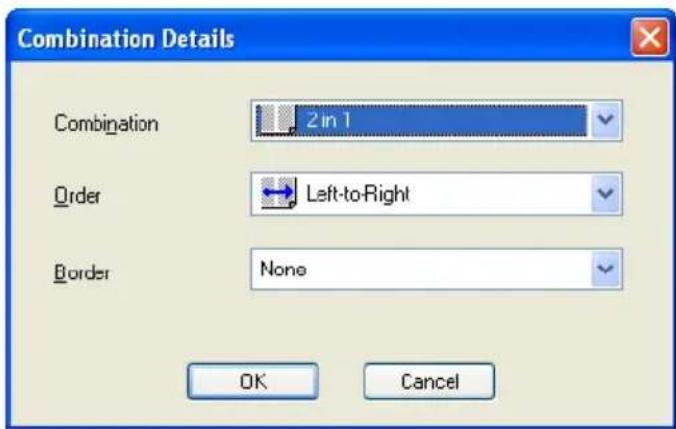

Note
When printing a job that contains pages of different sizes and orientations, images may be missing or overlapping when the document is printed.
Setting the file margin
File margins are added to the document before it is printed.
1 Click the Setup tab.
2 Select the "File Margin" check box.
3 To set the width of the file margin, click the [Details] button, and then specify the desired settings in the File Margin Details dialog box that appears.
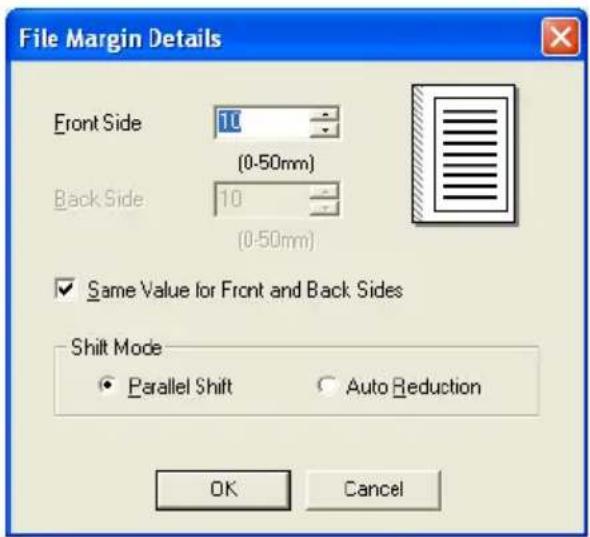
Front Side/Back Side: Sets the file margin values. By clearing the "Save Value for Front and Back Sides" check box, you can specify separate values for the front and back sides.
Shift Mode: To add a file margin, select how the image is to be shifted.

Note
When "Double Sided" is selected in "Print Type" and "Auto Reduction" is specified in Shift Mode in the File Margin Details dialog box, the reduction ratio according to the larger value of the file margin width is used from the values specified in Front Side/Back Side.
Stapling
Multiple-page documents can be stapled.
The staple function is available only when the optional finisher FS-514 is installed.
1 Click the Setup tab.
2 Select the "Staple" check box.
3 From the drop-down list, specify the number of staples and the stapling position.

Note
Depending on the selected Binding Position setting, different stapling positions are available.
Hole punching
Holes can be punched into the printed document.
The hole punch function is available only when optional finishers FS-514 and punch kit PK-510 are installed.
1 Click the Setup tab.
2 Select the "Hole-Punch" check box.
3 From the drop-down list, specify the number of punched holes.
Fold & Staple
You can specify the center binding process of a document.
1 Click the Setup tab.
2 Select the "Fold & Staple" check box.
3 To specify the settings in "Fold & Staple", click the [Details] button, and then specify the desired setting in the Fold & Staple Details dialog box that appears.
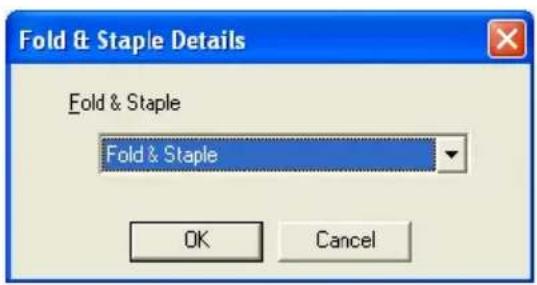
Fold & Staple: Specifies to fold and staple a printed document. You can specify “Fold & Staple” to fold and staple a document, “Center Staple” to staple a document in the center, or “Fold” to fold a document in half.

Note
The Fold & Staple function is available only when saddle stitcher SD-503 is installed on optional finisher FS-514.
Selecting the output method
Not only can you print directly, but you can select "Secured Print", which requires a password to print, or "Save in User Box", which saves documents in the document folder.
1 Click the Setup tab.
2 From the "Output Method" drop-down list, select the output method.
- Print: Prints immediately.
- Secured Print: Saves the document to be printed in the secured document box of this machine. When printing, you are required to enter the user ID and password in this machine's control panel. Select when printing highly confidential documents. (Up to 100 documents)
- Save in User Box: Saves the document to be printed in a box on this machine.
- Save in User Box and Print: Saves the document in a box and prints at the same time.
- Proof and Print: After part of the document has been printed, this machine stops printing temporarily. Select to avoid misprinting large print jobs.
Secured Printing
If "Secured Print" was selected, enter the ID and password in the dialog box that appeared.
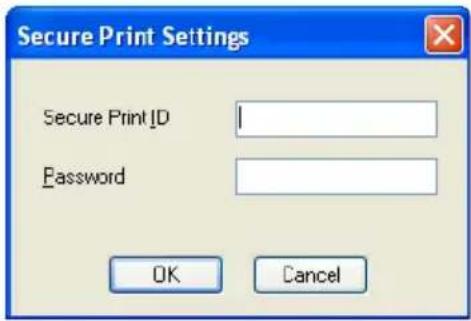

Note
To print the document, specify [Secured] in the Box mode of this machine, and then enter the ID and password. For details, refer to "Print job management" on page 10-104.
For details on the box functions of this machine, refer to the User's Guide [Box Operation].
When password rules are enabled on this machine, the passwords that can be used for secured printing are limited and the jobs are deleted when a password that does not comply with the password rule is entered. For the password rules, refer to User's Guide [Copy Operations].
Save in User Box
→When "Save in User Box" or "Save in User Box and Print" is selected, specify the file name and box number in the dialog box that appears for entering the file name and box number.
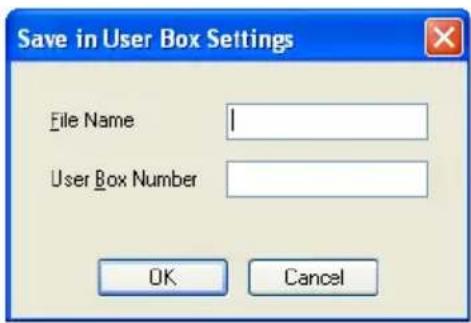

Note
For details on the box functions of this machine, refer to the User's Guide [Box Operations].
When the power rules are enabled on this machine, specify the box that is created on this machine.
Proof and printing
→When a print job is sent, this machine stops printing temporarily after part of the document has been printed. The remaining print job is stored in this machine as a print job. When printing multiple copies, you can print the remaining part of the print job after checking the print results.

Note
To print the document, specify the document in the Job mode of this machine, and then enter the ID and password. For details, refer to “Print job management” on page 10-104.
Specifying user authentication settings
If user authentication settings have been specified on this machine, you must enter a user name and password.
If a print job is sent using a user name or password that is not a registered account on this machine or if a job is sent without the “User Authentication” check box selected, the job is deleted without being authenticated by this machine.
When the user authentication settings are specified on this machine, the authentication operation restriction function is in mode 2, and the authentication information is not entered correctly, the applicable user is locked and cannot be accessed.
1 Click the Setup tab.
2 Click the [User Authentication/Account Track] button.
3 Select the "User Authentication" check box, and then enter the user name and password.
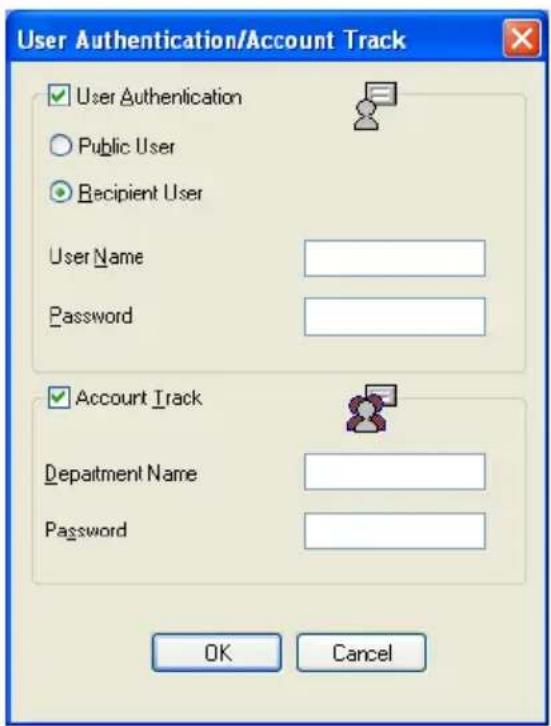
4 Click the [OK] button.

Note
If this machine has been set to permit public users, the machine can be used without a user name and password.
If printing is not allowed, printing cannot be performed even when used by a registered user.
For user authentication settings, consult the administrator of this machine.
Specifying account track settings
If account track settings have been specified on this machine, you must enter a department name and password.
1 Click the Setup tab.
2 Click the [User Authentication/Account Track] button.
3 Select the "Account Track" check box, and then enter the department name and password.
- A default password can be registered and used rather than entering a password for each job.
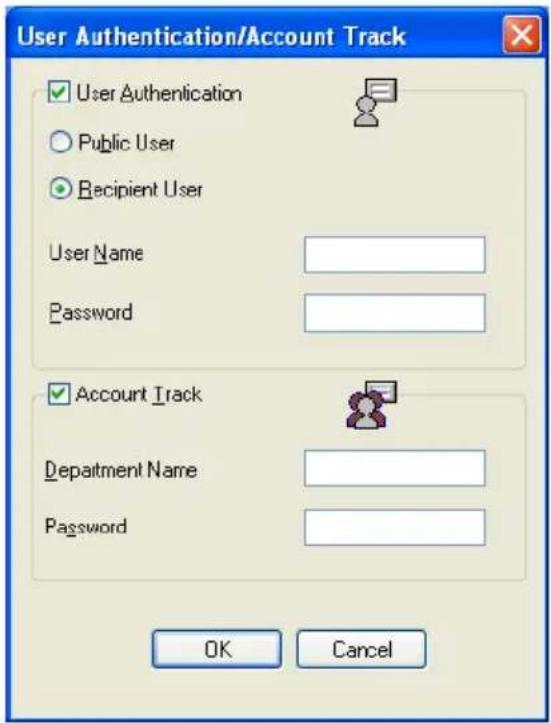
4 Click the [OK] button.

Note
If a print job is sent using a department name or password that is not a registered account on this machine or if a job is sent without the “Account Track” check box selected, the job is deleted without being authenticated by this machine.
When the account authentication settings are specified on this machine, the authentication operation restriction function is in mode 2, and the authentication information is not entered correctly, the applicable account is locked and cannot be accessed.
If printing is not allowed, printing cannot be performed even when used by a registered account.
For the account track details, consult the administrator of this machine.
5.3 Specifying the Per Page Setting tab settings
![Printing Preferences Setup Per Page Setting Overlay Watemark Quality Font FAX Version Front Cover Page Blank Colnted Paper Source Tray 1 Chapter Page Number Entry Example 2, 4, 6-10 (Comma, Hyphen) Back Cover Page Blank Colnted Paper Source Tray 1 Par Page Setting List Name List 1 Edit List Name... Page Number Print Type Paper Source Body Font Double-Shell Tray 1 Add....Edit...Help Save/Restore Setting... View: Paper Printer B 1/2x11 [8.5x11inch] Restore Defaults OK Cancel Help](/content/2026/06/1277641/images/88225ffad5a47f8f3746d6e2a62fcfcad5d80bc9bfef4925d46fbf5e5b6d3b2c.jpg)
Printing documents with a front cover/back cover
1 Click the Per Page Setting tab.
2 Select the "Front Cover Page" and "Back Cover Page" check boxes.
3 To print on the front cover and back cover, select "Printed". To only add a blank page, select "Blank".
4 Select the input tray that contains the loaded paper for the front cover and back cover.
Printing multiple pages
The “Per Page Setting” function comes in handy when you want to change the input tray during a print job when printing multiple pages.
Chapter
You can specify the page that you want to print on the front side when duplex printing or booklet printing.
Even if a specified page comes up to be printed on the back side in duplex printing or booklet printing, the specified page is moved and printed on the front side.
1 Click the Per Page Setting tab.
2 Select the "Chapter" check box.
3 Enter the page number of the page you want to print on the front side.

Note
Enter the page number using single-byte numerals.
When entering multiple page numbers, separate the page numbers with commas such as “2, 4, 6” or enter a page range using a hyphen such as “6-10”.
Per Page Setting
You can specify the print type and input tray for each page.
1 Click the Per Page Setting tab.
2 Select the "Per Page Setting" check box.
3 From the "List Name" drop-down list, select the name of the desired list.
- When changing the list name, click the [Edit List Name] button after selecting the list name, and then apply the settings on the dialog box that appears.
4 Click the [Add] button, and then specify the page number, print type, and paper source in the dialog box that appears.
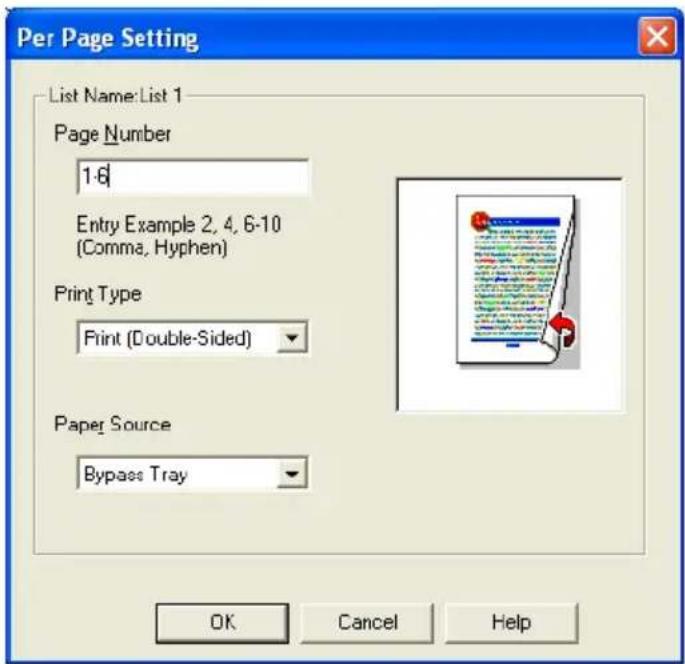

Note
For an existing list, click the [Edit] button to change the selected page settings, or click the [Delete] button to delete them.
Click [↑] or [↓] to change the page number starting with the smallest page number.
5.4 Specifying the Overlay tab settings
![Printing Preferences Setup Per Page Setting Overlay Watemark Quality Font FAX Version Overlay None Print Overlay Check before Printing Create Overlay Delete Overlay File Folder C:\Documents and Settings\Mats File Name=form1.kmf Browse Files... File Folder Select... Size Modified form1.kmf C:\Documents and ... Color 423KB 05/12/13 14:01 form2.kmf C:\Documents and ... Color 269KB 05/12/13 14:02 Save/Restore Setting... View: Paper Printer B 1/2x11 [8.5x11inch] OK Cancel Help](/content/2026/06/1277641/images/4b84a2e45bf6bbd8e44a14e9d85d82db93d2a5784971c17022653589d1509ee6.jpg)
Printing different original documents together (Overlay)
An original document can be printed on top of form data that was created separately. This function is handy for fax cover letters and form letters.
You must pre-register forms to be printed. For details, refer to "Editing forms" on page 5-24.
1 Create the print data using any application.
2 From the "File" menu, select "Print".
3 Select the printer in "Select Printer", and then click the [Properties] button or the [Preferences] button.
4 Click the Overlay tab.
5 Select "Print Overlay".
6 From the list, select the form that you want to print.
![Printing Preferences Setup Par Page Setting Overlay Watermark Quality Font FAX Version Overlay None Print Overlay Check before Printing Create Overlay Delete Overlay File Folder C:\Documents and Settings\Mets File Name 10m1.kmf Browse Files... File Folder Select... Size Modified 10m1.kmf C:\Documents and ... Color 423KB 05/12/13 14:01 10m2.kmf C:\Documents and ... Color 269KB 05/12/13 14:02 Save/Restore Setting... View: Paper Printer B 1/2x11 [8.5x17inch] OK Cancel Help](/content/2026/06/1277641/images/bb5d4711c986edfd64e9678232ed3db7623b5bf1268fb1586cb2617c5398c8b3.jpg)
7 Select the file name, and then click the [OK] button.
- The Print dialog box appears again.
8 Click the [OK] button.
Overlay printing is performed.
Editing forms
To use forms, the data for using forms must be pre-registered. To register a form, select the "Create Overlay" check box, and then specify the document that you want to register.
1 Create the form data using any application.
2 From the "File" menu, select "Print".
3 Select the printer in "Select Printer", and then click the [Properties] button or the [Preferences] button.
4 Click the Overlay tab.
5 Select the "Create Overlay".
![Printing Preferences Setup Par Page Setting Overlay Watemark Quality Font FAX Version Overlay None Print Overlay Check before Printing Create Overlay Delete Overlay File Folder Not Specified File Name *.kmf Browse Files... File Folder Select... Size Modified OK Cancel Help Save/Restore Setting... View: Paper Printer 8 1/2x11 [8.5x11 inch]](/content/2026/06/1277641/images/3535217b57364191935fb2060f7166556ce5829e8963106e77b2352d2a876f51.jpg)
6 Click the [Browse Files] button.
7 Specify the storage location for the form data, and then enter the file name in the "File name" box.
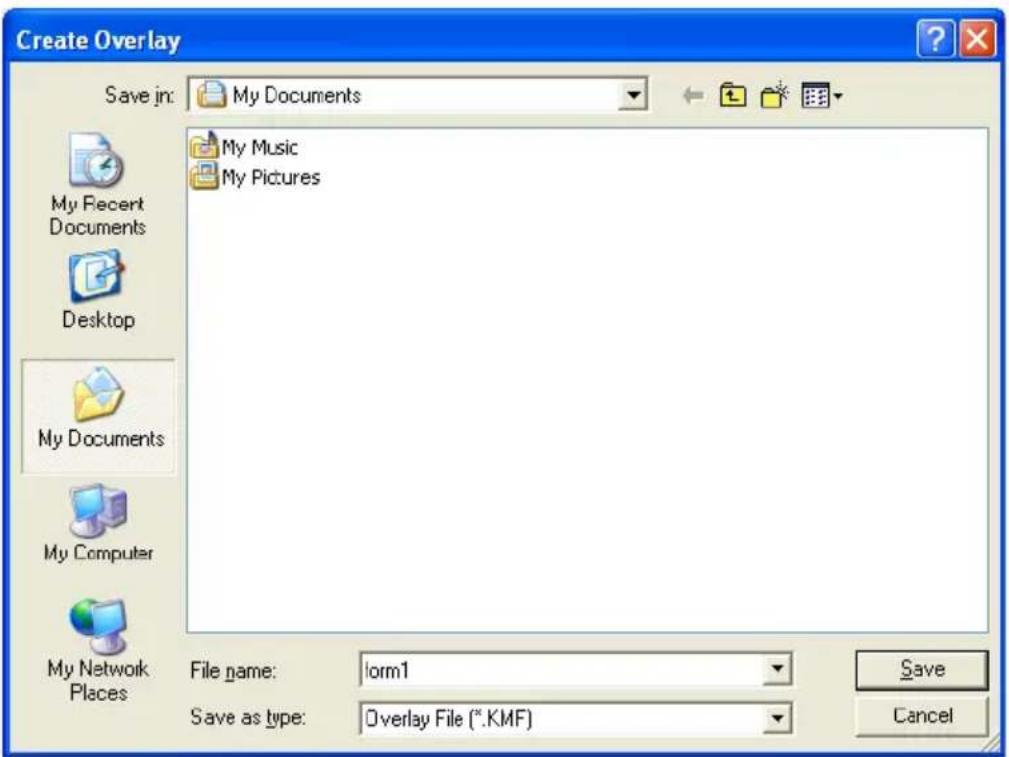
8 Click the [Save] button.
9 Select the file, and then click the [OK] button.
- The Print dialog box appears again.
10 Click the [OK] button.
Instead of executing a print job, the form data is saved. The file extension is “.kmf”.

Note
When the overlay data that was created consists of multiple pages, the first page of data is registered as an overlay.
From the Overlay tab, the selected form data can be deleted by clicking the [Delete Overlay File] button.
5.5 Specifying the Watermark tab settings
![Printing Preferences Setup Par Page Setting Overlay Watemark Quality Font FAX Version Watermark Confidential Edit... Type ○ Overwrite ○ Transparent □ 1st Page Only Image Confidential Distribution Number Stamping Pages to Print All Pages Starting Number 1 [0.9999] Color Block Save/Restore Setting... View: ○ Paper ○ Printer 8 1/2x11 [8.5x11 inch] Restore Defaults OK Cancel Help](/content/2026/06/1277641/images/3149d4c52cb780f7b5494c7ad18243f3d641ccc857856d0149817e763849cf34.jpg)
Printing a watermark
You can print specific text in the background as a watermark.
1 Click the Watermark tab.
2 Select the "Watermark" check box.
3 From the drop-down list, select the watermark that you want to print.
4 Specify the desired settings for "Type" and "1st Page Only".
Overwrite: The background of the watermark is printed in white. Transparent: The background of the watermark is transparent.
Editing a watermark
You can change the fonts and position of the watermark and you can register a new one.
1 Click the Watermark tab.
2 Select the "Watermark" check box.
3 Click the [Edit] button.
4 Specify settings for the following:
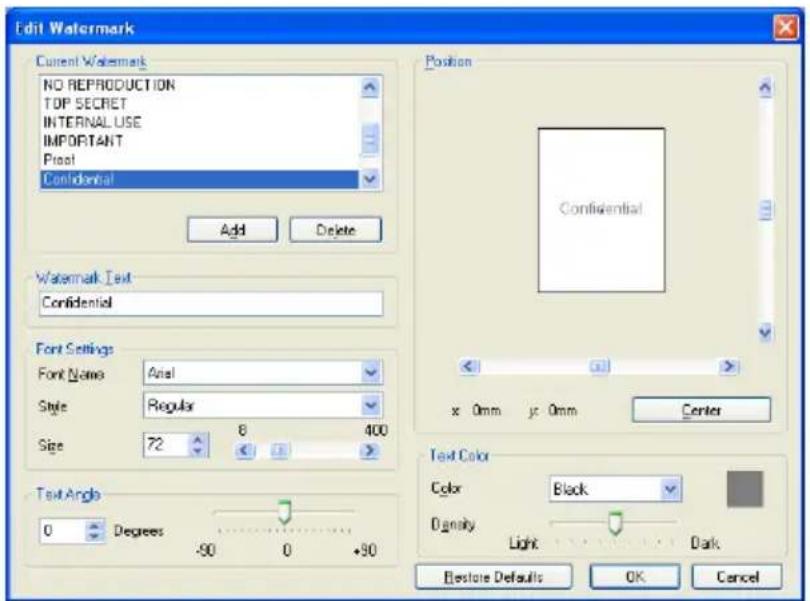
[Add]: Click to enter a new watermark in the watermark text box.
[Delete]: Click to delete the selected watermark.
Watermark Text: Enter the text to be printed as a watermark.
Font Settings: Specifies the font and font size.
Text Angle: Specifies the watermark print angle.
Position: Specifies the watermark position with the horizontal and vertical scroll bars.
Text Color: Specifies the watermark text color.
Printing the document number
When printing multiple copies, you can print the number of each document.
1 Click the Watermark tab.
2 Select the "Distribution Number Stamping" check box.
3 Specify settings for the following:
Pages to Print: Specifies the pages where the numbering is to be printed.
Starting Number: Specifies the starting number.
Color: Specifies the color of the number being printed.

Note
The "Numbering" check box is not available if the "Collate" check box is not selected on the Setup tab.
Copy Protect
You can print a special pattern on an entire page while printing.
When copying a printed page, the characters embedded in the pattern appear to prevent an illegal copy.
1 Click the Watermark tab.
2 Select the "Copy Protect" check box.
3 Click the [Edit] button.
4 Specify each setting, and then click the [OK] button.
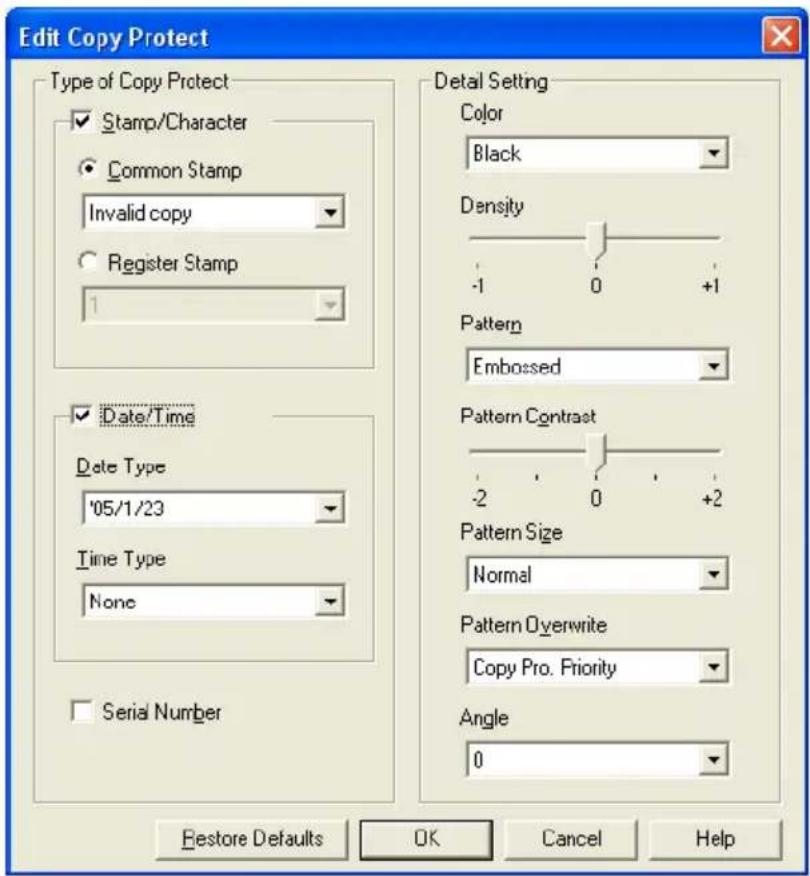
Type of Copy Protect: Specify the pattern to be embedded with copy protection. You can specify multiple types from "Stamp/Character", "Date/Time", and "Serial Number".
- Stamp/Character: Embeds the selected character string in a pattern. A preregistered character string (common stamp) or a character string registered on this machine (registered stamp) can be specified.
- Date/Time: Embeds the selected date and time in a pattern.
- Serial Number: Embeds the serial number of this machine in a pattern.
Detail Setting: Specifies the color and density pattern to be embedded with copy protection, and specifies the embedding method.
●Color: Select the pattern print color.
●Density: Select the pattern print density.
- Pattern: Select the pattern.
- Pattern Contrast: Select the pattern contrast.
- Pattern Size: Select the pattern size.
- Pattern Overwrite: Select whether to print the pattern over the text of a document or print in the blank spaces.
●Angle: Select the pattern angle.
5.6 Specifying the Quality tab settings
![Printing Preferences Setup Per Page Setting Overlay Watermark Quality Font FAX Version Select Color ● Color ○ Gray-scale ○ 2Color Black+Flated Pattern ○ Fine ● Coarge Original Image Type Document Quality Adjustment ○ Simple Settings... ○ Detailed Text Settings... Photo Settings... Figure/Table/Graph Settings... □ Glossy Mode Save/Restore Setting... View: ○ Paper ○ Printer 8 1/2x11 [8.5x11inch] Restore Defaults OK Cancel Help](/content/2026/06/1277641/images/5af47e0643a92152aa105f45c13d779eaae66d124419f055d65cc90ba16f95b5.jpg)
Specifying settings
1 Click the Quality tab.
2 Specify settings for the following:
| Item Function | |
| Select Color Specifies the color for printing.Color: Prints in color.Grayscale: Prints in grayscale.2 Color: Prints the two colors selected from the drop-down list. | |
| Original Image Type Specifies the contents of the original document. Prints with a quality suitable for the original document.Document: Prints with a quality suitable for documents with many characters.Photo: Prints with a quality suitable for photos.DTP: Prints with a quality suitable for documents produced using DTP.WEB: Prints with a quality suitable to Web page printing.CAD: Prints with a quality suitable for CAD data printing. | |
| Quality Adjustment Adjusts the image quality.Simple: Adjusts the entire document.Detailed: Adjusts the text, photos, and charts of each object in a document. | |
| Glossy Mode Prints using a gloss finish. | |
| Pattern Selects the print pattern. | |
To adjust the quality, select "Simple" or "Detailed", and then click the [Settings] button beside the desired setting. In the Quality Adjustment Settings dialog box that appears, specify the brightness and color balance.
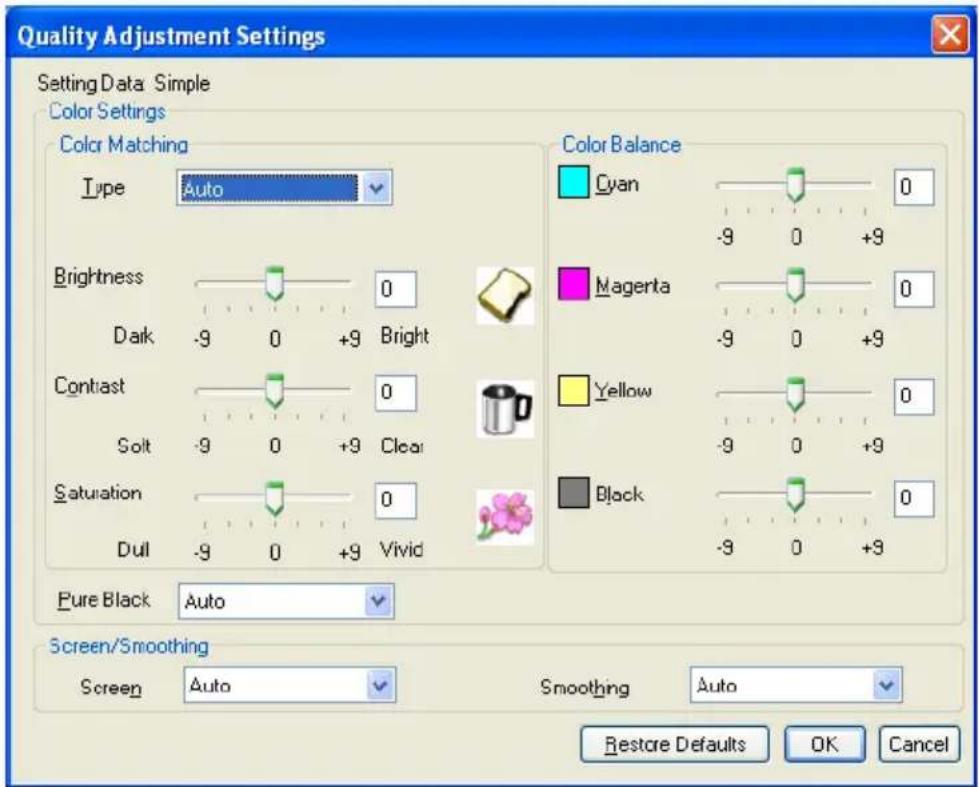
To adjust the quality, select "Detailed", and then click the [Settings] button beside "Figure/Table/Graph". In the Quality Adjustment Settings dialog box that appears, you can specify the color settings and screen/smoothing settings, and the corresponding text or photo settings.
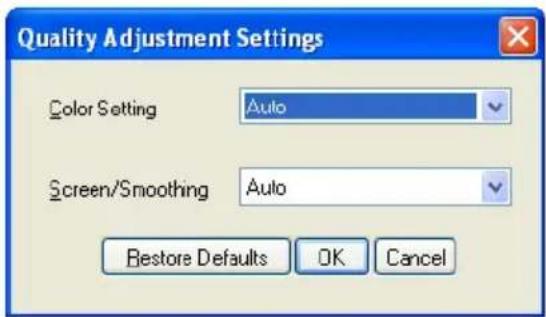
5.7 Specifying the Font tab settings
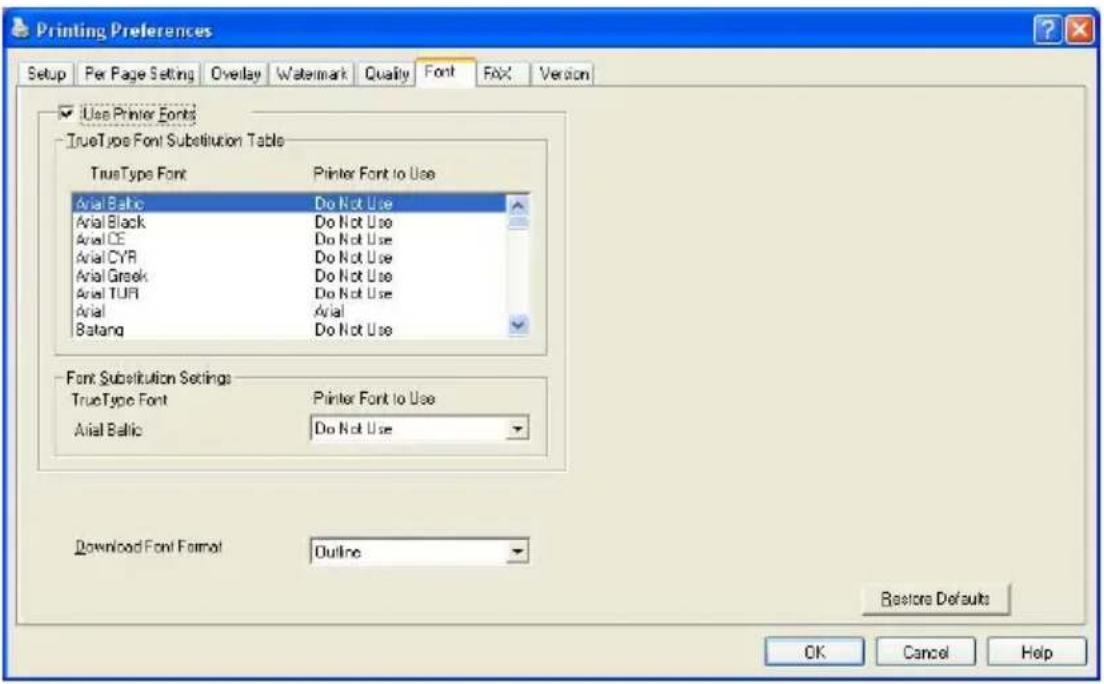
Specifying settings
You can replace the TrueType fonts used in Windows with the printer fonts of this machine.
1 Click the "Font" tab.
2 Select the "Use Printer Fonts" check box.
3 Select the TrueType font that you want to replace.
4 From the "Printer Font to Use" drop-down list, select the printer font to replace the TrueType font.
5 Click the [OK] button.

Note
Using the printer fonts will shorten the printing time, however, there may be a difference in the screen display and the print results.
To download the TrueType fonts when not using the printer fonts, select the font type to be downloaded to the printer from the "Download Font Format" drop-down list.
5.8 Specifying the FAX tab settings
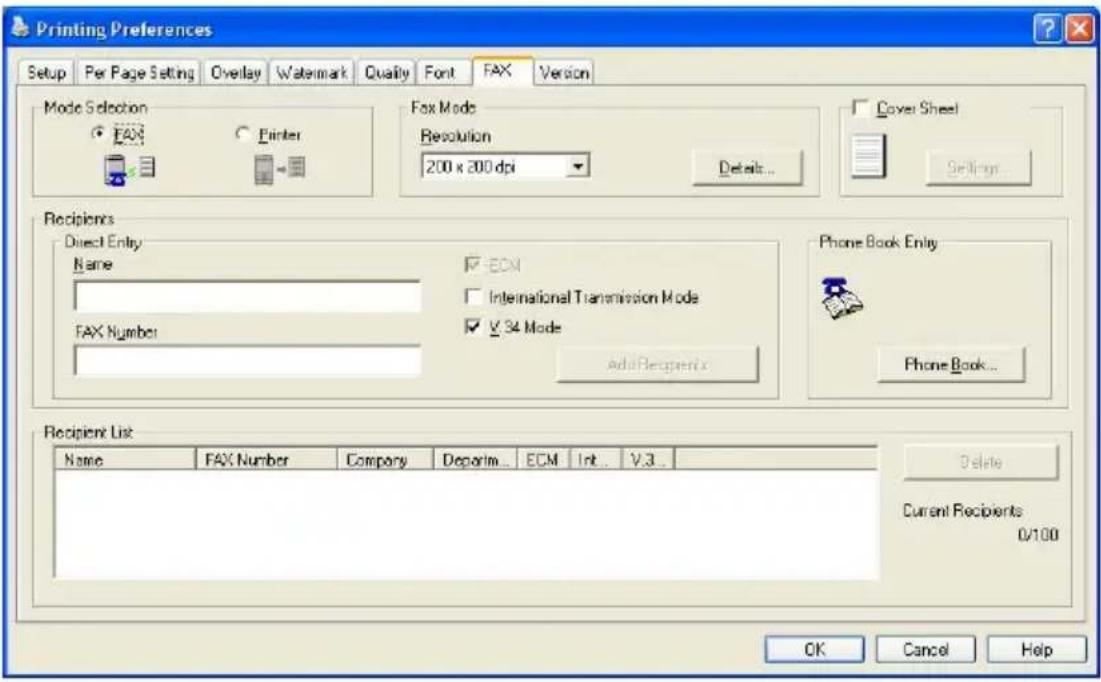
Sending a fax
You can send your created data by fax.
To use the fax function, you must install the optional fax kit onto this machine. In addition, you must enable the fax kit on the Option tab after installation. For details, refer to "Specifying the Option tab settings" on page 5-47.
1 Create the data you want to send using any application.
2 From the "File" menu, select "Print".
3 Select the printer in "Select Printer", and then click the [Properties] button or the [Preferences] button.
4 Click the "FAX" tab.
5 Under "Mode Selection", select "FAX".
- When "Custom Size" is selected from the "Output Paper" drop-down list on the Setup tab, the fax function cannot be set up.
- For details on the fax functions of this machine, refer to the User's Guide [Facsimile Operations].
A confirmation message appears.
6 Check the information, and then click the [OK] button.
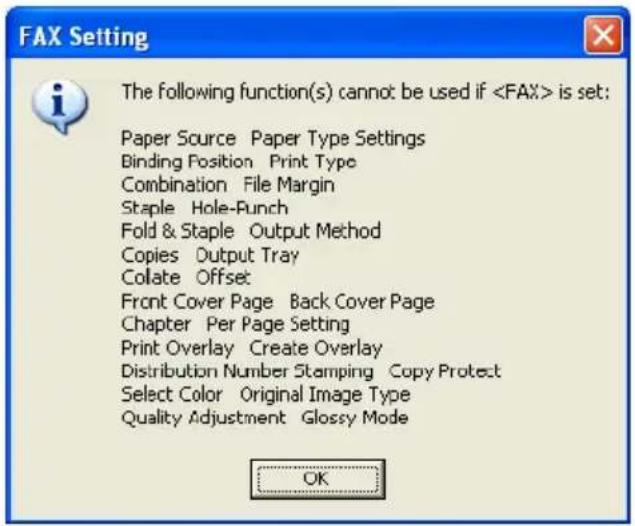
7 From the "Resolution" drop-down list, select the desired setting.
8 Click the Details button.
The [Fax Mode Details] dialog box appears.
9 To print a file after a fax is sent, select the "Print Recipient File" check box.
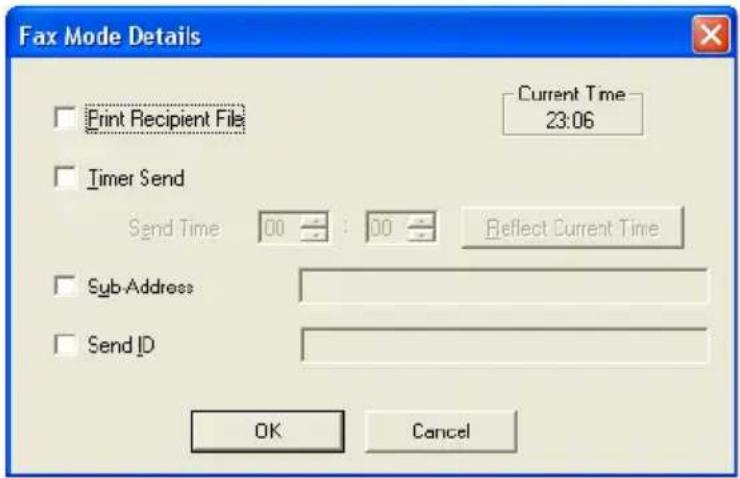
10 To set the time when the fax is to be sent, select the "Timer Send" check box, and then specify the time that you want the fax to be sent in the "Send Time" boxes.
- By clicking the [Reflect Current Time] button, the current time set on the computer is displayed in the "Send Time" boxes.
- When using "Timer Send", check that the time set on the computer is synchronized with the time on this machine. If the transmission time is earlier than the current time of this machine, the fax is sent the next day.
11 When transmitting a confidential fax, select the "Sub-Address" and "Send ID" check boxes, and then enter the sub address and transmission ID. It is possible to send confidential communications to another fax model using F codes.
- Up to 20 characters (numbers 0 through 9) can be entered in the "Sub Address" text box.
- Up to 20 characters (numbers 0 through 9, # and *) can be entered in the "Send ID" text box.
12 Click the [OK] button.
The Printing Preferences dialog box appears again.
13 Specify the fax destination.
You can directly enter the fax recipient or you can select one from the Phonebook.
To enter the fax recipient directly, continue with step 14. To select a fax recipient from the Phonebook, skip to step 15.
14 Under "Direct Entry", enter the appropriate information in the "Name" and "FAX Number" text boxes, and then click the [Add Recipients] button.
You can save up to 100 recipients in the “Recipients” list. After entering the recipient information, skip to step 19.
- Up to 38 characters (numbers 0 through 9, hyphens (-), spaces, #, *, E, P, and T) can be entered in the "FAX Number" text box.
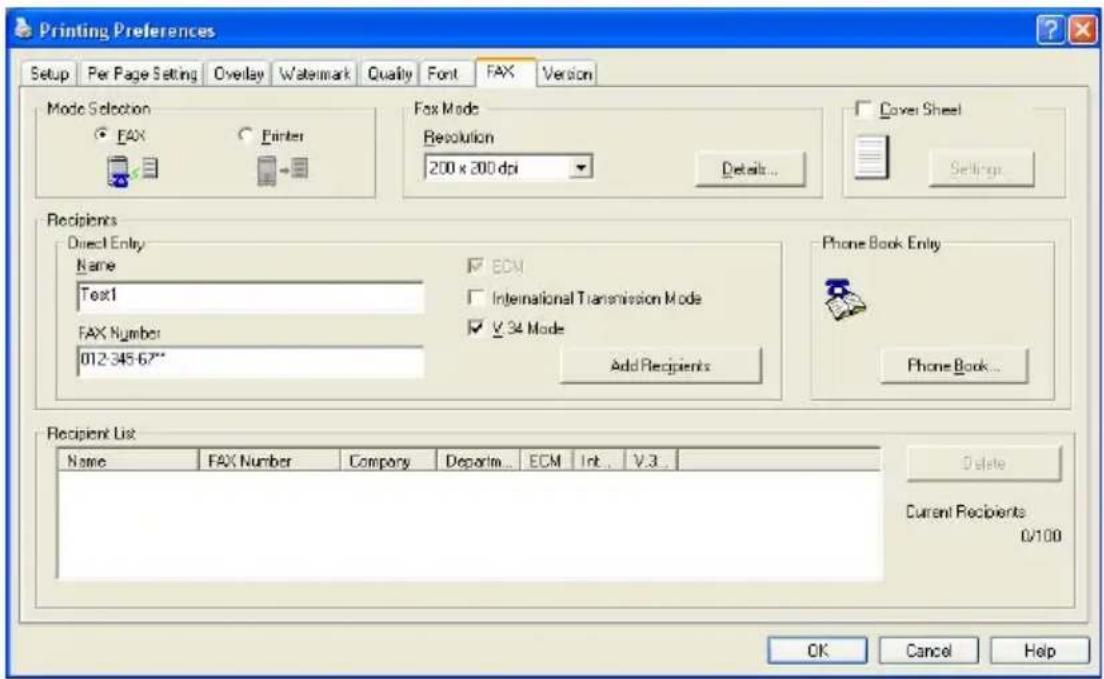
15 Click the [Phone Book] button.
- For details on registering recipients in the Phonebook, refer to "Registering a recipient in the phonebook" on page 5-42.
The Phonebook dialog box appears.
16 Select the recipient or group where the fax is to be sent.
17 Click the [Add Recipients] button.
The selected recipient is displayed in "Recipients" list.
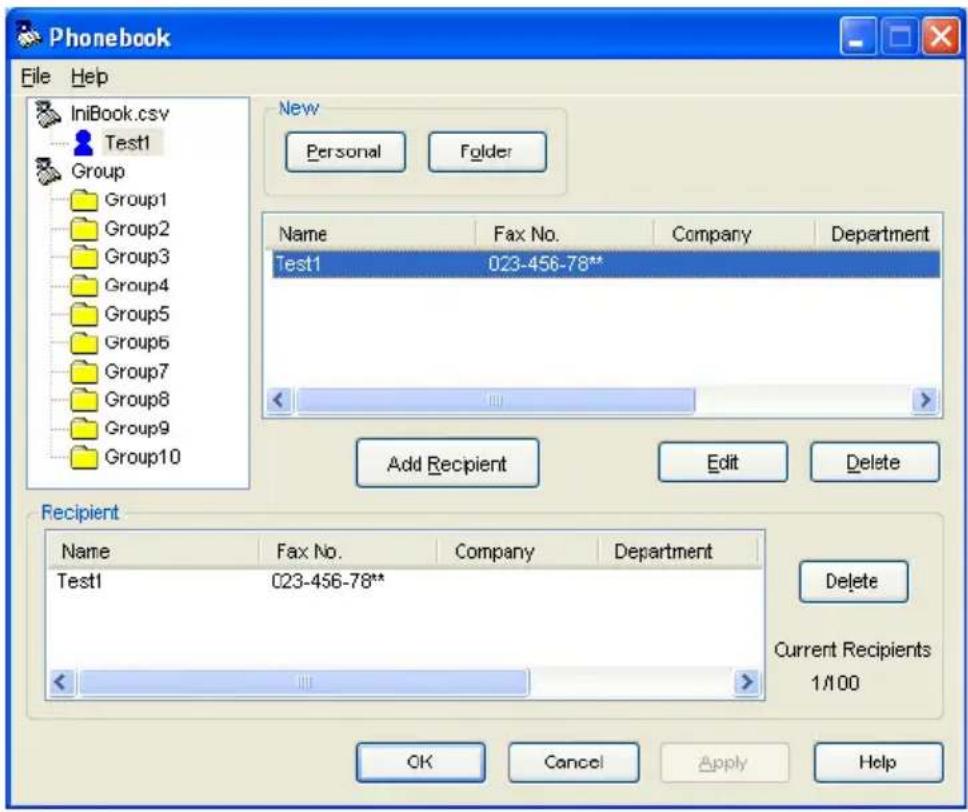
18 Select the recipient and then click the [OK] button.
- If a group is selected, all the members of the group are displayed in the “Recipients” list.
The Printing Preferences dialog box appears again.
19 Check that the file recipient appears in the "Recipients" list.
- To delete a recipient, select the recipient to be deleted from in the "Recipients" list, and then click the [Delete] button.
- It is not necessary to change the settings for the "ECM", "International Transmission Mode", and "V.34" check boxes. For details, refer to the "User's Guide [Fax Operations]".
20 When adding a cover sheet, select the "FAX Cover Sheet" check box.
- For setting up a fax cover sheet, refer to "Creating a cover sheet" on page 5-38.
21 Click the [OK] button.
The Print dialog box appears again.
22 Click the [OK] button.
The FAX Send Confirmation dialog box appears.
![FAX Send Confirmation OK to send FAX? [FAX Number]: 012-345-67** Timer Send: OFF OK Cancel](/content/2026/06/1277641/images/111dd4c8aa6bd31cce34ec49211dfa436788598c8a3023e1d23a8ea436c9eba2.jpg)
23 Click the [OK] button.
The fax is sent to the specified recipient.

Note
When a fax transmission error occurs, a TX Report is automatically printed. If you do not want the error report to be printed automatically, set "TX Report" to "OFF" in the Report Settings screen from this machine's control panel.
Creating a cover sheet
You can create a fax cover sheet and attach it to the fax message.
1 From the Printing Preferences dialog box, select the "FAX Cover Sheet" check box on the FAX tab.
2 Click the [Setting] button.
The FAX Cover Sheet Setting dialog box appears.
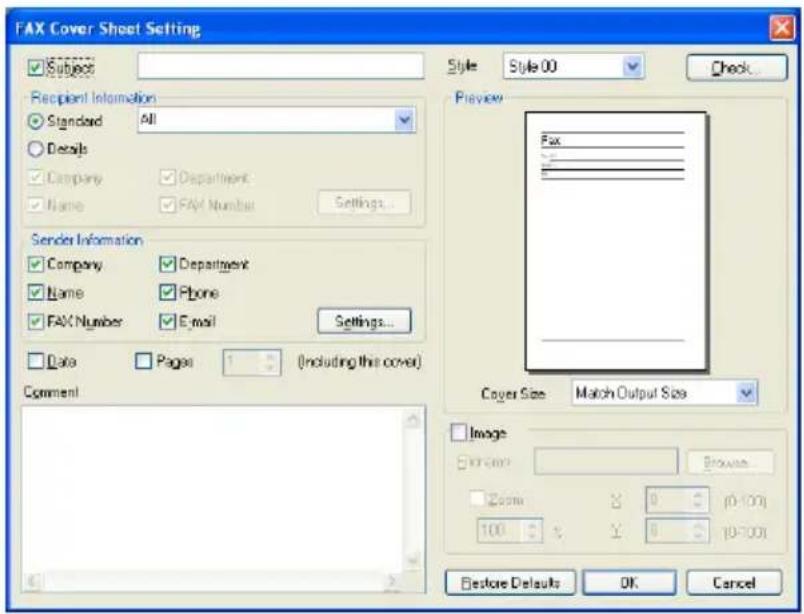
3 From the "Style" drop-down list, select the cover sheet format. Styles include 00 to 03 (03 is for English).
4 Select the "Subject" check box, and then enter the subject of the document being transmitted.
- Up to 64 characters can be entered in the "Subject" text box. In Windows 98SE/Me, you can enter up to 64 characters.
5 Under “Recipient Information”, you can specify the recipient information, such as the person’s name, for the cover sheet that is to be included. The information shown in the “Recipients” list on the FAX tab is entered on the cover sheet.
- Standard: Selects the standard recipient information. Select "Standard", and then select from the drop-down list the text to be entered in the recipient information line. You can also enter characters.
- Details: Specify the recipient information individually. Select "De-tails", and then select the "Company", "Department", "Name", or "FAX Number" check box for the information to be entered in the recipient information line. By clicking the [Settings] button, you can select "Load with Joint Name", "Change Each Recipient", or "Load Set Information" in the Destination Information Settings dialog box.
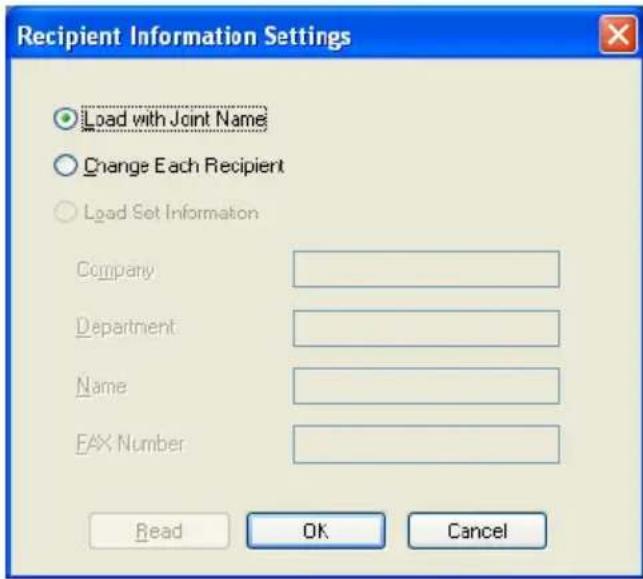
- The first recipient cover sheet is displayed as a sample in the "Preview" box.
- Up to 10 individual cover sheets can be created if “Change Each Recipient” is selected. When sending 11 or more faxes with “Load with Joint Name” or “Change Each Recipient” selected, the information specified for “Standard” appears in the recipient information line.
- If "Change Each Recipient" is selected, "Print Recipient File" cannot be selected from on the Fax Mode Details dialog box, displayed from the FAX tab.
- If "Destination" is not specified, "Load Set Information" cannot be selected.
- Depending on the type of characters entered and the settings specified with "Style", all characters entered may not be displayed on the cover sheet. After entering the information, check that the information is displayed properly in the image in the "Preview" box.
6 Select the “Company”, “Department”, “Name”, “Phone”, “FAX Number”, or “E-mail” check box under “Sender Information” for the information that you want to enter in the sender information line, and then click the [Settings] button to enter the main information to be sent on the cover sheet.
- Depending on the type of characters entered and the settings specified with "Style", all characters entered may not be displayed on the cover sheet. After entering the information, check that the information is displayed properly in the image in the "Preview" box.
- Up to 40 characters can be entered for each item. In Windows 98SE/Me, you can enter up to 40 characters.
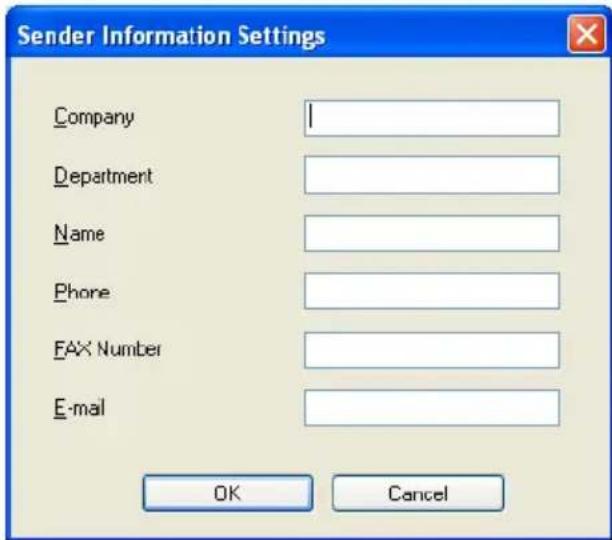
The entered sender information appears in the image in the "Preview" box.
7 To enter the current date on the cover sheet, select the "Date" check box.
8 To enter the number of pages being sent, select the "Pages" check box, and then specify the number of pages.
9 To write a message on the cover sheet, enter the message in the "Comment" text box.
- If more that 25 characters are entered per line, the characters may not be displayed correctly on the cover sheet. Check the text in the image in the "Preview" box, and then insert a return to adjust the number of characters per line.
- Up to 640 characters can be entered in the "Comments" text box. In Windows 98SE/Me, you can enter up to 640 characters. A return is equivalent to two characters.
10 To arrange cover sheets with a company logo, maps, or other images, select the "Image" check box, click the [Browse] button, and then specify the file.
- You can adjust the position of the image by specifying numerical values in the "X" and "Y" boxes, and you can adjust the image size between 50% and 800% by specifying a zoom ratio in the "Zoom" box.
11 Click the [Check] button to check the current settings.
The Check FAX Cover Sheet dialog box appears, and the cover sheet is displayed at a larger size.
Check the contents of the cover sheet and make any changes to the image as necessary.
12 Click the [OK] button.
The FAX Cover Sheet Setting dialog box appears again.
13 Select the cover sheet size in "Cover Size" drop-down list.
14 Click the [OK] button.
The Printing Preferences dialog box appears again.

Note
To erase all of the changed settings, click the [Restore Defaults] button on the FAX Cover Sheet Setting dialog box.
Registering a recipient in the phonebook
You can register the recipient of a fax message in the Phonebook.
Registering recipient information
1 In the Printing Preferences dialog box, click the [Phone Book] button in the FAX tab.
The Phonebook dialog box appears.
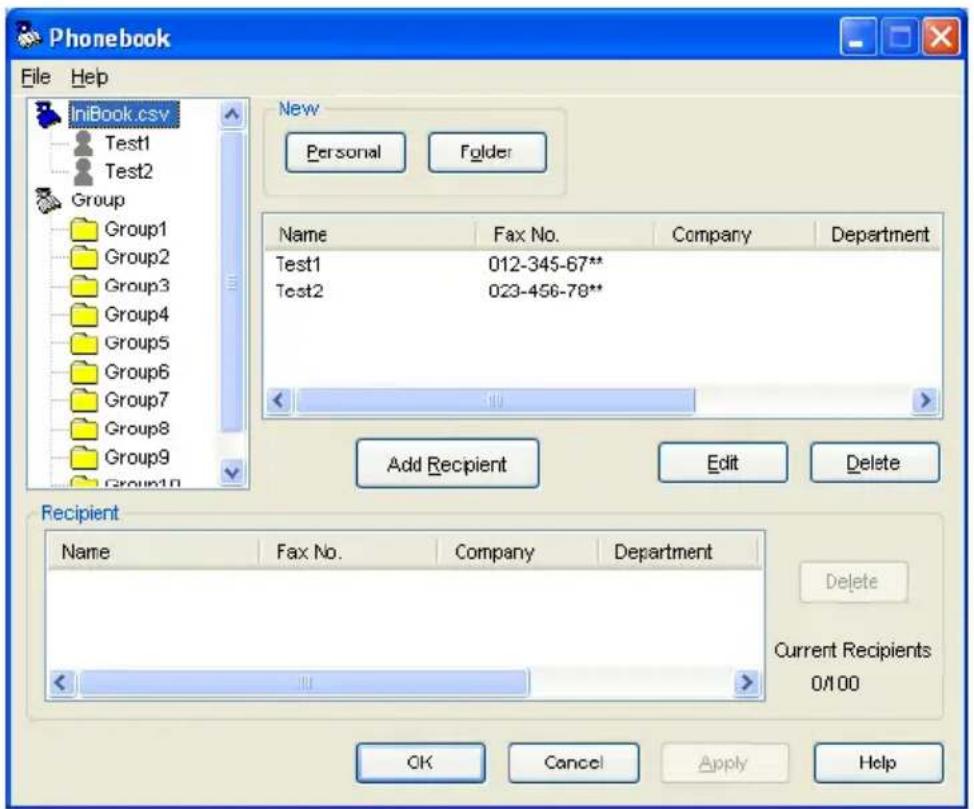
2 Click "PhoneBook1.csv", and then click the [Personal] button. The [Personal Information] dialog box appears.
3 Enter the appropriate information in the "Name", "Fax No.", "Company", and "Department" text boxes. You can enter titles in the "Name" text box.
- It is not necessary to change the settings for the "ECM", "Int. Tx", and "V.34" check boxes. For details, refer to the User's Guide [Facsimile Operations].
- Up to 40 characters can be entered in the "Name", "Company", and "Department" text boxes.
- Up to 38 characters (numbers 0 through 9, hyphens (-), spaces, #, *, E, P, and T) can be entered in the "Fax No." text box.
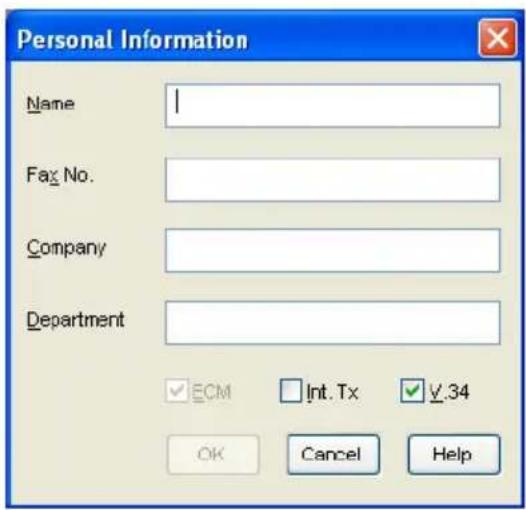
4 Click the [OK] button.
The recipient is registered and appears in the "Recipient" list.
5 Click the [OK] button.
The Save As dialog box appears.
6 Specify the storage location and enter the file name.
7 Click the [Save] button.
The Phonebook is saved as a file.

Note
By clicking the [Folder] button in step 2, you can create a folder and arrange the recipient information. To move the recipient into a folder, right-click the recipient name in the directory tree on the left-side of the dialog box, and then select "Copy" or "Cut". Select the target folder, and then select "Paste" to register the recipient in the folder.
Up to 40 characters can be entered as the folder name.
A folder can be up to three layers deep.
To edit the recipient information and folder, select the desired data, and then click the [Edit] button.
To delete recipient information or a folder, select the recipient or folder being deleted, and then click the [Delete] button.
When a recipient is registered in the Phonebook for the first time, the Save As dialog box, described in step 5, appears so that the Phonebook can be saved as a file. The Save As dialog box does not appear the next time that the Phonebook is changed since the Phonebook file is automatically overwritten.
The saved Phonebook file is automatically displayed the next time that you open the Phonebook. To open a different Phonebook, select "Open" from the "File" menu in the Phonebook dialog box. By saving multiple Phonebook files, you can switch between Phonebooks.
A new Phonebook can be created by clicking "New" in the "File" menu on the Phonebook dialog box. You can save a file under a different name by clicking "Save As" in the "File" menu.
The file extension for the Phonebook files is ".csv".
Registering a group
You can pre-register the recipients to which you want to send the same fax. This is called a "group".
1 On the Phonebook dialog box, select the recipient to be registered in the group.
The selected recipient is highlighted.
2 Right-click the selected recipient, and then, from the "Add Group" submenu, select the group where the recipient is to be registered.
The recipient is copied into the selected group.
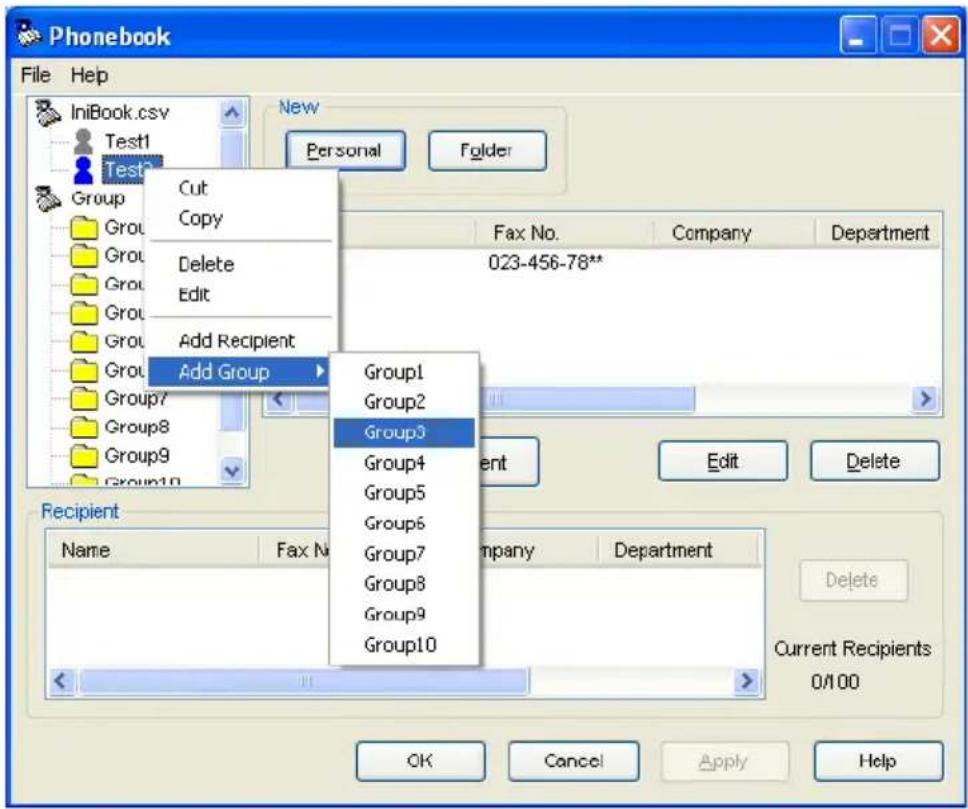

Note
Ten groups have been set. You cannot add or delete any group.
A total of 100 recipients can be registered in all 10 groups.
When a recipient is registered in the Phonebook for the first time, the Save As dialog box appears so that the Phonebook can be saved as a file. For details, refer to “Registering a recipient in the phonebook” on page 5-42.
To change the group name, right-click the name of the group in the directory tree on the left-side of the dialog box, and then click "Edit".
To delete a recipient from a group, click the group from which the recipient is to be deleted, right-click the name of the recipient in the directory tree on the left-side of the dialog box, and then click "Delete from Group".
5.9 Specifying the Option tab settings
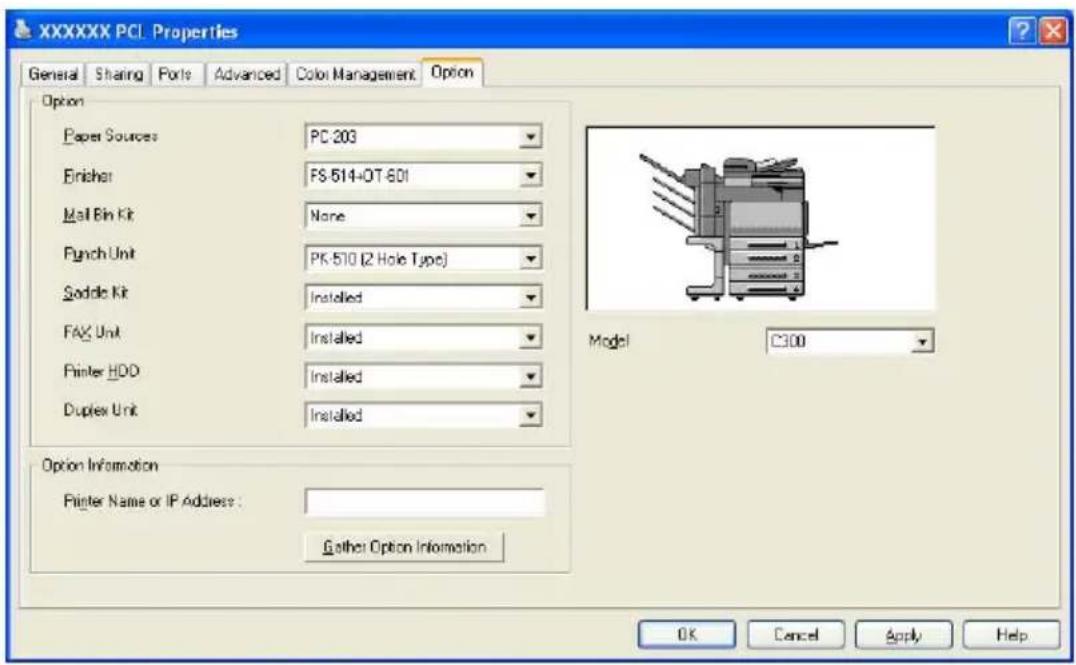
You can enable the options installed on this machine to be used from the printer driver by specifying whether the models or options are available.

Note
If the installed options are not set from the Option tab, the option function cannot be used with the printer driver. When installing options, be sure to make the proper settings.
Specifying settings
1 For Windows 98SE/Me/2000/NT 4.0, click the [Start] button, point to "Settings", and then click "Printers". For Windows XP/Server 2003, click the [Start] button, and then click "Printers and Faxes".
- If "Printers and Faxes" does not appear in the Start menu, open the Control Panel from the Start menu, select "Printers and Other Hardware", and then select "Printers and Faxes".
2 Right-click the printer icon, and then click "Properties".
3 Click the Option tab.
4 Select the model to be used from the "Model" drop-down list.
5 Select the installed options from the drop-down lists in the Option dialog box.

Note
To automatically set the installed options, enter the printer name or IP address of this machine in the "Printer Name or IP Address" box under "Option Information", and then click the [Gather Option Information] button.
The [Gather Option Information] button can only be used when the SNMP setting is enabled on this machine and the SNMP v1/v2c (IP) setting check box is selected.
When the Mail Bin Kit is installed, you can assign output tray 1 and output tray 2 as mail bins.
To assign the output destination of the mail bins, select "Bin Setting" from "Administrator Setting" - "System Setting" - "Output Setting" on the control panel.
If "Printer" is displayed when specifying the output destination in the printer driver, the mail bin that is selected is shown in the figure.
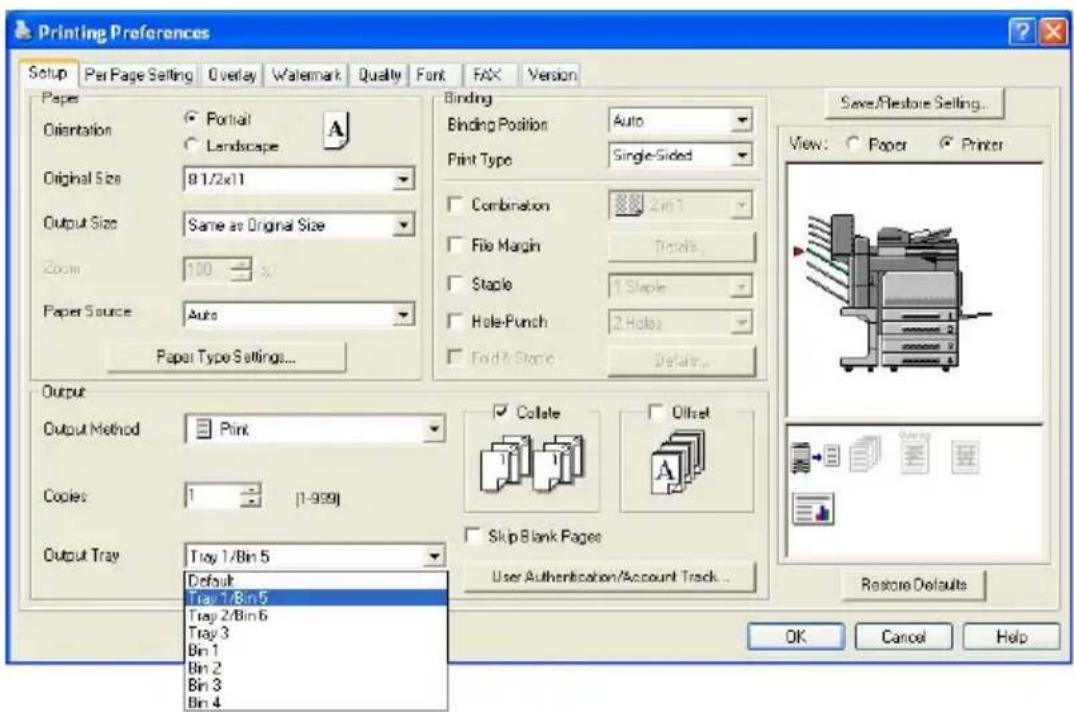
5.10 Saving the driver settings
For PCL drivers, you can save the setting values of the changed driver and recall them as necessary.
Saving the driver settings
1 Change the driver settings from the Setup tab and the Per Page Setting tab.
2 Click the [Save/Restore Setting] button, and then select "Save Current Setting".
![Printing Preferences Setup Per Page Setting Overlay Watermark Quality Font FAX Version Paper Orientation Portrait Landscape Original Size 8 1/2x11 Output Size Same as Original Size Zoom 100 % Paper Source Tray 1 Paper Type Settings... Binding Binding Position Auto Print Type Single-Sided Combination 2in1 File Margin Default... Staple 1 Staple Hole-Punch 2 Notes Fold & Staple Details Output Output Method Print Copies 1 (1-999) Output Tray Default Collate Offset Skip Blank Pages User Authentication/Account Track... Save/Restore Setting... Save Current Setting Restore Saved Setting Edit Library [1/25] Default Setting Detailed Restore Setting Restore Defaults OK Cancel Help](/content/2026/06/1277641/images/ff2f53b6cddc100738e26f0c324e663cd37e90dad1793342ea3073a3f97b0138.jpg)
3 Enter the file name in the "Name" text box.
![Save Setting Library [Number Saved] 1/25 Default Setting Name 2nl-duplex Comment Save Location C:\Documents and Settings\Mate\My Docs Browse... Setting List Setup Pair Page Setting Overlay Watermark Duality FAX Font Control Name Settings Settings Settings Orientation Portrait Original Size 81/2x11 Output Size Same as Original... Zoom 100 % Paper Source Auto Paper Type Plain Paper Binding Position Auto Print Type Single-Sided Combination Specified 2 in 1 8 1/2x11 (8.5x11inch) OK Cancel Help](/content/2026/06/1277641/images/9c9316696f1a6356dd216e98b3a27b24c14fe68df6438d1e30960d26afd94f54.jpg)
4 Enter a message in the "Comment" text box as necessary.
5 Specify a folder in the "Save Location" box, and then click the [OK] button.
The settings are registered in a library.

Note
The file extension is ".ksf".
You can save up to 25 items in the library.
Up to 40 characters can be entered in the "Name" text box. In Windows 98SE/Me, you can enter up to 40 characters.
Up to 512 characters can be entered in the "Comments" text box. In Windows 98SE/Me, you can enter up to 512 characters.
1 Click the [Save/Restore Setting] button on the Printing Preferences dialog box, and then select "Restore Saved Setting".
2 From the "Library" list, select the desired settings file.
3 Click the [OK] button.
The setting values are recalled, and the Printing Preferences dialog box appears again.
Deleting the settings
1 Click the [Save/Restore Setting] button on the Printing Preferences dialog box, and then select "Edit Library".
2 From the "Library" list, select the desired settings file to be deleted.
3 Click the [Delete] button.

Note
Even if the settings file is deleted from the “Library” list, it will remain on the hard disk of your computer. By specifying the file name in “Save Setting File in Library”, you can save it in the “Library” list.
6 Setting up the PostScript driver (Windows)
6.1 Settings
Common settings
The following describes the common settings and buttons that are displayed on all tabs.
![XXXXXX PS Printing Preferences Advanced Setup Layout Per Page Setting Watermark Quality Version 8 1/2x11 [215.9x279.4mm] 0 1/2x11 [215.9x279.4mm] Easy Set Defaults Says Edit... Orientation Portrait Landscape Original Size 8 1/2x11 Output Size Same as Original Size Zoom Auto Manual 100 % Paper Source Auto Paper Type Plain Paper Copies 1 : [1_999] Collate Offset Output Tray Default Output Method Print User Authentication/Account Track... Printer View OK Cancel Apply Help](/content/2026/06/1277641/images/9c41801065b396316c958f704f6a71a27478565230cdc6c66134613b86f5ab78.jpg)
| Button Function | |
| OK Click this button to close the dialog box and apply any settings that have been changed. | |
| Cancel Click this button to cancel any settings that have been changed and close the dialog box. | |
| Help Click this button to display the help for each item on the currently displayed dialog box. | |
| Save Click this button to save the current settings and to view them at a later time. | |
| Edit Click this button to change the saved settings. | |
| Default Click this button to return the settings to their defaults, which were selected when the driver was installed. | |
View When the [Paper View] button is clicked, a preview of the page layout as specified in the current settings is displayed and a preview image of the print job can be checked.When the [Printer View] button is clicked, a printer figure is displayed showing any options, such as the paper tray, that are installed on this machine.  Paper Printer Paper Printer | |


Note
To enable any installed options, you must specify the Option settings. For details, refer to "Specifying the Option tab settings" on page 6-25.
Setup tab
| Item Function | |
| Orientation Specifies the | orientation of the image being printed on the paper. |
| Original Size Specifies the | size of the original document. |
| Output Size Specifies the | output paper size. Automatically enlarges or reduces when the Original Size setting is changed. |
| Zoom Specifies the enlargement and reduction ratio. | |
| Paper Source Selects the | paper source for printing. |
| Paper Type Selects the | paper type for printing. |
| Copies Specifies the number of copies to print. | |
| Collate Specifies whether to print multiple copies in sets. | |
| Offset When printing multiple copies, shifts the output position of each set. | |
| Item | Function |
| Output Tray Selects the tray where to output the printed pages. | |
| Output Method Specifies output methods, such as “Secured Print” and “Save in User Box”. | |
| User Authentication/Account Track | Enters a user name, department name, and password for user management in the “User Authentication” and “Account Track”. |
Layout tab
| Item Function | |
| Combination You can print | multiple document pages on one page. Details can be specified in Combination Details. |
| Rotate 180 Prints the image | rotated 180^ . |
| Double Sides Specifies duplex printing. | |
| Binding Position Specifies | binding position. |
| Staple Specifies stapling. | |
| Fold & Staple Specifies the center binding process. | |
| Hole-Punch Specifies hole | punching. |
Per Page Setting tab
| Item Function | |
| Front Cover Page Attaches | a front cover page. |
| Paper Source Selects the input tray for the front cover. | |
| Back Cover Page Attaches | a back cover page. |
| Paper Source Selects the input tray for the back cover. | |
| Transparency Interleave Outputs and inserts interleaves when printing overhead projector transparencies. | |
| Paper Source Selects the input tray for the transparency interleaves. | |
Watermark tab
| Item Function | |
| Watermark Prints a watermark | mark (text stamp) on the page being printed. Water-marks can be added, changed, or deleted. |
| Transparent Prints the watermark with a transparent background. | |
| 1st Page Only | Prints the watermark on the first page only. |
| Repeat | Prints several watermarks on a single page. |
Quality tab
| Item Function | |
| Select Color Specifies the | color for printing. |
| Original Image Type Specifies the contents of the original document.Prints with a quality suitable for the original document. | |
| Quality Adjustment Adjusts | the image quality. You can select “Simple” to adjust the entire document or “Detailed” to separately adjust the text, photos, and charts in the document. |
| Glossy Mode Prints using | a gloss finish. |
| Download Fonts Selects the | TrueType font type to download when downloading the TrueType fonts and not using the printer fonts. |
| Use Printer Fonts Select to | enable the substitution setting of the printer fonts. If enabled, the TrueType fonts to be substituted are not downloaded to the printer. |
Advanced tab
| Item Function | |
| Advanced Printing Features | Specifies whether to enable detailed print functions (booklet). |
| PostScript Output Option | Specifies the PostScript file output format. |
| Send PostScript Error Handler | Specifies whether to print an error report when a PostScript error occurs. |
| Mirrored Output Reverses | horizontally, then prints. |
| PostScript Pass through | Allows applications to print directly without using GDI (Graphics Device Interface). |
Device Settings tab
| Item Function | |
| Font Substitution Table S | Specifies the replacement of TrueType fonts with printer fonts. |
| Available PostScript Memory | Specifies the usable PostScript memory size. |
| Output Protocol Specifies | the protocol for transmitting to the printer. |
| Send CTRL-D Before Each Job | Specifies whether to reset printer before printing. |
| Send CTRL-D After Each Job | Specifies whether to reset printer after printing. |
| Convert Gray Text to PostScript Gray | Specifies whether to convert gray text in a document to PostScript gray. |
| Convert Gray Graphics to PostScript Gray | Specifies whether to convert gray graphics in a document to Post-Script gray. |
| Add Euro Currency Symbol to PostScript Fonts | Specifies whether to convert the Euro currency symbol in a document to PostScript fonts. |
| Job Timeout Printer stops | printing when a print job is not completed within the specified time. |
| Wait Timeout Printer stops | printing when the printer does not receive data within the specified time from when the job was sent. Minimum Font Size Downloaded as Outline. |
| Minimum Font Size to Downloaded as Outline | Specifies the minimum font size (pixels) when downloading TrueType fonts as outline fonts. Fonts smaller than the minimum specified size are downloaded as bitmap fonts. |
| Maximum Font Size to Download as Bitmap | Specifies the maximum font size (pixels) when downloading TrueType fonts as bitmap fonts. Fonts larger than the maximum specified size are downloaded as outline fonts. |

Note
To display the Device Settings tab in Windows 2000/XP/NT 4.0/Server 2003, right-click the icon of the installed printer, and then click "Properties".
Option tab
| Item Function | |
| Option Specifies the options that are installed on this machine. | |
| Gather Option Information | Communicates with this machine and reads the status of the installed options. |
| PageScope Web Connection | Starts up PageScope Web Connection. |

Note
To display the Device Information tab in Windows 2000/XP/NT 4.0/Server 2003, right-click the icon of the installed printer, and then click "Properties".
You cannot click the [Gather Option Information] button if you are not connected to or able to communicate with this machine.
Settings tab
| Item Function | |
| Display Constraint Message | Displays a message when you want to perform a function that cannot be set when the printer driver is being used. |
| Use Print Server Properties Form | Uses the added registered paper in [Server Properties]. |

Note
To display the Settings tab in Windows 2000/XP/NT 4.0/Server 2003, right-click the icon of the installed printer, and then click "Properties".
6.2 Specifying the Setup tab settings
![Printing Preferences Advanced Setup Layout Per Page Setting Watermark Quality Version 8 1/2x11 (215.9x279.4mm) 8 1/2x11 (215.9x279.4mm) x1 Printer View Easy Set Defaults Save... Edit... Orientation Portrait Landscape Original Size 8 1/2x11 Output Size Same as Original Size Zoom Auto Manual 100 % Paper Source Auto Paper Type Plain Paper Copies 1 [1_999] Collate Offset Output Tray Default Output Method Print User Authentication/Account Track... Default OK Cancel Help](/content/2026/06/1277641/images/d28c2d28ffce5385ec8d4816582d118d110f6dcc7a789bd81b2ba507ed5fbf22.jpg)
Printing to suit the paper size
You can enlarge or reduce documents created when printing to match the output paper size.
1 Click the Setup tab.
2 From the "Original Size" and "Output Size" drop-down lists, select the desired settings.
- You can also specify any enlargement or reduction ration in the "Zoom" box.

Note
If the paper size is other than the custom size, select the desired settings after specifying the settings in Custom Size.
When “W” is selected for each standard paper size in the printer driver, the data can be centered and printed.
For example, if A4 size data is created and you want to center and print on A3 size paper, specify "A4 W" as the paper size in the printer driver and specify "Tray 1" or "Bypass Tray" as the paper source.
To print, load A3 size paper in the tray ("Tray 1" or "Bypass Tray") of this machine that is specified in the printer driver, and then specify the settings described below from [Basic Screen (Paper)] — [Change Tray Settings] — [Oversized Paper] on the control panel.
Select "A4W".
Enter the A3 paper size (420.0 × 297.0) in [Change Size]:
Saving a custom size
A custom size can be specified and saved in advance as described below.
1 From the "Original Size" and "Output Size" drop-down lists, select "Custom Size Settings".
The Custom Size Settings dialog box appears.
2 Specify settings for the following:
- Size: Specify the width and length of the custom size according to the selected measurement units.
![Custom Size Settings Width 8.27 inch [3.55_12.24] Length 11.69 inch [5.52_47.24] Unit ○ mm ● inch OK Cancel Default Help](/content/2026/06/1277641/images/fa98cd6d2c118811d42fa34448b313e66d2ff23f2cf43c41518f282ccfbe90e2.jpg)
3 Click the [OK] button.
If using long paper, specify the size of the long paper in Custom Size. For details, refer to "Printing on banner paper" on page 10-119.
Selecting the output method
Not only can you print directly, but you can select "Secured Print", which requires a password to print, or "Save in User Box", which saves documents in the document folder.
1 Click the Setup tab.
2 From the "Output Method" drop-down list, select the output method.
- Print: Prints immediately.
- Secured Print: Saves the document to be printed in the secured document box of this machine. When printing, you are required to enter the user ID and password in this machine's control panel. Select when printing highly confidential documents. (Up to 100 documents)
- Save in User Box: Saves the document to be printed a box on this machine.
- Save in User Box and Print: Saves the document in a box at the same time.
– Proof and Print: After a part of the document has been printed, this machine stops printing temporarily. Select to avoid misprinting large print jobs.
Secured Printing
→If "Secured Print" was selected, enter the ID and password in the dialog box that appeared.
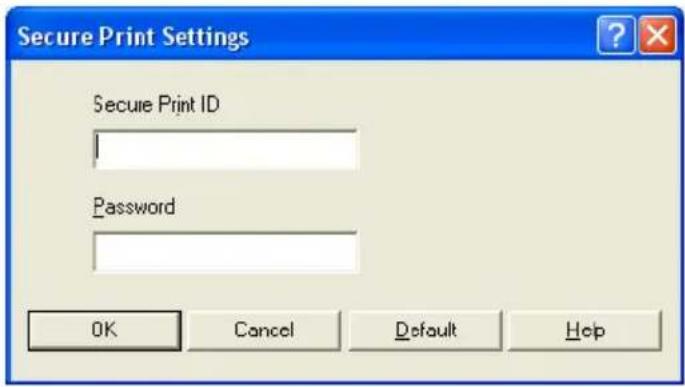

Note
To print the document, specify [Secured] in the Box mode of this machine, and then enter the ID and password. For details, refer to “Print job management” on page 10-104.
For details on the box functions of this machine, refer to the User's Guide [Box Operation].
When password rules are enabled on this machine, the passwords that can be used for secured printing are limited and the jobs are deleted when a password that does not comply with the password rule is entered. For the password rules, refer to User's Guide [Copy Operations].
Save in User Box
→When "Save in User Box" or "Save in User Box and Print" is selected, specify the file name and box number in the dialog box that appears for entering the file name and user box number.
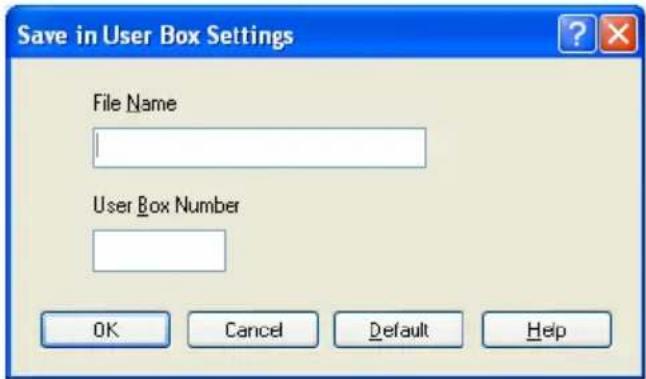

Note
For details on the box functions of this machine, refer to the User's Guide [Box Operations].
When the power rules are enabled on this machine, specify the box that is created on this machine.
Proof and printing
→When a print job is sent, this machine stops printing temporarily after part of the document has been printed. The remaining print job is stored in this machine as a print job. When printing multiple copies, you can print the remaining part of the print job after checking the print results.

Note
To print the document, specify the document in the Job mode of this machine, and then enter the ID and password. For details, refer to “Print job management” on page 10-104.
Specifying user authentication settings
If user authentication settings have been specified on this machine, you must enter a user name and password.
If a print job is sent using a user name or password that is not a registered account on this machine or if a job is sent without the “User Authentication” check box selected, the job is deleted without being authenticated by this machine.
When the user authentication settings are specified on this machine, the authentication operation restriction function is in mode 2, and the authentication information is not entered correctly, the applicable user is locked and cannot be accessed.
1 Click the Setup tab.
2 Click the User Authentication/Account Track button.
3 Select the "User Authentication" check box, and then enter the user name and password.
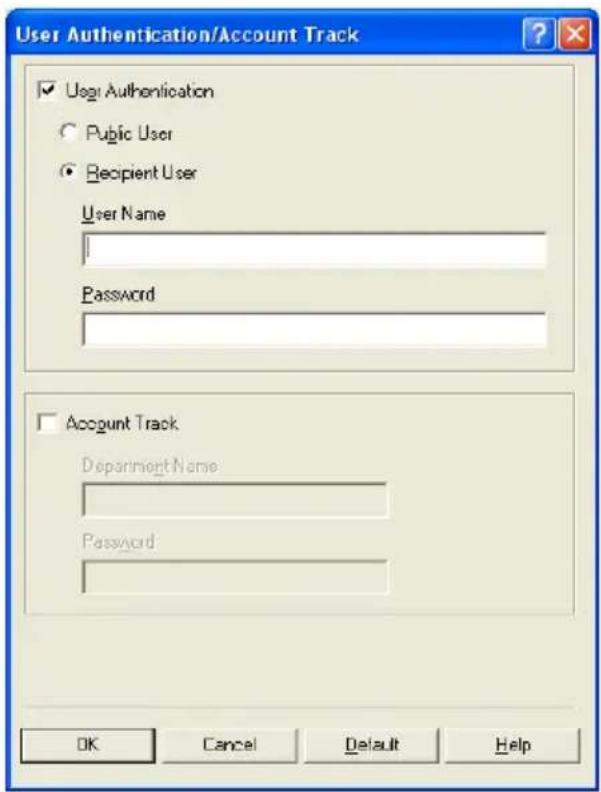

Note
If this machine has been set to permit public users, the machine can be used without a user name and password.
If printing is not allowed, printing cannot be performed even when used by a registered user.
For user authentication settings, consult the administrator of this machine.
Specifying account track settings
If account track settings have been specified on this machine, you must enter a department name and password.
If a print job is sent using a department name or password that is not a registered account or if a job is sent without the "Track Account" check box selected, the job is deleted without being authenticated by this machine.
When the account authentication settings are specified on this machine, the authentication operation restriction function is in mode 2, and the authentication information is not entered correctly, the applicable account is locked and cannot be accessed.
1 Click the Setup tab.
2 Click the User Authentication/Account Track button.
3 Select the "Account Track" check box, and then enter the department name and password.
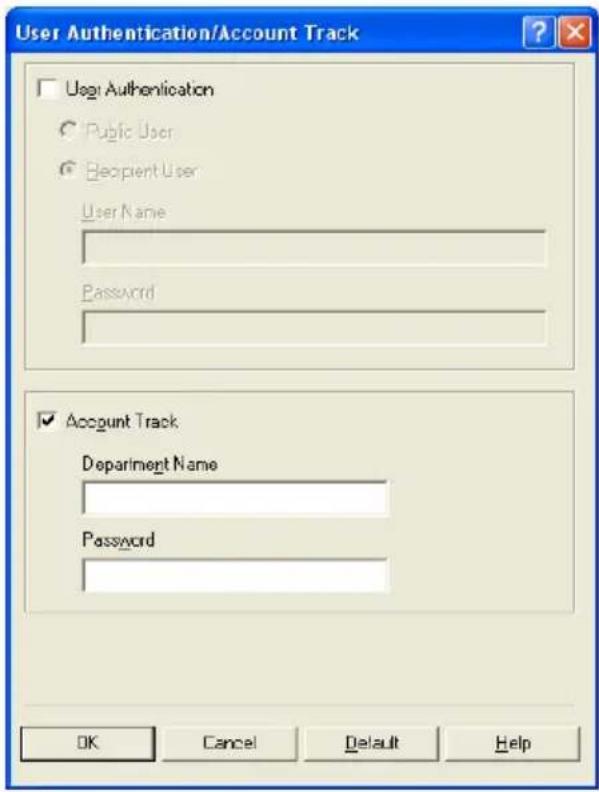

Note
If printing is not allowed, printing cannot be performed even when used by a registered account.
For the account track details, consult the administrator of this machine.
6.3 Specifying the Layout tab settings
![Printing Preferences Advanced Setup Layout Per Page Setting Watermark Quality Version 8 1/2x11 [215.9x279.4mm] 8 1/2x11 [215.9x279.4mm] x1 Printer View Easy Set Defaults Save... Edit... Combination Off Combination Details... Rotate 180 Staple Off Double Sides Single-Sided Binding Position Auto Fold & Staple Off Hole-Punch Off Default OK Cancel Help](/content/2026/06/1277641/images/7f19397b5cca1926f1abf98b99307df6f6569fd7cef2654403a1d400906ff412.jpg)
Printing multiple pages on one page (N in 1)
You can print multiple document pages on one page. You can also specify the "Booklet" setting to fold the printouts in two to make a booklet.
The booklet printing function is available only when the optional ADU is installed.
1 Click the Layout tab.
2 From the "Combination" drop-down list, select the number of pages to be printed on one page.
To change the border line and printing order settings, click the [Combination Details] button, and then change the settings in the dialog box that appears.
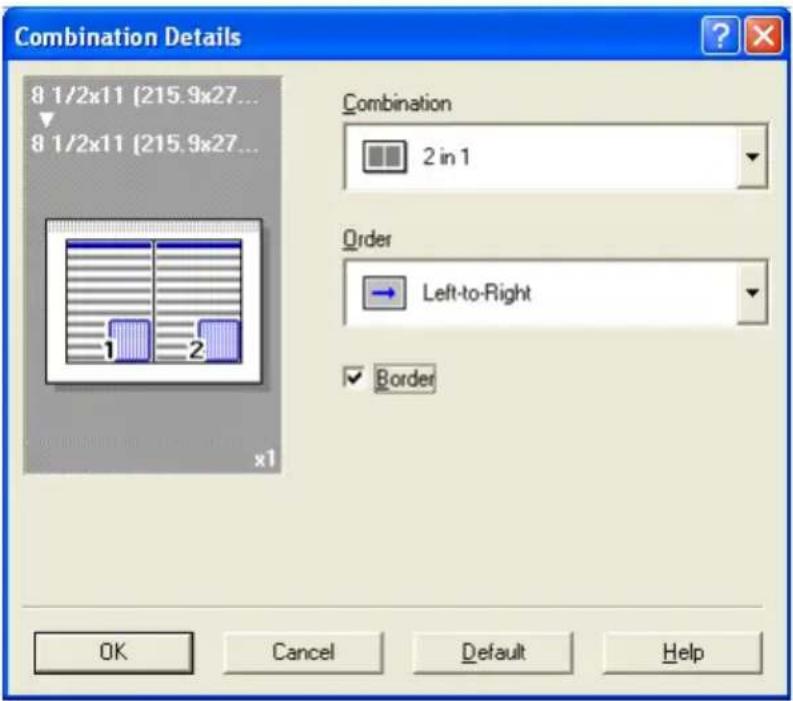

Note
When printing a job that contains pages of different sizes and orientations, images may be missing or overlapping when the document is printed.
Duplex printing
You can print a document onto both sides of a page. This comes in handy when you want to bind multiple-page documents.
1 Click the Layout tab.
2 From the "Double Sides" drop-down list, select "Double-Sided".

Note
The binding orientation can be specified from the "Binding Position" drop-down list.

Note
The duplex printing function is available only when the optional ADU is installed.
Setting the file margin
File margins are added to the document before it is printed.
1 Click the Layout tab.
2 From the “Binding Position” drop-down list, select the position of the binding margin.
Stapling
Multiple-page documents can be stapled.
The staple function is available only when optional finisher is installed.
1 Click the Layout tab.
2 From the “Staple” drop-down list, specify the number of staples and the stapling position.

Note
Depending on the selected Binding Position setting, different stapling positions are available.
Fold & Staple
You can specify to center staple and fold a printed document.
1 Click the Layout tab.
2 From the drop-down list, specify the folding condition.
You can specify “Fold & Staple” to fold and staple a document, “Center Staple” to staple a document in the center, or “Fold” to fold a document in half.

Note
The Fold & Staple function is available only when saddle stitcher SD-503 is installed on optional finisher FS-514.
Hole punching
Holes can be punched into the printed document.
The hole punch function is available only when optional finishers FS-514 and punch kit PK-510 are installed.
1 Click the Layout tab.
2 From the "Hole-Punch" drop-down list, select the number of punched holes.

Note
Depending on the selected Binding Position setting, different hole-punching positions are available.
6.4 Specifying the Per Page Setting tab settings
![Printing Preferences Advanced Setup Layout Per Page Setting Watermark Quality Version 8 1/2x11 [215.9x279.4mm] 8 1/2x11 [215.9x279.4mm] x1 Printer View Easy Set Untitled Save... Edit... Front Cover Page Printed Transparency Interleave None Paper Source Tray 1 Paper Source Tray 2 Back Cover Page Printed Paper Source Tray 1 Default OK Cancel Help](/content/2026/06/1277641/images/249eb9bcd93d99a5125048eb37f4b97da2dd00beb6ae15ca3b5fa08a3cf3fa6a.jpg)
Printing documents with a front cover/back cover
1 Click the Per Page Setting tab.
2 From the "Front Cover Page" and "Back Cover Page" drop-down lists, select the desired printing settings.
To print on the front cover and back cover, select "Printed". To only add a blank page, select "Blank".
3 Select the input tray that contains the loaded paper for the front cover and back cover.
6.5 Specifying the Watermark tab settings
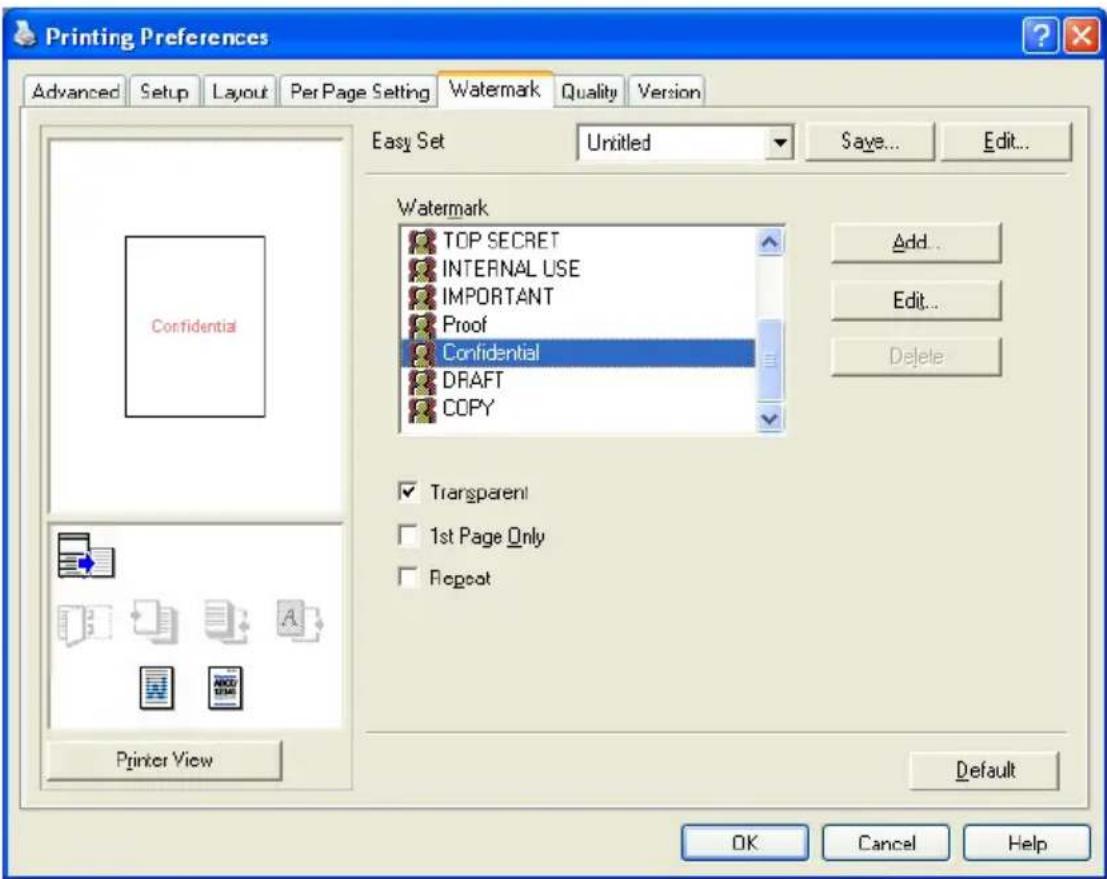
Printing a watermark
You can print specific text in the background as a watermark.
1 Click the Watermark tab.
2 From the drop-down list, select the watermark that you want to print.
3 Specify settings for the following:
Transparent: The watermark is transparent.
1st Page Only: Prints the watermark only on the first page.
Repeat: Prints several watermarks on one page.

Note
If "Booklet" was selected in the "Combination" drop-down list, the watermark is not printed.
Editing a watermark
You can change the fonts and position of the watermark and you can register a new one.
1 Click the Watermark tab.
2 To create a watermark, click the [Add] button.
- To change a watermark, select the watermark to be changed, and then click the [Edit] button.
3 Specify settings for the following:
![Watermark Settings Watermark Name +100% URGENT Watermark Text URGENT Font Name Size Arial 72 Point [7_600] Style Angle Regular 0 Degrees Color Red -100% Frame None Position X: 0 % Y: 0 % Center Sharing Yes No OK Cancel Default Help](/content/2026/06/1277641/images/2084482d04de7c48d90ea0fae94bf0fc385990f513109cdcf7473dcbc59d53b9.jpg)
Watermark Name: Specifies the watermark name being registered.
Watermark Text: Specifies the watermark text.
Font Name, Size, Style, Angle, Color, and Frame: Specifies the font, font size, style, text angle, color, and frame of the watermark.
Position: Specifies the watermark position with the horizontal and vertical scroll bars.
Sharing: Specifies whether to share the watermark with other users.

Note
Only the administrator can select a setting under "Sharing".
6.6 Specifying the Quality tab settings
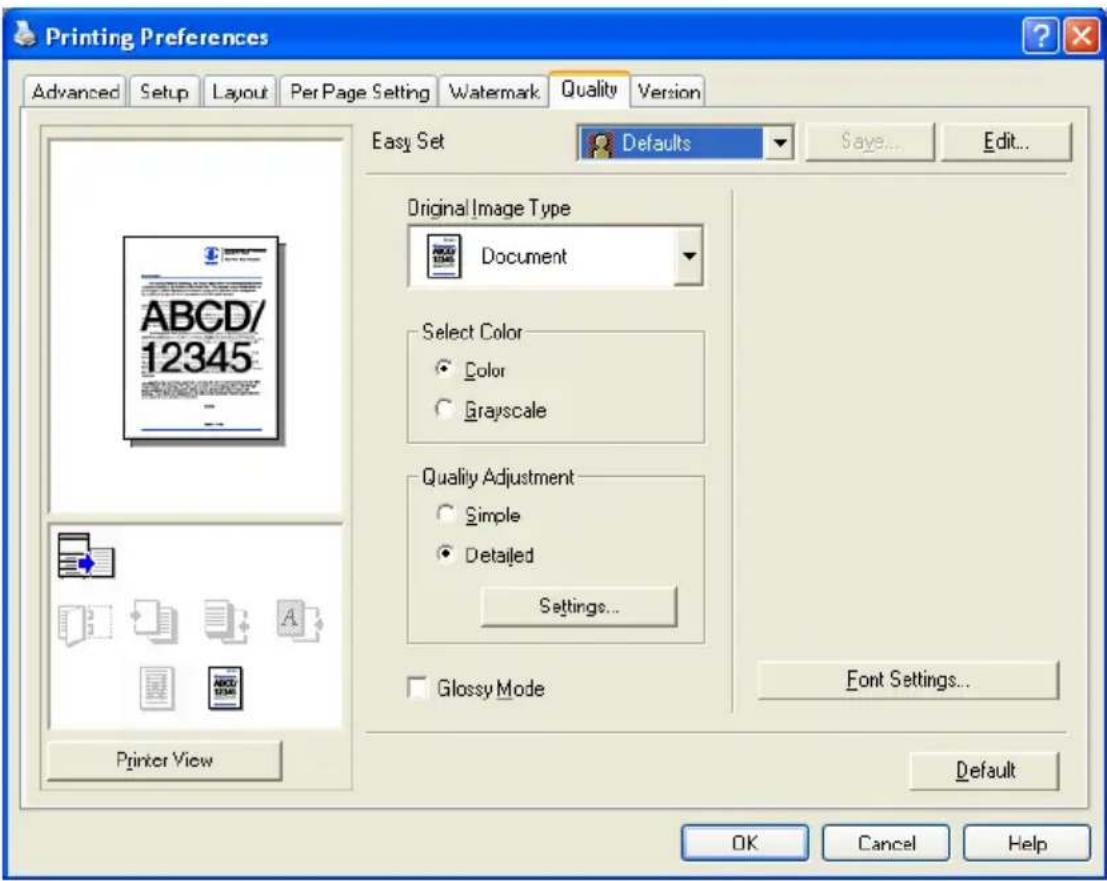
Specifying settings
1 Click the Quality tab.
2 Specify settings for the following:
- Original Image Type
Specifies the contents of the original document. Prints with a quality suitable for the original document.
Document: Prints with a quality suitable for documents with many characters.
Photo: Prints with a quality suitable for photos.
DTP: Prints with a quality suitable for documents produced using DTP.
Web: Appropriate for printing web pages. Smoothly reproduces low resolution images.
CAD: Appropriate for originals composed of fine lines. Reproduces images with high resolution.
- Select Color
Color: Prints in color.
Grayscale: Prints in grayscale.
- Quality Adjustment
Detailed: Separately adjusts the quality of each item (text, photos, and charts) in the document. - Glossy Mode
Prints using a gloss finish.
Font settings
You can replace the TrueType fonts used in Windows with the printer fonts of this machine.
1 Click the [Font Settings] button.
2 Specify settings for the following:
Download Font Format: Select the TrueType font type to download when downloading the TrueType fonts and not using the printer fonts. User Printer Fonts: Select to enable the substitution setting of the printer fonts. If enabled, the TrueType fonts to be substituted are not downloaded to the printer.

Note
Using the printer fonts will shorten the printing time, however, there may be a difference in the screen display and the print results.
When using TrueType fonts, select from the "Download Font Format" drop-down list the font type to be downloaded to the printer.
Specify the font replacement list from the Device Settings tab.
6.7 Specifying the Option tab settings
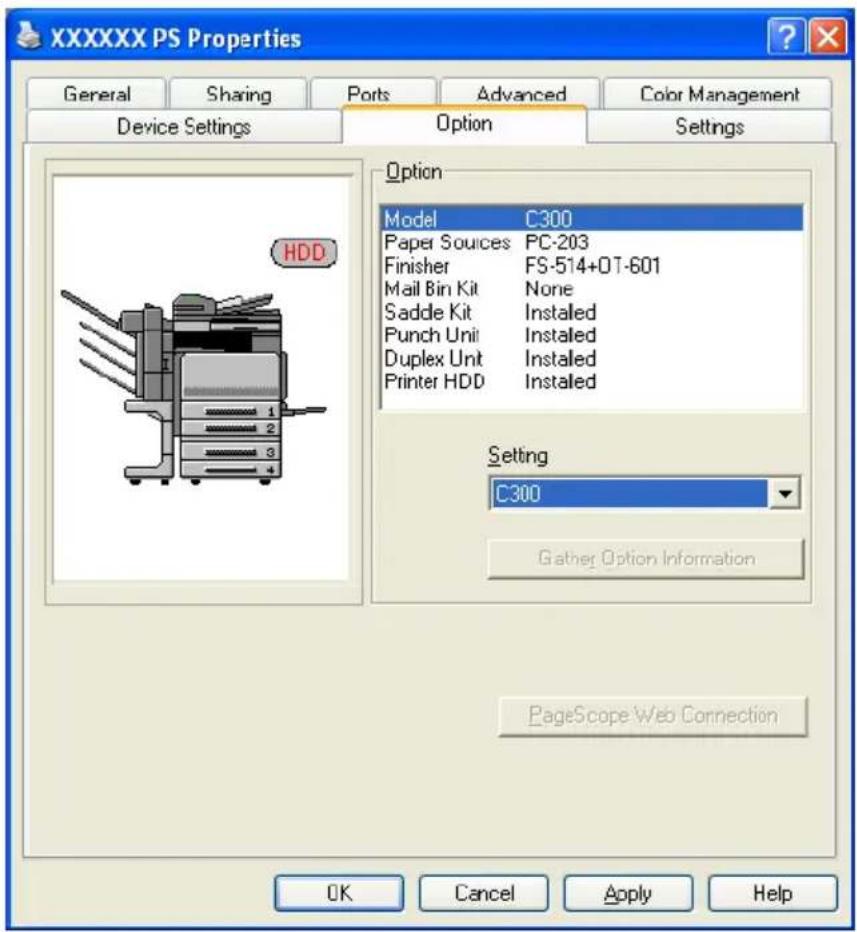
You can enable the options installed on this machine to be used from the printer driver by specifying whether the models or options are available.

Note
If the installed options are not set from the Option tab, the option function cannot be used with the printer driver. When installing options, be sure to make the proper settings.
Specifying settings
1 For Windows 2000/NT 4.0, click the [Start] button, point to "Settings", and then click "Printers".
For Windows XP/Server 2003, click the [Start] button, and then click "Printers and Faxes".
- If "Printers and Faxes" does not appear in the Start menu, open the Control Panel from the Start menu, select "Printers and Other Hardware", and then select "Printers and Faxes".
2 Right-click the printer icon, and then click "Properties".
3 Click the Option tab.
4 Select "Model" from the list, and then select the model to be used from the "Setting" drop-down list.
5 Select the option, and then specify the installation status from the drop-down list below.

Note
The installed option can be automatically registered in the "Option" list by clicking the [Gather Option Information] button when connected to this machine.
The [Gather Option Information] button can only be used when the SNMP setting is enabled on this machine and the SNMP v1/v2c (IP) setting check box is selected.
When the Mail Bin Kit is installed, you can assign output tray 1 and output tray 2 as mail bins.
To assign the output destination of the mail bins, select "Bin Setting" from "Administrator Setting" - "System Setting" - "Output Setting" on the control panel.
If "Printer" is displayed when specifying the output destination in the printer driver, the mail bin that is selected is shown in the figure.
![Printing Preferences Advanced Setup Layout Per Page Setting Watermark Quality Version Easy Set Untitled Sayo Edit... Orientation Portrait Landscape Original Size 8 1/2x11 Output Size Same as Original Size Zoom Auto Manual Paper Source Auto Paper Type Plain Paper Copies 1 [1_999] Collate Offset Output Tray Tray 1/Bin 5 Default Tray 1 Tray 1/Bin 5 Tray 2 Tray 2/Bin 5 Tray 3 Bin 1 Bin 2 Bin 3 Bin 4 OK Cancel Help](/content/2026/06/1277641/images/1864b976f9bd0cf2a38f6f1bdecc9e5db6ef982132eae519208957d2cbe61e7c.jpg)
6.8 Saving the driver settings
For PostScript drivers, you can save the setting values of the changed driver and recall them as necessary.
Saving the driver settings
1 Change the driver settings from the Setup tab and the Layout tab.
2 Click the [Save] button.
![Printing Preferences Advanced Setup Layout Per Page Setting Watermark Quality Version 8 1/2x11 [215.9x279.4mm] 8 1/2x11 [215.9x279.4mm] Easy Set Untitled Save... Edit... Orientation Portrait Landscape Original Size 0 1/2x11 Output Size Same as Original Size Zoom Auto Manual 100 % Paper Source Auto Paper Type Plain Paper Copies 1 [1_999] 1 1 2 Collate A Offset Output Tray Default Output Method Print User Authentication/Account Track... Printer View Default OK Cancel Help](/content/2026/06/1277641/images/e00a22ffd329b550b7f399c287e4336afaff1c1823bd634b7c475aae1e046bc8.jpg)
3 Enter the file name in the "Name" text box.
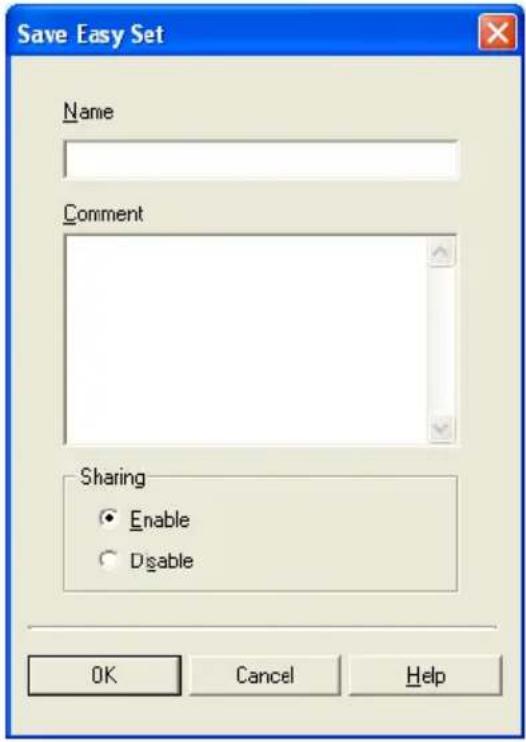
4 Enter a message in the "Comment" text box as necessary.
5 Specify whether to share the driver settings being saved with other users.
6 Click the [OK] button.
The settings are registered in a library.

Note
The file extension is ".ksf".
You can save up to 25 items.
Only the administrator can select a setting under "Sharing".
→ Select the settings to restore from the "Easy Set" drop-down list on the Printing Preferences dialog box.
The setting values are recalled, and the Printing Preferences dialog box appears again.
Changing the settings
1 On the Printing Preferences dialog box, click the [Edit] button.
2 From the list, select the file that you want to change, and then change the setting. To delete the file, click the [Delete] button.
3 Click the [Options] button, check the settings to recall, and then click the [OK] button.
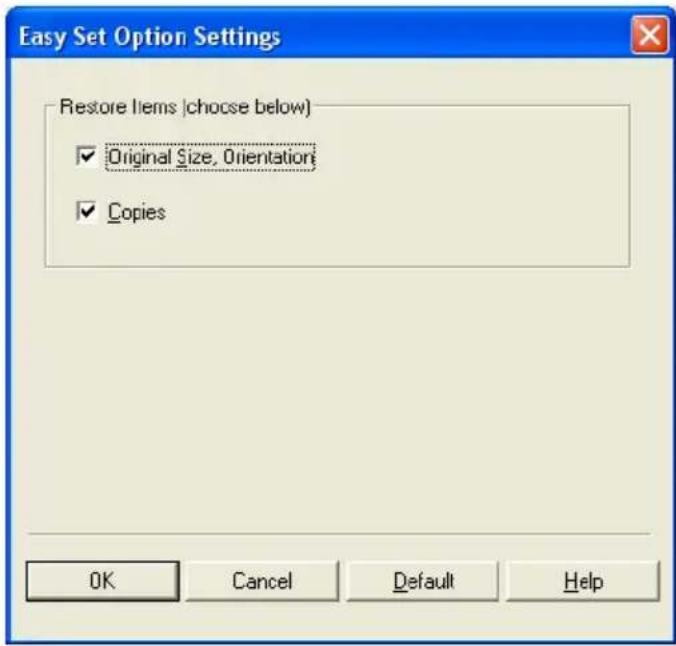
4 Click the [OK] button.
7 Setting up the PPD driver (Windows)
7.1 Settings
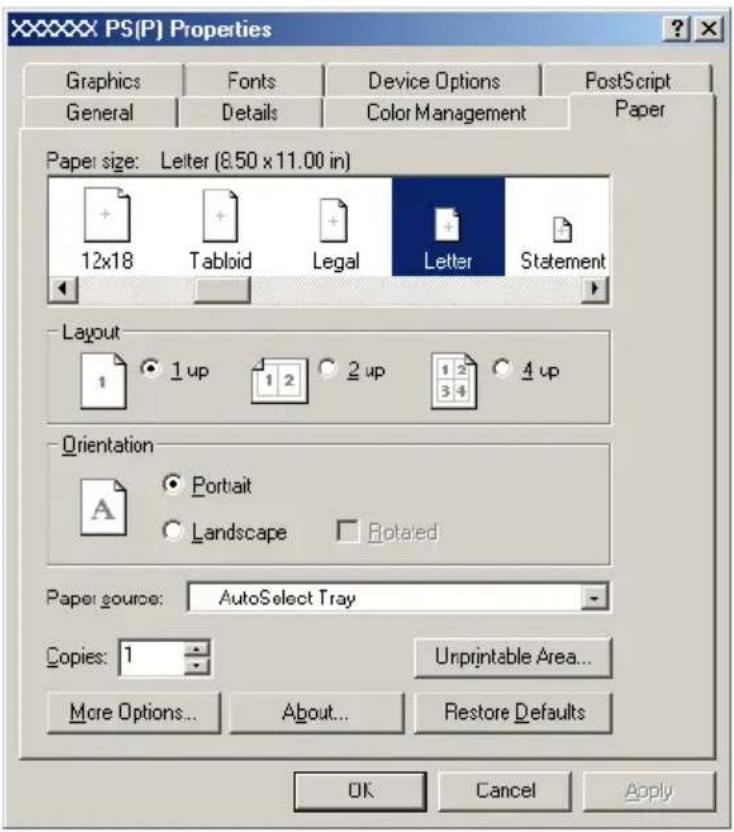
Paper tab
| Item Function | |
| Paper size Specifies the paper size. | |
| Layout Specifies the number of pages printed on one page. | |
| Orientation Specifies the orientation. | |
| Rotated Rotates the paper. | |
| Paper source Selects the input tray. | |
| Copies Specifies the number of copies to print. | |
| More Options Specifies the paper type and output device. | |
Graphics tab
| Item Function | |
| Resolution Specifies the print resolution. | |
| Color Control Specifies whether to adjust the color to that on the screen. | |
| Halftoning Specifies the halftone number of lines and the pattern angle. | |
| Special Prints a negative or mirror image. | |
| Scaling Specifies the enlargement and reduction ratio. | |
Device Options tab
To specify the following printer-specific options, right-click the printer icon in the Printers window, and then click "Properties" in the menu that appeared.
| Item Function | |
| Collated Specifies whether to print multiple copies in sets. | |
| Offset When printing multiple copies, shifts the output position of each set. | |
| Binding Position Specifies the binding position. | |
| Duplex Specifies duplex printing. | |
| Combination Specifies booklet printing. | |
| Staple Performs stapling. | |
| Hole Punch Performs hole punching. | |
| Fold & Staple Performs folding. | |
| Front Cover Page Attaches a front cover page. | |
| Paper Tray (Front Cover Page) | Selects the input tray for the front cover. |
| Back Cover Page | Attaches a back cover page. |
| Paper Tray (Back Cover Page) | Selects the input tray for the back cover. |
| Transparency Interleave | Inserts interleaves between overhead projector transparencies. |
| Paper Tray (Transparency Interleave) | Selects the input tray for the transparency interleaves. |
| Wait Mode | Stops printing temporarily after part of the document has been printed so that the proof print can be checked. |
| Select Color | Specifies whether to print in color or grayscale. |
| Glossy Mode | Prints using a gloss finish. |
| Original Image Type | Prints with a quality suitable for the original document. |
| Color Matching (Text) | Adjusts the color quality of the text in a document. |
| Pure Black (Text) | Specifies whether to enable grayscale of the text in a document. |
| Screen (Text) | Specifies screening of the text in a document. |
| Color Matching (Photo) | Adjusts the color quality of photos in a document. |
| Pure Black (Photo) | Specifies whether to enable grayscale of photos in a document. |
| Screen (Photo) | Specifies screening of photos in a document. |
| Smoothing (Photo) | Specifies smoothing of photos in a document. |
| Color Settings (Graphic) | Adjusts the color quality of a chart and graph in a document to the text or photo settings. |
| Smoothing (Graphic) | Adjusts the smoothing process of a chart and graph in a document to the text or photo settings. |
You can specify the following options by right-clicking the printer icon in the Printers window, then clicking "Properties".
| Item Function | |
| Available printer memory | Specifies the memory installed on this machine. |
| Installable options Specifies the options installed on this machine. | |
PostScript tab
| Item Function | |
| PostScript output format | Specifies the PostScript file output method. |
| PostScript header Specifies | whether to transmit header information to the printer. |
| Print PostScript error information | Specifies whether to print PostScript error reports. |
| PostScript timeout value | Specifies the time for a timeout. |
Fonts tab
| Item Function | |
| Send TrueType fonts to the printer according to the font Substitution Table | Prints the font specified in the Font Substitution Table with the printer fonts.The Font Substitution Table can be specified by clicking the [Edit the Table] button. |
| Always use built-in printer fonts instead of TrueType fonts | Prints all fonts with printer fonts. |
| Always use TrueType fonts | The printer fonts are not substituted. |
| Send Fonts As Specifies the font transmission method. | |
7.2 Specifying the Paper tab settings
You can specify the orientation and number of pages to be printed on one page when printing.
Specifying settings
1 Click the Paper tab.
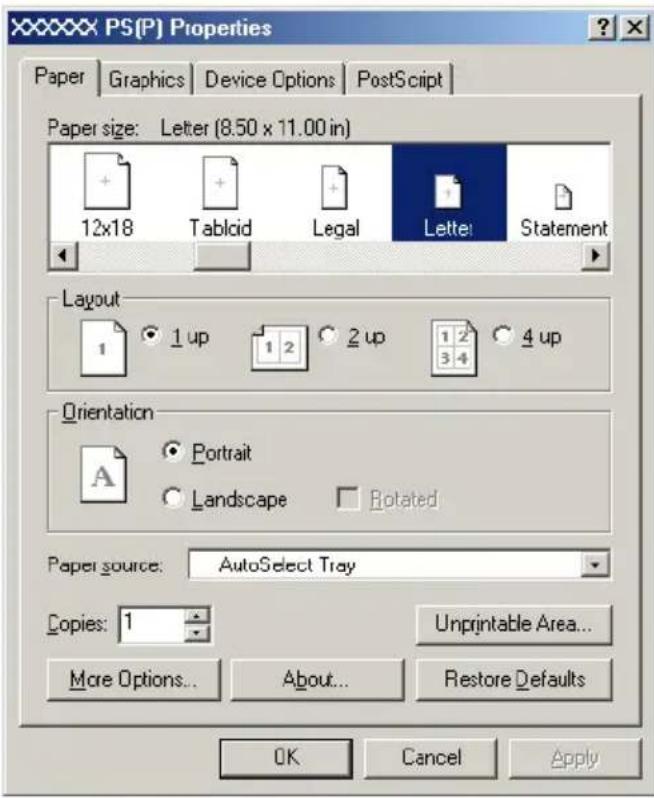
2 Specify settings for the following:
Paper size: Specifies the paper size.
Layout: Specifies printing multiple pages on one page (N in 1 printing).
Orientation: Specifies the orientation
Rotated: Rotates the paper.
Paper source: Selects the input tray.
Copies: Specifies the number of copies to print.
More Options: Specifies the paper type and output device.
7.3 Specifying the Device Options tab settings
You can specify advanced functions such as the finisher function and color adjustments from the Device Options tab.
Specifying setting
1 Click the Device Options tab.
2 Select a function, and then select the setting from the "Change setting for" drop-down list.
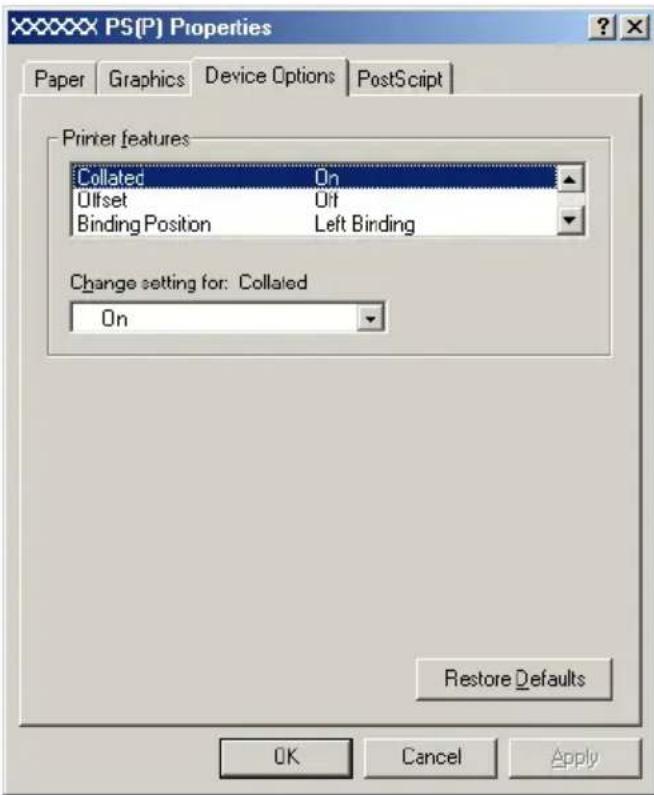

Note
For the items and functions that can be specified, refer to "Settings" on page 7-1.

Note
The duplex printing function is available only when the optional ADU is installed.
The staple function is available only when the optional finisher FS-514 is installed.
The hole punch function is available only when optional finishers FS-514 and punch kit PK-510 are installed.
The Fold & Staple function is available only when saddle stitcher SD-503 is installed on optional finisher FS-514.
7.4 Specifying the options
You can specify the options installed on this machine so that they can be used from the printer driver.
If the installed options are not set from the Device Options tab, the option function cannot be used with the printer driver. When installing options, be sure to make the proper settings.
Specifying settings
1 For Windows 98SE/Me, click the [Start] button, point to "Settings", and then click "Printers".
2 Right-click the printer icon, and then click "Properties".
3 Click the Device Options tab.
4 Select a function, and then select the setting from the "Change setting for" drop-down list.
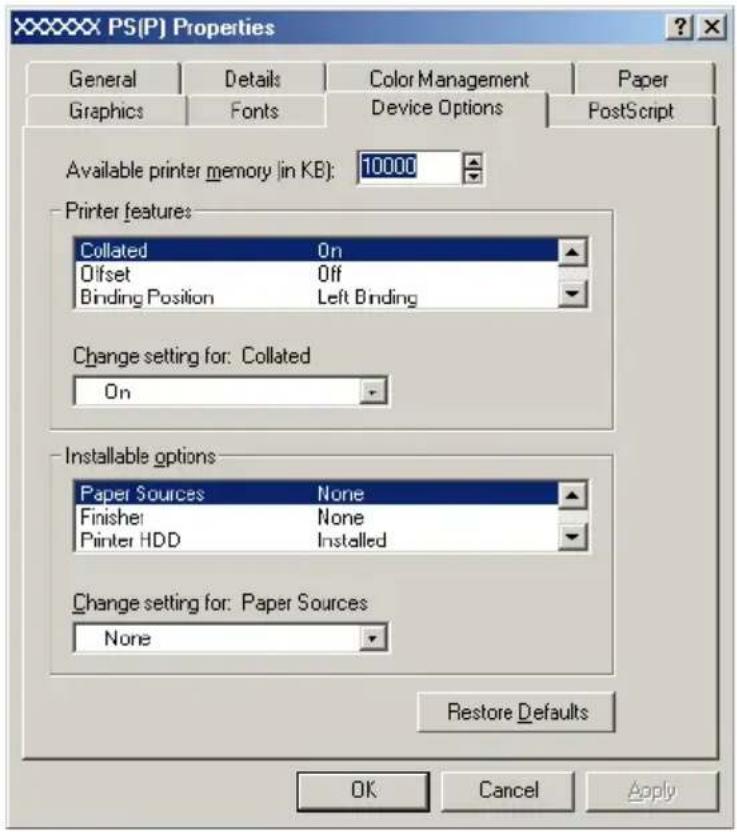

Note
For the items and functions that can be specified, refer to "Settings" on page 7-1.
8 Setting up the PPD driver (Mac OS 9.2)
8.1 Settings
The functions of this machine can be specified on the Paper Setup and Print dialog boxes displayed from an application.
The settings can only be applied while using the application. When the application is exited, the settings return to their defaults.
Page Setup dialog box
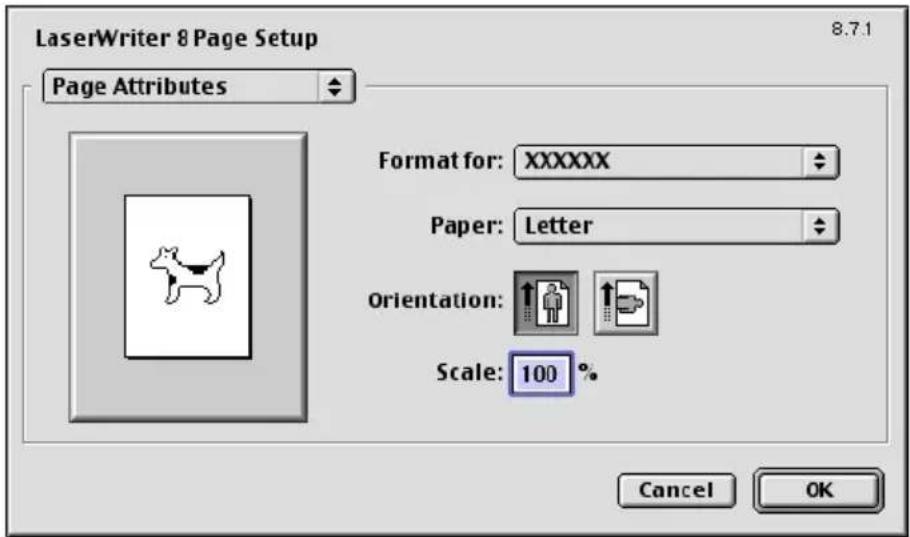
Page Setup items
| Menu Item Function | ||
| Page Attributes Paper | Per Specifies the paper size. | |
| Orientation Specifies the orientation. | ||
| Scale Specifies the enlargement and reduction ratio. | ||
| PostScript Options | Flip Horizontal Prints the image flipped horizontally. | |
| Flip Vertical Prints the image flipped vertically. | ||
| Invert Image Prints a negative image. | ||
| Substitute Fonts Replaces some fonts with printer fonts. | ||
| Smooth Text Smooths text data. | ||
| Smooth Graphics Smooths graphic data. | ||
| Precision Bitmap Alignment | Corrects jagged graphic images. | |
| Unlimited Download-able Fonts | Does not limit downloading screen fonts. | |
| Custom Page Sizes | Paper Size | Specifies any paper size. |
| Margins | Specifies the paper margins. | |
| Custom Page Size Name | Enters the registered name for the specified paper size and margin after the [OK] button is clicked. | |
| Units | Selects the specified unit. | |

...
Note
Depending on the application, "Page Setup" may be displayed as "Paper Setup". In addition, you may have to select "Paper Setup"—"Options" from the "File" menu.
The dialog boxes differ depending on the application.
Print dialog box
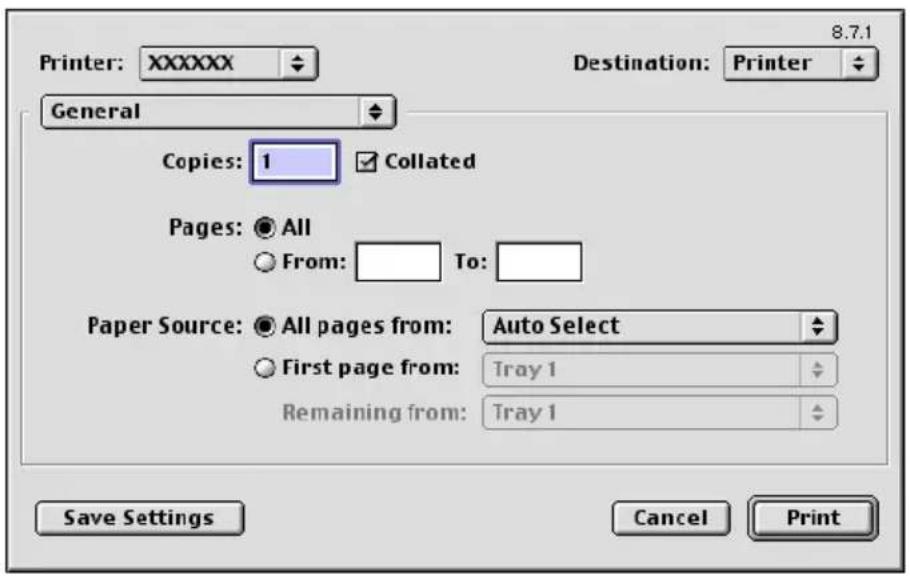
Print item
| Menu Item Function | ||
| General Copies Specifies the number of copies to print. | ||
| Color Matching Print | Color Specifies the color for printing. | |
| Intent Selects the matching method. | ||
| Printer Profile Specifies the color adjustment profile of the output device. | ||
| Background Printing | Print in Specifies background printing. | |
| Print Time Specifies the priority level and print time. | ||
| Save as File Format | Specifies the output format of the PostScript file. | |
| PostScript Level | Specifies the PostScript level. | |
| Data Format | Specifies the format to save a document. | |
| Font Inclusion | Specifies whether to include the font data on a file. | |
| Font Settings | Font Documentation | Adds information to the font key. |
| Font Downloading | Specifies the conditions to download fonts. | |
| Menu | Item | Function |
| Layout Pages per sheet | Specifies the number of pages to print on one page. | |
| Layout direction Specifies the page order for printing multiple pages on one page. | ||
| Border Specifies the borders around pages. | ||
| Job Logging If there is a PostScript error | Specifies the PostScript error report conditions. | |
| Job Documentation Specifies the conditions for the operation record to be saved. | ||
| Job Documentation Folder | Specifies the folder to which the operation record is to be saved. | |
| Cover Page Print Cover | Page Attaches a cover. | |
| Cover Page Paper Source | Selects the cover input tray. | |
| Finishing Options 1 Offset | Offset Specifies offset. | |
| Output Tray Selects the output tray. | ||
| Binding Position Selects the binding position. | ||
| Duplex Performs duplex printing. | ||
| Combination | Selects booklet printing. | |
| Staple | Performs stapling. | |
| Punch | Performs hole punching. | |
| Finishing Options 2 Fold & Staple | Performs folding. | |
| Front Cover Page Attaches a front cover page. | ||
| Paper Tray (Front Cover Page) | Selects the input tray for the front cover. | |
| Back Cover Page | Attaches a back cover page. | |
| Paper Tray (Back Cover Page) | Selects the input tray for the back cover. | |
| Transparency Inter-leave | Inserts interleaves between overhead projector transparencies. | |
| Paper Tray (Transparency Interleave) | Selects the input tray for the transparency inter-leaves. | |
| Menu Item | Function | |
| Finishing Options 3 | Wait Mode Stops printing | temporarily after part of the document has been printed so that the proof print can be checked. |
| Resolution Specifies the print resolution. | ||
| Select Color Specifies whether to print in color or grayscale. | ||
| Glossy Mode Prints using a gloss finish. | ||
| Original Image Type Prints with a quality suitable for the original document. | ||
| Color Matching (Text) Adjusts the color quality of the text in a document. | ||
| Pure Black (Text) Specifies whether to enable grayscale of the text in a document. | ||
| Finishing Options 4 | Screen (Text) Specifies screening of the text in a document. | |
| Color Matching (Photo) | Adjusts the color quality of photos in a document. | |
| Pure Black (Photo) Specifies whether to print the photos in a document in grayscale. | ||
| Screen (Photo) Specifies screening of photos in a document. | ||
| Smoothing (Photo) Specifies smoothing of photos in a document. | ||
| Color Setting (Graphic) | Adjusts the color quality of charts and graphs in a document to the text or photo settings. | |
| Smoothing (Graphic) Adjusts the smoothing process of a chart and graph in a document to the text or photo settings. | ||

...
Note
The dialog boxes differ depending on the application.
8.2 Page Setup
Page Attributes (basic settings)
1 Select "Paper Setup" or "Page Setup" from the "File" menu.
2 Select "Page Attributes".
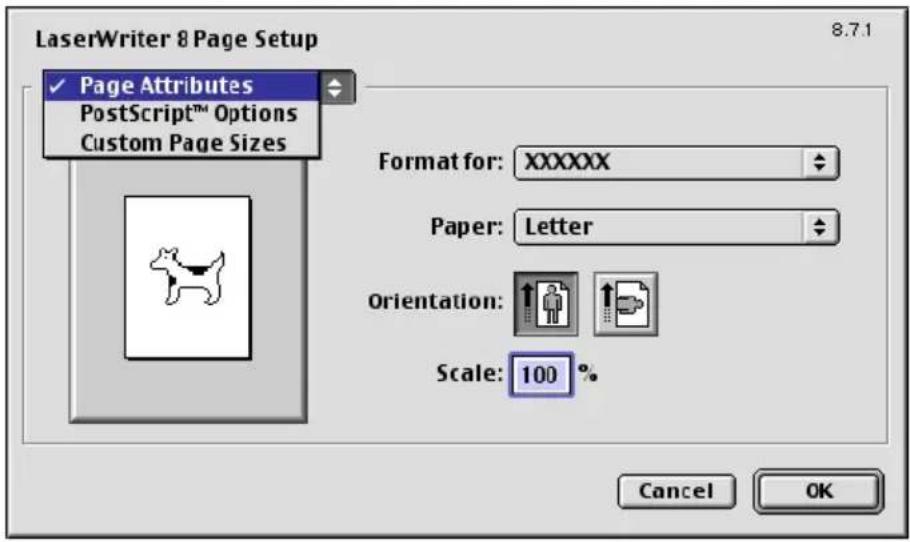
3 Specify settings for the following:
Paper: Specifies the paper size.
Orientation: Specifies the orientation.
Scale: Specifies the enlargement and reduction ratio.
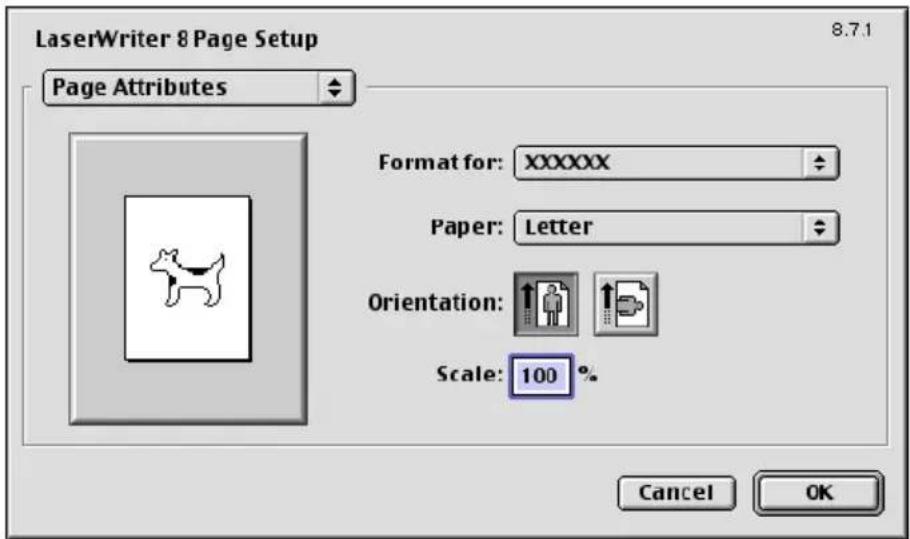

Note
The folding function can be selected from the screen that is displayed when "Layout" is selected in the Print dialog box.
Custom Page Sizes
1 Select "Paper Setup" or "Page Setup" from the "File" menu.
2 Select "Custom Page Sizes".
3 Click the [New] button.
4 Specify settings for the following:
Paper Size: Specifies the paper size.
Margins: Specifies the paper margins.
Custom Page Size Name: Enter the registered name for the specified paper size and margin, and then click the [OK] button.
Units: Selects the specified unit.
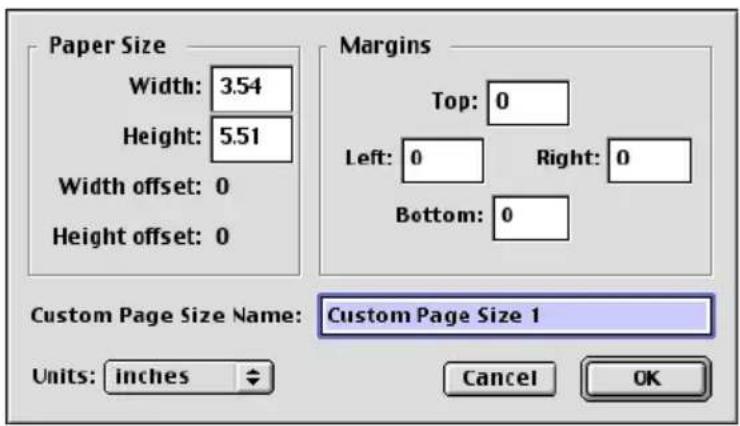
5 Click the [OK] button.
This registers the custom page settings, and allows you to select the paper in the screen that appears when "Page Attributes" is selected.
PostScript Options
1 Select "Paper Setup" or "Page Setup" from the "File" menu.
2 Select "PostScript Options".
3 Specify settings for the following:
Visual Effects: Provides "Flip Horizontal", "Flip Vertical", and "Invert Image" (negative image).
Substitute Fonts: Replaces some fonts with printer fonts.
Smooth Text: Smooths text data.
Smooth Graphics: Smooths graphic data.
Precision Bitmap Alignment: Corrects jagged graphic images.
Unlimited Downloadable Fonts: Does not limit downloading screen fonts.
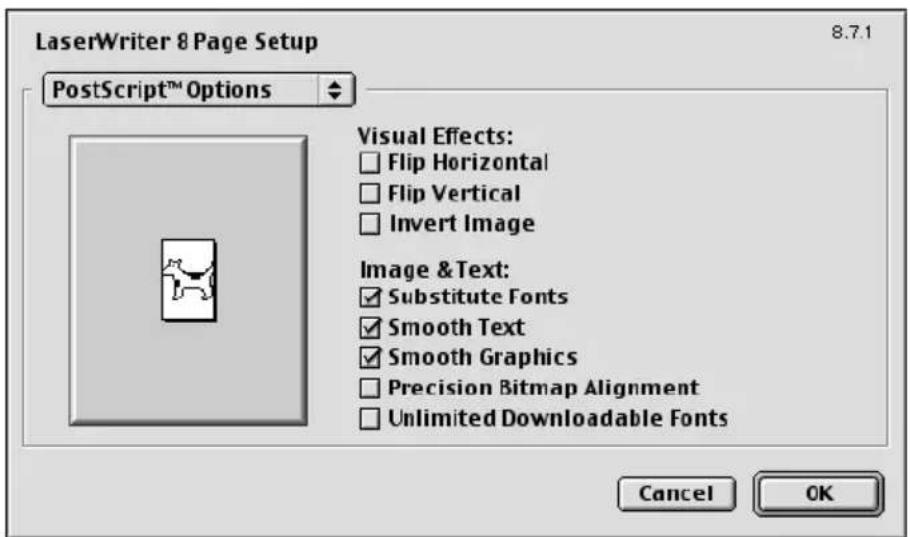
8.3 Printing
General (basic settings)
1 From the "File" menu, select "Print".
2 Select "General".
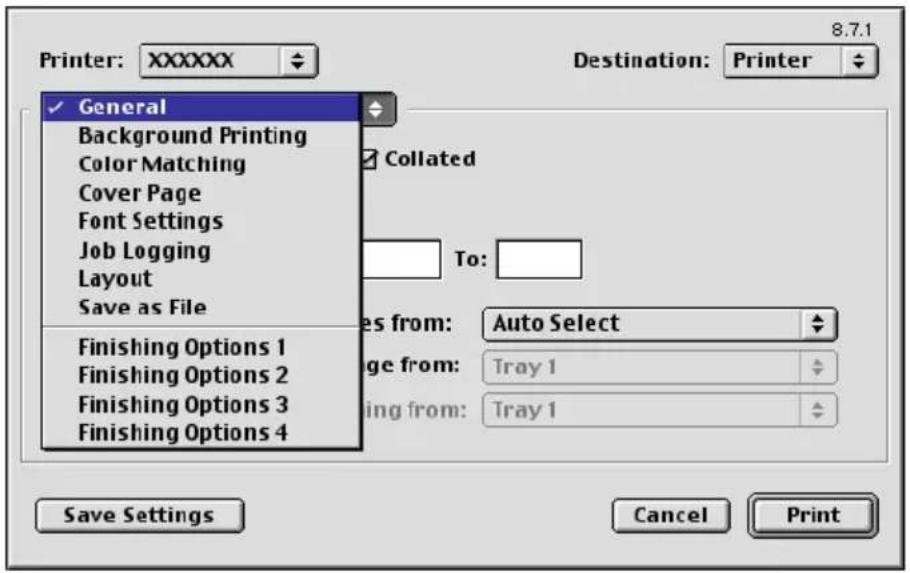
3 Specify settings for the following:
Copies: Specifies the number of copies to print.
Collated: Prints multiple copies in sets.
Pages: Specifies the print range to print.
Paper Source: Selects the input tray.
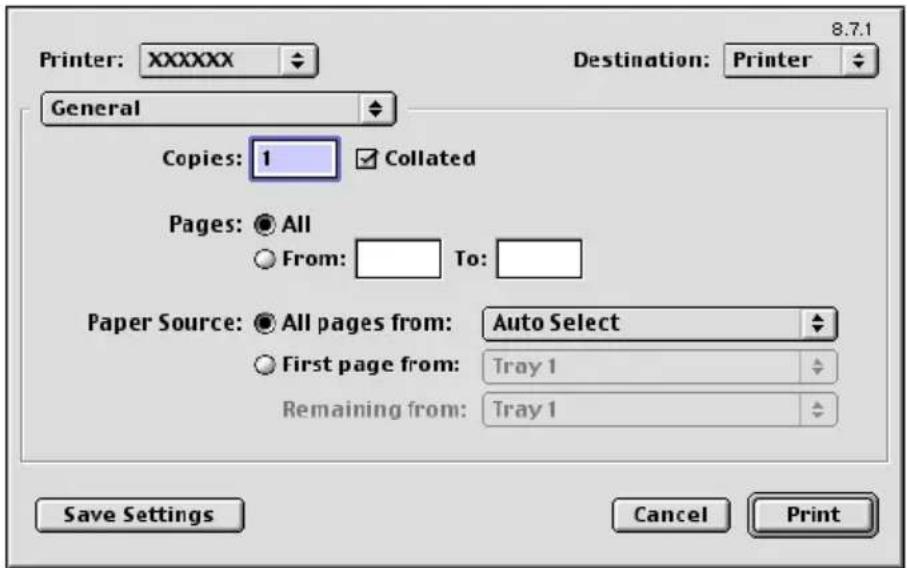
Layout (printing multiple pages on one page)
You can specify printing multiple pages on one page of paper or duplex printing.
1 From the "File" menu, select "Print".
2 Select "Layout".
3 Specify settings for the following:
Pages per sheet: Specifies the number of pages to print on one page. Layout direction: Specifies the document page order.
Border: Specifies the borders around pages.
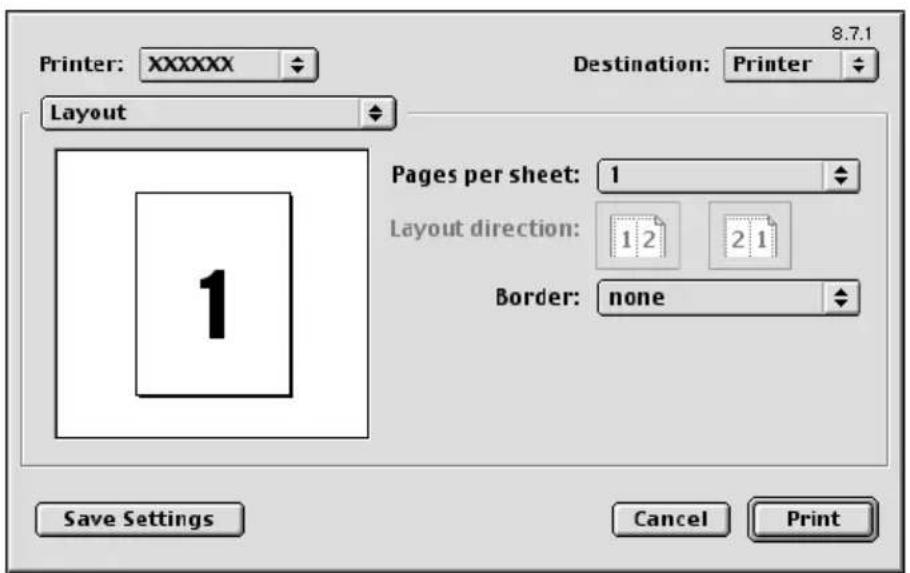
Printer specific options (Finishing Options 1 to 4)
You can specify printer-specific options. You can specify this option when using the staple or hole punch functions of this machine.
1 From the "File" menu, select "Print".
2 Select "Finishing Options 1 to 4".
3 Specify settings for the following:
Offset: Specifies offset.
Output Tray: Selects the output tray.
Binding Position: Specifies the binding position.
Duplex: Performs duplex printing.
Combination: Specifies booklet printing.
Staple: Performs stapling.
Punch: Performs hole punching.
Fold & Staple: Performs folding.
Front Cover Page: Attaches a front cover page.
Paper Tray (Front Cover Page): Selects the input tray for the front cover.
Back Cover Page: Attaches a back cover page.
Paper Tray (Back Cover Page): Selects the input tray for the back cover.
Transparency Interleave: Inserts interleaves between overhead projector transparencies.
Paper Tray (Transparency Interleave): Selects the input tray for the transparency interleaves.
Wait Mode: Stops printing temporarily after part of the document has been printed so that the proof print can be checked.
Resolution: Specifies the resolution.
Select Color: Specifies whether to print in color or grayscale.
Glossy Mode: Prints using a gloss finish.
Original Image Type: Prints with a quality suitable for the original document.
Color Matching (Text): Adjusts the color quality of the text in a document.
Pure Black (Text): Specifies whether to enable grayscale of the text in a document.
Screen (Text): Specifies screening of the text in a document.
Color Matching (Photo): Adjusts the color quality of photos in a document.
Pure Black (Photo): Specifies whether to enable grayscale of photos in a document.
Screen (Photo): Specifies screening of photos in a document.
Smoothing (Photo): Specifies smoothing of photos in a document.
Color Setting (Graphic): Adjusts the color quality of a chart and graph in a document to the text or photo settings.
Smoothing (Graphic): Adjusts the smoothing process of a chart and graph in a document to the text or photo settings.
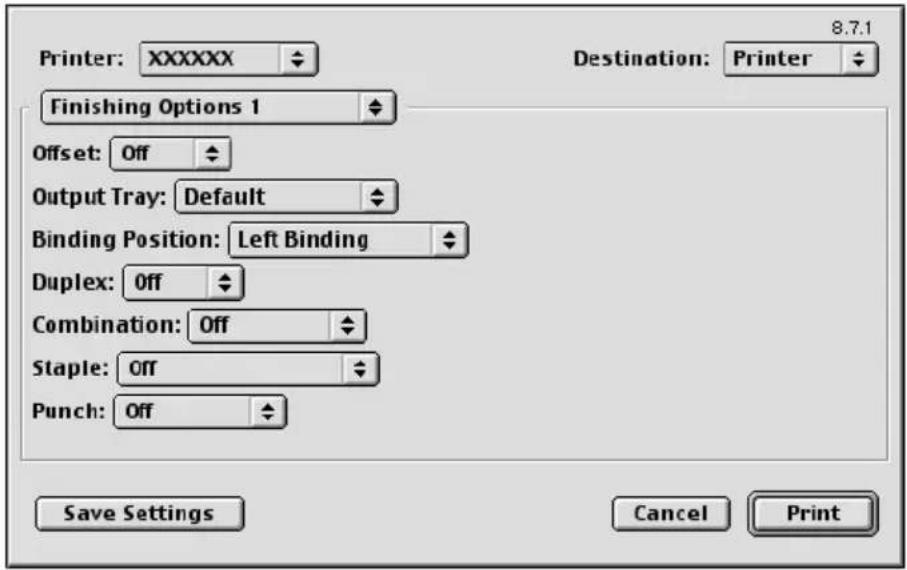

Note
The duplex printing function is available only when the optional ADU is installed.
The staple function is available only when the optional finisher FS-514 is installed.
The hole punch function is available only when optional finishers FS-514 and punch kit PK-510 are installed.
The Fold & Staple function is available only when saddle stitcher SD-503 is installed on optional finisher FS-514.
8.4 Setting options
You can specify the options installed on this machine so that they can be used from the printer driver.

Reminder
If the installed options on this machine are not set from the Installable Options screen, the option function cannot be used with the printer driver. When installing options, be sure to make the proper settings.
Specifying settings
1 On the Apple menu, click "Chooser".
2 Select the printer name.
3 Click the [Setup] button.
4 Click the [Configure] button.
The setting screen for adding options appears.
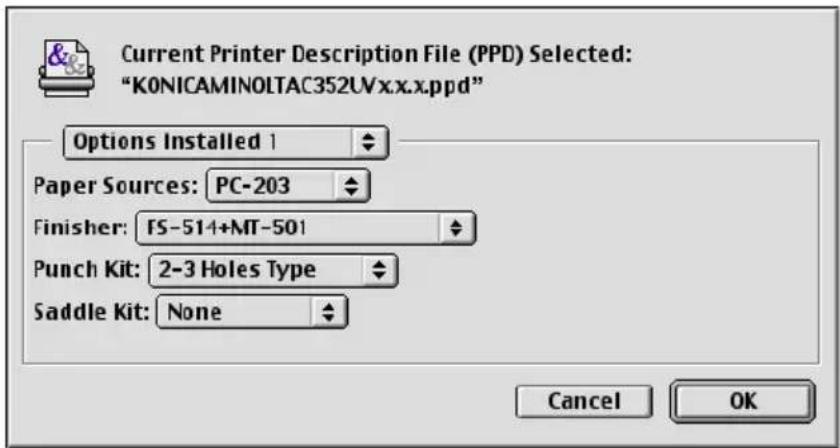
5 Select the option that is installed on this machine from Options Installed 1 and Options Installed 2.
6 Click the [OK] button. The Chooser window appears again.
7 Close the Chooser window.

Note
The option settings are displayed automatically the first time the printer driver is selected. For details, refer to “Selecting a printer” on page 2-18.
9 Setting up the PPD driver (Mac OS X)
9.1 Settings
The functions of this machine can be specified on the Paper Setup and Print dialog boxes displayed from the application.
The settings can only be applied while using the application. When the application is exited, the settings return to their defaults.
Page Setup dialog box
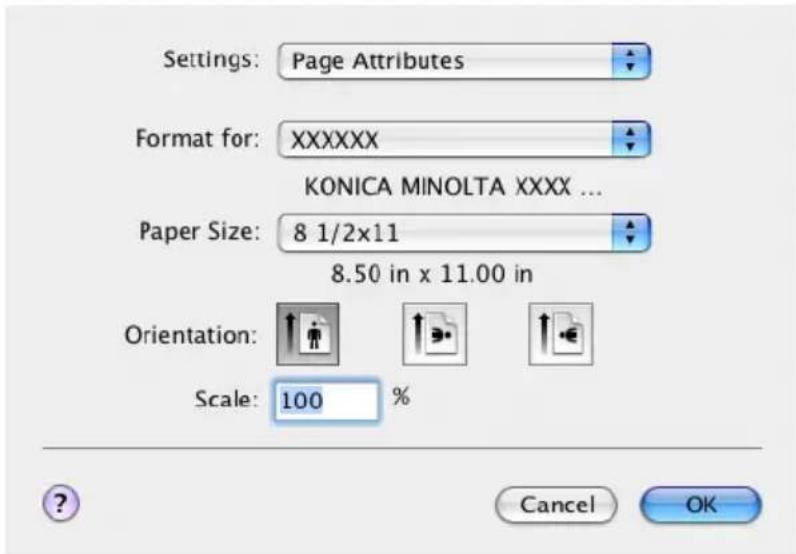
Page Setup items
| Menu Item Function | ||
| Page Attributes Paper | Size Specifies the paper size. | |
| Orientation Specifies the orientation. | ||
| Scale Specifies the enlargement and reduction ratio. | ||
| Custom Paper Size | Paper Size (Page Size) | Specifies any paper size. |
| Printer Margins Specifies the paper margins. | ||

Note
Depending on the application, "Page Setup" may be displayed as "Paper Setup". In addition, you may have to select "Paper Setup"—"Options" from the "File" menu.
The dialog boxes differ depending on the application.
To specify the "Custom Paper Size" settings for Mac OS 10.4, select "Manage Custom Sizes" from the "Paper Size" drop-down list.
Print dialog box
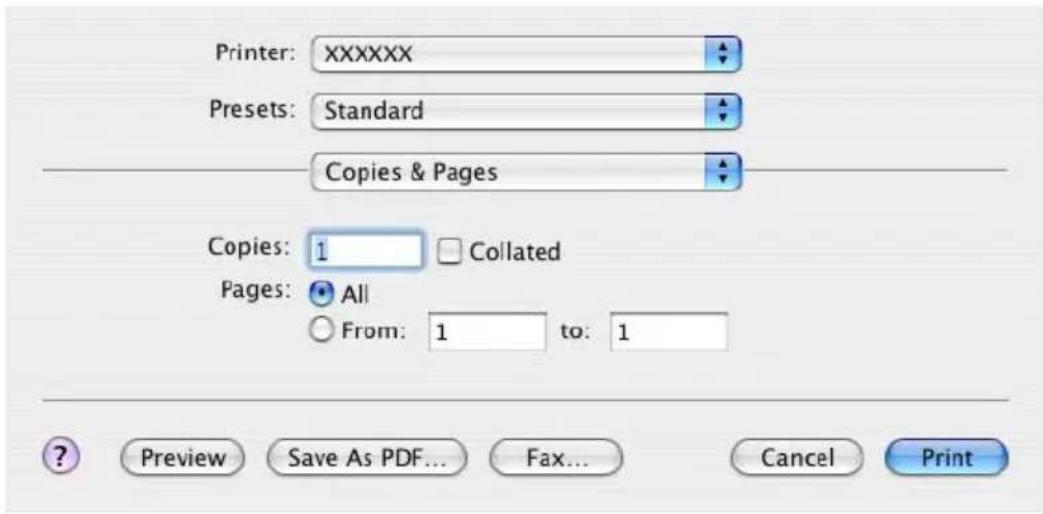
Print item
| Menu Item Function | ||
| Copies & Pages Copies | Specifies the number of copies to print. | |
| Collated Prints multiple copies in sets. | ||
| Pages Specifies the print range to print. | ||
| Layout Pages per Sheet | SHEET SPECIFIES THE NUMBER OF PAGES TO PRINT ON ONE page. | |
| Layout Direction Specifies the document page order. | ||
| Border Specifies the borders around pages. | ||
| Output Options*2 Save as File Specify the output format of a file. | ||
| Scheduler*1 | Print Document Specifies the print time. | |
| Priority Specifies the priority level. | ||
| Menu | Item Function | |
| Paper Handling*1 | Reverse Page Order (Page Order) | Prints pages in the reverse order. |
| Print Selects the pages for printing. | ||
| Destination paper size*3 | Specifies the output paper size. | |
| ColorSync*1 | Color Conversion Specifies the color conversion method. | |
| Quartz Filter Specifies the color for printing. | ||
| Cover Page*1 | Print Cover Page Specifies whether to attach a cover page. | |
| Cover Page Type Selects to print “Confidential” or other comments on the cover page. | ||
| Billing Info Enter the user information used for the account calculation. | ||
| Error Handling PostScript Errors Specifies whether to print an error report when a PostScript error occurs. | ||
| Paper Feed All pages from Selects the input tray. | ||
| Finishing Collate | Prints multiple copies in sets. | |
| Offset | Specifies offset. | |
| Duplex | Performs duplex printing. | |
| Output Tray Selects the output tray. | ||
| Binding Position | Specifies the binding position. | |
| Combination | Specifies booklet printing. | |
| Staple | Performs stapling. | |
| Hole-Punch | Performs hole punching. | |
| Fold & Staple | Performs folding. | |
| Menu | Item | Function |
| Quality Resolution S | Specifies the resolution | (this function cannot be selected on this machine). |
| Select Color Selects | the color for printing. | |
| Glossy Mode Prints | using a gloss finish. | |
| Original Image Type | Prints with a quality suitable for the original document. | |
| Color Matching (Text) | Adjusts the color quality of the text in a document. | |
| Pure Black (Text) | Specifies whether to enable grayscale of the text in a document. | |
| Screen (Text) | Specifies screening of the text in a document. | |
| Color Matching (Photo) | Adjusts the color quality of photos in a document. | |
| Pure Black (Photo) | Specifies whether to enable grayscale of photos in a document. | |
| Screen (Photo) | Specifies screening of photos in a document. | |
| Smoothing (Photo) | Specifies smoothing of photos in a document. | |
| Color Setting (Graphic) | Adjusts the color quality of a chart and graph in a document to the text or photo settings. | |
| Smoothing (Graphic) | Adjusts the smoothing process of a chart and graph in a document to the text or photo settings. | |
| Setup Paper Tray Selects the paper type. | ||
| Front Cover Page | ||
| Paper Tray (Front Cover Page) | ||
| Back Cover Page | ||
| Paper Tray (Back Cover Page) | ||
| Transparency Inter-leave | ||
| Paper Tray (Trans-parency Interleave) | ||
| Security | Output Method | Specifies output methods, such as “Secure Print” and “Save in User Box”. |
| Secure Print Set-tings | Specifies user ID and password for “Secure Print”. | |
| Save in User Box Settings | Specifies the file name and box name for “Save in User Box”. | |
| User Authentication | Checks if user authentication settings have been applied and specifies user Name and password. | |
| Account Track | Checks if account track settings have been ap-plied and specifies the department name and password. | |

Note
The dialog boxes differ depending on the application.
The items indicated by “*1” are displayed in Mac OS 10.3 and Mac OS 10.4.
The items indicated by “*2” are displayed only in Mac OS 10.3.
The items indicated by “*3” are displayed only in Mac OS 10.4.
9.2 Page Setup
Page Attributes (basic settings)
1 Select "Page Setup" or "Paper Setup" from the "File" menu.
2 Select "Page Attributes".
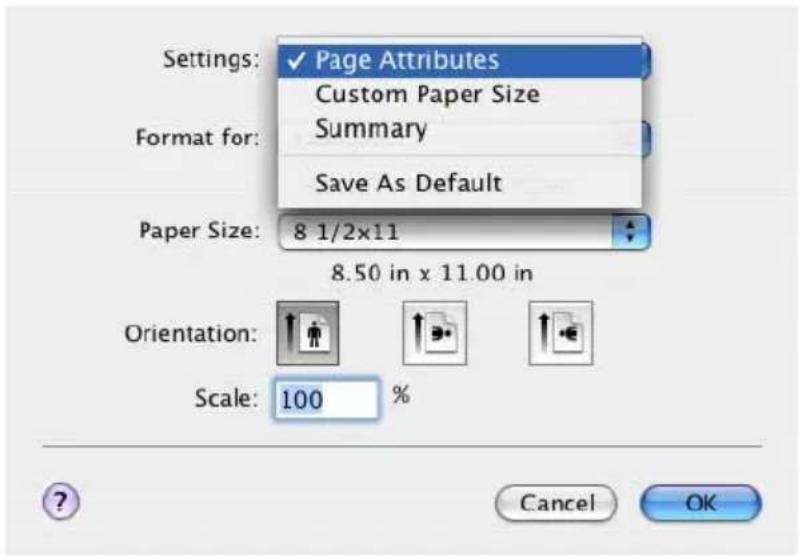
3 Specify settings for the following:
Paper Size: Specifies the paper size.
Orientation: Specifies the orientation.
Scale: Specifies the enlargement and reduction ratio.
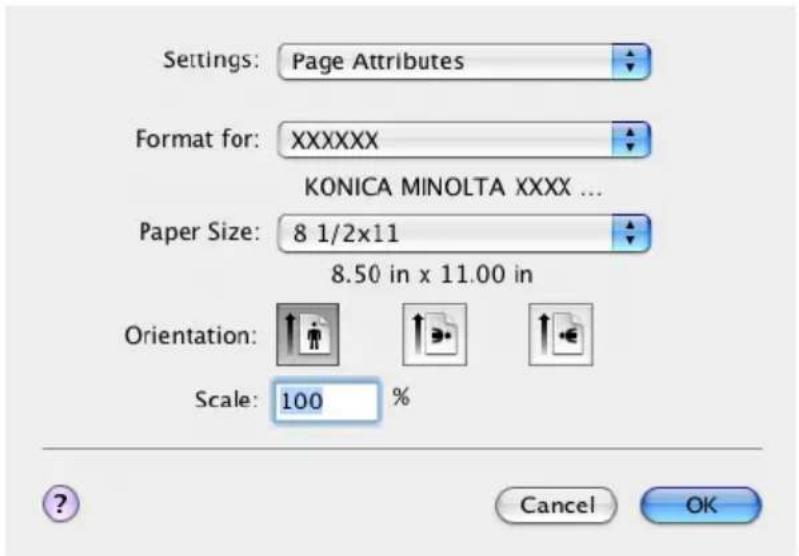

Note
If the paper size is any size other than the custom size, select the desired settings after specifying the settings in Custom Paper Size.
When “W” is selected for each standard paper size in the printer driver, the data can be centered and printed.
For example, if A4 size data is created and you want to center and print on A3 size paper, specify "A4 W" as the paper size in the printer driver and specify "Tray 1" or "Bypass Tray" as the paper source.
To print, load A3 size paper in the tray ("Tray 1" or "Bypass Tray") of this machine that is specified in the printer driver, and then specify the settings described below from [Basic Screen (Paper)] — [Change Tray Settings] — [Oversized Paper] on the control panel.
Select "A4W".
Enter the A3 paper size (420.0 × 297.0) in [Change Size].
Custom Paper Size
1 Select "Page Setup" or "Paper Setup" from the "File" menu.
2 For Mac OS 10.3, select "Custom Paper Size" from "Settings". For Mac OS 10.4, select "Manage Custom Sizes" from the "Paper Size" dropdown list.
3 Click the [New] (Mac OS 10.3) or [+] (Mac OS 10.4) button.
4 Enter the paper size name.
5 Specify settings for the following:
Paper Size: Specifies any paper size.
Printer Margins: Specifies the paper margins.
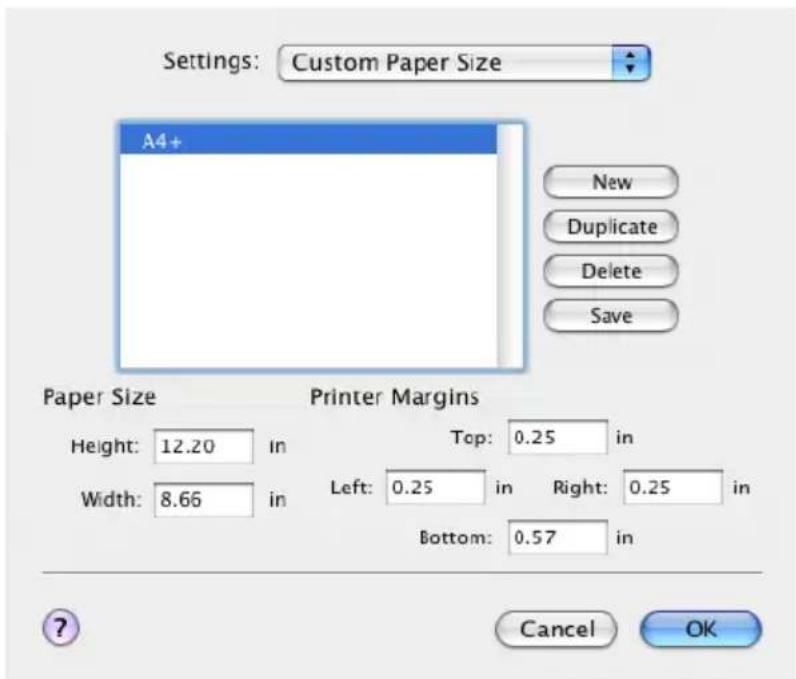
6 For Mac OS 10.3, click the [Save] button. For Mac OS 10.4, proceed to step 7.
7 Click the [OK] button.
This registers the custom paper size which allows you to select the paper size in the screen that appears when "Page Attributes" is selected.
9.3 Printing
Copies & Pages (general settings)
1 From the "File" menu, select "Print".
2 Select "Copies & Pages".
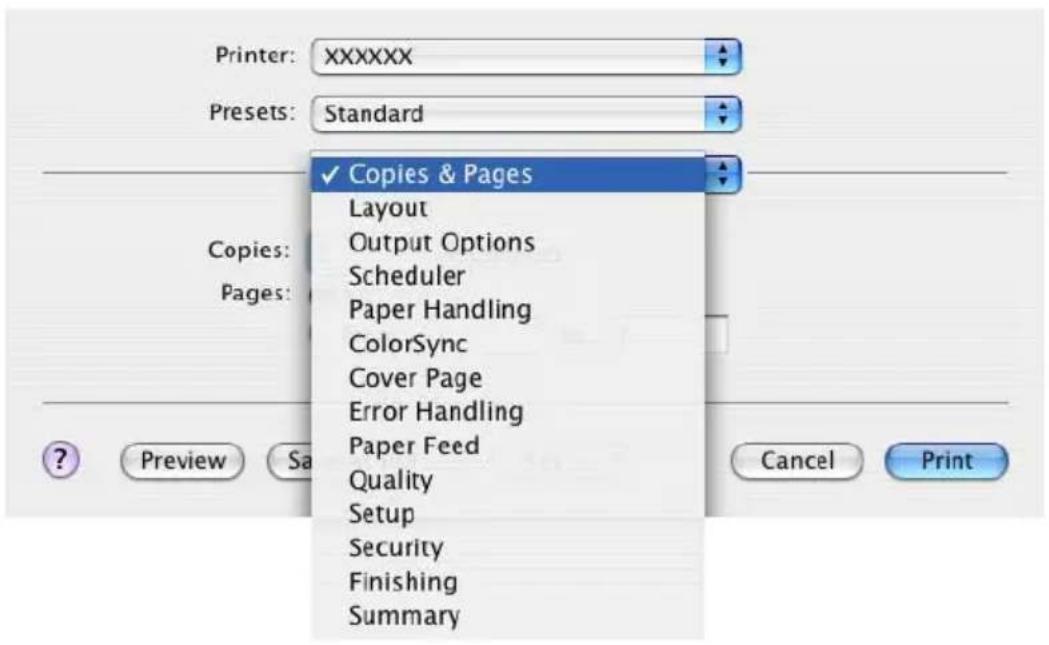
3 Specify settings for the following:
Copies: Specifies the number of copies to print.
Collated: Print multiple copies in sets.
Pages: Specifies the print range to print.
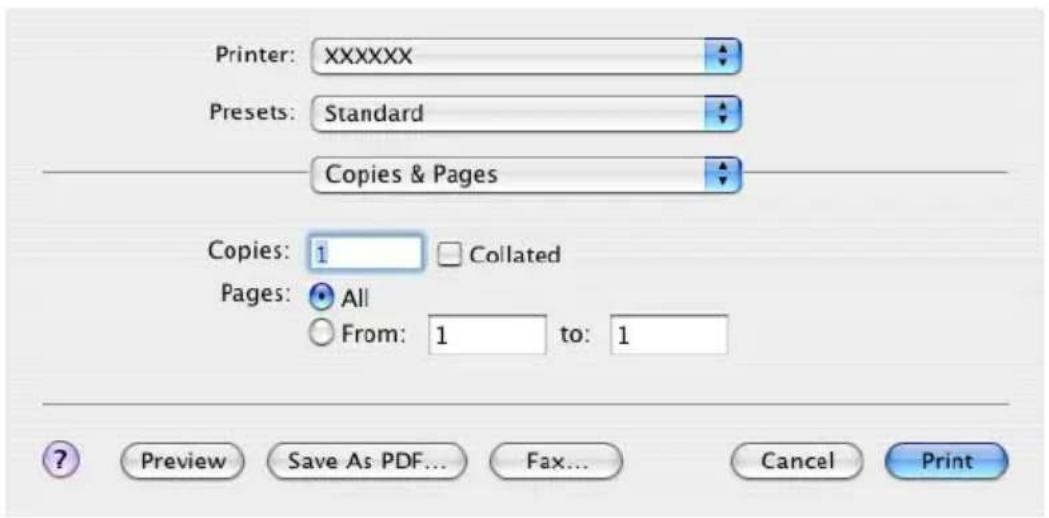
Layout (printing multiple pages on one page)
You can print multiple pages on one sheet.
1 From the "File" menu, select "Print".
2 Select "Layout".
3 Specify settings for the following:
Pages per Sheet: Specifies the number of pages to print on one page.
Layout Direction: Specifies the document page order.
Border: Specifies the borders around pages.
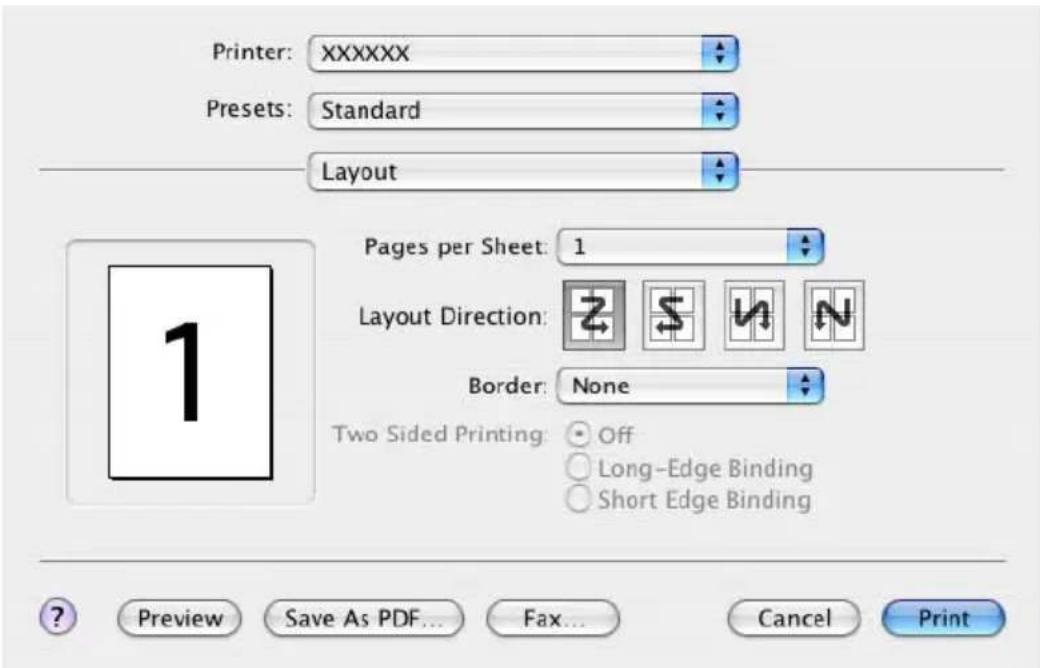
Paper Feed
You can specify the input tray for printing.
1 From the "File" menu, select "Print".
2 Select "Paper Feed".
3 Specify settings for the following:
All pages from: Selects the input tray to print all pages.
First page from: Selects the input tray to print the first page.
Remaining from: Selects the input tray to print from the second page.
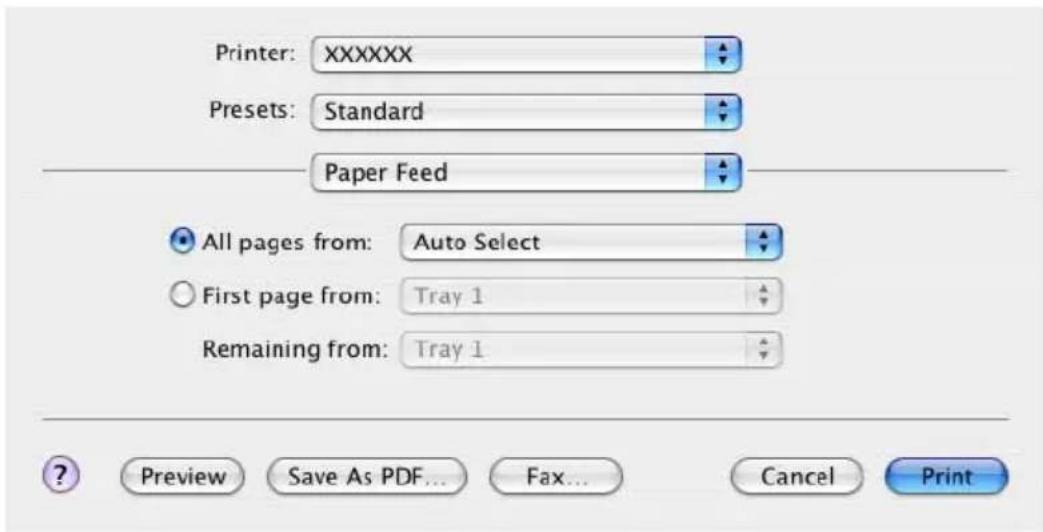
Security
Not only can you print directly, but you can select “Secure Print”, which requires a password to print, “Save in User Box”, which saves documents in a box, “Proof and Print”, which prints the first set of multiple copies and temporarily stops printing, “Authentication Settings”, which requires user authentication, and “Account Track Settings”, which manages the number of printed pages.
1 From the "File" menu, select "Print".
2 Select "Security".
3 Specify settings for the following:
Output Method: Specifies conditions for "Secure Print" and "Save in User Box".
Secure Print Settings: Enters ID and password when “Secure Print” is selected from the “Output Method” drop-down list. Enter the ID and password on this machine’s control panel when printing. (Up to 100 documents)
Save in User Box Settings: Enters file name and box number when "Save in User Box" or "Save in User Box and Print" is selected from the "Output Method" drop-down list.
When the power rules are enabled on this machine, specify the box that is created on this machine.
User Authentication: Enters the user name and password when the user authentication settings have been applied on this machine and when the check box is selected. If this machine has been set to permit public users, the machine can be used without a user name and password.
Account Track: Enters the department name and password when the account track settings have been applied on this machine and when the check box is selected.
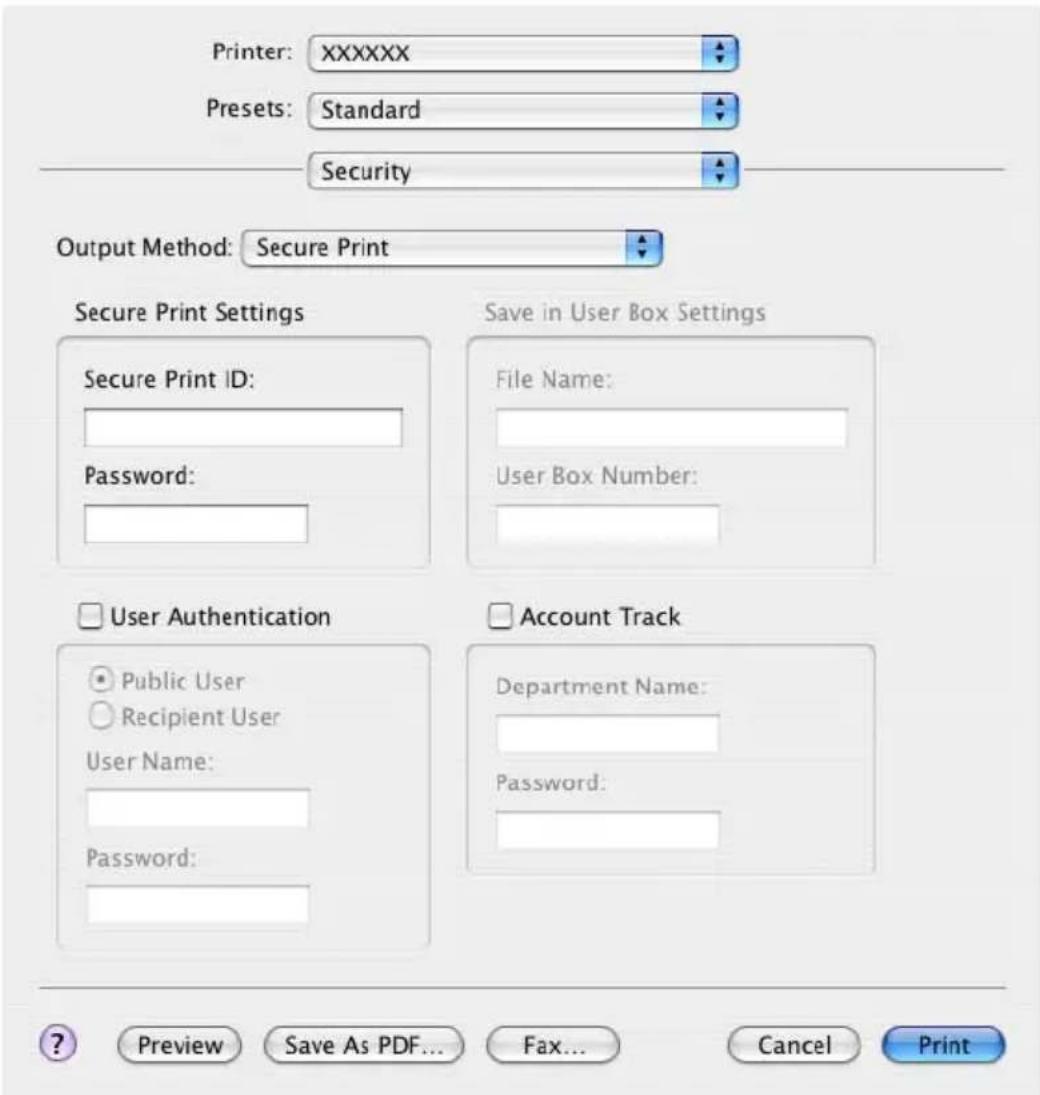

Note
If a print job is sent using a user name or password that is not a registered account on this machine or if a job is sent without the “User Authentication” check box selected, the job is deleted without being authenticated by this machine.
If a print job is sent using a department name or password that is not a registered account or if a job is sent without the “Track Account” check box selected, the job is deleted without being authenticated by this machine.
When the user authentication or account authentication settings are specified on this machine, the authentication operation restriction function is in mode 2, and the authentication information is not entered correctly, the applicable user or account is locked and cannot be accessed.
If this machine has been set to permit public users, the machine can be used without a user name and password.
If printing is not allowed, printing cannot be performed even when used by a registered user or registered account.
For the user authentication and account track details, consult the administrator of this machine.
Print the “Proof and Print” and “Secure Print” documents from the control panel of this machine. For details, refer to “Print job management” on page 10-104.
For details on the box functions of this machine, refer to the User's Guide [Box Operations].
When password rules are enabled on this machine, the passwords that can be used for secured printing are limited and the jobs are deleted when a password that does not comply with the password rule is entered.
For the password rules, refer to User's Guide [Copy Operations].
Finishing
You can specify these options when using the staple or hole punch finisher functions of this machine.
1 From the "File" menu, select "Print".
2 Select "Finishing".
3 Specify settings for the following:
Collate: Prints multiple copies in sets.
Offset: Specifies offset.
Duplex: Performs duplex printing.
Output Tray: Selects the output tray.
Binding Position: Specifies the binding position.
Combination: Specifies booklet printing.
Staple: Performs stapling.
Hole-Punch: Performs hole punching.
Fold & Staple: Performs folding.
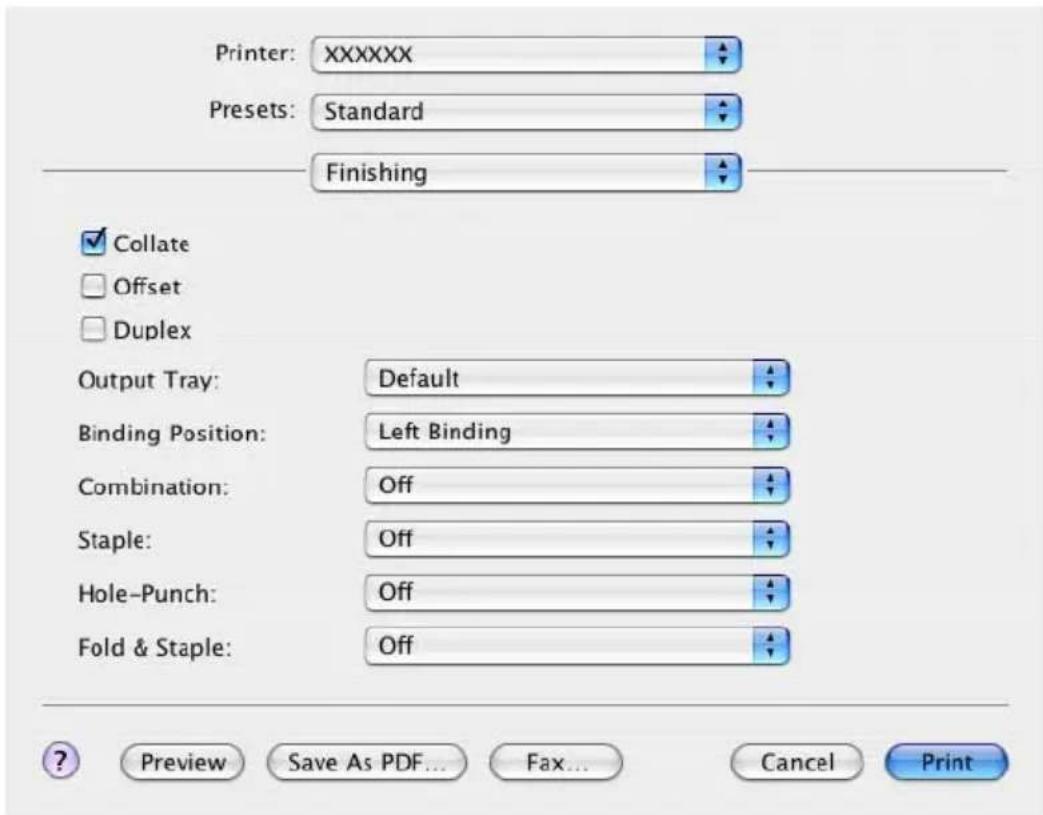

Note
The duplex printing and booklet printing functions are available only when the optional ADU is installed.
The staple function is available only when the optional finisher FS-514 is installed.
The hole punch function is available only when optional finishers FS-514 and punch kit PK-510 are installed.
The Fold & Staple function is available only when saddle stitcher SD-503 is installed on optional finisher FS-514.
Quality
1 From the "File" menu, select "Print".
2 Select "Quality".
3 Specify settings for the following:
Resolution: Specifies the resolution.
Select Color: Selects the color for printing.
Glossy Mode: Prints using a gloss finish.
Original Image Type: Prints with a quality suitable for the original document.
Color Matching (Text): Adjusts the color quality of the text in a document.
Pure Black (Text): Specifies whether to enable grayscale of the text in a document.
Screen (Text): Specifies screening of the text in a document.
Color Matching (Photo): Adjusts the color quality of photos in a document.
Pure Black (Photo): Specifies whether to enable grayscale of photos in a document.
Screen (Photo): Specifies screening of photos in a document.
Smoothing (Photo): Specifies smoothing of photos in a document.
Color Settings (Graphic): Adjusts the color quality of a chart and graph in a document to the text or photo settings.
Smoothing (Graphic): Adjusts the smoothing process of a chart and graph in a document to the text or photo settings.
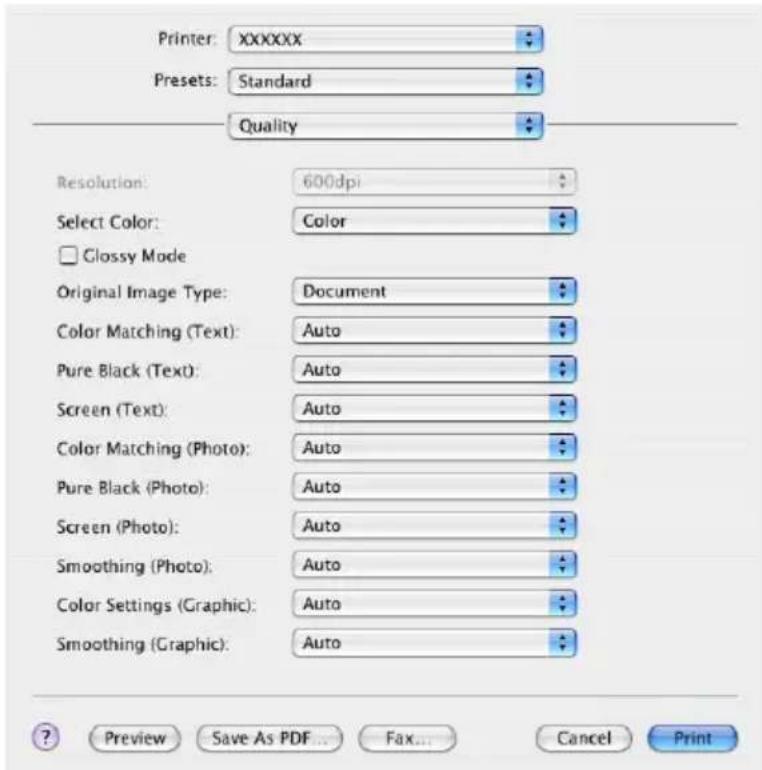
Setup
You can specify the cover settings.
1 From the "File" menu, select "Print".
2 Select "Setup".
3 Specify settings for the following:
Paper Type: Selects the paper type.
Front Cover Page: Attaches a front cover page.
Paper Tray (Front Cover Page): Selects the input tray for the front cover.
Back Cover Page: Attaches a back cover page.
Paper Tray (Back Cover Page): Selects the input tray for the back cover.
Transparency Interleave: Inserts interleaves between overhead projector transparencies.
Paper Tray (Transparency Interleave): Selects the input tray for the transparency interleaves.
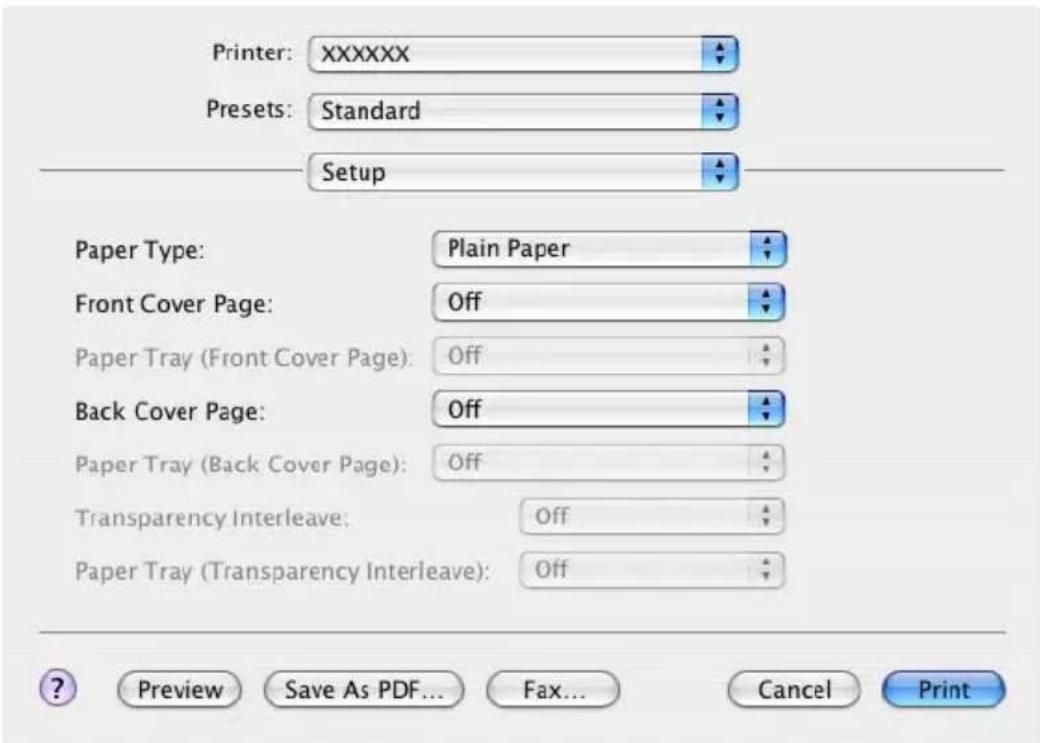
9.4 Setting options
You can specify the options installed on this machine so that they can be used from the printer driver.

Reminder
If the installed options on this machine are not set from the Installable Options screen, the option function cannot be used with the printer driver. When installing options, be sure to make the proper settings.
Specifying settings
1 Open Print Center or Printer Setup Utility, located in "Applications"—"Utilities" of "Hard Disk" and specify the printer model.
2 From the "Printer" menu, select "Show Info".
The "Printer Info" dialog box appears.
3 Select "Installable Options".
4 Select the option that is installed on this machine.
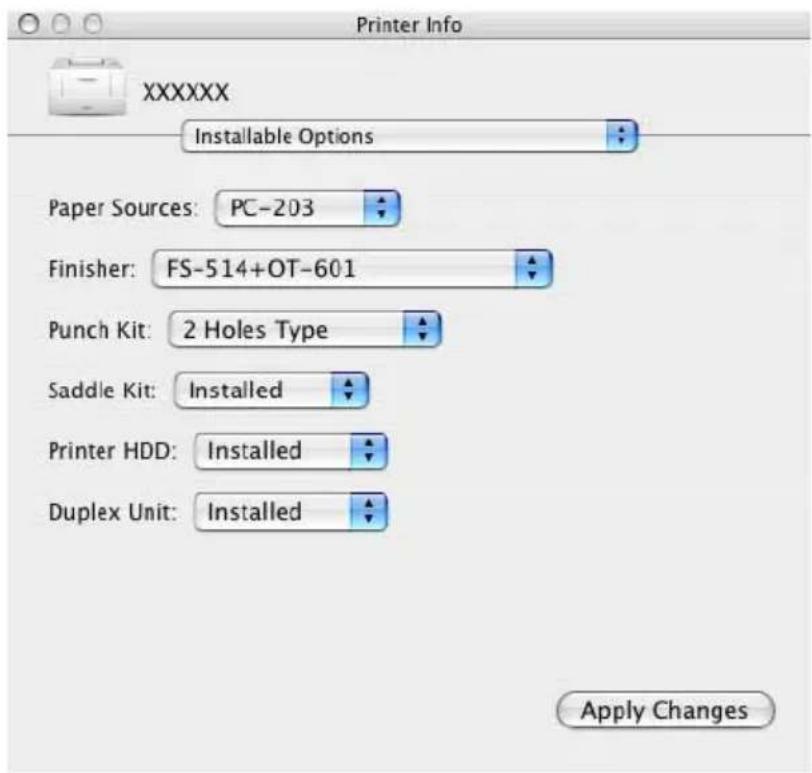
5 Click the [Apply Changes] button or click [] to close the Printer info dialog box.
9.5 Saving the driver settings
For Mac OS X drivers, you can save the setting values of the changed driver and recall them as necessary.
Saving the driver settings
1 Change the driver settings in "Copies & Pages" and "Layout".
2 From "Presets", click "Save As".
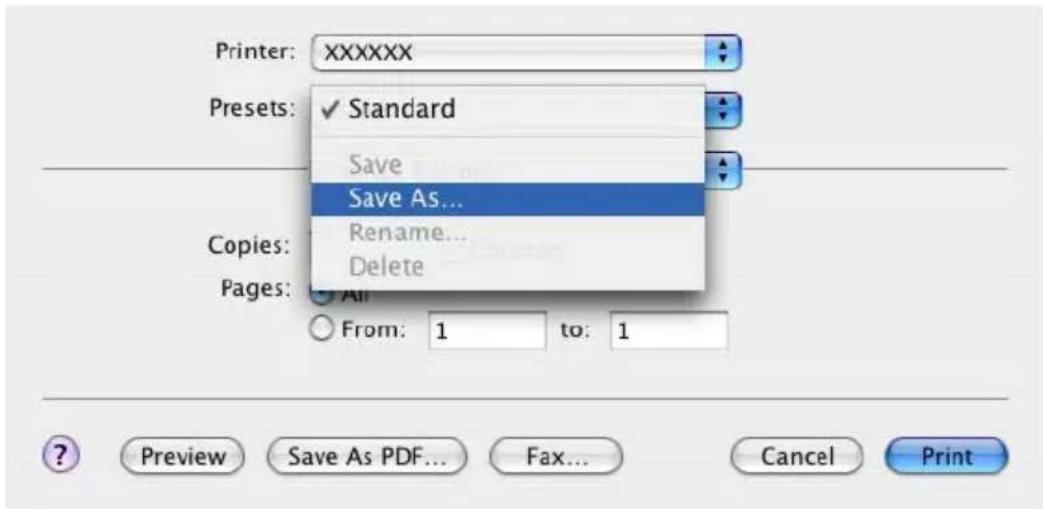
3 Enter the "Save Preset As".
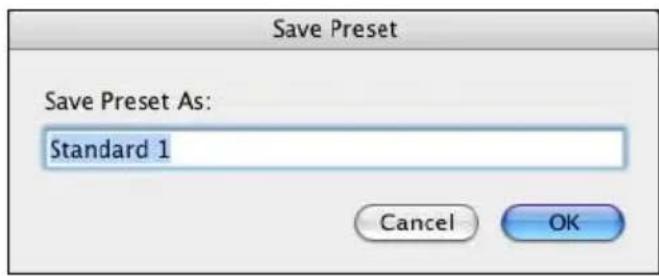
4 Click the "OK" button.
The setting are registered in the preset settings.
→Select "Presets" from the "Print" dialog box to recall the settings.
The settings are recalled, and the printer driver dialog box appears again.
Changing the settings
1 Select "Presets" from the "Print" dialog box to change the settings.
2 Change the driver settings in "Copies & Pages" and "Layout".
3 From "Presets", click "Save".
To delete, click "Delete". To change the name, click "Rename". The preset settings are changed.
10 Various settings
10.1 Print settings in Utility mode
You can change the various print settings on the control panel of this machine.
Default settings
To display the Utility Setting screen
1 Press the [Utility/Counter] key.
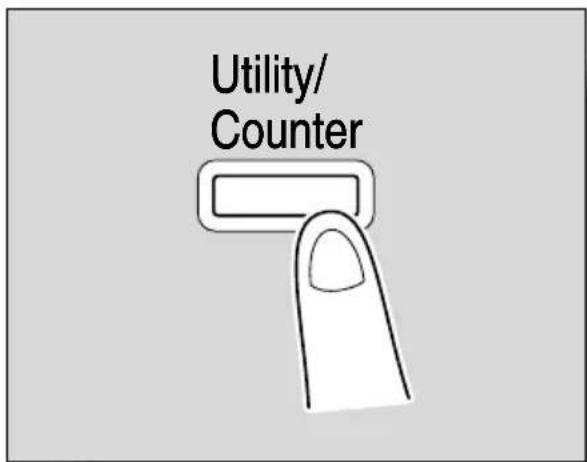
2 Touch [2 User Setting].
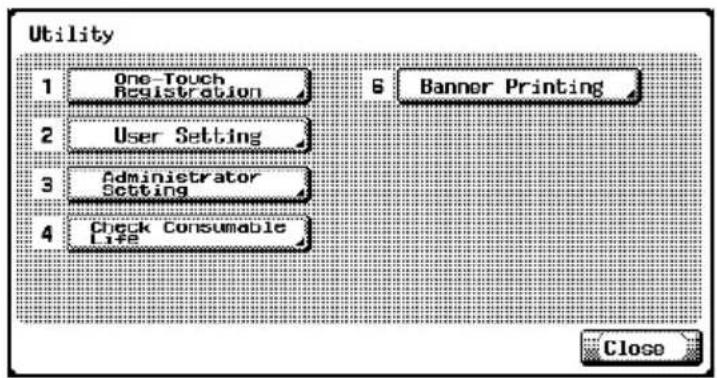
The User Setting screen appears.
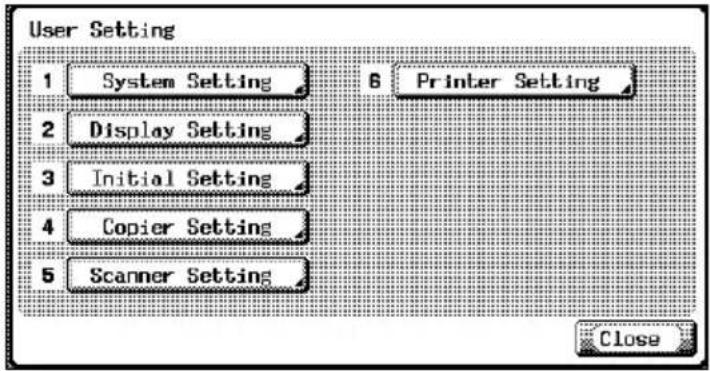

Note
In Utility mode, an item can also be selected by pressing the key in the keypad for the number beside the desired button. For "2 User Setting", press the [2] key in the keypad.
To quit specifying the Utility mode setting, touch [Exit] in the sub display area or press the [Utility/Counter] key. Otherwise, cancel the Utility mode by touching [Close] in each screen until the screen for the Copy, Fax, Scan or Box mode appears.
PDL Setting
You can specify the PDL (Page Description Language) setting. (Default setting: Auto)
1 On the Utility Setting screen, touch [6 Printer Setting].
- For details on displaying the Utility Setting screen, refer to "To display the Utility Setting screen" on page 10-1.
2 Touch [1 Basic Setting].
3 Touch [PDL Setting].
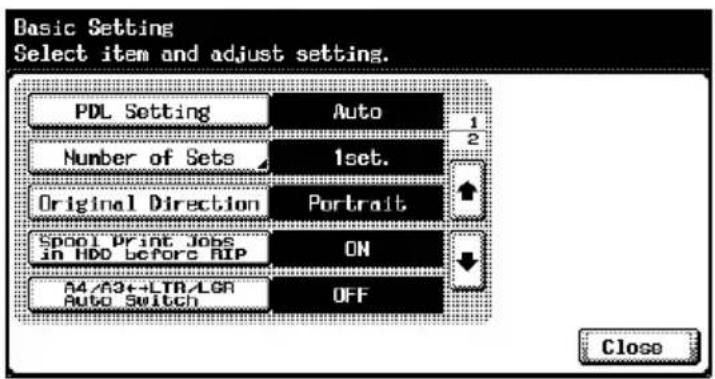
4 Touch the button for the desired setting.
- Auto: Automatically switches between PCL and PS.
- P C L : O n l y u s e s P C L .
- PS: Only uses PS.
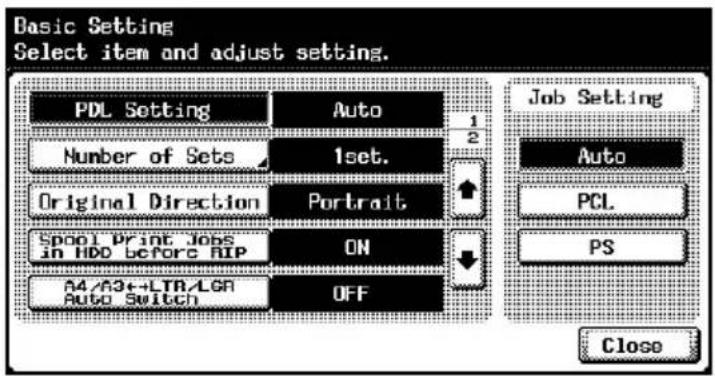
Number of Sets
You can specify the default number of copies when no setting has been specified from the printer driver. (Default setting: 1 set)
1 On the Utility Setting screen, touch [6 Printer Setting].
- For details on displaying the Utility Setting screen, refer to "To display the Utility Setting screen" on page 10-1.
2 Touch [1 Basic Setting].
3 Touch [Number of Sets].
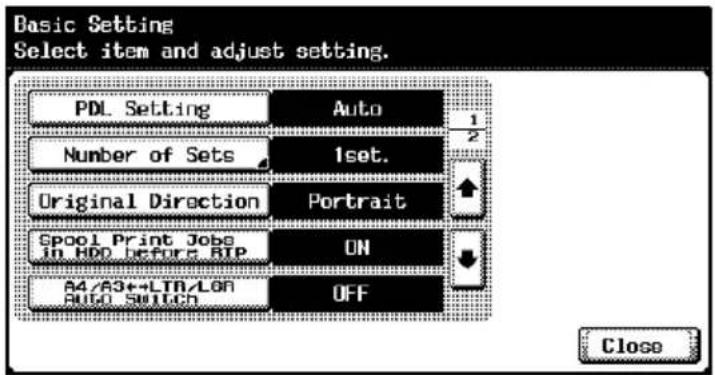
4 Press the [C] (clear) key to erase the value, and then use the keypad to type in the default number of copies (between 1 and 999 sets).
- If a value outside of the allowable range is specified, the message "Input Error" appears. Type in a value within the allowable range.
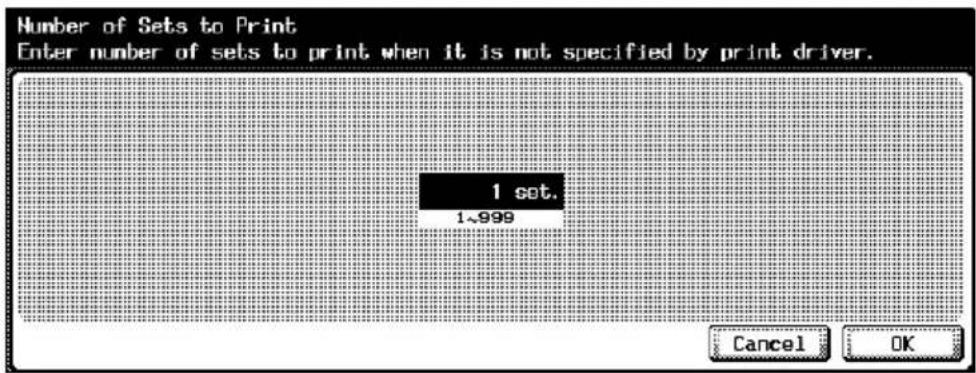
5 Touch [OK].
The default number of copies is set.
To cancel changes to the settings, touch [Cancel].
Original Direction
You can specify the default image orientation. (Default setting: Portrait)
1 On the Utility Setting screen, touch [6 Printer Setting].
- For details on displaying the Utility Setting screen, refer to "To display the Utility Setting screen" on page 10-1.
2 Touch [1 Basic Setting].
3 Touch [Original Direction].
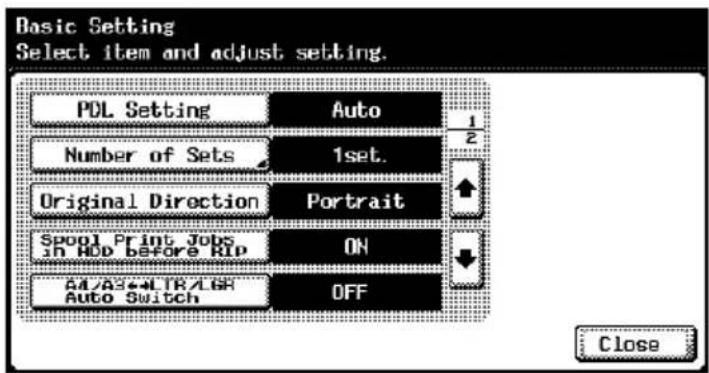
4 Touch the button for the desired setting.
- Portrait: The image is printed vertically on the page.
Landscape: The image is printed horizontally on the page.
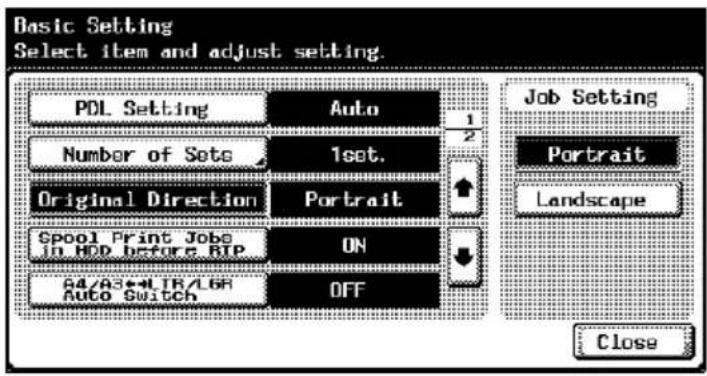
Spool Setting
You can set whether or not a spool is used. (Default setting: ON)
1 On the Utility Setting screen, touch [6 Printer Setting].
- For details on displaying the Utility Setting screen, refer to "To display the Utility Setting screen" on page 10-1.
2 Touch [1 Basic Setting].
3 Touch [Spool Print Jobs in HDD before RIP].
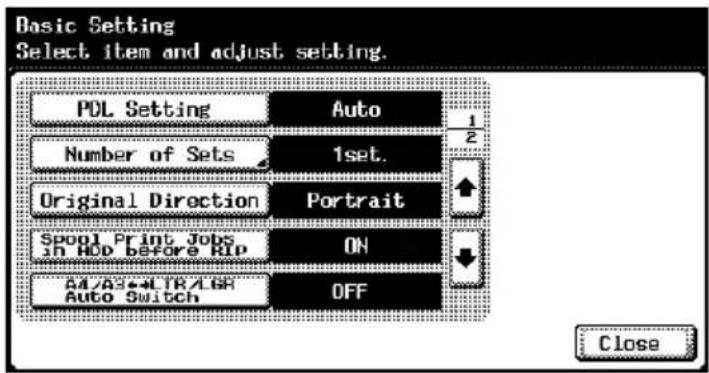
4 Touch the button for the desired setting.
- ON: When the next job is received while processing a job, the print data is stored in the HDD.
OFF: The print data is not stored in the HDD.

Note
Be sure not to change the setting to "OFF". Printing may not be possible.
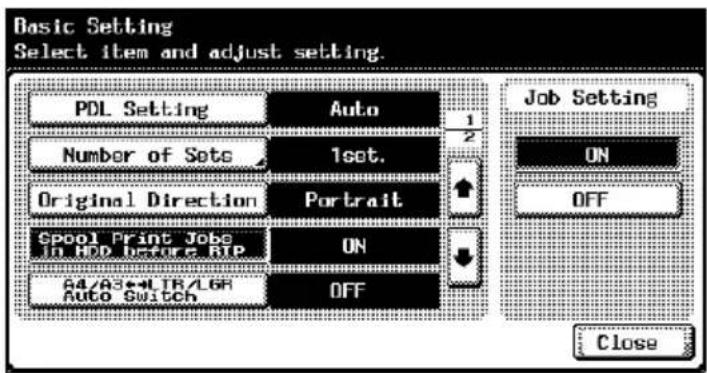
Paper Size Change
You can specify whether similar paper sizes 8-1/2 × 11 and A4, and 11 × 17 and A3 are substituted for each other when there is no paper of the size specified with the printer driver. (Default setting: OFF)
√The image may be defected since printing is forced.
1 On the Utility Setting screen, touch [6 Printer Setting].
- For details on displaying the Utility Setting screen, refer to "To display the Utility Setting screen" on page 10-1.
2 Touch [1 Basic Setting].
3 Touch [A4/A3 ← → LTR/LGR Auto Switch].
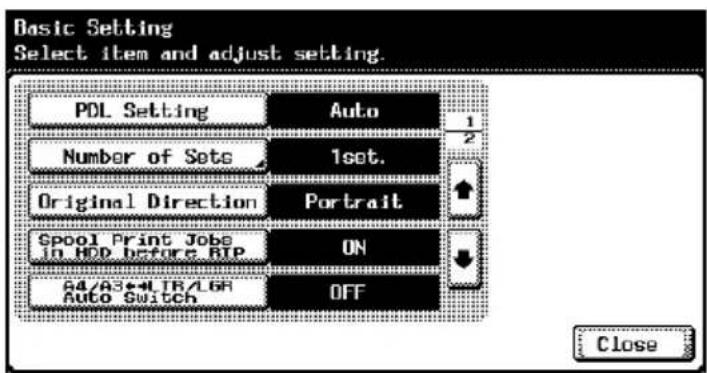
4 Touch the button for the desired setting.
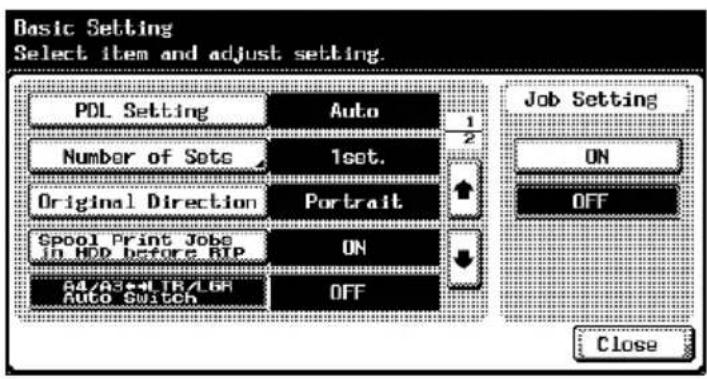
Banner Setting
You can specify whether to print banner pages (cover pages) with the sender of the print job and title. (Default setting: OFF)
ON: Prints banner pages.
OFF: Does not print banner pages.
1 On the User Setting screen, touch [6 Printer Setting].
- For details on displaying the User Setting screen, refer to "To display the Utility Setting screen" on page 10-1.
2 Touch [1 Basic Setting].
3 Touch [] or [ ], and then touch [Banner Setting].
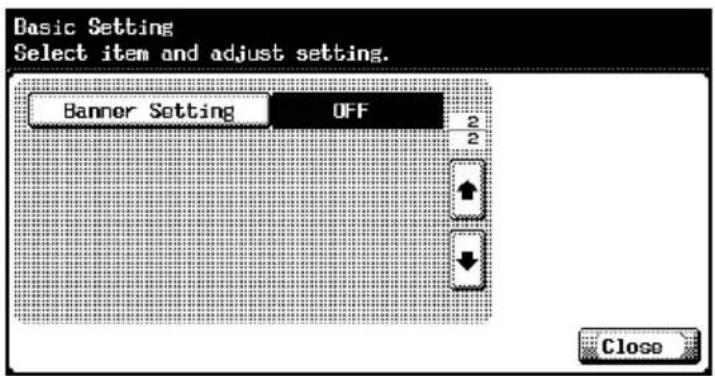
4 Touch the button for the desired setting.
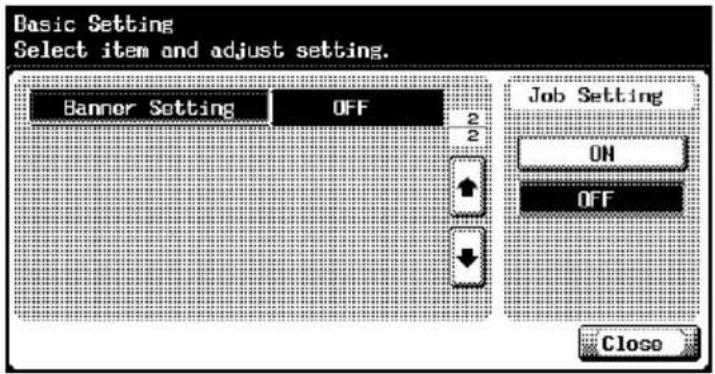
Paper Tray
You can specify the input tray to use when none has been specified with the printer driver. (Default setting: Auto)
1 On the Utility Setting screen, touch [6 Printer Setting].
- For details on displaying the Utility Setting screen, refer to "To display the Utility Setting screen" on page 10-1.
2 Touch [2 Paper Setting].
3 Touch [Paper Tray].
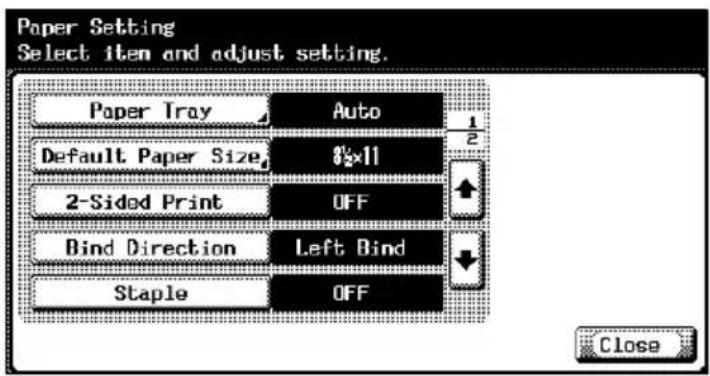
4 Touch the button for the desired paper tray.
- To select the input tray automatically, touch [Auto].
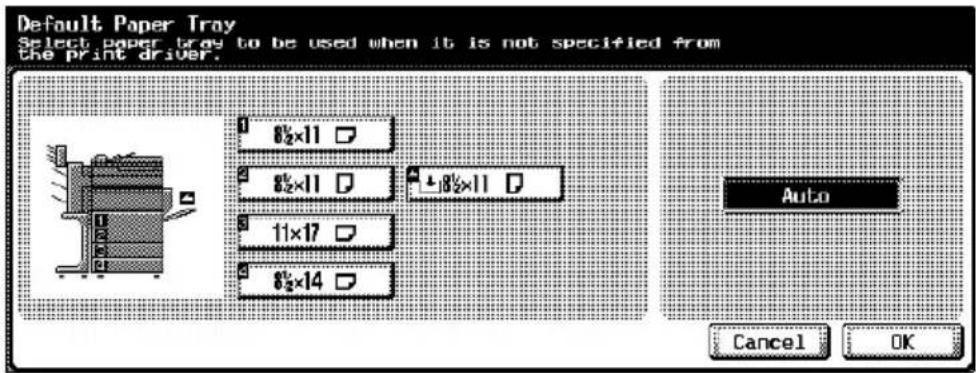
5 Touch [OK].
- To cancel changes to the settings, touch [Cancel].
Default Paper Size
You can specify the paper size to use when no setting has been specified from the printer driver. (Default setting: 8-1/2 × 11)
1 On the Utility Setting screen, touch [6 Printer Setting].
- For details on displaying the Utility Setting screen, refer to "To display the Utility Setting screen" on page 10-1.
2 Touch [2 Paper Setting].
3 Touch [Default Paper Size].
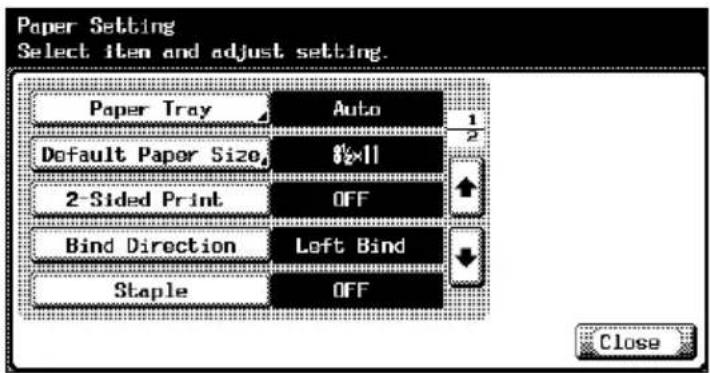
4 Touch the button for the desired setting.
- To select "8K", "16K", "envB5", "envC5", "envDL", "envCom10", or "env Monarch", touch [Other Sizes].
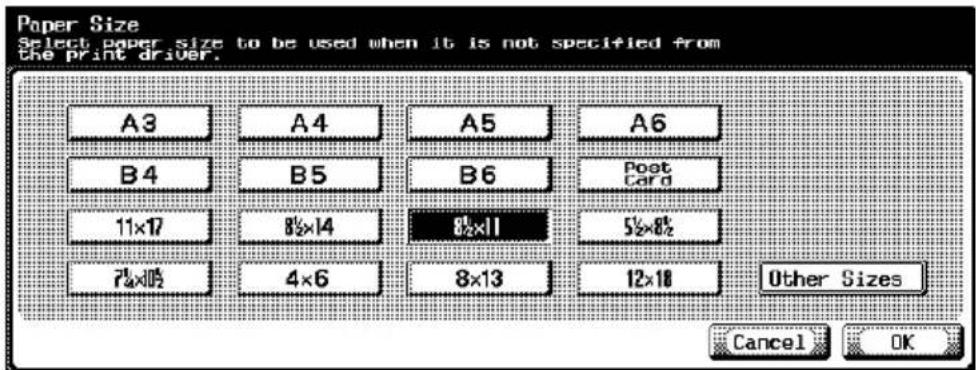
5 Touch [OK].
- To cancel changes to the settings, touch [Cancel].
2-Sided Print
You can specify the default duplex printing setting. (Default setting: OFF)
1 On the Utility Setting screen, touch [6 Printer Setting].
- For details on displaying the Utility Setting screen, refer to "To display the Utility Setting screen" on page 10-1.
2 Touch [2 Paper Setting].
3 Touch [2-Sided Print].
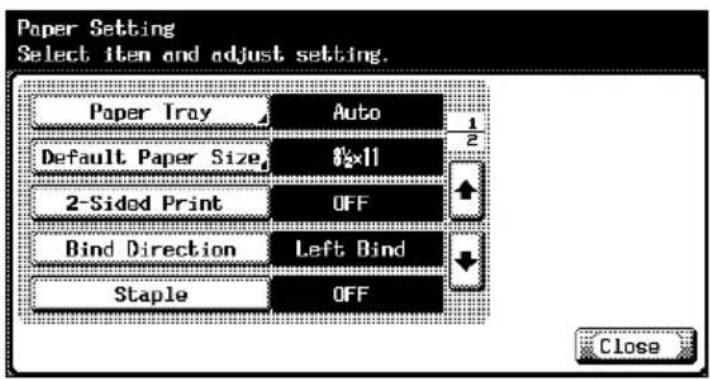
4 Touch the button for the desired setting.
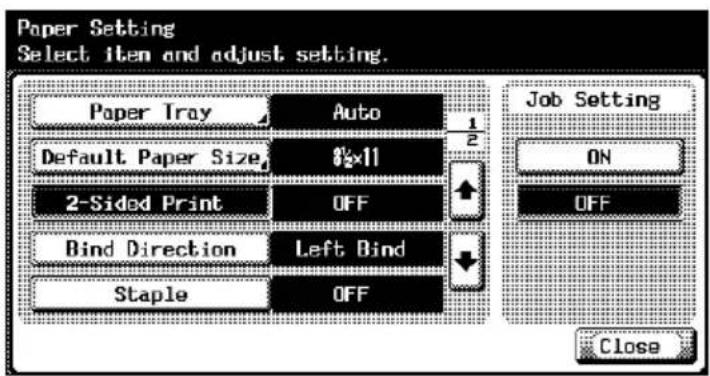

Note
The duplex printing function is available only when the optional ADU is installed.
Bind Direction
You can specify the default binding position for duplex printing. (Default setting: Left Bind)
1 On the Utility Setting screen, touch [6 Printer Setting].
- For details on displaying the Utility Setting screen, refer to "To display the Utility Setting screen" on page 10-1.
2 Touch [2 Paper Setting].
3 Touch [Bind Direction].
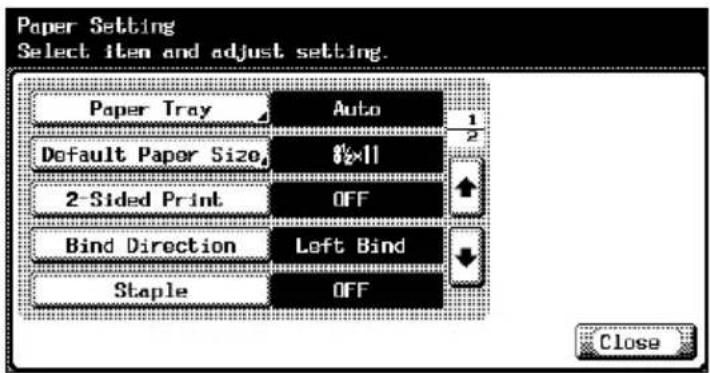
4 Touch the button for the desired setting.
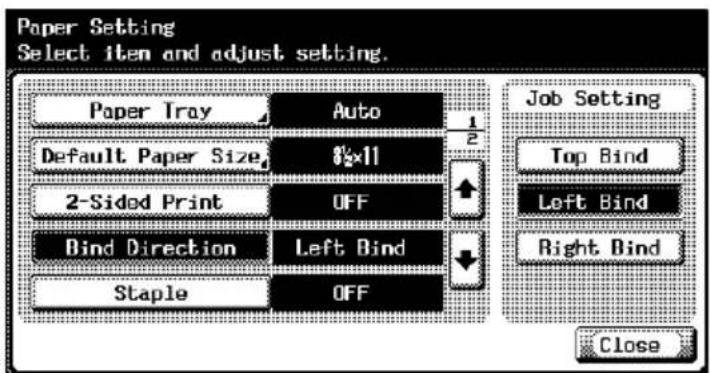
Staple
You can specify the staple settings. (Default setting: OFF)
1 On the Utility Setting screen, touch [6 Printer Setting].
- For details on displaying the Utility Setting screen, refer to "To display the Utility Setting screen" on page 10-1.
2 Touch [2 Paper Setting].
3 Touch [Staple].
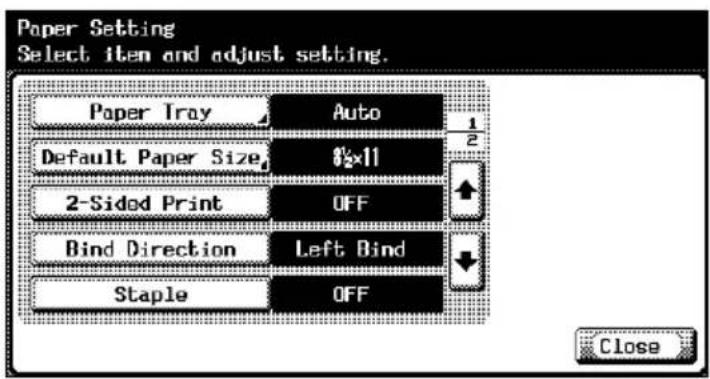
4 Touch the button for the desired setting.
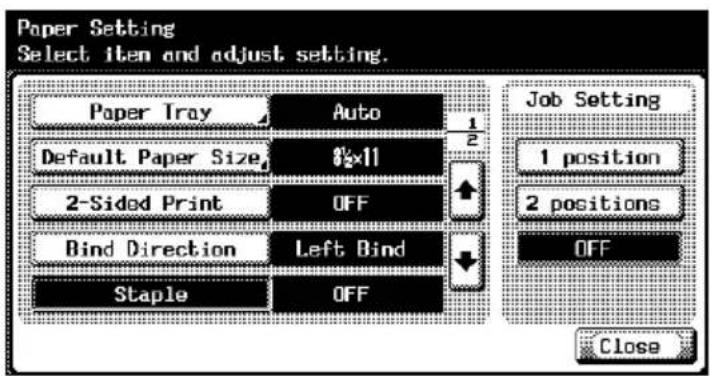

Note
The staple function is available only when the optional finisher FS-514 is installed.
Hole-Punch
You can specify the hole punching settings. (Default setting: OFF)
1 On the Utility Setting screen, touch [6 Printer Setting].
- For details on displaying the Utility Setting screen, refer to "To display the Utility Setting screen" on page 10-1.
2 Touch [2 Paper Setting].
3 Touch [ ] or [ ], and then touch [Hole-Punch].
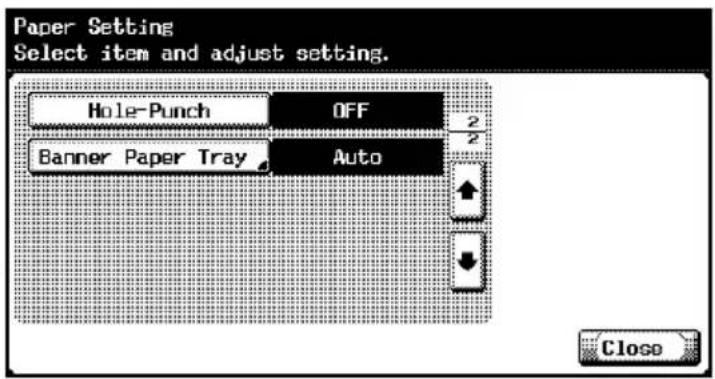
4 Touch the button for the desired setting.
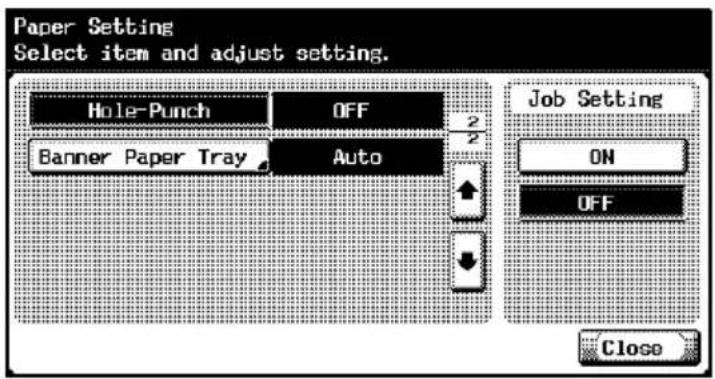

Note
The hole punch function is available only when optional finishers FS-514 and punch kit PK-510 are installed.
Banner Paper Tray
You can specify the paper tray to be used for banner page printing. (Default setting: Auto)
1 On the User Setting screen, touch [6 Printer Setting].
- For details on displaying the User Setting screen, refer to "To display the Utility Setting screen" on page 10-1.
2 Touch [2 Paper Setting].
3 Touch [ ] or □], and then touch [Banner Paper Tray].
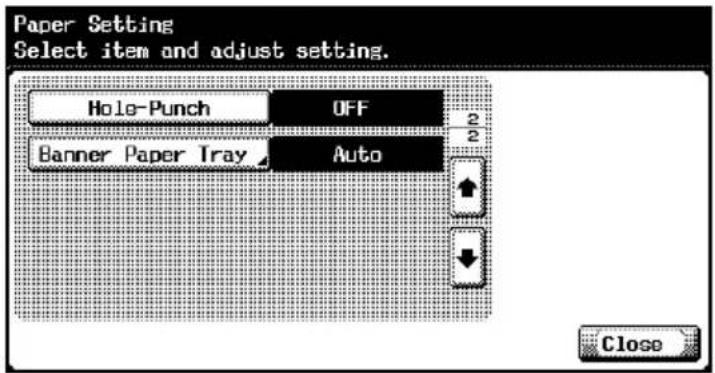
4 Touch the button for the desired setting.
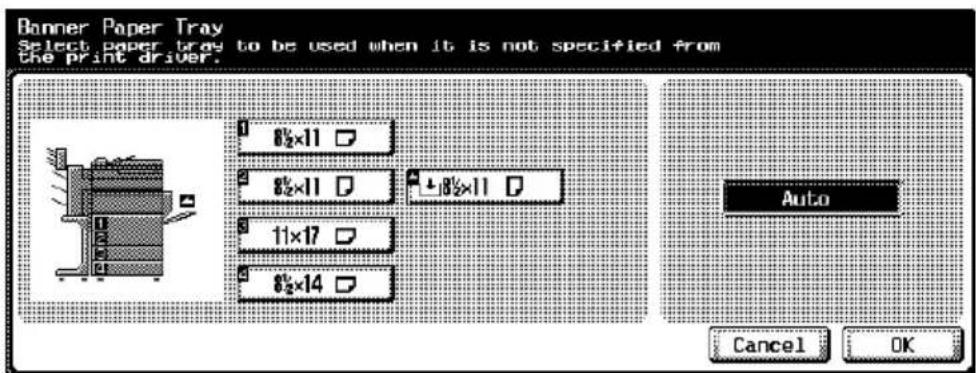
Font Setting
You can specify the font to use when no setting has been specified from the printer driver. (Default setting: Courier)
1 On the Utility Setting screen, touch [6 Printer Setting].
- For details on displaying the Utility Setting screen, refer to "To display the Utility Setting screen" on page 10-1.
2 Touch [3 PCL Setting].
3 Touch [1 Font Setting].
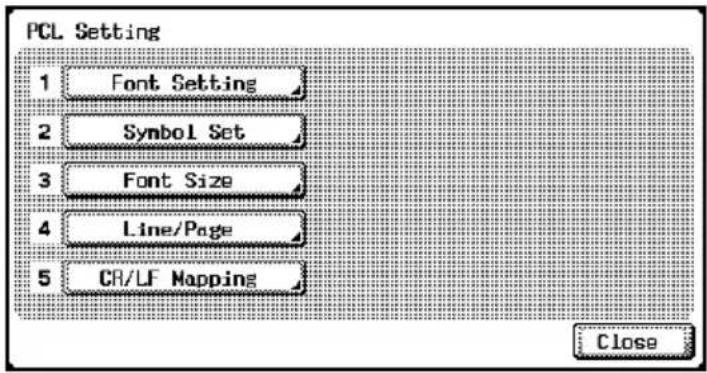
4 Touch [Internal].
- If downloaded fonts are available, [Disk] and [Soft] can also be selected.
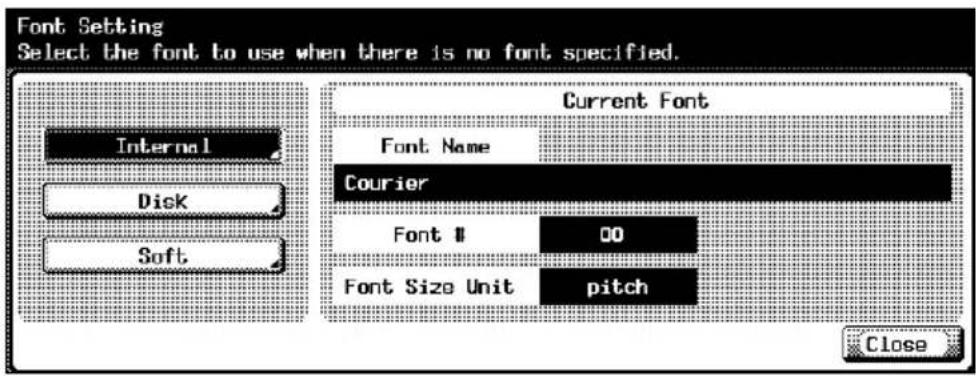
5 Touch the button for the desired setting.
- Touch [] or [] and then touch the button for the desired setting.
- You can check the selected font number and font size units.
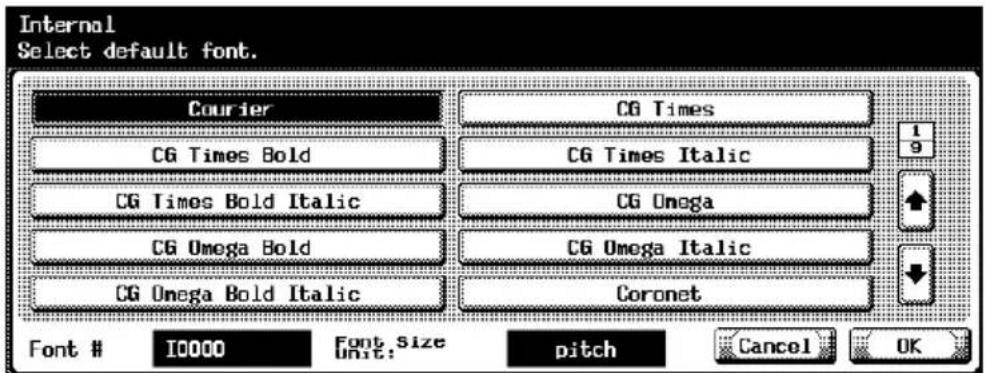
6 Touch [OK].
- To cancel changes to the settings, touch [Cancel].
Symbol Set
You can specify the font symbol set to use when no setting has been specified from the printer driver. (Default setting: Depends on the location)
1 On the Utility Setting screen, touch [6 Printer Setting].
- For details on displaying the Utility Setting screen, refer to "To display the Utility Setting screen" on page 10-1.
2 Touch [3 PCL Setting].
3 Touch [2 Symbol Set].
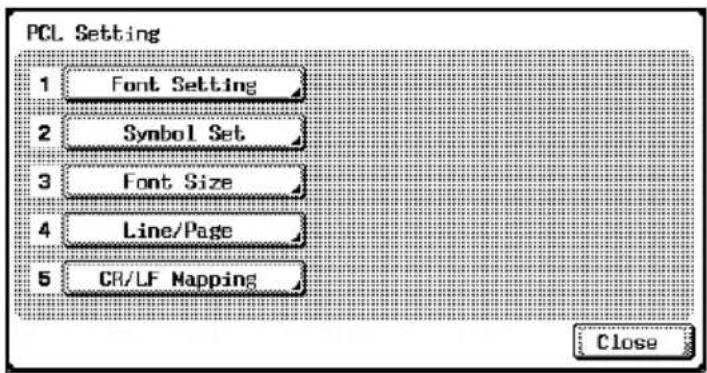
4 Touch the button for the desired setting.
- Touch [] or [], and then touch the button for the desired setting.
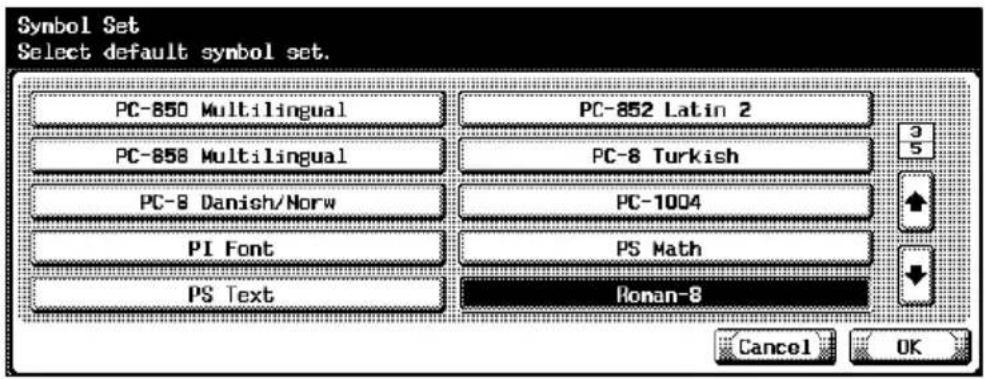
5 Touch [OK].
- To cancel changes to the settings, touch [Cancel].
[Non-Text]
Font Size
You can specify the font size to use when no setting has been specified from the printer driver. (Default settings: Scalable Font – 12.00 point; Bitmap Font – 10.00 pitch)
1 On the Utility Setting screen, touch [6 Printer Setting].
- For details on displaying the Utility Setting screen, refer to "To display the Utility Setting screen" on page 10-1.
2 Touch [3 PCL Setting].
3 Touch [3 Font Size].
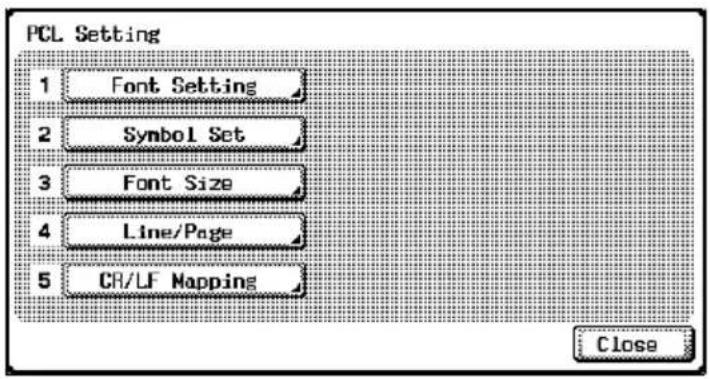
4 Press the [C] (clear) key to erase the value, and then use the keypad to type in the default font size (Scalable Font: between 4.00 and 999.75 points; Bitmap Font: between 0.44 and 99.00 pitches).
- Scalable Font: Specifies the font size in points.
Bitmap font: Specifies the width of the fixed-width font in pitches.
- If a value outside of the allowable range is specified, the message "Input Error" appears. Type in a value within the allowable range.
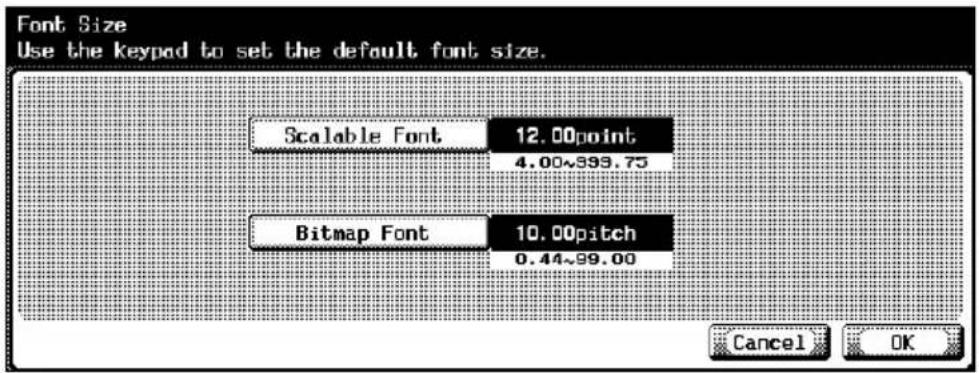
5 Touch [OK].
The font size is set.
To cancel changes to the settings, touch [Cancel].
Line/Page
You can specify the number of lines per page when test printing. (Default setting: Depends on the location)
1 On the Utility Setting screen, touch [6 Printer Setting].
- For details on displaying the Utility Setting screen, refer to "To display the Utility Setting screen" on page 10-1.
2 Touch [3 PCL Setting].
3 Touch [4 Line/Page].
4 Press the [C] (clear) key to erase the value, and then use the keypad to type in the default number of lines (between 5 and 128 lines).
- If a value outside of the allowable range is specified, the message "Input Error" appears. Type in a value within the allowable range.
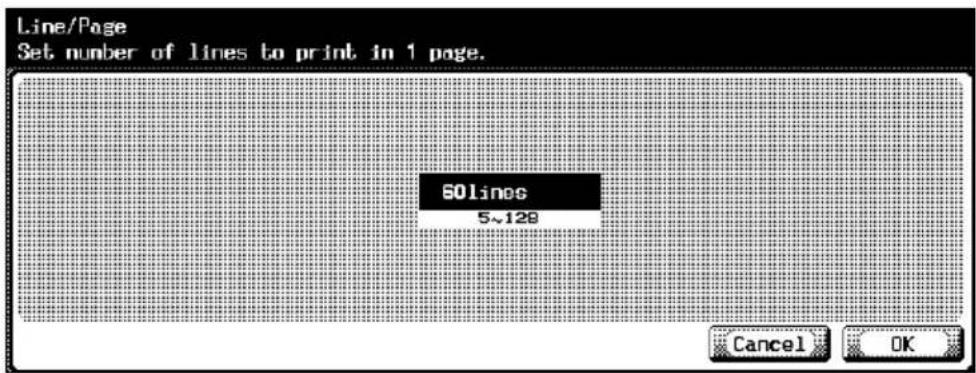
5 Touch [OK].
The number of lines/page is set.
To cancel changes to the settings, touch [Cancel].
CR/LF Mapping
You can specify the data substitution method when printing text data. (Default setting: OFF)
Mode 1: Substitutes CR for CR-LF.
Mode 2: Substitutes LF for CR-LF.
Mode 3: Substitutes to CR-LF.
OFF: Does not perform substitution.
1 On the Utility Setting screen, touch [6 Printer Setting].
- For details on displaying the Utility Setting screen, refer to "To display the Utility Setting screen" on page 10-1.
2 Touch [3 PCL Setting].
- Touch the button for the desired setting.
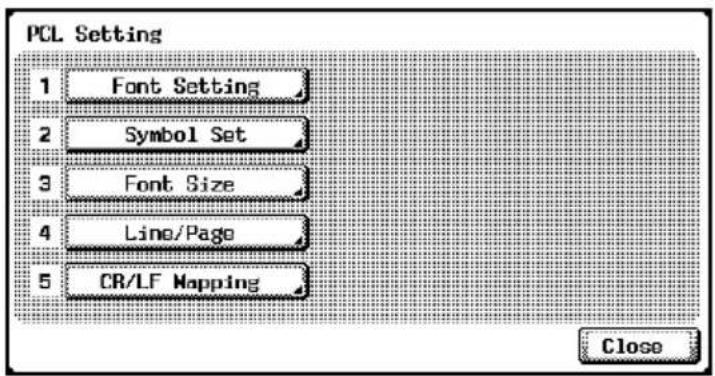
4 Touch the button for the desired setting.
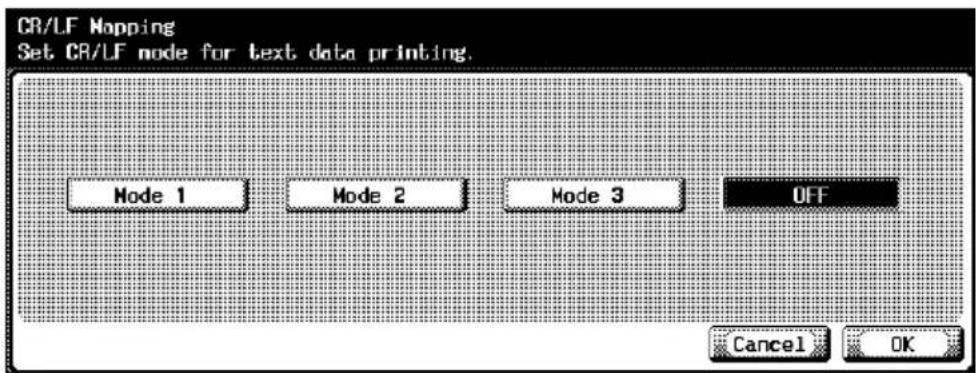
5 Touch [OK].
- To cancel changes to the settings, touch [Cancel].
PS Error Print
You can specify whether to print the error message when an error occurs during PS rasterization. (Default setting: OFF)
1 On the Utility Setting screen, touch [6 Printer Setting].
- For details on displaying the Utility Setting screen, refer to "To display the Utility Setting screen" on page 10-1.
2 Touch [4 PS Setting].
3 Touch [PS Error Print].
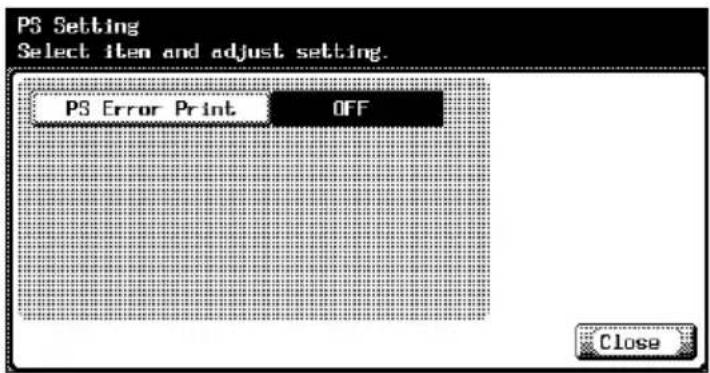
4 Touch the button for the desired setting.
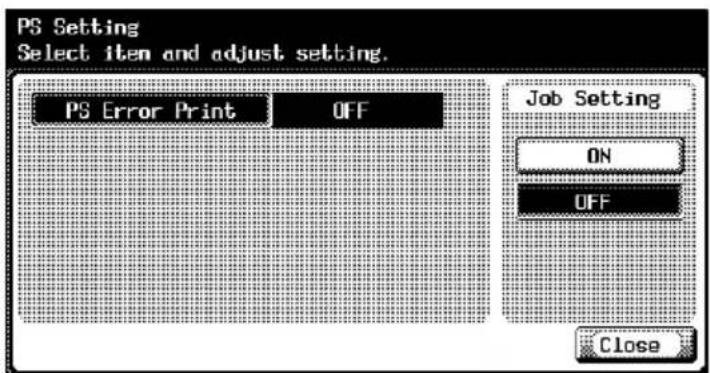
Print Reports
You can output the following four types of reports. This report output method is explained in the PCL font list.
1 On the Utility Setting screen, touch [6 Printer Setting].
2 Touch [5 Print Reports].
3 Touch the button for the desired setting.
![Print Lists Select desired List and press [Start]. Configuration Page Demo Page PCL Font List PS Font List Close](/content/2026/06/1277641/images/a9f9e9b1a5e454ed7879627d79eb9a3fdedf8d7531e02b0e7392c61e7313e89b.jpg)
- Configuration Page: Outputs a list of this machine's settings.
Demo Page: Outputs a test page.
PCL Font List: Outputs the PCL font list.
PS Font List: Outputs the PS font list.
4 Touch the button for the desired paper tray and the [Simplex/Duplex] button.
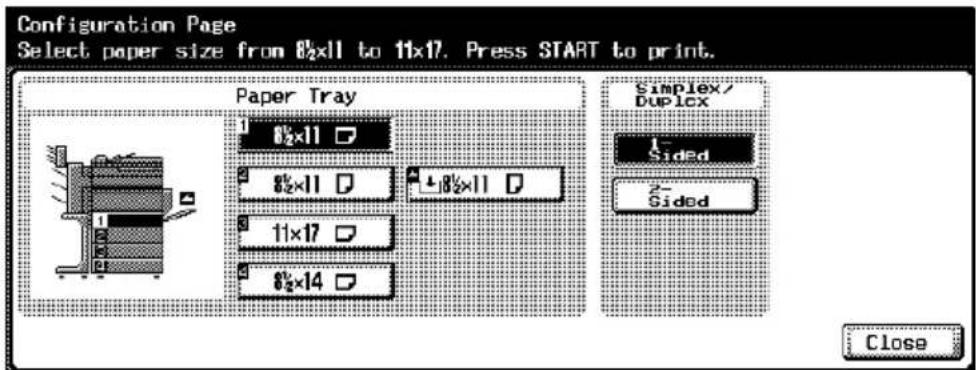
5 To output a report, press the [Start] key.
10.2 Printer settings in Administrator mode
To display the Administrator Setting screen
1 Press the [Utility/Counter] key.
2 Touch [3 Administrator Setting].
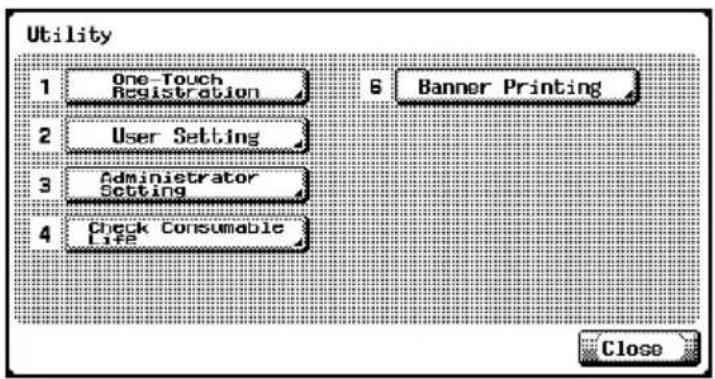
3 Enter the password, and then touch [OK].
![Administrator Password Enter the Administrator Password. Admin. Password ← → De- lete 1 2 3 4 5 6 7 8 9 0 - ^ q w e r t y u i o p @ [ a s d f g h j k l : : ] z x c v b n m . . / \ Shift Cancel OK](/content/2026/06/1277641/images/5ee24000b860ea4d2b94c43b4ecf5b799e150bd7e56d63f4013829b813b16643.jpg)
4 The Administrator Setting screen appears.
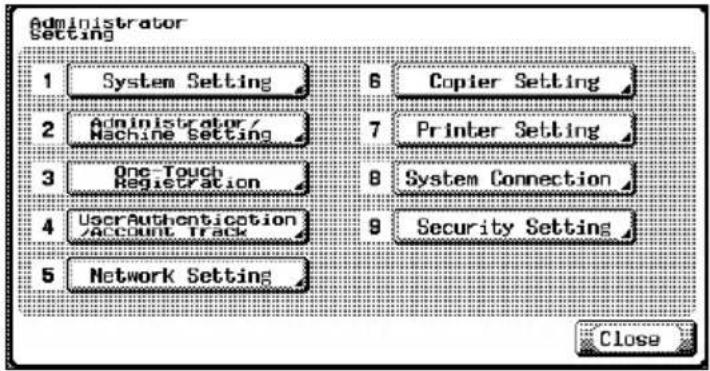

Detail
In Utility mode, an item can also be selected by pressing the key in the keypad for the number beside the desired button. For "3 Administrator Setting", press the [3] key in the keypad.
For details on setting or changing the password, refer to the User's Guide [Copy Operations].

Detail
To quit specifying the Utility mode setting, touch [Exit] in the sub display area or press the [Utility/Counter] key. Otherwise, cancel the Utility mode by touching [Close] in each screen until the screen for the Copy, Fax, Scan or Box mode appears.
To delete secure print documents
All saved secure print documents can be deleted.
1 In the Administrator Setting screen, touch [1 System Setting].
2 In the System Setting screen, touch [0 User Box Setting].
3 In the System Setting screen, touch [2 Delete Secure Print Documents].
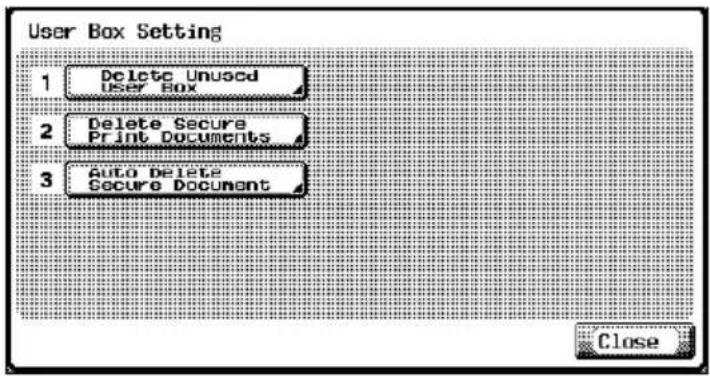
4 To delete the secure print documents, touch [Yes].
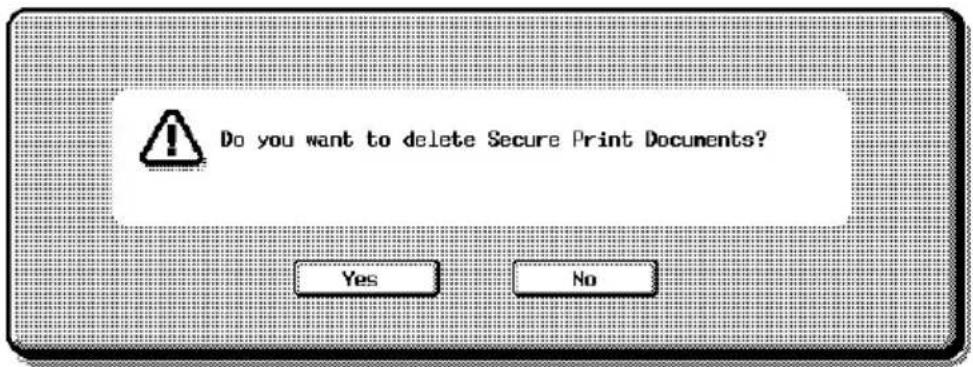
To specify the "Auto Delete Secure Document" parameter
The length of time for deleting a confidential document after it is saved can be specified.
1 In the Administrator Setting screen, touch [1 System Setting].
2 In the System Setting screen, touch [0 User Box Setting].
3 In the System Setting screen, touch [3 Auto Delete Secure Document].
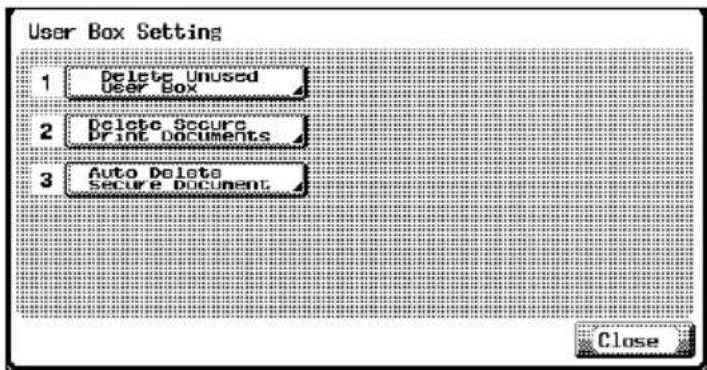
4 Select the length of time until documents are deleted, and then touch [OK].
![Secure Document Delete Time Select the interval to delete the secure documents. If you do not wish to delete, select [Save] 12 Hours 1 day 2 days 3 days 7 days 30 days Save Cancel OK](/content/2026/06/1277641/images/9c8bd4b35f858fbbc0042480fda949115f7d97098df258b1d48ba3e6110ccd04.jpg)
Print/Fax Output Settings
You can specify whether to print data after it is received or to print it simultaneously as it is being received.
You can specify this function for printing and for faxing. (Default settings: Printer – Page Print; Fax – Batch Print)
1 On the Administrator Setting screen, touch [1 System Setting].
- For details on displaying the Administrator Setting screen, refer to "To display the Administrator Setting screen" on page 10-23.
2 On the System Setting screen, touch [2 Output Setting].
3 On the Output Setting screen, touch [1 Print/Fax Output Settings].
The Print/Fax Output Settings screen appears.
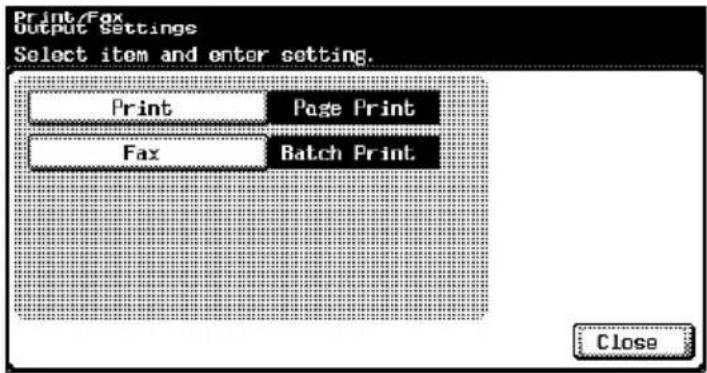
4 Touch [Print] or [Fax].
The buttons for the available settings appear.
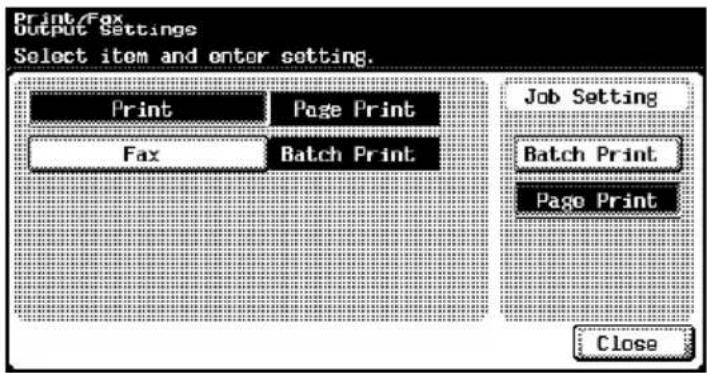
5 Touch the button for the desired setting.
The print timing setting is set.

Detail
If the “Administrator Security Level” parameter is set “Level 2”, users can also specify this setting. Touch [User Setting], [System Setting], [Output Setting], then [Print/Fax Output Settings] to display the Print/Fax Output Settings screen.
For details on the user access levels, refer to the User's Guide [Copy Operations].

Note
If “Batch Print” is selected, printing starts when all the data is received and the print job is queued. If “Page Print” is selected, printing starts when the data for the first page is received and the print job is queued.
I/F Timeout
You can set the time until a communication timeout occurs for the parallel, USB, or network interface. (Default setting: 60 seconds)
1 On the Administrator Setting screen, touch [7 Printer Setting].
- For details on displaying the Administrator Setting screen, refer to "To display the Administrator Setting screen" on page 10-23.
2 On the Printer Setting screen, touch [1 I/F Timeout].
The I/F Timeout screen appears.
![I/F Timeout Touch [Edit] and enter timeout time using the keypad. IEEE 1284 60 sec. 10~1000 Edit USB 60 sec. 10~1000 Edit Network 60 sec. 10~1000 Edit Cancel OK](/content/2026/06/1277641/images/eadf5a8f8e5585d0807f9539455f6eb90752cbd87bff4d5f72dc907dff1feefc.jpg)
3 Touch [Edit] below the setting that you are specifying.
4 Press the [C] (clear) key to erase the value, and then use the keypad to type in the default length of time (between 10 and 1000 seconds).
- If a value outside of the allowable range is specified, the message "Input Error" appears. Type in a value within the allowable range.
5 Touch [OK].
The time until a communication timeout occurs is set. To cancel changes to the settings, touch [Cancel].
Parallel I/F
You can specify the mode for using a parallel interface. (Default setting: ECP)
1 On the Administrator Setting screen, touch [7 Printer Setting].
- For details on displaying the Administrator Setting screen, refer to "To display the Administrator Setting screen" on page 10-23.
2 On the Printer Setting screen, touch [2 Parallel I/F].
The Parallel I/F screen appears.
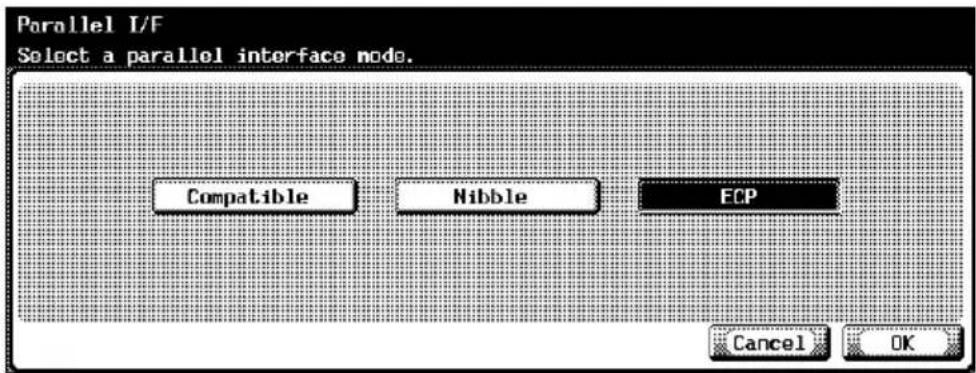
3 Touch the button for the desired setting.
4 Touch [OK].
The parallel interface mode is set.
To cancel changes to the settings, touch [Cancel].
IEEE 1284/USB
You can specify whether to use the parallel port or the USB port. (Default setting: USB)
1 On the Administrator Setting screen, touch [7 Printer Setting].
2 On the Printer Setting screen, touch [3 IEEE 1284/USB].
3 Touch the desired port.
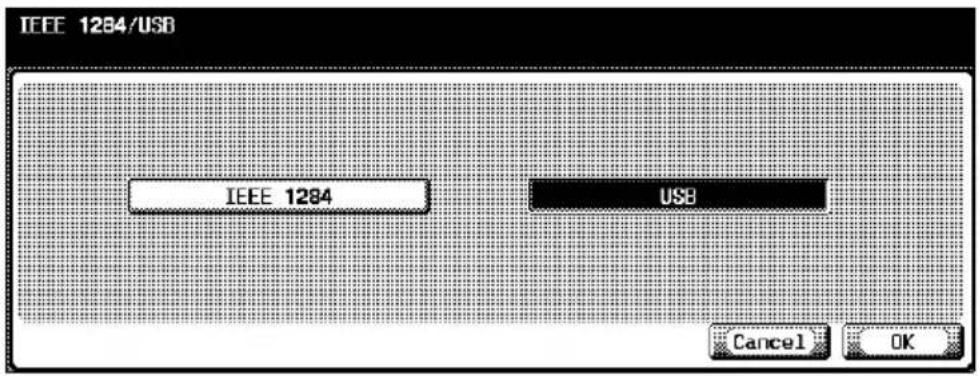

Note
The IEEE 1284 and USB ports cannot be used simultaneously.
After changing the setting for USB or IEEE 1284, the power must be turned off, then on again.
Capture Print Data
You can specify whether to allow or prohibit data capturing of a print job. (Default setting: Allow)
1 On the Administrator Setting screen, touch [Security Setting].
- For details on displaying the Administrator Setting screen, refer to "To display the Administrator Setting screen" on page 10-23.
2 On the Security Setting screen, touch [4 Security Details].
3 On the Security Details screen, touch [ ] or [ ], and then touch [Print Data Capture].
The buttons for the available settings appear.
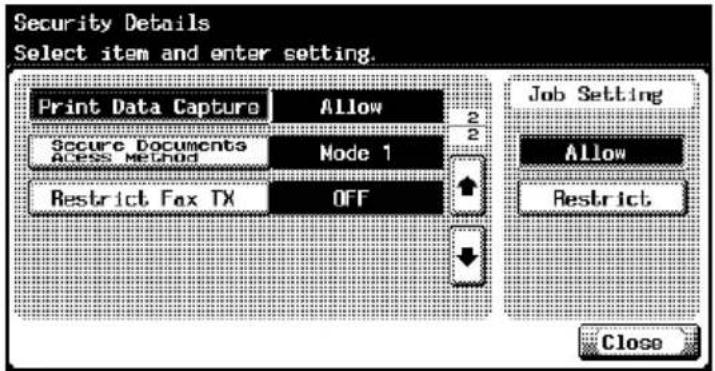
4 Touch the button for the desired setting.
The capturing a print job is either allowed or prohibited.

Note
For details on capturing a print job, consult a service technician.
10.3 Using PageScope Web Connection
PageScope Web Connection is a management utility supported by the HTTP server built into the printer controller.
Start up a Web browser on a computer on the network and access Page-Scope Web Connection to easily change this machine's settings.

Note
Flash and HTML are available from View Mode in PageScope Web Connection. For details, refer to "Logging In and logging out" on page 10-36.
System requirements
| Item System requirements | |
| Network EthernetTCP/IP | |
| Computer application Web Browser:Microsoft Internet Explorer 6 or later recommended (JavaScript enabled, Cookies enabled)Microsoft XML Parser MSXML3.X must be installed when using Internet Explorer 5.5.Netscape Navigator 7.02 or later (JavaScript enabled, Cookies enabled)Macromedia® Flash®(If “Flash” is selected in View Mode, version 7.0 or later plugin is required.) | |
Accessing PageScope Web Connection
PageScope Web Connection can be accessed directly from a Web browser.
1 Start up the Web browser.
2 In the Address bar, enter the IP address for this machine, and then press the [Enter] key.
http://
Example: If the IP address for this machine is 192.168.1.20
http://192.168.1.20/

Detail
If the user authentication function is enabled, you must enter a user name and password. For details, refer to “Logging in to the User mode (public user)” on page 10-38.
For the procedure to set the IP address of this machine, refer to “Setting the IP address for this machine” on page 3-5.
Page structure
The page that appears immediately after PageScope Web Connection is accessed is called the User mode page, and it is displayed when you have logged in as a public user.

Note
By clicking the [Logout] button, you can log in as another user or administrator. For details, refer to "Logging In and logging out" on page 10-36.
The configuration of the PageScope Web Connection page is shown below.
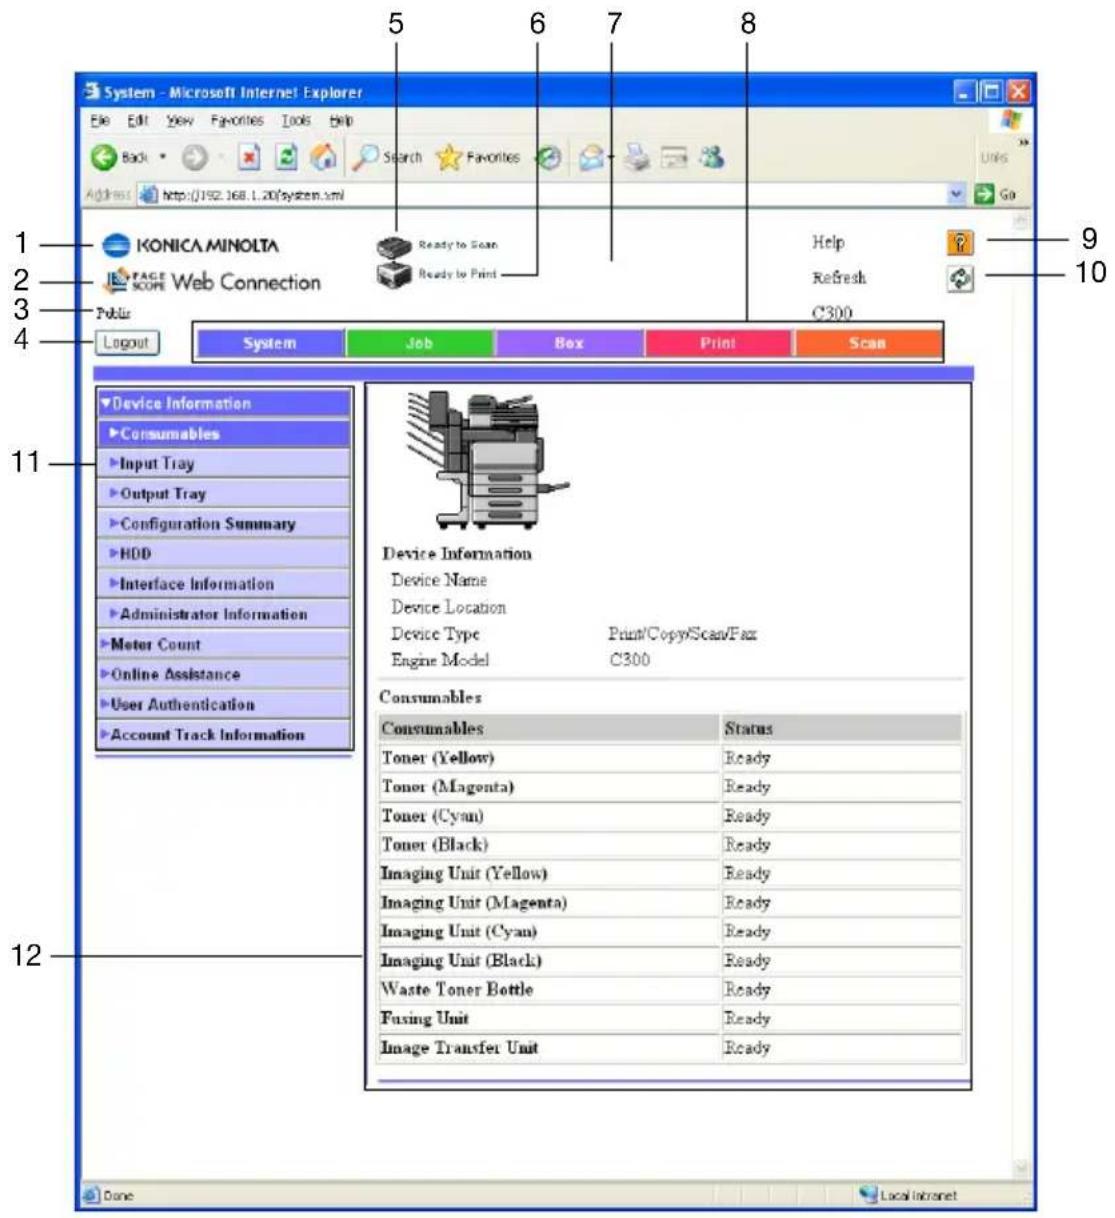
| No. | Item Description | |
| 1 | KONICA MINOLTA logo Click the logo to jump to the following Web site (KONICA MINOLTA Web site). http://konicaminolta.com | |
| 2 | PageScope Web Connection logo | Click the PageScope Web Connection logo to display the version information of PageScope Web Connection. |
| 3 | Login mode Displays the current login mode (public, registered user, Account name, administrator, box administrator). | |
| 4 | [Logout] Click to log out of the current mode. | |
| 5 | Status display Displays the status of this machine's printer and scanner sections using icons. | |
| 6 | Message display Displays the status of the problem/error and other error information if an error has occurred in this machine. | |
| 7 | Operation page Displays the operating status of this machine. | |
| 8 | Tab Displays the categories that can be controlled by PageScope Web Connection. The following tabs are displayed in User mode.SystemJobBoxPrintScan | |
| 9 | Help The page specified in “Online Manual URL” is displayed.For the setting procedure, refer to “System tab — Online Assistance” on page 10-73. | |
| 10 | Refresh | Click to renew the page that is being displayed. |
| 11 | Menus | Lists the information and settings for the selected tab. The menus that appear vary depending on the tab that is selected. |
| 12 | Information and settings display | Displays the details of the item selected from the menu. |
Cache function of Web browsers
The newest information may not appear on the PageScope Web Connection page due to the cache function of the Web browser. In addition, problems can occur when the cache function is used.
When using PageScope Web Connection, disable the cache function of the Web browser.

Detail
The menus and commands may vary depending on the Web browser. For details, refer to Help for the Web browser.
If the cache function is enabled on the Web browser and a timeout occurs in Administrator mode, the timeout page may appear even when Page-Scope Web Connection is accessed again. When this happens, the machine's control panel remains locked, and the main power of this machine must be turned off, then on again. To avoid such problems, disable the cache function.
When turning the power off, then on again, be sure to turn the sub-power switch off first, then the main power switch. In addition, wait at least 10 seconds before turning the power on again; otherwise, this machine may not function properly.
On Internet Explorer
1 On the "Tools" menu, click "Internet Options".
2 On the General tab, click the [Settings] button under "Temporary Internet files".
3 Select "Every visit to the page", and then click the [OK] button.
On Netscape Navigator
1 On the "Edit" menu, click "Preferences".
2 In the "Category" box, click "Advanced", then "Cache".
3 Under "Compare the page in the cache to the page on the network", select "Every time I view the page".
Logging In and logging out
When accessing PageScope Web Connection, the login page appears when performing user authentication and account track on this machine and the page that was logged in as a public user appears when not performing user authentication and account track. When logging in as a different user and to log in as an administrator, you must log out, and then log in again.

...
Note
If no operations are performed for a given length of time while logged in, a timeout automatically occurs and operations cannot be performed.
You can set the time for timeouts that occur in the User mode and Administrator mode from [Network] – [Authentication] – [Auto Logout] in the Administrator mode.
Logging out
→Click the [Logout] button at the top left of the page.
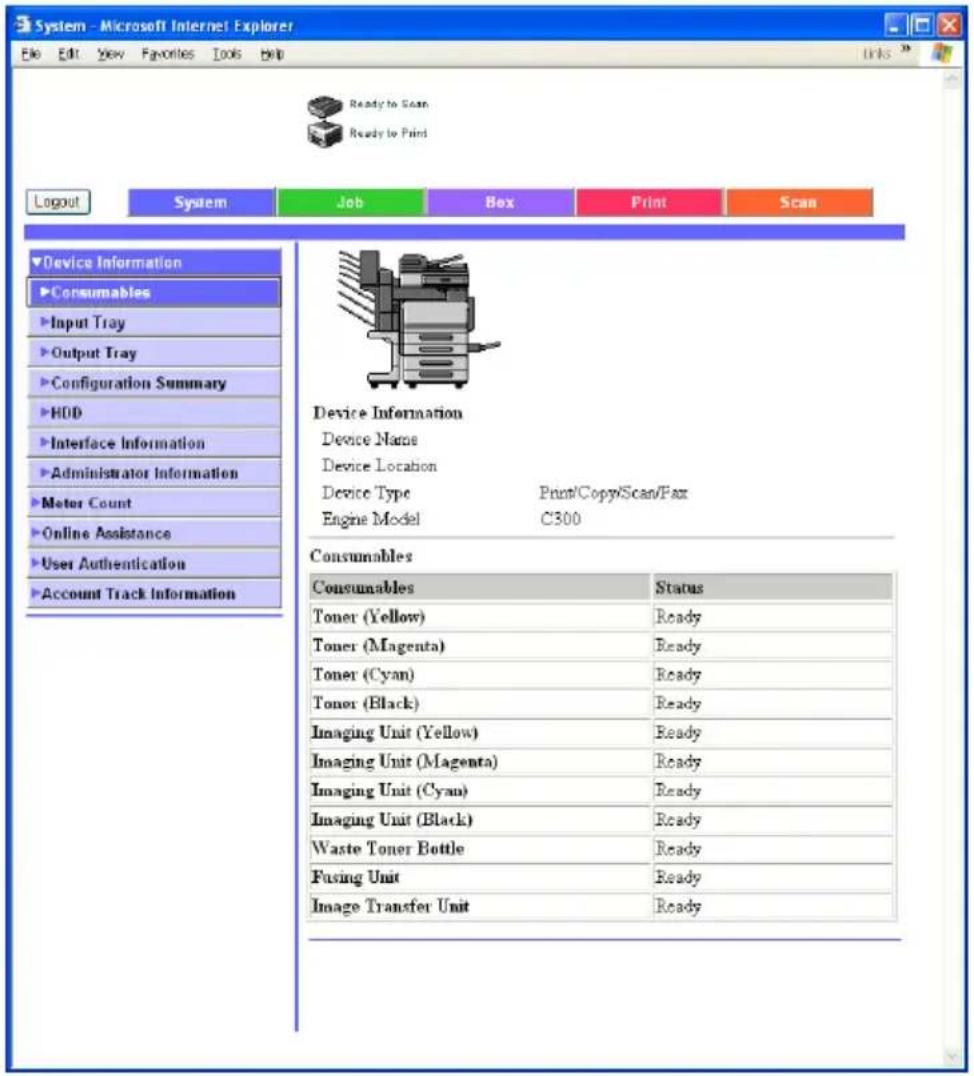
The login page appears after logging out.
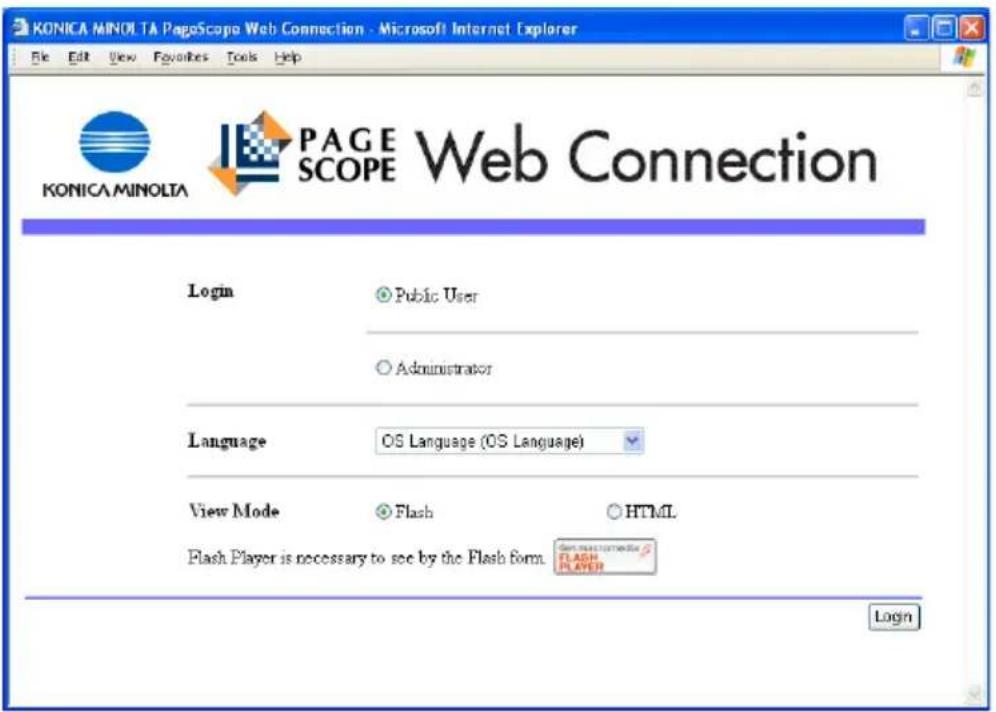
Logging in to the User mode (public user)
When not performing user authentication, log in as a public user.
1 In the login page, select [Public User].
- If necessary, select the language and the display format.
-
If "Flash" is selected in the display format, the following items are displayed by using the Flash function.
-
Status icons and images
- “System tab – Device Information – Input Tray” status
- "System tab" status
- To use the "Flash" function, Flash Player is required.
- If using screen reader software, it is recommended to select HTML.
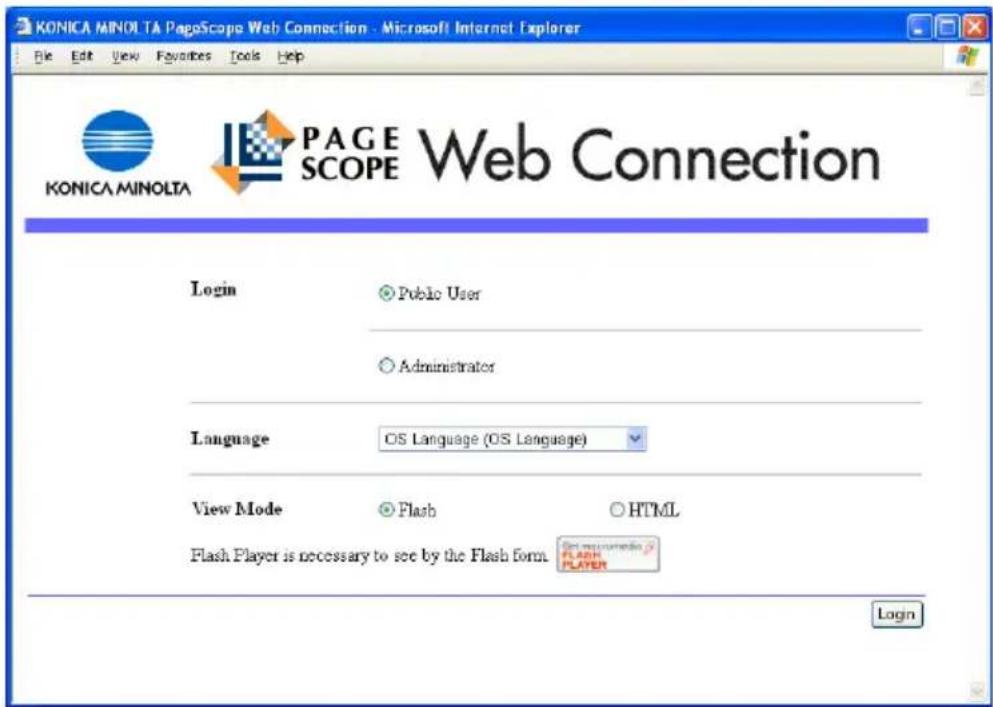
2 Click the [Login] button.
The page switches to the User mode page.
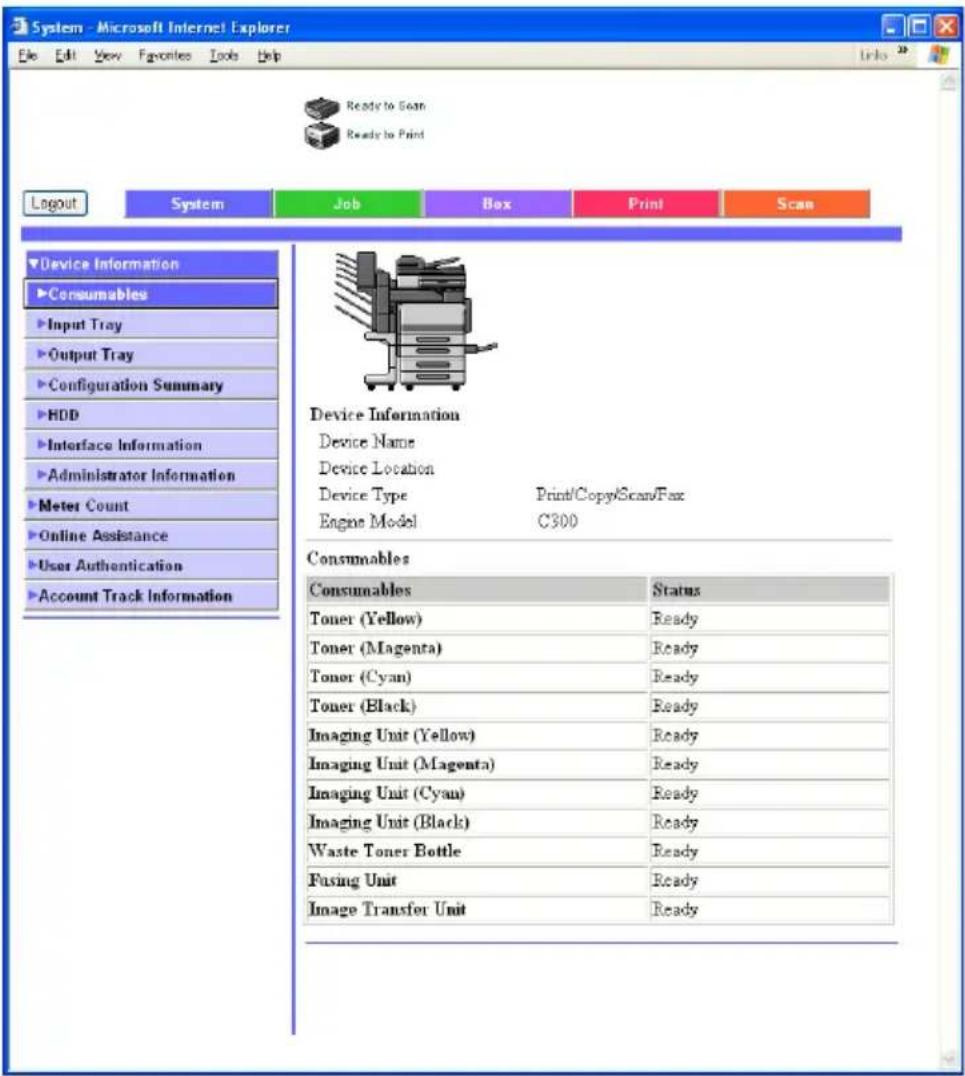
Logging in to the User mode (registered user)
When performing user authentication on this machine, you must login using the user name and password that are registered to this machine or an external authentication server. This section describes the procedure for logging in with a specified user name when performing user authentication.
1 In the login page, enter the user name and password.
- If performing account track, enter the Account name and password.
- If necessary, select the language and the display format.
-
If "Flash" is selected in the display format, the following items are displayed by using the Flash function.
-
Status icons and images
- “System tab – Device Information – Input Tray” status
- “System tab” status
- To use the "Flash" function, Flash Player is required.
- If using screen reader software, it is recommended to select HTML.
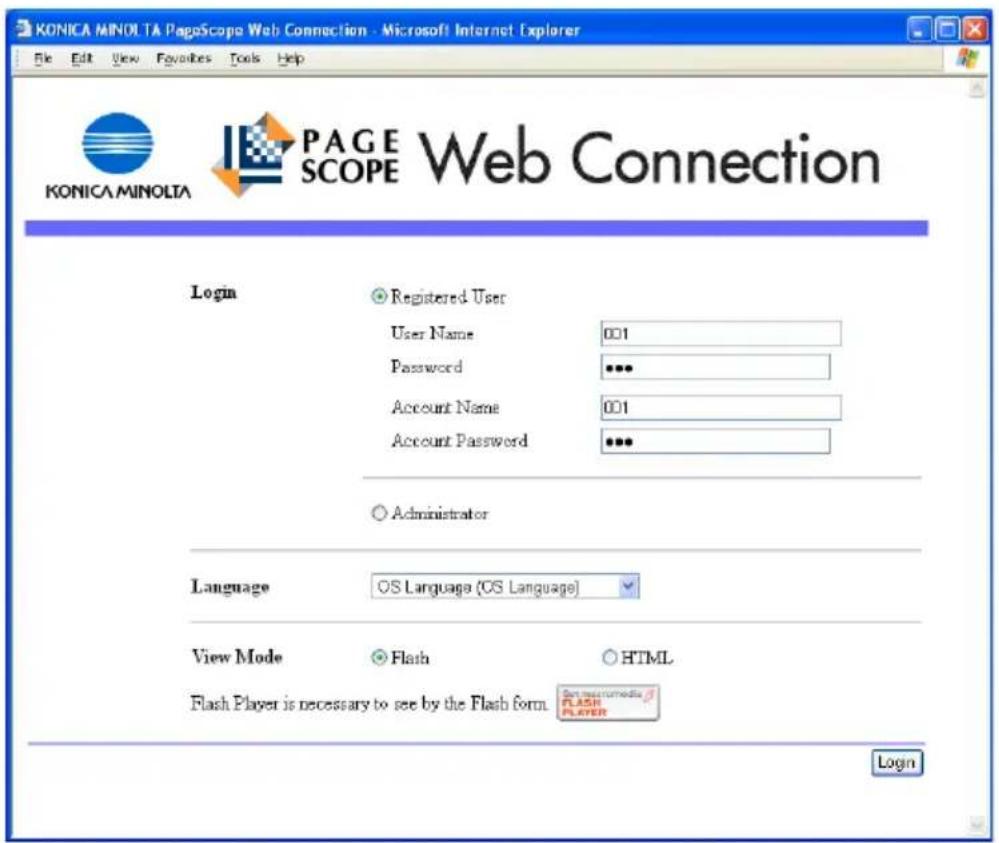
2 Click the [Login] button.
The page switches to the User mode page.
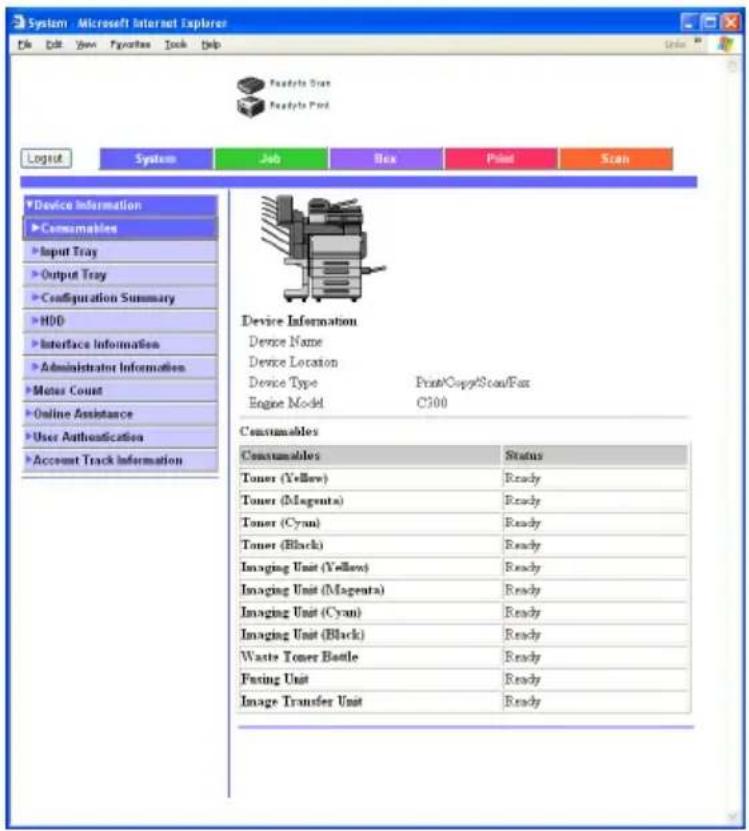
![KONICA MINOLTA bizhub c300 - Click the [Login] button. - 2](/content/2026/06/1277641/images/73bd0e96d132c842ffa7b898299266a5d0e443bcec63e9c602ed179b17659bbb.jpg)
...
Reminder
When the user authentication or account authentication settings are specified on this machine, the authentication operation restriction function is in mode 2, and the authentication information is not entered correctly, the applicable user or account is locked and cannot be accessed.

...
Note
By clicking the icon on the right of "User Name", you can select the user name from a list.
If multiple domains are specified as external server authentication on this machine, add “@” after the user name and enter the domain name. (Example: If the user name is “user01” and the domain name is “domain”, enter “user01@domain”).)
Logging in to the Administrator mode
You can specify the system and network settings by logging in to the Administrator mode.
1 In the login page, select [Administrator], and then click the [Login] button.
- If necessary, select the language and the display format.
- If "Flash" is selected in the display format, the following items are displayed by using the Flash function.
- Status icons and images
- “System tab – Device Information – Input Tray” status
- "System tab" status
- To use the "Flash" function, Flash Player is required.
- If using screen reader software, it is recommended to select HTML.
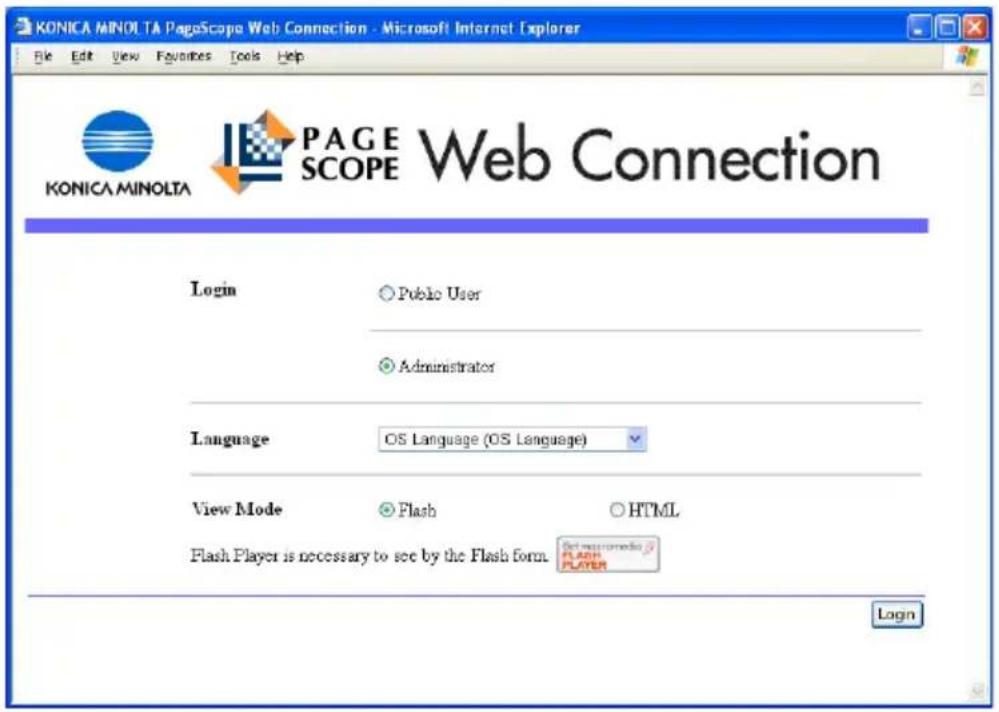
2 Enter the administrator password for this machine, and then click the [OK] button.
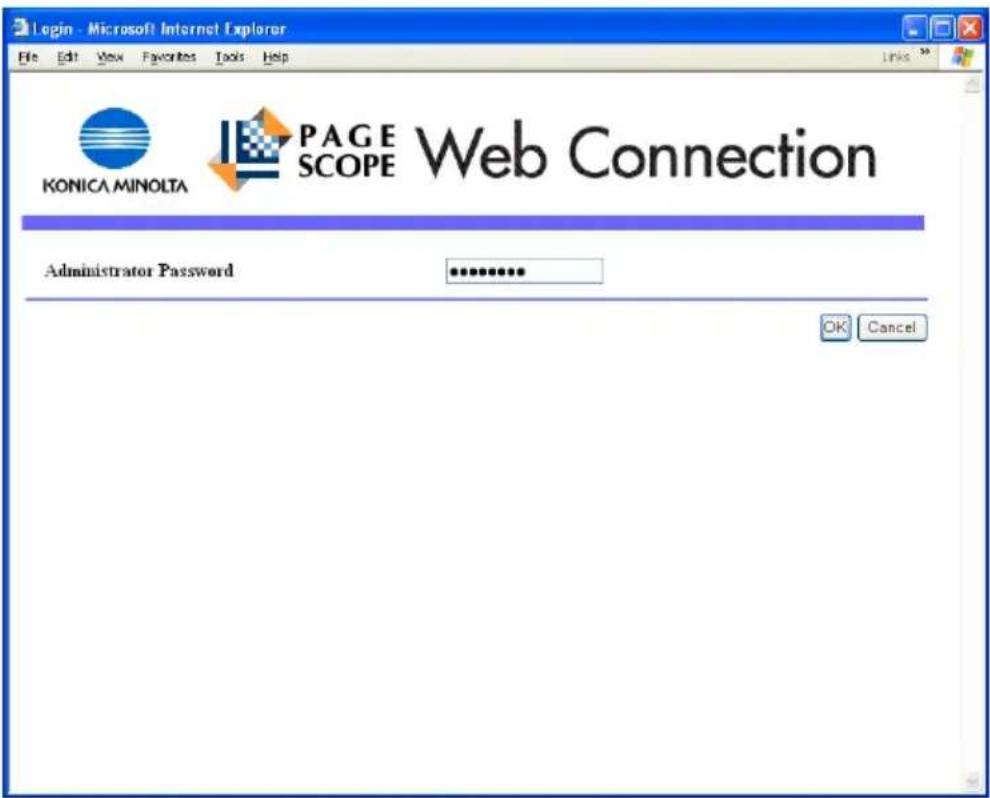
The page switches to the Administrator mode page.
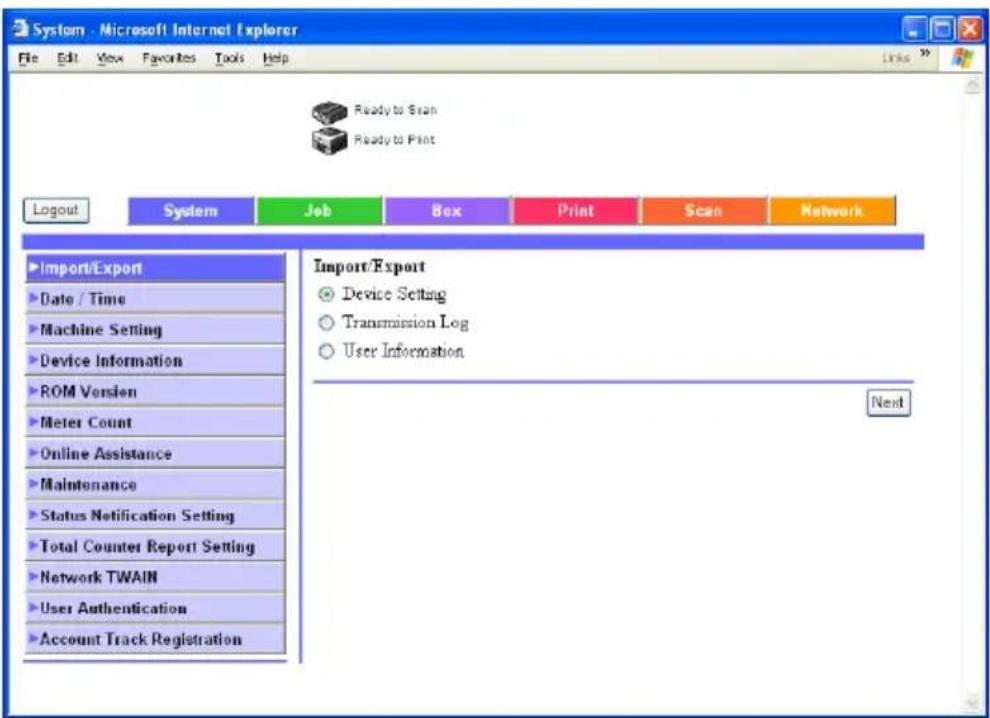

Note
When logged in to the Administrator mode, the machine's control panel is locked and cannot be used.
Depending on the status of this machine, you may not be able to log in to the Administrator mode.
User mode
The User mode provides functions for checking and operating the machine on a user level. You can select from five tabs (System, Job, Box, Print, or Scan).

Note
This manual describes the printer related functions. For the box and scanner functions of this machine, refer to the User's Guide [Box Operations] and User's Guide [Network Scanner Operations].
System tab
On the System tab, information and settings concerning the system configuration of this machine are displayed.
System tab — Device Information — Consumables
On the System tab, click "Device Information", and then click "Consumables" on the sub-menu that appeared. In addition, this is the initial page that appears when you access http://
This page shows the consumables information of this machine.
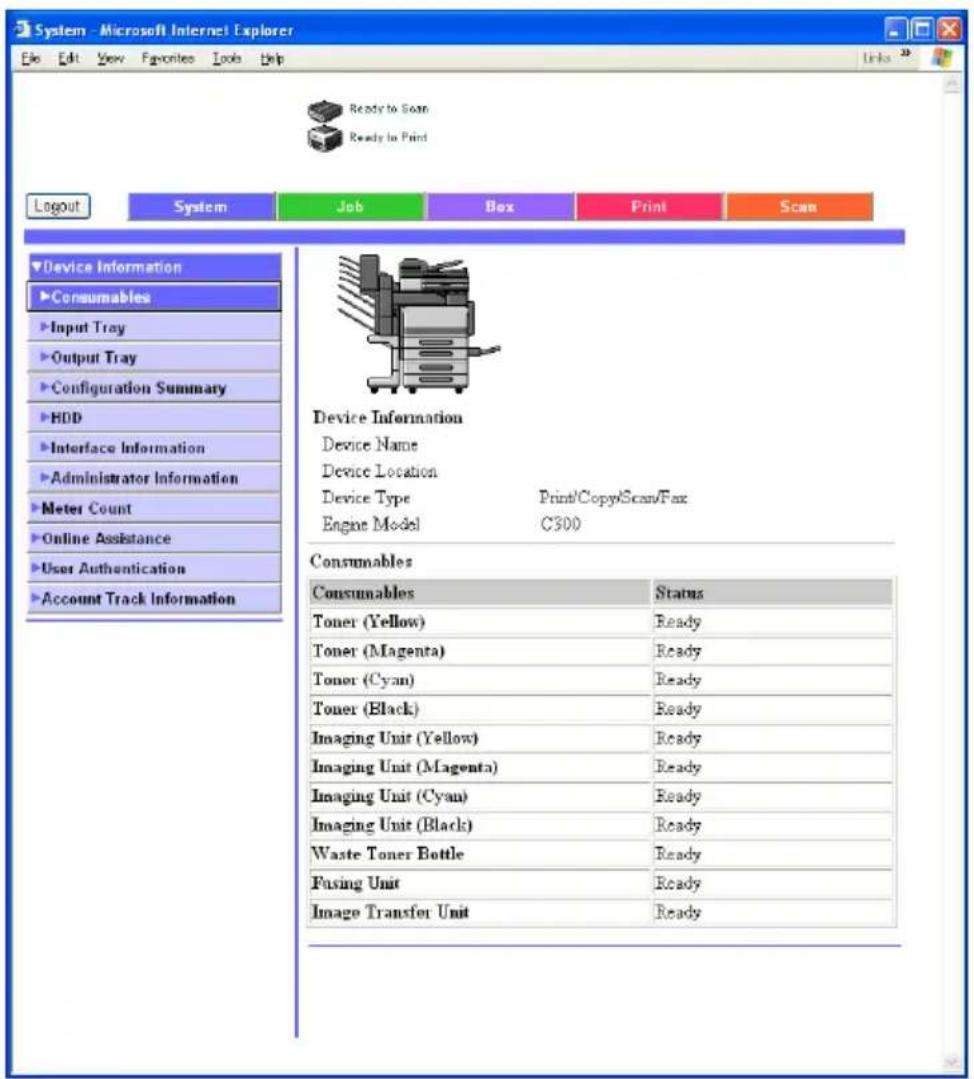
| Item Description | |
| Toner (Yellow, Magenta, Cyan, Black) | Displays information for each item. |
| Imaging Unit (Yellow, Magenta, Cyan, Black) | |
| Paper Dust Remover/Ozone Filter | |
| Punch Dust | |
| Staple | |
| Saddle Staple Cartridge | |
| Fusing Unit | |
| Image Transfer Unit |

...
Note
The items that are displayed may vary depending on whether options are installed.
System tab — Device Information — Input Tray
Click the System tab, click "Device Information", and then click "Input Tray" in the sub-menu that appeared.
You can check the status of the paper trays of this machine.
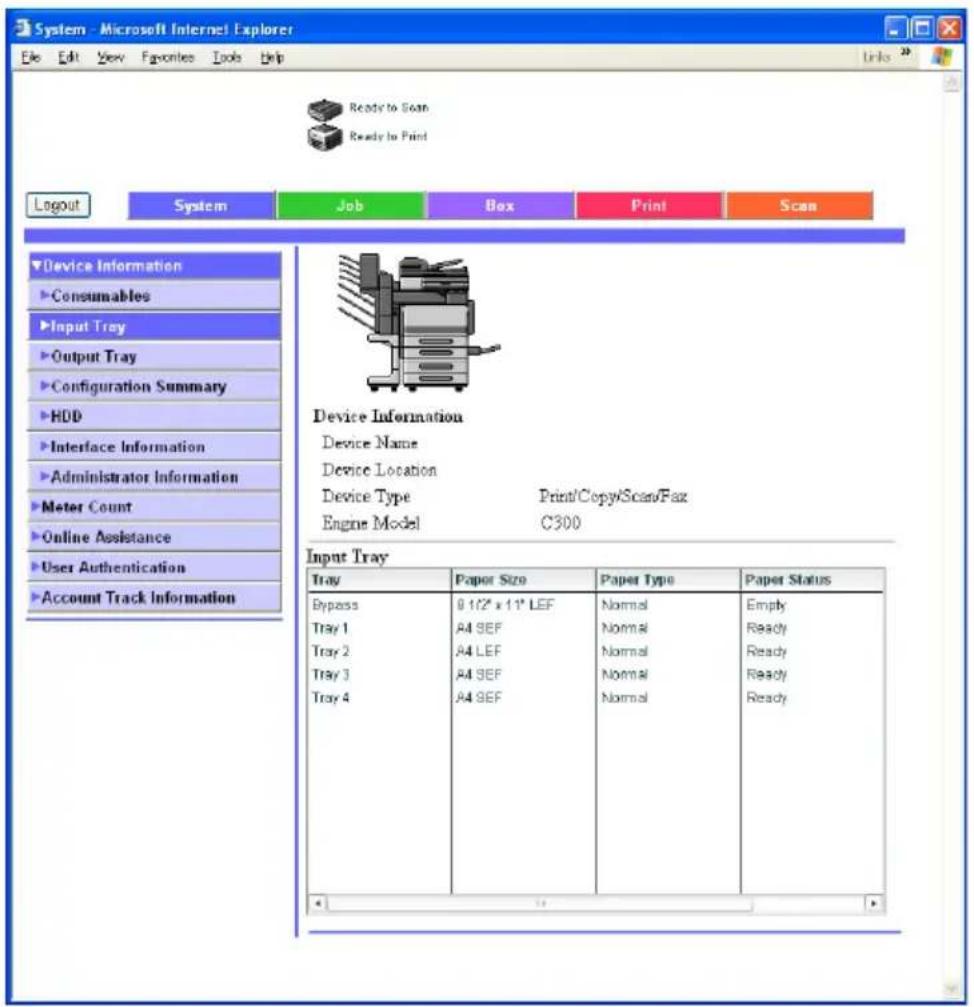
| Item Description | |
| Tray Displays information for each item. | |
| Paper Size | |
| Paper Type | |
| Paper Status | |
| Paper Capacity | |

Note
If "HTML" is selected in View Mode when logging in, the details can be check by selecting each tray and clicking the [Detail] button.
System tab — Device Information — Output Tray
Click the System tab, click "Device Information", and then click "Output Tray" in the sub-menu that appeared.
You can check the status of the output trays of this machine.
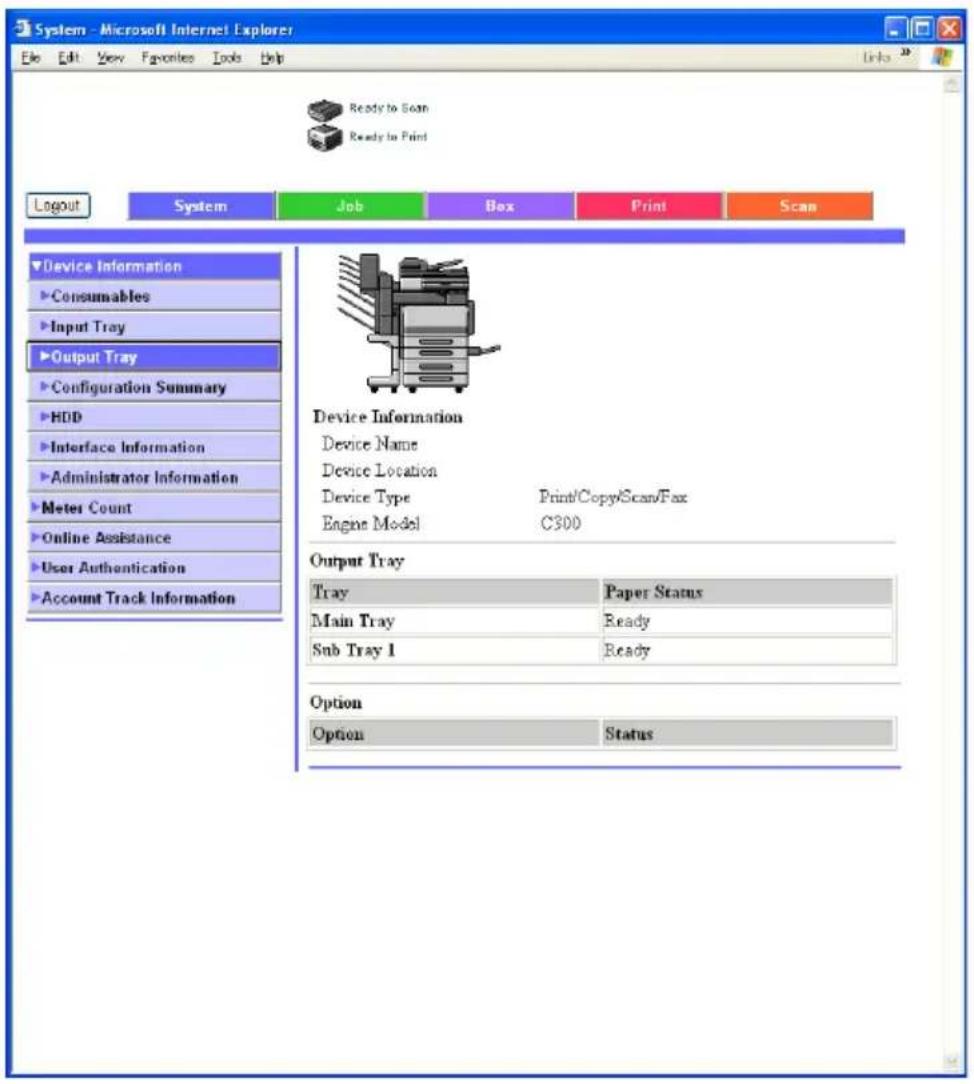
| Item Description | |
| Output Tray Displays the tray name and status of each installed tray. | |
| Option Displays whether an option is installed. | |
System tab – Device Information – Configuration Summary
Click the System tab, click "Device Information", and then click "Configuration Summary" in the sub-menu that appeared. This page shows the current system configuration and status of this machine.
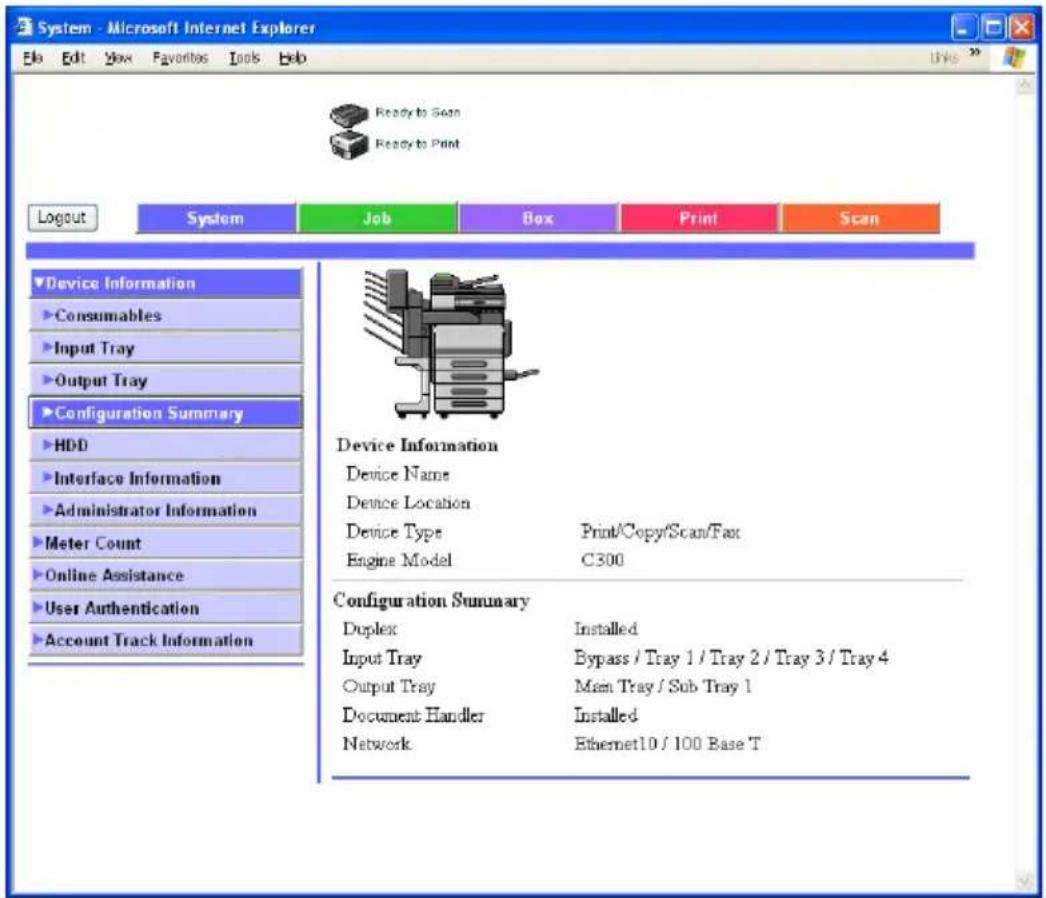
| Item Description | |
| Configuration Summary D | splays the configuration of the options installed on this machine. |
System tab — Device Information — HDD
Click the System tab, click "Device Information", and then click "HDD" in the sub-menu that appeared.
You can check the status of the hard disk of this machine.
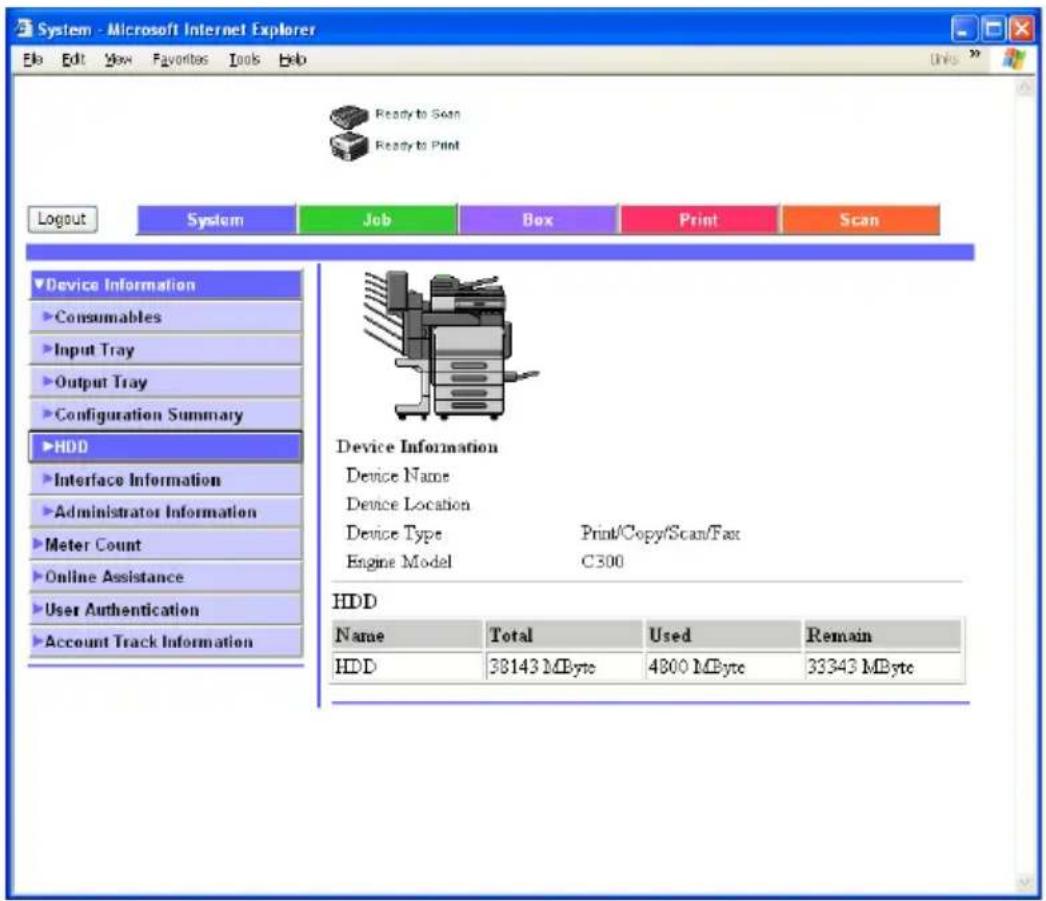
| Item Description | |
| Name Displays the hard disk name. | |
| Total Displays the total size of the installed hard disk. | |
| Used Displays the amount of space used by the system. | |
| Remain Displays the amount of free hard disk space. | |
System tab — Device Information — Interface Information
Click the System tab, click "Device Information", and then click "Interface Information" in the sub-menu that appeared.
You can check the interface information of this machine.
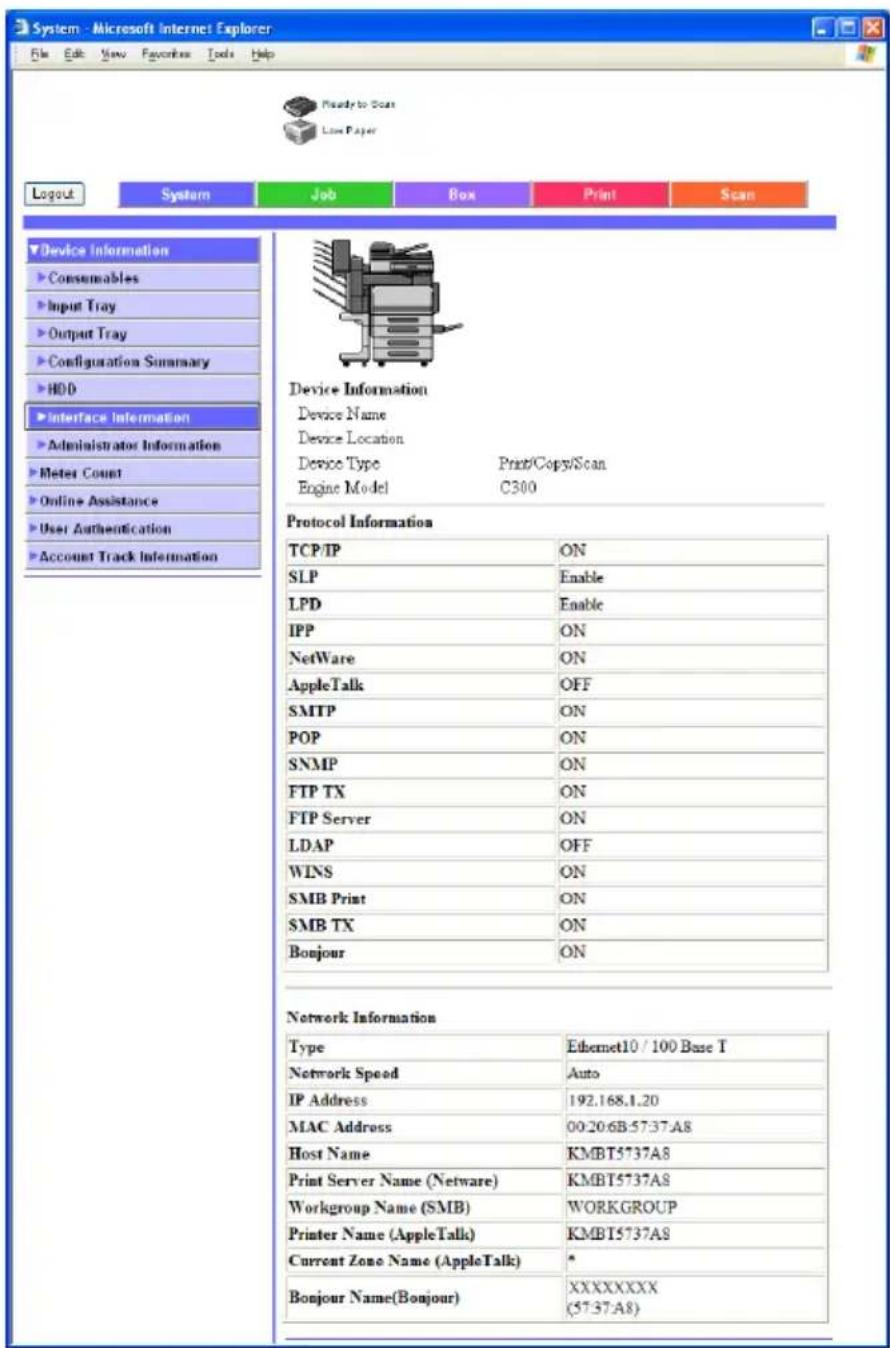
| Item Description | |
| Protocol Information Displays the usability status of each protocol. | |
| Network Information Displays the network information. | |
System tab — Device Information — Administrator Information
Click the System tab, click "Device Information", and then click "Administrator Information" in the sub-menu that appeared. This page shows the administrator information of this machine.
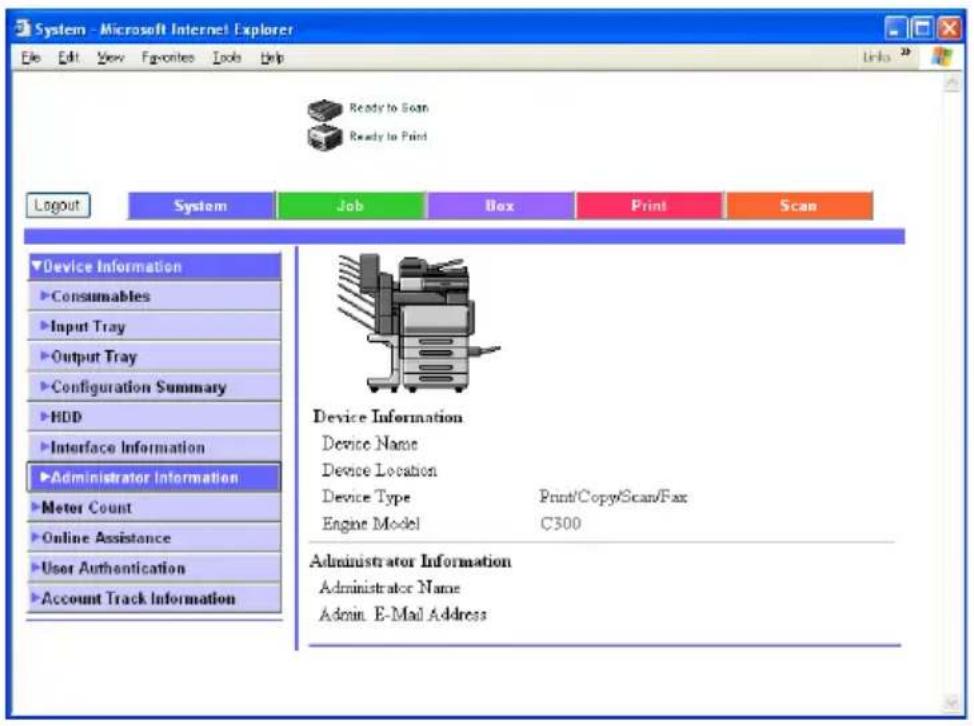
| Item Description | |
| Administrator Information Displays the administrator information. | |
System tab — Meter Count
Click the System tab, and then click "Meter Count" in the menu.
You can check the counters that this machine manages.
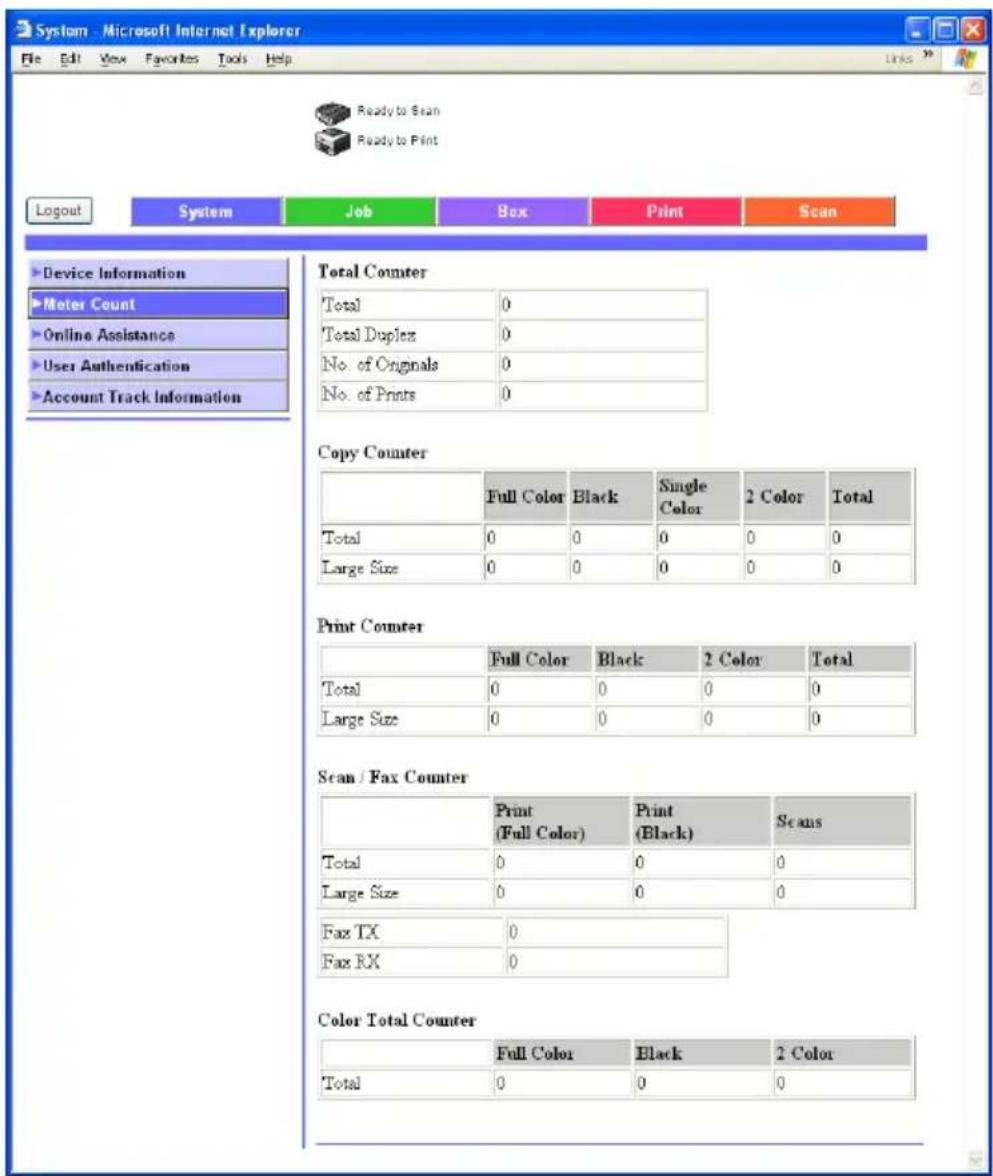
| Item Description | |
| Total Counter Displays the total of the output counter (copies, prints, scans, and faxes). | |
| Copy Counter Displays each counter. | |
| Print Counter | |
| Scan Counter (Displayed as Scan/Fax Counter when the optional fax kit is installed.) | |
| Color Total Counter Displays the color mode counter. | |
System tab — Online Assistance
Click the System tab, and then click "Online Assistance" in the menu. You can check support information concerning the product.
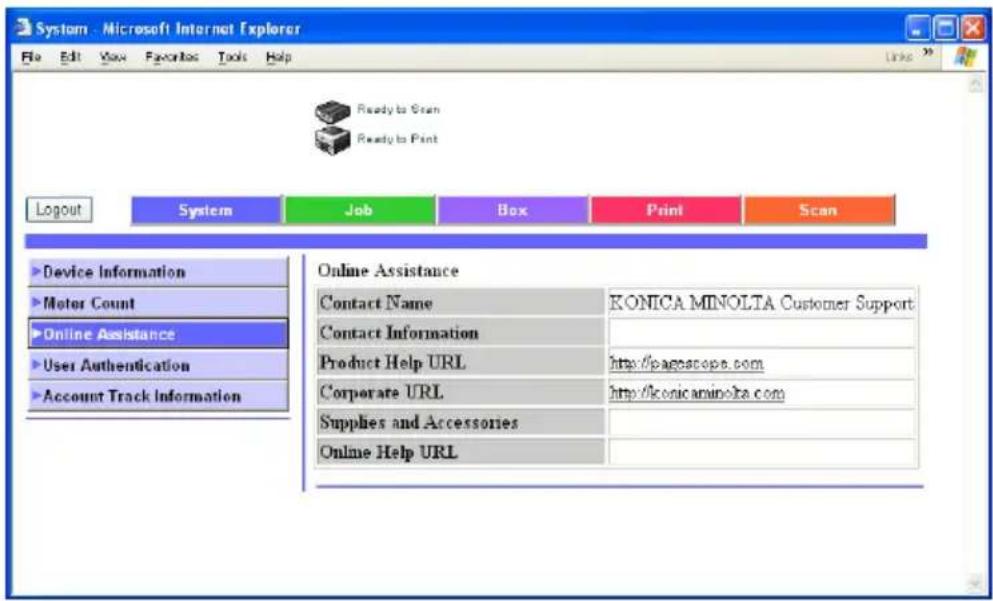
| Item Description | |
| Contact Name Displays each item specified on the Online Assistance page from the Systems tab in the administrator mode. | |
| Contact Information | |
| Product Help URL | |
| Corporate URL | |
| Supplies and Accessories | |
| Online Help URL | |
System tab — User Authentication — User Password Change
Click the System tab, click "User Authentication", and then click "User Password Change" in the sub-menu that appeared.
You can change the password of the user that is logged in.
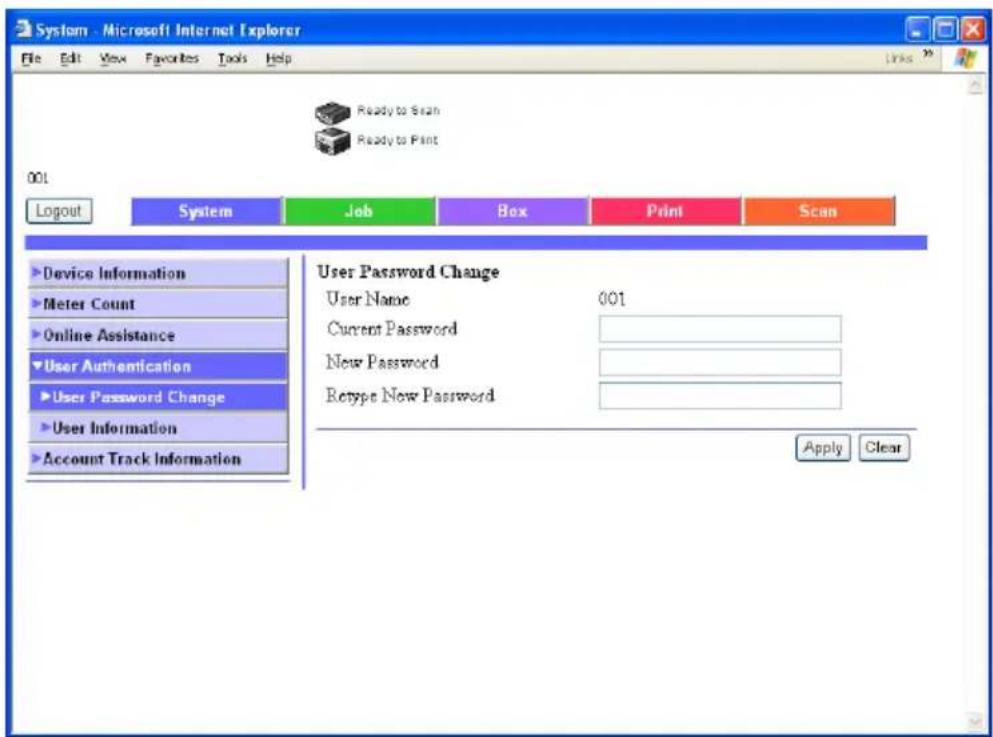
| Item Description | |
| Current Password Enter the | current password. |
| New Password Enter the new | password. (up to 64 alphanumeric characters, excluding " +) |
| Retype New Password Reenter the new password for confirmation. | |

Note
The password cannot be changed if you have not logged in as a user.
System tab — User Authentication — User Information
Click the System tab, click "User Authentication", and then click "User Information" in the sub-menu that appeared.
The information of the user that is logged in is displayed.
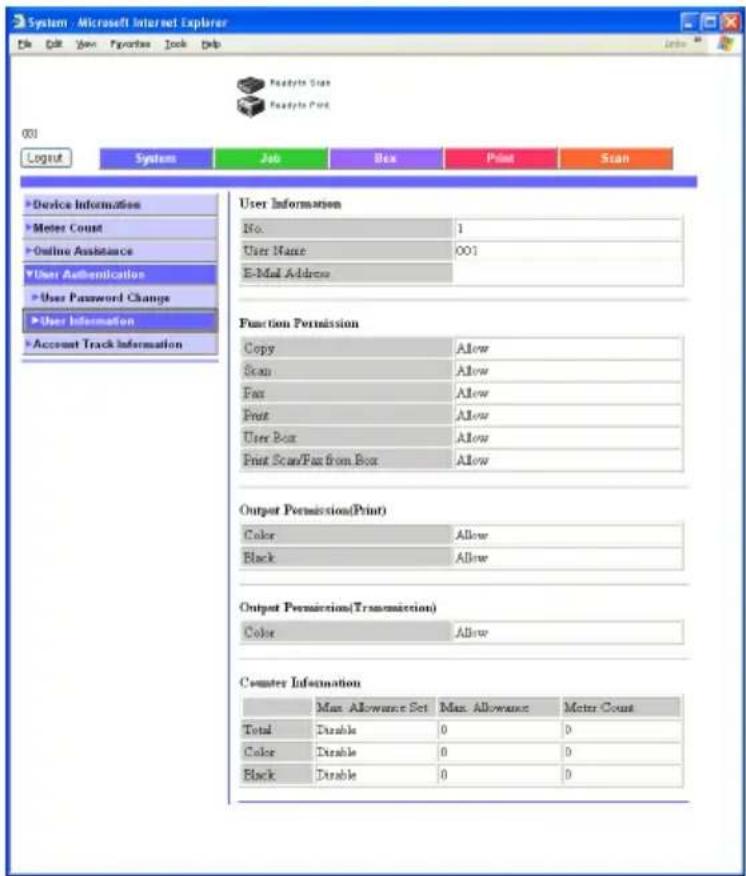
| Item Description | |
| User Information Displays the user name. | |
| Function Permission Displays whether each function of this machine can be used. | |
| Output Permission (Print/Transmission) | Displays whether the output function of this machine can be used. |
| Counter Information Displays the maximum value and the current counter. | |

Note
The user information is not displayed if you have not logged in as a user.
System tab — Account Track Information
Click the System tab, and then click "Account Track Information" in the menu.
The account track information of the user that is logged in is displayed.
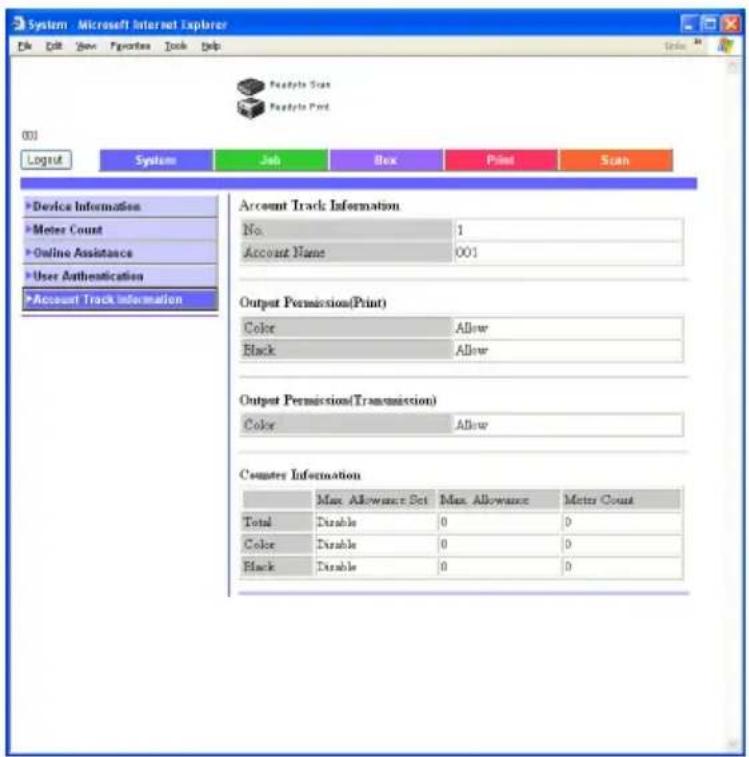
| Item Description | |
| Account Track Information | Displays the department name. |
| Output Permission (Print/Transmission) | Displays whether the output function of this machine can be used. |
| Counter Information Displays | the maximum value and the current counter. |

Note
The account track information is not displayed if the account track function is not enabled on this machine.
Job Tab
From the "Job" tab, you can check jobs managed by this machine.
Job tab — Current Job
Click the Job tab, click "Current Job List" in the menu, and then select each function (print and scanning operations) by the job type.
You can check jobs that are being printed or that are queued to be printed.
Sample print page
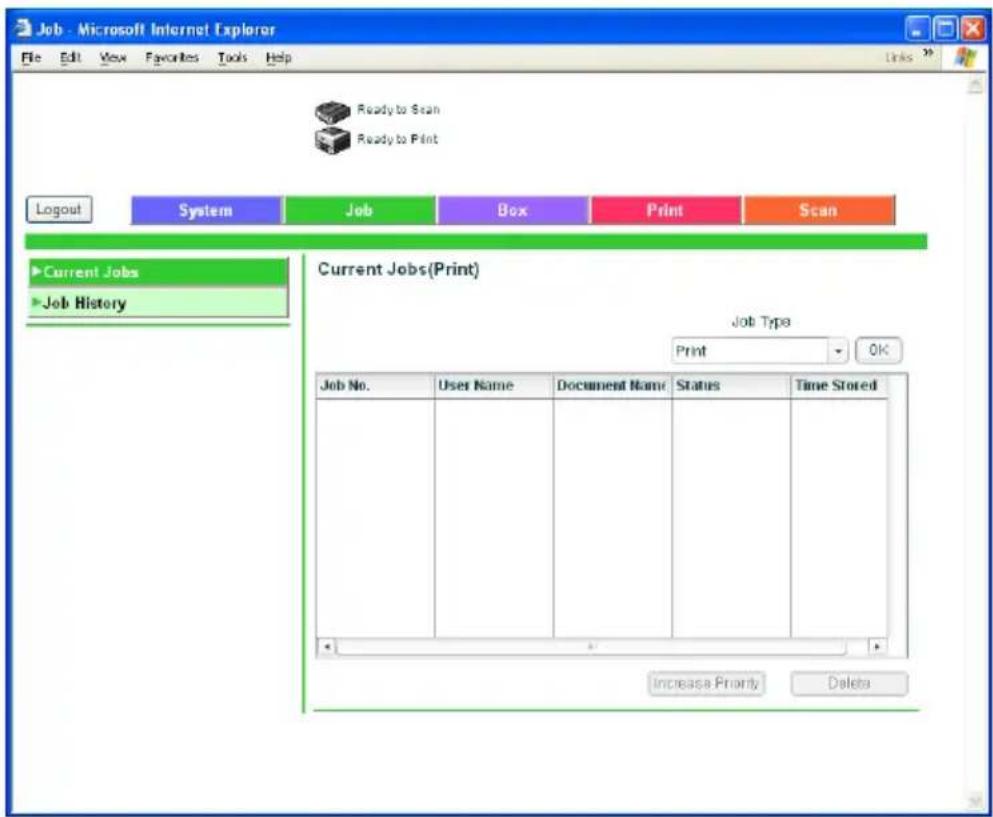
| Item Description | |
| Print Displays the print job list and details. | |
| Scan Transmission Displays the scan job list and details. | |
| Fax Transmission Displays the fax transmission job list and details. | |
| Fax Receive Displays the fax reception job list and details. | |
| HDD/Memory Displays the box job list and details. | |

Note
The job number that was assigned when the job was queued in this machine appears as the job number.
To output (for print jobs) by priority, select the job, and then click the [Increase Priority] button.
To check an address (for transmission jobs), select the job, and then click the [Display Broadcast Destination] button.
To delete a job, select the job, and then click the [Delete] button.
Job tab — Job History
Click the Job tab, click "Job History" in the menu, and then select each function (print and scanning operations) by the job type.
You can check completed jobs.
Sample Print Page
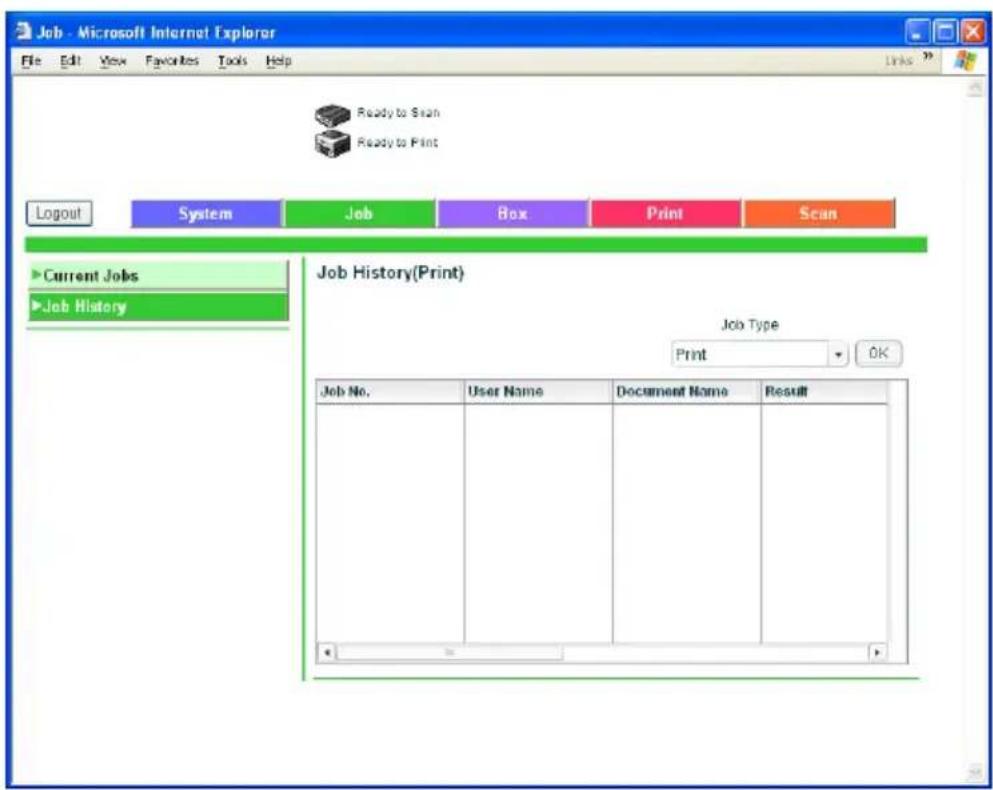
| Item Description | |
| Print Displays the print job list and details. | |
| Scan Transmission Displays the scan job list and details. | |
| Fax Transmission Displays the fax transmission job list and details. | |
| Fax Receive Displays the fax reception job list and details. | |
| HDD/Memory Displays the box job list and details. | |

Note
The job number that was assigned when the job was queued in this machine appears as the job number.
If "HTML" is selected in View Mode when logging in, the details can be check by selecting each job and clicking the [Detail] button.
Print tab
You can check the printer default settings and print various reports.
Print Tab — General Settings
Click the Print tab, click "General Settings" from the menu, and then select each setting classification (general and PCL).
If a print job is sent whose settings are not specified, the settings specified here are used for printing.
Sample general settings page
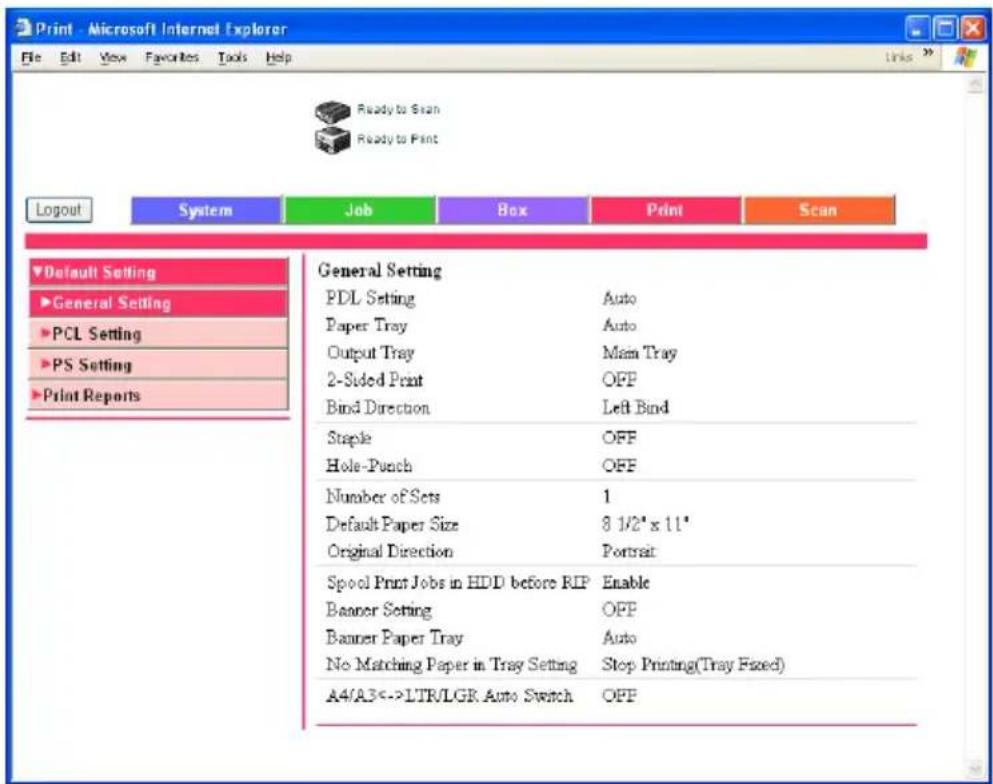
| Item Description | |
| General Settings Displays | information for each item. |
| PCL Settings | |
| PS Settings |
Print tab — Print Reports
Click the Print tab, and then click "Print Reports" in the menu.
You can print various configuration information, the demo pages, and the PCL font information. Select the report that you want to print, select the paper tray from the "Paper Tray" drop-down list, and then click the [Print] button.
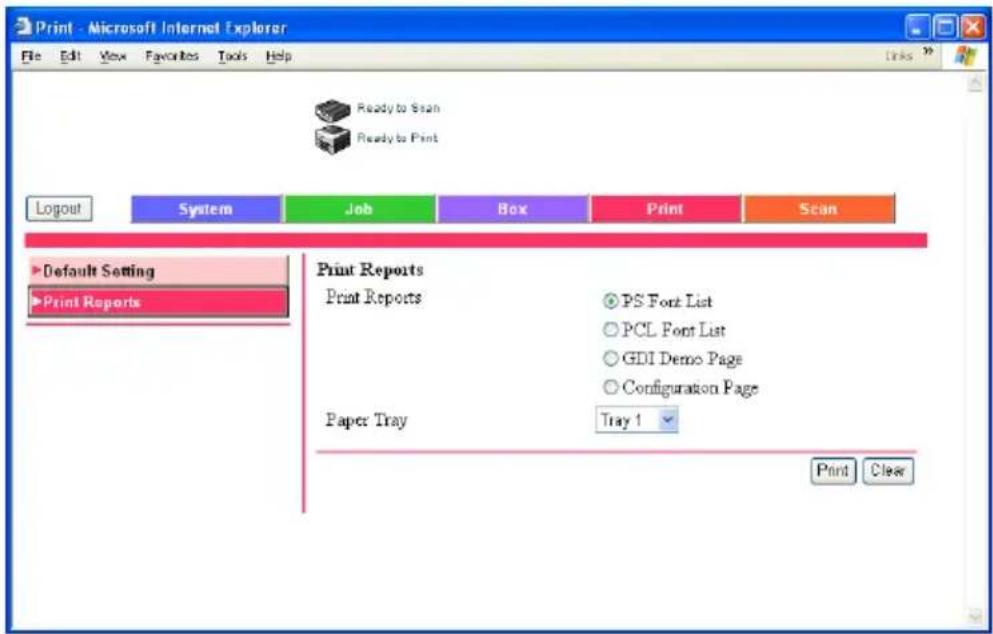

Note
When this machine is processing a job, you may not be able to output reports.
| Item Description | |
| PS Font List Prints the font list that is used by PostScript. | |
| PCL Font List Prints the font list that is used by PCL. | |
| GDI Demo Page Prints a demo page. | |
| Configuration Page Prints | the various configuration information pages of this machine. |
| Paper Tray Select the paper tray for printing reports. | |
Administrator mode
In Administrator mode, you can specify system settings for this machine. You can select from tabs (System, Job, Box, Print, Scan, or Network).
For details on logging on to Administrator mode, refer to “Logging in to the Administrator mode” on page 10-42.

Note
This manual describes the printer related functions. For the box, scanner, and network functions of this machine, refer to the User's Guide [Box Operations] and User's Guide [Network Scanner Operations].
Basic operation
1 Click a tab, and then select a item from the menu.
2 Specify settings for the displayed items. Either enter a setting directly or select one from the drop-down list.
3 Click the [Apply] button to apply the settings.
System tab
On the System tab, information and settings concerning the system configuration of this machine are displayed.
System tab — Import/Export
You can save (export) the setting information of this machine as a file or write (import) the information from a file to this machine.
Specify the information to be imported or exported, and then click the [Next] button.
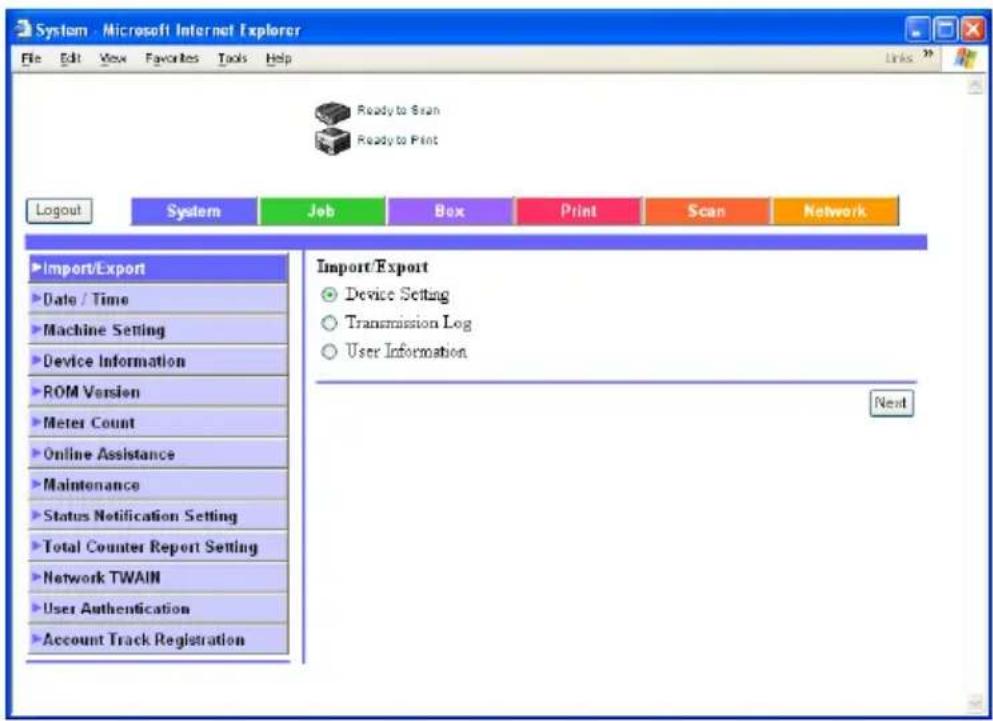
| Item Description | |
| Device Setting Specify the | setting values for the user and administrator settings of this machine. |
| Transmission Log Specify | the transmission log of this machine. |
| User Information Specify | the user registration information. |
Specify the file to import or export.
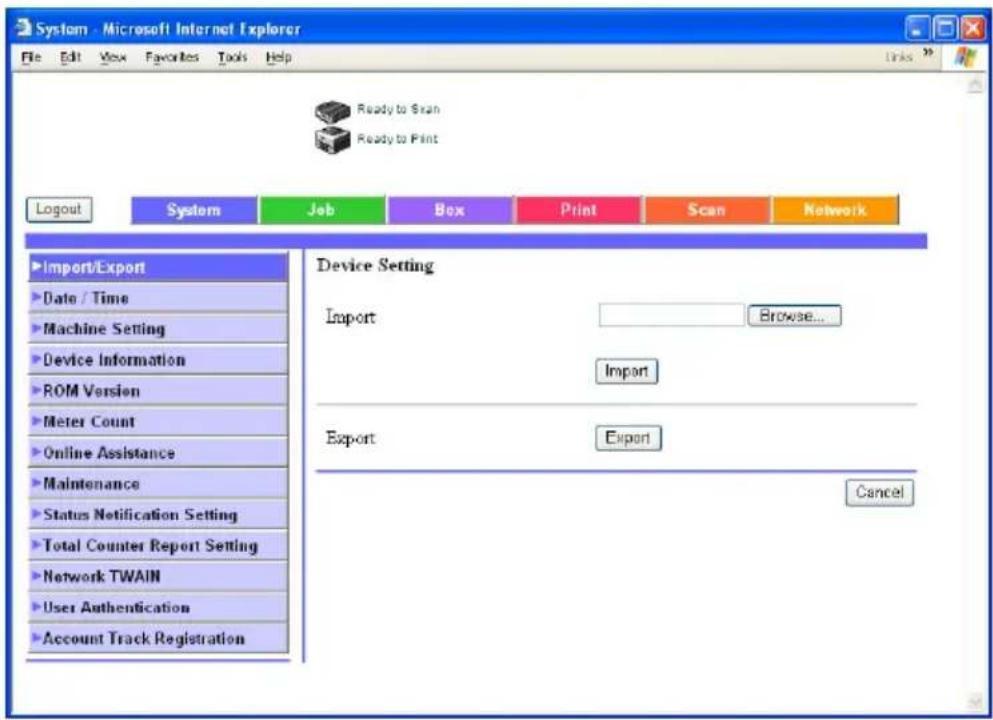
| Item Description | |
| Import To import a file, specify the file name you want to import, and then click the [Import] button. | |
| Export To download a file, click the [Export] button. | |

Note
The files exported cannot be edited.

Note
The transmission log can only be exported.
System tab — Date/Time — Manual Setting
Enter the time and date for this machine.
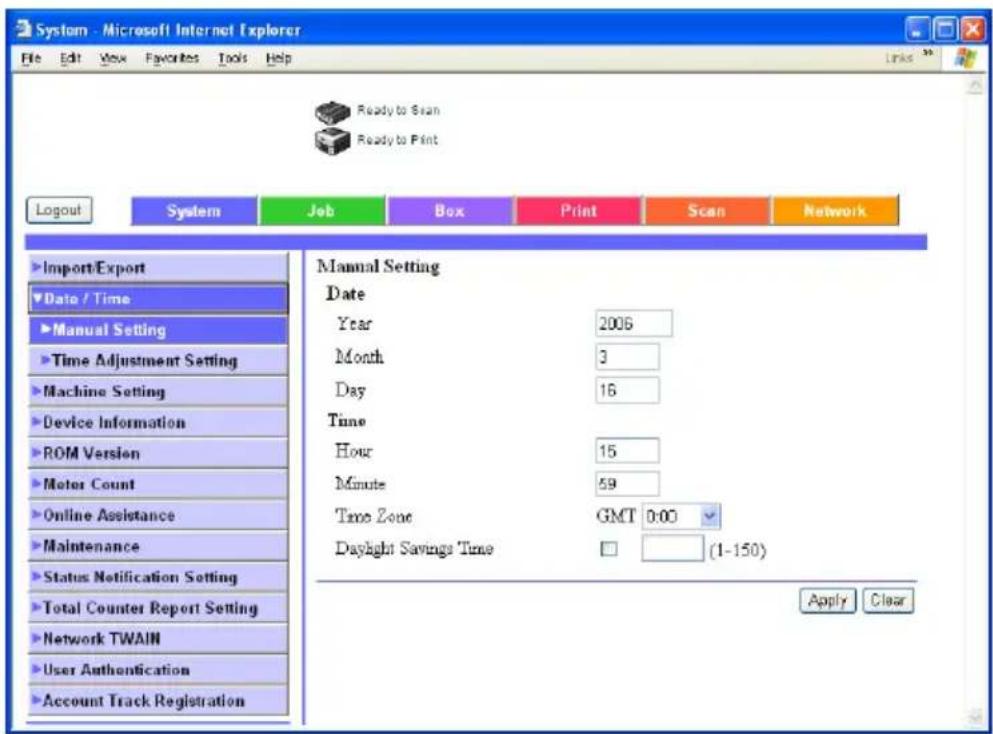
| Item Description | |
| Year Enter the year. | |
| Month Enter the month. | |
| Day Enter the day. | |
| Hour Enter the time. | |
| Minute Enter the minutes. | |
| Time Zone Specify the time | difference from GMT. |
| Daylight Saving Time Spec | fy whether the time is in daylight savings time (input range: 1-150, unit: minutes). |
System tab — Date/Time — Time Adjustment Setting
The time and date of this machine can be set through passive acquisition from the NTP server.
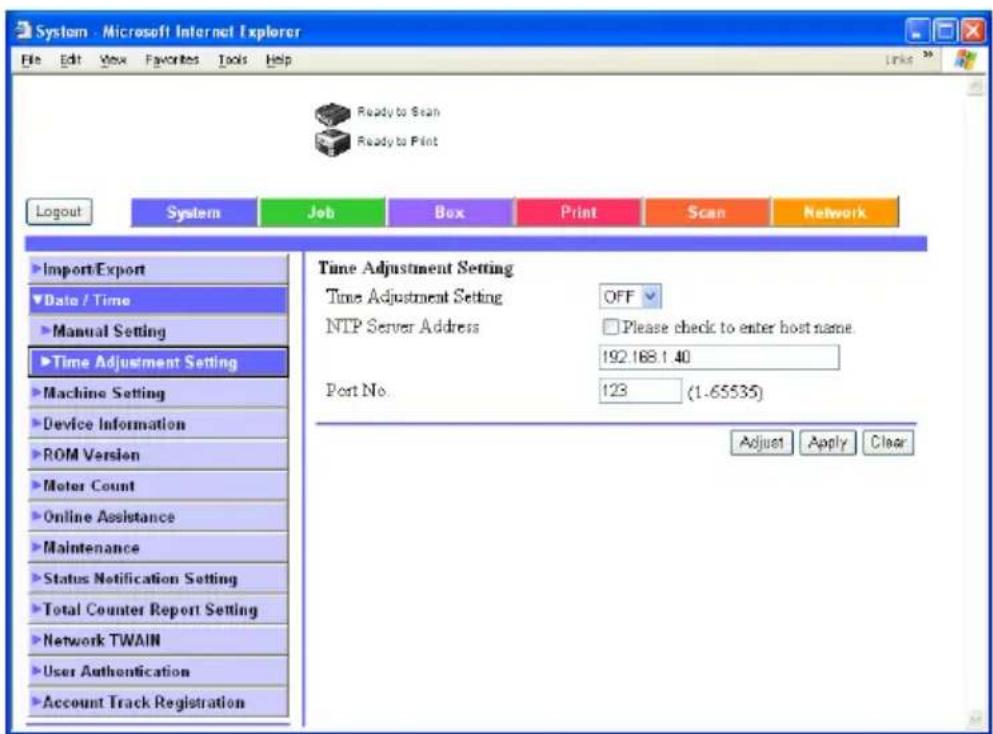
| Item Description | |
| Time Adjustment Setting | Specify whether to enable automatic time acquisition by NTP. |
| NTP Server Address Enter | the NTP server address (up to 255 characters, including - . only, format: “***.***.***.” or FQDN). |
| Port No. Enter the NTP server port (input range: 1-65535). | |
Click the [Adjust] button to connect at the specified conditions to the NTP server and to set the time.
System tab — Machine Setting
You can change the machine setting.
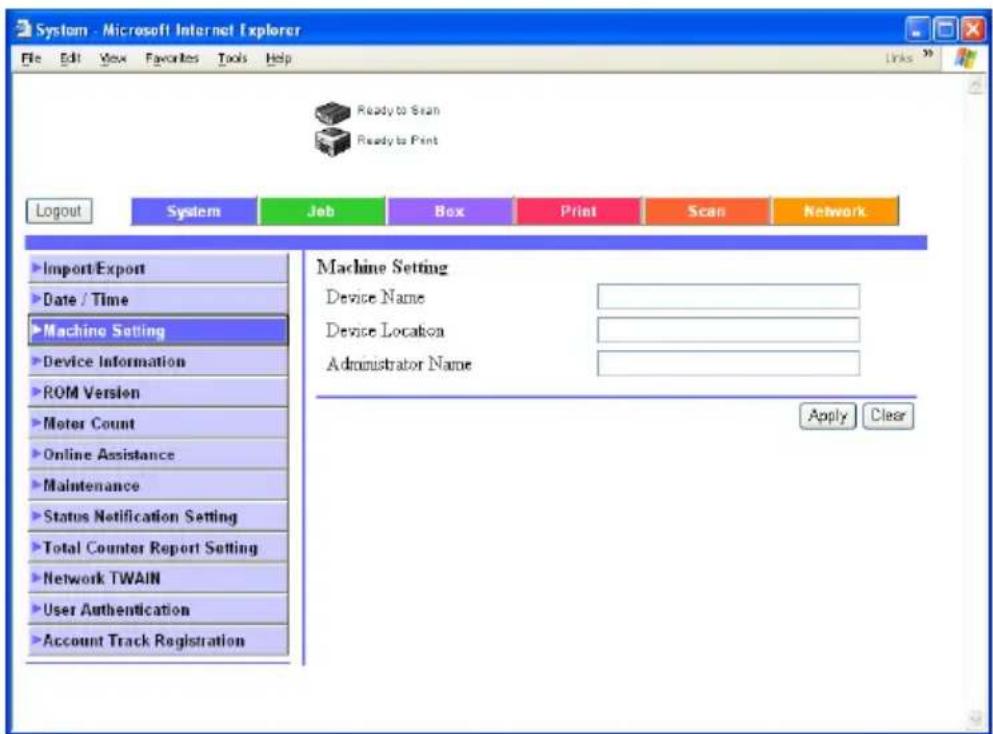
| Item Description | |
| Device Name Specify the | device name (up to 255 characters). |
| Device Location Specify the | device location (up to 255 characters). |
| Administrator Name Specify the administrator name (up to 255 characters). | |
System tab — Device Information
Click the System tab, click "Device Information" in the menu, and then select each setting (Consumables, Input Tray, etc.).
This page shows the configuration and status of this machine.
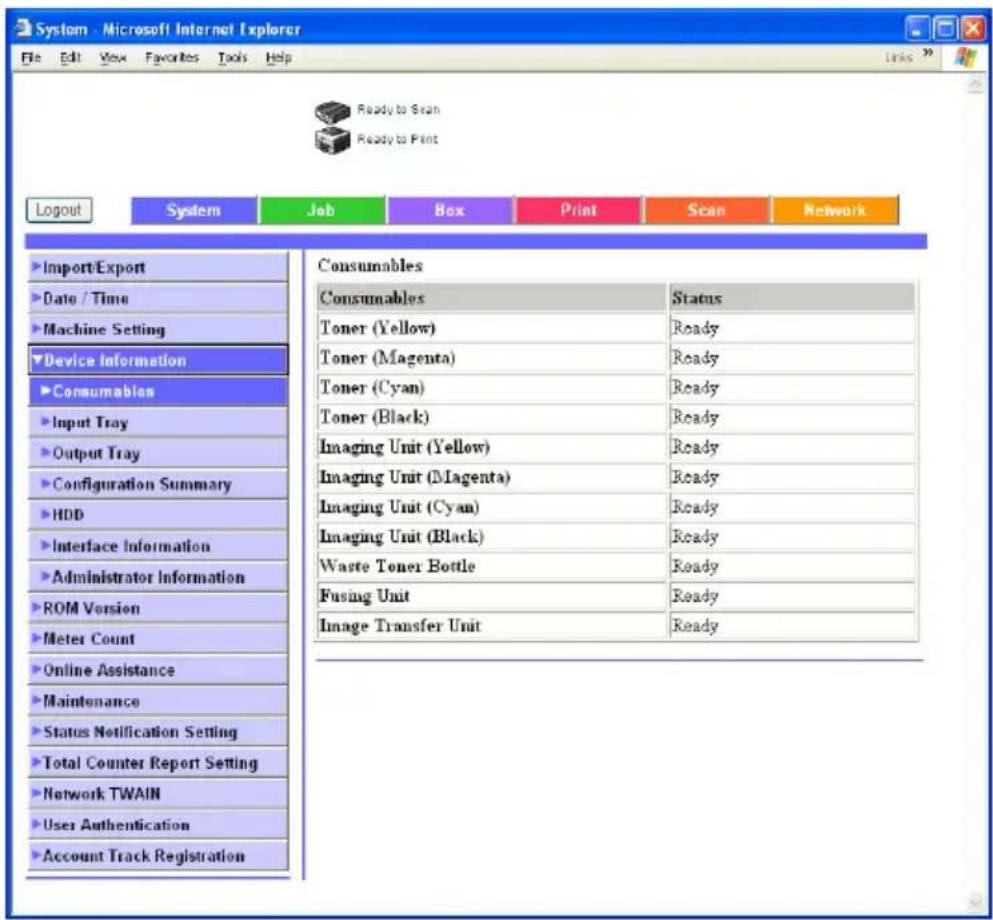

...
Note
The item that is displayed is the same as that on the System tab in "Device Information" in the User mode.
System tab — ROM Version
Displays the ROM version.
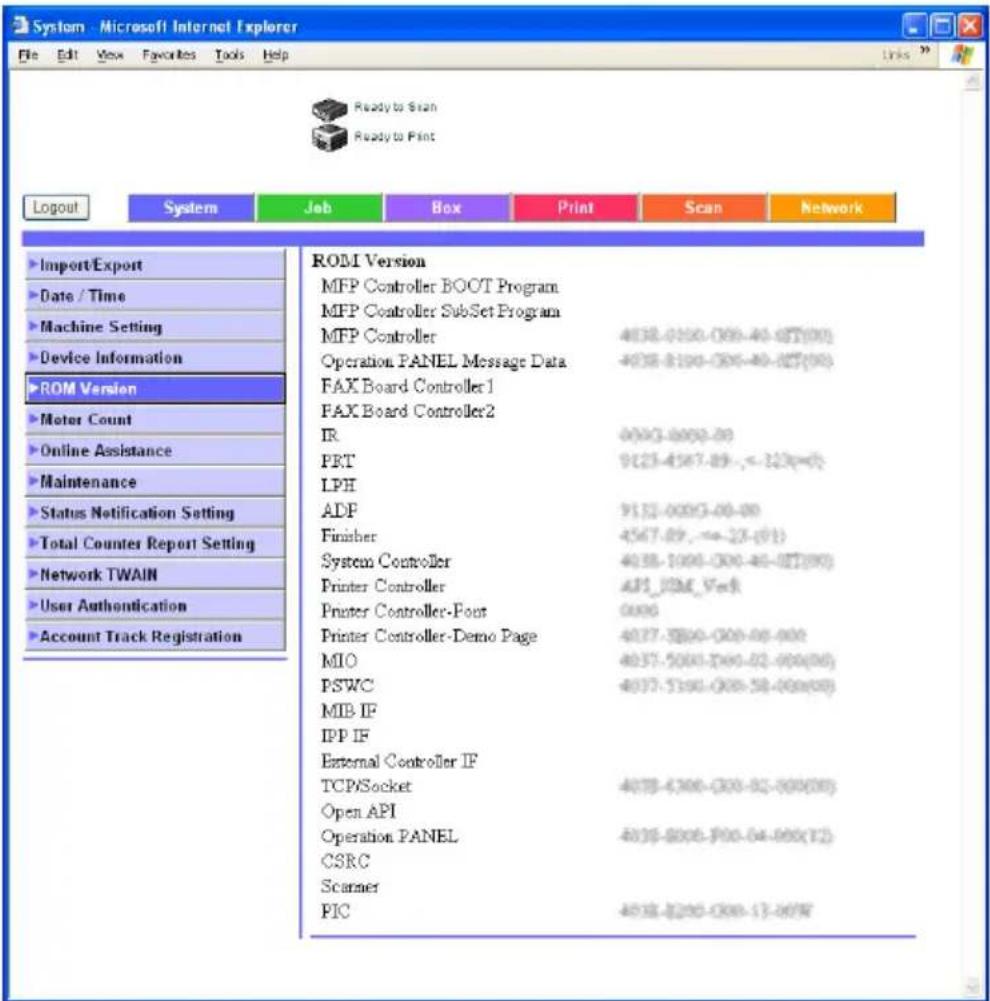
System tab — Meter Count
Click the System tab, and then click "Meter Count" in the menu. You can check the counters that this machine manages.
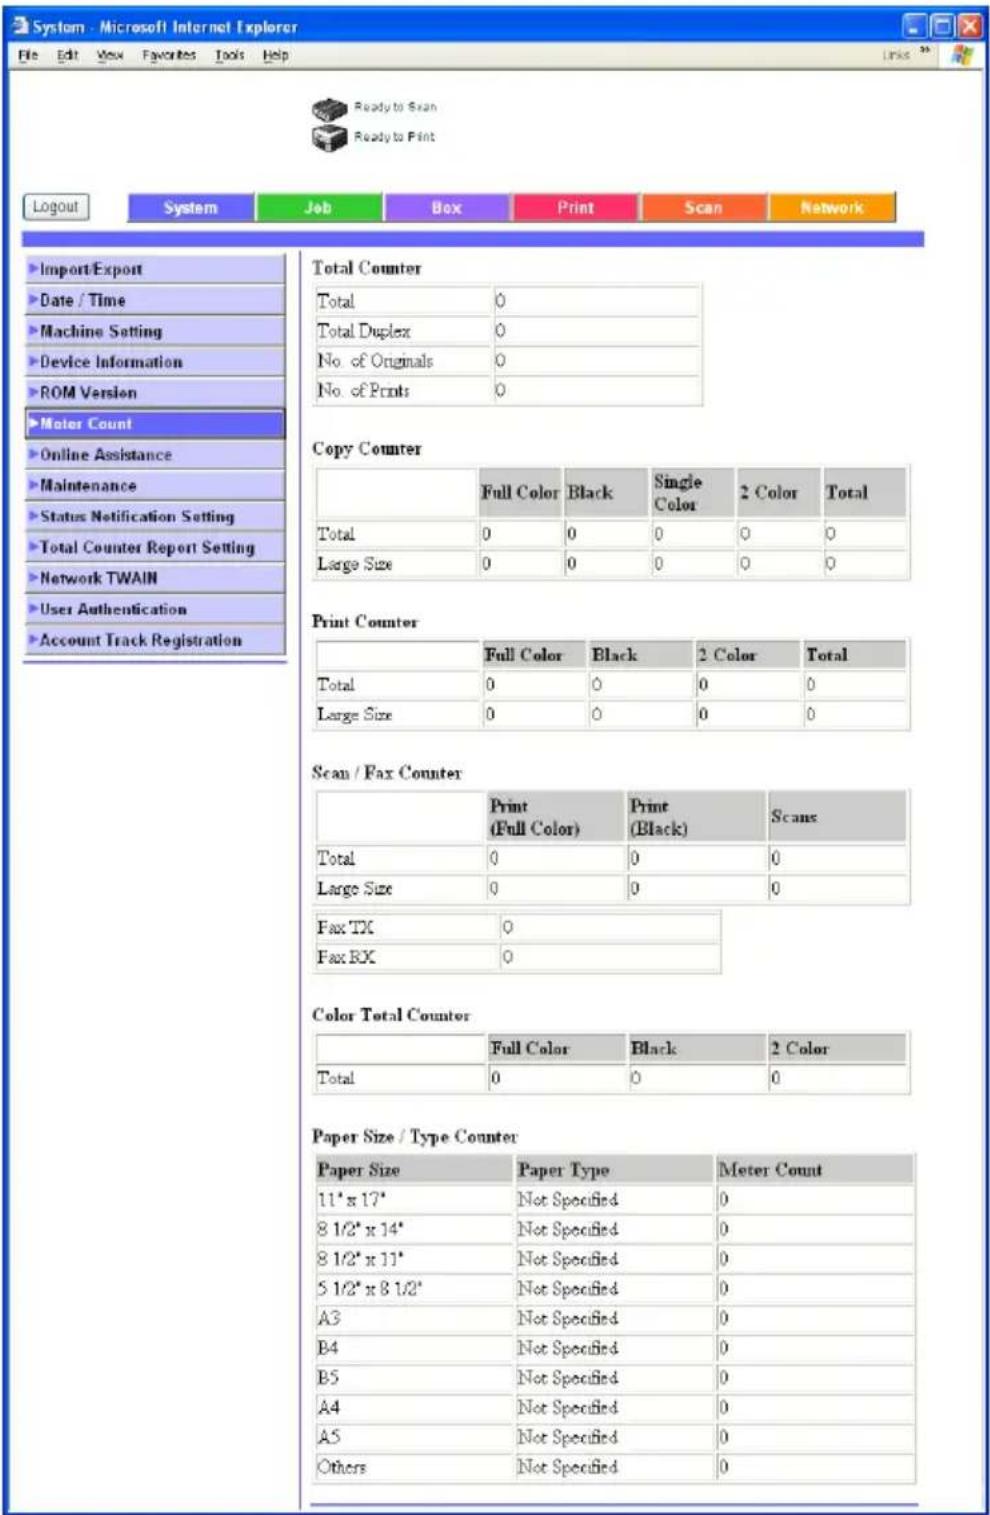
| Item Description | |
| Total Counter Displays the total of the output counter (copies, prints, scans, and faxes). | |
| Copy Counter Displays each counter. | |
| Print Counter | |
| Scan Counter (Displayed as Scan/Fax Counter when the optional fax kit is installed.) | |
| Color Total Counter Displays the color mode counter. | |
| Paper Size / Type Counter | Displays the paper size and paper type counter. |
System tab — Online Assistance
You can changed the online support information. To display this information click the System tab in the User mode, and then click "Online Assistance".
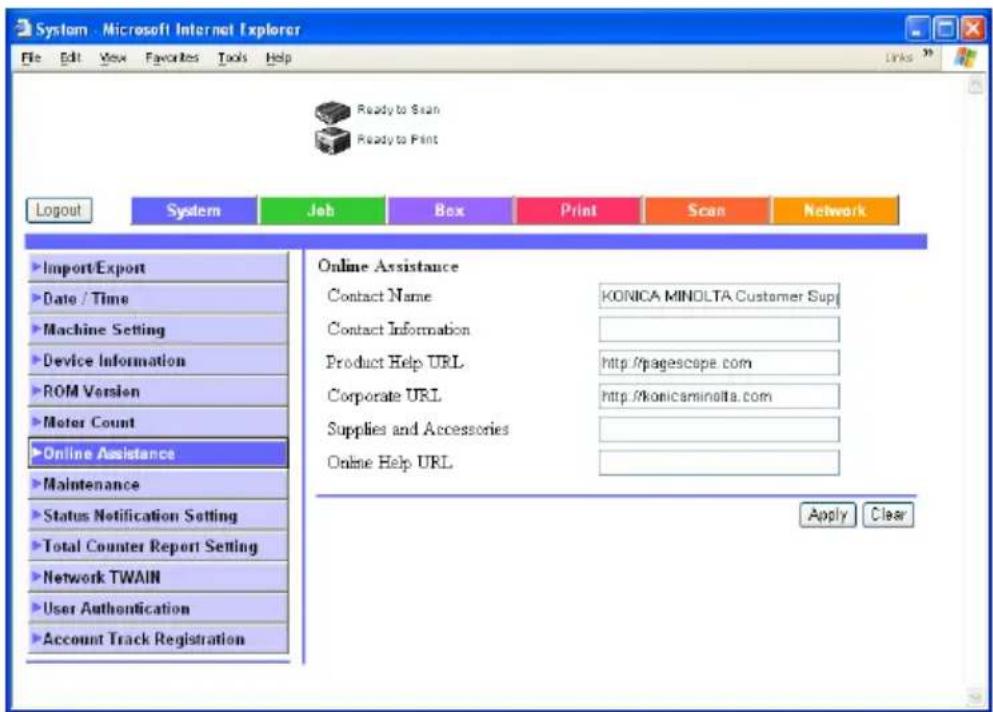
| Item Description | |
| Contact Name Specify the contact name (up to 63 characters). | |
| Contact Information Specify | the contact information (up to 127 characters). |
| Product Help URL Specify the product information Web page URL (up to 127 characters, excluding < >). | |
| Corporate URL Specify the manufacturer's Web page URL (up to 127 characters, excluding < >). | |
| Supplies and Accessories Specify the supply and accessory contact information (up to 127 characters). | |
| Online Help URL Enter the following URL (alphanumeric characters, excluding < >).http://pagescope.com/download/webconnection/onlinehelp/c300/help.html | |
System tab — Maintenance — Network Setting Clear
You can restore the network configuration of this machine to when it was shipped from the factory.
To execute, click the [Clear] button.
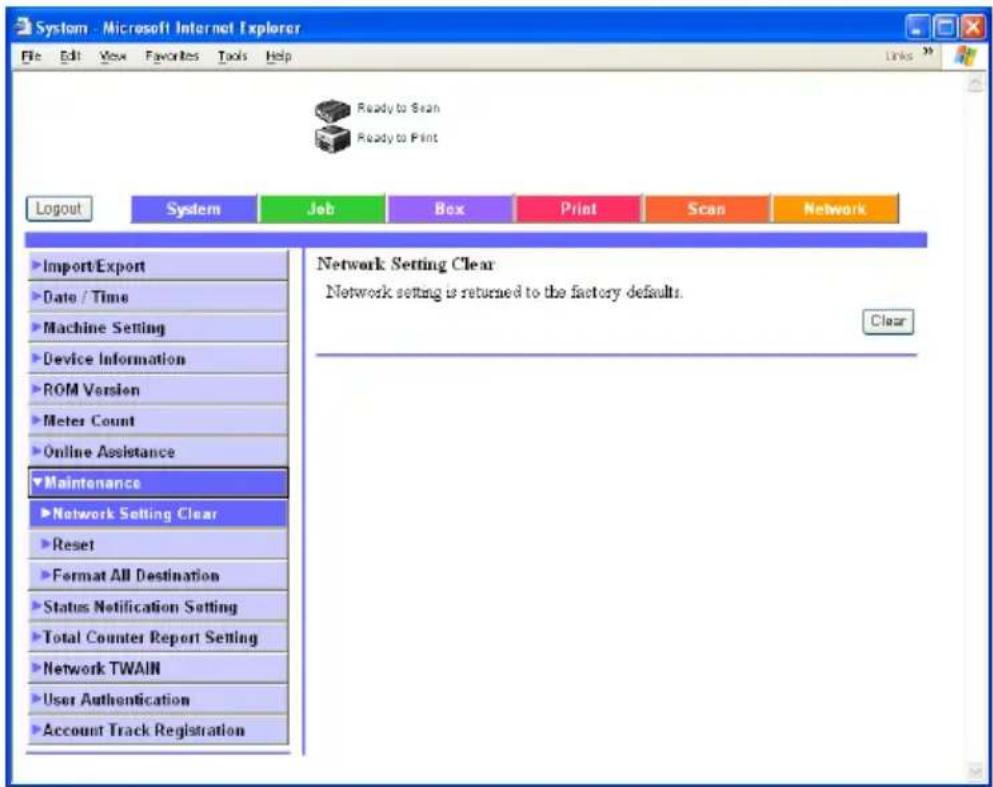

...
Note
If the settings are cleared after completing setup, you will not be able to access PageScope Web Connection until the settings are reset.
If the enhanced security mode is enabled, this menu will not be displayed.
System tab — Maintenance — Reset
Resets the printer controller.
To execute, click the [Reset] button.
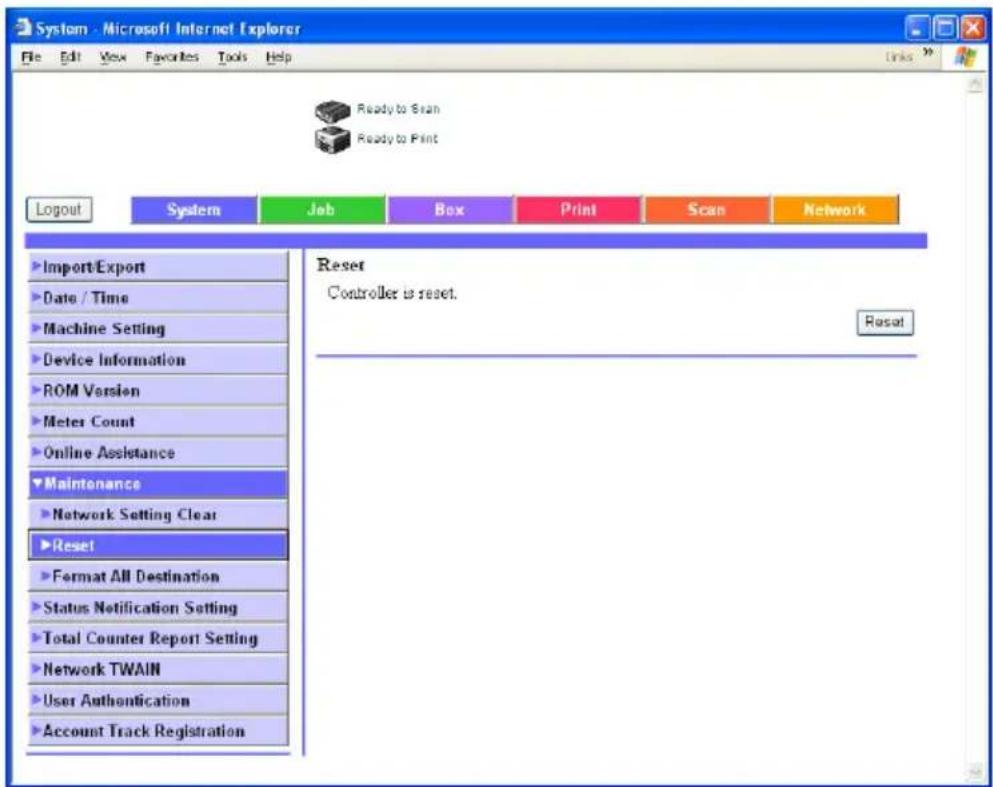
System tab — Status Notification Setting
When an error occurs in this machine, the registrant is notified. Enter the notification time, and then click the [Apply] button.
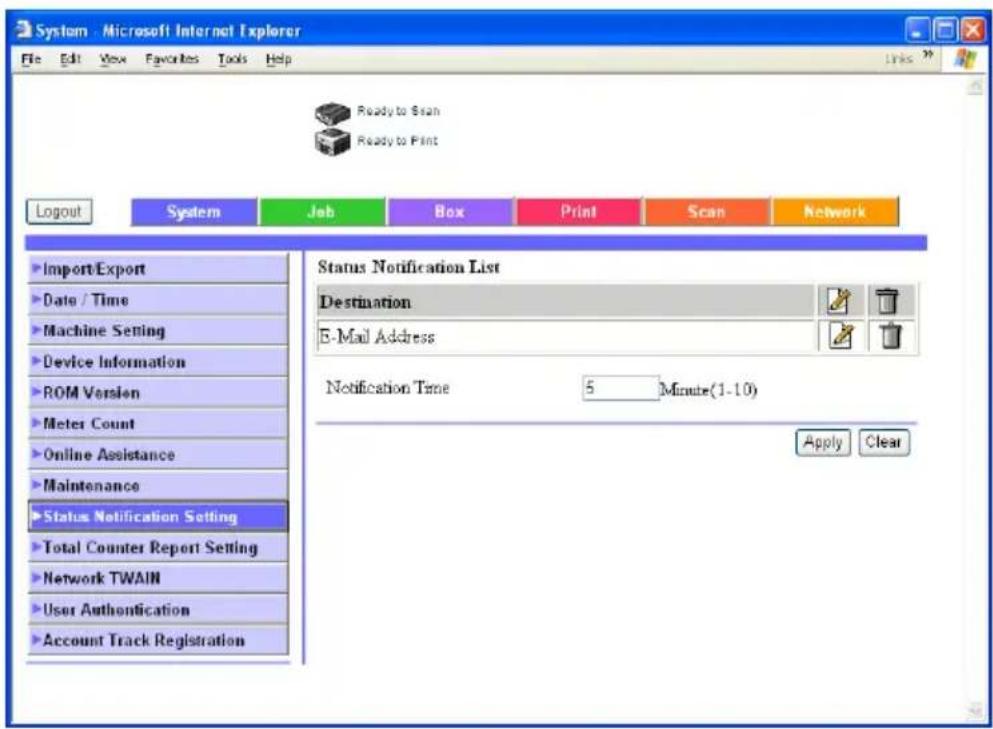
By clicking the [Edit] icon on the right of a notification address, you can specify the destination address and the notification conditions.
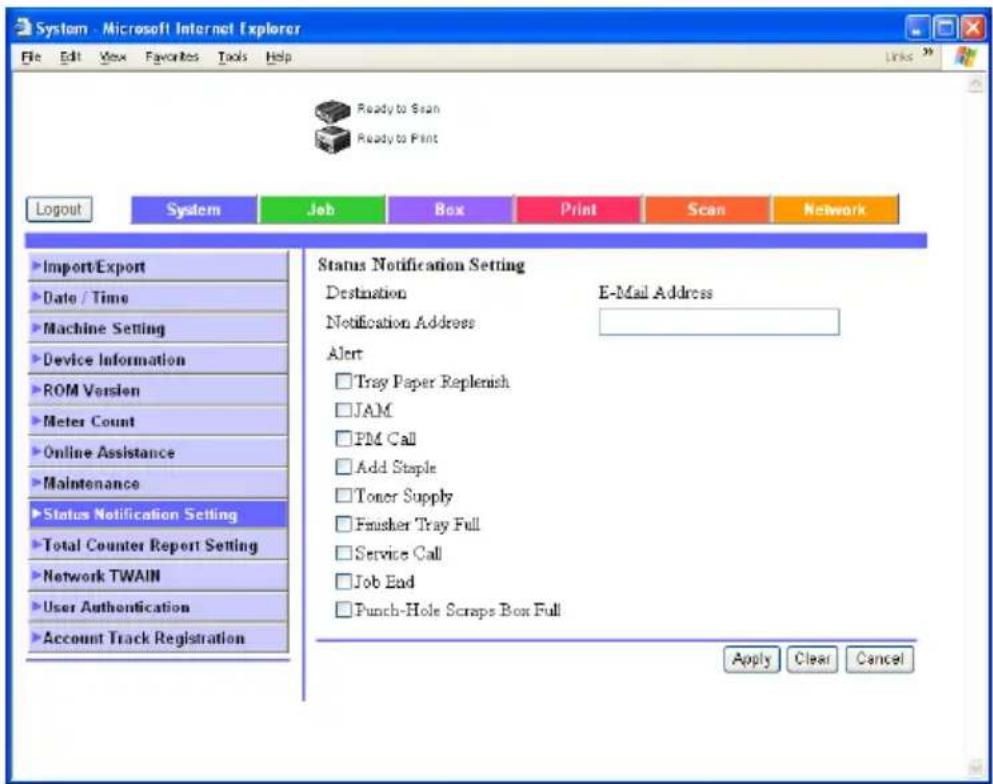
| Item Description | |
| Notification Address Enter the notification destination e-mail address (up to 320 characters). | |
| Tray Paper Replenish Notifies when there is no paper. | |
| JAM Notifies when a paper jam occurs. | |
| PM Call Notifies when there is a scheduled inspection. | |
| Add Staple Notifies when there are no staples. | |
| Toner Supply Notifies when there is no toner. | |
| Finisher Tray Full Notifies that the finisher tray is full. | |
| Service Call Notifies when there is a service call. | |
| Job End Notifies that a job is complete (completed normally). | |
| Punch-Hole Scraps Box Full | Notifies that the hole punch waste must be emptied. |

...
Note
The printer location that is mentioned in the e-mail sent by the status notification function is entered in “Printer Location” from Network tab – IPP Setting. For “Printer Location”, refer to “Network tab — IPP Setting” on page 10-96.
System Tab — Total Counter Report Setting
You can register the settings for notifying the total counter by e-mail and the notification e-mail address.
Enter each item, and then click [Apply] to specify the settings. After specifying the settings, click [Send Now] to send the e-mail notification.
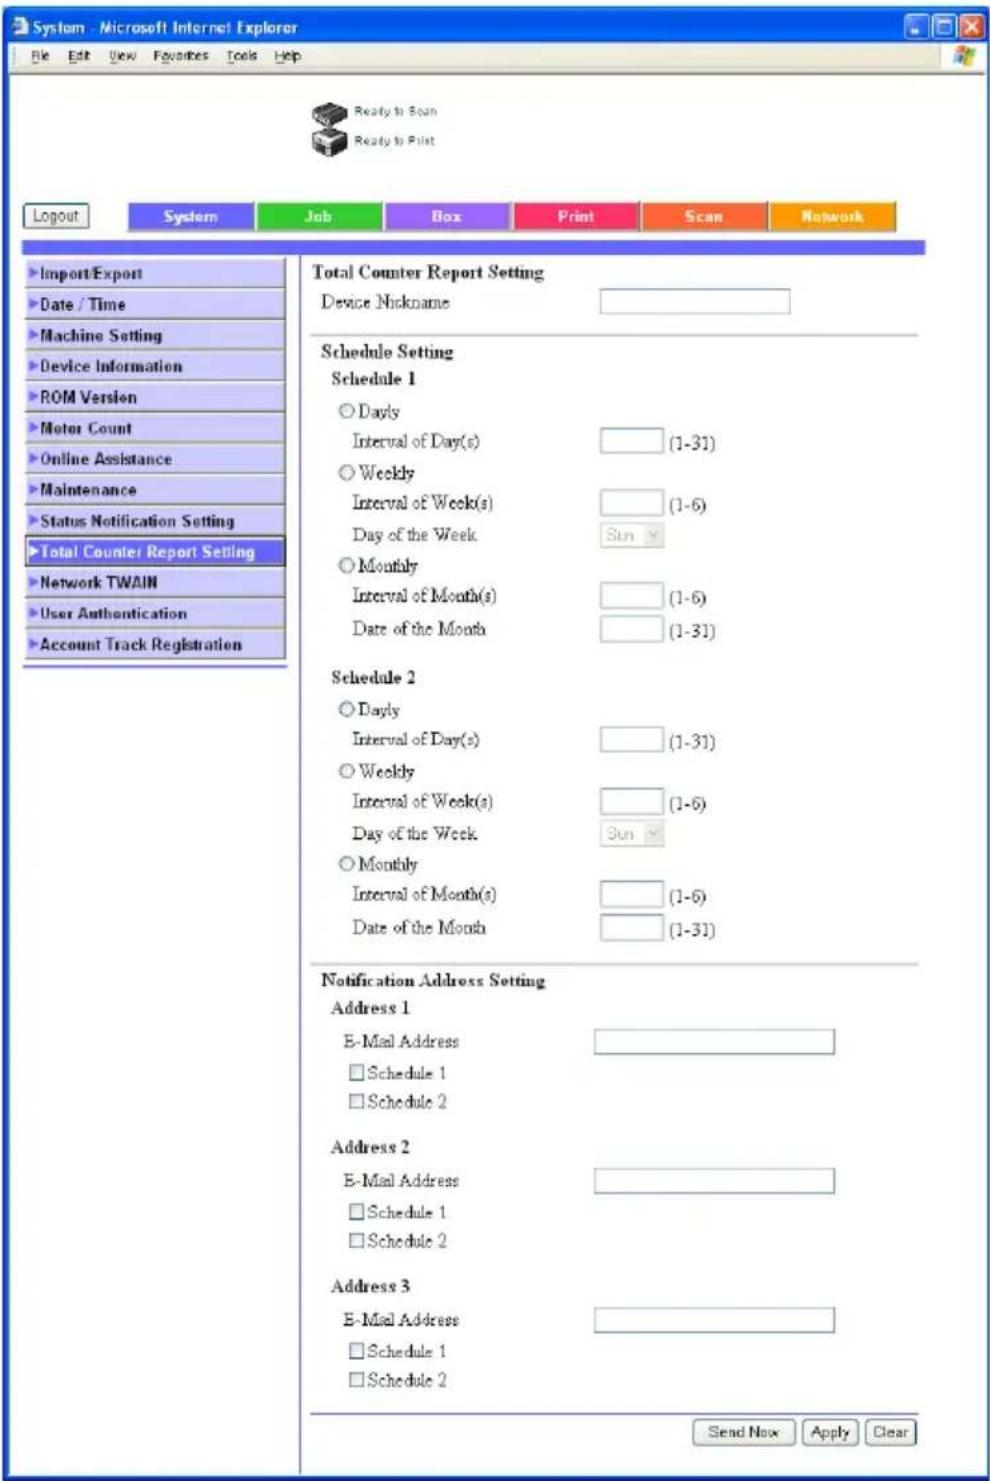
| Item Description | |
| Total Counter Report Setting (Device Nick-name) | Enter the model name to be shown in the list (up to 20 alphanumeric characters and symbols). |
| Schedule Setting Specifies the conditions for the schedule to be notified. Different settings can be registered for schedules 1 and 2. | |
| Notification Address Setting | Enter the notification destination e-mail address (up to 320 characters). The notification schedule can be selected for the address that was entered. |
System tab — User Authentication — User Registration
If performing user authentication on this machine, you can register the users that can log in.
You can register a user in [New Registration]. By clicking the [Edit] icon on the right of a user name, you can edit the conditions of a registered user.
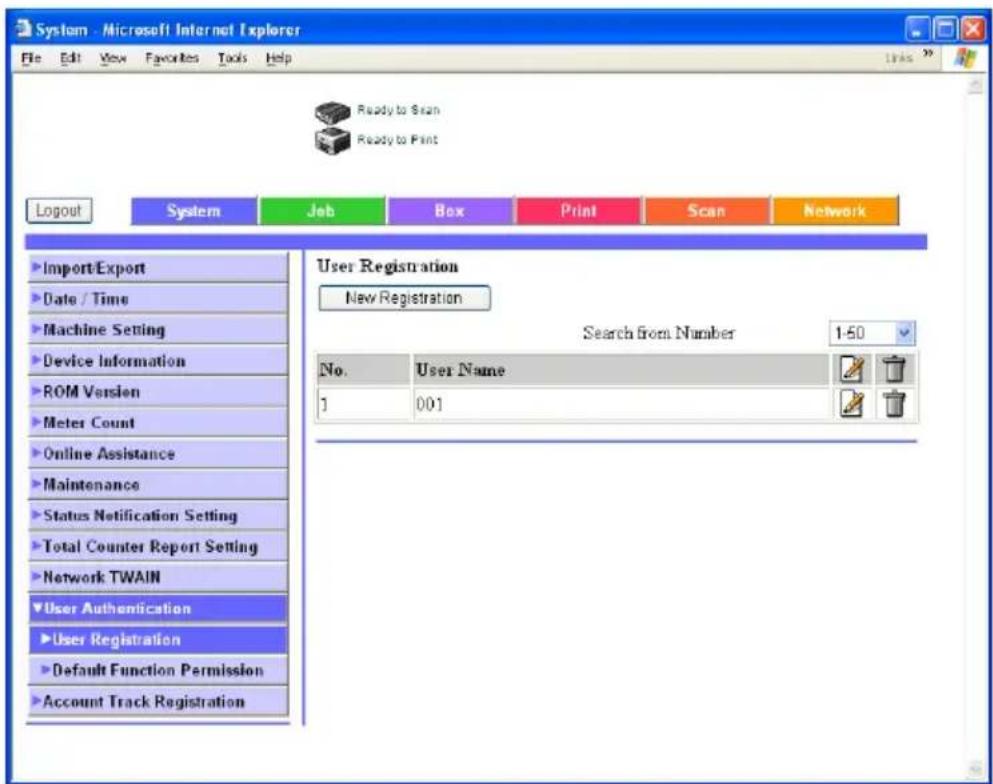
You can specify the user conditions by entering each item and then clicking the [Apply] button.
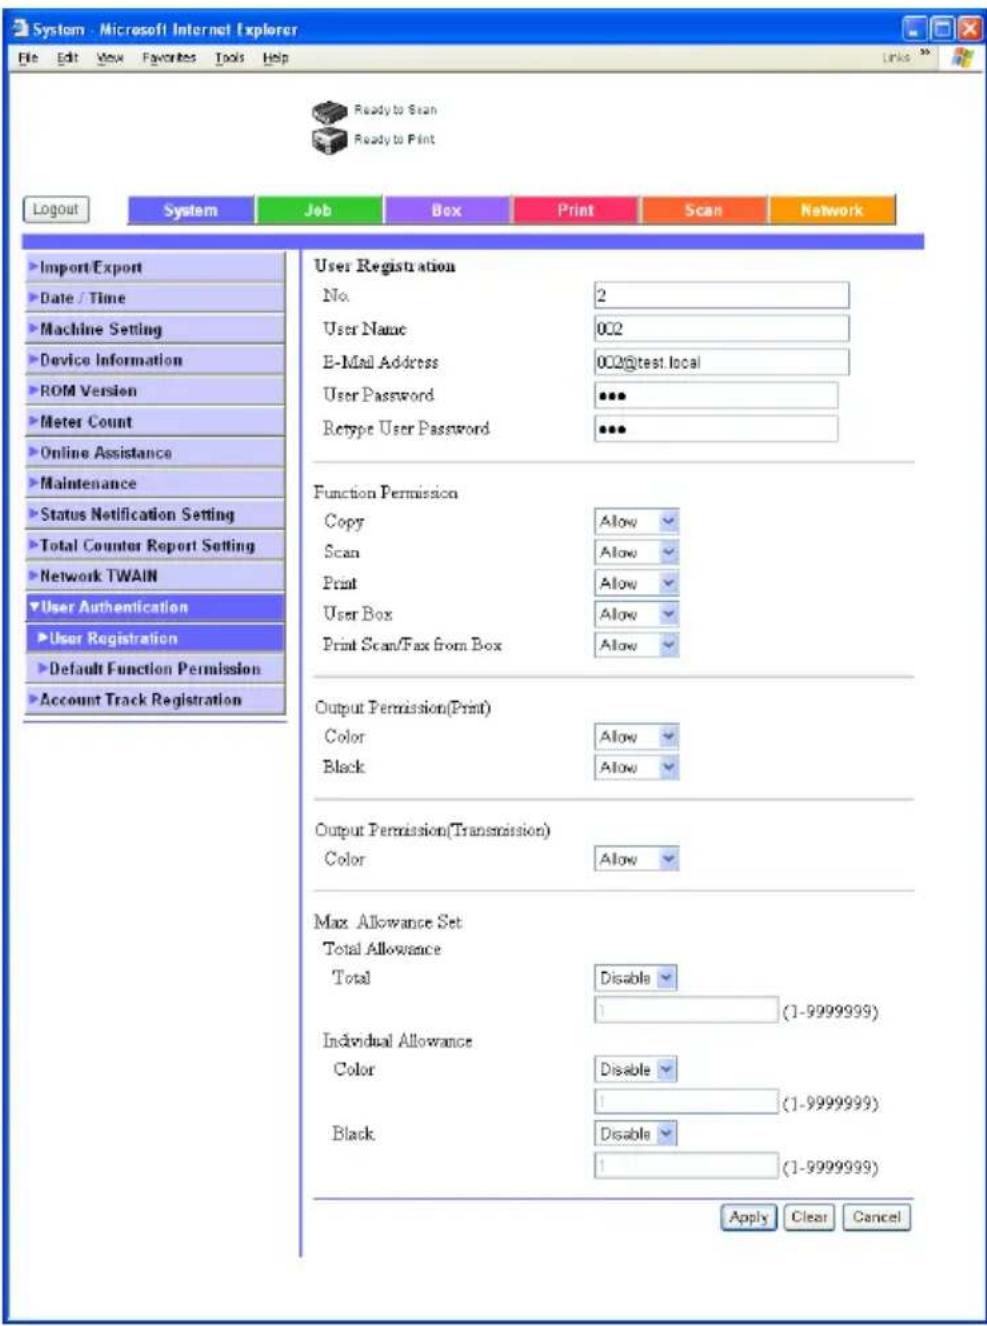
| Item Description | |
| User Registration Enter the user name and password. No.: Assigned number for the user counter (up to 1000) User Name: 1-64 characters E-Mail Address: Up to 320 characters User Password: Up to 64 characters, excluding " + | |
| Function Permission Specify whether each function of this machine can be used. | |
| Output Permission (Print/Transmission) | Specify whether the output function of this machine can be used. |
| Max. Allowance Set Specify the maximum value that can be used. | |
System tab — User Authentication — Default Function Permission
You can specify the default values of the limited functions on the user registration page.
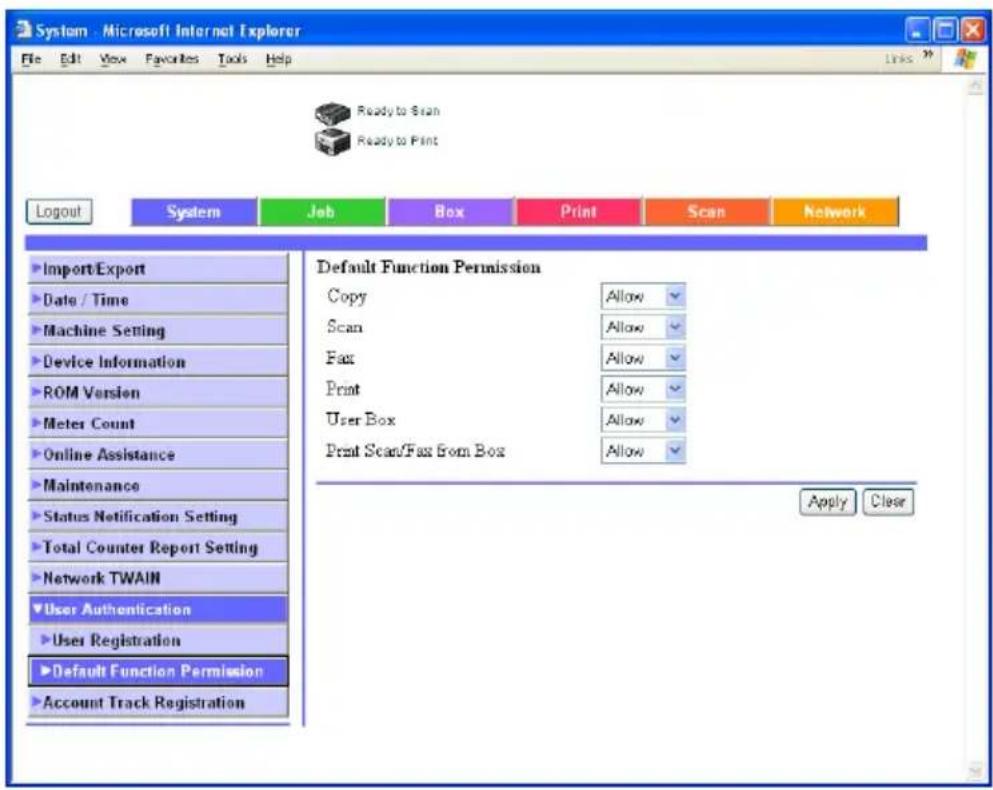
System tab — Account Track Registration
If performing account track on this machine, you can register the account to be managed.
You can register an account in [New Registration]. By clicking the [Edit] icon on the right of the department name, you can edit the conditions of a registered account.
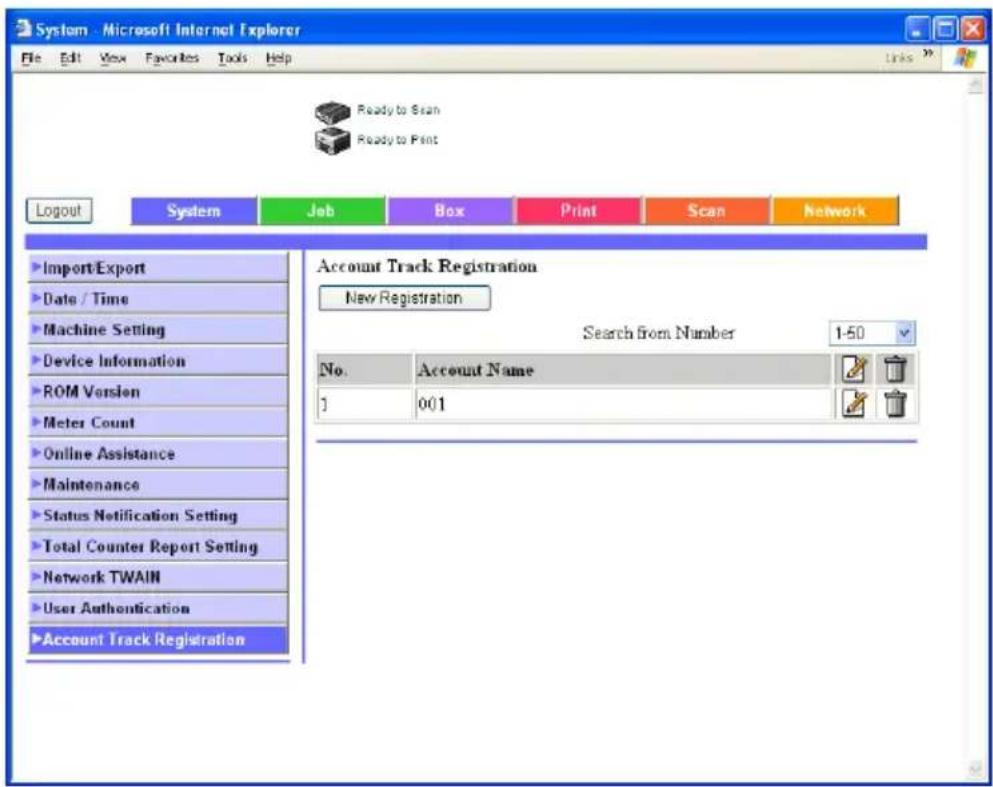
You can specify the account conditions by entering each item and then clicking the [Apply] button.
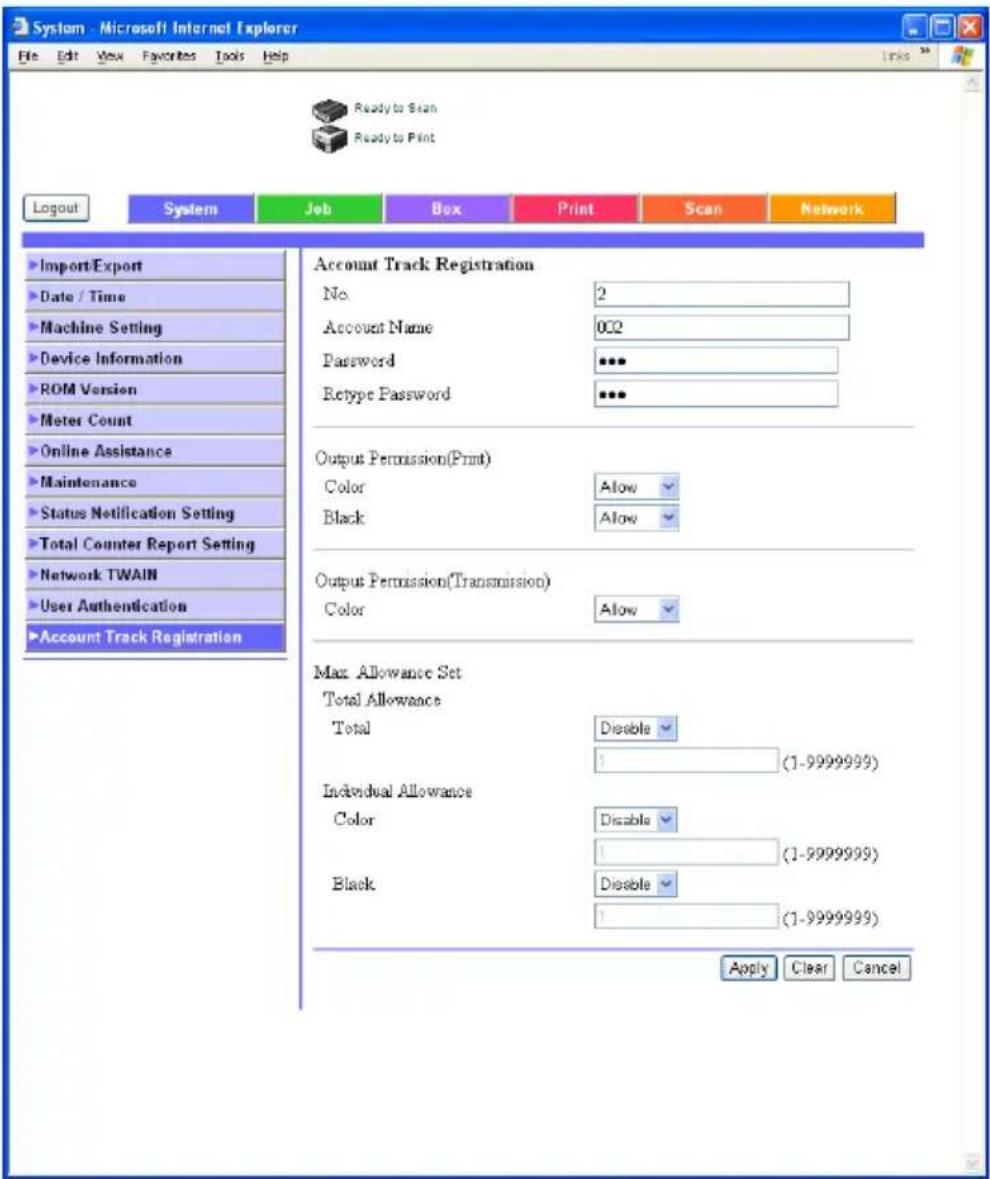
| Item Description | |
| Account Track Registration | Enters the department name and password.No.: Assigned number for the user counter (up to 1000)Account Name: 1-8 characters, excluding " +Password: 1-8 characters, excluding " + |
| Output Permission(Print/Transmission) | Specify whether the output function of this machine can be used. |
| Max. Allowance Set Specify the maximum value that can be used. | |
Job tab — Job History
Click the Job tab, and then click "Job History" in the menu.
Select each function (printing and scanner operations) by the job type.
You can check completed jobs.
Print Page Example
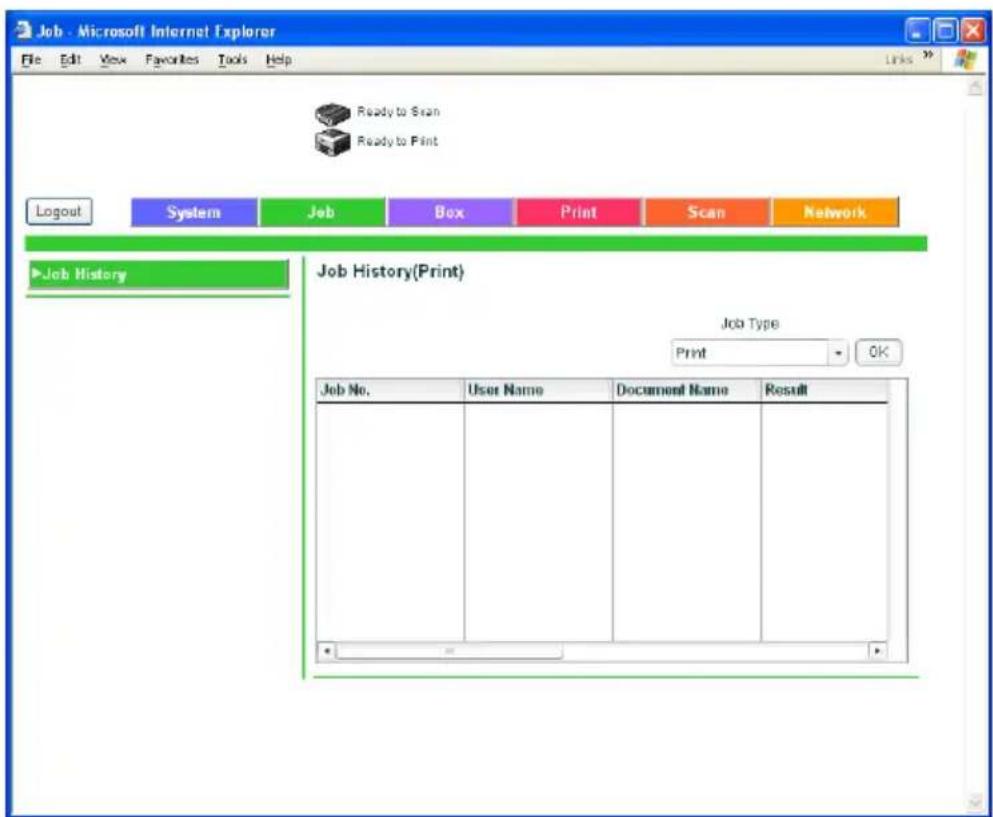

Note
The item that is displayed is the same as that on the Job tab in "Job History" in the User mode.
Print tab
On the Print tab, information and settings concerning the connecting interface and default print settings are displayed.
Print tab — Interface
You can change the interface timeout settings.
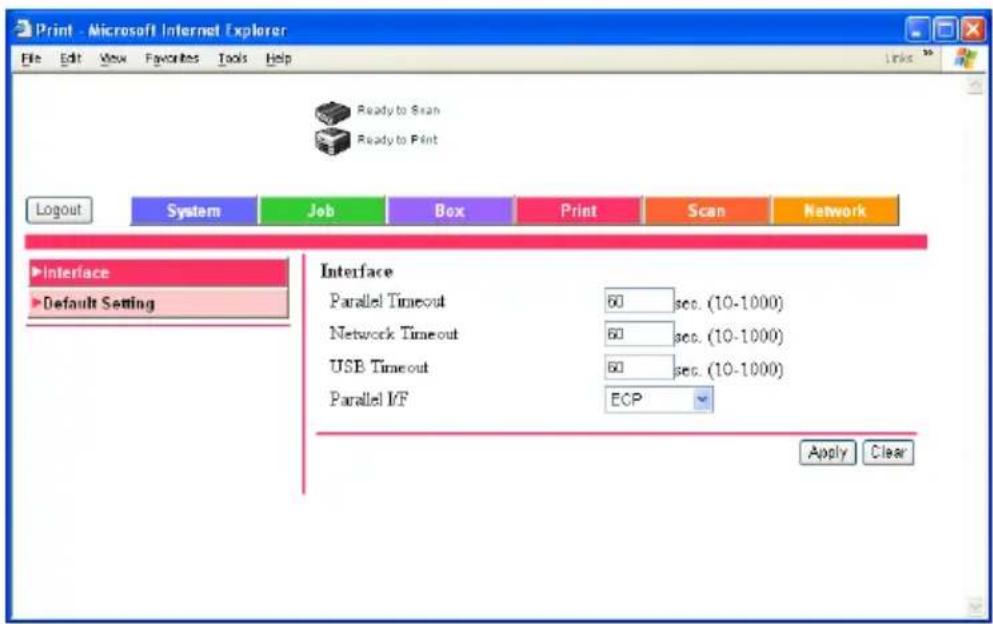
| Item Description | |
| Parallel Timeout Enter the | reception timeout for the parallel port (input range: 10—1000). |
| Network Timeout Enter the | reception timeout for the network (input range: 10—1000). |
| USB Timeout Enter the USB | timeout (input range: 10—1000). |
| Parallel Setting Select the | parallel port transmission method. |


Note
The items that are displayed may vary depending on whether options are installed.
Print tab — Default Settings — General Settings
You can specify the default setting values of the printer.
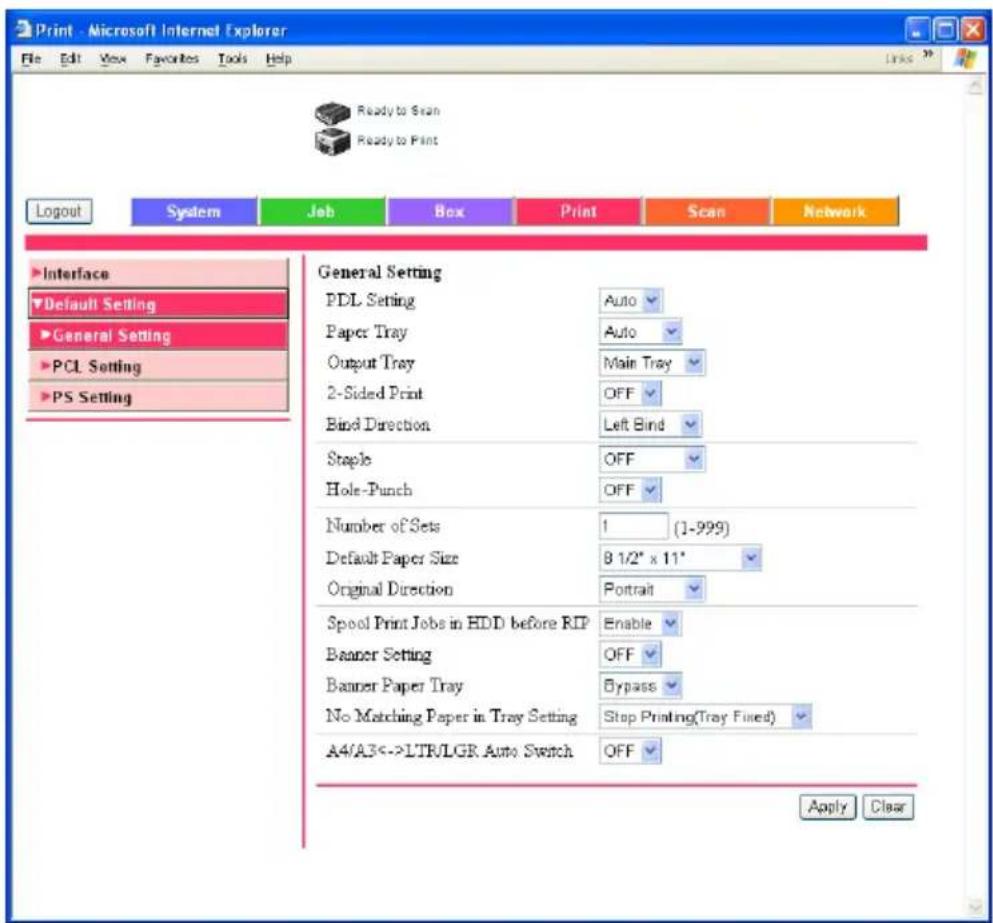
| Item Description | |
| PDL Setting Select the printer descriptive language. | |
| Paper Tray Select the input tray. | |
| Output Tray Select the output tray. | |
| 2-Sided Print Select whether to perform duplex printing. | |
| Bind Direction Select the position of the binding margin. | |
| Staple Select the staple function. | |
| Hole-Punch Select the hole punching function. | |
| Number of Sets Select the number of copies to print. | |
| Default Paper Size Select the paper size. | |
| Original Direction Select the print orientation. | |
| Spool Print Jobs in HDD before RIP | Select the spool function. |
| Banner Setting Specify whether to perform banner page printing. | |
| Banner Paper Tray Select the paper tray to be used for banner page printing. | |
| No Matching Paper in Tray Setting | Selects the operation when the specified input tray does not contain the suitable paper.Switch Trays (Tray Priority): Feeds paper from another paper tray.Stop Printing (Tray Fixed): Displays a warning message without printing. |
| A4/A3 ↔ LTR/LGR Auto Switch | Select whether to print 8-1/2 × 11 (A4)/11 × 17 (A3) documents when the A4 (8-1/2 × 11)/A3 (11 × 17) paper source is selected. |

Note
The staple function is available only when the optional finisher FS-514 is installed.
The hole punch function is available only when optional finishers FS-514 and punch kit PK-510 are installed.

Note
The items that are displayed may vary depending on whether options are installed.
Print tab — Default Settings — PCL Settings
You can specify the default setting values of the PCL mode.
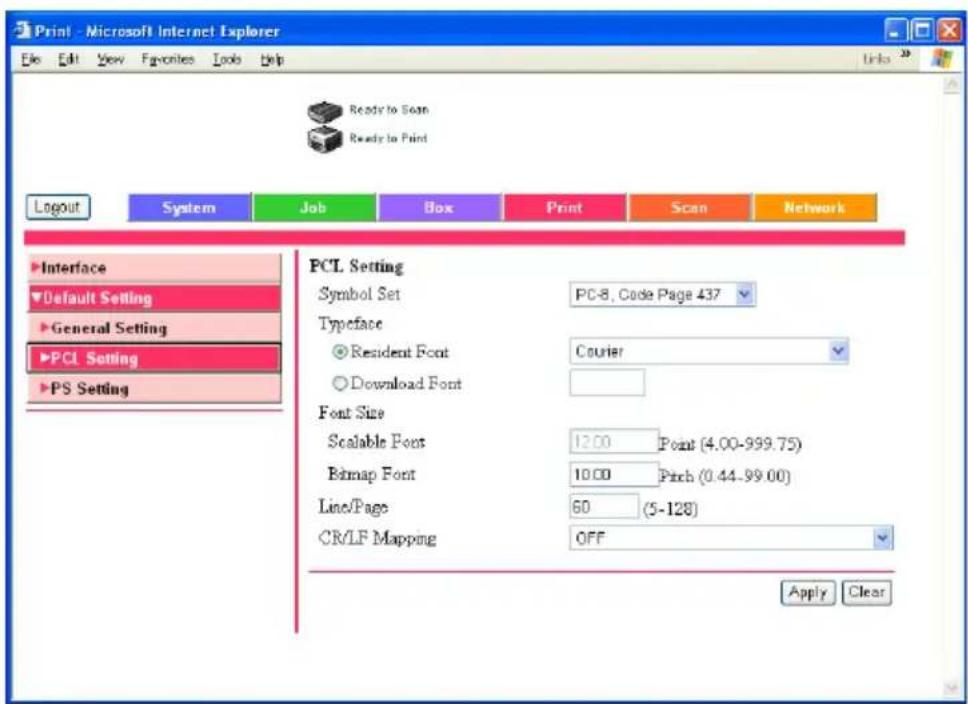
| Item Description | |
| Typeface Select the font. | |
| Symbol Set Select the symbol set. | |
| Font Size Specify the font pitch (input range: 0.44—99.00) or the font point size (input range: 4.00—999.75) according to the selected font. | |
| Line/Page Enter the number of lines per page (input range: 5—128). | |
| CR/LF Mapping Select the CR/LF operation. | |
Print tab — Default Settings — PS Settings
You can specify the default setting values of the PS mode.
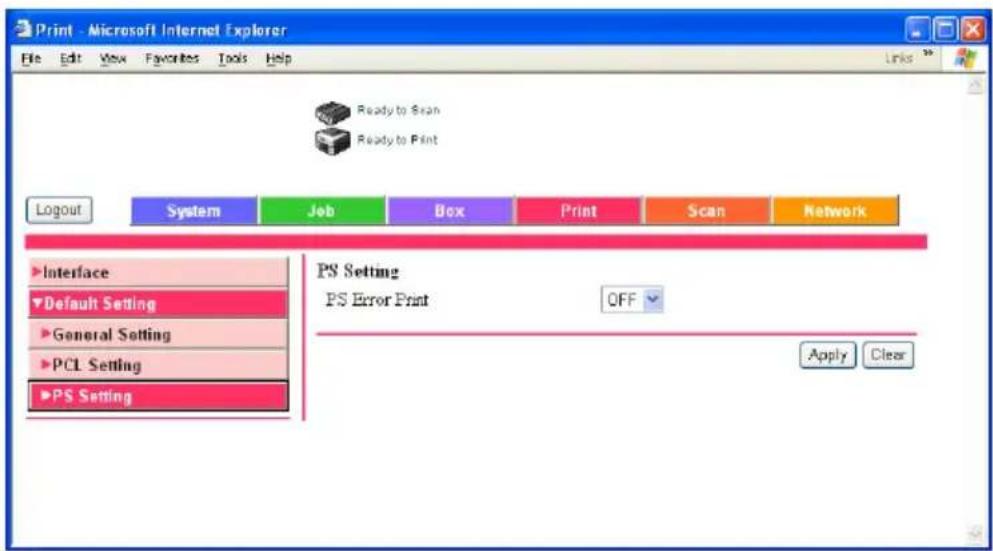
| Item Description | |
| PS Error Print Specify whether to enable the printing of errors. | |
Scan Tab
On the Scan tab, the settings at transmission and the information and settings concerning the address book limitations are displayed.

Detail
If the user is prohibited from registering recipients in the address book, the functions for registering recipients in the address menu will not appear in the menu.
For details on scanner registration, refer to the User's Guide [Network Scanner Operations].
Network tab
On the Network tab, information and settings concerning the network connection are displayed.
Network tab — TCP/IP — TCP/IP
You can specify the TCP/IP settings.
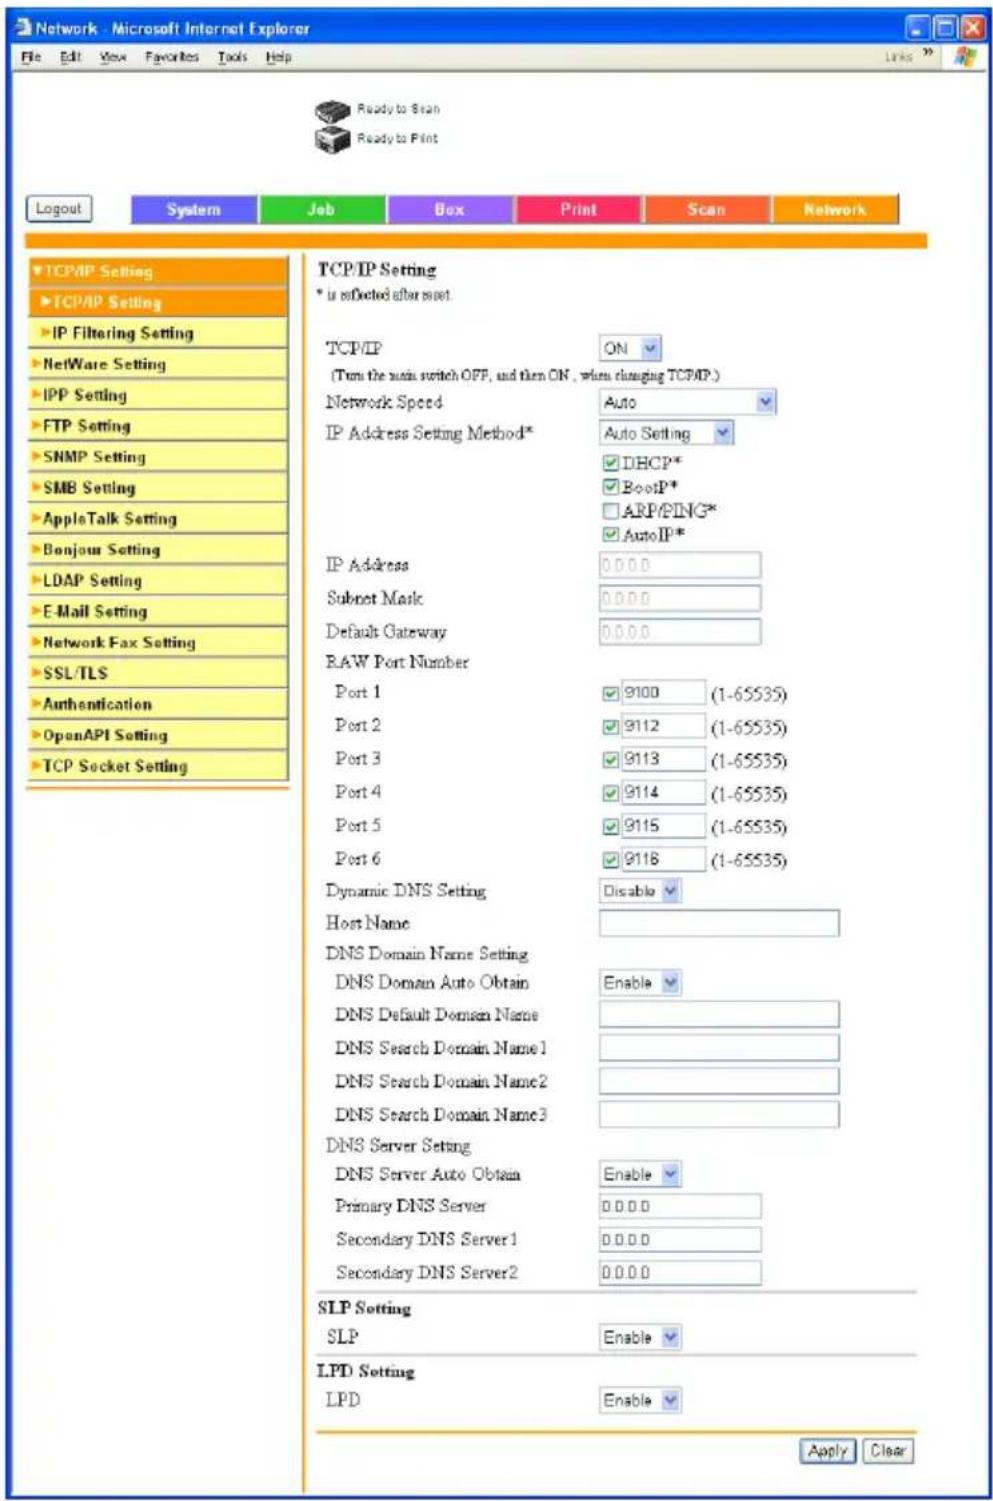
| Item Description | |
| TCP/IP Specify whether to enable TCP/IP. | |
| Network Speed Select the operation speed. | |
| IP Address Setting Method | Select when using a DHCP server. |
| IP Address Specify the IP address of this machine (format: “***.***.***.***”, input range for ***: 0-255). | |
| Subnet Mask Specify the subnet mask connecting to a network (format: “***.***.***.***”, input range for ***: 0-255). | |
| Default Gateway Specify the default gateway address connecting to a network (format: “***.***.***.***”, input range for ***: 0-255). | |
| Port 1 Specify the RAW port number (input range: 1-65535). | |
| Port 2 | |
| Port 3 | |
| Port 4 | |
| Port 5 | |
| Port 6 | |
| Dynamic DNS Setting Specify whether to enable DNS. | |
| Host Name Specify the host name (up to 63 characters). | |
| DNS Domain Name Setting Specify the domain name (up to 254 characters including the characters for the host name). | |
| DNS Server Setting Register a maximum of three DNS servers (format: “***.***.***.***”, input range for ***: 0-255). | |
| SLP Setting Specify whether to enable SLP. | |
| LPD Setting | Specify whether to enable LPD. |

...
Note
To apply any changes to settings for the Network tab, restart this machine (turn the main power off, then on again).
When turning the power off, then on again, be sure to turn the sub-power switch off first, then the main power switch. In addition, wait at least 10 seconds before turning the power on again; otherwise, this machine may not function properly.
Network tab — TCP/IP — IP Address Filtering
You can specify the IP address filter function.
You can specify the access limitations by specifying the IP address of the host.
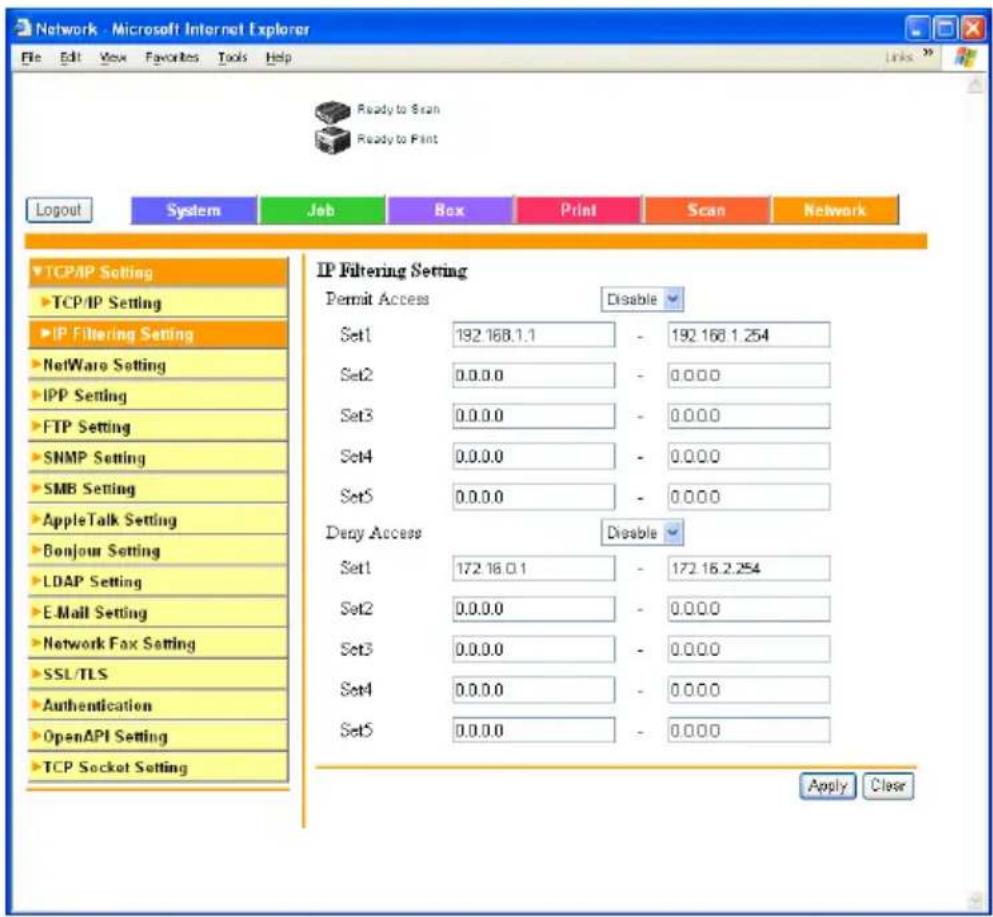
| Item Description | |
| Permit Access Specify whether to enable authorization of an IP address setting. | |
| Setting Range 1—5 Enter the IP address being authorized (format: “****.***.***.***”, input range for **: 0—255). | |
| Deny Access Specify whether to enable rejection of an IP address setting. | |
| Setting Range 1—5 Enter the IP address being rejected (format: “****.***.***.***”, input range for **: 0—255). | |

Note
When allowing (not allowing) a single IP address, the three methods described below can be specified.
Enter the IP address in the start address and enter 0.0.0.0 in the end address. (For example, “192.168.11.22 - 0.0.0.0”).
Enter 0.0.0.0 in the start address and enter the IP address in the end address. (For example, "0.0.0.0 - 192.168.11.22").
Enter the same IP address in the start address and the end address. (For example, “192.168.11.22 – 192.168.11.22”).
Network tab — NetWare — NetWare
You can specify the NetWare settings.
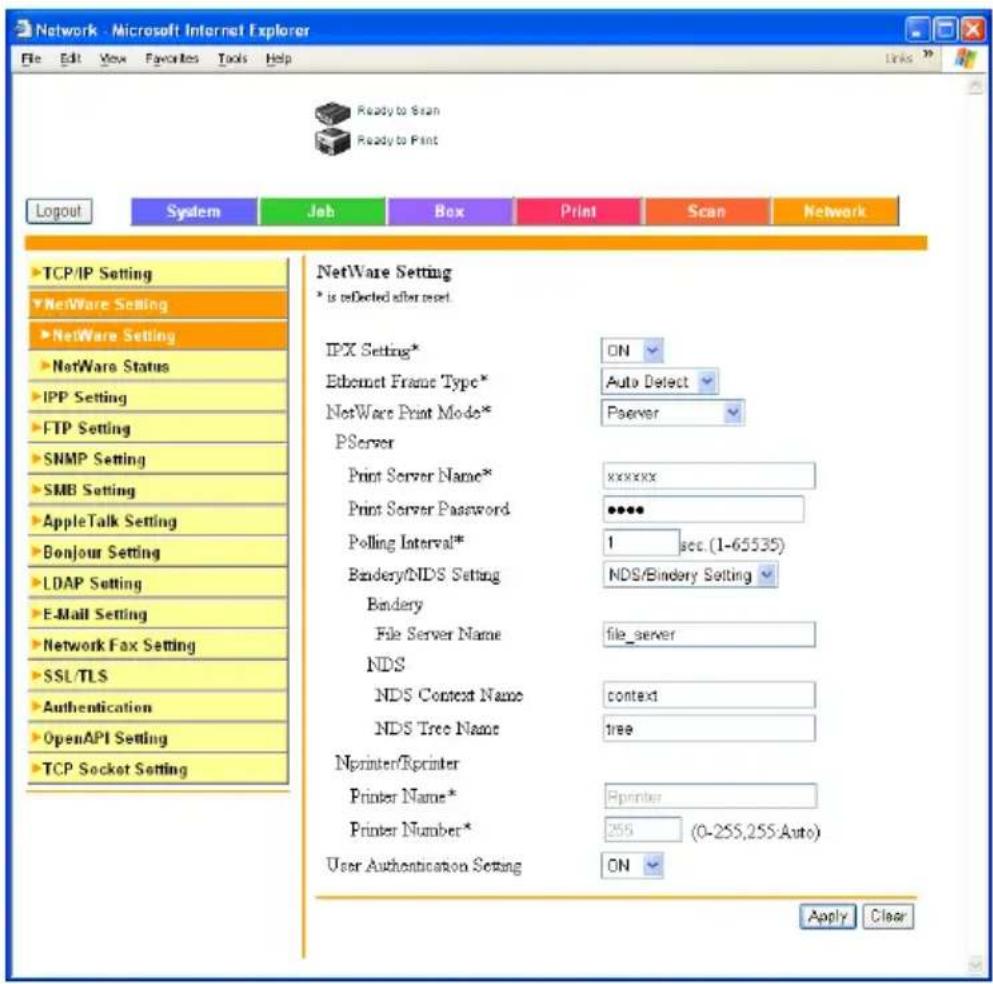
| Item Description | |
| IPX Setting Specify whether to enable NetWare. | |
| Ethernet Frame Type Select the frame type. | |
| NetWare Print Mode Select “P server” or “Nprinter/Rprinter” as the operation mode of the print server. | |
| Print Server Name Enter the print server name (up to 63 characters, excluding / : ; , * [ ] <> | + = ? .). | |
| Print Server Password Specify the print server password (up to 63 characters). | |
| Polling Interval Enter the print queue scan rate (input range: 1—65535 seconds). | |
| Bindery/NDS Setting Select from “NDS” and “NDS/Bindery Setting”. | |
| File Server Name Enter the preferred file server name of bindery (up to 47 characters, excluding / : ; , * [ ] <> | + = ? .). | |
| NDS Context Name Enter the preferred NDS context name (up to 191 characters, excluding / \ : ; , * [ ] <> | + = ? .). | |
| NDS Tree Name Enter the preferred NDS tree name (up to 63 characters, excluding / \ : ; , * [ ] <> | + = ? .). | |
| Printer Name Enter the NPrinter/RPrinter printer name (up to 63 characters, excluding / \ : ; , * [ ] <> | + = ? .). | |
| Printer Number Enter the NPrinter/RPrinter printer number (input range: 0–255). | |
| User Authentication Setting | Specify whether to perform user authentication with a NetWare connection. |

Reminder
To apply any changes to the settings for "IPX Setting", "Ethernet Frame Type", "NetWare Print Mode", "Print Server Name", "Polling Interval", "Printer Name", and "Printer Number", which are marked with an asterisk, restart this machine (turn the main power off, then on again).
When turning the power off, then on again, be sure to turn the sub-power switch off first, then the main power switch. In addition, wait at least 10 seconds before turning the power on again; otherwise, this machine may not function properly.
Network tab — NetWare — NetWare Status
"Server Name" and "Queue Name" appear as the NetWare connection status.
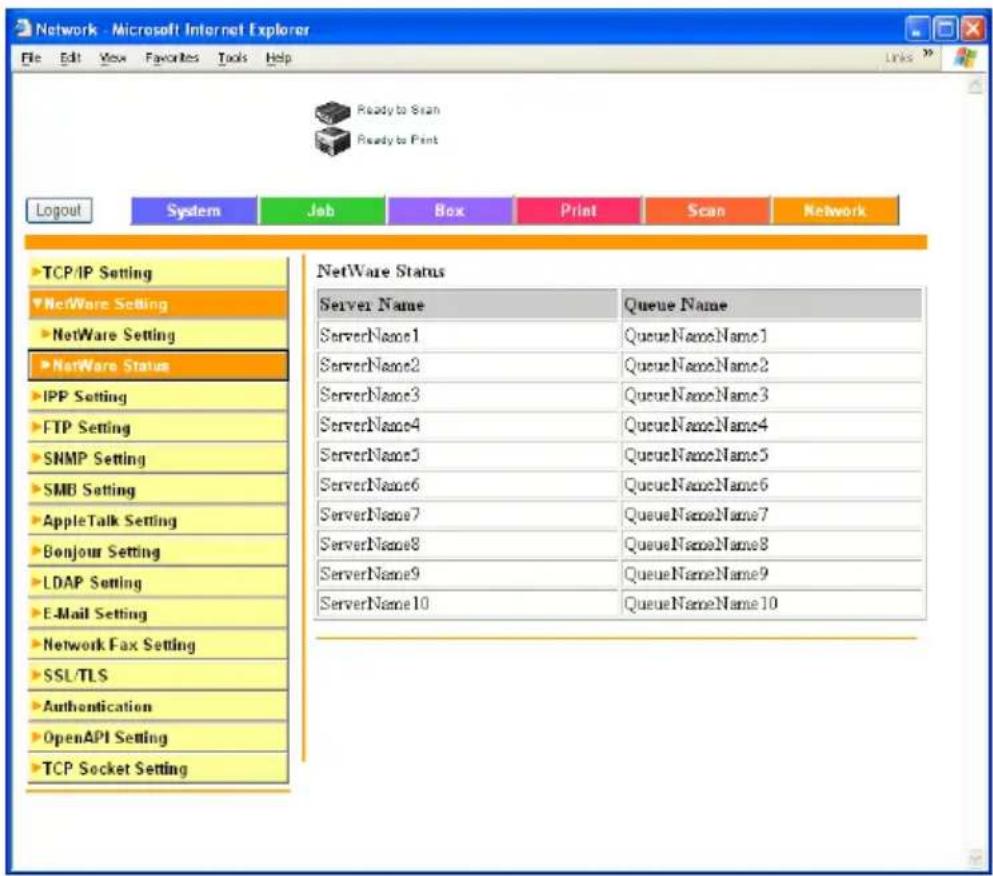
Network tab — IPP Setting
You can specify the IPP print settings.
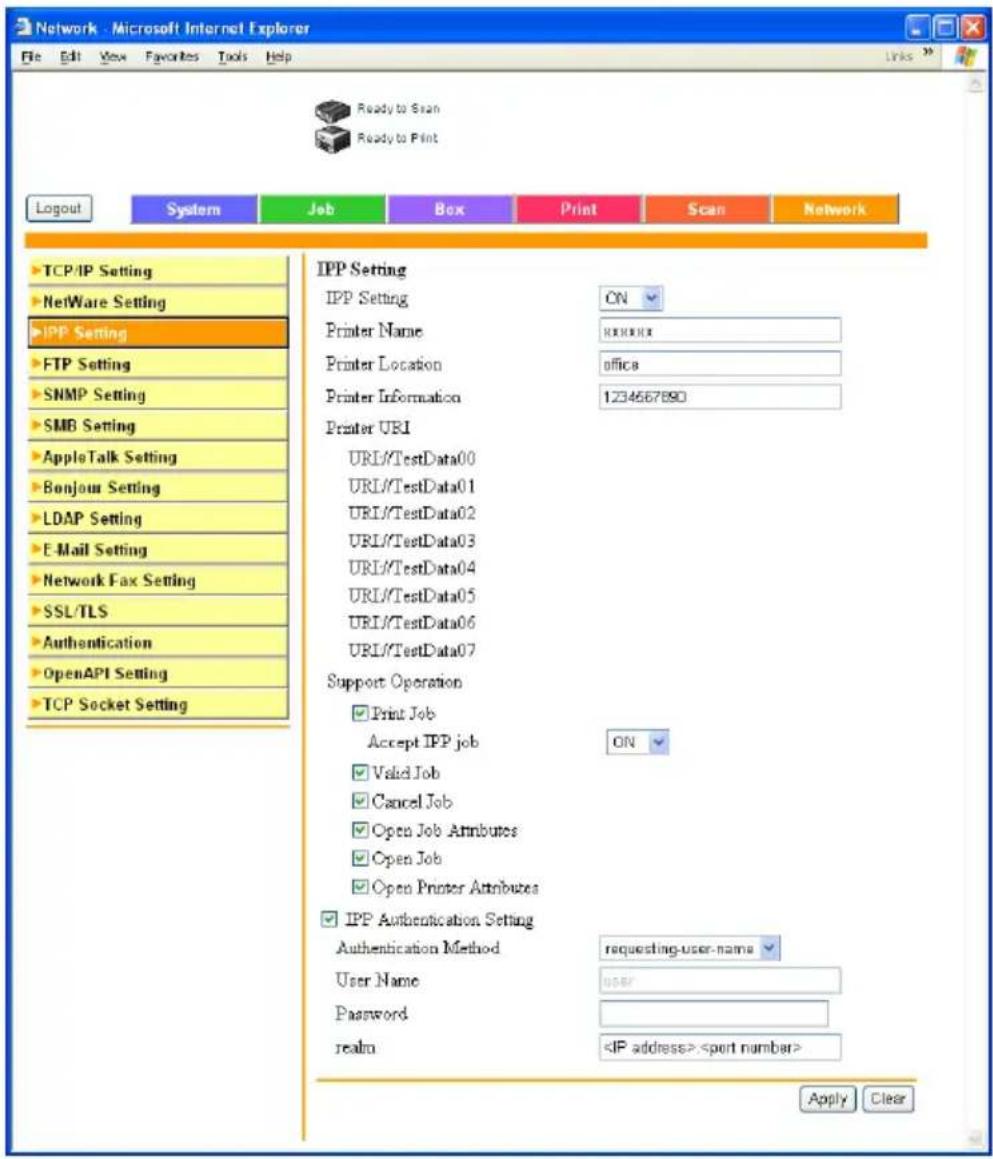
| Item Description | |
| IPP Setting Specify whether to enable IPP printing. | |
| Printer Name Enter the printer name (up to 127 alphanumeric characters and - _). | |
| Printer Location Enter the printer location (up to 127 characters).The printer location entered here is the setup location that is displayed in the status notification e-mail text that was specified from System tab – Status Notification Setting. | |
| Printer Information Enter the printer information (up to 127 characters). | |
| Printer URI Displays the URI of the printer that can be used for IPP printing. | |
| Support Operation Specify the print operations supported by IPP. | |
| IPP Authentication Setting S | Specify the authentication method, user name, and password for an IPP connection. |

Note
For the status notification function, refer to "System tab — Status Notification Setting" on page 10-76.
Network tab — SNMP Setting
You can specify the SNMP settings.
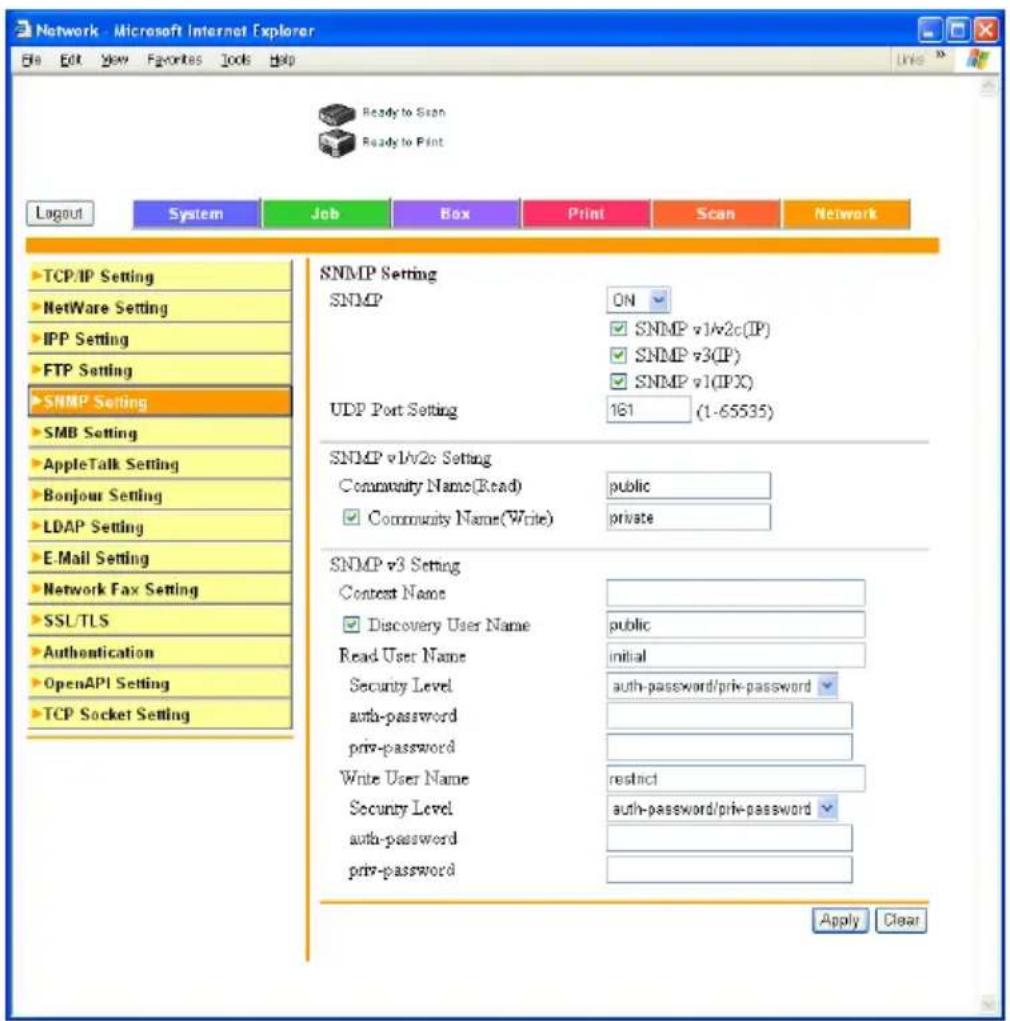
| Item Description | |
| SNMP Specify whether to enable SNMP. | |
| UDP Port Setting Specify the port number. | |
| SNMP v1/v2c Setting Specify the read and write names for SNMP v1/v2c. | |
| SNMP v3 Setting Specify the read and write names for SNMP v3. | |


Note
If the enhanced security mode is enabled, the community name of the SNMP v1/v2c setting is "R0". In addition, "Authentication OFF" cannot be selected in Write User Name – Security Level of SNMP v3 Setting.
Network tab — SMB Setting — WINS Setting
You can specify SMB WINS settings.
To perform SMB printing via a router, specify the settings in "SMB Setting" - "Print Setting" and both WINS settings.
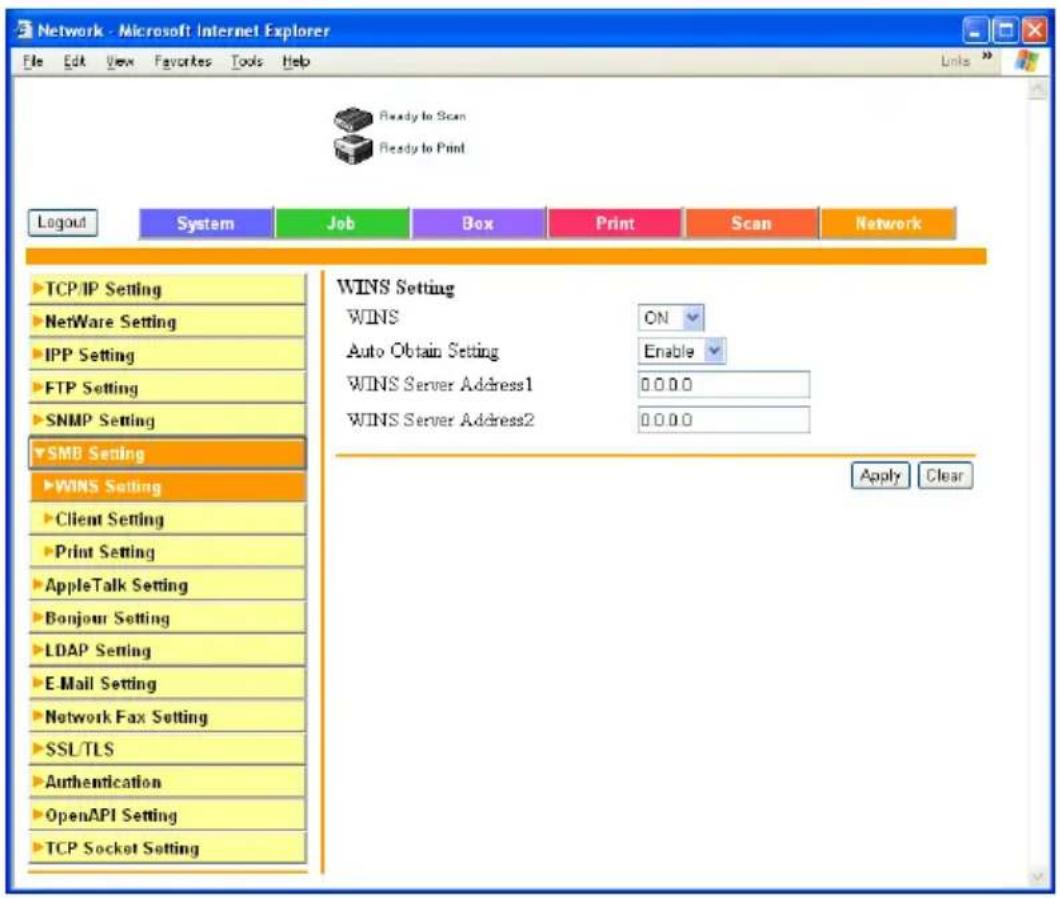
| Item Description | |
| WINS Specify whether to use WINS. | |
| Auto Obtain Setting Specify | whether to enable the automatic acquisition of WINS. |
| WINS Server Address1 Enter | the WINS server address (syntax: ***.***.***.*** where the input range for *** is 0 to 255). |
| WINS Server Address2 | |
Network tab — SMB — Print
You can specify the SMB print settings.
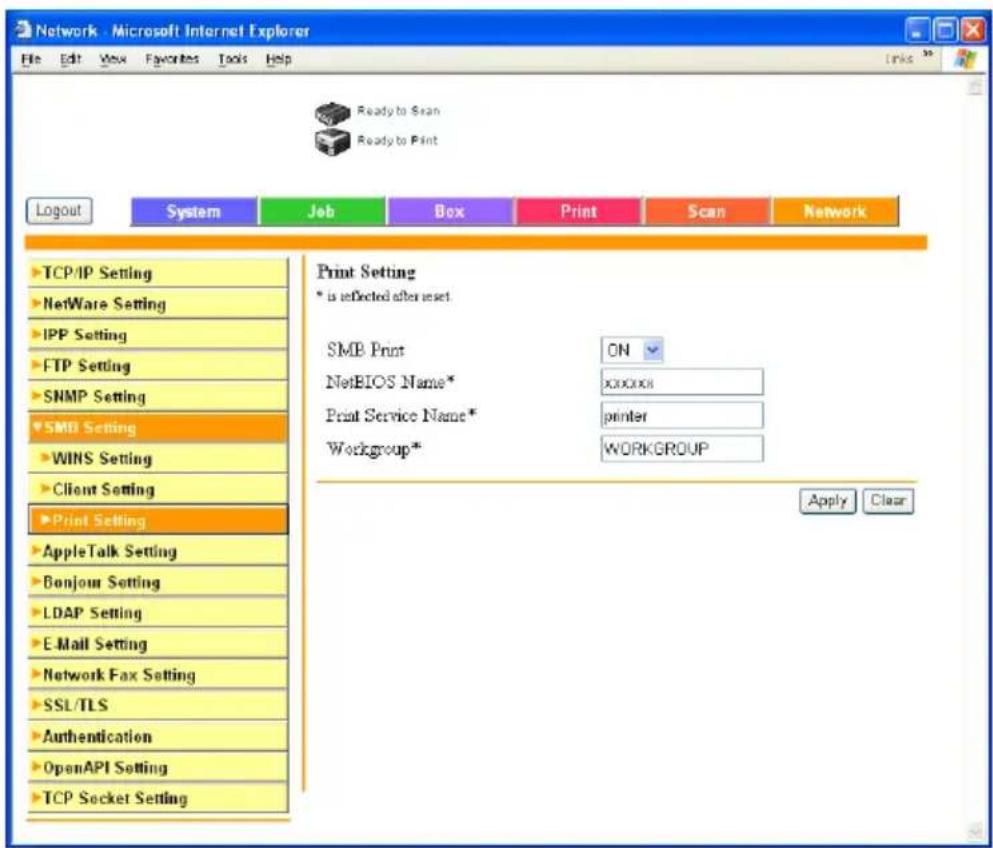
| Item Description | |
| SMB Print Specify whether to enable the SMB print (Window print) service. | |
| NetBIOS Name Enter the NetBIOS name (up to 15 characters, including - only). | |
| Print Service Name Enter the print service name (up to 12 characters, excluding / \). | |
| Work Group Enter the work group name (up to 15 characters, excluding " \ ; : , * <> | += ?). | |


Reminder
To apply any changes to settings for "NetBIOS Name", "Print Service Name", or "Work Group", restart this machine (turn the main power off, then on again).
When turning the power off, then on again, be sure to turn the sub-power switch off first, then the main power switch. In addition, wait at least 10 seconds before turning the power on again; otherwise, this machine may not function properly.
Network tab — AppleTalk
You can specify the AppleTalk settings.
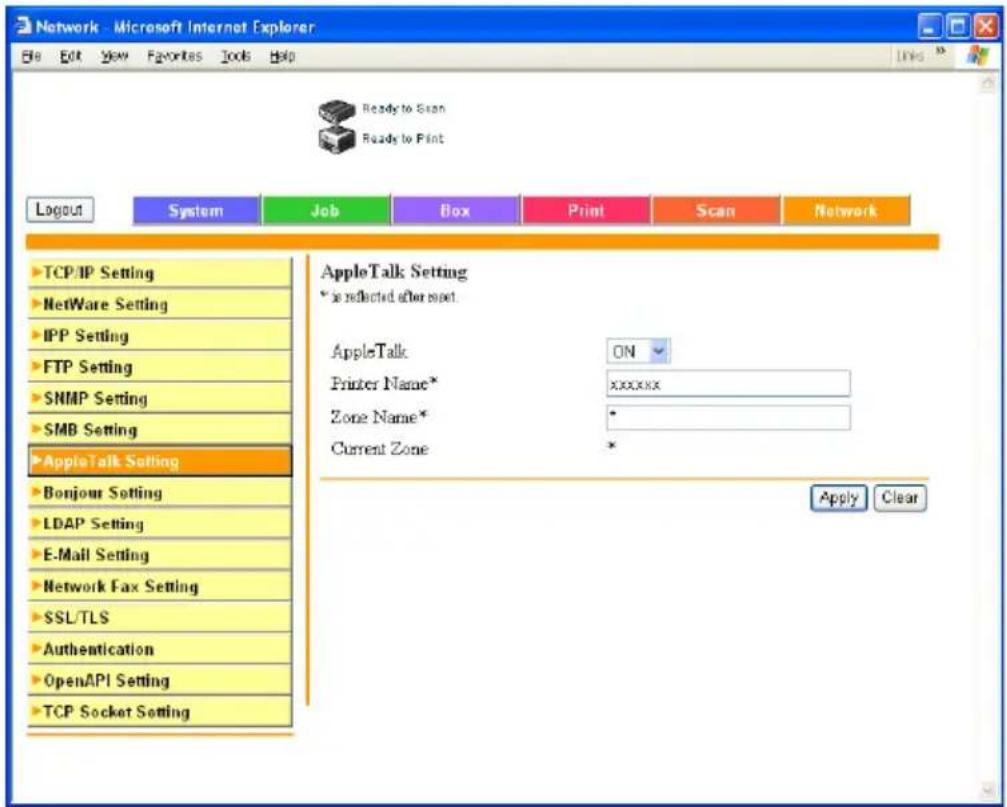
| Item Description | |
| AppleTalk Specify whether to enable AppleTalk. | |
| Printer Name Enter the printer name (up to 31 alphanumeric characters, excluding = ~). | |
| Zone Name Specify the zone name (up to 31 characters). | |
| Current Zone Displays the current zone name. | |
Network tab — Bonjour Setting
You can specify the Bonjour settings.
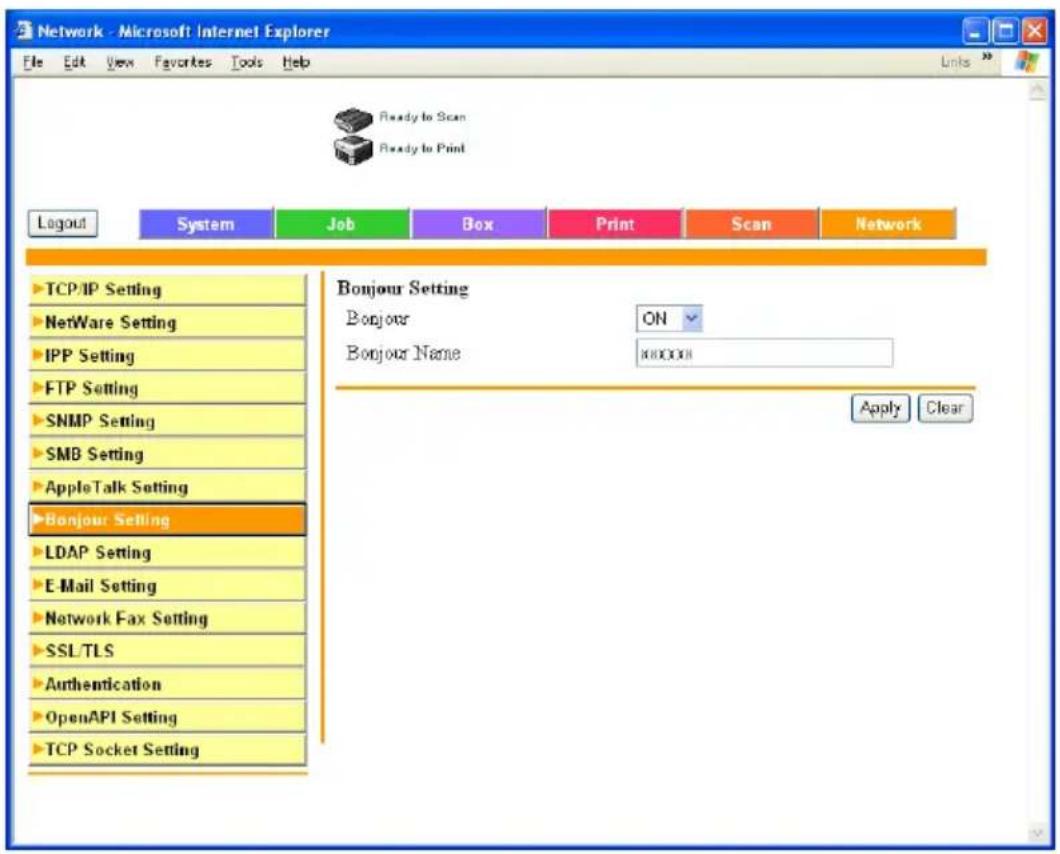
| Item Description | |
| Bonjour Specify whether to use a Bonjour/Rendezvous connection. | |
| Bonjour Name Specify the Bonjour name that is to appear as the connected device name (up to 63 alphanumeric characters and symbols). | |
Network tab — SSL/TLS
You can specify the SSL/TLS certificate settings.

Detail
For details on Network Tab—SSL/TLS, refer to the User's Guide [Network Scanner Operations].
Network tab — Authentication
You can specify the automatic PageScope Web Connection log off time settings.

Detail
For details on Network Tab—Authentication, refer to the User's Guide [Network Scanner Operations] and User's Guide [Box Operations].
10.4 Print job management
Specifying job operations
→You can specify job operations on this machine by setting a printer driver.

Note
The three printer drivers that can be set on this machine are as follows:
Konica Minolta PCL Printer Driver for Windows
Konica Minolta PostScript Printer Driver for Windows 2000/XP/Server 2003
Konica Minolta PostScript PPD Printer Driver for Mac OS X
Specifying settings (for Windows)
1 Click the [Properties] button on the Print dialog box to open the printer driver setup dialog box.
2 Click the Setup tab (PCL or PostScript driver).
3 From the "Output Method" drop-down list, select the output method.
Print: Prints immediately.
Secure Print: Enters the ID and password on this machine's control panel, then prints. (Up to 100 documents)
When the password rules are enabled on this machine, specify the password with 8 digits.
Save in User Box: Saves the document to be printed in a box on.
When the power rules are enabled on this machine, specify the box that is created on this machine.
Save in User Box and Print: Saves the document in a box and prints at the same time.
Proof and Print: After part of the document has been printed, this machine stops printing temporarily. Select to avoid misprinting a large volume of print jobs.

Detail
For details, refer to "Selecting the output method" on page 5-13 and page 6-10.
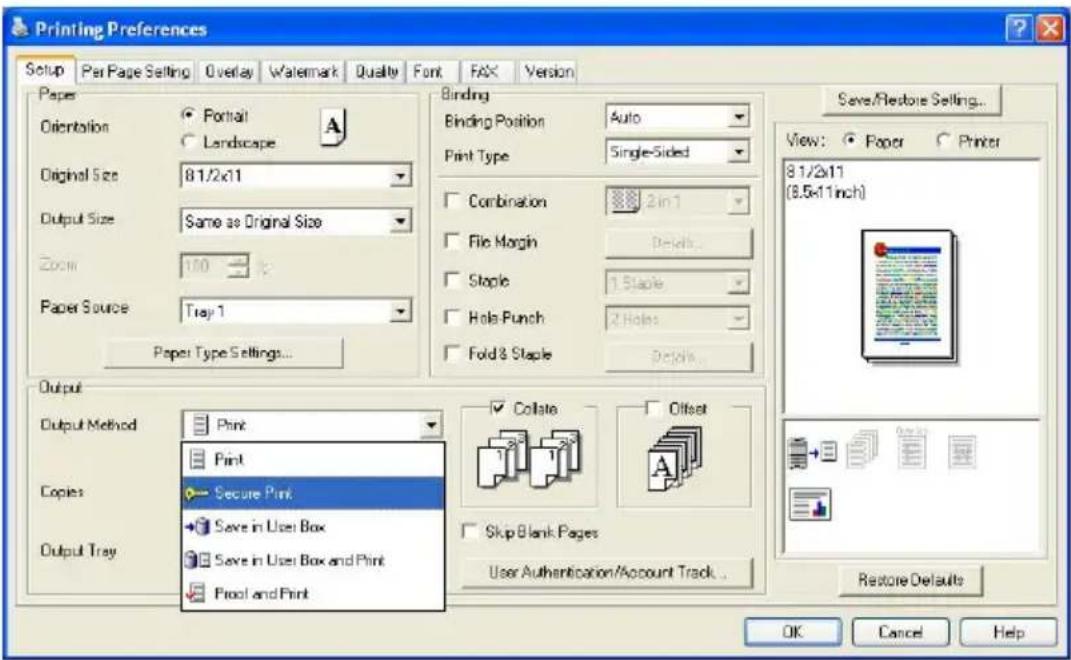
Specifying settings (for Mac OS X)
1 From the "File" menu, select "Print".
2 Select "Security".
3 Specify settings for the following:
- Print: Specifies conditions for "Secure Print" and "Box Hold".
- Secure Print: Enters ID and password when "Secure Print" is selected in "Output Method". Enter the ID and password on this machine's control panel when printing. (Up to 100 documents)
- When the password rules are enabled on this machine, specify the password with 8 digits.
- Save in User Box: Enters file name and box number when "Save in User Box" or "Save in User Box and Print" is selected in "Output Method".
- When the power rules are enabled on this machine, specify the box that is created on this machine.
- Proof and Print: After part of the document has been printed, this machine stops printing temporarily. Select to avoid misprinting a large volume of print jobs.
For details, refer to "Security" on page 9-11.
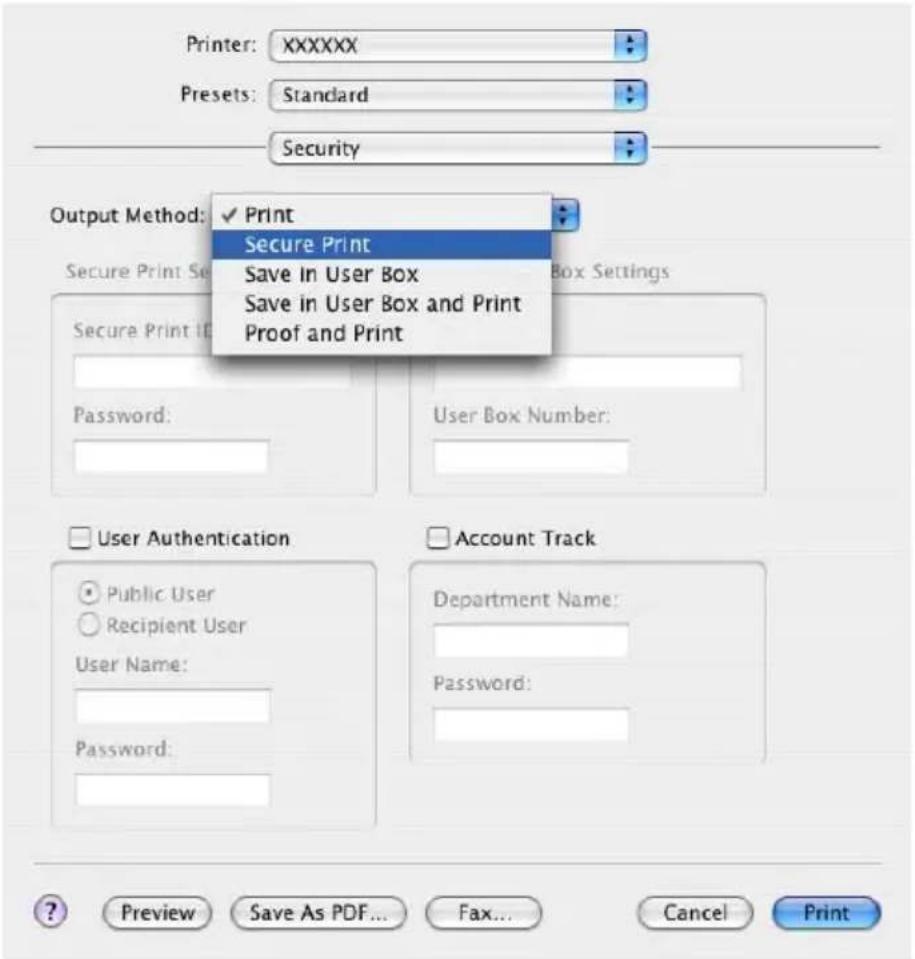
Job storage
When “Output Method” in the printer driver is selected, a print document can be stored in this machine as a print job.
To print a stored job, you must recall the job using this machine's control panel.
Recalling jobs (Proof and Print)
For details on using the keys on the control panel, refer to the User's Guide [Copy Operations]. For details on the box functions of this machine, refer to the User's Guide [Box Operations].
1 Touch [Job List] on this machine's control panel.
The Print tab appears.
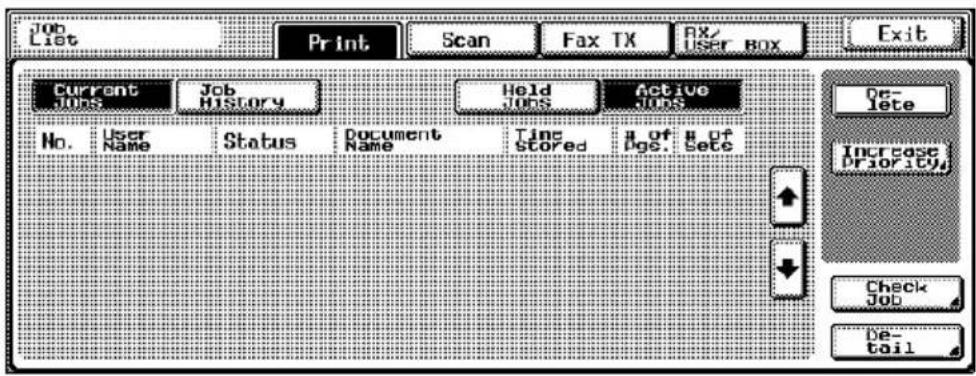
2 Touch [Held Jobs].
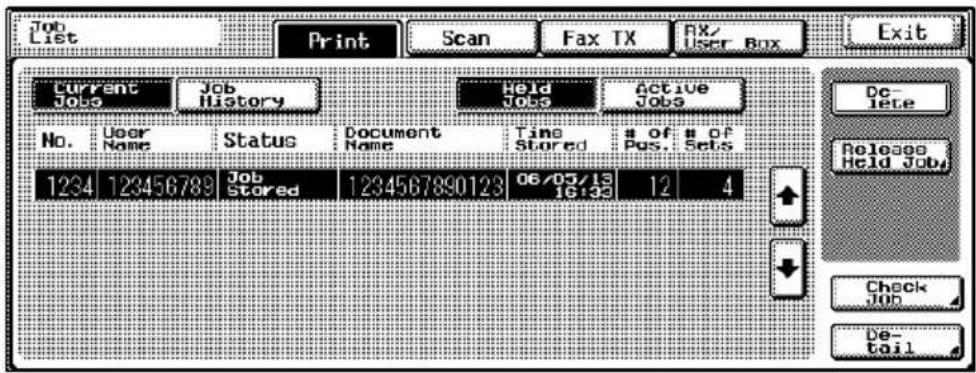
3 Touch [Release Held Job].
The Release Held Job screen appears.
![Job List Print Scan Fax TX Rx/ User Box Exit No. User Name Status Document Name 1234 123456789 Job Stored 1234567890123 Release Held Job To print selected job, choose output type, and then press [OK]. Print Proof Print OK Change Setting Cancel](/content/2026/06/1277641/images/d7456d265ccb0c6d0e12bac75b1cde05433f201e3e810cc8366489fc473cdcdc.jpg)
4 To check the print results, select the job whose sample copy is to be printed from the job list, select [Proof Print], and then touch [OK].
- Check the print results on the printed pages.
5 From the job list, select the job that you want to print.
- To change the settings of the printing conditions, continue with step 6.
- If you are not changing the settings of the printing conditions, skip to step 8.
6 Touch [Change Setting].
The Change Setting screen appears.
- If the job to be removed from the Held Job list is not displayed, touch [] or [] until the desired job is displayed.
- To change the settings of or cancel multiple jobs together, select one job, and then touch the next jobs.
- If an incorrect job was selected, touch the button for the selected job again to deselect it.
7 Change the printing conditions on the Change Setting screen, and then touch [OK].
The Release Held Job screen appears again.
8 Select [Print], and then Touch [OK].
The stored job is changed to an active job, then printed.
- To cancel printing of the job, touch [Cancel].
Recalling jobs (Secure Print)
"Secure Print" jobs are saved in the secured document box. To print a secured document, the ID and password that were specified in the printer driver are required.

Detail
For details on using the keys on the control panel, refer to User's Guide [Copy Operations].
For details on the box functions of this machine, refer to User's Guide [Box Operations].

Note
Confidential documents are automatically deleted after a set length of time after they are registered. The default setting of this time is 24 hours, and the setting can be specified in the administrator mode. For details, refer to "To specify the "Auto Delete Secure Document" parameter" on page 10-26.
A printed confidential document can be deleted manually from Administrator mode. For details, refer to "To delete secure print documents" on page 10-25.
For details on specifying a setting for "Secure Document Access Method", refer to the User's Guide [Copy Operations].
When "Secure Document Access Method" is set to "Mode 1"
1 Press the [Box] key on the control panel of this machine, and then touch [Secure Print User Box] on the System User Box tab.
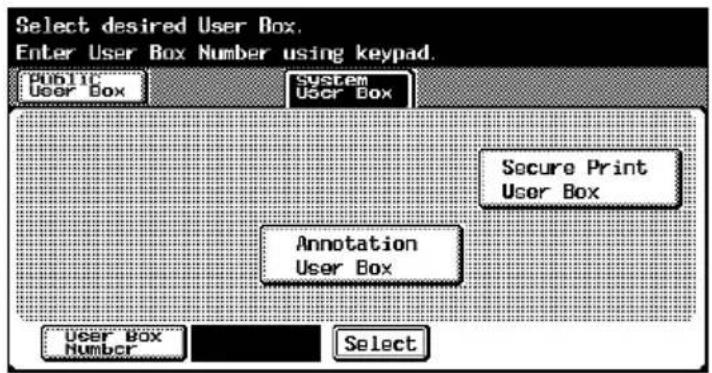
2 Type in the ID for the confidential document, and then click [OK].
![Secure Print User Box Enter the ID of the secure document. Close Access ← → De- lete Space 1 2 3 4 5 6 7 8 9 0 - ^ q w e r t y u i o p @ | a s d f g h j k l ; : ] z x c v b n m . / \ Shift Cancel OK](/content/2026/06/1277641/images/eb5b2799f3a5f72dd4215a6adeb9d52b41d53125e7d80655d82fc628c17a54b5.jpg)
3 Type in the password for the confidential document, and then click [OK].
![Secure Print User Box Input password of secure document. Close Pass- word ← → Ob- lete Space 1 2 3 4 5 6 7 8 9 0 - ~ q w e r t y u i o p @ [ a s d f g h j k l ; : ] z x c v b n m , . / \ Shift Cancel OK](/content/2026/06/1277641/images/60d2174a5d113058f1aec13fce89a3e93b97e7c1a45cebd0f1ee83be4612b249.jpg)
A list of received documents appears.
? Why does the desired document not appear?
→Only documents with an ID and password matching those specified by the printer driver are displayed.
4 Select the document to be printed, and then touch [Print].
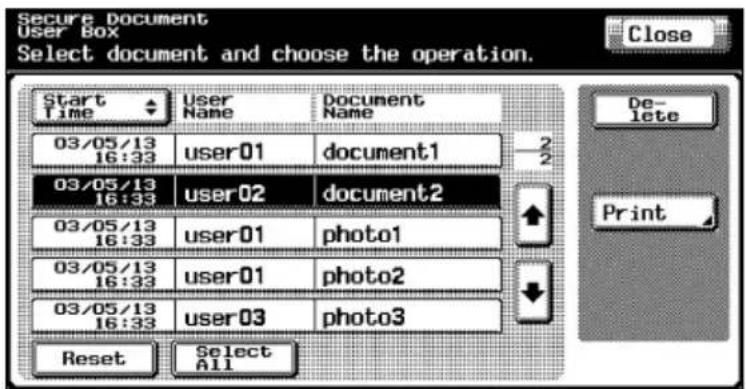
The document information appears.
5 Press the [Start] key in the control panel.
The document is printed.
When "Secure Document Access Method" is set to "Mode 2"
1 Press the [Box] key on the control panel of this machine, and then touch [Secure Print User Box] on the System User Box tab.
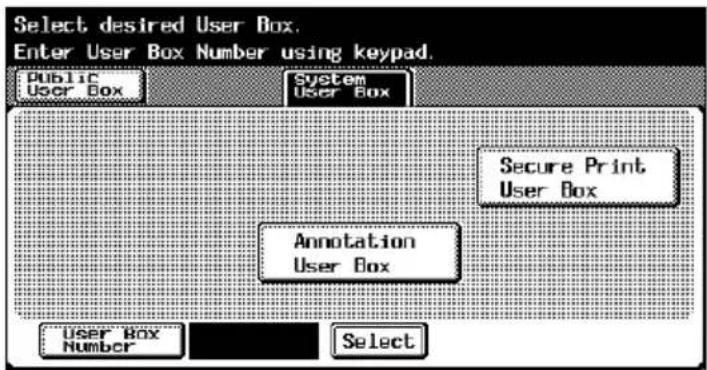
2 Type in the ID for the confidential document, and then touch [OK].
A list of confidential documents with the specified ID appears.
![Secure Print User Box Enter the ID of the secure document. Close Access ← → De- Lete Space 1 2 3 4 5 6 7 8 9 0 - ^ q w e r t y u i o p @ | a s d f g h j k l : : ] z x c v b n n , . / \ Shift Cancel OK](/content/2026/06/1277641/images/b9a64854c7f3c52c8ab01d84c2980f15bce3550cc4f4a818bd884ccbeb2f292f.jpg)
3 Select the document to be printed, and then touch [Password].
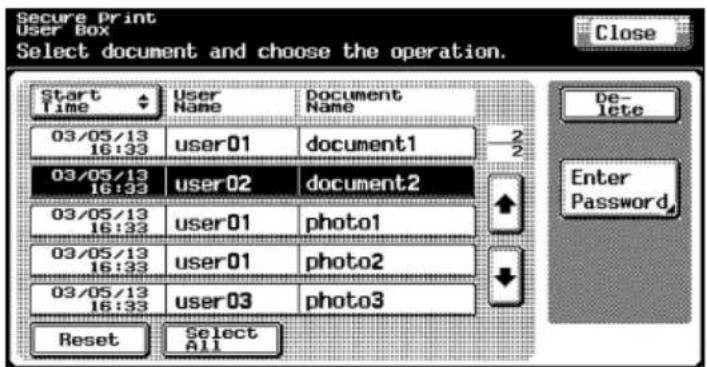
4 Type in the password for the confidential document, and then touch [OK].
A list of received documents appears.
5 Select the document to be printed, and then touch [Print].
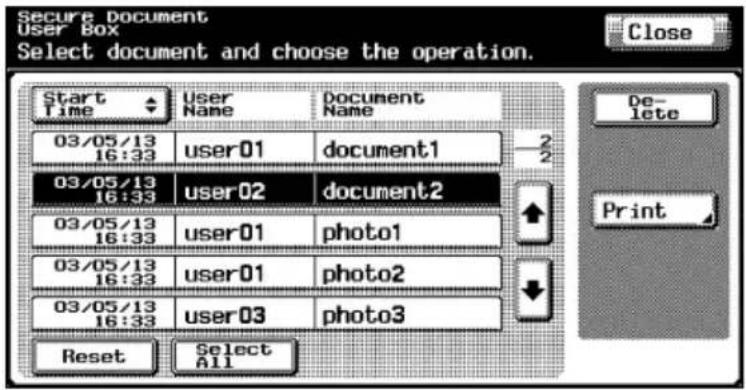
The document information appears.
6 Press the [Start] key in the control panel.
The document is printed.

Note
If "Prohibit Functions when Auth. Error" in Administrator mode is set to "Mode 2" and an incorrect document password is entered the specified number of times, the selected document is locked. Contact the administrator to cancel operation restrictions.
Printing when the User Authentication Is Specified on This Machine
When the user authentication has been specified on this machine, a user name and password must be entered when printing.

Note
If a print job is sent using a user name or password that is not a registered account on this machine or if a job is sent without the "User Authentication" check box selected, the operation is not authenticated by this machine and the job is canceled.
When the user authentication settings are specified on this machine, the authentication operation restriction function is in mode 2, and the authentication information is not entered correctly, the applicable user is locked and cannot be accessed.
The three printer drivers that can be set on this machine are described below.
Konica Minolta PCL printer driver for Windows
Konica Minolta PostScript printer driver for Windows 2000/XP/Server 2003
PostScript PPD printer driver for Mac OS X

Note
If printing is not allowed, printing cannot be performed even when used by a registered user.
For user authentication settings, consult the administrator of this machine.
Specifying Settings (for Windows)
1 Click the [Properties] button or the [Preferences] button on the Print dialog box to display the printer driver setup dialog box.
2 Click the Setup tab.
3 Click the [User Authentication/Account Track] button.
4 Select the "User Authentication" check box, select "Recipient User", and then enter the user name and password.
- If this machine has been set to permit public users, the machine can be used without a user name and password.
- A default password can be registered and used rather than entering a password for each job.
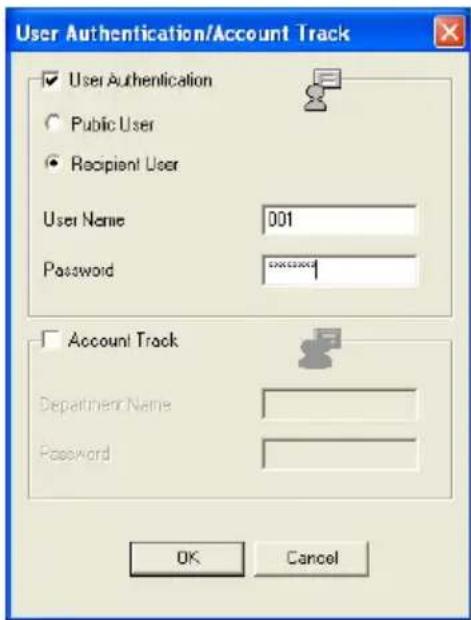
5 After specifying the settings, click the [OK] button to begin printing.
- If the entered user name is a name registered on this machine, the job is printed and counted as a job for the specified user.
Specifying Settings (for Mac OS X)
1 From the "File" menu, select "Print".
2 Select "Security".
3 Select the "User Authentication" check box, select "Recipient User", and then enter the user name and password.
- If this machine has been set to permit public users, the machine can be used without a user name and password.
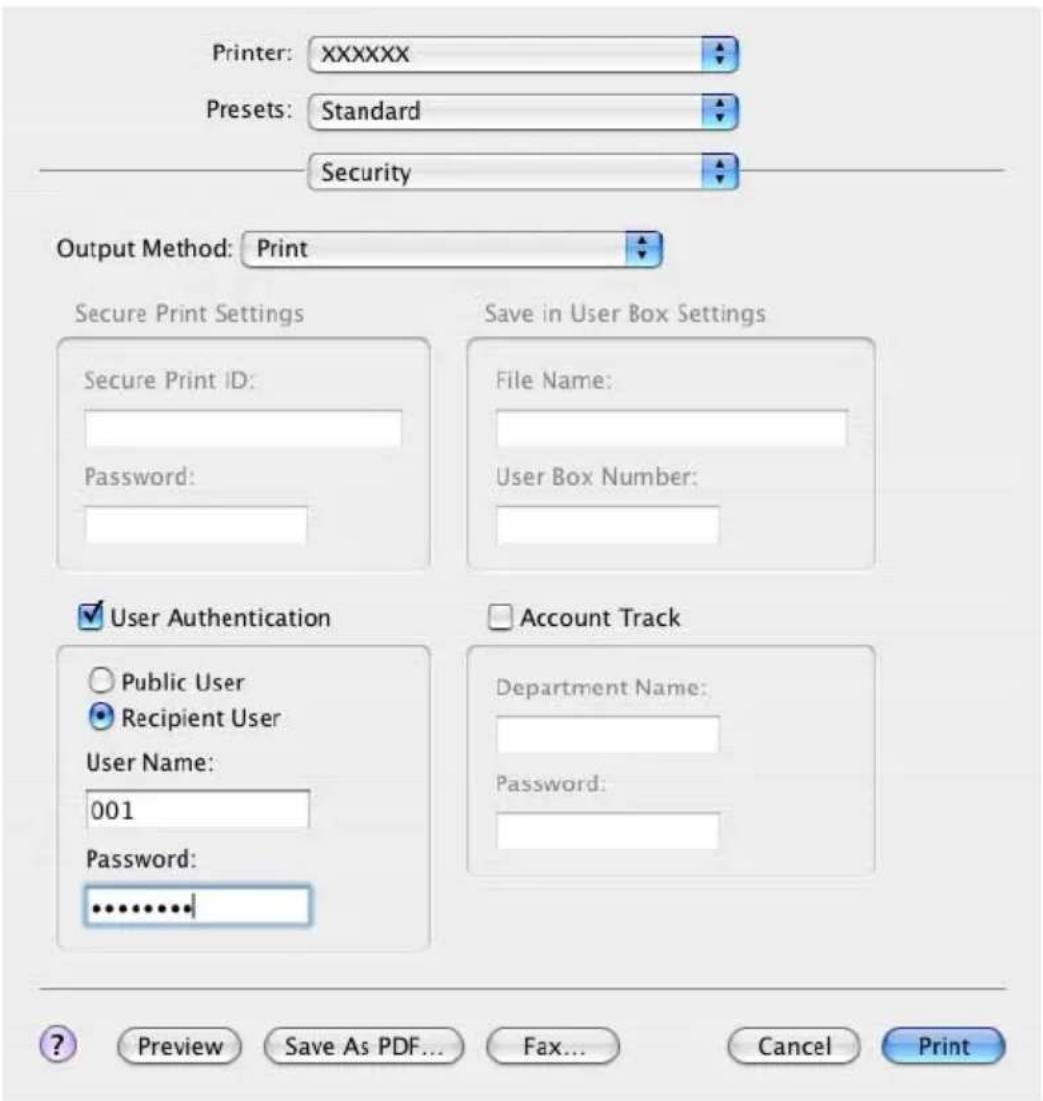
Printing with this machine when account track settings have been applied
When the account track settings on this machine have been specified, you must enter a password when printing a job.

Note
If a print job is sent using a department name or password that is not a registered account on this machine or if a job is sent without the “Account Track” check box selected, the job is deleted without being authenticated by this machine.
When the account authentication settings are specified on this machine, the authentication operation restriction function is in mode 2, and the authentication information is not entered correctly, the applicable account is locked and cannot be accessed.
The three printer drivers that can be set on this machine are as follows: Konica Minolta PCL Printer Driver for Windows
Konica Minolta PostScript Printer Driver for Windows 2000/XP/Server 2003
Konica Minolta PostScript PPD Printer Driver for Mac OS X

Note
If printing is not allowed, printing cannot be performed even when used by a registered account.
For the account track details, consult the administrator of this machine.
Specifying settings (for Windows)
1 Click the [Properties] button or the [Preferences] button on the Print dialog box to display the Printing Preferences dialog box.
2 Click the Setup tab.
3 Click the [User Authentication/Account Track] button.
4 Select the "Account Tack" check box, and then enter the department name and password.
A default department name can be registered and used instead of entering a department name for each job.
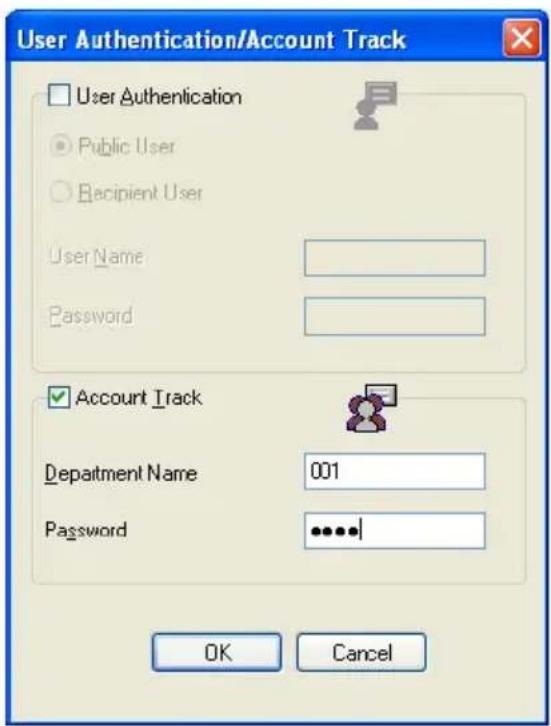
5 After specifying the settings, click the [OK] button to begin printing. If the entered department name is a name registered on this machine, the job is printed and counted as a job for the account.
Specifying settings (for Mac OS X)
1 From the "File" menu, select "Print".
2 Select "Security".
3 Select the "Account Track" check box, and then specify the department name and password.
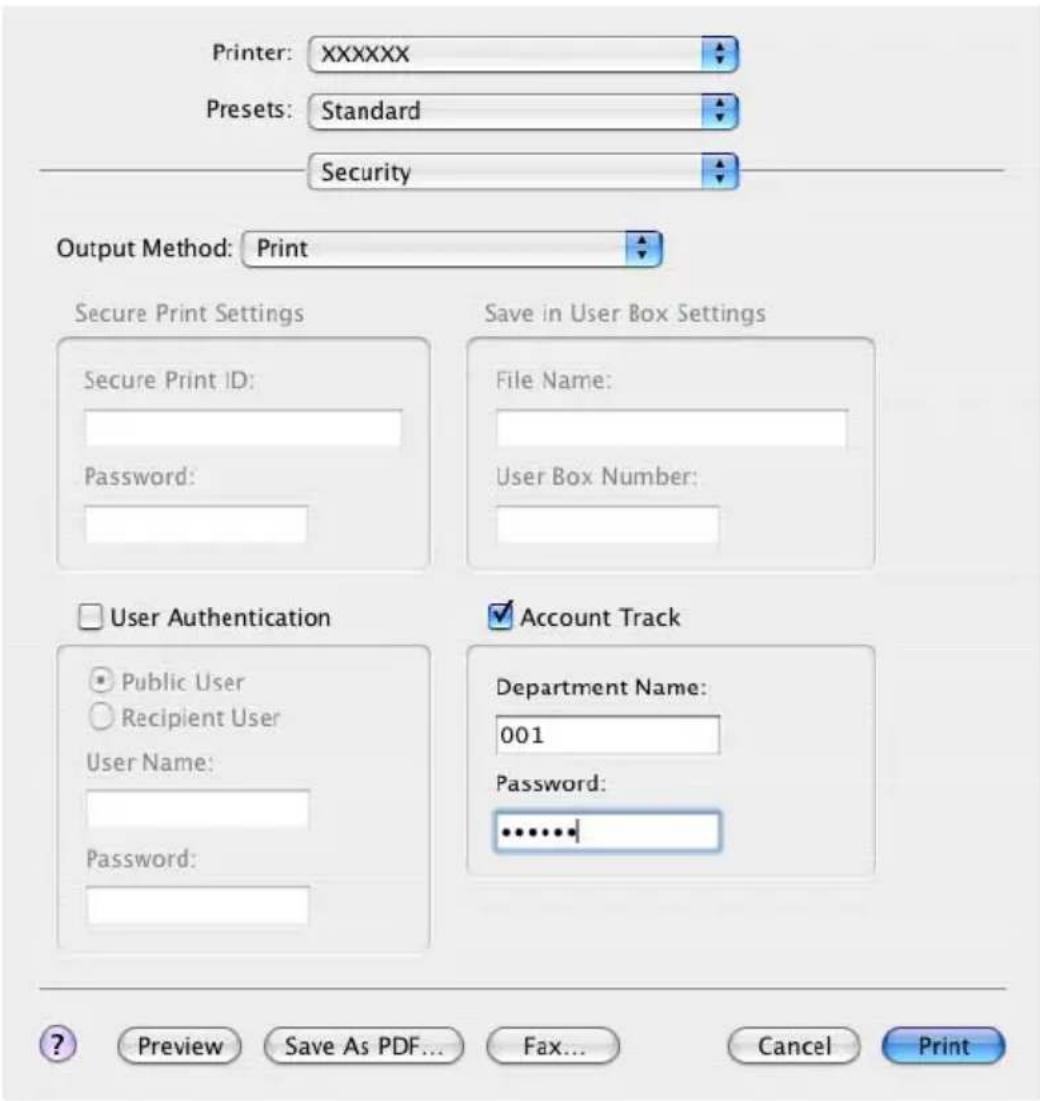
Job operations in PageScope Web Connection
From PageScope Web Connection, you can also check the status of jobs being performed by this machine.
For details, refer to the following pages.
- "Job tab — Current Job" on page 10-58
- "Job tab — Job History" on page 10-60
10.5 Printing on banner paper
Paper up to 1200 mm (47-1/4 inch) long can be loaded into the bypass tray and printed on using this machine with the appropriate setting specified from the control panel.
Loading banner paper and printing on it is referred to as “banner printing” throughout the manual.
Paper
Paper types
| Paper width Paper length Paper type | ||
| 210 to 297 mm(8-1/4 to 11-3/4 inch) | 457.3 to 1200 mm(18 to 47-1/4 inch) | 127 to 160 g/m ^2 (33-3/4 to 42-1/2 lb) |

Note
Feed only one sheet of paper at a time.
Printer drivers and supported operating systems
The following drivers are compatible with banner paper printing.
| Page description language | Printer driver Supported operating systems | |
| PCL (PCL XL) Konica | MinoltaPCL Driver | Windows NT 4.0, Windows 2000 Professional, Windows XP Home Edition, Windows XP Professional, and Windows Server 2003 |
| PostScript 3 Emulation | Konica Minolta PostScript Driver | Windows NT 4.0, Windows 2000 Professional, Windows XP Home Edition, Windows XP Professional, and Windows Server 2003 |
Specifying printer driver settings
To specify printer driver settings
The paper sizes to be printed are preregistered as Custom Size.
1 Click the Setup tab.
2 From the "Original Size" or "Output Size" drop-down list, select "Custom Size Settings".
The Custom Size Settings dialog box appears.
3 Specify settings for the following:
- List of Custom Sizes: Select the size for the custom size being set. (Konica Minolta PCL driver only)
- Custom Size Name: Input the name of the custom size being registered. (Konica Minolta PCL driver only)
– Size: Specify the width and length of the custom size according to the selected measurement units.
4 Click the [OK] button.
5 When printing, select the Custom Size that was registered from the "Original Size" and "Output Size" drop-down lists on the Setup tab.

Note
For the Konica Minolta PCL driver, the custom size settings can only be specified from the printer driver setup dialog box, which can be displayed from the Printers window (for Windows XP/Server 2003, Printers and Faxes window).
Printing
To print
1 Press the [Utility/Counter] key in the control panel.
2 Touch [6 Banner Printing].
3 Touch [ON], and then touch [OK].
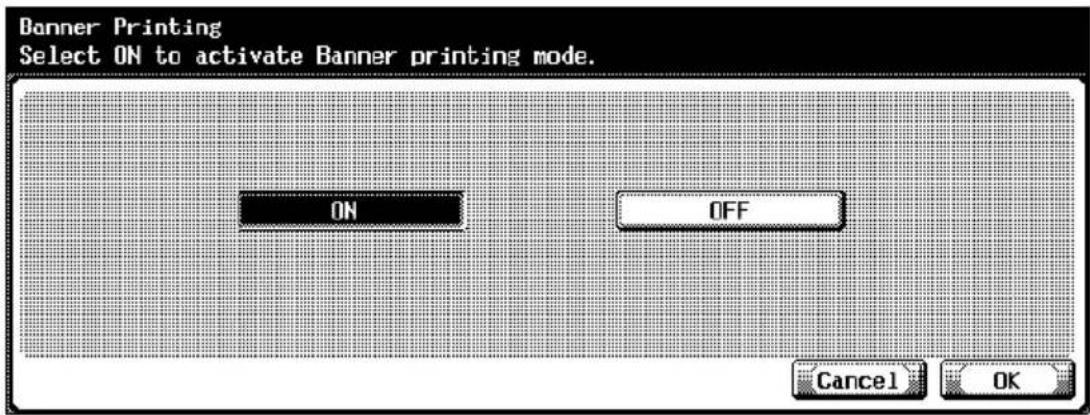
4 Select a job to be printed from the computer, and then click "Print" on the "File" menu.
5 Specify the desired settings, and then click the [OK] button.
6 Open the bypass tray.
7 With the side to be printed on facing down, insert the paper as much as possible into the feed slot.
- Before loading the paper, check that the following message appears in the control panel.
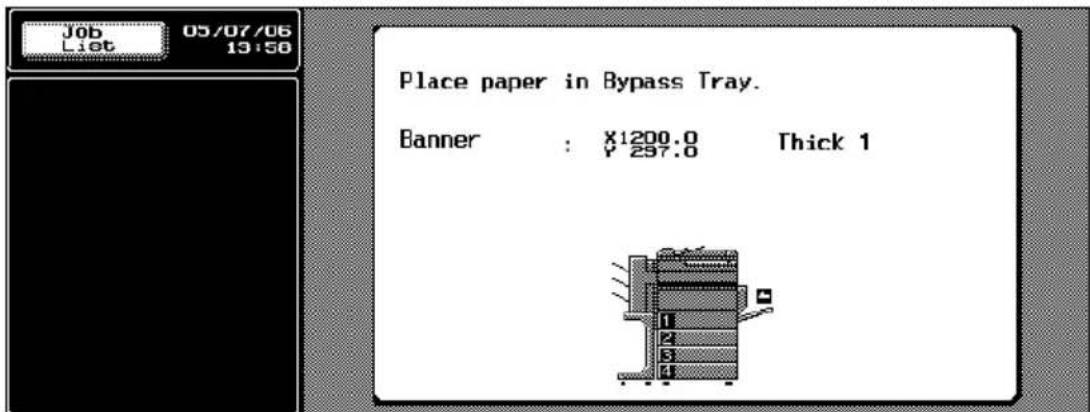
8 Slide the lateral guides to fit the size of paper being loaded.
- Load one sheet at a time.
- Print while supporting the loaded paper with your hands.
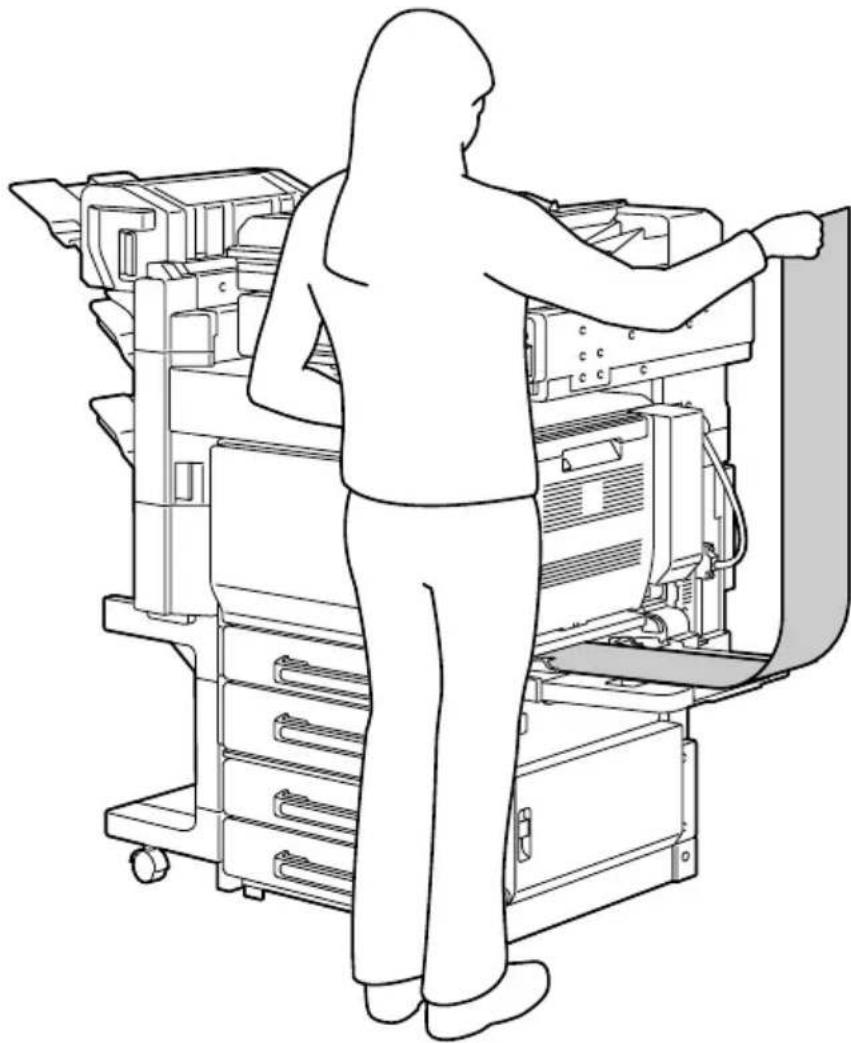
natural_image
Line drawing of a person operating a large industrial machine (no text or symbols visible)9 If the following screen appears, touch [Complete].
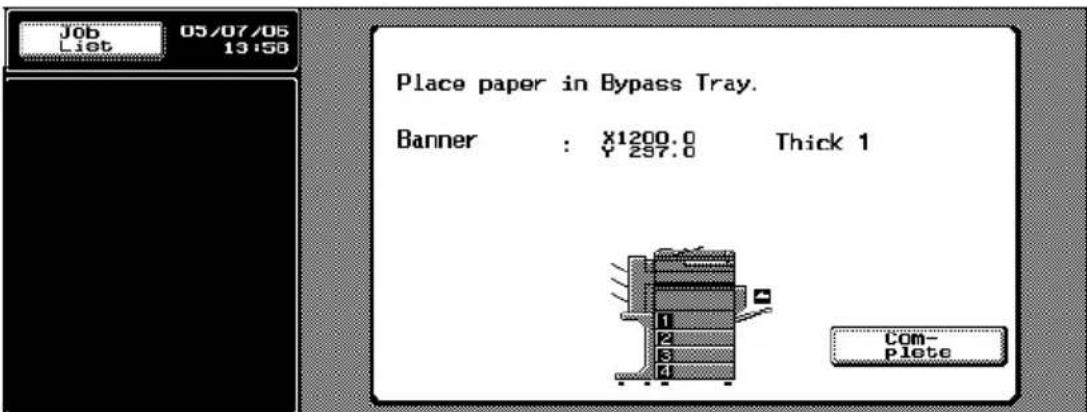
10 When printing is finished, touch [Finish].
![05/07/06 13:56 No. User Name Status De- lete Printing Banner paper. Waiting for Banner job to be received. Touch [Finish] to exit Banner mode. Finish](/content/2026/06/1277641/images/c8d33aaf193dd55f865dc0150155122a1451f4380e8214723c4f22a427b1d010.jpg)
- To continue printing, repeat steps 7 through 9.
11 Touch [Yes].
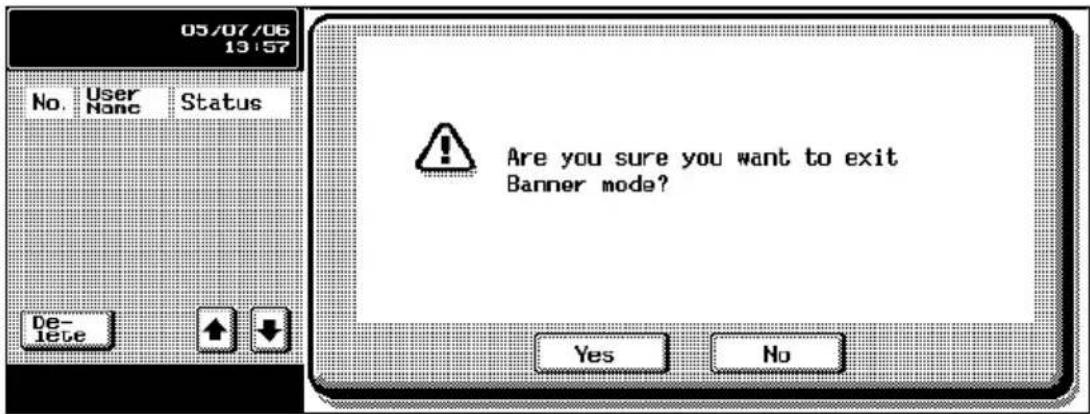
11 Troubleshooting
11.1 Unable to Print
This chapter explains the troubleshooting procedures for possible malfunctions.
Perform the troubleshooting procedures described below if this machine does not print after you have sent a print job.
| Symptom Probable cause | Action | |
| The message “No printers are connected.” or “Print error” appears. | The printer driver selected for printing is not compatible with the printer controller. | Check the printer name selected. |
| The network cable, parallel cable, or USB cable is disconnected. | Check that the cable is connected properly. | |
| An error has occurred in this machine. | Check this machine’s control panel. | |
| Available memory space is not sufficient. | Perform a test print to check whether printing is possible. | |
| The network cable, parallel cable, or USB cable is disconnected. | Check that the cable is connected properly. | |
| An error has occurred in this machine. | Check this machine’s control panel. | |
| A postscript error appears. | Available computer memory space is not sufficient. | Perform a test print to check whether printing is possible. |
| There is an error in the application software settings. | Refer to the user’s manual of the application software to check the settings. | |
| The file printing settings are incorrect. | Change the settings and try to print again. | |
| The machine does not start printing although the print job was completed on the computer. | The printer driver selected for printing is not compatible with the printer controller. | Check the printer name selected. |
| The network cable, parallel cable, or USB cable is disconnected. | Check that the cable is connected properly. | |
| An error has occurred in this machine. | Check this machine's control panel. | |
| A print job is queued in this machine, delaying printing. | Check the job order on the Active Jobs list of the machine's control panel. | |
| "Save in User Box" was selected for the print job. | Check if the print job is stored on the Box screen of this machine's control panel. | |
| "Secure Print" was selected for the print job. | Check if the print job is held on the Secure Print User Box screen of this machine's control panel. | |
| If the account track settings have been applied, an unregistered department name (or password) may have been entered. | Enter the correct department name (or password). | |
| If the authentication settings have been applied, an unregistered user name (or password) may have been entered. | Enter the correct user name (or password). | |
| Available computer memory space is not sufficient. | Perform a test print to check whether printing is possible. | |
| The connection of this machine to the network is not yet established (while connecting to a network). | Consult with the network administrator. | |
| The enhanced security mode may be enabled on this machine. | Specify the authentication settings in the enhanced security mode. For details, consult with the network administrator. |
If the problem persists after all of these procedures have been performed, read the User's Guide [Copy Operations].
11.2 Unable to specify desired settings or unable to print as specified
Perform these troubleshooting procedures if you cannot specify the desired settings in the printer driver, or if the print results do not represent the settings that have been specified.

Note
Some of the printer driver functions cannot be combined with other functions.
| Symptom Probable cause | Cause Action | |
| A printer driver setting cannot be selected. | Some functions cannot be combined. | Do not try to select settings that are not available. |
| The “Conflicts” message with “Unable to Select” or “Function Canceled” appears. | An incorrect combination of functions has been specified. | Check the settings and specify the functions correctly. |
| Printing is not performed as specified. | Incorrect settings are specified. Check each setting in the printer driver. | |
| A combination of functions, although possible in the printer driver, is not possible with this machine. | ||
| The paper size, orientation, and other settings specified in the application have priority over those specified in the printer driver. | Enter the correct settings in the application. | |
| The watermark cannot be printed. | The watermark is not correctly set. | Check the watermark settings. |
| The watermark density is set to a level that is too low. | Check the density settings. | |
| Watermarks cannot be printed in graphics applications. | No watermark can be printed in this case. | |
| The staple function cannot be specified. | Stapling is not possible if “Paper Type” is set to “Thick” or “Transparency”. | Check each setting in the printer driver. |
| The staple function requires optional finisher. | Install the required optional finisher and enable it using the printer driver. | |
| Stapling cannot be performed. | If are a large number of pages to be printed, stapling cannot be performed. | Change the number of pages to be printed. |
| Stapling is not possible if the document contains pages of different sizes. | Check the document. | |
| Symptom Probable cause | Action | |
| The stapling position is not as expected. | The orientation setting is not correct. | Check the stapling position in the printer driver setup dialog box. |
| The hole punch function cannot be specified. | Hole punching cannot be specified if “Booklet”, “Transparency”, “Thick2”, “Thick3”, or “Envelope” is selected. | Check each setting in the printer driver. |
| Optional finishers FS-514 and punch kit PK-510 are required. | Install the required optional finisher and enable it using the printer driver. | |
| The pages are not punched. | Printed pages may be fed out without being punched if the paper is loaded into the paper source with an incorrect orientation. | Check the orientation setting. |
| The hole punch position is not as expected. | The orientation setting is not correct. | Check the punch position on the Layout tab of the printer driver setup dialog box. |
| The form is not printed properly. | Available computer memory space is not sufficient. | Simplify the form to reduce the data size. |
| The image is not printed properly. | Available computer memory space is not sufficient. | Simplify the image to reduce the data size. |
| Paper is not fed from the specified paper source. | Paper will not be fed from the specified paper source if that paper source is loaded with paper of a different size or orientation. | Load the paper source with paper of the appropriate size and orientation. |
| The access number cannot be specified. | To specify access numbers, a hard disk must be added in the Option tab of the printer driver. | Add a hard disk in the Option tab of the printer driver. |
11.3 Error message
| Message Cause and remedy | |
| Cannot connect to the network. | A connection to the network could not be established.Check if the network cable is correctly connected. In addition, check that the Network Setting parameters on the Administrator Setting screen have been correctly specified. |
12 Appendix
12.1 Specifications
| Item Specifications | ||
| Model Built-in printer controller | ||
| Power supply Common with the main body | ||
| CPU PPC750 FX 600 MHz | ||
| RAM 512 MB | ||
| Hard disk 40 GB | ||
| Interface Standard: Ethernet (10Base-T or 100Base-TX)Optional: USB 1.1, USB 2.0, or IEEE 1284 | ||
| Frame type Ethernet 802.2 | Ethernet 802.3Ethernet IIEthernet SNAP | |
| Supported protocols TCP/IP | IPX/SPXNetBEUIAppleTalk (EtherTalk) | |
| Print speed | 30 pages/minute (color/monochrome, 8-1/2 × 11 □ paper, and simplex)30 pages/minute (color/monochrome, 8-1/2 × 11 □ paper, and duplex) | |
| Fast print time 8.5 seconds or less | (color and A4 paper)6.5 seconds or less (monochrome and A4 paper) | |
| Printer language | PCL5e/c EmulationPCL6 (XL 2.1) EmulationPostScript 3 Emulation (3011) | |
| Operating environment conditions | Temperature 10 to 30°CHumidity 15-85% RH | |
| Resolution Data processing | 600 × 600 dpi (printing and fax operations)400 × 400 dpi (fax operations)200 × 200 dpi (fax operations) | |
| Printing | 600 × 1800 dpi (equivalent) | |
| Supported paper sizes | Maximum Standard Size | |
| Printer fonts | PCL Latin 80 FontsPostscript 3 Emulation Latin 136 Fonts | |
| Compatible computers | IBM PC or compatible, and Macintosh (PowerPC or Intel Processor) | |
| Supported operating systems | Server Windows NT 4.0 (SP6a), Windows 2000 Server, or Windows Server 2003 | |
| Client Windows 98 | Second Edition, Windows Me, Windows 2000, Windows XP, or Windows NT 4.0 (SP6a)MacOS 9.2 or later or MacOS X 10.2, 10.3 or 10.4 | |
| Printer driver PCL6: | • Windows 98 Second Edition or Windows Me Printer Driver• Windows 2000, Windows XP, or Windows Server 2003 Printer Driver• Windows NT 4.0 Printer DriverPS3:• Windows 98 Second Edition or Windows Me PPD File• Windows NT 4.0 Printer Driver• Windows 2000, Windows XP (Home/Professional), Windows Server 2003 Printer Driver• Windows XP Professional x64, Windows Server 2003 x64 Printer Driver• MacOS 9.2 PPD File• MacOS X 10.2 Printer Driver• MacOS X 10.3 or MacOS X 10.4 Printer Driver | |
| Utility PageScope Web Connection | Web browsers:Microsoft Internet Explorer 6 or later recommended (JavaScript enabled, Cookies enabled)Microsoft XML Parser MSXML3.X must be installed when using Internet Explorer 5.5.Netscape Navigator 7.02 or later (JavaScript enabled, Cookies enabled)Macromedia ^ Flash ^ (If “Flash” is selected in View Mode, version 7.0 or later plugin is required.) | |
12.2 Configuration page
KONICA MINOLTA C300
Configuration Page
Print Operation Menu Map
Basic Setting
| Default Paper Size | = A4 | Printer Memory | = 512 [MByte] |
| Paper Tray | = Auto | ||
| Output Tray | = Elevate Tray | Printer Information | |
| Binding Position | = Left Binding | ||
| Double-Sided | = Off | Installed Tray | |
| Staple | = Off | Tray 1 | = A4 |
| Hole-Punch | = Off | Tray 2 | = A4 |
| Orientation | = Portrait | Tray 3 | = None |
| # of Sets | = 1 | Tray 4 | = None |
| No Matching Paper in Tray Setting | LCT | = None | |
| = Stop Printing (Tray Fixed) | |||
| Spool Setting | = On | Option | |
| Convert | = Off | Duplex Unit | = Installed |
| PDL Setting | = Auto | Finisher | = Not Available |
| Banner Setting | = Disable | Punch Unit | = Not Available |
| Banner Paper Tray | = Bypass Tray | Fold Unit | = Not Available |
PCL Setting
| Font Source | = 1 | |
| Font Number | = 0 | Firmware Version |
| Font Point | = 12.00 | |
| Font Pitch | = 10.00 | Printer Controller = 9J06-3000-RSS-1H-008 |
| Symbol Set | = PC-8, Code Page 437 | |
| Line/Page | = 64 [ Line / Page ] | Network |
| CR/LF Mapping | = Off |
PS Setting
| Print Reports = Disable | |||
| TCP/IP | |||
| /F Setting | TCP/IP | = Enable | |
| IEEE 1284 Timeout | = 60 [ sec. ] | IP Address | = 192.168.1.20 |
| Network Rx Timeout | = 60 [ sec. ] | Subnet Mask | = 255.255.255.0 |
| USB Timeout | = 60 [ sec. ] | Default Gateway | = 192.168.1.1 |
| Parallel I/F | = ECP | ||
RAW Port No.
| RAW Port 0 | = 9100 | ||
| RAW Port 1 | = 9112 | Appletalk | |
| RAW Port 2 | = 9113 | Appletalk | = Disable |
| RAW Port 3 | = 9114 | ||
| RAW Port 4 | = 9115 | SMB | |
| RAW Port 5 | = 9116 | SMB | = Enable |
Test Print
| Configuration |
| PCL Font List |
| PS Font List |
| Demo Page |
12.3 Font list
PCL font list
KONICA MINOLTA C300
PCL Font List
Internal Fonts
P.1
| Font | Pitch/Point | Escape Sequence | Font # | Font ID |
| Courier | Scalable | {01X{s0p10h0s0b4099T | 00000 | |
| CG Times | Scalable | {01X{s1p12v0s0b4101T | 00001 | |
| CG Times Bold | Scalable | {01X{s1p12v0s3b4101T | 00002 | |
| CG Times Italic | Scalable | {01X{s1p12v1s0b4101T | 00003 | |
| CG Times Bold Italic | Scalable | {01X{s1p12v1s3b4101T | 00004 | |
| CG Omega | Scalable | {01X{s1p12v0s0b4113T | 00005 | |
| CG Omega Bold | Scalable | {01X{s1p12v0s3b4113T | 00006 | |
| CG Omega Italic | Scalable | {01X{s1p12v1s0b4113T | 00007 | |
| CG Omega Bold Italic | Scalable | {01X{s1p12v1s3b4113T | 00008 | |
| Corneal | Scalable | {01X{s1p12v1s0b4116T | 00009 | |
| Clarendon Condensed | Scalable | {01X{s1p12v4s3b4140T | 00010 | |
| Univers Medium | Scalable | {01X{s1p12v0s0b4148T | 00011 | |
| Univers Bold | Scalable | {01X{s1p12v0s3b4148T | 00012 | |
| Univers Medium Italic | Scalable | {01X{s1p12v1s0b4148T | 00013 | |
| Univers Bold Italic | Scalable | {01X{s1p12v1s3b4148T | 00014 | |
| Univers Condensed Medium | Scalable | {01X{s1p12v4s0b4148T | 00015 | |
| Univers Condensed Bold | Scalable | {01X{s1p12v4s3b4148T | 00016 | |
| Univers Condensed Medium Italic | Scalable | {01X{s1p12v5s0b4148T | 00017 | |
| Univers Condensed Bold Italic | Scalable | {01X{s1p12v5s3b4148T | 00018 | |
| Antique Olive | Scalable | {01X{s1p12v0s0b4168T | 00019 | |
| Antique Olive Bold | Scalable | {01X{s1p12v0s3b4168T | 00020 | |
| Antique Olive Italic | Scalable | {01X{s1p12v1s0b4168T | 00021 | |
| Garamond Antiqua | Scalable | {01X{s1p12v0s0b4197T | 00022 | |
| Garamond Halbfett | Scalable | {01X{s1p12v0s3b4197T | 00023 | |
| Garamond Kursiv | Scalable | {01X{s1p12v1s0b4197T | 00024 |
PS font list
KONICA MINOLTA C300
PS Font List P.1
Internal Fonts
| Font | Font # | |
| Albertus MT | AlbertusMT | 00000 |
| Albertus MT Italic | AlbertusMT-Italic | 00001 |
| Albertus MT Light | AlbertusMT-Light | 00002 |
| Antique Olive Roman | AntiqueOlive-Roman | 00003 |
| Antique Olive Italic | AntiqueOlive-Italic | 00004 |
| Antique Olive Bold | AntiqueOlive-Bold | 00005 |
| Antique Olive Compact | AntiqueOlive-Compact | 00006 |
| Apple Chancery | Apple-Chancery | 00007 |
| Arial | ArialMT | 00008 |
| Arial Italic | Arial-ItalicMT | 00009 |
| Arial Bold | Arial-BoldMT | 00010 |
| Arial Bold Italic | Arial-BoldItalicMT | 00011 |
| ITC Avant Garde Gothic Book | AvantGarde-Book | 00012 |
| ITC Avant Garde Gothic Book Oblique | AvantGarde-BookOblique | 00013 |
| ITC Avant Garde Gothic Demi | AvantGarde-Demi | 00014 |
| ITC Avant Garde Gothic Demi Oblique | AvantGarde-DemiOblique | 00015 |
| Bodoni Roman | Bodoni | 00016 |
| Bodoni Italic | Bodoni-Italic | 00017 |
| Bodoni Bold | Bodoni-Bold | 00018 |
| Bodoni Bold Italic | Bodoni-BoldItalic | 00019 |
| Bodoni Poster | Bodoni-Poster | 00020 |
| Bodoni Poster Compressed | Bodoni-PosterCompressed | 00021 |
| ITC Bookman Light | Bookman-Light | 00022 |
| ITC Bookman Light Italic | Bookman-LightItalic | 00023 |
| ITC Bookman Demi | Bookman-Demi | 00024 |
| ITC Bookman Demi Italic | Bookman-Demiltalic | 00025 |
| A←※A♥A | Carta | 00026 |
| Chicago | Chicago | 00027 |
| Clarendon Roman | Clarendon | 00028 |
| Clarendon Bold | Clarendon-Bold | 00029 |
Demo page
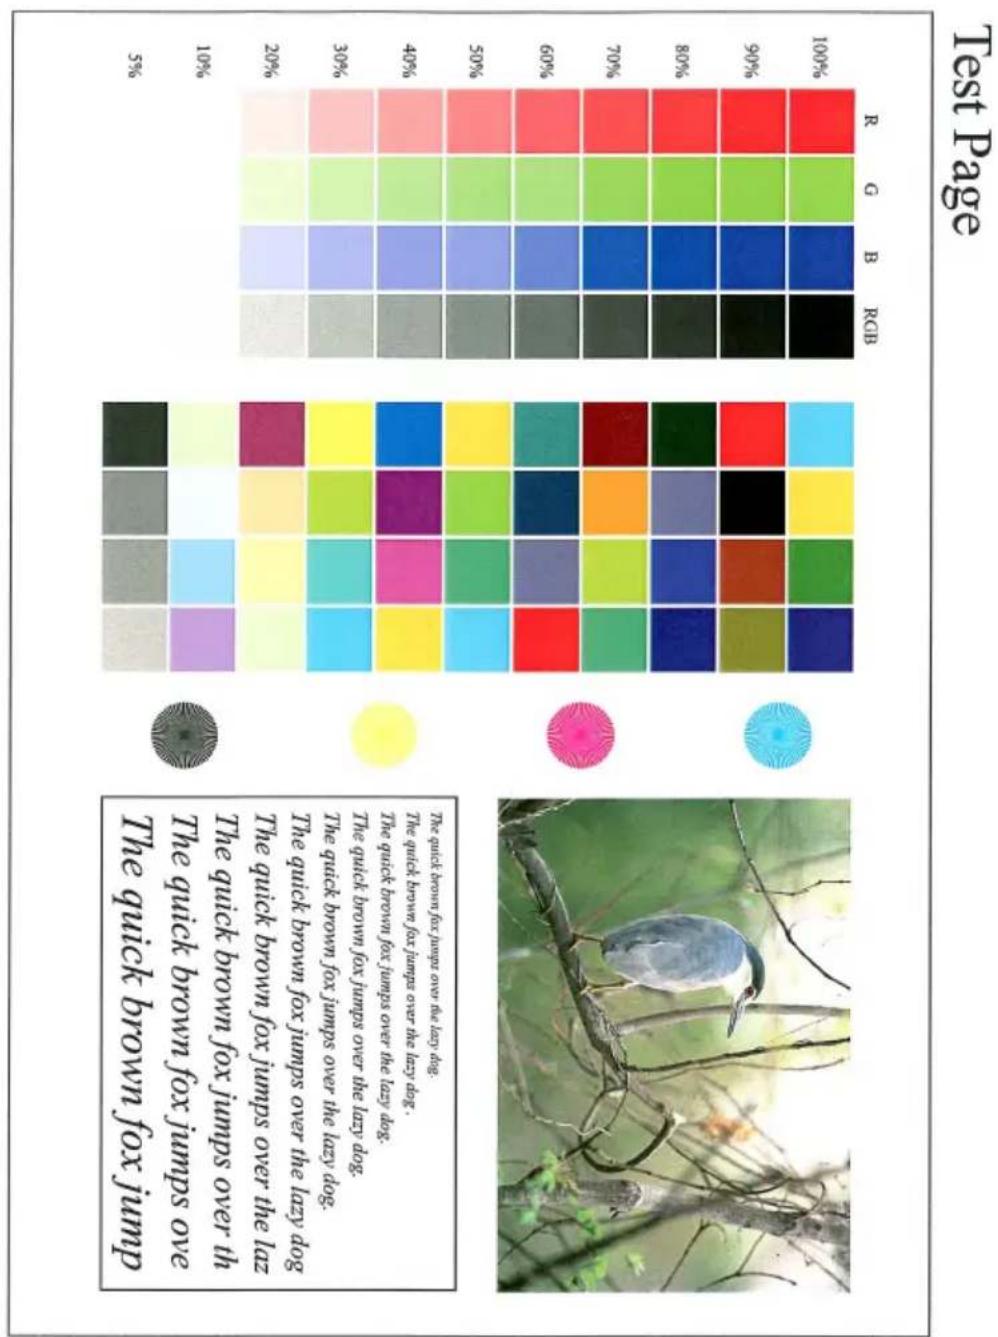
The quick brown fox jump
The quick brown fox jumps over
The quick brown fox jumps over the
The quick brown fox jumps over the lazy dog
The quick brown fox jumps over the lazy dog. The quick brown fox jumps over the lazy dog.
The quick brown fox jumps over the lazy dog. The quick brown fox jumps over the lazy dog.
The quick brown fox jumps over the lazy dog.
12.4 Glossary
| Term Definition | |
| 10Base-T/100Base-TX/1000Base-T | An Ethernet standard, which is a cable consisting of twisted copper wire pairs. The transmission speed of 10Base-T is 10 Mbps, of 100Base-TX is 100 Mbps, and of 1000Base-T is 1000 Mbps. |
| AppleTalk A generic name | for the protocol suite developed by Apple Computer for computer networking. |
| bit Abbreviation for Binary | Digit. The smallest unit of information (data quantity) on a computer or printer. Displays data using 0 or 1. |
| BMP Abbreviation for Bitmap | A file format for saving image data which uses the .bmp extension. Commonly used on Windows platforms. You can specify the color depth from monochrome (2 values) to full color (16,777,216 colors). Images are not usually compressed when saved. |
| Bonjour Macintosh network | technology for automatically detecting devices connected to the network and for specifying settings. Previously called “Rendezvous”, the name was changed to “Bonjour” starting with Mac OS X v10.4. |
| BOOTP Abbreviation for | Bootstrap Protocol. A protocol in which a client computer on a TCP/IP network automatically specifies the network settings from the server. Currently, DHCP, which is an advanced protocol based on BOOTP, is mainly used. |
| Byte Unit of information (data quantity) on a computer or printer. Configured as 1 byte equals 8 bits. | |
| CMYK Abbreviation for Cyan | , Magenta, Yellow, and Black. The colors in the toner and ink used for color printing can all be represented by changing the mixing ratio of the four colors of CMYK. |
| Default gateway A device | such as a computer or router, used as a “gateway” to access computers not on the same LAN. |
| DHCP Abbreviation for Dynamic Host Configuration Protocol. A protocol in which a client computer on a TCP/IP network automatically specifies the network settings from the server. With collective management of the IP address for DHCP clients on the DHCP server, you can avoid duplication of an address and you can build a network easily. | |
| DNS Abbreviation for Domain Name System. A system that acquires the supported IP addresses from host names in a network environment. DNS allows the user to access other computers over a network by specifying host names, instead of difficult to memorize and understand IP addresses. | |
| DPI (dpi) Abbreviation for | Dots Per Inch. A resolution unit used by printers and scanners. Indicates how many dots per inch are represented in an image. The higher the value, the higher the resolution. |
| FTP | Abbreviation for File Transfer Protocol. A protocol for transferring files over the Internet or an intranet on the TCP/IP network. |
| HTTP Abbreviation for HyperText Transfer Protocol. A protocol used to send and receive data between a Web server and a client (Web browser). Documents containing images, recordings, and video clips can be exchanged with the expressive form information. | |
| IEEE 1284 Abbreviation for | Institute of Electrical and Electronic Engineers 1284.A parallel port standard that was developed for printers. |
| IPP Abbreviation for Internet | Net Printing Protocol. A protocol that sends andreceives print data and controls printers over the Internet on a TCP/IP network. Data can also be sent to printers in remote areas to printover the Internet. |
| IPX A protocol used with | NetWare and works at the network layer of theOSI reference model |
| IPX/SPX Abbreviation for | Internetwork Packet Exchange/Sequenced PacketExchange. A protocol developed by Novel, Inc. that is commonlyused under a NetWare environment. |
| IP address | A code (address) that is used to identify individual network devicesover the Internet. A maximum of three digits for four numbers aredisplayed such as 192.168.1.10. IP addresses are assigned to devi-es, including computers, which are connected to the Internet. |
| LAN Abbreviation for Local | Area Network. A network which connectscomputers on the same floor, in the same building, or in neighboringbuildings. |
| LPD Abbreviation for Line | Printer Daemon. A printer protocol that usesTCP/IP and is platform-independent. Originally developed for BSDUNIX, it has become the standard printing protocol and can be usedwith any general computer. |
| LPR/LPD Abbreviation for | Line Printer Request/Line Printer Daemon. A print-ing method over a network in a Windows NT system or UNIX system.Using TCP/IP, you can output print data from Windows or Unix to aprinter over a network. |
| MAC address Abbreviation | for Media Access Control address. With a special IDnumber for each Ethernet card, data can be sent and received be-tween the cards. A number consists of 48 bits. The first 24 bits consist of a special number for each manufacture controlling andassigning IEEE. The last 24 bits consist of a number that the manu-facturer assigns uniquely to the card. |
| Macromedia® Flash® | Software developed by Macromedia, Inc. and used to create datacombining vector-graphic animation and sound, and the format ofthis data file. The bidirectional content can be manipulated using akeyboard and a mouse. The files can be kept relatively compact, andthey can be accessed with the Web browser plug-in. |
| NDPS Abbreviation for Novell | Distributed Print Services. Provides a highlyefficient printing solution in an NDS environment. By using the NDPSas a printer server, you can output from the desired printer, automatically download the printer driver of a newly installed printer, simplifyand automate complicated management environments related toprinter use, and integrate management related to the network printer. |
| NDS Abbreviation for Novell | Directory Services. The servers and printerson a network and the shared resources of the user's information, aswell as the user's access authority over these items can be consolidated in the hierarchy structure. |
| NetBIOS Abbreviation for | Network Basic Input Output System. A communica-tion interface developed by IBM. |
| Term | Definition |
| NetBEUI Abbreviation for | NetBIOS Extended User Interface. A network proto-col developed by IBM. By simply specifying the computer name, you can build a small-scale network. |
| NetWare Network operating system developed by Novell. NetWare IPX/SPX is used as the communication protocol. | |
| Nprinter/Rprinter Remote | printer support module for using a printer server under a NetWare environment. Use NetWare 3.x with Rprinter, and NetWare 4.x with Nprinter. |
| OHP/OHT OHP (overhead projector) transparencies which are used for presentations. | |
| OS Abbreviation for Operating System. Basic software for controlling the system of a computer. | |
| PDF Abbreviation for Portable Document Format. An electronically formatted document which uses the .pdf extension. Based on the Post-Script format, you can use the free Adobe Acrobat Reader software to view documents. | |
| PDL Abbreviation for Page Description Language. The language for specifying the print image per page to a printer when printing using a page printer. | |
| PostScript A typical page-descriptive language developed by Adobe and is commonly used for high quality printing. | |
| PPD Abbreviation for PostScript Printer Description. A file used to describe the resolution, usable paper size, and the PostScript printer model special information. | |
| Proxy server A server that is installed to act as an intermediary connection between each client and different servers to effectively ensure security over the entire system for Internet connections. | |
| Pserver Print server module under a NetWare environment that monitors, changes, pauses, restarts, or cancels a print job. | |
| Queue name Name specified to each device that allows printing when network printing. | |
| RIP Abbreviation for Raster Image Processor. Process that develops picture images from described text data using the PostScript page description language. The processor is usually integrated in the printer. | |
| RGB Abbreviation for Red, Green, and Blue. Represents all colors by changing the brightness ratio of the RGB 3 colors using the primary colors used by the color representation in a monitor. | |
| Samba | UNIX server software that uses SMB (Server Message Block) so that UNIX system resources can be used from a Windows environment. |
| SLP | Abbreviation for Service Location Protocol. A protocol capable of finding services over a TCP/IP network and automatically specifying a client. |
| SMB | Abbreviation for Server Message Block. A protocol that shares files and printers over a network and which is mainly used by Microsoft Windows. |
| SMTP | Abbreviation for Simple Mail Transfer Protocol. A protocol for sending and forwarding e-mail. |
| Term Definition | |
| SNMP Abbreviation for S | Simple Network Management Protocol. A manage-ment protocol in a network environment using TCP/IP. |
| TCP/IP Abbreviation for T | Transmission Control Protocol/Internet Protocol.The de facto standard protocol used by the Internet that uses IP ad-dresses to identify each network device. |
| TrueType An outline font that was developed by Apple Computer and Micro-soft. It is used as a standard by Macintosh and Microsoft Windows and can be used both on a display and in print. | |
| USB Abbreviation for Universal Serial Bus. A general interface standard for connecting a mouse, printer, and other devices to a computer. | |
| Outline font A font using lines and curves to display an outline of a character.Large-size characters can be displayed on a screen or printed with no jagged edges. | |
| Uninstall To delete software installed on a computer | |
| WINS Abbreviation for Windows Internet Naming Service. A service for re-calling named servers for the conversion of computer names and IP address in a Windows environment. | |
| Ethernet LAN transmission line standard | |
| Print Job Print request transmitted from a computer to a printing device. | |
| Install To install hardware | operating systems, applications, printer drivers on to a computer |
| Web browser Software such as Internet Explorer and Netscape Navigator for viewing Web pages. | |
| Resolution Displays the ability to reproduce the details of images and print matter correctly. | |
| Color matching Technology for decreasing the difference in color among different devices such as scanners, displays, and printers. | |
| Brightness Brightness of a display screen | |
| Queue name | Required logical printer name for LPD/LPR printing |
| Shared printer | A printer setup that allows the printer to be used by multiple computers connected to a server over a network. |
| Client A computer that uses the services provided by a server through a network. | |
| Grayscale | Monochrome image expressive form using the gradation information from black to white |
| Gateway | Hardware and software used as the point where a network is connected to a network. A gateway also changes data formats, addresses, and protocols according to the connected network. |
| Subnet mask | The unit used to divide a TCP/IP network into small networks (sub-networks). It is used to identify the bits in a network address that are higher than the IP address. |
| Screen font A font for displaying text and symbols on a CRT monitor. | |
| Spool Abbreviation for Simultaneous Peripheral Operation On-Line. For printer output, data is not sent directly to the printer, it is temporarily stored in another location, then sent to the printer collectively. | |
| Term | Definition |
| Driver Software that works | as a bridge between a computer and a peripheral device. |
| Hard disk Large capacity | storage device for storing data. The data can be stored even if the power is turned off. |
| Parallel interface Data transmission | mission method for sending and receiving data of multiple signals simultaneously. IEEE 1284 is commonly used as the printer connection. |
| Peer-to-peer A network format | that allows connected devices to communicate without using a dedicated server. |
| Plug-and-play Ability to automatically | find and use the appropriate driver when a peripheral device is connected to a computer. |
| Printer buffer Memory domain | temporarily used for data processing of a print job |
| Print queue A software system | which queues the generated print job in the devices. |
| Frame type Type of communication format | used in a NetWare environment.Communication is not possible if the same frame type is not used. |
| Preview A function that allows you to view an image before processing a print or scan job. | |
| Protocol The rules that allow computers to communicate with other computers or peripheral devices | |
| Property Attribute information | When using a printer driver, various functions can be specified in the file properties.In the file properties, you can check the attribute information of the file. |
| Profile Color attribute file | The dedicated file that contains the summarized correlation of the input and output of each primary color used so that the color input and output devices can reproduce the color. |
| Host name Displayed name of a device over a network. | |
| Memory | Storage device for storing data temporally. When the power is turned off the data may or may not be erased. |
| Local printer | A printer connected to a parallel or USB port of a computer. |
12.5 Index
Numerics
2-Sided Print 10-11, 10-86
A
Account Track ..... 4-18, 5-17, 6-15, 9-4, 9-12, 10-116
Add Printer Wizard 2-6
Administrator Mode ......10-23, 10-63
Authentication ... 4-18, 5-16, 9-4, 9-12
B
Back Cover ..... 4-15, 5-19, 6-20, 9-4
Bindery 3-20
Bindery Emulation ....3-20, 3-22
Bindery/NDS 10-93
Binding Direction .....10-12, 10-86
Binding Position 7-2, 8-4, 9-3
Booklet Printing 4-11
Border 8-4, 9-2
C
Collated 7-2, 8-3, 9-2, 9-3
Color Matching 8-3
Color Selection .... 5-30, 6-23, 8-3
Combination 8-4, 9-3
Computer Faxing 1-4
Confidential documents ......10-109
Copies ..... 7-1, 8-3, 9-2, 10-3, 10-86
Copies & Pages 9-2
CR/LF Mapping .....10-20, 10-87
Creating Cover Sheet 5-38
Creating Forms 5-24
Custom Page Sizes ...... 8-2, 9-1, 9-8
D
Default Gateway 10-90
Demo Page 10-62
Device Options 7-2, 7-5
DHCP 10-89
DNS Server 10-90
Domain Name 10-90
Duplex 7-2, 8-4, 9-3
Duplex Printing 4-11
E
Editing Forms 5-24
Editing Watermark 5-26, 6-22
Enlargement and Reduction ...... 4-9
F
FAX Tab 5-33
Fax Transmission 5-33
File Margin 5-10, 6-18
Finishing 8-4, 8-5, 9-14
Flip Vertical 8-2
Font List 12-4
Font Setting 10-15
Font Settings 8-3
Font Tab 5-32
Front Cover ..... 4-15, 5-19, 6-20, 9-4
G
General settings 8-3, 9-9
Graphics Tab 7-2
Group 5-45
H
Halftone 7-2
Hole Punching ....4-13, 5-11, 7-2, 8-4, 9-3, 10-14, 10-86
Host Name 10-90
|
I/F Timeout 10-28
Input Tray ...... 4-10, 5-7, 10-8, 10-86
Install 2-1, 2-4, 2-16
Interfaces 1-6
Interleaf Setting 4-15
Invert Image 8-2
IP Address 3-5, 10-90
IPP Printing 3-16
L
Layout
......7-1, 7-4, 8-4, 8-10, 9-2, 9-10
Layout Direction 9-2
Layout Tab 6-16
Line/Page 10-19, 10-88
LPD 10-90
LPR Printing 3-11
M
Mac OS 2-16
Mac OS 9.2 ......2-21, 8-1
Mac OS X 2-16, 2-18, 9-1
Macintosh 2-16, 3-29
Margins 9-1
More Options 7-1
N
N in 1 ....5-9, 6-16
NDPS 3-26
NDS 3-23, 3-25
NetBIOS 10-100
NetWare 3-20
Network 3-1
Network Connection ......2-2, 3-3
Network Timeout ....10-85
Novell Distributed Print Service .....3-26
O
Offset 4-14, 7-2, 8-4, 9-3
OHP Interleaving 9-4
Operating System 1-5
Operation Environment 1-5
Options 6-25, 7-3, 8-13, 9-18
Orientation 7-1, 7-4, 9-1
Original Direction 10-86
Original Image Type ..... 5-30, 7-2, 9-4
Original Size 4-8
Output Method 4-14, 5-13, 6-10, 9-4
Output Options 9-2
Output Settings 10-26
Output Size 4-8
Output Tray 8-4, 9-3, 10-86
Overlay 4-16
Overlay Tab 5-22
P
Page Attributes ..... 8-2, 8-6, 9-1, 9-6
Page Setup 9-1, 9-6
Pages 8-3, 9-2
Pages per sheet .....4-12, 5-9, 6-16, 8-4, 8-10, 9-2, 9-10
PageScope Web Connection 3-7, 10-32
Paper Feed 9-3, 9-11
Paper Setup 8-1, 8-6
Paper Size ..... 7-1, 9-1, 10-10, 10-86
Paper Size Change 10-6
Paper Source 4-10, 7-1, 8-3
Paper Tab 7-1
Paper Type 4-10, 9-4
Parallel Connection 2-2
Parallel Interface 10-29
Parallel Setting 10-85
Parallel Timeout 10-85
PCL 2-1
PCL Driver 5-1
PCL Font List 10-62
PCL Settings 10-61
PDL Setting 10-2, 10-86
Per Page Setting Tab .....5-19, 6-20
Plug and Play 2-11
PostScript 2-1
PostScript Driver 6-1
PostScript Font List ......10-62
PPD Driver 7-1, 8-1, 9-1
Print Job 10-104
Print Reports 10-22
Print Server Mode 3-22
Print Type 4-11
Printer Controller 1-1
Printer Driver 2-1, 2-16
Printer Fonts 4-18
Printer Selection 2-18
Printer Specific Options 8-11
Printing 1-3, 8-3, 8-9, 9-2, 9-9
Printing confidential documents 10-109
Printing document data from secure print user box 10-109
Printing Methods 4-1
Printing Operations 4-1
Proof and Print ..... 5-13, 6-10, 10-104
PS Error ......10-21
PS Error Print 10-88
PS Setting 10-61
Q
Quality 9-4, 9-16
Quality Adjustment .... 4-17, 5-30, 6-24
Quality Tab 5-30, 6-23
R
Recalling Jobs 10-107
Registering Recipient in Phonebook 5-42
Remote Printer Mode ....3-20, 3-23
Resolution 7-2, 8-5, 9-4
Rotated 7-1
S
Save in User Box ....5-13, 6-10, 9-4, 9-12, 10-104
Saving Driver Settings ..... 5-49, 6-28
Scale 9-1
Secure Print ....5-13, 6-10, 9-4, 9-11, 10-104
Secure Print Documents ....10-25, 10-26, 10-109, 10-111
Secure Print User Box 10-109, 10-111
Security 9-4, 9-11
Setup 1-8, 9-4, 9-17
Setup Tab 5-5, 6-7
Skip Blank Pages 4-15
SLP 10-90
SMB Print 10-100
SMB Printing 3-8
SNMP 10-98
Sorting 4-14
Specifications 12-1
Spool setting 10-5
Stapling ....4-13, 5-11, 6-18, 7-2, 8-4, 9-3, 10-13, 10-86
Subnet Mask 10-90
Substitute Fonts 8-2
Supported Operating Systems ...... 2-1
Symbol Set 10-17, 10-88
T
Test Printing 4-2
Troubleshooting 11-1
U
Unable to Print 11-1
Uninstall 2-23
USB Connection 2-2
USB Timeout 10-85
User Mode 10-44
Utility Mode 10-1
V
Various Settings 10-1
W
Watermark 4-17
Watermark Tab 5-26, 6-21
Windows 2-2
Z
Zone 10-101
Zoom 4-9

KONICA MINOLTA
http://konicaminolta.com
- User's Guide [Print Operations]
- Welcome
- OpenSSL statement
- Copyright
- Note
- SOFTWARE LICENSE AGREEMENT
- Contents
- Overview
- Installing the printer driver
- Setting up network printing
- Overview of network functions ......3-1
- Setting the IP address for this machine ....3-5
- Accessing PageScope Web Connection ....3-7
- SMB printing 3-8
- LPR printing ....3-11
- Port 9100 Printing (Windows 98SE/Me/2000/XP/Server 2003) ....3-13
- IPP printing (Windows 2000/XP/Server 2003) ....3-16
- Printing with NetWare ....3-20
- Printing with Macintosh ....3-29
- Various printing methods
- Printing operations 4-1
- Setting the printing functions ....4-5
- Specifying the printer driver basic settings .....4-19
- Setting up the PCL driver
- Settings ....5-1
- Specifying the Setup tab settings ....5-5
- Specifying the Per Page Setting tab settings ....5-19
- Specifying the Overlay tab settings ....5-22
- Specifying the Watermark tab settings 5-26
- Specifying the Quality tab settings ....5-30
- Specifying the Font tab settings ....5-32
- Specifying the FAX tab settings ....5-33
- Specifying the Option tab settings ....5-47
- Saving the driver settings ....5-49
- Setting up the PostScript driver (Windows)
- Settings 6-1
- Specifying the Setup tab settings 6-7
- Specifying the Layout tab settings 6-16
- Specifying the Per Page Setting tab settings 6-20
- Specifying the Watermark tab settings 6-21
- Specifying the Quality tab settings 6-23
- Specifying the Option tab settings 6-25
- Saving the driver settings 6-28
- Setting up the PPD driver (Windows)
- Settings 7-1
- Specifying the Paper tab settings 7-4
- Specifying the Device Options tab settings ....7-5
- Specifying the options 7-7
- Setting up the PPD driver (Mac OS 9.2)
- Settings 8-1
- Page Setup 8-6
- Printing 8-9
- Setting options 8-13
- Setting up the PPD driver (Mac OS X)
- Settings 9-1
- Page Setup 9-6
- Printing 9-9
- Setting options ......9-18
- Saving the driver settings 9-19
- Various settings
- Print settings in Utility mode ....10-1
- Printer settings in Administrator mode ....10-23
- Using PageScope Web Connection ....10-32
- Print job management 10-104
- Printing on banner paper 10-119
- Troubleshooting
- Appendix
- About this user's guide
- C300 User's Guides
- Notations
- Screen images in this user's guide
- Using this user's guide
- O v e r v i e w
- Printer controller
- Role of the printer controller
- Available printer controller functions
- Machine modes
- Printing flow
- Flow of the computer faxing operation
- Operation environment
- Compatible computers and operating systems
- Compatible interfaces
- Setting up the system
- To set up the printing system
- Detail
- Printer drivers and supported operating systems
- When used with Windows
- Automatic installation using the installer
- To install the printer driver
- Installing the printer driver using the Add Printer Wizard
- For Windows XP/Server 2003
- For Windows 98SE/Me/2000/NT 4.0
- Installing the printer driver using Plug and Play
- For Windows 98SE
- For Windows Me/2000
- Uninstalling the printer driver
- When used with Macintosh
- Installing the printer driver
- For Mac OS X
- Selecting a printer
- For Mac OS 9.2
- Restart the Macintosh computer.
- Overview of network functions
- Network functions
- Features of the network functions
- Network connection methods that can be selected in each Windows operating system
- Reminder
- Setting the IP address for this machine
- Setting the IP address
- Specify settings for the following:
- Touch [OK].
- To apply the settings, restart this machine (turn it off, then on again).
- Accessing PageScope Web Connection
- To access PageScope Web Connection
- SMB printing
- Operations on this machine
- To apply the settings, restart this machine (turn it off, then on again).
- Printer driver settings
- For Windows 98SE/Me
- For Windows 2000/XP/Server 2003
- LPR printing
- For Windows NT 4.0
- Port 9100 Printing (Windows 98SE/Me/2000/XP/Server 2003)
- Printer driver settings (Windows 2000/XP/server 2003)
- Installing the Peer to Peer Printing Tool to connect using Port 9100 (Windows 98SE/Me)
- Printer driver settings when installing the Peer to Peer Printing Tool to connect using Port 9100 (Windows 98SE/Me)
- IPP printing (Windows 2000/XP/Server 2003)
- On the Network tab, click "IPP Setting".
- Printing with NetWare
- For Remote Printer mode with NetWare 4.x Bindery Emulation
- For Print Server mode with NetWare 4.x Bindery Emulation
- For NetWare 4.x Remote Printer mode (NDS)
- For NetWare 4.x/5.x/6 Print Server mode (NDS)
- For NetWare 5.x/6 Novell Distributed Print Service (NDPS)
- Setting up a client (Windows) settings when using the NetWare Server
- Printing with Macintosh
- Specifying the AppleTalk settings
- On the Network tab, click "AppleTalk Setting".
- Specifying the Bonjour Settings
- Start up PageScope Web Connection.
- Setting the Macintosh computer
- Printing operations
- For Windows
- Test printing
- For Macintosh
- Setting the printing functions
- Function list
- Function overview
- Orientation
- Original Size and Output Size
- Zoom (enlargement and reduction)
- Input Tray (Paper Source)
- Paper Type
- Print Type (duplex printing/booklet printing)
- Printing multiple pages on one page
- Stapling and hole punching
- Output Method (Job Management)
- Sorting (Collating) and Classifying (Offset)
- Skip Blank Pages (saving paper)
- Front Cover, Back Cover, and Transparency Interleave
- Per Page Setting
- Chapter
- Overlay
- Watermark
- Copy Protect
- Quality Adjustment
- Use Printer Fonts (substitute fonts)
- User Authentication
- Account Track
- Specifying the printer driver basic settings
- PCL driver
- PostScript driver
- PostScript PPD driver
- For Mac OS 9.x
- Settings
- Common settings
- Overlay tab
- Watermark tab
- Quality tab
- Font tab
- FAX tab
- Version tab
- Option tab
- Specifying the Setup tab settings
- Printing to suit the paper size
- Saving a custom size
- Selecting the paper source
- Setting the paper source of the paper type
- Specifying duplex/booklet printing
- Printing multiple pages on one page (N in 1)
- Setting the file margin
- Stapling
- Hole punching
- Fold & Staple
- Selecting the output method
- Secured Printing
- Save in User Box
- Proof and printing
- Specifying user authentication settings
- Specifying account track settings
- Specifying the Per Page Setting tab settings
- Printing documents with a front cover/back cover
- Printing multiple pages
- Specifying the Overlay tab settings
- Printing different original documents together (Overlay)
- Editing forms
- Specifying the Watermark tab settings
- Printing a watermark
- Editing a watermark
- Specify settings for the following:
- Printing the document number
- Specifying the Quality tab settings
- Specifying settings
- Specifying the Font tab settings
- Specifying the FAX tab settings
- Sending a fax
- Click the [Phone Book] button.
- Select the recipient or group where the fax is to be sent.
- Click the [Add Recipients] button.
- Select the recipient and then click the [OK] button.
- Check that the file recipient appears in the "Recipients" list.
- Creating a cover sheet
- Registering a recipient in the phonebook
- Registering recipient information
- Registering a group
- Specifying the Option tab settings
- Saving the driver settings
- Saving the driver settings
- Deleting the settings
- Settings
- Settings tab
- Specifying the Setup tab settings
- Specifying the Layout tab settings
- Duplex printing
- Specifying the Per Page Setting tab settings
- Specifying the Watermark tab settings
- Specifying the Quality tab settings
- Font settings
- Specifying the Option tab settings
- Saving the driver settings
- Changing the settings
- Settings
- Device Options tab
- PostScript tab
- Fonts tab
- Specifying the Paper tab settings
- Click the Paper tab.
- Specify settings for the following:
- Specifying the Device Options tab settings
- Specifying setting
- Specifying the options
- Settings
- Print dialog box
- Print item
- Page Setup
- Page Attributes (basic settings)
- Custom Page Sizes
- PostScript Options
- Printing
- General (basic settings)
- Layout (printing multiple pages on one page)
- Printer specific options (Finishing Options 1 to 4)
- Setting options
- Settings
- Page Setup
- Custom Paper Size
- Printing
- Copies & Pages (general settings)
- Paper Feed
- Security
- Finishing
- Quality
- Setup
- Setting options
- Saving the driver settings
- Print settings in Utility mode
- PDL Setting
- Number of Sets
- Original Direction
- Touch the button for the desired setting.
- Spool Setting
- Paper Size Change
- Banner Setting
- Paper Tray
- Touch the button for the desired paper tray.
- Touch [OK].
- Default Paper Size
- 2-Sided Print
- Bind Direction
- Staple
- Hole-Punch
- Banner Paper Tray
- Font Setting
- Touch [1 Font Setting].
- Touch [Internal].
- Touch the button for the desired setting.
- Symbol Set
- Font Size
- Line/Page
- CR/LF Mapping
- PS Error Print
- Print Reports
- Printer settings in Administrator mode
- The Administrator Setting screen appears.
- To delete secure print documents
- To specify the "Auto Delete Secure Document" parameter
- Print/Fax Output Settings
- I/F Timeout
- Parallel I/F
- IEEE 1284/USB
- Capture Print Data
- Using PageScope Web Connection
- Accessing PageScope Web Connection
- Page structure
- Cache function of Web browsers
- On Internet Explorer
- On Netscape Navigator
- Logging In and logging out
- Logging out
- Logging in to the User mode (public user)
- In the login page, select [Public User].
- Click the [Login] button.
- Logging in to the User mode (registered user)
- Logging in to the Administrator mode
- User mode
- System tab
- System tab — Device Information — Consumables
- System tab — Device Information — Input Tray
- System tab — Device Information — Output Tray
- System tab – Device Information – Configuration Summary
- System tab — Device Information — HDD
- System tab — Device Information — Interface Information
- System tab — Device Information — Administrator Information
- System tab — Meter Count
- System tab — Online Assistance
- System tab — User Authentication — User Password Change
- System tab — User Authentication — User Information
- System tab — Account Track Information
- Job Tab
- Job tab — Current Job
- Job tab — Job History
- Print tab
- Print Tab — General Settings
- Print tab — Print Reports
- Administrator mode
- Basic operation
- System tab — Import/Export
- System tab — Date/Time — Manual Setting
- System tab — Date/Time — Time Adjustment Setting
- System tab — Machine Setting
- System tab — Device Information
- System tab — ROM Version
- System tab — Maintenance — Network Setting Clear
- System tab — Maintenance — Reset
- System tab — Status Notification Setting
- System Tab — Total Counter Report Setting
- System tab — User Authentication — User Registration
- System tab — User Authentication — Default Function Permission
- System tab — Account Track Registration
- Print tab — Interface
- Print tab — Default Settings — General Settings
- Print tab — Default Settings — PCL Settings
- Print tab — Default Settings — PS Settings
- Scan Tab
- Network tab
- Network tab — TCP/IP — TCP/IP
- Network tab — TCP/IP — IP Address Filtering
- Network tab — NetWare — NetWare
- Network tab — NetWare — NetWare Status
- Network tab — IPP Setting
- Network tab — SNMP Setting
- Network tab — SMB Setting — WINS Setting
- Network tab — SMB — Print
- Network tab — AppleTalk
- Network tab — Bonjour Setting
- Network tab — SSL/TLS
- Network tab — Authentication
- Print job management
- Specifying job operations
- Specifying settings (for Windows)
- Specifying settings (for Mac OS X)
- Job storage
- Recalling jobs (Proof and Print)
- Touch [Release Held Job].
- Recalling jobs (Secure Print)
- When "Secure Document Access Method" is set to "Mode 1"
- When "Secure Document Access Method" is set to "Mode 2"
- Printing when the User Authentication Is Specified on This Machine
- Printing with this machine when account track settings have been applied
- Job operations in PageScope Web Connection
- Printing on banner paper
- Paper
- Paper types
- Printer drivers and supported operating systems
- Specifying printer driver settings
- To specify printer driver settings
- Printing
- To print
- When printing is finished, touch [Finish].
- Touch [Yes].
- Unable to Print
- Unable to specify desired settings or unable to print as specified
- Error message
- Specifications
- Configuration page
- KONICA MINOLTA C300
- Configuration Page
- Font list
- PS font list
- Demo page
- Glossary
- Index
- Numerics
- A
- B
- C
- D
- E
- F
- G
- H
- |
- L
- M
- N
- O
- P
- Q
- R
- S
- T
- U
- V
- W
- Z
- KONICA MINOLTA
Brand : KONICA MINOLTA
Model : bizhub c300
Category : Printer