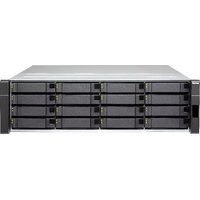
ES1640DC - Server QNAP - Free user manual and instructions
Find the device manual for free ES1640DC QNAP in PDF.


| Product Type | Storage Server (Dual-Controller) |
| Model | ES1640DC |
| Brand | QNAP |
| Form Factor | 2U Rackmount |
| Dimensions (H x W x D) | 88 x 446 x 650 mm |
| Weight | Approximately 25 kg (fully loaded) |
| Number of Drive Bays | 16 x 3.5-inch SATA/SAS |
| Processor | Intel Xeon (Dual per controller) |
| Memory | Up to 256 GB DDR4 per controller (optional) |
| Power Supply | Dual redundant 1600W (80 PLUS Platinum) |
| Cooling | Hot-swappable dual cooling modules |
| Data Protection | RAID 0/1/5/6/10/50/60, JBOD |
| Network Connectivity | Dual 10GbE RJ45, optional 40GbE |
| High Availability | Active-Active dual controller with failover |
| Operating System | QES (QNAP Enterprise Storage) |
| Supported Protocols | iSCSI, NFS, CIFS/SMB, FTP |
| Encryption | AES 256-bit volume and folder encryption |
| Replacement Parts Availability | Spare drives, power supplies, fans, controllers available |
| Maintenance | Hot-swappable components for easy servicing |
| Warranty | Standard 3-year limited warranty |
Frequently Asked Questions - ES1640DC QNAP
User questions about ES1640DC QNAP
0 question about this device. Answer the ones you know or ask your own.
Ask a new question about this device
Download the instructions for your Server in PDF format for free! Find your manual ES1640DC - QNAP and take your electronic device back in hand. On this page are published all the documents necessary for the use of your device. ES1640DC by QNAP.
USER MANUAL ES1640DC QNAP
Accessing Shared Folders on the NAS....9
About QES....9
Features and Benefits....9
Changes in QES 2.2.0....10
QES Installation....11
Installing QES Using Manual Setup.... 11
QES Navigation....13
Task Bar....13
Main Menu....22
Desktop 24
QES Utilities....25
3. Storage Manager
QNAP Flexible Storage Architecture....27
Storage Manager Global Settings....28
Storage....30
Disks.... 30
Storage Pools....38
RAID....50
Shared Folders....53
SSD Over-Provisioning....67
Snapshots....68
Snapshot Creation....69
Snapshot Management....71
Snapshot Data Recovery....72
QNAP Snapshot Agent....74
Snapshot Clone....74
Cache Acceleration....75
Configuring the SSD Cache....76
Enabling the SSD Cache....77
Disabling the SSD Cache....77
Configuring Cached Shared Folders and LUNs....77
iSCSI & Fibre Channel....77
Storage Limits....78
iSCSI & Fibre Channel Global Settings....78
LUNs....79
iSCSI....82
Fibre Channel....97
LUN Groups....106
Hosts....111
Adding a Host....111
QoS....112
Storage Group....113
Policy....114
Reserved Pool I/O Capacity.... 118
4. System Settings
General Settings.... 120
Configuring the System Administration Settings.... 120
Configuring the Time Settings.... 121
Configuring the Daylight Saving Time (DST) Settings.... 122
Configuring the Codepage Settings.... 123
Configuring the Login Screen....123
Network....124
IPv4....124
IPv6....129
Service Binding....131
Configuring Proxy Server Settings....131
Security....132
Allow/Deny List....132
Network Access Protection....133
Certificate & Private Key....134
Password Policy....135
Hardware....135
Reset Button....135
Buzzer....135
Smart Fan....136
Backup Battery Unit (BBU)....136
Power....137
Wake-on-LAN (WOL).... 137
Power Recovery....137
Notification....138
Email Alerts....138
SMS Alerts....139
Configuring Notification Settings.... 141
Firmware Update....142
Checking for Live Updates....142
Updating the Firmware Manually....142
Updating the Firmware Using Qfinder Pro....143
Backup/Restore....144
Backing Up the System Settings.... 144
Restoring the System Settings.... 144
System Reset and Restore to Factory Default 145
External Device.... 147
Uninterruptible Power Supply (UPS).... 147
System Status....149
System Logs.... 149
System Event Logs....150
System Connection Logs....150
Online Users....151
Syslog Client Management....151
5. Privilege
Users....153
Default User Accounts....153
User Creation....153
User Management....158
Home Folders....160
User Groups.... 160
Default User Groups....161
Creating a User Group....161
Editing a User Group's Description....162
Editing User Groups.... 162
Deleting User Groups....162
Shared Folder Permissions....163
Conflicts in Shared Folder Permissions....163
Editing a User's Shared Folder Permissions....164
Editing a User Group's Shared Folder Permissions.... 164
Quota....165
Configuring Quota Settings....165
Exporting Quota Settings....165
Domain Security....165
Active Directory (AD) Authentication....166
LDAP Authentication....169
Active Directory (AD) and LDAP Management.... 172
UIDs and GIDs....172
Reclaiming UIDs....173
Reclaiming GIDs....173
6. Network and File Services Settings
Win/NFS....174
Microsoft Networking.... 174
NFS Service....176
FTP 177
Configuring FTP Service Settings....177
Configuring the FTP Service Advanced Settings.... 178
SSH....178
Configuring SSH....179
SNMP....179
Configuring the SNMP Settings.... 179
SNMP Management Information Base (MIB)....181
Service Discovery....181
Bonjour....181
Network Recycle Bin....182
Configuring the Network Recycle Bin.... 182
Deleting All Files in the Network Recycle Bin.... 182
Permanently Deleting a File or Folder....183
Recovering a Deleted File or Folder....183
Restricting Access to the Network Recycle Bin.... 183
7. High Availability
About High Availability....185
Dual Path Overview....185
System Components....186
System Component Status.... 189
System Availability Status.... 189
High Availability Status....189
Dual Path Status....190
Storage Controller Actions.... 190
Cluster Options....191
8. Applications
Backup Station....192
Comparison of Backup Methods....192
Rsync....192
SnapSync....199
Diagnostic Tool....211
Downloading System Logs.... 211
Analyzing Kernel Logs 212
Analyzing Hard Disk Drives....212
Station Manager....213
TFTP Server 213
Virtualization....214
VAAI for iSCSI and VAAI for NAS....214
Offloaded Data Transfer (ODX)....214
10GbE Support....215
vSphere Client 215
QNAP SMI-S Provider....215
9. Notices
BSD License....216
CDDL License....216
GNU Public License....221
1. Preface
Audience
This document is intended for consumers and storage administrators. This guide assumes that the user has a basic understanding of storage and backup concepts.
Document Conventions
| Symbol Description | |
 | Notes provide default configuration settings and other supplementary information. |
 | Important notes provide information on required configuration settings and other critical information. |
 | Tips provide recommendations or alternative methods of performing tasks or configuring settings. |
 | Warnings provide information that, when ignored, may result in potential loss, injury, or even death. |
2. Overview
NAS Access
| Method Description Requirements | ||
| Web browser | You can access the NAS using any computer on the same network if you have the following information:• NAS name (Example: http://example123/) or IP address• Logon credentials of a valid user account | • Computer that is connected to the same network as the NAS• Web browser |
| Qfinder Pro Qfinder Pro is a desktop utility that enables you to locate and access QNAP NAS devices on a specific network. The utility supports Windows, macOS, Linux, and Chrome OS.To download Qfinder Pro, go tohttps://www.qnap.com/utilities. | • Computer that is connected to the same network as the NAS• Web browser• Qfinder Pro | |
| Explorer (Windows) | You can map a NAS shared folder as a network drive to easily access files using Explorer. | Windows computer that is connected to the same network as the NAS |
| Finder (macOS) | You can mount a NAS shared folder as a network drive to easily access files using Finder. | Mac computer that is connected to the same network as the NAS |
Accessing the NAS Using a Browser
You can access the NAS using any computer on the network if you know its IP address and the logon credentials of a valid user account.
Tip
- By default, you can access the NAS using the NAS management interface, which usually supports 1 Gbps. To access the NAS using a different interface (for example, one that supports 10 Gbps), enable service binding and then configure NAS Web Management Interface. For details, see Service Binding.
-
If you do not know the IP address of the NAS, you can locate it using Qfinder Pro. For details, see Accessing the NAS Using Qfinder Pro.
-
Verify that your computer is connected to the same network as the NAS.
-
Open a web browser on your computer.
- Type the IP address of the NAS in the address bar.
The QES login screen appears.
- Specify your username and password.
The default username is admin.
The default admin password depends on the QES version:
• Before QES 2.1.1 build 20200424: admin
• QES 2.1.1 build 2020424: The NAS serial number in lowercase
- QES 2.1.1 build 20200515 or later: The NAS serial number in uppercase
- Click Login.
The QES desktop appears.
Accessing the NAS Using Qfinder Pro
- Install Qfinder Pro on a computer that is connected to the same network as the NAS.
Tip
To download Qfinder Pro, go to https://www.qnap.com/en/utilities.
- Open Qfinder Pro.
Qfinder Pro automatically searches for all QNAP NAS devices on the network. - Locate the NAS in the list, and then double-click the name or IP address.
The QES login screen opens in the default web browser. - Specify your username and password.
- Click Login.
The QES desktop appears.
Accessing the NAS Using myQNAPcloud
The myQNAPcloud service allows you to use the internet to access a NAS device outside a local area network (LAN).
- Optional: Verify that myQNAPcloud is enabled.
a. Go to Control Panel > System > myQNAPcloud.
The myQNAPcloud window opens.
b. Locate the device URL.
The default URL format is
Important
The device URL is only available if myQNAPcloud is enabled.
For details, see Enabling myQNAPcloud.
- On your web browser, type the URL and then press Enter.
Enabling myQNAPcloud
The myQNAPcloud service allows you to use the internet to access a NAS device outside a local area network (LAN).
- Go to Control Panel > System > myQNAPcloud.
The myQNAPcloud window opens.
- Click Get Started.
The myQNAPcloud wizard opens.
- Perform the following steps.
a. Click Start.
b. Type your QID and password.
For details on creating a myQNAPcloud account, see https://support.myqnapcloud.com/features?&focus=howto.
c. Click Next.
d. Type a device name.
e. Click Next.
myQNAPcloud generates the device URL.
The default URL format is
Enabling My DDNS
The My DDNS service allows you to connect to network services on the NAS using the myQNAPcloud device URL.
-
Go to Control Panel > System > myQNAPcloud.
-
Verify that myQNAPcloud is enabled.
For details, see Enabling myQNAPcloud.
- Go to Control Panel > System > myQNAPcloud > Remote Access Services.
The myQNAPcloud window opens.
- Click My DDNS.
The My DDNS tab appears.
- Select Enable myQNAPcloud DDNS service and then click Apply.
myQNAPcloud generates the device URL.
The default URL format is
Accessing Shared Folders on the NAS
To access a shared folder on a NAS, you must first map the folder as a network drive.
For details on drive mapping, see the following:
- Mapping a Shared Folder on a Windows Computer
- Mounting a Shared Folder on a Mac Computer
- Mounting a Shared Folder on a Linux Computer
To access a mapped drive, use a file manager on your computer.
- On a Windows computer, open Windows Explorer and then locate the mapped drive.
- On a Mac computer, open Finder and then locate the mapped drive.
- On a Linux computer, open your preferred file manager and then locate the mapped drive.
About QES
QNAP Enterprise System (QES) is an operating system that is based on FreeBSD Kernel and ZFS to provide the stability and functionality of traditional Linux operating systems and native file systems.
Features and Benefits
QES provides the following features and benefits.
| Feature Description | |
| Remote data synchronization | Block-level SnapSync provides remote backup and disaster recovery at any time. |
| Application consistent snapshots | Snapshot Agent provides data consistency when taking snapshots. |
| Higher-capacity efficiency | Block-level deduplication, real-time data compression, and thin provisioning provide increased efficiency. |
| High availability, high reliability, and high serviceability | QES supports dual active controllers and dual Mini-SAS channel backups, and tolerates single-node failure to ensure uninterrupted mission-critical enterprise tasks and productivity. |
| Minimal backup configuration | The minimum requirements for a QNAP Snapshot Agent and VSS Hardware Provider operating environment include a QNAP ES NAS and a server. You can deploy all applications, including VSS Service, Requestor, Provider and QNAP Snapshot Agent, on the same server. |
| Excellent random write performance | QES uses a battery-protected DRAM write cache with cache data protection, and flash read acceleration. |
| Well-rounded networking support | QES supports 10 Gigabit Ethernet and iSCSI to provide storage deployment flexibility. |
Note
The "high availability" and "battery-protected DRAM write-cache" features are only available on dual-controller ES NAS devices.
Changes in QES 2.2.0
Important Notes
- For instructions on updating QES to the latest version, open the following link. https://www.qnap.com/en/how-to/faq/article/my-nas-is-running-an-older-version-of-qes-can-i-update-to-the-latest-version-directly-what-sequence-should-i-follow-when-updating-qes
- For release note history, open the following link. https://www.qnap.com/en/releasenotes_qes/
New Features
- Added support for Fibre Channel.
- Added support for NFS 4.1.
- Added schedule for storage pool scrubbing. Scrubbing tasks are suspended outside of the scheduled times.
- Added deduplication table recycling schedule. The deduplication table is cleaned periodically according to a schedule, in order to reduce memory use.
- Added SnapSync performance test. You can test SnapSync data transfer speeds between two NAS devices.
- Added SnapSync latency monitoring for real-time jobs. You can set alerts and view graphs of SnapSync latency over time.
Enhancements
- Improved file system performance.
- QES now alerts you if the storage controller databases are inconsistent.
Fixed Issues
- Several minor bug fixes.
QES Installation
You can install QES using any of the following methods.
| Method Description Requirements | ||
| Qfinder Pro installation | If the NAS is connected to your local area network, you can do the following:Locate the NAS using Qfinder Pro.Complete the steps in the Smart Installation Guide wizard.For details, seeInstalling QES Using Manual Setup. | ComputerNetwork cableQfinder Pro installer |
| Switch from QTS | If the NAS is currently installed with QTS, you can switch to QES.For details, seeSystem Reset and Restore to Factory Default. | N/A |
Installing QES Using Manual Setup
Warning
Installing QES deletes all data on the drives. Back up your data before proceeding.
- Power on the NAS.
- Connect the NAS to your local area network.
- Run Qfinder Pro on a computer that is connected to the same local area network.
Tip
To download Qfinder Pro, go to https://www.qnap.com/utilities.
-
Locate the NAS in the device list, and then double-click the name or IP address. The setup wizard opens.
-
Click Manual Setup.
The Enter the NAS name and administrator's password screen appears.
- Specify a NAS name and password.
| Field Requirements | |
| NAS name • Length: 1-14 charactersValid characters: A-Z, a-z, 0-9Valid special characters: Hyphen (-)Not allowed: The last character is a hyphen (-) | |
| Password • Length: 5-64 charactersValid characters: All ASCII characters |
- Click Next.
The Set the date and time screen appears.
- Specify the time zone, date, and time.
Tip
QNAP recommends connecting to an NTP server to ensure that the NAS follows the Coordinated Universal Time (UTC) standard.
- Click Next.
The Configure the network settings screen appears.
-
Select Obtain an IP address automatically (DHCP).
-
Click Next.
The Cross-platform file transfer service screen appears.
-
Select the types of devices that you will use to access shared folders on the NAS.
-
Click Next.
The Check system disk status screen appears.
- Select a storage pool to install QES on.
Important
Once the installation process starts, the selected storage pool cannot be modified. Reinitialize the NAS before selecting a different disk group.
- Click Next.
The Summary screen appears.
-
Review the settings.
-
Click Apply.
A confirmation message appears.
Warning
Clicking Confirm deletes all data on the drive before installing QES.
18. Click Confirm.
The wizard installs QES and restarts the NAS.
Note
You must initialize any unused disks upon your next login.
QES Navigation
Task Bar

| No. Element User Actions | ||
| 1 | Main Menu | Click the button to open the Main Menu panel on the left side of the desktop. |
| 2 Search • Type key words to locate settings, applications, and help content.• Click an entry in the search results to open the application or system utility. | ||
| 3 Background Tasks | • Hover the mouse pointer over the button to see the number of background tasks that are running. Examples of background tasks include file backup and multimedia conversion.• Click the button to see the following details for each background task:• Task name• Task description• Progress (percentage of completion)• Click to stop a task. | |
| No. | Element User Actions | |
| 4 | External Devices | Hover the mouse pointer over the button to view the number of external storage devices and printers that are connected to the USB and SATA ports on the NAS.Click the button to view the details for each connected device.Click a listed device to open File Station and view the contents of the device.Click Settings to open the UPS screen. |
| 5 | Event Notifications | Hover the mouse pointer over the button to see the number of recent errors and warnings.Click the button to view the following details for each event:Event typeDescriptionTimestampNumber of instancesClick a list entry to view the related utility or application screen.Clicking a warning or error log entry opens the System Event Log window.Click More>> to open the System Event Log window.Click Clear All to delete all list entries. |
| 6 | Options | Click your profile picture to open the Options screen. |
No. Element User Actions
7 [USER_NAME] Click the button to view the last login time and the following menu items:
- Options: Opens the Options window
- Sleep: Keeps the NAS powered on but significantly reduces power consumption This feature is only available on models with certain hardware specifications.
- Restart: Restarts the NAS
- Shutdown: Shuts down QES and then powers off the NAS
Note
You can also power off the NAS using one of the following methods:
- Press and hold the power button for 1.5 seconds.
- Open Qfinder Pro, locate the device in the list. Right click on the device and select Shut down Device.
- Open Qmanager, and then go to Menu > System Tools > System. Tap Shutdown.
- Logout: Logs the user out of the current session
| No. Element User Actions | |
| 8 More Click the button to view the following menu items:Help: Displays links to the Quick Start Guide, Virtualization Guide, QES Help, and online tutorials pageLanguage: Opens a list of supported languages and allows you to change the language of the operating systemDesktop Preferences: Opens a list of display modes and allows you to select the mode based on your device typeFeedback: Opens the QNAP Feature Request / Bug Report web pageData & Privacy: Opens the QNAP Privacy Policy pageAbout: Displays the following information:Operating systemHardware modelOperating system versionNumber of installed drivesNumber of empty drive baysSystem volume nameUsed disk spaceAvailable disk space | |
| 9 Dashboard Click the button to display the dashboard. |
Options
| # Tab User Actions | |
| 1 Profile• Specify the following optional information:Profile pictureE-mailPhone numberClick View to open the System Connection Logs screen.Click Edit login screen to open the Login Screen configuration screen in the Control Panel window.Click Apply to save all changes. | |
| 2 | WallpaperSelect a wallpaper from the built-in options or upload a photo.Click Apply to save all changes. |
| 3 Change Password | Specify the following information:Old passwordNew password: Specify a password with a maximum of 64 characters. QNAP recommends using passwords with at least 6 characters.Click Apply to save all changes. |
| 4 Miscel-laneous | Enable the following settings.Auto logout after an idle period of: You can specify the duration of inactivity after which the user is automatically logged out.Warn me when leaving QES: When enabled, QES prompts users for confirmation whenever they try to leave the desktop (by clicking the Back button or closing the browser). QNAP recommends enabling this setting.Reopen windows when logging back into QES: When enabled, the current desktop settings (including all open windows) are retained until the next session.Show the desktop switching button: When enabled, QES displays the desktop switching buttons <> on the left and right sides of the desktop.Show the link bar on the desktop: When enabled, QES displays the link bar on the bottom of the desktop.Show the Dashboard button: When enabled, QES displays the Dashboard button on the task bar.Show the NAS time on the desktop: When enabled, QES displays the server date and time on the desktop.Keep Main Menu open after selection: When enabled, QES keeps the main menu pinned to the desktop after you open it.ClickApplyto save all changes. |
Dashboard

The dashboard opens in the lower right corner of the desktop.
Tip
You can click and drag a section onto any area of the desktop.
| Section Displayed Information User Actions | ||
| System Health | • NAS name• Health status | Click the heading to openControl Panel> System > System Status > System Information.If disk-related issues occur, click the heading to openStorage Manager.If a hardware issue occurs, click the heading to openHigh Availability. |
| Hardware Information | For each storage controller:• CPU temperature• System fan speed | Click the heading to openControl Panel> System > System Status > Hardware Information. |
| Section Displayed Information User Actions | ||
| Resource Monitor | For each storage controller:CPU usage in %Memory usage in %Network upload and download speeds for each adapter. | Click the heading to openControl Panel> System > Resource Monitor > Overview. |
| Disk Health • Number of installed disksHealth status of installed disks | Click the heading to open theDisk Health screen inStorage Manager.Clickswitch between disk and NAS information.Click a disk name to view the following information for each installed disk:Capacity/sizeTemperatureHealth statusClickDetailsto openStorage Manager > Overview. | |
| Storage For each shared folder:StatusUsed spaceAvailable spaceFolder sizeFor each storage pool:StatusUsed spaceAvailable spaceShared folder sizeFor each LUN:StatusUsed spaceAvailable space | Click the heading to open Storage Manager > Storage > Storage Space.Click switch between shared folder and storage pool information. | |
| Online Users • UsernameTotal connection timeIP address | Click the heading to open Control Panel > System > QuLog Center > Online Users. | |
| Scheduled Tasks | Task typeTask summaryTask nameTimestampStatus | Use the filters to view tasks that were executed within a specific period. |
Main Menu

| No. Section Description User Actions | |||
| 1 NAS Information Displays the NAS name and model number. | N/A | ||
| No. | Section Description User Actions | ||
| 2 System Displays a list of | system utilities and other programs that enable you to manage the NAS.The following are the default system utilities:Control PanelStorage ManagerShared FoldersDiagnostic ToolUsersmyQNAPcloudNetworkWin/NFSSystem StatusSystem Logs | Open a system utility or application in the QES desktopClick a menu item.Right-click a menu item and then select Open.Create a shortcut on the desktopRight-click a menu item and then select Create shortcut.Click and drag a menu item to the desktop. | |
| 3 Applications Displays a list of | applications developed by QNAP or third-party developers.When an app is installed, it is automatically added to the applications list.The following are the default applications:File Station | ||
Desktop

| # | Element Description | User Actions | |
| 1 | Wallpaper This is a digital image that is used as a background for the QES desktop.Users can either select from one of the provided wallpapers or upload an image | Change the wallpaper in the Options window. | |
| 2 | Shortcut icons Each icon opens an app or a utility.When you install an application, QES automatically creates a desktop shortcut. The following are the default shortcuts:Control PanelFile Station | Click an icon to open the application window.Right-click an icon and then select one of the following:Open: Opens the application windowOpen in a new browser tab: Opens the application in a new tabRemove: Deletes the icon from the desktopClick and drag an icon to another desktop. | |
| 3 | Desktop This area contains open system utilities and applications. The desktop consists of three separate screens. | Click < or > to move to another desktop. | |
| # Element Description User Actions | ||
| 4 | Date and time This displays the date and time that the user configured during system installation. | N/A |
| 5 | NotificationsThis notifies the user about important system events that may or may not require user action.When there is more than one group of notifications, the notices will be arranged according to the notification type on a notice board.You can also view notifications in Notifications Board. | Click the notification to open the corresponding utility or app. |
QES Utilities
QES is compatible with the following QNAP utilities.
Tip
To download QNAP utilities that are compatible with your NAS model, go to https://www.qnap.com/download.
| Utility Description Supported Operating | System or Platform | |
| Qfinder Pro Locate and access QNAP NAS devices on a local area network (LAN). | • Windows• MacOS• Ubuntu• Chromebook | |
| QNAP VMware Storage Replication Adapter (SRA) | Deploy a VMware remote backup and disaster recovery solution with QNAP NAS and VMware Site Recovery Manager (SRM). | VMware ESXi |
| QNAP SMI-S Provider | Enable communication between System Center Virtual Machine Manager (SCVMM) and QES NAS devices. | Windows |
| QNAP Snapshot Agent | Create application-consistent LUN snapshots for data backup and restoration. | • Windows• VMware ESXi |
| Qmanila (QNAP Manila driver) | Use a QNAP NAS as part of a shared filesystem for OpenStack. The driver supports CIFS, NFS, and advanced features such as snapshots, compression, deduplication, and thin provisioning. | Manila |
| QNAP Cinder Driver Use a QNAP NAS to provide block-storage to OpenStack. The driver supports advanced features such as snapshots, compression, deduplication, and thin provisioning. | Cinder | |
| Qutil Configure a Windows server connected to a dual-controller QES NAS using MPIO to handle events such as data delays, data loss, and storage controller failover, and apply MPIO load balancing policies to iSCSI LUNs. | Windows | |
| QNAP VAAI NFS Plugin | Allow ESXi hosts to access the following VAAI features when connected to a QES NAS using NFS: Full File Clone, Space Reserve, Extended Statistic. | VMware ESXi |
| myQNAPcloud Connect | Access published NAS services over the internet using a VPN. | Windows |
| vSphere (Web) Client plug-in | Directly manage VMware datastores on the NAS from the vSphere client console. | Windows |
3. Storage Manager
Storage Manager is a QES utility that helps you create, manage, and monitor storage on your NAS. With Storage Manager you can perform the following tasks:
- Create RAID groups, storage pools, and shared folders.
• Monitor storage usage and access speeds. - Back up data using snapshots.
- Accelerate the performance of your NAS by creating an SSD cache.
- Share NAS storage space with other storage devices using iSCSI.
- Specify which hosts (computers, servers, other NAS devices) are allowed to access the NAS.
- Allocate I/O resources to specific LUNs and shared folders by creating QoS policies.

QNAP Flexible Storage Architecture
QNAP flexible storage architecture consists of three layers, which combine to offer storage flexibility and data protection.
- Disks
- Storage pools
• Shared folders and LUNs
![graph TD A["Shared Folder/LUN Layer"] --> B["Shared Folder 1"] A --> C["Shared Folder 2"] A --> D["LUN 1"] A --> E["LUN 2"] A --> F["Shared Folder 3"] A --> G["Shared Folder 4"] A --> H["LUN 3"] A --> I["LUN 4"] A --> J["LUN 5"] A --> K["LUN 6"] B --> L["Storage Pool 1 RAID Group"] C --> M["Storage…](/content/2026/06/1274100/images/0a1955bad6a26c5baeddc8055e1a6a359656ca6cb924f3bde51d168b20d8c627.jpg)
Tip
You can expand the storage capacity of your NAS by connecting a QNAP expansion unit. For details on compatible models, see www.qnap.com/compatibility or your NAS hardware user guide.
Storage Manager Global Settings
You can access the global settings screen by clicking in the upper-right corner of the Storage Manager window.
| Setting Description | |
| Predictive S.M.A.R.T. Migration | If S.M.A.R.T. errors are detected on a disk, or if an SSD has exceeded its endurance limit, QES issues a warning notification and then starts migrating data from the disk to a spare disk. After the migration is finished, the healthy disk replaces the faulty disk in the RAID group. |
| Disk S.M.A.R.T polling time | Specify how often QES checks disks for S.M.A.R.T. errors, in minutes. |
| TLER/ERC timer (seconds) | When a disk encounters a read or write error, it may become unresponsive while the disk firmware attempts to correct the error. QES might interpret this unresponsiveness as a disk failure. Enabling this feature ensures that a disk has sufficient time to recover from a read or write error before QES marks it as failed and initiates a RAID group rebuild.TipThis setting is also known as Error recovery control (ERC), Time-limited error recovery (TLER) or Command completion time limit (CCTL).You should specify values according to the disk manufacturer's recommendations. |
| Delete the oldest snapshots when a storage pool is full | When enabled, QES automatically deletes old snapshots when no storage pool space is available. You can choose to delete snapshots taken on a schedule, snapshots taken manually by a user, or both. |
| Enable Scrub Pool schedule | Pool scrubbing detects and automatically repairs damaged data blocks in the ZFS file system.ImportantWhile the scrubbing task is running, the read and write performance of the storage pool may be reduced. You should schedule pool scrubbing to run during times of low NAS usage.If you set an end time, then scrubbing will pause at the end time and resume at the next start time.For details on manually scrubbing a pool, see Scrubbing a Storage Pool. |
| Clean deduplication table | Clean the deduplication table of every storage pool according to a schedule.When deduplication is enabled in a storage pool, ZFS records duplicate data in a deduplication table. Cleaning removes unused entries from the pool's deduplication table. |
| Enable temperature alarm for hard disk drives | Enable this feature to monitor HDD temperatures. QES issues a warning notification when the temperature of a HDD exceeds the specified threshold.To set disk temperature alarms on individual disks, see Disk Health Information. |
| Enable temperature alarm for solid state drives | Enable this feature to monitor SSD temperatures. QES issues a warning notification when the temperature of a SSD exceeds the specified threshold.To set disk temperature alarms on individual disks, seeDisk Health Information. |
| Enable SSD Life When enabled, QES monitors the remaining lifespan of SSDs in the NAS. | |
Storage
Disks
This screen enables you to monitor and manage disks and connected expansion units.

Disk Types
QES restricts which types of disks can be used to create an SSD cache.
Important
- For compatibility reasons, PCIe form-factor SSDs and M.2 SSDs cannot be used to create SSD cache on dual-controller ES NAS devices.
| Disk Type Installation Method SSD Cache Storage | Pools | ||
| SATA/SAS/NL-SAS 3.5” HDD | NAS drive bay No Yes | ||
| SATA/SAS 2.5” HDD NAS drive bay No Yes | |||
| SATA/SAS 2.5” SSD NAS drive bay Yes Yes | |||
| PCIe NVMe M.2 SSD QM2 card Dual-controller NAS: No | Single-controller NAS: Yes | No | |
| PCIe NVMe M.2 SSD Third-party M.2 to PCIe adapter card | Dual-controller NAS: No Single-controller NAS: Yes | No | |
| SATA M.2 SSD QM2 card Dual-controller NAS: No | Single-controller NAS: Yes | No | |
| SATA M.2 SSD NAS internal M.2 slot Dual-controller NAS: No | Single-controller NAS: Yes | No | |
| PCIe form-factor SSD PCIe slot Dual-controller NAS: No | Single-controller NAS: Yes | Yes | |
Disk Management
Disk Information
| Information Description | |
| Disk Health Status | The general health status of the disk.Good: The disk is healthy.Warning: QES has detected an error. Run a full S.M.A.R.T. test and a disk scan.Error: QES has detected a critical error. You must replace the disk immediately. |
| Disk Model | The manufacturer and model of the disk. |
| Disk Capacity | The storage capacity of the disk. |
| Status | The hardware status of the disk. |
| Temperature The current temperature of the disk. Disk temperature is retrieved from the disk's firmware using S.M.A.R.T. | |
| Maximum Speed The maximum transfer speed supported by the drive bay or slot that the disk is installed in. | |
| Firmware Version The firmware version of the disk. | |
| Disk Access History (I/O) | ·Good: QES has not detected any errors on the disk. ·Warning: QES has detected and recovered errors on the disk. ·Error: QES has detected unrecoverable errors on the disk. |
| Disk SMART Information | The S.M.A.R.T. status of the disk. If any of the S.M.A.R.T. attribute values reach the threshold set by the disk manufacturer or a predefined threshold determined by QES, this field changes to Warning. |
| Life Remaining The remaining life of the disk, as calculated by the disk's firmware. When the value reaches 0, you should replace the disk. This information is only available for solid-state drives (SSDs). | |
| SSD life indicator The value that QES is using to estimate remaining SSD life. For details, see Disk Health Information. | |
Disk Status Information
| Status Color Description | |
| Cache The disk is used as an SSD cache. | |
| Data The disk contains data and is part of a storage pool. | |
| Raw The disk is uninitialized due to one of the following reasons:The disk is new and has not been initialized yet.The disk was removed from a storage pool.The disk was removed from the SSD cache.The disk had the status Dirty and then Disk Clean was used to erase it.To initialize a disk, see Initializing Raw Disks. | |
| Ready The disk is not in use.NoteQES uses all ready disks as global RAID hot spares. | |
| None There is no disk in the drive bay. | |
| Dirty The disk was removed from a storage pool and was then replaced by a spare disk. This occurred due to one of the following reasons:QES detected I/O errors on the disk and automatically removed it from the storage pool.Someone physically removed the disk from the NAS.Someone manually removed the disk from the storage pool using theReplace Disk feature.To use this disk again, you must run Disk Clean. For details, see Disk Actions. | |
| Error QES has detected bad sectors or I/O errors. You should replace the disk immediately. |
Disk Actions
Select a disk to perform one of the following actions.
| Action Description | |
| Disk Info View disk details, including the disk model, model number, serial number, disk capacity, firmware version, ATA version and ATA standard. | |
| Disk Health View disk S.M.A.R.T. information, check SSD life, run disk tests, set temperature alerts.For more information, see Disk Health Information. | |
| Scan Now Scan the disk for bad blocks. | |
| TipRun this scan if the disk's status changes to Warning or Error. If QES does not detect any bad blocks, it will change the disk's status back to Ready. | |
| To view the number of bad blocks, go to Disk Health > Summary. | |
| Locate Prompt the drive LEDs to blink so that you can locate the drive in a NAS or expansion unit. | |
| RAID Group Select a RAID group to view its capacity, RAID type, and member disks. | |
| Disk Clean Delete all stored data on a disk that has the status Dirty. You can also choose to delete partition data. | |
NAS and Enclosure Actions
On the disk screen, select a NAS or expansion unit to perform one of the following actions.
| Action Description | |
| Enclosure Info View full hardware details of the NAS or expansion unit, including the model, serial number, firmware version, BUS type, CPU temperature, system temperature, power status, and fan speeds. | |
| Action > Locate | Prompt the expansion unit or NAS chassis LEDs to blink, so that you can locate the device in a server room or rack. |
| Action > Rename Enclosure | Rename the selected expansion unit. |
| RAID Group View details about each RAID group on the expansion unit, including its RAID type, capacity, and member disks. | |
| Recover > Reinitialize enclosure ID | Reset all expansion unit IDs, and then give each unit a new ID number starting from 1 based on the order that they are physically connected. |
| TipUse this action if the expansion unit IDs appear out of sequential order in the enclosure list. | |
Initializing Raw Disks
Initializing a disk allows it to be used in a storage pool or SSD cache. When initializing an SSD, QES uses SSD Trim to indicate which data blocks are safe to erase. This helps maintain SSD write performance and life span.
- Go to Storage Manager > Storage > Disks.
- Click Initialize All Raw Disks.
A confirmation message appears.
- Click Yes.
QES initializes all raw disks on the NAS. The status of the disks changes from Raw to Ready.
Disk Health
Disk Health Information
S.M.A.R.T. (Self-Monitoring, Analysis and Reporting Technology) is a disk health monitoring system built into all modern disks. QES uses S.M.A.R.T. to continuously monitor all NAS disks for problems.
| Tab Description Actions | ||
| Summary View | S.M.A.R.T. disk information and the results of the last disk test | No actions |
| Tab Description Actions | ||
| SSD Life QES displays the estimated remaining life of the SSD formatted as both a number of days and a percentage. SSD life is estimated by the following:If the SSD's TBW (Terabytes written) rating is available, QES uses the formula Estimated Life Remaining = (TBW - Total Data Written) / Average Data Written Per Day.If the TBW rating is unavailable, QES estimates life using the disk's S.M.A.R.T. life remaining attribute. The ID of this attribute varies by disk manufacturer.If the TBW rating and S.M.A.R.T. life remaining attributes are both unavailable, QES uses an Opcode such as NVME_ADMIN_GET_LOG_PAGE to get the health information of the disk.If the TBW rating and S.M.A.R.T. life remaining attribute are both unavailable, and it is not possible to get disk health information using an Opcode, then QES cannot estimate SSD life. | Enter the disk's TBW (Terabytes written) rating for a more accurate life estimate.TipYou can find the TBW rating in the disk's hardware specifications. | |
| Disk Information | View disk hardware information, including model, capacity, serial number, firmware version, ATA version, and ATA standard | No actions |
| SMART Information | Displays S.M.A.R.T. disk information and supported attributes. | No actions |
| Tab Description Actions | |
| Test Run a S.M.A.R.T. disk self-test. Select one of the following options, and the click Test.·Rapid Test: Test the electrical and mechanical properties of the disk, and a small portion of the disk surface. The test takes approximately one minute.·Complete Test: Test the electrical and mechanical properties of the disk, and the full disk surface. The test duration varies depending on the capacity of the disk and the storage environment. | |
| Settings Apply disk settings to this disk or all disks. | Configure the following settings:·Enable temperature alarm: QES issues a warning notification when the disk temperature is above the specified threshold.·S.M.A.R.T. Test schedule: Schedule periodic rapid and complete S.M.A.R.T. disk tests. The results are displayed on theSummaryscreen. |
| TipYou can apply these settings to the current disk, all disks, or to disks with the same type as the current disk (HDD or SSD). | |
Testing Disk Performance
- Go to Storage Manager > Storage > Disks.
- Click Performance Test. The Performance Test screen appears.
-
Select one or more disks.
-
Click Performance Test and then select a test type.
| Test Type Description Test Results Format | |
| Sequential read Test sequential read speed. MB/s |
A confirmation message appears.
-
Click OK.
-
Optional: Schedule a weekly sequential read test for all disks. The weekly test runs every Monday at 6:30 AM.
a. Click Weekly Test.
b. Click OK.
QES runs the test and then displays the results on the Performance Test screen.
Drive Bay Compatibility and Expansion
- QNAP dual-controller ES NAS models only support SAS disks. To install a SATA disk in an ES NAS with full S.M.A.R.T. compatibility, use a QNAP QDA-SA SATA-to-SAS adapter. You can check the hardware status, health, and temperature of disks that are using QNAP QDA-SA adapters on the Disks screen.
- TES-x85U series NAS devices running on QES support the QNAP QM2-4P-384 cards. Installing a OMP-4P-384 card adds four more M.2 SSD slots.
Storage Pools
A storage pool is designed to aggregate multiple disks into one large storage space. Disks are joined together using RAID technology to form a RAID group. Storage pools may contain more than one RAID group.

Storage Pool Creation
Creating a Storage Pool
- Go to Storage Manager > Storage > Storage Space.
- Perform one of the following actions.
| NAS State Action | |
| No volumes or storage pools Click | New Storage Pool. |
| One or more storage pools. | Click Create, and then select New Storage Pool. |
The Create Storage Pool window opens.
- Specify a pool name.
The must consist of 1 to 31 characters from any of the following groups:
- Letters:, a-z, A-Z
- Numbers: 0-9
- Special characters: dash -, underscore _, period
- Optional: Select an expansion unit from the Enclosure Unit list.
Important
- You cannot select disks from multiple expansion units.
-
If the expansion unit is disconnected from the NAS, the storage pool becomes inaccessible until it is reconnected.
-
Select one or more disks.
Warning
All data on the selected disks will be deleted.
- Select a RAID type.
QES displays all available RAID types and automatically selects the most optimized RAID type.
Tip
For details, see RAID Types.
-
Click Next.
-
Optional: Configure SSD over-provisioning.
| Setting Description | |
| SSD over-provisioning | QES reserves the specified percentage of space on each SSD to increase random write performance and to extend SSD lifespan. Tip You should set this value according to the SSD manufacturer's recommendation. |
| Pool over-provisioning | QES reserves the specified percentage of space in the storage pool to ensure consistent random write performance when the pool is nearly full. Tip For best results, set pool over-provisioning to 20% or higher. |
| Enable Write Coalescing | Write Coalescing optimizes the pool for SSD storage, which improves pool random write performance and extends SSD lifespan. Important You cannot modify this setting after storage pool creation. |
For more information, see QES SSD Features.
Warning
SSD over-provisioning and pool over-provisioning both reduce the total storage capacity of the storage pool.
-
Click Next.
-
Verify the storage pool information.
-
Click Create.
A confirmation message appears.
- Click OK.
QES creates the storage pool and then displays the information on the Storage Space screen.
Creating a RAID 50 or RAID 60 Storage Pool
RAID 50 and RAID 60 groups are created by adding two or more RAID 5 or 6 sub-groups to a storage pool. QES stripes the sub-groups using RAID 0.
-
Go to Storage Manager > Storage > Storage Space.
-
Perform one of the following actions.
| NAS State Action | |
| No volumes or storage pools Click | New Storage Pool. |
| One or more storage pools. | Click Create, and then select New Storage Pool. |
The Create Storage Pool window opens.
- Click Create > New Storage Pool.
The Create Storage Pool window opens.
- Specify a pool name.
The must consist of 1 to 31 characters from any of the following groups:
- Letters:, a-z, A-Z
- Numbers: 0-9
-
Special characters: dash -, underscore _, period
-
Optional: Select an expansion unit from the Enclosure Unit list.
Important
If the expansion unit is disconnected from the NAS, the storage pool becomes inaccessible until it is reconnected.
- Create the first sub-group.
a. Select disks. For information on the minimum and maximum allowed number of disks, see RAID Types.
Warning
All data on the selected disks will be deleted.
b. Select a RAID type of RAID 50 or RAID 60.
c. Click Next.
- Create the second sub-group.
a. Select disks. For the best performance, the number of disks should be the same as the first sub-group.
Warning
All data on the selected disks will be deleted.
b. Click Next.
- Optional: Configure SSD over-provisioning.
| Setting Description | |
| SSD over-provisioning | QES reserves the specified percentage of space on each SSD to increase random write performance and to extend SSD lifespan. Tip You should set this value according to the SSD manufacturer's recommendation. |
| Pool over-provisioning | QES reserves the specified percentage of space in the storage pool to ensure consistent random write performance when the pool is nearly full. Tip For best results, set pool over-provisioning to 20% or higher. |
| Enable Write Coalescing | Write Coalescing optimizes the pool for SSD storage, which improves pool random write performance and extends SSD lifespan. Important You cannot modify this setting after storage pool creation. |
For more information, see QES SSD Features.
Warning
SSD over-provisioning and pool over-provisioning both reduce the total storage capacity of the storage pool.
-
Click Next.
-
Verify the storage pool information.
-
Click Create.
A confirmation message appears.
- Click OK.
QES creates the storage pool and then displays the information on the Storage Space screen.
- Optional: Add more RAID 5 or RAID 6 sub-groups to the storage pool.
You can add additional using the Expand Storage Pool wizard. For details, see Expanding a Storage Pool.
Storage Pool Management
Storage Pool Management Screen
Storage Pool pool1 Management

Storage Manager > Storage > Storage Space > Manage
| UI Element Description | |
| Name/Alias The name of the storage pool. This name is automatically generated by QES. | |
| Refreshes all of the information on this screen. | |
| Controller The storage controller that is currently managing the storage pool. | |
| Capacity The usable capacity of the storage pool. Usable capacity = Raw capacity - Pool Over-Provisioning Space. | |
| Allocated The amount of storage pool space allocated to shared folders and LUNs. | |
| Unallocated The amount of storage pool space not allocated to shared folders and LUNs. | |
| Snapshot Used The amount of storage pool space used for storing snapshots. | |
| Metadata The amount of storage pool space used for storing system, file system, snapshot, and storage pool metadata. | |
| Data Reduction The amount of storage pool space saved by compression and deduplication. | |
| Pool over-provisioning | The amount of storage pool space reserved for over-provisioning.For details, see QES SSD Features. |
| Write Coalescing The status of write coalescing in the storage pool.For details, see QES SSD Features. | |
| Status The status of the storage pool. | |
Removing a Storage Pool
Important
Before removing a storage pool you must remove all shared folders and LUNs from the pool.
- Go to Storage Manager > Storage > Storage Space.
- Select a storage pool.
- Click Manage.
The Storage Pool Management window opens.
- Click Remove Pool.
The Storage Pool Removal Wizard window opens.
- Click Apply.
Expanding a Storage Pool
You can expand the capacity of a storage pool by creating a new RAID group and adding it to the pool. QES combines the new group with the other RAID groups in the storage pool using striping (RAID 0).
Important
- The new RAID group must have the same RAID type as all existing RAID groups in the pool.
- Adding a RAID group to a pool may change the RAID type of the pool.
- You cannot add HDDs and SSDs to the same storage pool.
- To ensure performance and data integrity, QES limits the maximum number of disks allowed in a group for certain RAID types. For details, see RAID Types.
The number of required disks for expansion depends on the current RAID type of the specified pool.
| Pool RAID Type Disks Required to Expand Pool Pool RAID Type After Expansion | |
| RAID 0 ≥ 1 RAID 0 | |
| RAID 1 2 RAID 10 | |
| RAID 5 ≥ 3 RAID 50 | |
| RAID 6 ≥ 5 RAID 60 | |
| RAID-TP ≥ 8 RAID-TP | |
| Triple Mirror Can't be expanded N / A | |
| RAID 10 Multiple of 2 RAID 10 | |
| RAID 50 ≥ 3 for each additional RAID 5 group RAID 50 | |
| RAID 60 ≥ 5 for each additional RAID 6 group RAID 60 | |
- Go to Storage Manager > Storage > Storage Space.
- Select a storage pool.
- Click Manage.
The Storage Pool Management window opens.
- Click Expand Pool.
The Expand Storage Pool Wizard window opens.
- Optional: Select an expansion unit from the Enclosure Unit list.
Important
- You cannot select disks from multiple expansion units.
-
If the expansion unit is disconnected from the NAS, the storage pool becomes inaccessible until it is reconnected.
-
Select one or more disks.
Warning
All data on the selected disks will be deleted.
- Click Expand.
A confirmation message appears.
- Click OK.
Scrubbing a Storage Pool
Scrubbing a storage pool scans the file system of each RAID group in the pool. QES automatically attempts to repair bad blocks to maintain data consistency.
Important
- While the scrubbing task is running, the read and write performance of the storage pool may be reduced. You should schedule pool scrubbing to run during times of low NAS usage.
-
To perform storage pool scrubbing automatically on a schedule, see Storage Global Settings.
-
Go to Storage Manager > Storage > Storage Space.
- Select a storage pool.
- Click Manage.
The Storage Pool Management window opens.
- Click Actions, and then select Storage Pool Scrubbing.
The Storage Pool Scrubbing window opens.
- Click one of the following buttons.
| Button Description |
| Edit Run pool scrubbing periodically, according to a schedule. |
| Start Run pool scrubbing immediately. |
Taking a Storage Pool Offline
Taking a pool offline enables you to perform maintenance, such as changing SAS cables, without powering off the NAS or losing data.
- Go to Storage Manager > Storage > Storage Space.
- Select a storage pool.
The storage pool must be online.
- Click Manage.
The Storage Pool Management window opens.
- Select Actions > Offline Pool.
The Take Storage Pool Offline window opens.
- Click Take Offline.
A confirmation message appears.
- Click Yes.
The status of the storage pool changes to Offline. The status of each RAID group in the storage pools changes to Unmounted.
Bringing a Storage Pool Online
- Go to Storage Manager > Storage > Storage Space.
- Select a storage pool.
The storage pool must be offline.
- Click Manage.
The Storage Pool Management window opens.
- Select Actions > Online Pool.
A confirmation message appears.
- Click Yes.
The statuses of the storage pool and all RAID groups in the pool change to Ready.
Configuring a Pool Space Alert Threshold
QES issues a warning when the percentage of used storage pool space reaches the specified value.
- Go to Storage Manager > Storage > Storage Space.
- Select a storage pool.
- Click Manage.
The Storage Pool Management window opens.
- Select Actions > Set Threshold.
The Alert Threshold window opens.
- Select Please input the alert threshold [1-100].
- Specify a space alert threshold.
The default threshold is 80.
- Click Apply.
A confirmation message appears.
Replacing a Disk in a Storage Pool
You can replace a disk in a storage pool with a spare disk. QES will then initiate a rebuild of the disk's RAID group. Requirements:
- The RAID type of the storage pool cannot be RAID 0.
- The spare disk must have the status Ready.
- The capacity of the spare disk must be greater than or equal to the capacity of the disk it is replacing.
- The spare disk must be of the same type (HDD, SSD, SAS) as the disk it is replacing.
Note
After performing this task, the disk that was replaced will have the status Dirty. To use this disk again, you need to run Disk Clean. For details, see Disk Actions.
- Go to Storage Manager > Storage > Storage Space.
- Select a storage pool.
- Click Manage.
The Storage Pool Management window opens. - Click Actions, and then select Replace Disk.
- Select a disk to be replaced.
- Optional: Select an enclosure.
- Select a spare disk.
- Click Apply.
A confirmation message appears. - Click OK.
QES replaces the disk in the RAID group, and then starts a RAID group rebuild. The status of the RAID group changes to Rebuilding.
Suspending RAID Rebuilding on a Schedule
You can configure a storage pool to suspend automatic RAID rebuilding during specific time periods. For example, during work hours or when backup jobs are running. If a RAID rebuild job is running when the scheduled time starts, the job is suspended and resumes when the scheduled time ends.
- Go to Storage Manager > Storage > Storage Space.
- Select a storage pool.
- Click Manage.
The Storage Pool Management window opens. - Click Actions, and then select Set Suspend Rebuild Schedule.
The Suspend Rebuild Schedule window opens. - Select Suspend storage pool rebuilding during the times specified.
- Select the days of the week that you want to suspend RAID rebuilding.
-
Select the times when you want to suspend RAID rebuilding.
-
Click one of the following buttons.
| Button Description |
| Apply Applies the schedule to the current storage pool. |
| Apply to all Pools Applies the schedule to all storage pools. |
Cleaning the Deduplication Table
When deduplication is enabled in a storage pool, ZFS records duplicate data in a deduplication table. Cleaning removes unused entries from the pool's deduplication table.
Note
• This process might take a long time.
• To perform this task automatically on a schedule, see Storage Global Settings.
- Go to Storage Manager > Storage > Storage Space.
- Select a storage pool.
- Click Manage.
The Storage Pool Management window opens.
- Click Actions, and then select Clean Deduplication Table.
The Clean Dedup Table window opens.
- Click OK.
Storage Pool Status
| Status Description | |
| Ready The storage pool is working normally. All RAID groups in the pool have the status Ready. | |
| Degraded One or more RAID groups in the storage pool have the status Degraded.There are not enough spare disks available to QES to rebuild all of the RAID groups. | |
| Degraded (Rebuilding) | One or more RAID groups in the storage pool have the status Degraded (Rebuilding). QES is currently rebuilding them due to disk failure. |
| Error One or more RAID groups in the storage pool have the status Not Active. | |
The System Pool
The system pool is a hidden storage pool that QES uses to store application data and settings. QES creates the system pool when the NAS is initialized by combining 13 GB from each system disk in a four-way mirror RAID configuration.
Important
- The system disks are usually located in the first four drive bays of your NAS. For details, see the NAS hardware user guide.
- Using the system disks for general data storage may affect system pool performance. For ES NAS containing both SSDs and HDDs, QNAP recommends installing four SSDs as system disks and then configuring them as the SSD read cache.
- To view the status of the system pool, go to Storage Manager > Storage > Storage Space and then click System Pool Info.
RAID
RAID Types
Important
- To ensure best performance and data integrity, QES limits the maximum number of disks allowed in a group for certain RAID types.
- For best performance and space efficiency, you should use disks of the same brand and capacity when creating a RAID group.
- Increasing the number of disks in a RAID group increases the risk of simultaneous disk failure and lengthens rebuild times. When creating a storage pool with a large number of disks, you should split the disks into sub-groups using RAID 50 or RAID 60.
| RAID Type | Number of Disks | Disk Failure Tolerance | Overview |
| RAID 0 ≥ | 1 0 • Disks are combined together using striping. | • RAID 0 offers the fastest read and write speeds, and uses the total capacity of all the disks.• Provides no disk failure protection. This RAID type must be paired with a data backup plan. | |
| RAID 1 2 1 | • An identical copy of data is stored on each disk. | • Half of the total disk capacity is lost, in return for a high level of data protection.• Recommended for storing important data. | |
| RAID 5 3-16 1 • Data and parity information are striped across all disks.• The capacity of one disk is lost to store parity information.• Striping means read speeds are increased with each additional disk in the group.• Recommended for a good balance between data protection, capacity, and speed.• Ideal for running databases and other transaction-based applications. | |||
| RAID 6 5-16 2 • Data and parity information are striped across all disks.• The capacity of two disks are lost to store parity information.• Recommended for critical data protection, business and general storage use. It provides high disk failure protection and read performance. | |||
| RAID 10 4-16 (Creating) 2-16 (Expanding) | 1 per pair of disks | • Every two disks are paired using RAID 1 for failure protection. Then all pairs are striped together using RAID 0.• Excellent random read and write speeds and high failure protection, but half the total disk capacity is lost.• Recommended for applications that require high random access performance and fault tolerance, such as databases. | |
| RAID 50 3-16 per subgroup | 1 per disk subgroup | Multiple small RAID 5 groups are striped to form one RAID 50 group.Better failure protection and faster rebuild times than RAID 5. More storage capacity than RAID 10.Recommended for applications that require high fault tolerance, capacity, and random access performance. | |
| RAID 60 5-16 per subgroup | 2 per disk subgroup | Multiple small RAID 6 groups are striped to form one RAID 60 group.Better failure protection and faster rebuild time than RAID 6. More storage capacity than RAID 10.Recommended if you need higher fault tolerance than RAID 50. | |
| Triple Mirror | 3 2 • An identical copy of data is stored on three disks.There is also no degradation in performance while the RAID group is being rebuilt.Read performance is increased, but capacity is greatly decreased.Triple Mirror is suitable for storing critical data. | ||
| RAID-TP 8-16 3 • Data and parity information are striped across all disks.The capacity of three disks are lost to store parity information.RAID-TP adds an extra level of redundancy over RAID 6. | |||
RAID Group Capacity
QES uses the ZFS RAID scheme RAID-Z. RAID-Z capacity is calculated differently from normal RAID. To estimate the storage capacity of a RAID group in QES, use our online calculator at https://enterprise-nas.qnap.com/en/calculator.
RAID Disk Failure Protection
All RAID types except for RAID 0 can tolerate a specific number of disk failures without losing data. When a disk in a RAID group fails, the RAID group status changes to degraded and then QES performs one of the following actions.
| Spare Disk Available | Actions |
| Yes • QES automatically replaces the failed disk with a spare disk and then starts rebuilding the RAID group.NoteQES considers all ready disks to be spare disks.• The status of the RAID group changes to rebuilding, and then changes back to Ready after rebuilding has finished. | |
| No You must replace the failed disk manually. QES starts rebuilding the RAID group after you have installed a working disk. | |
RAID Group Status
| Status Description | |
| Ready The RAID group is working normally. | |
| Degraded One or more disks in the RAID group have failed. The number of disk failures are within the disk failure tolerance of the RAID group. There are not enough spare disks available to QES to replace all the failed disks. | |
| Degraded (Rebuilding) | One or more disks in the RAID group have failed. The number of disk failures are within the disk failure tolerance of the RAID group. QES has replaced the failed disks with spare disks, and is now rebuilding the RAID group. |
| Not active One or more disks in the RAID group have failed. The number of disk failures exceeds the disk failure tolerance of the RAID group. | |
Shared Folders
A shared folder is a portion of storage space created from the space of a storage pool. Shared folders enable users to store data on the NAS and allow connected clients to access that data.
Tip
- To create and configure shared folders, go to Storage Manager > Storage > Storage Space.
- A QES shared folder is the same as a QTS volume that contains one shared folder.
Creating a Shared Folder
- Go to Storage Manager > Storage > Storage Space.
- Click Create, and then select New Shared Folder.
-
Specify a shared folder name.
-
The name can be in any Unicode language.
- The maximum length is 64 bytes. In English, this equals 64 characters.
- The following special characters are not allowed: @" + = /\ : | * ? < > ; [ ] % , `' non-breaking space
- The last character cannot be a period (.) or space.
-
The first characters cannot be a space.
-
Optional: Specify a description.
-
Select a storage pool.
The shared folder is created using storage space from this pool.
Tip
SMB Path and NFS Path show you how to access the folder using SMB and NFS. These paths are for reference only and cannot be modified. On dual controller ES-NAS, there will be separate paths for storage controller A and B.
- Optional: Configure any of the following storage settings and services.
| Setting Description | |
| Thin provision In | thin provisioning, QES allocates storage pool space for the shared folder on demand, while data is being written, instead of during shared folder creation.ImportantA thin provisioned folder can be over-allocated, which means that its maximum capacity can be 20 times larger than the amount of free space in the parent storage pool.Enabling thin provisioning may affect shared folder access speeds. |
| Folder quota The | folder quota determines the amount of data that the folder can store. If folder quota is not enabled, the maximum capacity of the shared folder will be equal to that of the parent storage pool. |
| Compression QES | compresses the data in the shared folder to reduce the size of stored data. Enabling compression also reduces the total number of blocks that QES needs to read and write, increasing read and write speeds.TipCompression is enabled by default for all new shared folders and LUNs.Compression does not impact read/write and processor performance on ZFS filesystems. Only disable this setting when necessary. |
| Deduplication QES reduces the amount of storage needed by eliminating duplicate copies of repeated data.You can select one of the following hash algorithms.SHA256: A common algorithm which belongs to the NIST SHA-2 family.SHA512: This algorithm can take advantage of 64-bit architecture. Performance is 50% faster than SHA-256 on 64-bit hardware.Skein: A high-performance algorithm which belongs to the NIST SHA-3 family. Performance is 80% faster than SHA256. This is the default option.WarningBefore QES 1.1.3, the default deduplication algorithm was SHA256. If you update a pre-QES 1.1.3 NAS to QES 1.1.3 or later and then change the deduplication algorithm to SHA512 or Skein, data might become inaccessible.Deduplication is only available ifPerformance profileis set to VDI orCustom, andThin provisionis selected. | |
| Enable Fast Clone | Fast Clone enables QES to create copies of files faster. It also saves storage space by modifying file metadata, allowing original and copied files to share the same data blocks.ImportantTo enable this setting,Thin provisionmust be selected.Fast Clone only works when the copied file is created in the shared folder containing the original file.Fast Clone does not improve the speed of snapshot restoration operations such as restoring files from a snapshot, snapshot revert, and snapshot clone. |
| SSD cache QES adds data from this folder to the SSD cache to improve read performance.ImportantShared folders and LUNs created in an all-SSD storage pool cannot use the SSD cache. | |
| Performance profile | Specify how the shared folder will be used. Each option results in a different record size, optimizing performance for the specified application.Generic (Default, 64k)VMware (32k)Custom (Choose from: 8k, 16k, 32k, 64k, 128k)TipSelect Generic if you are unsure of which option to choose. |
| CIFS/SMB Allow Windows, Max, and Linux clients to access this shared folder using CIF or SMB. | |
| NFS Allow clients to access this shared folder using NFS. | |
| FTP/FTPS Allow clients to access this shared folder using FTP or FTPS. | |
- Configure user access permissions.
You can grant users read-only access, read/write access, or deny access. By default, only the QES admin account can access the shared folder.
- Optional: Configure advanced settings.
| Setting Description | |
| Hidden Folder Hide the shared folder from Microsoft Windows clients. The folder can still be accessed using its full path, for example: \\NAS_IP\share_name. | |
| Lock File (Oplocks) | Opportunistic lock (Oplocks) is a Windows file locking mechanism that facilitates caching and access control to improve performance. This feature is enabled by default and should only be disabled in networks where multiple users simultaneously access the same files. |
| Synchronous I/O | Select the ZFS Intent Log I/O mode to improve data consistency or performance. There are three modes:Always:All I/O transactions are treated as synchronous and are always written and flushed to a non-volatile storage (such as a SSD or HDD). This option gives the best data consistency, but might have a small impact on performance.Standard:QES uses synchronous I/O or asynchronous I/O based on the application and the type of I/O request_DISABLED:All I/O transactions are treated as asynchronous. This option gives the highest performance, but has a higher risk of data loss in the event of a power outage. Ensure that a UPS (uninterrupted power supply) is installed when using this option.TipThe default option on dual-controller NAS devices is Always.The default option on single-controller NAS devices is Standard. |
| Enable recycle bin | Enable the network recycle bin for this shared folder. Files can be recovered from the recycle bin after being deleted. If Restrict the access of Recycle Bin to administrators only for now is enabled, only NAS administrators can recover deleted files.TipTo enable this option you must first enable the network recycle bin at Control Panel > Network Services > Network Recycle Bin > Enable Network Recycle Bin.For more details, see Network Recycle Bin. |
| Path This shows the UNIX file system path to the folder. It is for reference only and cannot be modified. | |
- Optional: Configure WORM (Write Once Read Many).
WORM prevents anyone from modifying or deleting files or folders in the shared folder.
Important
This setting cannot be modified after shared folder creation.
a. Select WORM.
b. Configure any of the following settings.
| Setting Description | |
| WORM type Select a WORM type.EnterpriseUsers can delete the shared folder.ComplianceUsers cannot delete the shared folder. An administrator must remove the storage pool to delete the WORM shared folder. | |
| Lock delay | When enabled, a file added to the folder can be modified within the lock delay time period. After this time has passed, the file automatically becomes locked and unmodifiable.NoteThe maximum lock delay is 168 hours and 59 minutes.You cannot modify lock delay after folder creation.The time a file becomes locked might vary from the specified time by +/- 1 minute. |
| Retention Limit how long WORM applies to each file and folder. Files and folders can be modified after the specified time period. | |
- Configure folder encryption.
QES encrypts the folder using 256-bit AES encryption. Encrypted folders can be locked and unlocked using a password or an encryption key file.
Important
You cannot change the folder path if encryption is enabled.
a. Select Encryption.
b. Specify an encryption password.
The password must contain 8 to 16 characters, and can be any combination of letters, numbers and special characters. Spaces are not allowed.
Warning
If you forget this password, the shared folder will become inaccessible and all data will be lost.
c. Optional: Select Save encryption key.
Saving a local copy of the encryption key enables QES to automatically unlock and mount the encrypted shared folder when the NAS starts up. If the encryption key is not saved, you must specify the encryption password whenever the NAS restarts.
Warning
Storing the encryption key on the NAS can result in unauthorized access to data if the entire NAS is stolen.
11. Click Create.
Shared Folder Permissions
This screen enables you to assign folder access permissions for three different sets of users.
| Permissions Applies To | |
| User and group permissions All NAS users | |
| NFS host access Users accessing the NAS using NFS | |
| Microsoft networking host access Users accessing the NAS using SMB |
Shared Folder

Configuring User and Group Permissions
- Go to Storage Manager > Storage Space.
- Select a shared folder.
The Shared Folder Manager window opens.
- Click Permissions.
The Shared Folder Permissions window opens. - Ensure Users and groups permission is selected in Select permission type.
- Select a shared folder.
- Specify shared folder access permissions for each user and group.
| Permissions Abbreviation Description | |
| Read/Write RW | Users can view, modify, add and delete files and folders. |
| Read Only RO | Users can view files and folders. |
| Deny Access | Deny Users cannot access the folder. |
Shared folder user and group permissions override permissions set at the file system level. Setting deny access permissions on this screen will prevent a user from accessing any sub-folders even if you set read/write permissions on the sub-folders in File Station.
Tip
To specify read-only permissions on the root of a shared folder and read/write permissions on its sub-folders, first set the user and group permissions to read/write. Then set the root folder to read-only at the file system level using File Station.
- Optional: Click Add to add a new user or group permission.
- Optional: Click Remove to remove a user or group permission.
Tip
You can use the following keyboard shortcuts.
- Selecting multiple users: Press and hold the SHIFT key.
- Selecting a range of users: Press and hold the CTRL key.
Configuring NFS Host Access Permissions
- Go to Storage Manager > Storage Space.
- Select a shared folder.
The Shared Folder Manager window opens.
- Click Permissions.
The Shared Folder Permissions window opens.
- Select NFS host access.
- Select a shared folder.
- Configure the following permission settings.
| Setting Description | |
| Support NFSv4 ACL Inheritance | Deselecting this option disables NFSv4 ACL inheritance and enables umask settings. |
| Enable Map_Root and Map_All | Users that access shared folders using NFS can use the permissions associated with their NAS accounts. This can cause security risks, especially if a user has root privileges.Selecting this option allows you to restrict permissions of users that access the folder using NFS. Choose from:• Map_Root: The root user receives the specified user and group permissions.• Map_All: All users receive the specified user and group permissions. |
7. Configure security settings.
| Setting Description | |
| AUTH_SYS The default unencrypted NFS version 3 security mechanism. | |
| Kerberos Kerberos is a network authentication protocol. It is designed to provide strong authentication for client/server applications by using secret-key cryptography.krb5: Use Kerberos for authentication only.krb5i: Use Kerberos for authentication, and include a hash with each transaction to ensure data integrity. Traffic can still be intercepted and examined, but modifications to the traffic are made apparent.krb5p: Use Kerberos for authentication, and encrypt all traffic between the client and server. This authentication is the most secure mechanism but also incurs the most load. |
8. Configure NFS host access permissions.
a. Select access permissions for all NFS hosts.
| Permission Description |
| No limit Users can view, modify, add and delete files and folders. |
| Read Only Users can view files and folders. |
| Deny Access Users cannot access the folder. This is the default permission for NFS hosts. |
b. Optional: Add a new NFS host.
c. Select an NFS host in the table.
d. Optional: Select All hosts can access the shared folder.
QES applies the selected permission to all NFS hosts that attempt to access the folder.
9. Click Apply.
Configuring SMB Host Access Control
Windows and Mac hosts use SMB to access shared network folders. Linux hosts can also use SMB using Samba. By default all SMB hosts can access all SMB shared folders.
- Go to Storage Manager > Storage Space.
- Select a shared folder.
The Shared Folder Manager window opens.
- Click Permissions.
The Shared Folder Permissions window opens.
- Select Microsoft Networking host access.
- Deselect All hosts can access the shared folder.
- Optional: Click Create Host to add a new host IP address or IP range.
- Select the hosts that are allowed to access this folder.
- Click Apply.
Shared Folder Management
Deleting a Shared Folder
Note
If an application such as SnapSync is using the shared folder, then you need to stop the application from using the folder before deleting it.
- Go to Storage Manager > Storage > Storage Space.
- Select a shared folder.
- Click Manage.
The Shared Folder Management window opens. - Click Remove.
A confirmation message appears.
Warning
All data in the shared folder will be deleted.
- Click Apply.
Editing Shared Folder Properties
- Go to Storage Manager > Storage > Storage Space.
- Select a shared folder.
- Click Manage.
The Shared Folder Management window opens. -
Click Actions.
-
Select Edit Properties.
The Shared Folder Properties window opens.
- Modify shared folder settings.
For details on folder settings, see Creating a Shared Folder.
Important
- Disabling compression only affects new data. Existing data in the folder remains compressed.
- Disabling deduplication only affects new data. Existing data in the folder remains deduplicated.
7. Click Apply.
Shared Folder Encryption
QES can encrypt shared folders with 256-bit AES encryption, which protects data from unauthorized access if individual drives or the entire NAS are stolen. Users must specify the encryption password to access encrypted shared folders.
Important
You can only enable encryption during the folder creation process. For details, see Creating a Shared Folder.
Shared Folder Access
Mapping a Shared Folder on a Windows Computer
- Perform the following actions, depending on your Windows version.
| Windows Version Action | |
| Windows 7 a. Click Start. | b. Click Computer. |
| Windows 10 a. Press Windows | Key + E.b. Select This PC from the left pane. |
- Click Map Network Drive.
The Map Network Drive window opens.
-
Select a drive letter.
-
Specify the SMB path to the shared folder.
The path will be either \NAS_NAME\FOLDER_NAME or \NAS_IP_ADDRESS\FOLDER_NAME.
Tip
To get the SMB path to a shared folder:
a. Go to Storage Manager > Storage > Storage Space.
b. Select a shared folder.
c. Click Manage.
d. Click Actions, and then select Edit Properties.
e. In the Shared Folder Properties window under SMB Path, click Copy Link.
5. Click Finish.
- Optional: Specify your NAS user name and password if prompted.
Windows maps the shared folder to the specified drive letter. The drive can be accessed using Windows Explorer.
Mounting a Shared Folder on a Mac Computer
- Open Finder.
- Select Go > Connect to Server.
- Specify your NAS address.
The address must include the sharing protocol followed by the NAS data interface IP address.
| Sharing Protocol Address Format | |
| SMB smb://NAS IP Address | |
| NFS nfs://NAS IP Address | |
- Click Connect.
- Specify your NAS user name and password.
- Select a shared folder.
- Click OK.
MacOS mounts the shared folder.
Mounting a Shared Folder on a Linux Computer
- Open a terminal with root privileges.
- Run the following command.
mount
Example: If the NAS Ethernet interface IP address is 192.168.0.42 and you want to connect to a shared folder "public" under the /mnt/pub directory, enter the following command: mount -tnfs 192.168.0.42:/share/public /mnt/pub
Note
A dual controller QES NAS has two kinds of network interface:
- Management interface
- Ethernet interface (dedicated to data transfer)
You can connect to the Ethernet interface on either controller.
Tip
To get the NFS path to a shared folder:
a. Go to Storage Manager > Storage > Storage Space.
b. Select a shared folder.
c. Click Manage.
d. Click Actions, and then select Edit Properties.
e. In the Shared Folder Properties window under NFS Path, click Copy Link.
3. Specify your NAS username and password.
You can connect to the shared folder using the mounted directory.
SSD Over-Provisioning
When the blocks in an SSD are full with old data, the disk's firmware frees up space in a process called garbage collection. Garbage collection results in an effect called write amplification, which reduces the lifespan and random write performance of the SSD. Write amplification can be reduced by over-provisioning, which means reserving space on the disk for garbage collection. Most SSDs are manufactured with 7% or more of their capacity reserved for over-provisioning.
QES SSD Features
QES has the following features to improve the performance of all-SSD storage pools.
| Feature Description BenefitsRecommended | Settings | Reduces Storage Capacity | ||
| SSD over-provisioning | QES reserves a percentage of space on each SSD by issuing a command to the disk's firmware. | Increases SSD random write performanceExtends SSD lifespan | Follow the SSD manufacturer's recommendations | Yes |
| Write Coalescing | Write Coalescing optimizes a storage pool for SSD storage by converting random writes into sequential writes, and reducing the total number of I/O requests. | Increases storage pool random write performanceExtends SSD lifespan | Enable this feature on all-SSD storage pools. | No |
| Pool over-provisioning | QES reserves a percentage of space in the storage pool to ensure consistent random write performance when the pool is nearly full. | Ensures consistent random write performance when a storage pool is nearly fullLowers the total number of SSD writesExtends SSD lifespan | Pool over-provisioning should be set to 20-30%. | Yes |
Snapshots
Snapshots protect data by recording the state of a shared folder at a specific point in time. You can restore data to a previous state if it is unintentionally modified or deleted. You can also use snapshots to back up data to another NAS using SnapSync.

Snapshot Creation
Taking a Snapshot
- Go to Storage Manager > Storage > Storage Space.
- Select a shared folder or LUN.
- Click Snapshot and then select Take a Snapshot. The Take a Snapshot window opens.
-
Optional: Specify a name. The name must consist of 1 to 24 characters from the following groups:
-
Letters: A-Z, a-Z
- Numbers: 0-9
-
Special Characters: Dash (-), period (.), underscore (_)
-
Specify a retention time.
| Option Description |
| Keep For QES retains the snapshot for the specified time period. |
| Option Description | |
| Keep this snapshot permanently | QES retains the snapshot indefinitely.ImportantQES will still delete the snapshot when the following two conditions are met:Delete the oldest snapshots when a storage pool is full is enabled atStorage Manager > Global Settings.Storage space is low. |
6. Select the LUN snapshot type.
This setting is only available when taking a snapshot of a block-based LUN.
| Type Description | |
| Crash consistent | The snapshot records the state of the data on the LUN. |
| Application consistent | The snapshot records the state of data and applications on the LUN. The iSCSI host flushes data in memory to the LUN before QES takes a snapshot. If VMware vCenter is using the LUN, vCenter takes a virtual machine snapshot.ImportantThis option is only available for VMware vCenter, or for Volume Shadow Copy Service (VSS) aware applications running on a Windows server. You must install QNAP Snapshot Agent on the iSCSI initiator. |
7. Click OK.
QES takes the snapshot. The snapshot appears in Snapshot Manager.
Configuring a Snapshot Schedule
Tip
You can configure a separate snapshot schedule for each shared folder and LUN.
- Go to Storage Manager > Storage > Storage Space.
- Select a shared folder or LUN.
- Click Snapshot, and then select Snapshot Manager.
The Snapshot Manager window opens.
4. Click Schedule.
The Schedule Snapshot window opens.
5. Select Enable schedule.
- Specify how often QES will take a snapshot.
7. Select the LUN snapshot type.
This setting is only available when taking a snapshot of a block-based LUN.
| Type Description | |
| Crash consistent | The snapshot records the state of the data on the LUN. |
| Application consistent | The snapshot records the state of data and applications on the LUN. The iSCSI host flushes data in memory to the LUN before QES takes a snapshot. If VMware vCenter is using the LUN, vCenter takes a virtual machine snapshot.ImportantThis option is only available for VMware vCenter, or for Volume Shadow Copy Service (VSS) aware applications running on a Windows server. You must install QNAP Snapshot Agent on the iSCSI initiator. |
8. Specify a retention time.
QES retains the snapshot for the specified time period. If you deselect Keep for, QES retains the snapshot indefinitely.
9. Click OK.
QES takes snapshots according to the specified schedule.
Snapshot Management
Deleting Snapshots
- Go to Storage Manager > Storage > Storage Space.
- Select a shared folder or LUN.
- Click Snapshot, and then select Snapshot Manager.
The Snapshot Manager window opens.
- Select a snapshot.
- Click Delete.
6. Select an option.
| Option Description | |
| Delete Delete the selected snapshot. | |
| Delete all Delete all snapshots for this shared folder or LUN. |
A confirmation message appears.
7. Click OK.
Configuring Snapshot Global Settings
- Go to Storage Manager > Storage > Storage Space.
- Select a shared folder or LUN.
- Click Snapshot, and then select Snapshot Manager.
The Snapshot Manager window opens.
4. Click

The Snapshot Global Settings window opens.
5. Select Make snapshot directory (@Snapshot) visible.
QES mounts all snapshots in a folder called @Snapshot in the top-level shared folder. All users have read-only access to this snapshot folder.
Important
This setting only applies to the current shared folder.
6. Click OK.
Snapshot Data Recovery
Restoring Files and Folders from a Snapshot
Important
You cannot restore files and folders from a LUN snapshot.
- Go to Storage Manager > Storage > Storage Space.
- Select a shared folder.
- Select Snapshot > Snapshot Manager.
The Snapshot Manager window opens. - Select a snapshot.
5. Select a file or folder.
Tip
If the file preview window is not visible, click .

6. Select a restore action.
| Restore | QES restores the file or folder to its original storage location. If the file or folder still exists on the NAS, then it will be overwritten with the older version. |
| WarningAll changes made after the snapshot was created will be lost. | |
| Restore to | QES restores the file or folder to a different location on the NAS. |
| Download You can download the file or folder to your computer. QES packages folders in a ZIP file for downloading. | |
Reverting a Shared Folder or LUN
Reverting restores a shared folder or LUN to the state at which the snapshot was taken. Restoring data using snapshot revert is faster than restoring individual files and folders.
Important
- QES automatically unmaps an iSCSI LUN before reverting it.
-
If Snapshot Agent is installed and the snapshot is application consistent, QES will automatically re-map it to its original target.
-
Go to Storage Manager > Storage > Storage Space.
- Select a shared folder or LUN.
- Select Snapshot > Snapshot Manager.
The Snapshot Manager window opens.
- Select a snapshot.
- Click Revert.
A confirmation message appears.
Warning
All changes made after the snapshot was taken will be deleted.
6. Click OK.
QNAP Snapshot Agent
QNAP Snapshot Agent enables QES to take application-consistent snapshots of iSCSI LUNs on VMware or Microsoft servers. Application-consistent snapshots record the state of running applications, virtual machines, and data. When QES takes a LUN snapshot, QNAP Snapshot Agent triggers the following actions:
- Windows: The server flushes data in memory, logs, and pending I/O transactions to the LUN before the snapshot is created.
- VMware: The server takes a virtual machine snapshot.
For more information on using Snapshot Agent, see the following QNAP application note: https://files.qnap.com/news/pressresource/datasheet/Create_Microsoft_Hyper-V_Backups_Using_QNAP_Snapshot_Agent_and_VSS_Hardware_Provider(English).pdf.
Viewing Registered Snapshot Agent Servers
- Go to Storage Manager > iSCSI & Fibre Channel > iSCSI Storage.
- Select Snapshot > Snapshot Agent.
The Snapshot Agent window opens. - Optional: Deregister a server.
a. Select a server.
b. Click Remove.
Snapshot Clone
Cloning creates a copy of a shared folder or LUN from a snapshot. The copy is stored in the same storage pool as the original shared folder or LUN.
Cloning a Shared Folder
- Go to Storage Manager > Storage > Storage Space.
- Select a shared folder.
Important
The shared folder must have at least one snapshot.
- Click Snapshot, and then select Snapshot Manager. The Snapshot Manager window opens.
- Select a snapshot.
-
Click Clone. The Clone Snapshot window opens.
-
Specify a name.
- Click OK.
QES clones the shared folder and then displays a confirmation message.
Cloning a LUN
- Go to Storage Manager > Storage > Storage Space.
- Select a block-based LUN.
Important
The LUN must have at least one snapshot.
- Click Snapshot, and then select Snapshot Manager.
The Snapshot Manager window opens. - Select a snapshot.
- Click Clone.
The Clone Snapshot window opens.
- Specify a name.
- Optional: Select an iSCSI target.
QES will map the LUN copy to the target.
- Click OK.
QES clones the LUN and then displays a confirmation message.
Cache Acceleration
Cache Acceleration enables you to create an SSD cache for improving the read performance of the NAS.
Important
- QES only uses the SSD cache for read-cache.
- On ES series NAS models, QES performs write caching using hardware NVRAM.
- TES and TDS series NAS models offer RAM write cache protection (write log) when you add an SSD to the SSD cache. The write log ensures data integrity and also helps increase write performance, but it is not technically a write cache.
- Shared folders and LUNs created in an all-SSD storage pool cannot use the SSD cache, as it would provide no additional performance benefits.

Configuring the SSD Cache
For details on compatible SSDs, see www.qnap.com/compatibility.
- Go to Storage Manager > Storage > Cache Acceleration.
- Click Set SSD.
The Set SSD window opens.
- Select the SSDs to be included in the cache.
- Optional: Enable RAM write cache protection (Write Log).
When enabled, QES copies data from the RAM write cache to the SSD cache for additional data protection.
Important
- This feature is only available on TES and TDS series NAS models.
- Enabling this feature requires an even number of SSDs.
-
If an SSD fails, QES automatically disables the write log.
-
Click OK.
A confirmation message appears.
Warning
All data except for system partition data will be deleted.
- Click OK.
The Set SSD window closes.
QES uses the selected drives as an SSD cache. If no SSDs are selected, QES disables the SSD cache.
Enabling the SSD Cache
- Ensure the SSD cache contains at least one disk.
For details on adding disks to the SSD cache, see Configuring the SSD Cache. - Go to Storage Manager > Storage > Cache Acceleration.
- Set the Cache Acceleration toggle switch to

Disabling the SSD Cache
-
Go to Storage Manager > Storage > Cache Acceleration.
-
Set the Cache Acceleration toggle switch to

Configuring Cached Shared Folders and LUNs
- Go to Storage Manager > Storage > Cache Acceleration.
- Click Set Caching Storage.
- Select the shared folders and LUNs that are allowed to use the SSD cache.
Important
Shared folders and LUNs created in an all-SSD storage pool cannot use the SSD cache.
- Optional: Enable Bypass Prefetch Data.
| Setting Setting | |
| Setting QES does not copy data from large-block sequential I/O operations such as video streaming to the SSD cache. This is the default SSD cache behavior. | |
| Disabled QES copies data from large block sequential I/O operations to the SSD cache. This requires more cache space and CPU resources. |
- Click Finish.
iSCSI & Fibre Channel
Storage Manager is a QES utility that enables you to configure iSCSI and Fibre Channel storage settings on your NAS.
Storage Limits
iSCSI Storage Limits
| iSCSI Storage Limit Maximum | |
| iSCSI targets per NAS 255 | |
| iSCSI LUNs per NAS 1024 | |
| iSCSI sessions per target 256 | |
| iSCSI sessions per storage controller 512 | |
| iSCSI sessions per NAS • Single controller NAS: 512 | • Dual controller NAS: 1024 |
Fibre Channel Storage Limits
| Fibre Channel Storage Limit Maximum | |
| Fibre Channel ports + port groups 256 (combined) | |
| WWPN aliases 256 | |
| LUN masking rules 256 | |
| Port binding rules 256 | |
| LUNs mapped to 1 Fibre Channel port 256 |
iSCSI & Fibre Channel Global Settings
You can access global settings by clicking in the iSCSI & Fibre Channel window.
| Setting | Description |
| Enable iSCSI and Fibre Channel services | Enable these services to use iSCSI and Fibre Channel on your NAS. |
| Setting Description | |
| iSCSI service port View and modify the port that iSCSI initiators connect to. | |
| TipThe default port is 3260. | |
| Enable iSNS SNS enables the automatic discovery and management of iSCSI initiators and targets within a TCP/IP network. | |
| iSNS server IP: Specify the IP address of the iSNS server. | |
LUNs
QNAP NAS devices allow other devices to access their storage space in the form of LUNs over iSCSI and Fibre Channel networks. The LUNs must first be created on the NAS, and then mapped to iSCSI targets or Fibre Channel port groups for access over the network.
LUN Overview
QES supports blocked-based iSCSI LUNs with the following features:
• VAAI full copy
• VAAI block zeroing
• VAAI hardware assisted locking
- Thin provisioning
- Microsoft ODX
• LUN snapshot
• LUN SnapSync
• Space reclamation (with VAAI or from Windows 2012 or Windows 8)
Creating a LUN
- Go to Storage Manager > iSCSI & Fibre Channel > iSCSI Storage.
- Click Create, and then select iSCSI Target / LUN.
- Select iSCSI LUN only.
-
Click Next.
-
Configure the following LUN settings.
| Setting Description | |
| LUN name • Valid characters: 0-9, a-z, A-Z, dash -, underscore (_)Length: 1 to 32 characters | |
| LUN Allocation • Thin Provisioning: QES allocates storage pool space to a LUN only when necessary. However, QES cannot save data to the LUN if the storage pool runs out of space.Instant Allocation: QES allocates storage pool space when creating the LUN. This option is also known as Thick provisioning. | |
| LUN Location Select the storage pool that this LUN will be created in. | |
| Capacity Specify the maximum capacity of the LUN. The maximum capacity depends on the LUN allocation method:Thick provisioning: Equal to the amount of free space in the parent storage pool.Equal to the amount of free space in the parent storage pool.Thin provisioning: Twenty times the amount of free space in the parent storage pool. | |
| Alert threshold QES issues a warning notification when the percentage of used LUN space is equal to or above the specified threshold. | |
| Performance profile | Specify how the LUN will be used. Each option results in a different record size, optimizing performance for the specified application.GenericHyper-VVMwareDatabaseCustom (Choose from: 8k, 16k, 32k, 64k, 128k)TipSelect Generic if you are unsure of which option to select. |
| Synchronous I/O | Select the ZFS Intent Log (ZIL) sync setting to improve either data consistency or performance. There are three options:Always: (Default). All I/O transactions are treated as synchronous and are always written and flushed to a non-volatile storage (such as a SSD or HDD). This option gives the best data consistency, but might have a slight impact on performance.Standard: QES uses synchronous I/O or asynchronous I/O based on the application and the type of I/O request.Disabled: All I/O transactions are treated as asynchronous. This option gives the highest performance, but has a higher risk of data loss in the event of a power outage. Ensure that a UPS (uninterrupted power supply) is installed when using this option. |
| SSD Cache The SSD cache will be used to improve LUN access performance.ImportantShared folders and LUNs created in an all-SSD storage pool cannot use the SSD cache. | |
| Deduplication QES eliminates duplicate copies of data to reduce the required amount of storage space.WarningBefore QES 1.1.3, the default deduplication algorithm was SHA256. If you update a pre-QES 1.1.3 NAS to QES 1.1.3 or later and then change the deduplication algorithm to SHA512 or Skein, data might become inaccessible .Deduplication is only available ifPerformance profileis set to VDI orCustom, andThin provisioningis selected. | |
| Compression QES compresses the data in the LUN to reduce the size of stored data.Enabling compression also reduces the total number of blocks that QES needs to read and write, increasing read and write speeds.TipNew shared folders and LUNs have compression enabled by default. Compression does not impact read/write and processor performance on ZFS filesystems. Only disable this setting when necessary. | |
| Enable Fast Clone | Fast Clone enables QES to create copies of files faster. It also saves storage space by modifying file metadata, allowing original and copied files to share the same data blocks.ImportantTo enable this setting,Thin provisioningmust be selected.Fast Clone only works when the copied file is created in the LUN containing the original file.Fast Clone does not improve the speed of snapshot restoration operations such as restoring files from a snapshot, snapshot revert, and snapshot clone. |
| Encryption QES encrypts the LUN using 256-bit AES encryption. You must specify an encryption password.Valid characters: All alphanumeric and special characters except spacesLength: 8 to 16 charactersYou can also save a copy of the encryption key on the NAS. | |
- Click Next.
- Optional: Map the LUN to an existing target.
a. Deselect Do not map it to a target for now.
b. Select a target.
-
Click Next, and then Next again.
-
Click Finish.
QES creates the LUN.
iSCSI
iSCSI enables computers, servers, other NAS devices, and virtual machines to access NAS storage in the form of LUNs over a TCP/IP network. Hosts can partition, format, and use the LUNs as if they were local disks.
Getting Started with iSCSI
- Create an iSCSI target on the NAS.
For details, see Creating an iSCSI Target.
- Create a LUN on the NAS. creates LUNs using storage pool space. For details, see Creating a LUN.
- Map the LUN to the iSCSI target. Multiple LUNs can be mapped to one target. For details, see Creating an iSCSI Target With a Mapped LUN and Managing an iSCSI LUN.
- Install an iSCSI initiator application or driver on the host. The host is the service, computer, or NAS device that will access the LUN.
- Connect the iSCSI initiator to the iSCSI target on the NAS.
Warning
To prevent data corruption, multiple iSCSI initiators should not connect to the same LUN simultaneously.
The LUNs mapped to the iSCSI target appear as disks on the host. For details, see iSCSI Target Access.
- In the host OS, format the disks.
iSCSI Targets
iSCSI targets allow iSCSI initiators from other devices on the network to access mapped LUNs on the NAS. You can create multiple iSCSI targets and also map multiple LUNs to a single iSCSI target.
Creating an iSCSI Target
- Go to Storage Manager > iSCSI & Fibre Channel > iSCSI Storage.
- Click Create, and then select iSCSI Target / LUN.
- Select iSCSI Target only.
- Click Next.
- Specify a target name. QES appends the specified name to the iSCSI qualified name (IQN). IQNs are unique names used to identify targets and initiators.
- Valid characters: 0 to 9, a to z, A to Z
• Length: 1 to 16 characters
-
Specify a target alias. An alias enables you to identify the target more easily on the initiator.
-
Valid characters: 0 to 9, a to z, A to Z, underscore (_), hyphen (-)
• Length: 1 to 32 characters -
Optional: Enable CRC checksums. Initiators and targets communicate over TCP connections using iSCSI protocol data units (PDU). The sending device can send a checksum with each PDU. The receiving device uses this
checksum to verify the integrity of the PDU, which is useful in unreliable network environments. There are two checksum types, which can be enabled separately.
| Checksum Type Description |
| Data Digest The checksum can be used to verify the data portion of the PDU. |
| Header Digest The checksum can be used to verify the header portion of the PDU. |
The following options are available for each checksum type.
| Option Description | |
| None The target reports that it does not support checksums. CRC32C checksums must be disabled on connecting initiators. | |
| crc32c The target reports that checksums are required. CRC32C checksums must be enabled on connecting initiators. | |
| none/crc32c | |
8. Click Next.
9. Optional: Enable CHAP authentication.
An initiator must authenticate with the target using the specified username and password. This provides security, as iSCSI initiators do not require a NAS username or password.
- Username
• Length: 1 to 128 characters
- Valid Characters: 0 to 9, a to z, A to Z
- Password
• Length: 12 to 16 characters
- Valid characters: 0 to 9, a to z, A to Z
10. Optional: Enable mutual CHAP authentication.
Both the initiator and the target must authenticate with each other for additional security. First, the initiator authenticates with the target using the CHAP authentication username and password. Next, the target authenticates with the initiator using the mutual CHAP username and password.
- Username
• Length: 1 to 128 characters
- Valid characters: 0 to 9, a to z, A to Z, colon (:), period (.), hyphen (-)
- Password
• Length: 12 to 16 characters
- Valid characters: 0 to 9, a to z, A to Z, colon (:), period (.), hyphen (-)
- Click Next.
- Select the network interfaces that this target will use for data transmission.
- Click Next.
- Select the hosts that are allowed to access this target.
Click the field in the Access column to change a host's access rights. You must select All Access for at least one host.
- Click Next, and then Next again.
- Click Finish.
QES creates the iSCSI target.
Creating an iSCSI Target With a Mapped LUN
- Go to Storage Manager > iSCSI & Fibre Channel > iSCSI Storage.
- Click Create, and then select iSCSI Target / LUN.
- Select iSCSI Target with a mapped LUN and then click Next.
- Click Next.
- Specify a target name.
QES appends the specified name to the iSCSI qualified name (IQN). IQNs are unique names used to identify targets and initiators.
-
Valid characters: 0 to 9, a to z, A to Z
• Length: 1 to 16 characters -
Specify a target alias.
An alias enables you to identify the target more easily on the initiator.
-
Valid characters: 0 to 9, a to z, A to Z, underscore (_), hyphen (-)
• Length: 1 to 32 characters -
Optional: Enable CRC checksums.
Initiators and targets communicate over TCP connections using iSCSI protocol data units (PDU). The sending device can send a checksum with each PDU. The receiving device uses this checksum to verify the integrity of the PDU, which is useful in unreliable network environments. There are two checksum types, which can be enabled separately.
| Checksum Type Description | |
| Data Digest The checksum can be used to verify the data portion of the PDU. | |
| Header Digest The checksum can be used to verify the header portion of the PDU. |
The following options are available for each checksum type.
| Option Description |
| None The target reports that it does not support checksums. CRC32C checksums must be disabled on connecting initiators. |
| crc32c The target reports that checksums are required. CRC32C checksums must be enabled on connecting initiators. |
| none/crc32c The target reports that checksums can be disabled or enabled. Connecting initiators can choose whether to use CRC32C or not. |
8. Click Next.
9. Optional: Enable CHAP authentication.
An initiator must authenticate with the target using the specified username and password. This provides security, as iSCSI initiators do not require a NAS username or password.
- Username
• Length: 1 to 128 characters
- Valid Characters: 0 to 9, a to z, A to Z
- Password
• Length: 12 to 16 characters
- Valid characters: 0 to 9, a to z, A to Z
10. Optional: Enable mutual CHAP authentication.
Both the initiator and the target must authenticate with each other for additional security. First, the initiator authenticates with the target using the CHAP authentication username and password. Next, the target authenticates with the initiator using the mutual CHAP username and password.
- Username
• Length: 1 to 128 characters
- Valid characters: 0 to 9, a to z, A to Z, colon (:), period (.), hyphen (-)
- Password
• Length: 12 to 16 characters
- Valid characters: 0 to 9, a to z, A to Z, colon (:), period (.), hyphen (-)
11. Click Next.
12. Select the network interfaces that this target will use for data transmission.
13. Click Next.
- Select the hosts that are allowed to access this target.
Click the field in the Access column to change a host's access rights. You must select All Access for at least one host.
-
Click Next.
-
Configure the following LUN settings.
| Setting Description | |
| LUN name • Valid characters: 0-9, a-z, A-Z, dash -, underscore (_)Length: 1 to 32 characters | |
| LUN Allocation • Thin Provisioning: QES allocates storage pool space to a LUN only when necessary. However, QES cannot save data to the LUN if the storage pool runs out of space.Instant Allocation: QES allocates storage pool space when creating the LUN. This option is also known as Thick provisioning. | |
| LUN Location Select the storage pool that this LUN will be created in. | |
| Capacity Specify the maximum capacity of the LUN. The maximum capacity depends on the LUN allocation method: | |
| Alert threshold QES issues a warning notification when the percentage of used LUN space is equal to or above the specified threshold. | |
| Performance profile | Specify how the LUN will be used. Each option results in a different record size, optimizing performance for the specified application.GenericHyper-VVMwareDatabaseCustom (Choose from: 8k, 16k, 32k, 64k, 128k)TipSelect Generic if you are unsure of which option to select. |
| Synchronous I/O | Select the ZFS Intent Log (ZIL) sync setting to improve either data consistency or performance. There are three options:Always: (Default). All I/O transactions are treated as synchronous and are always written and flushed to a non-volatile storage (such as a SSD or HDD). This option gives the best data consistency, but might have a slight impact on performance.Standard: QES uses synchronous I/O or asynchronous I/O based on the application and the type of I/O request.Disabled: All I/O transactions are treated as asynchronous. This option gives the highest performance, but has a higher risk of data loss in the event of a power outage. Ensure that a UPS (uninterrupted power supply) is installed when using this option. |
| SSD Cache The SSD cache will be used to improve LUN access performance.ImportantShared folders and LUNs created in an all-SSD storage pool cannot use the SSD cache. | |
| Deduplication QES eliminates duplicate copies of data to reduce the required amount of storage space.WarningBefore QES 1.1.3, the default deduplication algorithm was SHA256. If you update a pre-QES 1.1.3 NAS to QES 1.1.3 or later and then change the deduplication algorithm to SHA512 or Skein, data might become inaccessible .Deduplication is only available ifPerformance profileis set to VDI orCustom, andThin provisioningis selected. | |
| Compression QES compresses the data in the LUN to reduce the size of stored data.Enabling compression also reduces the total number of blocks that QES needs to read and write, increasing read and write speeds.TipNew shared folders and LUNs have compression enabled by default. Compression does not impact read/write and processor performance on ZFS filesystems. Only disable this setting when necessary. | |
| Enable Fast Clone | Fast Clone enables QES to create copies of files faster. It also saves storage space by modifying file metadata, allowing original and copied files to share the same data blocks.ImportantTo enable this setting,Thin provisioningmust be selected.Fast Clone only works when the copied file is created in the LUN containing the original file.Fast Clone does not improve the speed of snapshot restoration operations such as restoring files from a snapshot, snapshot revert, and snapshot clone. |
| Encryption QES encrypts the LUN using 256-bit AES encryption. You must specify an encryption password.Valid characters: All alphanumeric and special characters except spacesLength: 8 to 16 charactersYou can also save a copy of the encryption key on the NAS. | |
- Click Next, and then Next again.
- Click Finish.
QES creates the LUN and the target.
Editing iSCSI Target Settings
- Go to Storage Manager > iSCSI & Fibre Channel > iSCSI Storage.
- Select an iSCSI target.
- Click Action, and then select Modify.
The Modify iSCSI Target window opens. - Modify any of the following settings.
| Setting Description |
| Target Alias An alias enables you to identify the target more easily on the initiator.Length: 1 to 32 charactersValid characters: 0 to 9, a to z, A to Z, underscore (_), hyphen (-), space ( ) |
| Setting Description | |
| CRC/Checksum | Initiators and targets communicate over TCP connections using iSCSI protocol data units (PDU). The sending device can send a checksum with each PDU. The receiving device uses this checksum to verify the integrity of the PDU, which is useful in unreliable network environments. There are two checksum types, which can be enabled separately.• Data Digest: The checksum can be used to verify the data portion of the PDU.• Header Digest: The checksum can be used to verify the header portion of the PDU. |
| Use CHAP authentication | An initiator must authenticate with the target using the specified username and password. This provides security, as iSCSI initiators do not require a NAS username or password.• Username• Length: 1 to 128 characters• Valid Characters: 0 to 9, a to z, A to Z• Password• Length: 12 to 16 characters• Valid characters: 0 to 9, a to z, A to Z |
| Mutual CHAP | Both the initiator and the target must authenticate with each other for additional security. First, the initiator authenticates with the target using the CHAP authentication username and password. Next, the target authenticates with the initiator using the mutual CHAP username and password.• Username• Length: 1 to 128 characters• Valid characters: 0 to 9, a to z, A to Z, colon (:) , period (.) , hyphen (-)• Password• Length: 12 to 16 characters• Valid characters: 0 to 9, a to z, A to Z, colon (:) , period (.) , hyphen (-) |
| Portals Select the network interfaces that this target will use for data transmission. | |
5. Click Apply.
Managing an iSCSI Target
-
Go to Storage Manager > iSCSI & Fibre Channel > iSCSI Storage.
-
Select a target.
- Click Action.
- Select an action.
| Target Action Description | |
| Deactivate Disable an active target and disconnect all connected iSCSI initiators. | |
| Activate Enable an inactive target. | |
| Modify Modify the target's settings. | |
| View Connections View the IP addresses and IQN information of iSCSI initiators connected to this target. | |
| Delete Disconnect all connected iSCSI initiators and delete the target. | |
| Hosts Select which hosts can connect to the target. | |
iSCSI LUN Management
Managing an iSCSI LUN
Important
Most of these actions will be unavailable if the LUN is part of a LUN group. For details, see LUN Groups.
- Go to Storage Manager > iSCSI & Fibre Channel > iSCSI Storage.
- Select a LUN.
Tip
Double-click a target to see all mapped LUNs.
- Click Action.
- Select an action.
| LUN Action LUN Location Description | |
| Disable iSCSI Target List Disable the LUN and disconnect all connected initiators. | |
| Enable iSCSI Target List Enable a disabled LUN. | |
| Un-map iSCSI Target List Unmap a disabled | LUN from its target. QES moves the LUN to the Un-Mapped iSCSI LUN list. |
| Modify iSCSI Target ListUn-Mapped iSCSI LUN List | Open the Modify an iSCSI LUN window. |
| Map Un-Mapped iSCSI LUN List Map the LUN to a target. | |
| Delete Un-Mapped iSCSI LUN List Delete the LUN and all data stored on it. | |
Changing the Target of an iSCSI LUN
- Go to Storage Manager > iSCSI & Fibre Channel > iSCSI Storage.
- Select a mapped iSCSI LUN.
Tip
Double-click an iSCSI target to view all of its mapped LUNs.
- Click Action, and then select Disable.
A confirmation message appears.
- Click OK.
QES disables the LUN.
- Click Action, and then select Un-map.
QES unmaps the LUN from its target and then moves it to the Un-Mapped iSCSI LUN List. - Select the unmapped LUN.
- Click Action, and then select Map.
The Map LUN to Target window opens.
- Select a target.
- Click Apply.
QES maps the LUN to the new target.
Expanding an iSCSI LUN
- Go to Storage Manager > iSCSI & Fibre Channel > iSCSI Storage.
- Select a LUN.
- Click Action and then select Modify.
The Modify an iSCSI LUN window opens.
- Specify the new LUN capacity.
Important
The new capacity must be higher than the current capacity of the LUN.
5. Click Apply.
iSCSI Access Control List
The iSCSI access control list (ACL) allows you to configure a LUN masking policy for each connected iSCSI initiator. A LUN masking policy determines which LUNs the initiator is able to see and access. If no policy is specified for an iSCSI initiator, then QES applies the default policy to it.
Tip
- The default policy gives all iSCSI initiators full read/write access to all LUNs.
- You can edit the default policy so that all LUNs are either read-only or not visible to all iSCSI initiators, except for initiators with specific permissions from a policy.
Adding an iSCSI LUN Masking Policy
- Go to Storage Manager > iSCSI & Fibre Channel > iSCSI Storage.
- Click iSCSI ACL.
The iSCSI ACL window opens.
- Click Add a Policy.
The Add a Policy window opens.
- Specify the policy name.
The name must consist of 1 to 32 characters from any of the following groups:
- Letters: a-z, A-Z
- Numbers: 0-9
-
Special characters: Hyphen (-), space (), underscore (_)
-
Specify the initiator IQN.
- Configure the access permissions for each LUN.
| Permission Description |
| Read Only The iSCSI initiator can read data on the LUN, but cannot write, modify, or delete data. |
| Read/Write The iSCSI initiator can read, write, modify, and delete data on the LUN. |
| Deny Access The LUN is invisible to the iSCSI initiator. |
Tip
Click the values in the columns to change the permissions.
7. Click Apply.
Editing an iSCSI LUN Masking Policy
- Go to Storage Manager > iSCSI & Fibre Channel > iSCSI Storage.
- Click iSCSI ACL.
The iSCSI ACL window opens.
- Select a policy.
- Click Edit.
The Modify a Policy window opens.
- Optional: Edit the policy name.
The name must consist of 1 to 32 characters from any of the following groups:
- Letters: a-z, A-Z
- Numbers: 0-9
-
Special characters: Hyphen (-), space ( ), underscore (_)
-
Optional: Configure the access permissions for each LUN.
| Permission Description |
| Read Only The iSCSI initiator can read data on the LUN, but cannot write, modify, or delete data. |
| Read/Write The iSCSI initiator can read, write, modify, and delete data on the LUN. |
| Deny Access The LUN is invisible to the iSCSI initiator. |
Tip
Click the values in the columns to change the permissions.
7. Click Apply.
Deleting an iSCSI LUN Masking Policy
- Go to Storage Manager > iSCSI & Fibre Channel > iSCSI Storage.
- Click iSCSI ACL.
The iSCSI ACL window opens.
-
Select a policy.
-
Click Delete.
A confirmation message appears.
- Click OK.
iSCSI Target Authorization
Each iSCSI target can be configured either to allow connections from all iSCSI initiators, or to only allow connections from a list of authorized initiators.
Important
By default, iSCSI target authorization is disabled.
Configuring an iSCSI Target's Authorized Initiators List
- Go to Storage Manager > iSCSI & Fibre Channel > iSCSI Storage.
- Select an iSCSI target.
- Click Action, and then select Modify.
The Modify an iSCSI Target window opens.
- Click Initiators.
- Select Allow connections from the list only.
- Optional: Add one or more iSCSI initiators to the authorized iSCSI initiators list.
a. Click Add.
b. Specify the initiator IQN.
c. Click Confirm.
d. Repeat the previous steps for each additional iSCSI initiator that you want to add.
- Optional: Delete one or more iSCSI initiators from the authorized iSCSI initiators list.
a. Select an initiator IQN.
b. Click Delete.
c. Repeat the previous steps for each additional iSCSI initiator that you want to delete.
- Click Apply.
Enabling iSCSI Target Authorization
- Go to Storage Manager > iSCSI & Fibre Channel > iSCSI Storage.
- Select an iSCSI target.
- Click Action, and then select Modify.
The Modify an iSCSI Target window opens.
- Click Initiators.
- Select Allow connections from the list only.
- Add one or more iSCSI initiators to the authorized iSCSI initiators list.
a. Click Add.
b. Specify the initiator IQN.
c. Click Confirm.
-
Repeat the previous step for each additional iSCSI initiator that you want to add.
-
Click Apply.
Disabling iSCSI Target Authorization
- Go to Storage Manager > iSCSI & Fibre Channel > iSCSI Storage.
- Select an iSCSI target.
- Click Action, and then select Modify.
The Modify an iSCSI Target window opens.
- Click Initiators.
- Select Allow all connections.
- Click Apply.
iSCSI Target Access
For information on connecting to QES iSCSI targets from different operating systems, go to https://www.qnap.com/en/how-to/tutorial/storage-management.
QNAP Snapshot Agent
QNAP Snapshot Agent enables QES to take application-consistent snapshots of iSCSI and Fibre Channel LUNs on VMware or Microsoft servers. Application-consistent snapshots record the state of running applications, virtual machines, and data. When QES takes a LUN snapshot, QNAP Snapshot Agent triggers the following actions:
- Windows: The server flushes data in memory, logs, and pending I/O transactions to the LUN before the snapshot is created.
- VMware: The server takes a virtual machine snapshot.
Tip
To download QNAP Snapshot Agent, go to https://www.qnap.com/utilities and then click Enterprise.
FC Snapshot Agent Server List
To view a list of all FC clients that are using QNAP Snapshot Agent with this NAS, go to Storage Manager > iSCSI & Fibre Channel > Fibre Channel > FC Storage . Click Snapshot, and then select Snapshot Agent.
Tip
To unregister an FC client, select the client in the list and then click Remove.
iSCSI Snapshot Agent Server List
To view a list of all iSCSI initiators that are using QNAP Snapshot Agent with this NAS, go to Storage Manager > iSCSI & Fibre Channel > iSCSI Storage. Click Snapshot, and then select Snapshot Agent.
Tip
To unregister an iSCSI initiator, select it in the list and then click Remove.
Snapshot Agent
Registered Snapshot Agent List Remove
https://www.qnap.com/utility
| Agent IP/FQDM | Agent... | Client OS | NAS LUN info | Status |
| 172.17.48.71 | 1.3.052 | Microsoft Windows NT 6.2.9200.0 | LUN_1 (E:) | Online |
| Page 1 /1 | > > | C | Display item: 1-1, Total: 1 | Show 10 ▼ Item(s) | |||
Close
Fibre Channel
Fibre Channel enables computers, servers, other NAS devices, and virtual machines to access NAS storage in the form of LUNs over a Fibre Channel network. Hosts can partition, format, and use the LUNs as if they were local disks.
Fibre Channel Ports
You can view and configure Fibre Channel ports and port groups on the NAS by going to Storage Manager > iSCSI & Fibre Channel > Fibre Channel > FC Ports.
Fibre Channel Port Groups
A Fibre Channel port group is a group of one or more Fibre Channel ports. Fibre Channel port groups help you organize and manage LUN mappings more easily. When a LUN is mapped to a Fibre Channel port group, QES automatically maps the LUN to every Fibre Channel port in the group.
Important
• Each Fibre Channel port can be in one or more Fibre Channel port groups.
• Each LUN can only be mapped to one Fibre Chanel group.
- There is a default port group that contains all Fibre Channel ports.
Creating a Fibre Channel Port Group
- Go to Storage Manager > iSCSI & Fibre Channel > Fibre Channel > FC Ports.
- Click Create Port Group. The Create Port Group window opens.
- Specify a group name. Name requirements:
• Length: 1-20 characters
- Valid characters: A-Z, a-z, 0-9
-
Select one or more Fibre Channel ports.
-
Click Create.
Mapping a LUN to a Fibre Channel Port Group
- Go to Storage Manager > iSCSI & Fibre Channel > Fibre Channel > FC Storage.
- Select a LUN.
- Click Action, and then select Edit LUN Mapping. The Edit LUN Mapping window opens.
- Select Map to FC port group.
- Select a Fibre Channel port group.
Tip
The default group contains all Fibre Channel ports.
- Choose whether you want to configure LUN masking.
| Option Description | |
| Enable LUN and do not configure LUN masking | Do not configure LUN masking. Any initiator that is able to connect to a Fibre Channel port in the port group will be able to see the LUN. |
| Keep LUN disabled and configure LUN masking in the next step | Configure LUN masking. You can restrict which initiators can see the LUN. |
-
Click OK.
-
Optional: Configure LUN masking.
a. Add one or more initiator WWPNs to the LUN's authorized initiators list.
| Method Steps | |
| Add from WWPN list | 1. Select one or more initiator WWPNs in the WWPN list.2. Click Add. |
| Add WWPNs as text | 1. Specify one WWPN per line using any of the following formats:•XXXXXXXXXXXXXX•XX:XX:XX:XX:XX:XX:XX:XX2. Click Add. |
b. Optional: Select Add unknown WWPNs to the FC WWPN Aliases List.
When selected, QES will add any unknown WWPNs to the list of known aliases. To view the list, go to Storage Manager > iSCSI & Fibre Channel > Fibre Channel > FC WWPN Aliases.
c. Optional: Select Enable LUN.
If selected, QES will enable the LUN after mapping it to the target.
d. Click OK.
Dual Controller NAS FC Port Groups
On dual controller NAS devices, QES creates the same FC port groups on storage controllers, for backup and redundancy.
Important
- Both storage controllers should have the same FC adapter.
- If the FC adapters in the storage controllers are different models, then QES might not be able to create a backup FC port group.
- If only one storage controller has an FC adapter, then clients have a higher chance of losing LUN access due to network connection issues.
- If the FC adapters have different port speeds, then the FC transmission speed on both adapters is reduced to the lowest FC port performance.
Configuring Fibre Channel Port Binding
Port binding is a Fibre Channel security method that enables you to restrict which initiator WWPNs are allowed to connect through a Fibre Channel port. It is similar to iSCSI target authorization.
Tip
By default, port binding is disabled on all Fibre Channel ports.
- Go to Storage Manager > iSCSI & Fibre Channel > Fibre Channel > FC Ports.
- Select a Fibre Channel port.
- Click Action, and then select Edit Port Binding. The Fibre Channel Port Binding window opens.
- Add one or more initiator WWPNs to the LUN's authorized initiators list.
| Method Steps | |
| Add from WWPN list a. | Select one or more initiator WWPNs in the WWPN list.b. Click Add. |
| Add WWPNs as text a. | Specify one WWPN per line using any of the following formats:•XXXXXXXXXXXXXX•XX:XX:XX:XX:XX:XX:XX:XXb. Click Add. |
-
Optional: Select Add unknown WWPNs to the FC WWPN Aliases List.
When selected, QES will add any unknown WWPNs to the list of known aliases. To view the list, go to Storage Manager > iSCSI & Fibre Channel > Fibre Channel > FC WWPN Aliases. -
Click OK.
Fibre Channel Port Actions
You can perform various actions on Fibre Channel ports by going to Storage Manager > iSCSI & Fibre Channel > Fibre Channel > FC Ports. Select a port and then click Action to select the desired action.
| Action Description | |
| Edit Alias Edit the alias for the Fibre Channel port.The alias must consist of 1 to 20 characters from any of the following groups:Letters: A-Z, a-zNumbers: 0-9Special characters: Hyphen (-), underscore (_) | |
| View initiators View a list of all Fibre Channel initiators currently logged into the port. | |
| Edit port binding | Modify the port binding for the port. Port binding allows you to restrict which initiators are allowed to connect to the port.For more information, seeConfiguring Fibre Channel Port Binding. |
Fibre Channel Port Status
You can view Fibre Channel port statuses by going to Storage Manager > iSCSI & Fibre Channel > Fibre Channel > FC Ports.
| Status Description |
| Connected The port has an active network connection. |
| Disconnected The port does not have an active network connection. |
Fibre Channel Storage
You can manage and monitor Fibre Channel LUNs by going to Storage Manager > iSCSI & Fibre Channel > Fibre Channel > FC Storage.
Configuring Fibre Channel LUN Masking
LUN masking is a security feature that enables you to make a LUN visible to some Fibre Channel initiators and invisible to other initiators.
- Go to Storage Manager > iSCSI & Fibre Channel > Fibre Channel > FC Storage.
2. Select a LUN.
Important
The LUN must be disabled.
3. Click LUN Masking.
The LUN Masking window opens.
- Add one or more initiator WWPNs to the LUN's authorized initiators list.
| Method Steps | |
| Add from WWPN list a. | Select one or more initiator WWPNs in the WWPN list.b. Click Add. |
| Add WWPNs as text a. | Specify one WWPN per line using any of the following formats:•XXXXXXXXXXXXXX•XX:XX:XX:XX:XX:XX:XX:XXb. Click Add. |
- Optional: Select Add unknown WWPNs to the FC WWPN Aliases List.
When selected, QES will add any unknown WWPNs to the list of known aliases. To view the list, go to Storage Manager > iSCSI & Fibre Channel > Fibre Channel > FC WWPN Aliases.
- Select Enable LUN.
If selected, QES will enable the LUN after mapping it to the target.
- Click OK.
Fibre Channel LUN Actions
You can perform various actions on Fibre Channel LUNs by going to Storage Manager > iSCSI & Fibre Channel > Fibre Channel > FC Storage.
| LUN Action Description | |
| Modify Edit the LUN settings. | |
| Enable Enable the LUN if it is currently disabled. | |
| Disable Disable the LUN. The LUN will become inaccessible to connected iSCSI initiators. | |
| Delete Delete the LUN and all data stored on it. | ImportantThis action is only available if the LUN is unmapped. |
| Edit LUN Mapping | Unmap the LUN, or map it to a different iSCSI target or Fibre Channel Port group. |
| Edit LUN Masking LUN masking is an authorization method that makes a Logical Unit Number (LUN) visible to some initiators and invisible to other initiators. | |
Fibre Channel LUN Status
You can view Fibre Channel LUN statuses by going to Storage Manager > iSCSI & Fibre Channel > Fibre Channel > FC Storage. Expand a port group to view its LUNs.
| Status Description |
| Enabled The LUN is active and visible to connected initiators. |
| Disabled The LUN is inactive and invisible to connected initiators. |
Fibre Channel WWPN Aliases
A WWPN (World Wide Port Name) is a unique identifier for Fibre Channel ports. A WWPN alias is a unique human-readable name for a Fibre Channel port that makes it easier to identify it.
You can view, edit, and add WWPNs and WWPN aliases by going to iSCSI & Fibre Channel > Fibre Channel > FC WWPN Aliases.
Adding WWPNs
- Go to Storage Manager > iSCSI & Fibre Channel > Fibre Channel > FC WWPN Aliases.
- Click Add.
The Add WWPN window appears.
- Add one or more WWPNs to the list of known WWPNs using any of the following methods.
| Method Steps | |
| Add WWPNs from logged-in Fibre Channel initiators. | Select Add WWPNs from all logged-in FC initiators. |
| Add WWPNs as text Specify one WWPN per line using any of the following formats:XXXXXXXXXXXXXXXXXXXX:XX:XX:XX:XX:XX:XX:XX:XX | |
- Click Add.
Configuring a WWPN Alias
- Go to Storage Manager > iSCSI & Fibre Channel > Fibre Channel > FC WWPN Aliases.
- Locate a WWPN.
- Under Alias, specify an alias for the WWPN.
The alias must consist of 1 to 20 characters from any of the following groups:
- Letters: A-Z, a-z
-
Numbers: 0-9
• Special Characters: Underscore (_), hyphen (-) -
Click Save.
Removing a WWPN Alias
- Go to Storage Manager > iSCSI & Fibre Channel > Fibre Channel > FC WWPN Aliases.
- Locate a WWPN.
- Clear the Alias field.
- Click Save.
Exporting a List of WWPN Aliases
- Go to Storage Manager > iSCSI & Fibre Channel > Fibre Channel > FC WWPN Aliases.
- Click Export.
The file browser window opens.
- In the file browser window, navigate to the folder where you want to save the file.
- Specify a filename.
- Click Save.
The list of WWPN aliases is saved to your local computer as a CSV file, in the format:
- Field 1: WWPN
- Field 2: Alias
11:00:24:5e:be:00:00:06,ja882c32p1
11:00:24:5e:be:00:00:07,ja88c32p2
11:00:00:24:5e:be:00:06,ja88c16p1
11:00:00:24:5e:be:00:07,ja882c16p2
10:00:00:10:9b:1b:cc:99,z640Emulex2
11:00:f4:e9:d4:54:89:49,z640Q32gport2
10:00:00:99:99:99:99:87,test3
10:00:00:99:99:99:99:99,test1
10:00:00:10:9b:1b:cc:98,z640Emulex1
11:00:f4:e9:d4:54:89:48,z640Q32gport1
10:00:00:99:99:99:99:89,test2
11:00:f4:e9:d4:58:23:46,QL16c1p1
11:00:f4:e9:d4:58:23:47,QL16c1p2
11:00:f4:e9:d4:58:31:bc,QL16c2p1
11:00:f4:e9:d4:58:31:bd,QL16c2p2
Example CSV Output
Importing a List of WWPN Aliases
You can import a list of WWPNs and aliases from a CSV file in the following format:
- Field 1: WWPN
- Field 2: Alias
11:00:24:5e:be:00:00:06,ja882c32p1
11:00:24:5e:be:00:00:07,ja88c32p2
11:00:00:24:5e:be:00:06,ja88c16p1
11:00:00:24:5e:be:00:07,ja882c16p2
10:00:00:10:9b:1b:cc:99,z640Emulex2
11:00:f4:e9:d4:54:89:49,z640Q32gport2
10:00:00:99:99:99:99:87,test3
10:00:00:99:99:99:99:99,test1
10:00:00:10:9b:1b:cc:98,z640Emulex1
11:00:f4:e9:d4:54:89:48,z640Q32gport1
10:00:00:99:99:99:99:89,test2
11:00:f4:e9:d4:58:23:46,QL16c1p1
11:00:f4:e9:d4:58:23:47,QL16c1p2
11:00:f4:e9:d4:58:31:bc,QL16c2p1
11:00:f4:e9:d4:58:31:bd,QL16c2p2
Example CSV File
Important
-
Identical aliases will be overwritten from the CSV file.
• Lines not formatted correctly will be ignored. -
Go to Storage Manager > iSCSI & Fibre Channel > Fibre Channel > FC WWPN Aliases.
- Click Import.
The file browser window opens.
- Locate and open the CSV file.
LUN Groups
LUN groups help you to organize, manage, and back up LUNs more easily. When you perform an action on a LUN group, the action is performed on every LUN in the group. LUN groups support the following actions:
- Map
- Unmap
- Take a snapshot
- Revert
- Clone
- Back up with SnapSync
LUN Group Features and Limitations
General
- LUN groups are only supported when using iSCSI.
• A LUN group must contain at least one LUN. - The member LUNs must all be in the same storage pool.
- Only unmapped LUNs can be added to a LUN group.
- Encrypted LUNs cannot be added to a LUN group.
• A LUN can only be in one LUN group.
iSCSI
- Mapping a LUN group to a target maps all member LUNs to the target.
- Unmapping a LUN group from a target unmaps all member LUNs from the target.
- Adding a LUN to a mapped LUN group maps it to the group's target.
- LUNs in a LUN group cannot be mapped or unmapped individually.
Snapshots
• Taking a LUN group snapshot takes a snapshot of every member LUN.
- You cannot revert, clone, or take snapshots of individual LUNs in a LUN group.
- Existing snapshots of a LUN become inaccessible after adding the LUN to a LUN group. They become accessible again after removing the LUN from the LUN group.
- If a LUN group is deleted, all snapshots taken of the group are deleted.
- When reverting or cloning a LUN group using a LUN group snapshot, the current group members must be the same as when the snapshot was taken. If the group members are different, the action will fail.
- Cloning a LUN group clones the group and all members. The cloned group will be unmapped.
Creating a LUN Group
- Go to Storage Manager > iSCSI & Fibre Channel > iSCSI Storage.
- Select Create > LUN Group.
- Specify a LUN group name.
The name must contain 1 to 31 characters from any of the following groups:
- Letters: A to Z, a to z
-
Numbers: 0 to 9
-
Select a storage pool.
- Add LUNs to the group.
Important
You must add at least one LUN.
- Click Apply.
QES creates the group and then adds it to the iSCSI Target List.
LUN Group Actions
Go to Storage Manager > iSCSI & Fibre Channel > iSCSI Storage, and then select a LUN group to perform one of the following actions.
| Action Description | |
| Map Map a LUN group and all member LUNs to an iSCSI target. | |
| Unmap Unmap a LUN group and all member LUNs from its iSCSI target. | |
| Modify Add or remove LUN group members. | |
| Delete Delete an unmapped LUN group. Member LUNs are not deleted. |
LUN Group Snapshots
Taking a LUN Group Snapshot
- Go to Storage Manager > iSCSI & Fibre Channel > iSCSI Storage.
- Select a LUN group.
- Click Snapshot and then select Take a Snapshot.
The Take a Snapshot window opens.
- Specify a name.
The name must consist of 1 to 24 characters from the following groups:
- Letters: A-Z, a-Z
- Numbers: 0-9
-
Special Characters: Dash (-), period (.), underscore (_)
-
Specify a retention time.
| Option Description | |
| Keep For QES retains the snapshot for the specified time period. | |
| Keep this snapshot permanently | QES retains the snapshot indefinitely.ImportantQES will still delete the snapshot when the following two conditions are met:Delete the oldest snapshots when a storage pool is full is enabled atStorage Manager > Global Settings.Storage space is low. |
- Select the LUN snapshot type.
| Type Description | |
| Crash consistent | The snapshot records the state of the data on the LUN. |
| Application consistent | The snapshot records the state of data and applications on the LUN. The iSCSI host flushes data in memory to the LUN before QES takes a snapshot. If VMware vCenter is using the LUN, vCenter takes a virtual machine snapshot.ImportantThis option is only available for VMware vCenter, or for Volume Shadow Copy Service (VSS) aware applications running on a Windows server. You must install QNAP Snapshot Agent on the iSCSI initiator. |
7. Click OK.
QES takes the snapshot. The snapshot appears in Snapshot Manager.
Configuring a LUN Group Snapshot Schedule
Tip
- All LUNs in the LUN group share the same snapshot schedule.
-
You can configure a separate snapshot schedule for each LUN group.
-
Go to Storage Manager > iSCSI & Fibre Channel > iSCSI Storage.
- Select a LUN group.
- Click Snapshot, and then select Snapshot Manager.
The Snapshot Manager window opens.
- Click Schedule.
The Schedule Snapshot window opens.
- Select Enable schedule.
- Specify how often QES will take a snapshot.
- Select the LUN snapshot type.
| Type Description | |
| Crash consistent | The snapshot records the state of the data on the LUN. |
| Application consistent | The snapshot records the state of data and applications on the LUN. The iSCSI host flushes data in memory to the LUN before QES takes a snapshot. If VMware vCenter is using the LUN, vCenter takes a virtual machine snapshot.ImportantThis option is only available for VMware vCenter, or for Volume Shadow Copy Service (VSS) aware applications running on a Windows server. You must install QNAP Snapshot Agent on the iSCSI initiator.For details, see QNAP Snapshot Agent. |
- Specify a retention time.
QES retains the snapshot for the specified time period. If you deselect Keep for, QES retains the snapshot indefinitely.
- Click OK.
QES takes snapshots according to the specified schedule.
Reverting a LUN Group
Reverting a LUN group restores each LUN in the group to the state at which the snapshot was taken. Restoring data using snapshot revert is faster than restoring individual files and folders.
Important
QES automatically unmaps an iSCSI LUN before reverting it.
- Go to Storage Manager > iSCSI & Fibre Channel > iSCSI Storage.
- Select a LUN group.
- Select Snapshot > Snapshot Manager.
The Snapshot Manager window opens.
- Select a snapshot.
- Click Revert.
A confirmation message appears.
Warning
All changes made after the snapshot was taken will be deleted.
- Click OK.
QES unmaps the LUN group from its iSCSI target and then reverts all member LUNs.
Cloning a LUN Group
- Go to Storage Manager > iSCSI & Fibre Channel > iSCSI Storage.
- Select a LUN group.
Important
The LUN group must have at least one snapshot.
- Click Snapshot, and then select Snapshot Manager.
The Snapshot Manager window opens.
- Select a snapshot.
- Click Clone.
The Clone Snapshot window opens.
- Specify a LUN group name.
- Click OK.
QES clones the LUN group and all member LUNs, and then displays a confirmation message. The cloned LUN group and LUNs appear in Storage Manager > iSCSI & Fibre Channel > iSCSI Storage.
Hosts
Hosts are computers that are authorized to connect to the NAS. You can configure access permissions for shared folders and iSCSI LUNs on this screen.

Adding a Host
- Go to Storage Manager >HOST >Hosts.
- Click Create Host.
The Create Host window opens.
3. Specify an alias.
The alias must consist of one or more characters from the following groups:
- Letters: A to Z, a to z
- Numbers: 0 to 9
- Special characters: space "", underscore "_", period ".", hyphen "-"
Important
The alias cannot be "all".
4. Specify a description.
5. Specify one or more of the following identifiers.
- IPv4 address
- IPv4 subnet
- IPv6 address
- IPv6 subnet
- Network name
- iSCSI IQN
Tip
To obtain the iSCSI IQN of a host, perform the following actions.
- Microsoft Windows: Start Microsoft iSCSI Initiator, and then click General.
- VMware ESXi: Log into the vSphere client and select an ESXi host. Go to Configuration > Hardware > Storage Adapters, select a vmhba, and then click Properties.
6. Click Apply.
QES adds the host to the list.
QoS
By default, all storage services running on the NAS share the same storage I/O resources. QoS (quality of service) can guarantee a minimum and maximum level of I/O resources for each LUN and shared folder, preventing resource-heavy services from negatively affecting the performance of other services.
Important
QoS does not support SnapSync.
Storage Group
On the Storage Group screen you can create and manage QoS storage groups. A storage group is a group of shared folders and LUNs with a policy applied to it. QES applies the policy to each storage group member individually.
• The maximum number of storage groups is 16.
- A storage group may contain 0 to 64 LUNs and shared folders from the same storage pool.
• A LUN or shared folder can only belong to one storage group.
- Removing a storage pool deletes all storage groups associated with the pool.

Enabling QoS
-
Go to Main Menu > Storage Manager > QoS > Storage Group.
-
Set Enable QoS to

Creating a QoS Storage Group
- Go to Main Menu > Storage Manager > QoS > Storage Group.
- Click Create.
The QoS Configuration Wizard window opens.
- Specify a group name.
The name must consist of 1 to 32 characters from the following groups:
- Letters: A-Z, a-z
-
Numbers: 0-9
-
Specify a description.
5. Select a storage pool.
Important
You cannot mix shared folders or LUNs from different storage pools in one storage group.
6. Select a storage type.
Choose from the following options:
• LUN
- Shared Folder
Important
You cannot add shared folders and LUNs to the same storage group.
- Select one or more shared folders or LUNs.
- Click Next.
- Select a QoS policy to apply to the storage group.
QES applies the policy to each storage member individually.
Tip
To create a new policy, click Create Policy. For details, see Creating a QoS Policy.
- Click Next.
- Review the storage group and policy information.
- Click Finish.
Policy
On the Policy screen you can create and manage QoS policies. A policy is a set of I/O limits and a priority which is applied to a storage group.
• The maximum number of policies is 16.
• Each policy can be applied to a maximum of 16 storage groups.
- A policy is applied to each member of a storage group individually.
- Policies only affect shared folders and LUNs in the same storage pool.

Creating a QoS Policy
- Go to Storage Manager > QoS > Policy
- Click Create.
The Create Policy window opens.
- Specify a name.
The name must consist of 1 to 32 characters from the following groups:
- Letters: A-Z, a-z
-
Numbers: 0-9
-
Specify a description.
-
Select a priority.
When a storage pool does not have enough I/O resources to fulfill the Maximum I/O requirements for all storage group members in the pool, QES uses the priority value to divide up I/O resources between members. Choose one of the following options:
| Priority Weight | |
| Highest 100 | |
| High 80 | |
| Medium 60 | |
| Low 40 | |
| Lowest 20 |
6. Select an I/O type.
Choose one of the following options:
• IOPS (Input/output operations per second)
• MB/s (Megabytes per second)
- Optional: Specify throughput limits.
| Setting Description Unit Allowed Values | ||
| Maximum The maximum amount of I/O that a storage group member is allowed to perform over an extended period of time. | IOPS or MB/s, depending on the selected I/O type | 0–500,000TipSetting Maximum to 0 means I/O is unrestricted. |
| Minimum The minimum amount of I/O required by this storage group member.QES tries to maintain the minimum I/O value for all storage group members that have a Minimum value set.When all members meet their minimum requirement, QES scales up the I/O for each member towards its Maximum value based on its priority.ImportantEnsure that network bandwidth available to the pool is greater than or equal to than Minimum I/O capacity.There should only be one storage pool per controller when using the Minimum setting. Having more than one storage pool may result in storage group members failing to meet the QoS minimum I/O requirements. | IOPS or MB/s,depending on the selected I/O type | 0-500,000ImportantThe value must be less than or equal to the maximum value.Setting Minimum to 0 means there is no minimum I/O requirement. |
| Burst The maximum amount of I/O that a storage group member is allowed to process over a short period of time. Burst requests are only processed when both of the following conditions are met:• The storage pool has sufficient spare I/O capacity.• The storage group member has had no I/O requests for a certain amount of time (see Burst Time). | IOPS or MB/s, depending on the selected I/O type | 0-500,000Important• The value must be greater than or equal to the maximum value.• If Maximum is set to 0, then I/O is unrestricted and burst is not used. |
| Burst Time | If a storage group member has no I/O requests for the specified amount of time, then when it starts I/O again it can perform burst I/O for an equal amount of time. | Seconds 0-60ImportantSetting Burst Time to 0 disables the burst feature. |
8. Click Apply.
Reserved Pool I/O Capacity
You can reserve a percentage of storage pool I/O capacity for shared folders and LUNs without a QoS minimum value applied to them. This ensures that all shared folders and LUNs in the pool always have sufficient I/O for normal operations.
Example: Six out of ten shared folders in a storage pool have throughput limits set to "Minimum". If the reserved ratio is set to 20%, then 20% of the pool's total I/O capacity is reserved for the remaining four shared folders. This reserved I/O capacity is then allocated equally to the four shared folders when they request I/O. If only two folders request I/O, they will get 10% of the reserved I/O capacity each. If all four folders request I/O, they will get 5% of the reserved capacity each.
Reserving Pool I/O Capacity
- Go to Main Menu > Storage Manager > QoS > Storage Group.
- Click Setting.
The Reserve Pool I/O Capacity window opens.
- Under Reserved Ratio, select the percentage of I/O capacity to reserve for each storage pool.
- Click Apply.
4. System Settings
Go to Control Panel > System to configure the basic settings of the NAS.
General Settings
| Settings Description | |
| System Administration | This screen allows you to specify the server name and ports, and configure secure connection settings. |
| Time Time settings affect event logs and scheduled tasks. This screen allows you to specify the time zone and format, and configure the system date and time. | |
| Daylight Saving Time (DST) | Daylight saving time (DST) settings apply only to regions that use DST. This screen allows you to either automatically adjust the system clock or to manually configure the settings. |
| Codepage This screen allows you to select the language that the NAS uses to display file and directory information. | |
| Login Screen This screen allows you to customize the NAS login screen. | |
Configuring the System Administration Settings
-
Go to Control Panel > System > General Settings > System Administration.
-
Specify the following information:
| Field User Action | |
| Server name Specify a NAS name that contains up to 14 characters from any of the following groups:Letters: A to Z, a to zNumbers: 0 to 9ImportantThe server name cannot consist of numbers only.Dashes (-)ImportantEnsure that dashes are not preceded or followed by a space. | |
| System port Specify the port that you will use to access the web interface.The default port is 8080. | |
| Service port Specify a port that client services and utilities can use to access the NAS. | |
| Enable secure connection (SSL) | Select this option and specify a port number to allow users to connect to the NAS using HTTPS. |
| Force secure connection (SSL) only | Select this option to require all users to connect to the NAS using only HTTPS. |
3. Click Apply.
Configuring the Time Settings
Important
You must configure the system time correctly to avoid the following issues.
- When using a web browser to connect to the NAS or save a file, the displayed time of the action will be incorrect.
- Event logs do not reflect the exact time that events occurred.
-
Scheduled tasks run at the wrong time.
-
Go to Control Panel > System > General Settings > Time.
-
Select the time zone.
- Specify the date and time format.
- Select the time setting.
| Option User Action | |
| Manual setting Specify the date and time. | |
| Synchronize with an Internet time server automatically | Ensure that your NAS is connected to the Internet, and then specify the following information:Server: Name of the Network Time Protocol (NTP) serverExamples: time.nist.gov, time.windows.comTime interval: Number of hours or days in between each time synchronization taskTipTo manually synchronize your NAS time with the NTP server, clickUpdate. |
5. Click Apply.
Configuring the Daylight Saving Time (DST) Settings
These settings are available for NAS users in regions that use Daylight Saving Time (DST). Users outside these regions can ignore these settings.
- Go to Control Panel > System > General Settings > Daylight Saving Time.
Tip
If you do not want to manually configure the DST settings, select Adjust system clock automatically for daylight saving time, then click Apply. Otherwise, perform steps 2 to 5.
- Select Enable customized daylight saving time table.
- Perform any of the following actions:
| Action Steps | |
| Add DST dataa. Click | Add Daylight Saving Time Data.b. Specify a time period and the number of minutes to offset.c. Click Apply. |
| Edit DST data a. Select a DST schedule from the table.b. Click .c. Specify a time period and the number of minutes to offset.d. Click Apply. | |
| Delete DST data a. Select a DST schedule from the table.b. Click Delete.c. Click OK. | |
-
Select a DST schedule from the table.
-
Click Apply.
Configuring the Codepage Settings
All files and directories on the NAS use Unicode encoding. If your operating system or FTP client does not support Unicode, you must configure the following settings to properly view files and directories on the NAS.
For details on modifying FTP settings, see Configuring FTP Service Settings.
-
Go to Control Panel > System > General Settings > Codepage.
-
Select the language of your operating system.
-
Click Apply.
Configuring the Login Screen
-
Go to Control Panel > System > General Settings > Login Screen.
-
Specify the following information:
| Field User Action | |
| Show firmware version | Select this option to display the QES firmware version. |
| Show the link bar Select this option to display links to myQNAPCloud, QNAP Utility, and Feedback. | |
| Background Select a background image or fill color. | |
| Logo Select a logo. | |
| Message Specify a message that will appear on the login screen. You can use a maximum of 120 ASCII characters. | |
-
Optional: Click Preview to view the changes.
-
Click Apply All.
Network
IPv4
You can configure the following settings on this screen:
- IP address
- Default gateway
• DNS - Port trunking
• VLAN
IP Address
ES series NAS devices have one management interface and two Ethernet interfaces on each controller. The management interface allows users to access and manage the NAS, but is also used by certain network protocols such as AD, NTP, and SNMP. The Ethernet interfaces are dedicated to data transfer for iSCSI and shared folders.
Tip
You can configure services to use the management interface or Ethernet interfaces by enabling service binding. For more information, see Service Binding.
You can connect the Ethernet interfaces to different switches and configure the TCP/IP settings separately. The NAS acquires two IP addresses, which allow access from two different subnets. When using Qfinder Pro, the IP address of Ethernet 1 is displayed only in LAN 1 and the IP address of Ethernet 2 is displayed only in LAN 2.
Configuring IPv4 Settings
-
Go to Control Panel > System > Network > IPv4.
-
Identify the interface that you want to configure and then click The TCP/IP - Property window opens.
3. Select the network transfer speed of the interface.
The default setting is Auto-negotiation, which means QES automatically detects and sets the transfer rate.
4. Configure the DHCP settings.
| Setting Description | |
| Obtain the IP address settings automatically via DHCP | QES automatically obtains the IP address and network settings. |
| Use static IP address You must specify the IP address, subnet mask,and default gateway.TipIn QES 1.1.3 and later, you can specify a default gateway for an interface that is part of a VLAN. | |
5. Enable jumbo frames.
Jumbo Frames are Ethernet frames that are larger than 1500 bytes. They are designed to enhance Ethernet networking throughput, and to reduce CPU usage when transferring large files.
QES uses standard Ethernet frames (1500 bytes) by default and supports the following jumbo frame sizes:
- Using jumbo frames requires a network speed of 1000 Mbps or higher.
- All connected network devices must enable jumbo frames and use the same MTU size.
- In QES, the selected jumbo frame size applies to the size of the data payload only. It does not include overhead data, such as the Ethernet, VLAN, and IP headers. This means that actual packet size will be larger than the selected value. Ensure that the MTU size on all connected network devices is higher than the selected jumbo frame size.
6. Click Apply.
A confirmation message appears.
7. Click OK.
Configuring Port Trunking
Port trunking enables you to combine two or more Ethernet interfaces for increased bandwidth, load balancing and fault tolerance.
- Go to Control Panel > System > Network > IPv4 > IP Address.
- Click Port Trunking.
The TCP/IP - Port Trunking window appears.
- Select two or more network interfaces that you want to add to the trunking group.
Important
Ensure that the ports are connected to the same switch.
- Select a port trunking mode.
The default option is Loadbalance.
Important
Some port trunking modes must be supported by your network switches. Selecting an unsupported mode may affect network performance or cause the network interface to freeze.
| Mode Description BenefitsRequires | Switch Support | ||
| Failover QES sends and receives traffic using only the master port, which is the interface that was added first to the trunking group. If the master port becomes unavailable, QES uses the next active port. | · Redundancy · Fault tolerance | No | |
| Lacp (IEEE® 802.3ad Link Aggregation Control Protocol) | QES negotiates a set of aggregable links with the peer in to one or more Link Aggregated Groups (LAGs). Each LAG is composed of ports of the same speed, which are set to full-duplex operation. Traffic is balanced across the ports in the LAG with the greatest total speed. In the event of changes in physical connectivity, QES will quickly reconfigure the LAG. Incoming traffic is accepted by any active port. | · Redundancy · Fault tolerance · Greater bandwidth | Yes |
| Mode Description BenefitsRequires | Switch Support | |
| Loadbalance QES distributes outgoing traffic based on the current load on each interface, which is computed relative to the interface's speed. The current interface receives incoming traffic. If that interface fails, another interface takes over its MAC address. | RedundancyFault toleranceIncreased throughput | No |
| Roundrobin QES sends packets in sequential order from the first active port to the last. | General purpose load balancingFault tolerance | Supports static trunking.Ensure static trunking is enabled on the switch. |

- Optional: Click to specify a hashing method.
| Hashing Method Description | |
| L2/Mac MAC address | |
| L3/IP IP address | |
| L4/Port Port number |
6. Click Apply.
Virtual LANs (VLANs)
A Virtual LAN (VLAN) enables a group of network devices to communicate as if they were attached to the same network switch, even if they are located in different physical locations. You can use VLANs to increase security and flexibility, and to decrease network latency and load.
QES supports a maximum of 512 VLANs.
Adding an Interface to a VLAN
Important
To use both VLANs and port trunking, you must configure port trunking first.
-
Go to Control Panel > System > Network > IPv4 > IP Address.
-
Click VLAN.
The VLAN window opens.
- Click Add.
The Add a VLAN window opens.
- Specify a VLAN ID.
You must specify a VLAN ID between 1 and 4094.
- Select an interface.
You can select a management or data interface.
- Click Apply.
The VLAN appears in the VLAN list.
DNS Server
You can configure the NAS to obtain a DNS server address automatically, or manually specify the IP address of a DNS server.
Configuring IPv4 DNS Settings
- Go to Control Panel > System > Network > IPv4 > DNS Server.
- Select one of the following options.
| Option User Action | |
| Automatically obtain the IP address using DHCP. | SelectObtain DNS server address automatically. |
| Manually specify the IP address. | a. SelectUse the following DNS server address.b. Obtain the IP addresses of the primary and the secondary DNS servers from your network administrator or ISP.c. Specify the following information:1. Primary DNS server2. Secondary DNS serverImportantQNAP recommends specifying at least one DNS server to allow URL lookups. |
- Click Apply.
Default Gateway
You must specify a network interface for the default gateway. All outgoing network traffic passes through this interface by default.
Configuring the IPv4 Default Gateway
- Go to Control Panel > System > Network > IPv4 > Default Gateway.
- Under Use the settings from, select an interface that QES will use as the default route.
Important
To use an interface as the default gateway:
- The interface must have a gateway IP address configured. If the interface obtains its IP address using DHCP, ensure that the DHCP server assigns a gateway address.
-
The interface's link status must be Connected.
-
Add a static route.
a. Click Static Route.
The Static Route window opens.
b. Specify an IP or subnet address.
c. Select an interface.
d. Click Apply.
QES adds the IP address and interface to the routing table.
e. Close the Static Route window.
- Click Apply.
IPv6
You can configure IPv6 settings on this screen. These settings allow hosts on the same subnet to automatically acquire IPv6 addresses from the NAS. The following NAS services support IPv6:
• NFS
- FTP
• iSCSI
• SNMP
• SSH
• CIFS/SMB
Configuring IPv6 Settings
- Go to Control Panel > System > Network > IPv6 > IP Address.
- Select Enable IPv6.
- Click Apply.
- Go to Control Panel > System > Network > IPv6 > IP Address.
-
Identify the interface you want to configure, and then click . The IPv6 - Property window appears.
-
Specify an IPv6 configuration.
| Option User Action | |
| IPv6 Auto-Configuration | Select this option to automatically obtain the IPv6 settings if an IPv6-enabled router is available on the network. |
| Use static IP address | Select this option to use a static IP address. You must specify the following information:• IPv6 address• Prefix lengthTipObtain the prefix and the prefix length information from your ISP.• Default gateway IPv6 address |
7. Click Apply.
Configuring IPv6 DNS Settings
- Go to Control Panel > System > Network > IPv6 > DNS Server.
- Select one of the following options.
| Option User Action | |
| Automatically obtain the IP address using DHCP. | SelectObtain DNS server address automatically. |
| Manually specify the IP address. | a. Select Use the following DNS server address.b. Obtain the IP addresses of the primary and the secondary DNS servers from your network administrator or ISP.c. Specify the following information:1. Primary DNS server2. Secondary DNS serverImportantQNAP recommends specifying at least one DNS server to allow URL lookups. |
3. Click Apply.
Service Binding
NAS services run on all available network interfaces by default. Service binding enables you to allow or block services from specific network interfaces to increase security. You can bind services to one or more specific wired or wireless network interfaces.
Applying changes to service binding settings does not affect the ongoing connections of online users. On their next session, these users will only be able to connect to services using the specified network interfaces.
Configuring Service Binding
- Go to Control Panel > System > Network > Service Binding.
- Select Enable Service Binding.
QES displays the available network interfaces.
- Select the network interfaces that you want each service to use.
- Click Apply.
Tip
If QES is unable to save the settings, click Refresh to list the current network interfaces on the NAS and then configure the settings again.
Configuring Proxy Server Settings
- Go to Control Panel > System > Network > Proxy.
-
Select Use a proxy server.
-
Specify a proxy server and port number.
All internet requests will pass through this proxy server. -
Optional: Select Authentication.
-
Optional: Specify a username and password.
-
Click Apply.
Security
Allow/Deny List
Go to Control Panel > System > Security > Allow/Deny List to select the security level for all your NAS connections.
Important
After modifying security level settings, the new settings do not take effect until a client has created a new connection session (disconnected then reconnected)
| Security Level | Option Description |
| No Security Allow all connections The NAS can connect to all IP addresses and network domains. | |
| Low Deny connections from the list | The NAS cannot connect to all IP addresses or network domains on the IP block list. |
| High Allow connections from the list only | The NAS can only connect to the IP addresses or network domains specified on the IP allow list. |
Creating an IP Block List
- Go to Control Panel > System > Security > Allow/Deny List.
- Select Deny connections from the list.
- Click Add.
The IP configuration window appears.
- Select IPv4 or IPv6.
- Specify an IP address, netmask, or IP range.
6. Click Create.
Tip
To remove an IP address, netmask, or IP range, select an entry from the table, then click Remove.
7. Click Apply.
Creating an IP Allow List
- Go to Control Panel > System > Security > Allow/Deny List.
- Select Allow connections from the list only.
- Click Add.
The IP configuration window appears.
- Select IPv4 or IPv6.
- Specify an IP address, netmask, or IP range.
- Click Create.
Tip
To remove an IP address, netmask, or IP range, select an entry from the table, then click Remove.
7. Click Apply.
Network Access Protection
Network access protection enhances system security. You can block an IP for a specific period or indefinitely after a specified number of unsuccessful connection attempts.
Configuring Network Access Protection
- Go to Control Panel > System > Security > Network Access Protection.
- Select Enable Network Access Protection.
- Select the connection methods that you want to protect.
-
Specify the following information:
-
Time period
• Maximum number of unsuccessful login attempts - Amount of time the IP will be blocked
5. Click Apply.
Certificate & Private Key
Secure Socket Layer (SSL) is a protocol used for secure data transfers and encrypted communication between web servers and browsers. To prevent receiving alert or error messages when accessing the web interface, upload an SSL certificate from a trusted provider.
Uploading an SSL Certificate and Private Key
Warning
The NAS supports only X.509 PEM certificates and private keys. Uploading an invalid security certificate may prevent you from logging onto the NAS through SSL. To resolve the issue, you must restore the default security certificate and private key.
For details, see Restoring the Default SSL Certificate and Private Key.
- Go to Control Panel > System > Security > Certificate & Private Key.
- Specify an SSL certificate.
Tip
Click View Sample to view a valid SSL certificate sample.
- Specify a private key.
Tip
Click View Sample to view a valid private key sample.
- Click Apply.
Downloading the SSL Certificate and Private Key
- Go to Control Panel > System > Security > Certificate & Private Key.
- Click Download Certificate.
The SSL certificate is downloaded.
- Click Download Private Key.
The private key is downloaded.
Restoring the Default SSL Certificate and Private Key
- Go to Control Panel > System > Security > Certificate & Private Key.
- Click Restore Default Certificate & Private Key.
A confirmation message appears.
- Click OK.
- Click Apply.
Password Policy
Enabling password policy rules will force NAS users to set stronger, more secure passwords.
Configuring the Password Policy
- Go to Control Panel > System > Security > Password Policy > Password Strength.
-
Select the password strength criteria.
-
A new password has to contain characters from at least three of the following classes: lowercase letters, uppercase letters, digits, and special characters.
- No character in the new password may be repeated three (or more) times consecutively. Example: AAA.
- The password must not be the same as the username, or username reversed. Example: Username: user1, password: 1resu.
3. Click Apply.
Hardware
Reset Button
You must enable the configuration reset switch to perform a basic or advanced system reset using the NAS reset button. You can enable the configuration reset switch on the General screen (Control Panel > System > Hardware > General).
For details on reset options, see System Reset and Restore to Factory Default.
Buzzer
The buzzer inform you of any ongoing NAS operations or errors. You can enable this option on the Buzzer screen (Control Panel > System > Hardware > Buzzer).
| Option Description |
| System operations The buzzer sounds when the NAS starts, shuts down, or updates the firmware. |
| System events The buzzer sounds when errors or critical events occur. |
Tip
You can find the full list of NAS events and their corresponding buzzer sounds in your NAS hardware user guide.
Smart Fan
Enabling the Smart Fan
- Go to Control Panel > System > Hardware > Smart Fan.
- Select Enable smart fan (recommended).
- Specify a smart fan setting.
| Option Description | |
| Pre-set temperature | The smart fan rotates at low speed when the system temperature is lower than 50°C (122°F).The smart fan rotates at high speed when any of the following conditions occur.The system temperature is higher than or equal to 60°C (140°F).The CPU temperature is higher than or equal to 75°C (167°F).The hard drive temperature is higher than or equal to 52°C (125°F). |
| User-specified temperature | The smart fan rotates at low and high speed according to the temperature you specify. |
- Click Apply All.
Configuring the Fan Speed Manually
- Go to Control Panel > System > Hardware > Smart Fan.
- Select Set fan rotation speed manually.
- Select a fan speed.
- Click Apply All.
Backup Battery Unit (BBU)
You can schedule a learning cycle for the backup battery units (BBUs). A learning cycle is when a controller performs a battery calibration operation to determine the battery's condition. During this cycle, the system switches to write-through mode to protect data integrity.
In write-through mode, the NAS writes data directly to HDDs/SSDs instead of writing to the RAM first. This prevents data loss if a power outage occurs before the NAS finishes writing data. Because this process takes up memory, QNAP strongly recommends scheduling the learning cycle during off-peak hours.
Configuring the Backup Battery Unit (BBU) Settings
QNAP strongly recommends scheduling the learning cycle during off-peak hours.
- Go to Control Panel > System > Hardware > BBU.
- Select Enable BBU learning schedule.
- Specify a learning cycle schedule.
- Click Apply All.
Power
You can configure Wake-on-LAN (WOL) and specify the NAS behavior after a power outage.
Wake-on-LAN (WOL)
You can power on the NAS remotely using the Wake-on-LAN (WOL) protocol in Qfinder. This feature is enabled by default.
Important
If the power cable is disconnected when the NAS is powered off, WOL will not work until the NAS has been manually powered on.
Enabling or Disabling Wake-on-Lan (WOL)
- Go to Control Panel > System > Power > Wake-on-LAN (WOL).
- Select Enable or Disable.
- Click Apply.
Power Recovery
This feature allows you to configure the power on and off status of the NAS after a power outage.
Configuring the Power Recovery Settings
- Go to Control Panel > System > Power > Power Recovery.
- Select a power recovery setting.
- Resume the server to the previous power-on or power-off status.
- Turn on the server automatically.
- The server should remain off.
- Click Apply.
Notification
You can configure the NAS to send you alert messages when system events, such as warnings or errors, occur.
Email Alerts
You can configure an SMTP server so you can receive alert notifications through email.
Configuring an Email Server
- Go to Control Panel > System > Notification > Email > SMTP Server.
- Specify the following information.
| Field User Actions | |
| Select an e-mail account | Select an email service.To use a custom SMTP server, see Configuring a Custom SMTP Server. |
| E-mail Specify an email address that contains a maximum of 128 characters. This is for testing purposes. | |
| Password Specify the password of the email account. The password must contain a maximum of 128 characters. | |
- Click Apply.
Configuring a Custom SMTP Server
- Go to Control Panel > System > Notification > Email > SMTP Server.
- Under Select an e-mail account, select Custom.
- Specify the following information.
| Field User Actions | |
| SMTP Server Specify an SMTP server name such as smtp.gmail.com. | |
| Port Number Specify the port number for the SMTP server. | |
| E-mail Specify the email address that will receive QES notifications. | |
| Username Specify a username that contains a maximum of 128 characters. This field is optional. | |
| Password Specify a | password that contains a maximum of 128 characters. This field is optional. |
| Secure connection | Select one of the following options.SSL: Use SSL to secure the connection.TLS: Use TSL to secure the connection.None: Do not use a secure connection.TipQNAP recommends enabling a secure connection if the SMTP server supports it. |
| Authentication Select one of the following SMTP authentication options.NoneLOGINPLAINCRAM-MD5 | |
4. Click Apply.
SMS Alerts
Configuring the SMSC server settings allows QES to send SMS messages to specified phone numbers from the NAS. You can use the default SMS service or specify a custom service provider.
Configuring SMS Alerts from Clickatell Communicator/Central
Important
Clickatell Communicator/Central is for Clickatell accounts created before November 2016.
- Go to Control Panel > System > Notification > SMS > SMSC Server.
-
Under SMS Service Provider, select Clickatell -Communicator/Central.
-
Specify the following information.
| Field User Action | |
| SMS server login name Specify your Clickatell username. The username must contain a maximum of 32 characters. | |
| SMS server login password | Specify your Clickatell password. The password must contain a maximum of 32 characters. |
| API ID Specify your Clickatell API ID. | |
- Click Apply.
Configuring SMS Alerts from Clickatell SMS Platform
Important
Clickatell SMS Platform is for Clickatell accounts created from November 2016 onwards.
- Go to Control Panel > System > Notification > SMS > SMSC Server.
- Specify the following information.
| Field User Action | |
| Alias Specify your Clickatell alias. | |
| API Key Specify your Clickatell API key. |
- Click Apply.
Configuring SMS Alerts from a Custom Service Provider
- Go to Control Panel > System > Notification > SMS > SMSC Server.
- Under SMS Service Provider, select Add SMS service provider.
- Specify the following information.
| Field Description | |
| SMS service provider | Specify the name of the service provider. The name must contain a maximum of 32 characters. |
| URL template text | Specify the URL template text according to the format of your SMS service provider.Use the following replaceable URL template parameters:@@UserName@@: Specify the username for this connection.@@Password@@: Specify the password for this connection.@@PhoneNumber@@: Specify the phone number where the SMS messages are sent. This parameter is required.@@Text@@: Specify the text content of the SMS message. This parameter is required.ImportantYou will not be able to receive SMS messages if the template text does not match the format used by your SMS service provider. |
| ImportantYou will not be able to receive SMS messages if the template text does not match the format used by your SMS service provider. | |
4. Click Apply.
Configuring Notification Settings
- Go to Control Panel > System > Notification > Alert Notification.
- Configure the alert notification settings.
| Alert NotificationDescription | |
| System error alert | QES sends an alert notification through email or SMS when a system error occurs. System errors include failures in updating applications or enabling NAS features. |
| System warning alert | QES sends an alert notification through email when the following occur.NAS resources, such as storage space and memory, are critically low.The hardware behaves abnormally. |
- Configure the email notification settings.
a. Verify that an SMTP server is configured.
For details, see Email Alerts.
b. Specify one to two email addresses that will receive notifications.
c. Click Send a test E-mail.
- Configure the SMS notification settings.
a. Verify that an SMSC server is configured.
For details, see SMS Alerts.
b. Select a country code.
c. Specify one to two mobile phone numbers that will receive notifications.
d. Click Send a test SMS message.
- Click Apply.
Firmware Update
Checking for Live Updates
QNAP recommends backing up all data before updating the firmware.
Important
You cannot perform a QES firmware update if the High Availability status is Takeover. This prevents firmware inconsistencies between storage controllers.
- Go to Control Panel > System > Firmware Update > Live Update.
- Perform one of the following actions:
| Action Description | |
| Click Check for Live Update. | QES immediately checks for firmware updates. |
| Select Automatically check if a newer version is available when logging into the NAS web administration interface. | QES periodically checks for firmware updates. When an update is available, QES notifies you after you log in as an administrator. |
- Click Apply.
Updating the Firmware Manually
QNAP recommends backing up all data before updating the firmware.
Important
You cannot perform a QES firmware update if the High Availability status is Takeover. This prevents firmware inconsistencies between storage controllers.
- Download the NAS firmware.
a. Go to http://www.qnap.com/download.
b. Read the release notes and confirm that your NAS mode supports the new firmware.
c. Download the firmware package.
d. Extract the firmware image file.
- Go to Control Panel > System > Firmware Update > Firmware Update.
- Click Browse and then select the extracted firmware image file.
- Click Update System.
- Select a restart option.
| Option Description | |
| Automatically apply new firmware and restart the system after update | The NAS automatically installs the new firmware and restarts the system once the update is complete. |
| Restart the system without interrupting services | This option is only available on dual-controller ES NAS models. The NAS passes control from the primary controller to the secondary controller, and then restarts. After restarting, the NAS passes control back to the primary controller. This process takes more time but ensures that all services stay running. |
- Click OK.
The firmware update may require a few minutes or longer to complete, depending on system load and storage pool utilization.
Updating the Firmware Using Qfinder Pro
QNAP recommends backing up all data before updating the firmware.
Important
You cannot perform a QES firmware update if the High Availability status is Takeover. This prevents firmware inconsistencies between storage controllers.
- Download the NAS firmware.
a. Go to http://www.qnap.com/download.
b. Read the release notes and confirm the following:
- The NAS model and firmware version match.
- Updating the firmware is necessary.
c. Ensure that the product model and firmware version are correct.
d. Download the firmware package.
e. Extract the firmware image file.
-
In Qfinder Pro, select a NAS model.
-
Go to Tools > Update Firmware.
Tip
You can also right-click the NAS model in the list, and then click Update Firmware.
The Firmware Update window appears.
- Log on to the NAS as an administrator.
- Click Browse, and then select a firmware image file.
- Perform one of the following actions:
| Action Steps | |
| Update a single NAS device Select a NAS model from the list. | |
| Update multiple NAS devices with the same model number | a. Select a NAS model from the list.b. Select Update all the devices with the same model number within the network. |
- Click Start.
Backup/Restore
Backing Up the System Settings
- Go to Control Panel > System > Backup/Restore > Backup/Restore Settings.
- Click Backup.
QES exports the system settings as a BIN file.
Restoring the System Settings
Warning
If the backup files contain users or groups that already exist on the NAS, QES overwrites the duplicate information on the NAS.
- Go to Control Panel > Sytem > Backup/Restore > Backup/Restore Settings.
- Select a system settings BIN file.
- Click Restore.
System Reset and Restore to Factory Default
QES provides different options for resetting or restoring the NAS to its default state.
| System Reset | Description User Action | |
| Basic system reset | This resets the following settings to the default values without deleting user data.• System administrator password:• Before QES 2.1.1 build 20200424: admin• QES 2.1.1 build 2020424: The NAS serial number in lowercase• QES 2.1.1 build 20200515 or later: The NAS serial number in uppercase• TCP/IP configuration:• Obtain IP address settings automatically via DHCP• Disable jumbo frames• System port: 8080 (system service port)• Security level: Low (Allow all connections)• LCD panel password: (blank)• VLAN: Disabled• Service binding: All NAS services can run on all available network interfaces. | Use one of the following methods:• Basic system reset using QESa. Go to Control Panel > System > Hardware > Backup/Restore > Restore to Factory Default.b. Click Reset Settings.• Basic system reset using the reset buttona. Power on the NAS.b. Press and hold the reset button for 3 seconds. |
| Advanced system reset | This performs a basic system reset and deletes all user and user group settings. It does not delete user data. | Use one of the following methods:• Advanced system reset using QESa. Go to Control Panel > System > Hardware > Backup/Restore > Restore to Factory Default.b. Click Reset System Pool.• Advanced system reset using the reset buttona. Power on the NAS.b. Press and hold the reset button for 10 seconds. |
Important
Back up all data before reinitializing the NAS.
| Reinitialize Description User Action | ||
| Reinitialize NAS | This deletes the operating system and all stored data. | 1. Go to Control Panel > System > Backup/Restore > Restore to Factory Default.2. Click Reinitialize NAS. |
| Reinitialize QTS | This deletes all system settings and stored data, and then installs QTS. Only TES and TDS NAS models support this feature. | 1. Go to Control Panel > System > Backup/Restore > Restore to Factory Default.2. Click Reinitialize QTS.A confirmation message appears.3. Click OK. |
| Reinitialize QES | This deletes all system settings and stored data, and then installs QES. Only TES and TDS NAS models support this feature. | 1. Go to Control Panel > System > Backup/Restore > Restore to Factory Default.2. Click Reinitialize QES.A confirmation message appears.3. Click OK. |
External Device
Uninterruptible Power Supply (UPS)
The NAS connects to uninterruptible power supply (UPS) devices that can protect your NAS from abnormal system shutdowns resulting from power disruptions.
Configuring an SNMP UPS
- Ensure that the NAS is connected to the same network as the UPS.
- Go to Control Panel > System > External Device > UPS.
- Select Enable UPS Support.
- Specify the IP address of the network UPS server.
- Select a power failure option for the NAS.
| Option Description | |
| Turn off the server after the AC power fails | The NAS shuts down after a specified time and then remains powered off. |
| Enter auto-protection mode after the AC power fails | The NAS stops all running services after a specified time and then resumes the stopped services after power is restored. |
- Specify the number of minutes the NAS should wait before performing the action that you selected.
Important
If the remaining UPS power during an outage is less than 15%, the NAS performs the selected action after 30 seconds regardless of the specified waiting time.
- Click Apply All.
NAS Behavior During a Power Outage
The following table describes the possible scenarios during a power outage and the corresponding NAS behavior.
| Phase Scenario NAS Behavior | ||
| Phase 1: From the start of the power outage until the end of the specified waiting time | The power outage starts. | The NAS detects the remaining UPS power. |
| Phase Scenario NAS Behavior | ||
| Phase 1: From the start of the power outage until the end of the specified waiting time | The UPS power is more than 15%. | Depending on your UPS settings, the NAS powers off or switches to auto-protection mode after the specified waiting time lapses. |
| The UPS power is less than 15%. | After 30 seconds, the NAS automatically powers off or switches to auto-protection mode regardless of the specified waiting time. | |
| The power resumes. The NAS remains operational. | ||
| Phase 2: From the end of your specified waiting time to when the UPS runs out of power | The power does not resume and the NAS is in auto-protection mode. | The NAS stops all running services. All shared folders and iSCSI LUNs become inaccessible. |
| The power does not resume and the NAS is powered off. | The NAS remains powered off. | |
| The power resumes and the NAS is in auto-protection mode. | The NAS reboots and resumes its previous state. | |
| The power resumes and the NAS is powered off. | The NAS remains powered off. | |
| Phase 3: From when the UPS device runs out power to when the power is restored | The power does not resume and the NAS is in auto-protection mode. | The NAS powers off. |
| The power does not resume and the NAS is powered off. | The NAS remains powered off. | |
| Phase 3: From when the UPS device runs out power to when the power is restored | The power resumes. The NAS applies the specified power recovery settings.For details, see Configuring the Power Recovery Settings. | |
System Status
You can check the status of your NAS on the System Status screen (Control Panel > System > System Status).
| Section Description | |
| Controller Information | This section displays the information (such as CPU and memory usage, storage pool usage, shared folders and LUNs) for each controller. |
| System Information | This section displays the system information (such as the server name, memory, firmware and system up time) for each controller. |
| Network Status This section displays the current network settings and statistics for each network interface. | |
| System Service This section displays the current status of system services, such as Microsoft networking, NFS, FTP, and File Station. | |
| Hardware Information | This section displays the basic NAS hardware information, such as CPU usage, memory, cache, and system fan speed. |
| Resource Monitor This section displays the CPU usage, disk usage, and bandwidth transfer statistics of the NAS. | |
System Logs
You can view logs on the system logs screen at Control Panel > System > System Logs.
| System Event Logs | System Connection Logs | Online Users | Syslog Client Management | |||||
| All events ▼ Clear All Save | Command Search | |||||||
| Type | Date | Time | Users | Source IP | Controller Name | Event ID | Content | |
| 1 | 2020/05/16 | 16:00:04 | System | 127.0.0.1 | SCB | 0x040500fb | [Snapshot Schedule] Scheduled Snapshot auto-20200516-160003 created for CYSnapsyncDST | |
| 2 | 2020/05/16 | 16:00:03 | System | 127.0.0.1 | SCB | 0x040500fb | [Snapshot Schedule] Scheduled Snapshot auto-20200516-160003 created for CYSnapsyncDST2 | |
| 3 | 2020/05/16 | 16:00:02 | System | 127.0.0.1 | SCB | 0x0405017b | [Snapshot] Deleted snapshot "auto-20200509-150003". The snapshot expired and was automatically deleted by the system. | |
| 4 | 2020/05/16 | 16:00:02 | System | 127.0.0.1 | SCB | 0x0405017b | [Snapshot] Deleted snapshot "auto-20200509-150003". The snapshot expired and was automatically deleted by the system. | |
| 5 | 2020/05/16 | 15:00:03 | System | 127.0.0.1 | SCB | 0x040500fb | [Snapshot Schedule] Scheduled Snapshot auto-20200516-150002 created for OVSnapsyncDST | |
| 6 | 2020/05/16 | 15:00:02 | System | 127.0.0.1 | SCB | 0x0405017b | [Snapshot] Deleted snapshot "auto-20200509-140005". The snapshot expired and was automatically deleted by the system. | |
System Event Logs
QES stores a maximum of 10,000 event logs, including warnings, errors, and information messages. You can perform the following actions:
- Delete a single entry: Right-click on the log message.
- Delete all logs: Click Clear All.
System Connection Logs
QES can log the following events:
| Protocol Events | |
| FTP, HTTP, HTTPS, iSCSI, and SMB | • Logging on and off• Accessing, creating, deleting, moving, and renaming files and folders |
| SSH Logging on and off |
You can perform the following actions:
| Action Steps | |
| Record connection logs Click Start Logging. | NoteLogging connections may affect file transfer speeds. |
| Select protocols to log 1. Click Options. | 2. Select one or more protocols. |
| Archive connection logs when the number of logs reaches 10,000. | 1. Click Options.2. Select When the number of log entries reaches 10,000, archive the connection logs.3. Select a folder for storing log files. |
Online Users
This screen shows the users that are currently connected to the NAS, ordered by network service. You can right-click on a log to disconnect the IP connection and block the IP.
Syslog Client Management
Syslog is a standard for forwarding log messages on an IP network. You must enable this service to store event and connection logs on a remote syslog server.
You can also export logs to a CSV file. The following tables contain the supported connection types and actions with their respective codes.
Connection Type Codes
| Code Connection Type | |
| 0 UNKNOWN | |
| 1 SAMBA | |
| 2 FTP | |
| 3 HTTP | |
| 4 NFS | |
| 5 AFP | |
| 6 TELNET | |
| 7 SSH | |
| 8 ISCSI | |
Action Codes
| Code Action | |
| 0 UNKNOWN | |
| 1 DEL | |
| 2 READ | |
| 3 WRITE | |
| 4 OPEN | |
| 5 MKDIR | |
| 6 NFSMOUNT_SUCC | |
| 7 NFSMOUNT_FAIL | |
| 8 RENAME | |
| 9 LOGIN_FAIL | |
| 10 LOGIN_SUCC | |
| 11 LOGOUT | |
| 12 NFSUMOUNT | |
| 13 COPY | |
| 14 MOVE | |
| 15 ADD |
5. Privilege
Go to Control Panel > Privilege to configure the privilege settings, disk quotas, and domain security on the NAS.
Users
Default User Accounts
| User Account Description | |
| admin This account can configure settings, create users, and install applications. You cannot delete this account. | |
| guest Users without dedicated accounts can use this account to view and modify files. You cannot delete this account. | |
| NoteFor security reasons, the guest account is disabled by default. | |
User Creation
Creating a Local User
- Go to Control Panel > Privilege > Users.
- Click Create > Create a User.
The Create a User window appears.
- Specify the following information:
| Field Actions | |
| Profile photo | Upload a profile photo for the user. |
| User Description (optional) | Specify a user description that contains a maximum of 50 characters. |
| Username Specify a username between 1 and 32 characters that contains any of the following:Letters: A to ZNumbers: 0 to 9Multi-byte characters: Chinese, Japanese, Korean, and RussianSpecial characters: . - _ ~ ! @ # $ % ^ & ( ) {}NoteUsernames are not case-sensitive. | |
| Password Specify a password that contains 5 to 64 ASCII characters. | |
| Phone number Specify the user's phone number.The information is for your reference and is not used by QES. | |
| Email (optional) | Specify an email address that will receive notifications from QES. |
| Send a notification mail to the newly created user | When selected, QES sends a message that contains the following information to the specified email address:Username and passwordURLs for connecting to the NAS |
- Optional: Specify the user groups the user belongs to.
For details, see Editing a User's Groups.
- Optional: Specify the user's shared folder permissions.
For details, see Editing a User's Shared Folder Permissions.
- Optional: Specify the user's application privileges.
For details, see Editing Application Privileges.
- Optional: Specify a custom UID.
Typically, QES assigns UIDs automatically. However, sometimes you might need to set the UID manually, such as when some NFS clients require that local and NAS users with the same name also use the same UID.
a. Under Advanced Options, click Edit.
b. Specify a UID for the user.
• The UID must be between 2,001 and 65,000.
- QES warns you if the specified UID is already in use.
8. Click Create.
QES creates the local user account and adds it to the displayed list of users.
Creating Multiple Users
- Go to Control Panel > Privilege > Users.
- Click Create > Create Multiple Users.
The Multiple Users Creation Wizard appears.
- Click Next.
- Specify the following information:
| Field Description | |
| User Name Prefix | Specify a user name that will be used as a prefix for all users.Example: test |
| User Name Start Number | Specify a start number.Example: 1NoteQES removes leading zeros in starting numbers. For example,001 becomes 1. |
| Number of Users Specify the number of users.Example: 5 | |
Note
The username format is [username prefix][user number]. The specified start number and number of users determine the user number.
Using the examples, the users created will have the following usernames: test1, test2, test3, test4, and test5.
- Specify a password for all users that will be created in this batch.
- Click Next.
QES creates the user accounts and adds them to the displayed user list.
- Click Finish.
The Multiple Users Creation Wizard closes.
User Account Lists
The NAS supports importing user accounts from TXT, CSV, and BIN files. The files contain user account information including usernames, passwords, user groups, and quota settings.
| File Format Description |
| TXT Create user account lists using a text editor. For details, see Creating a TXT User Account List. |
| CSV Create user account lists using Microsoft Excel. For details, see Creating a CSV User Account List. |
| BIN QNAP NAS devices can export user account information, including quota settings, to BIN files. For details, see Exporting Users and Quota. |
Creating a TXT User Account List
- Create a new file in a text editor.
- Specify user information in the following format:
Username,Password,Quota (MB),Group Name
Important
- Separate values using commas.
- Specify information for only one user in each line. Example:
John,s8fk4b,30,Sales
Jane,9fjwbx,40,Marketing
Mary,f9xn3ns,10,RD
- Save the file.
Important
If the list contains multi-byte characters, save the file with UTF-8 encoding.
Creating a CSV User Account List
- Create a new workbook in Microsoft Excel.
- Specify user information in the following format:
• column A: Username
• column B: Password
• column C: Quota (MB)
• column D: Group name
Important
Specify information for only one user in each row.
Example:
| A | B | C | D | |
| 1 | John | s8fk4b | 30 | Sales |
| 2 | Jane | 9fjwbx | 40 | Marketing |
| 3 | Mary | f9xn3ns | 10 | RD |
- Save the workbook as a CSV file.
Important
If the list contains multi-byte characters, open the file using a text editor and then save with UTF-8 encoding.
Importing Users
- Go to Control Panel > Privilege > Users.
- Click Create > Import/Export Users.
The Import/Export Users window appears.
- Select Import user and user group settings.
- Click Browse, and then select the file that contains the user account list.
Important
Ensure that you are importing a valid QES user account list file to avoid parsing errors.
For details, see User Account Lists.
- Click Next.
QES imports the user account list.
- Click Finish.
QES displays the imported user account information.
Exporting Users
- Go to Control Panel > Privilege > Users.
- Click Create > Import/Export Users.
The Import/Export Users window appears.
- Select Export user and user group settings.
4. Click Next.
QES exports the user account list to a BIN file on your computer.
Tip
You can use this file to import users to another NAS running QES.
User Management
Changing User Passwords
- Go to Control Panel > Privilege > Users.
- Identify a user.
- Under Action, click
The Change Password window appears.
- Specify a password that contains 5 to 64 ASCII characters.
- Specify the password again.
- Click Apply.
QES saves the new password.
Editing a User Account
- Go to Control Panel > Privilege > Users.
-
Identify a user.
-
Under Action, click
The Edit Account Profile window appears.
- Modify any of the following information.
| Field Actions | |
| Email (optional) | Specify the user's email address. |
| Phone number | Specify the user's phone number.The information is for your reference and is not used by QES. |
| Description (optional) | Specify a user description that contains a maximum of 50 characters. |
| Custom UID Specify a custom UID. Typically, QES assigns UIDs automatically. However, sometimes you might need to set the UID manually, such as when some NFS clients require that local and NAS users with the same name also use the same UID.NoteThe UID must be between 2,001 and 65,000.QES warns you if the specified UID is already in use. | |
| Disable this account | Select this option to disable the user account.You can either select to disable the accountNowor specify anExpiry Date. |
| QuotaSpecify a quota limit for the user. | |
| NoteThis option is only available when user quotas are enabled. For more details, seeConfiguring Quota Settings. | |
- Click OK.
QES saves the changes.
Editing a User's Groups
-
Go to Control Panel > Privilege > Users.
-
Identify a user.
-
Under Action, click

The Edit User's Groups window appears.
- Select or deselect user groups.
For details, see User Groups.
- Click Apply.
QES saves the changes.
Editing Application Privileges
-
Go to Control Panel > Privilege > Users
-
Identify a user.
-
Under Action, click

The Edit Application Privileges window appears.
- Select the applications that the user is allowed to access.
- Click Apply.
QES saves the changes.
Deleting Users
- Go to Control Panel > Privilege > Users
- Select the user accounts that you want to delete.
- Click Delete.
A warning message appears.
- Click OK.
QES deletes the selected user accounts.
Home Folders
Enabling home folders creates a personal folder for each local and domain user on the NAS. Users can access their home folder through Microsoft networking, FTP, and File Station.
All the home folders are located in the homes shared folder. By default, only the administrator can access this folder.
Enabling Home Folders
- Go to Control Panel > Privilege > Users.
- Click Home Folder.
The Home Folder window appears.
- Select Enable home folder for all users.
- Select a storage pool where the home folder will be created.
- Click Apply.
User Groups
A user group is a collection of users with the same access rights to files or folders. Administrators can create user groups to manage folder permissions for multiple users.
Default User Groups
| User Group Description | |
| administrators | Users in this group can configure settings, create users, and install applications. You cannot delete this group. |
| users Users in this group can only view and modify files. This group contains all local user accounts and can be used to grant shared folder permissions to all local user accounts. You cannot delete this group. | |
Creating a User Group
- Go to Control Panel > Privilege > User Groups.
- Click Create.
The Create a User Group window appears.
- Specify the following information:
| Field Actions | |
| User group name | Specify a user group name between 1 and 32 characters that contains any of the following:Letters: A to Z, a to zNumbers: 0 to 9Multi-byte characters: Chinese, Japanese, Korean, and RussianDashes (-) |
| Description Specify a description that contains a maximum of 128 ASCII characters. | |
- Optional: Add users to the user group.
a. Under Assign users to this group, click Edit.
b. Select one or more users.
- Specify shared folder permissions for the user group.
a. Under Edit shared folder permissions, click Edit.
b. Select the permissions for each shared folder.
For details, see Conflicts in Shared Folder Permissions.
- Optional: Specify a custom GID.
Typically, QES assigns GIDs automatically. However, sometimes you might need to set the GID manually, such as when some NFS clients require that local and NAS groups with the same name also use the same GID.
a. Under Advanced Options, click Edit.
b. Specify a GID for the group.
• The GID must be between 2,001 and 65,000.
- QES warns you if the specified GID is already in use.
- Click Create.
QES creates the user group and then adds it to the User Groups screen.
Editing a User Group's Description
- Go to Control Panel > Privilege > User Groups
-
Identify a user group.
-
Under Action, click
The View Group Details window appears.
- Modify the description.
- Click OK.
QES saves the changes.
Editing User Groups
- Go to Control Panel > Privilege > User Groups
-
Identify a user group.
-
Under Action, click
The Edit User Group window appears.
- Select the users you want to include or remove from the group.
- Click Apply.
QES saves the changes.
Deleting User Groups
- Go to Control Panel > Privilege > User Groups
- Select the user groups that you want to delete.
- Click Delete.
A warning message appears.
- Click OK.
QES deletes the selected user groups.
Shared Folder Permissions
Conflicts in Shared Folder Permissions
When a user is assigned different permissions for a shared folder, QES uses the following hierarchy to resolve conflicts.
- No Access (Deny)
- Read/Write (RW)
- Read Only (RO)
| User Permission User Group Permission Actual Permission | |
| No Access No Access No Access | |
| Read Only No Access | |
| Read/Write No Access | |
| Not SpecifiedNo Access | |
| No Access Read Only No Access | |
| Read Only Read Only | |
| Read/Write Read/Write | |
| Not SpecifiedRead Only | |
| No Access Read/Write No Access | |
| Read Only Read/Write | |
| Read/Write Read/Write | |
| Not SpecifiedRead/Write | |
| No Access Not SpecifiedNo Access | |
| Read Only Read Only | |
| Read/Write Read/Write | |
| Not SpecifiedNo Access |
Editing a User's Shared Folder Permissions
- Go to Control Panel > Privilege > Users
-
Identify a user.
-
Under Action, click

The Edit Shared Folder Permissions window appears.
- Select the permissions the user will have for each shared folder.
| Option Description |
| Read Only (RO) The user group can read but not write files in the shared folder. |
| Read/Write (RW) The user group can read and write files in the shared folder. |
| Deny The user group cannot read or write files in the shared folder. |
For details, see Conflicts in Shared Folder Permissions.
- Click Apply.
QES saves the changes.
Editing a User Group's Shared Folder Permissions
- Go to Control Panel > Privilege > User Groups
-
Identify a user group.
-
Under Action, click

The Edit Shared Folder Permissions window appears.
- Select the permissions the user group will have for each shared folder.
| Option Description |
| Read Only (RO) The user group can read but not write files in the shared folder. |
| Read/Write (RW) The user group can read and write files in the shared folder. |
| Deny The user group cannot read or write files in the shared folder. |
For details, see Conflicts in Shared Folder Permissions.
- Click Apply.
QES saves the changes.
Quota
To efficiently allocate storage space, you can specify a quota value (in megabytes or gigabytes) that applies to all users. When the feature is enabled, QES prevents users from uploading data to the NAS once the quota is reached. By default, no quotas are set for the users.
Configuring Quota Settings
- Go to Control Panel > Privilege > Quota.
- Select Enable a quota for all users.
- Specify the Quota size on the disk.
- Click Apply.
Tip
You can specify a quota size for each user. For details, see Editing a User Account.
Exporting Quota Settings
You can export quota settings to a CSV file after you have configured them. For details, see Configuring Quota Settings.
You can use the exported settings to review the quota allocated for each user or as a reference when configuring user accounts on other devices.
- Go to Control Panel > Privilege > Quota.
- Click Generate.
- Click Download.
Domain Security
The NAS supports user authentication by local access right management, Microsoft Active Directory (AD), and Lightweight Directory Access Protocol (LDAP) directory.
By joining the NAS to an Active Directory domain or an LDAP directory, AD or LDAP users can access the NAS using their own accounts without extra user account configuration on the NAS.
Note
QES supports AD running on Windows Server 2003, 2008, 2008 R2, 2012, 2012 R2, and 2016.
The following options are available on the Domain Security screen.
| Option Description | |
| No domain security Only the local users can access the NAS. | |
| Active Directory Authentication | Local and AD users can access the NAS using Samba, FTP, and File Station. |
| LDAP Authentication Local and LDAP users can access the NAS using Samba, FTP, and File Station. | |
Active Directory (AD) Authentication
Active Directory (AD) is a hierarchical data center that centrally holds information for users, user groups, and computers for secure access management. Windows environments use AD to store, share, and manage a network's information and resources.
When you join a NAS to an AD domain, the NAS automatically imports all of the AD server's user accounts. AD users will be able to use the same login details to access the NAS.
When joining a domain controller using a dual-controller ES NAS, you must connect both management ports of each controller to the network switch.
Configuring Active Directory (AD) Authentication Using the Quick Configuration Wizard
-
Go to Control Panel > Privilege > Domain Security.
-
Select Active Directory authentication (Domain member).
-
Click Quick Configuration Wizard. The Active Directory Wizard appears.
-
Read the introduction, and then click Next.
-
Specify the fully qualified domain name (FQDN) of the AD DNS server, and then type ENTER. QES automatically generates the NetBIOS domain name.
-
Specify the IP address of the AD DNS server.
-
Click Next.
-
Select a domain controller.
-
Specify the domain administrator username and password.
-
Click Join.
The NAS joins the domain.
- Click Finish.
The Active Directory Wizard closes.
Configuring Active Directory (AD) Authentication Manually
1. Verify the following:
- The time settings of the NAS and the AD server are identical. The maximum time disparity tolerated is 5 minutes. For details, see Configuring the Time Settings.
- The AD server is configured as the primary DNS server. If you use an external DNS server, you will not be able to join the domain. For details, see Network.
-
You have specified the IP address of the WINS server that you use for name resolution. For details, see Configuring Microsoft Networking Settings.
-
Log in to the NAS as an administrator.
- Go to Control Panel > Privilege > Domain Security.
- Select Active Directory authentication (Domain member).
- Click Manual Configuration.
The Active Directory box appears.
- Specify the following AD information:
| Field Description | |
| Domain NetBIOS Name Example: qnap | |
| AD Server Name Example: dc1 | |
| Domain Example: qnap.com | |
| Domain Administrator User Name | The specified user must have administrator access rights to the AD domain.Example: admin |
| Domain Administrator Password | Example: password123 |
| Organizational Unit (Optional) | You can specify the organizational unit the NAS belongs to.Example: computers |
| Server Description (Optional) | The NAS Samba service replicates this in the server'sCommentfield. You will see this description when connecting to a NAS Samba share using the command line interface.Example: QNAP ES1652DC NAS |
- Click Join.
Active Directory (AD) Server and Domain Names
After joining the NAS to the AD domain, you can use the following username formats to log into the NAS and access shared folders:
- Local users: NASname\NASusername
• Active Directory users: Domain\DomainUsername
The location of your Active Directory server and domain names varies depending on your Windows Server version.
| Windows Server Version | Location |
| 2003 Go toSystem Propertiesin Windows.Example: If the computer name is "node1.qnap-test.com", the AD server name is "node1", and the domain name is "qnap-test.com". | |
| 2008 Go toControl Panel > Systemin Windows.The AD server name will appear as the computer name, and the domain name can be found in the domain field. | |
| 2012, 2016 |  Right-click :n clickSystem.The AD server name will appear as the computer name, and the domain name can be found in the domain field. Right-click :n clickSystem.The AD server name will appear as the computer name, and the domain name can be found in the domain field. |
Trusted Domains
A trusted domain is a domain that Active Directory (AD) trusts to authenticate users. If you join the NAS to an AD domain, all users from trusted domains can log on and access shared folders.
Trusted domains are configured in AD. You can only enable trusted domains on the NAS. By default, this feature is disabled in QES.
Enabling Trusted Domain Authentication
- Log on to the NAS as an administrator.
- Go to Control Panel > Network & File Services > Win/NFS > Microsoft Networking.
- Click Advanced Options.
The Advanced Options window appears.
- Select Enable trusted domains.
5. Click Apply.
The Advanced Options window closes.
6. Click Apply.
LDAP Authentication
An LDAP (Lightweight Directory Access Protocol) server stores user and user group information. Administrators can use LDAP to manage users in the LDAP server and to connect to multiple NAS devices with the same logon details. This feature requires a running LDAP server and knowledge of FreeBSD servers, LDAP servers, and Samba.
Configuring LDAP Authentication
- Log on to the NAS as an administrator.
-
Go to Control Panel > Privilege > Domain Security.
-
Select LDAP authentication.
-
Specify the following information:
| Field Description | |
| LDAP Server Host | Host name or IP address of the LDAP server |
| LDAP Security | Method the NAS uses to communicate with the LDAP server·ldap://= Use a standard LDAP connection. The default port is 389.·ldap:// (ldap + SSL) = Use an encrypted connection with SSL. The default port is 686. Older versions of LDAP servers normally use this port.·ldap:// (ldap + TLS) = Use an encrypted connection with TLS. The default port is 389. Newer versions of LDAP servers normally use this port. |
| Base DN LDAP domainExample: dc=mydomain, dc=local | |
| Root DN LDAP root userExample: cn=admin, dc=mydomain, dc=local | |
| Password Root user password | |
| Users Base DN | Organizational unit (OU) where users are storedExample: ou=people, dc=mydomain, dc=local |
| Groups Base DN | OU where groups are storedExample: ou=group, dc=mydomain, dc=local |
5. Click Apply.
The LDAP authentication options window appears.
6. Select which users are allowed to access the NAS.
For details, see LDAP Authentication Options.
7. Click Finish.
LDAP Authentication Options
The LDAP authentication options vary depending on when Microsoft Networking is enabled.
To enable Microsoft Networking, see Configuring Microsoft Networking Settings.
| Condition Options | |
| Microsoft Networking is enabled while LDAP settings are applied. | Local users only: Only local users can access the NAS using Microsoft Networking.LDAP users only: Only LDAP users can access the NAS using Microsoft Networking. |
| Microsoft Networking is enabled after the NAS is connected to the LDAP server. | Standalone Server: Only local users can access the NAS using Microsoft Networking.LDAP Domain Authentication: Only LDAP users can access the NAS using Microsoft Networking. |
LDAP Authentication via Server Message Block (SMB)
Authenticating LDAP users requires third-party software and a Samba schema.
Third-party Software
Software applications such as the following allow management of LDAP users and Samba passwords.
| Application Description | |
| LDAP Account Manager (LAM) | Web-based front end interface available at http://www.ldap-account-manager.org/ |
| smbldap-tools Command line tool |
| Application Description |
| webmin/ldap-useradmin Web-based LDAP user administration module |
Samba Schema
Importing the Samba schema to the LDAP server requires a samba.schema file. You can find this file in the directory examples/LDAP in the Samba source distribution. For details, refer to the documentation or FAQ of the LDAP server.
Below is a Samba schema example for openldap in the FreeBSD server where the LDAP server is running. The schema varies depending on the FreeBSD distribution.
zcat /usr/share/doc/samba-doc/examples/LDAP/samba.schema.gz > /etc/ldap/schema/samba.schema
When editing openldap server configuration files like /etc/ldap/slapd.conf, the following lines should be present:
include /etc/ldap/schema/samba.schemainclude
/etc/ldap/schema/cosine.schemainclude
/etc/ldap/schema/inetorgperson.schema
include /etc/ldap/schema/nis.schema
Configuration Examples
The following are some domain name examples you can use as guides when configuring LDAP authentication.
- FreeBSD OpenLDAP Server
| Field Example | |
| Base DN dc=qnap, dc=com | |
| Root DN cn=admin, dc=qnap, dc=com | |
| Users Base DN ou=people, dc=qnap, dc=com | |
| Groups Base DN ou=group, dc=qnap, dc=com |
• Mac Open Directory Server
| Field Example | |
| Base DN dc=macserver, dc=qnap, dc=com | |
| Root DN uid=root, cn=users, dc=macserver, dc=qnap, dc=com | |
| Users Base DN cn=users, dc=macserver, dc=qnap, dc=com | |
| Groups Base DN cn=groups, dc=macserver, dc=qnap, dc=com |
Active Directory (AD) and LDAP Management
The administrator can perform the following tasks when the NAS joins an AD domain or connects to an LDAP server.
| Task Steps | |
| View and modify users | 1. Go to Privilege > Users2. Select Domain Users .QES displays the list of domain users.To modify a user's privileges, seeUser Management. |
| View and modify user groups | 1. Go to Privilege > User Groups2. Select Domain Groups .QES displays a list of domain user groups.To modify a user group, seeUser Groups. |
Tip
Click to display newly created users or user groups in the AD or LDAP server. User permission settings are automatically synchronized with the domain controller.
UIDs and GIDs
Each NAS user has a unique identifier, called a UID, which QES assigns when it creates the user. When a user is deleted:
- QES adds the deleted user's UID to a list of deleted UIDs. QES does not assign these deleted UIDs to new users.
- The file and folder permissions associated with the deleted user's UID are left on the NAS, as removing them would be too resource intensive
If the number of usable UIDs becomes low, you can reclaim these deleted UIDs. Reclaiming UIDs does the following:
-
QES cycles through each file and folder on the NAS, and removes all permissions associated with UIDs from the deleted UID list. This process is resource intensive, and may reduce system performance while it is running.
-
QES removes all UIDs from the deleted UID list, and adds them back onto the pool of usable UIDs.
Note
All the above information also applies to NAS groups and GIDs.
Reclaiming UIDs
Warning
The reclaim process might take a long time. System performance will be reduced while the reclaim process is running. You should run this process during off-peak hours.
- Go to Control Panel > Privilege > Users.
- Click Reclaim UIDs.
- Confirm OK.
Reclaiming GIDs
Warning
The reclaim process might take a long time. System performance will be reduced while the reclaim process is running. You should run this process during off-peak hours.
- Go to Control Panel > Privilege > User Groups.
- Click Reclaim GIDs.
- Confirm OK.
6. Network and File Services Settings
Win/NFS
Microsoft Networking
Configuring Microsoft Networking Settings
- Go to Control Panel > Network & File Services > Win/NFS > Microsoft Networking.
- Select Enable file service for Microsoft Networking.
- Specify the following:
| Setting User Action | |
| Server description(Optional) | Specify a description that contains a maximum of 256 characters. The description must enable users to easily identify the NAS on a Microsoft network. |
| Workgroup Specify a name between 1 and 32 characters that contains any of the following:Letters: A to Z, a to zNumbers: 0 to 9Multi-byte characters: Chinese, Japanese, Korean, and RussianSpecial characters: ~! @ # $ ^ & ( ) - _ { } . ' | |
- Select an authentication method.
| Option Description | |
| Standalone server QES uses the local user account information for authentication. For details, see User Creation. | |
| AD Domain Member QES uses Microsoft Active Directory (AD) for authentication. For details, see Active Directory (AD) Authentication. | |
| LDAP domain authentication | QES uses an LDAP directory for authentication. For details, see LDAP Authentication. |
- Configure the advanced settings.
a. Click Advanced Options.
The Advanced Options window opens.
b. Specify the following information:
| Option User Action | |
| Use the specified WINS server | Select this option to specify a WINS server IP address that the NAS will use for name resolution.Do not select this option if you are unsure about the settings. |
| Local master browser | Select this option to use the NAS as a local master browser. A local master browser is responsible for maintaining the list of devices in a specific workgroup on a Microsoft network.When deselected, another device on the network maintains the device list.ImportantTo use the NAS as local master browser, you must specify the name of the workgroup that your NAS belongs to. The default workgroup in Windows is "workgroup". |
| Allow only NTLMv2 authentication | Select this option to authenticate clients using only NT LAN Manager version 2 (NTLMv2).When this option is deselected, the NAS uses NT LAN Manager (NTLM). |
| Name resolve priority | Select the name service that you want to use for name resolution.The default service isDNS only.If you specified a WINS server,Try WINS then DNSis selected by default. |
| Automatically register in DNS | Select this option to register the NAS on the DNS server. If the NAS IP address changes, the NAS automatically updates the IP address on the DNS server.This option is only available if Active Directory (AD) authentication is enabled. For details, seeActive Directory (AD) Authentication. |
| Enable trusted domains | Select this option to join users from trusted AD domains. For details, seeTrusted Domains.This option is only available if Active Directory (AD) authentication is enabled. For details, seeActive Directory (AD) Authentication. |
| Enable Asynchronous I/O | Select this option to improve the Samba performance using asynchronous I/O.Asynchronous I/O refers to the I/O behavior on the CIFS protocol layer. This is different from the synchronous I/O feature found in the shared folder settings, which only applies to specific shared folders on the file system level.TipTo prevent power interruption, use a UPS when asynchronous I/O is enabled. |
| Force Encryption Transport | Select this option to encrypt all data using Microsoft Networking. When selected, only SMB 3 clients can connect to the NAS. |
| Highest SMB version | Select the highest SMB protocol version supported for Microsoft Networking operations. |
| Lowest SMB version | Select the lowest SMB protocol version supported for Microsoft Networking operations.For example, if you set Highest SMB version to SMB 3 and Lowest SMB version to SMB 2, QES supports SMB 2, SMB 2.1, and SMB 3 for Microsoft Networking. |
| Windows Previous Versions | Windows users can view and recover files from snapshots using the Previous Versions menu in Windows. This setting can be disabled per folder by editing the folder's properties in QES. |
c. Click Apply.
6. Click Apply All.
NFS Service
Enabling the NFS service allows Linux and FreeBSD users to connect to the NAS.
• To configure NFS permissions, see Configuring NFS Host Access Permissions.
- To connect to the NAS from Linux using NFS, see Mounting a Shared Folder on a Linux Computer.
Enabling the NFS Service
-
Go to Control Panel > Network & File Services > Win/NFS > NFS Service.
-
Select Enable NFS Service.
- Click Apply.
FTP
The NAS FTP service helps optimize FTP data transfer. To use the service, you must configure the settings and then connect the NAS to an FTP client such as FileZilla.
Configuring FTP Service Settings
- Go to Control Panel > Network & File Services > FTP > FTP Service.
- Select Enable FTP Service.
- Configure the following settings:
| Setting User Action | |
| Protocol type Select the protocols to use. At least one protocol must be selected.FTP: Standard file transfer protocolFTP with TLS (Explicit): File transfer protocol with channel encryption | |
| TLS version Select which TLS version to use for FTP with TLS. | |
| Port number Specify the port number that the FTP service will use. | |
| Enforce Unicode-only filenames | Select one of the following options.Yes: Your FTP client supports Unicode encoding.No: Your FTP client does not support Unicode encoding.TipTo correctly display the file and folder names, specify a filename encoding language.For details, see Configuring the Codepage Settings. |
| Maximum number of all FTP connections | Specify the maximum number of allowed FTP connections for the NAS.The maximum possible number that you can specify is 1024. |
| Maximum number of connections for a single account | Specify the maximum number of allowed FTP connections for single user accounts.The maximum possible number that you can specify is 1024. |
| Enable FTP transfer limitation | Select this option, and then specify the maximum upload and download rates. |
4. Click Apply All.
Configuring the FTP Service Advanced Settings
- Go to Control Panel > Network & File Services > FTP > Advanced.
- Configure the following settings:
| Setting User Action | |
| Passive FTP port range | Select one of the following options.Use the default port range: Use ports 55536 to 56559.Define port range: Specify a port range larger than 1023.ImportantWhen specifying a custom port range, ensure that your router and firewall ports are open. |
| Respond with external IP address for passive FTP connection requests | Enable this option and then specify an external IP address. Remote devices can use this IP address to connect to the NAS FTP server.ImportantUse this feature when the following conditions are true:The NAS is using a passive FTP connection.The NAS FTP server is behind a router.Remote devices cannot connect to the FTP server over the WAN. |
| Enable Site-to-Site Transfer (FXP) | Enable File eXchange Protocol (FXP). FXP enables an FTP client to transfer data directly from one FTP server to another, without routing the data through the client's connection. |
3. Click Apply All.
SSH
Enabling the Secure Shell (SSH) service on the NAS allows administrators to connect to the NAS using an SSH-encrypted connection or SSH clients such as PuTTY.
Tip
By default, SSH connections use the NAS management interface, which usually supports 1 Gbps. To use a different interface (for example, one that supports 10 Gbps), enable service binding and then configure SSH Service. For details, see Service Binding.
Configuring SSH
- Go to Control Panel > Network & File Services > SSH.
- Select Allow SSH connection.
- Specify a port number from 1 to 65535.
Tip
The default SSH port is 22.
- Click Apply.
SNMP
Enabling the Simple Network Management Protocol (SNMP) service on the NAS allows the immediate reporting of NAS events, such as warnings or errors, to an SNMP management station (SNMP manager).
Configuring the SNMP Settings
- Go to Control Panel > Network & File Services > SNMP.
- Select Enable SNMP Service.
- Specify the following information:
| Setting User Action | |
| Port number | Specify the port that the SNMP manager will use to connect to the NAS. |
| SNMP Trap Level | Select the type of alert messages that the NAS will send to the SNMP manager.Information: QES sends information regarding ongoing or scheduled NAS operations.Warning: QES alerts you when the NAS resources are critically low or the hardware behaves abnormally.Error: QES alerts you when enabling NAS features or updating applications fail. |
| Trap Address | Specify the IP addresses of the SNMP manager. You can specify a maximum of 3 trap addresses. |
- Select the SNMP version that the SNMP manager uses.
| Option User Action | |
| SNMP V1/V2 | Specify an SNMP community name that contains 1 to 64 characters from any of the following groups:Letters: A to Z, a to zNumbers: 0 to 9Special characters: _ -The SNMP community string functions as a password that is used to authenticate messages sent between the SNMP manager and the NAS. Every packet that is transmitted between the SNMP manager and the SNMP agent includes the community string. |
| SNMP V3 | Specify the user name, authentication protocol and password, and privacy protocol and password. For details, see Configuring SNMP V3 Settings. |
- Click Apply.
Configuring SNMP V3 Settings
- Specify a user name.
The user name must contain 1 to 32 characters from any of the following groups:
- Letters: A to Z, a to z
- Numbers: 0 to 9
-
Special characters: _ -
-
Optional: Select Use Authentication.
a. Specify the authentication protocol.
Tip
You can select either HMAC-MD5 or HMAC-SHA. If you are unsure about this setting, QNAP recommends selecting HMAC-SHA.
b. Specify an authentication password.
The password must contain 8 to 64 characters from any of the following groups:
- Letters: A to Z, a to z
- Numbers: 0 to 9
- Special characters: _ -
3. Optional: Select Use Privacy.
a. Specify the privacy protocol.
Tip
You can select either DES or AES. If you are unsure about this setting, QNAP recommends selecting AES.
b. Specify a privacy password.
The password must contain 8 to 64 characters from any of the following groups:
- Letters: A to Z, a to z
- Numbers: 0 to 9
- Special characters: _ -
SNMP Management Information Base (MIB)
The Management Information Base (MIB) is a type of database in ASCII text format that is used to manage the NAS in the SNMP network. The SNMP manager uses the MIB to determine the NAS status or understand the messages that the NAS sends within the network. You can download the MIB and then view the contents using any word processor or text editor.
Important
MIBs describe the structure of the management data of a device subsystem. They use a hierarchical namespace containing object identifiers (OID). Each OID identifies a variable that you can read or set using SNMP. You must assign the correct OID to retrieve the NAS information. The default OID for QNAP ES NAS devices is 1.3.6.1.4.1.24861.2.
Downloading the SNMP MIB
- Go to Control Panel > Network & File Services > SNMP.
- Under SNMP MIB, click Download.
QES downloads the NAS.mib file on your computer.
Service Discovery
Bonjour
Bonjour is a networking technology developed by Apple that enables usage of devices and services on a network. Enabling Bonjour allows Mac computers to automatically discover network services that are running on the NAS without requiring you to specify IP addresses or configure DNS servers.
Configuring the Bonjour Settings
You must enable all relevant services before configuring the Bonjour settings.
- Go to Control Panel > Network & File Services > Service Discovery > Bonjour.
- Select the services that you want Bonjour to broadcast.
- Click Apply.
Network Recycle Bin
The Network Recycle Bin contains files and folders that users have deleted from the NAS through File Station, FTP, and Samba. You can specify file types to exclude from the bin.
Important
Each file or folder in the Network Recycle Bin must have a unique name. If the Network Recycle Bin contains two files or folders with the same name, QES adds a unique number to the end of the newest file or folder's name.
Configuring the Network Recycle Bin
- Go to Control Panel > Network & File Services > Network Recycle Bin.
- Select Enable Network Recycle Bin.
- Optional: Specify a file retention time.
a. Select File retention time (days).
b. Specify a file retention time. QES deletes files from the recycle bin after the specified number of days. This field supports a maximum of 9999 days. The default is 180 days.
c. Specify what time QES should check the recycle bin for expired files every day. This check might affect system performance, and therefore should be set outside of working hours.
-
Optional: Specify the file extensions to exclude.
-
Click Apply.
Deleting All Files in the Network Recycle Bin
- Go to Control Panel > Network & File Services > Network Recycle Bin.
- Click Empty All Network Recycle Bin.
A warning message appears. - Click OK.
QES deletes all files in the Network Recycle Bin.
Permanently Deleting a File or Folder
Warning
After a file or folder is permanently deleted, it can no longer be recovered.
- Open File Station.
- Click Recycle Bin.
- Right-click on a file or folder.
- Select Delete.
A confirmation message appears.
- Click OK.
QES creates a background task which deletes the file or folder from the Network Recycle Bin.
Recovering a Deleted File or Folder
- Open File Station.
- Click Recycle Bin.
- Right-click on a file or folder.
- Select Recover.
The Recover window opens.
- Choose whether to overwrite an existing file or folder.
| Option | Description |
| Yes | QES restores the file or folder to its original location. If a file or folder exists in the same location with the same name, QES overwrites it with the file or folder from the Network Recycle Bin. |
| No | QES restores the file or folder to its original location. If a file or folder exists in the same location with the same name, QES does not restore the file. |
QES restores the file or folder to its original location.
Restricting Access to the Network Recycle Bin
- Go to Control Panel > Storage Manager > Storage Space.
- Click a shared folder.
- Click Actions > Edit Properties.
The Shared Folder Properties window appears.
-
Under Advanced Settings, click Edit.
-
Under Recycle Bin, select Enabled.
- Select Restrict the access to Recycle Bin to administrators only for now.
- Click Apply.
7. High Availability
About High Availability
High availability enables you to manage the storage controllers of your NAS. QNAP ES Series NAS devices are designed with a dual active-active controller architecture. If one controller fails, the other one immediately takes over to eliminate downtime.
Important
Only ES series NAS models support high availability.

Dual Path Overview
ES series NAS models use a redundant cross loop cabling configuration to connect the storage controllers and the SAS expansion units (also known as JBODs). This ensures continuous operation even if one cable is disconnected or damaged. The following image provides an example of dual-path cabling.

System Components
Select a system component in the left panel to see its location within the main NAS chassis and to view additional hardware information.

| Component Description HA Information Additional Information | |||
| NAS host The ES NAS Model name, | server name, firmware version, write mode | Write mode:• Write-back: QES writes incoming data to NVRAM first, notifies the host that the write command was completed, and then writes the data to disk storage later.• Write-through: QES writes incoming data to both NVRAM and disk, and then notifies the host that the write command was completed. This mode is enabled when a BBU is not working. | |
| REXP Expansion | enclosure | Model name | |
| SCA, SCB Storage controller Host name, | machine status, initialized | Machine status:• power_on: The controller is working normally.• power_off: The controller is powered off.• empty: There is no controller installed in the bay.• connecting: The communication channel between SCA and SCB is not established.• boot: The communication channel between SCA and SCB is established. The controller is starting up. | |
| ECA, ECB Expansion | enclosure controller | Machine status | |
| PSU Power supply unit Temperature, fan | speedNAS host only: Model, power | ||
| BBU Backup battery | unit | Capacity, temperature, voltage, serial number, manufacturing date, initialization date | |
| DIMM Memory module Manufacturer, | type, serial number, size, speed | ||
| FAN Internal fan Fan speed | NAS host only: Mode | ||
System Component Status
| Status Description | |
| OK The component is functioning properly. | |
| Charging The battery is charging. | |
| OfflineThe component is disabled. QES cannot communicate with it. | |
| Error The component is not functioning properly. You should replace it immediately. | |
| Warning The component might fail soon. | |
| Empty The component is missing or not installed. |
System Availability Status
The High Availability window contains the following status indicators.
| Status Indicator Description | |
| High Availability Status This shows the current high availability status of the NAS. | |
| Dual Path This shows the status of the connections between the storage controllers and the SAS expansion units. |
High Availability Status
| Status Description | |
| Active-Active Both controllers are active and working as expected. | |
| Taking over Only one controller is active and it is taking control from the other controller. | |
| Takeover Only one controller is active. | ImportantYou cannot perform a QES firmware update if the High Availability status is Takeover. This prevents firmware inconsistencies between storage controllers. |
| Status Description |
| Giving back Only one controller is active and it is returning control to the inactive controller. |
Dual Path Status
Note
QES issues a system notification every time the dual path status changes.
| Status Description | |
| Dual Path The storage controllers and SAS expansion units are connected using two independent paths. This ensures continuous operation of the NAS even if one cable is damaged or disconnected. | |
| Single Path The storage controllers and SAS expansion units are connected using one path. | |
| Empty No SAS expansion units are connected to the NAS. |
Storage Controller Actions
| Action Description | |
| Takeover The controller takes over all services while the other controller transitions into standby mode. HA status changes to Takeover. | |
| Giveback The controller gives back services to the other inactive controller. HA status changes to Active-Active. | |
| Restart The controller restarts. | |
| Shutdown The controller powers off. | |
| Power On The controller powers on. | |
| Force Takeover A recovered controller is forced to take over if it does not regain control automatically. This button becomes available only if a takeover or giveback attempt is unsuccessful. |
Cluster Options
| Setting Description | |
| System failover protection | When a controller fails, the other controller automatically takes over. A controller failure may result from one of the following situations:• The controller is powered off.• The controller is unresponsive.• The controller encounters an unrecoverable hardware failure.• The amount of memory installed in the controller is inconsistent with the other controller.• The CPU model of the controller is inconsistent with the other controller. |
| Failover when network fails | When a controller becomes inaccessible as a result of network connection failure, the other controller automatically takes over. |
| Failover when JBOD fails | When a SAS expansion unit that is connected to a controller becomes inaccessible, the other controller automatically takes over. |
| Automatically failback when system recovers | When a controller functions again after an automatic failover, it initiates a giveback and then regains control. |
| Prevent failback repeatedly | When automatic failback is unsuccessful, the recovered controller might repeatedly try to initiate failback. When enabled, a recovered controller can only attempt two failbacks with a 30-second interval between them. QES then disables automatic failback for 24 hours and changes the High Availability status to Locked.During this 24-hour period, you can manually initiate a failback by clicking Giveback on the working controller. If this succeeds, QES enables automatic failback again. |
| Management port failover | When the management interface of one controller fails, the other controller automatically takes over. This feature is disabled if static IP addresses are not assigned to the management interfaces of both controllers. |
8. Applications
Backup Station
Backup Station enables you to back up files and folders to other remote NAS devices. You can also configure QES as a backup destination for other NAS devices.
Comparison of Backup Methods
| Source Destination Backup Method | ||
| QES QES • Real-time SnapSync (Recommended) | Scheduled SnapSync, NAS to NASNAS to NAS | |
| QES QTS NAS to NAS | ||
| QTS QES NAS to NAS | ||
| QES QuTS hero • Real-time SnapSync (Recommended) | Scheduled SnapSync, NAS to NASNAS to NAS | |
| QuTS hero QES • Real-time SnapSync (Recommended) | Scheduled SnapSync, NAS to NASNAS to NAS | |
| QES Linux Rsync | ||
| Linux QES Rsync (with SSH) | ||
Rsync
Rsync is file transfer utility that enables you to synchronize files between QNAP NAS devices and Unix clients.
Configuring the Rsync Server
-
Go to Backup Station > Backup Server > Rsync Server.
-
Configure the following settings.
| Setting Description | |
| Port number The port used for incoming and outgoing Rsync connections. The default port is 873. | |
| Enable maximum download rate | Limit the amount of bandwidth used by clients backing up this NAS using Rsync. 0 is unrestricted. |
| Allow remote Rsync server to back up data to the NAS | UNIX clients can back up to this NAS using Rsync. |
- Click Apply.
Creating an Rsync Backup Job
- Go to Backup Station > Remote Replication > Rsync.
- Click Create a Replication Job.
- Specify a job name.
- Configure the remote server.
a. Click Settings.
b. Configure the following remote site settings.
| Setting Description | |
| Name or IP address of the remote server | The remote server DNS name or IP address. |
| User name The username of the remote user. The user must have full read/write access and a sufficient quota limit on the remote server. | |
| Password The password of the remote user. | |
| Port Number The Rsync port of the remote server. The default is 873. | |
| Server Mode By default, this setting is enabled and Rsync runs on server mode. When disabled, Rsync runs in daemon mode. | |
| Skip Group ID When enabled, Rsync does not replicate the group ownership of files and folders to the remote server. | |
| Enable encryption Rsync transfers are encrypted for additional security. SSH connections must be enabled on the remote server and the remote user must have permission to perform SSH encrypted backup jobs. Port number: Set the SSH port of the remote server. The default is port 22. | |
c. Optional: Test the remote server connection.
d. Click Apply.
- Select the source folder.
The source folder is a local shared folder or subfolder.
- Select the destination folder.
The destination folder is a shared folder or subfolder on the remote server.
-
Click Add.
-
Optional: Configure job options.
a. Click Options.
b. Configure the following settings.
| Setting Description | |
| Activate file compression | QES compresses the data before sending it to the destination. The destination NAS decompresses the data before saving it to disk. Enabling this setting can reduce transfer times if your NAS or the remote NAS has a slow network connection, or the NAS devices are connecting via a WAN. |
| Perform incremental replication | On the first run of a job, Rsync replicates all files to the remote server. On subsequent runs, Rsync only replicates files that have been modified since the last run.TipQNAP recommends enabling this setting as it can greatly reduce backup times. |
| Delete extra files on remote destination | By default, Rsync only adds new files and updates modified files at the destination. When enabled, Rsync deletes files from the destination folder if they no longer exist in the source folder. |
| Handle sparse files efficiently | A sparse file is a type of computer file that contains large blocks of zero-byte data. When enabled, Rsync replicates sparse files more quickly. |
| Remove source files | QES automatically deletes the source files from the source NAS after the job has run successfully. |
| Replicate ACL and extended attributes | Rsync replicates ACLs for Windows files and extended attributes for Mac and UNIX files.ImportantQES and the remote server must have the same ACL features enabled and must join the same domain. |
| Maximum transfer rate (KB/s) | Configuring this setting limits the bandwidth consumption of Rsync and prevents it from affecting the NAS storage performance. The default value is 0, which means unrestricted bandwidth. |
| Check file contents | By default, Rsync determines if two files in the source and destination are identical by comparing their filenames, last modified dates, and file sizes. When this setting is enabled, Rsync also compares content of both files using checksums. |
| Send alert emails when the following events occur | When enabled, QES sends out an email alert each time a job succeeds or fails. To use this feature, you must first configure the SMTP server on QES. Go toControl Panel > System >Notification > E-mail >SMTP Server. |
- Configure a job schedule.
a. Click Backup frequency.
b. Select Enable schedule.
c. Specify the schedule.
The job can be scheduled to run daily, weekly, monthly, or to repeat after a certain number of hours.
d. Click Apply.
- Optional: Select Execute backup immediately.
The job runs immediately after you finish creating it. Subsequent runs follows the backup schedule.
- Click Apply.
QES creates the job and runs it based on the specified settings.
Rsync Job Settings
To configure the following settings, go to Backup Station > Remote Replication > Rsync and click Options.
| Setting Description | |
| Timeout (seconds) If no data is received from the remote server during an Rsync job, QES waits for the specified number of seconds and then stops the job. | |
| Number of retries After an Rsync job fails, QES runs the job again until the specified number of retries is reached. | |
| Retry intervals (second) | QES waits for the specified number of seconds between each retry. |
Rsync Job Buttons
| Icon Action Description | ||
 | Start Run the job immediately. | |
 | Stop Stop a running job. | |
| [H48S] | Rsync Log View the job's logs. | |
 | Edit Edit the job's settings. | |
| [TOH3] | Disable schedule Disable the job's schedule. | |
 | Enable schedule Enable the job's schedule. This button is only active if a schedule is configured for the job. | |
NAS to NAS Backups
Creating a NAS to NAS Backup Job
- Go to Backup Station > Remote Replication > NAS to NAS.
- Click Create a Replication Job.
-
Specify a job name.
-
Configure the remote server.
a. Click Settings.
b. Configure the following remote site settings.
| Setting Description | |
| Name or IP address of the remote server | The remote server DNS name or IP address. |
| User name The username of the remote user. The user must have full read/write access and a sufficient quota limit on the remote server. | |
| Password The password of the remote user. | |
| Port Number The Rsync port of the remote server. The default is 873. | |
| Enable encryption Transfers are encrypted for additional security. SSH connections must be enabled on the remote server and the remote user must have permission to perform SSH encrypted backup jobs. Port number: The SSH port of the remote server. | |
c. Optional: Test the remote server connection.
d. Click Apply.
- Select the source folder.
The source folder is a local shared folder or subfolder.
- Select the destination folder.
The destination folder is a shared folder or subfolder on the remote server.
- Click Add.
- Configure the following settings.
| Setting Description | |
| Activate file compression | QES compresses the data before sending it to the destination. The destination NAS decompresses the data before saving it to disk. Enabling this setting can reduce transfer times if your NAS or the remote NAS have slow network connections, or are connecting via a WAN. |
| Perform incremental replication | On the first run of a job, Rsync replicates all files to the remote server. On subsequent runs, Rsync only replicates files that have been modified since the last run.TipQNAP recommends enabling this setting, as it can greatly reduce backup times. |
| Delete extra files on remote destination | By default, Rsync only adds new files and updates modified files at the destination. Enabling this setting causes Rsync to delete files from the destination folder if they no longer exist in the source folder. |
| Handle sparse files efficiently | A sparse file is a type of computer file that contains large blocks of zero-byte data. Enabling this setting allows Rsync to replicate sparse files more quickly. |
| Remove source files | QES automatically deletes the source files from the source NAS after the job has run successfully. |
| Replicate ACL and extended attributes | Rsync replicates ACLs for Windows files and extended attributes for Mac and UNIX files.ImportantQES and the remote server must have the same ACL features enabled and be joined to the same domain. |
| Maximum transfer rate (KB/s) | Limit the amount of bandwidth used by Rsync. By configuring this setting, you can prevent Rsync from consuming all bandwidth and affecting NAS storage performance. 0 is unrestricted. |
| Check file contents | By default, Rsync determines if two files in the source and destination are identical by comparing their filenames, last modified dates and file sizes. When this setting is enabled, Rsync also compares content of both files using checksums. |
| Send alert emails when the following events occur | You can receive an email alert each time a job fails or finishes successfully. The SMTP server must be configured in QES atControl Panel > System > Notification > E-mail > SMTP Server. |
- Configure a job schedule.
a. Click Backup frequency.
b. Select Enable schedule.
c. Specify the schedule.
The job can be scheduled to run daily, weekly, monthly, or to repeat after a certain number of hours.
d. Click Apply.
- Optional: Select Execute backup immediately.
The job will run immediately after you finish creating the job. Subsequent runs will follow the backup schedule.
- Click Apply.
QES creates the job, and then runs it if you selected Execute backup immediately.
SnapSync
SnapSync is a disaster recovery solution that enables you to back up data from the local NAS to another QNAP NAS using block-level replication in real time. This means that whenever data is written to the source NAS, it is also immediately written to the destination NAS. This reduces the backup time and lowers the risk of data loss.
![graph LR A["iSCSI LUNs"] --> D["Local Enterprise Storage"] B["Shared Folders"] --> D D --> E["Real-Time Data Mirror"] E --> F["Remote Enterprise Storage"] G["Replicated iSCSI LUNs"] --> F H["Replicated Shared Folders"] --> F](/content/2026/06/1274100/images/9bc4dec9072dde6d56da77836b40fa017b1213d9e09b82e7a443a72c7e272aa8.jpg)
Note
- You can also configure SnapSync to run periodically on a schedule (Scheduled SnapSync), in order to save system resources.
- SnapSync encrypts data during transmission using AES-256 encryption.
SnapSync Requirements
OS requirements:
| SnapSync Job Type QES Version QuTS hero Version | |
| QES to QES QES 2.0.0 or later N/A | |
| QuTS hero to QuTS hero N/A QuTS hero 4.5.2 or later | |
| QES to QuTS hero QuTS hero to QES | QES 2.1.1 Build 20210303 or later QuTS hero 4.5.2 or later |
Other requirements:
- The source and destination shared folder or LUN must be the same provisioning type (thick or thin).
- If the source and destination NAS devices are running incompatible versions of SnapSync, then you will be prompted to update the system firmware on one or both NAS devices.
- If both the source and destination NAS devices are running QES, then they must run the same version of QES to ensure data consistency.
- When using real-time SnapSync, the round-trip latency between the source and destination NAS devices must be 5ms or less. Higher latency might cause local storage write delays.
SnapSync Restrictions
The following restrictions apply after creating a SnapSync job.
- If the destination is a shared folder, the folder becomes read-only.
- If the destination is a LUN, the LUN becomes read-only and is no longer accessible to iSCSI initiators.
Deleting the SnapSync job removes these restrictions.
SnapSync Job Creation
Creating a Real-Time SnapSync Job
- Go to Backup Station > Remote Replication > SnapSync.
- Click Create a Replication Job.
The Create a Replication Job wizard opens.
- Specify a job name.
The name cannot contain any of the following special characters: `* = +[] \ | ;:'", <> / ? % - Select Real-Time.
- Select the backup destination.
Choose from one of the following settings.
| Setting Description |
| Local Interface Back up from one shared folder to another shared folder on the same NAS. |
| Remote Host Back up to another NAS. You must specify the IP address, username, and password of the destination NAS, and then click Connect. |
- Select the source storage pool.
- Select the source shared folder or LUN.
- Select the destination storage pool.
- Select the destination shared folder or LUN.
Warning
All data in the shared folder will be deleted.
- Optional: Click New to create a new destination shared folder.
- Set the source and destination network adapters for this job.
| Adapter Setting | Description |
| Auto-Select Network Adapter | QES automatically selects the fastest network adapters at the source and destination for this job.If either network adapter becomes disconnected, QES will select the fastest available adapter. |
| Manual-Select Network Adapter | Manually select the network adapters at the source and destination for this job. You can also select failover adapters, which the job uses if the either primary adapter becomes disconnected.NoteThe adapter lists are automatically filtered to only display adapters that can connect to the currently selected adapter. |
- Optional: Configure job options.
| Setting Description | |
| Compression SnapSync compresses the data before sending it to the destination.The destination NAS decompresses the data before saving it to disk.Enabling this setting can reduce transfer times if your NAS or theremote NAS has a slow network connection, or the two NAS devicesare connecting via WAN. | |
| Deduplication SnapSync reduces the amount of storage and bandwidth needed byeliminating duplicate copies of repeated data. | |
| Encryption SnapSync encrypts the data during transmission to the destinationNAS. The data is then decrypted before being stored at thedestination. | |
| Supportapplicationconsistentsnapshots | SnapSync creates application consistent snapshots.NoteThis option is only available for VMware vCenter and VolumeShadow Copy Service (VSS) aware applications running on aWindows server. You must install QNAP Snapshot Agent on theiSCSI initiator. |
| Send alert emailswhen the followingevents occur | You can receive an email alert each time a job fails or finishessuccessfully.ImportantAn SMTP server must be configured atControl Panel > System>Notification > E-mail > SMTP Server. |
- Enable latency monitor.
When latency monitor is enabled, QES monitors the latency of the SnapSync job to ensure the job is running normally. If the job latency goes over the threshold six times within a time period of one minute, QES issues a warning notification.
a. Click Latency Monitor.
b. Optional: To view the average latency in previous performance tests, click SnapSync Performance Report.
c. Enable Latency threshold.
d. Set a threshold value, in milliseconds. The value must be 1-5000.
- Click OK.
Creating a Scheduled SnapSync Job
- Go to Backup Station > Remote Replication > SnapSync.
- Click Create a Replication Job.
The Create a Replication Job wizard opens.
- Specify a job name.
The name cannot contain any of the following special characters: `* = +[] \ | ;:'", <> / ? %
- Select Scheduled.
- Select the backup destination.
Choose from one of the following settings.
| Setting Description |
| Local Interface Back up from one shared folder to another shared folder on the same NAS. |
| Remote Host Back up to another NAS. You must specify the IP address, username, and password of the destination NAS, and then click Connect. |
- Select the source storage pool.
- Select the source shared folder or LUN.
- Select the destination storage pool.
- Select the destination shared folder or LUN.
Warning
All data in the shared folder will be deleted.
- Optional: Click New to create a new destination shared folder.
- Set the source and destination network adapters for this job.
| Adapter Setting Description | |
| Auto-Select Network Adapter | QES automatically selects the fastest network adapters at the source and destination for this job.If either network adapter becomes disconnected, QES will select the fastest available adapter. |
| Adapter Setting | Description |
| Manual-Select Network Adapter | Manually select the network adapters at the source and destination for this job. You can also select failover adapters, which the job uses if the either primary adapter becomes disconnected.NoteThe adapter lists are automatically filtered to only display adapters that can connect to the currently selected adapter. |
- Optional: Configure job options.
| Setting Description | |
| Compression SnapSync compresses the data before sending it to the destination.The destination NAS decompresses the data before saving it to disk.Enabling this setting can reduce transfer times if your NAS or theremote NAS has a slow network connection, or the two NAS devicesare connecting via WAN. | |
| Deduplication SnapSync reduces the amount of storage and bandwidth needed byeliminating duplicate copies of repeated data. | |
| Encryption SnapSync encrypts the data during transmission to the destinationNAS. The data is then decrypted before being stored at thedestination. | |
| Supportapplicationconsistentsnapshots | SnapSync creates application consistent snapshots.NoteThis option is only available for VMware vCenter and VolumeShadow Copy Service (VSS) aware applications running on aWindows server. You must install QNAP Snapshot Agent on theiSCSI initiator. |
| Send alert emailswhen the followingevents occur | You can receive an email alert each time a job fails or finishessuccessfully.ImportantAn SMTP server must be configured atControl Panel > System>Notification > E-mail > SMTP Server. |
- Optional: Configure the backup frequency.
You can set the schedule to daily, weekly, or monthly. On the day the job runs, you can set the job to run once or periodically.
Important
If you do not enable a schedule, the job only runs when you start it manually.
14. Optional: Select Execute backup immediately.
When selected, the job will run immediately after it has been created.
15. Click OK.
SnapSync Screen
To get to this screen, go to Backup Station > Remote Replication > SnapSync.
SnapSync Screen UI Elements
| UI Element Description | |
| SnapSync Service Enable or disable the SnapSync service in QES.You must enable the SnapSync service to create and run SnapSync jobs,and to allow other NAS devices to back up data to this NAS using SnapSync. | |
| Port Displays the port used for incoming and outgoing SnapSync connections. | |
| SnapSync Settings Set the SnapSync port and limit upload rate.For details, see SnapSync Settings. | |
| Create aReplication Job | Create a real-time or scheduled SnapSync job.For details, see Creating a Real-Time SnapSync Job. |
| Job Name Displays the job's name. | |
| Source Displays the following information:Source NAS nameSource shared folder or LUN nameSource interface IP addressSource link and adapter speed | |
| Destination Displays the following information:Destination NAS nameDestination shared folder or LUN nameDestination interface IP addressDestination link and adapter speed | |
| Compression Displays whether compression is enabled for this job. | |
| Deduplication Displays whether deduplication is enabled for this job. | |
| Schedule Displays the backup plan for this job: · Manual · Scheduled · Real-time | |
| Data Status Displays the status of the job's source and destination folders. For details, see SnapSync Data Status. | |
| Job Status Displays the current job status. For details, see the following topics: · Real-Time SnapSync Job Status ·Scheduled SnapSync Job StatusIf QES is unable to contact the remote NAS, this field displays the last known job status plus (Disconnected). If the job is running, this field also shows job speed for real-time and scheduled jobs, and percentage completed for scheduled jobs. | |
| Action Choose to edit, delete, or resume the job. For details, see SnapSync Job Actions. | |
SnapSync Settings
| UI Element Action | |
| SnapSync version This displays the SnapSync version on the current NAS firmware. | TipIf you are having SnapSync compatibility issues, ensure that both source and destination NAS devices have the same SnapSync version. |
| Port number Set the port used for incoming and outgoing SnapSync connections. The default port is 874. | |
| Limit upload rate Limit the amount of upload bandwidth used by SnapSync. | |
| Maximum upload rate (KB/s) | Set the maximum upload rate for SnapSync, in kilobytes per second. 0 is unrestricted. |
SnapSync Job Actions
| Icon Action Description | ||
| Start Run the job immediately. | ||
| Stop Stop a running job. | ||
| Edit Edit the job's settings.You can edit backup frequency, network adapter, and certain job options.Note·You cannot change the job's backup frequency from Scheduled or Manual to Real-Time, or from Real-time to Scheduled or Manual.·If the destination login account password changes, then the job will stop working. To resolve this issue, edit the job setting on the source NAS and then update the destination password.·If the destination IP address changes, then the job state will change to Disconnected. To resolve this issue, edit the job setting on the source NAS and then update the destination address. | ||
| Suspend job | Temporarily prevents a job from running as scheduled. | |
| Resume job Allows a previously suspended job to run as scheduled. If QES detects that the source and destination folders are different, then it immediately runs the job and synchronizes them. | ||
Real-Time SnapSync Job Status
| Status Description | |
| Ready The job has been created but has not started synchronizing. | |
| Transferring The job is running for the first time. SnapSync must transfer all source data to the destination NAS. QES displays the data transmission speed and synchronization progress as a percentage. | |
| Updating The job has started running. QES is synchronizing the source and destination folders. | |
| Updated The source and destination folders are synchronized. | |
| Aborted The job has stopped running. The files in the source and destination folders might be either consistent or inconsistent. | |
| Connection Failed | The two NAS devices are disconnected. |
| Login Failure The source NAS is able to connect to the destination NAS, but the username and password saved in the job's settings are invalid. | |
Scheduled SnapSync Job Status
| Status Description | |
| Idle The job is not currently running. | |
| Starting SnapSync is preparing to run the job. | |
| Ready The job is not currently running. This status appears after deleting a SnapSync job, and then creating a new job with the same name and the same source and destination. | |
| Updated The job has finished running. The source was synchronized to a destination on a remote NAS. | |
| Local Updated The job has finished running. The source was synchronized to a destination on the local NAS. | |
| Suspended The job was suspended by a user who clickedSuspend jobon the source or destination NAS. | |
| Not run yet The job was created but has not been run. | |
| Updating The job is running. SnapSync is synchronizing data from the source folder to the destination folder.QES displays the data transmission speed and synchronization progress as a percentage. | |
| Disconnected The two NAS devices are disconnected. |
SnapSync Data Status
| Status Description | |
| Updating The job has started running. QES is synchronizing the source and destination folders.When the job runs for the first time, QES displays the data transmission speed and synchronization progress as a percentage. | |
| Updated The source and destination folders are synchronized. | |
| Aborted The job has stopped running. The files in the source and destination folders are identical. The destination folder is read-only. | |
| Interrupted The job has stopped running. The files in the source and destination folders are not identical. The destination folder is read-only. | |
| Split The source and destination folders are no longer paired. The destination folder has full read/write permissions. |
SnapSync Performance Test
A SnapSync performance test measures synchronization performance to the destination server. The test results show the performance of SnapSync under current system load.
Note
To get realistic results, we recommend running the test during regular hours under typical working conditions.
Running a SnapSync Performance Test
- Go to Backup Station > Remote Replication > SnapSync.
- Click Create a SnapSync Performance Test.
The Create a SnapSync Performance Test window opens.
- Specify the IP address, username, and password of a NAS that supports SnapSync, and then click Connect.
- Select the source storage pool.
- Select the destination storage pool.
- Select the IP address of the source network adapter.
- Select the IP address of the destination network adapter.
- Click Run Test.
Accessing a SnapSync Destination Folder
The destination shared folder has separate permissions from the source folder. To access a destination folder, you must configure its access permissions on the destination NAS.
Important
The destination folder of a SnapSync job is configured as read-only. To restore full read/write permissions you must suspend the SnapSync job.
-
Log onto the destination NAS using an account with administrator permissions.
-
Go to Storage Manager > Storage > Storage Space.
-
Select the destination storage pool.
-
Select the destination folder. The Shared Folder Manager window opens.
-
Select Actions > Edit Properties. The Shared Folder Properties window opens.
-
Under Storage Settings and Services, click Edit.
-
Select one or more storage services.
-
Click Apply.
-
Click Permissions. The Shared Folder window opens.
-
Select Users and groups permission.
-
Configure user and group access permission, then click Apply. You can only select RO (read-only) permissions. For details, see Configuring User and Group Permissions.
-
Configure NFS host access. For details, see Configuring NFS Host Access Permissions.
13. Configure SMB host access.
For details, see Configuring SMB Host Access Control.
You can now access the destination folder.
Diagnostic Tool
The Diagnostic Tool provides several features for checking the stability of the NAS. Users can export system kernel records to quickly check whether abnormal operations have recently occurred. In addition, users can send the records to QNAP technical support for further investigation. The Diagnostic tool also provides features for checking the file system, hard drives, and RAM.

Tip
QNAP strongly recommends using the Diagnostic Tool to efficiently troubleshoot NAS issues.
Downloading System Logs
- Go to Control Panel > Applications > Diagnostic Tool > Dump Log.
- Click Dump.
The system will produce a .zip file.
- Download the .zip file.
- Optional: Send the file to QNAP technical support for further investigation.
Analyzing Kernel Logs
- Go to Control Panel > Applications > Diagnostic Tool > Kernel Log Analyzer.
- Click Start.
QES will show the results of the kernel log analysis.
Analyzing Hard Disk Drives
- Go to Control Panel > Applications > Diagnostic Tool > HDD Analyzer.
- Perform one of the following actions.
| Action Steps | |
| Dump SMART test logs | a. SelectDump SMART value.b. Select the enclosure you wish to analyze.c. Click Dump.NoteYou can download the SMART test logs after they have been dumped. |
| Test system performance | a. Select Test performance.b. Select the enclosure you wish to analyze.c. Click Start.NoteQES will show the results of the system performance test. |
| Dump RAID logs a. SelectDump RAID information.b. Select the pool you wish to analyze.c. Click Update.NoteQES will show the results of the RAID information dump. | |
Tip
QNAP recommends sending these logs to technical support when you open a technical support request.
Station Manager
Station Manager is an integrated control panel for enabling and disabling QNAP stations. File Station is currently the only station on QES.

TFTP Server
Trivial File Transfer Protocol (TFTP) is a basic form of FTP. You can configure the NAS as a TFTP server for network device management and remote network booting. TFTP does not provide user authentication and you cannot connect to it using a standard FTP client.

Enabling the TFTP Server
- Go to Control Panel > Applications > TFTP Server.
- Select Enable TFTP Server.
- Specify the UDP port. The default UDP port is 69.
- Specify the TFTP root directory. The TFTP root directory stores all files and folders uploaded to the NAS using TFTP.
- Select access rights.
| Option Description | |
| Read only TFTP clients can view and download files. | |
| Full access TFTP clients can view, modify, upload, and download files. | |
- Configure TFTP client access.
| Option Description | |
| Anywhere | |
| Certain IP range only |
- Click Apply.
QES enables the TFTP server.
Virtualization
The QNAP ES NAS is a virtualization-ready storage solution that includes VMware vSphere, Microsoft Hyper-V, and Citrix XenServer, as well as VAAI for iSCSI, VAAI for NAS, and Offloaded Data Transfer (ODX). The NAS supports thin provisioning and storage reclamation, and QNAP offers network accessories that support 10GbE and SSD cache. In addition, you can use vSphere Client and SMI-S Provider to increase productivity and efficiency.
For more information, go to https://www.qnap.com/en/how-to/tutorial/zfs-virtualization.
VAAI for iSCSI and VAAI for NAS
For details, go to https://files.qnap.com/news/pressresource/datasheet/QNAP_Plugin_for_VMWare_vStorage_API_for_Array_Integration_(VAAI)(English).pdf
Offloaded Data Transfer (ODX)
The ES NAS supports Offloaded Data Transfer (ODX) in Microsoft Windows Server 2016, making it a high-performance iSCSI storage solution for Hyper-V virtualized environments. By supporting ODX, the NAS can be offloaded with all the copying processes from Windows servers. ODX significantly
reduces the load on Windows servers and improves the efficiency of copying and moving operations for Windows 2016 hosts that use QNAP iSCSI storage.
10GbE Support
A 10GbE network is essential for businesses that require high bandwidth for virtualization and quick, efficient backup and data restoration. The QNAP ES NAS series is a reliable storage solution for deploying a 10GbE environment. For details, go to https://www.qnap.com/solution/10gbe-ready/en/.
vSphere Client
The vSphere Client for the ES NAS is an interface between ESXi and the NAS. This tool enables system administrators to manage VMware datastores and verify the status of NAS units directly from the vSphere Client. For details, go to https://www.qnap.com/en/how-to/tutorial/article/using-qnap-vsphere-web-client-plug-in-with-qnap-es-nas.
QNAP SMI-S Provider
The QNAP SMI-S Provider is required for System Center Virtual Machine Manager (SCVMM 2012). With the SMI-S Provider, the NAS can directly communicate with SCVMM 2012, and server management tasks can be facilitated for administrators. For details, see https://files.qnap.com/news/pressresource/datasheet/QNAP_Enterprise-class_ES_NAS_SMI-S_Provider_for_System_Center_Virtual_Machine_Manager(English).pdf.
9. Notices
BSD License
Copyright © 2016, QNAP Systems, Inc.
All rights reserved.
Redistribution and use in source and binary forms, with or without modification, are permitted provided that the following conditions are met:
- Redistributions of source code must retain the above copyright notice, this list of conditions and the following disclaimer.
- Redistributions in binary form must reproduce the above copyright notice, this list of conditions and the following disclaimer in the documentation and/or other materials provided with the distribution.
- Neither the name of the copyright holder nor the names of its contributors may be used to endorse or promote products derived from this software without specific prior written permission.
THIS SOFTWARE IS PROVIDED BY THE COPYRIGHT HOLDERS AND CONTRIBUTORS "AS IS" AND ANY EXPRESS OR IMPLIED WARRANTIES, INCLUDING, BUT NOT LIMITED TO, THE IMPLIED WARRANTIES OF MERCHANTABILITY AND FITNESS FOR A PARTICULAR PURPOSE ARE DISCLAIMED. IN NO EVENT SHALL THE COPYRIGHT HOLDER OR CONTRIBUTORS BE LIABLE FOR ANY DIRECT, INDIRECT, INCIDENTAL, SPECIAL, EXEMPLARY, OR CONSEQUENTIAL DAMAGES (INCLUDING, BUT NOT LIMITED TO, PROCUREMENT OF SUBSTITUTE GOODS OR SERVICES; LOSS OF USE, DATA, OR PROFITS; OR BUSINESS INTERRUPTION) HOWEVER CAUSED AND ON ANY THEORY OF LIABILITY, WHETHER IN CONTRACT, STRICT LIABILITY, OR TORT (INCLUDING NEGLIGENCE OR OTHERWISE) ARISING IN ANY WAY OUT OF THE USE OF THIS SOFTWARE, EVEN IF ADVISED OF THE POSSIBILITY OF SUCH DAMAGE.
CDDL License
COMMON DEVELOPMENT AND DISTRIBUTION LICENSE Version 1.0 (CDDL-1.0)
1. Definitions.
1.1. Contributor means each individual or entity that creates or contributes to the creation of Modifications.
1.2. Contributor Version means the combination of the Original Software, prior Modifications used by a Contributor (if any), and the Modifications made by that particular Contributor.
1.3. Covered Software means (a) the Original Software, or (b) Modifications, or (c) the combination of files containing Original Software with files containing Modifications, in each case including portions thereof.
1.4. Executable means the Covered Software in any form other than Source Code.
1.5. Initial Developer means the individual or entity that first makes Original Software available under this License.
1.6. Larger Work means a work which combines Covered Software or portions thereof with code not governed by the terms of this License.
1.7. License means this document.
1.8. Licensable means having the right to grant, to the maximum extent possible, whether at the time of the initial grant or subsequently acquired, any and all of the rights conveyed herein.
1.9. Modifications means the Source Code and Executable form of any of the following:
A. Any file that results from an addition to, deletion from or modification of the contents of a file containing Original Software or previous Modifications;
B. Any new file that contains any part of the Original Software or previous Modification; or
C. Any new file that is contributed or otherwise made available under the terms of this License.
1.10. Original Software means the Source Code and Executable form of computer software code that is originally released under this License.
1.11. Patent Claims means any patent claim(s), now owned or hereafter acquired, including without limitation, method, process, and apparatus claims, in any patent Licensable by grantor.
1.12. Source Code means (a) the common form of computer software code in which modifications are made and (b) associated documentation included in or with such code.
1.13. You (or Your) means an individual or a legal entity exercising rights under, and complying with all of the terms of, this License. For legal entities, You includes any entity which controls, is controlled by, or is under common control with You. For purposes of this definition, control means (a) the power, direct or indirect, to cause the direction or management of such entity, whether by contract or otherwise, or (b) ownership of more than fifty percent (50%) of the outstanding shares or beneficial ownership of such entity.
2. License Grants.
2.1. The Initial Developer Grant: Conditioned upon Your compliance with Section 3.1 below and subject to third party intellectual property claims, the Initial Developer hereby grants You a worldwide, royalty-free, non-exclusive license:
(a) under intellectual property rights (other than patent or trademark) Licensable by Initial Developer, to use, reproduce, modify, display, perform, sublicense and distribute the Original Software (or portions thereof), with or without Modifications, and/or as part of a Larger Work; and
(b) under Patent Claims infringed by the making, using or selling of Original Software, to make, have made, use, practice, sell, and offer for sale, and/or otherwise dispose of the Original Software (or portions thereof).
(c) The licenses granted in Sections 2.1(a) and (b) are effective on the date Initial Developer first distributes or otherwise makes the Original Software available to a third party under the terms of this License.
(d) Notwithstanding Section 2.1(b) above, no patent license is granted: (1) for code that You delete from the Original Software, or (2) for infringements caused by: (i) the modification of the Original Software, or (ii) the combination of the Original Software with other software or devices.
2.2. Contributor Grant: Conditioned upon Your compliance with Section 3.1 below and subject to third party intellectual property claims, each Contributor hereby grants You a world-wide, royalty-free, non-exclusive license:
(a) under intellectual property rights (other than patent or trademark) Licensable by Contributor to use, reproduce, modify, display, perform, sublicense and distribute the Modifications created by such Contributor (or portions thereof), either on an unmodified basis, with other Modifications, as Covered Software and/or as part of a Larger Work; and
(b) under Patent Claims infringed by the making, using, or selling of Modifications made by that Contributor either alone and/or in combination with its Contributor Version (or portions of such combination), to make, use, sell, offer for sale, have made, and/or otherwise dispose of: (1) Modifications made by that Contributor (or portions thereof); and (2) the combination of Modifications made by that Contributor with its Contributor Version (or portions of such combination).
(c) The licenses granted in Sections 2.2(a) and 2.2(b) are effective on the date Contributor first distributes or otherwise makes the Modifications available to a third party. (d) Notwithstanding Section 2.2(b) above, no patent license is granted: (1) for any code that Contributor has deleted from the Contributor Version; (2) for infringements caused by: (i) third party modifications of Contributor Version, or (ii) the combination of Modifications made by that Contributor with other software (except as part of the Contributor Version) or other devices; or (3) under Patent Claims infringed by Covered Software in the absence of Modifications made by that Contributor.
3. Distribution Obligations.
3.1. Availability of Source Code: Any Covered Software that You distribute or otherwise make available in Executable form must also be made available in Source Code form and that Source Code form must be distributed only under the terms of this License. You must include a copy of this License with every copy of the Source Code form of the Covered Software You distribute or otherwise make available. You must inform recipients of any such Covered Software in Executable form as to how they can obtain such Covered Software in Source Code form in a reasonable manner on or through a medium customarily used for software exchange.
3.2. Modifications: The Modifications that You create or to which You contribute are governed by the terms of this License. You represent that You believe Your Modifications are Your original creation(s) and/or You have sufficient rights to grant the rights conveyed by this License.
3.3. Required Notices: You must include a notice in each of Your Modifications that identifies You as the Contributor of the Modification. You may not remove or alter any copyright, patent or trademark notices contained within the Covered Software, or any notices of licensing or any descriptive text giving attribution to any Contributor or the Initial Developer.
3.4. Application of Additional Terms: You may not offer or impose any terms on any Covered Software in Source Code form that alters or restricts the applicable version of this License or the recipients rights hereunder. You may choose to offer, and to charge a fee for, warranty, support, indemnity or liability obligations to one or more recipients of Covered Software. However, you may do so only on Your own behalf, and not on behalf of the Initial Developer or any Contributor. You must make it absolutely clear that any such warranty, support, indemnity or liability obligation is offered by You
alone, and You hereby agree to indemnify the Initial Developer and every Contributor for any liability incurred by the Initial Developer or such Contributor as a result of warranty, support, indemnity or liability terms You offer.
3.5. Distribution of Executable Versions: You may distribute the Executable form of the Covered Software under the terms of this License or under the terms of a license of Your choice, which may contain terms different from this License, provided that You are in compliance with the terms of this License and that the license for the Executable form does not attempt to limit or alter the recipients rights in the Source Code form from the rights set forth in this License. If You distribute the Covered Software in Executable form under a different license, You must make it absolutely clear that any terms which differ from this License are offered by You alone, not by the Initial Developer or Contributor. You hereby agree to indemnify the Initial Developer and every Contributor for any liability incurred by the Initial Developer or such Contributor as a result of any such terms You offer.
3.6. Larger Works: You may create a Larger Work by combining Covered Software with other code not governed by the terms of this License and distribute the Larger Work as a single product. In such a case, You must make sure the requirements of this License are fulfilled for the Covered Software.
4. Versions of the License.
4.1. New Versions: Sun Microsystems, Inc. is the initial license steward and may publish revised and/or new versions of this License from time to time. Each version will be given a distinguishing version number. Except as provided in Section 4.3, no one other than the license steward has the right to modify this License.
4.2. Effect of New Versions: You may always continue to use, distribute or otherwise make the Covered Software available under the terms of the version of the License under which You originally received the Covered Software. If the Initial Developer includes a notice in the Original Software prohibiting it from being distributed or otherwise made available under any subsequent version of the License, You must distribute and make the Covered Software available under the terms of the version of the License under which You originally received the Covered Software. Otherwise, You may also choose to use, distribute or otherwise make the Covered Software available under the terms of any subsequent version of the License published by the license steward.
4.3. Modified Versions: When You are an Initial Developer and You want to create a new license for Your Original Software, You may create and use a modified version of this License if You: (a) rename the license and remove any references to the name of the license steward (except to note that the license differs from this License); and (b) otherwise make it clear that the license contains terms which differ from this License.
5. DISCLAIMER OF WARRANTY.
COVERED SOFTWARE IS PROVIDED UNDER THIS LICENSE ON AN AS IS BASIS, WITHOUT WARRANTY OF ANY KIND, EITHER EXPRESSED OR IMPLIED, INCLUDING, WITHOUT LIMITATION, WARRANTIES THAT THE COVERED SOFTWARE IS FREE OF DEFECTS, MERCHANTABILITY, FIT FOR A PARTICULAR PURPOSE OR NON-INFRINGEMENT. THE ENTIRE RISK AS TO THE QUALITY AND PERFORMANCE OF THE COVERED SOFTWARE IS WITH YOU. SHOULD ANY COVERED SOFTWARE PROVE DEFECTIVE IN ANY RESPECT, YOU (NOT THE INITIAL DEVELOPER OR ANY OTHER CONTRIBUTOR) ASSUME THE COST OF ANY NECESSARY SERVICING, REPAIR OR CORRECTION. THIS DISCLAIMER OF WARRANTY CONSTITUTES AN ESSENTIAL PART OF THIS LICENSE. NO USE OF ANY COVERED SOFTWARE IS AUTHORIZED HEREUNDER EXCEPT UNDER THIS DISCLAIMER.
6. TERMINATION.
6.1. This License and the rights granted hereunder will terminate automatically if You fail to comply with terms herein and fail to cure such breach within 30 days of becoming aware of the breach. Provisions which, by their nature, must remain in effect beyond the termination of this License shall survive.
6.2. If You assert a patent infringement claim (excluding declaratory judgment actions) against Initial Developer or a Contributor (the Initial Developer or Contributor against whom You assert such claim is referred to as Participant) alleging that the Participant Software (meaning the Contributor Version where the Participant is a Contributor or the Original Software where the Participant is the Initial Developer) directly or indirectly infringes any patent, then any and all rights granted directly or indirectly to You by such Participant, the Initial Developer (if the Initial Developer is not the Participant) and all Contributors under Sections 2.1 and/or 2.2 of this License shall, upon 60 days notice from Participant terminate prospectively and automatically at the expiration of such 60 day notice period, unless if within such 60 day period You withdraw Your claim with respect to the Participant Software against such Participant either unilaterally or pursuant to a written agreement with Participant.
6.3. In the event of termination under Sections 6.1 or 6.2 above, all end user licenses that have been validly granted by You or any distributor hereunder prior to termination (excluding licenses granted to You by any distributor) shall survive termination.
7. LIMITATION OF LIABILITY.
UNDER NO CIRCUMSTANCES AND UNDER NO LEGAL THEORY, WHETHER TORT (INCLUDING NEGLIGENCE), CONTRACT, OR OTHERWISE, SHALL YOU, THE INITIAL DEVELOPER, ANY OTHER CONTRIBUTOR, OR ANY DISTRIBUTOR OF COVERED SOFTWARE, OR ANY SUPPLIER OF ANY OF SUCH PARTIES, BE LIABLE TO ANY PERSON FOR ANY INDIRECT, SPECIAL, INCIDENTAL, OR CONSEQUENTIAL DAMAGES OF ANY CHARACTER INCLUDING, WITHOUT LIMITATION, DAMAGES FOR LOST PROFITS, LOSS OF GOODWILL, WORK STOPPAGE, COMPUTER FAILURE OR MALFUNCTION, OR ANY AND ALL OTHER COMMERCIAL DAMAGES OR LOSSES, EVEN IF SUCH PARTY SHALL HAVE BEEN INFORMED OF THE POSSIBILITY OF SUCH DAMAGES. THIS LIMITATION OF LIABILITY SHALL NOT APPLY TO LIABILITY FOR DEATH OR PERSONAL INJURY RESULTING FROM SUCH PARTYS NEGLIGENCE TO THE EXTENT APPLICABLE LAW PROHIBITS SUCH LIMITATION. SOME JURISDICTIONS DO NOT ALLOW THE EXCLUSION OR LIMITATION OF INCIDENTAL OR CONSEQUENTIAL DAMAGES, SO THIS EXCLUSION AND LIMITATION MAY NOT APPLY TO YOU.
8. U.S. GOVERNMENT END USERS.
The Covered Software is a commercial item, as that term is defined in 48 C.F.R. 2.101 (Oct. 1995), consisting of commercial computer software (as that term is defined at 48 C.F.R. 252.227-7014(a)(1)) and commercial computer software documentation as such terms are used in 48 C.F.R. 12.212 (Sept. 1995). Consistent with 48 C.F.R. 12.212 and 48 C.F.R. 227.7202-1 through 227.7202-4 (June 1995), all U.S. Government End Users acquire Covered Software with only those rights set forth herein. This U.S. Government Rights clause is in lieu of, and supersedes, any other FAR, DFAR, or other clause or provision that addresses Government rights in computer software under this License.
9. MISCELLANEOUS.
This License represents the complete agreement concerning subject matter hereof. If any provision of this License is held to be unenforceable, such provision shall be reformed only to the extent necessary to make it enforceable. This License shall be governed by the law of the jurisdiction specified in a notice contained within the Original Software (except to the extent applicable law, if any, provides otherwise), excluding such jurisdictions conflict-of-law provisions. Any litigation relating to this License shall be subject to the jurisdiction of the courts located in the jurisdiction and venue specified in a notice contained within the Original Software, with the losing party responsible for costs, including, without limitation, court costs and reasonable attorneys fees and expenses. The application of the United Nations Convention on Contracts for the International Sale of Goods is expressly excluded. Any law or regulation which provides that the language of a contract shall be construed against the drafter shall not apply to this License. You agree that You alone are responsible for compliance with the United States export administration regulations (and the export control laws and regulation of any other countries) when You use, distribute or otherwise make available any Covered Software.
10. RESPONSIBILITY FOR CLAIMS.
As between Initial Developer and the Contributors, each party is responsible for claims and damages arising, directly or indirectly, out of its utilization of rights under this License and You agree to work with Initial Developer and Contributors to distribute such responsibility on an equitable basis. Nothing herein is intended or shall be deemed to constitute any admission of liability.
GNU Public License
Version 3, 29 June 2007
Everyone is permitted to copy and distribute verbatim copies of this license document, but changing it is not allowed.
Preamble
The GNU General Public License is a free, copy left license for software and other kinds of works.
The licenses for most software and other practical works are designed to take away your freedom to share and change the works. By contrast, the GNU General Public License is intended to guarantee your freedom to share and change all versions of a program--to make sure it remains free software for all its users. We, the Free Software Foundation, use the GNU General Public License for most of our software; it applies also to any other work released this way by its authors. You can apply it to your programs, too.
When we speak of free software, we are referring to freedom, not price. Our General Public Licenses are designed to make sure that you have the freedom to distribute copies of free software (and charge for them if you wish), that you receive source code or can get it if you want it, that you can change the software or use pieces of it in new free programs, and that you know you can do these things.
To protect your rights, we need to prevent others from denying you these rights or asking you to surrender the rights. Therefore, you have certain responsibilities if you distribute copies of the software, or if you modify it: responsibilities to respect the freedom of others.
For example, if you distribute copies of such a program, whether gratis or for a fee, you must pass on to the recipients the same freedoms that you received. You must make sure that they, too, receive or can get the source code. And you must show them these terms so they know their rights.
Developers that use the GNU GPL protect your rights with two steps: (1) assert copyright on the software, and (2) offer you this License giving you legal permission to copy, distribute and/or modify it.
For the developers' and authors' protection, the GPL clearly explains that there is no warranty for this free software. For both users' and authors' sake, the GPL requires that modified versions be marked as changed, so that their problems will not be attributed erroneously to authors of previous versions.
Some devices are designed to deny users access to install or run modified versions of the software inside them, although the manufacturer can do so. This is fundamentally incompatible with the aim of protecting users' freedom to change the software. The systematic pattern of such abuse occurs in the area of products for individuals to use, which is precisely where it is most unacceptable. Therefore, we have designed this version of the GPL to prohibit the practice for those products. If such problems arise substantially in other domains, we stand ready to extend this provision to those domains in future versions of the GPL, as needed to protect the freedom of users.
Finally, every program is threatened constantly by software patents. States should not allow patents to restrict development and use of software on general-purpose computers, but in those that do, we wish to avoid the special danger that patents applied to a free program could make it effectively proprietary. To prevent this, the GPL assures that patents cannot be used to render the program non-free.
The precise terms and conditions for copying, distribution and modification follow.
Terms and Conditions
1. Definitions.
"This License" refers to version 3 of the GNU General Public License.
"Copyright" also means copyright-like laws that apply to other kinds of works, such as semiconductor masks.
"The Program" refers to any copyrightable work licensed under this License. Each licensee is addressed as "you". "Licensees" and "recipients" may be individuals or organizations.
To "modify" a work means to copy from or adapt all or part of the work in a fashion requiring copyright permission, other than the making of an exact copy. The resulting work is called a "modified version" of the earlier work or a work "based on" the earlier work.
A "covered work" means either the unmodified Program or a work based on the Program.
To “propagate” a work means to do anything with it that, without permission, would make you directly or secondarily liable for infringement under applicable copyright law, except executing it on a computer or modifying a private copy. Propagation includes copying, distribution (with or without modification), making available to the public, and in some countries other activities as well.
To "convey" a work means any kind of propagation that enables other parties to make or receive copies. Mere interaction with a user through a computer network, with no transfer of a copy, is not conveying.
An interactive user interface displays "Appropriate Legal Notices" to the extent that it includes a convenient and prominently visible feature that (1) displays an appropriate copyright notice, and (2) tells the user that there is no warranty for the work (except to the extent that warranties
are provided), that licensees may convey the work under this License, and how to view a copy of this License. If the interface presents a list of user commands or options, such as a menu, a prominent item in the list meets this criterion.
2. Source Code.
The “source code” for a work means the preferred form of the work for making modifications to it. “Object code” means any non-source form of a work.
A "Standard Interface" means an interface that either is an official standard defined by a recognized standards body, or, in the case of interfaces specified for a particular programming language, one that is widely used among developers working in that language.
The “System Libraries” of an executable work include anything, other than the work as a whole, that (a) is included in the normal form of packaging a Major Component, but which is not part of that Major Component, and (b) serves only to enable use of the work with that Major Component, or to implement a Standard Interface for which an implementation is available to the public in source code form. A “Major Component”, in this context, means a major essential component (kernel, window system, and so on) of the specific operating system (if any) on which the executable work runs, or a compiler used to produce the work, or an object code interpreter used to run it.
The “Corresponding Source” for a work in object code form means all the source code needed to generate, install, and (for an executable work) run the object code and to modify the work, including scripts to control those activities. However, it does not include the work's System Libraries, or general-purpose tools or generally available free programs which are used unmodified in performing those activities but which are not part of the work. For example, Corresponding Source includes interface definition files associated with source files for the work, and the source code for shared libraries and dynamically linked subprograms that the work is specifically designed to require, such as by intimate data communication or control flow between those subprograms and other parts of the work.
The Corresponding Source need not include anything that users can regenerate automatically from other parts of the Corresponding Source.
The Corresponding Source for a work in source code form is that same work.
3. Basic Permissions.
All rights granted under this License are granted for the term of copyright on the Program, and are irrevocable provided the stated conditions are met. This License explicitly affirms your unlimited permission to run the unmodified Program. The output from running a covered work is covered by this License only if the output, given its content, constitutes a covered work. This License acknowledges your rights of fair use or other equivalent, as provided by copyright law. You may make, run and propagate covered works that you do not convey, without conditions so long as your license otherwise remains in force. You may convey covered works to others for the sole purpose of having them make modifications exclusively for you, or provide you with facilities for running those works, provided that you comply with the terms of this License in conveying all material for which you do not control copyright. Those thus making or running the covered works for you must do so exclusively on your behalf, under your direction and control, on terms that prohibit them from making any copies of your copyrighted material outside their relationship with you.
Conveying under any other circumstances is permitted solely under the conditions stated below.
Sublicensing is not allowed; section 10 makes it unnecessary.
- Protecting Users' Legal Rights From Anti-Circumvention Law.
No covered work shall be deemed part of an effective technological measure under any applicable law fulfilling obligations under article 11 of the WIPO copyright treaty adopted on 20 December 1996, or similar laws prohibiting or restricting circumvention of such measures. When you convey a covered work, you waive any legal power to forbid circumvention of technological measures to the extent such circumvention is effected by exercising rights under this License with respect to the covered work, and you disclaim any intention to limit operation or modification of the work as a means of enforcing, against the work's users, your or third parties' legal rights to forbid circumvention of technological measures.
5. Conveying Verbatim Copies.
You may convey verbatim copies of the Program's source code as you receive it, in any medium, provided that you conspicuously and appropriately publish on each copy an appropriate copyright notice; keep intact all notices stating that this License and any non-permissive terms added in accord with section 7 apply to the code; keep intact all notices of the absence of any warranty; and give all recipients a copy of this License along with the Program.
You may charge any price or no price for each copy that you convey, and you may offer support or warranty protection for a fee.
6. Conveying Modified Source Versions.
You may convey a work based on the Program, or the modifications to produce it from the Program, in the form of source code under the terms of section 4, provided that you also meet all of these conditions:
a. The work must carry prominent notices stating that you modified it, and giving a relevant date.
b. The work must carry prominent notices stating that it is released under this License and any conditions added under section 7. This requirement modifies the requirement in section 4 to "keep intact all notices".
c. You must license the entire work, as a whole, under this License to anyone who comes into possession of a copy. This License will therefore apply, along with any applicable section 7 additional terms, to the whole of the work, and all its parts, regardless of how they are packaged. This License gives no permission to license the work in any other way, but it does not invalidate such permission if you have separately received it.
d. If the work has interactive user interfaces, each must display Appropriate Legal Notices; however, if the Program has interactive interfaces that do not display Appropriate Legal Notices, your work need not make them do so.
A compilation of a covered work with other separate and independent works, which are not by their nature extensions of the covered work, and which are not combined with it such as to form a larger program, in or on a volume of a storage or distribution medium, is called an "aggregate" if the compilation and its resulting copyright are not used to limit the access or legal rights of the compilation's users beyond what the individual works permit. Inclusion of a covered work in an aggregate does not cause this License to apply to the other parts of the aggregate.
7. Conveying Non-Source Forms.
You may convey a covered work in object code form under the terms of sections 4 and 5, provided that you also convey the machine-readable Corresponding Source under the terms of this License, in one of these ways:
a. Convey the object code in, or embodied in, a physical product (including a physical distribution medium), accompanied by the Corresponding Source fixed on a durable physical medium customarily used for software interchange.
b. Convey the object code in, or embodied in, a physical product (including a physical distribution medium), accompanied by a written offer, valid for at least three years and valid for as long as you offer spare parts or customer support for that product model, to give anyone who possesses the object code either (1) a copy of the Corresponding Source for all the software in the product that is covered by this License, on a durable physical medium customarily used for software interchange, for a price no more than your reasonable cost of physically performing this conveying of source, or (2) access to copy the Corresponding Source from a network server at no charge.
c. Convey individual copies of the object code with a copy of the written offer to provide the Corresponding Source. This alternative is allowed only occasionally and noncommercially, and only if you received the object code with such an offer, in accord with subsection 6b.
d. Convey the object code by offering access from a designated place (gratis or for a charge), and offer equivalent access to the Corresponding Source in the same way through the same place at no further charge. You need not require recipients to copy the Corresponding Source along with the object code. If the place to copy the object code is a network server, the Corresponding Source may be on a different server (operated by you or a third party) that supports equivalent copying facilities, provided you maintain clear directions next to the object code saying where to find the Corresponding Source. Regardless of what server hosts the Corresponding Source, you remain obligated to ensure that it is available for as long as needed to satisfy these requirements.
e. Convey the object code using peer-to-peer transmission, provided you inform other peers where the object code and Corresponding Source of the work are being offered to the general public at no charge under subsection 6d.
A separable portion of the object code, whose source code is excluded from the Corresponding Source as a System Library, need not be included in conveying the object code work.
A "User Product" is either (1) a "consumer product", which means any tangible personal property which is normally used for personal, family, or household purposes, or (2) anything designed or sold for incorporation into a dwelling. In determining whether a product is a consumer product, doubtful cases shall be resolved in favor of coverage. For a particular product received by a particular user, "normally used" refers to a typical or common use of that class of product, regardless of the status of the particular user or of the way in which the particular user actually uses, or expects or is expected to use, the product. A product is a consumer product regardless of whether the product has substantial commercial, industrial or non-consumer uses, unless such uses represent the only significant mode of use of the product.
"Installation Information" for a User Product means any methods, procedures, authorization keys, or other information required to install and execute modified versions of a covered work in that User Product from a modified version of its Corresponding Source. The information must suffice to ensure that the continued functioning of the modified object code is in no case prevented or interfered with solely because modification has been made.
If you convey an object code work under this section in, or with, or specifically for use in, a User Product, and the conveying occurs as part of a transaction in which the right of
possession and use of the User Product is transferred to the recipient in perpetuity or for a fixed term (regardless of how the transaction is characterized), the Corresponding Source conveyed under this section must be accompanied by the Installation Information. But this requirement does not apply if neither you nor any third party retains the ability to install modified object code on the User Product (for example, the work has been installed in ROM).
The requirement to provide Installation Information does not include a requirement to continue to provide support service, warranty, or updates for a work that has been modified or installed by the recipient, or for the User Product in which it has been modified or installed. Access to a network may be denied when the modification itself materially and adversely affects the operation of the network or violates the rules and protocols for communication across the network.
Corresponding Source conveyed, and Installation Information provided, in accord with this section must be in a format that is publicly documented (and with an implementation available to the public in source code form), and must require no special password or key for unpacking, reading or copying.
8. Additional Terms.
"Additional permissions" are terms that supplement the terms of this License by making exceptions from one or more of its conditions. Additional permissions that are applicable to the entire Program shall be treated as though they were included in this License, to the extent that they are valid under applicable law. If additional permissions apply only to part of the Program, that part may be used separately under those permissions, but the entire Program remains governed by this License without regard to the additional permissions.
When you convey a copy of a covered work, you may at your option remove any additional permissions from that copy, or from any part of it. (Additional permissions may be written to require their own removal in certain cases when you modify the work.) You may place additional permissions on material, added by you to a covered work, for which you have or can give appropriate copyright permission.
Notwithstanding any other provision of this License, for material you add to a covered work, you may (if authorized by the copyright holders of that material) supplement the terms of this License with terms:
a. Disclaiming warranty or limiting liability differently from the terms of sections 15 and 16 of this License; or
b. Requiring preservation of specified reasonable legal notices or author attributions in that material or in the Appropriate Legal Notices displayed by works containing it; or
c. Prohibiting misrepresentation of the origin of that material, or requiring that modified versions of such material be marked in reasonable ways as different from the original version; or
d. Limiting the use for publicity purposes of names of licensors or authors of the material; or
e. Declining to grant rights under trademark law for use of some trade names, trademarks, or service marks; or
f. Requiring indemnification of licensors and authors of that material by anyone who conveys the material (or modified versions of it) with contractual assumptions of liability to the recipient, for any liability that these contractual assumptions directly impose on those licensors and authors.
All other non-permissive additional terms are considered “further restrictions” within the meaning of section 10. If the Program as you received it, or any part of it, contains a notice stating that it is governed by this License along with a term that is a further restriction, you may remove that term. If a license document contains a further restriction but permits relicensing or conveying under this License, you may add to a covered work material governed by the terms of that license document, provided that the further restriction does not survive such relicensing or conveying.
If you add terms to a covered work in accord with this section, you must place, in the relevant source files, a statement of the additional terms that apply to those files, or a notice indicating where to find the applicable terms.
Additional terms, permissive or non-permissive, may be stated in the form of a separately written license, or stated as exceptions; the above requirements apply either way.
9. Termination.
You may not propagate or modify a covered work except as expressly provided under this License. Any attempt otherwise to propagate or modify it is void, and will automatically terminate your rights under this License (including any patent licenses granted under the third paragraph of section 11).
However, if you cease all violation of this License, then your license from a particular copyright holder is reinstated (a) provisionally, unless and until the copyright holder explicitly and finally terminates your license, and (b) permanently, if the copyright holder fails to notify you of the violation by some reasonable means prior to 60 days after the cessation.
Moreover, your license from a particular copyright holder is reinstated permanently if the copyright holder notifies you of the violation by some reasonable means, this is the first time you have received notice of violation of this License (for any work) from that copyright holder, and you cure the violation prior to 30 days after your receipt of the notice.
Termination of your rights under this section does not terminate the licenses of parties who have received copies or rights from you under this License. If your rights have been terminated and not permanently reinstated, you do not qualify to receive new licenses for the same material under section 10.
10. Acceptance Not Required for Having Copies.
You are not required to accept this License in order to receive or run a copy of the Program. Ancillary propagation of a covered work occurring solely as a consequence of using peer-to-peer transmission to receive a copy likewise does not require acceptance. However, nothing other than this License grants you permission to propagate or modify any covered work. These actions infringe copyright if you do not accept this License. Therefore, by modifying or propagating a covered work, you indicate your acceptance of this License to do so.
11. Automatic Licensing of Downstream Recipients.
Each time you convey a covered work, the recipient automatically receives a license from the original licensors, to run, modify and propagate that work, subject to this License. You are not responsible for enforcing compliance by third parties with this License.
An “entity transaction” is a transaction transferring control of an organization, or substantially all assets of one, or subdividing an organization, or merging organizations. If propagation of a covered work results from an entity transaction, each party to that transaction who receives a copy of the work also receives whatever licenses to the work the party's predecessor in interest had or could give under the previous paragraph, plus a right to possession of the Corresponding Source of the work from the predecessor in interest, if the predecessor has it or can get it with reasonable efforts.
You may not impose any further restrictions on the exercise of the rights granted or affirmed under this License. For example, you may not impose a license fee, royalty, or other charge for exercise of rights granted under this License, and you may not initiate litigation (including a cross-claim or counterclaim in a lawsuit) alleging that any patent claim is infringed by making, using, selling, offering for sale, or importing the Program or any portion of it.
12. Patents.
A "contributor" is a copyright holder who authorizes use under this License of the Program or a work on which the Program is based. The work thus licensed is called the contributor's "contributor version".
A contributor's “essential patent claims” are all patent claims owned or controlled by the contributor, whether already acquired or hereafter acquired, that would be infringed by some manner, permitted by this License, of making, using, or selling its contributor version, but do not include claims that would be infringed only as a consequence of further modification of the contributor version. For purposes of this definition, “control” includes the right to grant patent sublicenses in a manner consistent with the requirements of this License.
Each contributor grants you a non-exclusive, worldwide, royalty-free patent license under the contributor's essential patent claims, to make, use, sell, offer for sale, import and otherwise run, modify and propagate the contents of its contributor version.
In the following three paragraphs, a “patent license” is any express agreement or commitment, however denominated, not to enforce a patent (such as an express permission to practice a patent or covenant not to sue for patent infringement). To “grant” such a patent license to a party means to make such an agreement or commitment not to enforce a patent against the party.
If you convey a covered work, knowingly relying on a patent license, and the Corresponding Source of the work is not available for anyone to copy, free of charge and under the terms of this License, through a publicly available network server or other readily accessible means, then you must either (1) cause the Corresponding Source to be so available, or (2) arrange to deprive yourself of the benefit of the patent license for this particular work, or (3) arrange, in a manner consistent with the requirements of this License, to extend the patent license to downstream recipients. "Knowingly relying" means you have actual knowledge that, but for the patent license, your conveying the covered work in a country, or your recipient's use of the covered work in a country, would infringe one or more identifiable patents in that country that you have reason to believe are valid.
If, pursuant to or in connection with a single transaction or arrangement, you convey, or propagate by procuring conveyance of, a covered work, and grant a patent license to some of the parties receiving the covered work authorizing them to use, propagate, modify or convey a specific copy of the covered work, then the patent license you grant is automatically extended to all recipients of the covered work and works based on it.
A patent license is “discriminatory” if it does not include within the scope of its coverage, prohibits the exercise of, or is conditioned on the non-exercise of one or more of the rights that are specifically granted under this License. You may not convey a covered work if you are a party to an arrangement with a third party that is in the business of distributing software, under which you make payment to the third party based on the extent of your activity of conveying the work, and under which the third party grants, to any of the parties who would receive the covered work from you, a discriminatory patent license (a) in connection with copies of the covered work conveyed by you (or copies made from those copies), or (b) primarily for and in connection with specific products or compilations that contain the covered work, unless you entered into that arrangement, or that patent license was granted, prior to 28 March 2007.
Nothing in this License shall be construed as excluding or limiting any implied license or other defenses to infringement that may otherwise be available to you under applicable patent law.
13. No Surrender of Others' Freedom.
If conditions are imposed on you (whether by court order, agreement or otherwise) that contradict the conditions of this License, they do not excuse you from the conditions of this License. If you cannot convey a covered work so as to satisfy simultaneously your obligations under this License and any other pertinent obligations, then as a consequence you may not convey it at all. For example, if you agree to terms that obligate you to collect a royalty for further conveying from those to whom you convey the Program, the only way you could satisfy both those terms and this License would be to refrain entirely from conveying the Program.
14. Use with the GNU Affero General Public License.
Notwithstanding any other provision of this License, you have permission to link or combine any covered work with a work licensed under version 3 of the GNU Affero General Public License into a single combined work, and to convey the resulting work. The terms of this License will continue to apply to the part which is the covered work, but the special requirements of the GNU Affero General Public License, section 13, concerning interaction through a network will apply to the combination as such.
15. Revised Versions of this License.
The Free Software Foundation may publish revised and/or new versions of the GNU General Public License from time to time. Such new versions will be similar in spirit to the present version, but may differ in detail to address new problems or concerns.
Each version is given a distinguishing version number. If the Program specifies that a certain numbered version of the GNU General Public License “or any later version” applies to it, you have the option of following the terms and conditions either of that numbered version or of any later version published by the Free Software Foundation. If the Program does not specify a version number of the GNU General Public License, you may choose any version ever published by the Free Software Foundation.
If the Program specifies that a proxy can decide which future versions of the GNU General Public License can be used, that proxy's public statement of acceptance of a version permanently authorizes you to choose that version for the Program.
Later license versions may give you additional or different permissions. However, no additional obligations are imposed on any author or copyright holder as a result of your choosing to follow a later version.
16. Disclaimer of Warranty.
THERE IS NO WARRANTY FOR THE PROGRAM, TO THE EXTENT PERMITTED BY APPLICABLE LAW. EXCEPT WHEN OTHERWISE STATED IN WRITING THE COPYRIGHT HOLDERS AND/OR OTHER PARTIES PROVIDE THE PROGRAM "AS IS" WITHOUT WARRANTY OF ANY KIND, EITHER EXPRESSED OR IMPLIED, INCLUDING, BUT NOT LIMITED TO, THE IMPLIED WARRANTIES OF MERCHANTABILITY AND FITNESS FOR A PARTICULAR PURPOSE. THE ENTIRE RISK AS TO THE QUALITY AND PERFORMANCE OF THE PROGRAM IS WITH YOU. SHOULD THE PROGRAM PROVE DEFECTIVE, YOU ASSUME THE COST OF ALL NECESSARY SERVICING, REPAIR OR CORRECTION.
17. Limitation of Liability.
IN NO EVENT UNLESS REQUIRED BY APPLICABLE LAW OR AGREED TO IN WRITING WILL ANY COPYRIGHT HOLDER, OR ANY OTHER PARTY WHO MODIFIES AND/OR CONVEYS THE PROGRAM AS PERMITTED ABOVE, BE LIABLE TO YOU FOR DAMAGES, INCLUDING ANY GENERAL, SPECIAL, INCIDENTAL OR CONSEQUENTIAL DAMAGES ARISING OUT OF THE USE OR INABILITY TO USE
THE PROGRAM (INCLUDING BUT NOT LIMITED TO LOSS OF DATA OR DATA BEING RENDERED INACCURATE OR LOSSES SUSTAINED BY YOU OR THIRD PARTIES OR A FAILURE OF THE PROGRAM TO OPERATE WITH ANY OTHER PROGRAMS), EVEN IF SUCH HOLDER OR OTHER PARTY HAS BEEN ADVISED OF THE POSSIBILITY OF SUCH DAMAGES.
- Interpretation of Sections 16 and 17.
If the disclaimer of warranty and limitation of liability provided above cannot be given local legal effect according to their terms, reviewing courts shall apply local law that most closely approximates an absolute waiver of all civil liability in connection with the Program, unless a warranty or assumption of liability accompanies a copy of the Program in return for a fee.
END OF TERMS AND CONDITIONS
- STORAGE MANAGER
- SYSTEM SETTINGS
- PRIVILEGE
- NETWORK AND FILE SERVICES SETTINGS
- HIGH AVAILABILITY
- APPLICATIONS
- NOTICES
- PREFACE
- AUDIENCE
- OVERVIEW
- ACCESSING THE NAS USING A BROWSER
- TIP
- ACCESSING THE NAS USING QFINDER PRO
- ACCESSING THE NAS USING MYQNAPCLOUD
- IMPORTANT
- ENABLING MYQNAPCLOUD
- ENABLING MY DDNS
- ACCESSING SHARED FOLDERS ON THE NAS
- ABOUT QES
- FEATURES AND BENEFITS
- NOTE
- CHANGES IN QES 2.2.0
- IMPORTANT NOTES
- NEW FEATURES
- ENHANCEMENTS
- FIXED ISSUES
- QES INSTALLATION
- INSTALLING QES USING MANUAL SETUP
- WARNING
- CLICK CONFIRM
- QES NAVIGATION
- TASK BAR
- NO. ELEMENT USER ACTIONS
- DASHBOARD
- MAIN MENU
- DESKTOP
- QES UTILITIES
- QNAP FLEXIBLE STORAGE ARCHITECTURE
- STORAGE MANAGER GLOBAL SETTINGS
- STORAGE
- DISKS
- DISK TYPES
- DISK MANAGEMENT
- DISK INFORMATION
- DISK STATUS INFORMATION
- DISK ACTIONS
- NAS AND ENCLOSURE ACTIONS
- INITIALIZING RAW DISKS
- DISK HEALTH
- DISK HEALTH INFORMATION
- TESTING DISK PERFORMANCE
- DRIVE BAY COMPATIBILITY AND EXPANSION
- STORAGE POOLS
- STORAGE POOL CREATION
- CREATING A STORAGE POOL
- CREATING A RAID 50 OR RAID 60 STORAGE POOL
- STORAGE POOL MANAGEMENT
- STORAGE POOL MANAGEMENT SCREEN
- REMOVING A STORAGE POOL
- EXPANDING A STORAGE POOL
- SCRUBBING A STORAGE POOL
- TAKING A STORAGE POOL OFFLINE
- BRINGING A STORAGE POOL ONLINE
- CONFIGURING A POOL SPACE ALERT THRESHOLD
- REPLACING A DISK IN A STORAGE POOL
- SUSPENDING RAID REBUILDING ON A SCHEDULE
- CLEANING THE DEDUPLICATION TABLE
- STORAGE POOL STATUS
- THE SYSTEM POOL
- RAID
- RAID TYPES
- RAID GROUP CAPACITY
- RAID DISK FAILURE PROTECTION
- RAID GROUP STATUS
- SHARED FOLDERS
- CREATING A SHARED FOLDER
- OPTIONAL: SELECT SAVE ENCRYPTION KEY
- CLICK CREATE
- SHARED FOLDER PERMISSIONS
- SHARED FOLDER
- CONFIGURING USER AND GROUP PERMISSIONS
- CONFIGURING NFS HOST ACCESS PERMISSIONS
- CONFIGURE SECURITY SETTINGS
- CONFIGURE NFS HOST ACCESS PERMISSIONS
- CLICK APPLY
- CONFIGURING SMB HOST ACCESS CONTROL
- SHARED FOLDER MANAGEMENT
- DELETING A SHARED FOLDER
- EDITING SHARED FOLDER PROPERTIES
- SHARED FOLDER ENCRYPTION
- SHARED FOLDER ACCESS
- MAPPING A SHARED FOLDER ON A WINDOWS COMPUTER
- CLICK FINISH
- MOUNTING A SHARED FOLDER ON A MAC COMPUTER
- MOUNTING A SHARED FOLDER ON A LINUX COMPUTER
- SPECIFY YOUR NAS USERNAME AND PASSWORD
- SSD OVER-PROVISIONING
- QES SSD FEATURES
- SNAPSHOTS
- SNAPSHOT CREATION
- TAKING A SNAPSHOT
- SELECT THE LUN SNAPSHOT TYPE
- CLICK OK
- CONFIGURING A SNAPSHOT SCHEDULE
- CLICK SCHEDULE
- SELECT ENABLE SCHEDULE
- SPECIFY A RETENTION TIME
- SNAPSHOT MANAGEMENT
- DELETING SNAPSHOTS
- SELECT AN OPTION
- CONFIGURING SNAPSHOT GLOBAL SETTINGS
- CLICK
- SELECT MAKE SNAPSHOT DIRECTORY (@SNAPSHOT) VISIBLE
- SNAPSHOT DATA RECOVERY
- RESTORING FILES AND FOLDERS FROM A SNAPSHOT
- SELECT A FILE OR FOLDER
- SELECT A RESTORE ACTION
- REVERTING A SHARED FOLDER OR LUN
- QNAP SNAPSHOT AGENT
- VIEWING REGISTERED SNAPSHOT AGENT SERVERS
- SNAPSHOT CLONE
- CLONING A SHARED FOLDER
- CLONING A LUN
- CACHE ACCELERATION
- CONFIGURING THE SSD CACHE
- ENABLING THE SSD CACHE
- DISABLING THE SSD CACHE
- CONFIGURING CACHED SHARED FOLDERS AND LUNS
- ISCSI & FIBRE CHANNEL
- STORAGE LIMITS
- ISCSI STORAGE LIMITS
- FIBRE CHANNEL STORAGE LIMITS
- ISCSI & FIBRE CHANNEL GLOBAL SETTINGS
- LUNS
- LUN OVERVIEW
- CREATING A LUN
- ISCSI
- GETTING STARTED WITH ISCSI
- ISCSI TARGETS
- CREATING AN ISCSI TARGET
- CLICK NEXT
- OPTIONAL: ENABLE CHAP AUTHENTICATION
- OPTIONAL: ENABLE MUTUAL CHAP AUTHENTICATION
- CREATING AN ISCSI TARGET WITH A MAPPED LUN
- SELECT THE NETWORK INTERFACES THAT THIS TARGET WILL USE FOR DATA TRANSMISSION
- EDITING ISCSI TARGET SETTINGS
- MANAGING AN ISCSI TARGET
- ISCSI LUN MANAGEMENT
- MANAGING AN ISCSI LUN
- CHANGING THE TARGET OF AN ISCSI LUN
- EXPANDING AN ISCSI LUN
- ISCSI ACCESS CONTROL LIST
- ADDING AN ISCSI LUN MASKING POLICY
- EDITING AN ISCSI LUN MASKING POLICY
- DELETING AN ISCSI LUN MASKING POLICY
- ISCSI TARGET AUTHORIZATION
- CONFIGURING AN ISCSI TARGET'S AUTHORIZED INITIATORS LIST
- ENABLING ISCSI TARGET AUTHORIZATION
- DISABLING ISCSI TARGET AUTHORIZATION
- ISCSI TARGET ACCESS
- FC SNAPSHOT AGENT SERVER LIST
- ISCSI SNAPSHOT AGENT SERVER LIST
- FIBRE CHANNEL
- FIBRE CHANNEL PORTS
- FIBRE CHANNEL PORT GROUPS
- CREATING A FIBRE CHANNEL PORT GROUP
- MAPPING A LUN TO A FIBRE CHANNEL PORT GROUP
- DUAL CONTROLLER NAS FC PORT GROUPS
- CONFIGURING FIBRE CHANNEL PORT BINDING
- FIBRE CHANNEL PORT ACTIONS
- FIBRE CHANNEL PORT STATUS
- FIBRE CHANNEL STORAGE
- CONFIGURING FIBRE CHANNEL LUN MASKING
- SELECT A LUN
- CLICK LUN MASKING
- FIBRE CHANNEL LUN ACTIONS
- FIBRE CHANNEL LUN STATUS
- FIBRE CHANNEL WWPN ALIASES
- ADDING WWPNS
- CONFIGURING A WWPN ALIAS
- REMOVING A WWPN ALIAS
- EXPORTING A LIST OF WWPN ALIASES
- EXAMPLE CSV OUTPUT
- IMPORTING A LIST OF WWPN ALIASES
- EXAMPLE CSV FILE
- LUN GROUPS
- LUN GROUP FEATURES AND LIMITATIONS
- GENERAL
- CREATING A LUN GROUP
- LUN GROUP ACTIONS
- LUN GROUP SNAPSHOTS
- TAKING A LUN GROUP SNAPSHOT
- CONFIGURING A LUN GROUP SNAPSHOT SCHEDULE
- REVERTING A LUN GROUP
- CLONING A LUN GROUP
- HOSTS
- ADDING A HOST
- SPECIFY AN ALIAS
- SPECIFY A DESCRIPTION
- SPECIFY ONE OR MORE OF THE FOLLOWING IDENTIFIERS
- QOS
- STORAGE GROUP
- ENABLING QOS
- CREATING A QOS STORAGE GROUP
- SELECT A STORAGE POOL
- SELECT A STORAGE TYPE
- POLICY
- CREATING A QOS POLICY
- SELECT AN I/O TYPE
- RESERVED POOL I/O CAPACITY
- RESERVING POOL I/O CAPACITY
- CONFIGURING THE SYSTEM ADMINISTRATION SETTINGS
- CONFIGURING THE TIME SETTINGS
- CONFIGURING THE DAYLIGHT SAVING TIME (DST) SETTINGS
- CONFIGURING THE CODEPAGE SETTINGS
- CONFIGURING THE LOGIN SCREEN
- NETWORK
- IPV4
- IP ADDRESS
- CONFIGURING IPV4 SETTINGS
- SELECT THE NETWORK TRANSFER SPEED OF THE INTERFACE
- CONFIGURE THE DHCP SETTINGS
- ENABLE JUMBO FRAMES
- CONFIGURING PORT TRUNKING
- VIRTUAL LANS (VLANS)
- ADDING AN INTERFACE TO A VLAN
- DNS SERVER
- CONFIGURING IPV4 DNS SETTINGS
- DEFAULT GATEWAY
- CONFIGURING THE IPV4 DEFAULT GATEWAY
- IPV6
- CONFIGURING IPV6 SETTINGS
- CONFIGURING IPV6 DNS SETTINGS
- SERVICE BINDING
- CONFIGURING SERVICE BINDING
- CONFIGURING PROXY SERVER SETTINGS
- SECURITY
- ALLOW/DENY LIST
- CREATING AN IP BLOCK LIST
- CREATING AN IP ALLOW LIST
- NETWORK ACCESS PROTECTION
- CONFIGURING NETWORK ACCESS PROTECTION
- CERTIFICATE & PRIVATE KEY
- UPLOADING AN SSL CERTIFICATE AND PRIVATE KEY
- DOWNLOADING THE SSL CERTIFICATE AND PRIVATE KEY
- RESTORING THE DEFAULT SSL CERTIFICATE AND PRIVATE KEY
- PASSWORD POLICY
- CONFIGURING THE PASSWORD POLICY
- HARDWARE
- RESET BUTTON
- BUZZER
- SMART FAN
- ENABLING THE SMART FAN
- CONFIGURING THE FAN SPEED MANUALLY
- BACKUP BATTERY UNIT (BBU)
- CONFIGURING THE BACKUP BATTERY UNIT (BBU) SETTINGS
- POWER
- WAKE-ON-LAN (WOL)
- ENABLING OR DISABLING WAKE-ON-LAN (WOL)
- POWER RECOVERY
- CONFIGURING THE POWER RECOVERY SETTINGS
- NOTIFICATION
- EMAIL ALERTS
- CONFIGURING AN EMAIL SERVER
- CONFIGURING A CUSTOM SMTP SERVER
- SMS ALERTS
- CONFIGURING SMS ALERTS FROM CLICKATELL COMMUNICATOR/CENTRAL
- CONFIGURING SMS ALERTS FROM CLICKATELL SMS PLATFORM
- CONFIGURING SMS ALERTS FROM A CUSTOM SERVICE PROVIDER
- CONFIGURING NOTIFICATION SETTINGS
- FIRMWARE UPDATE
- CHECKING FOR LIVE UPDATES
- UPDATING THE FIRMWARE MANUALLY
- UPDATING THE FIRMWARE USING QFINDER PRO
- BACKUP/RESTORE
- BACKING UP THE SYSTEM SETTINGS
- RESTORING THE SYSTEM SETTINGS
- SYSTEM RESET AND RESTORE TO FACTORY DEFAULT
- EXTERNAL DEVICE
- UNINTERRUPTIBLE POWER SUPPLY (UPS)
- CONFIGURING AN SNMP UPS
- NAS BEHAVIOR DURING A POWER OUTAGE
- SYSTEM STATUS
- SYSTEM LOGS
- SYSTEM EVENT LOGS
- SYSTEM CONNECTION LOGS
- ONLINE USERS
- SYSLOG CLIENT MANAGEMENT
- USERS
- DEFAULT USER ACCOUNTS
- USER CREATION
- CREATING A LOCAL USER
- CREATING MULTIPLE USERS
- USER ACCOUNT LISTS
- CREATING A TXT USER ACCOUNT LIST
- CREATING A CSV USER ACCOUNT LIST
- IMPORTING USERS
- EXPORTING USERS
- USER MANAGEMENT
- CHANGING USER PASSWORDS
- EDITING A USER ACCOUNT
- EDITING A USER'S GROUPS
- EDITING APPLICATION PRIVILEGES
- DELETING USERS
- HOME FOLDERS
- ENABLING HOME FOLDERS
- USER GROUPS
- DEFAULT USER GROUPS
- CREATING A USER GROUP
- EDITING A USER GROUP'S DESCRIPTION
- EDITING USER GROUPS
- DELETING USER GROUPS
- CONFLICTS IN SHARED FOLDER PERMISSIONS
- EDITING A USER'S SHARED FOLDER PERMISSIONS
- EDITING A USER GROUP'S SHARED FOLDER PERMISSIONS
- QUOTA
- CONFIGURING QUOTA SETTINGS
- EXPORTING QUOTA SETTINGS
- DOMAIN SECURITY
- ACTIVE DIRECTORY (AD) AUTHENTICATION
- CONFIGURING ACTIVE DIRECTORY (AD) AUTHENTICATION USING THE QUICK CONFIGURATION WIZARD
- CONFIGURING ACTIVE DIRECTORY (AD) AUTHENTICATION MANUALLY
- VERIFY THE FOLLOWING
- ACTIVE DIRECTORY (AD) SERVER AND DOMAIN NAMES
- TRUSTED DOMAINS
- ENABLING TRUSTED DOMAIN AUTHENTICATION
- LDAP AUTHENTICATION
- CONFIGURING LDAP AUTHENTICATION
- SELECT WHICH USERS ARE ALLOWED TO ACCESS THE NAS
- LDAP AUTHENTICATION OPTIONS
- LDAP AUTHENTICATION VIA SERVER MESSAGE BLOCK (SMB)
- THIRD-PARTY SOFTWARE
- SAMBA SCHEMA
- CONFIGURATION EXAMPLES
- ACTIVE DIRECTORY (AD) AND LDAP MANAGEMENT
- UIDS AND GIDS
- RECLAIMING UIDS
- RECLAIMING GIDS
- WIN/NFS
- MICROSOFT NETWORKING
- CONFIGURING MICROSOFT NETWORKING SETTINGS
- NFS SERVICE
- ENABLING THE NFS SERVICE
- FTP
- CONFIGURING FTP SERVICE SETTINGS
- CLICK APPLY ALL
- CONFIGURING THE FTP SERVICE ADVANCED SETTINGS
- SSH
- CONFIGURING SSH
- SNMP
- CONFIGURING THE SNMP SETTINGS
- CONFIGURING SNMP V3 SETTINGS
- OPTIONAL: SELECT USE PRIVACY
- SNMP MANAGEMENT INFORMATION BASE (MIB)
- DOWNLOADING THE SNMP MIB
- SERVICE DISCOVERY
- BONJOUR
- CONFIGURING THE BONJOUR SETTINGS
- NETWORK RECYCLE BIN
- CONFIGURING THE NETWORK RECYCLE BIN
- DELETING ALL FILES IN THE NETWORK RECYCLE BIN
- PERMANENTLY DELETING A FILE OR FOLDER
- RECOVERING A DELETED FILE OR FOLDER
- RESTRICTING ACCESS TO THE NETWORK RECYCLE BIN
- ABOUT HIGH AVAILABILITY
- DUAL PATH OVERVIEW
- SYSTEM COMPONENTS
- SYSTEM AVAILABILITY STATUS
- DUAL PATH STATUS
- STORAGE CONTROLLER ACTIONS
- BACKUP STATION
- RSYNC
- CONFIGURING THE RSYNC SERVER
- CREATING AN RSYNC BACKUP JOB
- RSYNC JOB SETTINGS
- RSYNC JOB BUTTONS
- NAS TO NAS BACKUPS
- CREATING A NAS TO NAS BACKUP JOB
- SNAPSYNC
- SNAPSYNC REQUIREMENTS
- OTHER REQUIREMENTS
- SNAPSYNC RESTRICTIONS
- SNAPSYNC JOB CREATION
- CREATING A REAL-TIME SNAPSYNC JOB
- CREATING A SCHEDULED SNAPSYNC JOB
- OPTIONAL: SELECT EXECUTE BACKUP IMMEDIATELY
- SNAPSYNC SCREEN
- SNAPSYNC SETTINGS
- SNAPSYNC PERFORMANCE TEST
- RUNNING A SNAPSYNC PERFORMANCE TEST
- ACCESSING A SNAPSYNC DESTINATION FOLDER
- CONFIGURE SMB HOST ACCESS
- DIAGNOSTIC TOOL
- DOWNLOADING SYSTEM LOGS
- ANALYZING KERNEL LOGS
- ANALYZING HARD DISK DRIVES
- STATION MANAGER
- TFTP SERVER
- ENABLING THE TFTP SERVER
- VIRTUALIZATION
- VAAI FOR ISCSI AND VAAI FOR NAS
- OFFLOADED DATA TRANSFER (ODX)
- 10GBE SUPPORT
- VSPHERE CLIENT
- QNAP SMI-S PROVIDER
- BSD LICENSE
- CDDL LICENSE
- DEFINITIONS
- LICENSE GRANTS
- DISTRIBUTION OBLIGATIONS
- VERSIONS OF THE LICENSE
- DISCLAIMER OF WARRANTY
- TERMINATION
- LIMITATION OF LIABILITY
- U.S. GOVERNMENT END USERS
- MISCELLANEOUS
- RESPONSIBILITY FOR CLAIMS
- GNU PUBLIC LICENSE
- PREAMBLE
- TERMS AND CONDITIONS
- SOURCE CODE
- BASIC PERMISSIONS
- CONVEYING VERBATIM COPIES
- CONVEYING MODIFIED SOURCE VERSIONS
- CONVEYING NON-SOURCE FORMS
- ADDITIONAL TERMS
- ACCEPTANCE NOT REQUIRED FOR HAVING COPIES
- AUTOMATIC LICENSING OF DOWNSTREAM RECIPIENTS
- PATENTS
- NO SURRENDER OF OTHERS' FREEDOM
- USE WITH THE GNU AFFERO GENERAL PUBLIC LICENSE
- REVISED VERSIONS OF THIS LICENSE
Brand : QNAP
Model : ES1640DC
Category : Server