
Pro 6 - Audio and video software ACDSEE - Free user manual and instructions
Find the device manual for free Pro 6 ACDSEE in PDF.


| Product Type | Audio and Video Editing Software |
| Brand | ACDSee |
| Model | Pro 6 |
| Version | 6.0 |
| Category | Multimedia Editing Suite |
| Supported Operating Systems | Windows 10/11, macOS 10.14 or later |
| User Interface | Graphical User Interface (GUI) with timeline and panels |
| Languages | English, French, German, Spanish, Italian, Japanese, Chinese |
| Key Features | Multi-track video editing, audio mixing, effects, transitions, chroma key, color grading |
| Supported Input Formats | MP4, AVI, MOV, MKV, WMV, MP3, WAV, FLAC, and more |
| Supported Output Formats | MP4, AVI, MOV, WMV, MP3, WAV, FLAC, image sequences |
| System Requirements | 8 GB RAM, 2 GB free disk space, dedicated GPU recommended |
| Installation Method | Download installer from official website |
| Updates | Automatic online updates |
| Documentation | PDF user manual (403 pages) included |
| Customer Support | Online knowledge base, email support, community forum |
| License Type | Commercial, single-user license |
| Disk Space Required | 2 GB for installation, additional space for projects |
| RAM Recommended | 8 GB minimum, 16 GB for 4K editing |
| GPU Support | Hardware acceleration for encoding/decoding |
Frequently Asked Questions - Pro 6 ACDSEE
User questions about Pro 6 ACDSEE
0 question about this device. Answer the ones you know or ask your own.
Ask a new question about this device
Download the instructions for your Audio and video software in PDF format for free! Find your manual Pro 6 - ACDSEE and take your electronic device back in hand. On this page are published all the documents necessary for the use of your device. Pro 6 by ACDSEE.
USER MANUAL Pro 6 ACDSEE
acdsee™ pro6 Total photography control
User Guide
Contents
C HAPTER 1 : G ETTI NG S TARTED.1....
Welcome To ACDSee Pro 6.1
About The ACDSee User Interface 1
Manage Mode 1
View Mode 2
Develop Mode 2
Edit Mode 2
Online Mode 2
Switching Modes In ACDSee Pro 3
Using Manage Mode.... 3
About The Manage Mode Panes 3
Manage Mode Drop-down Menus 4
Working With Manage Mode Panes 5
Moving Panes 5
Docking Panes.... 5
Stacking Panes 6
Resizing Panes 6
Resetting The Workspace 6
Using View Mode 6
Viewing Images In Full Screen Mode 7
Using The View Mode Panes....8
Using The Bottom Toolbar 8
Switching To Manage Mode 9
Using Develop And Edit Mode 9
Using Online Mode 11
Uploading Images 11
Finding Other Resources And Support 12
C HAP TER 3 : MANAG E MOD E 1 4
Importing Files With ACDSee Pro 14
Importing Files Using The Windows AutoPlay Dialog Box 14
Importing Files From Specific Types Of Devices..14....
About Removable Devices 15
Importing Photos From A Device 15
Importing Photos From A CD Or DVD 20
Importing Photos From A Disk 20
Importing Photos From A Scanner 21
Importing Photos From A Mobile Phone Folder 22
Creating A Renaming Template..22....
Browsing Files In The File List Pane 23
Using The File List Pane 23
Maximizing The File List Pane 25
Browsing Using The Folders Pane 25
Selecting Multiple Folders.... 26
Creating And Managing Folders 26
Browsing Files By Date Or Event 26
Adding Descriptions And Thumbnails In Events View 28
Browsing Favorite Files 28
Creating A Shortcut 28
Creating A New Folder.... 29
Deleting A Shortcut Or Folder 29
Using The Catalog Pane 29
Easy-Select Bars 29
The ACDSee Pro Database.... 29
Browsing RAW Files 30
Changing Views 30
Customizing The Details View 30
Filtering Files 31
Grouping Files 32
Navigating Through Groups In The File List 32
Removing Groups From The File List 33
Selecting Files In One Or More Groups.... 33
Sorting Files 33
Sorting Files Using Column Headers 34
Custom Sorting Files 34
Selecting Files 34
Previewing Images..35
Rotating Images..35
Comparing Images..36.
Gathering Images In The Image Basket 38
Cataloging And Managing Files In ACDSee Pro..38.
Organizing With The Catalog Pane 38.
Categories .39
Keywords .39
Ratings .39
Color Labels 39
Auto Categories 39
Saved Searches 39
Special Items 40
The ACDSee Pro Database And Embedded Data 40
Easy-Select Bars 40
Match All Match Any 41
Creating Categories
Manage Categories 42
Create Easy-access Category Sets 42
Assigning And Searching Categories And Ratings
Quickly Assign Ratings 43
Assign And Search Categories And Ratings In The Catalog Pane 44
Assign Categories And Ratings In The Properties Pane 45
Remove Categories Or Ratings From Files 45
Assigning Color Labels
Create A Color Label Set 46
Assign Color Labels 46
Search Images Assigned To A Label 48
Removing Color Labels And Color Label Sets 49
Using The Properties Pane
Properties Pane Areas 49
Metadata Tab 49
50
Organize Tab.50
File Tab 50
Embedding ACDSee Metadata Into Files..50....
Using The Map Pane.51
Using The Map Pane In Manage_Mode_52
Adding Metadata To Files And Using Presets 52
Manage Metadata Views And Presets 54
Creating And Assigning Hierarchical Keywords .55....
Managing Keywords.... 56
To Create Quick Keywords 56
Copying And Moving Files 57
Copying Images To The Clipboard.... 58
Pasting Files And Folders 58
Replacing Or Overwriting Files 58
Renaming A File Or Folder 59
Storing Files In Private Folders 59
Tagging Images 61
Removing Metadata From Files 62
Removing IPTC Keywords From Auto Categories 63
Changing The Date And Time Properties Of Images 63
Backing Up Your Files To Another Computer 65
Updating Or Deleting A Synchronization 65
Running A Saved Synchronization.... 66
Searching With ACDSee Pro.... 66
Using The Quick Search Bar 66
Using The Search Pane 67
Search Pane Areas.... 68
Properties Area 69
Searching With File Name Patterns 70
Using Selective Browsing 70
Setting Selective Browsing Criteria 71
Tips For Selective Browsing 71
Hiding The Selective Browsing Pane 71
Searching With Auto Categories 72
Identifying Commonly Used Search Categories 72.
Refining Your Auto Categories Search 73
Finding Duplicate Files 73
Finding Images Quickly.74
Sharing Files With ACDSee Pro 74
Taking A Screen Capture 74
Emailing Images 76
Share / Email Using ACDSee Online 76
Creating A Desktop Screensaver 77
Viewing And Configuring A Slideshow 79
Sharing Slideshows And Screensavers 82
Creating A Desktop Slideshow 83
Using The ACDSee Showroom Slideshow Controls 84
Creating A PDF 84
Creating A PowerPoint Presentation 85
Burning A CD Or DVD 86
Creating An HTML Album 87
Uploading Images To Photo Websites 88
Connecting 88
New Services 89
Creating A Contact Sheet 89
Creating Archives Of Your Files 90
Extracting Archived (.zip) Files 91
Creating A SendPix Album 92
Printing Images 92
Setting Printer Options 93
Setting Image Size And Positioning 95
Adding Text To Pages 95
Setting Contact Sheet Printing Options 96
About Batch Processing....97
Using Batch Export 97
Converting Multiple Images To Another File Format.... 102
Rotating Or Flipping Multiple Images 103
Setting Rotated And Flipped File Options 104
Resizing Multiple Images 105
Adjusting Exposure For Multiple Images..106.
Adjusting Batch Exposure Options 107
Renaming Multiple Files..108
Changing The Color Profiles Of Multiple Images 110
Using Batch Edit..111.
Batch Edit Rotate Options 113
Batch Edit Crop Options
Batch Edit Resize Options
Batch Edit Color Options
Batch Edit Channel Mixer Options
Batch Edit Sepia Options
Batch Edit Exposure Options
Batch Edit Lighting Options.
Batch Edit Noise Removal Options 122
Batch Edit Sharpening Options.
Batch Edit Vignette Options
Batch Edit Text Overlay Options
Batch Edit Watermark Options
Using Batch Develop
About The ACDSee Pro Database
Embedding ACDSee Metadata In Files
Viewing Files That Have Data To Embed
Retrieving ACDSee Metadata That Is Embedded In Files
Excluding Folders From The Database
Cataloging Files In The Database.
Converting An Older Database
Importing Database Information
Importing File Information From Other Sources
Importing Photo Discs.
Importing Albums.
Working With Descript.ion Files
Exporting Database Information
Generating File Lists.
114
114
118
119
120
120
122
[Non-Text]
123
124
126
128
129
132
133
34
34
134
135
135
136
136
.36
137
137
137
38
Backing Up Your Database 138
Database Backup Tips And Strategies..139.
Backup Schedule..140.
Backup Location 140
Backup Size..140.
Restoring Database Information From A Backup .140.
Maintaining The Database 141
Optimizing The Database.... 141
Rebuilding Thumbnails And Metadata 142
Quarantined Files 142
Working With Plug-ins 142
Types Of Plug-ins 143
Managing Plug-ins 143
Disabling A Plug-in 143
Changing The Plug-in Order.... 143
Viewing Plug-in Properties And Getting Help 144
CHAPTER 4: VIEW MODE 145
Viewing RAW Images 145
Viewing Images With Auto Advance 145
Displaying Text On Images In View Mode 146
Hiding Image Text 147
Synchronizing View Mode To A Folder 147
Viewing Offline Images 148
Rebinding Photo Discs 148
Using ACDSee Quick View 149
Viewing Images In Another Application 150
Setting An Image As The Desktop Wallpaper 150
Viewing And Using Brush Files 151
Playing Video And Audio Files 151
Automatically Playing Audio And Video Files 152
The Media Toolbar.... 152
Selecting Part Of A Media File 153
Saving Video Frames As Images 154
Adding Or Editing Image Audio 154
Recording Audio To An Image 155
Selecting Part Of An Image 156
Applying Presets In View Mode 157....
Viewing File Properties In View Mode 157
Printing Images In View Mode 157
Showing Originals 158
Committing Changes 158
Zooming An Image 159
Setting The Zoom Level 159
Automatically Shrinking Or Enlarging Images 160
Using The Navigator To View Select Areas Of An Image 161
Panning A Magnified Image 161
Using Pan Lock 162
Magnifying Specific Areas Of An Image 162
CHAPTER 5: DEVELOP MODE 163
Using Develop Mode 163
Developing An Image 163
Saving And Canceling.... 163
Restoring Original Settings 165
Histogram And Image Viewing Controls 165
Viewing Images 167
Customizing The View.... 167
Exporting An Image To Multiple Formats And Resolutions.... 167
Sharing Develop Settings 170
Restoring Original Images 171
Using Presets In Develop Mode 171
Creating And Applying Presets 171
Applying A Preset To A Single Image 173
Applying A Develop Settings Preset To A Batch Of Images
Renaming Presets.... 174
Deleting Presets 174
Saving Images In Develop Mode 175
Saving Images..175....
How ACDSee Pro Saves Changes To Images 176
Pro 3 RAW Processing Emulation 177
About The Tune Tab 178
Saving And Canceling 178
Using The Develop Brush 179
Develop Brush Options.181
Making General Adjustments 181
A Brief Technical Explanation Of EV 182
Adjusting White Balance 182
Adjusting Lighting 183
Basic Lighting 184
Light EQ 184
Advanced Options 185
Graph 185
Adjusting Color 187
Adjusting Soft Focus 191
Applying A Cross Process Effect 192
Adjusting Split Tone 192
Adding A Post-Crop Vignette.... 193
Adjusting Tone Curves 193
Selecting An Output Color Space For RAW Files 194
About The Detail Tab 194
Saving And Canceling 195
Sharpening 195
Reducing Noise....196
Correcting Chromatic Aberration 197
About The Geometry Tab.... 198
Saving And Canceling..198....
Fixing Lens Distortion 199
Rotating And Straightening 199
Correcting Perspective....200
Cropping 201
Resizing The Crop Window 201
Fixing Lens Vignetting 202
About The Repair Tab 203
Saving And Canceling..203....
Reducing Red Eye 204
C HAPTER 6 : EDI T MODE 2.0.6
Using Edit Mode 206
What Happens From Develop To Edit.... 206
Editing An Image 206
Reverting To Develop Settings Or Original Settings 207
Histogram And Image Viewing Controls 207
Using Presets In Edit 208
Using The Undo/Redo Button 208
Restoring Originals And Develop Settings 209
Restoring The Original Image 209
Restoring Your Develop Settings.... 209
Using The Edit Brush.... 209
Using Blend Modes And Opacity 211
Opacity 211
Blend Modes 211
Saving Images In Edit Mode 212
Saving Images 212
How ACDSee Pro Saves Changes To Images 213
Using Selections 214
The Selection Tools 215
Combining The Tools 215
Applying Edits Or Effects To Selections 217
Reducing Red Eye 218
Removing Flaws 219
Adding Text To An Image 220
Adding Drawings To Your Image 223
Adding A Watermark To An Image 224
Adding Borders 225
Adding Your Own Textures Or Edges.... 228
Textures 228
Edges .228
Adding A Vignette 229
About Special Effect Filters 231
Applying A Bathroom Window Effect 231
Applying A Blinds Effect 232
Applying A Bulge Effect 232
Applying A Collage Effect 233
Applying A Colored Edges Effect 234
Applying A Contours Effect 235
Applying A Crayon Drawing Effect 235
Applying A Crosshatch Effect 236
Applying A Dauber Effect 236
Applying An Edge Detect Effect 237
Applying An Emboss Effect 237
Applying A Furry Edges Effect 238
Applying A Glowing Edges Effect 239
Applying A Granite Effect 239
Applying A Lomo Effect 240
Applying A Mirror Effect 240
Applying A Negative Effect 241
Applying An Oil Paint Effect 241
Applying The Old Effect 242
Applying The Orton Effect 243
Applying An Outline Effect 243
Applying A Pencil Drawing Effect 244
Applying A Pixel Explosion Effect 244
Applying A Pixelate Effect 245
Applying A Posterize Effect 246
Applying A Radial Waves Effect 246
Applying A Rain Effect 247
Applying A Ripple Effect .248
Applying A Scattered Tiles Effect 249
Applying A Sepia Effect 250
Applying A Sheet Metal Effect 250
Applying A Shift Effect 251
Applying A Slant Effect 252
Applying A Sobel Effect 252
Applying A Solarize Effect 253
Applying A Stained Glass Effect 253
Applying A Sunspot Effect 254
Applying A Swirl Effect.255....
Applying The Threshold Effect 255
Applying A Topography Effect 256
Applying A Water Effect 257
Applying A Water Drops Effect 257
Applying A Waves Effect 258
Applying A Weave Effect 259
Applying A Wind Effect 260
Creating A Custom Special Effect Filter (Convolution Effect) 261
About Blend Modes 261
Rotating An Image 262
Flipping An Image 263
Cropping An Image.... 264
Resizing The Crop Window 264
Correcting Perspective Distortion 265
Correcting Lens Distortion 265
Resizing An Image.... 266
Pixel Resize Options And Resulting Action 267
Adjusting Image Exposure 269
Adjusting Image Levels 270
Adjusting Levels Automatically 272
Adjusting Tone Curves 272
Adjusting Lighting 273
Using The Basics Tab 274
Using The Light EQ Tab 275
Using The Advanced Tab 276
Sliders 276
Graphs .276....
Dodge And Burn 281
Dodging And Burning Parts Of An Image..281....
Adjusting White Balance 282
Adjusting Color 282
Adjusting Split Tone 287
Adjusting Color Balance 288
Creating A Grayscale Image..289....
Using The Histogram 290
Changing Image Color Depth 290
Using The Color Dialog Box 291
The Color Grids 292
The Color Palette And Slider 292
Selecting And Adjusting Colors 292
Sharpening An Image 292
Blurring An Image 293
About Noise And Noise Reduction 295
Removing Noise 295
Adding Noise 296
Adjusting Clarity 297
CHAPTER 7: ONLINE MODE 299
Working In Online Mode 299
Creating An ACDSeeOnline.com Account 300
Uploading Images To ACDSeeOnline.com 300
Setting Folders To Automatically Sync To Web 301
Creating Folders And Setting Privacy 302
Changing The Rating System 303
Downloading Images 303
Using Transfer Manager 304
CHAPTER 8: OPTIONS AND CONFIGURATION 305
Setting The General Options 305
Setting The Manage Mode Options 305
Setting The Quick Search Options 306
Setting The File List Pane Options 307
Setting The Thumbnail Info Options..309.
Setting The Thumbnail Style Options 311
Setting The Details View Options..311
Setting The Preview Pane Options 312
Setting The Folders Pane Options 313.
Setting The Catalog Pane Options.313
Setting The Calendar Pane Options..314
Setting The CD/DVD Management Options 315
Setting The Properties Pane Options.316
Setting The File Management Options
Setting The Color Management Options.
Setting The Database Options
Setting The View Mode Options
Setting The Display Options.
Setting Develop And Edit Mode Options
Setting The ACDSee Online Options
Setting The ACDSee Showroom Options.
Setting The ACDSee Quick View Options
Setting JPEG Options.
Creating Custom Workspaces
Auto-hiding Panes And Panels.
Using The Task Pane
Customizing Toolbars
Displaying And Hiding Toolbars
Customizing Toolbar Contents.
Resetting Toolbars
Customizing The Tools Panes
Configuring External Editors
Customizing Keyboard Shortcuts
Changing The Display Theme.
CHAPTER 9: SHORTCUTS
Manage Mode Keyboard Shortcuts
316
317
319
320
321
322
323
324
325
25
326
327
27
7
27
28
8
29
29
0
31
32
Manage Mode Mouse Shortcuts 335
View Mode Keyboard Shortcuts 336
View Mode Mouse Shortcuts 340
Calendar Pane Shortcuts 341
Develop And Edit Mode Keyboard Shortcuts 341
Develop And Edit Mode Mouse Shortcuts 342
Online Mode Keyboard Shortcuts 342
Online Mode Mouse Shortcuts 345
CHAPTER 10: FILE FORMATS ...... 346
About RAW Files 346
Registering And Associating Files 346
For Microsoft XP® 346
For Microsoft Windows Vista® Or Windows..7® 347
For Microsoft Windows 8 ^ 347
G LOS SARY 350
I NDEX 362
Chapter 1: Getting starte
Welcome to ACDSee Pro 6
Welcome to ACDSee, and congratulations on choosing the industry-leading digital photo management software.
ACDSee Pro is the essential application for importing, organizing, viewing, enhancing, and sharing your digital photos and other media files.
With ACDSee Pro you can import your photos from your camera to your computer, categorize and rate your files, and manage photo collections of any size—from a few hundred to a few hundred thousand. Choose to view thumbnail previews of any size, or use a detailed list of file properties to sort your files. Can't find a particular photo? No problem—ACDSee Pro includes a variety of powerful searching tools and a Compare Images feature to eliminate duplicates.
Achieve total control of your photography workflow and get back behind the lens faster with ACDSee, the complete photography management solution for professional photographers.
Build your photography workflow around ACDSee and notice the difference. Its flexible cataloging capabilities, unrivalled viewing speed, and powerful photo editor make ACDSee the choice of busy professional and advanced amateur photographers worldwide.
Add vastly improved RAW processing, a full set of metadata tools, and unparalleled viewing speed, and you have a fully integrated photography editing and management solution. ACDSee accelerates your workflow and quickly gets you back to doing what you do best: shooting amazing photographs.
The Patented LCE (Lighting and Contrast Enhancement) single-exposure HDR algorithms powering Pro's Lighting tool accurately and intelligently stretch the dynamic lighting range of your photos, making them incredibly realistic or atmospheric.
View mode quickly generates high-quality displays of your images. You can run slideshows, play embedded audio, and display multiple-page images in any of the more than 50 image and multimedia file formats.
Also, ACDSee Pro includes a wide variety of image processing tools you can use to create, edit, and touch-up your digital images. Use tools such as red eye reduction, crop, sharpen, blur, and photo repair to enhance or correct your images. Image processing tools, such as exposure adjustment, convert, resize, rename, and rotate, can be performed on multiple files at the same time.
The user interface is completely customizable, and provides quick access to tools and features. You can customize the screen layout, the order of images, toolbar display, and many other options to suit your preferences. ACDSee Pro contains extensive context-sensitive Help to assist you as you move through the application.
ACDSee Pro is a fast, powerful, and easy-to-use image management system that everyone from beginners to professionals can use and enjoy.
About the ACDSee User Interface
The ACDSee user interface provides easy access to the various tools and features you can use to browse, view, edit, and manage your photos and media files. ACDSee consists of five modes: Manage mode, View mode, Develop mode, Edit mode, and Online mode.
Manage mode

Manage mode is the main browsing and managing component of the user interface, and is what you see when yo Pro using the shortcut icon on your desktop. In Manage mode, you can find, move, preview, and sort your files, and access
organization and sharing tools.
Manage mode consists of 12 panes, most of which can be closed when not in use. The File List pane is always visible, and displays the contents of the current folder, the results of your latest search, or the files in your database that match your filtering criteria. A status bar at the bottom of the Manage mode window displays information about the currently selected file, folder, or category.
You can open and close panes, move them to different areas of your screen, and stack them on other panes or dock them to the edge of the window. Most panes also have additional options you can set to further customize their behavior and appearance. Manage mode also features a toolbar and a set of drop-down menus. The toolbar provides buttons for your home folder, and for navigating forwards and backwards through your folders. The drop-down menus provide quick access to the most common tasks.
View mode

In View mode you can play media files and display images in full resolution, one at a time. You can also open panes to view image properties, display areas of an image at varying magnifications, or examine detailed color information.
You can open View mode by selecting an image and clicking on the View mode tab, and you can use the filmstrip in View mode to flip quickly between all of the images in a folder. View mode contains a toolbar with shortcuts to commonly-used commands, and a status bar at the bottom of the window, which displays information about the current image or media file.
Develop mode

Perform most of your image adjustment in Develop to apply changes to the entire image. Then take your image i select and fix specific parts of the image. Use Develop mode's non-destructive editing tools to adjust an image's exposure, white balance, color profile, as well as sharpen, reduce noise and much more.
Develop mode is a non-destructive, parametric editing, RAW conversion environment. Parametric editing means that when you edit an image in Develop mode you are creating instructions for adjustments, rather than adjusting the actual pixels as you do in Edit mode. Develop mode's non-destructive operations are entirely interwoven and interdependent and are applied in a fixed order to maximize the image quality. When working on RAW files, adjustments are applied as much as possible using the RAW image data.
Edit mode

After applying changes to the entire image in Develop mode, use Edit mode to fine tune your image using pixel-based editing tools such as red eye removal.
Edit mode works on the image data already rendered to RGB. Edits are independently applied to the converted RGB data in the order that you do them. This chain editing gives you full control over the pixels allowing creative freedom to apply precise adjustments. This makes operations such as selections and blend modes possible.
Online mode

Online mode provides an easy way to upload images to ACDSeeOnline.com to share with your contacts or the public. In Online mode, you can select the images on your computer and then drag and drop them directly into ACDSeeOnline.com.
Switching Modes in ACDSee Pro
In ACDSee, you can quickly switch between the five modes—Manage, View, Develop, Edit, and Online mode.
The mode buttons are located at the top right of the ACDSee Pro window:
Manage
View
Develop
Edit
Online
To switch from one mode to another:
Click one of the following mode buttons:
- Manage: Import, browse, organize, compare, find, and publish your photos.
• View: Display and examine photos at any magnification.
• Develop: Adjust all your images using the non-destructive power of the Develop tools.
• Edit: Fix and enhance photos using the pixel-based Edit tools.
• Online: Upload images to ACDSeeOnline.com to share with your contacts or the public.
Using Manage Mode
In Manage mode, you can browse, sort, catalog, manipulate, and share your files and images. You can combine different tools and panes to perform sophisticated searching and filtering operations, and view thumbnail previews of images and media files.
You can also switch very quickly to the other modes by clicking the mode buttons in the top right corner.
The panes in Manage mode are fully customizable, and can be moved, resized, hidden, docked, or closed. You can also stack the panes together for easy reference and accessibility, and to maximize your screen space.
If the pane you want to view is not visible, click View from the top left main toolbar and select a pane.
About the Manage mode panes
Manage mode consists of the following panes:
| File List | This panedisplays the contentsof the currently selected folder, the results of your latest search, or the files and folders that match your selective browsing criteria. The File List pane is always visible, and cannot be hidden or closed. You can customize the File List pane by changing the way the files are displayed, or the size of the thumbnails. |
| Folders | This panedisplays the directory structureof your computer, much like the directory tree in Windows Explorer. You can use the Folders pane to browse through the folders and display their contents in List pane. You can also display the contents of multiple folders in the File List by clicking the Easy indicator opposite each folder, on the left side of the pane. |
| Calendar | This panedisplays a calendarthat you can use to organize and browse your files according to their associated dates. |
| Favorites | This pane stores shortcuts to your favorite images, files, folders or even applications. Dragging an image file, or folder into theFavorites panecreates a shortcut to the original without affecting it in any way. |
| Search | This pane provides access to a powerfulsearch utility. You can specify the type of search you want to perform, and enter your search criteria into the fields provided in the Search pane.You can also save a search and give it a name. Saved searches are listed on the Search pane and Catalog pane. On the Search pane, can selectSaved searchesfrom the drop-down list to run again. On the Catalog pane, Saved Searches are listed below Auto Categories, where you can run them again clicking once on the Saved Search name. |
| Preview | This panedisplays a thumbnail previewand histogram of any image or media file currently selected in the File List pane. You can adjust the size of the thumbnail by resizing the Preview pane, and also sp whether you want the Preview pane to play media files or just display the first frame. |
| Selective Browsing | This pane combines input from the Folders, Catalog, and Calendar panes tolimit the list of files in the File List paneto those that match a specific set of criteria. You can include or exclude files by adjusting the different criteria in the Selective Browsing pane. |
| Catalog | This panelists the categories, auto categories, ratings, color labels, and saved searchesto help you sort and manage your files. You can also use the Special Items area in the Catalog pane to quickly view images on your computer, or see any uncategorized files in the current folder. |
| Task | This pane displays menus ofcommonly-used buttons and commandsfrom the menus and toolbars. The menus change dynamically based on your current location and selections in ACDSee. |
| Properties | This pane displaysfile properties and metadatafor any file or folder you select in the File List pane. You can use the Properties pane to view and edit metadata for your files, and the EXIF metadata include digital photos. |
| Map | This panedisplays marked locations on amapfor any file you select in the File List pane. You can use the Map to view and mark the geographic location of your files. |
| Image Basket | While browsing through your files and folders, you can place images in the Image Basket tohold them temporarily. You can then edit, print, or share those images without moving them all into a single folder. |
| Burn Basket | This pane provides the tools you need to group and organize files and thenburn them to CDs and DVDs from within ACDSee. |
Manage mode drop-down menus
The drop-down menus in Manage mode give you quick access to often-used tasks. The drop-down menus include the fo
• Workspaces: Where you can save a set of customized layouts for the workspace or reset it to the default workspace.
- Import: Where you can import photos from cameras and other devices.
- Batch: Where you can run all the batch editing processes.
• Create: Where you can create slide-show files, PDFs, PowerPoint presentations, CD/DVDs, online albums, or archives.
- Slideshow: Where you can configure and run a slideshow.
- Send: Where you can upload to photo sites, an FTP, or share photos by email.
- External Editors: Where you can list external editors for easy access.
Working with Manage mode panes
You can open and close panes in Manage mode to suit your preferences, and move, float, or stack any of the panes to customize the layout of the Manage mode window.
To open or close panes in Manage mode:
Click View and select the pane you want to open or close.
Moving panes
You can move a pane from a docked or floating position to a new location. You can move one pane at a time, or several stacked panes.
To move a pane:
- Drag the pane's title bar and hold your cursor over any of the arrows of the Docking Compass.
- When the shaded marquee displays the position of the pane you want, release the mouse button.
- To return a pane to its previous location, double-click its title bar.
To move a docked or floating pane:
Do one of the following:
- Drag the pane's tab to a new location. Only one pane moves.
- Drag the pane's title bar to a new location. Any panes stacked beneath it also move.

If you use dual monitors, you can move the panes to your second monitor to free up space on your main r
Docking panes
When you select a pane in the Manage mode, the Docking Compass activates to help you place the pane precisely. The Docking Compass consists of an outer and inner ring of arrows. When you hold your cursor over any of the arrows, a shaded marquee displays the potential position of the pane.
To dock a pane in Manage mode window:
- Drag the pane's title bar or tab to activate the Docking Compass.
- To dock a pane around the outer edge of the window, hold your cursor over any of the outer arrows of the Docking Compass, and then release the mouse button.
- To dock a pane around the outer edge of the File List pane, or any another pane, hold your cursor over the inner arrows of the Docking compass, and then release the mouse button.
Stacking panes
You can stack panes and reorder their tabs to suit your needs.
To stack panes:
-
Do one of the following:
-
Drag one pane's title bar onto the title bar of another pane until the shaded marquee appears, and the mouse button.
-
Drag one pane inside another, hold your cursor over the center of the Docking Compass, and then release mouse button.
-
To reorder the panes, drag a tab to the left or right in the tab order.
- To separate a tabbed pane, drag the pane's tab to another location on the screen.
Resizing panes
You can resize all the panes in Manage mode, whether they are docked or floating.
To resize a docked pane:
- Hold your cursor over the edge of the pane until the cursor changes to arrows and lines.
- Drag the edge of the pane to the size you want.
To resize a floating pane:
Hold your cursor over the edge or corner of the pane and then drag the pane to the size you want.
Resetting the workspace
You can return all of the Manage mode panes to their default positions at any time.
To reset the Manage mode workspace:
Click View | Workspaces | Default Workspace.
Using View Mode
You can use View mode to display your images and media files using their actual dimensions or at a variety of magnifications. You can also display a group of images in sequential order.
View mode contains four main areas:
- View area: This is the main viewing area, which displays the current image or media file. You can customize the view, and zoom in or out on your images and media files.
- Bottom toolbar: Located below the main viewing area, the Bottom toolbar provides shortcut buttons to commonly-used tools and commands, such as the zoom and scroll tools. You can customize the toolbar to use large or small can choose to not display the toolbar.
- Filmstrip: This is an area below the main viewing area, which displays thumbnails of the images in the current folder or in the group of images you selected in Manage mode. It provides a scroll bar along the bottom, so that you can scroll through your images, and buttons for moving to the next or previous image.
- Status bar: Located at the bottom of the window, the Status bar displays information and properties for the current image or media file. It also displays icons for rating, color labels, and tagging that you can click to edit.
View mode can also display the Properties pane to show EXIF, IPTC and ACDSee metadata information about the image or file. View mode also has the Navigator, Magnifying Glass and Histogram panes, each of which show detailed image information.
To open an image or media file in View mode:
In Manage mode, in the File List pane, do one of the following:
- Select a file and press Enter.
- Select a file and click the View mode button.
• Double-click a file. - Right-click an image or media file, and then select View.
To open a group of images in View mode:
- In Manage mode, in the File List pane, select a group of images.
- Press Enter.
- To navigate through the images, do the following:
• To view the next image in the sequence, click Next.
• To view the previous image in the sequence, click Previous.
Viewing images in full screen mode
You can use the entire screen of your monitor to display images. In full screen mode, the window borders, menu bar, status bar, and toolbars are hidden, and only the image is visible. If you want to always view your images in full screen mode, you can set this option as the default for View mode.
To view images in full screen mode:
- Open an image or a group of images in View mode.
- Click View | Full Screen.
- Right-click the image to access the View mode tools and options via a context menu.
To exit full screen mode:
Do one of the following:
- Press the F key.
• Right-click the image and select View | Full Screen.

Use the keyboard shortcut F in View mode to toggle in and out of a full screen view.
Using the View mode panes
To open the View mode panes:
- Open an image in View mode.
-
Do one of the following:
-
Click View | Histogram to display the histogram for the image.
- Click View | Magnifying glass to display a pane which shows the area of the image under your cursor at a higher magnification.
- Click View | Navigator to display a thumbnail overview of a magnified image.
- Click View | Properties to display the IPTC, EXIF and ACDSee Metadata for the image.
Using the Bottom toolbar
Use the Bottom toolbar to access commonly-used tools.
Bottom toolbar
| Add to image basket | Adds the image to the image basket. | |
| Rotate left | Rotates the image to the left. | |
| Rotate right | Rotates the image to the right. | |
| Scroll | Pans or scrolls the image when the image is zoomed to a larger size the View mode area. | |
| Select | Selects a rectangular area of the image. | |
| Zoom | Zooms in or out on the image. Click to zoom in or right-click to zoom | |
| Full Screen | Displays the image on a full screen. Press F to view full screen. | |
| External Editors | Opens the file in an external editor of your choosing. | |
| Show Original | Show Original | Toggles between the original image and the edited image. |
| Navigator | Displays the Quick Navigator pane so you can see a thumbnail overview of magnified image. (Only visible for images that are zoomed in to a size la than will fit on the screen.) | |
| Zoom slider | Controls the size of the image in the View mode area. Drag the slider to adjust the size. | |
 | Zoom drop-down list | Displays a list of zoom sizes to select. |
| Actual Size | Returns the image to its actual size. | |
| Fit Image | Reduces the image to fit within the View mode area. |
Switching to Manage mode
You can return to Manage mode at any time.
To return to Manage mode from View mode:
Do one of the following:
• Double-click the image.
- Click the Manage mode button.
Using Develop and Edit Mode
Develop mode is a non-destructive, parametric editing, RAW conversion environment. Parametric editing means that when you edit an image in Develop mode you are creating instructions for adjustments, rather than adjusting the actual pixels as you do in Edit mode. Develop mode's non-destructive operations are entirely interwoven and interdependent and are applied in a fixed order to maximize the image quality. When working on RAW files, adjustments are applied as much as possible using the RAW image data.
Edit mode works on the image data already rendered to RGB. When switching from Develop to Edit mode with a RAW file, the full resolution image data is converted to a 16 bit RGB image with the Develop instructions applied. In Edit mode, each operation is completely independent. Edits are applied to the converted RGB data in the order that you do them. This chain editing gives you full control over the pixels allowing creative freedom to apply precise adjustments. This makes operations such as selections and blend modes possible.
Workflow
Do most of your adjustments on RAW images in Develop mode, where you can work on the RAW image data. Then make your final adjustments in Edit mode, where you can apply fine-tuned adjustments on the more limited RGB image data.
For example, if you adjust the White Balance on an RAW image in Develop mode, you will be controlling the color temperature applied during the RAW conversion. Doing a white balance adjustment in Edit mode can only apply a color cast adjustment to the already rendered RGB data, reducing image quality and introducing the possibility of posterization (ie. color banding) in your image.
The processing power of Develop and Edit mode
Develop mode first Edit mode second
Develop mode allows non-destructive processing of RAW, JPEG and Fotheny touch-ups to specific areas of your images, file types. use the tools in Edit mode. Use the Selections tool t
- Start your image corrections in Develop. Develop is where you make most of your image adjustments. Changes you make are applied to the editing tools to selectively apply entire image. adjustments to parts of your image.
- Tweak previous image adjustments at any time. If you re-open aAdd final touches to your image such as developed image in Develop, the settings are the same as you lefters, text, watermark and special effects. them. Develop allows you to revisit the image at any time to reset the pixel-editing tools to fix red eye or adjust the previous settings.
- When you make a change, the changes are saved in a separate file. Record your edit changes and revert back to and the original remains untouched. Every time you open the image in your Develop settings or to the original. When Develop mode, the original image opens with the changes applied, you revert back to the Develop settings, the This allows non-destructive developing of your images. settings are exactly the way you left them.
- Discard your Develop settings and revert back to the original image at any time. The original is saved for all file types.
In Develop mode you can:
- Tune the image using exposure, white balance, lighting, color, split tone and tone curves tools, or set the output color space RAW image.
- Adjust details in your image using the sharpening, noise reduction, and chromatic aberration tools.
- Fix geometry in your image using the lens distortion, rotate and straighten, perspective, vignette correction, and cropping tools.
• Repair red eye in your image.
In Edit mode you can:
- Use the Selections tool or Edit Brush to apply edits to a specific part of the image.
- Remove flaws, or red eye.
- Add text, watermark, borders, vignettes, special effects, and drawing tools.
- Crop, flip, resize, rotate, and correct perspective and lens distortion.
- Adjust lighting using the exposure, levels, auto levels, tone curves, lighting, and dodge and burn tools.
- Adjust color using the White Balance, Advanced Color, Color Balance, Convert to Black & White or Split Tone tool.
- Add details to your image using Sharpen, Remove Noise, Add Noise, Blur, or Clarity tools.

You can easily group your images in Manage mode so that you can find the images that have been developed. From the Group drop-down menu select Processed State, or use color labels to plan your workflow.

Use the keyboard shortcut ESC to cancel out of Develop or Edit mode.
Using Online Mode
You can use Online mode to upload your images to ACDSeeOnline.com. ACDSeeOnline.com is an image sharing and storage service available to ACDSee Pro users. With Online mode and ACDSeeOnline.com, you can upload and browse through your online images without having to launch an Internet browser.
Online mode has two parts: ACDSeeOnline.com and Transfer. In ACDSeeOnline.com, you can browse through your images in your ACDSeeOnline.com account and modify your account settings. In Transfer, the screen splits into two. The bottom part of the screen displays the images in your computer, and the top part of the screen displays your ACDSeeOnline.com account. You can simply click and drag images in your computer displayed in the bottom part of the screen, and drag them into the top part of the screen to upload the images to your ACDSeeOnline.com account.

You cannot take an image from Online mode and open it in Develop or Edit mode. To edit an image, select Manage or View mode and open it in Develop or Edit mode.
Uploading images
To upload photos to your ACDSeeOnline.com account:
- In Online mode, click Login.
- Login to your account.
- Click Transfer.
Your screen splits in two, with the bottom part of the screen displaying images in your computer.
- Select an image to upload. To select multiple photos, press the SHIFT or the CTRL key.
- Click and drag the image into the top part of the screen to upload it to your ACDSeeOnline.com account.

There is no upload size limit when uploading your images to your ACDSeeOnline.com account.
Chapter 2: Getting hel
Using the Quick Start Guide
The Quick Start Guide contains a set of links on the left side that you can click to get a tour of the main features in ACDSee or set some important preferences.
To close the Quick Start:
Uncheck the Always show at start-up option in the bottom left corner of the dialog box, and click Close.
To re-open the Quick Start Guide:
On the Menu bar, click Help | Quick Start Guide.
To use the Quick Start Guide for quick access to more information:
Click the links on the left side of the Quick Start Guide or the Next button for a high-level tour.
To set preferences:
- Click Default start folder to select which folder to open at start-up.
- Click Display theme to select a window display theme.
- Click Backup reminder and set reminders to backup your database.
Finding Other Resources and Support
The Help menu on the ACDSee Pro menu bar contains links to open plug-in help files and options that link you to the ACDSee Web site, where you can find updates, newsletters, and system requirements.
Other links take you to the support page, to the registration page, or the community home page where you can join the community and participate in the ACDSee forums.
The Help menu is also where you can convert a trial version of ACDSee Pro to a full version by entering a license
Click Help to see the following menu options:
- Plug-in Help
• ACDSeeOnline.com Help - Manage acdID Account
• Check for Updates and Messages - Quick Start Guide
• Product Support and Resources - Customer Support
• ACDSee Products
• ACDSee Community
ACDSee Pro 6 User Guide
Facebook
- Twitter
• About ACDSee Pro
Chapter 3: Manage Mod
Manage mode is the main browsing and managing component of the user interface, and is what you see when you start ACDSee Pro using the shortcut icon on your desktop.
In Manage mode, you can:
- Import your photos from a device, CD or DVD, disk, or scanner.
• Browse files and folders.
• Catalog files by tagging them, adding categories, color labels, ratings, keywords and other metadata.
• Search for files and create saved searches. - Publish and share files, including emailing files, creating slideshows, burning files to CD or DVD, and uploading images to your favorite photo Web site.
- Print images.
• Edit or develop batches of files. - Manage and maintain your ACDSee Pro database.
Importing Files With ACDSee Pro
You can use ACDSee Pro to download images from devices like your digital camera, flash drives, CD/DVDs, scanners, mobile phones, or other removable devices. In Manage mode, you can also use the File | Import | From Disk option to import files from a network, and any kind of disk or drive that can be mapped, while preserving the original folders and subfolders.
Importing files using the Windows AutoPlay dialog box
When you connect your digital camera or other device to your computer, the Windows AutoPlay dialog box prompts you to choose one of the following:
- Import pictures using ACDSee: Select this option to open the Import dialog box. You can then select settings to rename, backup, and place the files. You can save your import settings and give them a name so that you can re-use them later. You can also create advanced settings for import dates and RAW + JPEG options if your camera takes both file formats. You can also create a file renaming template to use with specific kinds of files or projects.
- Manage pictures using ACDSee: Select this option to browse the files in ACDSee. You can then choose to import the files or simply copy and paste the files from the device.
• Import pictures and videos using Windows: Select this option if you prefer to use Windows to import the files.
Depending on the other applications installed on your computer, there may be additional options.
Importing files from specific types of devices
For more specific instructions, select the type of device you connected:
- Importing Photos From a Device
- Importing Photos From a CD or DVD
- Importing Photos From a Disk
- Importing Photos From a Scanner (This option may not be available in the 64 bit version.)
- Importing Photos From a Mobile Phone Folder
About removable devices
With ACDSee, there are several ways to obtain images from your digital camera, scanner, or memory card. For more information about how your device communicates with your computer, please consult your device's Help file or manual. Some different types of removable devices are:
- USB Removable device: Removable devices include memory cards that you can attach to your computer using a USB card reader, camera memory cards that insert directly into slots on the computer, or flash drives. USB removable device detected by your computer and are shown in the structure as a removable drive.
- Windows Image Acquisition (WIA): Cameras and scanners that use Windows Image Acquisition (WIA) drivers to communicate with the computer. Some cameras, including Canon cameras, use WIA. ACDSee Pro automatically detWIA protocol.
- TWAIN: Cameras and scanners that use the TWAIN interface. TWAIN-supported devices use TWAIN drivers that you must install on your computer to communicate with the device. For more information about drivers, and whether or no device uses TWAIN, please consult your device's Help file.

You require DirectX 9.0c and QuickTime to copy and view audio or video files.
Importing Photos From a Device
The Import From dialog box gives you multiple options for importing your files from cameras, card readers, flash drives, and other mass storage devices. If you want to simply import files with a few clicks, you can. Or you can select from several options to streamline your workflow and perform multiple tasks with each import.
In the Import From dialog box, you can view the thumbnails of the files on the device by their date or file type. You can change the size of the thumbnails to make it easier to select those you want to import or leave on the device, and then view only those you have selected.
You can also choose the destination folder or subfolders for the files, create a backup set of files as you import, and rename the files during the import process, automatically rotating them if your camera has this option. Advanced settings give you options to change the date you want to use, and where to place RAW and JPEG files if your camera creates both file formats.
You can even organize your files as you import by adding Categories, IPTC and ACDSee Metadata.
Then you can save all these settings as a preset to use or adapt later.

If your camera connects to the computer as a removable drive, you can also simply copy photos directly from the File List and Folders pane because ACDSee Pro detects and displays the removable device in the Folders pane. If you have your camera connects to your computer, please see About removable devices in Importing files with ACDSee

Some cameras, for example, Canon, use Windows Image Acquisition (WIA) to communicate with a computer. Son scanners use TWAIN to connect to a computer. If your devices use these protocols, you can import by clicking From
Device or From Scanner on the File | Import menu. ACDSee Pro automatically detects these protocols.
To download photos using the Import From dialog box:
- Connect your camera or device to the computer. Make sure your camera is turned on, and the cable is properly connected to your computer.
-
Do one of the following:
-
If the Windows AutoPlay dialog box opens, select Import pictures using ACDSee.
- If you have more than one device connected to your computer, select the device you want to use from then click OK.
• In Manage mode, click File | Import | From Device. -
Press ALT + G on the keyboard.
-
In the Import From dialog box, select from the import options as described below.
- Click Import.
- To browse your imported photos, click Yes when the Import Complete dialog box displays.

You may require Direct X 9.0c and QuickTime to download audio and video files from your camera.
Import From options
| View by Date | Displays all the files grouped by the dates they were created. To deselect a click the check box beside the date. To deselect all dates, click the All Date: check box. | |
| File Type | Displays all the files grouped by their file type. To deselect a file type, click check box beside the file type. To deselect all file types, click the All file type check box. | |
| View all | Displays all the thumbnails of the files on the device. | |
| View selected | Displays only the files selected for import. | |
| Files selected for import | Displays the number of files currently selected for import. | |
| Zoom slider | Adjusts the size of the thumbnails as you drag the slider left (shrinks) or rig (enlarges). | |
| Choose Import Settings | Import settings drop-down list | Displays the names of recently-used import settings to use again, or you can select one of the following:Current: Uses the current settings to import.Last used: Uses the import settings from the last import.None: Clears all the current import settings. |
| Save import settings | Saves all the current import settings with a name so that you can use them again. To save (or edit) import settings, select the Save icon and type in name (or re-save existing settings).The new name for the import settings appears in the drop-down list. | |
| Delete import settings | Deletes the saved import settings currently selected in the Import settings drop down list. | |
| Choose destination | Destination drop-down list | Displays the names of recently-used destinations to use again, or you can select one of the following:Last used: Uses the destination from the last import.None: Clears all the current destination settings. |
| Place insubfolders | Subfolders drop-down list | Displays the following pre-defined subfolder options to select:Single folder by name: Creates a new subfolder with the name you type into the Name field, which activates when you select this option. the files are placed into a folder with the new name.Single folder by today's date: Creates one folder using today's date as the name and places all the files into the folder.Nested folder by today's date: Creates a series of nested folders, one below the other, based on today's date and the format you select in Format field. The folders are created as the sample shows and all the files are placed in the lowest folder.Nested folders by file's date: Creates multiple sets of nested folders based on the files' dates and on the format you select in the Format field, which activates when you select this option. The folders are created as the sample shows and the files are imported into the lowest folders on each date.Separate folders by file's date: Creates separate folders based on the individual file dates in the format selected from the Format drop-down options.Preserve folder names: Preserves existing folder names when you use the From Disk option to import. For example, if you have a flash drive CD containing images in a complex set of subfolders, the whole folder tree is imported intact. |
| Format | Displays date format options for the Nested folder options (see above). | |
| Sample | Displays a sample of the nested folders that will be created using the current settings (see above). | |
| Backup to Backup destination drop-down list | Creates a backup set of files using an exact duplicate of the subfolders you I selected under Place in subfolders.You can also do one of the following:ClickBrowseand then navigate to an existing folder to use as a backup destination.ClickBrowseand then Make New Foderto create a new folder as a backup destination.While existing ACDSee metadata is included in the backup copy, any Catalog settings (IPTC or ACDSee Metadata) added during import will not be included. | |
| Rename files to | Rename template drop-down list | Renames each file as it imports according these predefined renaming templates:Date/time - filename: Creates each filename using the file date and time the file was created plus the original filename.Date/time: Creates each filename using the file date and the time it created.Camera - sequence number: Creates each filename using the camera name and a sequential number starting at one.Date/time - sequence number: Creates each filename using the file date and the time it was created plus a sequential number starting at one.Camera - filename: Creates each filename using the camera name and the original filename.When you create and save your own renaming templates, they also appear in list for you to select. |
| Edit | Opens the Rename Templates dialog box where you can create and save your own renaming templates. | |
| Automatically rotate images | Rotates your images automatically if your camera creates the information needed for this option to v | |
| Advanced | Opens the Advanced Import Options dialog box where you can change the date settings for files an specify where to place RAW and JPEG files.To set the ACDSee Pro database, use one of the following as the file date:Exif date: Uses the EXIF date embedded in the image by the camera.File modified date: Uses the date the file was last modified.Specific date: Uses the date you select by clicking the in the calendar drop-down arrow.To specify where to place RAW+JPEG files select one of the following:Place both in chosen destination folder: Places RAW and JPEG files in the folder you have selected under Choose destination on the Import From dialog box.Place JPEG in subfolder: Places the RAW files in the folder you have selected under Choose destination on the Import From dialog box. Then creates a new subfolder with the name yo into the Subfolder name field, which activates when you select this option. All the JPEG files are placed into the new subfolder.Place RAW in subfolder: Places the JPEG files in the folder you have selected under Choose destination on the Import From dialog box. Then creates a new subfolder with the name yo into the Subfolder name field, which activates when you select this option. All the RAW files are placed into the new subfolder. | |
| Organize settings | Organize settings drop-down list | Select the names of saved metadata presets or select Manage presets to open Manage Metadata Presets dialog box of options. |
| Properties pane Metadata tab | Enter ACDSee and IPTC Metadata into to the fields to add to the files you are importing.* |
| Opens the Keyword Picker dialog box where you can select existing keywords. | |
| Properties pane Categories tab | Assigns the imported files to any category selected in this tab. You can select multiple categories. |

The Import dialog gives access to new IPTC Core 1.1 metadata fields introduced in Pro 4.

The values set in the IPTC fields are reflected in their corresponding EXIF field.
Importing Photos From a CD or DVD
You can download photos from a CD or DVD using the Import From dialog box, or the Folders pane. Before you import photos, you can browse to the CD and view them just like any other folder and then simply copy and paste them into a new file.
If you use the Import From dialog box, you can set the subfolder options to import complex folder structures intact, including all the folder names. You can also organize your files as you import them, as well as create a duplicate backup folder, simultaneously.
To import photos from a CD or DVD:
- Insert the CD or DVD into the drive.
-
Do one of the following:
-
If the Windows AutoPlay dialog box opens, select Import pictures using ACDSee.
-
If you have more than one CD or DVD drive connected to your computer, select the device you want click OK.
• In Manage mode, click File | Import | From CD/DVD. -
In the Import From dialog box, select the Import From options you want to use, and then click Import.
- To browse your imported photos, click Yes when the Import Complete dialog box displays.
Importing Photos From a Disk
ACDSee Pro makes it easy to import photos from any other storage device, computer, network, flash drive etc. In fact any device that your computer can map to. When you connect a removable drive, or to a network, disk or another computer, ACDSee Pro sees it as a removable drive and you can browse to it, and around it, using the Folders pane. You can just copy and paste the files into ACDSee.
If the files in the disk or drive have a complex folder structure or you want to organize, rename, and back up the files as you import them, it is worth using the Import From dialog box, which has import settings do all of these tasks simultaneously.
To import photos from a disk:
- Connect the disk to the computer.
-
Do one of the following:
-
If the Windows AutoPlay dialog box opens, select Import pictures using ACDSee.
-
If you have more than one disk or drive connected to your computer, select the device you want to click OK.
• In Manage mode, click File | Import | From Disk. -
In the Browse for Folder dialog box, navigate to the removable drive or device in the folder tree, and then click OK.
- In the Import From dialog box, select the options you want to use, and then click Import.
- To browse your imported photos, click Yes when the Import Complete dialog box displays.
Importing Photos From a Scanner
The Get Photos Wizard guides you through the process of downloading files from your scanner if it uses TWAIN. You can preview the images you want to download, and specify a location for them on your hard drive.
To use the Get Photos Wizard, your scanner needs to use Windows Image Acquisition (WIA) or TWAIN. If you are not sure how your scanner connects to your computer, see About removable devices.

This option may not be available in the 64 bit version of ACDSee Pro 6.
To download photos from a scanner:
- Connect your scanner to your computer. Make sure your scanner is turned on, and the cable is properly connected to your computer.
- In Manage mode, click File | Import | From Scanner.
- On the Source Device page, in the Device list, select the specific name of the scanner from which to download your files. Click Next when you are ready to continue.
-
On the File Format Options page, select the following options:
-
Documents to scan: If you want to scan a single document, do not make any selections in this section. If you want to scan more than one document, select the Scan multiple documents check box, and then choose whether to create an image for each document, or a single image for all the scanned documents.
-
Output file format: Select a file format to save your images. You can click the Settings button to select any file-specific options available for your chosen format. Note that not every file format has additional settings.
-
Click Next when you are ready to continue.
-
Finally, on the Output Options page, specify whether you want to rename your imported images using a name template, and where to place them on your hard drive. When you are ready, click Next to copy your images.
-
Select Browse to your new images if you want to view the files in Manage mode, and click Finish to return to ACDSee.
Importing Photos From a Mobile Phone Folder
The Mobile Phone Acquire Wizard will guide you through the process of downloading images from your mobile phone fol
To download photos from your mobile phone:
- In Manage mode, click File | Import | From Mobile Phone Folder.
- On the Welcome page, select the location of your mobile phone folder, and where you want to place the images on your hard drive. You can select options to place images in a dated subfolder, and to remove the files from your device once they are on your hard drive. Click Next when you are ready to continue.
- On the Downloaded Images page, preview your downloaded images. Click Next when you are ready to place the images on your hard drive.
Creating a Renaming Template
In the Import From dialog box, you can create, name, and save a template that gives each file a unique name as they are imported and placed on your hard drive. You can then re-use the template each time you import photos. Renaming templates can have a numerical sequence, custom text, and file-specific information in each new file name. You can create and save different renaming templates for different sorts of files. For example, you could have a different renaming template for a different camera, or a different type of file.
To create a renaming template:
- In the Import From dialog box, select Rename files to.
- From the drop-down list, select one of the following system templates:
- Date/time - filename: Renames the files using the date and time each file was created and the original file name.
- Date/time: Renames the files using the date and time each file was created.
- Camera - sequence number: Renames the files using the camera name and a sequential number.
- Date/time - sequence number: Renames the files using the date and time each file was created and a sequential number.
-
Camera - filename: Renames the files with the name of the camera and each file's original name.
-
To create your own renaming template, or add to a system template, click Edit.
-
In the Rename Templates dialog box, select from the options as described in the table below.
-
Click OK.

If you select the Skip video and audio files check box, the rename process will not rename video and audio files.
Rename Templates options
| System template drop-down list | Click the drop-down list to select a different pre-defined system template. |
| New rename template | Click to open the New Rename Template dialog box where you can type in a name for your own rer template. Give the renaming template a name that clearly identifies how you plan to use the template, kind of information the name will contain. For example,Camera name_photographer.When you clickSave,the name of your new template is added to the drop-down list of system templates. |
| Delete | Deletes the renaming template currently selected in the drop-down list unless it is a pre-defined system template, which cannot be deleted. |
| Rename Template | Use this field to create the renaming template. You can type in the photographer's name and an unde between each element of the template to make it easier to read.Use the following placeholders to ensure that each filename is unique:Insert an *. When your files are renamed, the * will be replaced by the original file name.Insert a #. When your files are renamed, each # will be replaced by a sequential number. If you have a large number of files, insert several ##s. For example, if you enter ####, the first file renar be numbered 001, the next 002, and so on. If you have over 1000 files, insert ####.Insert a metadata placeholder <> and the data inside these brackets is replaced with whatever data you have chosen. For example, if you choose, the model of the camera is inse into each file name. |
| Insert Metadata | Click to open the Choose Properties dialog box, where you can select from a long list of metadata to your template. |
| Sample | As you type, or add placeholders in the Rename Template field, the same updates to show you a sar renaming template will look. |
| Skip video and audio files | Skips the renaming of video and audio files during the rename process. |
Browsing Files in the File List Pane
The File List pane is the large pane in the center of the Manage mode window. The File List pane displays the contents of the currently selected folder, the results of your latest search, or the files and folders that match your selective browsing criteria. The File List pane is always visible, and cannot be hidden or closed.
Files display as thumbnails in the File List pane by default. However, you can change the File List pane view from thumbnails to details, list, icons, tiles, or filmstrip. You can sort your files according to name, size, image properties, and more. You can also use filters to control which files display in the File List pane.
Using the File List pane
There are three sections in the File List pane: the Contents bar, the File List drop-down lists, and the File List toolbar. The overlay icons, which appear on the thumbnails, allow you to rate, tag, and label your images and indicate additional information such as if
the file has been processed or geotagged.
The Contents Bar
The Contents bar is located at the top of the File List pane and describes what you are currently browsing. When you are using the Folders pane, the Contents bar will display the path or paths to the folders you are browsing, as in the following example:

C:\Pictures\Family

If you are browsing files by category or rating with the Catalog pane, the Contents bar displays the selected classifications, as in the following example:
[Rating: 1] And [1 Category: Places]
![ACDSEE Pro 6 - [Rating: 1] And [1 Category: Places] - 1](/content/2026/06/1261857/images/4f3668b88de7fdad3a34bcd2417bb88a5037b8aae245f2a54edef7b3aff99ca8.jpg)
The Contents bar also displays a date range when browsing with the Calendar pane, and a summary of your search criteria when you use the Search pane.
File List drop-down lists
| Filter | Displays a list of filter options such as rating and category. You can also select Advanced Filters create a custom filter. |
| Group | Displays a list of file attributes that you can use to group files in the File List pane. |
| Sort | Displays a list of file attributes that you can use to sort the files in the File List pane. |
| View | Displays a list of view options for viewing files in the File List pane. |
| Select | Displays a list of file selection options. |
File List toolbar
| Add to image basket | Adds selected images to the image basket. | |
| Rotate left | Rotates selected images to the left. | |
| Rotate right | Rotates selected images to the right. | |
| Compare images | Opens selected images in the Compare Images Viewer. | |
| Zoom slider | Controls the size of the thumbnails in the File List pane. Drag the slider adjust the thumbnails. |
Overlay icons
| Sound | Appears if the file contains embedded or associated audio. | |
| 3 | Rating | Appears if the file has been rated in the ACDSee Pro database. |
| Color Label | Appears if the file has been assigned a color label. | |
| Database information | Appears if the file has information stored in the ACDSee Pro database. | |
| File format | Displays the file format. | |
| Category | Appears if the file has been categorized. | |
| Shortcut | Appears if the item is a shortcut to another file. | |
| Offline | Appears if the file is stored on an offline device. | |
| Excluded items | Appears if the file has been excluded from the ACDSee Pro database. | |
| Tagged items | Appears if the file has been tagged. | |
| Untagged items | Appears if the file has not been tagged. | |
| Geotagged items | Appears if the file has been geotagged. | |
| Auto-rotate | Appears if the file has been automatically rotated. | |
| Developed | Appears if the file has been developed. | |
| Edited | Appears if the file has been edited. |
Maximizing the File List pane
To make the most of your available screen space, you can choose to maximize the File List pane and hide the rest of the Manage mode panes. The only parts of the Manage mode window that remain visible are the File List pane and whichever toolbars you are currently using.
To maximize the File List pane:
- Click View | Maximize File List.
- To show only the File List pane and its toolbar, click View | Full Screen.
- Click the Close Full Screen button in the upper right corner to return to Manage mode.
Browsing Using the Folders Pane
The Folders pane displays a directory tree of all the folders on your computer, similar to Windows Explorer. You can select one or more folders in the Folders pane to display their contents in the File List pane.
You can also use the Folders pane to create shortcuts to your favorite files, folders, or applications. Then, instead of having to search for a specific file, you can quickly access it in the Favorites pane.
Whenever you browse to a folder using the Folders pane, the ACDSee Pro database catalogs any images or media files in the folder.
To open or close the Folders pane:
In Manage mode, click View | Folders.
When you connect a removable device, such as a mass storage device or digital camera, the Folders pane displays the device as another drive, and assigns it a drive letter automatically.
You can access the device, and its contents, by clicking on it in the Folders pane.
Selecting multiple folders
Easy-Select bars are vertical columns of indicators on the left side of the Folders and Catalog panes. You can use the Easy-Select bars to select multiple folders, categories, or ratings, and display their contents in the File List pane.
To use the Easy-Select bar:
In the Folders pane, select the indicator to the left of each folder with contents you want to display.
You can also use the Easy-Select bars with the Selective Browsing pane.
Creating and managing folders
You can use the Folders and File List panes to create, delete, rename, and move folders on your hard drive to help organize your files.
To manage your folders:
- In the Folders pane, browse to where you want to add, delete, or rename a folder.
- Do one of the following:
• To create a folder, click File | New, and then select Folder. Type a name for the new folder and press Enter.
• To delete a folder, select a folder and press Delete.
- To rename a folder, right-click the folder you want to rename and select Rename. Type a new name for the folder and press Enter.

You cannot rename a drive or any folder on a read-only file system, such as a CD-ROM.
Browsing Files By Date or Event
With the Calendar pane you can browse your collection of image and media files using the dates associated with each file. The Calendar pane includes Events, Year, Month, Day view and the Photo Calendar, which shows thumbnails per day within a month. You can click any date in the Calendar pane to display a list of files associated with that date.
To open the Calendar pane:
In Manage mode, click View | Calendar.
The Calendar pane opens on the left, tabbed with the Folders and Favorites panes.

Your images will not display in the Calendar pane until you have either browsed the folder containing the image of the Catalog Files Wizard to catalog your images so they are in the ACDSee Pro database.

If you are using the Photo Calendar, you only see thumbnails if there are photos on a particular day in that month. Days that have no photo, are blank.
Calendar pane view options
| Events View | Switches the Calendar pane to Events view. In the Events view you see only those months dur which images or media files are available. Next to the month you see the number of dates on images or media files are available. Expand the month to see the dates and the number of pin available for those dates. You can add a description and a thumbnail image to help you remem event. | |
| Year View | Switches the Calendar pane to Year view. In Year view you see a series of tables. Each table represents a specific year. Next to the year you see how many images or media files are asso with that year. The months during which images or media files are available are highlighted. | |
| Month View | Switches the Calendar pane to Month view. In Month view you see a series of tables. Each tal represents a specific month. Next to the month you see how many images or media files are associated with that month. The dates on which images or media files are available are highlight | |
| Day View | Switches the Calendar pane to Day view. In Day view you see a series of tables. Each table a specific day. Next to the date you see how many images or media files are associated with The time at which the images or media files are available are highlighted. | |
| Photo Calendar | Switches the Calendar pane to the Photo Calendar. In the Photo Calendar, you see a single mo thumbnails for any day that contains photos. A pop-up of the first four images opens if you he cursor over a thumbnail. Click on a thumbnail and all the pictures for that date display in the The total number of photos belonging to that month is in the top right corner of the calendar. title bar to float this pane onto another monitor and drag a corner to resize it and make the bigger or smaller. | |
| Options | Use the Calendar pane options to specify which date you want to use to organize your files. F example, you can quickly change the setting so that the photos are displayed by the following:Date the ACDSee Pro database cataloged the fileDate the image was takenDate the file was modifiedDate the file was loaded to your computerSelect Options to open the Calendar dialog, where you can set filter options, choose the day to the week, and set clock formats. | |
| Previous Item | Selects, and moves to, the closest previous date that has photos. | |
| Next Item | Selects, and moves to, the next closest date that has photos. | |
| Previous Group | Scrolls to the previous group. | |
| Next Group | Scrolls to the next group. | |
| Table of Contents | Opens a list of event dates. |
Adding descriptions and thumbnails in Events view
You can add a description and a thumbnail image to dates in Events view to help you remember the event.

Try right-clicking the Calendar Title bar and select Floating to move the pane to a new location.
To add a description to a date in Events view:
- Expand the month to see the dates on which images or media files are available.
- Click Enter event description here and replace the highlighted text with a new description.
- Press Enter or click outside of the description area. The description is saved.
To select a specific thumbnail in the Events view or Photo Calendar:
- Expand the month to see the dates on which images or media files are available.
- Click on a date to display the images or media files in the File List pane.
- Click and drag an image or media file and drag it to the thumbnail area for the date.
When you release the mouse button the thumbnail is saved. You can reset the default thumbnail by right-clickin thumbnail and selecting Restore Default Thumbnail.
To navigate a long list of dates in Events view:
- To expand and collapse specific groups click the +/- signs which are located on the left side of the group header.
- To expand and collapse all groups right-click a group header and select either Open All Groups or Close All Groups.
- To scroll through multiple groups click the Next Group and Previous Group buttons, which are located at the bottom of the File List scroll bar.
- At the bottom of the Calendar pane scroll bar, click the Table of Contents button and select a date.
Browsing Favorite Files
Creating a shortcut
You can create shortcuts to folders and files, and even run executable files, from inside the Favorites pane. Favorite shortcuts can be copied, renamed, moved, or deleted just like a folder. You can even use an executable shortcut to start another application from inside ACDSee. You can also create a shortcut by dragging a file, folder, or executable file directly from the File List pane to the Favorites pane.
To create a Favorites shortcut:
- In the File List pane, select a file, folder, or executable file.
- Do one of the following:
• Right-click the item you selected, and then select Add to Favorites. -
Click File | Add to Favorites.
-
Type a name for the new shortcut and click OK.
Creating a new folder
You can create a folder, or an entire directory tree, in the Favorites pane to help organize your shortcuts.
To create a new folder:
- In the Favorites pane, right-click the Favorites folder, or a folder you previously created, and then select New | Folder.
- Type the name of the folder and press Enter.

If you move a file or a folder that is a favorite, you break the link and the favorite no longer works.
Deleting a shortcut or folder
You can delete a shortcut or folder from within the Favorites pane.
To delete a shortcut or folder:
In the Favorites pane, right-click the shortcut or folder, click Delete, and then click Yes to confirm that you want to delete the shortcut or folder.
Using the Catalog Pane
The Catalog pane is one of the most useful panes in Manage mode as it provides so many tools for organizing, managing, and finding your files. You can drag files into the categories, ratings, keywords, or color labels of the Catalog pane to assign and quickly organize your files. The Auto Categories section can be used to find files with specific information such as file size, keywords, or shutter speed. The Saved Searches section allows you to create and run custom searches. Special items such as the Image Well display all the images on the computer in one click, or you can click Uncategorized to display only those that are not yet in a category.
Easy-Select bars
Select multiple albums, ratings, keywords, labels, and categories with the Easy-Select bars to display files matching these selections in the File List pane.
To use the Easy-Select bar:
Select the indicator 📋 to the left of one or more items in the Catalog pane to display the files in the File List pane that match the specific set of criteria.
The ACDSee Pro database
Any organizing you do using categories, ratings, or labels (on the Catalog pane or the Properties pane) is stored in the ACDSee Pro database. If you choose to, you can then also embed this information in each individual file, making it easier to relocate and share files, or retrieve the information from the file if you need to.
Browsing RAW Files
Because a RAW file is similar to a negative, it is necessary to develop, or process it, before it becomes visible. It would be very inconvenient if you had to develop all of your RAW files before you could browse your photos. In ACDSee Pro you don't have to develop your RAW files to browse your photos because ACDSee Pro does some basic preprocessing for you.
If there is a thumbnail of the photo embedded in the RAW file, ACDSee Pro displays it in Manage mode. Sometimes the quality of an embedded thumbnail is poor, so ACDSee Pro initially displays embedded thumbnails in Manage mode, then it creates and displays a higher-quality thumbnail. You can see this happening if you look in the Status bar at the bottom of the window.
If you find that it takes too long to display the higher-quality thumbnails, you can turn off that option. (In Manage mode, click Tools | Options, select File List, and then clear the Generate high quality thumbnail check box.) If there is no thumbnail of the photo embedded in the RAW file, ACDSee Pro quickly creates a high-quality thumbnail to display in Manage mode.

Turning off the Generate high quality thumbnail option will increase display speed but will reduce the accuracy of thumbnails for RAW images.
ACDSee Pro also searches the database to see if you have developed a RAW file. If it finds develop settings for the RAW file, it uses those settings to display an accurate thumbnail in Manage mode.
Once generated, the thumbnails are stored in the ACDSee Pro database to speed up retrieval and display time for later browsing.
Changing Views
You can select different views to display your files in the File List pane, including thumbnail previews and file details. You can also customize the appearance and size of thumbnails, and specify the information displayed in the Details view.
Views
| Thumbs+Details | Displays file names and details in a list, and adds a thumbnail preview to the Filename col |
| Filmstrip | Displays thumbnail previews of your files in a single row across the bottom of the File List and displays the currently selected file in an expanded Preview pane. |
| Thumbnails | Displays thumbnail previews of all image and media files in the File List pane. You can cus the appearance of thumbnails, and specify what information to display with them. |
| Tiles | Displays each file in the File List pane on a "tile" that includes a thumbnail preview and fi information. You can resize the tiles using the Zoom slider. |
| Icons | Displays files in a list, represented by large default system icons for each file type. |
| List | Displays a list of file names and extensions. |
| Details | Displays a list of file names and details about each file, such as size, format, and creation You can customize the appearance of the Details view mode, as explained below, and specify what information it displays. |
Customizing the Details view
You can set the Details view to automatically resize columns, display or hide grid lines, and select an entire row when you select a column entry in that row. You can also change the appearance of the Details view, select which columns to display, and customize
the column order.
To select columns and set column order:
-
In Manage mode, from the File List drop-down, click View | Choose Details.
-
In the Choose Details dialog box, do one or more of the following:
- To add a column, select a folder or detail name in the Available Details pane, and then click Add. Adding a folder adds all detail names within the folder.
• To remove a column, select a detail name in the Currently Displayed Details pane, and then click Remove.
• To move a column to the left in the File List pane, select its name in the Currently Displayed Details Move Up.
• To move a column to the right in the File List pane, select its name in the Currently Displayed Details Move Down.
- Click OK.

You can click Reset to display only the default column names in the Currently Displayed Details pane, and you can also move a column in the File List pane by dragging its header to a new position. A vertical line indicates where the column will be inserted.
Filtering Files
You can use the Filter By options to identify the types of files and folders you want to display in the File List pane
To filter files in the File List pane:
Do one of the following:
- Click View | Filter By and select a filter option.
- Click the Filter drop-down and select a filter option.

If all your thumbnails seem to disappear, click Filter | All and they reappear.
To create a custom filter:
-
Do one of the following:
-
Click View | Filter By | Advanced Filters.
-
Click the Filter drop-down and select Advanced Filters.
-
Select Apply filtering criteria.
-
Select or clear one or more of the following options to show or hide that file or folder type in the File List pane:
• Show image files
• Show media files
• Show folders
• Show archive files
- Select Show hidden files and folders to show files and folders that are normally hidden by your operating system.
- Select Show THM files to show thumbnail files.
- Select Show XMP files to show the XMP sidecar files that Adobe® creates for RAW formats.
- Click OK.
Grouping Files
If you have to browse a lot of images in the File List you should consider using Group By to organize images into different groups. You may find it easier to find images when they are organized into groups. For example, if you use more than one camera, you can quickly organize your images according to the camera you used to capture the images. Similarly, if you save your images into different file formats you can quickly organize your images according to their file format.

Group By only works in the Thumbs, Thumbs + Details, Details, Tiles, and Icons views.

The Processed State group is particularly useful for finding images that you have developed, edited, or developed edited.
To group files in the File List:
- Browse to the folder or folders containing your files.
-
Do one of the following:
-
Click View | Group By and select a group option.
- Click the Group drop-down and select a group option.
Navigating through groups in the File List
To expand and collapse specific groups:
Click the Expand or Collapse arrows, on the left side of the group header.
To expand and collapse all groups:
Right-click a group header, and then select either Open All Groups or Close All Groups.
To display a preview of the images in a closed group:
Hover your cursor over the group header.
To scroll through multiple groups:
Click the Next Group and Previous Group buttons at the bottom of the File List scroll bar.
To display the table of contents:
Do one of the following:
- Click View | Group By | Table of Contents.
- Click the Group drop-down list and select Table of Contents.
- At the bottom of the File List scroll bar, click the Table of Contents button.
To quickly jump to a specific group:
- Display the table of contents.
- Click the group that you want to display.
To change the sort order of the groups:
Do one of the following:
- Click View | Group By and select either Group Forward or Group Backward.
- Click the Group drop-down and select either Group Forward or Group Backward.
Removing groups from the File List
To remove a group:
Do one of the following:
- ClickView | Group By | None.
- Click the Group drop-down list and select None.
Selecting files in one or more groups
To select files in groups:
Do one of the following:
- Click the group header to select all of the files in that group.
- Press and hold the CTRL key and click two or more group headers to select all of the files in those groups.
Sorting Files
In Manage mode, you can sort your files according to different file properties to quickly organize your images, find specific files, and create a range of files with similar attributes for easy selection.
To sort items in the File List:
-
Click View | Sort By, and then select a sort option:
-
Filename
Size (KB) -
Image Type
-
Modified Date
• Image Properties
Caption
• Rating -
Tagged
• More (sort by metadata, EXIF, file properties, image attributes, IPTC information, or multimedia attributes) -
To set the direction of the sort, click View | Sort By, and then select a direction:
- Sort Forward
- Sort Backward
- Sort Forward - Sort Backward

Your sort settings are saved until you change them. For example, if you sort images in the File List pane ac, Rating, the images will remain sorted according to Rating until you change the sort settings.
Sorting files using column headers
You can quickly sort files in Details view mode using column headings.
To sort files using a column header:
- Click a column header. An arrow appears, indicating the sort direction.
- Click the column header again to change the sort direction.
Custom sorting files
You can use custom sorting to customize the order of files in the File List pane. After custom sorting your files, ACDSee Pro automatically saves the file order for the selected folder until you change it or delete the custom sort order.
To customize the sorting order of your files:
- Select one or more files.
- Drag the selected files to a new location in the File List.

To delete a custom sort order, click View | Sort By, and then select Delete Custom Sort.
Selecting Files
In the File List pane, you can select all of your files and folders at once, select all of the files in the current folder, select only the image files, or clear your selection entirely.
You can also set an option to automatically select new files whenever you add them to the File List. Click Tools | Options | File List to set this option.
To select your files or folders:
- Click a thumbnail to select the file.
- CTRL + click to select more than one file.
- SHIFT + click to select a number of files in a row.

Click off to the side in the file list pane to clear your selection.
To select your files or folders using the menu:
- In Manage mode, click Edit.
-
Select one of the following:
-
Select All: Selects all files and subfolders in the current folder.
- Select All Files: Selects all files in the current folder.
- Select All Images: Selects all image files in the current folder.
- Select Tagged: Selects all tagged image files regardless of their folder.
- Select by Rating: Displays a list of ratings, and selects all files currently assigned to the rating you select.
• Clear Selection: Clears your selection.
• Invert Selection: Selects all files except for your original selections.
Previewing Images
You can preview image, audio, and video files in the Preview pane. The Preview pane displays a thumbnail of the currently selected image or media file. You can resize the pane to adjust the thumbnail dimensions, and reposition the pane anywhere on your screen.
You can also display information other than the histogram below the image in the Preview pane by setting the Preview options.

If you use dual monitors, you can move the Preview pane to your second monitor so that you can see a large preview of your images.
To open or close the Preview pane:
Click View | Preview.
To show or hide the histogram from Preview pane:
Right-click the Preview pane, click Image and Information, and then select one of the following:
• Show Image: Displays only a preview of the image.
• Show Information: Displays the histogram and other information about the image.
• Show Image and Information: Displays a preview of the image and the histogram and image information.
Rotating Images
You can rotate images in Manage and View modes using the Rotate icons in the bottom toolbar.

When you rotate unprocessed JPEG images, ACDSee Pro performs a lossless rotation.
To rotate images:
- In Manage mode or View mode, select one or more images.
- Click the Rotate Left or Rotate Right icon in the bottom toolbar.
Rotate icons
| Rotate Left | Rotates the image 90° to the left. |
| Rotate Right | Rotates the image 90° to the right. |
Comparing Images
You can use the Compare Images feature to compare a group of images. The tool highlights both the similarities and the differences in the properties, metadata, and pixel intensity levels of images you select. You can save your preferred images to a new location on your hard drive, or tag images you would like selected in Manage mode, and then delete, move, rename, or alter the images.
To compare images:
- In the File List pane, select the images that you want to compare.
- Click Tools | Compare Images. Up to four images display in the Compare Images Viewer.
- To change which image displays in the comparison view, do one or more of the following:
• In the Comparison List, right-click an image and click Send to Active View (indicated by a pale box).
• In the Comparison List, drag an image to a box in the Compare Images Viewer.
• In the Compare Images Viewer, right-click an image and click Next Image or Previous Image. -
In the Compare Images Viewer, right-click an image and click File | Remove From View or click the Remove icon in the image toolbar.
-
To tag images, do one of the following:
• In the Comparison List, click the check box that is located at the bottom of the image on the right si
- In the Compare Images Viewer, right-click an image and click Tag or click the Tag icon in the image toolbar.
- Click the Tag All button in the bottom left corner to tag all of the images, or click Untag All to untag all of the images.
-
To rate images, right-click an image, click Set Rating, and then select an appropriate rating.
-
To categorize images, right-click an image, click Set Categories, and then select an appropriate category (or create an appropriate category).
-
Click, located in the bottom right corner.
Compare Images toolbar
| Previous | Swaps the selected image with the previous image in the Comparison List. | |
| Next | Swaps the selected image with the next image in the Comparison List. | |
| Zoom In | Increases the magnification of the selected image. | |
| Zoom Out | Reduces the magnification of the selected image. | |
| Zoom menu | Opens a menu of zoom options. Select from the following options:Actual Size: Displays the image at its original size.Fit Image: Displays the image at the largest magnification that fits in the Compare Images Viewer.Fit Width: Displays the image to fit between the left and right sides of the Compare Images Viewer.Fit Height: Displays the image to fit between the top and bottom of the Com Images Viewer.Zoom Lock: Displays all images at the zoom option of the current image. If zoom is adjusted, the new zoom level is applied to all images that you view.Zoom To: Opens a dialog box where you can select a zoom option. | |
| Pan Lock | Locks the panned image area, so that when you zoom and pan an image to a spec the Compare Images Viewer displays the same area for all images you view. | |
| Exposure warning | Indicates pixels that may be over or underexposed. | |
| Properties | Displays properties for each image in the Compare Images Viewer. Click the Metadata Setup button to specify which file properties are displayed.The Compare Images tool displays the file properties in a field below each image.Differences in properties are bolded, while similarities are displayed in regular font. | |
| Histogram | Displays a histogram for each image in the Compare Images Viewer. | |
| Metadata Setup | Opens a dialog box where you can select the metadata to display for each image in Compare Images Viewer (ensure Properties is toggled to on). | |
| One Image | Displays one image in the Compare Images Viewer. | |
| Two Images | Displays two images in the Compare Images Viewer. | |
| Three Images | Displays three images in the Compare Images Viewer. | |
| Four Images | Displays four images in the Compare Images Viewer. | |
| Properties Pane | If one image is displayed, this button opens the Properties, Histogram, Magnifying Glass and Navigator panes. | |
| Help | Opens the Help file. |
Image toolbars
Each image in the Compare Images tool has a toolbar located below it. You can use this toolbar to adjust each image individually.
| Save | Opens a dialog box where you can save the image with a different file name and a file format. |
| Previous | Swaps the displayed image with the previous image in the Comparison List. |
| Next | Swaps the displayed image with the next image in the Comparison List. |
| Zoom In | Increases the magnification of the image. |
| Zoom Out | Reduces the magnification of the image. |
| Delete | Deletes the image from your hard drive. |
| Remove | Removes the image from the Comparison List. |
| Tag | Tags the image so that it will remain selected when you close the Compare Images |
Gathering Images in the Image Basket
You can use the Image Basket to gather and hold images and media files from different locations or folders. Once you have placed items in the Image Basket, you can use any of the tools or features in ACDSee Pro to edit, share, or view those f
To use the Image Basket:
- To open the Image Basket, in Manage mode, click View | Image Basket.
- In the File List pane, select the files you want to add. Drag the items to the Image Basket, or right-click a selected item and select Add to Image Basket.
- To remove one or more files, right-click the file, and then select Remove from Image Basket.
- To remove all files, right-click the Image Basket, and then select Clear Image Basket.

You can also add images to the Image Basket by dragging them from Windows Explorer.
Cataloging and Managing Files in ACDSee Pro
In addition to its browsing, viewing, and editing capabilities, ACDSee Pro features integrated management tools you can use to organize and sort your images and media files. These tools include batch functions (tools that can alter or adjust multiple files at the same time), category and rating systems, and a powerful database to hold all of your important image information.
You can use the ACDSee Pro batch functions to export, rename, resize, rotate, add EXIF information, and adjust the exposure of a single image, a group of images, or the contents of an entire folder all at once. With the category, color label, and rating systems, you can create a virtual folder structure, and use it to find related images and media files with a single click.
ACDSee Pro displays file properties and image information in an easily accessible Properties pane that you can use to directly add and edit file information, including ACDSee metadata. You can add an author, description, notes, and keywords to your files, and adjust the category and rating assignments at the same time.
Organizing With the Catalog Pane
The Catalog pane is one of the most useful panes in ACDSee Pro as it provides many ways to catalog, sort, group, search for, and manage your files.
Categories
Categories are an easy way to organize your files into context-related sections. When you assign a file to a category, you do not move the file from its folder or create an extra copy. Your categories can be simple or complex and use any names you choose. There are different icons to use for different categories to help you identify them at a glance. Once your files are in categories, you can search, sort, group, and find them by category.
One way to assign files to a category is to select and drag one or more files from the file list and drop them onto the category. Any file that is assigned to a category has a blue tab above its thumbnail in the File List. A file can belong to multiple categories, but it will only have one blue tab. For comprehensive categories management, use the Organize tab of the Properties pane.
Keywords
Keywording is a highly efficient way to group files in hierarchies that make sense to you and find them quickly in an expanding tree. The hierarchical tree of keywords you have created in the Organize tab of the Properties pane is displayed in the Keywords section of the Catalog pane without the need to select an image. Utilize this group to manage your keywords on the fly by using the context menu (right-click). Keyword quickly by dragging a keyword onto an image, or by dragging an image onto a keyword.
Ratings
You can assign a numerical rating from 1 to 5 to your images and files. Once you have assigned ratings, you can search, sort, and catalog your files based on the ratings, or a combination of ratings, categories, auto categories etc. A file can have only one rating. When a file has a rating, the number appears on top of the thumbnail in the File List pane.
Color Labels
Color labels can be used in many ways to help you catalog your files. You can use different colors to represent different stages of your workflow. As you review your photos you can assign them to the color labels and rename them accordingly.
Auto Categories
Most digital cameras create and embed information about the file as you take a photo. This information is called metadata and can include the name and model of the camera, the file size, shutter speed, camera settings used in the shot and much more. ACDSee Pro uses this information to create auto categories. When you click on an auto category, ACDSee Pro searches for images containing that metadata. You can select one or more auto categories to find files, for example, photos of a certain size, taken by a particular camera. You can also add to this data using the Properties panes.
Saved Searches
If you find yourself creating the same search criteria frequently, you can save the search to use again later. Saved searches appear at the top of the Search pane but they also appear in the Catalog pane for you to re-run using a single click on the name or in the white check box of the Easy-select bar.
To create a new saved search from the Catalog pane:
- In the Saved Searches area of the Catalog pane, click the New saved search icon.
The Search pane opens.
- Enter your search criteria and then click the Saved searches icon.
The new saved search appears in the Saved Searches on the Catalog pane and in the Saved Searches drop-down Search pane.
Special Items
You can use Special Items to quickly view all of the images in your database and any uncategorized images. Select one of the following items:
- Image Well: Displays all images cataloged in the ACDSee Pro database. If you have a substantial image collection, it may take a few moments to gather all of the information.
- Embed Pending: Displays all the files with database data that has changed but has not yet been embedded in the files.
• Uncategorized: Displays any images cataloged in the database that have not been assigned to a category. - Tagged: Displays all the tagged photos on the computer.
You can assign a rating or category to any type of file, but the options in the Special Items area only apply to ima
The ACDSee Pro database and embedded data
When you assign a file to a rating, or category, this information is stored in the ACDSee Pro database. If you choose to, you can also embed this information in each individual file, making it easier to relocate and share files, or retrieve the information from the file if you need to. As the database, information is always associated with a particular file. If you move or rename files using an application other than ACDSee Pro (like Windows Explorer) the link between the file and the ACDSee Pro database will be broken. If this happens, and you have embedded the information in each file, you can rebuild the database and retrieve all the information.
You can also use the Properties pane to add information to the ACDSee Pro database like captions, keywords and much more. Taking the time to assign categories and add keywords, notes, etc., makes it much easier to find and organize your files.

ACDSee Pro uses XMP to embed ACDSee Metadata into each file. Only some file formats and file extensions su These include GIF, JPEG, DNG, PNG, and TIF. In the case of these file formats, the ACDSee Metadata is embedded inside the file and so you can rename or move the file outside of ACDSee Pro and still be able to retrieve the ACDSee formats that currently do not support XMP, including RAW, PSD, ABR, the ACDSee Metadata is written to a sidecar file that is stored in the same folder as its file. Because a sidecar file is separate from the file itself, you need to rename or move them together, or you could lose the ACDSee Metadata permanently.
Easy-Select bars
The Easy-Select bars are the indicators on the left side of the Folders and Catalog panes. You can use the Easy-Select indicators to select multiple folders or categories, and display their contents in the File List pane. In the Catalog pane you can also use the Easy-Select indicators to select combinations of categories, ratings, auto categories, saved searches, and special items. For example, you could display all your photos with a rating of 1 that belonged to the category People.
You can also use the Easy-Select indicators with the Selective Browsing pane (View | Selective Browsing).
When you use the Match Any/All buttons and the Easy-Select indicators together, the Catalog pane becomes a powerful search tool for finding unique sets of files.
To use the Easy-Select bar:
In the Catalog pane, select the indicator to the left of each item with contents you want to display. The indicator changes orientation to point to the item you have selected.

If you select a category, rating, or combination that does not have any files that match, the File List displays a message and shows no thumbnails. The quickest way to return to a folder with files is to click the back arrow.
To view cataloged files:
Select one or more categories, ratings, auto categories, saved searches, or special items. Files assigned to those classifications are displayed in the File List pane.
The Contents bar at the top of the File List pane displays whatever categories or items are currently selected. You can browse through specific categories, ratings, or items within specific folders using the Selective Browsing pane.
Match All Match Any
There are two Match All/ Match Any drop-down lists on the Catalog pane; one at the top of the pane that affects categories and one that affects saved searches. You can use the Match All and Any options to affect the display of thumbnails in the File List in the following way:
- Match All: To be included, a file has to belong to all the categories or searches you select. So the file has to be in both or all of the categories or searches before it will display in the File List. Match All is more exclusive. You can use it to limit the number of files that display and narrow a search down.
- Match Any: To be included, a file can belong to any of the categories or searches you select. So any files in the selected categories or searches will display in the File List. Match any is more inclusive.
Catalog icons
| Category | Identifies files that have been assigned to a category. |
| Ratings 1-5 | Identifies file ratings. |
| New Saved search | Opens the Search pane so that you can create a new saved search. |
| Saved search | Displays the Save/Save As menu so you can save a search. |
| Easy-Select indicator (selected) | Selects the category, rating, auto category, or other item for display in t File List pane. |
| Easy-Select indicator (not selected) | Does not select the category, rating, auto category, or other item for display in the File List pane. |
| Match Any/All | Controls which images are displayed in the File List pane. |

To hide the icons in the Catalog pane, click Tools | Options, and then select Catalog. Deselect the Show Icons check box in the Options dialog box.
Creating Categories
Create and manage a system of categories for your images in the Organize tab of the Properties pane. You can easily customize your category system in a way that makes sense to you.
Select the Organize tab in the Properties pane to create, rename, delete, and move your categories.
To create a category:
- Do one of the following:
• Right-click a category in the Catalog pane, and then select New Category.
• In Manage mode, click Edit | Set Categories | New Category.
- Select one of the following:
• Create a new, top-level category
• Create a sub-category within the current selection
- If you are creating a sub-category, select a top-level (or parent) category from the drop-down list. (If you right-clicked a category in the Catalog pane, the new sub-category will be added below that category by default.)
- Type a name for the new category in the Name field.
- Click OK.

When you create a new top-level category, you can select an icon to help identify the category. The Icon dro appears if the Show Icons check box is selected on the Catalog page of the Options dialog box. In Manage mode, click Tools | Options, and then select Catalog.
Manage Categories
To manage your categories:
Select a category in the Catalog pane, and do one of the following:
• To move the category, drag it to the new location.
• To edit the category, right-click the selected category and select Edit.
• To delete the category, right-click the selected category and select Delete.
Create easy-access Category sets
If you have a long list of categories, or would like to break your categories up into different events or areas of interest, you can use the Edit Category Sets feature.
To create easy-access category sets:
- First create the categories you want in your set.
- In the Properties pane, click the Quick Categories drop-down list and select Manage Quick Categories.
- Enter your commonly used categories into the entry fields. For sub-categories, use the pipe key. Example: A|B|C.
- Click the Save button.
- Click OK. This category set will be listed in the Quick Category drop-down list.
- Select one or more files and click a button in the category set. The category will be assigned to the selected files. The button text color will change to indicate that the category is assigned to currently selected files, and will display in italics if assigned to only some (but not all) of the currently selected files.

Make sure the category button name matches the category name in the category tree.
Assigning and Searching Categories and Ratings
You can assign files to a rating, or one or more categories, without moving the file or making an extra copy.

If the Properties pane or Catalog pane is not visible in Manage mode, click View | Properties or View | Catalog.
Quickly Assign Ratings
- Hover over a thumbnail to display the gray box with diagonal line through it.
- Click the gray box to make your selection.
Example of hovering over a thumbnail to select a rating:

natural_image
Exterior view of a stone archway with open path, surrounded by rocky terrain under clear blue sky (no signage or text)1.
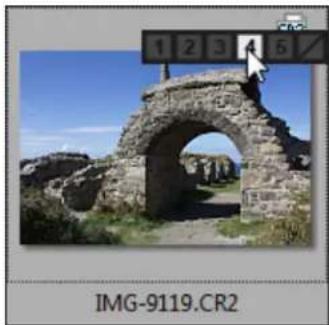
natural_image
Exterior view of a stone archway with a clear sky background (no signage or text in the scene)2.

natural_image
Exterior view of an ancient stone archway under a clear blue sky, labeled 'IMG-9119.CR2' at bottom (no other text or symbols)3.

The hover icons display in Thumbnail view only.

Use the keyboard shortcut CTRL + 0-5 to quickly rate a file.

The rating number you select can be reflected as a star rating in other applications. Give your favorite shots a high rating, and your least favorite shots a low rating.
Assign and Search Categories and Ratings in the Catalog pane
The Catalog pane allows you to both assign categories and ratings as well as search them.
To assign files to categories or ratings in the Catalog pane:
-
In Manage mode, do one of the following:
-
Drag selected files to a category or rating in the Catalog pane.
- Drag the category or rating from the Catalog pane to selected files.
-
Right-click the files, and then click Set Categories and click the category in the fly out, or click Set Rating and click the rating.
-
In View mode, do one of the following:
-
Click Edit | Set Categories and then click the category to which you want to assign the file.
• Right-click the file, click Set Categories, and then click the category to which you want to assign the file. -
Click Edit | Set Rating and then click the rating to which you want to assign the file.
• Right-click the file, click Set Rating, and then click the rating to which you want to assign the file.
• On the status bar, click the rating icon, and then click a new rating. This icon only appears once a ra -
If you are comparing images and want to categorize them, do one of the following:
-
Right-click one of the files, click Set Categories, and then click the category to which you want to assign the file.
• Right-click one of the files, click Set Rating, and then click the rating to which you want to assign the file.

Ratings embedded by ACDSee can be seen in other applications supporting xmp:rating and vice versa. To embed into one or more selected files click Tools | Embed ACDSee Metadata | In Selected Files.
Use the context menu (right-click) in the category tree to do the following:
- Assign Items
- Remove Items
• Create New Category
Search
Cut
ACDSee Pro 6 User Guide
• Copy
- Paste
- Delete
- Edit Category
To search a category or rating in the Catalog pane:
Click the Category name or Rating number to display all corresponding files in the File List pane.
Assign Categories and Ratings in the Properties pane
The Properties pane provides another way to assign categories and ratings.
To assign files to Ratings in the Properties pane:
- In the File List pane, select the files you want to assign a rating.
- In the Properties pane, select the Metadata tab.
- Click the rating you want these files to have from the numbers listed at the top of the Properties pane.
To assign files to Categories in the Properties pane:
- In the File List pane, select the files you want to assign a rating.
- In the Properties pane, select the Organize tab.
- Click the category you want these files to have from your Categories list.

Assign files quickly with a category sets button. See Create easy-access Category sets.
Remove Categories or Ratings from files
You can remove a file from a category or rating without moving or deleting the original file, or affecting any other files assigned to that classification.
To remove categories or ratings from files:
- In the File List pane, select the files you want to remove.
- Do one of the following:
• Right-click a selected file, and then click Set Rating | Clear Rating.
- Right-click a selected file, click Set Categories, and then click the name of the category from which you want to remove the file, or to remove all categories, click Uncategorized All Selected Items.
- Clear a check box for a category or a radio button for a rating in the Catalog pane.
• Right-click a category or rating in the Catalog pane, and then click Remove Items.
Assigning Color Labels
Color labels are useful for naming and quickly identifying your processing plans for your images. Different colors can be used to represent different stages of your workflow. For example, as you review your photos you can quickly label files to upload, print, reject, review, or sharpen, or any other term that matches your workflow needs. Once your files have been labeled, you can click a color label in the Catalog pane to instantly display all of the files assigned to that label.
You can also use color labels in combination with the Group by, or Filter By features to refine your list. Color labels, like tagging, categories, and ratings, are a way to set aside, organize, and group your photos without moving them into different folders.

If the Properties pane or Catalog pane is not visible in Manage mode, click View | Properties or View | Catalog.
Create a Color Label set
Begin by creating a label set so you can quickly select and assign specified labels. Once you have a label set in place, you can assign your images to the appropriate labels corresponding to your workflow.
To create a color label set:
- In the Catalog pane, click the Labels settings button and select Edit Label Sets.
- Enter names for your labels and click the Save icon.
- Click Save As from the Save Label Set dialog box.
- Enter a name for your new label set.
- Click OK.
Once you have created color label sets, you can access them from the Catalog pane by clicking the Labels settings button and selecting from the drop-down list. Before assigning a color label, make sure the intended label set is active. The active label set name is shown in brackets in the label header.
Assign Color labels
You can assign color labels to your files by using the following:
• Hover icons in thumbnail view
- Catalog pane
- Properties pane
• Edit menu in Manage and View mode
- Context menu
- Keyboard shortcuts

ACDSee Pro uses XMP to embed ACDSee Metadata into each file. Only some file formats and file extensions su These include GIF, JPEG, DNG, PNG, and TIF. In the case of these file formats, the ACDSee Metadata is embedded inside the file and so you can rename or move the file outside of ACDSee Pro and still be able to retrieve the ACDSee

formats that currently do not support XMP, including RAW, PSD, ABR, the ACDSee Metadata is written to a sidecar file that is stored in the same folder as its file. Because a sidecar file is separate from the file itself, you need to rename or move them together, or you could lose the ACDSee Metadata permanently.

You can also set labels from the status bar in View, Develop, and Edit mode.
To assign a color label using the label line hover icon in Thumbnail view:
- Hover over a thumbnail to display the gray label line.
- Click gray label line to make your selection.
Example of hovering over a thumbnail to click and select a color label:

natural_image
Exterior view of an ancient stone archway under a clear blue sky, with no visible text or symbols on the structure itself.1.
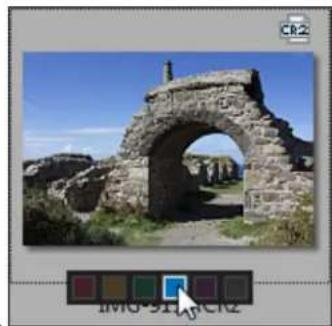
natural_image
Exterior view of a stone archway with arched openings under a clear blue sky (no signage or text visible)2.
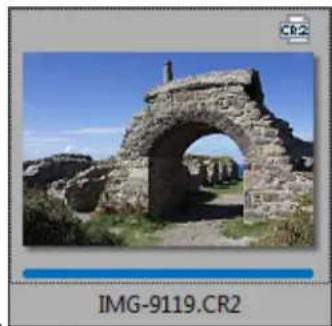
natural_image
Exterior view of an ancient stone archway under a clear blue sky, labeled 'IMG-9119.CR2' at bottom (no other text or symbols visible)3.

Use the overlay icon on one of a number of selected images to assign the label to all.
To assign a color label to a file in the Catalog pane:
-
In Manage mode, do one of the following:
-
Drag selected files to a color label in the Catalog pane.
- Drag the color label from the Catalog pane to selected files.
To assign files to color labels in the Properties pane:
- In the File List pane, select the files you want to assign a color rating.
- In the Properties pane, select the color label from the boxes along the top.
To assign color labels using the Edit menu in Manage and View mode:
- Click Edit | Set Label and then select a color.
To assign color labels with the context menu:
- Right-click the file, click Set Label, then select a label name.
To assign color labels using keyboard shortcuts:
- Keyboard shortcuts are available for the five color labels, plus Alt-0 to clear the label (exactly the same as ratings, except Alt is used instead of Ctrl)

Search images assigned to a label
To search all images in the database assigned to a label:
- Click the color label in the Catalog pane to display all corresponding files in the File List pane.
• Use the Search box.
• Use Quick Search.
To search all images in the file list assigned to a label:
Click the Filter drop-down above the File List pane and select a label name. All files assigned to that label in the current file list will be selected.
To select all images in the file list assigned to a label:
Use Alt-1 through Alt-5 for the five colors, plus Alt-0 to clear the label (exactly the same as ratings, except it uses Alt instead of Ctrl
Removing color labels and color label sets
To remove a color label from a file:
- In the File List pane, select one or more files you want to remove a label from.
- Do one of the following:
- Right-click a selected file, and then click Set Label | Clear Label.
• In the Properties pane, click the gray unlabeled icon.
To delete a Label Set:
- In the Catalog pane, click the Labels settings button and select Edit Label Sets.
- Select the set you want to delete from the Labels Sets drop-down list.
- Click the delete button.
Using the Properties Pane
The Properties pane displays all the metadata about your files. It also displays file properties such as file size, creation date, and read-only or hidden status. You can use the Properties pane to add, change, or delete the metadata for image and media files.
To open the Properties pane:
Click View | Properties.
The Properties pane is located by default on the right side of your screen. The Properties pane is available in all modes except Online mode.

The Metadata panel offers adjustable width for metadata fields. Simply hover between a corresponding label and display the double arrow cursor. Click and drag to adjust width. Double-click to toggle between the width of the label in the group or the longest label in the pane.
Properties pane areas
The Properties pane is divided into 3 tabs: Metadata tab, Organize tab, and File tab.

Use the overlay icons, which appear as you hover over a thumbnail, to tag, rate and add color labels to you. Alternatively, you can display these settings in the Properties pane by clicking Tools | Options | Properties Pane and selecting Show Tagged, Rating, and Color Labels.
Metadata tab
The Metadata tab displays the rating, category, IPTC, EXIF and ACDSee metadata stored with a photo. The ACDSee metadata fields are available for you to enter the caption for your photographs as well as date, author, and notes. The keywords field is display-only and can be entered in the Organize tab. The label field can be entered here or selected from the Labels section in the Catalog pane. IPTC information is automatically embedded into your image, while ACDSee Metadata is not embedded in your files, but instead is
held in the database. ACDSee Metadata can be embedded into all your files (or just selected ones) by clicking the Tools | Embed ACDSee Metadata command.
The IPTC data fields provide a standard means for entering and storing information about your photographs such as description, creator, and copyright information. ACDSee supports fields defined in IPTC Core 1.1.
The EXIF data fields hold information captured by your camera such as shutter speed, camera model and GPS information
Certain EXIF fields are no longer visible by default. The EXIF Artist, Copyright, Image Description, and Date/Time Original fields are automatically modified when their matching IPTC fields are modified (see table below). This change reflects the recommendations of the Metadata Working Group (MWG). If you need to have these fields visible in the EXIF section you can adjust your settings by clicking Tools | Options | Properties Pane and clicking the Manage Metadata Views button.
Matching IPTC and EXIF fields
IPTC EXIF
Description writes to Image Description
Creator writes to Artist
Copyright Notice writes to Copyright
Date Created writes to Date/Time Original

When ACDSee parses metadata from a file, the contents of the field is displayed without mapping.
Organize tab
The Organize tab displays a tree of categories and a tree of keywords. The Category tree context-menu (right-click) allows you to add and delete categories and sub-categories. You can create category sets to quickly categorize your files. Right-clicking the Keyword tree also allows the same options. Use the keyword tree to create a hierarchy to easily organize your files in a way that holds meaning for you.
File tab
The File tab displays detailed file information and image attributes for a selected file or files. You can set or change the Read-Only and Hidden properties of a file or folder, and view a summary of any EXIF information contained in a file.
Embedding ACDSee Metadata into files

If you have metadata in your files and they are copied, moved, or renamed, outside of ACDSee, the link between the file and the database will be broken, but you can rebuild the database using the embedded data in the file.

ACDSee Pro uses XMP to embed ACDSee Metadata into each file. Only some file formats and file extensions su These include GIF, JPEG, DNG, PNG, and TIF. In the case of these file formats, the ACDSee Metadata is embedded inside the file and so you can rename or move the file outside of ACDSee Pro and still be able to retrieve the ACDSee formats that currently do not support XMP, including RAW, PSD, ABR, the ACDSee Metadata is written to a sidecar file that is stored in the same folder as its file. Because a sidecar file is separate from the file itself, you need to rename or move them together, or you could lose the ACDSee Metadata permanently.
Using the Map Pane
The map pane allows you to add and view photo locations to anywhere in the world. Use the map to select groups of files for further workflow steps, and select photos for display in View mode.
The locations of files are displayed in the Map pane based on the latitude and longitude information in the file properties. If you have a camera with geotagging capabilities, the geographic location is automatically conveyed visually on the map. You can also add map coordinates to files by dragging them directly onto the map.
Geotagged images are indicated on the map with pins. You can click a pin on the map to select files within a geographic location for viewing or processing. If your geotagged image pin is not displayed on the map, try using the keyboard shortcut F5 to refresh the map.

The following file formats can be added to the map: JPG, TIFF, RAW, DNG, and PNG.

ACDSee automatically adds file information, including geotags, to the database as you browse. However if you have a large number of files you may want to catalog those files first to speed up the loading time for the pins on the map. To catalog your files click Tools | Database | Catalog Files.
To open the Map pane:
In Manage mode, click View | Map (CTRL + SHIFT + M).
The Map pane appears above the File List pane in Manage mode by default. You can drag the Map title bar to a new location and float the pane or dock it in another position like the other movable panes in ACDSee.

You can toggle the Map on and off with the keyboard shortcut CTRL+SHIFT+M in Manage mode.
To add files to the map by dragging:
- In Manage mode, drag one or more files onto the map.
- Click Save All in the top left corner of the map.

Ideally images should be geotagged prior to processing. If an image is geotagged after it has been edited and the Restore to Original command is used, then the geotag will be lost.
To delete a pinned location on the map:
Right-click the geotagged image thumbnail and select Map | Remove from Map.
To view a geotagged image on the map:
Right-click the geotagged image thumbnail and select Map | View on Map.
To set default location, zoom and map type:
- Pan to your preferred location on the map, then adjust the zoom-level and select your preferred map type (Map, Satellite, or Terrain).
- Click Tools | Map | Set default map location.

Note: The map reflects the current File list. If the File list has images mapped to a different location from your default setting, then that location will be displayed.

To pan and zoom the map to a specific location, enter the location into the Map search field and press Enter.
Using the Map pane in Manage mode
All geotagged images in your current file list will be indicated by pins on the map. Click a pin and the image taken at that location will be selected in the Filmstrip and will display in the View pane. You can click through the list to display each one in the View pane.
With the images from a particular location all selected, here are a few possible workflow options:
- Enter Develop or Edit mode to process this selection together.
• Use the Batch tool to apply the same settings on photos from the same location. - Click Slideshow to view and present a slideshow of the photos from this location.
- Send photos from this location via email.

If geotagged image does not display try using the keyboard shortcut F5 to refresh the map.
Pin Legend

Indicates geotagged location.

Indicates more than one geotagged location in this area. (Zoom in to see locations)

Indicates selected geotagged location.

A dot on a pin of any color indicates unsaved image location.
Adding Metadata to Files and Using Presets
You can add information to your images using IPTC and ACDSee Metadata. IPTC information is automatically embedded into your image, while ACDSee Metadata can be embedded into your file, or stored in the database. You can add this information to one or multiple files at a time. You can also save frequently used metadata values as a preset, allowing you to quickly input this information without having to rewrite it.
We recommend entering and editing metadata prior to processing your images. If you use the Restore to Original command the metadata will be lost unless it was entered prior to processing (except in the case of RAW images).

You cannot set IPTC and EXIF information for read-only files, such as those on a CD-ROM.

If the Properties pane is not already open, select View | Properties.
To add metadata to one or more files:
- In Manage mode, select one or more files in the File List pane.
- In the Properties pane, select the Metadata tab.
- Enter information into the metadata fields.
- Click Apply or press Enter to apply your changes.

When you click Apply or Enter in Manage Mode, the focus is returned to the File List pane allowing you to quickly make another file selection using your keyboard.
Metadata Tab keyboard shortcuts
This shortcut Has this result
TAB Jumps focus forward from field to field.
SHIFT + TAB Jumps focus backwards from field to field.
CTRL + K Places the cursor in the ACDSee Metadata Keywords field of the Organize tab in the Properties pane.
ALT + K Places the cursor in the IPTC Keywords field of the Metadata tab in the Properties pane.
ENTER Applies your changes.
ESC Discards your changes.

If you click away from the Properties pane, any metadata that you have just entered will be lost. You must click Apply or press ENTER to apply your changes.
To use keyboard shortcuts to enter Metadata into the same field of multiple photos:
- Select the first photo in your list and enter content into a Metadata field.
- Press the Page Down key to move to the next photo. The cursor remains in the same field of the Properties pane for each photo, allowing you to quickly enter content for the same field for multiple photos.
- Enter content into the field and again press Page Down to move to the next photo.
- Continue Step 3 until complete.

You do not need to click the Apply button when using this shortcut.

You can use the Page Up key to move back to the previous photo.
To create a Metadata Preset:
- In Manage mode, select any file in the File List pane.
- In the Properties pane, select the Metadata tab.
- Click the Metadata Presets drop-down list and select Manage Presets.
-
Enter content into the fields provided in the Manage Presets dialog box.
See Notes for inserting data into the Manage Presets dialog box below. -
Click Save.
- Enter a name for the preset and click OK. The preset will appear in the Presets drop-down list.
To set a Shortcut Preset (CTRL+M):
- From the Metadata Presets drop-down list, select Manage Presets.
- In the Manage Metadata Presets dialog box, click the arrow button next to the Presets drop-down presets list.
- Set a Shortcut Preset by making your selection from the list of saved Metadata Presets.
- Click OK.
Once your default preset is set, the shortcut Ctrl+M will auto-fill the metadata fields for all selected images. If you have not set a default preset, the shortcut Ctrl+M will open the Manage Metadata Presets dialog box.
To apply a metadata preset:
- Select one or more images in the File List pane.
- In the Properties pane, select the Metadata tab.
- Click the Metadata Presets drop-down list and select a preset that you have created.
- Click Apply.
Notes for inserting data into the Manage Presets dialog box:
- The asterisk (*) represents any existing field data for the individual files. You can append additional information next to the asterisk to maintain the existing field data, or you can delete it and enter new information. For example, if you would like to append some text to IPTC Caption rather than replace it, insert an asterisk in the field followed by a space and append your additional text.
- You can transfer the value of one metadata field to another using the Insert Metadata command. Click the Insert arrow next to each field to select and insert metadata place holders. For example, you can transfer your ACDSee Keywords to IPTC Keywords by inserting the
placeholder into the IPTC Keywords field.
Manage Metadata Views and Presets
To select a Metadata View:
- Click View | Properties to open the Properties pane.
- Select the Metadata tab of the Properties pane.
- Click the Metadata View drop-down list in the Metadata tab to select one of the view options: Default Metadata View (most commonly used fields), All EXIF, All IPTC, ACDSee Metadata, or saved custom views.
To create a customized Metadata View:
- Click the Metadata View drop-down list in the Metadata pane and select Manage Metadata Views.
-
In the Choose Metadata to Display dialog box, select New Metadata View from the drop-down list.
-
Click the plus + signs to expand the tree and toggle the check boxes on and off to select your preferences. See Manage Metadata View options below.
-
Click the save button and enter a name for your customized view.
-
Click OK.
Manage Metadata Views options
- When all items in a group are selected, the group check box is checked.
- When no items in a group are selected, the group check box is clear.
- When some, but not all items in a group are selected, the group check box Toggle the check boxes on and off to make your selections.


You can choose whether or not to display maker notes by selecting or deselecting the Display Maker Notes checkbox.
Creating and Assigning Hierarchical Keywords
You can keyword your files in a hierarchy and maintain these groups in the Keyword tree. Select the Organize tab in the Properties pane to create, rename, delete, and move your keywords.
To create keywords:
- Select a file to reveal the Properties pane, located to the right of the File List pane. Do one of the following:
• Right-click Keywords in the Organize tab, and then select New Keyword.
- Type a keyword into the field of the Keyword group and press Enter.
-
To keyword files with existing keywords, do one of the following:
-
Select one or more files, then drag the keyword onto them.
- Select one or more files, then check the box next to the appropriate keyword.
- Select one or more files, then right-click the keyword. Select Assign items.
-
Select one or more files, then drag them onto the keyword.
-
To establish a hierarchy, do one of the following:
- In the keyword field, type the lesser or more specific keyword, followed by the less than symbol, followed greater or more general keyword.
Example:
Owl < Bird
or
Madrid < Spain < Europe
- Right-click an existing keyword, then select New Keyword. The new keyword will automatically become a child to the existing keyword.

When assigning multiple keywords to a file, it is important to note that separating keywords with commas will not generate a hierarchy.
Managing Keywords
To manage your keywords:
Select a keyword in the Organize tab, and do one of the following:
• To unassign a keyword from a file, right-click the selected keyword and select Remove Items or uncheck the box.
• To edit the keyword, right-click the selected keyword and select Edit.
• To delete the keyword, right-click the selected keyword and select Delete.
• To edit the keyword tree, click and drag the keyword to other parts of the tree.
• To duplicate a keyword, right-click the selected keyword and select Copy, then Paste where desired.
• To merge duplicate keywords, click and drag one keyword into the other.
• To create a keyword from an existing category, click and drag the category into the keyword tree.
To Create Quick Keywords
In order to keep your keywords organized and streamline your workflow, you can use quick keywords by creating a group of related keywords that hold an association for you. This is ideal for keywords you would like to be easily accessible, rather than buried in the hierarchical tree. You can create multiple groups and choose between them based on the photos you are viewing at the time. You can also add these keywords to your tree.
Example:
Italy
| Florence Venice Lake Como | ||
| Rome Milan Verona | ||
| Genoa Bologna Naples |
To create easy-access quick keywords:
- In the Keyword group, on the Organize tab, select Manage Quick Keywords from the drop-down menu. The Quick Keywords dialog box opens.
- Enter up to nine associated or commonly-used keywords into the open fields. To create a hierarchy within a field, use the pipe key. Example: A|B|C.
- Click the Save button and choose a name for your set. Click OK.
- To create another set, select Manage Quick Keywords from the drop-down menu. Alter the fields as you like and then click Save. Choose Save As. Click OK.
- Apply keywords from your set by selecting a file.
- Select the applicable keyword from the Quick Keywords Table.
- A dialog will open asking if you would like to create this keyword. Click Yes. The keyword will be added to the tree. If you specified a hierarchy in the keyword set, the parent keyword will appear in the tree with the child under it. The text of the keywords in the table will change color to indicate that the keyword is assigned to the currently selected files, and will display in italics if assigned to only some (but not all) of the currently selected files.
Copying and Moving Files
You can use the Copy To Folder and Move To Folder commands to relocate files and folders on your hard drive, and specify how to handle overwriting existing files. You can also select from a list of previously accessed folders to save time looking through your directory structure.

When you use ACDSee Pro to relocate your files, by default any ACDSee Metadata associated with those files is copied to the new location. However, if you do not want to copy the associated files, clear the Include related files for non-RAW images check box.

When you do NOT use ACDSee Pro to move or copy your files, you break the link to any database information added to those files. This is because ACDSee Pro cannot track the files. You will lose important categorizing and database information. You can fix this by clicking Change Binding and rebinding the database. If you have embedded the database information in the files themselves, you can also retrieve this information using Tools | Database | Catalog Files.

ACDSee Pro uses XMP to embed ACDSee Metadata into each file. Only some file formats and file extensions su These include GIF, JPEG, DNG, PNG, and TIF. In the case of these file formats, the ACDSee Metadata is embedded inside the file and so you can rename or move the file outside of ACDSee Pro and still be able to retrieve the ACDSee formats that currently do not support XMP, including RAW, PSD, ABR, the ACDSee Metadata is written to a sidecar file that is stored in the same folder as its file. Because a sidecar file is separate from the file itself, you need to rename or move them together, or you could lose the ACDSee Metadata permanently.
To copy or move files:
- Do one of the following:
• In the File List pane, select one or more files, and then click Edit | Copy To Folder or Move To Folder.
• While viewing an image or media file in View mode, click Edit | Copy To Folder or Move To Folder.
-
In the Copy To Folder or Move To Folder dialog box, do one of the following:
-
Select the Folders tab, and locate the folder on your hard drive where you want to place the files.
- Select the History tab, and select a folder from the list of recently-accessed folders.
-
Select Create Folder and enter the name of a new folder.
-
In the Overwriting duplicate files drop-down list, select one of the following options to specify how ACDSee Pro should handle overwriting files:
-
Ask: Prompts you for confirmation when overwriting a file.
- Rename: Prompts you to rename a file.
- Replace: Overwrites any file with the same file name and extension.
-
Skip: Cancels the operation if there is a file with the same file name and extension.
-
Click OK.
Copying Images to the Clipboard
You can copy an image to the Clipboard and then paste it into another application. Using the Copy Image command transfers only the image data to the Clipboard: no EXIF, IPTC or metadata information is retained.
To copy an image:
- In Manage mode or View mode, select the image file you want to copy.
- Click Edit | Copy Image.
- Paste the image into your other application.
Pasting Files and Folders
You can cut or copy files to the Clipboard, and then paste them into another folder without losing your ACDSee meta
To cut and paste files:
- In Manage mode, in the File List or Folders pane, select one or more files or folders.
- Click Edit | Copy or Cut.
- In the Folders pane, browse to a new location.
- Click Edit | Paste to place the files or folders into the new location.
Replacing or Overwriting Files
When copying or moving files from one location to another, a file name collision occurs if a file already exists in the destination folder with the same file name and extension as a file you are relocating. In ACDSee, you can view both of the files involved in the Confirm File Replace dialog box. If the files involved are image files, ACDSee Pro displays thumbnail previews of both files, and provides options to replace the existing file, rename, delete, or skip the file you are moving, or cancel the operation entirely.
To use the Confirm File Replace dialog box:
- If you are moving a number of files and want to handle all potential file name collisions in the same manner, select the Apply to all check box.
- To help determine any differences between the two files, use the toolbar between the two preview fields to shrink or enlarge the size of the previews.
- Do one of the following:
• To replace the destination file with the source file, click Replace.
- To rename the new file before moving it into the destination folder, type a new name for the file in the Rename to field, and then click Rename.
• To skip this file, and leave both files intact, click Skip.
• To delete either the destination or source file, click Delete below the file you want to remove from your hard drive.
• To cancel the operation and not move or copy any more files, click Cancel.

In the Confirm File Replace dialog box, destination file refers to the file that exists in the target folder, and source file refers to the file you are moving or copying.
Renaming a File or Folder
You can rename a file or folder on your hard drive in the Folders and File List panes.
To rename a file or folder:
- In Manage mode, in the File List or Folders pane, select the item you want to rename.
- Click Edit | Rename.
- Without removing or changing the file name extension, such as ".jpg", type a new name for the file.
- Press Enter.

You can rename multiple files at the same time using the Batch Rename tool.
Storing Files in Private Folders
Private folders are secure folders where you can store confidential files. When you place files into a private folder, ACDSee Pro moves them from their current location into the private folder. Private folders are password-protected and the files in them can only be viewed in ACDSee.
When you add files or folders to a private folder all information related to them is permanently removed from the database. Restoring files and folders from a private folder does not restore information to the database. The only way you can preserve database information related to the files or folders is to back up or export the database before you add them to a private folder.
To open the Private Folder pane:
In Manage mode, click View | Private Folder.
To create a private folder:
- Close any open private folders.
- Right-click the private folder icon in the Private Folder pane and select Create Private Folder.
- In the Enter Password text box, type a password for the private folder. Your password must be less than 40 characters long.
- In the Re-enter Password text box, type the password again to verify it.
- Click OK.
A new folder will not display in the Private Folder pane. Private folders are hidden and are only identified by their password. When you have a private folder open you will see any subfolders that exist within the private folder, but do not confuse these subfolders with the private folder itself.
To open a private folder:
- Close any open private folders.
- Click View | Private Folder.
- Click the Open button in the Private Folder pane header.
- In the Enter Password text box, type the password of the private folder that you want to open.
- Click OK.

The contents of an open private folder remain visible until you close it. Remember to close your private folder if you have to step away from your computer and do not want anyone to see its contents.
To close a private folder:
Do one of the following:
- Click the Close button in the Private Folder pane header.
- Click File | Exit to exit ACDSee. The private folder is closed automatically.
To add files to a private folder:
- Open the private folder to which you want to add files.
- Do one of the following:
- Click and drag the files onto the private folder icon in the Private Folder pane.
-
Select the files, right-click one of the selected files, and then select Add to Private Folder.
A warning message displays. -
Click Yes to move the files to the private folder.

When you add files and folders to a private folder they are removed from their original location in the file system and added to the password-protected private folder. There is no way to recover files and folders from a private folder if forgotten your password. Ensure that you choose a password that you will be able to remember.
To add an existing folder and its contents to a private folder:
- Open the private folder to which you want to add files.
- Click and drag the folder onto the private folder icon in the Private Folder pane.
- Click Yes to move the folder and its contents to the private folder.
To restore folders and files from a private folder:
- Open the private folder containing the folders or files that you want to restore.
- Select the folders or files and click File | Restore from Private Folder.
- Click the browse button, navigate to the folder where you would like to move the folders or files, and then click OK.
- Click OK.
ACDSee Pro moves the folders or files from the private folder to the selected location. These folders and files are now visible to anyone with access to the computer.
To delete a private folder, or the folders or files in the private folder:
- Open the private folder containing the folders or files that you want to delete.
- Do one of the following:
• To delete the private folder, right-click the private folder icon and select Delete.
• To delete folders or files in a private folder, right-click them and select Delete.
A warning message displays.
- Click Yes to delete the private folder and all of its contents, or the selected folders or files in the private folder.

Use caution when deleting folders or files in private folders. If you delete folders or files in private folders they are permanently destroyed. Restore the folders and files if you want to move them from the private folder to a n location on your computer.
Tagging Images
It is easy to take hundreds of photos at an important event like a wedding or a marathon. After you have transferred your photos to your computer, you may want to review them and sort out your favorites. Tagging is a fast and easy way to identify your best photos or to separate them for editing or review.
The tagging check box is at the bottom right corner of the thumbnails. Click the check box to tag or un-tag photos. Photos remain tagged until you clear the checkmark from the check box.
You can display all your tagged photos with one click by clicking Tagged under Special items in the Catalog pane. Tagging, like categories and ratings, is a way to set aside, organize, and group your photos without moving the files into different folders.

Tagging is intended as a temporary means of separating your images. Once tagged, you can move or apply car ratings to the images, and then clear all of the tags. Categories, ratings, color labels, and folders are more effective for organizing and grouping your images over a long period of time.
To tag a selected image:
- Use the keyboard shortcut \ backslash key to toggle the tag on.
- Select the check box in the bottom right corner of the thumbnail.
• Right-click on one or more thumbnails and select Tag.
• In the Properties pane, select the tag check box at the top left corner in the Metadata tab.
To untag a selected image:
- Use the keyboard shortcut \ backslash key to toggle the tag off.
• In the Properties pane, uncheck the tag check box at the top left corner in the Metadata tab.
To untag all tagged images:
- Click Tagged in the Catalog pane to display all tagged files in the File List pane.
- Use the keyboard shortcut CTRL + A to select all.
- Click the backslash key \ to toggle the tag off.
To display tagged photos:
In Manage mode, click View | Catalog to display the Catalog pane, then click Tagged in the Special Items section.
Tagged photos from all your folders display in the File List pane.
To tag a photo in View mode:
Do one of the following:
• In View mode, select the check box in the bottom right corner of the status bar.
- In View mode, click View | Properties to display the Properties pane, click the Metadata tab, then select the Tagged check box in the top left corner.
To tag a photo when you are comparing images:
- In the Comparison List, select the check box in the bottom right corner of the image thumbnails.
- Click OK. The Compare Images Viewer closes. You will see a checkmark in the checkbox of the images that you tagged.
Removing Metadata From Files
You may want to share your photos without including file information such as location, camera model, personal ratings etc. The Remove Metadata option allows you to strip out this information from selected images and maintain privacy. Metadata can be removed from JPG, GIF, TIFF, PNG and DNG files.

You can make copies of the images you want to remove the metadata from so you can maintain the version metadata intact.
To remove metadata from selected images:
-
Click Tools | Remove Metadata.
-
If you do not want to remove EXIF and IPTC or the Embedded ACDSee Metadata, deselect accordingly.
-
Click OK.
Metadata is permanently removed.

Note: EXIF data specific to DNG files will be preserved.
Removing IPTC Keywords From Auto Categories
You can remove unused IPTC keywords from the ACDSee Pro database. Once removed, the IPTC keywords will no longer under Keywords (IPTC) in the Photo Properties' Auto Categories list of the Catalog Pane.

This process also applies for the Supplemental Categories field. This field is only visible if selected from the Ch Metadata to Display dialog box found under Tools | Options | Properties Pane by pressing the Manage Metadata Views button.
To remove IPTC keywords and supplemental categories:
-
In Manage mode, select any image which supports IPTC.
-
If the Properties pane is not already displayed, click View | Properties.
-
To ensure the image is writable, do the following:
-
Select the File tab and check to see if there is a check mark in Read only.
-
If there is a check mark the image is not writable. Deselect the Read only check box to make the file writable.
-
In the IPTC section of the Metadata tab, click the keyword picker button ... beside the Keywords field.
- In the IPTC Keywords Picker dialog box, click Edit List.
- Select the keyword you want to remove from the Value list.

To select more than one keyword, press and hold the CTRL key while selecting the keywords.
- Click Remove.
- Click OK.
- Click OK.

Only keywords that are not in use can be removed from the list. To find photos associated with a keyword, keyword listed under Photo Properties in the Auto Categories list of the Catalog pane.
Changing the Date and Time Properties of Images
You can use the Batch Adjust Time Stamp tool to change the date and time properties of one or more images in Manage mode or in View mode.
To change the date and time properties of a file:
1. Do one of the following:
• In Manage mode, select one or more images, and then click Tools | Batch | Adjust Time Stamp.
• In View mode, click Tools | Modify | Adjust Image Time Stamp.
2. On the Date to Change tab, choose from the following:
Date to Change
| EXIF date and time | EXIF date/time original | The original date/time the image was captured. |
| EXIF date/time digitized | The date/time the image was converted to a digital image (usually the same as original). | |
| EXIF date/time | The date/time the image was lasted edited. | |
| File last-modified date and time | The date/time the image or file was lasted edited (for example image editing updates to metadata) | |
| File creation date and time | The original date/time the file was created. | |
| ACDSee database date and time | The date and time held in the ACDSee database. | |
3. On the Advanced Options tab, select the options for the Adjust Image Time Stamp tool described below, then click Next.
Advanced options
| Accept defaults and start conversion | Accepts the default settings for the new time stamp options. To start changing the date a time of your images, click Adjust Time Stamp. |
| Automatically close wizard when finished | Closes the Adjust Image Time Stamp Wizard as soon as the process is complete. |
| Save current settings as defaults | Remembers the current settings and applies them the next time you change time stamps. |
4. On the Choose new time stamp page, select one of the following options:
- Use different date and time: Replaces the selected date and time with another time stamp property from the same file. Select the file property you want to use from the Select date and time drop-down list.
- Use specific date and time: Changes the selected time stamp in each file to a specific date and time. Type the new date and time for the time stamp in the Date and Time fields.
- Shift to a new starting date and time: Replaces the earliest timestamp with a date and time you specify, and shifts all later timestamps ahead accordingly. Specify the time stamp for the earliest file in the Date and Time fields.
- Shift date and time by a specific number: Shifts all the time stamps either forwards or backwards by a specific number of hours (to adjust for time zones). Select either Shift forward or Shift backward, and type a number into the Hours, Minutes, and Seconds spin boxes.
-
Click Adjust Time Stamp to begin adjusting your files.
-
When the wizard is finished, click Done to return to ACDSee.
Backing Up Your Files to Another Computer
The Sync Wizard will guide you through the process of creating a synchronized copy of your files to protect you from local hard drive failure. You can synchronize your local folders with a network drive, remote computer, or external hard drive. You can name the synchronization, specify the actions you want to take each time you synchronize your files, schedule the synchronization to run at specific intervals, and edit or remove the synchronization at a later time.

The Sync Wizard does not backup your database when your files are copied to a new location. To back up fi database information, use the ACD Database Backup Wizard.
To create a synchronization:
- In Manage mode, click File | Sync | Create Sync.
- On the Welcome page, click the Next button when you are ready to continue.
- On the Synchronization Options page, do the following:
• In the Source folder field, specify the folder containing files you would like to copy.
- In the Backup destination field, specify a folder on a network drive, remote computer, or external hard drive in which to place the backup files.
• In the Options area, specify how Sync should handle errors and logs.
- In the Confirmations area, specify how Sync should handle file duplication conflicts.
- Click Next when you are ready to continue.
-
On the Synchronization Schedule page, do the following:
-
In the Name text box, type a name for your synchronization.
- In the Schedule area, specify whether you would like to run the synchronization immediately, or schedule the synchronization.
- Click Finish when you are ready to complete the wizard.

Schedule: An account with no password cannot set up a schedule. You must set a password for your account for schedules to work. A blank password will not work; you must have a real password with more than one character
Updating or deleting a synchronization
You can adjust the settings of a synchronization, schedule it to run at regular intervals, or delete the synchronization from ACDSee.
To update or delete a saved synchronization:
- In Manage mode, click File | Sync | Edit Sync.
- In the Saved Synchronizations dialog box, select a synchronization from the list.
-
Do one of the following:
-
To schedule the synchronization, click Schedule. Specify how often to run your synchronization, and then click OK.
- To adjust the settings, click Edit. In the Edit Synchronizations dialog box, update the folder containing files you would like to copy, and a folder on a network drive, remote computer, or external hard drive in which files. In the Options area, update how Sync should handle errors and logs. In the Confirmations area, update how Sync should handle file duplication conflicts. Click OK when you are finished.
• To rename the synchronization, click Rename. Type a new name for the synchronization and click OK.
• To delete the synchronization, click Delete.
4. Click Close.
Running a saved synchronization
After you create a synchronization, you can run it at any time, even if it is scheduled to run at regular intervals.
To run a saved synchronization:
In Manage mode, click File | Sync, and then select the name of the synchronization you want to run.
Searching With ACDSee Pro
ACDSee Pro includes a number of ways to search your computer for files and folders. You can use the Search pane to search by file name, keywords, or image properties. You can create advanced searches to locate files that fall within a date or rating range and then save and name the search to use later. You can also use the Duplicate Finder to locate and manage identical fi
For simpler searches, you can use the Quick Search bar to quickly locate files and folders, or search the database for specific names and keywords. You can also customize the Quick Search bar to only search for specific items or certain parts of the database.
Also, you can use the Catalog pane to quickly locate and list all images on your hard drive, or to locate any files in a folder that have not been categorized. If you are working with larger image collections, you can use Selective Browsing to specify broad or narrow criteria for the images you want to display in the File List pane.
Using the Quick Search Bar
You can use the Quick Search bar in Manage mode to quickly locate files or folders. You can use the Quick Search options or basic operators to refine or expand your search, and view the results in the File List pane.
The Quick Search feature always searches the following IPTC fields: Title, Headline, Description, Keywords, Creator, City, Location, State/Province, Country, and Instructions. The Quick Search also searches Color labels and the ACDSee Metadata fields: Caption, Author, Notes and Keywords.

When ACDSee Pro searches file names, it only considers the first term in the filename. For example, a file called Cat_Dog would be found by searching for Cat, but not for Dog. Search terms are not case-sensitive.
To run a Quick Search:
Do one of the following:
• In the Quick Search bar, type the term or part of a word for which you want to search.
- Click the drop-down list beside the Quick Search field and select a previously entered search term.
Quick Search operators
You can use the following operators to further refine or expand your searches in the Quick Search bar. Note that a search term cannot begin with an operator; it must start with a word.
Operator Result Examples
| - | Searches for all items containing the first search term, andcat+Dog returns all items that contain displays only those items that don't also contain the second cat;se except those that also contain Dog. term.Be sure to insert a space before the minus sign. If you do not insert a space, ACDSee Pro will assume you are searching for a hyphenated word. |
| + | Searches for all items containing both the search term beCat+Dog or Cat Dog returns items after the operator. Those items that only contain one of containing, both Cat and Dog. are excluded. The Quick Search bar treats spaces between wordsCat+Dog+-Kittens returns items that as + operators. |
| | | Searches for all items containing one or the other of the cat+Dog includes all items with either elements.Cat+Dog|Kittens includes items that contain both Cat and Dog, and those that contain Kittens. |
Using the Search Pane
You can use the Search pane to search for your files and folders. You can do basic searching by file name or keyword phrase, and create advanced searches to narrow your results by folders, categories, and image properties. You can also search for patterns in file names and find duplicate files.
You can also save a search and give it a name. Saved searches are listed on the Search pane and the Catalog pane. On the Search pane, can select Saved searches from the drop-down list to run again. On the Catalog pane, Saved Searches are listed below Auto Categories where you can run them again by clicking once on the Saved Search name.

The Search pane will not return results for folders that are not cataloged in the ACDSee Pro database. Cataloging happens automatically when you browse to a folder. You can also click Tools | Database | Catalog Files.
To open the Search pane:
In Manage mode, click View | Search.
Search pane areas
The Search pane contains several areas to help you manager your searches. When you create a search, remember that the search tool will only return files that match all of the criteria that you specify.
Saved searches
In the Saved searches area, you can save a complex search to use later, select a search to run again, or delete a saved search.
| Saved searches | If you have saved a search, it is listed in this drop-down list for you to select and run when you click Start at the bottom of the pane, the search results are listed in the File List pane.Saved searches are also listed on the Catalog pane, from where you can run them with a click on the Saved Search name. |
| Save a search | Click the Save icon, and then Save or Save As to save or overwrite a saved search. When the Saved Search dialog opens, type in a name for the search. If you use a descriptive name, it easier to remember the criteria in your saved search. |
| Delete a search | Select a search from the drop-down list and then click the Delete icon. Click Yes to confirm the deletion, when the prompt opens. |
Files and Text
In the Files and Text area, you can identify what you are searching for, and where you want to search for it.
| Search for files or folders named | Type a portion of the file or folder name for which you want to search, or select a previ term from the drop-down list. You can also use wildcards to search for file name patterns. To exclude all non-image files, click the right-arrow button beside the field and select Images only. |
| With the text | Type the text you want to search for within the ACDSee Pro database. This can include portions of a caption or keyword, or even the name of a folder or category that might contain the fil want to find. When you search by both file name and a keyword or phrase, an item is in the search result only when it includes both criteria.To specify what parts of the database you want to search, and indicate how to treat the type in the field, click the arrow next to the field and select any of the following options:Find all words: Only returns files that match all of the words you enter.Find whole words only: Only returns files that contain the entire word, exactly as y type it.Search in Caption: Searches the Caption field of files in the database.Search in Keywords: Searches the Keyword field of files in the database.Search in Notes: Searches the Notes field of files in the database.Search in Categories: Searches the Category assignments of files in the database.Search in Folders: Searches in the name of folders in the database.Search in Labels: Searches the labeled images by color. |
| Search in | Select one of the following options:Entire database: Performs a search on the entire ACDSee Pro database. Note that a folders on your computer that have not been cataloged are not included in the search results.Specific folders and categories: Performs the search only within the categories and folders you specify. Selecting this option opens the Categories and Folders area, where you can select the location and categories in which you want to search. |
| Sync to file list settings | Imports the current Manage mode settings, including Selective Browsing settings, into the Search pane. Note that this may also remove criteria from the Search pane. |
Properties area
In the Properties area, you can identify file properties that you want to search for, and specify ranges of values to include or exclude from your search.
To use the Properties area:
- Below the Search file properties field, click Add.
- In the Add Search Criteria dialog box, select one or more properties on which to base your search.
-
Click OK.
-
In the Properties area, click the hyperlinks to define conditional statements for each property.
- Click Start to perform the search.
Searching With File Name Patterns
You can type a text pattern into the Search pane's Search for files and folders named field to search for file names. You can search for simple patterns such as portions of file names, or more advanced patterns that include wildcards.
File name pattern wildcards
| Wildcard Result Example | ||
| ? | Matches any single character in the file name. | ca?.jpg results in cat.jpg, cap.jpg, and car.jpg, but not cats.jpg |
| * | Matches zero or more characters in the file name. | cat* results in cat.jpg, cats.jpg, and cathy.jpg |
| [...] | Matches any of the enclosed characters. | ca[tr] results in cat.jpg or car.jpg, but not cap.jpg |
| [!...] | Matches any character not enclosed.cat[!0] results in cata.jpg and catb.jpg, but not cat0.jpg | |
| [...-...] | Matches any character in the specified range. | cat[a-f0-9] results in cata.jpg, catb.jpg, catf.jpg and cat0.jpg, cat1.jpg, ..., cat9.jpg |
| \ | Blocks the use of other wildcard characters that Because square brackets are wildcards, if you also characters permitted in a file name, such wanted to search for a file name that contains square brackets: [ ]. The * and ? characters are allowed, you must precede the bracket with a permitted in file names so this function does not be shown:with them.ACD $$ [123]\ results in ACD[123].gif | |

Patterns are not case-sensitive. To use multiple patterns, separate the names with spaces or semicolons. To match pattern containing a space or semicolon, enclose the pattern in double quotation marks. If you do not include wildcard in your pattern, the pattern is matched as a sub-string. For example, cat would match cat, cathy and bobcat, and is equivalent to the pattern *cat*.
Using Selective Browsing
You can use selective browsing to browse for files that are located in a specific folder, assigned a specific date, and/or assigned to a specific Catalog classification. By adjusting the selective browsing criteria, you can quickly include or exclude files from the File List pane, and view only those files you want to browse.
To get the most out of selective browsing, it is recommended that you catalog and organize your files in the ACDSee Pro database. The more information you enter for your files, the more helpful you will find the selective browsing feature.
To use selective browsing:
Open the Selective Browsing pane by clicking View | Selective Browsing. The pane appears on the left side of the File List pane.
Setting selective browsing criteria
The Selective Browsing pane is divided into three areas: Folders, Catalog, and Calendar, each of which corresponds to the Manage mode pane of the same name. When the Selective Browsing pane is open, the Contents bar in the File List pane is replaced by the Selective Browsing bar, which lists all of the current browsing criteria.
When you add a folder, date range, or organize method to the Selective Browsing pane, ACDSee Pro excludes any files that do not match that criteria. You can add or remove criteria to narrow or broaden your results.
To add selective browsing criteria:
With the Selective Browsing pane open, do any of the following:
• In the Folders pane, select one or more folders.
• In the Catalog pane, select one or more categories, and/or a rating.
- In the Calendar pane, select one or more date ranges.
As each criteria is added to the Selective Browsing pane, ACDSee Pro searches its database for files in that folder, that match the date range, and are assigned to the classification, and displays them in the File List pane. You can then select those files and use the ACDSee Pro features to edit, share, move, and view them however you want.
You can also adjust or refine your criteria in the Selective Browsing pane:
- To remove a selected criteria from the Selective Browsing pane, right-click any of the criteria, and then select Remove From Scope.
- To exclude all of a certain type of criteria, click the bar above the list, and toggle the option to include that type in the scope. For example, to exclude the listed folders from the scope, click the Folders bar, and then click Include Folders in Scope. The folders you selected will still be displayed in the Selective Browsing pane, but will not factor in the results
• To remove all criteria of a certain type, click the bar above the list, and select Clear All.
The default behavior for categories in the Selective Browsing pane is to display files that match any of the categories listed. You can refine your results by choosing to display only those files that are assigned to all of the specified categories. To toggle between behaviors, right-click the bar above the categories you selected, and select Match Any or Match All.
Tips for selective browsing
When you add a criteria to the Selective Browsing pane, you are indicating that the files you want to browse must have that attribute. For example, if you select a folder in the Folders pane, then ACDSee Pro displays only files in that folder. If you select a rating in the Catalog pane, ACDSee Pro displays only files assigned to that rating.
You can combine criteria to refine your selective browsing even further. For example, if you select a category and a date range, then ACDSee Pro displays only those files that belong to both the category and date range you selected. ACDSee Pro does not display items that fall within the date range unless they are also assigned to the correct category, and does not display files assigned to that category unless they also match the date range.
Hiding the Selective Browsing pane
You can use the Auto Hide feature to automatically hide the Selective Browsing pane and increase space for the File List pane. When the pane is set to auto-hide, it rolls away when you click outside it, leaving only an edge displayed. You can access the pane again by
moving the cursor over the edge.
Searching With Auto Categories
Do you have hundreds, possibly thousands, of images? Do you use more than one camera? Do different members of your family share cameras? Or do you have images on your computer that were captured by friends and family? If you answered yes to any of these questions you should consider using auto categories to search for images.
You will see auto categories in the Catalog pane, below Labels. Double-click or click the plus sign (+) to expand auto category groupings. Double-click or click the minus sign (-) to collapse the auto category groupings.
Some auto category information is added to your images by your camera. For example, cameras will record information such as the camera make and model, the white balance settings you used, the focal length you used, and the aperture. You may supplement that information with the city, province/state, or country in which you captured the images, as well as keywords or copyright. You can do this by manually entering information in the Properties pane.
When you click on an auto category, ACDSee Pro searches for images belonging to that category. For example, imagine that you use more than one camera. You can expand the Photo Properties and Camera Model groupings, then select the category representing your camera model. All images captured with that camera model will display. Similarly, imagine that your brother captures a lot of images and sends them to you. You can expand the Photo Properties and Photographer groupings, then select your brother's name from the list of photographers. All images captured by your brother will display.
Below are some tips for searching with auto categories.
Identifying commonly used search categories
If there are certain auto categories in the Photo Properties grouping that you use frequently, you can save time by adding them to the Commonly Used grouping. Some Photo Properties groupings are available in the Commonly Used grouping by default. You can add as many auto categories as you want to the Commonly Used grouping, and you can easily remove any grouping Commonly Used grouping when you no longer need them.
To add an auto category grouping to the Commonly Used grouping:
- Expand the Photo Properties grouping.
- Right-click the auto categories grouping that you want to add to the Commonly Used grouping, and select Add to Commonly Used. The grouping is added to the Commonly Used grouping.
It remains visible in the Photo Properties grouping as well.
To remove an auto category grouping from the Commonly Used grouping:
- Expand the Commonly Used grouping.
- Right-click the auto categories grouping that you want to remove from the Commonly Used grouping, and select Remove from Commonly Used.
The grouping is removed from the Commonly Used grouping.
Refining your auto categories search
You can refine your auto categories search by selecting more than one auto category. For example, imagine that you are learning to combine aperture and shutter speed settings to properly expose images in a variety of lighting and you want find images taken at specific settings. If you click the Easy-Select indicator beside the f/16 aperture auto category and the 1/30 s shutter speed auto category, ACDSee Pro will search for images that belong to both of those auto categories.
When you select more than one auto category you can further control the search by selecting Match All or Match Any from the Match Any/All drop-down list at the top of the Catalog pane. If you select Match Any, ACDSee Pro will display any images associated with the selected auto categories. If you select Match All, ACDSee Pro will display only those images that are associated with all of the selected auto categories.
You can also refine your auto categories search by selecting a category or rating. For example, imagine that you clicked on the Photographer auto category and found over 1000 images. However, you only want to see the best images by that photographer. Click the Easy-Select indicator beside 1 in the Ratings area of the Catalog pane. Only the images by that photographer with a rating of 1 will display.
You can also use the Selective Browsing pane to refine your auto categories search. For example, imagine that you clicked on the Camera Model auto category and ACDSee Pro displayed over 1000 images. However, you only want to see the images that you took on a specific date. Display the Selective Browsing pane by clicking View | Selective Browsing, then select the Calendar pane and select the appropriate date. Only the images taken with that camera model on that day will be displayed.
Finding Duplicate Files
You can use the Duplicate Finder plug-in to search for duplicate files on your hard drive. Once you locate any duplicates, you can rename or delete them to better manage your file collection.
The following steps are a basic overview of how to use the Duplicate Finder. There is also extensive context-sensitive Help in the plug-in dialog box to provide you with additional information.

Limit your search by selecting only a portion of the photos or images in a folder.
To find duplicate files:
- In Manage mode, select a folder or images to search for duplicates.
- Click Tools | Find Duplicates.
- In the Duplicate Finder dialog box, on the Select Search Type page, add any other files and folders you want to search.
-
Do one of the following:
-
To find duplicates within the files and folders you added to the list, select Find duplicates within this list of files.
-
To compare files between the list you created and another group of files, select Find duplicates between these files and another list.
-
Click Next.
- If you are comparing the files with another list, add the files or folders you want to compare to the second list, and then click Next.
-
On the Search Parameters page, specify whether you want to find exact duplicates, or just files with the same name.
-
Select Find images only if you only want to search for image files.
- Click Next.
-
Click Next to review your changes, and then click Finish.
-
If no duplicates are found, click OK and refine your search or click Cancel to exit the Duplicate Finder.
-
If duplicates are found, specify from which list you want to delete the duplicates, and then select the check box next to the files you want to delete. You can also right-click a file name to open, rename, or delete a file.
Finding Images Quickly
You can click on the name of a saved search to quickly re-run the search. You can select Special Items in the Catalog pane to locate all of the images in your database, or list all of the images that you have not yet assigned to a category.
To re-run a saved search:
In Manage mode, in the Catalog pane, click the name of a saved search.
The results of the search display in the File List pane.
To find all of your images at once:
- In Manage mode, click View | Catalog to open the Catalog pane.
- In the Catalog pane, under Special Items, click Image Well.
To locate uncategorized images:
- In Manage mode, click View | Catalog to open the Catalog pane.
- In the Catalog pane, under Special Items, click Uncategorized.
- The Image Well and Uncategorized features only display images that have been cataloged in the database; they do not search your hard drive for specific file types.
Sharing Files With ACDSee Pro
ACDSee Pro makes it easy to share your images and other files with friends and family. You can email files directly from ACDSee, upload images to a Web site, and create your own Web pages with the HTML Album plug-in.
ACDSee Pro includes a Burn Basket pane, to help you burn your images safely onto a disc. You can also create slideshows and screensavers that you can give to anyone with a computer—they do not need ACDSee Pro to view them.
Taking a Screen Capture
You can use the ACDSee Pro Screen Capture utility to create images from different areas of your screen. You can select what areas to capture, how you want to perform the capture, and where to store the captured image.
To take a screen capture:
-
In Manage mode or View mode, click Tools | Screen Capture.
-
In the Source area of the Screen Capture dialog box, identify the part of the screen you want to capture. See the table below for a description of the Source options.
-
If you want to include your cursor in the output image, select the Include mouse cursor check box.
-
In the Destination area, identify where you want to place the output image.
-
In the Initiate capture area, identify how you want to take the screen capture.
-
Click Start to launch the screen capture tool.
An icon appears in the Taskbar Notification area.
-
Prepare your screen to show the area you want to capture, and then follow the steps that appear in the bubble above the Screen Capture icon.
-
To exit the Screen Capture utility without taking a screen capture, right-click the Screen Capture icon, and then select Exit Screen Capture.
Screen Capture options
| Desktop Current monitor | Captures an image of the entire area displayed on the screen. | |
| Window Entire window | Captures an image of the entire active window. | |
| Content only Captures an image of the window contents (does not include the frame title bar). | ||
| Region Fixed size | Captures an image of a fixed area on the screen.Click the drop-down button and select a dimension setting or selectCustom, and enter the dimension in pixels. | |
| Selected region Captures a selected area of the screen. Click and drag your cursor to surround the area you want to capture. | ||
| Object Child window | Captures an image of sections of the window. For example, a toolbar of button. | |
| Menu under cursor Captures selected menu commands. | ||
| Include mouse cursor | Includes the cursor in the screen capture. | |
| Destination options Clipboard | Places a copy of the image on the Clipboard. From the Clipboard you paste the image in a new location. | |
| File Displays the Save dialog box to save the file; you can specify location, format, and file name. | ||
| Editor Opens the captured image in the default editor. | ||
| Initiate Capture options | Hot key | Designates a keystroke combination to trigger the screen capture.To set the Hot Key, press a key or combination of keys (e.g., CTRL - the keyboard; do not type in the box. |
| Timer | Takes a screen capture after a designated period. Choose enough time to set up your desktop or window for the screen capture. The maximum setting is 60 seconds. | |
Emailing Images
You can use the Send Email Wizard to send images directly from ACDSee Pro without opening an external email application. To use the Send Email Wizard, you will need an active email account, and have a default email application setup on your computer, or have access to an SMTP server.
To email your images:
- In the File List pane, select the images you want to email, and then click File | Send | Email Images.
• If you want to add other images, click Add. When you have finished adding images, click OK.
- If you want to delete images, select an image and click Remove. The image is removed from the wizard, but not deleted from ACDSee.
- If you want to set email and image options, such as the maximum size for emails or the conversion of JPEG, click Options. When you have finished selecting options, click Apply.
- If you want to change the email account settings, to use either your default email client or an SMTP s Change. When you have finished changing your email account settings, click OK.
-
In the Send Email Wizard, click Next.
-
If you selected Send using your default email client, the wizard adds your images and email information to a new email message. You can edit the message and then send it as you normally would.
-
If you selected Send through an SMTP server, in the wizard, enter the email address you want to send the email to, a subject for the email, and a message. Click Next.
-
When the images have been sent, click Finish to close the wizard.

Some Internet-based email applications such as Hotmail and Yahoo (free accounts) do not support SMTP and can be used with the Send Email Wizard. For others, such as Gmail, Yahoo (upgraded accounts), and AOL, you must account for POP/SMTP. To learn how to configure these types of email accounts, visit their specific websites and search for SMTP.
Share / Email Using ACDSee Online
Once you have activated your account with ACDSee Online, you can share your images through ACDSeeOnline.com.
To email your images:
- In the File List pane, select the images you want to share, and then click File | Send | Share/Email using ACDSee Online.
- Enter a Name for your album of photos and select a Location from your existing online folders.
- Enter one or more email addresses to send the images to.

You can click the Share with button to pull names from your address book.
-
Select an upload size from the drop-down list.
-
Click Upload.
- A new window opens providing the option to enter a message, enable download of full sized JPG, and create an access password.
- Click OK.
Creating a Desktop Screensaver
You can create a desktop screensaver using your own images. You can set the screensaver options to adjust how long each image is displayed, set the background color, apply transition effects, and add header or footer text.
To create a screensaver:
- In Manage mode, in the File List pane, select a group of images, and then click Tools | Configure Screensaver.
- In the ACDSee Screensaver dialog box, click Add to browse for more images to add to your screensaver, or select images you do not want to include and click Remove.
- Click Configure, specify the options as described below, and then click OK.
- To automatically use the screensaver on your desktop, select the Set as default screensaver check box.
- When you are satisfied with your choices, click OK.
To activate the screensaver on your computer:
Select the Screen Saver tab in your Windows Display Properties dialog box, and then select ACDSee Screensaver from the drop-down list.
ACDSee Screensaver options
| Basic Select transitions | Displays a list of transitions for you to select and plays each transition, variation, or effect in Preview as you select it.Select all: Selects all the transitions and displays them randomly.Clear all: Clears any selected transitions.These transitions do not work with the 2-up, 4-up and Collage variations. |
| Variations | Click the drop-down list to select from the following:None: Uses no variationsPan and Zoom: Zooms in and pans across each slide during the time it is displayed.2-up: Displays two images at a time.4-up: Displays four images at a time.Collage: Displays images as a collage where images overlap each other. |
| Effects | Click the drop-down list to select from the following:None: Uses no effects.Black & white: Displays all images in grayscale.Sepia: Displays all images in sepia.Vivid: Increases the saturation of the images to make colors brighter.Soft: Blurs images slightly for a softening effect. |
| Background color | Specifies the background color. Click the color picker to select or change the color. ClickOtherto set a custom color intheColor dialog box. |
| Slide duration (sec) | Specifies how long you want the screensaver to display each image. |
| Advanced General settings | Select or clear the following options:Stretch images to fit screen: Enlarges small images to fill the entire screen.Play embedded audio: Plays any audio clips embedded in the images. |
| Slide order | Select one of the following options to specify the order to display your images:ForwardShuffle |
| Text Display header text | Displays a text caption at the top of each image. Set the options to specify the text you wa display. |
| Display footer text | Displays a text caption at the bottom of each image. Set the options to specify the text you display. |
| Alignment | Specifies the alignment of the text captions. |
| Background color | Specifies a background color for the caption text. |
| Text | Specifies the text to display as a caption. |
| Font | Opens the Font dialog box where you can select or change the font options for your text. |
| Insert Metadata Tag | Inserts file-specific information called metadata into the caption.Click to open the Choose Properties dialog box and select the metadata you want to insert. |
Viewing and Configuring a Slideshow
You can view a slideshow of images from Manage mode or from View mode. You can also configure your slideshow to automatically whenever you run it, and set the slideshow options to adjust how long each image is displayed, set the background color, apply transition effects, and add header or footer text.
To start a slideshow in Manage mode:
- Do one of the following:
• In the File List pane, select a group of images.
• In the Folders pane, select a folder.
• Use the Easy-Select bar to select multiple folders that contain images.
- Click Tools | Slideshow (keyboard shortcut CTRL+ S)
To start a slideshow in View mode:
Click Tools | Slideshow.
To configure a slideshow:
- In Manage mode, do one of the following:
• In the File List pane, select a group of images.
• In the Folders pane, select a folder or use the Easy-Select bar to select multiple folders that contain in
-
Click Tools | Configure Slideshow.
-
In the Slideshow Properties dialog box, select or change the slideshow options as described below.
- To save your settings as the default slideshow behavior, select the Save current settings as default check box.
- Click OK.
Slideshow options
| File Selection Slideshow contents | Specifies which of the following media to include in the slideshow:All media in current folder: Displays all the files (images or video) in the folder you have selected.All media in current folder and subfolders:Displays all the files in the currently selected folder and its subfolders.Selected media: Displays only the files that you selected before opening the Slideshow Properties dialog box. |
| Always use these contents for this selection type and start slideshow automatically | Retains the current Slideshow contents setting and starts automatically the next time you launch the slideshow. |
Basic Select transitions
Displays a list of transitions for you to select and plays each transition, variation, or effect in the Preview as you select it.
- Select all: Selects all the transitions and displays them randomly.
• Clear all: Clears any selected transitions.

These transitions do not work with the 2-up, 4-up and Collage variations.
Variations
Click the drop-down list to select from the following:
• None: Uses no variations.
- Pan and Zoom: Zooms in and pans across each slide during the time it is displayed.
• 2-up: Displays two images at a time.
• 4-up: Displays four images at a time.
• Collage: Displays images as a collage where images overlap each other.
Effects
Click the drop-down list to select from the following:
• None: Uses no effects.
- Black & White: Displays all images in grayscale.
- Sepia: Displays all images in sepia.
- Vivid: Increases the saturation of the images to make colors brighter.
- Soft: Blurs images slightly for a softening effect.
Background color
Specifies the background color. Click the color picker to select or change the color. Click Other to set a custom color in the Color dialog.
Slide duration (sec)
Specifies how long you want the slideshow to display each image.
| Advanced General settings | Select or clear any of the following options:Stretch images to fit screen: Enlarges small images to fill the entire screen.Play embedded audio: Plays any audio clips embedded in the images.Stretch video to fit screen: Enlarges video files to fill the entire screen.Autohide control bar: Hides the slideshow controls whenever the cursor stops moving for more than a few seconds.Loop: Repeats the slideshow after displaying the last image. |
| Slide order | Select one of the following options to specify the order to display your images:ForwardShuffle |
| Music directory | Displays music from the previously-selected folders, or you can clickBrowseto find a new folder. |
| Text Display header text | Displays a text caption at the top of each image. Set the options to specify the text you want to display. |
| Display footer text | Displays a text caption at the bottom of each image. Set th options to specify the text you want to display. |
| Save current settings as default | Retains the current settings on all of the tabbed pages and applies them the next time you view a slideshow. |
Slideshow text options
| Alignment | Specifies the alignment of the text captions. |
| Background color | Specifies a background color for the caption text. |
| Text | Specifies the text to display as a caption. |
| Font | Opens the Font dialog box where you can select or change the font options for your text. |
| Insert Metadata Tag | Inserts file-specific information called metadata into the caption.Click to open the Choose Properties dialog box and select the metadata you want to insert. |
Sharing Slideshows and Screensavers
You can view a slideshow of your images from Manage or View mode at anytime by clicking Tools | Slideshow (keyboard shortcut CTRL+S in Manage mode). With ACDSee, you can also create slideshows and screensavers of your favorite photos, and send them to friends and family, or display them on your website. You can even save your slideshow or screensaver project to edit at a later time.
To create a slideshow:
-
In Manage mode, click Tools | Create | Slideshow File.
-
On the Welcome page, to create a new slideshow, select the Create a new slideshow radio button. To specify what type of slideshow you want to create, select one of the following options:
-
Standalone slideshow: Creates a single executable file (.exe) containing all of your images and everything needed to view them. You can share this type of file with anyone who has a computer, even if they ACDSee.
- Windows screensaver: Creates a standard Windows screensaver file (.scr) that can be stored and used on any Windows system.
-
Adobe Flash Player® slideshow: Creates a compact Adobe Flash file (.swf) that you can display on a Web site.
-
To edit an existing slideshow or screensaver project, select the Load an existing slideshow project radio button, and then click Browse to locate your project (.asw file).
- Click Next to continue.
- On the Choose your images page, you can view the images included in your slideshow, in the default order they will be displayed. Click Add or Remove to change the images, and use the arrow buttons to reorder them. Click Next when you are ready to continue.
- On the Set file specific options page, click the underlined words beside each thumbnail to set the individual options for each image. These include transitions between photos, the duration of the transition and slide, text captions, and audio files to play when the image is displayed. Note that the options available depend on your choice of output file format, and not all formats support all options. Click Next when you are ready to continue.
- On the Set slideshow options page, set the timing for each slide to automatic or manual, the order to display slides, and whether or not to hide the controls. You can also add audio files to play in the background, and adjust the quality, or speed, of the transitions. Click Next when you are ready to continue.
- On the following pages, set the options for image size, location of your slideshow file and the project file.
- Finally, click Next, and wait a few moments while ACDSee Pro generates your slideshow. When complete, you can launch your slideshow and exit the wizard.

If you assign an audio file to an individual image, as well as to the whole slideshow on the Setslideshow options page, then both audio files will play simultaneously when that slide displays.
Creating a Desktop Slideshow
You can use ACDSee Showroom to create a slideshow of your photos and display that slideshow in a small window on your computer desktop. You can run up to 16 different slideshows on your computer at once.
You can configure the ACDSee Showroom window to always stay on top of other application windows. You can also configure it to open when you start your computer. You do not have to open ACDSee Pro to use ACDSee Showroom.
To create a desktop slideshow with ACDSee Showroom:
- In Manage mode, navigate to a folder containing images that you want to add to the desktop slideshow.
- Do one of the following:
- Click Tools | Create | ACDSee Showroom.
- Click Start | Programs | ACD Systems | ACDSee Showroom.
The slideshow starts immediately and the ACDSee Showroom icon appears in the taskbar.
Using the ACDSee Showroom slideshow controls
There are a number of slideshow controls in the ACDSee Showroom window.
- Click the Back or Forward buttons to display the previous or next photos in the slideshow.
- Click the Pause button to pause the slideshow while a particular photo is displayed.

If you cannot see these slideshow controls in the ACDSee Showroom window, click anywhere in the window. Th disappear while the slideshow is playing so you can fully enjoy your photos.
To create more than one ACDSee Showroom:
With ACDSee Showroom open, do one of the following:
• Right-click in the ACDSee Showroom window and select New Showroom.
- Click the ACDSee Showroom icon in the taskbar and select New Showroom.
To close ACDSee Showroom:
Do one of the following:
- Click Close in the ACDSee Showroom window.
- Click the ACDSee Showroom icon in the taskbar and select Exit ACDSee Showroom.

If you have configured ACDSee Showroom to open when you start your computer, it will automatically open the you start your computer.
Creating a PDF
You can use ACDSee Pro to combine your images into PDF (portable document format) files. The Create PDF Wizard will guide you through the process of creating one or more PDF files from your images, or adding images to a PDF slideshow.
To create a PDF:
- In Manage mode, in the File List pane, select the images you want to share.
-
Click Tools | Create | PDF.
-
On the Welcome page of the Create PDF Wizard, select one of the following options, and then click Next:
• Create a PDF slideshow: Combines all of your images into a single PDF file that you can view as a slideshow.
- Create one PDF file containing all images: Combines all of the selected images into a single PDF file with multiple pages.
• Create one PDF file for each image: Converts each image into a separate PDF file.
-
On the Choose images page, you can change the selected images, and use the arrow buttons to reorder them. Click Next to continue.
-
Do one of the following:
-
If you selected to create a PDF slideshow, set or change the transition options by clicking the hyperlink image. Click Next to set the order, color, and file name options for your slideshow. Click Next when you are ready to continue.
-
If you selected to create one or more PDF files, specify a file name and location, and then click Next.
-
Click Finish to close the wizard and return to ACDSee.
Creating a PowerPoint Presentation
You can create a PowerPoint presentation quickly from inside ACDSee Pro using the Create PPT Wizard. The wizard walks you through the process of creating or editing a presentation using your photos. You can set slide duration, the location of the file, number of images per slide and whether or not to use a design template as a background. You can also add captions, a title, or notes to each slide.

This feature only works if you have Microsoft PowerPoint® installed on your computer. The feature does not suit files, so you will need to convert RAW files to another format.
To create a PowerPoint presentation:
- In Manage mode, in the File List pane, select the images you want to share.
- Click Tools | Create | PPT.
- On the Choose images page of the Create PPT Wizard, click Add if you want to add more images.
- Click Next.
-
On the Presentation Options page, do one or all of the following:
-
In the Presentation Options area, if this is a new presentation, set the duration that you want each slide to display.
- If you are editing a presentation, select Existing presentation to activate the Path field, and browse to your presentation. Select whether you want to Insert slides at the beginning or end of the presentation.
-
Select the Number of images per slide from the drop-down list. (If you select more than one, the Title and Notes options on the next page do not appear.)
-
Select Link to Image file if you want your images to stay linked to ACDSee Pro rather than be embedded in the presentation.
- Click Use a design template if you want to use a background template and browse to the folder on your computer to select it. (PowerPoint templates are usually under Microsoft Office | Templates | Presentation Designs.)
6. Click Next.
-
On the Text Options page, do one or all of the following:
-
On the Caption tab, type in a caption and select its background color and alignment. You can also select a different font, or insert metadata like file name or picture dimensions. Captions appear at the bottom of the slide
- On the Title tab, type in a title for the slide and select its background color and alignment. You can also select a different font, or insert metadata.
- On the Notes tab, type in any notes that you want to appear in the Notes section attached to each slide. These notes do not appear on the slide itself.
8. Click Create.
The presentation opens in PowerPoint where you can edit it like any other presentation.
Burning a CD or DVD
You can use the Burn Basket to burn a CD or DVD of your photos and files, to use on a computer. You must have a CD or DVD writer installed in your computer to use the Burn Basket.
With the Burn Basket, you can organize, arrange, and store your photos and files until you are ready to burn them to a disc. The Burn Basket allows you to create your own folders, use existing folders, or have the Burn Basket create the folder structure automatically.
To create a CD or DVD:
- To open the Burn Basket pane, do one of the following:
• In Manage mode, click View | Burn Basket.
• In Manage mode, clickTools | Create | CD or DVD.
- From the drop-down list in the toolbar of the Burn Basket, select the device you want to use to create your disc. The options in this drop-down list depend on the CD/DVD hardware you have on your computer.
- Click the Format Options button. The Format Options dialog box will open. Check or uncheck the box to specify whether you want to include any ACDSee metadata associated with your files.
- You can use the left side of the Burn Basket to create a folder structure to organize the photos and files on the disc. To create a new folder, right-click the name of a folder, "Volume Label" by default, and select New Folder from the context menu. Type a name for the new folder and then press Enter.
- To add photos or other files to your disc, drag them from the File List pane to the Burn Basket, or select the files you want to add and then click Edit | Add to Burn Basket. You can use the buttons on the Burn Basket toolbar, as explained below, to adjust the contents of the Burn Basket, or to save or load projects.
Bum
- When you are ready to create your disc, click, located in the bottom right corner.

In order to be able to browse the contents of your disc while it is ejected, you may want to create an ACDSee Photo Disc.
Burn Basket toolbar buttons
| Format Options | Opens the Format Options dialog box, where you can specify whether or not want to add a catalog to your data disc. |
| Add to Burn Basket | Adds the currently selected files or folders to the Burn Basket. |
| Remove From Burn Basket | Removes the currently selected files or folders from the Burn Basket. |
| Remove All | Clears the contents of the Burn Basket. |
| New Folder | Creates a new sub-folder. |
| Rename | Renames the currently selected file or folder. |
| Save Project | Saves the current contents and settings of the Burn Basket as a project file can edit later. |
| Load Project | Opens a previously saved Burn Basket project. |
Creating an HTML Album
You can use the HTML Album Wizard to prepare photo collections for posting on the Internet. The HTML album includes slideshow controls and a thumbnail display. You can select from a list of gallery style templates and then customize the gallery by adding your own logo as an image or text to the header or footer. You can also change the fonts and colors used in the galler
To create an HTML album:
- In Manage mode, in the File List pane, select the images you want to share.
- Click Tools | Create | HTML Album.
- On the Style Settings page of the Create HTML Album Wizard, select a Gallery Style from the Web page styles box.

After you select a Gallery Style and other settings, you can click Preview Gallery to see how those selections affect the appearance of your HTML album. You can also generate your HTML album from any page in the HTML Album clicking Generate Album.
- Click Next.
- On the Gallery Customization page, do one or all of the following:
• In the Gallery Title text box, type the title that you want to display at the top of the Web page.
- Select Include header to display a header at the top of the Web page, or clear the Include header checkbox to remove the header.
- Select Include footer to display a footer at the bottom of the Web page, or clear the Include footer check box to remove the footer.
- If you want to display an image in the header or footer, select Use image and click Browse and select a company logo, a photo of yourself, or another image to display in the header.
If you want to display text in the header or footer, select Use information and click Set Information and add enter the text that you would like to display.
- In the Folder settings section, click Browse and select the folder where you would like to save the HTML album files.
6. Click Next.
- On the Thumbnail and Image page, do one or all of the following:
• In the Thumbnail settings section, adjust the appearance and format of the thumbnails in the album.
• In the Image settings section, adjust the appearance and format of full size images in the album.
• In the Slideshow duration section, specify how long to display full size images during a slideshow.
- In the Color and font settings section, click Color and font, adjust the colors and fonts used in the Web page, and then click OK.

Click Save Settings to save the settings that you select for specific Web page styles. If you save the settings, you can quickly reapply them to a Web page style from the Style Settings page of the Create HTML Album Wizard.
- Click Next to create your HTML album. You may need to wait a few moments while ACDSee Pro generates the thumbnails and creates the Web page.
- Click Create Another Album to create another album, or click Finish to exit the wizard and return to ACDSee.
You will need to use FTP or another method to post the HTML album files to your Web site.
Uploading Images to Photo Websites
You can upload your photos or images directly from ACDSee Pro to sites like Flickr, SmugMug, and Zenfolio. Of course, you do need an account before you can upload pictures to these sites. You can create an account as part of the first upload process from ACDSee Pro if you wish.
Connecting
You can quickly upload your photos without having to leave ACDSee.
To read about a service:
- In Manage mode, click File | Send | Upload to.
- Click one of the names in the Select a service to upload to box.
Information about that service displays in the right-hand pane.
To upload images to a website:
- In Manage mode, in the File List pane, select the images you want to upload.
- Click File | Send | Upload to.
-
In the Upload Manager dialog, click the service you want to use, and then click Next.
-
Follow the instructions in the wizard to upload your images. Each service has different steps.
- If you need help, click Help. Each service has its own help file, which you open from inside its dialog box.
New Services
As new services become available, they will appear in the New Services Available box. New services might include photo publishing and other online services. As soon as a new service is available, it appears automatically in the New Services Available box. You can install and use new services right away.
To install a new service:
- When a new service appears in the New services available box, click the service, and then click Install.
- Follow the installation instructions as they appear.
Creating a Contact Sheet
You can create contact sheets—thumbnail previews of your images arranged on pages — that you can use to organize and share your images. You can use the Create Contact Sheet utility to save your contact sheets in multiple image formats, and as HTML image maps. You can save your options as a preset for future use.
The size of the thumbnails depends on how many columns and rows the contact sheet displays, and how much space is displayed between them.
To create a contact sheet:
- In Manage mode, in the File List pane, select the images you want to include.
- Click Tools | Create | Contact Sheet.
- In the Contact sheet format area, set the Contact sheet format options.
- In the Output Settings area, set the Output Settings options.
- If desired, add or change the text on the page.
- Click OK.

If you do not specify an output file path, the Create Contact Sheet utility places a file named Contact Sheet.
Contact sheet format options
Chapter 3: Manage Mode
| Thumbnail settings Size | Specifies the number of columns and rows to create on each page. | |
| Spacing | Creates a frame around each thumbnail. Specifies the amount of space between rows or columns. In the Horizontal and Vertical spin boxes, type a value to indicate the amount of space to display. | |
| Frame options Use thumbnail frame | Creates a frame around each thumbnail. | |
| Margin | ||
| Solid color | ||
| Tiled image | ||
| Thumbnail options Colored drop shadow | Creates a drop shadow effect around each thumbnail. Click the color picker to define a color. | |
| Colored edge fade | ||
| Colored matte | ||
| Beveled edges | ||
| Page background options Solid color | Uses a solid color as a background for the page. Click the color pick to define a color. | |
| Tiled image | ||
Creating Archives of Your Files
You can use the Archive Creator plug-in to create archives of your images and media files. Archive Creator supports multiple archive formats, and helps you manage your files using compression, encryption, and password protection tools.
To create an archive:
-
In Manage mode, in the File List pane, select a folder or group of files.
-
Click Tools | Create | Archive.
-
In the Create Archive dialog box, in the Options area, click the Archive Type drop-down list and select the archive format you want to create.
Some archive formats have additional settings that you can adjust by clicking the Settings button.
- Do any of the following:
• To include the contents of any subfolders you selected, select the Include subfolders check box.
• To include any hidden files in your archive, select the Include hidden files check box.
- To remove the selected files and folders from your hard drive once they have been added to the archive. Delete files after archiving check box.
- To protect the contents of your archive with a password, select the Password Protect Archive check box, and type a password into the field beside it. Note that not all archive types support passwords, and some f require them.
-
Type a path and file name into the Output File field, or click Browse to locate a folder on your hard drive.
-
Select one of the following:
- Add to existing archive: Adds your files to an existing archive. This option is only available if the archive specified in the Output File field already exists.
- Overwrite existing archive: Replaces any existing archive with the archive you are creating. This option is only available if the archive specified in the Output File field already exists.
- When you are satisfied with your choices, click Create to begin archiving your files.
Extracting Archived (.zip) Files
You can extract archived (.zip) files very quickly and easily without leaving ACDSee. You can either extract the files to a folder or simply double-click and view them.
To extract an archived file to a folder:
-
In Manage mode, navigate to the folder containing the archived file, using the Folders pane.
-
Click the archived file in the File List.
-
Click Edit | Extract to Folder.
-
In the Extract to Folder dialog, navigate to, and select the folder where you want to keep the files.
-
To create a new folder, click Create Folder, type in the name of the folder and then press Enter.
-
Use the Overwriting duplicate files drop-down list if you want to specify what do so with files in the folder that have the same name as those you are extracting. You can select any of the following:
- Ask: To be asked what to do about each individual file.
- Rename: Duplicates are given a new name.
- Replace: Duplicate files are overwritten.
- Skip: No duplicates are extracted.
- Click OK.
To view files inside an archived file:
-
In Manage mode, navigate to the folder containing the archived file.
-
Double-click the archived file.
Thumbnails of the contents of the archived file open in the File List pane.
Creating a SendPix Album
ACDSee Pro includes SendPix, a free digital image sharing service. You can create albums of your images to share with your friends and family. The albums you create are stored on ACD Systems' secure servers for 30 days. SendPix sends an email to selected recipients who can then view your albums using a standard Web browser—no special software is required.
You can also create a photo widget that you can host on your blog or Web site. The photo widget is a scrollable gallery of your photos that a visitor can click on to go to the full album on Sendpix.
If you want to use SendPix, you must first activate the plug-in.
To activate the SendPix plug-in:
- In Manage or View mode, click Tools | Plug-in Settings.
- On the Command tab, select the CX_Sendpix.apl check box.
- Click OK.
- Close ACDSee Pro and restart it to activate the plug-in.
To share your images with SendPix:
- In Manage mode, in the File List pane, select the images you want to share.
-
Click File | Send | SendPix Album.
-
Follow the instructions in the SendPix Image Sharing Wizard. For help with any of the controls or features, click the Help button in the wizard.
Printing Images
With the ACDSee Pro print utility, you can print your images on any size of paper, in any orientation, and at any resolution your printer can support. You can also use the print utility to create and print contact sheets, complete with headers, footers, and captions specific to each image.
As you change the options in the Print dialog box, you can view a dynamically updated preview of the image and its position on the page. You can adjust the output size, print multiple copies of each image, and change the orientation of the images on each page.
To print your images:
- Select the image or images you want to print.
- Do one of the following:
• In Manage mode, click File | Print. -
In View mode, click File | Print All Images. (If you want to print a single image in View mode, select Print Image.)
-
Under Print layout, do one of the following:
-
Select Full page and then choose a print size from the Format list.
- Select Contact sheet and then set the Contact sheet format options to define the appearance of your contact
sheet.
- Select Layout and then choose one of the available layout options.
- On the Printer Options tab, specify the printer you want to use, the paper size, the number of copies you want, the range of pages that you want to print, and image resolution.
- On the Page Settings tab, specify the image position on the paper and the margin widths.
- Specify the number of prints of each photo. If you are printing a Full page or a Contact sheet this option is available on the Page Settings tab. If you are printing a Layout this option is available below the list of layouts.
- Add captions, headers, or footers. You can only add captions, headers, or footers if you are printing a Full page or a Contact sheet.
- Click Print.
Setting Printer Options
When printing your images with ACDSee, you can specify which printer you want to use, and set the printer options on the Printer Options tab in the Print dialog box.
Printer options
| Printer | Specifies the printer you want to use. Select a printer from the drop-down list and click the Properties button to set its options. Refer to the printer manufacturer's Help file or manual for more information. |
| Paper size | Specifies the size of the paper, e.g. Letter, Legal, A4. |
| Orientation | Specifies Portrait or Landscape page orientation. |
| Copies | Specifies the number of copies you want to print. |
| Print range | Select one of the following options:All: Prints all of the pages in the document.Pages from: Prints a range of pages. Specify the first and last pages of the range in the fields. |
| Resolution | Specifies a resolution in pixels-per-inch (PPI) for the image. The higher the value, the more dots per inch the higher the resolution of the printed image. For example, 600 PPI is 360,000 (600 x 600) pixels per inch. |
| Filter | Specifies the resampling filter to use when printing images. Click the drop-down list and select one of the following:Box: Displays considerable tiling or jaggies when you resize an image.Triangle: Produces good results for image reduction and enlargement, but displays sharp transition lines.Bicubic: Produces good results with photo-realistic images and with images that are irregular or complex. Uses interpolation to minimize the raggedness normally associated with image expansion.Bell: Smoothes the image.B-Spline: Produces smooth transitions, but may cause excessive blurring.Lanczos: Produces the sharpest images, but may also introduce some ringing artifacts.Mitchell: Produces smooth transitions when enlarging photo-realistic images. This filter is good compromise between the ringing effect of Lanczos and the blurring effect of other filters. |
| Gamma | Applies gamma correction to the printed images. Type a number from 0.10 to 3.00 in the Gamma value field to adjust the gamma of the image. Higher values make the image appear brighter, while lower values image appear darker. |
| Use EXIF2.2 printingwhenavailable | Your camera may capture EXIF information that, when shared with your printer, will optimize printing resist Select this option if your camera and printer support EXIF 2.2 printing. |
| Color | From the drop-down menu, you may choose between allowing your printer to manage colors, or managing colors with ACDSee.Manage colors using ACDSee:Printer Profile: Allows you to select from all printer profiles currently stored on your computer. Scroll down to find the profile corresponding to the currently selected printer.Rendering Intent: A strategy for handling situations where not all colors will fit in the output device's color space.Soft Proof: Allows you to preview what the printed output would look like with the currently selected printer profile.Gamut Warning: Displays colors that cannot be reproduced by the printer in the preview. In such cases, the closest available color is selected. The rendering intent describes the method used to s another color. |
For more information, see Color Management.
Setting Image Size and Positioning
You can use the Page Settings tab in the Print dialog box to adjust and control the size of the images you are printing, and the positioning of images on each page.
Page Settings options
| Page position | Specifies where to place the image on each page. |
| Margins | Specifies the size of the margins. Type a value or click the arrows in the Top, Bottom, Left, and Right spin boxes. |
| Number of prints | Specifies how many copies of each image to print. The print utility adds pages as required. |
| Automatically rotate picture based on print format | Specifies whether you want the print utility to determine automatically which orientation to use for image. If you select the check box, the print utility changes each page's orientation to best suit image you are printing. |
| Maintain aspect ratio | Specifies whether you want the print utility to maintain the original image's aspect ratio. Select c the following options to indicate how the print utility should handle the aspect ratio for oversized images:Crop image to fit print format:Prints only the part of the image that fits within the p format.Shrink image to fit print format:Prints the entire image, reduced to fit inside the print format. |
Adding Text to Pages
You can add headers and footers to pages, and captions beneath your images.
To add captions to your printed images:
- In the Print dialog box, click the Caption tab.
- Select Use caption text.
- Click Font to open the Font dialog box and set the font options.
- In the text box, type the text you want the caption to display.
- Click Insert Metadata to insert file-specific information into the caption for each image.
-
In the Text alignment drop-down list, select the caption positioning.
-
To set the maximum number of text lines for each caption to display, select the Number of lines check box, and then specify a number in the field.
To add headers and footers to your printed pages:
-
Do one of the following:
-
Click the Header tab and select Use header text.
-
Click the Footer tab and select Use footer text.
-
Click Font to open the Font dialog box and set the font options.
-
In the text box, type the text you want the header or footer to display.
-
To insert the current page number or the total number of pages into the text, click Insert Page Number, and then select an option from the menu.
-
In the Text alignment drop-down list, select the header or footer positioning.
-
To set a maximum number of text lines, select the Number of lines check box, and then specify a number in the field.
Setting Contact Sheet Printing Options
The Contact sheet format area of the print utility contains settings you can adjust to control the appearance, layout, and size of your thumbnails. If you saved your format options as a preset you can select the preset.
Contact sheet format options
| Thumbnail settings | Size | Specifies the number of columns and rows to create on each page. |
| Spacing | Specifies the amount of space between rows or columns. In the Horizontal and Vertical spin boxes, type a number to indicate the amount of space to display. | |
| Frame options Use thumbnail frame | Creates a frame around each thumbnail. | |
| Margin Specifies the width of the frame. | ||
| Solid color Specifies the frame's color. Click the color picker to define a color. | ||
| Tiled image Specifies an image to use as a frame. Click Browse to locate the image you want to use. | ||
| Thumbnail options Colored drop shadow | Creates a drop shadow effect around each thumbnail. Click the color picker to define a color. | |
| Colored edge fade Creates a fading frame effect around the image. Click the color picker to define a color. | ||
| Colored matte Creates a matte effect around each thumbnail. Click the color picker to define color. | ||
| Beveled edges Creates a beveled edge effect on each thumbnail. This effect is not displayed the Preview window. | ||
| Page background options Solid color | Prints a solid color as a background for the page. Click the color picker to define a color. | |
| Tiled image Prints a tiled image as the background for the page. Click Browse to locate the image you want to use. | ||
About Batch Processing
In ACDSee Pro you can:
• Make one type of edit to many images: For example, if you need to resize multiple photos you can use the Batch Resize tool. Or, if you need to rotate multiple photos by 90 degrees you can use the Batch Rotate/Flip tool.
• Make multiple types of edits to multiple images: For example, if you need to resize, crop, correct color cast, and rotate multiple images, you can use the Batch Edit wizard to perform all the edits, to all the files, simultaneous.
- Save a batch of images to a variety of outputs quickly and easily: Export multiple files to a number of specified folders, file names, formats and dimensions.
- Develop a batch of images: If you want to apply the same develop settings to multiple images, you can save your Develop settings as a Preset
You can speed up the batch developing and editing workflow by tagging your files. For example, you can quickly tag the files you want to change, then click Tagged in the Catalog pane to display all the tagged files in the File List pane. Then you can select the files and choose a batch tool.
Using Batch Export
The batch export tool allows you to save files to a variety of outputs quickly and easily.
You can export one or more files to a number of specified:
- folders
- file names
- formats
- dimensions
To export a batch of images:
- In Manage mode, select the images that you want to export.
-
Do one of the following:
-
Click File | Export (also available in View, Develop and Edit mode).
- Right-click to display the context menu and select Batch | Export (also available in View mode).
-
Click Batch | Export.
• Use the keyboard shortcut keys CTRL+ALT+E. -
Refer to the table below to make your selections from the Export dialog box.
Export options
| Destination folder | Same as source folder | Select this option to use the same folder where the source images currently reside.Select the Create a new subfolder for the files check box to place the images within a subfolder of the source folder. | |
| Specific folder | Select this option to change the output folder to a specific location. | ||
| File names | Use Template to rename files | Using a template gives you control over the output file name. If you choose not use a template, the file name is unchanged. Duplicate files given an underscore and number suffix. | |
| Template | Select the Use Template to rename files check box to create a renaming template. You can specify a numerical or alphabetical sequence for the new file names, and use the original file names, new names, or names based on image metadata. | ||
| Template field | Displays the template to use to rename the files.Type an asterisk (*) to insert the original file name into the template. Use one or more number signs (#) to insert numeric or alphabetic characters, depending which options you selected.Click the arrow on the drop-down list to select a recently-used template. | ||
| Insert | Metadata field | Inserts file-specific information into the file name template.Position the cursor in the Template field, and then click Insert. Choose Metadata field from the Insert drop-down menu to open the Choose Property dialog box. Select the metadata you want to insert, and then click OK. | ||
| Insert | Sequence number | Replaces any number signs (#) in the template with sequential numeric characters or alphabetic characters. Select numeric or alphabetic preference in Sequence number options below. | ||
| Insert | Original filename | Replaces any asterisk signs (*) in the template name with the original filename. | ||
| Insert | Sequence number options | Specifies the first letter or number of the sequence. | ||
| Start at | |||
Chapter 3: Manage Mode
| Format File Format | Select the file format in which you would like to save the exported image. | |
| Format Settings | Click this button to change the settings for the format you have selected. | |
| Pixel format | Specify the color depth for your format settings. | |
| Color space | Select the color space check box to choose a color space option from drop-down list. | |
| Output size | Resize image | Select this option to specify how to scale the images. |
| Resampling method | Use this option to determine the method used to resize (resample) the image:Bell: Smoothes the image.Bicubic: Produces good results with photo-realistic images and with images that are irregular or complex. Uses interpolation to minimize the raggedness normally associated with image expansion.Box: Displays considerable tiling or jaggies when you resize an image.B-spline: Produces smooth transitions, but may cause excessive blurring.ClearIQZ: Slower than Bicubic and Lanczos, but produces the best results when enlarging photos, especially those of people.Lanczos: Produces the sharpest images, but may also introduce some ringing artifacts.Mitchell: Produces smooth transitions when enlarging photo-realistic images. This filter is good compromise between the ringing effect of Lanczos and the blurring effect of other filters.Triangle: Produces good results for image reduction and enlargement, but displays sharp transition lines. | |
| Dimensions | Select this option to force the exported images to fit the set dimension independent of landscape or portrait orientation. Enter the dimensions in pixels, inches, or centimeters | |
| Width and height | Select this option to resize the exported image to fit within the values entered in the two boxes. | |
| Long edge | Select this option to resize the image to the long edge only. Enter the dimensions in pixels, inches, or centimeters | |
| Short edge | Select this option to resize the image to the short edge only. Enter the dimensions in pixels, inches, or centimeters | |
| Resolution | Enter a resolution to set the number of pixels per inch or centimeter. | |
| Enlarge only | Enlarge only resizes only those images that are smaller than the specified height and width. | |
| Reduce only | Resizes only those images that are larger than the specified height and width. | |
| Enlarge or reduce | Resizes all images to the specified height and width. | |
| Preserve Original Aspect ratio | Select this option to maintain original image proportions. Note: Images resized to long or short edge maintain original image proportion. | |
Metadata
Select these options if the image contains metadata, and you want the exported image to contain same metadata and color profile.
Option: You can save your settings as a preset by clicking the new export preset button and entering a name for your preset. Select one or more presets in the list to apply.
- Click Export.

To edit a preset, click the preset in the list, make your edits, and click the Save current export preset I
Converting Multiple Images to Another File Format
You can convert multiple images to any supported file format. You can set the options for each format individually, specify how to handle multiple-page images, and apply the conversion defaults automatically. The Convert File Format Wizard guides you through the process.
To convert an image to another file format:
- Do one of the following:
• In Manage mode, select one or more images, and then click Tools | Batch | Convert File Format.
• In View mode, click Tools | Modify | Convert File Format.
- On the Select a format page, select a new format for your image or images from the list displayed on the Format tab.
- Select the Advanced Options tab to change the settings for this wizard.
- Click Next to continue.
-
On the Set output options page, identify where you want to place the converted images, and specify how you want the wizard to handle any file name conflicts by selecting one of the following options from the Overwrite existing files dropdown list:
-
Ask: Prompts you when overwriting a file.
- Skip: Cancels the operation if there is a file with the same file name and extension.
- Replace: Overwrites the file without prompting for confirmation.
-
Rename: Prompts you to rename the file.
-
Click Next to continue.
-
On the Set multiple page options page, you can specify how you want to handle any multiple-page images you are converting.
If you did not select any multiple-page images to convert, and did not specify a multiple-page image format as your output file format, you can skip the options on this page.
- When you are satisfied with your choices, click Start Convert, and wait a few seconds while the wizard converts your images.
Rotating or Flipping Multiple Images
You can rotate or flip multiple images at preset angles.
To rotate or flip an image:
- In Manage mode, select one or more images, and then click Tools | Batch | Rotate/Flip.
- In the Batch Rotate/Flip Images dialog box, select the angle of rotation you want to apply. See below for an explanation of each angle.
-
If you select an image with multiple pages and want to apply the selected angle of rotation to all of the pages, select the Apply to all pages of the current image check box.
-
Do one of the following:
-
Click Next Image to move on to the next selected image. The Next Image button is not available if the Apply to all selected images box is checked.
- If you select multiple images and you want to apply the same angle of rotation to all of them, select the Apply to all selected images check box.
-
Click Options to specify how you want to save and store the images.
-
When you are ready to apply the rotations to your images, click Start Rotate.
Rotate / Flip angles

Rotates the image counter-clockwise 90 degrees.

Rotates the image 180 degrees.

Rotates the image clockwise 90 degrees.

Rotates the image according to any EXIF data contained within the image. (Does not affect images without information.)

Flips the image along the vertical axis.

Flips the image along the horizontal axis.

Flips the image along the vertical axis, and then rotates it counter-clockwise 90 degrees.

Flips the image along the vertical axis, and then rotates it clockwise 90 degrees.

You can also use the Rotate tool in Edit mode to rotate an image using a custom angle of rotation.
Setting Rotated and Flipped File Options
You can change the settings in the Batch Image Rotate/Flip Options dialog box to control where ACDSee Pro places modified images, how to handle file duplication conflicts, and specify whether you want to preserve the last-modified date of the file when you use the Batch Rotate/Flip Images tool.
To set the rotate and flip options:
- In Manage mode, select one or more images, and then click Tools | Batch | Rotate/Flip.
- In the Batch Rotate/Flip Images dialog box, click the Options button.
- Set the options as described below.
- Click OK.
Rotate and flip options
| Force lossless JPEG operations | Rotates JPEG images without decompressing and re-compressing the JPEG information. As a result the image does not lose quality when rotated or flipped. |
| File options | Specifies where to place the new images. Select one of the following options:Remove/replace original files: Overwrites the original file with the new image.Rename modified images and place in source folder: Adds identifying labels to the image names and places them in the same folder as the originals.Place modified images in the following folder: Places the converted image in a folder that you can specify. Click theBrowsebutton and select a folder. |
| Overwrite existing files | Determines how ACDSee Pro should handle overwriting files. Select one of the following options the drop-down list:Ask: Prompts you when overwriting a file.Skip: Cancels the operation if there is a file with the same file name and extension.Replace: Overwrites the file.Rename: Prompts you to rename the file. |
| Preserve last-modified dates | Retains the date and time properties of the file. |
| Remember and apply the last rotation performed | Automatically applies the same settings the next time you rotate an image. |
| Auto-close progress dialog if all operations succeed | Automatically closes the dialog box after all images have been adjusted. |
| Save current settings as default | Stores the current settings and applies them the next time you use the Rotate/Flip Images Wiz |
Resizing Multiple Images
You can resize a group of images by specifying their dimensions in pixels, specifying a percentage of their original size, or by constraining them to a physical print size.
To resize a group of images:
- In Manage mode, select one or more images, and then click Tools | Batch | Resize.
- In the Batch Resize Images dialog box, select one of the following options:
• Percentage of original: Resizes the images to a percentage of their original size.
- Size in pixels: Resizes the images to a specific size in pixels.
• Actual/Print size: Resizes the images to specific printed dimensions.
- Set the options for your selection as explained in the table below.
- Click Options to specify how you want to save and store the images.
- When you are satisfied with your choices, click Start Resize.

You can also resize an image, and use alternate resampling filters, in Edit mode.
Resize options
| Percentage of original | Percentage | Specifies how to resize the images. Enter a percentage less than 100 to reduce the images, and greater than 100 to enlarge them. |
| Apply to | Specifies whether the resize is applied to the height, width, or both. | |
| Size in pixels | Width | Specifies the new width for the images in pixels. |
| Height | Specifies the new height for the images in pixels. | |
| Resize | Specifies how to scale the images. Select one of the following options:Enlarge only: Resizes only those images that are smaller than the specified height and width.Reduce only: Resizes only those images that are larger than the specified height and width.Enlarge or reduce: Resizes all images to the specified height and width | |
| Preserve original aspect ratio | Retains the width-to-height ratio of the original images. | |
| Fit within | Specifies whether the aspect ratio is maintained based on the specified width. For more information about how the different combinations affect the images, seePixel resize options and resulting action. | |
| Actual/Print size | Units | Specifies the units of measurement. |
| Width | Specifies the new width for the images. | |
| Height | Specifies the new height for the images. | |
| Resolution | Specifies the print resolution for the images. | |
| Preserve original aspect ratio | Retains the width-to-height ratio of the original images. | |
| Fit within | Specifies whether the aspect ratio is maintained based on the specified width. For more information about how the different combinations affect the images, seePixel resize options and resulting action. |
Adjusting Exposure For Multiple Images
In ACDSee, you can lighten or darken the colors of an image or a group of images with the Batch Adjust Exposure Wizard. You can adjust each image individually and preview the changes before applying, or make adjustments to an image and automatically apply the same changes to all of the images you selected.
You can also save your settings as a preset for future use.
To adjust image exposure:
- In Manage mode, select one or more images, and then click Tools | Batch | Adjust Exposure.
- In the Batch Adjust Exposure dialog box, do one or more of the following:
• To adjust image exposure, contrast, and fill light level, select the Exposure tab and adjust the options.
• To precisely adjust the contrast and light levels in your images, select the Levels tab and set the options.
• To adjust image exposure automatically, select the Auto Levels tab and set the options.
• To precisely adjust the RGB color channels in your image, select the Tone Curves tab and set the options.
-
Do one of the following:
-
Select the Apply settings to all selected images check box to apply the current settings to all of the images you selected.
-
De-select Apply settings to all selected images and click Next Image to move to the next image, and then repeat step 2 for each image you want to adjust.
-
Click Options to specify how you want to save and store the images.
-
Click Filter All Images.

You can also adjust your image's exposure and color levels in Edit mode.
Adjusting Batch Exposure Options
You can use the options in the Batch Adjust Exposure dialog to correct the exposure of your images. There are four tabs in the Exposure section: Exposure, Levels, Auto Levels, and Tone Curves.
To use the Exposure options:
In the Batch Adjust Exposure dialog box, use the following options.
Exposure options
| Exposure | Specifies the amount of light to add to all areas of the image. |
| Auto | Automatically corrects the exposure based upon the brightness of the image. |
| Contrast | Specifies the amount of difference between color and brightness in an image. Moving the slider to the darkens the shadowed areas in an image, while moving the slider to the left brightens them. |
| Fill Light | Specifies the amount of light to add to the darkest areas of the image. |
Levels options
| Channel | Specifies the brightness or color channel you want to adjust. |
| Shadows | Specifies the black point of an image.Move the slider or type a number from 0 to 255 into the spin box to define the blackest area othe value increases, the dark colored areas of the image become darker. |
| Midtones | Specifies the gamma correction in an image.Move the slider or type a number from 0.00 to 2.00 into the spin box to set the amount of gan correction. Higher values make the image appear brighter, while lower values make the image appear darker. |
| Highlights | Specifies the white point of an image.Move the slider or type a number from 0 to 255 into the spin box to define the whitest area of the value increases, the light colored areas of the image become lighter. |
| Clipped % | Indicates how much of the image detail is lost due to black point and white point correction. |
| Black Point Eyedropper | Click the button with the black eyedropper icon to adjust the black point. Select the area in the B image that you want to set as the black point for the After image. |
| Mid Point Eyedropper | Click the button with the gray eyedropper icon to adjust the gamma correction value. Select the area Before image that you want to set as the gamma correction value. |
| White Point Eyedropper | Click the button with the white eyedropper icon to adjust the white point. Select the area in the B image that you want to set as the white point for the After image. |
Auto Levels options
| Strength | Adjusts the amount of exposure applied to the image. |
| Auto Contrast and Color | Adjusts color differences, brightness, and image color channels. |
| Auto Contrast | Adjusts the color differences and brightness only. |
| Auto Color | Balances color within the whole image. |
Tone Curves options
| Channel | Specifies the color channels to adjust. |
| Show Histogram | Toggles the histogram display. |
| Histogram | Displays a visual representation of the color information levels in the image, based on the selected Click and drag the line to manipulate the curve. |
Renaming Multiple Files
You can use the Batch Rename tool to rename multiple files. You can specify a template with a numerical or alphabetical sequence, save your template for future use, replace specific characters or phrases, and insert file-specific information into each new file name.
To rename a group of files:
- In Manage mode, select one or more files, and then click Tools | Batch | Rename.
-
In the Batch Rename dialog box, do one or more of the following:
-
Select the Template tab to specify the Template options.
- Select the Search and Replace tab to set the Search and Replace options.
-
Select the Advanced Options tab to adjust the settings for the Batch Rename tool.
• Review your changes to the file names in the Preview field. -
Click Start Rename.

You cannot rename any file on a read-only file system, such as a CD-ROM.
Batch Rename options
| Template | Select the Use Template to rename files check box to create a renaming template. You can specify a numerical or alphabetical sequence for the new file names, and use the original file names, new names, or names image metadata. | |
| Template | Displays the template to use to rename the files.Type an asterisk (*) to insert the original file name into the template. Use one more number signs (#) to insert numeric or alphabetic characters, depending which options you selected.Click the arrow on the drop-down list to select a recently-used template. | |
| Clear Templates | Clears the recently-used templates from the Templates drop-down list. | |
| Use numbers to replace #'s | Replaces any number signs (#) in the template with sequential numeric characters. | |
| Use letters to replace #'s | Replaces any number signs (#) in the template name with sequential alphabetic characters. | |
| Start at | Specifies the first letter or number of the sequence. | |
| Insert Metadata | Inserts file-specific information into the file name template.Position the cursor in the Template field, and then click Insert Metadata to open the Choose Property dialog box. Select the metadata you want to insert, and the click OK. | |
| File name case | Specifies upper or lower case for file names and file format extensions. | |
| Search and Replace | Select the Use Search and Replace to rename files check box to replace certain letters or words in the file names. You can replace spaces with underscores, or change upper case letters to lower case, and combine changes with any naming template. | |
| Search for | Identifies the characters you want to replace in the file names. | |
| Replace with | Identifies the characters to use in place of the original text. | |
| Case sensitive | Indicates whether you want to limit the search to the same case you typed in Search for field. | |
| Advanced Options | Select any of the Advanced Options to adjust the behavior of the Batch Rename tool. | |
| Automatically close wizard when finished | Closes the Batch Rename dialog box when the renaming process is complete. | |
| Save current settings as defaults | Stores the current settings and loads them the next time you rename files. | |
| Warn about extension changes | Provides a warning if you have changed the file extension as part of the temp | |
| Automatically resolve naming conflicts | Automatically resolves any naming conflicts by adding an underscore and a sequential number to the end of each file name. | |
Changing the Color Profiles of Multiple Images
You can change the color profiles of multiple images using the Batch Convert Color Profile tool.

At this time, ACDSee Pro does not support CMYK color profiles.
To change the color profiles used in images:
-
In Manage mode, select one or more images.
-
Click Tools | Batch | Convert ICC Profile.
-
In the Color profile to convert from list, select the color profile currently associated with the images.
For example, you will typically use the Batch Convert Color Profile tool to convert from your camera's color profile to a more universal color profile, such as sRGB. If you select Use profile information when found in JPEG and TIFF images, ACDSee Pro will convert from the color profile embedded in the images, not the color profile that you select in the list.
-
In the Color profile to convert to list, select color profile that you want to associate with the image.
-
In the Rendering Intent list, select the rendering intent.
The most common rendering intent is Perceptual. Some color profiles ignore the rendering intent, so results can vary depending on the profile that you select.
-
Click Options to specify whether ACDSee Pro should overwrite the image file (which effectively deletes the original color profile) or create new files with the new color profiles. You can also select options for JPEG compression.
-
Click Start.
-
Click Done.
Using Batch Edit
You can use the Batch Edit wizard to make multiple types of edits to multiple images. You can save your editing settings as a preset for future use. See the links below for detailed descriptions of the editing options for each editing tool.
To open Batch Edit:
-
In Manage mode, select the images that you want to edit, and then click Tools | Batch | Batch Edit.
-
On the Batch Editing Options page, on the Processing Profile tab, click on the name of each type of edit (for example, Rotate) to display the options that are available for that type of edit.
-
Select the types of edits that you want to make to the images.
To preview changes:
You can see how the editing options will affect an image in the Preview area.
-
In the Batch Edit wizard, select the Before and After tabs to evaluate how the currently selected options affect the image, or click and hold the Preview icon to switch between the Before and After tabs.
-
Click Original Image or Final Image, at the top and bottom of the Operations list, to evaluate how all the editing options affect the image.
-
To see how the selected editing options affect each image, click the Next Image and Previous Image buttons to display each image in the Preview area.
To use Zoom features:
- Drag the Zoom slider to the left or right to see the entire image, or to zoom in to a specific area in the image.
- Click the Fit Image button to fit the image into the Preview area.
- Click the Actual Size button to display the image at full size in the Preview area. If you click the Actual Size button you will need to use the horizontal and vertical scroll bars to see different parts of the full-size image.
To add or remove images:
- If you no longer want to include an image in the Batch Edit wizard, select the Image List tab, select an image, and then click Remove.
- If you decide that you want to edit additional images, select the Image List tab, and then click Add.
- Navigate to the folder containing the images that you want to add.
- Select the images in the Available items area, and then click Add.
- Click OK.
- When you are satisfied with the images and the editing options, click Next.
To set output options and complete the process:
- On the Output Options page, specify where you would like to save the edited images, how you want to rename them, and other options. The output options are described below.
- When you are satisfied with the output options, click Next.
- On the Batch Edit Progress page, the progress bars indicate which images and edits are being processed.
- On the Batch Edit Completed page, you have the following options:
• In the Summary section, click View Log to see a log that explains any process warnings or failures.
- Click Browse with Explorer to open Windows Explorer so you can look at the edited images.
- Click Save Preset to save all of the editing options as a preset for future use.
- Select Browse the output folder with ACDSee if you want look at the edited images in the File List pane.
5. Click Finish.
Editing options
Detailed descriptions of the options for each tool in the Batch Edit wizard are in the following help topics:
Rotate
Crop
Resize
Color
Channel Mixer
Sepia
Exposure
Lighting
Noise Removal
• Sharpening
• Vignette
- Text Overlay
Watermark
Output options
| Destination folder | Same as source folder | Select this option if you want to save the edited images in the same folder the original images. |
| Create a new subfolder for the files | Creates a new subfolder in the folder that you selected from the Specific folder drop-down. Type a name for the new folder in the Create a new subfolder for the files text box. | |
| Specific folder | Select this option if you want to save the edited images to a specific folder | |
| File names Keep original file names | Select this option if you want to save the edited images with the same file as the original images. | |
| Name using template Select this option if you want to rename the edited images using a renamin template. | ||
| Image file format | File format | If you want to change the file format of the edited images, select the file in which you would like to save the edited images. |
| Pixel format | Use this option to determine number of bits per pixel (BPP) in the output images, and whether the images will be color or grayscale. Select Automatic if you want the output images to have the same pixel format (or the close possible match) as the original images. You can use this option to convert t images from color to grayscale, or to convert the images to a pixel format is compatible with other software or processes. | |
| Metadata Preserve metadata | Select this option if the original image contains metadata, and you want the edited image to contain the same metadata and color profile. | |
| Preserve embedded audio Select this option if the original image contains embedded audio, and you wa the edited image to contain the same embedded audio. | ||
| Other options | Preserve last-modified date | Select this option if the original image has a last-modified date, and you wa the edited image to have the same last-modified date. |
| Copy database information | Select this option if you want to copy ACDSee Metadata for the original ima and enter it into the database for the edited image. | |
| When output file already exists | Use this option to determine what ACDSee Pro should do if the destination folder contains an image with the same file name as one of the edited imaAsk: Prompts you to choose different options (skip, rename, overwrite) depending on the image.Skip: Skips processing that image, and begins processing the next image.Replace: Replaces the image in the destination folder with the edited image.Rename: Renames the edited file. | |
Batch Edit Rotate Options
You can use the options in the Rotate section to rotate the image at a pre-set angle or at a custom angle.
To use the Rotate options:
In the Batch Edit wizard, select the Rotate check box.
Rotate options
| No rotation | This option is selected by default so you see the un-rotated image until you are ready to rotation option. |
| 180° | Rotates the image 180 degrees. |
| Left 90° | Rotates the image to the left by 90 degrees. |
| Right 90° | Rotates the image to the right by 90 degrees. |
| Custom angle | Select this option and then either type a custom angle number into the spin box or click arrow and drag it around the circle until the image is rotated to the desired angle. |
| Background color | The color that you select displays behind the rotated image. |
| Draw a line on the imageClick the Horizontal or Vertical button, and then use the cursor to draw a line on the image that you want to become that you want set as horizontal or vertical. vertical or horizontal | |
| Automatic cropping | When you rotate an image at a custom angle, select Automatic cropping if you want to crop the image to the largest possible rectangular size within the rotated image. |
| Reset | Click to reset all options to the default. |
Batch Edit Crop Options
You can use the options in the Crop section to control the size and orientation of the cropped area.
To use the Crop options:
In the Batch Edit wizard, select the Crop check box.
Crop options
| Cropping proportion | Select the size of the cropped area or the ratio to use to determine the cropped area. Select Custom to define a custom crop area. |
| Orientation | Select the orientation of the cropped area:Automatic: Base the orientation of the cropped area on the orientation of the original image. For example, if the original image has a landscape orientation, the cropped area will also have a la orientation.Landscape: Use a landscape orientation for the cropped area.Portrait: Use a portrait orientation for the cropped area. |
| Reset | Click to reset all options to the default. |
Batch Edit Resize Options
You can use the options in the Resize section to reduce or enlarge the image.
To use the Resize options:
ACDSee Pro 6 User Guide
In the Batch Edit wizard, select the Resize check box.
Resize options
Resize by Megapixels
Select this option to reduce or enlarge the image to the specified number of megapixels while maintaining the height/width aspect ratio. For example, if you have a 6 megapixel image with an aspect ratio of 3000 by 2000 and you see 1.5 megapixels, the image will be reduced to 1500 by 1000.
Use the drop-down list to select from a pre-set list of megapixel sizes.
Alternately, enter the megapixels into the Megapixels spin box. The
Reduce/Enlarge drop-down list determines how the image will be resized:
- Reduce only: Reduces the size of the image.
- Enlarge only: Makes the image larger.
- Enlarge or reduce: Either reduces the size of the image, or makes the image larger.
| Percentage | Select this option to reduce or enlarge the image to a percentage of the origin. For example, if you want to reduce the image, enter a percentage that is less than 100. If you want to enlarge the image, enter a percentage that is greater than 100. |
| Pixel dimensions | Select this option to reduce or enlarge the image to a specific width and height measured in pixels. The Reduce/Enlarge drop-down list determines how the image will be resized:Reduce only: Reduces the size of the image.Enlarge only: Makes the image larger.Enlarge or reduce: Either reduces the size of the image, or makes the image larger. |
| Print dimensions | Select this option to reduce or enlarge the image to specific print dimensions, such as the dimensions of a photographic print. Use the drop-down to select from a preset list of print dimensions. Alternately, enter a specific height, width and resolution.The Reduce/Enlarge drop-down list determines how the image will be resized:Reduce only: Reduces the size of the image.Enlarge only: Makes the image larger.Enlarge or reduce: Either reduces the size of the image, or makes the image larger. |
The Fitting method, which applies to the Percentage, Pixel dimensions, and Print dimensions options, determines how the image will fit into the new image area:
- Best fit preserving original aspect ratio: Select this option to preserve the width/height aspect ratio from the original image. For example, if the aspect ratio of the original image is 4:3, the aspect ratio resized image will also be 4:3.
- Fit exactly by stretching: Select this option if you want to stretch the image to fit a particular width and height.
- Fit exactly by adding bars: Select this option if you want to fit the image into an area that is larger than the image. You can select the color of the bars that fill the gaps between the image and the edg
| Resampling method | Use this option to determine the method used to resize (resample) the image:Box: Displays considerable tiling or jaggies when you resize an image.Triangle: Produces good results for image reduction and enlargement, but displays sharp transition lines.Bicubic: Produces good results with photo-realistic images and with images that are irregular or complex.Uses interpolation to minimize the raggedness normally associated with image expansion.Bell: Smoothes the image.B-spline: Produces smooth transitions, but may cause excessive blurring.Lanczos: Produces the sharpest images, but may also introduce some ringing artifacts.Mitchell: Produces smooth transitions when enlarging photo-realistic images. This filter is good compromise between the ringing effect of Lanczos and the blurring effect of other filters.ClearIQZ: Slower than Bicubic and Lanczos, but produces the best results when enlarging photos, especially those of people. |
Reset Click to reset all options to the default.
Batch Edit Color Options
You can use the options on the Color Cast tab to remove an unwanted hue from an image. You can change the saturation of a batch of images using the Saturation tab.
To use the Color options:
In the Batch Edit wizard, select the Color check box.
Color options
| Color Cast Select color | Click an area in the image that should be white or gray. The color square shows the the original pixel on the left, and of the modified pixel on the right. | |
| White Point | Select one of the following:Custom: Displays the color temperature of the area in the image that you clickSunny: Adjusts the color temperature to 5500K, approximately that of the midday sun.Cloudy: Adjusts the color temperature to 6500K, approximately that of a lightly overcast sky.Shade: Adjusts the color temperature to 7500K, approximately that of a heavily overcast sky.Tungsten: Adjusts the color temperature to 2850K, approximately that of a household light bulb.Fluorescent: Adjusts the color temperature to 3800K, approximately that of a fluorescent light bulb.Flash: Adjusts the color temperature to 5500K, approximately that of a camera flash. | |
| Strength | Specifies the color cast removal strength. Higher settings remove more of the unwanted color. | |
| Temperature | Specifies the color temperature. | |
| Tint | Specifies the amount of green (to the left) and red (to the right) to match the setting when you took the photo. | |
| Saturation Amount | Specifies the amount to increase or decrease the intensity of hues (color) in the image.remove all the color and create a grayscale image, drag the slider all the way to the | |
| Reset | Click to reset | all options to the default. |
Batch Edit Channel Mixer Options
The Channel Mixer in the Batch Edit wizard can change multiple images to create a rich grayscale. Because you can control the brightness of the red, green, and blue channels, as well as the overall brightness, you can use the Channel Mixer to emphasize different areas or aspects of a photo, as well as alter its mood and tone.
If you hover your cursor over each slider and watch the effect on the small preview below the controls, it shows you which parts of the image will be affected by each channel. This helps to gauge the effect of each slider on the image.
To create a grayscale image:
In the Batch Edit wizard, select the Channel Mixer check box.
Channel Mixer options
Chapter 3: Manage Mode
| Percent Red | Drag the slider to the left or right. The more red there is in a pixel, the more effect the red slider pixel. So the area of red in the picture is brightened or darkened more than other areas. |
| Percent Green | Drag the slider to the left or right. The more green there is in a pixel, the more effect the green : that pixel. So the area of green in the picture is brightened or darkened more than other areas. |
| Percent Blue | Drag the slider to the left or right. The more blue there is in a pixel, the more effect the blue slid pixel. So the area of blue in the picture is brightened or darkened more than other areas. |
| Percent Brightness | Drag the slider to the left or right to brighten or darken the whole image. |
| Reset | Click to reset all options to the default. |
Batch Edit Sepia Options
You can use the Batch Edit wizard to change batches of images to a sepia color.
To change images to sepia:
- In the Batch Edit wizard, select the Sepia check box.
The image in the Preview immediately changes to a sepia color.
- Click the Image List tab and then each image in the batch to see the effect of the sepia on the other images.
Batch Edit Exposure Options
You can use the options in the Exposure section to correct the exposure of your images. There are four tabs in the Exposure section: Exposure, Levels, Auto Levels, and Tone Curves.
To use the Exposure options:
In the Batch Edit wizard, select the Exposure check box.
Exposure options
| Exposure | Specifies the amount of light to add to all areas of the image. |
| Contrast | Specifies the amount of difference between color and brightness in an image. Moving the slider to the darkens the shadowed areas in an image, while moving the slider to the left brightens them. |
| Fill Light | Specifies the amount of light to add to the darkest areas of the image. |
| Brightness | Specifies the image's light intensity. Moving the slider to the right lightens the image, while moving slider to the left darkens it. |
| Gamma | Specifies the intensity of the light spectrum in an image. Moving the slider to the right lightens the while moving the slider to the left darkens it. |
| Exposure warning | Highlights overexposed and underexposed areas of the image. |
| Reset | Click to reset all options to the default setting. |
Levels options
| Channel | Specifies the brightness or color channel you want to adjust. |
| Shadows | Specifies the black point of an image.Move the slider or type a number from 0 to 255 into the spin box to define the blackest area othe value increases, the dark colored areas of the image become darker. |
| Midtones | Specifies the gamma correction in an image.Move the slider or type a number from 0.00 to 2.00 into the spin box to set the amount of gan correction. Higher values make the image appear brighter, while lower values make the image appear darker. |
| Highlights | Specifies the white point of an image.Move the slider or type a number from 0 to 255 into the spin box to define the whitest area of the value increases, the light colored areas of the image become lighter. |
| Clipped % | Indicates how much of the image detail is lost due to black point and white point correction. |
| Black Point Eyedropper | Click the button with the black eyedropper icon to adjust the black point. Select the area in the B image that you want to set as the black point for the After image. |
| Mid Point Eyedropper | Click the button with the gray eyedropper icon to adjust the gamma correction value. Select the area Before image that you want to set as the gamma correction value. |
| White Point Eyedropper | Click the button with the white eyedropper icon to adjust the white point. Select the area in the E image that you want to set as the white point for the After image. |
| Auto | Select one of the following options:Adjust Contrast: Automatically analyzes and adjusts image contrast.Adjust Color and Contrast: Automatically analyzes and adjusts each color channel independently, and then adjusts the contrast.Adjust Color and Brightness: Automatically analyzes and adjusts image color and brightness.Tolerance: Opens the Tolerance settings dialog box. Specify the maximum clipping percentage Shadows and Highlights, and click OK. ACDSee adjusts the image levels automatically. |
| Exposure warning | Highlights overexposed and underexposed areas of the image. |
| Reset | Click to reset all options to the default setting. |
Auto Levels options
| Strength | Adjusts the amount of exposure applied to the image. |
| Auto Contrast and Color | Adjusts color differences, brightness, and image color channels. |
| Auto Contrast | Adjusts the color differences and brightness only. |
| Exposure warning | Highlights overexposed and underexposed areas of the image. |
| Reset | Click to reset all options to the default setting. |
| Channel | Specifies the color channels to adjust. |
| Show Histogram | Toggles the histogram display. |
| Histogram | Displays a visual representation of the color information levels in the image, based on the Click and drag the line to manipulate the curve. |
| Exposure warning | Highlights overexposed and underexposed areas of the image. |
| Reset | Click to reset all options to the default setting. |
Batch Edit Lighting Options
You can use the options in the Lighting section to independently adjust areas in your images that are too light or too dark, without affecting other areas. As you make changes, you can see the effect on the image in the After Lighting tab, or you can click the Image List tab and click on any of the other images to see the effect of the adjustment on each image.
To adjust the lighting:
In the Batch Edit wizard, select the Lighting check box.
Lighting options
| Use automatic settings for each image | Allows the software to analyze the photo and apply optimal settings based on the amount of I dark pixels in the photo. Darker photos are brightened more than photos that are already bright |
| Brighten | Brightens dark areas in the images. Do one or both of the following:Compression: Drag the slider to the right to brighten dark areas in the image.Amplitude: Drag the slider to the right to increase the intensity of the brightening across areas of the image. |
| Darken | Darkens bright areas in the images. Do one or both of the following:Compression: Drag the slider to the right to darken bright areas in the image.Amplitude: Drag the slider to the right to increase the intensity of the darkening across areas of the image. |
| Exposure warning | Highlights overexposed and underexposed areas of the image. |
| Reset | Click to reset all options to the default. |
Batch Edit Noise Removal Options
You can use the options in the Noise removal section to remove noise from your images while preserving details that you want to retain.
You can also save your settings as a preset for future use.
To use the Noise Removal options:
- Click Tools | Batch | Batch Edit.
- In the Batch Edit dialog box, select the Noise Removal check box.
Noise Removal options
| Despeckle | Removes noise. |
| Square | Removes noise using a 3 x 3 pixel square. |
| X | Removes noise using a 3 x 3 pixel X shape. Use this option when you want to preserve an image's diagonal lines. |
| Plus | Removes noise using a 3 x 3 pixel plus (+) shape. Use this option when you want to preserve an i vertical, and horizontal lines. |
| Hybrid | Removes noise using a 3 x 3 pixel square, a 3 x 3 pixel X shape, and a 3 x 3 pixel plus (+) s option when you want to preserve an image's thin, diagonal, horizontal, and vertical lines. When hybrid selected you have additional noise removal options: ·Luminance: Drag the slider to the left or right to control variations in brightness. ·Color: Drag the slider to the left or right to control variations in color (hue and saturation). For example, drag the slider to the right if you want to reduce color variation. However, you should careful about reducing color variation (that is caused by noise) because you could unintentionally reduce real color variations in a photo. |
| Reset | Discards all changes and reverts to the original noise level. |
Batch Edit Sharpening Options
You can use the options in the Sharpening section to sharpen an image by enhancing the contrast of medium-contrast and high-contrast edges.
To use the Sharpening options:
In the Batch Edit wizard, select the Sharpening check box.
Sharpening options
| Amount | Specifies the amount of light added to or removed from each edge. Higher values produce darker |
| Radius | Specifies the number of pixels to adjust around each edge. Higher values increase the number of sharpened pixels. |
| Threshold | Specifies how different the lightness values of two adjacent pixels must be before they are sharperHigher values increase the required difference. It is recommended that you set the threshold so thenenhances edges while keeping background noise to a minimum. |
| Reset | Click to reset all options to the default. |
Batch Edit Vignette Options
You can use the options in the Vignette section to add a frame around a subject, such as a person or a bouquet of flowers. You can change the focal point in the portrait. You can also control the appearance of the border.
To use the Vignette options:
In the Batch Edit wizard, select the Vignette check box.
Vignette options
| Horizontal | Specifies the focal point of the portrait on the horizontal axis. A value of 500 places the center in the photo. |
| Vertical | Specifies the focal point of the portrait on the vertical axis. A value of 500 places the center in the photo. |
| Clear zone | Specifies the size of the clear area around the focal point in the portrait. Drag the slider to the left the size of the clear area. Drag the slider to the right to increase the size of the clear area. |
| Transition zone | Specifies the width of the transition area between the clear zone and the frame. Drag the slider to the narrow the transition area. Drag the slider to the right to widen the transition area. |
| Shape | Specifies the shape of the frame:Round: Creates a round frame.Rectangular: Creates a square frame. |
| Show outline | Displays an outline that shows the outside edge of the clear zone and the inside edge of the frame. |
| Frame | Specifies special effects that you can apply to the frame around the focal point:Color: Applies a color to the frame area.Saturation: Removes color from the frame area.Blur: Blurs the frame area.Clouds: Displays clouds over the frame area.Edges: Traces the lines and details of people or objects within the frame area with neon colors.Radial Waves: Creates the appearance of waves radiating from the focal point into the frame area.Radial Blur: Rotates and stretches people or objects in the frame area.Zoom Blur: Applies a zoom blur to the frame area.Crayon Edges: Traces the lines and details around people or objects in the frame area with crayon.Dauber: Creates the impression that the people or objects in the frame area around the portrait were painted with a paint dauber.Pixelate: Blurs images by increasing the size of the pixels in the images.Old: Gives your images an antique look.Glowing Edges: Adds color to the lines and details in the frame. The colored lines and details appear to glow.Ripple: Divides your images into concentric circles that resemble what you see when you drop a pebble into water. |
| Filter Settings | The settings available in the Filter Settings area vary for each frame effect. For example, if you select Color in the Frame area, a color picker displays in the Filter Settings area. Similarly, if you select Blur in the Frame area, a slider that controls the level of blurriness displays in the Filter Settings area. |
| Reset | Click to reset all options to the default. |
Batch Edit Text Overlay Options
You can use the options in the Text Overlay section to add formatted text to a photo. You can apply special effects to your text to add artistic flair. You can also adjust the opacity of the text to create a watermark effect—useful for putting copyright information onto your photos.
To use the Text Overlay options:
In the Batch Edit wizard, select the Text Overlay check box.
Text options
| Text | Type the text you want to add in the available field, then specify the font you want to use and the options such as bold, italics, and underline. Click the drop-down list to the right of the Text field to insert a registration, copyright, or trademark symbol or image metadata. | |
| Rotation | Specify the rotation of the text. | |
| Size | Drag the slider to specify a point size. | |
| Color | Specify the color of the text. | |
| Opacity | Drag the slider to specify the transparency of the text. | |
| Alignment | Click a square to specify the alignment of the text in the text box. | |
| Text box Left | Specify the alignment of the text box from the left edge of the image | |
| Right | Specify the alignment of the text box from the right edge of the image | |
| Top | Specify the alignment of the text box from the top edge of the image | |
| Bottom | Specify the alignment of the text box from the bottom edge of the image | |
| Border | Specify the color of the border of the text box, then drag the slider to specify the transparency of the border. | |
| Fill | Specify the color of the fill in the text box, then drag the slider to select the transparency of the fill. | |
| Reset | Click to reset all options to the default. | |
Box Effects options
| Special Effect | Specifies the effect you want to apply to the box. Each effect has different options that control its ap Drag the sliders to adjust the appearance of the box. | |
| Bevel Angle | Specifies the direction of the imaginary light source that creates the bevel effect. Drag arrow to adjust the angle—note that this also adjusts the angle of the drop shadow. | |
| Elevation | Specifies the height of the imaginary light source that creates the bevel's shadowed effect. Lower values produce longer shadows on the box, while a higher value produce more direct lighting effect and shorter shadows. | |
| Bevel | Specifies how much of each box's edge is beveled. Higher values give the box a more rounded, smoother look. | |
| Strength | Specifies the difference between the highest and lowest points on the box. Higher valu heighten the difference between the flat portions of the box and the beveled edges. | |
| Drop Shadow | Angle | Specifies the direction of the imaginary light source that creates the drop shadow. Dra the arrow to adjust the angle—note that this also adjusts the shading of the box be |
| Blur | Specifies the amount of blur applied to the drop shadow. Sharp shadows tend to seer less realistic than those with a slight blur. | |
| Opacity | Specifies the darkness of the drop shadow where it falls on the image. | |
| Distance | Specifies the distance between the drop shadow and the box. The higher the value, the farther the shadow and the higher the box appears. If a drop shadow is cut off, or has a noticeably sharp edge, you may need to incre size of the box rectangle. | |
| Blend Mode | Select an option from the Blend Mode drop-down list to specify how you want the box to blend into the underlying image. | |
Text Effects options
| Special Effect | Specifies the effect you want to apply to your text. Each effect has different options that control its appearance. Drag the sliders to adjust the appearance of the text. | |
| Bevel Angle | Specifies the direction of the imaginary light source that creates the bevel effect. Drag arrow to adjust the angle - note that this also adjusts the angle of the drop shadow. | |
| Elevation | Specifies the height of the imaginary light source that creates the bevel's shadowed effect. Lower values produce longer shadows on the text, while a higher value produce more direct lighting effect and shorter shadows. | |
| Bevel | Specifies how much of each letter's edge is beveled. Higher values give the text a m rounded, smoother look. | |
| Strength | Specifies the difference between the highest and lowest points on the text. Higher value heighten the difference between the flat portions of the text and the beveled edges. | |
| Drop Shadow | Angle | Specifies the direction of the imaginary light source that creates the drop shadow. Drag the arrow to adjust the angle-note that this also adjusts the shading of the text be |
| Blur | Specifies the amount of blur applied to the drop shadow. Sharp shadows tend to seer less realistic than those with a slight blur. | |
| Opacity | Specifies the darkness of the drop shadow where it falls on the image. | |
| Distance | Specifies the distance between the drop shadow and the text. The higher the value, t farther the shadow and the higher the text appears.If a drop shadow is cut off, or has a noticeably sharp edge, you may need to incre size of the text rectangle. | |
| Blend Mode | Select an option from the Blend Mode drop-down list to specify how you want the text to blend into the underlying image. | |
Batch Edit Watermark Options
You can use the options in the Watermark section to add a watermark to an image. You can move the watermark to any position on the image. You can also change the opacity of the watermark and blend the watermark into the image.
To use the Watermark options:
In the Batch Edit wizard, select the Watermark check box.
Watermark options
| Image Browse | Click to select a watermark, or select a watermark from the drop-down list. The watern displays in the center of the photo by default. Click and drag the watermark to positio use the options on the Position & Blending tab. | |
| Maintain aspect ratio while resizing | Select if you want to resize the watermark without stretching or distorting the shape. | |
| Apply Alpha Channel | Select to apply the alpha channel if it is present in the watermark. (Only TIFF, PNG, watermark files can have an alpha channel.) | |
| Apply Transparency | Select to make a color in the watermark transparent. The default color is white. You c enter the RGB value of the color. If you do not know the RGB value, move your cur the watermark preview thumbnail and click on the color that you want to make transpa | |
| Position & Blending | Location | Specify the horizontal and vertical location of the watermark in pixels or percent. |
| Blending mode | Specify how you want the watermark to blend with the image. | |
| Opacity | Drag the slider to specify the transparency of the watermark. | |
| Reset | Click to reset all options to the default. | |
Using Batch Develop
The Batch Develop tool is useful for applying a Develop preset to multiple images and exporting multiple images to other file formats.
To apply a preset to a batch of images:
- In Manage mode, select the images that you want to develop.
- Do one of the following:
• Right-click to display the context menu and select Batch | Batch Develop (also available in View mode).
- Click Batch | Batch Develop.
- Select a preset in the Select a develop preset section.
- Select the Export files to another format check box if you want to save the images in a different file format (for example, JPEG or TIFF).
- Click Options to display the Export dialog box and select file formats and other options (see table below).
- Refer to the table below to make your selections from the Export dialog box
- Click Ok.
- Click Develop.
Export options
| Destination folder | Same as source folder | Select this option to use the same folder where the source images currently reside. Select the Create a new subfolder for the files check box to place the images within a subfolder of the source folder. | |
| Specific folder | Click this button to change the output folder to a specific location. | ||
| File names | Use Template to rename files | Using a template gives you control over the output file name. If you choose i use a template, the file name is unchanged. Duplicate files are given an underscore and number suffix. | |
| Template | Select the Use Template to rename files check box to create a renaming template. You can specify a numerical or alphabetical sequence for the new file names, and use the original file names, new names, or names based on imag metadata. Template field | Displays the template to use to rename the files. Type an asterisk (*) to insert the original file name into the template. Use one or more number signs (#) to insert numeric or alphabetic characters, depending which options you selected. Click the arrow on the drop-down list to select a recently-used template. Inserts file-specific information into the file name template. Position the cursor in the Template field, and then click Insert Metadata to open the Choose Property dialog box. Select the metadata you want to insert, and then click OK. | |
| Insert | Metadata field | |||
| Format File Format | Select the file format in which you would like to save the exported images. | ||
| Format Settings | Click this button to change the settings for the format you have selected. | ||
| Pixel format | Specify the color depth for your format settings. | ||
| Color space | Select the color space check box to choose a color space option from the dro down list. | ||
Chapter 3: Manage Mode
| Output size | Resize image | Select this option to specify how to scale the images. Select from the following options: |
| Dimensions | Select this option to force the exported images to fit the set dimensions independent of landscape or portrait orientation. Enter the dimensions in pixels, inches, or centimeters | |
| Width and height | Select this option to resize the exported image to fit within the values entered the two boxes. | |
| Long edge | Select this option to resize the image to the long edge only. Enter the dimen in pixels, inches, or centimeters | |
| Short edge | Select this option to resize the image to the short edge only. Enter the dimer in pixels, inches, or centimeters | |
| Resolution | Enter a resolution to set the number of pixels per inch or centimeter. | |
| Enlarge only | Enlarge only resizes only those images that are smaller than the specified height and width. | |
| Reduce only | Resizes only those images that are larger than the specified height and width. | |
| Enlarge or reduce | Resizes all images to the specified height and width. | |
| Preserve Original Aspect ratio | Select this option to maintain original image proportions. Note: Images resized long or short edge maintain original image proportion. | |
| Metadata | Select these options if the image contains metadata, and you want the exported image to contain the metadata and color profile. | |

Option: You can save your settings as a preset by clicking the new export preset button and entering a name for your preset. Select one or more presets in the list to apply.

To edit a preset, click the preset in the list, make your edits, and click the Save current export preset button
About the ACDSee Pro Database
The ACDSee Pro database stores image and media file information automatically when you browse your folders. This process is called cataloging. The database increases the speed with which you can browse your computer, and you can use the information stored in the database to sort, organize, search, and filter your images and media files. You can also backup, restore, and share database information.
You can store cached thumbnail previews, and add or edit the following information for each image or media file on your computer:
- Categories
Notes
Keywords
• Color Labels - Authors
-
Dates
-
Ratings
- Captions
You can also choose to exclude folders from the database, and keep the contents of those folders separate from your other images and media files.

When you add ACDSee Metadata to a file in ACDSee, the file is linked to the database. If you then copy, m your files using programs other than ACDSee, such as Windows Explorer, the link to the database is broken ar cause the loss of ACDSee Metadata.
Embedding ACDSee Metadata in files
If you edit or add ACDSee Metadata to your files, ACDSee Pro automatically adds the new data to its database. If you have the Display embed ACDSee metadata reminder check box selected in the Options dialog box (click Tools | Options | Database), next time you close ACDSee, the Embed ACDSee Metadata in Files dialog box opens and offers to embed the new data into the changed files themselves. Embedding ACDSee Metadata in the files as well, is a safe way to back up this data and make it easier to retrieve if you should need to.
For example, once you have assigned ACDSee Metadata to a file, the file is linked to the database. If the file is moved using Windows Explorer, or any application other than ACDSee, the link will be broken. However if you have embedded this data in the file and the link is broken, you can still retrieve the ACDSee Metadata using the embedded data in the files.
You can use ACDSee Pro to rename, move, or copy the file—even to another computer—and the embedded ACDSee Me transfer with the file.
To embed ACDSee Metadata in a file when you are prompted:
- Do one of the following:
• To embed data in files that are on a network, select the Include Network Drives check box.
To write the information to a sidecar file if the file format does not support embedding inside the file, Write sidecar files for formats that do not support embedded XMP.
- To accept the current selection in the dialog and have these options happen automatically in future, select Do not ask me this again.
-
Click Yes to embed the data in the files. A progress bar appears, followed by the Embed Summary Report dialog that lists the following:
-
Items Selected: Indicates the number of files that you selected.
- Items Processed: Indicates the number of files actually that were processed. (If you selected files that did not need to have date embedded, this number may be different from the Items Selected.)
• Succeeded: Indicates the number of files that had data embedded. -
Failed: Indicates the number of files that, for a variety of reasons, could not have data embedded. (To see the Error Log, click View Errors.)
-
Click Close.
To embed ACDSee Metadata at any time:
You can embed data in files at any time.
Click Tools | Embed ACDSee Metadata, and then select one of the following:
• In All Files: Embeds data for all files.
• In Selected Files: Embeds data for any files that you have selected.

ACDSee Pro uses XMP to embed ACDSee Metadata into each file. Only some file formats and file extensions su These include GIF, JPEG, DNG, PNG, and TIF. In the case of these file formats, the ACDSee Metadata is embedded inside the file and so you can rename or move the file outside of ACDSee Pro and still be able to retrieve the ACDSee formats that currently do not support XMP, including RAW, PSD, ABR, the ACDSee Metadata is written to a sidecar file that is stored in the same folder as its file. Because a sidecar file is separate from the file itself, you need to rename or move them together, or you could lose the ACDSee Metadata permanently.
Viewing files that have data to embed
If you want to see the files that have data that needs to be embedded, there is a quick way to list them using the Embed Pending option.
To view files that have data to embed:
In the Catalog pane, under Special Items, click Embed Pending.
All the files that have data to embed are displayed in the File List.
Retrieving ACDSee Metadata that is embedded in files
If you simply browse to the folder where the files are located, some of the ACDSee Metadata is retrieved and written to the database.
The safest way to retrieve all the ACDSee Metadata, is to click Tools | Database | Catalog Files. Then the following applies:
• If the files are GIF, JPEG, DNG, PNG, and TIF formats, all the data will be retrieved and written to the datal
- If the files still have their sidecar files in the folder, and they still have the same file name, the database information is retrieved and written to the database.
- If the files have become separated from their sidecar files or renamed, their ACDSee Metadata cannot be retrieved and will be lost.
Excluding Folders From the Database
You can choose to exclude folders from the database, and keep the contents separate from your other images and media files. By default, the Program Files and Windows folders on your hard drive are automatically excluded from the database.
To manage your excluded folders settings:
- In Manage mode, click Tools | Database | Excluded Folder Settings.
- In the Excluded Folders dialog box, do one of the following:
• To exclude a folder from the database, click Add. Browse to a folder on your hard drive, and then click OK.
• To remove a folder from the excluded folders list, select a folder in the list, and then click Remove.
• To reset your excluded folders list to the default settings, click Reset to Defaults.
- When you are satisfied with your choices, click Close to return to ACDSee.
Cataloging Files in the Database
ACDSee Pro automatically adds file information and thumbnails to the database as you browse. You can use the Catalog dialog box to add groups of files to the database without having to first browse the folders. This can be particularly useful when using ACDSee Pro for the first time, and when browsing or managing large collections of images as it reduces the loading time required for these folders.
The first time you run ACDSee, you are prompted to catalog your files.
To catalog your files:
-
In Manage mode, click Tools | Database | Catalog Files.
-
In the Folders to Catalog section, select the check box next to the folders you want to catalog.
If you want to add folders that are not in the list, click Add folder, select the folders you want to include, and then click OK.
-
In the Options section, select the information to add to the database.
-
Click Start.
A progress bar shows your photos as they are cataloged.
- Click Finish.

If you are cataloging a large collection of files, do not disrupt the process, or use other software while it is running. For large file collections, it is best to run cataloging overnight.
Converting an Older Database
You can use the ACD Database Convert Wizard to take database information from previous versions of ACDSee Pro and add it to your current database. This ensures that any information associated with your files using a previous version of ACDSee Pro is referenced properly in the current database.

If you have already added information to your current ACDSee Pro database, it is recommended that you create your database before converting an older ACDSee Pro database.
To convert an older database:
-
In Manage mode, click Tools | Database | Convert Database.
-
On the Welcome page, click Next to select your conversion options.
-
On the Database Convert Options page, specify the version of the database files you want to convert, as well as the folder where the database files are located on your hard drive. Click Next.
-
To automatically rebuild image thumbnails, IPTC and EXIF information after the conversion process is complete, select the Rebuild thumbnails, EXIF and IPTC data for local images check box.
-
To automatically update your database after converting, select the Optimize database files after convert check box.
- Click Next.
- On the Summary page, review your selections, and then click Next to convert your database.
Importing Database Information
You can use the ACD Database Import Wizard to import archived database information, or to import database information that was sent to you with images from another ACDSee Pro user. After you import the information, ACDSee Pro associates it with the appropriate images.

If you have already added information to your current ACDSee Pro database, it is recommended that you create your database before converting an older ACDSee Pro database.
To use the ACD Database Import Wizard:
- In Manage mode, click Tools | Database | Import, and then select Database.
- Click Next to start the wizard.
- On the Import Options page, select the type of exported database information you want to import.
You can import image information from a compressed database version, or information from an XML-based text fi - Click the Browse button to locate the database you want to import, and then click OK.
- Select the Optimize database files after import check box to optimize the database after exiting the wizard, and then click Next.
- On the Summary page, review your selections. Click Back to make changes, or click Next to begin importing the database information.
- Click Finish to close the ACD Database Import Wizard.

If you are importing database information sent to you by another ACDSee Pro user, ensure that the images to information applies are in an identical location and folder structure on your hard drive.
Importing File Information From Other Sources
You can import file information into your database from other sources, including ACDSee Photo Discs and files from previous versions of ACDSee.
Importing Photo Discs
Previous versions of ACDSee (versions 4.0 and 5.0) created separate database files with a .ddf file extension for Photo Discs. You can import the Photo Disc database files into your ACDSee Pro database.
To import a Photo Disc:
- In Manage mode, click Tools | Database | Import, and then select Photo Disc.
- In the Open dialog box, locate and select the photo disc file you want to import.
- Click Open.

To import the information from Photo Discs created with ACDSee 6.0 or later, you must convert and import the database.
Importing albums
In previous versions of ACDSee, you could create albums in an .ais file format that consisted of organized shortcuts to your images. Now you can use categories to create albums of images that do not require a separate file extension. You can, however, import your albums from previous versions of ACDSee, and add the information from the albums to the database. ACDSee Pro creates a new category for each album you import.
To import album information into the database:
- In Manage mode, click Tools | Database | Import, and then select Album.
- In the Open dialog box, locate and select the .ais file you want to import.
- Click Open.
Working with description.ion files
In previous versions of ACDSee, file descriptions were stored in a separate descript.ion file in each folder that contained images. ACDSee Pro now stores file descriptions as captions in the database, along with other file information such as notes and keywords. You can use the Descript.ion tools to import your old descript.ion files and add the information to the database, or export your existing file captions to a descript.ion file.
To import a description.ion file:
- In Manage mode, click Tools | Database | Import, and then select Descript.ion File.
- In the Open dialog box, locate and select the description file you want to import.
- Click Open.
To export captions to a description.ion file:
- In Manage mode, click Tools | Database | Export, and then select Descript.ion File.
- In the Save As dialog box, type a name for the description file in the File name field.
- Click Save.
Exporting Database Information
You can use the ACD Database Export Wizard to save selected database information in a compressed format, and then store it as a backup, or share it with other ACDSee Pro users. You can also choose to export your category and keyword definitions to a text file.
Exporting your database information differs from creating a backup in that you can choose to export only the parts of your database that you want to share or store with specific files, such as those on a CD. Other ACDSee Pro users can import your information without affecting their existing database.
To create a backup of your entire database, including image or media files, use the ACD Database Backup Wizard.
To back up the contents of a local folder to a remote location, such as a network drive, use the ACDSync Wizard.
To use the ACD Database Export Wizard:
- If you want to export your database information for a specific group of images or media files, select the files in the File List pane in Manage mode.
- Click Tools | Database | Export | Database.
- Click Next to begin using the wizard.
-
On the Content and Format Options page, specify how you want to export your database information by selecting one of the following options, and then clicking Next:
-
Export entire ACDSee database to a read-only, compressed version: Exports the entire contents of your ACDSee Pro database to a compressed version that can be shared with other ACDSee Pro users.
- Export database information for selected items to a read-only, compressed version: Exports all of your database information for the images selected in the File List pane.
-
Export database information to a text file: Exports the selected information to an XML-based text file. Select the check boxes next to the information you want to include.
-
On the Location Options page, specify a location for the exported information, and a name for the text file, if necessary, and then click Next.
- On the Summary page, review your choices. You can click Back to make changes, or click Next to begin exporting your database information.
- Click Finish to close the wizard and return to ACDSee.
Generating File Lists
You can generate a text file that lists all of the files in the folder currently displayed in the File List pane. The text file places the file name, size, image file format, modified date, image properties, caption, and rating for all of the files in the folder into a table, and creates a single text file.
To generate a list of your files:
In Manage mode, click Tools | Database | Export, and then select Generate File Listing.
ACDSee Pro automatically generates the file listing and opens it as a text file in your default text editor. You can then edit or save the text file.
Backing Up Your Database
You can use the ACDSee Backup Wizard to back up all of your database information, which you can then restore in the case of a system failure or other event. You can also choose to back up your image, media, or archive files along with the relevant database
information.
The ACDSee Backup Wizard creates a series of files in a specified location that contain your entire database. The backup is generated using your folder structure and is unique to your computer. To back up portions of your database, or to share database information with another ACDSee Pro user, use the ACD Database Export Wizard.
For some suggestions about managing your database backups, see Database backup tips and strategies.
To back up your database information:
- In Manage mode, click Tools | Database | Back Up Database.
- On the Welcome page, select whether you would like to create a new backup, or update an existing backup. Click Next.
If you choose to update an existing backup, please go to step #5. - On the New Backup page, select the information you would like to back up. Click Next.
- On the Backup Location page, click Browse and specify a location for your backup, and type a name for the backup file. Click Next.
- On the Backup Summary page, review your settings. If you chose to update an existing backup, click the Backup to update drop-down list, and then select the existing backup. Click Next.
Backup information options
| Do not include thumbnails | Excludes thumbnails from the backup, saving a substantial amount of storage space on your hard drive. |
| Include thumbnails for offline files | Includes only thumbnails for files that do not reside on your hard drive, such as PhotoDiscs. |
| Include thumbnails | Includes all thumbnails in the database. This will require more space on your hard dr to store the backup. |
| Backup files of type | Backs up the specified file types with the database information. Select from the followi file types:Image: Includes image files in the backup.Media: Includes audio and video files in the backup.Archive: Includes archive files in the backup. |
| All files of specified types on your local hard drives | Backs up all specified files on your hard drive. |
| All files of specified types on local and network hard drives | Backs up all specified files on your hard drive and network drives. |
| All files of specified types in a folder (including subfolders) | Backs up all specified files in a specified folder. Click theBrowsebutton and select the folder to back up. |
Database Backup Tips and Strategies
The ACDSee Pro database stores information about your files, including EXIF information, file name and folder location, thumbnails, categories, ratings, and any other information you add using the Properties pane. The more information you store in the database,
and the more time you spend entering that information, the more important it is to back up your database, and to have a good strategy for managing your backups. Losing hours of work to a system crash or other uncontrollable event is something that should, and can, be avoided.
Backup schedule
How often you need to back up depends on how often you add or change information in the database. A good rule to use would be to back up your data as often as you want to avoid retyping it. You can use the backup reminder settings on the Database page of the Options dialog box to set a regular reminder for yourself to back up your data as often as you think appropriate. Business environments and professional users should back up every day.
It is also recommended that you back up your database before performing any major adjustments to it, such as important information from another ACDSee Pro user, or converting a database from a previous version of ACDSee.
Backup location
It's a good idea to consider where you back up your data, as well as how often. If you're backing up to your hard drive, ACDSee Pro creates a new folder for each day. This helps to avoid overwriting your backup, and gives you several increments from which you can restore. Also helpful is a monthly backup that is stored in a different physical location than your computer, such as a network drive.
Backup size
To keep the size of the backup small, choose to back up database information only, and back up your images separately, also on a regular basis.
Restoring Database Information From a Backup
You can use the ACD Database Restore Wizard to restore previously backed up database information.
To restore database information:
- In Manage mode, click Tools | Database | Restore Database.
- On the Welcome page, click Next to select the backup.
- On the Restore Options page, select the backup and date from which you want to restore, or browse to the location of your backup and select a .bkup file.
- Click Next when you are ready to restore your database.

When restoring a backup from a series of backup files, ACDSee Pro will only restore the information included in and prior to the selected backup file. Therefore, unless required, it is recommended that you select the last file in the back sequence.
Maintaining the Database
It is recommended that you regularly perform database maintenance and optimization to increase hard drive space, remo redundant or extraneous information, and increase overall ACDSee Pro performance.
You can use the tools in the Database Maintenance dialog box to update folders, or to identify folders whose thumbnails and database information you would like to delete. The Database Maintenance dialog box displays a list of the folders on your system, and uses icons to indicate the status of database information within specific folders.
Database content icons
Folder contains files with cached thumbnails stored in the database.
Folder contains files that were changed without a database update. For example, a folder or file was renamed or outside of ACDSee.
To perform database maintenance:
- In Manage mode, click Tools | Database | Database Maintenance.
- In the Database Maintenance dialog box, browse for folders marked with the database content icons. If there are no marked folders, you do not need to perform database maintenance and can exit the Database Maintenance dialog box.
-
Select a folder and click one of the following buttons to identify the maintenance you want to perform on that folder:
-
Remove Thumbnails: Removes all thumbnail information for the selected folder.
- Remove All DB Info: Deletes all database and thumbnail information for the selected folder.
- Remove Orphan Folders: Deletes any out-of-date or broken references to missing files or information for the selected folder. It is only possible to check for orphans in folders located on your computer. This option visible if the folder is located on a network.
-
Change Binding: Changes all location references for the selected orphaned folder to another folder, and retains all database information. The default binding folder is My Pictures.
-
The Database Maintenance tool will delete records, creating unused space in your database. To reclaim the unused space, click Optimize Database, and follow the instructions in the wizard.
-
Click Close.
Optimizing the Database
You can use the Optimize Database Wizard to quickly remove redundant or outdated database records. Optimizing your database, along with performing regular database maintenance, helps regain hard drive space and improves the overall performance of ACDSee.

If you are cataloging large numbers of files regularly, it is helpful to optimize weekly, or after an extended cataloging session. This is also a good time to backup the database.
To optimize your database:
- In Manage mode, click Tools | Database | Optimize Database.
- In the Database Optimization Wizard, click Next.
-
Select one or both of the following:
-
Optimize the database tables and fields: Removes obsolete information from the database, reduces the space used by database fields, and re-indexes the tables.
-
Remove orphans from database: Removes any orphan database entries, caused by files or folders deleted by other programs.
-
Click Next.
-
When the wizard has finished, click Finish to return to ACDSee.
Rebuilding Thumbnails and Metadata
Situations can develop in which your images will be out of sync with the thumbnail images displayed in the File List pane and the embedded metadata. You can use the Rebuild Thumbnails and Metadata tool to immediately regenerate the thumbnails for selected images and rebuild the metadata.
To rebuild thumbnails:
-
In Manage mode, do one of the following:
-
Select one or more thumbnails in the File List pane.
-
Select a folder in the Folders pane.
-
Click Tools | Database | Rebuild Thumbnails and Metadata.
Quarantined Files
If ACDSee Pro has trouble reading a corrupted or incomplete image or media file, or a file causes a plug-in to generate an error, ACDSee Pro will quarantine that file. You can view a list of quarantined files, and remove a file from the list.
To view quarantined files:
- In Manage mode, click Tools | Database | Quarantine Files.
- To remove a file, select it in the list, and then click Remove.
- To disable the Quarantine feature, clear the Enable Quarantine check box.
- Click OK to close the Quarantine Files dialog box and return to ACDSee.
Working With Plug-ins
A plug-in is a software module that adds functionality to a larger program. ACDSee Pro comes standard with many different plugins.
Types of plug-ins
- Image Decode: Converts a file from a binary format to the image displayed in ACDSee. Decode plug-ins allow ACDSee Pro to display images of many different file formats. The files that you can view with ACDSee Pro depend on which plug-ins are installed on your computer.
- Image Encode: Converts the image displayed in ACDSee Pro to a binary file format. Encode plug-ins allow ACDSee Pro to save (or convert) images to many different file formats. The files that you can edit and save with ACDSee Pro which encoding plug-ins are installed on your computer.
- Archive: Allows ACDSee Pro to display and save archives of many different file formats. The archives that you can view and create with ACDSee Pro depend on which archive plug-ins are installed on your computer.
- Camera: Allows ACDSee Pro to browse images on your digital camera and transfer them to a folder on your hard drive.
- Command Extension: Adds functionality to ACDSee. For example, there is a plug-in that you can use to share your images over the Internet.
- Pane Extension: Adds a pane to ACDSee Pro where you can perform tasks like order prints of your digital images.

We cannot ensure the quality of plug-ins that are not certified by ACD Systems. As with any other piece of : are trusting that the plug-in is free of viruses and that the company that produced the plug-in is trustworthy.
Managing Plug-ins
The Plug-in Settings dialog box displays a list of all the ACDSee plug-ins installed on your computer. You can also use the Plug-in Settings dialog box to control which plug-ins ACDSee Pro uses.
To access the Plug-in Settings dialog box:
In Manage mode, click Tools | Plug-in Settings.
Disabling a plug-in
You can disable a plug-in in the Plug-in Settings dialog box so that ACDSee Pro no longer uses it.
To disable a plug-in:
- In the Plug-in Settings dialog box, select one of the Plug-in tabs.
- Clear the check box beside the name of the plug-in that you do not want ACDSee Pro to use.
- Click OK.
Changing the plug-in order
Some file formats can be supported by more than one plug-in. However, when this happens, you can control which plug-in is used to read or write a file format. The order that plug-ins appear in the Plug-in Settings dialog box is the order that ACDSee Pro uses the plug-ins to read or write a file.
To change the plug-in order:
- In the Plug-in Settings dialog box, select one of the Plug-in tabs.
- Select a plug-in in the Plug-ins list.
-
Do one of the following:
-
Click the Move up button to move the plug-in higher in the list.
-
Click the Move down button to move the plug-in lower in the list.
-
Click OK.

Susie plug-ins do not have the features and speed of ACDSee plug-ins. Therefore, it is recommended that you plug-ins a low priority to prevent them from being used instead of an ACDSee plug-in. Also, you can disable Susie plug-ins that overlap the file formats that ACDSee plug-ins support. Susie plug-ins may not be supported in the 64 bit ACDSee.
Viewing Plug-in Properties and Getting Help
You can view and set properties for certain plug-ins.
To view plug-in properties:
- In the Plug-in Settings dialog box, select one of the Plug-in tabs.
- Select a plug-in in the Plug-ins list.
- Click the Properties button.
To view a plug-in's Help file:
- In the Plug-in Settings dialog box, select one of the Plug-in tabs.
- Select a plug-in in the Plug-ins list.
- Click the Plug-in Help button.
Chapter 4: View Mode
View mode is the main viewing component of the user interface.
In View mode, you can:
- Click+hold+drag to pan around large images.
- Press the keyboard shortcut F to toggle in and out of full screen view.
- Zoom in or out on your images.
• View images in a slideshow.
• Play video and audio files, and add audio to your image files.
- Add captions to your images.
- Catalog files by tagging them, adding categories, keywords and other metadata.
- Apply editing and special effect presets to your images.
Viewing RAW Images
A RAW image is like a photo negative. When your camera takes the photo, it captures all the raw data that makes up the image and it includes an embedded JPEG so that you can preview the image. The same as with a negative, it is necessary to develop your RAW file to view the photo.
When you double-click the thumbnail of a RAW image in Manage mode, ACDSee Pro checks to see if you have previously developed the RAW file. If you have, ACDSee Pro displays the developed photo in View mode. If you have not, ACDSee Pro does one of the following:
- If you have selected the Speed: Use embedded JPEG check box on the General tab of the Options dialog box, ACDSee Pro displays the embedded JPEG, created by your camera when you took the photo. This is the default setting.
- If you have selected the Quality: Perform high quality decode check box on the General tab, ACDSee Pro quickly develops the RAW file and displays a temporary photo of the RAW file.
When you zoom in on your undeveloped RAW image in View mode, if you have selected the Speed: Use embedded JPEG option, and if you zoom past the resolution of the embedded JPEG, ACDSee Pro quickly develops the RAW image so that you can see the image at that zoom level. When View mode changes the display from the embedded JPEG to the decoded RAW image, you might see a change in the color, light, or detail of the image. This is due to a difference between the settings applied by your camera to the JPEG and the settings used by ACDSee Pro to develop the image. Since different camera models apply different color, light, and detail settings to embedded JPEGs, these settings do not always match the settings used by ACDSee. However, you can then use the ACDSee Pro Develop tools to process the RAW image to use your preferred settings.
Viewing Images With Auto Advance
You can use the Auto Advance feature to create a quick slideshow preview of a group of images, or all the images in a folder.
To start Auto Advance:
- Open a group of images in View mode.
- Click View | Auto Advance | Options.
- In the Auto Advance dialog box, set the options as described below.
- Click Start.
- To advance to the next image, press Space.
- To return to the previous image, press Backspace.
- To stop or restart Auto Advance, press Pause.
Auto Advance options
| Sequence | Determines the order that you want to display your images. Select one of the following options:ForwardReverseRandom |
| Repeat | Automatically restarts the slideshow after the last image has been displayed. |
| Delay | Specifies how long to display each image. Drag the slider or type a value from 0 to 864000000 to time (in milliseconds). |
| Sound | Select the Play audio clips check box to play any audio embedded in the selected images. |
Displaying Text on Images in View Mode
You can use the Header/Footer tool to display text with your images in View mode. The text is displayed while you are viewing the image, but does not modify the original image. You can also hide the headers and footers without changing the setting. To add text directly to your photos and save it as part of the image, see Adding text to an image.
To edit image headers and footers:
- In View mode, click View | Edit Header/footer.
- Do one or both of the following:
- Select the Header check box to add text at the top of the image.
-
Select the Footer check box to add text at the bottom of the image.
-
Select or change the text options as described below.
-
Click OK.
Text options
| Alignment | Specifies the justification of the captions. |
| Background | Adds a background color to the text. Click Color to specify a color. |
| Description | Displays the text you want to see on your images. Type the text you want to appear, or click field to set an insertion point for inserting metadata. |
| Insert Metadata | Inserts file-specific information into the text for each image. |
| Font | Sets the font, size, and color of the caption text. |
To insert metadata in image text:
- Position the cursor in the Description text box where you want to display the file information and click Insert Metadata.
- In the Choose Properties dialog box, select the file information you want to include.
- Click OK.
The information you added is inserted as a placeholder that will be replaced by the specific text for each imag
Hiding image text
You can hide either the header or footer, or disable both at once without changing or deleting the information in the header and footer fields.
To hide the image text:
- In View mode, click View | Edit Header/footer.
-
Do one or both of the following:
-
Clear the Header check box to remove text from the top of the image.
-
Clear the Footer check box to remove text from the bottom of the image.
-
Click OK.

To show or hide both headers and footers simultaneously, click View | Show Header/Footer.
Synchronizing View Mode to a Folder
You can use the Sync to Folder option to change the images being displayed in View mode.
To synchronize to a folder:
- In View mode, click File | Sync To Folder.
- Type the path to the folder you want to synchronize, or click the Browse button to locate the folder.
- Select or change the New Images options as described below.
- Click OK.
New Images options
| Show new images immediately | Displays images as soon as they appear in the folder. If this option is cleared, new images are the end of the slideshow. |
| Ignore open files | Delays adding a new file to the slideshow until the transferring application has finished moving or downloading the file. |
| Sort by name | Sorts the images displayed in the slideshow by their file name. |
To stop synchronizing to a folder:
In View mode, click File | Sync To Folder.
Viewing Offline Images
ACDSee Pro stores thumbnails and database information for images contained on CDs or other removable media as Photo Discs. You can then browse the thumbnails and view the information for those images even when the disc is not in your CD-ROI
To add a Photo Disc:
- Place a disc containing images into your CD-ROM drive.
-
In Manage mode, click File | New | Photo Disc.
-
In the New Disc dialog box, type a name for your disc in the Title field, and then click OK.
You can then browse the contents of the Photo Disc in the Offline Media section of the Folders pane.

If you add or remove images from a disc that you have already added to ACDSee Pro as a Photo Disc, you information stored in the database. Insert the disc in your CD-ROM drive, and then right-click the name of the disc in the Folders pane and select Update Photo Disc.
By default, ACDSee Pro identifies Photo Discs by their serial numbers. This is the most reliable setting to use when working with Photo Discs, particularly if you are importing or converting Photo Discs from previous versions of ACDSee.
However, if you are working with, or planning to work with, multi-session discs, the serial number may be regenerated or changed each time you change the contents of a disc. Therefore, the volume label is the required method of identification for multi-session Photo Discs.
Rebinding Photo Discs
Depending on the method used to identify Photo Discs, ACDSee Pro may encounter a Photo Disc that it does not recognize. This is most common when you are using the serial number method to identify Photo Discs and you insert a multi-session disc. ACDSee Pro may not recognize the disc, as serial numbers are likely to change when updating a multi-session disc.
You can use the Rebind option to update the identification information, and associate the correct database information with your disc.
To rebind a Photo Disc to its ACDSee Pro database information:
-
In the Rebind Photo Disc dialog box, carefully review the Current disc information to be sure that the correct disc is in the drive.
-
Select the Photo Disc record that you want to rebind to the current disc from the Photo Disc Name list.
- Click Rebind.
Using ACDSee Quick View
ACDSee Quick View is an image viewer that you can use to quickly view images without opening ACDSee. For example, imagine that you want to view an image that someone sent to you in an email. If you double-click the image it will open in Quick View, which is like a pared-down version of View mode in ACDSee.
With Quick View you can quickly scroll through your images, temporarily rotate images, and zoom in and out. If you are viewing a particularly appealing image in Quick View, you can also set the image as your desktop wallpaper or print the image.
You can easily switch from Quick View to ACDSee. You also have the option to open an image in Manage, View, Develop, or Edit mode.
If you are accustomed to using keyboard and mouse shortcuts in View mode you can use most of those shortcuts in Quick View as well.
To open an image in Quick View:
- With ACDSee Pro closed, double-click an image. For example, double-click the image in Windows Explorer or in an email message.
- Use the viewing options described below to view the image.
ACDSee Quick View viewing options
| Previous | View the previous image. | |
| Next | View the next image. | |
| Rotate Left | Rotate the image to the left. | |
| Rotate Right | Rotate the image to the right. | |
| Zoom In | View the image at a higher magnification. | |
| Zoom Out | View the image at a lower magnification. | |
| × | Delete | Move the image to the computer's Recycle Bin. |
To open the image in ACDSee:
- Click Manage, View, Develop or Edit mode.
To set an image as your desktop wallpaper:
- Click Previous or Next until the image that you want to make your desktop wallpaper displays in Quick View.
-
Click Tools | Set Wallpaper and select one of the following:
-
Centered: Displays the image in the center of the desktop.
- Tiled: Displays the image in one or more tiles until the desktop is covered. If the image is small it may appear in several tiles on the desktop. If the image is large it may appear in only one or two tiles.
- Stretched: Stretches the image proportionally to fill as much of the desktop as possible.
To restore your system to the default desktop wallpaper:
Click Tools | Set Wallpaper | Restore.
To print the image:
- Click File | Print.
- Under Format, choose a print size.
- On the Printer Options tab, specify the printer you want to use, the paper size, the number of copies you want, the range of pages that you want to print, and image resolution.
- On the Page Settings tab, specify the image position on the paper and the margin widths, and specify the number of prints of each photo.
- Add captions, headers, or footers.
- Click Print.
Viewing Images in Another Application
You can open a file in another program from within ACDSee. For example, you can open documents in the application used to create them.
To use the shell open and edit commands:
- In Manage mode, click File | Shell.
-
Select one of the following options:
-
Open: Opens the file using the application that Windows associates with its file extension.
- Edit: Opens the file using the default system application, or opens a dialog box where you can select an application.
Setting an Image as the Desktop Wallpaper
You can select any image and set it as the Windows desktop wallpaper. You can also automatically stretch a wallpapered image to fill the screen, or restore your previous wallpaper.
To set an image as the desktop wallpaper:
-
Do one of the following:
-
In Manage mode, select an image, and then click Tools | Set Wallpaper.
• In View mode, click Tools | Set Wallpaper. -
Select one of the following:
-
Centered: Places the image in the center of the screen. If the image is larger than the screen, it is shrunk to fit.
- Tiled: Places the image in a tiled pattern that fills the entire desktop.
- Stretched: Stretches the image to fit the screen.
The selected image is saved as ACD Wallpaper.bmp in the Windows folder. ACDSee Pro automatically changes the wallpaper settings in the Control Panel Display properties to display the image.
To automatically stretch wallpapered images to fit the screen:
- Click Tools | Options.
- In the Options dialog box, click General.
- On the General page, select the Automatically stretch wallpaper to fit screen check box.
- Click OK.
To display the previous wallpaper:
Click Tools | Set Wallpaper | Restore.
Viewing and Using Brush Files
You can view brush files in Manage mode just like fonts or other files. This means that you can assign ratings or organize them just like any other file in ACDSee. Because many .abr files are actually groups of images in one file, you need to open them in View mode to see the individual images.

This icon indicates an .abr brush file in ACDSee.
To view brush files:
In Manage mode, navigate to the folder containing your brush files.
- To see just the top image in any .abr file, hover over the thumbnail to activate the pop-up, or click it to see the image in the Preview pane.
- To view the other images in the .abr file, double-click it to open it in View mode. The file opens in View mode showing the individual images in a pane on the left-hand side.
• To see the number of images, and select them by number, click the down-arrow at the top of the sidebar, at the number of the image.
• To scroll through the images, click the right and left arrows at the top of the sidebar, or on each image.
To use brush files in Adobe Photoshop®:
With both Adobe Photoshop® and ACDSee Pro open, drag the file from the File List (in Manage mode) onto the Photoshop® window.
Even though nothing appears to happen, the brush is loaded into the Photoshop® brush library. To view the new brushes, open the library and scroll to the bottom of the pane.

To make it even easier to use brushes in Photoshop®, you can configure it to be your default editor. Then, CTRL + ALT + X to open Photoshop® and use the brush right away.
Playing Video and Audio Files
You can play video or audio files in many formats in ACDSee. You can control playback volume and appearance, select parts of a media file to play or save, and create an image from a video frame.
To play video or audio files:
In Manage mode, in the File List pane, do one of the following:
• Double-click a video or audio file.
- Select one or more files and press Enter.
- Select one or more files, right-click a selected file, and then select View.
- Use the Media toolbar to adjust the volume, stop, pause or restart the file playback, and control the appearance of media files.
Automatically playing audio and video files
You can configure your settings to play audio and video files automatically, as soon as you open them in View mode, or as you view them in the Preview pane in Manage mode.
To start playing media files automatically:
- In Manage mode or View mode, click Tools | Options | Preview.
- Select the Autoplay audio or video clips check box.
- Click OK.
The Media toolbar
You can use the Media toolbar to quickly access common media viewing and editing tools.
Media toolbar buttons
| Play | Plays the media file or selection. Changes into the Pause button when a media file or selection playing. |
| Pause | Pauses the media file or selection. |
| Stop | Stops playback of the media file or selection. |
Selection and media controls toolbar buttons
| Show Selection | Toggles between showing and hiding the selection handles. This option only supported on Windows Vista® and XP®. |
| Play Selection | Plays only the selected portion of the media file. This option only supported on Windows Vista® and XP®. |
| Save As | Opens a dialog you can use to save the video with a new file name. This option only supported on Windows Vista® and XP®. |
| Extract Frames | Opens a menu you can use to copy, save, and extract video frames. This option only supported on Windows Vista® and XP®. |
| Loop | Continuously plays the media file or selection. |
| Rotate | Rotates a video clockwise in 90-degree increments. This option only supported on Windows Vista® and XP®. |
| Auto Levels Effect | Automatically adjusts the color and light levels in a video. This option only supported on Windows Vista® and XP®. |
| Gamma Effect | Opens the Gamma dialog box, which you can use to adjust the Tis motion of only video. Higher values brighten the video, while lower values darkers supported on reset the gamma level, click Default. Windows Vista® and XP®. |
Selecting Part of a Media File
You can select a segment of an audio or video file and play it.

This feature is only supported on Windows Vista® and XP®.
To select part of an audio or video file:
- Click the Show Selection button.
- Move the selection handles to specify the beginning and end of the selection.

natural_image
Pure structural beam diagram without any text, numbers, or symbols- Click the Play Selection button.
- Click the Play button.
Saving Video Frames as Images
You can extract an individual frame from a video and save it as a still image, or extract multiple frames and save each one as a single image.

This feature is only supported on Windows Vista® and XP®.
To extract and save a single video frame as an image:
- Do one of the following:
• While the video is playing, click the Pause button at the frame you want to save.
- On the progress slider, move the pointer to display the frame you want to save.
- On the Selection and media controls toolbar, click the Extract Frames button and select Extract Current Frame.
- In the Extract Current Frame dialog box, select a folder in which to save your file.
- In the File name field, type a filename.
- Click the Save as type drop-down list and select a file format. You can click the Options button to select or change any options associated with the file format.
- Click Save.
To extract and save multiple video frames as images:
- Select part of the video.
- On the Selection and media controls toolbar, click the Extract Frames button, and then select one of the following options:
• Extract Selected Frames: Extracts all the video frames contained in the selected portion of the video file.
- Extract All Frames: Extracts all of the video frames in the video file.
- In the Extracting Frames dialog box, click the Browse button, and then select the folder where you want to save your files.
- In the Filename field, type a filename to use when saving the images. Numbers are added to the filename for each frame.
- Click the Format drop-down list and select a file format. You can click the Options button to select or change any options associated with the file format.
- Click OK.
Adding or Editing Image Audio
ACDSee Pro supports images with embedded audio and images with associated audio files.
Images with embedded audio are TIFF or JPEG images with audio saved inside the image file. You can embed audio inside an image file by adding audio to the image.
Images with associated audio are image files paired with separate WAV audio files. Image files and their associated audio files contain the same file name and are located in the same folder. You can associate any WAV file with an image file by giving them the same name and placing them in the same folder, or by adding audio to the image.

If you move or rename either an image file or the audio file associated with it, both files must be renamed and in the same folder or they will no longer be associated. This does not apply to images with embedded audio.
To add audio to an image:
-
Do one of the following:
-
Select an image in Manage mode.
-
Open an image in View mode.
-
Click Tools | Image Audio | Edit.
- In the Edit Audio dialog box, click the Browse button.
- Select a WAV file and click Save.
-
If you would like to truncate or clip the audio file, select the Use markers check box, and drag the Start marker and End marker sliders. Do one of the following:
-
Click the Truncate button to remove the beginning and end of the audio file (the sections outside of the start and end markers).
-
Click the Clip button to remove the section of the audio file inside the start and end markers.
-
To hear a preview of the file, click the Play button.
-
Click OK.
Recording audio to an image
You can record your own audio files and add them to your images. When you add audio to a JPEG or TIFF image, the audio is embedded in the image. With other file formats, the audio file is associated with the image; the audio file is saved in the same folder and is played when the image is viewed.
To record and add an audio file to an image:
-
Do one of the following:
-
Select an image in Manage mode.
-
Open an image in View mode.
-
Click Tools | Image Audio | Edit.
- In the Edit Audio dialog box, select or change the Record sound settings options as described below.
- Click Record and do one of the following:
• Use a microphone and record a sound.
- Play audio from an audio player on your computer.
- Click Record to stop the recording.
- Click Save As to save the audio file.
- In the Save Sound File dialog box, type a name in the File name field, and then click Save.
- Click OK.
Record sound settings options
| Capture device | Specifies which of your computer's devices you want to record the audio. |
| Input format | Determines which sample rate and audio type are used to record the sound. The formats display depend on the sound card you have installed on your computer. |
| Overwrite | Replaces the recorded audio from the Start marker slider location. |
| Mix | Combines the recording with the existing audio file. |
| Insert using start marker | Inserts the recording at the start marker location. Drag the Start marker slider to select a position. |
| Append to sound file | Adds the recording to the existing audio file. |
| Replace sound file | Replaces the entire audio file with the new recording. |
Selecting Part of an Image
You can use the Select tool in View mode to select a rectangular area of an image. You can then zoom in on the selection, copy the selection, save the selection as a new image, print the selection, and use the selection as the desktop wallpaper.
To select part of an image:
- Click the Select Tool icon.
- Drag the cursor across the image to create a marquee.
- Right-click inside the marquee and select one of the options described below.
- To cancel the selection, click an area of the image outside of the marquee.
Selection options
| Zoom To | Zooms in on the selected area. |
| Copy | Copies the selected area to the Clipboard. |
| Save Crop As | Saves the selected area as a new image. |
| Prints the selected area. | |
| Wallpaper Centered | Creates desktop wallpaper using the selected area and centers it on your desktop, shrinking it to 1 necessary. |
| Wallpaper Tiled | Creates a tiled desktop wallpaper pattern using the selected area. |
Applying Presets in View Mode
Many ACDSee Pro developing tools allow you to save your settings as presets. This is convenient when you frequently use the same settings for a particular tool or effect.
For most tools, ACDSee Pro automatically saves the last option settings you applied to an image when you clicked Apply or Done. This preset is called Last Used Settings. To create presets to be used at anytime see Using Presets in Develop mode.
To apply presets in View mode:
- In View mode, click Tools | Process | Apply Preset.
- Select one of the presets.
The preset is applied and automatically saved.

To undo the applied preset right-click and select Process | Restore to Original.

Presets created from Edit mode can only be applied in Edit mode.
Viewing File Properties in View Mode
You can view an image's properties in View mode and edit the information in the Properties pane.
To view an image's properties:
In View mode, click View | Properties.
For more information about the Properties pane, and adding or editing ACDSee metadata, see Using the Properties pane.
Printing Images in View Mode
With the ACDSee Pro print utility, you can print your images on any size of paper, in any orientation, and at any resolution your printer can support. You can also use the print utility to create and print contact sheets, complete with headers, footers, and captions specific to each image.
As you change the options in the Print dialog box, you can view a dynamically updated preview of the image and its position on the page. You can adjust the output size, print multiple copies of each image, and change the orientation of the images on each page.
To print a single image:
- In View mode, select the image you want to print.
- Click File | Print Image.
- Under Format, choose a print size.
- On the Printer Options tab, specify the printer you want to use, the paper size, the number of copies you want, the range of pages that you want to print, and image resolution.
-
On the Page Settings tab, specify the image position on the paper and the margin widths, and specify the number of prints of each photo.
-
Add captions, headers, or footers.
- Click Print.
To print all images:
- In View mode, click File | Print All Images.
-
Under Print layout, do one of the following:
-
Select Full page and then choose a print size from the Format list.
- Select Contact sheet and then set the Contact sheet format options to define the appearance of your contact sheet.
-
Select Layout and then choose one of the available layout options.
-
On the Printer Options tab, specify the printer you want to use, the paper size, the number of copies you want, the range of pages that you want to print, and image resolution.
- On the Page Settings tab, specify the image position on the paper and the margin widths.
- Specify the number of prints of each photo. If you are printing a Full page or a Contact sheet this option is available on the Page Settings tab. If you are printing a Layout this option is available below the list of layouts.
- Add captions, headers, or footers. You can only add captions, headers, or footers if you are printing a Full page or a Contact sheet.
- Click Print.
Showing Originals
When you make changes to your images, the original image is saved so that you can restore the image to its original settings.
To show the original image:
- In View mode, select an image that has been developed or edited.
- Click and hold the Show Original button in the bottom toolbar.
When you release the mouse button, the developed or edited image is displayed.
Committing Changes
When you make changes to your images, the original image is saved so that you can restore the image to its original settings. If you decide that you want to keep your developed or edited image and save that as your original image, you can commit the changes to the image. This deletes any sidecar files or originals that have been saved, and removes the D or E overlay icon that indicates the image has been developed or edited.
To commit changes to an image:
- In Manage mode or View mode, select an image that has been developed or edited.
- Click Tools | Process | Commit Changes.
Zooming an Image
In View mode you can use the Zoom tools to enlarge or reduce the size of the image you are viewing. When an image is zoomed to a larger size than the View mode window, you can use the Scroll tool (hand icon) to pan or scroll the image.

When you zoom in on a RAW image, you might see a change in the color, light, or detail of the image. This can occur if you
have selected the Speed: Use embedded JPEG check box on the General tab of the Options dialog box. This option
displays the embedded JPEG for the image, but when you zoom in past the resolution of the embedded JPEG, decodes the RAW image in order to display the image at that zoom level. As ACDSee Pro decodes the image, might be slow to respond. See Viewing RAW images for more information.
To zoom an image in or out:
- Click once on the image to toggle between your default view and Actual Size view.
- Click Tools | Zoom, and then select one of the Zoom menu options.
Zoom menu options
| Zoom In | Increases the magnification of the image. |
| Zoom Out | Decreases the magnification of the image. |
| Actual Size | Displays the image at its original dimensions (100%). |
| Fit Image | Displays the image at the largest magnification that fits in View mode window. |
| Fit Width | Fits the image within the left and right sides of the View mode window. |
| Fit Height | Fits the image within the top and bottom of the View mode window. |
| Zoom Lock | Displays all images at the zoom option of the current image. If the zoom level is adjusted, the zoom level is applied to all images that you view. |
| Zoom To | Opens a dialog box where you can select a zoom level. |
| Pan Lock | Locks the panned area of an image. |

If you select Fit Image you can display the previous or next image by pressing the left and right arrow keys on your keyboard.

To change your default image view, click Tools | Zoom and select Actual Size, Fit Image (standard), Fit Width, or Fit Height.
Setting the Zoom Level
You can use the Set Zoom Level dialog box to set a specific zoom level in View mode.
To set a specific zoom level:
-
Click Tools | Zoom | Zoom To.
-
In the Zoom level area, select one of the following:
• Fit whole image: Zooms the image to fit entirely within the window.
• Fit width: Zooms the image to fit the width of the window.
• Fit height: Zooms the image to fit the height of the window.
- Specify: Specifies a zoom percentage. Type a number in the field or click the drop-down list and select a zoom level.
-
To use this setting as the default View mode zoom level, select the Lock at this zoom level check box. View mode displays all images based on the specified zoom level.
-
Click OK.

If you select Fit whole image you can display the previous or next image by pressing the left and right arrow keys on your keyboard.
Automatically Shrinking or Enlarging Images
You can use the settings on the Display page of the Options dialog box to automatically enlarge or shrink images to fit the size of the ACDSee Pro window. For information about how the combination of the choices affects the display of images, see the Zoom mode and Resize results table below.
To automatically shrink or enlarge images:
- In Manage mode or View mode, click Tools | Options.
- In the Options dialog box, click View mode | Display.
- In the Zoom options area, select one of the following options from the Default zoom mode drop-down list:
• Actual Size: Keeps images at their original size.
• Fit Width: Resizes images to fit the width of the View mode window.
• Fit Height: Resizes images to fit the height of the View mode window.
• Fit Image: Resizes images to fit the size of the View mode window.
-
Select one of the following options from the Resize drop-down list:
-
Reduce Only: Reduces large images to fit the size of the View mode window.
- Enlarge Only: Enlarges smaller images to fit the size of the View mode window.
-
Reduce or Enlarge: Reduces large images, and enlarges smaller images to fit the size of the View mode window.
-
Click OK.
Zoom mode and Resize results
| Fit Image Fit Width Fit Height | |||
| Reduce Only | Reduces large images to fit the values of the View mode window. | Reduces large images to fit between the sides of the top and bottom of the View mode window. | |
| Images that are smaller than the view mode window are displayed their original size. | the View mode window. Images that are smaller than the mode window are displayed at their view mode window are displayed at their original size. | ||
| Enlarge Only | Enlarges small images to fit the values of the Viewer. | Enlarges small images to fit between the sides of the top and bottom of the View mode window. | |
| Images that are larger than the view mode window are displayed their original size. | the View mode window. Images that are larger than the window are displayed at their original size. | ||
| Reduce and Enlarge | Reduces large images and enlarges small images to fit the size of the window. | Reduces large images and enlarges small images to fit between the sides of the top and bottom and right sides of the View mode window. | |

If you select Fit Image you can display the previous or next image by pressing the left- and right-arrow keys on your keyboard.
Using the Navigator to View Select Areas of an Image
Use the Navigator pane to display a thumbnail overview of images that are larger than the View mode display area. In the Navigator, a marquee indicates the area of the image that is visible.
To display and use the Navigator pane:
- In View mode, click View | Navigator.
- Drag the slider to increase or decrease the magnification of the image in View mode.
- Drag the marquee to the area of the image you would like to display in View mode.
To use the Quick Navigator pane:
- In View mode, click and hold the Navigator button in the bottom toolbar.
- Drag the marquee to the area of the image you would like to display in View mode.
Panning a Magnified Image
In View mode, you can pan large images by moving them vertically, horizontally, and diagonally across the display area to view specific areas of the image. When an image is larger than the ACDSee Pro window and you use the Scroll tool, the cursor changes to a hand.
To pan an image:
Do one of the following:
- Drag the image to center the area you want to view.
- Press an arrow key. You can hold the CTRL key to pan quickly, or hold the SHIFT key to pan more slowly.
Using Pan Lock
You can use the Pan Lock setting to automatically center the same area of a series of larger images in View mode.
To use Pan Lock:
- In View mode, pan over a large image to a specific area you want to view.
- Using the Zoom menu, zoom in on the image until you reach the magnification you want to use for all of your images.
-
Click Tools | Zoom | Zoom Lock to keep the current zoom level.
-
Click Tools | Zoom | Pan Lock.
As you move through your images, each one will be automatically zoomed and panned to the same area.
Magnifying Specific Areas of an Image
You can view specific areas of an image at a higher magnification in the Magnifying Glass pane.
To use the Magnifying Glass pane:
- In View mode, click View | Magnifying Glass.
- Move the cursor over an area of the image to view that area in the Magnifying Glass pane.
-
Change the Magnifying Glass pane settings by doing any of the following:
-
Move the slider at the bottom of the Magnifying Glass pane to increase or decrease the magnification.
- Select the Fixed check box to apply the slider setting to the original size of the image. Clear the Fixed check box to apply the slider setting to the magnification of the zoomed image in View mode.
- Select the Smooth check box to apply anti-aliasing to the magnified portion of the image, or clear the Smooth check box to view the individual pixels.
Chapter 5: Develop Mode
Develop mode allows non-destructive processing of RAW, JPEG and other file types. Do most of your adjustments on RAW images in Develop mode, where you can work on the RAW image data.
In Develop mode you can:
- Tune the image using exposure, white balance, lighting, color, split tone, post-crop vignette, and tone curves tools, or set the output color space of a RAW image.
- Adjust details in your image using the sharpening, noise reduction, and chromatic aberration tools.
- Fix geometry in your image using the lens distortion, rotate and straighten, perspective, vignette correction, and cropping tools.
• Repair your image with the Red Eye Reduction tool.
Using Develop Mode
Changes you make in Develop are applied to the entire image. When adjusting your images in Develop, the original file is never changed. The changes are saved in a separate file, and are applied each time you open the image. This allows for non-destructive developing of your images, and it is recommended that you do most of your image adjustments in Develop.
When you open a developed image in Develop, it displays the settings you previously left them at. This allows you to revisit the image at any time to adjust the previous settings.
For more information on how develop settings are saved, see How ACDSee Pro saves changes to images.
Developing an image
To develop an image:
- Select Develop mode.
- In Develop, in the Tune tab, select General, White Balance, Lighting, Advanced Color, Tone Curves, Soft Focus, Cross Process, Split Tone, Post-Crop Vignette, or for RAW files: Output Color Space.
- On the Details tab, select Sharpening, Noise Reduction, or Chromatic Aberration.
- On the Geometry tab, select Lens Distortion, Rotate & Straighten, Perspective, Crop, Vignette Correction.
- On the Repair tab, select Red Eye Reduction.
Saving and canceling
When you have finished developing an image, you can choose from one of the many options for saving your image, depending on what you want to do next.
To save the image and return to the mode you were in previously:
- Click Done.
- Select one of the following:
• Save: Save your changes.
- Save as: Save a copy of your developed image with a new name or format.
• Discard: Discard your changes.
- Cancel: Remain on the same image in Develop with your changes intact, without saving the image.

If you want your changes saved automatically (without the prompt to save), select the Auto Save check box. Then next time you switch to a new image your changes will be saved automatically without the prompt. You can change back by clicking Tools | Options and selecting the Automatically save Develop Mode adjustments check box on the Develop Mode page.
To save the image and continue processing other images:
- Click Save.
-
Select one of the following:
-
Save As: Save a version of your developed image with a new name or format and switch to the updated image.
- Save a Copy: Save a copy of your developed image with a new name or format, and continue to work on the original file.
- Export: Export one or more copies of your developed image with the option to specify a format and size for each.
• Copy to Clipboard: Copy the developed image to the clipboard.

Save a Copy is useful for making multiple versions of an image while continuing to work from the original file instead of a new processed copy. For example, if you take a RAW image and save a copy of it as a switching to this lossy JPG image, you remain on the unprocessed RAW file with the settings still intact
To discard changes to the image and return to the mode you were in previously:
Click Cancel.

Save is not available for RAW file formats because you cannot directly save changes to a RAW file.
To copy and apply settings from one image to others:
- Open an image with the settings you want to copy in Develop.
- Select Edit | Copy Settings.
- In the Copy settings dialog box, select the settings you want to copy.
-
Click OK.
-
Select an image you want to copy the setting to, by doing one of the following:
-
Click on an image in the filmstrip view.
- Select File | Open Next Image (or press the Page Down key).
- Select File | Open Previous Image (or press the Shift + Alt + L keys).
6. Select Edit | Paste Settings.

A blue square icon appears at the top of the Tune, Detail, Geometry and Repair tab to indicate that changes made.
Restoring Original settings
You can discard your Develop settings and revert to the original image. For more information, see Restoring original images.
Histogram and image viewing controls
While developing an image, you can adjust the magnification with the zoom controls, located in the bottom right corner

It is extremely useful to have both the Exposure Warning and Histogram preview open while you are adjusting exposure. Below the histogram, percentage of the pixels underexposed and overexposed is shown.
Histogram | Displays the histogram preview for the current image. The histogram preview shows the red, green, and blue color channels of the photo. Keeping the histogram open is particularly useful when adjusting exposure, as the histogram reflects all adjustments as you make them. When the histogram is enabled the icon is blue and gray when disabled.At the bottom of the histogram, icons appear to notify you if there is a loss details in the highlights , or loss in details in the dark areas of the image.Numbers beside these two icons represents the percent of pixels that have lost details in either the shadows or the highlights. |
Clipped Shadows and Highlights | Displays clipped shadows and highlights. Click the icon or press E on the keyboard, to highlight over- and under-exposed areas of the image. When the shadows and highlights tool is enabled the icon is yellow, and gray when disable. |
Undo/Redo | Undo to discard all changes made on the current tab. Redo to return to the code that you had selected prior to clicking Undo. |
Reset | Discards the settings that you have selected and revert to the default settings each individual group. When you apply changes using one of the groups, the reset button turns blue. Click on the reset button to reset the image to its default settings. |
Preview | Turns on or off changes you have made within the group. This button is available in each group, so you can view the effects of each group's develop settings. With the icon is green the group's changes are visible. A gray icon indicates that the changes are hidden. |
| Develop Settings[407] | Resets Develop Settings to Last Saved, Default, or Last Used. You can also save your settings as a preset, copy, or paste them. |
| Display Full Screen[596] | Displays the image on a full screen. Press F to view full screen. Press any key return to Develop. |
| Actual Size[598] | Returns the current image to its actual size. |
| Navigator[599] | The Navigator icon only appears when the image is magnified or if the Actual icon has been clicked. Click the Navigator icon to display a small duplicate of image. Then drag your cursor to the section of the image you would like to set magnified. Release the cursor to settle on an area of the image. |
| Fit Image[600] | Reduces the image to fit within the Develop mode area. |
| Show Original | Toggles the changes on or off, to compare your changes to the original. |
Zoom slider | Increases the size of the image if you drag it to the right, decreases the size drag to the left. |
Zoom drop-down list | Displays a list of zoom sizes to select. |
Viewing Images
You can view other images by clicking on the filmstrip at the bottom of the screen. Or, click the arrows on the Done button to select an image to develop.
Customizing the view
You can detach the Develop and Edit panes to suit your workflow.
You can also customize how the groups expand and collapse within the pane. From the View menu, select:
- Expand all groups: Expands all the groups in pane.
• Collapse all groups: Collapses all the groups that are open. - Auto-collapse groups: This is the default setting. This setting automatically collapses groups and keeps the group you're working in open. This is useful for keeping groups in one pane without having to scroll.
- Filmstrip: Toggles the filmstrip display on or off.
Exporting an Image to Multiple Formats and Resolutions
In ACDSee, you can export an image to multiple image formats and resolutions.
To export an image to multiple formats and resolutions:
- In Develop mode, select the desired develop settings.
- Click Save and then select Export.
- Refer to the table below to make your selections from the Export dialog box.
Export options
| Destination folder | Same as source folder | Select this option to use the same folder where the source images current reside. Select the Create a new subfolder for the files check box to place the in within a subfolder of the source folder. | |
| Specific folder | Click this button to change the output folder to a specific location. | ||
| File names | Use Template to rename files | Using a template gives you control over the output file name. If you choose not use a template, the file name is unchanged. Duplicate files are given underscore and number suffix. | |
| Template | Select the Use Template to rename files check box to create a renaming template. You can specify a numerical or alphabetical sequence for the new file names, and use the original file names, new names, or names based on image metadata. | ||
| Template field | Displays the template to use to rename the files. Type an asterisk (*) to insert the original file name into the template. Use one or more number signs (#) to insert numeric or alphabetic characters, depending which options you selected. Click the arrow on the drop-down list to select a recently-used template. | ||
| Insert | Metadata field | Inserts file-specific information into the file name template. Position the cursor in the Template field, and then click Insert Metadata to open the Choose Property dialog box. Select the metadata you want to insert, and then click OK. | ||
| Insert | Sequence number | Replaces any number signs (#) in the template with sequential numeric characters or alphabetic characters. Select numeric or alphabetic preference in Sequence number options below. | ||
| Insert | Original filename | Replaces any asterisk signs (*) in the template name with the original filename. | ||
| Insert | Sequence number options | Specifies the first letter or number of the sequence. | ||
| Start at | |||
| Format File Format | Select the file format in which you would like to save the exported image | ||
| Format Settings | Click this button to change the settings for the format you have selected. | ||
| Pixel format | Specify the color depth for your format settings. | ||
| Color space | Select the color space check box to choose a color space option from the drop-down list. | ||
| Output size | Resize image | Select this option to specify how to scale the images. Select from the following options: | |
| Resampling method | Use this option to determine the method used to resize (resample) the image:Box: Displays considerable tiling or jaggies when you resize an image.Triangle: Produces good results for image reduction and enlargement, but displays sharp transition lines.Bicubic: Produces good results with photo-realistic images and with images that are irregular or complex. Uses interpolation to minimize the raggedness normally associated with image expansion.Bell: Smoothes the image.B-spline: Produces smooth transitions, but may cause excessive blurring.Lanczos: Produces the sharpest images, but may also introduce some ringing artifacts.Mitchell: Produces smooth transitions when enlarging photo-realistic images. This filter is good compromise between the ringing effect of Lanczos and the blurring effect of other filters.ClearIQZ: Slower than Bicubic and Lanczos, but produces the best results when enlarging photos, especially those of people. | ||
| Dimensions | Select this option to force the exported images to fit the set dimensions independent of landscape or portrait orientation. Enter the dimensions in pixels, inches, or centimeters | ||
| Width and height | Select this option to resize the exported image to fit within the values entered in the two boxes. | ||
| Long edge | Select this option to resize the image to the long edge only. Enter the dimensions in pixels, inches, or centimeters | ||
| Short edge | Select this option to resize the image to the short edge only. Enter the dimensions in pixels, inches, or centimeters | ||
| Resolution | Enter a resolution to set the number of pixels per inch or centimeter. | ||
| Enlarge only | Enlarge only resizes only those images that are smaller than the specified height and width. | ||
| Reduce only | Resizes only those images that are larger than the specified height and width. | ||
| Enlarge or reduce | Resizes all images to the specified height and width. | ||
| PreserveOriginalAspect ratio | Select this option to maintain original image proportions. Note: Images resized to long or short edge maintain original image proportion. |
| Metadata | Select these options if the image contains metadata, and you want the exported image to metadata and color profile. |
Option: You can save your settings as a preset by clicking the new export preset button and entering a name for your preset. Select one or more presets in the list to apply.
4. Click Export.

To edit a preset, click the preset in the list, make your edits, and click the Save current export preset button
Sharing Develop Settings
You can share your develop settings with other ACDSee Pro users. To do this, you export the processing settings from the database to a file, which has an .rpp file extension. You can then send the image and the settings file, to another ACDSee Pro user, who can import the .rpp settings into their ACDSee Pro database. When they open the image in ACDSee, the developed photo will have the appearance you intended.
For RAW files, your changes are stored in the XMP file. To share settings for RAW files, XMP sidecar files are the preferred way for sharing settings.
To export your develop settings:
- In Manage mode, select the image(s) that you want to share.
- Click Tools | Database | Export | RPP Files. A summary of the export process displays in the Summary dialog.
- Click OK.
- The .rpp file is saved in the same folder as the image.
When you send the image and the .rpp file to another ACDSee Pro user, tell them to keep the image and the together in the same folder.
To import develop settings:
- In Manage mode, select the shared image(s).
- Click Tools | Database | Import | RPP Files.
A summary of the import process displays in the Summary dialog.
- Click OK.
The thumbnails of the shared images are also updated to show your processing settings.
Restoring Original Images
Once you have developed an image, the settings you used are saved in the database and will be applied again each time you open that file. You can remove the develop settings from a single image or from a batch of images.
To remove develop settings from an image:
- Select one or more developed images in Manage or View mode. Developed Images have a overlay icon.
- Click Tools | Process | Restore to Original.

You can also right-click a developed image and select Process | Restore to Original from the context menu.

When you restore your image to its original state, all the develop settings will be deleted from the ACDSee Pro database.
Using Presets in Develop Mode
You can save your develop settings as a preset to apply the same adjustments to additional images. Presets allow you to quickly apply changes to an image without having to repeat the steps each time you want to apply the same change. For example, if you always correct your images using the Contrast tool with the value of 25 and the Midtones tool with the value of -8, you can save these settings as a preset and quickly apply them to change the contrast and midtones in your images. You can also use presets to ensure that settings are applied consistently in your images. You can create a preset with one or multiple develop settings.

You can apply as many presets as you want to an image. Each time you add a preset, the settings are applied on top of the previous settings.
Creating and applying presets
You can create and access presets by clicking the develop settings button from the following places:
Top of the pane

Use the develop settings button from the top-level to save all develop settings from Tune, Detail, Geometry, and Repair tabs. Presets created at this level can be accessed from Manage and View mode. In Manage mode, presets can be applied to multiple images at a time.
Tabs: Tune, Detail, Geometry, or Repair
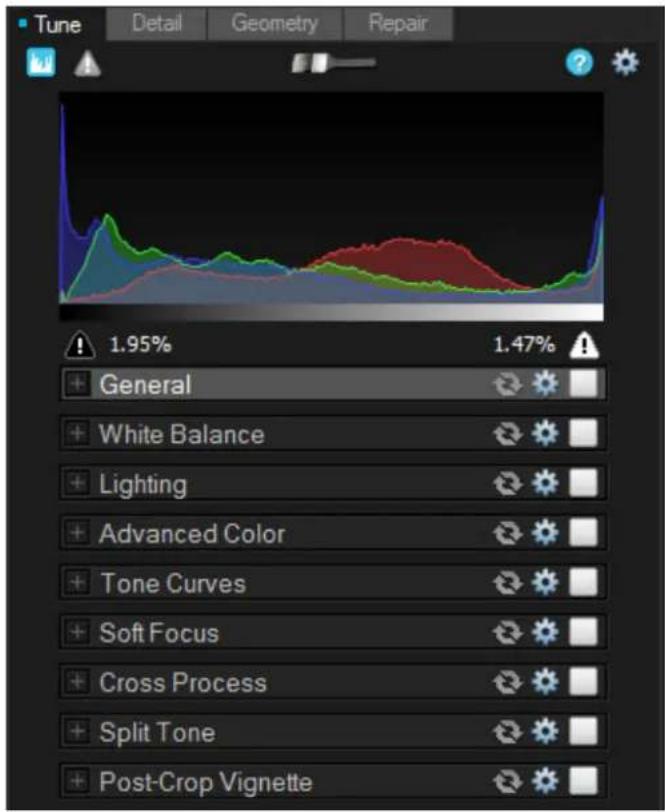
Use the develop settings button within a tab to save develop settings exclusively from the groups within that tab only. The example on the left shows the settings button to click to save develop settings from the Tune tab. A preset created in a tab only be accessed through the same tab.
Groups

Use the develop settings button within a group to save develop settings exclusively from within that group only. The example on the left shows the settings button to click to save develop settings from the General group. A preset created in a group can only be accessed through the same group.
To create a preset from the top of the pane:
- Make corrections to your image in Develop mode.
- Click the develop settings button located at the top of the pane.
- Select Save Preset from the menu.
- In the Save Develop Settings Presets dialog, click Select All to save your settings, or select only the specific settings you want to save as a preset.
- Enter a name for your preset.
- Click OK.
To create a preset from a tab:
- In Develop mode, select the Tune, Detail, Geometry, or Repair tab.
- Make corrections to your image in the tab.
- Click the develop settings button on the top right of the tab.
- Select Save Preset from the menu.
- In the Save Develop Settings Presets dialog, enter a name for your preset.
- Click OK.
To create a preset from a group:
- In Develop mode, select the Tune, Detail, Geometry, or Repair tab.
- Select a group and make corrections to your image.
- Click the develop settings button located on the top right of the group.
- Select Save Preset from the menu.
- In the Save Develop Settings Presets dialog, enter a name for your preset.
- Click OK.
Applying a preset to a single image
To apply a preset to a single image in Develop mode:
- Click a develop setting button from the top of the pane, tab, or group.
- From the menu, select a preset.
The image is updated with the selected preset.

You can also apply presets to an image in the filmstrip. Select an image in the filmstrip, right-click and select Apply Preset. Then select the preset you want to apply to the image. The image is updated with the selected preset.
To apply a preset to a single image in View mode:
- In Manage mode, select an image and click the View tab.
The image opens in View mode.
-
Right-click on the image and select Process | Apply Preset.
-
Select the preset you want to apply to the image.
The image is updated with the selected preset.
Applying a develop settings preset to a batch of images
Applying a preset to multiple images helps to save time, and improve the efficiency of your workflow.
To apply a preset to a batch of images:
-
In Manage mode, select the images that you want to apply a preset.
-
Click Tools | Process | Apply preset and then select a preset.
The thumbnail images are updated to reflect the preset applied.

To apply a preset to a batch of images and export them to other formats see Using Batch Develop.
Renaming presets
You can rename a preset at any time.
To rename a preset:
- Click the develop settings button.
- Select Manage Presets.
- In the Manage Presets dialog, select a preset and click Rename.
- Enter a new name for the preset.
- Click OK to save and close the dialog.
Deleting presets
You can delete presets that you no longer need. Deleting a preset does not affect images that already have the preset applied.
To delete a preset:
- Click the develop settings button.
- Select Manage Presets.
- In the Manage Presets dialog, select a preset and click Delete.
- Click OK to save and close the dialog. Or click Cancel to cancel deleting your preset.
Saving Images in Develop Mode
In Develop, changes are saved to the database, so that every time you open an image the adjustments are where you left them. This also allows you to return to the image to undo or further tweak adjustments. You have several options for saving changes to an image in Develop.
Saving Images
When you have finished developing an image, you can choose from one of the many options for saving your image, depending on what you want to do next.
To save the image and return to the mode you were in previously:
- Click Done.
- Select one of the following:
| Save | Save your changes. |
| Save as | Save a copy of your developed image with a new name or format.Depending on your file type, any of the following check boxes appear in the bottom left corner of the Save as dialog box:Preserve Metadata: Retains metadata with the new image.Preserve database information: Maintains your catalog information, such as ratings.Preserve develop settings for original image: Applies changes to the original image, as well as the being saved.Embed Color Profile in Image: Retains color profile selected in Color Management with your new |
| Discard | Discard your changes. |
| Cancel | Remain on the same image in Develop with your changes intact, without saving the image. |

If you want your changes saved automatically (without the prompt to save), select the Auto Save check box. Then next time you switch to a new image, your changes will be saved automatically without the prompt. You can change back by clicking Tools | Options and selecting the Automatically save Develop Mode adjustments check box on the Develop Mode page.
To save the image and continue processing other images:
- Click Save.
-
Select one of the following:
-
Save As: Save a version of your developed image with a new name or format and switch to the updated image.
- Save a Copy: Save a copy of your developed image with a new name or format, and continue to work on the original file.
• Export: Export one or more copies of your developed image with the option to specify a format and size for each.

Save a Copy is useful for making multiple versions of an image while continuing to work from the original file
instead of a new processed copy. For example, if you take a RAW image and save a copy of it as a switching to this lossy JPG image, you remain on the RAW file with the settings still intact.
To discard changes to the image and return to the mode you were in previously:
Click Cancel.

Save is not available for RAW file formats because you cannot directly save changes to a RAW file.
How ACDSee Pro Saves Changes to Images
How images are saved is different between non-encodable (e.g. RAW) and encodable (e.g. JPEG) images. The table below outlines the differences in how changes to your image are saved by ACDSee. The purpose of saving files in its original, developed, and edited states is to allow you to revert back to a setting if you decide to discard your changes at a later time.

If you archive your images, ensure that you back up subfolders to preserve the original image files.
| State Non encodable files (e.g. RAW) Encodable files (e.g. JPEG) | |
| Original | Original images are located in the folder Original images are located in the folders you placed them in.you placed them in. |
| Developed | When you make changes and click Don when you develop an image and click Done, the develop settingthe image's develop settings are stored are stored in an XMP file, and the original and XMP file are mthe XMP file of the RAW, and in the tACDSee Originals] folder. In Manage and View modes, the image wiPro database.the changes applied is displayed. The develop settings are alsostored in the ACDSee Pro database. |
| Edited | When you take a RAW file directly into Edit, take an image directly to Edit and save your image, theand you click Save, ACDSee Pro prompts Original image is saved to the [Originals] folder in ACDSee.you to save the file in a different file format. If you edit an image first, and then take it into Develop, ACDSIn RAW, to permanently save changes to an prompts that the edits will be lost. You cannot revert an imageimage, you will need to save the image in a back to Develop, if it was not developed before taking the imagedifferent file format. Edit. |
| Developed and Edited | When you develop an image, the image When you take a developed image into Edit and apply edits anddevelop settings are stored in the XMP file if the develop settings are saved in the XMP file and plathe RAW. When you take the developedhe [Originals] folder. If the developed image is in Edit, and haimage into Edit, and then apply edits adds applied and you click Save, ACDSee Pro saves the image.save the image, ACDSee Pro prompts you tosave the image in a new file format. If you decide to take the edited image back into Develop, ACDSPro prompts that you will lose your edits. If you choose to disFor RAW files, to permanently save charges, edits, the original image with its develop settings will beyou will need to save the image in a modifiedfile format. |
Pro 3 RAW Processing Emulation
ACDSee Pro RAW processing pipeline uses a wide color gamut to maximize full use of the colors captured in your RAW files. The wider ProPhoto color space ensures that no colors are clipped until the end of the pipeline where you can then choose to keep the colors in ProPhoto or output to sRGB.
ACDSee Pro emulates the RAW processing pipeline for images developed in Pro 3 or previous versions. However, if you would like to take full advantage of the improved RAW processing, you can move your previously developed RAW images into the ACDSee Pro pipeline with the following two options.
One option is to use the Restore to Original command and redevelop your RAW images in ACDSee. Alternatively, if you would like to convert over to the ACDSee Pro pipeline but still want to maintain some of your Develop settings from Pro 3, (such as Geometry settings), you can create a Preset to retain certain develop settings and clear others.
To use the ACDSee Pro RAW processing pipeline while maintaining some Develop settings:
- In ACDSee, open an undeveloped RAW image in Develop.
- Create a Develop Preset and in the Save Develop Settings Preset dialog box, select Camera (RAW Only) under the Tone Curves group. You may also want to add Advanced Color, Vibrance, Contrast and Exposure to this preset since the initial color, contrast and exposure is very different in the RAW processing engine of ACDSee Pro.
-
Enter a name for your Preset and click OK.
-
Apply this preset in ACDSee Pro to any image developed in Pro 3 to convert over to the new processing pipeline (right-click and select Process | Apply Preset to select the preset).
About the Tune Tab
In the Tune tab, you can adjust exposure, white balance, saturation, brightness, hue, color profile and much more.
To use the Tune tab:
- In Develop mode, select the Tune tab.
- Select the General, White Balance, Lighting, Advanced Color, Tone Curves, Soft Focus, Cross Process, Split Tone, Post-Crop Vignette, or Output Color Space group to develop the image.
Saving and canceling
When you have finished developing an image, you can choose from one of the many options for saving your image, depending on what you want to do next.
To save the image and return to the mode you were in previously:
- Click Done.
- Select one of the following:
• Save: Save your changes.
- Save as: Save a copy of your developed image with a new name or format.
• Discard: Discard your changes.
- Cancel: Remain on the same image in Develop with your changes intact, without saving the image.

If you want your changes saved automatically (without the prompt to save), select the Auto Save check box. Then next time you switch to a new image your changes will be saved automatically without the prompt. You can change back by clicking Tools | Options and selecting the Automatically save Develop Mode adjustments check box on the Develop Mode page.
To save the image and continue processing other images:
- Click Save.
-
Select one of the following:
-
Save As: Save a version of your developed image with a new name or format and switch to the updated image.
- Save a Copy: Save a copy of your developed image with a new name or format, and continue to work on the original file.
- Export: Export one or more copies of your developed image with the option to specify a format and size for each.
- Copy to Clipboard: Copy the developed image to the clipboard.

Save a Copy is useful for making multiple versions of an image while continuing to work from the original file
instead of a new processed copy. For example, if you take a RAW image and save a copy of it as a switching to this lossy JPG image, you remain on the unprocessed RAW file with the settings still intact
To discard changes to the image and return to the mode you were in previously:
Click Cancel.

Save is not available for RAW file formats because you cannot directly save changes to a RAW file.
Using the Develop Brush
The Develop Brush is designed to allow you to make a variety of touch ups to specific areas of your photos. You can selectively adjust the Exposure, Saturation, Fill Light, Contrast and Clarity in your photo by simply brushing on the effects. For example, instead of adding fill light to an entire photo, you may want to only add it to certain areas, such as backlit subjects. You can apply up to seven brushes to separate areas in the image and assign each with unique effect settings.
Develop Brush
The Develop Brush button displays at the center of the top of the Tune tab.
To use the Develop Brush:
- In Develop mode, in the Tune tab, click the brush icon at the center of the top of the pane to open the c panel and enter brushing mode. Or, toggle the brush panel open and closed with the B key.
- Specify the brush settings in the panel, or on the fly as described in the table below.
- Start painting the effects onto your photo.
- Adjust the sliders to get the effect you want.
- To apply another brush, (up to seven are available), select the next brush in the sequence. The box above the brush will become checked. The check marks represent the activated brushes, while the selected brush icon (highlighted in represents the currently enabled brush. You can return to any of the brushes at any given time by selecting its respective brush icon. A blue brush represents a brush that has been used. You can deactivate or re-activate any brush unchecking or rechecking its respective check box.


Hovering over a brush button will reveal that specific brush's strokes on the image. The brush strokes will appear in the color selected in the drop-down next to the Show brush strokes check box. (By default, the color is red.) Alternatively, hold down the S key to see your brush strokes on the image.

If all of the sliders are at zero, brush strokes will appear in color, (as selected in the drop-down next to the Show brush strokes check box), as no changes have been made to the image.
To delete brush strokes:
To remove brush strokes, select the brush you wish to delete and press the button. Note that unchecking a brush checkbox will only remove the brush strokes until the box is re-checked.
Develop Brush options
| Add brush stroke | Brush while holding the left mouse button down. |
| Erase brush stroke | Brush while holding the right mouse button down. |
| Adjust brush size | Use the mouse wheel to adjust nib width or use the Nib Width slider. |
| Adjust feathering | Use SHIFT + mouse wheel to adjust the amount of feathering. |
| Clear all brush strokes |  Removes all brush strokes of the currently selected brush from the image. Removes all brush strokes of the currently selected brush from the image. |
| Invert all brush strokes | Toggle this option to invert the brush strokes of the currently selected brush. This makes brushed areas no longer brushed and untouched areas brushed. This is useful if you want the majority of the image brushed and a small section untouched. Simply brush only the small are don't want affected and invert the brush strokes. |
| Show brush strokes | [WTCE] how brush strokes When this option is checked, the currently selected brush's strokes will be displayed in the colc shown. This is helpful when brushing a complex area with a subtle effect because it can be h tell if you have missed a spot. The color can be changed in case you are brushing on a re image. |
ck a slider to reset to the default value.


To exit the brushing panel, toggle the Develop brush button.
Making General Adjustments
In the General group, you can make global adjustments to your image.
You can save your settings as a preset for future use.
To develop your image in General:
- In Develop mode, select the Tune tab.
- In the General group, make adjustments as described below.

You can right-click a slider to reset to the default value.
Adjustment options
| Exposure | Drag the slider to the right to increase exposure, or drag to the left to decrease exposure. One eV i to one stop of exposure change. |
| Highlight Enhancement | Drag the slider to the right to recover detail in overexposed areas of the image. |
| Fill Light | Drag the slider to the right to add light to the darkest areas of the image. |
| Contrast | Drag the slider to the right to increase contrast, or to the left to decrease contrast. |
| Saturation | Drag the slider to the right to increase saturation, or to the left to decrease saturation. |
| Vibrance | Drag the slider to the right to increase vibrance, or to the left to decrease vibrance. Increasing the v does not affect skin tone in an image. This is unlike saturation, which intensifies all colors equally. |
| Clarity | The Clarity tool adds subtle definition to the details in your image. Use the Clarity slider to enhance t contrast of midtones, without overpowering the shadows and highlights. Drag the slider to the right to increase clarity, or to the left to reverse clarity. |

Use the Settings button 📋 to reset sliders to Last Saved or Last Used settings. You can also save your settings as a preset, copy, or paste them.
A brief technical explanation of eV
eV stands for exposure value. When you capture an image, the exposure is determined by several things — the f-stop (or aperture) shutter speed, and ISO. Typically, the camera automatically determines the optimal exposure based on a built-in light meter and then sets the f-stop and shutter speed accordingly. However, the light meter can be fooled by a bright sky or dark surroundings, leading it to choose an incorrect f-stop and shutter speed. This results in an underexposed or overexposed image. With the exposure slider you can compensate for exposure problems caused by incorrect settings when the image was captured.
Adjusting White Balance
Use the White Balance group to remove unwanted color casts in your images.
You can save your settings as a preset for future use.
To adjust the white balance in an image:
- In Develop mode, select the Tune tab.
- In the White Balance group, do one of the following:
- Automatically adjust white balance by selecting a portion of the image with neutral gray pixels with the White Balance eyedropper.
- Manually adjust white balance with the sliders as described below.

You can right-click a slider to reset to the default value.
White Balance options
White Balance
For RAW images, select one of the following white balance correction options:
* As Shot: Selected automatically. Applies the camera's white balance setting as stored in the camera when the photo was taken.
- Auto: Adjusts the color temperature and tint to settings automatically determined by analyze the image.
- Sunny: Adjusts the color temperature to 5500K, approximately that of the midday sun.
- Cloudy: Adjusts the color temperature to 6500K, approximately that of a lightly overcast s
- Shade: Adjusts the color temperature to 7500K, approximately that of a heavily overcast s
- Tungsten: Adjusts the color temperature to 2850K, approximately that of a household light bulb.
- Fluorescent: Adjusts the color temperature to 3800K, approximately that of a fluorescent light bulb.
- Flash: Adjusts the color temperature to 5500K, approximately that of a camera flash.
- Custom: Allows you to specify a specific white balance, by adjusting the Temperature and sliders. You can also hover your mouse over the image until it turns into an eye droppe click an area of the image that is a neutral color (gray).
For encodable images, such as JPEGs, select one of the following white balance correction options:
- As Shot: Selected automatically. Applies the camera's white balance setting as stored in the camera when the photo was taken.
- Auto: Adjusts the color temperature and tint to settings automatically determined by analyze the image.
- Custom: Allows you to specify a specific white balance, by adjusting the Temperature and sliders. You can also hover your mouse over the image until it turns into an eye droppe click an area of the image that is a neutral color (gray).
| Temperature | Drag the Temperature slider to the left (more blue) or right (more yellow) to select a specific temperature. |
| Tint | Drag the Tint slider to the left (more magenta) or right (more green) to match the white balance settings that you selected when you took the photo. |
| Strength | Drag the slider to the right to increase, or to the left to decrease the white balance adjustment. |
Adjusting Lighting
You can use the lighting tool to adjust tone levels in an image that are too dark or too light, without affecting other areas of the photo. Tone level is the average brightness of a pixel and its surrounding pixels.
You can also simultaneously lighten dark areas that are too dark, and darken areas that are too bright. Examples would be a back-lit photo of a person silhouetted against a bright background like the sea, or a window. In fact, most photos taken on a dull day, or with a flash, can be improved in various ways with fine adjustments using the Lighting tool.
You can save your settings as a preset for future use.
To reduce lighting in your image:
- In Develop mode, select the Tune tab.
- In the Lighting group, select Basic mode, Light EQ mode or Advanced mode from the drop-down menu at the top of the pane and do one of the following:
- Select an area of the image you would like to adjust, left-click and drag up to lighten or right-click and drag down to darken.
• Manually adjust the lighting as described below.

You can right-click a slider to reset to the default value.
Basic Lighting
Basic is for very quick and easy adjustments using just three sliders. You can also click directly on an area of the image to generate automatic settings optimal for that area (usually the subject of the photo).
Basic Lighting options
| Shadows | Drag the slider to the right to brighten or drag the slider to the left to darken the shadows. |
| Midtones | Drag the slider to the right to brighten or drag the slider to the left to darken midtones. |
| Highlights | Drag the slider to the right to brighten or drag the slider to the left to darken highlights. |
| Auto | Click the Auto button for ACDSee Pro to automatically adjust the lighting in your image. |
Light EQ
Light EQ works like a sound equalizer but with light. You can adjust the brightness and contrast of different tone bands (areas of relative brightness or darkness) of the image – independently – using a slider for each tone band. A graph shows the amount of brightening or darkening applied throughout the tonal range. The gray areas in the graph are suggested boundaries for adjustment to avoid clipping and loss of detail, and turn pink to indicate where you have adjusted the sliders far enough to cause clipping.
Light EQ options
| Brighten sliders (top) | Drag the sliders up to increase the brightening in each tonal band. The sliders on the left affect dark tone sliders on the right affect bright tones. Moving a slider changes the amount of brightening only in that part tonal band in the image.You can also type a number into the number boxes and increment them slowly to make precise adjustments |
| Darken sliders (bottom) | Drag the sliders down to increase the darkening in each tonal band. The sliders on the left affect dark ton sliders on the right affect bright tones. Moving a slider changes the amount of darkening only in that partic band in the image.You can also type a number into the number boxes and increment them slowly to make precise adjustments |
| Graph | The graph indicates the amount of brightening and darkening applied throughout the tone range of the image portion of the graph above the horizontal axis corresponds to brightening, while the portion of the graph below horizontal axis corresponds to darkening. When both brightening and darkening are applied within the same to band, contrast is increased. The area between the top of the brightening graph and the bottom of the dark graph indicates the relative increase of contrast throughout the tone range of the image. You can click on t or on the image and drag the double-pointed arrow up or down to brighten or darken. |
| # tone bands | Drag the slider on each tonal band to adjust areas of the curve. |
Advanced options
Advanced gives you ultimate control of the brightness and contrast in an image. Adjustment curves can be constructed using four sliders, and you can manually adjust the curves by clicking and dragging within the graph area or on the image itself
Graph
The top half of the graph corresponds to brightening, and the bottom half corresponds to darkening. Tone levels of the shadows are represented on the left, midtones in the middle, and highlights on the right.
The light gray in the graph shows the amount of brightening or darkening applied throughout the image. The dark gray areas in the graph are suggested boundaries for adjustment, and turn red to indicate where you have adjusted far enough to cause a loss in detail. When the cursor is over the image, the two vertical yellow lines correspond to the lower and upper bounds of the tone level of the area under the cursor and indicate the center of adjustment.
Adjustment options
Area Action Result
| Sliders | Drag Brightening slider | To the right: Increases the light applied to the darker areas.To the left: Applies brightening more uniformly to all areas of the image. |
| Drag Darkening slider | To the right: Increases the darkening applied to the brighter areas of the image.To the left: Applies the darkening more uniformly to all areas of the image. | |
| Drag Amplitude slider (Brighten) | To the right: Increases the intensity of the brightening across all areas of the imagThe height of the curve increases.To the left: Reduces the intensity of the brightening and the height of the curve.If the Amplitude slider is 0: No brightening is applied.If the Amplitude is 100 - 200: Proportional amount of clipping increases.In most cases, 110 is the right amount of amplitude. For images with fine detail i highlights, decreasing brighten amplitude preserves the detail.In most cases it is not necessary to adjust amplitude. | |
| Drag Amplitude slider (Darken) | To the right: Increases the intensity of the darkening across all areas of the image height of the bottom orange curve increases.To the left: Reduces the intensity of the darkening and the height of the curve. | |
| On Graph | Drag the graph (top) | The graph changes as you left-click and drag up on the graph itself. The graph represents the brightening adjustments you are making. The gray graph represents the maximum amount you can drag the graph before clipping (pink) begins.The height of the graph represents the level of brightening applied at each tone lev (Tone moves from black on left to white on the right.)When you make direct brightening or darkening adjustments on the graph or image, the corresponding Brightening or Darkening slider changes toCustom curve. If you adjust the position of the slider after this, it discards all direct curve adjustments.When you make direct brightening or darkening adjustments on the graph or image, the corresponding Brighten or Darken Amplitude slider changes to indicate the current curve amplitude. (An amplitude of 100 is the maximum amplitude a curve can have without causing clipping.) |
| Drag the graph (bottom) | The graph changes as you right-click and drag down on the graph itself. The graph represents the darken adjustments you are making. The gray graph represents the maximum amount you can drag the graph before clipping (pink) begins. | |
| You can use all the shortcuts below that apply to the image, directly to the Graph itself. | Changes the tonal band on the graph itself with a corresponding change in the ima This is useful for making fine adjustments to a specific tonal band. | |
| On Image | Double-click with left mouse button | Automatically sets brightening to optimum for that area of the image. A brighter area (e.g. a face) works best. |
| Double-click with right mouse button | Automatically sets the darkening compression to optimum for that area of the image. | |
| CTRL + double-click with left mouse button | Increases the amount of brightening around that tone level while decreasing the brightening in the rest of the image.Use this method to quickly brighten a specific subject or area to bring it out of the image. | |
| CTRL + double-click with right mouse button | Increases the amount of darkening around that tone level while decreasing the amount of darkening in the rest of the image. | |
| Scroll up or down with the mouse wheel above the image | Increases or decreases the amount of brightening applied at that tone level in the image. Both the image and the graph show the changes. | |
| SHIFT + scroll with the mouse wheel above the image | Decreases or increases the amount of darkening applied at that tone level in the image | |
| Hold down "A" + scrolling or + dragging with the left mouse button | Sets the brighten Amplitude slider directly. | |
| Hold down "A" + SHIFT + scrolling or + dragging with the right mouse button | Sets the darken Amplitude slider directly. | |
| Click and drag up and down on the image (left mouse button). | Increases or decreases the amount of brightening amplitude applied at that tone level in the image. Both the image and the graph show the changes.(Only works if the image is actual size - no zooming.) | |
| SHIFT + click and drag up and down on the image (left mouse button). | Decreases or increases the amount of darkening applied at that tone level in the image. (Only works if the image is actual size - no zooming.) |
Adjusting Color
Advanced Color lets you make color adjustments for saturation, brightness and hue. You can make adjustments to the entire image in Standard mode, or adjust on a color by color basis in Standard or High Quality mode. For explanation on the controls, see below.
You can save your settings as a preset for future use.
To adjust color:
- In Develop mode, select the Tune tab.
- In the Advanced Color group, select the Saturation, Brightness or Hue tab, and adjust them according to the options described in the table below.

You can right-click a slider to reset to the default value.
Advanced Color options
Select High Quality mode or Standard mode from the Advanced Color drop-down menu. To adjust colors individually, left-click a color in the image and drag up or down to alter. Your changes are reflected in the color sliders in High Quality mode, and the graph in Standard mode respectively. This works in the saturation, brightness and hue tabs.
High Quality
Adjust image colors individually. High Quality uses the newer, more modern color models, allowing for visually perceptive and higher quality adjustment.

Adjust each color individually by dragging sliders right for more intensity, or left for less intensity. You can also enter a number into the fields for precise adjustments. Or, select a precise color to adjust by placing your cursor on the image for the double arrow icon to appear. Then, click and drag up or down to adjust the colors beneath the double arrow icon. The affected color sliders automatically adjust as you move your cursor.
Standard
Supports previously developed images. Adjust colors individually or make global adjustments.
Vertical slider

Apply adjustments to the entire image. A slider on the left has the following effects on the tabs:
• Saturation: Adjusts from saturation to grayscale.
- Brightness: Adjusts the light or dark tones in the image.
• Hue: Changes to a different color.
You can also enter a number into the field for precise adjustments.
Individual color sliders

Adjust each color with individual sliders. Select the color you want to adjust and click and drag the sliders. You can also enter a number into the fields for precise adjustments.
Direct image adjustments
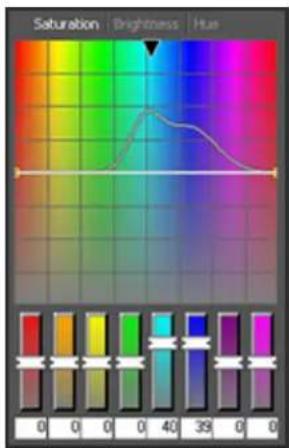
Place your cursor on the image for the double arrow icon to appear. Then click and drag up or down to adjust the colors beneath the double arrow icon. The curve control and the affected color sliders automatically adjust as you move your cursor. The black down arrow on the graph indicates the color you are adjusting in the image.
The curve appears black in the graph, and you cannot directly adjust it. To apply further adjustments, you can alter the white curve. When you adjust the white curve, the black curve automatically changes with it. You can also enter a number into the fields for precise adjustments.
Black & White Advanced Black & White
Mode

In Black & White mode, (as defined in the General group of the Develop Tools pane), the Advanced Color group becomes the Advanced Black & White group.
- Brightness: Adjusts the brightness of colors in the image.
- Colorization: Adds color back into the image based upon the color you select with the Hue slider. The saturation of the color added back to any given pixel is scaled based both on the amount of color/saturation that existed in the original image and the Amount slider.
Adjusting Soft Focus
You can use the Soft Focus tool to add a dreamy quality to your images. This softening can be applied across the entire tonal range or limited to the image's midtones. To target the Soft Focus effect to a specific tonal range within your image or the entire tonal range, use the Tonal Width slider.
You can save your settings as a preset for future use.
To add soft focus to an image:
- In Develop mode, select the Tune tab.
- In the Soft Focus group, make adjustments as described below.
Soft focus options
| Strength | Adjusts the amount of soft focus. Move the slider to the right to intensify the effect. |
| Brightness | Drag the slider to the right to increase brightness. |
| Contrast | Drag the slider to the right to increase contrast. |
| Tonal Width | Drag the slider to the right to increase the tonal width of the soft focus and affect a wider range of midtones and highlights, or to the left to decrease the tonal width by limiting the soft focus' affect to range of shadows, midtones and highlights. |

You can right-click a slider to reset to the default value.
Applying a Cross Process Effect
A popular film photography technique in the '80s and '90s involved processing film in a solution that was intended for another type of film. This cross processing gave photos a boost in saturation and contrast, and shifted colors towards greenish-yellow highlights and bluish shadows. You can simulate these retro-effects with the Cross Process tool. Using Cross Process along with Post-Crop Vignette, creates an effect called Lomo.
You can save your settings as a preset for future use.
To apply the cross process effect:
- In Develop mode, select the Tune tab.
- In the Cross Process group, drag the Strength slider to the right to increase the retro-effect.

You can right-click a slider to reset to the default value.
Adjusting Split Tone
Split toning is a powerful technique originating in film photography to tint the highlights and shadows.
The Split Tone tool gives you creative control over the Hue and Saturation of your highlights and shadows. Use the sliders to adjust the balance of tones in the highlights and shadows of your photos. Split toning allows you to add a creative element to RAW conversion and non-destructive editing in ACDSee.
You can save your settings as a preset for future use.
To adjust Highlights and Shadows:
- In Develop mode, select the Tune tab.
- Drag the sliders to apply colored highlights and shadows as described in the table below.

You can right-click a slider to reset to the default value.
Adjustment options
| Highlights | |
| Hue | Drag the slider to the right to select a highlight color. |
| Sat-uration | Drag the slider to the right to increase saturation of the color in the highlights of the image. |
| Shadows | |
| Hue | Drag the slider to the right to select a shadow color. |
| Sat-uration | Drag the slider to the right to increase saturation of the color in the shadows of the image. |
| Balance | Drag the slider to the right to emphasize the highlight color; drag the slider to the left to e the shadow color. For example if the slider is set to the maximum at 50, then full emphasis applied to the highlight color; if the slider is set to the minimum -50, then full emphasis is to the shadow color. |

Create a sepia tone effect by first reducing the saturation of your photo with the Advanced Color tool and then applying a reddish brown hue with the Split Tone tool. Or create a monochromatic black and white photo with a slight ti
Adding a Post-Crop Vignette
Use the Post-Crop Vignette effect to add a frame around a subject. You can also control the appearance of the border. Use the Post-Crop Vignette as a finishing tool after an image is cropped. This gives you more control over the focal point of the image.
You can save your settings as a preset for future use.
- In Develop mode, select the Tune tab.
- In the Post-Crop Vignette group, make adjustments as described below.

You can right-click a slider to reset to the default value.
Vignette options
| Strength | Drag the slider to the right to add a white vignette, or drag to the left to add a black vignette. |
| Radius | Adjusts the distance from the corners of the image where the pixels will be softened. The higher the radius further from the center the pixels will be before the softening begins. |
| Feathering | Feathering controls how soft or hard the edge of the vignette is. Drag the slider to the right to increase softness of the vignette transition. |
| Roundness | Drag the slider to the right to increase the roundness of the vignette, or to the left to make it more difficult. |
Adjusting Tone Curves
In Develop, you can use the Tone Curves tool to change the tonal range of an image. Select the RGB color channel to adjust the entire range of the image, or select a specific color.
You can save your settings as a preset for future use.
To adjust the brightness curves in an image:
- In Develop mode, select the Tune tab.
- In the Tone Curves group, adjust the curves as described below.

Right-click the number field or the arrow for Blacks, Midtones, or Whites to reset it to the default setting. You can also double-click the number field or on the arrows to use automatic settings.
Tone curves options
| Curve | Select a curve to apply to your image. Standard curve is the default. Use Camera to use the curve get ACDSee Pro to produce a curve suitable for the image. The Curve drop-down list is only available for RJ |
| Channel | Specify the color channels to adjust. |
| Histogram | Displays a graphic of the color information levels in the image, based on the selected channel. Click and line to manipulate the curve. Each time you click the curve, a new node is added. You can drag the red down the curve. To get rid of a node, click on it and drag it up and out of the graph, or drag it down the graph. |
| Blacks | Click and drag the black triangle or click it to automatically set the black point. You can also enter a black field or use the up or down arrow buttons to set an exact black point. |
| Midtones | Click and drag the gray triangle or click it to automatically set the midtone point. You can also enter a into the fields or use the up or down arrow buttons to set an exact midtone point. |
| Whites | Click and drag the white triangle or click it to automatically set the white point. You can also enter a the fields or use the up or down arrow buttons to set an exact white point. |
| Auto | Automatically sets the points for blacks, midtones, and whites. |
Selecting an Output Color Space For RAW Files
You can select the output color space to use when developing RAW files. This option is only available for RAW files.
To set the output color space for a RAW file:
- In Develop mode, select the Tune tab.
Look to the Histogram to help determine the best Output Color Space for your image. The histogram provides a representation of the intensity level of pixels within each color channel. Spikes at either end of the graph indicate clipped colors. Aim for an output color space that provides the widest gamut of colors possible while minimizing spikes at either end of the graph.
- In the Output Color Space group, select a color space.
- ClickSet as Default if you want to use this same color space as the default color space for developing RAW files from Develop mode.
When saving your RAW images, the dialog box will have the Embed Color Profile in Image option selected by default. If you deselect this option, your output color space will not be embedded.
About the Detail Tab
In the Detail tab, you can sharpen, reduce noise, or correct chromatic aberration in your photos.
To use the Detail tab:
- In Develop mode, select the Detail tab.
- Select the Sharpening, Noise Reduction, or Chromatic Aberration group to develop the image.
Saving and canceling
When you have finished developing an image, you can choose from one of the many options for saving your image, depending on what you want to do next.
To save the image and return to the mode you were in previously:
-
Click Done.
-
Select one of the following:
• Save: Save your changes.
- Save as: Save a copy of your developed image with a new name or format.
• Discard: Discard your changes.
- Cancel: Remain on the same image in Develop with your changes intact, without saving the image.

If you want your changes saved automatically (without the prompt to save), select the Auto Save check box. Then next time you switch to a new image your changes will be saved automatically without the prompt. You can change back by clicking Tools | Options and selecting the Automatically save Develop Mode adjustments check box on the Develop Mode page.
To save the image and continue processing other images:
-
Click Save.
-
Select one of the following:
-
Save As: Save a version of your developed image with a new name or format and switch to the updated image.
- Save a Copy: Save a copy of your developed image with a new name or format, and continue to work on the original file.
• Export: Export one or more copies of your developed image with the option to specify a format and size for each.
• Copy to Clipboard: Copy the developed image to the clipboard.

Save a Copy is useful for making multiple versions of an image while continuing to work from the original file
instead of a new processed copy. For example, if you take a RAW image and save a copy of it as a switching to this lossy JPG image, you remain on the unprocessed RAW file with the settings still intact
To discard changes to the image and return to the mode you were in previously:
Click Cancel.

Save is not available for RAW file formats because you cannot directly save changes to a RAW file.
Sharpening
You can use the Sharpening tool to define details and fine-tune your images.
You can save your settings as a preset for future use.
To sharpen your image:
- In Develop mode, select the Detail tab.
- In the Sharpening group, adjust the sliders as described below.

You can right-click a slider to reset to the default value.
Sharpening options
| Amount | Specifies the amount of sharpening applied by increasing contrast around the edges. |
| Radius | Controls the number of pixels to adjust around each edge. Higher values increase the number of sharp pixels and tend to bring out coarser detail, while lower values reduce the number of sharpened pixels tend to bring out finer detail. |
| Mask | Allows the targeting of edges, while suppressing the sharpening of noise and texture. To view the area mask affects, press the ALT key when moving the mask slider. Areas affected by sharpening appear white. |
| Detail | Suppresses the halo, (the light border that forms around edges with extreme sharpening), by reducing intensity. The higher the value, the stronger the reduction. |
| Threshold | Specifies how different the pixel lightness values within an edge must be before the pixels within the shape sharpened. Higher values sharpen only stronger edges but minimize the appearance of noise. Lower values sharpen both strong and weaker edges, but can increase the appearance of noise. We recommend your threshold to enhance edges while keeping background noise to a minimum. |

View the effects of your changes in the Preview Window, located at the top of the Detail pane. Move the overlay square on your image to change the area the Preview Window displays.

Set the default sharpening for RAW files by clicking the Settings button 📋 in the Sharpening group and selecting Save New Default.
Reducing Noise
You can reduce noise in your images caused by high ISO settings or long exposure.
You can save your settings as a preset for future use.
To reduce noise in your image:
- In Develop mode, select the Detail tab.
- In the Noise Reduction group, adjust the sliders as described below.

You can right-click a slider to reset to the default value.
Noise reduction options
| Luminance | Drag the slider to the right to reduce the visibility of lighting noise. Apply a setting that is proportion noise in the image and refer to the preview window to ensure that you balance the level of noise re loss of detail. Hold down the ALT key while using the slider to see the remaining noise in the image. |
| Strength | Drag the slider to the right to control how aggressively to reduce noise. Prevent the loss of detail by Luminance with Strength. |
| Color | Drag the slider to the right to remove color noise from the image. Hold down the ALT key while using the slider to see the remaining color noise in the image. |

View the effects of your changes in the Preview Window, located at the top of the Detail pane. Move the overlay square on your image to change the area the Preview Window displays.
Correcting Chromatic Aberration
Chromatic aberration is a lens artifact that can result in fringes in high contrast areas of some photos. The camera lens can cause different wavelengths of light to focus differently, which appears in photos as colored fringing or colored lines on the borders of high contrast areas. Purple fringing can also occur when there is a bright spot of light in front of the lens.
This zoomed-in image shows an example of blue/yellow fringing.

natural_image
Close-up of ornate architectural carvings with geometric patterns and grid texture (no text or symbols)You can use the Defringe and Chromatic Aberration tools in Develop mode to reduce the appearance of colored fringes. This can be especially useful for photos with architectural details. For best results, it's recommended that you use the Chromatic Aberration sliders first, and then the Defringe sliders.
You can save your settings as a preset for future use.
To reduce fringing in your image:
- In Develop mode, select the Detail tab.
- In the Chromatic Aberration group, adjust the sliders as described below.

You can right-click a slider to reset to the default value.
Chromatic Aberration options
| Fix Red/Cyan | Adjust the red and cyan channels to reduce red/cyan fringing. |
| Fix Blue/Yellow | Adjust the blue and yellow channels to reduce blue/yellow fringing. |
Defringe options
| Defringe strength | Adjust the amount of fringe color to remove from high contrast edges. A setting of zero means defringing is off. |
| Defringe radius | Adjust the number of pixels surrounding an edge that will be defringed. |
| Color | Adjust the color to remove from high contrast edges. |

View the effects of your changes in the Preview Window, located at the top of the Detail pane. Move the overlay square on your image to change the area the Preview Window displays.
About the Geometry Tab
In the Geometry tab, you can correct lens distortion and perspective, or rotate and straighten your image. You can also use the crop tool to change the composition of your image.
You can save your settings as a preset for future use.
To use the Geometry tab:
- In Develop mode, select the Geometry tab.
- Select the Lens Distortion, Rotate & Straighten, Perspective, Crop, or Vignette Correction group to develop the image.
Saving and canceling
When you have finished developing an image, you can choose from one of the many options for saving your image, depending on what you want to do next.
To save the image and return to the mode you were in previously:
- Click Done.
- Select one of the following:
• Save: Save your changes.
- Save as: Save a copy of your developed image with a new name or format.
• Discard: Discard your changes.
- Cancel: Remain on the same image in Develop with your changes intact, without saving the image.

If you want your changes saved automatically (without the prompt to save), select the Auto Save check box. Then next time you switch to a new image your changes will be saved automatically without the prompt. You can change back by clicking Tools | Options and selecting the Automatically save Develop Mode adjustments check box on the Develop Mode page.
To save the image and continue processing other images:
- Click Save.
-
Select one of the following:
-
Save As: Save a version of your developed image with a new name or format and switch to the updated image.
- Save a Copy: Save a copy of your developed image with a new name or format, and continue to work on the original file.
• Export: Export one or more copies of your developed image with the option to specify a format and size for each.
• Copy to Clipboard: Copy the developed image to the clipboard.

Save a Copy is useful for making multiple versions of an image while continuing to work from the original file
instead of a new processed copy. For example, if you take a RAW image and save a copy of it as a switching to this lossy JPG image, you remain on the unprocessed RAW file with the settings still intact
To discard changes to the image and return to the mode you were in previously:
Click Cancel.

Save is not available for RAW file formats because you cannot directly save changes to a RAW file.
Fixing Lens Distortion
You can correct barrel, pincushion, and fisheye distortion in digital photographs. In barrel distortion the photo appears to bulge outwards from the center. In pincushion distortion the photo appears to shrink inwards toward the center. In fisheye distortion, the photo appears to bulge outwards from the center, as if the photo were wrapped around a sphere. Barrel, pincushion, and fisheye distortion are common in photos that were taken with wide angle or zoom lenses.
You can save your settings as a preset for future use.
To fix lens distortion:
- In Develop mode, select the Geometry tab.
- In the Lens Distortion group, adjust the slider to the left for a bulge effect, or adjust the slider to the right to stretch the edges of the image.

You can right-click a slider to reset to the default value.

Click the Show Grid button 📋 to display a grid over your image. This tool is useful when fixing alignment in your images.
When the grid is not activated, it is gray.
Rotating and Straightening
You can straighten a crooked photo in Develop mode by rotating the photo at a custom angle.
You can save your settings as a preset for future use.
To correct a crooked photo:
- In Develop mode, select the Geometry tab.
- In the Rotate and Straighten group, adjust your image as described below.

You can right-click a slider to reset to the default value.

Click the Show Grid button ☑ to display a grid over your image. This tool is useful when fixing alignment in your images. When the grid is not activated, it’s gray .
Rotate options
| 90 degrees to the left | Rotates image 90 degrees to the left. |
| 90 degrees to the right | Rotates image 90 degrees to the right. |
Straighten options
| Slider | Adjusts the horizontal angle of the image. Move the slider left or right until the image appears straightened. |
| -5 Degrees left | Adjusts the image -5 degrees to the left. |
| +5 Degrees right | Adjusts the image +5 degrees to the right. |
| Straighten tool | Straightens the image. Use your cursor to draw a line along the crooked horizon. Relea the cursor to automatically straighten the horizon. |
Correcting Perspective
Perspective issues, which can occur if the camera is not held horizontal or perpendicular to the object of the photo, can be common in images taken with wide angle lenses. For example, if you take a photo of a tall building, looking up from street level, the building can appear to bend in the photo. You can correct perspective issues using the tools in the Perspective group.
You can save your settings as a preset for future use.
To correct perspective:
- In Develop mode, select the Geometry tab.
- In the Perspective group, set the options as described below.

Click the Show Grid button ☑ to display a grid over your image. This tool is useful when fixing alignment in your images. When the grid is not activated, it’s gray .
Perspective options
| Vertical | Drag the slider to the left or right to identify the center of the image on the vertical axis. |
| Horizontal | Drag the slider to the left or right to identify the center of the image on the horizontal axis. |
| Vertical Shear | Drag the slider to the left or right to identify the center of the image on the vertical and diagonal axis. |
| Horizontal Shear | Drag the slider to the left or right to identify the center of the image on the horizontal and diagonal axis. |

You can right-click a slider to reset to the default value.
Cropping
You can use the Crop tool to remove unwanted parts of your images, or to reduce the image canvas to a particular. You can save your settings as a preset for future use.
To crop an image:
- In Develop mode, select the Geometry tab.
- In the Crop group, resize the crop window, and position it over the area of the image you want to keep. See below for more details.

Click the Preview Cropped Image button 📄 or press E to preview your image when cropped.

Click the Show Grid button ☑ to display a grid over your image. This tool is useful when fixing alignment in your images. When the grid is not activated, it is gray .
Resizing the crop window
You can resize the crop window in the following ways:
- Drag the edges of the crop window to the desired size.
- Specify an exact size for the crop window in inches.
- Apply a ratio to constrain to the crop window proportions.
- Use the arrow keys to manipulate the size of the crop window.
To resize the crop window by dragging:
- Position your cursor over the edge or corner of the crop window until it changes into a double-pointed arrow.
- Drag the crop window's border to the desired size.
To maximize crop area:
- Click Maximize crop area. The crop selection expands to the outer edges of your images.
- Drag the crop window's border to the desired size.
To specify an exact size for the crop window:
- Type the desired crop window proportions into the Width and Height spin boxes.
- In the Units drop-down list, select a unit of measurement.
- Use the Dots per inch spin box to specify a resolution.
To constrain the crop window to a ratio:
- Select the Constrain proportion check box.
-
Select a ratio from the drop-down list.
-
Position your cursor over the edge of the crop window until it changes into a double-pointed arrow, and then drag the edge of the crop window to the desired size.
To delete a proportion:
- Select a proportion from the Constrain proportion drop-down list.
- Click the down arrow button beside the drop-down list, and select Delete.
- Click Yes.
To set a proportion as default:
- Select the Constrain proportion check box.
- Select a ratio from the drop-down list.
- Click the down arrow button beside the drop-down list, and select Set as Default.
Crop options
| Constrain proportion | Select this option to constrain the crop area to a specified proportion. Select the proportion from drop-down list. |
| Maximize crop area | Click to expand the crop area to the entire image, and then click and drag the crop borders. your crop selection, click on the Maximize crop area button to expand the selection to the entire image again, and make your crop adjustments. |
| Rotate crop area | Click to rotate the crop area. |
Fixing Lens Vignetting
Vignetting, an unusual darkness in the corners of images, is the result of the inability of the lens to distribute light into the corners of the image. You can fix lens vignetting in Develop mode by brightening the corners of the image.
You can save your settings as a preset for future use.
To fix vignetting:
- In Develop mode, select the Geometry tab.
- In the Vignette Correction group, adjust your image as described below.

You can right-click a slider to reset to the default value.
Vignette Correction options
| Strength | Adjust how much the corners of the image will be brightened. |
| Radius | Adjust the distance from the corners of the image that pixels will be brightened. The higher the the closer to the center of the image pixels will be brightened. |

Click the Show Grid button 📋 to display a grid over your image. This tool is useful when fixing alignment in your images.
When the grid is not activated, it is gray.
About the Repair Tab
In the Repair tab, you can reduce red eye.
To use the Repair tab:
- In Develop mode, select the Repair tab.
- For information on using the Red Eye Reduction tool, see Reducing Red Eye.
Saving and canceling
When you have finished developing an image, you can choose from one of the many options for saving your image, depending on what you want to do next.
To save the image and return to the mode you were in previously:
- Click Done.
- Select one of the following:
• Save: Save your changes.
- Save as: Save a copy of your developed image with a new name or format.
• Discard: Discard your changes.
- Cancel: Remain on the same image in Develop with your changes intact, without saving the image.

If you want your changes saved automatically (without the prompt to save), select the Auto Save check box. Then next time you switch to a new image your changes will be saved automatically without the prompt. You can change back by clicking Tools | Options and selecting the Automatically save Develop Mode adjustments check box on the Develop Mode page.
To save the image and continue processing other images:
- Click Save.
-
Select one of the following:
-
Save As: Save a version of your developed image with a new name or format and switch to the updated image.
- Save a Copy: Save a copy of your developed image with a new name or format, and continue to work on the original file.
• Export: Export one or more copies of your developed image with the option to specify a format and size for each.
• Copy to Clipboard: Copy the developed image to the clipboard.

Save a Copy is useful for making multiple versions of an image while continuing to work from the original file
instead of a new processed copy. For example, if you take a RAW image and save a copy of it as a switching to this lossy JPG image, you remain on the unprocessed RAW file with the settings still intact
To discard changes to the image and return to the mode you were in previously:
Click Cancel.

Save is not available for RAW file formats because you cannot directly save changes to a RAW file.
Reducing Red Eye
You can use the Red Eye Reduction tool in Develop mode to correct red eye in digital photographs. The Red Eye Reduction tool specifically targets red pixels so that nearby pixels are unaffected.
To correct red eye:
- In Develop mode, select the Repair tab.
- Use the Zoom tools in the bottom right corner to enlarge and center the eye you want to correct.
- Click within the red portion of the eye.
- In the Red Eye Reduction group, adjust the sliders as described below.

You can right-click a slider to reset to the default value.
Red eye reduction options
| Size | Drag the slider to the right to increase the size of the area being darkened, or to the left to decrea |
| Darkening | Drag the slider to the right to darken the corrected portion of the eye. |
You can correct as many red eyes as you want. Simply keep clicking on the image to add a new eye-definition. Move the eye-definitions after you have placed them by clicking and dragging, or delete them by hitting the Delete key.

Scroll with your mouse to adjust the size of the area you would like to darken at any time.

You can show or hide the red eye outline by toggling the eye button, located in the top left corner of the Red Eye group, on or off.

Use the Delete key to remove the currently selected red eye adjustment.
Chapter 6: Edit Mode
Make your final edits in Edit mode, where you can apply fine-tuned adjustments on the more limited RGB image data. Use the tools in Edit mode for any touch-ups to specific areas of your images.
In Edit mode you can:
• Use the Selection tool to select and apply edits to a specific part of the image.
• Use the Edit Brush to paint an effect onto specific areas of your image.
- Remove flaws, or red eye.
- Add text, watermark, borders, vignettes, special effects, and drawing tools.
- Crop, flip, resize, rotate, and correct perspective and lens distortion.
- Adjust lighting using the exposure, levels, auto levels, tone curves, lighting, and dodge and burn tools.
- Adjust color using the White Balance, Advanced Color, Color Balance, Convert to Black & White or Split Tone tool.
- Add details to your image using Sharpen, Blur, Remove Noise, Add Noise or Clarity tools.
Using Edit Mode
After completing all of your image corrections using the non-destructive tools in Develop, take your image into Edit to apply finishing touches to your image. In Edit, use the pixel-based editing tools such as red eye removal, special effects and many other tools and combine it with the Selections tool to fine tune your image.
What happens from Develop to Edit
When you take an image through Develop or Edit, the original is never altered. Changes you make are saved to a separate file, so that you can revert to the original or the developed version at any time. To understand more on how changes are saved, see How ACDSee Pro saves changes to images.
Editing an image
To edit an image:
- Select Edit mode.
- In the Selections group, click Selections.
- In the Repair group, click Red Eye Reduction or Repair Tool.
- In the Add group, click Text, Watermark, Borders, Vignette, Drawing tools, or click Special Effect and select an effect.
- In the Geometry group, click Rotate, Flip, Crop, Perspective Correction, Lens Distortion Correction, or Resize.
- In the Exposure/Lighting group, click Exposure, Levels, Auto Levels, Tone Curves, Lighting, Dodge and Burn.
-
In the Color group, click White Balance, Advanced Color, Color Balance, Convert to Black & White, or Split Tone.
-
In the Detail group, click Sharpen, Blur, Clarity, or click Noise to remove or add noise.
- You have several options in saving your images. See Saving images in Edit for more information.
Reverting to Develop settings or original settings
You can discard your Edit settings and revert to the Develop or the original settings for your image. For steps to revert your image, see Restoring originals and develop settings.
Histogram and image viewing controls
While editing an image, you can adjust the magnification with the zoom controls, located in the bottom right corner.
| Histogram | Displays the histogram preview for the current image. The histogram provides a graphical representation of the intensity level of pixels within each color channel. Spikes at either end of the graph indicate clipped colors. Keeping the histogram open is particularly useful when adjusting exposure, as the histogram reflects all adjustments as you make them.You can also display the Histogram as a separate window by selecting View, and then Histogram. |
| Undo/Redo | Undo to discard all changes made on the current tab. Redo to return to the options that you I selected prior to clicking Undo. In Edit, Undo and Redo buttons display the changes you can undo redo. |
| Reset | Click on the reset button to reset the image to its default settings. |

Display Full Screen Displays the image on a full screen. Press F to view full screen and to return to Develop.

| Actual Size | Returns the current image to its actual size. |
| Navigator Pane | The Navigator icon only appears when the image is magnified or if the Actual Size icon has been clicked. Click the Navigator icon to display a small duplicate of your image. Then drag your cursor the section of the image you would like to see magnified. Release the cursor to settle on an image. |
| Fit Image | Reduces the image to fit within the Edit mode area. |
| Show Saved | Toggles the changes on or off, to compare the current image to the last saved version. |
| Zoom slider | Increases the size of the image if you drag it to the right, decreases the size if you drag to |

Zoom drop-down list Displays a list of zoom sizes to select.
Using Presets in Edit
Many ACDSee Pro editing tools and special effects allow you to save your settings as presets. This is convenient when you frequently use the same settings for a particular tool or effect.
For most tools, ACDSee Pro automatically saves the last option settings you applied to an image when you clicked Apply or Done. This preset is called Last Used.

The Save Preset and Delete ✗ buttons are located at the top of an editing tool's panel.
To save a preset:
- In Edit mode, select a tool and specify its settings.
- Click the Save Preset button.
- In the New Preset dialog box, enter a name for your preset, and then click OK.
The new preset will appear in the tool's Presets drop-down list.
To use a previously saved preset:
- In Edit mode, select the tool for which you created the preset.
- Click the Presets drop-down list and select the preset you want to apply.
To delete a preset:
- In Edit mode, select the tool for which you created the preset.
- Click the Presets drop-down list and select the preset you want to delete.
- Click the Delete button.
- In the Confirm Delete dialog box, click Yes.
Using the Undo/Redo Button
You can undo and redo your changes when editing an image.
To undo a change:
In Edit mode do one of the following:
- Click the Undo button found at the bottom of the left pane.
• Use the keyboard shortcut CTRL + Z.
To redo a change:
In Edit mode do one of the following:
- Click the Redo button found at the bottom of the left pane.
• Use the keyboard shortcut CTRL + Y.
Restoring Originals and Develop Settings
You can also restore an edited image back to its develop settings, if you wish to discard work done in Edit. You can read more information on how changes are saved in ACDSee.

If you have committed changes to an image, you cannot restore the original.
Restoring the original image
You can discard all your changes and revert to the original image.
To revert an image back to the original in Edit:
In Edit mode, select File | Restore to Original.
To revert an image back to the original in Manage or View mode:
- Select the image.
- Do one of the following:
• Right-click the image and select Process | Restore to Original. - SelectTools | Process | Restore to Original.
Restoring your Develop settings
You can discard your Edit settings and revert to the Develop settings for your image.
To revert an image back to Develop settings in Edit:
- Take an edited image into Edit mode. A prompt will ask if you want to Discard your edits.
- Click Discard Edits.
Using the Edit Brush
The tools in Edit mode allow you to make a variety of global adjustments to your photos, but sometimes you may only want to adjust specific areas of your photos. For example, instead of blurring an entire photo, you may want to blur certain areas, such as the background. To do this, and other local adjustments, you can use the Edit Brush.
The Edit Brush allows you to selectively edit your photo by simply brushing on the effects. The Edit Brush is essentially creating a mask that is used to determine which pixels will be affected by the current settings of the chosen operation.

Edit Brush
The Edit Brush button displays at the center of the top editing panel toolbar for all applicable Edit tools.
To use the Edit Brush:
- In Edit mode, select the tool you want to use.
- Click the Edit Brush to enter brushing mode and open the brush controls. Or, toggle the brush panel open and closed with the B key.
- Specify the brush settings in the panel or on the fly as described in the table below.
- Start painting the effects on your photo.
- Adjust the sliders to get the effect you want.
- Press Apply or Done to apply your brush strokes.
Edit brush options
| Add brush stroke | Brush while holding the left mouse button down. |
| Erase brush stroke | Brush while holding the right mouse button down. |
| Adjust brush size | Use the mouse wheel to adjust nib width or adjust the Nib Width slider. |
| Adjust feathering | Use SHIFT + mouse wheel to adjust the amount of feathering. |
| Use alternative cursor tools | For filters such as Lighting and Advanced Color, use the alternative cursor tools to interact with image. Holding down the ALT key allows you to use those tools in place of brushing. |
| Clear all brush strokes | Removes all brush strokes from the image. |
| Invert all brush strokes | Toggle this option to invert brushed strokes. This makes brushed areas no longer brushed an untouched areas brushed. This is useful if you want the majority of the image brushed and a section untouched. Simply brush only the small area you don't want affected and invert the brush strokes. |
| Load last applied brush strokes | Applies effects to the area most recently brushed and applied. |
| Show brush strokes | Show brush strokesWhen this option is checked, your brush strokes will be displayed in the color shown. This is when brushing a complex area with a subtle effect as it can be difficult to tell if you have spot. Alternatively, hold down the S key to see your brush strokes on the image. |

When you click the Edit brush and enter brushing mode, you need to apply brush strokes in order to see an adjustments.

To exit brushing mode, toggle the Edit brush


You can also use the Edit Brush with Blend Modes and Selections to alter the way the effect is applied.
The Edit Brush is enabled in many of the editing tools and special effects filters. When it does not make sense to have this option, it is omitted. The Edit Brush is not available in the following tools: Crop, Resize, Lens Distortion Correction, Perspective Correction, Rotate, Flip, Watermark, Text, Red Eye Reduction, Repair Tool, Selections.
Using Blend Modes and Opacity
When using a tool in Edit, at the top there is a blend mode and opacity tools. These tools give you creative control and let you combine the two to create a new image. You can apply blend modes and opacity to an entire image or to a selected part of an image.
Opacity
The Opacity slider changes the opacity of the edited image. It gives you control of how much of the edit should be visible on the image.
Blend modes
The ability to control how the edits and the image merge, means that other blend modes besides opacity can be used to affect the final image.
| Normal | Pixels in the edited image are combined with those in the original. Only opacity affects this blend. |
| Screen | Combines the edited image color with the inverse of the original photo color, resulting in a color that same or lighter. |
| Multiply | Combines the edited image color with the original photo to produce a darker color. Multiplying any colo black produces black; multiplying any color with white leaves the color unchanged. |
| Dodge | Combines the edited image color with the original pixels in the photo to produce a lighter color. |
| Burn | Combines the edited image color with the original pixels in the photo to produce a darker color. |
| Overlay | Preserves the shadows and highlights of the lower layers while applying either Multiply or Screen blend based on the original image area's color values. |
| Difference | Subtracts the edited image color from the color of the original photo. Any white in the edited image true negative of the color in the image, while black produces no effect. |
| Darken | Applies pixels in the edited image that are darker than the original image. Pixels in the edited image lighter than the original image disappear (based on RGB values). |
| Lighten | Applies pixels in the edited image that are lighter than the original image. Pixels in the edited image darker than the original image disappear (based on RGB values). |
| Hard Light | Adds strong highlights or shadows by applying Multiply or Screen based on the original image area's co values. |
| Soft Light | Adds soft highlights or shadows by darkening or lightening based on the original image area's color val |
| Hue | Applies the hue value of colors in the edited image to the color of the original image areas. |
| Saturation | Applies the saturation value of colors in the edited image to the color of the original image areas. |
| Color | Applies the hue and saturation of the edited image to the image. This blend does not affect the lumin the original image. |
| Luminosity | Applies the lightness value of colors in the edited image to the color of the original image areas. |
| Dissolve | Applies some pixels from the edited image layer onto the original image, resulting in specks of color. Opacity slider controls the amount of speckling. |

You can use the Edit Brush

to paint an effect onto specific areas of your image, and then set the blend mode by the effect is applied.
The blend mode and opacity controls apply to many of the editing tools and special effects filters. When it does not make sense to have these controls, they are omitted. The blend mode and opacity controls are not on the following tools: Crop, Resize, Lens Distortion Correction, Perspective Correction, Rotate, Flip, Watermark, Text, Red Eye Reduction, Repair Tool, Selections. It is also not available in Develop.
Saving Images in Edit Mode
Saving Images
When you have finished editing an image, you can choose from one of the many options for saving your image, depending on what you want to do next.
To save the image and return to the mode you were in previously:
-
Click Done.
-
Select one of the following:
| Save | Save your changes. |
| Save as | Save a copy of your developed image with a new name or format.Depending on your file type, any of the following check boxes appear in the bottom left corner of the Save as dialog box:Preserve Metadata: Retains metadata with the new image.Preserve database information: Maintains your catalog information, such as ratings.Preserve develop settings for original image: Applies changes to the original image, as well as the being saved.Embed Color Profile in Image: Retains color profile selected in Color Management with your new |
| Discard | Discard your changes. |
| Cancel | Remain on the same image in with your changes intact, without saving the image. |
To save the image and continue processing other images:
-
Click Save.
-
Select one of the following:
- Save: Save your changes.
- Save As: Save a version of your edited image with a new name or format and switch to the updated image.
- Save a Copy: Save a copy of your edited image with a new name or format, and continue to work on the original file.

Save a Copy is useful for making multiple versions of an image while continuing to work from the original file instead of a new processed copy. For example, if you take a RAW image and save a copy of it as a JPG, instead of switching to this lossy JPG image, you remain on the RAW file with the settings still intact.

Save is not available for RAW file formats because you cannot directly save changes to a RAW file.
To discard changes to the image and return to the mode you were in previously:
Click Cancel or use the keyboard shortcut ESC.

For more information on how different file formats are saved depending on their processed state, see How ACD saves changes to images. To learn how images are saved in Develop, see Saving images in Develop.
How ACDSee Pro Saves Changes to Images
How images are saved is different between non-encodable (e.g. RAW) and encodable (e.g. JPEG) images. The table below outlines the differences in how changes to your image are saved by ACDSee. The purpose of saving files in its original, developed, and edited states is to allow you to revert back to a setting if you decide to discard your changes at a later time.

If you archive your images, ensure that you back up subfolders to preserve the original image files.
State Non encodable files (e.g. RAW) Encodable files (e.g. JPEG)
| Original | Original images are located in the folder. Original images are located in the folders you placed them in. you placed them in. |
| Developed | When you make changes and click Don when you develop an image and click Done, the develop setting the image's develop settings are stored are stored in an XMP file, and the original and XMP file are m the XMP file of the RAW, and in the tACDSee originals] folder. In Manage and View modes, the image wi Pro database.the changes applied is displayed. The develop settings are also stored in the ACDSee Pro database. |
| Edited | When you take a RAW file directly into Edit, take an image directly to Edit and save your image, the and you click Save, ACDSee Pro prompts original image is saved to the [Originals] folder in ACDSee. you to save the file in a different file format. If you edit an image first, and then take it into Develop, ACDSee In RAW, to permanently save changes to an prompts that the edits will be lost. You cannot revert an image image, you will need to save the image in a back to Develop, if it was not developed before taking the image different file format. Edit. |
| Developed and Edited | When you develop an image, the image when you take a developed image into Edit and apply edits and develop settings are stored in the XMP safe if the develop settings are saved in the XMP file and pla the RAW. When you take the developed the [Originals] folder. If the developed image is in Edit, and ha image into Edit, and then apply edits edits applied and you click Save, ACDSee Pro saves the image. save the image, ACDSee Pro prompts you to save the image in a new file format. If you decide to take the edited image back into Develop, ACDSee Pro prompts that you will lose your edits. If you choose to dis charges, edits, the original image with its develop settings will be you will need to save the image in a different file format. |
Using Selections
Use Selections to isolate an area of a photo to apply edits or filters to only that area, rather than the whole photo. There are three different selection tools and each selects an area of a photo in a unique way. The controls available change depending on which tool you select.
You can save your settings as a preset for future use.
To use the Selections tool:
- In Edit mode, in the Selections group, click Selections.
- Select one of the tools: Freehand Lasso, Magic Wand, Marquee. See below for more detailed steps for using these tools.

You can also quickly access the Selections tool by clicking on the Create Selection button at the top when using some of the tools in Edit. Once you make your selection and click Done to return to the Edit tool, you can modify your selection by clicking Modify Selection.
You can use Selections with the following Edit tools:
- Add: Vignette, Special Effect
- Exposure/Lighting: Exposure, Levels, Auto Levels, Tone Curves, Lighting
• Color: White Balance, Advanced Color, Color Balance, Convert to Black and White
• Detail: Sharpen, Blur, Noise, Clarity
The selection tools
- Freehand Lasso: Click the left mouse button and drag the cursor to draw around the area that you wish to select. As you draw, a line appears showing where you have drawn. When you release the mouse, the end of the line joins automatically to complete the selection. The whole selection animates and looks like marching ants.
- Magic Wand: Click on any area of the image and all the pixels the same color are included in the selection. You can choose whether to select only the same color pixels that are actually touching the one you clicked, or all the pixels in the photo that are similar. You can increase the threshold to include more pixels in the selection. The lower the threshold, the more similar a pixel has to be to the one clicked to be included. The greater the threshold, the more different a pixel can be and still be in the selection.
- Marquee: Click and drag either a rectangle or an ellipse that begins where you first click and ends when you release the mouse.
Combining the tools
You can use the Selection tools separately or in combination. For example, you can use the Magic Wand to select most of a particular color, then switch to the Freehand Lasso to add to, or subtract from, the selection. Or you could use the Marquee to select a large general area, then refine it using the Freehand Lasso.
To use the Freehand Lasso:
- Select Freehand Lasso.
- On the image, click and hold down the left mouse button as you draw around the area you want to select.
- Release the mouse button to complete the selection.

natural_image
Group of large rams grazing in a dry grassland with mountainous background (no text or symbols visible)-
To clear the selection, click anywhere on the image (for the Freehand Lasso or Marquee) or click Clear.
-
To add to an existing selection, hold down SHIFT and draw a shape that includes any part of the original selection line.
When you release the mouse, the original selection expands to include the outer edge of your addition.

natural_image
Group of large black-and-white rams in a grassy field with mountainous background (no text or symbols)- To add multiple areas into your selection, hold down SHIFT and draw around any part of the image.
As long as you do not touch the line of any other selection, you can add several separate areas to a selecti

natural_image
Group of large rams grazing in a dry grassland with mountainous background (no text or symbols visible)-
To subtract from a selection, hold down CTRL and draw a shape that includes part of the original selection, or encircles it completely.
-
If you wish to apply edits or effects to the outside areas of the image, you need to click Invert to reverse the selected area. Now the selection includes all the outside areas of the image with the central area outside the selection.
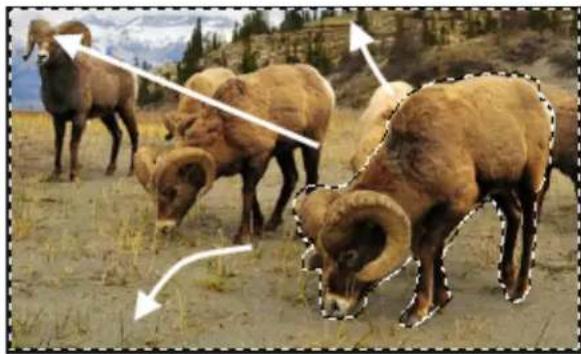
natural_image
Group of ram horns in a grassland field, with arrows indicating direction and shading (no text or symbols)- Click Done.
You return to the Edit mode menu, where you can select an editing tool or a special effect to apply to the selection.
To use the Magic Wand:
-
Select Magic Wand.
-
Click any color in the image.
-
Do any of the following:
-
Slide the Threshold slider to adjust the number of pixels to be included or excluded. The Threshold slider sets how similar a pixel needs to be to the one you clicked in order to be included in the selection.
- Click the Connected radio button if you want to include only pixels that are touching the one you clicked.
- Click the Not connected radio button if you want to include all the pixels that are similar to the one you clicked.
- Hold down SHIFT and click around the selection to include more pixels.
- Hold down CTRL and click around the selection to remove pixels from the selection.
-
Click Invert to swap your selection to the opposite area from the original, usually the outer part of the image.
-
From the Wand Type drop-down list, select one of the following:
-
Brightness: Selects pixels similar in brightness to the area of the image you clicked.
• Color: Selects pixels similar in hue to the area of the image you clicked. -
RGB: Selects pixels with red, green and blue combination similar to the area of the image you clicked.
-
Click Done.
You return to the Edit mode menu, where you can select an editing tool or a special effect to apply to the selection.
To use the Marquee:
- Select Marquee.
- Select either Rectangle or Ellipse as the shape for your marquee.
-
Click and drag to draw the selection on the image.
-
Do any of the following:
To add to an existing marquee, hold down SHIFT and drag another marquee that includes any part of the selection line. Release the mouse and the selection now includes the additional area.
To add multiple marquees to your selection, hold down SHIFT and drag as many as you want. As long edges touch, you can continue adding areas to the selection.
- To subtract from an existing marquee, hold down CTRL and drag another marquee that intersects with the want to reduce. Release the mouse and any part that was inside the new marquee is removed.
- Click Done.
You return to the Edit mode menu, where you can select an editing tool or a special effect to apply to the selection.

You can right-click a slider to reset to the default value.
Applying Edits or Effects to Selections
You can use the Selections tool to isolate an area of an image. Once selected, you can apply many of the editing tools such as color and exposure, or any of the special effects filters, to the selected area. An active selection in an image looks like a line of marching ants.
To apply an edit or effect to a selection:
- Use the Selections tool to create a selection, then click Done to return to the Edit mode menu. The selection remains active.
-
Select a tool to use from any of the following groups:
-
Exposure/Lighting
• Color
• Detail -
Add (Special Effects)
-
Use the tool to edit the image.
Use any of these special selections options:
| Show/HideSelection | Click to show or hide the marching ants around the selection. Hiding the selection line makes it to judge the effect of various effects. |
| Use Selection | Click to use the selection or apply the edit or effect to the whole image. This control means just the selection, then deselect Use Selection and apply another edit to the whole image without clearing the selection. |
| Invert Selection | Click to invert the selection. |
| Modify Selection | Click to return to Selections to modify your selection on the image. When you make a new select click Done, you return back to the editing tool you were using previously. |
| Feathering | Drag to increase or decrease the blurring between the edge of the selection and the edit or eff Feathering prevents an unnatural or sharp transition between the selection and the rest of the image as it blends the edges. This control also makes it unnecessary for your selection to be perfectly edge of the area you want to select. |
Reducing Red Eye
You can use the Red Eye Reduction tool in Edit mode to correct red eye in digital photographs.
To correct red eye:
- In Edit mode, in the Repair group, click Red Eye Reduction.
- Use the Zoom tools in the bottom right corner to enlarge and center the eye you want to correct.
- Click within the red portion of the eye.
- In the Red Eye Reduction group, adjust the sliders as described below.
Red eye reduction options
| Size | Drag the slider to the right to increase the size of the area being darkened, or to the left to decrea |
| Darkening | Drag the slider to the right to intensify the fill color, or to the left to lighten. |

Click Reset to clear your changes and reset to default settings. If you saved your changes, you cannot reset your settings. If you want to discard only the Edit settings, select File | Restore to Developed.

You can right-click a slider to reset to the default value.

Scroll with your mouse to adjust the size of the area you would like to darken at anytime.

You can show or hide the outline of the darkened area by toggling the Show Outline checkbox.

Use the Delete key to remove the currently selected red eye adjustment.
Removing Flaws
You can use the Repair Tool to remove flaws, such as:
- Skin blemishes
• Telephone wires and other unwanted objects
• Flash flares from snowflakes or windows - Lens scratches and water drops
There are two options available for the Repair Tool: the Healing Brush and the Cloning Brush.
When you select the Healing Brush, the Repair Tool copies pixels from one area of a photo to another, but it analyzes the pixels in the source area before copying them. It also analyzes the pixels in the target area, and then blends the pixels of both source and target, to match the surrounding area. This ensures that the lighting and color of the replacement pixels integrate with the surrounding area. The Healing Brush works particularly well with photos that involve complicated textures like skin or fur.
When you select the Cloning Brush, the Repair Tool copies the exact pixels from one area of a photo to another, creating an identical image area. The Cloning Brush is more effective for photos that have strong, simple textures or uniform colors, as it is more difficult to identify the copied pixels in the finished photo.
You can save your settings as a preset for future use.
To remove flaws from a photo:
- In Edit mode, in the Repair group, click Repair Tool.
- Select one of the following:
• Heal: Copies the pixels from the source area to the target area, and blends pixels into the surrounding image area.
- Clone: Copies the pixels from the source area to the target area.
- Drag the Nib Width and Feathering sliders as described in the table below.
- Right-click the image to set a source location. Pixels will be copied from this location and used in the target location.
-
Click and drag over the area that you want to cover. If you selected the healing brush, ACDSee Pro analyzes and replaces the pixels when you release the mouse button.
-
Do one of the following:
-
Click Done to apply your changes and close the tool.
- Click Cancel to discard all changes and close the tool.

Click Reset to clear your changes and reset to default settings. If you saved your changes, you cannot reset your settings. If you want to discard only the Edit settings, select File | Restore to Developed.

Scroll with your mouse to adjust the brush size on the fly, or press the SHIFT key while you scroll to adjust feathering.
Repair Tool options
| Nib Width | Sets the width of the brush. The maximum brush width is relative to the size of your image. |
| Feathering | Sets the amount to feather on the edge of the brush to prevent sharp transitions between the healed part of the photo.Feathering is set as a percentage of the nib width, not as a specific number of pixels. This me do not have to adjust the feathering when you reset the Nib Width, as it automatically adjusts percentage of the new nib width. |

You can right-click a slider to reset to the default value.
Adding Text to an Image
You can use the Add Text tool in Edit to add formatted text to a photo, or add talk and thought bubbles to create a comic-book effect. You can also adjust the opacity of the text to create a watermark effect, which is useful for putting copyright information onto your photos.
You can save your settings as a preset for future use.
To add text to an image:
- In Edit mode, in the Add group, click Text.
- Type the text you want to add in the Text field.
- In the Font area, specify the font you want to use, the formatting options such as italics or justification, and the color of the text. Drag the Size slider to specify a point size, and then drag the Opacity slider to specify the transparency of the text.
- Click and drag the text marquee to reposition it anywhere on your image, or drag the marquee's handles to resize it.
- Select an option from the Blend Mode drop-down list to specify how you want the text to blend into the underlying image.
-
Do one of the following:
-
Select the Bubble Text check box, and set the Bubble Text settings as explained in the table below. Note that other text effects cannot be applied to bubble text.
-
Select one or more of the Effects, Drop Shadow, and Bevel check boxes to customize your text. Click the Settings button to adjust the settings for each of these options as explained in the table below.
-
Do one of the following:
-
Click Apply to add the text to your image, and keep the Text tool open so you can add more text. The Text tool creates a new, empty marquee, and you can return to step 3 in the list above.
- Click Done to add the text to your image, and leave the tool. If you still have an empty marquee open, it will be discarded.
- Click Cancel to discard your changes and leave the tool.
Add Text options
| Bubble Text Settings Talk | Encloses your text in a comic-book text bubble with a pointed stem. | |
| Thought | Encloses your text in a comic-book text bubble with a dotted stem. | |
| Stem Angle | Specifies the direction of the text bubble stem. Drag the arrow to adj the angle. | |
| Thickness | Specifies the thickness of the text bubble border. | |
| Length | Specifies the length of the text bubble stem. | |
| Fill | Specifies the background color of the text bubble. Click the arrow to select a color. | |
| Border | Specifies the color of the text bubble border. Click the arrow to select color. | |
| Effect Settings Effect | Specifies the effect you want to apply to your text. Each effect has different options that control its appearance. Drag the sliders to adjust the appearance of the text. | |
| Drop Shadow Settings Distance | Specifies the distance between the drop shadow and the text. The higher the value, the farther the shadow and the higher the text appears.If a drop shadow is cut off, or has a noticeably sharp edge, you may need to increase the size of the text rectangle. | |
| Blur | Specifies the amount of blur applied to the drop shadow. Sharp shadows tend to seem less realistic than those with a slight blur. | |
| Opacity | Specifies the darkness of the drop shadow where it falls on the image | |
| Angle | Specifies the direction of the imaginary light source that creates the drop shadow. Drag the arrow to adjust the angle — note that this is adjusts the shading of the text bevel. | |
| Bevel Settings Bevel | Specifies how much of each letter's edge is bevelled. Higher values give the text a more rounded, smoother look. | |
| Strength | Specifies the difference between the highest and lowest points on the text. Higher values heighten the difference between the flat portions of the text and the bevelled edges. | |
| Elevation | Specifies the height of the imaginary light source that creates the bevel's shadowed effect. Lower values produce longer shadows on the text, while a higher value produces a more direct lighting effect and shorter shadows. | |
| Angle | Specifies the direction of the imaginary light source that creates the bevel effect. Drag the arrow to adjust the angle — note that this als adjusts the angle of the drop shadow. |

You can right-click a slider to reset to the default value.
Adding Drawings to Your Image
You can use the Drawing Tools in Edit mode to add lines and shapes, such as squares, circles and arrows to your image. You can also adjust the width, feathering and blending of your brush, which is useful for creating subtle and dramatic drawings. You can save your settings as a preset for future use.
To draw on your image:
- In Edit mode, select Drawing Tools found under the Add group.
- Select from the following tools:
Tool Instructions
| Pencil | Drag over the image to draw a free-flowing line. Scroll with your mouse wheel to adjust the size, or press the SHIFT key as you scroll to adjust feathering. |
| Rectangle | Drag over the image to create rectangle. Press the SHIFT key as you draw to create a square. |
| Ellipse | Drag over the image to create an ellipse. Press the SHIFT key as you draw to create a circle. |
| Line | Drag over the image to draw a straight line. Press the SHIFT key as you draw to create a horizontal line. |
| Arrow | Drag over the image to create an arrow. Press the SHIFT key as you draw to create a vertical horizontal arrow. |
| Curve | Drag over the image then release. Next, move your mouse to create the curve and click to complete the shape. |
| Polygon | Click to set the corner points of a polygon, then double-click to connect the start and end to complete the polygon. |
- Select from one or more of the following options (Note: options vary depending on the tool selected):
Option Instructions
| Color | Select a color by clicking the drop-down arrow to display gradients of colors, or click the cc box to display a dialog of swatches to choose from. |
| Fill | Select the Fill check box and select a color by clicking the drop-down arrow to display grad of colors, or click the color box to display a dialog of swatches to choose from. |
| Nib Width | Drag the Nib Width slider to set the diameter of the brush measured in pixels. |
| Feathering | Drag the Feathering slider to set the blurring radius of the brush. |

Select a blending option from the Blending drop-down menu to affect how your brush strokes blend with image as you draw.
-
Drag over the image to draw.
-
Do one of the following:
-
Click Done to add the drawing to your image, and leave the tool.
- Click Cancel to discard your changes and leave the tool.

Scroll with your mouse to adjust the size of the nib width at anytime.

You can right-click a slider to reset to the default value.
Adding a Watermark to an Image
You can use the Watermark tool to add a watermark to a photo. You can move the watermark to any position on the photo. You can also change the opacity of the watermark and blend the watermark into the image.
You can save your settings as a preset for future use.
You will need to create a watermark image before you can add the watermark to your photos.
To add a watermark to an image:
- In Edit mode, in the Add group, click Watermark. A watermark displays in the center of the photo by default.
- Click Browse, select your watermark, and then click Open.
- Click and drag the watermark to reposition it anywhere on your image, or click Center to quickly position the watermark image in the center.
- Drag the marquee handles to resize the watermark image.
- Select Maintain aspect ratio when resizing if you want to resize the watermark image without distorting it.
- Select Apply Alpha Channel to apply the alpha channel if it is present in the watermark.
(Only TIF and ICO watermark files can have an alpha channel.)
- Select Apply Transparency to make a color in the watermark transparent.
The default color is white. You can enter the RGB value of the color. If you do not know the RGB value, m over the watermark preview thumbnail on the Edit panel, and then click on the color that you want to make
- Select an option from the Blending Mode drop-down list to specify how you want the watermark to blend into the underlying image.
- Drag the Opacity slider to specify the transparency of the watermark.
-
Do one of the following:
-
Click Apply to add the watermark to your image, and keep the Watermark tool open.
- Click Done to add the watermark to your image, and leave the tool.
- Click Cancel to discard your changes and leave the tool.

You can right-click a slider to reset to the default value.

Click Reset to clear your changes and reset to default settings. If you saved your changes, you cannot reset your settings. If you want to discard only the Edit settings, select File | Restore to Developed.
Adding Borders
You can use the Borders tool to add one or more borders and edge effects to your images. You can set the size of each side of the border, change the color and texture of the border or pick up a color from within the image by clicking on that color in the image.
There are libraries of edges and textures to get you started, but you can save your own textures or edges to the ACDSee folder so that they appear in the library for you to use.
You can also use Edge blur to soften the edges or blend the image into the background texture. You can also add a third dimension to your images using the Drop Shadow and Raised edge effects.
Using combinations of multiple borders and edge effects can add to the mood and atmosphere of a photo, emphasize contrast, and enhance color.
You can save your settings as a preset for future use.
To add a border to an image:
- In Edit mode, in the Add group, click Borders.
- Create the border by selecting its size, color, texture, edge, or edge effects as described in the Borders options below.
-
Do one of the following:
-
Click Done to apply your changes and close the Border tool.
-
Click Cancel to discard all changes and close the tool.
-
To add another border, restart the border tool and repeat these steps.

Click Reset to clear your changes and reset to default settings. If you saved your changes, you cannot reset your settings. If you want to discard only the Edit settings, select File | Restore to Developed.
Border options
| Eyedropper | Picks up the color beneath the cursor when you click on the image. The border changes to the clicked color, which also appears in the Color box on the Border pane so that you can adjust it if you open the Color dialog box. The eyedropper is not available when you are using a texture. The eyedropper is not available when you are using a texture. | |
| Border Size | Sets the size of all the sides of the border simultaneously. Drag the slider left and right to adjust the width of the border. You can all type in a different number or use the up and down arrows to change the size of the border.The text below the Size field shows the final size of your image the border added. The final size changes dynamically as you adjust the size of the border. | |
 | Advanced size controls | Opens a fly-out of advanced size controls. Use the sliders, up- and down-arrow keys, or type in a number, to set the size of each size of the border individually. For example, you can set the bottom border to be larger to include a space for copyright information.Click on the arrow beside the Size slider to open the advanced size controls menu. |
 | Color box | Activates when you select theColorradio button.Do any of the following:Click on a color in the image to make the border that color The clicked color appears in the Color box.Click on the color in the middle of the Color box to open Colors dialog, where you can adjust the color in multiple ways.Click the down-arrow beside the box and hover over the quick-color box until you find a color you like. When you click inside the quick color box, the picked color appears in the Color box and the border changes to the selected color. |
 | Texture box | Activates when you select theTextureradio button.Do any of the following:Click the side arrow to open the texture library and view thumbnails of textures to select.Click the forward and back arrows to browse through the textures one at a time, without opening the library. |
| Edge Straight | Sets the edge of the border to be a straight line. |

Irregular Activates when you select the Irregular radio button.
Do any of the following:
- Click the side arrow beside the edge box to open the edge library and view thumbnails of edges to select.
- Click the forward and back arrows to browse through the edges one at a time, without opening the library.
Edge blur Blurs the edges of the edge of the image into the border. Drag t slider to the right to increase the blur, or to the left to decrease blur.
Edge effects Drop
shadow
Adds a drop shadow to the image that appears to lift it off the The drop shadow appears behind the image, between it and the border. You can adjust the depth of the blur on the edge of the shadow, and the transparency of the shadow, which affects how much of the border shows through the shadow. You can also change the direction of the imaginary source of light by dragging the glow on the Light Source ball.
- Blur: Adjusts the blur on the edge of the shadow when you drag the slider.
- Opacity: Adjusts the transparency of the drop shadow when you drag the slider.
Raised Adds a raised edge to the image that appears to raise it above t border, giving it a 3D look. The raised effect is applied to the im between it and the border. You can change the direction of the imaginary source of light of the raised edge by dragging the glow on the Light Source ball. You can also adjust the size, strength, a color of the raised edge in the following ways:
- Size: Drag the slider to the right to increase the size of the raised edge so that it appears higher. The greater the size the more rounded the effect.
- Strength: Drag the slider to the right to increase the 3D effect of the raised edge.
- Colored: Select this option to apply the border color to the raised edge.
Light Source
Activates when you click either the Drop shadow or Raised check boxes. Click a drag the glow on the ball to reposition the imaginary light source for the 3D of the Drop shadow or Raised edge effects.

You can right-click a slider to reset to the default value.
Adding your own textures or edges
It is possible to add custom textures and edges to the libraries in the Borders tool. If you make your own edges or textures, or own a collection from the Internet, you can add them to the texture and edge libraries. You can also delete existing files from the libraries to make room for others.
The textures or edges have to be in the following file formats with these extensions:
BMP
EMF
GIF
JPG
GIF
PNG
TIF
Textures
As the textures are tiled, it is important to use an image that can be seamlessly repeated. The files are used at their full resolution, not scaled up or down. For example, if your texture image is 100 x 100 pixels and you are creating a bordered image that is 1000 x 1000 pixels, then your texture file will be tiled 10 times. If you use a texture file that is 1000 x 1000 pixels, then there would just be the one texture tile for the whole border.
To add your own textures to the texture library:
- In ACDSee, close the Borders tool if it is open.
- In Manage mode, copy and paste your texture files into this folder:
- In Manage mode, select the image you want to use and then click Tools | Process | Edit.
- In the Add group, click Borders.
Thumbnails of the textures display for you to select.
C:\Program Files\Common Files\ACD Systems\borders\textures
- Select the Texture radio button and then click the arrow on the right side of the texture box to open the texture library.
Edges
Edge files are grayscale images that are resized to fit the image. The image file shows through any areas in the edge file that are white, and does not show through any black areas. Pixels that are tones of gray in the edge file show through with relative opacity depending on how close the pixels are to black or white (in other words, the darker the gray pixel, the less it shows through).
To add your own edges to the edges library:
- In ACDSee, close the Borders tool if it is open.
- In Manage mode, copy and paste your edge files into this folder:
C:\Program Files\Common Files\ACD Systems\borders\edges
- In Manage mode, select the image you want to use and then click Tools | Process | Edit.
- In the Add group, click Borders.
- Select the Irregular radio button and then click the arrow on the right side of the edge box to open the edge library.
Thumbnails of the edges display for you to select.

If you open an image with borders already applied, another border will be applied to the image.
Adding a Vignette
You can use the Vignette effect to add a frame around a subject, such as a person or a bouquet of flowers. You can change the focal point in the portrait. You can also control the appearance of the border.
You can save your settings as a preset for future use.
To apply a Vignette effect:
- In Edit mode, in the Add group, click Vignette.
- Set the options as described below.
-
Do one of the following:
-
Click Done to apply your changes and close the tab.
- Click Cancel to discard all changes and close the tab.

Click Reset to clear your changes and reset to default settings. If you saved your changes, you cannot reset your settings.
If you want to discard only the Edit settings, select File | Restore to Developed.
Vignette options
| Horizontal | Specifies the focal point of the portrait on the horizontal axis. A value of 500 places the center middle of the photo. |
| Vertical | Specifies the focal point of the portrait on the vertical axis. A value of 500 places the center i middle of the photo. |
| Clear zone | Specifies the size of the clear area around the focal point in the portrait. Drag the slider to th reduce the size of the clear area. Drag the slider to the right to increase the size of the clea |
| Transition zone | Specifies the width of the transition area between the clear zone and the frame. Drag the slider left to narrow the transition area. Drag the slider to the right to widen the transition area. |
| Stretch | Stretches the vignette horizontally to make the shape elliptical rather than round. |
| Shape | Specifies the shape of the frame:Round: Select Round if you want the frame to be round.Rectangular: Select Rectangular if you want the frame to be square. |
| Show outline | Select Show outline if you want to display an outline that shows the outside edge of the clear zone and the inside edge of the frame. |
| Frame | Applies the following special effects to the vignette frame area around the focal point:Color: Changes the color of the frame area to the color you select in the color picker.Saturation: Removes color from the people or objects in the vignette frame so they are scale.Blur: Blurs the vignette frame area.Clouds: Applies a Clouds effect to the frame area.Edges: Applies an Edges effect by tracing the lines and details of people or objects with colors.Radial Waves: Creates the appearance of waves radiating from the focal point into the fr area.Radial Blur: Creates a Radial Blur that rotates and stretches the frame area.Zoom Blur: Applies a Zoom Blur to the frame area.Crayon Edges: Applies the Crayon Edges effect by tracing the lines and details around pe or objects with crayon.Dauber: Creates the impression that the people or objects around the focal point were pa with a brush.Pixelate: Applies a pixel effect to the frame.Old: Applies an aging effect to the frame to make it look like an old photo.Glowing Edges: Applies glowing edges to all the strong lines in the frame area.Ripple: Adds ripples to the frame so that it looks like liquid ripples moving outwards from focal area. |
Frame settings
The settings that display below the Frame drop-down list change depending on the frame you sel For example, if you select Color in the Frame drop-down list, a color picker displays so that you can select the color for the vignette. Similarly, if you select Blur in the Frame drop-down list, a slider appears that you can use to change the amount of blur surrounding the photo. For some choice Edges, there are no settings to apply.

You can right-click a slider to reset to the default value.
About Special Effect Filters
You can use filters to add unique effects to your images. ACDSee Pro includes more than 40 special effect filters, such as Crosshatch, Pencil Drawing, and Solarize.
To access the special effects filters:
In Edit mode, in the Add group, click Special Effect.
For more information about each effect, click the Help button to view a Help file page specific to that effect.
Applying a Bathroom Window Effect
The Bathroom Window effect divides your images into bars, transforming them so they resemble the view through privacy glass often found in bathrooms. You can select or change the Bathroom Window options to apply this effect to your image. You can save your settings as a preset for future use.
To apply a Bathroom Window effect:
- In Edit mode, in the Add group, click Special Effect.
- Click Bathroom Window.
- Drag the Bar width slider to set the thickness of the bars. Thinner bars result in a more distorted image.
-
In the Bar direction area, select one of the following to specify the orientation of the bars in your image:
-
Vertical
Horizontal -
Do one of the following:
-
Click Done to accept your changes and close the panel.
- Click Cancel to discard your changes and close the panel.

You can right-click a slider to reset to the default value.

You can use the Edit Brush to paint this effect onto specific areas of your image.
Applying a Blinds Effect
Use the Blinds effect to divide your image into bars that look like venetian or vertical window blinds. You can customize the characteristics of the blinds you would like added to your image.
You can save your settings as a preset for future use.
To apply a Blinds effect:
- In Edit mode, in the Add group, click Special Effect.
- Click Blinds.
- On the Blinds panel, set the options as described below.
-
Do one of the following:
-
Click Done to accept your changes and close the panel.
- Click Cancel to discard your changes and close the panel.
Blinds options
| Width | Specifies the width of the blinds. Type a number from 1 to 1000 or drag the slider to adjust of each blind. As the value increases, the width of the blind also increases. |
| Opacity | Specifies the opacity of the blinds. Type a number from 1 to 99 or drag the slider to adjust of the blinds. The higher the opacity, the more the image is obscured. |
| Angle | Specifies the angle of the blinds. Type a number from 1 to 360 or drag the arrow to adjust the blind color. |
| Blind color | Specifies the color of the blinds. |

You can right-click a slider to reset to the default value.

You can use the Edit Brush to paint this effect onto specific areas of your image.
Applying a Bulge Effect
Use the Bulge effect to stretch or shrink areas of your images horizontally and vertically. You can customize the strength, radius and position of the distortion.
You can save your settings as a preset for future use.
To apply a Bulge effect:
- In Edit mode, in the Add group, click Special Effect.
- Click Bulge.
-
On the Bulge panel, set the options as described below.
-
Do one of the following:
-
Click Done to accept your changes and close the panel.
- Click Cancel to discard your changes and close the panel.
Bulge and Shrink options
| Horizontal position | Specifies the center of the distortion along the horizontal axis. A lower value moves the distortion towards the left side of the image, while a higher value moves it towards the right side of the |
| Vertical position | Specifies the center of the distortion along the vertical axis. A lower value moves the distortion the bottom of the image, while a higher value moves it towards the top of the image. |
| Radius | Specifies the radius of the distorted area. A lower value decreases the radius of the distortion, while higher value increases the radius of the distortion. |
| Strength | Specifies the strength of the distortion. A negative value shrinks the center of the distortion, while higher value bulges the distortion. |
| Background color | Specifies the background color for the filtered image.Select the Image check box to use the original image color, or click the color picker to select a different color. |
| Bulge direction | Specifies the direction of the distortion. Select one or both of the following options:Horizontal: Moves the distortion horizontally.Vertical: Moves the distortion vertically. |

You can right-click a slider to reset to the default value.

You can use the Edit Brush to paint this effect onto specific areas of your image.
Applying a Collage Effect
You can use the Collage effect to creatively break up a photo into a number of photos.
You can save your settings as a preset for future use.
To use the Collage effect:
- In Edit mode, in the Add group, click Special Effect.
- Click Collage.
- Drag the sliders to set the Number and Size of the photos.
- Select a background color by clicking the drop-down arrow to display gradients of colors, or click the color box to display a dialog of swatches to choose from.
-
If you would like to reshuffle the photos, click Randomize.
-
Do one of the following:
-
Click Done to accept your changes and close the panel.
-
Click Cancel to discard your changes and close the panel.
-
Click Exit to leave Special Effects, and return to the Edit mode menu.

You can right-click a slider to reset to the default value.

You can use the Edit Brush to paint this effect onto specific areas of your image.
Applying a Colored Edges Effect
You can use the Colored Edges effect to trace the lines and details of people or objects in your images.
You can save your settings as a preset for future use.
To apply a Colored Edges effect:
- In Edit mode, in the Add group, click Special Effect.
- Click Colored Edges.
- On the Colored Edges panel, set the options as described below.
-
Do one of the following:
-
Click Done to accept your changes and close the panel.
- Click Cancel to discard your changes and close the panel.
Colored Edges options
| Intensity | Specifies the amount of color added to the edges within the image. The higher the setting, the the color that is applied to the image. |
| Edge color | Specifies the color of the edges. |
| Edge detection | Specifies the edge detection algorithm. The algorithm controls the formula used to detect the edge and the direction of the edge indicators. |
| Blurring | Blurs the edges in the image. Select the Use blurring check box, and then select a blur setting to determine how much blur is applied. |

You can right-click a slider to reset to the default value.

You can use the Edit Brush to paint this effect onto specific areas of your image.
Applying a Contours Effect
You can use the Contours effect to draw contour lines on your image to create a cartoon effect. Select or change the rounding, line frequency, color and strength setting to apply to your image.
You can save your settings as a preset for future use.
To apply a Contours effect:
- In Edit mode, in the Add group, click Special Effect.
- Click Contours.
- On the Contours panel, set the options as described below.
-
Do one of the following:
-
Click Done to accept your changes and close the panel.
- Click Cancel to discard your changes and close the panel.
Contours options
| Rounding | Specifies the amount of curve in the contour lines. The higher the value, the rounder the lines. |
| Line frequency | Specifies the amount of space between the contour lines. The higher the value, the closer the line move together. |
| Strength | Specifies the strength of the line. The higher the value, the darker the line. |
| Line color | Specifies the color of the contour lines. |

You can right-click a slider to reset to the default value.

You can use the Edit Brush to paint this effect onto specific areas of your image.
Applying a Crayon Drawing Effect
You can use the Crayon Drawing effect to give your photos the appearance of a crayon drawing.
To use the Crayon Drawing effect:
- In Edit mode, in the Add group, click Special Effect.
- Click Crayon Drawing.
-
Do one of the following:
-
Click Done to accept your changes and close the panel.
- Click Cancel to discard your changes and close the panel.

You can use the Edit Brush to paint this effect onto specific areas of your image.

Applying a Crosshatch Effect
You can use the Crosshatch effect to add crosshatching to an image.
To use the Crosshatch effect:
- In Edit mode, in the Add group, click Special Effect.
- Click Crosshatch.
-
Do one of the following:
-
Click Done to accept your changes and close the panel.
- Click Cancel to discard your changes and close the panel.

You can use the Edit Brush

to paint this effect onto specific areas of your image.
Applying a Dauber Effect
You can use the Dauber effect to make your images look like they were painted with a paint dauber. Select or change the settings of the effect you want applied to your image, such as intensity, frequency and more.
You can save your settings as a preset for future use.
To use the Dauber effect:
- In Edit mode, in the Add group, click Special Effect.
- Click Dauber.
- On the Dauber panel, set the options as described below.
-
Do one of the following:
-
Click Done to accept your changes and close the panel.
- Click Cancel to discard your changes and close the panel.
Dauber options
| Intensity | Specifies the amount of color applied with each daub. |
| Frequency | Specifies the number of daubs added to the image. |
| Background color | Specifies the background color of the filtered image.Select theImagecheck box to use the original image colors or click the color picker to select a different color. |
| Randomize | Indicates the random placement of the paint daubs.When you apply the Dauber effect to an image, ACDSee Pro places the daubs randomly. This m paint daubs different every time you apply the filter. You can define a specific random seed to identical daubs.To generate a new random seed, clickRandomize. |

You can right-click a slider to reset to the default value.
Applying an Edge Detect Effect
You can use the Edge Detect effect to create a highlighted outline of your image. After creating a black image, the effect uses colored lines to outline the detail of an image where significant color differences exist. Greater differences between colors in the original image produce brighter outline colors. (The Sobel effect is similar to the Edge Detect effect, but produces sharper and brighter outlines.)
To use the Edge Detect effect:
- In Edit mode, in the Add group, click Special Effect.
- Click Edge Detect.
-
Do one of the following:
-
Click Done to accept your changes and close the panel.
- Click Cancel to discard your changes and close the panel.

You can use the Edit Brush to paint this effect onto specific areas of your image.
Applying an Emboss Effect
You can use the Emboss effect to add a grayscale relief to an image.
You can save your settings as a preset for future use.
To emboss an image:
- In Edit mode, in the Add group, click Special Effect.
- Click Emboss.
- On the Emboss panel, set the options as described below.
-
Do one of the following:
-
Click Done to accept your changes and close the panel.
- Click Cancel to discard your changes and close the panel.
Emboss options
| Elevation | Specifies the light source's elevation on the image. Lower values produce more shadows and a di image. Higher values produce fewer shadows and a lighter image. |
| Weight | Specifies the amount of relief added to the image. Higher values increase the relief depth. |
| Azimuth | Specifies the angle of shadows that extend from the edges of image details. A value of 0 adds to the left side, while a value of 180 adds shadows to the right side. |

You can right-click a slider to reset to the default value.

You can use the Edit Brush to paint this effect onto specific areas of your image.
Applying a Furry Edges Effect
You can use the Furry Edges effect to add fur and bristles to the lines and details of people or objects in your image. You can save your settings as a preset for future use.
To use the Furry Edges effect:
-
In Edit mode, in the Add group, click Special Effect.
-
Click Furry Edges.
-
On the Furry Edges panel, set the options as described below.
-
Do one of the following:
- Click Done to accept your changes and close the panel.
- Click Cancel to discard your changes and close the panel.
Furry Edges options
| Frequency | Specifies how much fur is added to the image. The higher the setting, the more dense the fur applied to the image. |
| Threshold | Specifies how sharp an edge must be before fur is applied to it. As the value decreases, the image that fur is added to increases. |
| Fur length | Specifies the length of each strand of fur. As the value increases, the length of each fur strand increases. |
| Variance | Specifies how much of the fur grows in the direction indicated by the Hair direction setting. The the value, the more random the fur direction will be. |
| Hair direction | Specifies the general direction in which fur appears to grow. |
| Edge detection | Specifies the edge detection algorithm. The algorithm controls the formula used to detect the edge and the direction of the edge indicators. |
| Background color | Specifies the background color of the filtered image. Select the Image check box to use the original image colors, or click the color picker to select a different color. |
| Fur color | Specifies the color of the fur. Select the Image check box to use the original image colors, or click the color picker to select a different color. |
| Randomize | Indicates the random placement of the fur strands.When you apply the Furry Edges effect to an image, ACDSee Pro places the fur randomly. This the fur strands different every time you apply the filter. You can define a specific random seed generate identical fur patterns.To generate a new random seed, click Randomize. |
ACDSee Pro 6 User Guide

You can right-click a slider to reset to the default value.

You can use the Edit Brush to paint this effect onto specific areas of your image.
Applying a Glowing Edges Effect
You can use the Glowing Edges effect to add color to the lines and details of people or objects in your images. The colored lines and details appear to glow.
You can save your settings as a preset for future use.
To apply a Glowing Edges effect:
- In Edit mode, in the Add group, click Special Effect.
- Click Glowing Edges.
- On the Glowing Edges panel, set the options as described below.
-
Do one of the following:
-
Click Done to accept your changes and close the panel.
- Click Cancel to discard your changes and close the panel.
Glowing Edges options
| Intensity | Specifies the amount of color added to the edges within the image. The higher the setting, the intense the color that is applied to the image. |
| Color | Specifies the color of the edges. |

You can right-click a slider to reset to the default value.

You can use the Edit Brush to paint this effect onto specific areas of your image.
Applying a Granite Effect
You can use the Granite effect to give your images the appearance of being painted on a rock wall. You can save your settings as a preset for future use.
To use the Granite effect:
- In Edit mode, in the Add group, click Special Effect.
- Click Granite.
-
On the Granite panel, set the options as described below.
-
Do one of the following:
-
Click Done to accept your changes and close the panel.
- Click Cancel to discard your changes and close the panel.
Granite options
Light Angle
Specifies the direction from which an imaginary light source is shining on the image. Drag the a adjust the angle. Different light angles will change the highlights and shadows in the peaks and valleys on the rock.

You can use the Edit Brush

to paint this effect onto specific areas of your image.
Applying a Lomo Effect
Simulate the retro-effects of a lomo camera. Photos taken with a lomo camera are high contrast, with a golden hue and a noticeable vignette.
You can save your settings as a preset for future use.
To use the Lomo effect:
- In Edit mode, in the Add group, click Special Effect.
- Click Lomo.
- Drag the Color Distortion slider to the right to increase the color distortion.
-
Drag the Vignette Strength slider to the right to increase the vignette strength.
-
Do one of the following:
-
Click Done to accept your changes and close the panel.
-
Click Cancel to discard your changes and close the panel.
-
Click Exit to leave Special Effects, and return to the Edit mode menu.

You can right-click a slider to reset to the default value.

You can use the Edit Brush

to paint this effect onto specific areas of your image.
Applying a Mirror Effect
You can use the Mirror effect to reflect an image along the horizontal or vertical axis. Select or change the Mirror options to apply mirroring to your image, including mirror axis and direction.
You can save your settings as a preset for future use.
To apply a Mirror effect:
- In Edit mode, in the Add group, click Special Effect.
- Click Mirror.
- On the Mirror panel, in the Mirror direction area, select one of the following options to indicate which direction you want to mirror the image:
Horizontal
- Vertical
-
Drag the Mirror axis slider to adjust the position of the mirror. A value of 500 places the mirror in the center of the image.
-
Do one of the following:
-
Click Done to accept your changes and close the panel.
- Click Cancel to discard your changes and close the panel.

You can right-click a slider to reset to the default value.

You can use the Edit Brush to paint this effect onto specific areas of your image.
Applying a Negative Effect
You can use the Negative effect to create a negative of your image. You can also apply the Negative filter to a negative scanned from a roll of film to produce a positive image.
To create an image negative:
- In Edit mode, in the Add group, click Special Effect.
- Click Negative.
-
Do one of the following:
-
Click Done to accept your changes and close the panel.
- Click Cancel to discard your changes and close the panel.

You can use the Edit Brush to paint this effect onto specific areas of your image.
Applying an Oil Paint Effect
You can use the Oil Paint effect to give your images a painted appearance.
You can save your settings as a preset for future use.
To create an oil painting from a photo:
- In Edit mode, in the Add group, click Special Effect.
-
Click Oil Paint.
-
On the Oil Paint panel, drag the Brush width slider to specify the width of the brush strokes in the effect. The higher the value, the wider the brush stroke.
- Drag the Variance slider to specify the color variance in each brush stroke. Higher values increase the number of colors used in each stroke.
-
Drag the Vibrance slider to adjust the intensity of the colors in the image.
-
Do one of the following:
-
Click Done to accept your changes and close the panel.
- Click Cancel to discard your changes and close the panel.

You can right-click a slider to reset to the default value.

You can use the Edit Brush to paint this effect onto specific areas of your image.
Applying the Old Effect
You can use the Old effect to give your images an antique look. (The Old effect is similar to the Sepia effect, but produces a more realistic appearance of age.)
You can save your settings as a preset for future use.
To apply the Old effect:
- In Edit mode, in the Add group, click Special Effect.
- Click Old.
- On the Old panel, set the options as described below.
-
Do one of the following:
-
Click Done to accept your changes and close the panel.
- Click Cancel to discard your changes and close the panel.
Old options
Age
Specifies the intensity or degree of the effect. (The numbers do not correspond to how old the should appear.)

You can right-click a slider to reset to the default value.

You can use the Edit Brush to paint this effect onto specific areas of your image.
Applying the Orton Effect
Create beautiful impressionistic images with the Orton effect. The Orton effect mimics a darkroom technique created by sandwiching two images together, one of which is slightly out of focus, and both of which are slightly overexposed.
You can save your settings as a preset for future use.
To use the Orton effect:
- In Edit mode, in the Add group, click Special Effect.
- Click Orton.
- Drag the Blur, Contrast, and Brightness sliders to adjust each effect.
- Do one of the following:
- Click Done to accept your changes and close the panel.
-
Click Cancel to discard your changes and close the panel.
-
Click Exit to leave Special Effects, and return to the Edit mode menu.

You can right-click a slider to reset to the default value.

You can use the Edit Brush to paint this effect onto specific areas of your image.
Applying an Outline Effect
The Outline effect is similar to the Edge Detect effect. You can use the Outline effect to create a highlighted outline of your image. However, with the Outline effect you can control the thickness of the outline, whether an edge is outlined or not, and the color that displays behind the outlined image.
You can save your settings as a preset for future use.
To use the Outline effect:
- In Edit mode, in the Add group, click Special Effect.
- Click Outline.
- On the Outline panel, set the options as described below.
- Do one of the following:
- Click Done to accept your changes and close the panel.
- Click Cancel to discard your changes and close the panel.
Outline options
| Line width | Specifies the width of the outline in the effect. The higher the value, the wider the outline. |
| Threshold | Specifies how sharp an edge must be in order to be outlined. If you specify a higher value, m in the photo will be outlined. |
| Background color | Specifies the background color of the filtered image. Click the color picker to select a different c |

You can right-click a slider to reset to the default value.

You can use the Edit Brush to paint this effect onto specific areas of your image.
Applying a Pencil Drawing Effect
You can use the Pencil Drawing effect to create a pencil drawing from your images.
To create a pencil drawing from an image:
- In Edit mode, in the Add group, click Special Effect.
- Click Pencil Drawing.
-
Do one of the following:
-
Click Done to accept your changes and close the panel.
- Click Cancel to discard your changes and close the panel.

You can use the Edit Brush to paint this effect onto specific areas of your image.
Applying a Pixel Explosion Effect
You can use the Pixel Explosion effect to explode pixels from a center point in your images. Select or change the Pixel Explosion settings, such as intensity and direction, to apply this effect to your image.
You can save your settings as a preset for future use.
To use the Pixel Explosion effect:
- In Edit mode, in the Add group, click Special Effect.
- Click Pixel Explosion.
-
On the Pixel Explosion panel, set the options as described below.
-
Do one of the following:
-
Click Done to accept your changes and close the panel.
- Click Cancel to discard your changes and close the panel.
Pixel Explosion options
| Horizontal center | Specifies the center point of the explosion on the horizontal axis. A value of 500 places the exp the middle of the image. |
| Vertical center | Specifies the center point of the explosion on the vertical axis. A value of 500 places the explo the middle of the image. |
| Intensity | Specifies the intensity of the explosion. A higher value creates a larger, more brilliant spread of pixels in the image. |
| Explosion direction | Specifies the direction of the explosion. Select one or both of the following:Explode horizontally: Explodes the pixels towards the right and left sides of the image.Expode vertically: Explodes the pixels towards the top and bottom of the image. |
| Randomize | Indicates the random placement of the pixels.When you apply the Pixel Explosion effect to an image, ACDSee Pro places the pixels randomly. makes the pixels different every time you apply the filter. You can define a specific random seed generate identical pixel patterns.To generate a new random seed, click Randomize. |

You can right-click a slider to reset to the default value.

You can use the Edit Brush to paint this effect onto specific areas of your image.
Applying a Pixelate Effect
A pixel is the smallest piece of a digital image, arranged in rows and columns. When you reduce the resolution of your image, the size of the pixel increases and produces blurring. You can use the Pixelate effect to increase the size of the pixels in your image.
You can save your settings as a preset for future use.
To apply a Pixelate effect:
- In Edit mode, in the Add group, click Special Effect.
- Click Pixelate.
- On the Pixelate panel, drag the Width and Height sliders to set the size of the pixels in your image. Select the Square check box to make the width and height equal.
-
Do one of the following:
-
Click Done to accept your changes and close the panel.
- Click Cancel to discard your changes and close the panel.

You can right-click a slider to reset to the default value.

You can use the Edit Brush to paint this effect onto specific areas of your image.
Applying a Posterize Effect
You can use the Posterize effect to reduce the number of brightness levels in your image. Select or change the Posterize options to apply this effect to your image.
You can save your settings as a preset for future use.
To apply a Posterize effect:
- In Edit mode, in the Add group, click Special Effect.
- Click Posterize.
- On the Posterize panel, drag the Brightness levels slider to adjust the variance of colors in the image. The lower the value, the fewer colors used in the image.
-
Do one of the following:
-
Click Done to accept your changes and close the panel.
- Click Cancel to discard your changes and close the panel.

You can right-click a slider to reset to the default value.

You can use the Edit Brush to paint this effect onto specific areas of your image.
Applying a Radial Waves Effect
You can use the Radial Waves effect to display waves radiating from a center point in the photo. You can change the center point in the photo and you can also control the appearance of the waves.
You can save your settings as a preset for future use.
To apply a Radial Waves effect:
- In Edit mode, in the Add group, click Special Effect.
- Click Radial Waves.
- On the Radial waves panel, set the options as described below.
-
Do one of the following:
-
Click Done to accept your changes and close the panel.
- Click Cancel to discard your changes and close the panel.
Radial waves options
| Horizontal position | Specifies the center of the waves on the horizontal axis. A value of 500 places the waves in t of the image. |
| Vertical position | Specifies the center of the waves on the vertical axis. A value of 500 places the waves in the the image. |
| Amplitude | Specifies the depth and height of each wave. |
| Wavelength | Specifies the amount of space between waves. |
| Light strength | Specifies the amount of light contrast between the top and bottom of each wave. |
| Background color | Specifies the background color of the filtered image. Select the Image check box to use the original image colors, or click the color picker to select a different color. |
| Wave direction | Specifies the direction of the waves. Select one, or both, of the following:Wave horizontally: Makes the waves move towards the right and left sides of the imageWave vertically: Makes the waves move towards the top and bottom of the image. |

You can right-click a slider to reset to the default value.

You can use the Edit Brush to paint this effect onto specific areas of your image.
Applying a Rain Effect
You can use the Rain effect to make it look like it was raining when you took a photo. Control the amount, the angle, strength and other characteristics of the rain.
You can save your settings as a preset for future use.
To apply rain to a photo:
- In Edit mode, in the Add group, click Special Effect.
- Click Rain.
- On the Rain panel, set the options as described below.
-
Do one of the following:
-
Click Done to accept your changes and close the panel.
- Click Cancel to discard your changes and close the panel.
Rain options
| Strength | Specifies the length of the rain drops. Drag the slider to the right to increase the length. |
| Opacity | Specifies the opacity of the rain drops. Type a number from 0 to 100 or drag the slider to a opacity of the rain drops. The higher the opacity, the more the image is obscured. |
| Amount | Specifies the number of rain drops. |
| Angle variance | Specifies the angle of the rain drops. Type a number from 0 to 50 or drag the arrow to adjust angle. |
| Strength variance | Specifies how much variety there should be in the length of the rain drops. Drag the slider to you want rain drops to have a similar length. Drag the slider to the right if you want to vary of rain drops. If you vary the length of rain drops they look natural. |
| Background blur | Specifies the amount of blur in the photo. Heavy rain will block your vision. Use this option to photo so the rain effect looks natural. |
| Angle | Specifies the angle at which the rain drops are falling. |
| Color | Specifies the color of the rain drops. |

You can right-click a slider to reset to the default value.

You can use the Edit Brush to paint this effect onto specific areas of your image.
Applying a Ripple Effect
You can use the Ripple effect to divide your images into concentric circles that resembles what you see when you drop a pebble into water. Select or change the Ripple settings to apply to your image, such as position, strength and more.
You can save your settings as a preset for future use.
To apply a Ripple effect:
- In Edit mode, in the Add group, click Special Effect.
- Click Ripple.
- On the Ripple panel, set the options as described below.
-
Do one of the following:
-
Click Done to accept your changes and close the panel.
- Click Cancel to discard your changes and close the panel.
Ripple options
| Horizontal position | Specifies the center of the ripples on the horizontal axis. A value of 500 places the ripples in the image. |
| Vertical position | Specifies the center of the ripples on the vertical axis. A value of 500 places the ripples in the image. |
| Amplitude | Specifies the depth and height of each ripple. |
| Wavelength | Specifies the amount of space between ripples. |
| Light strength | Specifies the amount of light contrast between the top and bottom of each ripple. |
| Background color | Specifies the background color of the filtered image. Select the Image check box to use the original image colors, or click the color picker to select a different color. |
| Ripple direction | Specifies the direction of the ripples. Select one or both of the following:• Ripple vertically: Makes the ripples move towards the top and bottom of the image.• Ripple horizontally: Makes the ripples move towards the right and left sides of the imag |

You can right-click a slider to reset to the default value.

You can use the Edit Brush to paint this effect onto specific areas of your image.
Applying a Scattered Tiles Effect
You can use the Scattered Tiles effect to divide your images into rectangular tiles, and scatter and stack the tiles. Select or change the Scattered Tiles options to apply this effect to your image.
You can save your settings as a preset for future use.
To apply a Scattered Tiles effect:
- In Edit mode, in the Add group, click Special Effect.
- Click Scattered Tiles.
- On the Scattered Tiles panel, set the options as described below.
- Do one of the following:
- Click Done to accept your changes and close the panel.
- Click Cancel to discard your changes and close the panel.
Scattered Tiles options
| Tile size | Specifies the size of the tiles. |
| Scatter amount | Specifies how much the tiles will move from their original positions. |
| Background color | Specifies the color of the background. Click the color picker to select a different color. |
| Randomize | Indicates the random placement of the tiles.When you apply the Scattered Tiles effect to an image, ACDSee Pro places the tiles ra makes the effect different every time you apply the filter. You can define a specific ra generate identical tile patterns.To generate a new random seed, click Randomize. |

You can right-click a slider to reset to the default value.

You can use the Edit Brush to paint this effect onto specific areas of your image.
Applying a Sepia Effect
You can use the Sepia effect to give your images an antique look. (The Old effect is similar to the Sepia effect, but produces a more realistic appearance of age.)
You can save your settings as a preset for future use.
To add a sepia tone to an image:
- In Edit mode, in the Add group, click Special Effect.
- Click Sepia.
-
Do one of the following:
-
Click Done to accept your changes and close the panel.
- Click Cancel to discard your changes and close the panel.

You can right-click a slider to reset to the default value.

You can use the Edit Brush to paint this effect onto specific areas of your image.
Applying a Sheet Metal Effect
You can use the Sheet Metal effect to turn your images into sheet metal impressions.
You can save your settings as a preset for future use.
To apply a Sheet Metal effect:
- In Edit mode, in the Add group, click Special Effect.
-
Click Sheet Metal.
-
On the Sheet Metal panel, set the options as described below.
- Do one of the following:
- Click Done to accept your changes and close the panel.
- Click Cancel to discard your changes and close the panel.
Sheet Metal options
| Rounding | Specifies the amount of curve in the edges of the impressions. |
| Detail | Specifies the amount of detail in the impression. |
| Angle | Specifies the angle of the grain in the sheet metal. |
| Metal color | Specifies the color of the sheet metal. |
| Direction | Specifies the direction in which the sheet metal was manipulated. Select one of the following: |
- Indented: Stamps the metal from the top side of the image.
- Pushed out: Stamps the metal from underneath the image.

You can right-click a slider to reset to the default value.

You can use the Edit Brush to paint this effect onto specific areas of your image.
Applying a Shift Effect
You can use the Shift effect to divide your images into bars and shift them in random directions.
You can save your settings as a preset for future use.
To apply a Shift effect:
- In Edit mode, in the Add group, click Special Effect.
- Click Shift.
- On the Shift panel, set the options as described below.
-
Do one of the following:
-
Click Done to accept your changes and close the panel.
- Click Cancel to discard your changes and close the panel.
Shift options
| Strength | Specifies the amount of shift between the bars. |
| Width | Specifies the width of each bar. |
| Angle | Specifies the angle of the bars. |
| Background color | Specifies the background color of the filtered image. Select the Image check box to use the original image colors, or click the color picker to select a different color. |

You can right-click a slider to reset to the default value.
Applying a Slant Effect
You can use the Slant effect to make a photo appear slanted. For example, you could use the Slant effect to distort a photo by pushing the top of the photo to the left and the bottom of the photo to the right. Similarly, you could use the slant effect to push the left side of the photo upwards and the right side of the photo downwards.
You can save your settings as a preset for future use.
To apply a Slant effect:
- In Edit mode, in the Add group, click Special Effect.
- Click Slant.
- On the Slant panel, set the options as described below.
-
Do one of the following:
-
Click Done to accept your changes and close the panel.
- Click Cancel to discard your changes and close the panel.
Slant options
| Amount | Specifies the degree of the slant. |
| Fulcrum | Specifies the center of the slant. Drag the slider to the left to place the center of the slant n bottom of the photo. Drag the slider to the right to place the center of the slant near the top photo. |
| Background color | Specifies the background color of the filtered image. Click the color picker to select a different c |
| Slant Direction | Specifies the angle of the slant:Horizontal: Select Horizontal to push the top or bottom of the photo to the left or rightVertical: Select Vertical to push the left or right side of the photo up or down. |

You can right-click a slider to reset to the default value.

You can use the Edit Brush to paint this effect onto specific areas of your image.
Applying a Sobel Effect
You can use the Sobel effect to create a highlighted outline of your image. After creating a black image, the effect uses colored lines to outline the detail of an image where significant color differences exist. Greater differences between colors in the original image produce brighter outline colors. (The Sobel effect is similar to the Edge Detect effect, but produces sharper and brighter outlines.)
To use the Sobel effect:
- In Edit mode, in the Add group, click Special Effect.
- Click Sobel.
-
Do one of the following:
-
Click Done to accept your changes and close the panel.
- Click Cancel to discard your changes and close the panel.

You can use the Edit Brush

to paint this effect onto specific areas of your image.
Applying a Solarize Effect
You can use the Solarize effect to simulate the effect of overexposing an image, as though the film was exposed to light before developing. Select or change the Solarize options to apply this effect to your image.
You can save your settings as a preset for future use.
To apply a Solarize effect:
- In Edit mode, in the Add group, click Special Effect.
- Click Solarize.
- On the Solarize panel, drag the Threshold slider to specify the brightness threshold of the image.
-
In the Effect area, specify which pixels you want to adjust by selecting one of the following options:
-
Solarize: adjusts pixels located above the specified threshold option. The effect takes any pixels above the threshold and replaces them with their negative value. When you solarize an image, a higher threshold v brighter threshold, and colors need to be brighter to be overexposed.
-
Lunarize: adjusts pixels located below the specified threshold option. The effect takes any pixels below the threshold and replaces them with their negative value. When you lunarize an image, a higher threshold v darker threshold, and colors do not have to be as bright to be overexposed.
-
Do one of the following:
-
Click Done to accept your changes and close the panel.
- Click Cancel to discard your changes and close the panel.

You can right-click a slider to reset to the default value.

You can use the Edit Brush

to paint this effect onto specific areas of your image.
Applying a Stained Glass Effect
You can use the Stained Glass effect to divide your image into fragments of a random size and shape, to give the photo the appearance of a stained glass window. Control the size and position of the fragments using the effect settings.
You can save your settings as a preset for future use.
To apply a Stained Glass effect:
- In Edit mode, in the Add group, click Special Effect.
- Click Stained Glass.
- On the Stained Glass panel, set the options as described below.
-
Do one of the following:
-
Click Done to accept your changes and close the panel.
- Click Cancel to discard your changes and close the panel.
Stained Glass options
| Fragment size | Specifies the size of the fragments. |
| Randomize | Indicates the random placement of the fragments.When you apply the Stained Glass effect to an image, ACDSee Pro places the fragments randoml makes the effect different every time you apply the filter. You can define a specific random seed generate identical fragment patterns.To generate a new random seed, click Randomize. |

You can right-click a slider to reset to the default value.

You can use the Edit Brush to paint this effect onto specific areas of your image.
Applying a Sunspot Effect
You can use the Sunspot effect to add a bright spot in your images.
You can save your settings as a preset for future use.
To apply a Sunspot effect:
- In Edit mode, in the Add group, click Special Effect.
- Click Sunspot.
- On the Sunspot panel, drag the Horizontal Position and Vertical Position sliders or click the image to set the location of the sunspot.
- Drag the Brightness slider to set the intensity of the sunspot.
- Do one of the following:
- Click Done to accept your changes and close the panel.
- Click Cancel to discard your changes and close the panel.

You can right-click a slider to reset to the default value.
Applying a Swirl Effect
You can use the Swirl effect to rotate and stretch people and objects in your image.
You can save your settings as a preset for future use.
To apply a Swirl effect:
- In Edit mode, in the Add group, click Special Effect.
- Click Swirl.
- On the Swirl panel, set the options as described below.
-
Do one of the following:
-
Click Done to accept your changes and close the panel.
- Click Cancel to discard your changes and close the panel.
Swirl options
| Horizontal position | Specifies the center of the swirl on the horizontal axis. A value of 500 places the swirl in the image. |
| Vertical position | Specifies the center of the swirl on the vertical axis. A value of 500 places the swirl in the image. |
| Radius | Specifies the size of the swirl effect. |
| Strength | Specifies the strength and direction of the swirl. Higher values create a clockwise swirl, while neg values create a counter-clockwise swirl. |
| Focus | Specifies the concentration of the swirl. Higher values concentrate the effect on the center of the while lower values spread the swirl across the image. |
| Background color | Specifies the background color of the filtered image. Select the Image check box to use the original image colors, or click the color picker to select a different color. |
| Swirl direction | Specifies the direction of the swirl. Select one or both of the following:• Swirl horizontally: Moves the swirl towards the top and bottom of the image.• Swirl vertically: Moves the swirl towards the right and left sides of the image. |

You can right-click a slider to reset to the default value.

You can use the Edit Brush to paint this effect onto specific areas of your image.
Applying the Threshold Effect
You can use the Threshold effect to create a black and white image.
You can save your settings as a preset for future use.
To apply the Threshold effect:
- In Edit mode, in the Add group, click Special Effect.
- Click Threshold.
- On the Threshold panel, set the options as described below.
-
Do one of the following:
-
Click Done to accept your changes and close the panel.
- Click Cancel to discard your changes and close the panel.
Threshold options
Threshold
This slider determines which pixels become black and which ones become white in the black and image. Any pixels that are brighter than the selected threshold will become white and any pixels are darker than the threshold will become black.

You can right-click a slider to reset to the default value.

You can use the Edit Brush to paint this effect onto specific areas of your image.
Applying a Topography Effect
You can use the Topography effect to change the details of your images into contour lines.
You can save your settings as a preset for future use.
To apply a Topography effect:
- In Edit mode, in the Add group, click Special Effect.
- Click Topography.
- On the Topographic Map panel, drag the Rounding slider to adjust the amount of curve in the contour lines.
- Drag the Number of lines slider to specify how many contour lines you want to add.
-
Do one of the following:
-
Click Done to accept your changes and close the panel.
- Click Cancel to discard your changes and close the panel.

You can right-click a slider to reset to the default value.

You can use the Edit Brush to paint this effect onto specific areas of your image.
Applying a Water Effect
You can use the Water effect to insert an expanse of water below the subject of a photo and to display a reflection of the subject in the water. You can control the position of the water below the subject. For example, you can position the water below a person's chin, or below their waist. You can also control the appearance of ripples in the water and how dark or light the water appears.
You can save your settings as a preset for future use.
To apply a Water effect:
- In Edit mode, in the Add group, click Special Effect.
- Click Water.
- On the Water panel, set the options as described below.
-
Do one of the following:
-
Click Done to accept your changes and close the panel.
- Click Cancel to discard your changes and close the panel.
Water options
| Position | Specifies the position of the water below the subject of the photo. |
| Amplitude | Specifies the height of the ripples in the water. Drag the slider to the left to reduce the heigh ripples and the distortion caused by the ripples. Drag the slider to the right to increase the hei the ripples and the distortion caused by the ripples. |
| Wavelength | Specifies the distance between ripples. Drag the slider to the left to reduce the distance between ripples and increase the distortion caused by the ripples. Drag the slider to the right to increase distance between ripples and reduce the distortion caused by the ripples. |
| Perspective | Changes the size of the waves as they get farther from the subject. Drag the slider to the left increase the size of the waves farthest from the subject and to increase the illusion of distance. |
| Lighting | Specifies the amount of light in the water. |

You can right-click a slider to reset to the default value.

You can use the Edit Brush

to paint this effect onto specific areas of your image.
Applying a Water Drops Effect
You can use the Water Drops effect to display water drops on the surface of the photo. You can control the number and size of water drops, and their position on the photo.
You can save your settings as a preset for future use.
To apply water drops to a photo:
-
In Edit mode, in the Add group, click Special Effect.
-
Click Water Drops.
-
On the Water Drops panel, set the options as described below.
-
Do one of the following:
- Click Done to accept your changes and close the panel.
- Click Cancel to discard your changes and close the panel.
Water Drops options
| Density | Specifies the number of water drops on the photo. Drag the slider to the left to remove water Drag the slider to the right to add water drops. |
| Radius | Specifies the size of the water drops. Drag the slider to the left to make the water drops sma the slider to the right to make the water drops larger. |
| Height | Specifies the height of the water drops above the photo surface. Drag the slider to the left to the height of the water drops and the distortion caused by the water drops. Drag the slider to to increase the height of the water drops and the distortion caused by the water drops. |
| Randomize | Indicates the random placement of the water drops.When you apply the Water Drops effect to an image, ACDSee Pro places the water drops random This makes the effect different every time you apply the filter. You can define a specific random generate identical water drop patterns.To generate a new random seed, click Randomize. |

You can right-click a slider to reset to the default value.

You can use the Edit Brush to paint this effect onto specific areas of your image.
Applying a Waves Effect
You can use the Waves effect to display waves across the photo. You can change the distance between waves. This distance is called wavelength. You can also change the height of the waves, and the angle at which the waves cross the photo. You can save your settings as a preset for future use.
To apply a Waves effect:
-
In Edit mode, in the Add group, click Special Effect.
-
Click Waves.
-
On the Waves panel, select or change the options as described below.
-
Do one of the following:
-
Click Done to accept your changes and close the panel.
- Click Cancel to discard your changes and close the panel.
Waves options
| Wavelength | Specifies the distance between waves. Drag the slider to the left to reduce the distance between and increase the distortion caused by the waves. Drag the slider to the right to increase the di between waves and reduce the distortion caused by the waves. |
| Amplitude | Specifies the height of the waves. Drag the slider to the left to reduce the height of the wave distortion caused by the waves. Drag the slider to the right to increase the height of the waves distortion caused by the waves. |
| Angle | Specifies the angle of the waves. Type a number from 1 to 360 or drag the arrow to adjust |
| Background color | Specifies the background color. Select the Image check box to use the original image colors, or click the color picker to select a different color. |

You can right-click a slider to reset to the default value.

You can use the Edit Brush
to paint this effect onto specific areas of your image.
Applying a Weave Effect
You can use the Weave effect to give a photo the appearance of being woven into a tapestry or basket. You can control the width of the vertical and horizontal strips, the width of the gap between the strips, and the background color that displays through the gap.
You can save your settings as a preset for future use.
To apply a Weave effect:
- In Edit mode, in the Add group, click Special Effect.
- Click Weave.
- On the Weave panel, set the options as described below.
-
Do one of the following:
-
Click Done to accept your changes and close the panel.
- Click Cancel to discard your changes and close the panel.
Weave options
| Strip width | Specifies the width of the vertical and horizontal strips. |
| Gap width | Specifies the width of the gap between the strips. |
| Background color | Specifies the color of the background. Click the color picker to select a different color. |

You can right-click a slider to reset to the default value.
Applying a Wind Effect
You can use the Wind effect to add wind lines that make stationary objects in your image look like they are moving. Select or change the settings to control the effect of the wind added to your image.
You can save your settings as a preset for future use.
To apply a Wind effect:
- In Edit mode, in the Add group, click Special Effect.
- Click Wind.
- On the Wind panel, select or change the options as described below.
-
Do one of the following:
-
Click Done to accept your changes and close the panel.
- Click Cancel to discard your changes and close the panel.
Wind options
| Strength | Determines how strong the wind lines are in the image. The higher the value, the stronger the lines. |
| Threshold | Determines how sharp an edge must be before the filter will apply wind. The higher the value, sharper the edge needs to be. |
| Chance of wind | Determines the amount of wind lines to place in the image. |
| Edge detection | Specifies the edge detection algorithm. The algorithm controls the formula used to detect the edge and the direction of the edge indicators. |
| Background color | Specifies the background color. Select the Image check box to use the original image colors, or click the color picker to select a different color. |
| Wind color | Specifies the color of the wind lines. Select the Image check box to use the original image colors, or click the color picker to select a different color. |
| Wind angle | Specifies the angle of the wind lines. |
| Randomize | Indicates the random placement of the wind lines.When you apply the Wind effect to an image, ACDSee Pro places the wind lines randomly. This the wind lines different every time you apply the filter. You can define a specific random seed to generate identical wind lines.To generate a new random seed, click Randomize. |

You can right-click a slider to reset to the default value.

You can use the Edit Brush

to paint this effect onto specific areas of your image.
Creating a Custom Special Effect Filter (Convolution Effect)
You can use the Convolution filter to create your own special effects and apply them to your image.
You can save your settings as a preset for future use.
To create a custom effect filter:
-
In Edit mode, in the Add group, click Special Effect.
-
Click User Defined Convolution.
-
On the User Defined Convolution panel, set the options as described below.
-
Do one of the following:
- Click Done to accept your changes and close the panel.
- Click Cancel to discard your changes and close the panel.
User Defined Convolution options
| Convolution Matrix | Specifies the formula to use when altering the image. |
| Type numbers in the matrix fields to change the pixels in the image. Using a mathematical form color value of each pixel in an image is multiplied by the numbers in the matrix to produce an | |
| Division | Specifies the fractional coefficient of the matrix. |
| Type a number into the Division field to use fractional coefficients in the matrix. The product of the convolution matrix is divided by the division factor before being applied to a pixel. | |
| Bias | Specifies the brightness of the image. |
| Type a number into the Bias field to change the brightness of the image. The bias number is added to the RGB values of each pixel. A positive number brightens the image, while a negative number the image. | |
| Clear Matrix | Resets the matrix. |
| Sample Filters | Loads a sample effect to use as a starting point for creating your own effect. |
| Drop-Down Menu |

You can use the Edit Brush

to paint this effect onto specific areas of your image.
About Blend Modes
Blend modes are filters that change the appearance of the text added to your images with the Add Text tool. The following table lists the blend modes available in the Text tool, and gives a brief explanation of their effects.
Blend modes
| Normal | Applies the text to the underlying image with the specified color. Only opacity affects this blend. |
| Screen | Combines the text color with the inverse of the underlying photo color, resulting in a color that same or lighter. |
| Multiply | Combines the text color with the underlying photo to produce a darker color. Multiplying any cold black produces black; multiplying any color with white leaves the color unchanged. |
| Dodge | Combines the text color with the underlying pixels in the photo to produce a lighter color. |
| Burn | Combines the text color with the underlying pixels in the photo to produce a darker color. |
| Overlay | Preserves the shadows and highlights of the lower layers while applying either Multiply or Screen blend mode based on the underlying image area's color values. |
| Difference | Subtracts the text color from the color of the underlying photo. Any white in the text produces negative of the color in the image, while black produces no effect. |
| Darken | Applies pixels in the text that are darker than the underlying image. Pixels in the text that are than the underlying image disappear (based on RGB values). |
| Lighten | Applies pixels in the text that are lighter than the underlying image. Pixels in the text that are than the underlying image disappear (based on RGB values). |
| Hard Light | Adds strong highlights or shadows by applying Multiply or Screen based on the underlying image area's color values. |
| Soft Light | Adds soft highlights or shadows by darkening or lightening based on the underlying image area's values. |
| Hue | Applies the hue value of colors in the text to the color of the underlying image areas. |
| Saturation | Applies the saturation value of colors in the text to the color of the underlying image areas. |
| Color | Applies the hue and saturation of the text to the image. This blend does not affect the luminar underlying image. |
| Luminosity | Applies the lightness value of colors in the text to the color of the underlying image areas. |

You can use the Edit Brush

to paint an effect onto specific areas of your image, and then set the blend mode y the effect is applied.
Rotating an Image
You can rotate an image at preset or custom angles in Edit mode.
You can save your settings as a preset for future use.
To rotate an image at a custom angle:
- In Edit mode, in the Geometry group, click Rotate.
-
Select one or more of the following:
-
Select one of the default orientation options.
-
Drag the Straightening slider to the left or right until the image appears straightened.
-
Click the Horizontal or Vertical button, and use the tools as described below.
- Select Crop straightened image if you want to crop the image after it is straightened.
- Select Preserve straightened image if you do not want to crop the straightened image. Select the color that you would like to display behind the straightened image from the Fill color drop-down.
-
Select Show grid overlay to display a grid over the image. You may find that the grid helps you straighten the image and understand how the image will be cropped.
-
Do one of the following:
-
Click Done to apply your changes and close the tool.
- Click Cancel to discard all changes and close the tool.

Click Reset to clear your changes and reset to default settings. If you saved your changes, you cannot reset your settings. If you want to discard only the Edit settings, select File | Restore to Developed.
Rotate icons
| Horizontal | Click on the horizontal icon, and then use the cursor to draw a line on the image that you want to horizontal line. |
| Vertical | Click on the vertical icon, and then use the cursor to draw a line on the image that you want to s vertical line. |

You can right-click a slider to reset to the default value.
Flipping an Image
You can flip an image both vertically and horizontally in Edit mode.
You can save your settings as a preset for future use.
To flip an image:
- In Edit mode, in the Geometry group, click Flip.
- Do one or both of the following:
- Select the Horizontal Flip check box.
- Select the Vertical Flip check box.
-
Do one of the following:
-
Click Done to apply your changes and close the tool.
- Click Cancel to discard all changes and close the tool.

Click Reset to clear your changes and reset to default settings. If you saved your changes, you cannot reset your settings. If you want to discard only the Edit settings, select File | Restore to Developed.
Cropping an Image
You can use the Crop tool to remove unwanted parts of your images, or to reduce the image canvas to a particular. You can also save your settings as a preset for future use.
To crop an image:
- In Edit mode, in the Geometry group, click Crop.
- Resize the crop window, and position it over the area of the image you want to keep.
- To darken the parts of the image outside the crop window, drag the Darken outside crop area slider to the left. Drag the slider to the right to lighten the area outside the crop window.
-
Click Estimate new file size to view how big your image file is after cropping.
-
Do one of the following:
-
Click Done to crop the image and close the tool.
- Click Cancel to exit the tool without cropping the image.

You can right-click a slider to reset to the default value.
Resizing the crop window
You can resize the crop window in three ways:
- Drag the edges of the crop window to the desired size.
- Specify an exact size for the crop window in pixels, inches, centimeters, or millimeters.
- Apply a ratio to constrain the crop window proportions.
To resize the crop window by dragging:
- Position your cursor over the edge or corner of the crop window until it changes into a double-pointed arrow.
- Drag the crop window's border to the desired size.
To specify an exact size for the crop window:
- Type the desired crop window proportions into the Width and Height spin boxes.
- In the Units drop-down list, select a unit of measurement.
- Use the Dots per inch spin box to specify a resolution.
To constrain the crop window to a ratio:
- Select the Constrain cropping proportion check box.
-
Select a ratio from the drop-down list and select or clear the Landscape check box to toggle the crop window between landscape and portrait orientation.
-
Do one of the following:
-
Position your cursor over the edge of the crop window until it changes into a double-pointed arrow, and the edge of the crop window to the desired size.
- Use the Width or Height spin box to specify a dimension for one side of the crop window. ACDSee Pro automatically resizes the other dimension based on the ratio you selected.
Correcting Perspective Distortion
You can use the Perspective Correction tool to correct perspective distortion in digital photographs. Perspective distortion is caused by wide-angle and telephoto lenses, which distort the perspective of large or far-away objects. For example, if you take a photo of a tall building, the building may appear to be narrower at the top even though the building is the same width from top to bottom.
To correct perspective distortion:
- In Edit mode, in the Geometry group, click Perspective Correction.
- An outline displays around the image. The outline has handles at all four corners, and in the middle of all the sides. Drag the handles to change the perspective.
- Set the options as described below.
- Do one of the following:
- Click Done to apply your changes and close the tool.
- Click Cancel to discard all changes and close the tool.

Click Reset to clear your changes and reset to default settings. If you saved your changes, you cannot reset your settings. If you want to discard only the Edit settings, select File | Restore to Developed.
Perspective Correction options
| Background color | When you correct distortion in a photo, the edges of the photo may bulge outwards or shrink if Use the Background color options to fill gaps in the corners or sides of a corrected photo:Image: Select this option if you want to fill gaps in the corners or sides of a corrected photo by placing the uncorrected photo in the background. This is useful if the gaps are small. |
| Show Grid | Select this option if you want to display a grid over the photo while you correct distortion. This if you want to assess whether objects in the photo are straight. |
Correcting Lens Distortion
You can use the Lens Distortion Correction tool to correct barrel, pincushion, and fisheye distortion in digital photographs. In barrel distortion the photo appears to bulge outwards from the center. In pincushion distortion the photo appears to shrink inwards toward the center. In fisheye distortion, the photo appears to bulge outwards from the center, as if the photo were wrapped around a sphere.
Barrel, pincushion, and fisheye distortion are common in photos that were taken with wide angle or zoom lenses.
You can save your settings as a preset for future use.
To correct lens distortion:
- In Edit mode, in the Geometry group, click Lens Distortion Correction.
- In the Type of Distortion section, select Barrel, Pincushion, or Fisheye.
- Set the options as described below.
-
Do one of the following:
-
Click Done to apply your changes and close the tool.
- Click Cancel to discard all changes and close the tool.

Click Reset to clear your changes and reset to default settings. If you saved your changes, you cannot reset your settings. If you want to discard only the Edit settings, select File | Restore to Developed.
Lens Distortion Correction options
| Horizontal center | Drag the slider to the left or right to identify the center of the image on the horizontal axis. |
| Vertical center | Drag the slider to the left or right to identify the center of the image on the vertical axis. |
| Correction strength | Drag the slider to the right until the objects in the photo appear to be straight. |
| Scale | Drag the slider to the left or right to change the scale of the photo. |
| Background color | When you correct distortion in a photo, the edges of the photo may bulge outwards or shrink i Use the Background color options to fill gaps in the corners or sides of a corrected photo:Image: Select this option if you want to fill gaps in the corners or sides of a corrected photo by placing the uncorrected photo in the background. This is useful if the gaps are small. |
| Show Grid | Select this option if you want to display a grid over the photo while you correct distortion. This if you want to assess whether objects in the photo are straight. |

You can right-click a slider to reset to the default value.
Resizing an Image
You can resize an image by adjusting its dimensions in pixels, percentage, or actual/print size. While resizing, you can also choose an aspect ratio and a resampling filter to adjust the resized image's appearance.
You can save your settings as a preset for future use.
To resize an image:
- In Edit mode, in the Geometry group, click Resize.
- Select one of the following resize options:
- Pixels: resizes the image to specific dimensions in pixels.
• Percent: Resizes the image to a percentage of the original.
- Actual/Print size in: Resizes the image to match a specific output size. Click the drop-down list to specify a unit of measurement.
- If you want to maintain a specific width to height ratio, select the Preserve aspect ratio check box, and then select one of the following options from the drop-down list:
• Original: Maintains the original image's width to height ratio.
• 1 x 1: Forces the width and height to be equal.
• 2 x 3: Forces a width to height ratio of 2:3.
• 3 x 2: Forces a width to height ratio of 3:2.
• 3 x 5: Forces a width to height ratio of 3:5.
- 5 x 3: Forces a width to height ratio of 5:3.
- Custom: Applies a custom ratio. Enter a width to height ratio in the Custom Aspect Ratio dialog box.
- Select a resizing filter from the Resizing Filter drop-down list.
- Under the resize option you selected in step #3, type the image's new dimensions into the Width and Height spin boxes. If you selected Actual/Print size in, click the Resolution drop-down list, and then select a resolution (in dots per inch) for your output image.
- To estimate the size of the output image, click Estimate new file size.
-
Do one of the following:
-
Click Done to apply your changes and close the Resize tool.
- Click Cancel to discard all changes and close the tool.

Resizing tips:
- Maintain image quality by reducing images only by 33% , 50% , or 66% . Other percentages can distort the aspect
- Avoid resizing an image repeatedly. Each resizing places image pixels using a slightly different orientation. As a result, multiple resizes can change the overall color and appearance of the image. If your first resize attempt does not produce the desired result, click the Undo button.
- Avoid increasing the size of an image. Increasing image size makes the image's pixels more apparent, causing a grainy effect.
Pixel Resize Options and Resulting Action
You can reduce and enlarge the size of one or more images from Manage mode by entering a new dimension in pixels. For more information on how to resize an image using pixel dimensions, please see Resizing an image or Resizing multiple images.

Enlarging an image tends to pixelate the image, reducing image quality. It is best to avoid enlarging images.
| Resize options Fit within options Action | |
| Enlarge only Width only | Resizes the image if the specified dimensions are larger than the image's original dimensions. The width is increased to the specified value and the height is increased to maintain the aspect ratio. |
| Height only | Resizes the image if the specified dimensions are larger than the image's original dimensions. The height is increased to the specified value and the width is increased to maintain the aspect ratio. |
| Width and height | Resizes the image if the specified dimensions are larger than the image's original dimensions. The width and height are increased as close to the specified value as possible, while maintaining the aspect ratio. |
| Width or height (largest image) | Resizes the image if the specified dimensions are larger than the image's original dimensions. The width or height is increased as close to the specified value as possible to maximize the size of image, while maintaining the aspect ratio. |
| Reduce only Width only | Resizes the image if the specified dimensions are smaller than the image's original dimensions. The width is decreased to the specified value and the height is decreased to maintain the aspect ratio. |
| Height only | Resizes the image if the specified dimensions are smaller than the image's original dimensions. The height is decreased to the specified value and the width is decreased to maintain the aspect ratio. |
| Width and height | Resizes the image if the specified dimensions are smaller than the image's original dimensions. The width and height are decreased as close to the specified value as possible, while maintaining the aspect ratio. |
| Width or height (largest image) | Resizes the image if the specified dimensions are smaller than the image's original dimensions. The width or height is decreased as close to the specified value as possible to minimize the size of image, while maintaining the aspect ratio. |
| Enlarge or reduce Width only | Resizes the width to the specified value and resizes the height to whatever value is necessary to maintain the aspect ratio. |
| Height only | Resizes the height to the specified value and resizes the width to whatever value is necessary to maintain the aspect ratio. |
| Width and height | Resizes the image within the specified width and height. The width and height are resized as close to the specified value as possible while maintaining the aspect ratio. |
| Width or height (largest image) | Resizes the image within the specified width and height. The width or height is resized as close to the specified value as possible to maximize (or minimize) the size of the image, while maintaining the aspect ratio. |
Adjusting Image Exposure
You can use the Exposure tool to adjust an image's exposure, contrast, and fill light.
You can save your settings as a preset for future use.
To adjust the image exposure in an image:
- In Edit mode, in the Exposure/Lighting group, click Exposure.
- Set the options as described below.
-
Do one of the following:
-
Click Apply to apply your changes and set options on another tab.
- Click Done to apply your changes and close the tool.
- Click Cancel to discard all changes and close the tool.

Click Reset to clear your changes and reset to default settings. If you saved your changes, you cannot reset your settings. If you want to discard only the Edit settings, select File | Restore to Developed.
Image Exposure options
| Exposure | Drag the slider to the right to increase the exposure, or drag to the left to decrease exposure. |
| Auto | Click the Auto button to automatically adjust the exposure level. |
| Contrast | Drag the slider to the right to increase contrast, or drag to the left to decrease contrast. |
| Fill Light | Drag slider to the right to increase the amount of light in the darkest areas of the image, or drag to the decrease fill light. Fill light brightens dark areas of the image. |
| Exposure warning | Highlights overexposed and underexposed areas of the image. Overexposed pixels turn red, underexposed pixels turn green. The icon is gray when disabled, and turns yellow if enabled. |

You can right-click a slider to reset to the default value.

You can use the Edit Brush

to paint this effect onto specific areas of your image.
Adjusting Image Levels
You can use the Levels tool to precisely adjust the contrast and light levels in your images.
You can save your settings as a preset for future use.
To adjust image levels:
-
In Edit mode, in the Exposure/Lighting group, click Levels.
-
Do one of the following:
-
Set the options as described below to adjust the contrast and light levels manually.
-
Click Auto and select a menu option to automatically adjust image properties.
-
Do one of the following:
-
Click Apply to apply your changes.
- Click Done to apply your changes and close the Levels tool.
- Click Cancel to discard all changes and close the tool.

Click Reset to clear your changes and reset to default settings. If you saved your changes, you cannot reset your settings. If you want to discard only the Edit settings, select File | Restore to Developed.
Levels options
| Channel | Specifies the brightness or color channel you want to adjust. |
| Shadows | Specifies the black point of an image.Move the slider or type a number from 0 to 255 into the spin box to define the blackest area image. As the value increases, the dark colored areas of the image become darker. You can also on the arrow to automatically set it to where the black point start in the image. |
| Midtones | Specifies the midtones in an image.Move the slider or type a number into the spin box to set the midtone. Higher values make the appear brighter, while lower values make the image appear darker. You can also click on the area automatically set it to the midtone of the image. |
| Highlights | Specifies the white point of an image.Move the slider or type a number from 0 to 255 into the spin box to define the whitest area As the value increases, the light colored areas of the image become lighter. You can also click arrow to automatically set it to where the highlights start in the image. |
| Auto | Select one of the following options:Adjust Contrast: Automatically analyzes and adjusts image contrast.Adjust Color and Contrast: Automatically analyzes and adjusts each color channel independently, and then adjusts the contrast.Adjust Color and Brightness: Automatically analyzes and adjusts image color and brightness.Tolerance: Opens the Tolerance settings dialog box. Specify the maximum clipping percentage for black and white levels, and click OK. ACDSee Pro adjusts the image levels automatically. |
Black Point picker Click the Black Point picker, and then click the image area you want to set as the black point.

Mid Point picker Click the Mid Point picker, and then click the image area you want to set as the mid point.

White Point picker Click the White Point picker, and then click the image area you want to set as the white poir


When you click around the image with a selected eye dropper you will see the RGB numbers changing to reflect values of the pixel under the eye dropper. The RGB values represent the source pixel (unprocessed) and the c as it appears on the screen.

You can use the Edit Brush

to paint this effect onto specific areas of your image.
Adjusting Levels Automatically
You can use the Auto Levels tool to automatically correct the exposure levels of your images. Auto Levels makes the darkest image pixels darker, and the brightest pixels brighter.
You can save your settings as a preset for future use.
To automatically correct an image's levels:
- In Edit mode, in the Exposure/Lighting group, click Auto Levels.
- Select one of the following options:
• Auto Contrast and Color: Adjusts color differences, brightness, and balances RGB channels.
• Auto Contrast: Adjusts the color differences and brightness only.
• Auto Color: Balances the RGB channels in the image, without changing the brightness or contrast.
- Use the Strength slider to fine tune the amount of exposure you want to apply.
- Click Exposure Warning to make overexposed and underexposed pixels visible. Overexposed pixels turn red, underexposed pixels turn green.
-
Do one of the following:
-
Click Done to accept your changes and close the panel.
- Click Cancel to discard your changes and close the panel.

Click Reset to clear your changes and reset to default settings. If you saved your changes, you cannot reset your settings. If you want to discard only the Edit settings, select File | Restore to Developed.

You can right-click a slider to reset to the default value.

You can use the Edit Brush to paint this effect onto specific areas of your image.
Adjusting Tone Curves
In Edit, you can use the Curves tool to change the tonal range of an image. Select the RGB color channel to adjust the entire range of the image, or select a specific color.
You can save your settings as a preset for future use.

Remember that any changes you make with this tool in Edit, are pixel-based edits, recommended for final touch your image. For non-destructive changes, use the Tone Curves tool in Develop.
To adjust the brightness curves in an image:
- In Edit mode, in the Exposure/Lighting group, click Tone Curves.
-
Set the options as described below.
-
Do one of the following:
-
Click Apply to apply your changes.
- Click Done to apply your changes and close the Curves tool.
- Click Cancel to discard all changes and close the tool.

Click Reset to clear your changes and reset to default settings. If you saved your changes, you cannot reset your settings. If you want to discard only the Edit settings, select File | Restore to Developed.
Curves options
| Channel | Specifies the color channels to adjust. |
| Show Histogram | Toggles the histogram display on and off. |
| Histogram | Displays a graphic of the color information levels in the image, based on the selected channel. (and drag the line to manipulate the curve. Each time you click the curve, a new node is added drag the nodes up and down the curve. To remove a node, drag the node up and out of the down and out of the graph. |
| Exposure warning | Highlights overexposed and underexposed areas of the image. Overexposed pixels turn red, underexposed pixels turn green. |

You can use the Edit Brush to paint this effect onto specific areas of your image.
Adjusting Lighting
You can use the Lighting tool to adjust areas in an image that are too dark or too light, without affecting other areas of the photo. You can also simultaneously lighten dark areas that are too dark, and darken areas that are too bright. Examples would be a photo of a person silhouetted against a bright background like the sea, or a window. In fact, most photos taken on a dull day, or with a flash, can be improved in various ways with fine adjustments.
You can save your settings as a preset for future use.
The Lighting tool is very versatile. There are 3 tabs, each allows you to achieve results in different ways. In addition, there are several keyboard and mouse shortcuts that allow you to make adjustments on specific areas of the photo itself.
- Basics tab: Is for very quick and easy adjustments using three sliders. ACDSee Pro analyzes the photo and varies the adjustment throughout the image automatically. For example, darker images are brightened more. By clicking the Auto button, you can have ACDSee Pro fully analyze the photo and set the slider positions automatically. You can also directly on an area of the image to generate automatic settings optimal for that area, (usually the subject of the photo).
- Light EQ tab: Works like a sound equalizer but with light. You can adjust the brightness and contrast of different tone bands (areas of relative brightness or darkness) of the image independently using a slider for each tone band. shows the amount of brightening or darkening applied throughout the tonal range. The gray areas in the graph suggested boundaries for adjustment to avoid clipping and loss of detail, and turn red to indicate where you have adjusted the sliders far enough to cause clipping.
- Advanced tab: Gives you ultimate control of the brightness and contrast in an image. Basic adjustment curves can be constructed using four sliders, and you can manually adjust the curves by clicking and dragging within the graph on the image itself.
To open the Lighting tool:
In Edit mode, in the Exposure/Lighting group, click Lighting.
Using the Basics tab
To add light to dark areas:
- Drag the Highlights slider to the right to add light to the dark parts of the photo.
- Adjust the settings using any of the controls in the table below.
To darken areas that are too bright:
- Drag the Shadows slider to the right to lighten and return detail to areas that are too dark.
- Adjust the settings using any of the controls in the table below.
To adjust midtones that are too light or dark:
- Drag the Midtones slider to the right to lighten and return detail to areas that are too dark.
- Adjust the settings using any of the controls in the table below.
Lighting controls
Right-click on a slider to reset it. click on a slider
Exposure Click the Exposure Warning to make any overexposed or underexposed areas visible. Overexposed pixels turn underexposed pixels turn green. You can also toggle Exposure Warning on and off momentarily by holding dc Warning E key.

Auto Click to allow the software to analyze the photo and apply optimal settings based on the amount of light pixels in the photo. Darker photos are brightened more than photos that are already bright.
Done Click to apply your changes and close the tool.
Cancel Click to discard all changes and close the tool.

Click Reset to clear your changes and reset to default settings. If you saved your changes, you cannot reset your settings. If you want to discard only the Edit settings, select File | Restore to Developed.
Using the Light EQ tab

The Light EQ tab has two sets of sliders. The top set is for brightening. The lower s darkening. The dark-to-light gradient on each slider indicates that you brighten that tone band when you move the slider up (top row of sliders) or darken that tone band wh move the slider down (bottom row).
Between the two sets of sliders are two horizontal bars graded from black to white. T bars indicate that sliders on the far left affect the dark tonal bands. The sliders on the affect light tonal bands. Moving a slider changes the light in that particular tonal band. In the middle of the bands are two graphs that change as you adjust the sliders to represent the amount of darkening and lightening throughout the tonal range of the image. The two gray graphs show the maximum amount of brightening or darkening that you apply before clipping begins. If you push a slider too far, the clipping is shown in bright pink.
To increase contrast within a tonal band, apply brightening and darkening simultaneously in equal amounts by dragging the upper and lower sliders up and down, respectively. The area between the top of the upper graph and the bottom of the lower graph indicates the amount by which contrast is increased.
To use the Light EQ tab:
-
Do one of the following:
-
Drag the tone band sliders up or down depending on which light bands you want to adjust.
• Type the exact number into the number boxes or increment the numbers to make precise adjustments. - Click the # Tone drop-down list to increase or decrease the number of tone band sliders.
- Click (or press E) to see any overexposed or underexposed pixels.
- Click the Auto button to apply settings automatically.
- Drag the Darkening slider to darken the light areas of the image.
- Drag the Contrast slider to increase the contrast in the image.
-
Drag the Fill Light slider to lighten dark areas of the image.
-
Click Done to apply your settings and close the tool. Or click Cancel to discard your changes and close the tool.
Using the Advanced tab

Sliders
The Advanced tab has two sliders for brightening and two for darkening. The Brightening and Darkening sliders control the shape of the adjustment curves, while the Amplitude sliders control the height of the curves.
The more you brighten or darken, the more you increase the balance of the dark against the light areas in the image. The Amplitude sliders increase the intensity of the effects of brightening or darkening.
The Scale slider at the bottom of the tool adjusts the overall adjustment sensitivity, local variation in brightness. Moving this slider to the left makes the adjustment m sensitive to smaller areas of brightness variation, which may be beneficial in some images. For most images, however, leaving the slider in the default position gives best result. You can also adjust the Contrast slider to decrease or increase contrast or use the Fill Light slider to lighten dark areas of the image.
Graphs
Between the Brightening and Darkening controls are two gray graphs that indicate the maximum amount of lightening or darkening that you can apply before clipping (shown as bright pink) begins.
Two colored curves appear and change as you drag the Brightening, Darkening and Amplitude sliders - these curves indicate the amount of brightening and darkening applied throughout the tonal range of the image. Darker tonal areas are on the left, and brighter tonal areas are on the right. As you move your cursor over the image, a vertical line in the graph indicates the tone level of the area under the cursor within the tonal range. At times there are two lines because the tone levels for brightening and darkening are not necessarily the same. This is because brightening is sensitive to maximum color values while darkening is sensitive to minimum color values.
The Advanced tab is unique in that you can adjust the curves manually, either on the graph itself, or on the actual photo. Adjustments made on the photo are reflected in the curve on the graph. Adjustments made on the graph are reflected on the photo.
To increase contrast within a tonal range without changing the brightness, apply brightening and darkening simultaneously in equal amounts by dragging the upper and lower curves up and down, respectively. The area between the top of the upper graph and the bottom of the lower graph indicates the amount by which contrast is increased.
To use the Advanced tab:
-
Do one of the following:
-
Drag the Brightening or Darkening sliders to adjust the bright or dark pixels. As you drag, a gray curve appears to indicate your adjustments.
- Left-click and drag upwards to brighten the dark areas of the photo. Try to prevent clipping (shown in graph).
- Right-click and drag downwards to darken the bright areas of the photo. Try to prevent clipping (shown the graph).
-
Drag the Scale slider to the right to make your adjustments more sensitive to smaller areas of brightness variation.
-
Drag the Contrast slider to increase or decrease contrast in your image.
-
Drag the Fill Light slider to add light to the dark areas in your image.
• Make adjustments using any of the options in the table below, including on the image itself. -
Click Done to apply your settings and close the tool. Or click Cancel to discard your changes and close the tool.
Adjustment options - Advanced tab
Area Action Result
| Sliders Drag Brightening | To the right: Increases the lightening applied to the darker areas.To the left: Applies brightening more uniformly to all areas of the image.(The name of the slider changes toCustom curvewhen you change the curve manually or make adjustments on the image.) |
| Drag Darkening | To the right: Increases the darkening applied to the brighter areas of the image.To the left: Applies the darkening more uniformly to all areas of the imag |
| Drag Amplitude (Brightening) | To the right: Increases the intensity of the brightening across all areas of image. The height of the curve increases.To the left: Reduces the intensity of the brightening and the height of the curve.If the Amplitude slider is 0 - no brightening is applied.If the Amplitude is 100 - 200, the proportional amount of clipping increaseIn most cases it is not necessary to adjust amplitude. |
| Drag Amplitude (Darkening) | To the right: Increases the intensity of the darkening across all areas of t image. The height of the bottom curve increases.To the left: Reduces the intensity of the darkening and the height of the curve. |
| Drag Scale | To the left: Makes the tool more sensitive to smaller areas of brightness variation.This means that smaller areas can be adjusted independently. Generally the default scale of 10 gives the best result, but if an image contains small details that need brightening, a lower scale might give better results. |
Area Action Result
| On Graph Drag the graph (top) | The graph changes as you left-click and drag up on the graph itself. The graph represents the brighten adjustments you are making. The dark gray graph represents the maximum amount you can drag the graph before clipping (pink) begins.The height of the graph represents the level of brightening applied at each tone level. (Tone moves from black on the left to white on the right.)When you make direct brightening or darkening adjustments on the graph c image, the corresponding Brightening or Darkening slider changes to Custom curve. If you adjust the position of the slider after this it discards direct curve adjustments.When you make direct brightening or darkening adjustments on the graph c image, the corresponding Brightening or Darkening Amplitude slider changes to indicate the current curve amplitude. |
| Drag the graph (bottom) | The graph changes as you right-click and drag down on the graph itself. 1 graph represents the darken adjustments you are making. The dark gray graph represents the maximum amount you can drag the graph before clipping (pink) begins. |
| You can use all the shortcuts that apply to the image, directly the Graph itself. | Changes the tonal band on the graph itself with a corresponding change in the timage. This is useful for making fine adjustments to a specific tonal band. |
Area Action Result
| On Image | Double-click with left mouse button | Automatically sets Brightening to optimum for that area of the image. A brighter area (e.g. a face) works best. |
| Double-click with right mouse button(or SHIFT + double-click with left mouse button) | Automatically sets the Darkening to optimum for that area of the image. | |
| CTRL + double-click with left mouse button | Increases the amount of brightening around that tone level while decreasing the brightening in the rest of the image.Use this method to quickly brighten a specific subject or area to bring it of the image. | |
| CTRL + double-click with right mouse button | Increases the amount of darkening around that tone level while decreasing the amount of darkening in the rest of the image. | |
| Scroll up or down with the mouse wheel above the image | Increases or decreases the amount of brightening applied at that tone level in the image. Both the image and the graph show the changes. | |
| SHIFT+ scroll with the mouse wheel above the image | Decreases or increases the amount of darkening applied at that tone level the image. | |
| Hold down "A" + scrolling or + dragging with the left mouse button | Sets the brightening Amplitude slider directly. | |
| Hold down "A" +SHIFT + scrolling or + dragging with the right mouse button | Sets the darkening Amplitude slider directly. | |
| Click and drag up and down on the image (left mouse button) | Increases or decreases the amount of brightening applied at that tone level in the image. Both the image and the graph show the changes.(Only works if the image is actual size - no zooming.) | |
| SHIFT + click and drag up and down on the image (left mouse button) | Decreases or increases the amount of darkening applied at that tone level the image.(Only works if the image is actual size - no zooming.) |

You can right-click a slider to reset to the default value.

You can use the Edit Brush

to paint this effect onto specific areas of your image.
Dodge and Burn
Enhance your photos and improve contrast by controlling the light and intensity of color in select areas. Dodge, burn, saturate and desaturate your photos to accentuate and define shapes, magnify and fade color, and add shadows and highlights.
You can use the Dodge and Burn tool to lighten or darken areas in a photo without affecting other areas. The tool is often used to lighten underexposed areas or darken overexposed areas.
You can save your settings as a preset for future use.
Dodging and Burning parts of an image
To lighten or darken areas of a photo:
- Select the Dodge tool to lighten areas, or the Burn tool to darken areas.
- Under Tool Settings, select the area to adjust: Shadows, Midtones, or Highlights.
-
Drag the range slider to fine-tune targeted areas within the shadows or highlights. Increasing the range broadens the affected range of tones, while decreasing the range narrows the affected range of tones.
-
Under Brush settings select from the following preference settings:
-
Drag the Nib Width slider to select a brush size.
- Drag the Feathering slider to soften the edges of your strokes.
-
Drag the Strength slider to adjust the intensity of your strokes.
-
Draw over the areas of the image you want to lighten or darken.
-
Click Done.

When you adjust the range slider, a preview of the areas of the image that will be affected by brushing will be shown as a grayscale image. The brighter the pixels are in the preview image, the more they will be affected by brush strokes. Areas that are pure white will be affected with full strength, and areas that are black will be completely unaffected. For best results, move the range slider until the pixels you want to dodge or burn are white, and areas that you want unaffected are black.

Scroll with your mouse to adjust the brush size on the fly, or use SHIFT + mouse scroll to adjust feathering
To saturate or desaturate areas of a photo:
- Select the Saturate tool to intensify colors, or the Desaturate tool to fade colors.
- Under Tool Settings, select one of the following:
- Standard to target all areas of the photo.
• Vibrance to target the less saturated colors and to prevent skin tones from becoming over-saturated.
-
Under Brush settings select from the following preference settings:
-
Drag the Nib Width slider to select a brush size.
- Drag the Feathering slider to soften the edges of your strokes
-
Drag the Strength slider to adjust the intensity of your strokes
-
Draw over the areas of the image you want to lighten or darken.
-
Click Done.

You can right-click a slider to reset to the default value.
Adjusting White Balance
You can use the White Balance tool to remove unwanted hue from an image. For example, if you take a photo at sunset and the resulting image has a reddish hue, you can use the White Balance tool to remove it.
You can save your settings as a preset for future use.
To remove a color cast from an image:
- In Edit mode, in the Color group, click White Balance.
- Click an image area that should be white or gray. The color square shows the color of the original pixel on the left, and the modified pixel on the right.
- To specify the strength of the white balance adjustment, move the slider. Higher settings remove more of the unwanted color.
- Click Done to save your changes, or click Cancel to discard your changes and leave the tool.

You can right-click a slider to reset to the default value.

You can use the Edit Brush to paint this effect onto specific areas of your image.

If you are having difficulties achieving the desired effect, try clicking an image area that is a different shade of white or gray.

Click Reset to clear your changes and reset to default settings. If you saved your changes, you cannot reset your settings. If you want to discard only the Edit settings, select File | Restore to Developed.
Adjusting Color
You can use the Advanced Color (hue, saturation, and brightness) tool to adjust overall colors in an image or each color individually. The advanced tools can subtly fine-tune and enhance colors, or completely change individual colors in an image.
Advanced Color is useful for changing a single color in an image. If you have an image with a yellow car, you can use the Saturation tab to saturate the yellow, or use the Brightness tab to brighten the yellow. In the Hue tab, you can change the color of the car from yellow to pink.
You can save your settings as a preset for future use.

If you have an image of a yellow car with a yellow building in the background, you can change just the car. Selections tool. Select the car using the Selections tool and then apply your color adjustments.
To adjust color:
- In Edit mode, in the Color group, click Advanced Color.
- Select the Saturation, Brightness, or Hue tab, and adjust them according to the options described in the table below.
-
Do one of the following:
-
Click Apply to apply your changes.
- Click Done to apply your changes and close the tool.
- Click Cancel to discard all changes and close the tool.

Click Reset to clear your changes and reset to default settings. If you saved your changes, you cannot reset your settings. If you want to discard only the Edit settings, select File | Restore to Developed.

You can use the Edit Brush to paint this effect onto specific areas of your image.
Advanced Color options
Select High Quality mode or Standard mode from the top of the Advanced Color pane. To adjust colors individually, left-click a color on the image and drag up or down to alter. Your changes are reflected in the color sliders in High Quality mode, and the graph in Standard mode respectively. This works in the Saturation, Brightness and Hue tabs.
High Quality
Adjust image colors individually. High Quality uses the newer, more modern color models, allowing for a visually perceptive and higher quality adjustment.

Adjust each color individually by dragging sliders right for more intensity, or left for less intensity. You can also enter a number into the fields for precise adjustments. Or select a precise color to adjust by placing your cursor on the image for the double arrow icon to appear. Then click and drag up or down to adjust the colors beneath the double arrow icon. The affected color sliders automatically adjust as you move your cursor.
Vibrance
Drag the slider to adjust the vibrance of the image without affecting skin tones.
Saturation
Drag the slider to adjust the saturation of the image.
Standard
Supports previously developed images. Adjust colors individually or make global adjustments.
Vertical slider

Apply adjustments to the entire image. A slider on the left has the following effects on the tabs:
- Saturation:
Adjusts from saturation to grayscale.
- Brightness:
Adjusts the light or dark tones in the image.
- Hue: Changes to a different color.
You can also enter a number into the field for precise adjustments.

Direct image adjustments
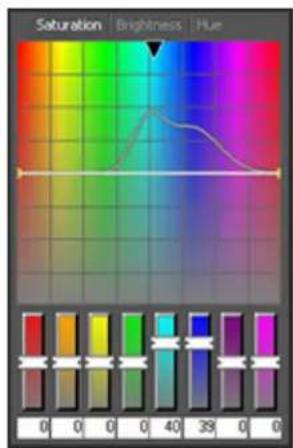
Adjust each color with individual sliders. Select the color you want to adjust and click and drag the sliders. You can also enter a number into the fields for precise adjustments.
Place your cursor on the image for the double arrow icon to appear. Then click and drag up or down to adjust the colors beneath the double arrow icon. The curve control and the affected color sliders automatically adjust as you move your cursor. The black down arrow on the graph indicates the color you are adjusting in the image.
The curve appears black in the graph, and you cannot directly adjust it. To apply further adjustments, you can alter the white curve. When you adjust the white curve, the black curve automatically changes with it. You can also enter a number into the fields for precise adjustments.
Vibrance
Drag the slider to adjust the vibrance of the image without affecting skin tones.

You can right-click a slider to reset to the default value.
Adjusting Split Tone
Split toning is a powerful technique originating in film photography to tint the highlights and shadows.
The Split Tone tool gives you creative control over the Hue and Saturation of your highlights and shadows. Use the sliders to adjust the balance of tones in the highlights and shadows of your photos. Split toning allows you to add a creative element to RAW conversion and non-destructive editing in ACDSee.
You can save your settings as a preset for future use.
To adjust Highlights and Shadows:
- In Edit mode, under the Color group, select Split Tone.
- Drag the sliders to apply colored highlights and shadows as described in the table below.

You can right-click a slider to reset to the default value.
Adjustment options
| Highlights | |
| Hue | Drag the slider to the right to select a highlight color. |
| Sat-uration | Drag the slider to the right to increase saturation of the specified color in the highlights of t image. |
| Shadows | |
| Hue | Drag the slider to the right to select a shadow color. |
| Sat-uration | Drag the slider to the right to increase saturation of the specified color in the shadows of th |
| Balance | Drag the slider to the right to emphasize the highlight color; drag the slider to the left to e shadow color. For example if the slider is set to the maximum at 50, then full emphasis is highlight color; if the slider is set to the minimum -50, then full emphasis is applied to the color. |

Create a sepia tone effect by first reducing the saturation of your photo with the Advanced Color tool and then applying a reddish brown hue with the Split Tone tool. Or create a monochromatic black and white photo with a slight ti

You can use the Edit Brush to paint this effect onto specific areas of your image.
Adjusting Color Balance
You can adjust an image's color values using the Color Balance tool.
You can save your settings as a preset for future use.
To adjust an image's color:
- In Edit mode, in the Color group, select Color Balance.
-
Adjust the sliders as described in the table below.
-
Do one of the following:
-
Click Apply to apply your changes.
- Click Done to apply your changes and close the tool.
- Click Cancel to discard all changes and close the tool.

Click Reset to clear your changes and reset to default settings. If you saved your changes, you cannot reset your settings. If you want to discard only the Edit settings, select File | Restore to Developed.
Color Balance options
| Vibrance | Boosts color in the image, and avoids affecting skin tones. |
| Saturation | Adjusts the saturation of the image. Drag the slider to the right to increase or drag to the left to saturation. |
| Hue | Adjusts the hue of the image. Drag the slider to the right to increase or drag to the left to decrease |
| Lightness | Adjusts the image brightness. Drag the slider to the right to increase or drag to the left to decrease image's brightness. |
| Red | Adjusts the red channel in the image. Drag the slider to the right to increase or drag to the left to the red tone in your image. |
| Green | Adjusts the green channel in the image. Drag the slider to the right to increase or drag to the left to decrease the green tone in your image. |
| Blue | Adjusts the blue channel in the image. Drag the slider to the right to increase or drag to the left to decrease the blue tone in your image. |

You can right-click a slider to reset to the default value.

You can use the Edit Brush to paint this effect onto specific areas of your image.
Creating a Grayscale Image
You can create rich grayscale images when you can control the brightness of the red, green, and blue channels, as well as the overall brightness. Use the Convert to Black and White tool to emphasize different areas or aspects of a photo, as well as alter its mood and tone.
If you hover your mouse over each slider and watch the effect on the small preview, it shows you which parts of the image will be affected by each channel. This helps to gauge the effect of each slider on the image.
You can save your settings as a preset for future use.
To create a grayscale image:
-
In Edit mode, in the Color group, click Convert to Black & White.
-
Do any of the following:
- Drag the Percent Red slider to the left or right.
The more red there is in a pixel, the more effect the red slider has on that pixel. The area of re brightened or darkened more than other areas.
- Drag the Percent Green slider the left or right.
The more green there is in a pixel, the more effect the green slider has on that pixel. The area o picture is brightened or darkened more than other areas.
- Drag the Percent Blue slider to the left or right.
The more blue there is in a pixel, the more effect the blue slider has on that pixel. The area of I is brightened or darkened more than other areas.
- Drag the Percent Brightness slider to the right or left to brighten or darken the whole image.

You can right-click the slider to reset the value to zero.
- Click Done to save your changes, or click Cancel to discard your changes and return to the Edit mode menu.

You can use the Edit Brush

to paint this effect onto specific areas of your image.

Click Reset to clear your changes and reset to default settings. If you saved your changes, you cannot reset your settings. If you want to discard only the Edit settings, select File | Restore to Developed.
Using the Histogram
The Histogram displays a graphical representation of the distribution of intensity levels of pixels for each color channel in an image.
To display and use the Histogram:
-
In View mode, click View | Histogram.
-
On the Histogram, select or clear the following check boxes:
• R: Shows or hides the red color channel.
• G: Shows or hides the green color channel.
• B: Shows or hides the blue color channel.
• L: Shows or hides the lightness of the image.
Changing Image Color Depth
You can modify an image's color depth in View mode. Color depth refers to the range of colors an image contains.
To change the color depth of an image:
In View mode, click Tools | Modify | Change Color Depth, and select one of the options described below.
Color depth options
| Black and White | Two-color black and white palette |
| 16 Grays | 16-color grayscale palette |
| 256 Grays | 256-color grayscale palette |
| 16 Colors | 16-color palette |
| 256 Colors | 256-color palette (GIF format uses 256 colors by default) |
| Hicolor | 32,768-color palette |
| Truecolor | 16,777,216-color palette of all colors visible to humans |
| 16 bit grayscale | 16-bit grayscale palette |
| 48 bit color | 48-bit color palette |
You can use ACDSee Pro to convert an image to any of these color depths. However, to use certain image enhancement tools, filters, blends, and adjustment options, the image must be Hicolor or Truecolor. To edit an image that is not originally Hicolor or Truecolor, you can convert it, edit the image, and then convert it back to its original color depth.
Using the Color Dialog Box
The Colors dialog box appears in several places in Edit when you select or apply a color. You can use the Color dialog box to select a color in multiple ways and to adjust a color using several different tools.

The color grids
In the top left corner there is a fixed grid of Basic colors to choose from, including gray, black, and white in the last three boxes. Below it is a grid of Custom colors that you can fill in by creating a custom color, and then clicking the Add to Custom Colors button.
The color palette and slider
Beside the Basic colors is a color palette. It contains all the colors of the spectrum from red through yellow, green, turquoise, blue, purple, pink, to red again. The colors at the top of the palette are pure primary colors with increasing amounts of gray added until along the bottom, the colors are mostly gray. If you want a color to have a smoky look, select it from the bottom end of this palette. Similarly, you will find colors like browns at the lower end of the red/orange in this palette.
On the far right is a color slider. In the slider, the actual color selected is where the small black arrow appears. You can then adjust the color to add white or black to it by moving the slider up to add white (for pastels) until it is completely white or move the slider down to add black (for a richer color) until it is completely black.
Selecting and adjusting colors
To select a color, click on a square in either grid, or on the color palette. You can also drag over the color palette. When you click a color, or lift your finger off the mouse after dragging, that color appears in the large Color/Solid square and all its numerical values; Hue, Saturation, Luminosity, as well as Red, Green, Blue, appear in the boxes.
You can also adjust a color by changing the Hue Saturation, and Luminosity numbers. To select a precise color, type in the values for that color. You can do the same using the Red, Green, Blue values.
Sharpening an Image
You can use the Sharpen tool to sharpen an image by enhancing medium and high contrast edges.
You can save your settings as a preset for future use.
To sharpen an image using Sharpen tool:
- In Edit mode, in the Detail group, select Sharpen.
- Drag the sliders to enhance or fix your image as described below.
-
Do one of the following:
-
Click Done to apply your changes and close the tool.
- Click Cancel to discard all changes and close the tool.

Click Reset to clear your changes and reset to default settings. If you saved your changes, you cannot reset your settings. If you want to discard only the Edit settings, select File | Restore to Developed.
Sharpen options
| Amount | Specifies the amount of sharpening applied by increasing contrast around the edges. |
| Radius | Controls the number of pixels to adjust around each edge. Higher values increase the number of sharpened pixels and tend to bring out coarser detail, while lower values reduce the number of sharpened pixels and tend to bring out finer detail. |
| Mask | Allows the targeting of edges, while suppressing the sharpening of noise and texture. To view the areas the mask affects, press the ALT key when moving the mask slider. Areas affected by sharpening appear white. |
| Detail | Suppresses the halo, (the light border that forms around edges with extreme sharpening), by reducing its intensity. The higher the value, the stronger the reduction. |
| Threshold | Specifies how different the pixel lightness values within an edge must be before the pixels within edge are sharpened. Higher values sharpen only stronger edges but minimize the appearance of nLower values sharpen both strong and weaker edges, but can increase the appearance of noise. I recommend you set the threshold to enhance edges while keeping background noise to a minimum. |

You can right-click a slider to reset to the default value.

You can use the Edit Brush to paint this effect onto specific areas of your image.
Blurring an Image
You can use the Blur tool to apply different kinds of blur to an image.
You can save your settings as a preset for future use.
To blur an image:
- In Edit mode, in the Detail group, select Blur.
- In the Blur type drop-down list, select the type of blur to apply.
- Set the options as described below.
- Do one of the following:
- Click Done to apply your changes and close the Blur tool.
- Click Cancel to discard all changes and close the tool.

Click Reset to clear your changes and reset to default settings. If you saved your changes, you cannot reset your settings.
If you want to discard only the Edit settings, select File | Restore to Developed.
Blur types
| Gaussian | Produces an even, smooth blur. | |
| Amount | Specifies the amount of blur. Move the slider to the right to intensify the effect. | |
| Linear | Produces a blurring effect that gives the illusion of movement. | |
| Amount | Specifies the amount of blur. Move the slider to the right to intensify the effect. | |
| Angle | Specifies the direction of the blur effect. | |
| Radial | Produces blur around a center point. Click the image to set the center point. | |
| Amount | Specifies the amount of blur. Move the slider to the right to intensify the effect. | |
| Clockwise | Specifies clockwise blur. | |
| Counter-clockwise | Specifies counter-clockwise blur. | |
| Horizontal position | Specifies the blur's center point on the horizontal axis. | |
| Vertical position | Specifies the blur's center point on the vertical axis. | |
| Spread | Produces a smeared or frosted blur. | |
| Amount | Specifies the amount of blur. Move the slider to the right to intensify the effect. | |
| Zoom | Produces inward or outward blur to or from a center point. | |
| Amount | Specifies the amount of blur. Move the slider to the right to intensify the effect. | |
| Zoom in | Creates a blur that zooms in to the image's center. | |
| Zoom out | Creates a blur that zooms out from the image's center. | |
| Horizontal position | Specifies the blur's center point on the horizontal axis. | |
| Vertical position | Specifies the blur's center point on the vertical axis. | |
| Smart Blur | Produces blur by detecting and avoiding edges, and preserves detail based on the threshold setting. TI effect is usually used to smooth out skin. | |
| Amount | Specifies the amount of blur. Move the slider to the right to intensify the effect. | |
| Threshold | Specifies how little detail an area must have before the blur will apply to it. | |

You can right-click a slider to reset to the default value.

You can use the Edit Brush to paint this effect onto specific areas of your image.
About Noise and Noise Reduction
Image noise looks like random black, white, or colored pixels in an area of a photo where there should be solid color, such as a dark night sky. In digital photography, noise is typically more visible in the dark areas of a photo.
There are many causes of image noise. You will increase image noise if you use a high ISO setting (such as ISO 800) to capture a photo, or if you extend the exposure time. (You would typically use a high ISO setting and extend exposure time to take a photo in low light.) However, image noise can be caused by dead or stuck pixels in a digital camera's image sensor. Similarly, dust on a camera lens or scanner bed can cause noise by blocking or reflecting light.
Images generally have two types of noise: luminance and color. Luminance noise is random variations of brightness, and particularly in gray areas, may appear spotted when there should be a solid color in the area of the image.

natural_image
Completely dark gray image with no visible content, text, or symbols.Color noise is random variations of color in the image.

natural_image
Blank or nearly blank image with no discernible text, symbols, or visual content.Noise is visually distracting, so in most cases you will want to reduce noise in your photos. However, if you reduce noise too much you may unintentionally reduce image sharpness. You can use the Noise Removal tool to remove both luminance and color noise in your images.
Removing Noise
You can use the Remove Noise tool to remove noise from your images while preserving details that you want to reta

You can use the Remove Noise tool to remove hot image pixels caused by digital cameras with malfunctioning sensors, or the extra pixels caused by a dusty scanner or camera lens.
You can save your settings as a preset for future use.
To remove noise from an image:
- In Edit mode, in the Detail group, click Noise.
- Select the Remove Noise tab.
-
Set the options as described below.
-
Do one of the following:
-
Click Done to apply your changes and close the Remove Noise tool.
- Click Cancel to discard all changes and close the tool.

Click Reset to clear your changes and reset to default settings. If you saved your changes, you cannot reset your settings. If you want to discard only the Edit settings, select File | Restore to Developed.
Noise Removal options
| Despeckle | Removes noise. |
| Square | Removes noise using a 3 x 3 pixel square. |
| X | Removes noise using a 3 x 3 pixel X shape. Use this option when you want to preserve an in and diagonal lines. |
| Plus | Removes noise using a 3 x 3 pixel plus (+) shape. Use this option when you want to preserve image's thin, vertical, and horizontal lines. |
| Hybrid | Removes digital camera noise. Adjust the following sliders to further remove noise:• Luminance: Reduces the random variations of brightness in the noise.• Color: Reduces the random variations of color in the noise. |

You can right-click a slider to reset to the default value.

You can use the Edit Brush to paint this effect onto specific areas of your image.
Adding Noise
You can use the Add Noise tool to add a grainy texture to an image. Adding small amounts of noise can reduce the appearance of minor imperfections in the original image.
You can save your settings as a preset for future use.
To add noise to an image:
- In Edit mode, in the Detail group, click Noise.
- Select the Add Noise tab.
- Set the options as described below.
-
Do one of the following:
-
Click Done to apply your changes and close the Add Noise tool.
- Click Cancel to discard all changes and close the tool.

Click Reset to clear your changes and reset to default settings. If you saved your changes, you cannot reset your settings. If you want to discard only the Edit settings, select File | Restore to Developed.
Add Noise options
| Intensity | Specifies the amount of noise to add to the image. A higher intensity increases the chance that pixel will replace a pixel in the original image. |
| Color proximity | Specifies the color of noise pixels to add to the image. A lower value gives each noise pixel a similar to the pixel it replaces. Higher values result in a random selection of the noise pixel col |
| Noise color | Select one of the following options to specify noise pixel color:Random: Randomly selects the color.Monochrome: Produces black and white noise pixels.Adjustable: Randomly selects the color of each noise pixel, but more pixels match a defic color. To define a color, click the color picker and select a color. |
| Noise placement | Adds noise to image areas that closely match a defined color. Select the Set color check box to enable noise placement, and click the color picker to specify a color. |
| Randomize | Indicates the random placement of noise in an image.When you use Add Noise tool, ACDSee Pro places the noise pixels based on a random seed. The image noise different each time you use the Add Noise tool. You can define a specific rand to generate identical image noise.To generate a new random seed, click Randomize. |

You can right-click a slider to reset to the default value.

You can use the Edit Brush to paint this effect onto specific areas of your image.
Adjusting Clarity
The Clarity tool adds subtle definition to the details in your image. Use the Clarity tool to enhance the contrast of midtones in your images, without overpowering the shadows and highlights.
You can save your settings as a preset for future use.
To adjust the clarity of your image:
- In Edit mode, open the Detail group.
- Select Clarity.
-
Drag the Strength slider to the right for greater clarity, or to the left for reverse clarity.
-
Do one of the following:
-
Click Done to apply your changes and close the tool.
- Click Cancel to discard all changes and close the tool.

You can also type a number into the number box and incrementally make precise adjustments.

You can right-click a slider to reset to the default value.

You can use the Edit Brush to paint this effect onto specific areas of your image.
Chapter 7: Online Mod

For help with ACDSeeOnline.com, click the ACDSeeOnline.com tab, then click Help.
You can use Online mode to upload your images to ACDSeeOnline.com, an image sharing and storage service available to ACDSee Pro users. With Online mode and ACDSeeOnline.com, you can upload and browse through your online images without having to launch an Internet browser. You need to create an ACDSeeOnline.com account first, before uploading your photos.

With ACDSeeOnline.com, you can:
• Create your ACDSeeOnline.com account
- Upload images
- Set privacy settings for your image folders
Working in Online Mode
For help with ACDSeeOnline.com click the ACDSeeOnline.com tab, then click Help.

You can use the Online mode to upload your images to ACDSeeOnline.com, an image sharing and storage service available to ACDSee Pro users. With the Online mode and ACDSeeOnline.com, you can upload and browse through your online images without having to launch an Internet browser. Or you can access ACDSeeOnline.com at any time directly from an Internet browser.
Online mode has two parts: ACDSeeOnline.com and Transfer

To enable the ACDSeeOnline.com and Transfer tabs, you need to create an ACDSeeOnline.com account.
ACDSeeOnline.com
Clicking the ACDSeeOnline.com tab takes you to ACDSeeOnline.com, where you can browse through images you have uploaded to your online account, or see other users' images. ACDSeeOnline.com has the following menus:
- Manage: Organize your images into folders.
- Upload: Click Upload to switch to Transfer for uploading images.
• Profile: Modify your profile and set specific information to public or private.
• Help: See the Help for assistance with ACDSeeOnline.com.
Transfer
Transfer allows you to upload images to your ACDSeeOnline.com account. In Transfer, the screen splits into two. The bottom of the screen displays the available images in your computer, and top of the screen displays your ACDSeeOnline.com account.

You cannot take an image from Online mode and open it in Develop or Edit mode for editing. To edit an image in Manage or View mode and open it in Develop or Edit mode for processing.
Creating an ACDSeeOnline.com Account
Before you can upload your images to ACDSeeOnline.com, you need to create an account.
To create an ACDSeeOnline.com account:
- Click the Online tab to enter Online mode.
- Press the Sign Up Now button.
- Enter your information into the fields and click Create your account.

If you already have an account, click the Login button.
Uploading Images to ACDSeeOnline.com

For help with ACDSeeOnline.com, click the ACDSeeOnline.com tab, then click Help.
ACDSeeOnline.com is an image sharing and storage service for ACDSee Pro users. You need to create an ACDSeeOnline.com account first, before uploading your photos. There is no size limit for uploading images to your ACDSeeOnline.com account.
To upload your images:
- In Online mode, click Login.
- Login to your account.
- Click Upload to switch to Transfer.
Your screen splits in two, with the bottom part of the screen displaying images on your computer, and the top part of the screen representing your images online.
-
Use the drop-down list in the top right corner to select one of the following:
-
Upload Original with associated data: Upload images in current file format, including any associated files such as those containing metadata. This option is the best for images you want to archive.
- Upload Original (as JPG): Uploads image as a JPG in its original size.
- Upload 1920 x 1440 JPG: Converts the image to JPG and sets the size to 1920 x 1440. This option is the best for high quality JPGs.
-
Upload 1024 x 768 JPG: Converts the image to JPG and sets the size to 1024 x 768. This option is the best for images you want to view on a Netbook, and results in the fastest upload.
-
Do one of the following to select an image to upload:
-
Click and drag an image into the top part of the screen to upload it to your ACDSeeOnline.com account multiple images, press the SHIFT or the CTRL key and click on the images to select them. You can also drag your cursor to select multiple images.
- Drag a folder of your images to the top part of the screen.
- Select images and click the up arrow icon beside Transfer Manager, or click Sync to Web to upload all the Sync to Web folders.
When upload is complete, images are displayed in the order they were uploaded. Overlay icons indicate the file type and if the image has been developed or edited.

You can upload a folder with sub-folders. Online mode respects folder hierarchy when uploading a folder to you ACDSeeOnline.com account.
Setting Folders to Automatically Sync to Web

For help with ACDSeeOnline.com, click the ACDSeeOnline.com tab, then click Help.
If you want to upload all the images from a folder on your computer to ACDSeeOnline.com and keep the folder synced as you add new images, you can set your folder to automatically Sync to Web. The sync works in one direction; images from your computer are uploaded to your ACDSeeOnline.com account. Set selected folders to Sync to Web, and have all files in these folders upload to your ACDSeeOnline.com pages whenever you click Sync to Web.
To set a folder to automatically Sync to Web:
- In Online mode, click Login.
-
Login to your account.
-
Click the Transfer tab.
- In the Folders pane in the bottom half of the screen, right-click a folder and select Set as Sync to Web Folder.
- In the Set up Sync to Web folder dialog box, set the options as described below.
- Click OK.

You can also set Sync to Web folders by clicking File | Manage Sync to Web Folders.
To run Sync to Web:
- In Transfer, on the right side along the screen split, click Sync to Web.
- Click OK.
To edit a folder's Sync to Web settings:
- In Transfer, in the Folders pane in the bottom half of the screen, right-click a Sync to Web folder, and select Edit Sync to Web Folder.
- In the Edit Sync to Web Folder dialog box, set the options as described below.
- Click OK.
Sync to Web Folder options
Upload Type
Use the drop-down list to select one of the following:
- Upload Original with associated data: Uploads images in their current file format, including any associated files such as those containing metadata. This option is the best images you want to archive.
- Upload Original (as JPG): Converts the image to JPEG in its original size.
- Upload 1920 x 1440 JPG: Converts the image to JPEG and sets the resolution to 1920 1440. This option is the best for high quality JPEGs.
- Upload 1024 x 768 JPG: Converts the image to JPEG and sets the resolution to 1024 768. This option is the best for images you want to view on a Netbook, and results i fastest upload.
| Local Folder | Displays the path to the folder you selected. Click theBrowsebutton to select a different folder. |
| Online Folder | Enter a name for the online folder. By default this is set to the same name as the folder o computer that you want to sync to Web. |
| Sync to Web right away | Select to upload the images in the selected folder immediately. If you do not select this check you can click Sync to Web to upload all the images in all the folders you have chosen to s |
Creating Folders and Setting Privacy

For help with ACDSeeOnline.com, click the ACDSeeOnline.com tab, then click Help.
In ACDSeeOnline.com and Transfer, you can create folders and make them private or public. When you make a folder public, anyone can find and see the images in that folder. You can also copy the URL for your public folders and share the URL with someone.

When you create a new folder, it is set to private by default.
To create a folder and make it private or public in Transfer:
- In Online mode, click Transfer.
- In the online Folders pane on the top left, right-click your user name, and select New Online Folder.
- In the New Online Folder dialog box, enter a name for the new folder.
- Click OK.
By default the new folder is Private.
To change the folder to Public, right-click on the folder, and then click Make Public.
To share the URL for a public folder:
- In Online mode, click Transfer.
- In the Folders pane, in the top section of the window, right-click on a public folder.
- Click Copy URL.
- Paste the URL into an email, instant message, or other application to share it.

Right-click a public folder and select Share folder to share in an email, post on a social networking site, or to create a widget.
Changing the Rating System

For help with ACDSeeOnline.com, click the ACDSeeOnline.com tab, then click Help.
Photos that you have rated in Manage mode are rated with a star rating system in Online mode. You can select how to use stars to rate your photos.
To change your rating system:
- Click Tools and then select Options.
- In the Options dialog box, select ACDSee Online.
- In Ratings, select Convert 'Rating 1' to 5 stars or Convert 'Rating 1' to 1 star.
- Click OK.
Downloading Images

For help with ACDSeeOnline.com, click the ACDSeeOnline.com tab, then click Help.
ACDSeeOnline.com is also a storage service for ACDSee Pro users. You can download your images from your ACDSeeOn account to your computer at any time.
To download your images:
- In Online mode, click Login.
- Login to your account.
- Click the Transfer tab.
Your screen splits in two, with the bottom part of the screen displaying images on your computer, and the top part of the screen representing your images online.
-
In the top part of the screen, in the Folders pane in the top left, navigate through your ACDSeeOnline.com folders to the images you want to download.
-
In the bottom part of the screen, in the Local Computer pane, select a folder that you want to download your image to.
-
Do one of the following to select an image to download:
-
Click and drag an image into the bottom part of the screen to download it to your computer. To select images, press the SHIFT or the CTRL key and click on the images to select them. You can also click and drag your cursor to select multiple images.
- Drag a folder of your images to the bottom part of the screen.
- Select images and click the down arrow icon beside Transfer Manager.
Using Transfer Manager

For help with ACDSeeOnline.com, click the ACDSeeOnline.com tab, then click Help.
The Transfer Manager lets you monitor the progress of your uploads and downloads on your ACDSeeOnline.com account, and also lets you cancel or pause image transfers. The Transfer Manager has two tabs: Uploads and Downloads. These two tabs list images that are being uploaded, downloaded, paused, or canceled.
To open the Transfer Manager:
Click Tools | Transfer Manager.
You can do the following in Transfer Manager:
| × | Cancel an upload or download. |
| ∅ | Retry the image upload or download. |
| ∥ | Pause an upload or a download. |
| ▶ | Continue the image upload or download. |
| ≡ | Selects all images in the list. |
| □ | Clear uploaded, downloaded or canceled images from the list. |
Chapter 8: Options and configurat
Setting the General Options
You can adjust settings in the Options dialog box to display helpful tips, set the format for date displays, set automatic rotate options, and control the display of certain image types.
To access the General options:
- In Manage mode, click Tools | Options.
- In the Options dialog box, click General.
- On the General page, set or change any of the options described below.
- Click OK to apply your changes and return to ACDSee.
General options
| Enable gamma correction | Applies the specified amount of gamma correction when viewing or previewing images. |
| Show screen capture help tips | Displays the Help Tips dialog box when using the screen capture tool. |
| Automatically stretch wallpaper to fit screen | Stretches small images to fit the entire desktop when you set them as your wallpaper. |
| Disable image animation | Displays only the first frame of an animated image in Manage mode's Preview pane and in mode. |
| Automatically rotate JPEG and TIFF images based on displayed in ACDSee. EXIF orientation | Automatically corrects the orientation of TIFF and JPEG images (based on their EXIF data) |
| Status bar date | Specifies the date to display in the status bar for a selected file. |
| Date/Time output format | Select one of the following:Default system format: Uses the default system format when displaying the date and time in information overlays.Custom format: Uses the specified format to display the date and time in all information overlays. Select a format for both Date and Time from the drop-down list |
| RAW Display | Select one of the following:Speed:Use embedded JPEGQuality: Perform high quality decodeSee Viewing RAW images for more information. |
Setting the Manage Mode Options
You can use the Options dialog box to set various options for Manage mode, including the default start folder.
To set Manage mode options:
- In Manage mode, click Tools | Options.
- In the Options dialog box, click Manage Mode.
- On the Manage mode page, set or change the options as described below.
- Click OK to apply your changes and return to ACDSee.
Manage mode options
| Default start folder | Remember from previous session | Opens Manage mode in the same folder that was open the last time you ACDSee, and automatically applies any browsing criteria you were using. |
| Home folder | Always opens Manage mode to the specified Home folder. Click the Browse button to locate a starting folder on your hard drive. | |
| Taskbar Notification area | Show icon in Taskbar Notification area | Displays the ACDSee Pro icon in the Taskbar Notification area. |
| Continue running in Taskbar Notification area on exit | Continues to run ACDSee Pro in the background after you exit the applicati You can restart ACDSee Pro by clicking the icon in the Taskbar Notification area. | |
| Run ACDSee in Taskbar Notification area when system starts | Starts ACDSee Pro in the background when you turn on your computer. Yo can open ACDSee Pro by clicking the icon in the Taskbar Notification area. | |
| Display theme | Specifies the color scheme to use in ACDSee. | |
| Clear path history on exit | Clears the list of recently-accessed folders whenever you exit ACDSee. | |
| Show full path in title bar | Displays the full path of an image in the ACDSee Pro title bar. | |
| Error Reporting | Select this option if you do not want to see a system error report if there is an error in A | |
Setting the Quick Search Options
You can use the Quick Search options to refine your search.
To set Quick Search options:
- In Manage mode, click Tools | Options.
- In the Options dialog box, click Manage Mode | Quick Search.
- On the Quick Search page, set or change any of the Quick Search options described below.
- Click OK to apply your changes and return to ACDSee.
Quick Search options
| Include file names | Searches for file and folder names that begin with the search term. |
| Include categories | Searches for categories that match the search term, and returns any files assigned to those categories. Subcategories are not included. |
| Include contents of folders | Searches for folder names that begin with the search term and returns the contents of those 1 Subfolders are not included. |
Setting the File List Pane Options
You can use the Options dialog box to set options for the File List pane to suit your preferences, such as grouping archive files with subfolders, or highlighting image types with different background colors. You can also customize your thumbnails, the file types ACDSee Pro displays, and adjust how ACDSee Pro handles files and thumbnails in the File List pane.
To adjust the File List pane options:
- In Manage mode, click Tools | Options.
- In the Options dialog box, click File List.
- On the File List page, set or change the options as described below.
- Click OK to apply your changes and return to ACDSee.
File List options
| File List Automatically select new files | Automatically selects new files when they are added to the folder displayed in the File List pane. |
| Group archives with folders | Treats archive files as folders when sorting items in the File List pane. |
| Use embedded thumbnails | Displays the RAW files embedded thumbnail if the RAW file has them. |
| Generate high quality thumbnails | Creates a high-quality thumbnail of the RAW file in the background while the embedded thumbnail is displayed, then replaces the poorer quality thumbnail once it is ready. |
| Show thumbnails on folders | Displays thumbnails of a folder's contents on the folder icon in the File List pane. |
| Remember each folder's sort settings | Select this option if you want ACDSee Pro to remember the sort setting that you used in specific folders. |
| key activates hot-tracking | Activates hot-tracking when holding the CTRL key. When selected, you can hot-track (update the contents of the Preview and Properties panes without changing your file selection) by holding the CTRL key and moving your cursor over the File List pane. |
| Use animations | Activates or deactivates animation for some features as they close or open. For example, group headers. |
| Configure Filters Show all files | Shows image files, folders, media files and archive files in the File List. |
| Apply filtering criteria | Shows any of the following that you select, and hides any that are not selected.Show image filesShow foldersShow media filesShow archive files |
| Show hidden files and folders | Shows system and other files and that are normally hidden for safety. |
| Show THM files | Shows Canon THM files in the File Fist. |
| Show XMP files | Shows XMP sidecar files in the File List. |
| Highlight image files Don't highlight image files | Does not highlight image files in Details and Thumbs+Details views. |
| Use a single color to highlight image files | Uses a single color to highlight all image file types in Details and Thumbs+Details views. |
| Use multiple colors to highlight image files | Uses a different color to highlight each image type in Details and Thumbs+Details views. |
| Pop-ups Mouse cursor hover activates pop-ups | Activates or deactivates the animated pop-up preview that displays when you hover over thumbnails in the File List. Settings below allow you to include text and/or an image in the pop-up or if you turn this option off, to activate the pop-up only when you h down the SHIFT key. |
| Activates the pop-up only if you hold down the SHIFT key while hoveri over a thumbnail in the File List. You can turn this option off if it interferes with SHIFT selection. | |
| Auto hide pop-ups | Hides pop-ups after 5 seconds, even if you are still hovering over the image. |
| Show thumbnail in pop-ups | Shows a pop-up preview of images in the File List when you hover ovi them with a mouse |
| Show file information in pop-ups | Includes text file information in the mouse-over pop-up. You can select the information to display by clicking Configure Pop-ups and clicking on the type of information. |
| Configure file information | Opens the Choose Pop-up Information dialog where you can select what information to display i pop-up when you hover over a thumbnail in the File List. The default is file name, location, s modified date, and image dimension, but you can select other ACDSee Metadata, EXIF, file, ima IPTC, or multimedia attributes. |
| Show the Windows Explorer shell context menu as the default right-click menu | Displays the default Windows Explorer context menu instead of the ACDSee Pro context menu. |
Setting the Thumbnail Info Options
You can use the Options dialog box to change what information to display with thumbnails of images in the File List pane. These options are set under File List | Thumbnail Info.
To adjust the Thumbnail Info options:
- In Manage mode, click Tools | Options.
- In the Options dialog box, click File List | Thumbnail Info.
- On the Thumbnail Info page, set or change the options as described below.
- Click OK to apply your changes and return to ACDSee.
Thumbnail Info options
| Information File name | Displays the name of each file on the thumbnail in the File List pane. | |
| Choose Thumbnail Info | Opens a dialog box where you can select the information to display on each thumbnail in the File List pane. | |
| Choose Tiles Info | Opens a dialog box where you can select the information to display on each tile in Tiles view mode. | |
| Show unrated, untagged, and unlabeled overlay icons on hover | Shows unrated, untagged, and unlabeled overlay icons on hover. | |
| Overlay icons Rating | Displays a rating overlay icon on thumbnails if the file has been rated the ACDSee Pro database. | |
| Database information | Displays a database overlay icon on thumbnails if the file has information stored in the ACDSee Pro database. | |
| Icon | Displays a file format overlay icon on thumbnails in the File List pane. | |
| Category | Displays a category overlay icon on thumbnails if the file has been categorized. | |
| Shortcut | Displays a shortcut overlay icon on thumbnails if the item is a shortcut another file. | |
| Offline | Displays an offline overlay icon on thumbnails if the file is stored on a offline device. | |
| Excluded items | Displays an excluded file icon on thumbnails if the file is excluded from the ACDSee Pro database. | |
| Tagged items | Displays a tagging overlay icon on thumbnails. If the file is tagged, a checkmark displays in the icon. | |
| Untagged items | If selected, an empty tagging overlay icon displays on the thumbnails of untagged images. | |
| Auto-rotate | Displays an auto-rotate overlay icon on thumbnails if the file was automatically rotated. | |
| Sound | Displays a sound overlay icon on thumbnails if the image contains embedded or associated audio. | |
| Developed | Displays a Develop overlay icon on thumbnails if the file has been developed. | |
| Edited | Displays an Edit overlay icon on thumbnails if the file has been edited. | |
| Geotagged | Displays a globe overlay icon on thumbnails if the file has been pinned the map. | |
| Label | Displays a color label overlay icon on thumbnails if the file has been labeled. |
Setting the Thumbnail Style Options
You can use the Options dialog box to change how the thumbnails of images display in the File List pane. These options are set under File List | Thumbnail Style.
To adjust the Thumbnail Style options:
- In Manage mode, click Tools | Options.
- In the Options dialog box, click File List | Thumbnail Style.
- On the Thumbnail Style page, set or change the options as described below.
- Click OK to apply your changes and return to ACDSee.
Thumbnail Style Options
| Thumbnail frame Show frame | Displays a white frame around each thumbnail. | |
| Show drop shadow Shows thumbnails with a 3D drop shadow. | ||
| Show slide background Displays a shaded background behind the thumbnail and its information. | ||
| Show slide border Displays a thin black border around the outer edge of the thumbnail. | ||
| Folder style XP style folder | Displays folders as an XP-style image. | |
| 3D style folder Displays folders as a 3D folder with transparency. | ||
| Thumbnail ratio Custom | Specifies a custom height-to-width ratio for the shape of the thumbnails in the File List pane. Drag the slider under the preview to set the rat The preview shows you the shape as you move the slider. | |
| Portrait Specifies a standard 3:4 portrait ratio for the shape of the thumbnails in the File List pane. | ||
| Landscape Specifies a standard 4:3 landscape ratio for the shape of the thumbnails in the File List pane. | ||
| Thumbnail spacing Slider | Increases or decreases the space between each thumbnail. | |
| High-quality scaling | Uses high-quality thumbnail scaling in the File List pane. | |
Setting the Details View Options
You can use the Options dialog box to change how thumbnails display in the File List pane.
To adjust the Details View options:
- In Manage mode, click Tools | Options.
- In the Options dialog box, click File List | Details View.
- On the Details View page, set or change the options as described below.
- Click OK to apply your changes and return to ACDSee.
Details View options
| Show grid lines | Separates each row and column in Details view mode with a grid line. |
| Full row select | Selects the entire row when you click a column entry in that row. |
| Column auto-width | Automatically resizes each column to fit its contents. |
| Highlight sort column | Highlights the column used to sort files when you click on the column's title. |
| Choose Details | Specifies the columns you want to use to sort files in Details view mode. |
Setting the Preview Pane Options
You can specify how ACDSee Pro displays previews of your images, and configure settings to play audio and video file: automatically, as soon as you view them in the Preview pane.
To set the Preview options:
- Do one of the following:
• In Manage mode, clickTools | Options | Preview.
- In Manage mode, right-click in the Preview pane and select Preview Options.
-
On the Preview options page, set or change the options as described below.
-
Click OK to apply your changes and return to ACDSee.
Preview options
| Delay | Specifies how quickly the Preview pane displays an image after you select it in the File List p |
| Size | Specifies the size of the previewed image in relation to the selected image. |
| Preview audio and video clips | Previews media files as you select them in the File List pane. |
| Autoplay audio and video clips | Automatically starts playing audio and video files in the Preview pane. |
| Instant image preview | Displays an instant preview that improves in quality as the image is decoded. |
| Image and Information | Select one of the following:Show image: Displays a preview of the selected image in the Preview pane.Show information: Displays information about the selected image in the Preview pane.Show image and information: Displays a preview of the selected image and information about the image in the Preview pane.You can also change this option by right-clicking the Preview pane. In the right-click menu, click Image and Information, and then click one of the options. |
| Choose Preview Info | Specifies the type of information you want to display in the Preview pane. |
Setting the Folders Pane Options
You can customize the Folders pane by showing or hiding the Easy-Select bar, displaying archives, and identifying excluded folders.
To customize the Folders pane:
- In Manage mode, click Tools | Options.
- In the Options dialog box, click Folders.
- On the Folders page, set or change the options as described below.
- Click OK to apply your changes and return to ACDSee.
Folders pane options
| Easy-Select Show Easy-Select | Displays the Easy-Select bar in the Folders pane, which you can use to select multiple folders. | |
| Enable Easy-Select tooltip | ||
| Folder display Show archives in Folder Pane | Lists archive files in the Folders pane. | |
| Confirm drag & drop move within folder views | ||
| Show overlay for excluded folders | ||
Setting the Catalog Pane Options
You can customize the Catalog pane to specify which confirmations you want to be prompted for while working with categories, and choose whether to show the Easy-Select bar.
To set the Catalog pane options:
- In Manage mode, click Tools | Options
- In the Options dialog box, click Catalog.
- On the Catalog page, set or change the options as described below.
- Click OK.
Catalog options
| Category deletion Confirm if category has assigned files | Prompts you for confirmation when deleting a category with assigned files. |
| Confirm if category has sub-categories | Prompts you for confirmation when deleting a category containing sub-categories. |
| File removal Confirm file removal from category | Prompts you for confirmation when un-assigning files from a category. |
| Easy-select Show Easy-Select | Displays an Easy-Select bar in the Catalog pane, which you can use to select multiple categories, special items, and ratings. |
| Enable Easy-Select tooltip | Displays a tool-tip when you place your cursor over the Easy-Select bar. |
| Icons Show icons for categories, ratings, color labels, and special items | Displays icons so you can easily identify categories, ratings, color labels, and special items. |
| Enable setting categories, keywords, ratings, and color labels | Allows you to set categories, ratings, and color labels in the Catalog pa |
Setting the Calendar Pane Options
You can customize the ACDSee Pro Calendar to start each week on a specific day, to use a 12- or 24-hour clock format, and to use one of four date types when sorting files.
To set the Calendar pane options:
- In Manage mode, click Tools | Options.
- In the Options dialog box, click Calendar.
- On the Calendar page, set or change any of the options described below.
- Click OK to accept your changes and return to ACDSee.
Calendar pane options
Chapter 8: Options and configuration
| Date types Database date | Sorts files in the Calendar pane based on the date stored in the database. | ACDSee Pi |
| Date taken | Sorts files in the Calendar pane based on the EXIF date of each item. | |
| File modified date | Sorts files in the Calendar pane based on the last-modified date of each item. | |
| File created date | Sorts files in the Calendar pane based on the date each file was created or computer. | |
| Filters Apply Advanced | Filters the items displayed in the Calendar pane based on the current File Li | |
| File List Filters (excluding folders) | pane filter settings. | |
| Show image and media files only | Displays only image, audio, and video files in the Calendar pane. | |
| Start of week | Specifies the first day of each week in the Calendar pane. | |
| Clock formats 12 hour | Uses a 12-hour clock in the Calendar pane. | |
| 24 hour | Uses a 24-hour clock in the Calendar pane. |
Setting the CD/DVD Management Options
You can use the Options dialog box to change the folder where Burn Basket files are stored and to set the preferred method for identifying Photo Discs.
To change the Burn Basket or Photo Disc Identification options:
- In Manage mode, click Tools | Options.
- In the Options dialog box, click CD/DVD Management.
- On the CD/DVD Management page, set or change any of the options described below.
- Click OK to apply your changes and return to ACDSee.
CD/DVD Management options
| Burn Basket Show Burn Basket Wizard welcome step | Displays the Welcome step in the Burn Basket Wizard. | |
| Browse | Opens the Browse For Folder dialog box where you can change the folder when Burn Basket files are stored. | |
| Photo Disc Identification | Use disc volume label | Attempts to identify a Photo Disc by its volume label. This setting is recommerr if you are working with multi-session Photo Discs. |
| Use disc serial number | Attempts to identify a Photo Disc by its serial number. This setting is preferred when working with single-session Photo Discs, or importing or converting Photo Discs from a previous version of ACDSee. | |
Setting the Properties Pane Options
You can use the Options dialog box to customize the information available on the Metadata tab in the Properties pane.
To customize the Metadata tab in the Properties pane:
- In Manage mode, click Tools | Options.
- In the Options dialog box, click Properties Pane.
- On the Properties Pane page, hide the Tagged, Rating, and Color Labels, by deselecting the corresponding check box.
- Hide the Categories by deselecting the check box.
- Click Manage Metadata Views to open the Choose Metadata to Display dialog box.
- Click the plus signs to expand the tree and select your preferences.
- Click OK.
- Click OK to apply your changes and return to ACDSee.

You can also click the Metadata View drop-down list in the Properties pane Metadata tab and select Manage Metadata Views.
Setting the File Management Options
You can specify how ACDSee Pro handles renaming and deleting files and folders, and whether ACDSee Pro sends deleted files to the desktop Recycle Bin by default.
To set the File Management options:
- In Manage mode, click Tools | Options.
- In the Options dialog box, click File Management.
- On the File Management page, set or change any of the options as described below.
- Click OK to accept your changes and return to ACDSee.
File Management options
| Overwriting duplicate files | Ask | Prompts you for confirmation when overwriting duplicate files. |
| Rename | Automatically resolves any naming conflicts when moving or copying files by renaming the source files. In the Separator character field, type a character to use to separate file names in the automatic renami system. | |
| Replace | Automatically overwrites files in the target folder without prompting for confirmation. | |
| Skip | Does not move, copy, or overwrite any files that result in naming conflicts. | |
| Save Originals | Saves a copy of the original file when it is edited using one of the batch editing tools. This possible to restore the original file later. Turning this option off means that originals are not s during batch editing, and so cannot be restored.In Develop and Edit mode, a copy of the original file is always saved, whether or not this op selected. | |
| Other Click to edit file name | Specifies that file names can be edited by clicking the file name in the File List pane. | |
| Use Recycle Bin Sends files to the Desktop Recycle Bin. If not selected, deleted files are permanently removed from your hard drive. | ||
| Preserve ACDSee metadata when files are copied Copies ACDSee metadata with files when you copy them to another location. | ||

Control confirmations for folder delete, file delete, and read-only rename and delete actions in your operating system settings.
Setting the Color Management Options
The ACDSee Pro color management options help reduce color matching problems between devices, such as your computer monitor, and printers. ACDSee Pro automatically detects the color profile assigned to your monitor, (if setup correctly within your operating system). It is recommended that you regularly profile your monitor with color management hardware and software.
Before changing the color management settings, make sure you have accurate color profiles for each of the devices that you plan to use. You can obtain color profiles from device manufacturers if the profiles were not included in the device's software, or from the professional printers.

Color management can be a complex process. If you are not familiar with color management systems, it is required that you accept the default color management settings in ACDSee.
To set the Color Management options:
- In Manage mode, click Tools | Options.
-
In the Options dialog box, click Color Management.
-
On the Color Management page, set or change any of the options as described below.
- Click OK to accept your changes and return to ACDSee.
Color Management options
| Enable Enable Color | Management | Activates the color management system in ACDSee Pro and the fields in this dialog box. |
| Apply to thumbnails | Activates color management for thumbnails. | |
| Color Management Engine | Select from the drop-down list of color management engines. | |
| Input Default Input Profile | Specifies the default color profile to use when the image is not tagged with an ICC profile. | |
| Profile Details | ||
| Soft Proofing Enable Soft Proofing | Allows you to choose from a selection of device profiles you want your monitor to simulate for proofing. You can choose your printer profile to the emulated device and then preview what the output from your printer would look like on your monitor (soft proofing). | |
| Emulated Device Profile | ||
| Rendering Intent | ||

In View, Develop, and Edit Mode, the shortcut [ toggles Soft Proofing on and off.

Some Soft Proofing menu items are also available through View, Develop, and Edit Mode. Under View | Soft Proofing, select your Rendering Intent or whether to enable Soft Proofing.
Setting the Database Options
You can adjust settings in the Options dialog box to display reminders, control database information, and specify a location on your hard drive where you want to store your database files and cached thumbnails.
To set the database options:
- In Manage mode, click Tools | Options.
- In the Options dialog, click Database.
- On the Database page, set or change the options as described below.
- Click OK to apply your changes and return to ACDSee.
Database options
| Database location | Specifies the location on your hard drive to store the ACDSee Pro database. Click theBrowsebutton to locate a folder. |
| Display backup reminder | Automatically reminds you to back up your ACDSee Pro database. Click theEverydrop-down list and select how often you would like to be reminded. |
| Manage excluded folders | Opens the Excluded Folders List dialog box, where you can specify which folders you want to exclude from the ACDSee Pro database. |
| Display embed ACDSee Metadata reminder | Displays a reminder to embed ACDSee Metadata. |
| Set database date | Automatically adds the date of files to the ACDSee Pro database when you catalog the content: folder. Select one of the following to specify which date you want to store as the database d•EXIF date•File modified date•Specific date (Select the date you want to use from the drop-down list.) |
| Import EXIF and IPTC metadata from cataloged files | Automatically imports EXIF and IPTC information into the ACDSee Pro database whenever you ca the contents of a folder.If this option is not selected, ACDSee Pro does not import the EXIF and IPTC information, but set aside space within the database records. To remove the empty records, be sure tooptimize yourdatabasefrequently. |
| Show separator conflict dialog for IPTC keywords | Displays the IPTC Keywords dialog box when a separator conflict occurs. You can specify a mel of handling conflicts within the dialog and select not to display it again. Select this option to or adjust those settings the next time a separator conflict occurs. |
| Show separator conflict dialog for IPTC supplemental categories | Displays the IPTC Supplemental Categories dialog box when a separator conflict occurs. You can specify a method of handling conflicts within the dialog and elect not to display it again. Select option to change or adjust those settings the next time a separator conflict occurs. |
Setting the View Mode Options
You can use the Options dialog box to adjust the behavior of View mode to suit your preferences, and increase the speed with which images are displayed.
To set the View mode options:
- In Manage mode, click Tools | Options.
- In the Options dialog box, click View Mode.
- On the View mode options page, set or change any of the View mode options described below.
- Click OK to accept your changes and return to ACDSee.
View Mode options
| Decoding and caching | Decode next image in advance | Automatically decodes the next image in sequence in View mode, resulting in shorter load times. |
| Keep previous image in memory | Keeps the previously decoded image in memory for quick display in View mode. | |
| Startup files Replace | images in list | Does not open a new View mode window if an image is opened from another application. |
| Images in new window | Opens a new View mode window to display images opened from another application. | |
| Show pixels when zoomed past 100% | Resampling is not applied to images zoomed past 100%. When the box is unchecked, images are past 100% are resampled to produce smooth transitions, but this may result in excessive blurring. | |
| Dropped files Replace | images in list | Replaces the list of images open in View mode with images dropped into View mode from another application. |
| Add images to list | Adds any images dropped into View mode by another application to the list of images already open. | |
| Always on top | Keeps the ACDSee Pro window as the top window in a stack of windows. | |
| Full-screen | Opens images in View mode in full-screen mode. (Press F to exit full-screen mode.) | |
| Hide mouse cursor in full-screen | Hides the cursor in full-screen mode. | |
| Instant image preview | Displays an instant preview in View mode that improves in quality as the image is decoded. | |
| Use ACDSee Quick View | If selected, ACDSee Quick View is set as the default viewer for images when ACDSee Pro is closed. | |
| Exit after delete/move | Automatically returns to Manage mode after moving or deleting an image in View mode. | |
| View all images in folder | Adds all images in a folder to the current image list when viewing any file from that folder. | |
| Show full image file path | Displays the image's full file path in View mode title and status bars. | |
| Sharpen subsampled images | Automatically sharpens the view for images zoomed in at less than 100%. | |
Setting the Display Options
You can use the Options dialog box to change the window background and specify how images are zoomed.
To set the Display options:
- In Manage mode, click Tools | Options.
- In the Options dialog box, click View Mode | Display.
- On the Display options page, set or change the options described below.
- Click OK to accept your changes and return to ACDSee.
Display options
| Zoom options Default | zoom mode | Specifies the default zoom level for images in View mode. |
| Reset zoom mode to default on every image change | Resets the zoom mode to the selected default when the displayed image changes. | |
| Resize | Resizes the image based on the selected option. For more information about how these choices affect the Viewer, see Automatically shrinking or enlarging images. | |
| Pan tool Enable click-zooming | Deselect to turn off the one click image toggle between Default view and Actual Size view. | |
| Pan speed Slow - Fast | Specifies the speed when panning an image. | |
| Background Default color | Uses the default ACDSee Pro color for the background in View, Develop and Edit mode. | |
| Custom color | ||
| Tiled image | ||

The background color and tiled image options do not affect full screen mode.

To change the background color in ACDSee Quick View, open an image in Quick View, and then click Tools | Options.
Setting Develop and Edit Mode Options
You can use the Options dialog box to set options for Develop and Edit mode.
To set Develop and Edit mode options:
- In Manage mode, click Tools | Options.
- In the Options dialog box, click Develop Mode or Edit Mode.
- Set the options as described below.
- Click OK to apply your changes and return to ACDSee.
Develop and Edit mode options
| Edit | • Show icons in edit pane: Displays icons next to the tools in Edit. |
| Develop | • Enable fast image switching for RAW files in Develop: Enables fast image switching for RAW and other non-encodable files in Develop so that when you switch to the next you do not have to wait for the processing to be finished. The processing is done as background task when you exit Develop, so that you can process images more quickly. I deselect this option, non-encodable images are processed one at a time and you can immediately see the results of your processing, but you have to wait for the image pro each time you switch to another image.• Automatically save Develop Mode adjustments: Enables the automatic saving of images in Develop so when you switch to the next image you are not prompted to save change current image. This lets you quickly develop a number of images, saving your changes automatically. If you deselect this option, each time you switch to a new image you are prompted to save changes to the current image—you choose to save your changes to cut file, save a copy of the image, or discard your changes. |
Setting the ACDSee Online Options
You can use the Options dialog box to set options for ACDSee Online such as the temporary folder location and what to do with uploads and downloads when you close ACDSee.
To set the ACDSee Online options:
- In Manage mode, click Tools | Options.
- In the Options dialog box, click ACDSee Online.
- On the ACDSee Online page, set or change any of the options described below.
- Click OK to accept your changes and return to ACDSee.
ACDSee Online options
| Folder locations Temporary folder | Click theBrowsebutton to change the folder where ACDSee Pro temporarily keeps files during uploads and downloads. | |
| Uploads/Downloads On shutdown, always pause all transfers | Pauses all transfers when you close ACDSee. | |
| On startup, always automatically resume all paused transfers | Resumes all transfers when you reopen ACDSee. | |
| Number of concurrent uploads (1-10) | Select the number of files to be uploaded at the same time. | |
| Number of concurrent downloads (1-10) | Select the number of files to be downloaded at the same time. | |
| Ratings Convert 'Rating 1' to 5 stars | Converts a numeric rating of 1 to five stars. | |
Setting the ACDSee Showroom Options
You can customize the ACDSee Showroom desktop slideshow in a number of ways, including changing the slide duration, order, and transition or changing the frame opacity, size, and frame style.
To customize the ACDSee Showroom desktop slideshow:
- Start ACDSee Showroom by doing one of the following:
• In Manage mode, click Tools | Create | ACDSee Showroom.
- Click Start | Programs | ACD Systems | ACDSee Showroom.
- Right-click anywhere in the ACDSee Showroom window and select Options.
- Set or change the options as described below.
- Click Set As Default to use the currently selected options as the default for new Showroom windows.
- Click OK to apply your changes.
ACDSee Showroom options
| Picture Folder Include subfolders | Select this option if you want to include photos from subfolders in the slideshow. | |
| Skip hidden folders Select this option to skip hidden folders such as the [Originals] folders that are created when you process images. | ||
| Slide Duration | Drag the slider to the left to decrease the display time for each photo to the right to increase the display time for each photo. | |
| Order From the Order drop-down list select Sequential to display photos in order or Random to display photos randomly. | ||
| Transition From the Transition drop-down list select None if you do not want any special transition effects, Slide if you want photos to enter the window from the right and exit to the left, and Fade if you want to reduce opacity during the transition from one photo to another. | ||
| Apply to all Select Apply to all if you want to apply these changes to all slideshows. | ||
| Showroom Window Opacity | Drag the Opacity slider to the left to reduce the opacity of the Showro window and to the right to increase opacity. | |
| Size From the Size drop-down list select either a Small, Medium, or Large Showroom window frame. | ||
| Frame From the Frame drop-down list select a frame style. | ||
| Always on top Select Always on top if you want the Showroom window to display on top of all other application windows. | ||
| Apply to all Select Apply to all if you want to apply these changes to all Showro window. | ||
| Run at startup | Select Run at startup if you want to start ACDSee Showroom automatically when you start yo computer. | |
Setting the ACDSee Quick View Options
You can customize ACDSee Quick View in a number of ways, including displaying Quick View on top of any open windows, displaying Quick view at full screen, or even changing the background color in the Quick View window.
To customize ACDSee Quick View:
- Double-click on an image. For example, double-click on the image in Windows Explorer or in an email message.
- Click Tools | Options.
- Set or change the options as described below.
- Click OK to apply your changes.
ACDSee Quick View options
| Use ACDSee Quick View | If selected, ACDSee Quick View is set as the default viewer for images when ACDSee Pro is ( |
| Enable gamma correction | Applies the specified amount of gamma correction when viewing images. |
| Disable animation | Displays only the first frame of an animated image. |
| Always on top | Keeps the Quick View window as the top window in a stack of windows. |
| Full screen | Opens images in the Quick View window in full screen mode. |
| Hide mouse cursor in full screen | Hides the cursor in full screen mode. |
| Default zoom mode | Fit image: Displays the image at the largest magnification that fits in the Quick View window. Images that are smaller than the Quick View window display at their original size. Actual size: Displays the image at its actual size in the Quick View window. |
| Background | Default color: Uses the ACDSee Pro background color in Quick View. Custom color: Specifies a color to use as the background in the Quick View window. Click the color swatch to select a different color. |
Setting JPEG Options
You can change the settings in the Options dialog box to control the quality of the JPEG image, encoding method, color subsampling method, and whether to update or create embedded thumbnails in the JPEG image.
JPEG options
| Image quality | Drag the slider to determine the quality of the JPEG image. |
| Encoding | Progressive: Select to enable progressive encoding.Optimize Huffman codes: Select to optimize Huffman codes to increase compression. |
| Color component sampling | 2:1 Horizontal: Select to subsample color channels on the horizontal axis by a factor of 2:12:1 Vertical: Select to subsample color channels on the vertical axis by a factor of 2:1 |
| Embedded thumbnails | Only update existing thumbnails: Select to update any existing embedded thumbnails.Always add/update thumbnails: Select to update any existing embedded thumbnails, or create embedded thumbnails.Never add/update thumbnails: Select if you do not want to update any existing embed thumbnails, or if you do not want to create embedded thumbnails.Generate DCF compatible thumbnails: Select to generate thumbnails that meet the Digital Camera Format (DCF) specification and are compatible with the thumbnail view on LCD of a digital camera. This option forces a fixed resolution of 160 × 120 and pads space with black. |
| Save these settings as the defaults | Select this option to use these JPEG settings by default for all JPEGs. |
Creating Custom Workspaces
You can create and save custom Manage mode workspaces based on your preferences or the tasks you perform in AC example, you could create and save an editing workspace, an organizing workspace, and a browsing workspace, each with its own panes and tools arranged for easy access.
To create and save a custom workspace:
- Change the Manage mode workspace by displaying or hiding specific panes, moving and docking panes, stacking panes, or resizing panes.
- When you are satisfied with the layout of the panes, click View | Workspaces | Manage Workspaces.
- In the Manage Workspaces dialog box, click Save Workspace.
- Type a name for the workspace, and then click OK.
- Click OK.
To load a saved workspace:
- Click View | Workspaces.
- Select the saved workspace.
To restore the default workspace:
Click View | Workspaces | Default Workspace.
Auto-hiding Panes and Panels
You can use the Auto Hide button to automatically hide some panes and panels in ACDSee. When a pane is set to auto-hide, it rolls away when you click outside of it, leaving a tab displayed. You can access the pane by moving the cursor over the tab. When a pane or panel is floating, the auto-hide feature is not available. You cannot move the pane to a new location if it is set to auto-hide.
The Auto Hide button's appearance on the pane's title bar reflects its current setting:
A horizontal pushpin indicates that the pane is set to automatically hide when you click outside of it.
A vertical pushpin indicates that the pane is fixed and will remain visible even if you click outside of it.
To set or remove auto-hide:
Click the Auto Hide button on the title bar so that it displays a slanted or horizontal pushpin.
Using the Task Pane
The Task Pane displays groups of often-used tasks from the menus and toolbars based on your current location and selections in ACDSee. By default, the Task Pane opens on the right side of the Manage mode window.
To open or close the Task pane:
In Manage mode, click View | Task Pane.
The menus in the Task Pane change depending on what area of the Manage mode window you are working in and select. For example, if you select more than a folder in the File List pane, the Task Pane displays different menus than it does if you select a photo or media file.
The options on the Task Pane menus also change dynamically. For example, if you select multiple images in the File List, the options in the Fix and Enhance Photos menu change to list options that you can use with multiple images.
Customizing Toolbars
You can customize the appearance and organization of toolbars in Manage mode and View mode by selecting which toolbars to display, and specifying each toolbar's buttons or commands. You can also discard your changes and reset the toolbars to their default layout at any time.
Displaying and hiding toolbars
You can choose to display or hide the specific toolbars in Manage mode and View mode.
To display or hide a toolbar:
Do one of the following:
- In Manage mode, click View | Toolbars, and then select the toolbar you want to display or hide.
- In View mode, click View, and then select the toolbar you want to display or hide.
Customizing toolbar contents
You can customize the following toolbars:
• In Manage mode: The Main toolbar and the File List toolbar.
• In View mode: The Bottom toolbar.
You can add, remove, and rearrange buttons on these toolbars. You can also display or hide text labels and tool tips for the buttons on these toolbars, and change button size. All toolbar customization options are on the Customize dialog box.
To display the Customize dialog box:
Do one of the following:
• In Manage mode, click View | Toolbars and then select Customize.
- In Manage mode, click the drop-down arrow, located to the right of the Main toolbar or File List toolbar, and Customize.
- In View mode, click the drop-down arrow, located to the right of the Bottom toolbar, select Add or Remove Buttons, and then select Customize.
To display or hide text labels below toolbar buttons:
- Display the Customize dialog box.
- Click the Toolbars tab.
- Select File List Toolbar or Main Toolbar.
- Select the Show text labels check box to display text labels, or clear the Show text labels check box to hide text labels.
- Click Close.
To display or hide tool tips for toolbar buttons:
- Display the Customize dialog box.
- Click the Options tab.
- Select Show ScreenTips on toolbars to display tool-tips, or clear Show ScreenTips on toolbars to hide tool-tips. If you select this option, you can also select Show shortcut keys in ScreenTips to show keyboard shortcuts in the tool-tips.
- Click Close.
To change the toolbar button size:
- Display the Customize dialog box.
- Click the Options tab.
- Select Large Icons to display larger toolbar buttons, or clear Large Icons to display smaller toolbar buttons.
- Click Close.
Resetting toolbars
You can discard all of your changes, and return the toolbars and buttons to their default states.
To reset the toolbars:
- Display the Customize dialog box.
- Click the Toolbars tab, and then click Reset All.
- Click Yes to reset the toolbars.
- Click Close.
Customizing the Tools Panes
You can resize, move, and dock the Develop and Edit Tools panes to suit your preferences.
To customize the Tools pane:
- In Develop or Edit mode, drag the Tools pane's title bar to a new location. If you drag the Tools pane to either the left or right side of the window, it will dock against that side.
• To resize the Tools pane, drag one of its edges.
Configuring External Editors
You can configure ACDSee Pro to work with a variety of image editors, such as Canvas, and specify which image editor ACDSee Pro uses by default. You can then open images in any of your external editing applications from within ACDSee.

You must configure an external editor before you can assign a shortcut key to it or place it as a button on
To configure an external editor in ACDSee:
- In Manage mode, click Tools | External Editors | Configure Editors.
- In the Configure Photo Editors dialog box, click Add.
- Browse to the folder on your hard drive that contains an image editing application.
- Select the executable file of the editing application. For example, Canvas14.exe.
- Click Open.
- In the Name field, type a name for the editor, and then click OK.
To create a shortcut to an external editor:
- Click the Toolbar drop-down arrow (to the right of the External Editors menu item) and select Add or Remove Buttons | Customize.
- In the Customize dialog box, click the Keyboard tab and select External Editors from the Category list.
- Enter a shortcut key into the Press New Shortcut Key field.
- Click Assign and close the dialog box.
Your new keyboard shortcut has been set.
To add an external editor to the FileList toolbar in Manage mode:
- Click the Toolbar drop-down arrow (to the right of the External Editors menu option) and select Add or Remove Buttons | Customize.
- In the Customize dialog box, in the Commands tab, select External Editors from the Category list.
- Click and drag an External Editor from the list onto the FileList toolbar.
- Close the dialog box.
The External Editor is added to the FileList toolbar.
To add an external editor button to the toolbar in View mode:
- Click the Toolbar drop-down arrow next to the tools and select Add or Remove Buttons | Customize.
- In the Customize dialog box, in the Commands tab, select External Editors from the Category list.
- Click and drag an External Editor from the list onto the toolbar.
- Close the dialog box.
The External Editor is added to the toolbar.
To manage your image editors:
-
In the Configure Photo Editors dialog box, in the Editors list, select the application you want to change.
-
Do any of the following:
-
To change the location of the executable file or the name of the application displayed in the Editors list, click Edit. Set the location and name of the application, and then click OK.
• To set the application as the default external editor for ACDSee, click Set As Default. -
To specify whether the application can handle multiple images at the same time, select or clear the check Supports Multiple Images column.
• To remove the application from the list, click Remove. -
Click OK to accept your changes and return to ACDSee.
To open an image in an external image editor:
- In Manage or View mode, select the image you want to open in the external editor.
- Do one of the following:
- Click Tools | External Editors | Default External Editor or the name of an editor.
- Press CTRL + ALT + X to open the image in the default external editor.
Customizing Keyboard Shortcuts
There are pre-defined keyboard shortcuts for commands that you use frequently in Manage mode and View mode. You can change pre-defined shortcuts, or create keyboard shortcuts for commands that do not currently have shortcuts.
Some commands, such as Open and Copy, are available in both Manage mode and View mode. You can use the same shortcut for these commands in Manage mode and the View mode, or you can define different shortcuts for these commands in
Manage mode and View mode. To define a shortcut for a command in a specific mode, open the Customize dialog from that mode.
To customize keyboard shortcuts:
-
Do one of the following:
-
In Manage mode, click View | Toolbars, and then select Customize.
- In Manage mode, click the drop-down arrow, located to the right of the Main toolbar or File List toolbar, select Customize.
- In View mode, click the drop-down arrow, located to the right of the Bottom toolbar, select Add or Remove Buttons, and then select Customize.
- In the Customize dialog box, click the Keyboard tab.
-
From the Category drop-down, select a top-level menu such as File, Edit, or View. The commands available from that menu display in the Commands list box.
-
Select a command in the Commands list box.
• If a keyboard shortcut has been defined for that command, it displays in the Current Keys box.
- If a keyboard shortcut has not been defined for that command, the Current Keys box will be empty.
- To remove an existing keyboard shortcut, select the keyboard shortcut in the Current Keys box, and then click Remove.
To define a new keyboard shortcut:
- Click in the Press New Shortcut Key text box.
- Press the keys on your keyboard that you want to use for the keyboard shortcut.
The keys display in the Press New Shortcut Key text box.
- Click Assign.
The new keyboard shortcut displays in the Current Keys box.
- To remove all custom keyboard shortcuts and restore the default keyboard shortcuts, click Reset All.
- Click Close.
Changing the Display Theme
In ACDSee Pro you can change the display theme to change the background color of the panes and toolbars.
To change the display theme:
- In Manage mode, click Tools | Options.
- In the Options dialog box, click Manage Mode.
- In the Display theme drop-down list, select a theme.
- Click OK to apply your changes and return to ACDSee.
Chapter 9: Shortcuts
Manage Mode Keyboard Shortcuts
You can use the following keyboard shortcuts while working in Manage mode. There are also shortcuts that can be used specifically in the Calendar pane.

To print this page for easy reference, right-click and select Print...
| This shortcut | Has this result |
| \ (backslash) | Tags or untags the image. |
| ` (grave accent) | Toggles image audio on or off. |
| ALT + LEFT ARROW | Returns to the previous folder you browsed in the File List pane. |
| ALT + RIGHT ARROW | Returns to the folder you last moved back from in the File List pane. |
| ALT + 0 to 5 | Assigns a color label to the currently selected item. Press ALT + 0 to remove a color lab pane. |
| ALT + B | Adds the selected items to the Burn Basket. |
| ALT + C | Copies one or more selected files to a folder you specify. |
| ALT + COMMA | Opens the previous tab in the Properties pane. |
| ALT + ENTER | Opens or closes the Properties pane. |
| ALT + F4 | Closes ACDSee. |
| ALT + G | Opens the Import dialog box. |
| ALT + I | Opens the Filters dialog box where you can specify the types of files displayed in the File pane. |
| ALT + K | Places the cursor in the Keyword section of the IPTC group in the Metadata tab of the Pane. |
| ALT + M | Moves one or more selected files to a folder you specify. |
| ALT + O | Opens the Options dialog box. |
| ALT + PERIOD | Opens the next tab in the Properties pane. |
| ALT + Q | Removes currently displayed item from the Burn Basket. |
| ALT + SHIFT + F | Maximizes the File List pane. |
| ALT + W | Restores your desktop wallpaper to the settings you were using before you applied an ACD Pro wallpaper. |
| ALT + X | Removes currently displayed item from the Image Basket. |
| BACKSPACE | Moves up one level in the current drive's folder structure. |
| CTRL + 0 to 5 | Assigns a rating to the currently selected item. Press CTRL + 0 to remove a rating. |
| CTRL + \ (backslash) | Selects the tagged images. |
| CTRL + A | Selects the entire contents of the current folder. |
| CTRL + B | Adds the selected items to the Image Basket. |
| CTRL + C | Copies the selected items to the Clipboard. |
| CTRL + D | Opens the current image in Develop mode. |
| CTRL + E | Opens the currently selected image in Edit mode. |
| CTRL + F | Opens the Batch Convert File Format dialog box. |
| CTRL + G | Generates a file listing as a text document. |
| CTRL + I | Selects all images in the current folder. |
| CTRL + INSERT | Copies selected items to the Clipboard. |
| CTRL + J | Opens the Batch Rotate/Flip Images dialog box. |
| CTRL + K | Places the cursor in the Keywords field of the Organize tab in the Properties pane. |
| CTRL + L | Opens the Batch Adjust Exposure dialog box. |
| CTRL + M | Opens the Manage Metadata Presets dialog box. |
| CTRL + N | Opens a second instance of the ACDSee Pro program. |
| CTRL + O | Opens the Open Files dialog box, in which you can select one or more images to open i mode. |
| CTRL + P | Opens the currently selected image or images in the ACDSee Pro Print utility. |
| CTRL + R | Opens the Batch Resize Images dialog box. |
| CTRL + S | Creates a slideshow from the currently selected images. |
| CTRL + T | Opens the Batch Adjust Time Stamp dialog box. |
| CTRL + TAB | Moves the focus of the Manage mode window between the currently displayed panes. |
| CTRL + V | Pastes the contents of the Clipboard. |
| CTRL + W | Closes ACDSee. |
| CTRL + X | Cuts the currently selected items to the Clipboard. |
| CTRL + ALT + B | Opens the Batch Edit dialog box. |
| CTRL + ALT + D | Opens the Edit Caption dialog box. |
| CTRL + ALT + E | Opens the Export dialog box. |
| CTRL + ALT + R | Opens the selected images in the Compare Images viewer. |
| CTRL + ALT + W | Sets the selected image as a stretched desktop wallpaper. |
| CTRL + ALT + X | Opens the current image in the default external editor. |
| CTRL + RIGHT CLICK | Opens Windows Explorer context menu. |
| CTRL + SHIFT + 1 | Opens or closes the Folders pane. |
| CTRL + SHIFT + 2 | Opens or closes the Catalog pane. |
| CTRL + SHIFT + 3 | Opens or closes the Search pane. |
| CTRL + SHIFT + 4 | Opens or closes the Calendar pane. |
| CTRL + SHIFT + 5 | Opens or closes the Image Basket. |
| CTRL + SHIFT + A | Selects all files in the current folder. |
| CTRL + SHIFT + B | Shows or hides the status bar. |
| CTRL + SHIFT + C | Copies the currently selected image to the Clipboard. |
| CTRL + SHIFT + D | Clears your current selection. |
| CTRL + SHIFT + E | Opens the current file in the default system application or opens a dialog box where you select an application. |
| CTRL + SHIFT + F | Toggles the full-screen view for the File List pane. |
| CTRL + SHIFT + I | Inverts your current selection. |
| CTRL + SHIFT + L | Opens or closes the Selective Browsing pane. |
| CTRL + SHIFT + M | Opens or closes the Map pane. |
| CTRL + SHIFT + O | Opens the file using the system application associated with its file extension. |
| CTRL + SHIFT + P | Opens or closes the Preview pane. |
| CTRL + SHIFT + T | Displays or hides the Manage mode Main toolbar. |
| CTRL + SHIFT + TAB | Moves the focus of the Manage mode window between the currently displayed panes. |
| CTRL + SHIFT + W | Sets the selected image as a tiled desktop wallpaper. |
| CTRL + SHIFT + ALT + W | Sets the selected image as a centered desktop wallpaper. |
| DELETE | Deletes the selected items to the Recycle Bin. |
| ENTER | Opens the selected item in View mode. |
| F1 | Opens the ACDSee Pro Help file. |
| F2 | Renames one or more selected files. |
| F3 | Opens the Search pane. |
| F4 | Displays the Contents bar drop-down list. |
| F5 | Refreshes Manage mode. |
| F6 | Changes the File List to Thumbs+Details view. |
| F7 | Changes the File List to Filmstrip view. |
| F8 | Changes the File List to Thumbnails view. |
| F9 | Changes the File List to Tiles view. |
| F10 | Changes the File List to Icons view. |
| F11 | Changes the File List to List view. |
| F12 | Changes the File List to Details view. |
| SHIFT + DELETE | Removes the selected item from your hard drive. |
| SHIFT + F5 | Refreshes the File List pane. |
| SHIFT + INSERT | Pastes the contents of the Clipboard. |
| SHIFT + TAB | Moves the focus of the Manage mode window to the previous pane or tool in sequence. |
| TAB | Moves the focus of the Manage mode window to the next pane or tool in sequence. |
Manage Mode Mouse Shortcuts
You can use the following mouse shortcuts in Manage mode.

To print this page for easy reference, right-click and select Print...
| Shortcut Resulting action | |
| Double-click | Opens the selected image in View mode. |
| Right-click | Opens the Manage mode context menu. |
| SHIFT + click | Selects a group of images. |
| Click + drag | Selects a group of images. Be sure to click on a blank area of the screen, not on an folder, before you drag, so you can draw a selection box around the group of images. |
| CTRL + click | Selects images you click on. |
| CTRL + right click | Opens the Windows Explorer context menu. |
| CTRL + Wheel up | Increases the magnification of the image (zooms in). |
| CTRL + Wheel down | Decreases the magnification of the image (zooms out). |
View Mode Keyboard Shortcuts
You can use the following keyboard shortcuts while working in View mode.

To print this page for easy reference, right-click and select Print...

If you would like to define your own keyboard shortcuts, see Customizing Keyboard Shortcuts .
Shortcut Resulting action
| \ (backslash) | Tags or untags the image. |
| = (equal sign) | Increases the magnification of the current image (zooms in). |
| ` (grave accent) | Toggles image audio on or off. |
| ALT + ENTER | Opens or closes the Properties pane. |
| ALT + DOWN ARROW | Zooms the image to fit the height within View mode window. Does not enlarge only reduces. |
| ALT + RIGHT ARROW | Zooms the image to fit the width within View mode Window. Does not enlarge only reduces. |
| ALT + \ | Toggles the zoom lock on and off. |
| ALT + 0 to 5 | Assigns a color label to the currently selected item. Press ALT + 0 to remove color label. |
| ALT + B | Adds the selected items to the Burn Basket in Manage mode. |
| ALT + C | Copies the current item to a folder you specify. |
| ALT + COMMA | Moves the focus in the Properties pane to the previous tab. |
| ALT + D | Opens the Edit Caption dialog box. |
| ALT + F4 | Closes ACDSee. |
| ALT + M | Moves the current item to a folder you specify. |
| ALT + O | Opens the ACDSee Pro Options dialog box. |
| ALT + PERIOD | Moves the focus in the Properties pane to the next tab. |
| ALT + Q | Removes currently displayed item from the Burn Basket in Manage mode. |
| ALT + R | Opens the Rename File dialog box. |
| ALT + S | Starts or stops the Auto Advance slideshow. |
| ALT + W | Restores your desktop wallpaper to the settings you were using before you applied an ACDSee Pro wallpaper. |
| ALT + X | Removes currently displayed item from the Image Basket in Manage mode. |
| B | Displays or hides the status bar. |
| BACKSPACE | Displays the previous item in the slideshow, Auto Advance, or View sequence. |
| CTRL + LEFT ARROW | Displays the previous image. |
| CTRL + RIGHT ARROW | Displays the next image. |
| CTRL + 0 to 5 | Assigns a rating to the currently selected item. Use only the numeric keypad these shortcuts. Press CTRL + 0 to remove a rating. |
| CTRL + A | Displays or hides headers and footers. |
| CTRL + B | Adds currently displayed item to the Image Basket in Manage mode. |
| CTRL + C | Copies the currently displayed file to the Clipboard. |
| CTRL + D | Opens the currently selected image in Develop mode. |
| CTRL + E | Opens the currently selected image in Edit mode. |
| Shortcut Resulting action | ||
| CTRL + F | Opens the Batch Convert File Format dialog box. | |
| CTRL + F4 | Closes the current item. | |
| CTRL + INSERT | Copies the selected portion of an image to the Clipboard. | |
| CTRL + J | Opens the Batch Rotate/Flip Images dialog box. | |
| CTRL + MINUS | Reduces the magnification of the area inside the Magnifying Glass pane. | |
| CTRL + O | Opens the Open files dialog box, in which you can select one or more image open in View mode. | |
| CTRL + P | Opens the current image in the ACDSee Pro Print utility. | |
| CTRL + PLUS | Increases the magnification of the area inside the Magnifying Glass pane. | |
| CTRL + Q | Clears the current selection. | |
| CTRL + S | Opens the Save Image As dialog box, in which you can save your image with different name or file format. | |
| CTRL + T | Opens the Batch Adjust Time Stamp dialog box. | |
| CTRL + V | Pastes the contents of the Clipboard. | |
| CTRL + W | Closes ACDSee. | |
| CTRL + X | Cuts the current item to the Clipboard. | |
| CTRL + ALT + LEFT ARROW | Rotates the current image 90° counterclockwise. | |
| CTRL + ALT + RIGHT ARROW | Rotates the current image 90° clockwise. | |
| CTRL + ALT + B | Opens the Batch Edit dialog box. | |
| CTRL + ALT + D | Opens the Set Caption dialog box. | |
| CTRL + ALT + E | Opens the Export dialog box. | |
| CTRL + ALT + L | Opens the previous image. | |
| CTRL + ALT + W | Sets the selected image as a stretched desktop wallpaper. | |
| CTRL + ALT + X | Opens the current image in the default external editor. | |
| CTRL + Right-click | Opens the Windows Explorer context menu. | |
| CTRL + SHIFT + A | Opens or closes the Magnifying Glass. | |
| CTRL + SHIFT + B | Displays or hides the status bar. | |
| CTRL + SHIFT + C | Copies the currently displayed image to the Clipboard. | |
| CTRL + SHIFT + F | Toggles full screen mode. | |
| CTRL + SHIFT + F4 | Closes all images. | |
| CTRL + SHIFT + H | Opens or closes the Histogram pane. | |
| CTRL + SHIFT + P | Prints all currently selected images, or all images in the current folder. | |
| CTRL + SHIFT + Q | Opens the Edit Header/Footer dialog box, in which you can specify the text to display on your images in View mode. | |
| CTRL + SHIFT + S | Opens or closes the Navigator pane. | |
Shortcut Resulting action
| CTRL + SHIFT + T | Displays or hides the Bottom toolbar. |
| CTRL + SHIFT + W | Sets the selected image as a tiled desktop wallpaper. |
| CTRL + SHIFT + ALT + W | Sets the selected image as a centered desktop wallpaper. |
| CTRL + SHIFT + 1 | Changes the image color depth to Black and White. |
| CTRL + SHIFT + 2 | Changes the image color depth to 16 grays. |
| CTRL + SHIFT + 3 | Changes the image color depth to 256 grays. |
| CTRL + SHIFT + 4 | Changes the image color depth to 16 colors. |
| CTRL + SHIFT + 5 | Changes the image color depth to 256 colors. |
| CTRL + SHIFT + 6 | Changes the image color depth to Hicolor. |
| CTRL + SHIFT + 7 | Changes the image color depth to Truecolor. |
| DELETE | Deletes the current image to your Recycle Bin. |
| E | Toggles the exposure warning on and off. |
| END | Displays the last of your selected items, or the last item in the current folder. |
| ENTER | Closes View mode and returns to the previous mode. |
| ESC | Closes current dialog box, or closes View mode and returns to the previous mode. |
| F | Toggles full screen mode. |
| F1 | Opens the ACDSee Pro Help file. |
| F2 | Opens the Rename File dialog box. |
| F5 | Refreshes the View mode window and reloads the current image. |
| HOME | Displays the first of your selected items, or the first item in the current folder. |
| INSERT | Opens the Open files dialog box, in which you can select one or more images open in View mode. |
| L | Toggles the pan lock. |
| PAGE DOWN | Displays the next item. |
| PAGE UP | Displays the previous item. |
| PAUSE | Stops or starts the Auto Advance slideshow. |
| SHIFT + BACKSPACE | Displays the previous page in a multiple-page image. |
| SHIFT + DELETE | Removes the current item from your hard drive. |
| SHIFT + E | Opens the current file in the default system application or opens a dialog box where you can select an application. |
| SHIFT + END | Displays the last page of the current multiple-page image. |
| SHIFT + ENTER | Closes View mode and returns to Manage mode. |
| SHIFT + F1 | Activates the image scrolling tool. |
| SHIFT + F2 | Activates the selection tool. |
| Shortcut Resulting action | |
| SHIFT + F3 | Activates the zoom tool. |
| SHIFT + HOME | Displays the first page of the current multiple-page image. |
| SHIFT + INSERT | Pastes the contents of the Clipboard. |
| SHIFT + L | Opens the file using the system application associated with its file extension. |
| SHIFT + PAGE DOWN | Displays the next page in a multiple-page image. |
| SHIFT + PAGE UP | Displays the previous page in a multiple-page image. |
| SHIFT + SPACEBAR | Displays the next page in a multiple-page image. |
| SHIFT + Z | Activates the Select tool, and zooms into the selected area. |
| SPACEBAR | Displays the next item in the slideshow, Auto Advance, or View sequence. |
| T | Displays or hides the Bottom toolbar. |
| TAB | Moves the focus of the Properties pane to the next field. |
| Z | Opens the Set Zoom Level dialog box. |

Note: Use the numeric keypad for the following View mode keyboard shortcuts.
| * (asterisk) | Automatically zooms the image to fit within View mode window. |
| - (minus) | Decreases the magnification of the image (zooms out). |
| + (plus) | Increases the magnification of the image (zooms in). |
| / (forward slash) | Zooms the image to its actual size. |
| 1 | Displays the last item in the current folder. |
| 3 | Displays the next item. |
| 7 | Displays the previous item. |
| 9 | Displays the last item in the current folder. |
View Mode Mouse Shortcuts
You can use the following mouse shortcuts while working in View mode.

To print this page for easy reference, right-click and select Print...
Shortcut Resulting action
| Double-click | Closes View mode and returns to the previous mode. |
| Right-click | Opens the View mode context menu. |
| Middle click | Toggles full screen mode (on 3-button mouse). |
| Wheel click | Toggles full screen mode. |
| Wheel up | Displays the previous item. |
| Wheel down | Displays the next item. |
| CTRL + Right-click | Opens the Windows Explorer context menu. |
| CTRL + Wheel up | Increases the magnification of the image (zooms in). |
| CTRL + Wheel down | Decreases the magnification of the image (zooms out). |
| SHIFT + Wheel up | Displays the previous page of a multiple-page image. |
| SHIFT + Wheel down | Displays the next page of a multiple-page image. |
Calendar Pane Shortcuts
Once you are familiar with the basic calendar pane options, consider using the following shortcuts:
- Click the title bar on a year, month, or day table to display all available images for that year, month, or day
• Right-click the title bar on a year, month, or day table to scroll through and select from adjacent years, months, or days.
• In Year view double-click any month to switch to Month view. Or, in Month view, double-click any date to switch to Day view. - In Month view click the letter indicating a day of the week to display all available images for that day of the week. For example, click F to select all Fridays in that month.
• In Day view click AM or PM to select the first or second half of a day. - In Event view press and hold the CTRL key and click any month or day to display all available images for those months or days.
- Click on the title of any month calendar, to select all the photos in that month.
- Click the name of the week, to select all the photos in those weeks of the month.
- Drag and select any days in the calendar to select all the photos in those days.
Develop and Edit Mode Keyboard Shortcuts
Use the following keyboard shortcuts in Develop and Edit mode.

To print this page for easy reference, right-click and select Print...

If you would like to define your own keyboard shortcuts, see Customizing Keyboard Shortcuts.
| Shortcut Resulting action | |
| ALT + ENTER | Opens or closes the Properties pane. |
| B | Toggles the Edit Brush on and off in Edit mode. |
| S | Shows brush strokes. |
| CTRL + D | Opens the image in Develop mode. |
| E | Toggles the exposure warning on and off in Develop mode. |
| CTRL + S | Saves the image in Develop mode. |
| CTRL + Y | Redo. |
| CTRL + Z | Undo. |
| ALT | After making adjustments to Noise Reduction sliders, hold down ALT key to display residual noise within the image. |
| CTRL + E | Opens the image in Edit mode. |
| CTRL + SHIFT + H | Toggles the histogram to open and close in Edit mode. |
| PAGE UP | Opens previous image. |
| PAGE DOWN | Opens the next image. |
Develop and Edit Mode Mouse Shortcuts
Use the following mouse shortcuts in Develop and Edit mode to make quick image adjustments.

To print this page for easy reference, right-click and select Print...
| Shortcut Resulting action | |
| SHIFT + click | Turns off the auto-collapse feature in the pane as you open groups. |
| SHIFT + mouse wheel | Makes large adjustments to the sliders. If the scroll is active in the Develop pane, the will scrolls the pane. |
| SPACEBAR + click + drag | Scrolls the image by dragging the mouse. Use when you are using a tool in Develop, and the image zoomed in. |
| Right-click | Resets any slider to its default value. |
| Mouse wheel over slider | Makes fine adjustments to a slider. Place your cursor over the slider and scroll up or down |
| Mouse wheel over image | Adjusts brush size. Place your cursor over the image and scroll up or down to adjust nib |
| SHIFT + mouse wheel | Adjusts feathering. Place your cursor over the image and scroll up or down to adjust feathering. |
Online Mode Keyboard Shortcuts
Use the following keyboard shortcuts in the Transfer mode.

To print this page for easy reference, right-click and select Print...

If you would like to define your own keyboard shortcuts, see Customizing Keyboard Shortcuts .
Shortcut Resulting action
| ALT + A | Sets selected folder as an Upsync folder. |
| ALT + D | Downloads selected files and folders. |
| ALT + ENTER | Displays Properties pane in the lower screen of Transfer mode. |
| ALT + Num + | Group forward files and folders in the lower screen of Transfer mode. |
| ALT + Num - | Group backward files and folders in the lower screen of Transfer mode. |
| ALT + O | Displays Options dialog. |
| ALT + U | Uploads selected files and folders. |
| ALT + X | Removes files from the image basket. |
| ALT + SHIFT + U | Upsyncs all files. |
| CTRL + \ | Selects tagged files. |
| CTRL + A | Selects all files and folders. |
| CTRL + F8 | Changes the view in the upper screen in Transfer mode to thumbnail view of images in account. |
| CTRL + F12 | Changes the view in the upper screen in Transfer mode to a detailed view of images in account. |
| CTRL + SHIFT + D | Clears image selection. |
| CTRL + SHIFT + I | Inverts image selection. |
| CTRL + SHIFT + 1 | Displays Folders pane in the lower screen of Transfer mode. |
| CTRL + SHIFT + 2 | Displays Catalog pane in the lower screen of Transfer mode. |
| CTRL + SHIFT + 3 | Displays Search pane in the lower screen of Transfer mode. |
| CTRL + SHIFT + 4 | Displays Calendar pane in the lower screen of Transfer mode. |
| CTRL + SHIFT + 5 | Displays the image basket. |
| CTRL + W | Closes ACDSee. |
| DELETE | Deletes files or folders. |
| ENTER | Opens the selected item in View mode. |
| F2 | Renames files and folders. |
| F5 | Refreshes the view. |
| F6 | Displays thumbnails and details of folders and files in the lower screen of Transfer mode. |
| F7 | Displays filmstrip view of folders and files in the lower screen of Transfer mode. |
| F8 | Displays thumbnails of folders and files in the lower screen of Transfer mode. |
| F9 | Displays tile view of folders and files in the lower screen of Transfer mode. |
| F10 | Displays icon view of folders and file types in the lower screen of Transfer mode. |
| F11 | Displays a list of folder and file types in the lower screen of Transfer mode. |
| F12 | Displays a detailed view of folders and files in the lower screen of Transfer mode. |
Shortcut Resulting action
| Num + | Sort forward files and folders in the lower screen of Transfer mode. |
| Num - | Sort backward files and folders in the lower screen of Transfer mode. |
| SHIFT + ALT + A | Displays ACDSeeOnline.com mode. |
| SHIFT + ALT + C | Copies URL. |
| SHIFT + ALT + T | Displays Transfer mode. |
Online Mode Mouse Shortcuts
Use the following mouse shortcuts in Transfer mode.

To print this page for easy reference, right-click and select Print...
Shortcut Resulting action
| Click + drag | Selects a group of images. |
| CTRL + click | Selects images you click on. |
| SHIFT + click | Selects a group of images. |
Chapter 10: File format
About RAW Files
A RAW file is like a negative. RAW files contain all of the data that was collected by your digital camera's sensor when you took a photo. If you tried to view a RAW file without processing, it would appear almost completely black. It is therefore necessary to process your RAW files to produce a photo.
ACDSee Pro offers a new RAW processing engine providing improved Color, Contrast and Exposure. ACDSee Pro also emulates Pro 3's pipeline for RAW images developed in Pro 3 or earlier versions.
You can use Develop and Edit mode to select exposure, color, and image sharpness settings for your RAW files. You can select and save unique settings for each RAW file, or you can select and save generic settings as presets. If you save generic settings as presets, you can apply those presets to numerous RAW files using the batch tool, or by going to Manage mode, and selecting Tools |
Process | Apply Preset and then selecting a preset.
You cannot change your original RAW files permanently. The RAW files remain intact after processing to preserve all the data captured by your camera. The processing settings that you select for a particular image are saved to the XMP file of the RAW, and associated with the image in the database.
To save any changes you make to a RAW file permanently, you need to save it as a separate file, in a different file format (JPEG or TIFF, for example). If you want to save your processed file to many different formats at the same time, use the multiple format option in Develop mode. After developing your image, simply click on the Save button, and select Export. In the Export dialog box, select your export settings and click OK.
Registering and Associating Files
ACDSee Pro can work with a large number of file formats. If you are running Microsoft XP® then you can set ACDSee Pro to be the default application to open certain file types. This process is called associating files.
With Microsoft Windows Vista®, Windows 7® and Windows 8®, you need to register file types (or extensions) as well as associate them. When you register file types, you tell the Windows Vista® or Windows 7 or 8® that these file types are used with ACDSee. When you associate file types, you set ACDSee Pro as the default program to open these kinds of files when you double-click them.
For Microsoft XP®
To associate files with ACDSee:
- Click Tools | File Associations.
-
Select each of the following:
-
Select the Image Files tab and then select the check boxes next to the image file formats that you want to associate with ACDSee.
-
Select the Archives tab and then select the check boxes next to the archive file formats that you want to associate with ACDSee.
-
Click OK.
For Microsoft Windows Vista® or Windows 7®
To set file association options in ACDSee:
- Click Tools | File Associations | Set File Associations.
-
Select one of the following options:
-
All image file types: Sets ACDSee Pro as the default application to open all image file types.
- Image file types not currently associated with ACDSee or another program: Retains any file types already associated with ACDSee Pro and adds any file types that are not yet associated with a program.
-
Choose the image file types myself: Opens a dialog where you can select the files you want to associate with ACDSee Pro.
-
Click OK.
To register new file extensions with Microsoft Windows Vista® or Windows 7®:
When you add a plug-in to ACDSee Pro that allows it to recognize and use new file types, you need to register the new file formats with the operating system as being used by ACDSee. You can then use the same dialog to associate these files with ACDSee.
- Click Tools | File Associations | Register New Extensions.
- To only register the new file formats in the list, click OK.
-
Click OK to register and/or associate the new files.
-
To associate the new file formats with ACDSee Pro so that it opens these file formats in the future, check each file type by clicking in the white square.

You can change file associations directly in Microsoft Windows Vista® or Windows 7® by going to your desktop clicking Start | Default Programs.
For Microsoft Windows 8 ^®
With ACDSee on Windows 8®, you are not prompted to associate your files on installation. Instead, when you launch a given file type, Windows 8® will ask you how you would like to associate the file. This only occurs the first time you launch the file type after installing a new program, (such as ACDSee), which is capable of associating itself to that type of file.
To set file association to ACDSee:
- In Windows 8®, open the Control Panel.
- Search for Default Programs.
- Choose Set your default programs.
- Select ACDSee from the list of programs. Then choose:
- Set this program as default to set all available file types to ACDSee.
- Choose defaults for this program to pick and choose by file type. 5. Click OK.
Glossary
A
Absolute Colorimetric
Rendering intent, generally used for proofing. Based on a device-independent color space, reproducing colors within the available gamut perfectly, and reducing colors outside of the gamut to the nearest reproducible hue (at the expense saturation).
acquire
Often used term to describe the process of locating images on peripheral devices (such as scanners and digital cameras) and adding the images to your hard drive. Can also refer to taking screen captures. See import.
album
Collection of images, often organized by theme or event. In ACDSee, albums contain shortcuts to where the images are stored on your hard drive.
aliasing
Jagged edges caused by pixels. Occurs most often in low resolution images or images that have been enlarged. See jaggies.
anchor
Method of fixing an object such as a selection to a screen, page, or image location.
antialiasing, anti-aliasing
Software technique for reducing jagged lines, or 'jaggies'. Uses shades of gray and color to smooth out the contrast between adjacent pixels.
aspect ratio
An image's width-to-height ratio. For example, an image with an aspect ratio of 3:1 has a width 3 times larger than its height.
archive
Collection of files saved as a single file for storage. Archive files usually use compression to reduce their size. You can use archiving software such as ACDSee Pro and ACDZip to create and view archives.
azimuth
Angle of shadows that extend from the edges of image details. In ACDSee Pro you can control azimuth when applying the Emboss effect to an image.
B
background processing
Tasks or programs that function without user interaction.
bandwidth
Amount of data that can be sent through a network connection in a fixed amount of time. Bandwidth is measured in kilobits per second (Kbps).
barrel distortion
In barrel distortion the photo appears to bulge outwards from the center.
batch processing
Any operation or tool, such as resizing, converting, or renaming, that can be used to adjust multiple images or files simultaneously.
bit
Bits are small units of computer memory. The color depth of your image is constrained by the number of bits available to store color information. For example, it is possible to store 256 different color values per color channel in 8-bit RGB images. Similarly, it is possible to store 65,536 different color values per color channel in 18-bit images.
blackpoint
An image's darkest area. You can control the intensity of the black in an image by adjusting its blackpoint.
blend modes
Filters that change the effect of a tool or the appearance of a selected object.
brightness
Light intensity of an image. You can make an image appear brighter or darker by adjusting its brightness.
C
cache
High-speed storage mechanism. The ACDSee Database is a cache.
caption
Text associated with a file, or a comment or description added to a printed image.
cataloging
Adding file information to the ACDSee Pro database.
category
Assign categories to photos to help sort and manage them more easily.
chromatic aberration
A lens artifact that can result in fringes in high contrast areas of some photos.
CMYK
Color model that uses cyan, magenta, yellow, and black (key) as its primary colors.
color cast
Changes the hue of an image while keeping the saturation and brightness intact. For example, many digital cameras produce pictures with a slightly blue color cast. ACDSee Pro includes a tool that removes an unwanted color cast.
color channel value
Contains all pixel information for a single color. A grayscale image has one channel, while an RGB image has three channels. You can adjust RGB values when editing a color.
color gamut
Range of colors that a device such as a printer or monitor can produce or display.
color management
Process of adjusting your computer settings so that the color output from your printer matches the colors you see on your monitor.
color space
There are two types of color spaces: device-independent or device-dependent. A device-independent color space, such as RGB, describes all possible colors. A device-dependent color space describes the subset of colors (from the device-independent color space) that a particular device can reproduce. Device-dependent color spaces are used to map colors between devices example, from a monitor to a printer) to ensure that colors are reproduced accurately.
compression
Process that converts data to a storage format requiring less space than the original data.
contact sheet
Physical or digital page that contains a series of small images, usually in a grid format.
contrast
Measure of an image's color and brightness differences.
convert
Change a file from one format to another. For example, you might convert a file from a bitmap (.bmp) to a JPEG (.jpg) to reduce the file size.
cropping
Removing unwanted image areas.
D
database
Electronic filing system that provides fast access to stored data. The ACDSee Database contains two parts: a cached thumbnail file and an information file. The cached thumbnail file contains small copies (thumbnails) of the images on your system. The information file contains details about the files on your system, such as descriptions, dates, authors, notes, keywords, and categories.
database date
Date that you apply to the properties of a file and save in the ACDSee Database.
descriptions
ACDSee Pro stores descriptions in a hidden file named descript.ion. Descriptions such as file name and captions for an image will be included in the descript.ion files.
dock
Attaching a toolbar, window, or pane to different screen areas.
DPI (dots per inch)
Measurement of an image's resolution. For example, 92 DPI means 92 dots horizontally and 92 dots vertically, which equals 8,464 dots per square inch. More dots per inch result in higher resolution and image quality.
dynamic range
The dynamic range of an image is directly related to the dynamic range of your digital camera's sensor. If your digital camera's sensor has a large dynamic range it can capture the darkest shadows and brightest highlights at the same time, without clipping the shadows or highlights. (RAW images preserve the dynamic range of your digital camera's sensor.) Adjusting the tonal range of the image changes how the dynamic range of the image is represented on a monitor or in a photo.
E
elevation
Height of an imaginary light source over an image. The elevation of the light source works in conjunction with azimuth to generate a three-dimensional emboss effect.
encode
Writing (or saving) a file format.
encryption
Method of converting data into a secure format. You need a digital password or key to read an encrypted file.
EXIF (Exchangeable Image File)
Standard for storing information, primarily with images that use JPEG compression. Most digital cameras create EXIF information and embed it in the image file. For example, EXIF information can include details about shutter speed and whether a flash was used.
export
Moving data from one application to another. The exporting application places the data in a format that the other application understands.
exposure
Exposure is the amount of time that your digital camera's sensor is exposed to light.
F
feather
Softening image edges to blend them into the background.
file listing
In ACDSee, a report of the files currently displayed in Manage mode.
file format
Medium for encoding information in a file. Each type of file has a different file format that specifies how it organizes the information it contains.
filter
Program that can apply an effect to an image, such as an embossed appearance or a sepia tone.
fisheye distortion
ACDSee Pro 6 User Guide
In fisheye distortion, the photo appears to bulge outwards from the center, as if the photo were wrapped around a sphere.
G
gamma
Range of color values a monitor, scanner, or printer can display. Adjusting this value increases or decreases the intensity of the light spectrum.
grayscale image
Image composed of different shades of gray.
H
highlights
Highlights are the brightest or whitest parts of an image.
histogram
A histogram is a graph that displays the dynamic range of shadows and highlights in an image.
HSL
An acronym for hue, saturation, and lightness.
hue
Predominant color in an image.
|
image editor
Program that you can use to create and edit images. ACDSee Pro is an image editor.
image resolution
Quality of image details and colors. Also used to describe the quality of monitors and printer output.
image viewer
Program that displays images. ACDSee Pro is an image viewer.
import
Bringing data into an application from another using a format that the receiving application understands.
interpolation
Process that uses nearby pixels to estimate the color of new pixels added to the larger image. For example, interpolation might be used when enlarging a digital image.
IPTC
Standard method of encoding information within image files so that items such as descriptive comments and copyright information can be transmitted with the image.
J-K
jaggies
Individual pixels displayed in an image with low resolution. The appearance of pixels in an image causes lines and curves to appear jagged.
L
lens vignetting
Unusual darkness in the corners of images as a result of an inability of the lens to distribute light into the corners of the image.
lossless compression
Form of compression that retains all image data and quality.
lossless rotation and flipping
Rotation of a JPEG image without loss of image quality. This works best on images with dimensions that are a multiple of 8 or 16.
lossy compression
Form of compression that attempts to remove unnecessary data. This data loss can affect image quality.
M
marquee
Dashed-line frame that identifies a selected portion of an image. Depending on the tool, you can resize or move a marquee with or without changing the underlying image.
metadata
Information about an image and how it was taken. For example, the metadata of digital camera images can contain the date and time the picture was taken, the shutter speed, the exposure settings of the camera, and whether a flash was used.
monochrome image
Image containing a single color.
N
noise
Effect produced when a variety of pixel colors are used in the same color region. Noise often occurs in images with high ISO setting or slow shutter speed.
O
opacity
Determines how visible an effect is when applied to an image or a selection. High opacity produces a more solid effect, while low opacity results in a nearly invisible effect.
overexposed
Images that are overexposed have too many highlights, and tend to look faded. You typically overexpose images by exposing your digital camera's sensor to light for too long.
P-Q
panning
Moving zoomed images vertically, horizontally, and diagonally across the display area to view specific areas of the image.
An acronym for Portable Document Format. You can view PDFs on any computer using the free Adobe Reader® soft
Perceptual
Rendering intent that scales all of the colors within one gamut to fit within another gamut. Best used for photographic images, as it maintains the relationship between the colors more accurately than the colors themselves.
perspective distortion
Perspective distortion is caused by wide angle and telephoto lenses, which distort the perspective of large or far-away objects. For example, if you take a photo of a tall building, the building may appear to be narrower at the top even though the building is the same width from top to bottom.
photo album
See album.
photo editor
See image editor.
pincushion distortion
In pincushion distortion the photo appears to shrink inwards toward the center.
pixel (PICture ELEMENT)
Smallest visible portion of a digital image, arranged in rows and columns.
plug-in
Software module that adds functionality to a larger program.
PPI (pixels per inch)
Measurement of how an image is displayed. More pixels per inch result in higher image quality.
presets
A preset contains image correction settings. You can create and use presets to ensure that settings you apply are the same and consistent across all images.
primary colors
Colors that can produce other colors when blended. For example, in the RGB color model, red, green, and blue are colors.
R
raster image
Image composed of a rectangular grid of pixels. Each pixel contains a defined value about its color, size, and location in the image. As a result, resizing the image can affect its quality.
rating
Assign ratings (1, 2, 3, 4, 5) to photos to help sort and manage them more easily.
RAW
An image file format. RAW files contain all of the image data that was captured by your digital camera's sensor. RAW files are not processed by your camera; instead, you must process RAW images through Develop mode.
recursive
Program or task that can repeat itself indefinitely, such as a slideshow.
red eye
Red eye occurs when the light from your digital camera's flash reflects off the retinas in the subject's eyes. The subject's eyes look red instead of their normal color.
Relative Colorimetric
Rendering intent that maps the colors that fall exactly within the color gamuts of both the input and output devices. Best used for single- or limited-color images as colors outside of both gamuts may be mapped to a single color.
render
Drawing images to your screen.
rendering intent
Approach used to map colors from one color gamut to another. There are four rendering intents available: Perceptual, Relative Colorimetric, Saturation, and Absolute Colorimetric.
resolution
Quality and clarity of an image, measured in pixels, dots per inch, or pixels per inch.
RGB
Color model that uses red, green, and blue as its primary colors.
ringing artifacts
Distortion around the edges of image subjects, caused by compressing or resizing an image.
S
saturation
Purity of a color. Higher color saturation results in more gray.
Saturation (rendering intent)
Rendering intent that maintains color saturation from one gamut to another. Best suited for images in which the actual color represented is less important than the color's vividness.
selection
Portion of an image that you define with a selection tool. A marquee surrounds a selection. ACDSee Pro and ACD Photo Editor include selection tools.
SendPix
ACD SendPix is a free, electronic photo sharing service offered by ACD Systems.
sepia
Sepia-toned images are composed of shades of brown. Many old photographs have a sepia tone.
sharpen
The sharpen tool is for sharpening images. The original image is blurred slightly. This blurred version of the image is subtracted from the original image, revealing the edges in the original image. These edges can then be sharpened by increasing contrast.
sharpness
The sharpness in an image is determined, primarily, by your digital camera's lens and sensor. You can also create the illusion of sharpness by increasing the contrast between edges within an image.
shortcut menu
Menu that appears when you right-click within a program. Sometimes referred to as a context menu.
slideshow
Automated sequential display of images. You can use slideshow software such as ACDSee Pro to display slideshows of images.
soft proofing
Using your computer's monitor as a proofing device. The monitor displays a simulation of how colors will appear when rendered by the printer.
T
tagging
Tagging, like categories and ratings, is a great way to organize and group your photos without moving the files into different folders. You can tag a photo with one click. Similarly, you can display all tagged photos with one click.
thumbnails
Small preview of a full-sized image.
timestamp
Date and time associated with a file.
transitions
Special effects used between images or video segments in slideshows, screensavers, and videos.
U
underexposed
Images that are underexposed have too many shadows. Images typically become underexposed if you don't expose your digital camera's sensor to light long enough.
V
vector image
Image consisting of individual objects rather than pixels. Mathematical equations define the objects. You can adjust the size of a vector image and the image will retain its clarity and quality.
W
watermark
Background text or graphics added to an image, usually to provide copyright protection.
white balance
Removes color cast to create a photo that is correctly lit. You can use your camera settings to apply the correct white balance before taking an image, or correct the white balance in ACDSee.
whitepoint
Lightest image area. You can control the intensity of the white in an image by adjusting its whitepoint.
X-Z
XML (Extensible Markup Language)
Standard language for Web documents.
zoom
In ACDSee, zoom refers to the process of increasing or decreasing the display scale for an image. Increase the display scale to view a portion of an image or a specific image detail. Decrease the display scale to view more or all of the image
Index
Index
A
ACDSee
database 132
importing photos 14
user interface 1
acquiring
importing 14
acquiring photos 14
Adjusting Clarity 297
adjusting post-crop vignetting 193
adjusting soft focus 191
Advanced Color 282
archiving files 90
assigning categories and color labels 46
assigning categories and ratings 43
associating files with ACDSee 346
audio
adding to images 154
playing 151
recording to images 155
auto advance 145
B
backing up
database 138
tips and strategies 139
barrel distortion 265
batch editing
Batch Processor 111
color profiles 110
exposure 106
flipping 103
renaming 108
resizing 105
rotating 103
batch export
how 97
batch processing
about 97
black and white 291
blend modes 261
blurring 293
border 225
brightness 269
Burn Basket 86
C
Calendar pane 26
Catalog pane
customizing 313
cataloging
assigning ratings 43
files 38
cataloging files 135
categories
assigning 43
finding unassigned images 74
managing 41
CD
creating 86
getting photos 20
Photo discs 148
setting CD/DVD management options 315
clarity 297
color
changing color depth 290
changing color profiles 110
setting color management options 317
color labels 46
color scheme 306,331
committing changes 158
comparing images 36
contact sheets
creating 89
printing 96
converting
databases 135
descript.ion files 136
images to another file format 102
to grayscale 290
copying
files 57
images 58
Crayon Drawing effect 235
crooked photos 199
cropping 201, 264
Crosshatch effect 236
customizing
Calendar pane 314
Catalog pane 313
Database 319
File List pane 307
File management 316
Folders pane 313
keyboard shortcuts 330
Manage mode workspace 326
moving panes 5
Preview pane 312
Processing Tools pane 329
toolbars 327
View mode 320
D
D icon 25,310
database
about 132
adding information to 52, 54
backing up 138
cataloging files 135
converting 135
descript.ion files 136
excluding folders 134
exporting 137
importing 136
keywords 55
maintaining 141
optimizing 141
options 319
quarantining files 142
rebuilding thumbnails 142
restoring 140
tips and strategies 139
date
changing in multiple files 63
Dauber effect 236
deleting
metadata 62
descript.ion files 136
Detail tab 194
Details view 30
Details View options 311
Develop 163
Advanced Color group 187
Crop group 201
Detail tab 194
General group 181
Geometry tab 198
Lens Distortion group 199
Lighting group 183
Noise Reduction group 196
Output Color Space group 194
Perspective group 200
Post-Crop Vignette group 193
presets 171
Red Eye Reduction 204
Rotate & Straighten group 199
Sharpening group 195
Soft Focus group 191
Split Tone 192, 287
Tone Curves group 193
Tune tab 178
White Balance group 182
Develop mode 9
developing
adjusting color 187
adjusting lighting 183
adjusting tone curves 193
adjusting white balance 182
cropping images 201
fixing lens distortion 199
Highlights, shadows, hue, saturation 192, 287
making general adjustments 181
rotating and straightening 199
selecting an output color space 194
sharpening images 195
soft focus 191
Developing
managing presets 171
digital camera
getting photos 15
plug-ins 15
display theme 306, 331
downloading
photos from a CD 20
photos from a digital camera 15
photos from a mobile phone 22
photos from a scanner 21
photos in ACDSee 14
dual monitors
moving the panes 5, 35
Duplicate Finder 73
DVD
creating 86
setting CD/DVD management options 315
E
E icon 25,310
Convert to Black & White 289
Crop 264
Flip 263
Lens Distortion Correction 265
Perspective Correction 265
presets 208
Red Eye Reduction 218
Remove Noise 295
Repair tool 219
Resize 266
Rotate 262
Selections 214
Sharpen 292
Text 220, 223
Tone Curve 272
Vignette 229
Watermark 224
Edit mode 9
Edit mode, Develop mode 9
editing
adding noise 296
adding text 220, 223
blurring 293
brightness 269
clarity 297
cloning 219
configuring editors 329
correcting barrel distortion 265
correcting fisheye distortion 265
correcting perspective distortion 265
correcting pincushion distortion 265
correcting shadows and highlights 273, 281
cropping 264
exposure 272
flipping 263
HSL values 282
light levels 270
presets 208
removing noise 295
removing red eye 204, 218
repairing 219
resizing 266
RGB values 288
rotating 262
sharpen 292
special effects 231
tone curve 272
toolbars 327
effects
about 231
Bathroom Window 231
Blinds 232
Blur 243
Bulge 232
collage 233
Colored Edges 234
Contours 235
Crayon Drawing 235
Crosshatch 236
Dauber 236
Edge Detect 237
Emboss 237
Furry Edges 238
Glowing Edges 239
golden hue 240
Granite 239
Mirror 240
Negative 241
Oil Paint 241
Old 242
Outline 243
Pencil Drawing 244
Pixel Explosion 244
Pixelate 245
Posterize 246
Radial Waves 246
Rain 247
Ripple 248
Scattered Tiles 249
Sepia 250
Sheet Metal 250
Shift 251
Slant 252
Sobel 252
Solarize 253
Stained Glass 253
Sunspot 254
Swirl 255
Threshold 255
Topography 256
user defined 261
Vignette 229
Water 257
Water Drops 257
Waves 258
Weave 259
Wind 260
emailing images 76
Emboss effect 237
erasing 62
excluding folders from database 134
EXIF
adding EXIF information 52, 54
batch set information 52
viewing 49
exporting database information 137
exposure
adjusting automatically 272
adjusting for multiple images 106
F
Favorites pane 28
File List pane
customizing 307
filtering files 31
full screen 25
setting Details View options 311
setting File List options 307
setting thumbnail display options 309
using 24
views 30
files
archiving 90
associating with ACDSee 346
cataloging 38
cataloging in the database 135
changing dates 63
copying and moving 57
details 30
finding duplicates 73
listing 138
management options 316
map coordinates 51
pasting 58
playing audio and video 151
properties 49
quarantining 142
renaming 59
replacing 58
selecting 34
sorting 33
synchronizing between folders 65
filtering files 31
fisheye distortion 265
flipping
in Edit 263
multiple photos 103
focus 191
folders
browsing 25
excluding from database 134
mobile phone 22
pasting 58
renaming 59
synchronizing files 65
synchronizing in View mode 147
Folders pane
options 313
using 25
footer
in View mode 146
printing on pages 95
fullscreen mode 7
Furry Edges effect 238
G
Geometry tab 198
getting photos
renaming templates 22
Glowing Edges effect 239
Granite effect 239
grayscale 291
Group by
Processed State 32
H
header
in View mode 146
printing on pages 95
Heal tool 219
hicolor 291
highlights 273, 281
histogram 290
home folder 306
HSL 282
HTML album 87
I
Image Basket 38
Image Well 74
images
adding audio 155
comparing 36
converting to another format 102
copying 58
developing 167
developing a batch of files 129
downloading 14
emailing 76
extracting from video files 154
finding quickly 74
import 15
importing 14
panning 161
sharing develop settings 170, 177
uploading 301
viewing 7
import
photos 15
importing
images 14
importing database information 136
importing photos
from a CD 20
from a digital camera 15
from a disk 20
from a mobile phone 22
from a scanner 21
IPTC
adding IPTC information 52, 54
removing IPTC keywords auto categories 63
viewing 49
J
JPEG options 325
K
keyboard shortcuts
customizing 330
Manage mode 332
View mode 336
L
labels
assigning 46
light levels 270
listing files 138
local contrast enhancement 273, 281
M
magnifying glass 162
Manage mode
and RAW files 30
Burn Basket 86
customizing the workspace 326
customizing toolbars 327
Favorites pane 28
File List pane 23
Folders pane 25
Image Basket 38
keyboard shortcuts 332
Map pane 51
options 305
Properties pane 49
Quick Search bar 66
Index
Search pane 67
Selective Browsing pane 70
using 3
views 30
Map pane
using 51
metadata
removing metadata 62
Mirror effect 240
mobile phone 22
modes
switching 3
mouse shortcuts 340
moving
files 57
Manage mode panes 3
multiple images
adjusting exposure 106
renaming 108
resizing 105
N
navigator 161
Negative effect 241
noise
about 295
adding to an image 296
removing from an image 295
0
Oilpaint effect 241
Old effect 242
Online mode 11,299
creating an account 11,300
creating folders 302
making folder public or private 302
ACDSee Pro 6 User Guide
privacy settings 302
rating system 303
uploading images 11
optimizing the database 141
options
ACDSee Quick View 149
Calendar pane 314
Catalog pane 313
contact sheet 96
database 319
file management 316
Folders 313
general 305
Manage mode 305
Preview pane 312
View mode 320
organizing
assigning categories 43
assigning color labels 46
finding images quickly 74
managing categories 41
originals
showing 158
Orton effect 243
Outline effect 243
overwriting files 58
P
panes
auto-hiding 327
moving 4
resetting to default layout 3
PDF 84
Pencil Drawing effect 244
perspective distortion 265
photo discs 148
Photo Repair tool 219
photos 233
pincushion distortion 265
Pixel Explosion effect 244
pixel resize options 267
Pixelate effect 245
plug-ins
about 142
managing 143
viewing properties 144
polaroid 233
Posterize effect 246
Preview pane
customizing 312
using 35
printing
contact sheet options 96
setting size and positioning 95
text on pages 95
Process mode
customizing the Processing Tools pane 329
Develop 163
Processed State
group by 32
Properties pane
options 316
using 49
Q
quarantining files 142
R
Radial Waves effect 246
Rain effect 247
ratings
assigning 43
RAW images
browsing 30
developing 163
removing develop settings 171
viewing 145
recording image audio 155
red eye reduction 204, 218
removeable devices 15
renaming
file or folder 59
multiple files 108
while getting photos 22
replacing files 58
resizing
multiple images 105
one image 266
restoring database information 140
restoring originals 209
retro effect 240
RGB 288
Ripple effect 248
rotating
in Develop 199
in Edit 262
in Manage and View mode 35
multiple photos 103
S
scanner 21
Scattered Tiles effect 249
screen capture 74
screensavers
creating 77
sharing 82
Search pane 67
searching
file name patterns 70
for duplicate files 73
Image Well 74
Quick Search bar 66
setting Quick Search options 306
wildcards 70
with ACDSee 66
with the Search pane 67
second monitor
moving the panes 5,35
selecting
files 34
part of a media file 153
part of an image 156
Selections tool 214
Selective Browsing 70
SendPix albums 92
Sepia effect 250
sharing 273, 281
archives 90
contact sheets 89
emailing images 76
HTML albums 87
PDFs 84
screensavers 82
SendPix albums 92
slideshows 82
with ACDSee 74
sharpen 292
Sheet Metal effect 250
Shift effect 251
shortcuts
Manage mode 332
mouse 340
View mode 336
Slant effect 252
slideshows
auto advance 145
configuring 79
sharing 82
Sobel effect 252
soft focus 191
Solarize effect 253
sorting files 33
sound
adding to images 154
recording 155
Stained Glass effect 253
start folder
default 306
Straightening crooked photos 199
Sunspot effect 254
Swirl effect 255
switching
modes 3
sync
uploading images 301
sync to web 301
synchronizing
files between folders 65
View mode to a folder 147
T
tagging images 61
text
adding to an image 220, 223
Index
adding to pages (printing) 95
blend modes 261
displaying on images in View mode 146
lists of files 138
theme
color 306, 331
Threshold effect 255
thumbnails
rebuilding 142
setting display options 309
setting ratio options 311
views 30
timestamp 63
timestamps 63
toolbars 327
Topography effect 256
truecolor 291
Tune tab 178
TWAIN
about 15
importing photos 21
U
undo/redo 208
USB mass storage device
about 15
user interface 1
V
Vibrance 181, 282
video files
extracting frames 154
playing 151
View mode
auto advance 145
automatic zooming 160
customizing 320
displaying text 146
fullscreen mode 7
histogram 290
keyboard shortcuts 336
magnifying glass 162
mouse shortcuts 340
navigator 161
panning 161
setting display options 321
setting zoom level 159
synchronizing to a folder 148
using 6
zooming an image 159
viewing
file properties 157
file types in the File List 31
fullscreen 7
images 6
images in another application 150
text on images in View mode 146
Vignette effect 193,229
W
wallpaper 150
Water Drops effect 257
Water effect 257
watermarks 224
Waves effect 258
Weave effect 259
White Balance 282
wildcards 70
Wind effect 260
Z
zooming
automatically 160
setting level 159
- acdsee™ pro6 Total photography control
- Contents
- C HAPTER 1 : G ETTI NG S TARTED.1....
- About The ACDSee User Interface 1
- Switching Modes In ACDSee Pro 3
- Using Manage Mode.... 3
- Using View Mode 6
- Using Develop And Edit Mode 9
- Using Online Mode 11
- C HAP TER 3 : MANAG E MOD E 1 4
- Selecting Files 34
- Previewing Images..35
- Rotating Images..35
- Comparing Images..36.
- Gathering Images In The Image Basket 38
- Cataloging And Managing Files In ACDSee Pro..38.
- Organizing With The Catalog Pane 38.
- Creating Categories
- Assigning And Searching Categories And Ratings
- Assigning Color Labels
- Using The Properties Pane
- CHAPTER 5: DEVELOP MODE 163
- C HAPTER 6 : EDI T MODE 2.0.6
- CHAPTER 10: FILE FORMATS ...... 346
- G LOS SARY 350
- I NDEX 362
- Chapter 1: Getting starte
- Welcome to ACDSee Pro 6
- About the ACDSee User Interface
- Manage mode
- View mode
- Develop mode
- Edit mode
- Online mode
- Switching Modes in ACDSee Pro
- Manage
- View
- Develop
- Edit
- Online
- To switch from one mode to another:
- Using Manage Mode
- About the Manage mode panes
- Manage mode drop-down menus
- Working with Manage mode panes
- To open or close panes in Manage mode:
- Moving panes
- To move a pane:
- To move a docked or floating pane:
- Docking panes
- To dock a pane in Manage mode window:
- Stacking panes
- To stack panes:
- Resizing panes
- To resize a docked pane:
- To resize a floating pane:
- Resetting the workspace
- To reset the Manage mode workspace:
- Using View Mode
- To open an image or media file in View mode:
- To open a group of images in View mode:
- Viewing images in full screen mode
- To view images in full screen mode:
- To exit full screen mode:
- Using the View mode panes
- To open the View mode panes:
- Using the Bottom toolbar
- Bottom toolbar
- Switching to Manage mode
- To return to Manage mode from View mode:
- Using Develop and Edit Mode
- Workflow
- The processing power of Develop and Edit mode
- Develop mode first Edit mode second
- Using Online Mode
- Uploading images
- Chapter 2: Getting hel
- Using the Quick Start Guide
- To close the Quick Start:
- To re-open the Quick Start Guide:
- To use the Quick Start Guide for quick access to more information:
- To set preferences:
- Finding Other Resources and Support
- Chapter 3: Manage Mod
- Importing Files With ACDSee Pro
- Importing files using the Windows AutoPlay dialog box
- Importing files from specific types of devices
- About removable devices
- Importing Photos From a Device
- To download photos using the Import From dialog box:
- Importing Photos From a CD or DVD
- To import photos from a CD or DVD:
- Importing Photos From a Disk
- To import photos from a disk:
- Importing Photos From a Scanner
- To download photos from a scanner:
- Importing Photos From a Mobile Phone Folder
- To download photos from your mobile phone:
- Creating a Renaming Template
- To create a renaming template:
- Browsing Files in the File List Pane
- Using the File List pane
- The Contents Bar
- C:\Pictures\Family
- [Rating: 1] And [1 Category: Places]
- Overlay icons
- Maximizing the File List pane
- To maximize the File List pane:
- Browsing Using the Folders Pane
- To open or close the Folders pane:
- Selecting multiple folders
- To use the Easy-Select bar:
- Creating and managing folders
- To manage your folders:
- Browsing Files By Date or Event
- To open the Calendar pane:
- Adding descriptions and thumbnails in Events view
- To add a description to a date in Events view:
- To select a specific thumbnail in the Events view or Photo Calendar:
- To navigate a long list of dates in Events view:
- Browsing Favorite Files
- Creating a shortcut
- To create a Favorites shortcut:
- Creating a new folder
- To create a new folder:
- Deleting a shortcut or folder
- To delete a shortcut or folder:
- Using the Catalog Pane
- Easy-Select bars
- The ACDSee Pro database
- Browsing RAW Files
- Changing Views
- Customizing the Details view
- To select columns and set column order:
- Filtering Files
- To filter files in the File List pane:
- To create a custom filter:
- Grouping Files
- To group files in the File List:
- Navigating through groups in the File List
- To quickly jump to a specific group:
- To change the sort order of the groups:
- Removing groups from the File List
- To remove a group:
- Selecting files in one or more groups
- To select files in groups:
- Sorting Files
- To sort items in the File List:
- Sorting files using column headers
- To sort files using a column header:
- Custom sorting files
- To customize the sorting order of your files:
- Selecting Files
- To select your files or folders:
- To select your files or folders using the menu:
- Previewing Images
- To open or close the Preview pane:
- To show or hide the histogram from Preview pane:
- Rotating Images
- To rotate images:
- Rotate icons
- Comparing Images
- To compare images:
- Compare Images toolbar
- Image toolbars
- Gathering Images in the Image Basket
- To use the Image Basket:
- Cataloging and Managing Files in ACDSee Pro
- Organizing With the Catalog Pane
- Categories
- Keywords
- Ratings
- Color Labels
- Auto Categories
- Saved Searches
- To create a new saved search from the Catalog pane:
- Special Items
- The ACDSee Pro database and embedded data
- To view cataloged files:
- Match All Match Any
- To create a category:
- Manage Categories
- To manage your categories:
- Create easy-access Category sets
- To create easy-access category sets:
- Quickly Assign Ratings
- Assign and Search Categories and Ratings in the Catalog pane
- To assign files to categories or ratings in the Catalog pane:
- Use the context menu (right-click) in the category tree to do the following:
- Assign Categories and Ratings in the Properties pane
- To assign files to Ratings in the Properties pane:
- To assign files to Categories in the Properties pane:
- Remove Categories or Ratings from files
- To remove categories or ratings from files:
- Create a Color Label set
- To create a color label set:
- Assign Color labels
- Search images assigned to a label
- Removing color labels and color label sets
- To remove a color label from a file:
- To delete a Label Set:
- To open the Properties pane:
- Properties pane areas
- Metadata tab
- Matching IPTC and EXIF fields
- IPTC EXIF
- Organize tab
- File tab
- Embedding ACDSee Metadata into files
- Using the Map Pane
- To open the Map pane:
- To add files to the map by dragging:
- To delete a pinned location on the map:
- To view a geotagged image on the map:
- To set default location, zoom and map type:
- Using the Map pane in Manage mode
- Pin Legend
- Adding Metadata to Files and Using Presets
- Metadata Tab keyboard shortcuts
- This shortcut Has this result
- To use keyboard shortcuts to enter Metadata into the same field of multiple photos:
- To create a Metadata Preset:
- To set a Shortcut Preset (CTRL+M):
- To apply a metadata preset:
- Notes for inserting data into the Manage Presets dialog box:
- Manage Metadata Views and Presets
- To select a Metadata View:
- To create a customized Metadata View:
- Manage Metadata Views options
- Creating and Assigning Hierarchical Keywords
- To create keywords:
- Example:
- Managing Keywords
- To manage your keywords:
- To Create Quick Keywords
- Copying and Moving Files
- To copy or move files:
- Copying Images to the Clipboard
- To copy an image:
- Pasting Files and Folders
- To cut and paste files:
- Replacing or Overwriting Files
- To use the Confirm File Replace dialog box:
- Renaming a File or Folder
- To rename a file or folder:
- Storing Files in Private Folders
- To open the Private Folder pane:
- To create a private folder:
- To open a private folder:
- To close a private folder:
- To add files to a private folder:
- To restore folders and files from a private folder:
- To delete a private folder, or the folders or files in the private folder:
- Tagging Images
- To tag a selected image:
- To untag a selected image:
- To untag all tagged images:
- To display tagged photos:
- To tag a photo in View mode:
- To tag a photo when you are comparing images:
- Removing Metadata From Files
- To remove metadata from selected images:
- Removing IPTC Keywords From Auto Categories
- To remove IPTC keywords and supplemental categories:
- Changing the Date and Time Properties of Images
- To change the date and time properties of a file:
- Do one of the following:
- On the Date to Change tab, choose from the following:
- On the Advanced Options tab, select the options for the Adjust Image Time Stamp tool described below, then click Next.
- On the Choose new time stamp page, select one of the following options:
- Backing Up Your Files to Another Computer
- To create a synchronization:
- Updating or deleting a synchronization
- Click Close.
- Running a saved synchronization
- To run a saved synchronization:
- Searching With ACDSee Pro
- Using the Quick Search Bar
- To run a Quick Search:
- Quick Search operators
- Using the Search Pane
- To open the Search pane:
- Search pane areas
- Files and Text
- Properties area
- To use the Properties area:
- Searching With File Name Patterns
- Using Selective Browsing
- To use selective browsing:
- Setting selective browsing criteria
- To add selective browsing criteria:
- Tips for selective browsing
- Hiding the Selective Browsing pane
- Searching With Auto Categories
- Identifying commonly used search categories
- To add an auto category grouping to the Commonly Used grouping:
- To remove an auto category grouping from the Commonly Used grouping:
- Refining your auto categories search
- Finding Duplicate Files
- To find duplicate files:
- Finding Images Quickly
- To re-run a saved search:
- To find all of your images at once:
- To locate uncategorized images:
- Sharing Files With ACDSee Pro
- Taking a Screen Capture
- To take a screen capture:
- Emailing Images
- To email your images:
- Share / Email Using ACDSee Online
- Creating a Desktop Screensaver
- To create a screensaver:
- To activate the screensaver on your computer:
- Viewing and Configuring a Slideshow
- To start a slideshow in Manage mode:
- To start a slideshow in View mode:
- To configure a slideshow:
- Slideshow options
- Sharing Slideshows and Screensavers
- To create a slideshow:
- Creating a Desktop Slideshow
- Using the ACDSee Showroom slideshow controls
- To create more than one ACDSee Showroom:
- To close ACDSee Showroom:
- Creating a PDF
- To create a PDF:
- Creating a PowerPoint Presentation
- To create a PowerPoint presentation:
- Click Next.
- Click Create.
- Burning a CD or DVD
- To create a CD or DVD:
- Bum
- Creating an HTML Album
- To create an HTML album:
- Uploading Images to Photo Websites
- Connecting
- To read about a service:
- To upload images to a website:
- New Services
- To install a new service:
- Creating a Contact Sheet
- To create a contact sheet:
- Creating Archives of Your Files
- To create an archive:
- Extracting Archived (.zip) Files
- To extract an archived file to a folder:
- To view files inside an archived file:
- Creating a SendPix Album
- To activate the SendPix plug-in:
- To share your images with SendPix:
- Printing Images
- To print your images:
- Setting Printer Options
- Setting Image Size and Positioning
- Adding Text to Pages
- To add headers and footers to your printed pages:
- Setting Contact Sheet Printing Options
- About Batch Processing
- Using Batch Export
- To export a batch of images:
- Metadata
- Converting Multiple Images to Another File Format
- To convert an image to another file format:
- Rotating or Flipping Multiple Images
- To rotate or flip an image:
- Rotate / Flip angles
- Setting Rotated and Flipped File Options
- To set the rotate and flip options:
- Resizing Multiple Images
- To resize a group of images:
- Resize options
- Adjusting Exposure For Multiple Images
- To adjust image exposure:
- Adjusting Batch Exposure Options
- To use the Exposure options:
- Renaming Multiple Files
- Changing the Color Profiles of Multiple Images
- To change the color profiles used in images:
- Using Batch Edit
- To open Batch Edit:
- To preview changes:
- To use Zoom features:
- To add or remove images:
- To set output options and complete the process:
- Click Finish.
- Editing options
- Output options
- Batch Edit Rotate Options
- Batch Edit Crop Options
- To use the Crop options:
- Batch Edit Resize Options
- To use the Resize options:
- Resize by Megapixels
- Batch Edit Color Options
- To use the Color options:
- Batch Edit Channel Mixer Options
- To create a grayscale image:
- Batch Edit Sepia Options
- Batch Edit Exposure Options
- Batch Edit Lighting Options
- To adjust the lighting:
- Batch Edit Noise Removal Options
- Batch Edit Sharpening Options
- To use the Sharpening options:
- Batch Edit Vignette Options
- To use the Vignette options:
- Vignette options
- Batch Edit Text Overlay Options
- To use the Text Overlay options:
- Batch Edit Watermark Options
- To use the Watermark options:
- Using Batch Develop
- To apply a preset to a batch of images:
- About the ACDSee Pro Database
- Embedding ACDSee Metadata in files
- To embed ACDSee Metadata in a file when you are prompted:
- To embed ACDSee Metadata at any time:
- Viewing files that have data to embed
- To view files that have data to embed:
- Retrieving ACDSee Metadata that is embedded in files
- Excluding Folders From the Database
- To manage your excluded folders settings:
- Cataloging Files in the Database
- To catalog your files:
- Converting an Older Database
- To convert an older database:
- Importing Database Information
- To use the ACD Database Import Wizard:
- Importing File Information From Other Sources
- Importing Photo Discs
- To import a Photo Disc:
- Importing albums
- To import album information into the database:
- Working with description.ion files
- To import a description.ion file:
- To export captions to a description.ion file:
- Exporting Database Information
- To use the ACD Database Export Wizard:
- Generating File Lists
- To generate a list of your files:
- Backing Up Your Database
- To back up your database information:
- Database Backup Tips and Strategies
- Backup schedule
- Backup location
- Backup size
- Restoring Database Information From a Backup
- To restore database information:
- Maintaining the Database
- Database content icons
- To perform database maintenance:
- Optimizing the Database
- To optimize your database:
- Rebuilding Thumbnails and Metadata
- To rebuild thumbnails:
- Quarantined Files
- To view quarantined files:
- Working With Plug-ins
- Types of plug-ins
- Managing Plug-ins
- Disabling a plug-in
- To disable a plug-in:
- Changing the plug-in order
- Viewing Plug-in Properties and Getting Help
- To view plug-in properties:
- To view a plug-in's Help file:
- Chapter 4: View Mode
- Viewing RAW Images
- Viewing Images With Auto Advance
- Displaying Text on Images in View Mode
- To edit image headers and footers:
- Text options
- To insert metadata in image text:
- Hiding image text
- To hide the image text:
- Synchronizing View Mode to a Folder
- To synchronize to a folder:
- Viewing Offline Images
- To add a Photo Disc:
- Rebinding Photo Discs
- To rebind a Photo Disc to its ACDSee Pro database information:
- Using ACDSee Quick View
- To open an image in Quick View:
- To open the image in ACDSee:
- To set an image as your desktop wallpaper:
- To print the image:
- Viewing Images in Another Application
- To use the shell open and edit commands:
- Setting an Image as the Desktop Wallpaper
- To set an image as the desktop wallpaper:
- To automatically stretch wallpapered images to fit the screen:
- To display the previous wallpaper:
- Viewing and Using Brush Files
- To view brush files:
- To use brush files in Adobe Photoshop®:
- Playing Video and Audio Files
- To play video or audio files:
- Automatically playing audio and video files
- To start playing media files automatically:
- The Media toolbar
- Media toolbar buttons
- Selecting Part of a Media File
- To select part of an audio or video file:
- Saving Video Frames as Images
- To extract and save a single video frame as an image:
- To extract and save multiple video frames as images:
- Adding or Editing Image Audio
- To add audio to an image:
- Recording audio to an image
- To record and add an audio file to an image:
- Selecting Part of an Image
- To select part of an image:
- Applying Presets in View Mode
- To apply presets in View mode:
- Viewing File Properties in View Mode
- To view an image's properties:
- Printing Images in View Mode
- To print a single image:
- To print all images:
- Showing Originals
- To show the original image:
- Committing Changes
- To commit changes to an image:
- Zooming an Image
- To zoom an image in or out:
- Setting the Zoom Level
- Automatically Shrinking or Enlarging Images
- To automatically shrink or enlarge images:
- Using the Navigator to View Select Areas of an Image
- To display and use the Navigator pane:
- To use the Quick Navigator pane:
- Panning a Magnified Image
- To pan an image:
- Using Pan Lock
- To use Pan Lock:
- Magnifying Specific Areas of an Image
- To use the Magnifying Glass pane:
- Chapter 5: Develop Mode
- Using Develop Mode
- Developing an image
- To develop an image:
- Saving and canceling
- Select Edit | Paste Settings.
- Restoring Original settings
- Histogram and image viewing controls
- Viewing Images
- Customizing the view
- Exporting an Image to Multiple Formats and Resolutions
- To export an image to multiple formats and resolutions:
- Click Export.
- Sharing Develop Settings
- To export your develop settings:
- To import develop settings:
- Restoring Original Images
- To remove develop settings from an image:
- Using Presets in Develop Mode
- Creating and applying presets
- To create a preset from the top of the pane:
- To create a preset from a tab:
- To create a preset from a group:
- Applying a preset to a single image
- To apply a preset to a single image in Develop mode:
- Applying a develop settings preset to a batch of images
- Renaming presets
- To rename a preset:
- Deleting presets
- To delete a preset:
- Saving Images in Develop Mode
- Saving Images
- How ACDSee Pro Saves Changes to Images
- Pro 3 RAW Processing Emulation
- To use the ACDSee Pro RAW processing pipeline while maintaining some Develop settings:
- About the Tune Tab
- To use the Tune tab:
- To save the image and continue processing other images:
- Using the Develop Brush
- Develop Brush
- To use the Develop Brush:
- To delete brush strokes:
- Making General Adjustments
- To develop your image in General:
- Adjustment options
- A brief technical explanation of eV
- Adjusting White Balance
- To adjust the white balance in an image:
- White Balance options
- White Balance
- Adjusting Lighting
- To reduce lighting in your image:
- Basic Lighting
- Light EQ
- Advanced options
- Graph
- Adjusting Color
- Advanced Color options
- High Quality
- Standard
- Adjusting Soft Focus
- To add soft focus to an image:
- Applying a Cross Process Effect
- To apply the cross process effect:
- Adjusting Split Tone
- To adjust Highlights and Shadows:
- Adding a Post-Crop Vignette
- Adjusting Tone Curves
- To adjust the brightness curves in an image:
- Tone curves options
- Selecting an Output Color Space For RAW Files
- To set the output color space for a RAW file:
- About the Detail Tab
- To use the Detail tab:
- Sharpening
- To sharpen your image:
- Reducing Noise
- To reduce noise in your image:
- Noise reduction options
- Correcting Chromatic Aberration
- To reduce fringing in your image:
- Chromatic Aberration options
- About the Geometry Tab
- To use the Geometry tab:
- To save the image and return to the mode you were in previously:
- Fixing Lens Distortion
- To fix lens distortion:
- Rotating and Straightening
- To correct a crooked photo:
- Rotate options
- Straighten options
- Correcting Perspective
- To correct perspective:
- Perspective options
- Cropping
- To crop an image:
- Resizing the crop window
- To resize the crop window by dragging:
- To maximize crop area:
- To constrain the crop window to a ratio:
- To delete a proportion:
- To set a proportion as default:
- Fixing Lens Vignetting
- To fix vignetting:
- Vignette Correction options
- About the Repair Tab
- To use the Repair tab:
- Reducing Red Eye
- To correct red eye:
- Chapter 6: Edit Mode
- In Edit mode you can:
- Using Edit Mode
- What happens from Develop to Edit
- Editing an image
- To edit an image:
- Reverting to Develop settings or original settings
- Using Presets in Edit
- To save a preset:
- To use a previously saved preset:
- Using the Undo/Redo Button
- To undo a change:
- To redo a change:
- Restoring Originals and Develop Settings
- Restoring the original image
- Restoring your Develop settings
- Using the Edit Brush
- Edit Brush
- Using Blend Modes and Opacity
- Opacity
- Blend modes
- Saving Images in Edit Mode
- Using Selections
- To use the Selections tool:
- The selection tools
- Combining the tools
- To use the Freehand Lasso:
- To use the Magic Wand:
- To use the Marquee:
- Applying Edits or Effects to Selections
- To apply an edit or effect to a selection:
- Removing Flaws
- To remove flaws from a photo:
- Adding Text to an Image
- To add text to an image:
- Adding Drawings to Your Image
- To draw on your image:
- Adding a Watermark to an Image
- To add a watermark to an image:
- Adding Borders
- To add a border to an image:
- Border options
- Irregular Activates when you select the Irregular radio button.
- Edge effects Drop
- shadow
- Light Source
- Adding your own textures or edges
- Textures
- To add your own textures to the texture library:
- C:\Program Files\Common Files\ACD Systems\borders\textures
- Edges
- To add your own edges to the edges library:
- C:\Program Files\Common Files\ACD Systems\borders\edges
- Adding a Vignette
- To apply a Vignette effect:
- Frame settings
- About Special Effect Filters
- To access the special effects filters:
- Applying a Bathroom Window Effect
- To apply a Bathroom Window effect:
- Applying a Blinds Effect
- To apply a Blinds effect:
- Applying a Bulge Effect
- To apply a Bulge effect:
- Applying a Collage Effect
- To use the Collage effect:
- Applying a Colored Edges Effect
- To apply a Colored Edges effect:
- Applying a Contours Effect
- To apply a Contours effect:
- Applying a Crayon Drawing Effect
- To use the Crayon Drawing effect:
- Applying a Crosshatch Effect
- To use the Crosshatch effect:
- Applying a Dauber Effect
- To use the Dauber effect:
- Applying an Edge Detect Effect
- To use the Edge Detect effect:
- Applying an Emboss Effect
- To emboss an image:
- Applying a Furry Edges Effect
- To use the Furry Edges effect:
- Applying a Glowing Edges Effect
- To apply a Glowing Edges effect:
- Glowing Edges options
- Applying a Granite Effect
- To use the Granite effect:
- Granite options
- Light Angle
- Applying a Lomo Effect
- To use the Lomo effect:
- Applying a Mirror Effect
- Applying a Negative Effect
- To create an image negative:
- Applying an Oil Paint Effect
- To create an oil painting from a photo:
- Applying the Old Effect
- To apply the Old effect:
- Old options
- Applying the Orton Effect
- To use the Orton effect:
- Applying an Outline Effect
- To use the Outline effect:
- Outline options
- Applying a Pencil Drawing Effect
- To create a pencil drawing from an image:
- Applying a Pixel Explosion Effect
- To use the Pixel Explosion effect:
- Applying a Pixelate Effect
- To apply a Pixelate effect:
- Applying a Posterize Effect
- To apply a Posterize effect:
- Applying a Radial Waves Effect
- To apply a Radial Waves effect:
- Applying a Rain Effect
- To apply rain to a photo:
- Applying a Ripple Effect
- To apply a Ripple effect:
- Applying a Scattered Tiles Effect
- To apply a Scattered Tiles effect:
- Scattered Tiles options
- Applying a Sepia Effect
- To add a sepia tone to an image:
- Applying a Sheet Metal Effect
- To apply a Sheet Metal effect:
- Applying a Shift Effect
- To apply a Shift effect:
- Applying a Slant Effect
- To apply a Slant effect:
- Applying a Sobel Effect
- Applying a Solarize Effect
- To apply a Solarize effect:
- Applying a Stained Glass Effect
- To apply a Stained Glass effect:
- Applying a Sunspot Effect
- To apply a Sunspot effect:
- Applying a Swirl Effect
- To apply a Swirl effect:
- Applying the Threshold Effect
- Threshold options
- Threshold
- Applying a Topography Effect
- To apply a Topography effect:
- Applying a Water Effect
- To apply a Water effect:
- Applying a Water Drops Effect
- Applying a Waves Effect
- To apply a Waves effect:
- Applying a Weave Effect
- To apply a Weave effect:
- Applying a Wind Effect
- To apply a Wind effect:
- Creating a Custom Special Effect Filter (Convolution Effect)
- To create a custom effect filter:
- About Blend Modes
- Rotating an Image
- To rotate an image at a custom angle:
- Flipping an Image
- To flip an image:
- Cropping an Image
- To specify an exact size for the crop window:
- Correcting Perspective Distortion
- To correct perspective distortion:
- Correcting Lens Distortion
- To correct lens distortion:
- Resizing an Image
- To resize an image:
- Resizing tips:
- Pixel Resize Options and Resulting Action
- Adjusting Image Exposure
- To adjust the image exposure in an image:
- Adjusting Image Levels
- To adjust image levels:
- Levels options
- Adjusting Levels Automatically
- To automatically correct an image's levels:
- To open the Lighting tool:
- Using the Basics tab
- To add light to dark areas:
- To darken areas that are too bright:
- To adjust midtones that are too light or dark:
- Lighting controls
- Using the Light EQ tab
- To use the Light EQ tab:
- Using the Advanced tab
- Sliders
- Graphs
- To use the Advanced tab:
- Dodge and Burn
- Dodging and Burning parts of an image
- To lighten or darken areas of a photo:
- To saturate or desaturate areas of a photo:
- To remove a color cast from an image:
- To adjust color:
- Vibrance
- Saturation
- - Saturation:
- - Brightness:
- Adjusting Color Balance
- To adjust an image's color:
- Creating a Grayscale Image
- Using the Histogram
- To display and use the Histogram:
- Changing Image Color Depth
- Using the Color Dialog Box
- The color grids
- The color palette and slider
- Selecting and adjusting colors
- Sharpening an Image
- To sharpen an image using Sharpen tool:
- Sharpen options
- Blurring an Image
- To blur an image:
- Blur types
- About Noise and Noise Reduction
- Removing Noise
- To remove noise from an image:
- Adding Noise
- To add noise to an image:
- Adjusting Clarity
- To adjust the clarity of your image:
- Chapter 7: Online Mod
- Working in Online Mode
- Online mode has two parts: ACDSeeOnline.com and Transfer
- Creating an ACDSeeOnline.com Account
- To create an ACDSeeOnline.com account:
- Uploading Images to ACDSeeOnline.com
- To upload your images:
- Setting Folders to Automatically Sync to Web
- To set a folder to automatically Sync to Web:
- To run Sync to Web:
- To edit a folder's Sync to Web settings:
- Sync to Web Folder options
- Upload Type
- Creating Folders and Setting Privacy
- To create a folder and make it private or public in Transfer:
- To share the URL for a public folder:
- Changing the Rating System
- To change your rating system:
- Downloading Images
- To download your images:
- Using Transfer Manager
- To open the Transfer Manager:
- Chapter 8: Options and configurat
- Setting the General Options
- To access the General options:
- Setting the Manage Mode Options
- To set Manage mode options:
- Setting the Quick Search Options
- To set Quick Search options:
- Quick Search options
- Setting the File List Pane Options
- To adjust the File List pane options:
- Setting the Thumbnail Info Options
- To adjust the Thumbnail Info options:
- Setting the Thumbnail Style Options
- To adjust the Thumbnail Style options:
- Setting the Details View Options
- To adjust the Details View options:
- Details View options
- Setting the Preview Pane Options
- To set the Preview options:
- Setting the Folders Pane Options
- To customize the Folders pane:
- Setting the Catalog Pane Options
- To set the Catalog pane options:
- Catalog options
- Setting the Calendar Pane Options
- To set the Calendar pane options:
- Setting the CD/DVD Management Options
- To change the Burn Basket or Photo Disc Identification options:
- Setting the Properties Pane Options
- To customize the Metadata tab in the Properties pane:
- Setting the File Management Options
- To set the File Management options:
- Setting the Color Management Options
- To set the Color Management options:
- Setting the Database Options
- To set the database options:
- Database options
- Setting the View Mode Options
- To set the View mode options:
- Setting the Display Options
- To set the Display options:
- Setting Develop and Edit Mode Options
- To set Develop and Edit mode options:
- Setting the ACDSee Online Options
- To set the ACDSee Online options:
- Setting the ACDSee Showroom Options
- To customize the ACDSee Showroom desktop slideshow:
- Setting the ACDSee Quick View Options
- To customize ACDSee Quick View:
- Setting JPEG Options
- Creating Custom Workspaces
- To create and save a custom workspace:
- To load a saved workspace:
- To restore the default workspace:
- Auto-hiding Panes and Panels
- To set or remove auto-hide:
- Using the Task Pane
- To open or close the Task pane:
- Customizing Toolbars
- Displaying and hiding toolbars
- To display or hide a toolbar:
- Customizing toolbar contents
- To display the Customize dialog box:
- To display or hide text labels below toolbar buttons:
- To display or hide tool tips for toolbar buttons:
- To change the toolbar button size:
- Resetting toolbars
- To reset the toolbars:
- Customizing the Tools Panes
- To customize the Tools pane:
- Configuring External Editors
- To configure an external editor in ACDSee:
- To create a shortcut to an external editor:
- To add an external editor button to the toolbar in View mode:
- To manage your image editors:
- To open an image in an external image editor:
- Customizing Keyboard Shortcuts
- To customize keyboard shortcuts:
- To define a new keyboard shortcut:
- Changing the Display Theme
- To change the display theme:
- Chapter 9: Shortcuts
- Manage Mode Keyboard Shortcuts
- Manage Mode Mouse Shortcuts
- View Mode Keyboard Shortcuts
- View Mode Mouse Shortcuts
- Calendar Pane Shortcuts
- Develop and Edit Mode Keyboard Shortcuts
- Develop and Edit Mode Mouse Shortcuts
- Online Mode Keyboard Shortcuts
- Online Mode Mouse Shortcuts
- Chapter 10: File format
- About RAW Files
- Registering and Associating Files
- For Microsoft XP®
- To associate files with ACDSee:
- For Microsoft Windows Vista® or Windows 7®
- To set file association options in ACDSee:
- To register new file extensions with Microsoft Windows Vista® or Windows 7®:
- For Microsoft Windows 8 ®
- To set file association to ACDSee:
- Glossary
- A
- Absolute Colorimetric
- acquire
- album
- aliasing
- anchor
- antialiasing, anti-aliasing
- aspect ratio
- archive
- azimuth
- B
- background processing
- bandwidth
- barrel distortion
- batch processing
- bit
- blackpoint
- brightness
- C
- cache
- caption
- cataloging
- category
- chromatic aberration
- CMYK
- color cast
- color channel value
- color gamut
- color management
- color space
- compression
- contact sheet
- contrast
- convert
- D
- database
- database date
- descriptions
- dock
- DPI (dots per inch)
- dynamic range
- E
- elevation
- encode
- encryption
- EXIF (Exchangeable Image File)
- export
- exposure
- F
- feather
- file listing
- file format
- filter
- fisheye distortion
- G
- gamma
- grayscale image
- H
- highlights
- histogram
- HSL
- hue
- |
- image editor
- image resolution
- image viewer
- import
- interpolation
- IPTC
- J-K
- jaggies
- lens vignetting
- lossless compression
- lossless rotation and flipping
- lossy compression
- marquee
- monochrome image
- noise
- overexposed
- panning
- Perceptual
- perspective distortion
- photo album
- photo editor
- pincushion distortion
- pixel (PICture ELEMENT)
- plug-in
- PPI (pixels per inch)
- presets
- primary colors
- R
- raster image
- rating
- RAW
- recursive
- red eye
- Relative Colorimetric
- render
- rendering intent
- resolution
- RGB
- ringing artifacts
- S
- Saturation (rendering intent)
- selection
- SendPix
- sepia
- sharpen
- sharpness
- shortcut menu
- slideshow
- soft proofing
- T
- tagging
- thumbnails
- timestamp
- transitions
- U
- underexposed
- V
- vector image
- W
- watermark
- whitepoint
- X-Z
- XML (Extensible Markup Language)
- zoom
- CD
- date
- deleting
- effects
- File List pane
- files
- flipping
- I
- N
- 0
- Q
- Z
Brand : ACDSEE
Model : Pro 6
Category : Audio and video software